

BDSchindler
-
Posts
457 -
Joined
-
Last visited
Content Type
Profiles
Forums
Events
Gallery
Posts posted by BDSchindler
-
-
I'm sure this has been asked before but I'll ask it anyway...has anyone ever purchased from Hobbyist Haven and if so, how was your experience?
I'm considering it but they are outside of the US and after 50 years of working in Information Technology, I have seen too many things get hacked that I am a little bit leary of dealing with a company outside the US that I personally have never dealt with.
There will be those that flame me for asking (which is not needed or asked for) and those that will understand...all I want to know is if they are legit and is their customer service good or not if an issue arises.
Thanks in advance!
-
Question about the leather you're using. Are you thinning the thickness of the leather before adhering it to the seats? I would assume so given you are able to work it into the pleats of the cushion but man...that must be paper thin on the backside of the leather.
Fantastic work, by the way...loving what you are doing and very inspiring.
-
6 hours ago, Bainford said:
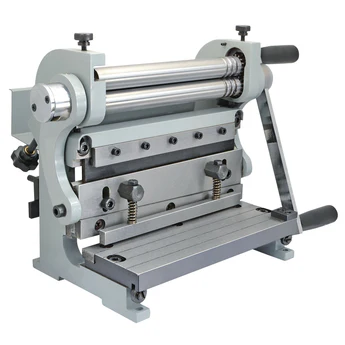
That's a neat looking machine. How big (small?) is it?
to be honest...I don't know! LOL! I just ordered it and hasn't been rec'd as of yet...but according to the MicroMark site, "only takes up 16"x7"x10.5" benchtop space". I have the perfect tool stand to mount it to.
I have been on the fence for over a year on spending the money on it but a friend of mine swears by it as it works equally as well for plastic as it does metal. So when MicroMark offered it in their Memorial Day sale at roughly $58 off, I pulled the trigger!
Once I get it and get a chance to play with it, I will post a review in the Tips and Tricks section.
-
 1
1
-
-
16 hours ago, Lownslow said:
styrene chopper

How do you like it? Considering one and love DSPIAE tools!
-
1
-
-
Well...not a model kit but a tool that can be used for plastic as well as metal...Bender-Brake-shear tool. I've been wrestling with buying this for a long time and just figure...screw it!
The most recent kit I got was Tamiya's Datsun 240Z that will be built as the American version...
-
8
-
-
Love it!
-
Outstanding!
-
1
-
-
5 hours ago, peteski said:
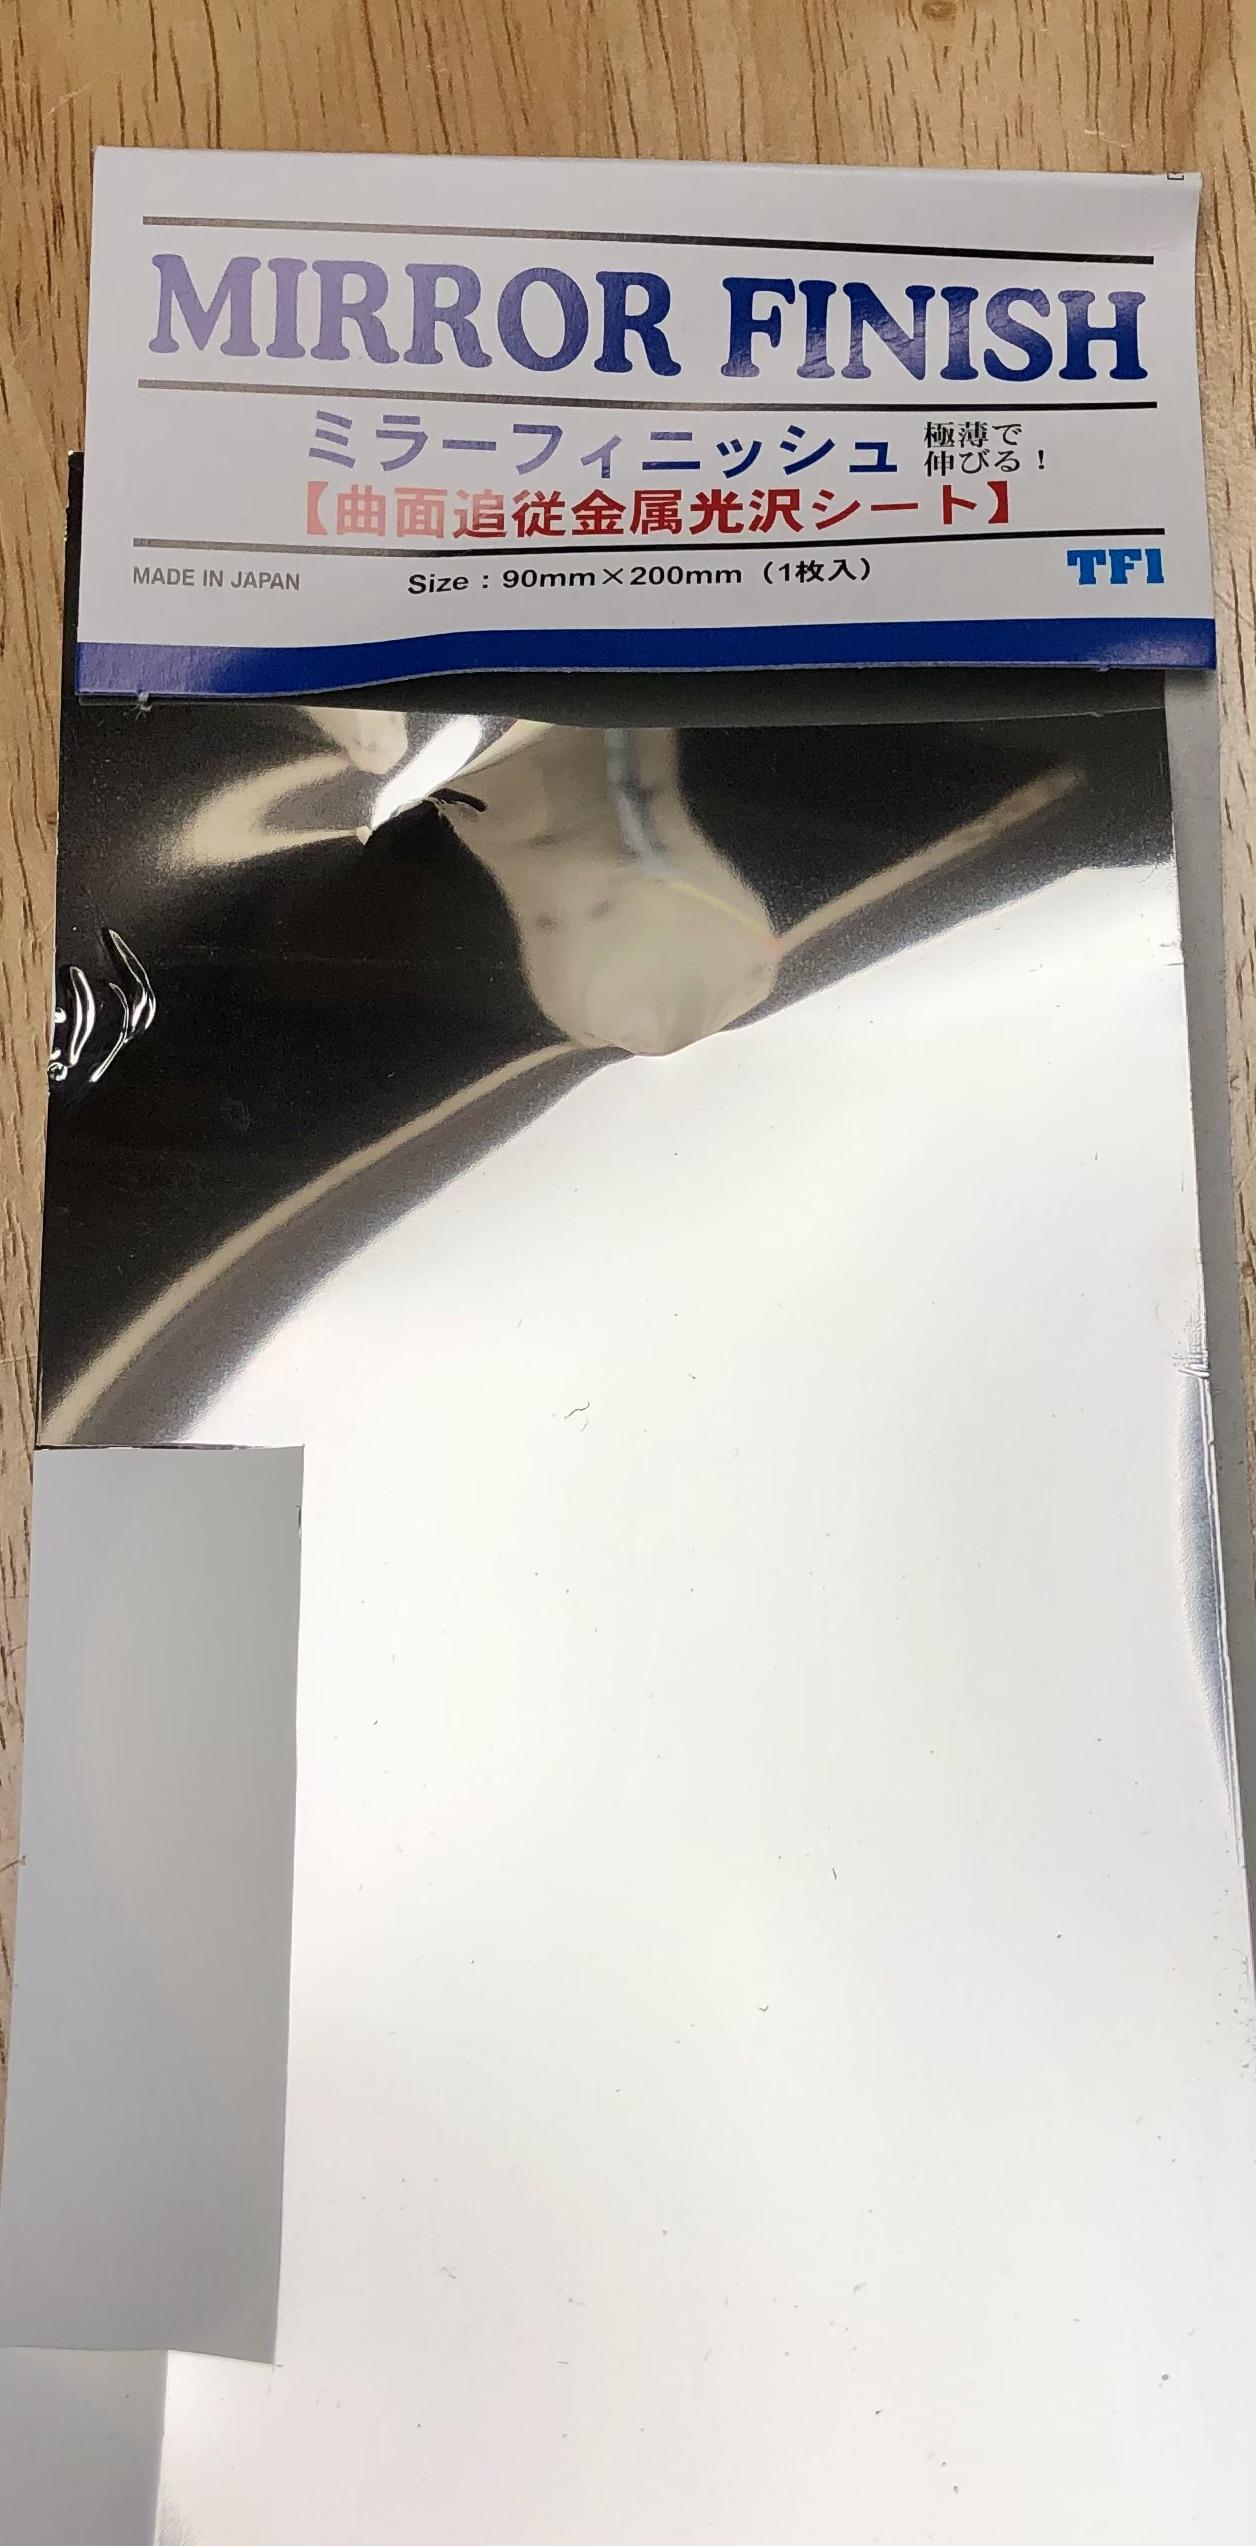
Looks like Brian got a hold of partially used foil with the bottom of the package (and plastic box) missing.
Nothing new here - move along . . .
")
No it wasn't partially used foil...I removed it from the package and used the portion that you see missing. I placed those 2 together for the shot AFTER I used it. I wouldn't go making blind statements based on assumptions, Pete.
-
11 minutes ago, Bainford said:
I am certainly curious. Is it a metal foil like BMF? Or something flexible like the Hasegawa stuff?
Any photos of this stuff applied to a model?
I want to say it’s like sticky Mylar. Like those Mylar balloons…definitely plastic, not metal like BMF is.
-
1
-
 1
1
-
-
Has anybody used this?
has a great mirror finish but be careful…it’ll pull the paint off when you remove excess.
I’ll never complain about BMF not sticking very well. This is the other extreme!
-
11 minutes ago, Chuckyg1 said:
Just stumbled upon this. This is looking really awesome looking. Clean and well thought out execution so far. Great paint choice and interior. Any thoughts on a power plant?
Thanks.
Still debating on the engine...I was thinking Texas3DCustom's Shelby GT350 5.2L but I think it will be too big and not really interested in hacking up the chassis any further than I have already so I am leaning towards the Roush engine used in the Foose Ford Pickup.
I dunno...kinda making this up as I go
-
1
-
-
On 3/30/2025 at 2:58 PM, Belugawrx said:
Really like where your'e going with it Brian...diggin' the wheel choice.
Is it too late or can the body move back about an 1/8"...?
That was tires sitting under the body.
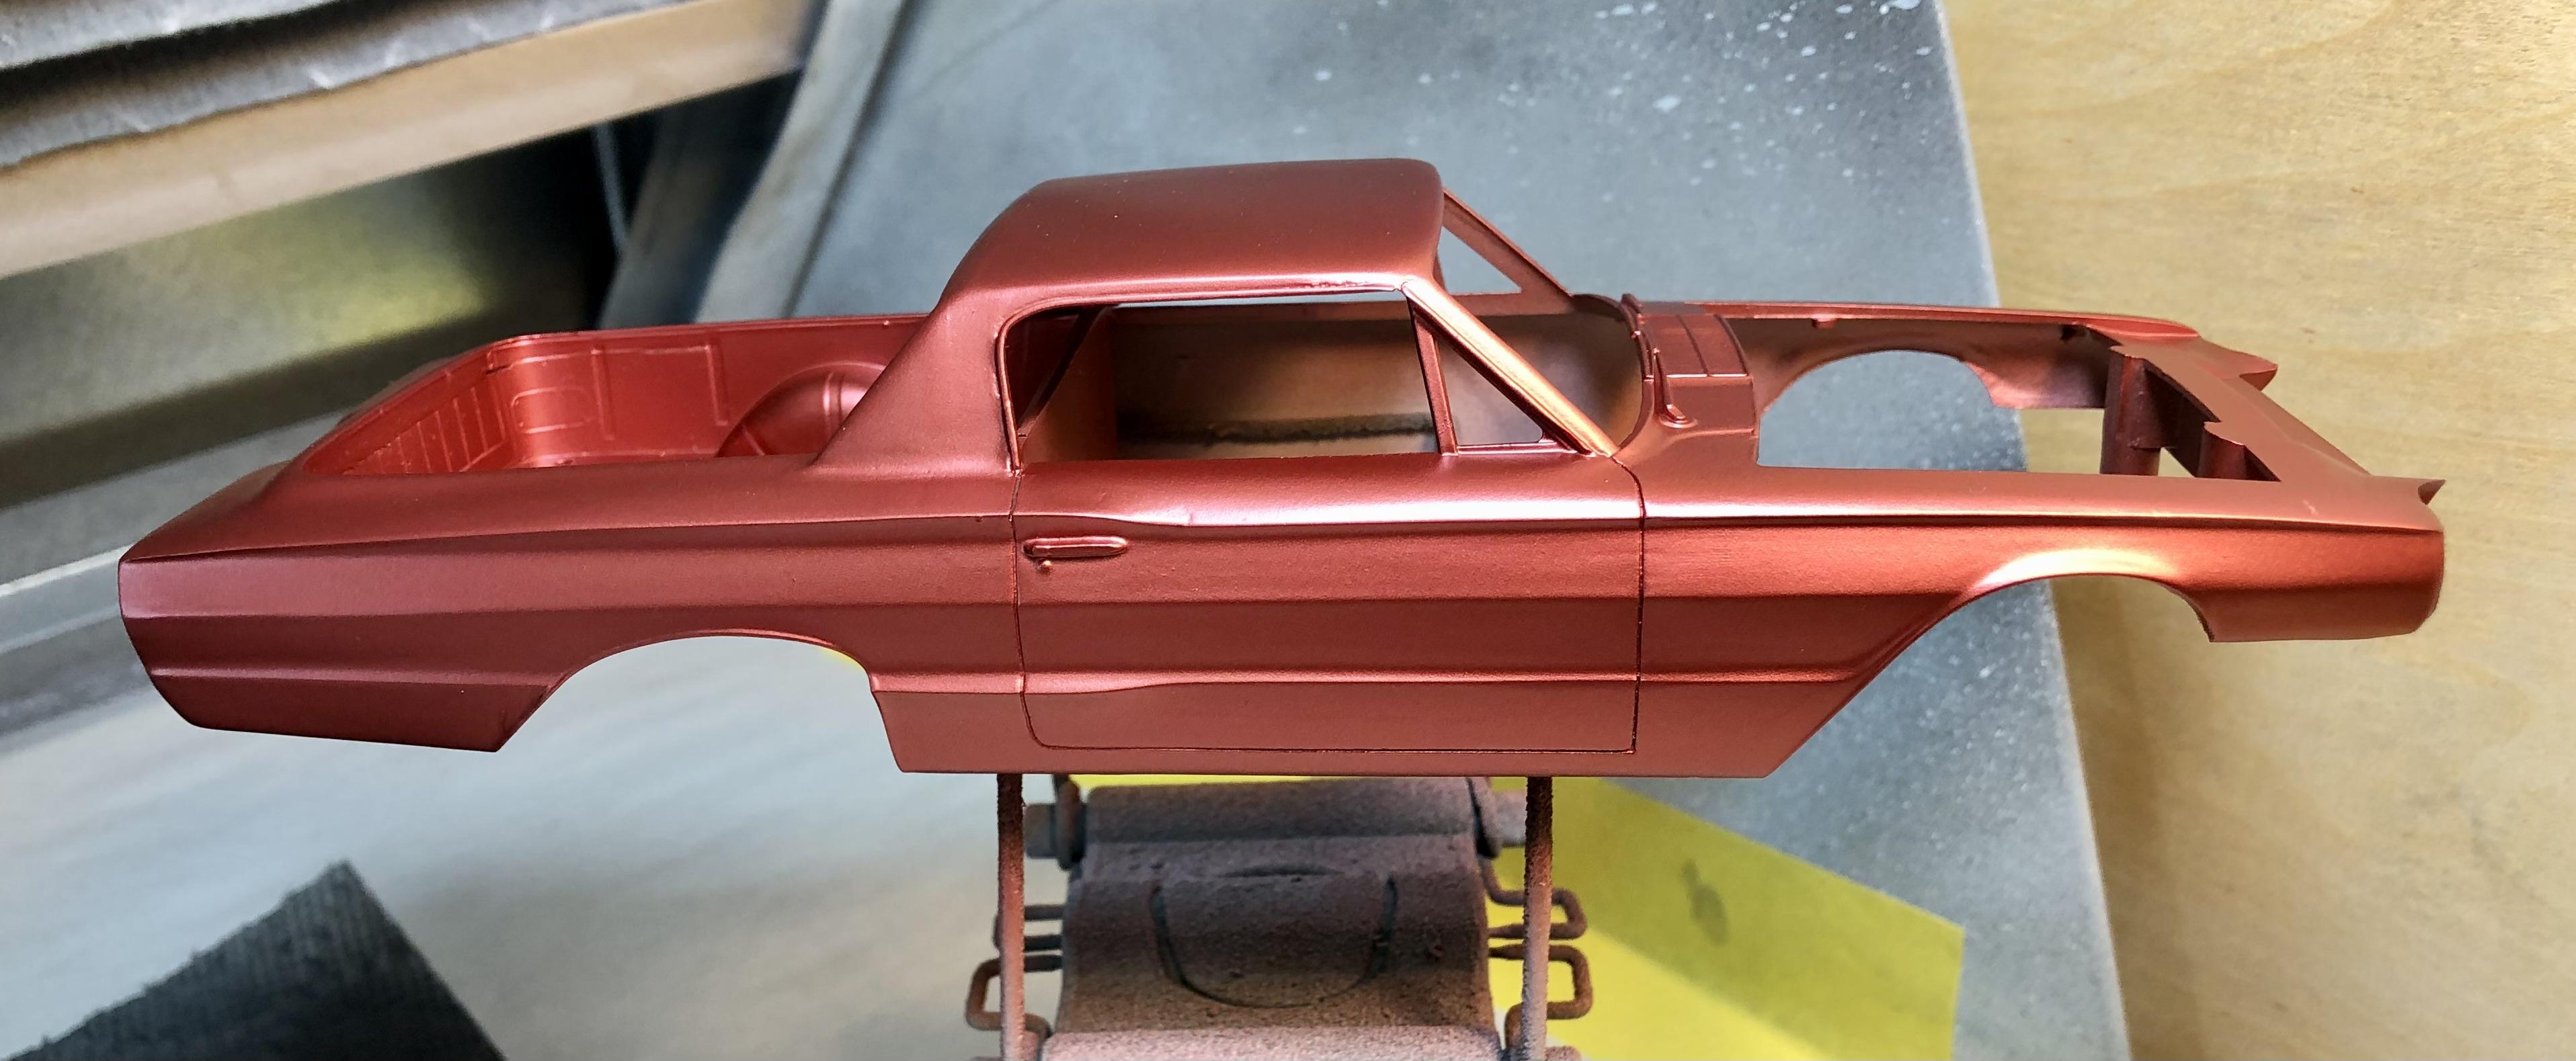
finally got some color on it…Splash Paint “Soul Red Crystal”
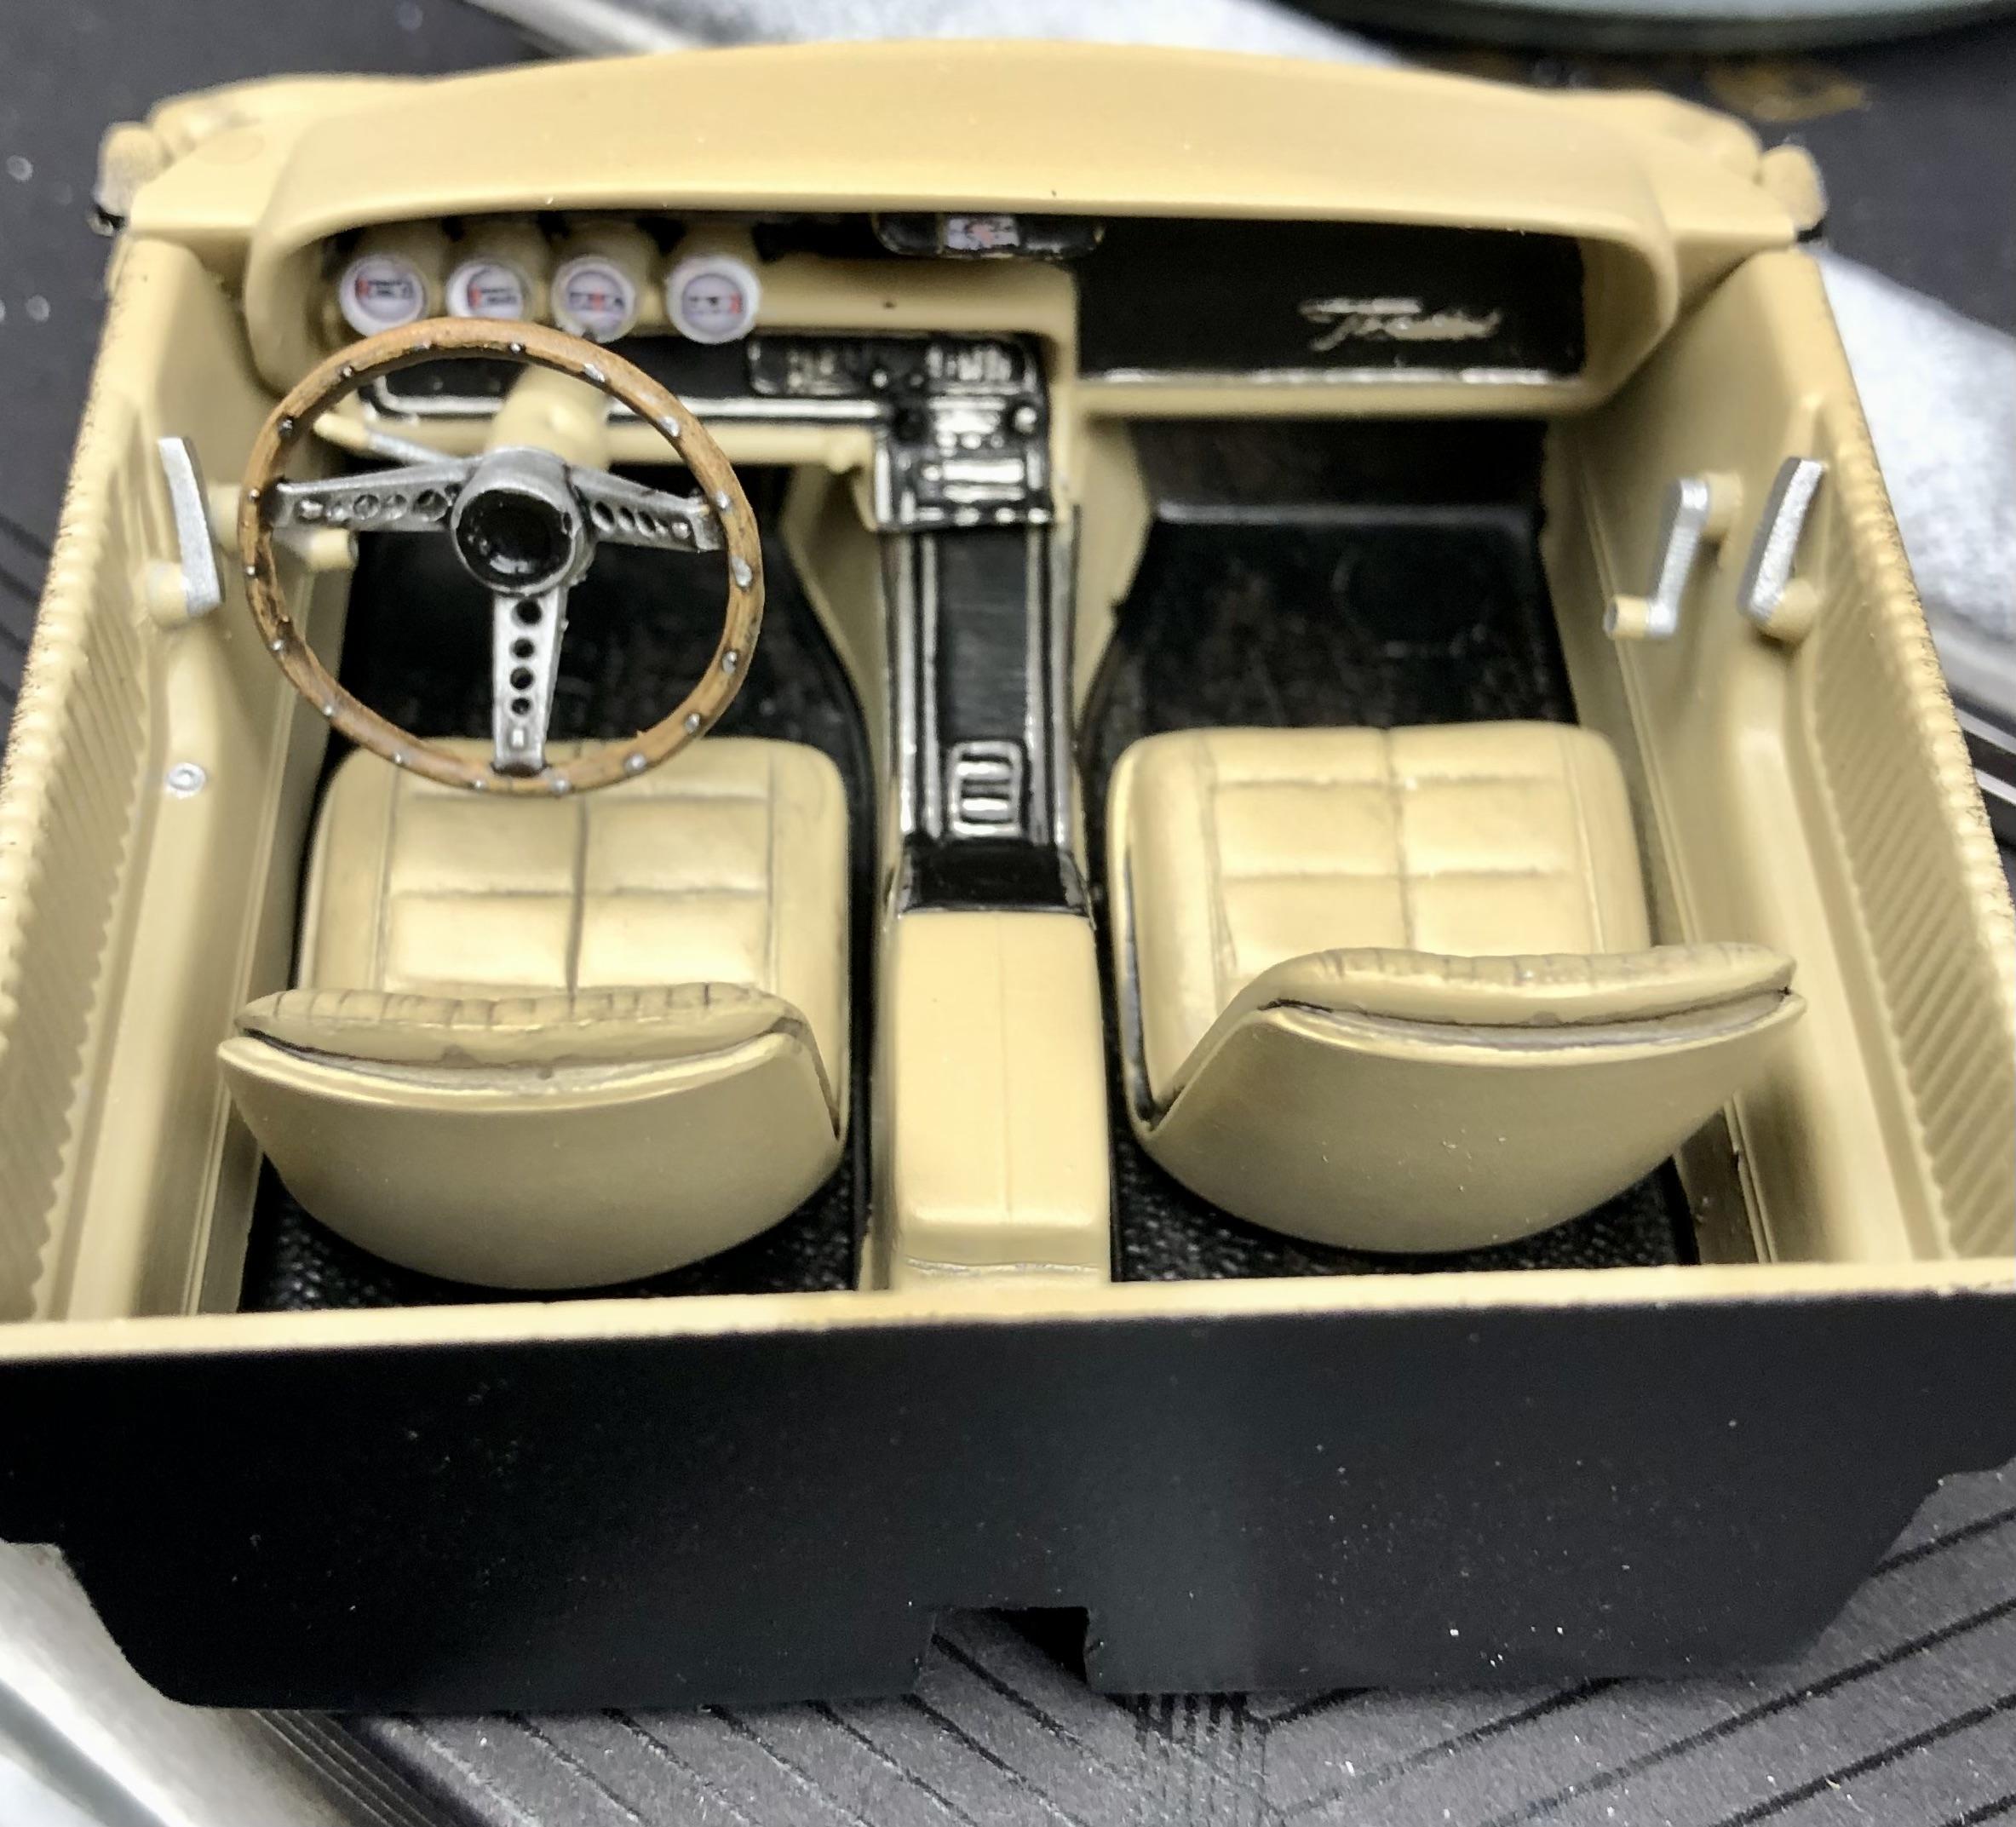
and the interior is done…
-
5
-
-
Don't give up on it...it'll be a cool custom truck. Go for it!
-
2 hours ago, customline said:
I wonder if the '62 chassis would work under there, Brian. 🤔 it wouldn't be correct but so what? 🥴
I agree…part of the reason I like doing customs, all you have to please is yourself! Your own imagination and creativity leads the way.
Who cares if it’s correct as long as it’s cool!-
1
-
1
-
-
Also posted in another thread...
Body (while still in primer) ironed out and now the chassis...
I'll shift gears (pardon the pun) to the engine and interior.
-
7
-
-
Well...it's been a bit since an update...
Body has finally been hashed out so I turned my sights onto the chassis. The T-bird is an old school kit and the chassis left little to be desired as it was molded as one solid thick piece. I originally had thoughts of using a Revell GT-350 chassis and running gear.
After a little work trying to make that all work...I aborted those thoughts.
After copious amounts of work...I opted to just stick with the original chassis...but with some alterations...
I cut out all of the superfluous chassis and tried to give the illusion that the rear end is actually somewhat feasible. I'm still debating if I want to take the time and effort to remove all of the plastic under the leaf springs or not. I plan to make my own driveshaft for it and the "floating" trans cross-member needs to be attached to the chassis yet.
I also couldn't wait to see how the "Z-Wheelz" would look underneath so here is a mock-up minus the front lower valance....
wha-cha' think? All comments are welcome, as always!
-
5
-
-
On 2/14/2025 at 7:23 PM, dmthamade said:
Yup!! Any time i've had a big gap to fill, i've used stretched sprue or rod stock with thin cement. Gives a much stronger weld than filler putty or CA. Gouging or "V" ing out the joint then filling is like MIG or ARC welding, gives better penetration=stronger weld.
Don
yep...I do the same thing
-
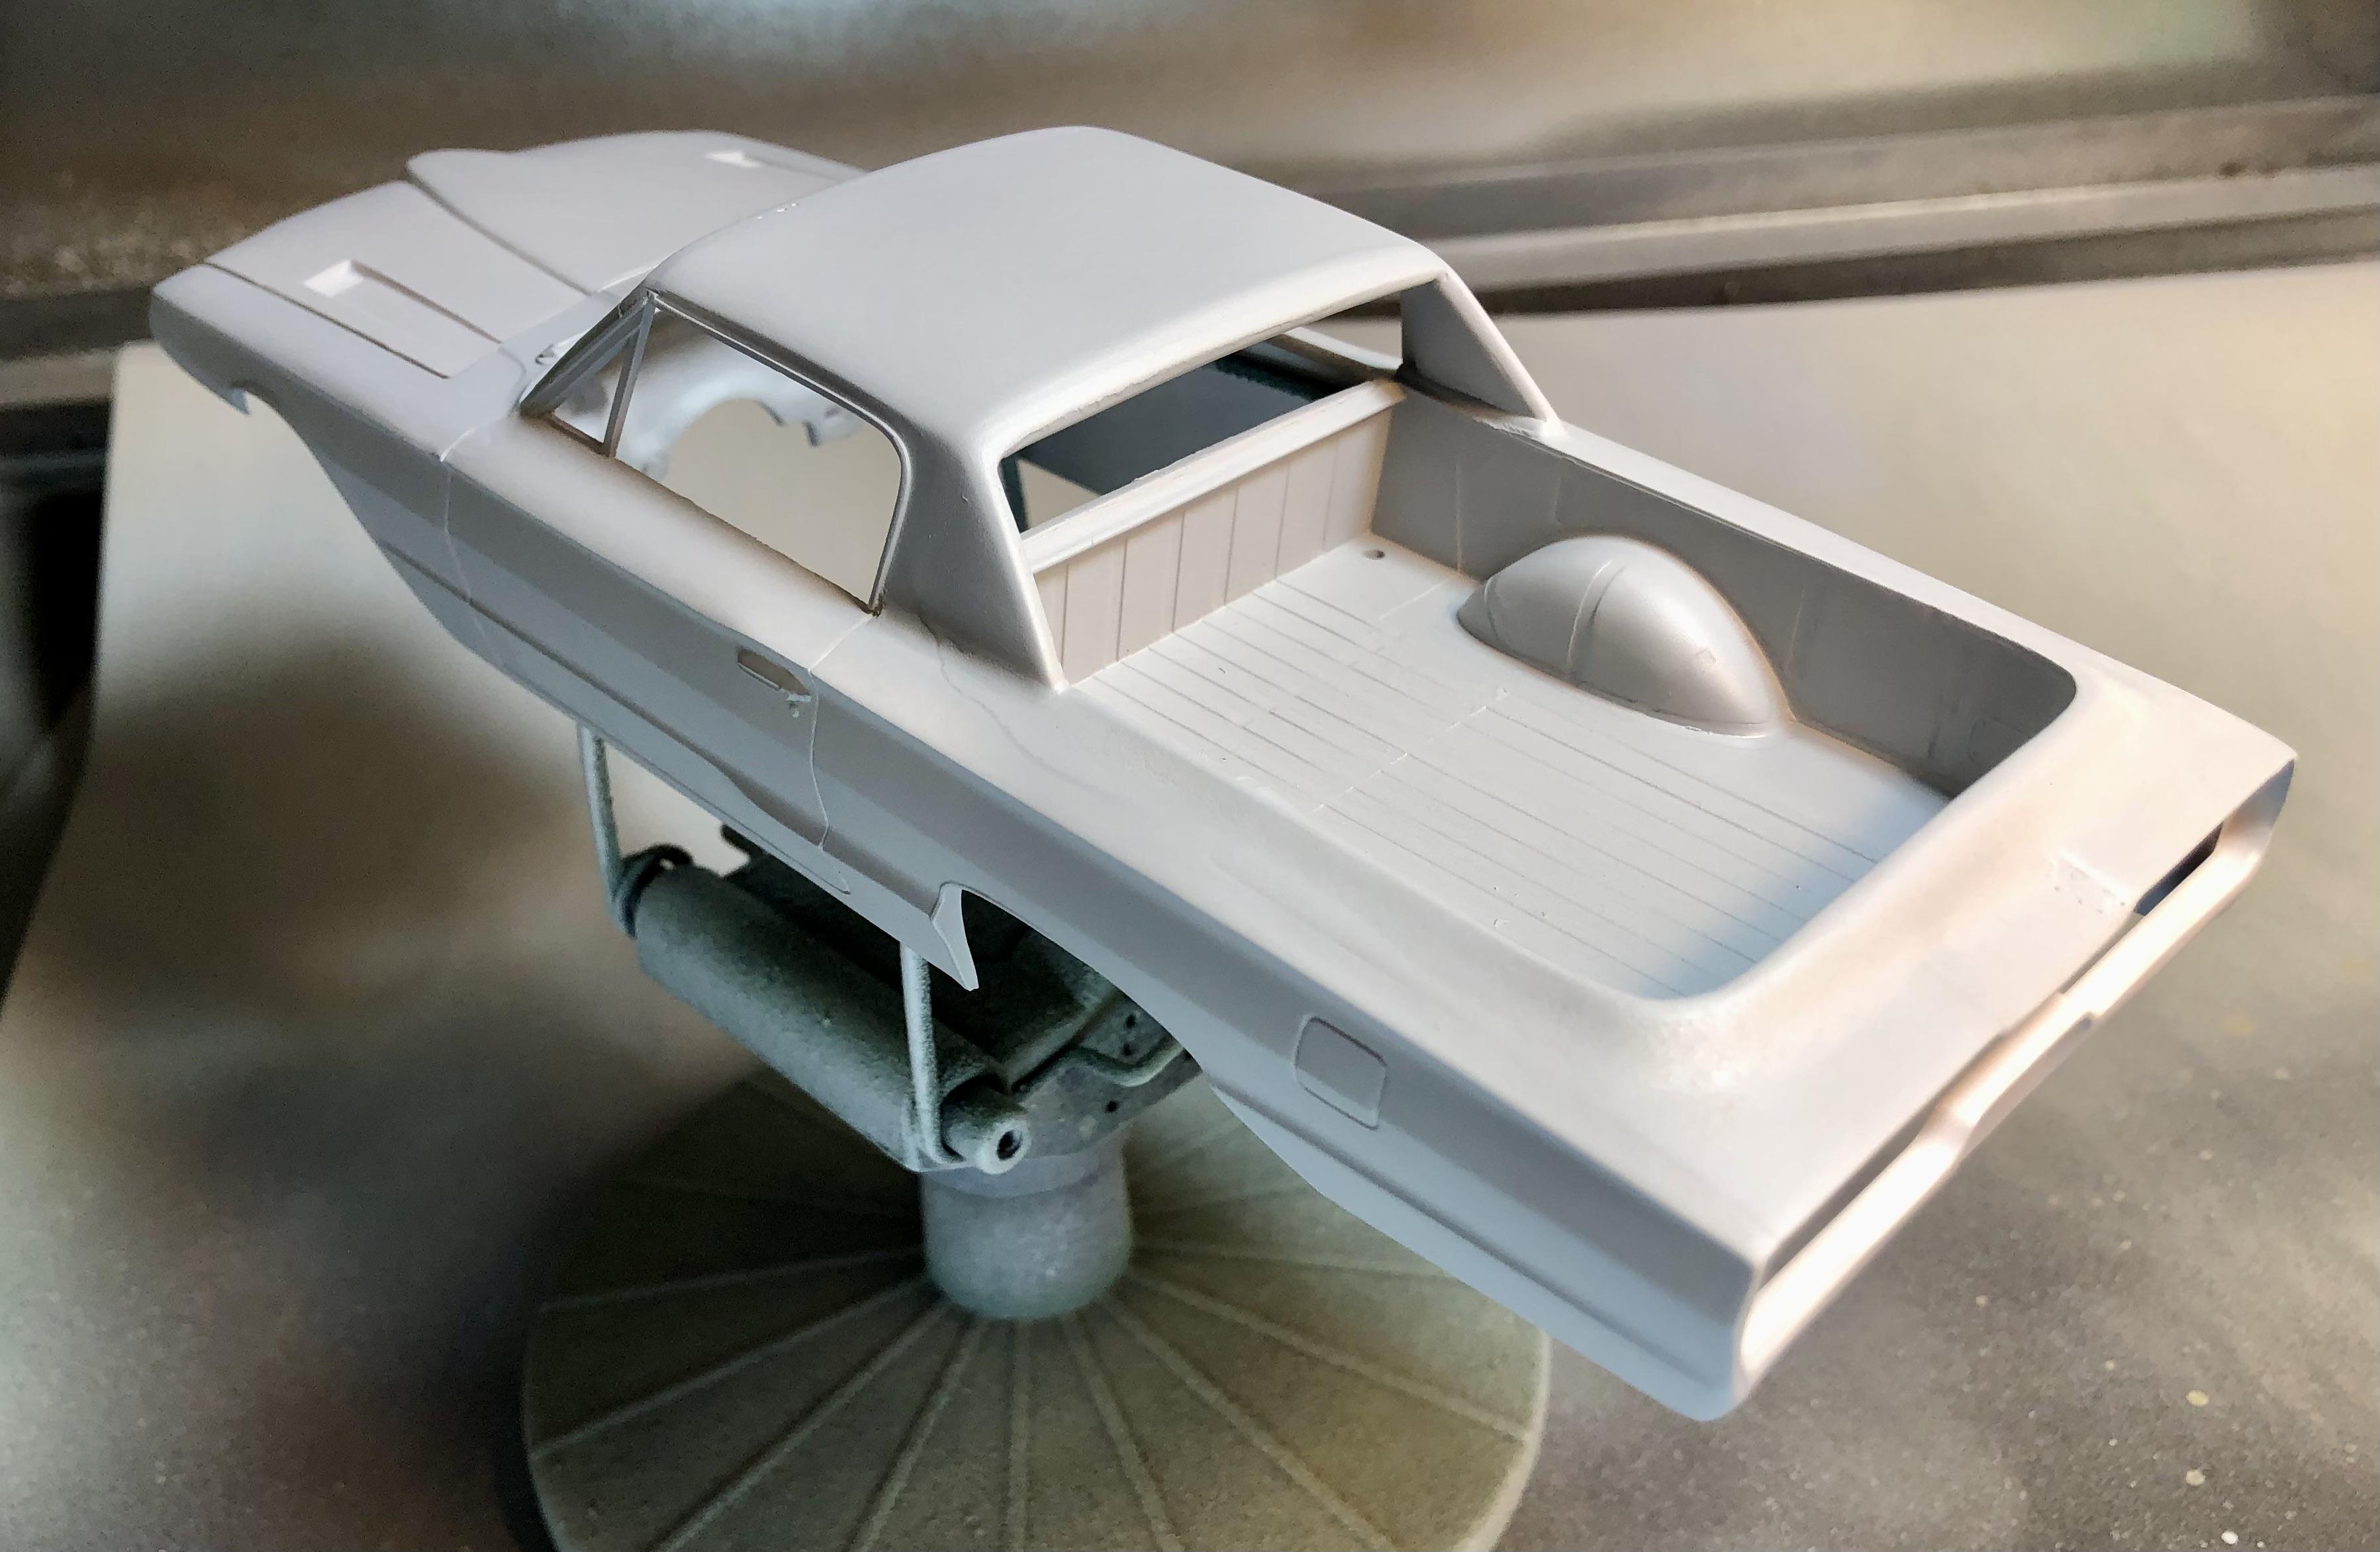
So first shot of primer with lots of clean-up, body repair and sanding to go but I needed to see if this was headed in the right direction or not.
So far, I like it and glad I changed the roofline. I’ll let it dry a couple of days before I mess with it. I opted for the kit supplied custom hood. Just something about it that I liked better than the stock one with chrome “V” in it.
Comments are welcome!!!!
-
8
-
-
29 minutes ago, TransAmMike said:
The cone shaped object is a pretty hard wax and it screws into to "pen". The wax is tacky and sticks to light small parts. Especially useful for clear headlight and taillight lenses.
got it...it's a wax bead pick
-
5 hours ago, TransAmMike said:
I sure do appreciate all the replies. I did order a tube of watch crystal glue due in Friday.
Thought I'd show this handy gadget I use for doing some attaching of small light parts. Now if I can just get the right glue.
The sticky wax tips last a long time and hold light parts pretty well.
So what is that handy little gadget?
-
Excellent work!
-
Thanks guys!
-
16 minutes ago, Zen said:
Looks much better!
Thanks...I like it better also.
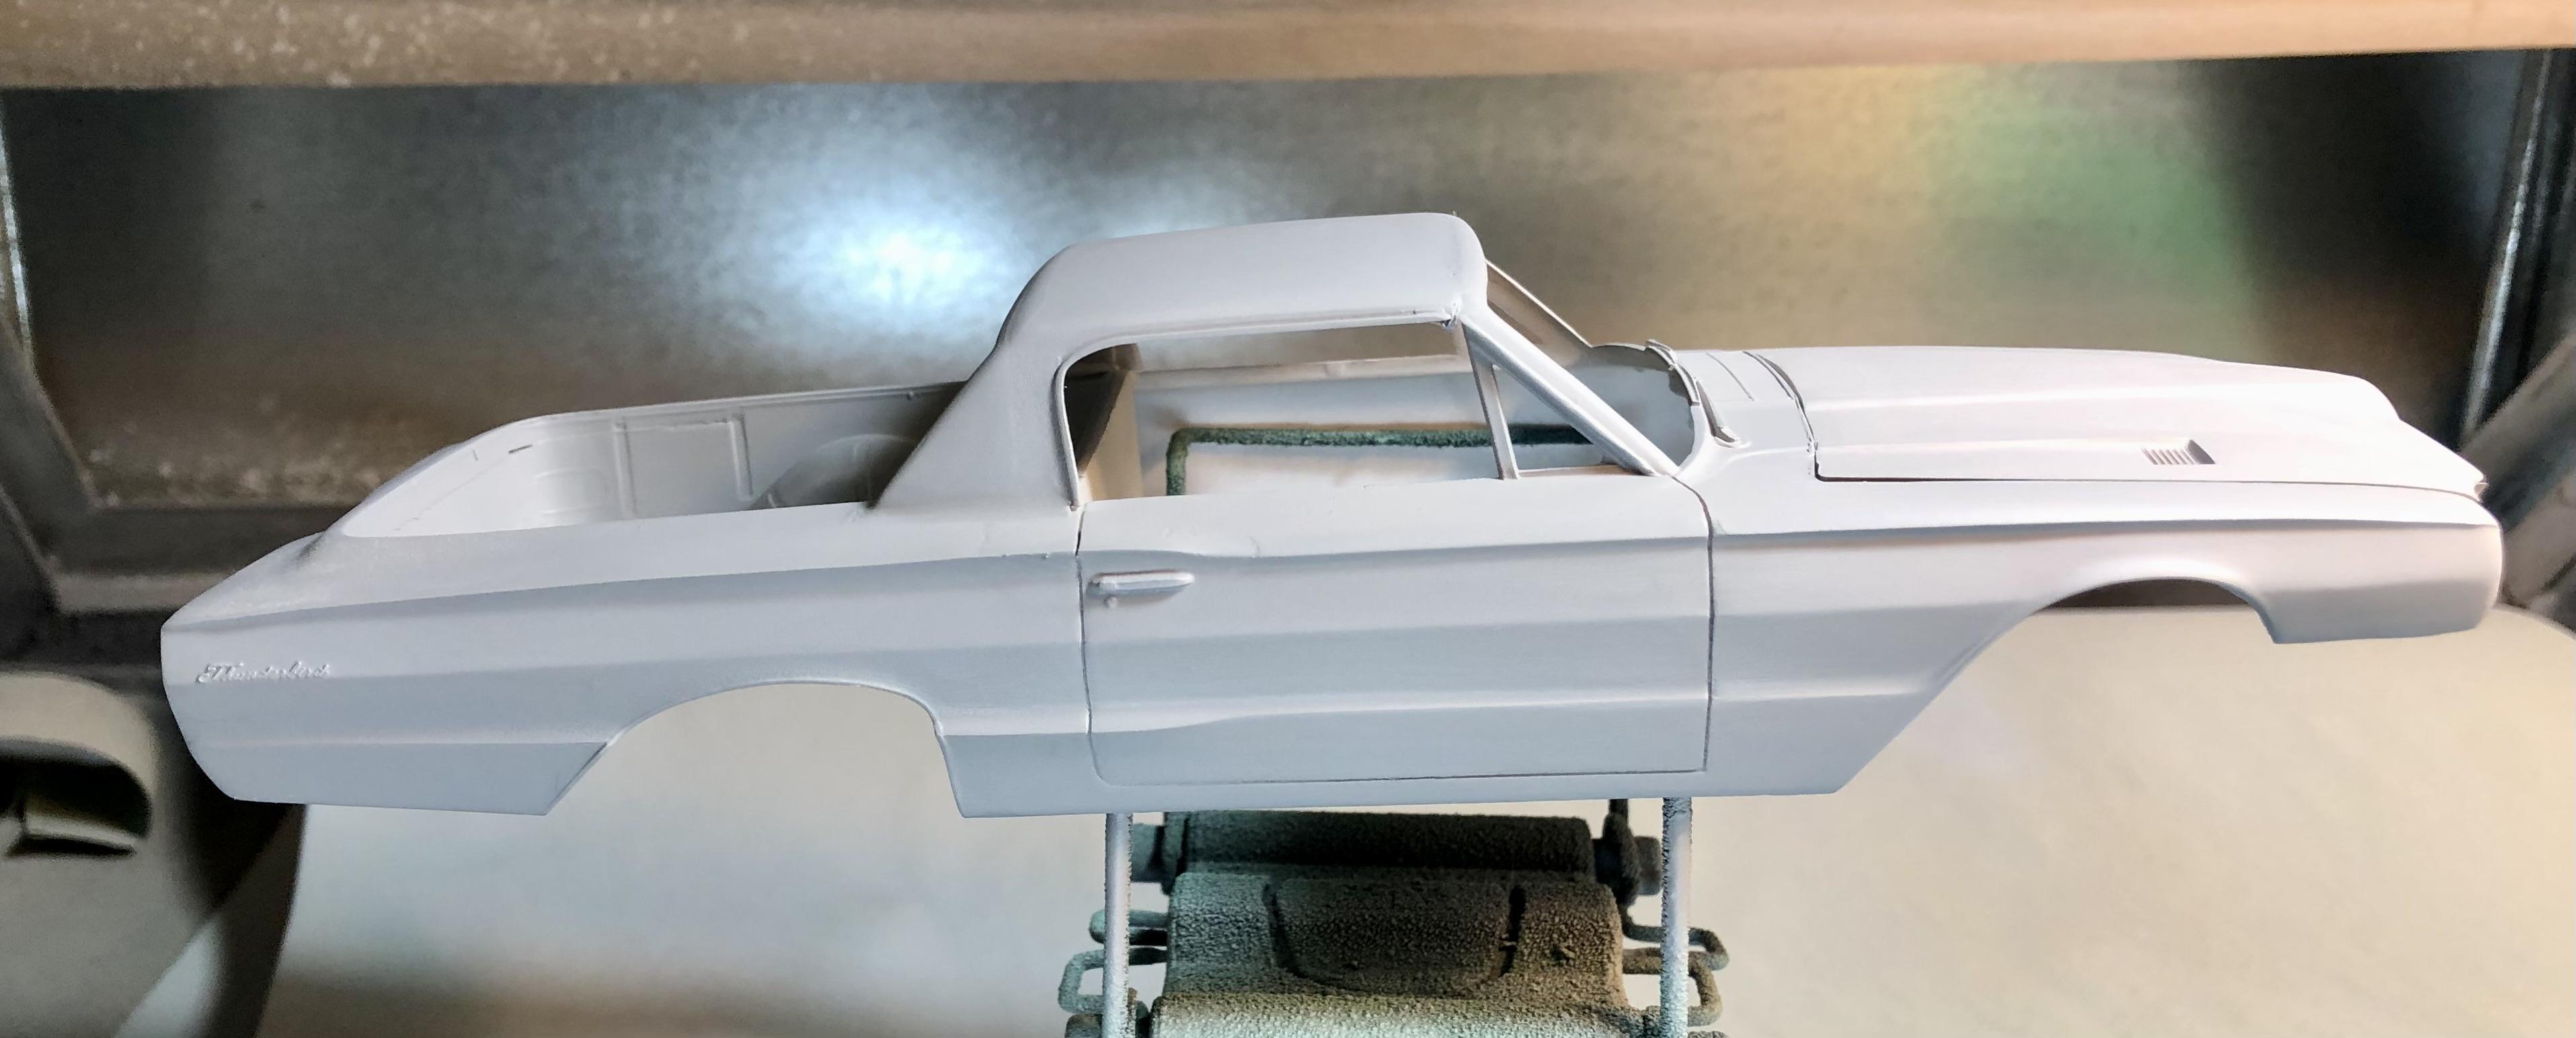
I had to custom make a rear glass for it. Since it won't be flush mounted like the T-bird rear glass was, it will be set back at the front of the bed more like the original rendering from Kaucher Kustoms.
Fortunately, back when this kit was designed/produced, they used some seriously thick plastic on the roof. I didn't have to worry about sanding through the roof or making the roof too thin when I sanded off the molded in vinyl top.
-
So…I wasn’t really happy with the way the roofline looked on the original mockup…
So I took the T-bird hardtop (it was a separate part in the kit) and hacked it up and sanded it smooth to remove the molded in “vinyl” top look. Just a mock-up at this point as it is not attached yet but I like it better…
the rear glass will be back set as opposed to being mounted at an angle.
From here, I’ll start slinging mud on it and other than a different chassis, engine and wheels/tires, the body will be all t-bird from here on out.
-
4
-
2
-
.jpg.39c006f3de99ab80632ed484aeb90331.jpg)


Hobbyist Haven
in Model Building Questions and Answers
Posted
yeah, i bought the sander from a local seller and love it. I'm assuming you got these from Hobbyist Haven?