Sonny J.
-
Posts
30 -
Joined
-
Last visited
Content Type
Profiles
Forums
Events
Gallery
Everything posted by Sonny J.
-
I'm really annoyed that I don't have so much time to build at this model anymore since I started working during the summer. But I build what i have time for but it isn't advancing as steady as before. However I'll hopefully be done with it soon so I can start my next build
-
Thanks for all the suggestions! This really helps a lot I haven't been able to get my hands on any of them yet But eventually I will and it will be glorious! (hopefully) I'm think to go with either Purple Power or oven cleaner since that will be the easiest ,and cheapest??, for me to get
-
yeah that's what i feared so I started wet sanding instead but thanks for the tip! Now I shall start my adventure to find something equal to the "more affordable" Purple Power (as a student AND Porsche owner every penny saved counts )
-
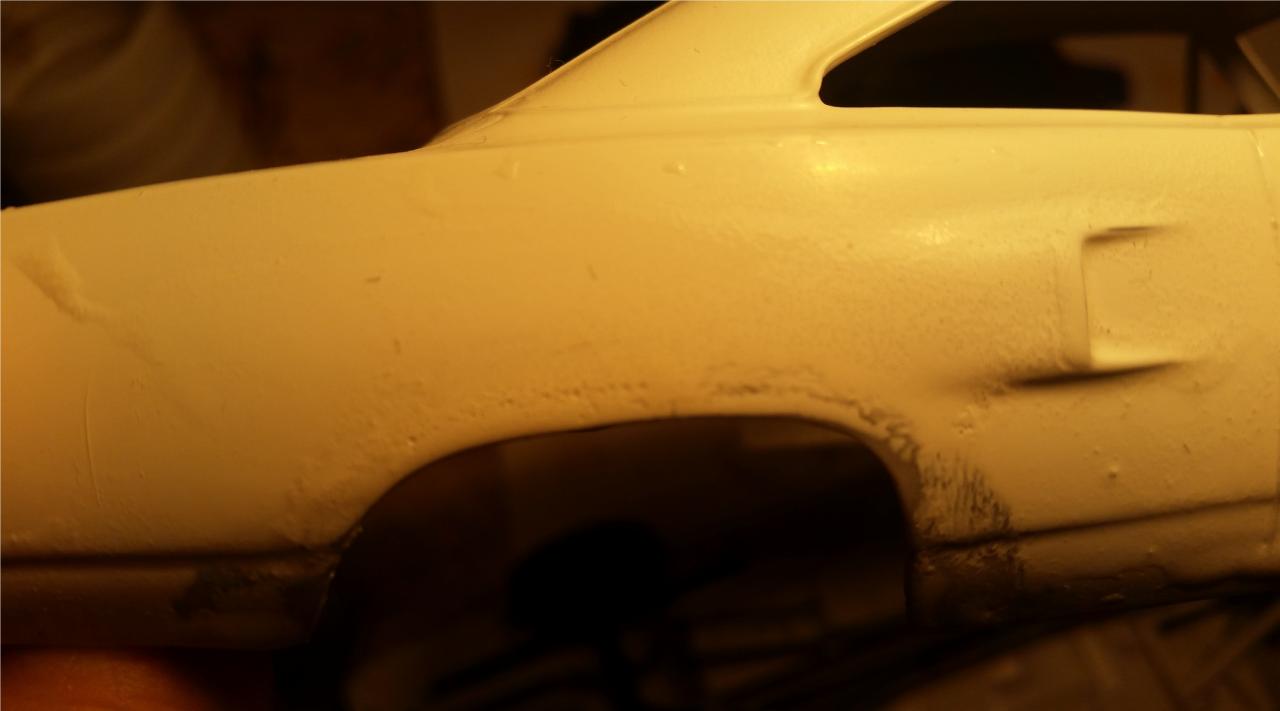
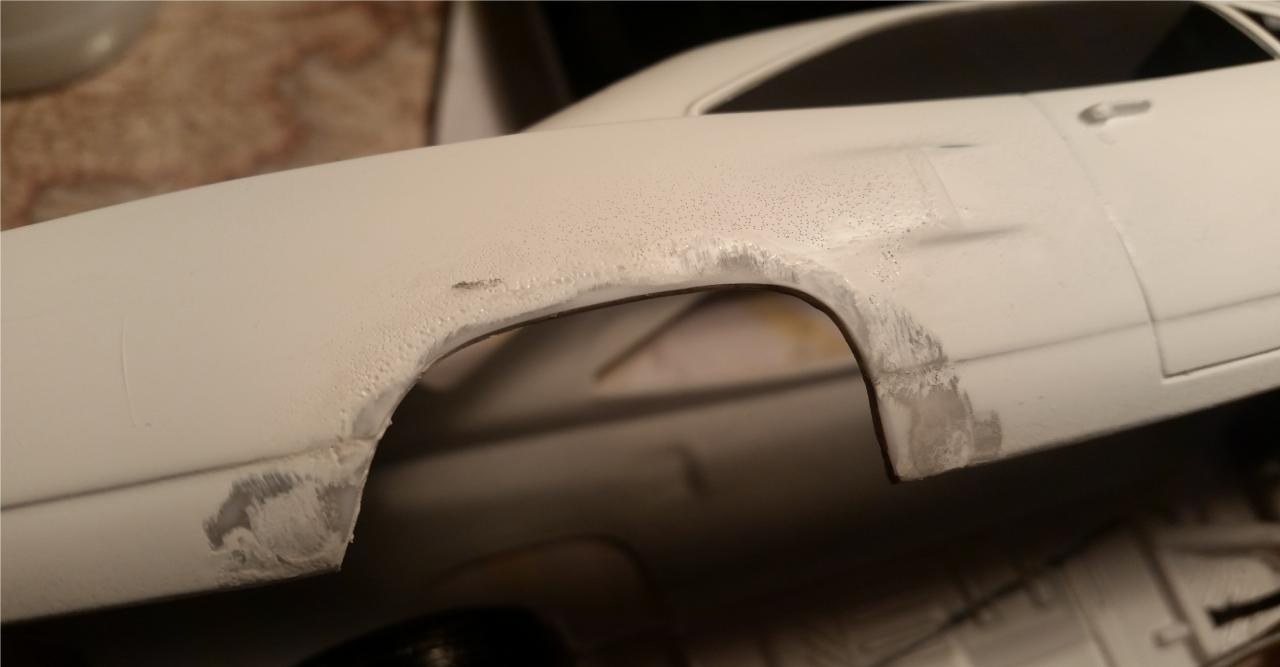
I have progressed.. but i can't admitt that it's forward moving progress, i were just putting on my final layer on the chassi when I put a too thick layer and it started running and the whole rear right quarter panel got cover in small airholes. I'm not completely sure what to do i have tried to strip the paint with Acetone and fine sandpaper but showed little result. do you guys have any suggestions on how i could strip the paint without harming the plastic? That would be greatly appreciated since this photo is after i tried with acetone and sandpaper, it slowly works but im worried that I'm gonna chip away at the plastic if I haven't already /Sonny J.

-
Thanks and I've genuinely missed that rubber strip.. It's so exiting to learn more and more of these cars
-
Thanks to all of your comments I'm glad that you like the build and it's progress especially since I'm not completely happy about the results my self.. I know I shouldn't hurry but at the same time it's so extremely motivating to read all the comments and so on ! Thanks for the tip on using a pen to paint thin lines, this will come in hand for example the chrome rim around the fender turnsignals. Thanks for the advise I'll remember to paint the inside of the roof before i put it all together but first i need to think of how I'm supposed to paint the roofliner that's on the outside.
-
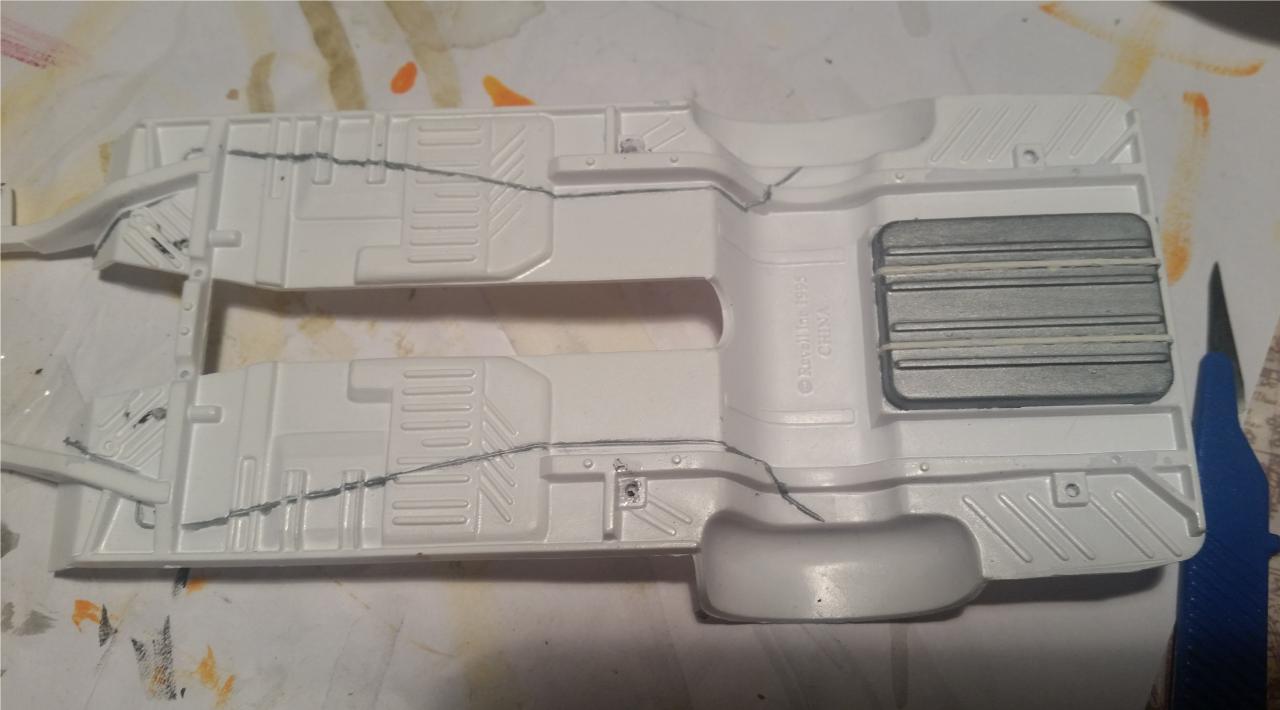
I'm sorry for not posting for quite some time. I've spent all my spare time studying for my drivers license, which I've now gotten so I can continue on this build. Although I've done some progress on it at least! I painted the undercarriage of the car the same white color but matte instead of gloss like on the rest of the body. foolishly i tried to take a shortcut and didn't give it a layer of primer before the paint so now I have to be careful not to chip paint of but here's the result: I detailed it by painting the fuellines steel ( not very accurate) and the fueltank aluminum with white struts. The fuellines I'm very proud of since I tend to have very shaky hands when doing stuff like this Hopefully I wont take this long until next update Comments, tips and criticism is welcome and appreciated.
-
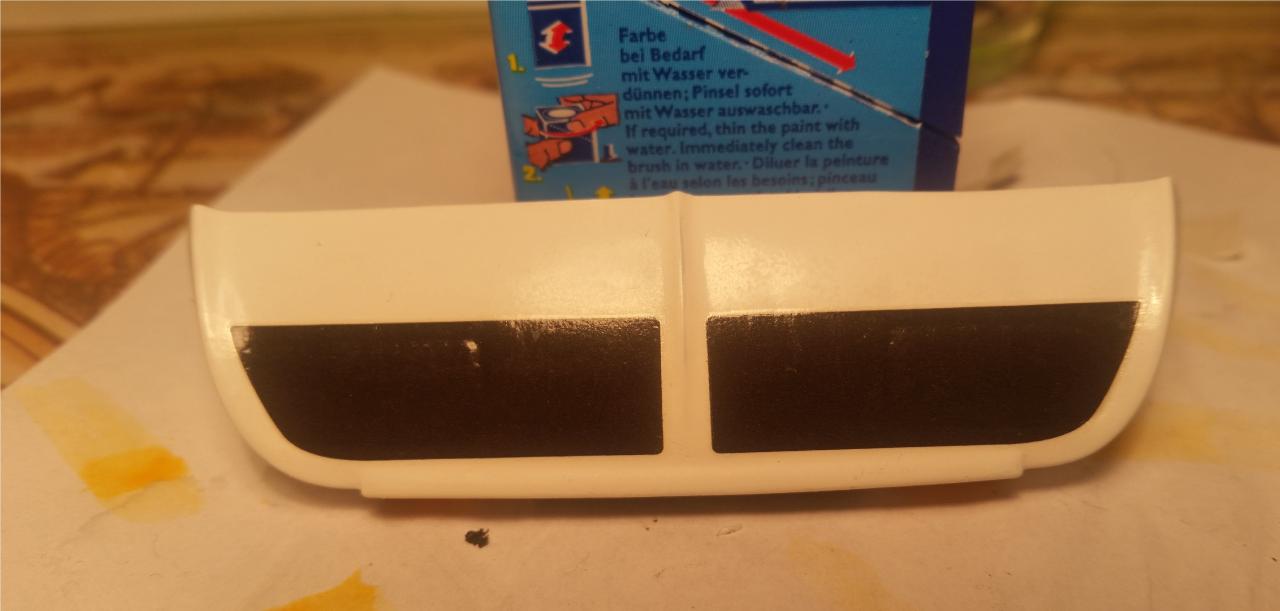
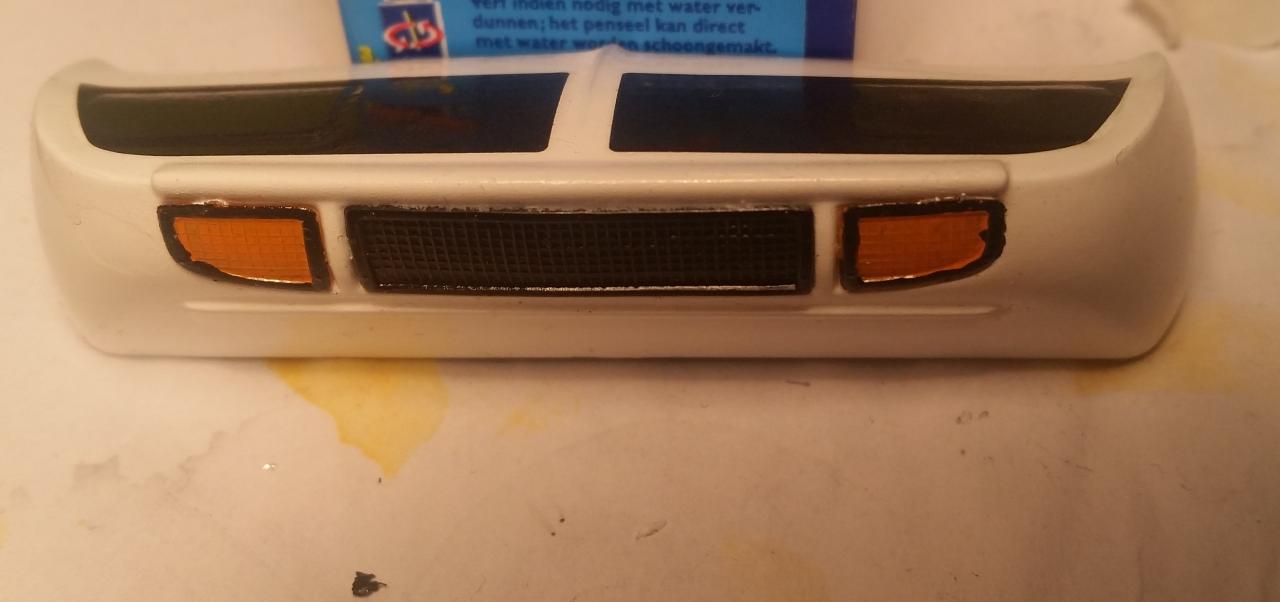
I got some more time at the bench so i started on the nosecone, it was in really good condition. I found no flash, moldlines or scratches so just wetsanded it and putt a layer of primer on top of it. Wetsanded the primer with 1500's and primed it again to again get wetsanded down for the first layer of paint, which i messed-up as I shot it at to far distance so the surface got a really heavy texture and not in a good way. If that wasn't bad enough when i tried to fix it i wetsanded a tad to much so i had to redo that layer completely. When the nosecone was ready for it's second-first layer of paint the piece dropped from my custom made stand... But then after alot of anger management i finally got it looking good with two good layers of paint so started making the bottom pieces. The grille i sprayed black and the indicator i painted with acrylic orange and added a black rim for detail even though it looks really bad because I painted it badly. Lastly I added the decals that got a bit wrinkled all over. Here's the result: ( not completely happy) I stared on the hood too and that is it's first layer of paint this far. Comment, criticism tips e.t.c are all welcome! /Sonny J.
-
Thanks everyone for the support! .t really is amazing waking up in the morning to read all your comments! I haven't glued it together, the pieces are sort of leaning towards each other or what ever you could call it. They can't be merged before the underside of the body is complete . The pieces are fitting marvelously well, even the exaust to the headers are a nice fit without me even touching it or using any amount of force to it. As you only wanted to help it's sort of constructive criticism and that is always, for me at least, appreciated. Thanks for caring!
-
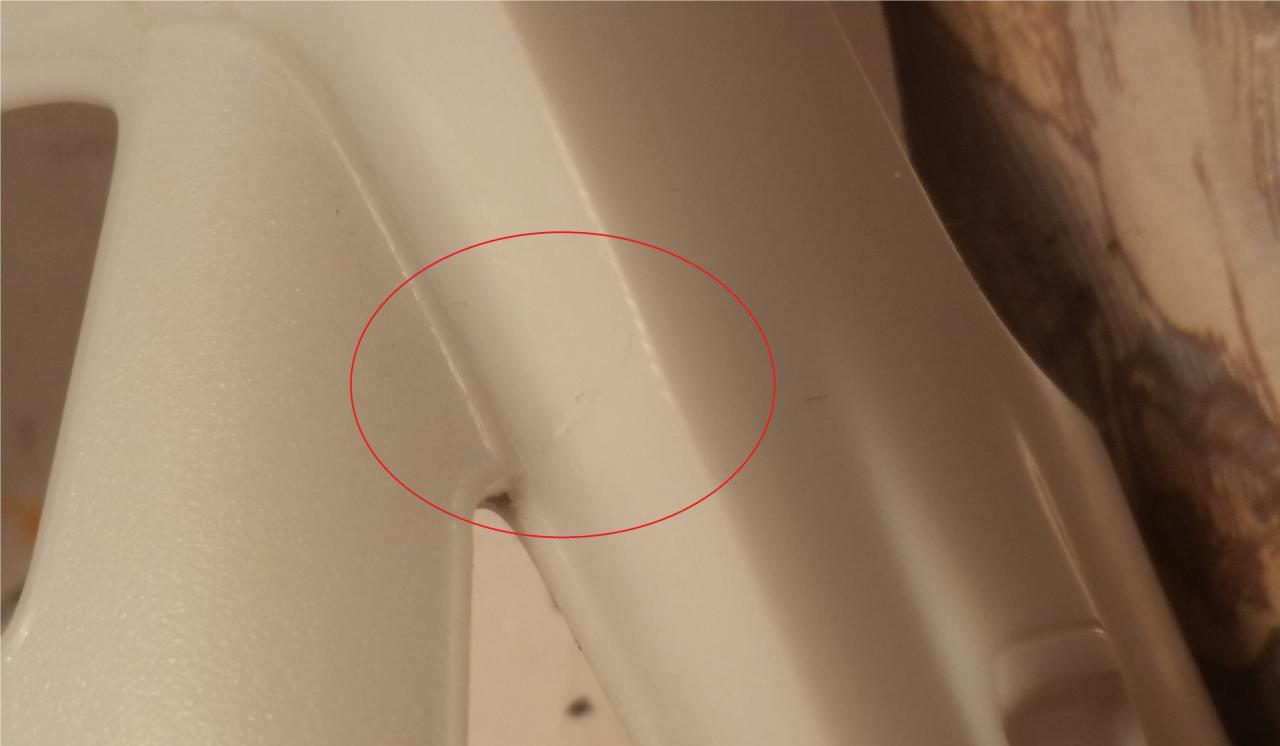
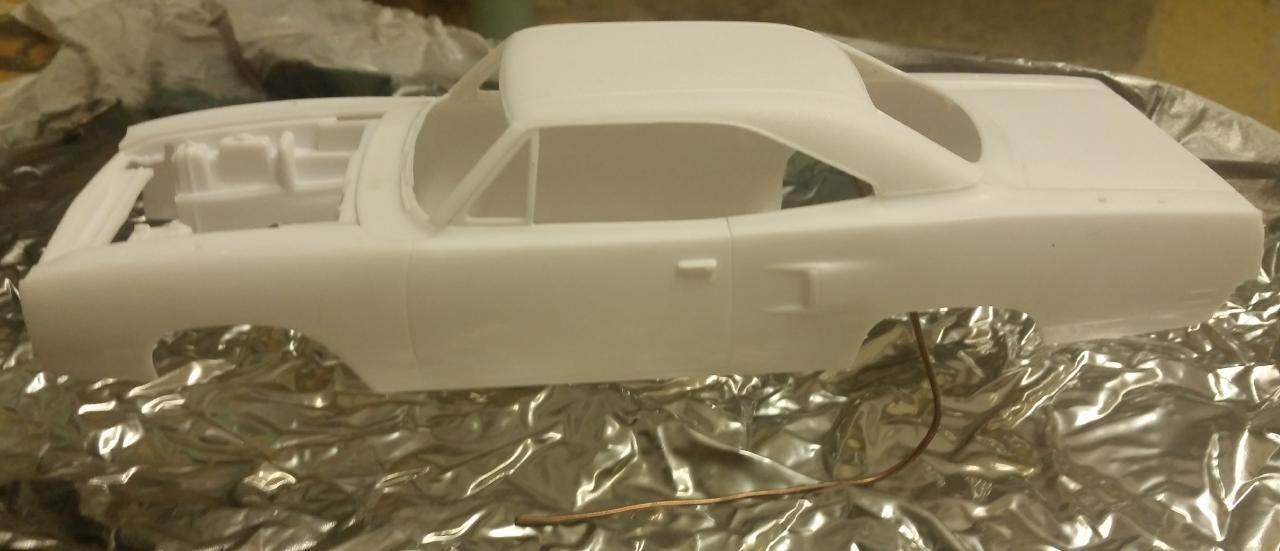
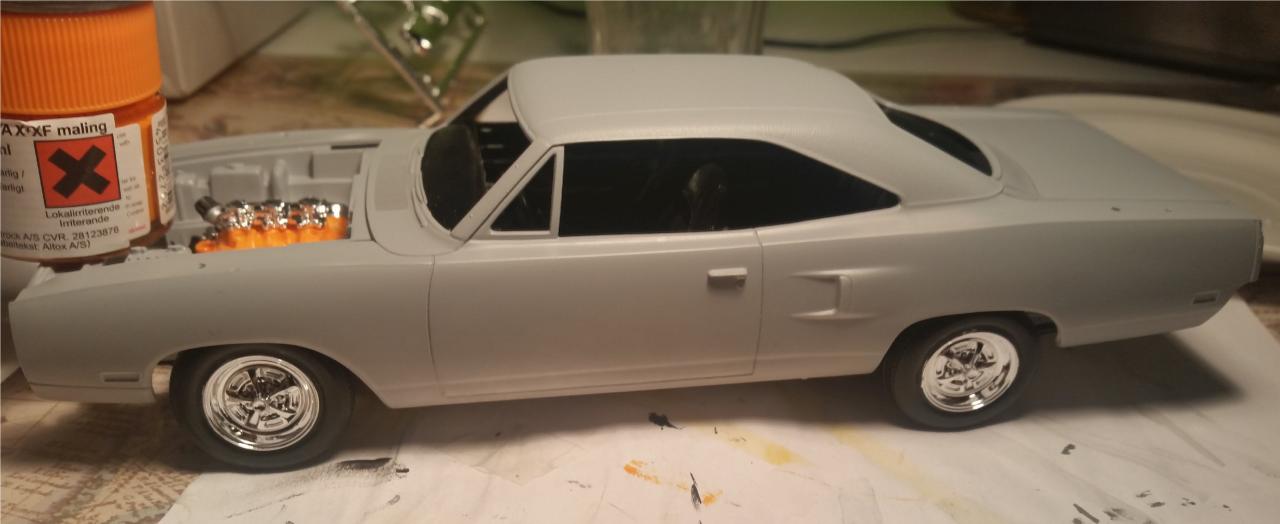
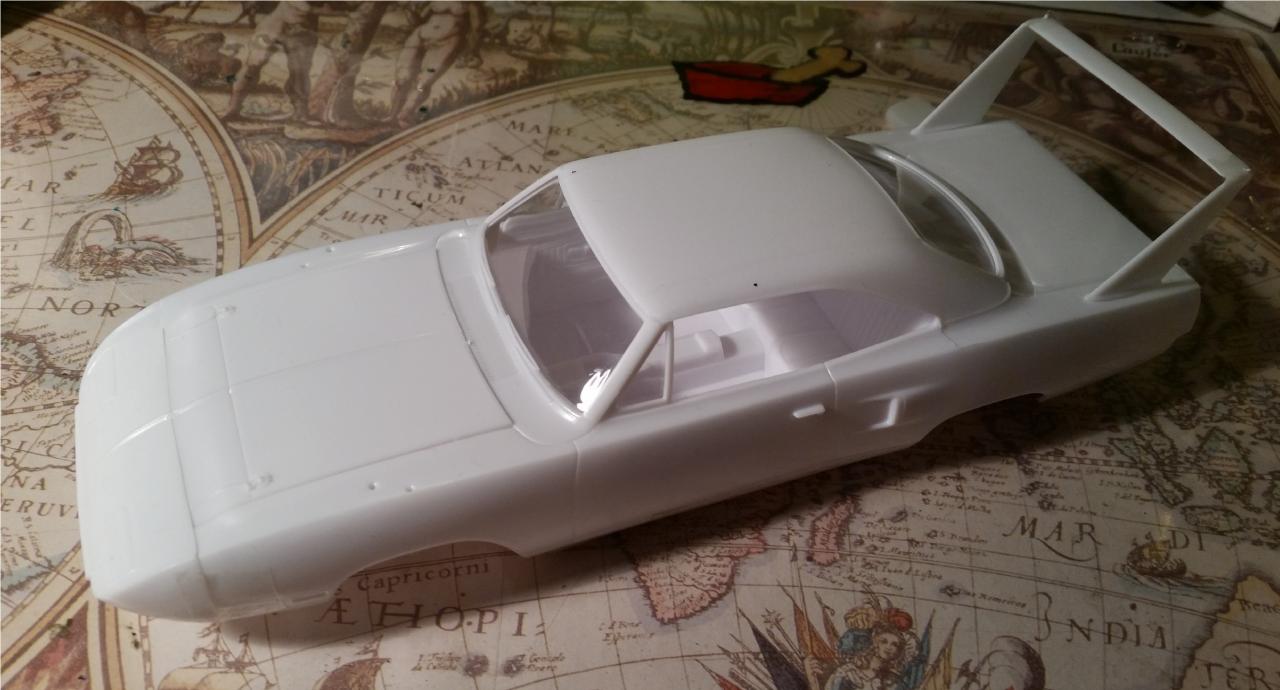
I'm trying to post updates everyday but it's starting to take it's toll but as far as i can keep that schedule and updates coming I'm happy! Might be a problem if i go away for a weekend or so... didn't think about that... I started looking at the body a bit closer than I had previously, the only inperfections my untrained eye could spot were 2 mold lines in the top front part of the door and two close to the rear side window (picture). I made a stand out of thin copper tubing that could fit under the roof along with the hood, spoiler And nosecone. Here the body is ready for it's first shot of primer, i use standard rattlecan primer because that's the only i could get hold of easily: Here it is in it's first uneven (visible) coat of primer: I sanded the whole body using 1500's sandpaper. Here's how much material i took of before applying the second shot, the surface were glass smooth. I may or may not have found myself rubbing the model because if felt so smooth. After three layers of primer and all of them receiving the same treatment as the first, this where the result. It's smooth, even and ready for paint! Also this time i succeeded better at simulation the stance that i think it will have thanks to my trusty orange enamel bottle! All comments/feedback/suggestions are welcome! /Sonny J.
-
Thanks for the tip! I just have to try this. However it might be towards the end of the build :/
-
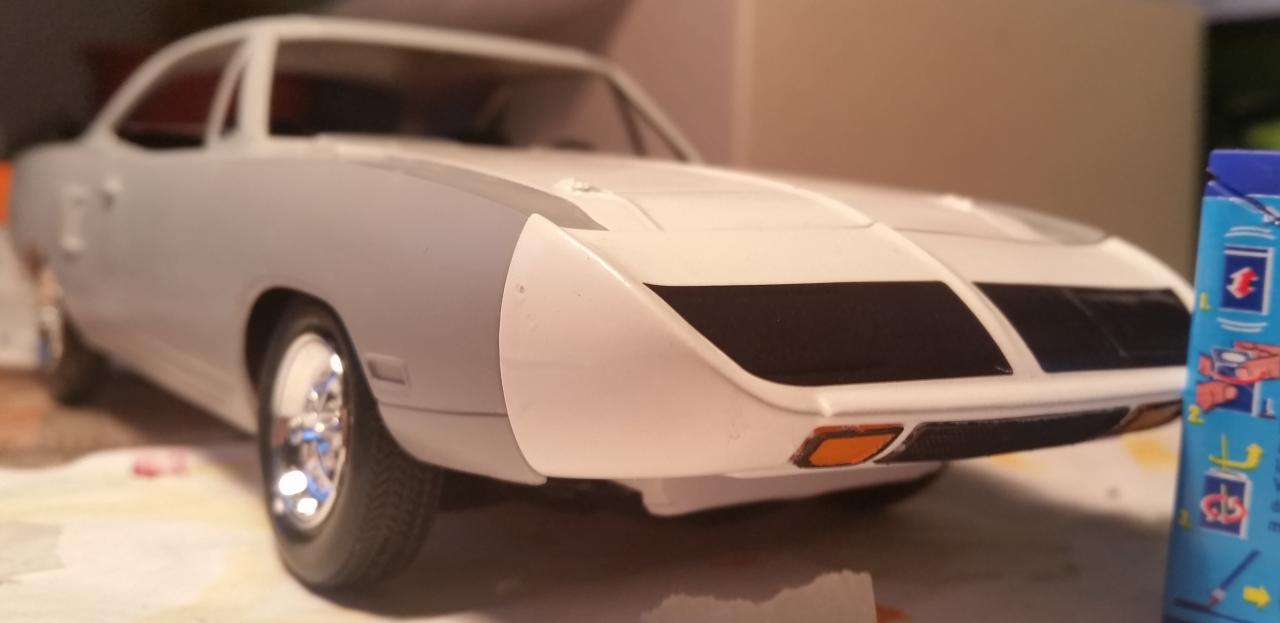
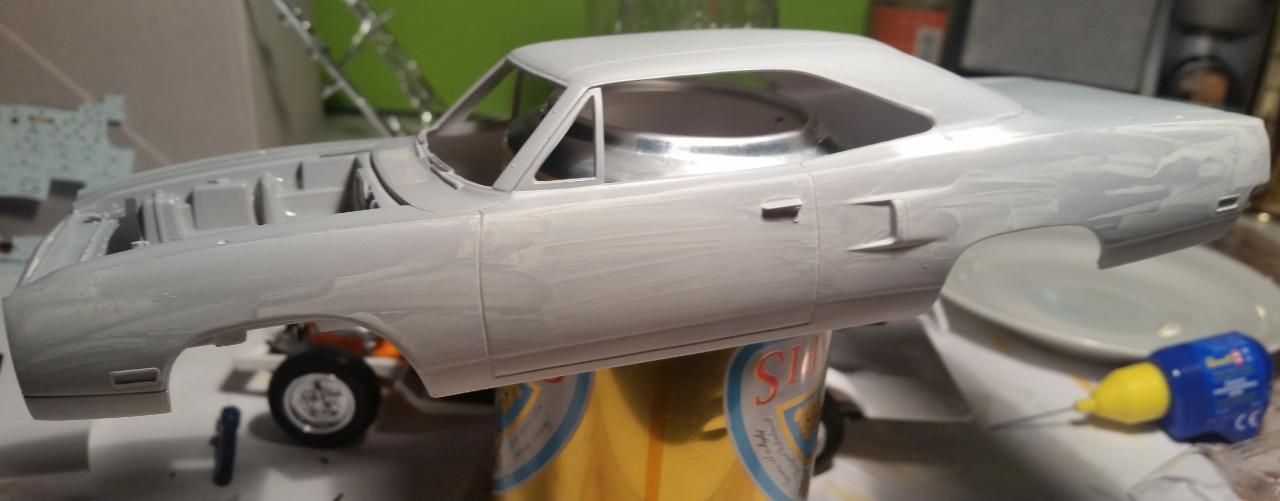
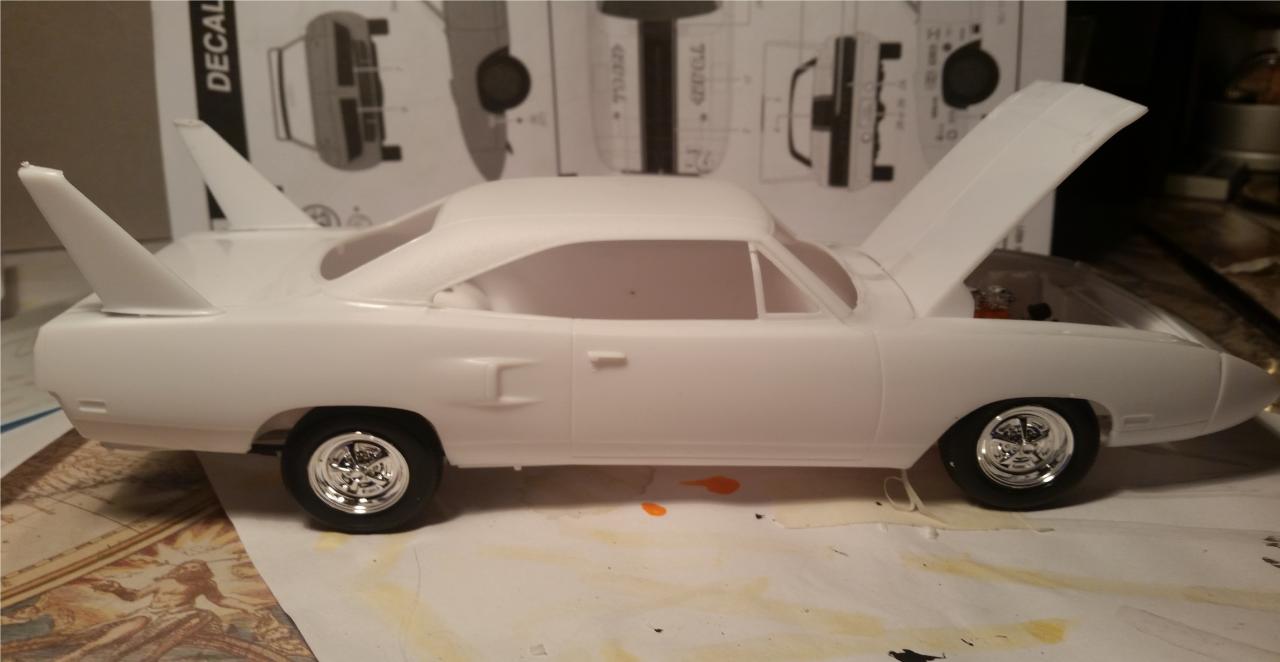
Thanks for the kind comments and good support it means a lot to me! I assembled everything I've built this far and it looking like this now: I started looking at the body and it's a really nice piece, smooth, no flash, really small moldlines and the pieces fit together great. It should sit something like this when done, perhaps a bit lower in the back: Do you guys have any tips on how i could detail my wheels/rims? I thought of painting the space between the spokes a darker color but i don't think i can trust myself with getting a good result with so small parts Appreciates all feedback/comments and tips. /Sonny J.
-
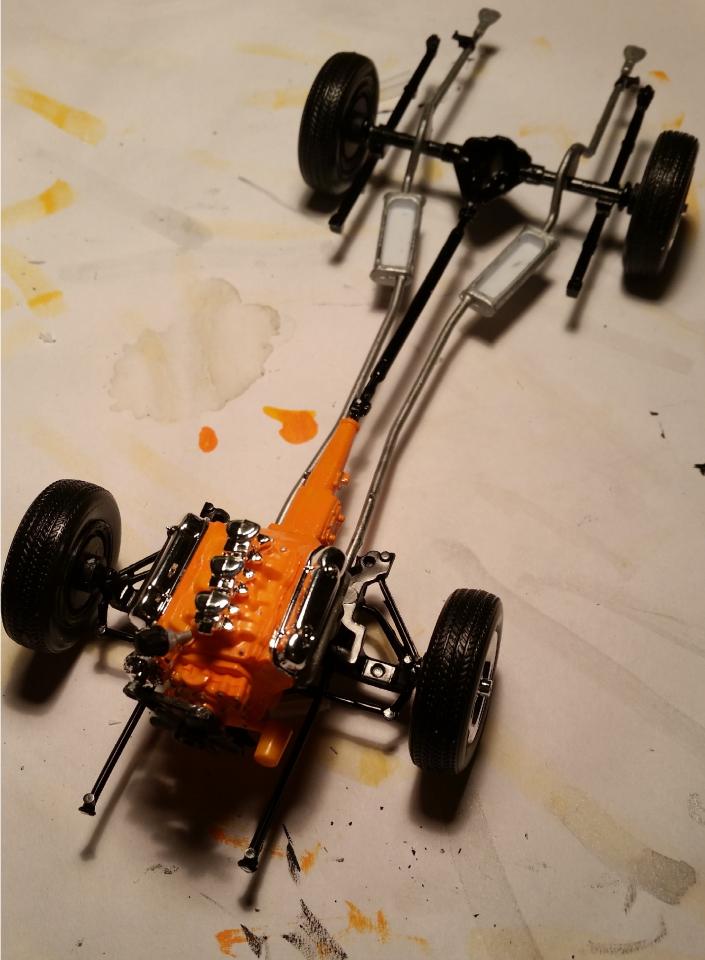
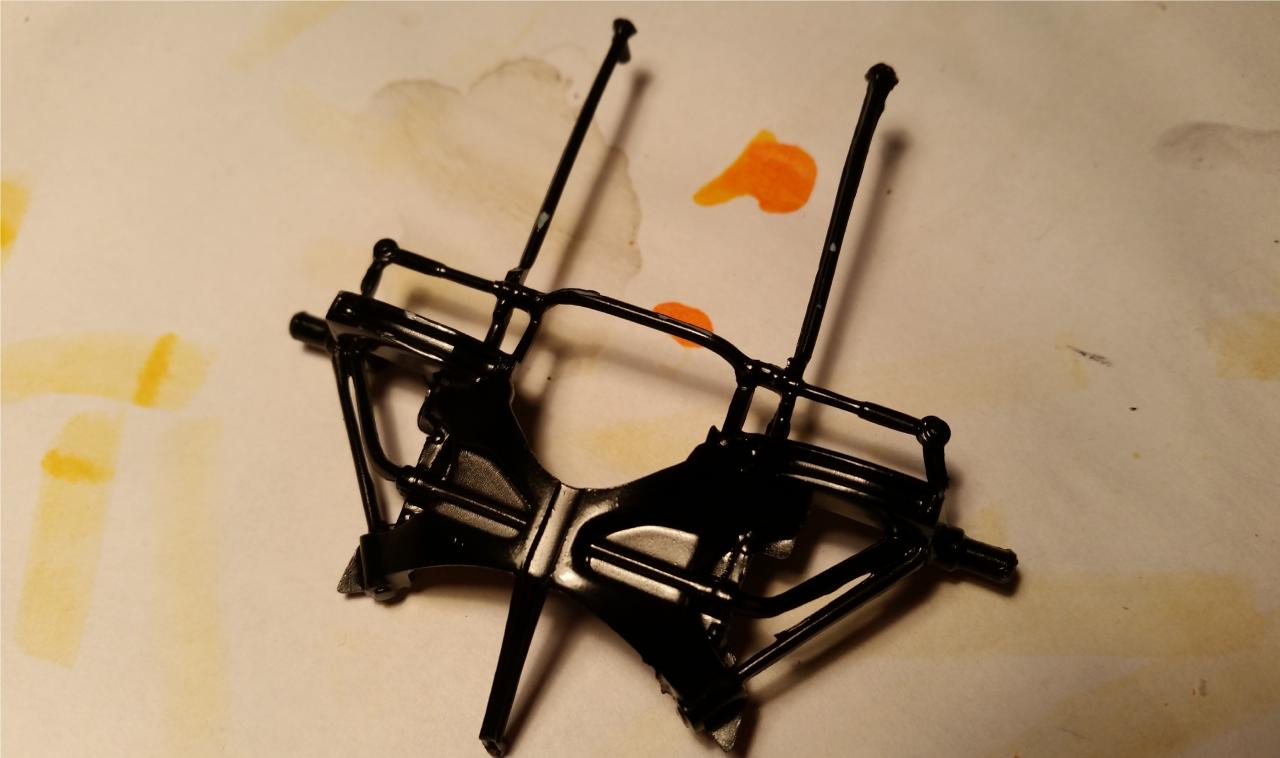
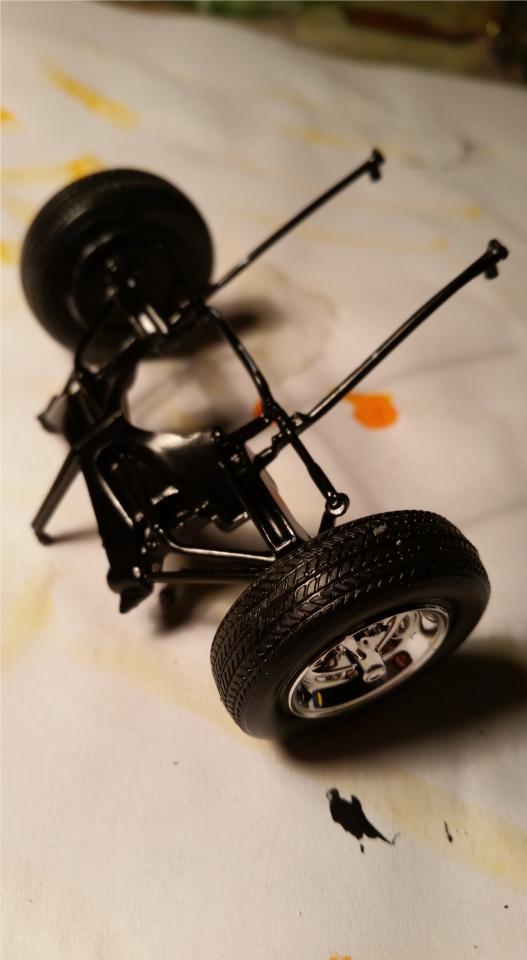
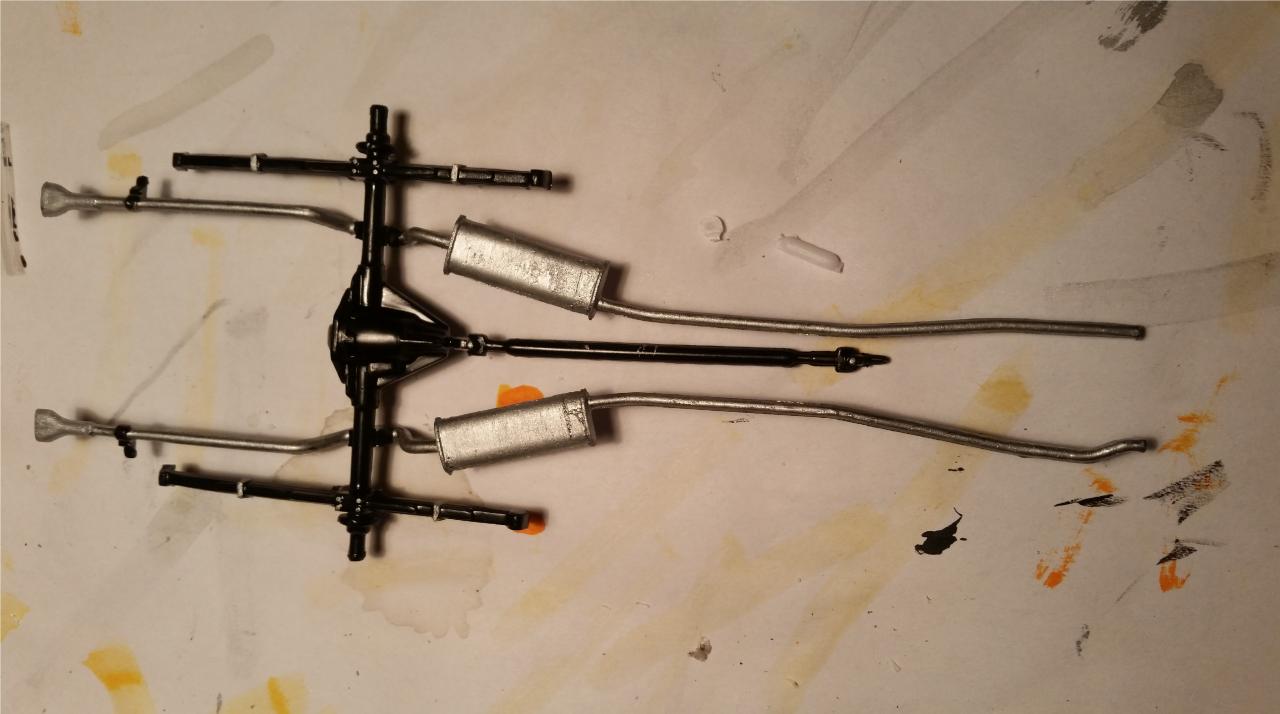
Yeah i usually do that as far as google can help me, beyond that i use my "fantasy" and knowledge of those cars to try to figure out how stuff should look, but thanks for the tip! It's appreciated I got the front suspension assembly done. I'ts painted with a semi gloss rattlecan. Added the wheels both to test the fit and to show the threading and some of the rims. I also got the rear suspension assembly, drivetrain and exhaust done. The black is the same black as on the front piece, the exhaust pipe is brush painted with steel enamels, the mufflers aluminum and the exhaust tips silver. I detailed it by painting all bolts and the brackets? around the leaf springs aluminum. I know i kinda messed up the mufflers with the aluminum, especially the left one. In the next update I will fit everything together and start looking a bit more closely at the body or interior Hope you'll like the progress and feedback is, as usual, appreciated.
-

A rookie from the cold north of Sweden
Sonny J. replied to Sonny J.'s topic in Welcome! Introduce Yourself
Thanks! Trying my best both at my project and my spelling. -
A rookie from the cold north of Sweden
Sonny J. replied to Sonny J.'s topic in Welcome! Introduce Yourself
-
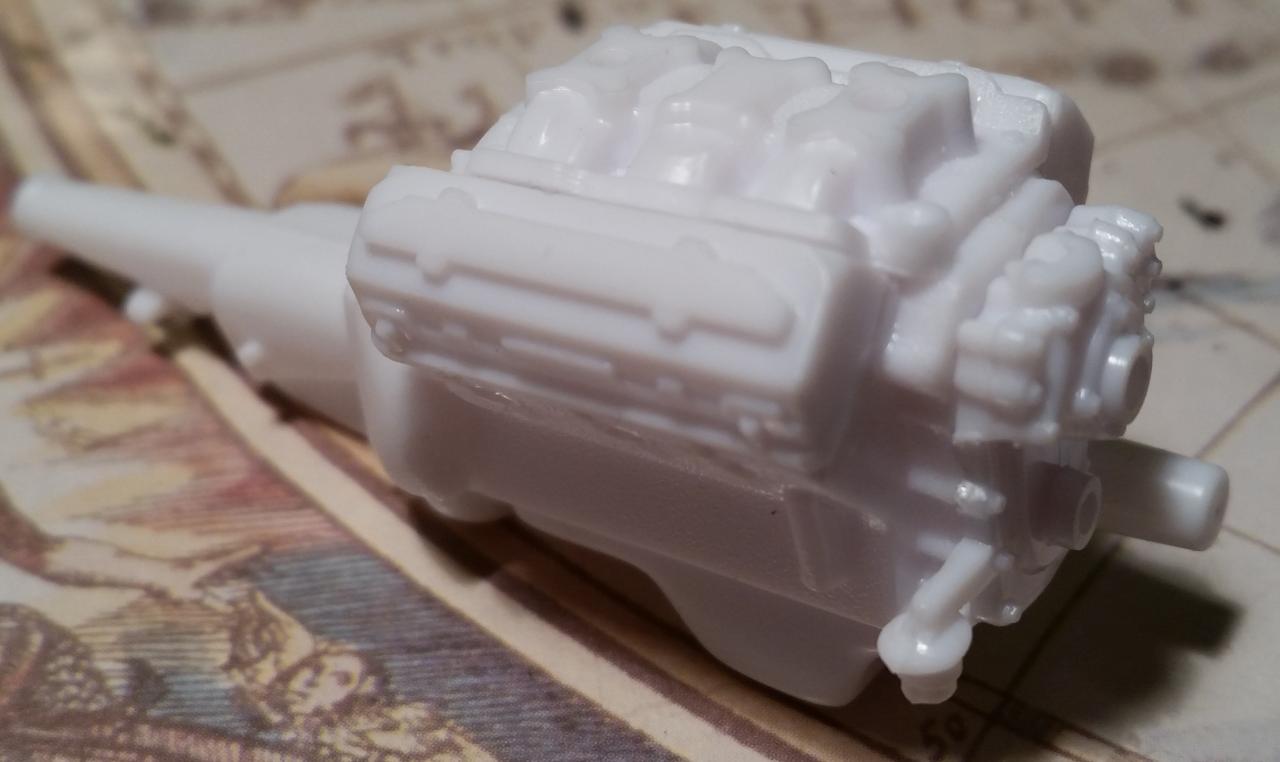
Here's the engine painted and assembled, It's hand painted with Tamiya's acrylic orange. It's somewhat visible where i have tried to fix the mold lines and not, for example: I have tried to fixed them on the front because that's visible but not on top of the transmission because that's not. I detailed the engine by painting the bolts and pulleys. I know it isn't accurate because these engine where painted when they where assembled so the bolts should naturally be the color of the engine but i thought this would add some detail. Appreciates all kinds of feedback. /Sonny J.
-
Yeah I really need to figure out how to hold of some of that stuff, they dont sell it my town (i don't think) and ordering can be quite costly.
-
That cool! I didn't know that and I'm glad they didn't add it. Although, and i know it isn't stock, there is decals to make it look like a racecar with two of the decals being big 426's that go on each side of the hood. However I'm more interested to build it with the stock livery.
-
A rookie from the cold north of Sweden
Sonny J. replied to Sonny J.'s topic in Welcome! Introduce Yourself
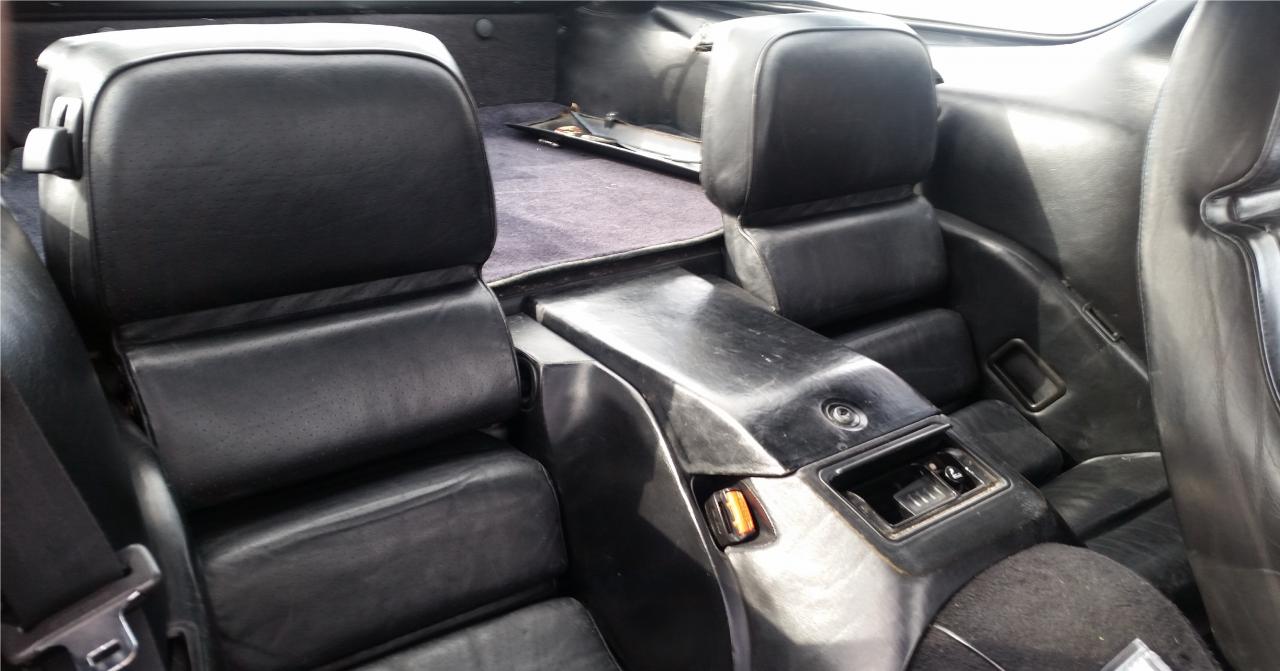
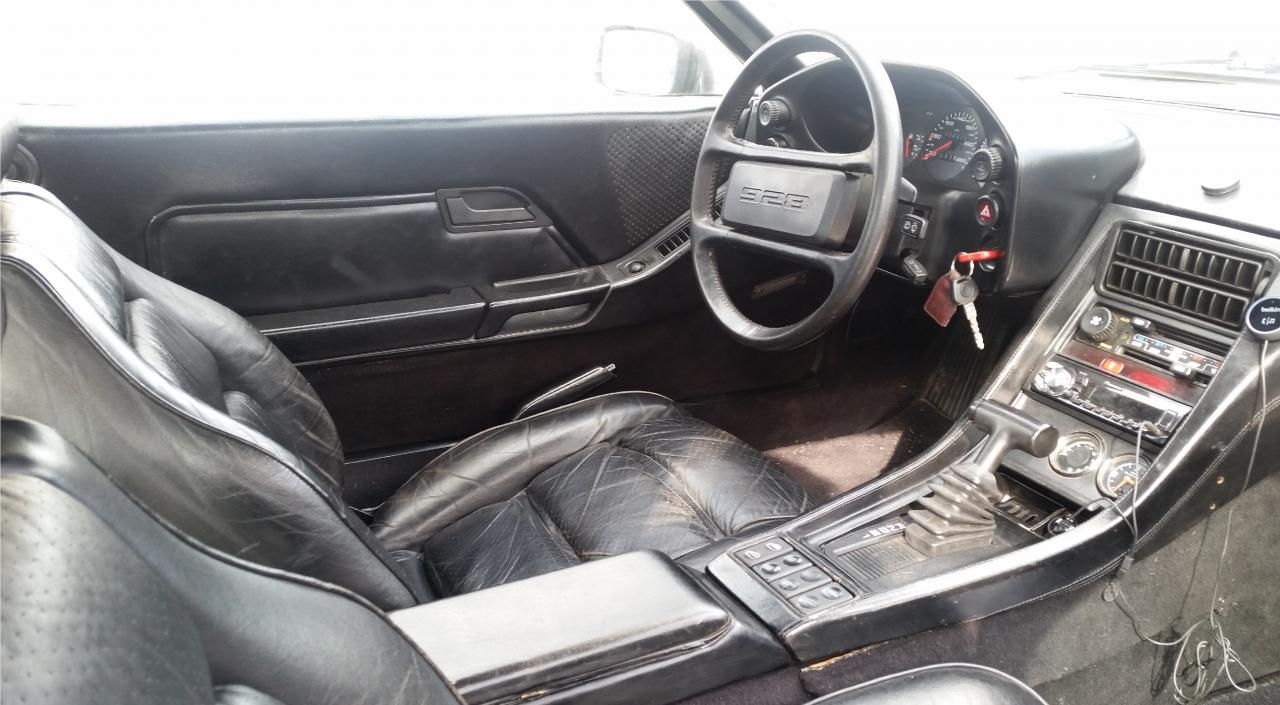
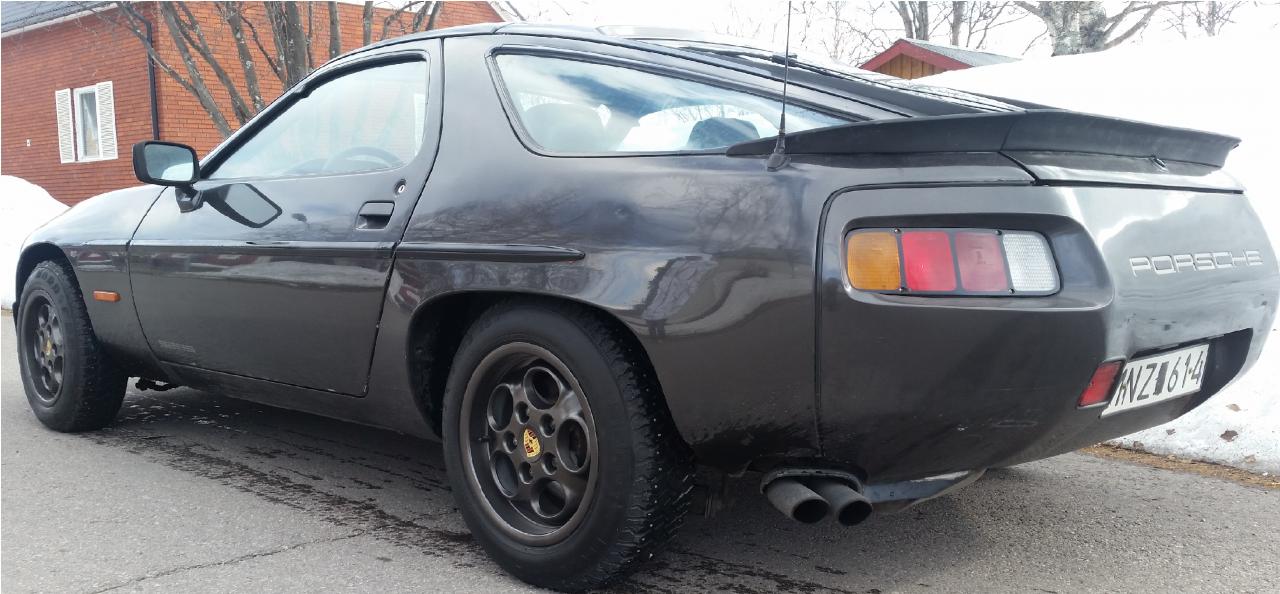
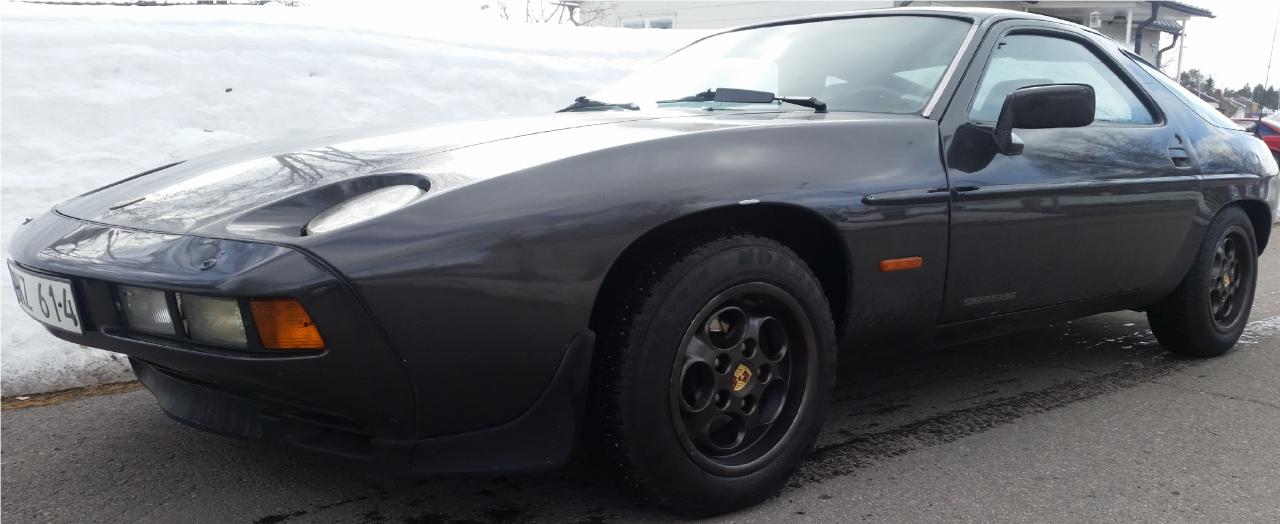
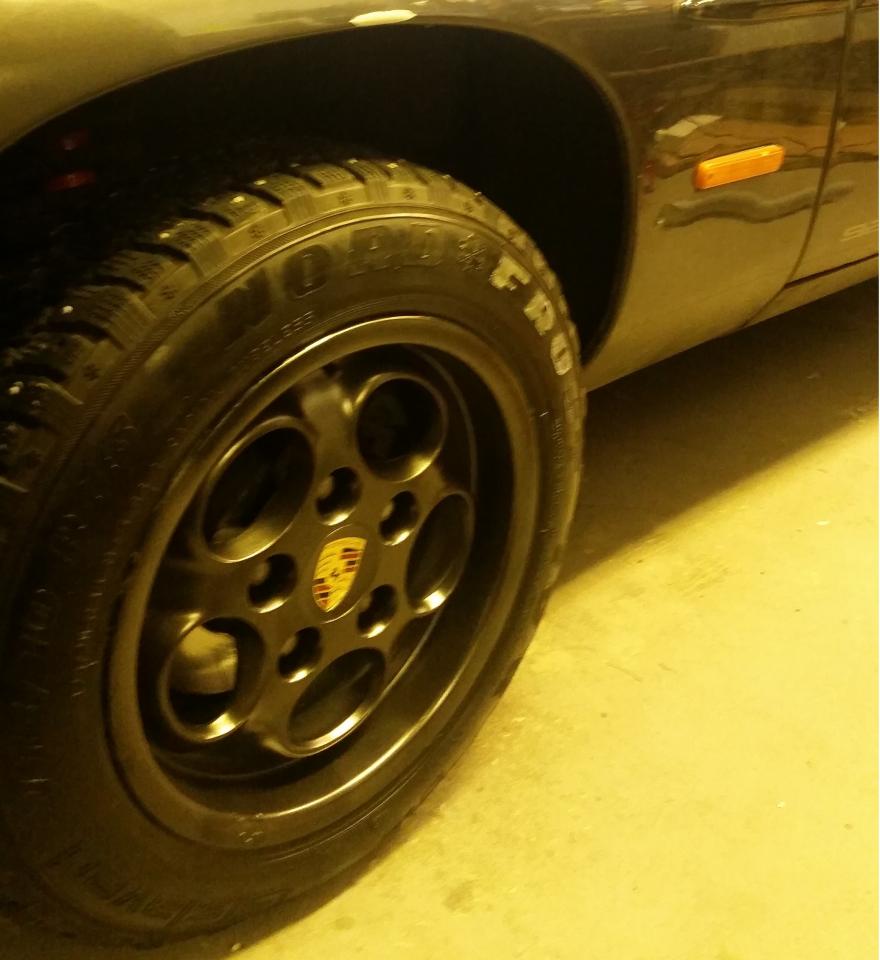
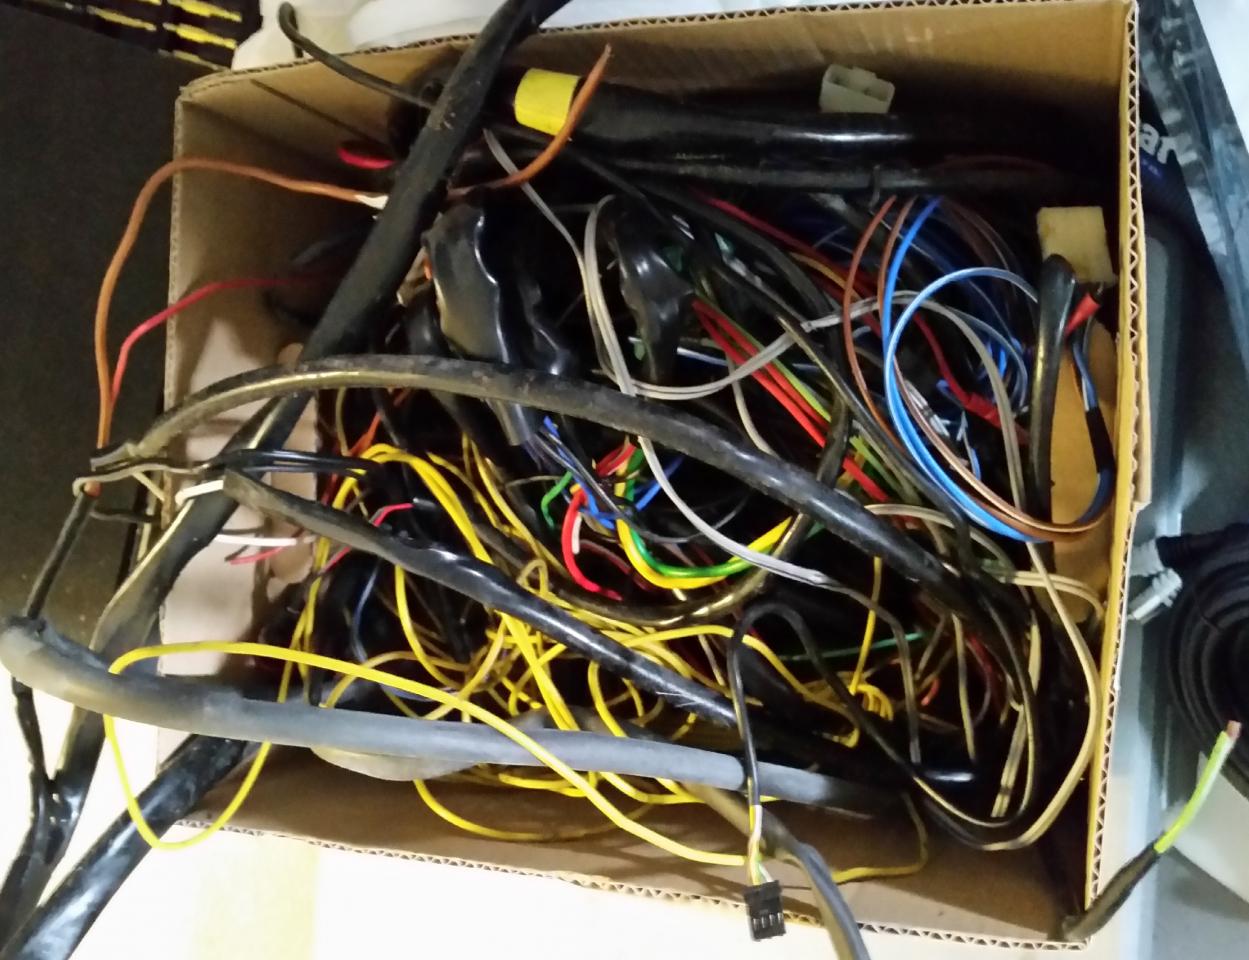
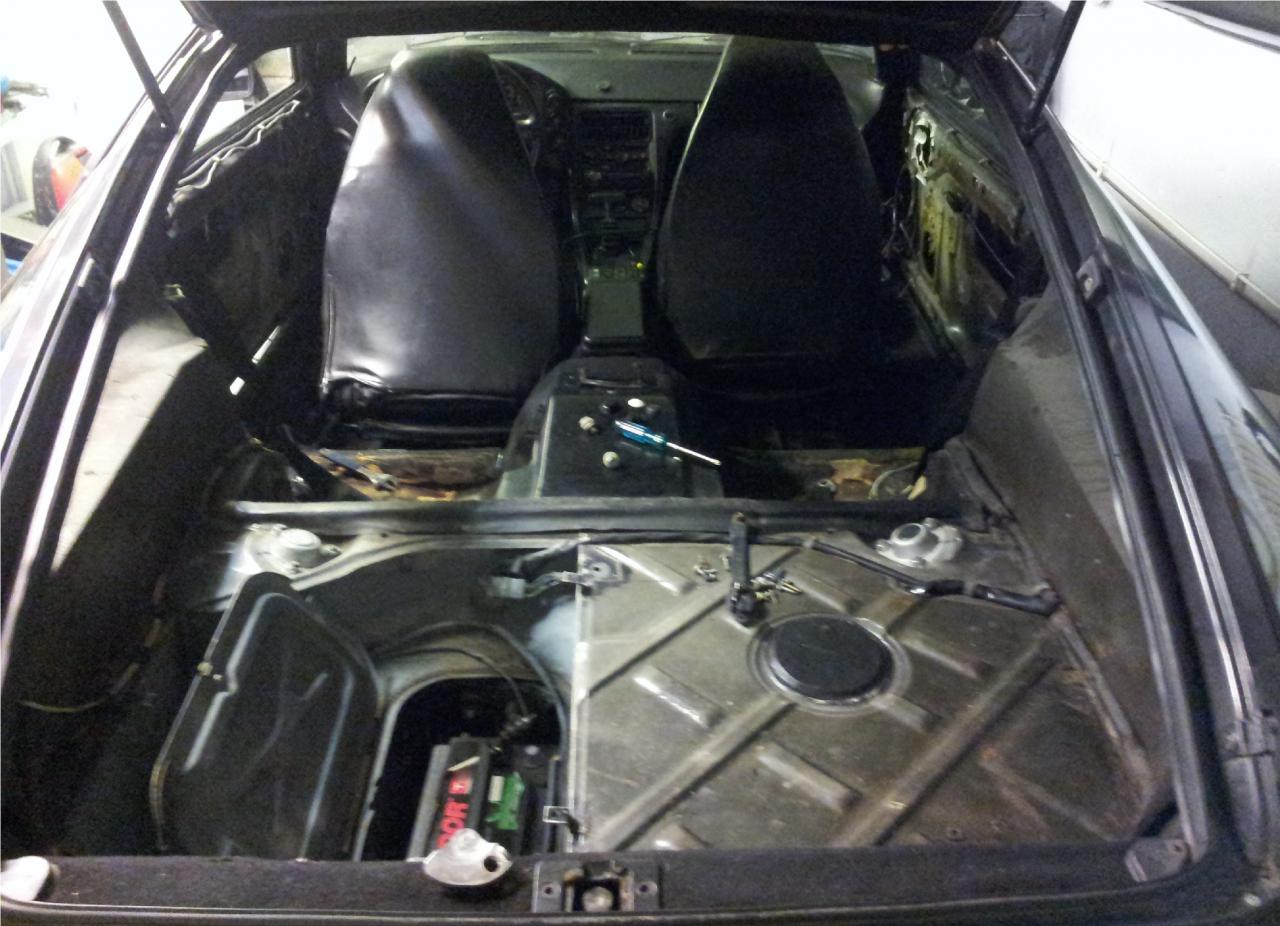
So here is the promised pictures of my Porsche 928 S 3-speed Automatic Euro. To be considered is that this car sat in a field, uncovered and taking in water for over 10 years. After that it got taken cared of for about 4 years until i got it. I got it on a trailer, the engine didn't run, the transmission where leaking, all the interior panels where warped badly and the leather bent. Cables where cut of or leading nowhere so i had to practically redo all the electrics in the coupe, which there where a lot of. now it's running, driving and looking vaguely decent: Here's the interior not long after i got it: How it looks now: Cables that where bad, didn't go anywhere or had corroded to dust: Fixed the original rims that had dents and all kinds of ugly damage, built them up and Plastidipped them: And ALOT more have been done but it would be an endless post if i where to add it all so here it the car now: The car has a lot of dust and grime on it and the paintjob sucks and so. On the to-do list in the near future is tinting the rear windows 45% smoke, painting brake calipers and lastly have fun cruising! It might not be a beauty due to the paint and so on, but it sure is a fun project!
-
A rookie from the cold north of Sweden
Sonny J. replied to Sonny J.'s topic in Welcome! Introduce Yourself
--double posted and don't know how to delete posts-- -
That's cool! following this.
-
A rookie from the cold north of Sweden
Sonny J. replied to Sonny J.'s topic in Welcome! Introduce Yourself
Norrland, själv då? (bilder kommer ) -
Nice build, following .
-
The engine will be painted orange with chrome parts such as the carburetors and cam covers. I'm going to paint the body gloss white with the classic black "stickers" (can't think of the name for it now). If I remember correctly back in 1970, these cars had the option to be ordered in white (alpine white) or light blue (corporation blue) these colors didn't cost extra in comparison to other more popular colors like: lemon twist (bright yellow), limelight green (neon green), Vitamin C (orange). If i recall correctly, all this is from memory so don't take my word for it. I was thought it would be a kind of "tribute" to those that where a bit more "normal". I have no idea if this makes sense but that's how i thought . I also believe that no matter what color you make these, you cant go wrong . And thanks for all your nice comments, I'm humbled to say the least!
-
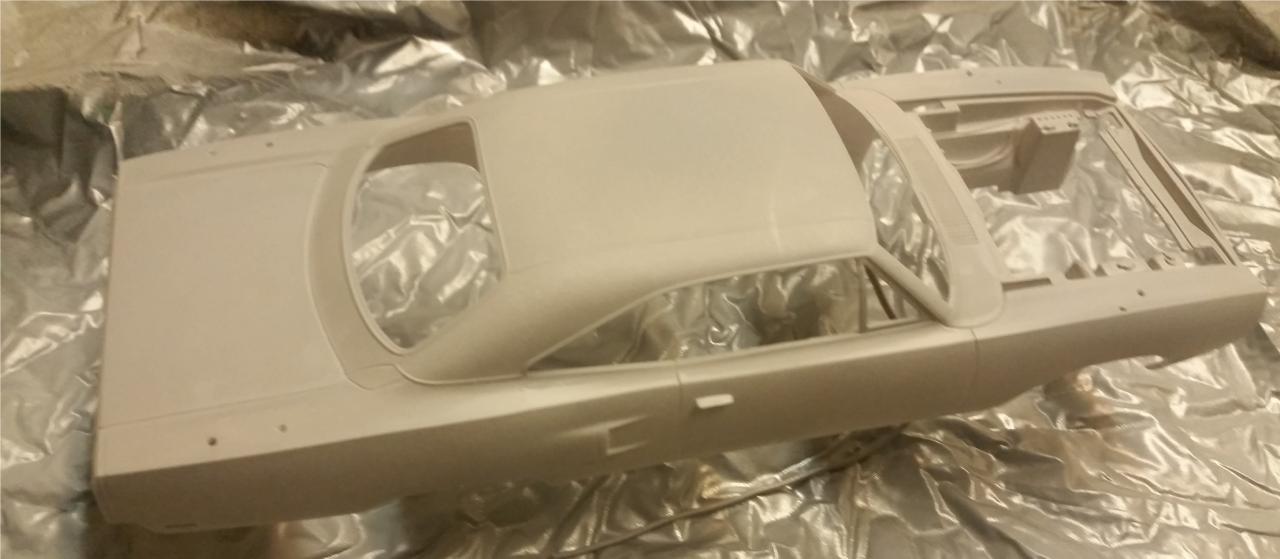
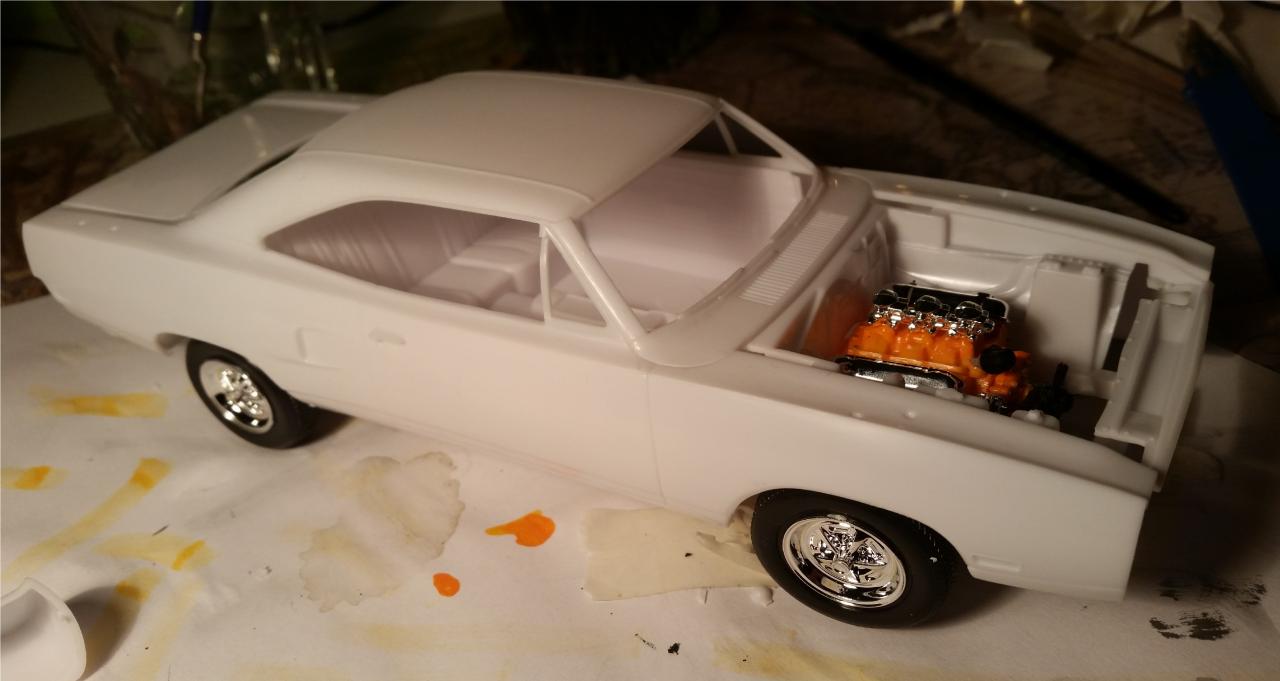
Wow thanks for the support guys, this came as a big shock to me (in a good way ) that so many of you were interested and into box-stock. This will be WAY more fun than I ever would have expected. So without further ado: Here's the model mocked up without the wheels, dash, windows and so on: I was gladly surprised about the quality of this model. The only thing that is vaguely annoying me is that the rear of the hood sits a tad too high, not as much as in this picture but still higher than the body. I mocked up the 440 6-barrel 4-speed which were a bit of disappointment, i was a poor fit with two engine halves not lining up correctly so there where a edge all around the engine but i tried my best to clean it up with my knife and fine sandpaper (1500p). You'll be the judges is succeeded: Feel free to give me suggestions and critique on everything i do , It's appreciated.