paolo76
-
Posts
35 -
Joined
-
Last visited
Content Type
Profiles
Forums
Events
Gallery
Everything posted by paolo76
-

'37 ford panel delivery
paolo76 replied to paolo76's topic in WIP: Model Trucks: Pickups, Vans, SUVs, Light Commercial
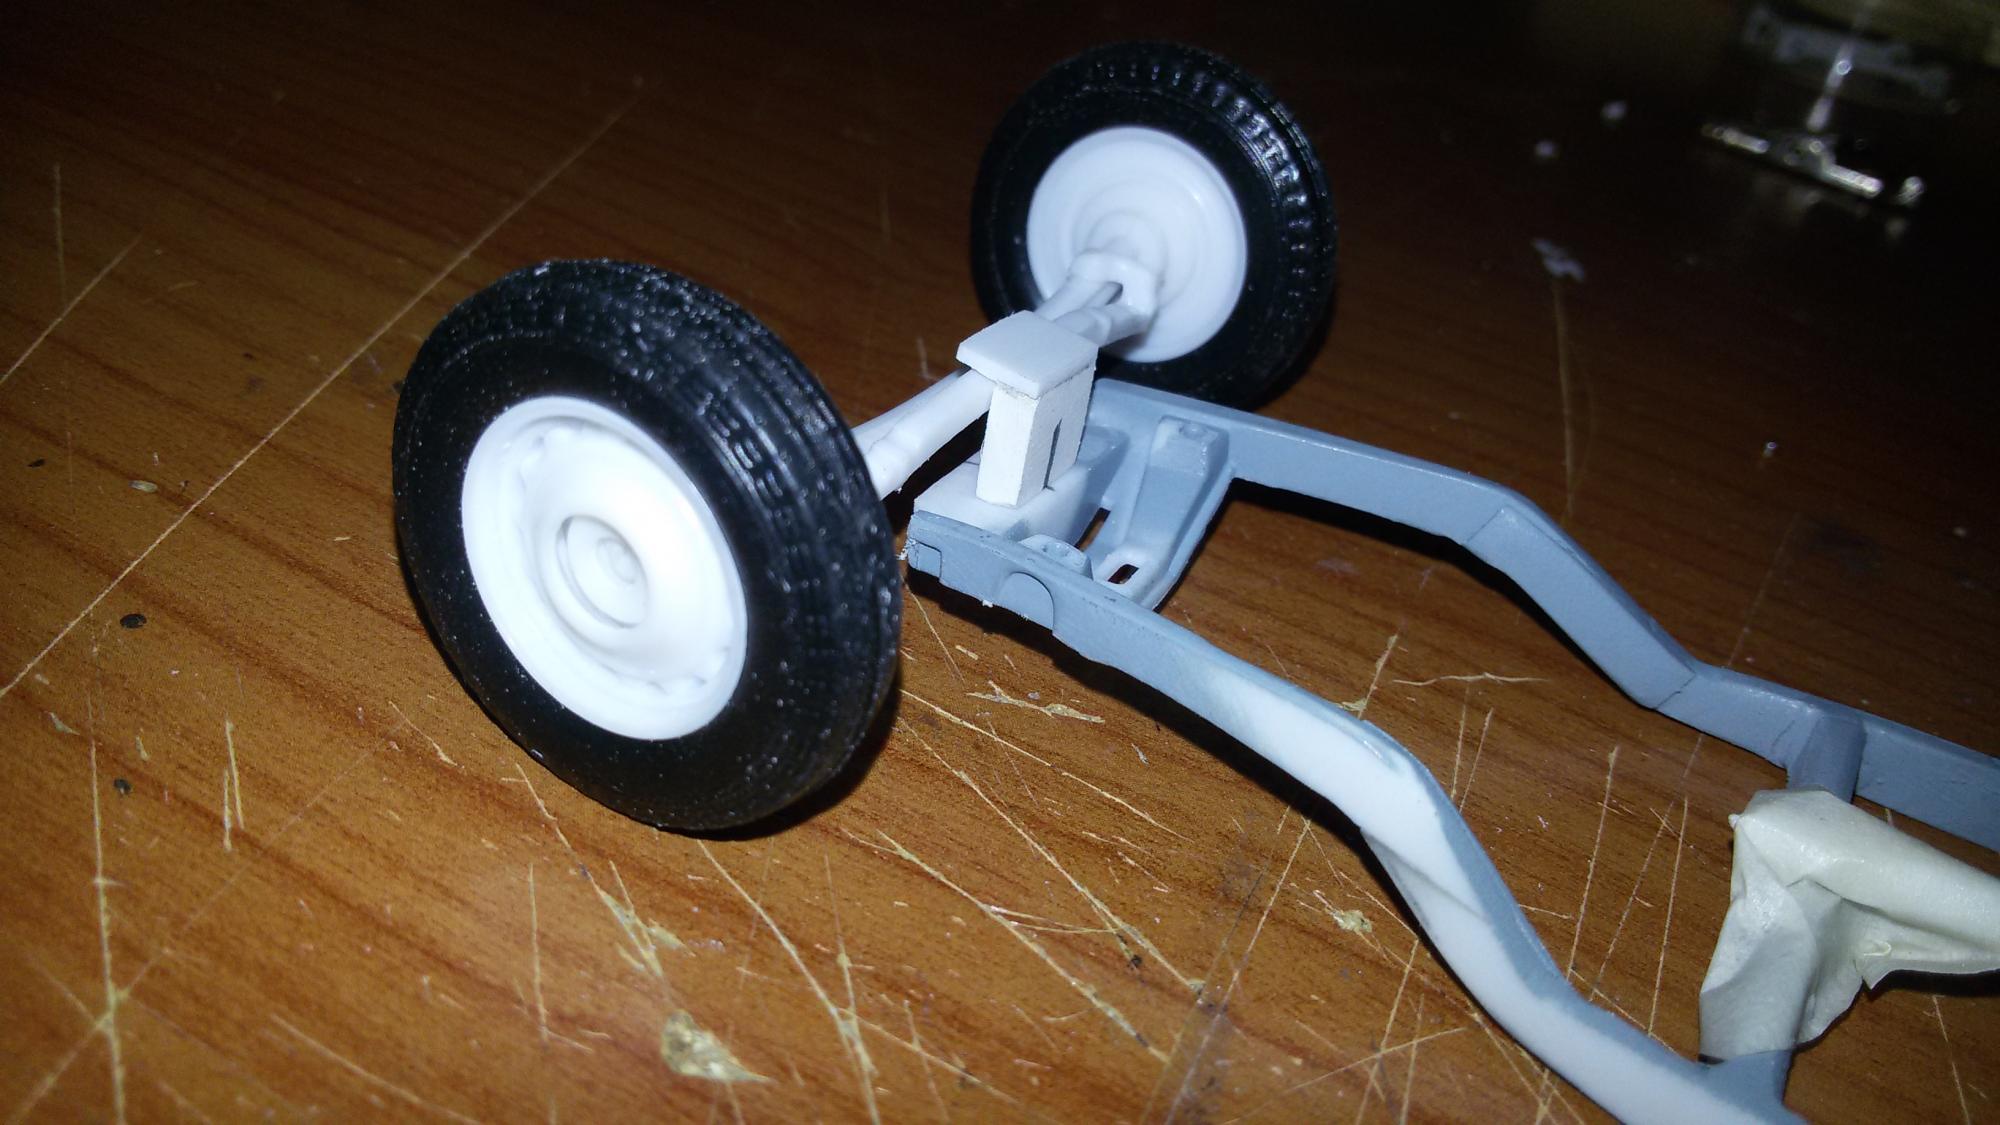
at the front, I moved the suspension to the front of the frame, creating, I think, a suicide front end. I built a bracket and a support for pinch the leaf in the middle and I built from scratch the tie rods. I then drilled the frame for fixing. here too, i don't know whether it is a realistic scheme, I copied from some pictures found on the net. sorry for the pictures with flash, I realize now seeing on the computer screen that really sucks, I hope the next are best. Control heights with new front setup: OK
-
'37 ford panel delivery
paolo76 replied to paolo76's topic in WIP: Model Trucks: Pickups, Vans, SUVs, Light Commercial
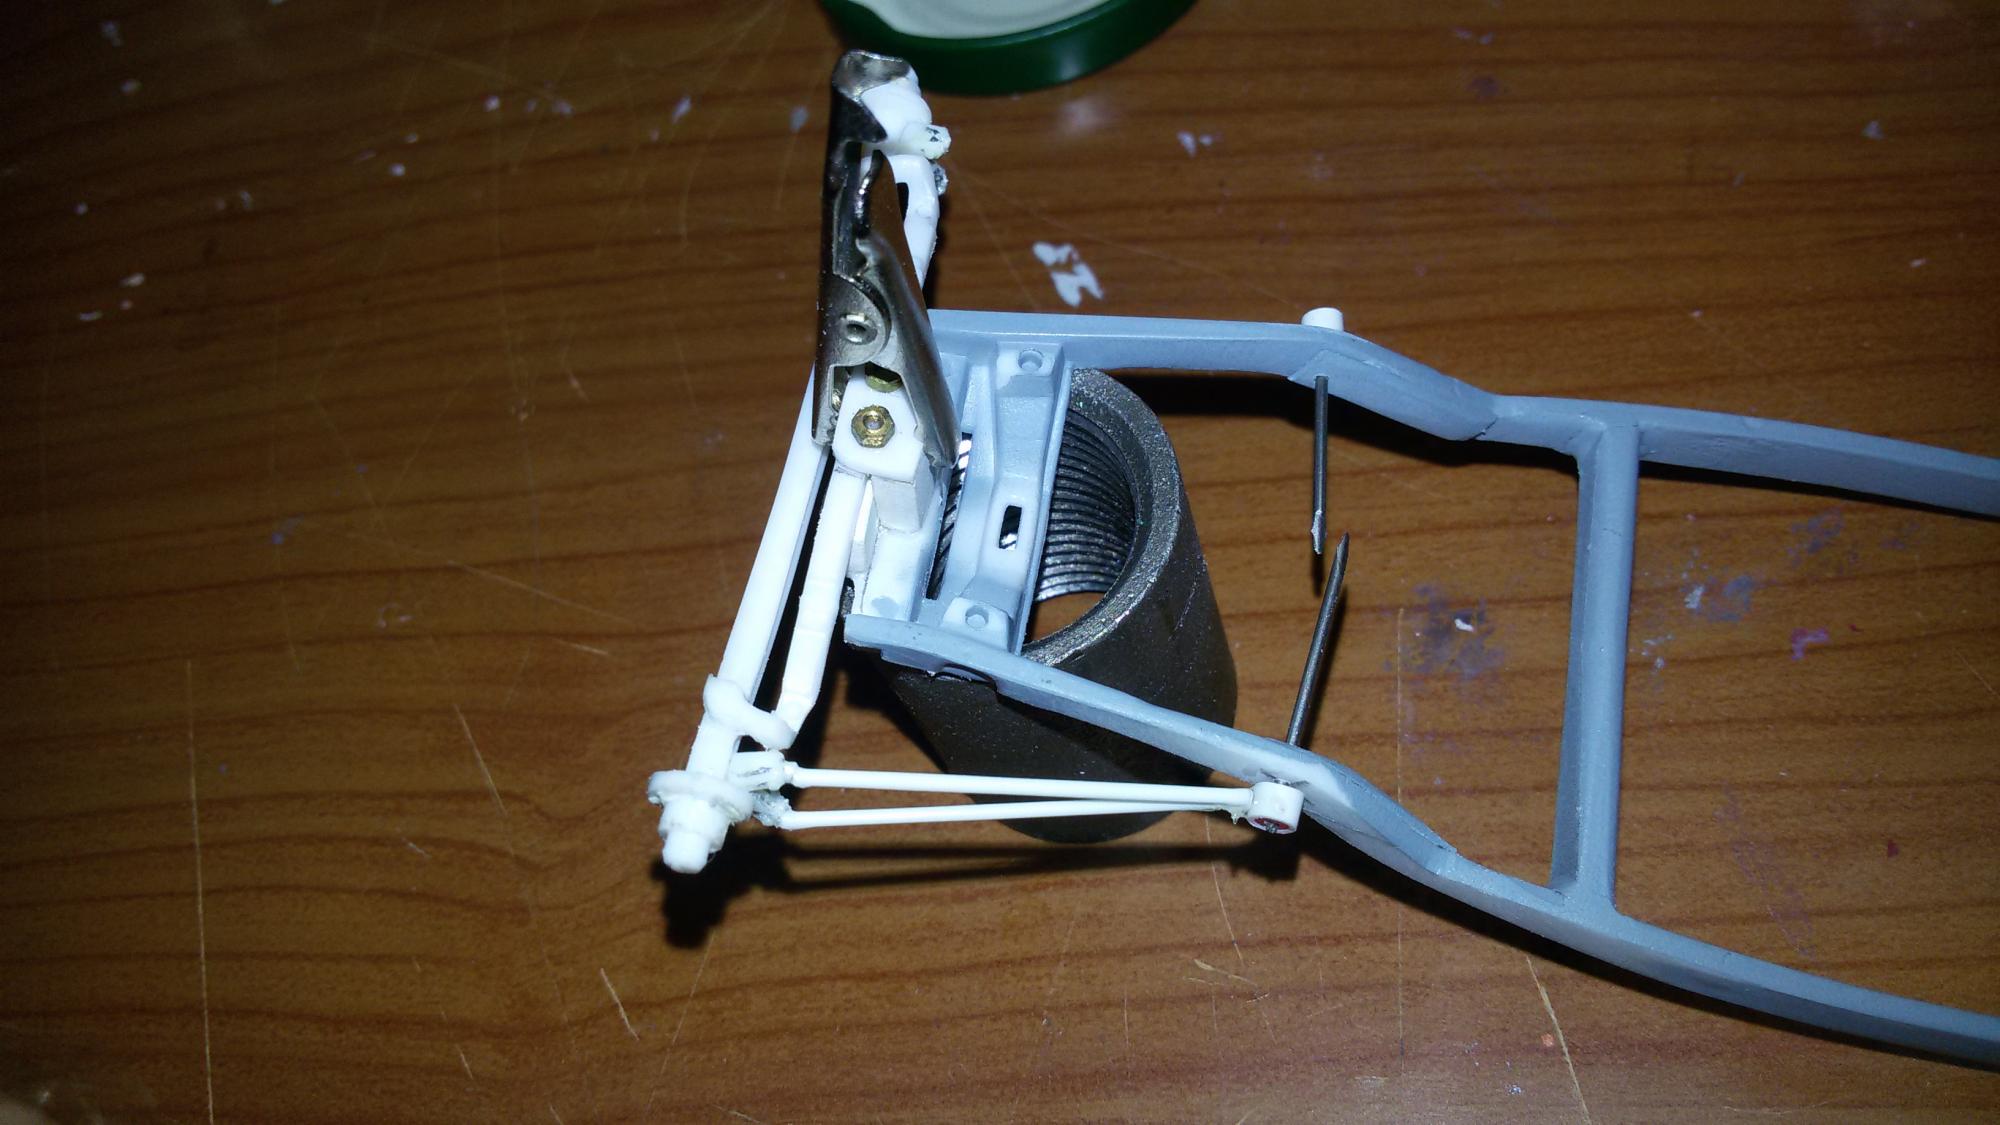
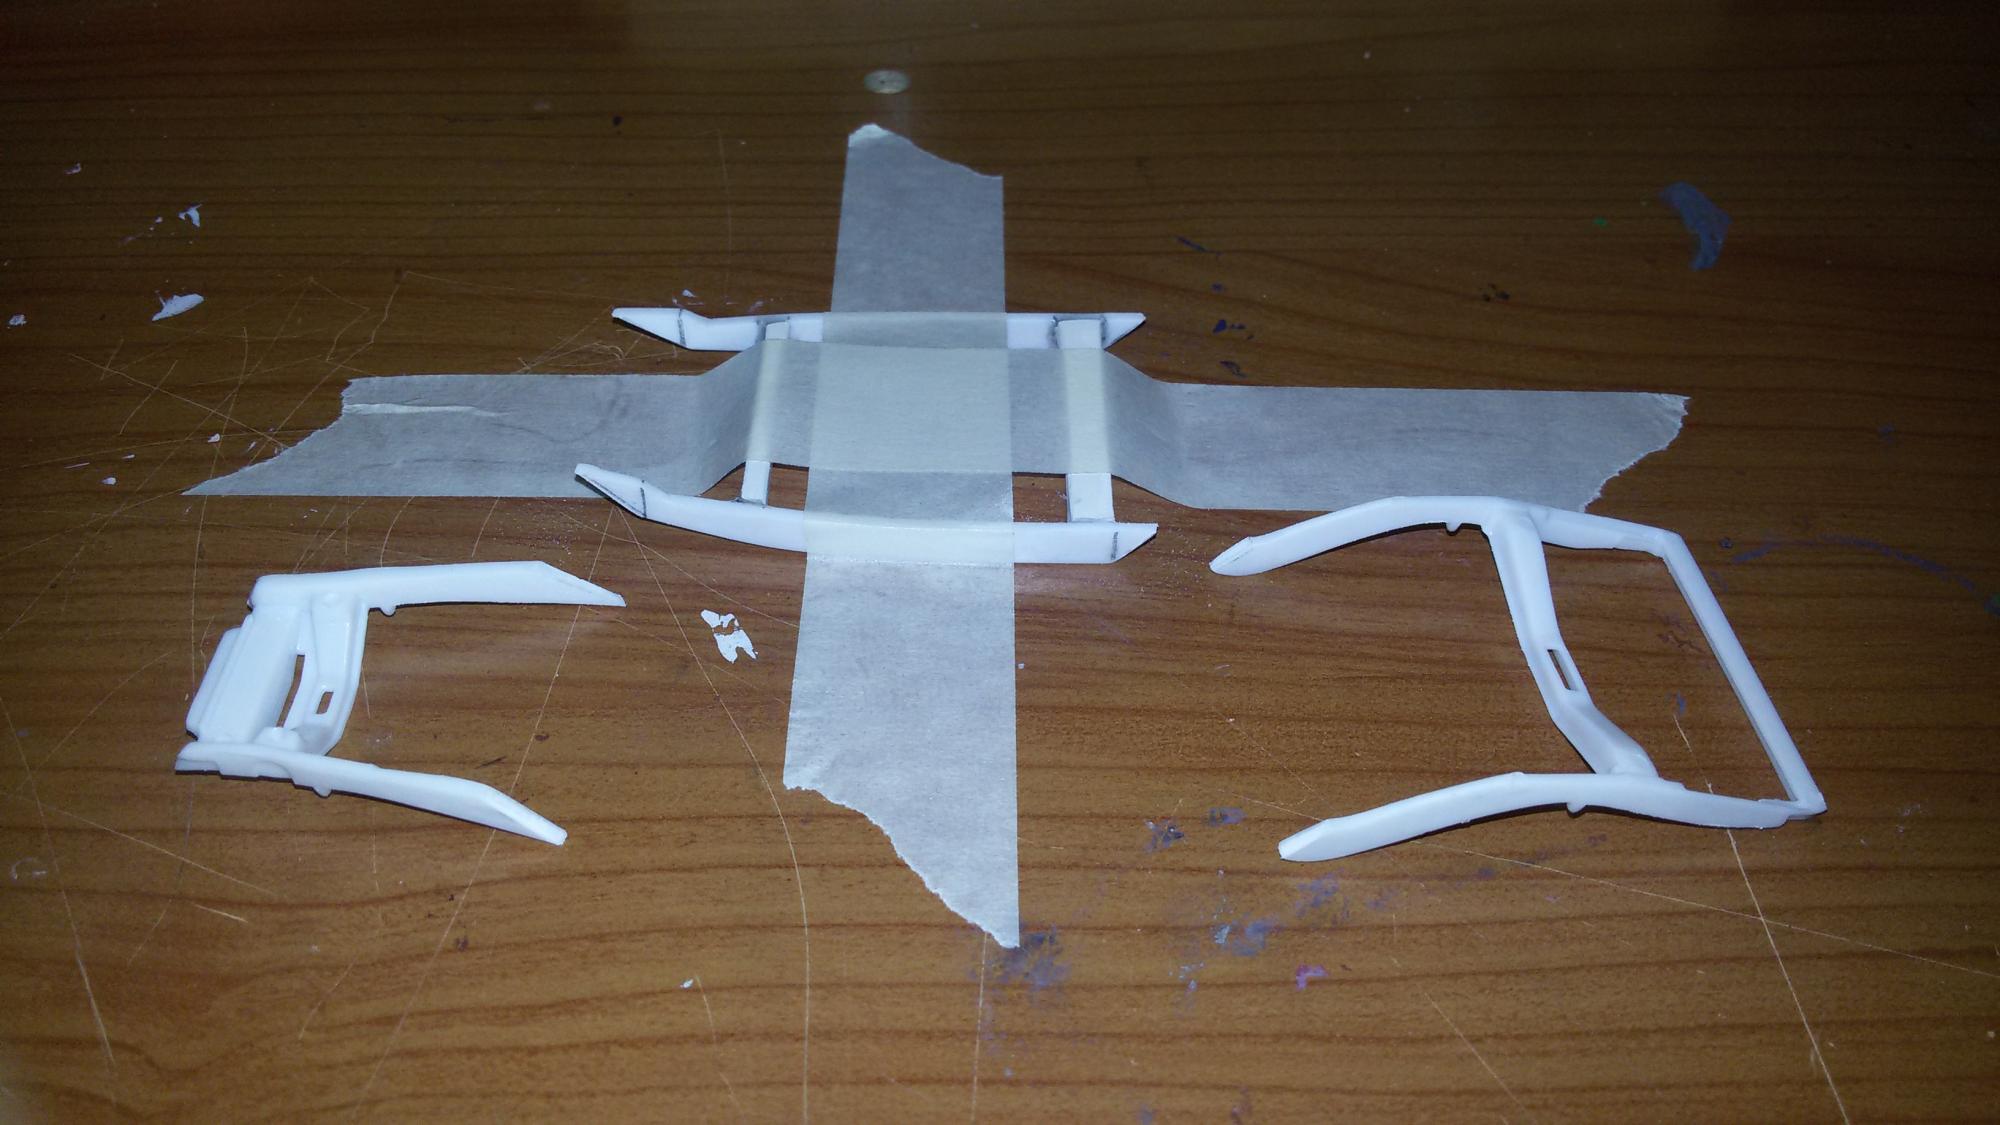
in the next photo you can see how I've changed, rebuilding them from scratch, the tie rods (I think ...) of the rear suspension; now, I know that maybe is one not too realistic scheme, I probably would have had to add two more arms or something else, but ... boh , I did so, I do not know why! i then redone the tie rods and brackets attack _ because I was not satisfy with them, but unfortunately I did not make photos of new ones, perhaps you can see them in the following photos.
-
'37 ford panel delivery
paolo76 replied to paolo76's topic in WIP: Model Trucks: Pickups, Vans, SUVs, Light Commercial
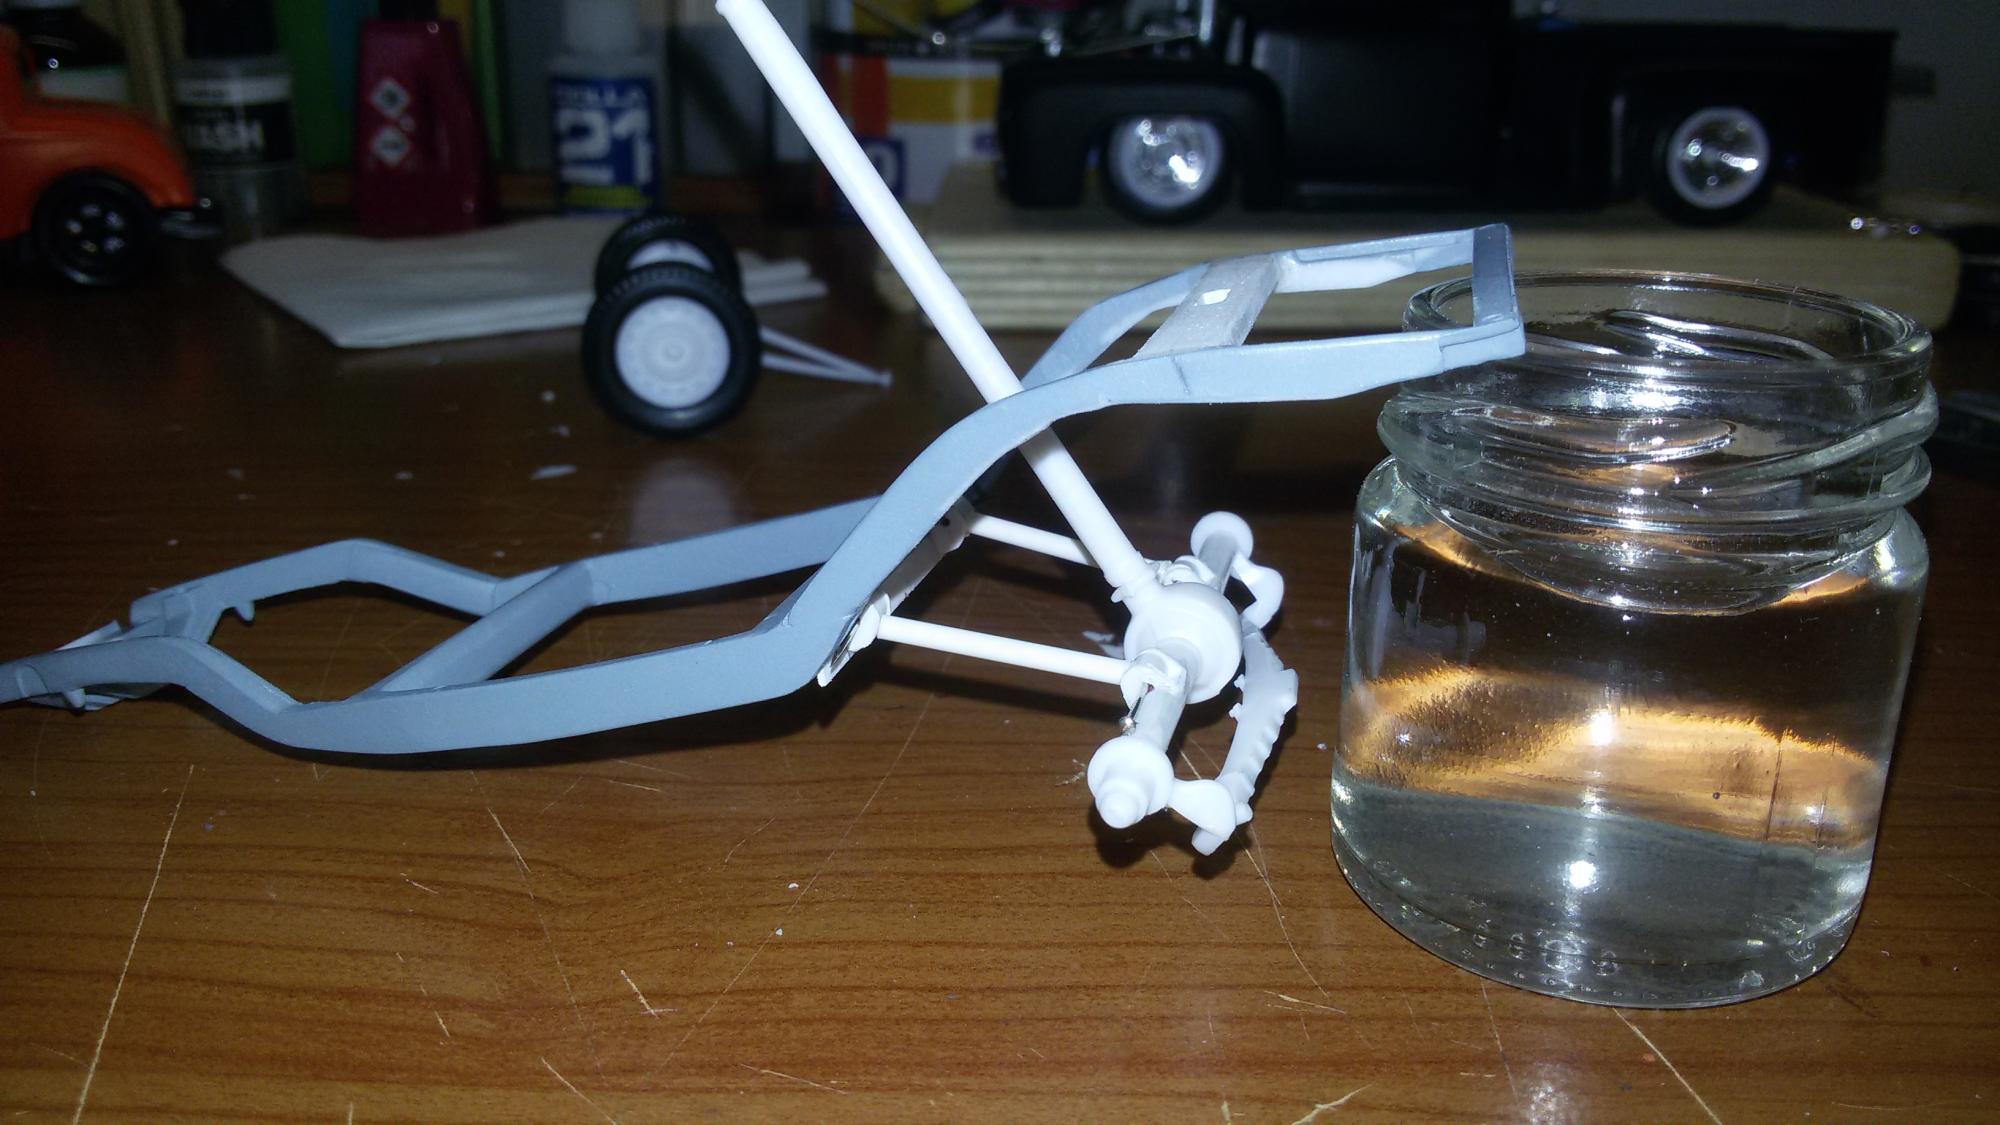
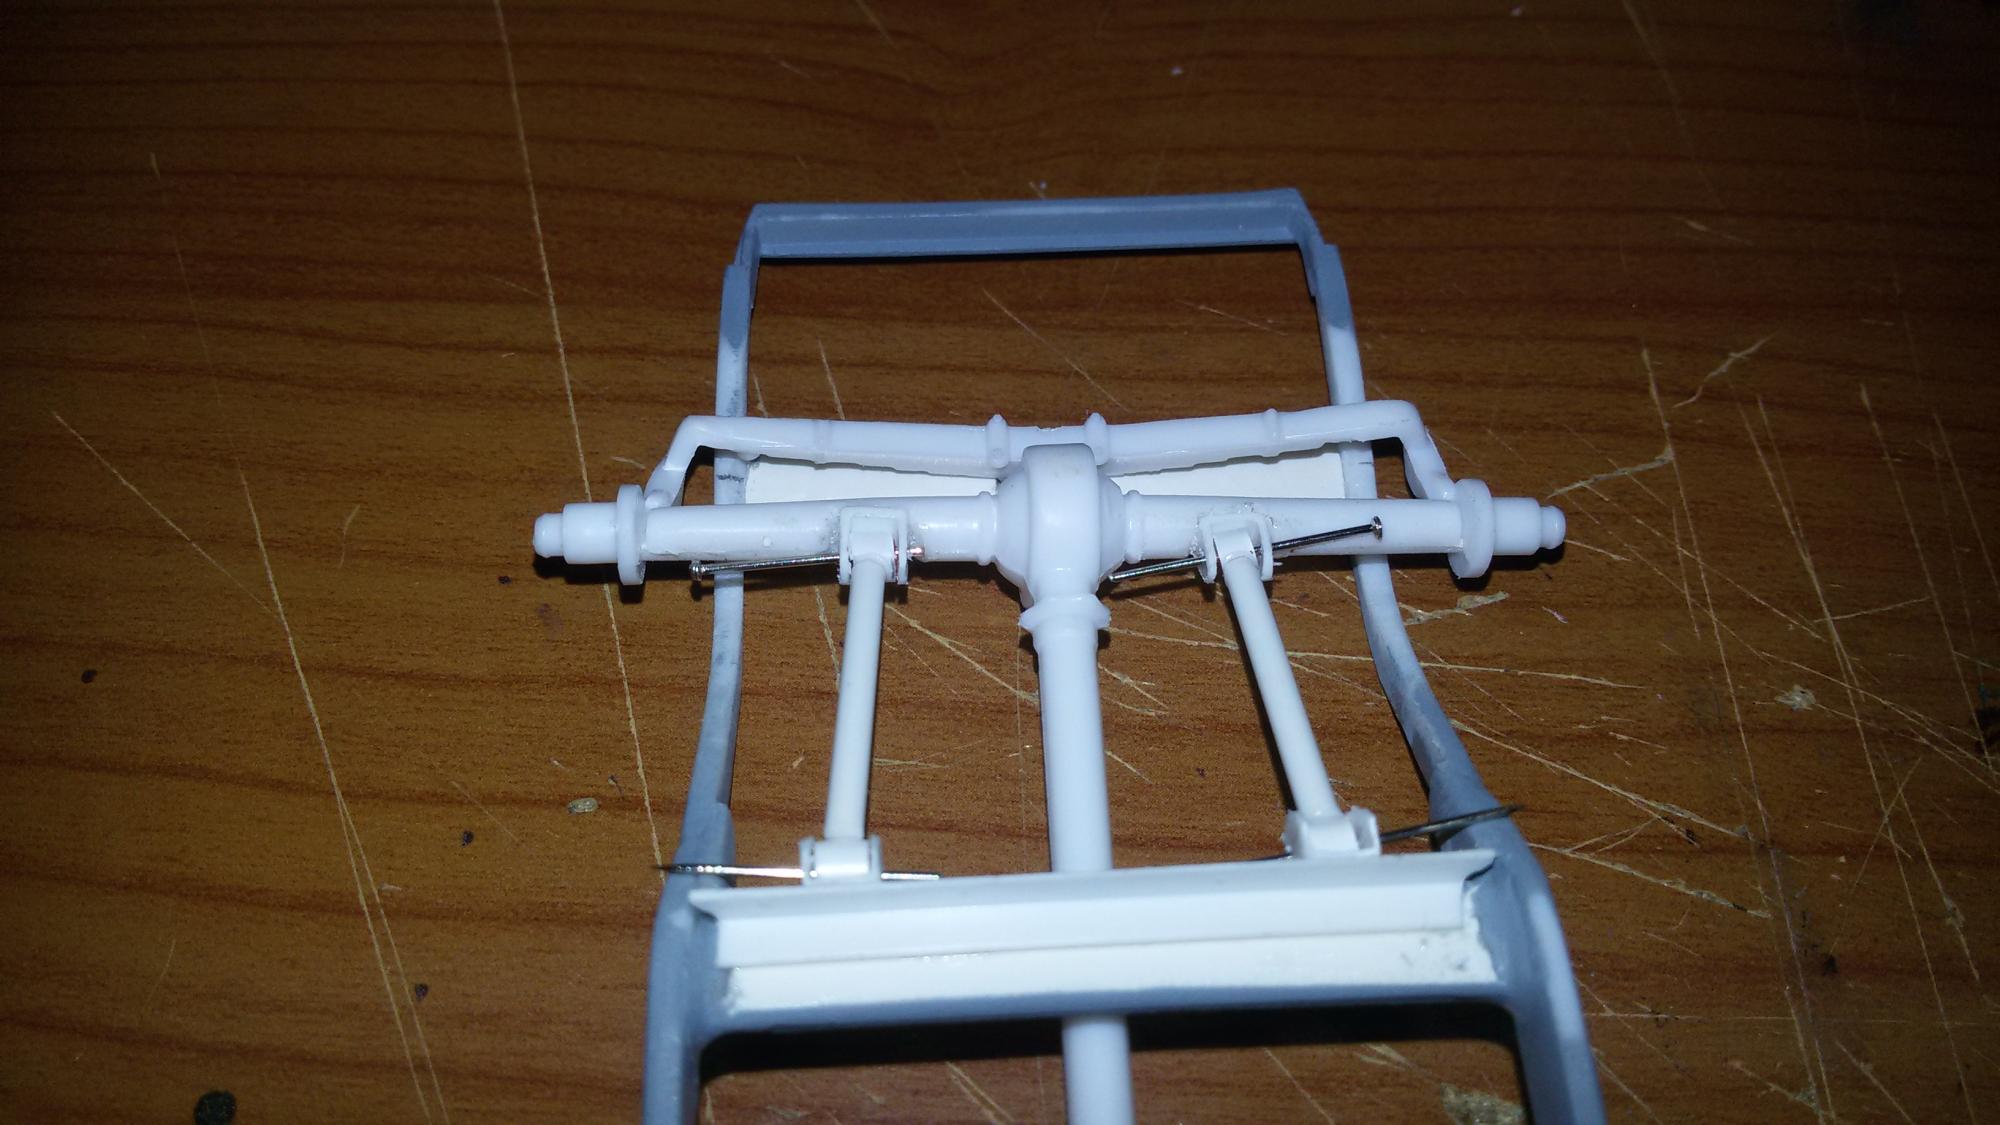
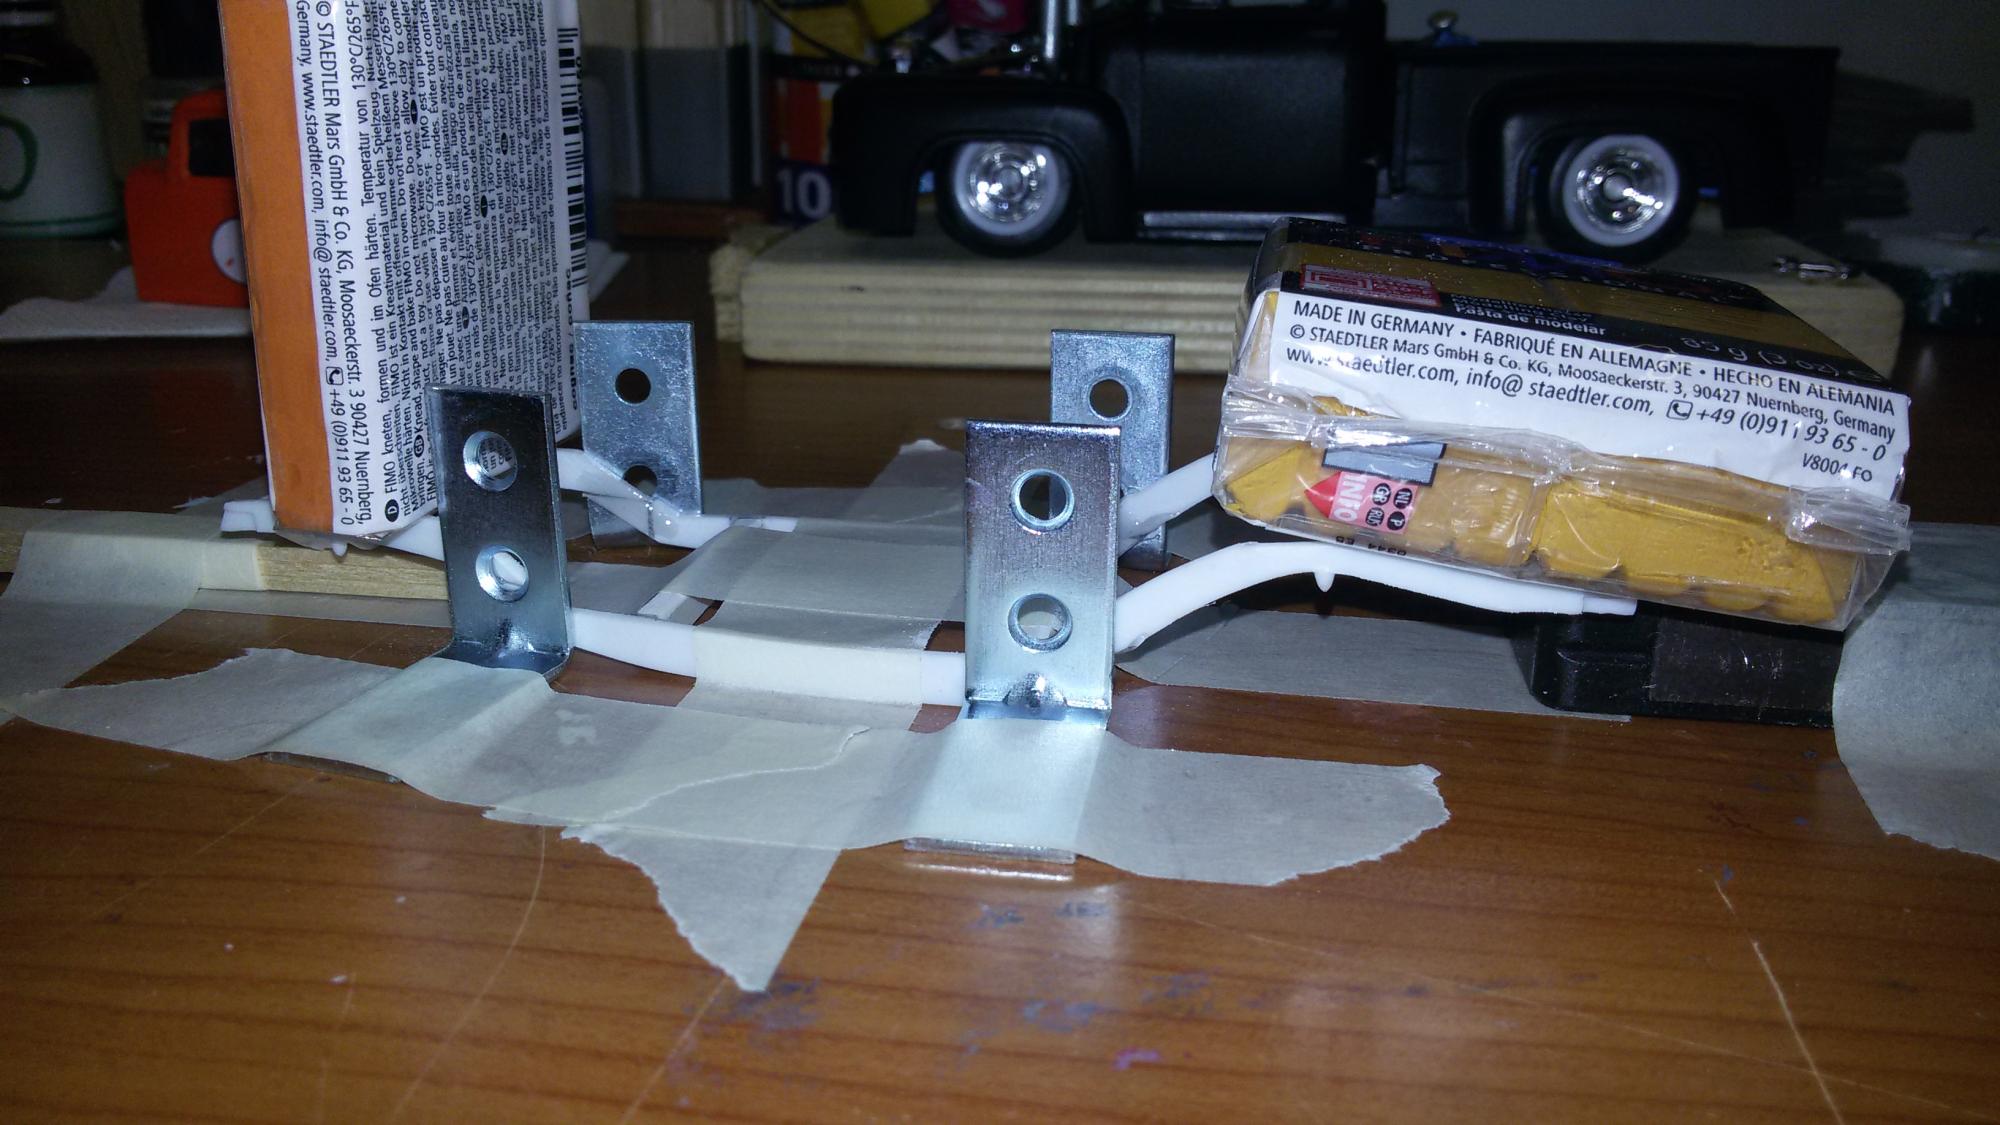
I then given a thin coat of primer to the frame to show the faults: oh, and you can see that I have added reinforcements inside the frame at the four points where it was glued, I was afraid that only the glue was not enough. I then made a set-up test with the original suspension to see how ground clearance was definitely too high, I want it much lower! so I started from the rear to further decrease the height from the ground; I removed the rear crossmember and I rebuilt one in order to move further up the attack of the crossbow in the new crossmember I replicated the original fitting of the Crossbow new height test , much better this way,this is the ground clearence that i want!
-
'37 ford panel delivery
paolo76 replied to paolo76's topic in WIP: Model Trucks: Pickups, Vans, SUVs, Light Commercial
sorry but I do not quite understand what you mean with "section the body ". I'm Italian and my English is a little poor ... thank you for your appreciation! -
'37 ford panel delivery
paolo76 replied to paolo76's topic in WIP: Model Trucks: Pickups, Vans, SUVs, Light Commercial
thanks sir! -
'37 ford panel delivery
paolo76 replied to paolo76's topic in WIP: Model Trucks: Pickups, Vans, SUVs, Light Commercial
So probably I had beginner's luck, because I think I've got a good result ... I'd love to know what you think when I'll post the photos of the finished work See you soon -
'37 ford panel delivery
paolo76 replied to paolo76's topic in WIP: Model Trucks: Pickups, Vans, SUVs, Light Commercial
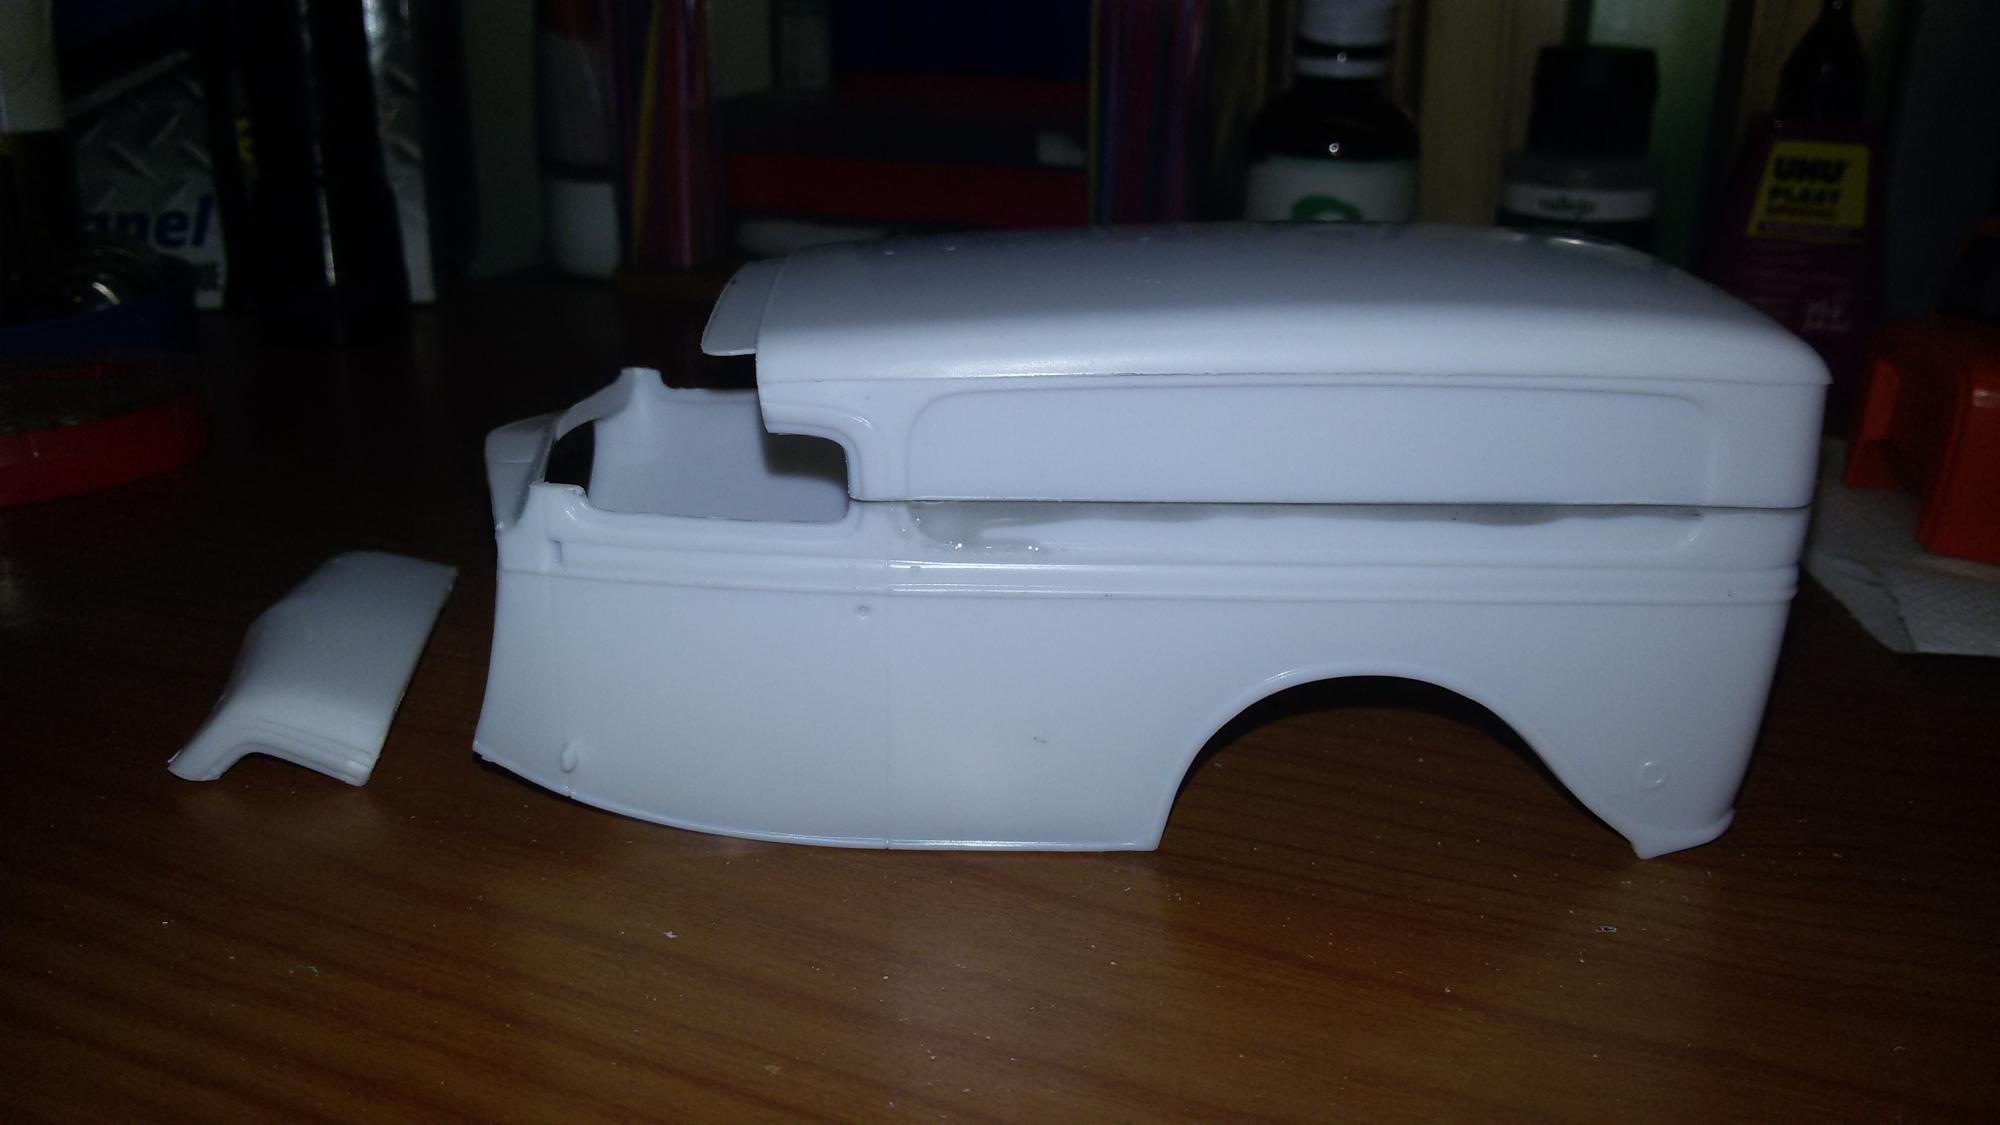
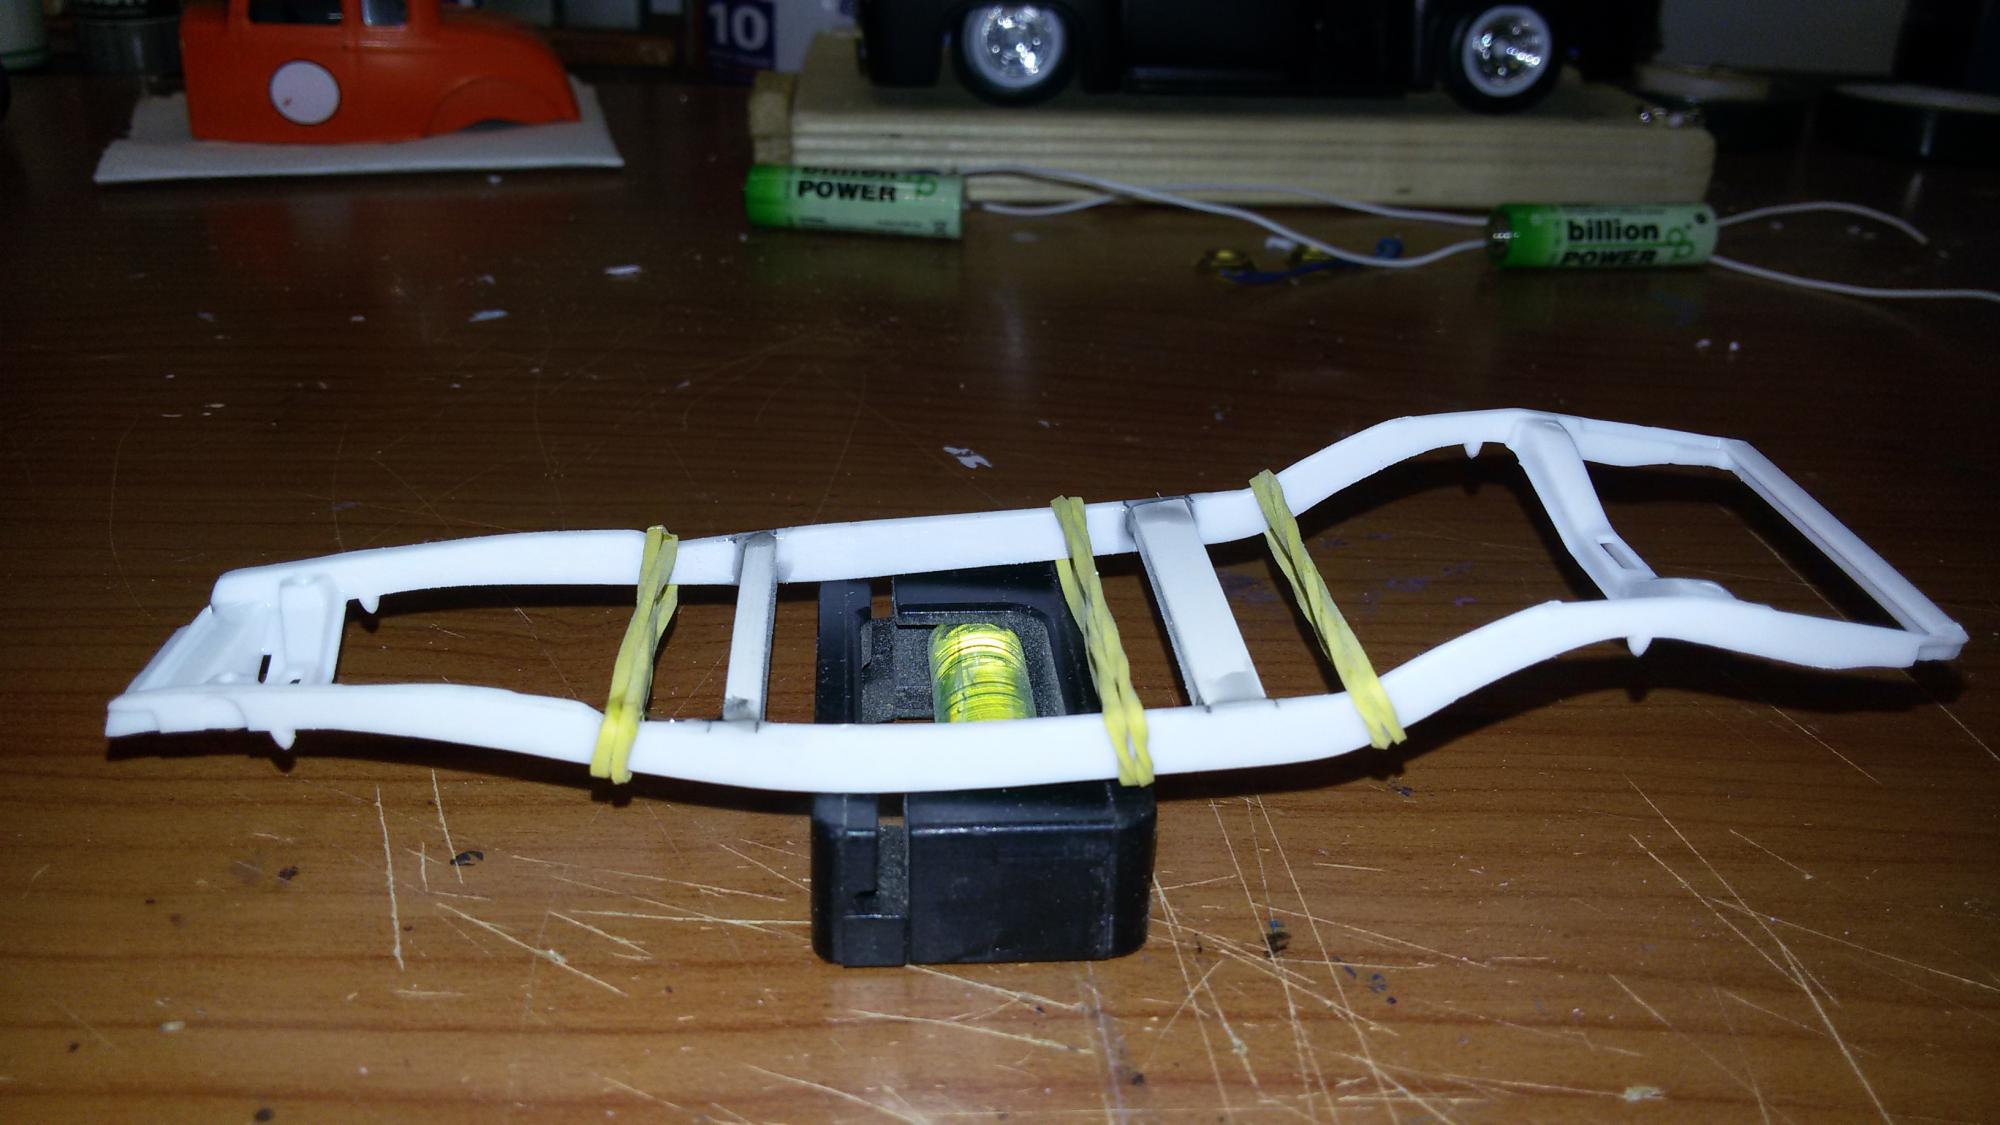
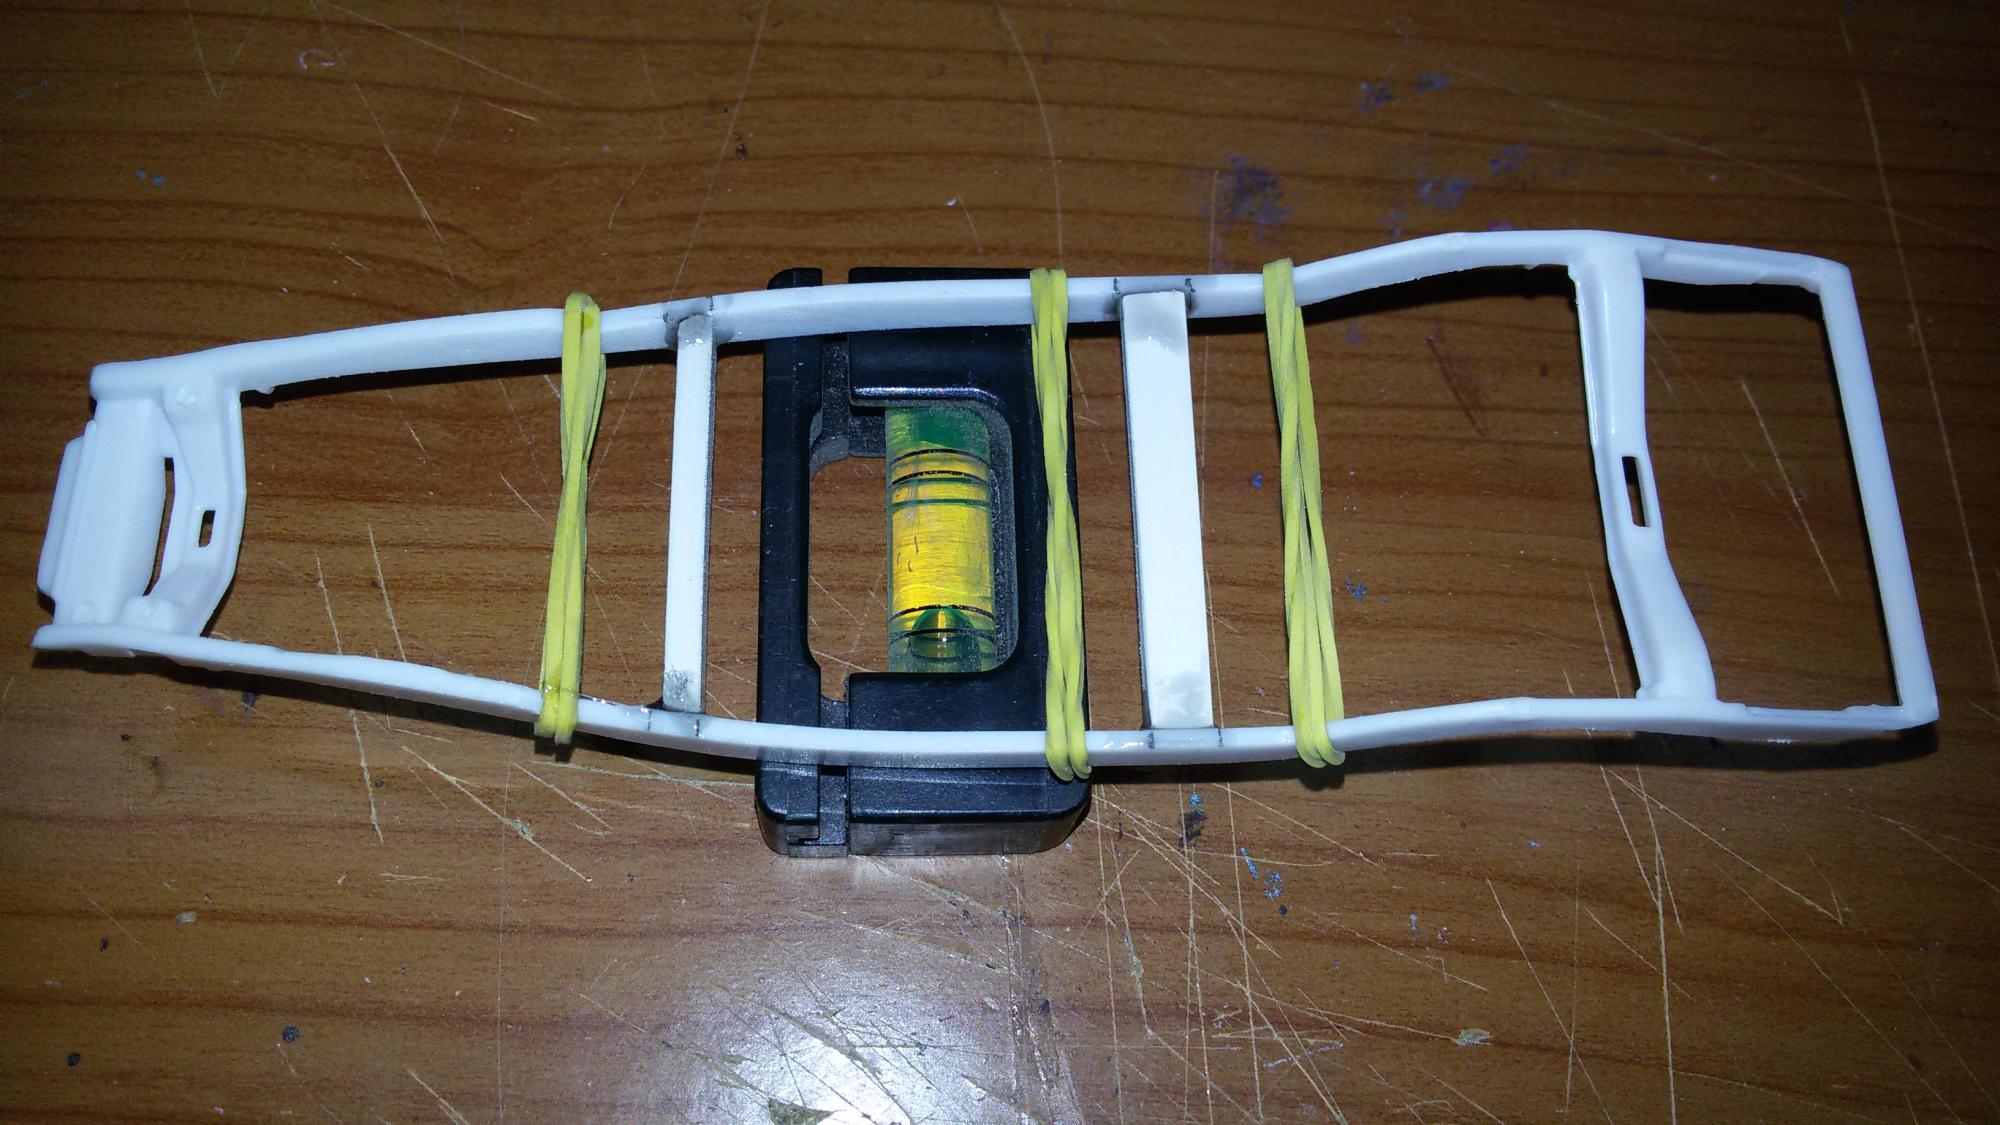
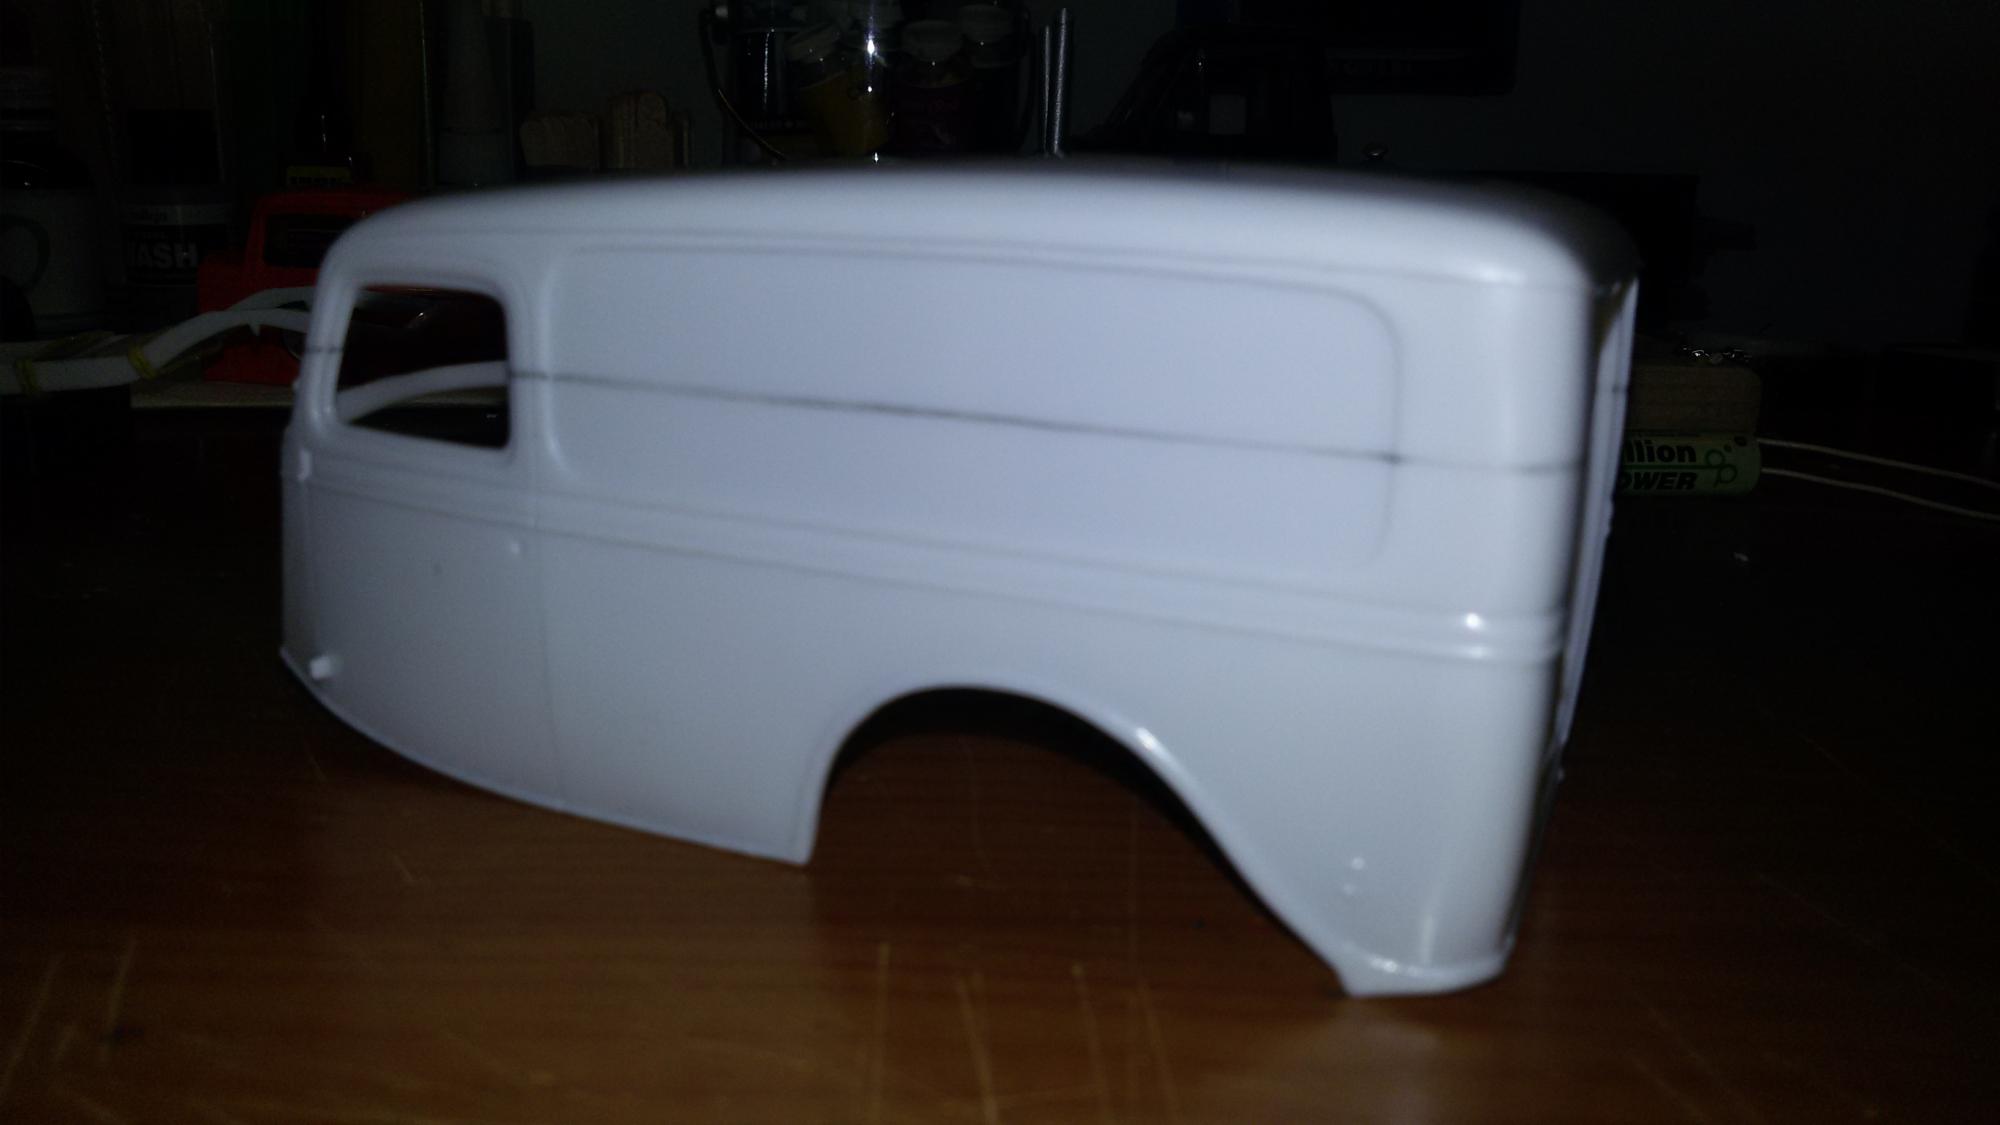
as mentioned, the next step is to modify the frame: I then marked the lines for cutting and, not without a little fear, I sectioned. I then built a template to make sure that was all in line, and I glued with two-component glue. while the glue dried I built a piece of plasticard for joining the two parts of the roof that I had to cut on the length to ensure that pillars match and I have also glued the top of the roof, adding a strip on each side inside the junction of the two parts. once the glue dried on the frame, this was the result: as I said, the system for me is really simple and not difficult, just make sure that the pieces are properly positioned. I think I got a good result, I was not convinced to do it, but I was satisfied at the end. regarding the bodywork, I i then glued the front of the roof in position. in the picture you can see the left pillar that does not fit at all well, luckily I noticed and I was able to fix it before the glue dry.
-
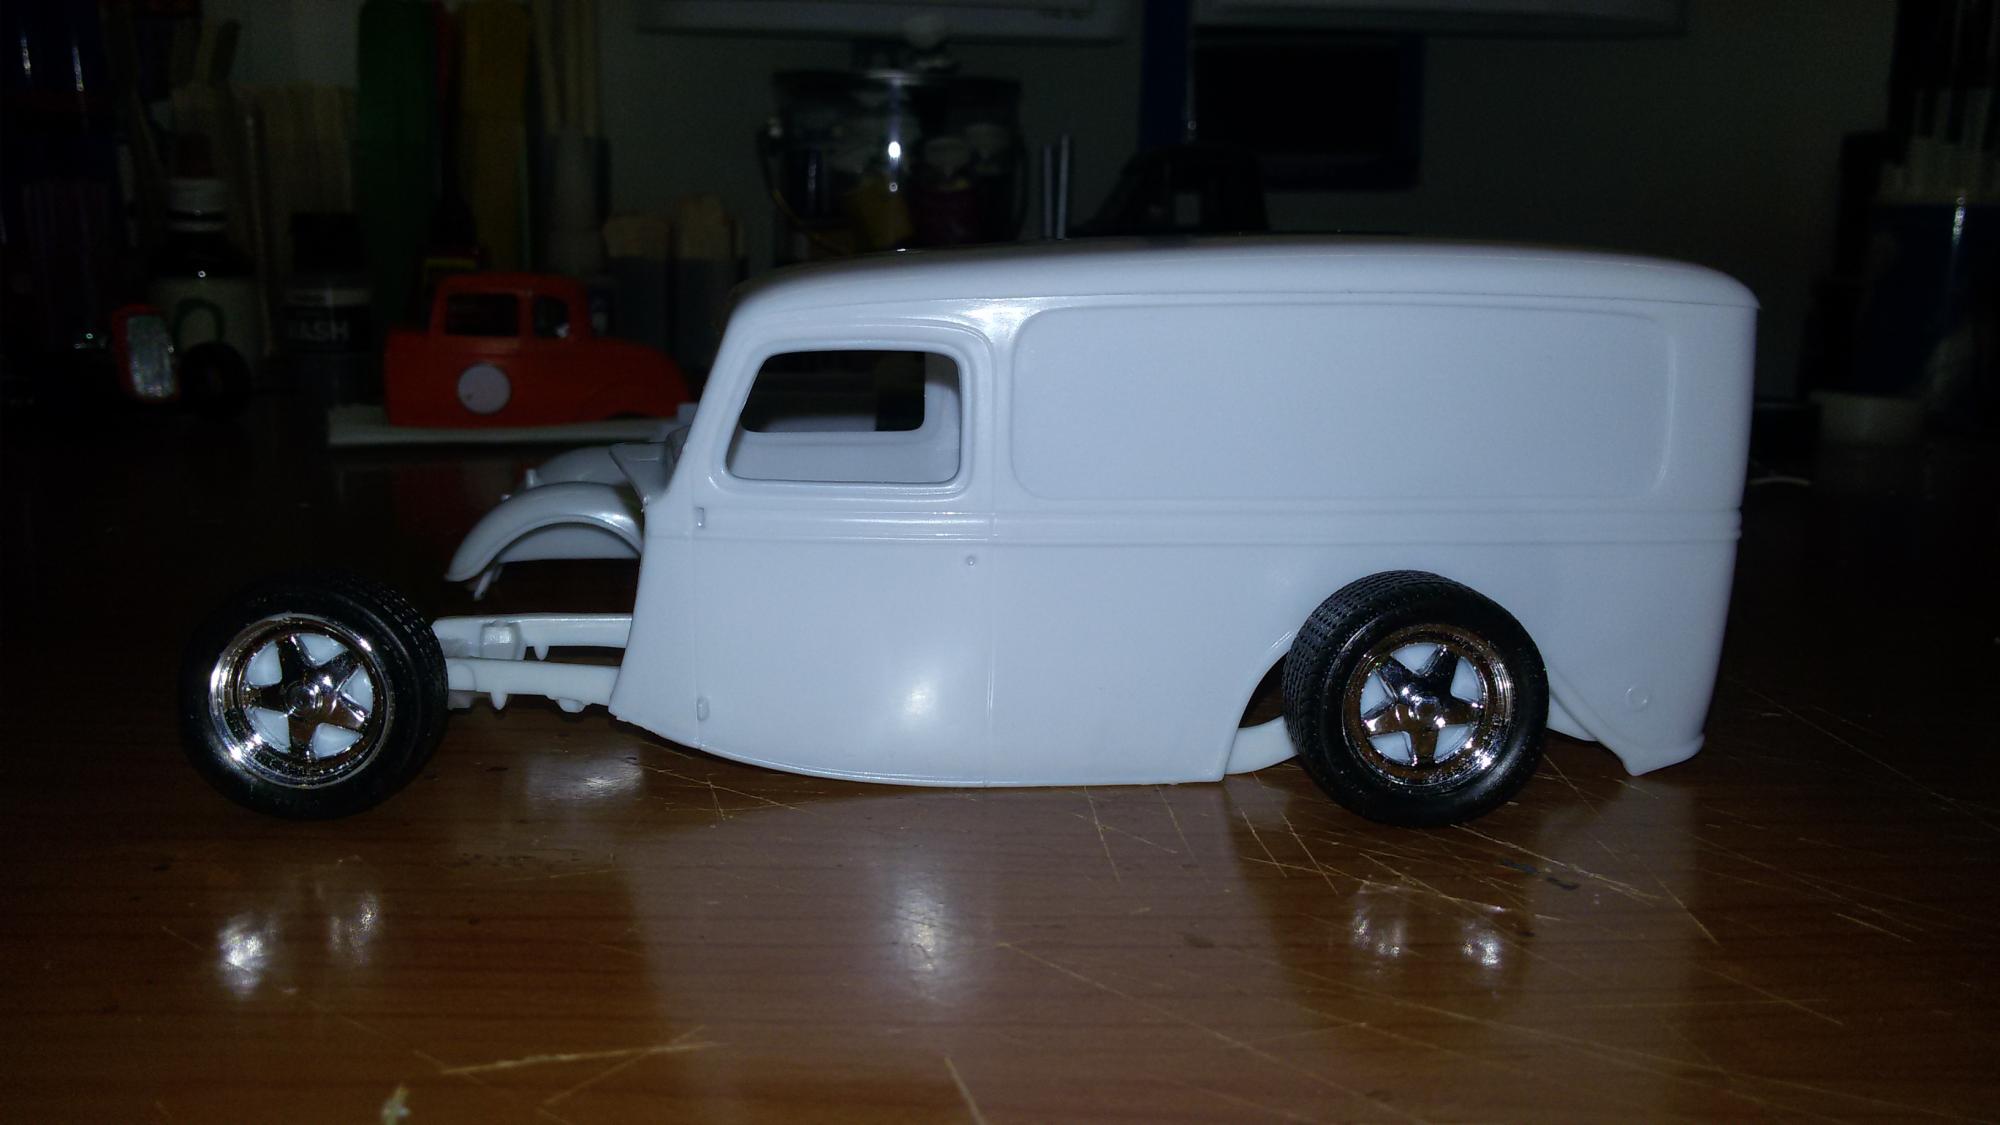
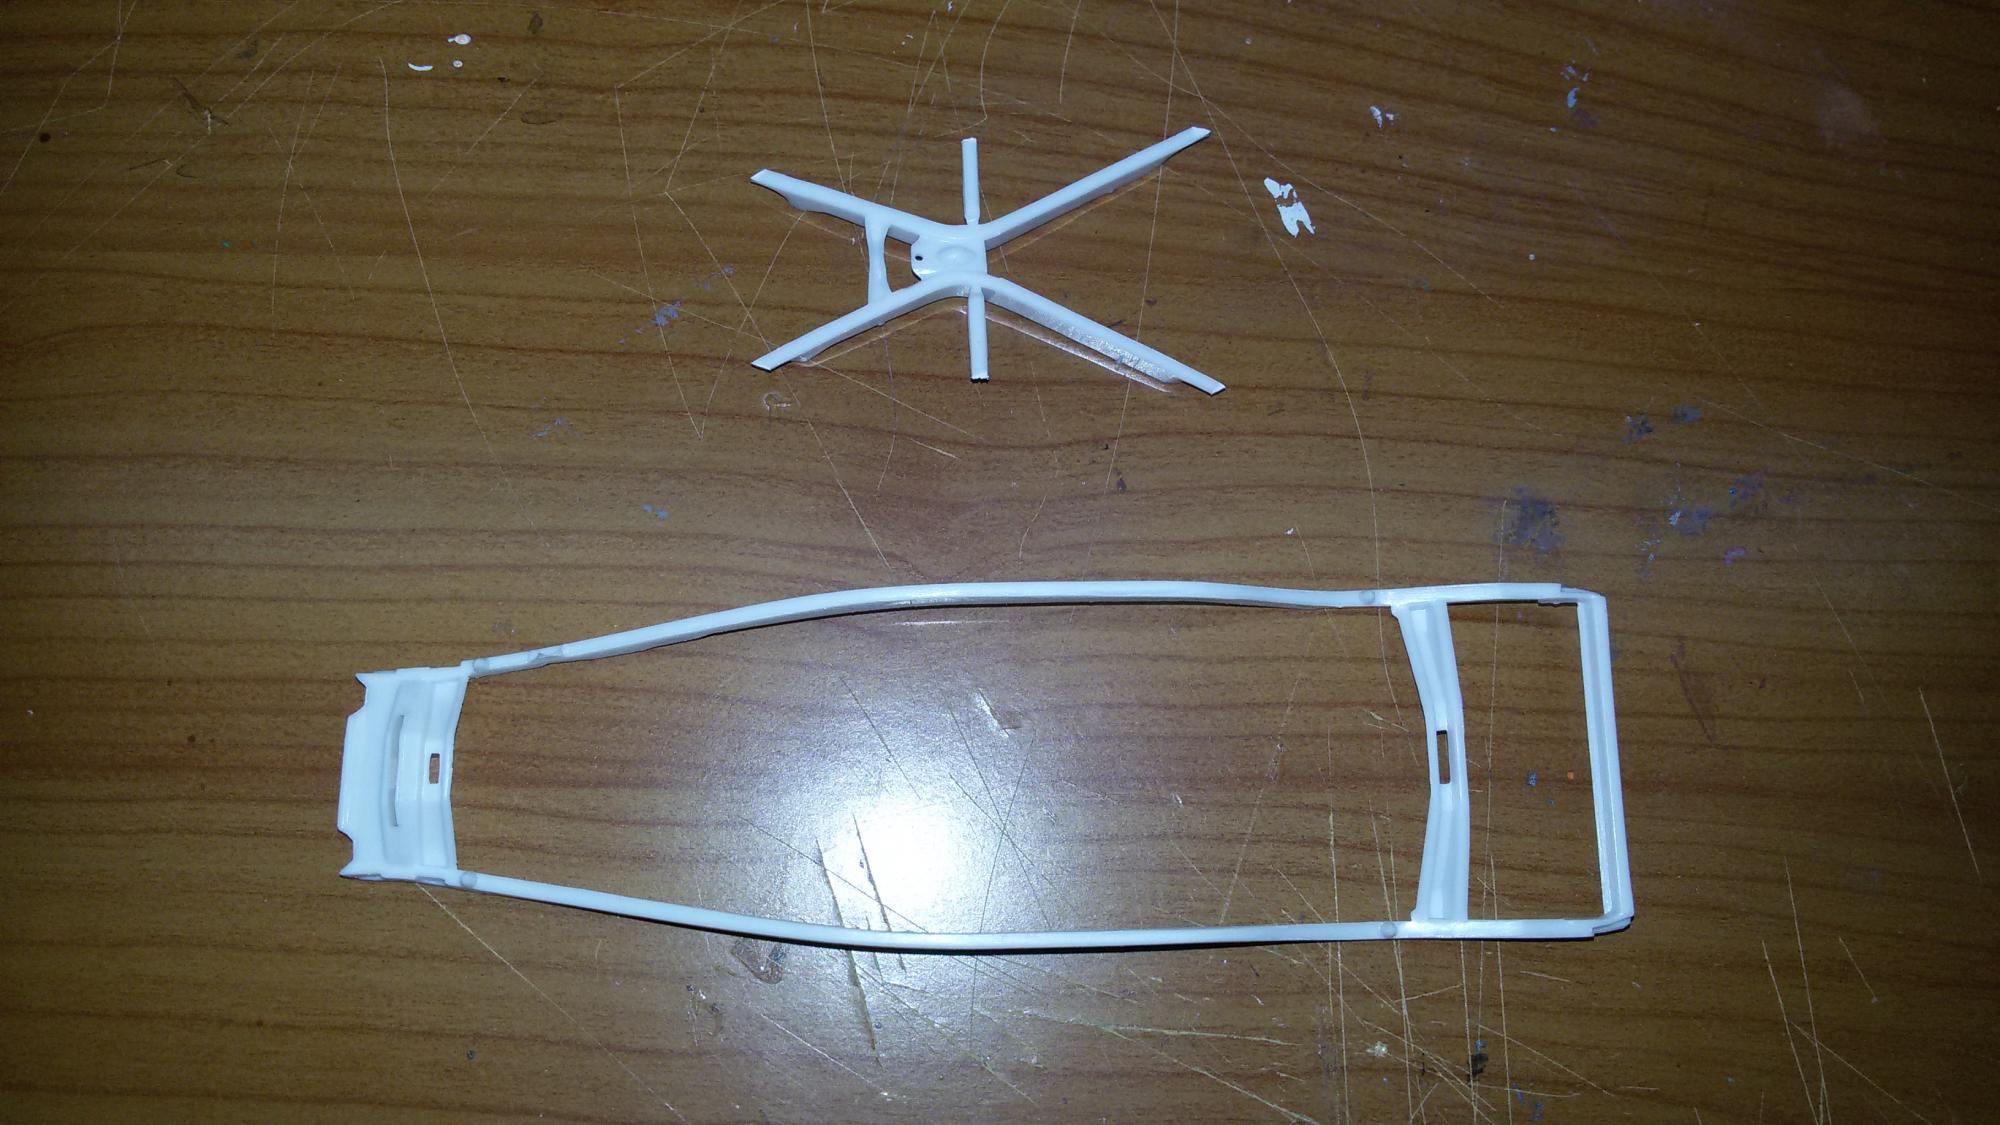
this is my latest project, since I have photographed all the steps and i'm very satisfied with the result I decided to open a wip; tell me what do you think, because even after 25 years of inactivity I have to take back a little confidence ... comments and criticisms are welcome. the starter kit is this: of course, because I do not like to build the original kit box, the project is to turn it into a rat rod. This is the first mock-up right out of the box: I began by eliminating the central part of the frame, which will be replaced by two new crossmembers I made from plastic chopsticks and I glued in place. Meanwhile, I drew a line for cutting the body (my first top chop ... i was a little afraid ...) and made the first cut. It comes better than expected, very accurate, so I continued with the second cut ... in the picture you can see the strip that I deleted, about 5 millimeters, not much but I hope will see the difference at the end. for now I'll stop here, the next step is to cut the frame to lower the suspension, using a method that I learned from a tutorial by a user of this forum of which I can not remember the name, but I was able to first try and it's very simple. I do not remember how you call this technique, however, it is to obliquely cut the beams of the frame and glue them overlapping. See you soon
-
thank you all guys!
-
hello to all guys! I write from Italy and I follow you from a few months, ever since I restarted with the hobby of model after 25 years of inactivity! when i was young I've built mainly military models and motorcycles, now I began instead with pick ups, muscle cars, and hot / rat rod, which are my passion. I'm at my fifth model at the time, the first are served to regain confidence and see what level I was, and I was quite amazed at what I was able to accomplish,i will put some pictures under glass soon. my last model (just finished!) is a '37 ford panel delivery turned into rat rod hearse. for this I will open 'a wip since I remembered to photograph all of the building steps. Now I greet you and sorry for my English, any error is the fault of google translate anyway! P.S. I saw that some of you are true artists of the model, I saw some fantastic creations that have inspired me a lot and keep alive the passion and the desire to improve model after model. ah, of course, I copied a lot from your work and tricks, thank you all!