
camaro69
-
Posts
264 -
Joined
-
Last visited
Content Type
Profiles
Forums
Events
Gallery
Posts posted by camaro69
-
-
Really looking great so far. I really like that it isn´t yellow.
")
-
And here it is...
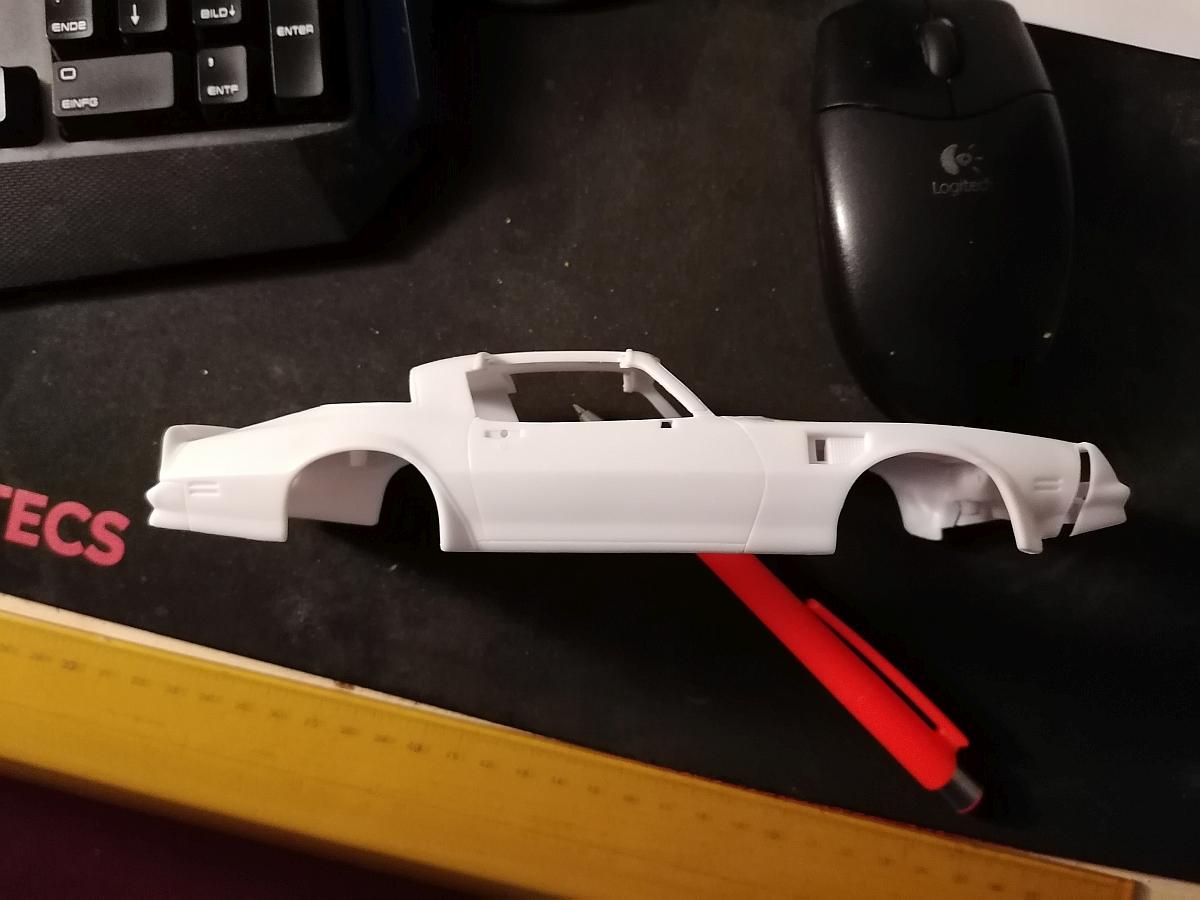
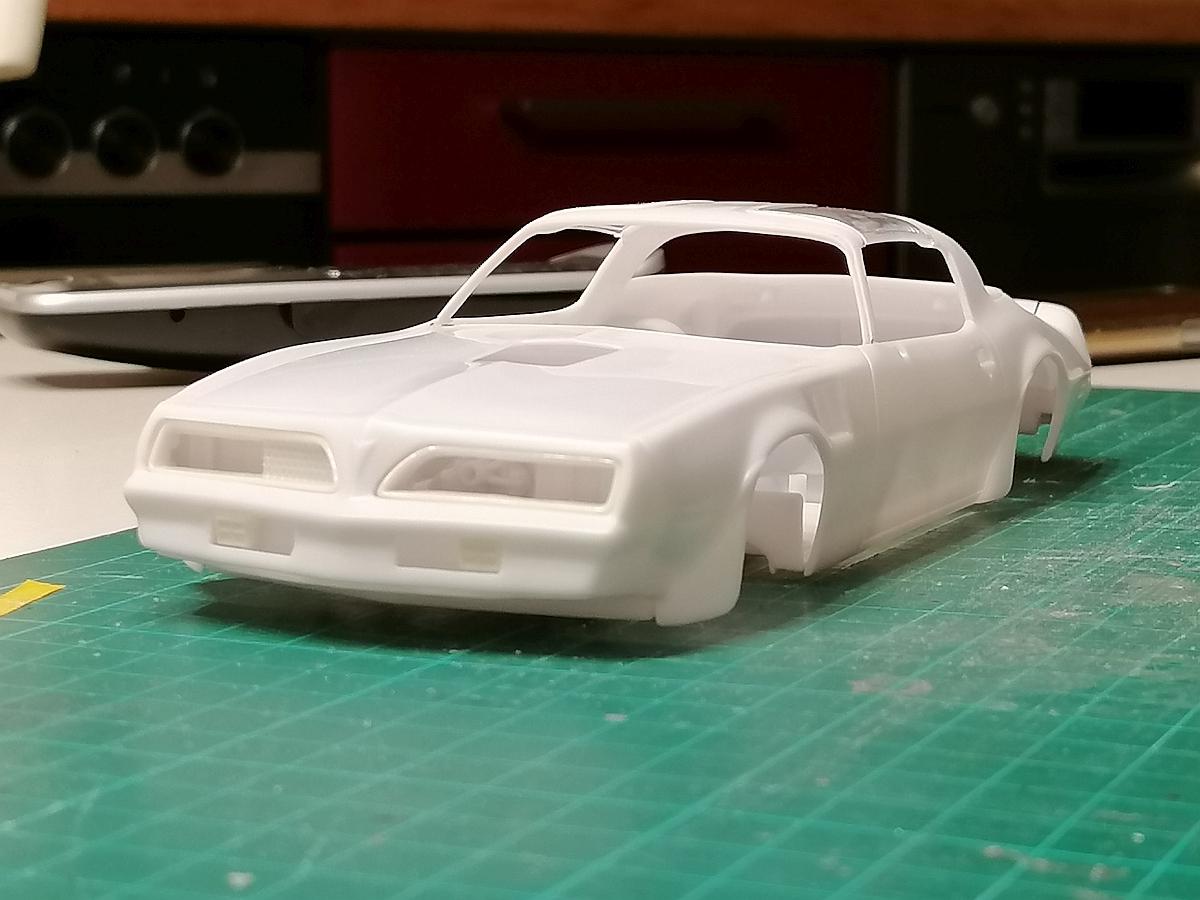
Part 2 - more body corrections
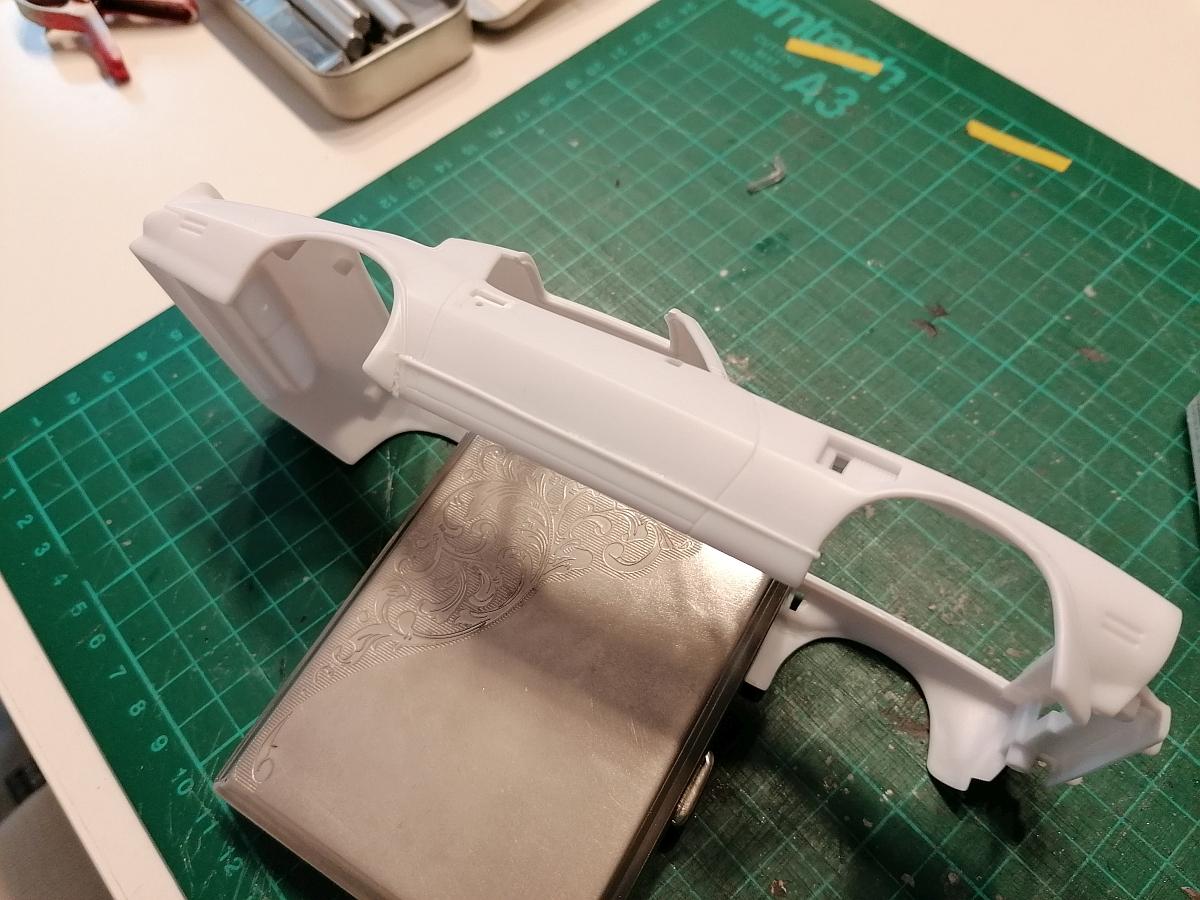
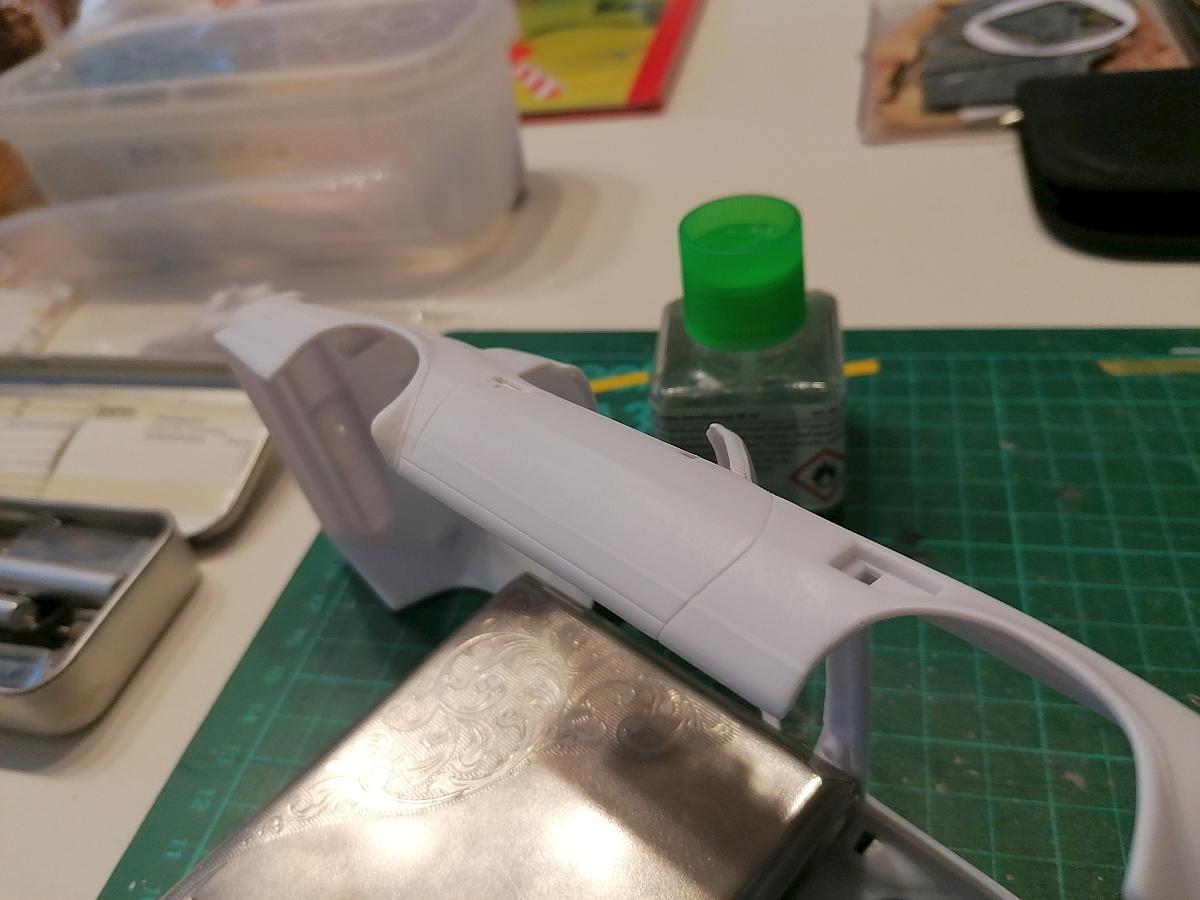
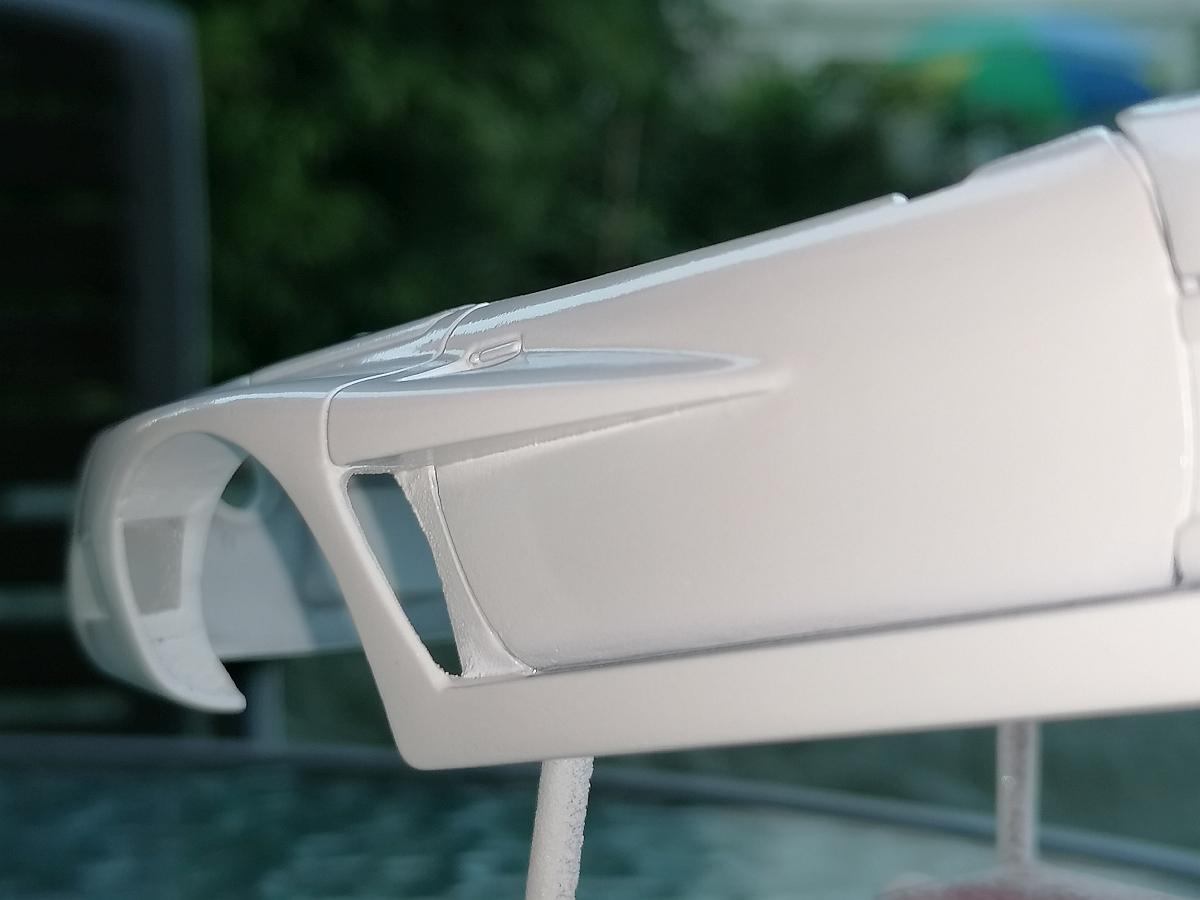
The kit comes with one simple chrome plated part with a rectangular formed survey one each side for the headlight housings and a single clear part for the lenses. Found this a cheap solution even for a former Diecast kit.
So I started to scratchbuild my own headlight housings as I already did on my Corvette C4.
For those who are interested I started with a piece of 0.125 x 0.156 Evergreen which I filed the reflectors in. Its one piece per side but with a vertical groove to show the two separate headlights.

After I was happy with the shape of the reflectors I sanded them to the correct height so I could glue a small piece of 0.010 x 0.156 Evergreen to the bottom and the top of each reflector as separate pieces and get the correct height overall.
At last I testfitted them with a photoetched piece of hexagonal mesh beside them.
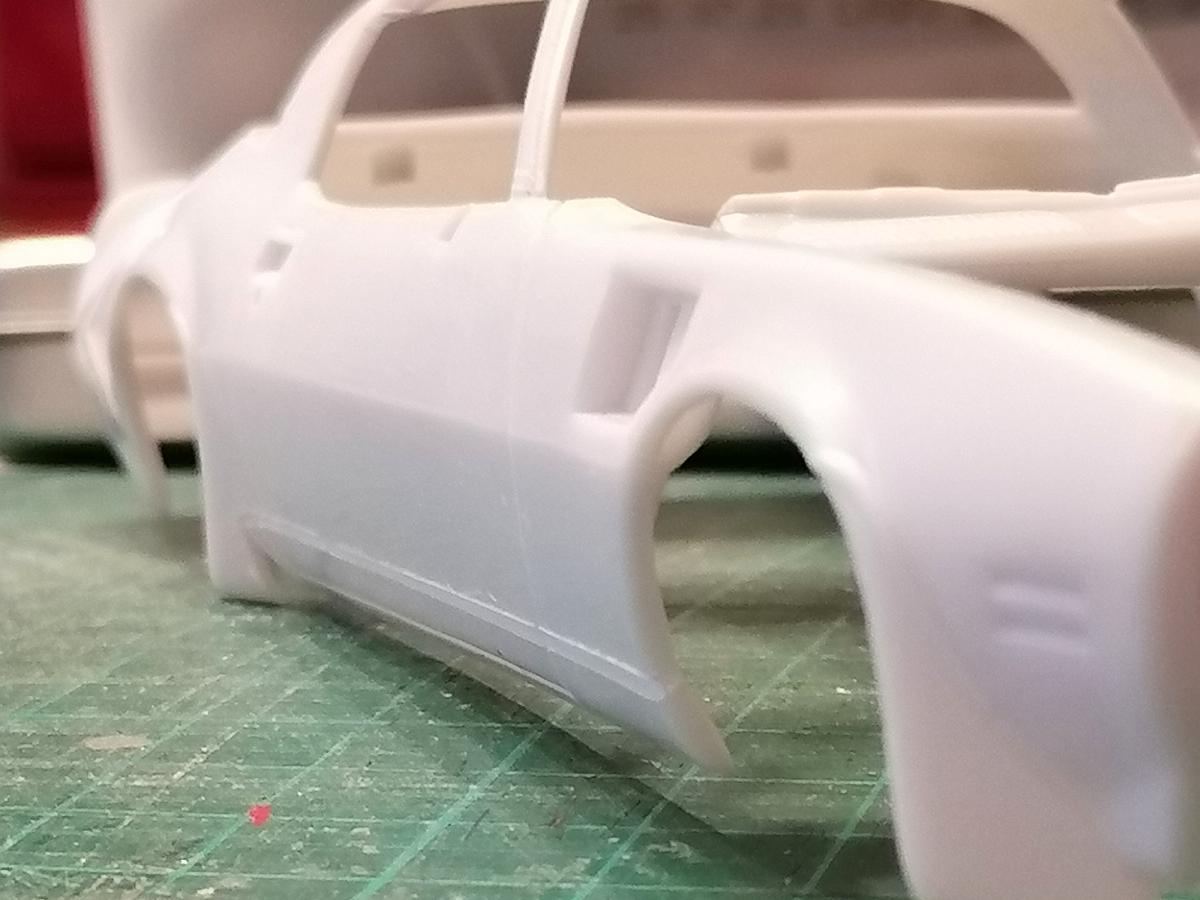
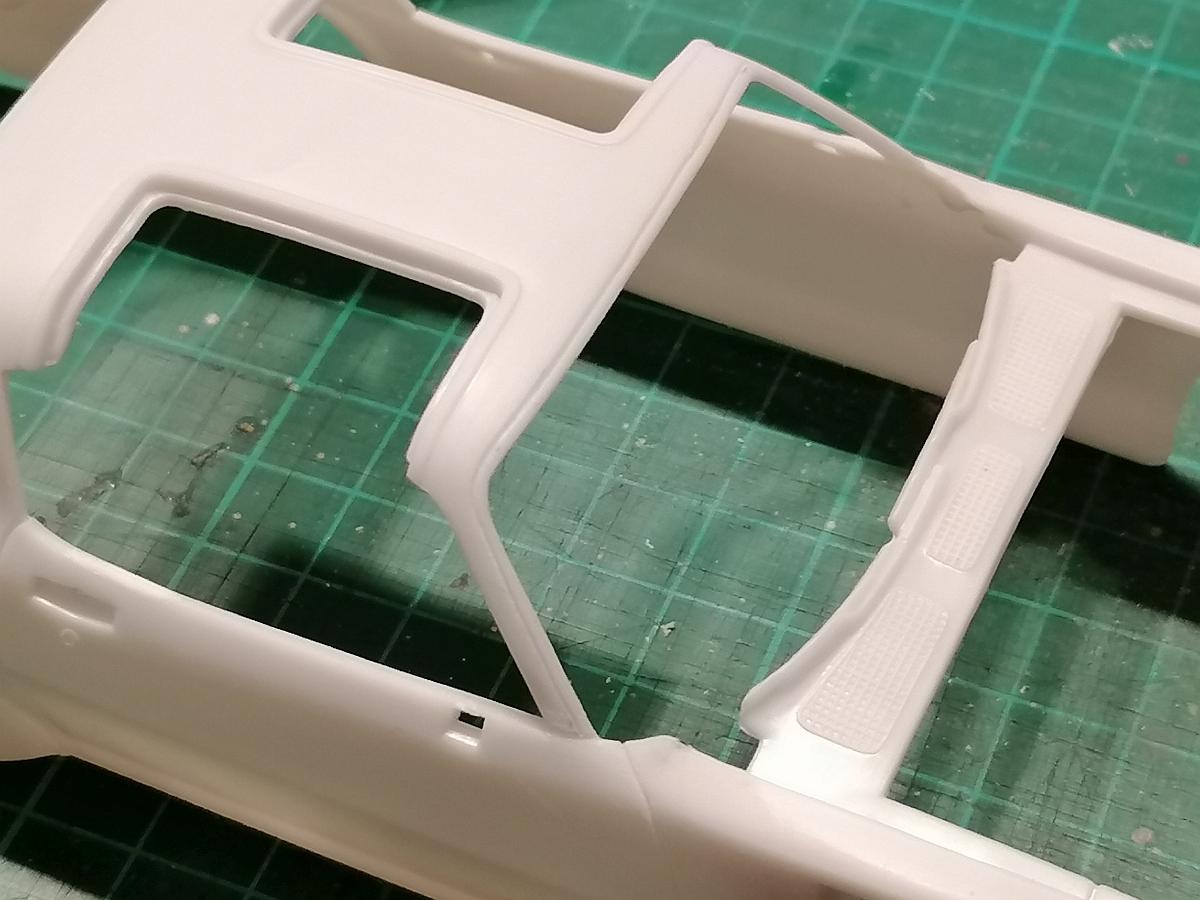
After the first housings were done I thought it would be time to correct the sidewalls.
As Andy (Sledsel) mentioned in his thread in the reviews section they are completely wrong shaped. You can already see this in the pic above where the orange line is drawn in and also in the next one shown by the orange arrow.
Everytime I´m at the model kit building day of our modeling group I hear: "Simply do it."
So after a short time of thinking how this could be done I started scraping a groove where the wrong body line is molded. Additionally I cutted in the rear wheel spoiler flare directly beside the molding up to the height of the groove. After the groove was deep enough I simply could bend the lower sidewall into the new shape as you can see here. Because of the new soft plastic nothings broken in this stage.
This was a simple step but the improvement is unbelievabe.
When I was happy with the shape I filled the groove with some 0.025 Evergreen rod. The triangular opening on the flare I closed with a little piece of flat styrene.
Next step after the glue has been dried was sanding down the rod to match the sidewalls shape and the flat styrene to the flare.
Here you can also see the added grooves on the front and rear bottom of the door. This was the correction I have done first only forgot to mention it in the first post.
passenger side...
drivers side...
front view...
To take away anyones fear the chassis still fits without any modifications. You can also see the opened headlight mounting support panel.
As already mentioned: questions, suggestions and critisms are much apprecciated.
Thank you all for taking a look.
Rico
P.S.: Preview... Next part will include opening the sidemarkers, scraping the groove around them and scratchbuild the second headlight housing unit. So stay tuned.
-
Thank you Andy. It´s definitiv not a quick build but in my opinion the corrections are mostly simple to realize even for not so experienced modelers like me.
Next update comes soon.
-
Thanks Mike, I really apprecciate your feedback.
The body issues are very pronounced and if you want to get this body right there is a lot of work.
I want to update this thread this evening because I´ve done much more already.
-
Thanks Mike, I really apprecciate your feedback.
The body issues are very pronounced and if you want to get this body right there is a lot of work.
I want to update this thread this evening because I´ve done much more already.
-
Hello fellow modelers,
as posted in Car Kit News & Reviews section nearly a month ago that I tried to correct most of the body issues this kit came with (because it was a kit with a metal body before) I thought it would be time to start this WIP thread. Started this one already on November 5th.
I noticed the most issues without having seen the thread from sledsel before.
Now lets start with it...
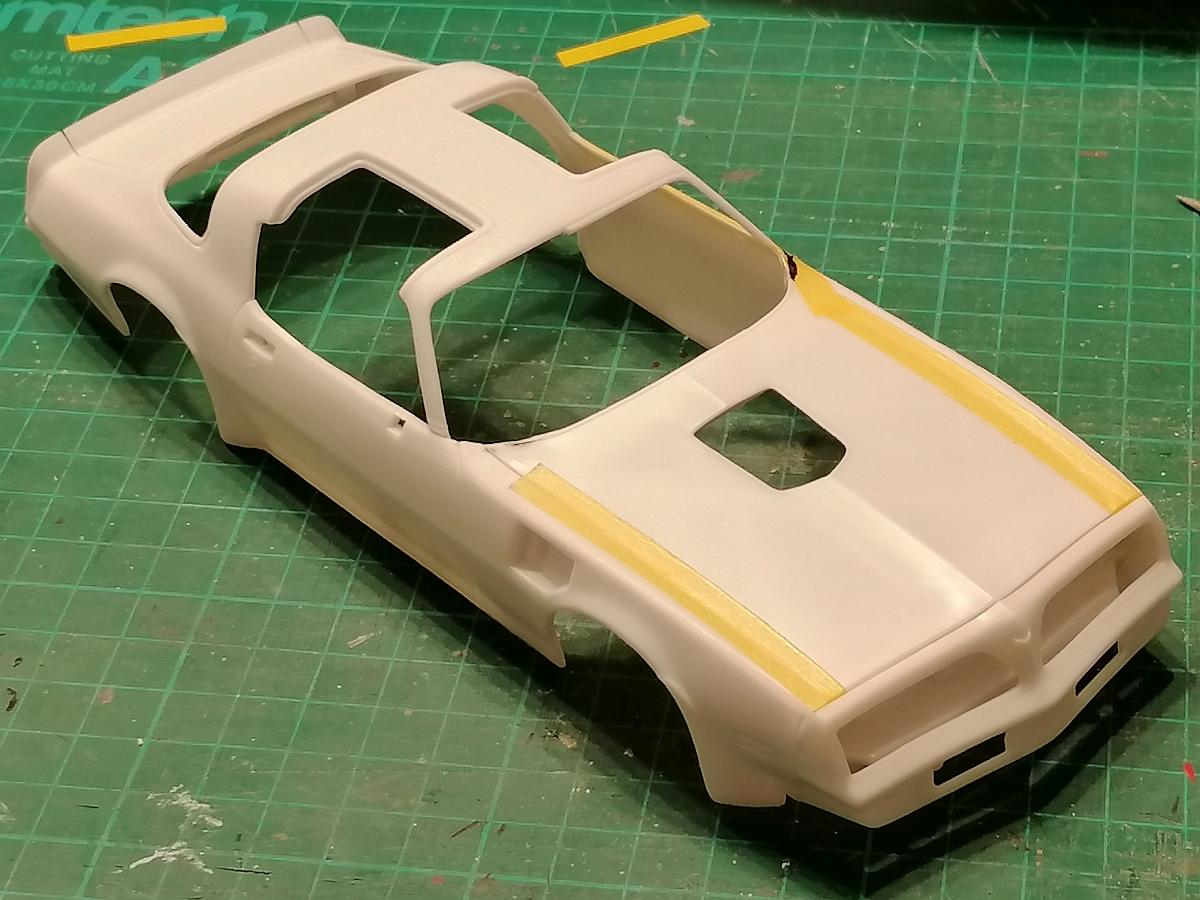
Part 1 - first body corrections
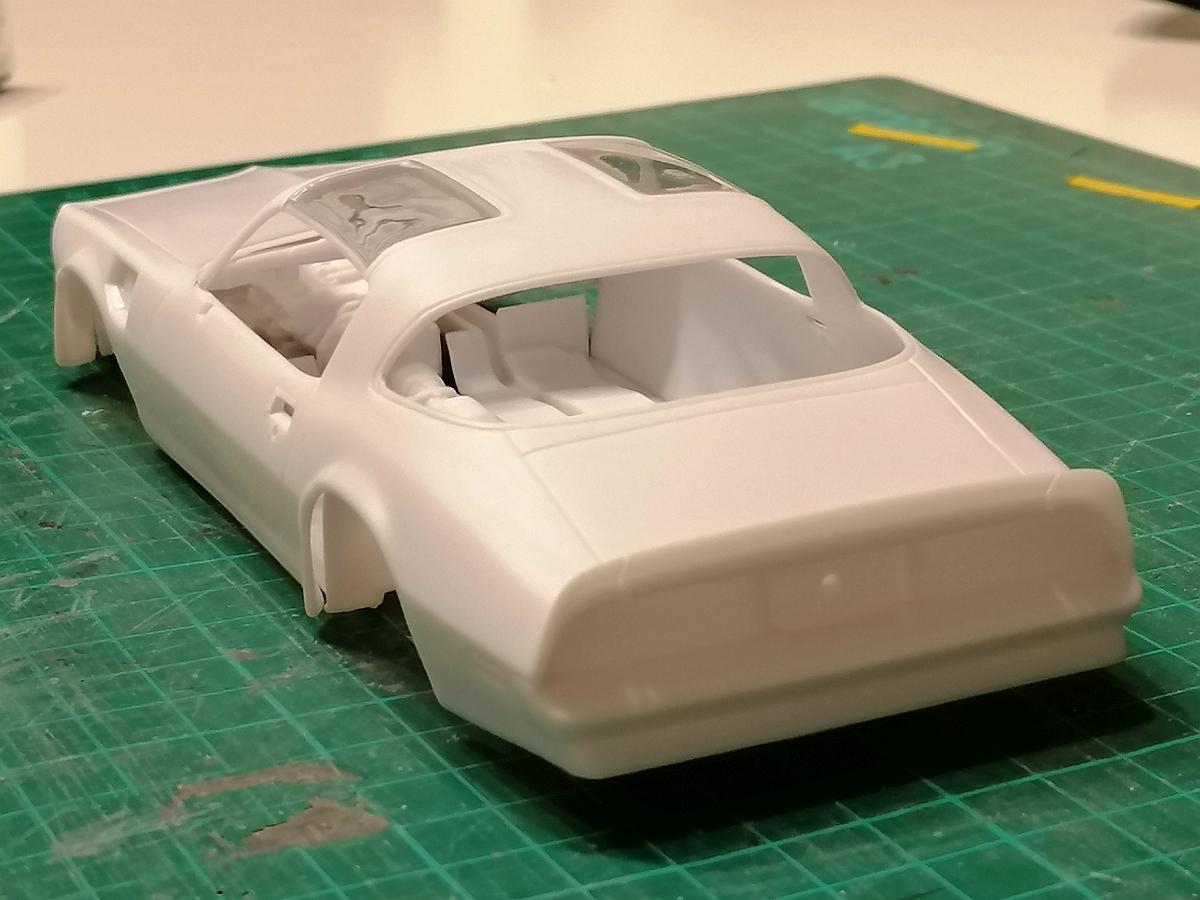
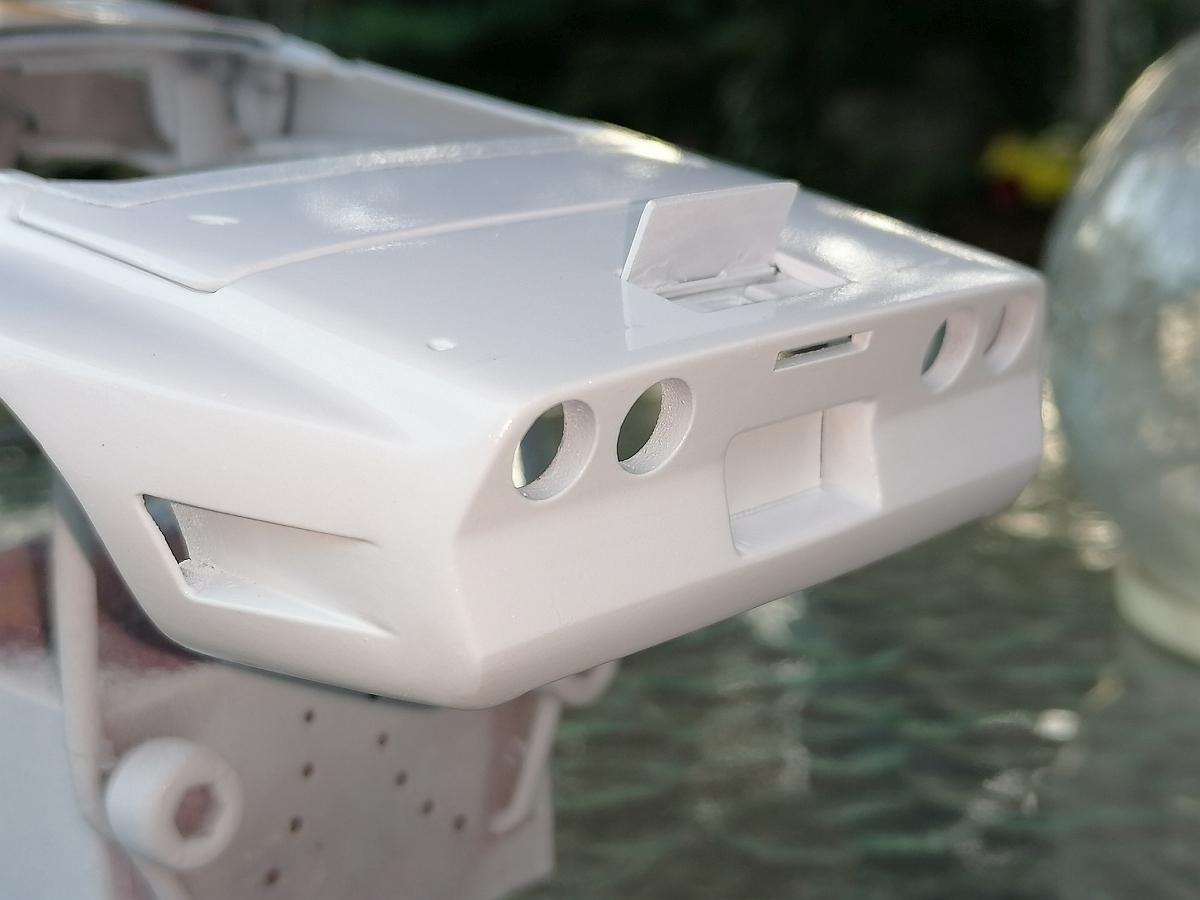
First of all I flattened the rear spoiler because it´s much to high (sorry no pic from that).
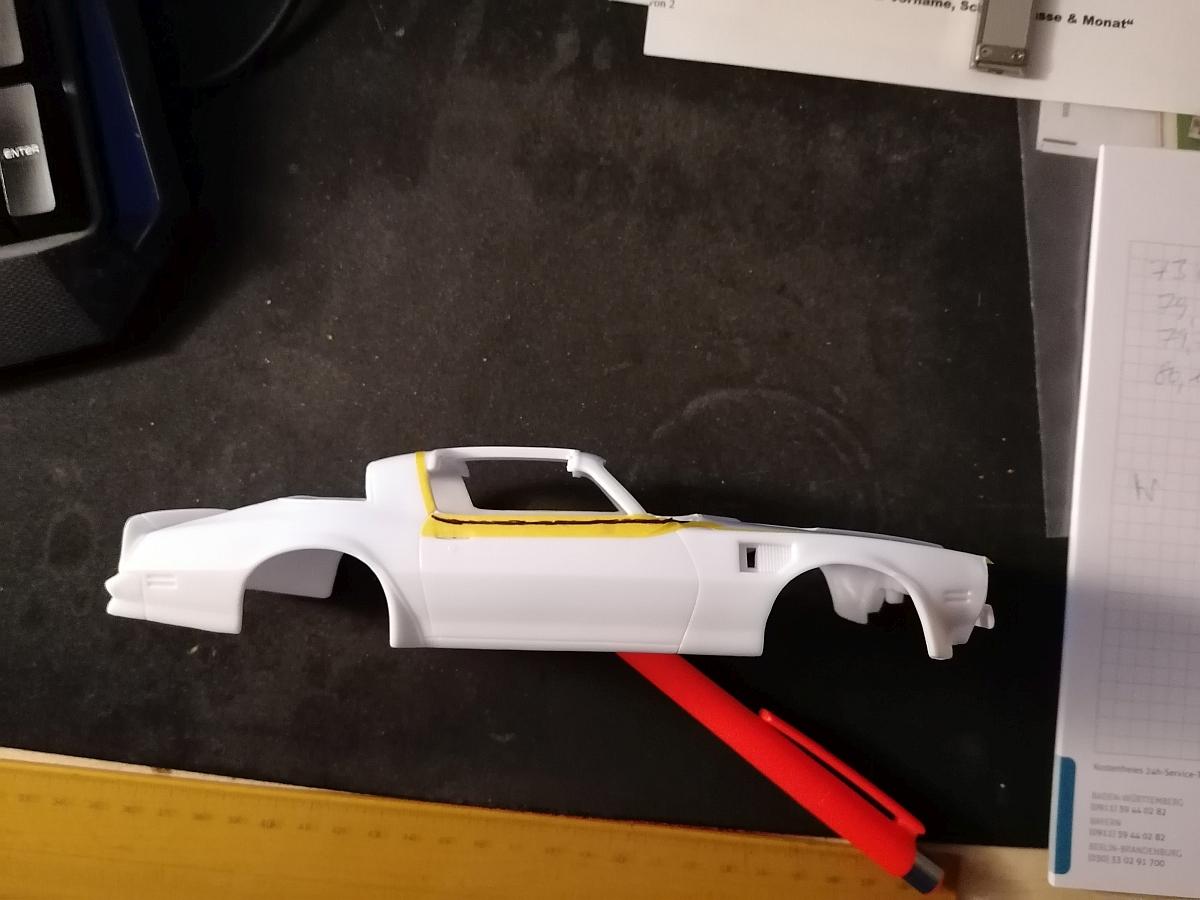
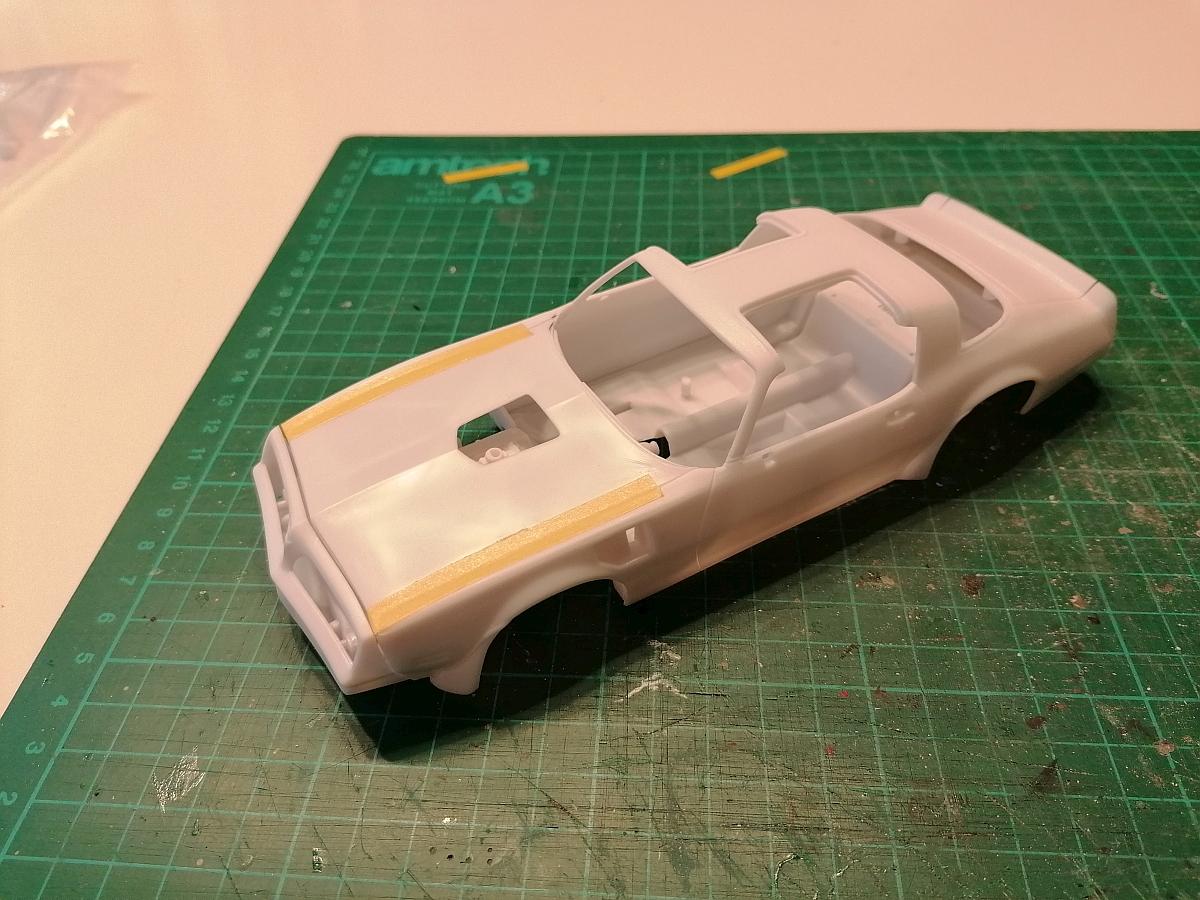
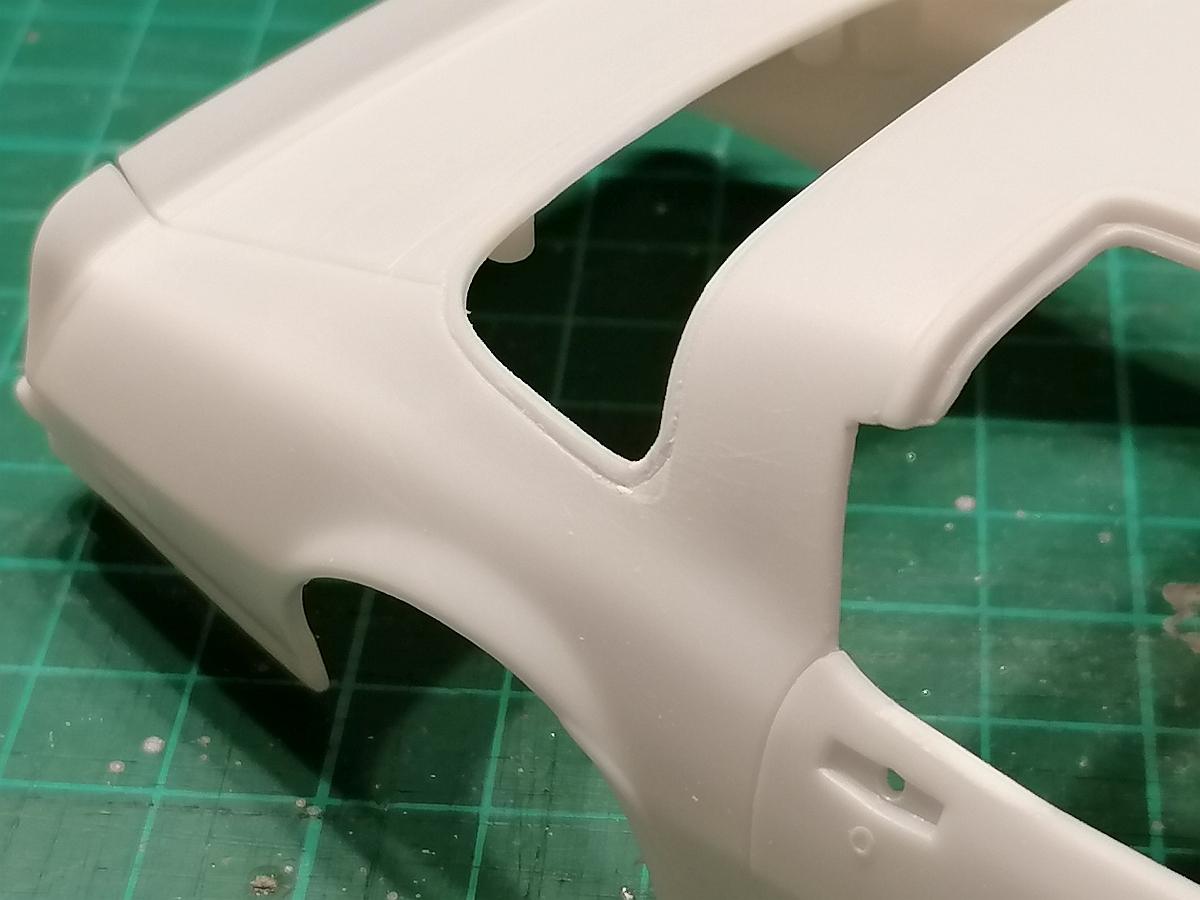
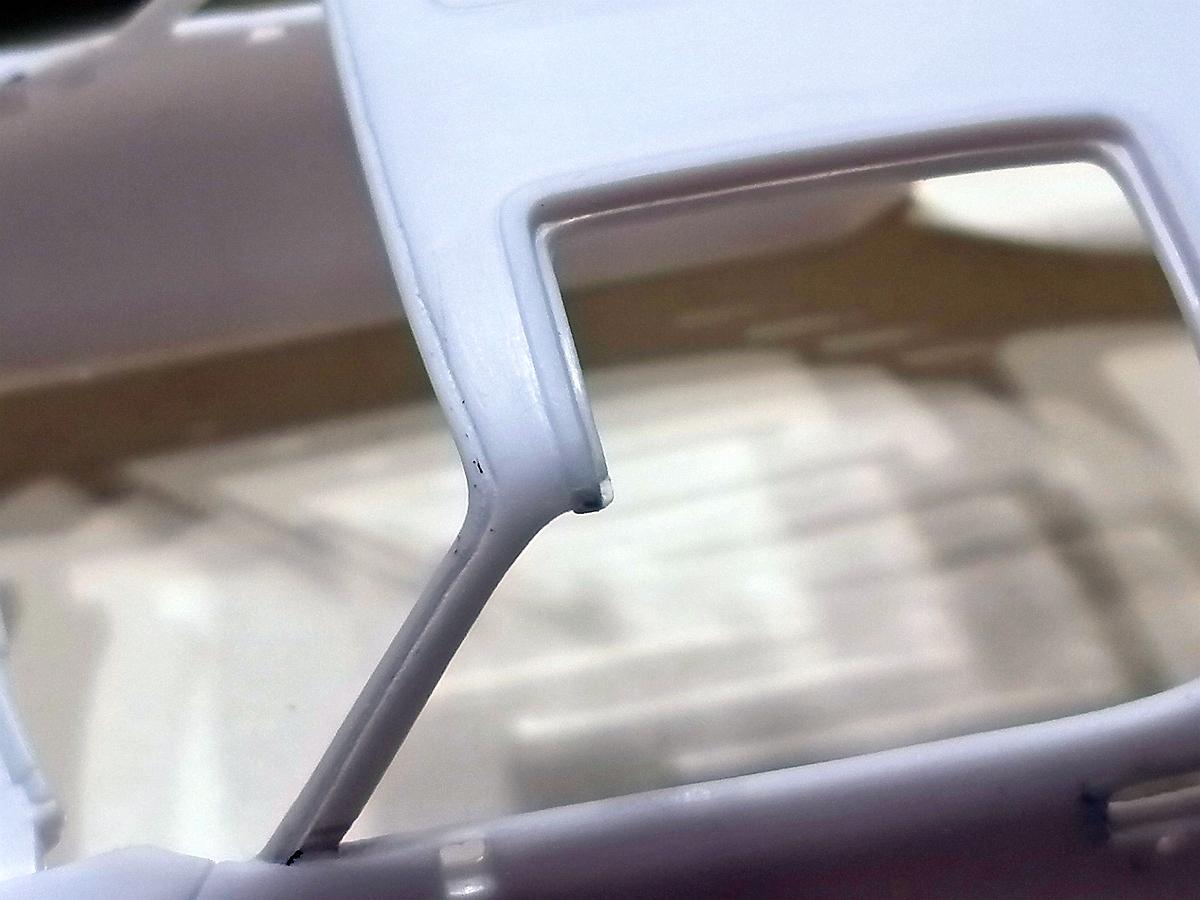
Then I noticed the incorrect window openings and shape of the hood. So I marked the areas on the doors and B-pillars that have to be removed and started with cutting and filing these away.
Important notice: "If you´ll try to do this to you have to change the inner door panels too because they won´t fit anymore."
Marked areas here...
Passengers side window opening done...
Here you can see the difference between the done passenger side and the undone drivers side...
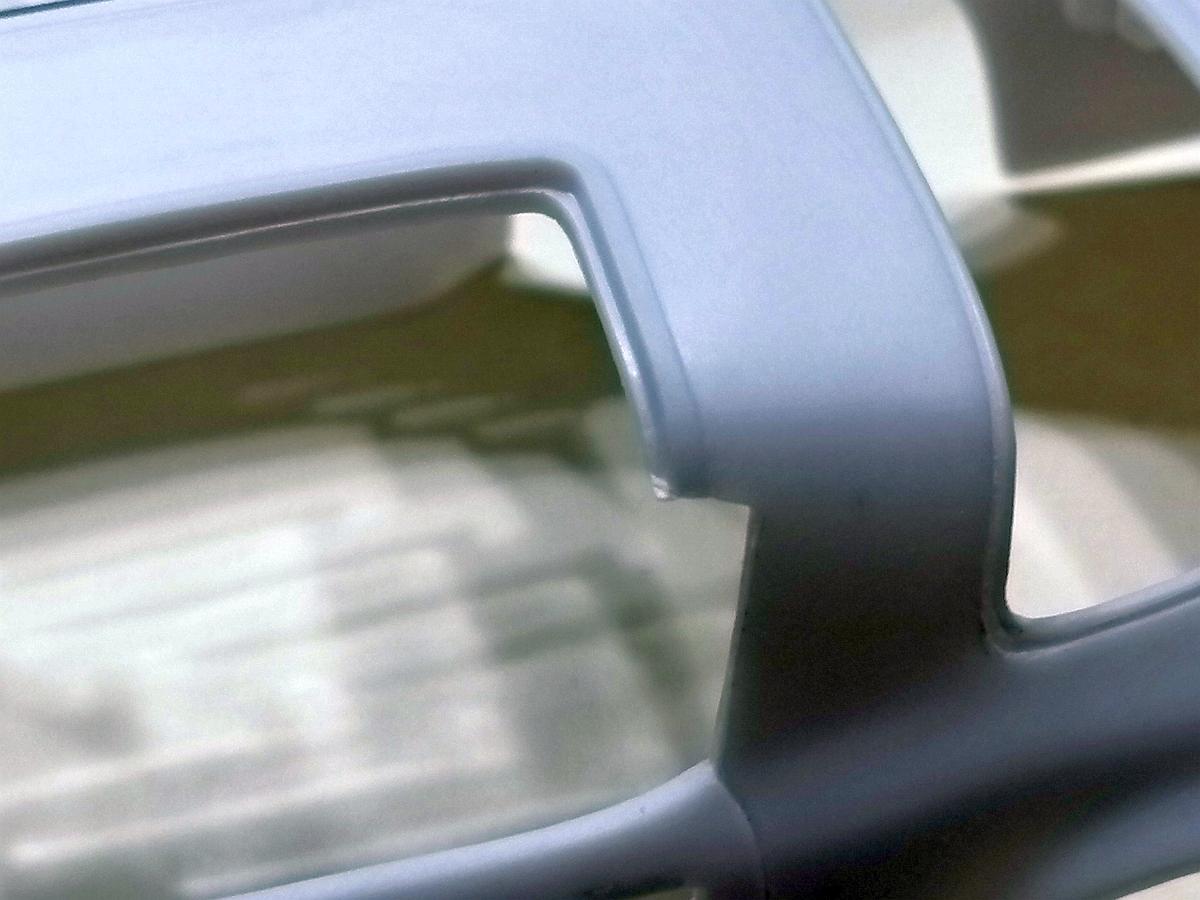
The A-pillars are also to wide and the windshield opening to small in heigth so I filed away the windshield molding first on the passengers side...
then on the drivers side too...
then I scribed in the new windshield surround moulding...
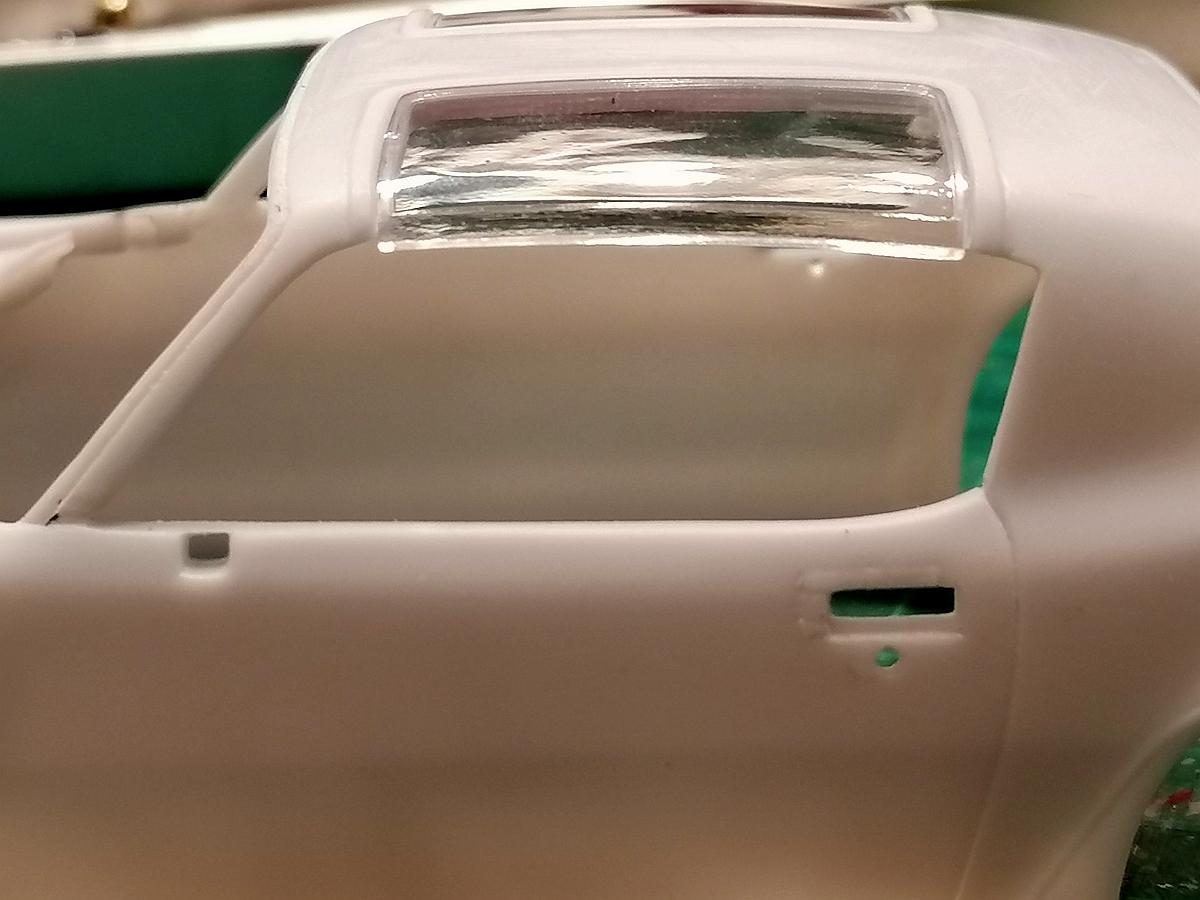
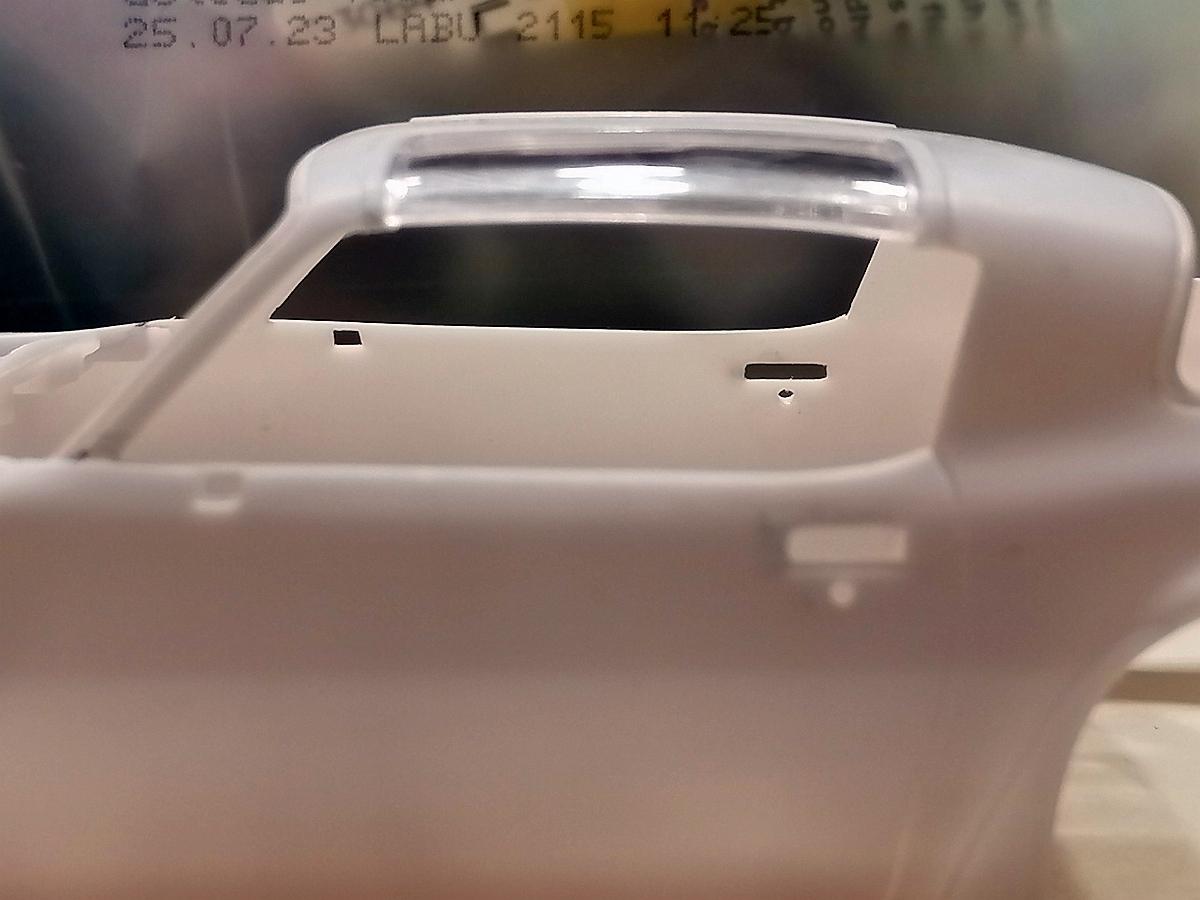
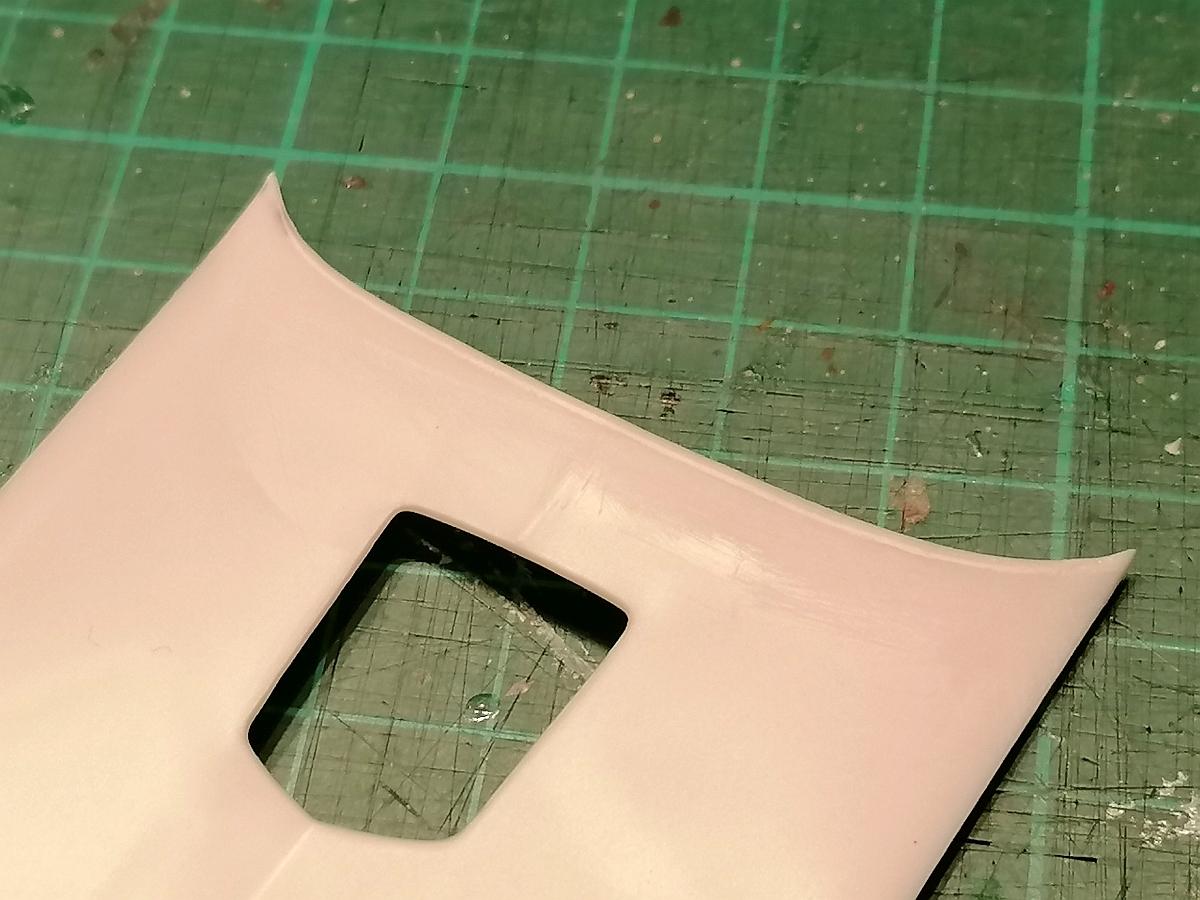
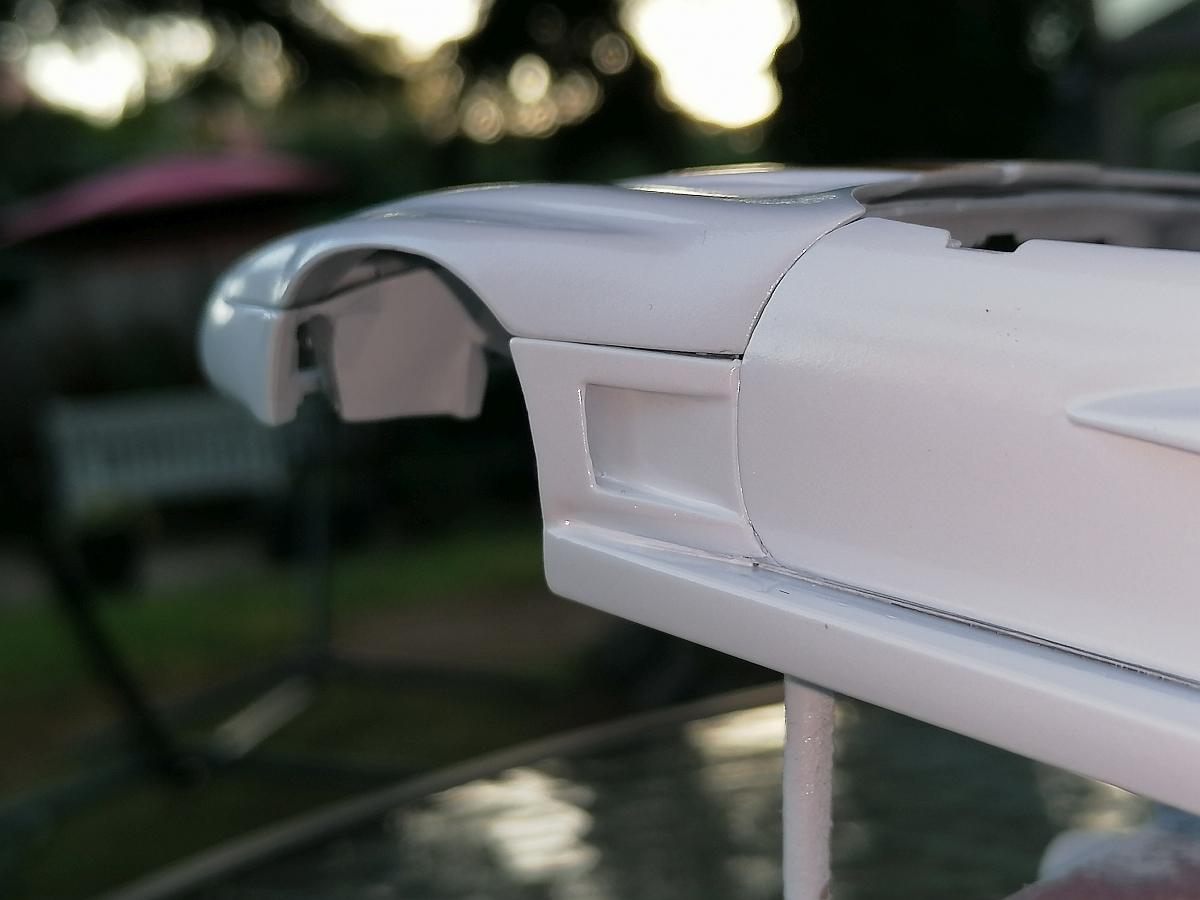
The rear window surround is also wrong shaped on the bottom of the B-pillar. I added small styrene pieces and rounded the corners.
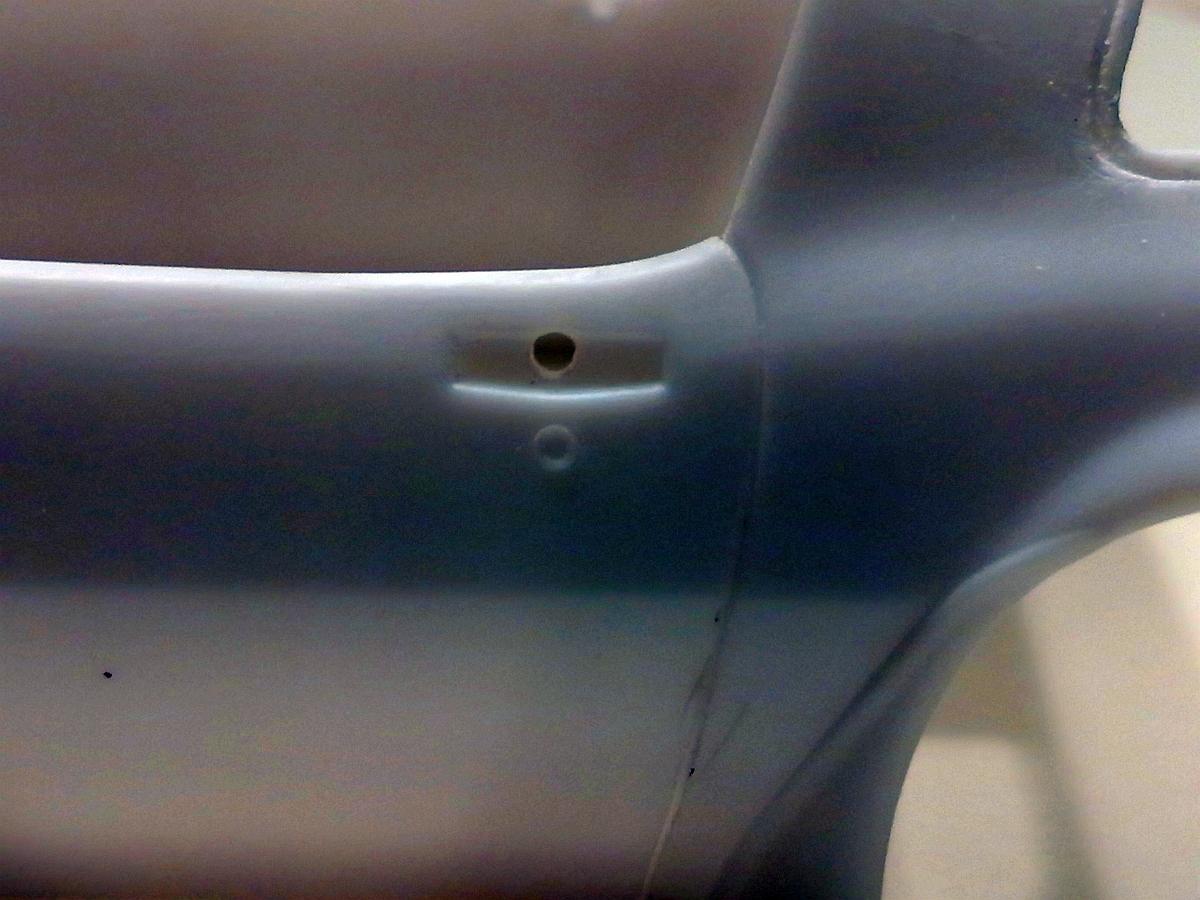
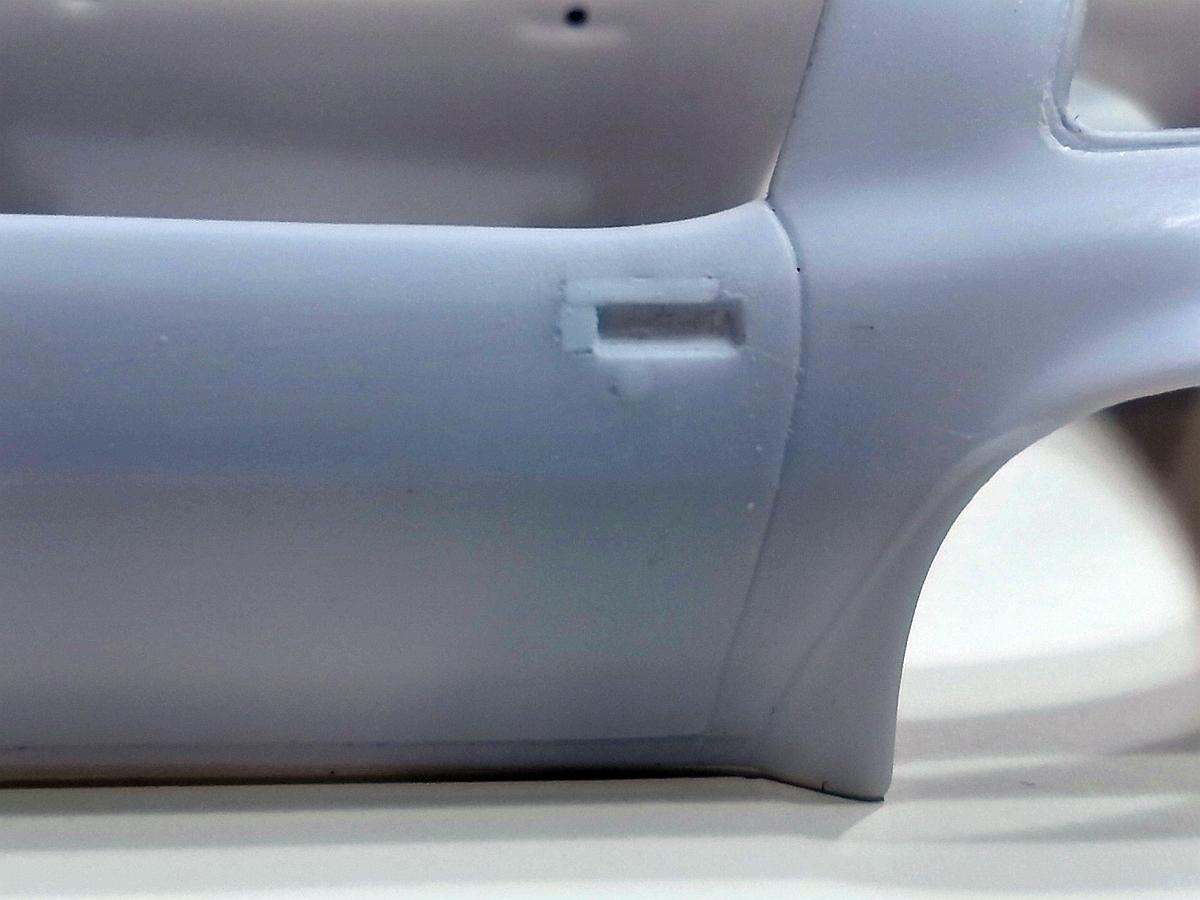
Because of removing nearly 1mm from the top of the doors the door handles looked like they are wrong placed. Looked on many photos before changing the position for the door handle recesses.
Before...
After...
Next were the T-top glasses. Without modifications they look horrible as you can see here...
After filing some material away from the bottom and adding some small styrene pieces to the roof where they sit it looks much better...
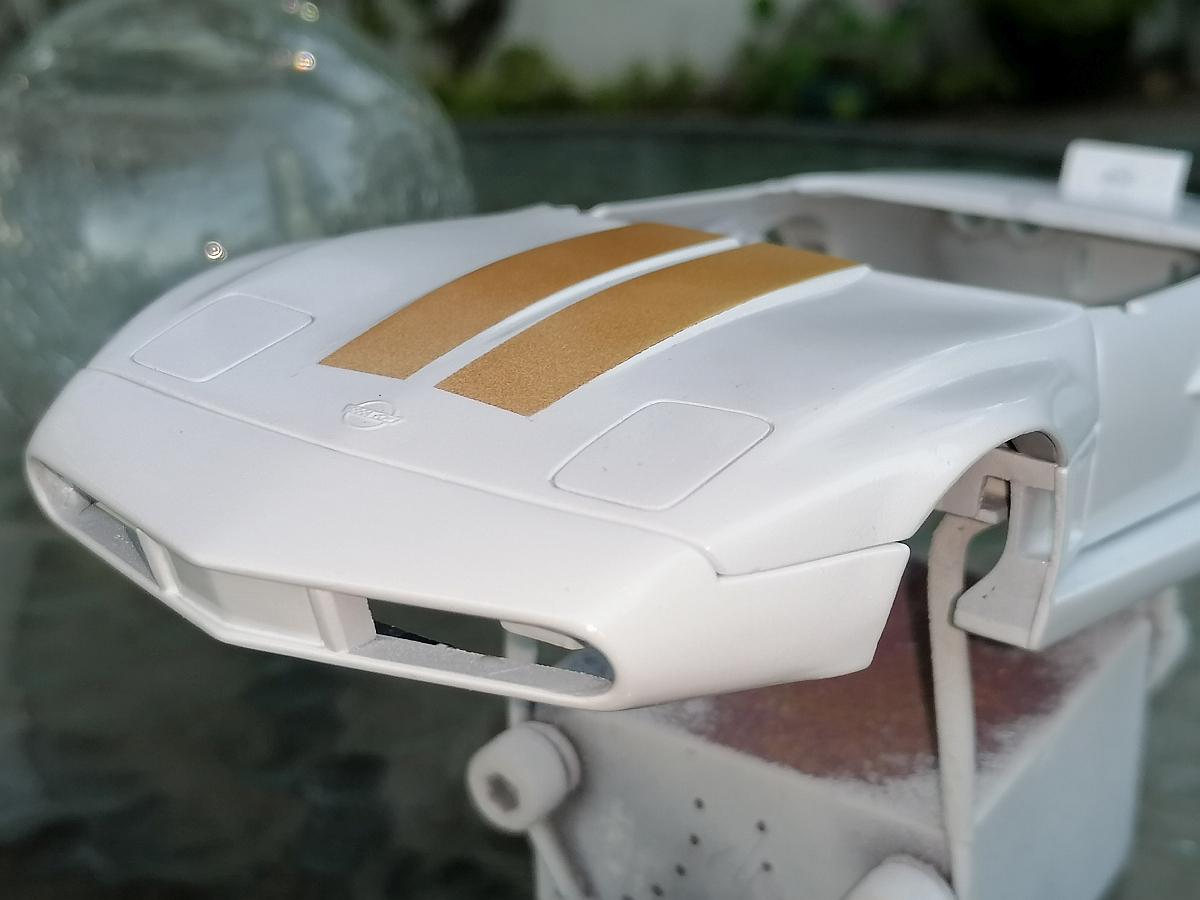
Here a complete view from the left front and back corner. The shape of the outsides of the hood are already corrected. Photos from November 19th...
As you can see I started opening the grille. Will add photoeched parts here.
Because I´ve seen many T/A´s without chrome molding on the hood I removed the groove by adding styrene and grinding it down to the hoods shape.
That´s for today. More coming soon.
Hope you´ll enjoy this. Any questions, comments and critisms are much apprecciated.
Rico
-
 4
4
-
-
On 5/23/2021 at 9:19 AM, Sledsel said:
Well, while out I was at a local drug store, they had some kits for $19 and I decided to grab a Revell 77 Trans Am. Thought was, a nice black Bandit, no frills build. Got home, dug thru the box, all looked decent....... Then later I took it out to start sub assemblies and looked really closely.
Here was what I found:
The body is fairly thick compared to other kits (I understand now it started as a die cast)
The front fenders near the A pillar are shaped wrong, The back edge of the hood should come across and then make a slope down to the fender and door line. This one rises up!
The hood fender line leads us to a side window that is to small and a weird shape at the rear where the door rises.
The body line across the top of the rear quarters continues across the door and to the front fender, but is over exaggerated across the door.
The hood has some nice inner panel detail on the underside, but shows up on the top side as depressions.
The front fender looks to short from the center of the wheel well to the edge where the nose attaches. I did not measure, but comparing to a 1:1 pic
Then the most glaring thing, the over exaggerated body line near the bottom of the door and fender. On a 1:1 this is very minor and gentle, the kit looks as it has side skirts
I tried to correct most of these issues. Will post this in the WIP section next days.
-
1
-
-
Thank you guys for the kind words. They´re much aprecciated.
-
Hey guys, thank you all for the kind words. Three months since the last update and so much happened meanwhile so here´s the next one.
Part 11 - More bodywork, finishing interior and engine compartment
Sorry, I don´t have pics of every step I made since the last update but here´s what I have...
Because I hinged the tonneau cover I thought there must be some detail on the inside. Studied many pics to make it mostly correct to the 1/1 piece.
Everything is made out of styrene and the cables out of 0.4mm aluminium wire. Some masking tape 1mm to hold the wires in the correct position.
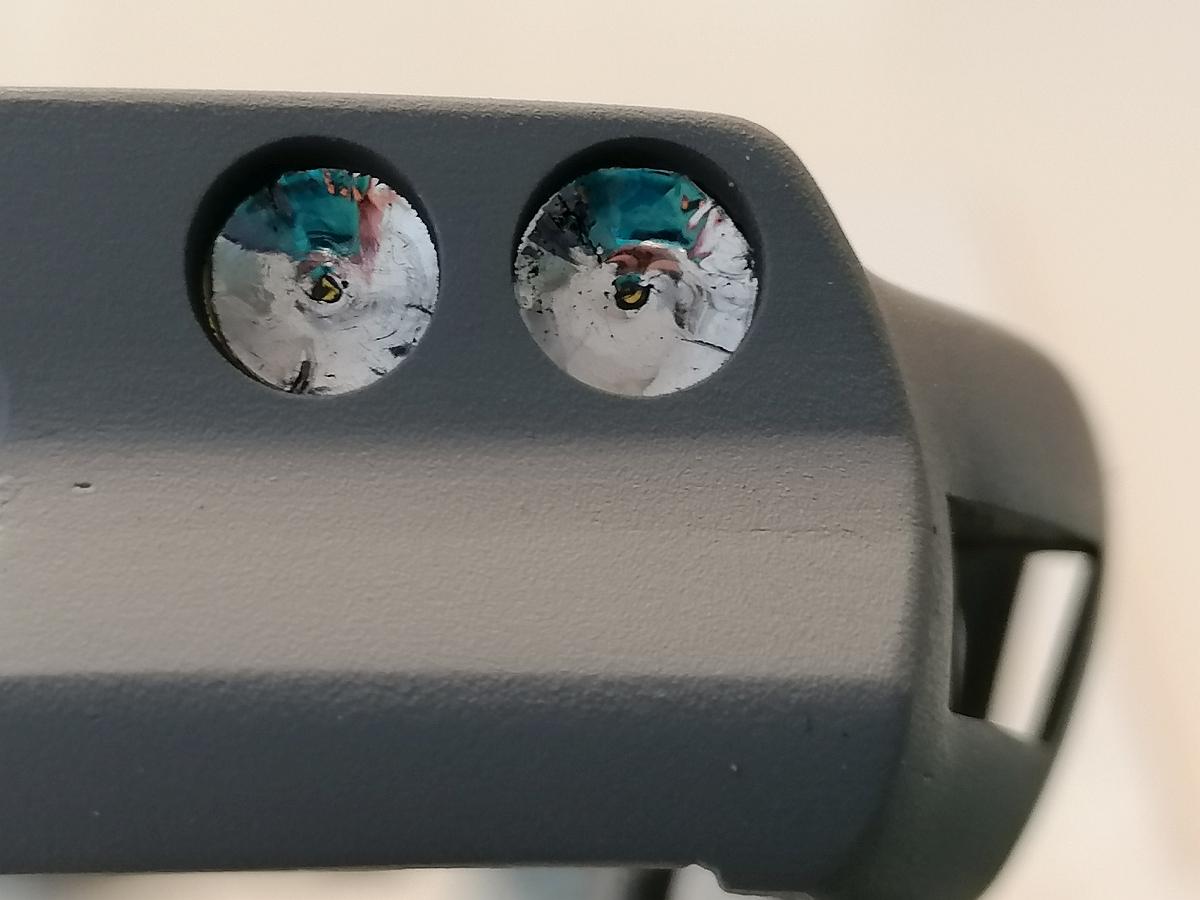
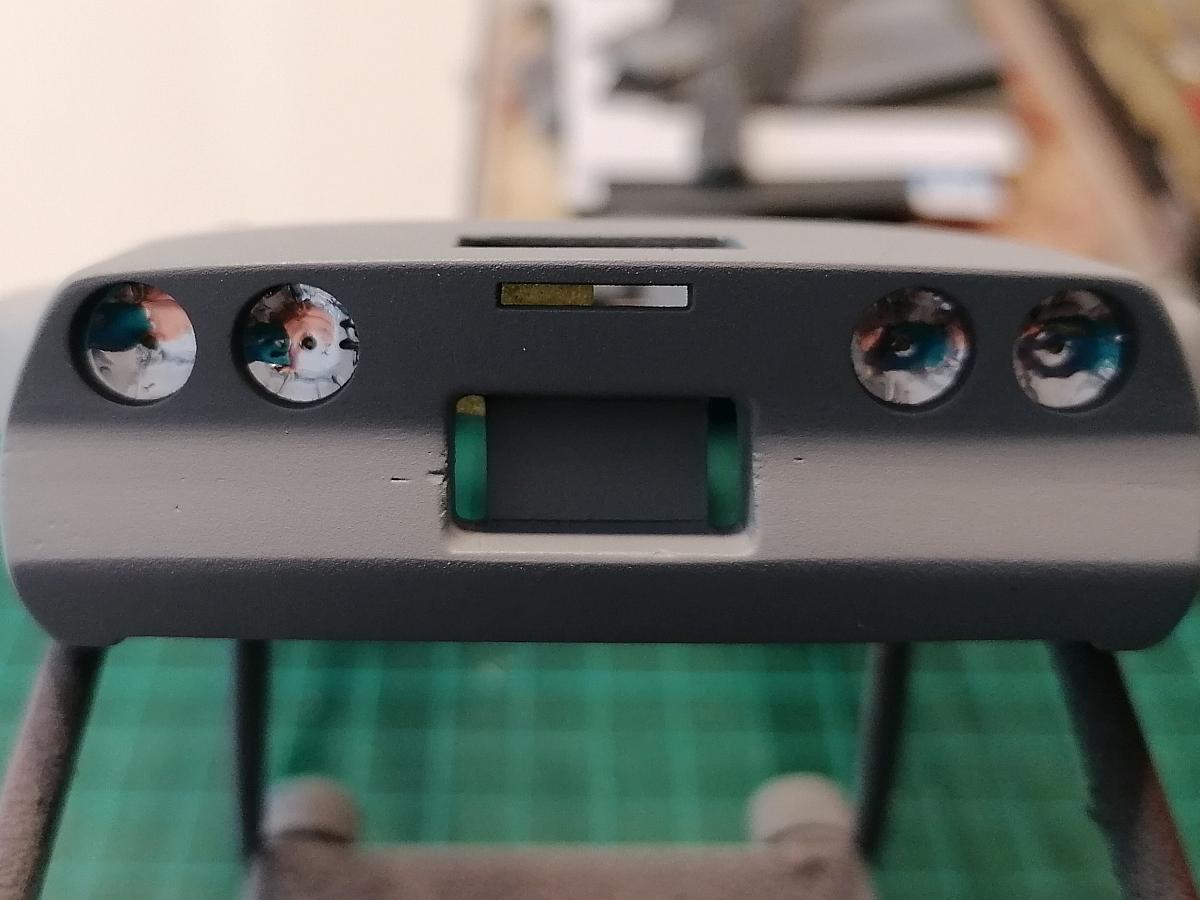
BTW I did the 3rd brake light, the reverse driving lights and the headlights.
All lenses are made out of a plane windshield I found in my spare parts box. Housings are made out of styrene covered with mirroring self adhesive foil. The headlight bulbs are small pins.
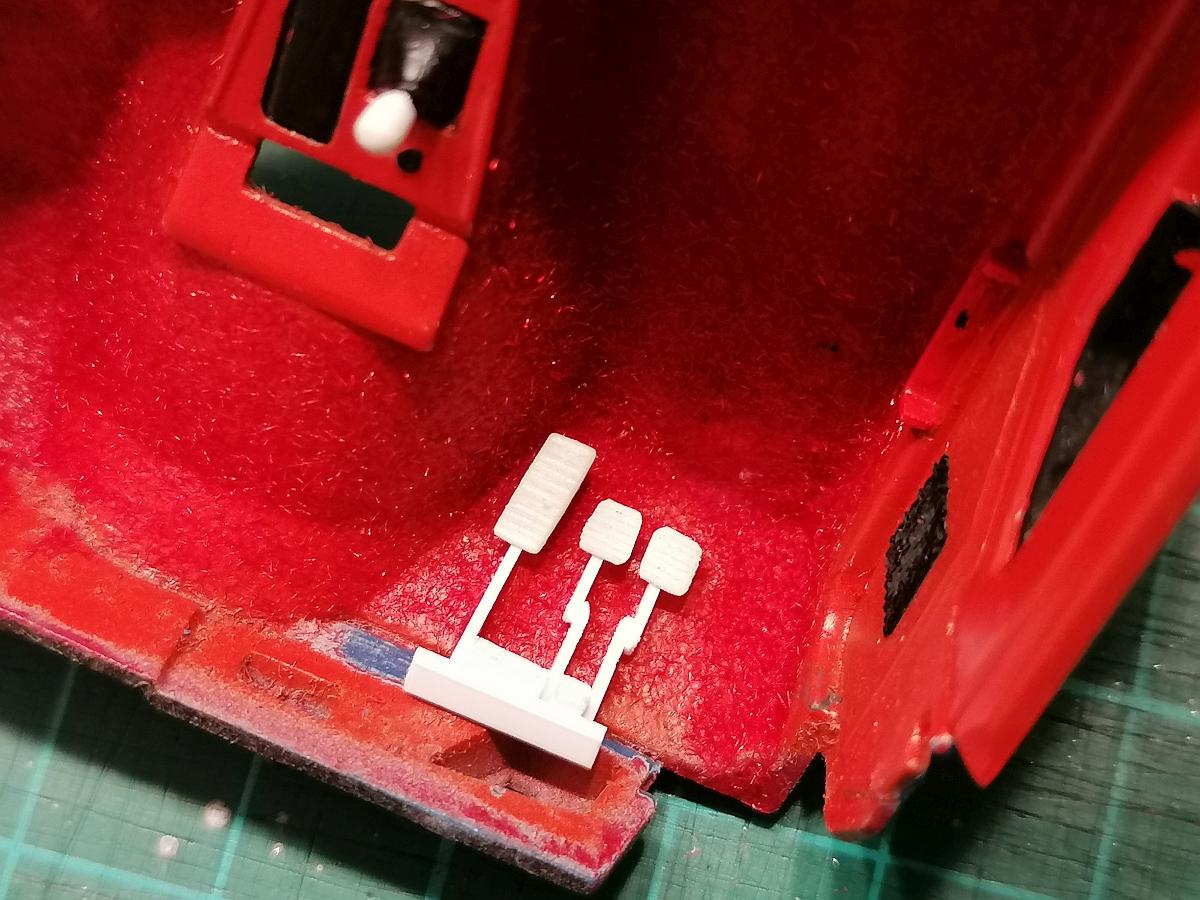
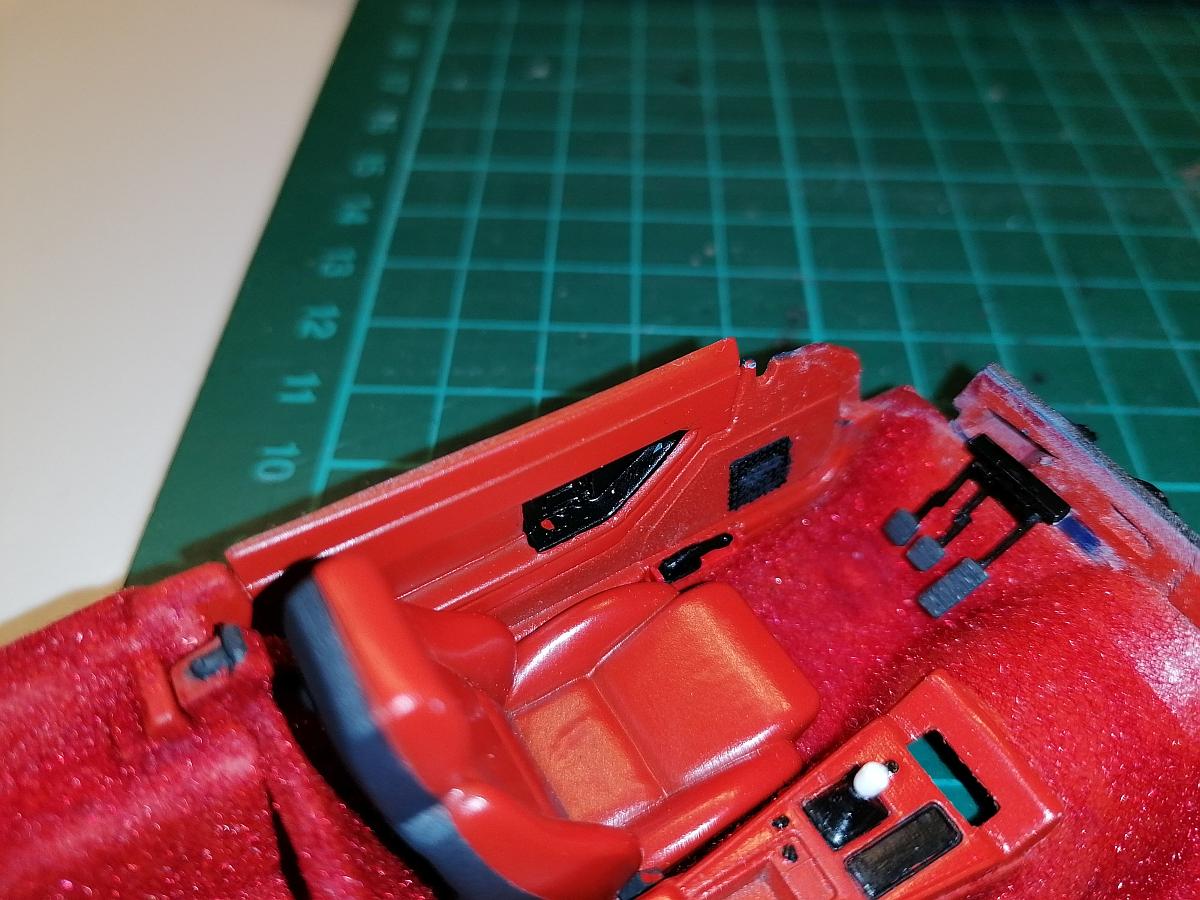
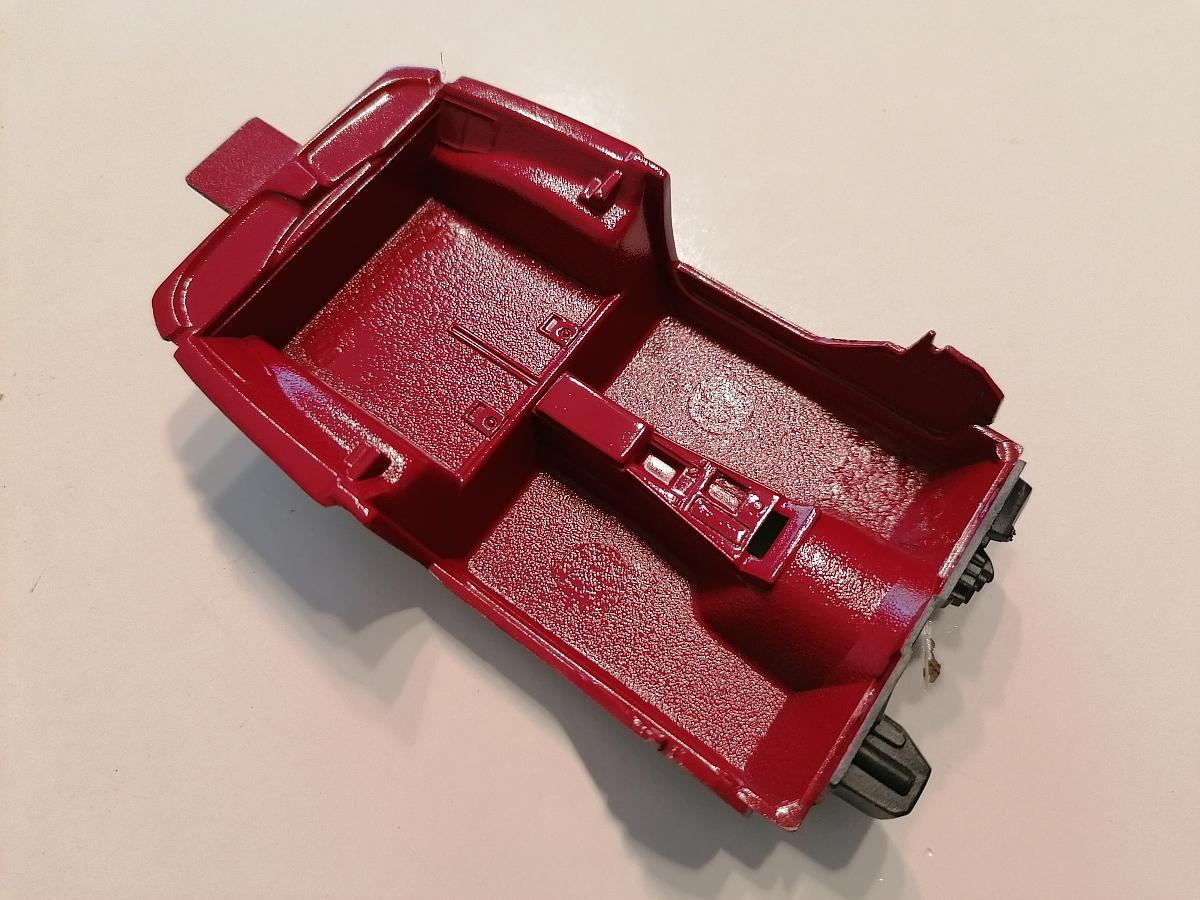
Now on to the interior.
I scratchbuilt a new pedal assembly, a parkingbrake lever with housing and a shifter knob. Before assembling I flocked the dedicated areas.
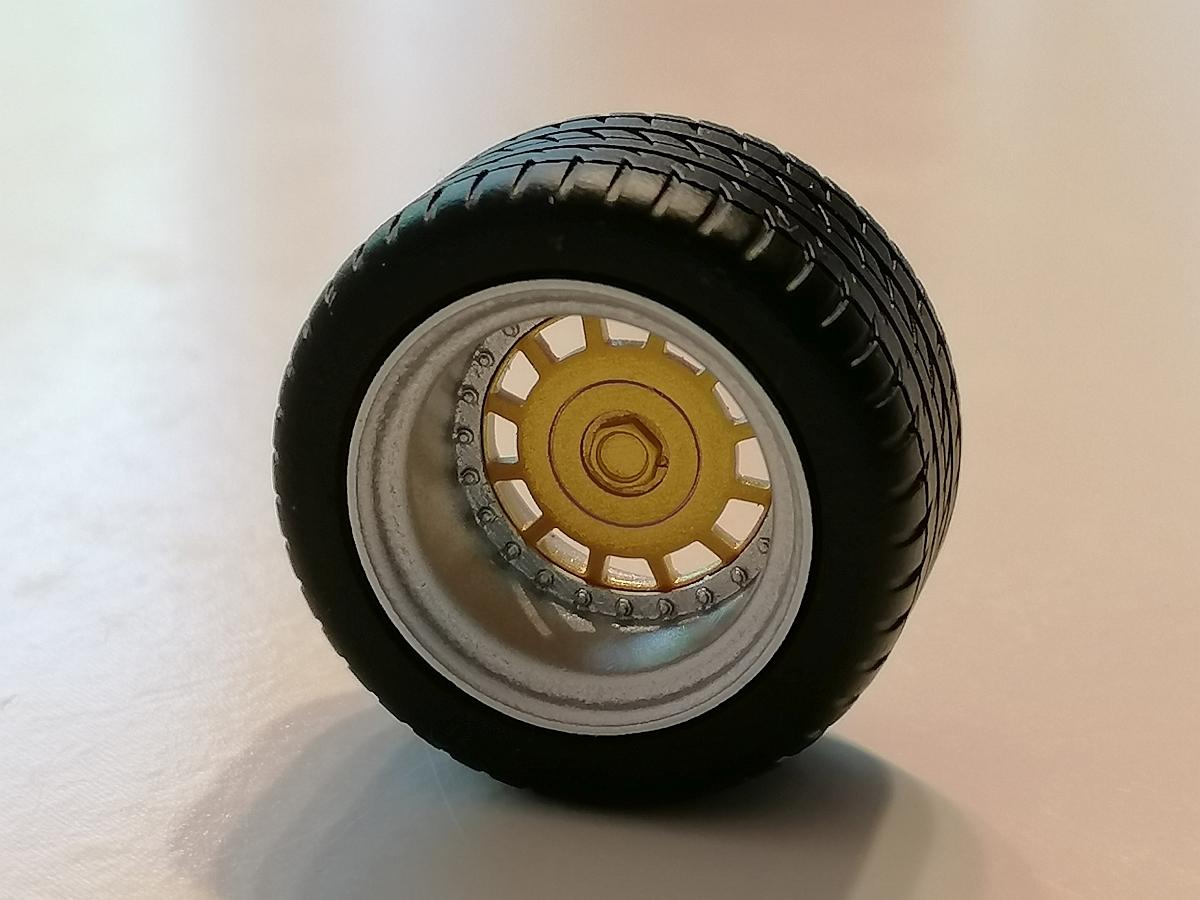
I dechromed the rim rings because the color from the rattle can I used rubbed down. I used some silver bronze for the second try. Here is one of the assembled wheels.
Next was one of the most challenging parts of this build... Getting the body, interior and chassis mated was so tricky especially with all the body mods which strengthened the body. That´s why no pic here.
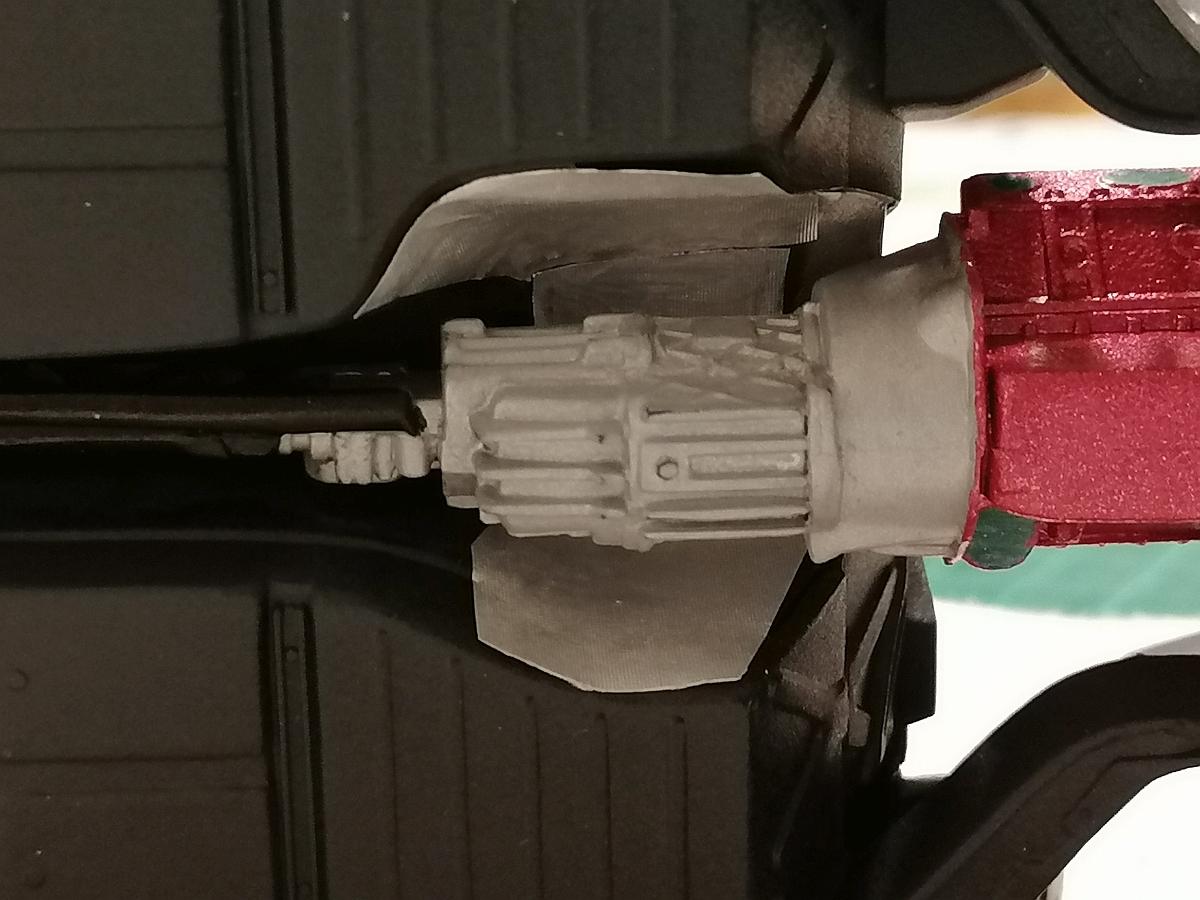
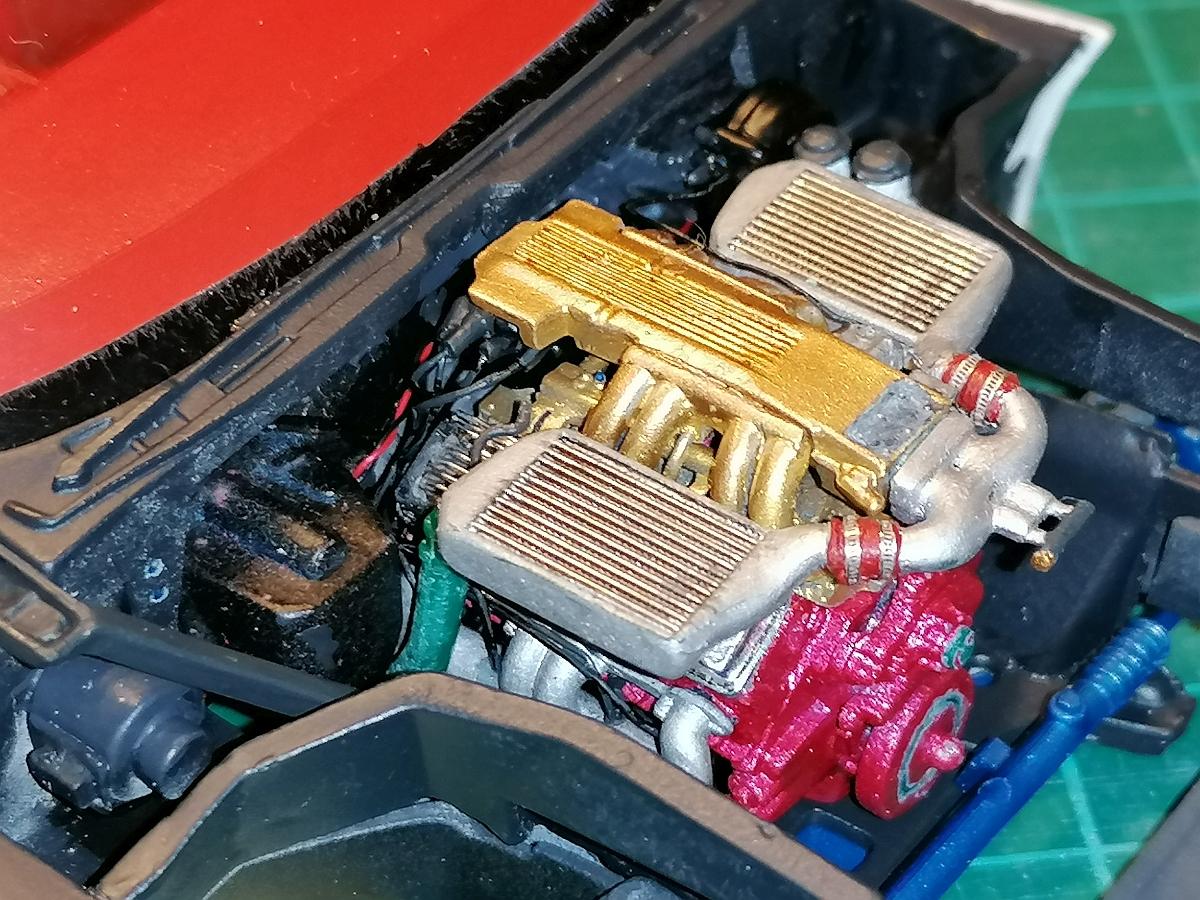
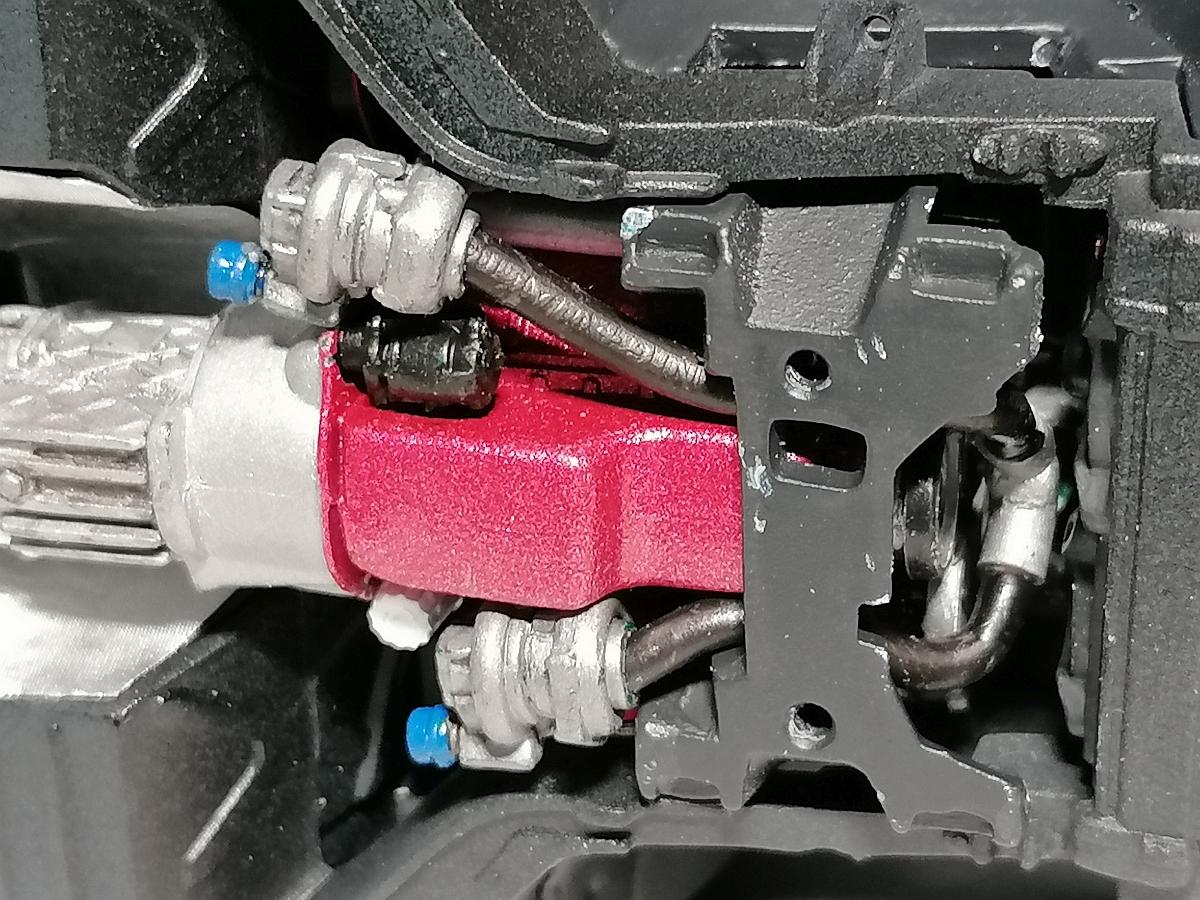
Next was doing some heat shields for the transmission area before finally mounting the engine.
The next horrible thing comes with the next step. Because I wanted to use the TwinTurbo-setup I had to mount the hood first. I hadn´t thought of checking the hood with the different air intake.
Problem here was that this kits hood has a continuous rod between the hinges and the Callaway speedster hood has two pins showing to the outside of the hinges. After this I installed the engine and completed the underhood detailing.
Here you can see my support for the bonnet while doing all the underhood pieces made out of electrical wire.
Next was the undercarriage.
I scratchbuild the two catalysts out of different styrene stripes and the hoses from the air intake to the turbos.
The whole exhaust piping left of the orange line in the next pic is scratchbuilt.
Here´s the whole exhaust system in color with two flanges added before. The exhaust tips are made of ferrules. I added the lines for the lambda sensor as well.
On this pic you can see that I cutted the complete rear axle assembly into pieces. This was necessary to get the correct ride height.
Here the first step of this operation.
Next the completed engine compartment.
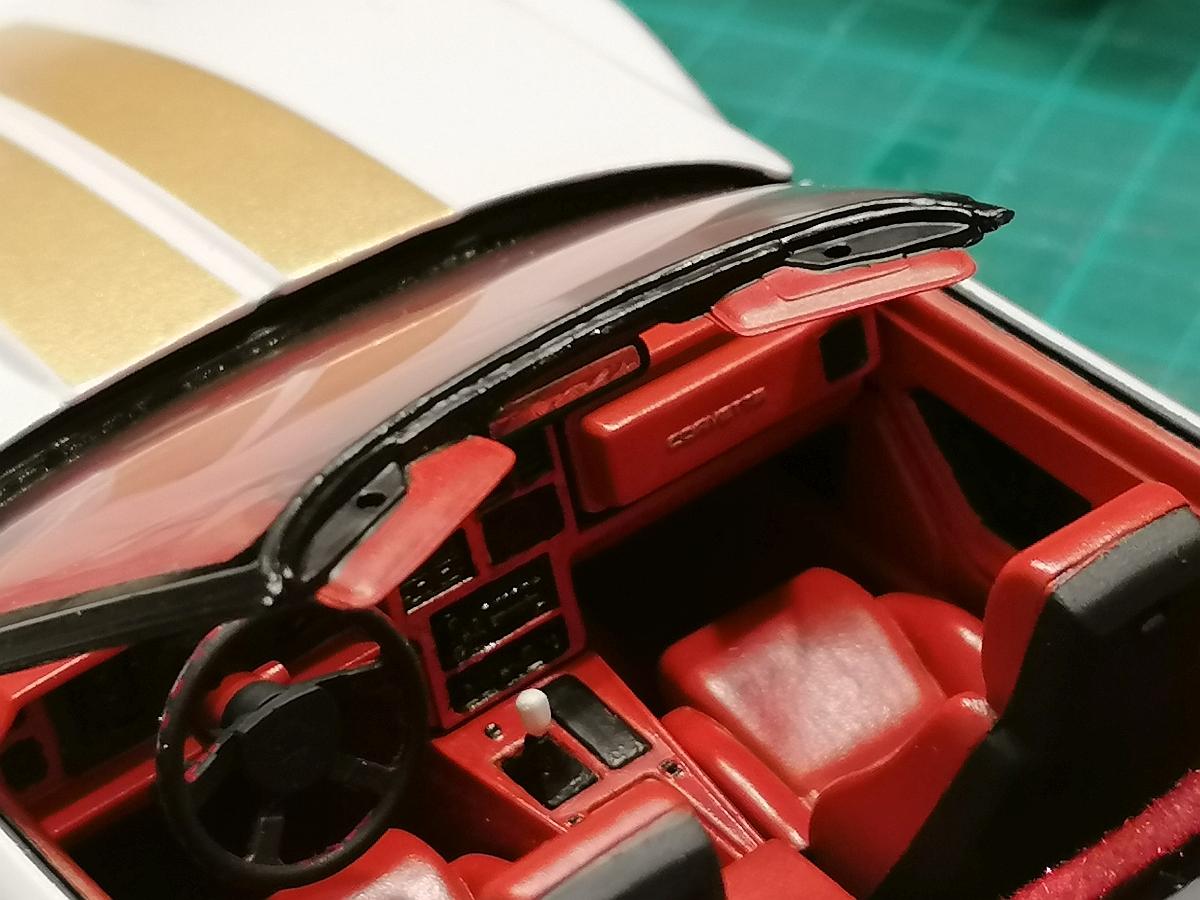
Mounting the windshield wasn´t that tricky but the sun visors were. I used Revell Contacta clear and after that I even putted some satin black on the mounting area.
And the horror is never ending.
The new front needed a lot of glue and patience to finally stay in the dedicated place. Here two mockup pics, still not finished.
Although still some things are left to do she was on her first meeting and became a lot of positive feedback from more experienced modelers.
Goal is to get her finally done for the next meeting in March 2024.
Thank you all for watching and stay tuned for the final update, Rico
-
2
-
-
Hi Steve,
after a little research I can tell you that its thickness is about 0.06mm. If you can find some of the Oracal 631 it´s a little bit thicker round about 0.075mm.
My offer for sending you some leftover pieces for at least much more then one model still stands. Here 2 samples...
On the Cuda i did the Hockey stripes with this nearly 20 years ago now and clearcoated right out of a rattlecan...
and on the NSX the white stripes over the body.
Cheers, Rico
-
Hi Steve,
I think Orafol cutted into the width you need could be a possible option. It´s mainly used by advertising companies and even on 1:1 cars for foiling so it should stick well.
With a little warming you can lay it smooth on the areas you want to have it and with some water underneath it you even have time to bring it into the right position.
I already used this to create the seams for vinyl tops and it worked very well.
Rico
P. S.: I can send you some leftover pieces if you want. If so feel free to send me a PM.
-
Thanks a lot again.
-
Thanks Bill, any informations if this engine is still available somewhere?
-
On 7/31/2023 at 10:52 PM, spencer1984 said:
Here's a few I've done:
Hi Bill,
can you remember which kit this engine is from? Any help would be much appreciated.
Thanks in advance, Rico
-
Hey guys,
3 hours ago, Texas_3D_Customs said:Man shapeways has lost their mind $12 for shipping by the time you buy a set of those wheels You're at $30 I am shocked to be honest
I know that their pricing strategy is more then weird and I totally agree. I was shocked too even already after the first increase.
I´m still thinking about your offer. Looks like it becomes more and more a good and less expensive alternative for other modelers.
-
I did these long time ago. They are available at shapeways. Here´s the link.
Rico
-
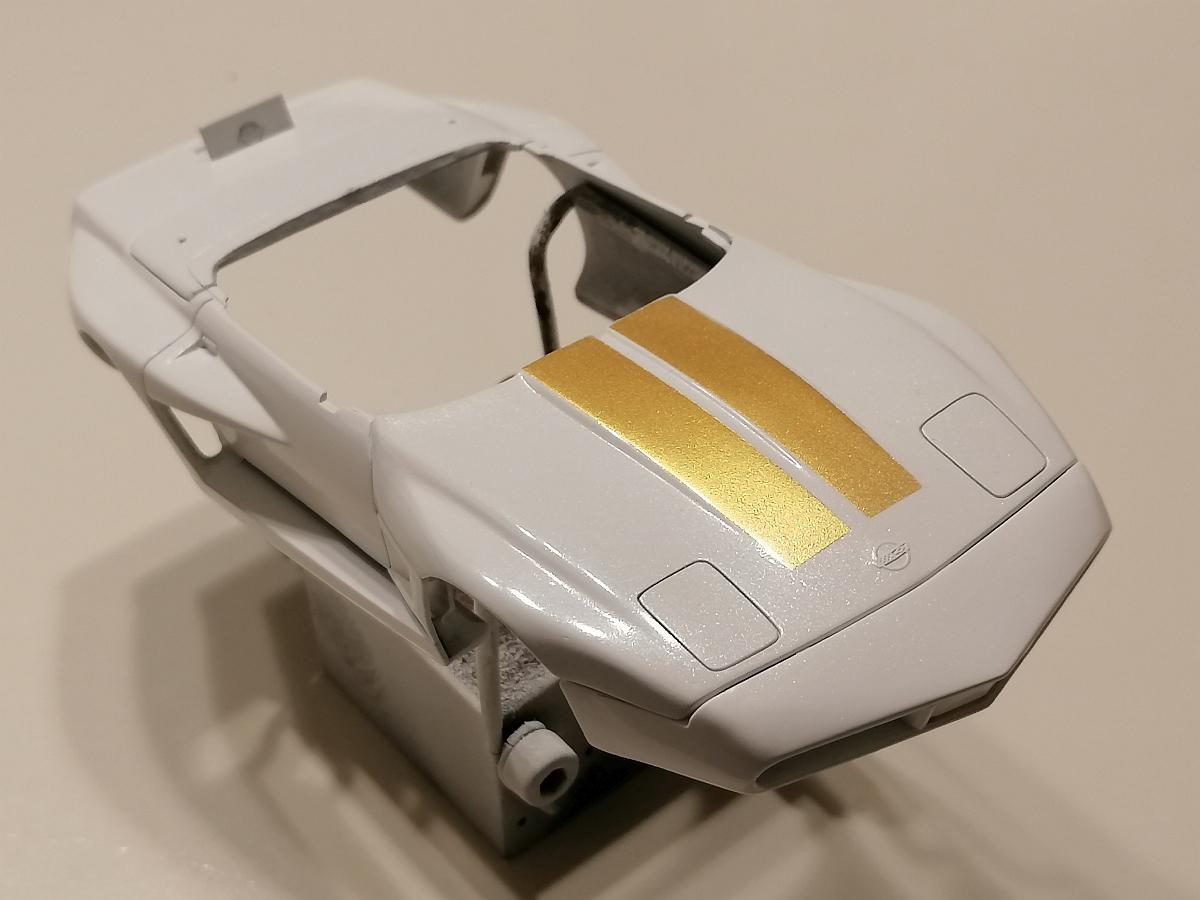
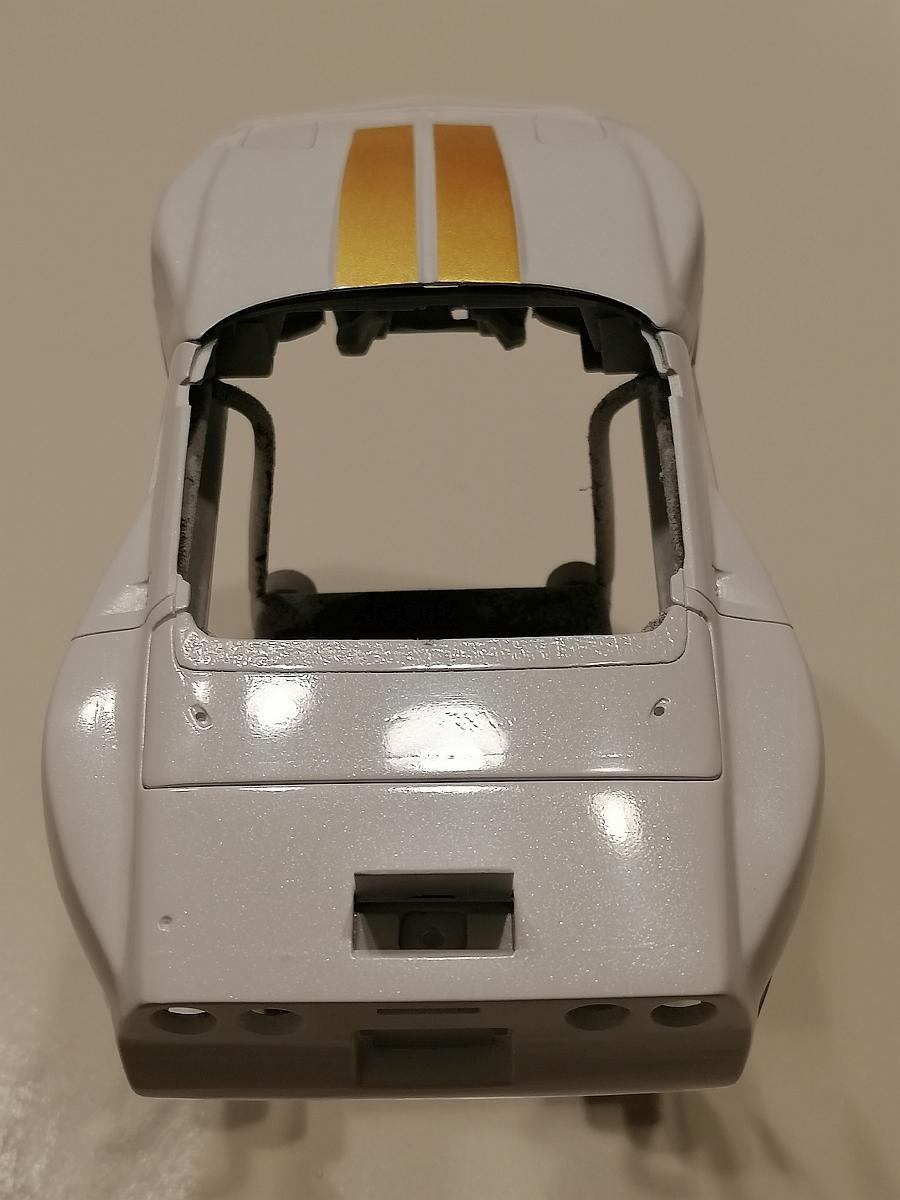
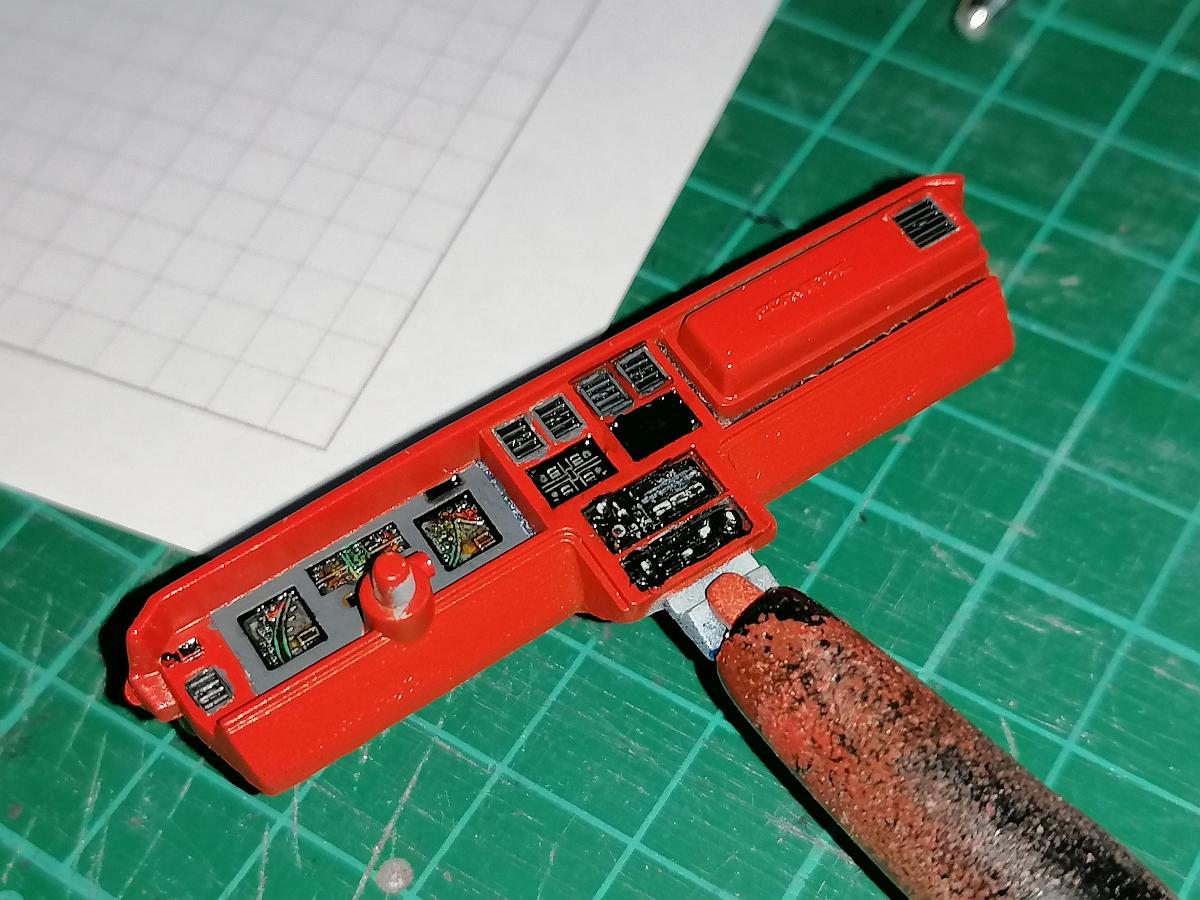
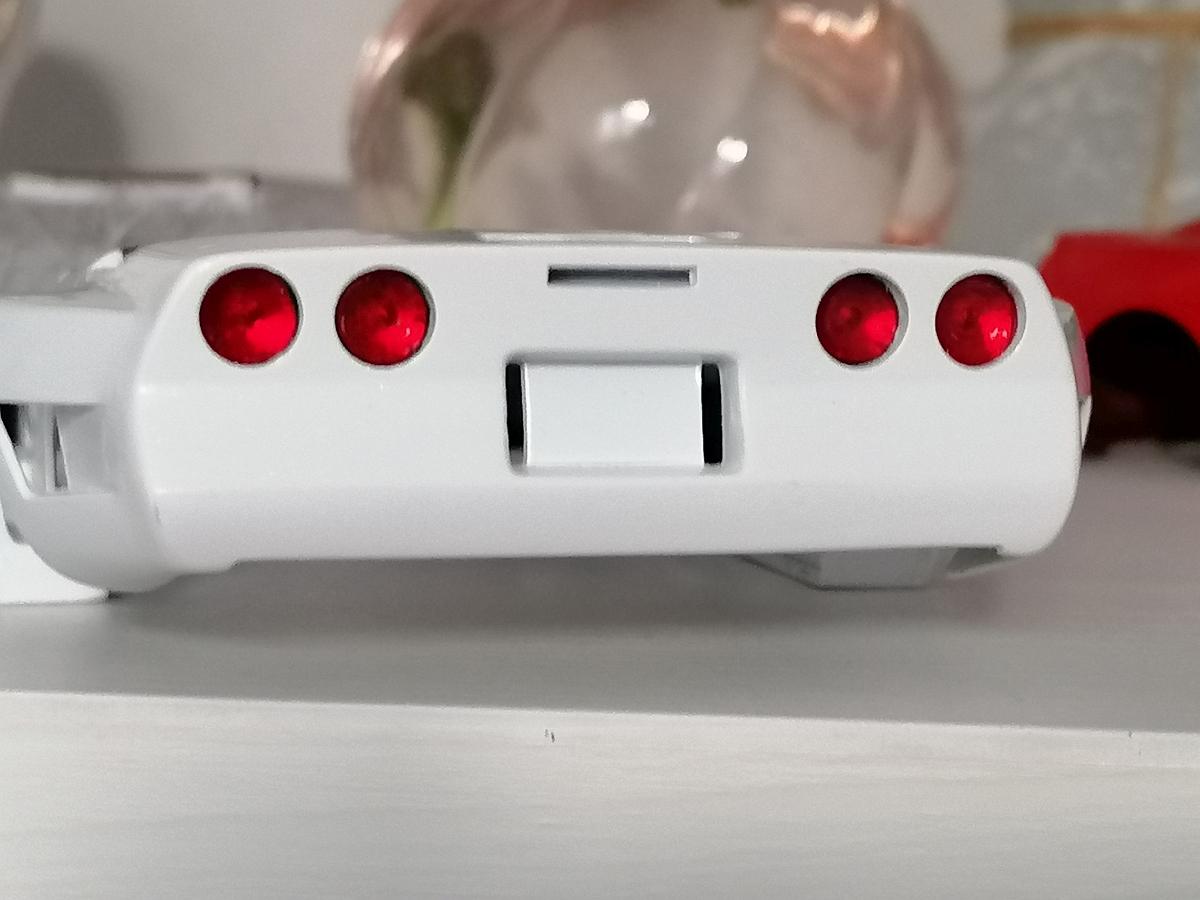
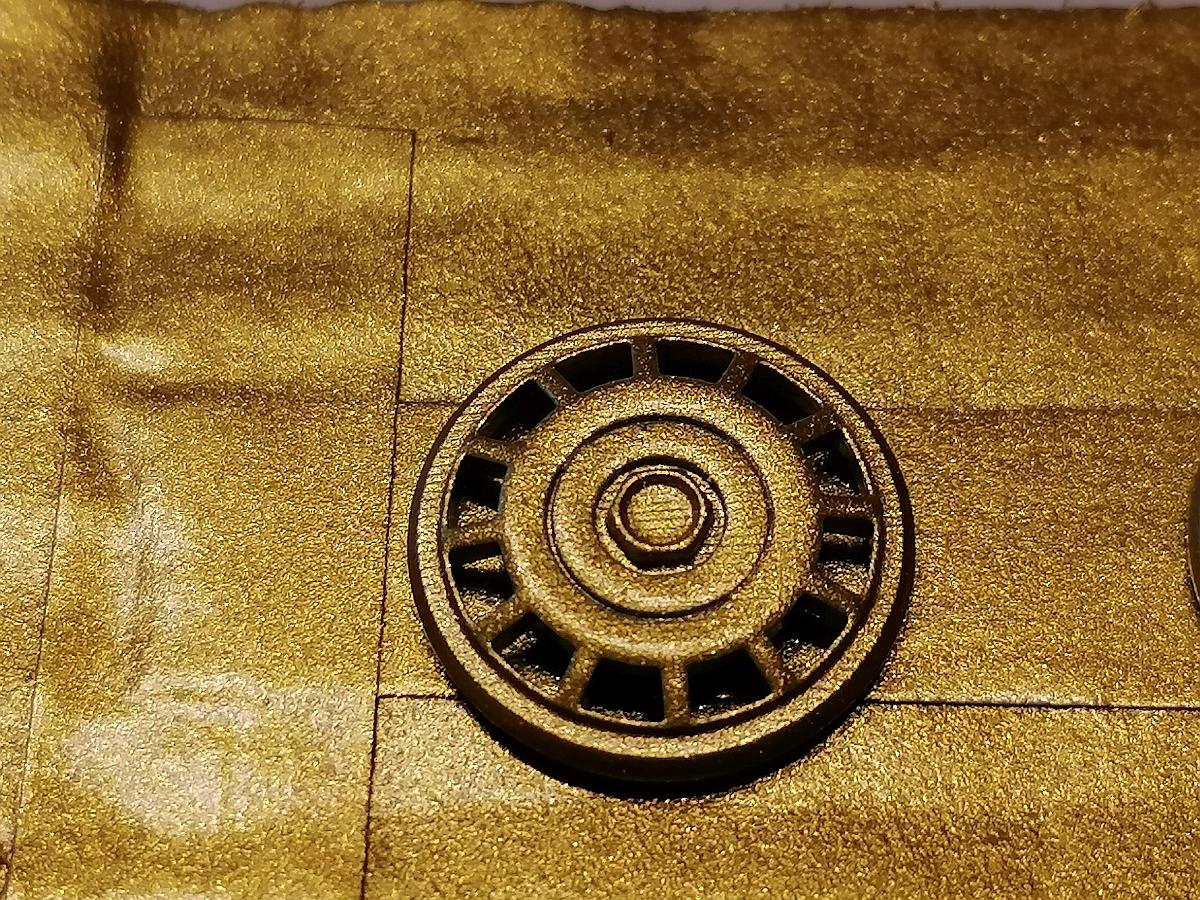
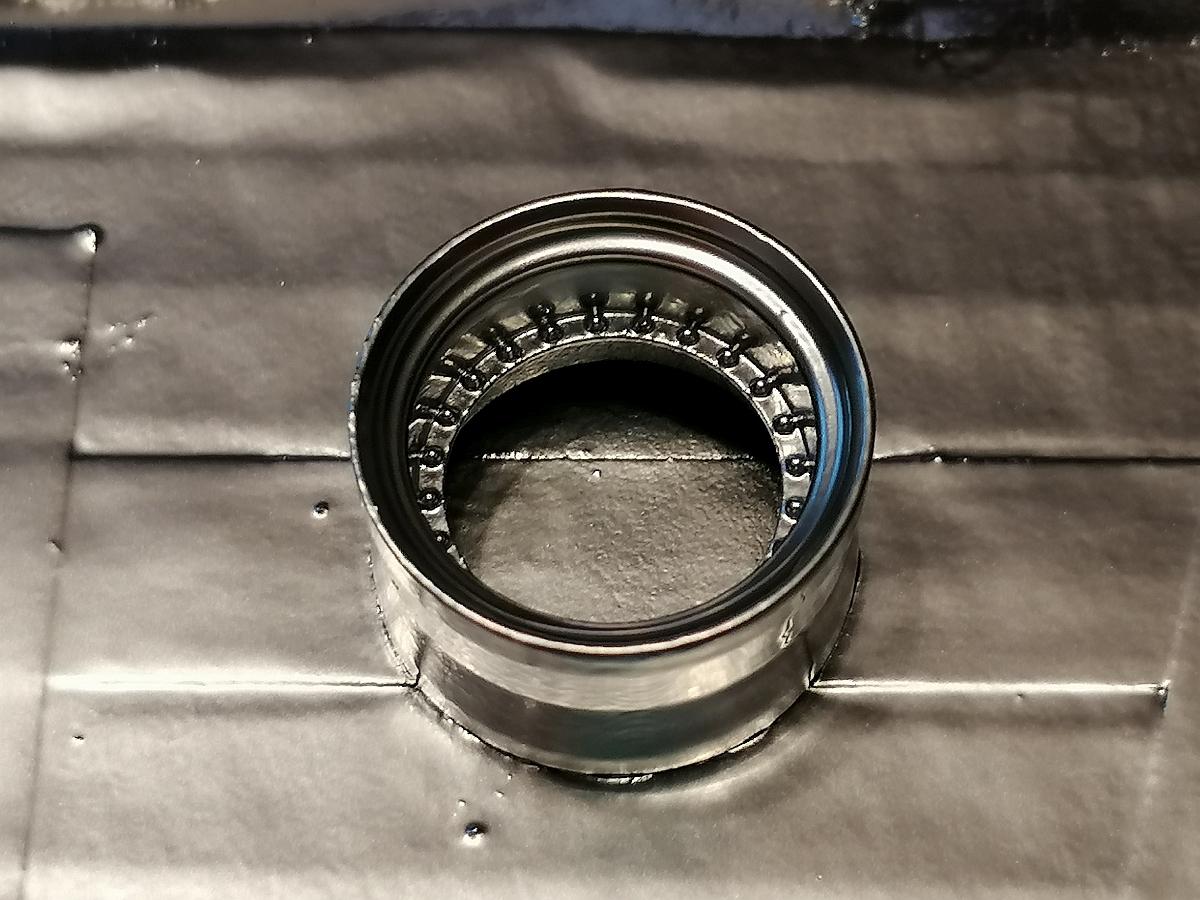
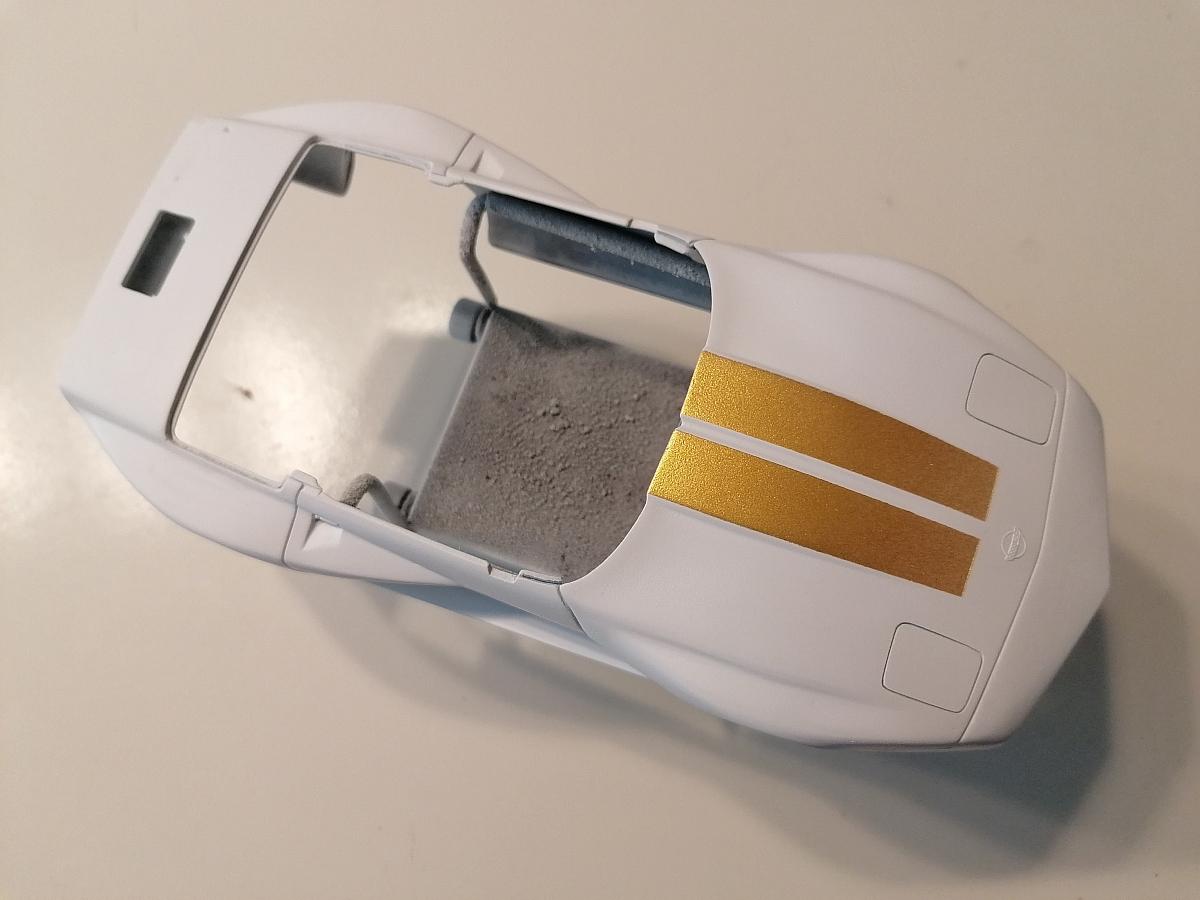
Update...
Part 10 - body polishing, dashboard, new taillights, 3d printed exhaust manifolds and wheels
Let´s start with the polished body. For my skills I´m pleased with how it turned out.
Then I painted the dashboard. Red is out of the can. Details were done with brush and toothpick.
Without steering wheel...
and with...
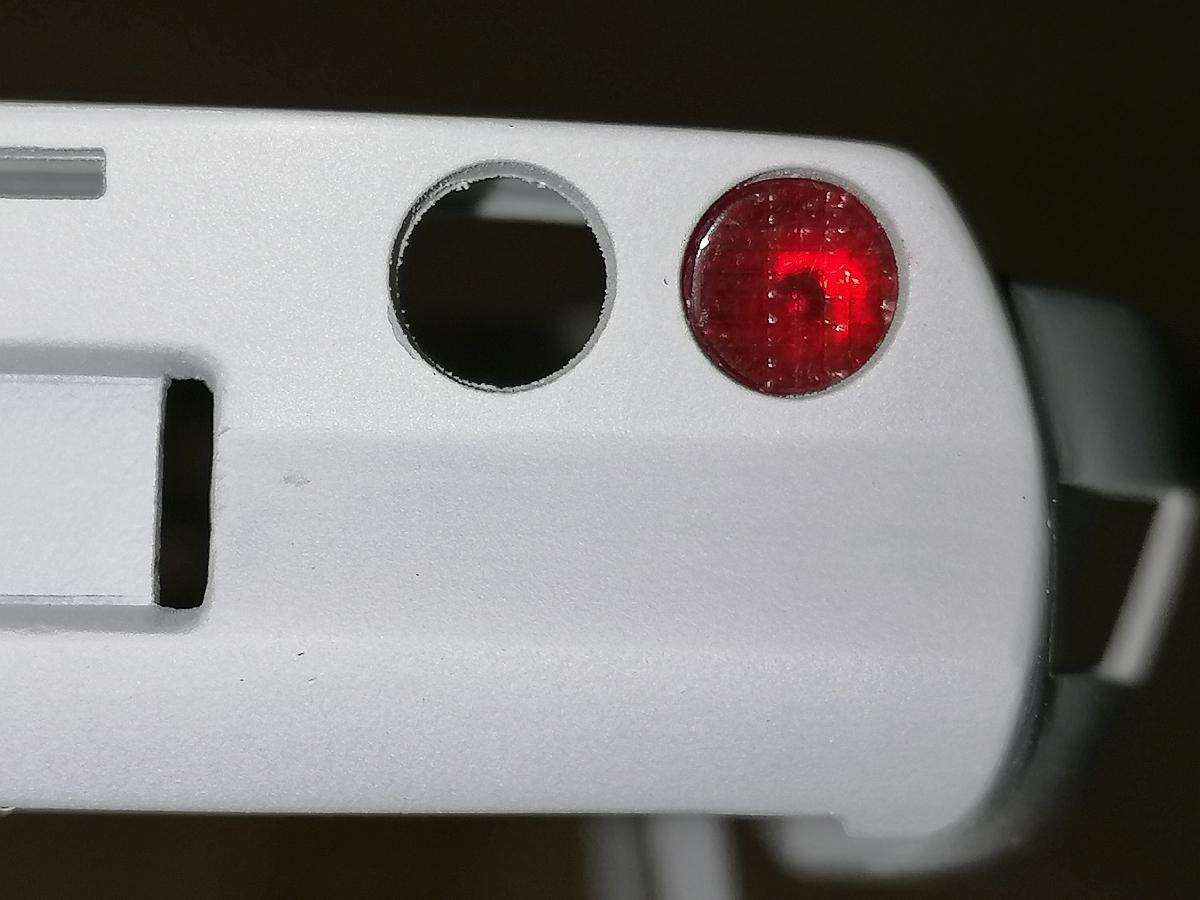
This weekend I finished the redone taillights. The lenses were made out of clear plastic covered with Tamiya Clear Red out of the can.
Today I got the 3d printed manifolds and wheels designed by me and printed by a friend.
First the manifolds...
wheel inserts already colored ...
and the rings.
That´s for today. Stay tuned, Rico
-
3
-
-
Every part of this build looks killer. I think I have to train my stamina for painting things and mostly car bodies.😇
-
This one will turn out really nice. I like the color combo and all the detail work you´re doing with it.
-
I like this one. The wheels suit it very well.
-
Hey John, still a rough shape but this is custom work. Wow!
-
On 8/31/2023 at 7:05 AM, beeRS said:
You have created an epic looking wide body here.
Those taillights look great and I like the white and gold bodywork. Need to see more pics.Thank you so much Sonny. More pics are coming today.
On 8/31/2023 at 2:34 PM, customsrus said:Excellent work.
Thank you John. I like your custom works. Guys like you give me so much inspiration.
On 8/31/2023 at 6:14 PM, Rattlecan Dan said:Very much admiring your work stamina and detailing skills. Nice job.
Thank you Donato. Stamina is the most needed skill in this case.🤣
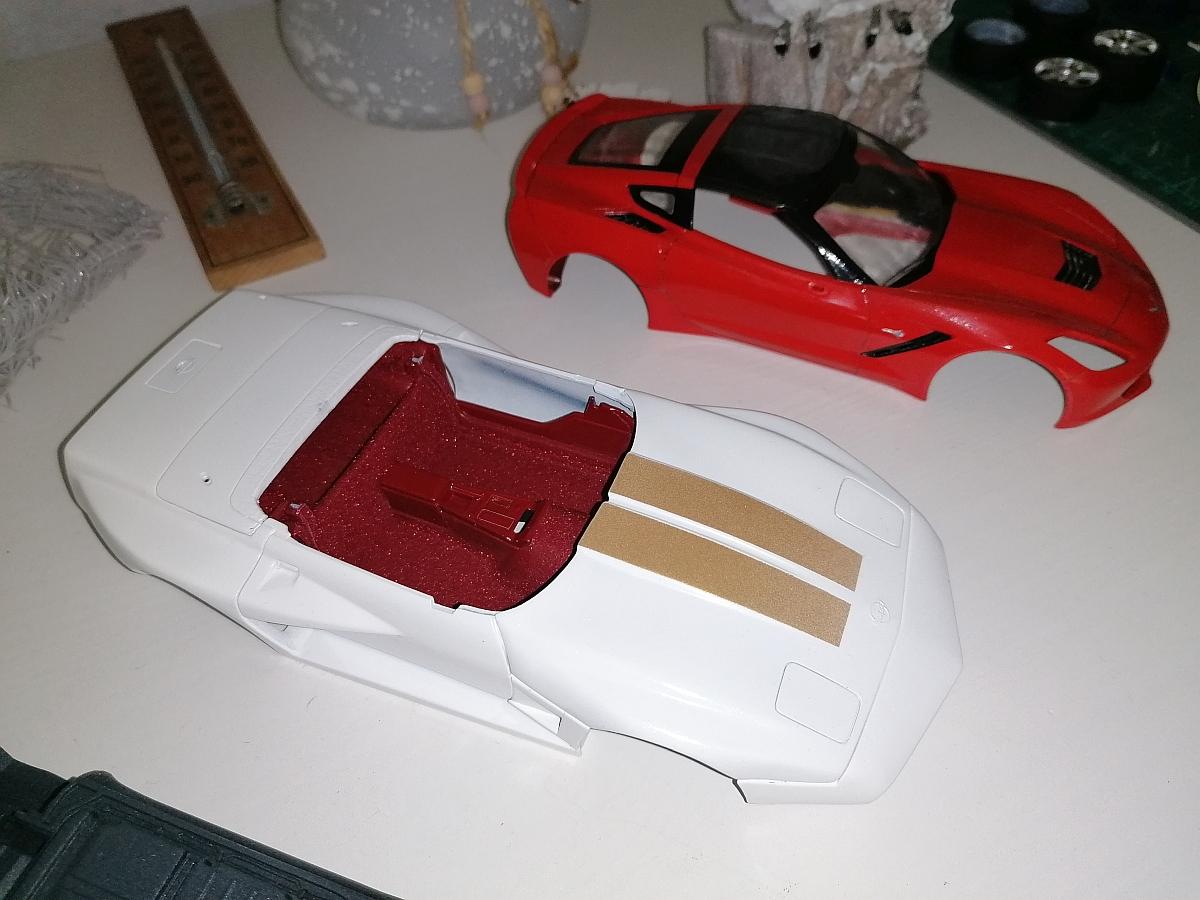
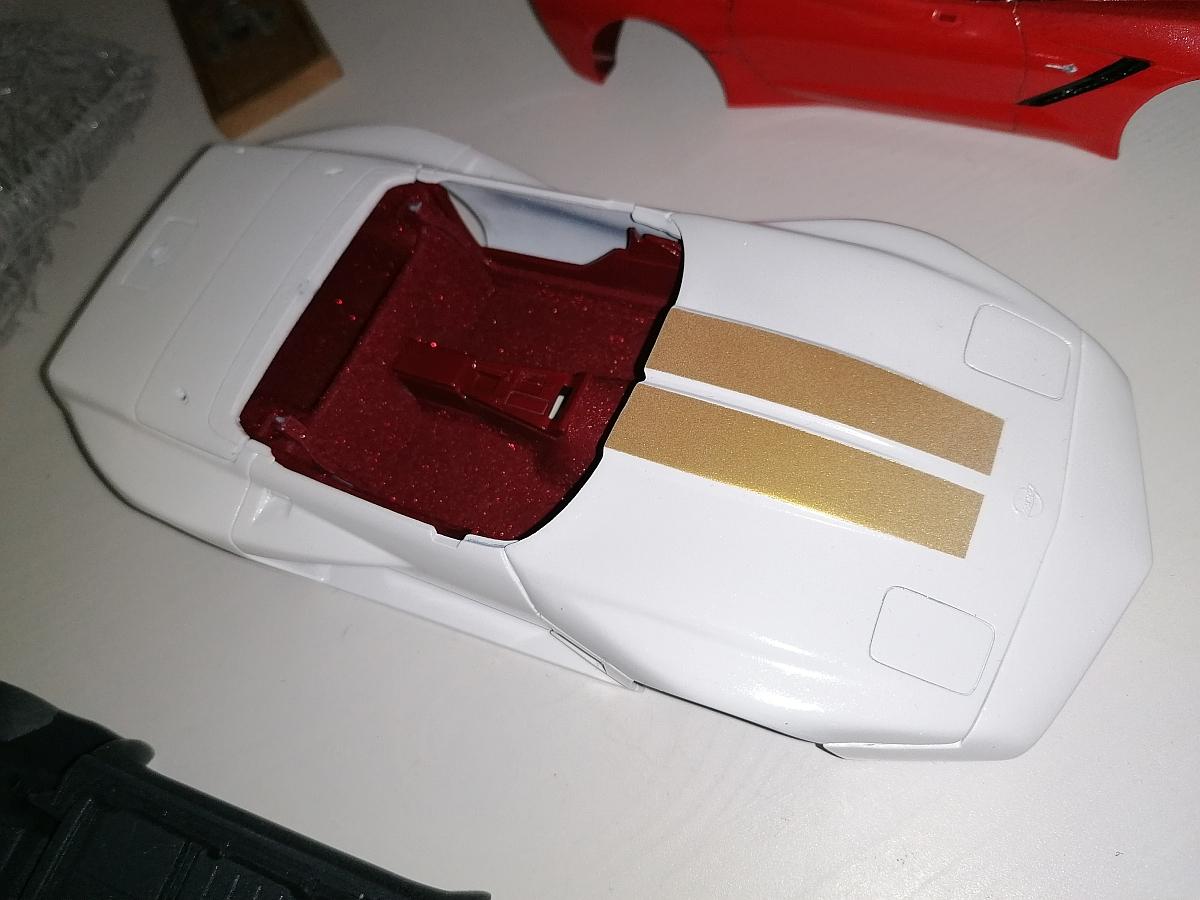
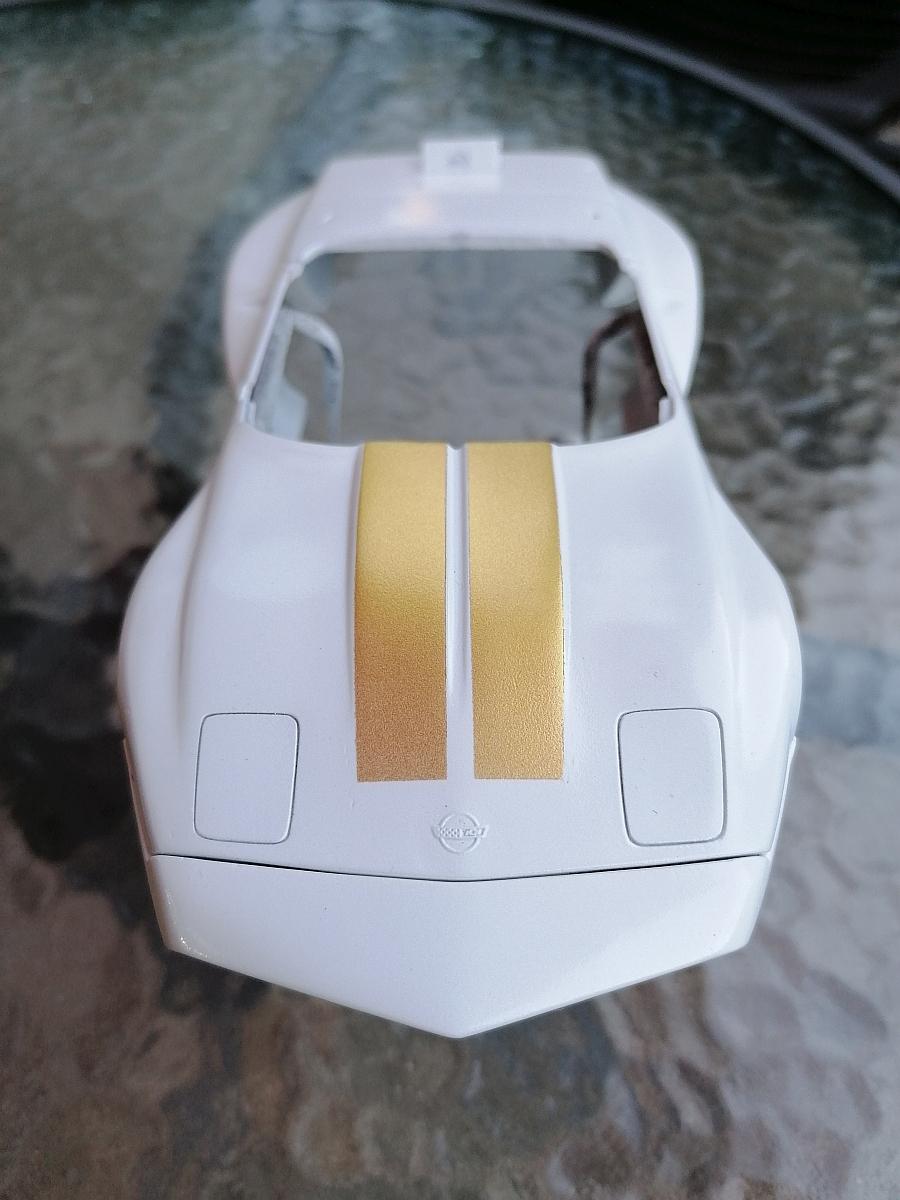
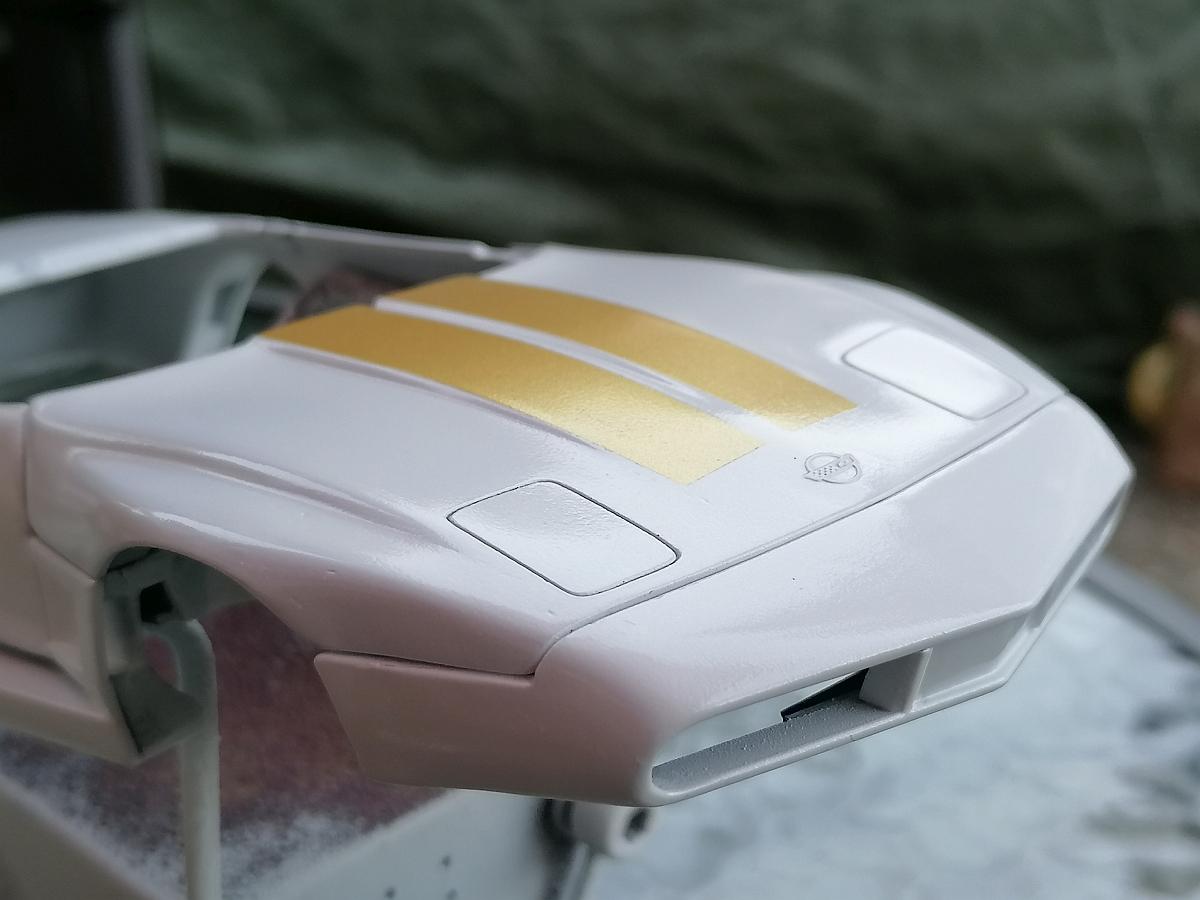
Part 9 - only Pearl Clear, some flocking and comparison pic with my also on the bench C7
Here we go. The C4 (1/24 scale) next to the Revell Snapkit C7 (1/25 scale). Not much difference in length and width. The Pearl Clear is already sprayed to the body on Sunday.
Here the C4 alone with the first time flocked interior. I think I will have to give it another try.
And now some pics from today after some polishing with Tamiya compounds fine and finish. There are still some minor failures but for me it´s ok how it looks now.
That´s for today. Hope to get more done next weekend.
Rico
-
2
-
-
On 8/23/2023 at 7:16 AM, Dennis Lacy said:
This is phenomenally bad ass! Awesome scratch building creating the body panels!!
Thanks Dennis. It´s really a lot of fun.
On 8/24/2023 at 4:35 PM, slusher said:Impressive work on that body!!
Thank you again Carl.
On 8/25/2023 at 7:39 AM, jaftygas said:Let’s see this thing with paint on it. The bodywork is just cool and clever. Come on let’s go!
Don´t hurry me...🤣🤣🤣 Building model kits takes time. 😇
But you´re right. This thing needs color. So take a seat and let´s go.
Part 8 - more scratchbuilding and started paintjob
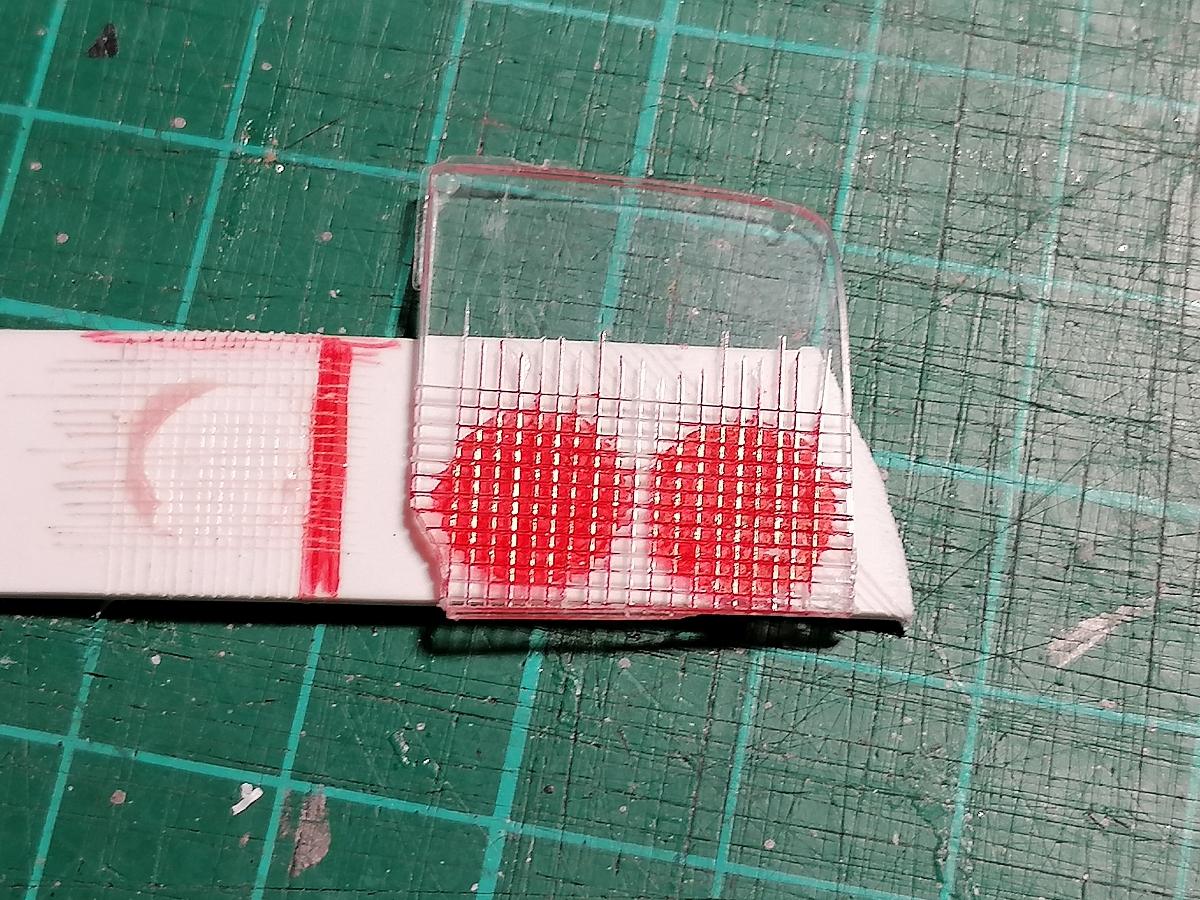
Because the kit didn´t come with taillights when I found it in the bay I was in need of scratchbuilding them. Here´s the starting point a flat windshield out of the parts box (please don´t ask me from which kit).
I scribed a crosshatch pattern in it, then cutted for parts out of it and sanded them into the right shape.
I also scratchbuilt the bezels out of 2mm sheet and self adhesive chrome foil. The center holes were filled with small metal head needles. The head of the needles should simulate the lightbulbs.
Now a pic of the first test fit. As you can see the colour becomes lighter.😇
And her´s the current status of the body.
And the interior too. It still needs to become flocked and detailed. The scriptings for the auto trans I have deleted to make place for the manual trans shifter.
Stay tuned and many thanks for watching, Rico
-
4
-
-
Hi Marcel,
nice bodykit you have done and the decals fit quite well or in german...
Hast nen schönen Bodykit gemacht und die Decals passen klasse.
Rico
-
 1
1
-


1964 Pontiac Lemans Convertible.
in WIP: Model Cars
Posted
Hi Steve,
I love reading your build threads. There is so much information for any modeler and your skills are awesome. Still so much to learn for me I think.
The softtop looks top notch. Can´t wait to see more.