kmc3420
-
Posts
54 -
Joined
-
Last visited
Content Type
Profiles
Forums
Events
Gallery
Everything posted by kmc3420
-
Awesome job. That red looks fantastic. What red is that?
-
Thanks Mike, we was super happy with it, which made me thankful. I am ready to cruise in style, that's for sure.
-
Pro Touring 69 Camaro Chassis Questions?
kmc3420 replied to KWT's topic in Model Building Questions and Answers
I take it you have been down this road? I was tempted to purchase that but thanks for the heads up. -
Thanks for the compliments. I sure am happy with how it turned out.
-
Pro Touring 69 Camaro Chassis Questions?
kmc3420 replied to KWT's topic in Model Building Questions and Answers
Would this one fit the bill? 1/25 Camaro Pro street -
Thanks David, I will for sure consider that, as Jordan has stated. Using the correct car from the get go is a good plan. I have a 68 Chevy C10 on the bench for my next build so I have time to possibly buy both a 67 & 68 Camaro. I do know the next go round, I will be doing a mock up 1st.
-
Thanks all for the positive comments. I plan on giving it to him today. The reason i went with the 69 is my local hobby lobby had a 69, and after purchasing it, I did find a 68 online, but only after the primer was laid and most of the black parts were painted, so I just went with it. My dad's is a 68. I haven't built a model since I was roughly 14, being 31 I for sure have lost touch in the model years offered. I was tempted to get a 68 and build it, but I was already committed. I am pretty certain I will go ahead and get the 68, and build it as a finished car, nice paint and a correct 383. This build was all about fun for me, and that was accomplished, but am afraid I'm hooked now
-
Thanks Bruce, I will for sure be helping when it comes to painting, probably mostly on the sanding side . This build was a lot of fun for me, as I never had the intent of perfection, however the paint came out pretty decent. The BMF was fun, my first go at that. Probably my biggest leason learned is use the glue sparingly!
-
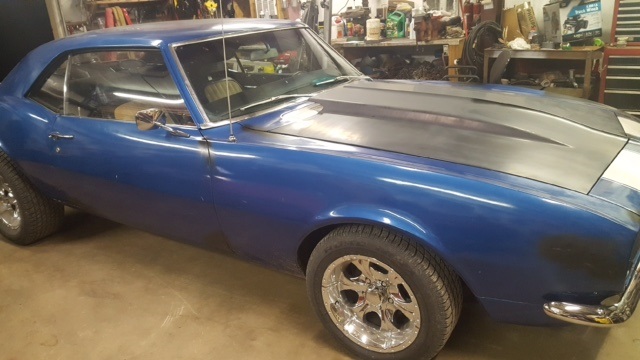
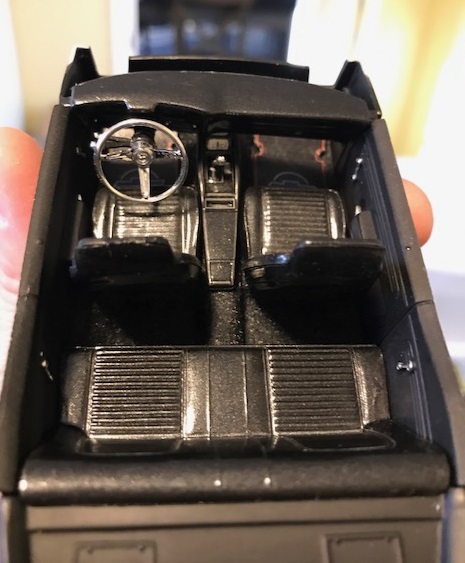
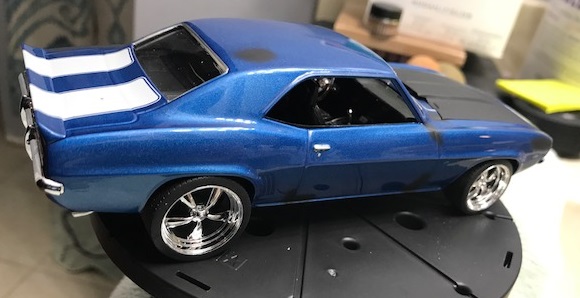
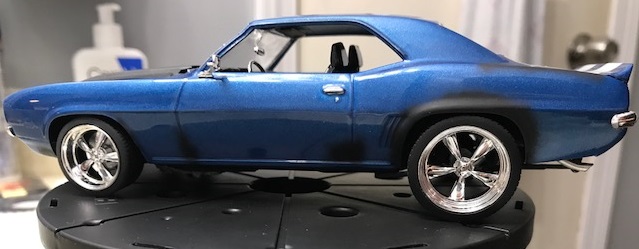
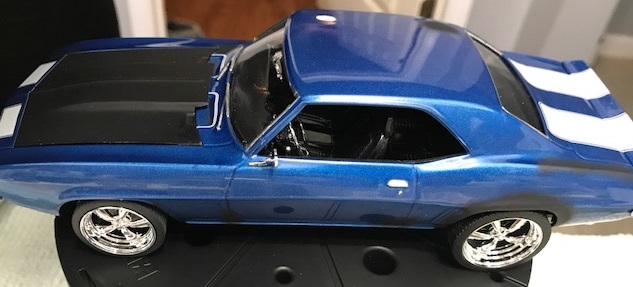
My Dad has a Camaro he has been working on for a while now. He has put a new 383 motor in it, as well as a rebuilt manual tranny. The drive train is perfectly sound, it just lacks the perfect body. So I wanted to make a car that he could sit on his desk at work as a reminder to keep at it on a daily basis. I have not built a model in a long time, and learned quite a bit on this build, but plan to build many more, getting better each try as I have purchased many of the necessary tools. The paint is Testors enamel with Testors enamel clear coat. I color wet-sanded the body, and then added 3 clear coats and polished the clear coat out. Still learning. I fully understand that there are some inaccuracies and oversights on my end, like the dual carbs and one air cleaner/filter. I am okay with how it turned out, next go round I will be doing much more test fitting. My dad’s 1:1 car: He has put black spray paint where the paint is peeling or there are small amounts of rust so I felt I should replicate those. My very close rendering:

-
Thanks for the feedback. Not much info on the talon other than reviews of brand new brushes. I will get some paint and mix it up and do a bit of practicing on plastic bottles. What PSI do you typically run?
-
I have purchased a new Paasche gravity feed dual action air brush. It came with 3 tips/needles. Anybody have any suggestion on which tip works best with this air brush? Also can the fan cap be used with any of the tips? It came with .25mm, .38mm, and .66mm tips and needles. It is the TG Talon. My goal is to spray bodies for now. Not doing any fine detail work as I'm new to air brushes. Thanks
-
Ideal Glue for Resin bed
kmc3420 replied to kmc3420's topic in Truck Aftermarket / Resin / 3D Printed
Thanks all for the suggestions, I did get the bed super glued together, and filled the gaps with the two part epoxy that sets up in 15 minutes. It is very solid. I was able to brush the epoxy mixture from the bottom side and it filled the gaps very nicely. Just need to do a bit of sanding in the corners where the bedsides/floor meet. -
68 C10 truck hood
kmc3420 replied to kmc3420's topic in WIP: Model Trucks: Pickups, Vans, SUVs, Light Commercial
Thanks Steve, that is a brilliant idea, not sure why that did not come to mind for me. I have looked over your build probably a dozen times, great job. I am going to send you a PM with a few more questions if you dont mind. -
68 C10 truck hood
kmc3420 replied to kmc3420's topic in WIP: Model Trucks: Pickups, Vans, SUVs, Light Commercial
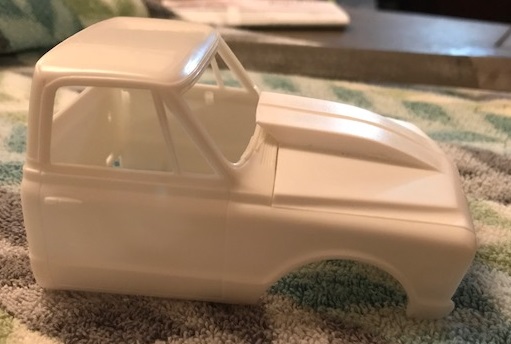
I think you are right. I purchased the cowl hood not knowing it was so tall. The 67-68 stock hood is perfect in my opinion. I paid through the nose for the below hood, but its the only stock 67-68 hood I could find. I think it will look much better.
-
68 C10 truck hood
kmc3420 replied to kmc3420's topic in WIP: Model Trucks: Pickups, Vans, SUVs, Light Commercial
Thanks Blunc, I have to agree with you on the hood hinge geometry. I was just curios if astheticly the hood scoop looked too large. I have ordered a new hood that is stock without a scoop. -
68 C10 truck hood
kmc3420 replied to kmc3420's topic in WIP: Model Trucks: Pickups, Vans, SUVs, Light Commercial
Thanks Espo, I am on the hunt for a 2" hood currently. The Camaro i am working on has the 2" hood and it looks much better. You are correct, if this was a 1:1, the hood would be lift off only as it could not tilt back. -
Ideal Glue for Resin bed
kmc3420 replied to kmc3420's topic in Truck Aftermarket / Resin / 3D Printed
Thanks Tom and Joseph, super glue it is. I have a few small gaps to fill and might use the epoxy for filling gaps. -
This is my first go at using Resin. I am assembling a 68 C10 bed, what is the ideal glue/epoxy for resin?Thanks. I have testors super glue that dries within seconds, I have Tamiya ultra thin cement, and Bob Smith quick set epoxy, its two part. What would be my best course of action, thanks.
-
68 C10 truck hood
kmc3420 replied to kmc3420's topic in WIP: Model Trucks: Pickups, Vans, SUVs, Light Commercial
Thanks Mike. That is my exact thought as well. The shorter cowl hoods look much better on a street truck. I will do a bit more research and find one. The fit on the above hood is nice, just a bit tall. I had intentions of running a GM LS motor, and maybe a turbo setup so no huge hood clearance needed. -
68 C10 truck hood
kmc3420 posted a topic in WIP: Model Trucks: Pickups, Vans, SUVs, Light Commercial
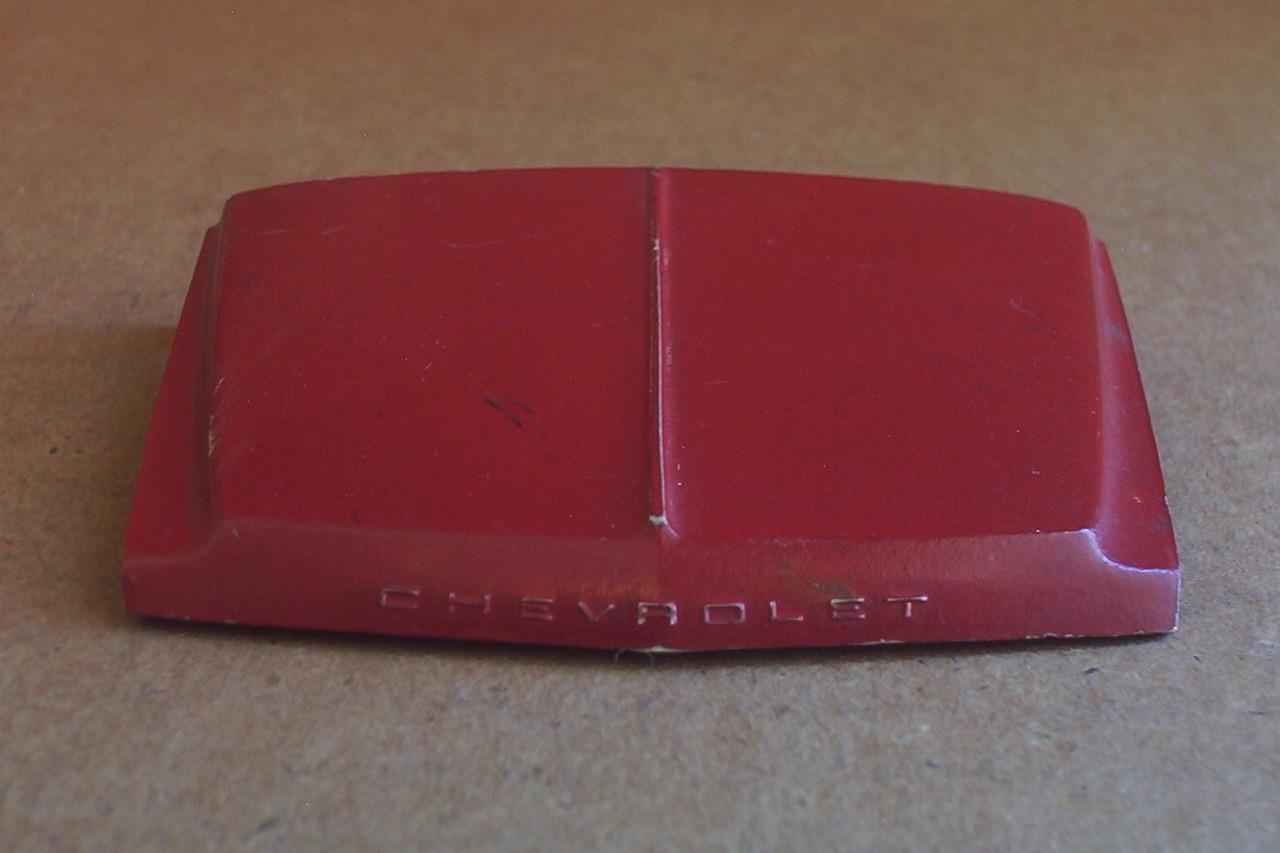
I need some opinions on the below truck hood. Does the cowl look too tall? I am using a 67-68 hood, but will be making a 68 C10 as it has the side marker light.
-
Enamel paint curing time and clearcoat application
kmc3420 replied to kmc3420's topic in Model Building Questions and Answers
Thanks again. I am waiting on the Micro Sol/Set to arrive to apply the decals. I purchased the below. -
Engine assembly and painting
kmc3420 replied to kmc3420's topic in Model Building Questions and Answers
Thanks all, for sure some great options to try here. The quick drying super glue, as well as using the pick to apply. I will most likely give both of those a try. I think my issue was getting glue on my fingers and handling the motor which caused the paint to be thinned. I then had tracks of paint all over the engine. -
Enamel paint curing time and clearcoat application
kmc3420 replied to kmc3420's topic in Model Building Questions and Answers
Thanks TJ, I really appreciate that. So do I need to wait a length of time before applying the clear coat? Or will it be fine to coat now as it will be an enamel clear over an enamel base? -
I am currently working on a 69 Camaro Z/28 RS by Revell. I have painted this car enamel being this is my first model in a long time, I will be using Lacquer paint moving forward as the enamel is heavier and covers too much of the detail. I applied DupliColor grey primer, 3 mist coats of color, and 3 wetcoats as I had runs I had to sand out after the 2nd wetcoat. The enamel is so heavy. I am considering investing in an airbrush, but will research brands later on. For my current project, I have a few questions. 1. How long should I wait to apply the clear coat? Today is the 2nd day after the last wetcoat, I have read that I need to wait until the paint no longer smells and at a minimum two weeks. 2. When should i apply the decals? Should I lay down one coat of clear and then do decals, just so as long as a coat of clear covers the decals? 3. Should I sand the color coat and then clear and sand/polish the clear coat, or only sand/polish the clear coat? Below is the car I referencing. Thanks for any help!
-
Engine assembly and painting
kmc3420 replied to kmc3420's topic in Model Building Questions and Answers
Thanks Art and Snake. I have a 68 c10 model truck I am going to try and incorporate your suggestions above on, and more than anything take my time and prefit the pieces together.