retriever
-
Posts
83 -
Joined
-
Last visited
Content Type
Profiles
Forums
Events
Gallery
Everything posted by retriever
-
Thanks Guys Tony
-
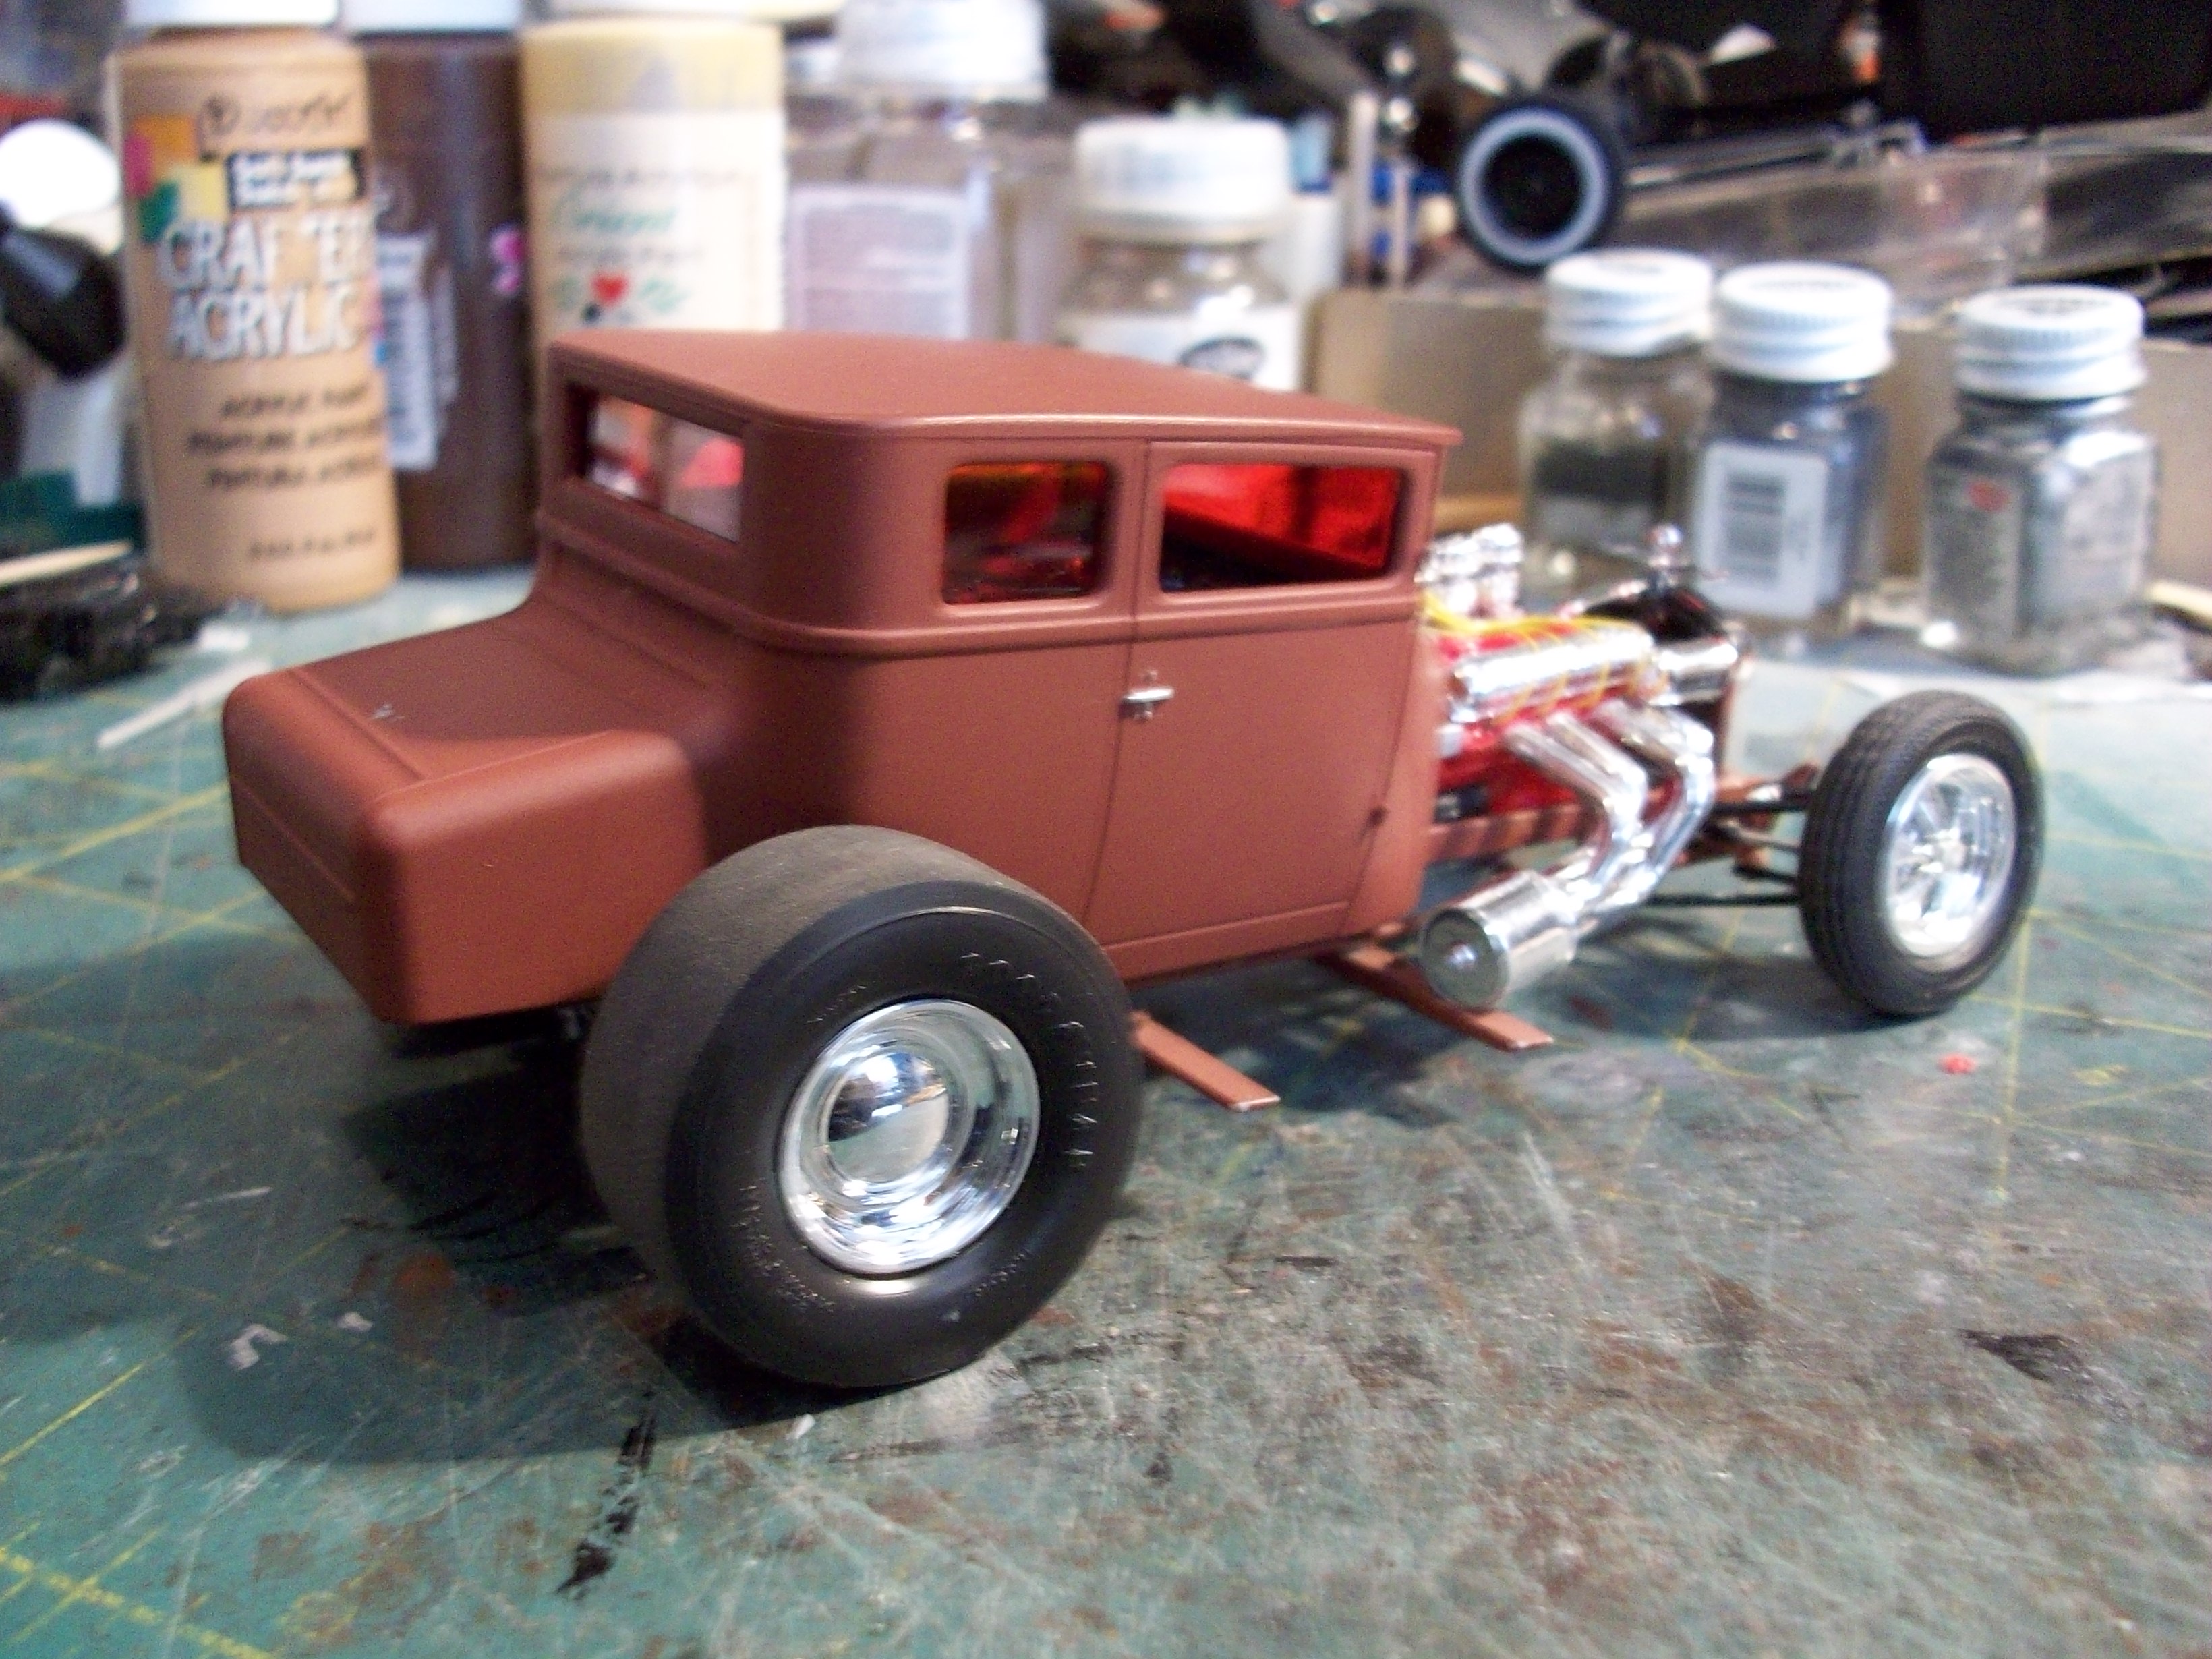
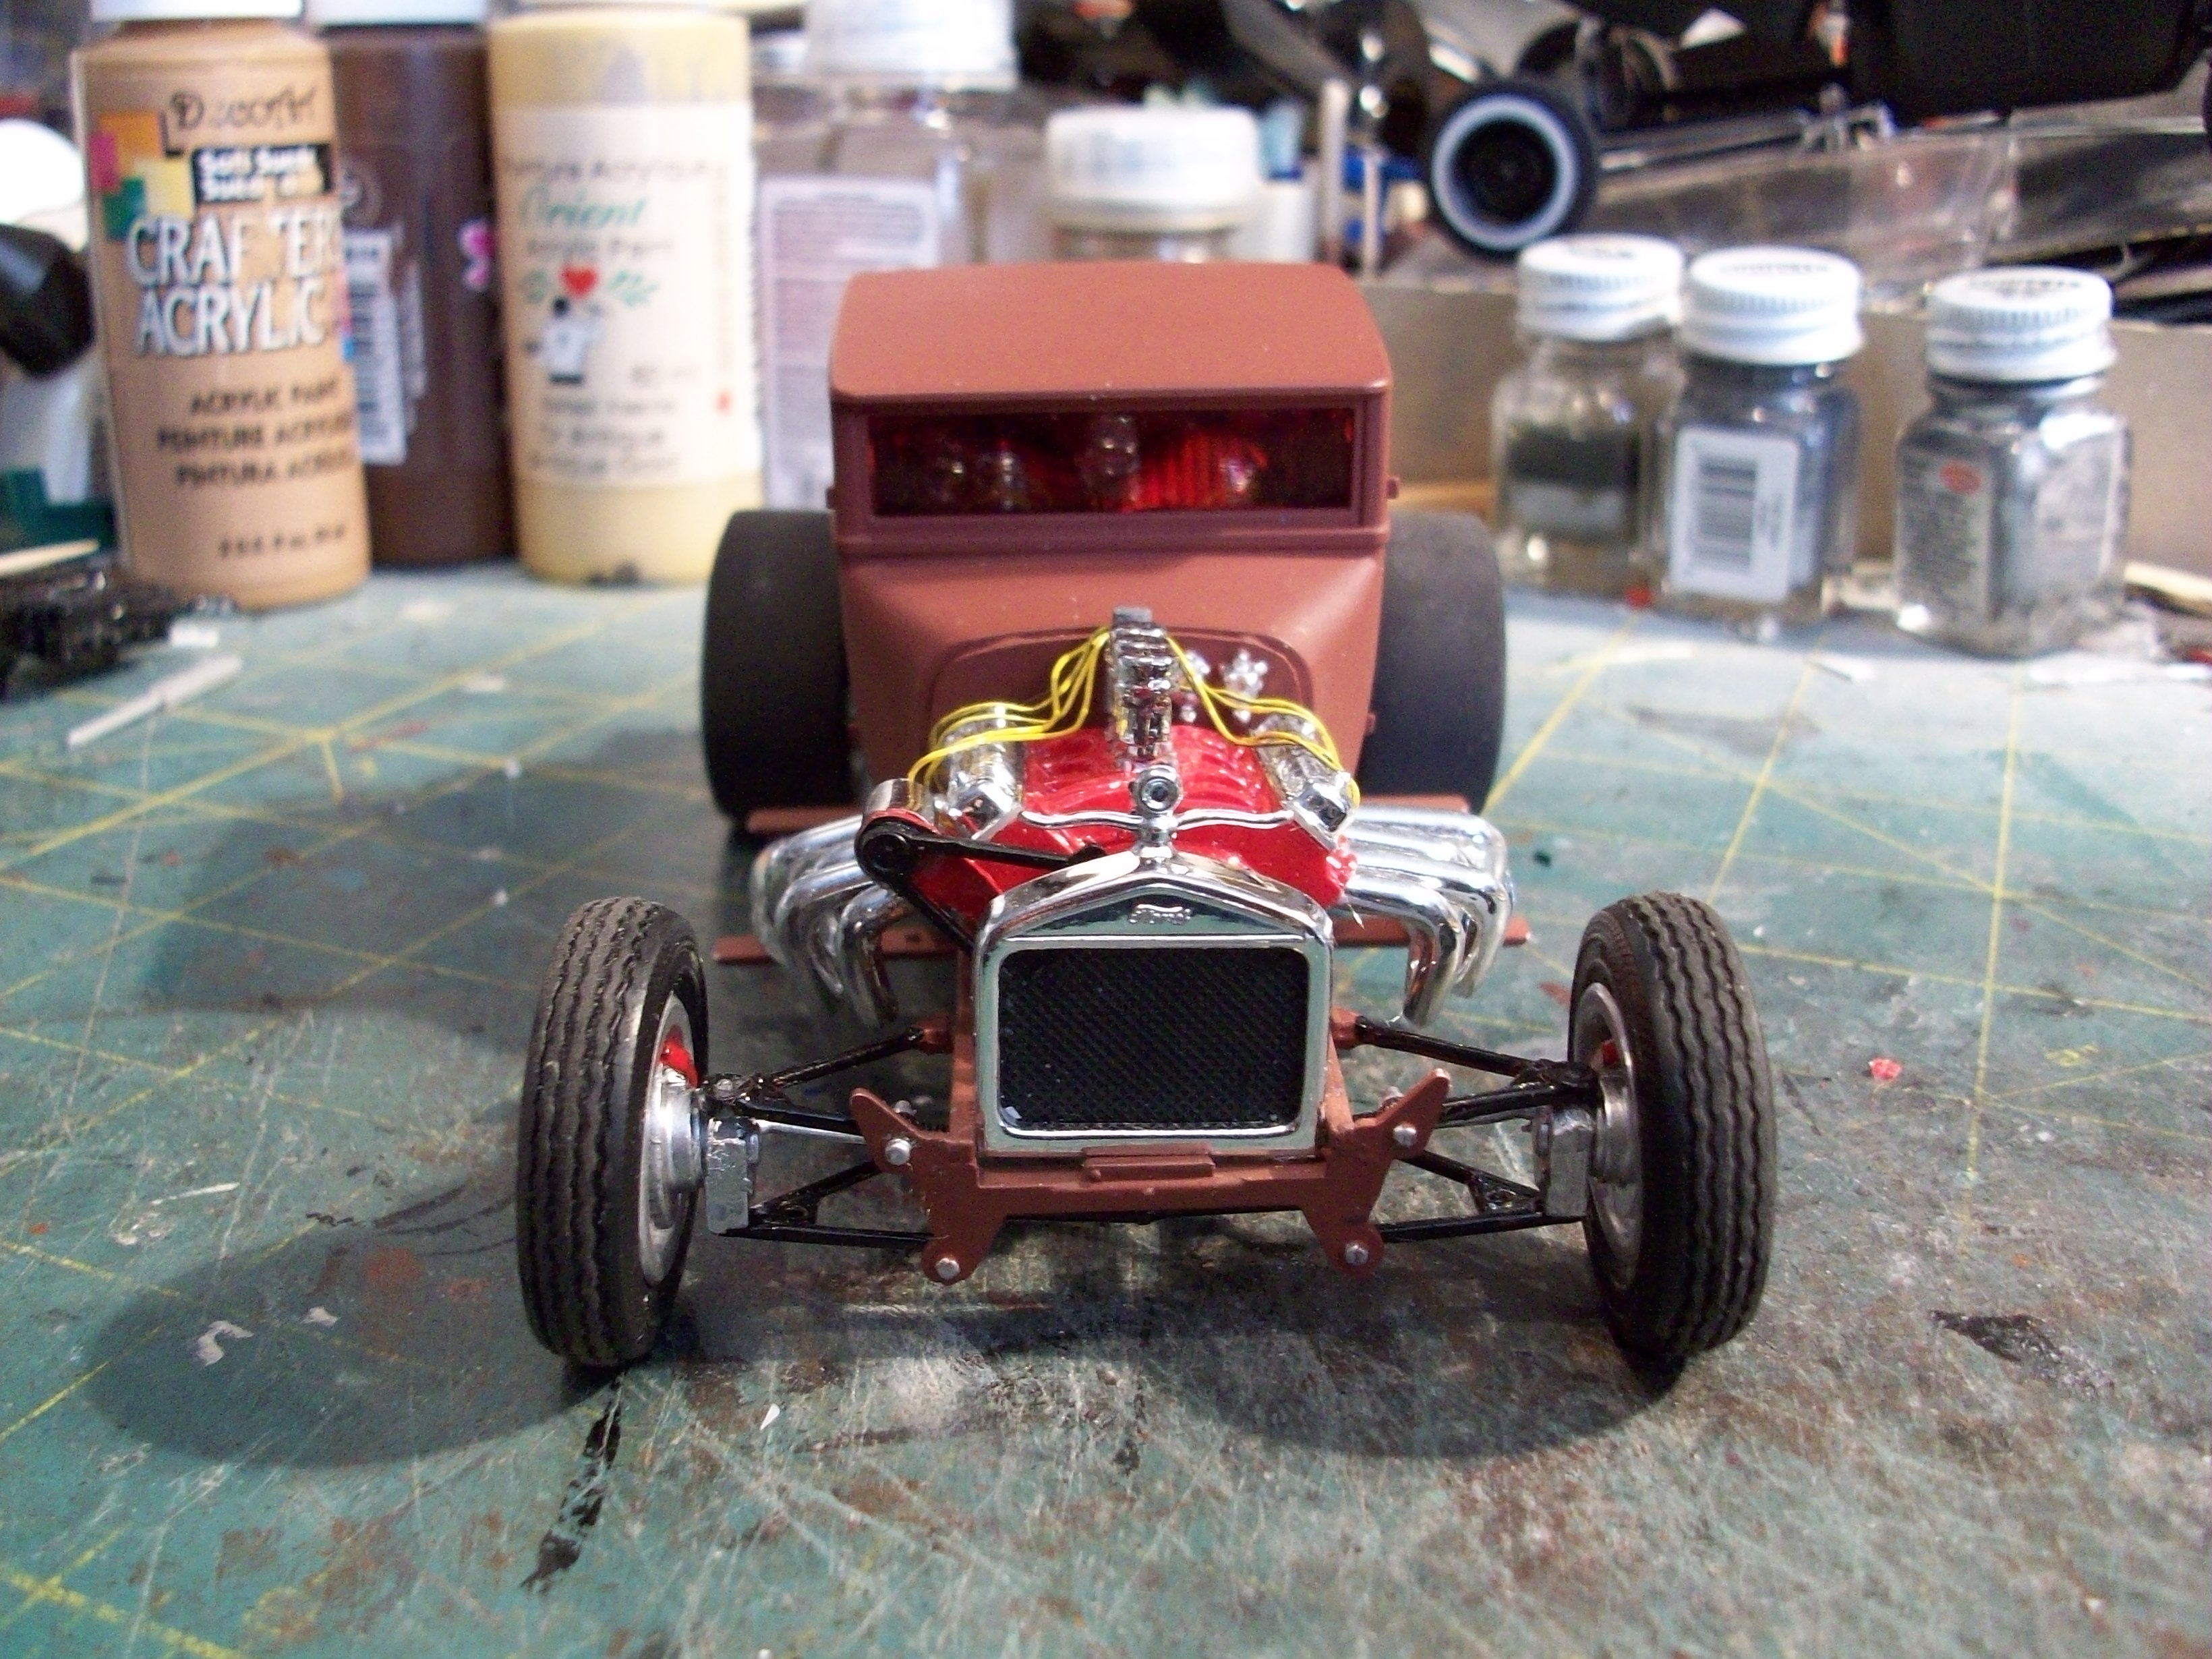
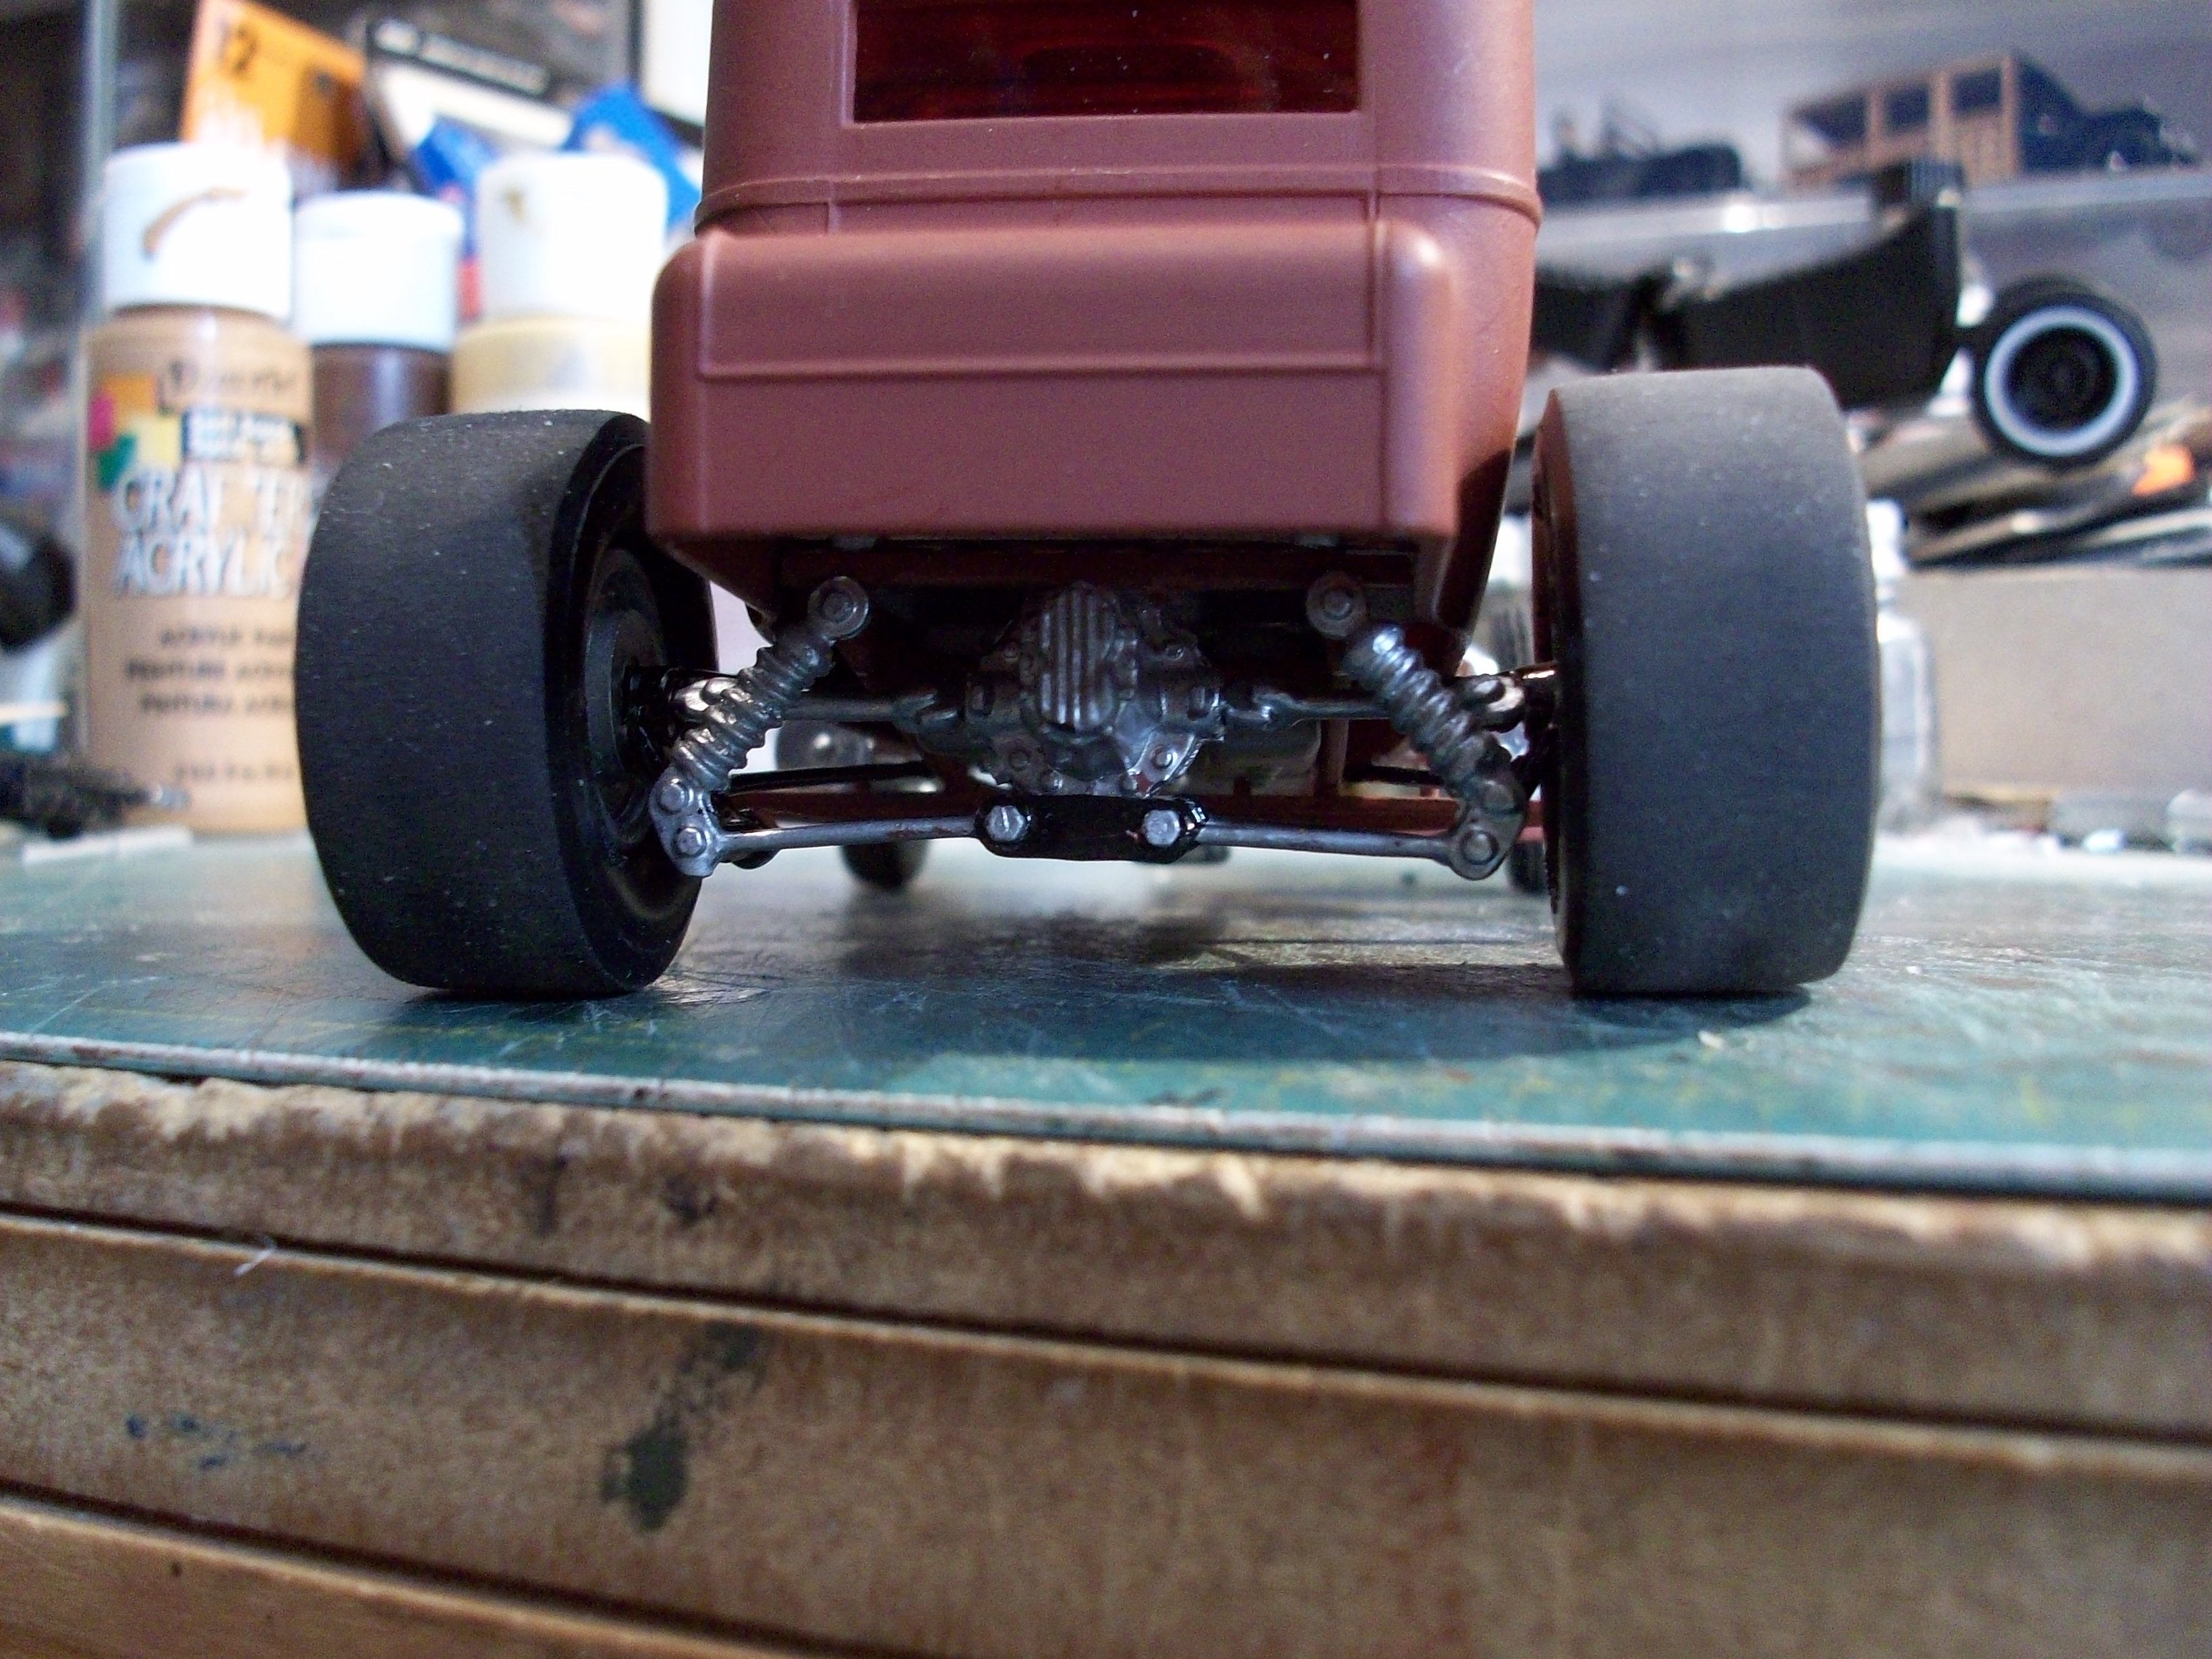
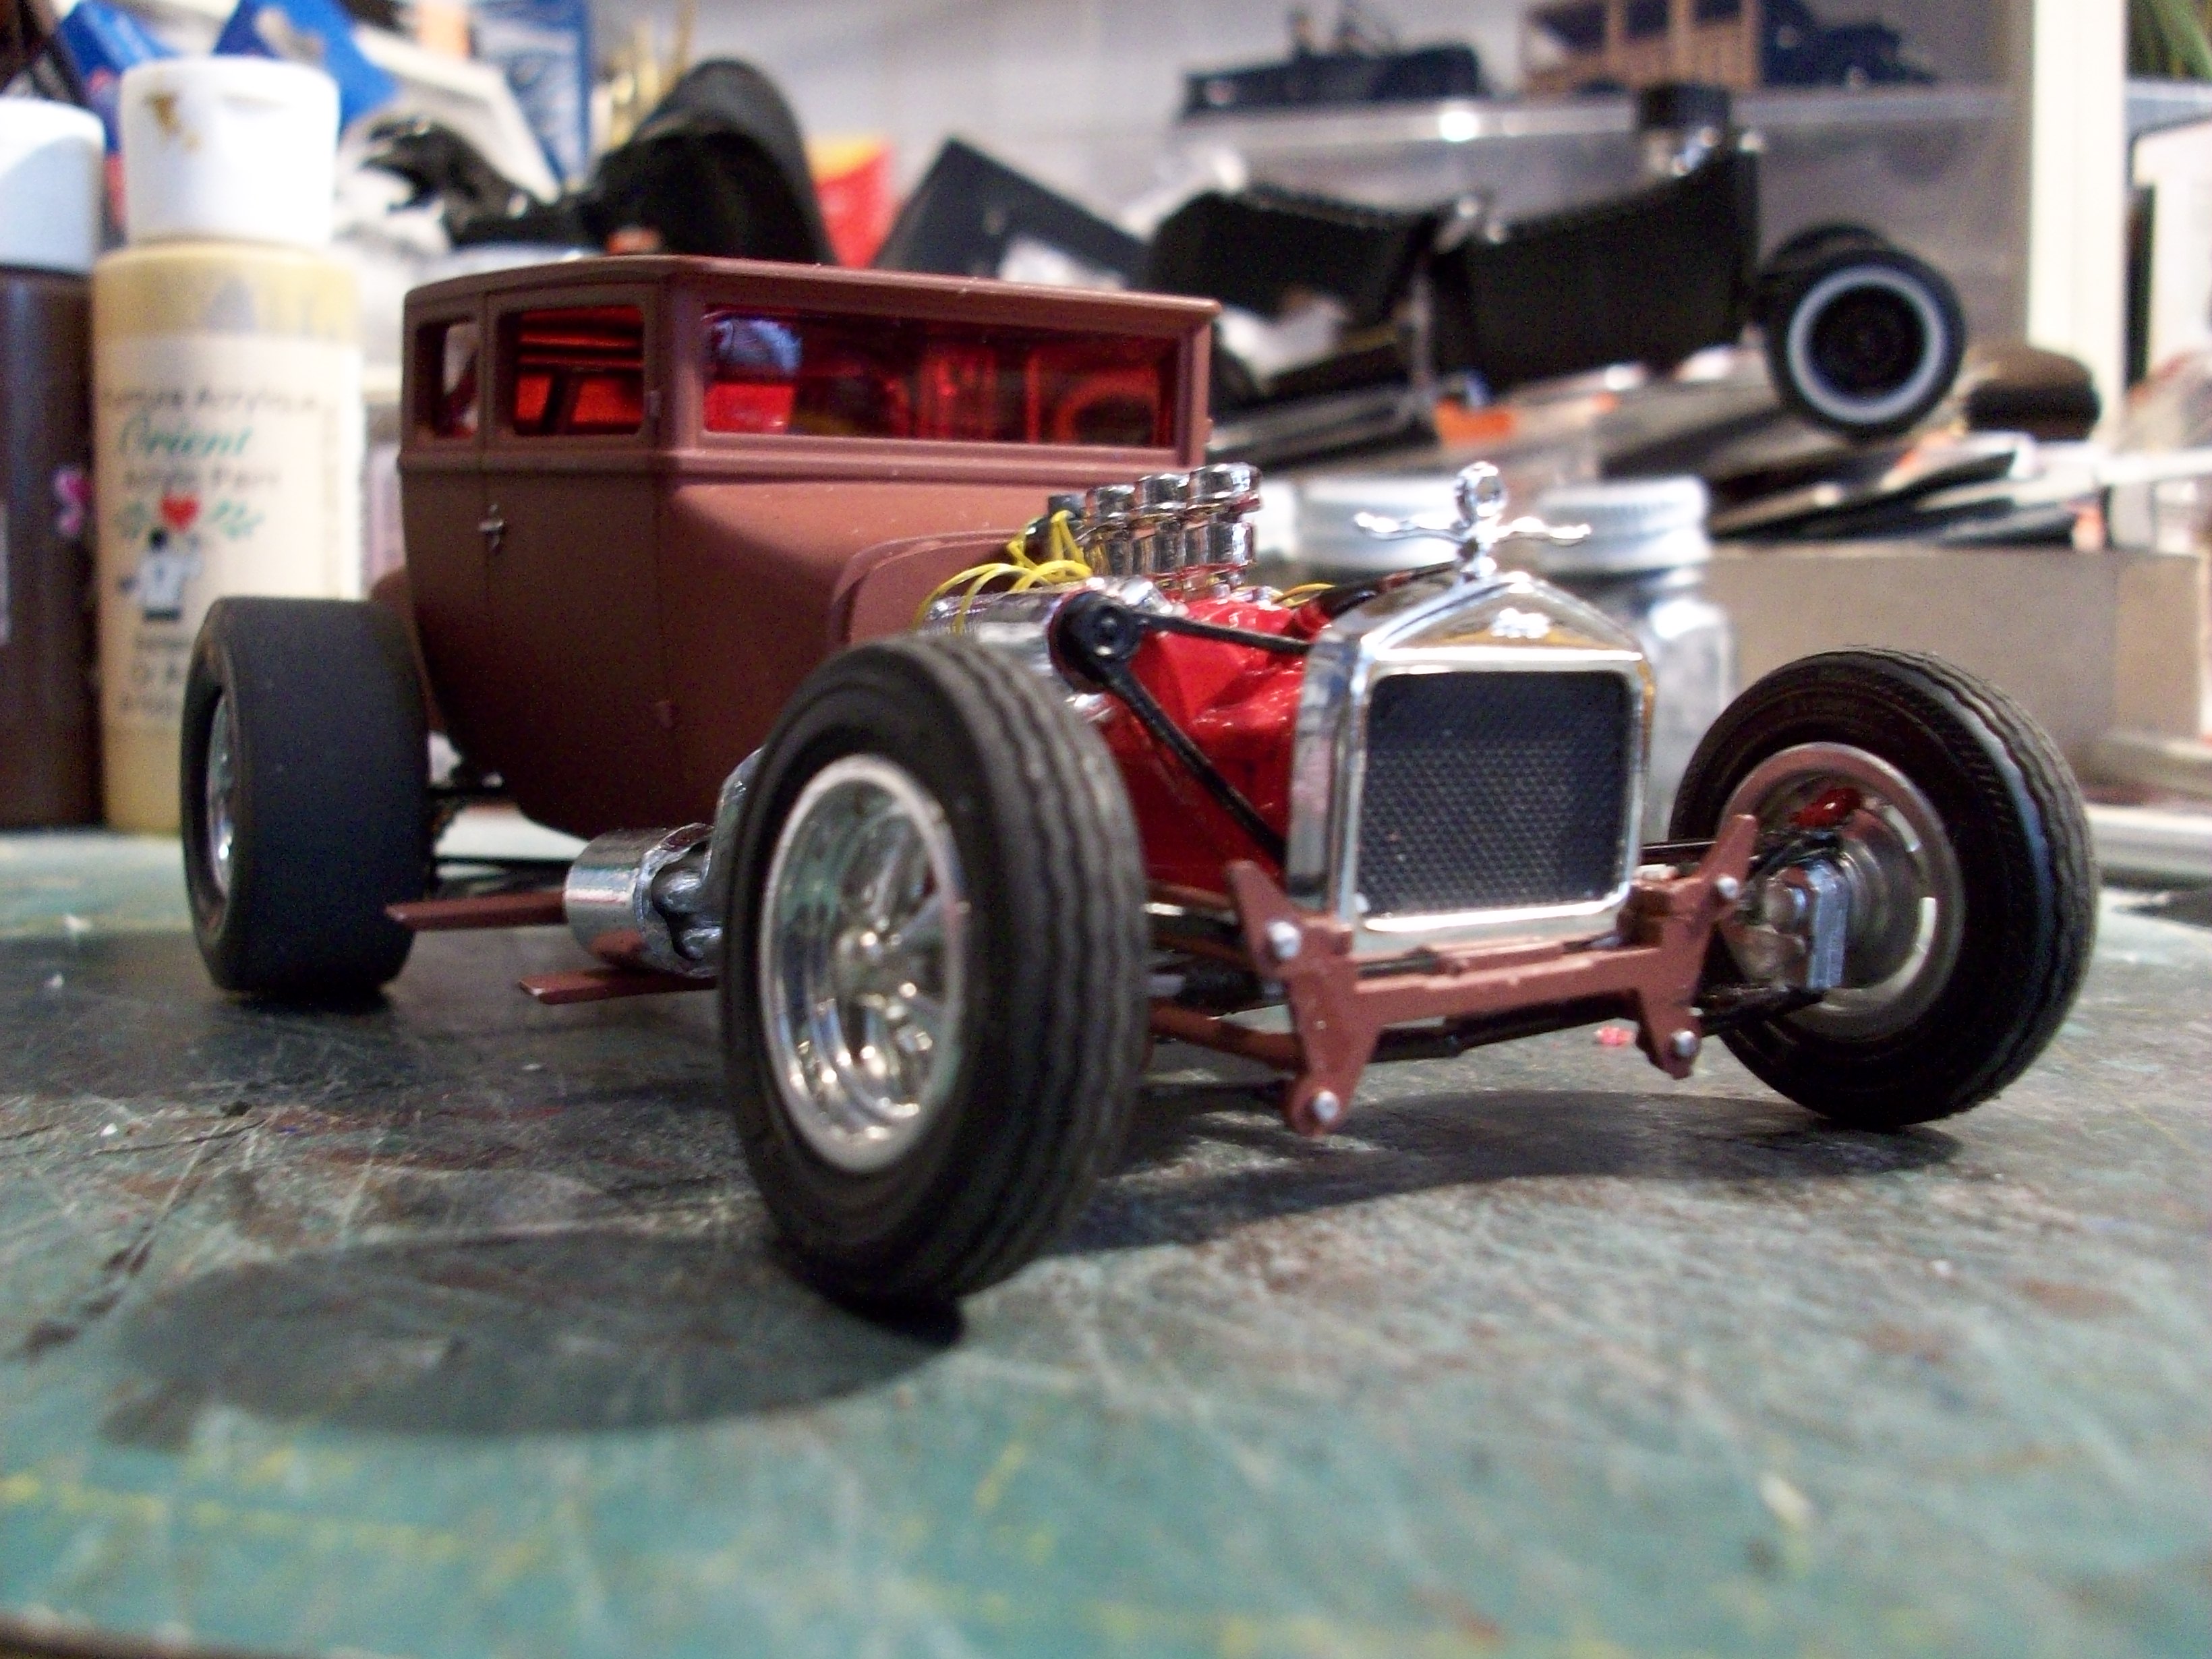
This got finished faster than I expected! A little detail paint, add the radiator, mount the body on the frame and that's it. Decided it would stay as a primered rod (to save me some paint!). Here's the chassis from below: And the finshed model: THE END Tony

-
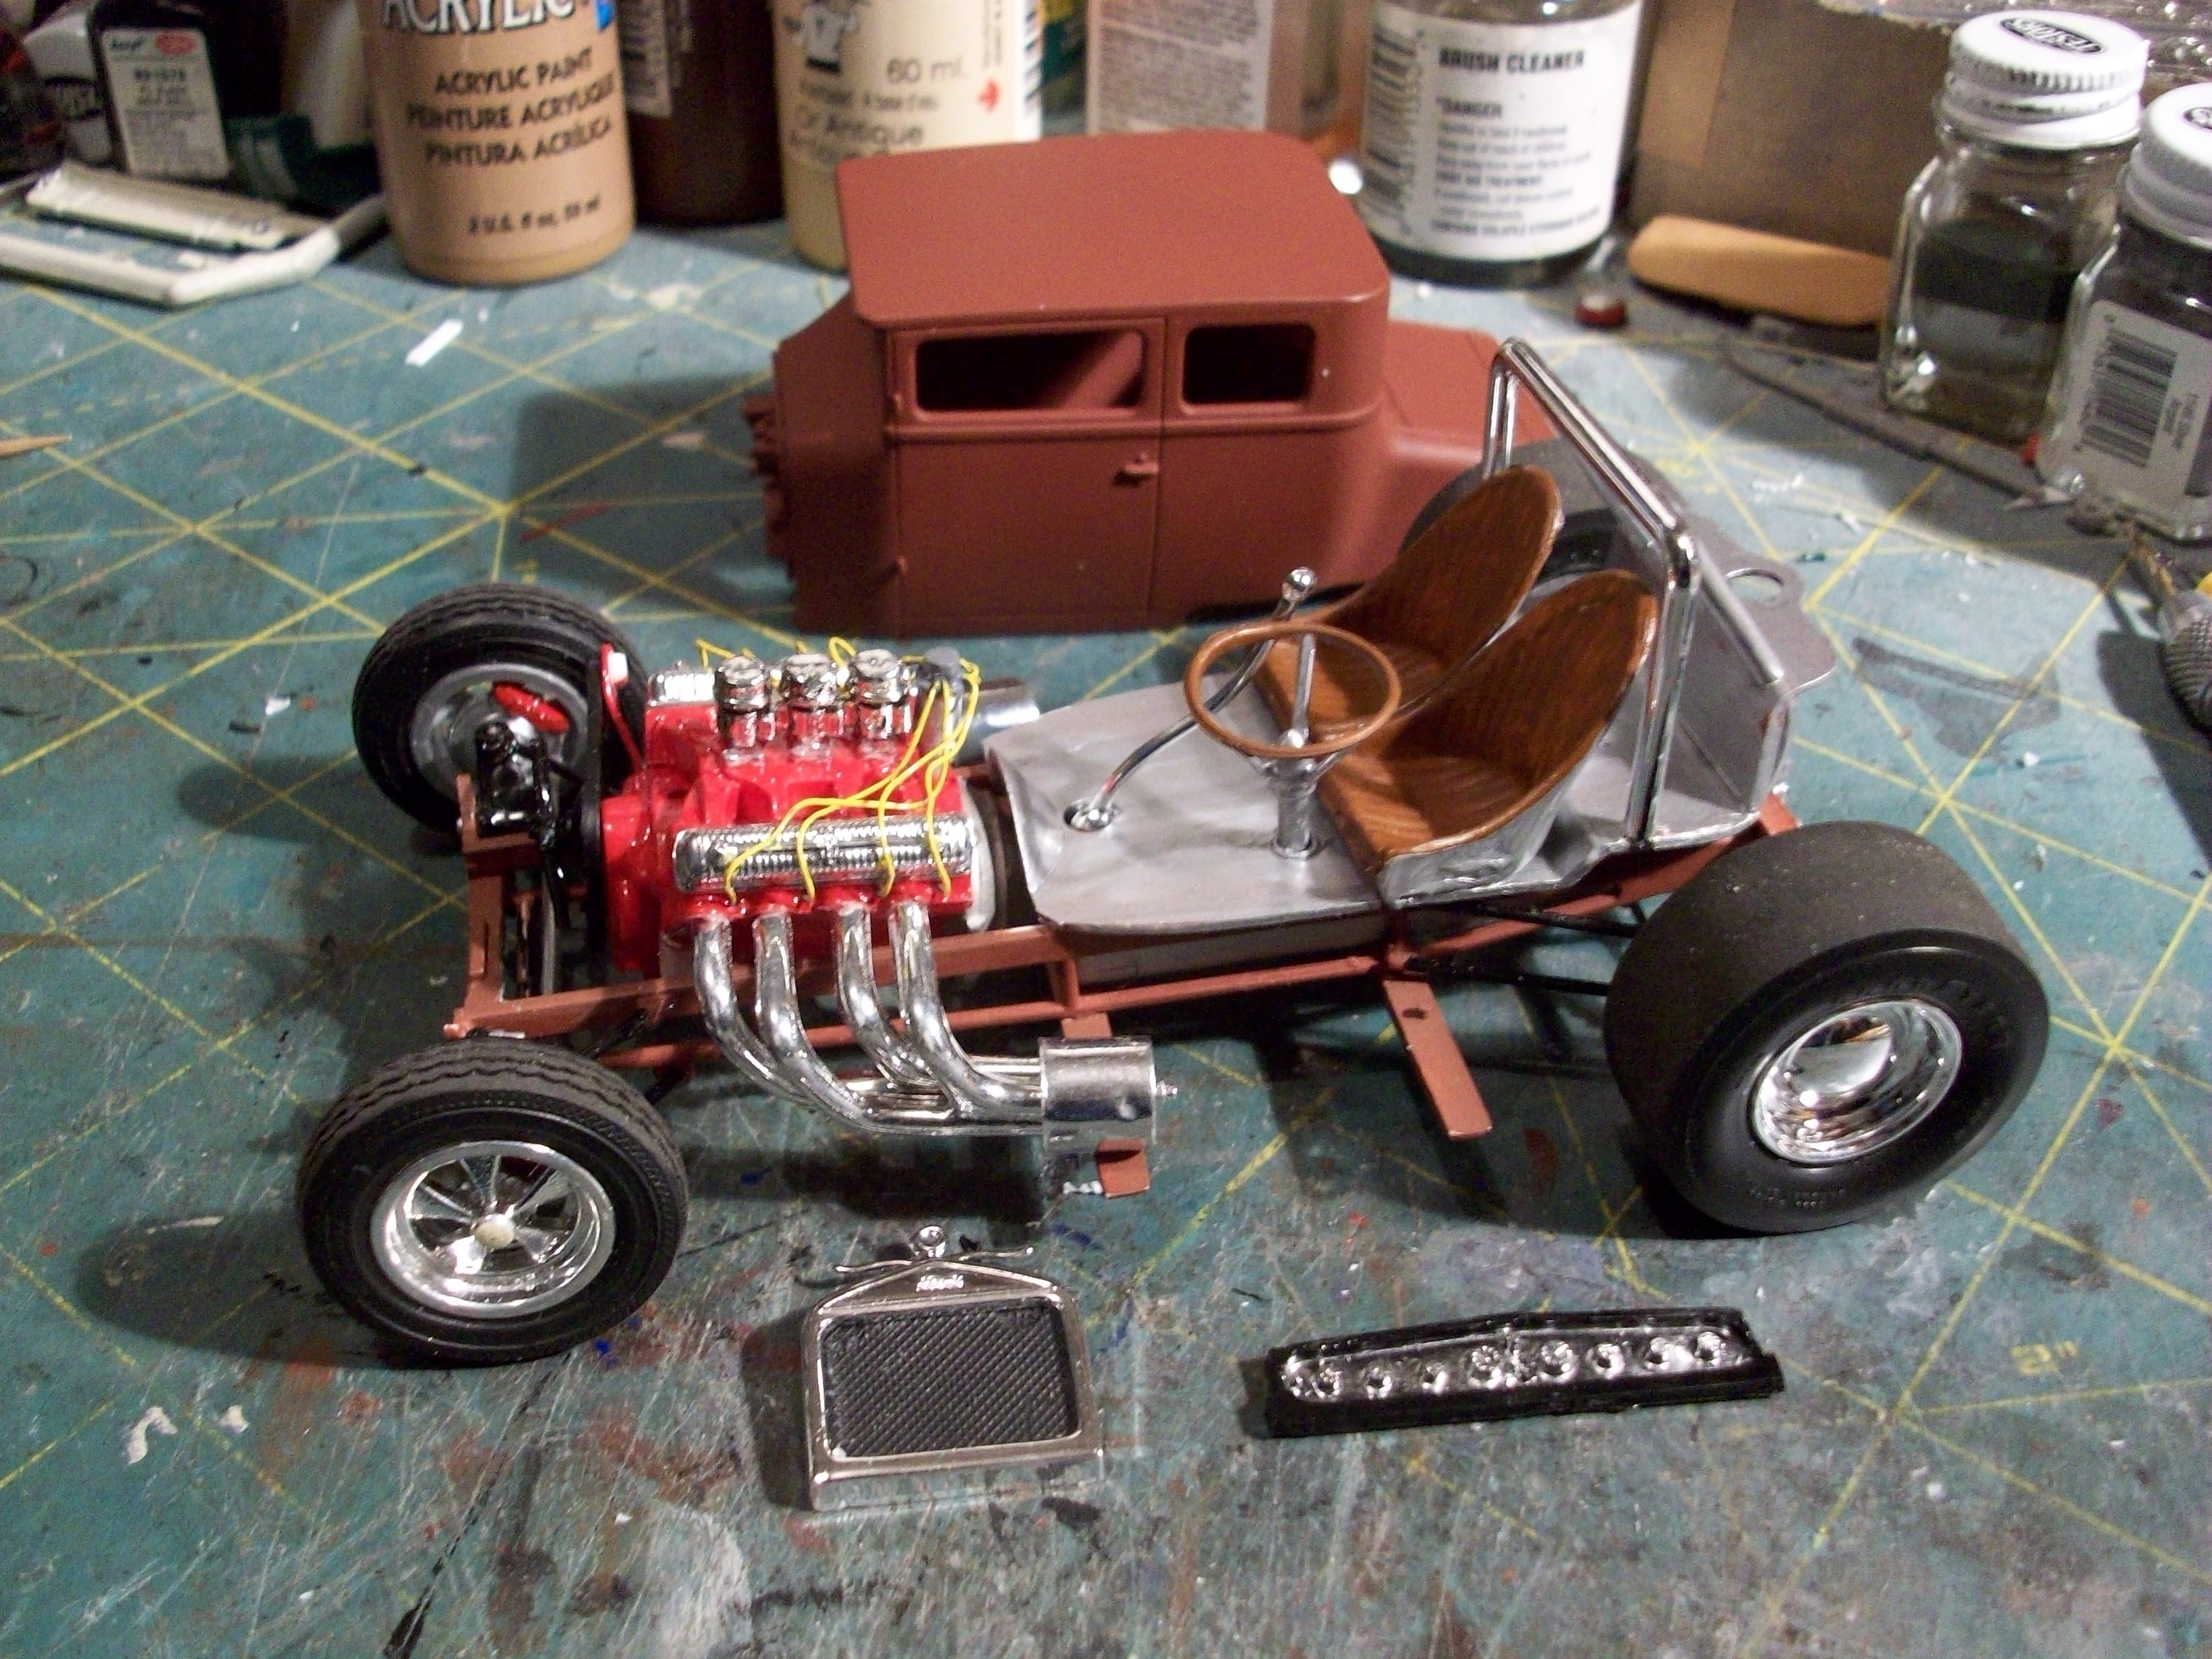
Finished the interior of the coupe and she's all ready to go back together. Nothing spectacular.... just basic building. In the picture above I didn't line up the floor with the chassis properly. That's been corrected and the roll bar extensions now sit squarely on the rear frame member. Tony
-
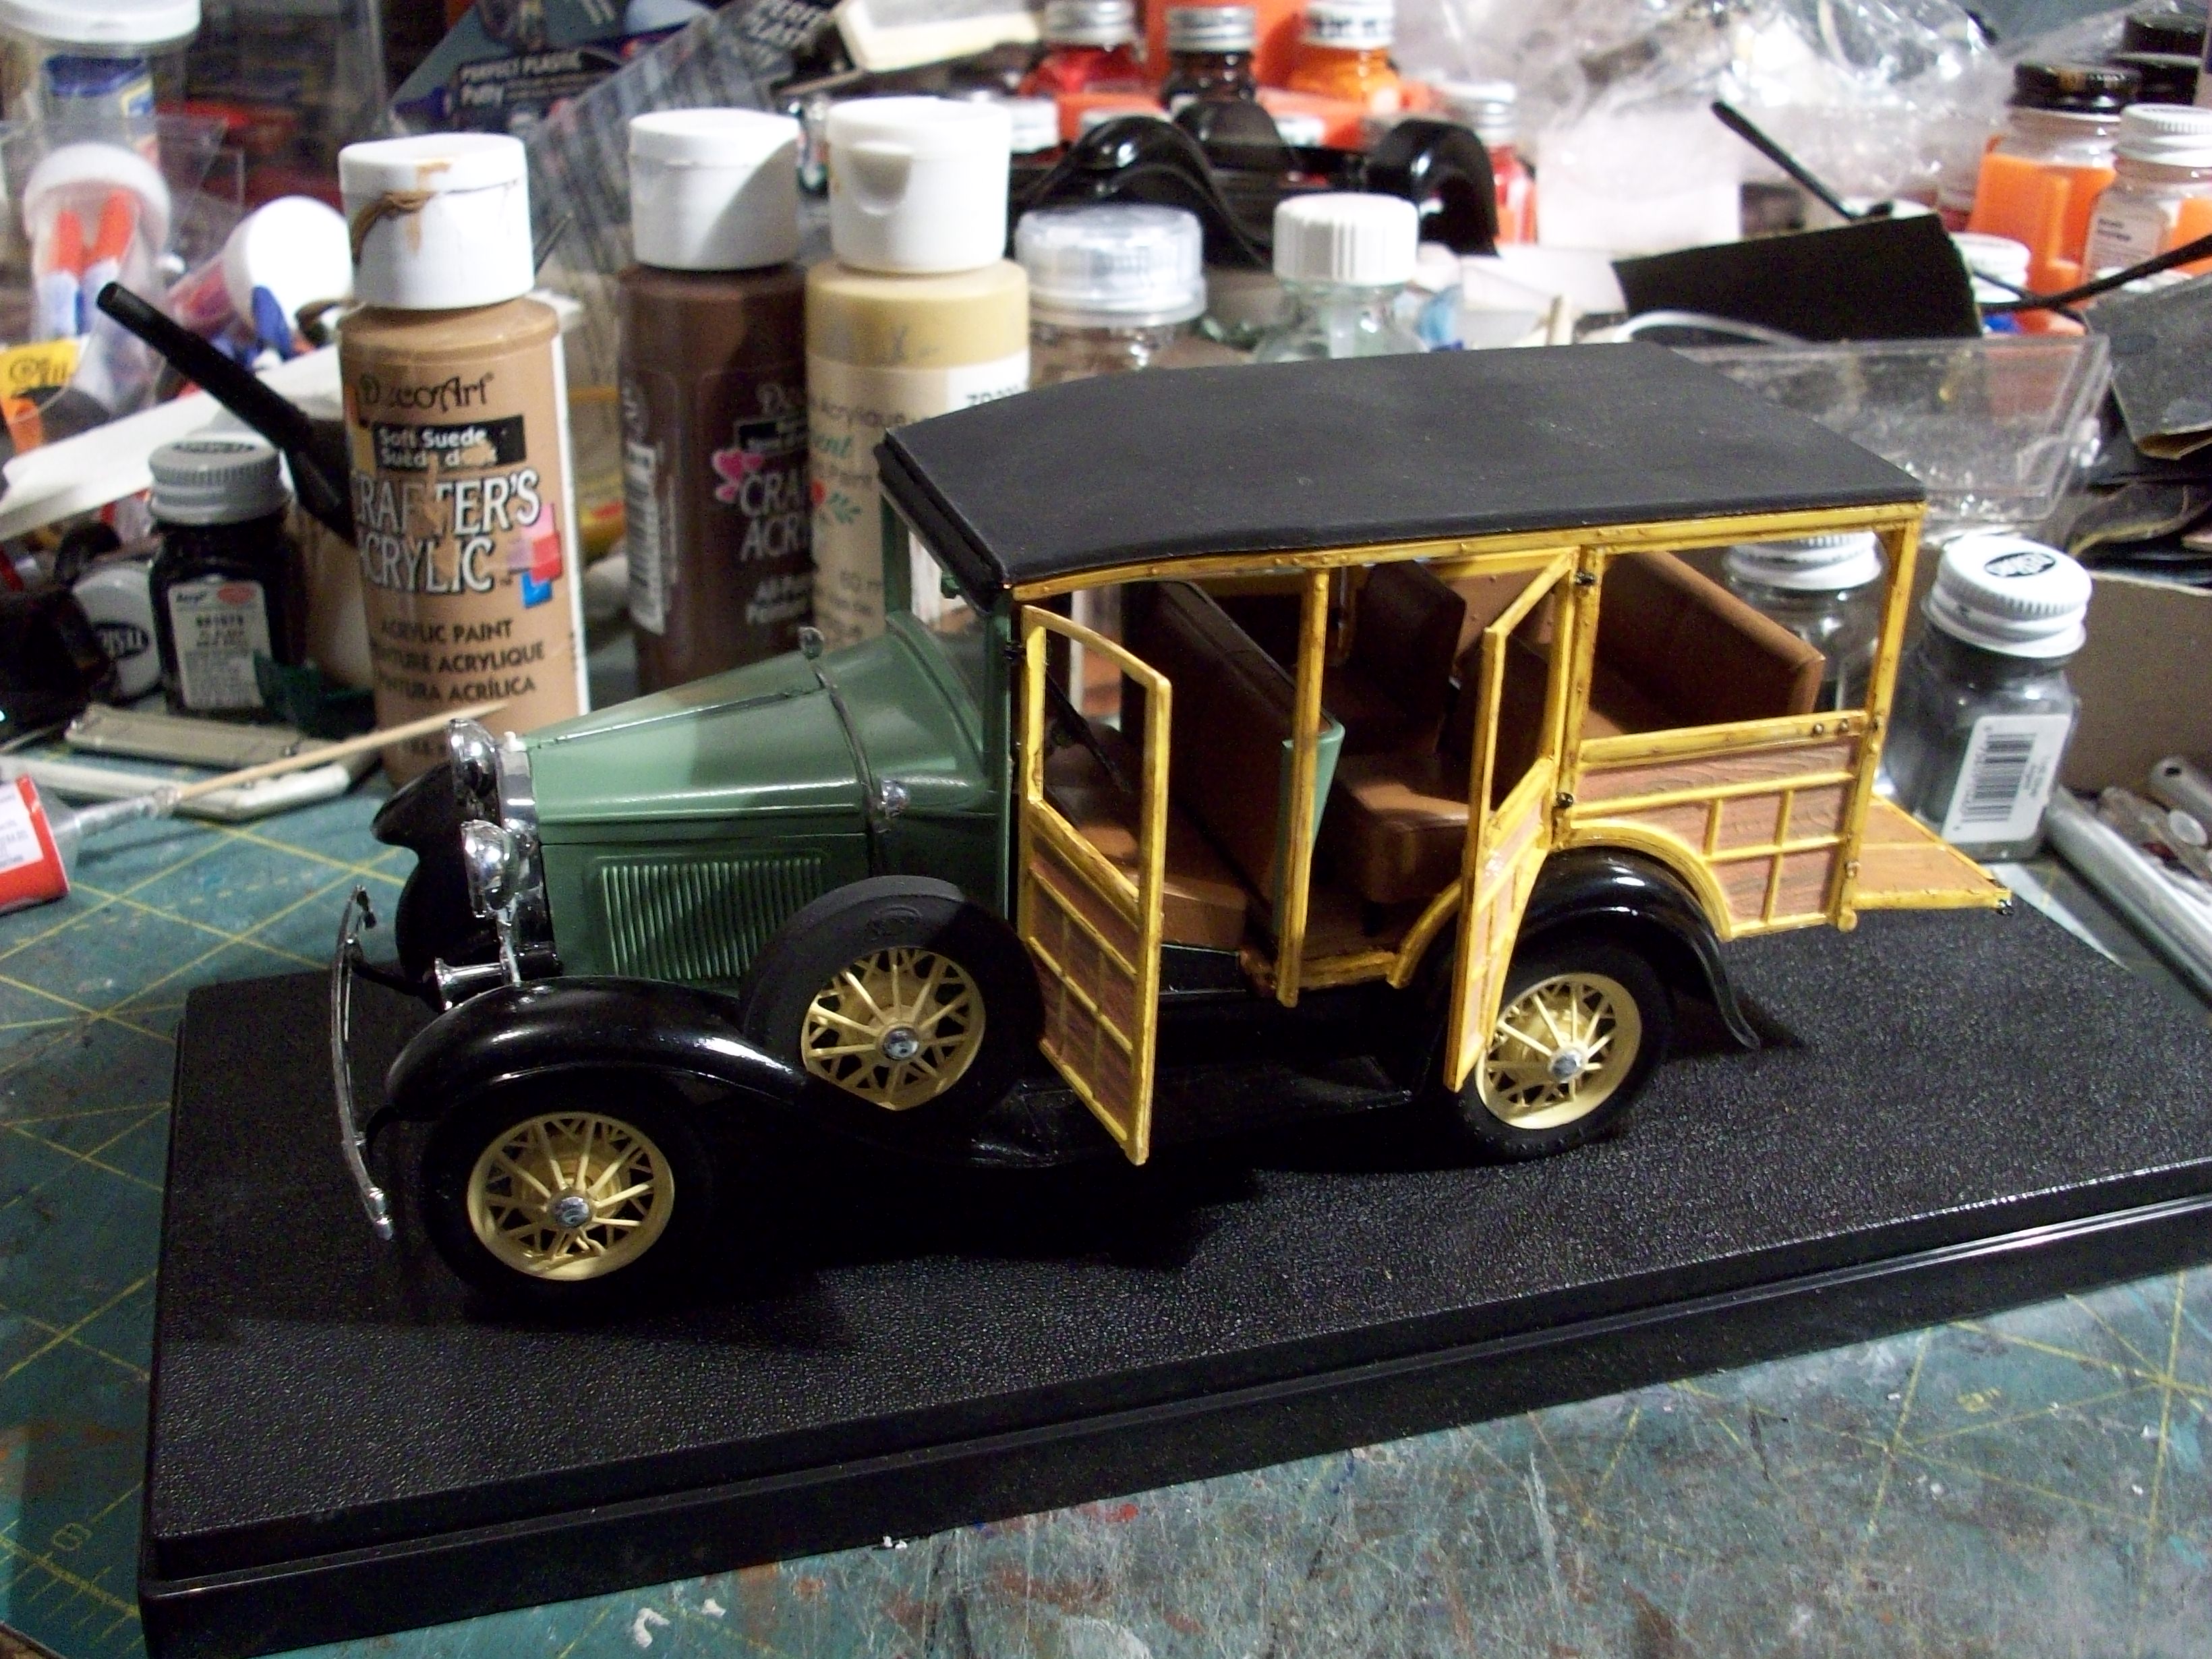
Your '41 Woody is really coming along nicely. I think the maroon will be a super color choice. I have used craft paint to represent wood, but it's a delicate, "hit and miss" process. One method I have found works for me, depending on the type of wood you're trying to represent, is to first give the framing a solid coat of antique gold, yellow or tan enamel. Then I dry brush various shades of craft paint brown vertically down the frame, trying(!) to represent the grain of the wood. It rakes a steady hand, patience and some kind of reference photo beside you, or you'll just finish up painting the whole frame brown! Another method is simply to chose a craft paint that looks like light, grain free wood. The advantage of craft paint, is you can run the part under the faucet and start again if you don't like it. Whatever you chose to do, experiment on some pieces of sprue first until you get the hang of it. Hope this helps, Tony
-
I was just checking out your '41 Woody and it's really coming along nicely. I think the maroon will be a super color choice. I have used craft paint to represent wood, but it's a delicate, "hit and miss" process. One method I have found works for me, depending on the type of wood you're trying to represent, is to first give the framing a solid coat of antique gold, yellow or tan enamel. Then I dry brush various shades of craft paint brown vertically down the frame, trying(!) to represent the grain of the wood. It rakes a steady hand, patience and some kind of reference photo beside you, or you'll just finish up painting the whole frame brown! Another method is simply to chose a craft paint that looks like light, grain free wood. The advantage of craft paint, is you can run the part under the faucet and start again if you don't like it. Whatever you chose to do, experiment on some pieces of sprue first until you get the hang of it. Hope this helps, Tony
-
Can't wait to see what you do with the wood, especially the framing. Not the easiest thing to paint and make it look real. Real wood (maybe 1/32" basswood) would probably look best for the panels. I'm loving this build. Tony
-
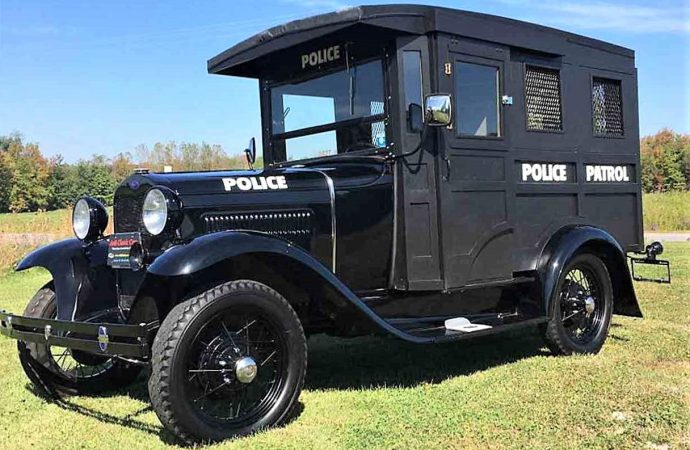
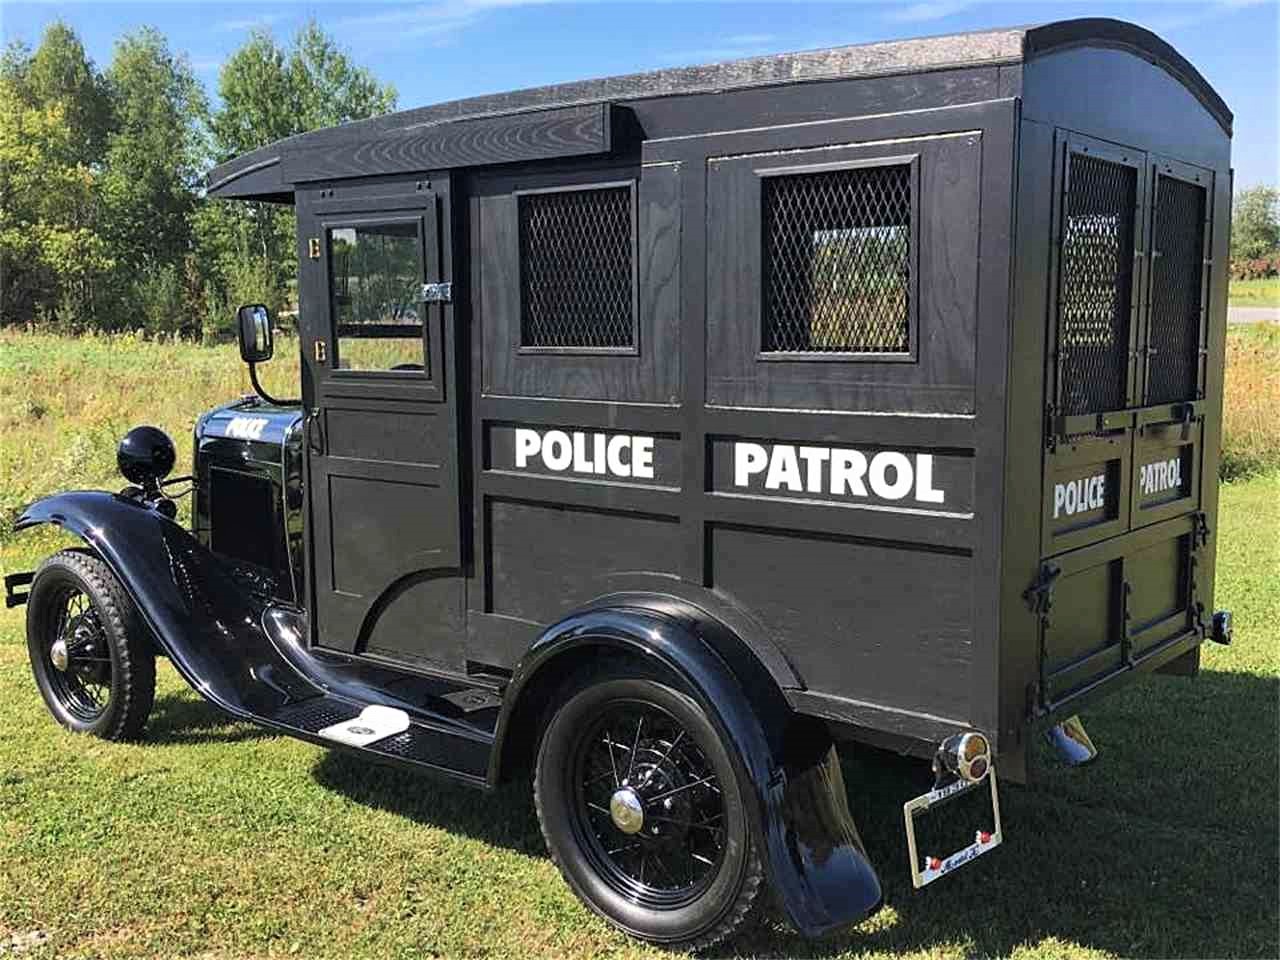
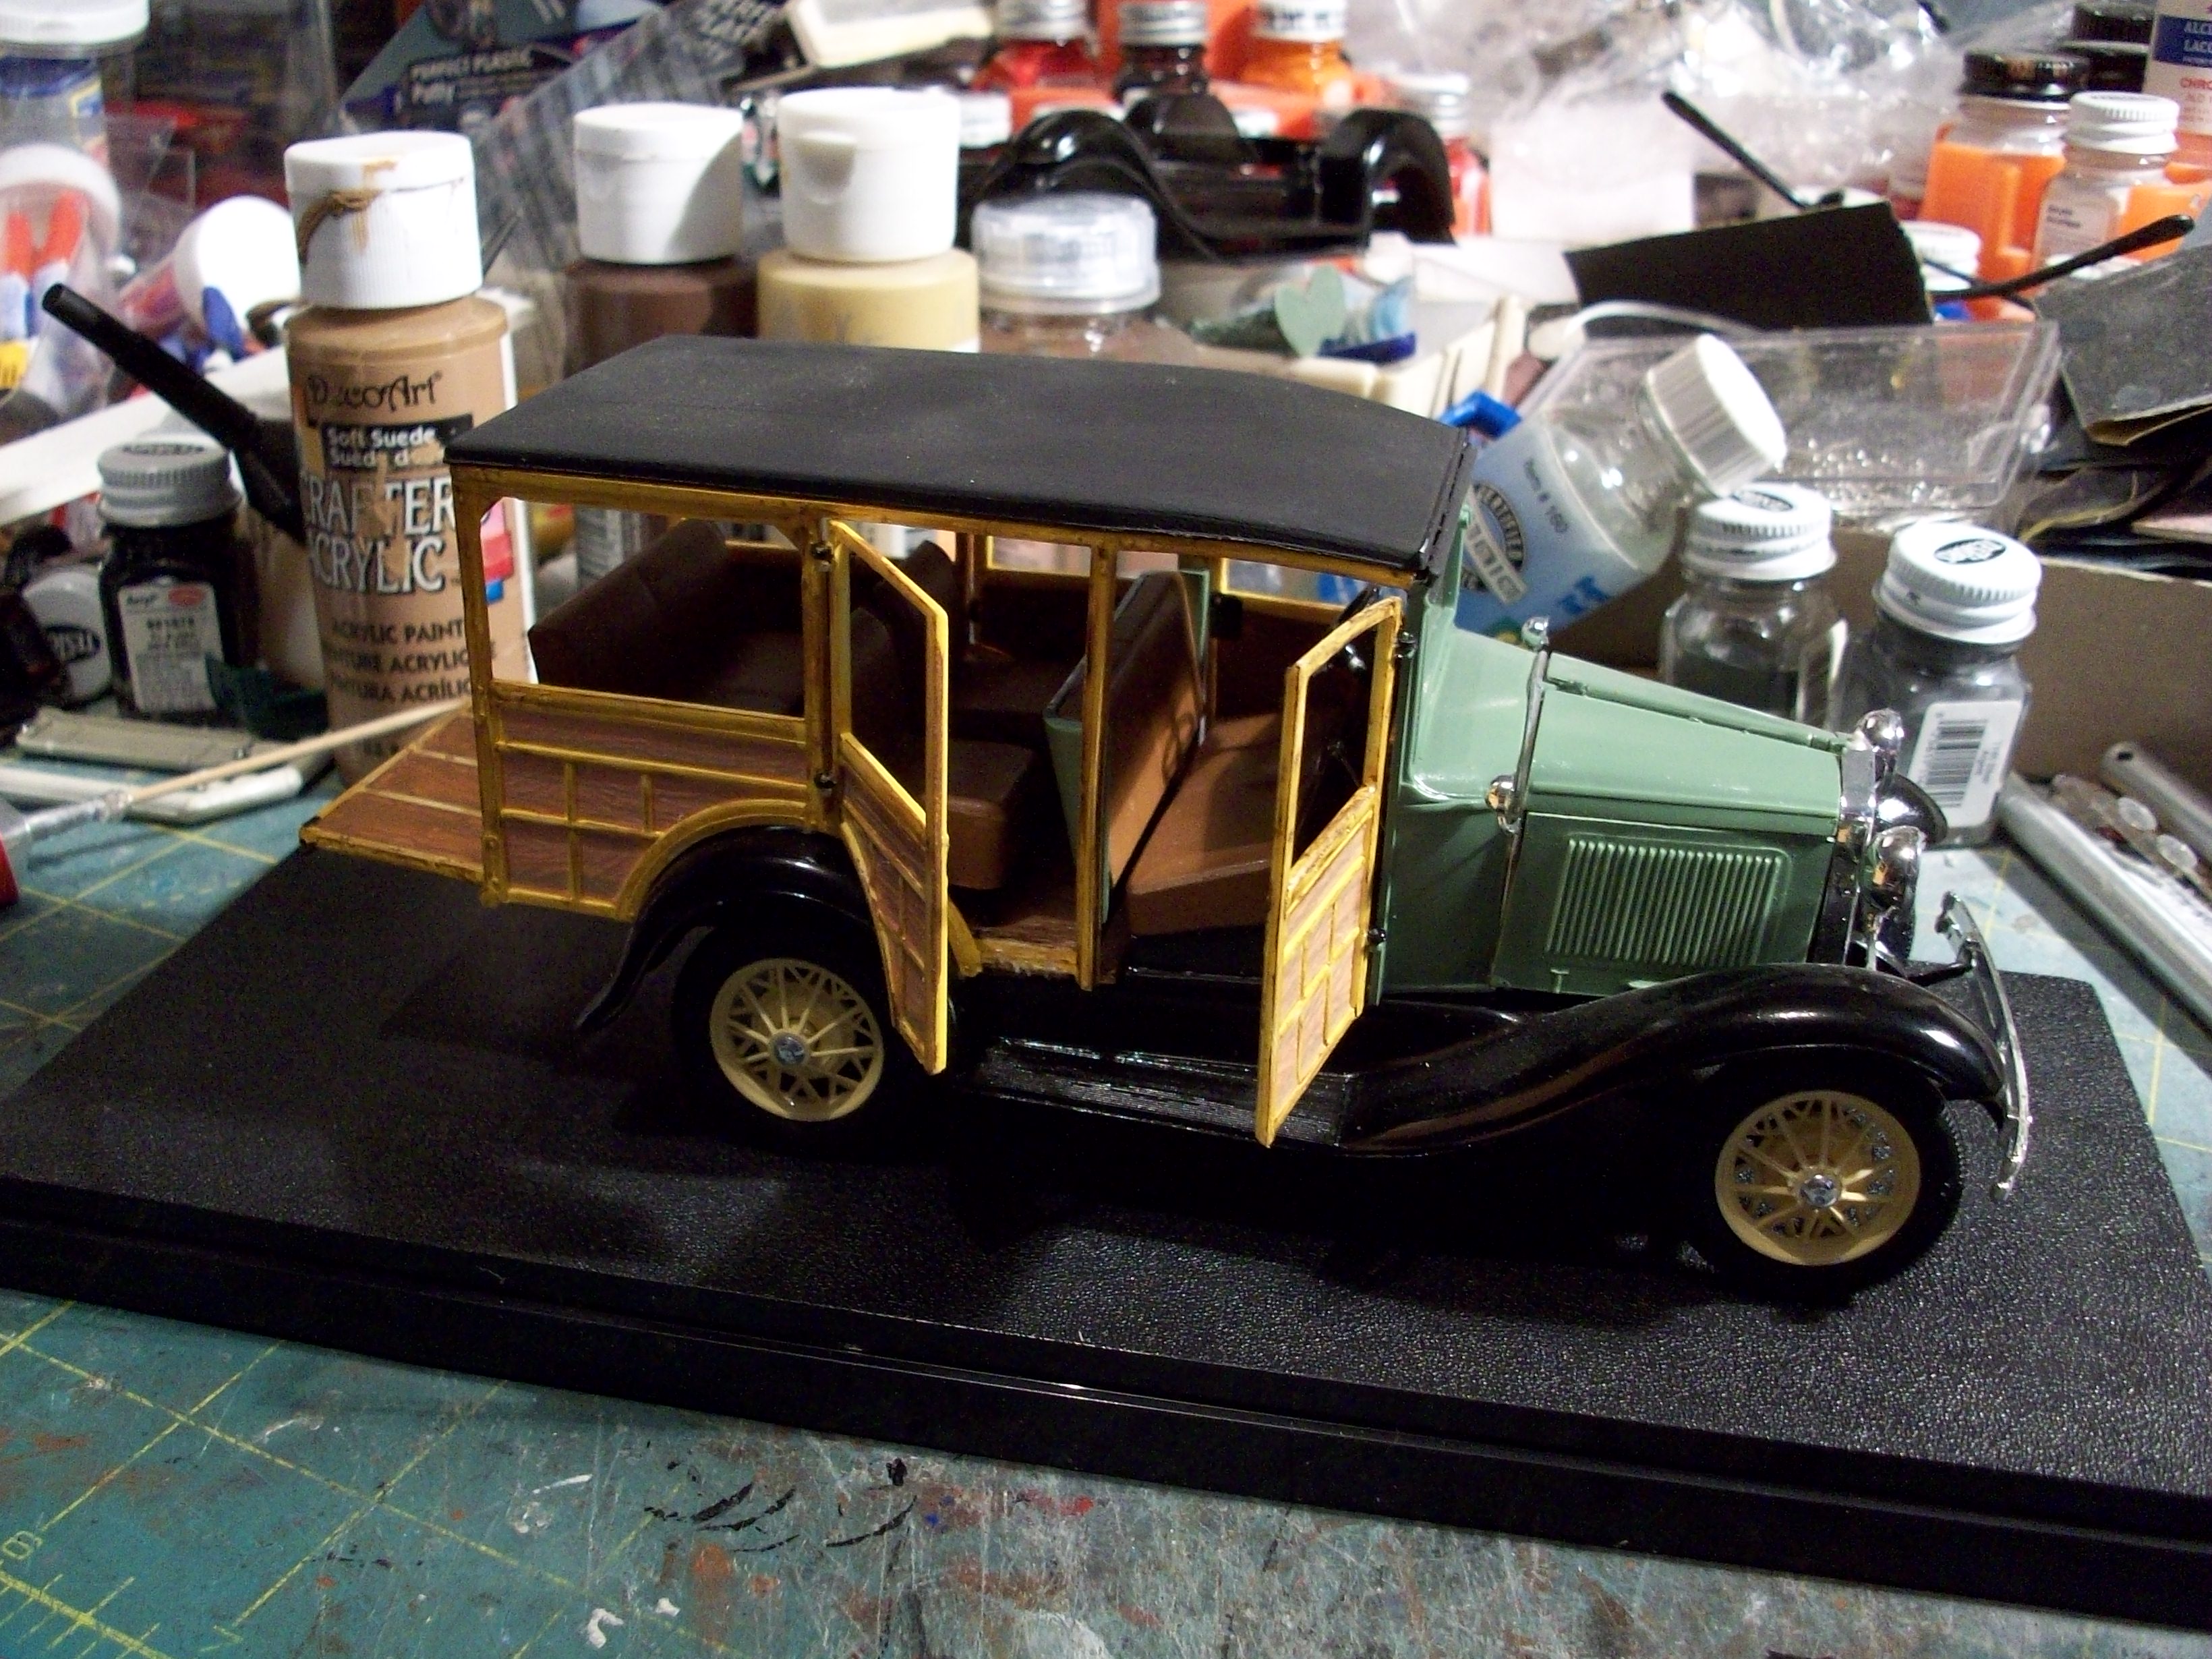
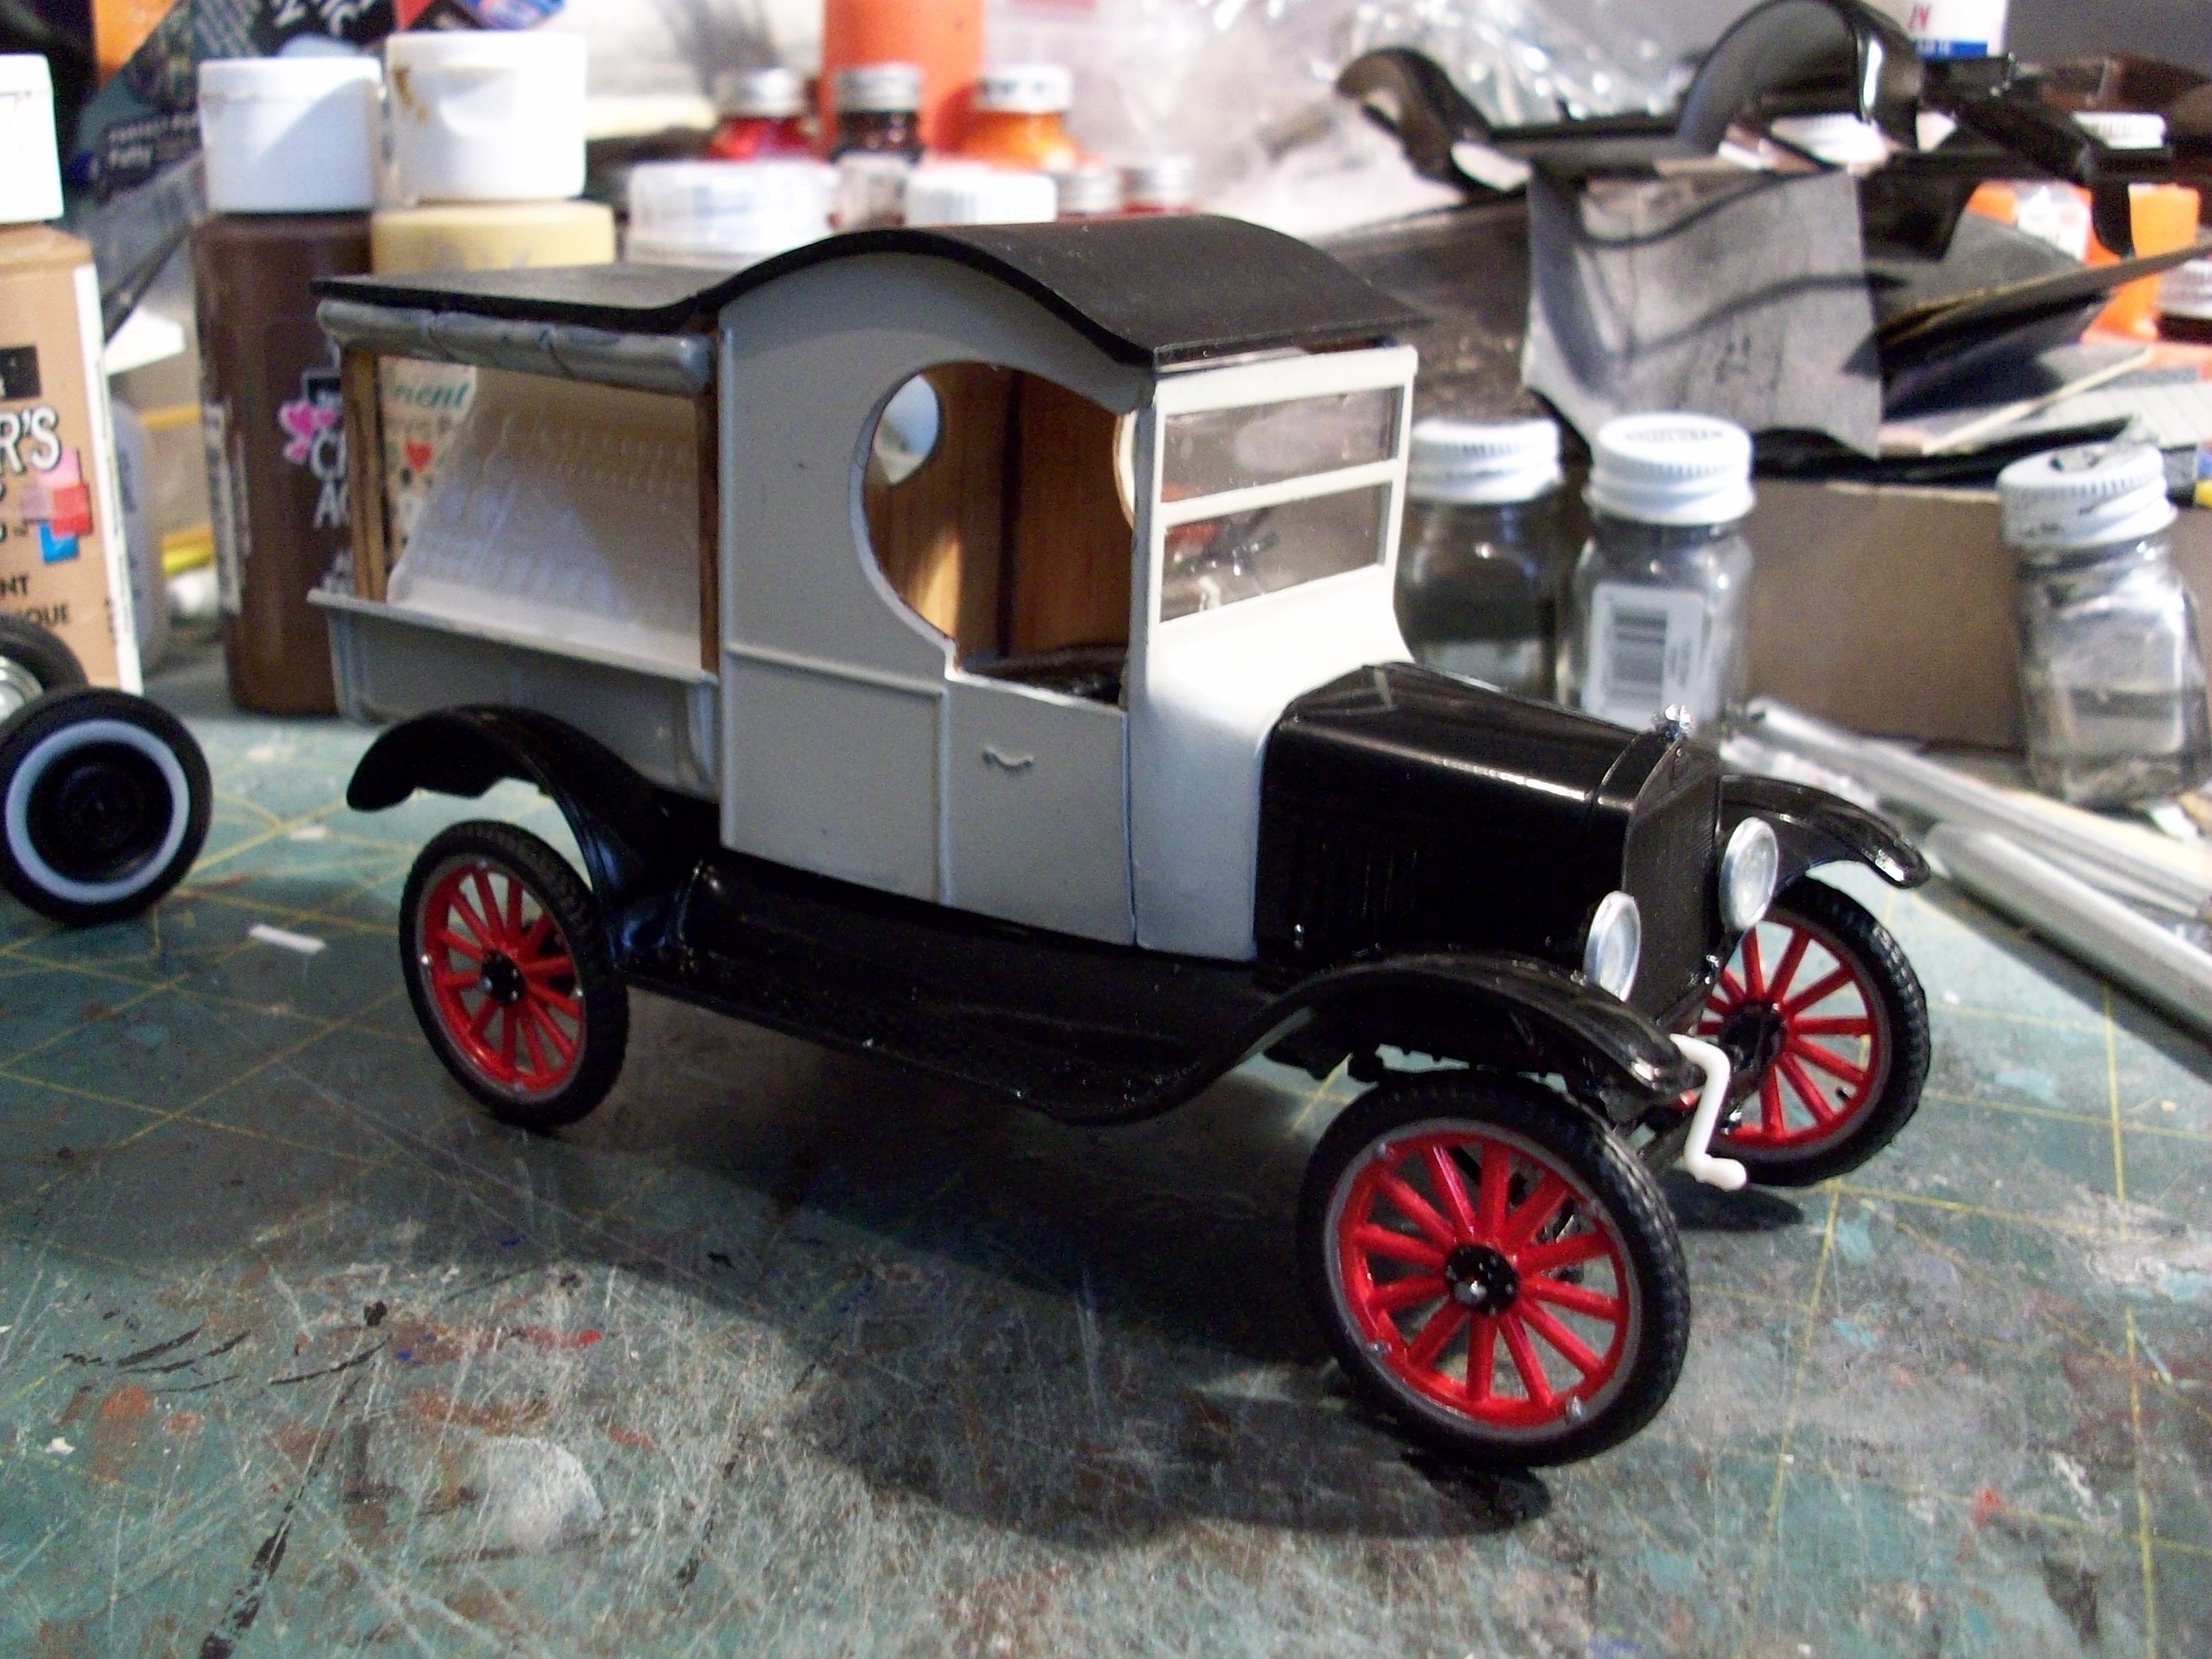
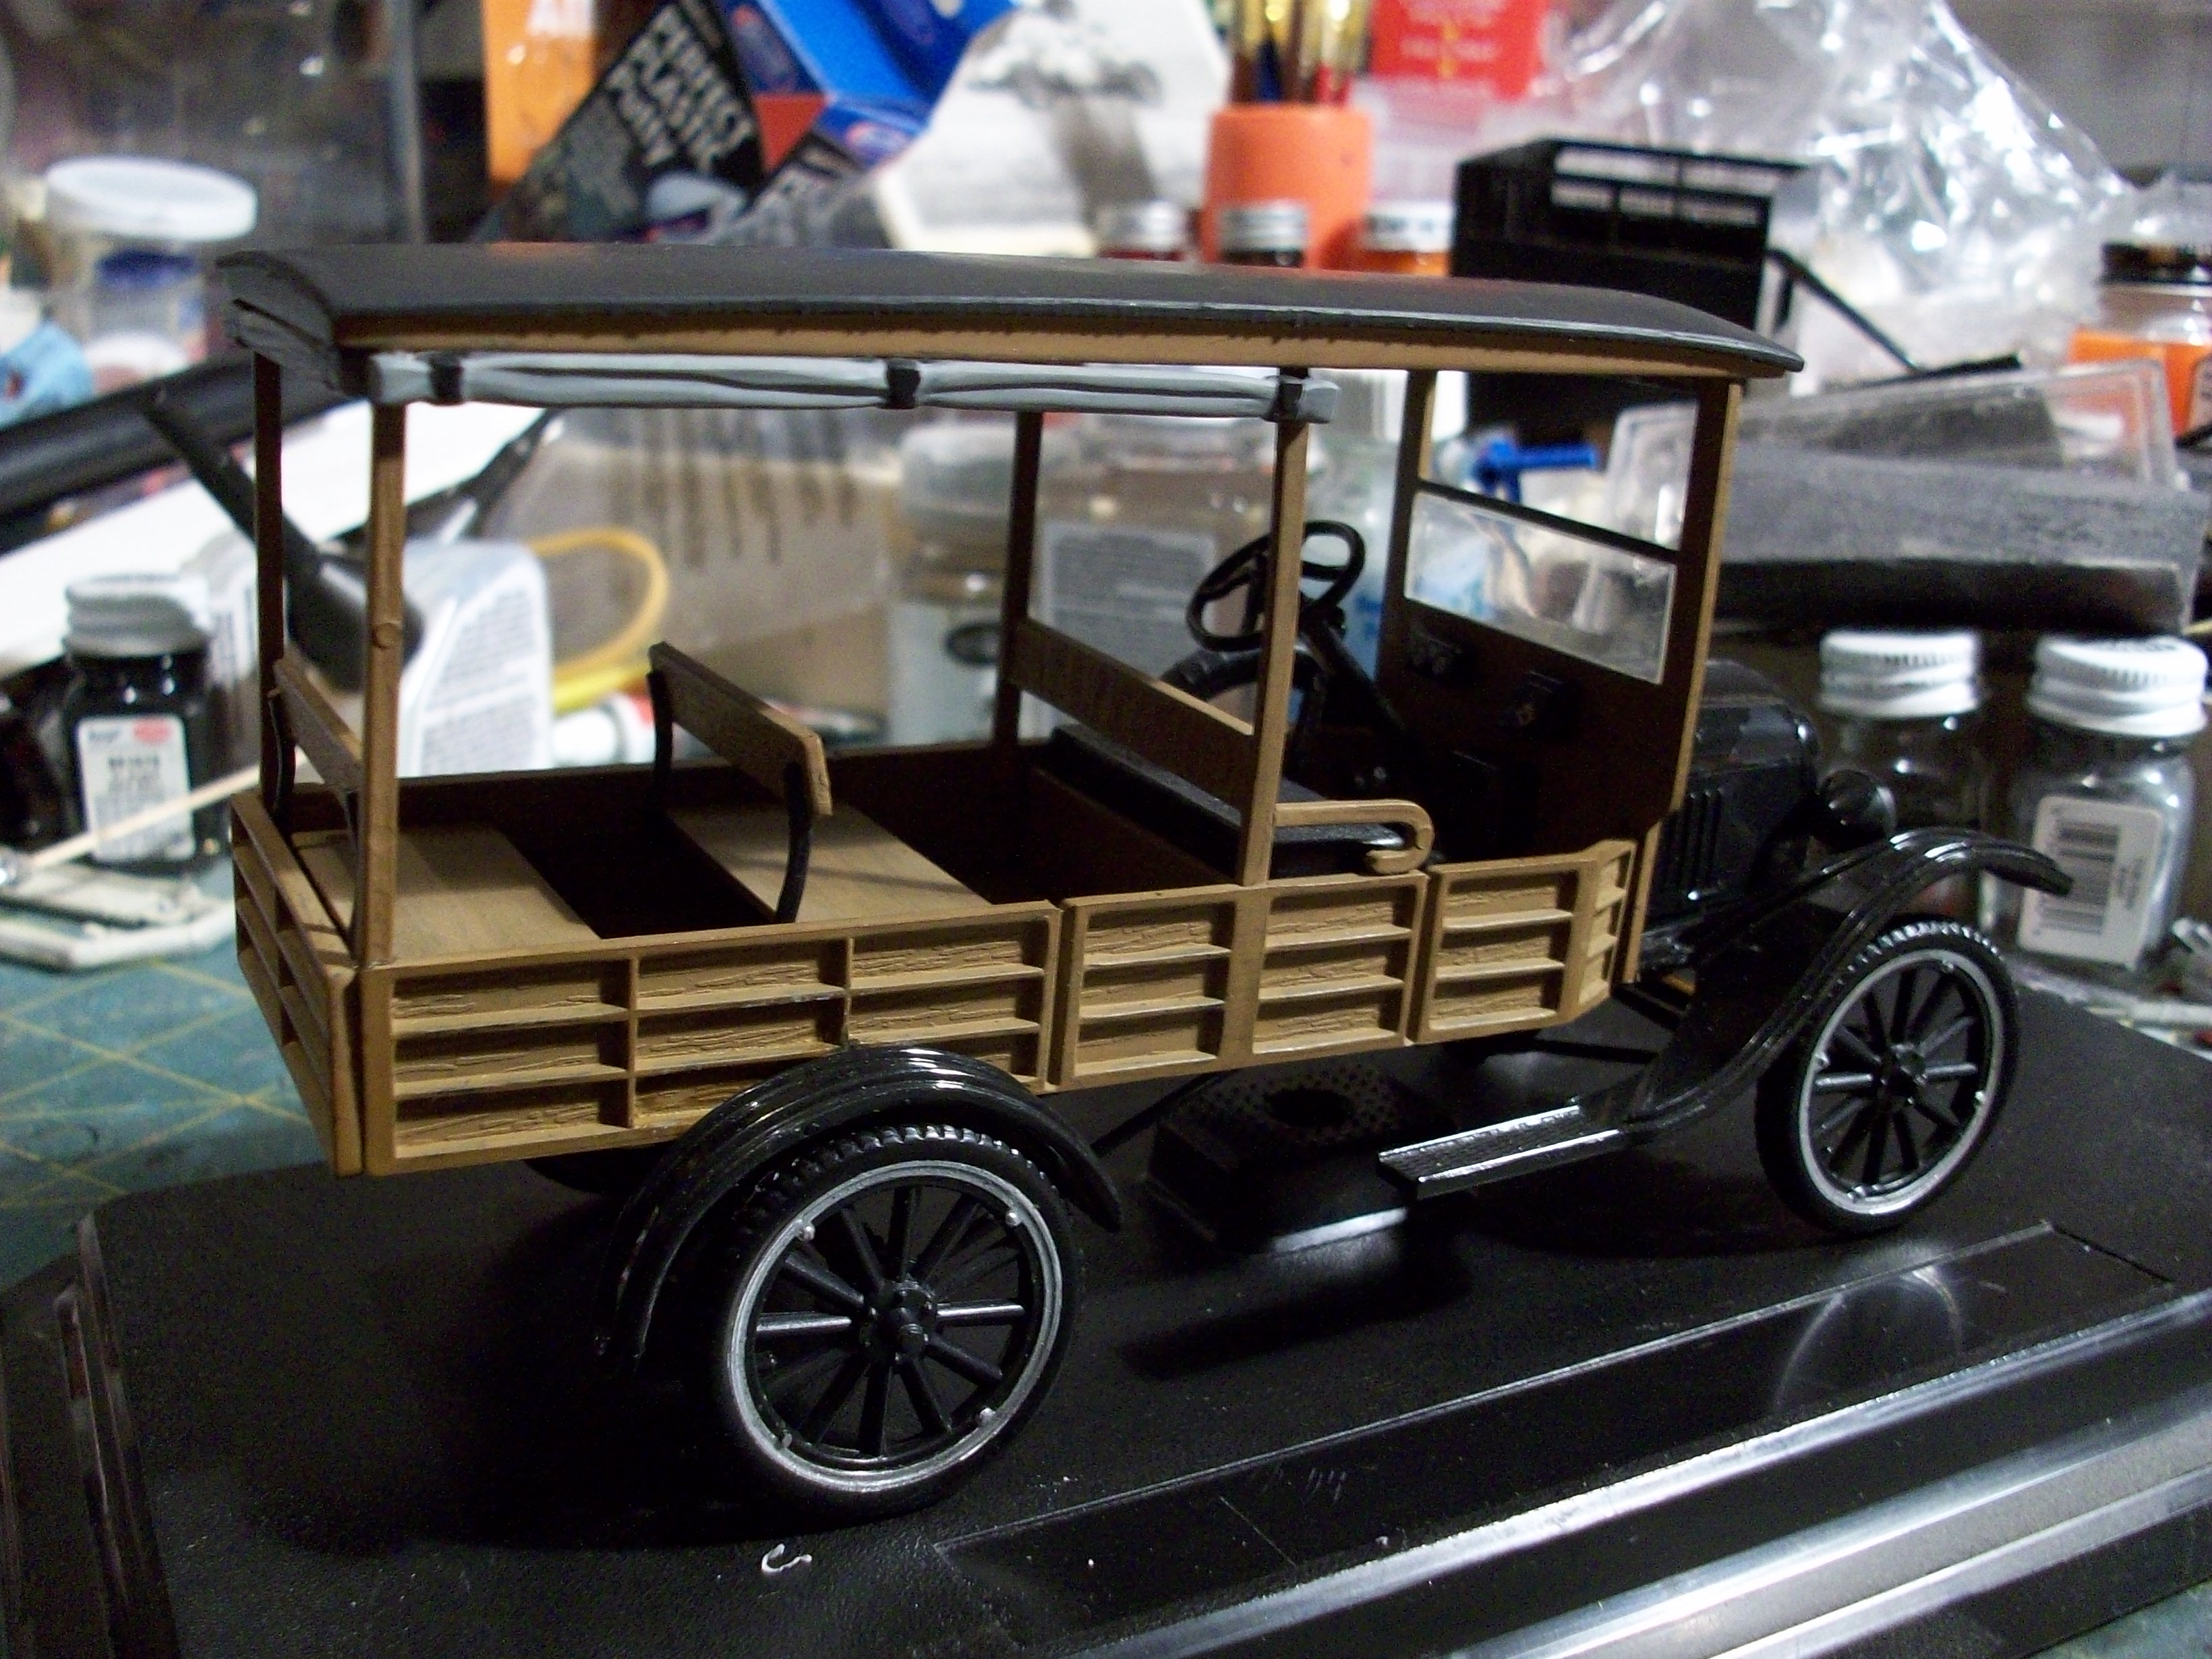
One model I've thought about building for quite some time, is the Ford Model A "Paddy Wagon", Searching Google, I found these pictures of a Model A Paddy Wagon and it's just what I had in mind. Some time ago I built the AMT 1931 Ford Woody. As I have an almost complete spare kit of this model, I figured it would make a great starting point for the paddy wagon. Here's the '31 that I built before: I'm starting with the chassis, fenders, engine and firewall of the '31 woody, The remainder of the body will be a combination of modified woody panels and scratch building. I have a couple of other models to finish first, but I will work on this one while paint and/or glue dries on the others....... Tony
-
I've contacted my friend to see if he's interested in getting any more to send to MCM members. I'll let you know. Tony
-
From what I can see, the tires don't appear to be directional. By the way, I made an error in the title of this post. It's actually a 1925 Model T, so the tires may be different. Tony
-
This is the 1/24 scale fruit I should be receiving from my friend Fred in France. Hope it's a s good as it looks in the photo...... Tony
-
Thanks John, I usually only use the folk art paint on small details.... It's so much easuier to clean up than enamels. Recently I've also been using Testor's bottle acrylics.as well. The only real problem I've found is that if you try to add a second coat too quickly,, it can pull off the paint from the first coat.... even if you thought the first coat was dry! Tony
-
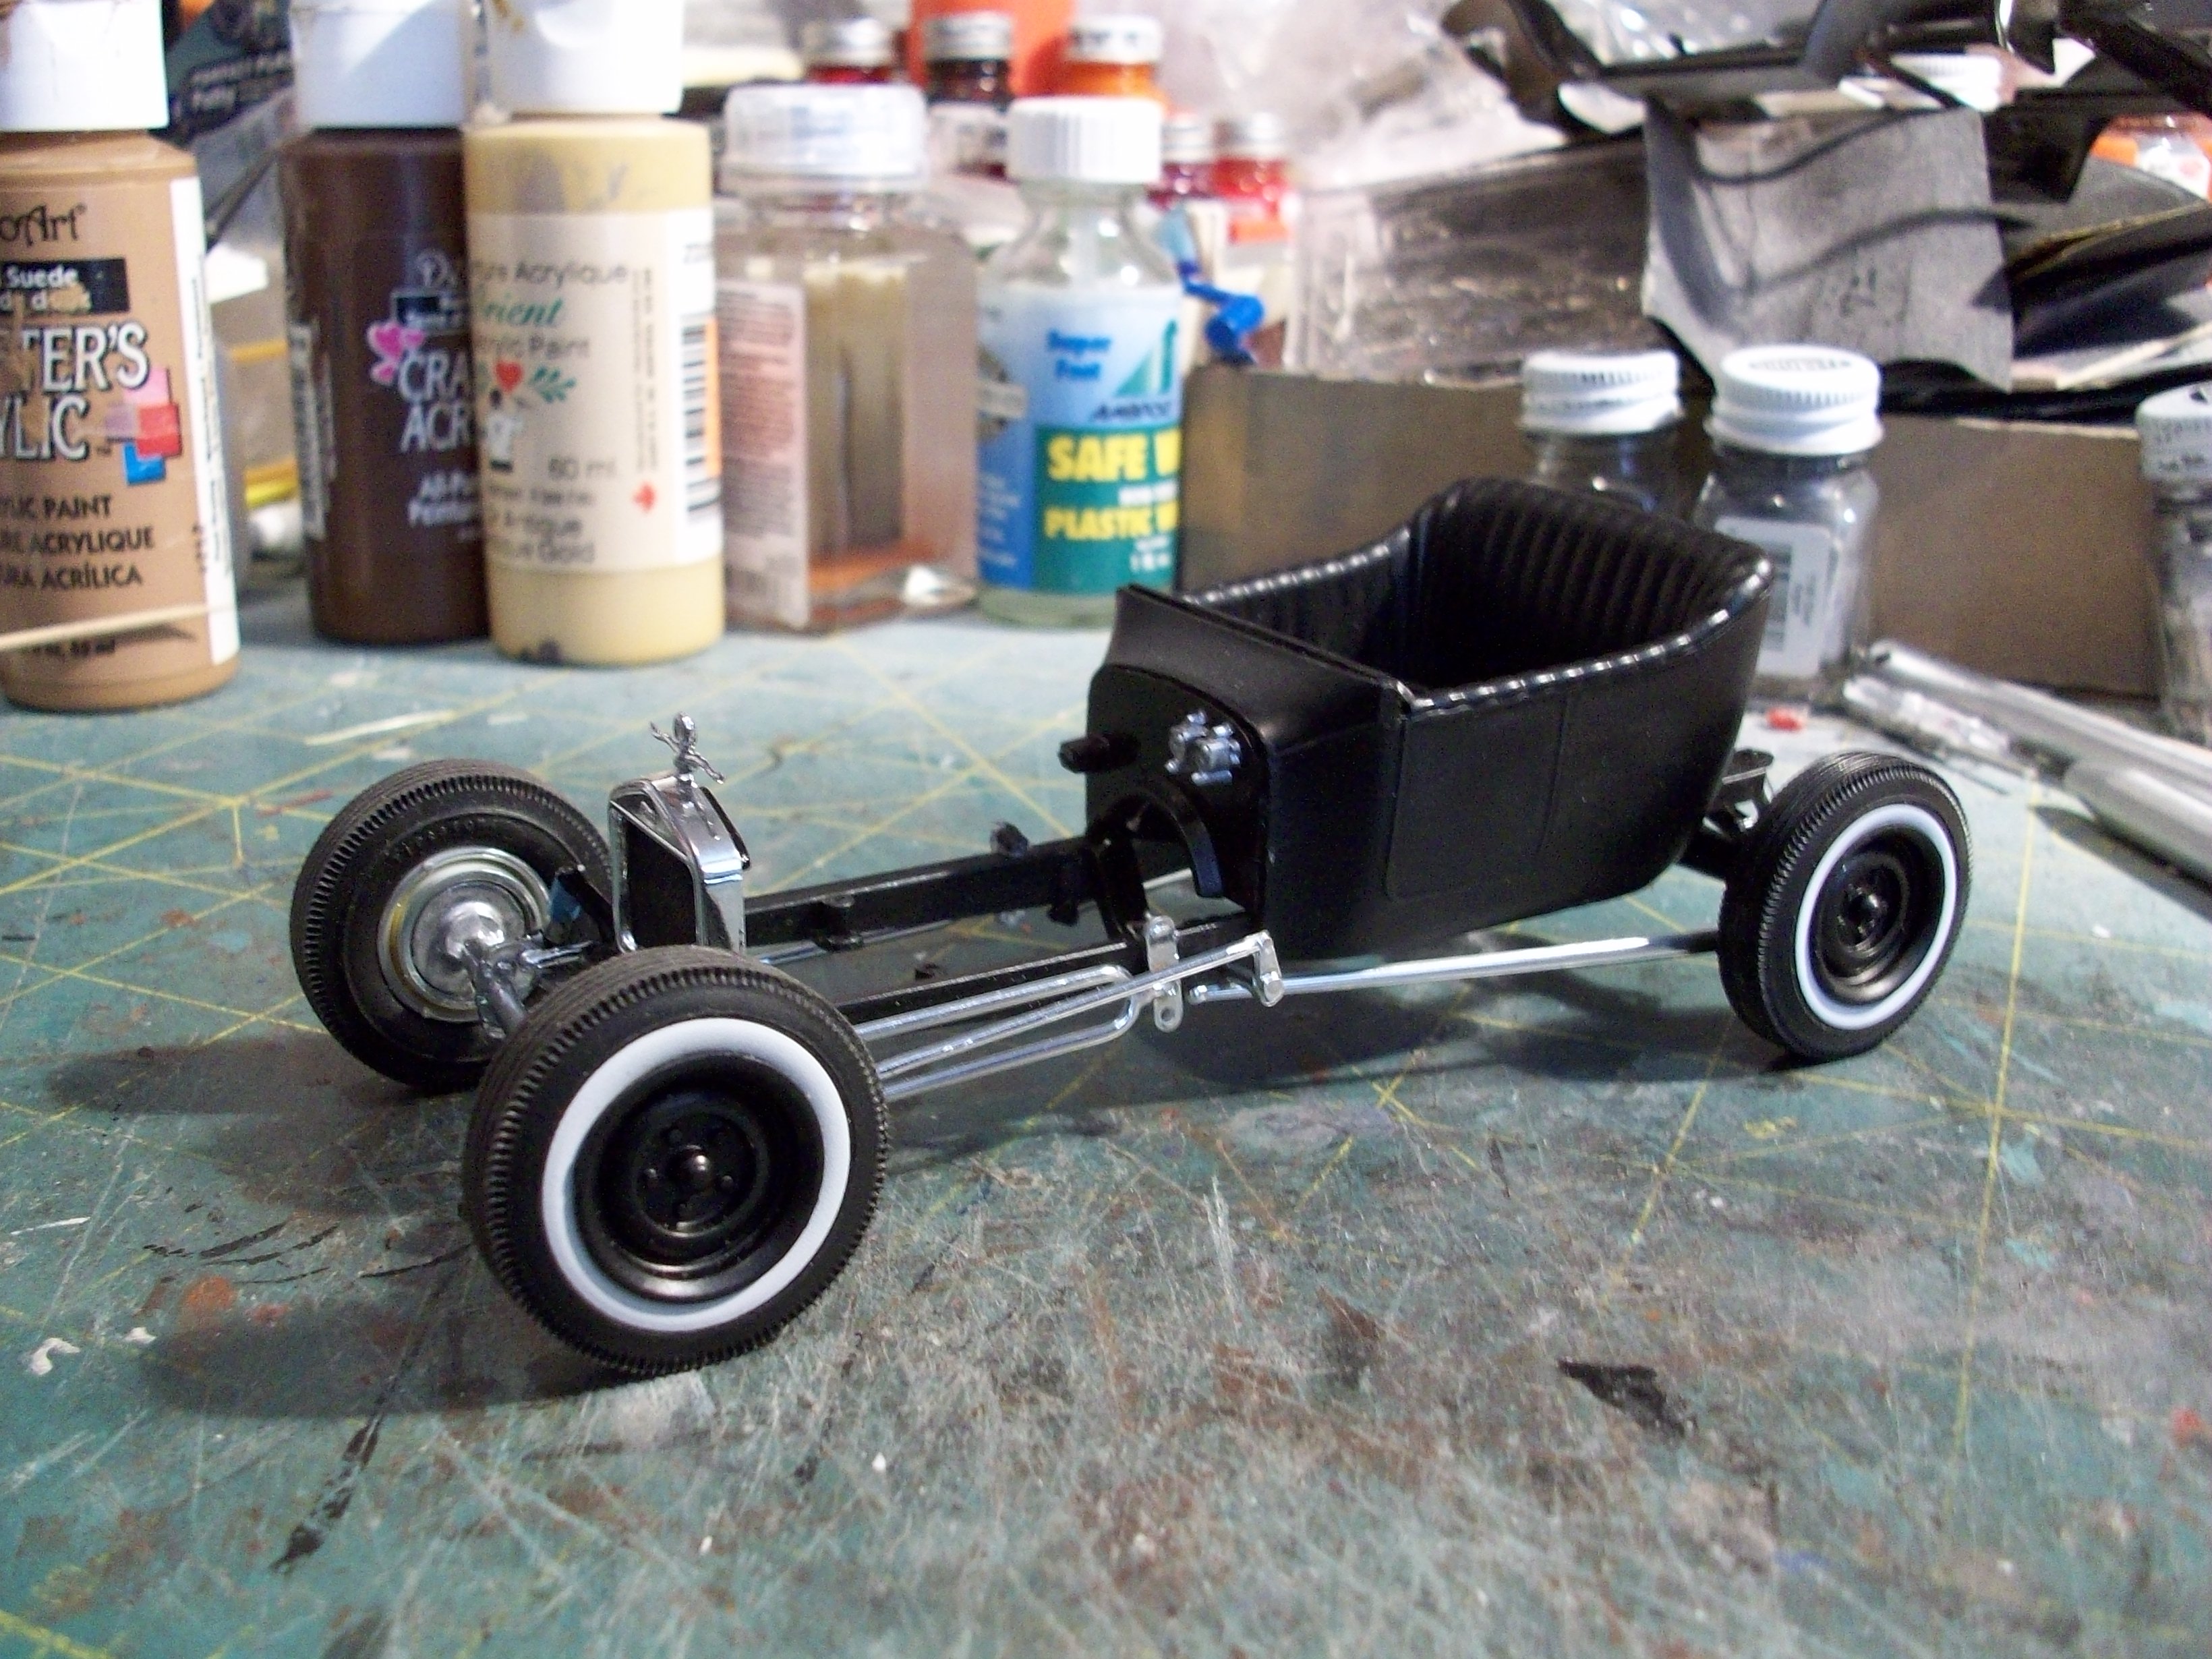
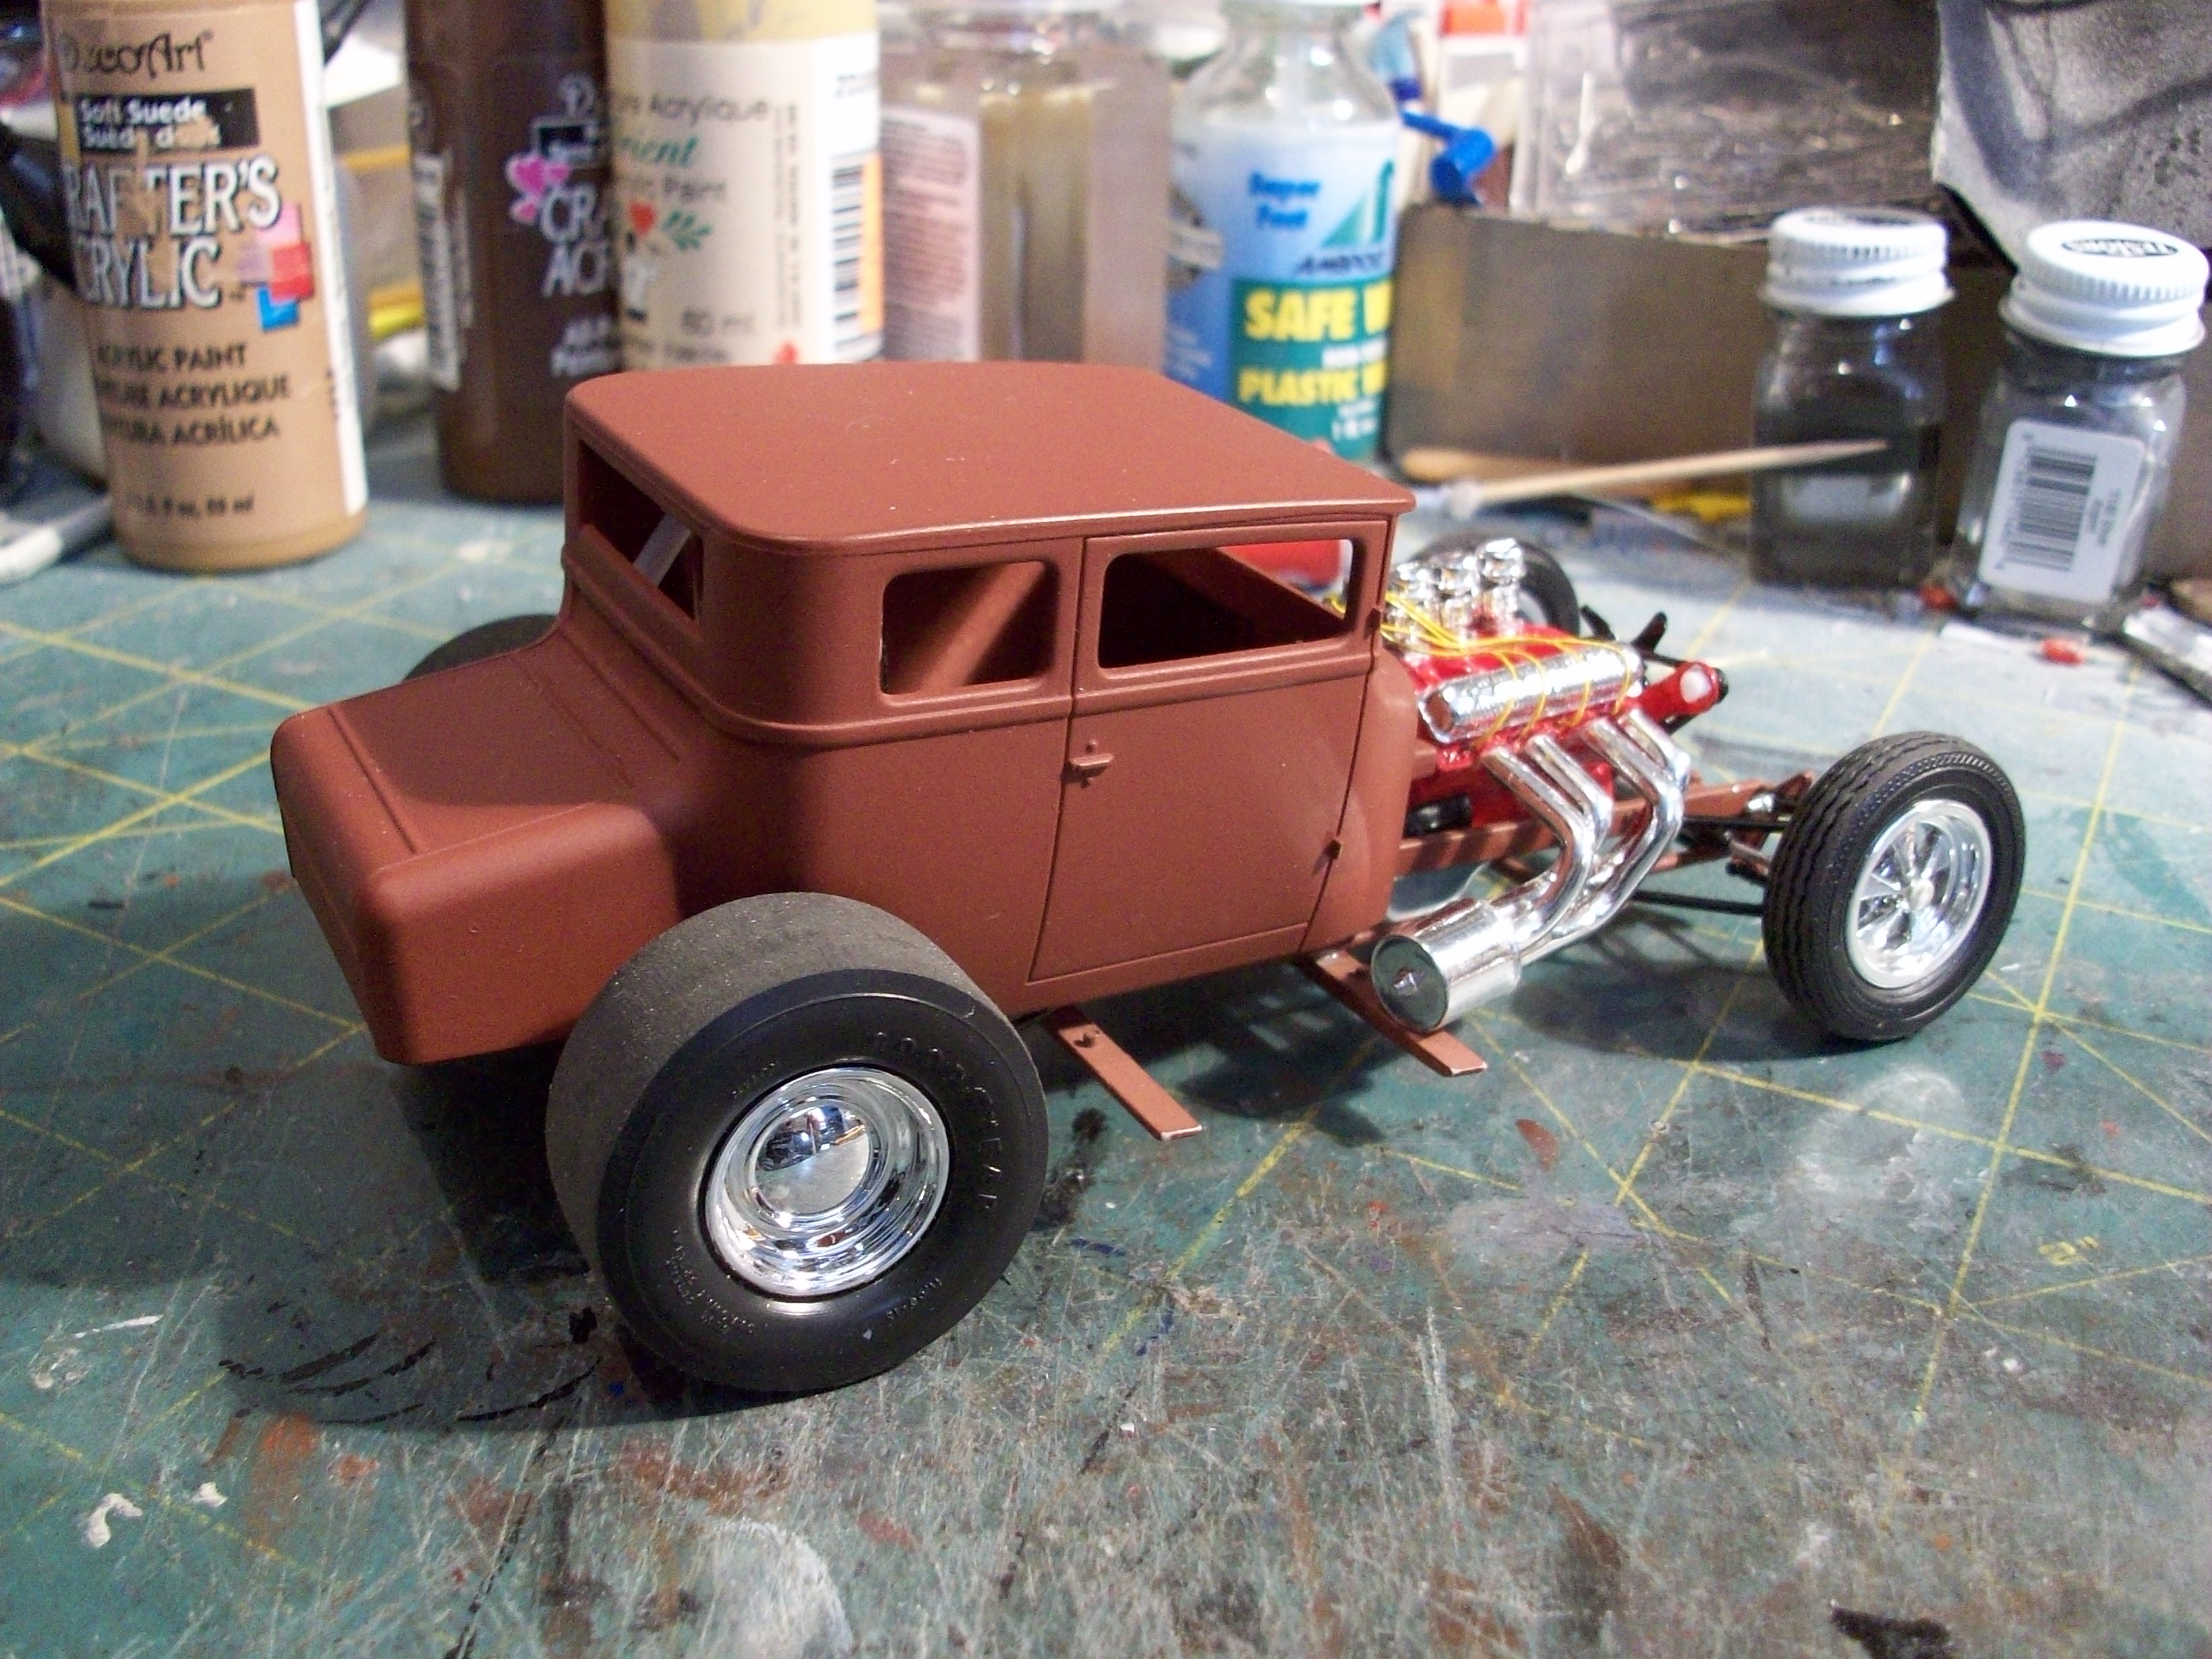
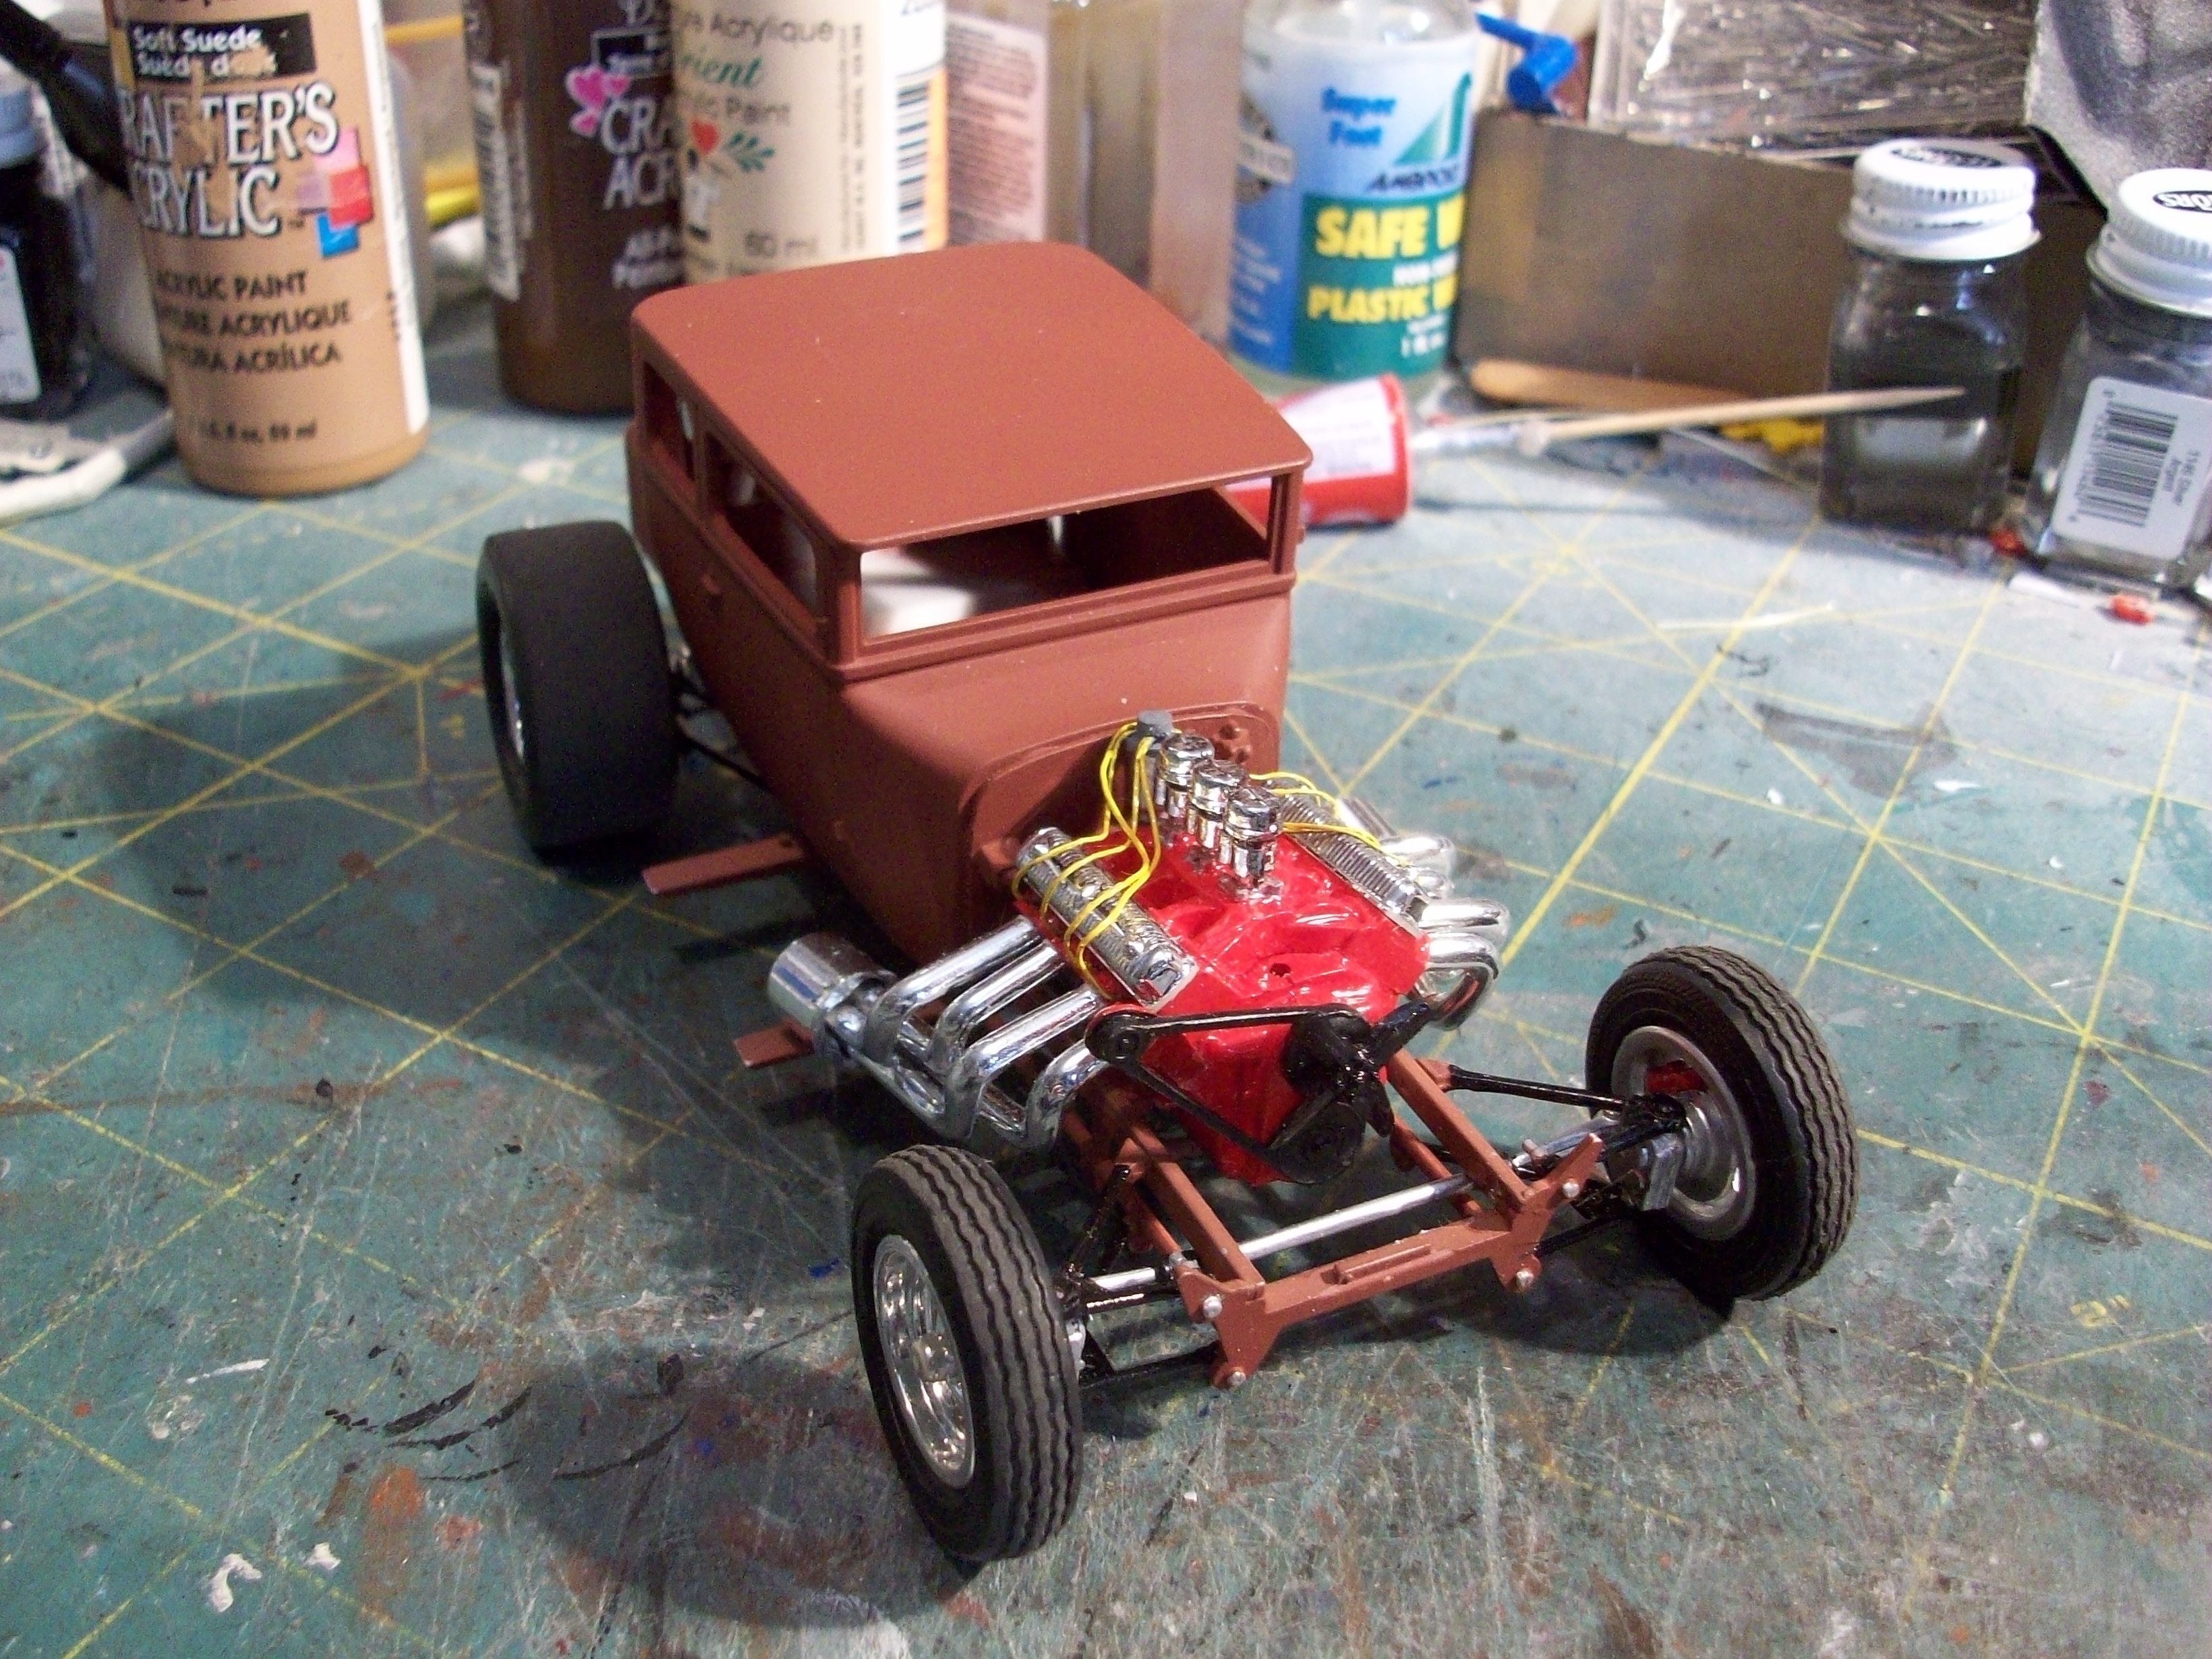
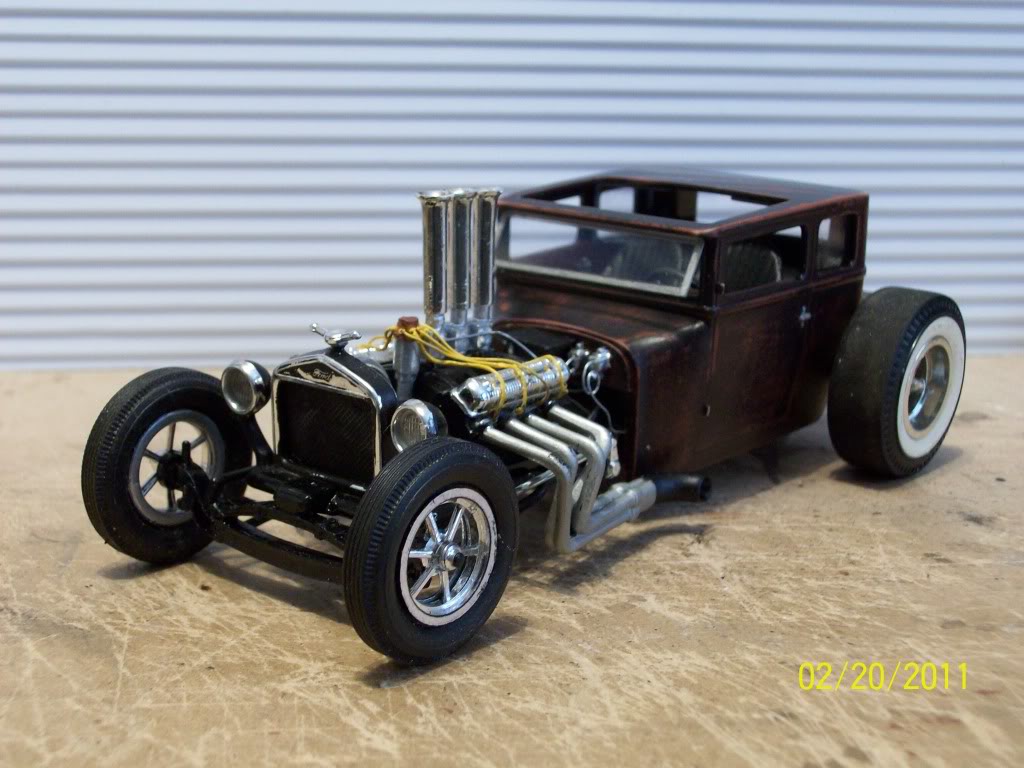
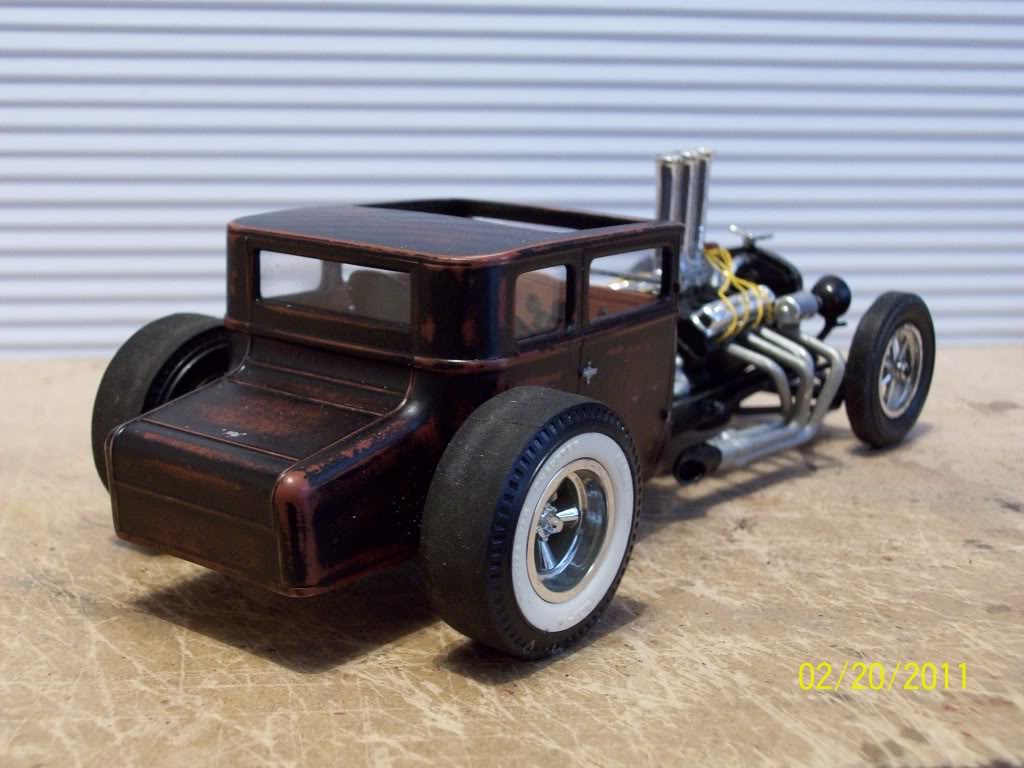
I'm not usually a rod builder, but now and again I get inspired by something I've seen on TV or in the pages of the forums. So I started a couple of rods based on the 1925 Model T Ford..... from extra parts found in some of the kits where I have built the stock Model T. Nothing spectacular in the builds though. Some minor variations from the kits but basically box stock. And here's a "Rat Rod" version I built a few years back using the same basic kits. Tony
-
For the most part the model T is complete, but It's lacking the fruit. I put the kit fruit in the bed just to get an idea of how it would look, but I don't intend to use it in the finished model. I haven't glued the roof or the canopy supports to the model yet, as I'm waiting for some miniature boxes of fruit to come from my friend in France. When They are painted and arranged in the bed, I will glue the roof in place. I think this truck also need some advertising decals. The kit ones only relate to the hot rod version, so I can't use those.
-
I built a depot hack a few years ago. I also have a '29 ready to become a "paddy wagon" when I get around to it. Meanwhile, a little more progress on the fruit wagon. Tony
-
Thanks to all the nice words guys. I did include the engine, but didn't really detail the engine compartment very much. Tony.
-
Thanks Nick. Tony
-
Thanks Wayne. Perhaps a hot rod in the future? Tony
-
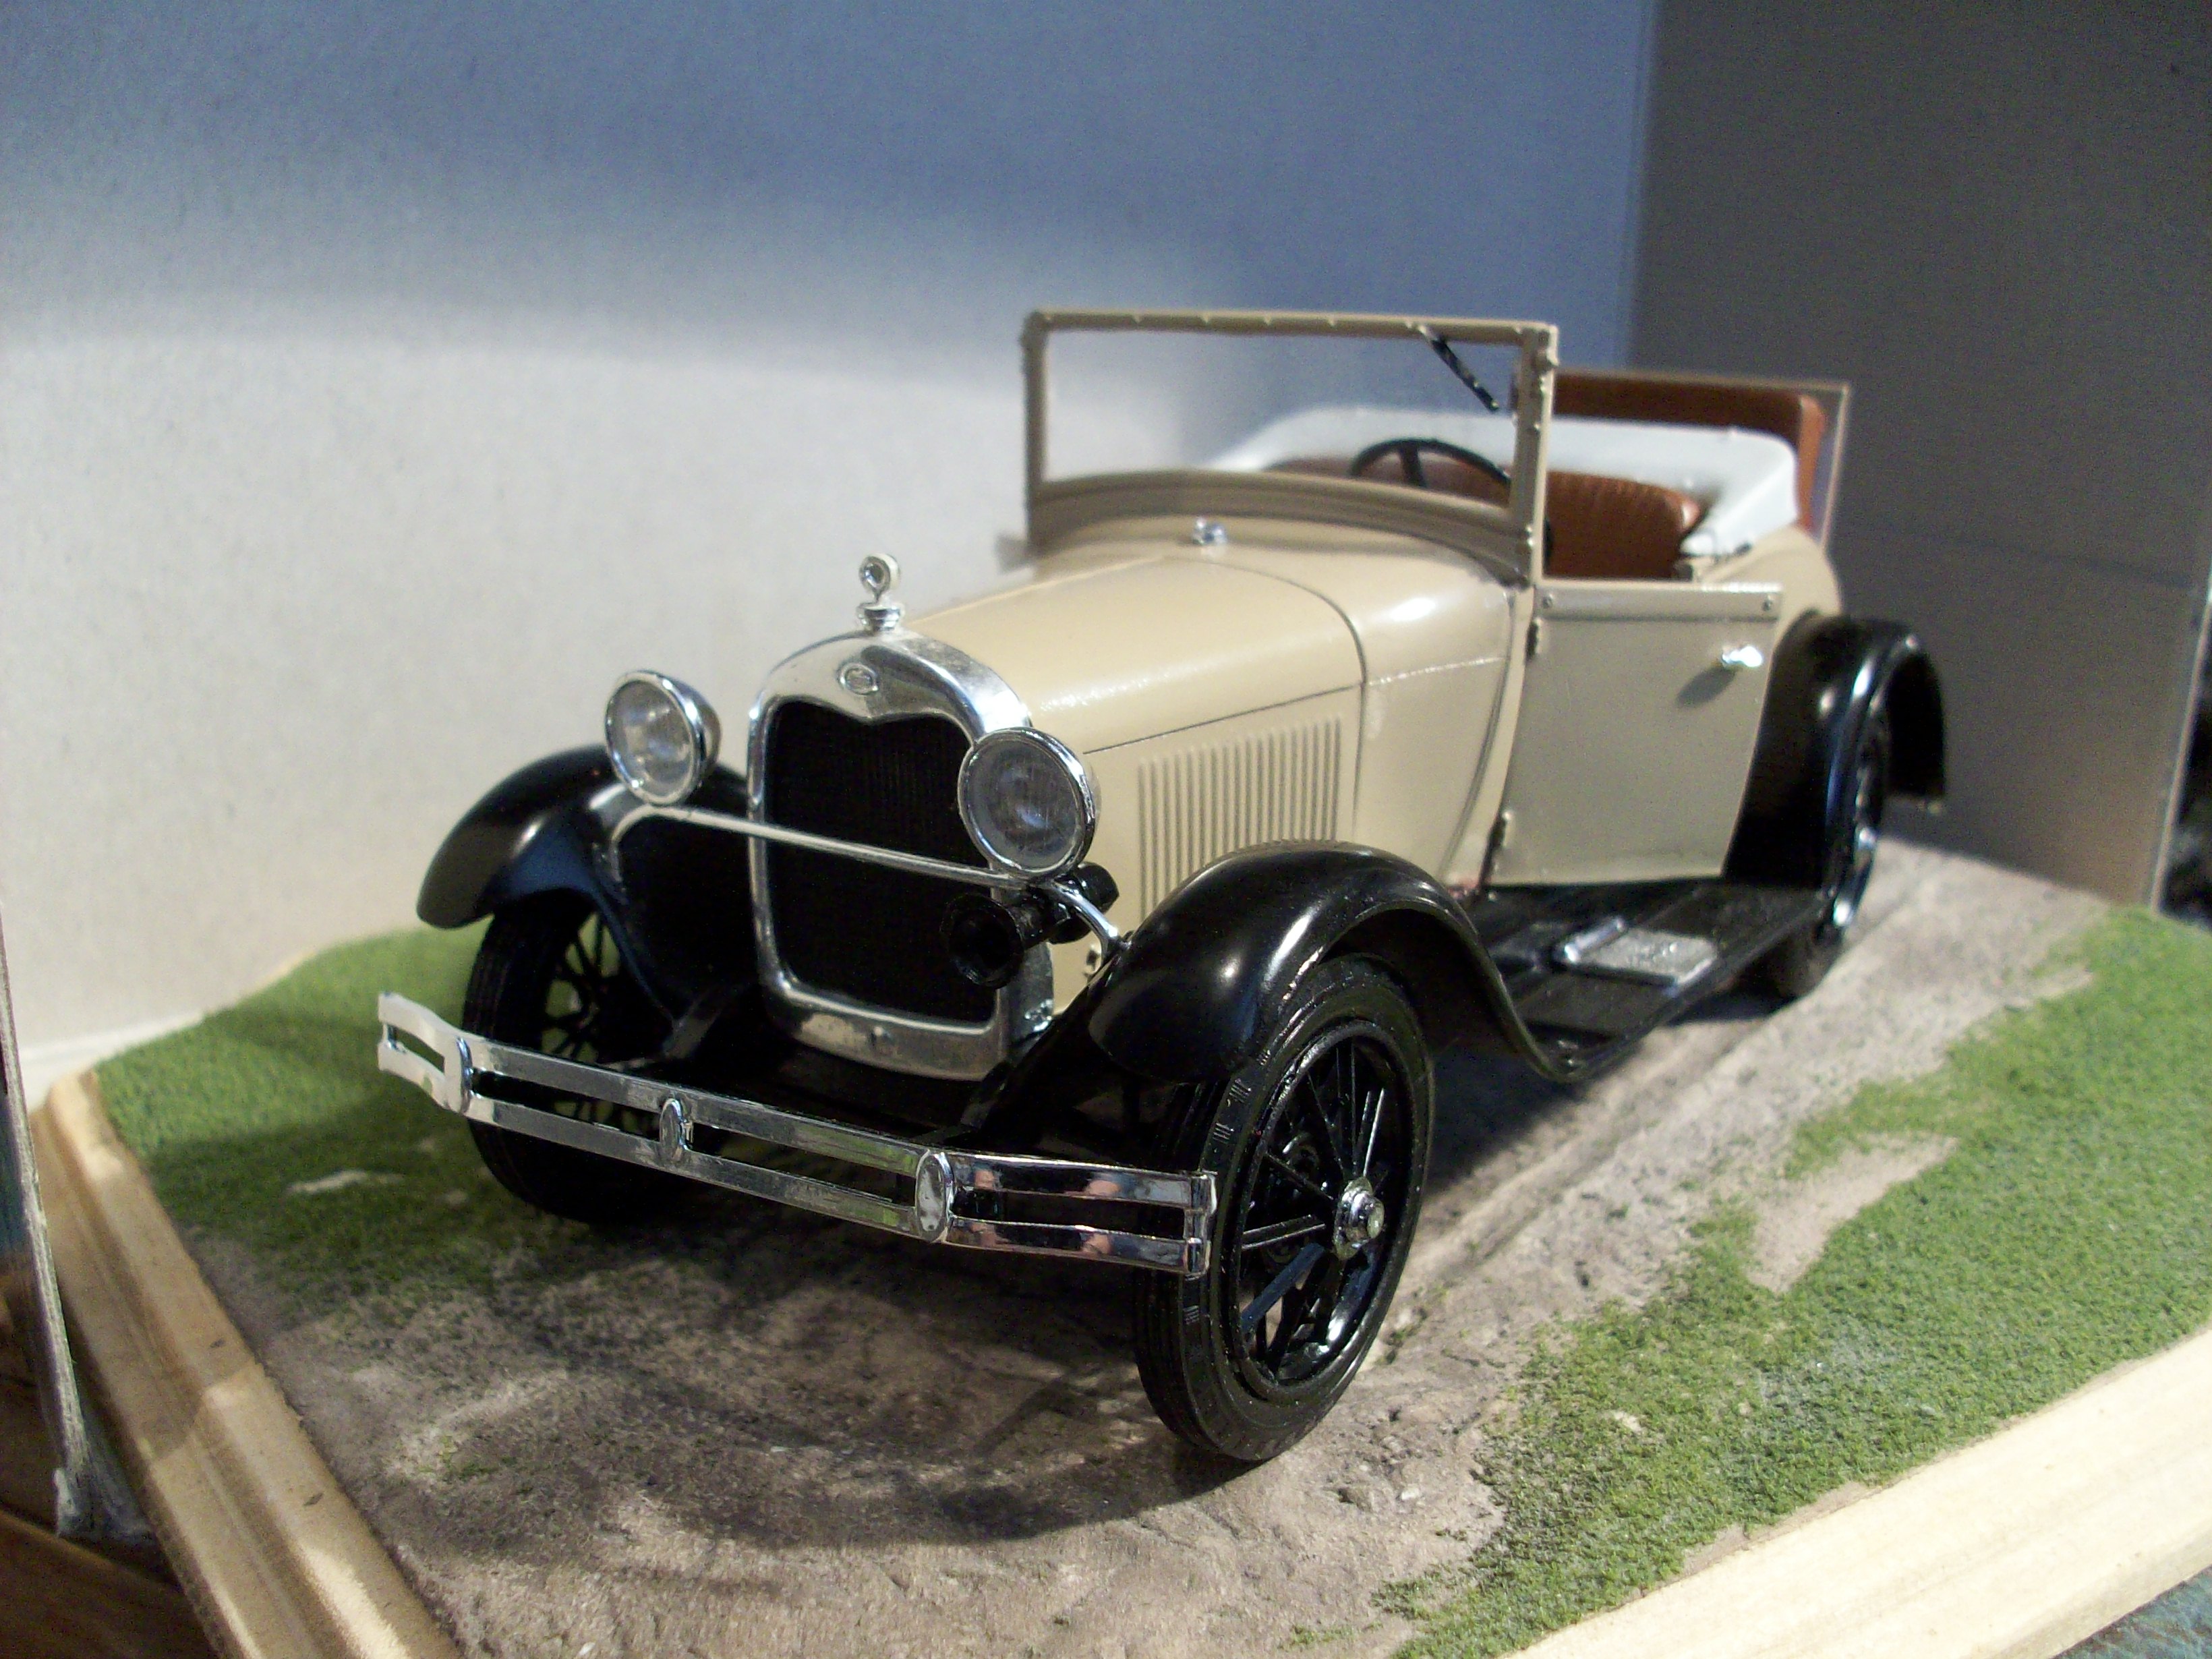
I built this '29 Ford roadster recently but just before rejoining MCM. It's the 1929 Model A roadster by AMT. I opened up the trunk (rumble seat) and doors for a little more interest. The top can be up or folded and the rumble seat open or closed. The doors, however, are glued in the open position. Hope you like it. Tony
-
You may know me by another name?
retriever replied to retriever's topic in Welcome! Introduce Yourself
Oh, I see what you mean. My old name was "gtmust" but I think I'll leave my old name in the history books and start out afresh as "retriever". If anyone wants to check out my past (!) it can be found in that old name. (Hope I didn't do anything bad. haha!) Tony -
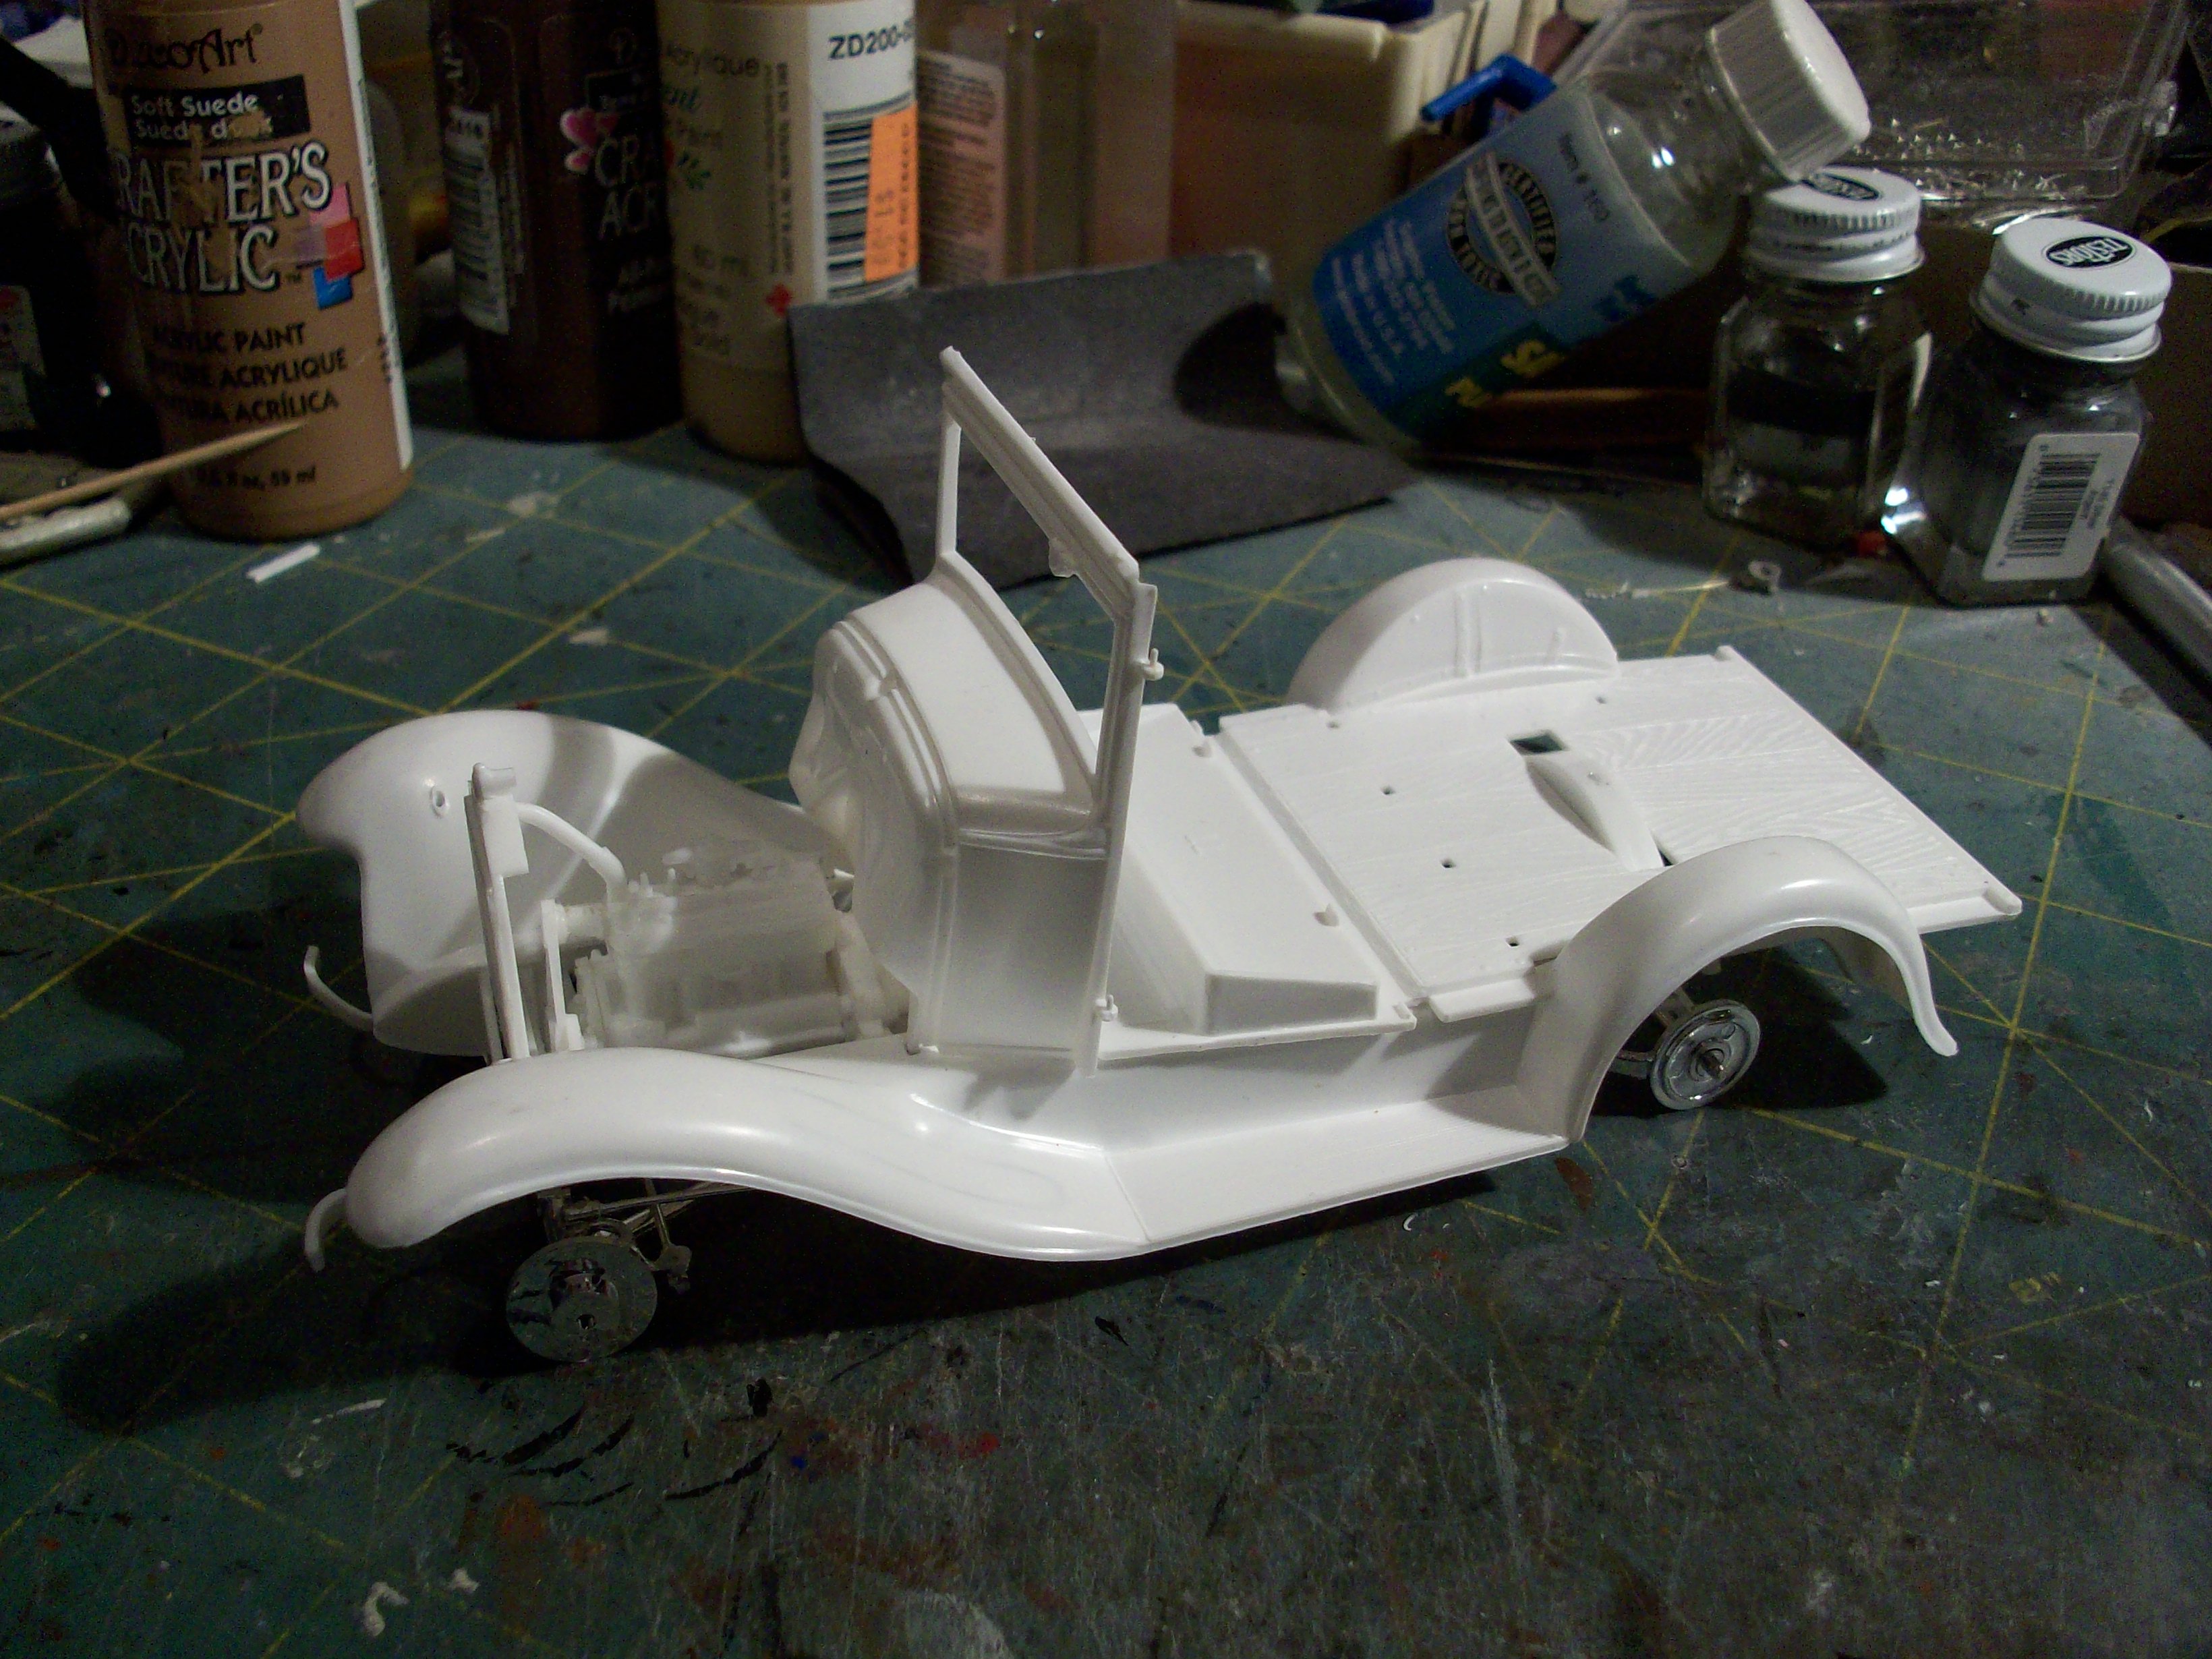
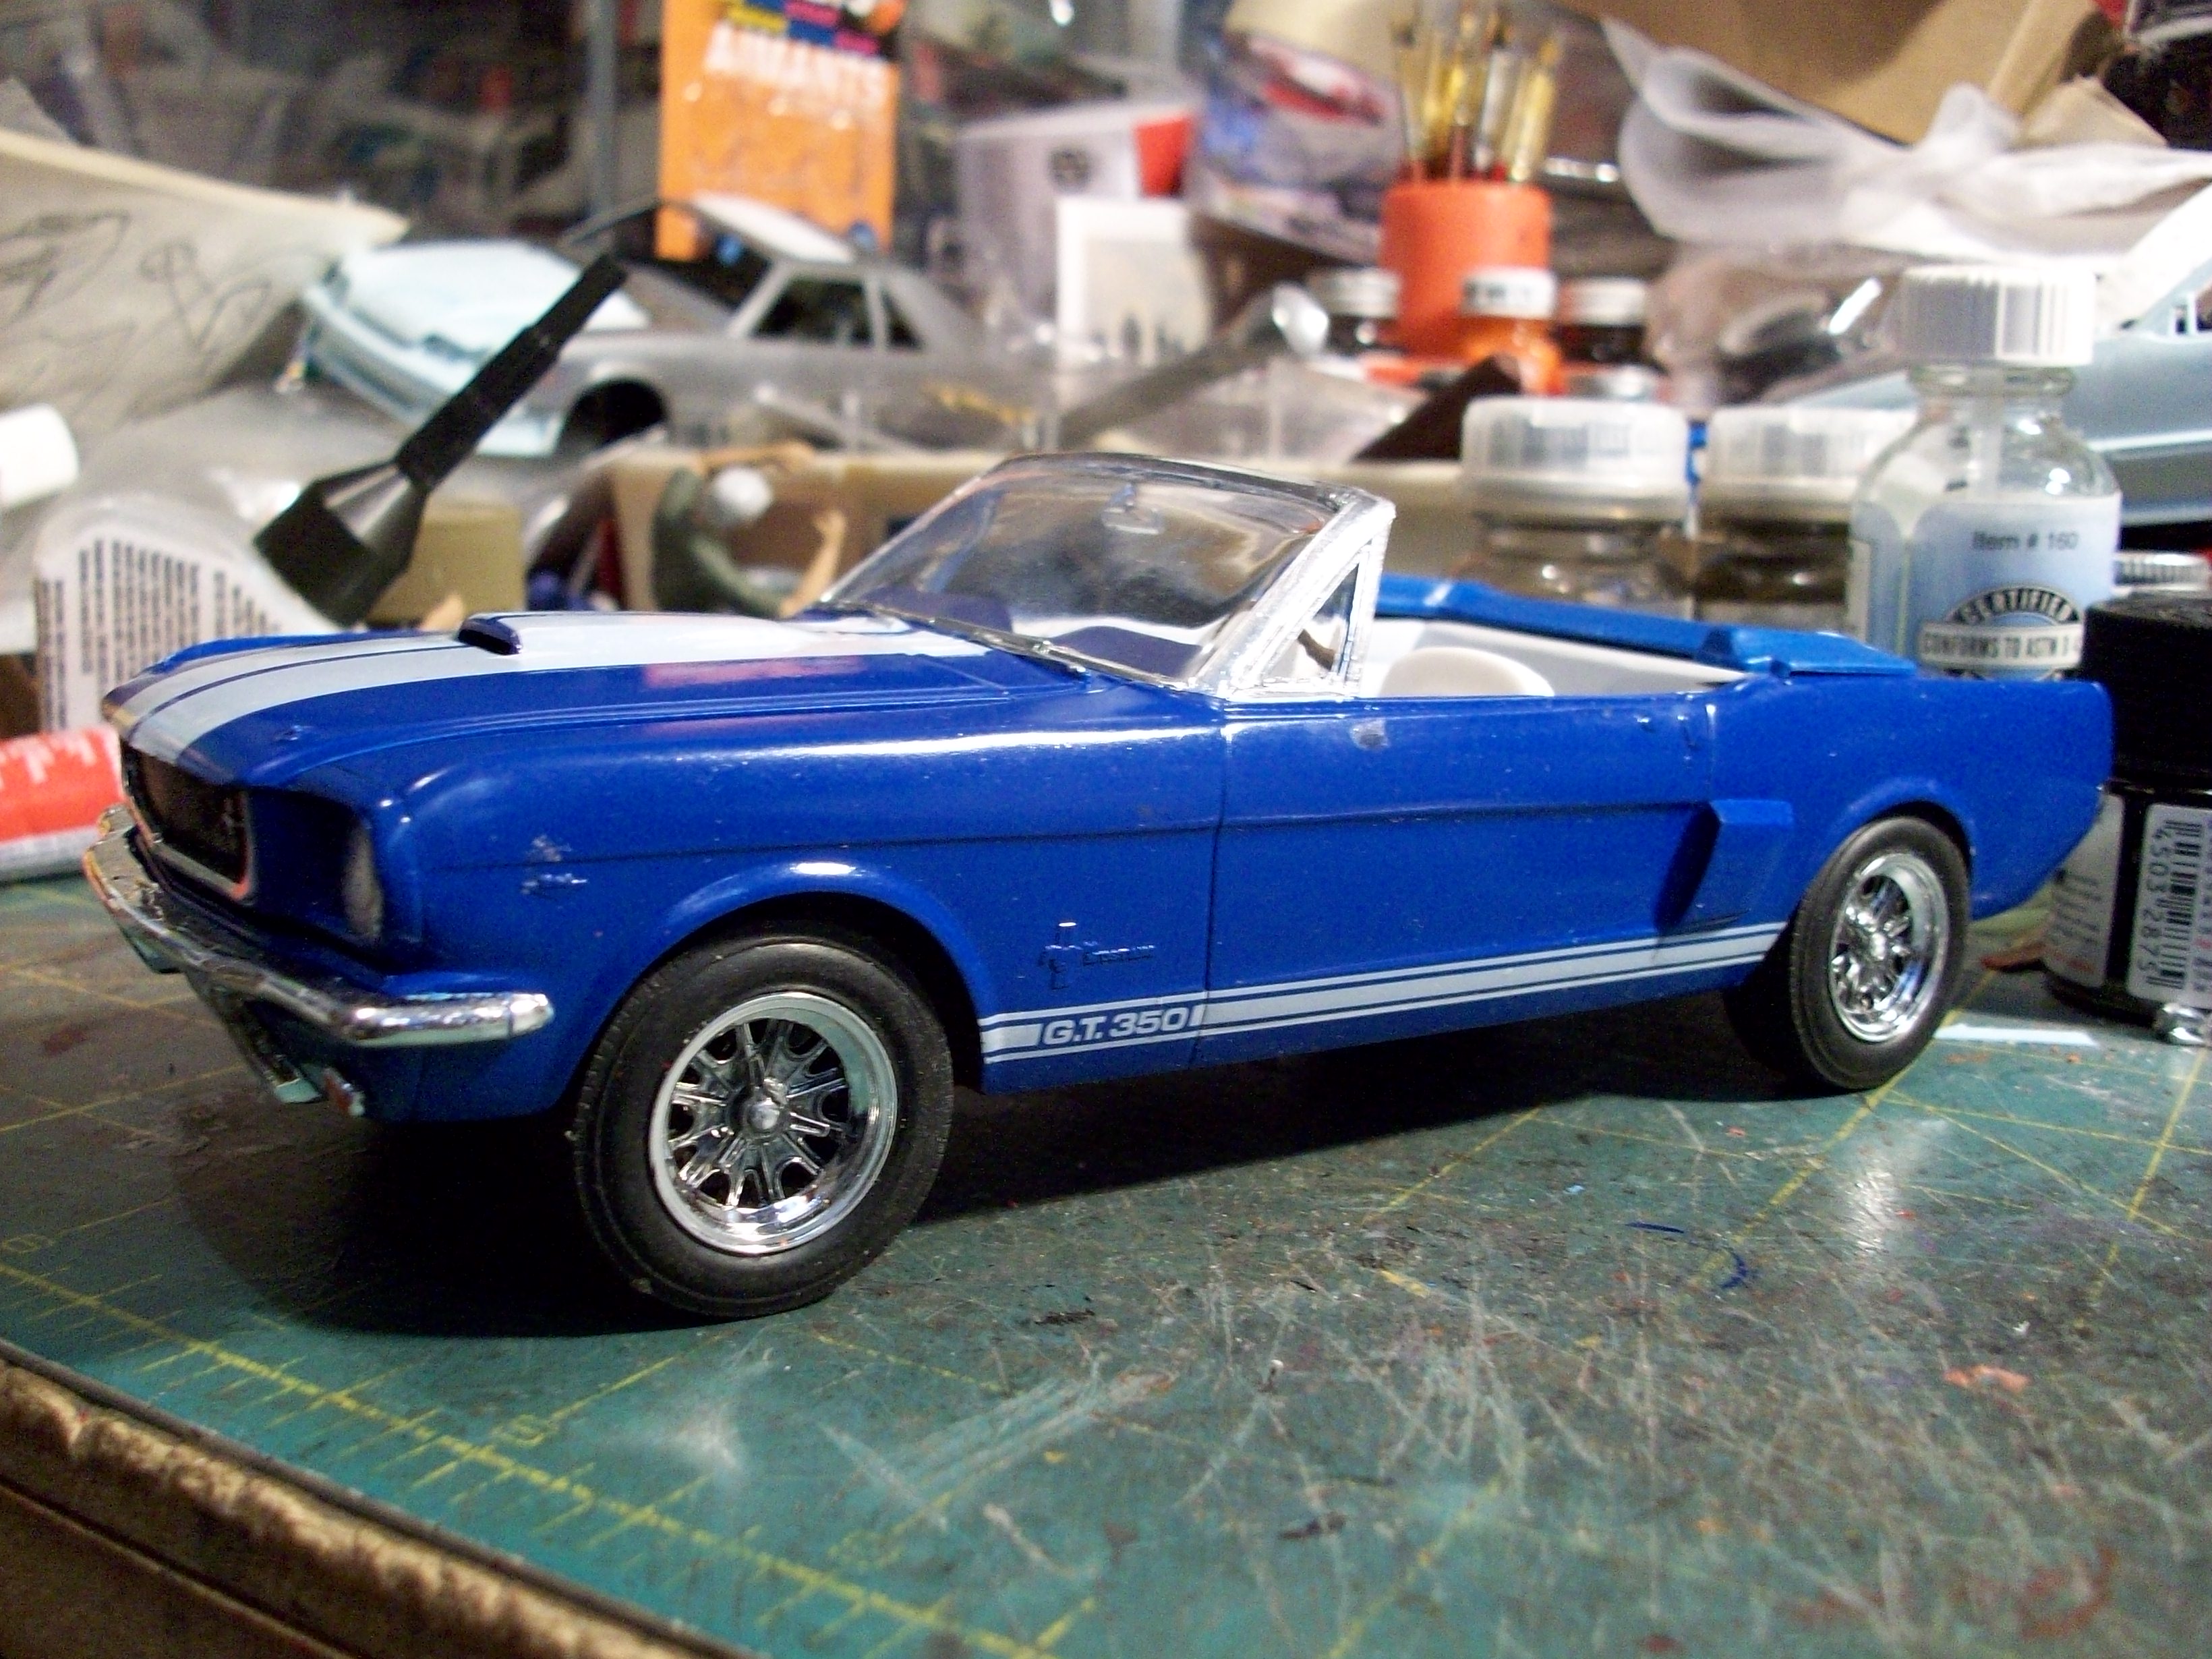
It's not commonly known that Shelby American built four G.T. 350 convertibles for '66. Each of the four convertibles was a different color--green, yellow, blue, and red. The '66 G.T. 350 convertibles were equipped identically to the fastbacks, except the rear quarter panel brake-cooling scoops were not functional because the convertible top mechanism interfered with the ducting. All four '66 G.T. 350 convertibles survive today--three are complete cars while the fourth is disassembled and in storage. For many years, it was rumored that there were six convertibles. However, paperwork discovered by SAAC proves that only four were built. Funny that no white ones were built to match the fastbacks....... I'm building mine using the Monogram '65 Mustang convertible as the base. I've added the Shelby hood and side scoops together with the '66 Shelby grille. The build is almost complete. I just have to add exterior door handles, build the rollbar and paint the folded top white. The wheels came from the Monogram Cobrs kit and are pretty close to the real thing. For those Shelby experts, I made a mistake which it's too late to correct. These cars had the side emblems deleted, which I should have done. Too late now! Here's the actual car.: Just a little more work and she'll be ready for the display case. Tony
-
You may know me by another name?
retriever replied to retriever's topic in Welcome! Introduce Yourself
I'm a very basic computer user... just enough to get by. I don't understand your suggestion. Tony -
That's an interesting concept Tom. Thanks for the suggestion. Tony
-
Thanks for the information Michael. I'll check it out. Tony
-
A good suggestion but I already built a 1929 Model T wagon (depot hack) just recently.
-
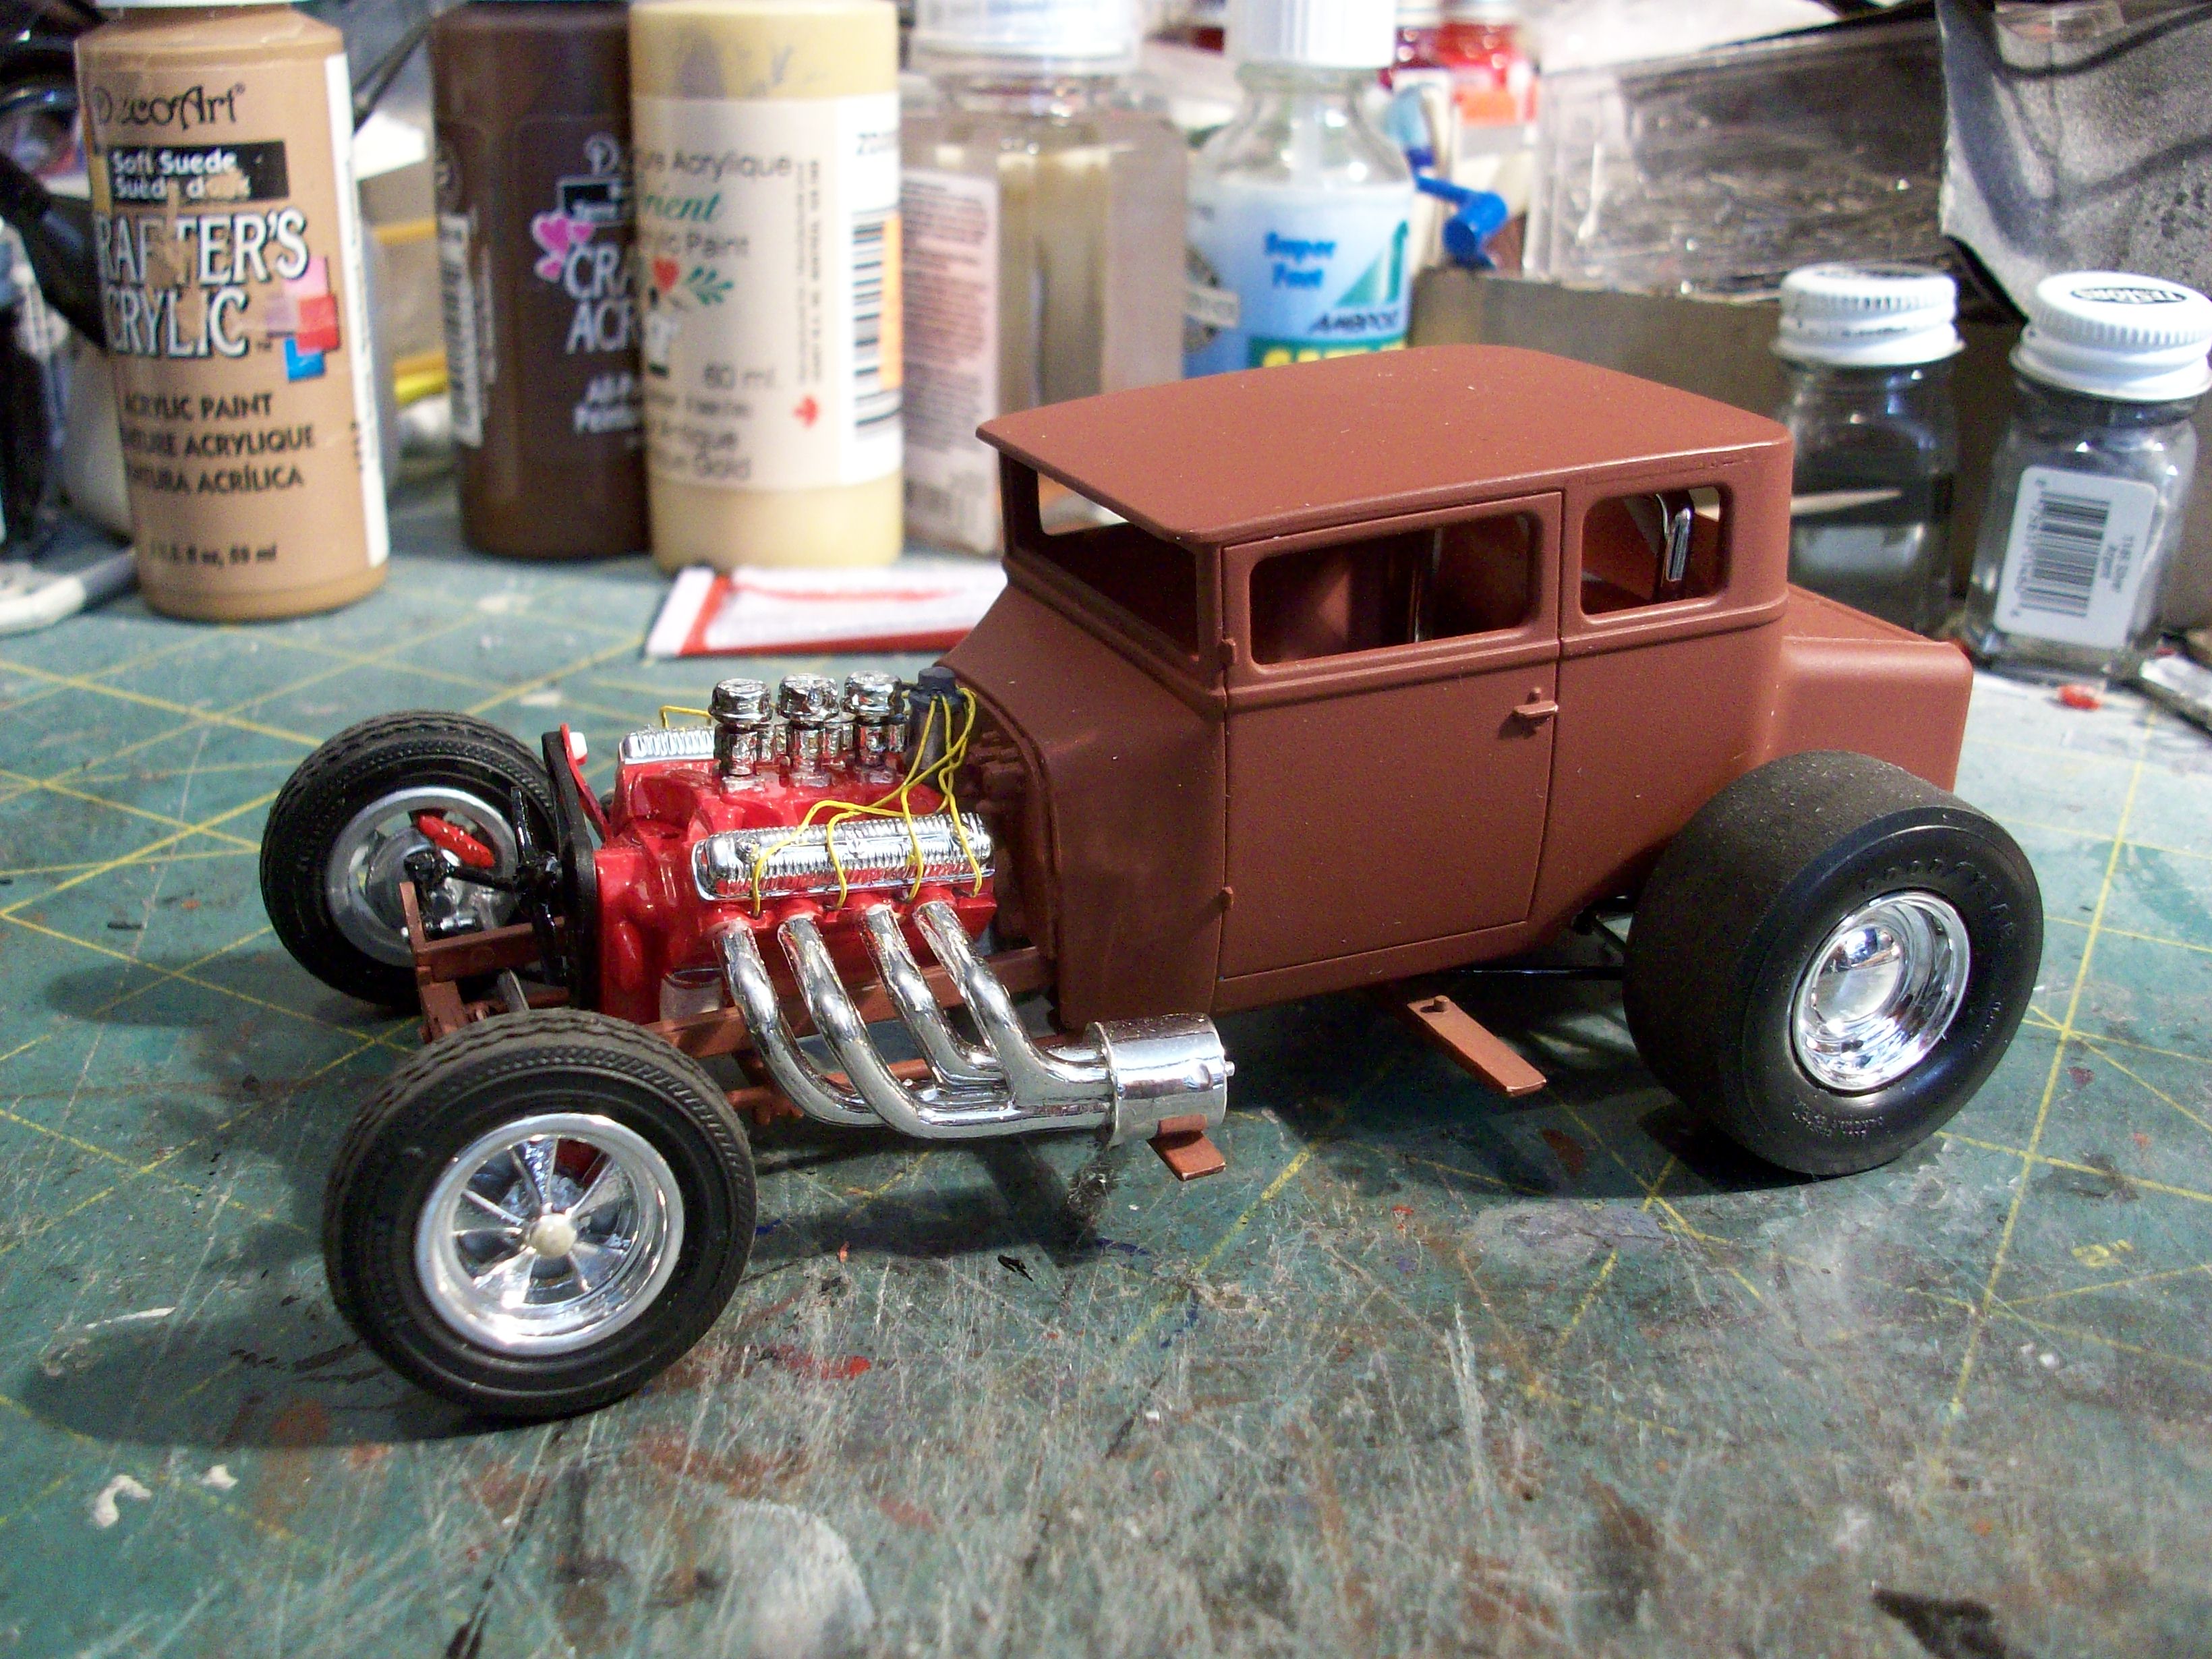
Wheels are painted and installed. Engine is basically detailed and installed. This one will be wired but that can't be done until firewall is installed.