joeb99
-
Posts
12 -
Joined
-
Last visited
joeb99's Achievements
MCM Member (2/6)
-
65 Stepside
joeb99 replied to joeb99's topic in WIP: Model Trucks: Pickups, Vans, SUVs, Light Commercial
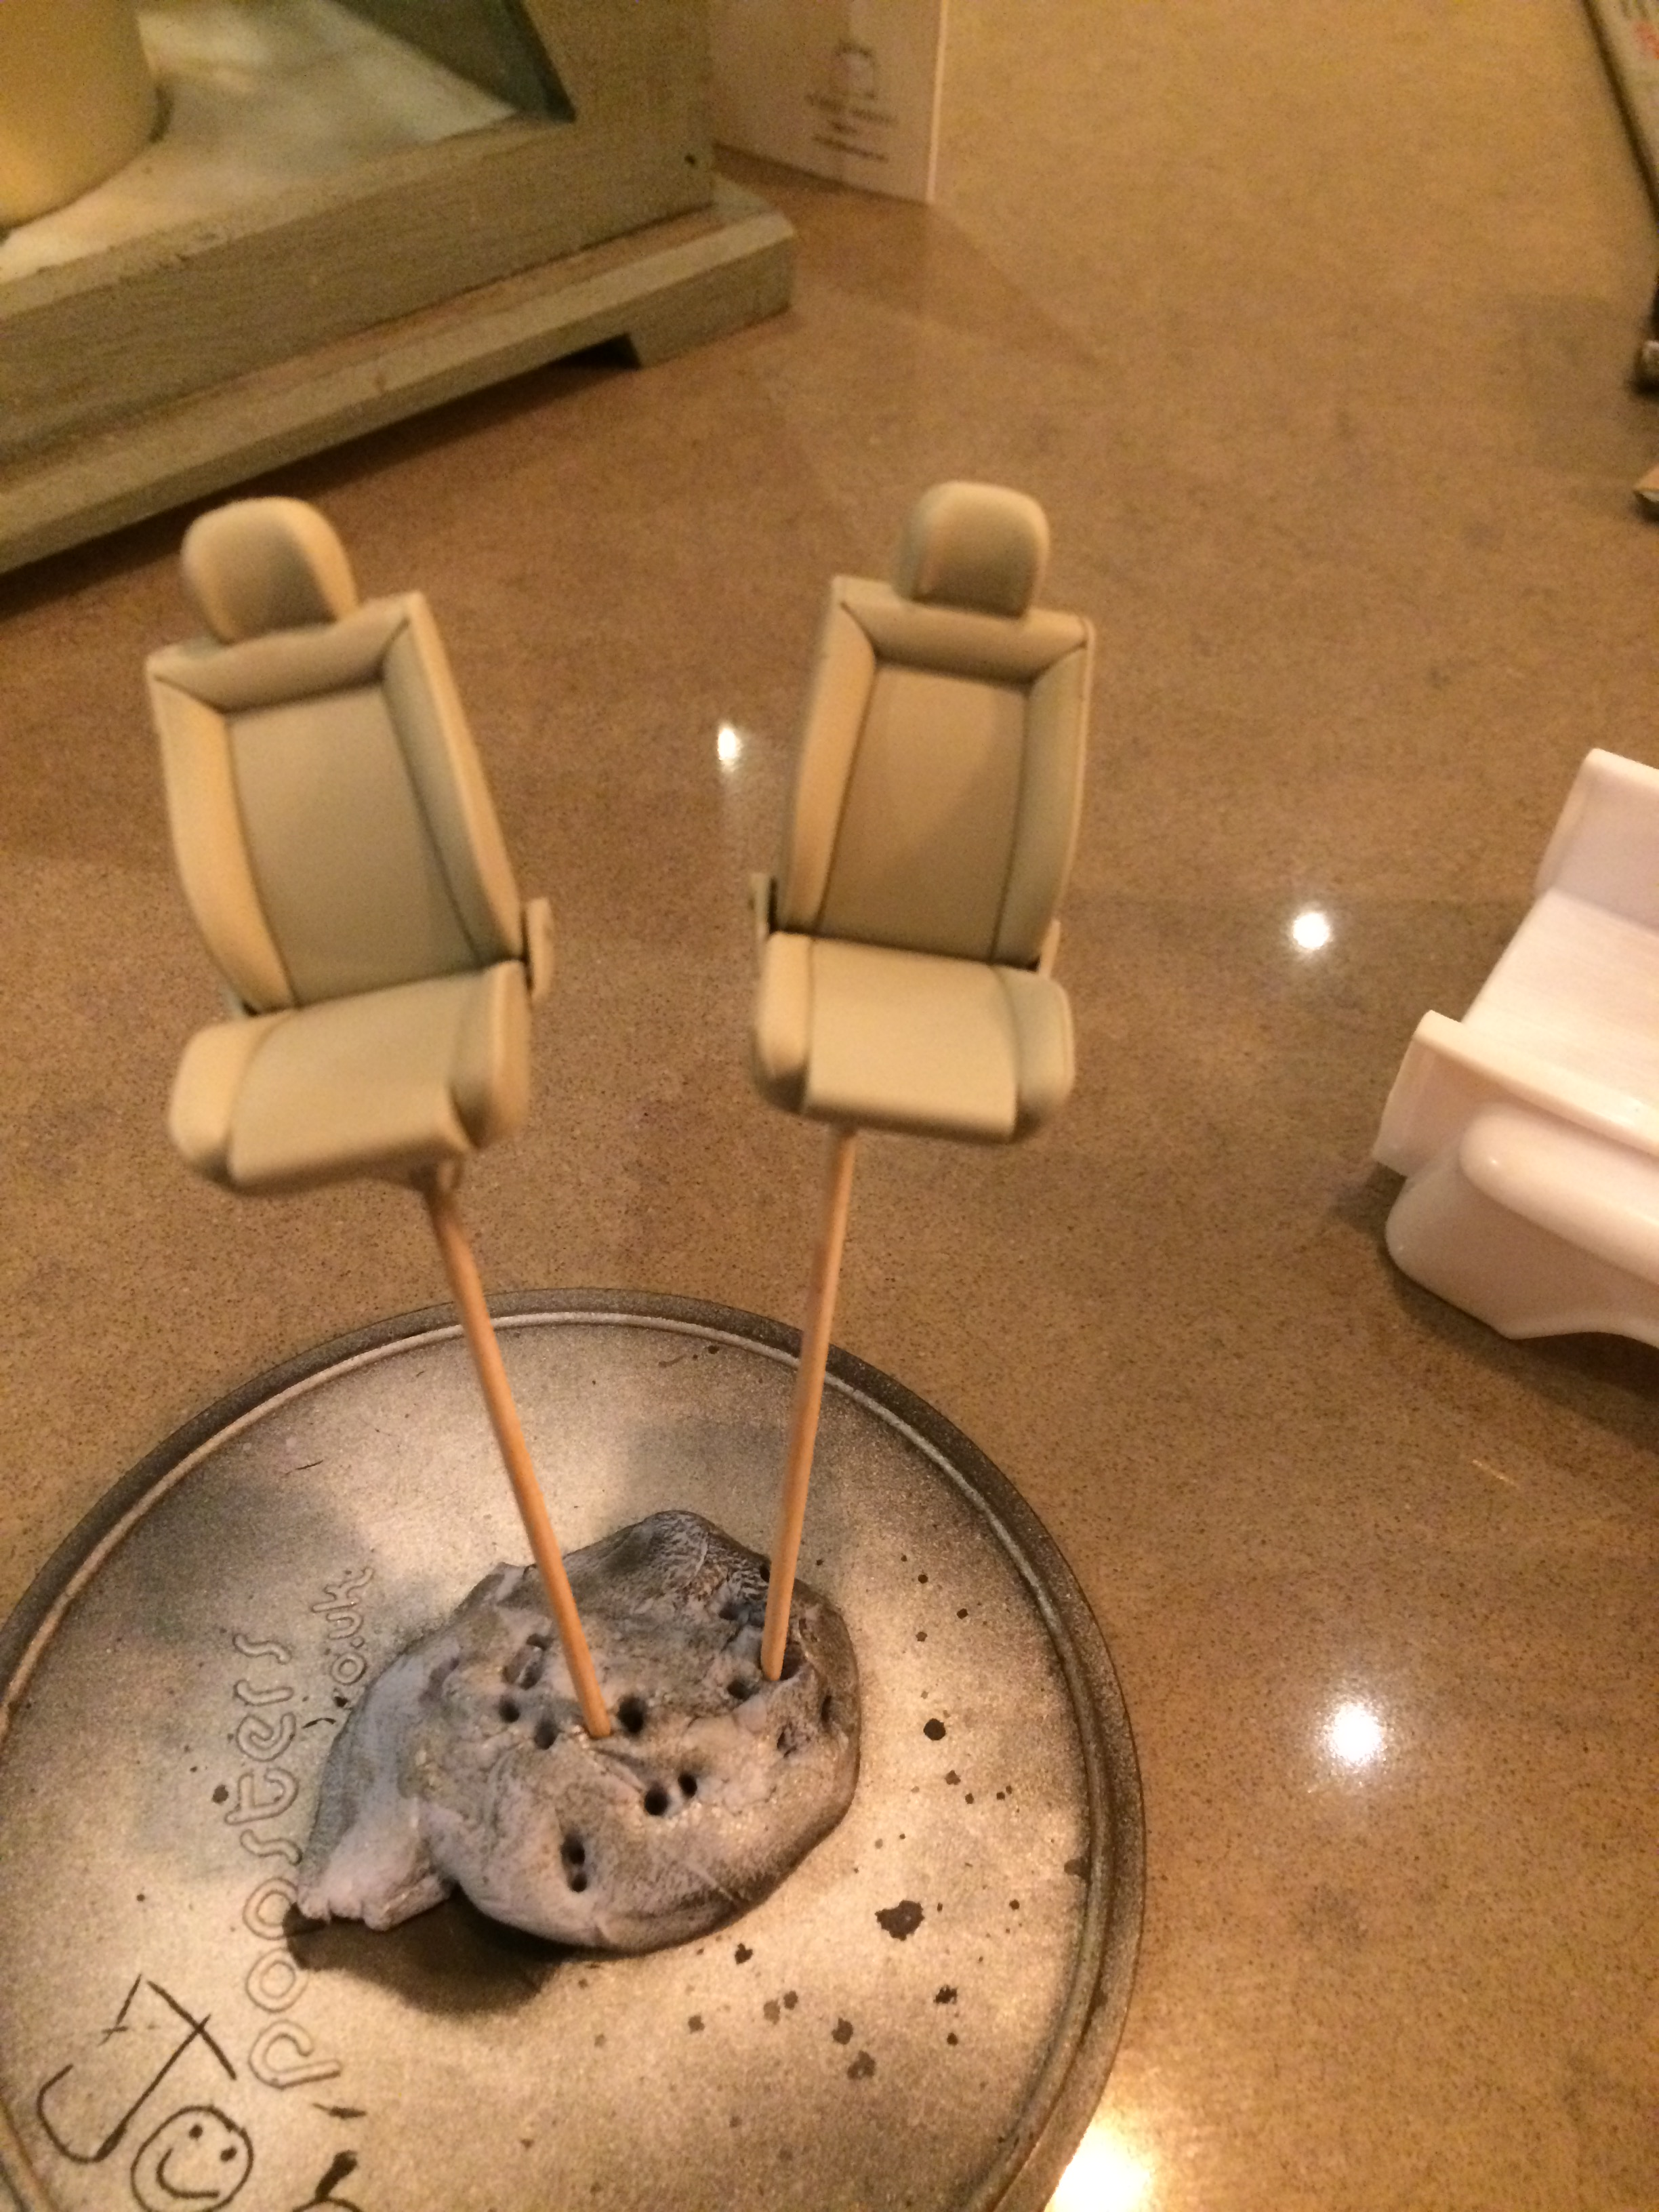
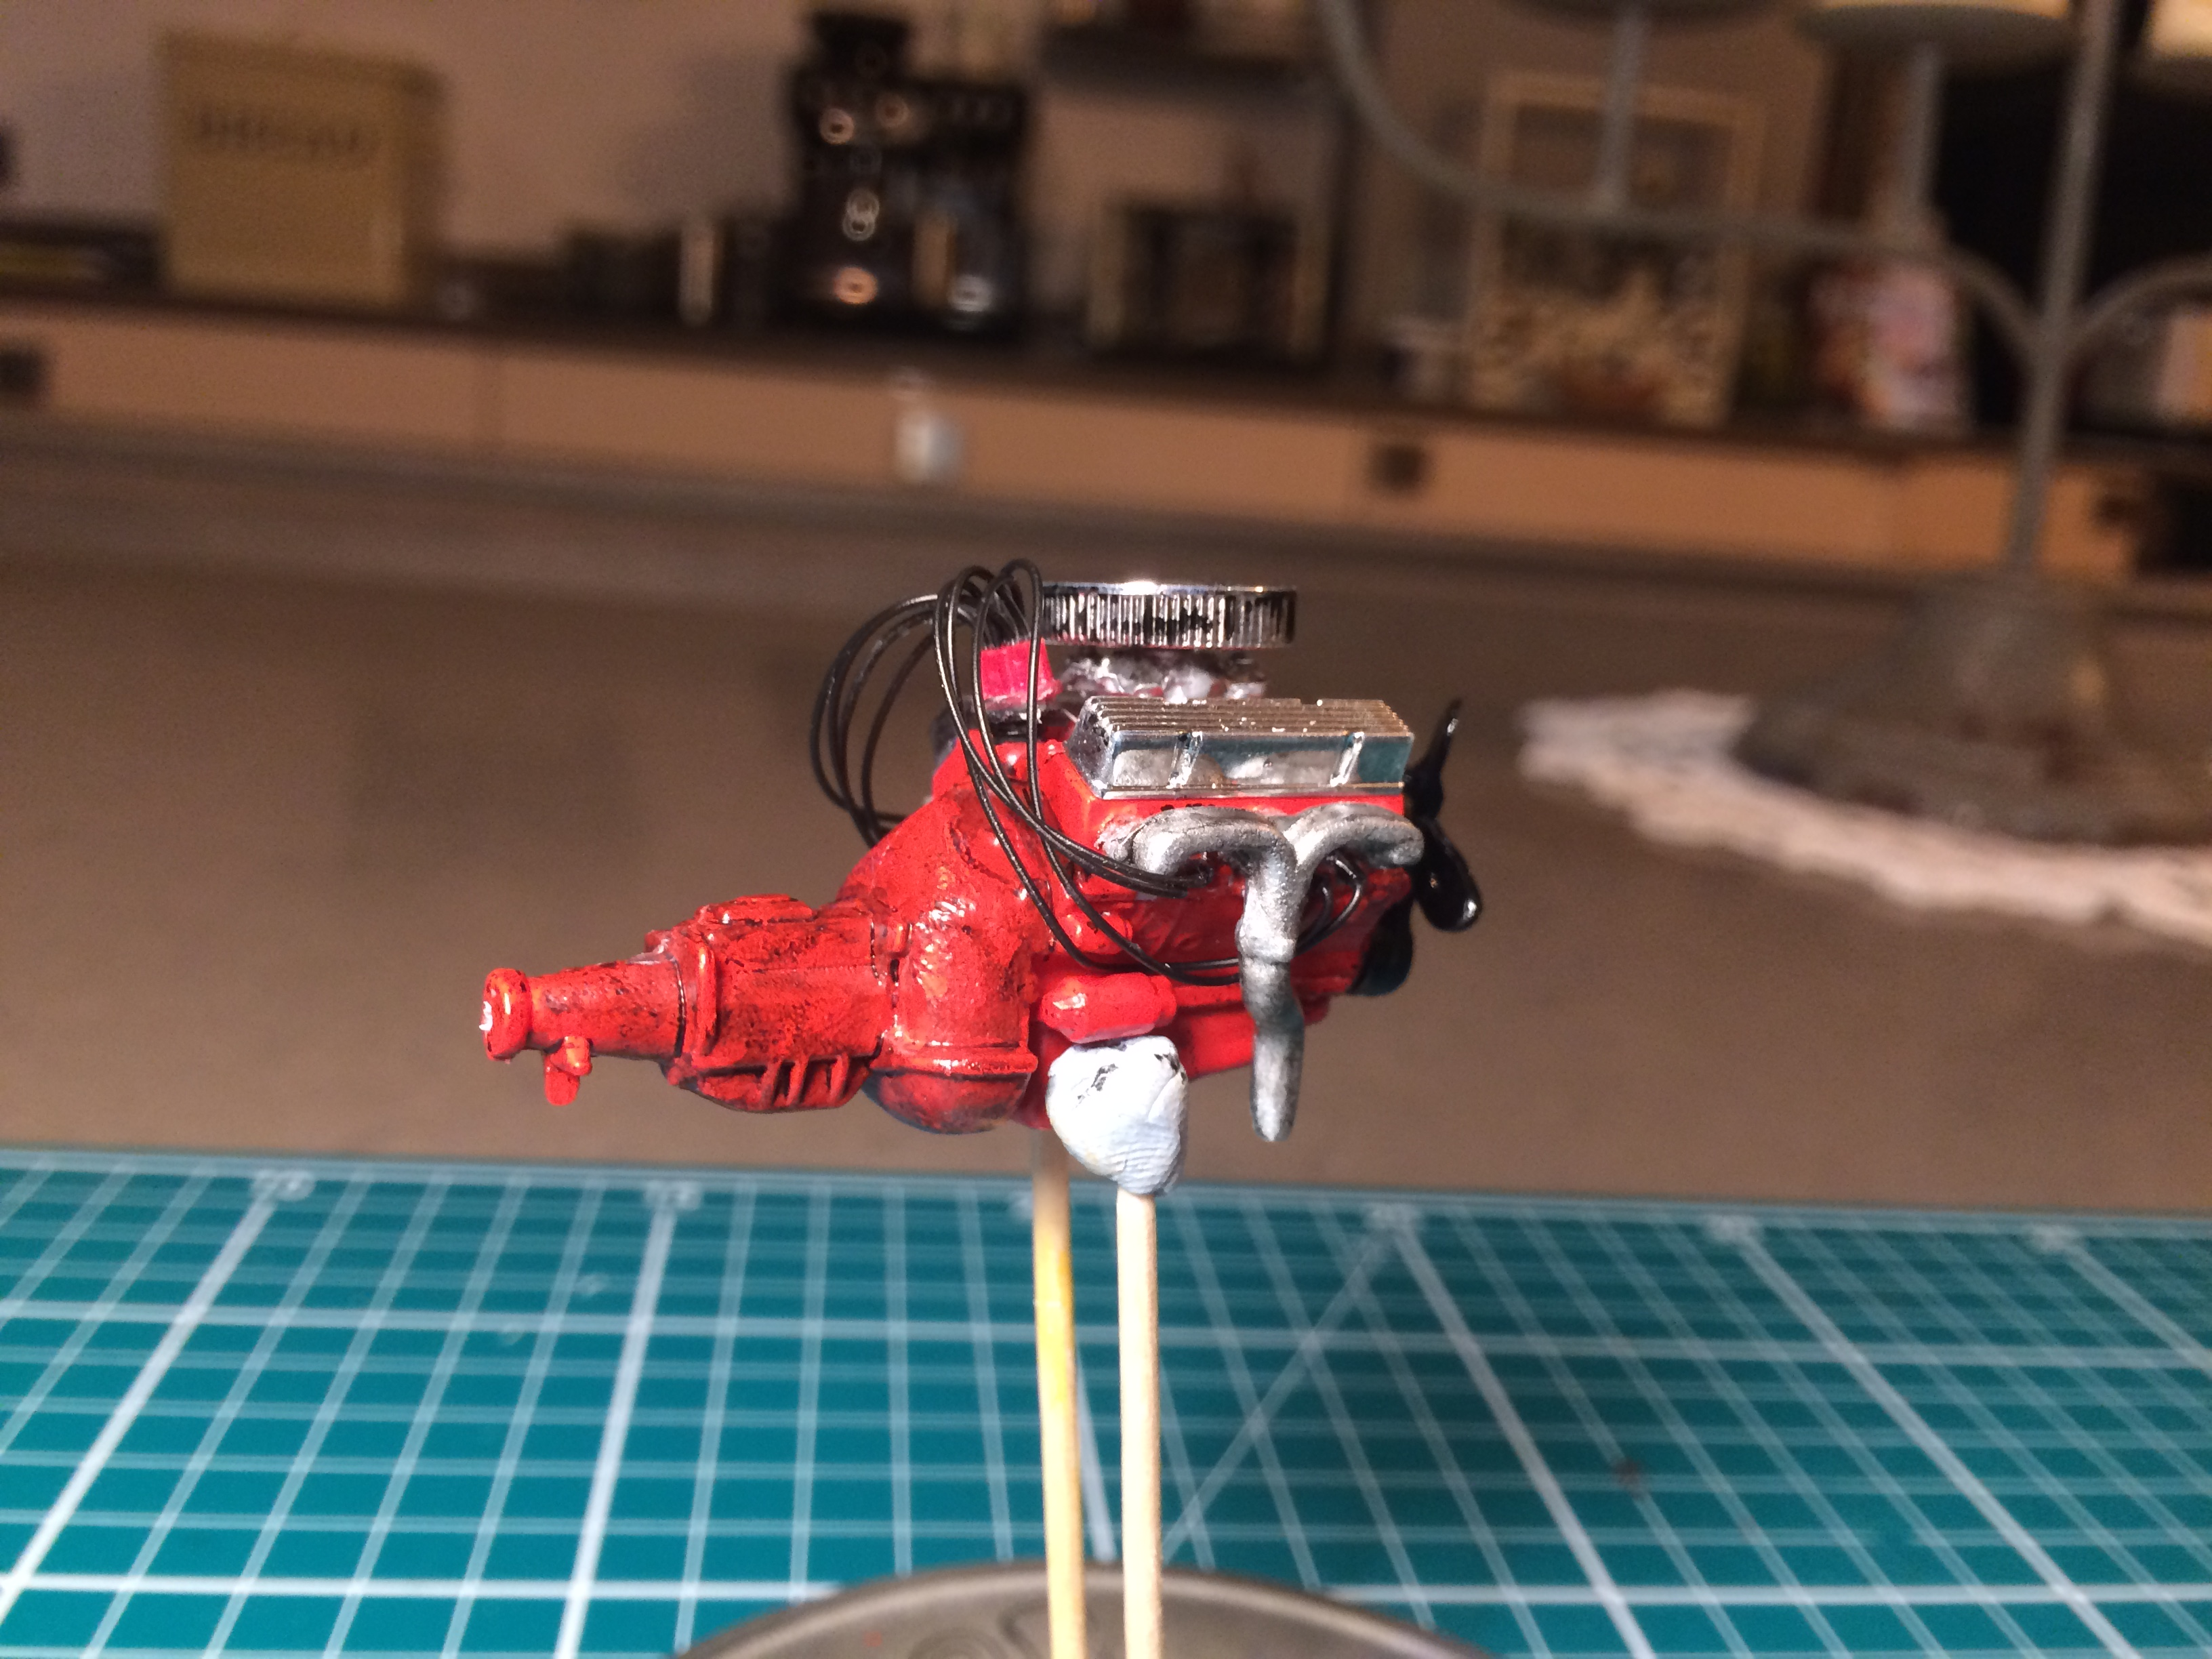
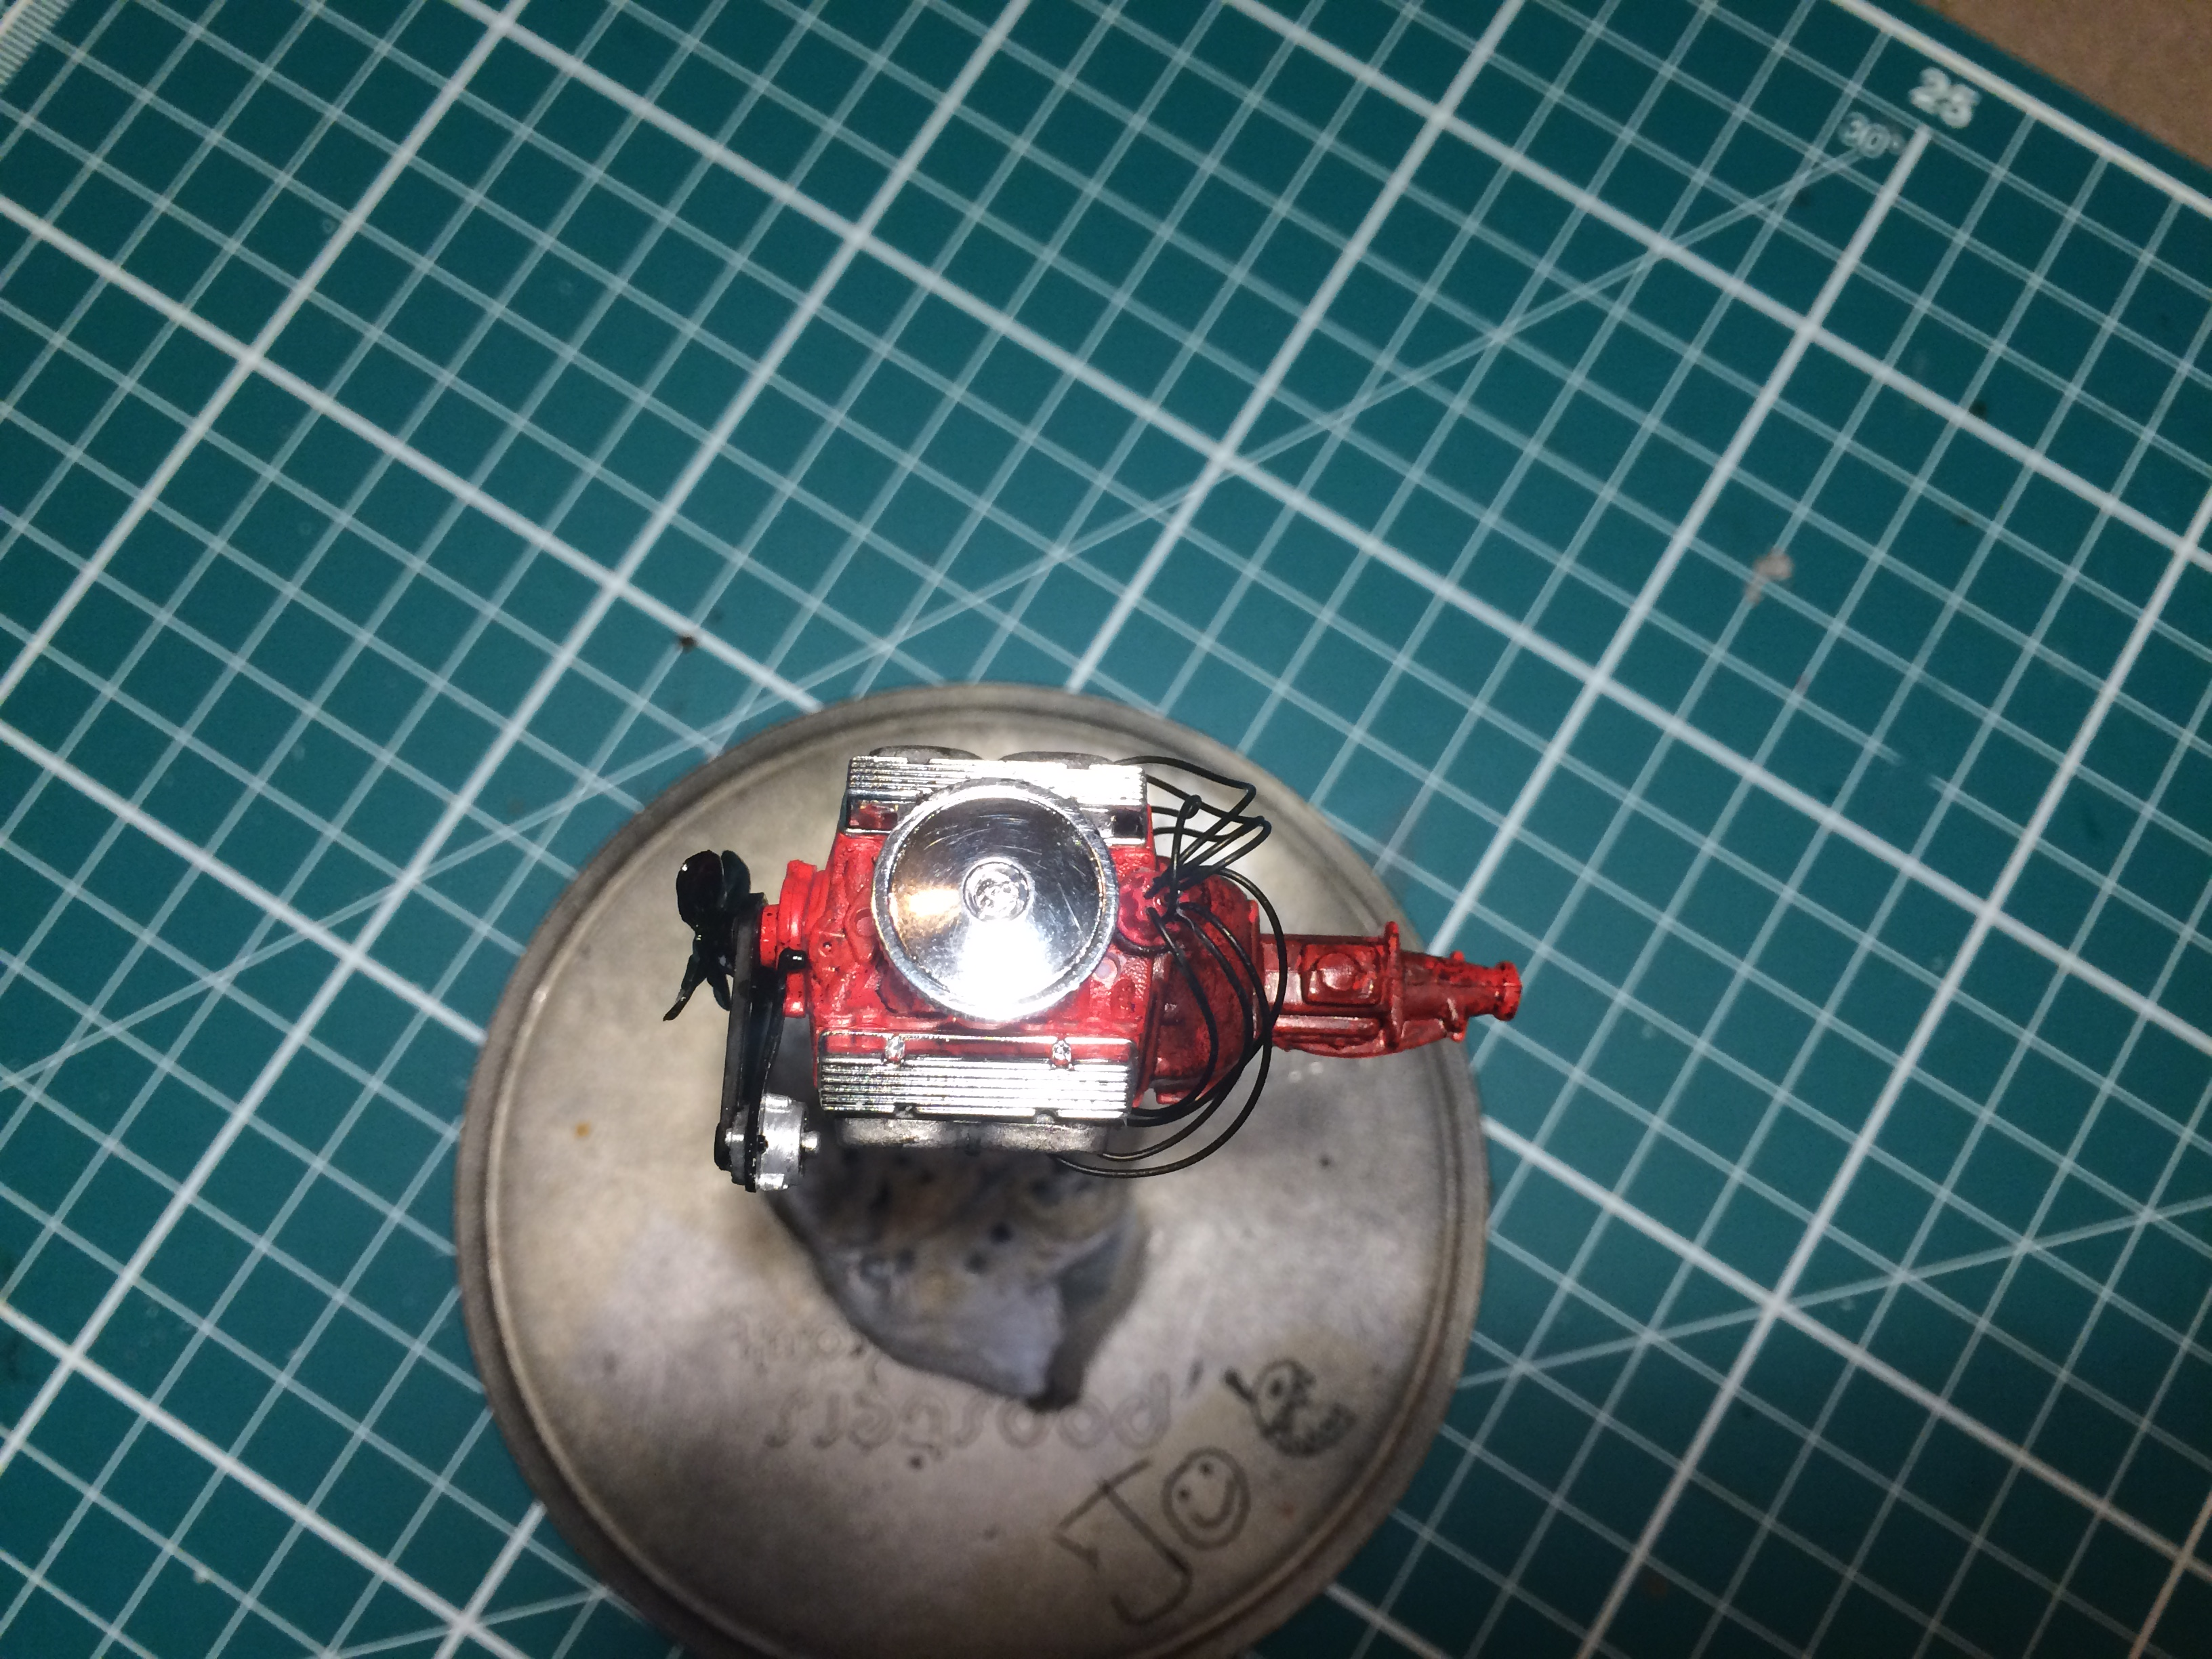
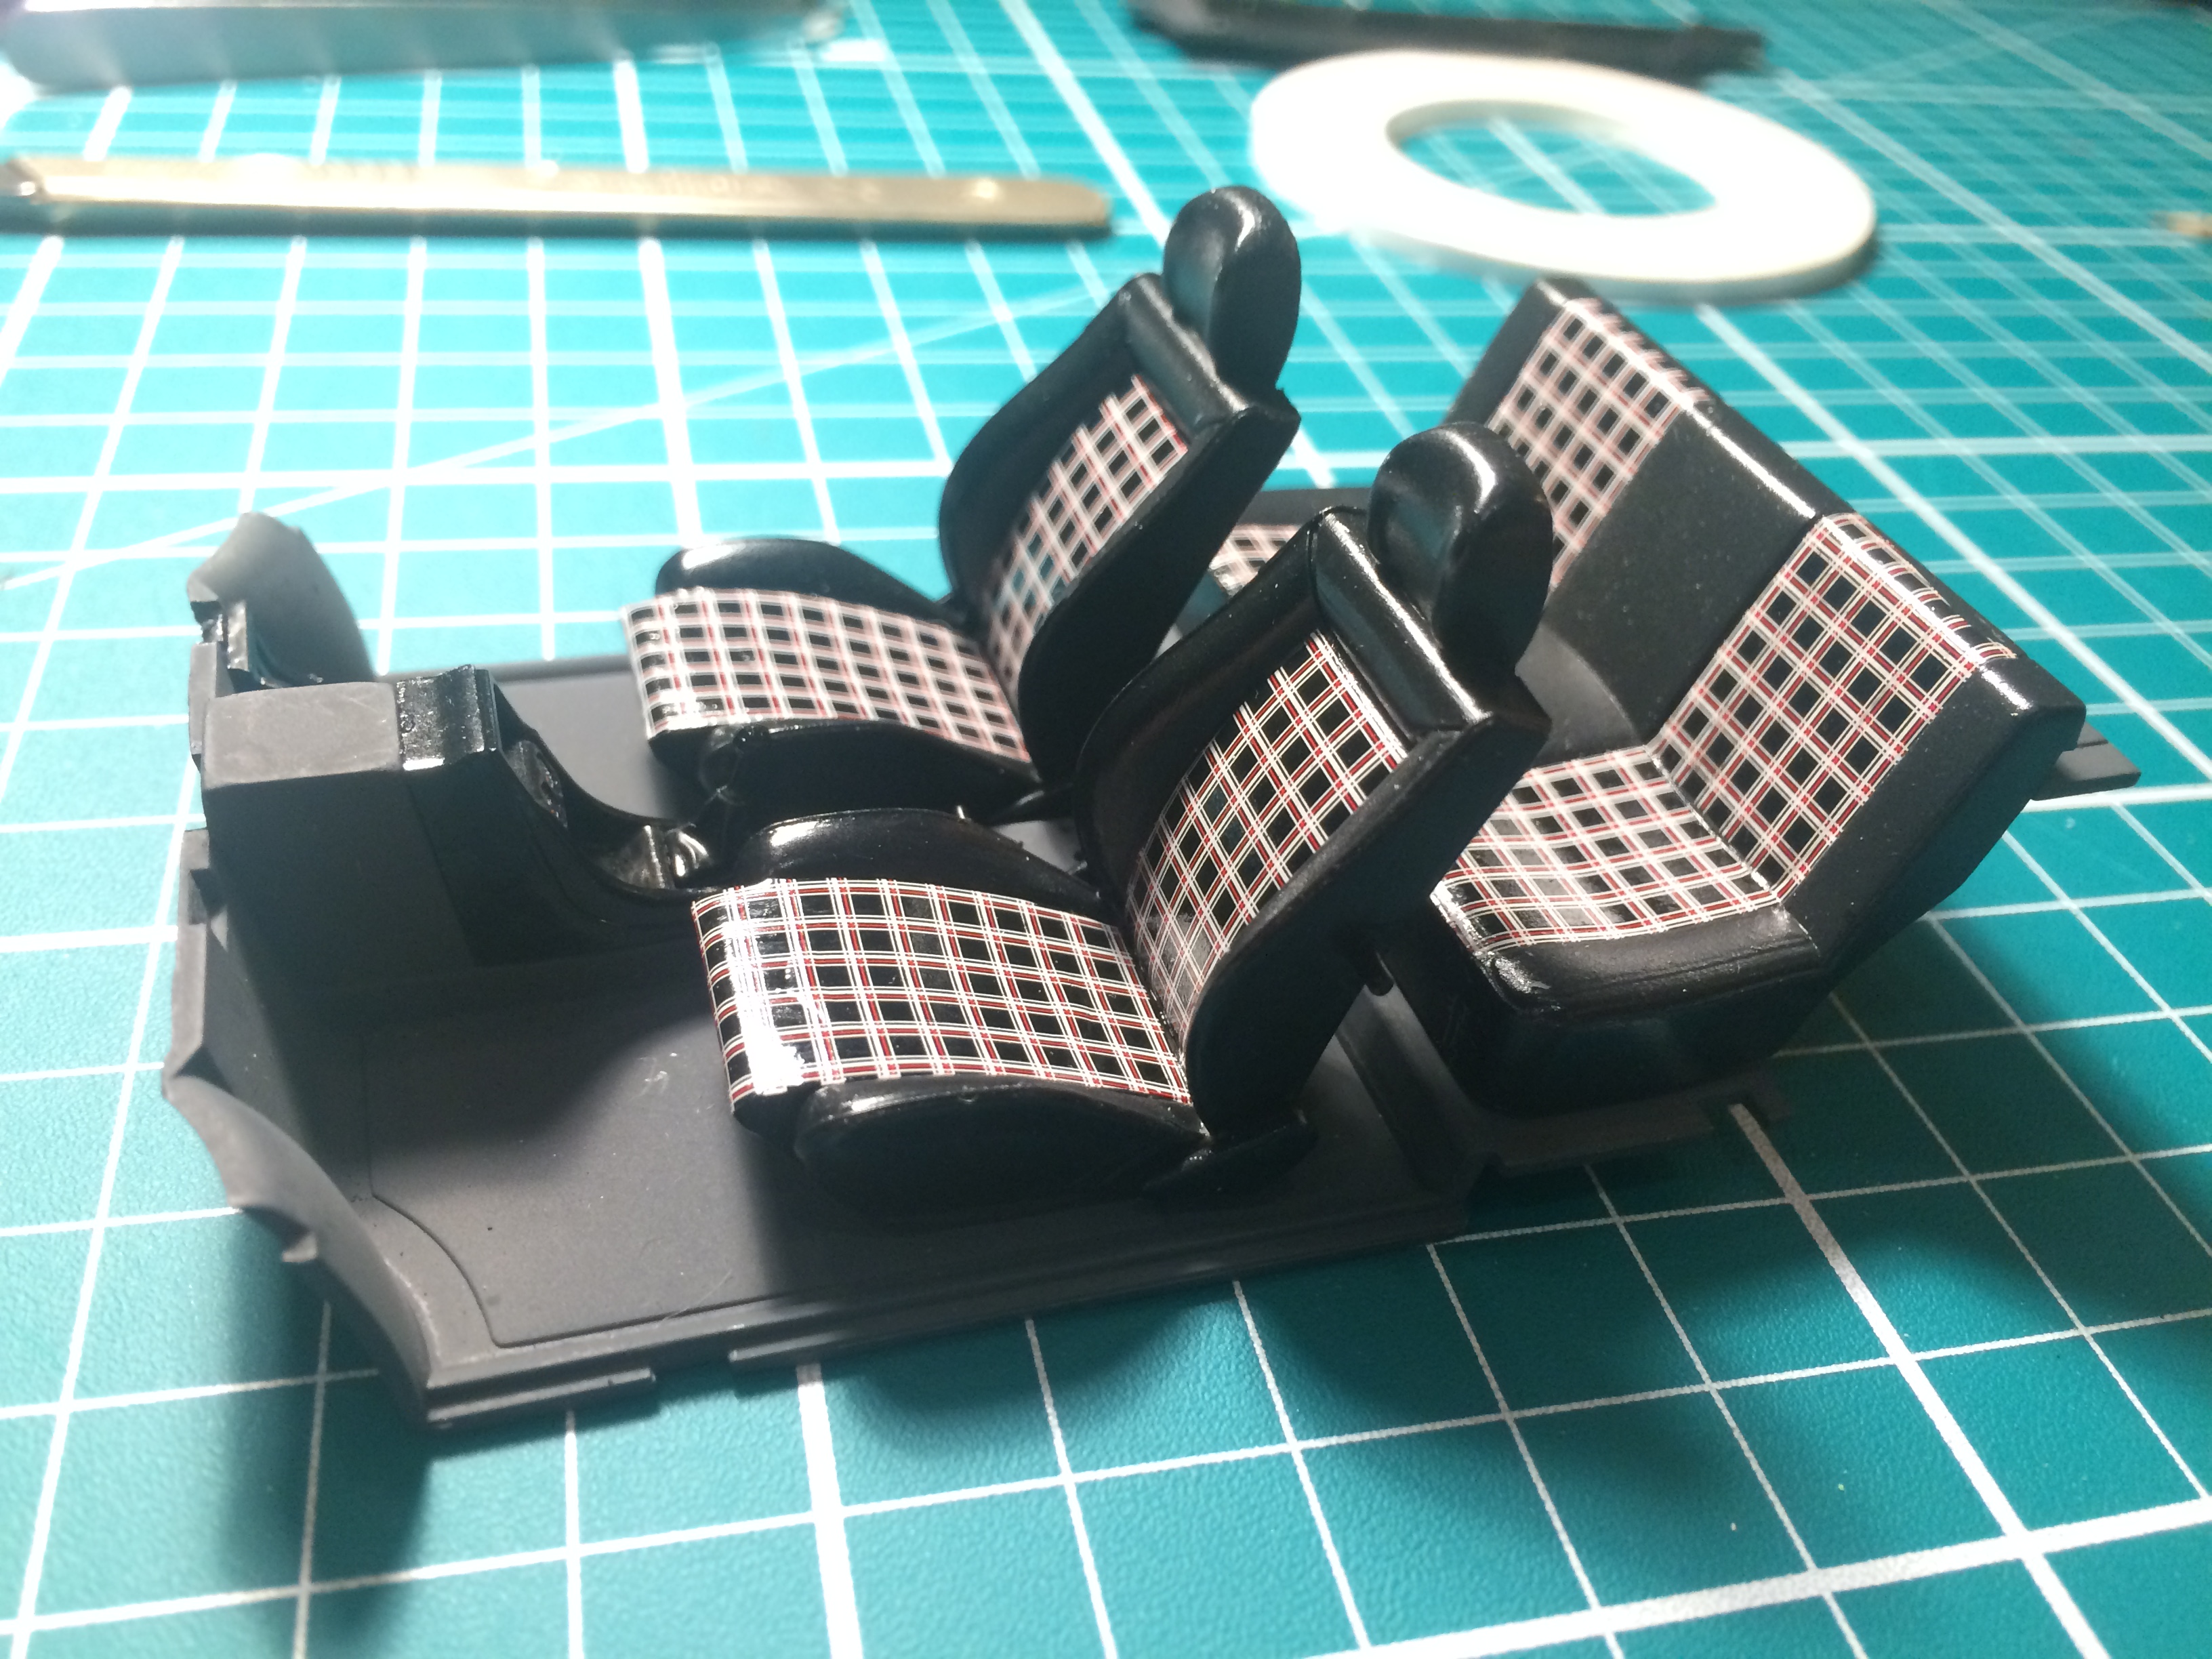
thanks! the seats are from a golf gti kit, nothing to aggressive but suit the build nicely, colour used on them was some tamiya "deck tan". also used on door panels but with a glossy clear coat to mimic differnent materials that would of been used. engine wiring sure is a tight fit. just need to paint exhaust and spare wheel and chassis will be rolling -
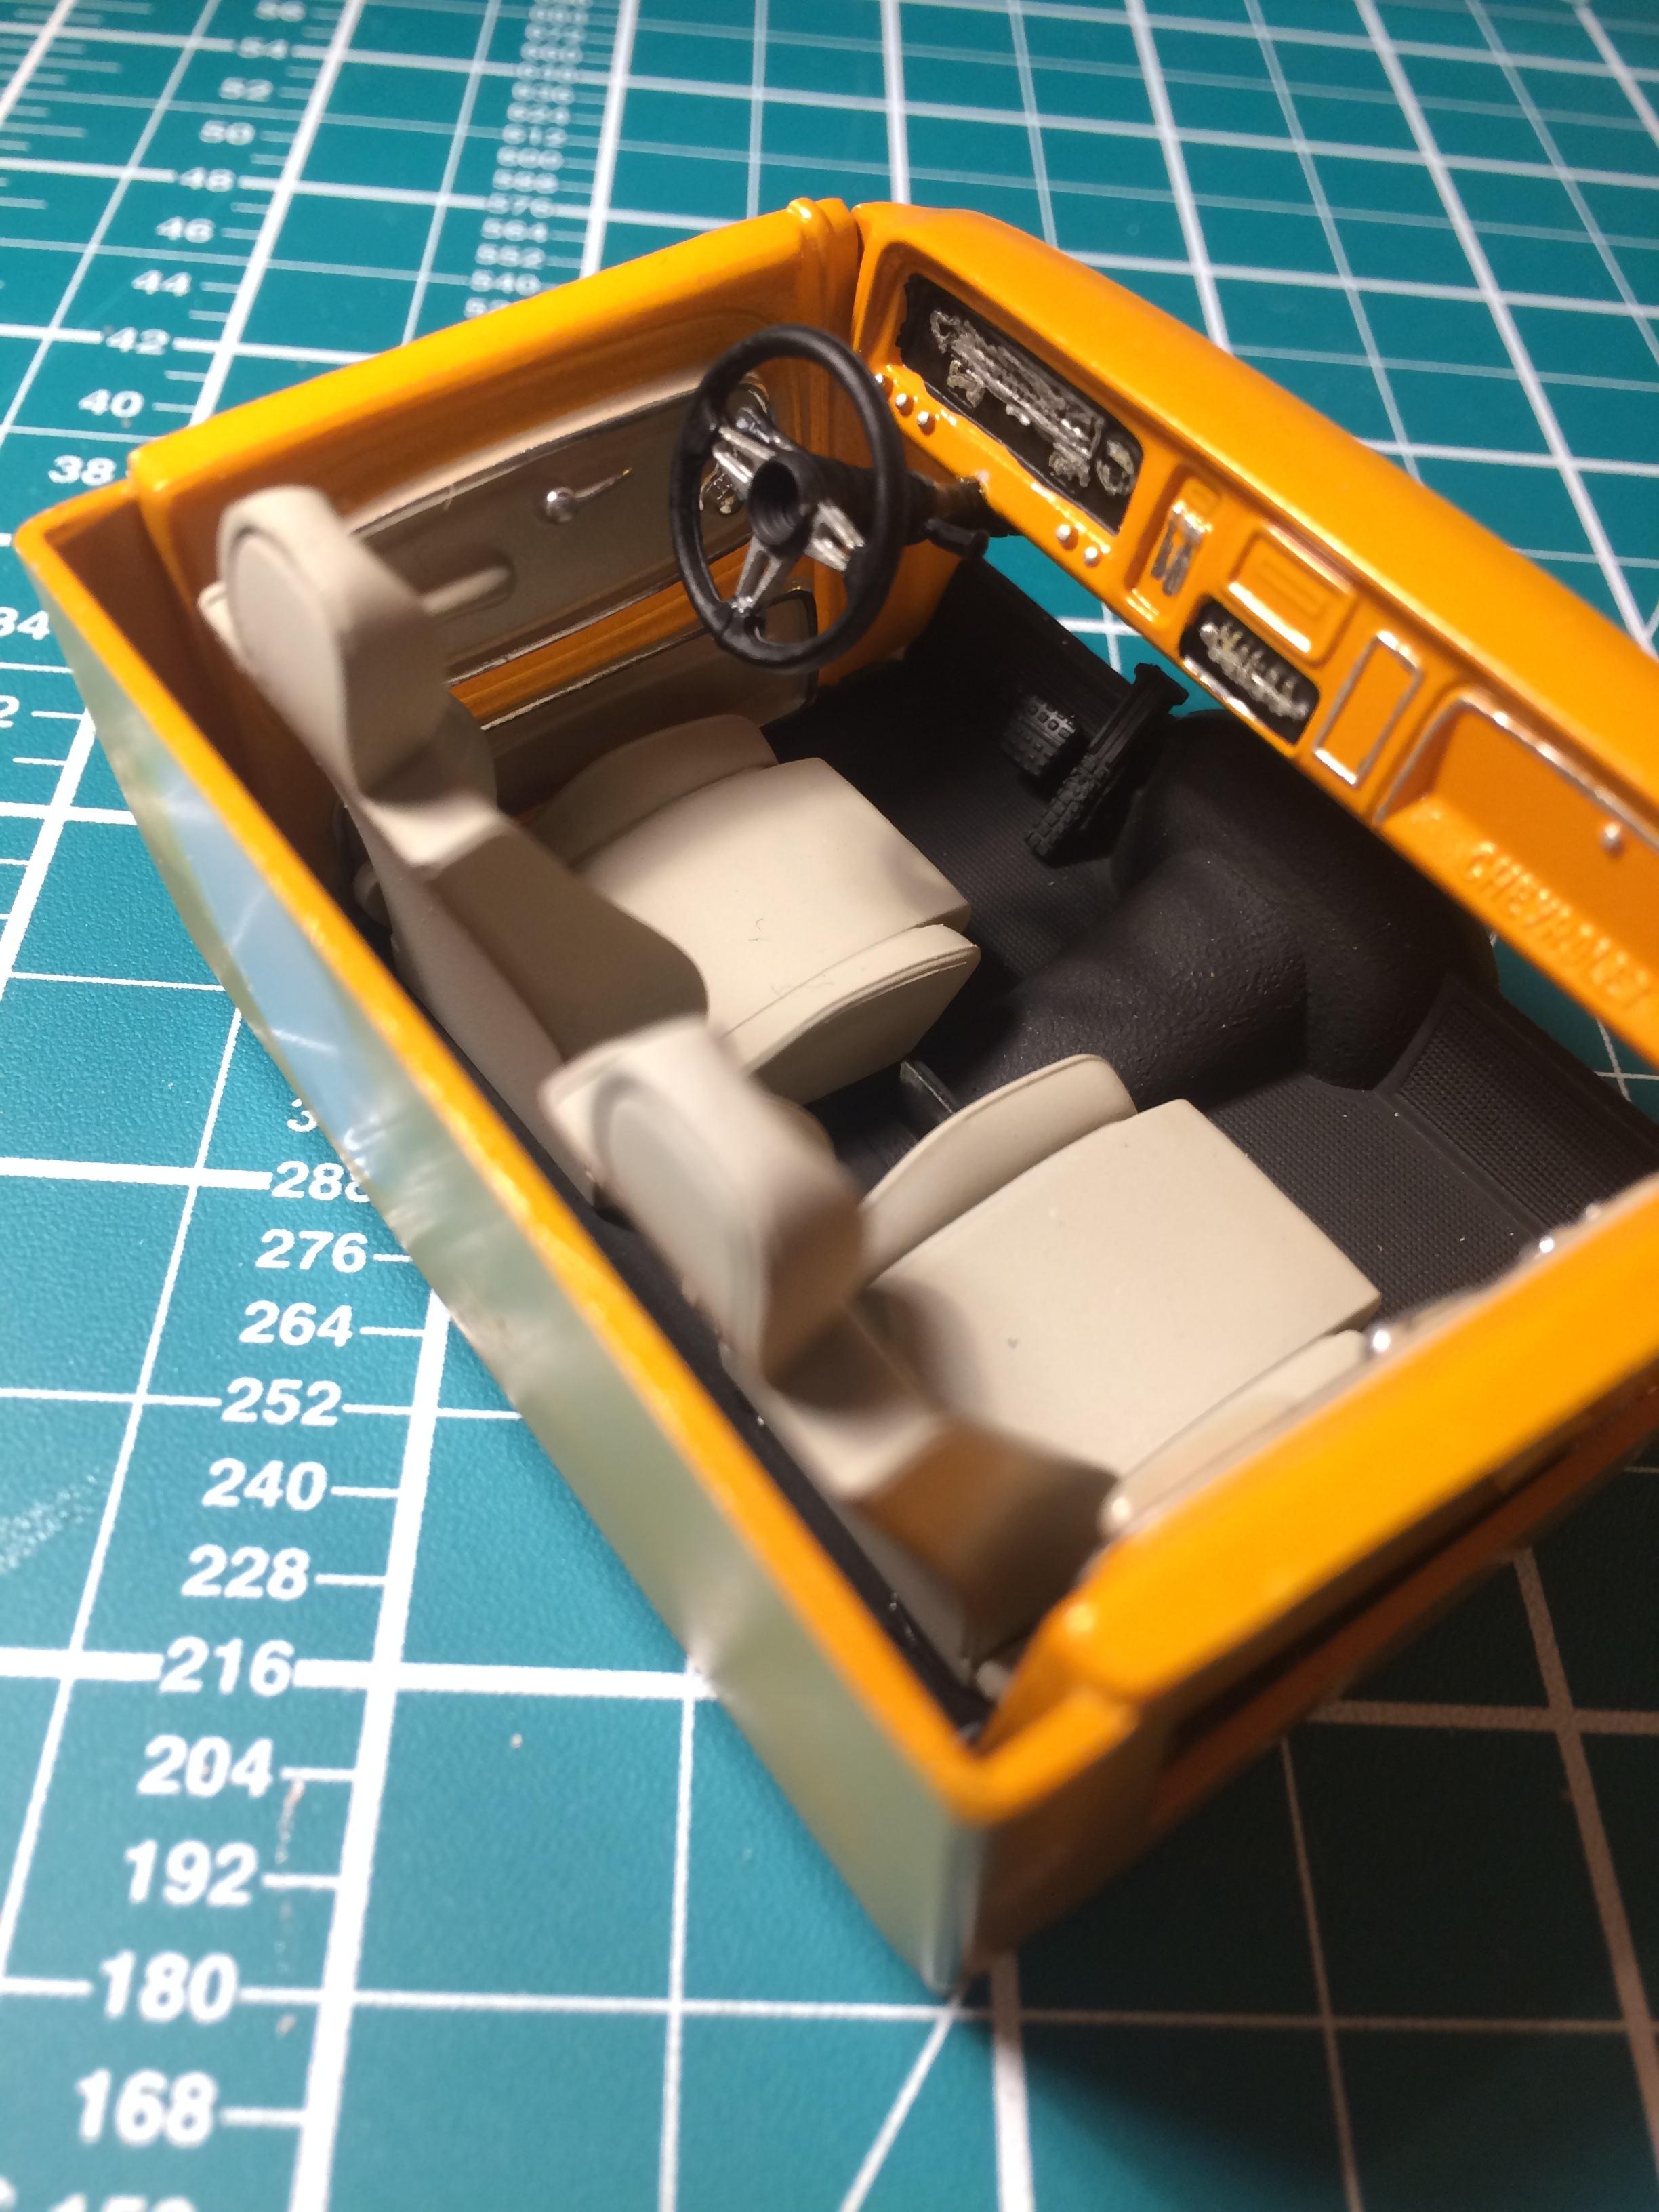
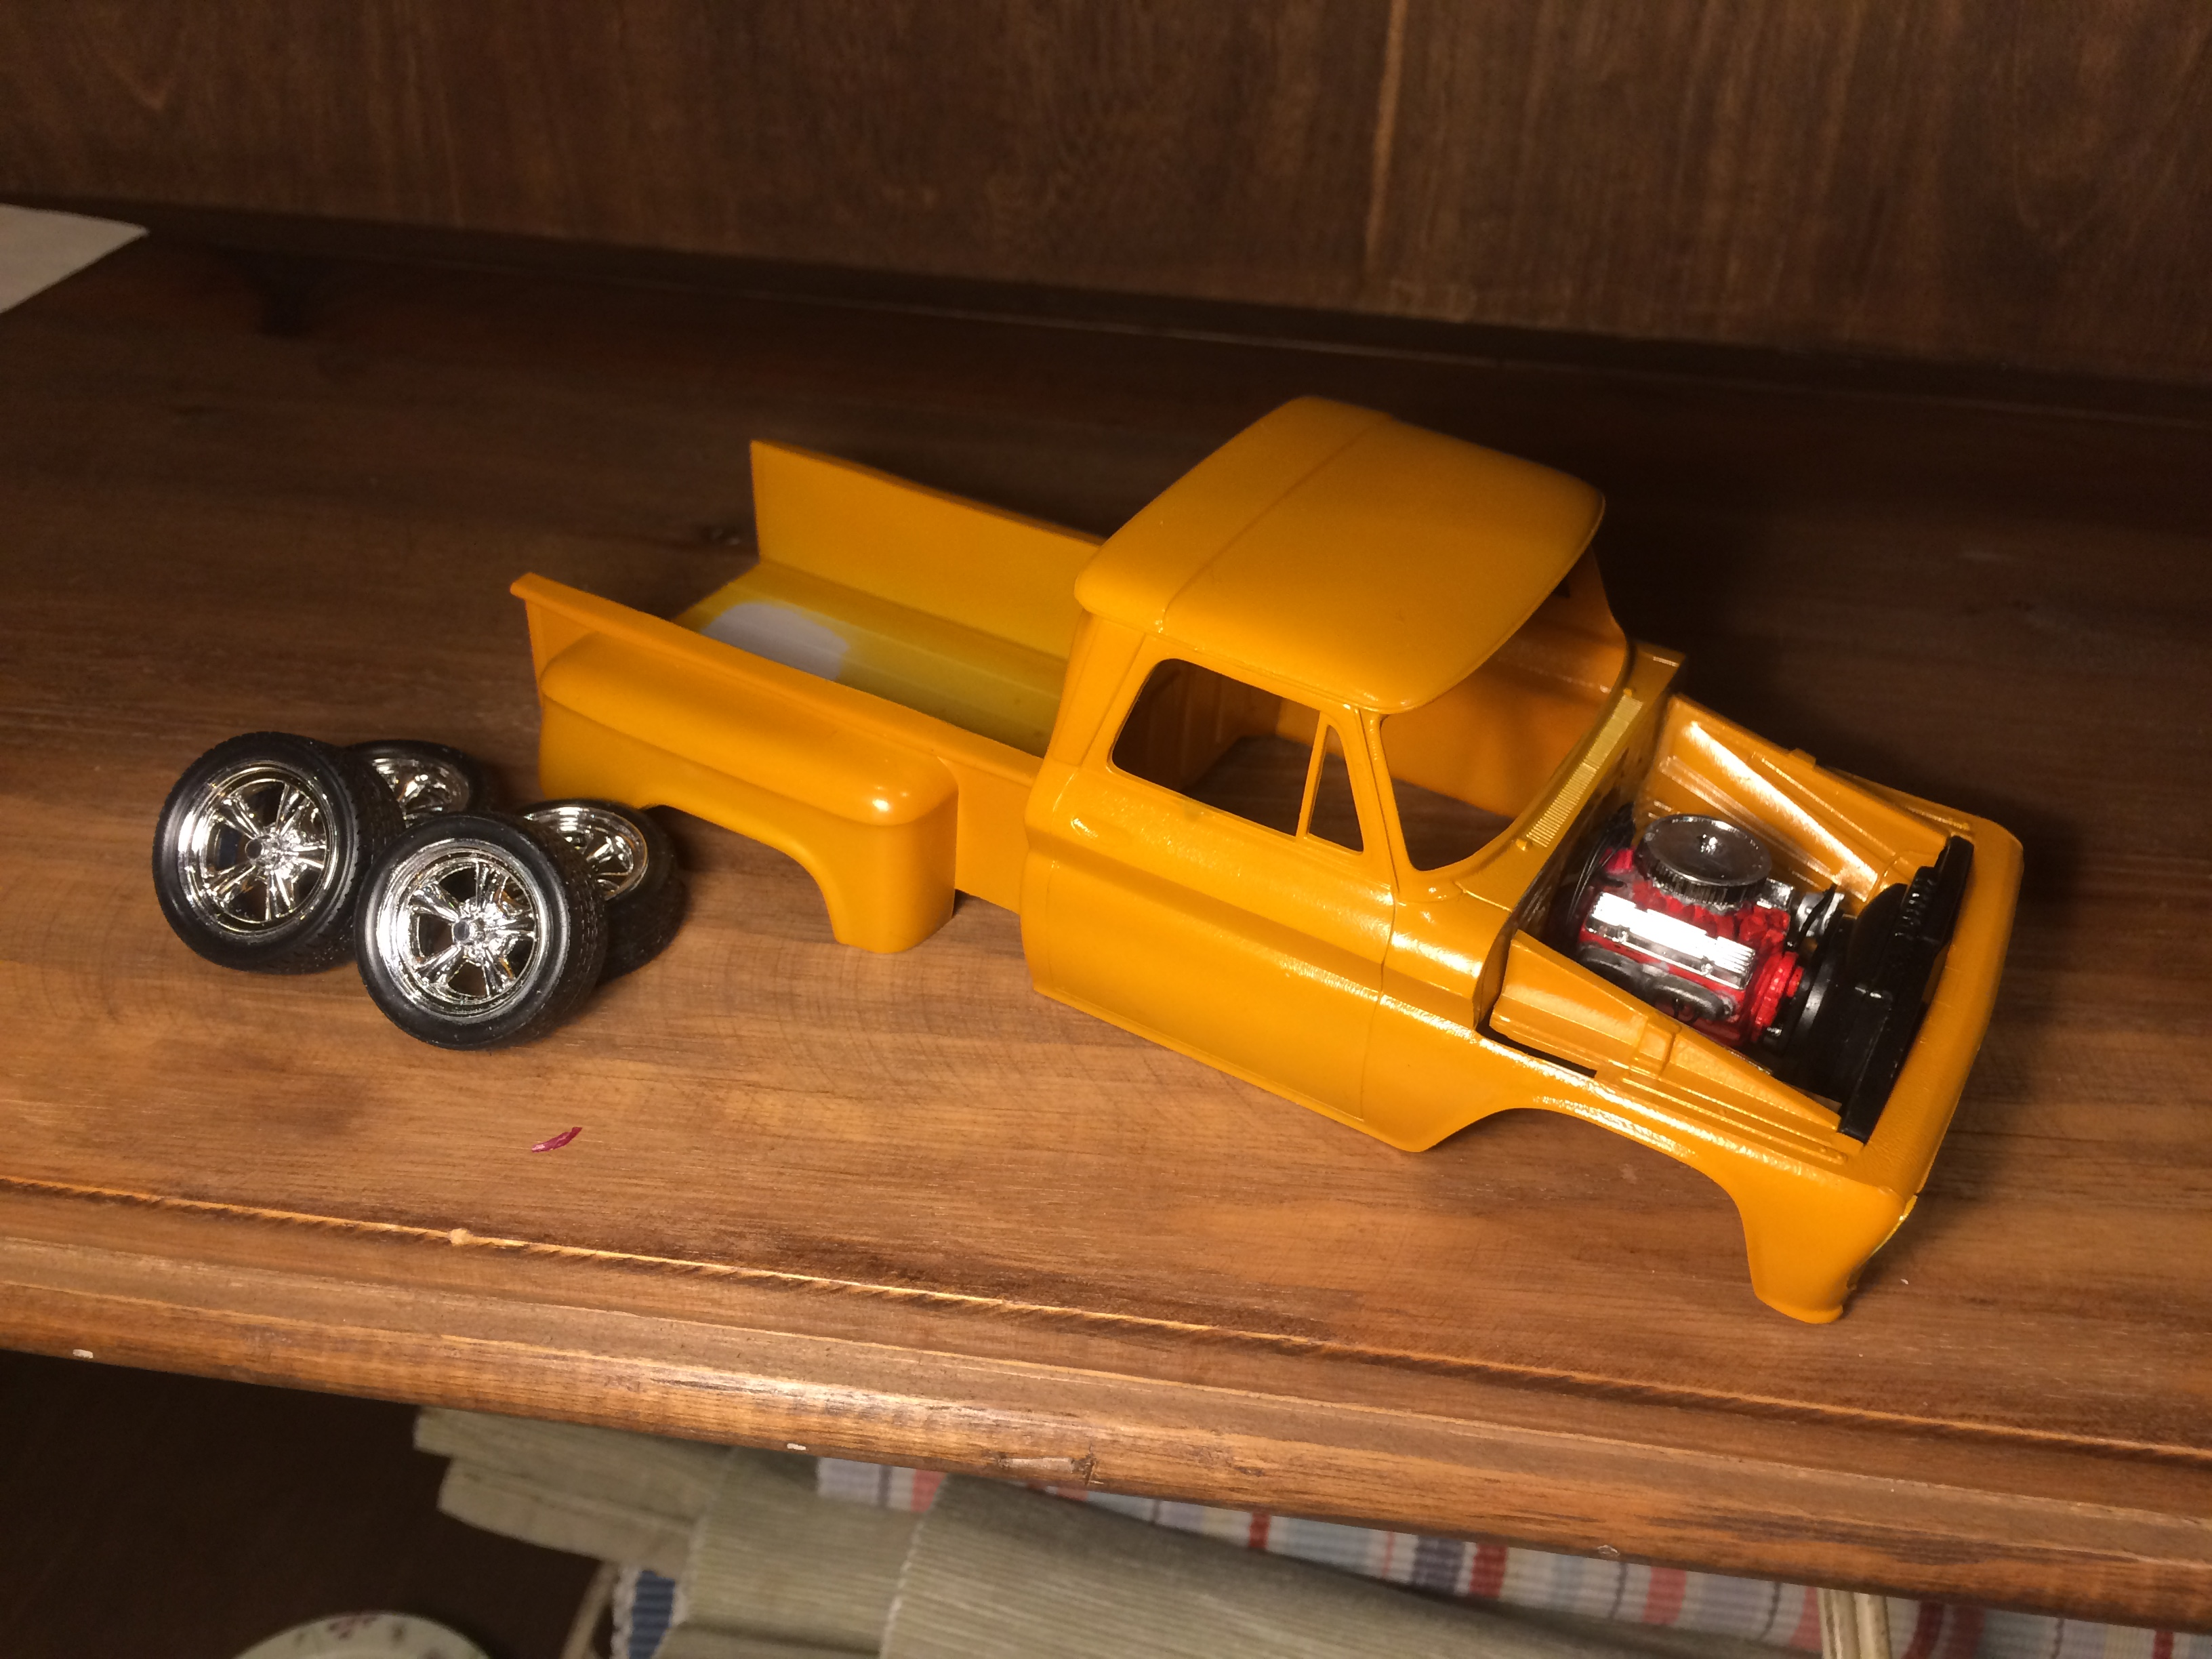
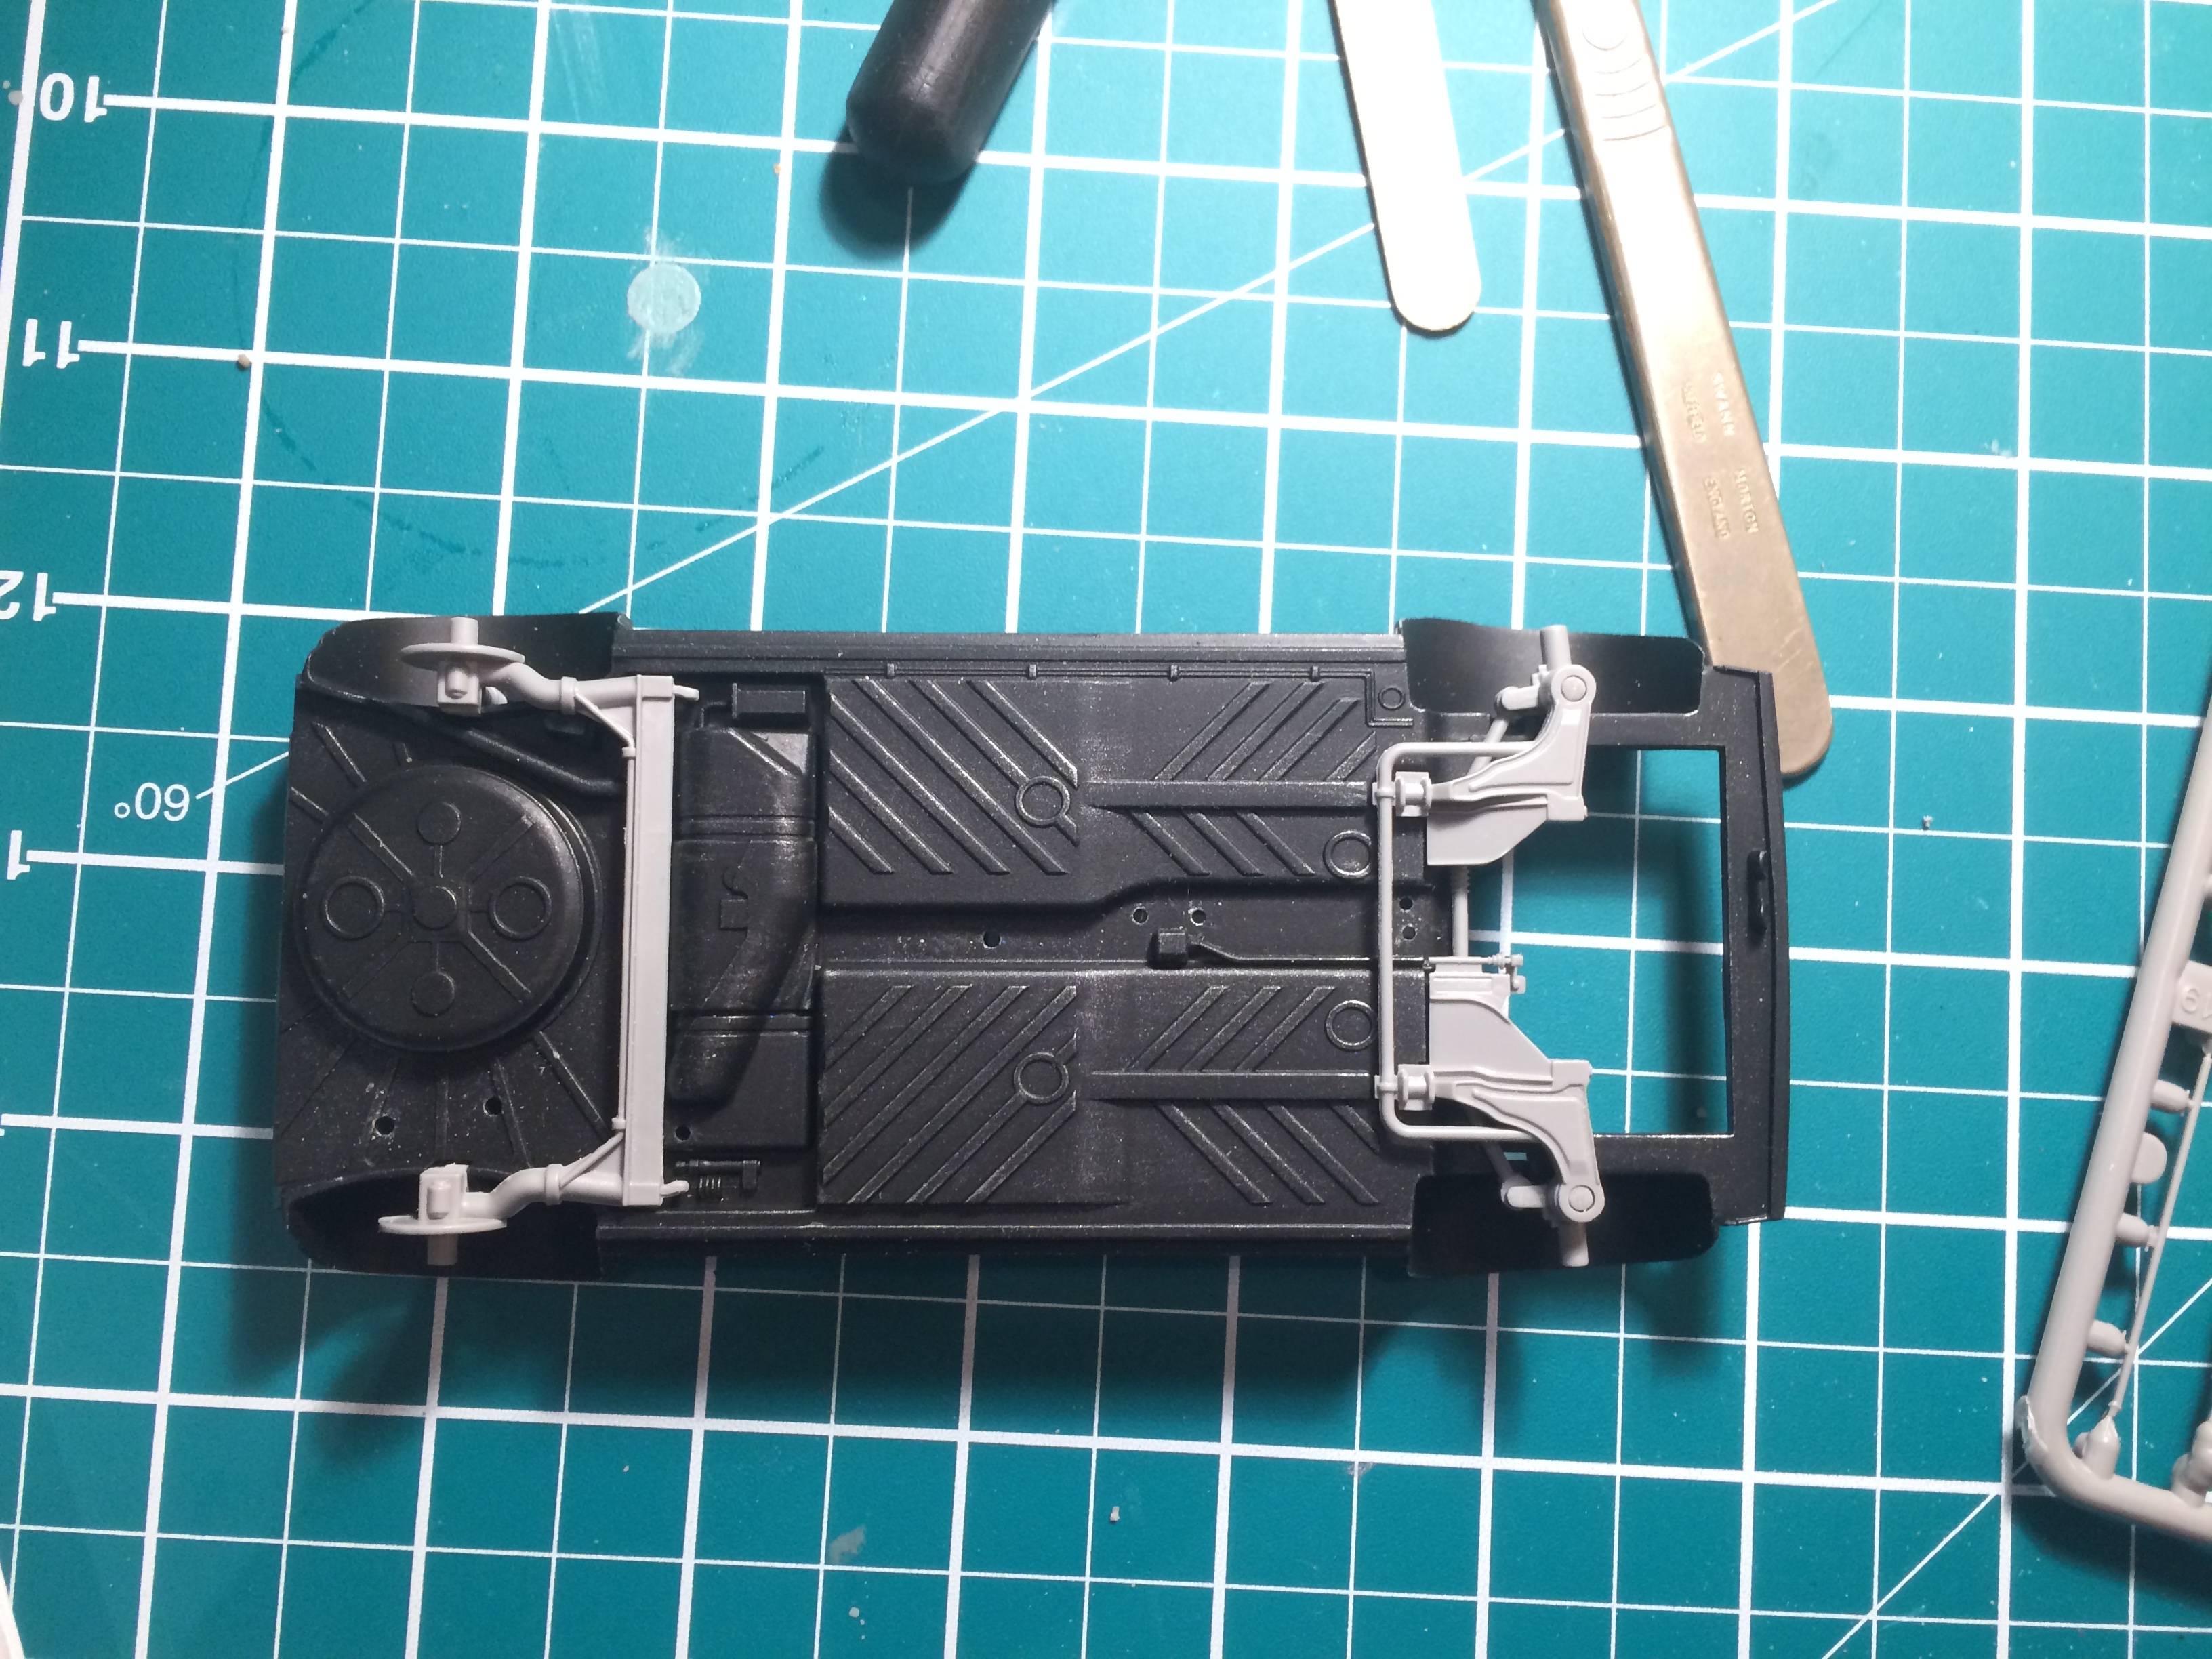
Started work on this 65 stepside kit about 2 week ago. got a few ideas going around: swap out bench seat for two singles, wire up dizzy. lower suspension and make bed out of wood as opposed to decal the kit comes with. using some zero paints escort orange and chevy red for engine of course. please take a look at the progress so far: the 283 all wired up (correctly i think??), mix of custom and non-customer parts on engine side of things... cab completed today, swapped out bench seat, steering column brought in abit and different steering wheel: Progress so far, enjoy!

-
Hi David, i have now painted the body and cab and can happily say i have managed to get a good finish. this issue i had was being impatient and not letting the paint enough time to settle. ive painted an engine in chevy red and didnt use a clear coat/laquer as the finish was already perfect and i was really suprised at how well the paint stood up to being handled. your method of using wax polish sounds good especially as ive had trouble getting a consistently good finish with clearcoats. i will post some pictures of my work so far
-
thank so for the response guys. after some recent practice i have managed to get the two paints to work together, the main issue is drying time of the colour, having left the paint to dry for about a week the ts13 works with the zero paint and doesn't eat into it. as long as you use plenty of light coats you should be ok. using 2 coats of primer and 4 /5 colour followed by a further 2 coats of ts13 worked fine
-
Greetings all, so today i started a new model decided to paint in some zero paints colour matched orange. i started off by applyind two coats of zero light grey primer followed by 4/5 light coats of orange using airbrush by the way. after letting the paint dry for 30 mins i decided to go ahead with clearcoating using some tamiya TS-13 in a spray can. however almost immediatly the clear coat seemed to "eat away" at parts of the paint revealing the primer below. the clear coat did not dissolve all of the orange paint but is noticible in most places. i have not come across this problem before and i applied paint in light coats to get a smooth finish. My only thoughts would be to leave the paint to dry out for longer up to a week before clearcoating to make sure the surface is absolutely solid. any help or advice would be greatly appreciated. many thanks joe
-
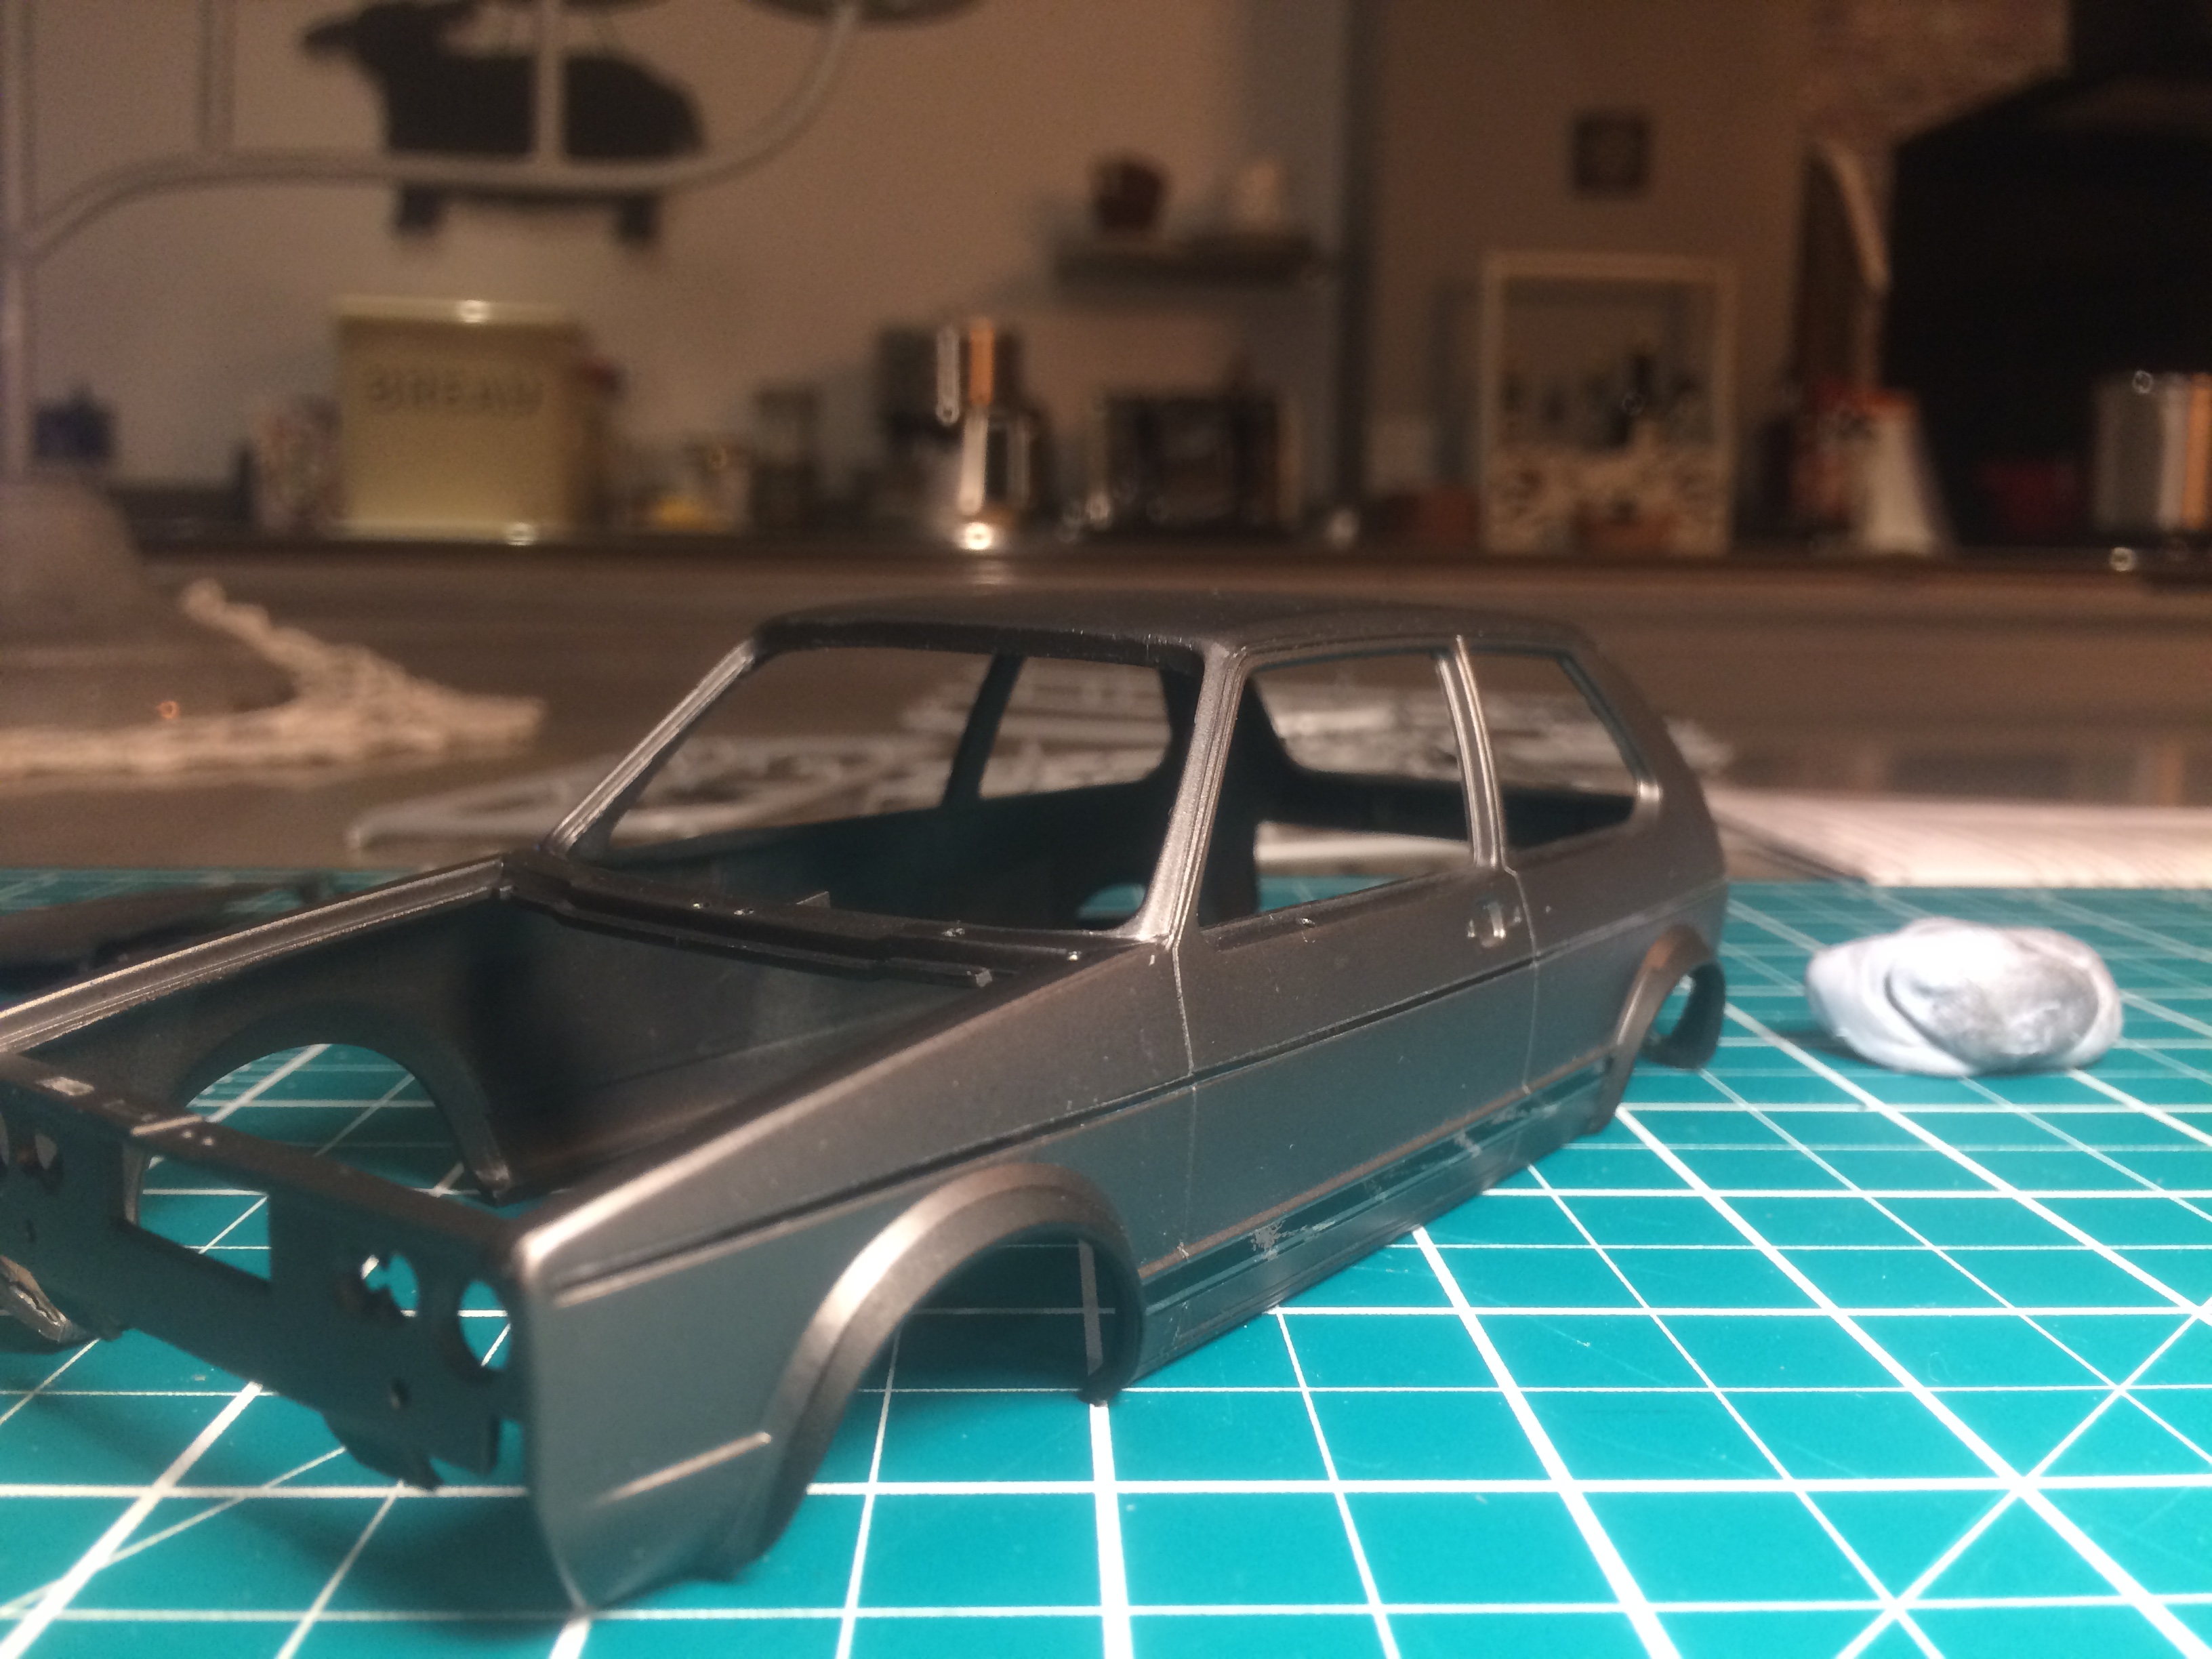
Thanks for the feedback guys! I have painted wheel arches and back window in flat black but once i clear coat the body over the decals it should be a bit more glossy so you will see it clearer. I too ended stripping back the body first time, however, after multiple layers of clear coat just tamiya i think i used i managed to make the body resistant to touch. Just been putting decals on last couple of days and its holing up well. you may be able to see from the pics that when i painted the engine bay earlier it was not clear coated and so some paint is rubbing off. i also found that you need to spray vallejo on in really light mist coats or else you get a terrible finish. yes need to dull the seats down, just clear coated to make sure set decals stay in place. Progress has been slow the recently due to work etc. Just one more decal to apply to the body then pretty much just assemble the final pieces like wipers and mirrors etc. will post some pics of my works, cheers
-
thanks! the kit really does help with plenty of detail packed in, as you can see the build is pretty much stock and still looks great
-
the kit came with one hole already drilled out. I'm running it british RHD so can only think one was intended for LHD wiper setup. may have to fill in on of those holes hmm...interesting, some aftermarket wheels and seats may be tempting for the next build.
-
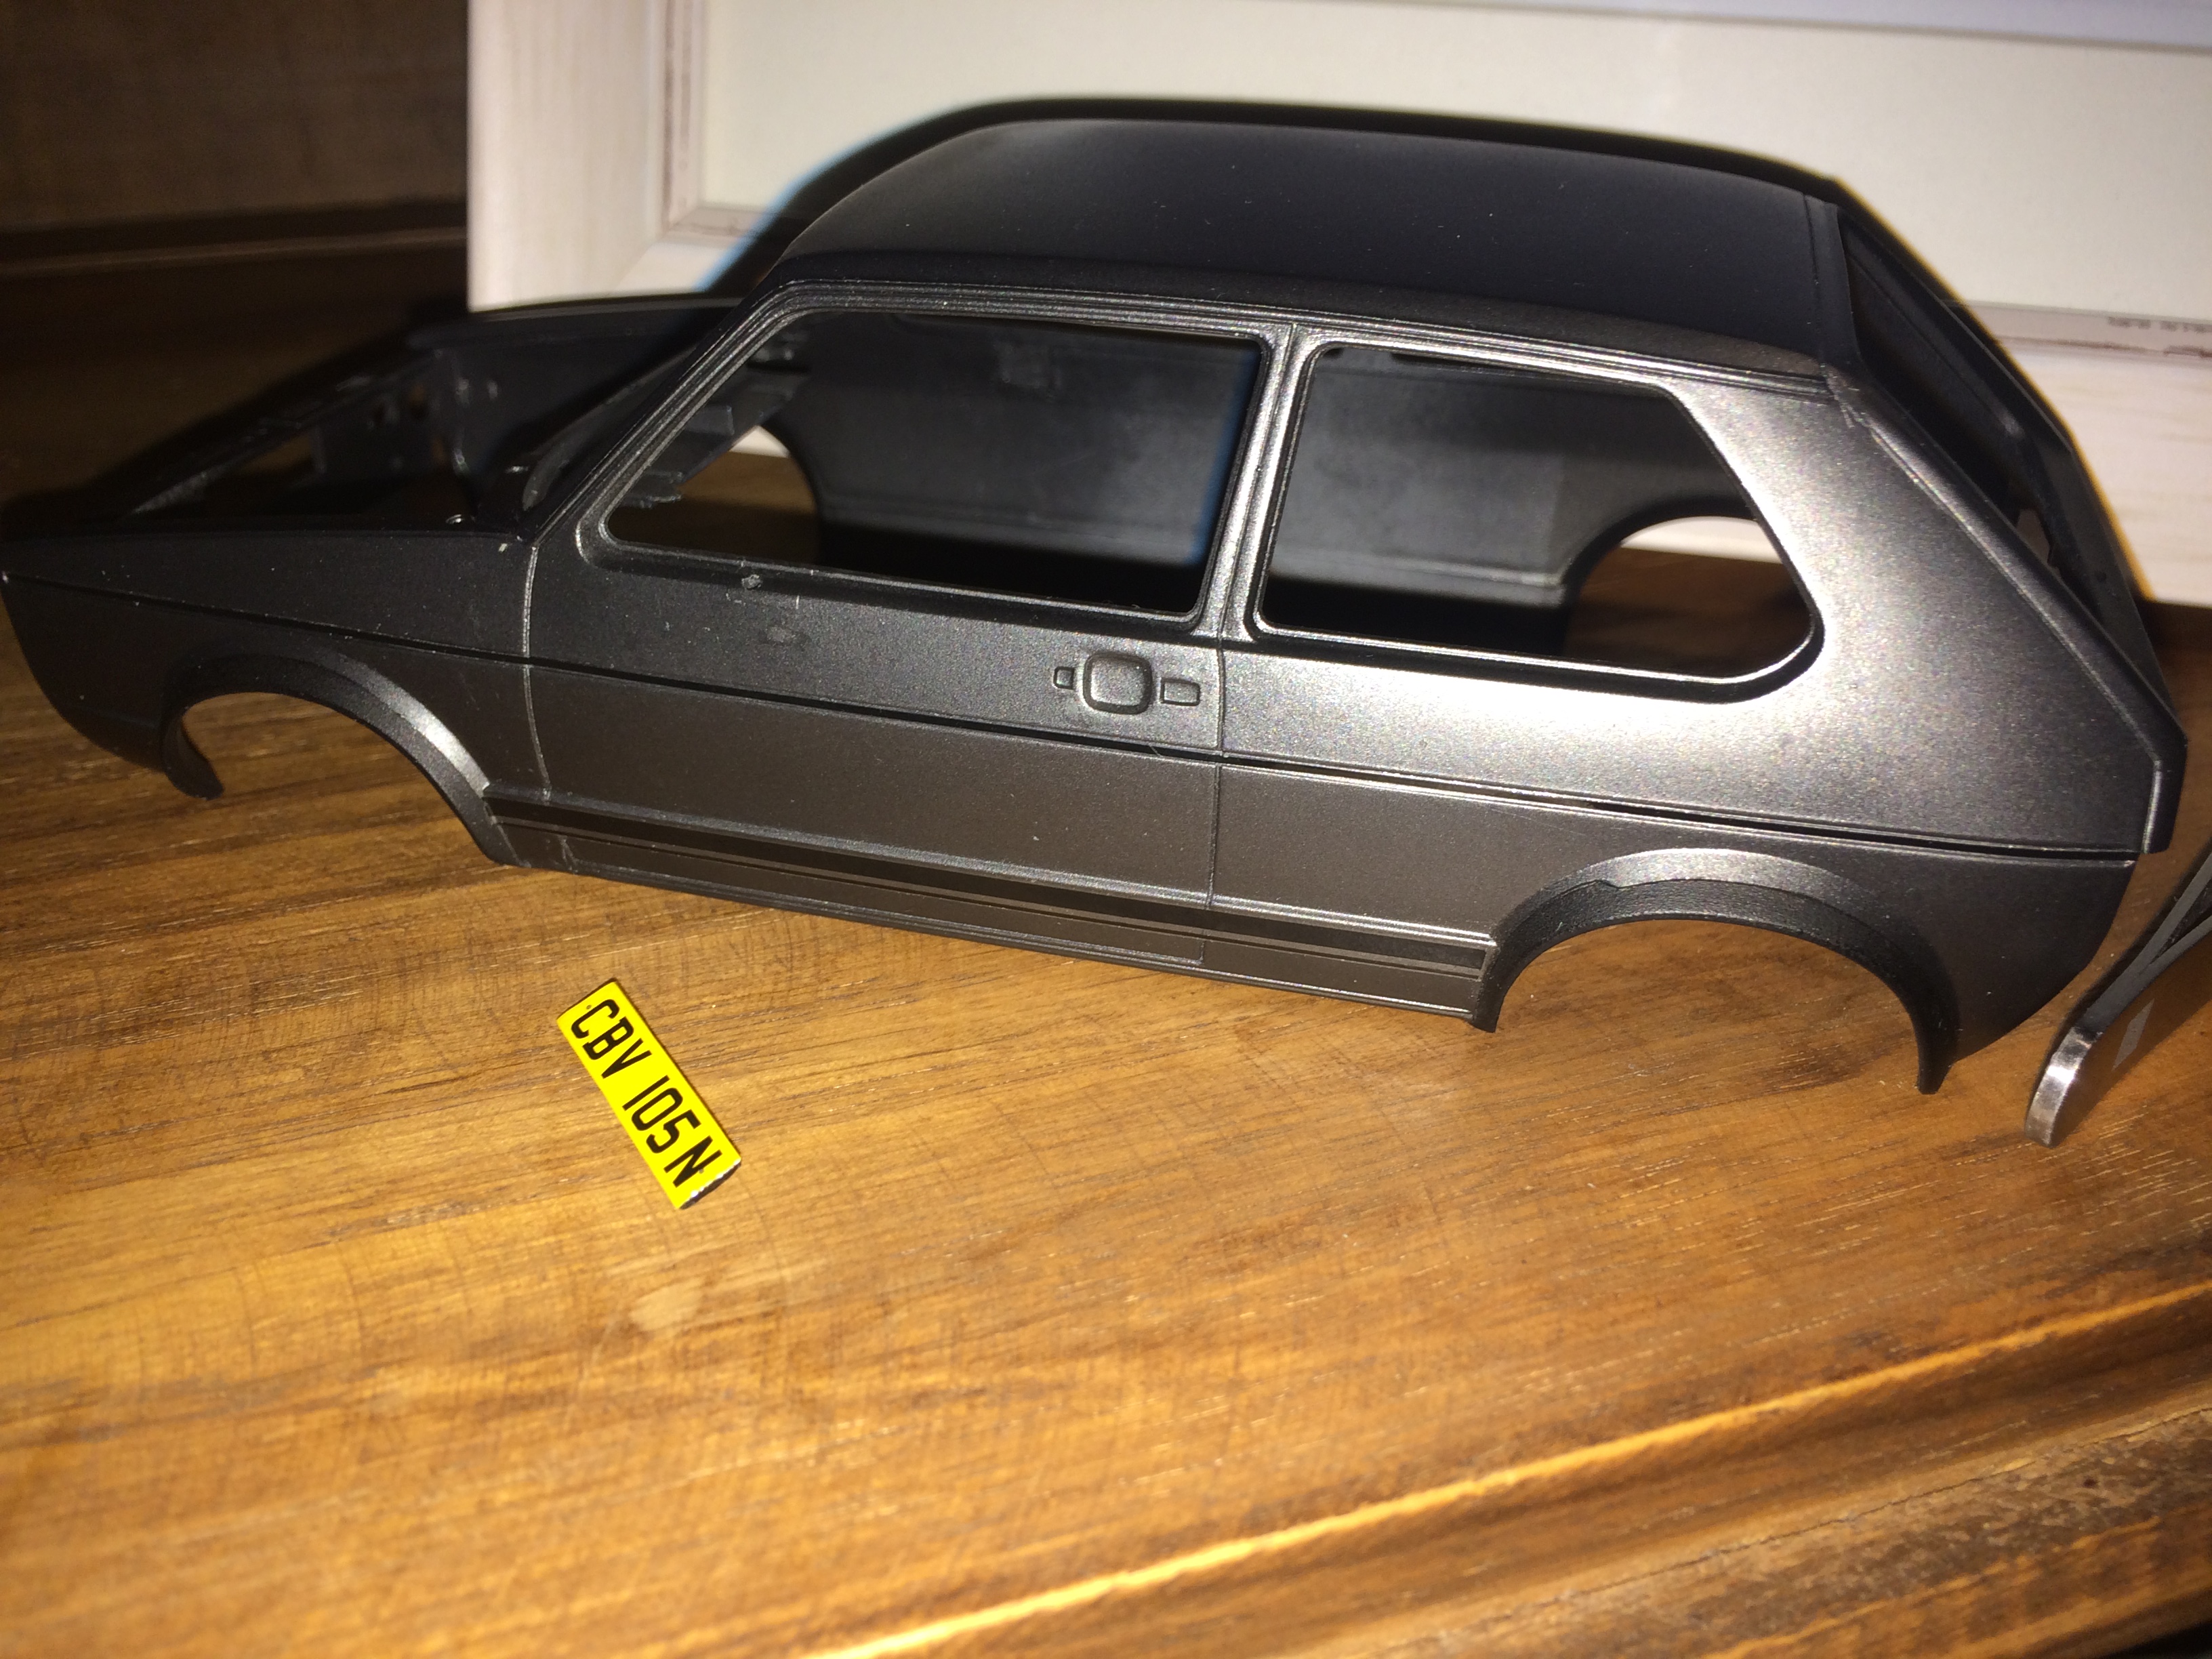
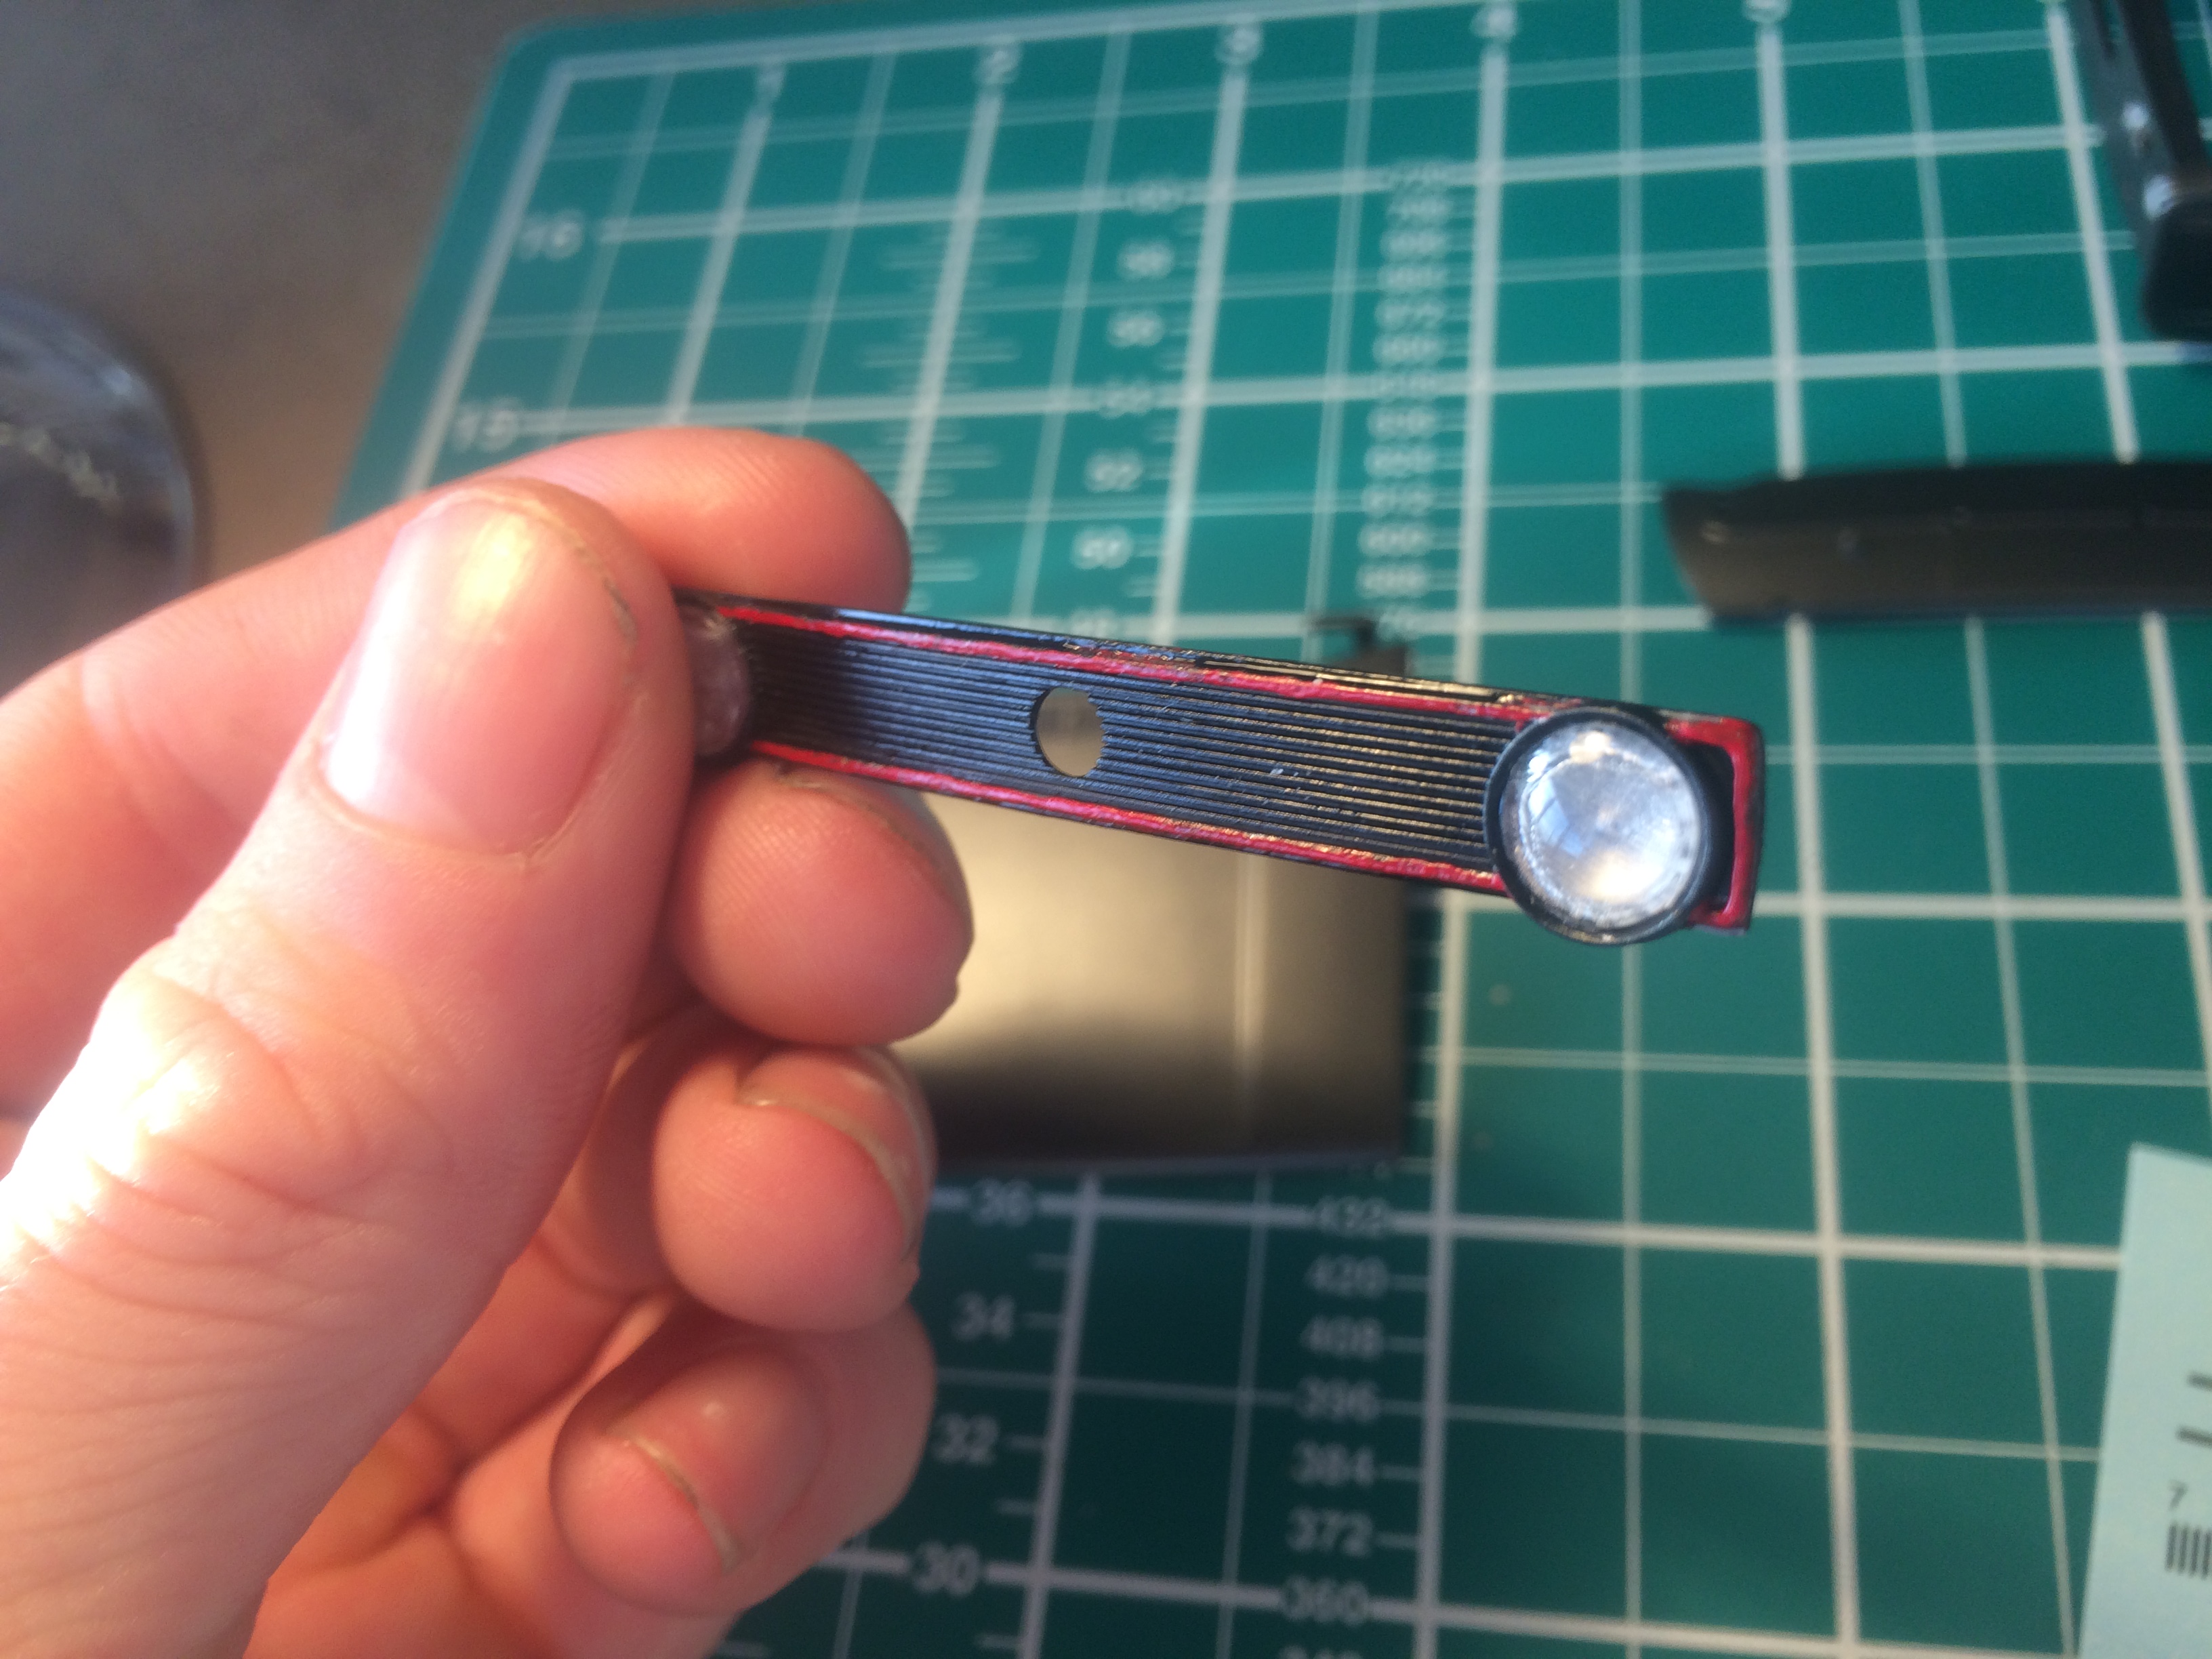
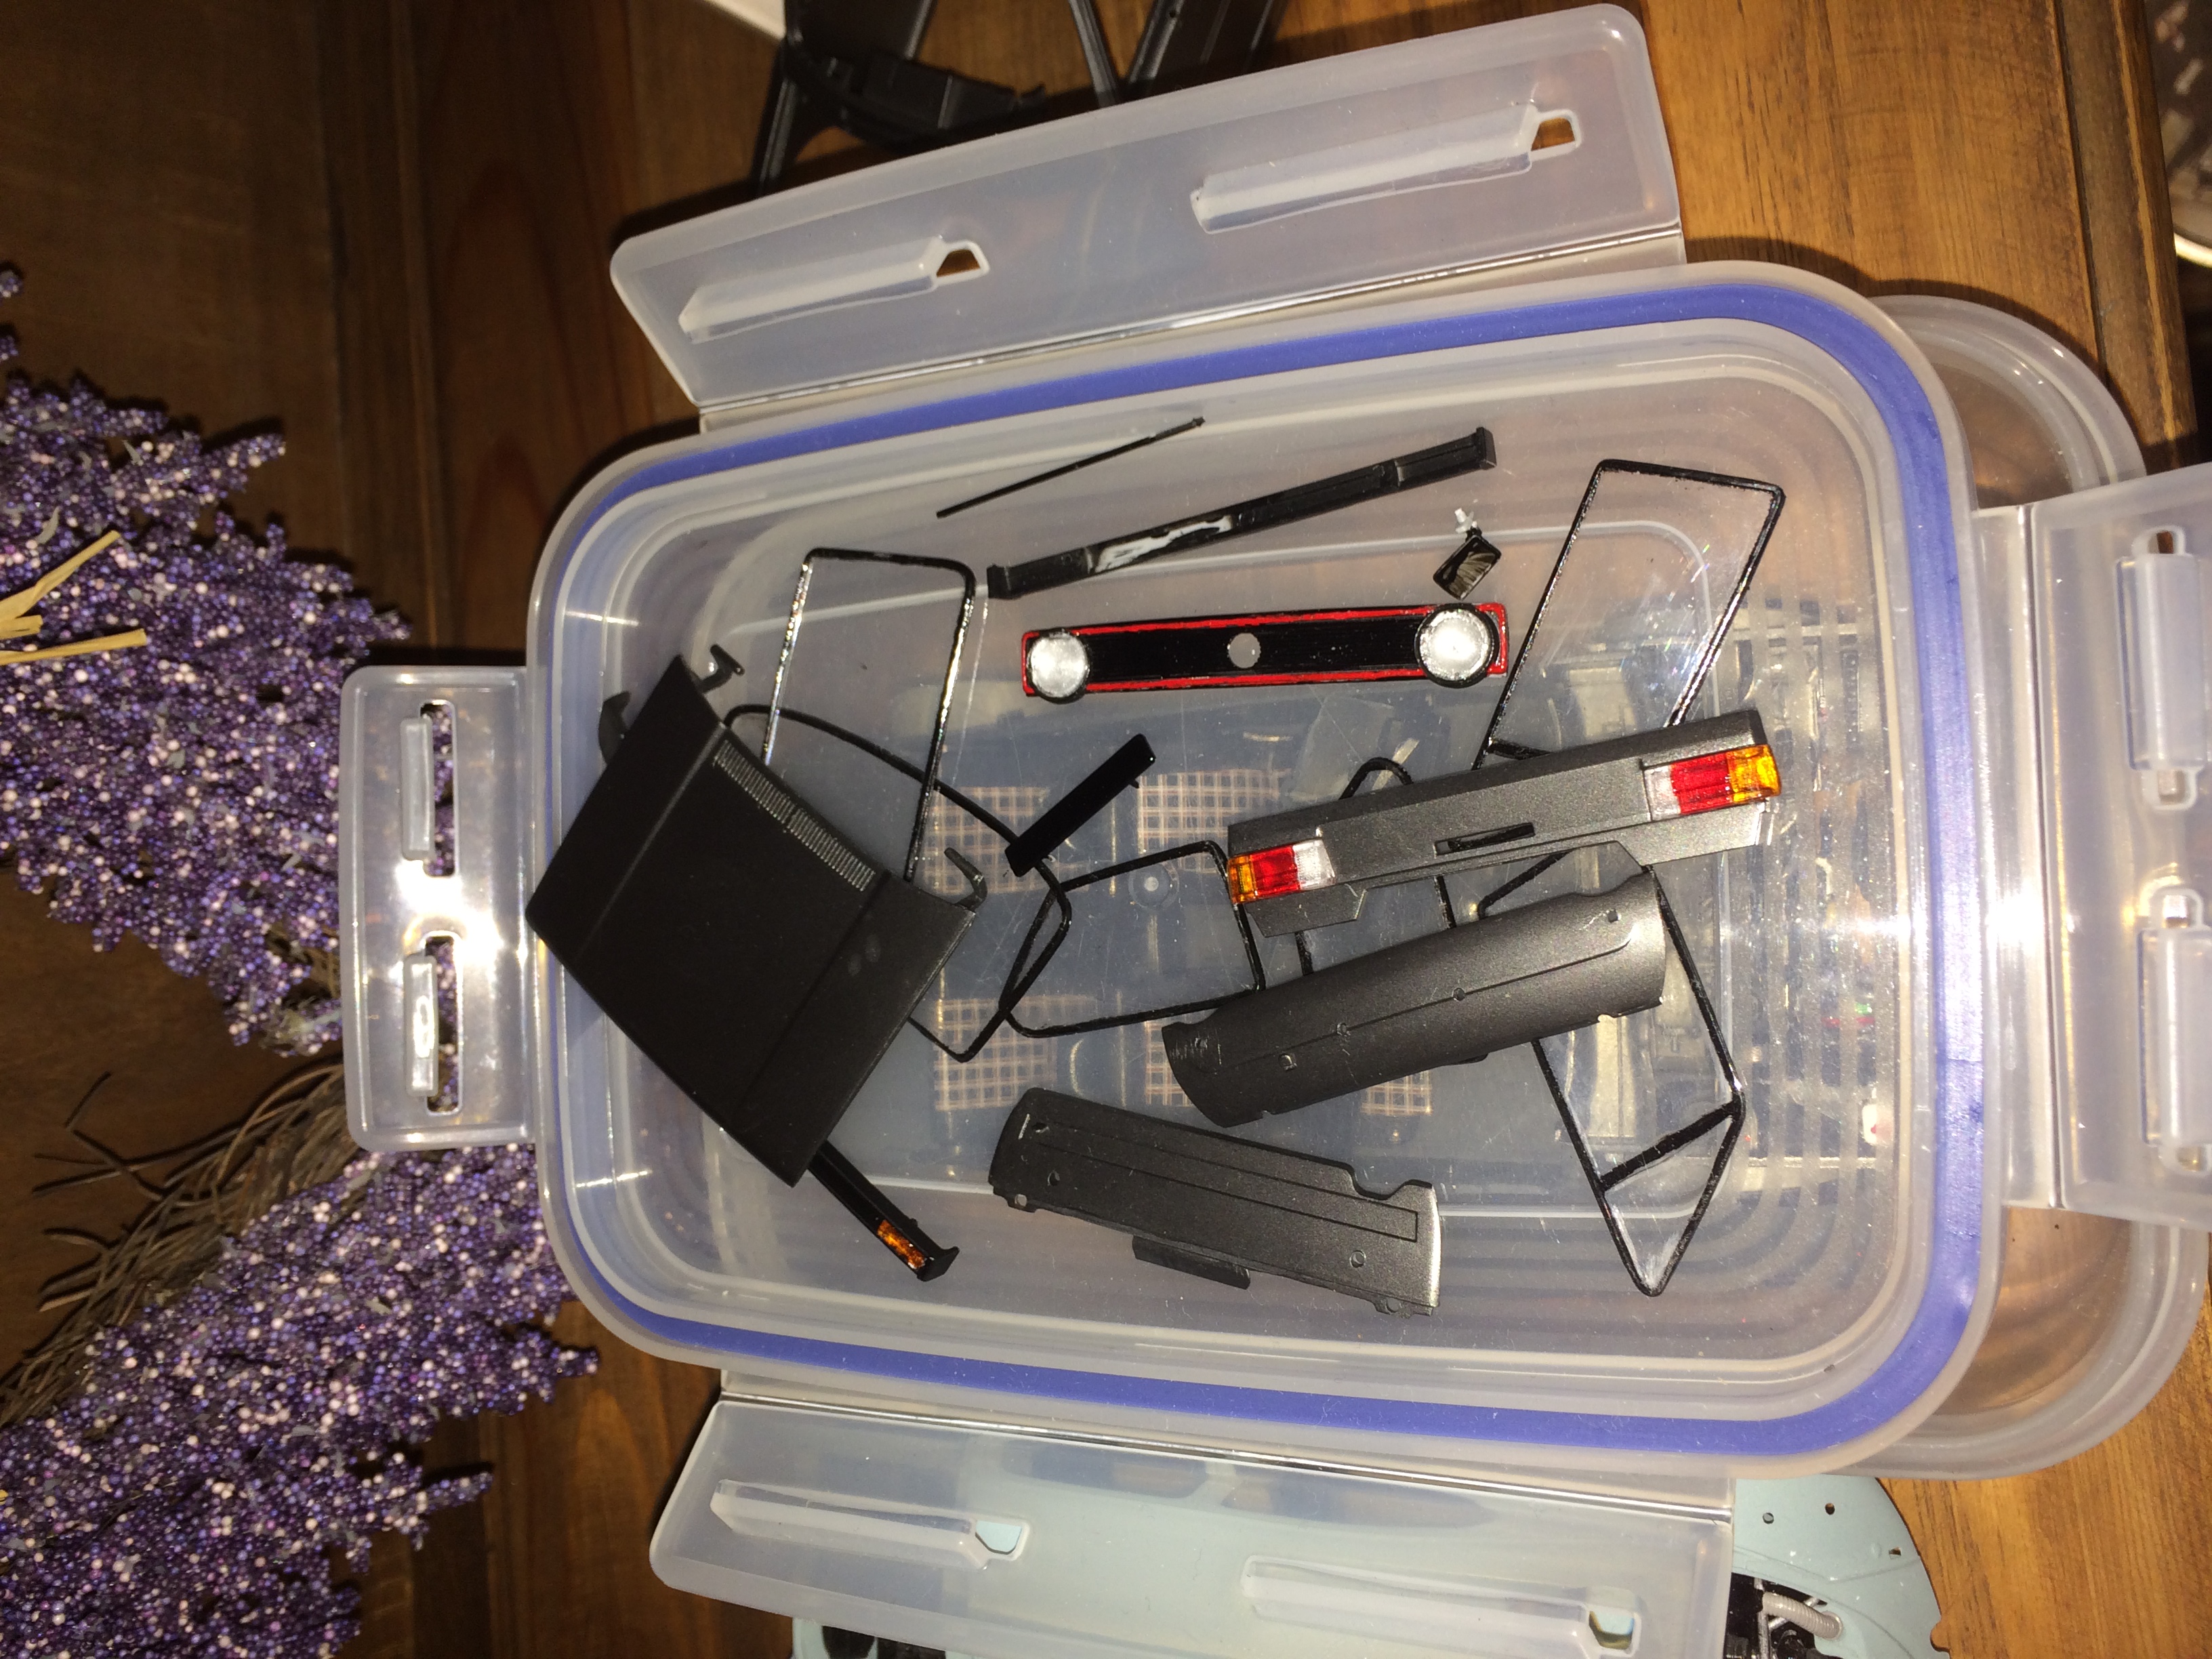
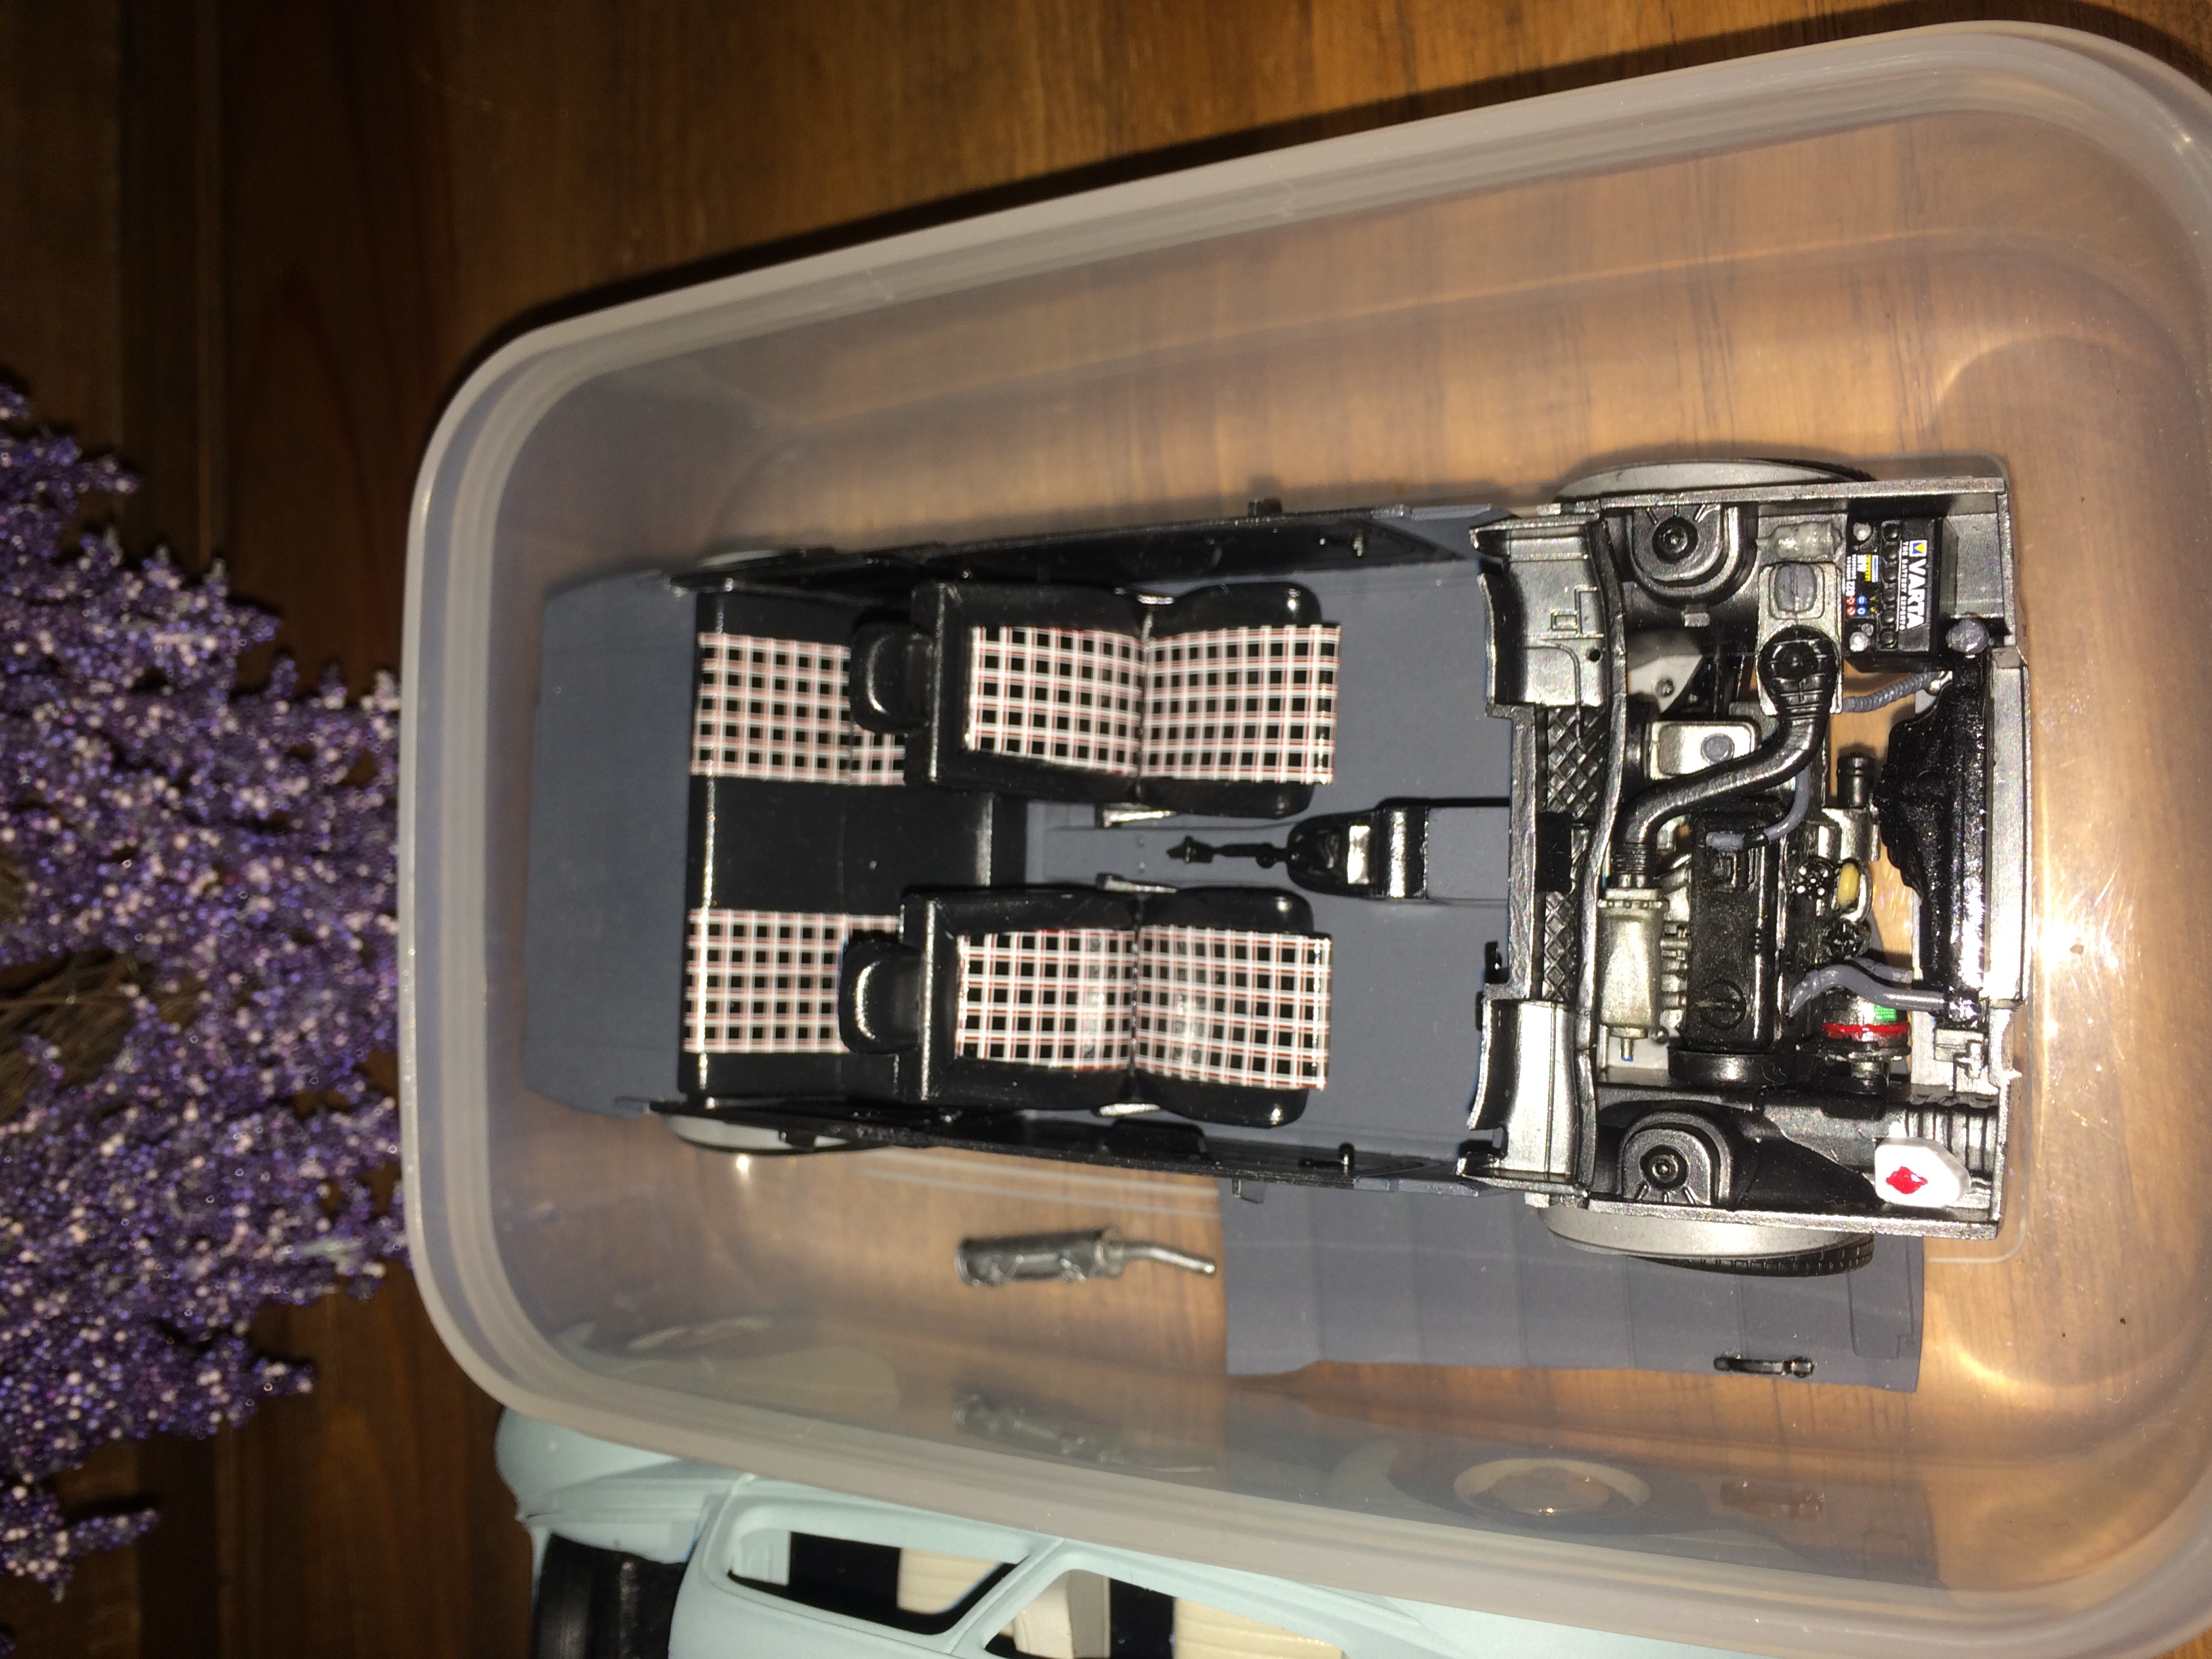
Greetings, this is my first model build still in progress. Decided to go for a mk1 gti by revell. Dad has been building a 66' beetle by tamiya so thought id have a pop. Kit looks great up to now even fully stock and was suprised at the detail. looks like this kit is one of the newer revell kits after looking at other examples of revell gti's. Only just got round to posting some pics so not much 'progress' pictures but you get the idea of sub assemblies and how its coming along First up the engine bay: this would be my first expirience of modelling and turned out suprisingly well. plenty of parts packed in keeps things interesting even without spark plug wiring. pretty much all of the engine compoents handpainted apart from bay and firewall itself which was airbrushed. Chassis airbrushed with some revell semi-gloss black which came with kit. bit of drybrushing. first time using an airbrush and realised how much better finish i got exhaust pipes airbrushed with tamiya flat aluminium with light oversprays of metallic grey xf-56. due to short supply of paints i used some clear orange around welds and clamps. also polished muffler to give a bit of contrast steering dry assembly: suspension and steering painted in gloss black as opposed to semi gloss of the chassis Next phase: interior decided to go for some german grey as the main colour for interior however on my next model may experiment with some 'flocking' that ive seen people use to replicate a carpet effect Revell did a great job with dash detail with plenty of transfers realistic to the car in real life. the transfers were applied suprisingly well pro spray booth setup Okay, so now for the fun to begin... Decided to go for the atlas grey gti. okay so this model looks to be based around the earlier versions around 76 whilst atlas grey golfs only came about in 82 but oh well, looks pretty cool in my opinion this time i used some vallejo gunmetal grey from their metal series of paints. For future reference must use a laquer in my case some tamiya x-22 or else this paint rubs of really easily even when handling to apply transfers. Also masked of the wheel arches and rear window trim to apply some black. Next i applied the transfers; this is pretty much my progress so far as you can see not all body transfers have been applied , the body trim proved really awkward : enjoy the pics: english plates of course what looks to be chassis vin, too small to see that red grill trim -decided to opt to handpaint the red grill trim with an undercoat of silver to really make it stand out. maybe not as neat as if i had used the transfers but i couldnt resist various parts ready to be assembled once body is ready so... here we are up to now. hope you enjoy the content so far and i plan to update in a few days once the body is finished and then time to assemble. any feedback is more than welcome enjoy guys!