littlfron
-
Posts
40 -
Joined
-
Last visited
littlfron's Achievements
MCM Regular (3/6)
-
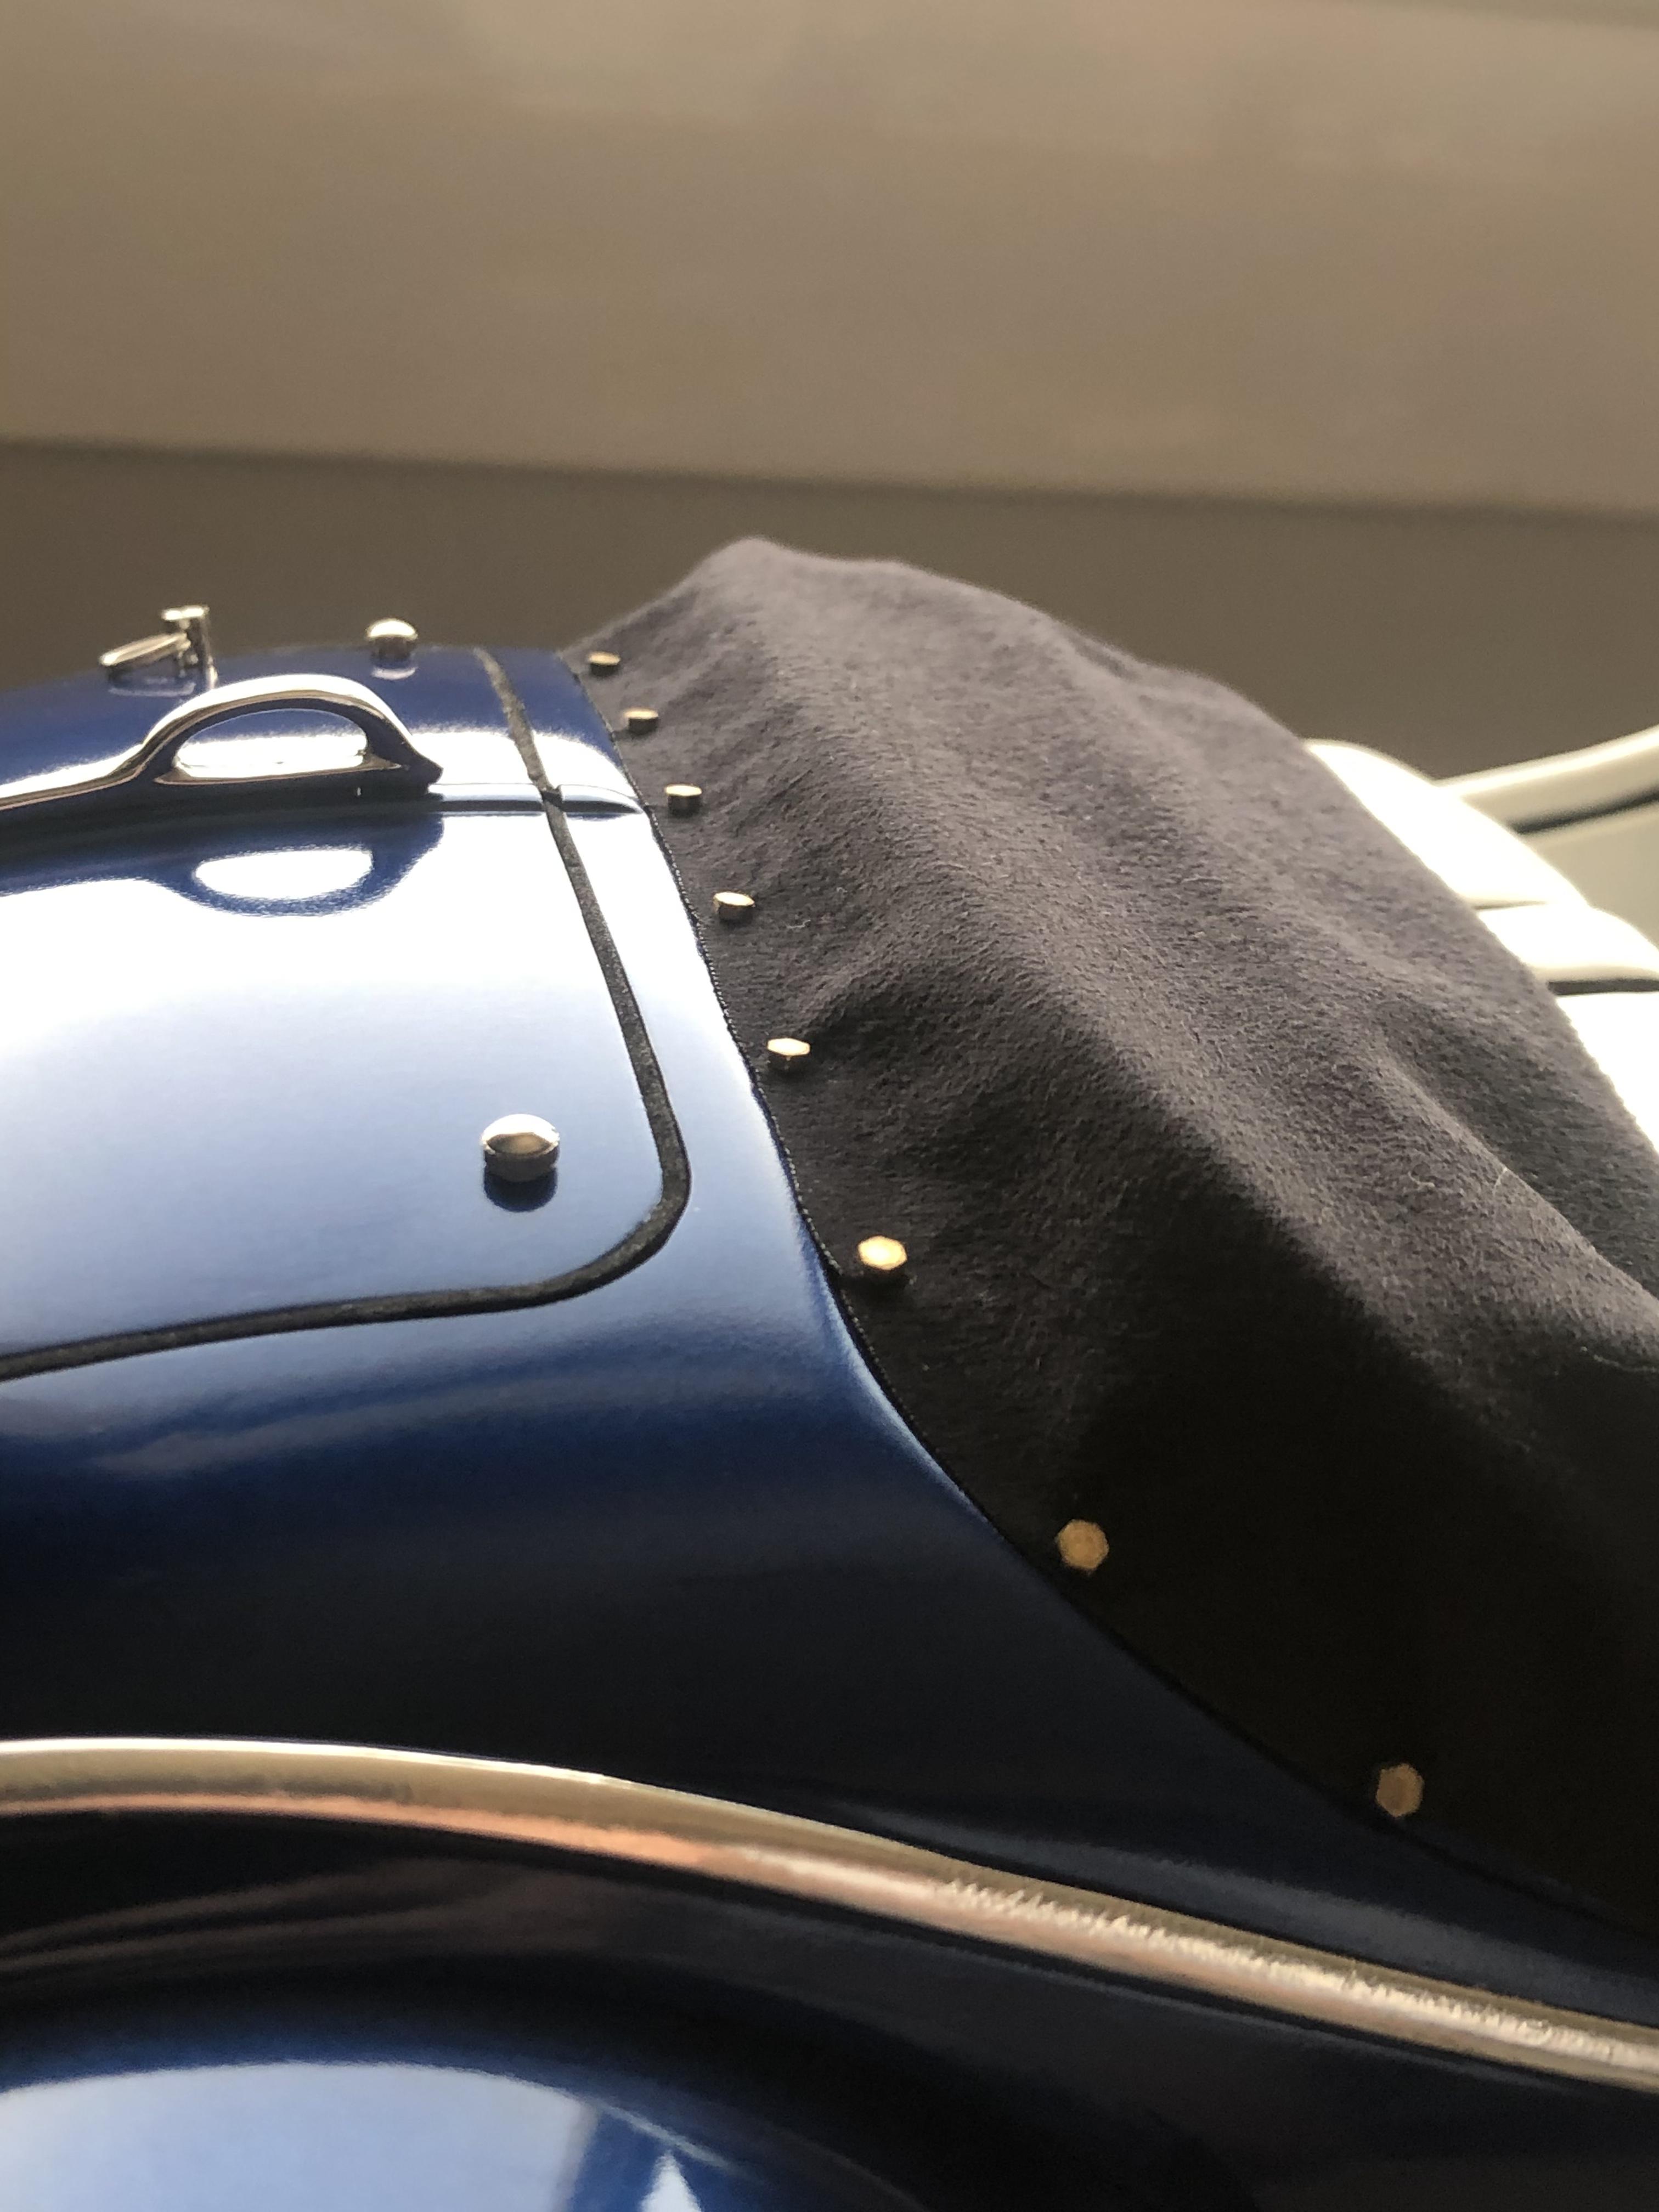
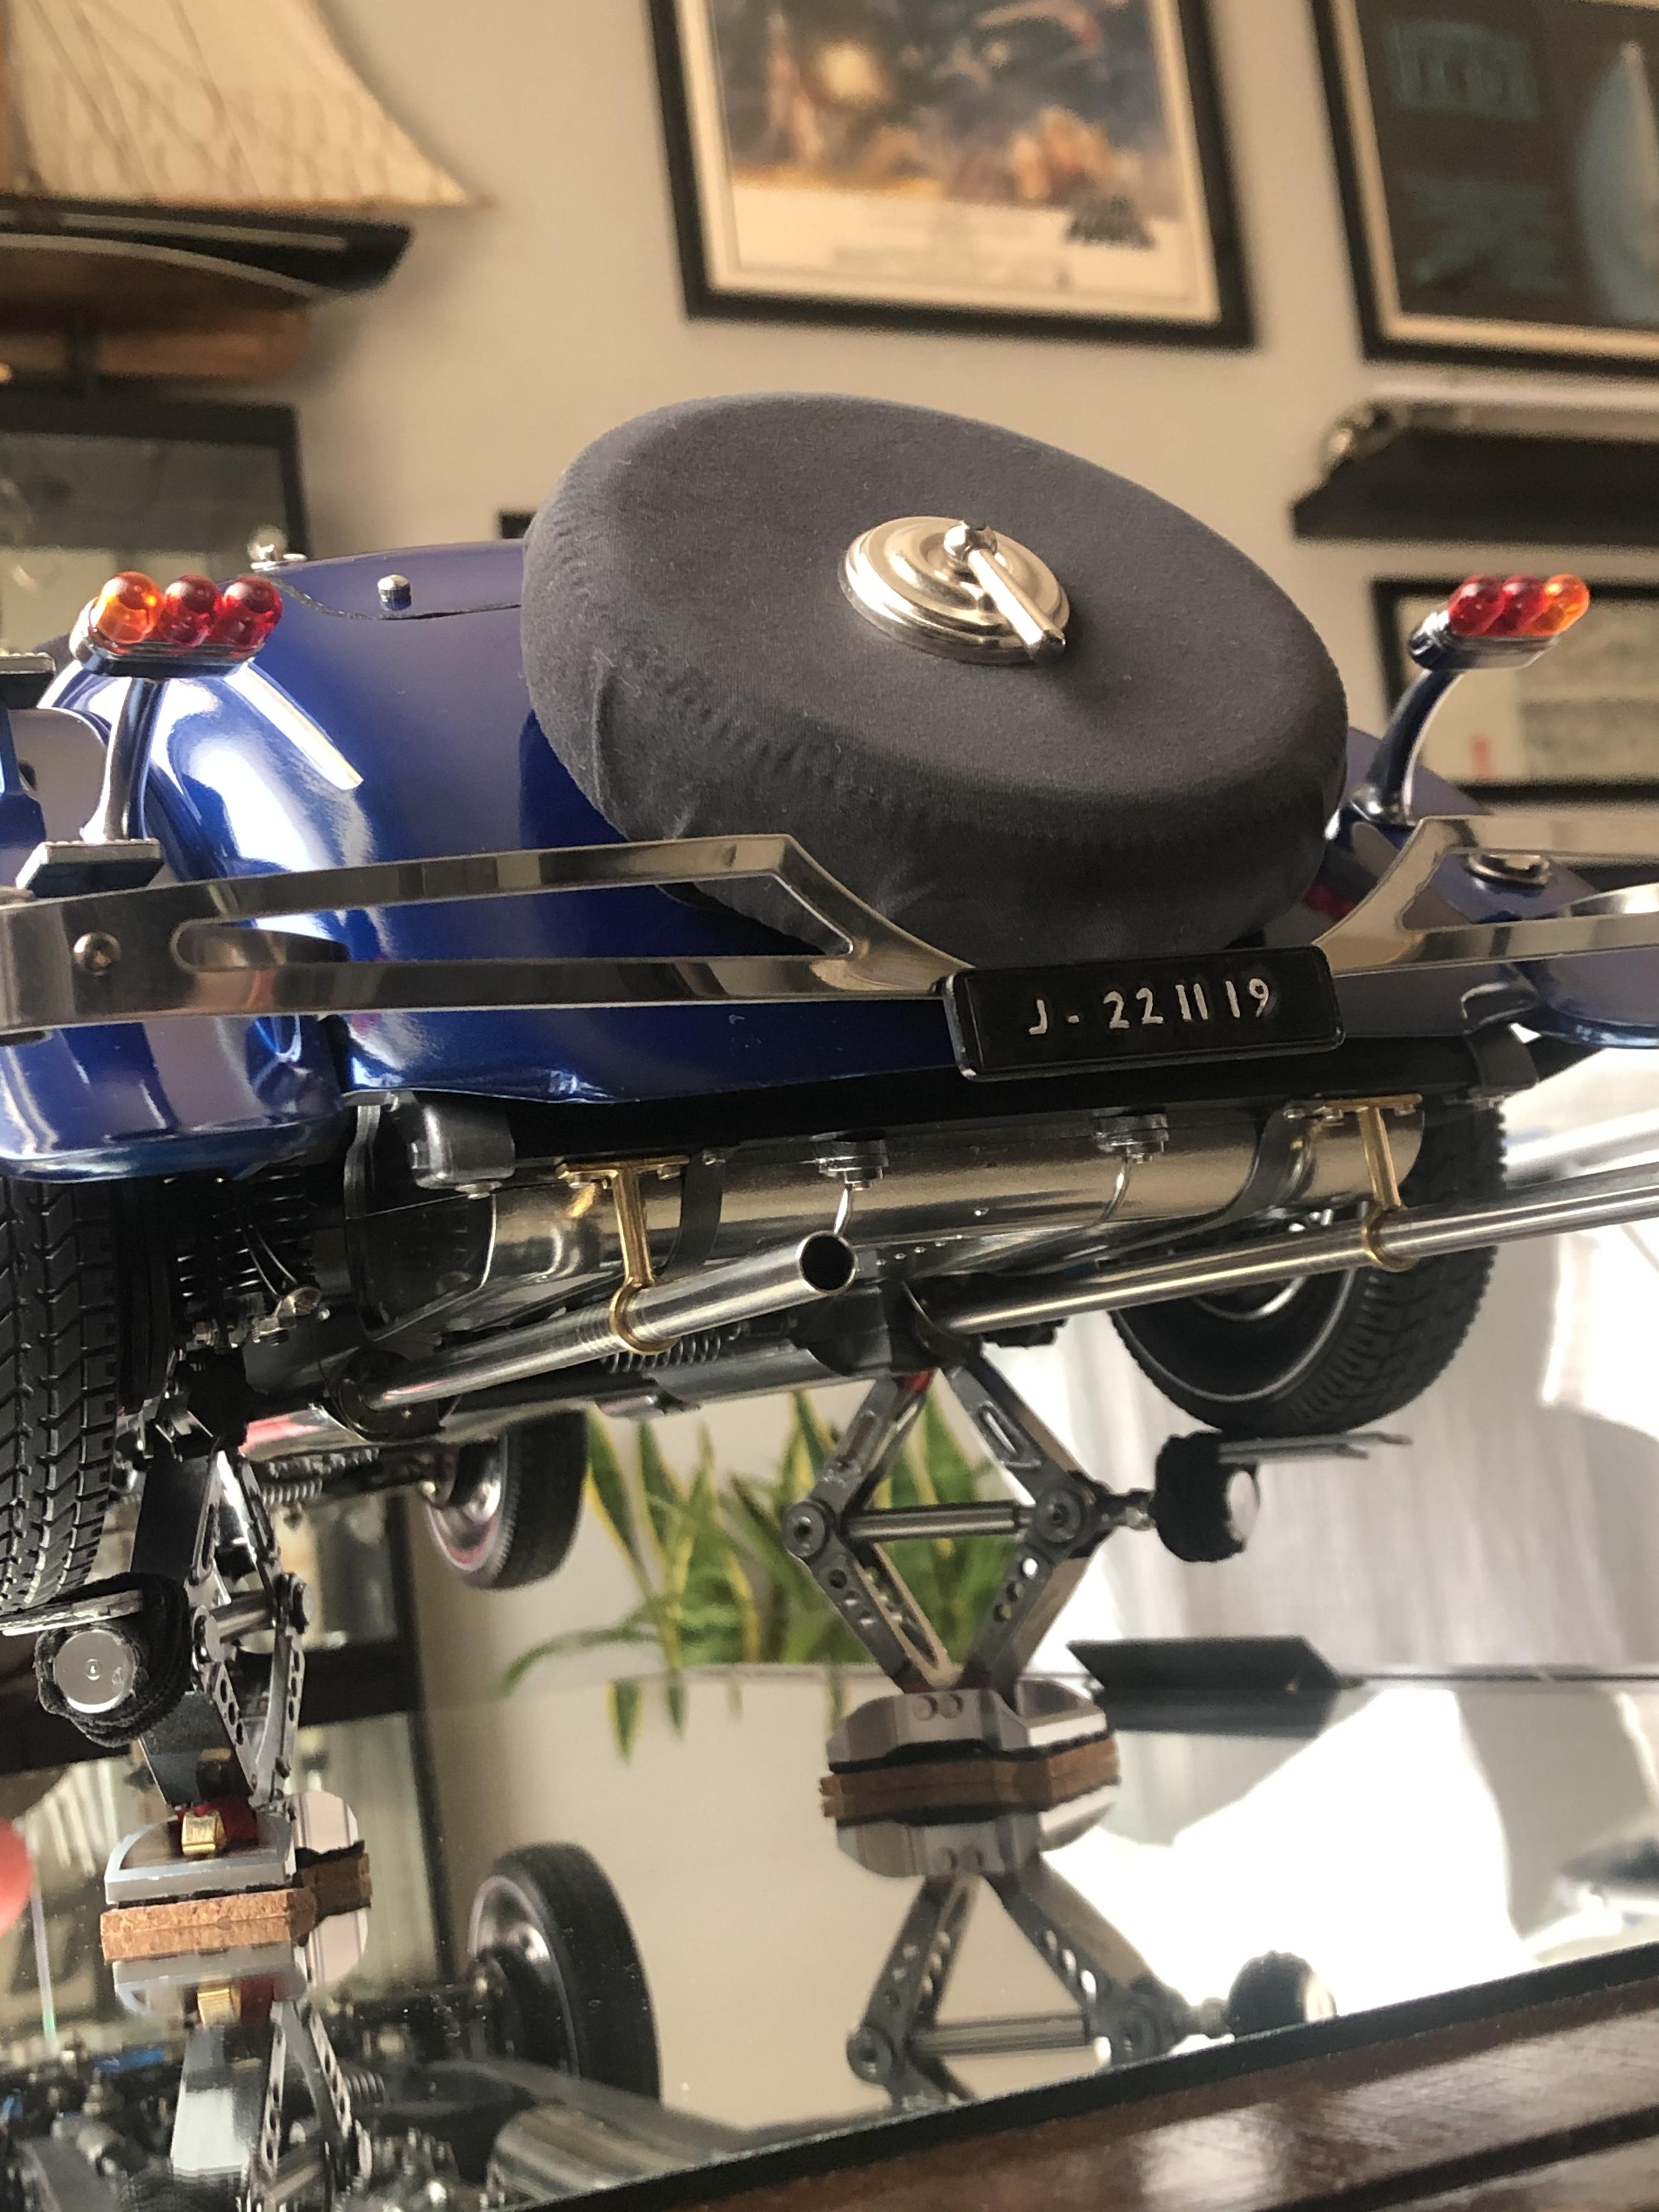
The embossed registration was the last added part, done manually from a coke can and painted !!!

-
-
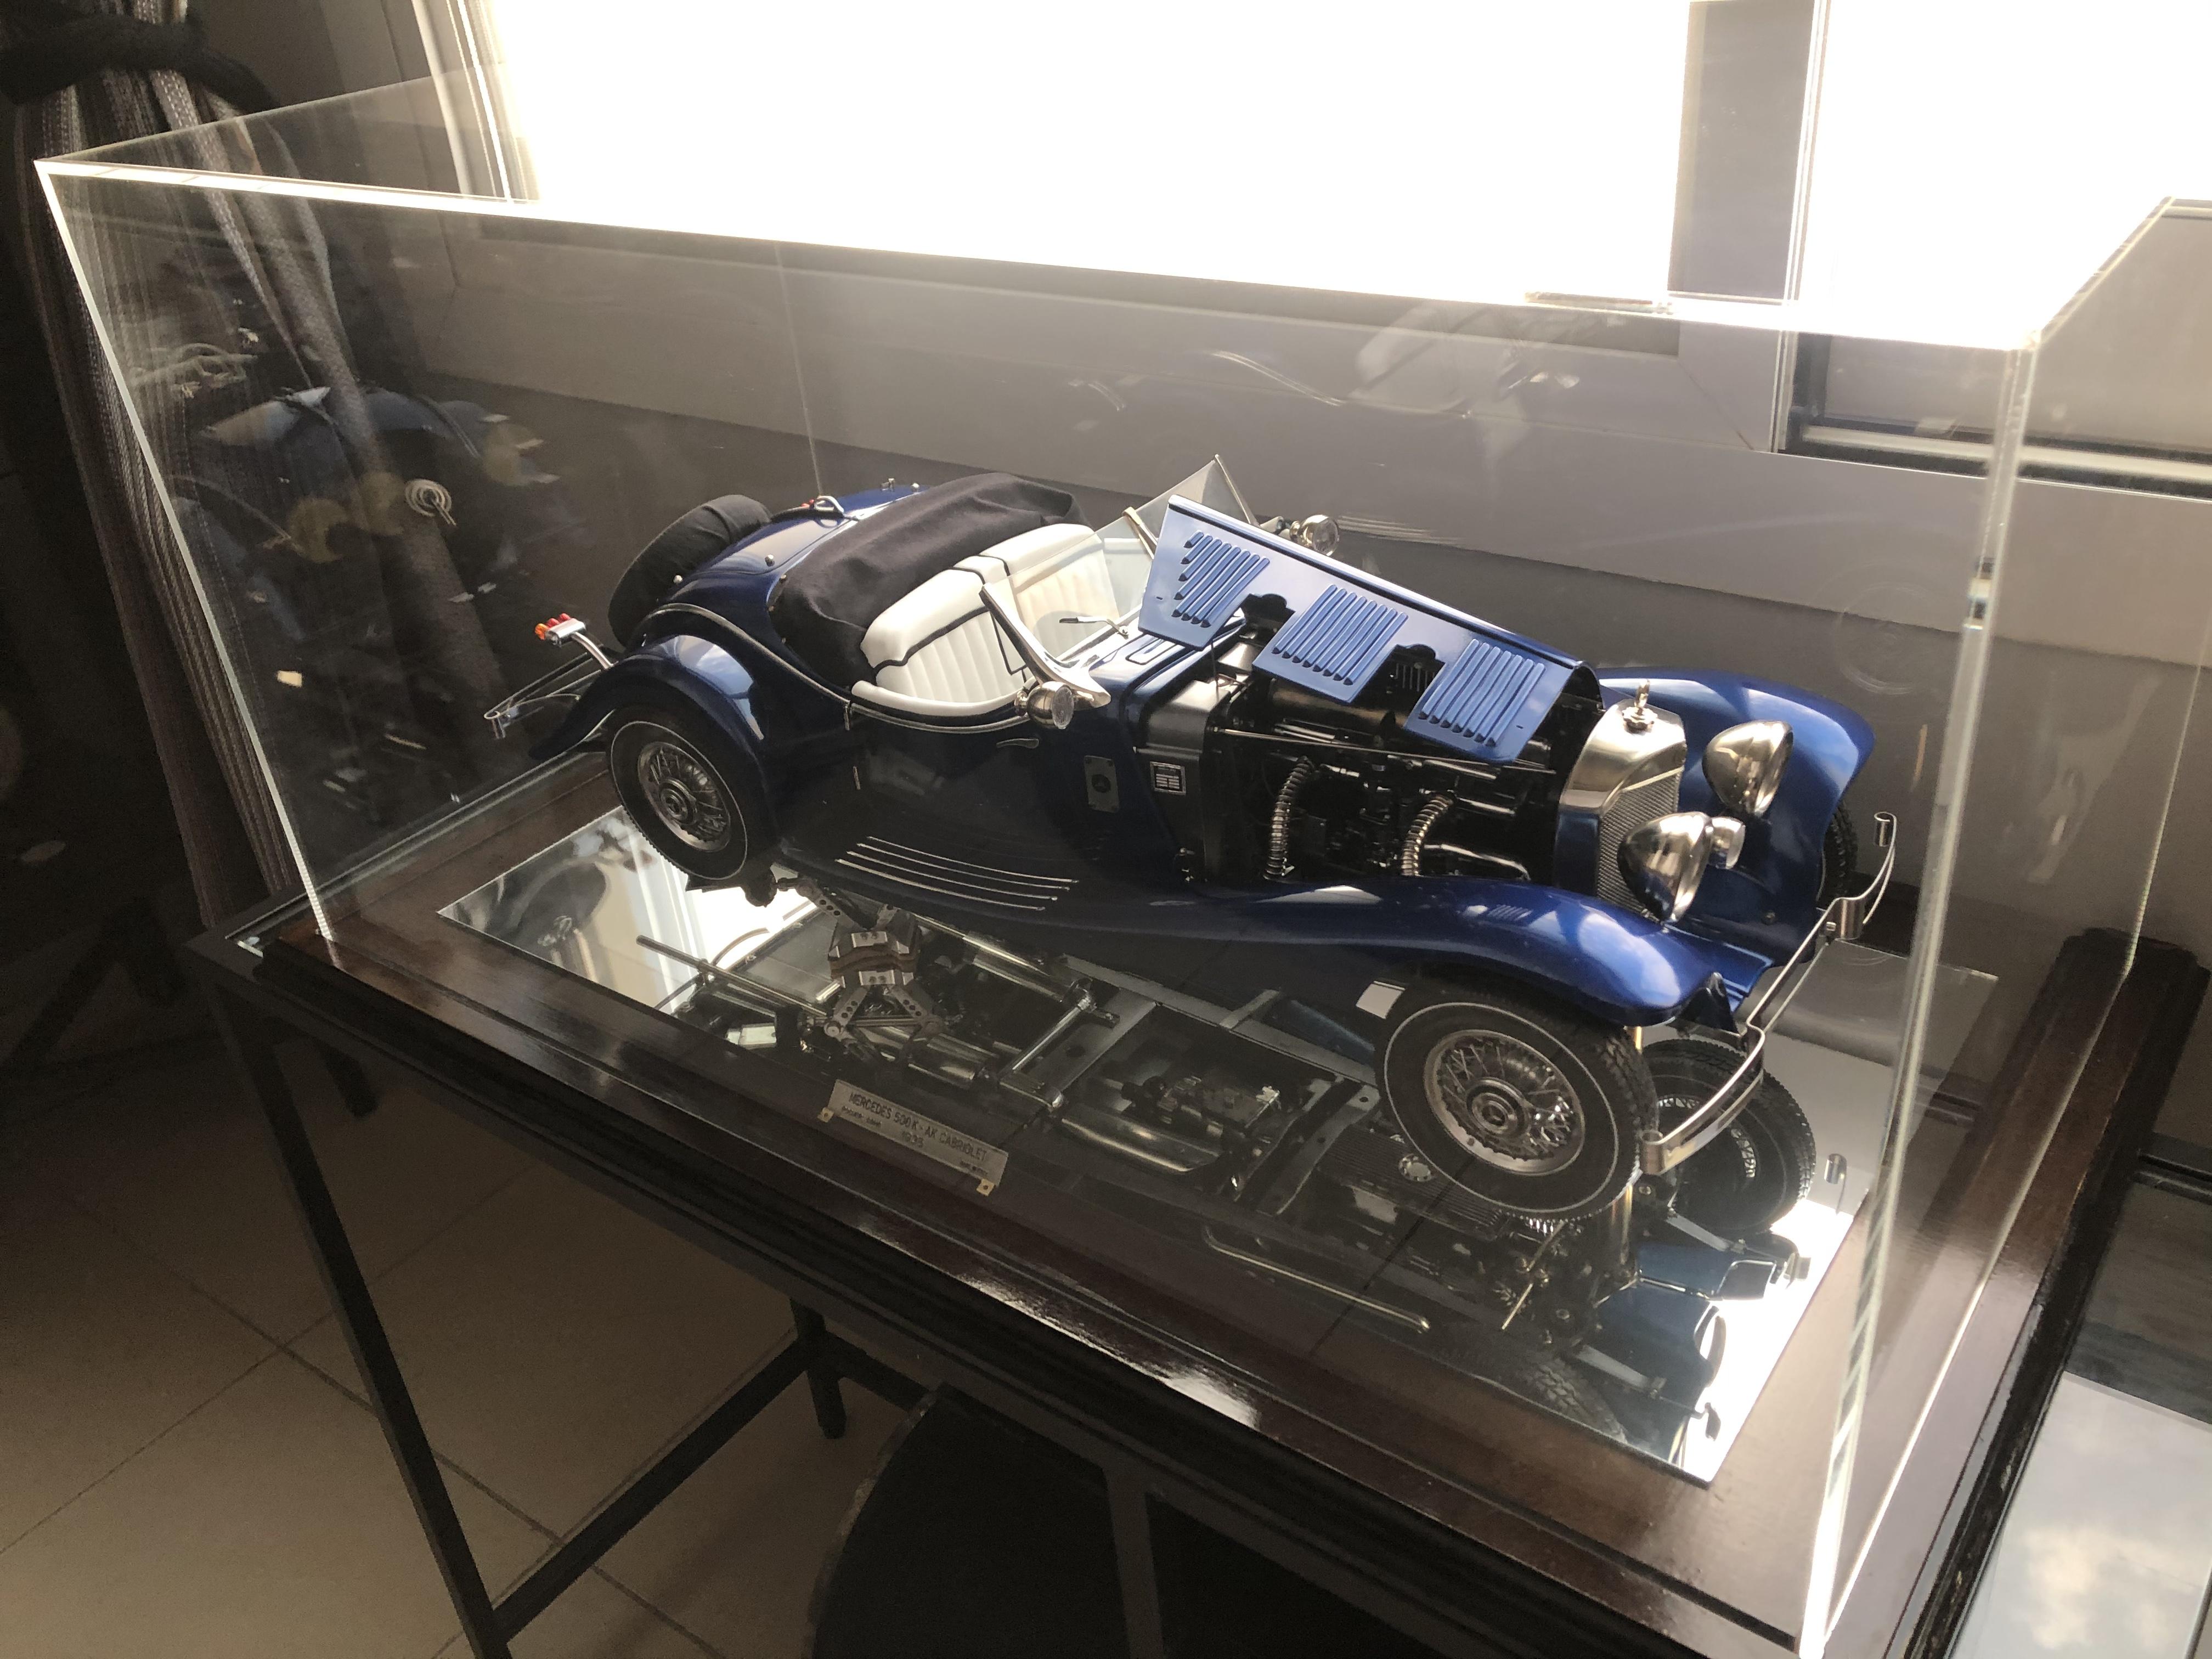
Project finished .... 2 years time..
-
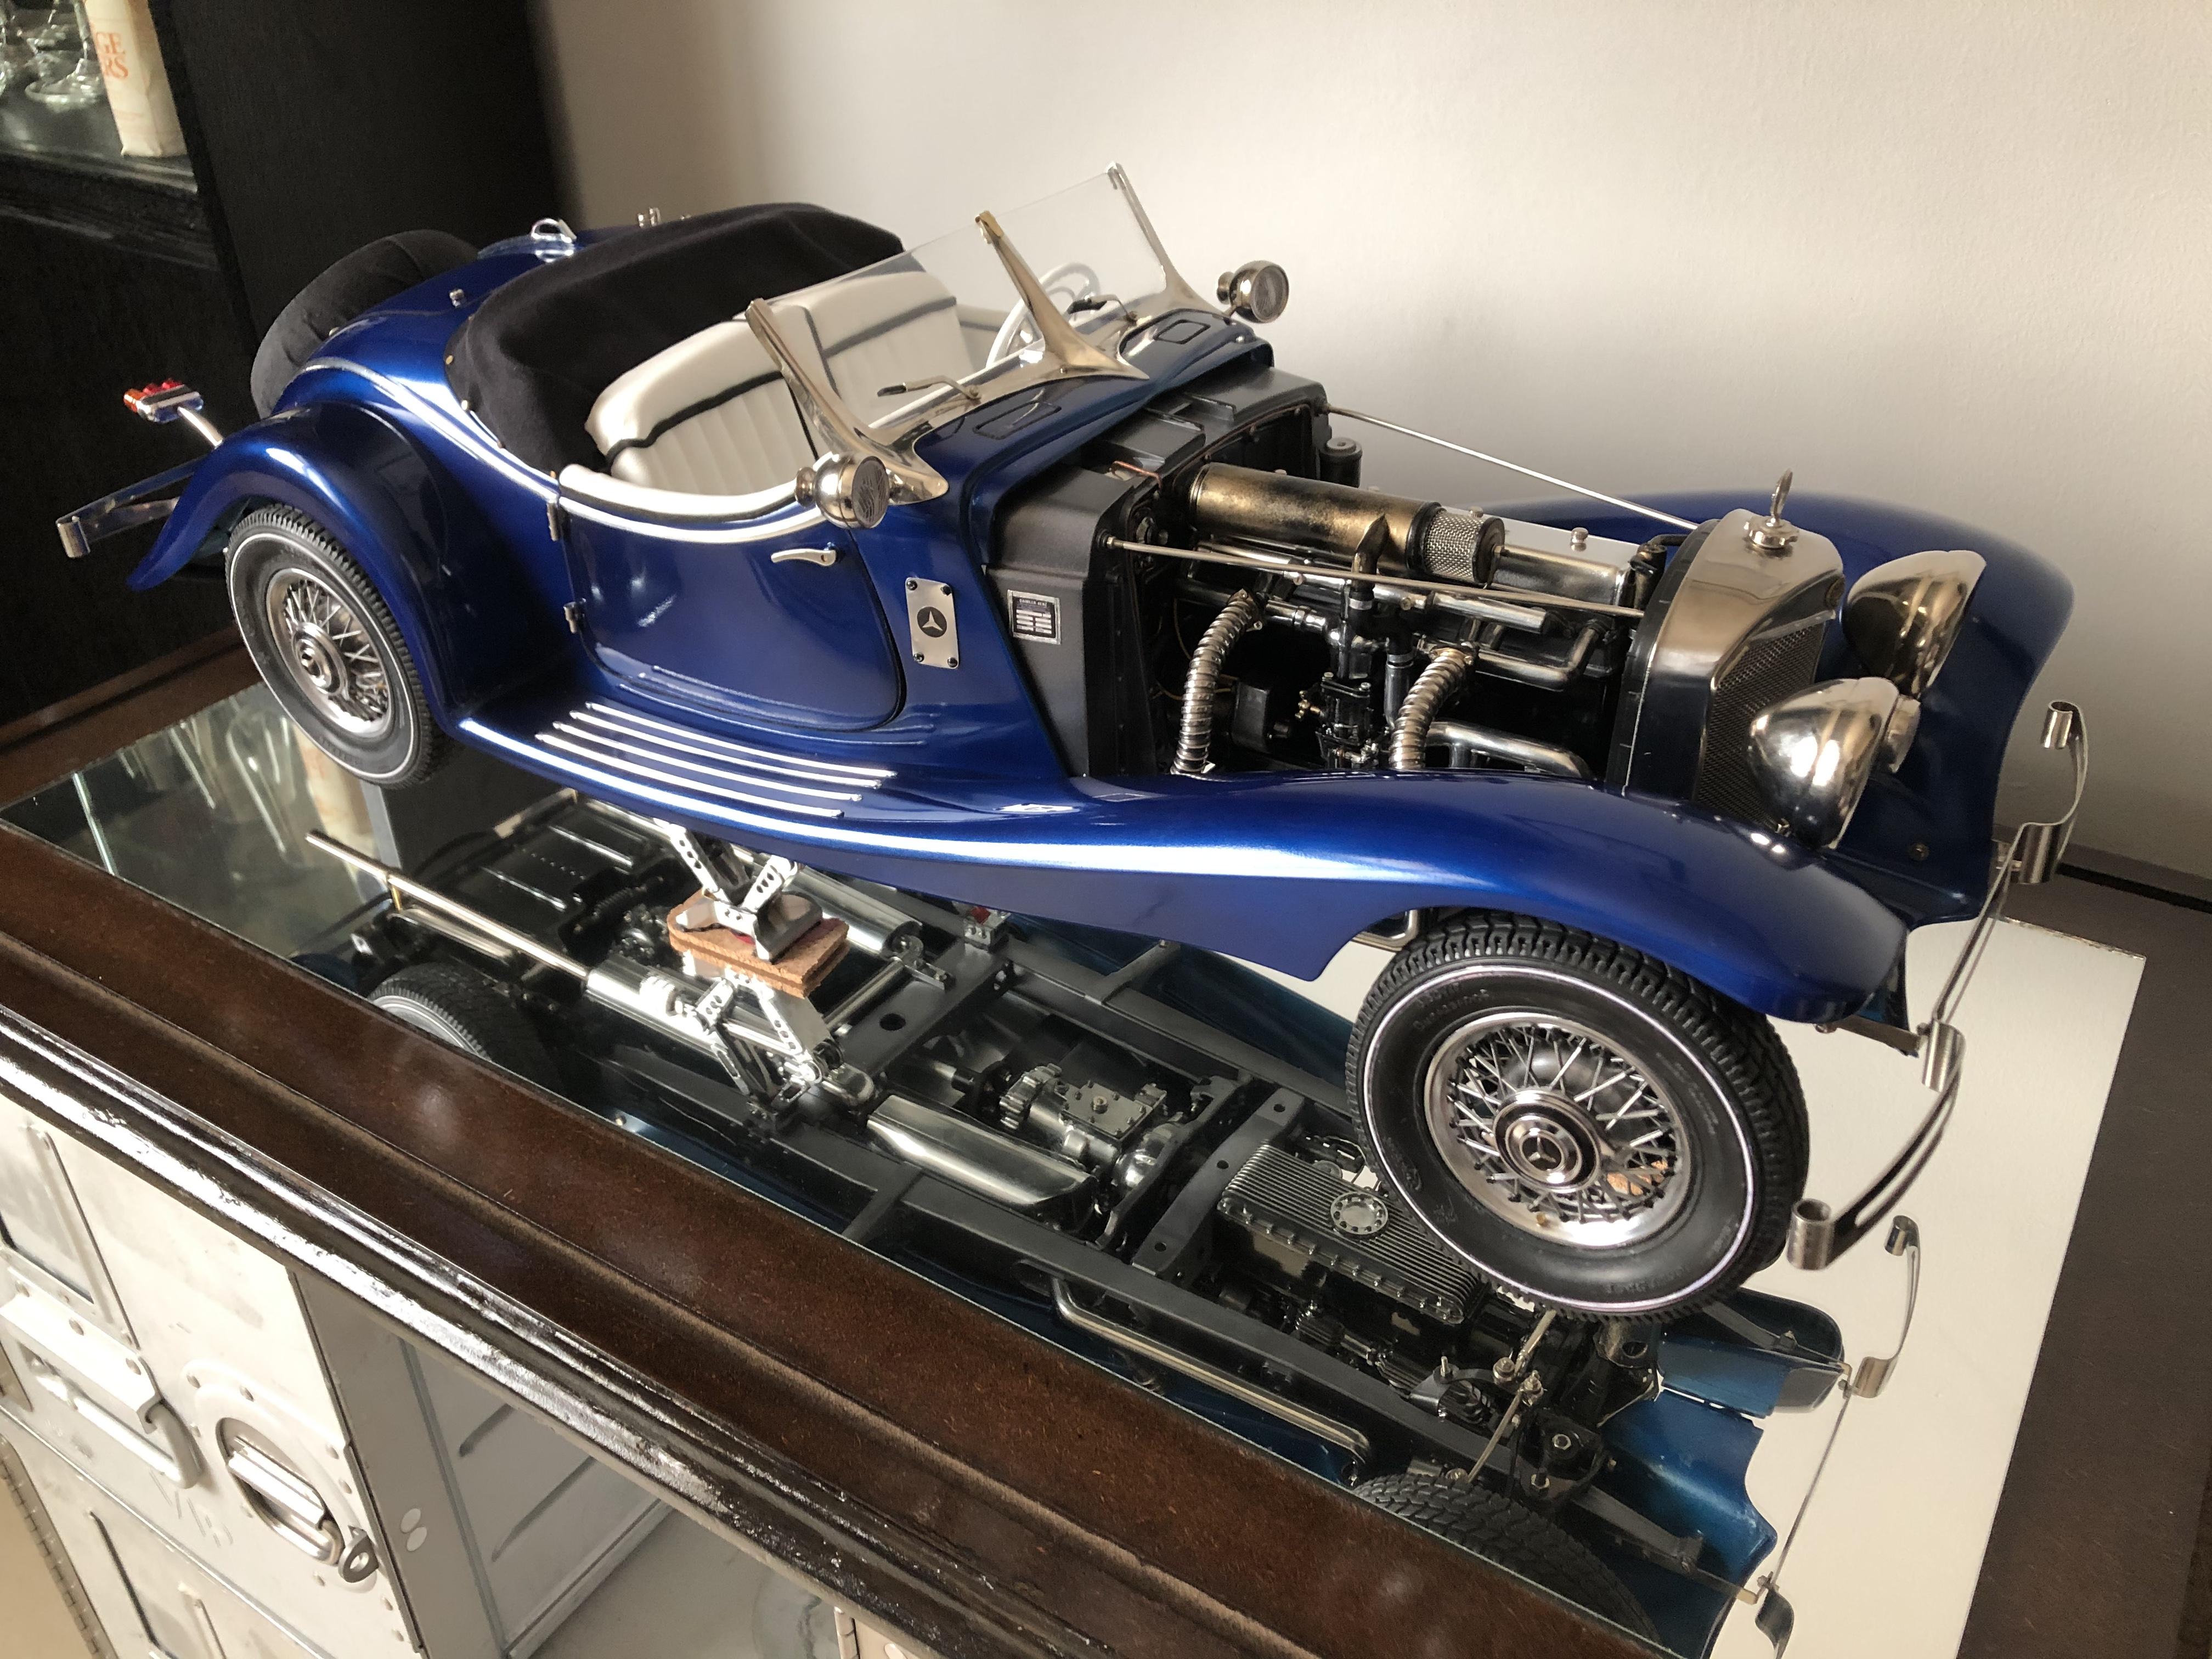
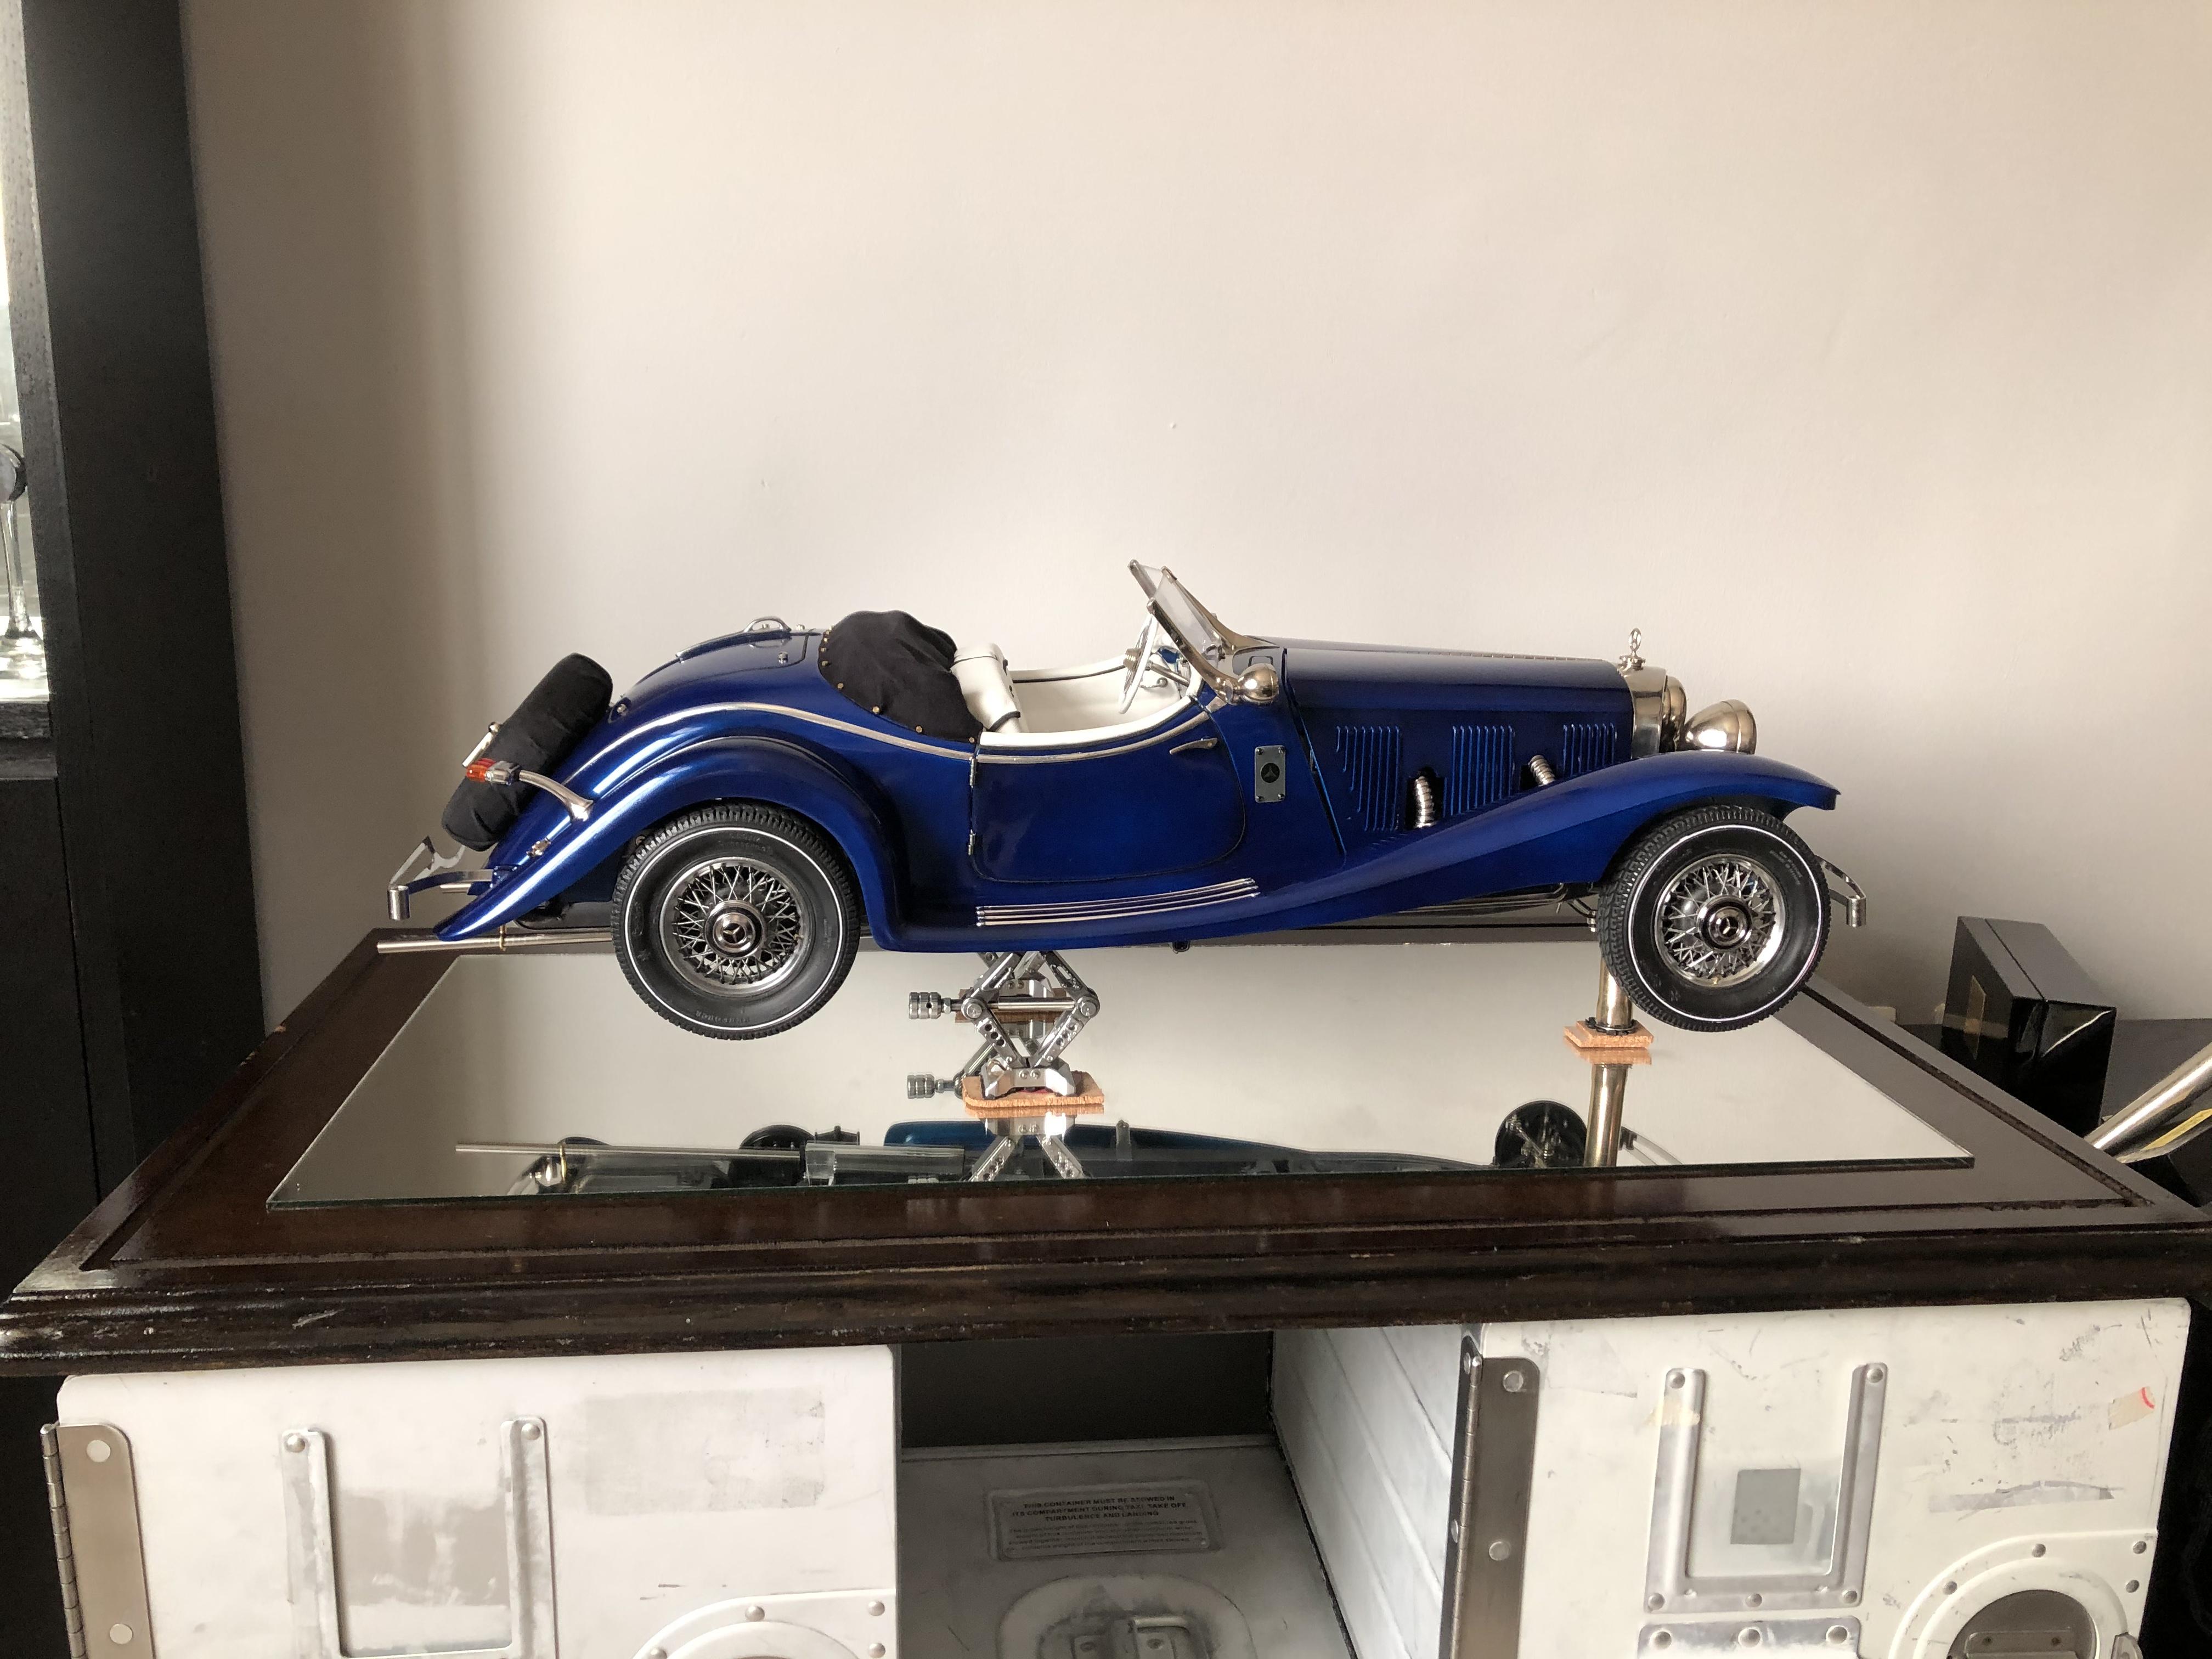
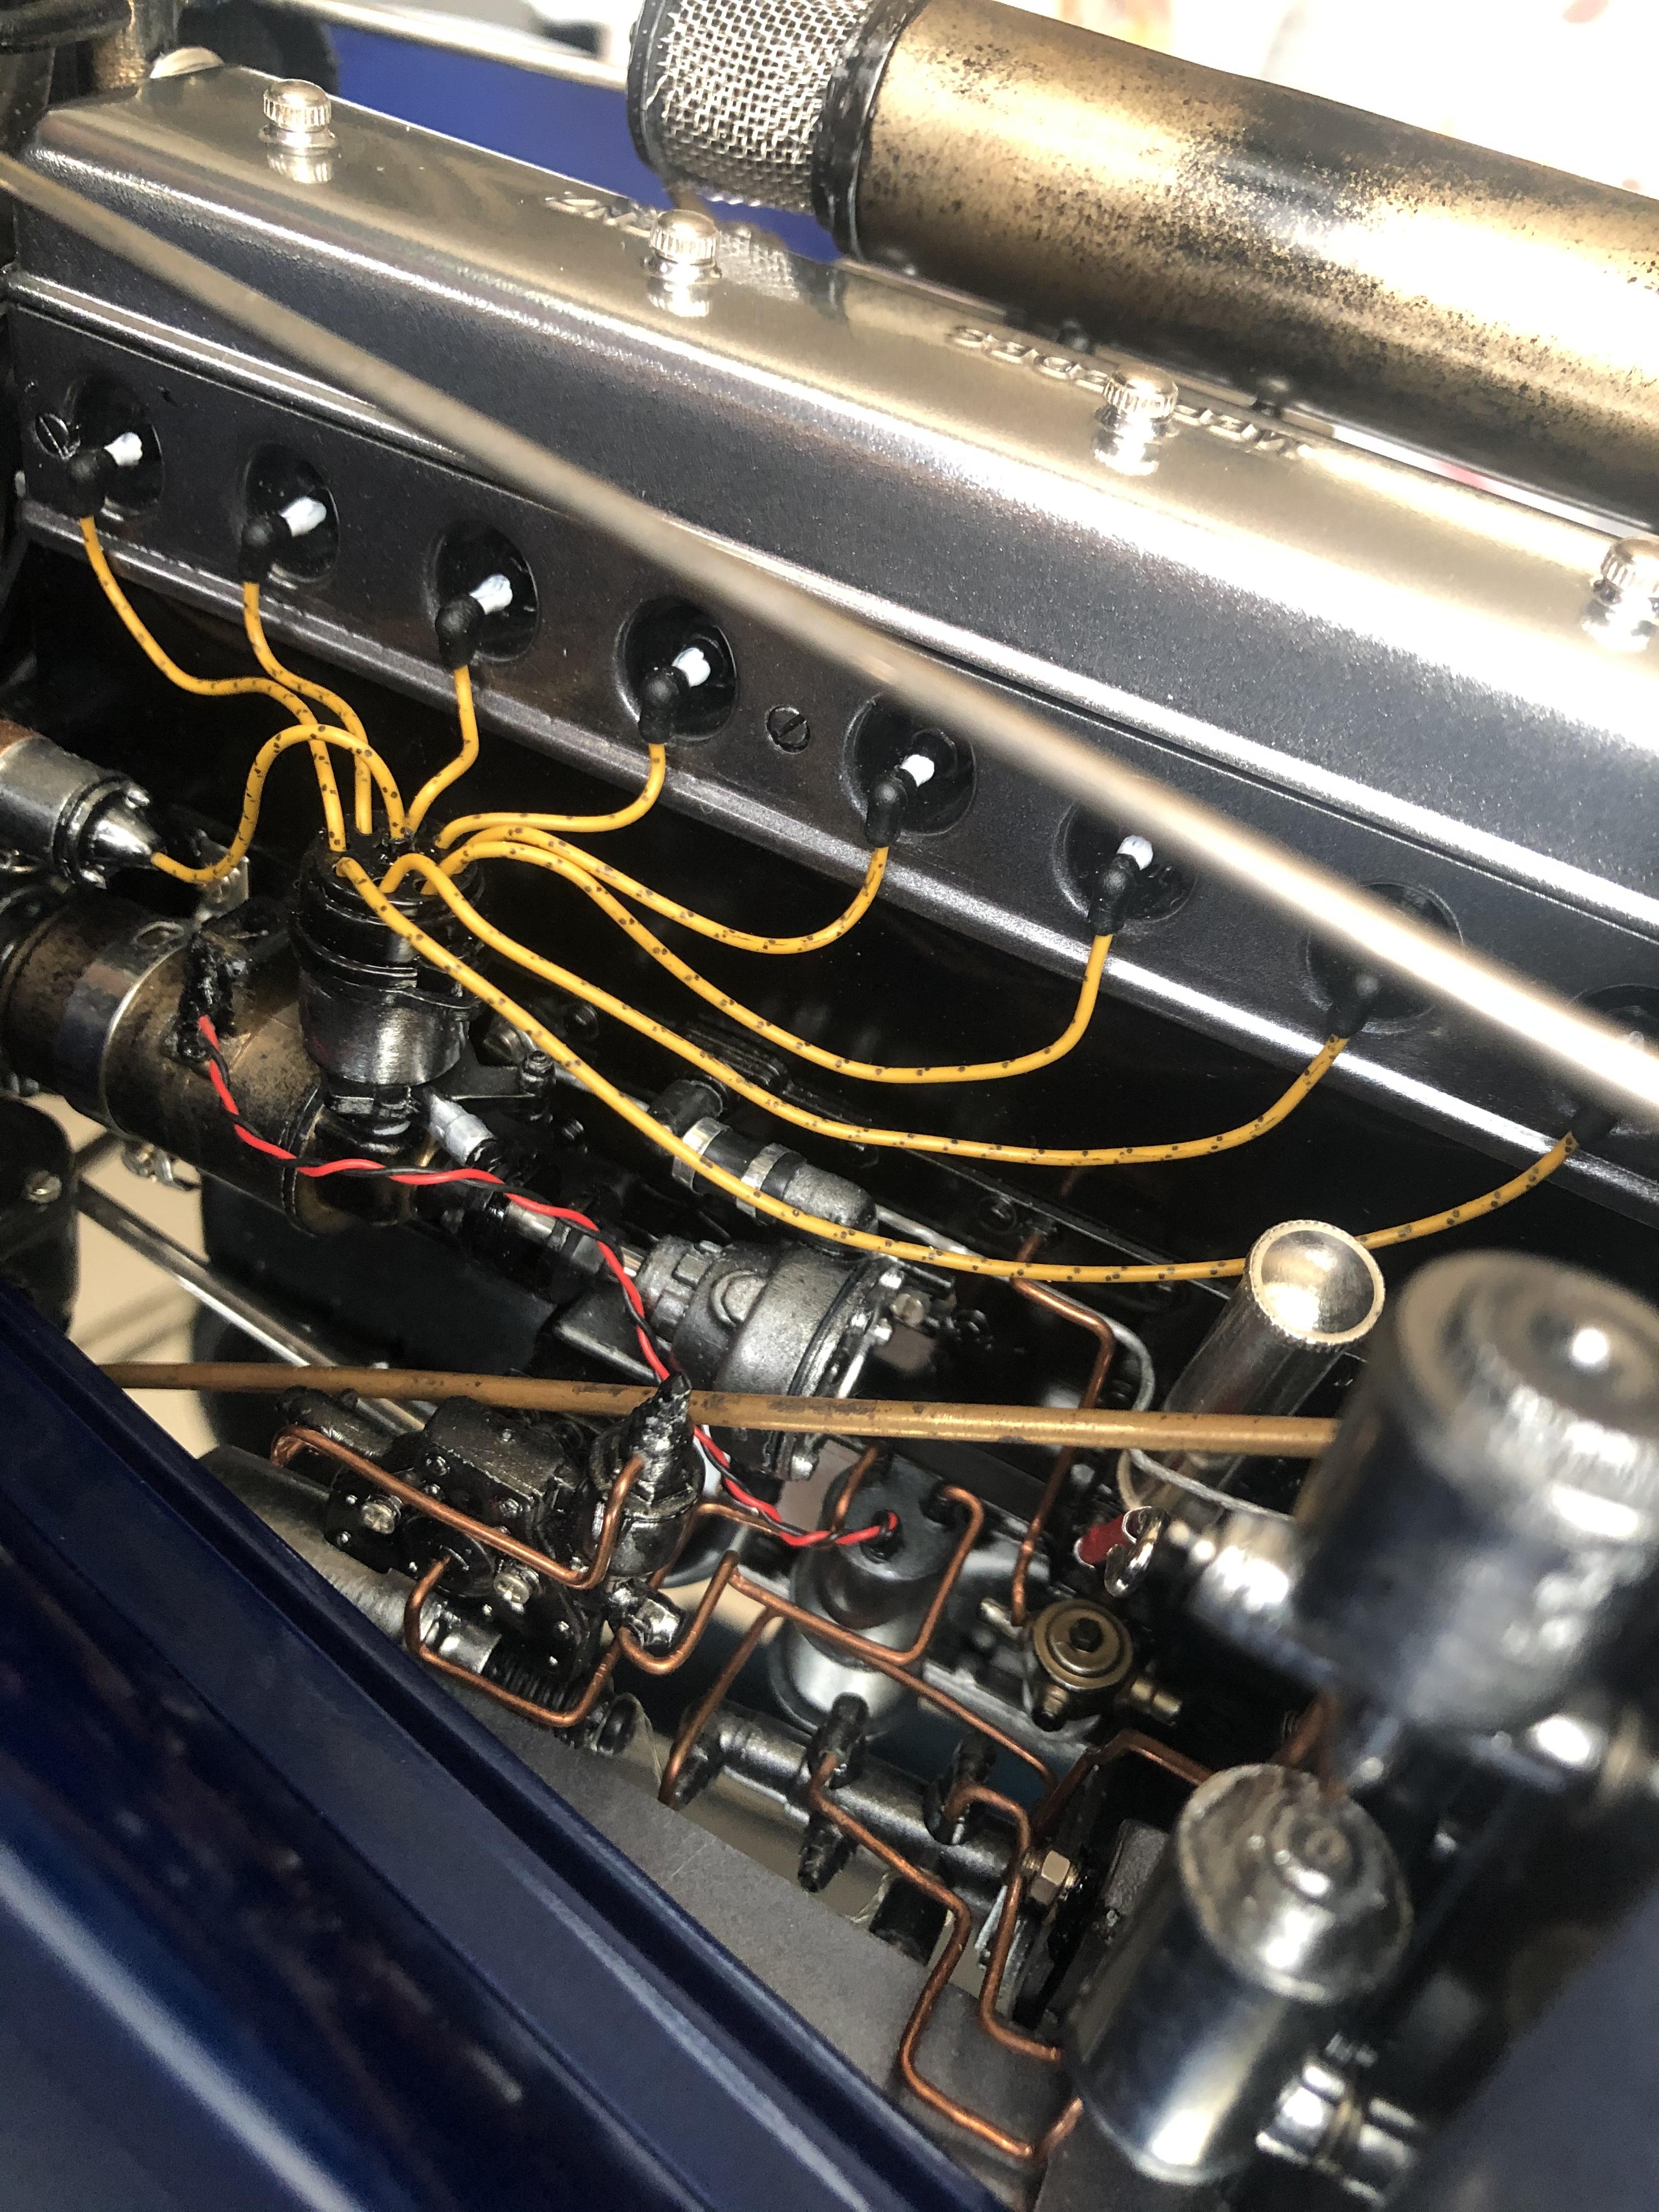
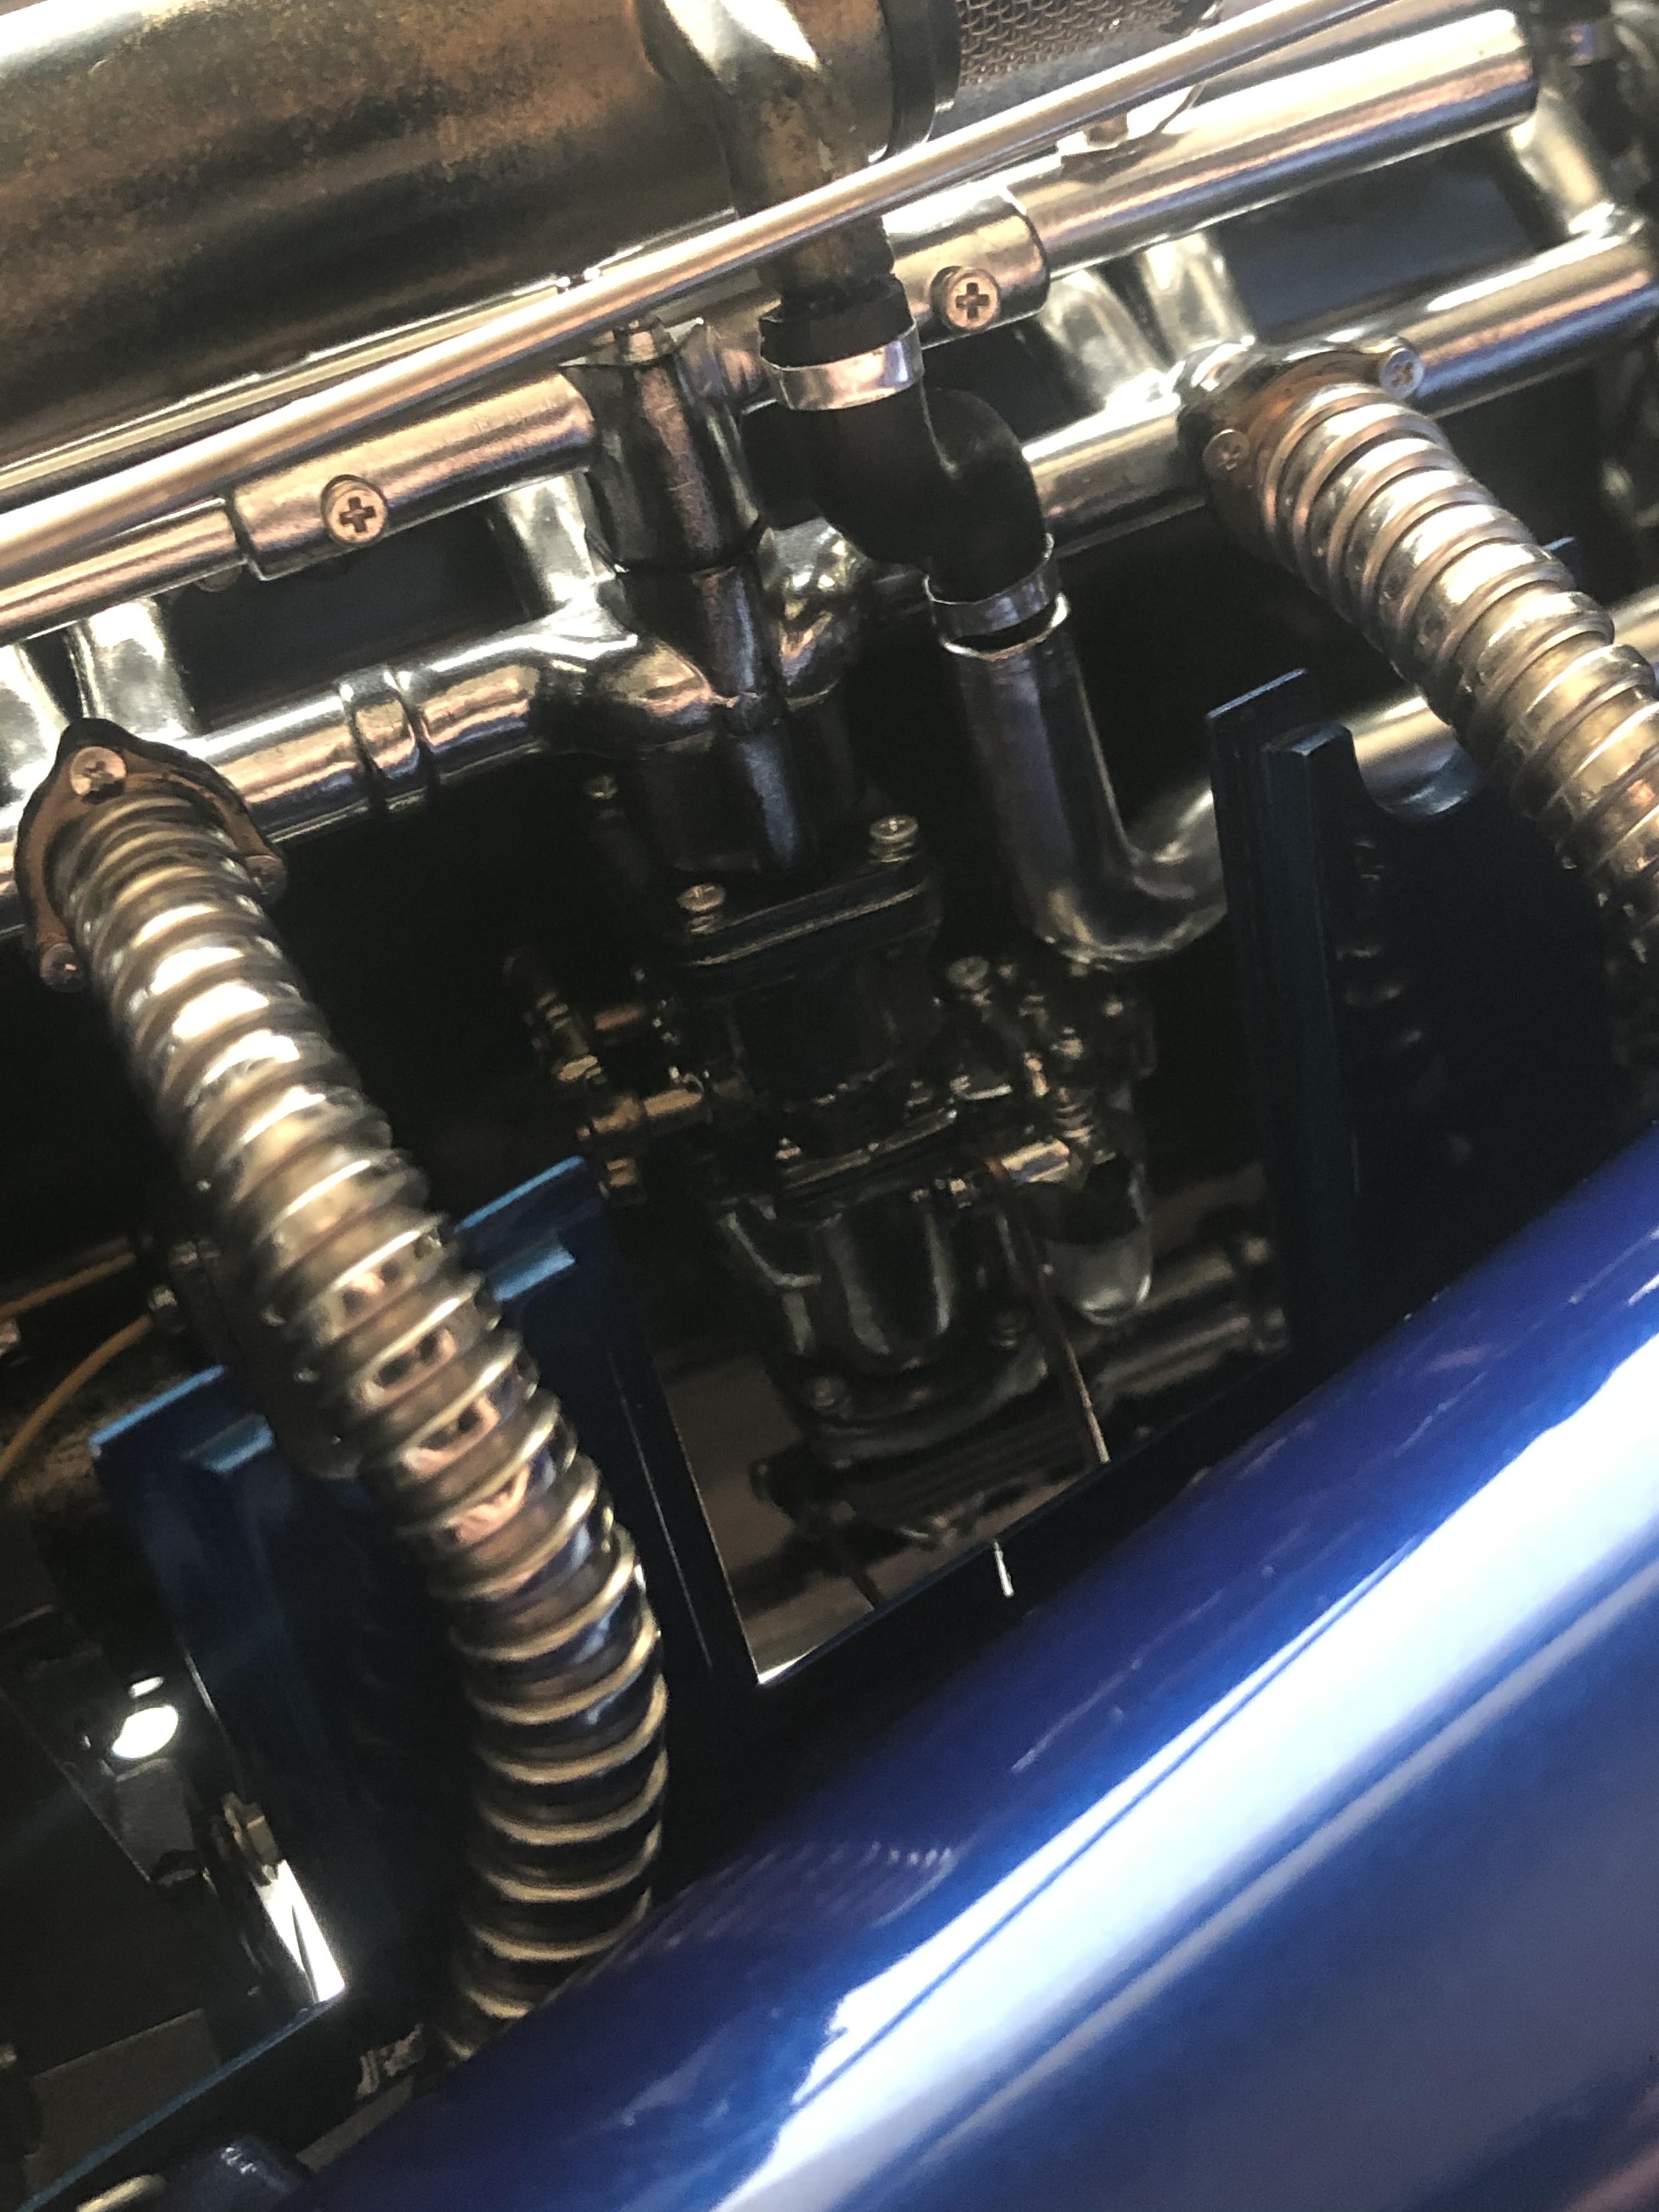
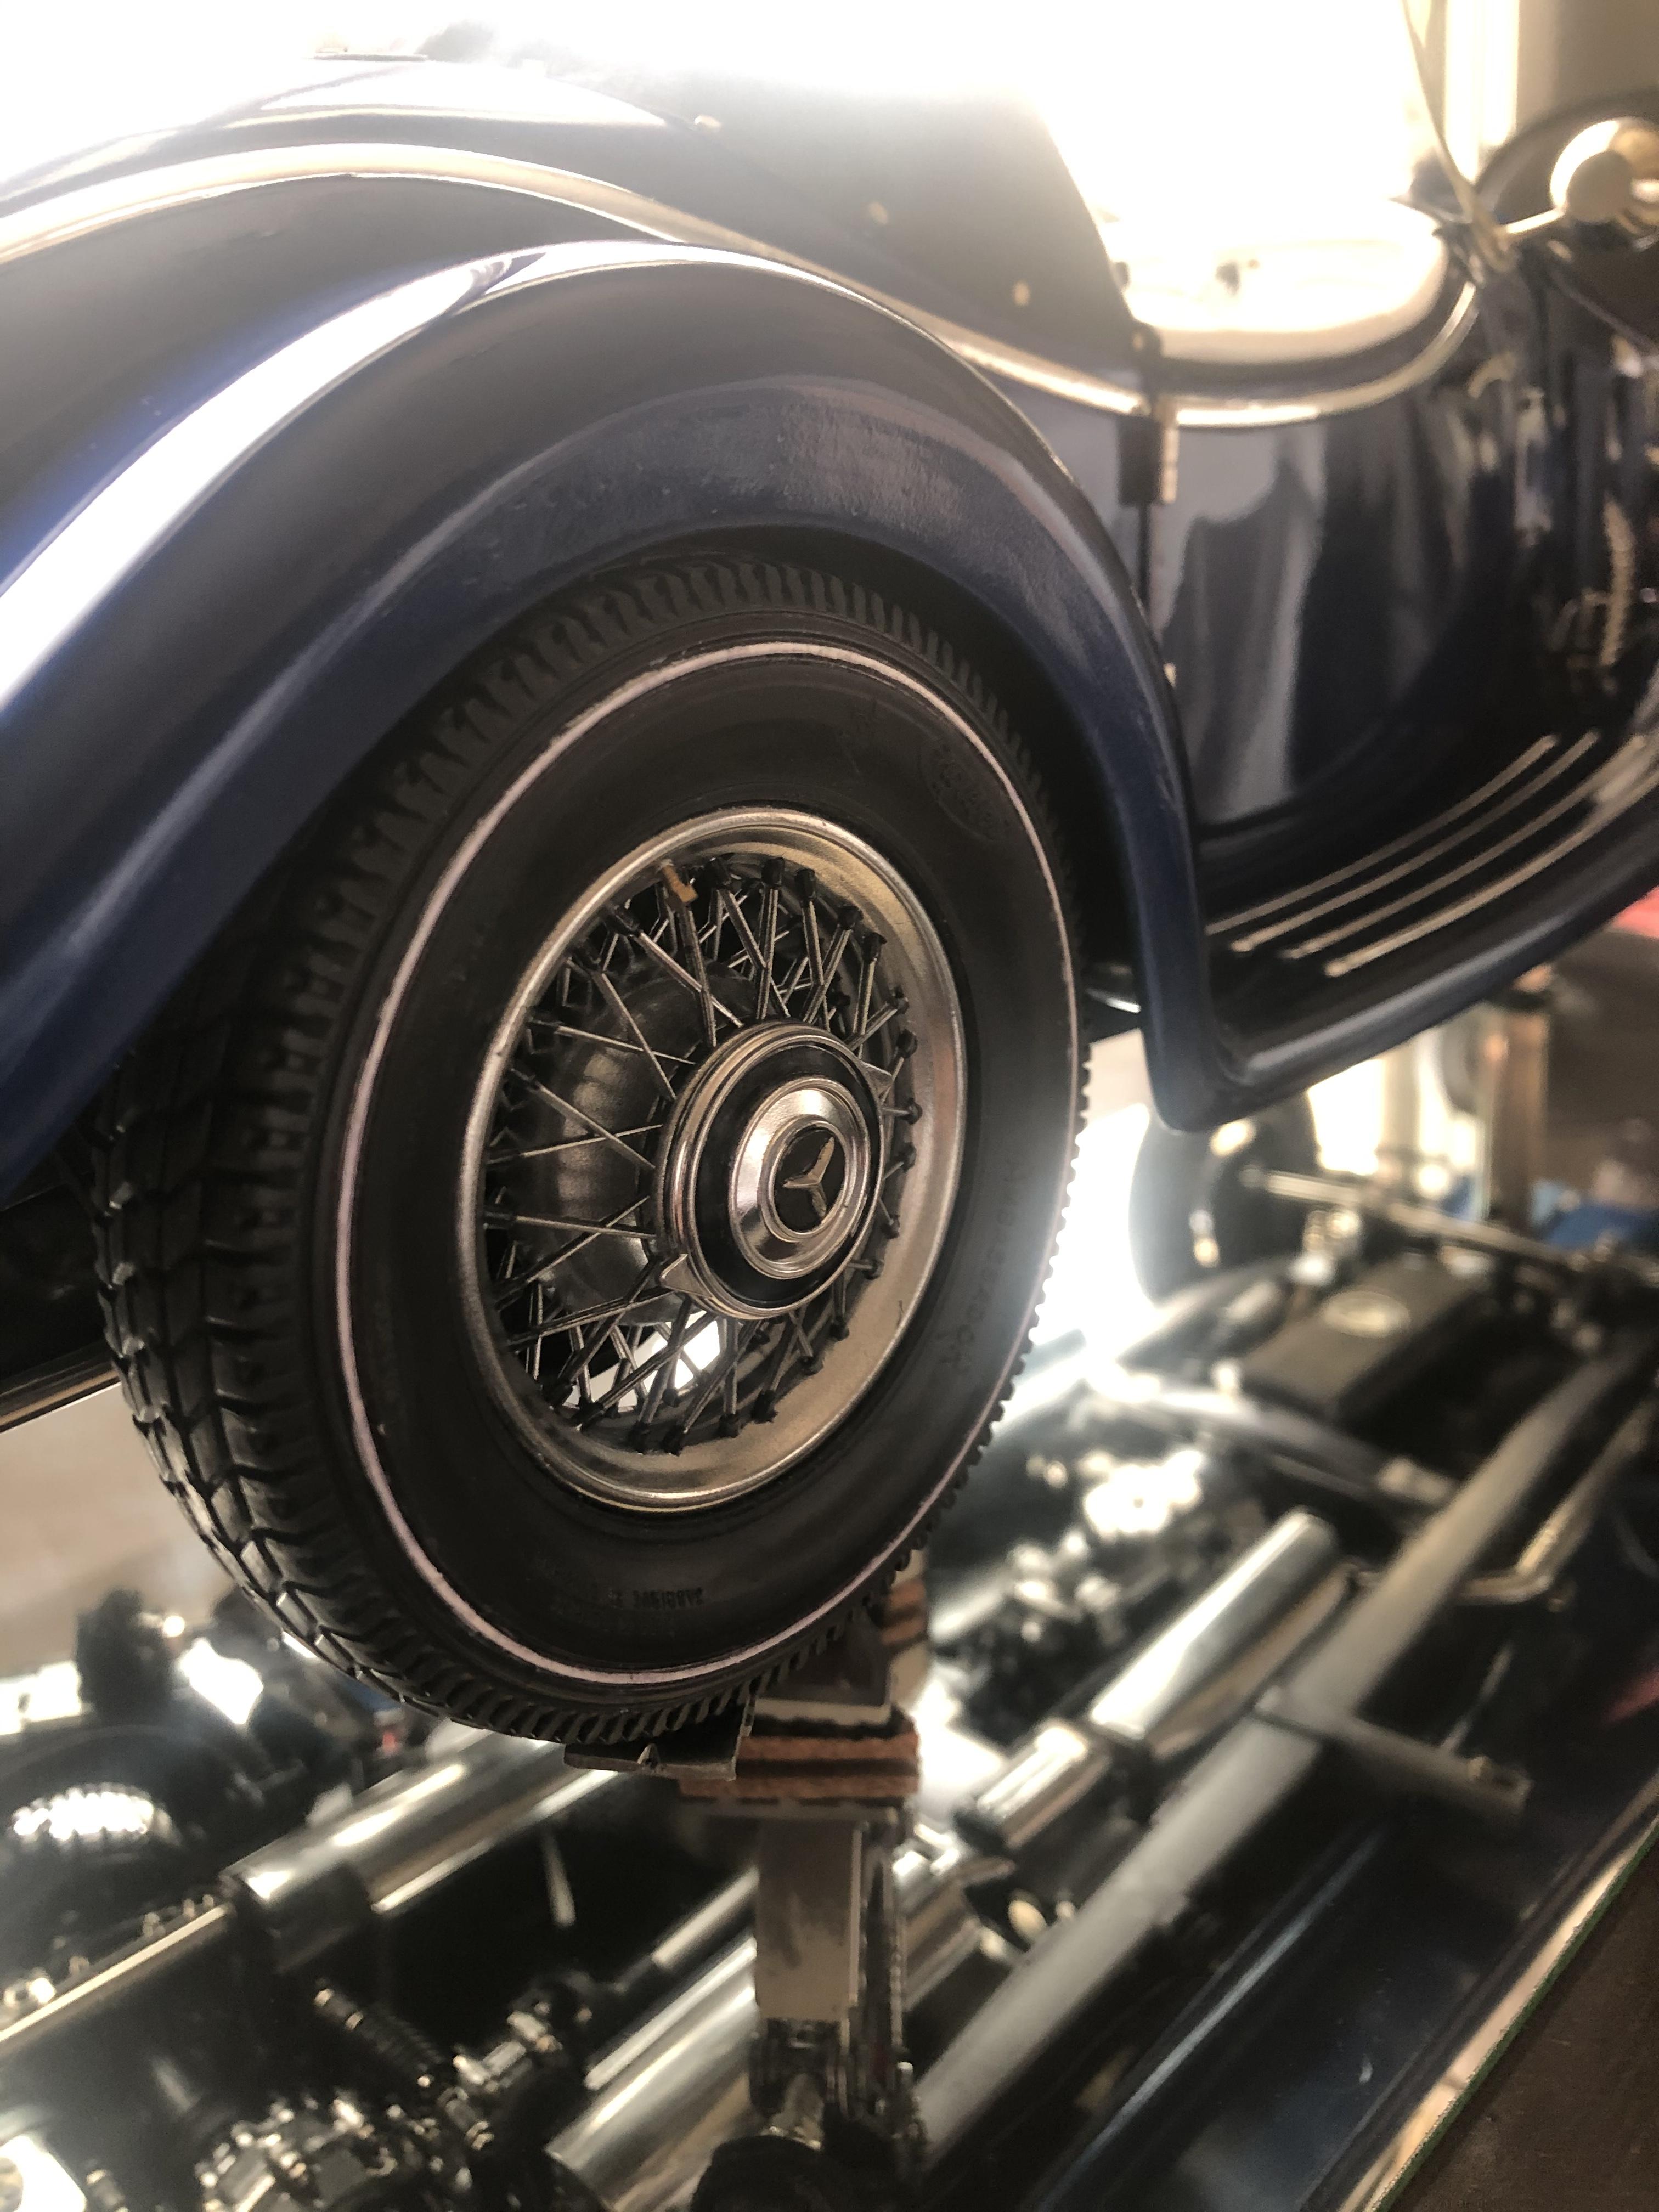
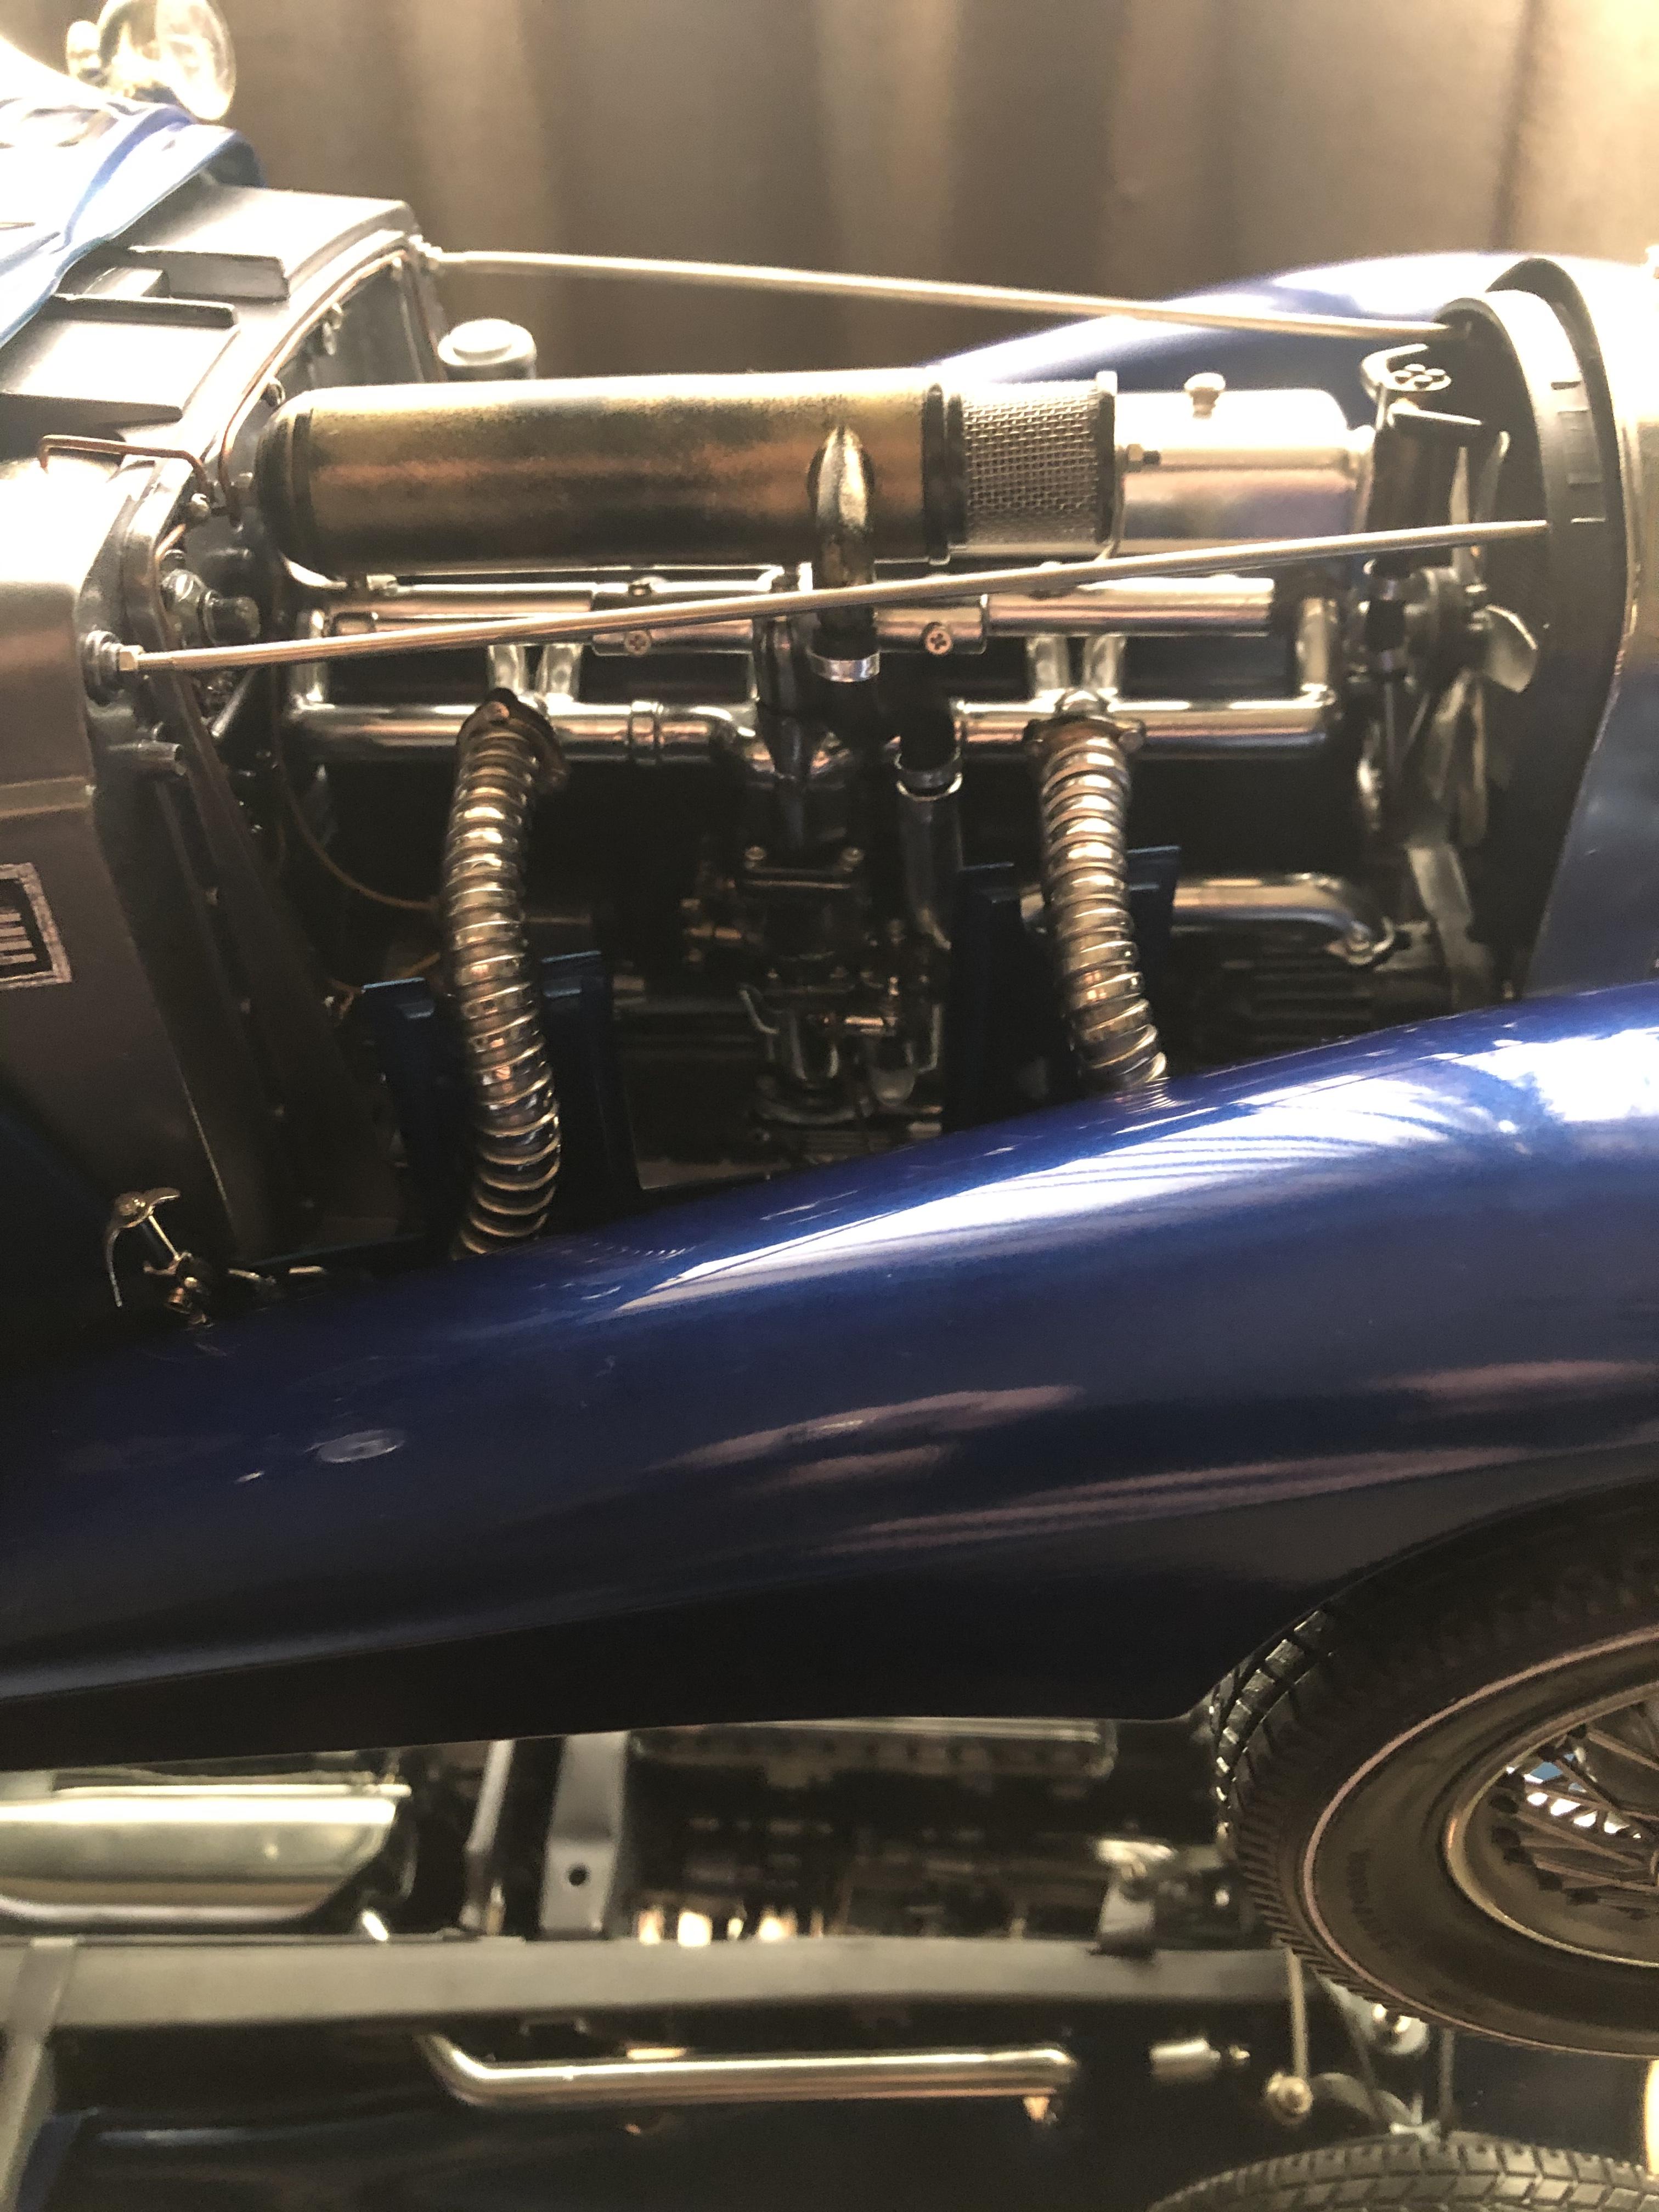
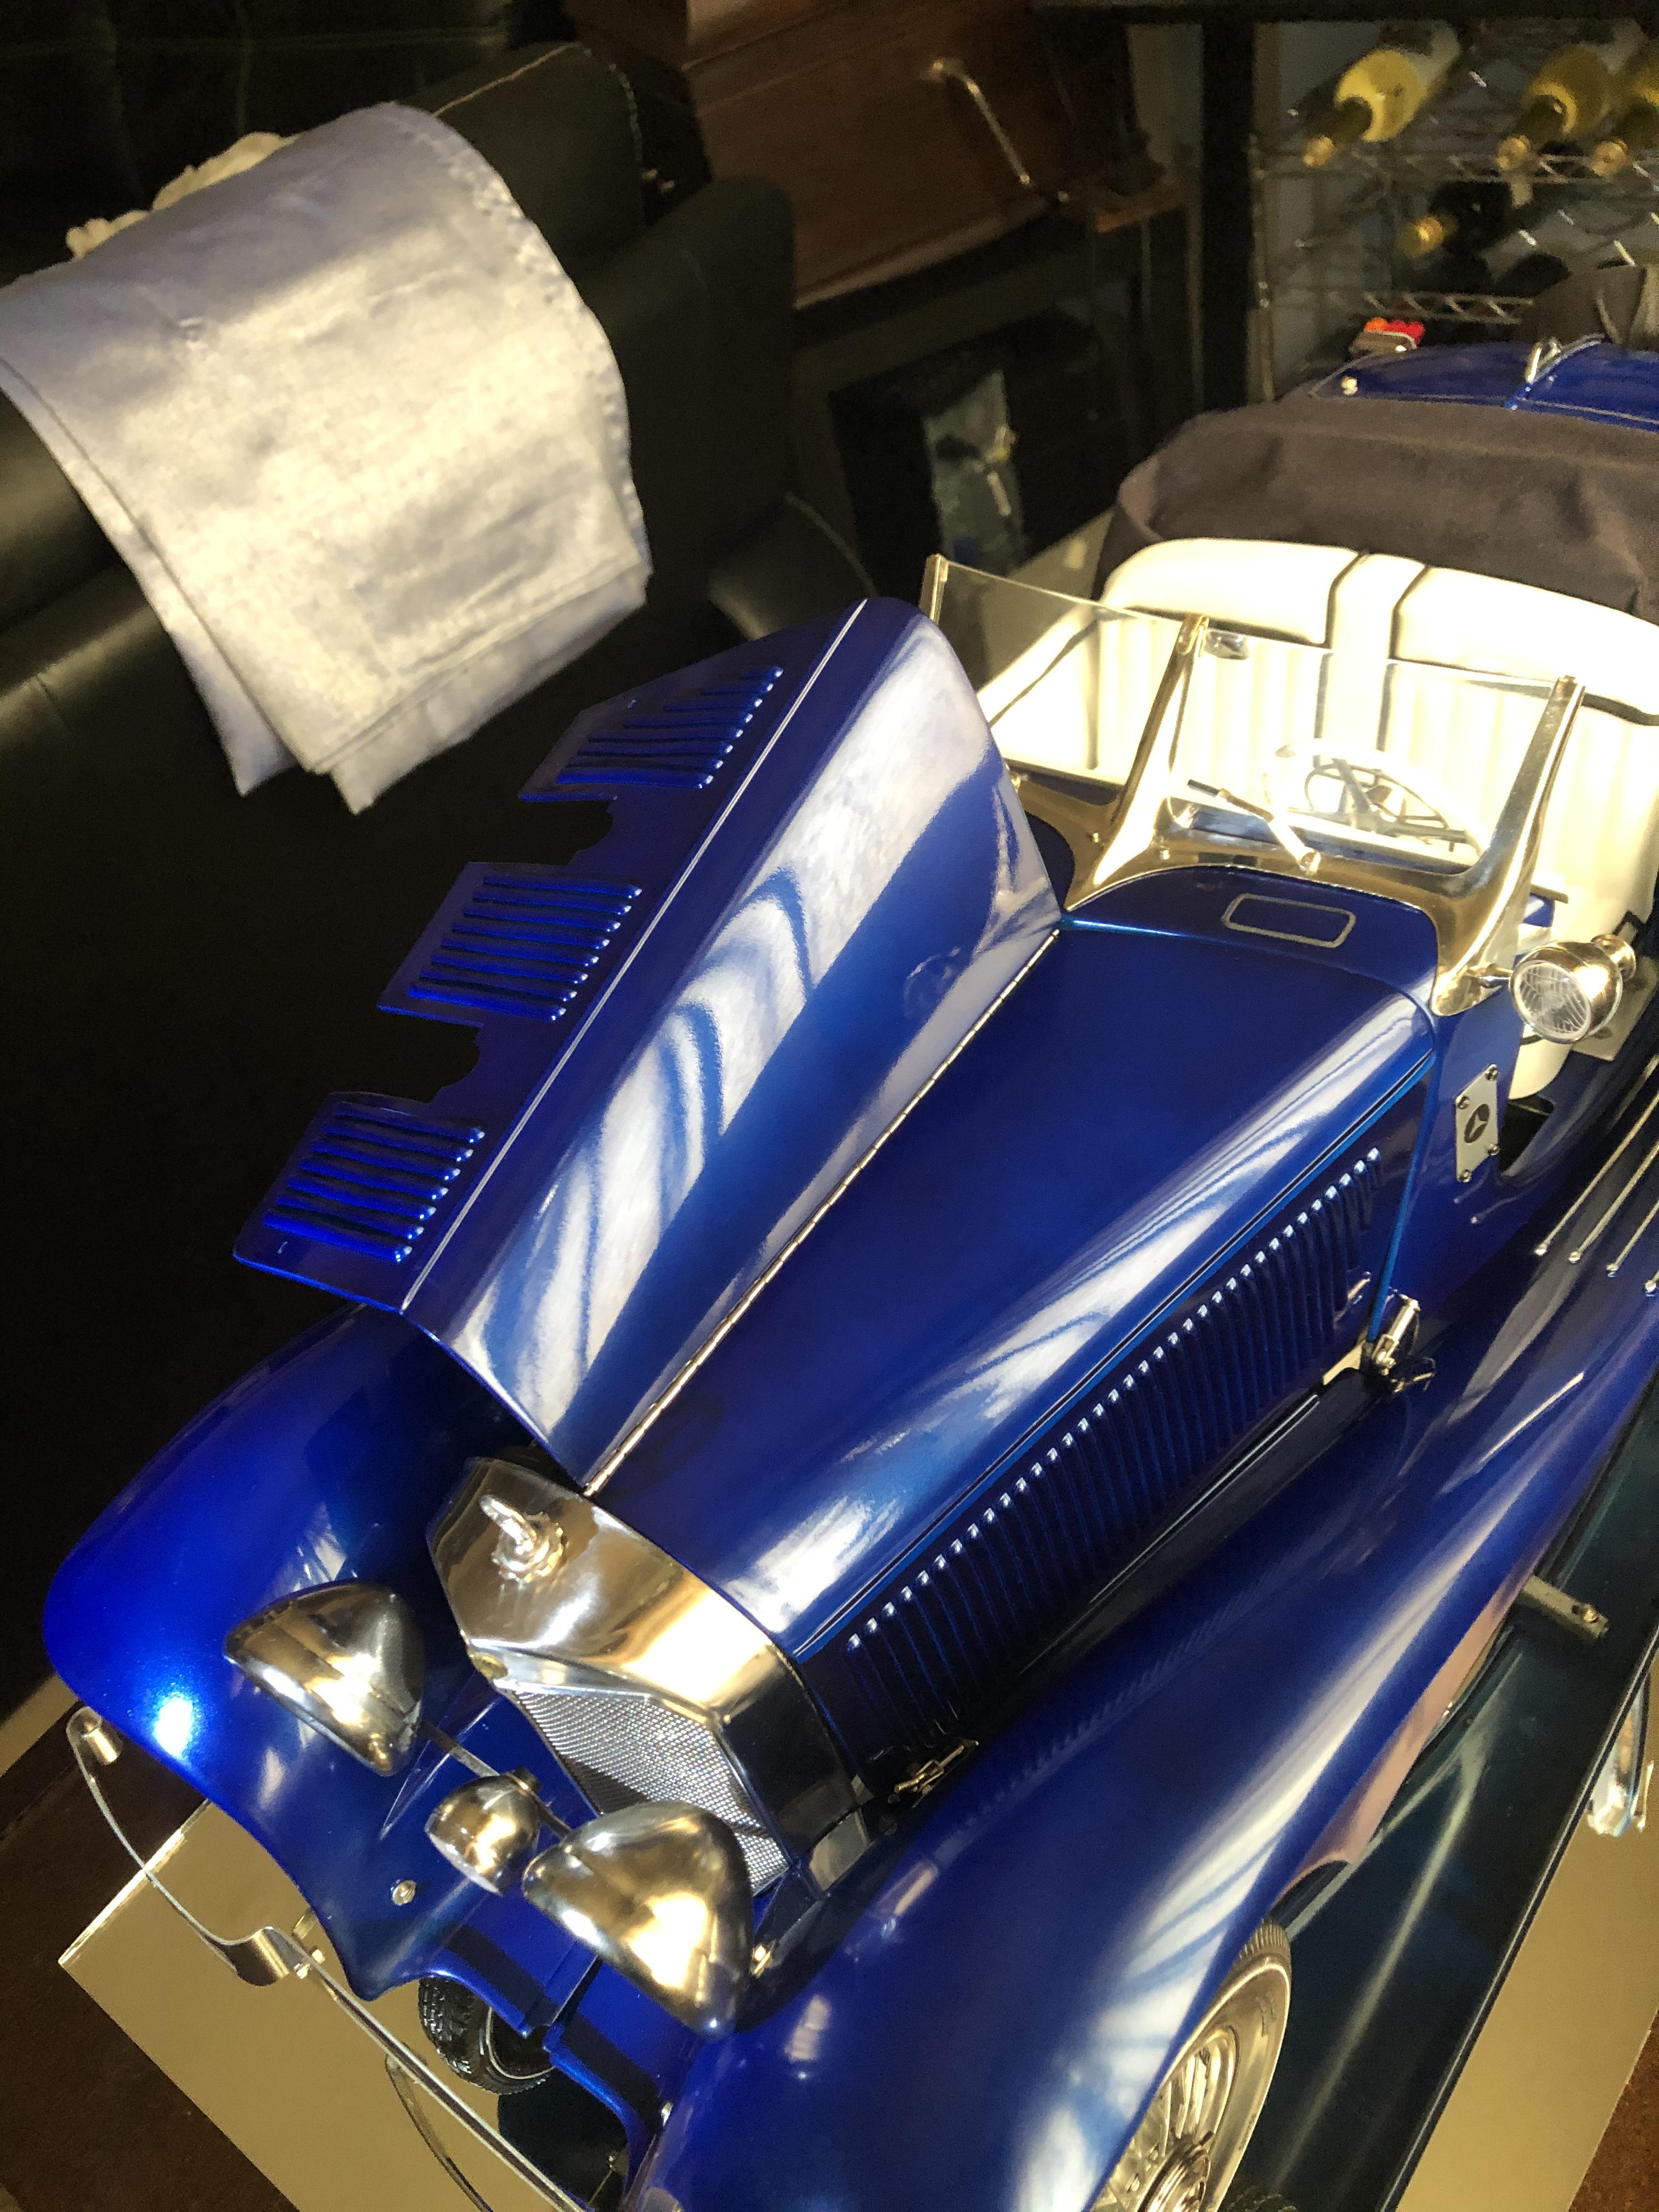
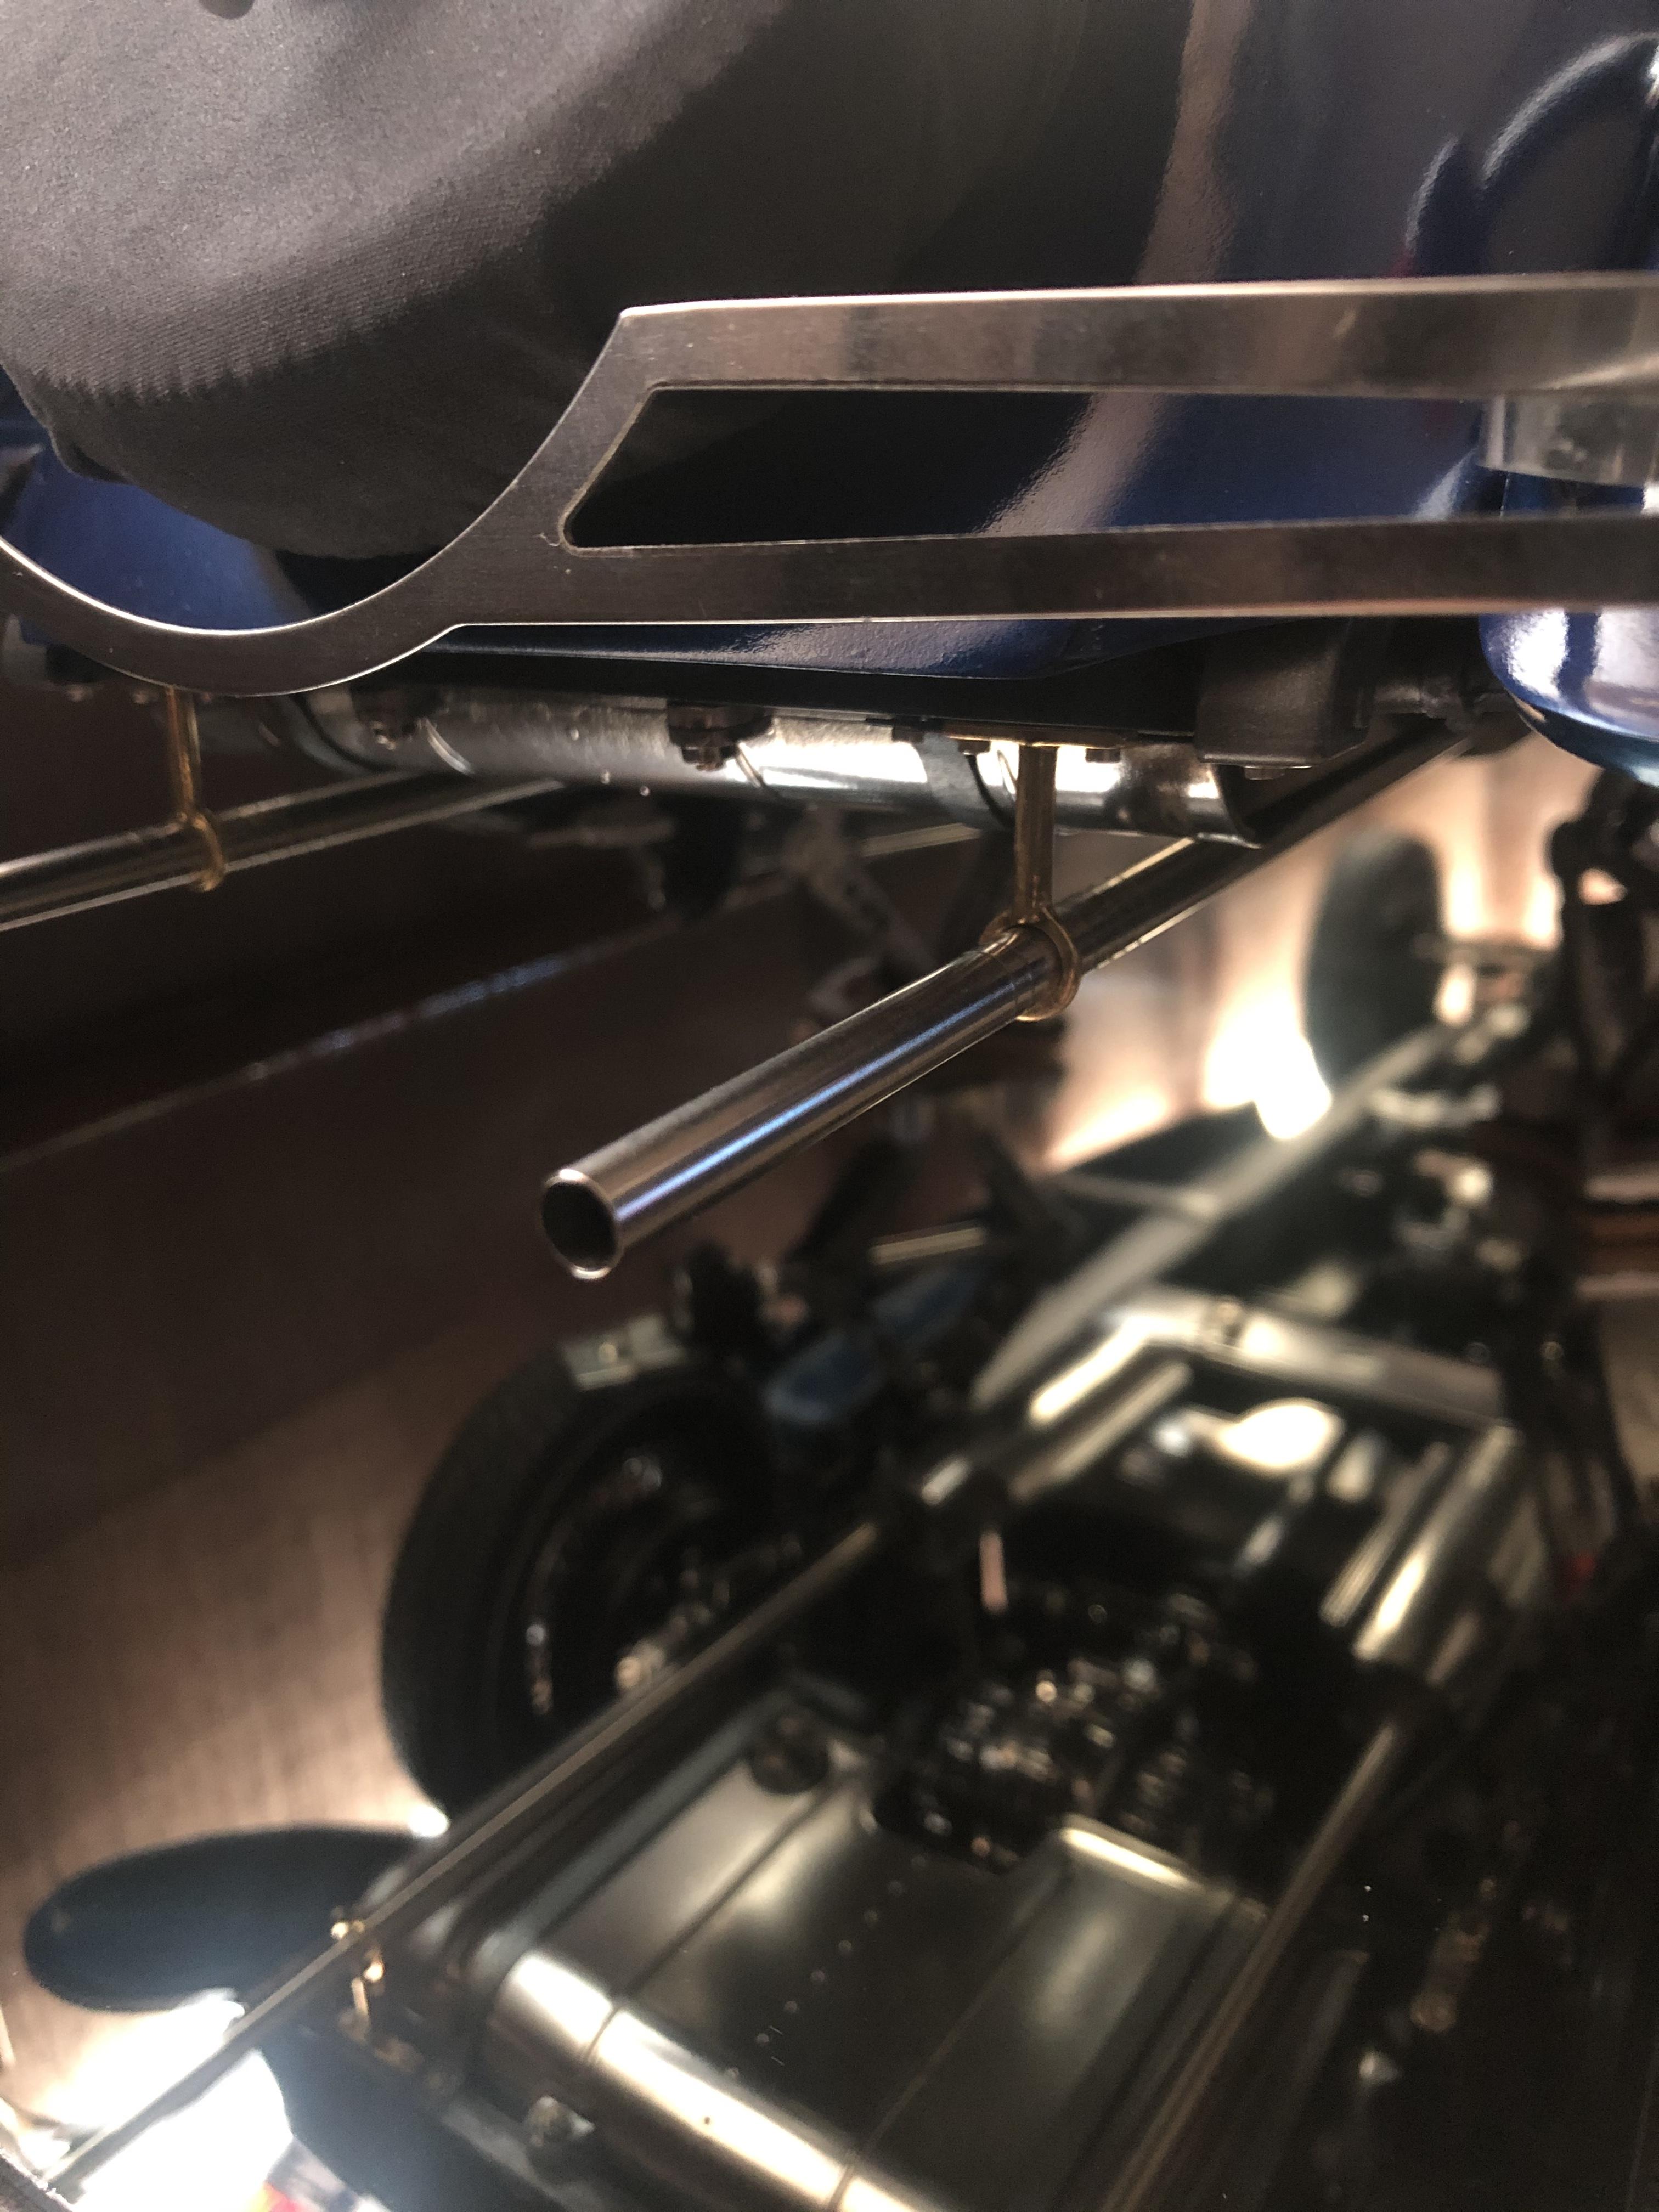
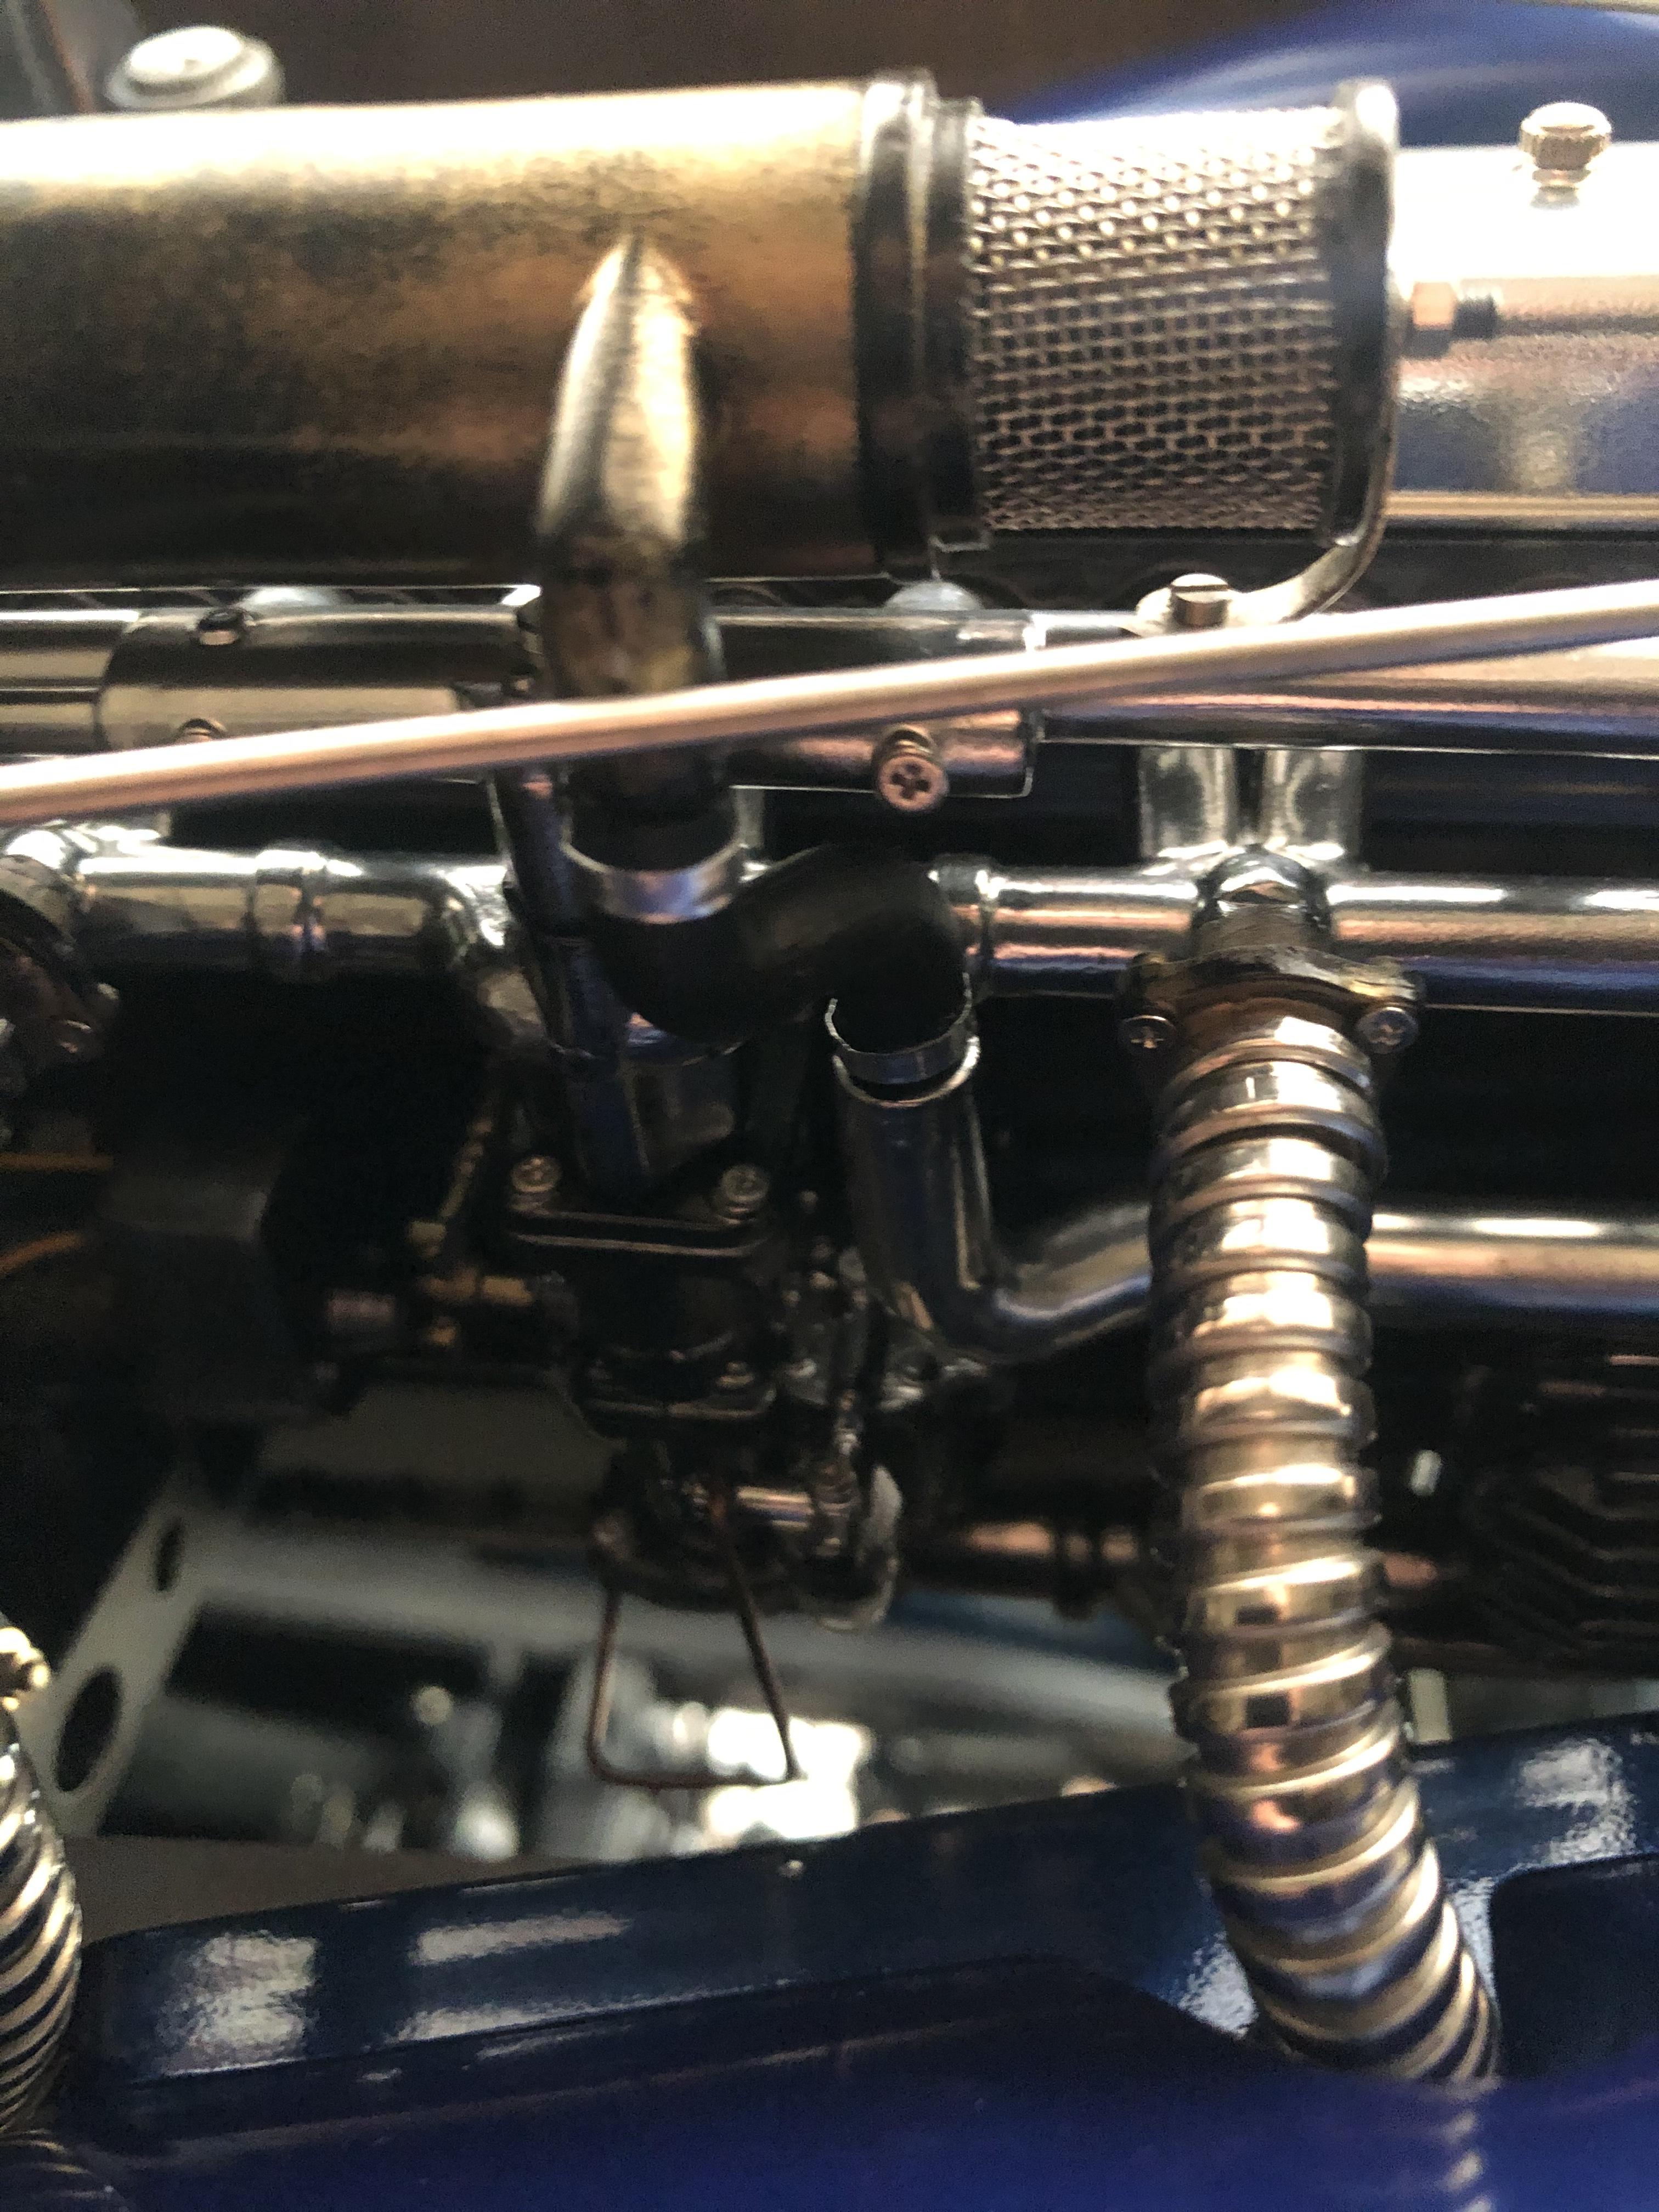
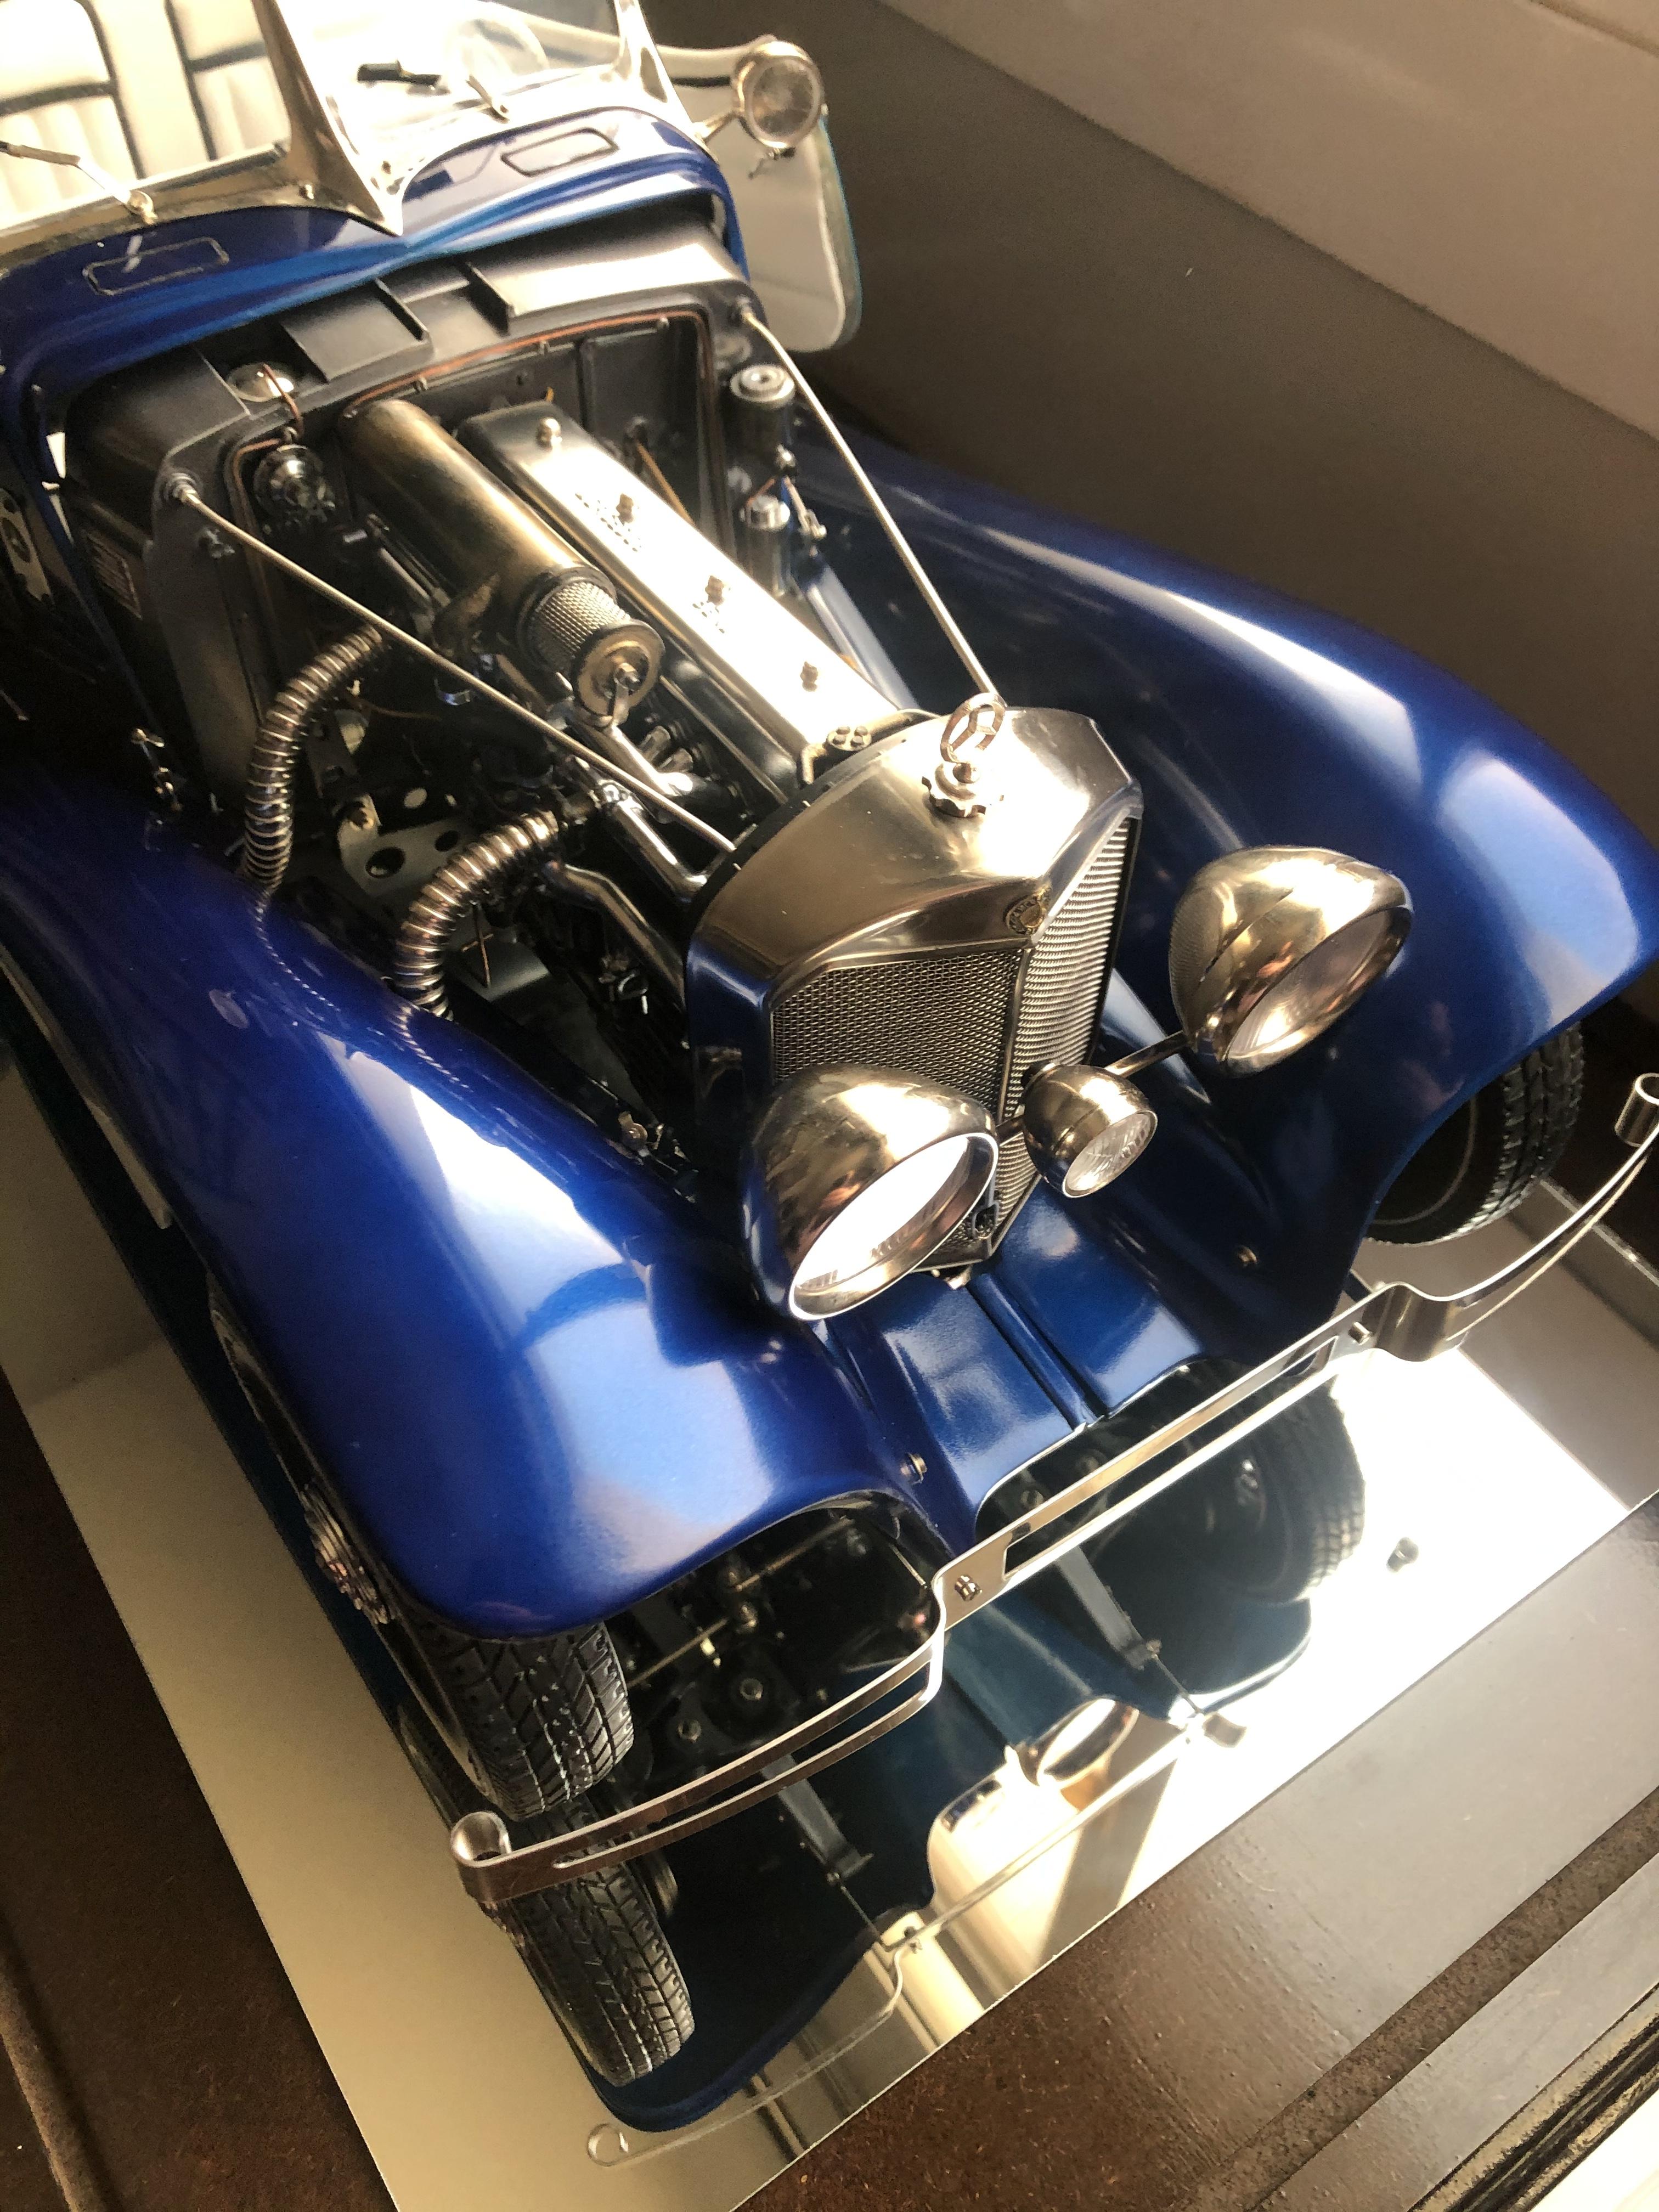
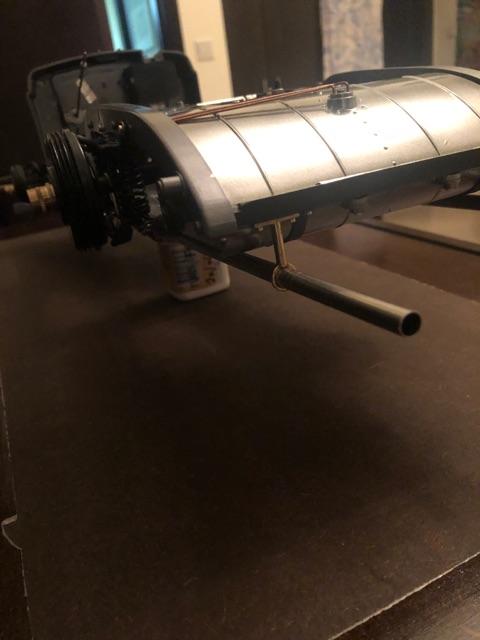
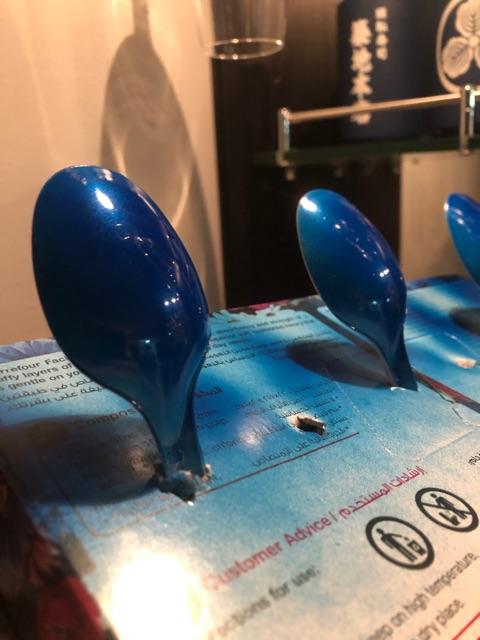
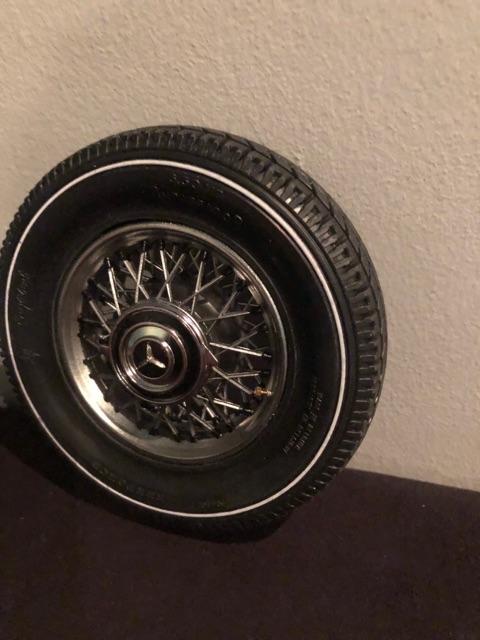
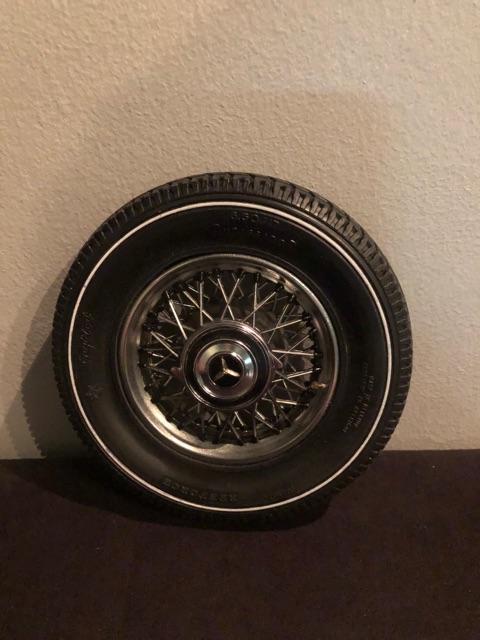
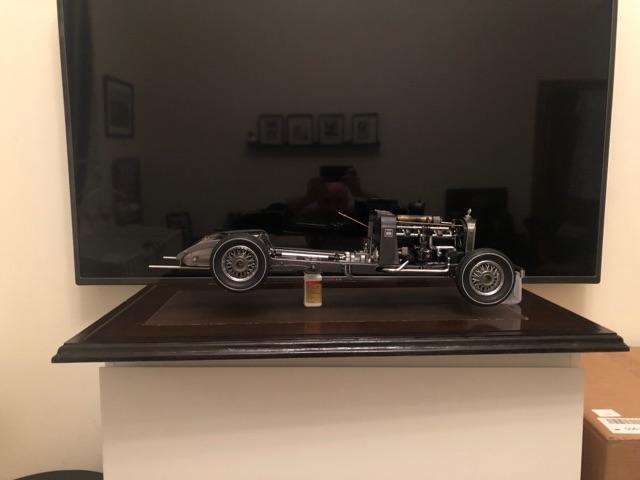
replace the original exhaust pipe from the Pocher kit who are not very nice by metallic straw founded in DAYSO .. Cheap , the exact same size and looking way better . finish my spoon testing paint .. this blue will be the one, a pearl blue .. and the rims are done with the Mercedes logo .. this project is getting closer to the end . next step is the real deal with the paint of all the part ...
-
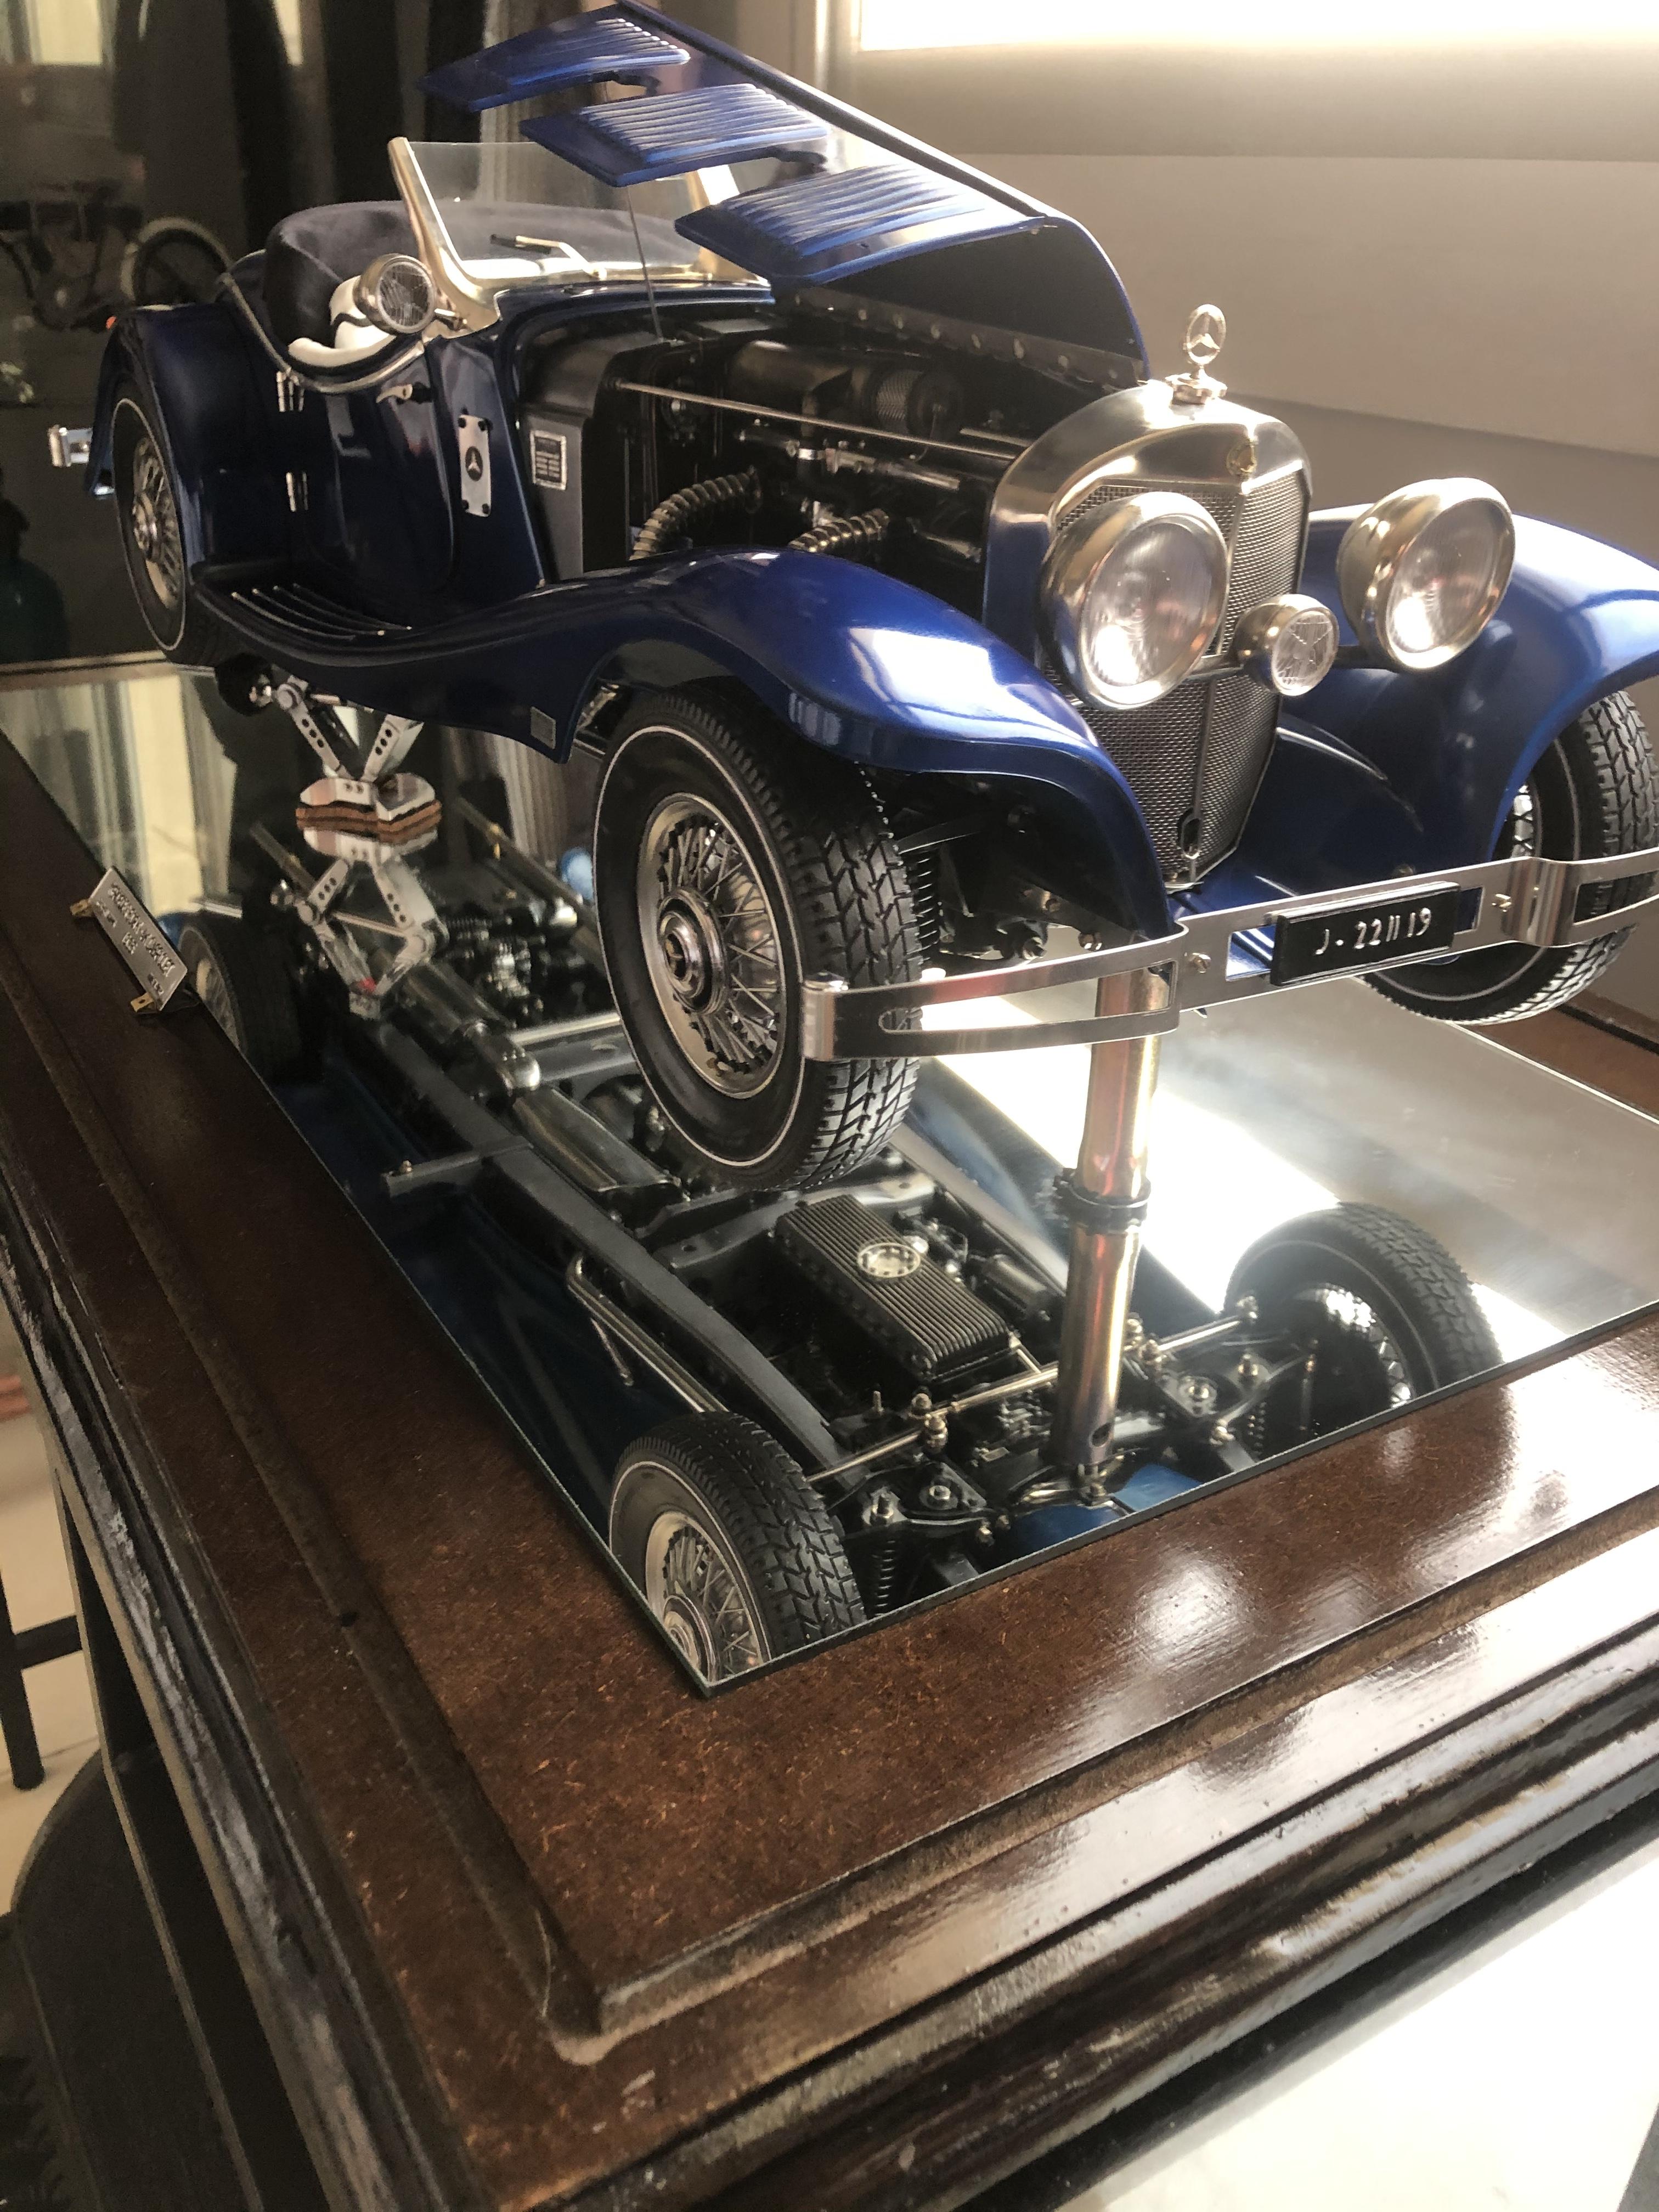
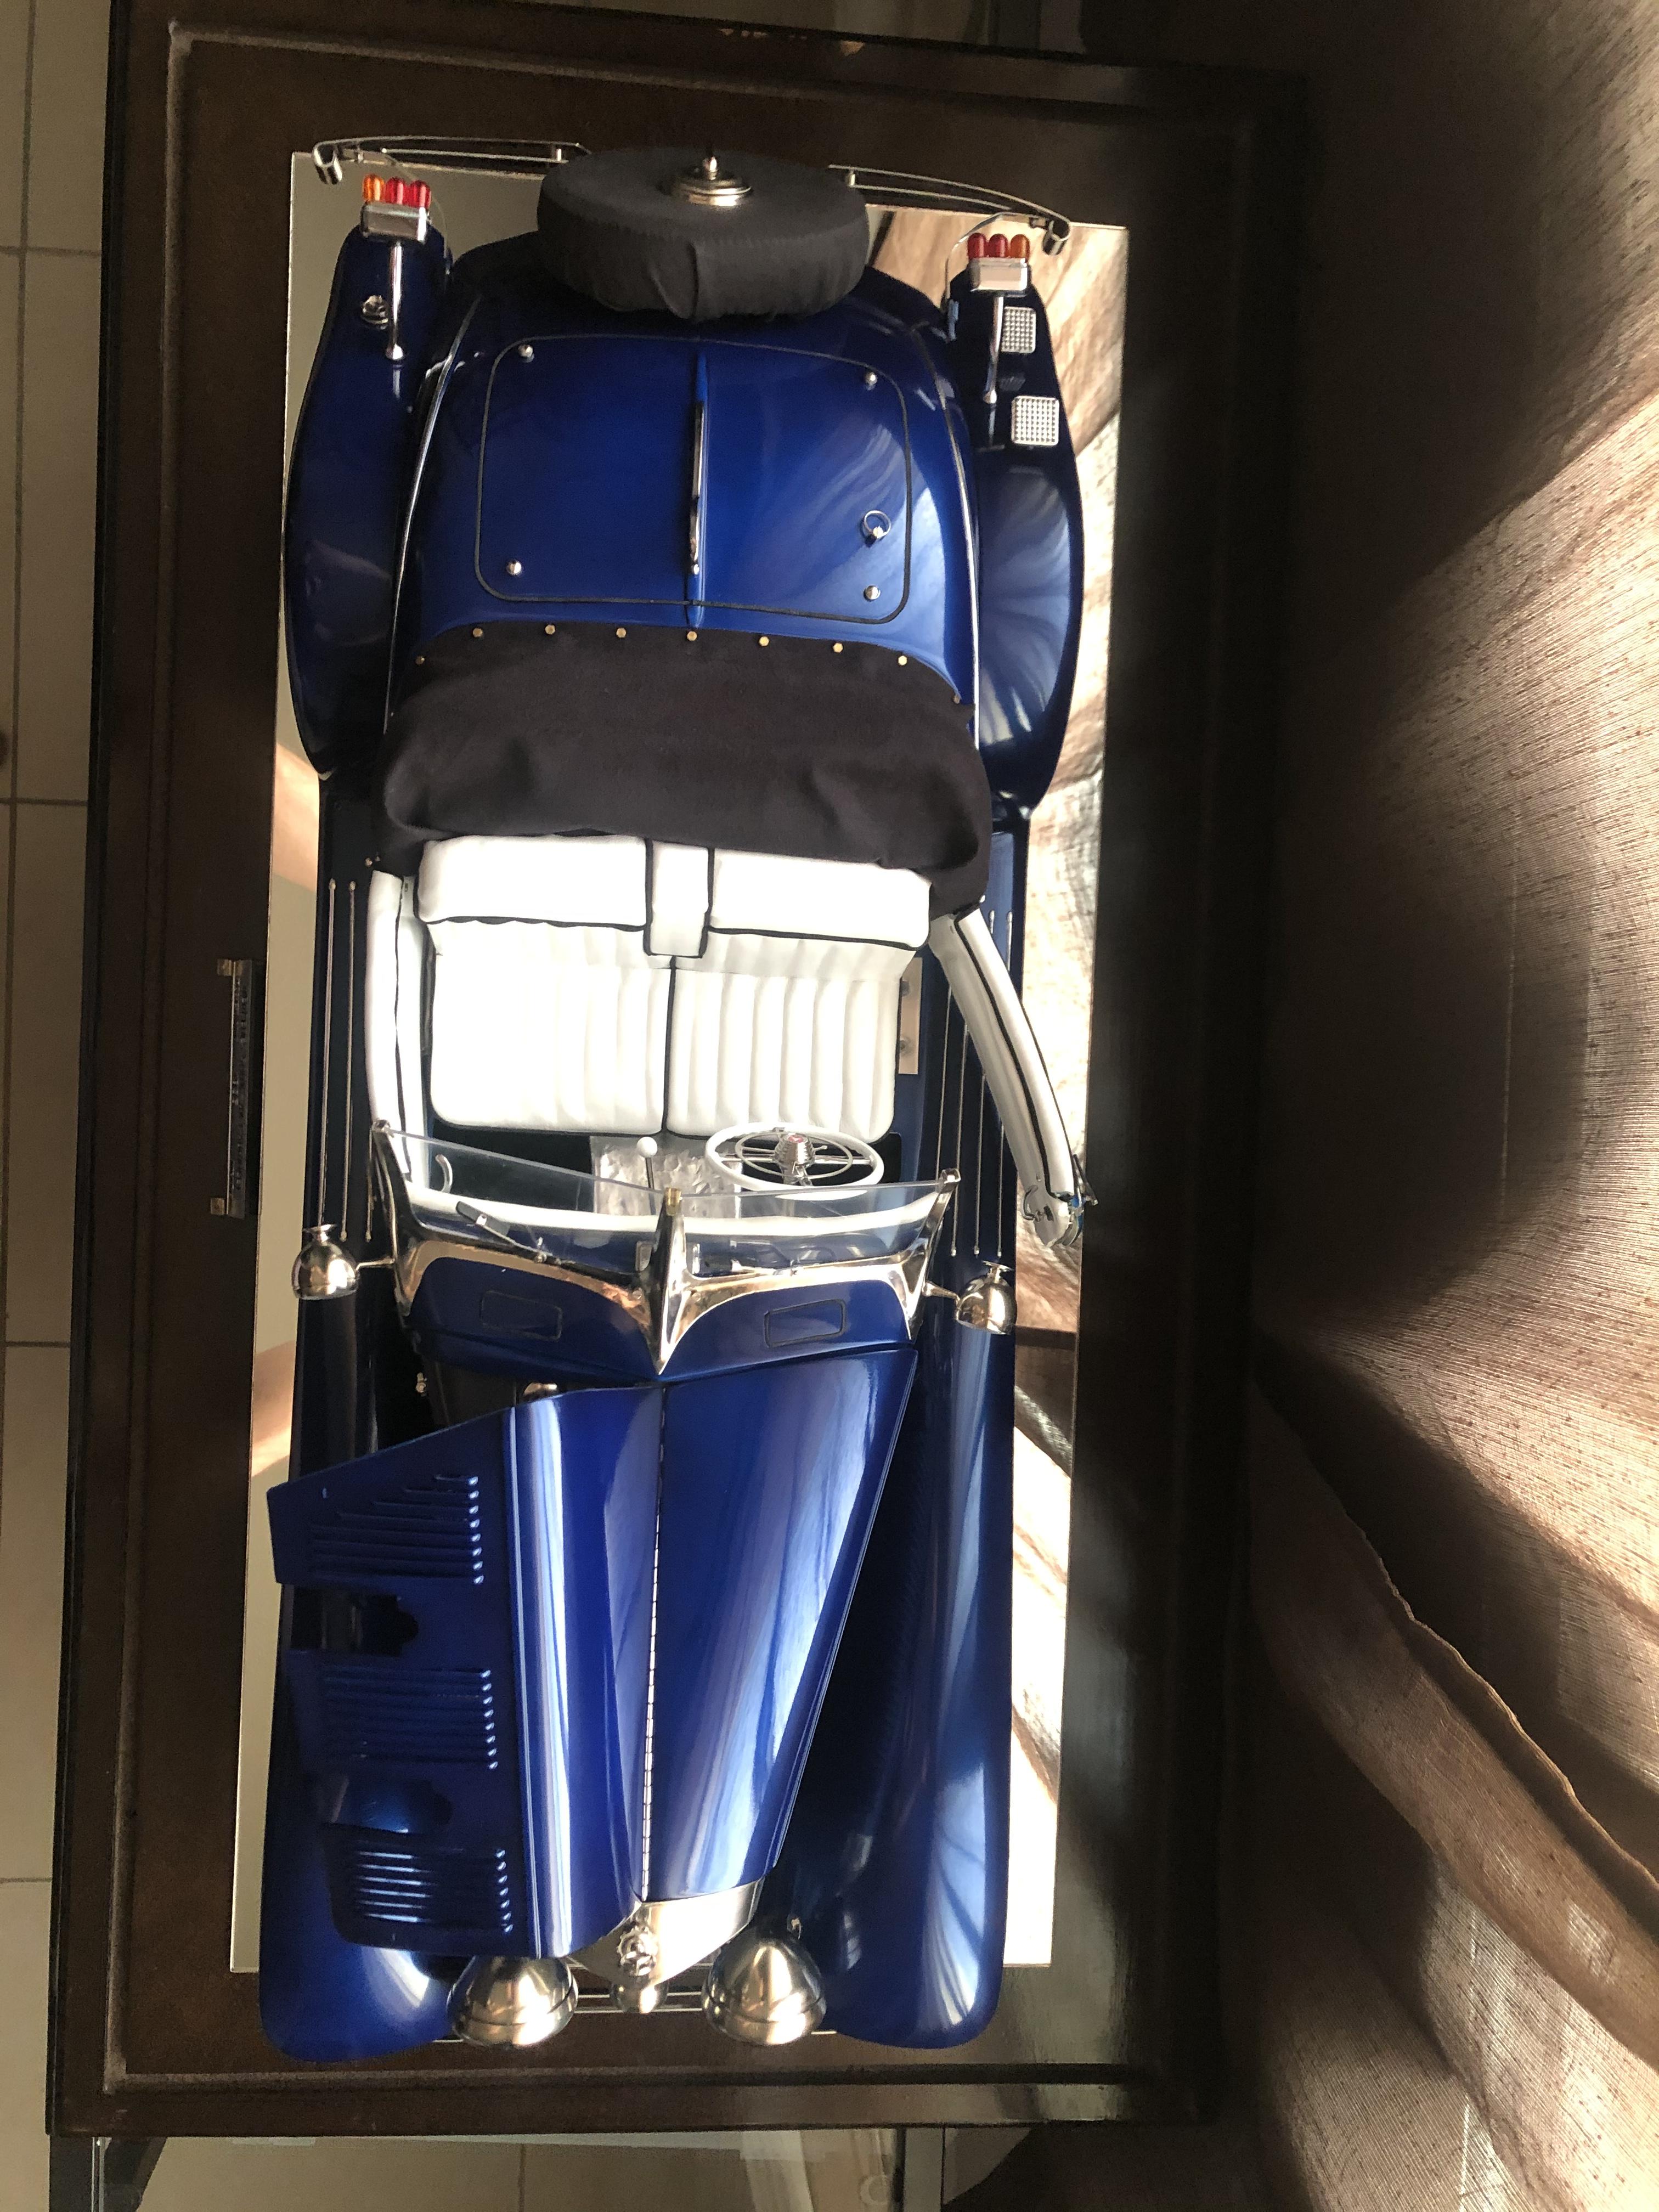
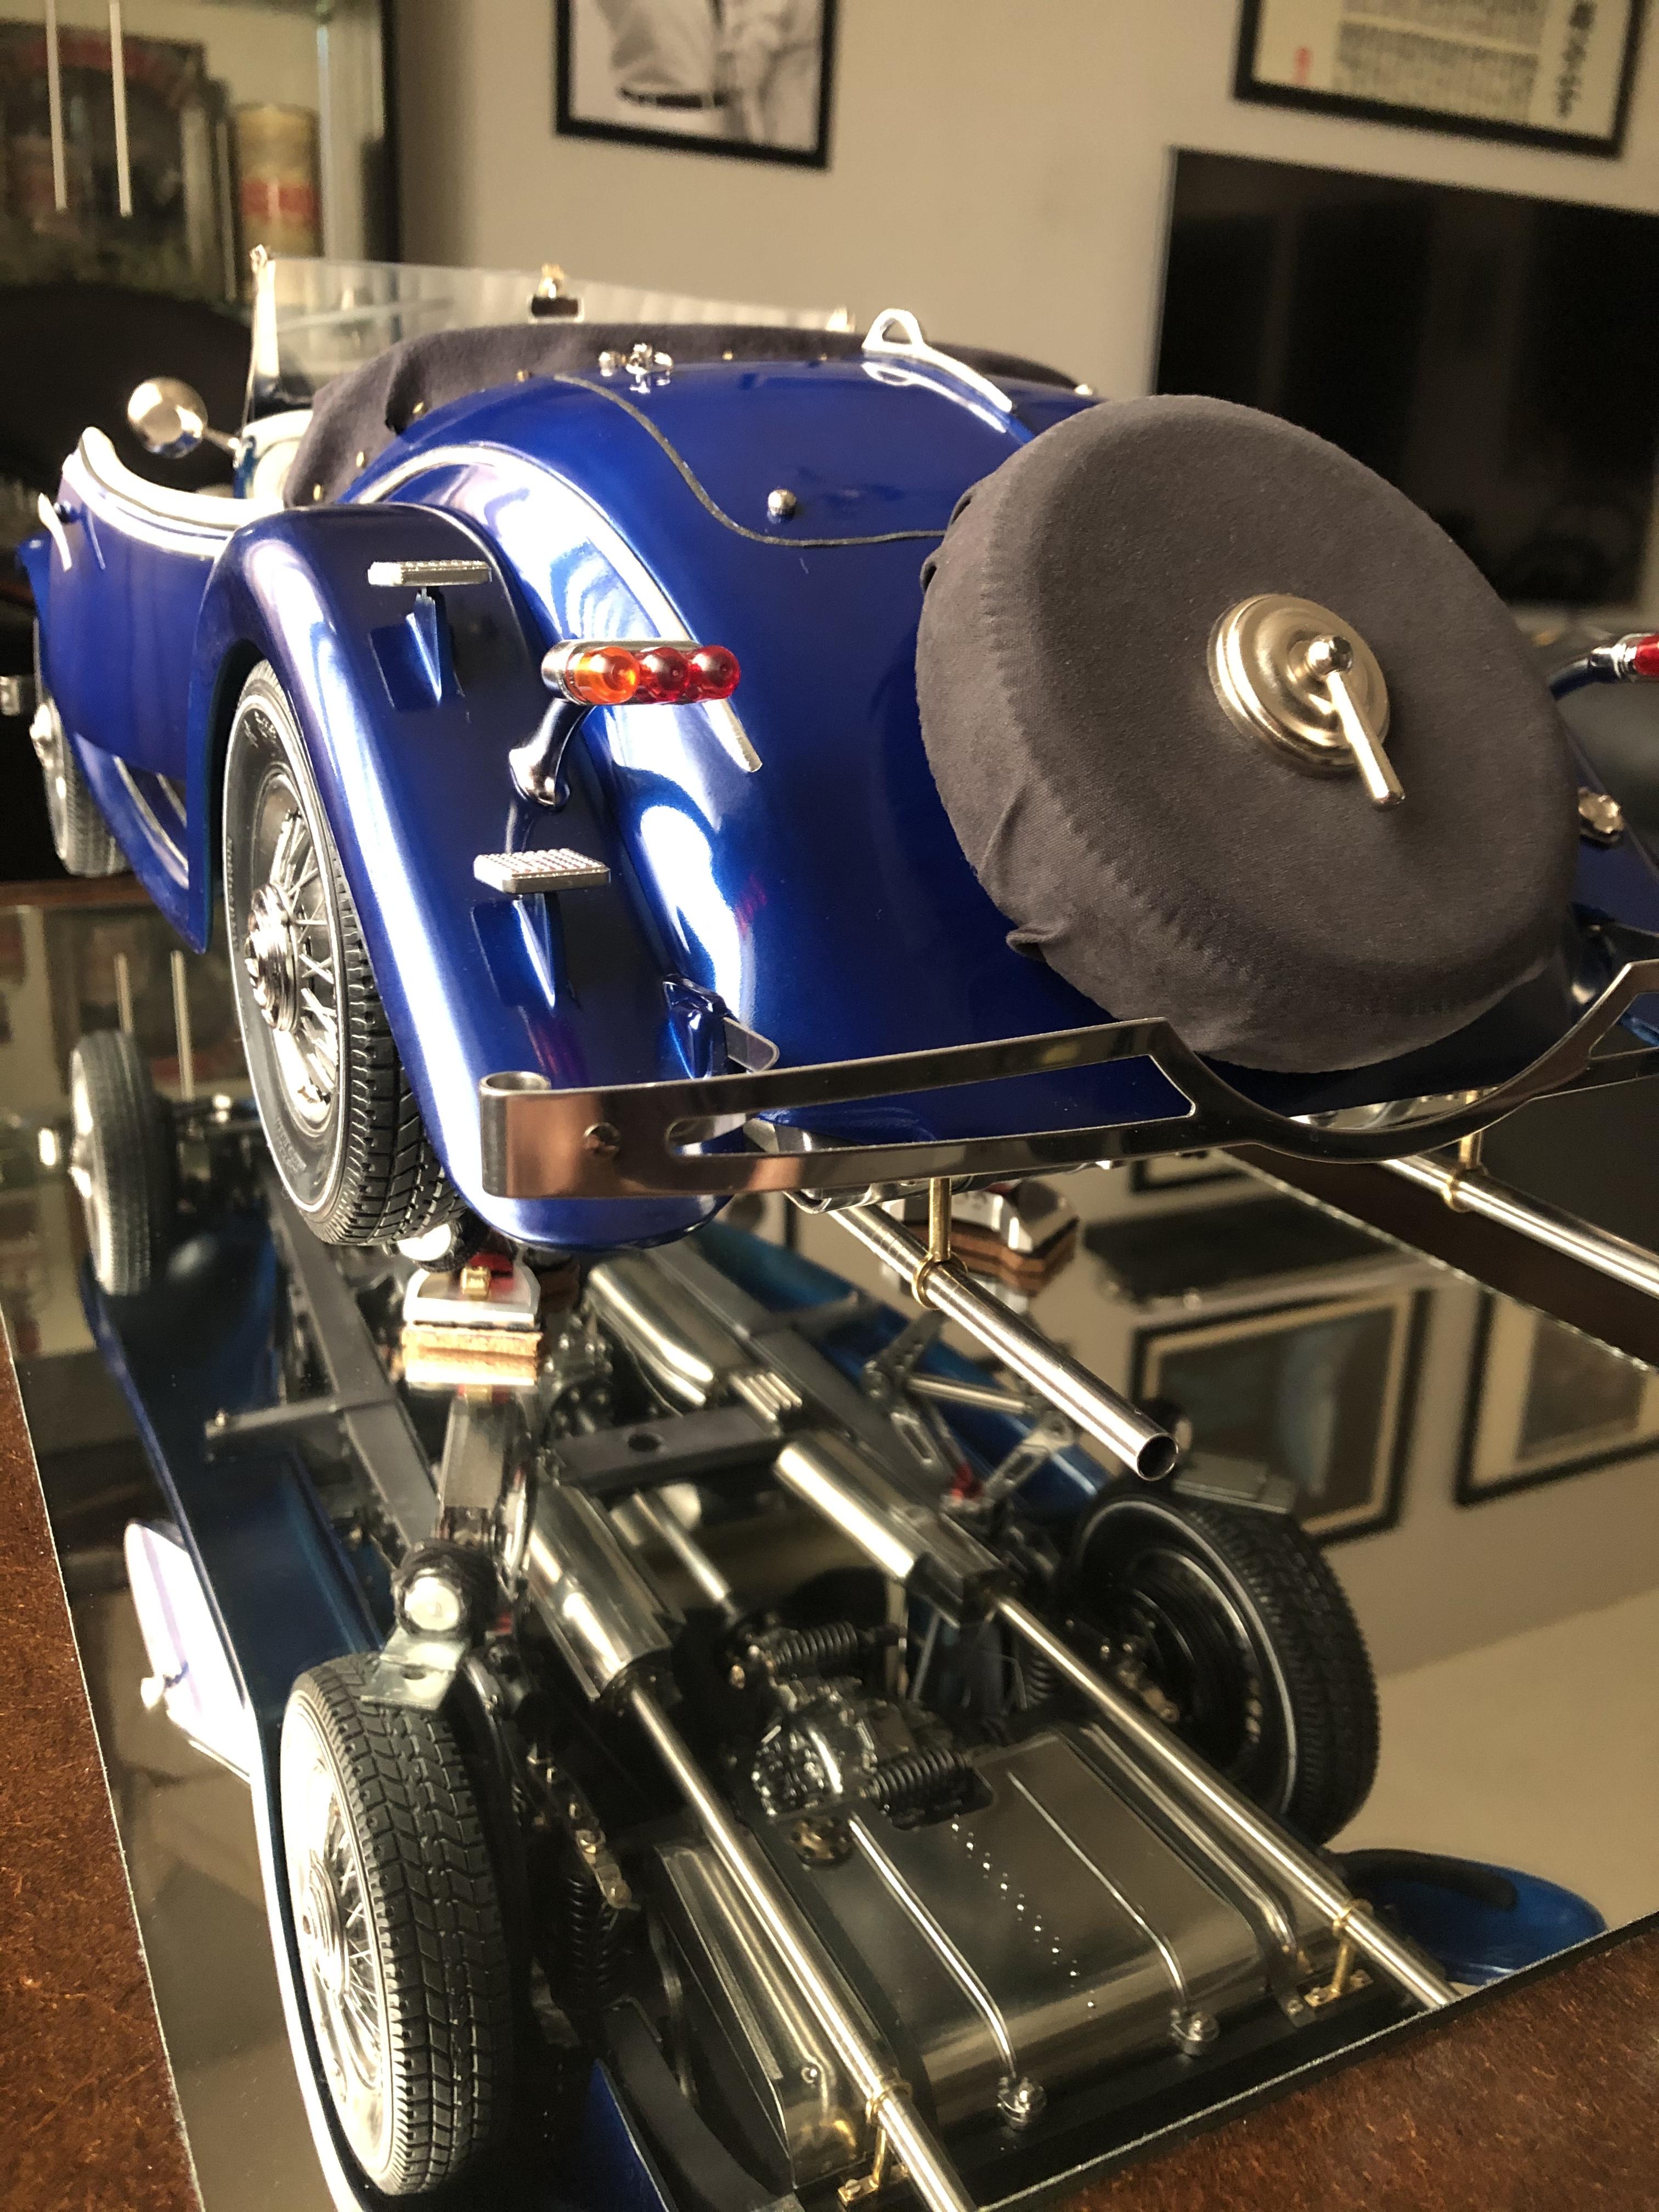
used some clothes hanger to create a kind of metallic frame to give some volume behind the seat .. still working on it ... and on the other side , started to work on the display case ... stain the kind of composite wood I had to give an impression of legitimate wood ... color is dark walnut with a gloss polycrylic water base for the finish , that doesn t become yellow over the year . I order a mirror that will be under to show the details .
-
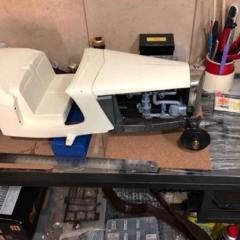
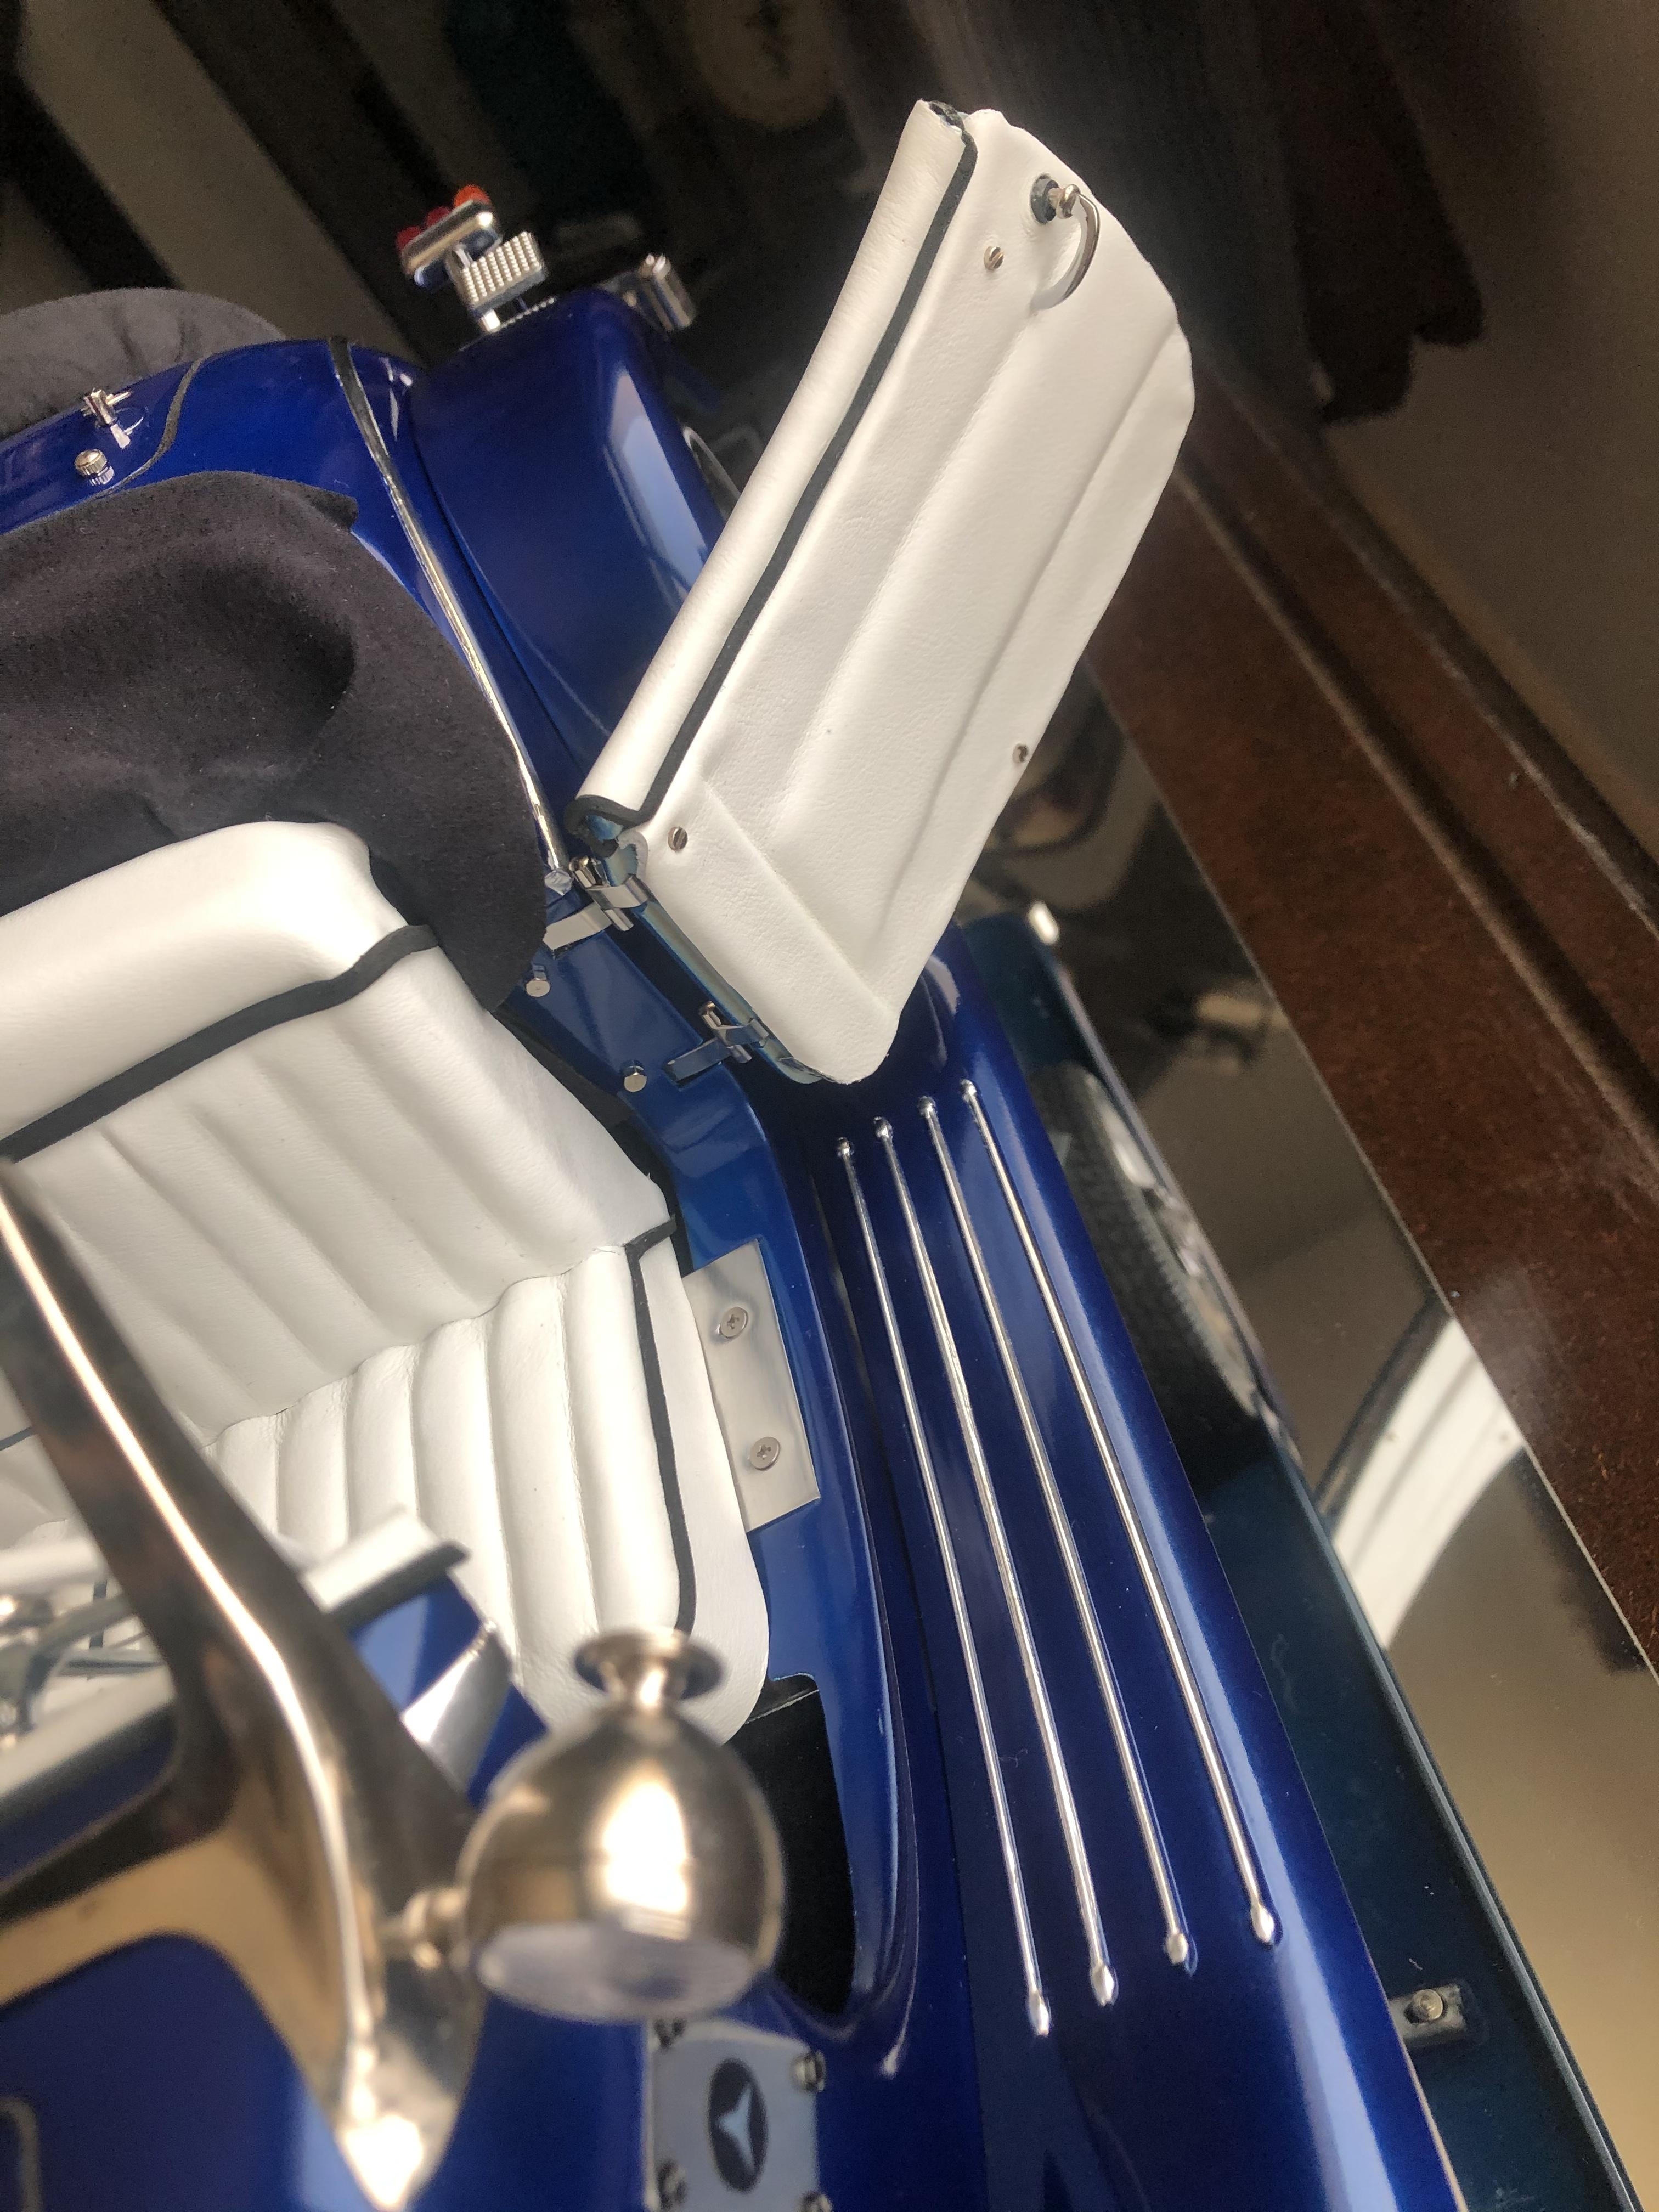
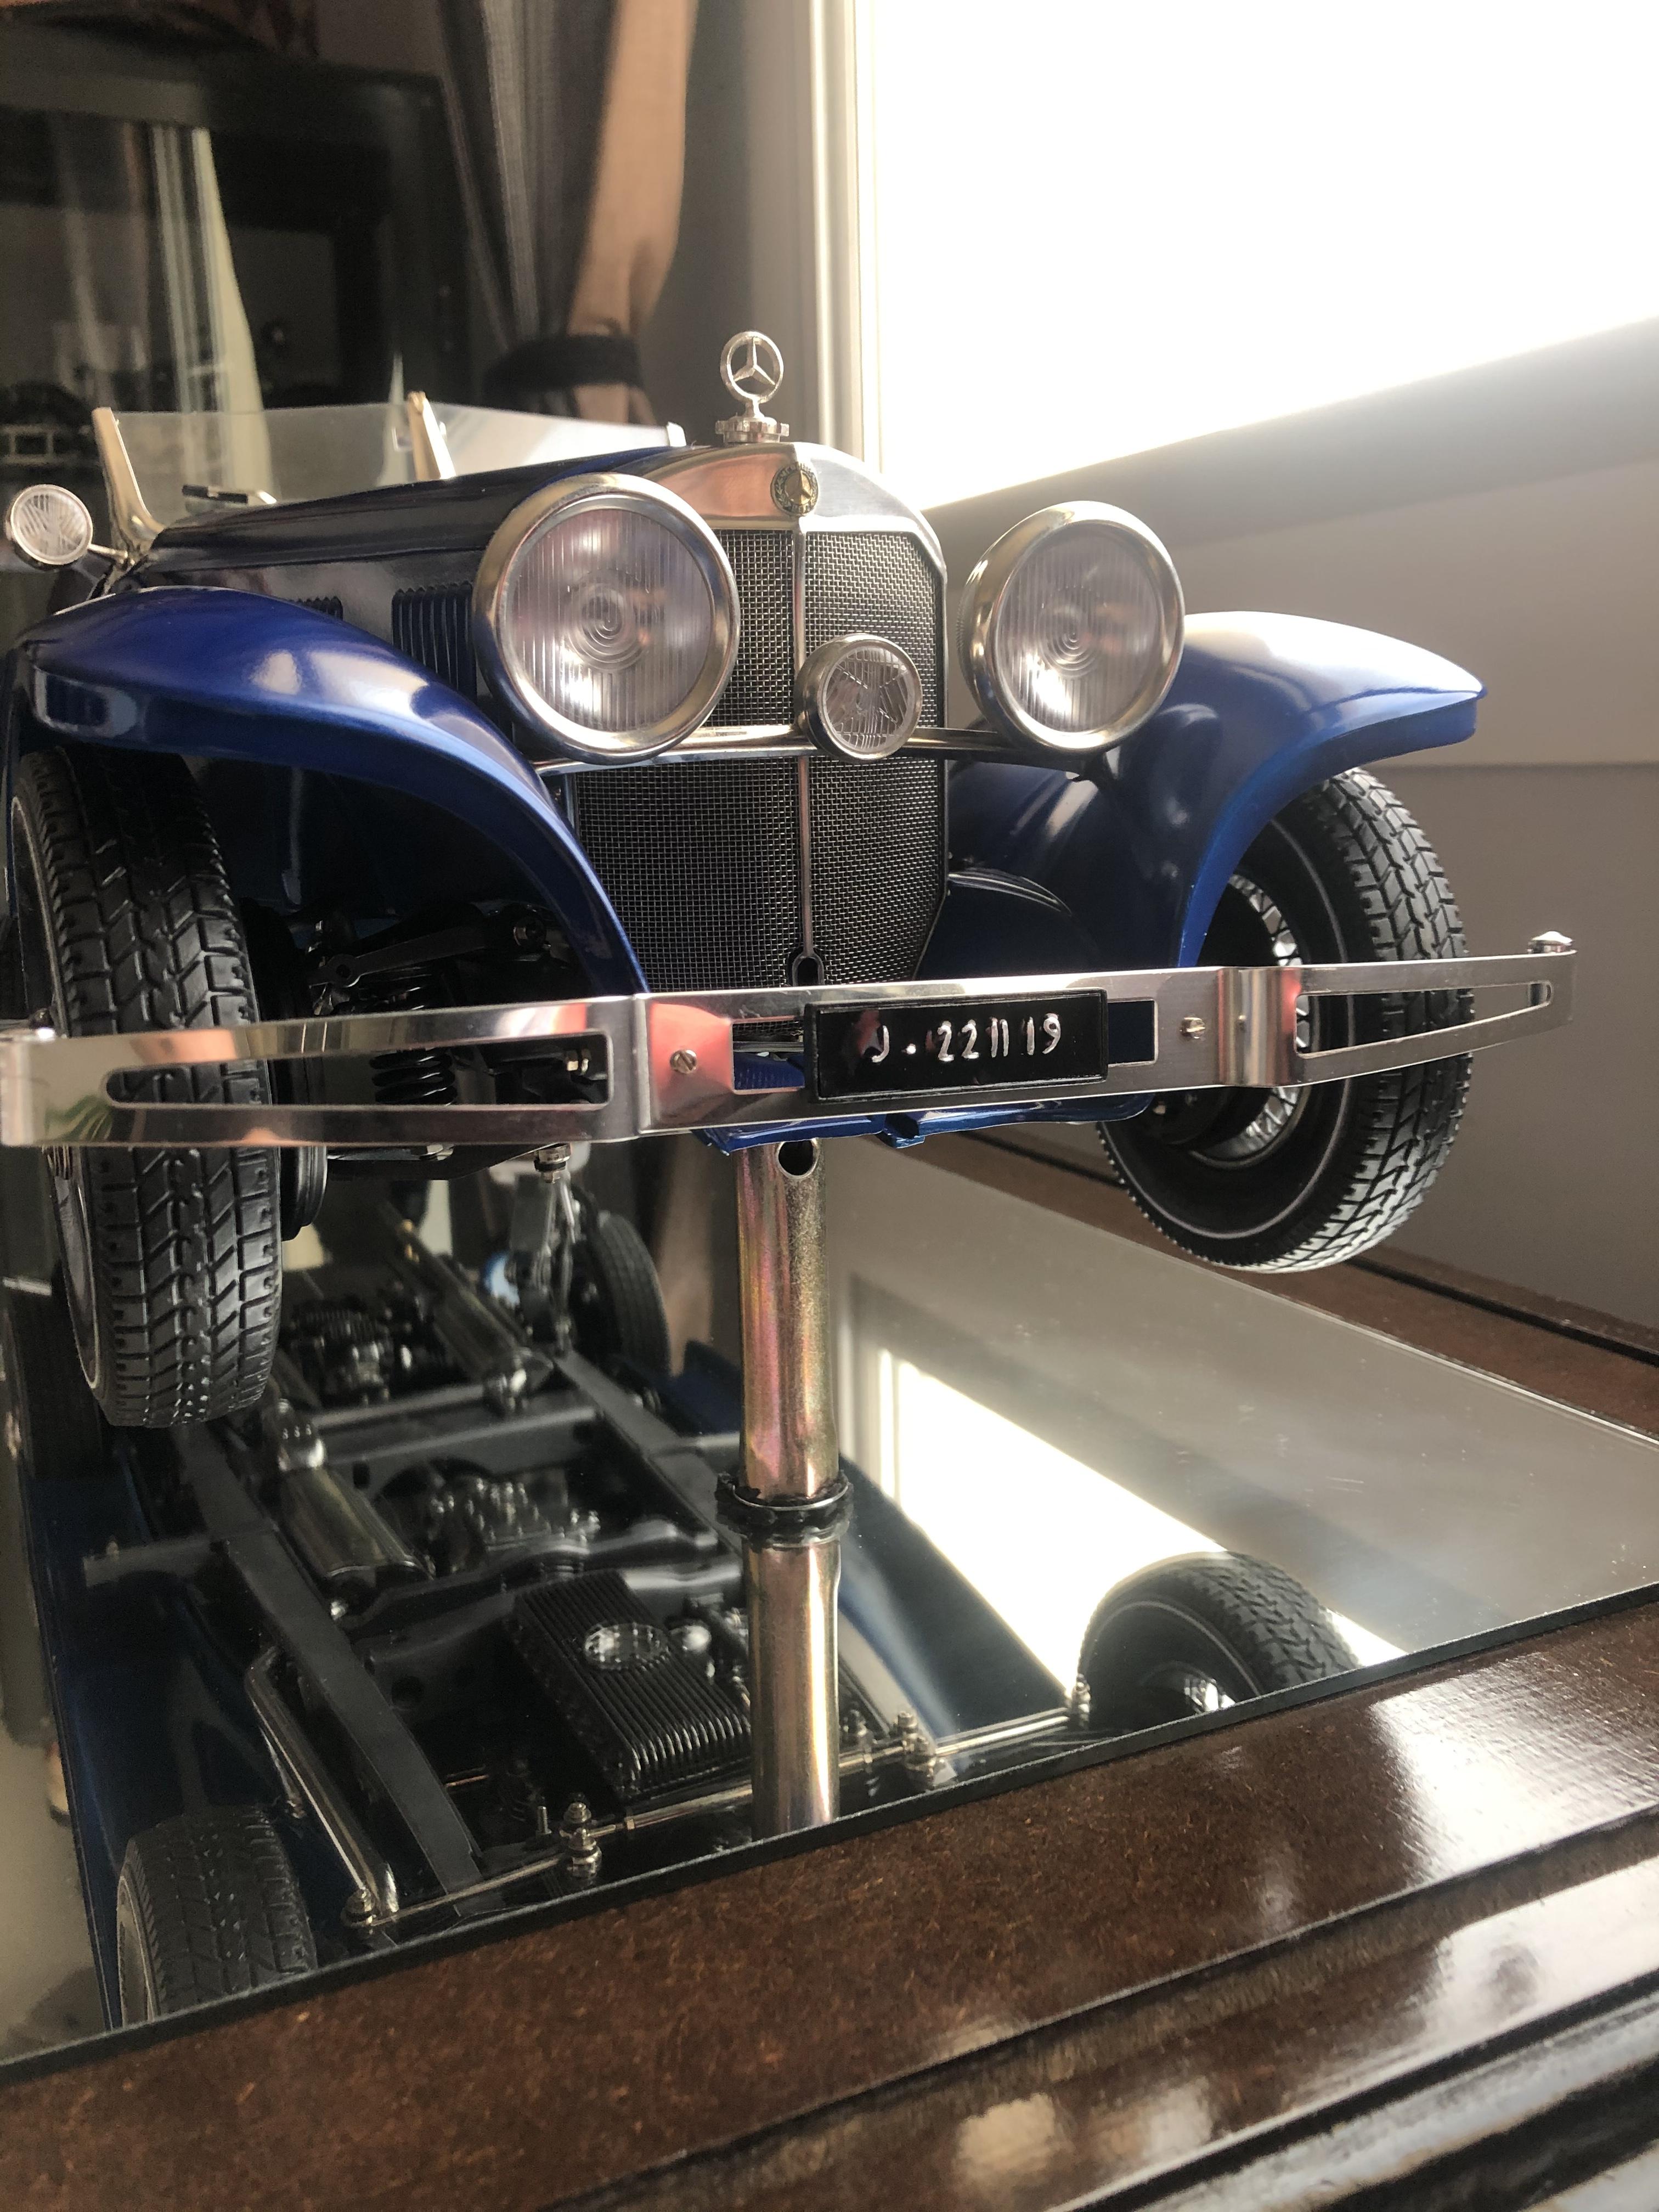
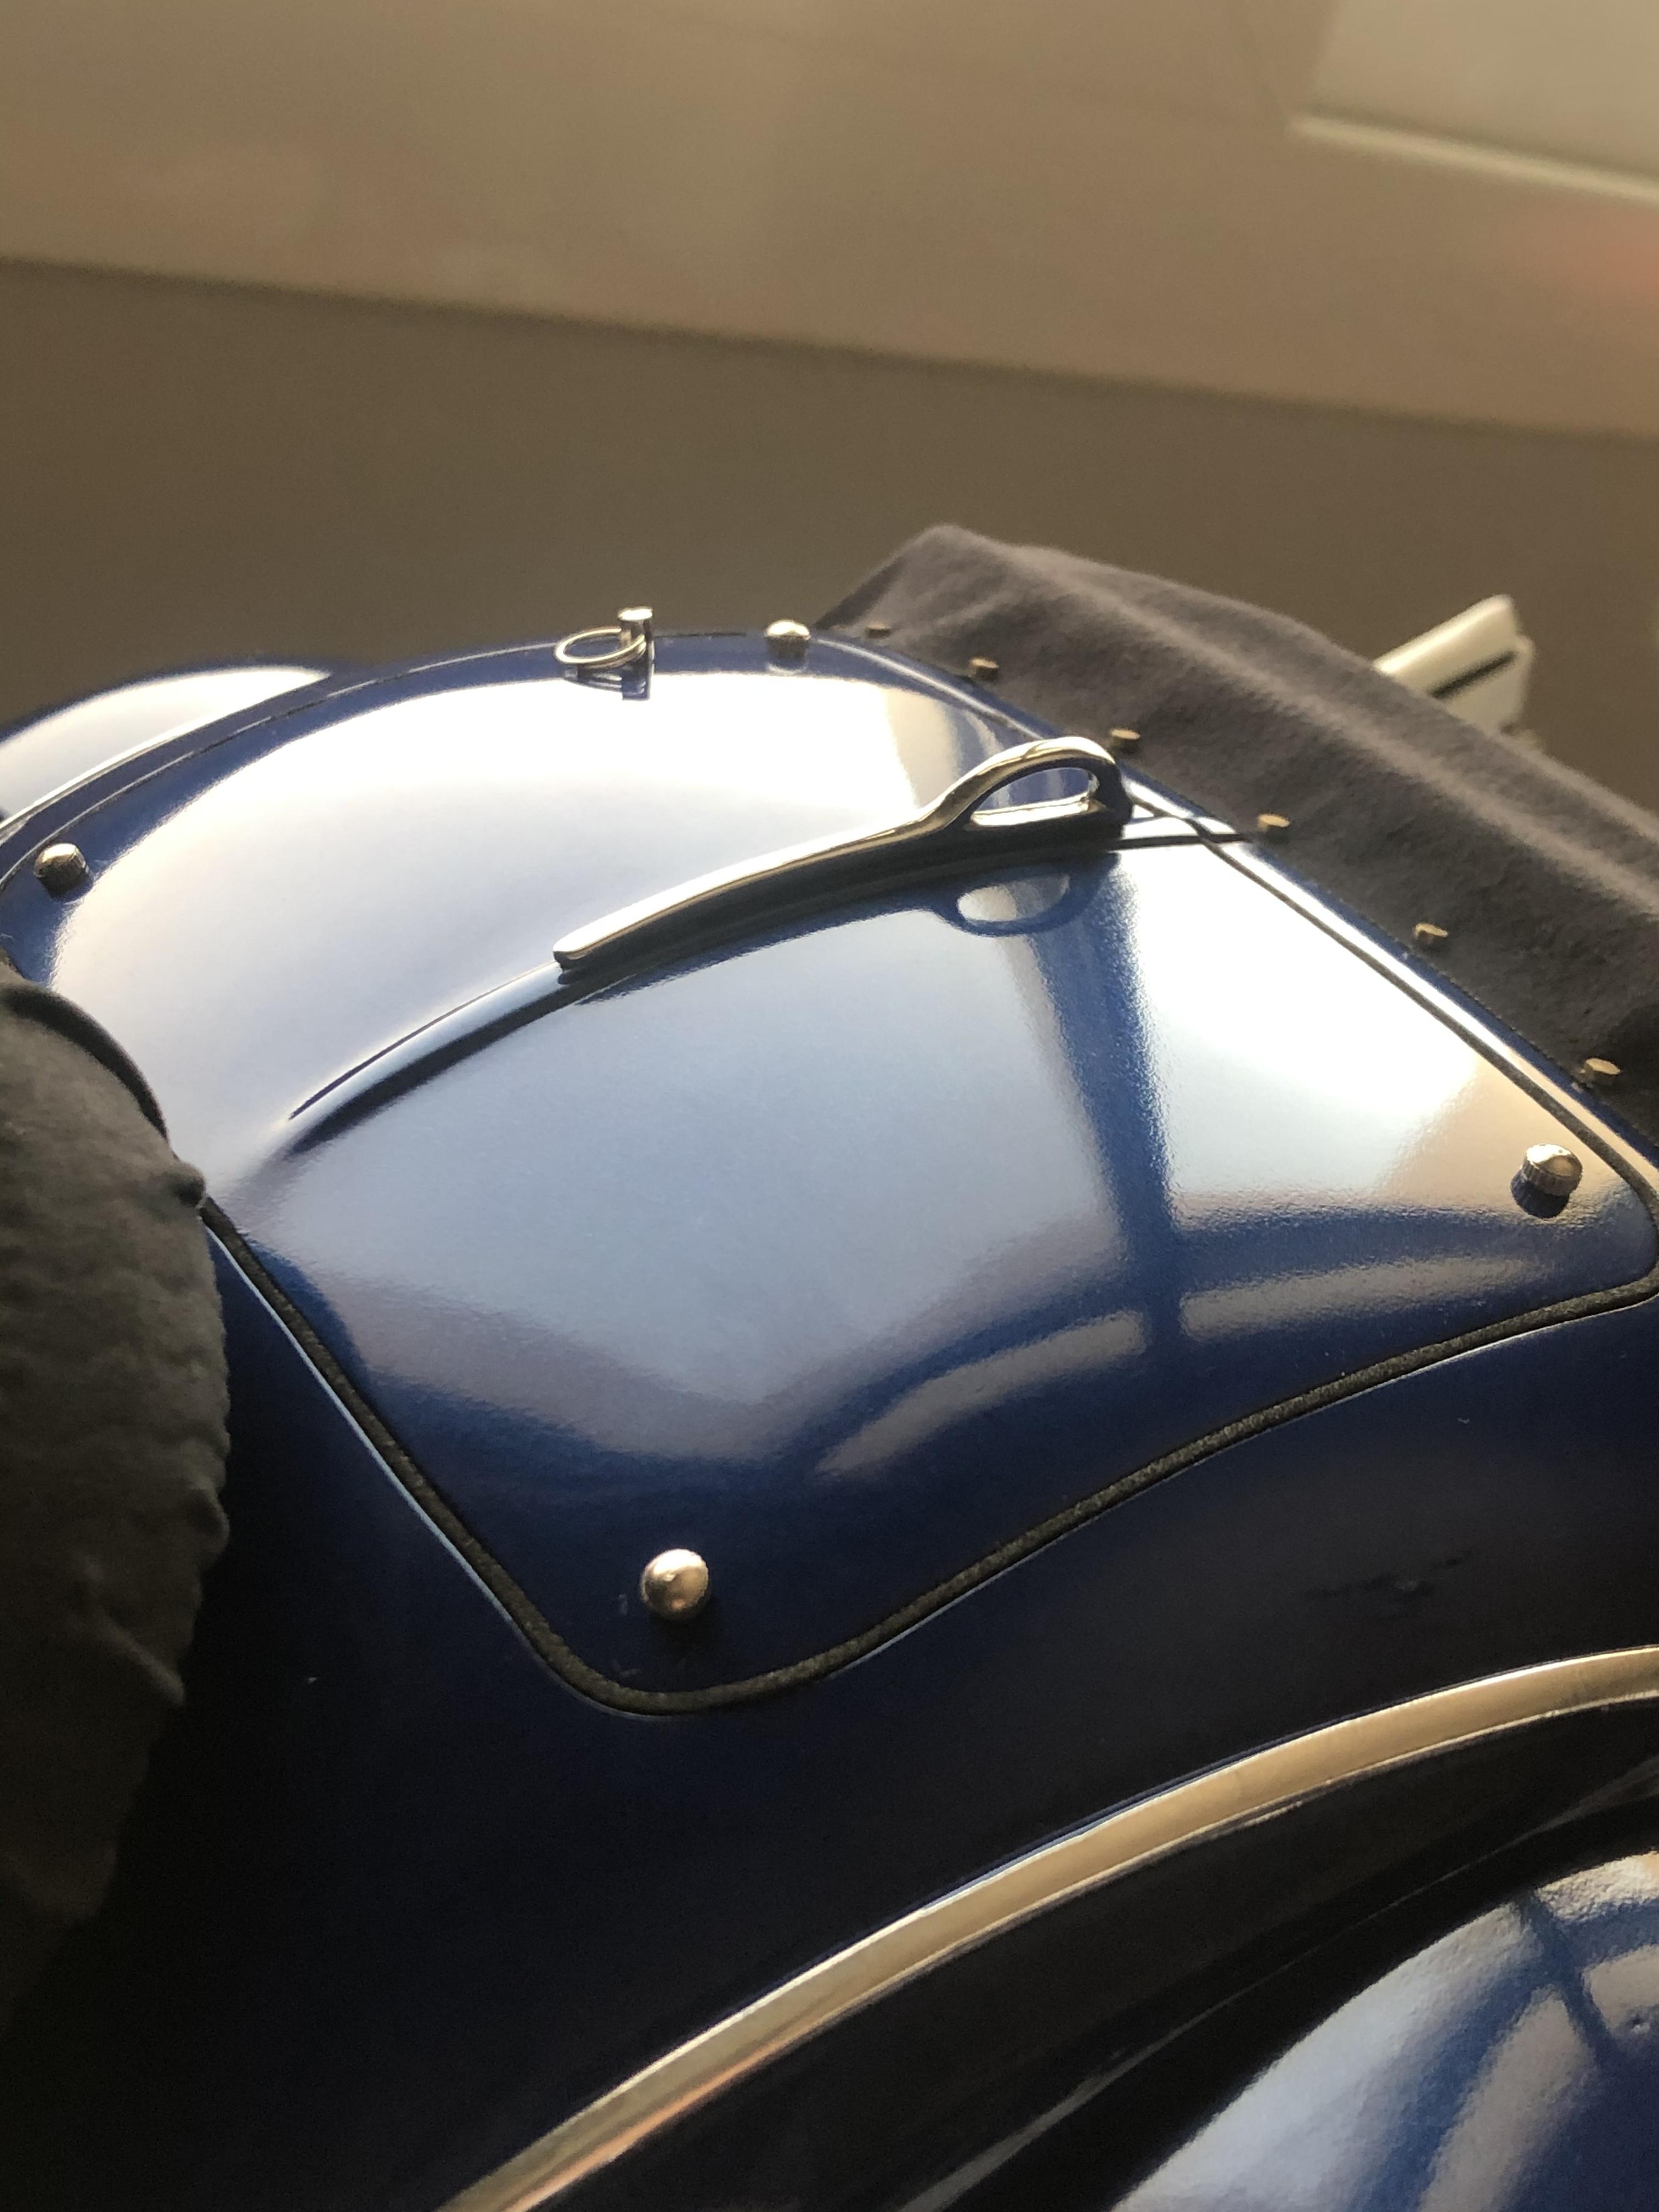
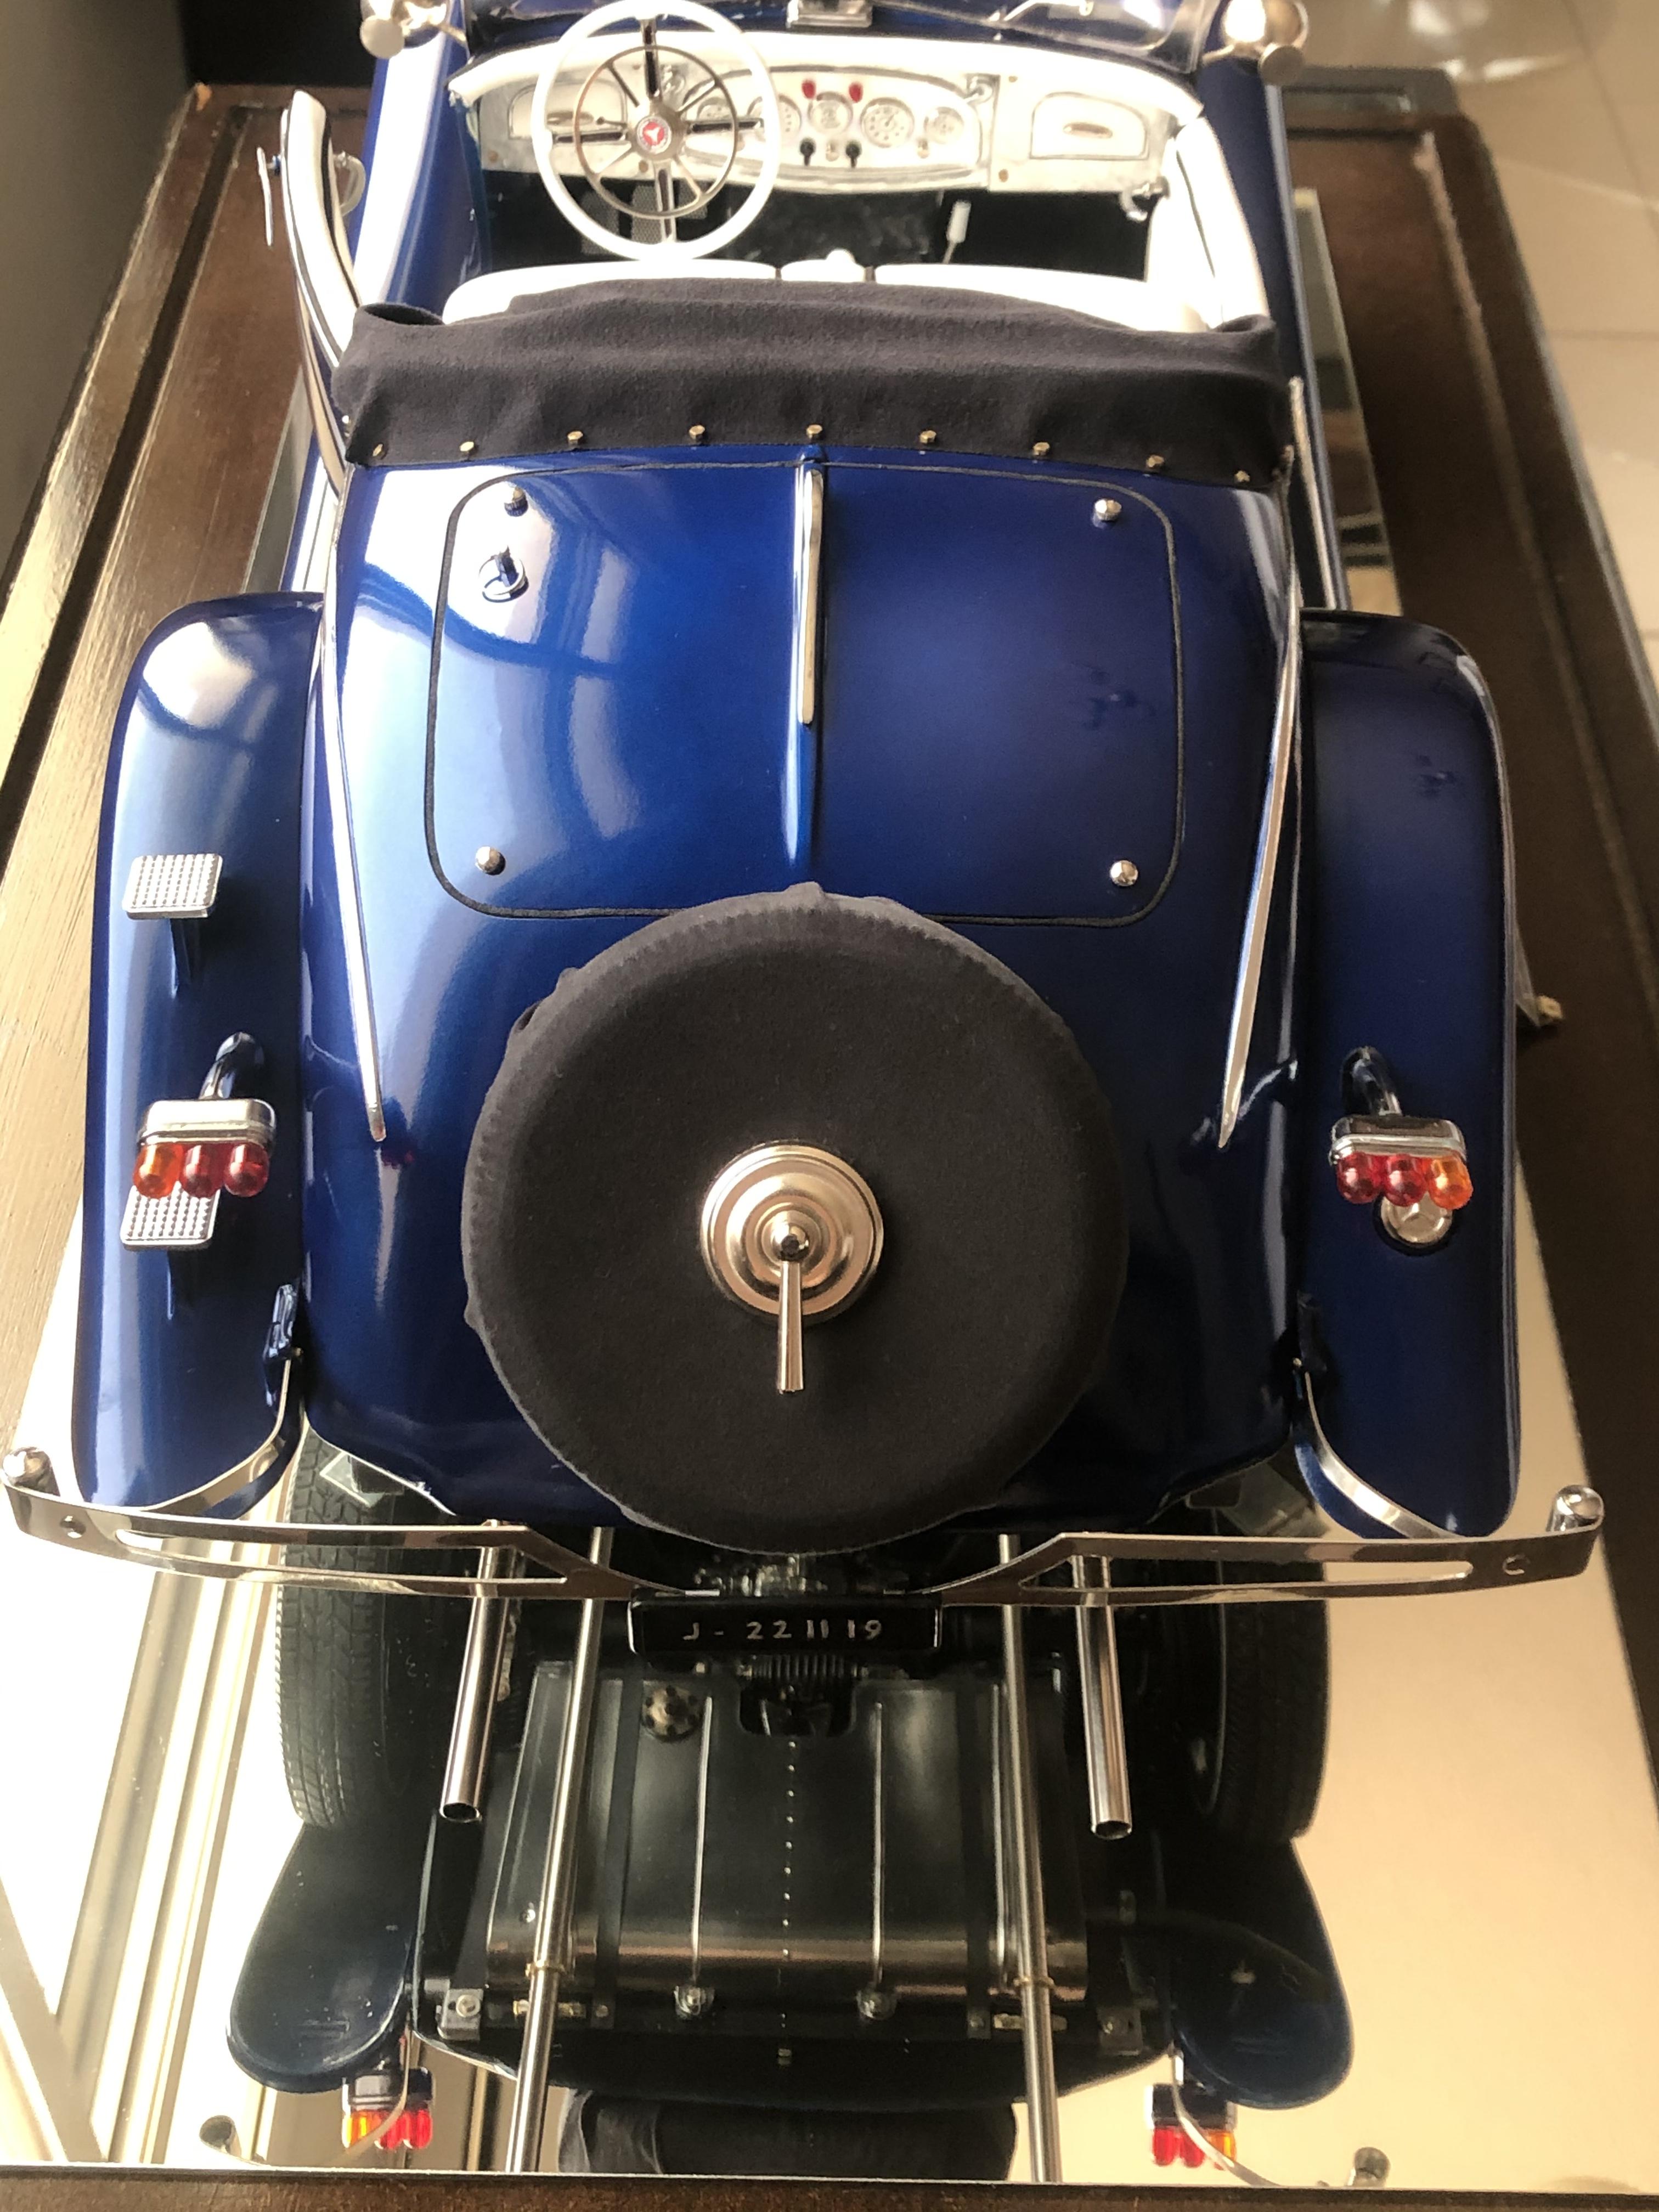
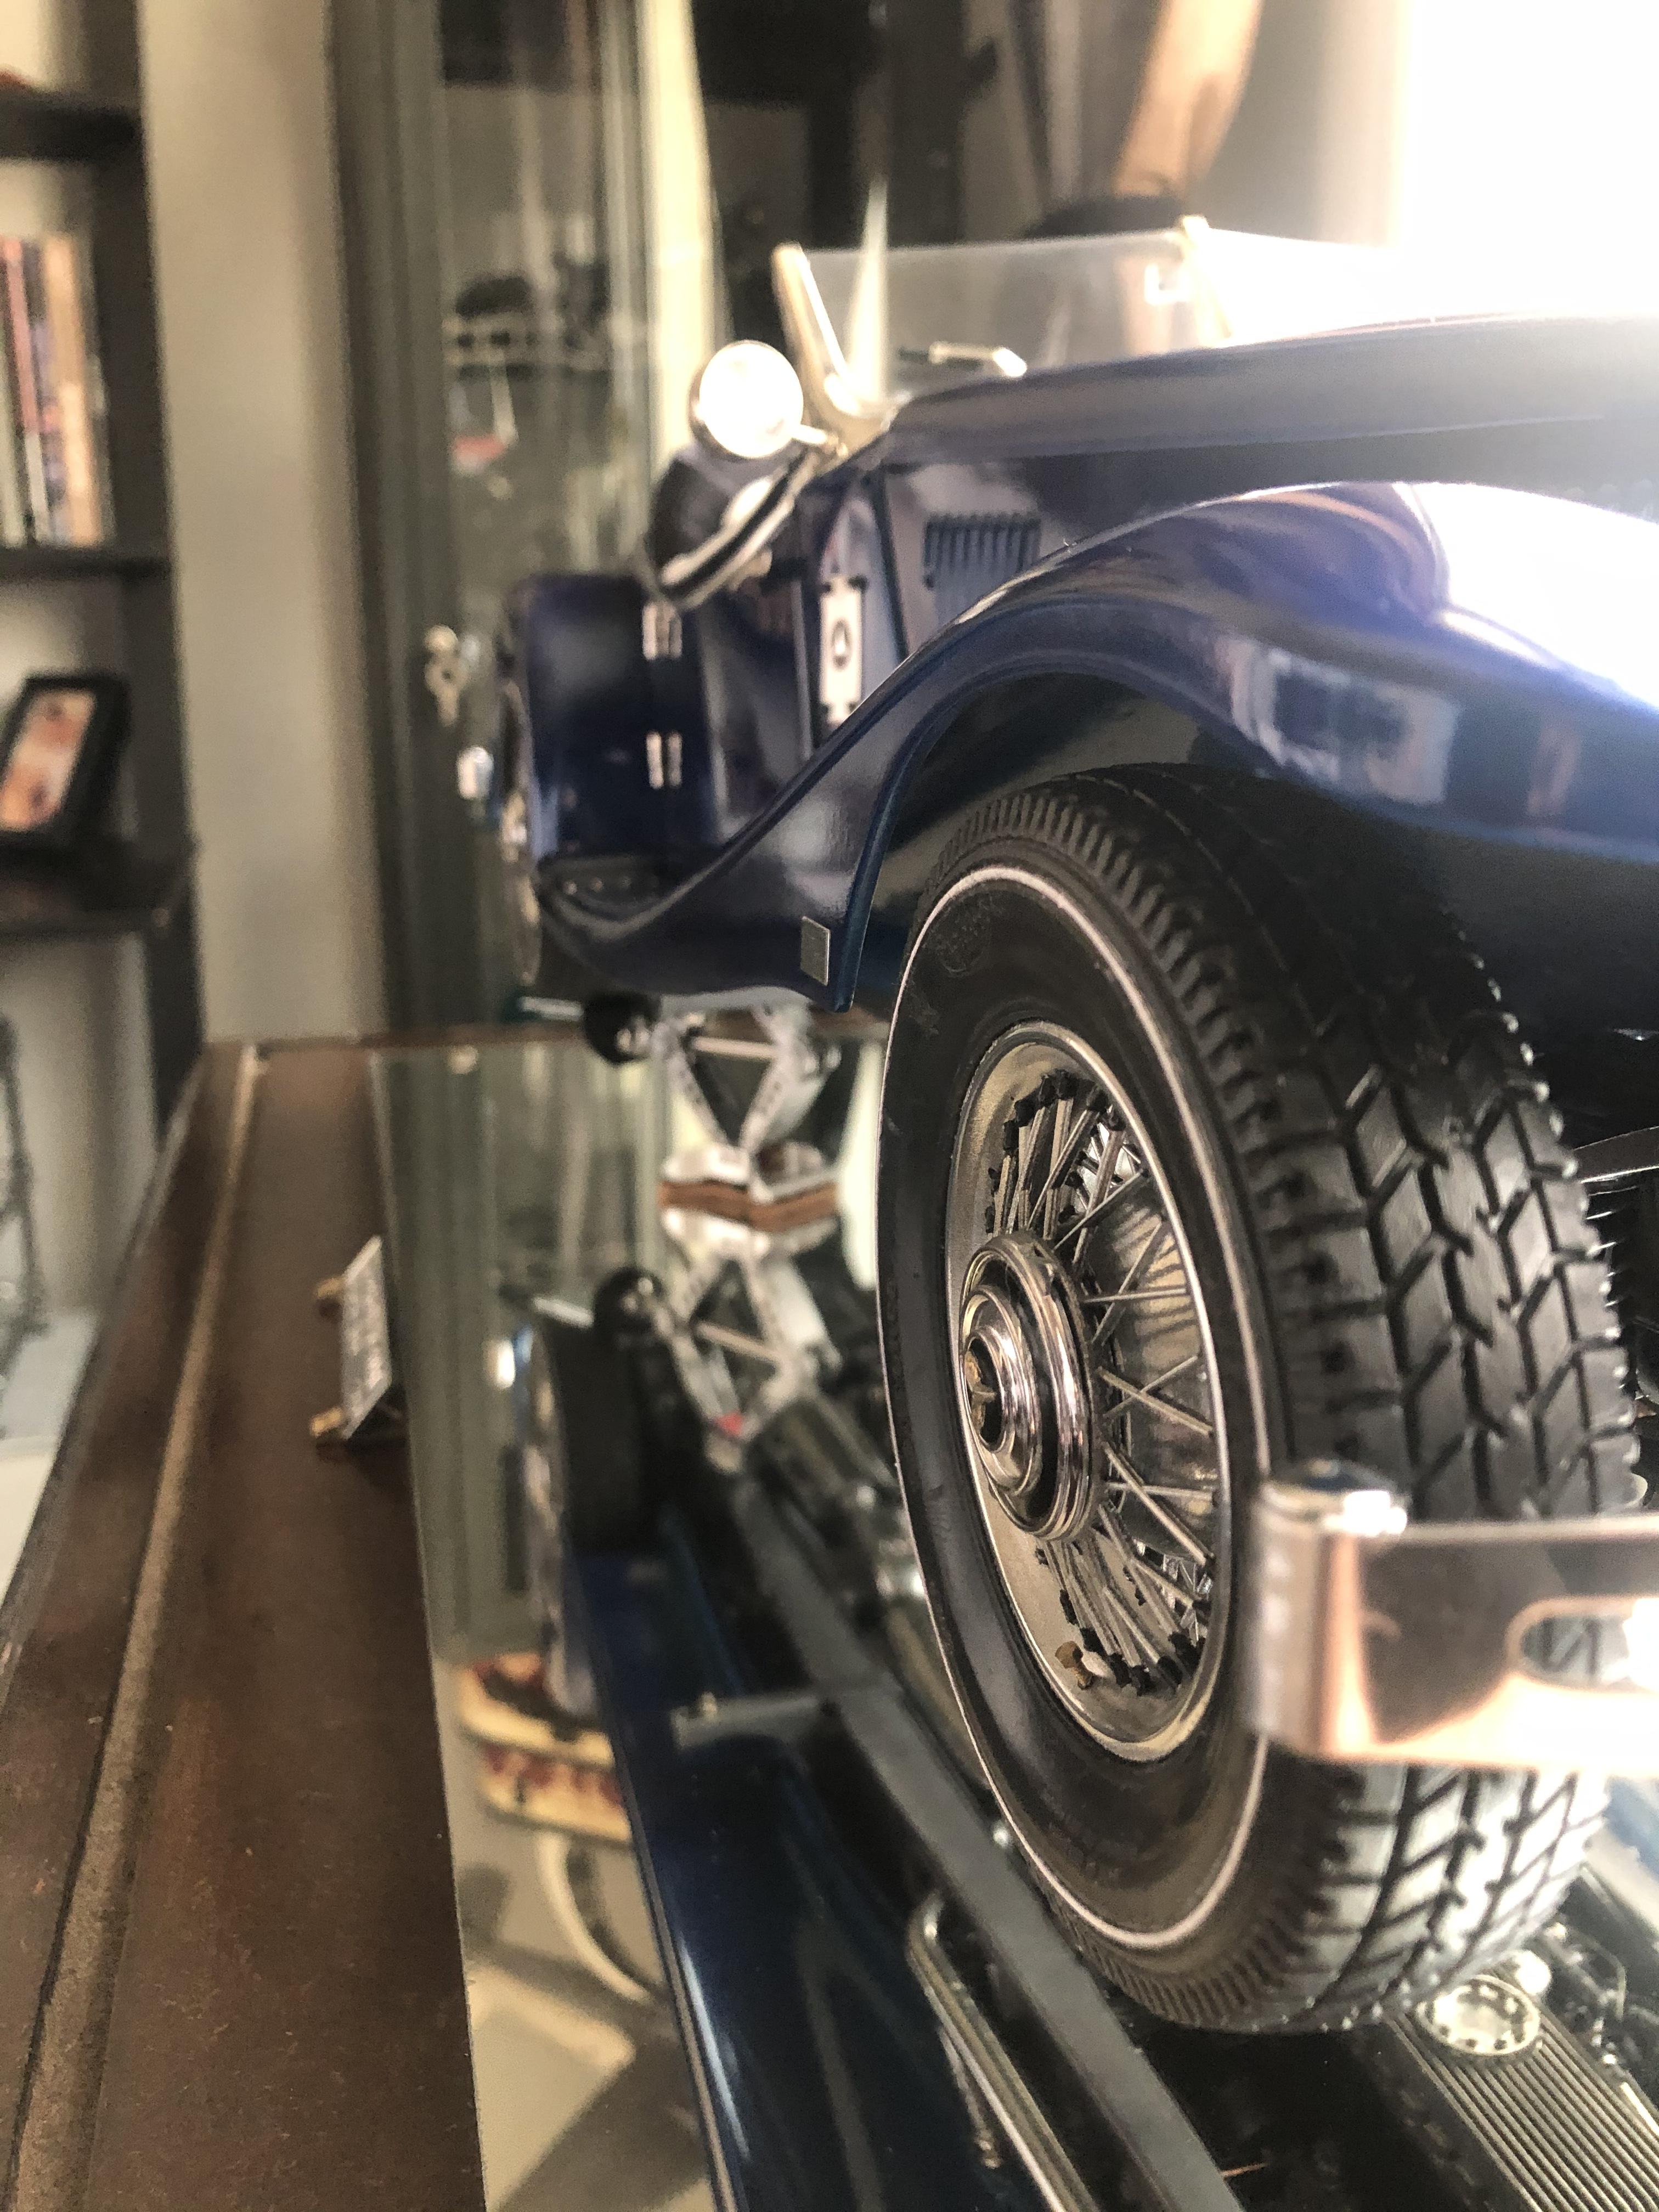
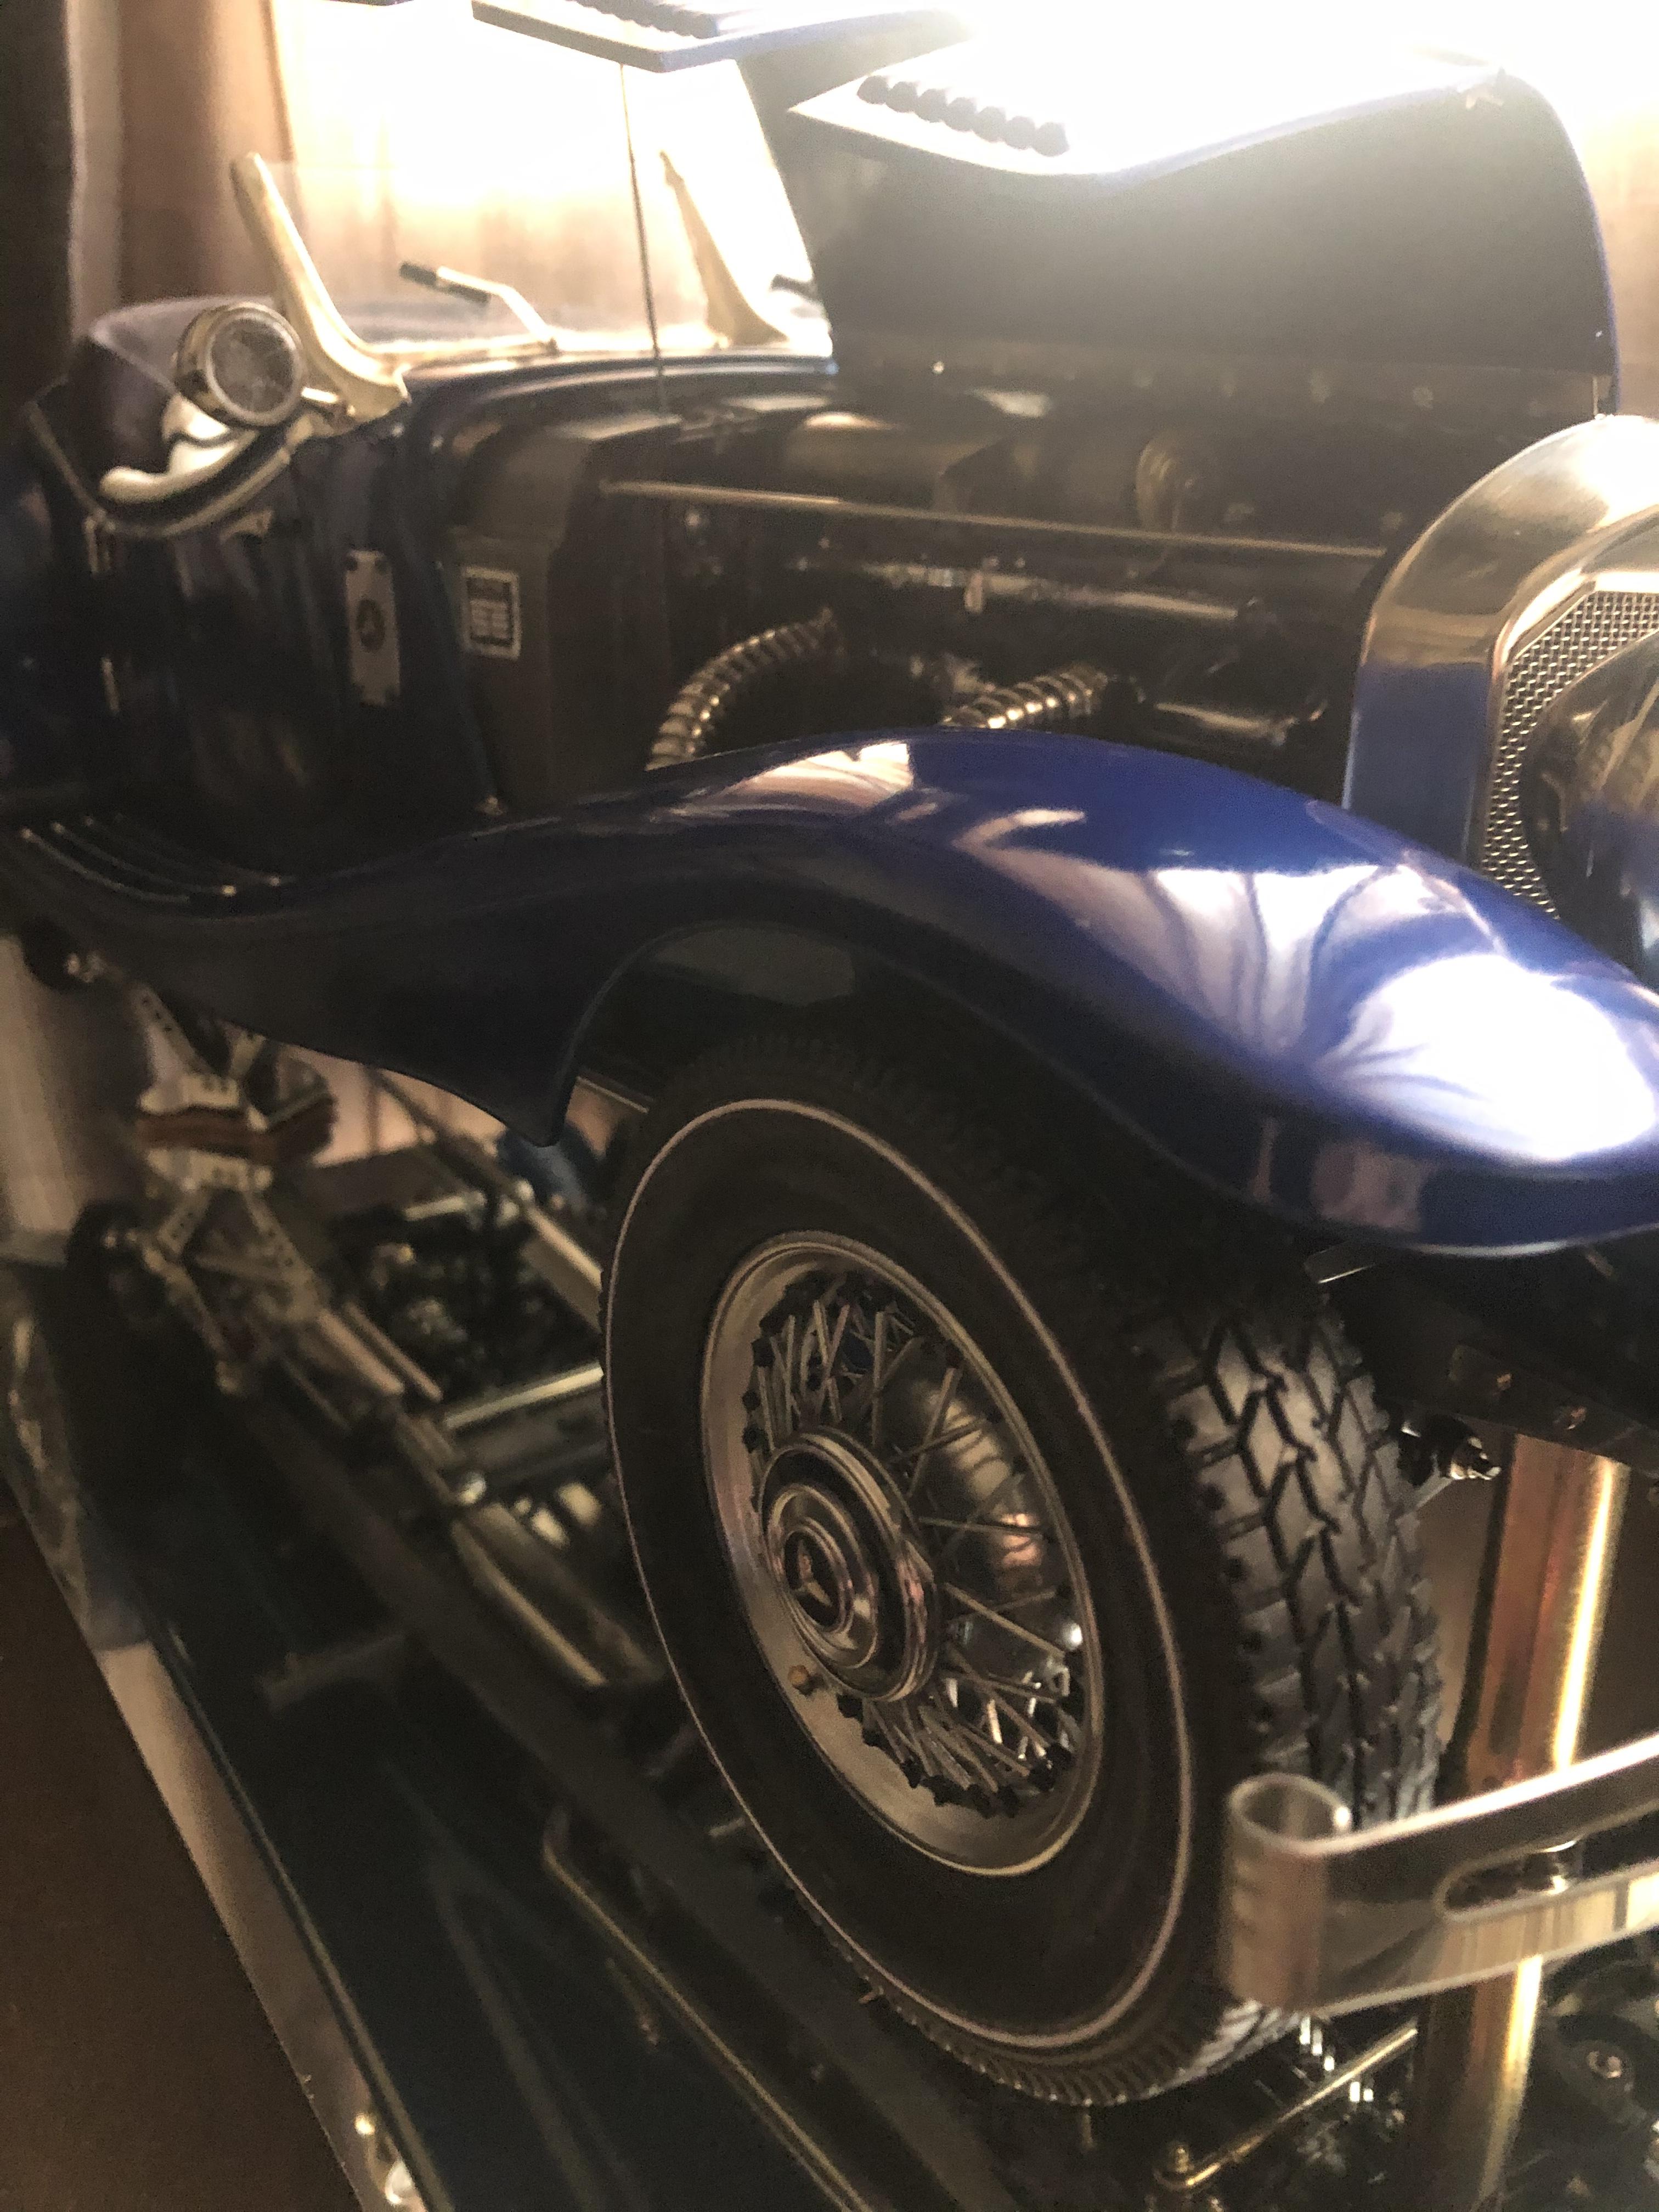
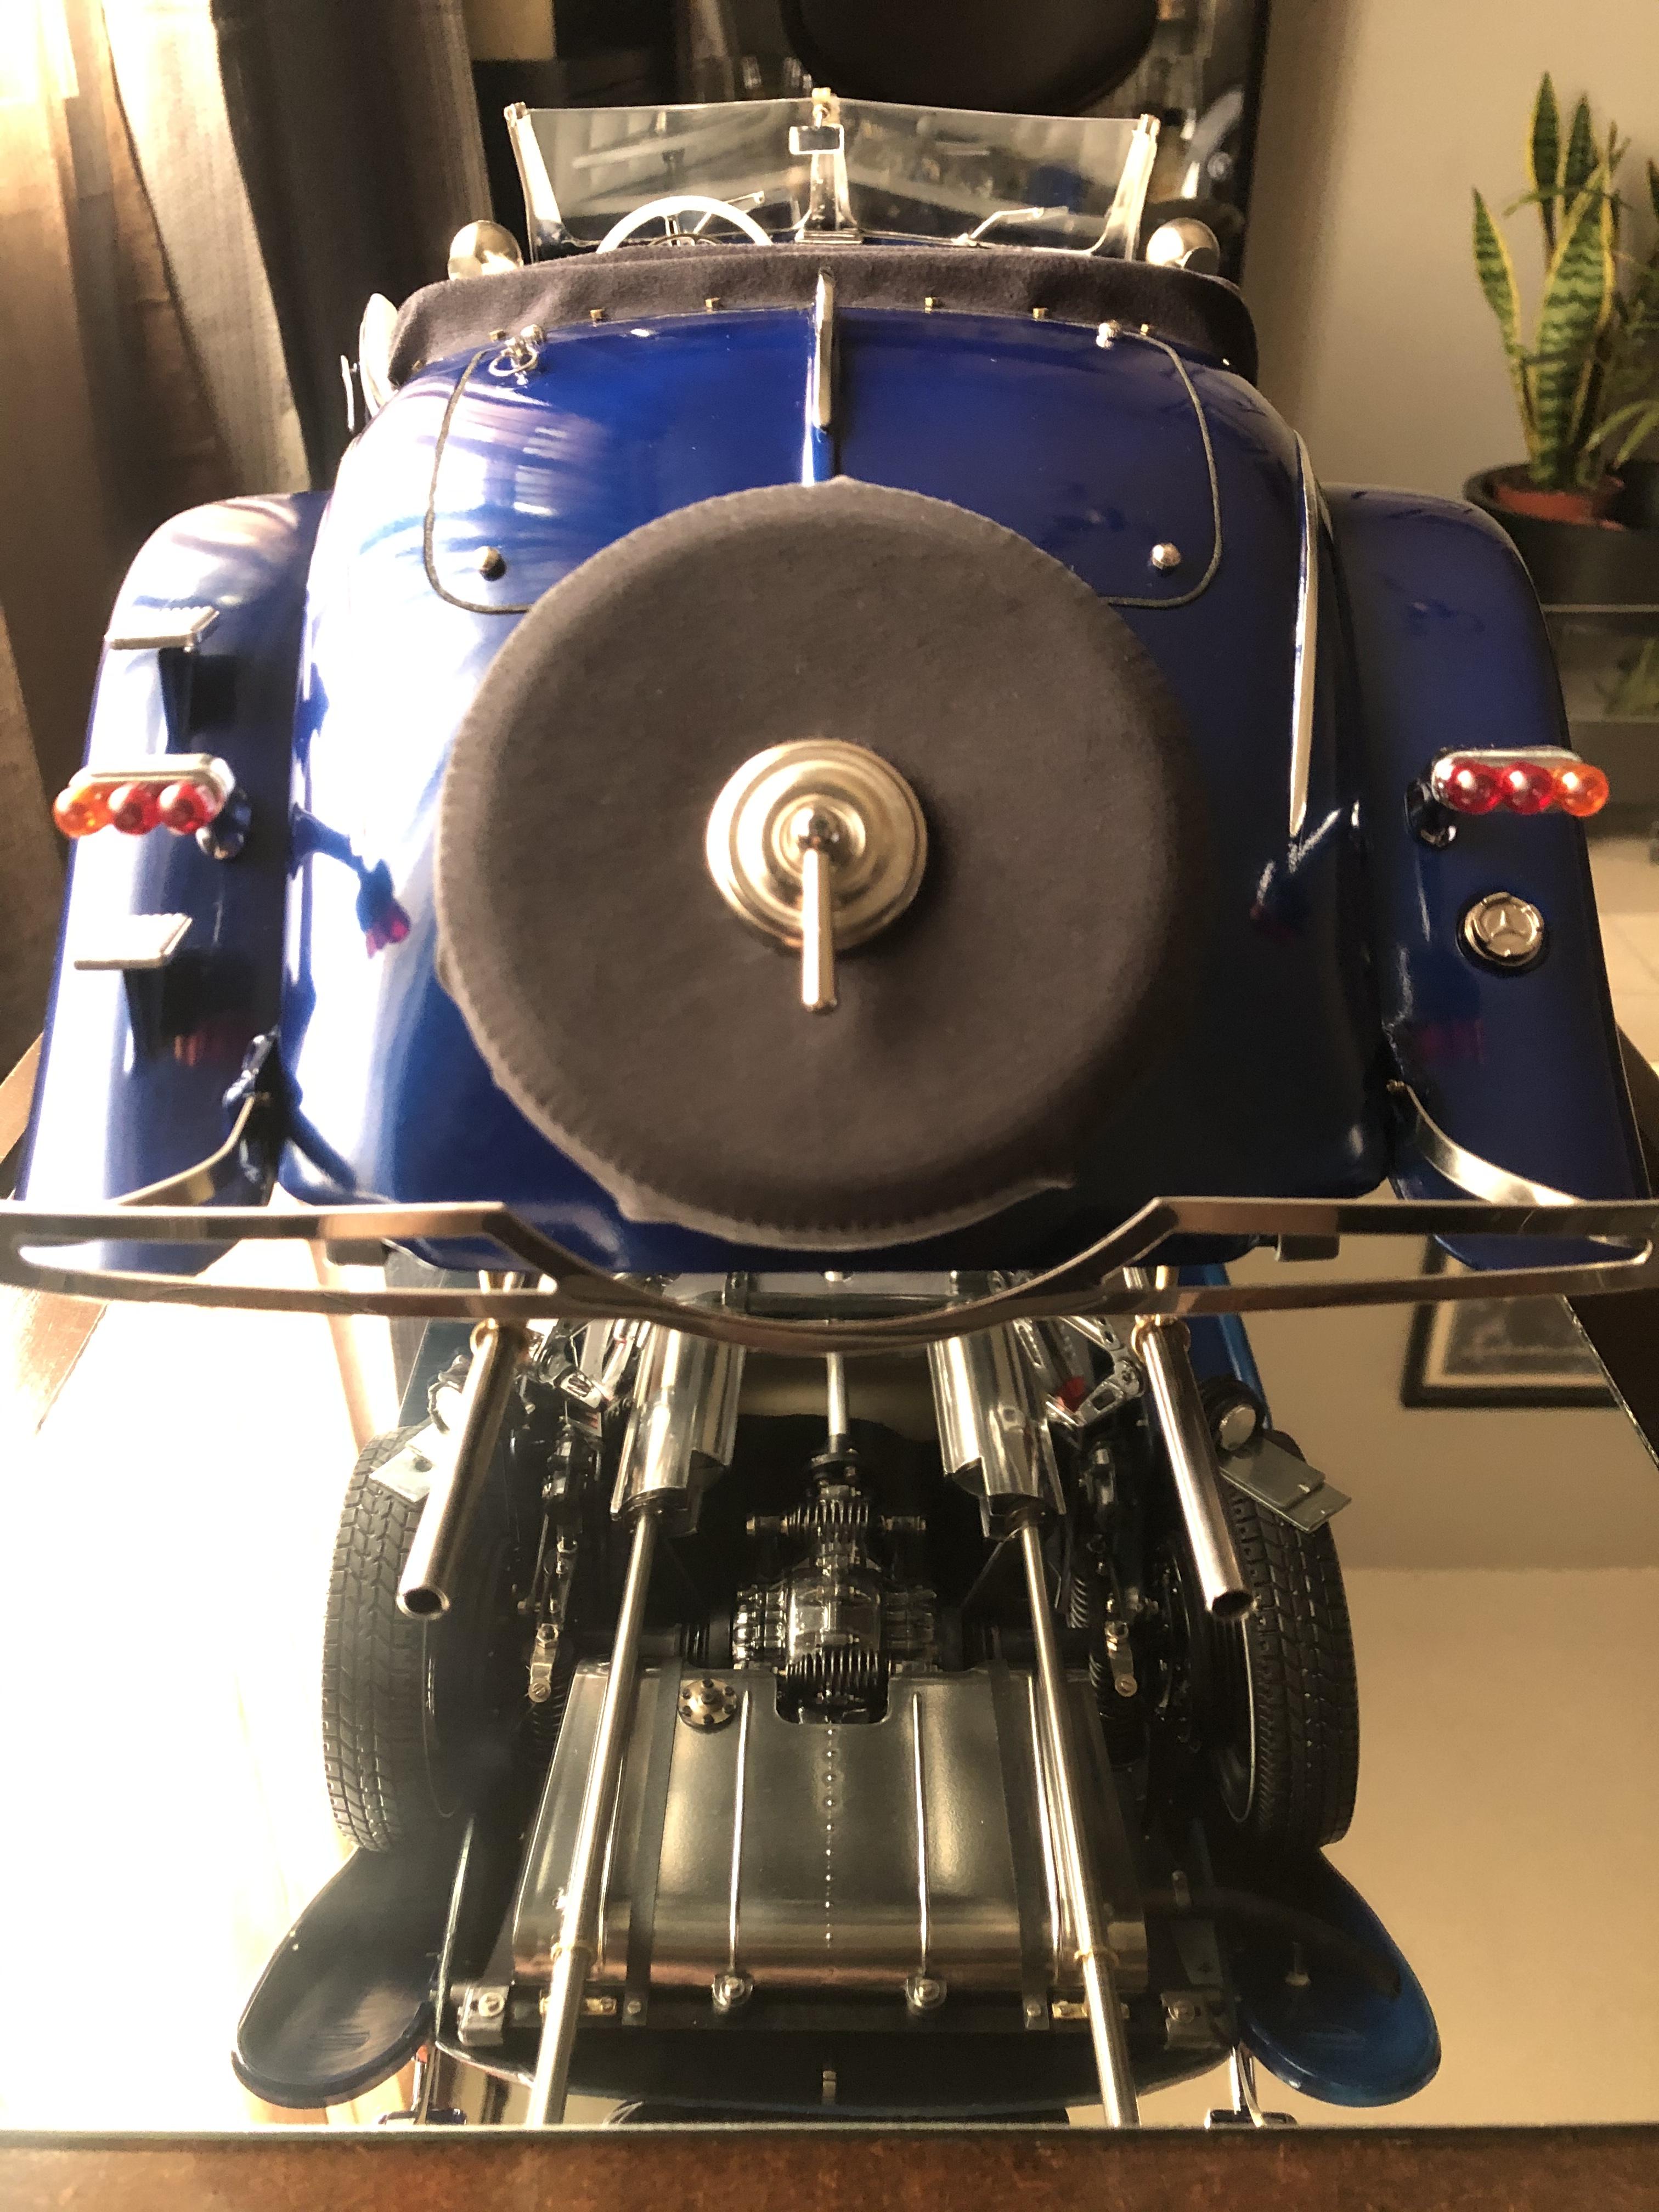
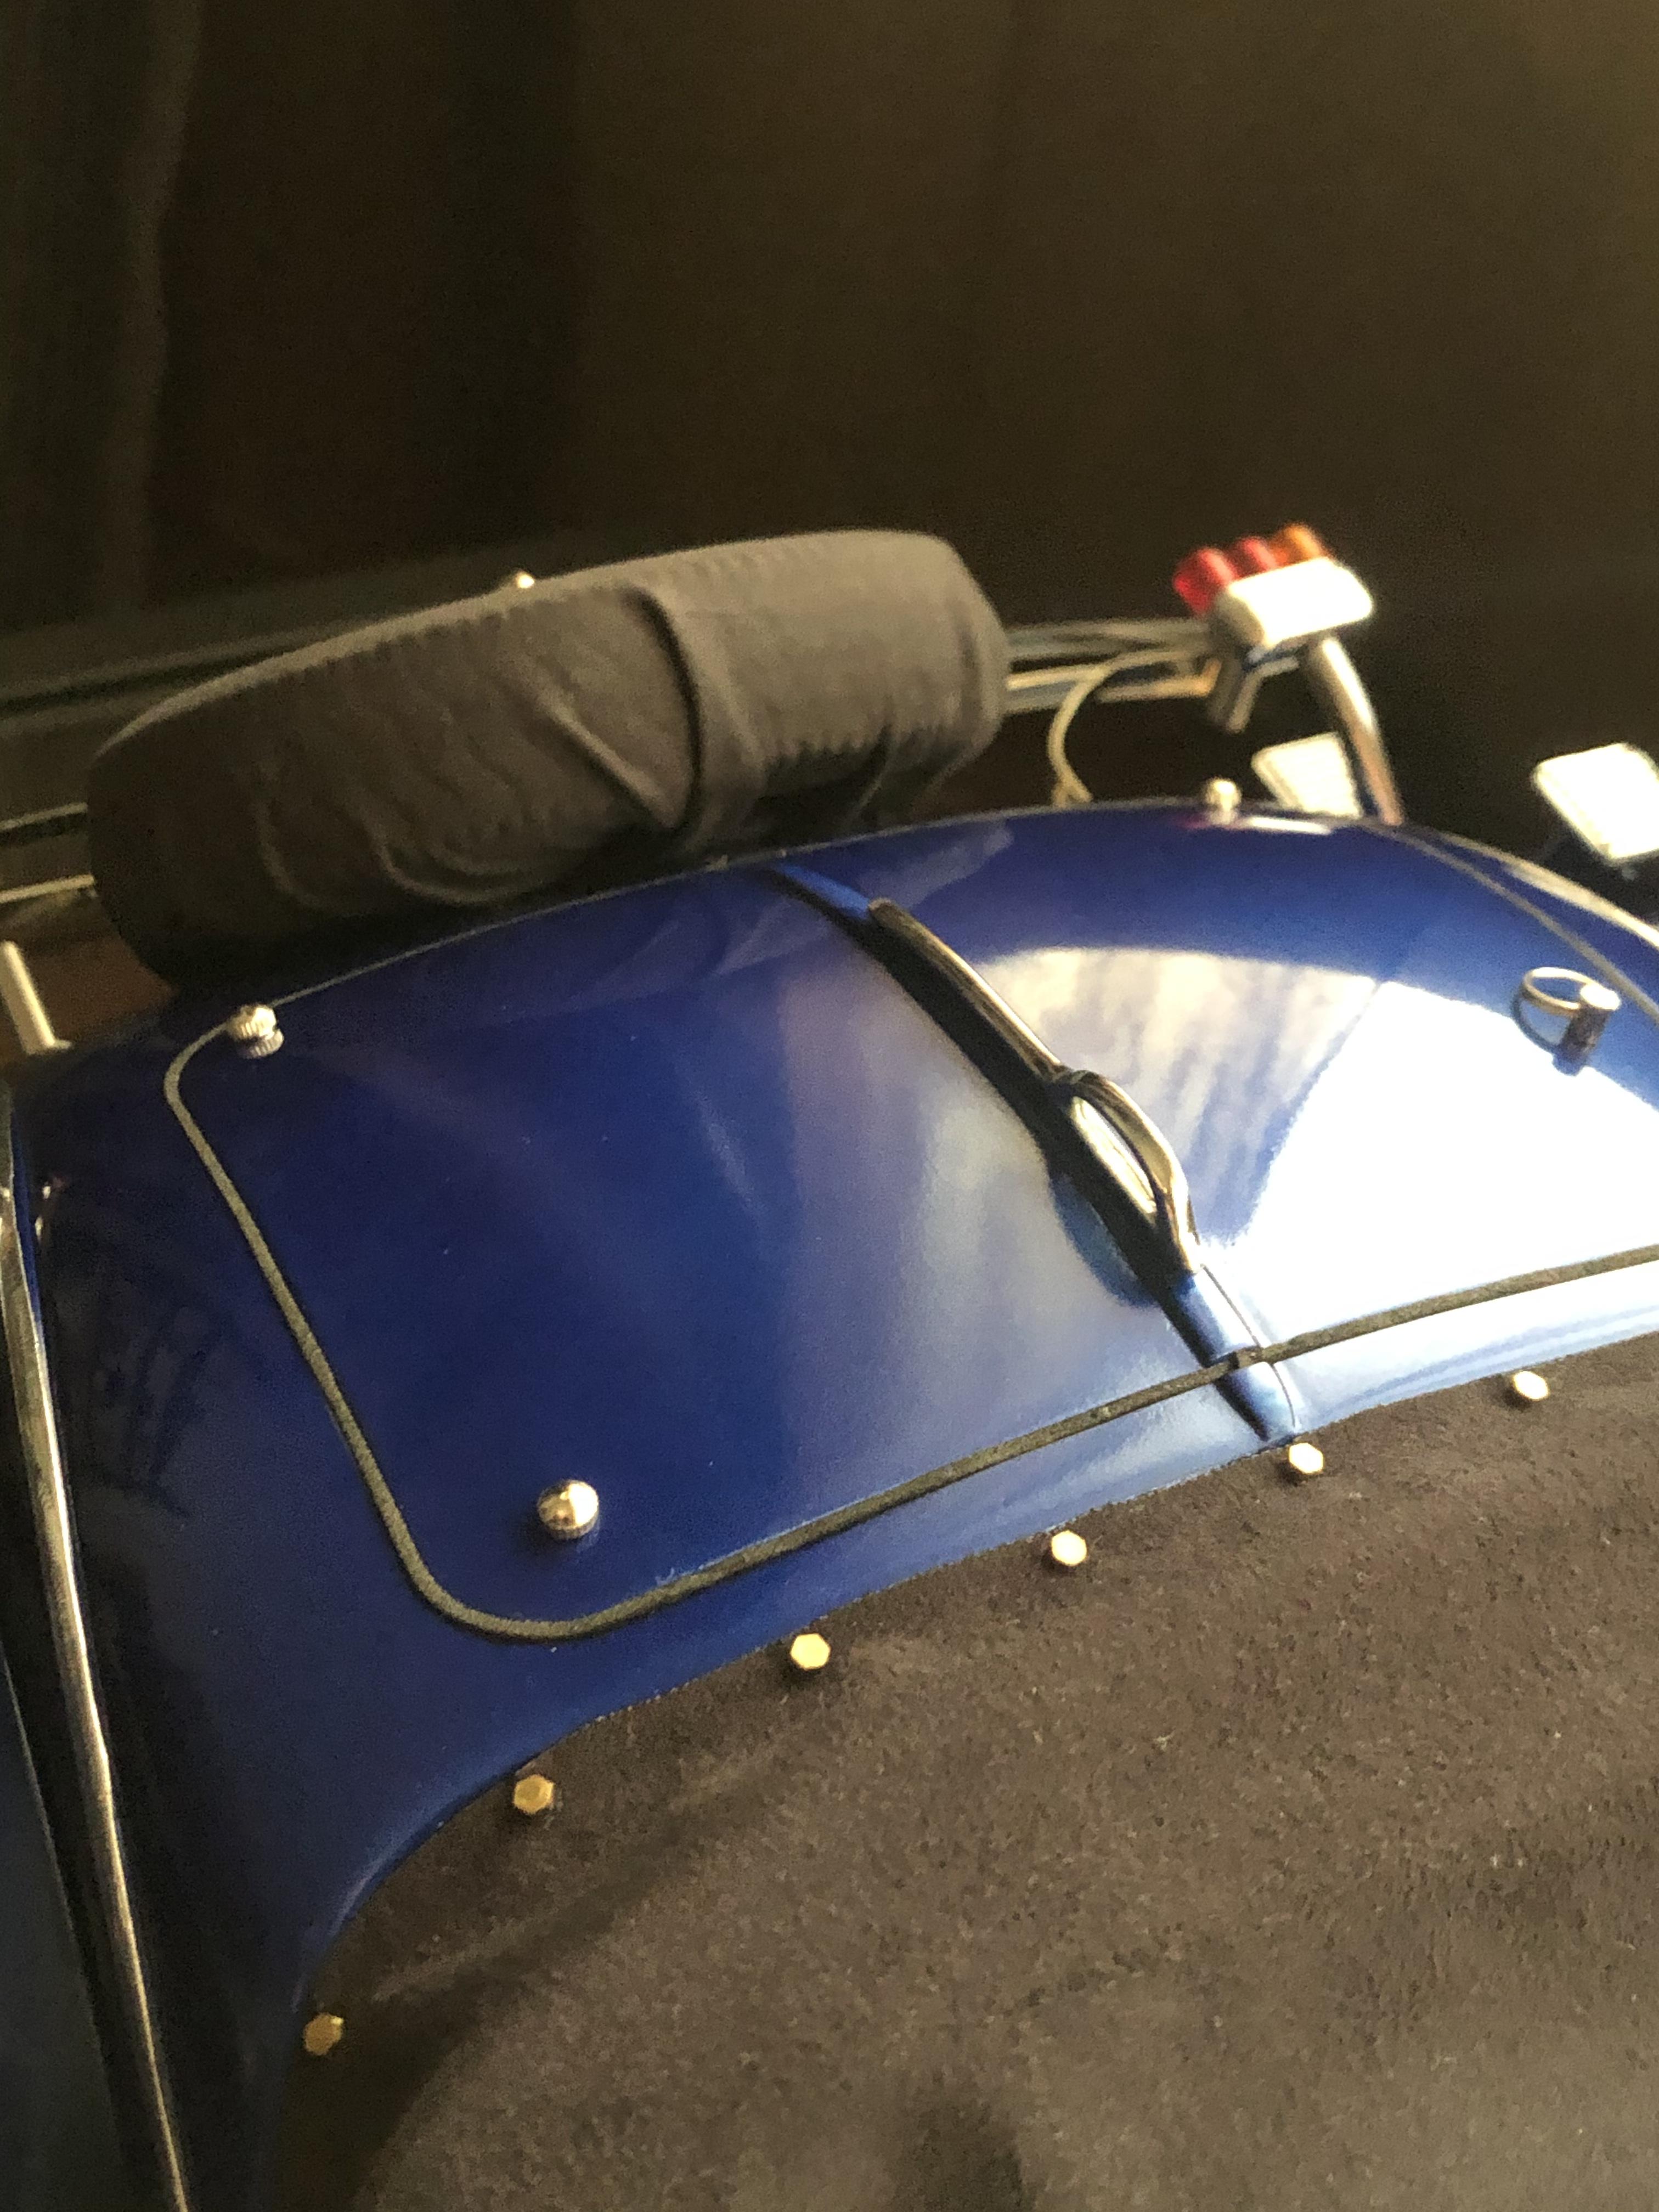
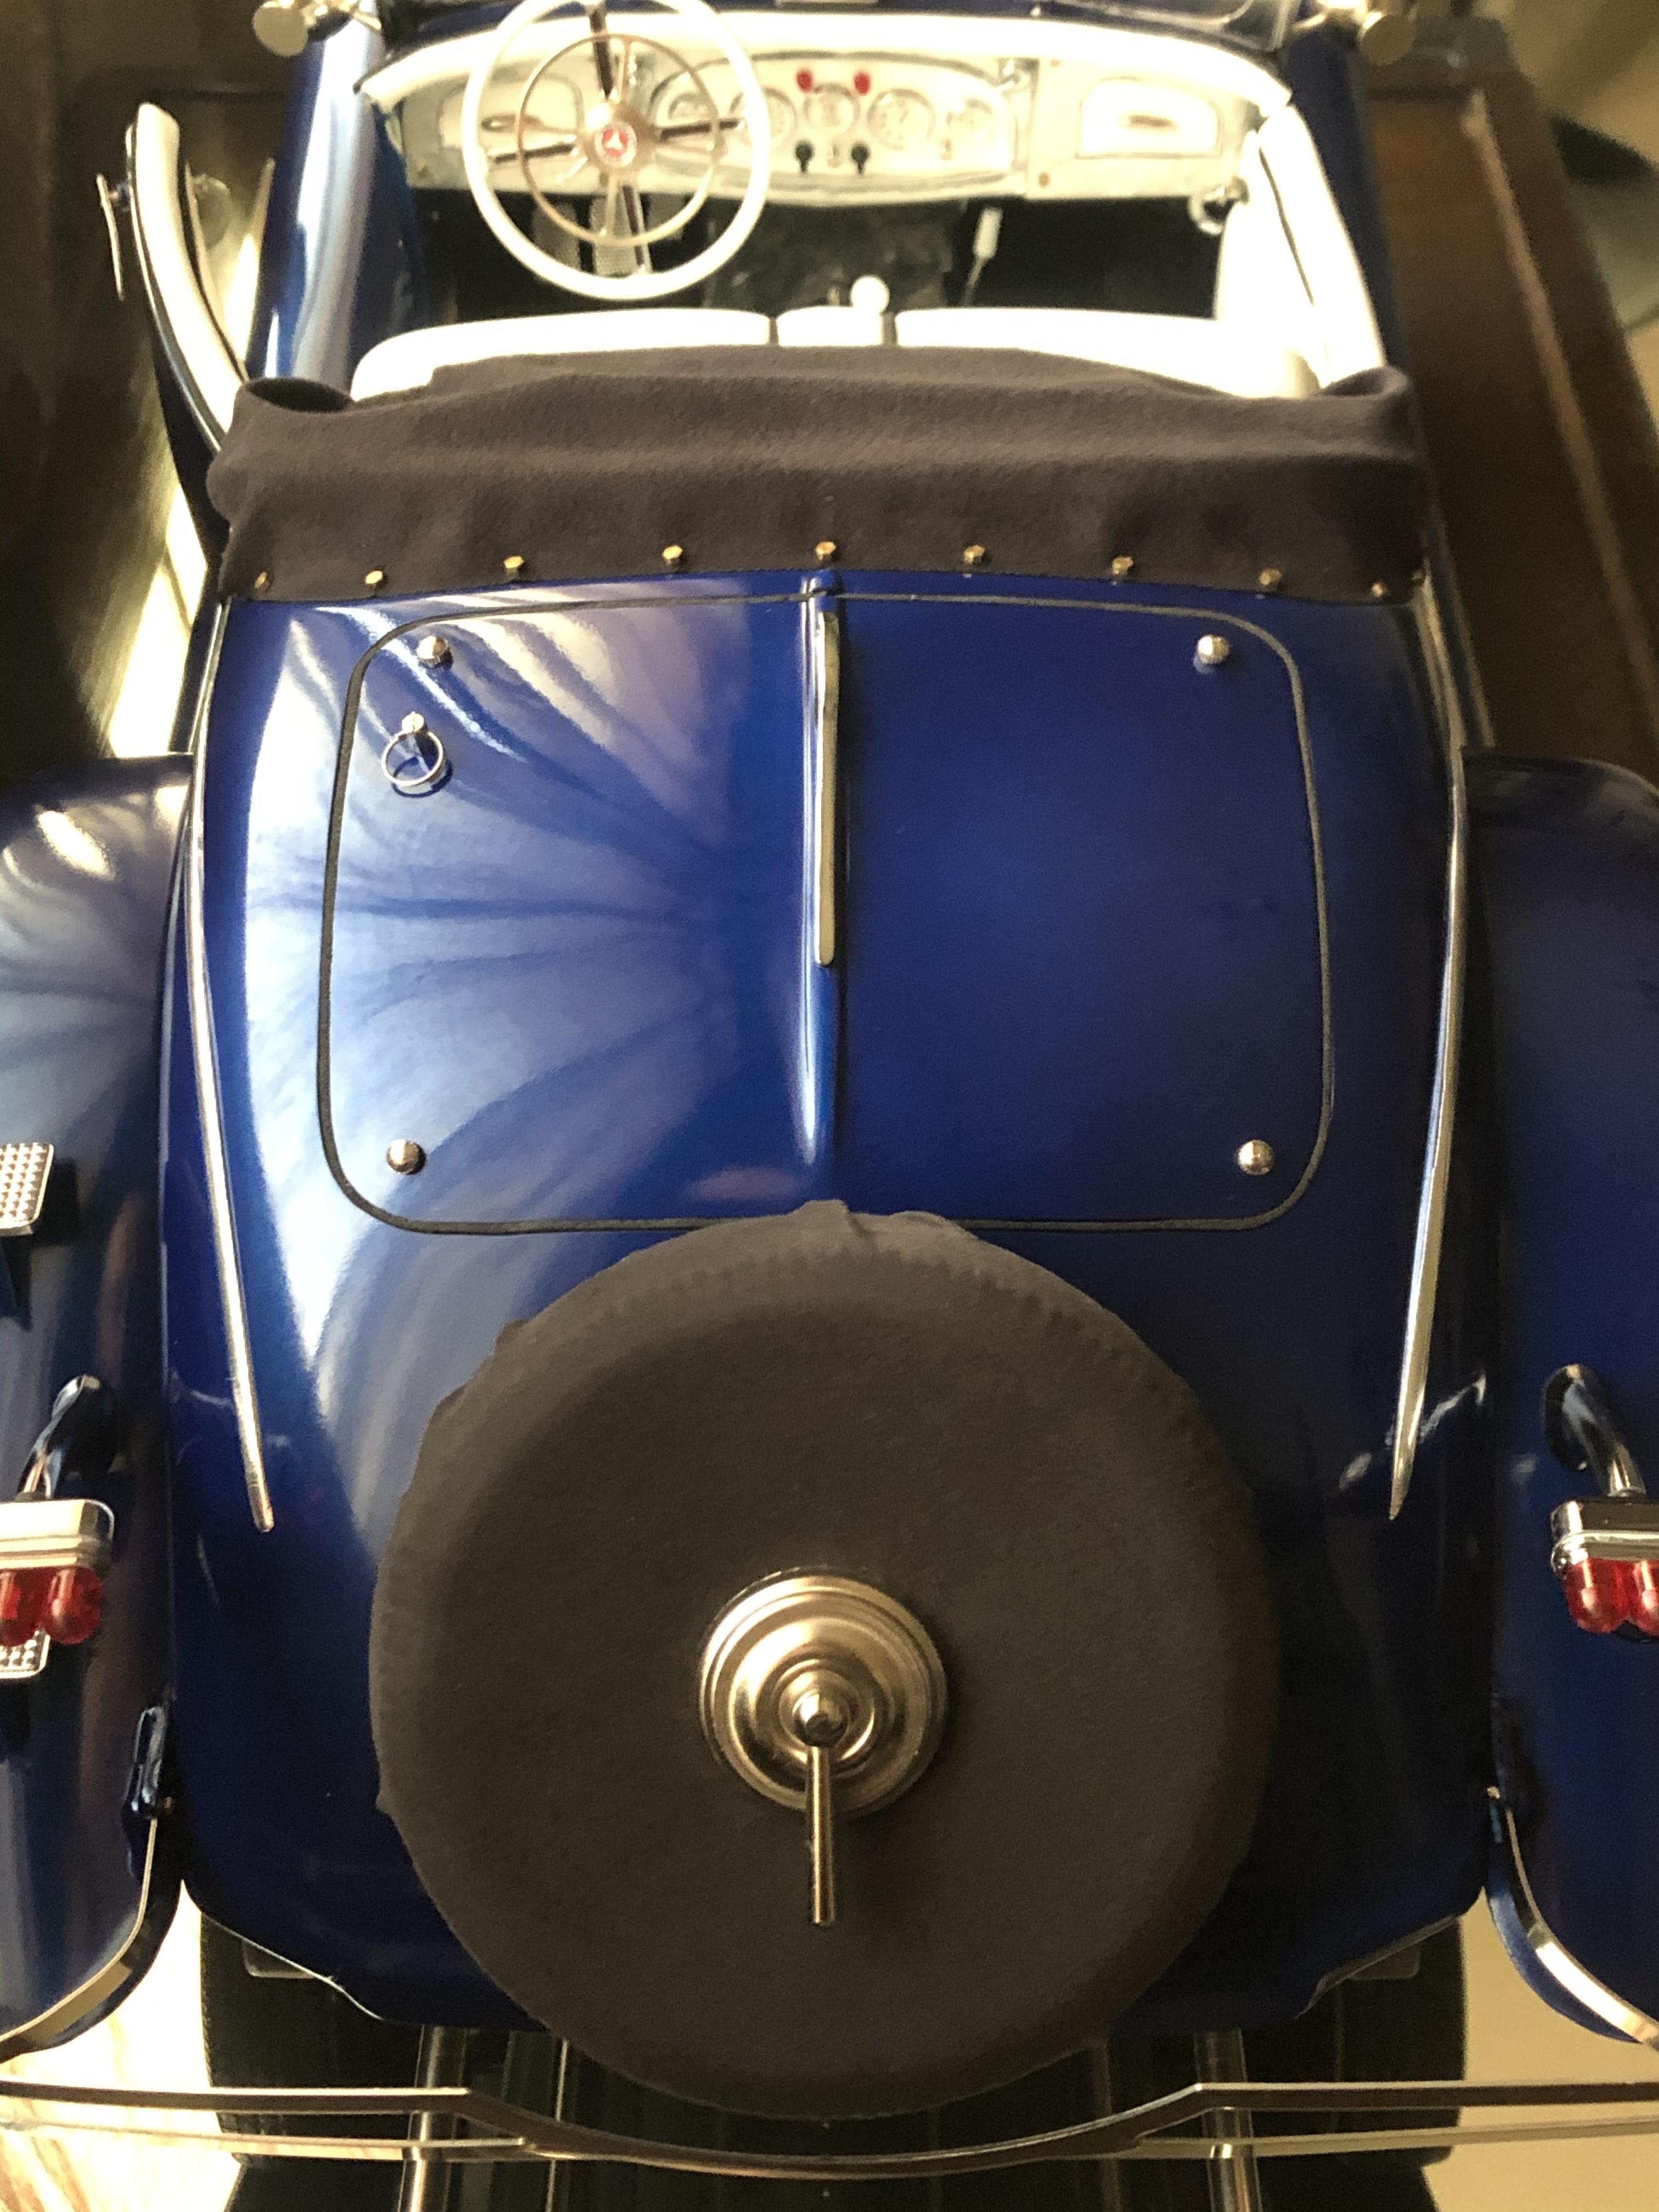
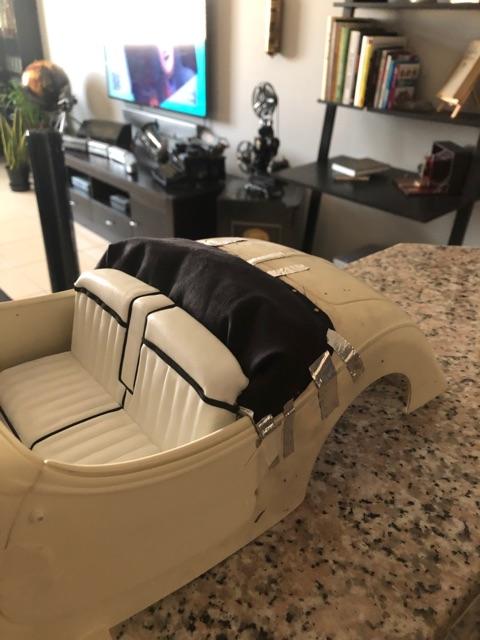
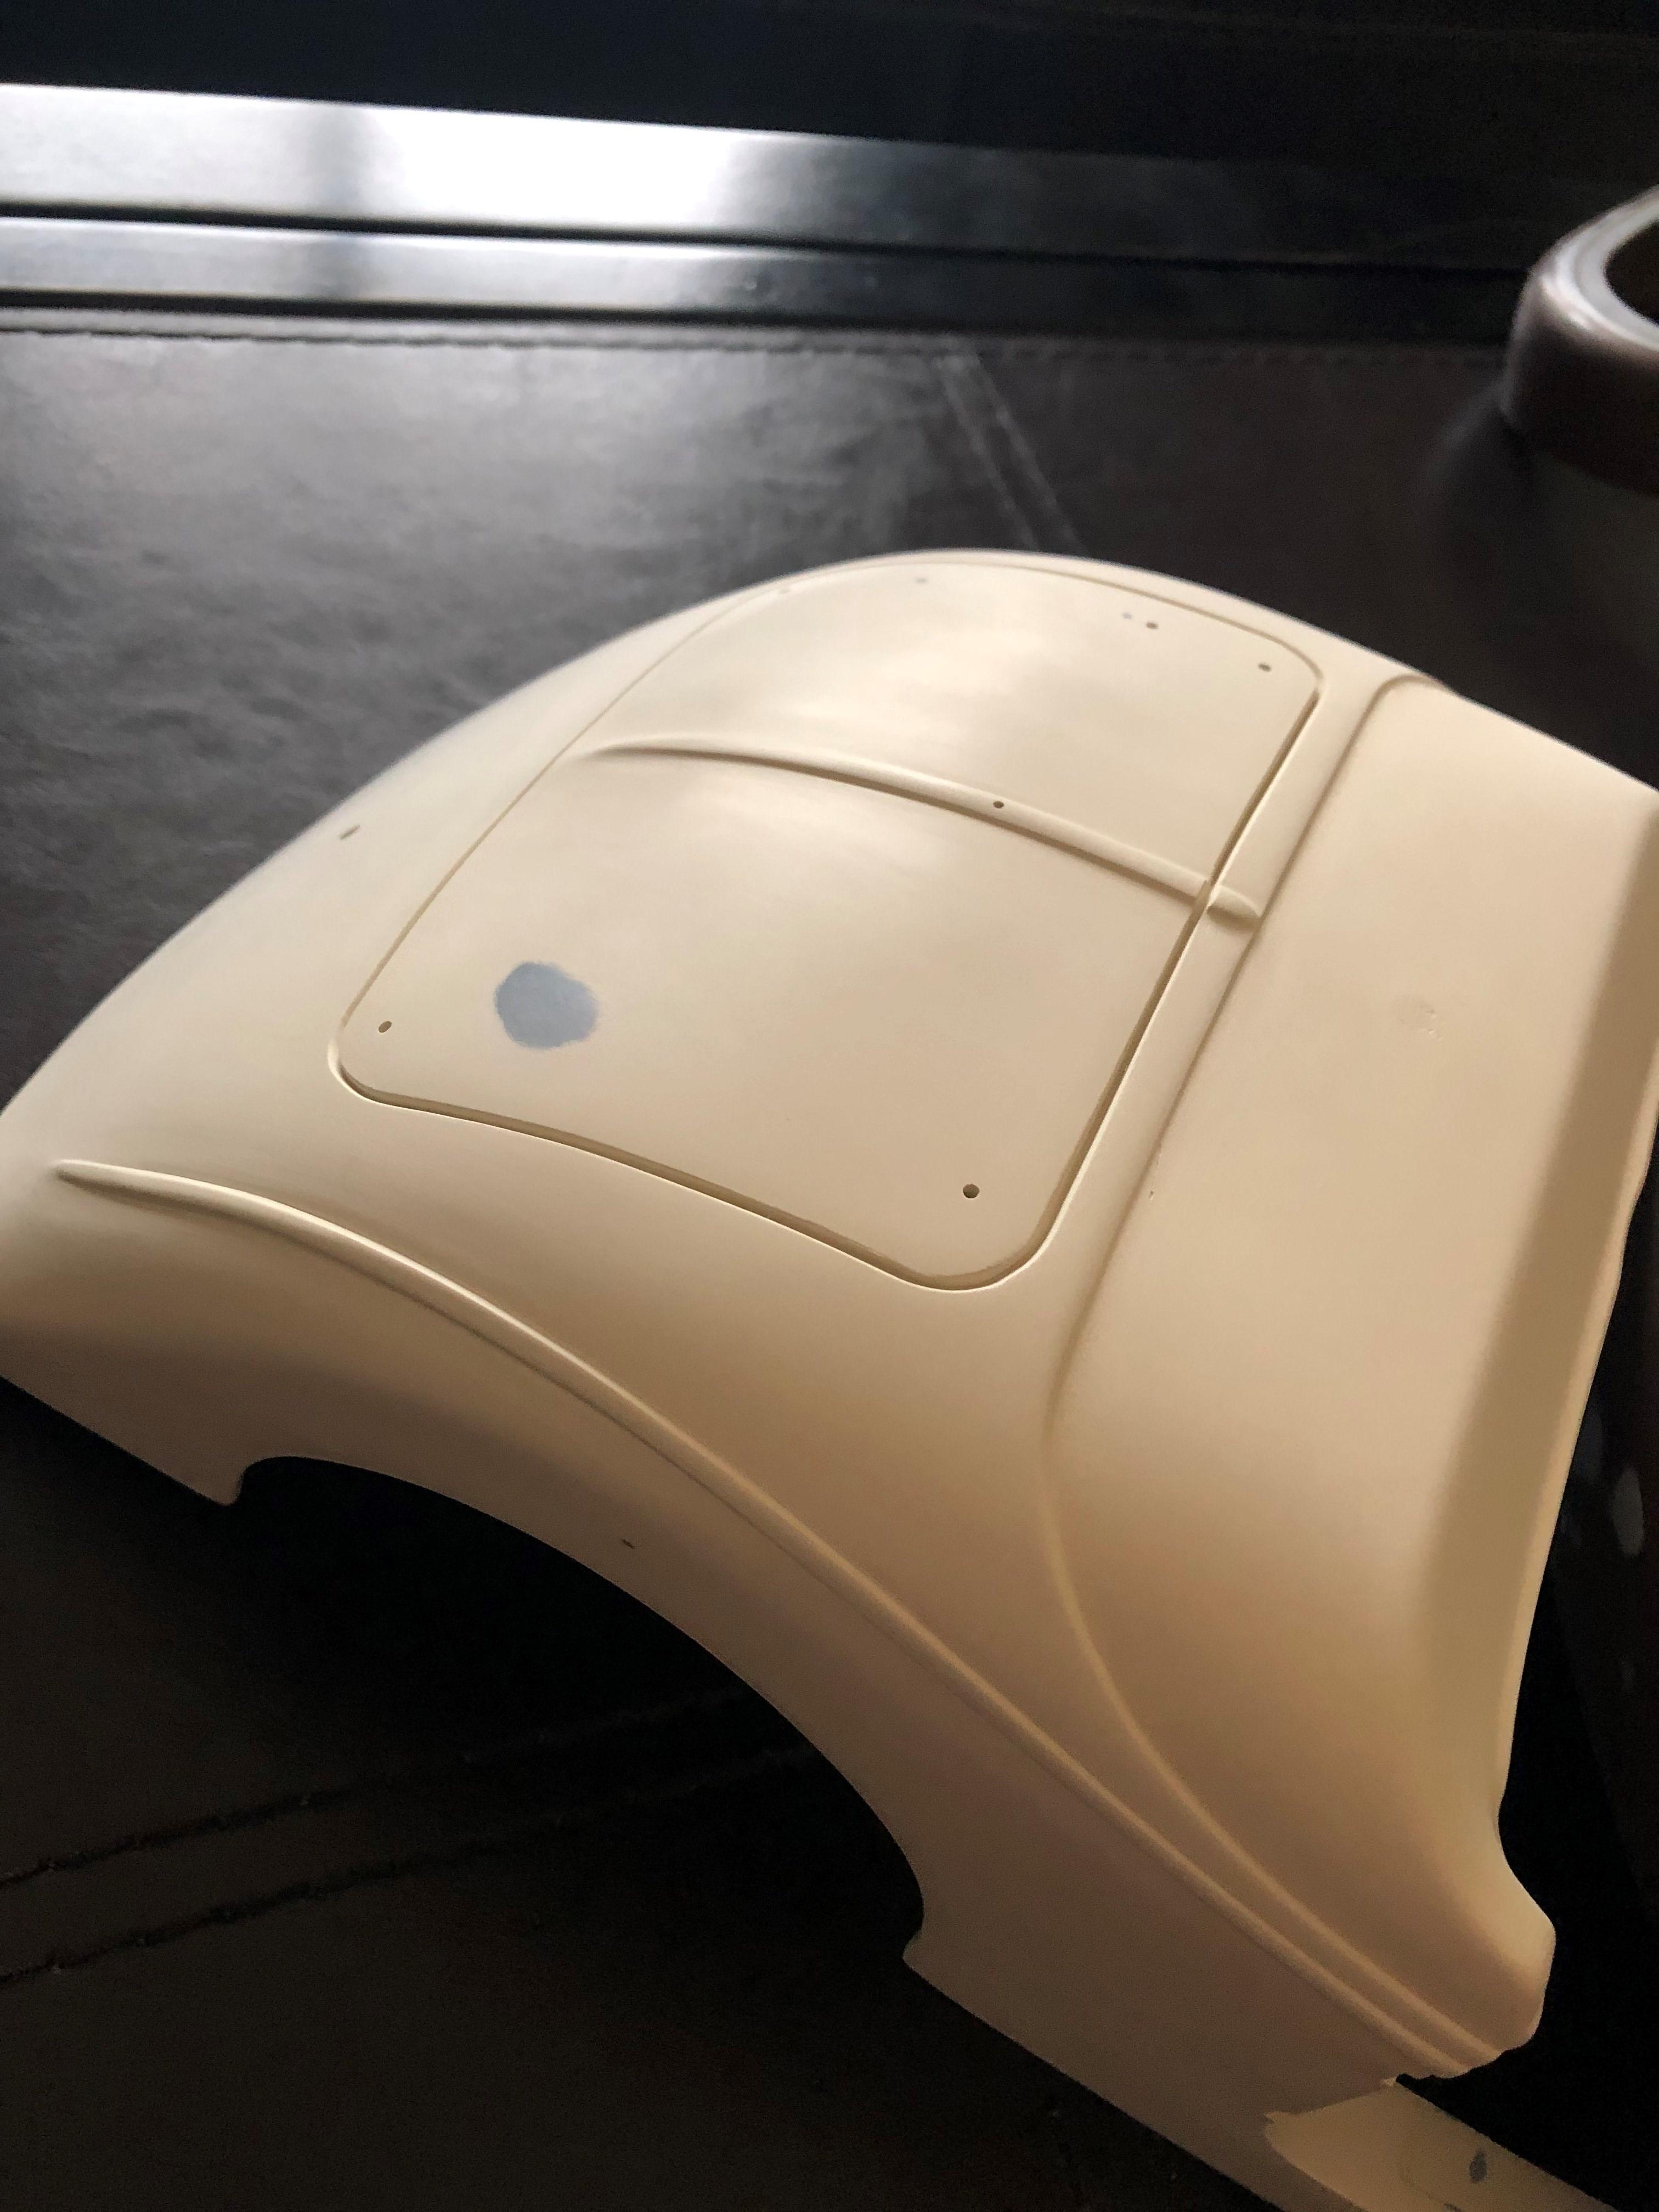
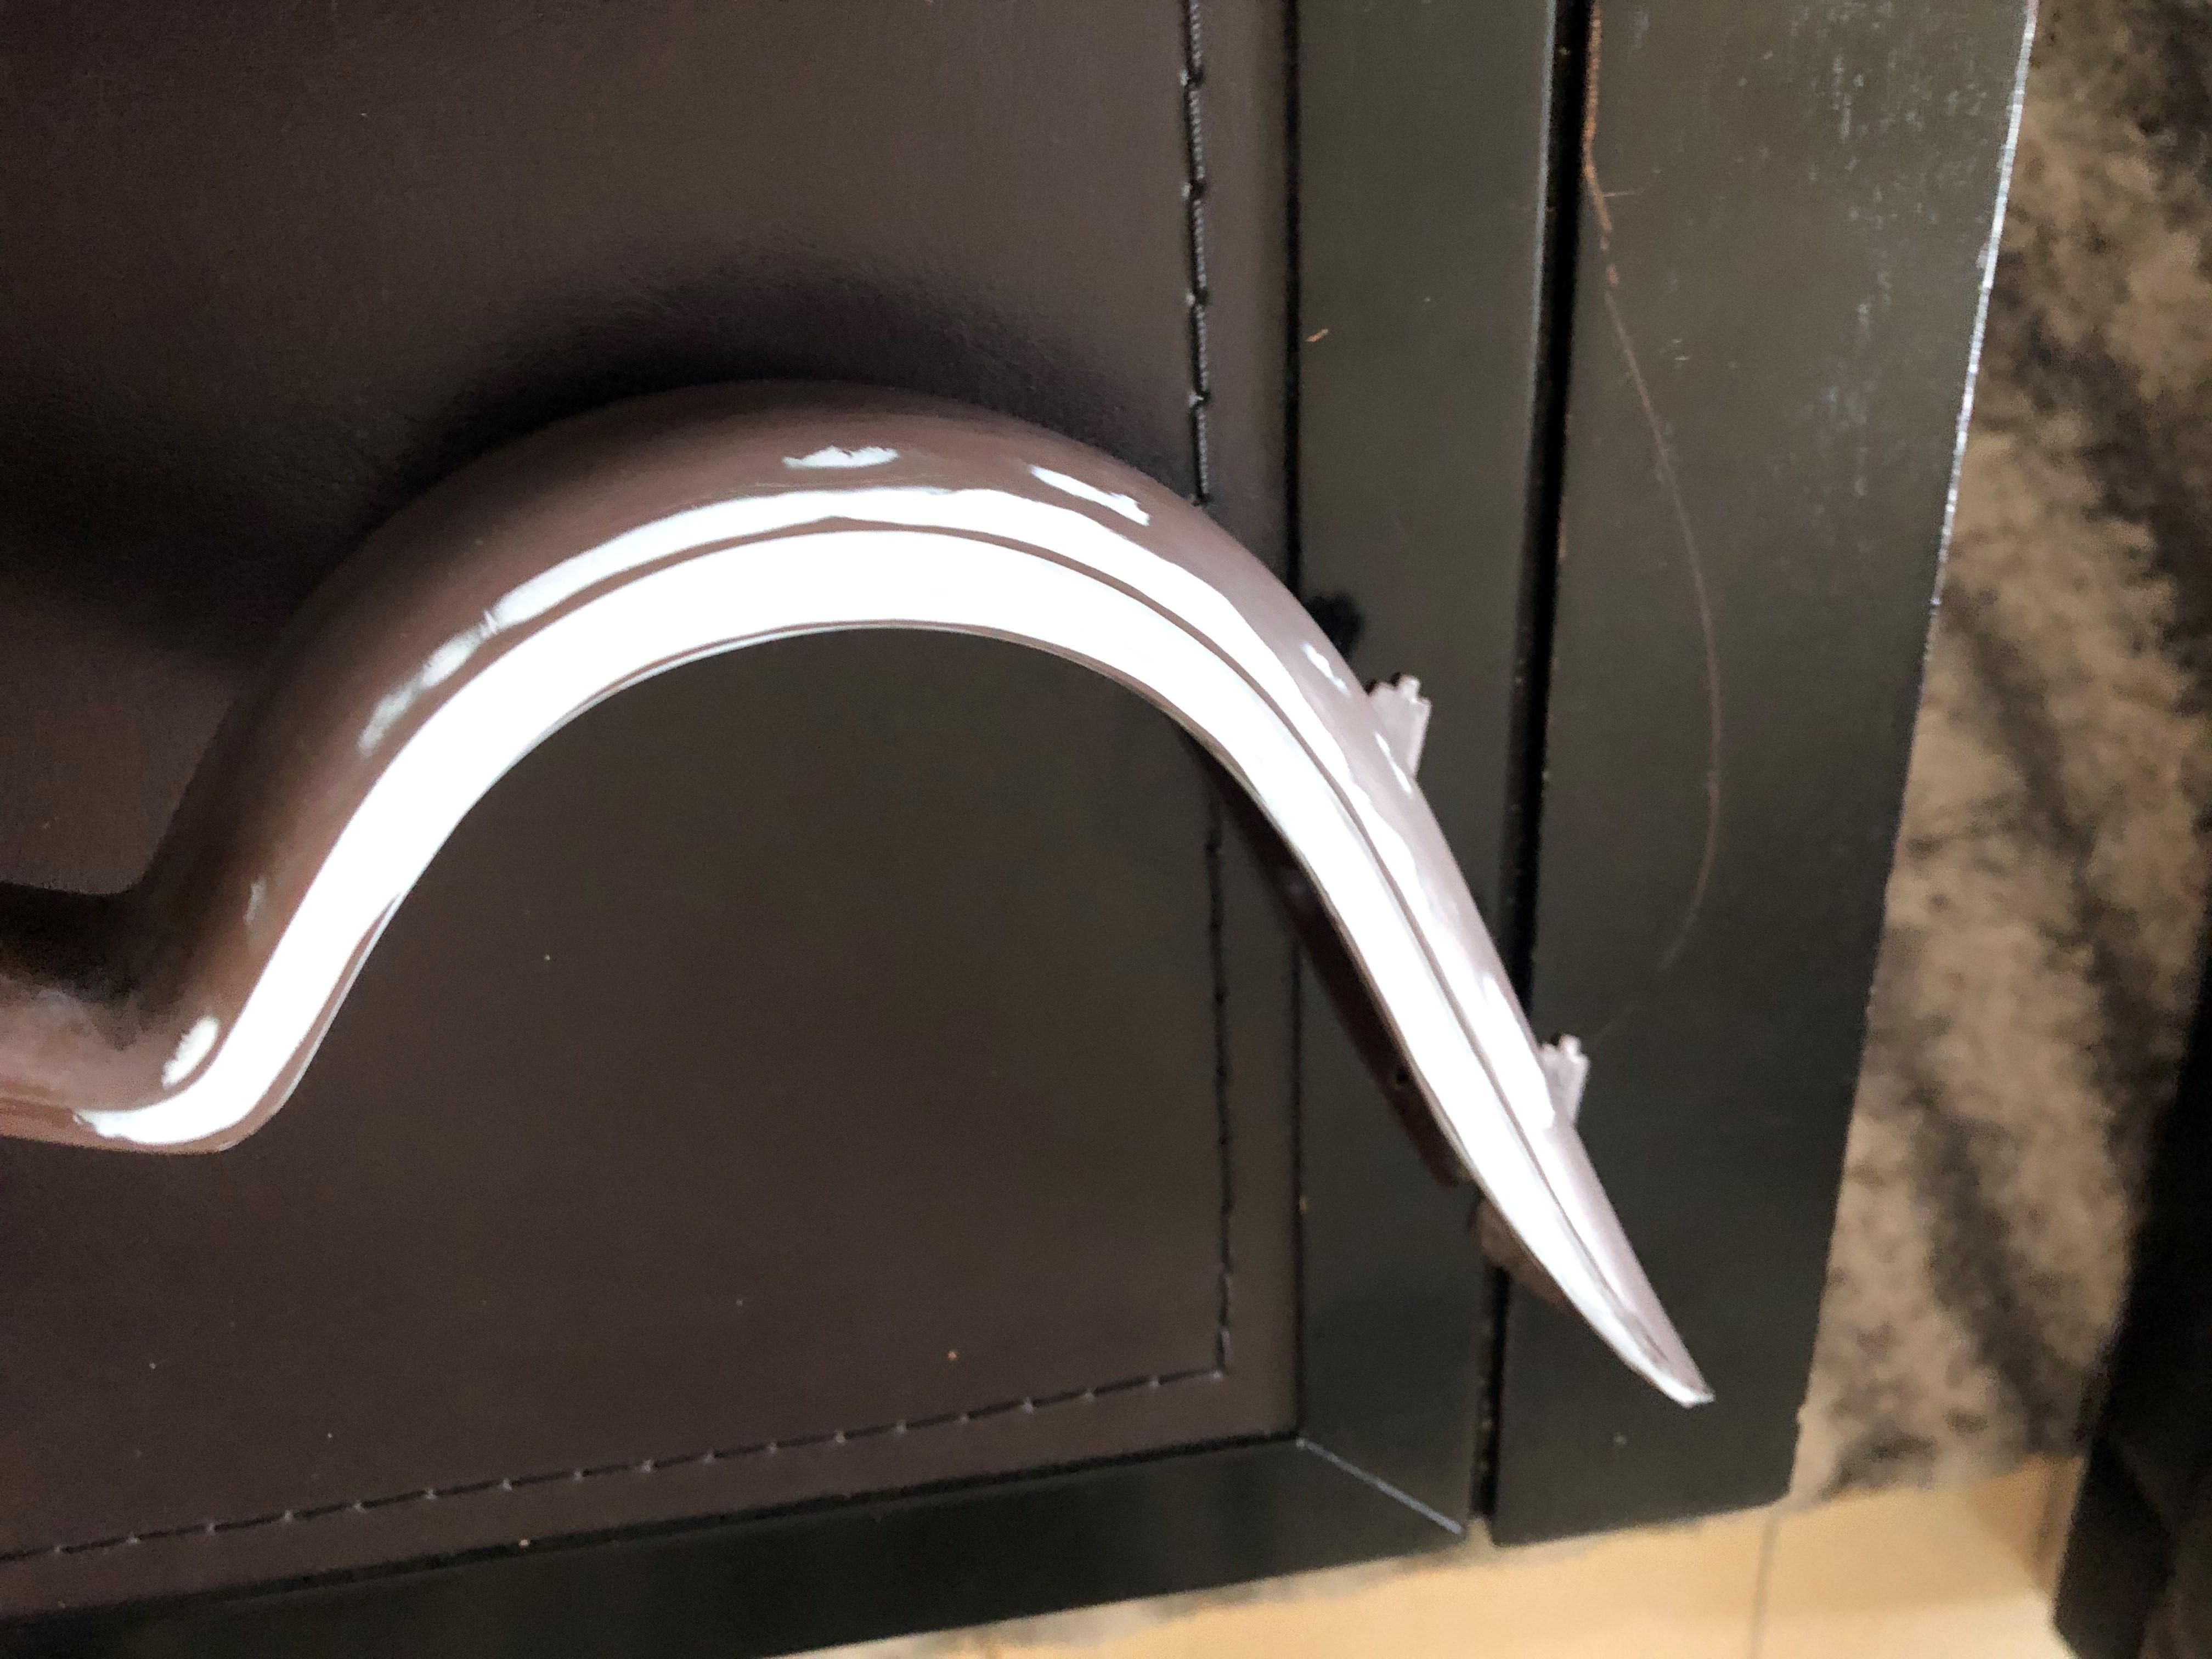
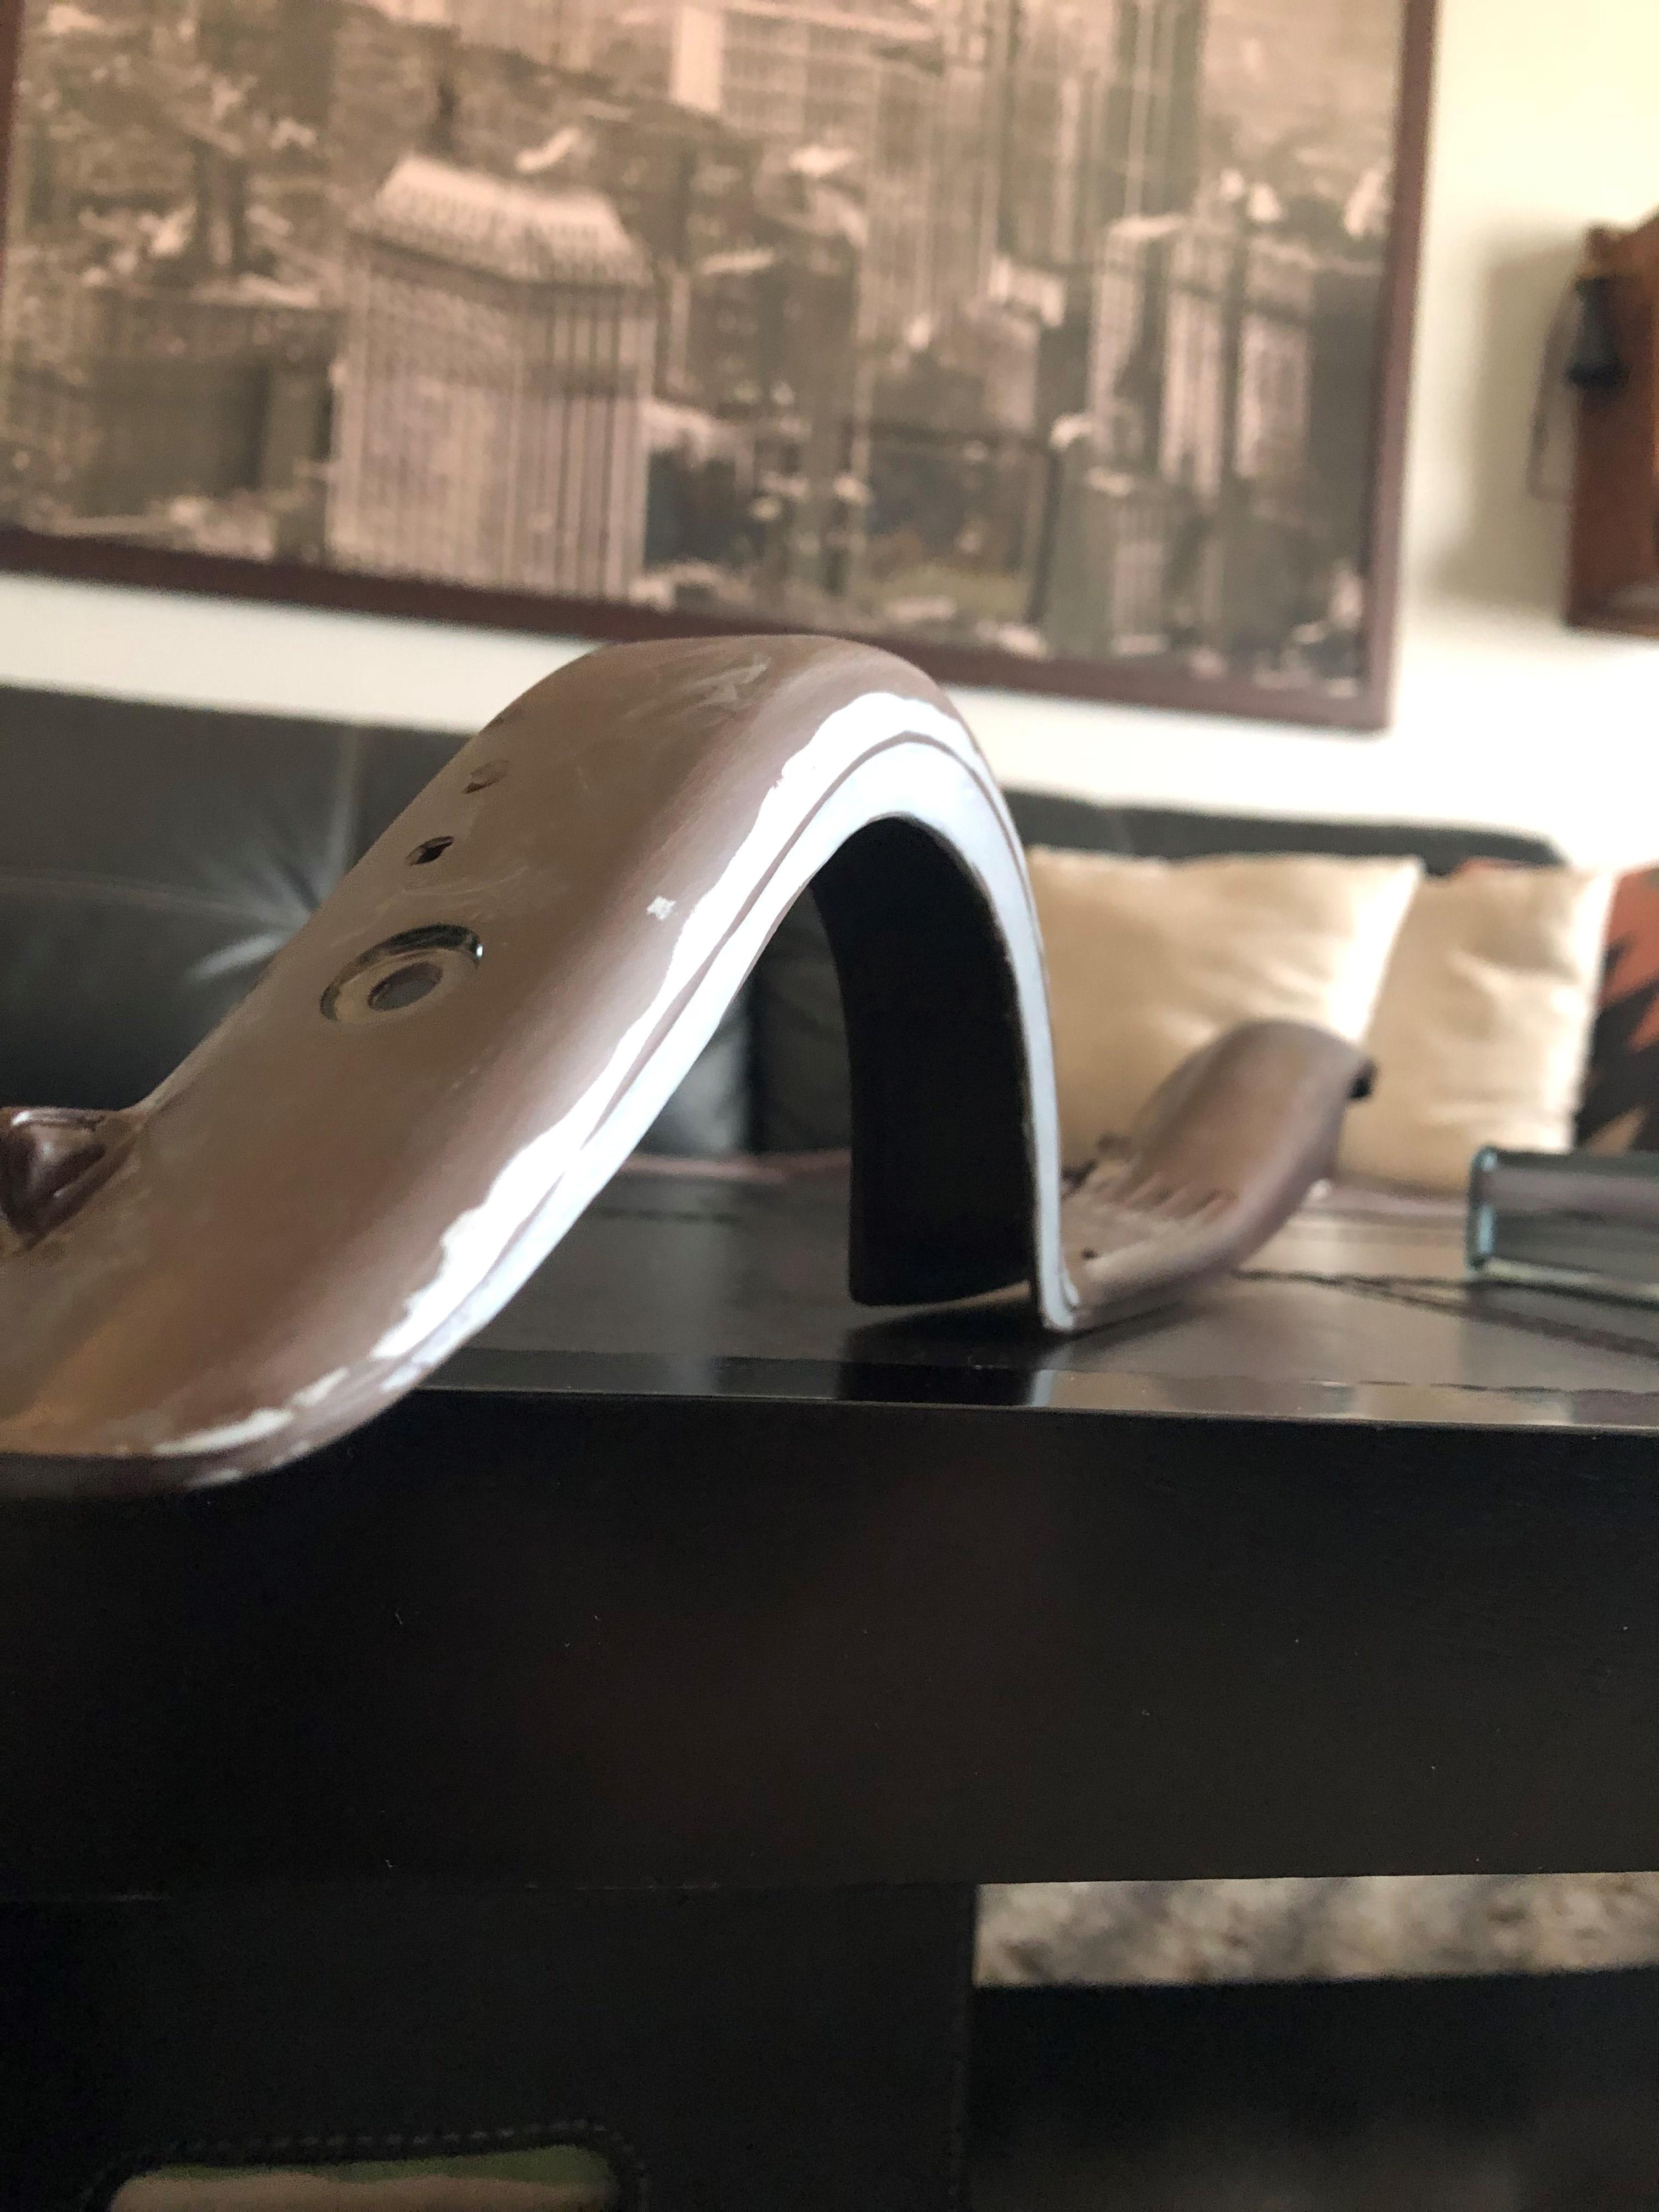
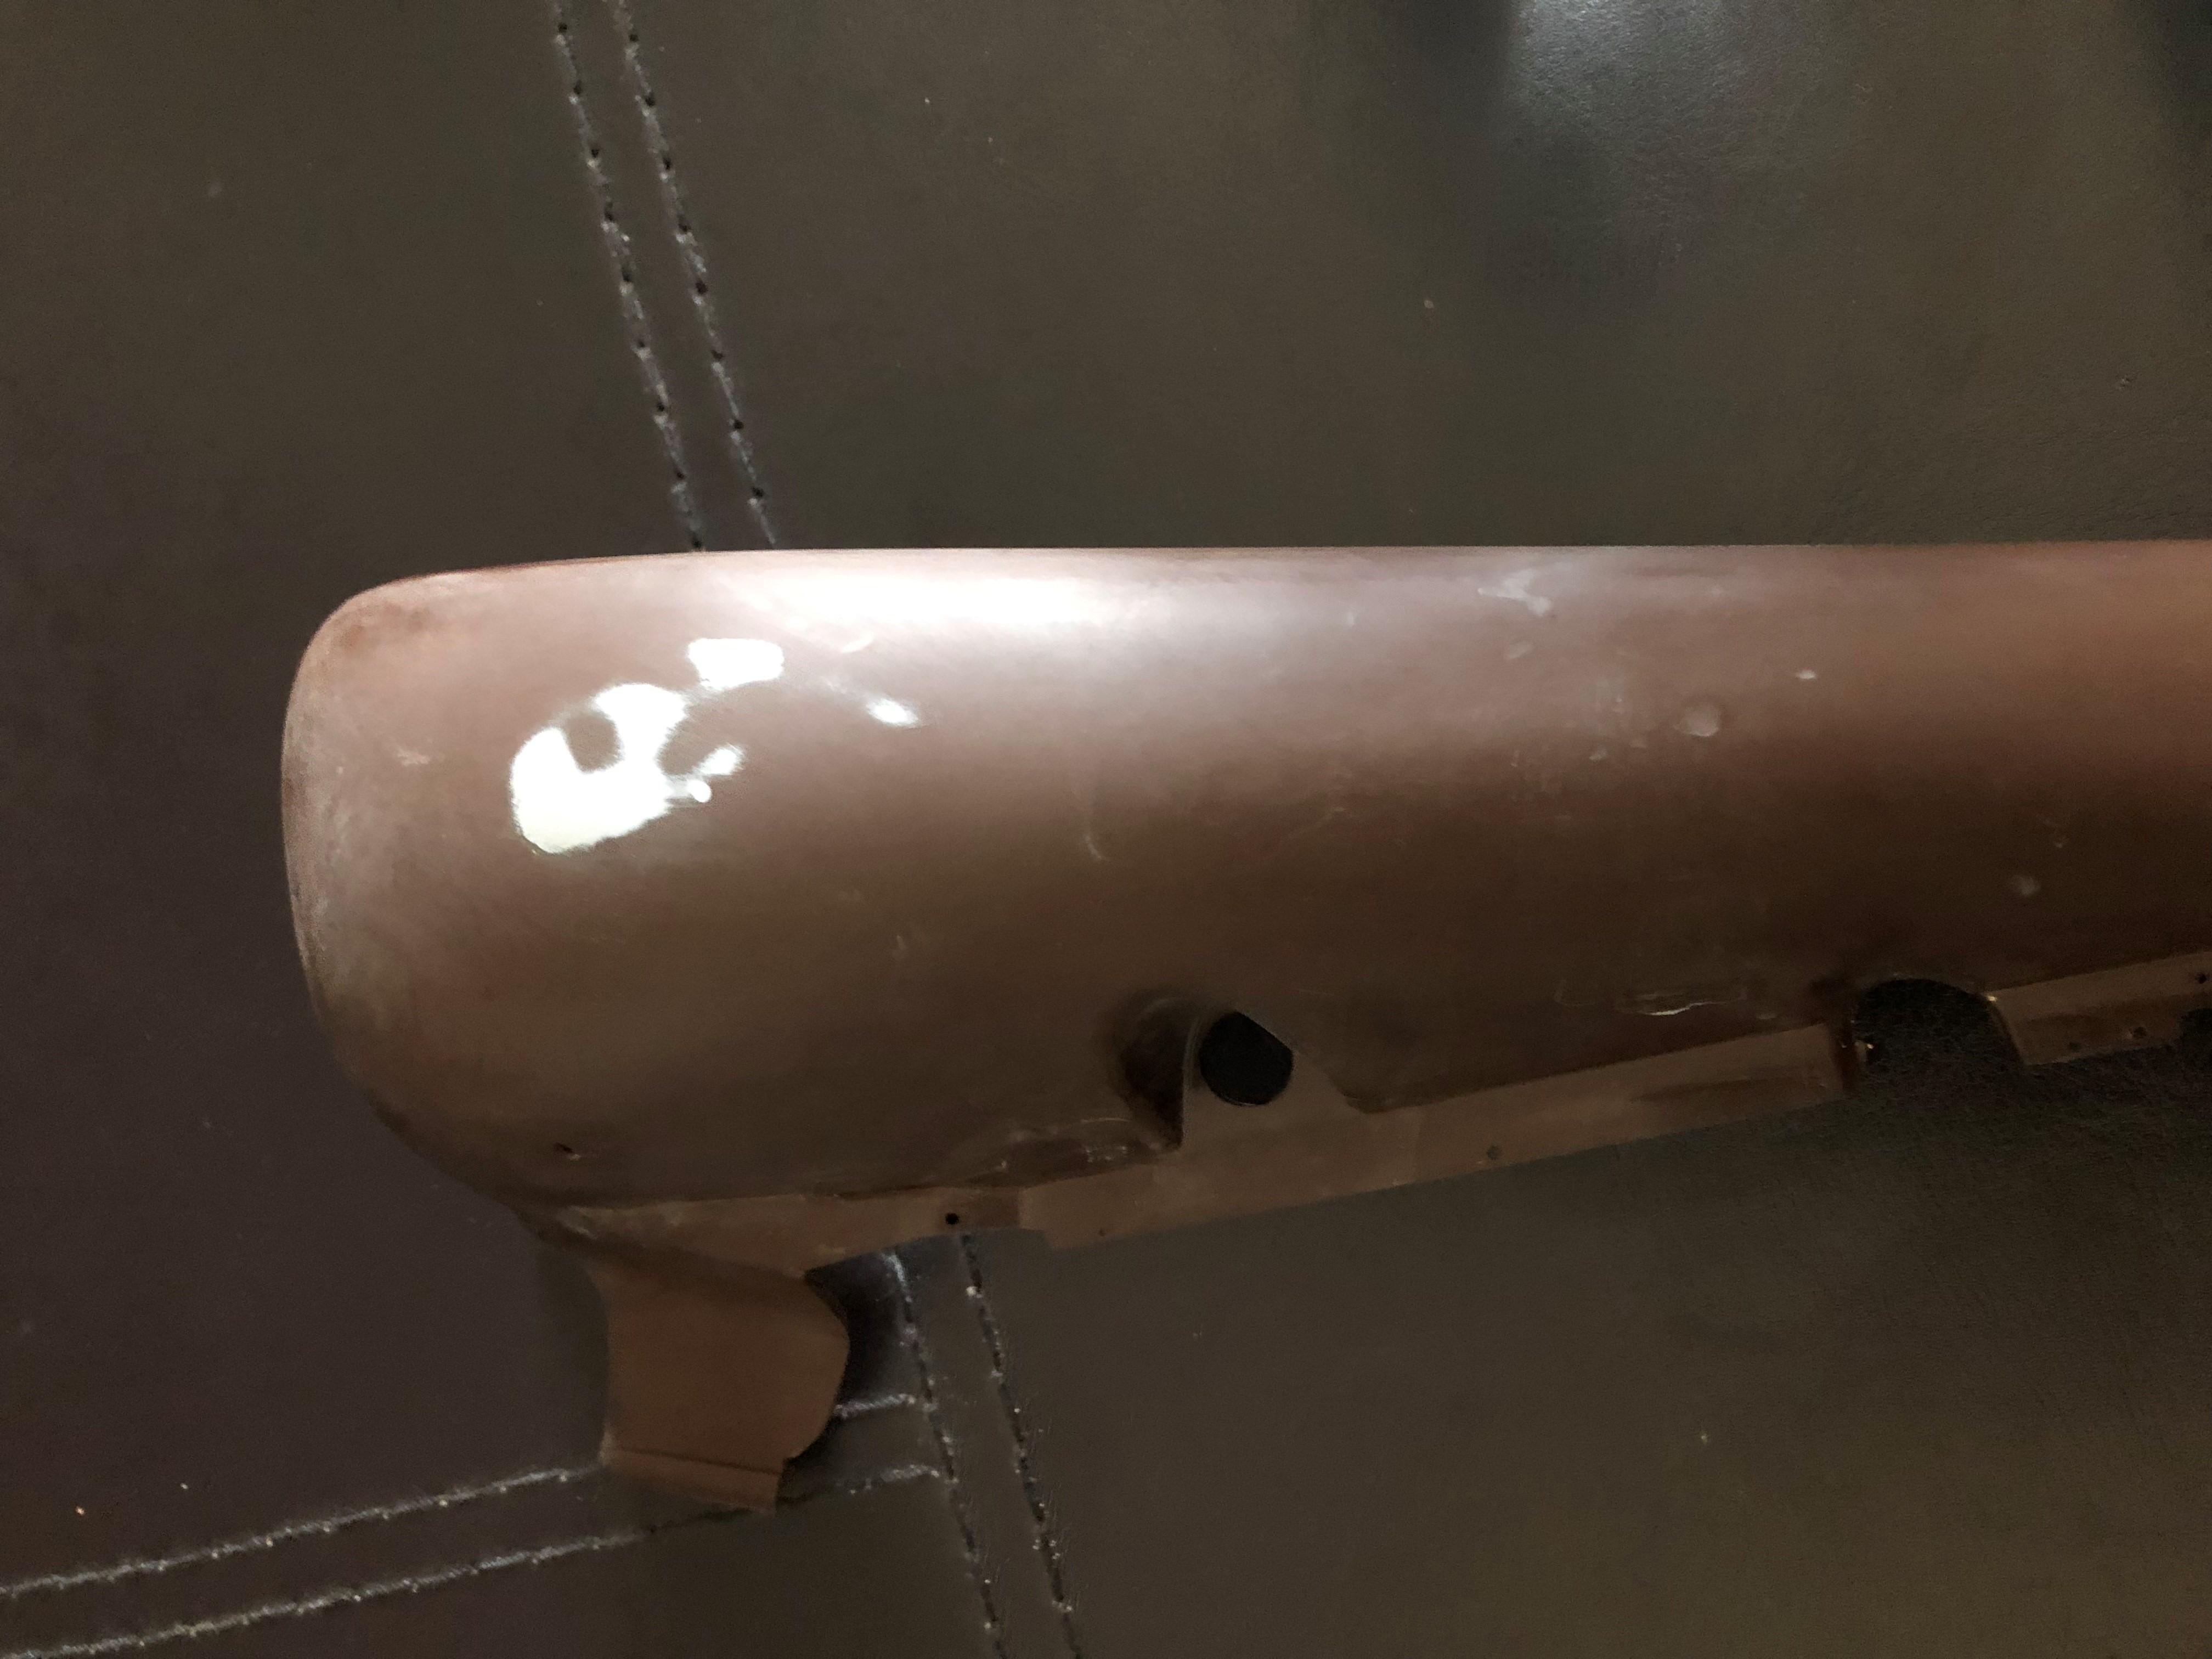
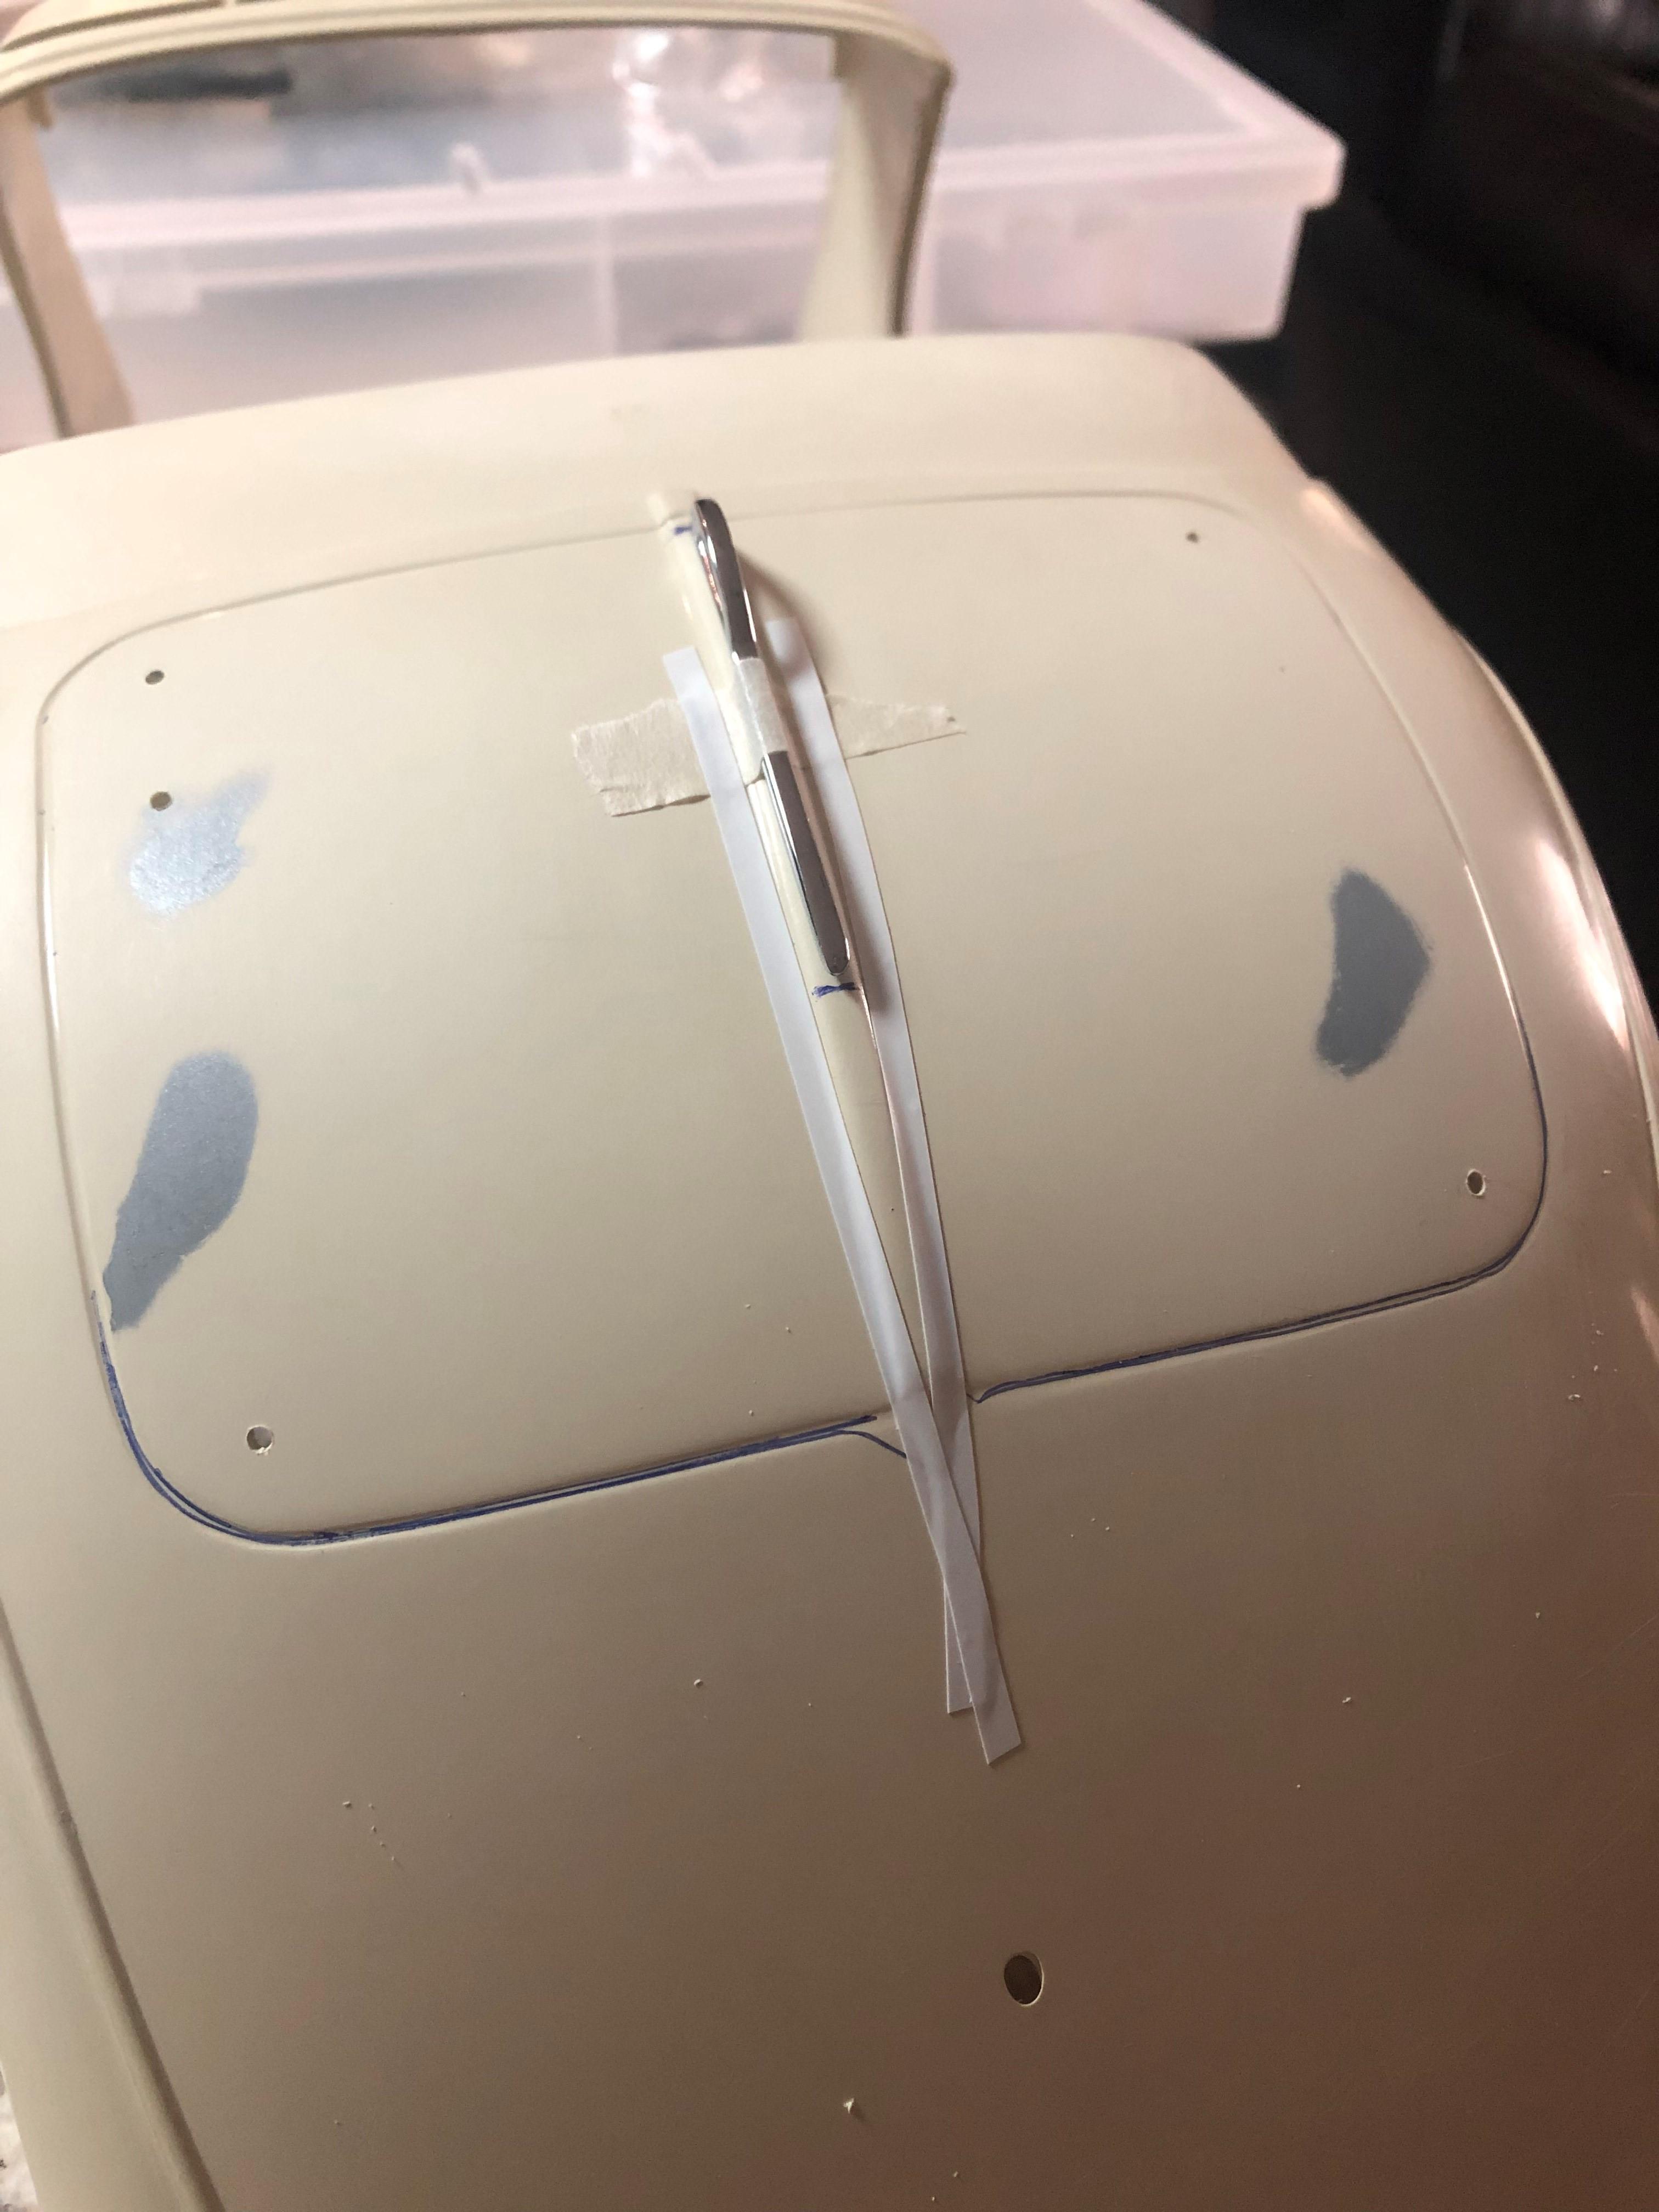
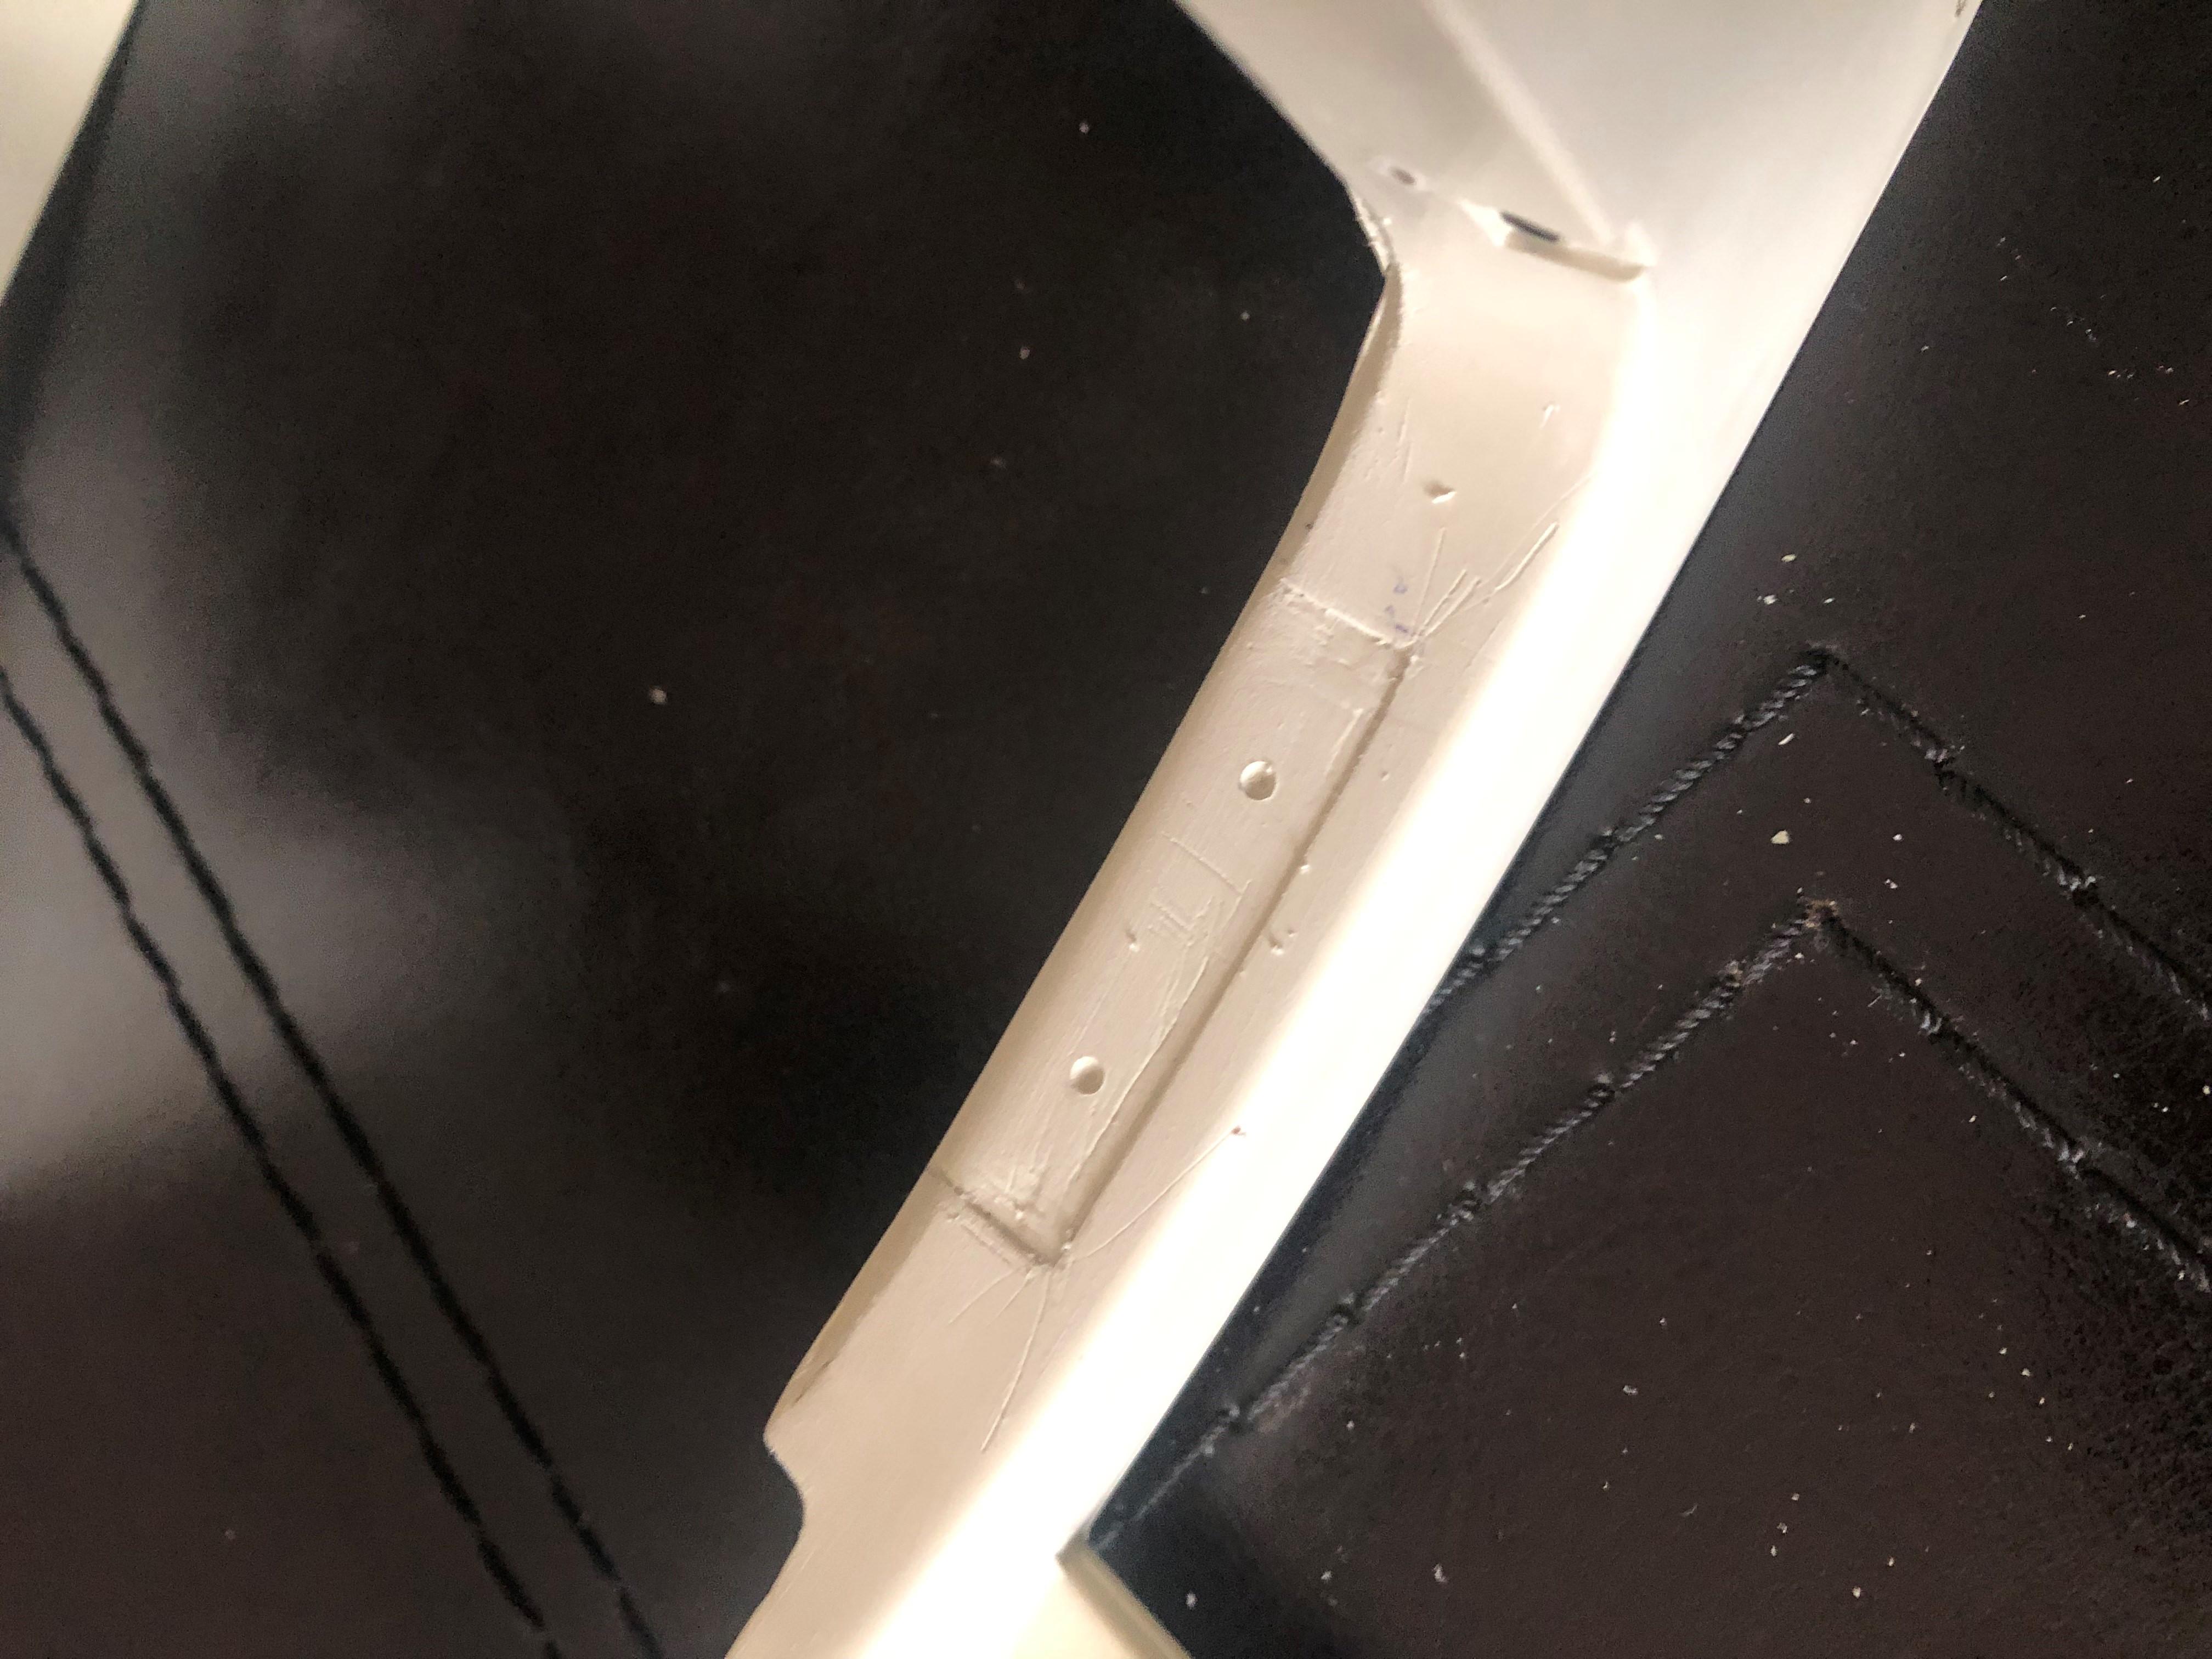
preparing all the body , before painting , the trim aluminium have been reduce , they don't go until the rear bumper anymore , all line of the back seat cover have been improved and will be filled with a black kind of foam to give a more realistic impression , a reduce the size of the rear light as only one spare tires will be put on , it was going a bit out of proportion so I cut , drill a hole for a screw and fix the headlight on it , with a small black rubber rim between the 2 part ( and it look not so bad ) . on the fender , the impression next to the rear wheel was not looking nice . the line was not in harmony and loosing the curvy surrounding the wheels ( that cover the wheels) hard to explain ahahah , so I fill the gap with putty , as you can see , also fill the hole as I remove the supposed little light on the front fender , the original from the kit not giving visual satisfaction . sometimes nothing is better , and there is enough light ( 3 in front ) and 2 next to the doors ..
-
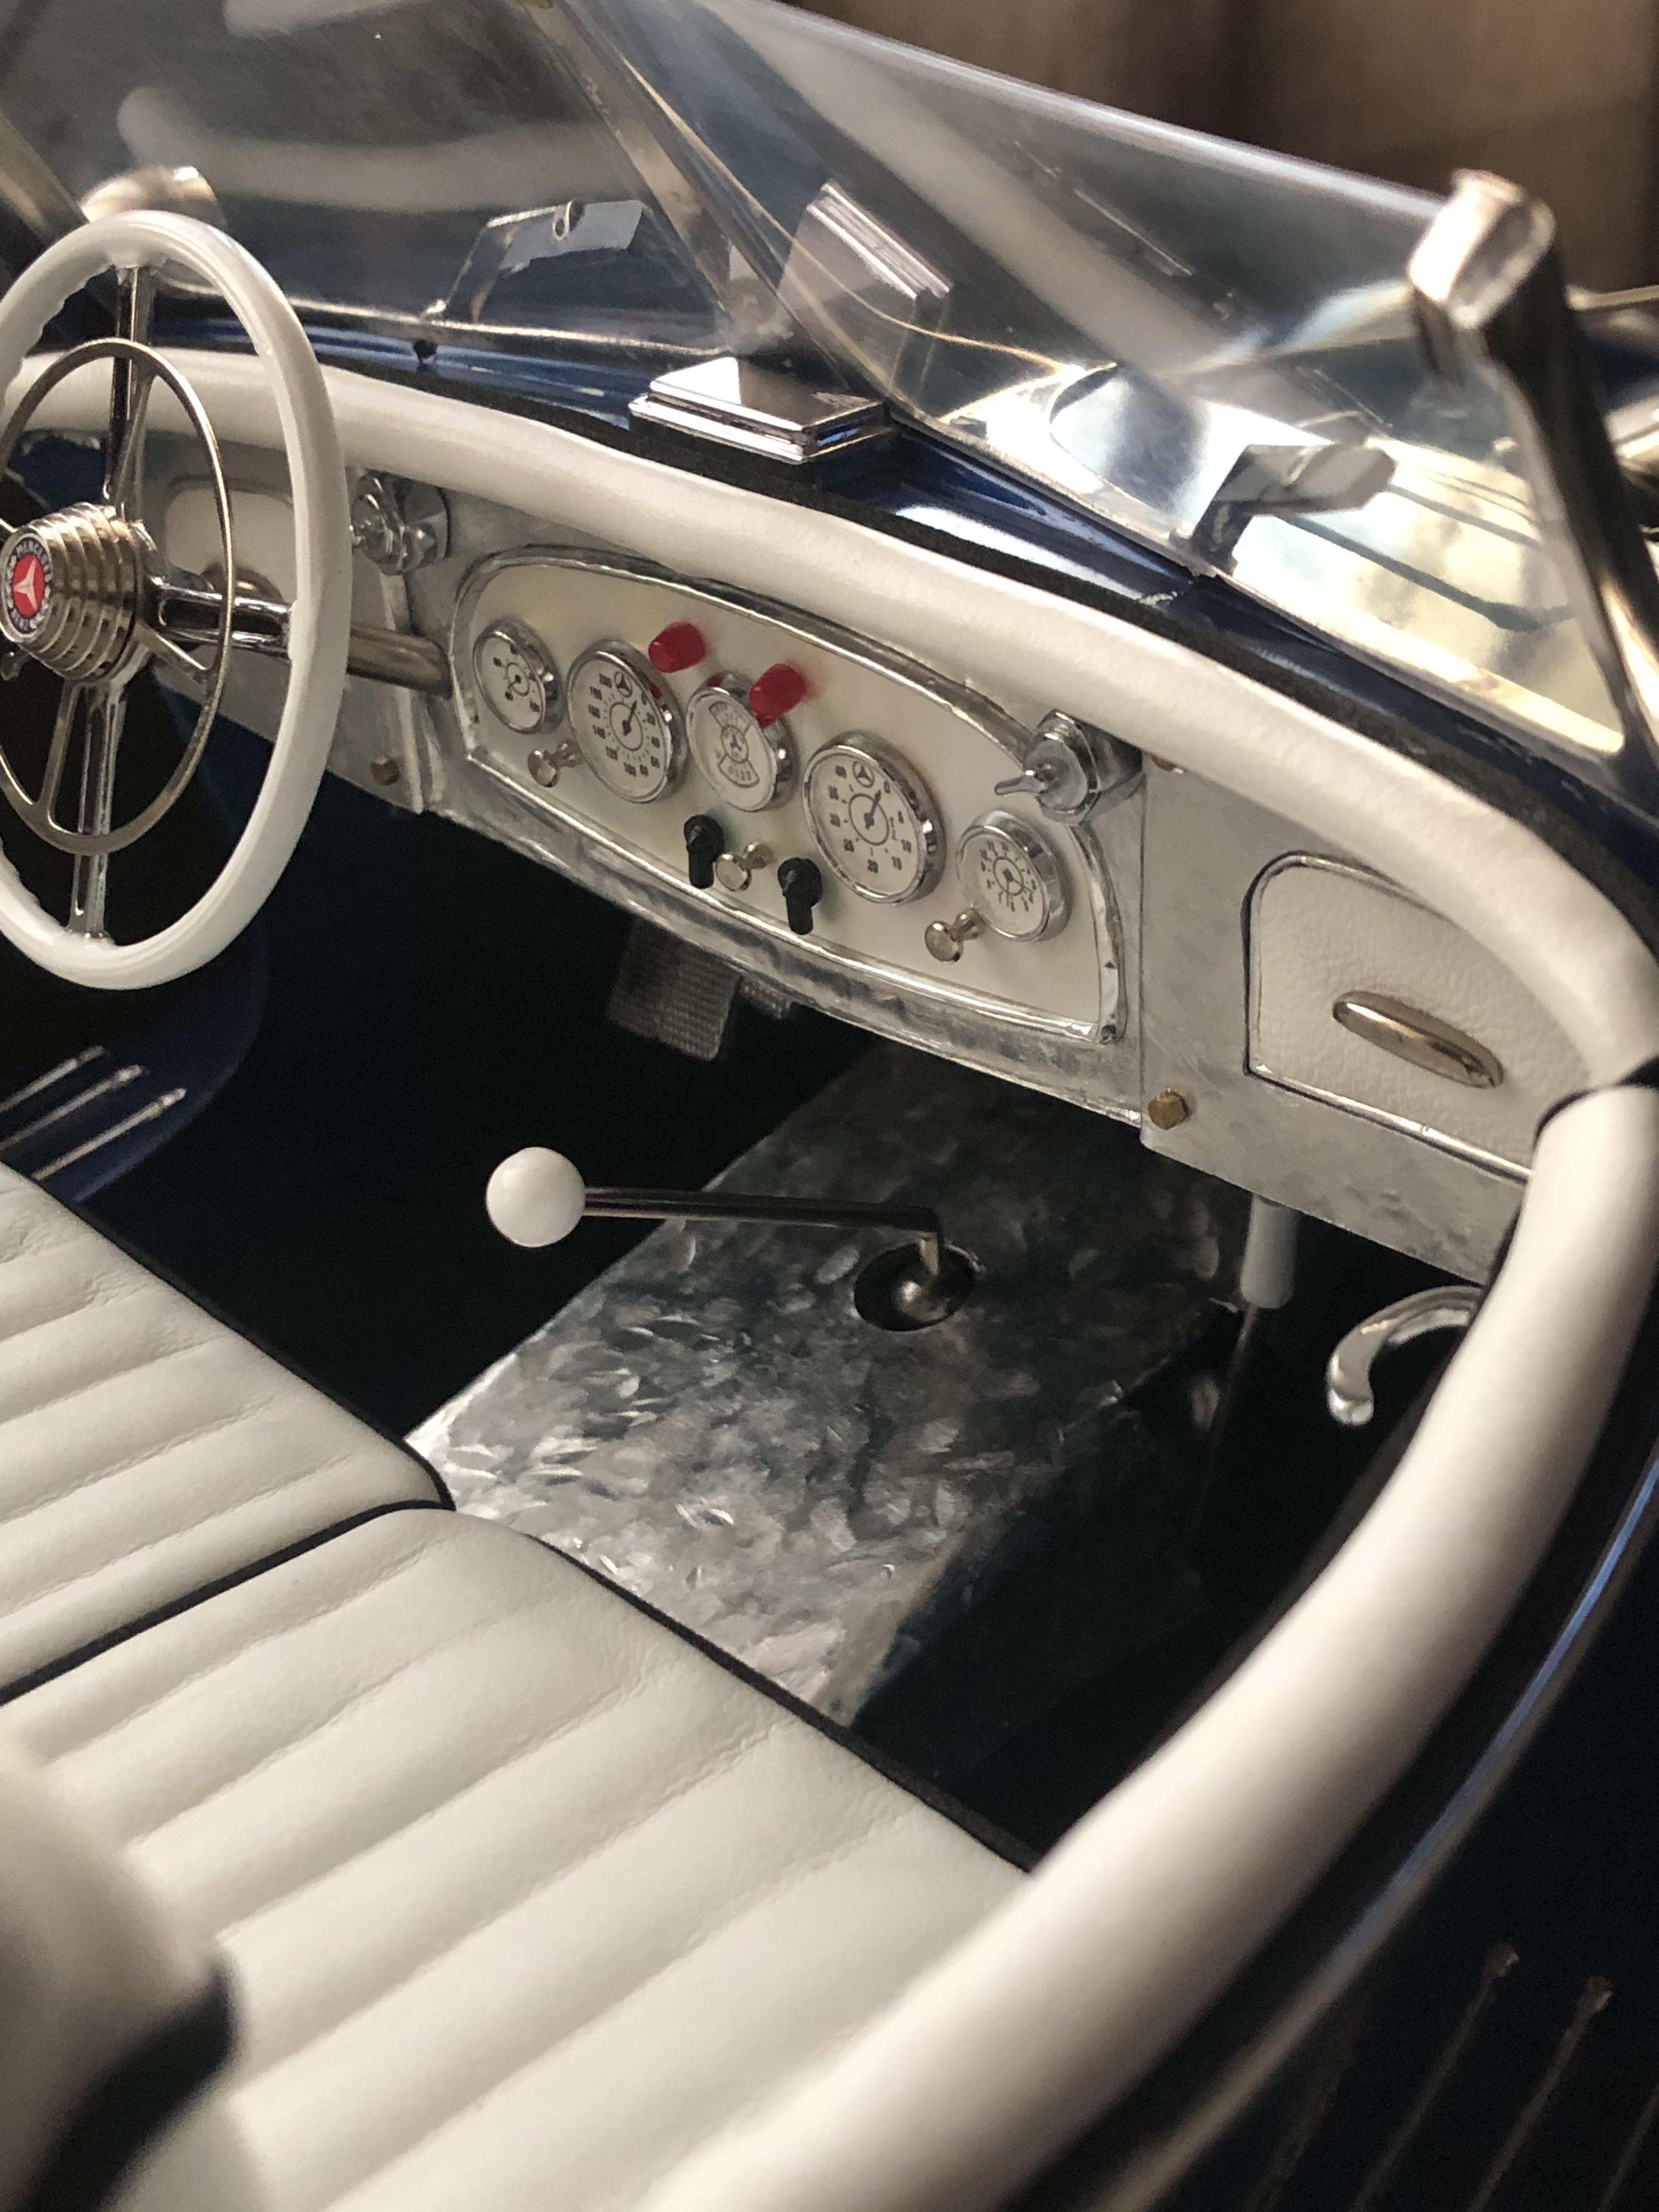
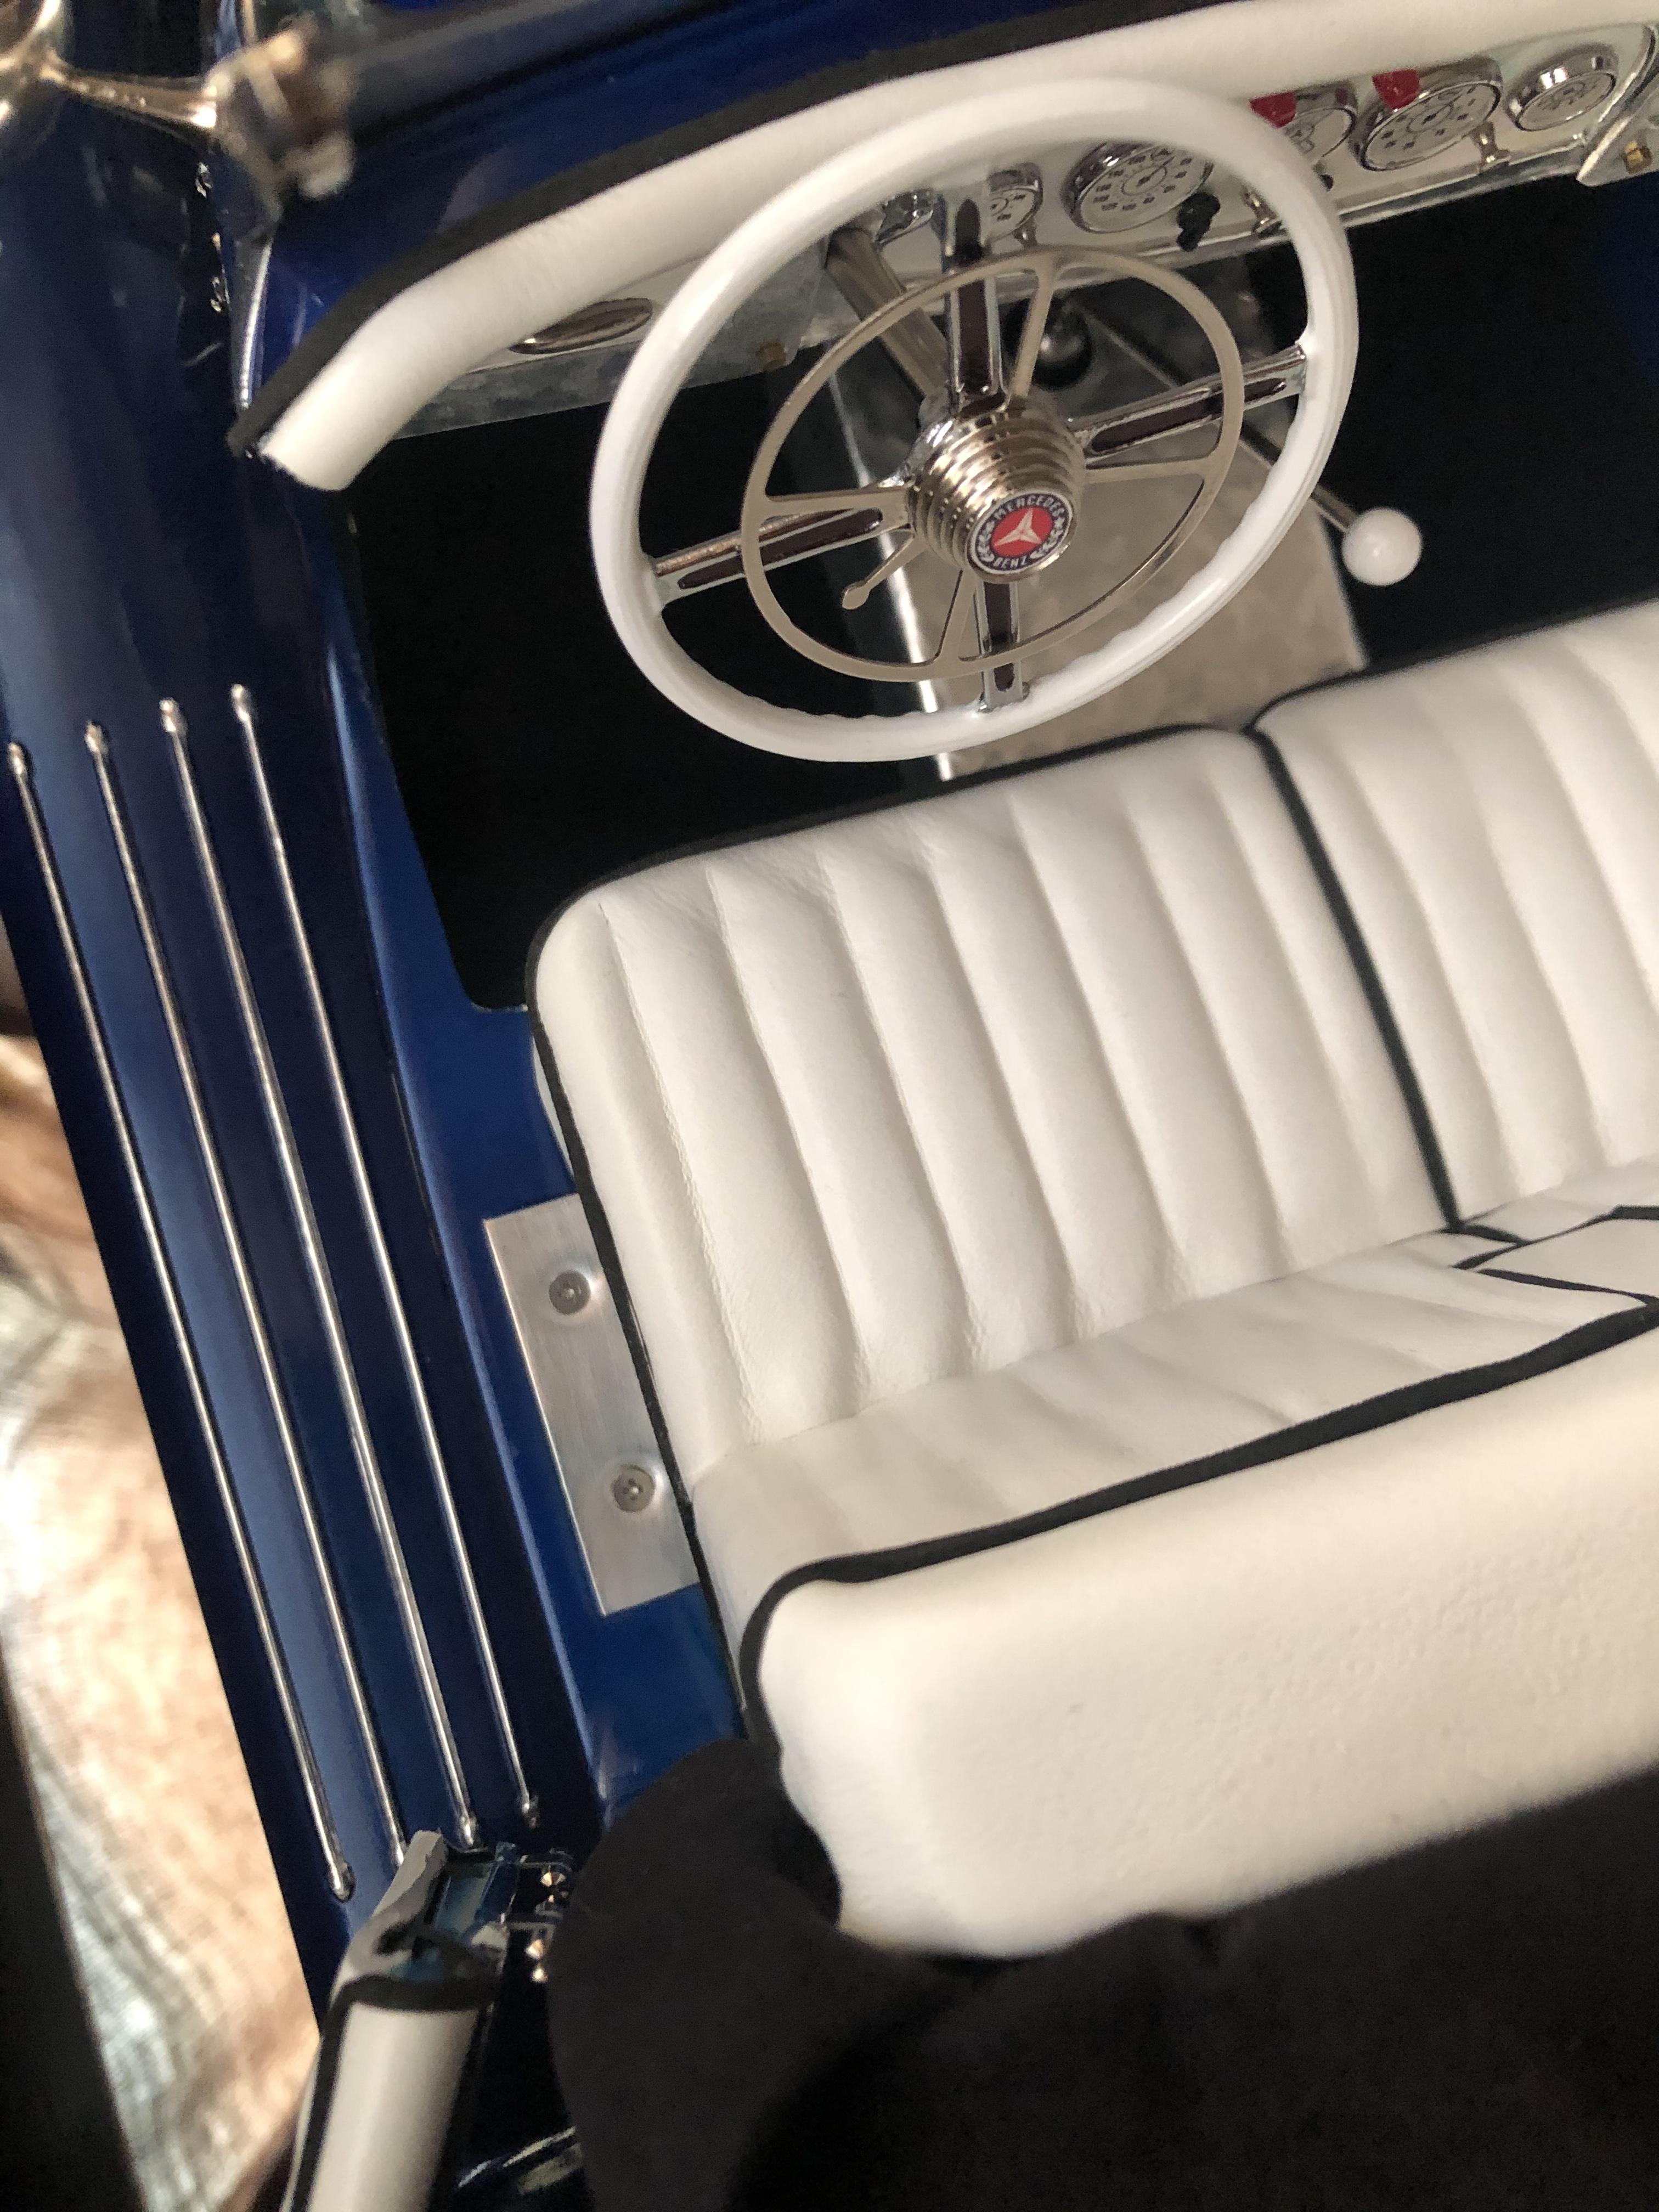
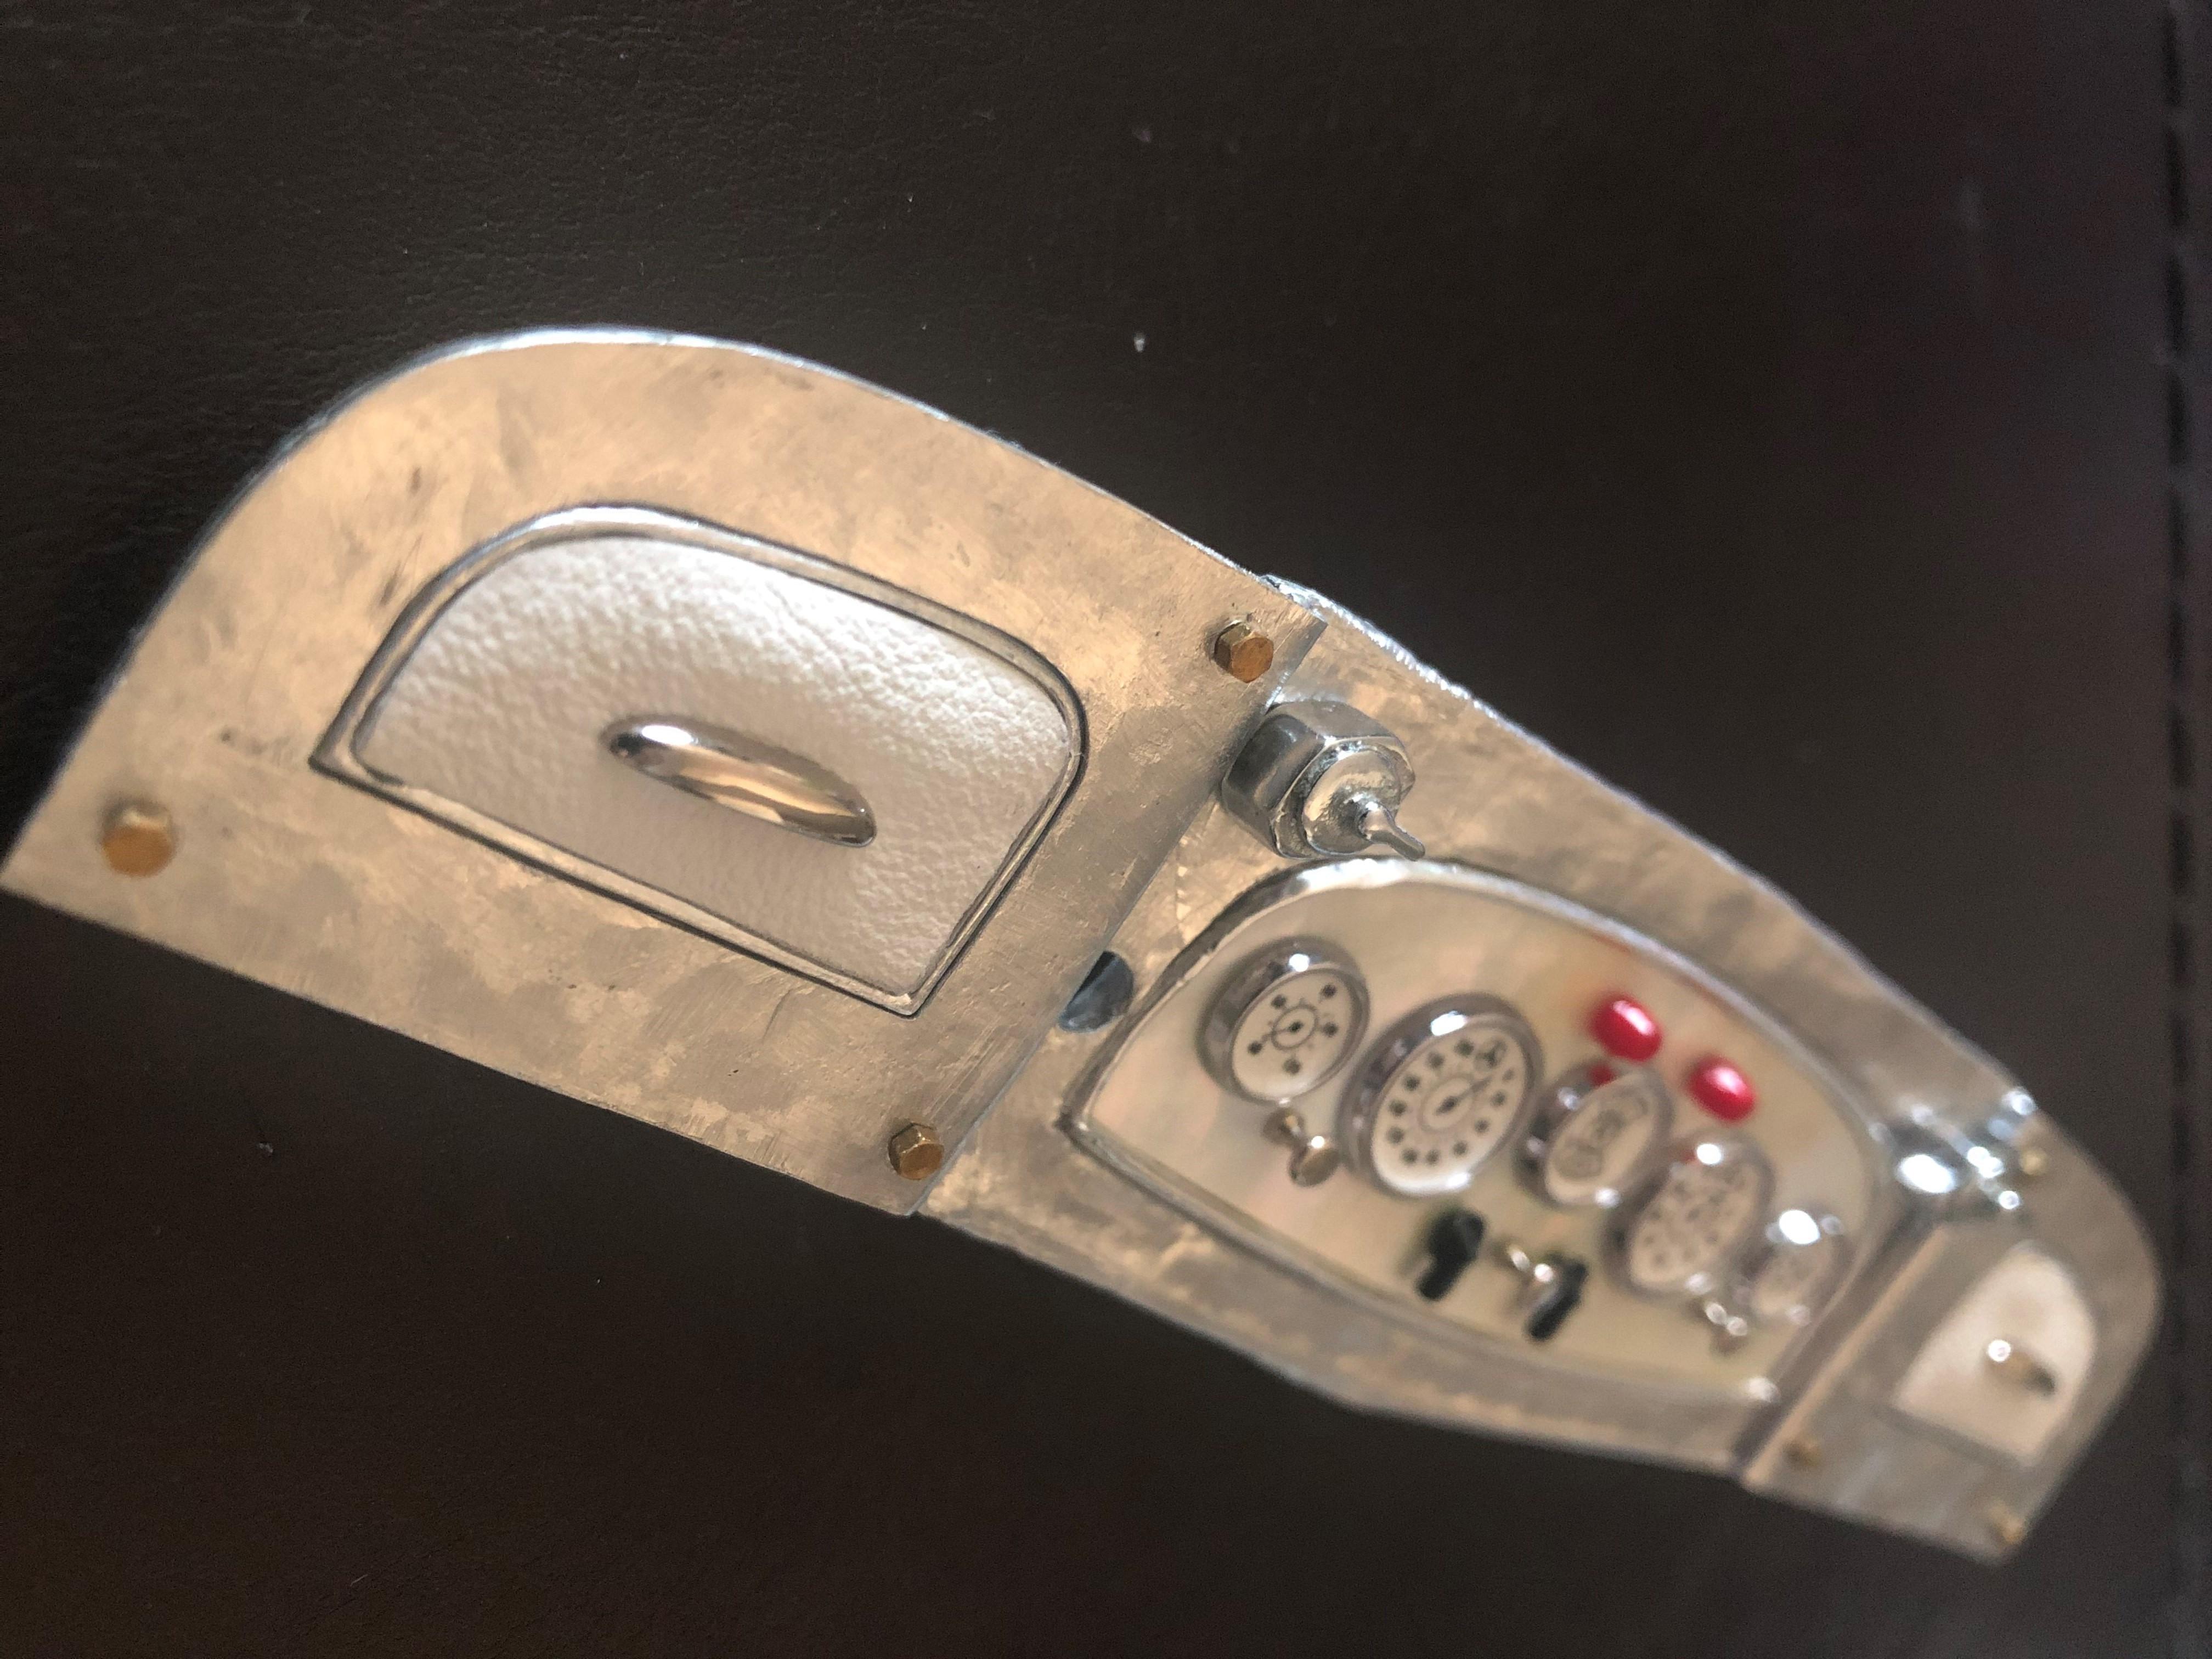
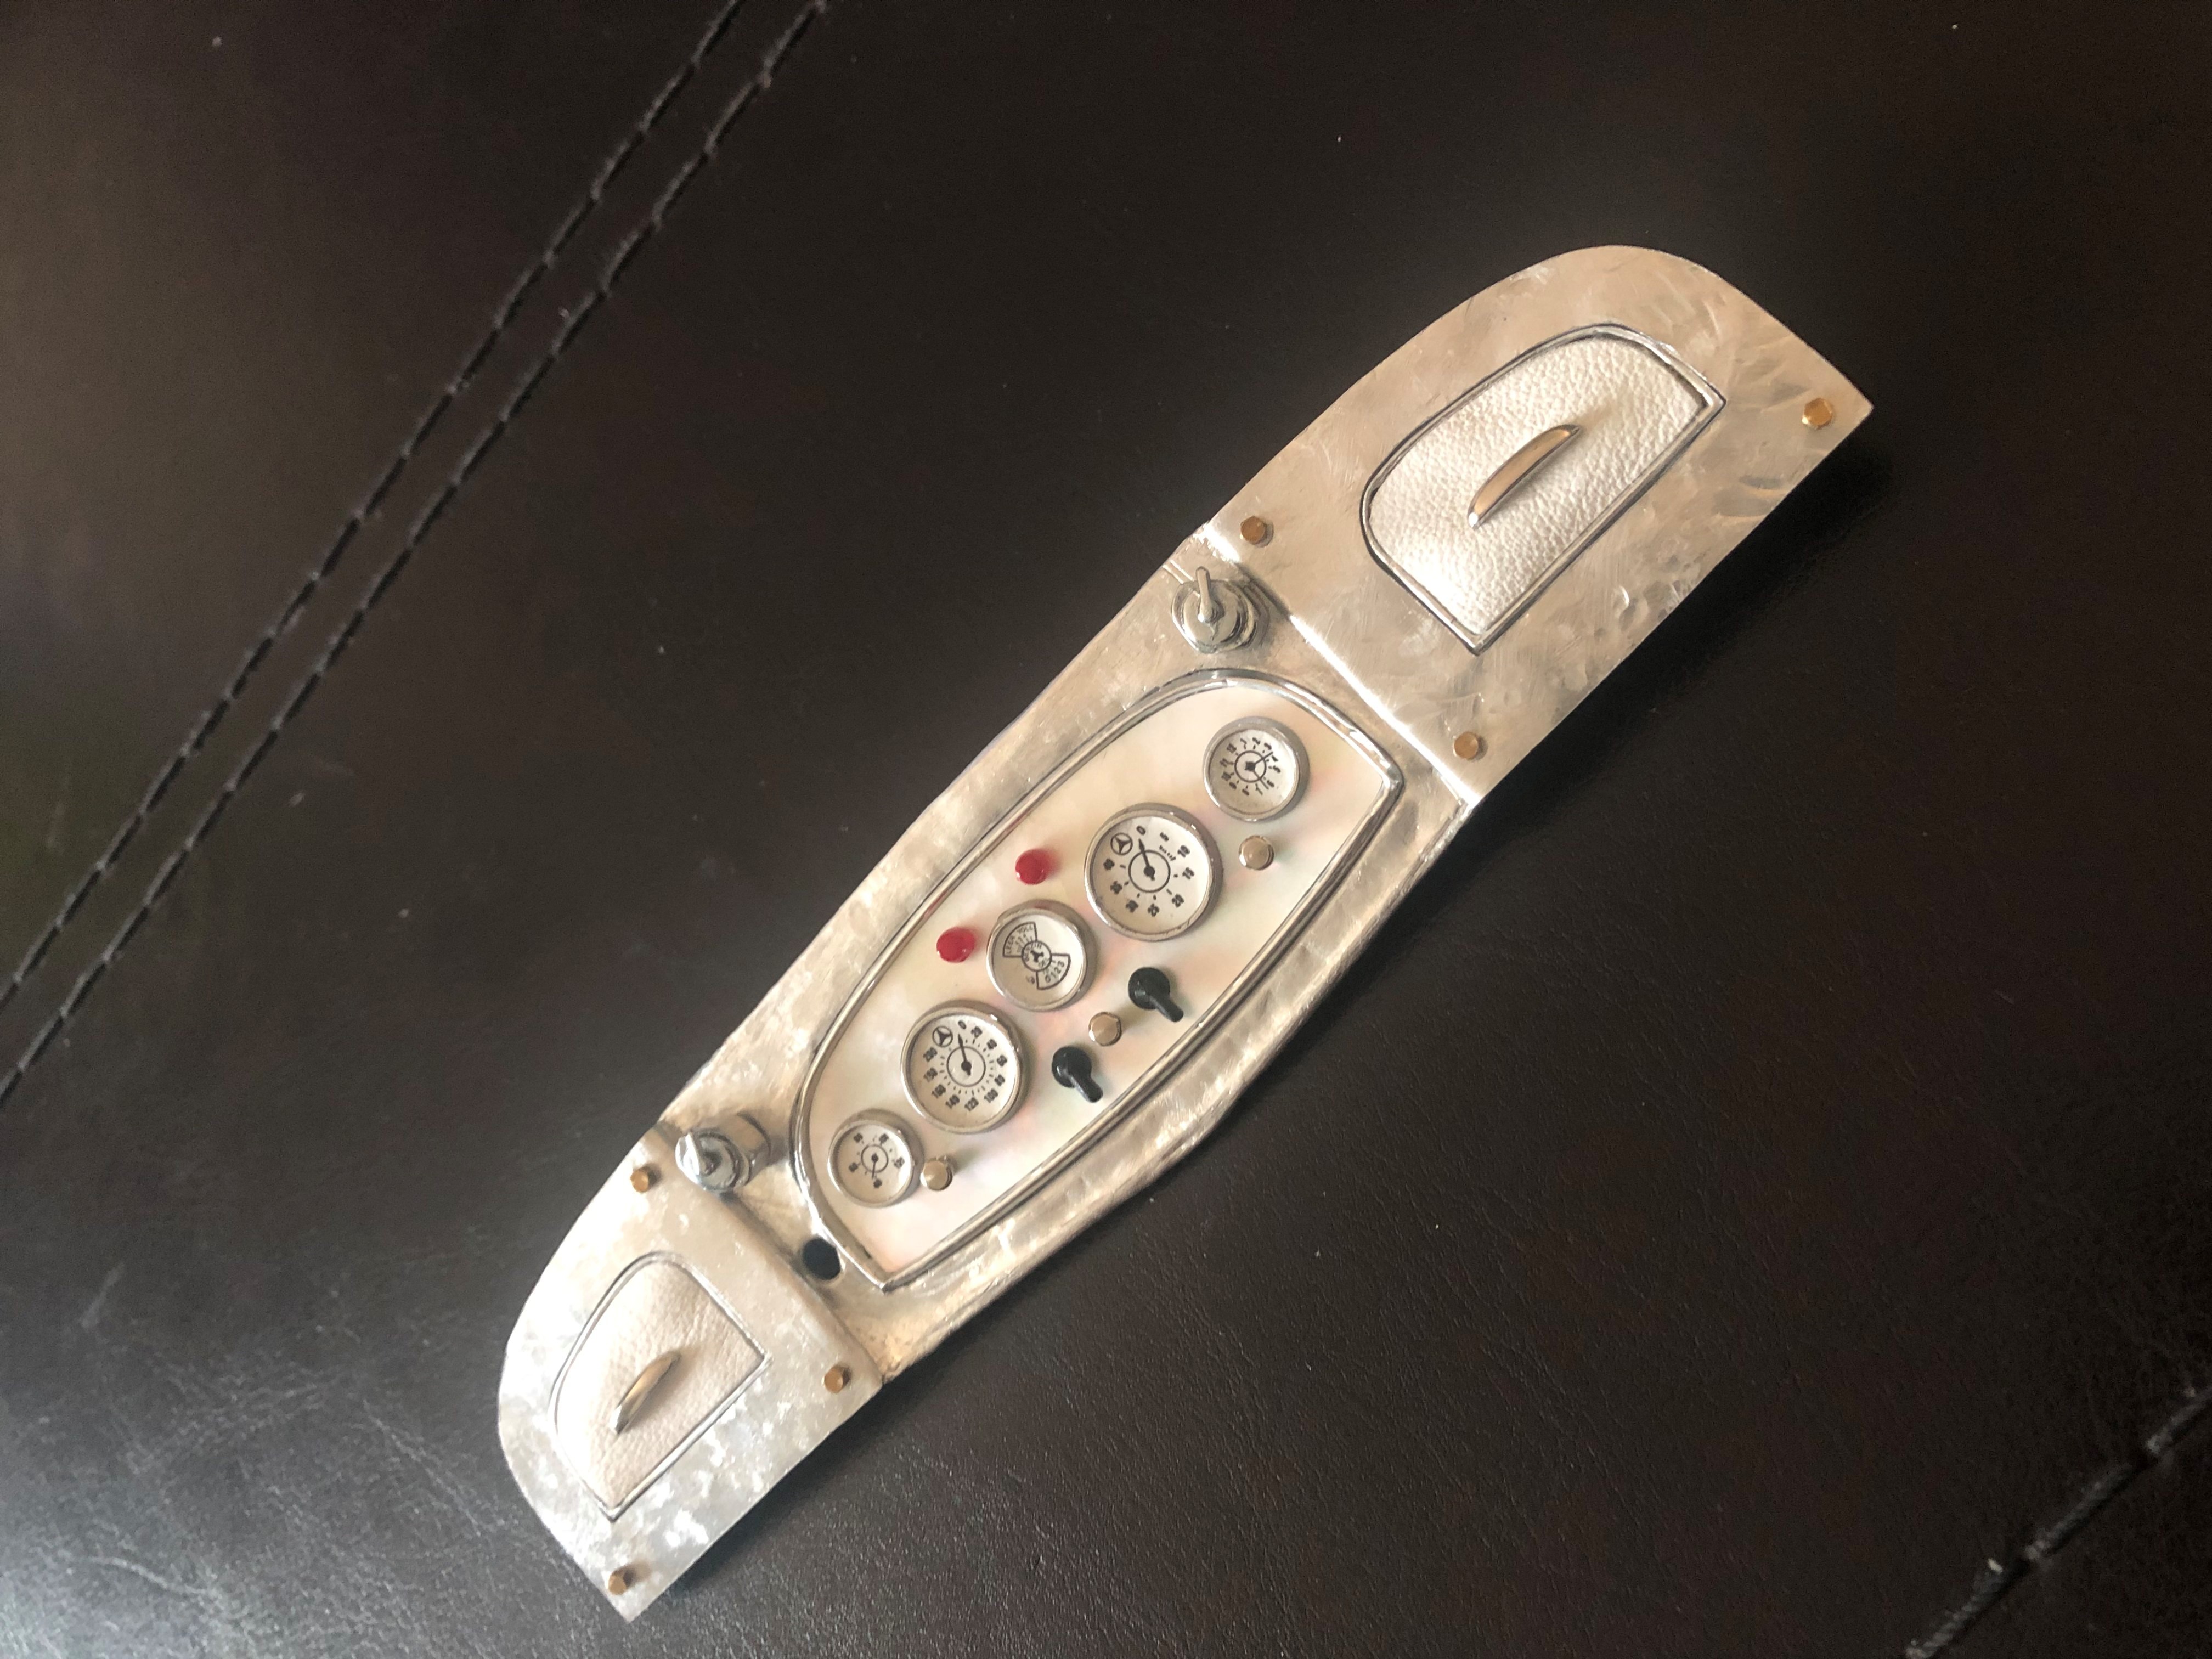
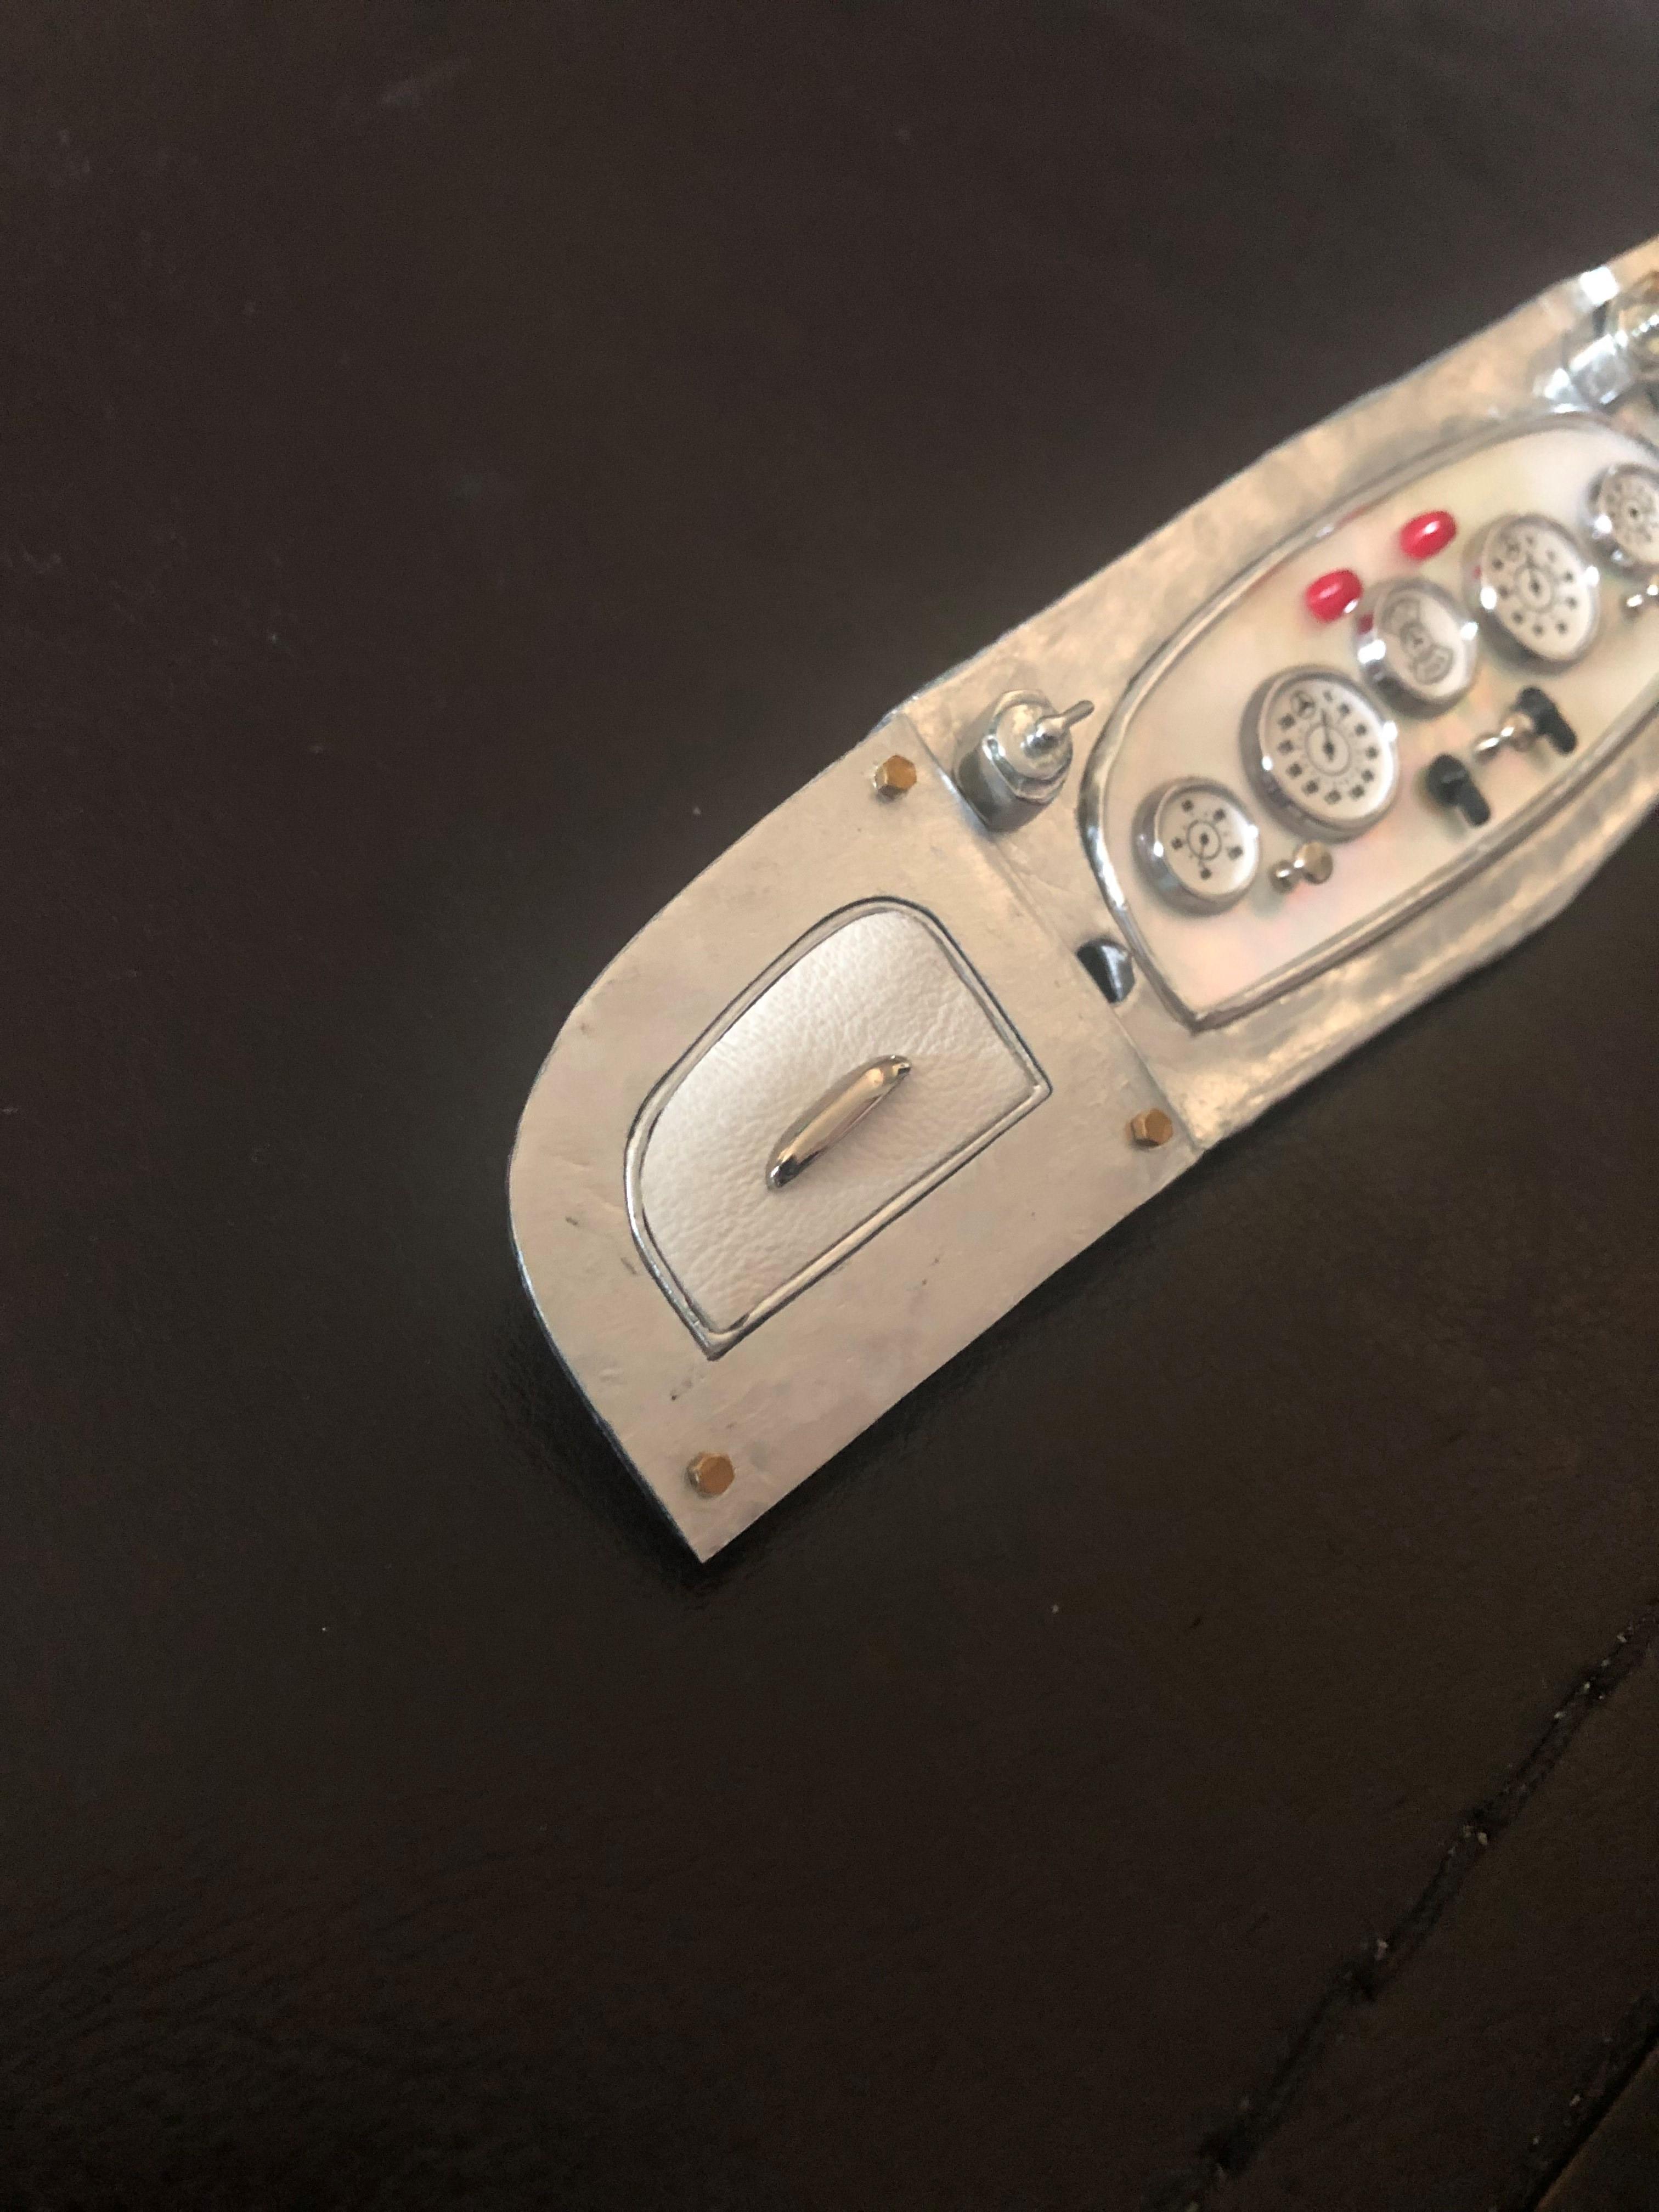
leather on the inside panel is done , some details remain to be worked on , I also upgrade the the gauge with a glass cover ( a clear plastic bottle cut and insert inside the gauge ... result is ok exception on the first left one ... might re do them later , I let it sit like this for the moment .. and I start the body frame work , the handle that open the back seat compartment will be in a central position as I damage the part 2 , so only one left , re adjustment .... I worked on the central line were the handle will be positioned , will put 4 nice bolt at the initial fixing nuts in each corner and an extra bolt wit a pin will be on the left side .
-
-
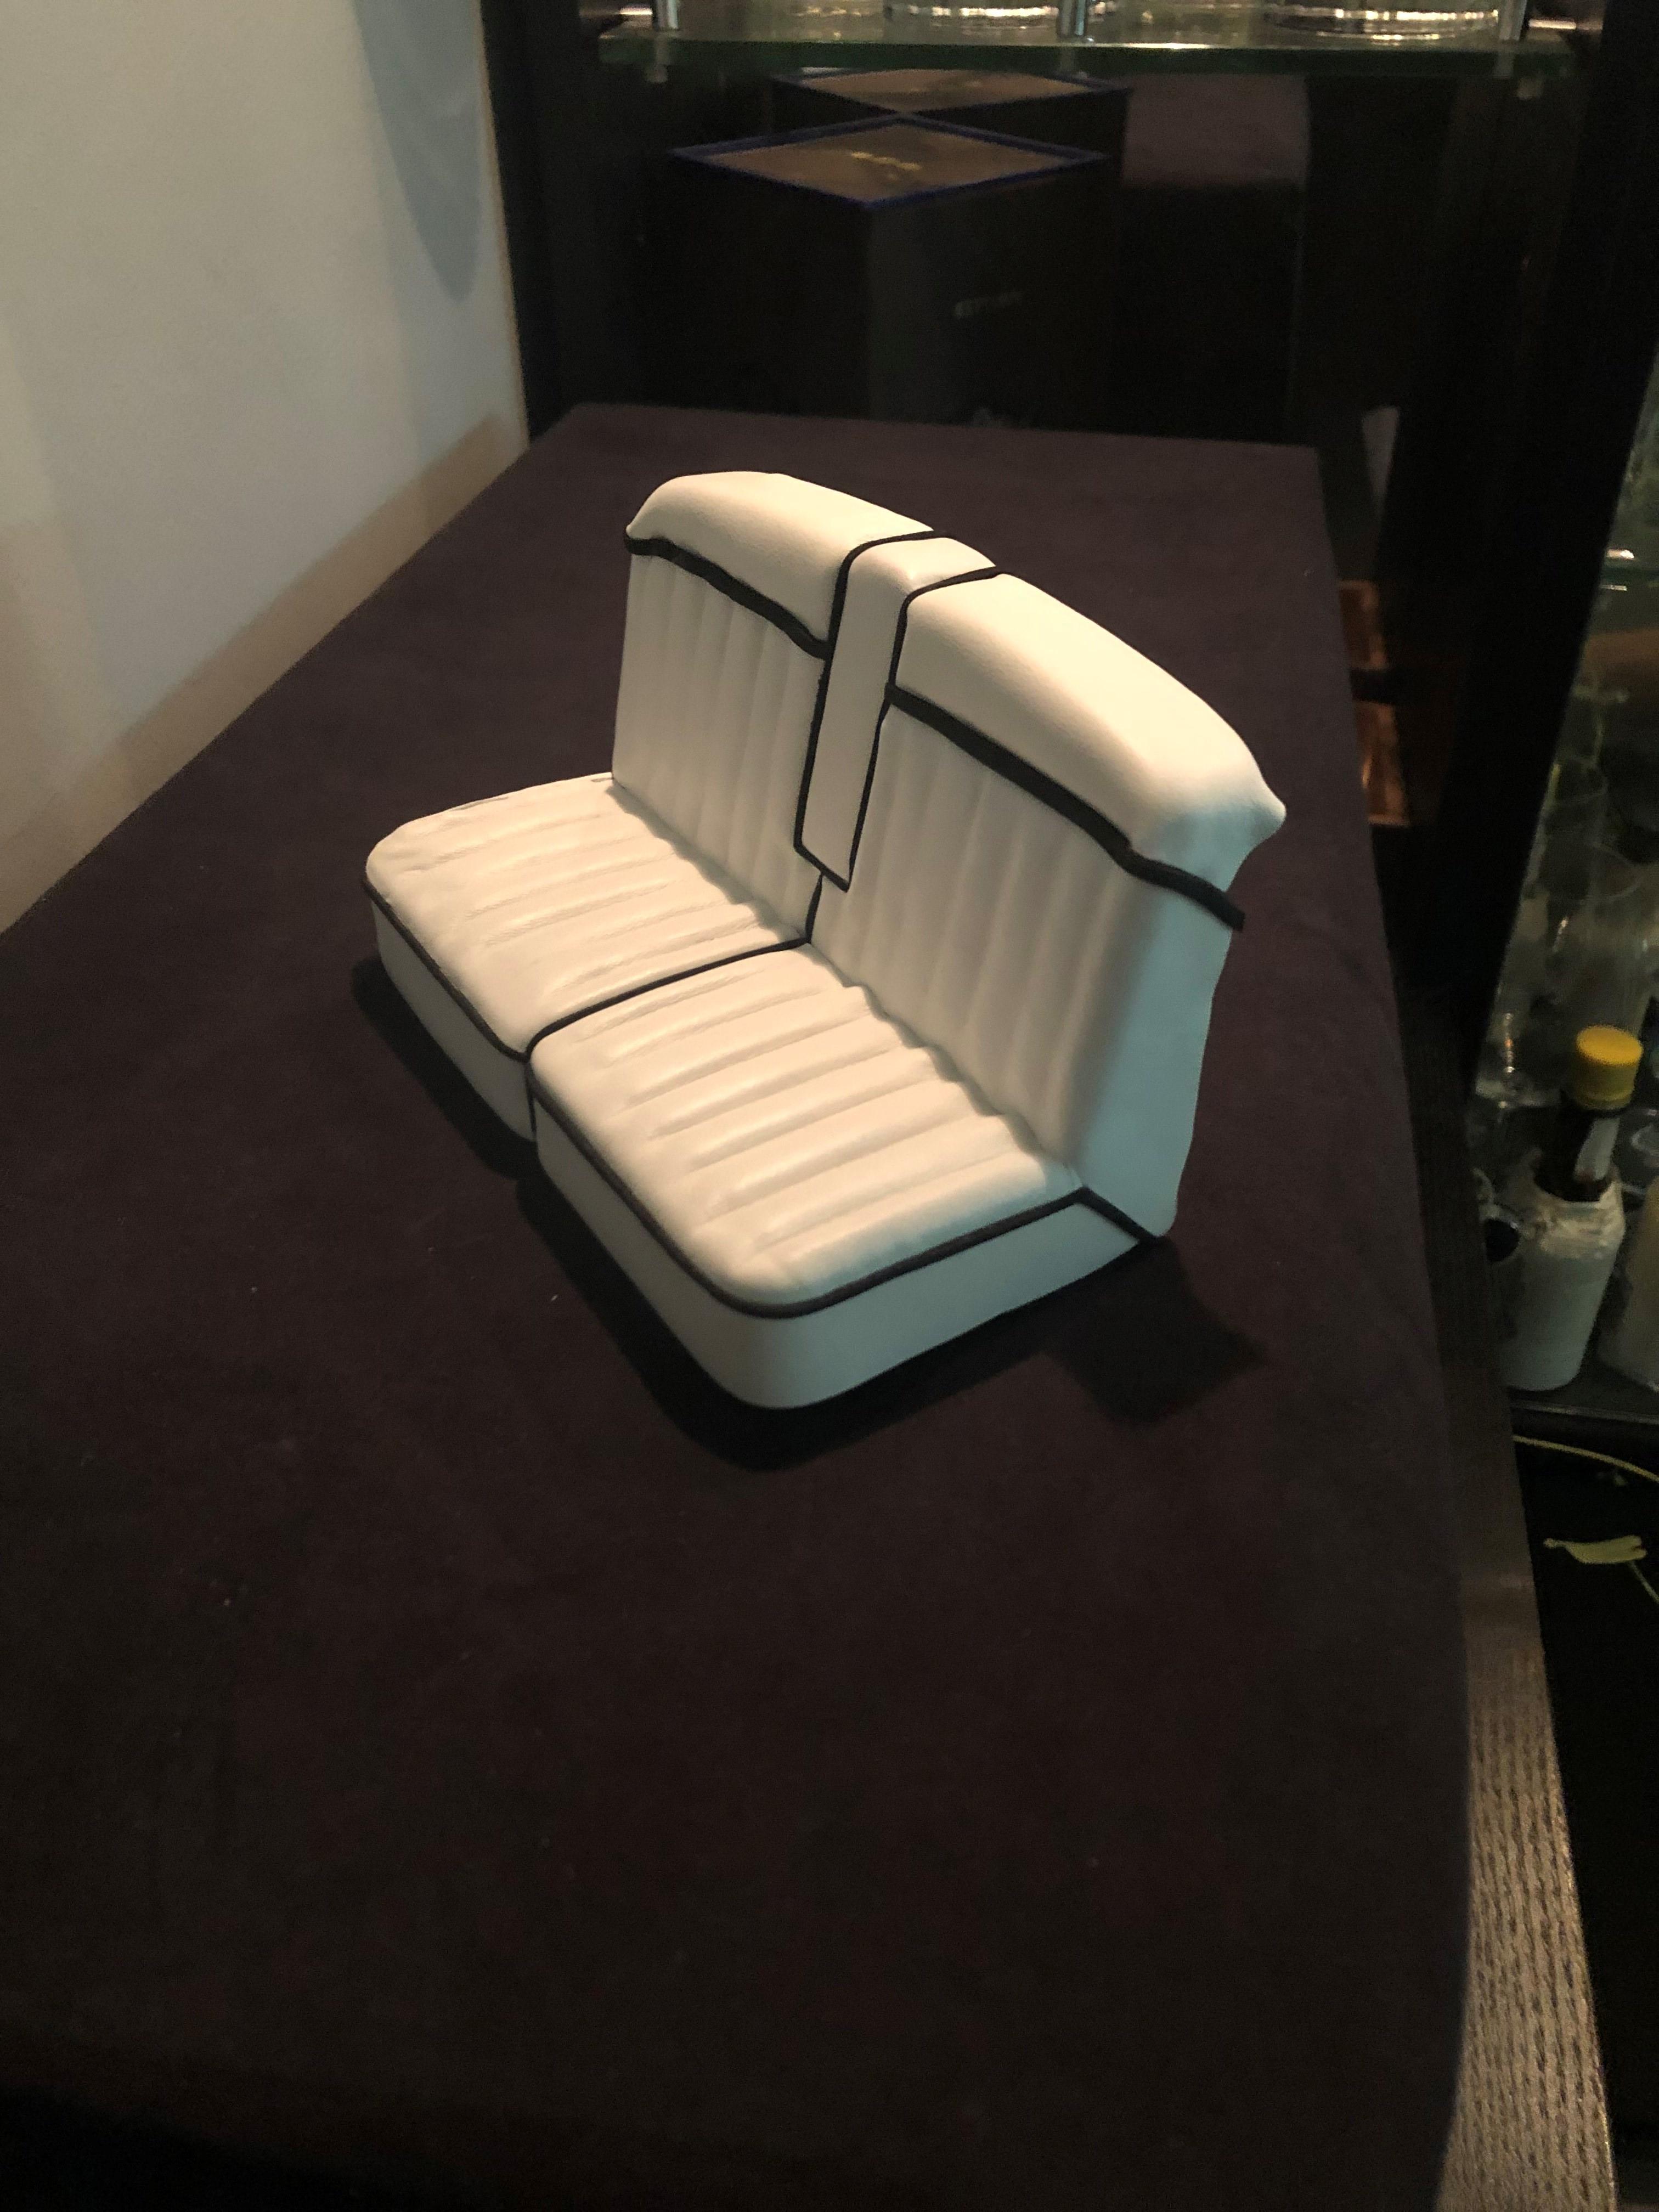
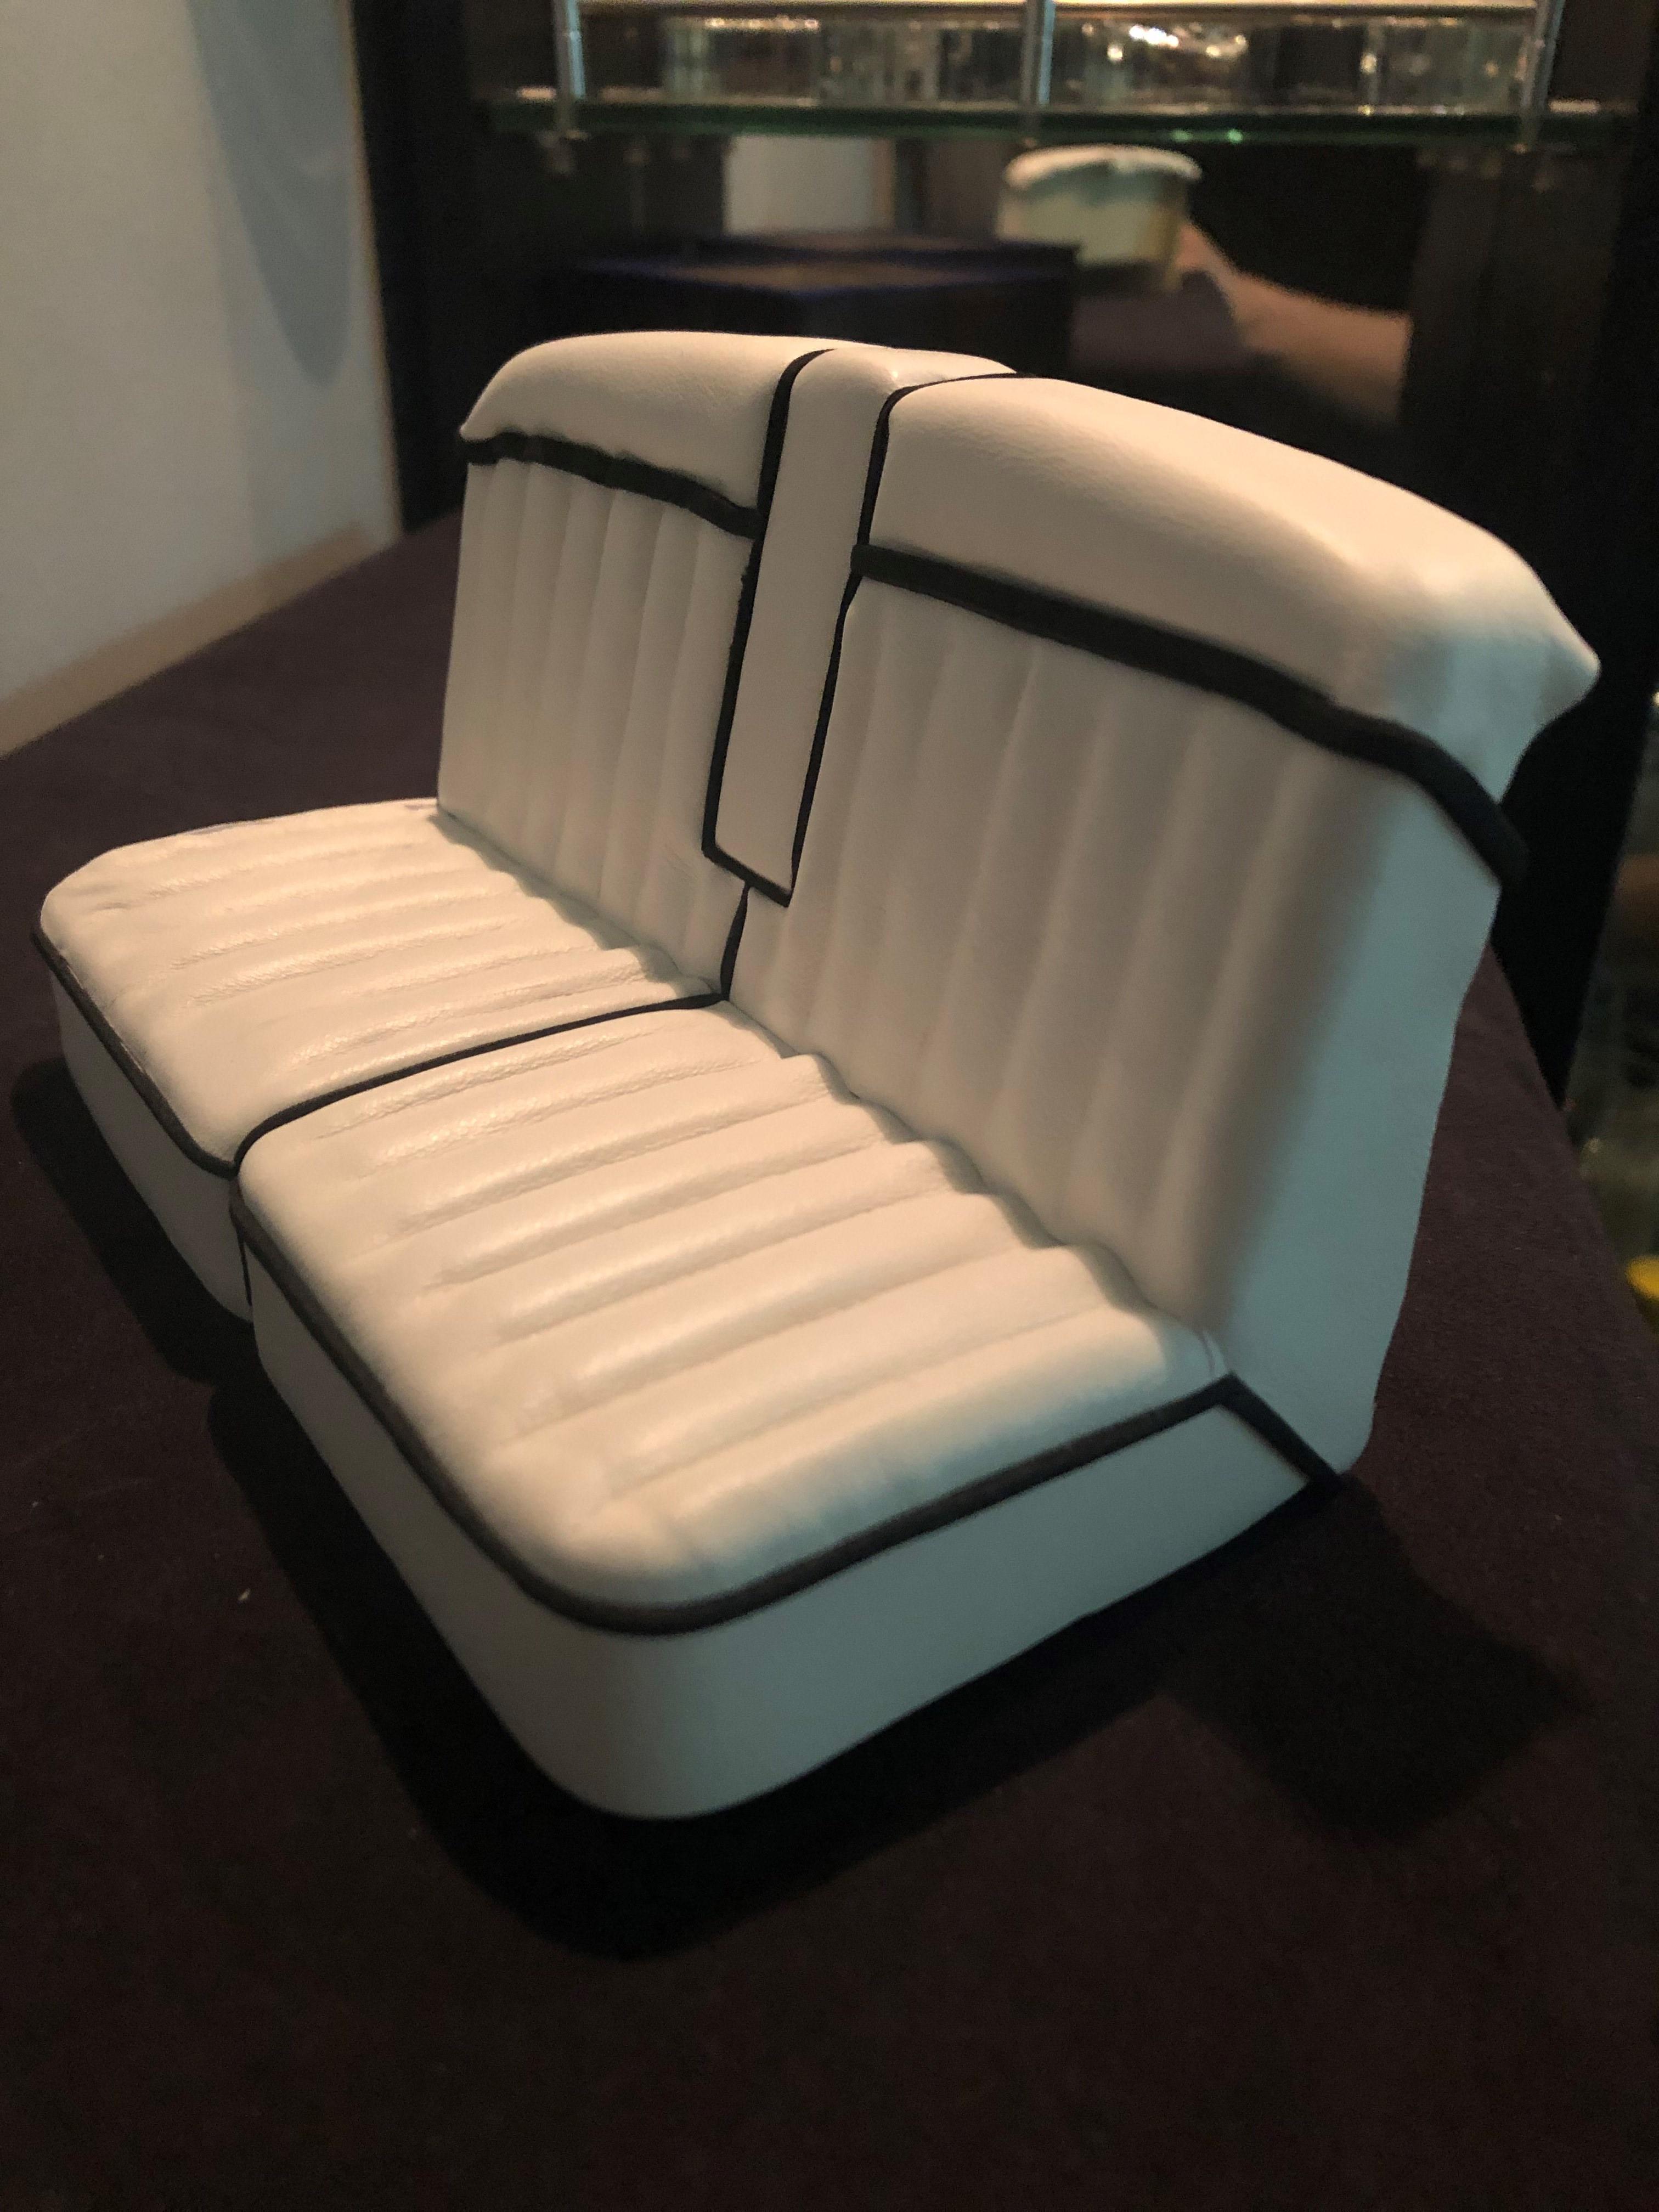
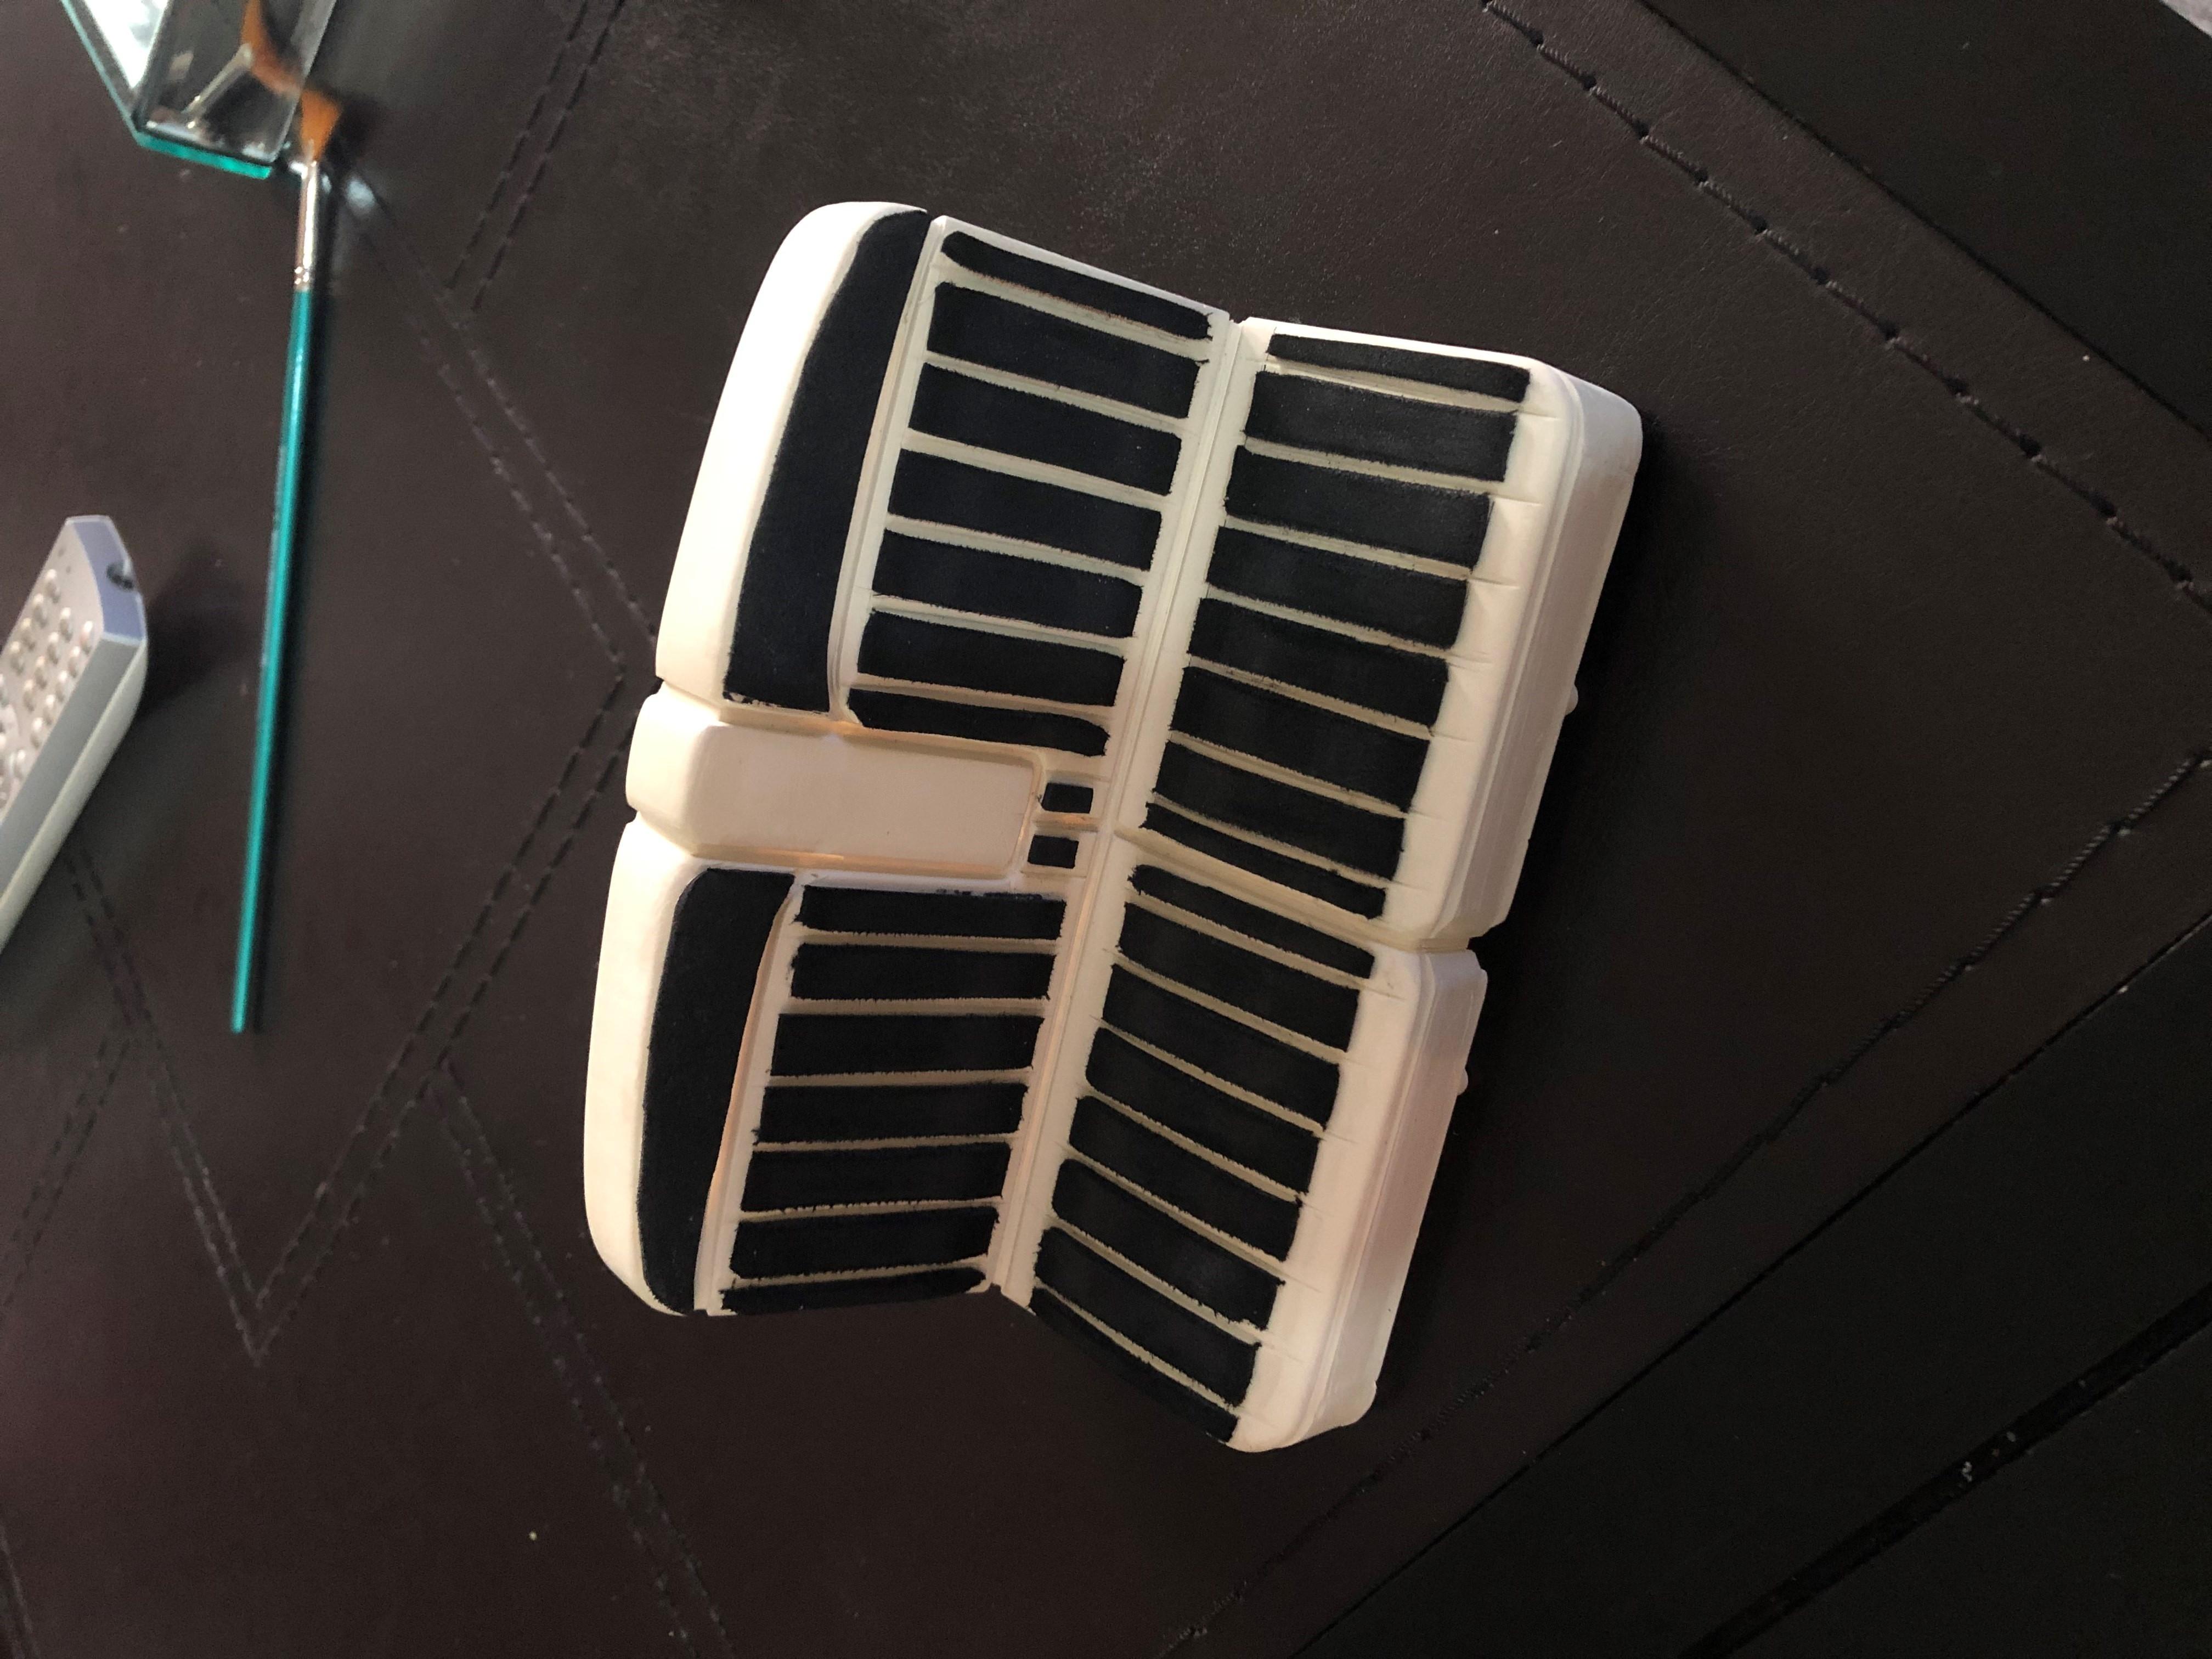
must be one of the most difficult part , working the leather , giving a shape , hiding the connection , to get an acceptable result . this leather was so thick , but quality ... it was a one shot attempt as I had no spare fabric . As I cut the seat part to be able to work it in good condition , I created a bottom support , no idea yet how I will re fix the seat on this ... improvisation still on .... next step the leather on inside door panel ..
-
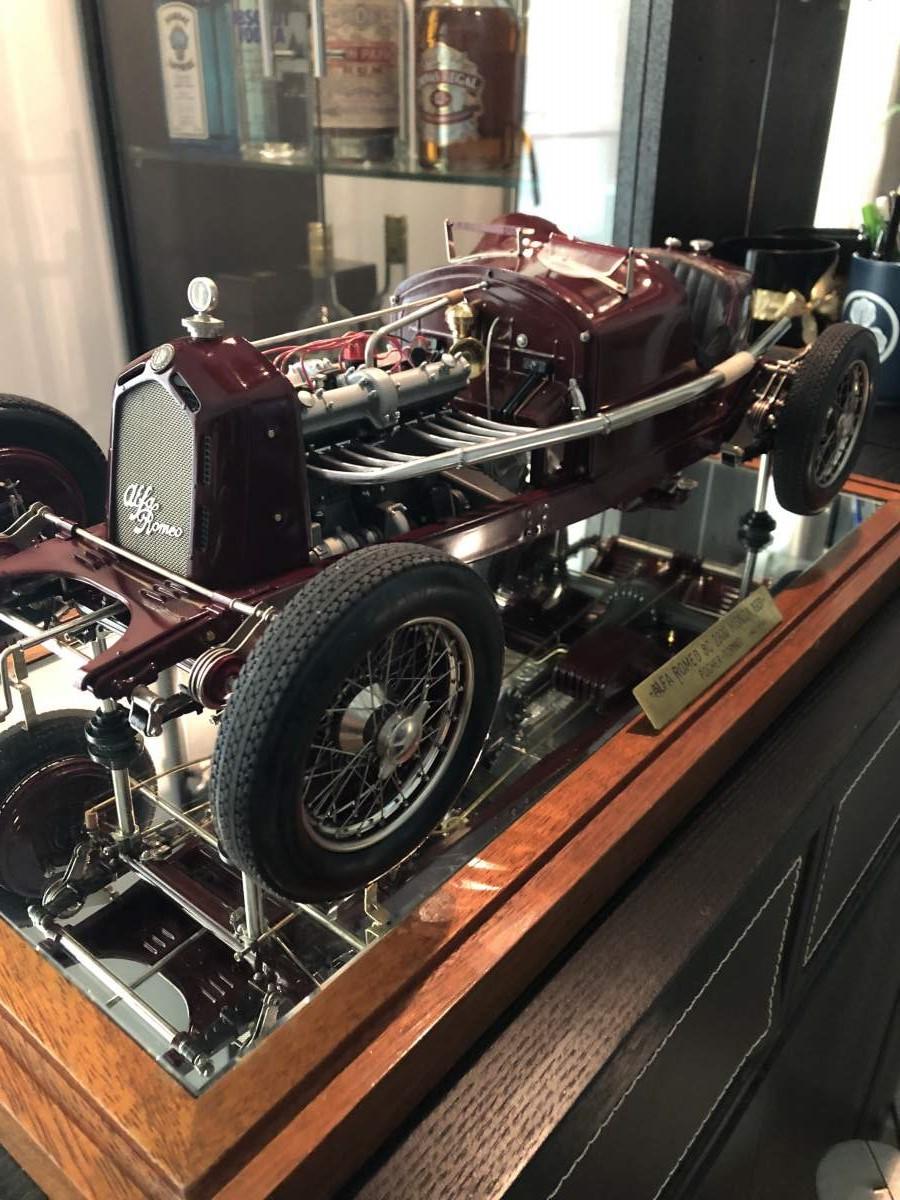
Hi, that was my first model I built , in 2017 , I got this model from France and was already built, by the italian factory (Pocher) itself in 1969 , the grandmother of the person who sold it to me was working for a famous toy shop in Paris ( galerie Primptemps Haussman ) and she bring back the model in 1969 and offer it to the grand children , since then he was on a shelf for decades , and in 2016 I bough it , and bring it back to Dubai , it was original with the case ( classic built , but was showing the effect of time ) , I decided without any experience in modeling to dismantle the car , to upgrade it with dashboard aluminium , leather seat, new paint and to re built it in a more roaster looking ... since there it is sitting in my living room .... and can showcase this very old piece of model that travel into time and from Torino, to Paris , and finally Dubai.
-
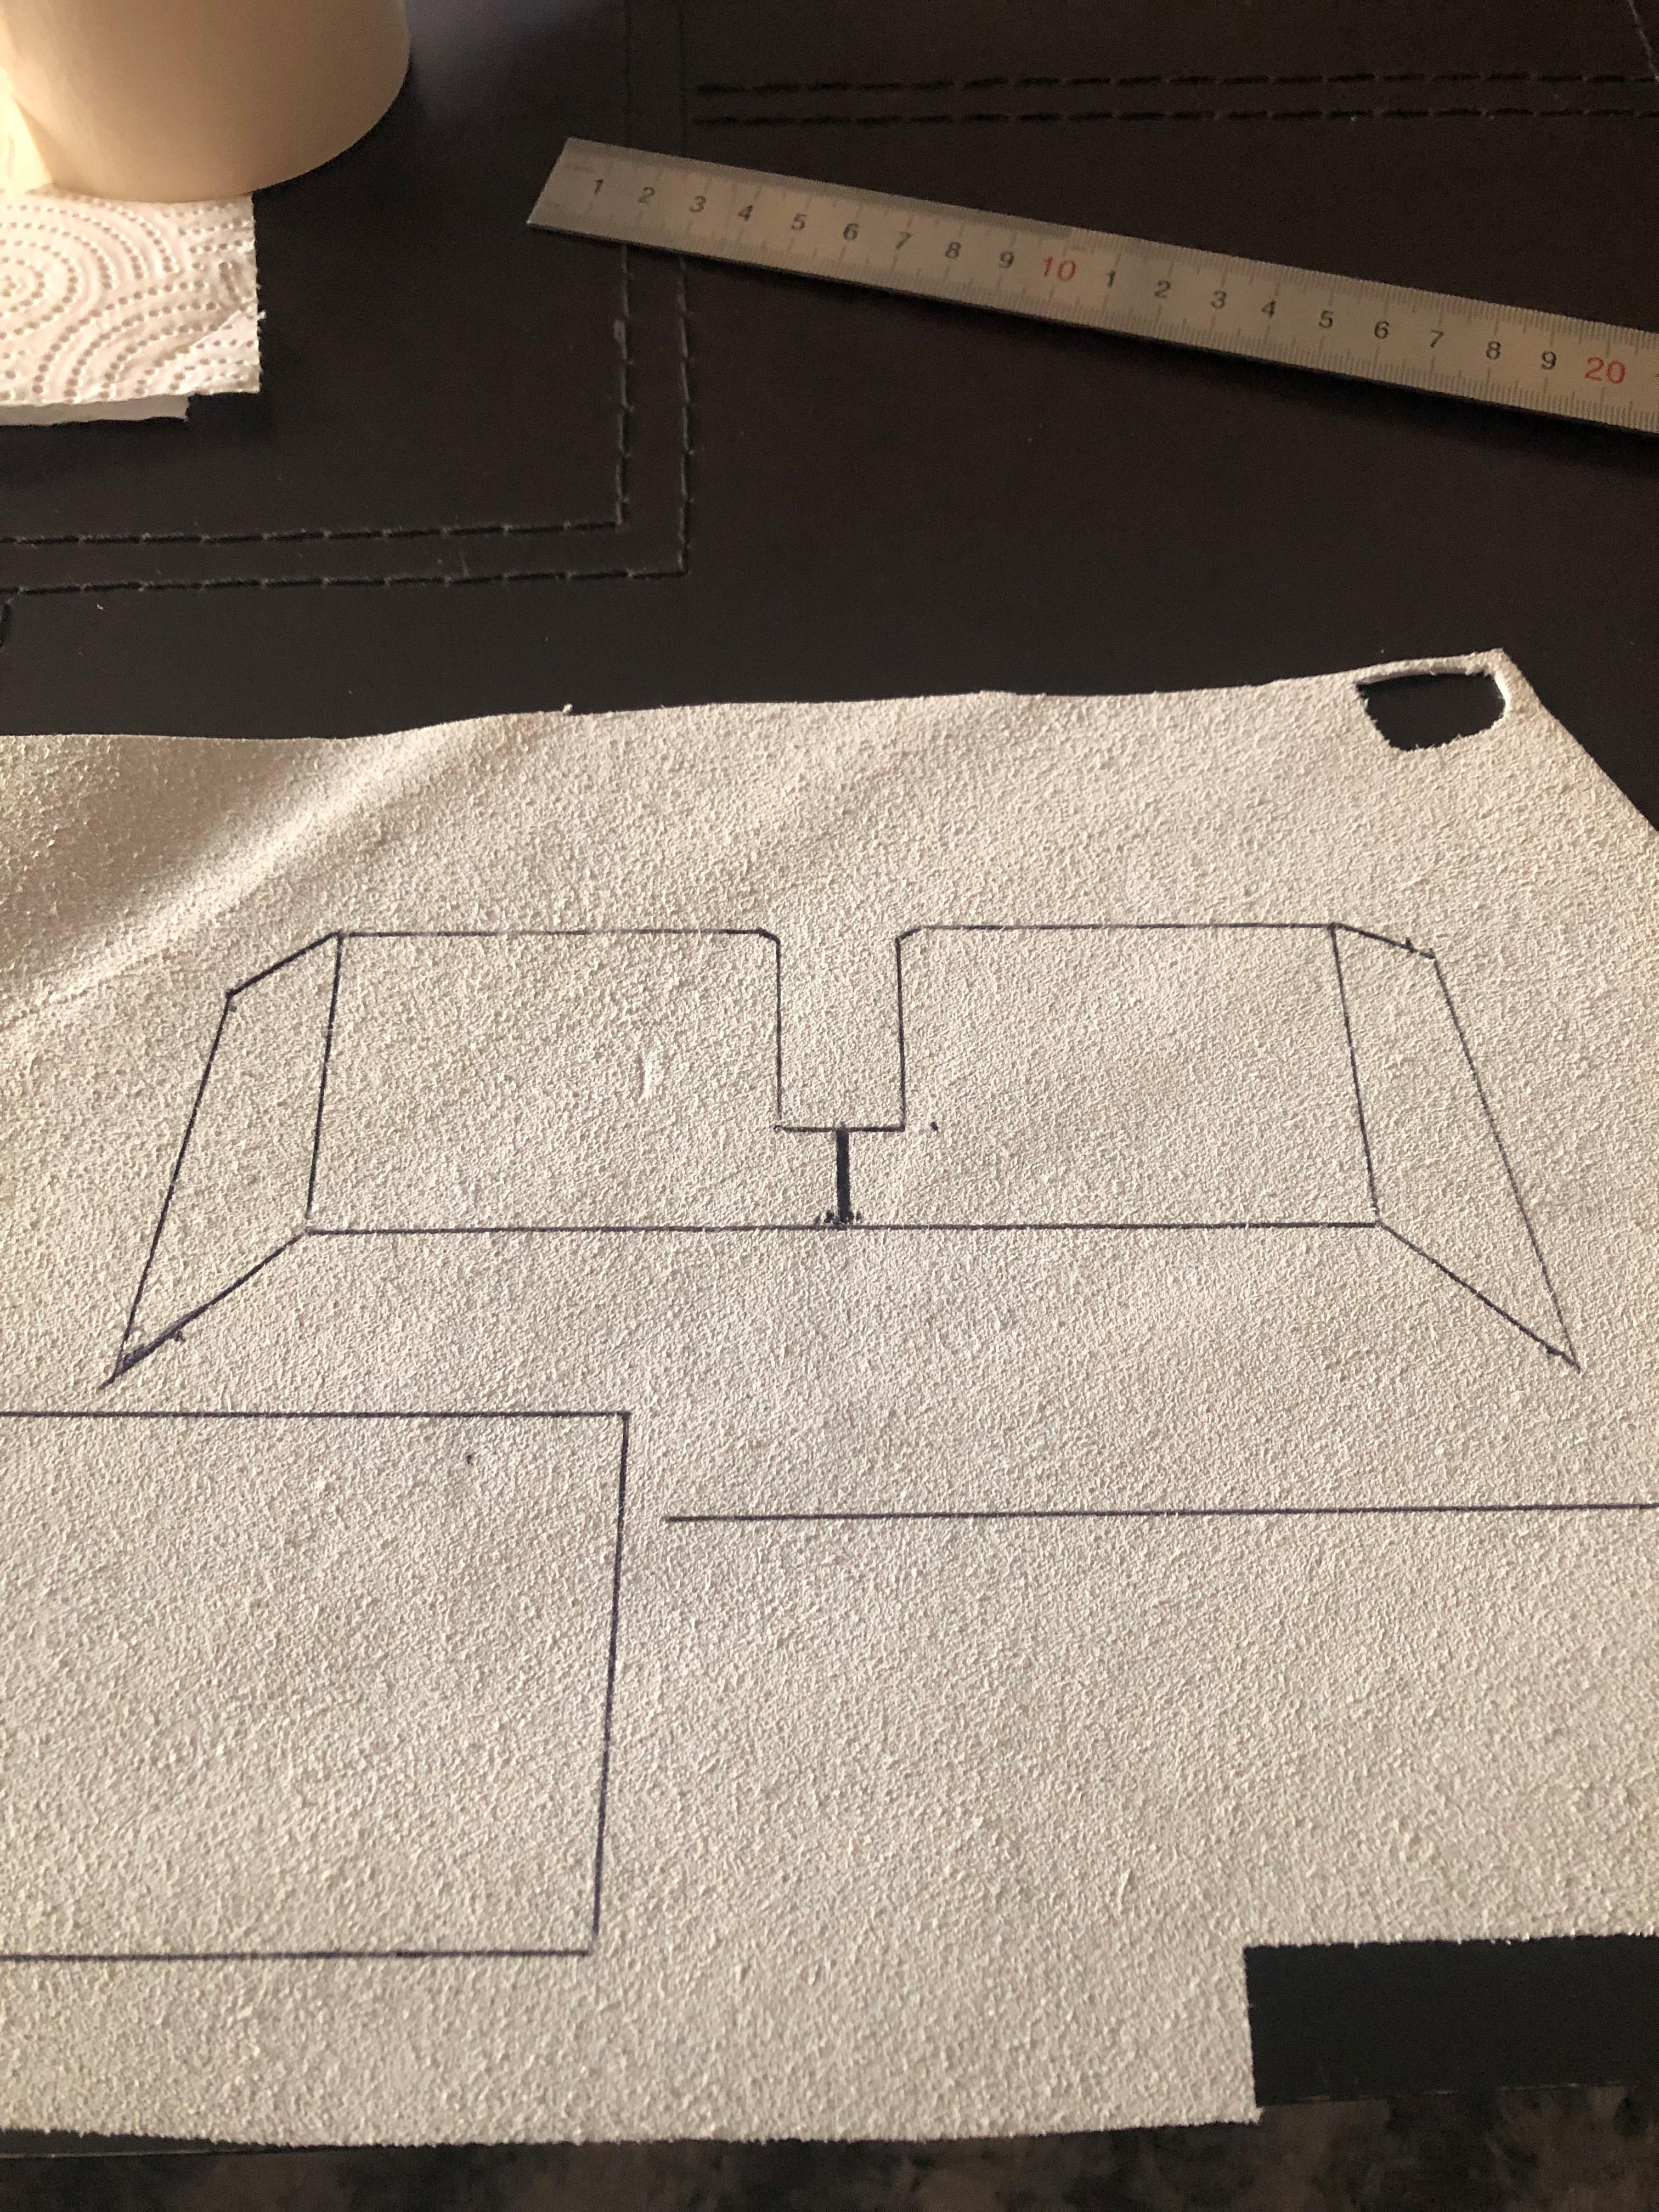
creating footprint for a metal sheet that will support the seat and my fight to get all the leathers dimension pieces fitting inside the small fabric I got . forgot the inside panel door at one point , had to squeeze a bit more .
-
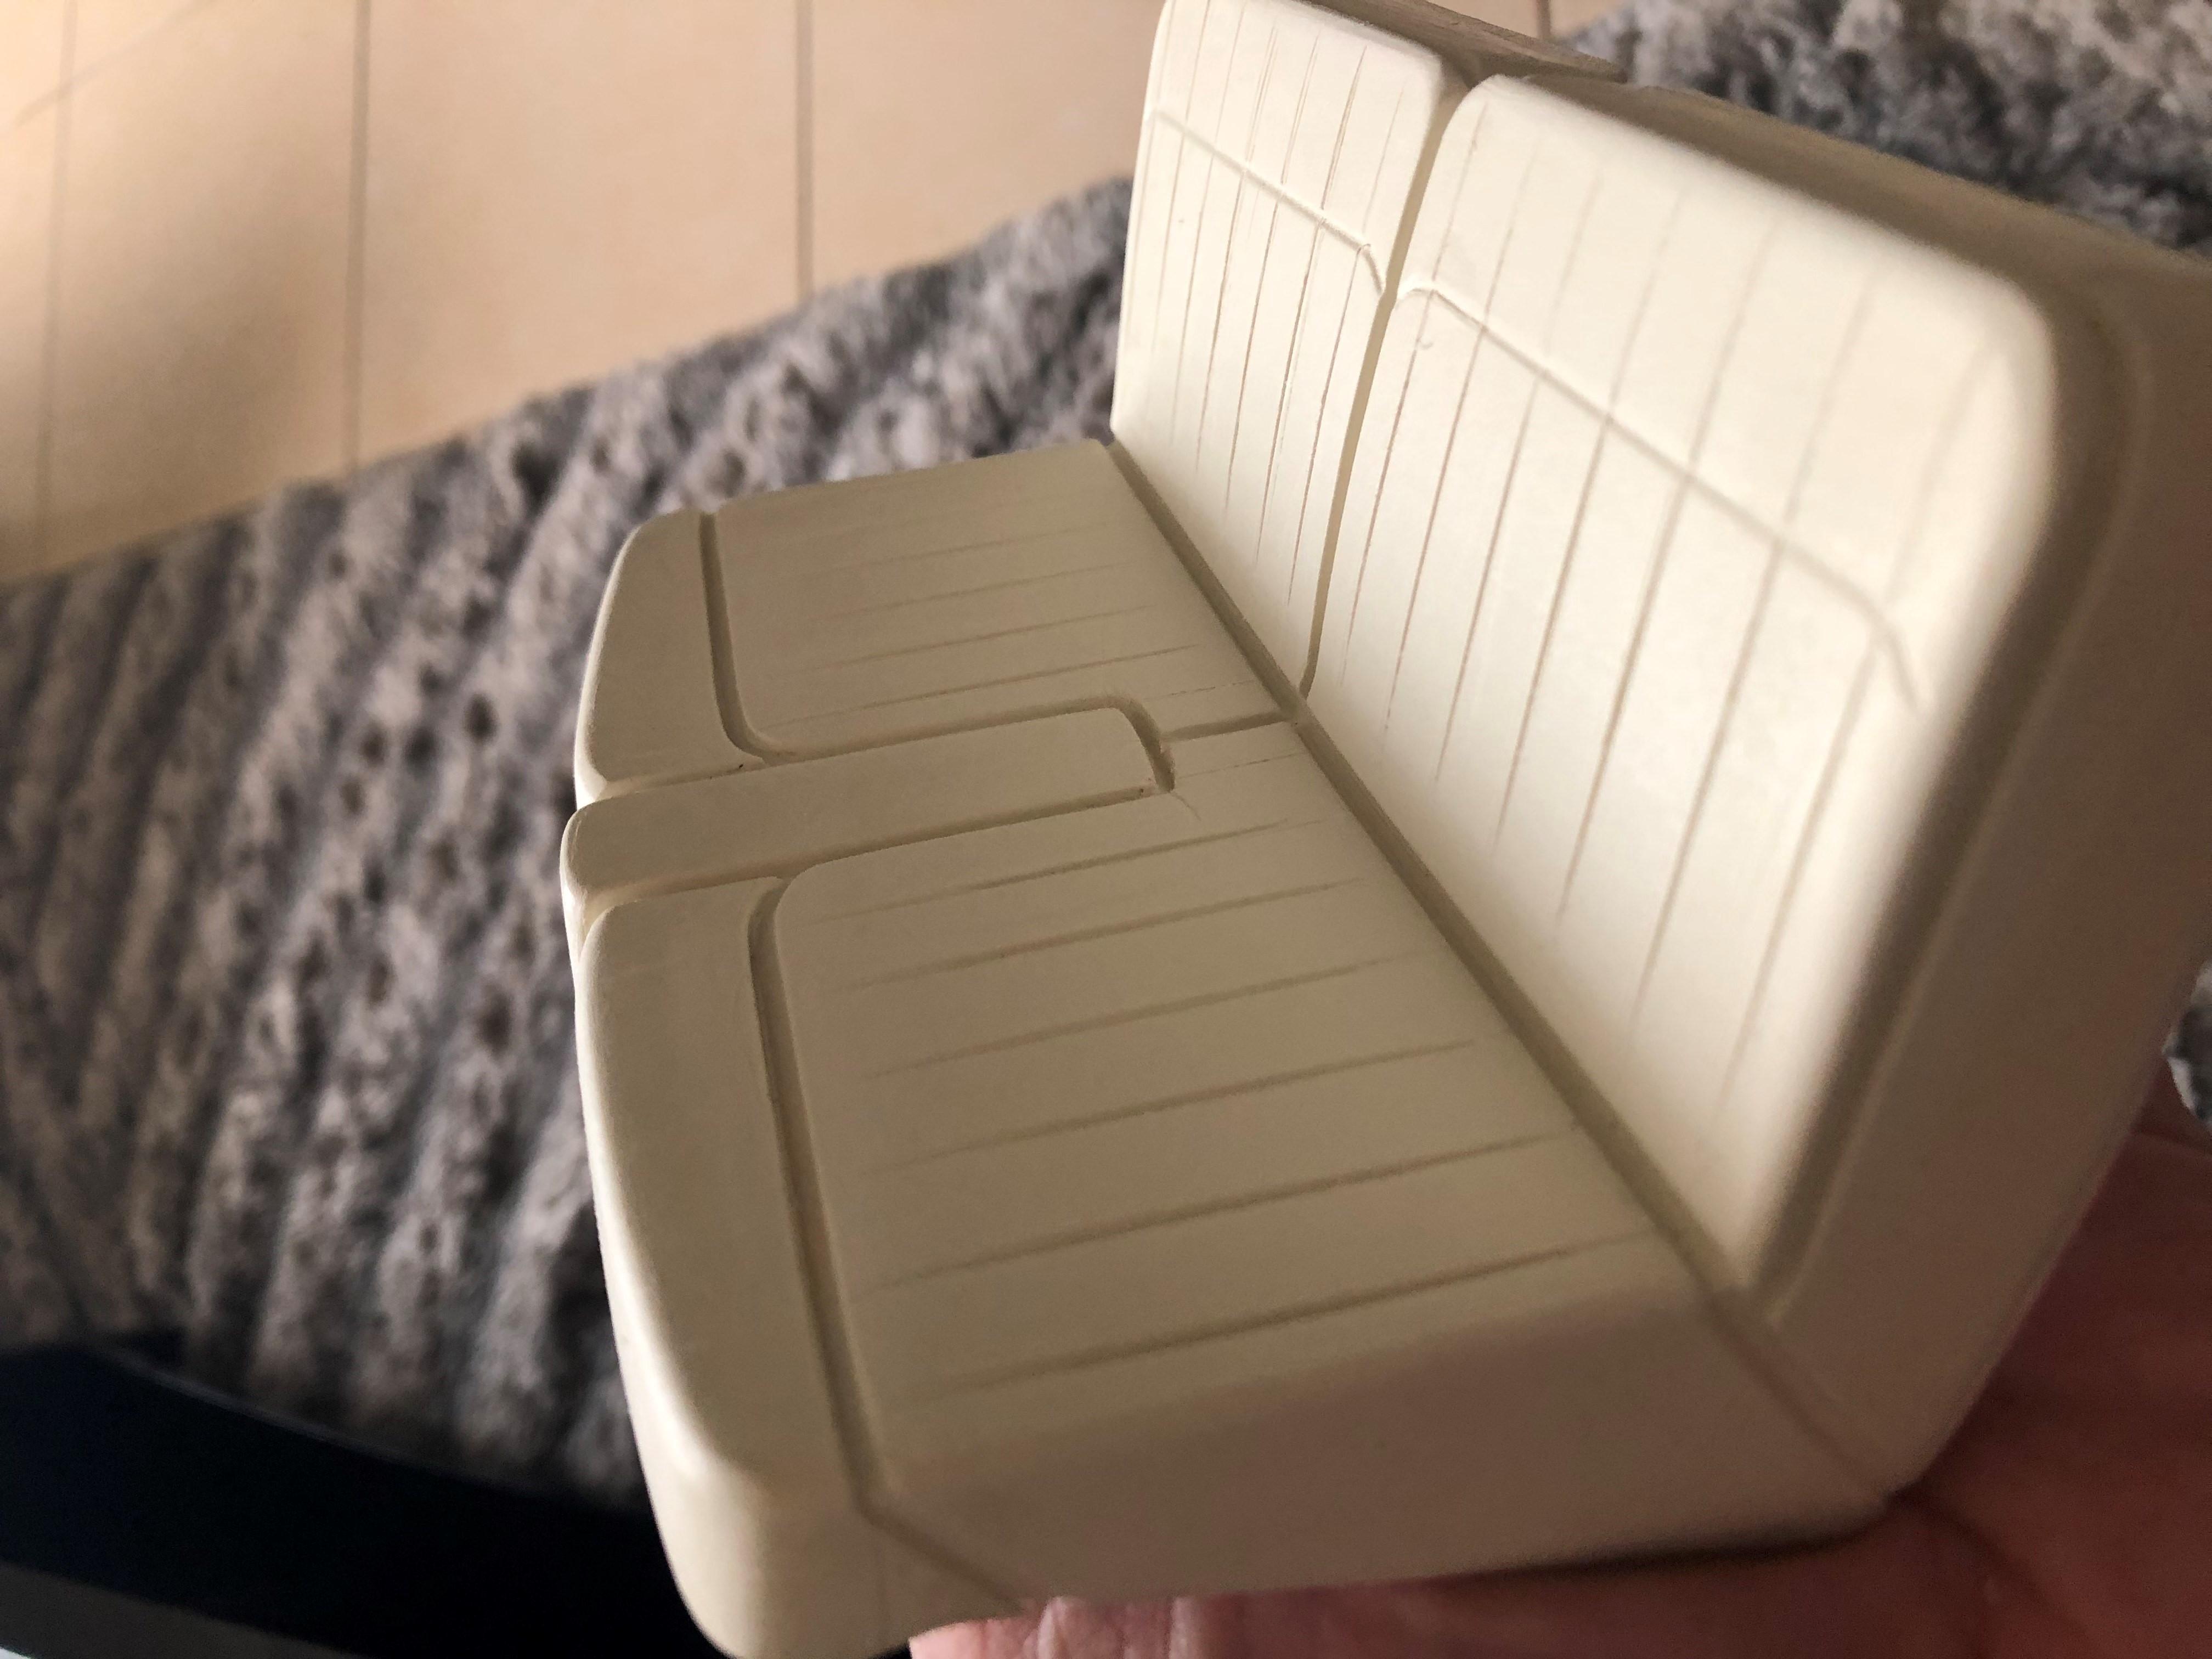
I remove the seat from the main body frame section to be able to work it more easily , and start to create future line where the leather will be attached, the already existing line have been accentuate for the leather connection to be better . on the last picture I found a knife case with this back kind of sponge material quite flexible and easy to cut , that will be to create volume on the leather .hope the result will be nice as I just have one piece of leather to work on ... no second chance available
-
very nice job ....... well done
-
I am currently preparing the fitting of the doors before the paint , got one question without answer about the overall layer of paint and the gape I need to leave to be able to open and close the doors... tried to see online the average thickness of a paint Tamiya TS rattle can , not sure at all , considering that there will be 2 coats primer , 2 coats undercoat , 2 final coats , and possibly 2 coats clear,, total will be 8 coats in total , I won 't be sanding on the under edge of the door , ....what will be the final extra thickness ? 0.6....... 0.4 ......... 0.3 mm ... that the question ? if anyone have an idea ... !!!!!!
-
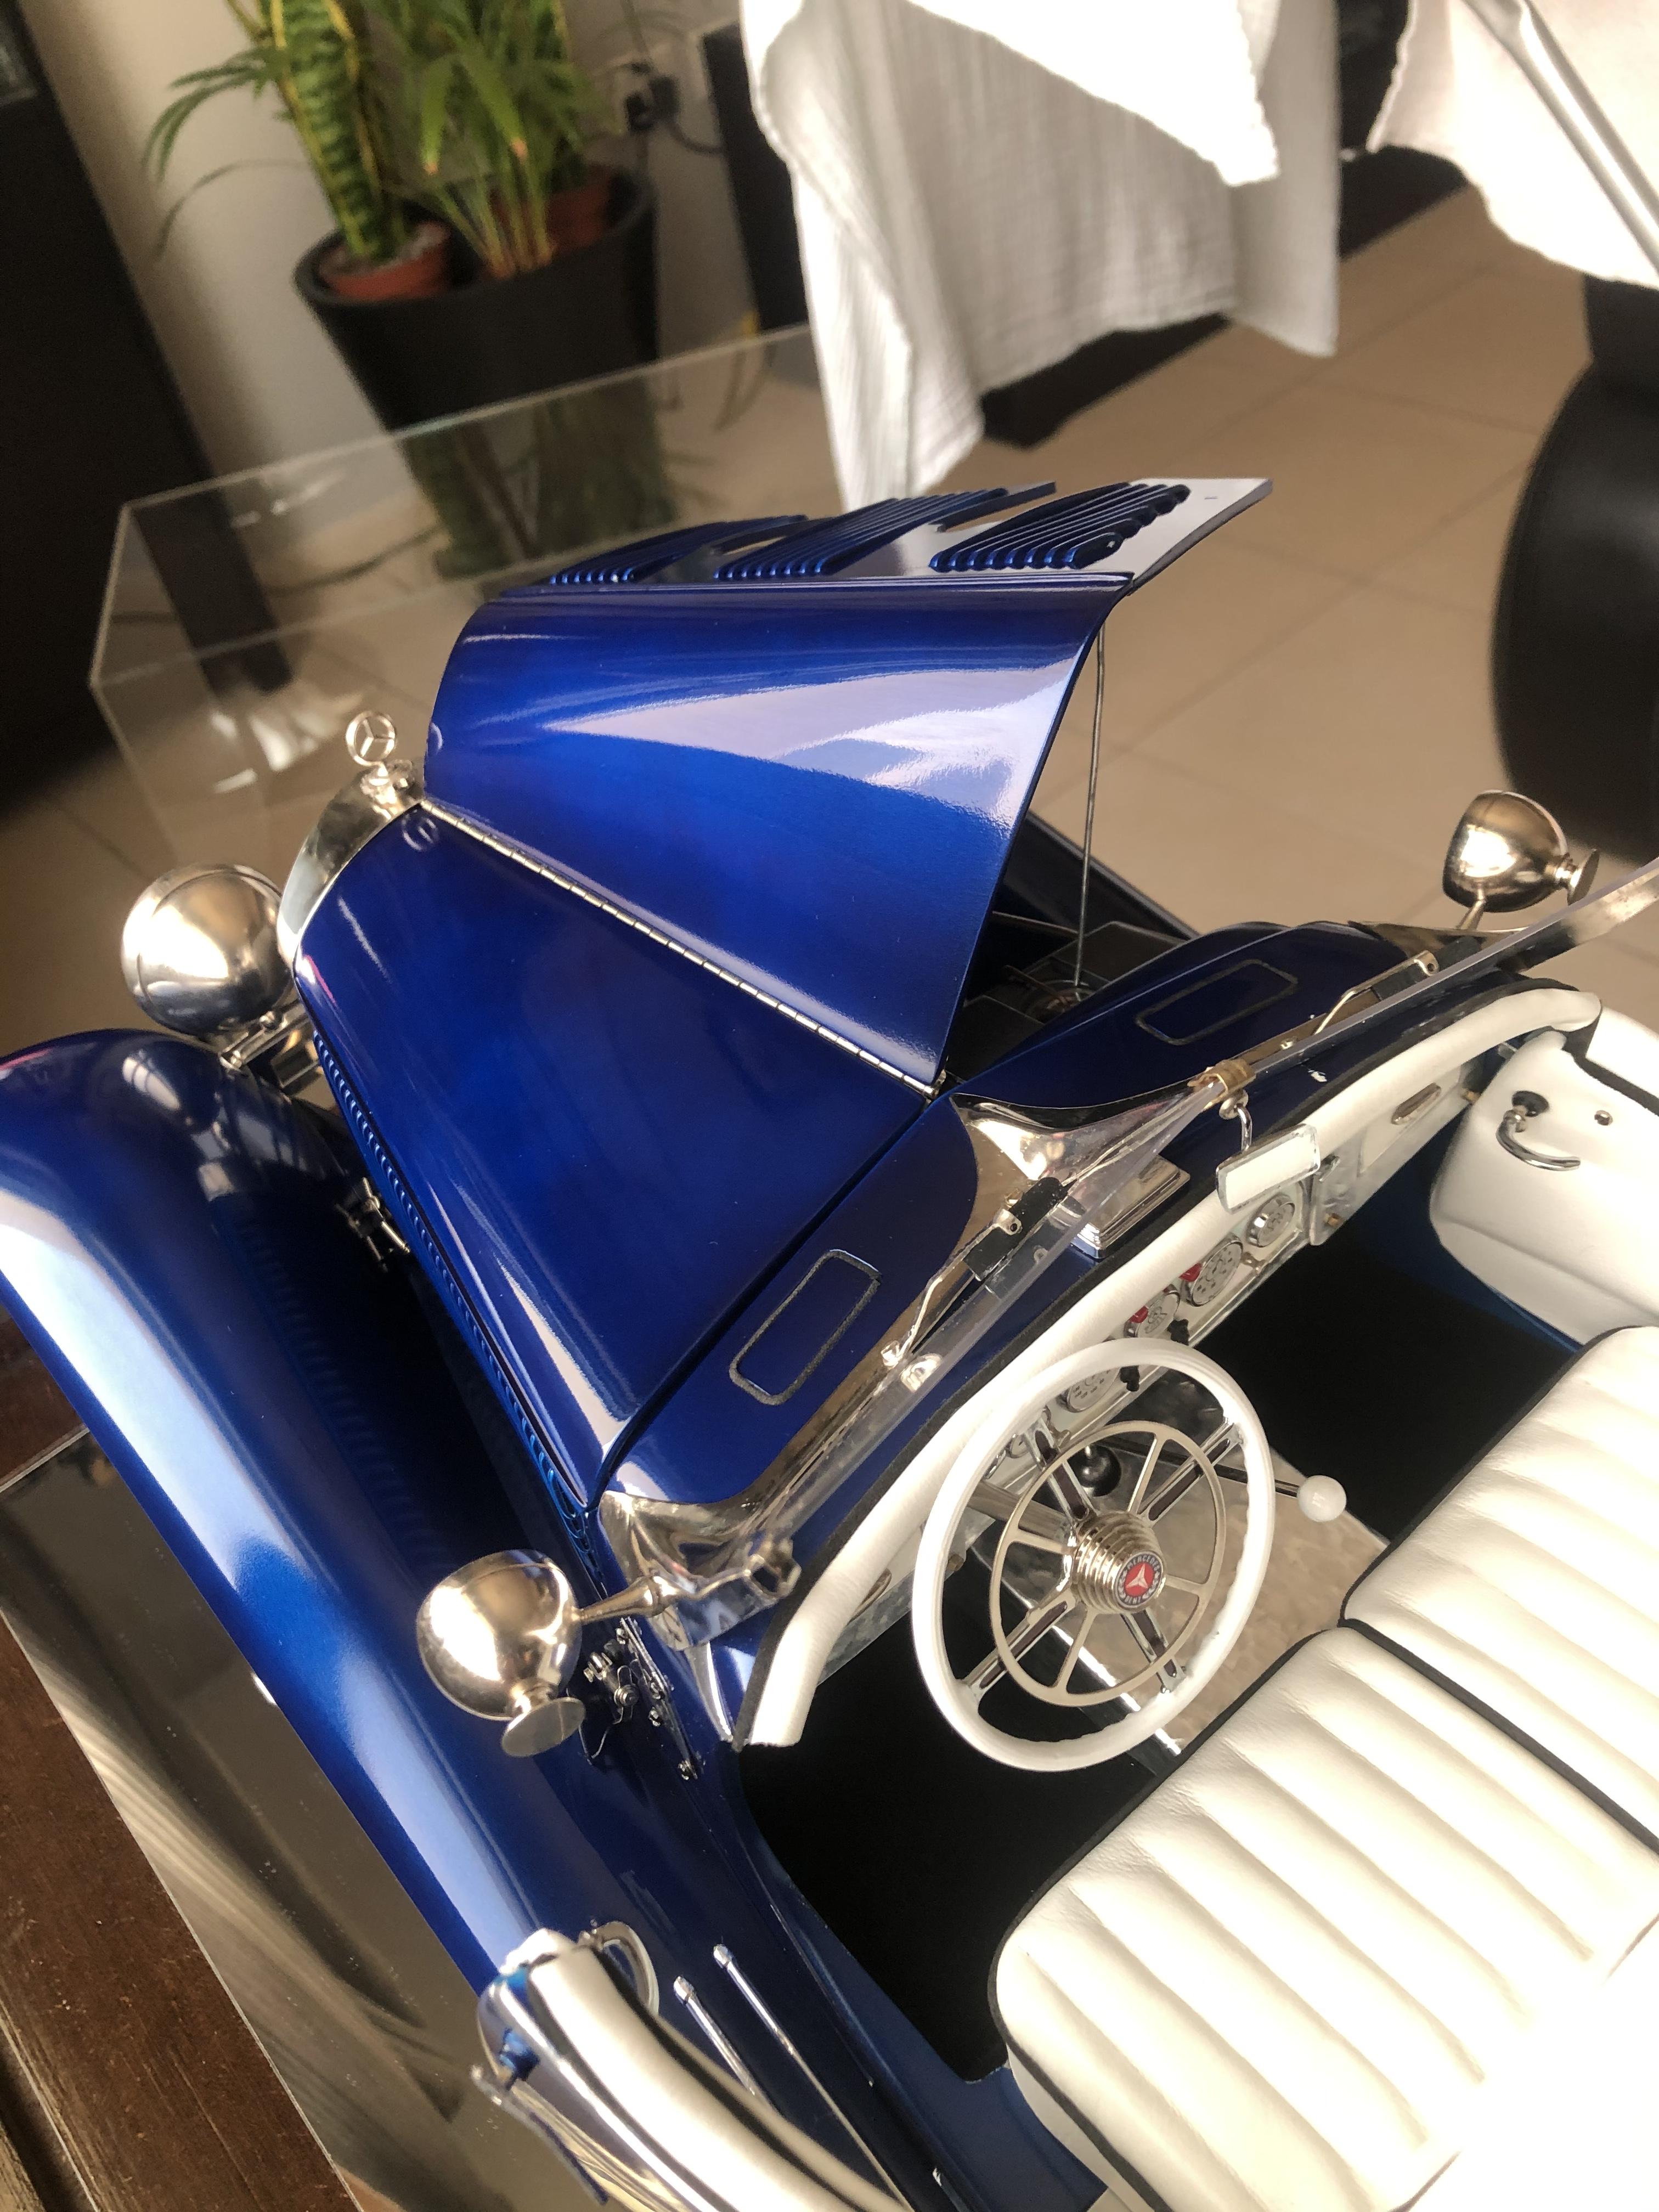
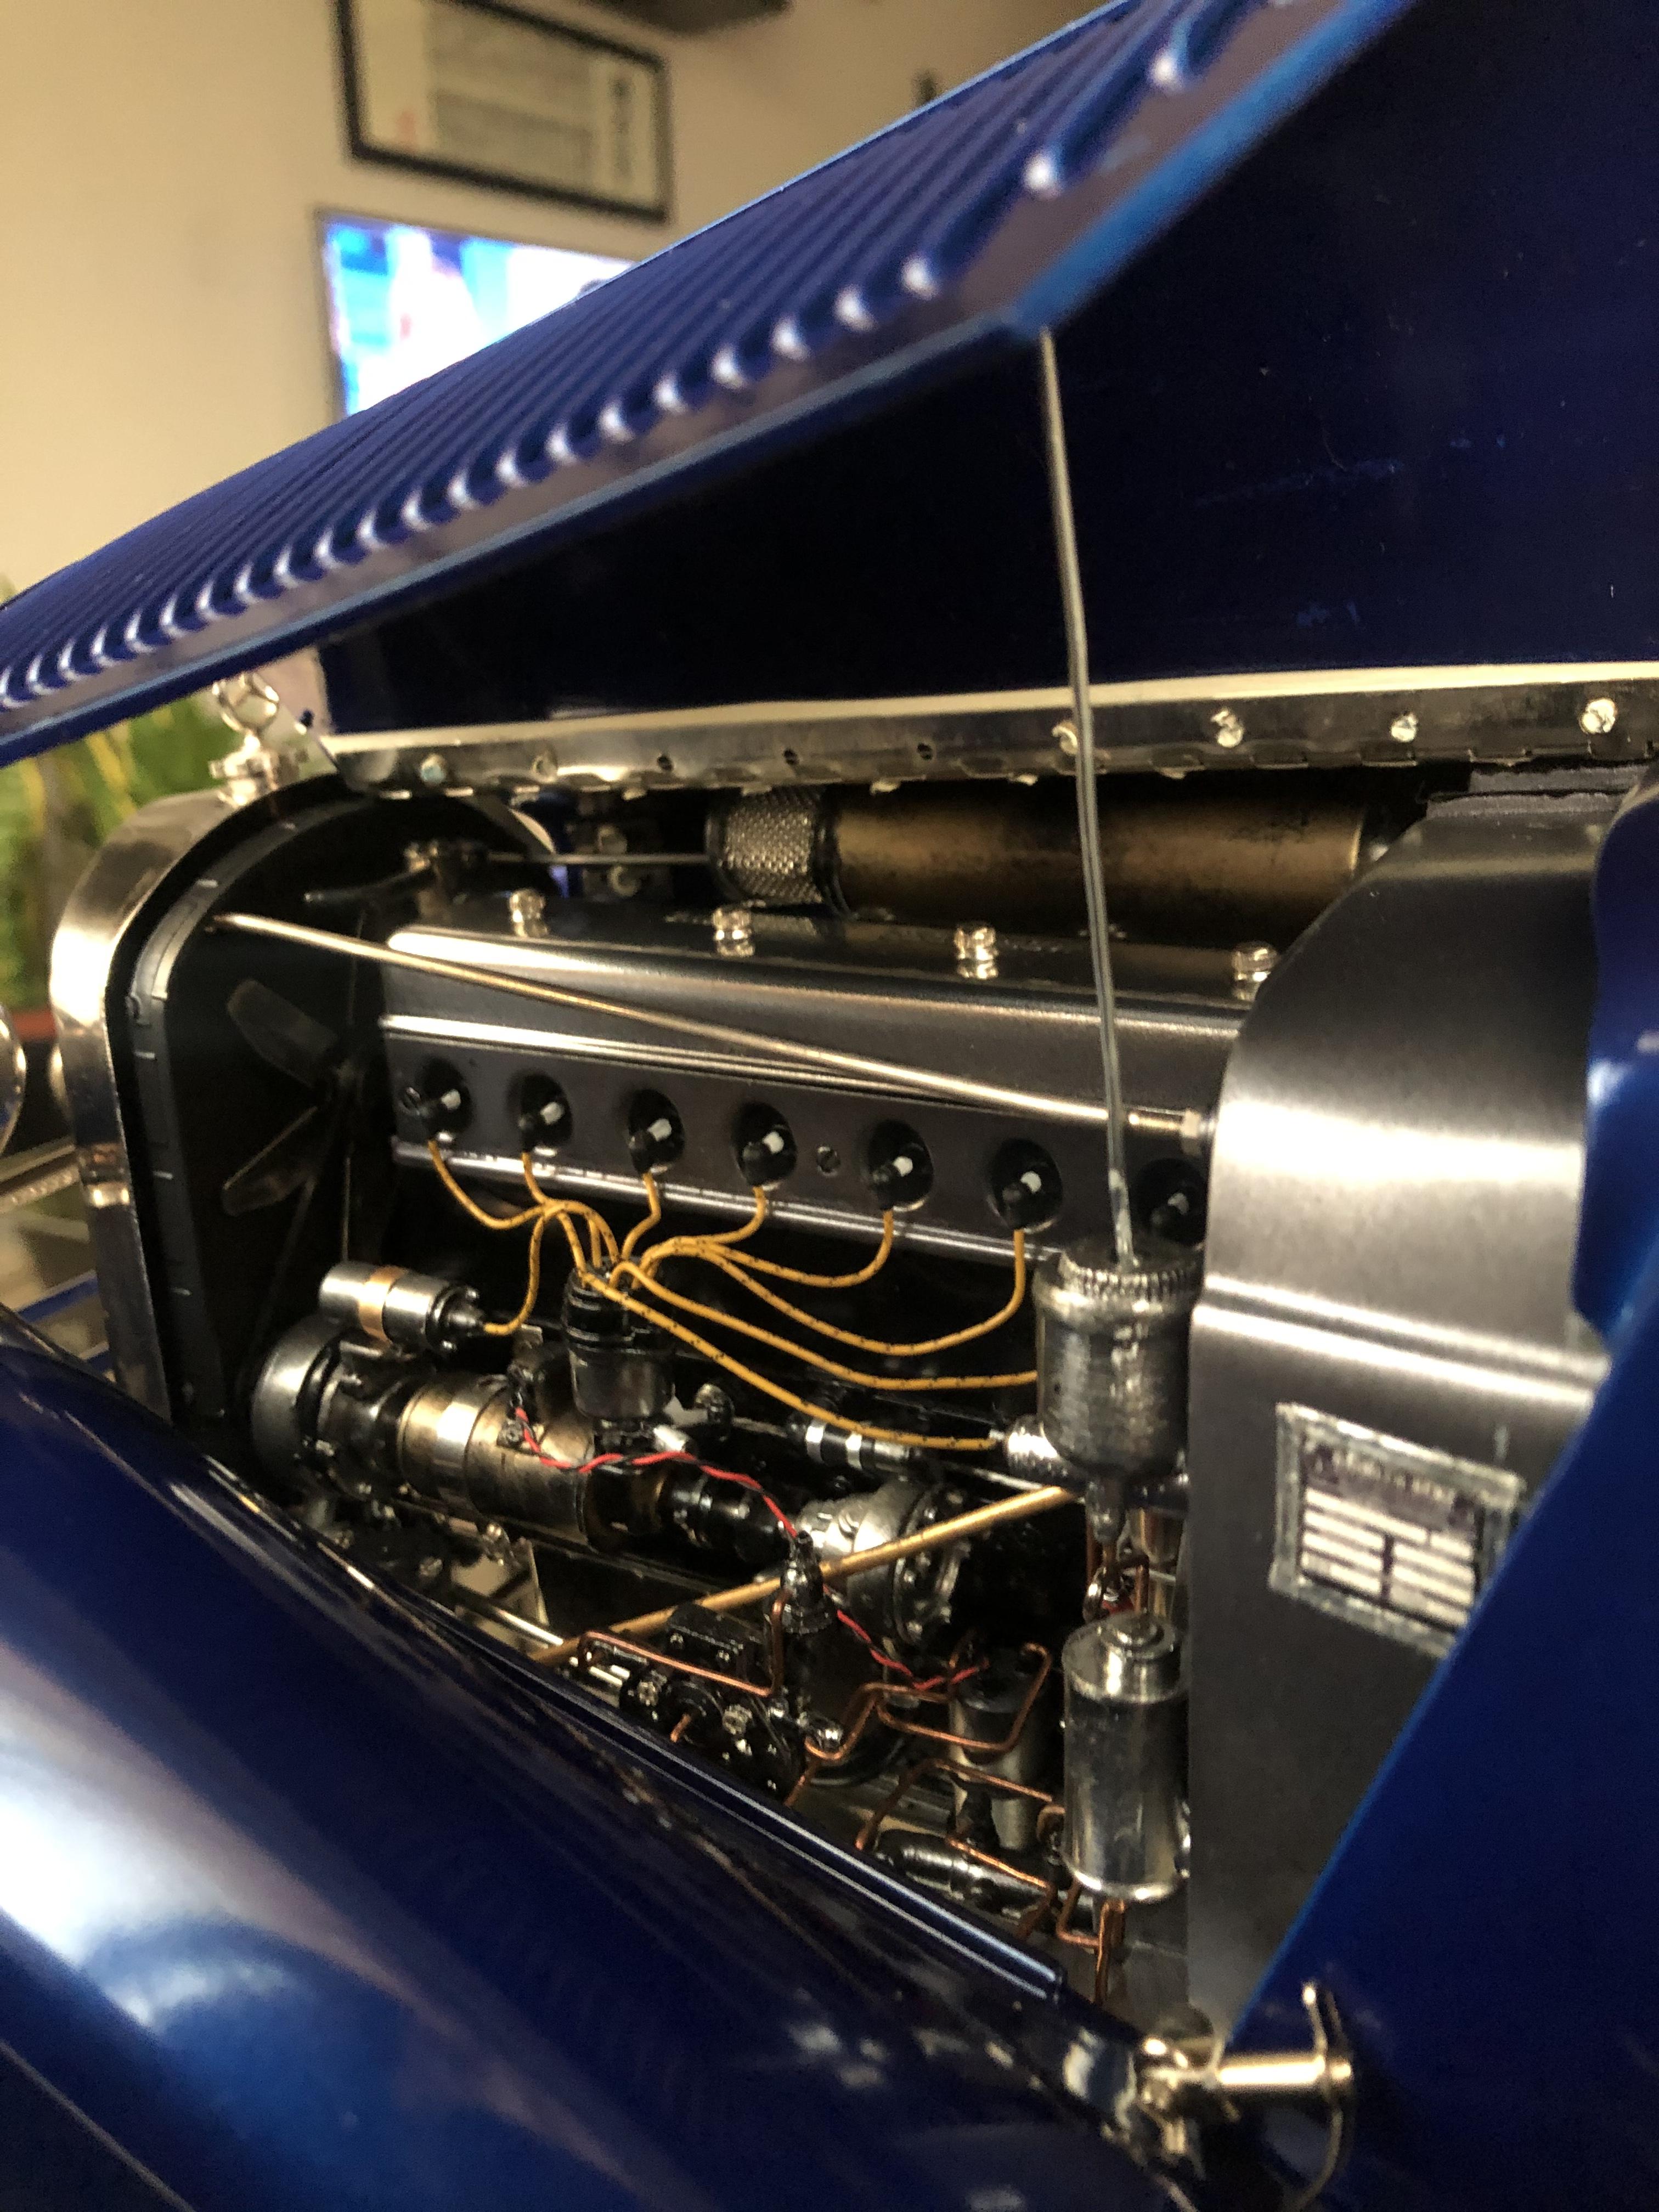
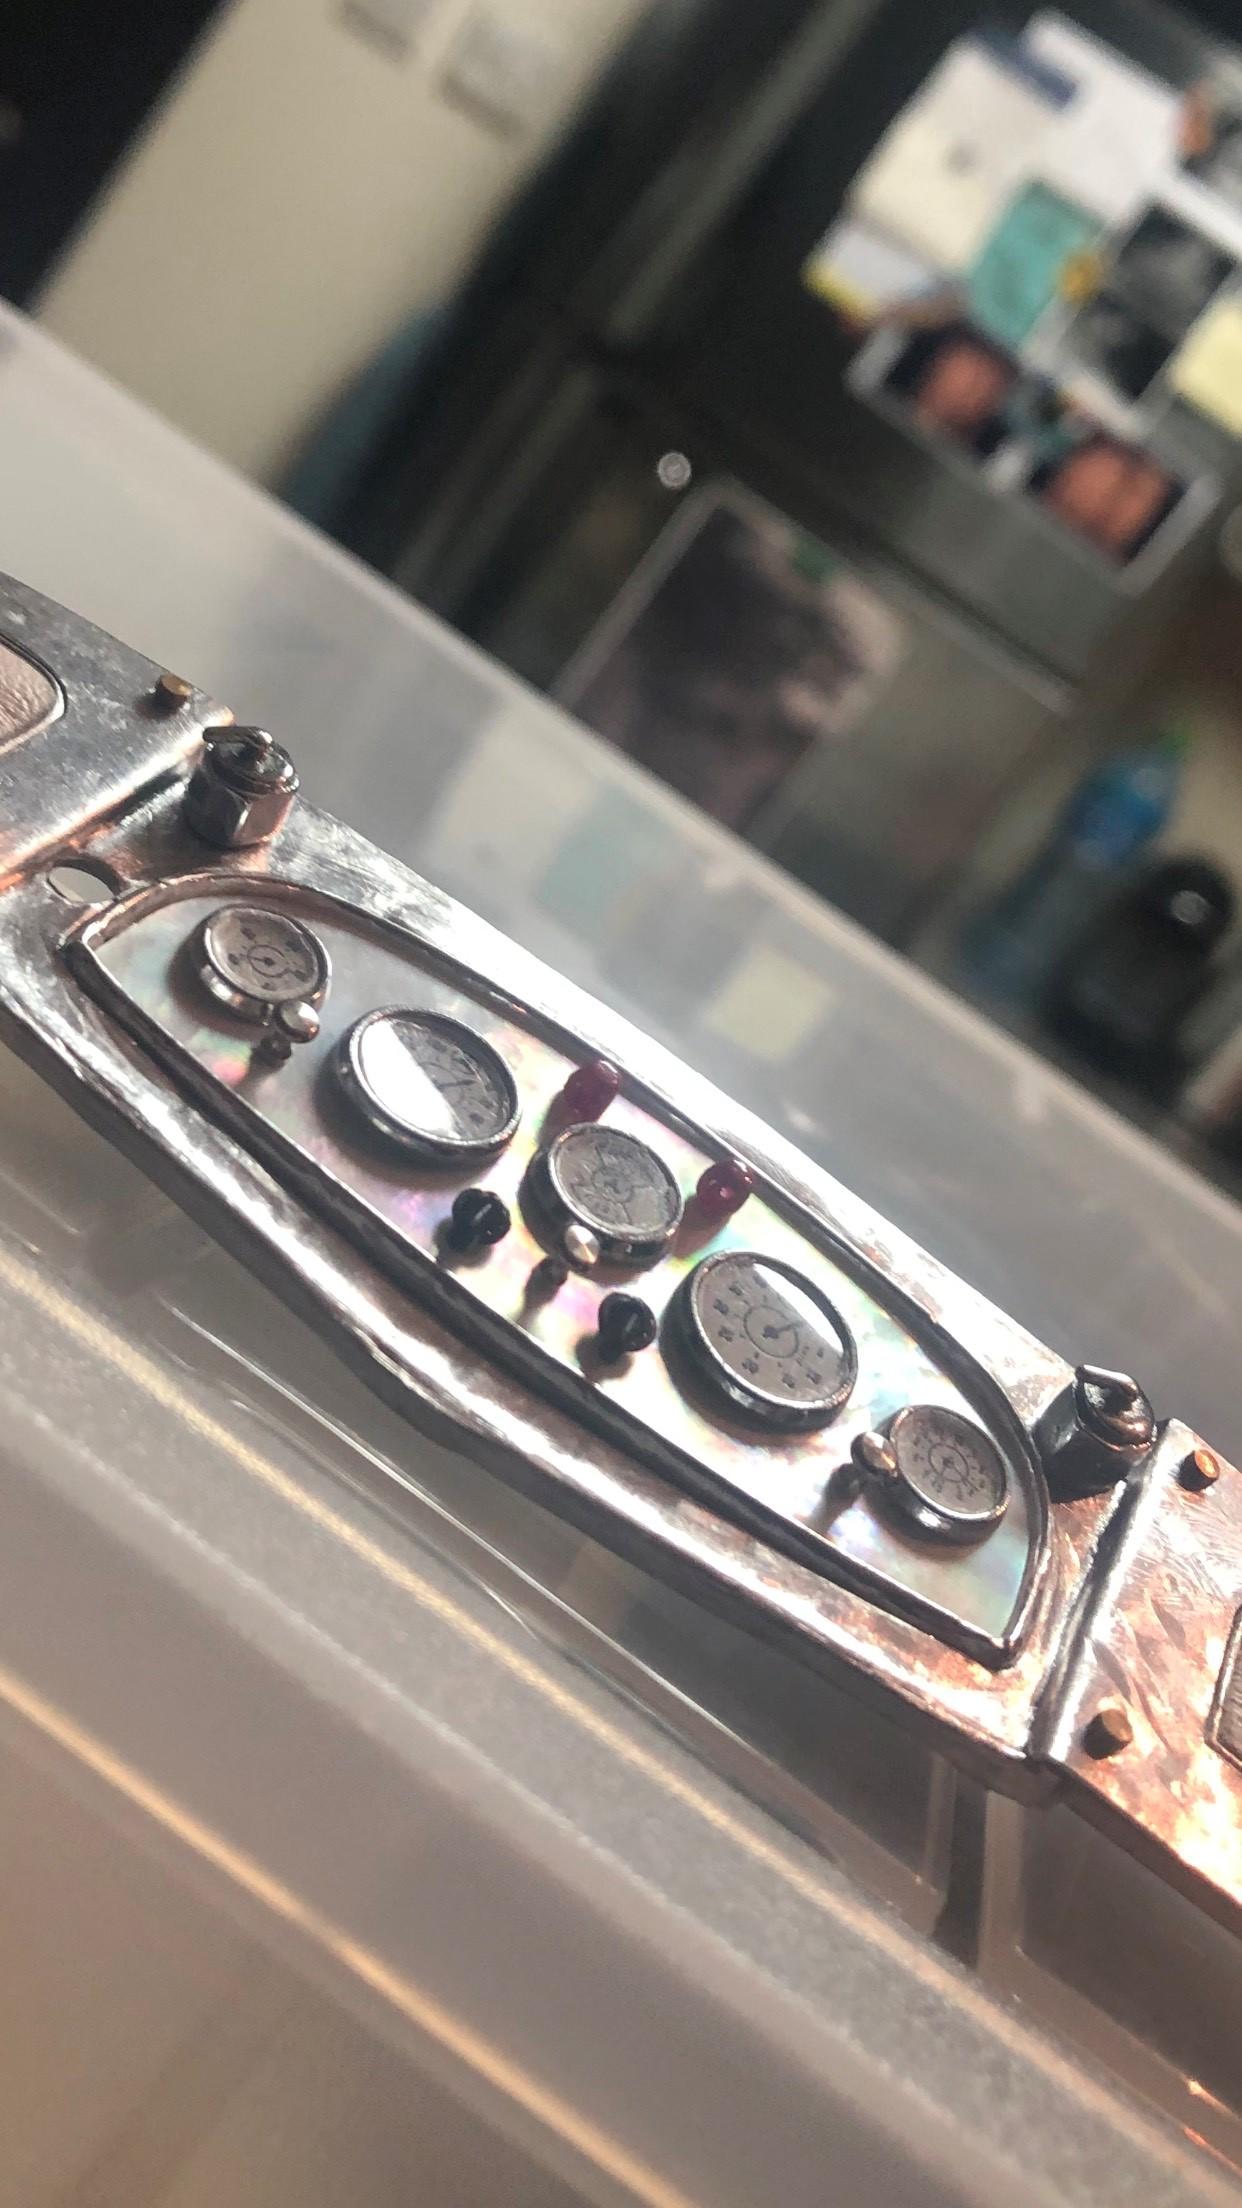
dashboard completed , aluminium panel fixed with brass bolt , gauge inserted in mother of pearl panel , glove compartment in white leather .