

dmthamade
-
Posts
142 -
Joined
-
Last visited
Content Type
Profiles
Forums
Events
Gallery
Posts posted by dmthamade
-
-
On 9/6/2019 at 8:29 PM, 64Comet404 said:
Thanks for the compliments Dave!
I also agree with you about the Vallejo primer, but have found it needs a lot longer. I once tried to do some priming over a surface painted with masking fluid. When I went to remove the mask (5 days later), the primer stripped off in sheets.
Yup!! Did a P-38 in NMF using their specific primer and paint with sufficient drying time. Masked to paint different panels and the pant came off in sheets. Had to start over. At least stripping the paint was easy, used green masking tape.

Have used their normal primer with mixed results. Prime with anything else and the paint is great!!
Don
-
Be careful with their primer. Have had bad luck with paint and primer pulling up with masking tape. Especially true with their metal colors and primer. Priming with any other primer the paint works great. I've even used Tamiya XF-19 as a primer for their paints, worked fine.
Don
-
Tamiya X-22 thinned with Mr Color thinner or Mr Color leveling thinner. Next would be Tamiya TS-13. All this might change doing glossy schemes.
Don
-
Guns!! Car like that, gonna need guns.
-
Classic hotrod!!
Don
-
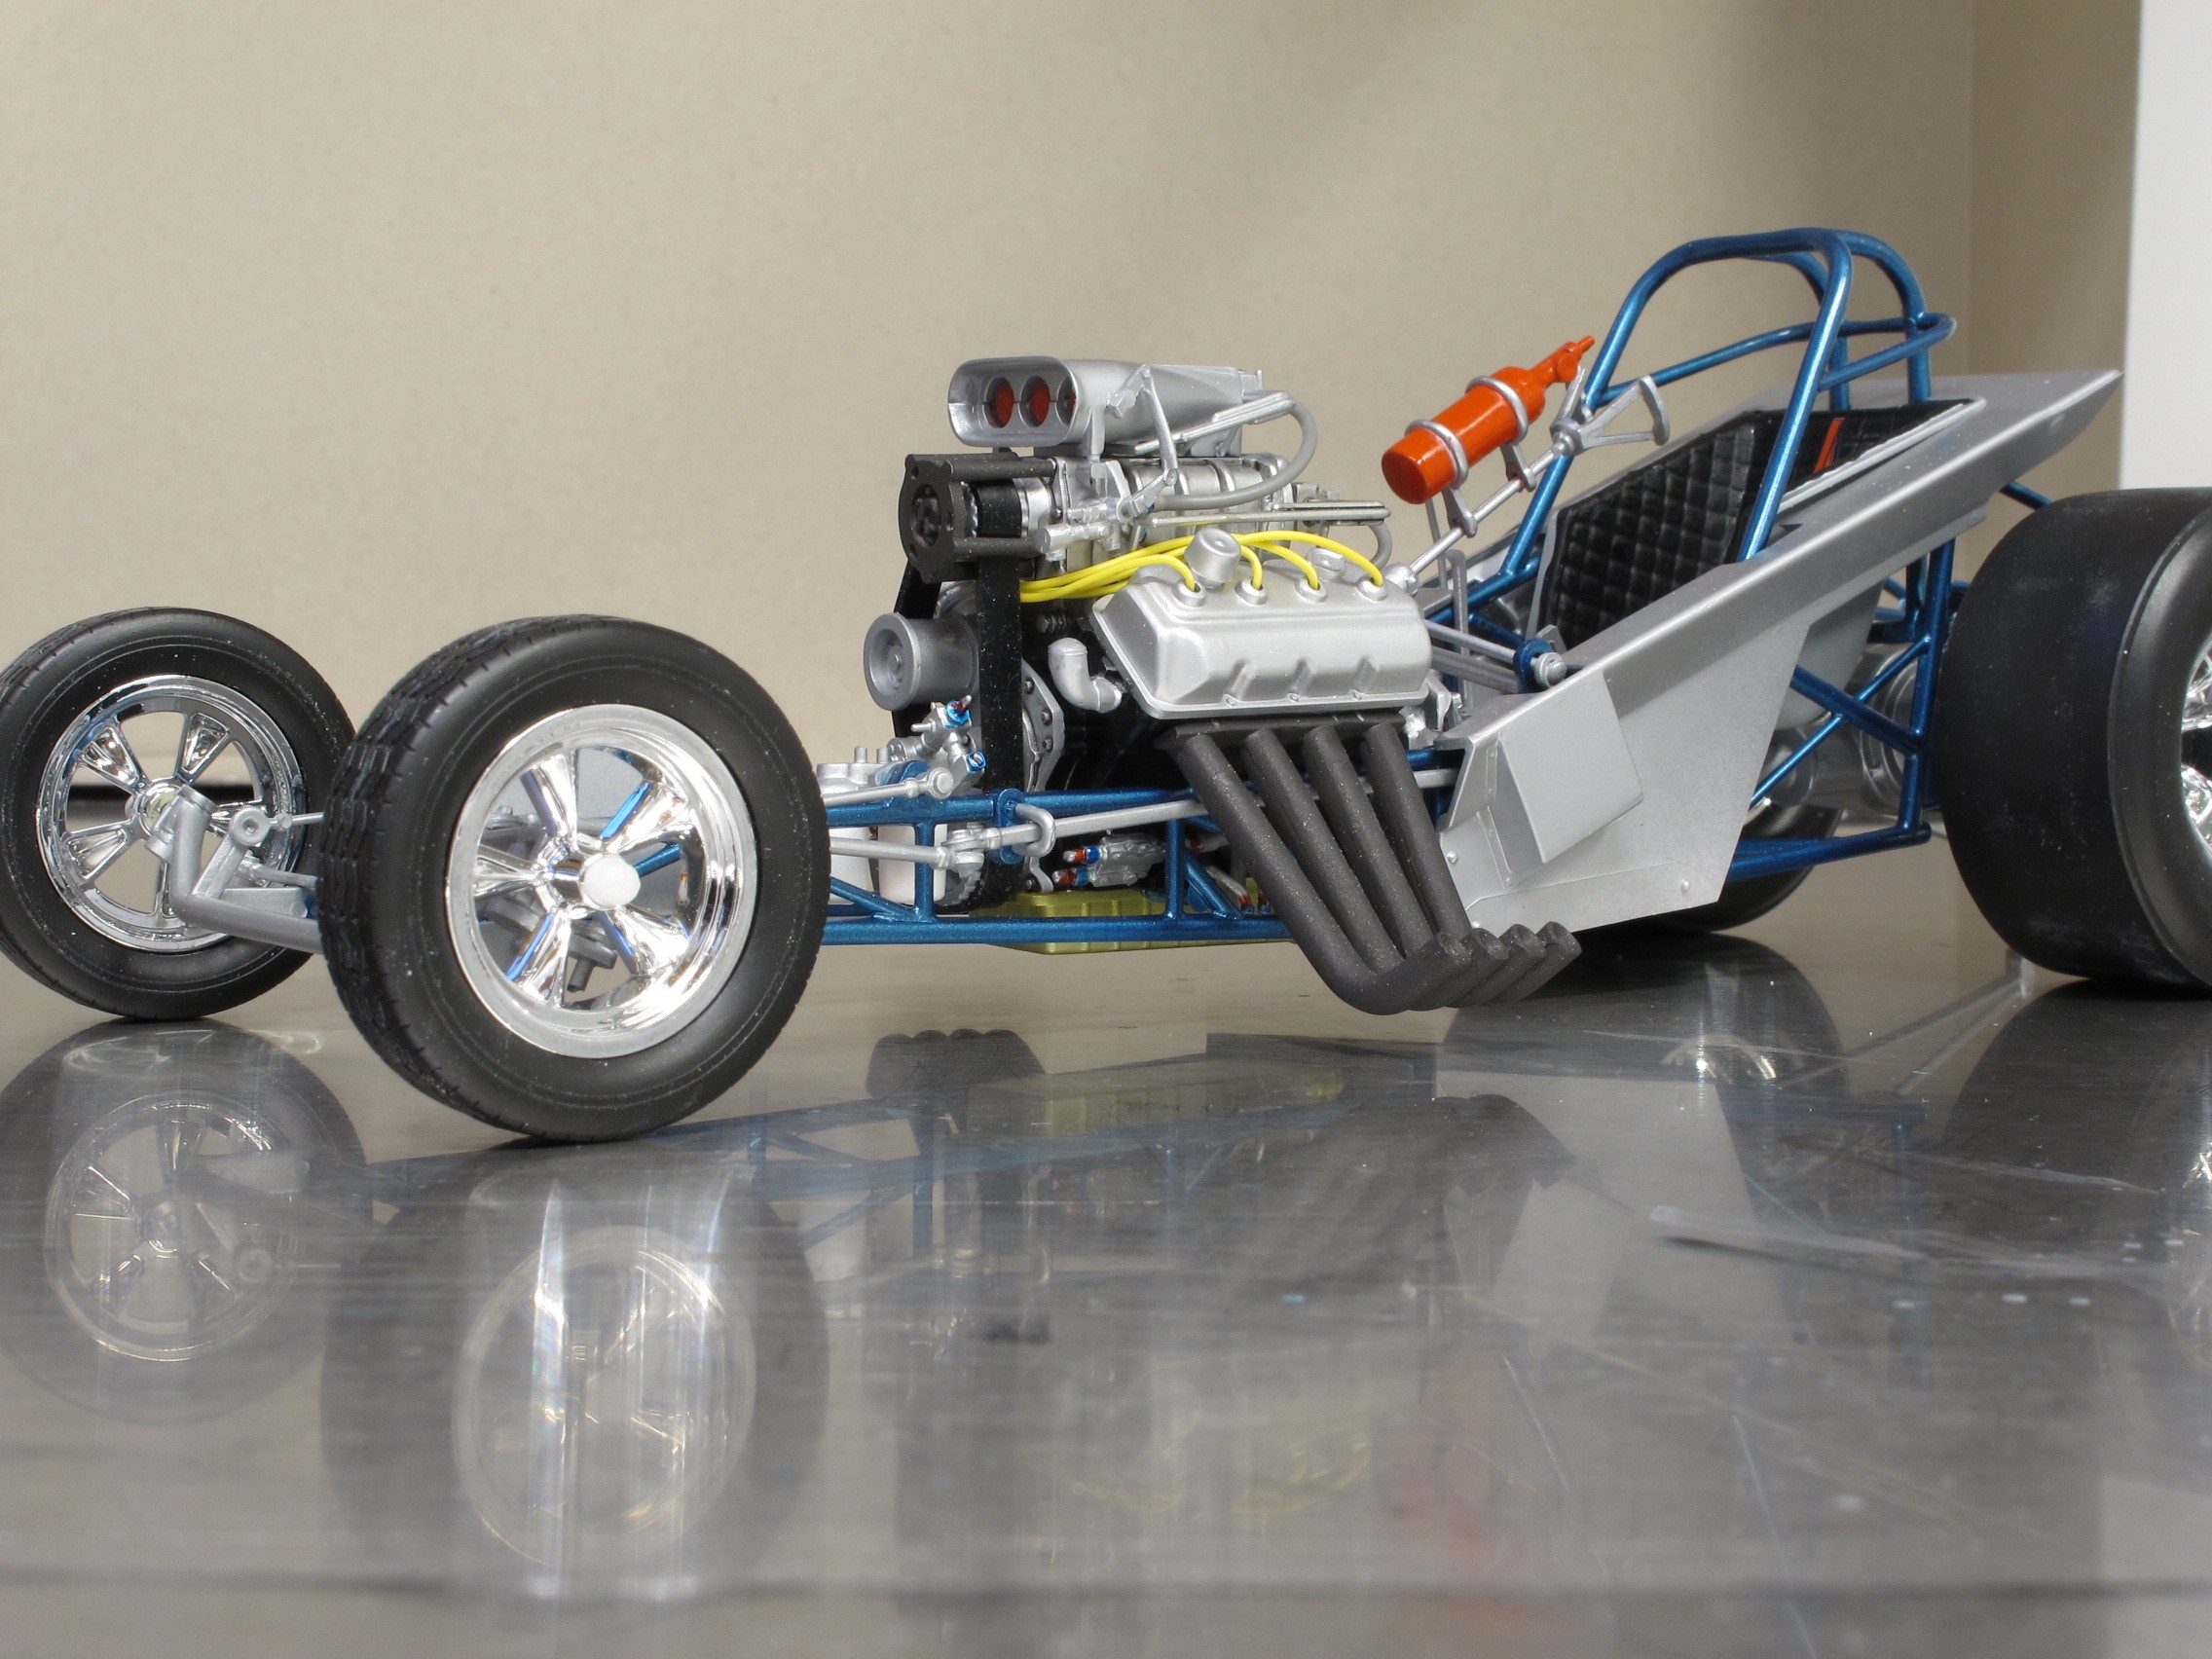
Hello all!! New here, first in progress build. I'm not building this in the kit colors, going off on my own. I've done very few cars, been doing 1/32 aircraft for decades. This build is more an exercise in building and painting, i'll worry about details as i build more car kits. Still haven't figured out what the color will be, building this with a black interior. I have been using different sheens of black to try and avoid a monochrome look. There is matt, semi gloss and gloss black in the interior. I did hit the handles and cranks with silver.
Dash is gloss black on lower parts with top semi gloss. Might hit the dash with clear flat to take away some of the shine.
Engine is painted ford blue with various metallic silvers for manifold, valve covers, timing cover. Fan belt looks really odd, something to change in later builds.
I stripped the chrome off all parts but the bumpers and grilles.
Don
-
Have used Model Air, find it needs a primer or it would scratch away easily, not stick to bare plastic. Use your go to primer, find Vallejo primers don't stick too well, though. Can't say enough good about Tamiya spraybombs, they work. Best over a primer though have sprayed over bare plastic OK. Metallics need a primer especially if filler or work was done.
Don
-
Great topic!! Years ago I was building a 1/32 A-7E CorsairII by Trumpeter. All going great, glued wings, etc together, dried and sanded seams. Parts fell apart. Huh. Reglued, resanded, fell apart... glue had zero effect on the "plastic". I was using a hot solvent cement, tried spilling some on a wing part and pressing with finger...nothing. Don't know what material it was, but it got binned. Just bad juju when a kit can't be glued together. I've got a few recent car kits in the stash now, I can see the plastic looks "different" from the aircraft kits i'm used to. The only thing that will matter will be the end results, though.
Don
-
So, you like Mustangs? Back in the day, I remember how my buds wanted the 60s ponys over the 70 because they were smaller and lighter. I always liked the 70s Mustangs. How long you figure to build all these?
Don
-
45 minutes ago, JollySipper said:
Something to keep in mind...... DupliColor paints are very much affected by the color primer that you use. You can change the whole tone of a color by changing the color primer...... make sure that if you have several parts to be the same color, that you use the same color primer on all of them........
Yup!! That's something I did know, with car colors it's more important than a low viz F-16. Also affects the amount of color coats needed for coverage, eg. white over dark grey primer vs white over white primer. I do remember candy colors are greatly affected by the base coat, light silver vs dark silver or gold. All this to say stay consistent with the primers!!
Don
-
Building aircraft kits, navigation/position lights need to be added. If/when I do, I put a base color of silver down first, then after it dries I apply Tamiya clear red, yellow or orange. Seems if you have bare metal foil down already then add the clear paint, you can have the bezel and lens easily. Haven't tried this yet (no chrome bezels on warplanes) but maybe on a future build.
Don
-
3 hours ago, Speedfreak said:
Good job Don! Hope your paint job goed smoothly.
Well i'm happy with the primer, now I just have to pick the color coat. I'm doing the Model King Comet Cyclone, hoping to do a different color than what's on the box. I should start a build in progress post.
Don
-
Great that you're continuing with the build in spite of all the setbacks. I built this kit in 2013 as a break from planes. The decals went bad for me as well, reacted with the clearcoat I applied. Stripped off, had to repaint, then redid some with Tamiya spray bomb gold and Indycals decals. At the time I was happy with how it turned out, now i'm thinking I could do better....The indycals decals worked great, though they aren't as crisp or in register as the Tamiya kit decals were.
Don
-
Great ideas all!! I've been looking at some finished builds with the neatly done badges, etc and been wondering how the heck am I going to do that? Reminds me of picking out details in model aircraft cockpits, something i'm not good at. Lots to learn...
Don
-
8 hours ago, GRiN said:
looking mighty fine. Looks like you got rid of a lot of the plating? Gary
Except for the wheels, I deplated everything. All the plated parts had a lot of flashing and fit was poor, so it was a choice of shiny but poor fit, or no seams and no shine. I need to find an alternative to painting parts that should be chromed or highly polished. Lots to learn after 30+ years of flat aircraft finishes.
Don
-
1960 Chevy Sedan Delivery. It's a two door, wagons are four doors. I think i remember building this kit, does it have a flip front?
Don
-
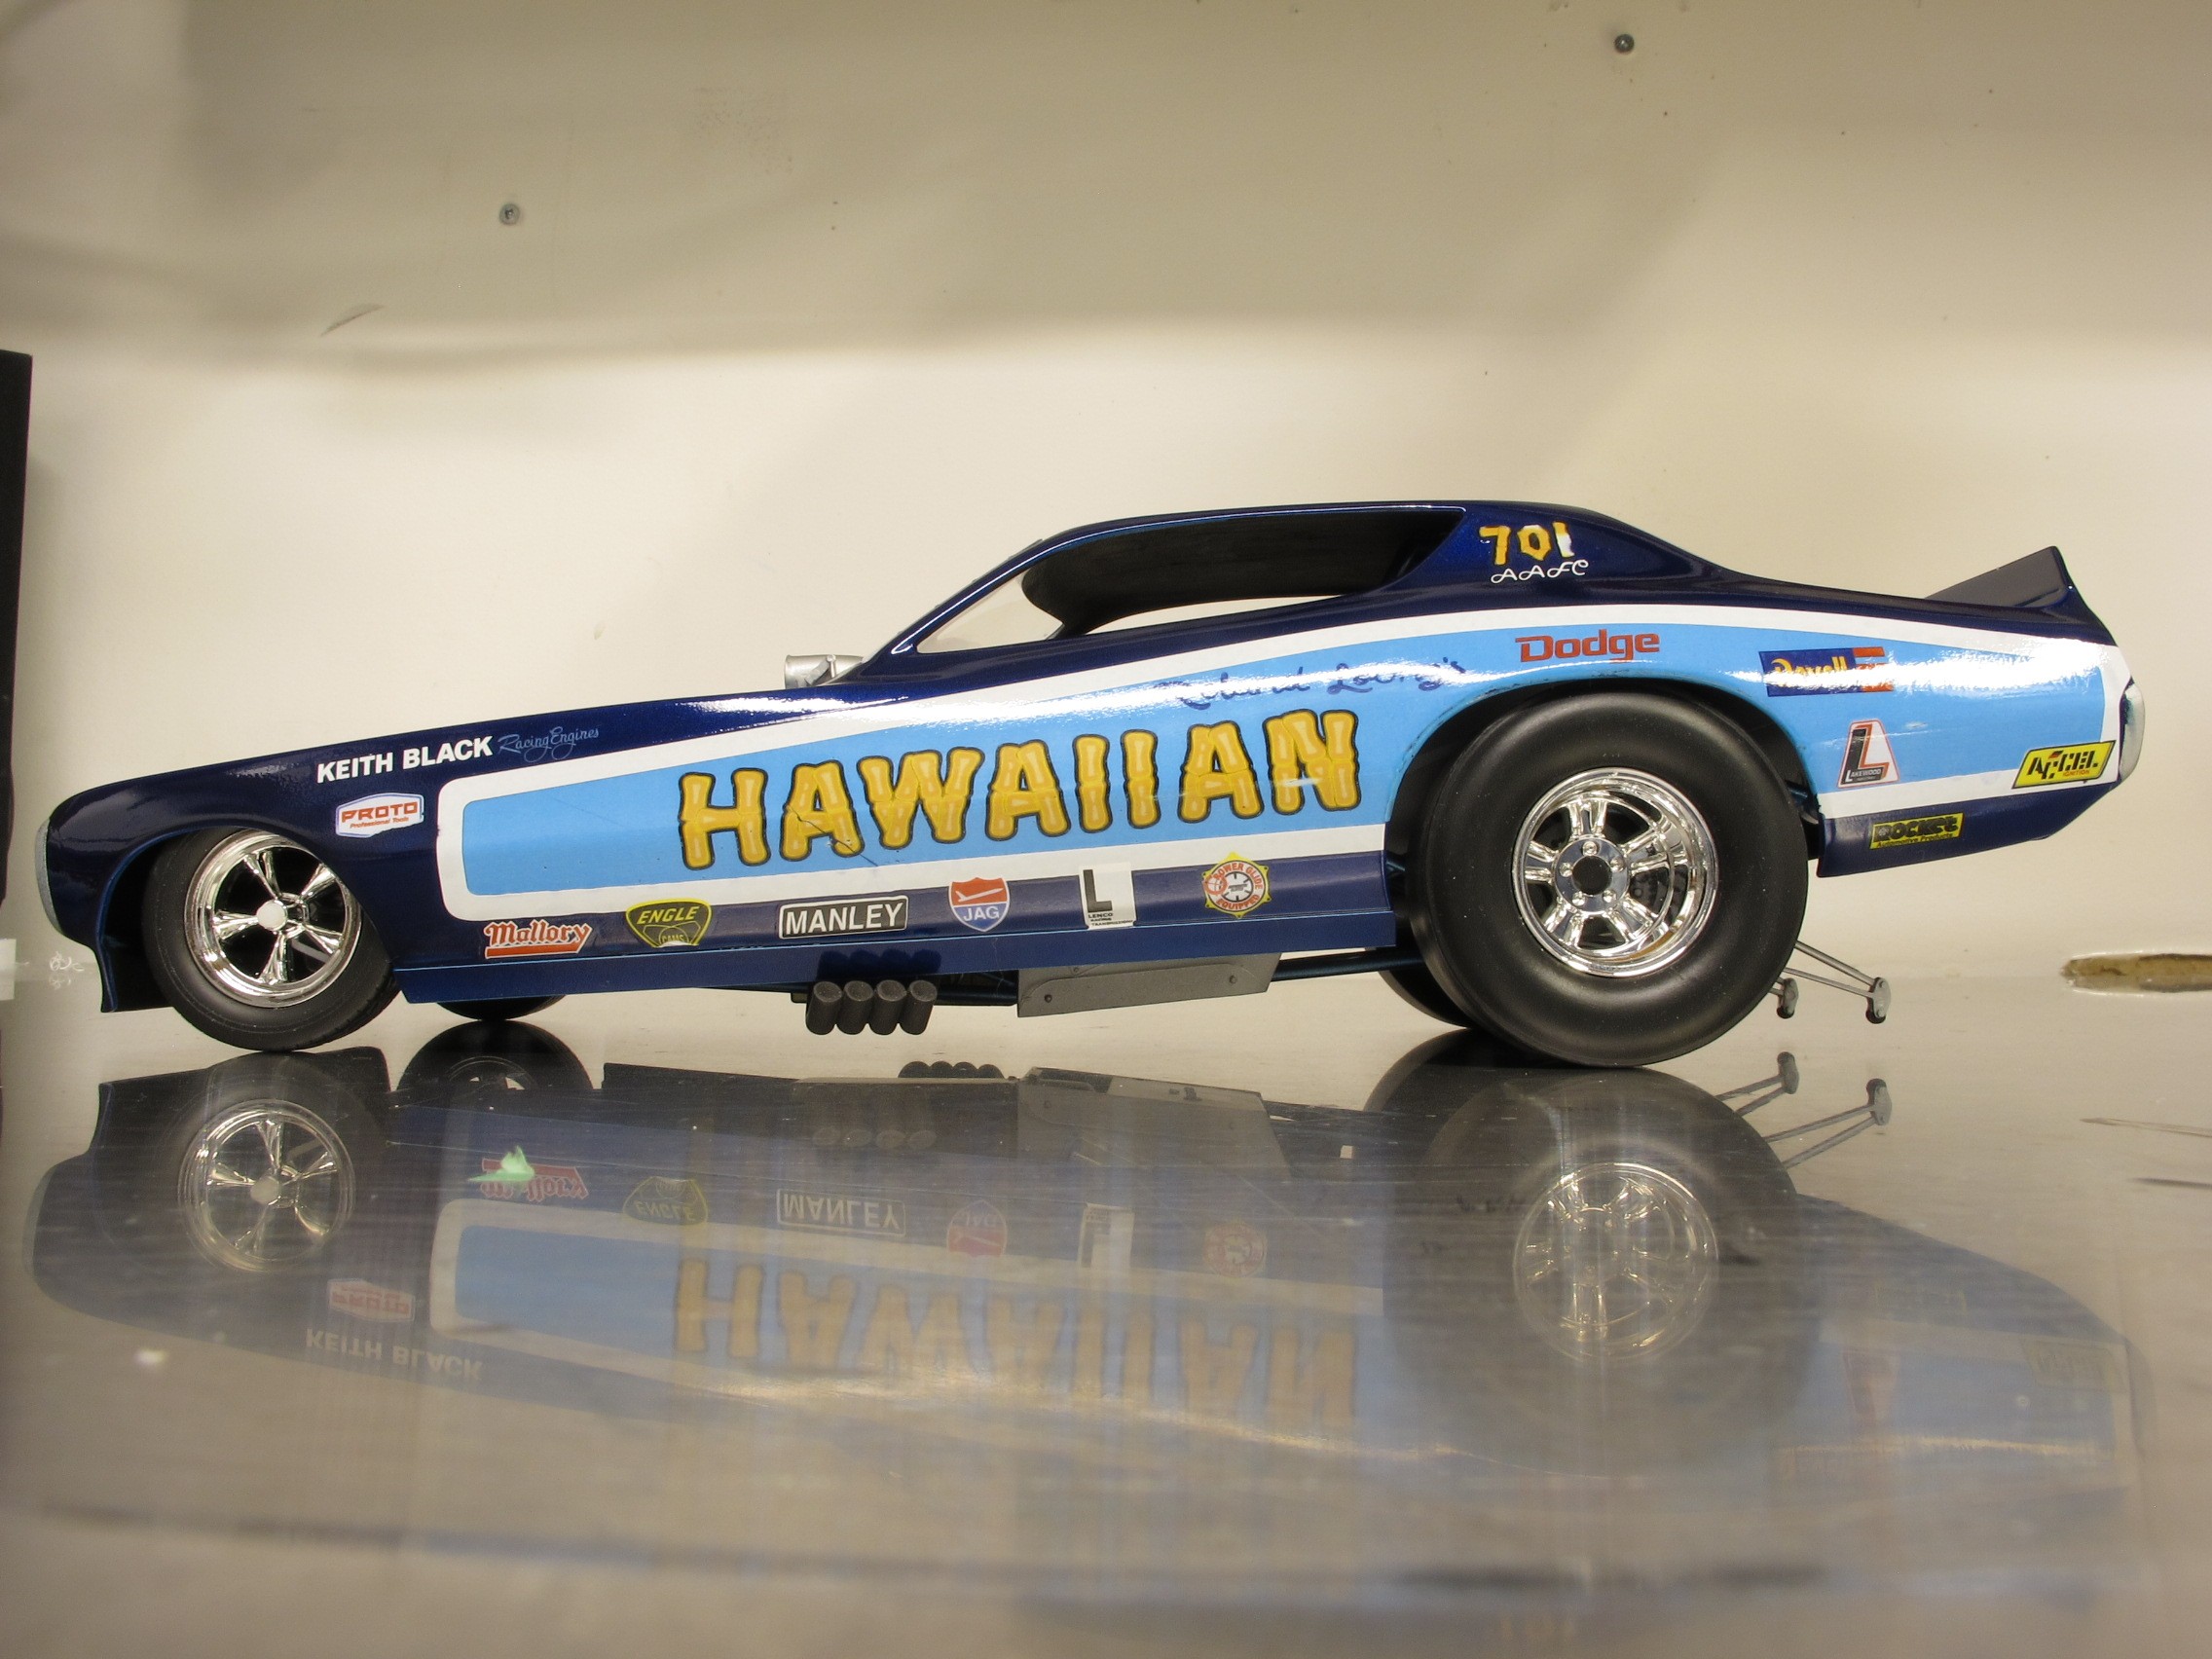
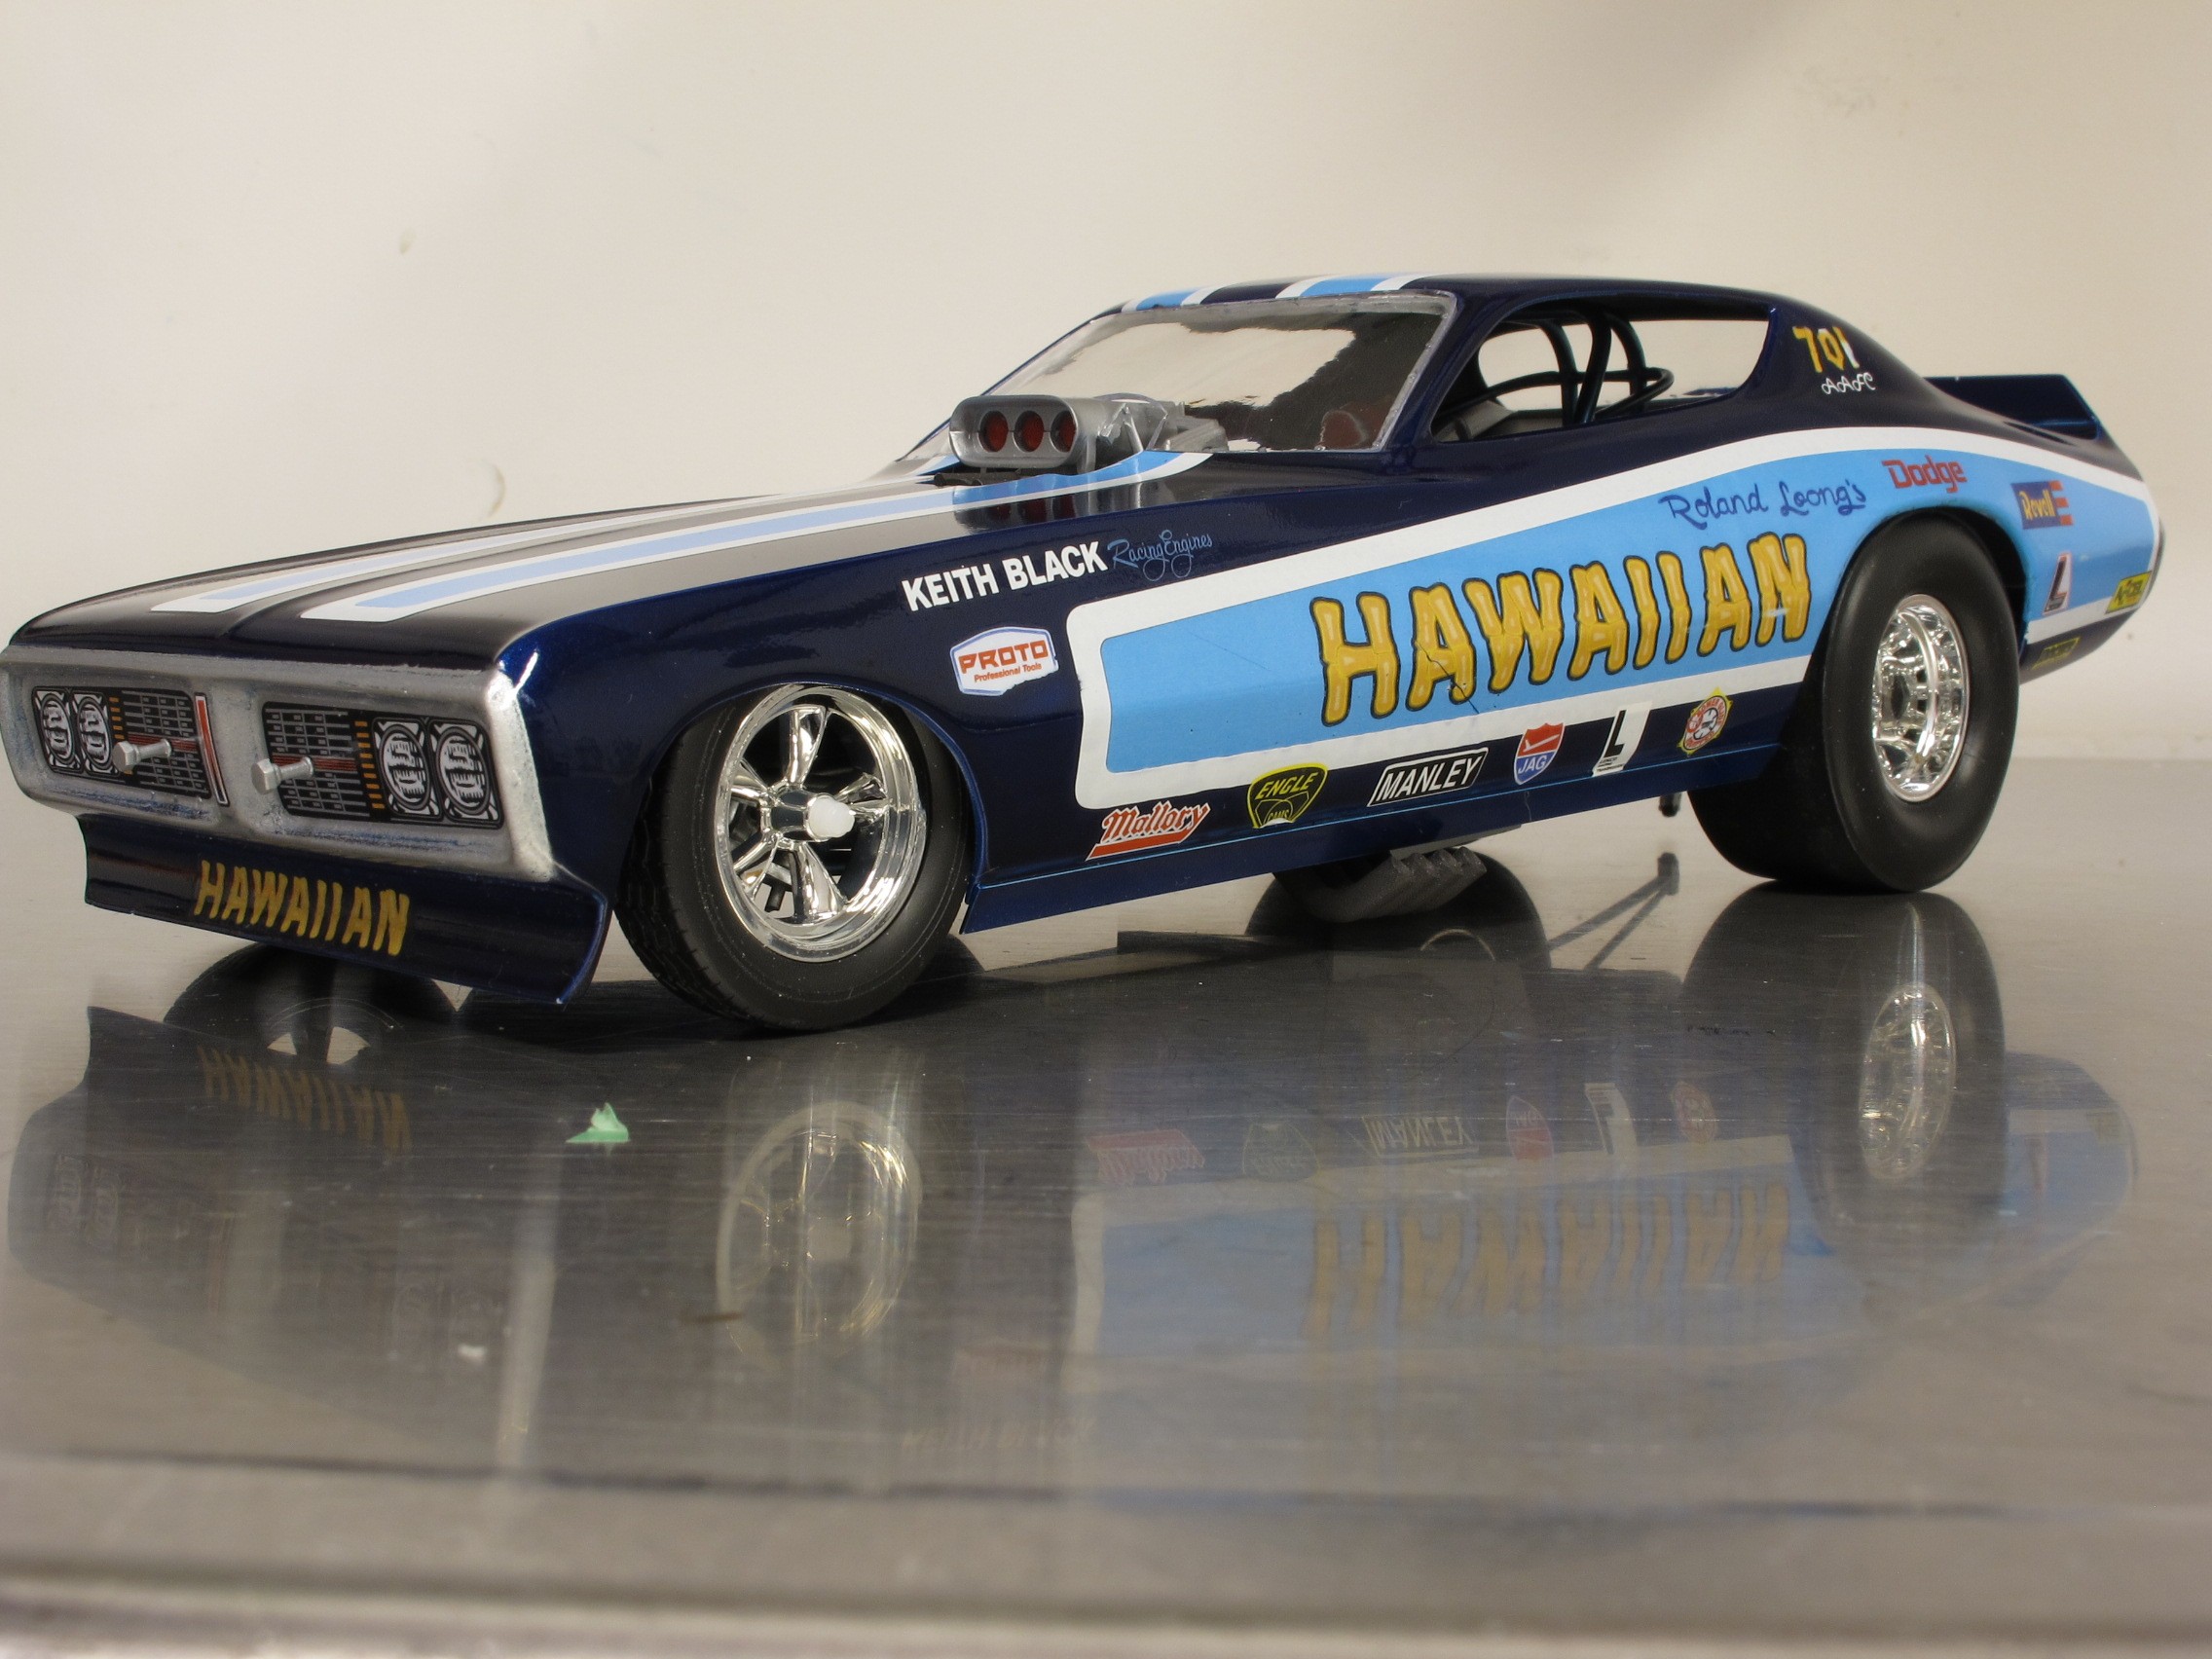
Hello!! New guy checking how to post pics and adding a completed build. Recently finished this kit. Have to say, there are a LOT of inaccuracies and fit issues with this kit, but it is from real old molds. Not OOB, did change the stance a bit and didn't do any plumbing. This is the most recent release with updated wheels/tires and decals.
Don
-
 2
2
-
-
OK, so i bought a can of the Duplicolor sandable primer. Big can. As a first try, i have the floor pan/ chassis and the two inner panels to paint. Read instructions, prepped parts and...painted. Hit the parts with two light coats 20min apart, then one color coat. Stuff dries fast, no crazing, worked as you guys said?. I have to say, it has a WIDE spray pattern!! but it's for real cars!!
Thanks for the great advice, guys!!
Don
-
Man you guys are killing me. Everything looks great....I'm having cold breakfast cereal for dinner....
Don
-
Aftermarket maybe? Started in the trade mid 70's, remember tan distributor caps, black coils, can't remember yellow topped Mopar coils. Yellow topped Ford coils, yes, but IIRC no Mopar coils. I'll probably be proved wrong...
Don
-
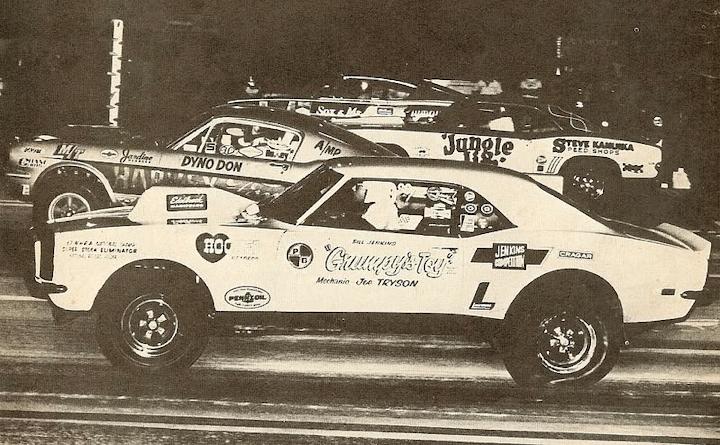
7 hours ago, magicmustang said:
Here's a pic of this car as Dyno Don ran it in 1969. Now there's a group of cars to replicate.
4wide!!
Don
-
13 minutes ago, JollySipper said:
These paint jobs aren't polished, once you get the hang of the spray pattern it's almost impossible to get orange peel and such....
Heh, you haven't seen me paint...great paint on those bodies.
Don
-
Light coats at first sounds good, think first time i'll do this, let dry overnight, then hit with color coats next day, applied like i was spraying Tamiya. Temp and humidity cautions will observe. Thanks again, guys!!
Don
-
OK then, lots of excellent feedback and experiences. So, time to take what I've been given and experiment a little. I have a few paint hulks i'll sacrifice. I plan on spraying one with Tamiya primer, let it dry about an hour, then hit it with a color coat of Duplicolor. Second hulk i'll hit with Duplicolor primer, then hit with Duplicolor. No doubt it will be ok, but it will give me an idea how it lays down, how thick it looks, detail hiding, etc. The Tamiya primer I know I can hit with Tamiya color with as little as 30 minutes drying, will see how it works with Duplicolor. Did look at the web page, so have an idea which primer and color coat to get. Thanks for the help, guys!! Your BTDT experiences help a lot.
Don


Moebius Comet Cyclone
in WIP: Model Cars
Posted
Thanks, guys!! It's been a long time since an update, life got in the way. Did manage to get it up on all 4, interior done, engine installed. Have to say, the engine takes up a lot of room, fitting it and the headers and steering linkages was fun. I don't know if it is accurate to the real Dyno Don car, but the pedals look off, gas pedal is HUGE, clutch/brake pedals look too high and too far way from the firewall. Steering column/wheel look too high, angle should be less. Other than that, all else looks ok. Would have been easy to fix the column, the pedals would need to be mounted lower and closer to the firewall.
Next up, working on the body. Still haven't decided on a color. I had to scrape away the bottom of the hood to clear the air cleaner, easier to do on a plastic kit than a real car. Fit onto the chassis needed a little tweaking but otherwise was ok.
Don