GlueSniffer
-
Posts
48 -
Joined
-
Last visited
GlueSniffer's Achievements
MCM Regular (3/6)
-
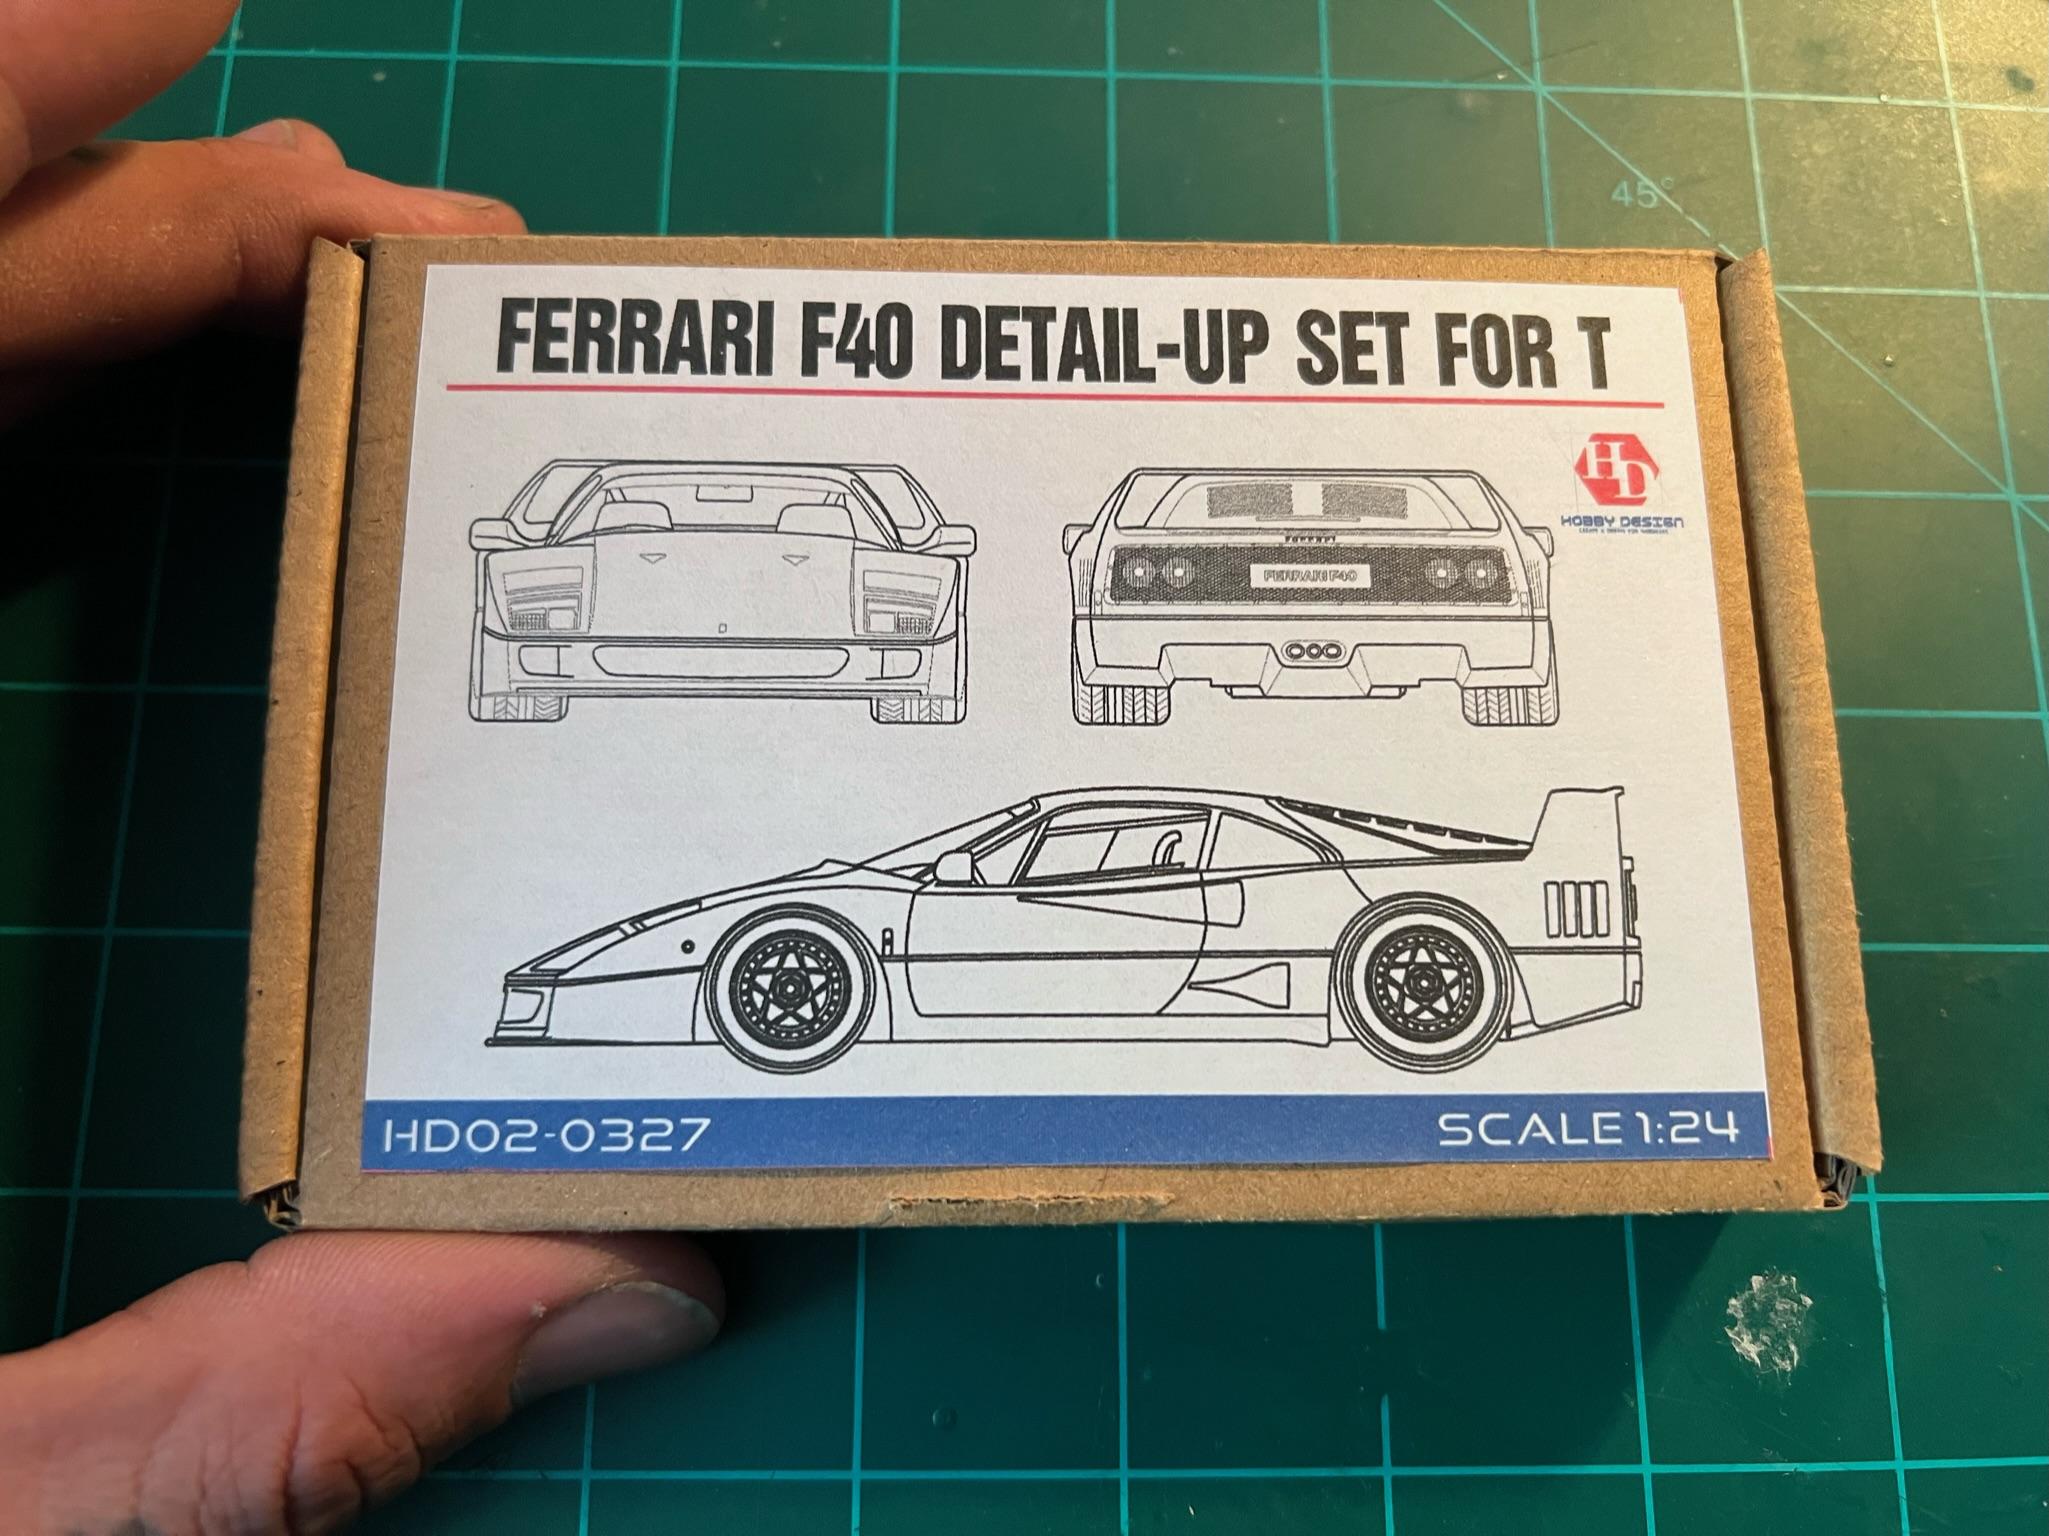
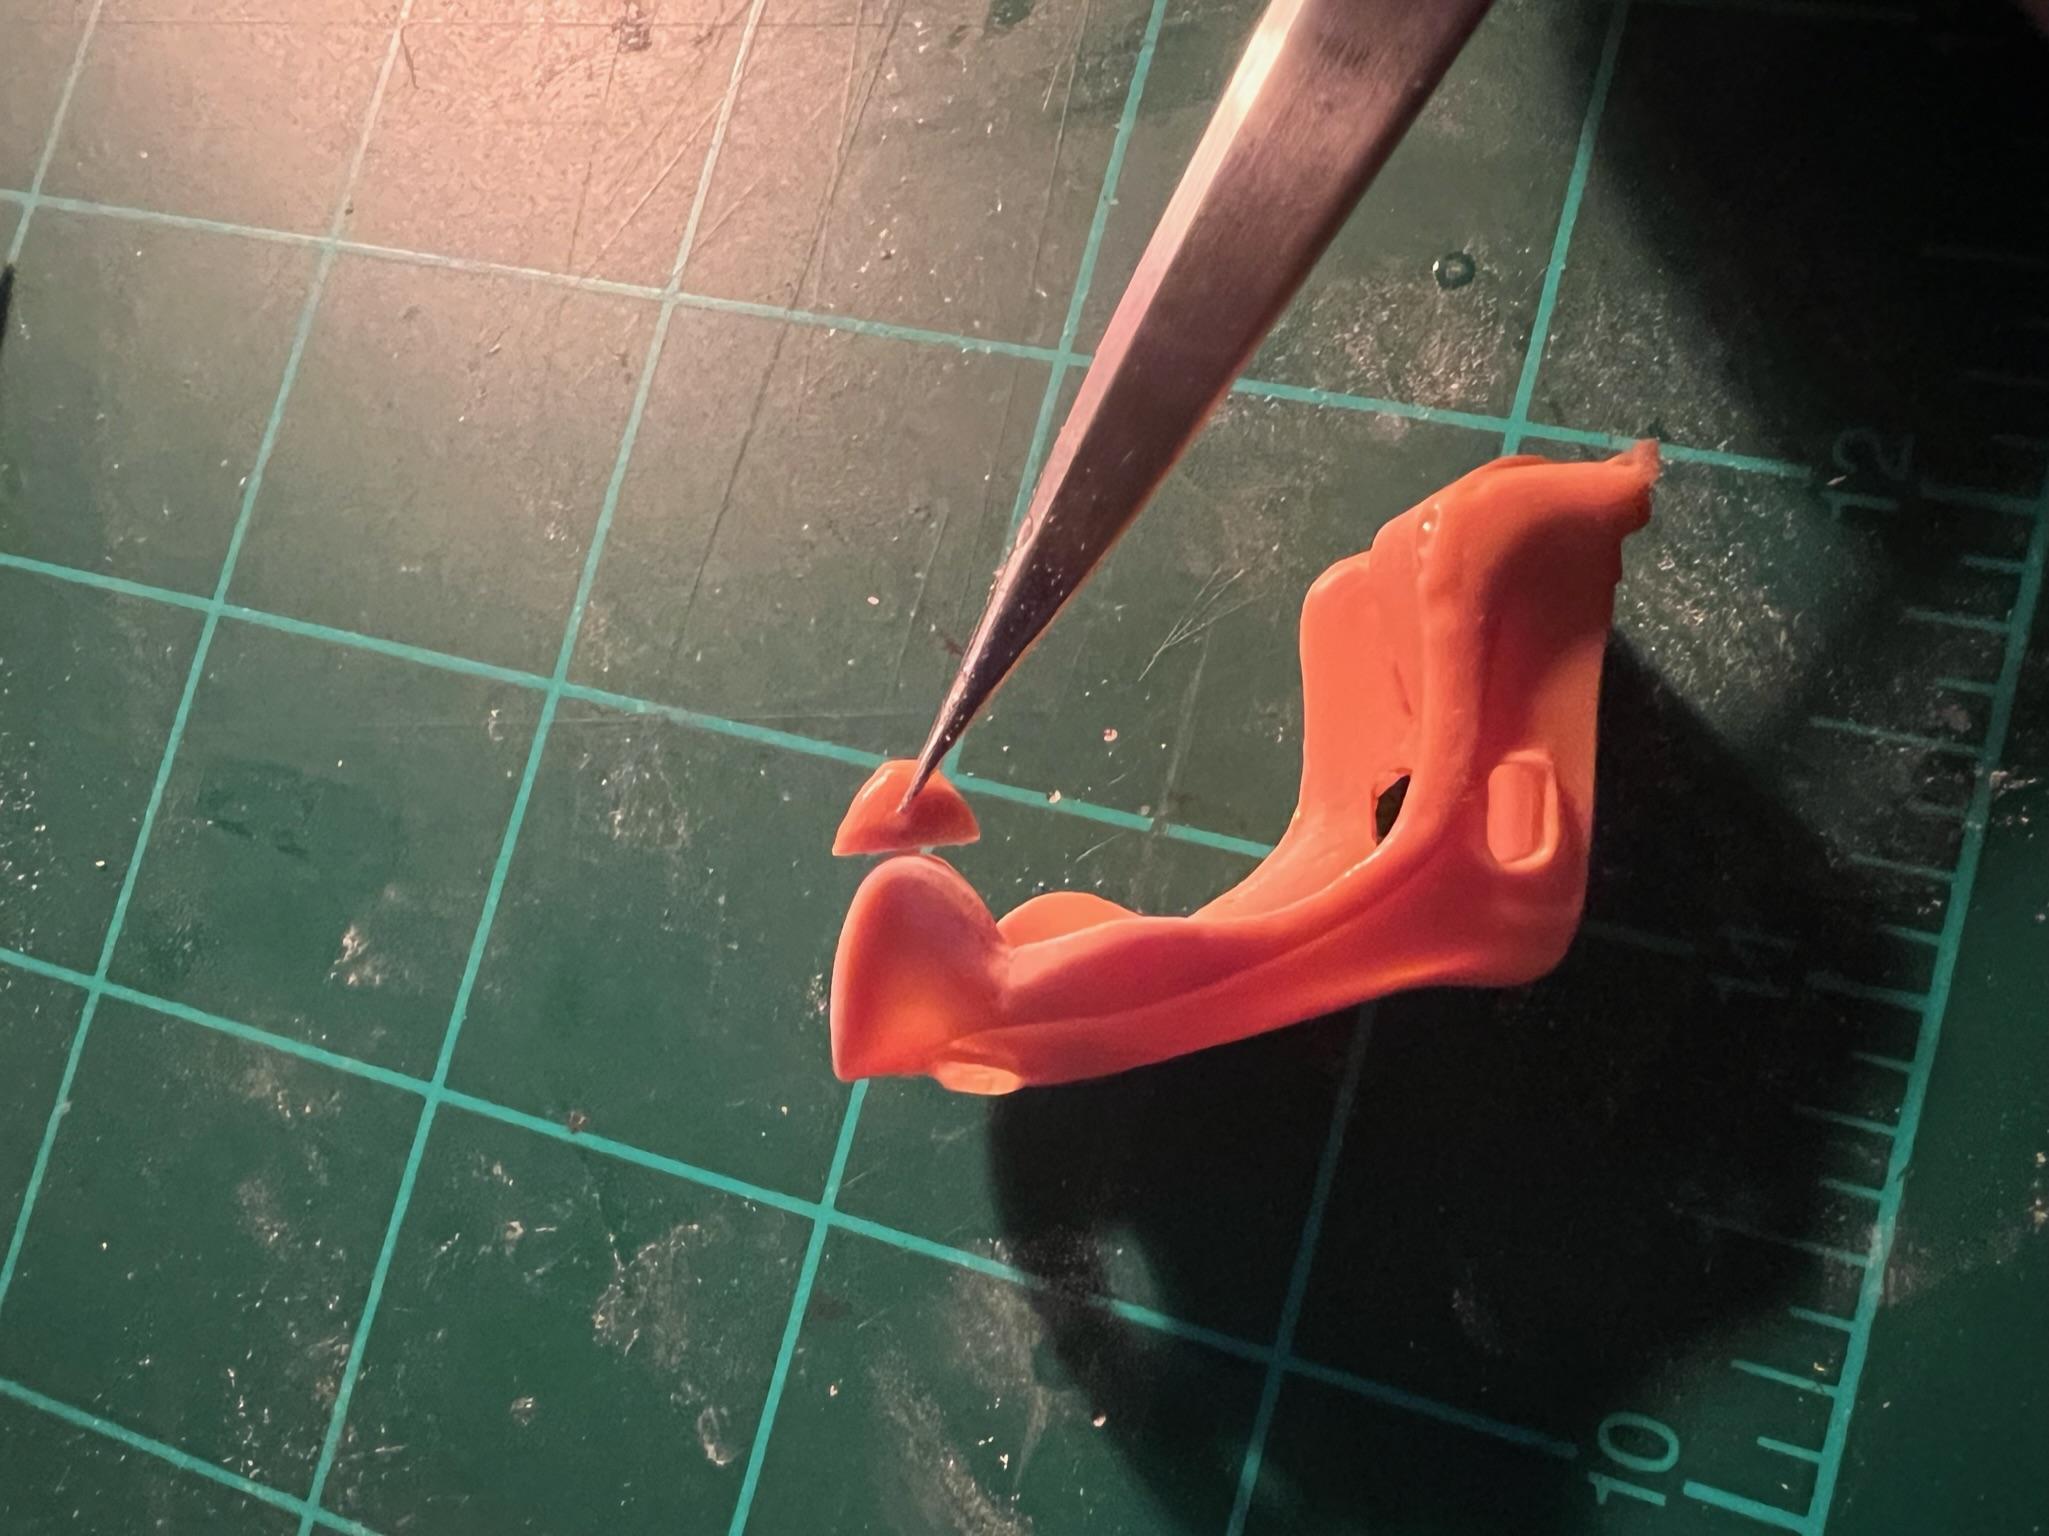
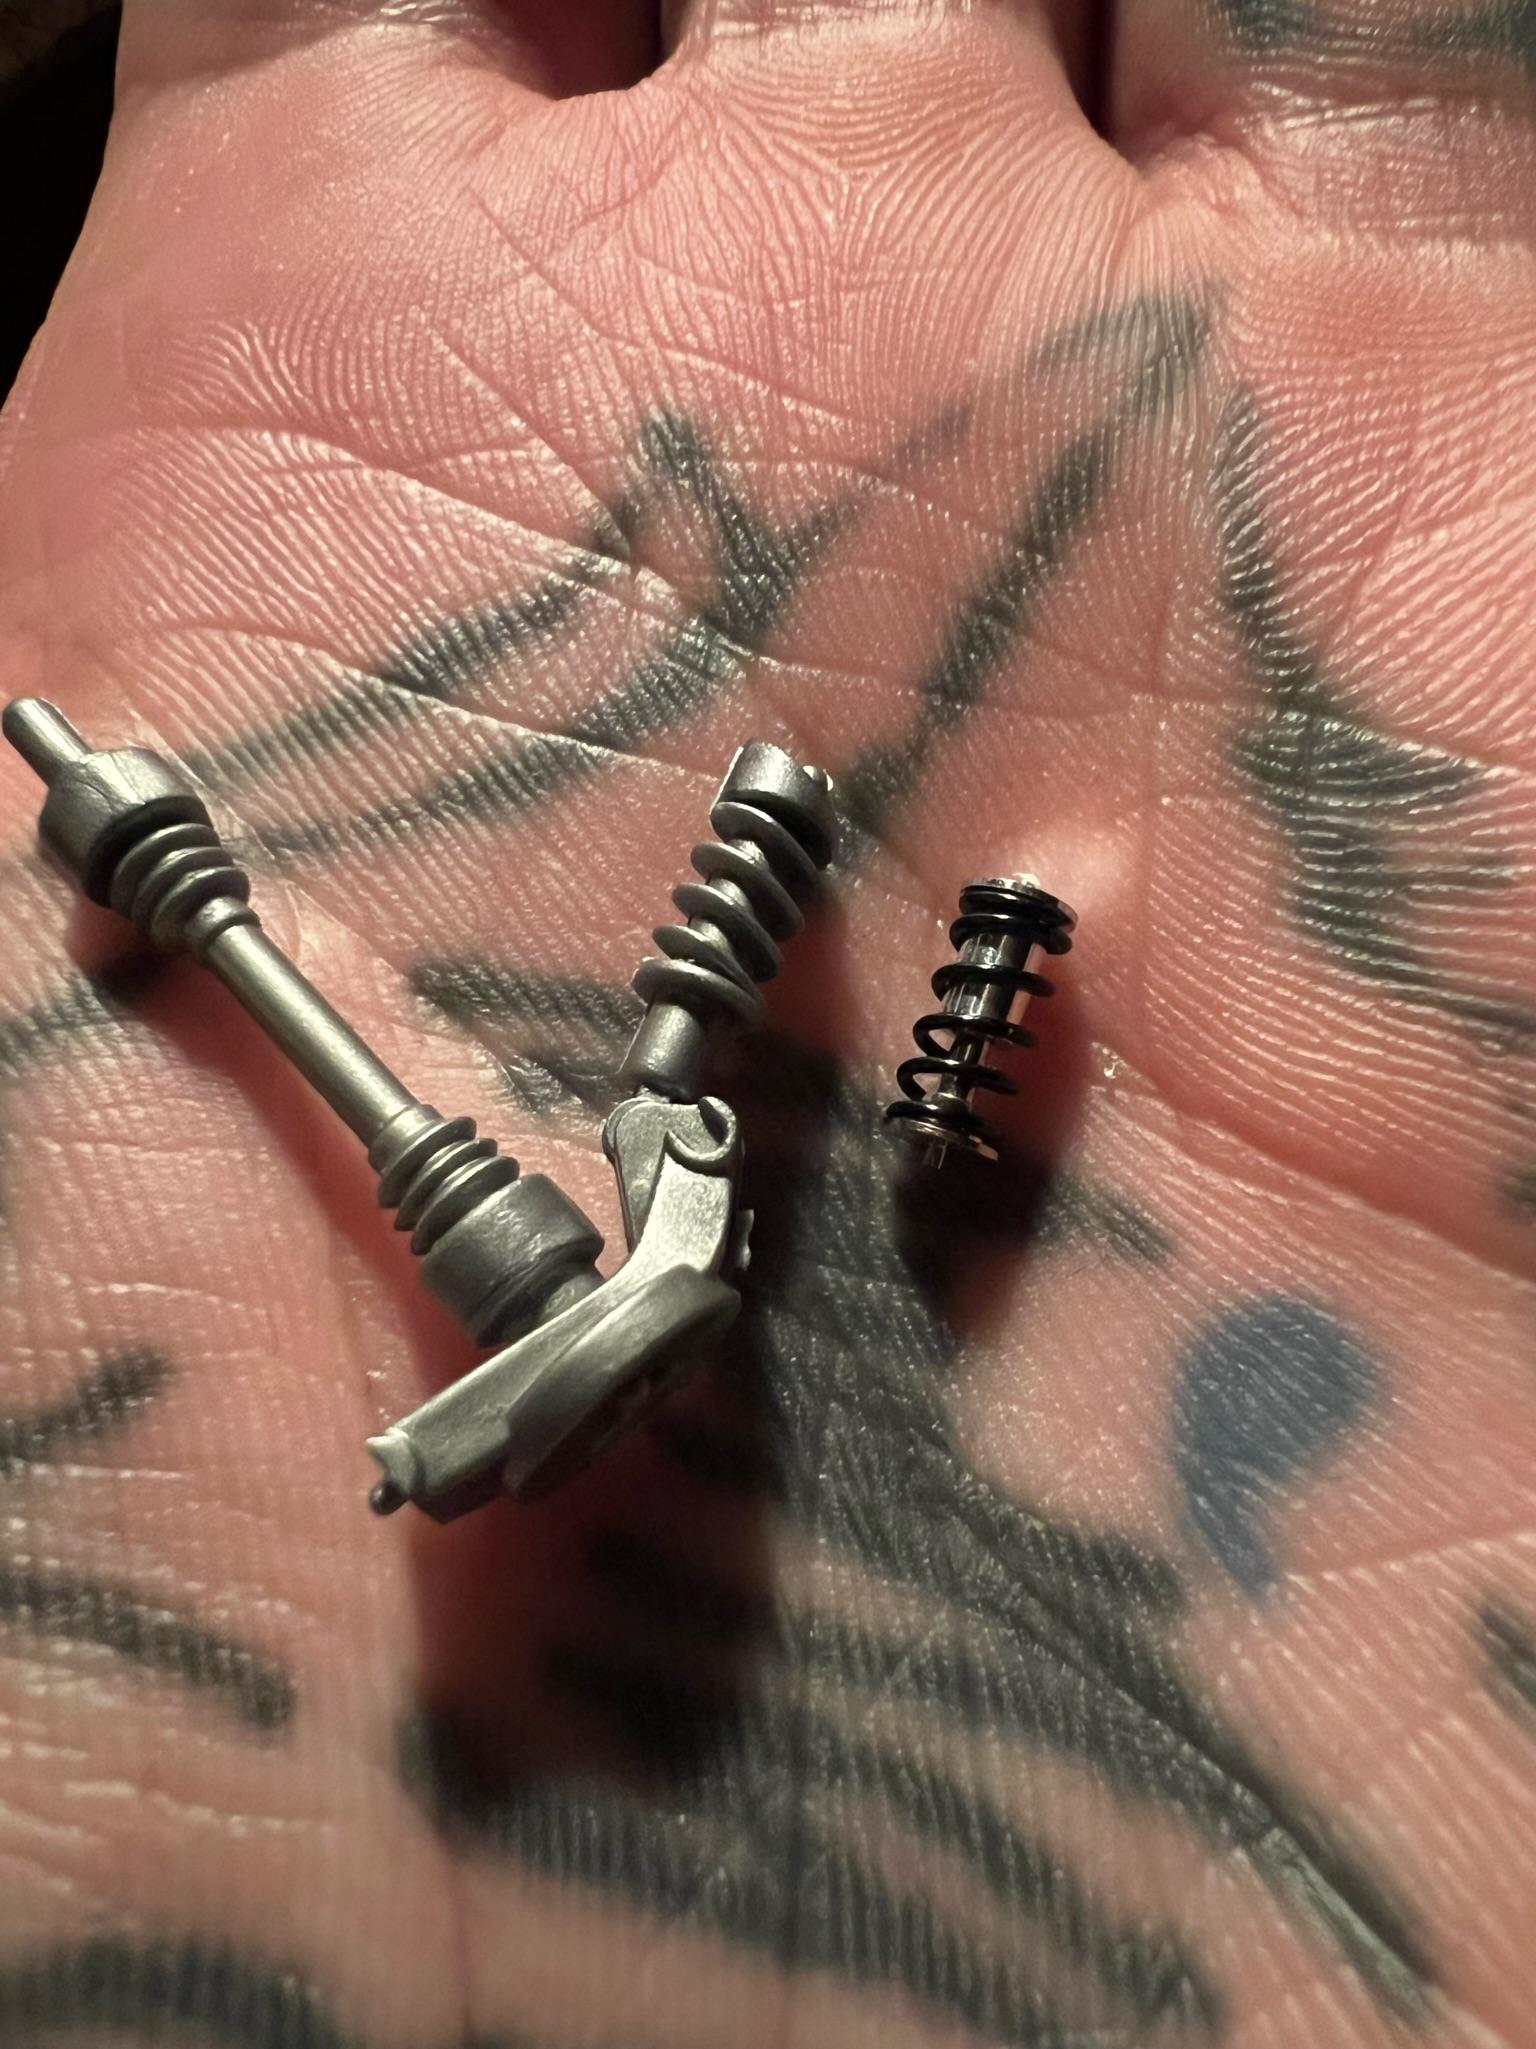
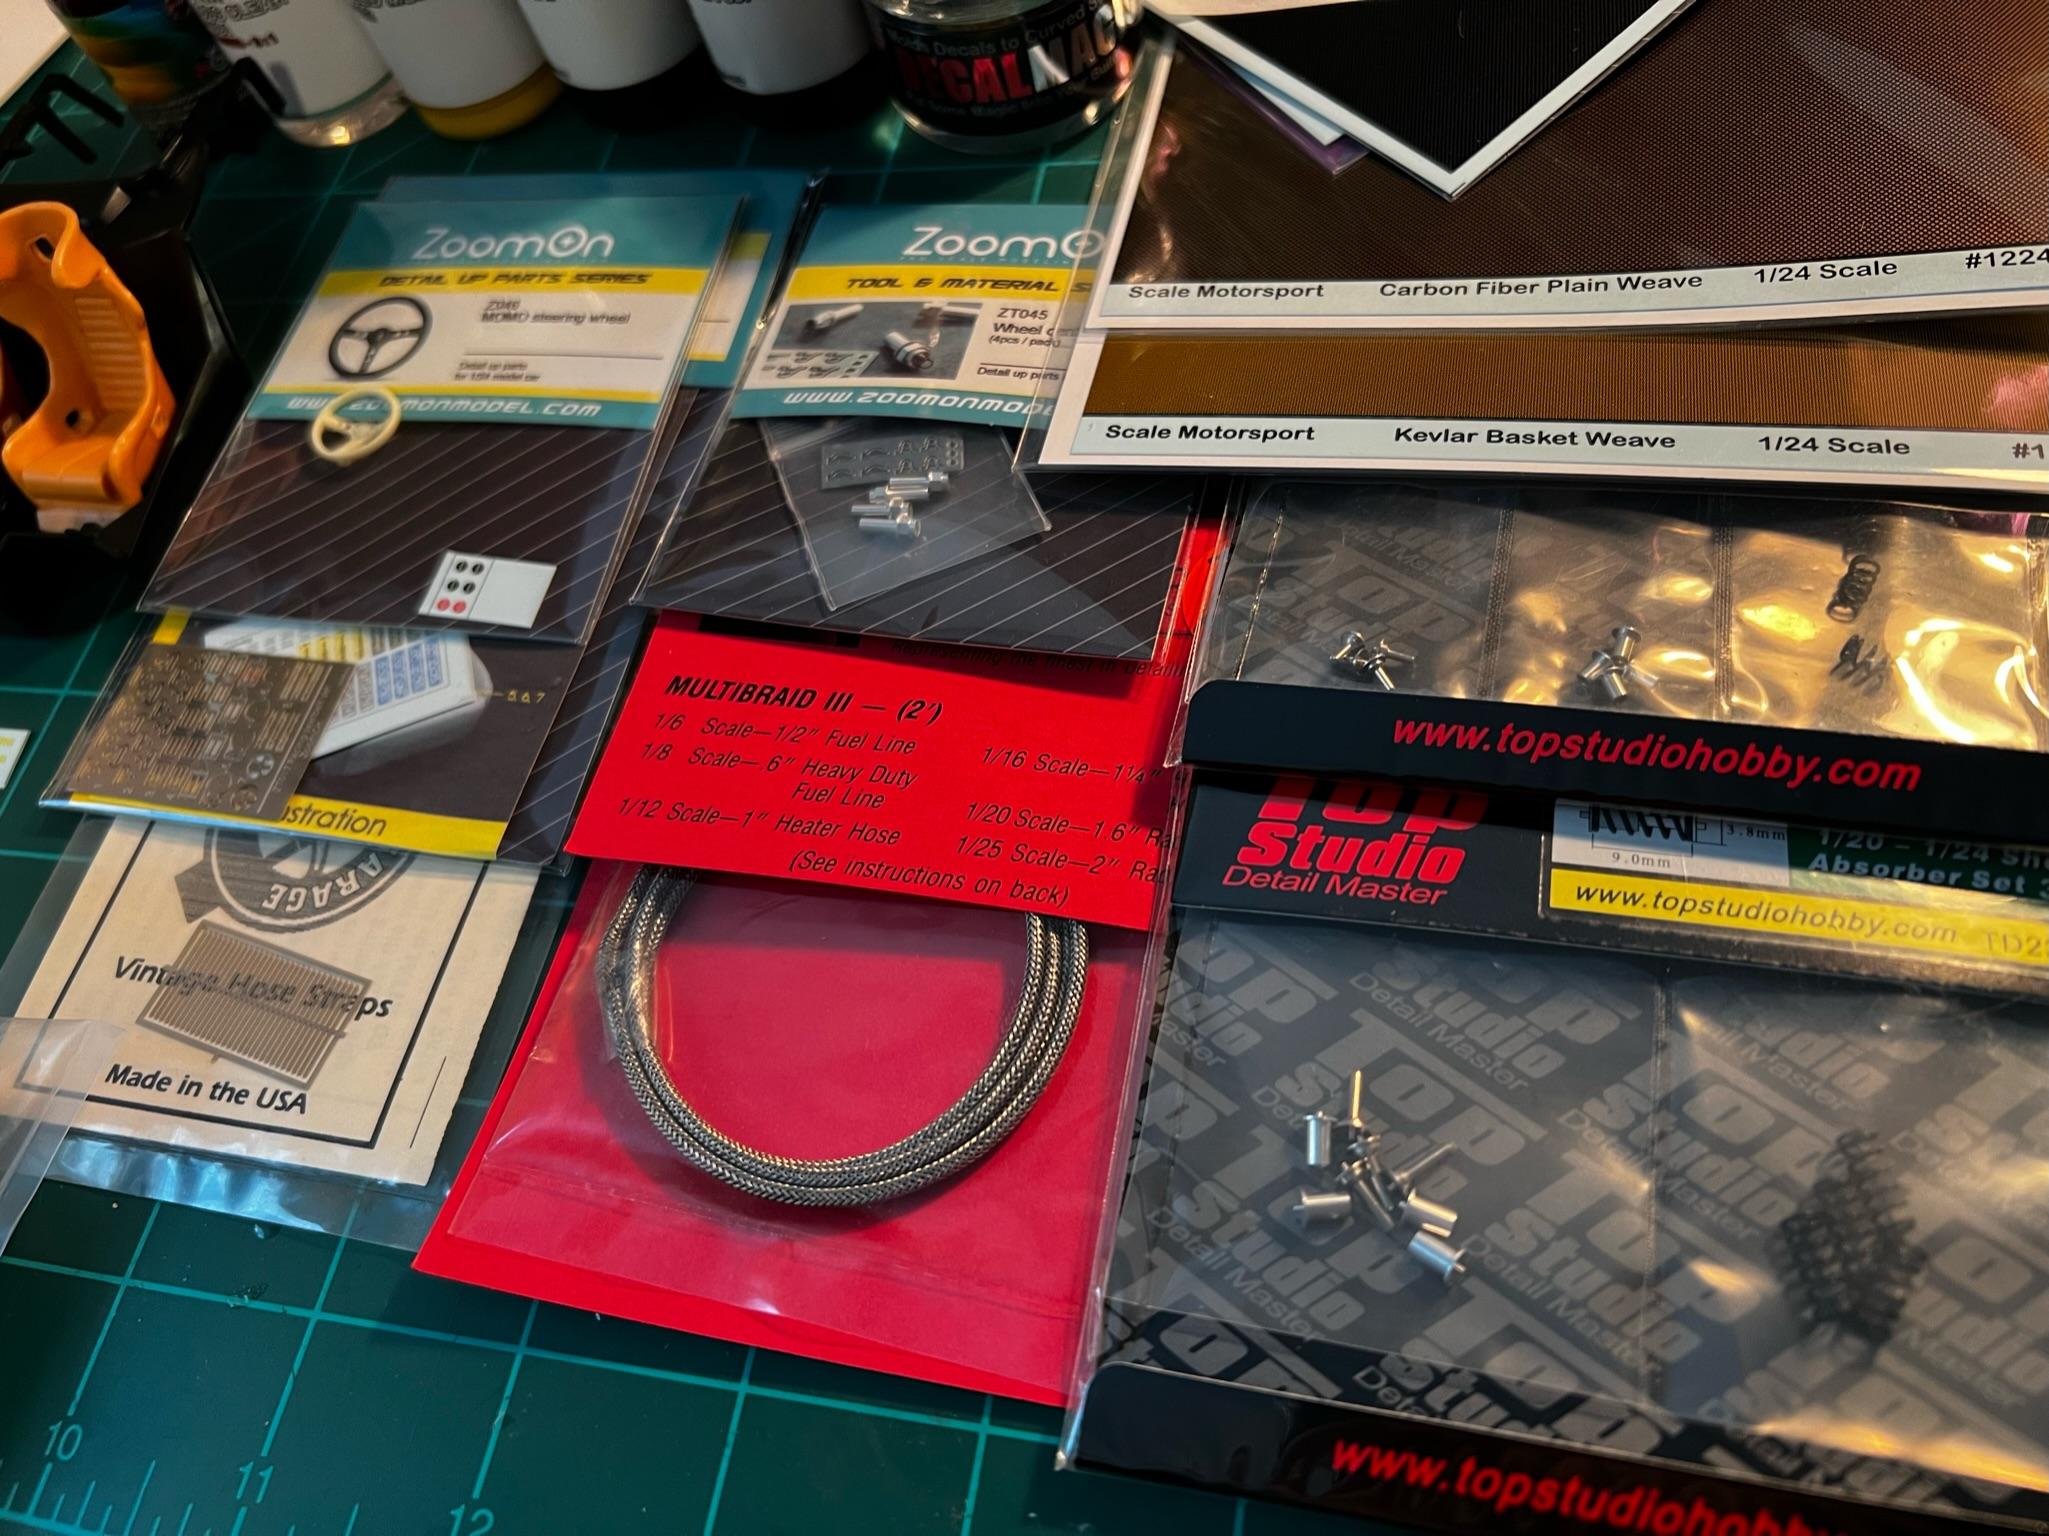
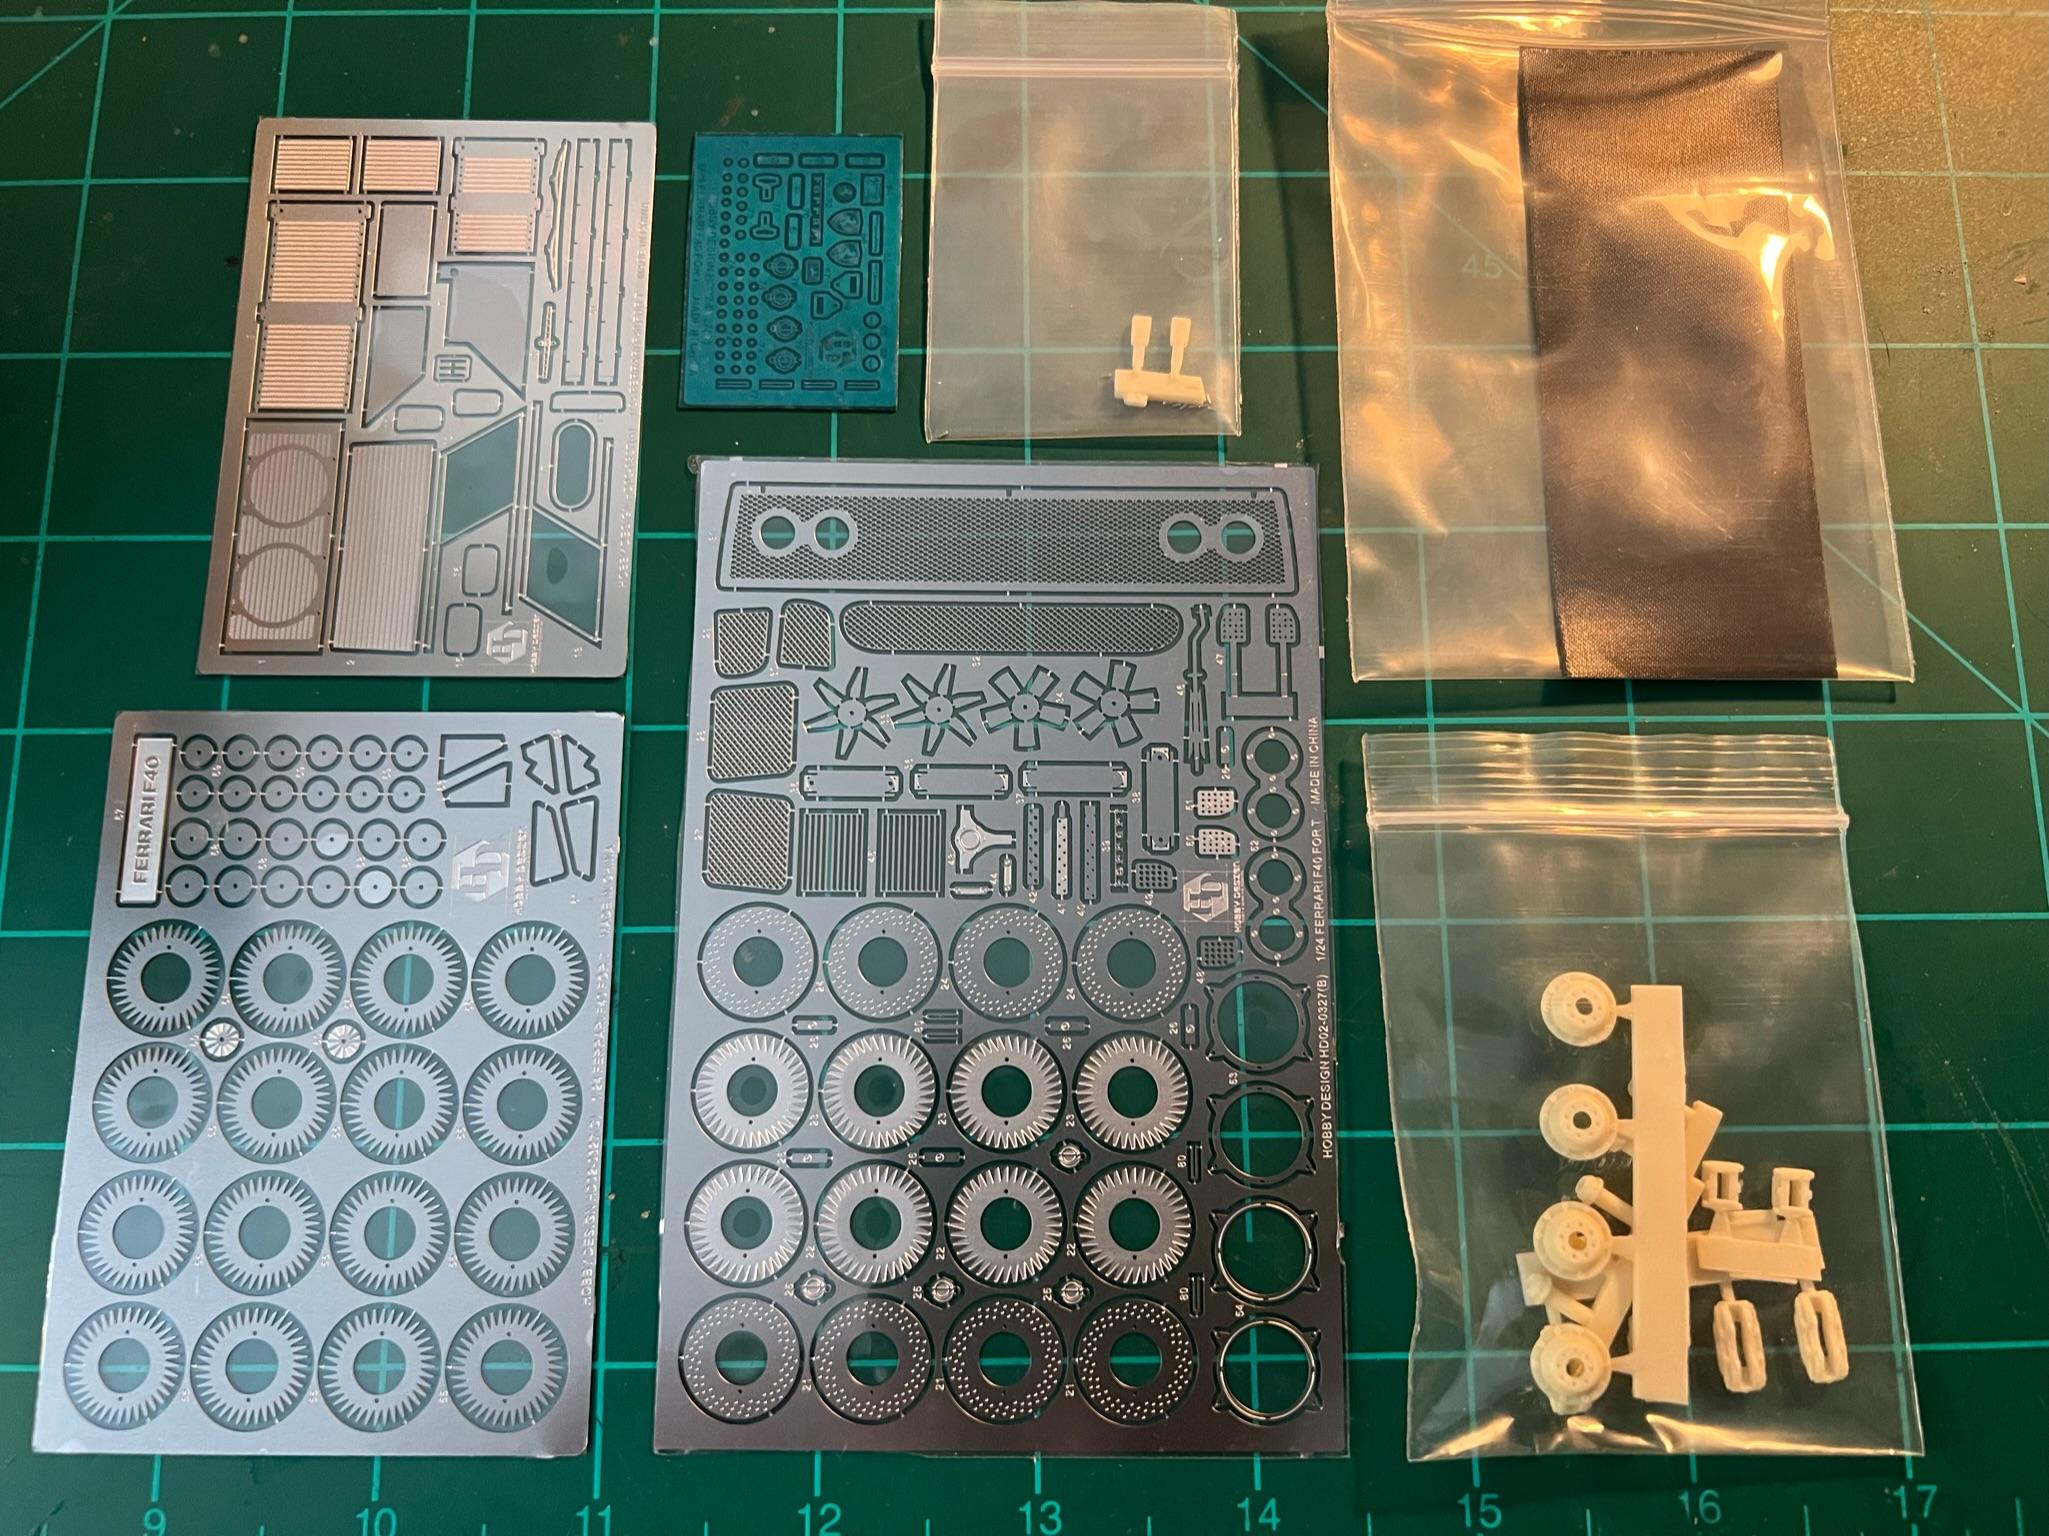
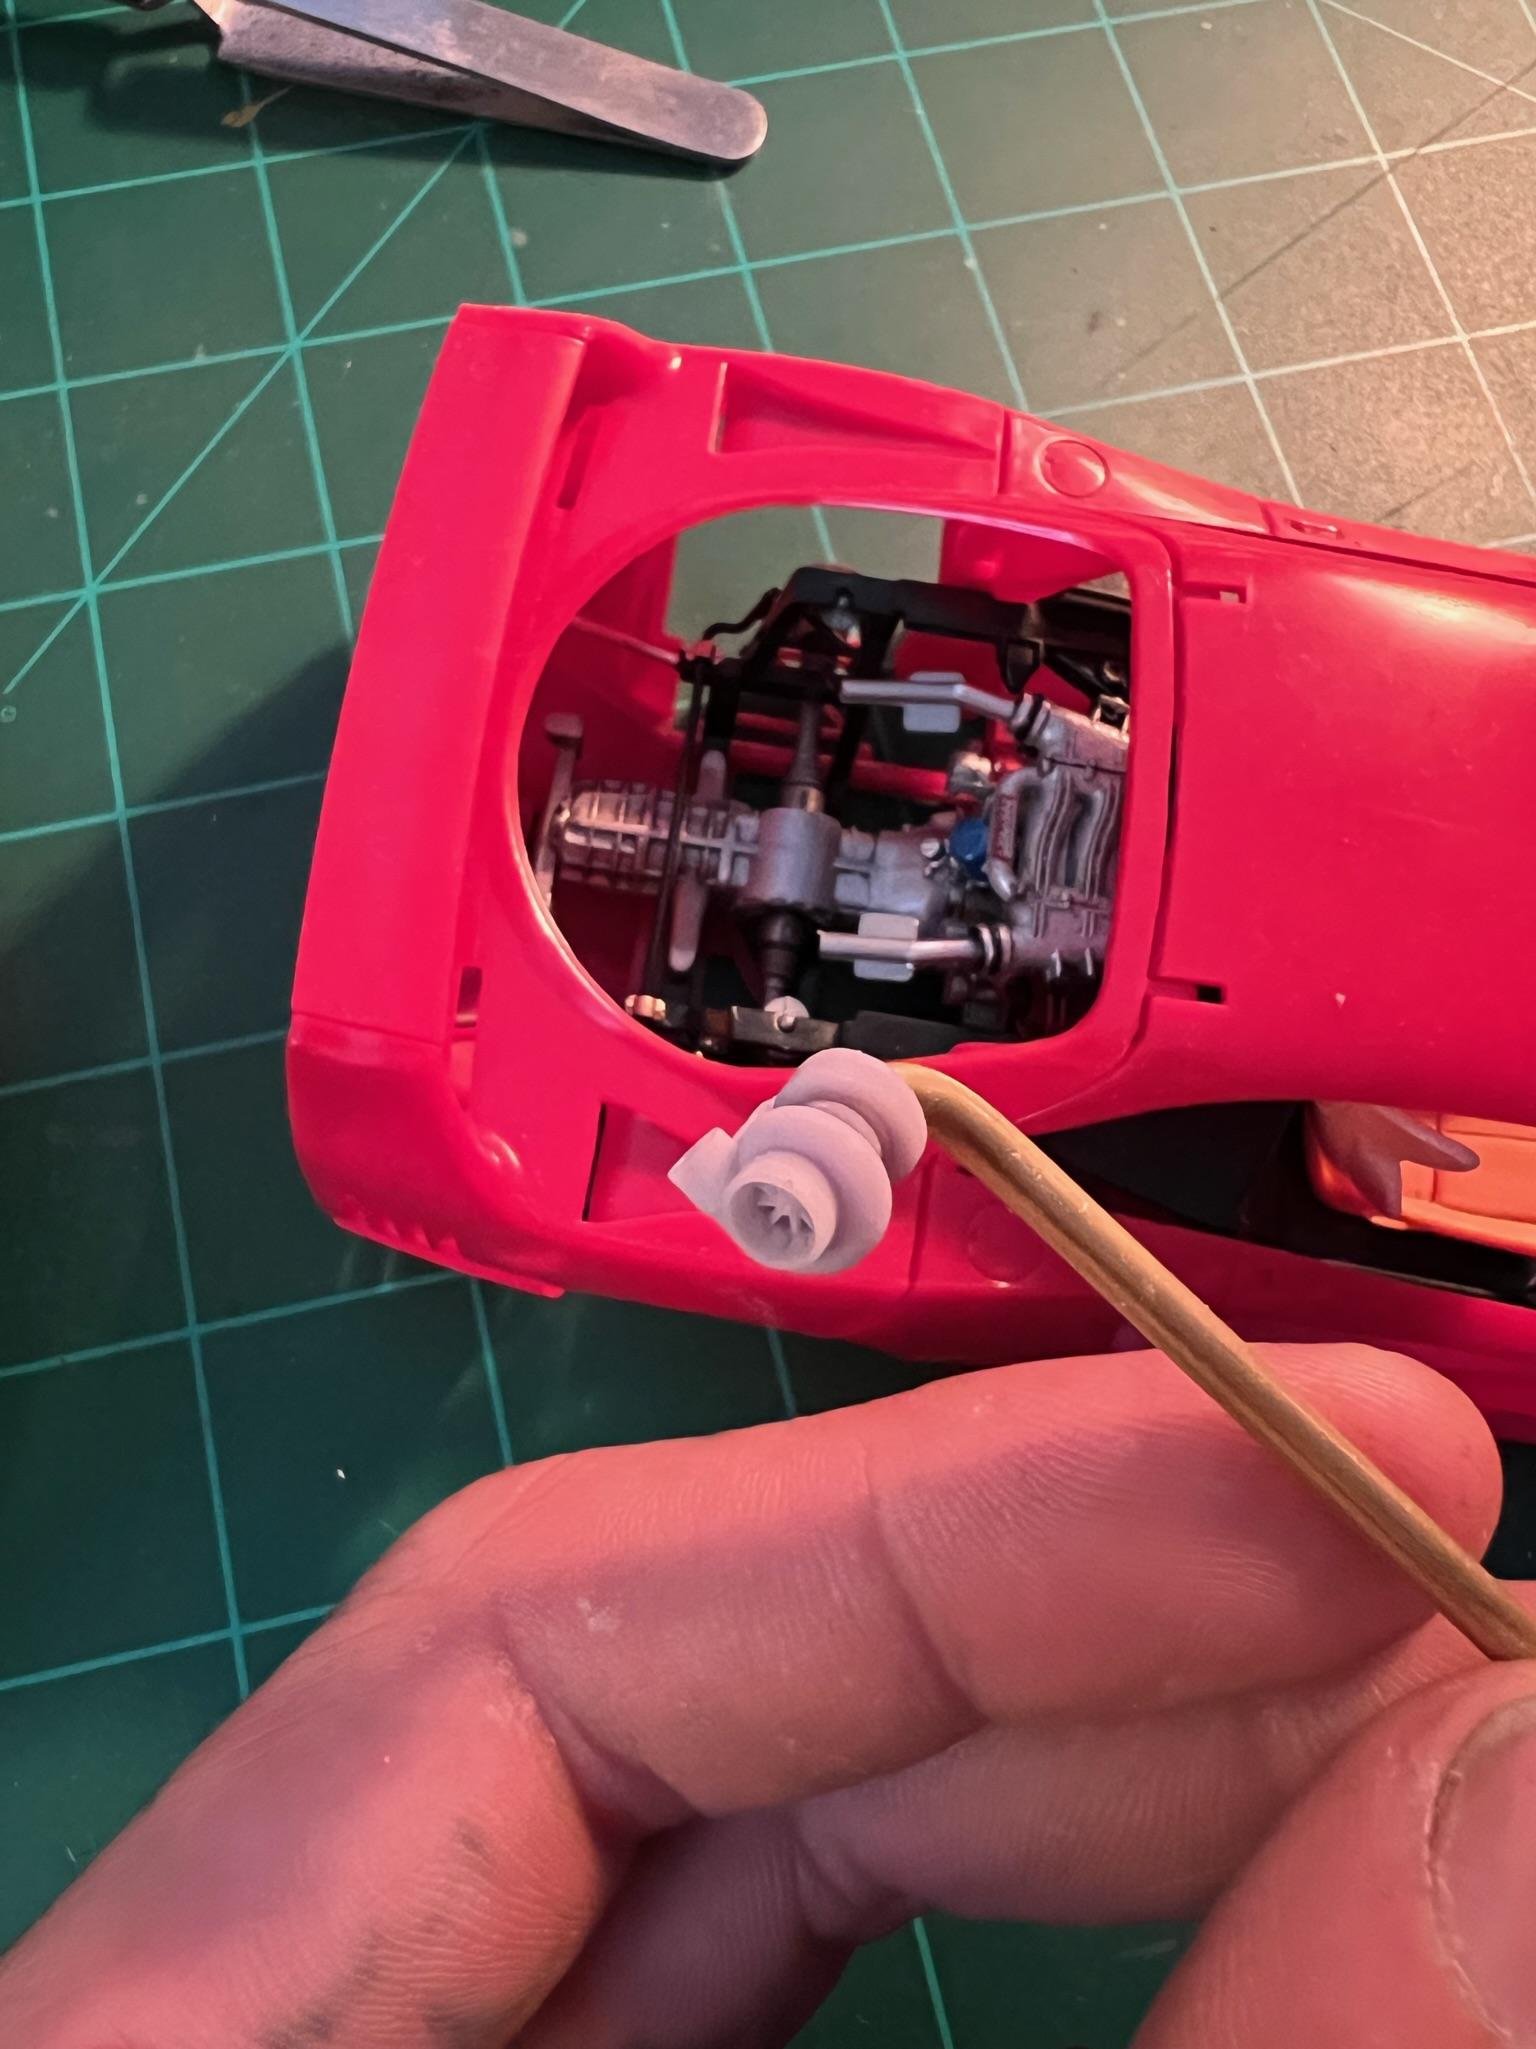
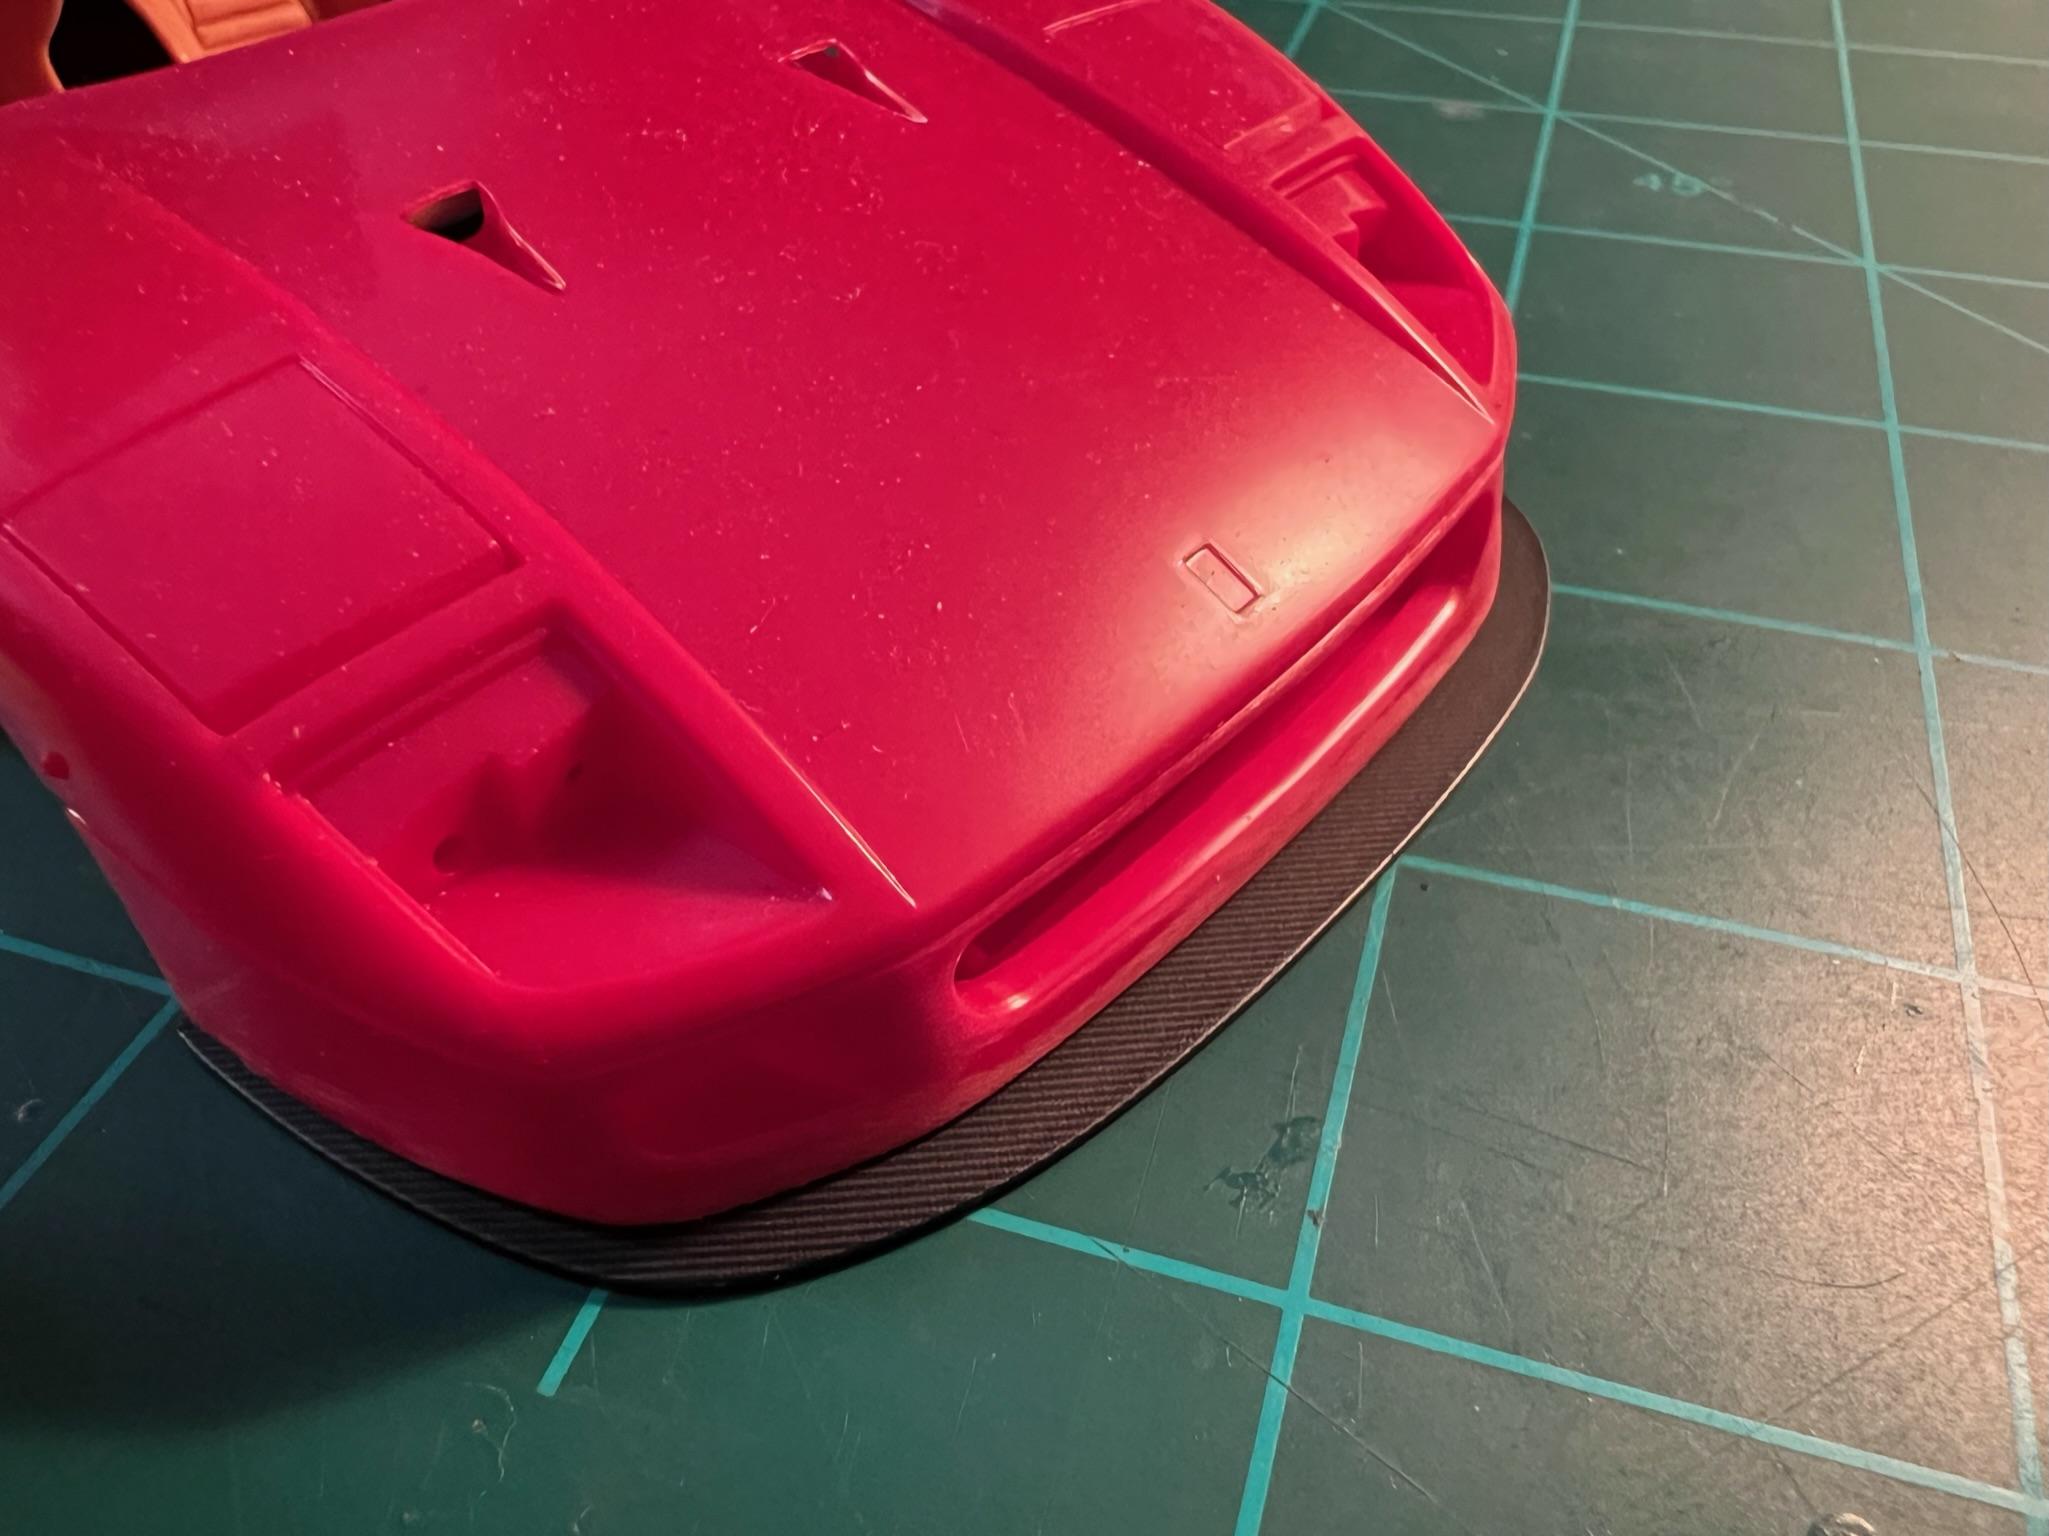
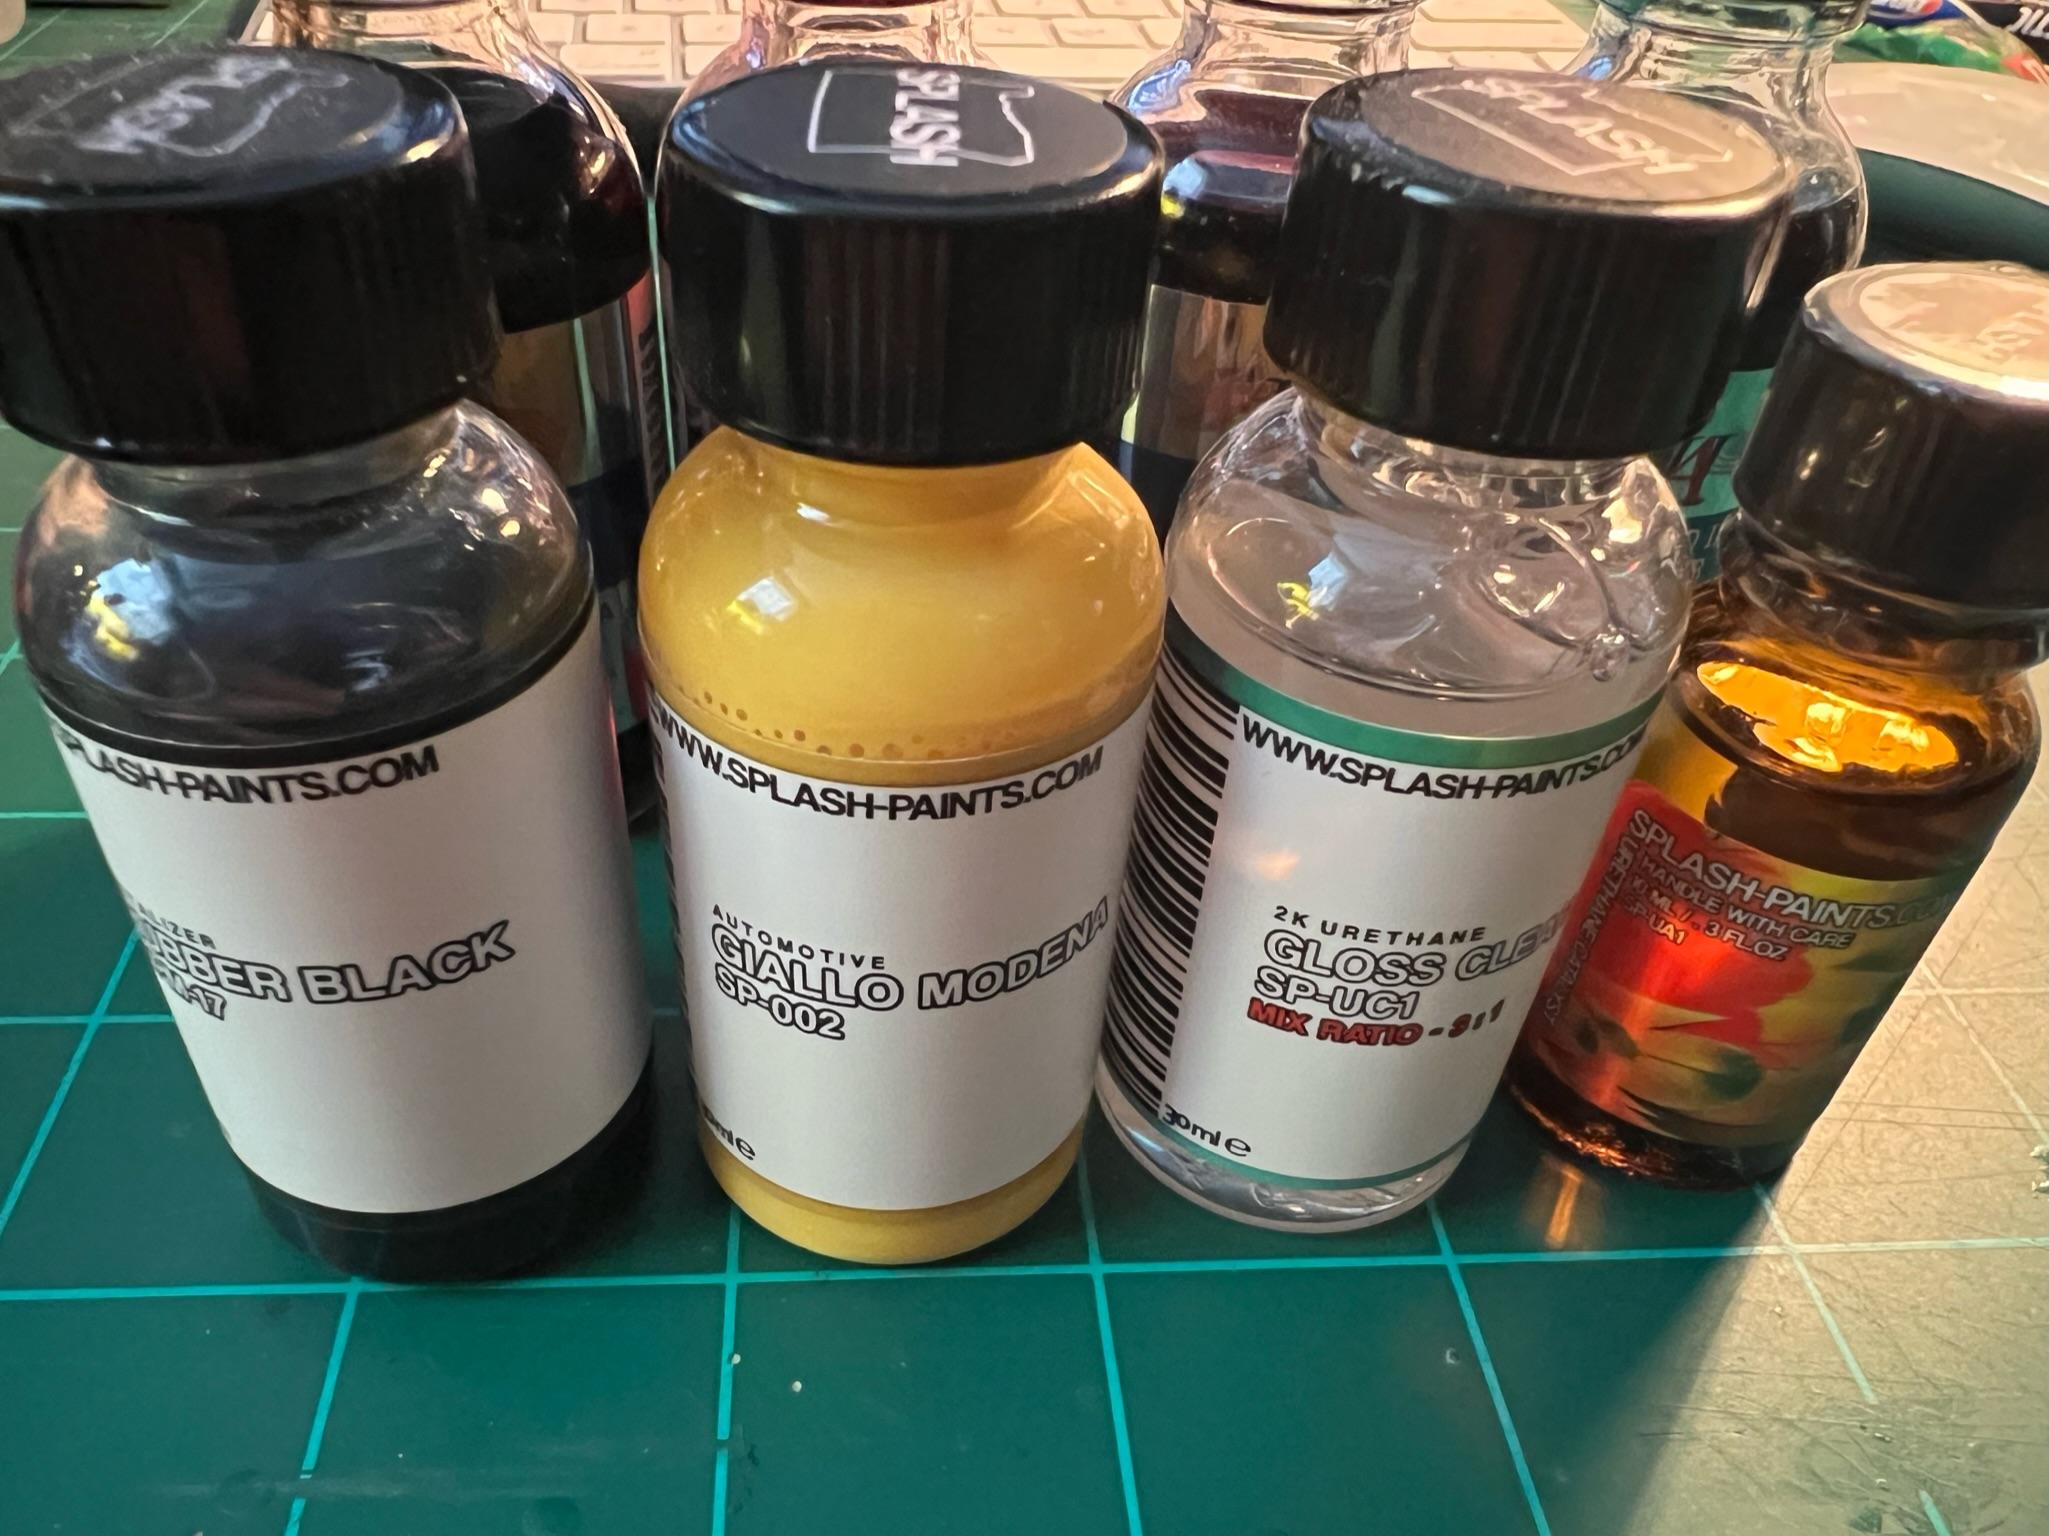
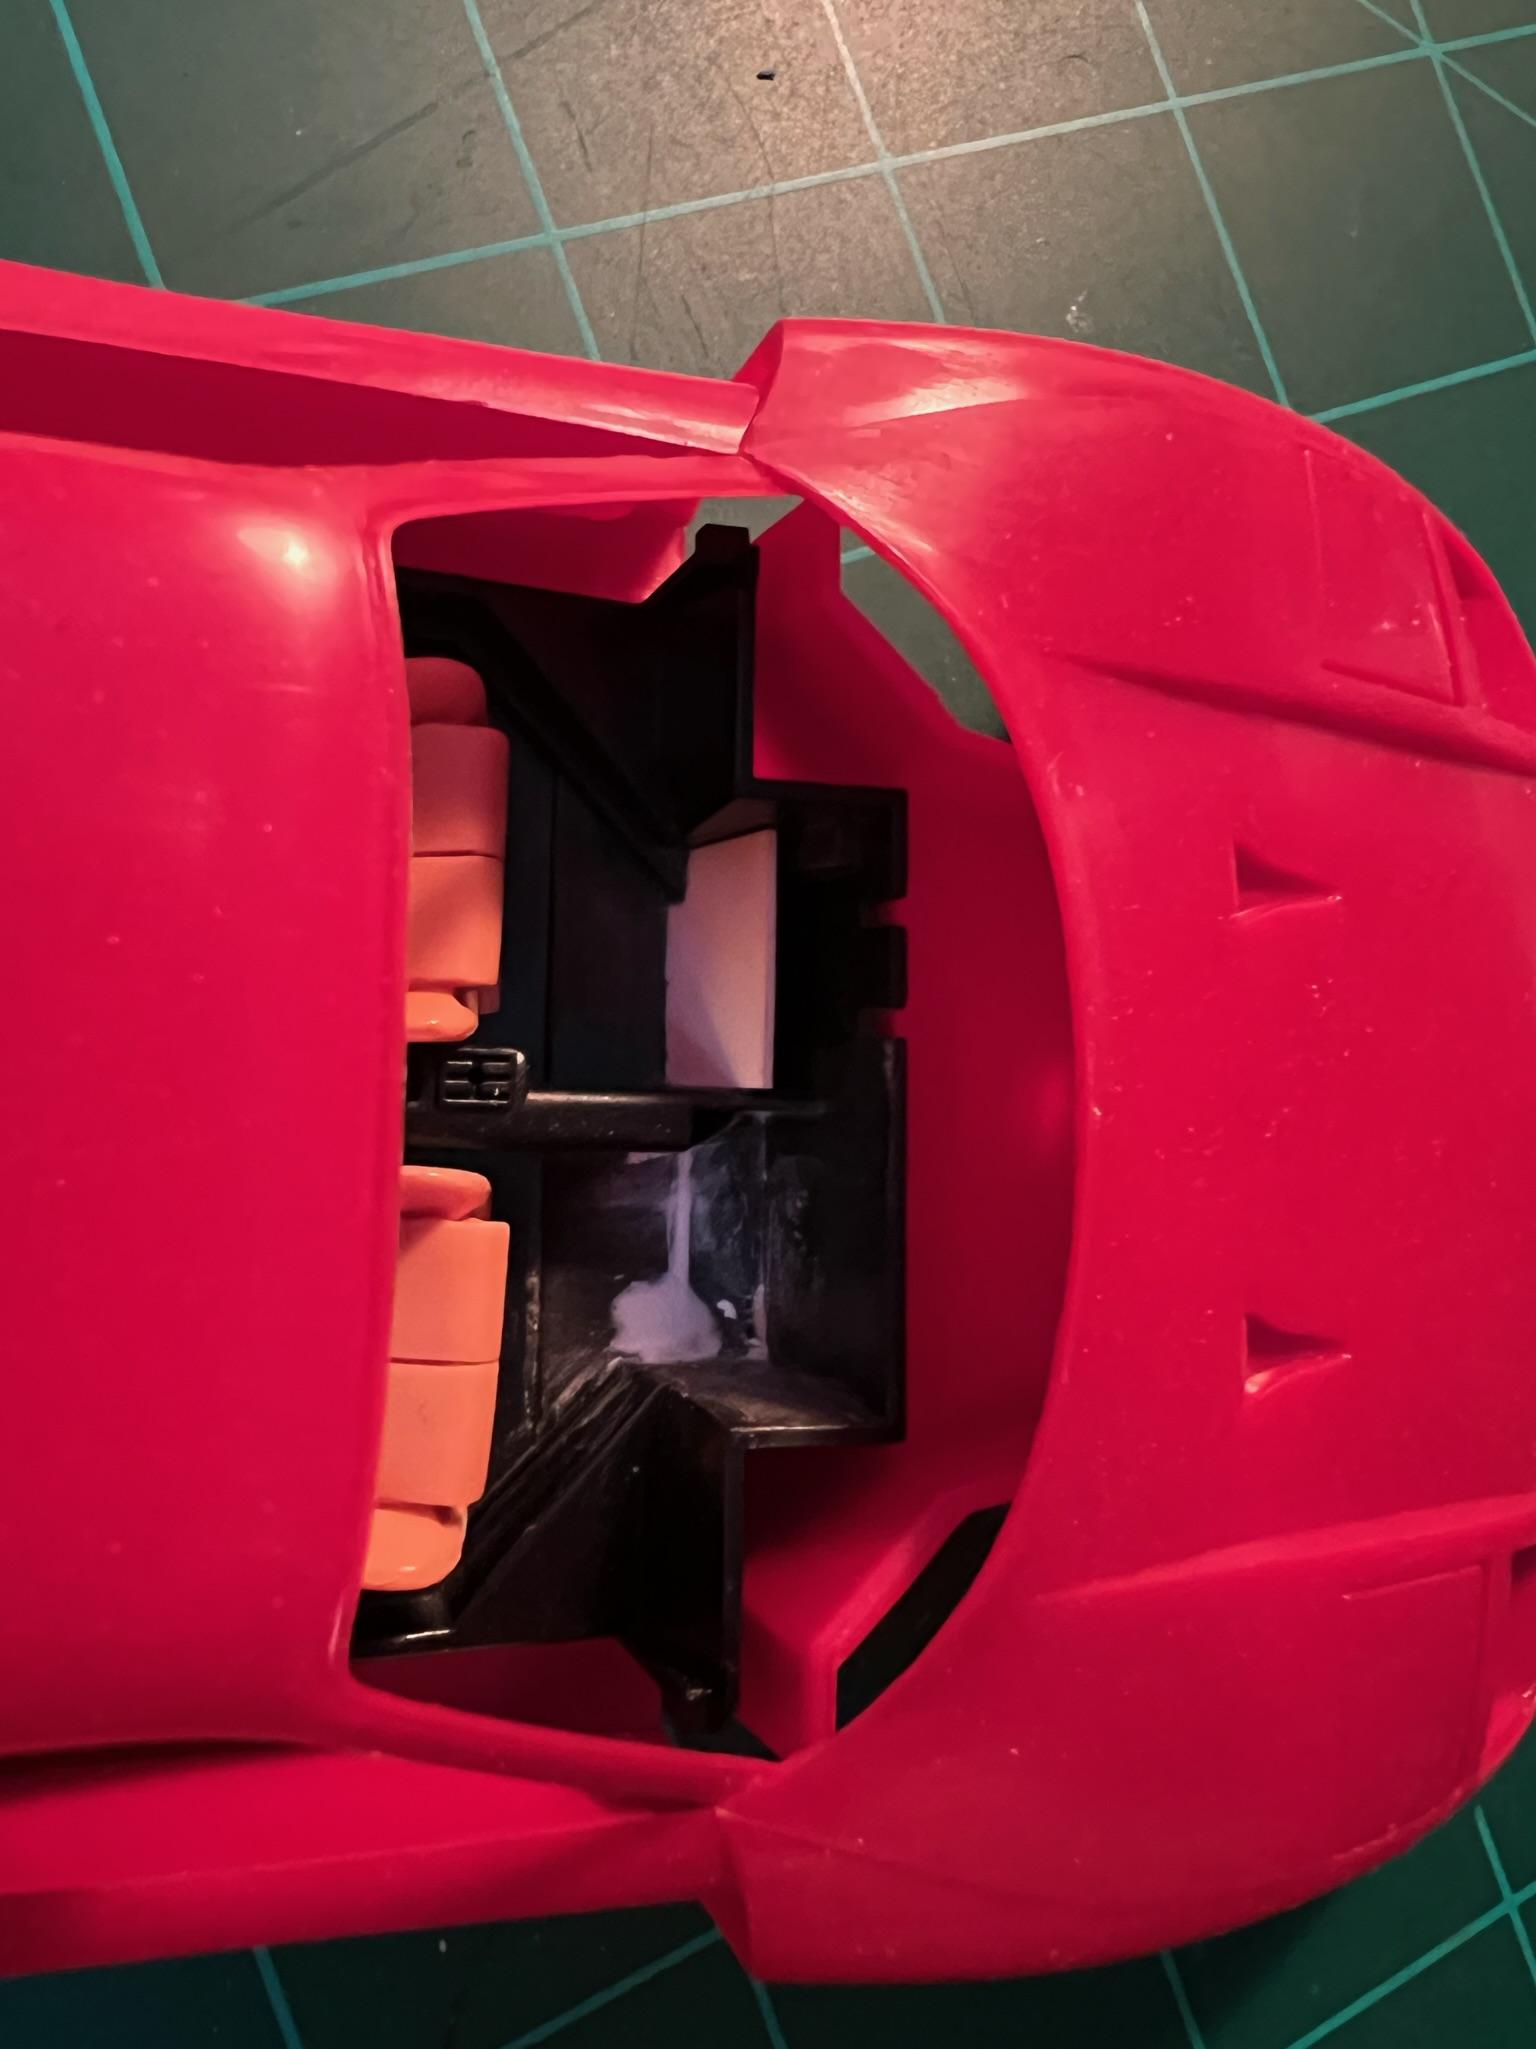
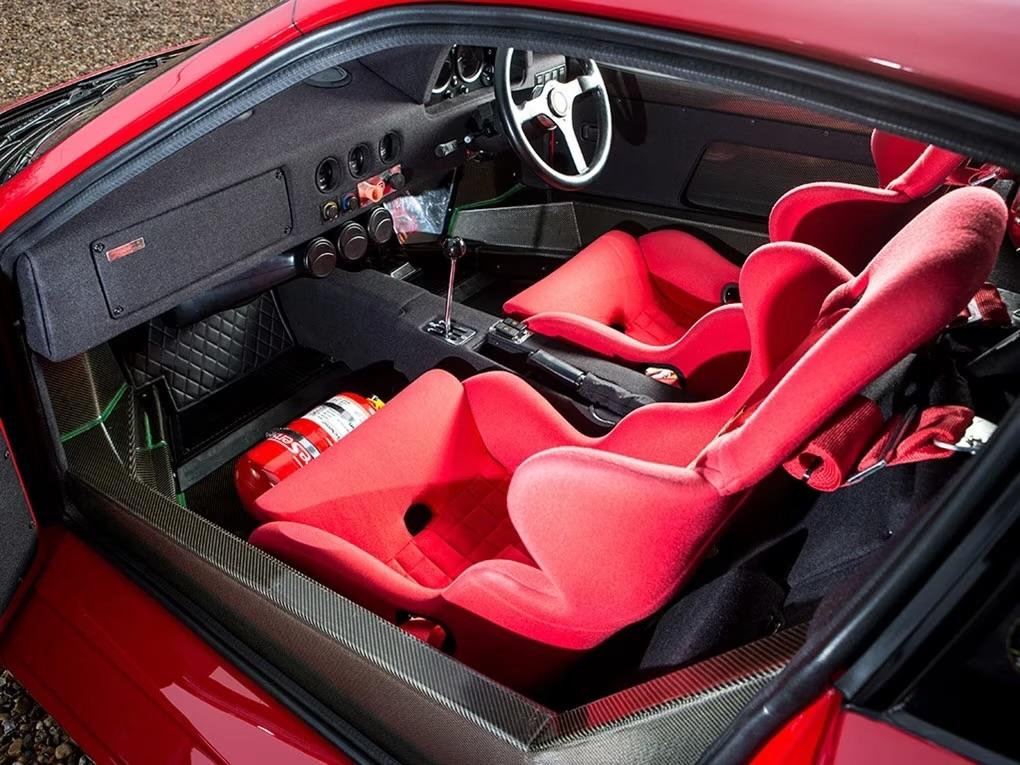
Had a short hiatus of this because of some work obligations, but back to the F40 now! Plus a lot of parts had arrived in the last few weeks! Here are some of the goodies going in it, including the incredible Hobby Design detail up set. It’s far nicer than I had expected and included much more than what limited descriptions all the retails had offered. Hose straps, MOMO seats and steering wheel, coil overs, metal wheel center locks, yellow racing harnesses… Multiple carbon fiber and Kevlar weaves for different areas of the car. The plain weave if to try making turbo blankets. A few paints. Including the Giallo Modena yellow for the body’s exterior. The brake rotors alone in this set are mind blowing. Going to begin on them tonight! Here is some progress shots. The MOMO Daytona seats didn’t fit the cabin very well, so I had to trim the seat brackets way down as well as the head restraints. Made a carbon fiber front splitter from scratch, bigger than the factory lip, but smaller than a LM splitter. Nice middle ground. Began the RHD conversion. Made a new left toe board, removed the right toe board. Most of this interior tub will get the same carbon fiber decal as the front splitter and a dark green panel bond lines. New “medium” size turbos from Iceman Collections. These will look far better than the kit turbos. A little bigger, but not too big for a street car. The rear coils have already been cut to size and installed. Thats all for now! Going to start putting together the rear rotors now that they arrived. I only jumped to the interior to keep busy while I waited for that Hobby Design set to arrive from Japan!

-
Following this one! Great start!
-
Absolutely spectacular reference material! Thank you so much. I don’t think I ever would have gotten the lines as accurate with just my internet research! Your knowledge of these cars is definitely going to help take my build to the next level. Plumbing and wiring engines is one of my favorite parts of building any model and being so unfamiliar with modern cars, nonetheless Italian super cars, this information will be invaluable! Most of my experience is in hot rods, muscle cars, super stock and top fuel dragsters. Not going to lie, when I first opened this kit I thought I was looking at an enigma machine. I wasn’t sure what to make of most of it other than, follow the instructions, look at references, and paint it well! I appreciate the offer on the paint too, but I had a bottle of Giallo Modena arrived a few days ago. I actually have a full PPG toner mixing bank at my work and access to the PPG color library, so I can mix almost any color under the sun. This was my first time buying paint from Splash. The cost of mixing a 1oz sample depending on the color is typically about $3-$5 my cost, So Splash selling them for $8.99 with a shaker bottle is actually not a bad deal! Thank you again though! As of today I’m at a short stand still until parts arrive over the next 2 days. Carbon Kevlar, carbon fiber decals, the MOMO parts, seat belt material, struts and springs, the new turbos and lots of other detail parts! Thank you again for the reference material and knowledge!
-
Hey Chris! You and I both! Hope you’re doing well!
-
Believe it or not, she can tell you the difference between PVC and Pex tubing, knows the difference between solenoid and a relay. I am a lucky guy!
-
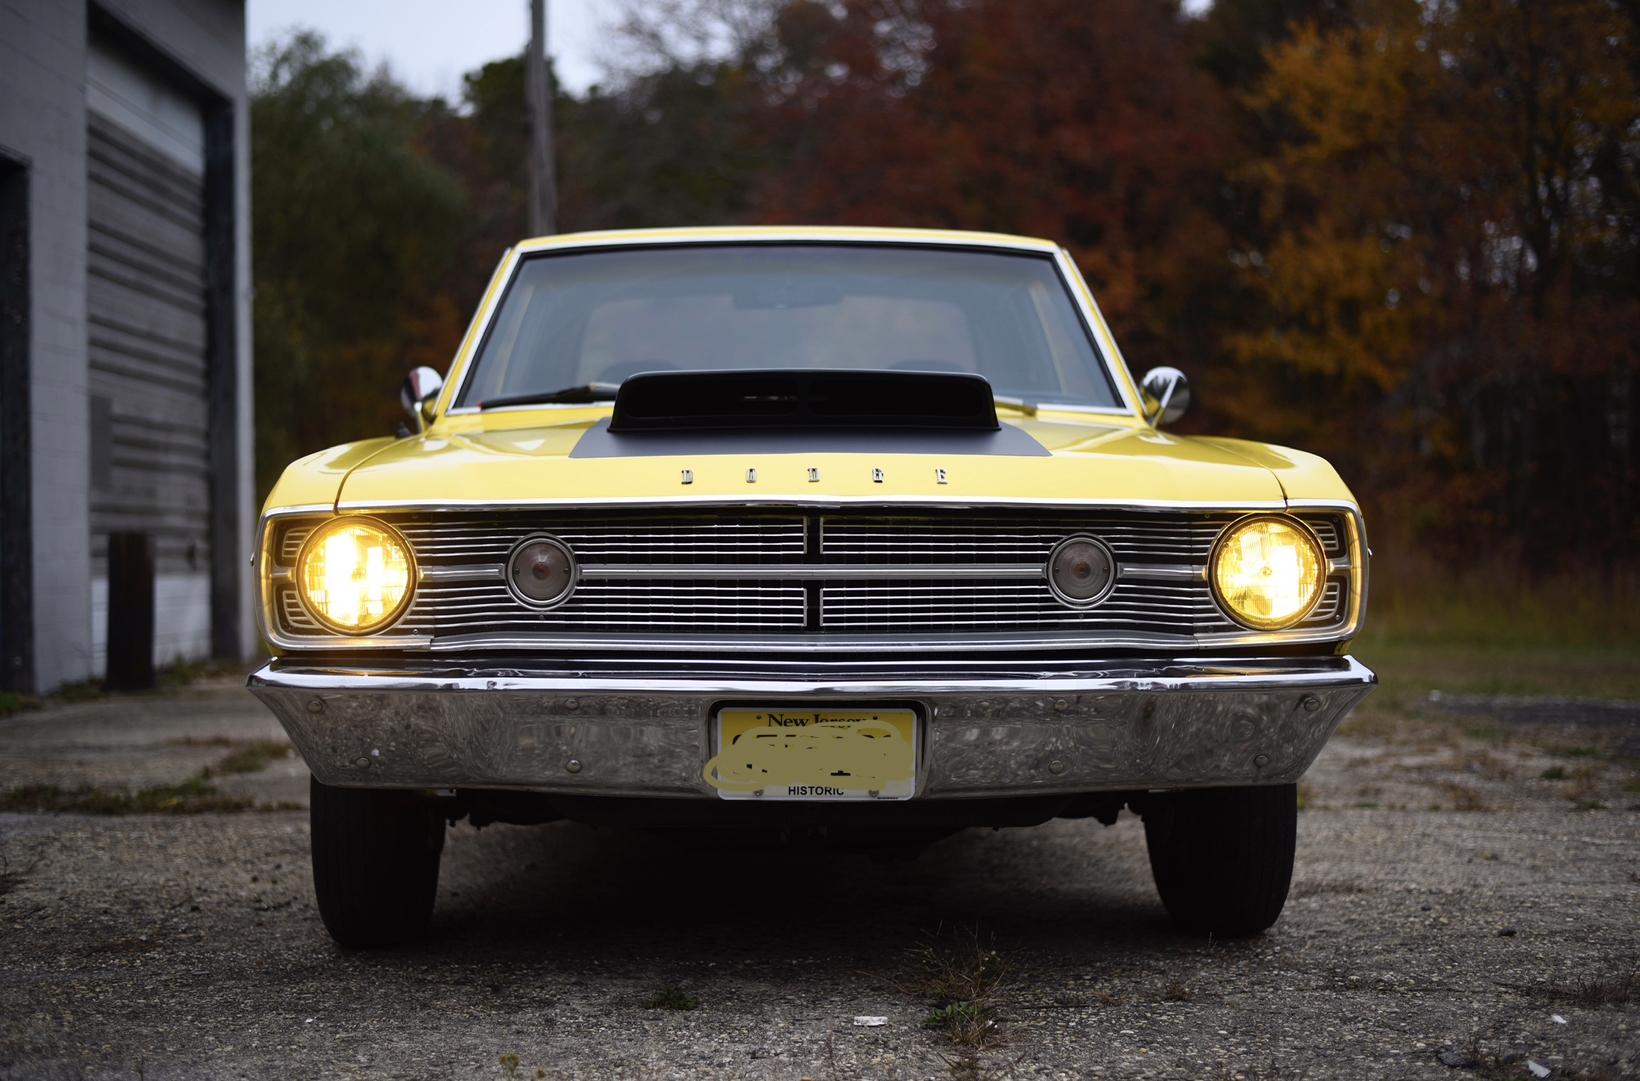
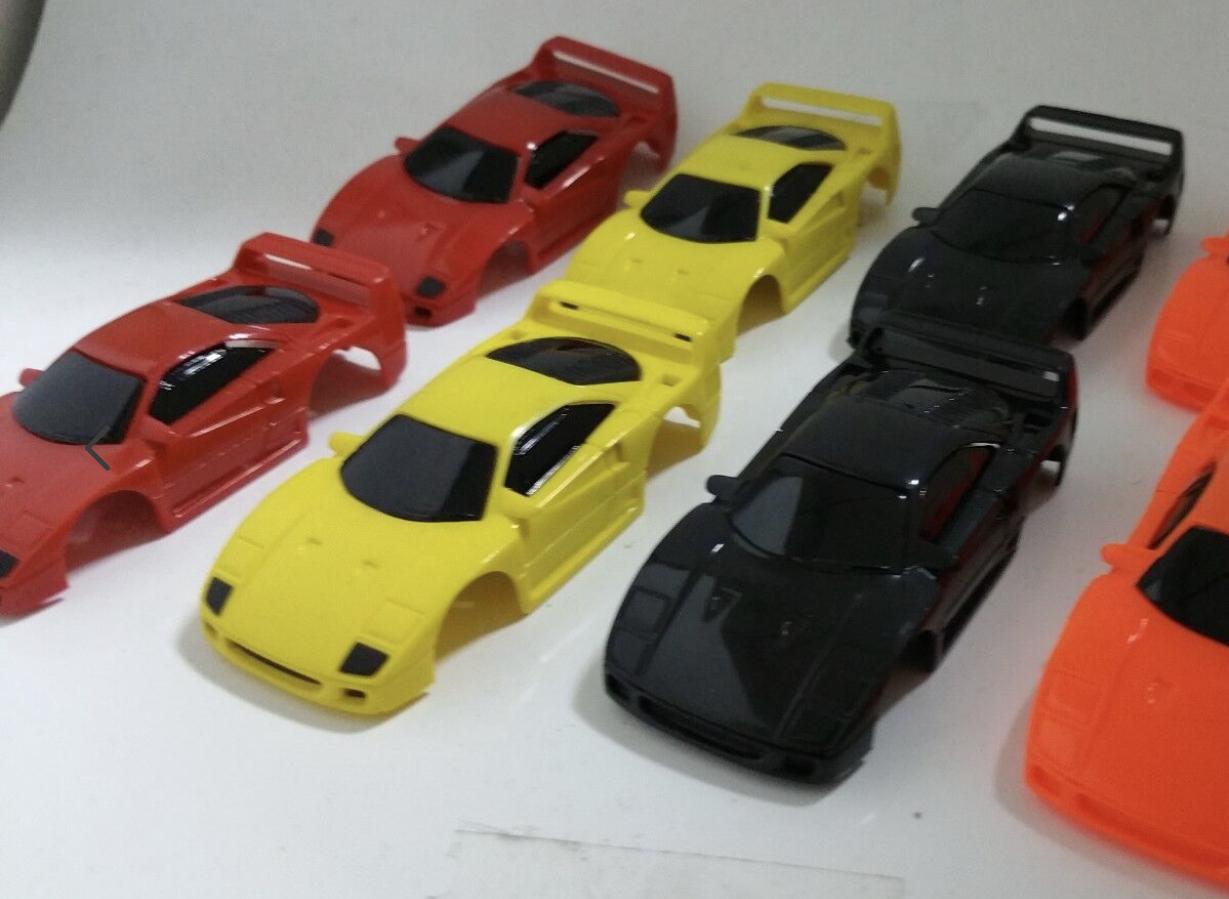
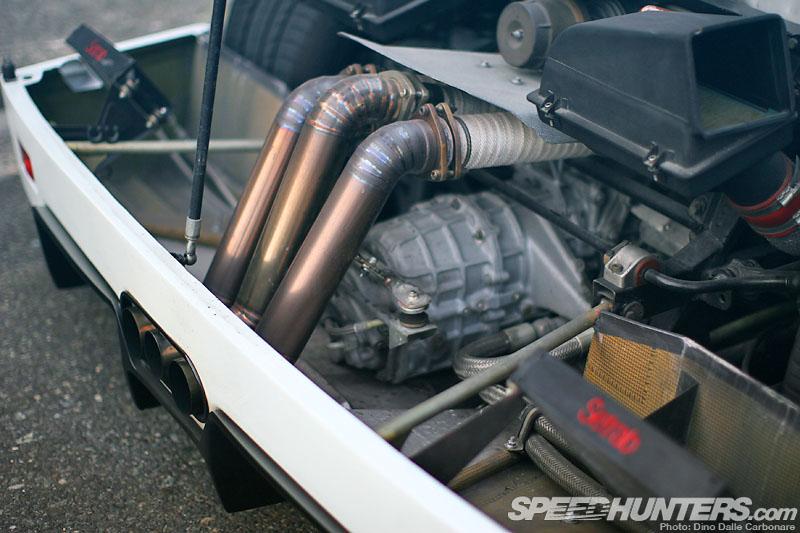
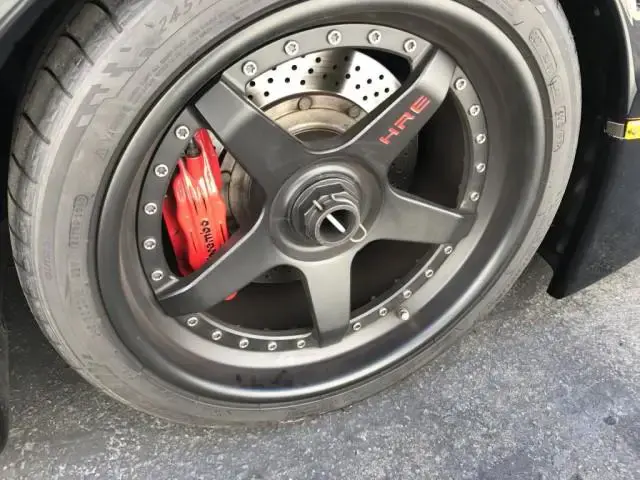
My 1:1 car is also yellow! And I hate it! 🤣 My ‘68 Dart, will eventually be black. As a kid I had a Tyco slot car track, I don’t know why I had 4 as my dad bought them and I wouldn’t exactly call him a Ferrari guy by any means, but I had 4 F-40s. 2 red, 1 black, and 1 yellow. I don’t know why, but I remember the yellow one being my favorite. I must agree, for as great of a kit that Tamiya put together, the turbos are PATHETIC! I don’t necessarily plan on huge turbos, but definitely a detail that needs fixing. I will use the kit supplied intercoolers and aftermarket waste gate. I did a few things to the engine already that I know are not “factory” such as I painted around the Ferrari lettering on the rear of the intake plenums and silver details on the valve covers. It’s actually sad just how little of the actual engine is visible when assembled. I found some incredible reference photos that’s to the restoration of a previously raced F-40 by Mototechnique. Or course that still does not compare to being able to see one in person and take your own reference photos! As for the hoses, I haven’t glued down the intake or the cradle yet. I still have those details you mentioned to address ( to the extent of my abilities, I’m not an award winning modeler…yet!) I have to make my best guess for hose size and AN fittings from photos. As for the RHD conversion, I simply want to build the car tastefully and still be respectful of its Italian racing heritage but as if the car maybe in Tokyo. It will have Japanese plates. I know 7 RHD F-40s were produced for the Sultan of Brunei by Pininfarina, which a few were auctioned off. It would be easy to chop the dash by hand, but it’s more so an exercise in my 3D modeling as I am an amateur, and to make it mildly different. But my question is the wheels. Everywhere I have looked was referencing the factory rear wheels as 17”X13” with a 335 tire (almost dead on 13”) whereas the kit supplied rear tires measured 0.620” which in 1:24 is about 15”! They seemed to have gotten that scale off a little. I will print my wheels in 2 or 3 pieces to make the carbon fiber decals a hopeful possibility. I have not found the tires I want so I will probably print those as well, Toyo Proxes 888. I have printed 2 sets of wheels so far, that was a learning curve in itself as you can’t just model a 1:1 wheel and scale it down, it prints them as thin as tissue paper! The photo you showed of the exhaust is most likely the route I will go, pretty much straight piped. The OEM muffler is ugly! May give it the heated stainless look with a golden brown tint. I will most definitely look into the Studio 27 photo etch. The Hobby Design set I bought the day after I bought the kit still has not shipped, from over seas of course so there is a chance of not seeing it for 2 months. I would LOVE to see some more of your models! They look great from what I see in the photos and I am green with envy over your opportunity to look over a real deal! I will keep my fingers crossed for one to be at Greenwich CT concourse this year! I greatly appreciate your response! I did a search on here and didn’t see a lot of builds going with this kit, I love the passion for this one!
-
That pic certainly sums it up! I have a collection of vintage MPC Dodge Tradesman vans, I feel the same way about those as they seem to be $90-$200 on average depending on the kit. The F-40 seems to always be around $100+ and factor shipping on that. I’m surprised my girlfriend hasn’t duct taped my mouth shut over me raving about this kit and the price 😁
-
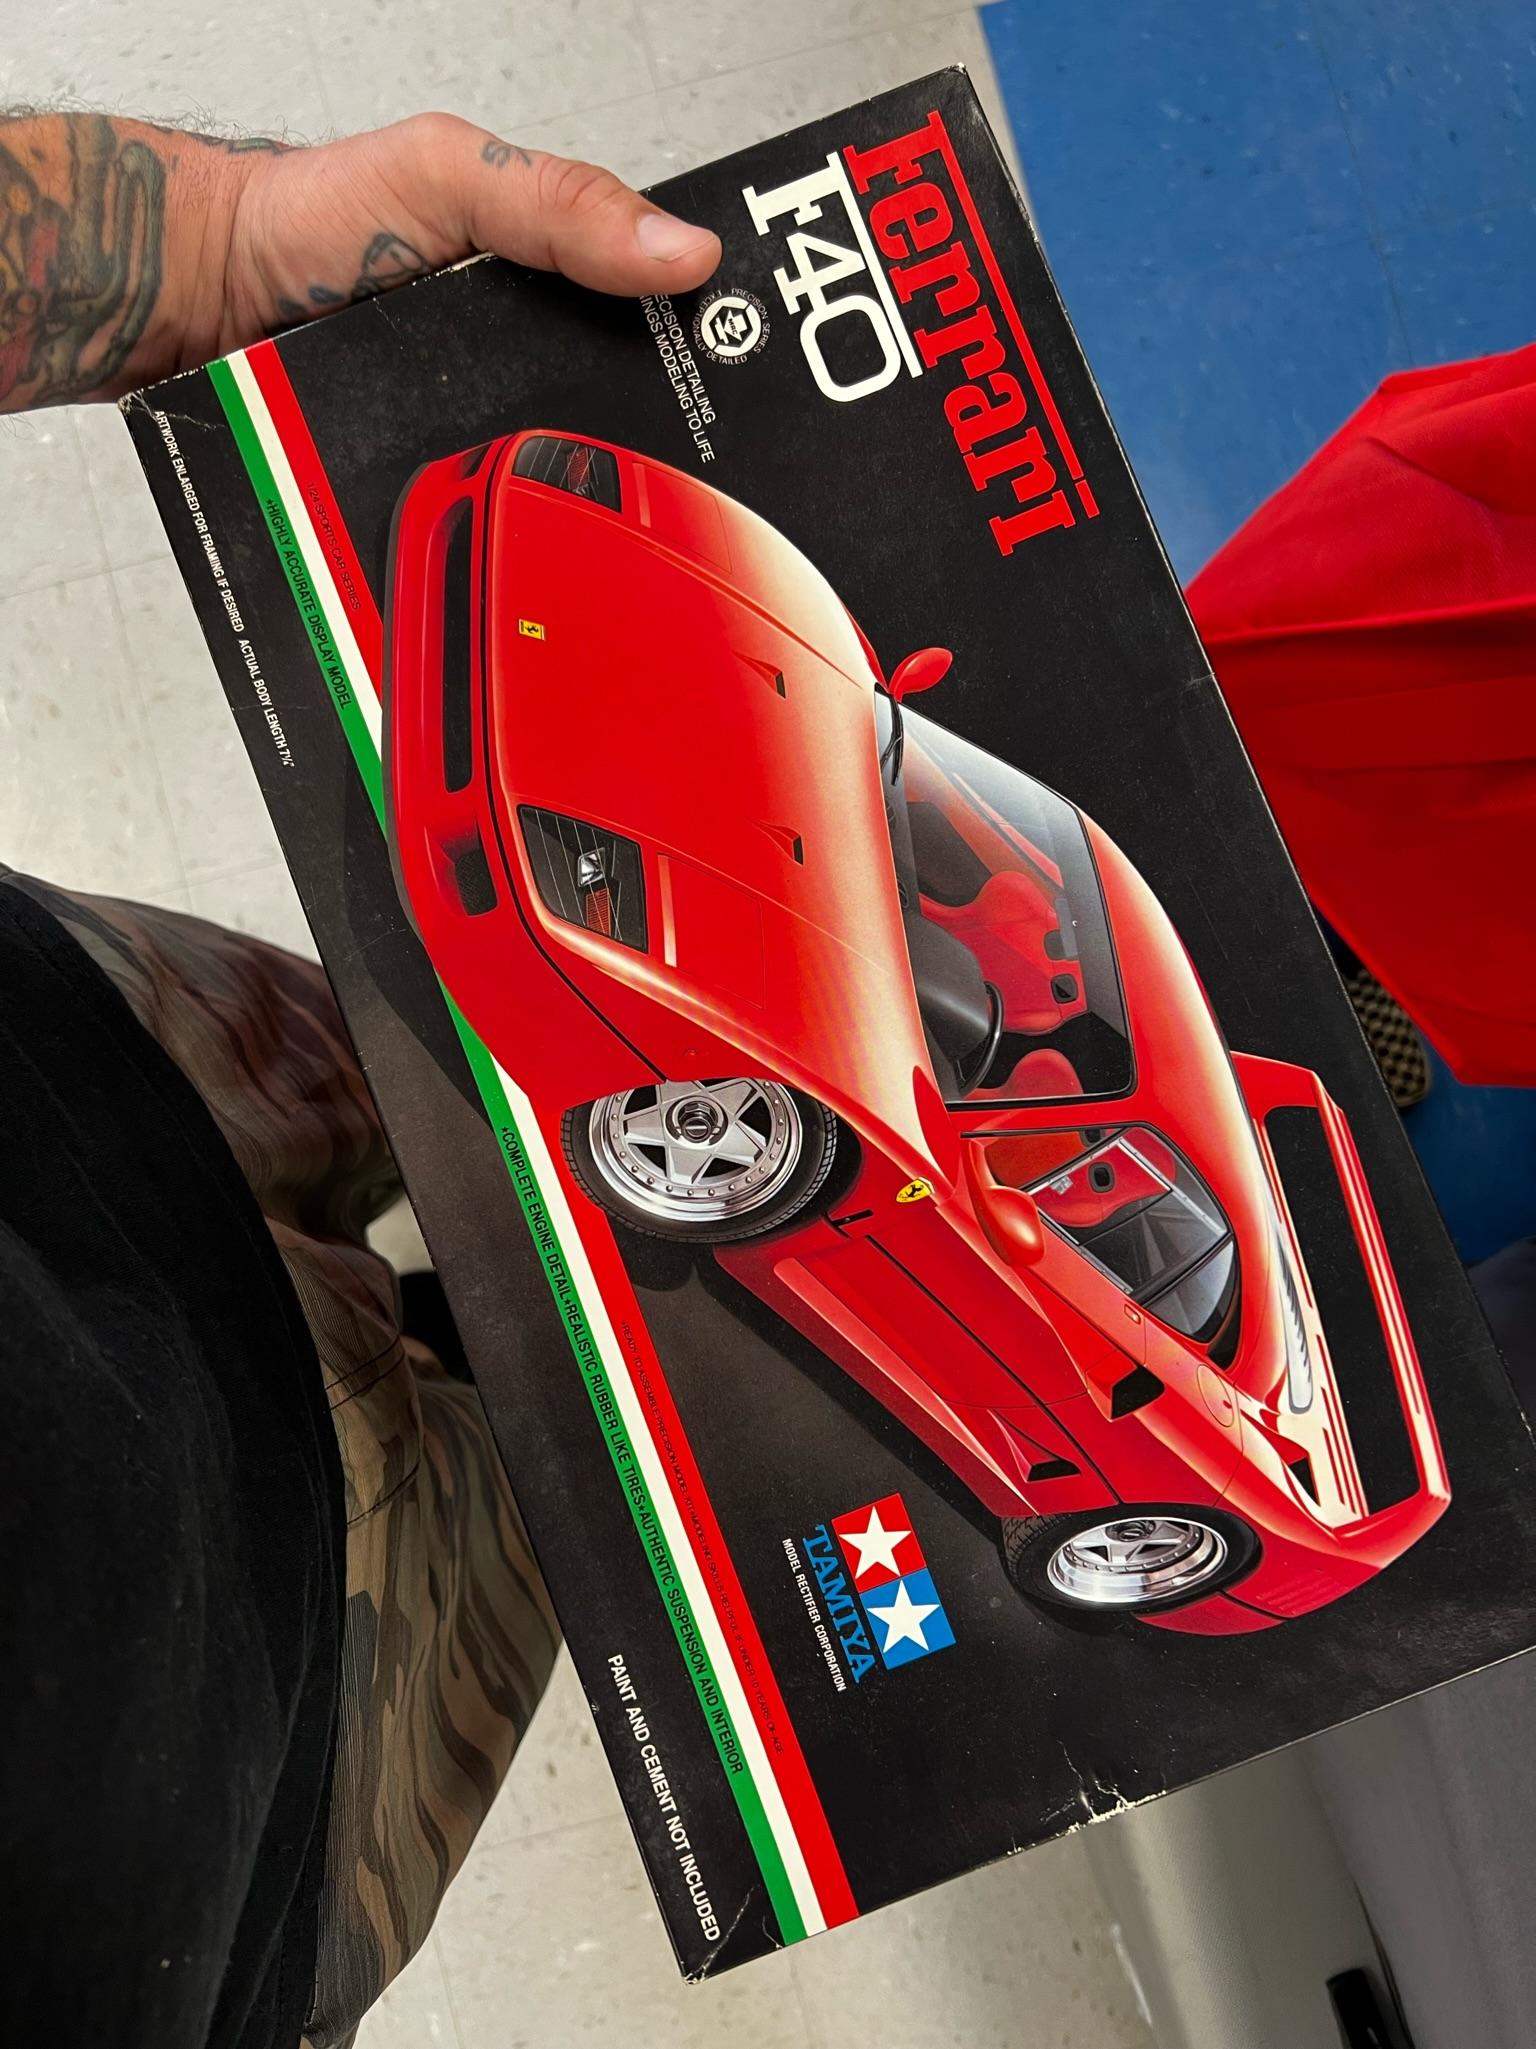
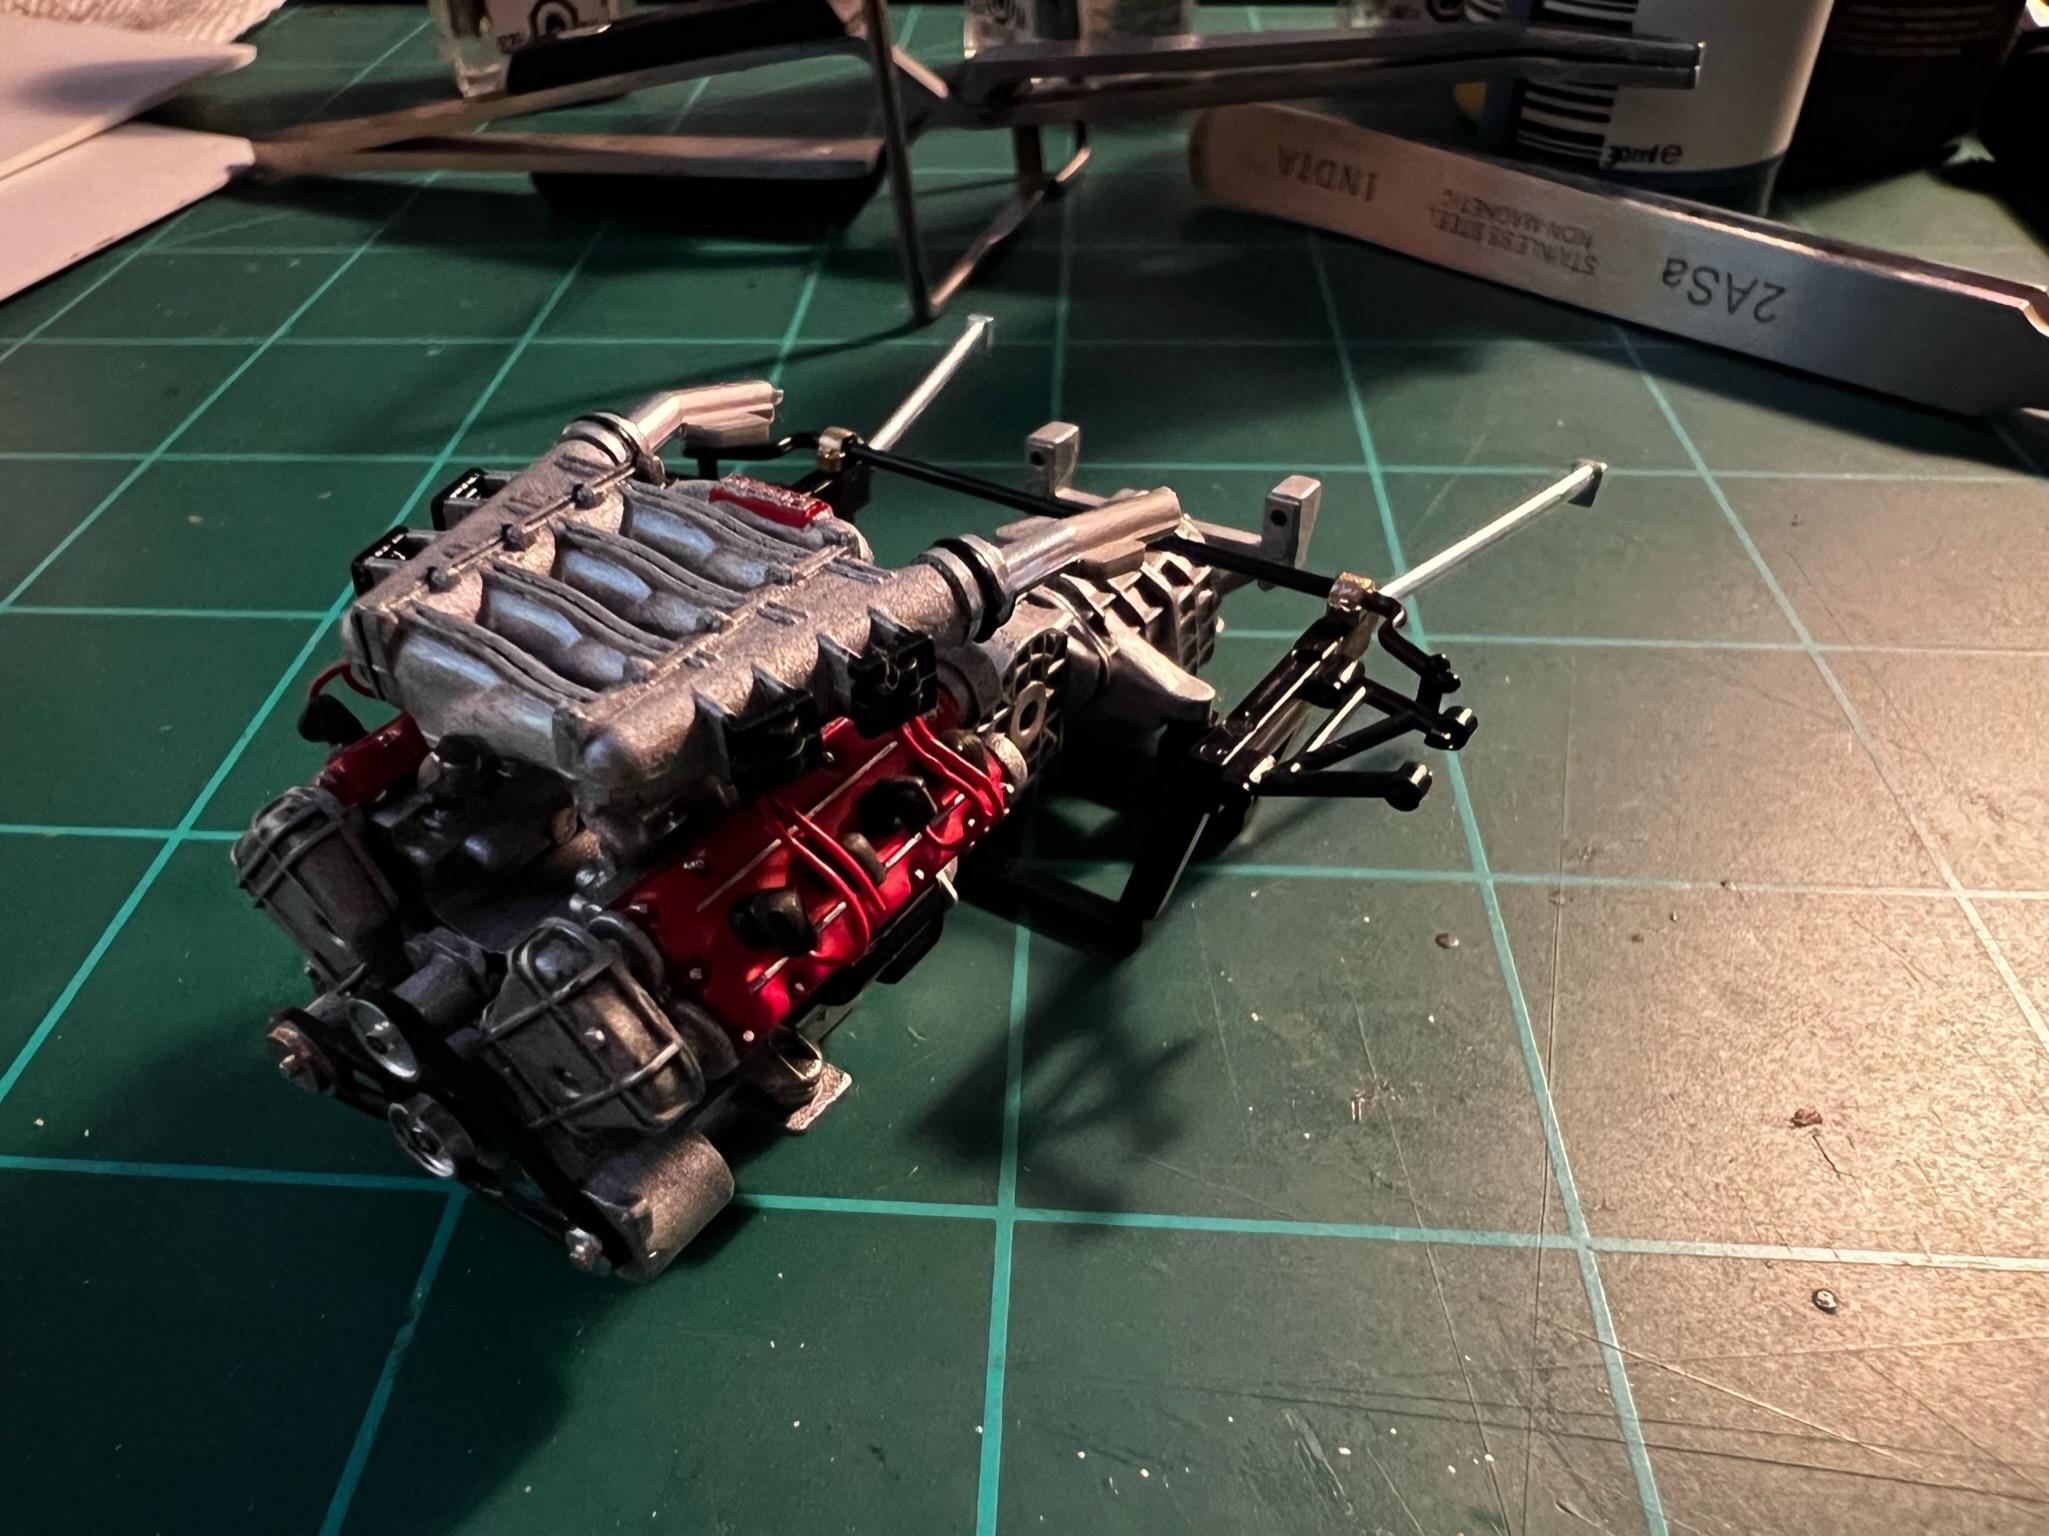
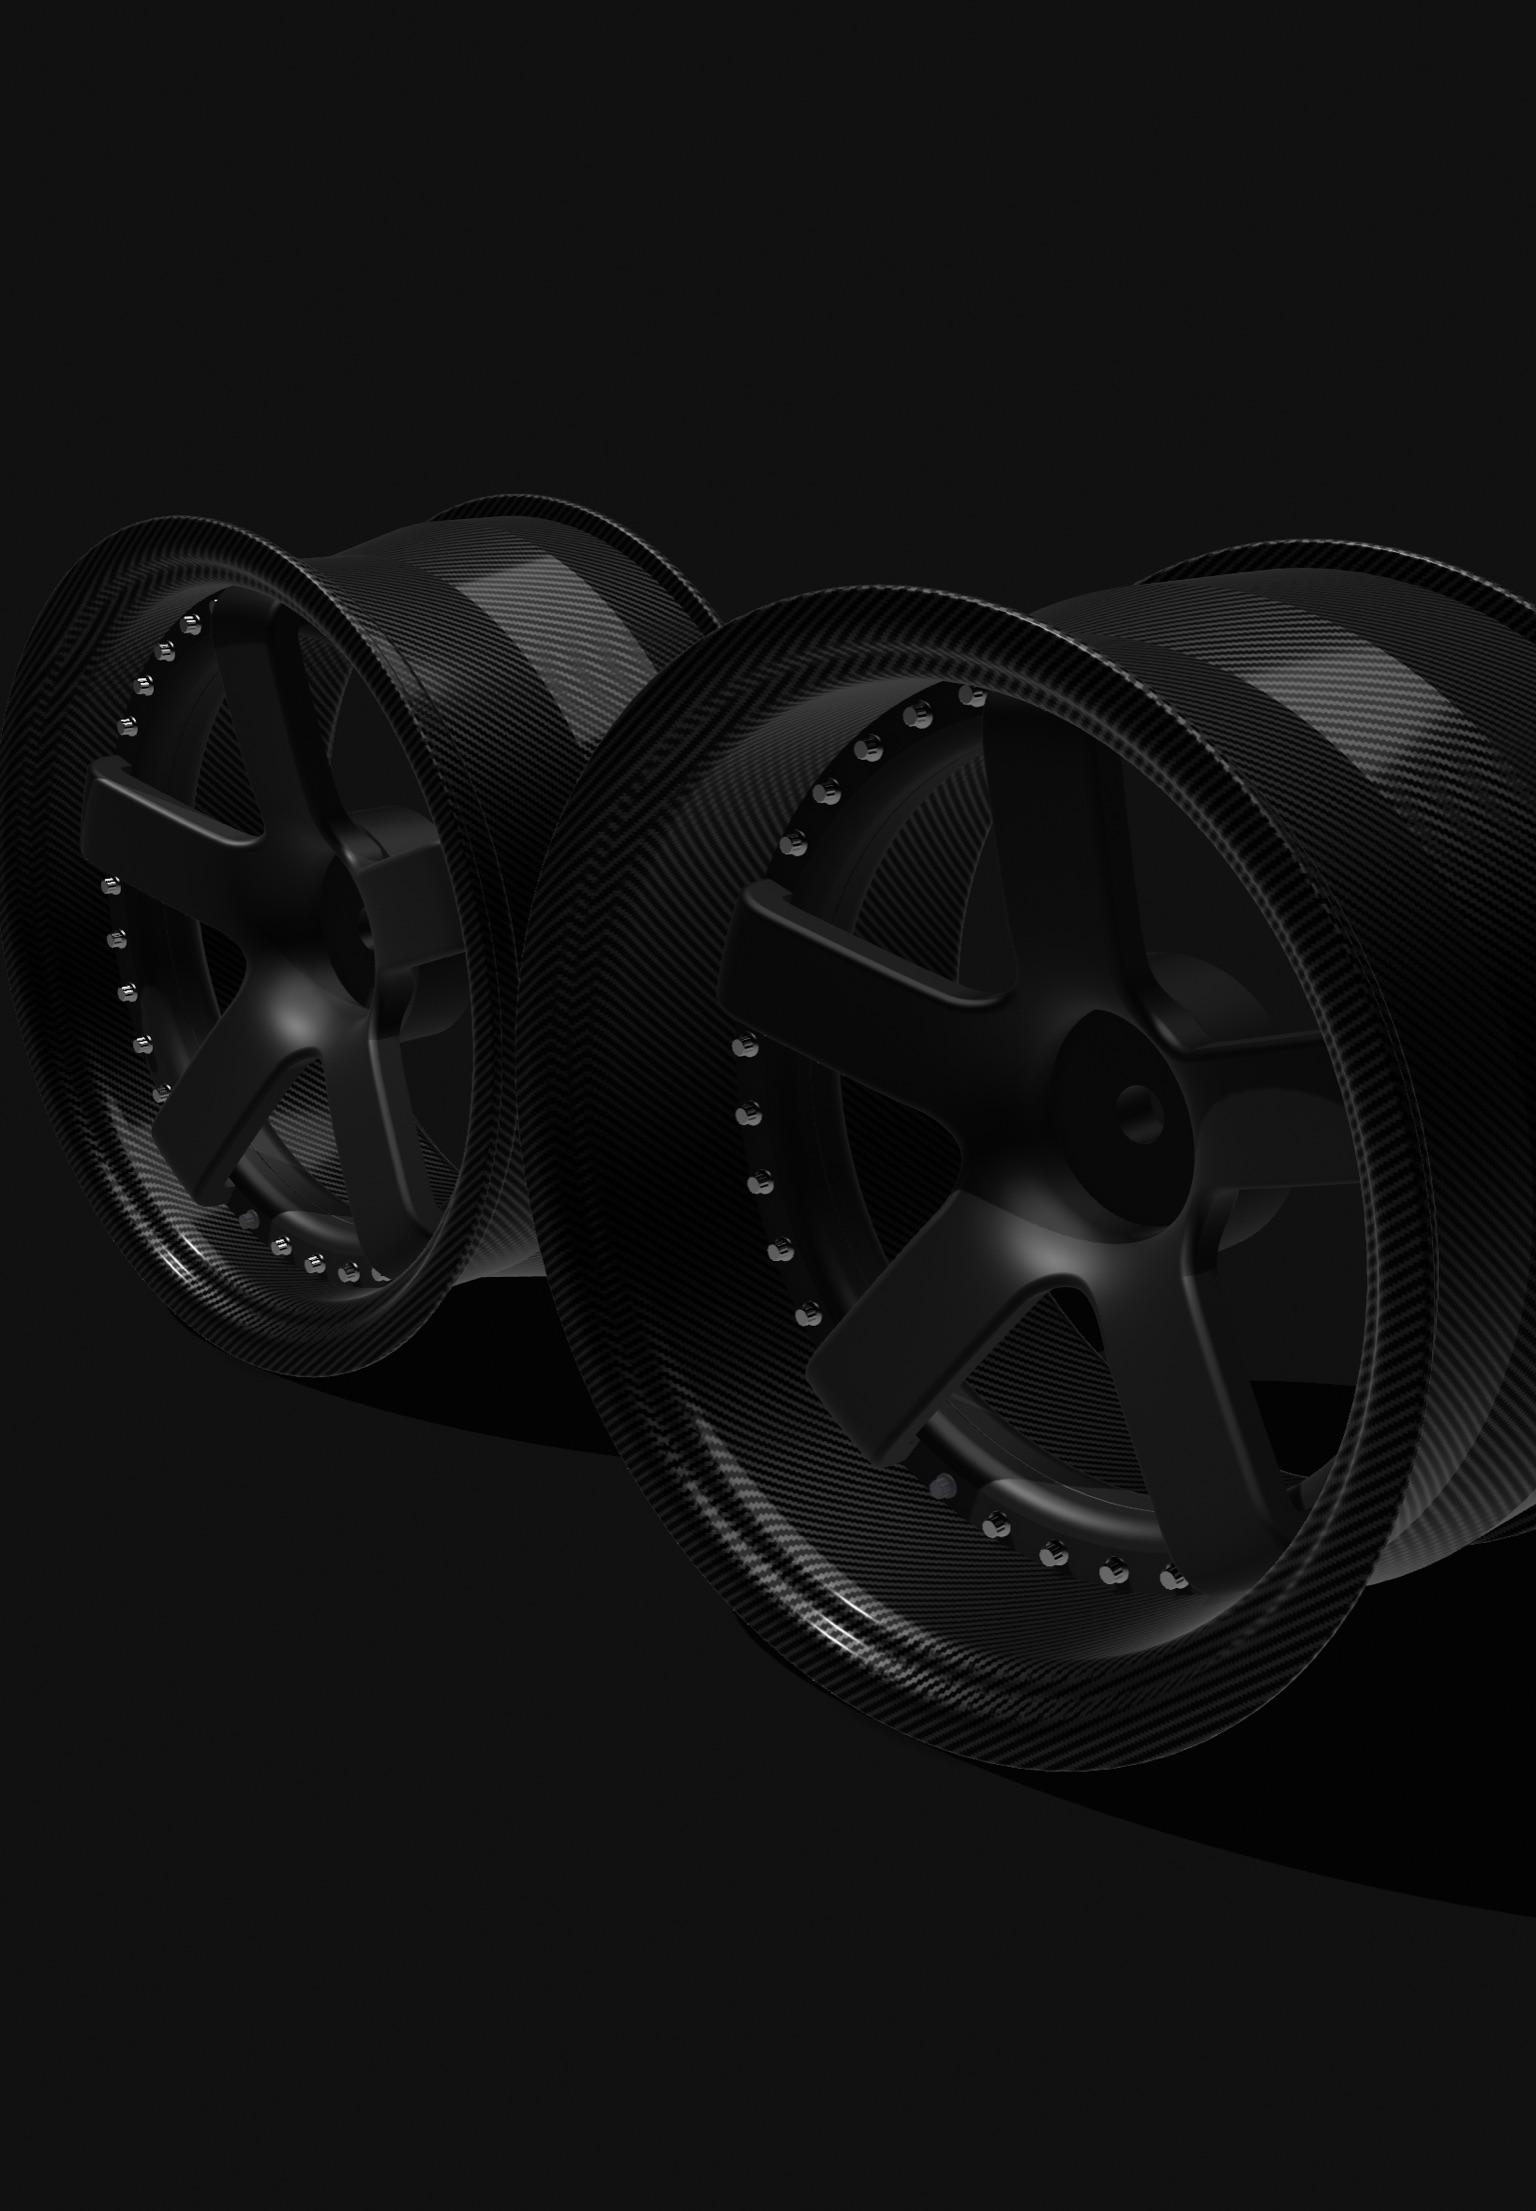
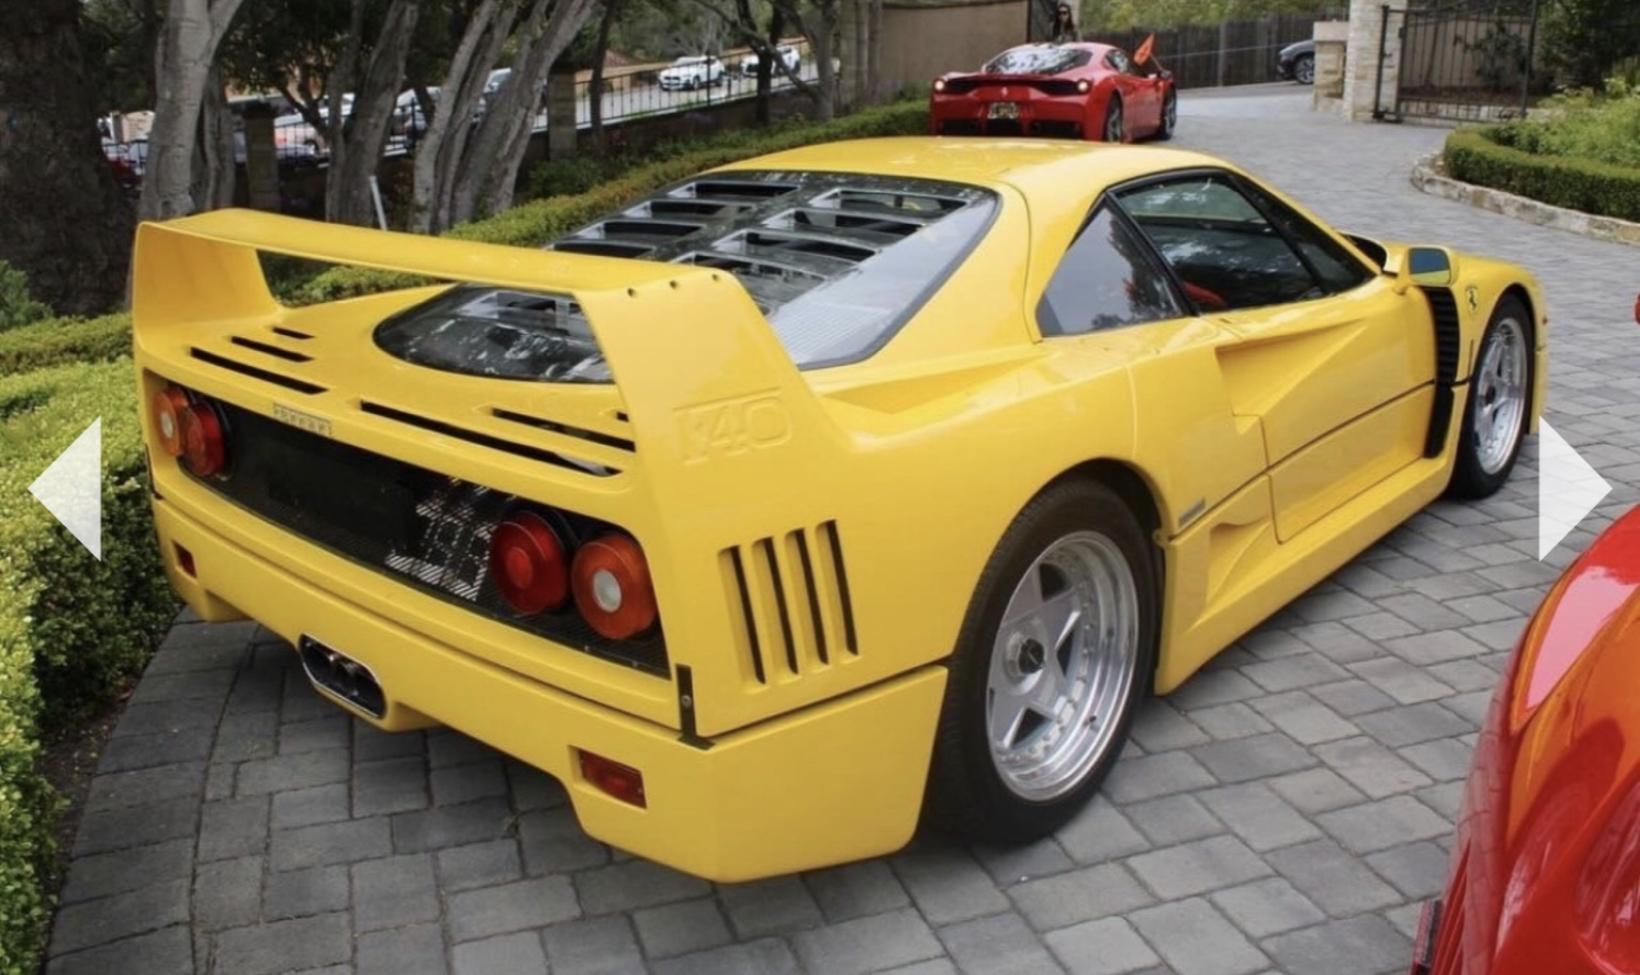
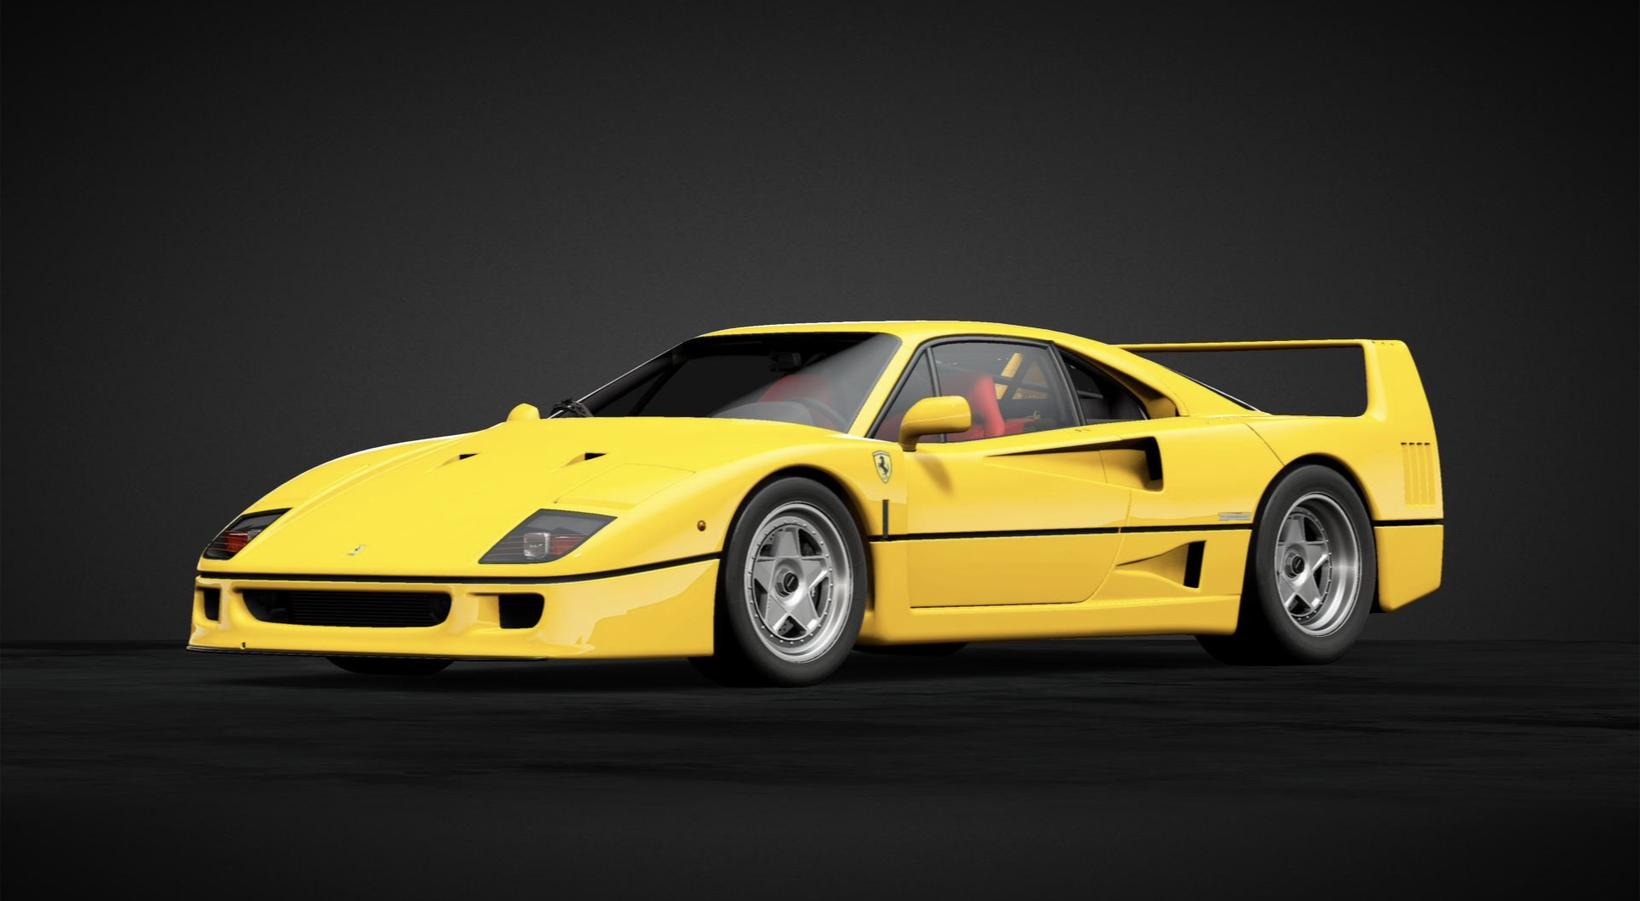
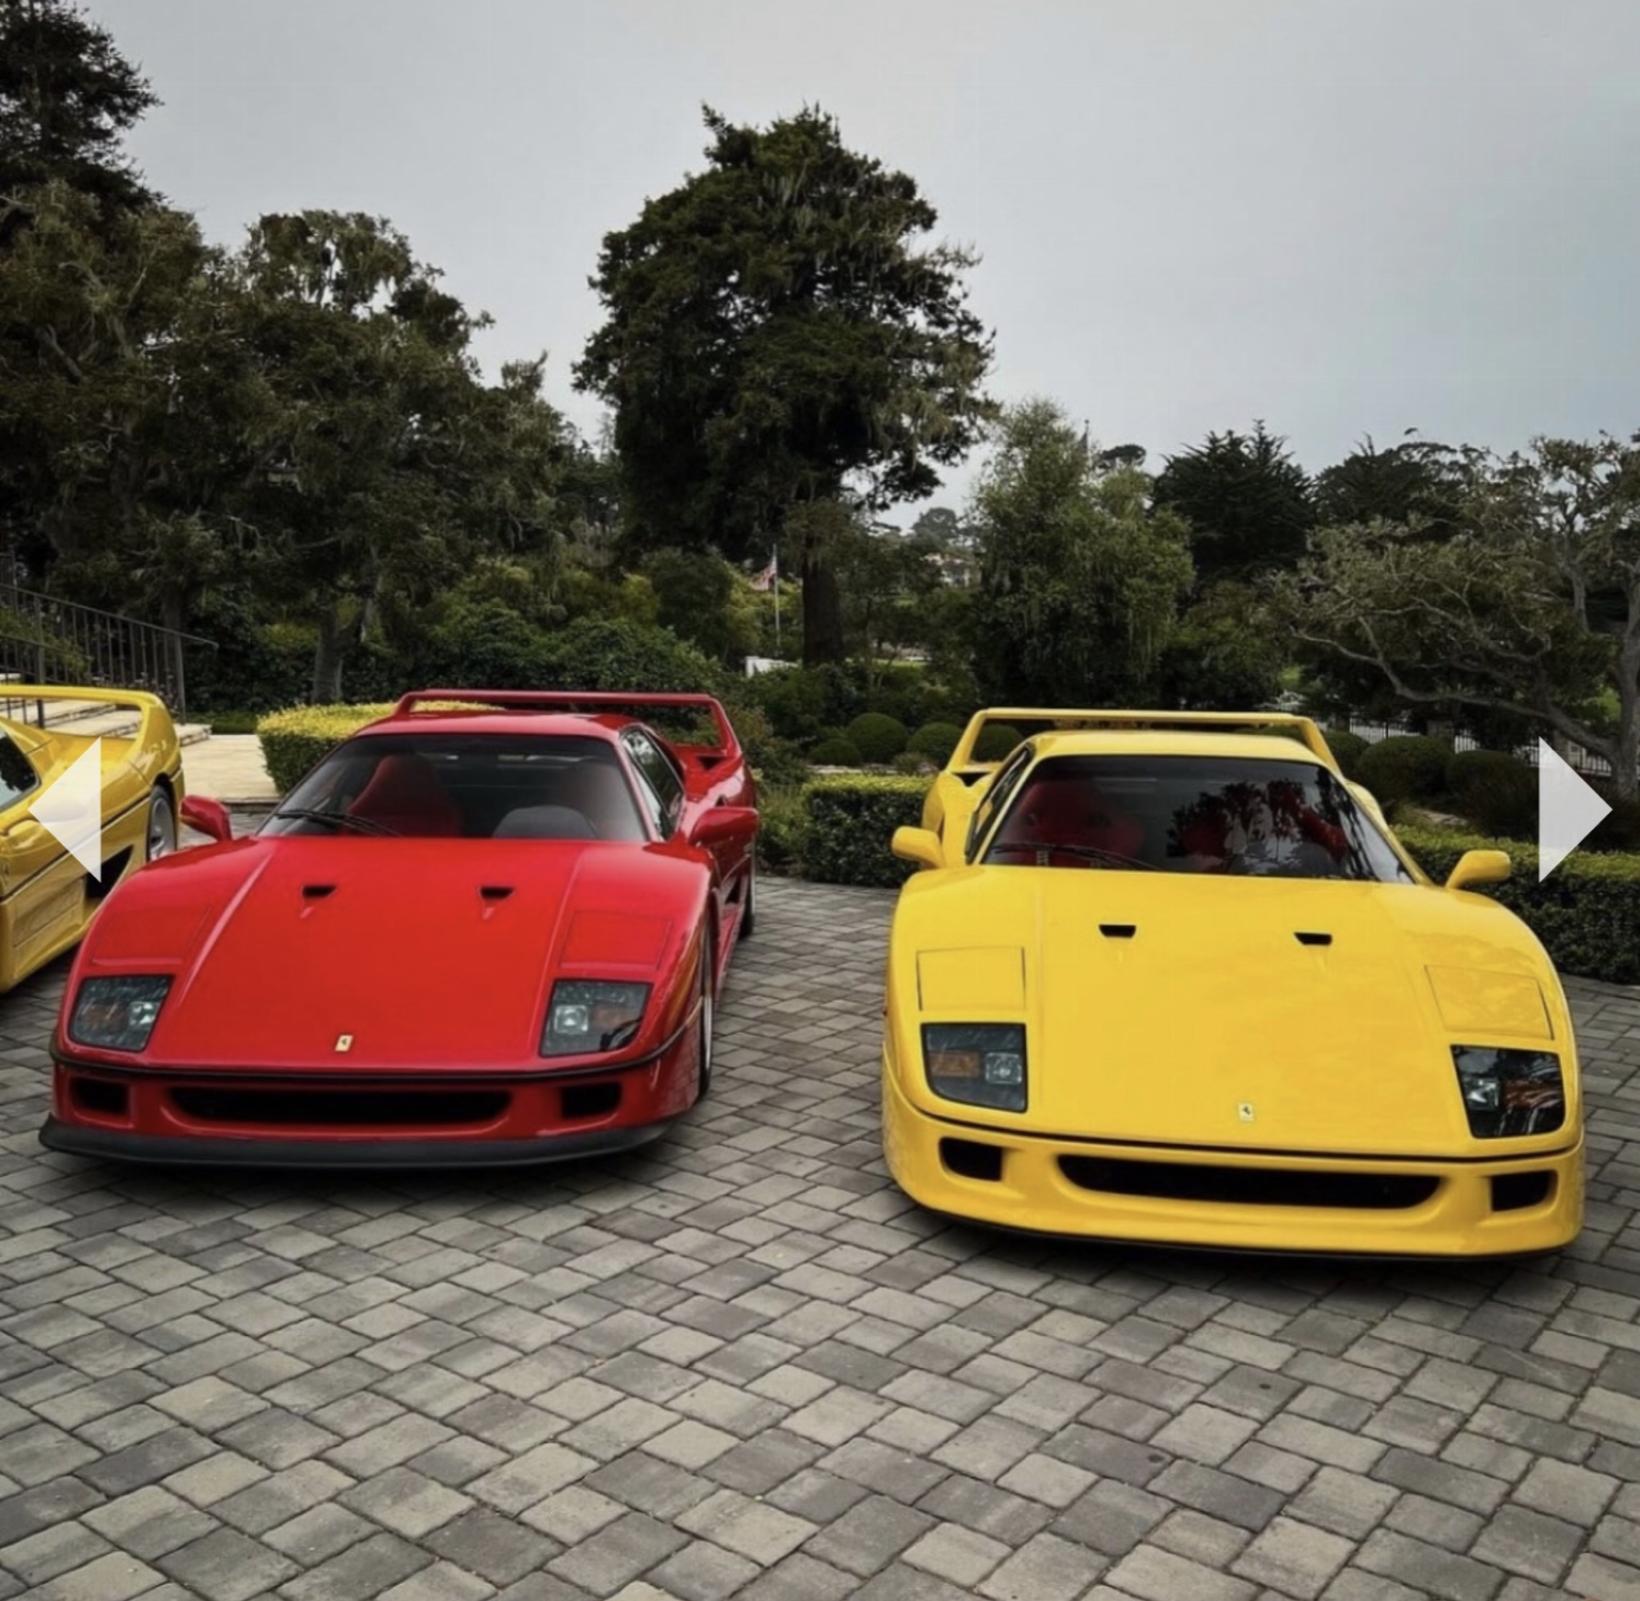
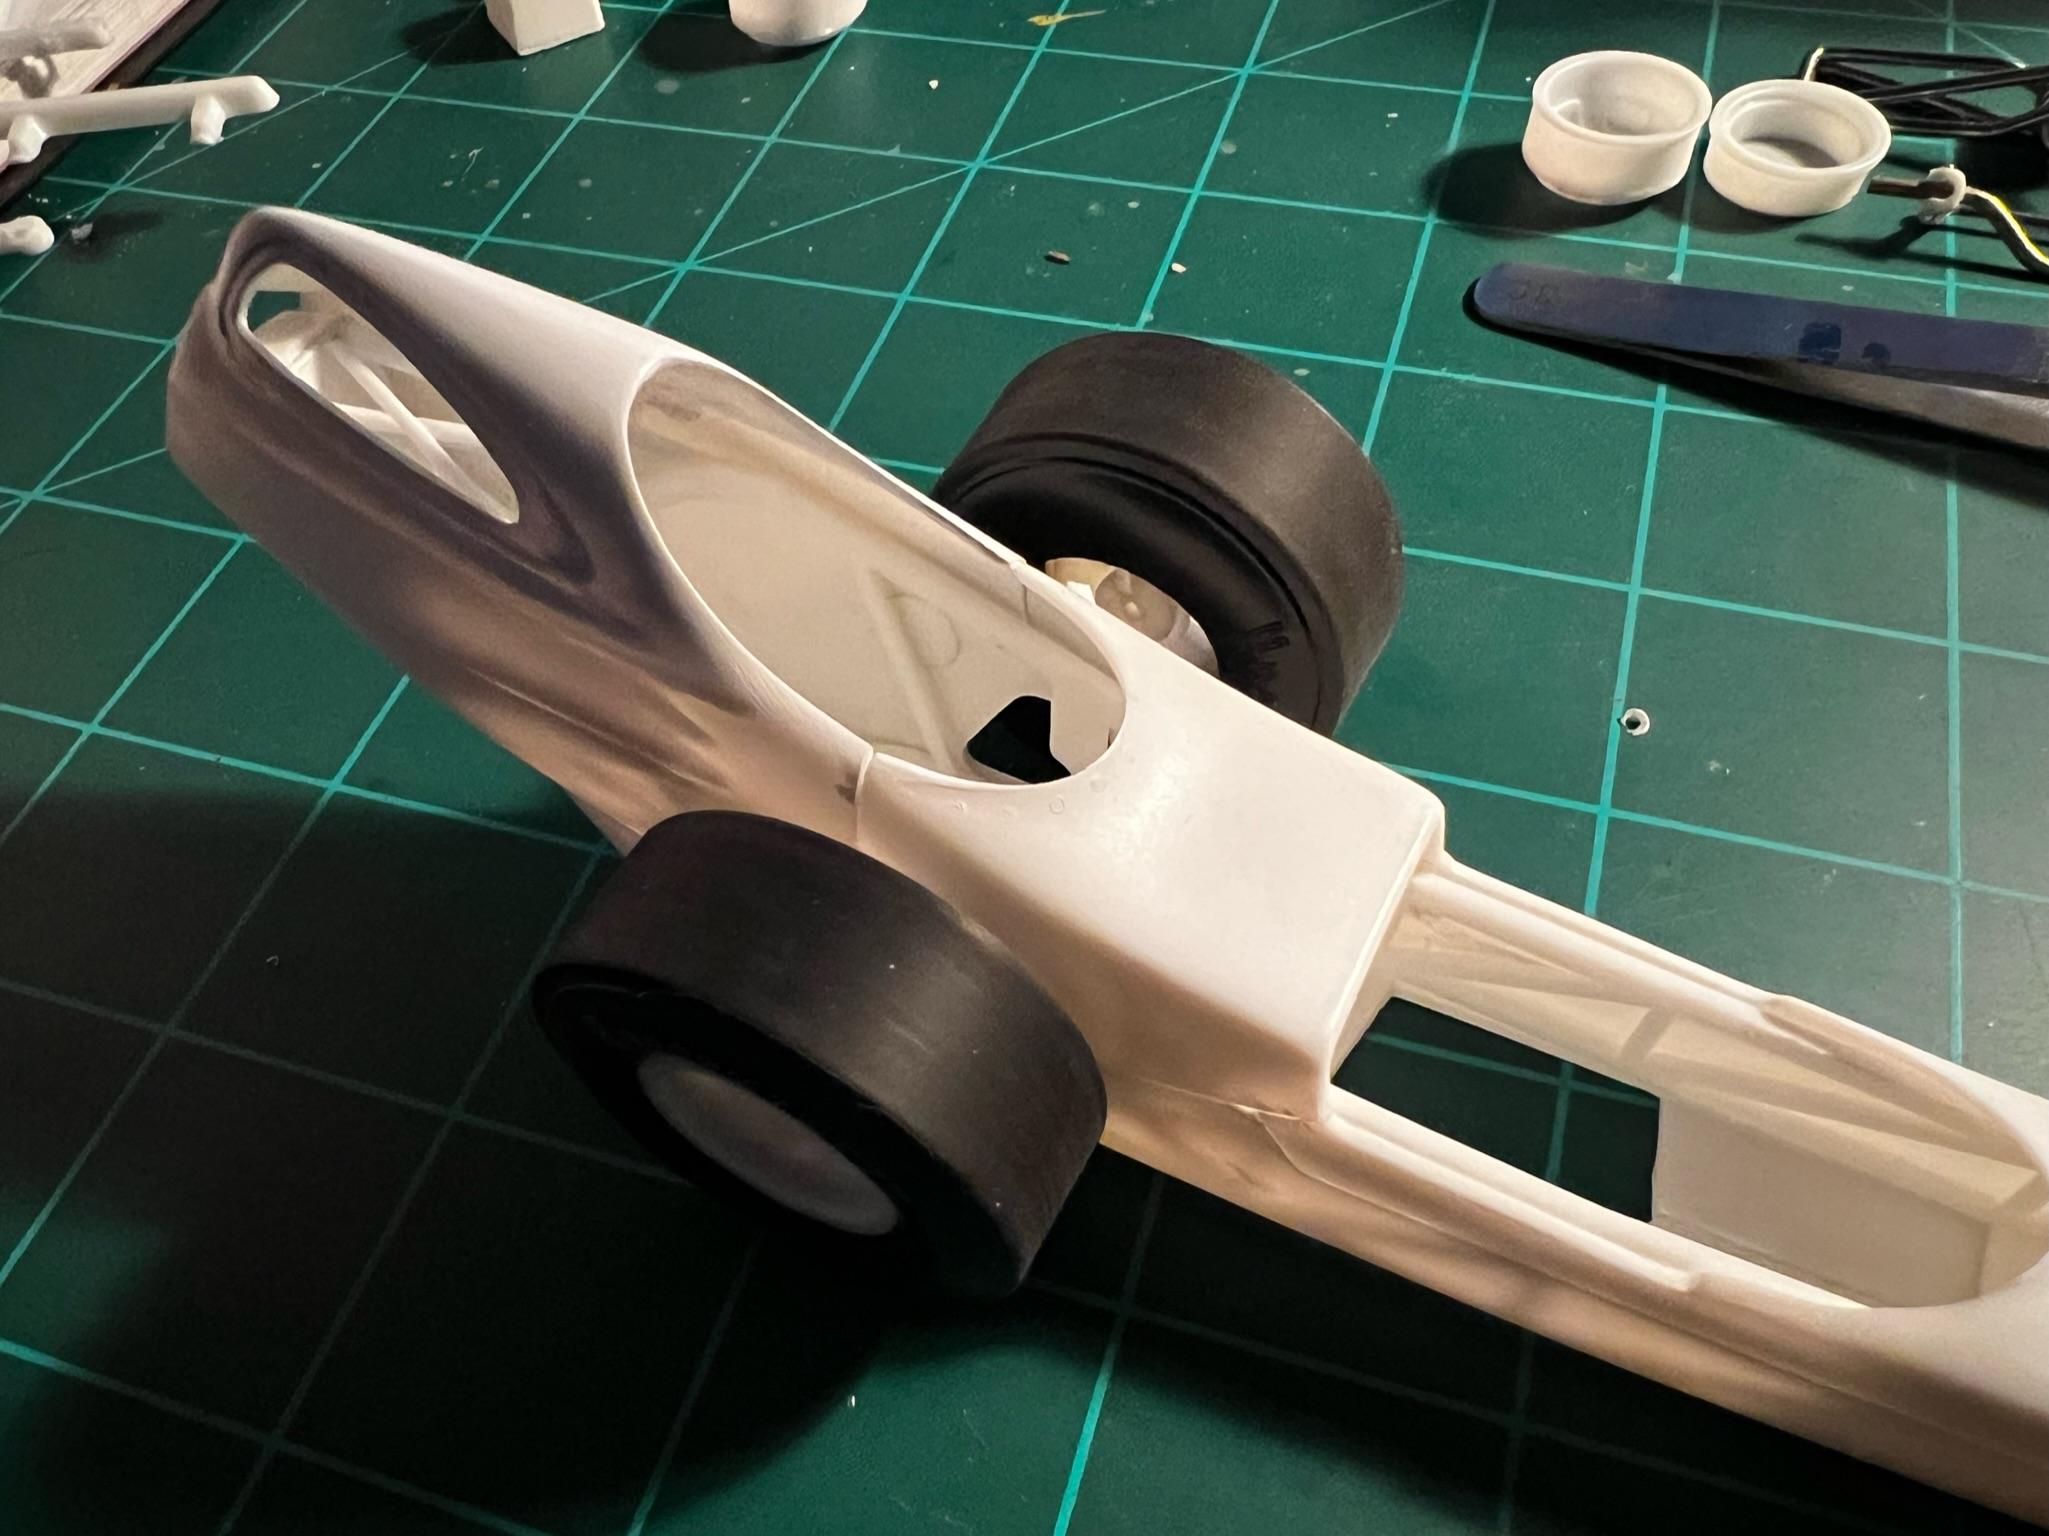
At the NNL East 2023 show last weekend, I found one of my holy grail kits, no missing parts, in great condition, with extra parts… for $30! The 1988 (first release) Tamiya Ferrari F-40! Thank you to the gentleman in the J.D. McDuffie shirt! I have been watching these kits on eBay for years and could never actually pull the trigger on one. I am excited for this as this if my first “modern” car as well as my first import and first exotic / super car. First bright paint job too. A lot of firsts for me with this! So naturally I couldn’t wait to get home and begin ordering up all the parts for it! Parts, paint, photo etch and began 3D modeling one-off parts to print! Wheels will be HKE inspired 3 piece 5 spoke, which I will attempt to do carbon fiber barrels on. 18”X8” Front and 18”X13” rear. I will 3D design and print them myself. My current in progress rendering: Chassis will be detailed with Hobby Design up detailing set with resin calipers, photo etch rotors. I also bought Top Studio shock / coil sets. Engine will have larger, more detailed turbos from Iceman Collections. Custom exhaust. Already wired it with plug wires and I have braided hoses. Current Engine progress: Interior will be converted to right hand drive and I will 3D model and print the dash. I bought MOMO Daytona racing seats and a MOMO steering wheel from Scale Riders. Yellow racing harnesses. Exterior will be yellow. Yes, YELLOW. Giallo Modena to be exact. Correct for this car although none but one was supposedly painted this color. Will make a carbon fiber front splitter. Slightly lowered. Mild F-40 LM look with street car style. I HATE YELLOW CARS. But for whatever reason, this is the only car I have ever liked in yellow. I like it more than the Rosso Corsa red by far. Some reference photos!
-

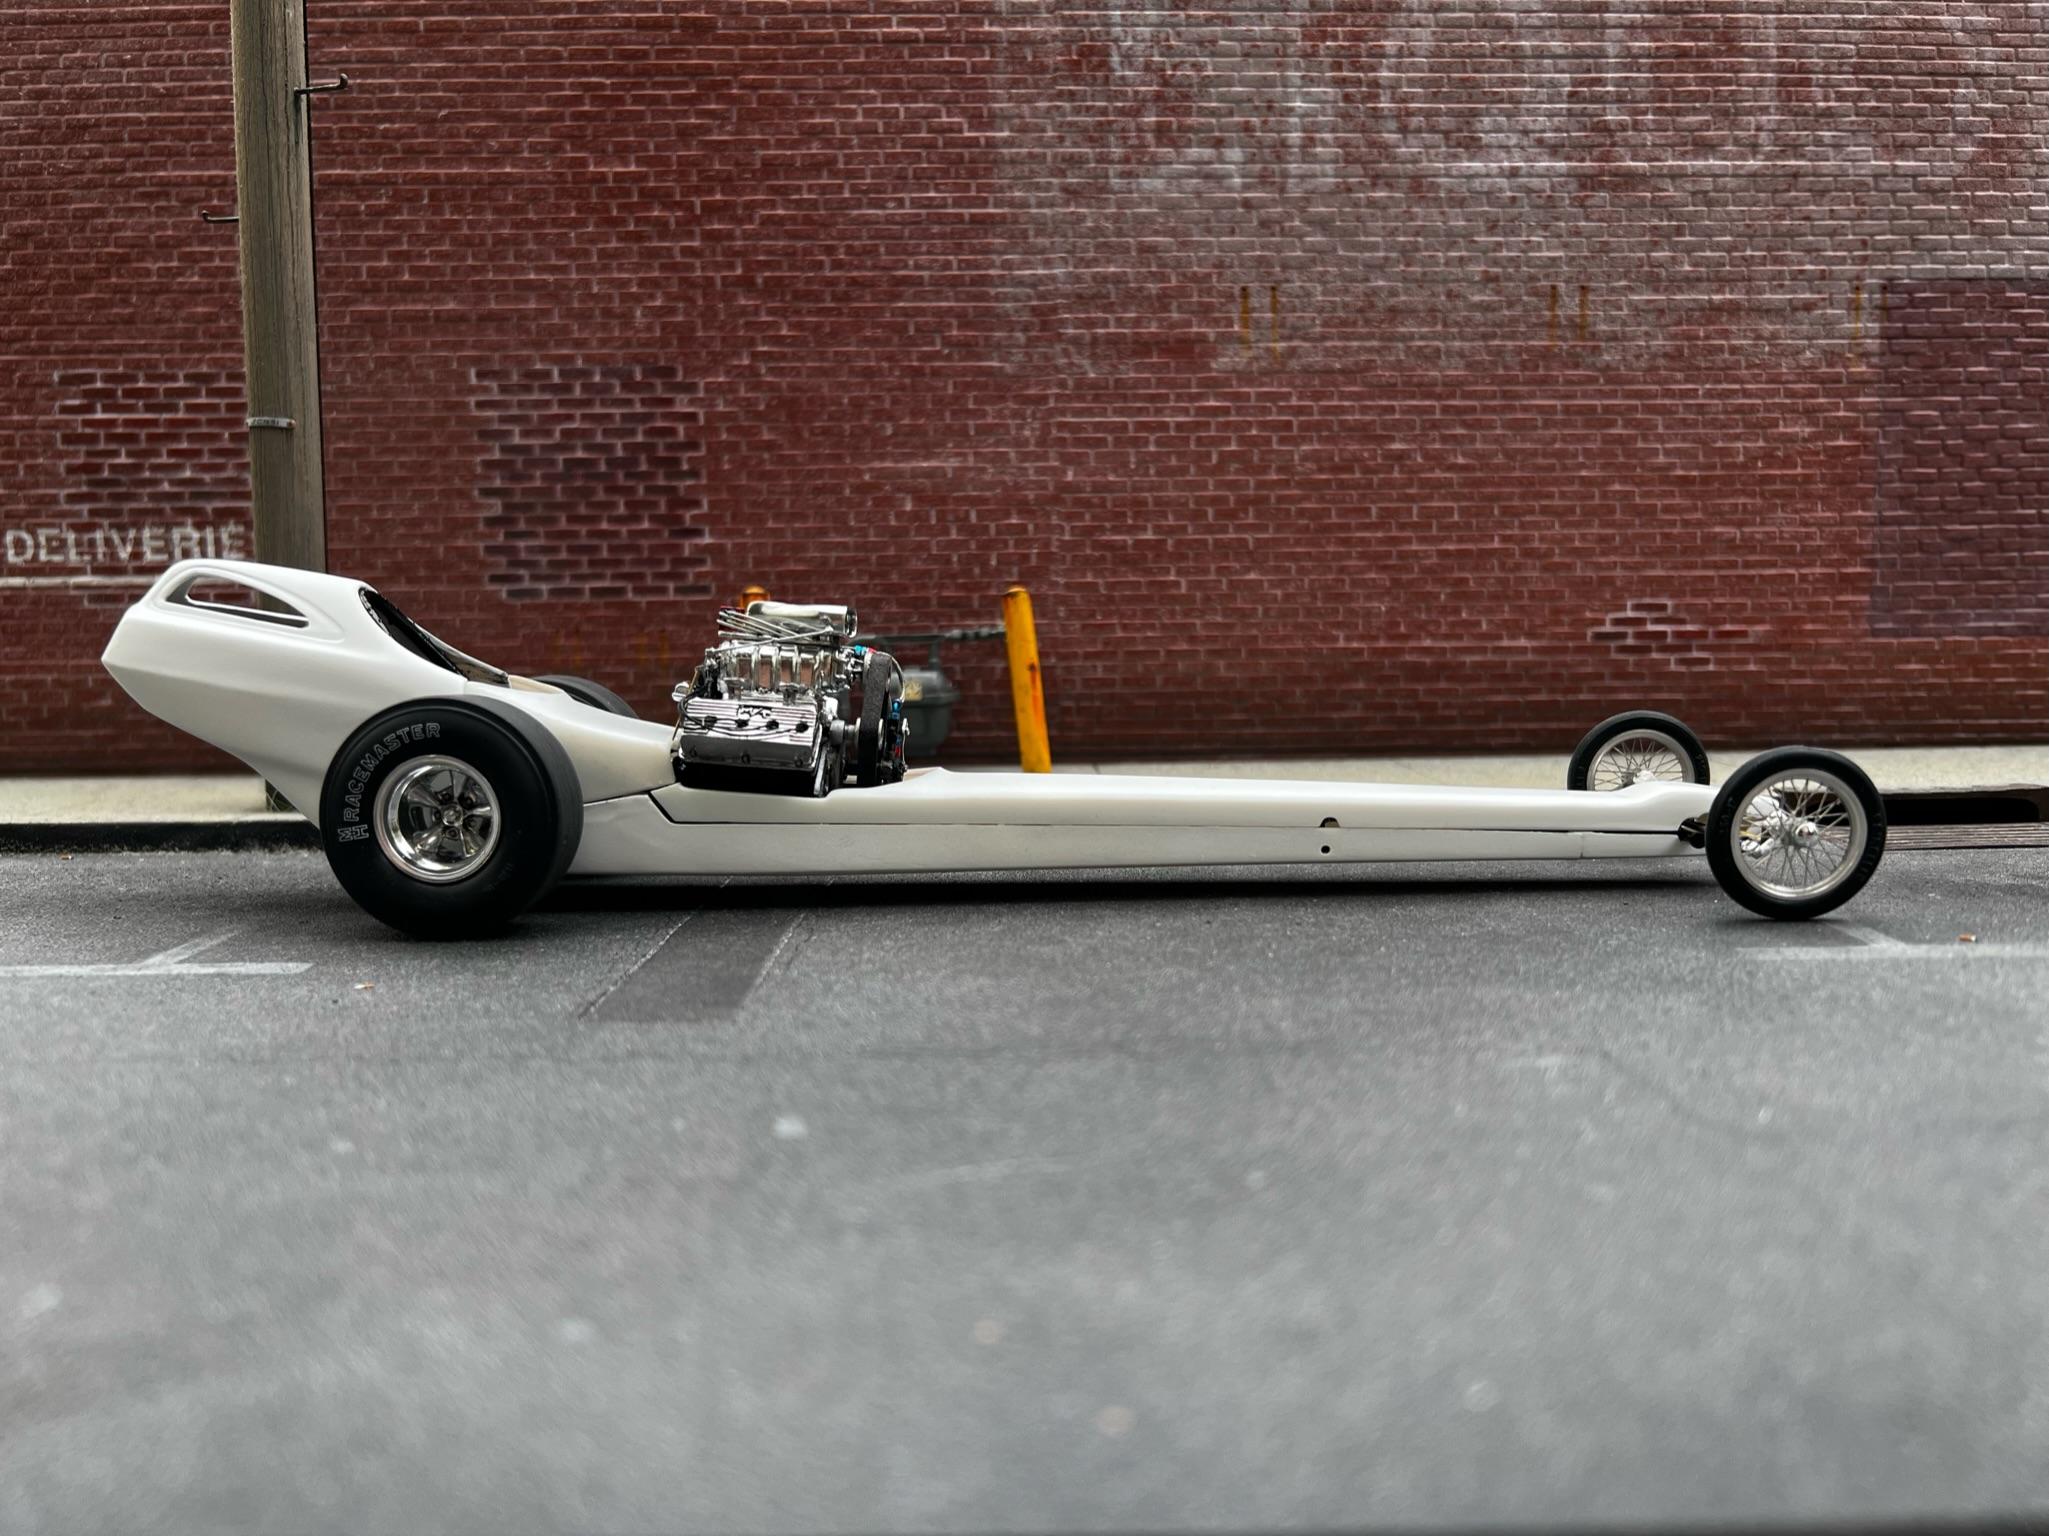
Tom Hanna inspired front engine AA/FD build
GlueSniffer replied to GlueSniffer's topic in WIP: Drag Racing Models
Pulled it out of the garage on its own 4 wheels this morning! Out on the street ready to load into the trailer to head to the body shop to have all the panel edges cleaned up, gaps straightened out and a 60’s tri-tone paint job! All kidding aside, done enough for the primer table at NNL EAST tomorrow. Still a lot of work to do, a few things to correct. But I like how it’s turning out!
-
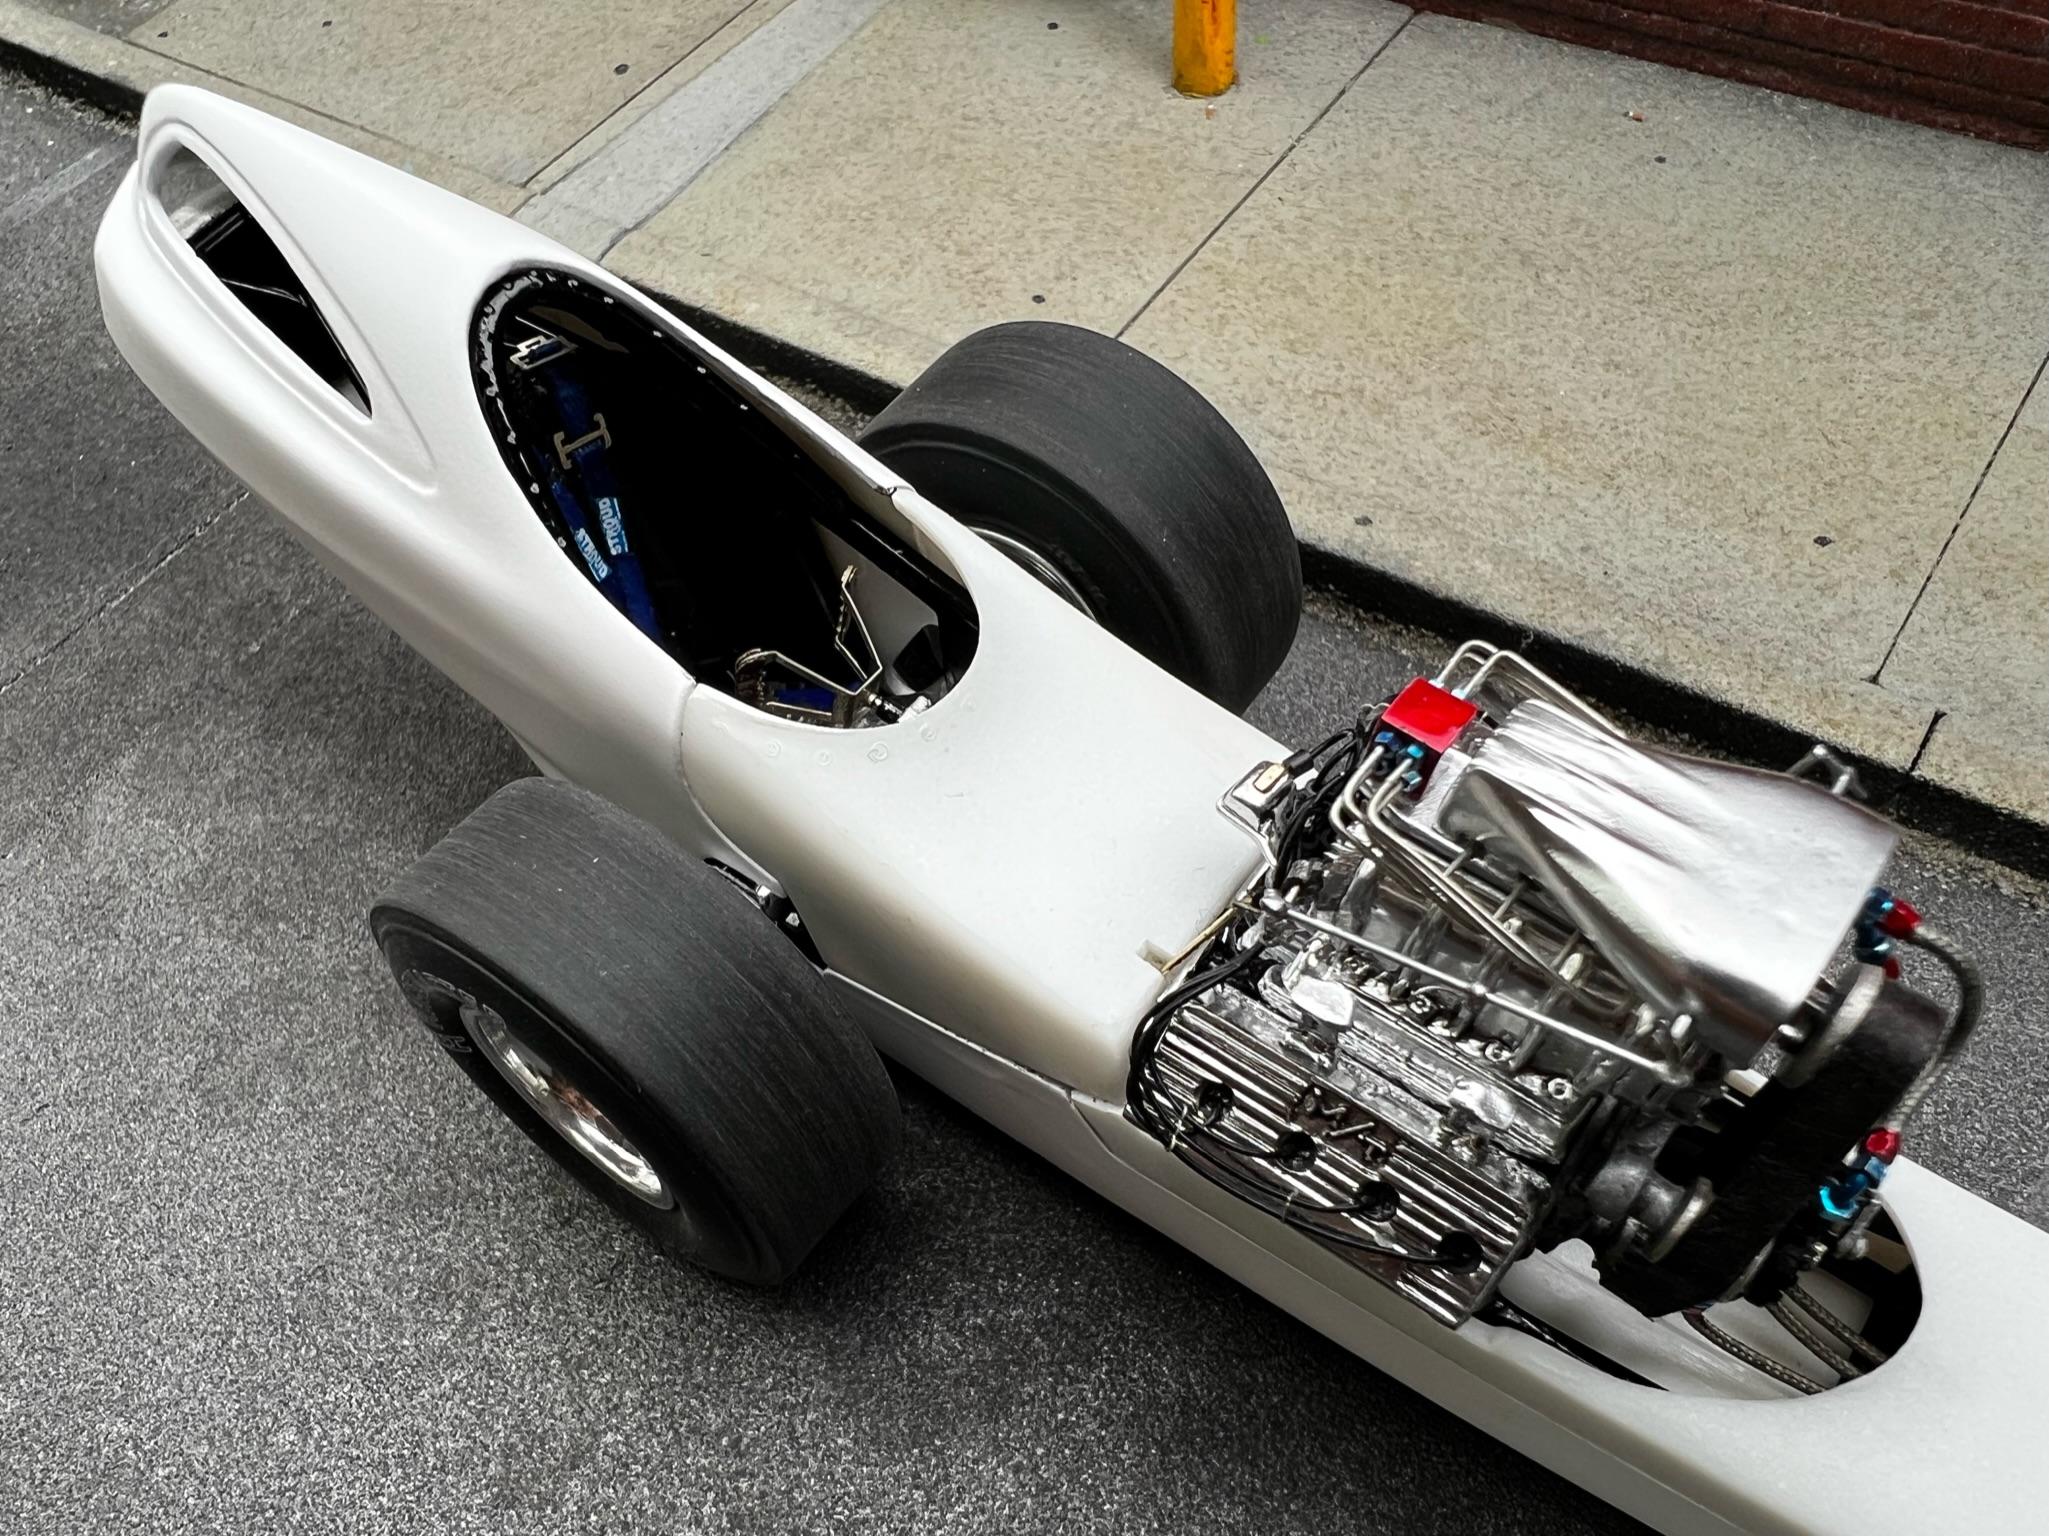
Tom Hanna inspired front engine AA/FD build
GlueSniffer replied to GlueSniffer's topic in WIP: Drag Racing Models
Tonight I get the driver’s hoop cemented in place, snapped the seat in place. Always nerve racking doing that on dragsters since you have to flex them so much. Double checked the engine placement and glued on the kit supplied clutch can to the resin 392. Sanded the flash and seam on the rear axle. Also sprayed both the Halibrand and American Racing wheels. tomorrow I will finish the assembly of any remaining chassis tubes, paint the rear axle. I’ll aim to paint and detail the seat.
-
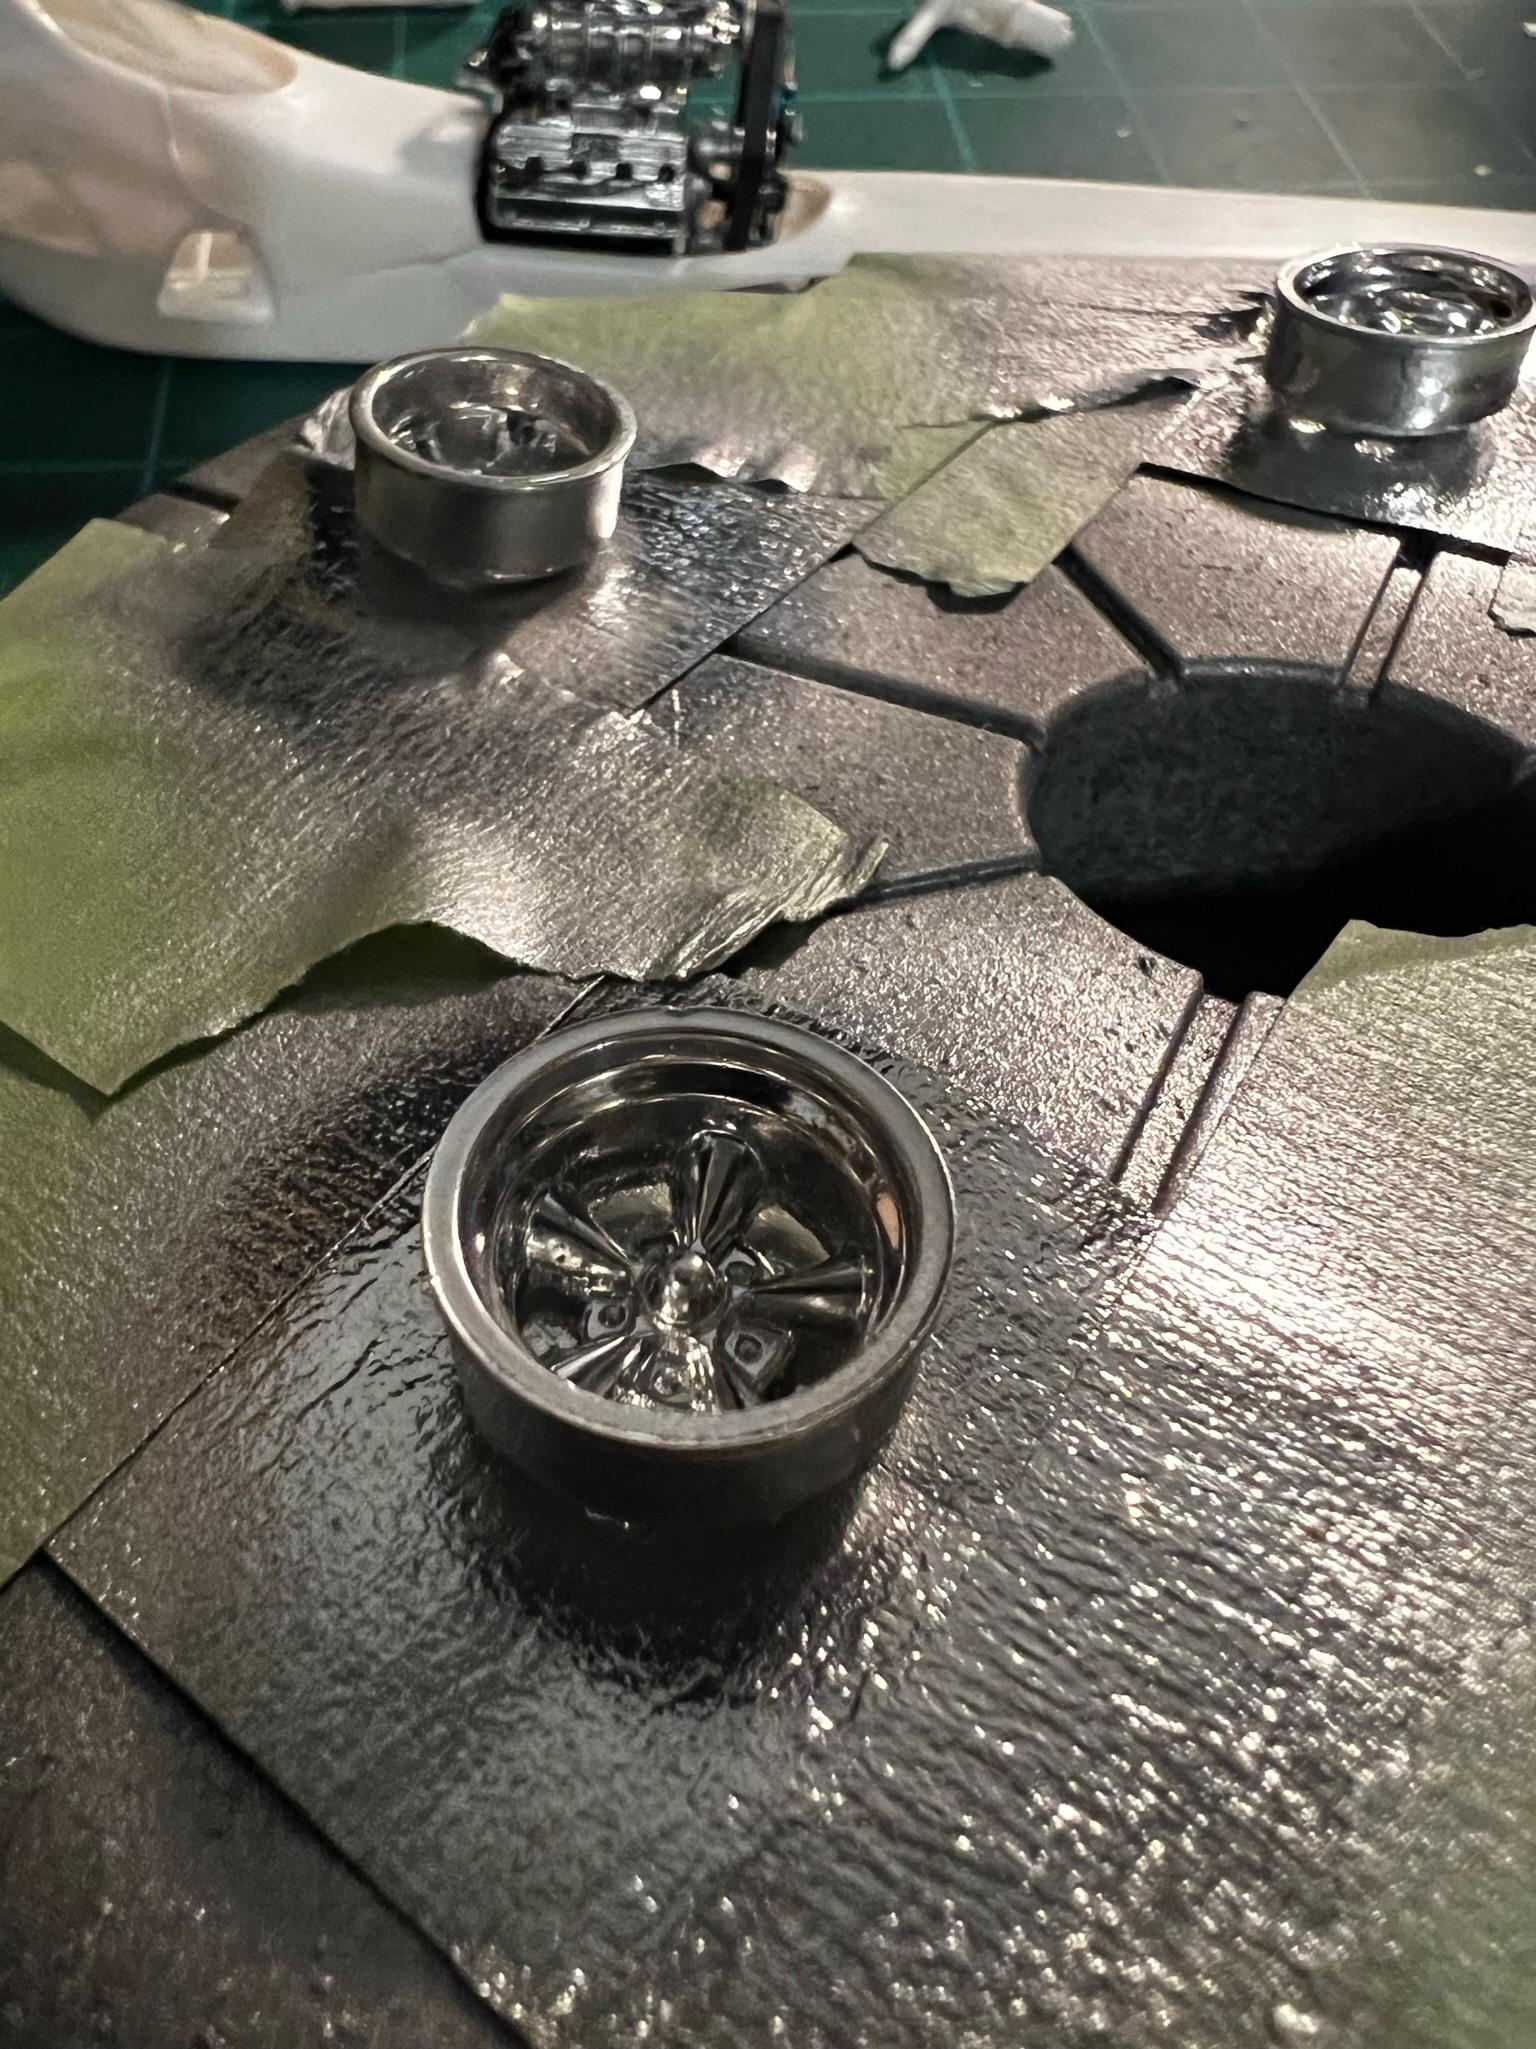
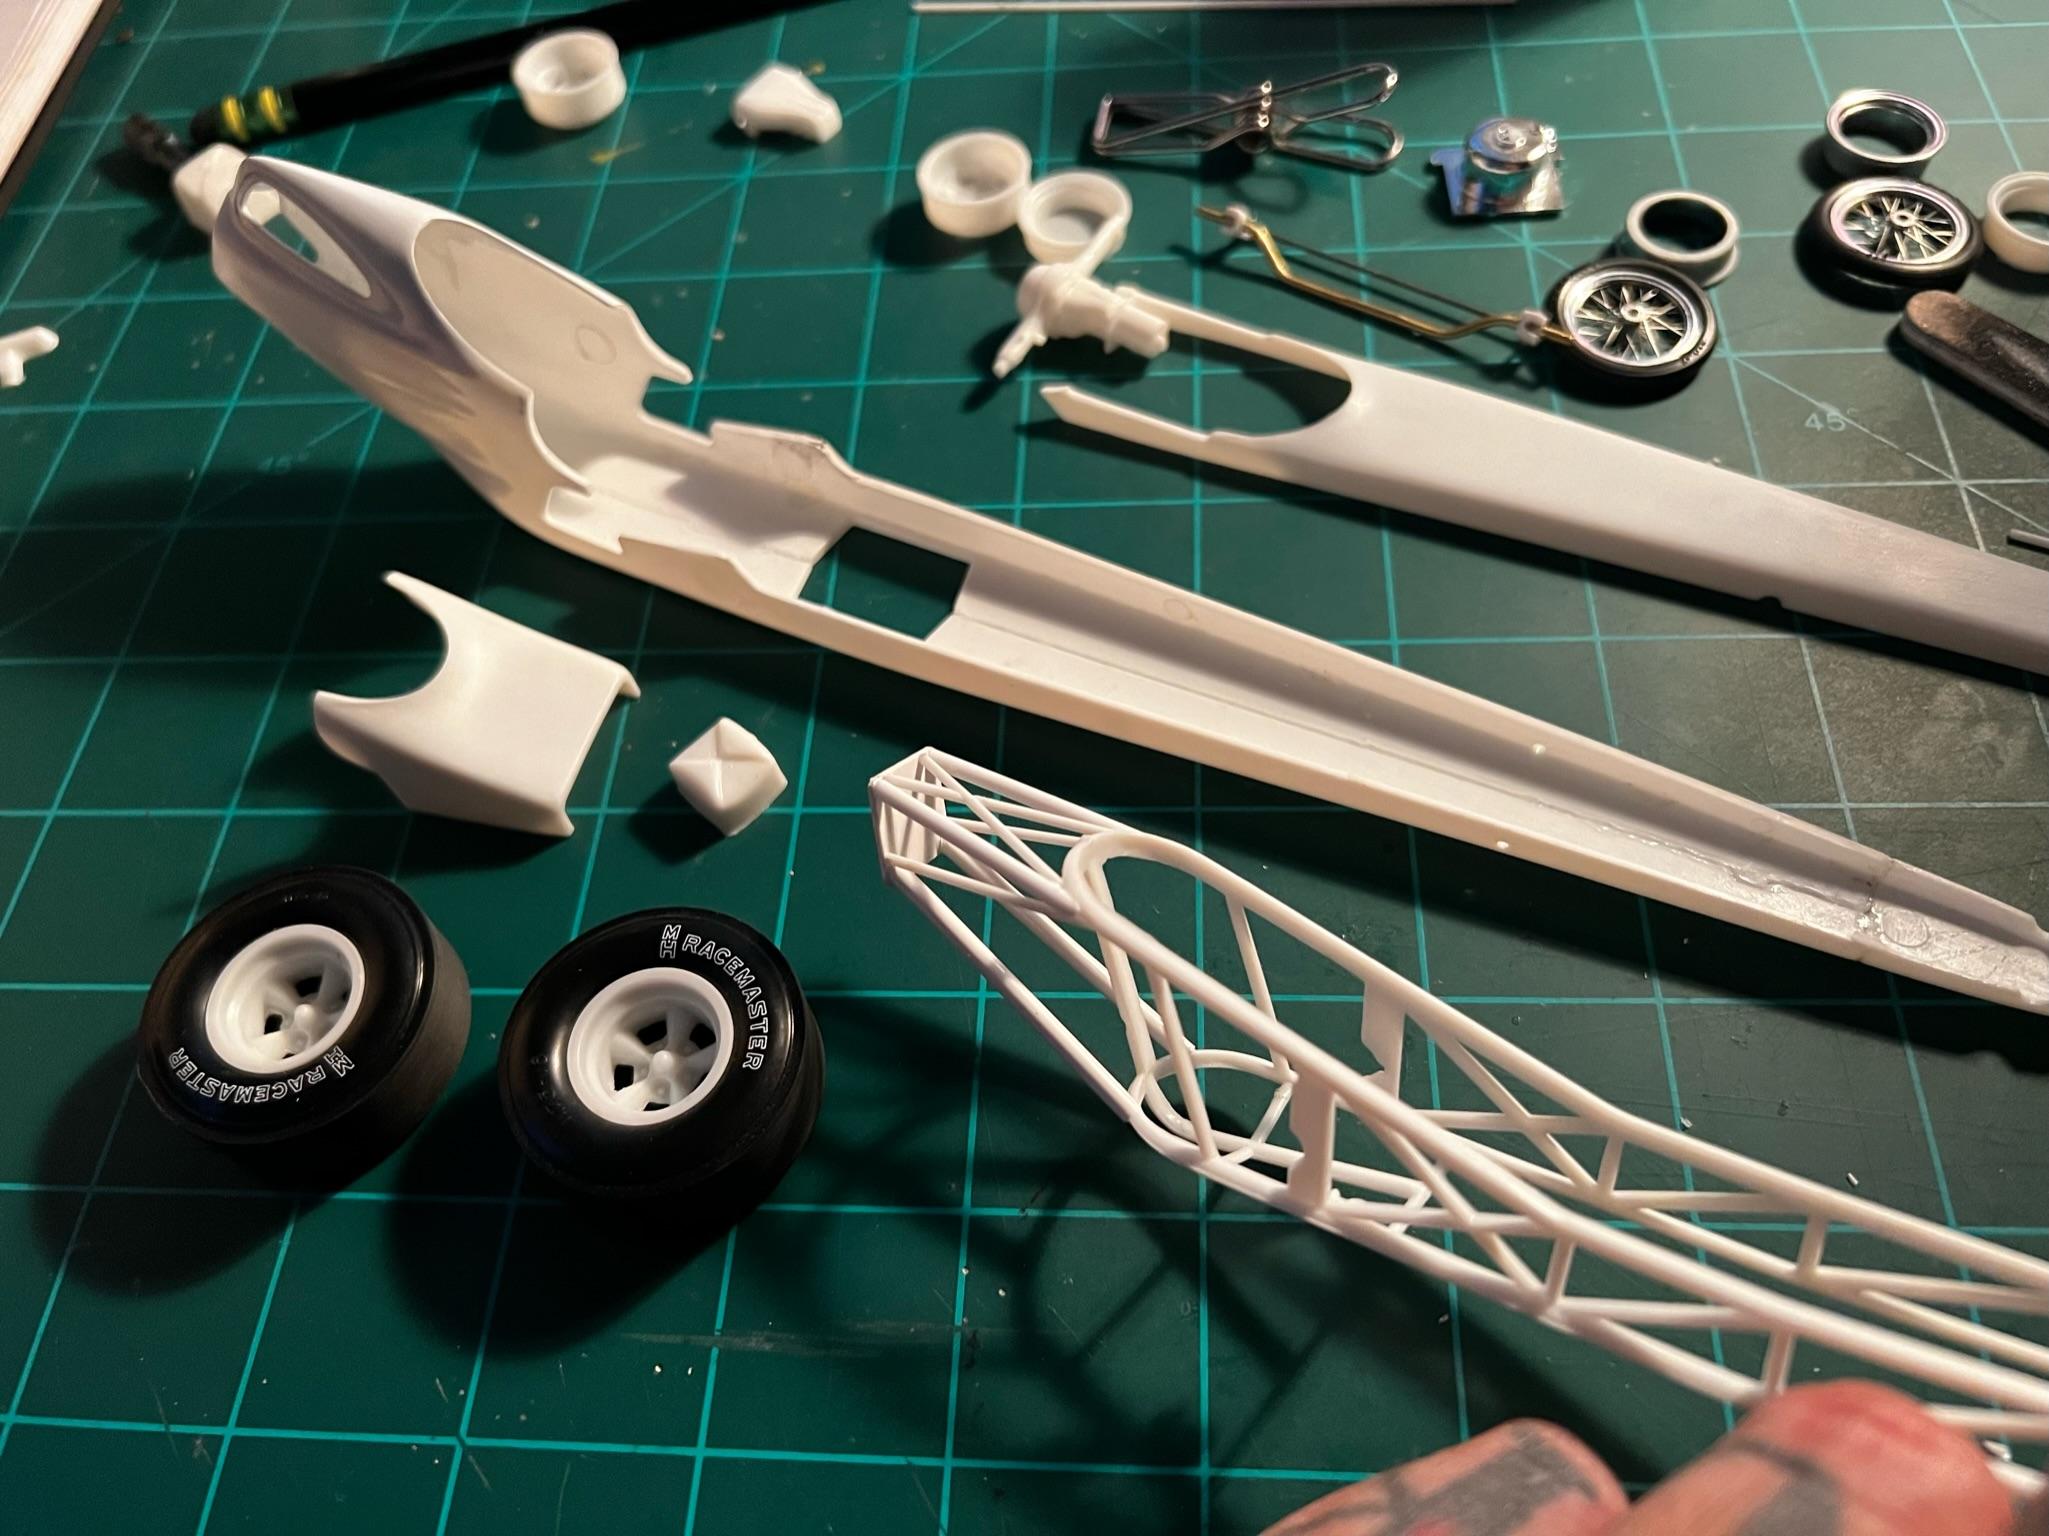
Tom Hanna inspired front engine AA/FD build
GlueSniffer replied to GlueSniffer's topic in WIP: Drag Racing Models
I see some replies since my last post on this car asking for updates. Well, the good news is this car is back on the bench as of today and some progress was made where I left off! I had built quite a few things since (most not model related) With the upcoming NNL EAST show for 2023 coming up, I wanted to push to finish the chassis on this so that I may put it on the “Primer Project” table. I will be bringing my ‘29 Model A for the Street Rod category. I finished up the parachute mount that I was starting when this was last out of the box. I have no experience in tube chassis scratch building, so this was a nice section to try it out as it will barely be visible when the chassis is in the body. Just a bit of the X-bracing will be visible through the blue tinted “plexiglass “ windows in the body work. Also leaning towards American Racing wheels now over the Halibrands. That is not set in stone though.
-
Just finished my first diorama! Asbury, NJ streets!
GlueSniffer replied to GlueSniffer's topic in Dioramas
I was not familiar with their work but I certainly enjoyed looking at the photos! And I do take that as very high praise! Thank you! I had taken a lot of my inspiration from 2 guys I follow on Instagram for a few years now, Ryan Monahan (@what_thehell) and Joshua Smith (@joshua_smith_street_artist) as I am really new to miniature making and scale modeling, I don’t know a ton of the more known guys that do it well yet aside from them and a few that I have found branching from their circle. I had been out of the country for a few weeks but I’m back now and going to hit the next project with full force. While I was gone a massive stock pile of Plastruct bricks, stone wall, slate, and cobble stone had arrived! About $250 worth! There seemed to have been a supply issue with the smooth brick around the start of the project, but I have a good stock pile now! The Hemi came from a Moebius 1955 Chrysler 300 that I cut the trans off and attached to the box stock Chevy trans. Air filters (although poorly fitting) came from the Lindburg Color Me Gone 1964 Dodge 330 SS, alternator from Monogram 1971 Plymouth Road Runner. But now that I can 3D model and print, I won’t be sacrificing old kits anymore! -
Just finished my first diorama! Asbury, NJ streets!
GlueSniffer replied to GlueSniffer's topic in Dioramas
I am very flattered! Thank you! 😀 -
Just finished my first diorama! Asbury, NJ streets!
GlueSniffer replied to GlueSniffer's topic in Dioramas
I am using the smooth bricks from Plastruct on my building as well. You did a fantastic job with the corners and seams! Maybe I just need more practice with it unless you have any tips? Corners are what I am dreading -
Just finished my first diorama! Asbury, NJ streets!
GlueSniffer replied to GlueSniffer's topic in Dioramas
I’m currently building a store front / apartments similar to what you have built here! You can see the beginnings of it in the last photo. Yours looks great! What did you use for the bricks?? That it what I struggle with the most.