Slipster17
-
Posts
23 -
Joined
-
Last visited
Slipster17's Achievements
MCM Member (2/6)
-
#24 Jeff Gordon Dupont/ Superman Chromalusion (1999 The Winston Select)
Slipster17 replied to Slipster17's topic in NASCAR

-
#24 Jeff Gordon Dupont/ Superman Chromalusion (1999 The Winston Select)
Slipster17 replied to Slipster17's topic in NASCAR
-
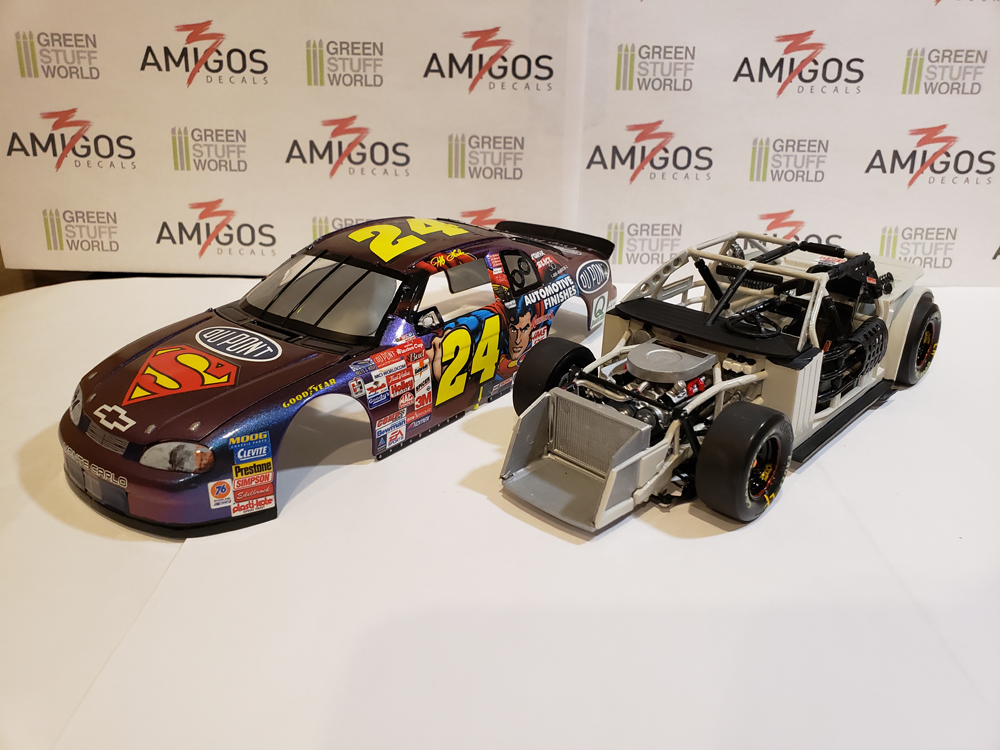
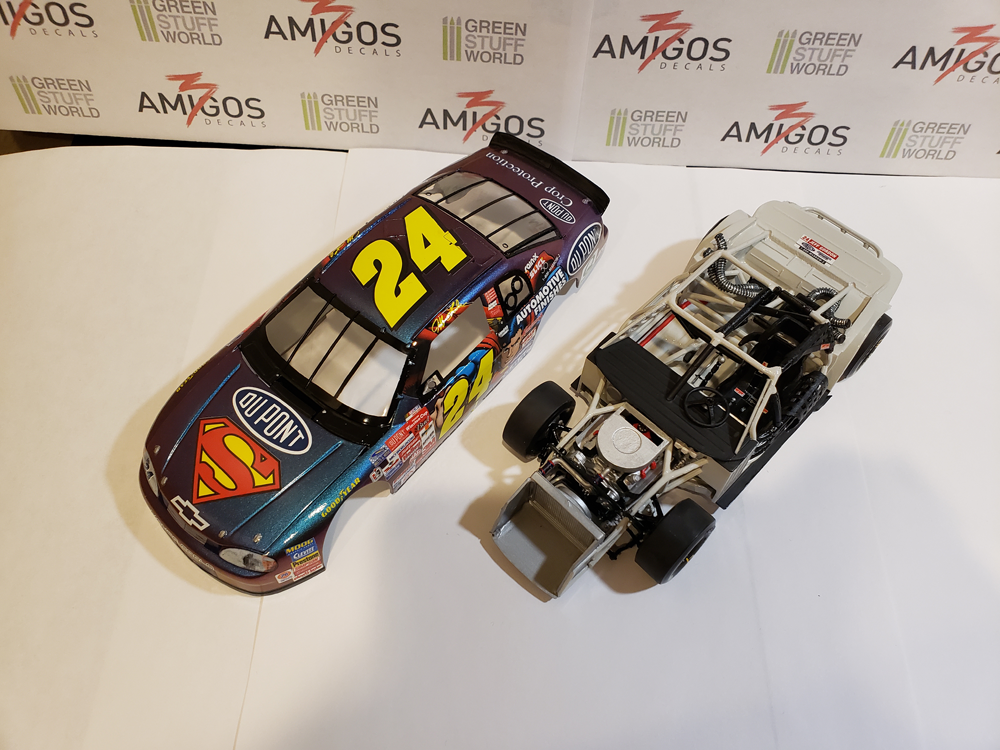
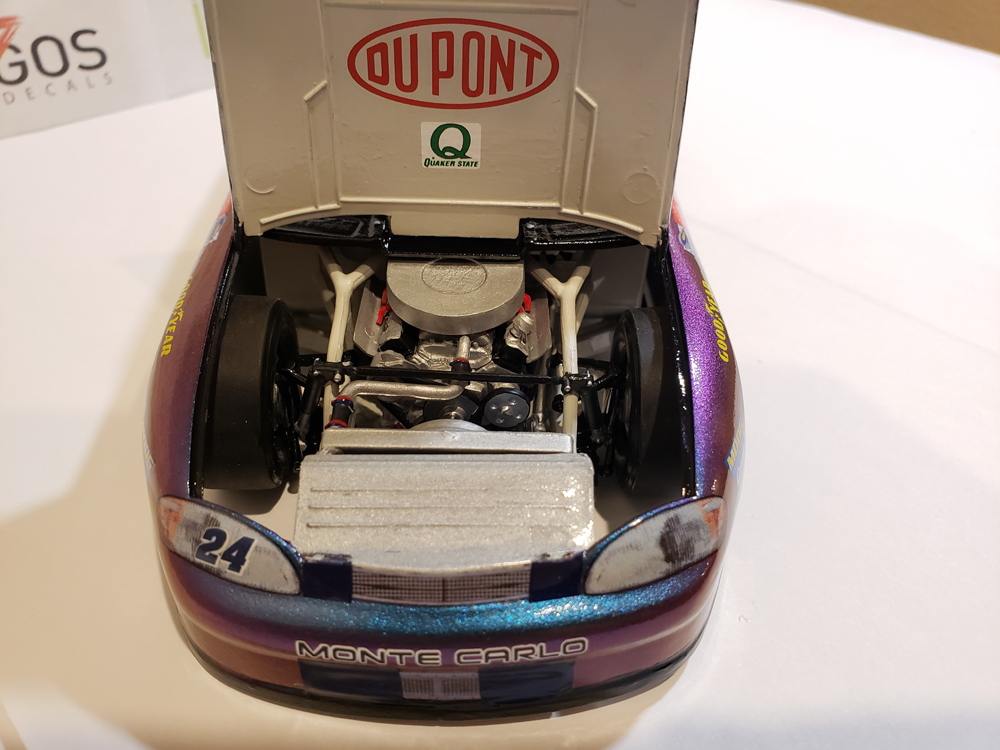
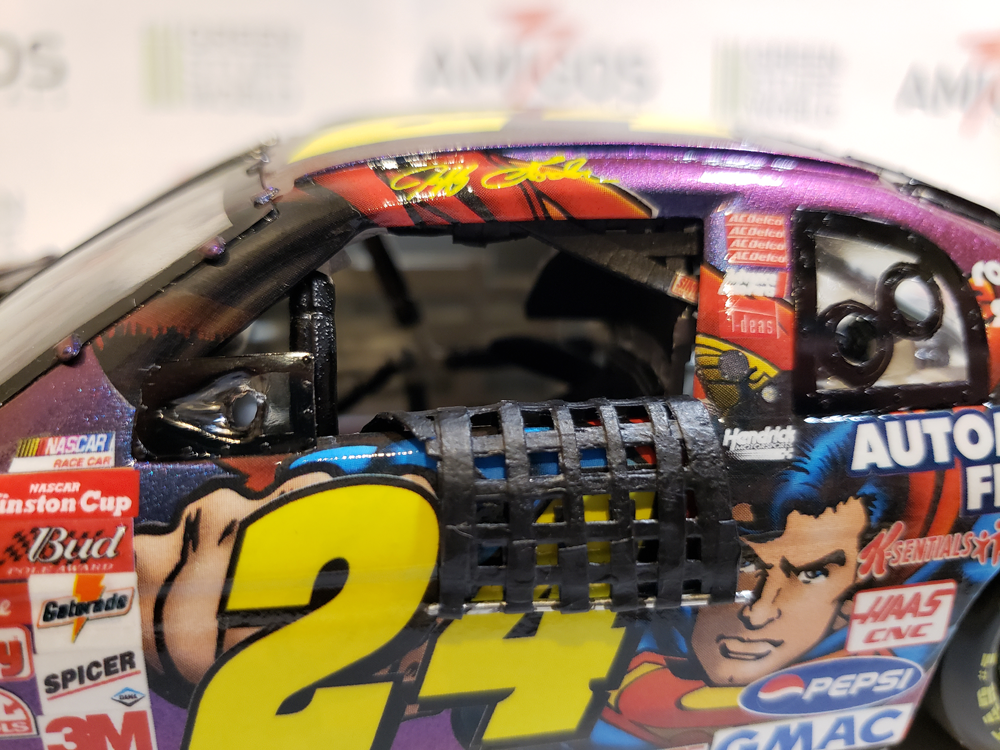
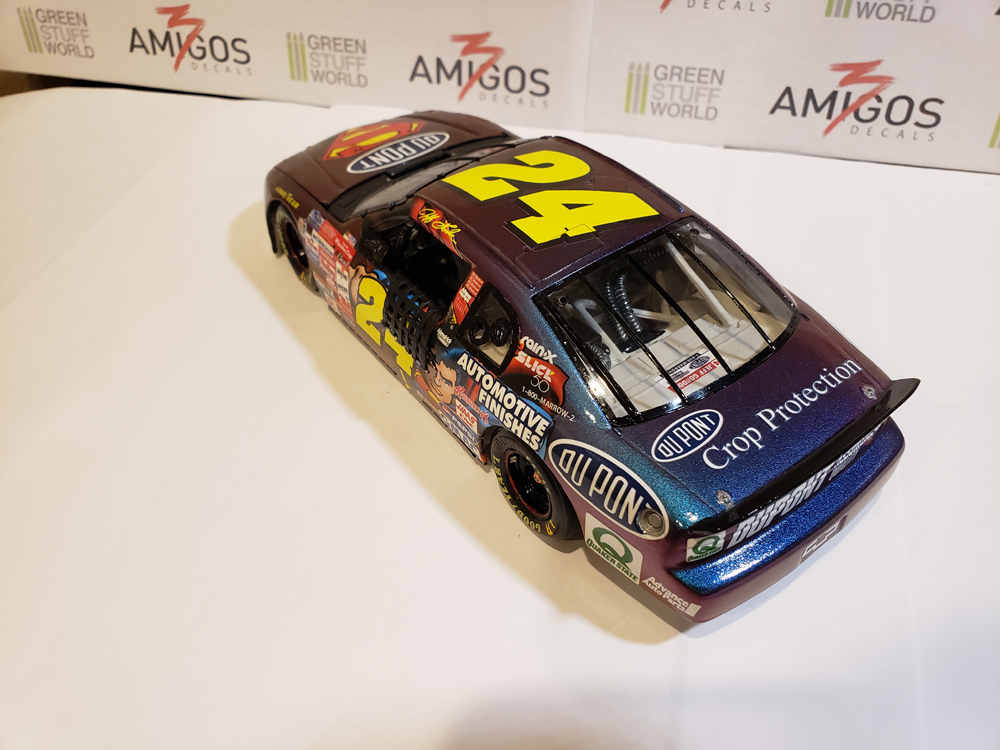
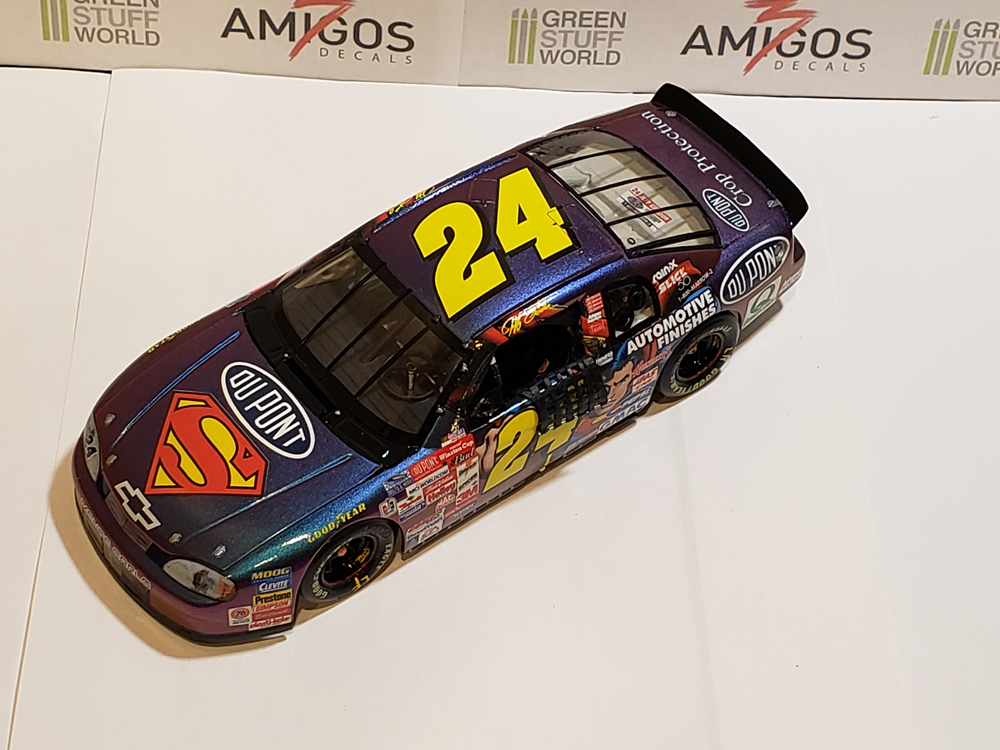
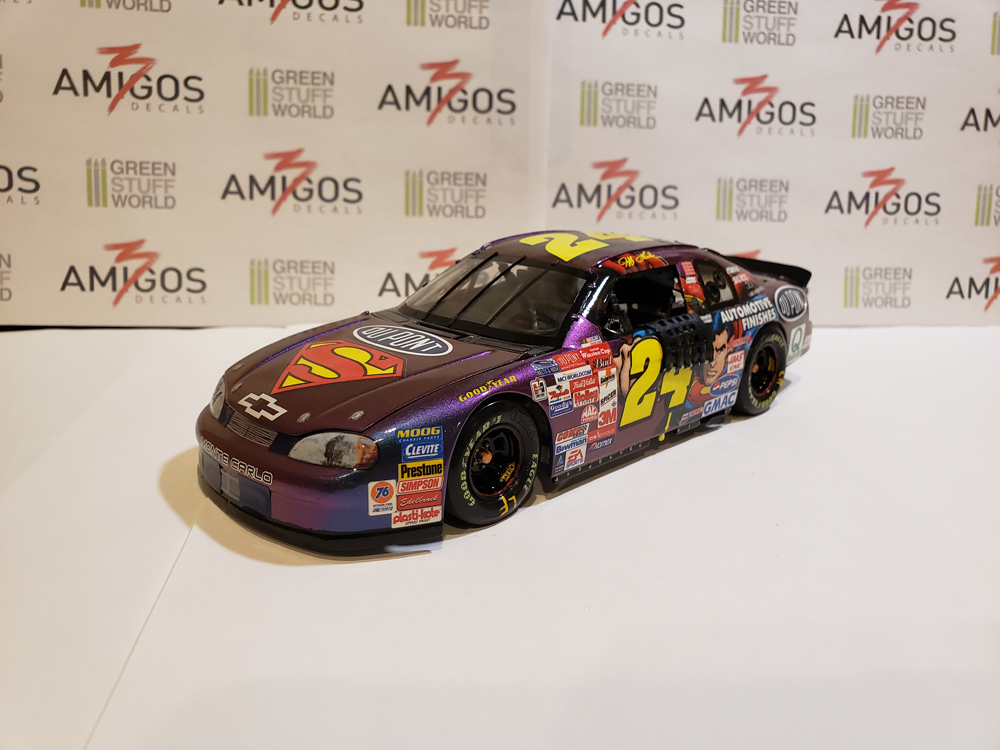
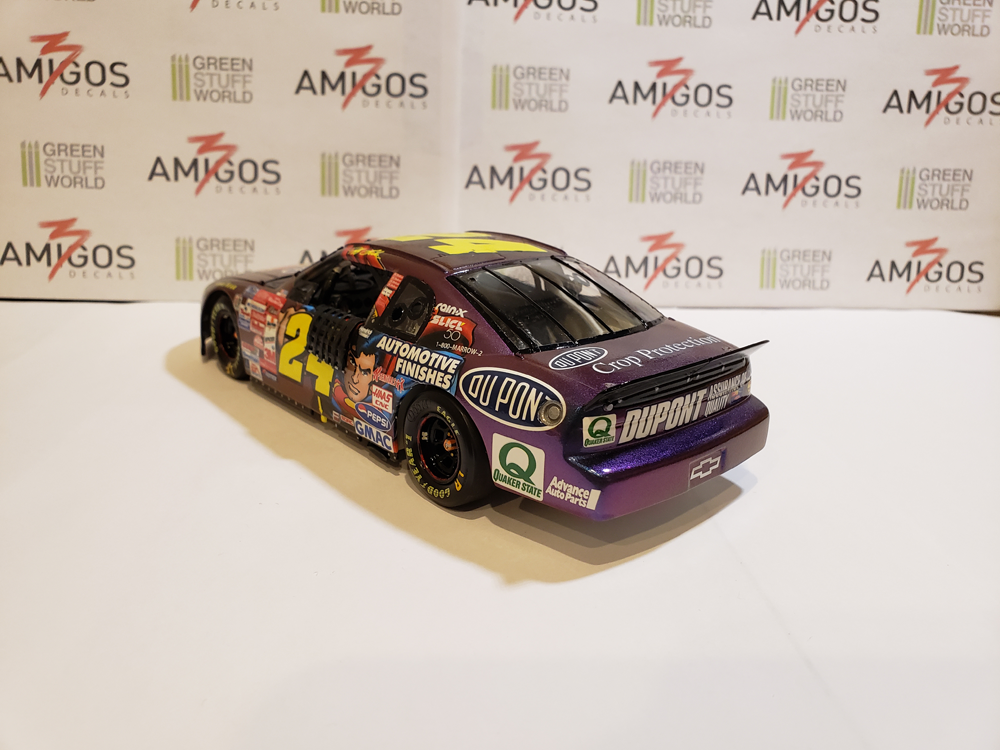
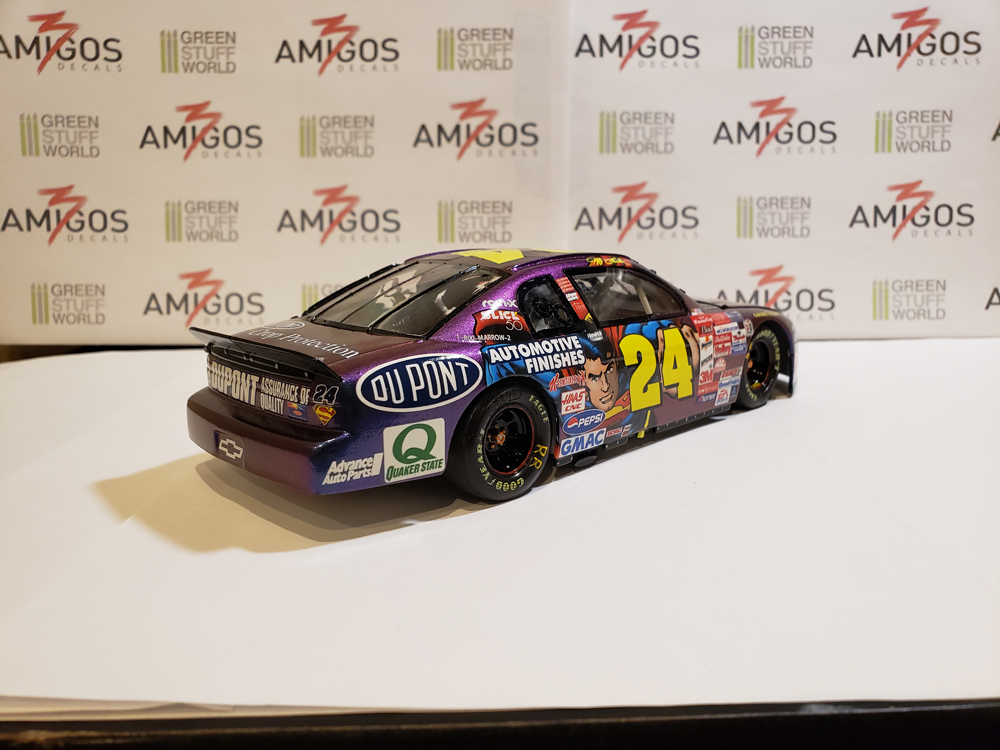
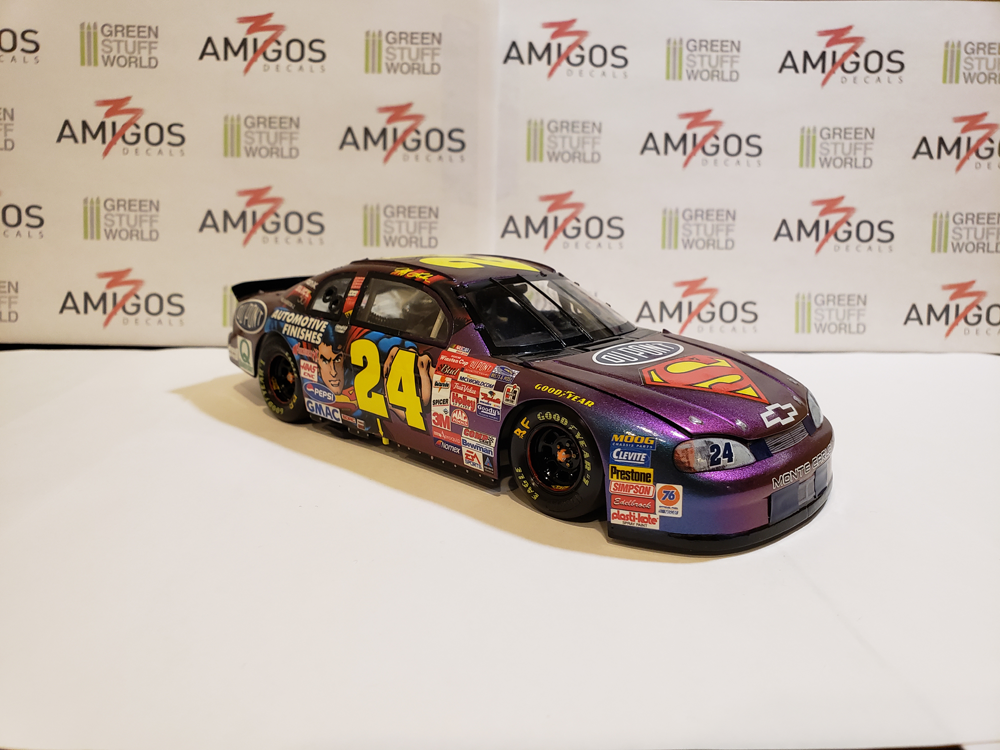
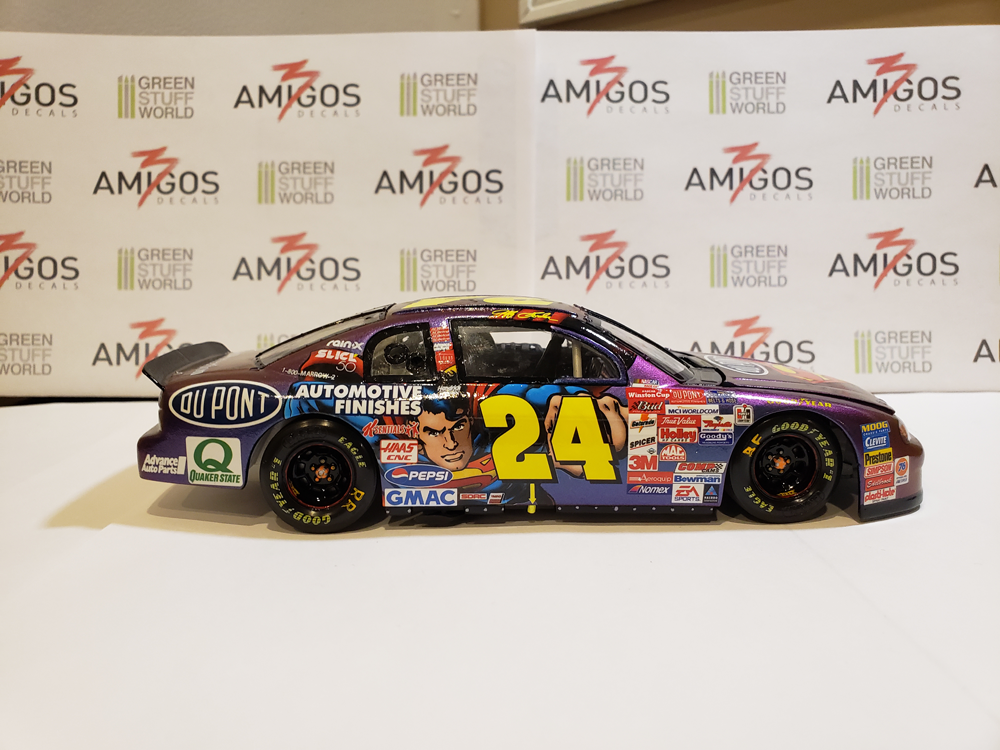
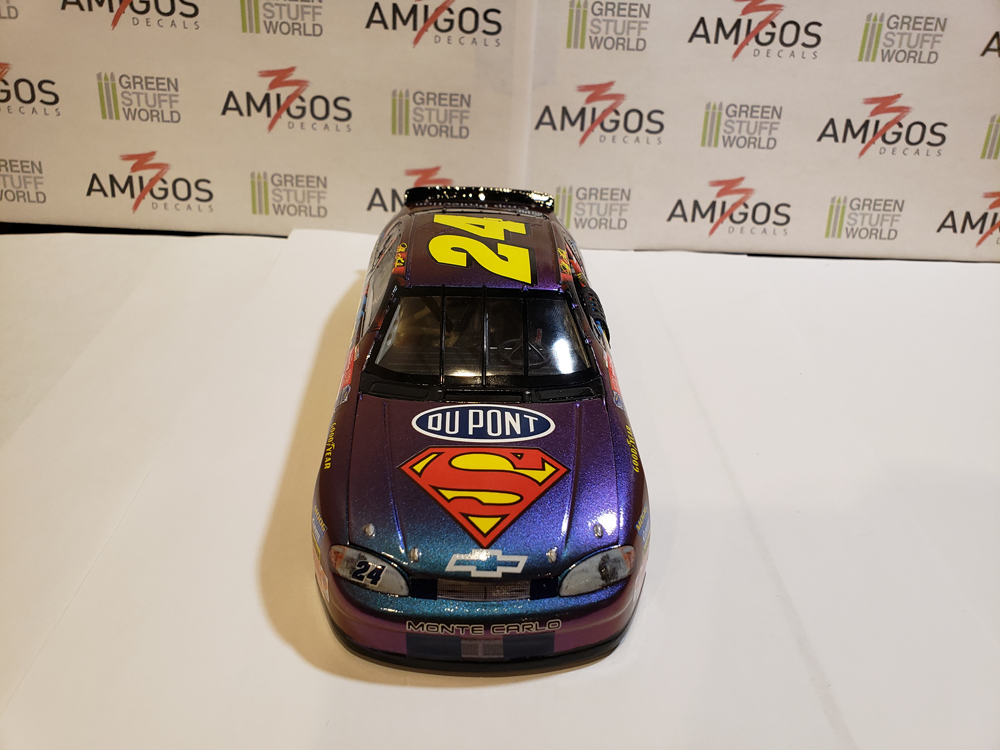
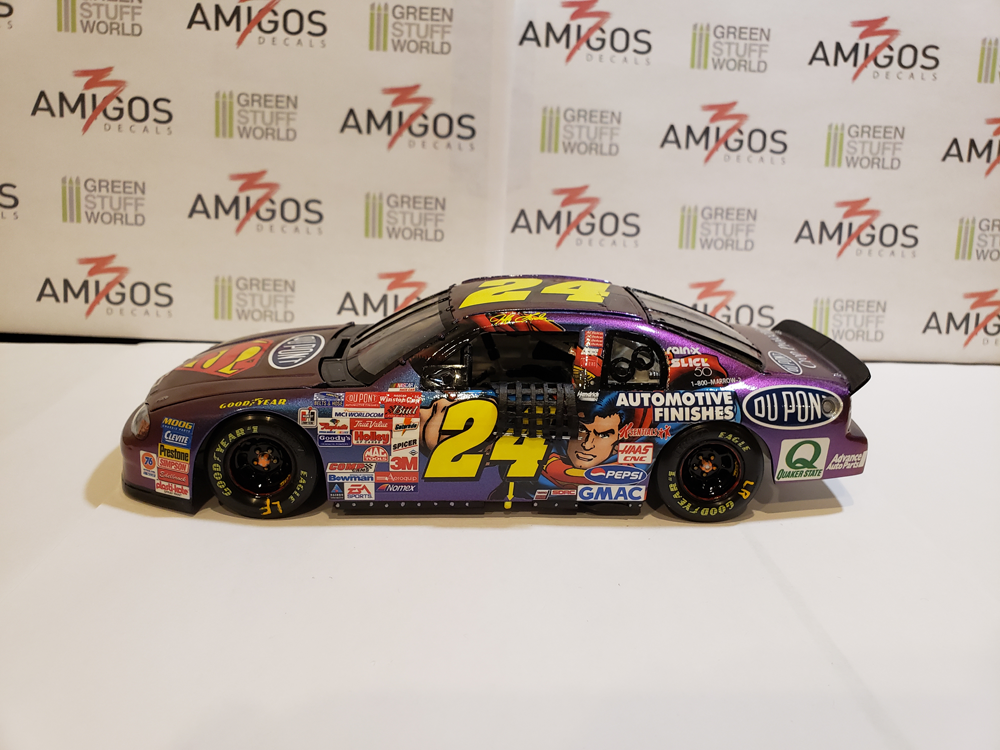
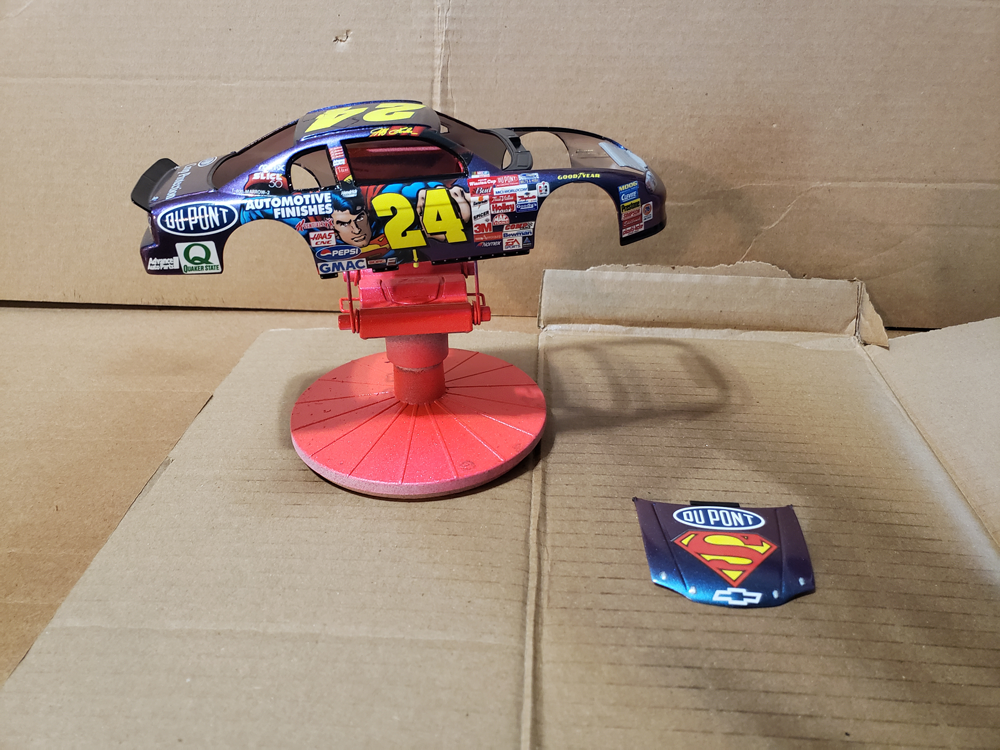
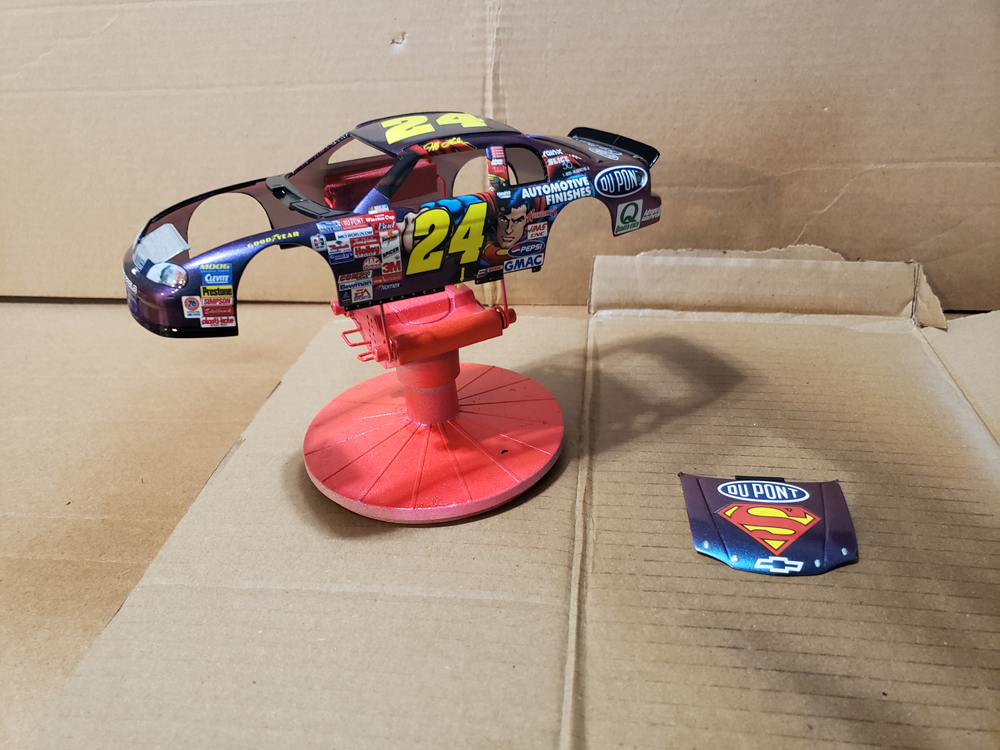
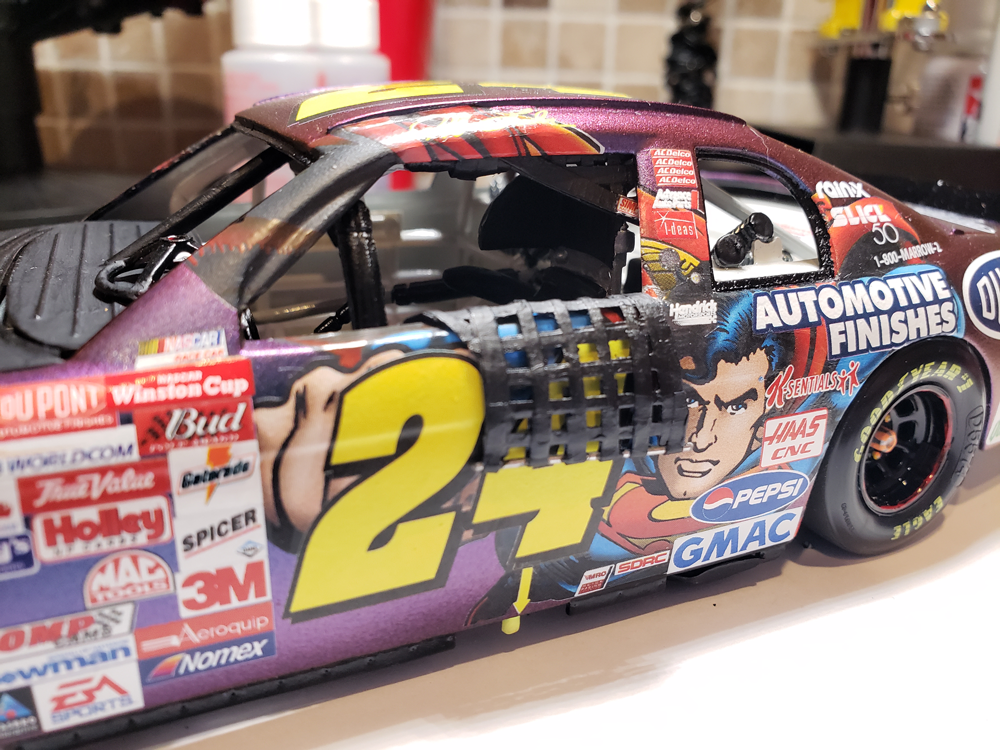
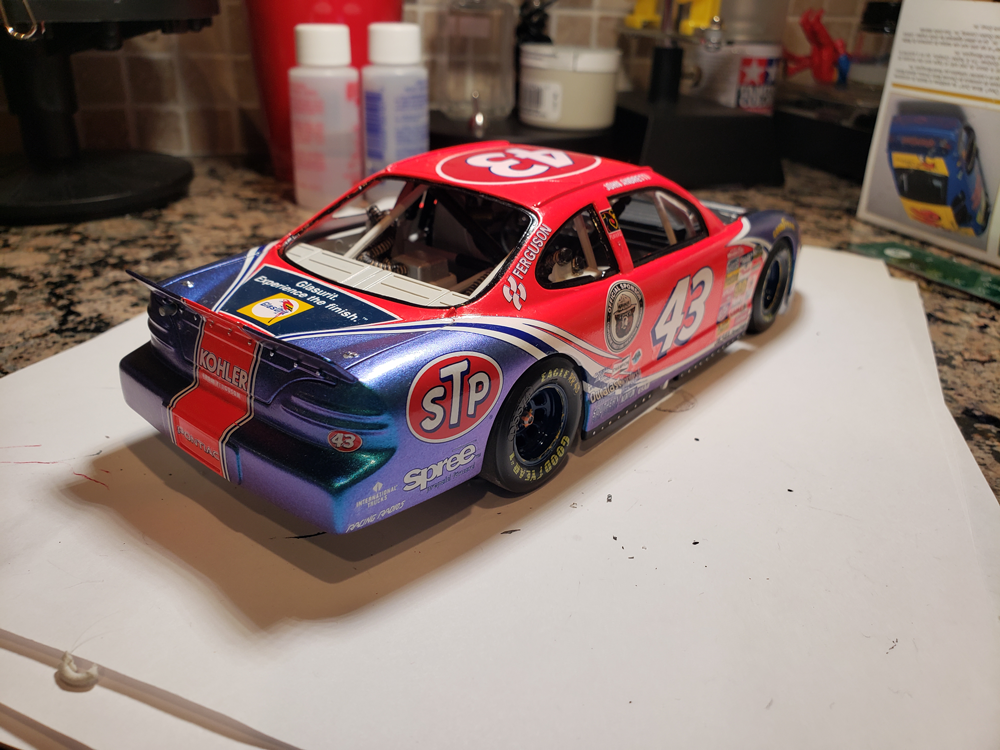
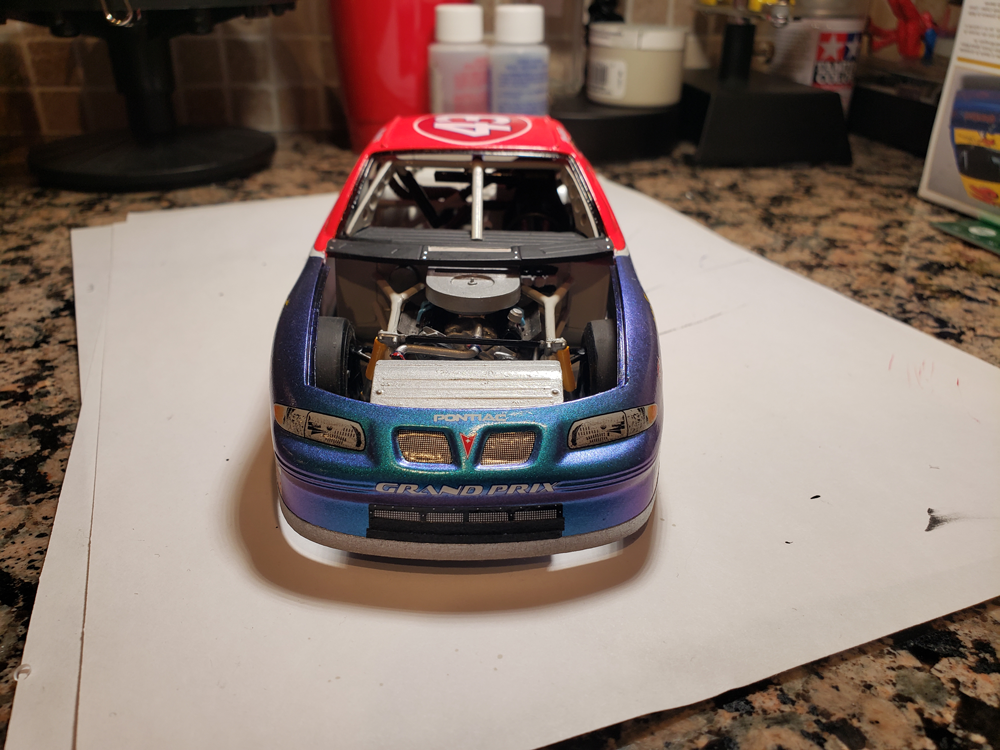
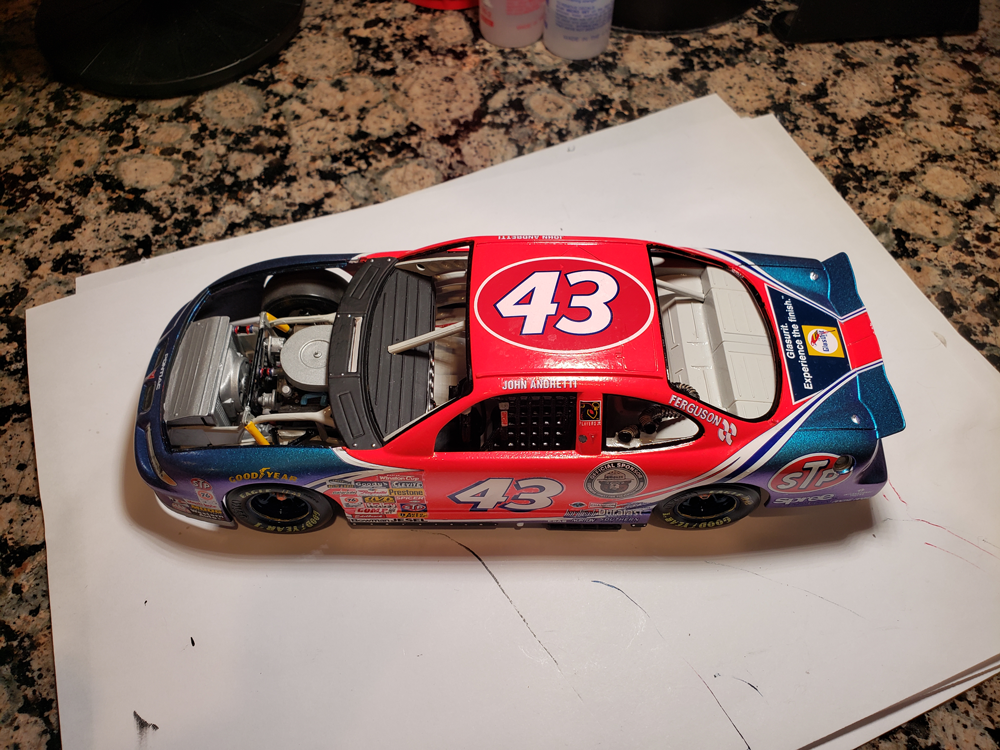
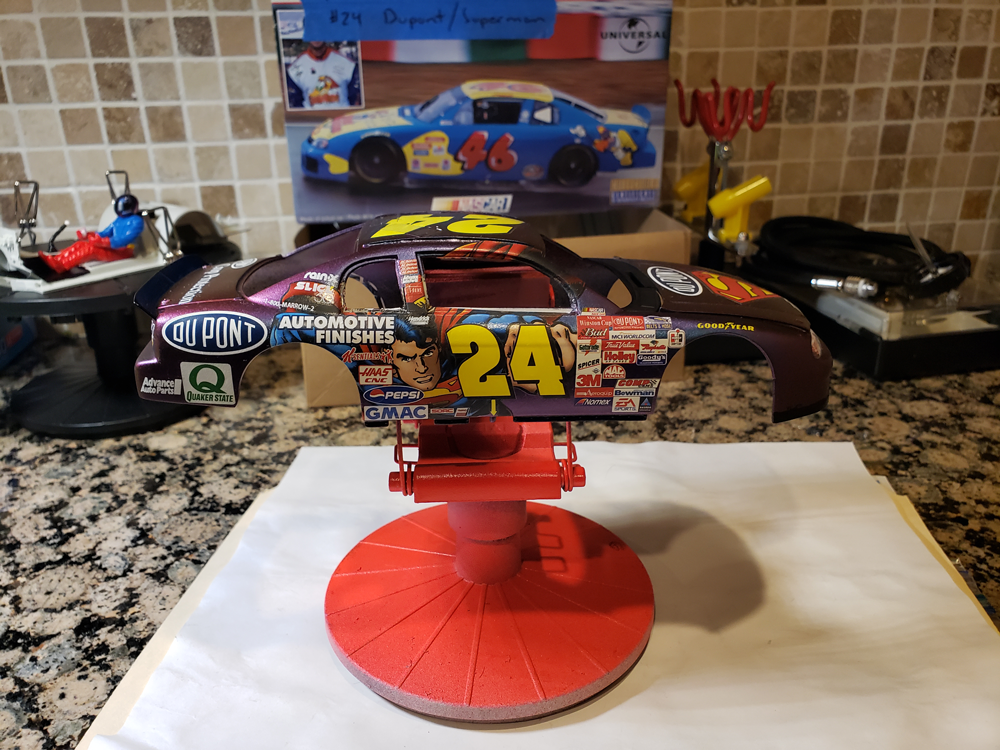
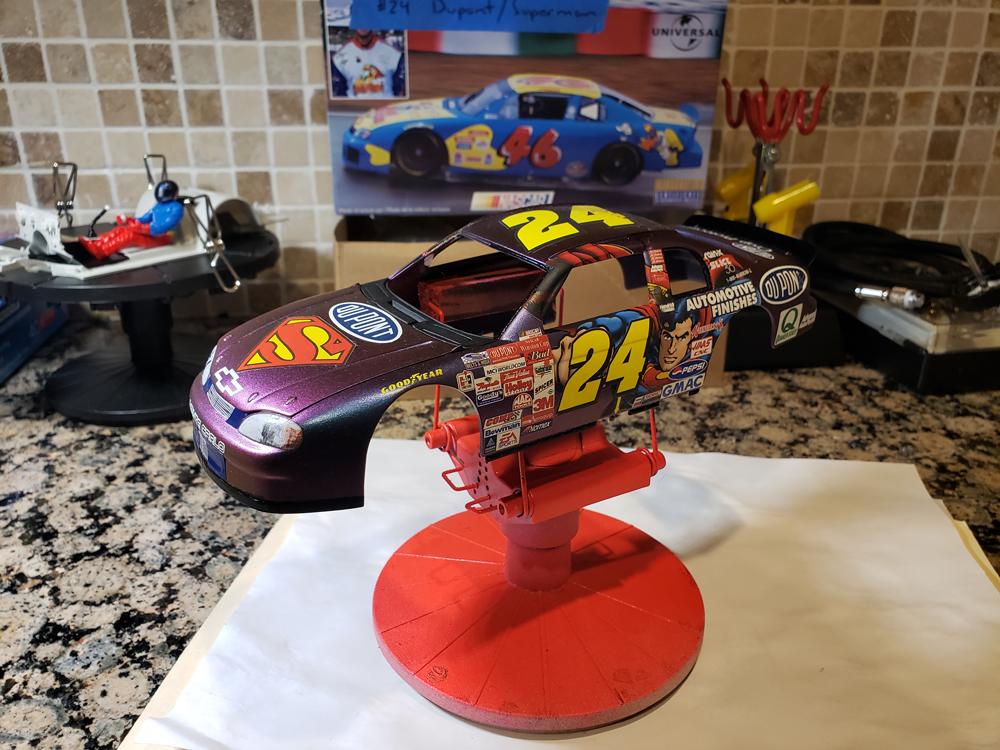
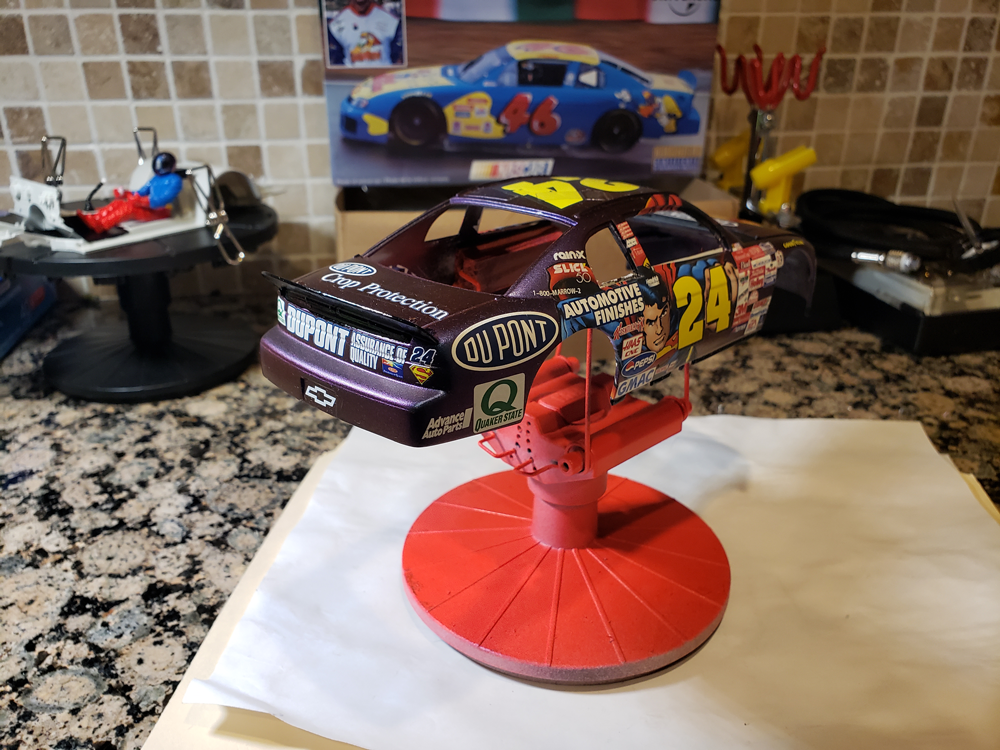
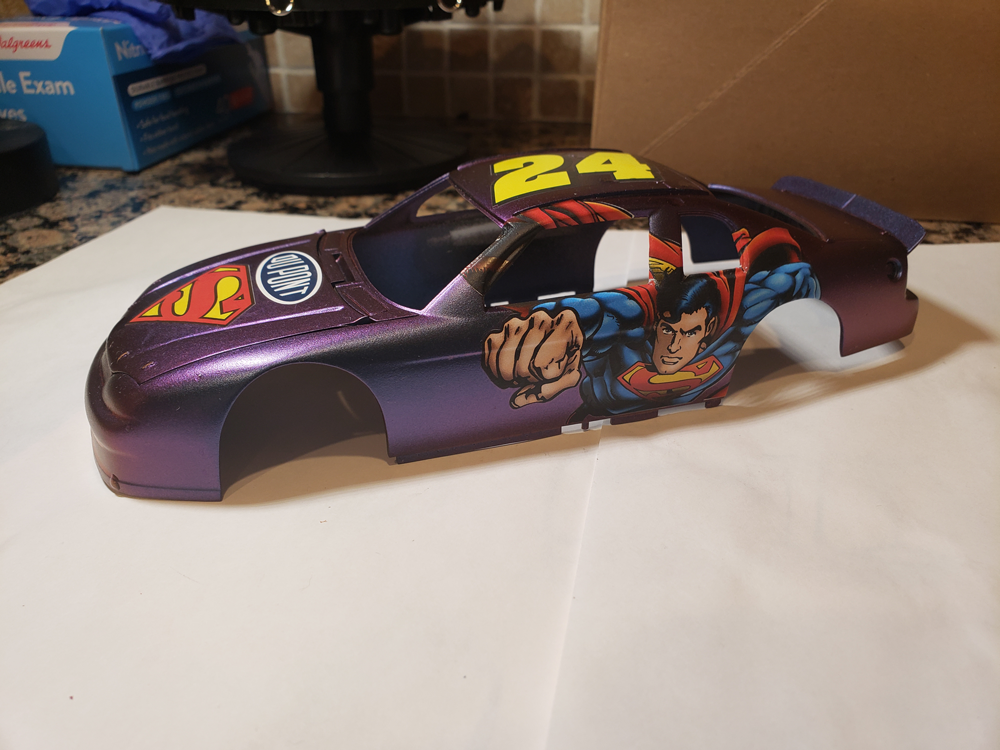
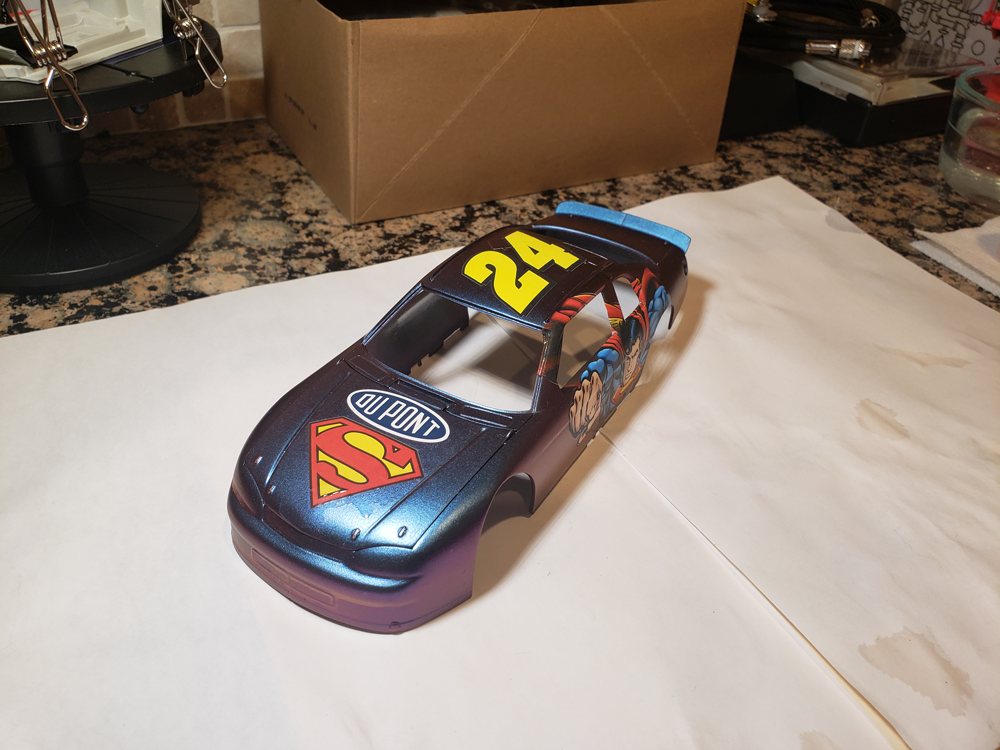
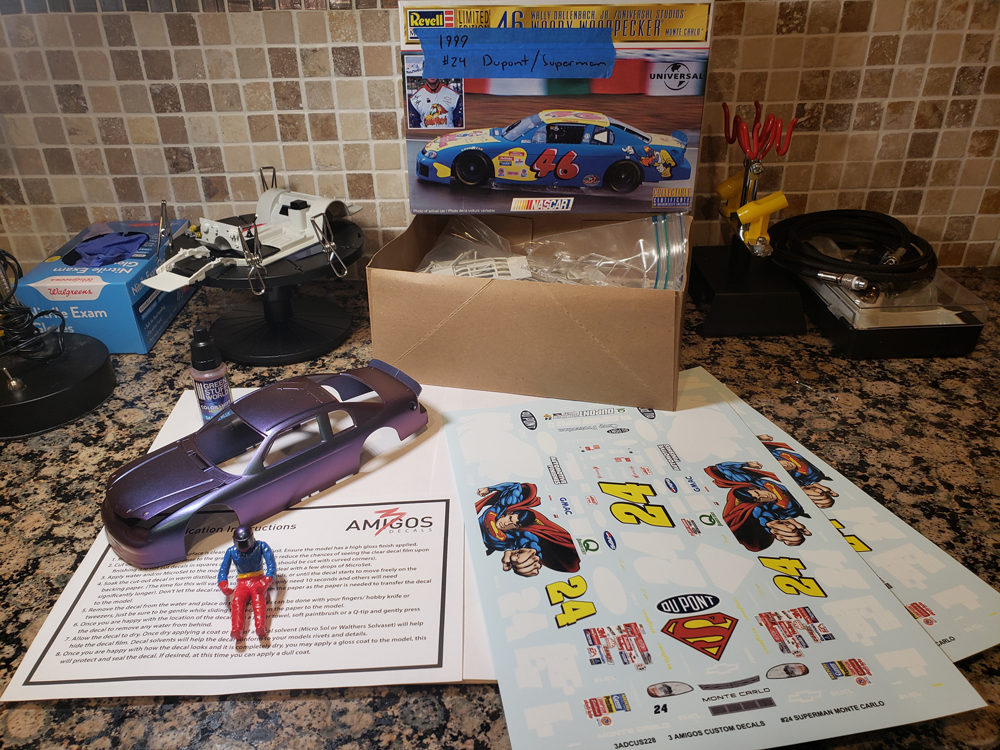
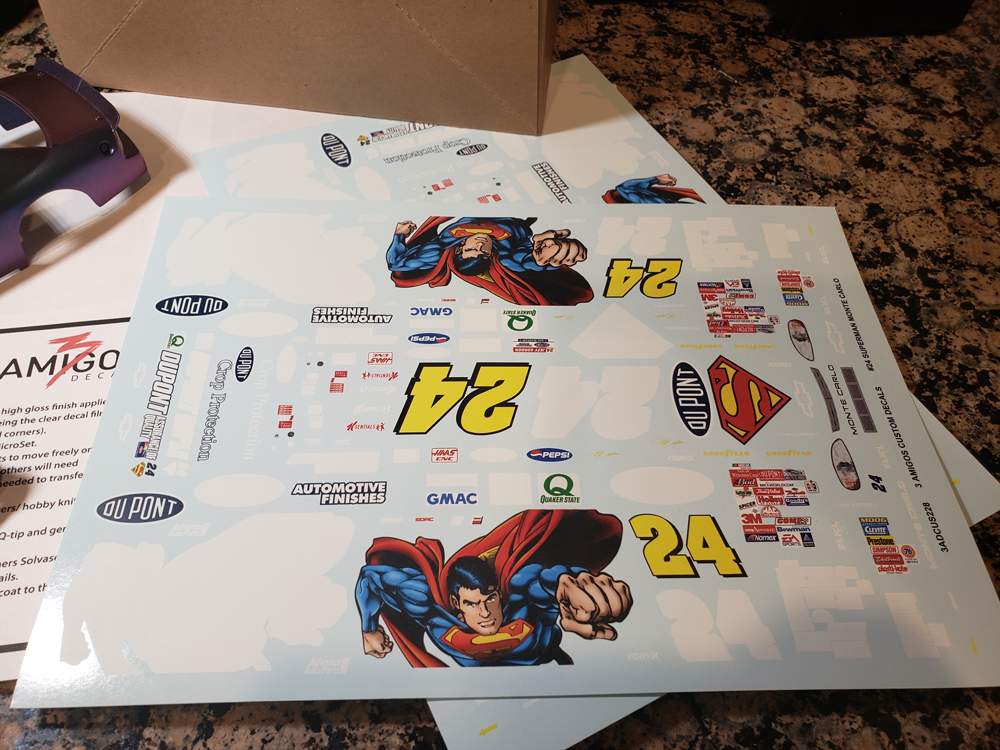
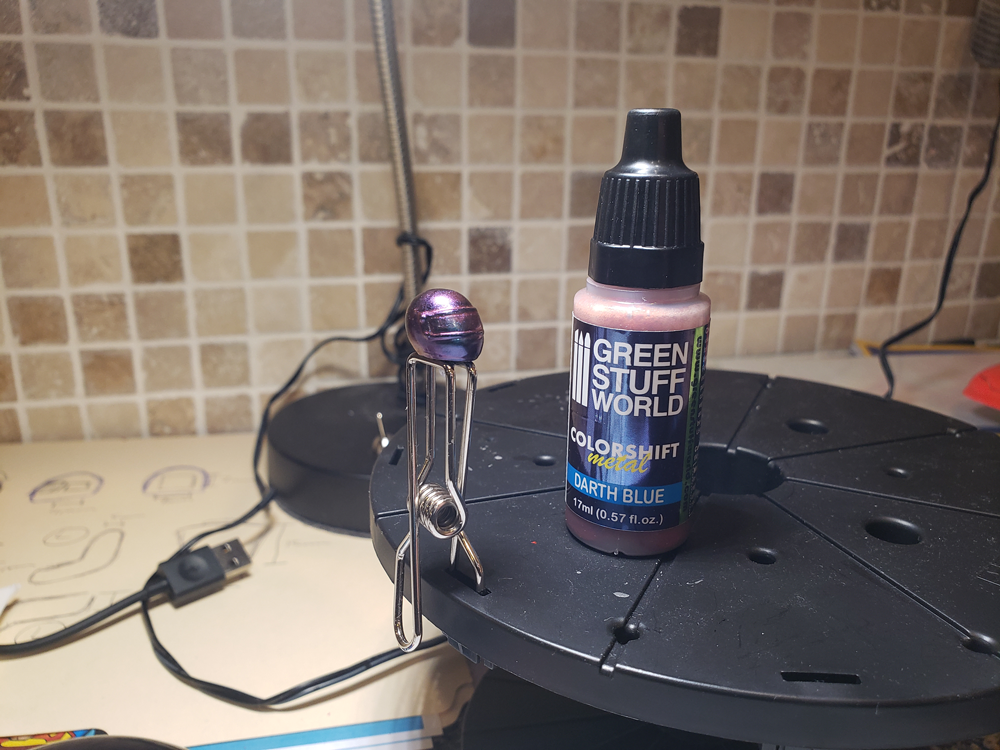
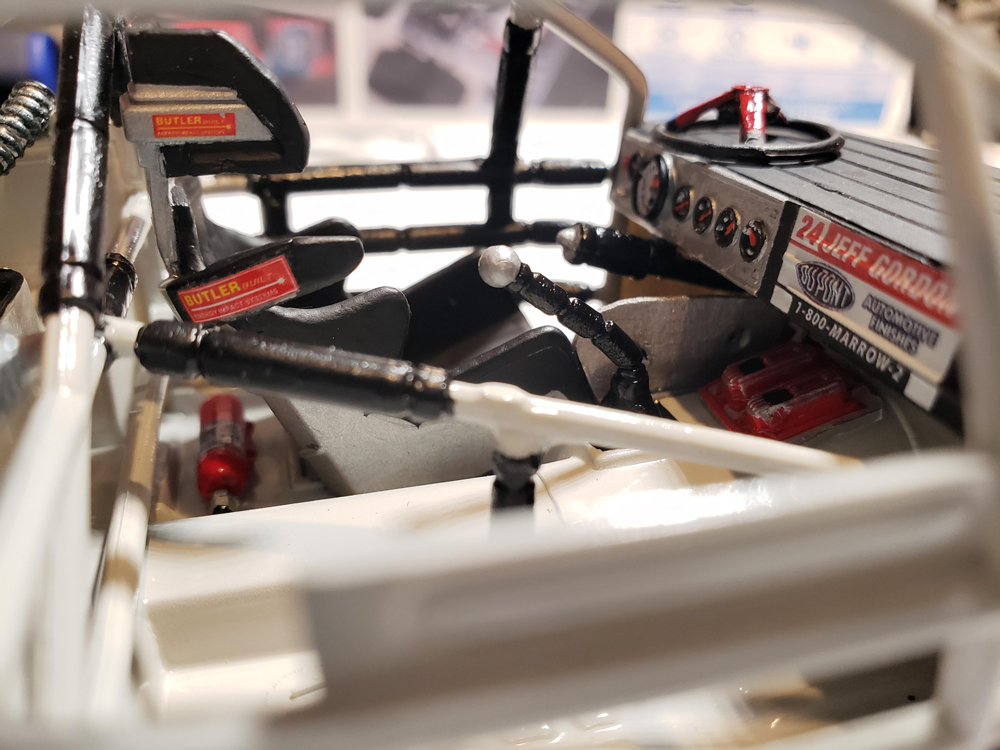
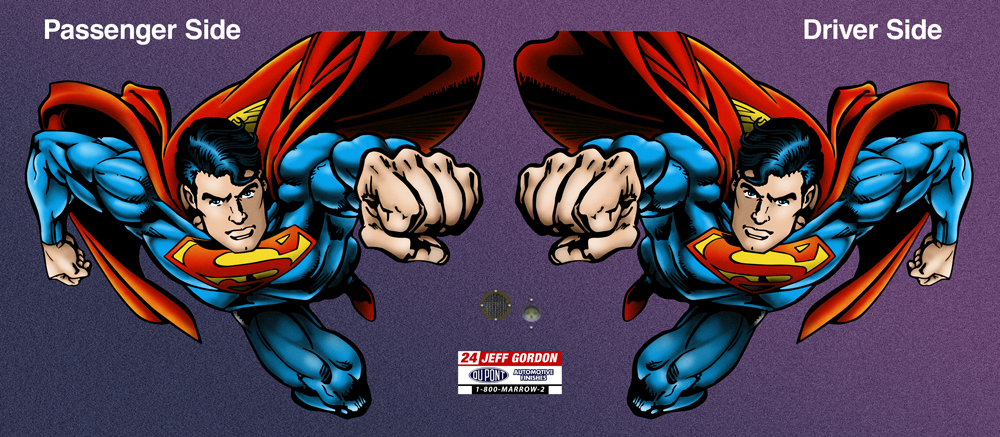
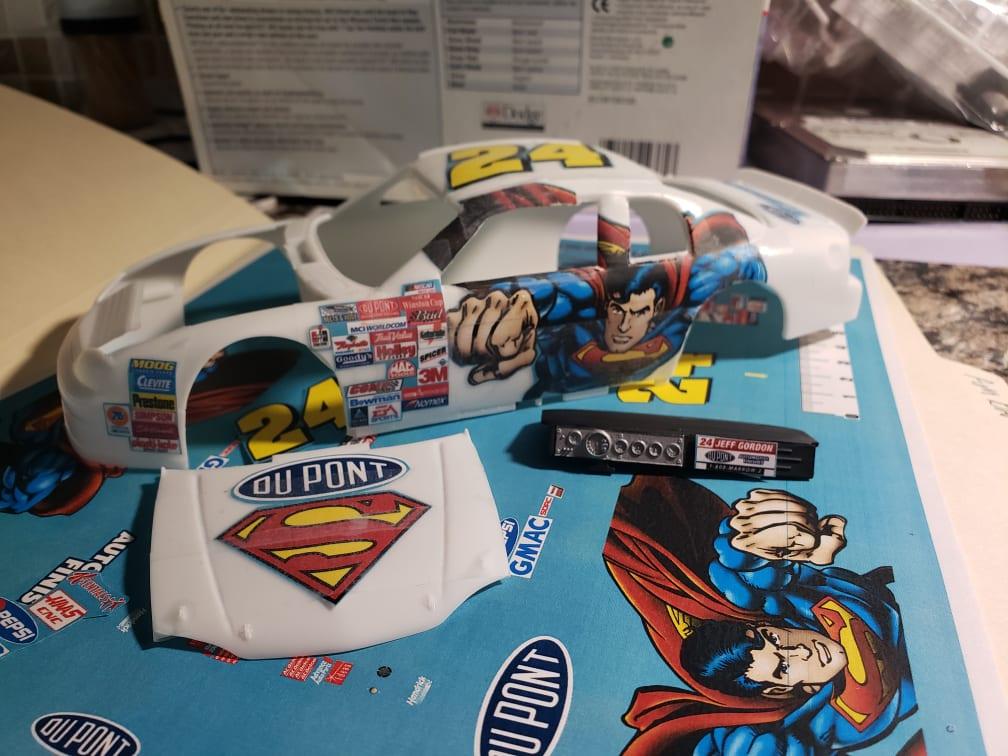
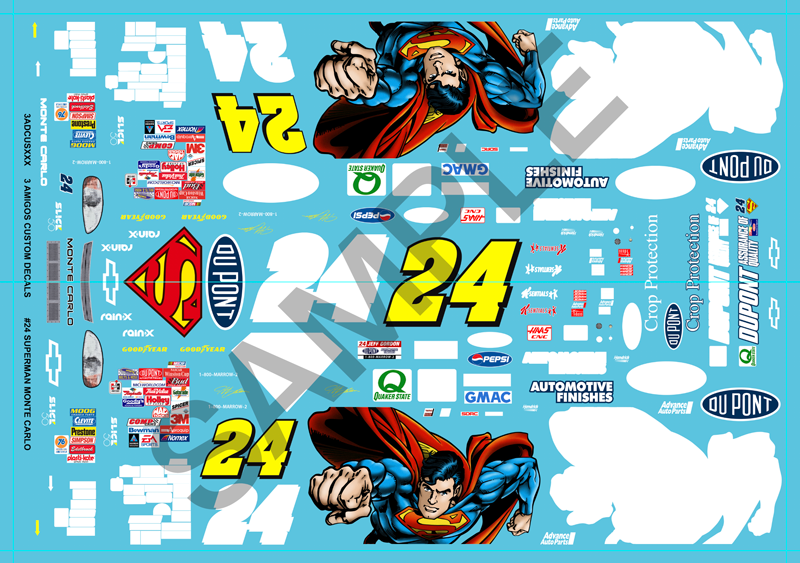
What began as a pipedream in December is now reality. Using promotional/ diecast box art I recreated the Superman image on the side of this car as a full vector-based graphic for a Sim-Racing project. Once I was all done with that I got the itch to see what else I could use it for... The result - A one-off build of Jeff Gordon's special paint scheme from the 1999 Winston Select. Sporting custom decals from 3 Amigos Decals . Sam was able to take my Superman graphic and build the rest of the decal set around it - with awesome results! I cannot say enough about how rewarding it was to work with him on this project! We passed a few test pages back and forth, I would print them out and test fit them to the Revell body to verify the scale and coverage was correct and then get back to him with any changes I thought might be needed. Just about every decal on the car also has a separate white underlayer to help the color pop like it should over the darker paint. The awesome paint I chose, BTW, is called "Darth Blue" and is a colorshift airbrush paint available from GreenStuffWorld. The chroma effect looks about as close to the real deal as I could have hoped! Some supplemental decals under the hood and on the wheels from older Slixx sheets. Custom interior touches include a newer version of the Revell drivers seat, self-fabbed leg protection, ignition module under the dash, more accurately positioned fire extinguisher, self made Earnhardt bar and the rear shelf from a Ford model to better reflect the look of the real car. This was also my first attempt at cutting out the stock plastic window net and fashioning my own from strips of painters tape. Enjoy, feel free to comment and thank you for looking! 20220125_215854[1].mp4
-
#24 Jeff Gordon Dupont/ Superman (1999 The Winston)
Slipster17 replied to Slipster17's topic in WIP: NASCAR
Home stretch on this one - time for a few coats of clear!
-
#24 Jeff Gordon Dupont/ Superman (1999 The Winston)
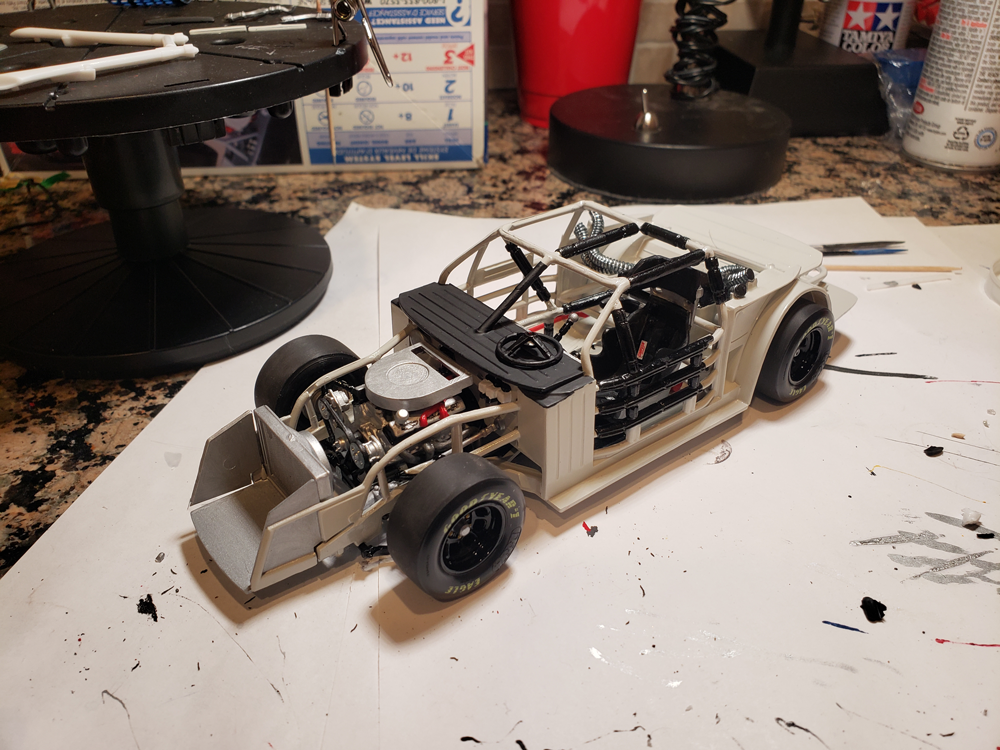
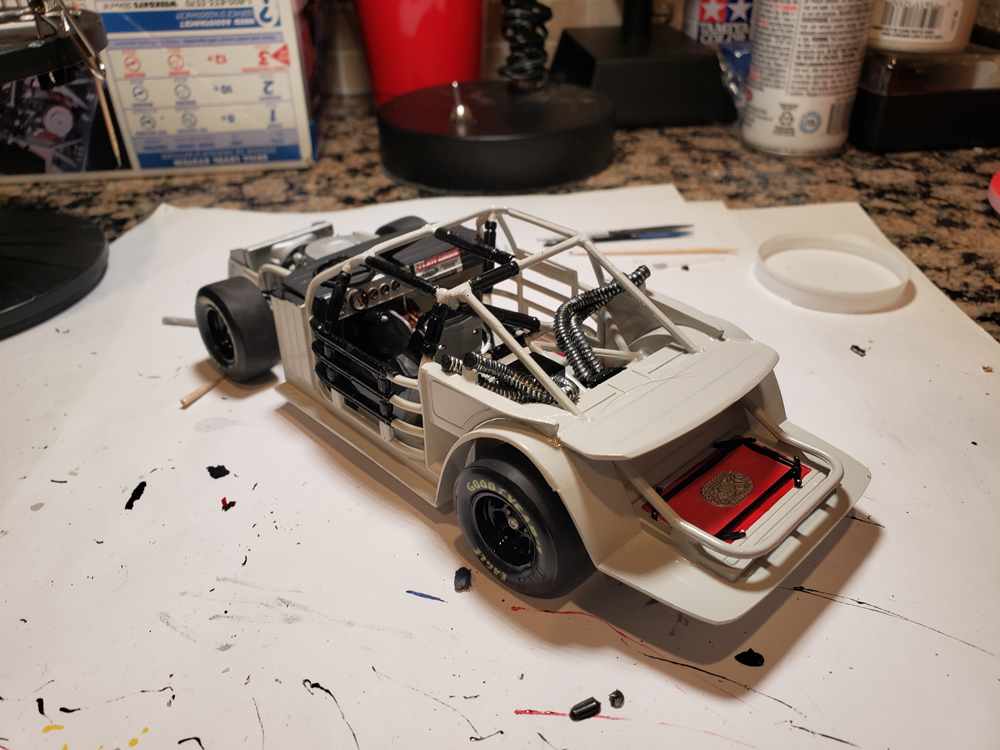
Slipster17 replied to Slipster17's topic in WIP: NASCAR
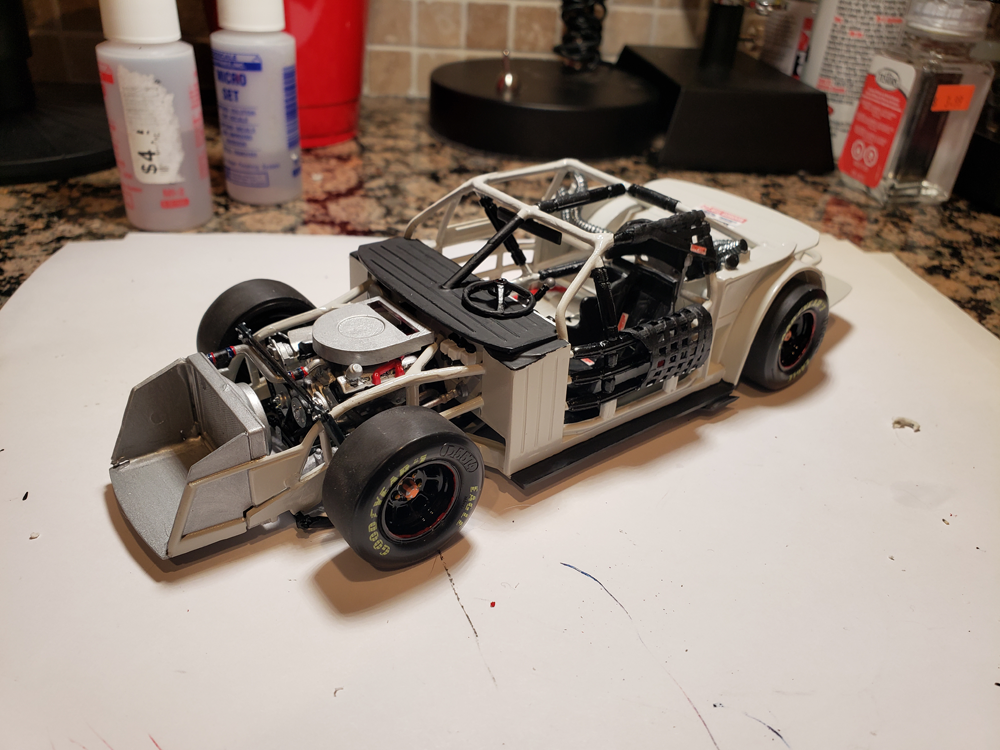
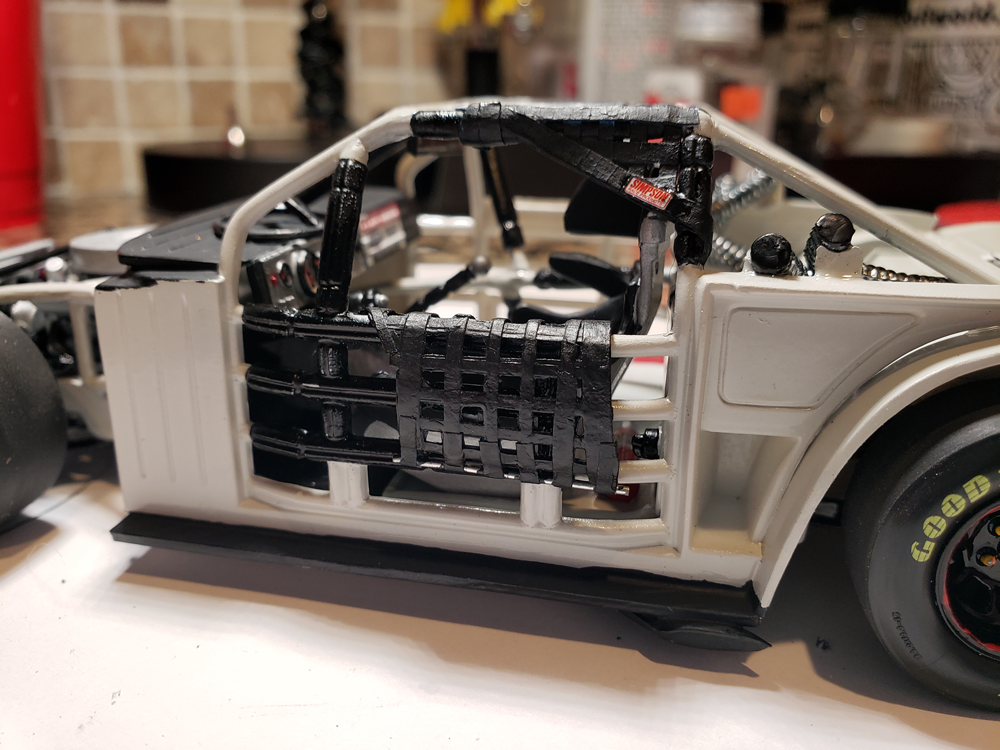
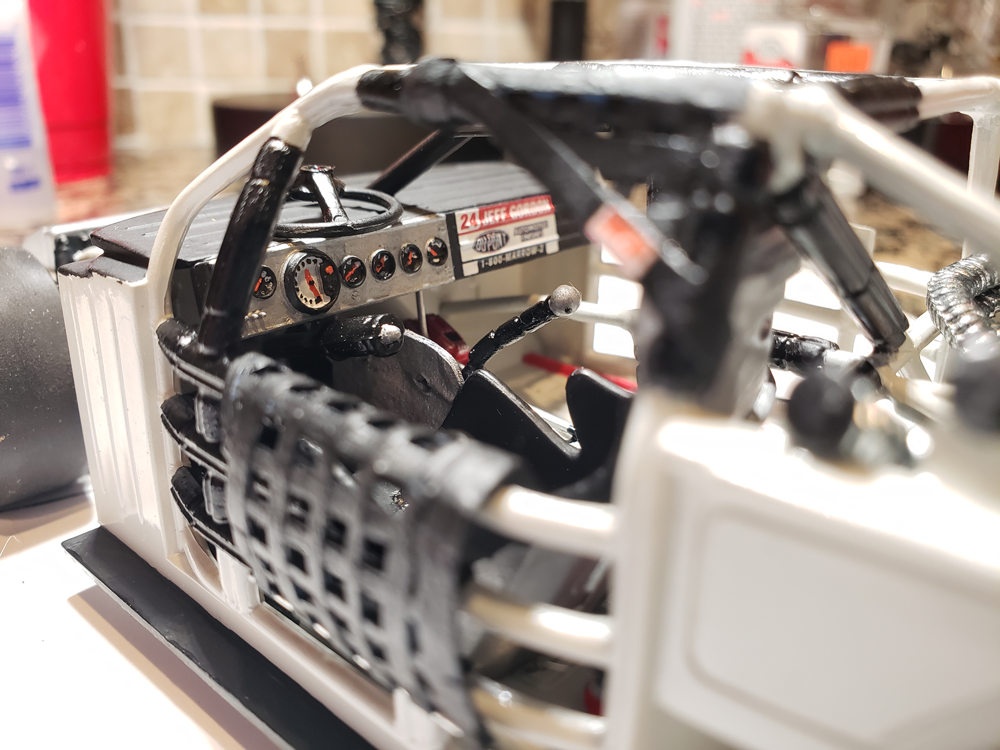
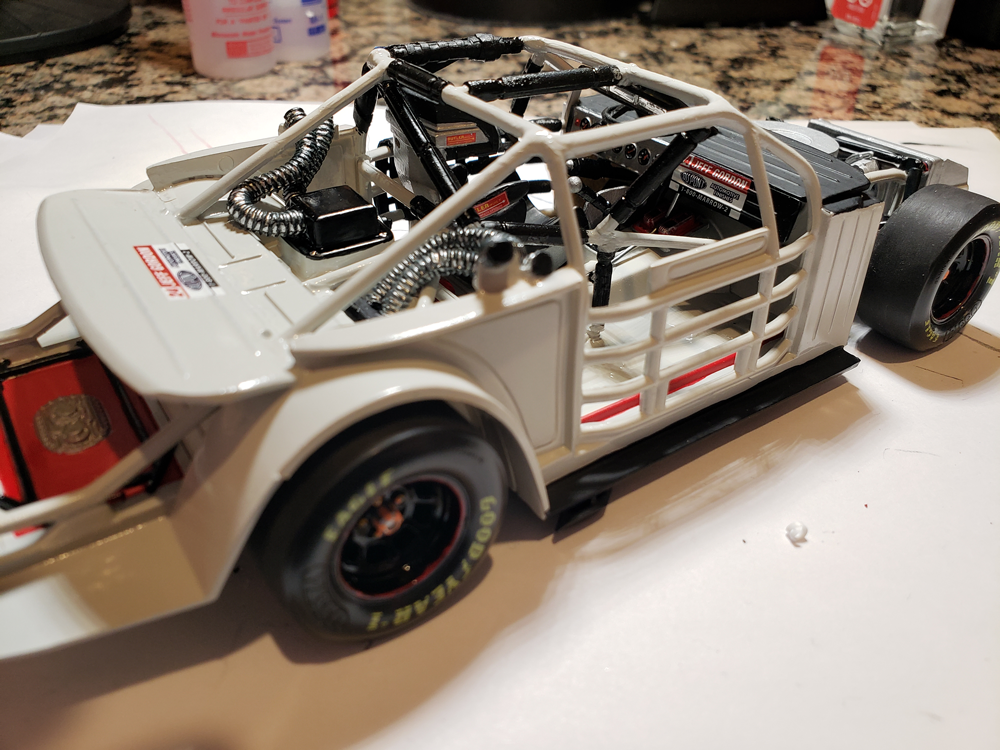
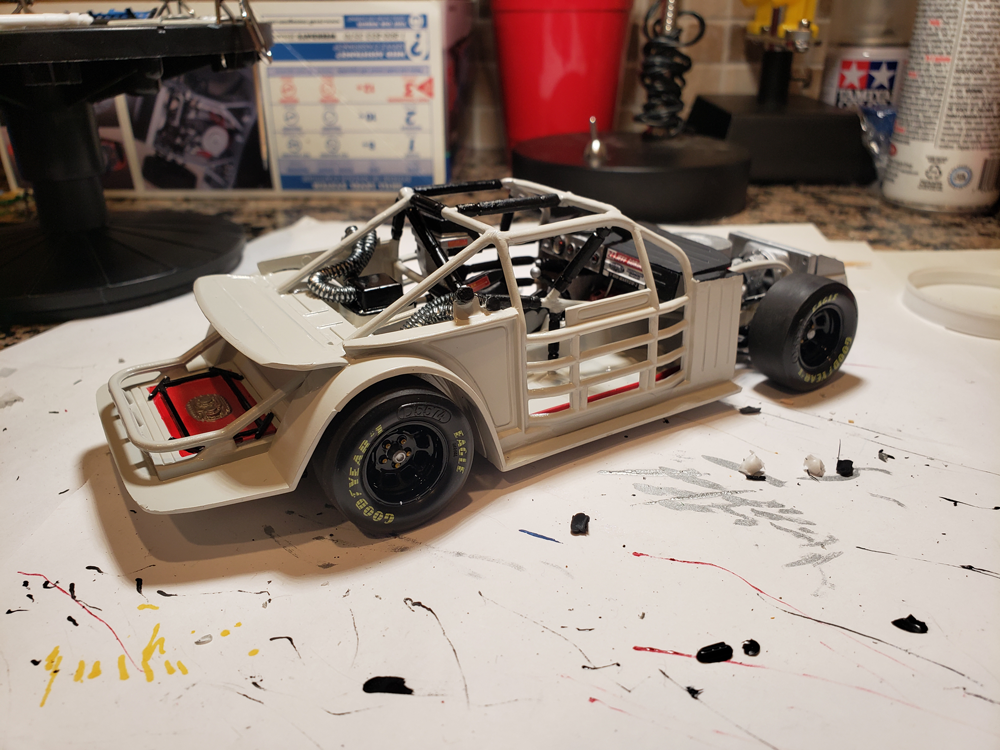
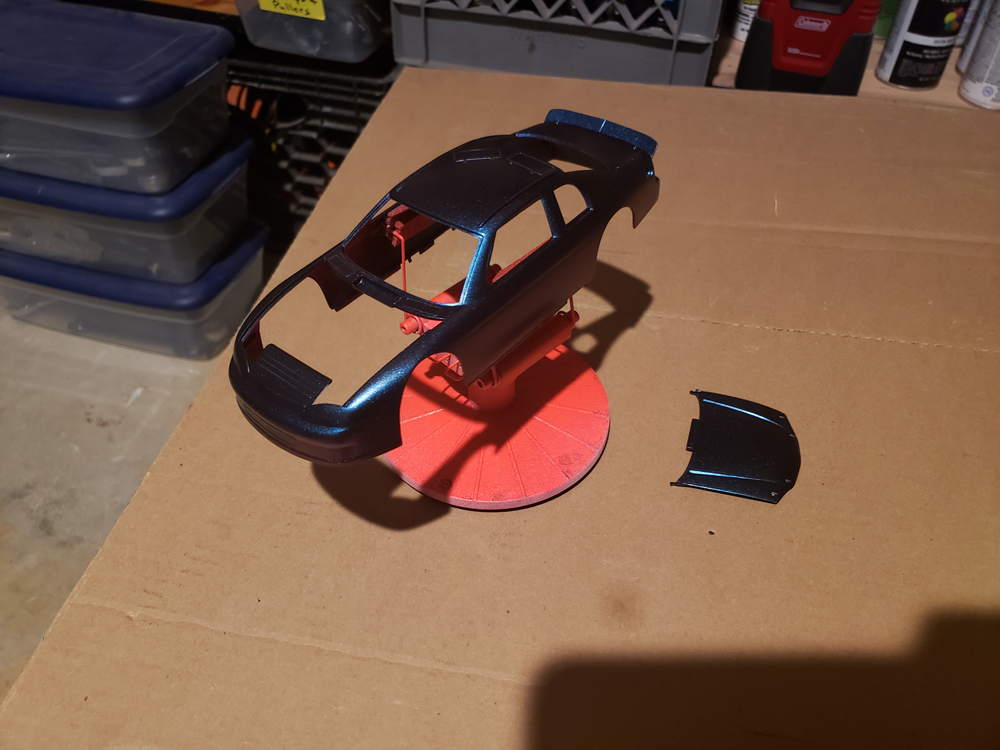
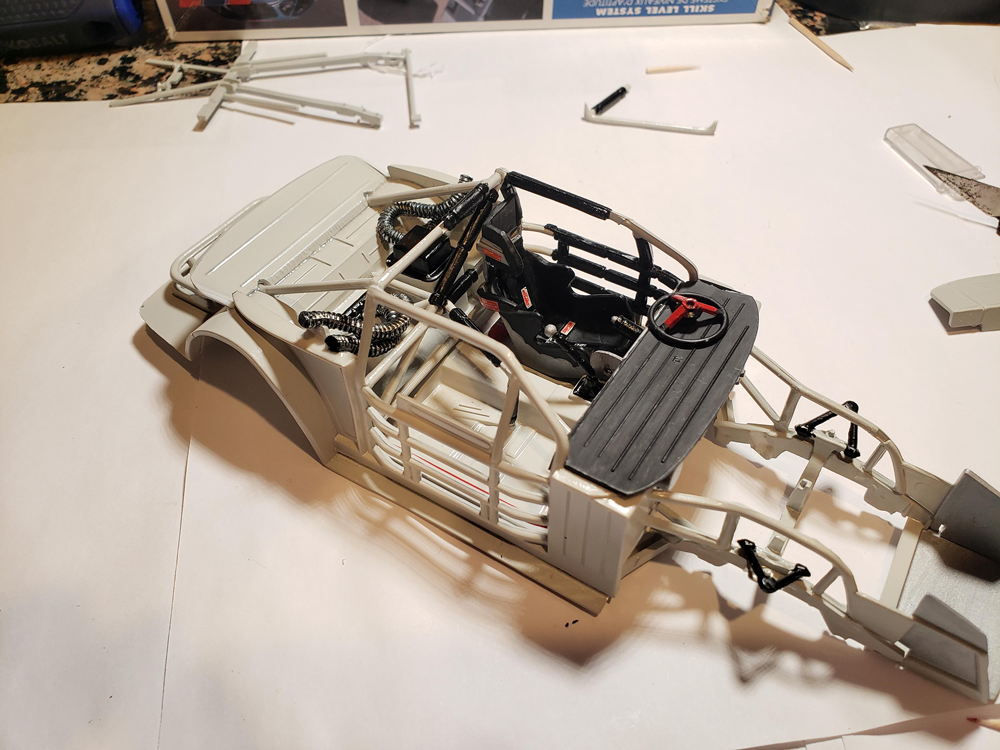
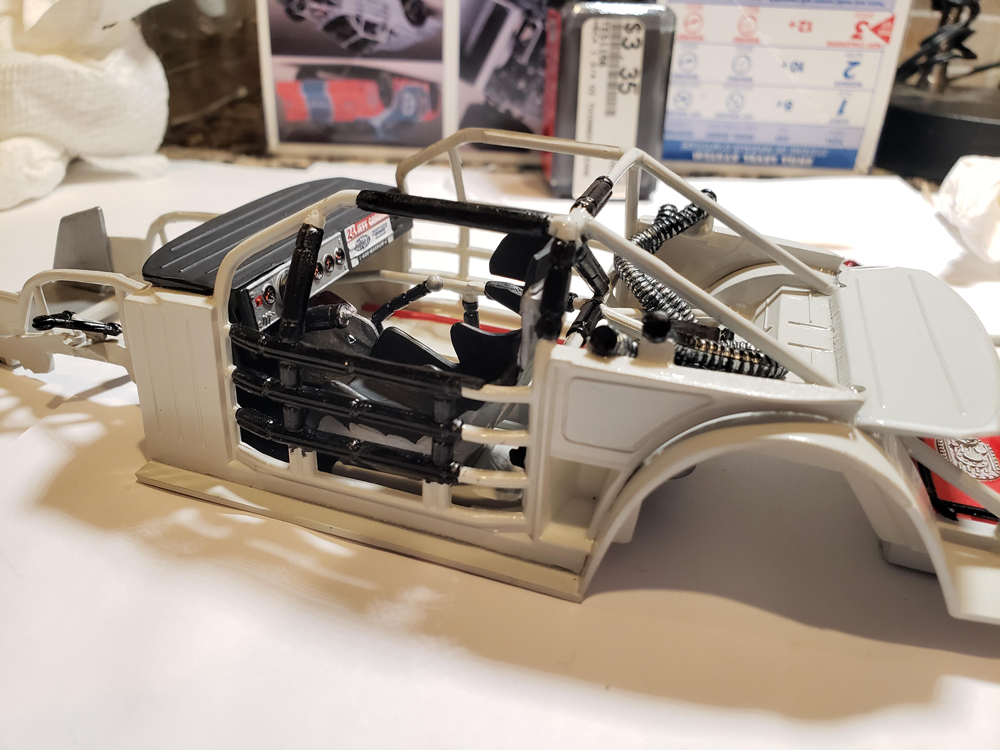
Chassis is done! First attempt at creating my own window nets - cut and layered strips of painters tape to make the effect.
-
Dreading tackling the last few decals on this guy - mostly due to the 'ribs' on the back of the Pontiac body. Going to take a lot of patience and solvent! Most of the white decals you see here are double layered BTW - the cracks visible in the rear stripes will be covered with the second layer.
-
#24 Jeff Gordon Dupont/ Superman (1999 The Winston)
Slipster17 replied to Slipster17's topic in WIP: NASCAR
Decal Progress!
-
#24 Jeff Gordon Dupont/ Superman (1999 The Winston)
Slipster17 replied to Slipster17's topic in WIP: NASCAR
Chassis update - only a few more pieces to go. I ended up adding a 'Ford' rear parcel shelf to this build as well because the Chevy ones included with the kits from this time period look horribly inaccurate when looking through the rear windows of the real cars.
-
#24 Jeff Gordon Dupont/ Superman (1999 The Winston)
Slipster17 replied to Slipster17's topic in WIP: NASCAR
This. Is. Going. To. Be. Epic.
-
#24 Jeff Gordon Dupont/ Superman (1999 The Winston)
Slipster17 replied to Slipster17's topic in WIP: NASCAR
Mail call from 3AmigosDecals!
-
#24 Jeff Gordon Dupont/ Superman (1999 The Winston)
Slipster17 replied to Slipster17's topic in WIP: NASCAR
Final color chosen for the body - 'Darth Blue', again part of the colorshift line from GreenStuffWorld. 20220102_104156.mp4
-
#24 Jeff Gordon Dupont/ Superman (1999 The Winston)
Slipster17 replied to Slipster17's topic in WIP: NASCAR
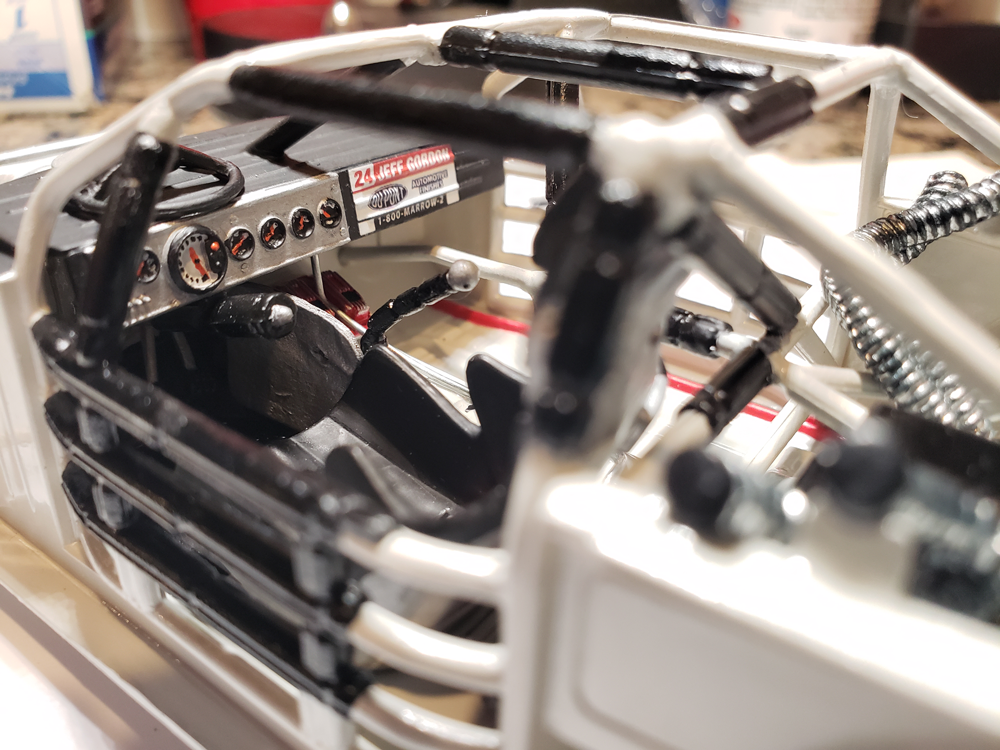
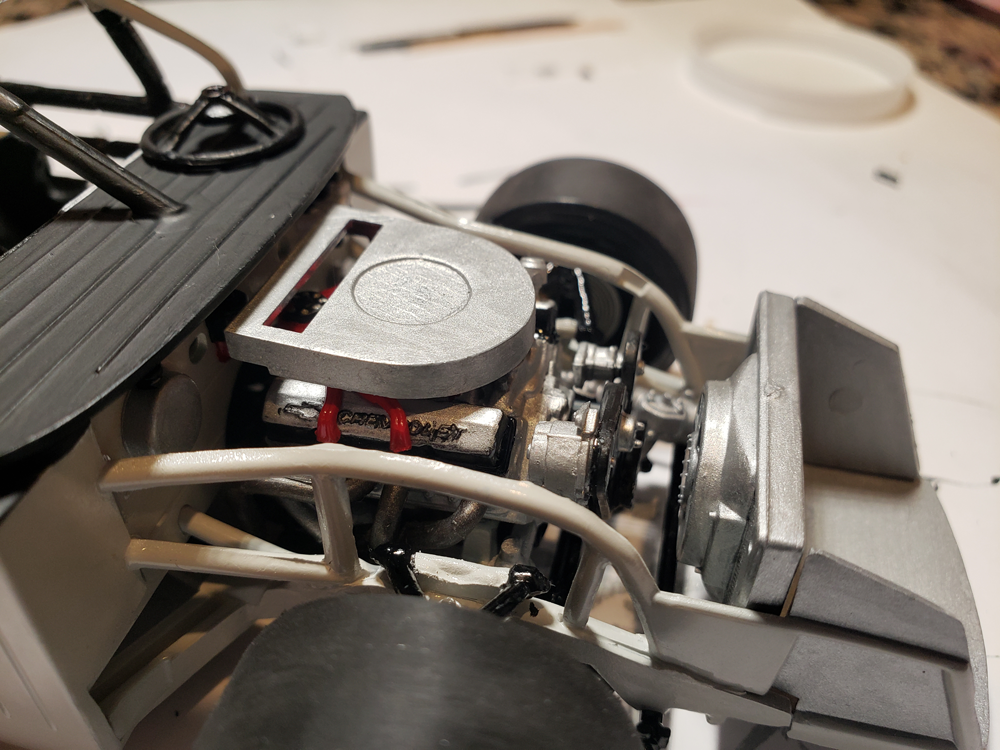
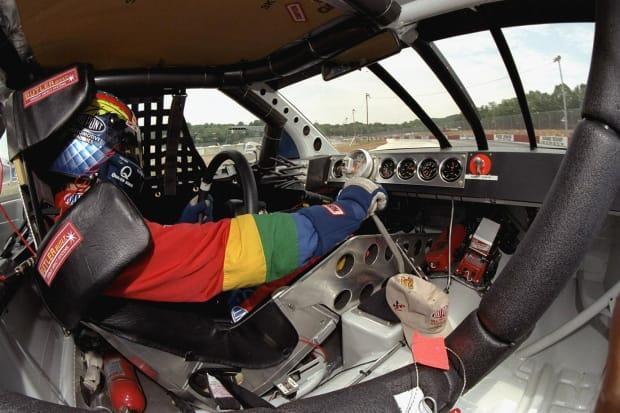
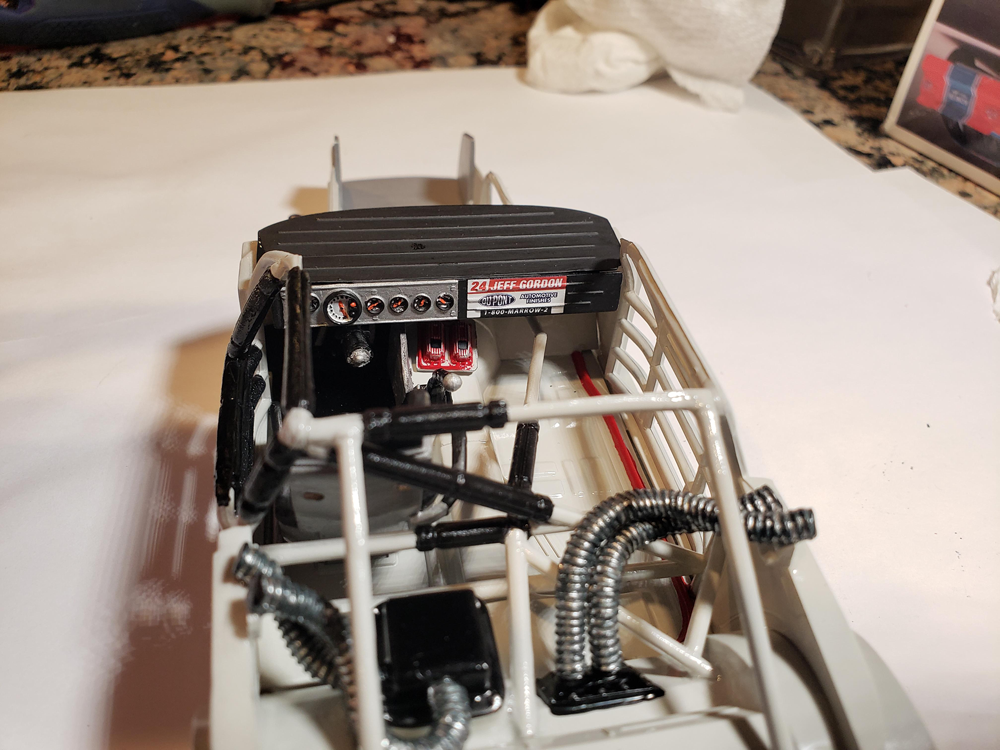
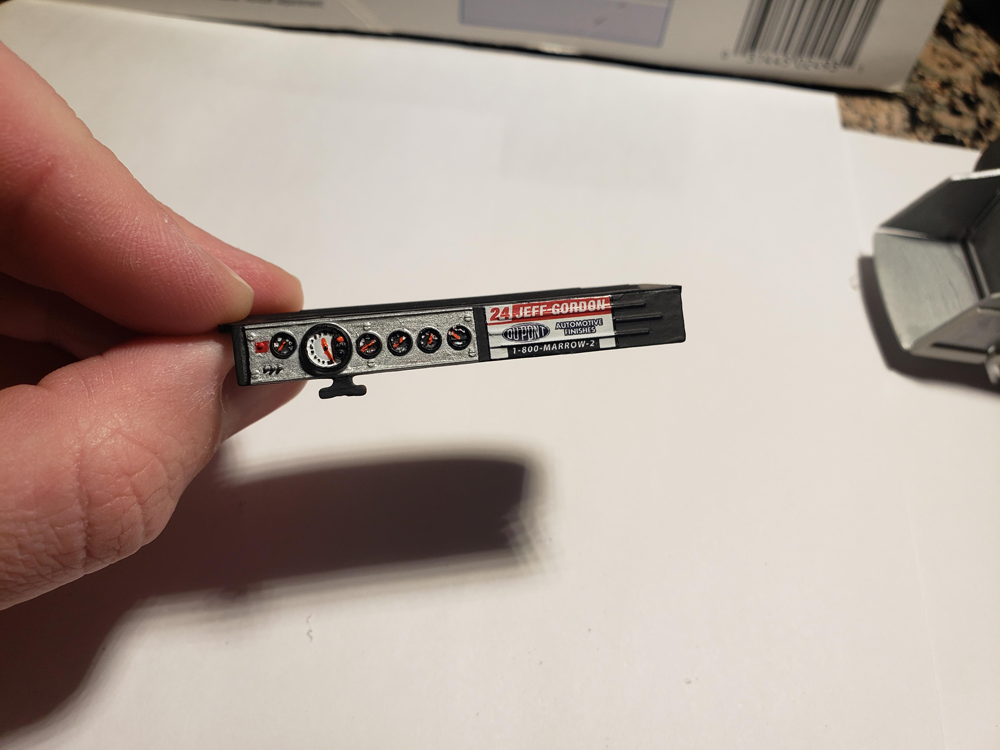
Pushing forward and trying a few more interior modifications than I had done with Andretti's Pontiac. I had a pretty decent in-car image of Jeff Gordon from 1999 sometime that I was going to try and base the look off of. I knew the driver seat that came with the model wasn't quite going to cut it. So I dug into my junkyard and found one of the newer driver seats after Revell made the after change over.... so like >2003ish? I had to clip the driver side 'wings' off of the seat as they prevented the seat from sitting straight inside the chassis. But I'm going to attempt that little secondary triangular window net that was used during this time period so they weren't needed. Cut the plastic window net out as well - going to try and create my own! I also clipped the ignition modules off of a newer brace bar and relocated the fire extinguisher to a more accurate spot. Fabbed up my own leg protector for the side of the seat using some layered painters tape and glued that in place as well. Gauge dials were painted with my ever trusty toothpick! I'm leaving the steering wheel off because I have an idea to put a driver figure standing outside of the car. I think it is coming together nicely!
-
I got the itch to look into building this scheme from two sources. The first - I painted/ recreated this paint scheme in the computer sim-racing game NASCAR Racing 2k3. Moreover - I did so using a 3rd party program that allows users to create a faux 'chroma' effect for the cars in-game. And I was ecstatic with how it turned out. In the process of making this paint scheme in game I drew and shaded my own full-layered vector image of Superman for the side of the car based on diecast box art. And then I got thinking.... I have this asset now..... how else can I use it? The second - the family and I were in Hobby Lobby and I wandered through the model kits to see that Testors in-fact had their own line of colorshift paints now. The Blue Galaxy color in particular caught my eye and looked pretty darn close to what I had seen of the actual Superman scheme while researching the car. Wheels turning....... What would it take for me to be able to use the vector graphic I had created and build an actual 1:24 scale model of this car using the colorshift paint? I got it touch with Sam of 3AmigosDecals, who I've had previous dealings with, and put forward the idea to him. I asked if he would be able to use my Superman asset and then build the rest of the car decals around that to make me a custom printed set of decals. He loved the idea and we set about trading some test files back and forth to make sure we had things like scale and color correct. I was printing out the test sheets and then taping them to a body-in-white and letting him know if we needed to adjust anything. He DID clue me into the fact that a 3rd party decal company had produced a run of these decals waaaaaaay back in the day - but there was next to no chance of me locating a still unused sheet and (if I'm being entirely honest AND humble.....) ours was going to look better, lol. We both agreed that because of the dark final color of this car - the decals would probably all benefit from white underlays. So we finalize a full sheet of decals with a full slate of underlays as well. Sure - some wouldn't be used. But they would be there if I needed them. Queue happy squeals. Now to do some paint experimenting while waiting for the mail to arrive!
-
Moving Forward on the decals. Slooooooow and steady with generous use of solvent!
-
LOVE the stance on this build!