BWDenver
-
Posts
21 -
Joined
-
Last visited
BWDenver's Achievements
MCM Member (2/6)
-
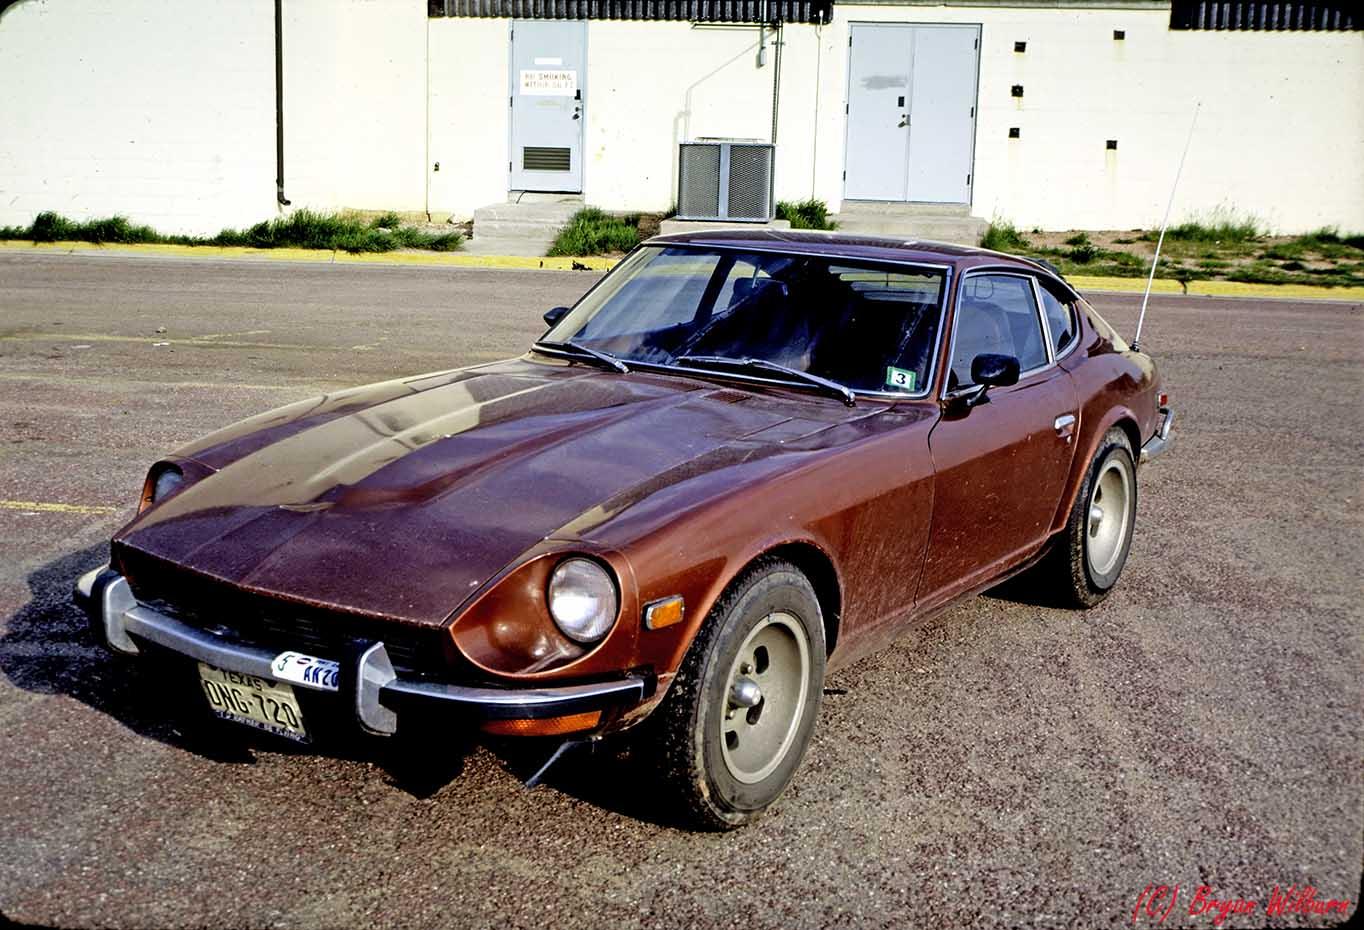
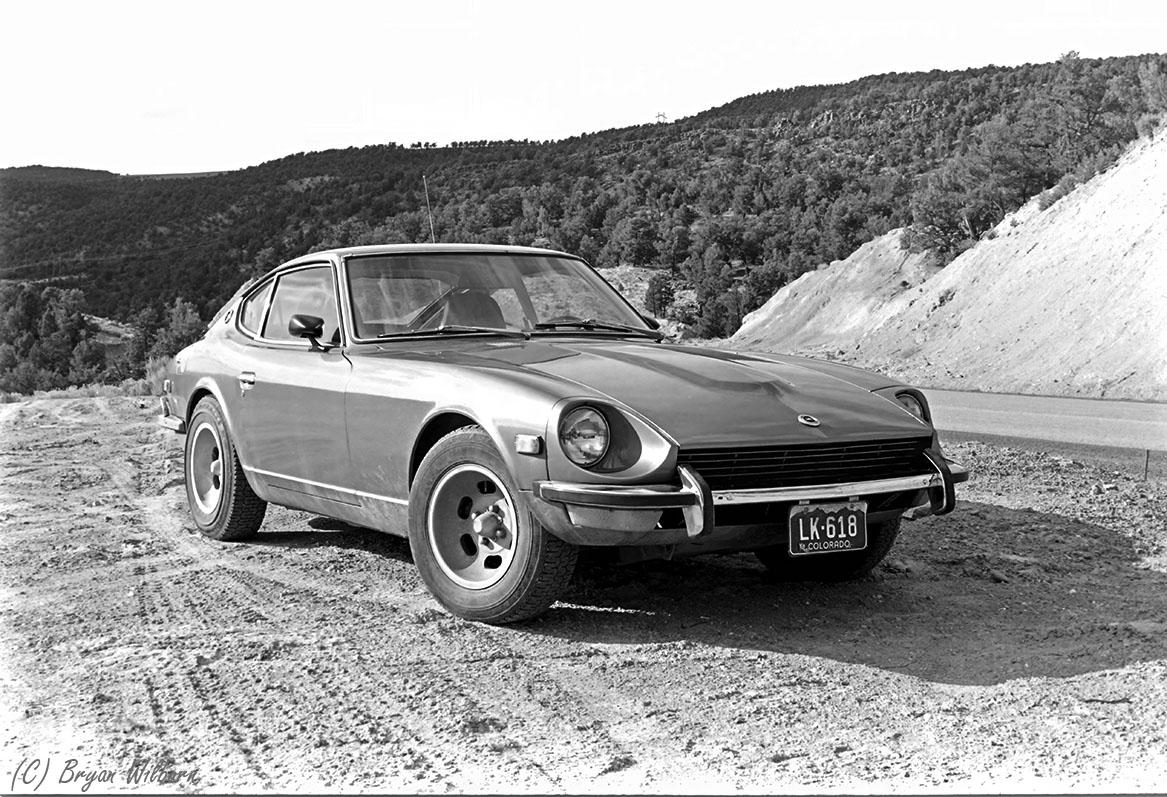
 I was in the US Army Flight School at Ft Rucker in the summer of 1973, and needed a ride. There was a local lot that catered to the military students, the "super Lot". Prices were a bit steep, interest a bit over street. I had no credit history, no down payment so I basically had to take what they offered. A friend got a 72 Corvett off the lot, probably the last Vett I liked look of. I loved the car and drove it for 13 years when it finally rusted out from under me. In the color shot you can see a bit of damage to the front spoiler, the result of a snow drift at Ft Carson CO. The major change to the car was the Shelby Deep Dish Mags. The were a bit wider than stock and I had to bend the wheel well lip up as ever time I went over a twig the rear wheels rubbed. Recently a 73 Z sold for $50,000. The car was great to drive, rack and pinion steering was precise.
-
Very nice 24 Oz. I appreciate the offer. This has been an evolving project. I have picked up and discarded multiple kits of the 24 Oz to date. I finally settled on the Tamiya Street-Custom but will need to add the lower valance from another kit. Aside from the Valance that represents the best overall. Still trying to find the interior color that was a sort of brown/Orange. The lower valance is just a tad too wide, so I'll need to section it and shrink it a bit. I worked with MCW to get the '76 Datsun 301 color mix as I repainted the car around then to the "brighter" color. My first choice was ZeroPaints, in England, but are no longer shipping to the US because of the Tariffs. Screen shot from a restoration video. You have to love the Z to like the color! ZeroPaints has a color that looks close, but again, they are not shipping to the US at the moment...
-
Close but not close enough. Those are semi straight walled, the Shelby wheels are a continuous curve, rounding out in the bottom and having 6 slots. I'll either have to make them on my mini mill, or talk to someone to 3D and print them. I have a 4K resin printer that I have yet to use. They are such an uncommon wheel that nobody makes an aftermarket in 1/24... I picked them up from another pilot when I got to Ft Hood in 1974, after graduating from the Army Flight School at Ft Rucker. The other issue is the rear window louver. The back window was a sun attracting hearting unit, without the louver the car really heated up. Especially after I scrapped the "Dealer Added" AC system that would shake the whole car, and not really work... ZoomOn prints one that is supposedly for the Tamiya Nissan Fairlady 240ZG, but it's not wide enough for the Street-custom body. I may have to make it out of brass.
-
New to the board, but not new to modeling, just getting back into it after retiring. Spent 32 years driving US Army helos, from the tiny OH-58A to the rather large CH-47D. While I have an interest in Cold War Reccy satellites/rockets, and aircraft. I also love Ferrari's. Look forward to talking to "ya'all"! Bryan Wilburn
-
You always have a fondness in your heart for your “First”! OK, not THAT first! Your first car or airplane. In July 1973 I checked into Ft Rucker for advance Rotary Wing Flight Training at the tender age of 19. There was a saying that once you passed your Instrument Check Ride, you could by your bars. In most cases it was an all-downhill easy slide after that. I jumped the gun by a couple of weeks and went out looking for a car. and found it in a 1973 lt Brown Metallic 240Z. When I got to Ft hood Tx I made a few changes. One of the other mods I made was a set of Shelby Deep Dish Mage wheels. I had to do some back woods modifications to the wheel wells to keep the rear tires from rubbing once I had the Mags installed. The 4 lug mags had a chrome plastic center caps with the familiar Shelby Snake. I'm trying to find a 1/24 source for those wheels, or something that looks like them. See image below. Thanks in advance! Bryan Wilburn
-
Ferarri 365GTB/4 Engine question
BWDenver replied to BWDenver's topic in Model Building Questions and Answers
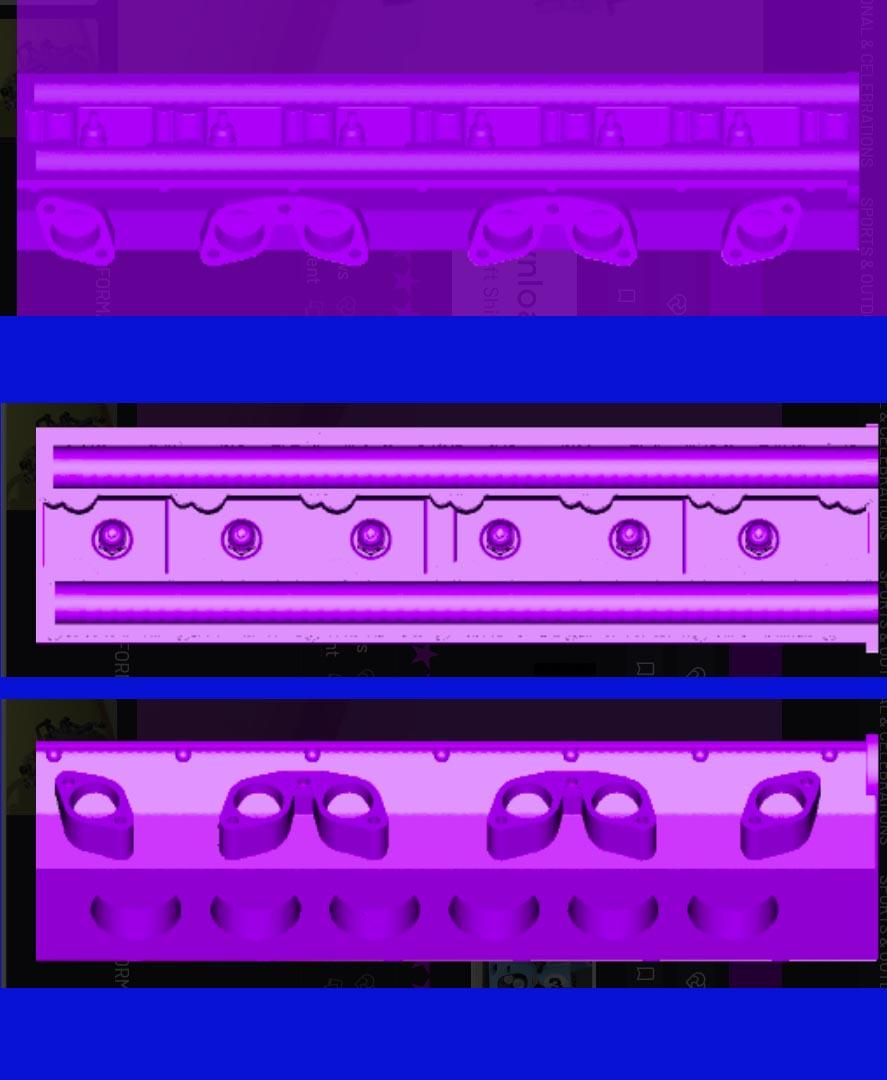
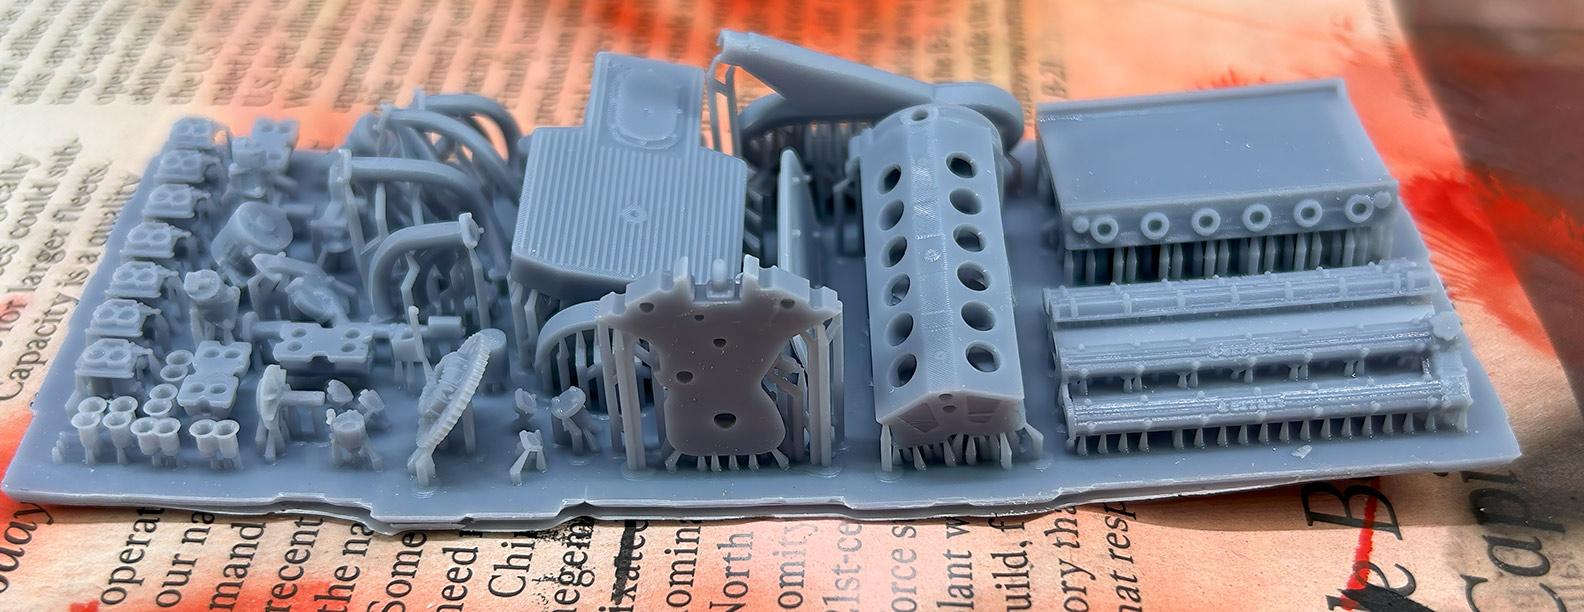
I'll give that a try on the second set. After looking at the STL files you pointed me to, it appears JPG is in fact using those files. But for some bizarre reason (likely they have not a clue as to how the engine actually looks) they printed all the supports and those solid pate connecters on the "TOP" of the cylinder head and quite literally obliterated all the detail of where the spark plugs should go. The part in question is in the upper right corner of the parts carrier I posted. I did not catch on until I looked at the STL files and noted the orientation of the side-by-side exhaust flanges, they should point down and fore and aft. I'm still mystified how they screwed it up so bad. I might be able to salvage the heads by milling out the area where the plugs should go in. I think my 1/8" end mill is small enough... Thanks again for the help! Bryan
-
Ferarri 365GTB/4 Engine question
BWDenver replied to BWDenver's topic in Model Building Questions and Answers
Not sure. The JPG print engine has large circular depressions where the spark plugs go. They did email me several photos of exploded views fo the engine. The primary problem with the engine kit is they printed the heads and cam covers with multiple "sheet cross connects" that make it almost impossible to separate them without damaging the heads or cam covers. The over sued of support runners just about turn into solid pipes and also make it difficult to separate the parts. After looking at the parts I think I'll use the intake and exhaust pipes, and some of the additional parts, but scrap the oil pan, block, heads and cam covers. I snapped one of the cam covers in half trying to separate it from the cross connect sheet. I do appreciate the link and will look at it. Bryan -
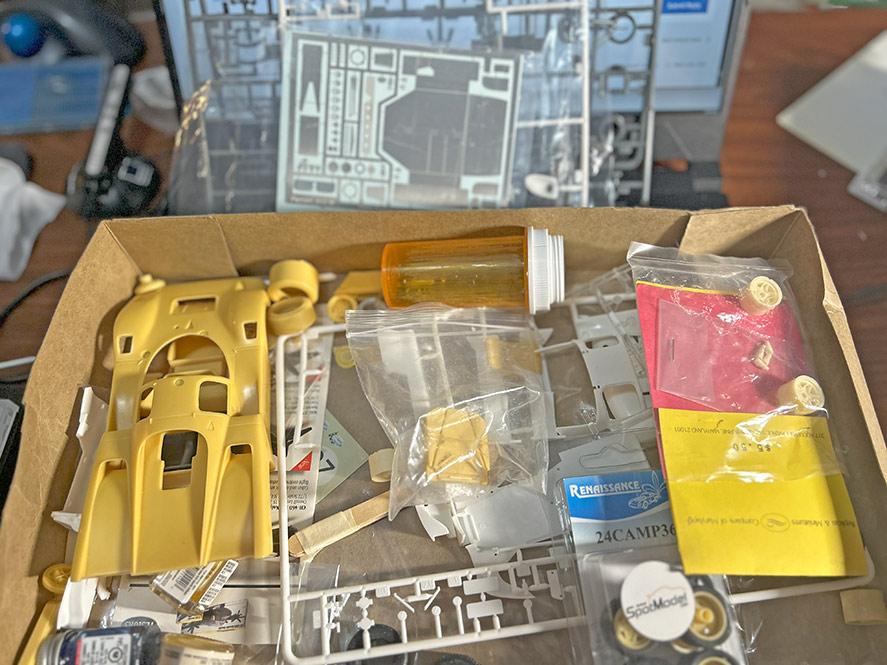
Need a bit of help with a 365GTB/4 project. I'm trying to build a scale replica of the 365GTB/4, and just received a 1/24th printed engine from Poland. While the printed engine looks great, it arrived with no information on how to assemble the kit. An email to the company has yet to generate a reply. You would think that if they generated a printed engine, they would have some info on how to assemble it... The tiny parts on the LH side of the to the right of the carbs and intakes are some of where di o they go parts.. The only photos I have of the engine is installed in the car, and none of the engine front or lower sides. There are a lot of very small fiddly bits that I have no idea of where they might go. Photos of the engine out of the car would be greatly appreciated. Thanks in advance Bryan
-
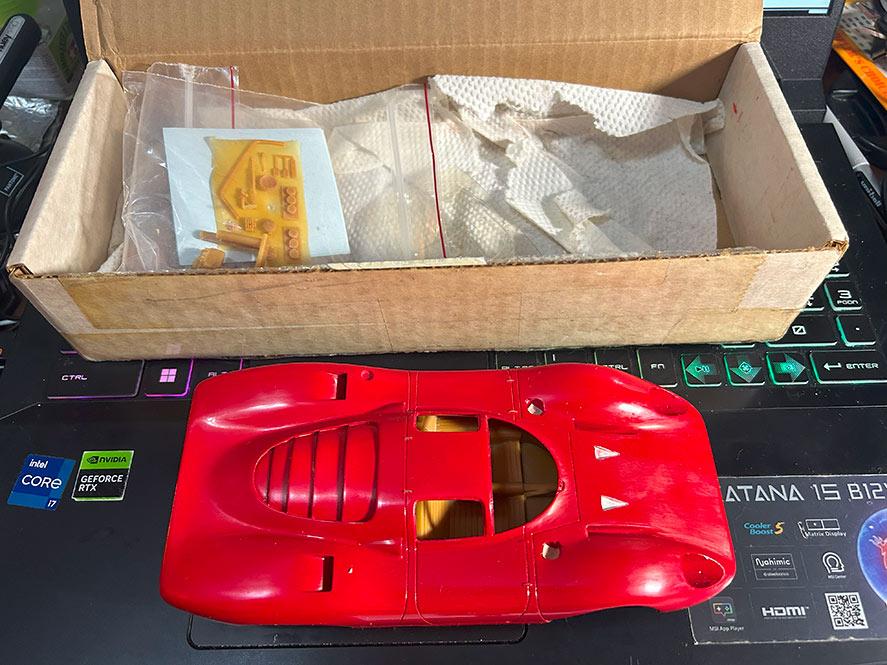
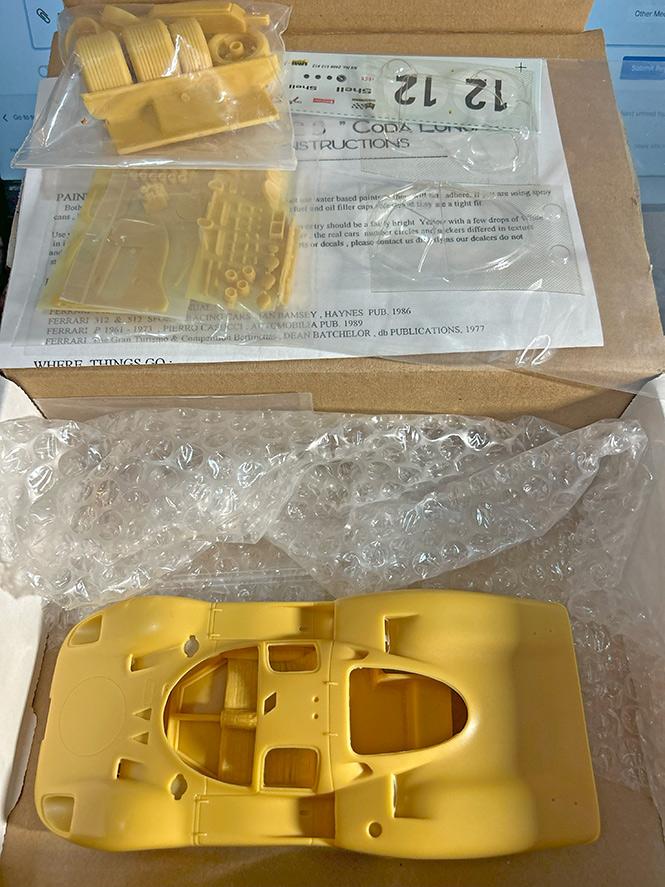
That was actually the second time he was burned out and lost everything. Over the years when he was producing, I picked up a number of his car kits. Dragon Model works 1969 Ferrari 312P 1969 Ferrari 312 P Spider Fisher Models 1979 Le Mans F 512 S "Longtail Yellow 12" "Coda Lunga" And my favorite: 1971 Sunoco Ferrari 512 M, I'm splicing some parts from a Testers Ferrari 512S for a full detailed kit. In all the moves I managed to lose the clear parts for the 512 M, and the parts with the air box. The Coda Lunga has identical clear parts and I can vacform a replacement. From emails I've traded with Paul I think he's trying to resurrect the line with the help of 3D Scanning. He lost everything in the Camp fire. Bryan
-
Good to know!
-
When I was in Colorado Springs I picked up the Challenger 1 kit and looked at all the "chrome" on the engine parts. The real car engine appears to be painted in a metallic grey, or aluminum. In any event the chrome had to go. At a weekend together of the local hobby group I asked for advice, not wanting to go the oven cleaner route. One of the guys recommended "Purple Power", an industrial strength cleaner/degreaser. It's available at most "home" stores in the US, overseas not sure... Works like a charm, while it's less dangerous than oven cleaner, it is corrosive, and the pats should not be handled directly until they are washed off. Takes about 10 minutes or less. Regards, Bryan
-
Farrari "Testa Rossa" head wrinkle paint help
BWDenver replied to BWDenver's topic in Model Building Questions and Answers
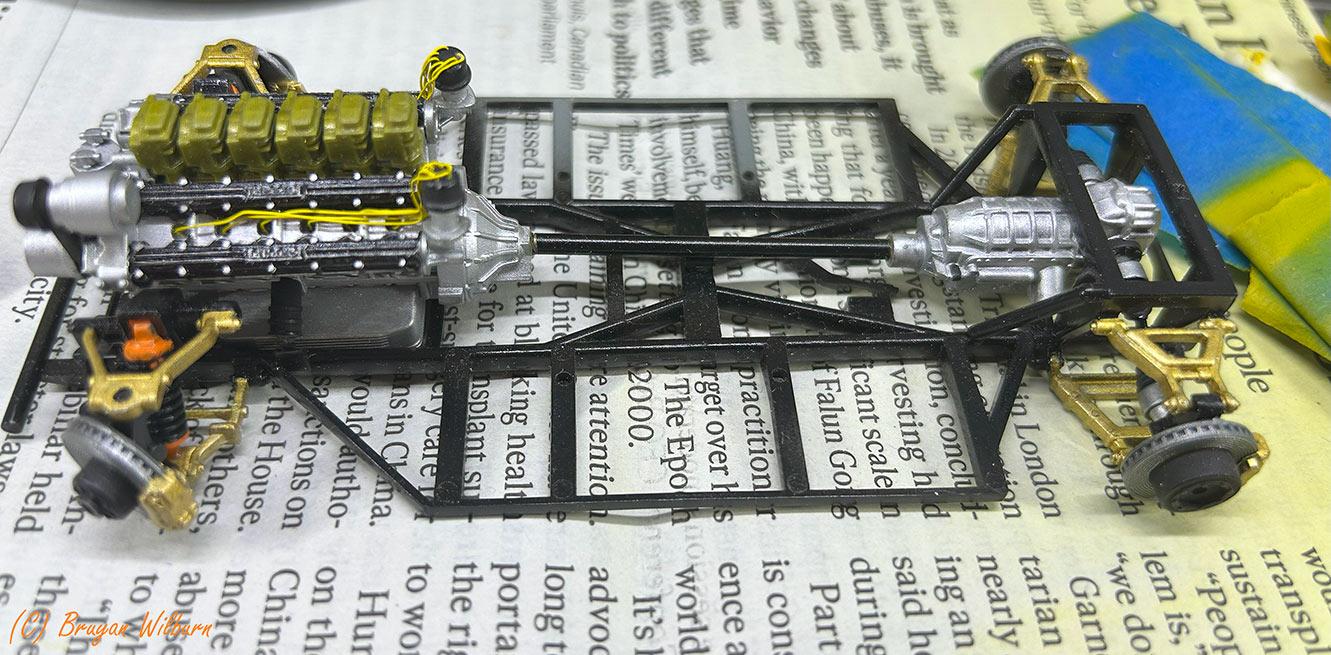
Interesting view point. I spent 32 years flying military helicopters and was around "tactical" aircraft a great deal. Aircraft modelers started going WAY overboard in the mid to late 80's. I did a slide show of how "real" Navy tactical AC looked at one DC IPMS meeting, and made the mistake of pointing out the modelers were a bit "going overboard" on WX'ing. Several of the prolific modelers literally stopped talking to me. Car modelers tend to like to do the build up like it was just cleaned up on a weekend by the owner, and I tend to like that better than it looking like it just crawled out of a mud bath... The attached shot is a chassis that I started in the last century, around 1989. I may "oil down" the engine, or leave it "clean"... Colors are a bit wrong, but in the late 80's there were not a lot of good info around. Bryan
-
Farrari "Testa Rossa" head wrinkle paint help
BWDenver replied to BWDenver's topic in Model Building Questions and Answers
I picked up a bottle of ZeroPaint Textured Black. I think one bottle of this stuff is enough to do a hundred heads, and a few dashes. I've yet to try it on a resin 250 GTO engine. To do an engine head you're looking at 1/2 Ml of paint. Basically, just enough to fill the lower end of the airbrush. I tried the Rust-Oleum and it was WAY out of scale, in 1/24 it needs to be a hint of texture... I do like the ZeroPaint line, especially with a series of Ferraris I'm doing. The downside is they only appear to make batches of the paint on a yearly Baisis. So around this time of year, it's difficult to find in the States, and incredibly expensive from Europe, if they have it. None of the Ferrari F-1 colors are available pre 2007... Bryan -
BWDenver changed their profile photo
-
Farrari "Testa Rossa" head wrinkle paint help
BWDenver replied to BWDenver's topic in Model Building Questions and Answers
Little bit of Photoshop on the above image. Feel free to use it on your project if you are lucky enough to have a Haseagawa 1/24 TR
-
Farrari "Testa Rossa" head wrinkle paint help
BWDenver replied to BWDenver's topic in Model Building Questions and Answers
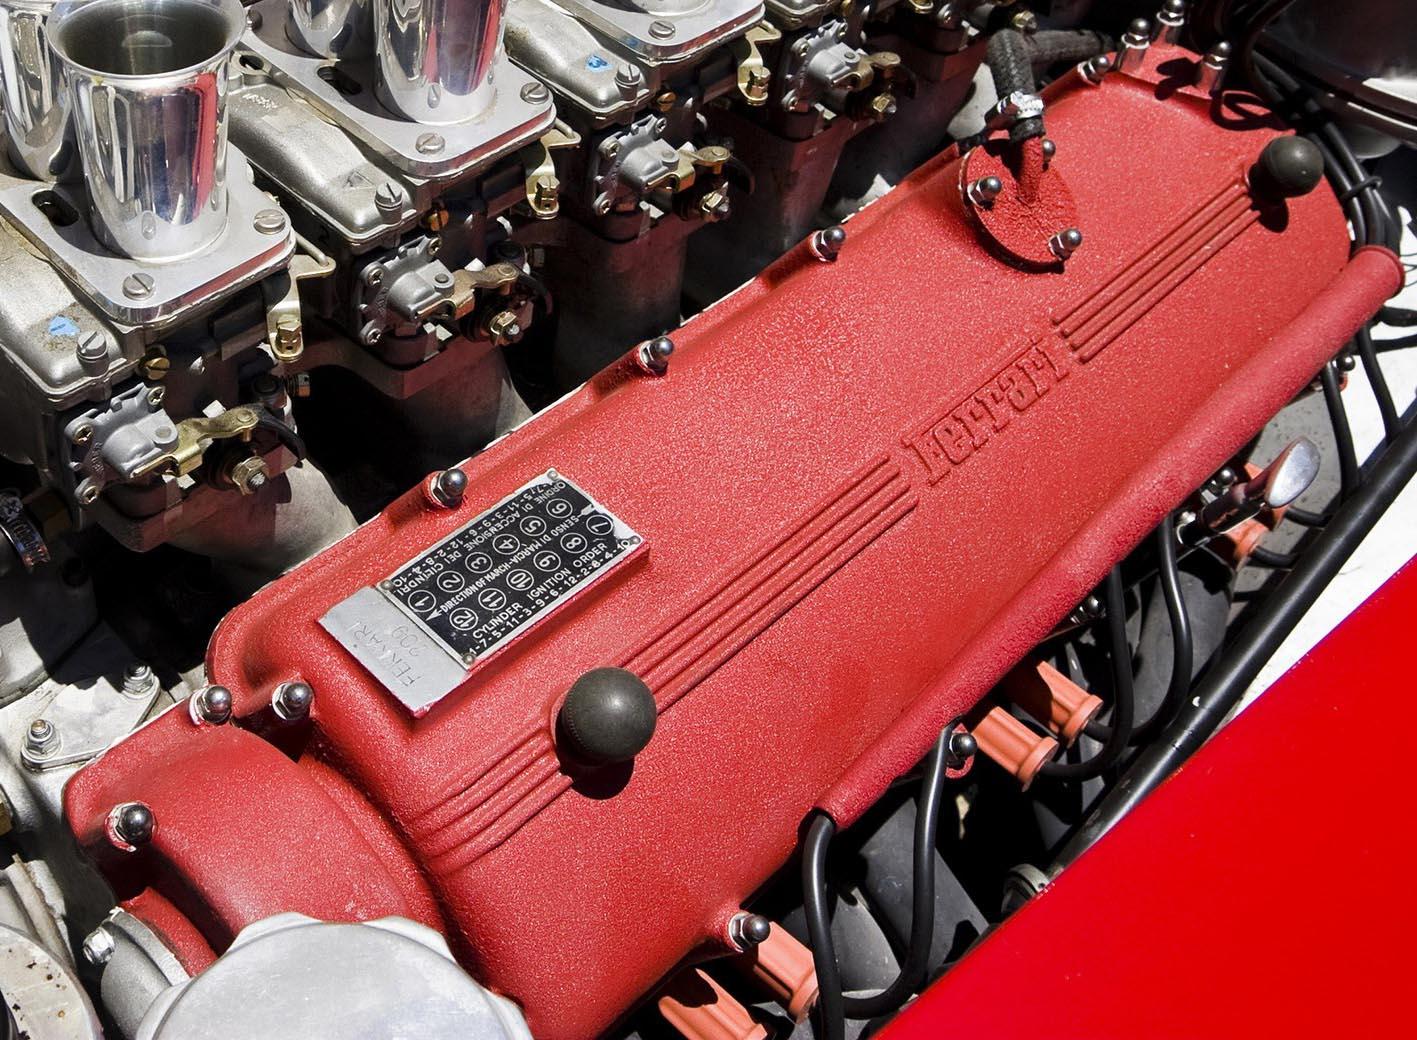
probably the best shot of a Testa Rossa head... From a corner of the Wide World Internet...