Devyn
-
Posts
32 -
Joined
-
Last visited
Content Type
Profiles
Forums
Events
Gallery
Everything posted by Devyn
-
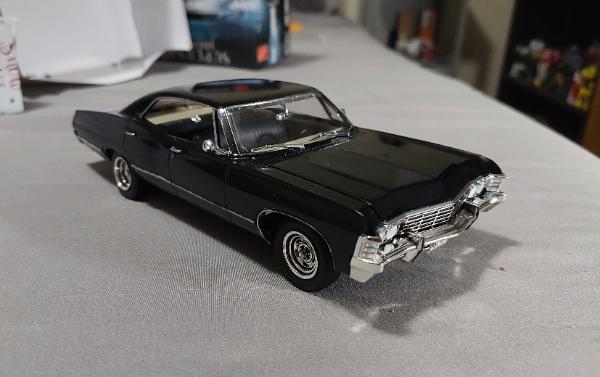
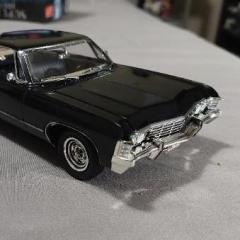 Pretty darn proud of this one. Everything that isn't the base coat is hand painted. Using the Tamiya wash had a nice effect on a certain miniature paint I used which peeled it away at edges of surfaces, and it made a beautiful chipping effect. Bob Ross couldn't be more accurate about happy accidents
-
AMT White-Freightliner to Optimus Prime
Devyn replied to Devyn's topic in WIP: Model Trucks: Big Rigs and Heavy Equipment
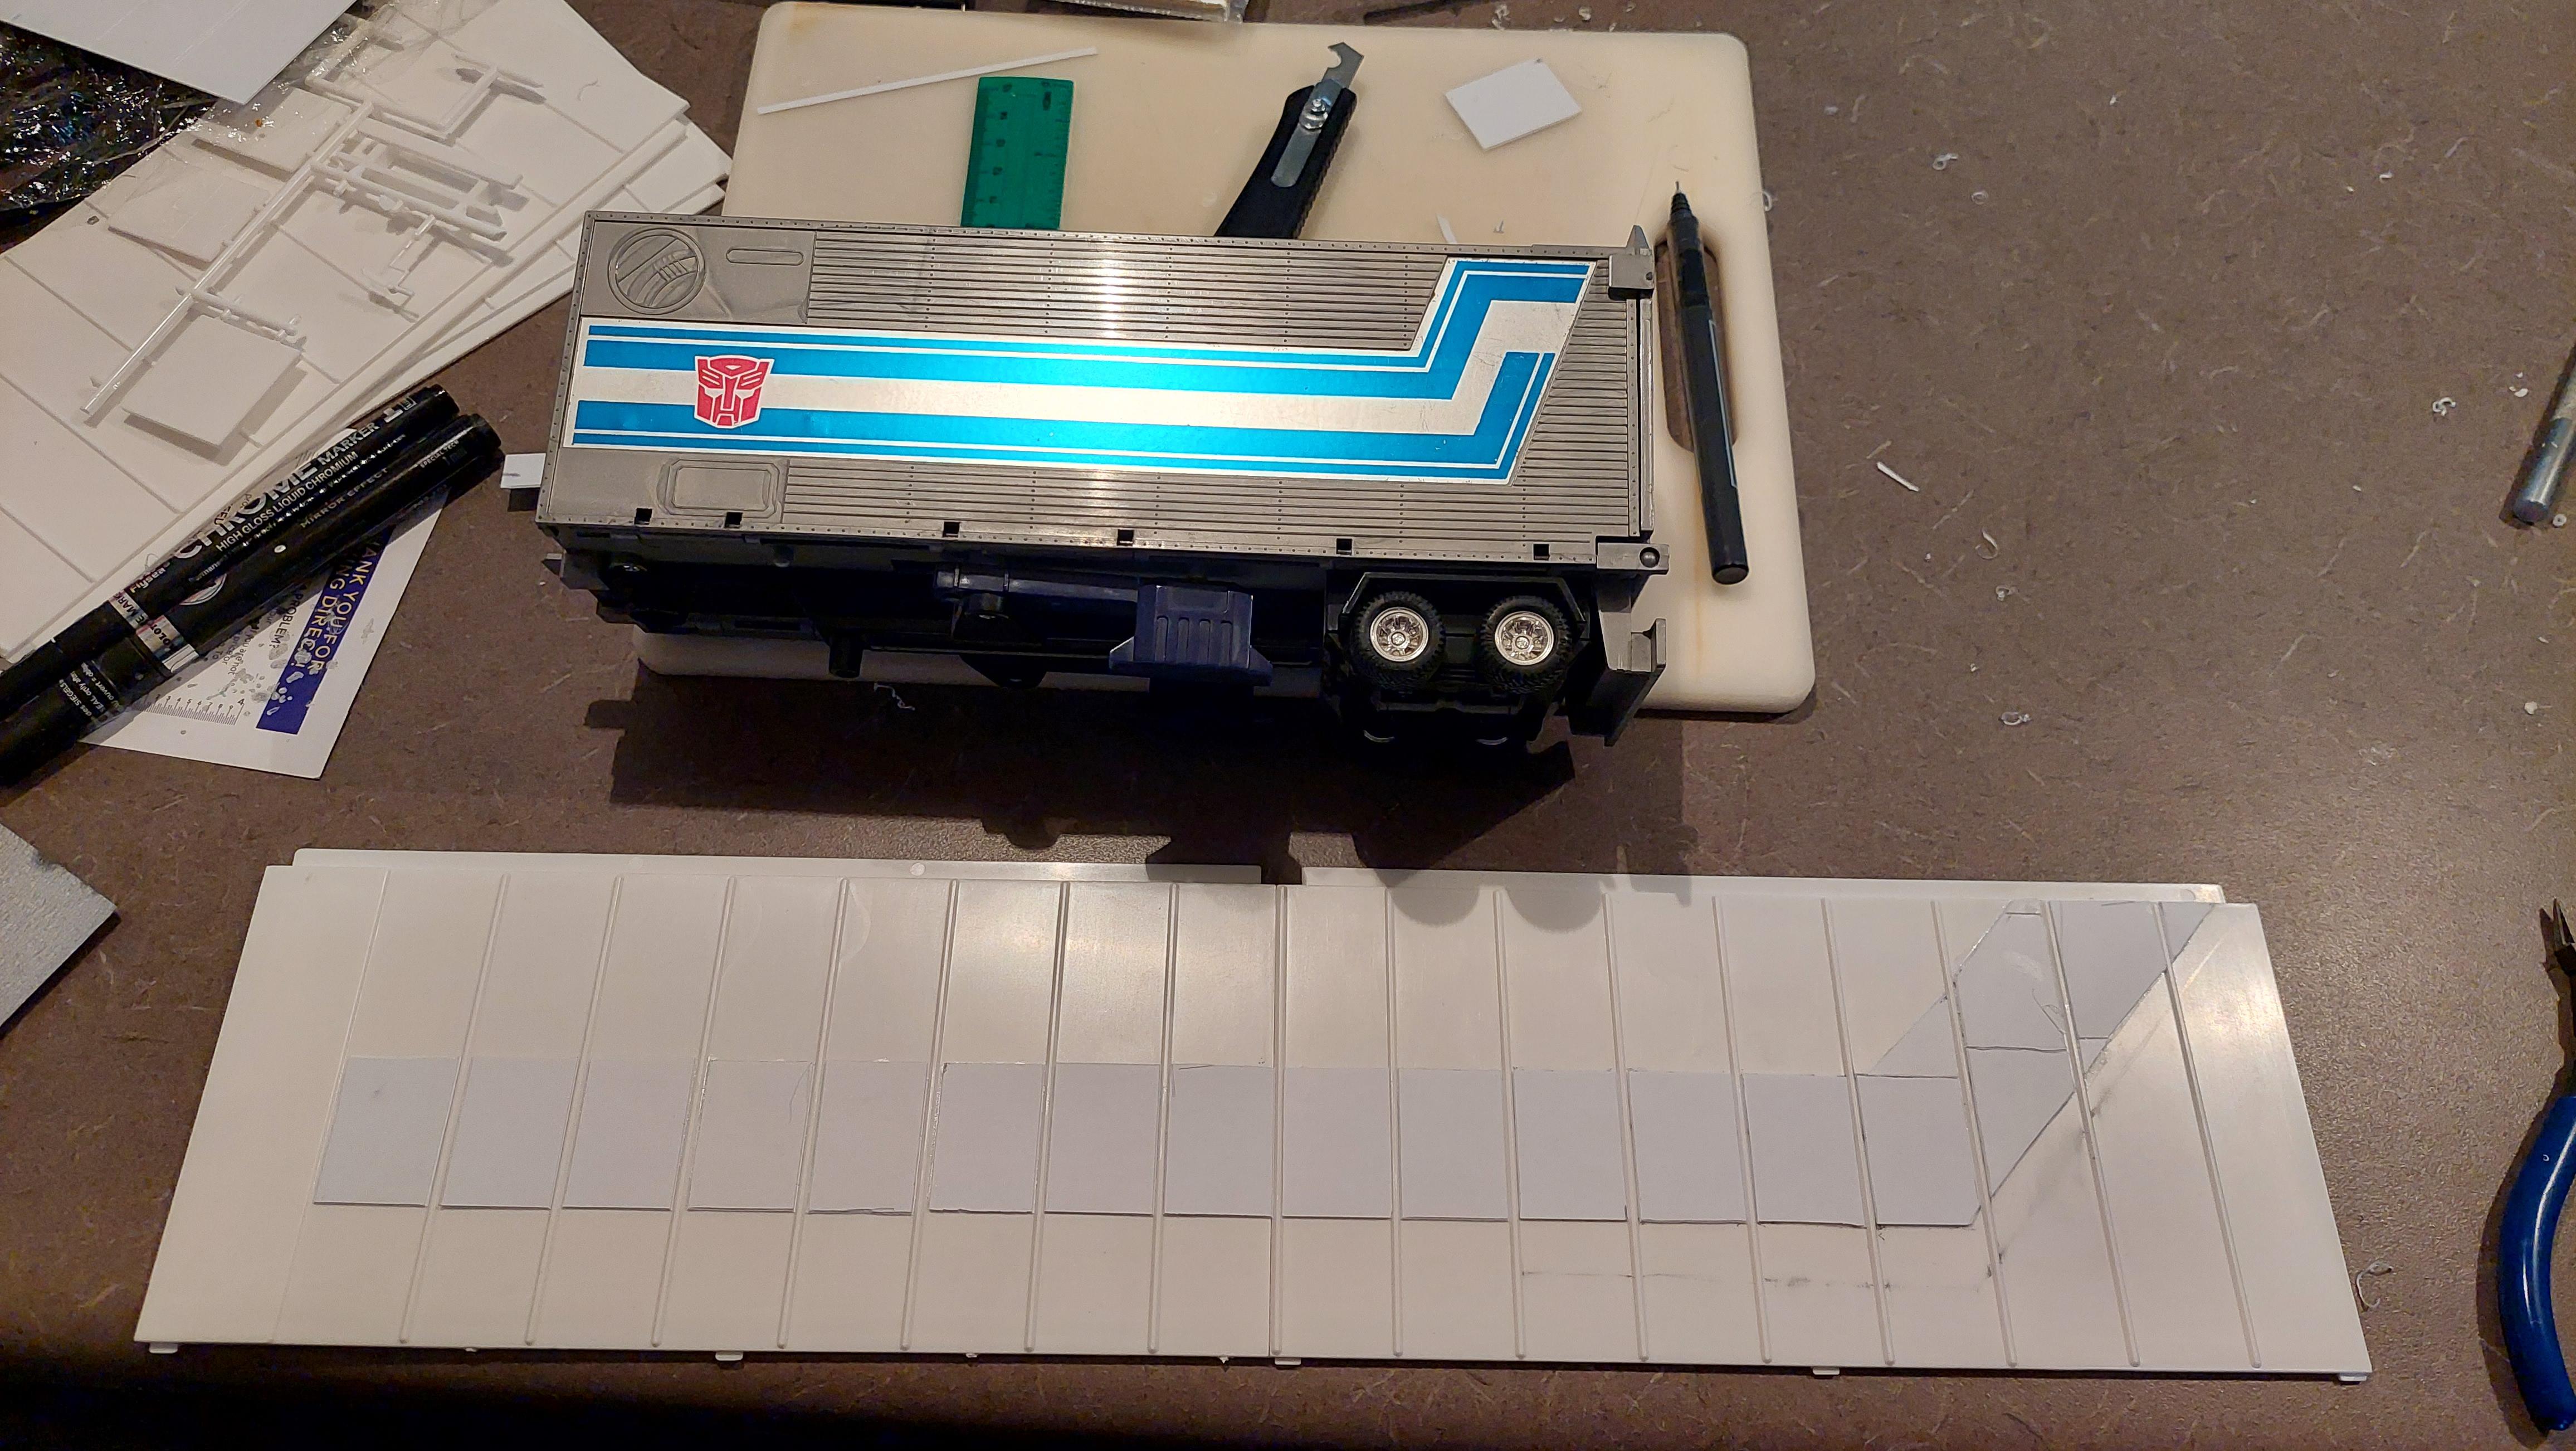
Alright, trailer is underway! I hope the plastic I've added doesn't look so wonky when painted
- 32 replies
-
- 3
-

-
- amt
- freightliner
- (and 1 more)
-
Thank you all for your help. It ended up being close enough for what I was doing and I'm super happy with the result
-
AMT White-Freightliner to Optimus Prime
Devyn replied to Devyn's topic in WIP: Model Trucks: Big Rigs and Heavy Equipment
Alright! It's basically done! Just need an autobot symbol and figuring out which stock decals I might wanna add! Now onto the trailer! Any critiques so far are very very appreciated.
- 32 replies
-
- 3
-
-
- amt
- freightliner
- (and 1 more)
-
AMT White-Freightliner to Optimus Prime
Devyn replied to Devyn's topic in WIP: Model Trucks: Big Rigs and Heavy Equipment
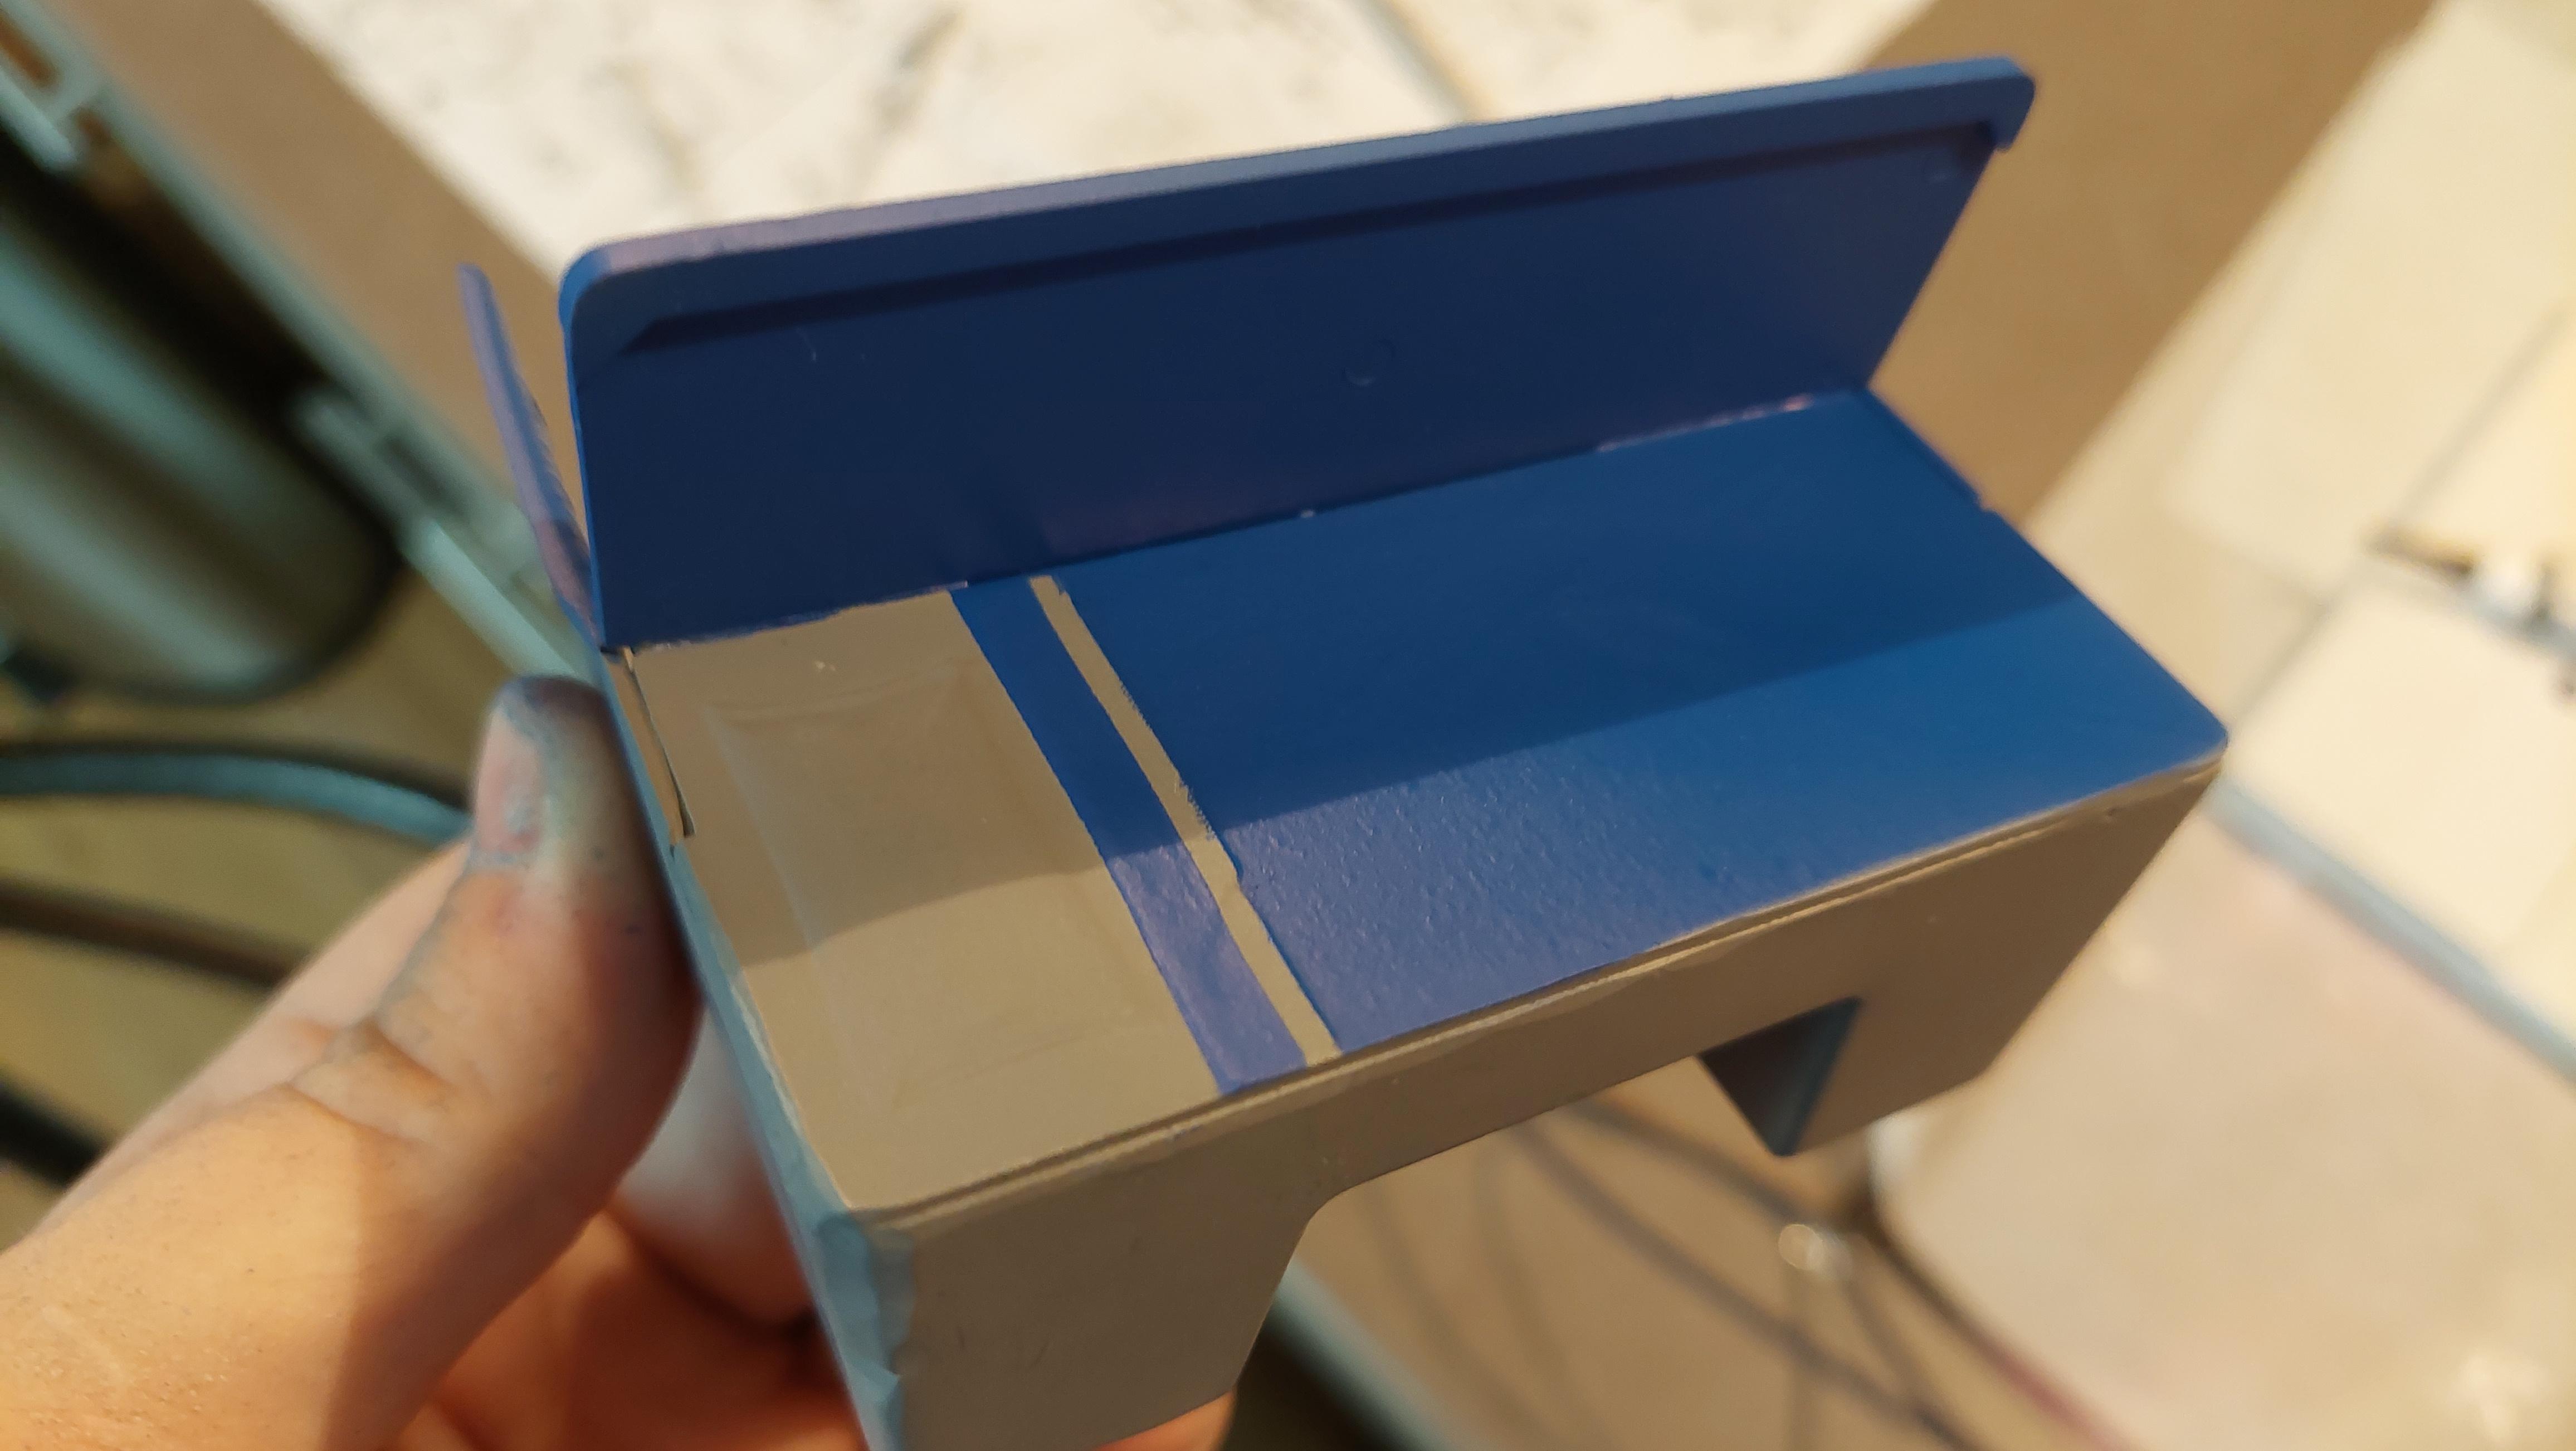
The stripe has been realized
-
Yeah I saw that thread first. It doesn't exactly help as images might be deceiving. I have no idea if it's more metallic or an entirely different shade still. But at least I know it looks good either way
-
I definitely will. This post was made before I decided to just buy it. But I figured I would ask to see if anyone has anything on hand
-
Hi, I'm not exactly asking about quality. It's more about shipping speed and my personal patience lol. I used Model Air on the entirety of my kit, but in the process of loading up my airbrush, I spilled the remaining that I had. Now I'm working on the final section of the kit which I want to mask off and spray a silver stripe across the body. But I don't have the exact same aluminum as I used before. I'm just curious how different they might be and if it would be too obvious. If they're similar, I'll use the Metal Color that's arriving today. If they're way too different, I'll wait for the Model Air arriving in 2 weeks
-
AMT White-Freightliner to Optimus Prime
Devyn replied to Devyn's topic in WIP: Model Trucks: Big Rigs and Heavy Equipment
For this specific model kit, I used G scale AR88082- 32 replies
-
- 2
-
-
- amt
- freightliner
- (and 1 more)
-
Anyone have a comparison of these 2 paints? I wanna see how different they might be. Thank you!
-
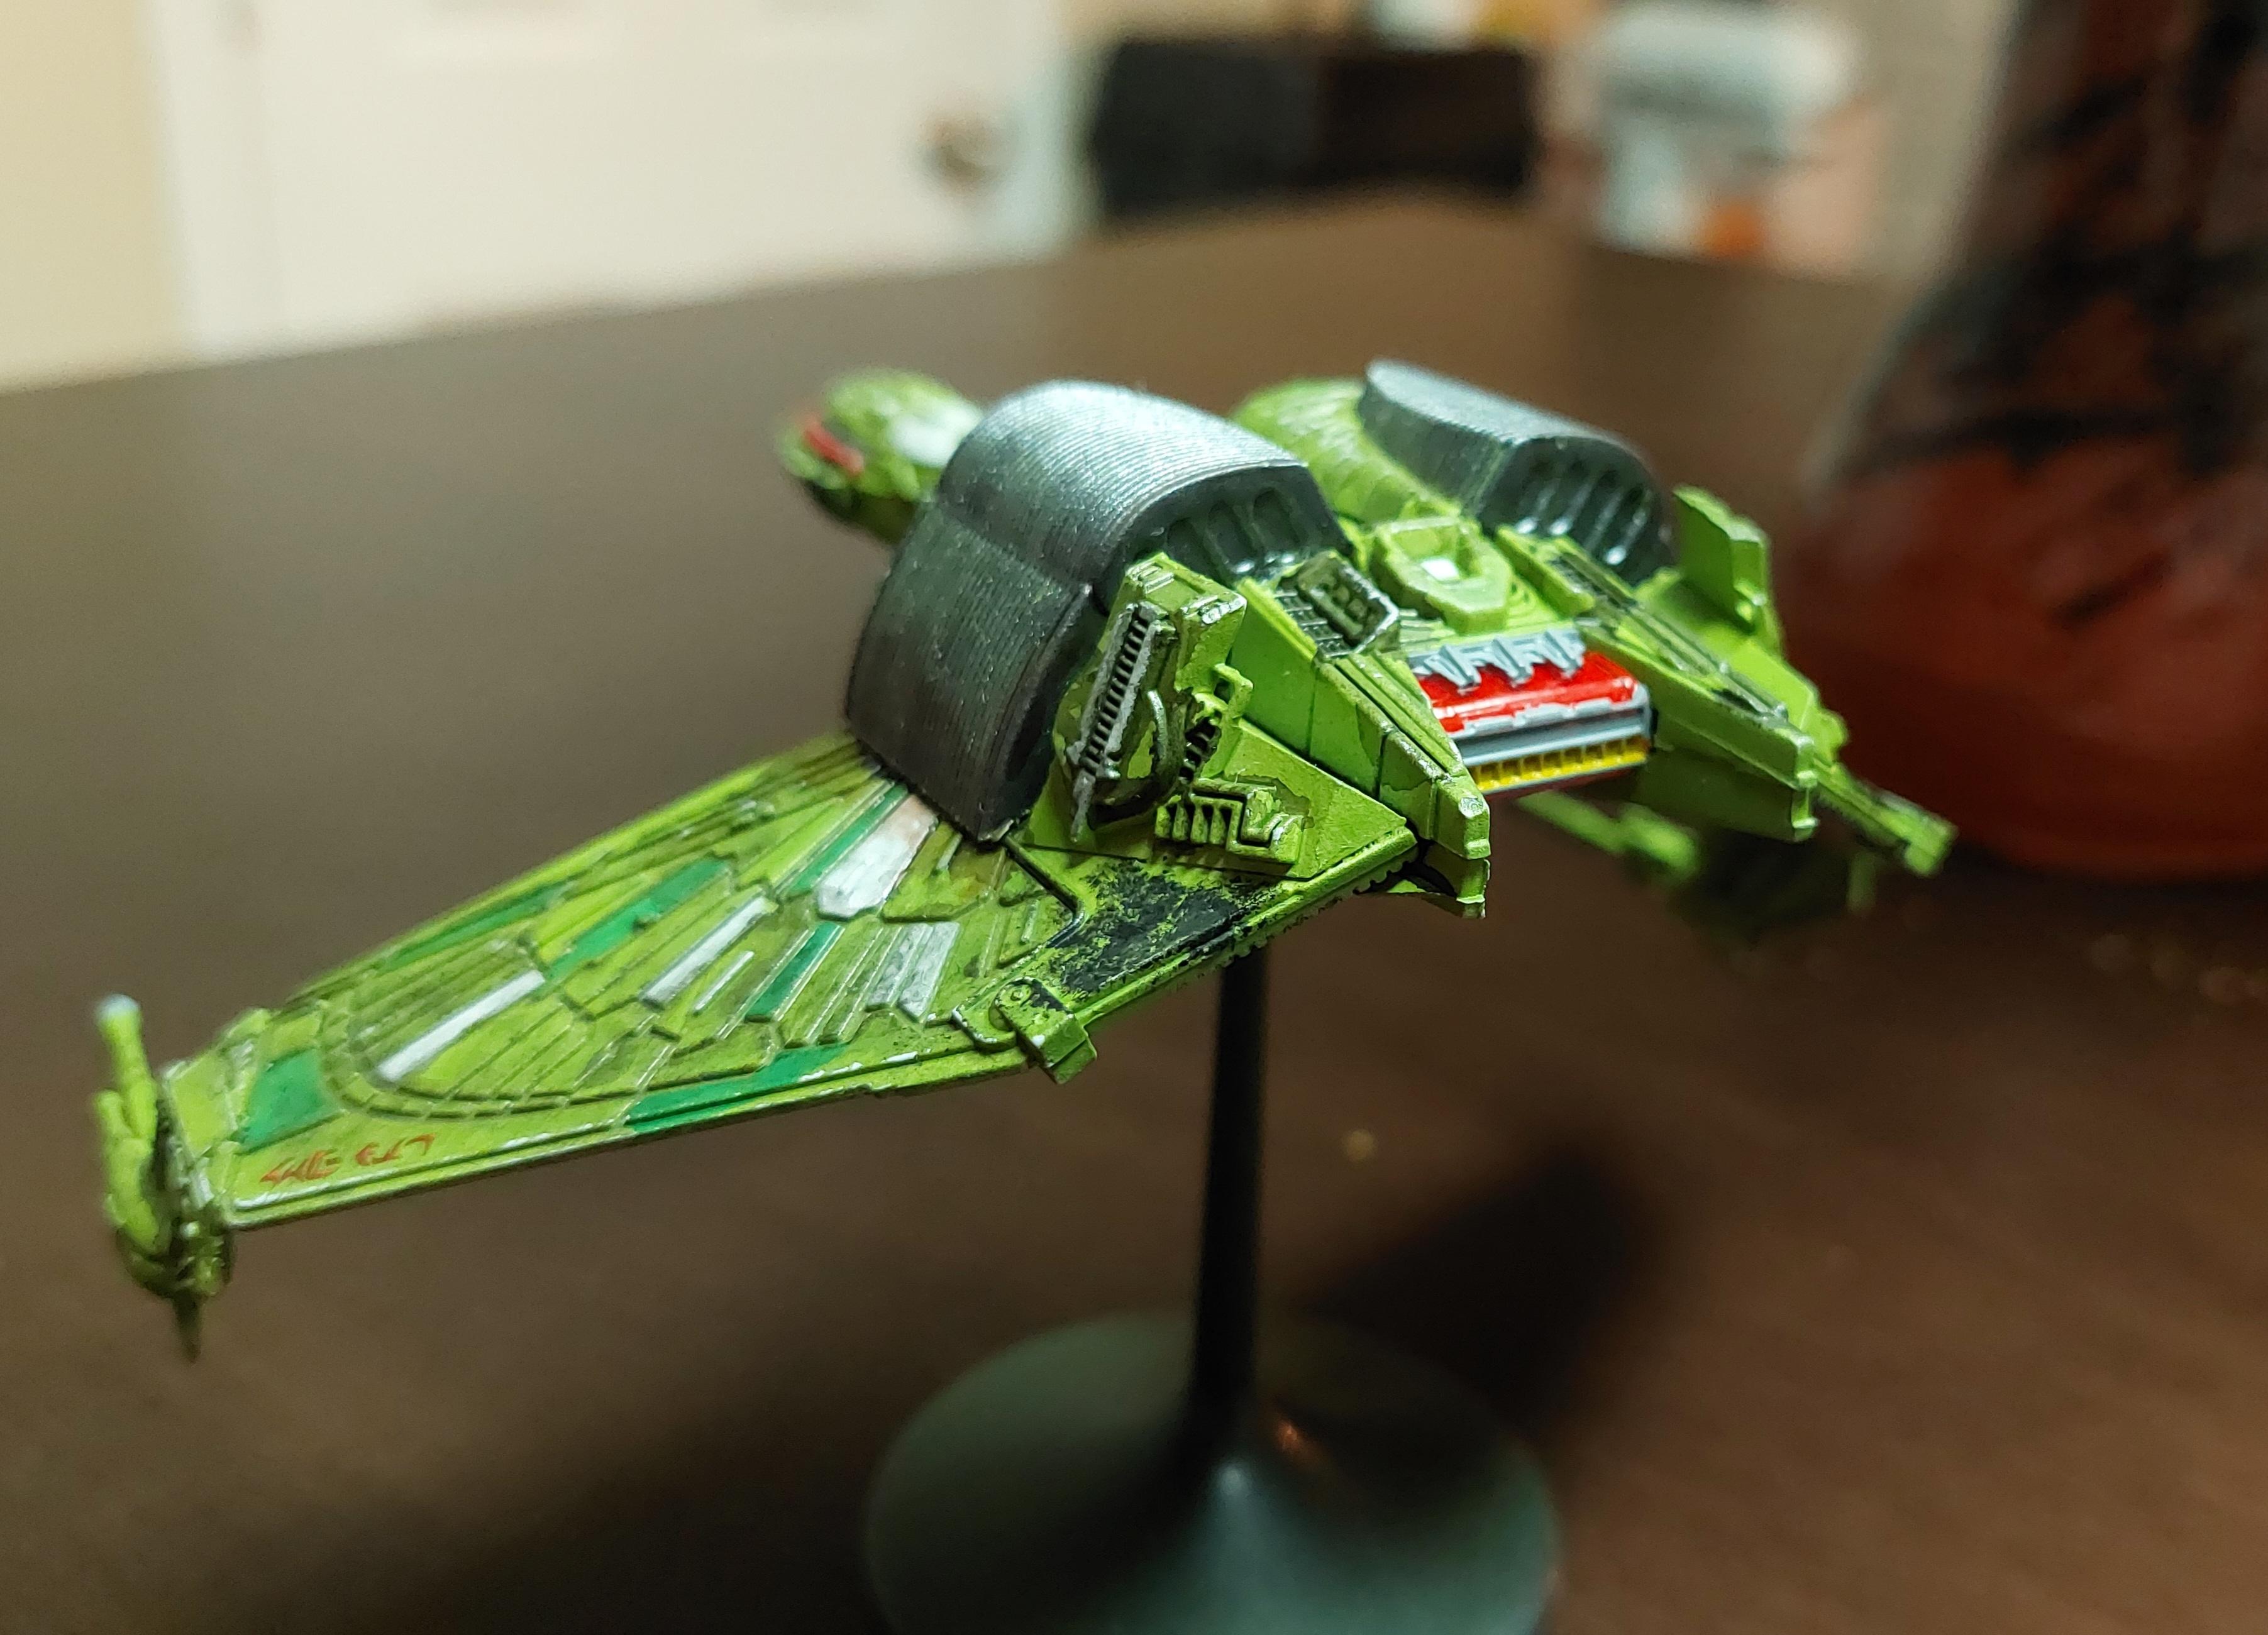
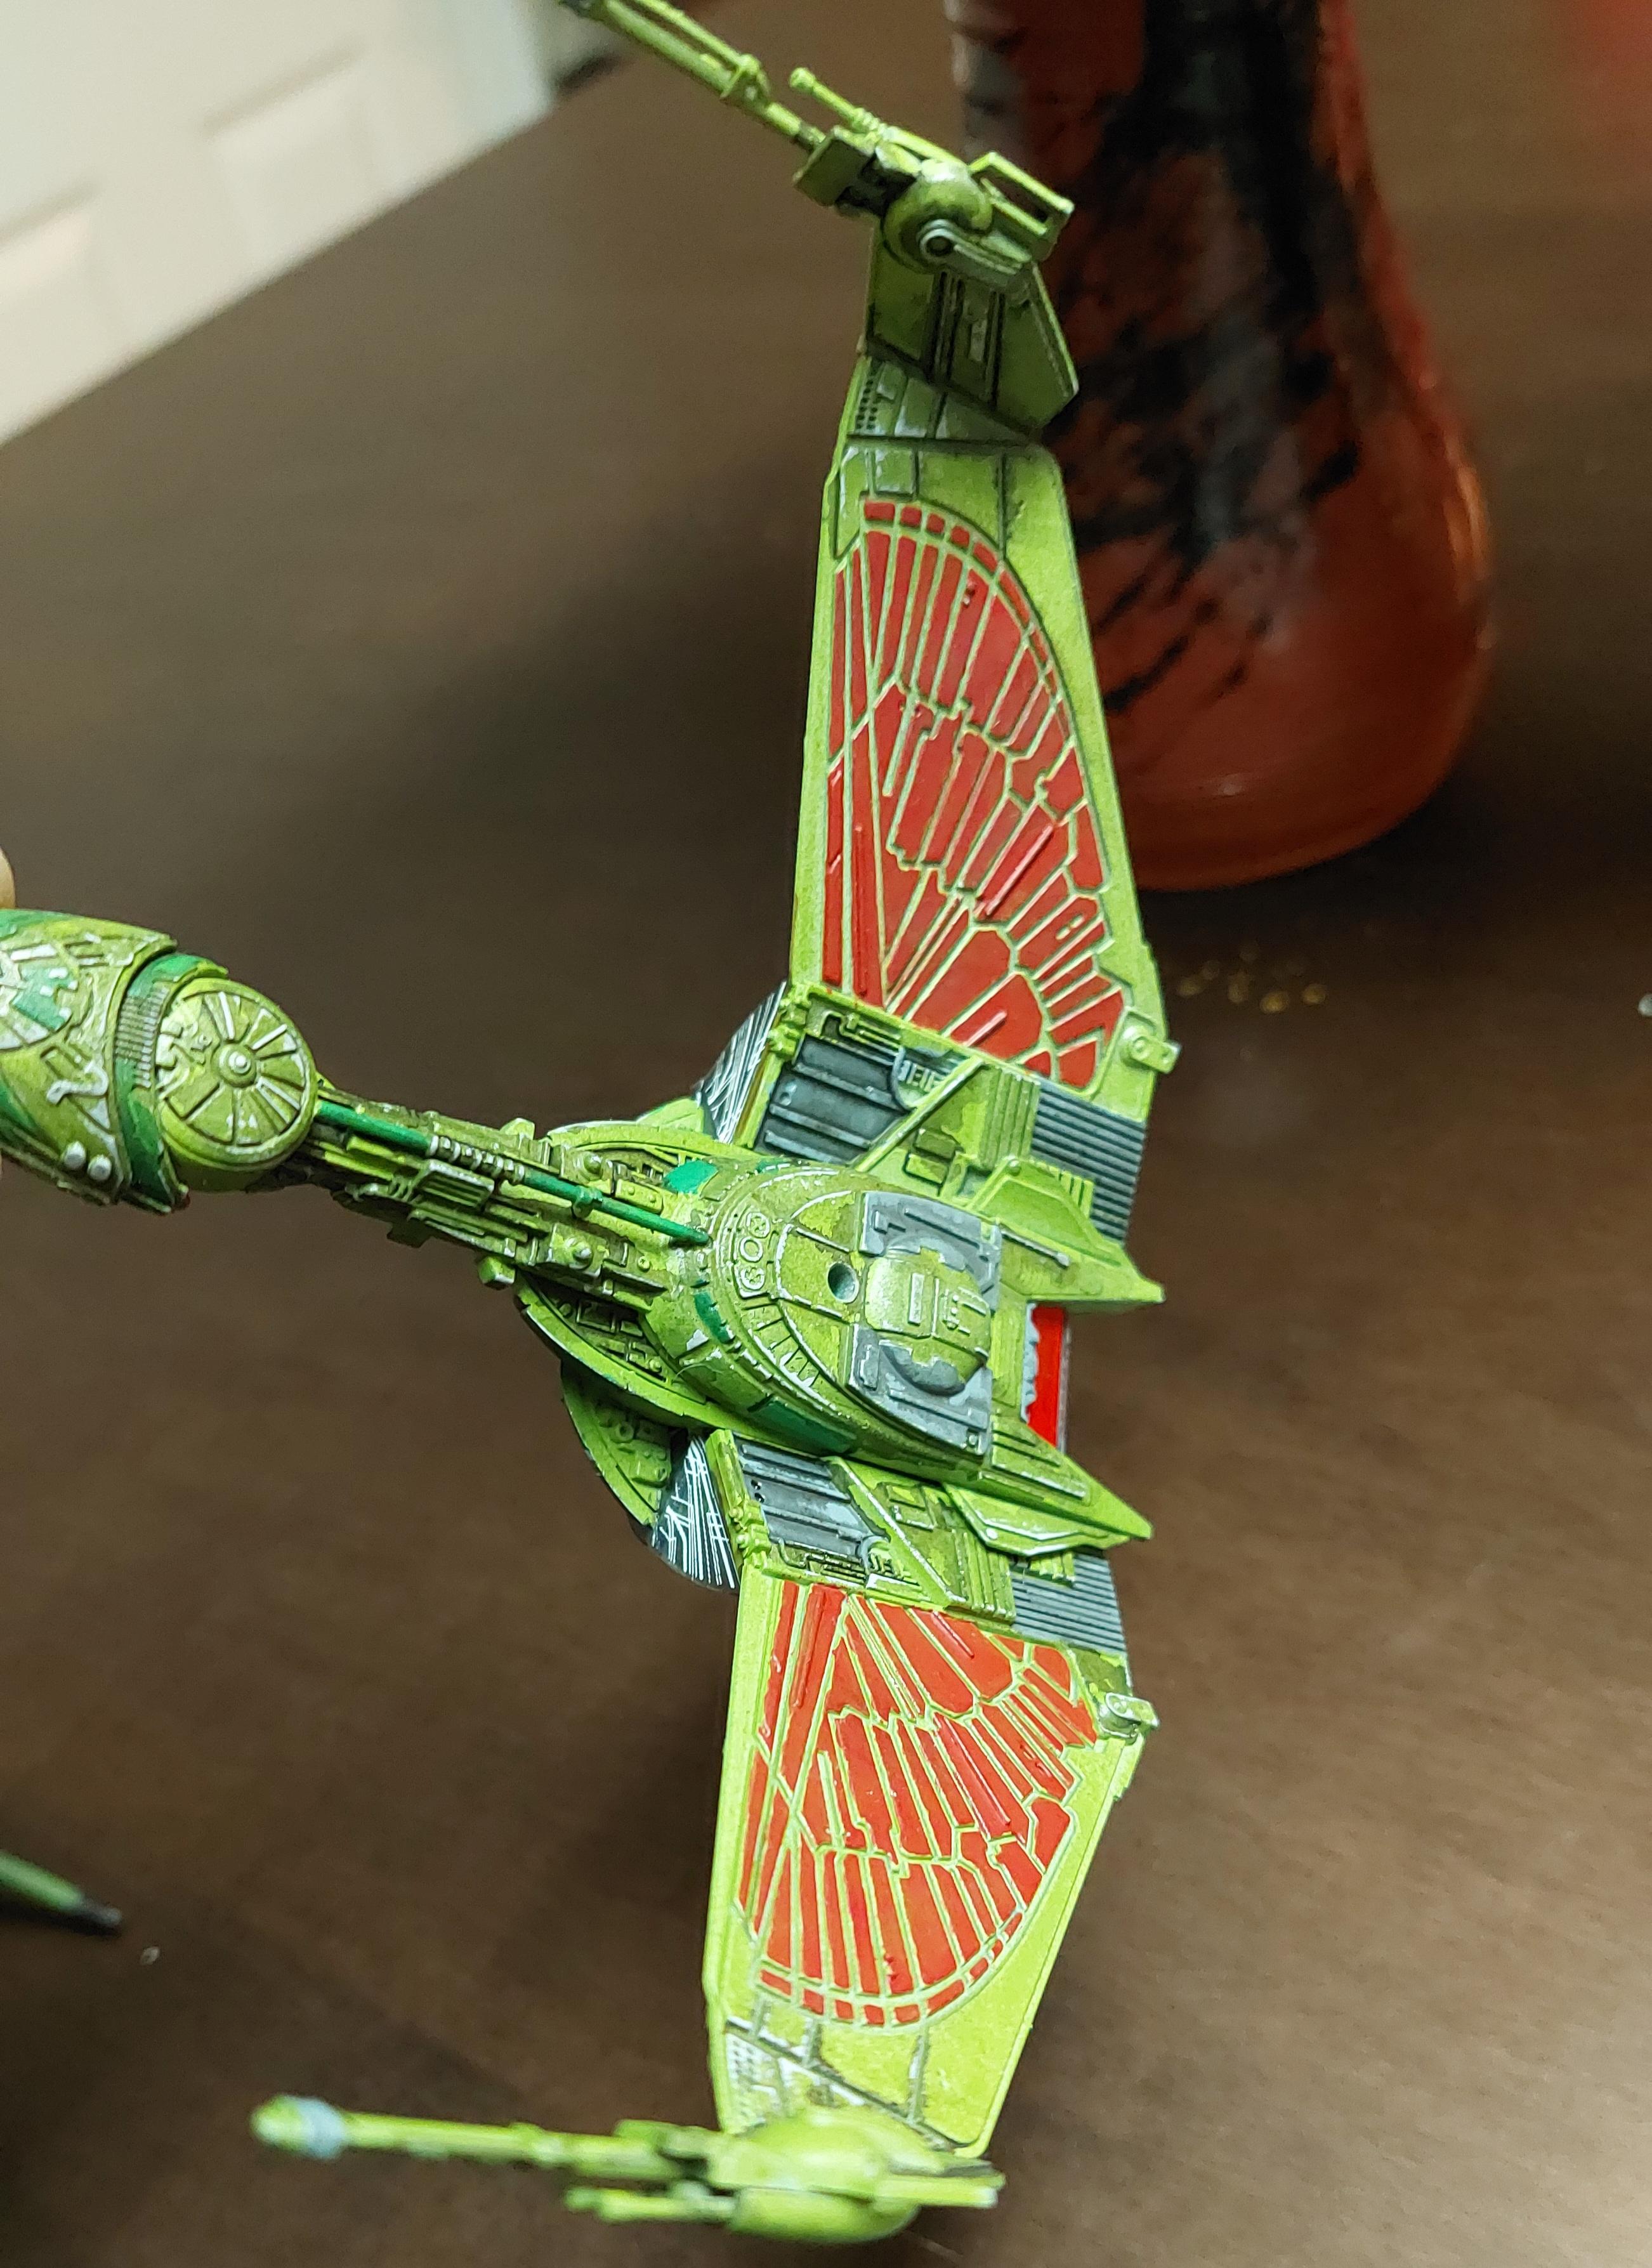
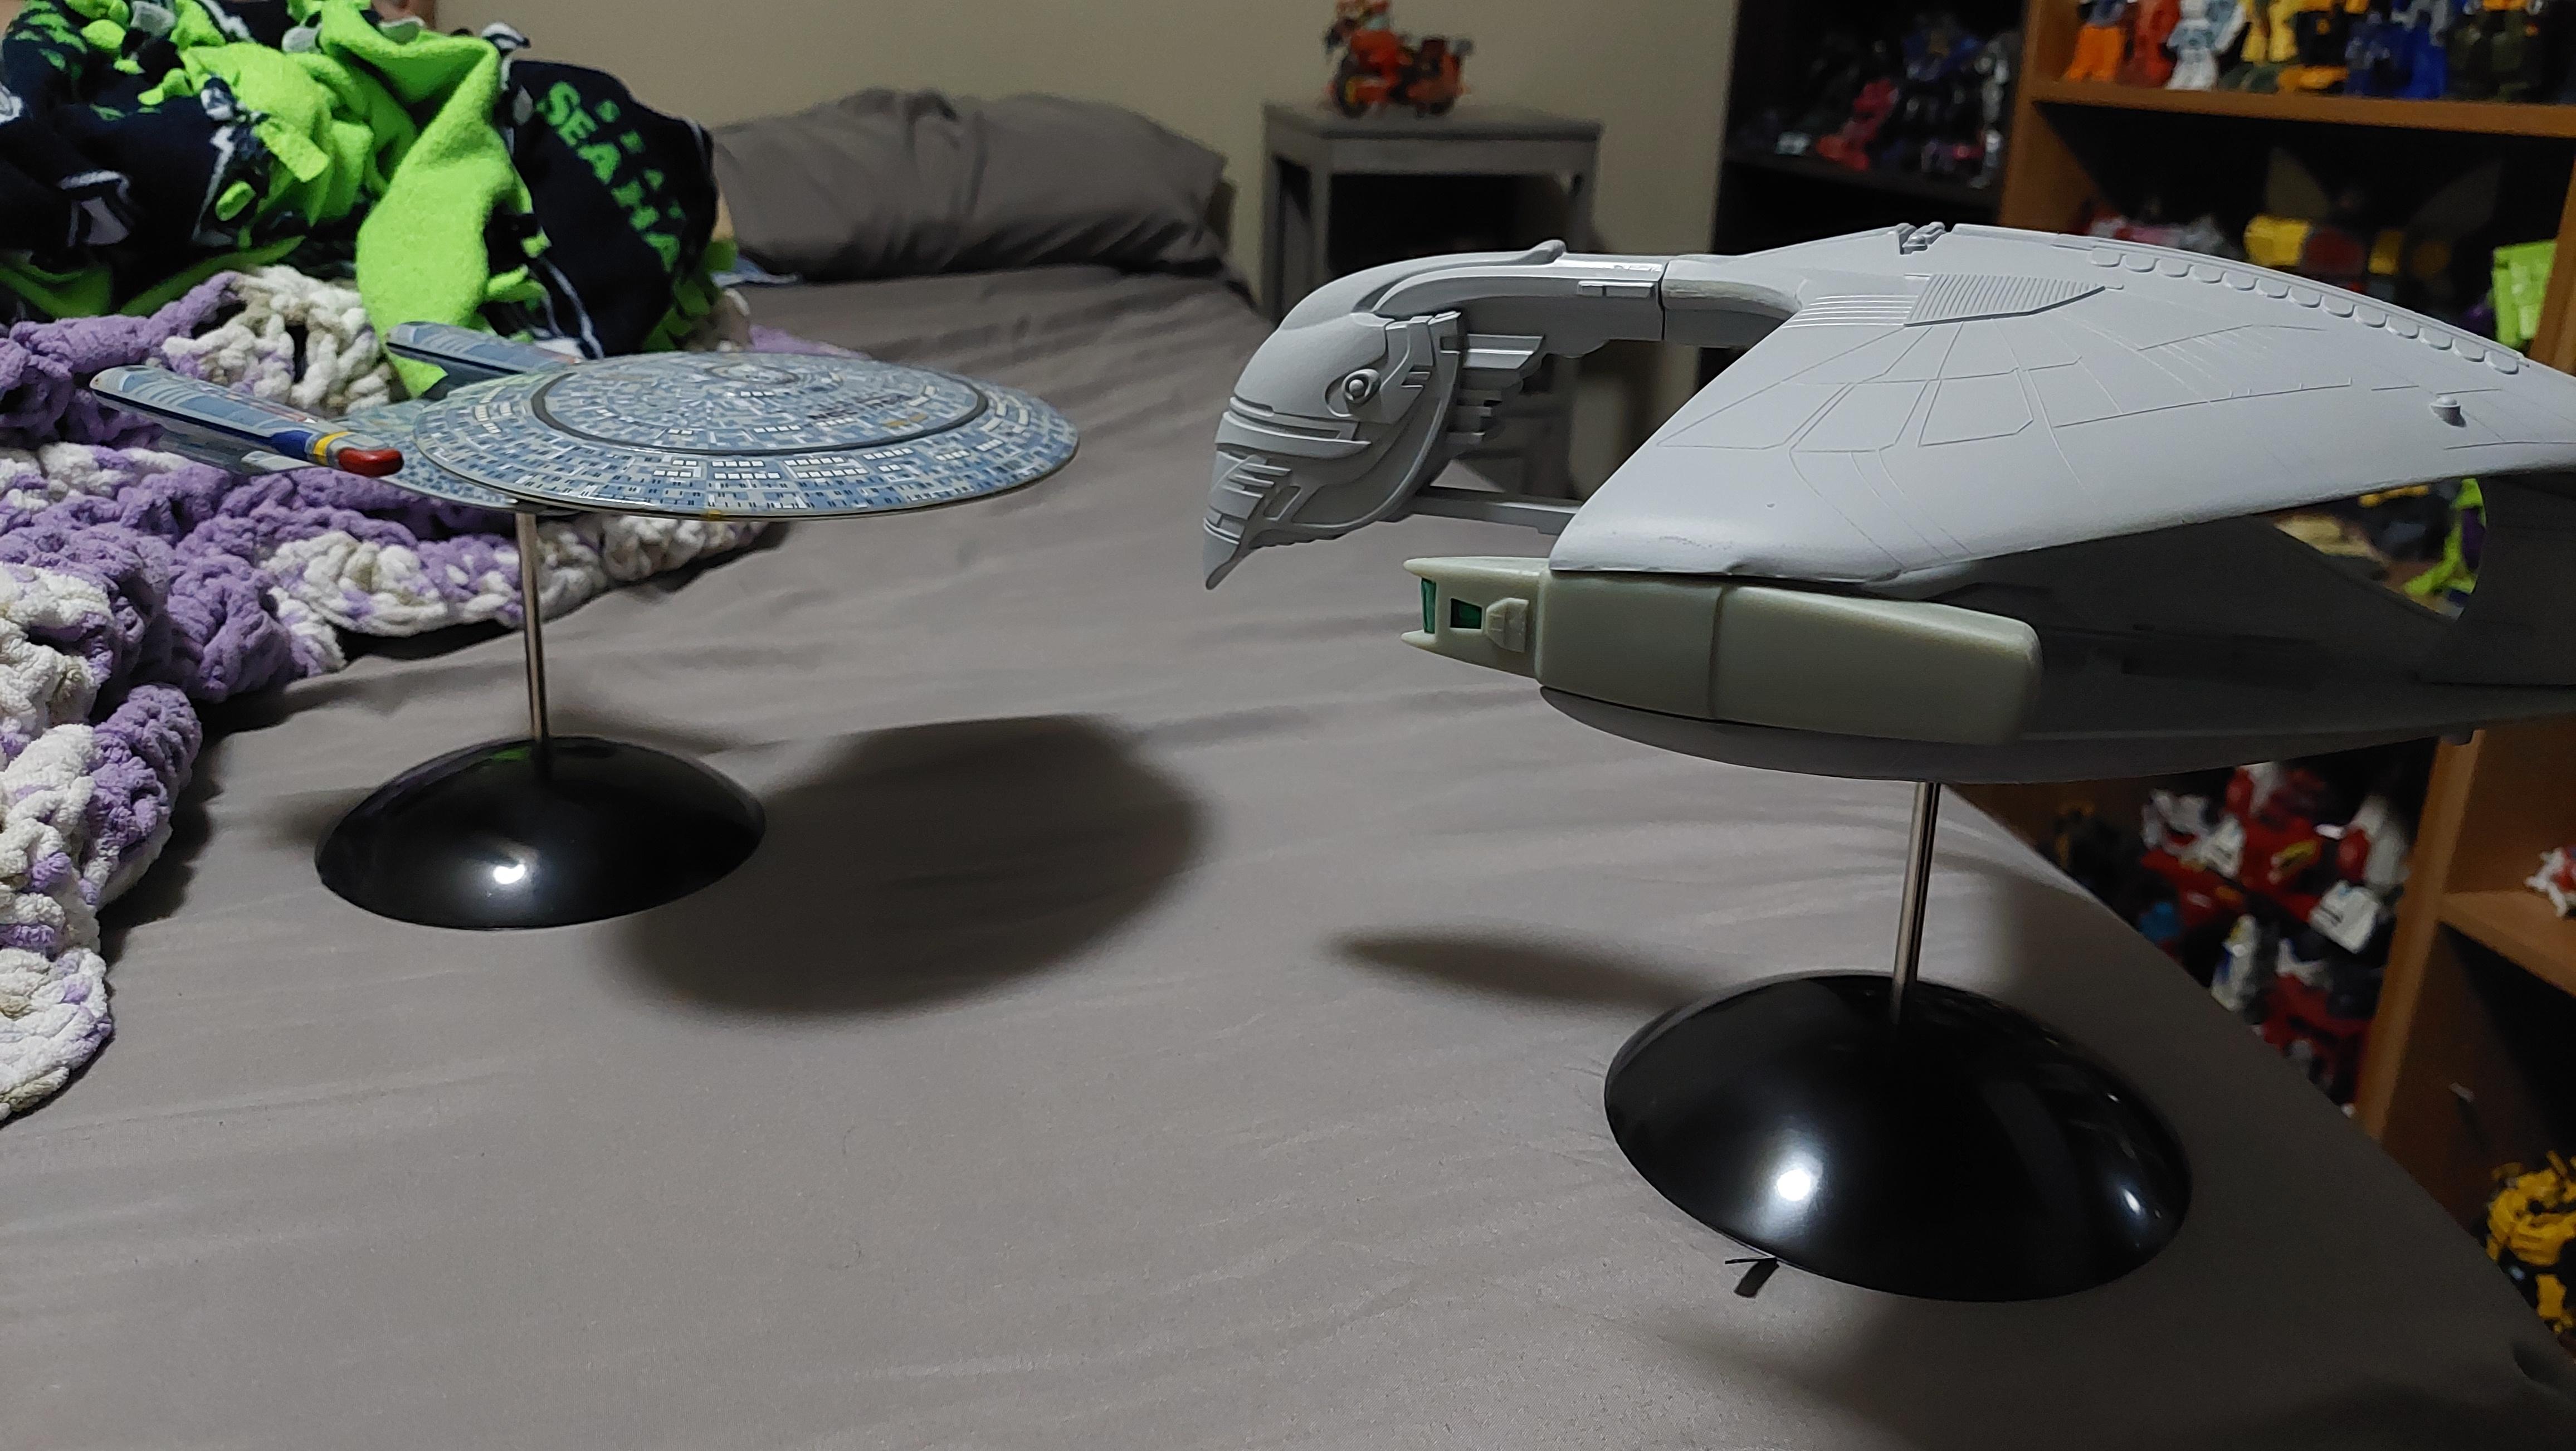
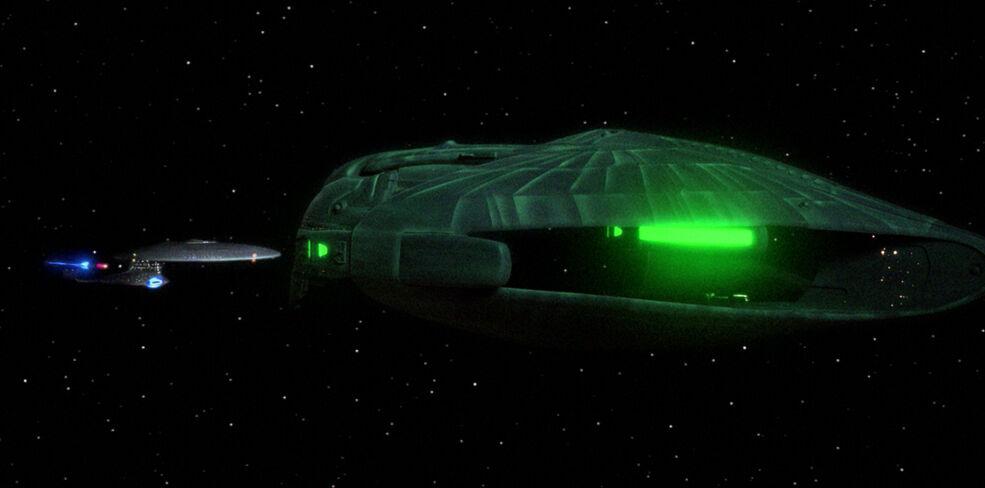
The finished product! More pictures are in my Under Glass post
-
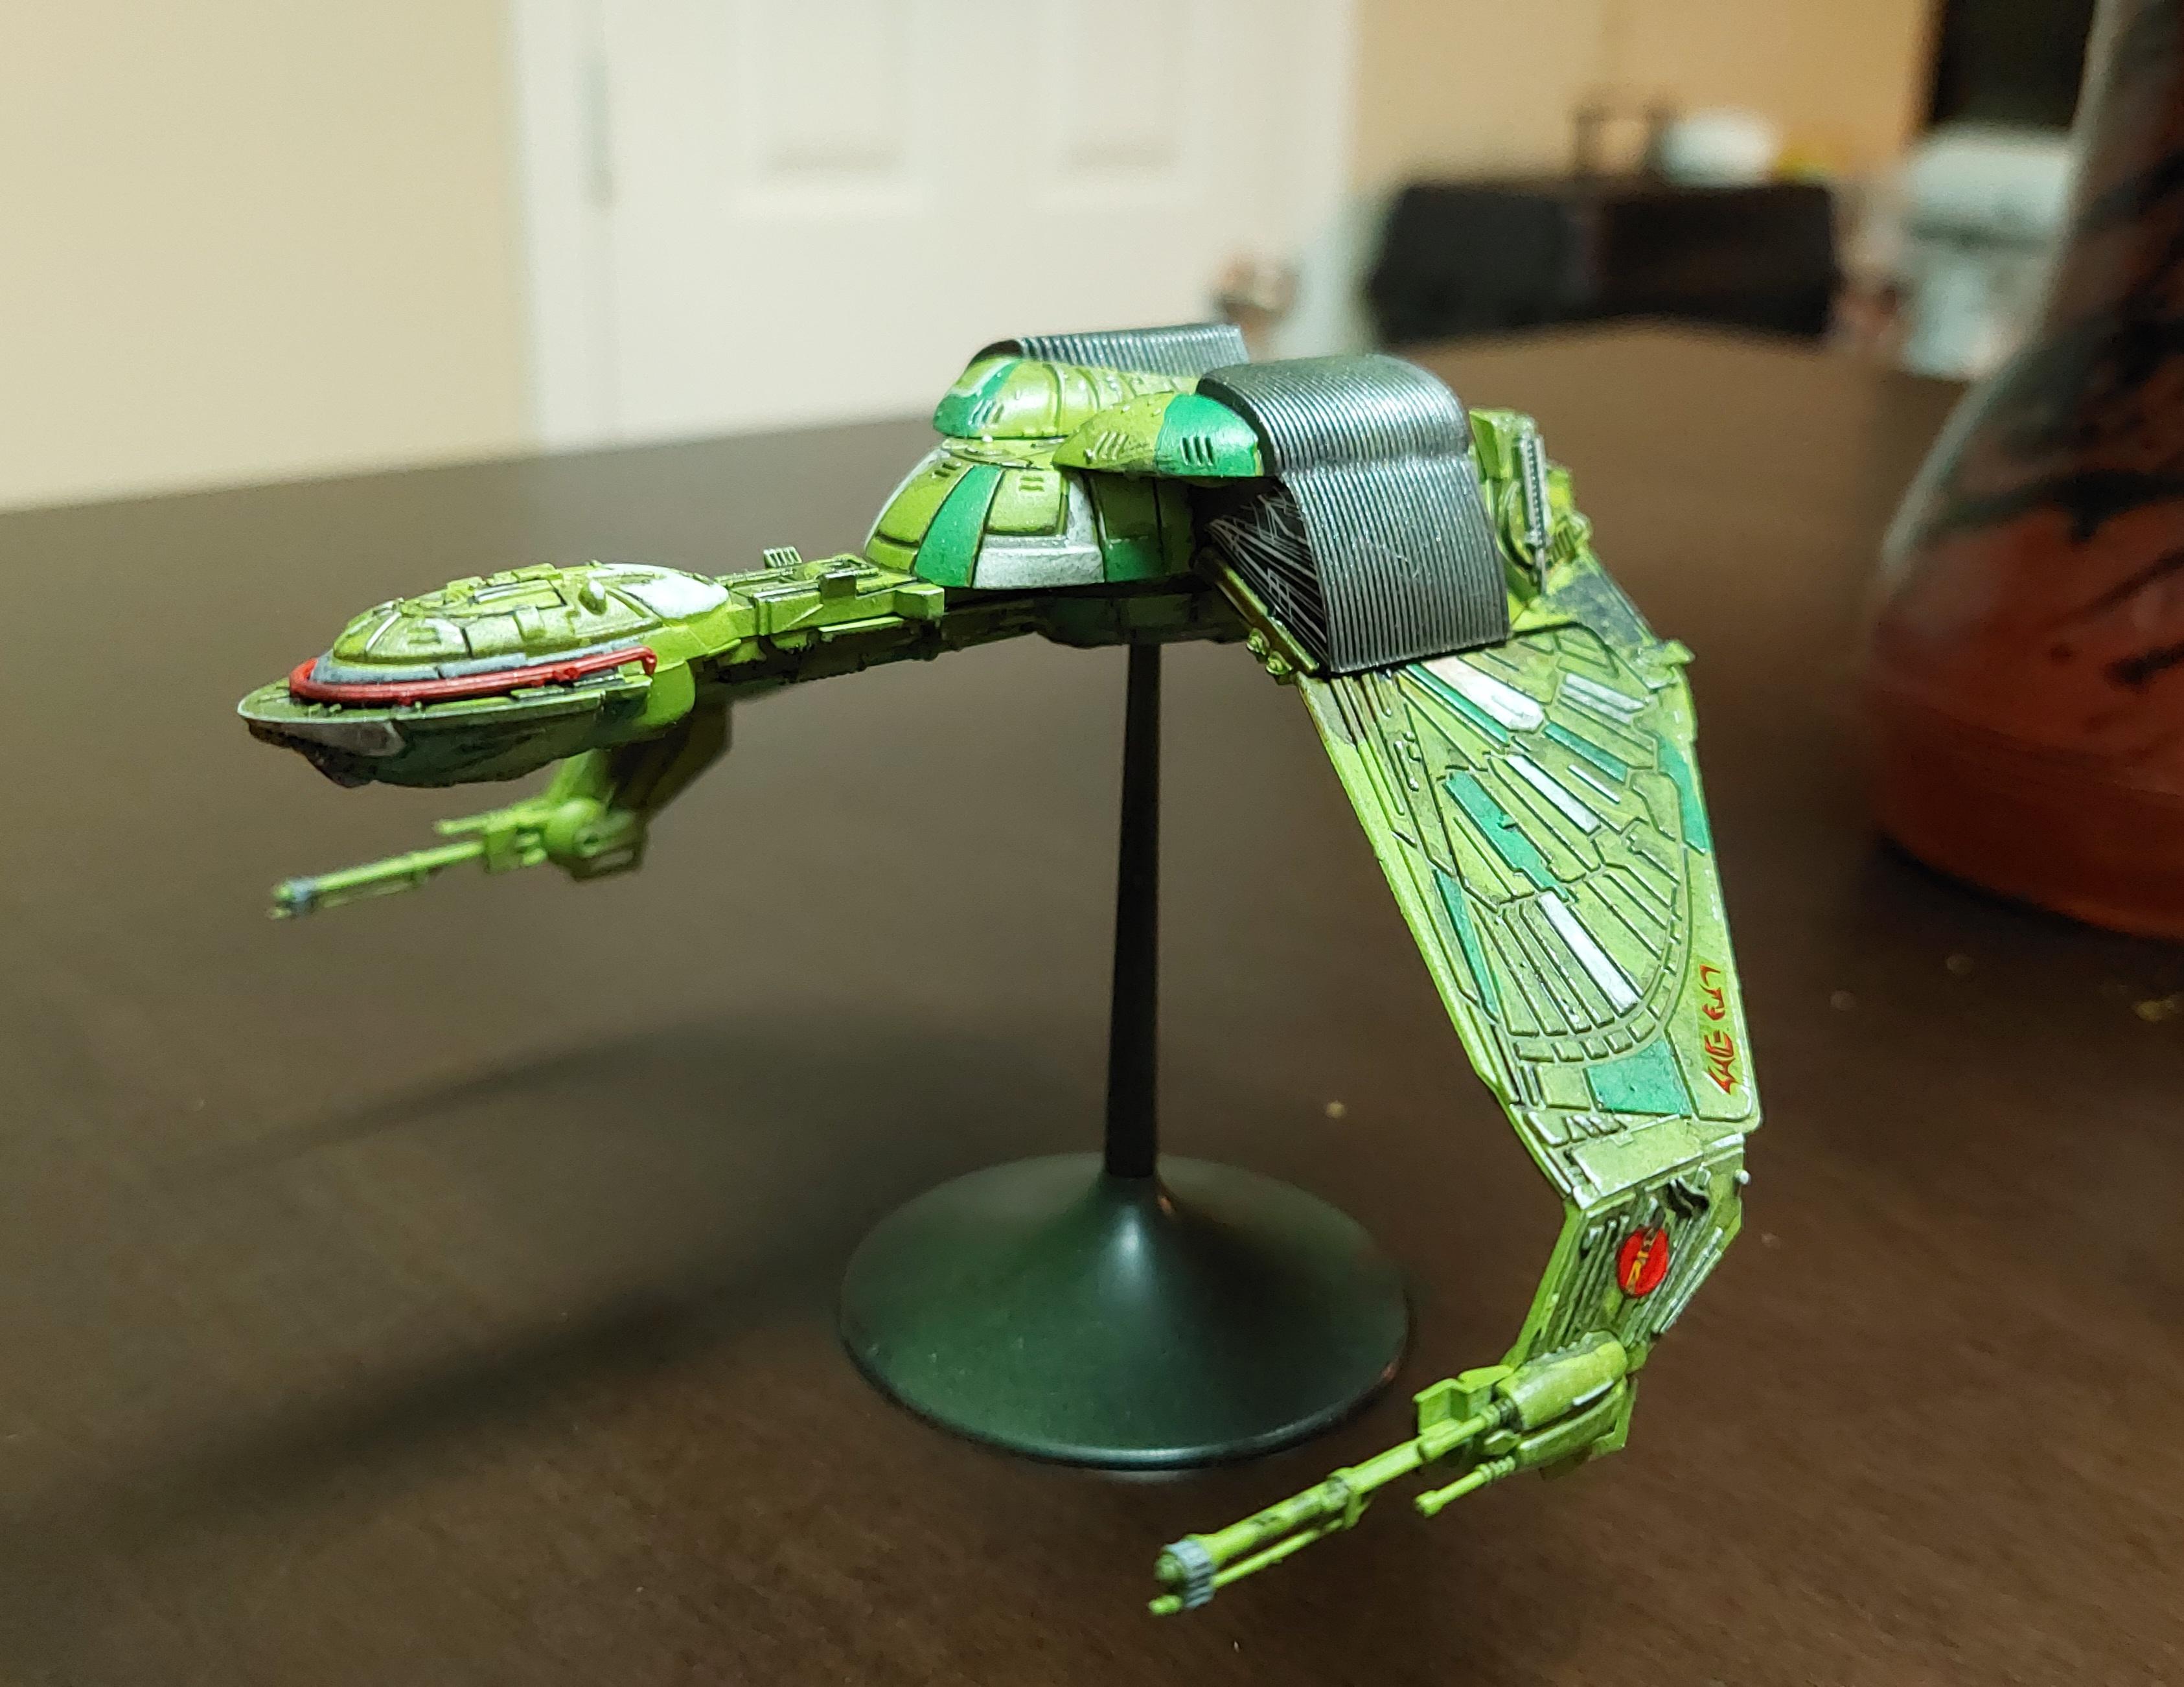
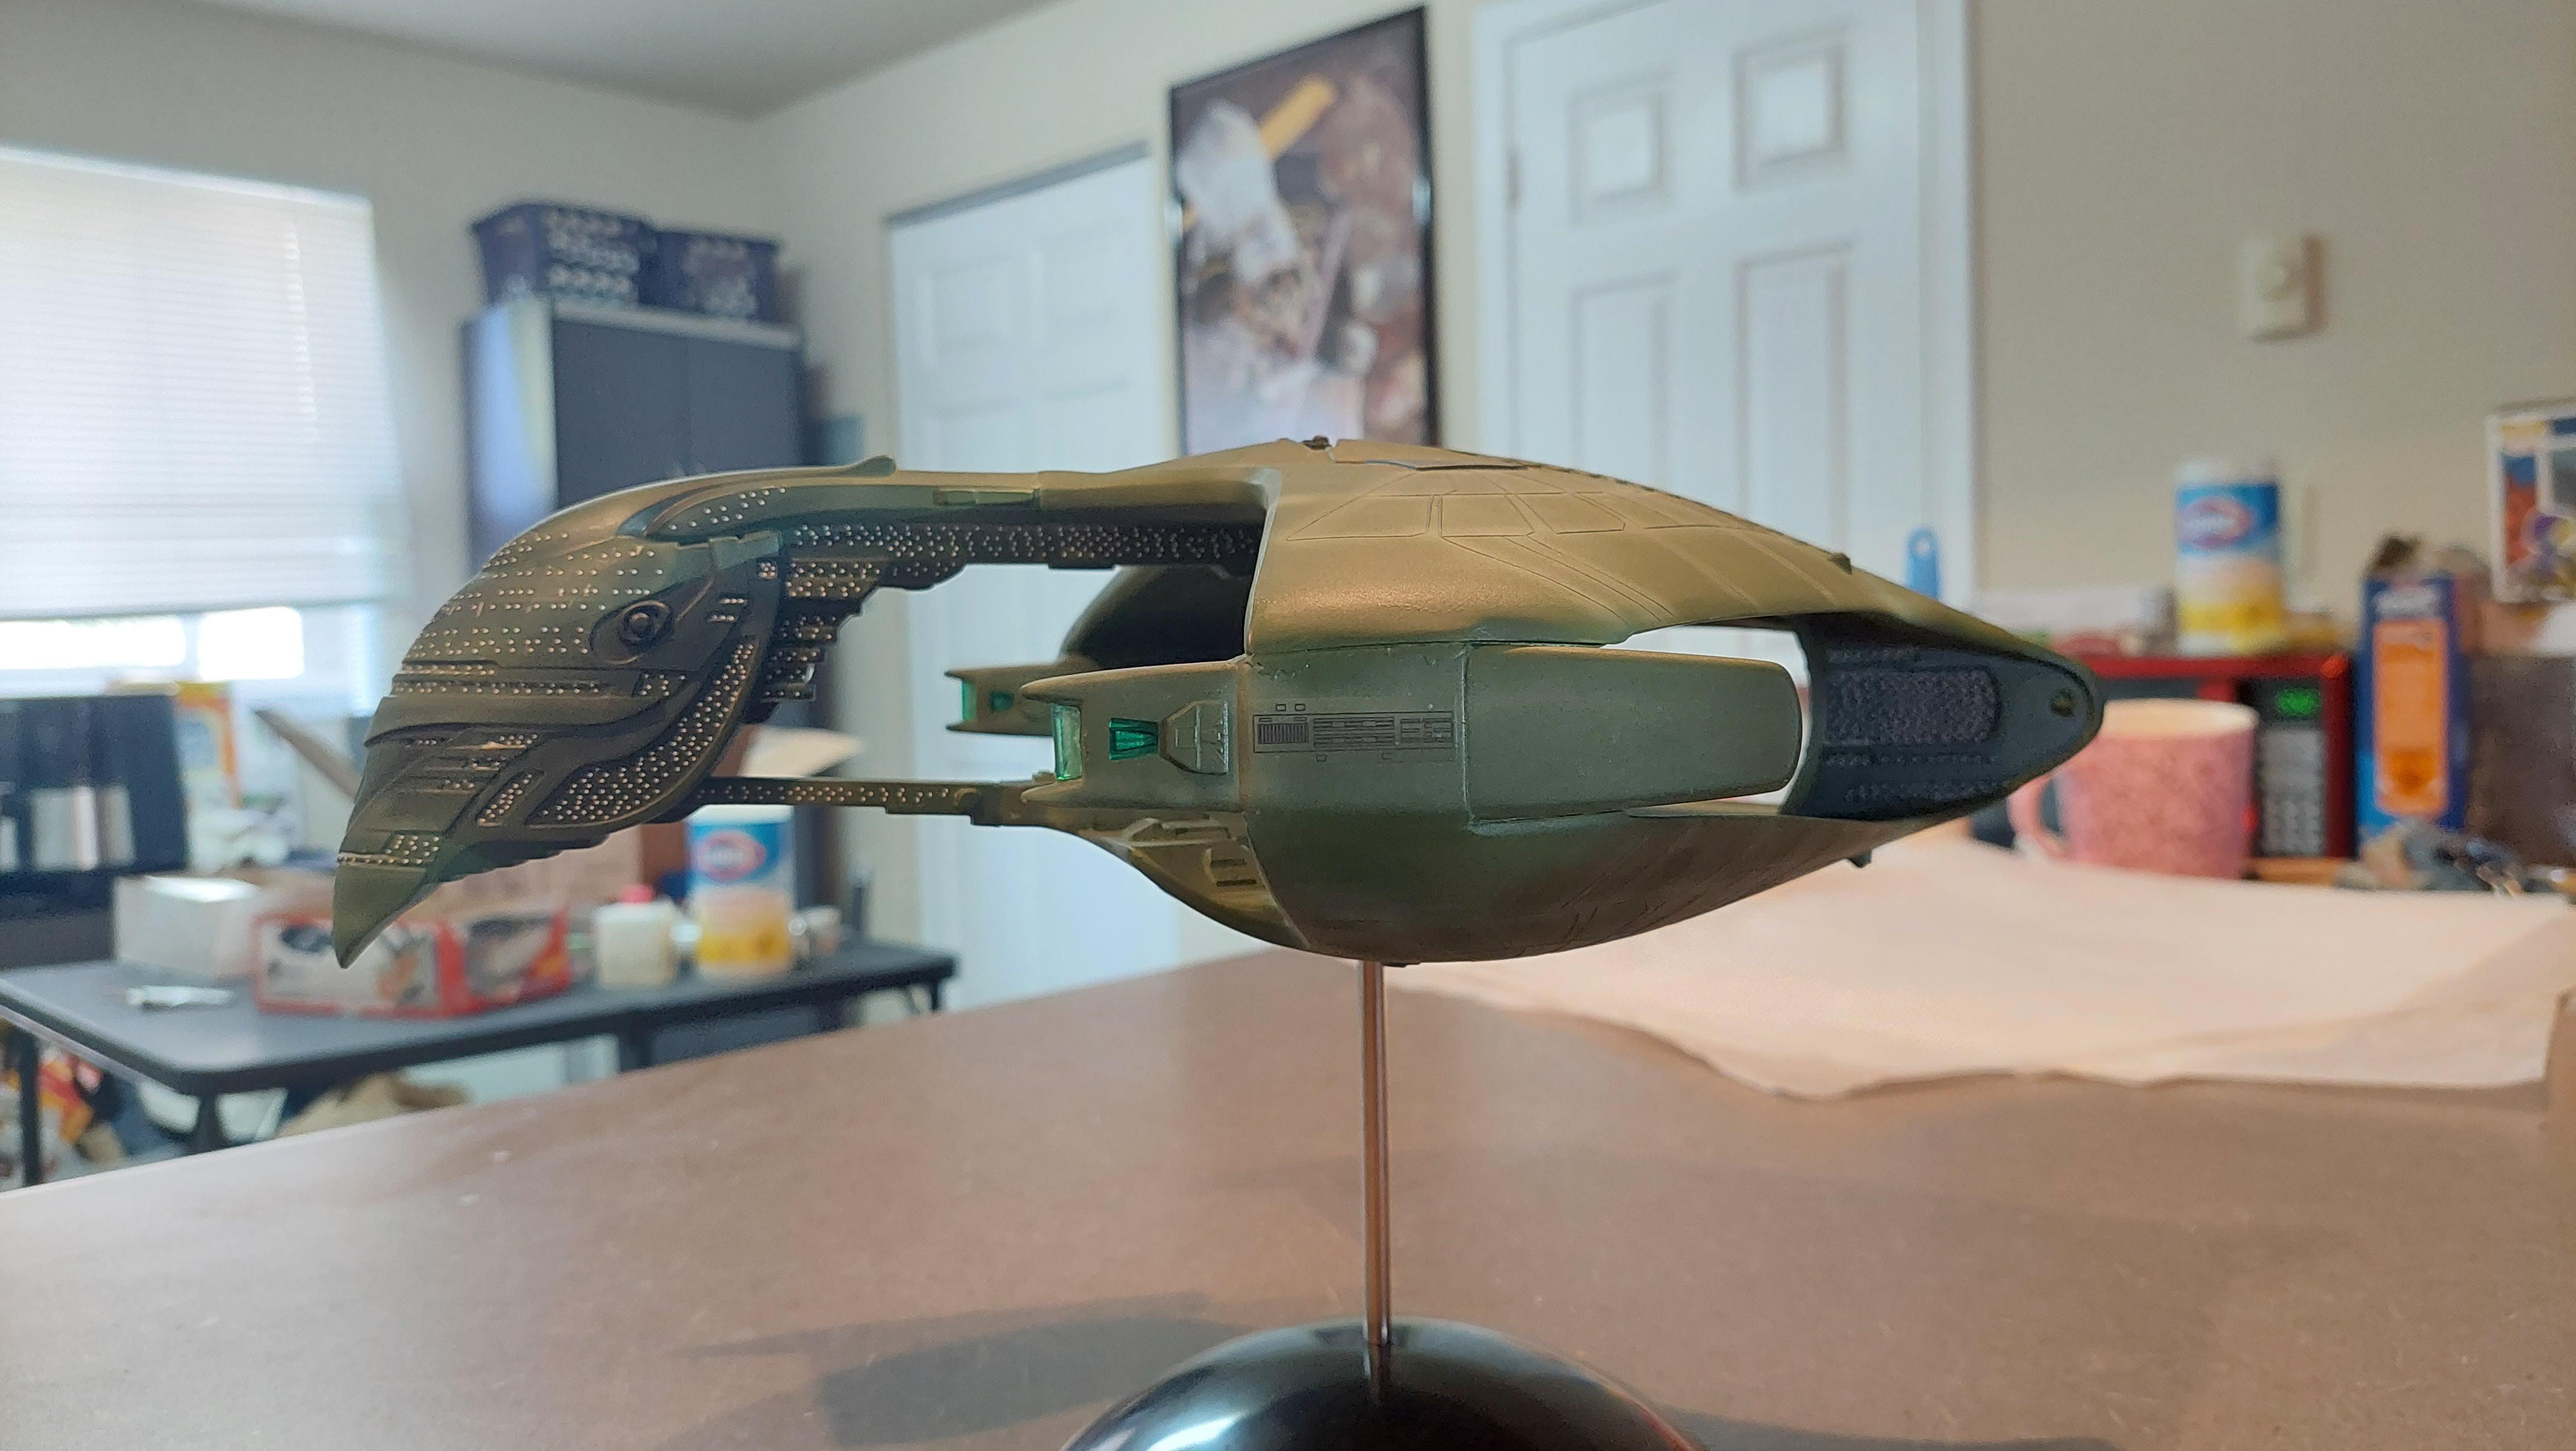
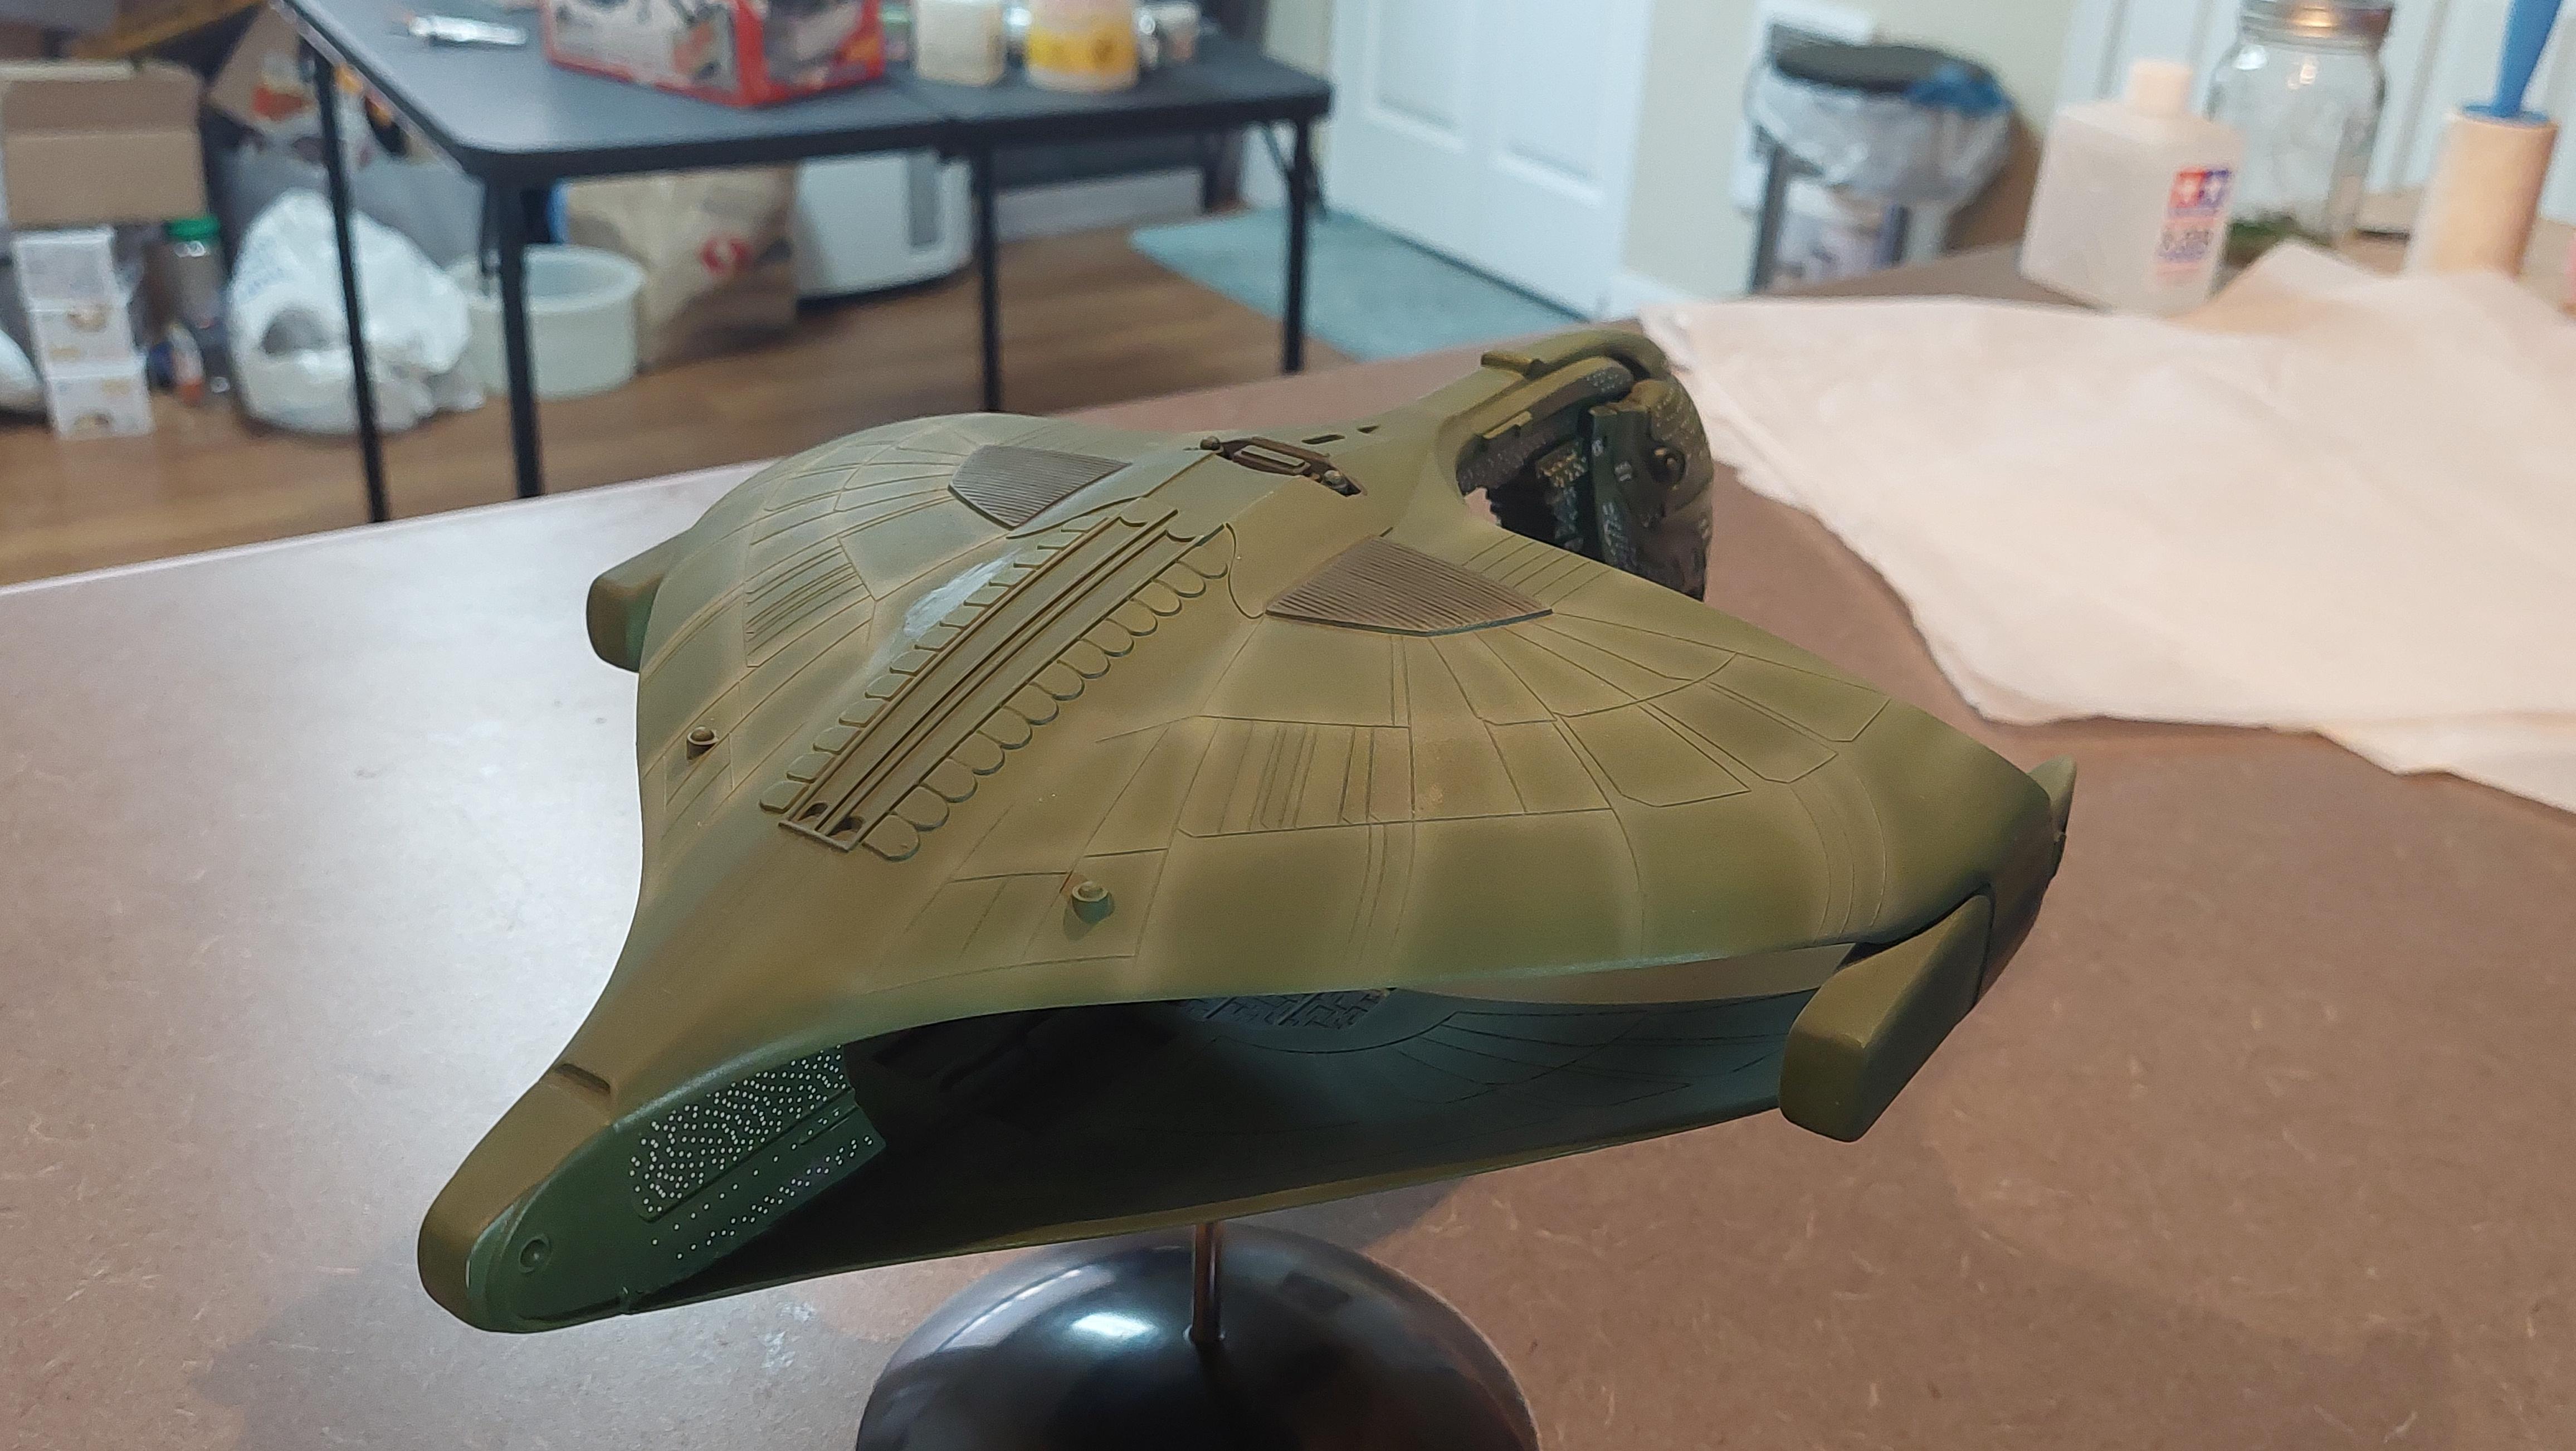
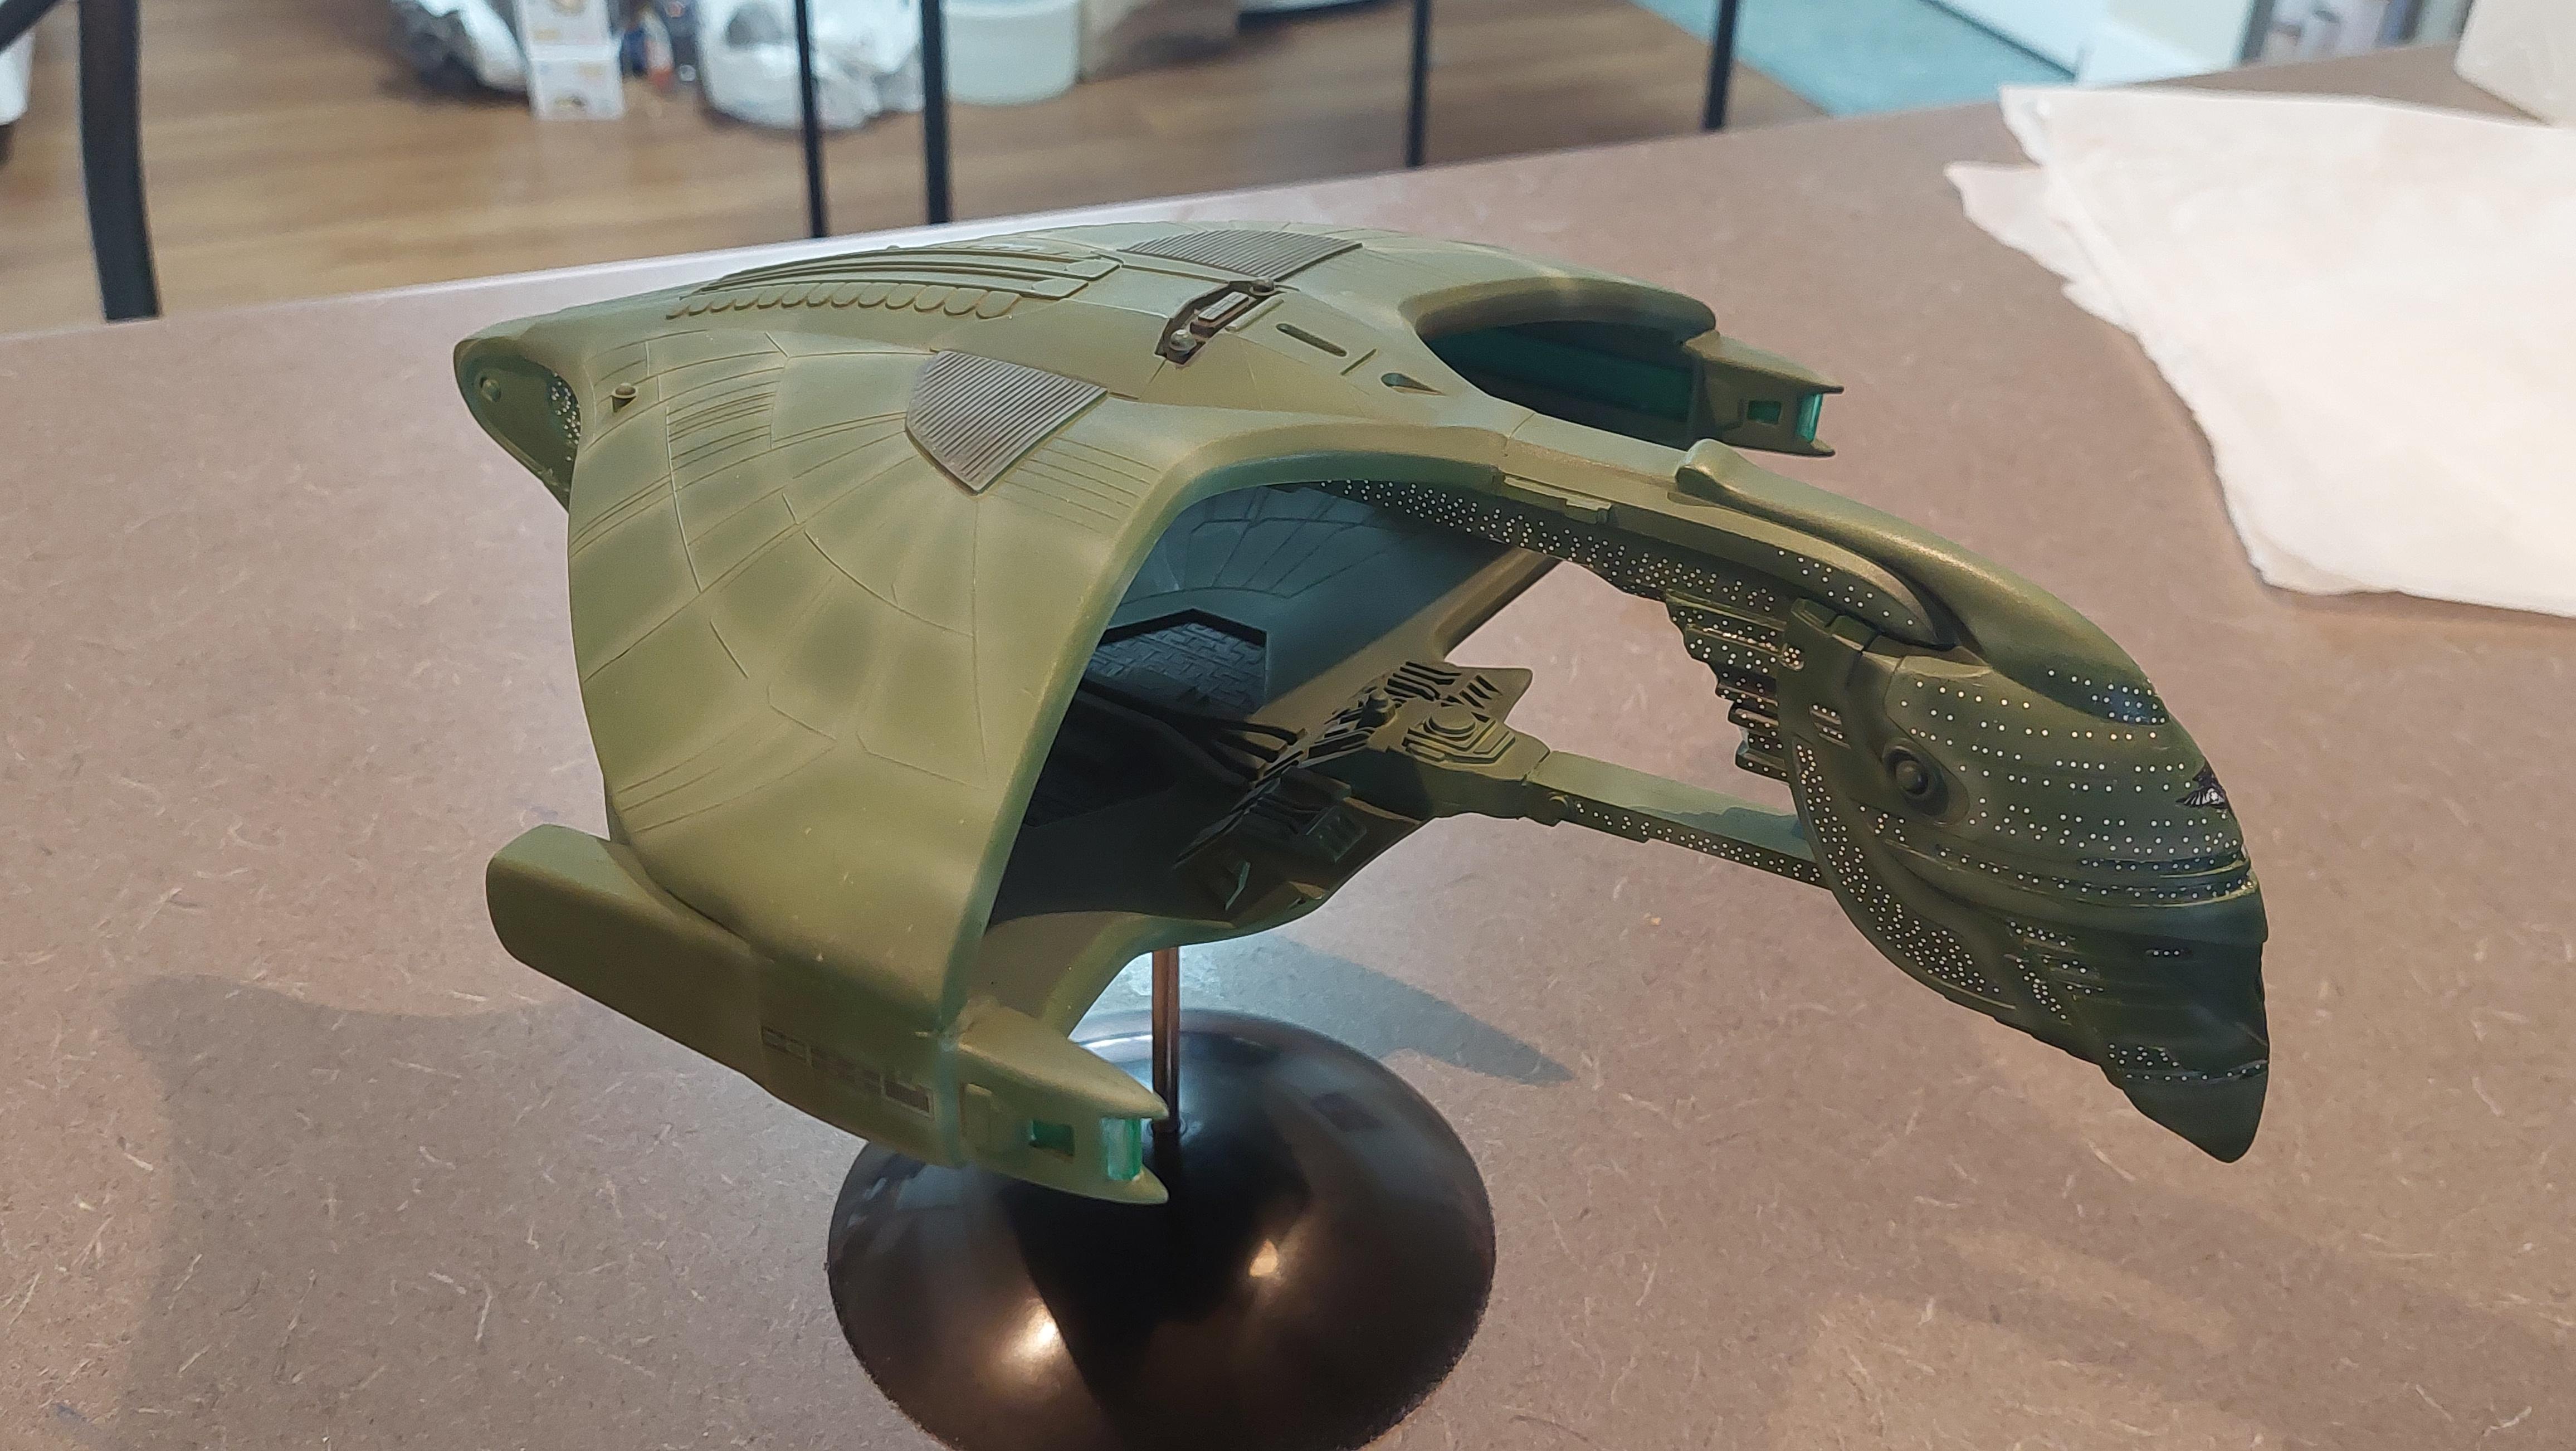
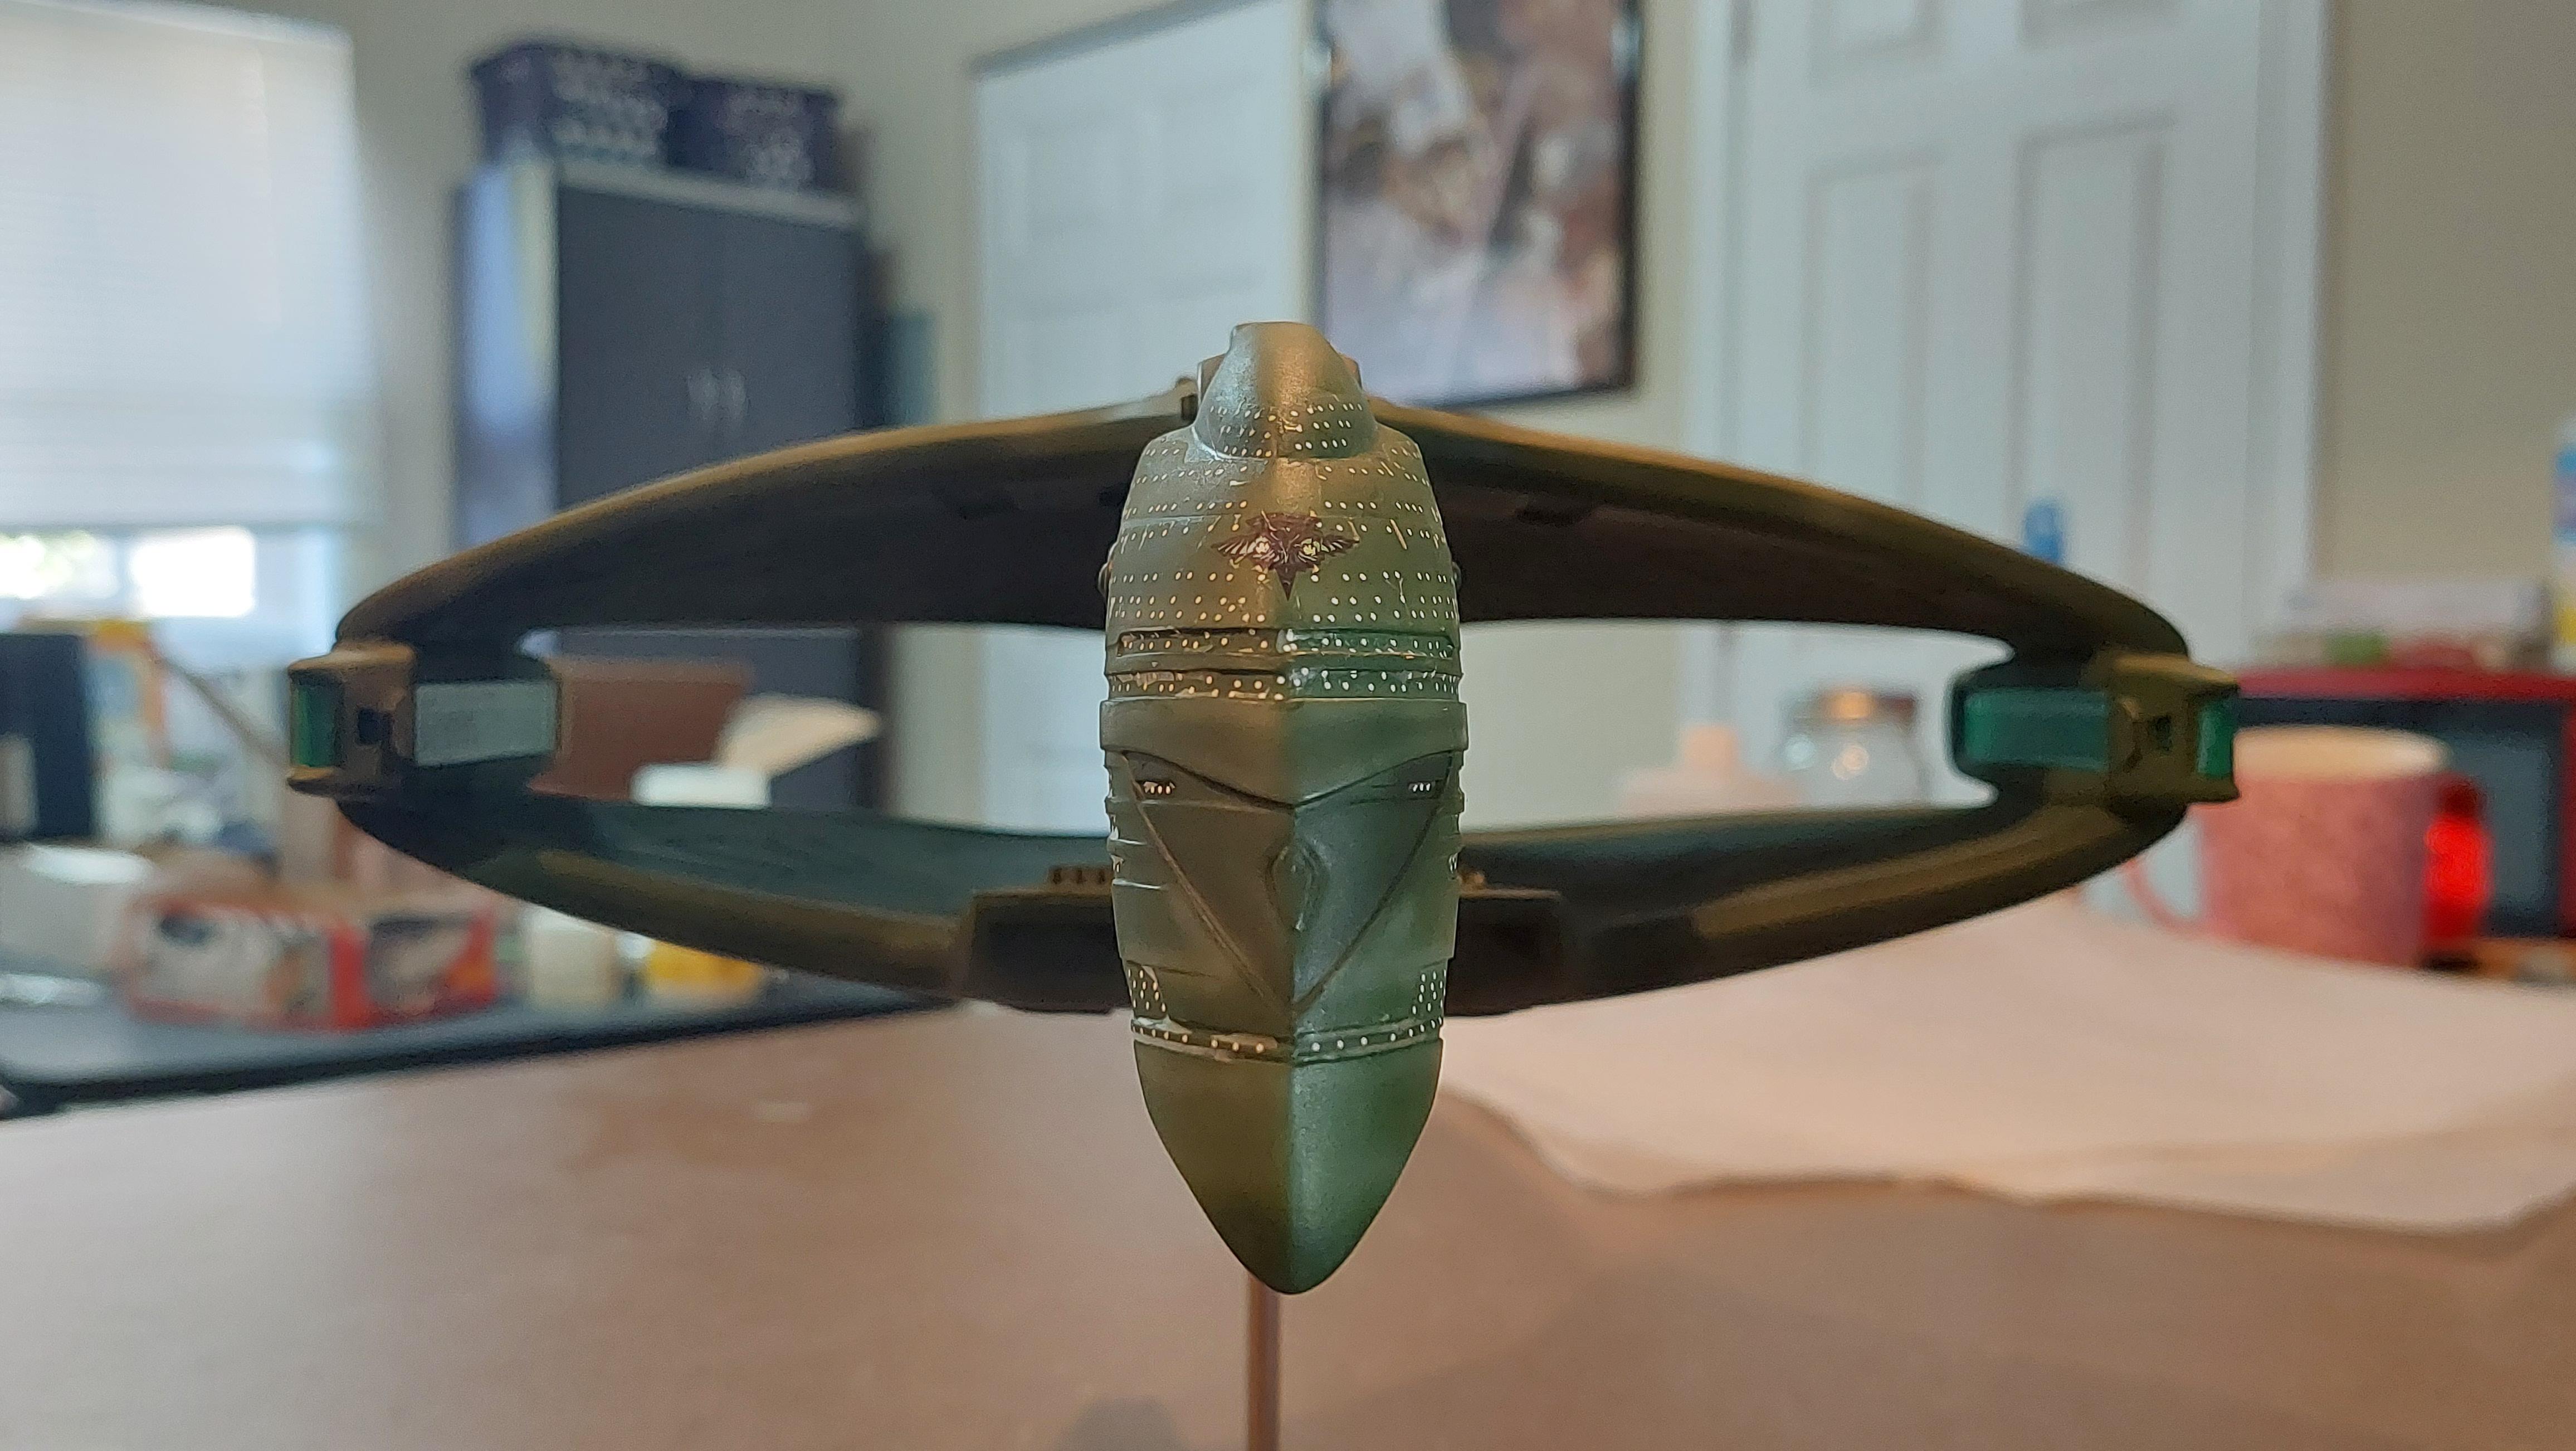
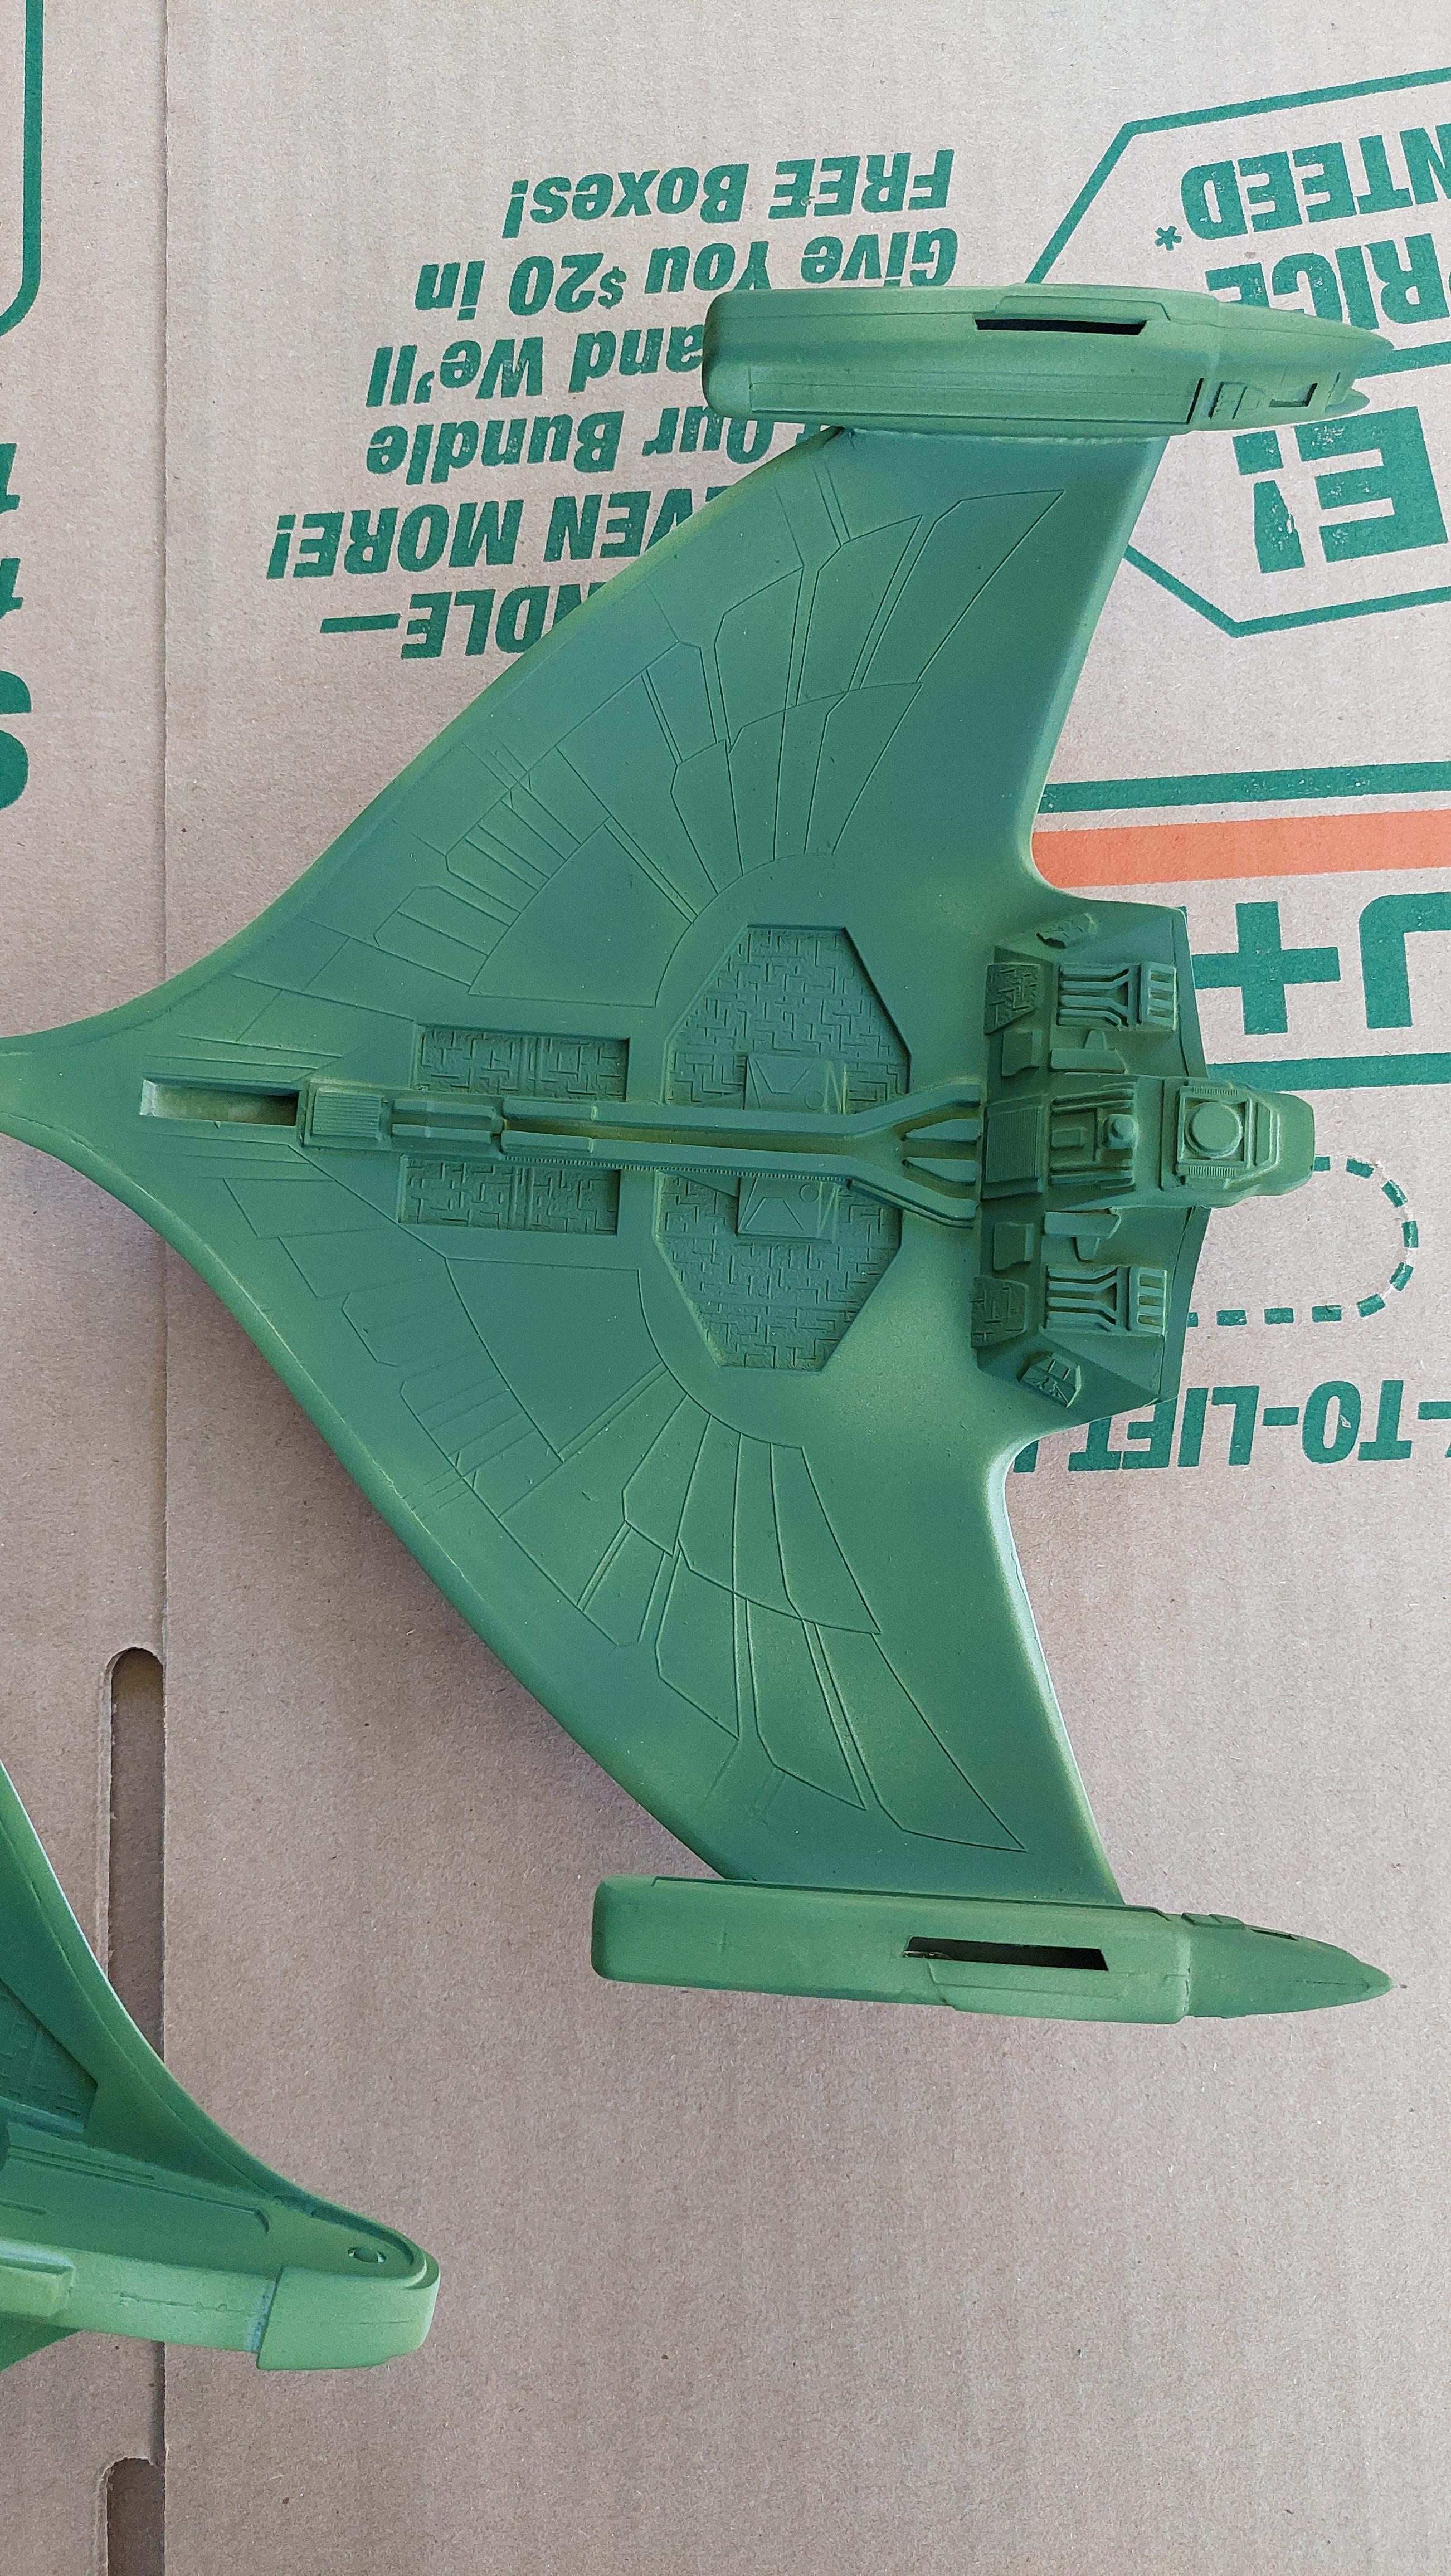
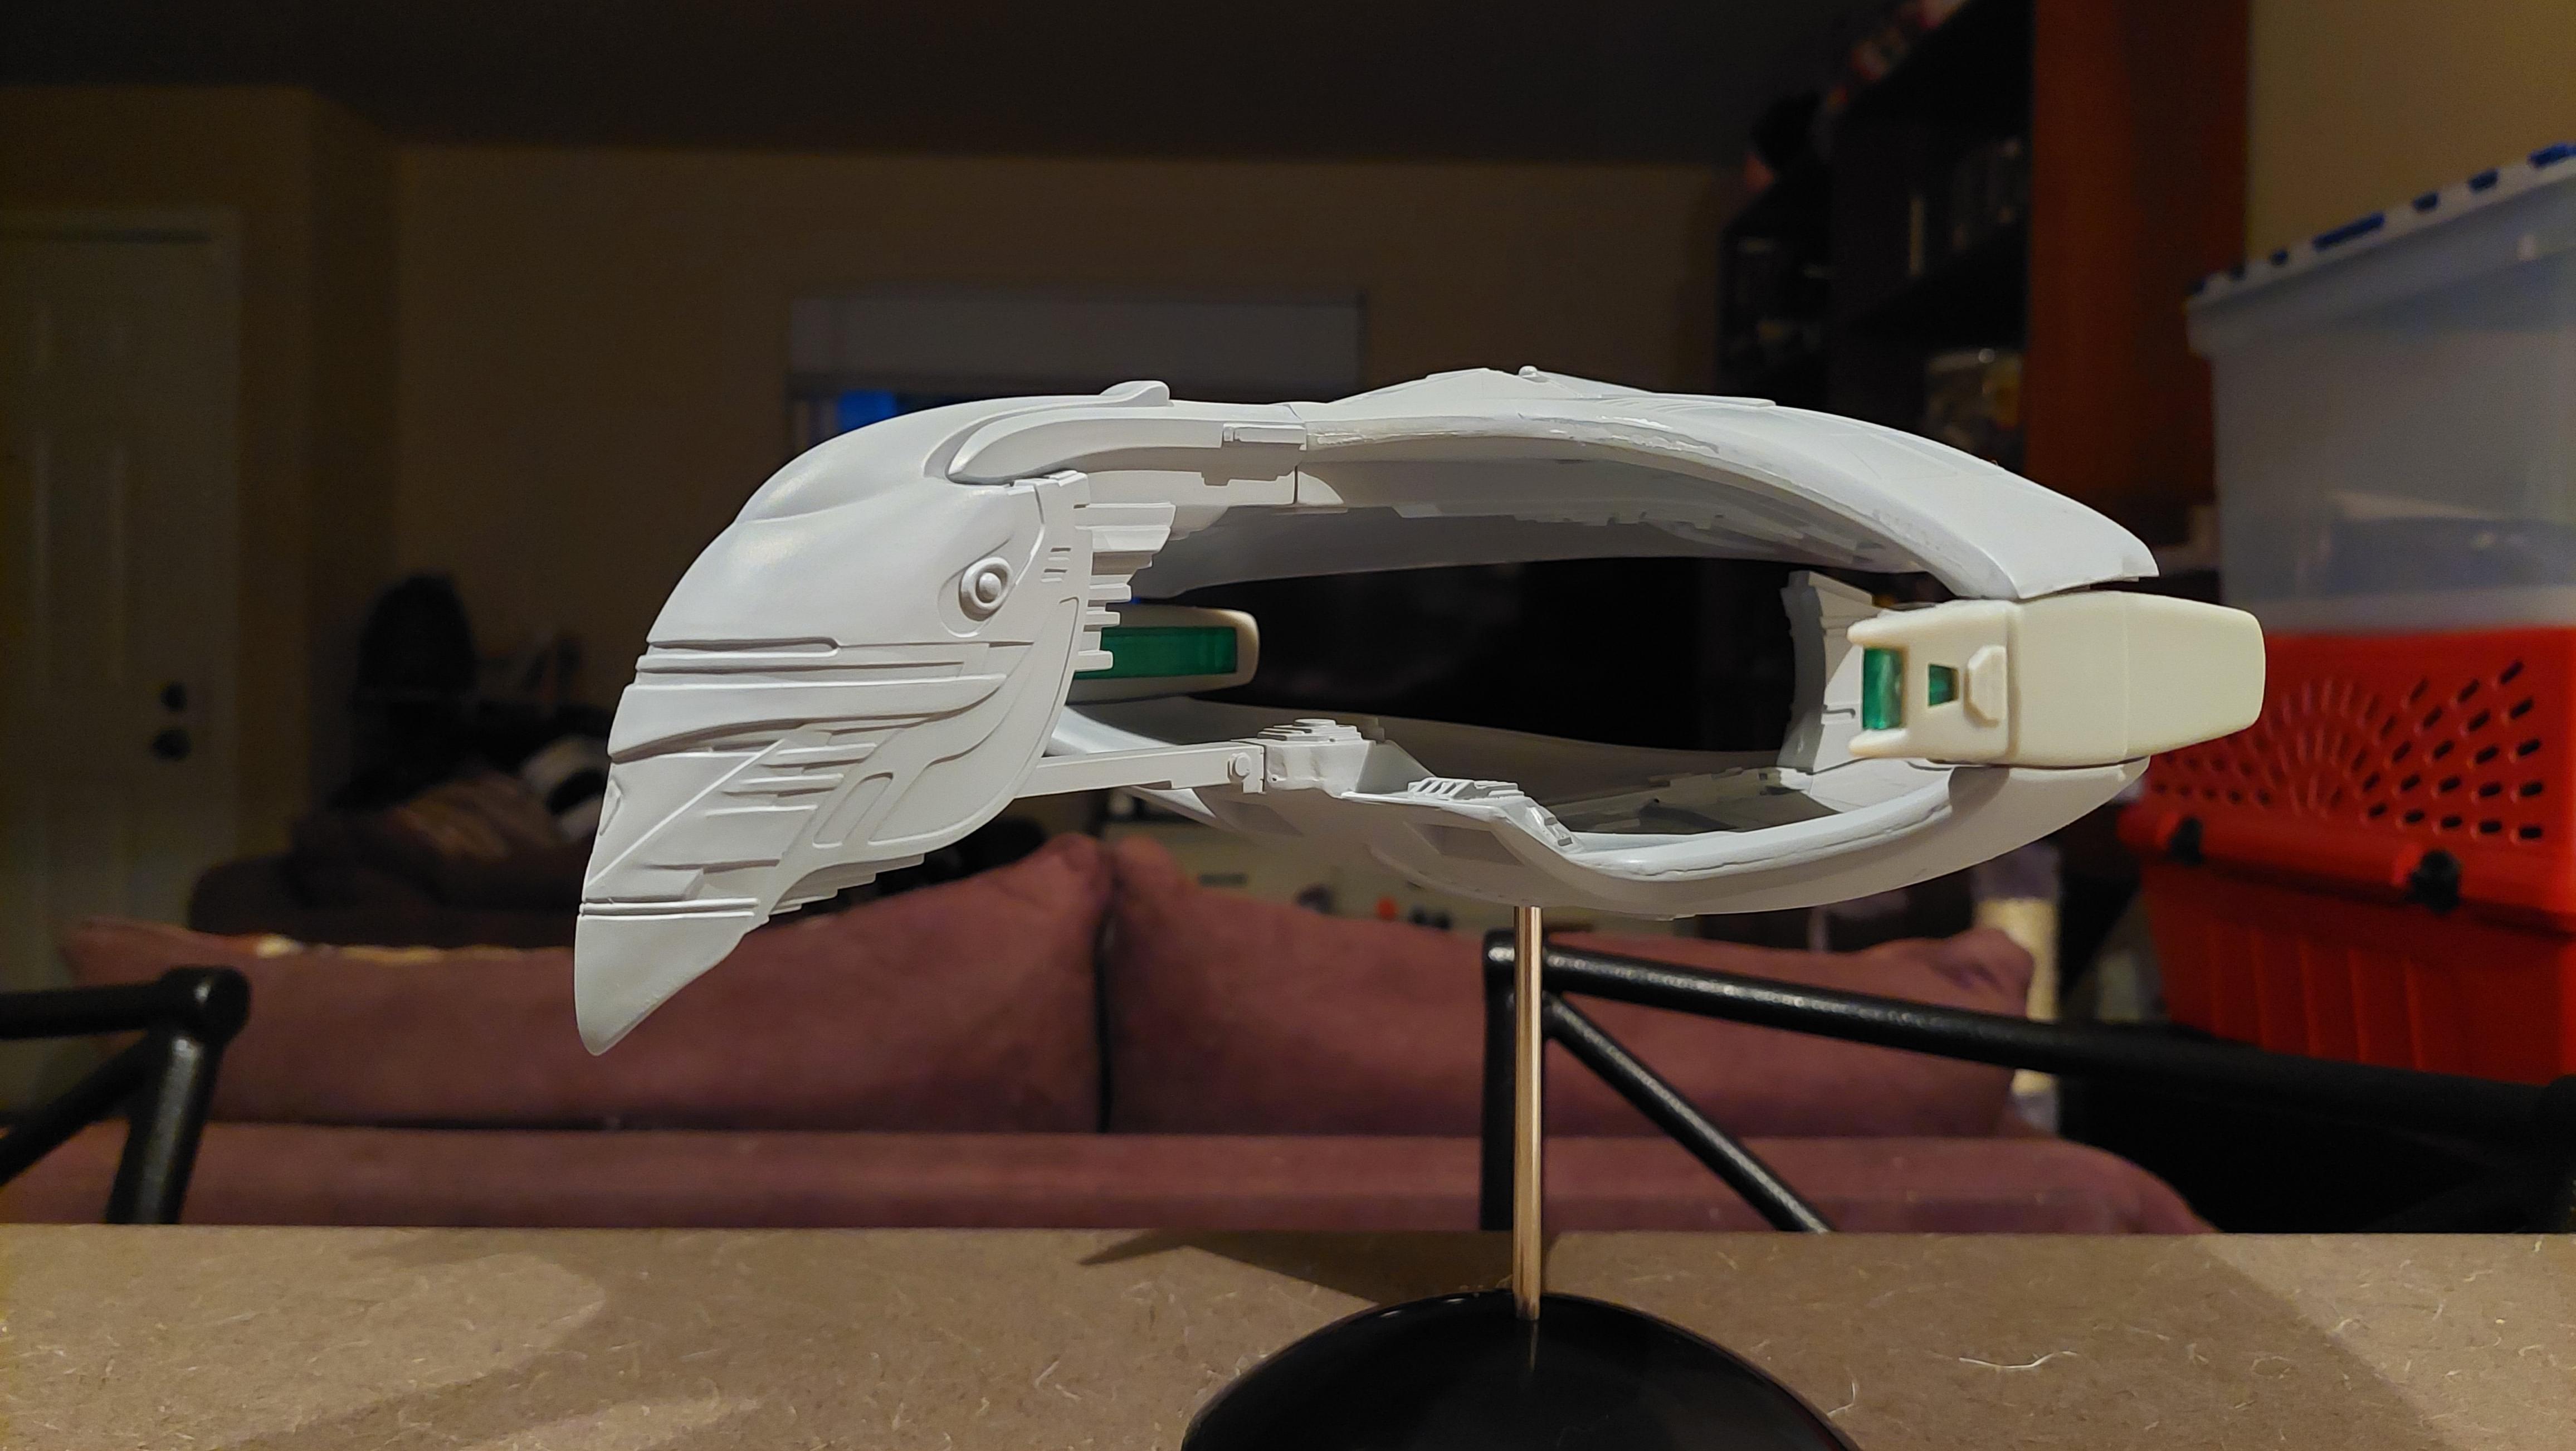
Here is the finished product of the romulan Warbird I've been working on! I'm extremely proud of the paint job and airbrush work I did to it!
-
AMT White-Freightliner to Optimus Prime
Devyn replied to Devyn's topic in WIP: Model Trucks: Big Rigs and Heavy Equipment
Stripe pattern has been masked off. Gonna wait for more silver to arrive because I accidentally spilled my remaining Vallejo aluminum. I used the model air version on the rest of the model, but I bought the Metal Airbrushing aluminum because it was faster. I'm hoping it's a close enough match otherwise I'll wait for the aluminum I used previously
- 32 replies
-
- 1
-
-
- amt
- freightliner
- (and 1 more)
-
AMT White-Freightliner to Optimus Prime
Devyn replied to Devyn's topic in WIP: Model Trucks: Big Rigs and Heavy Equipment
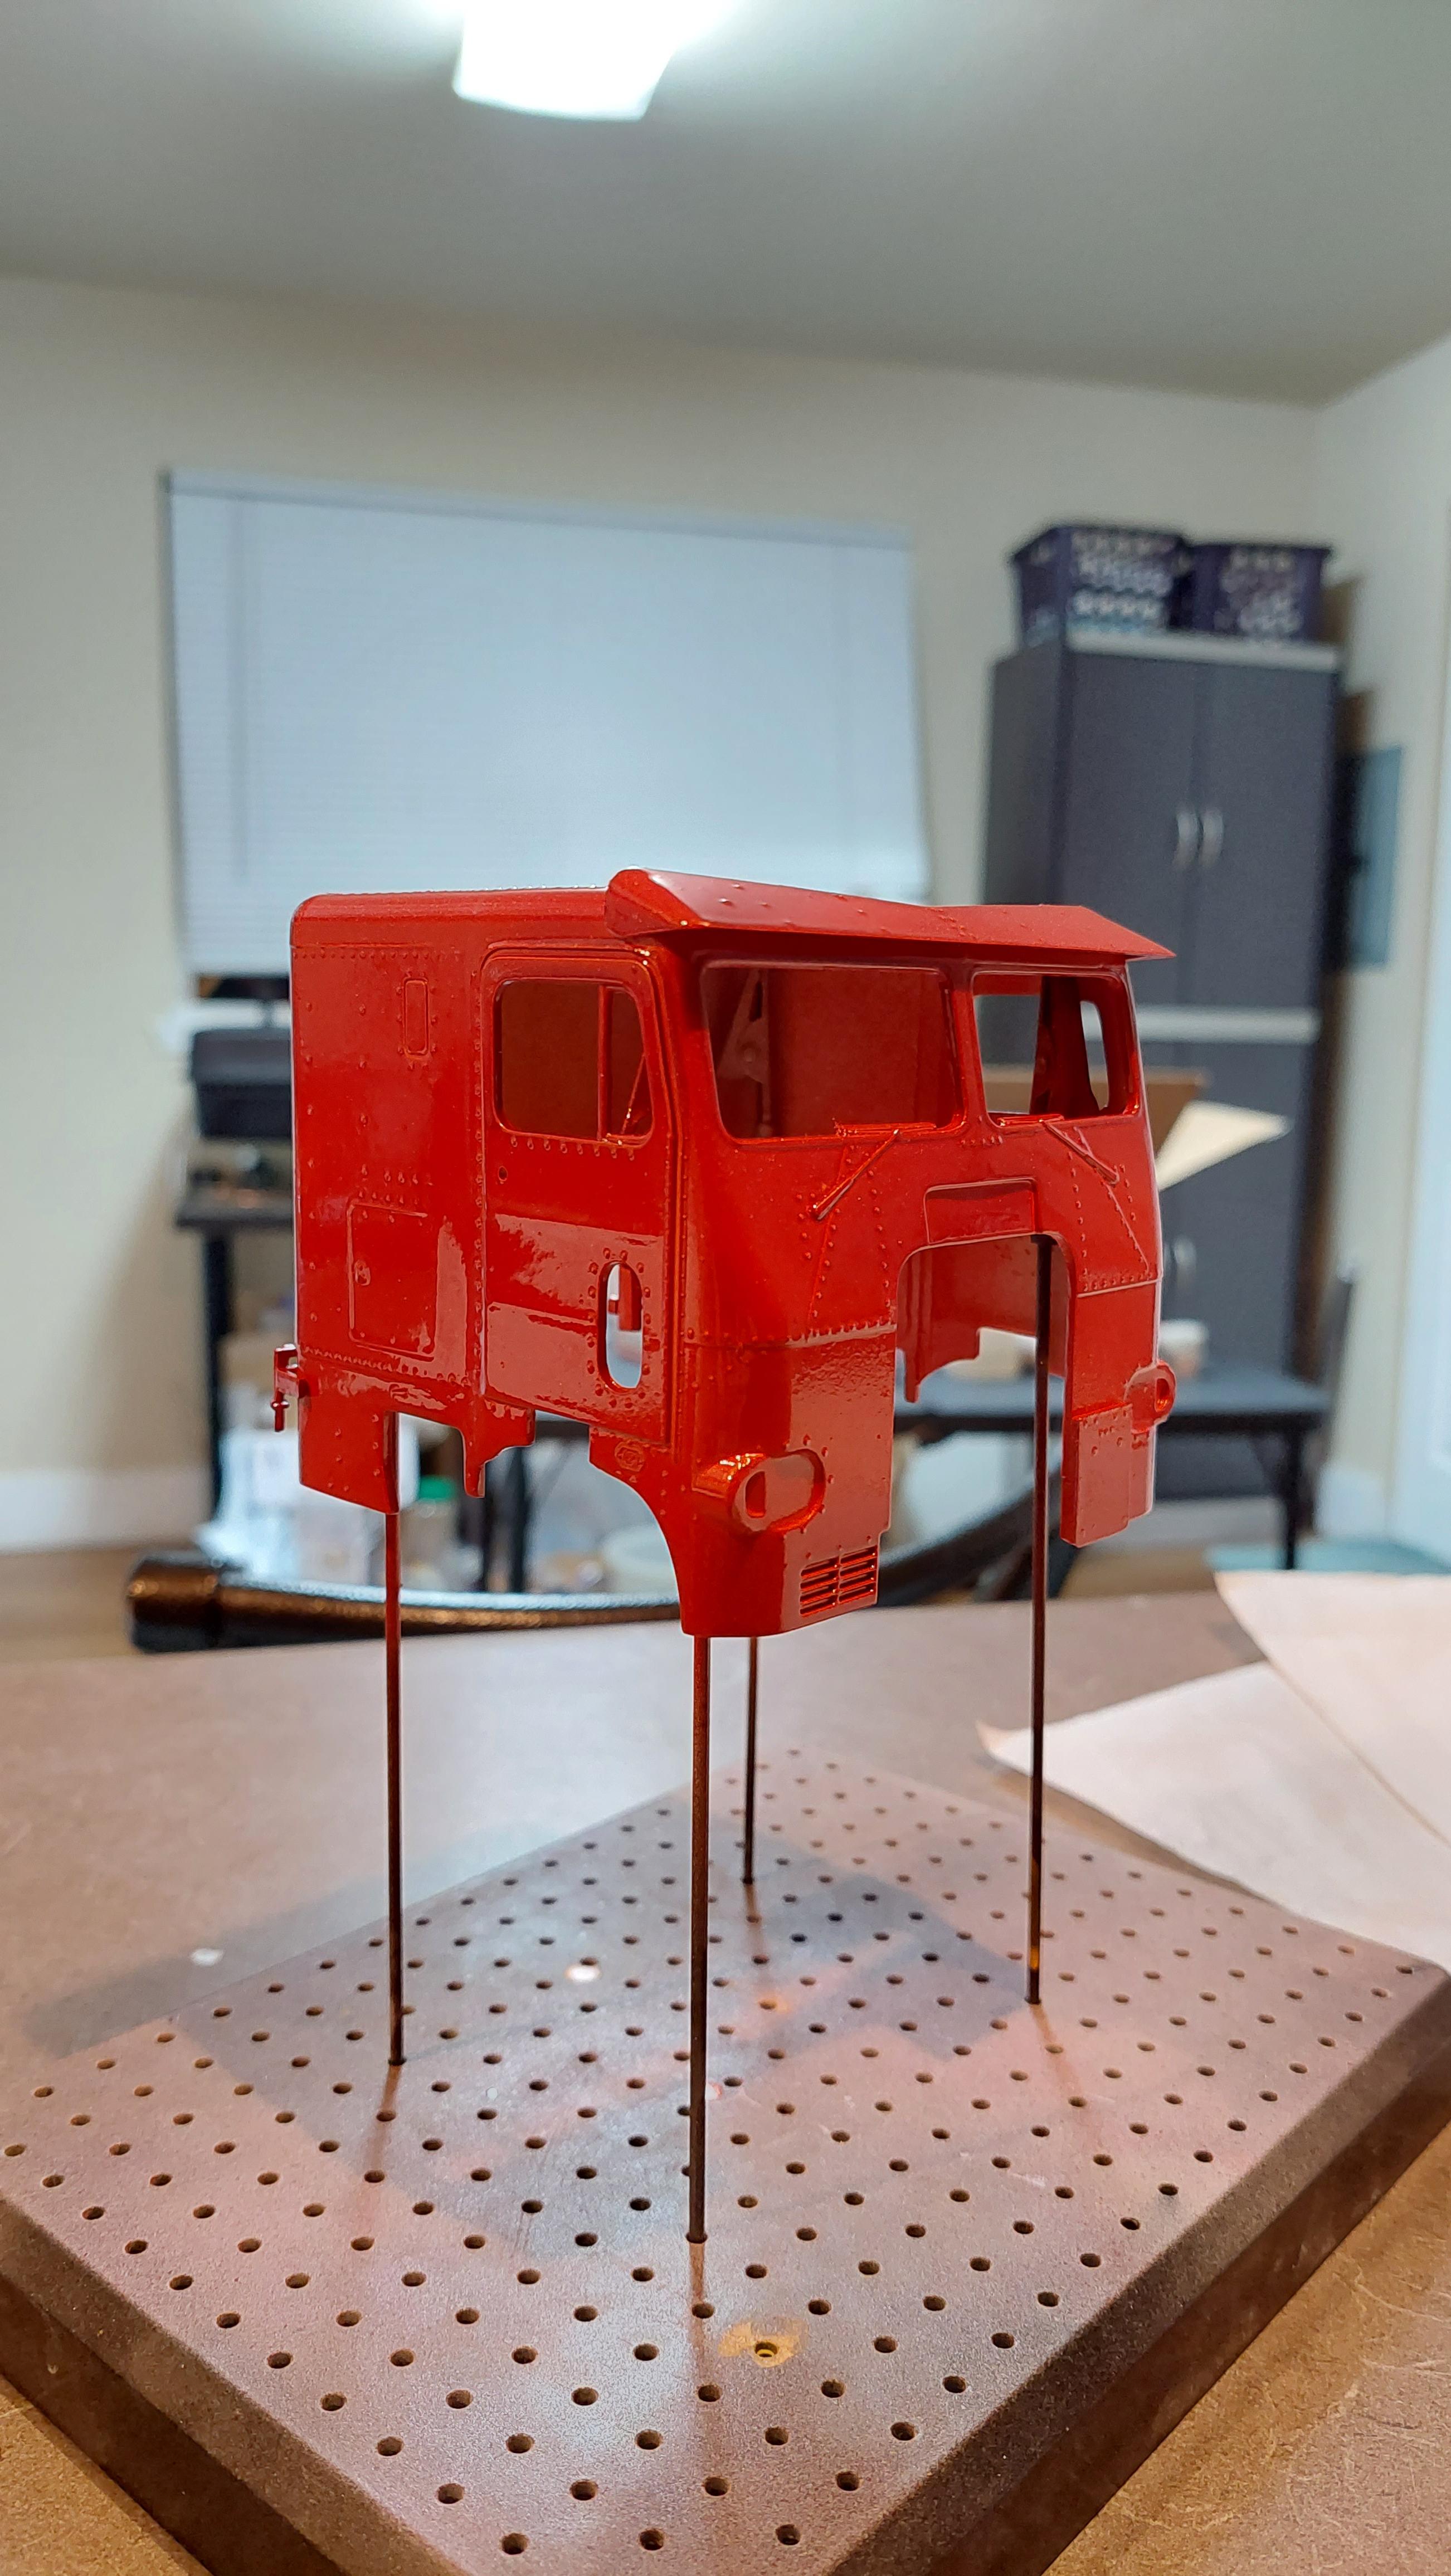
Alright! Red has been painted. As shown in the pictures below, this was achieved with a base coat of thinned Vallejo yellow (this coat came out a little grainy and it slightly shows in the final product upon close inspection). With testing, this showed to result in the brightest red from the next paint I used: Testors enamel metallic red rattle can. Overall really proud of it and probably wouldn't change a thing. I'll let it sit a bit, gloss coat, sit even longer, then I'll mask off the silver stripe around the cab. After that, it's nothing but gluing! Then I'll move onto the trailer which is both extremely simple and very complex
- 32 replies
-
- 3
-
-
- amt
- freightliner
- (and 1 more)
-
AMT White-Freightliner to Optimus Prime
Devyn replied to Devyn's topic in WIP: Model Trucks: Big Rigs and Heavy Equipment
Huh?? I bought from them a week ago and they arrived 3 days ago. -
AMT White-Freightliner to Optimus Prime
Devyn replied to Devyn's topic in WIP: Model Trucks: Big Rigs and Heavy Equipment
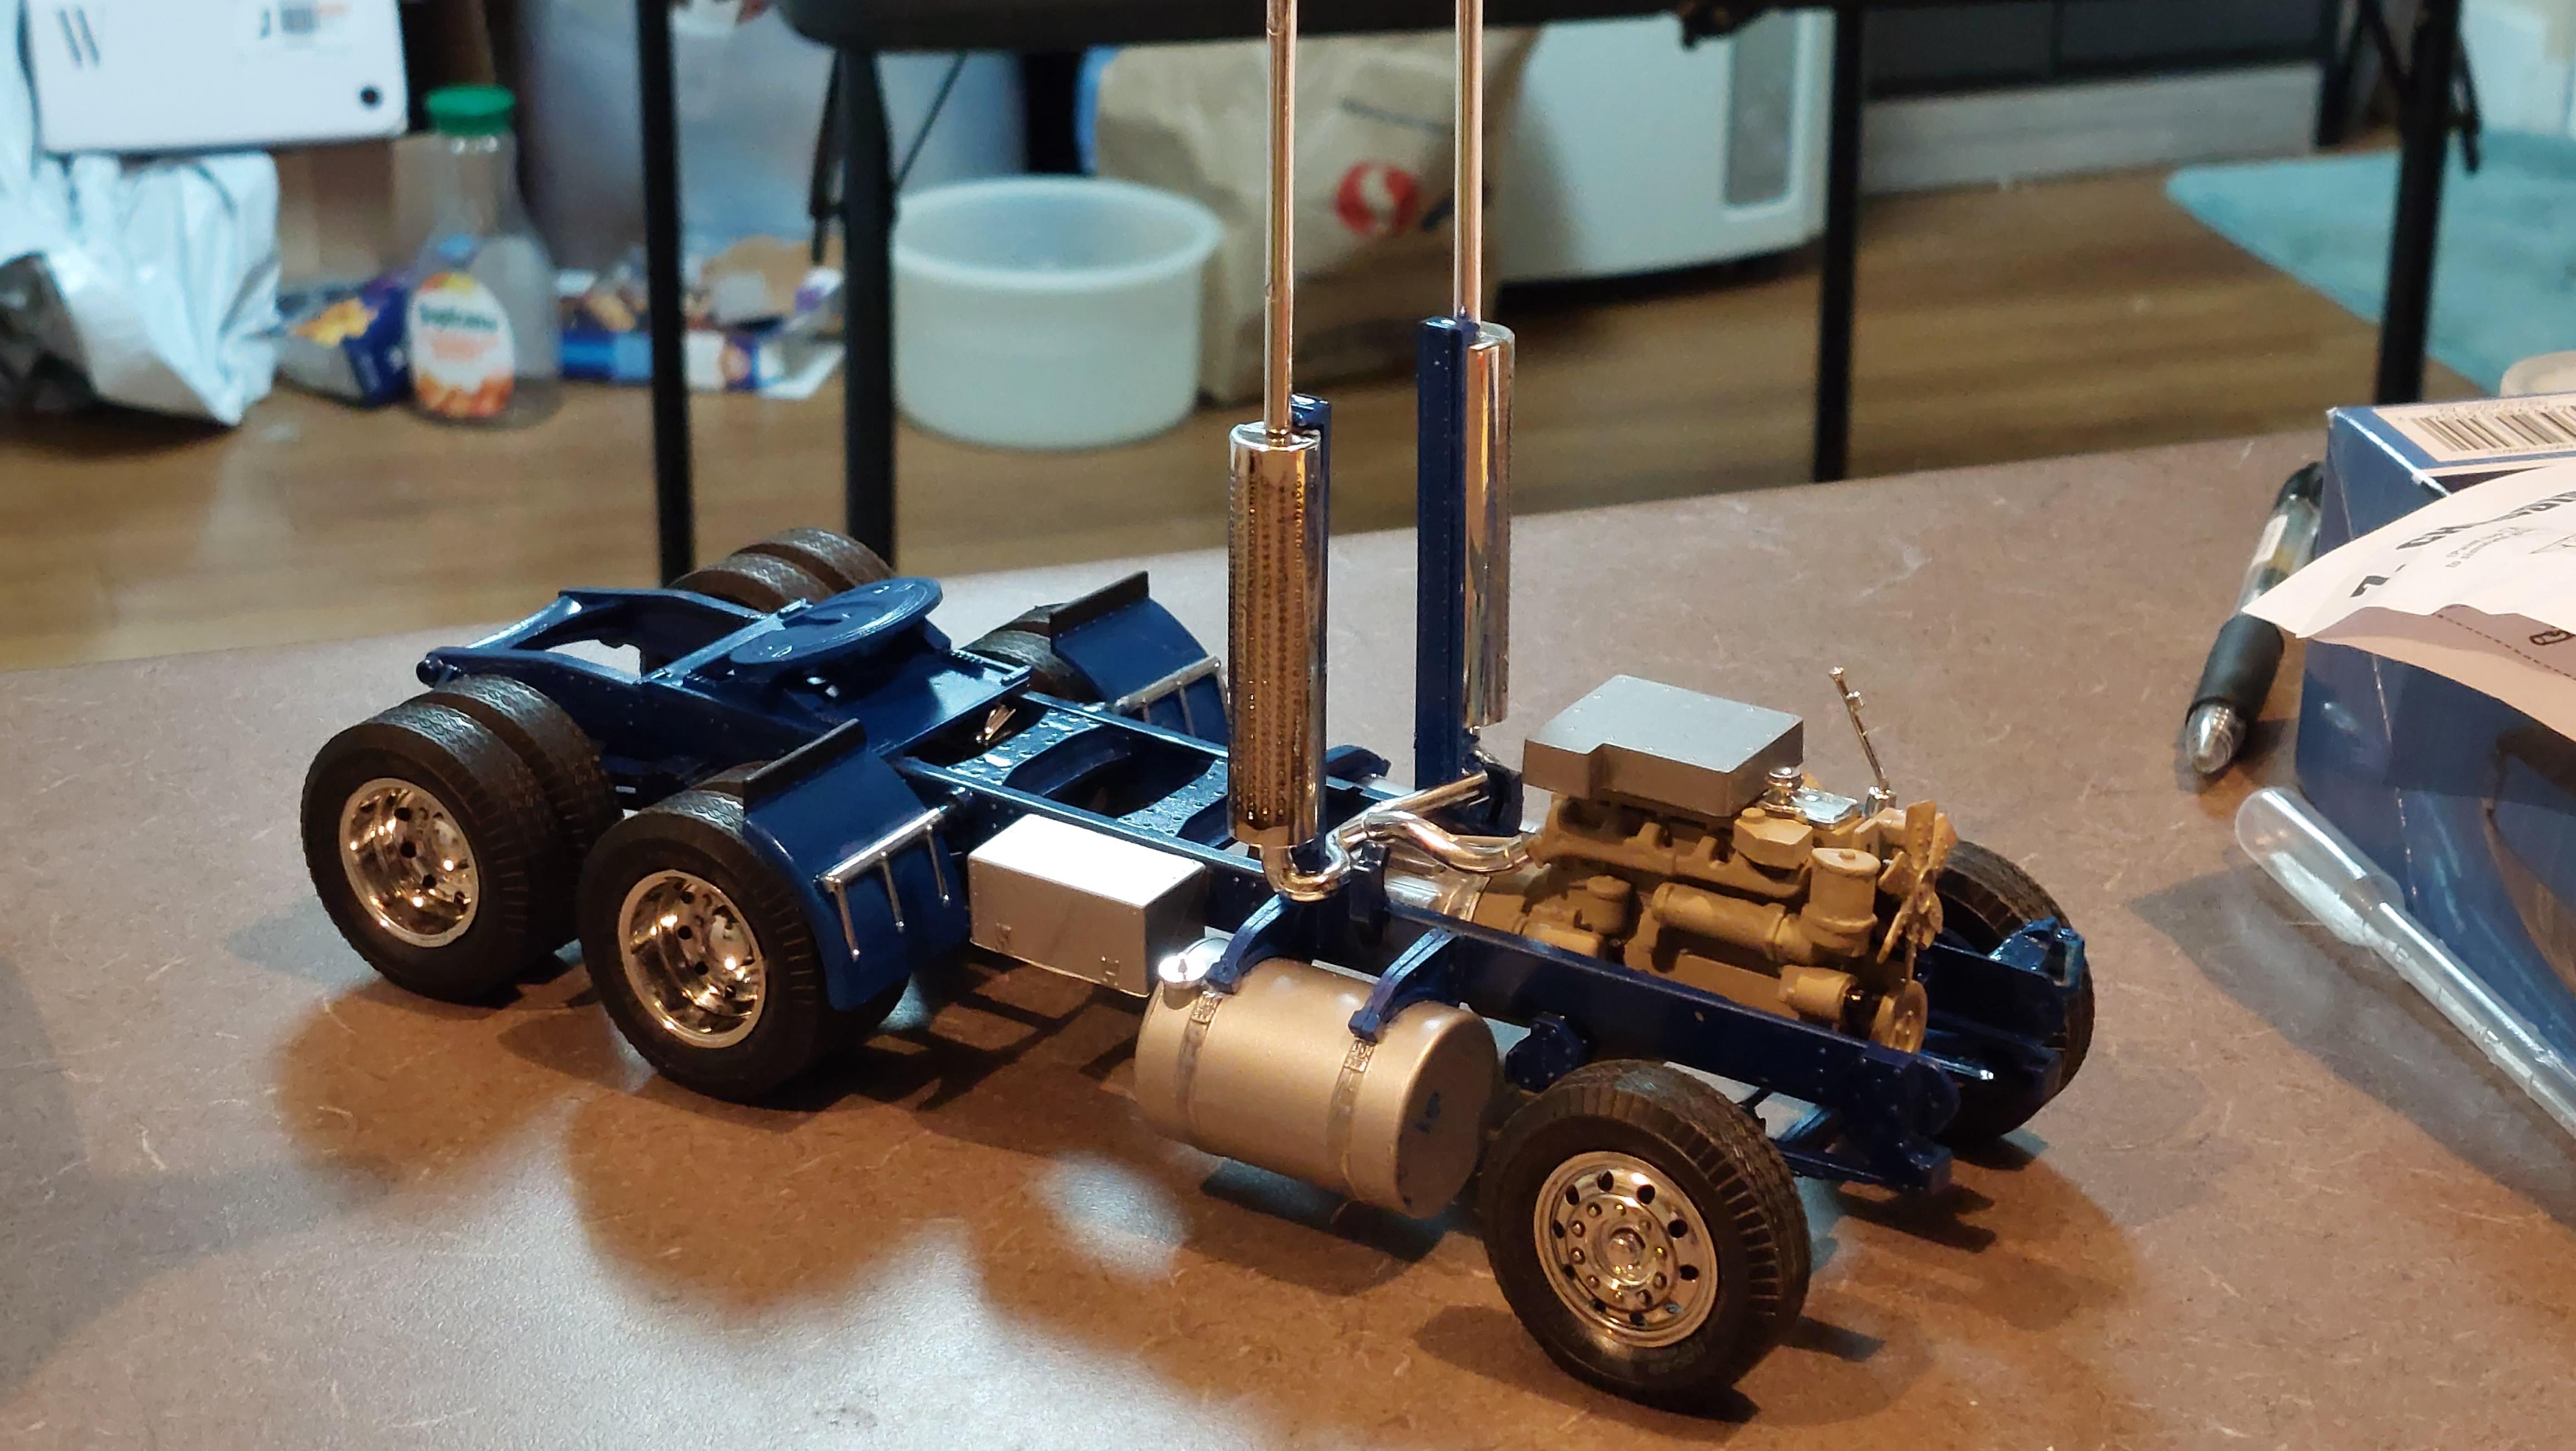
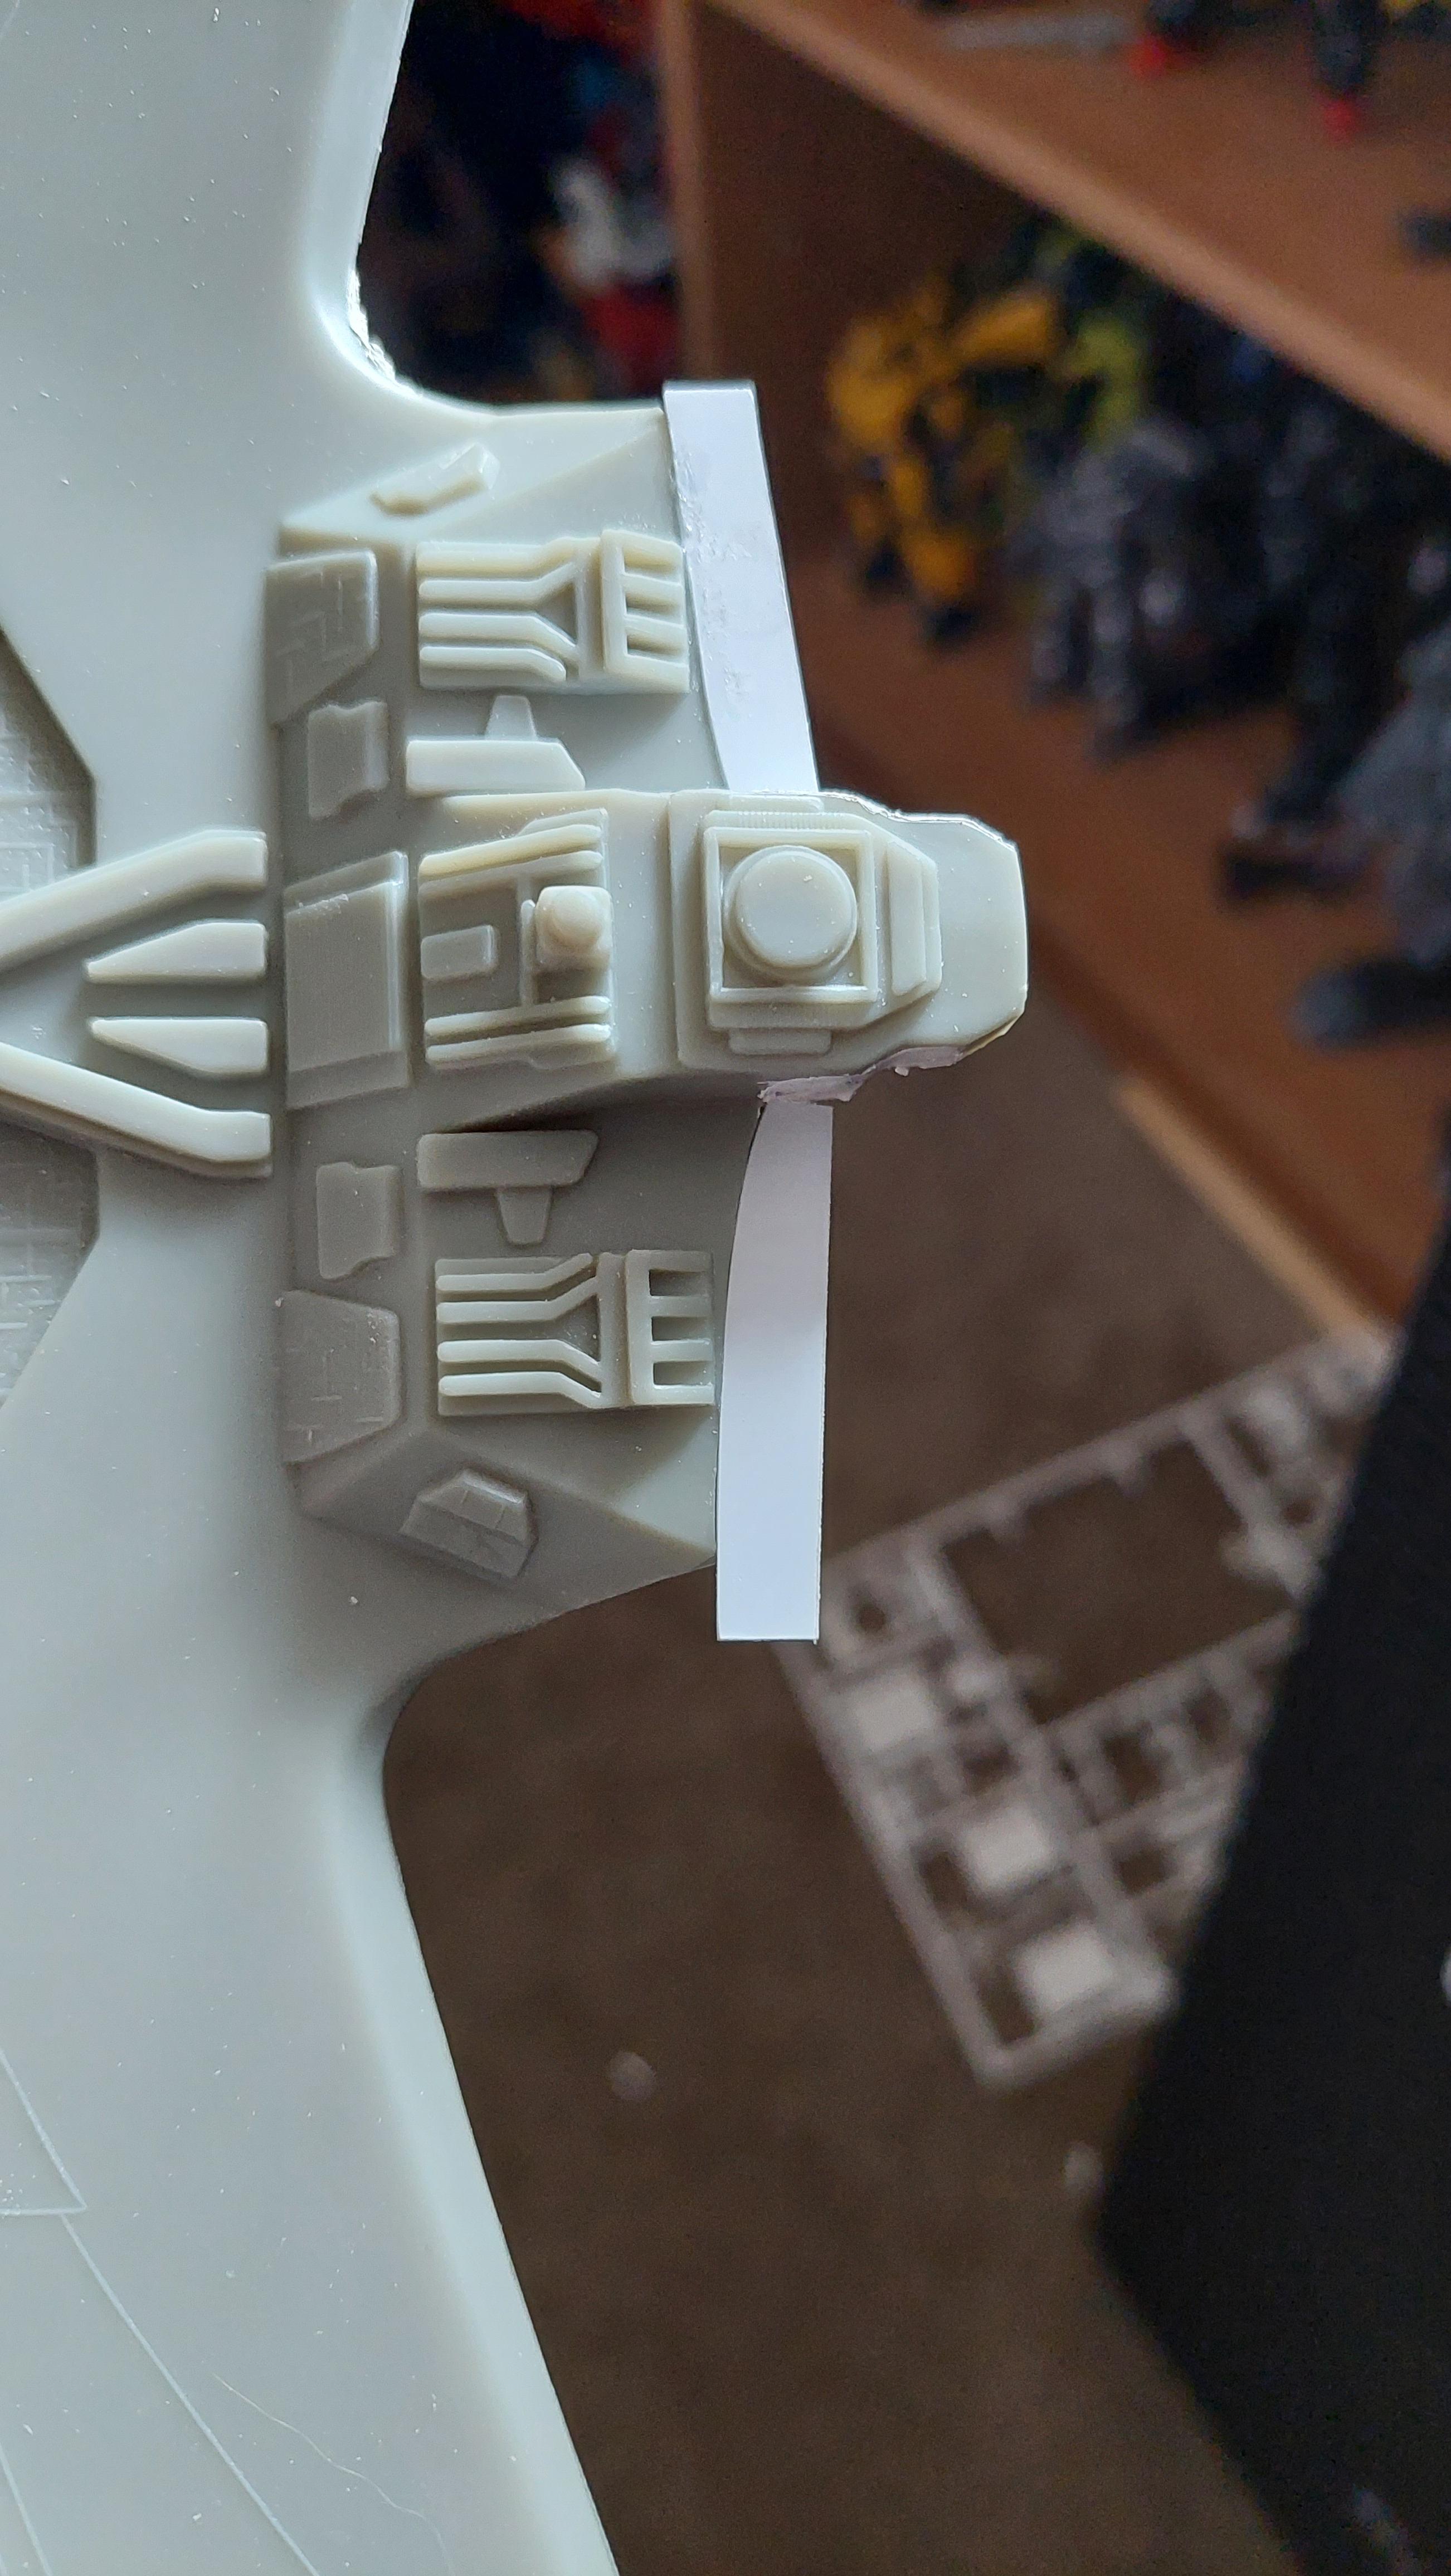
Progress update! Archer transfers rivets are a life saver! It's like nothing even happened. I did get a hair in my """""last""""" coat of primer so I'll have to sand and prime just a LITTLE more. I also painted all of the radiator parts, pipes, and the mudflaps, which will be installed tomorrow. otherwise the chassis is done with the exhaust being installed today. Had to extend the central pipe that connects to the engine just a little bit more with some chrome sprue clippings. The sprue is more oval than round so it isn't perfect but from a side view and quick glance, it looks fine Today ended on a good note with me walking away on my own terms and not out of frustration
- 32 replies
-
- 2
-
-
- amt
- freightliner
- (and 1 more)
-
Pretty damn proud of this airbrush work. First I did a coat of straight Tamiya Green, not doing full coverage in some spots to make some lighter patches to emulate the uneven pattern on the filming model. Then I used tamiya cockpit green with a small needle on my airbrush to highlight the wing detailing. Now I'll wait for that to cure and I'll glue the 2 halves together, putty, sand, repaint, and paint the other half of the top side. Should be done by at least tomorrow!
-
AMT White-Freightliner to Optimus Prime
Devyn replied to Devyn's topic in WIP: Model Trucks: Big Rigs and Heavy Equipment
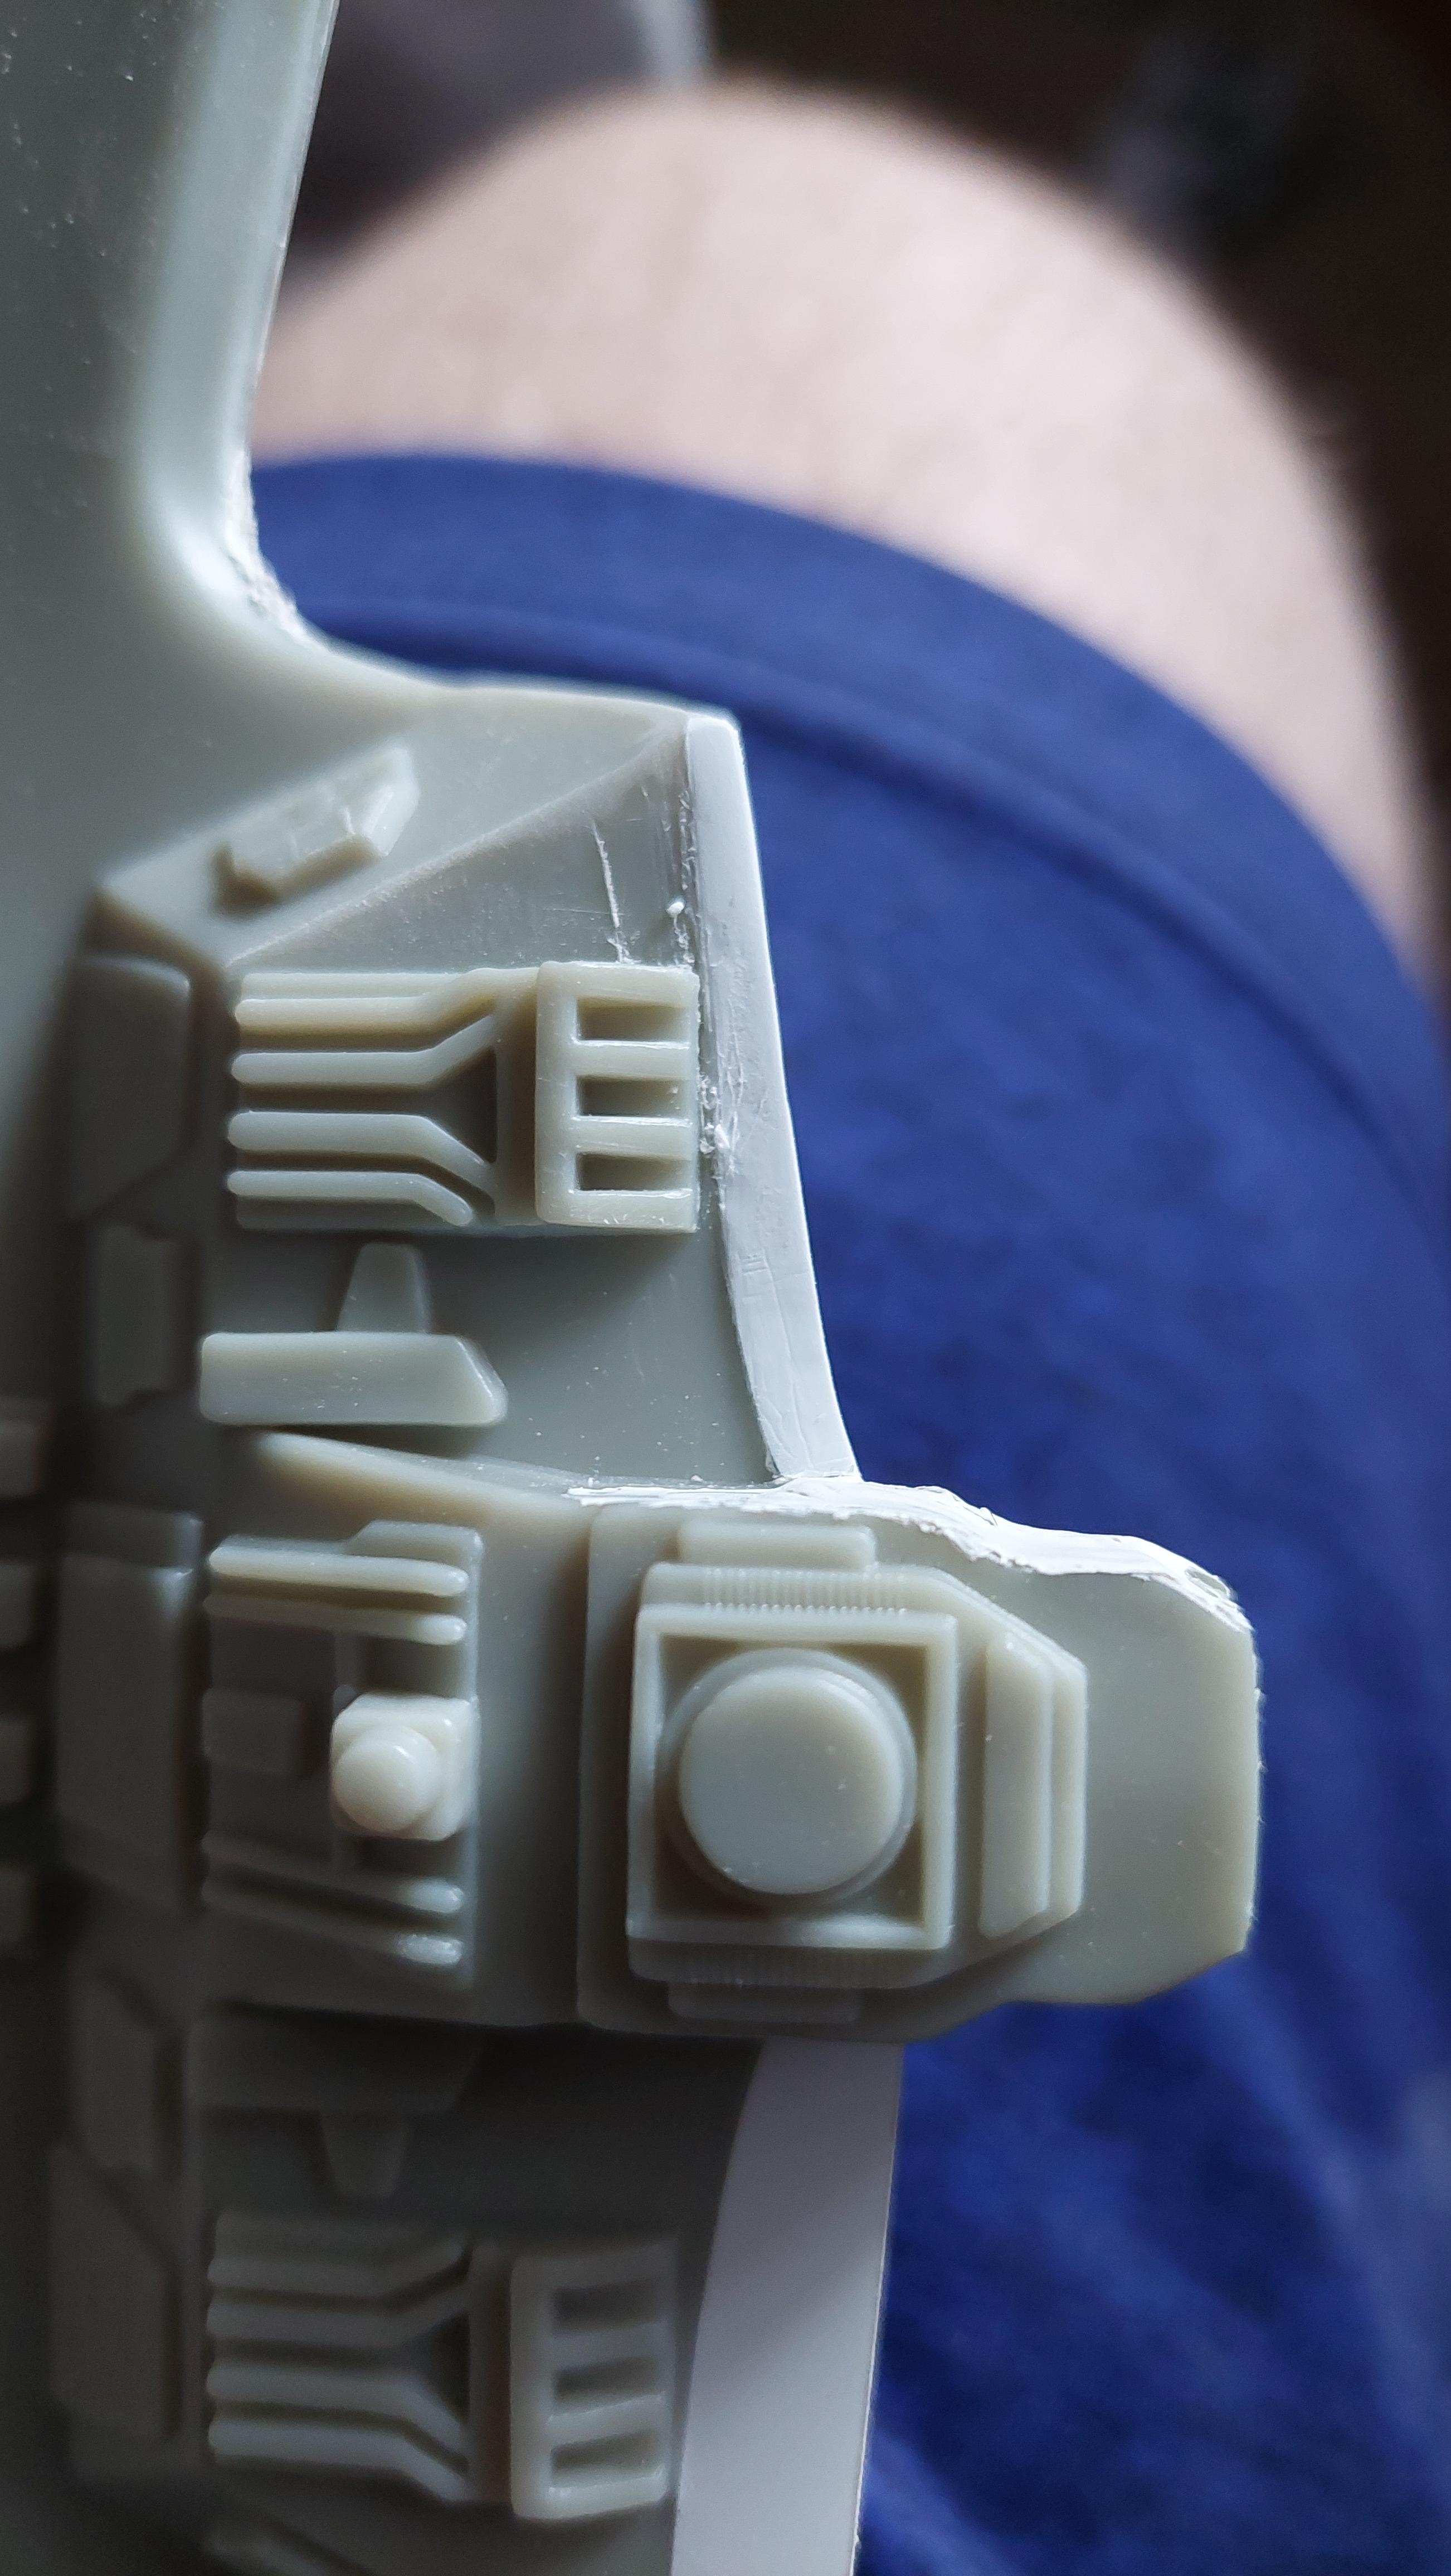
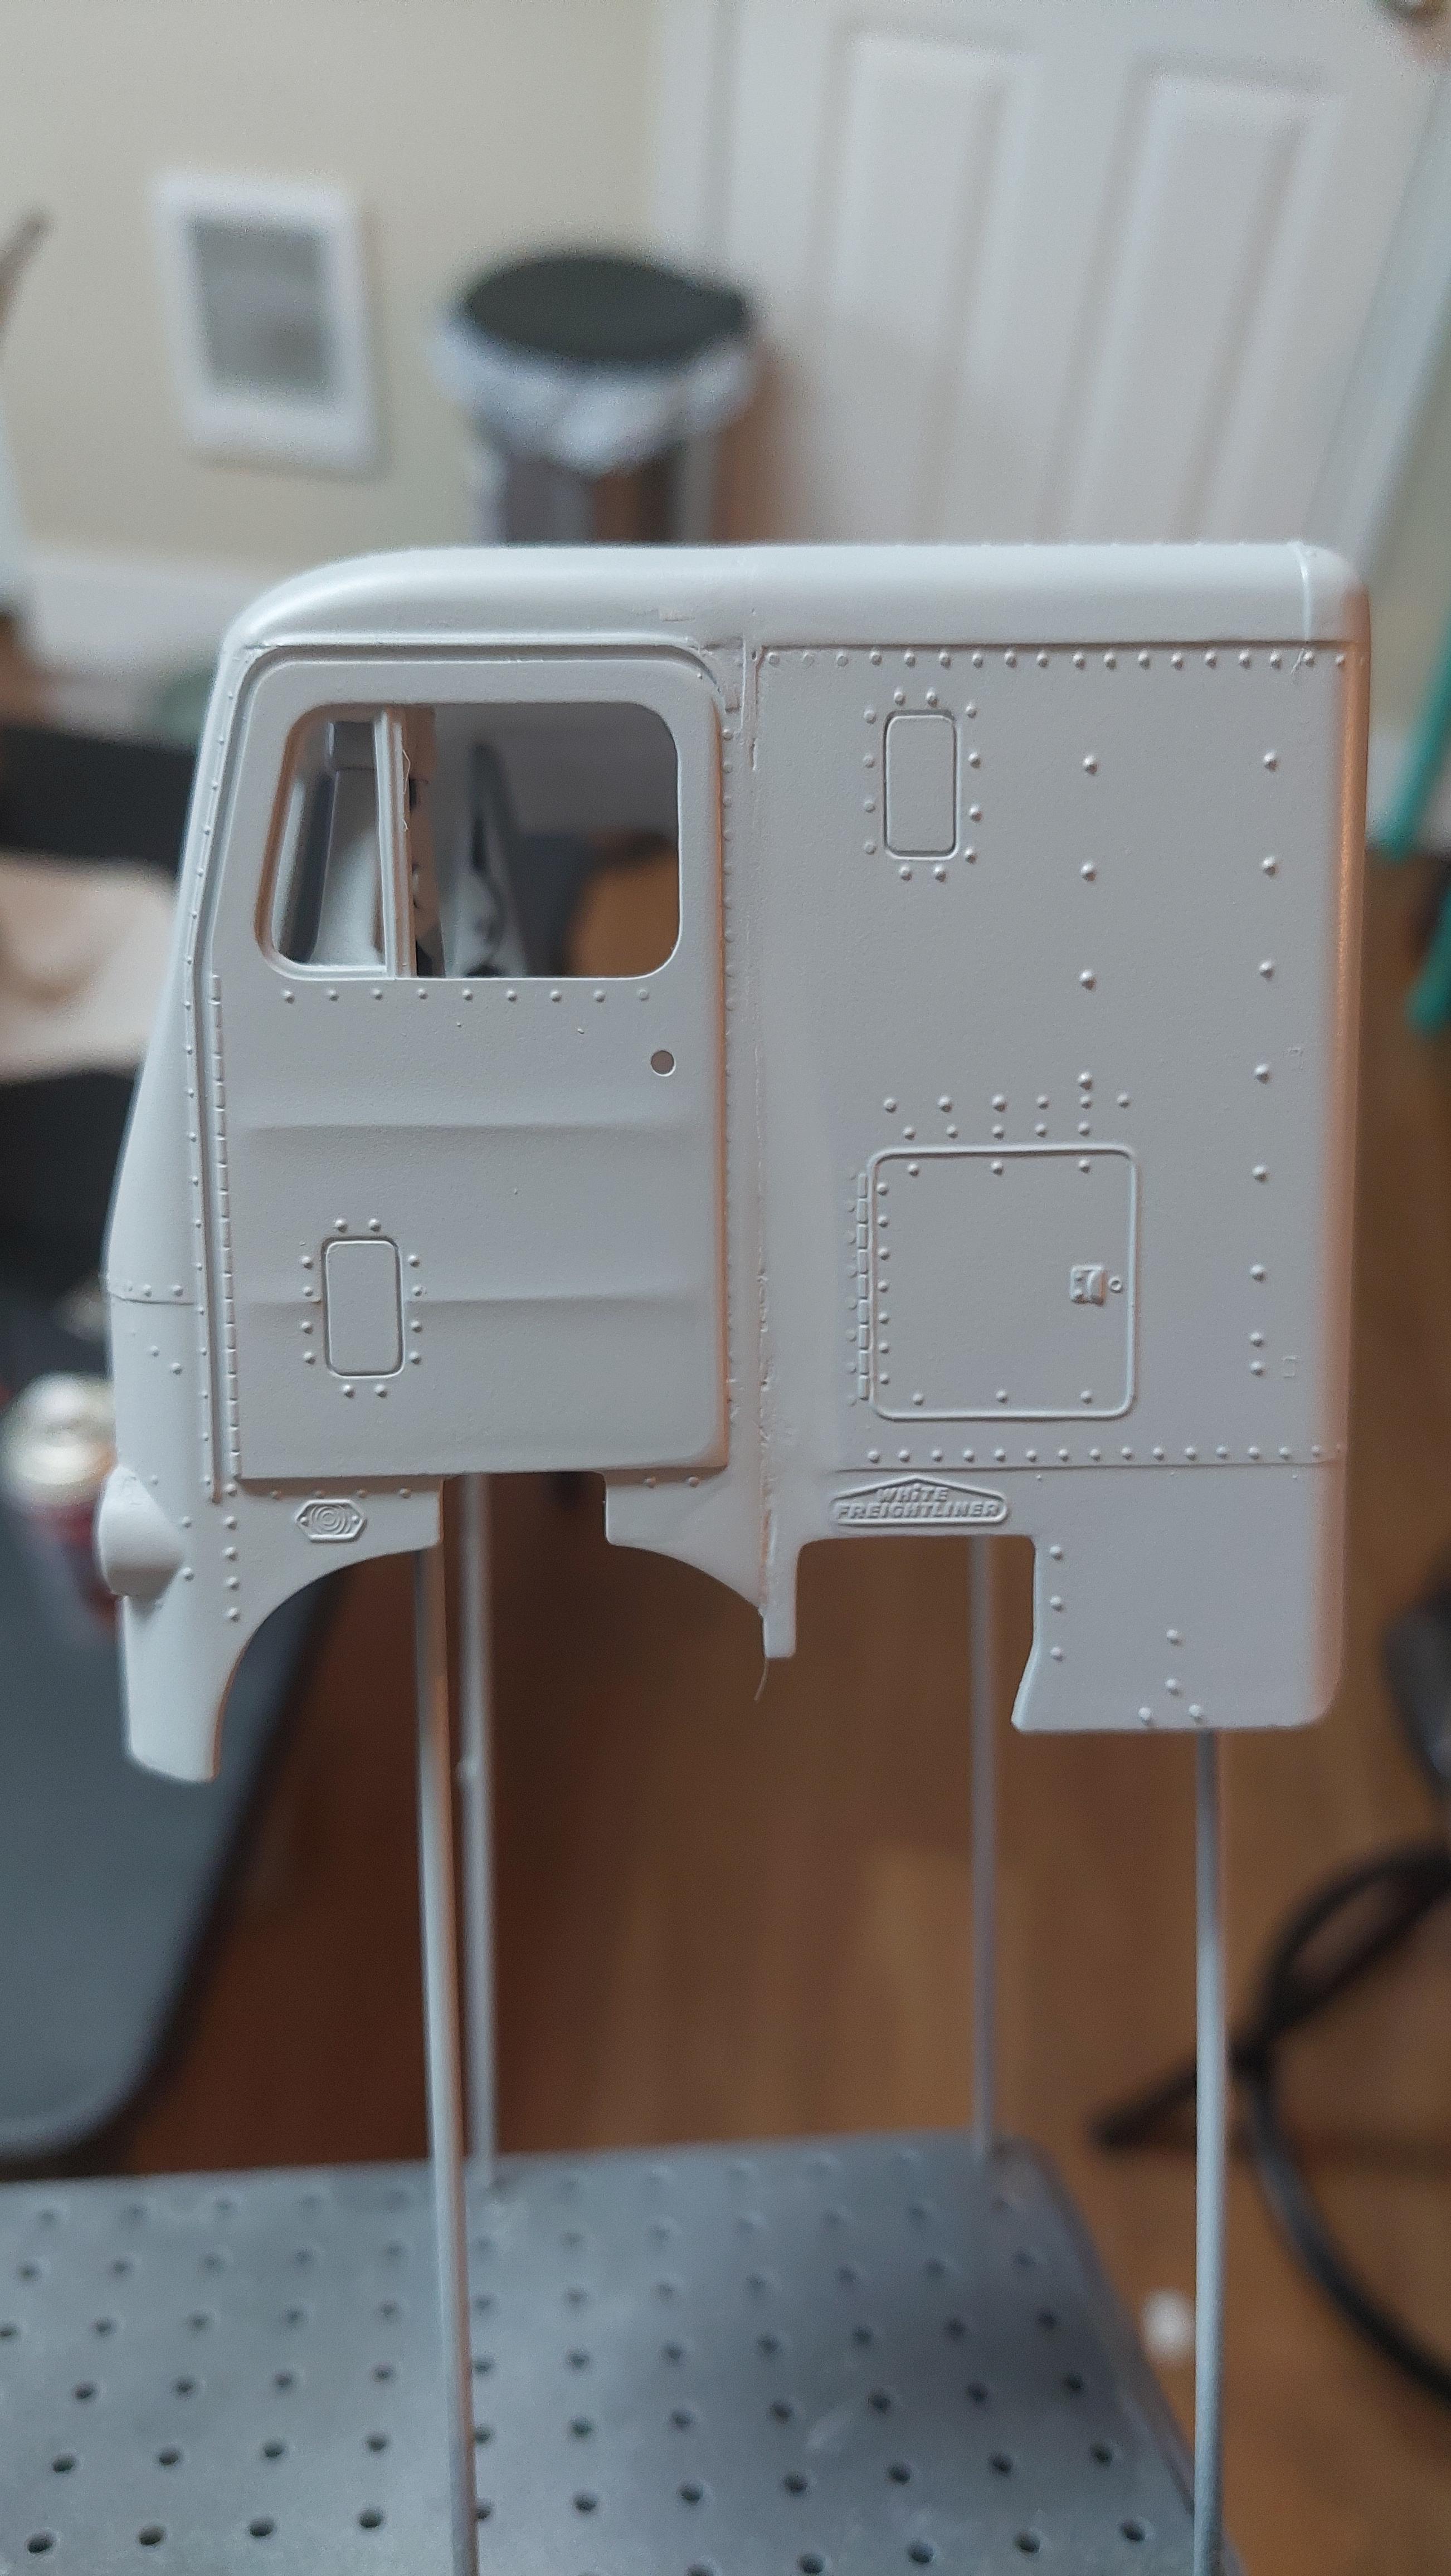
No not yet. I'm not sure if you can see in the pictures but I have since taken a knife to a lot of the edges but I have no idea if it's helped at all. My main fear is the seam popping once the exterior is all painted, but luckily it's the rear panel seam and will almost never be seen unless photographed from that angle. Worst case scenario, I glue it and hold it shut til it dries. Another issue I've just worked around was the axles being too long. The way I worked around that was by not installing the axles lol -
AMT White-Freightliner to Optimus Prime
Devyn replied to Devyn's topic in WIP: Model Trucks: Big Rigs and Heavy Equipment
Got a lot done today
-
AMT White-Freightliner to Optimus Prime
Devyn replied to Devyn's topic in WIP: Model Trucks: Big Rigs and Heavy Equipment
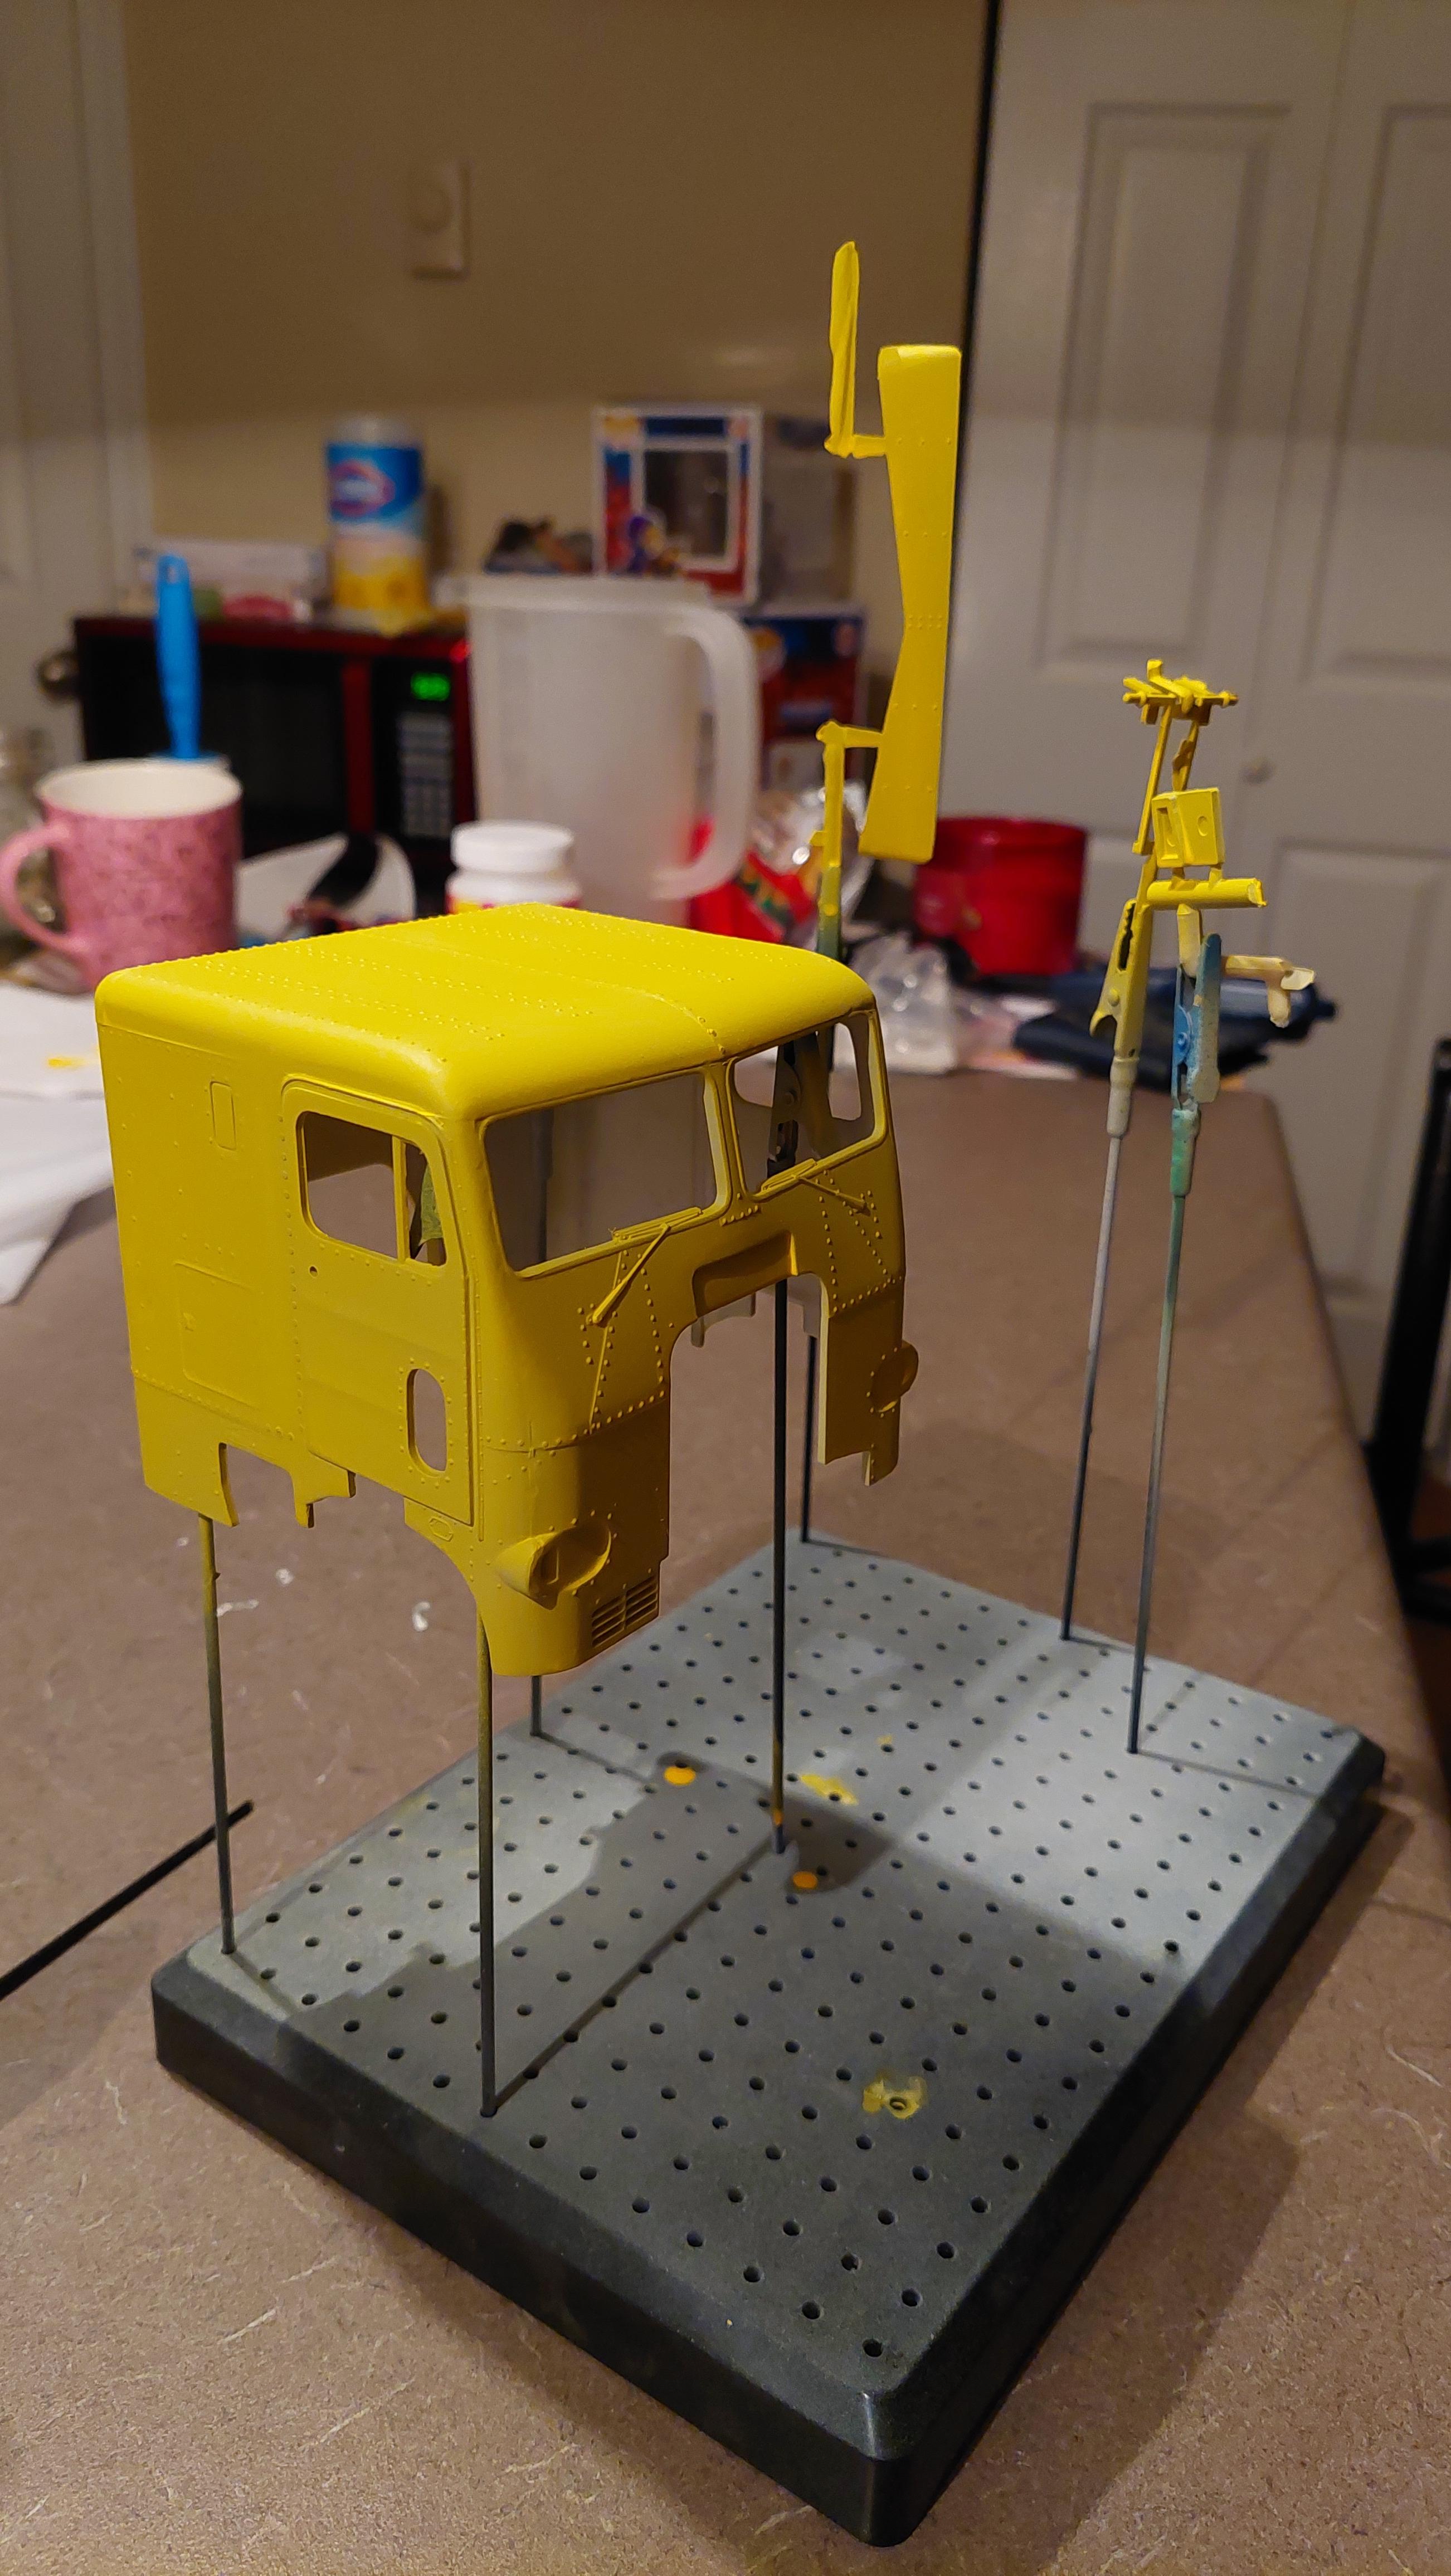
Interior color scheme has been realized. All other interior parts have also been painted but are waiting for detail work. Pretty proud of the masking job! Tomorrow will be detail work and assembly. The interior is an important milestone so I can chill for a little
-
AMT White-Freightliner to Optimus Prime
Devyn replied to Devyn's topic in WIP: Model Trucks: Big Rigs and Heavy Equipment
Anyone know how to make the interior fit inside the cab better? Did a couple test fits and it worked fine with a bit of squeeze but then this most recent time it popped a seam for the back panel -
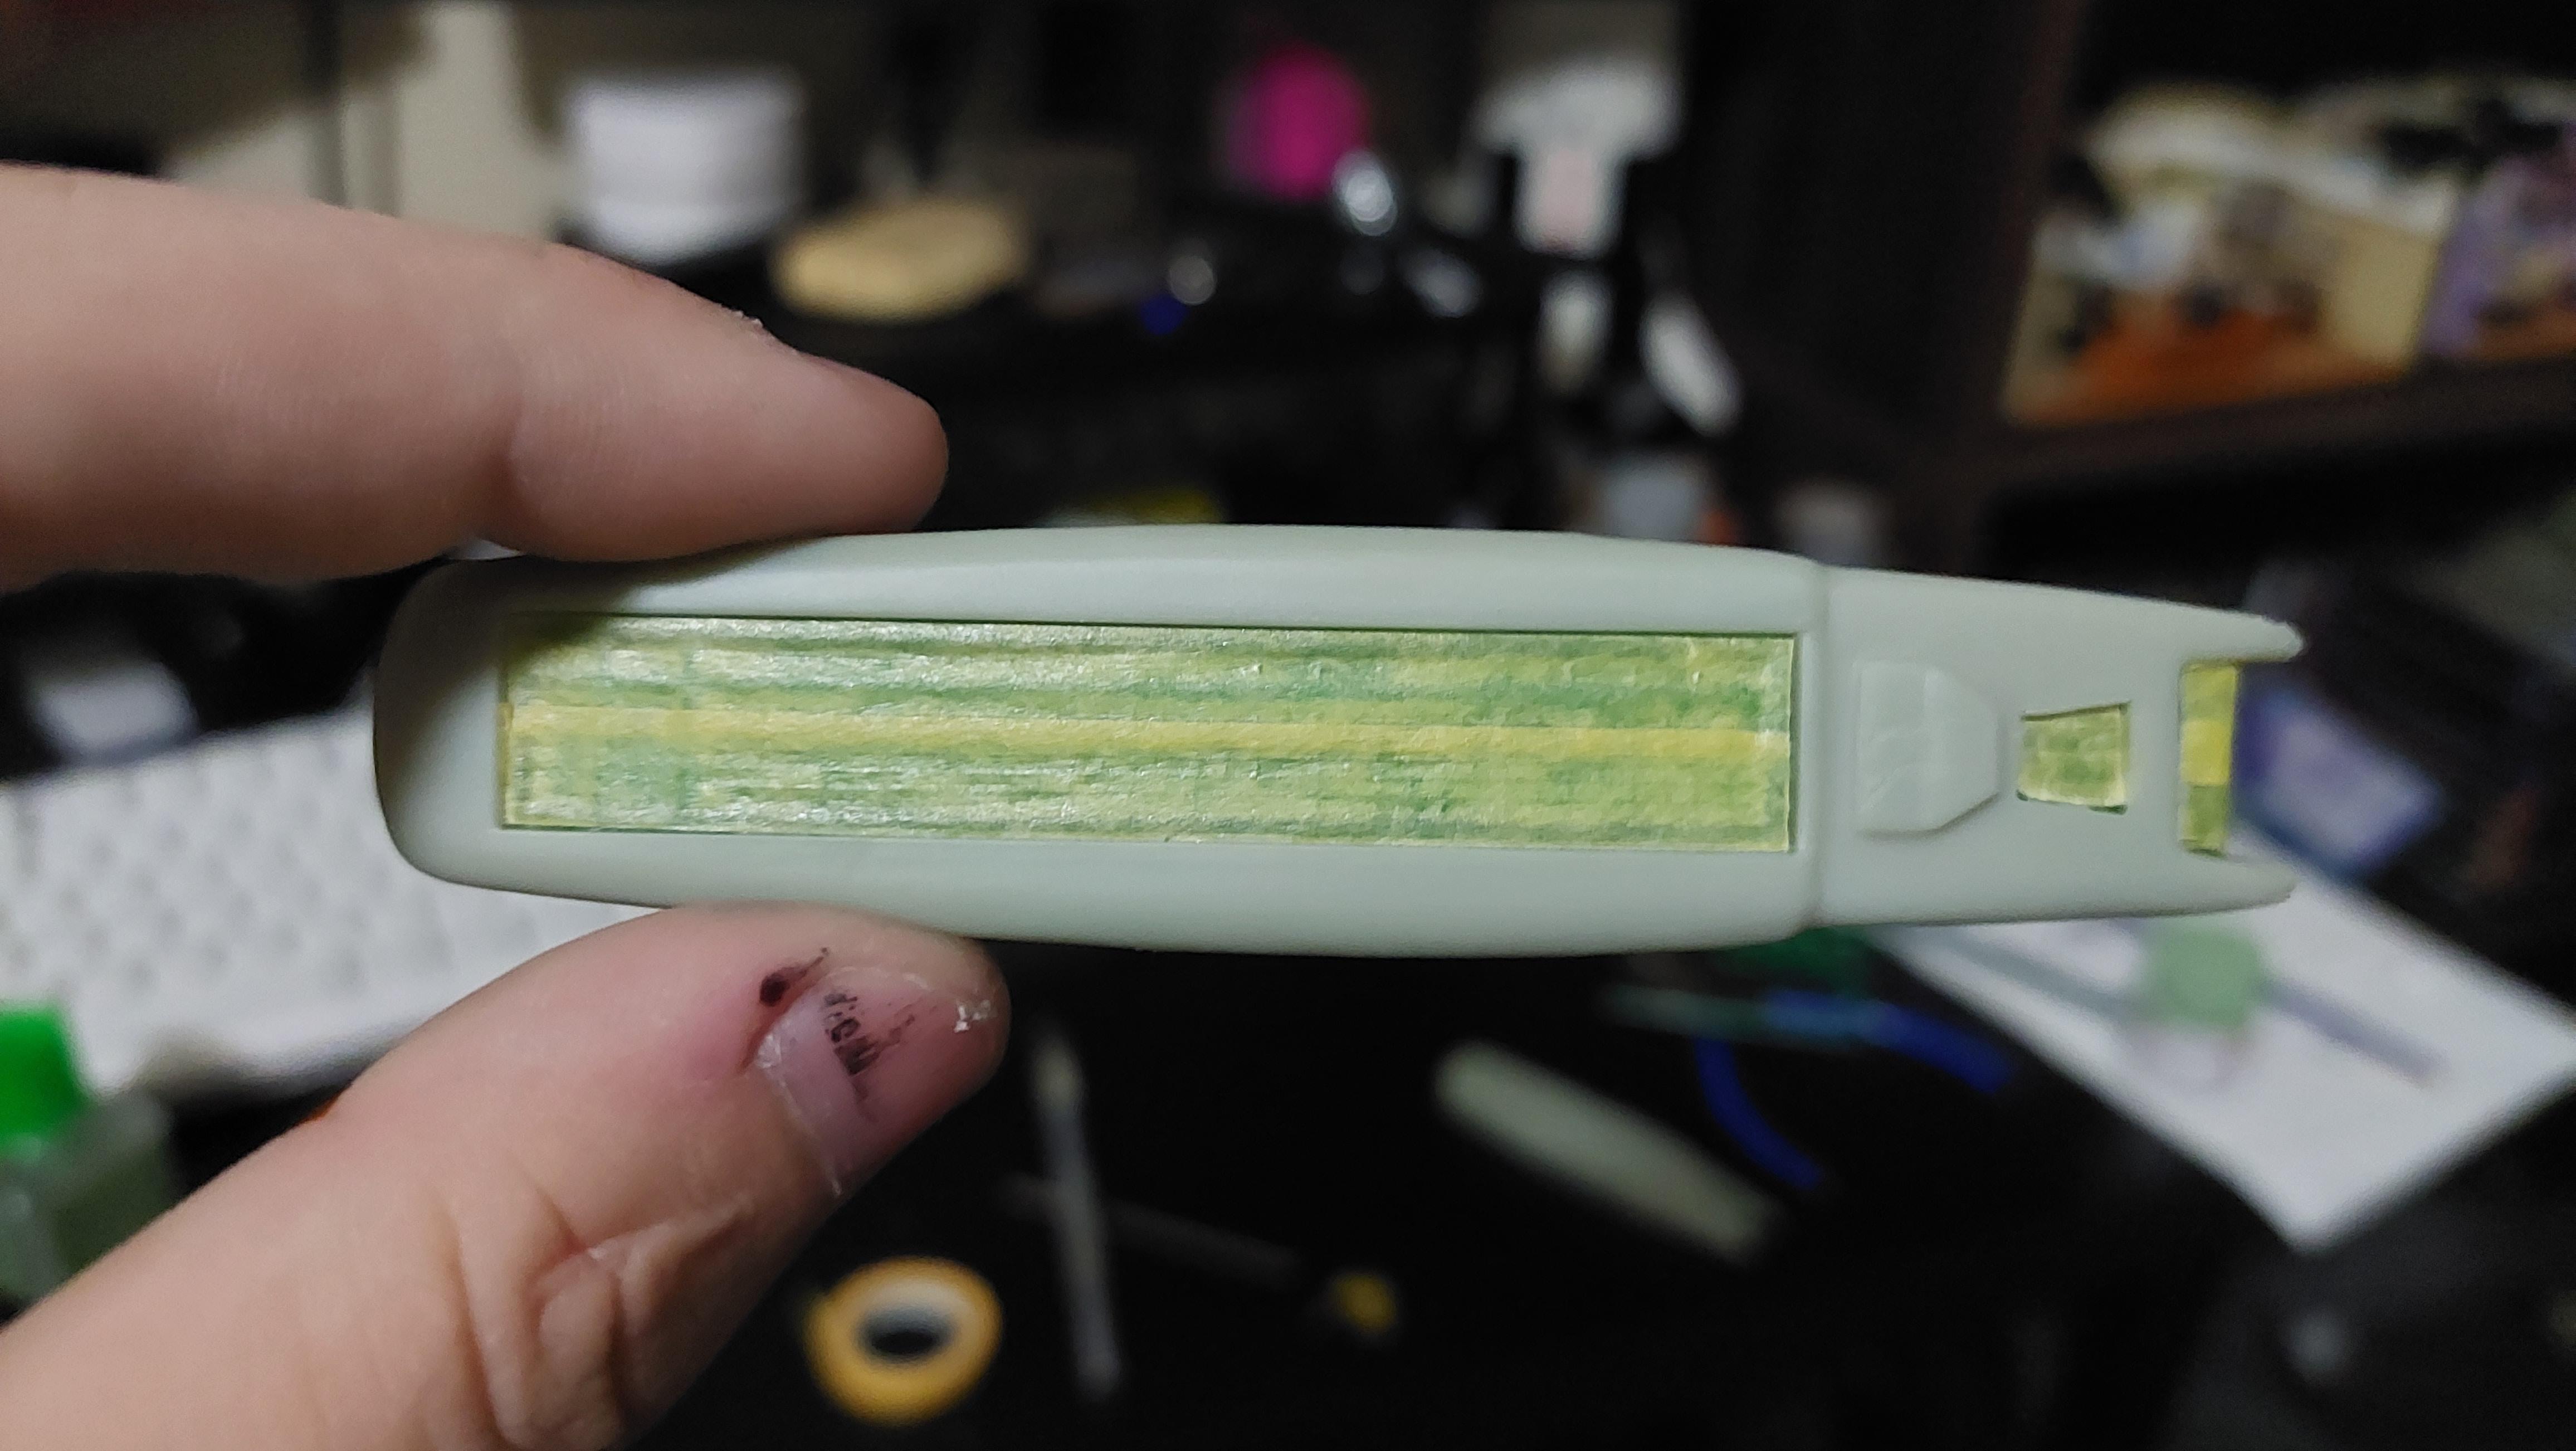
As I mentioned in my intro, I love media based models, and I especially love star trek starships! This is a simple side build while I work on my Optimus. It's probably gonna be done by the end of the week knowing me. Imma practice my airbrushing with this kit, to get those wing and "space dust erosion" highlights. Might use like a sheet of paper on one side to help with the hard edges that fade into soft edges. Also the alignment on this kit is atrocious
-
AMT White-Freightliner to Optimus Prime
Devyn replied to Devyn's topic in WIP: Model Trucks: Big Rigs and Heavy Equipment
This brings some ease to mind. Thank you. One sides logo looks fine but the other doesn't so I'll probably sand one away and try to keep the other (I'm a fan of it). I have archer transfers coming so any rivets are no worry. And I can bring back door panel trim with a touch of silver or chrome. The only thing uniquely Optimus going into this is the logos. Trying to go for realism. Paints and plastic for the trailer came in so maybe I can work on that while I wait on the rivets. Again I really appreciate your input! -
AMT White-Freightliner to Optimus Prime
Devyn replied to Devyn's topic in WIP: Model Trucks: Big Rigs and Heavy Equipment
I did a little bit more sanding but I'll have to call it good. I'm hoping all the chrome pieces, a lot of chrome trim, and the slightly thick metallic red will distract from it -
AMT White-Freightliner to Optimus Prime
Devyn replied to Devyn's topic in WIP: Model Trucks: Big Rigs and Heavy Equipment
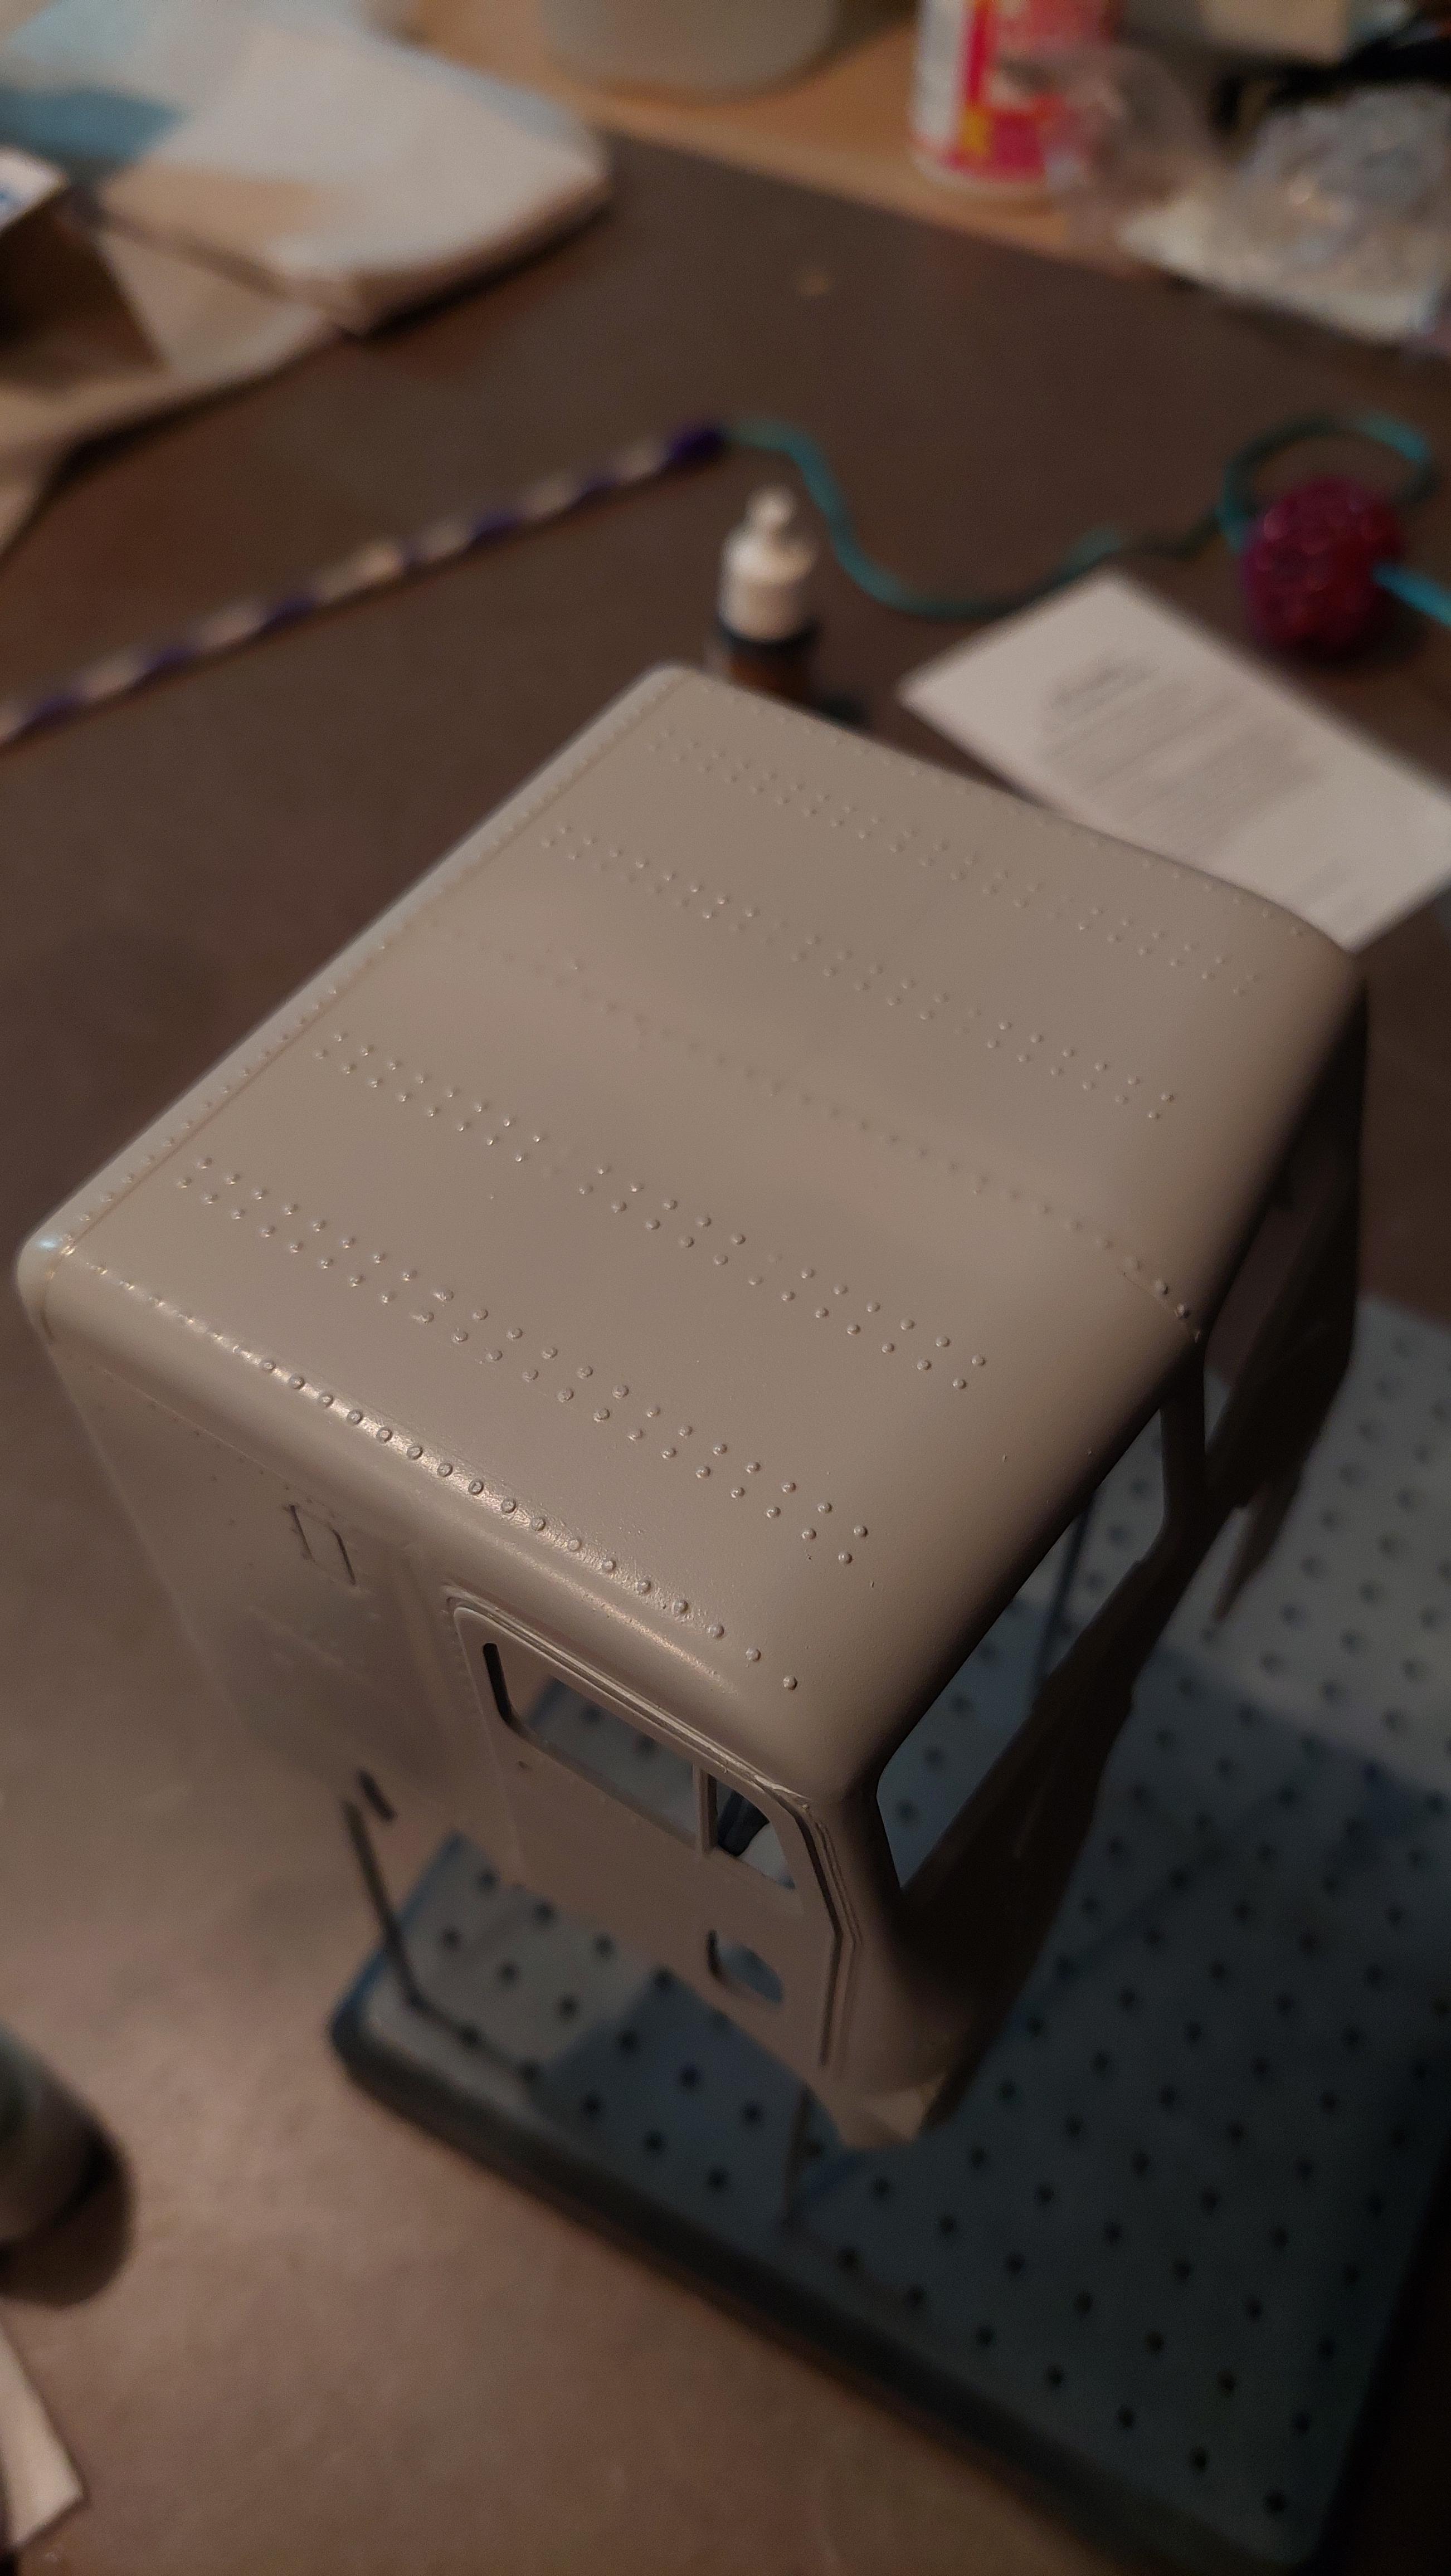
Fighting for my life with this seamline but I'm probably gonna have to call it before I lose any more detail. Bought some archer transfers for the rivets but I don't know what I'm gonna do about that center line down the top of the cab and the tiny "White-Freightliner" logo near the steps
- 32 replies
-
- 1
-
-
- amt
- freightliner
- (and 1 more)