Search the Community
Showing results for tags 'amt'.
-
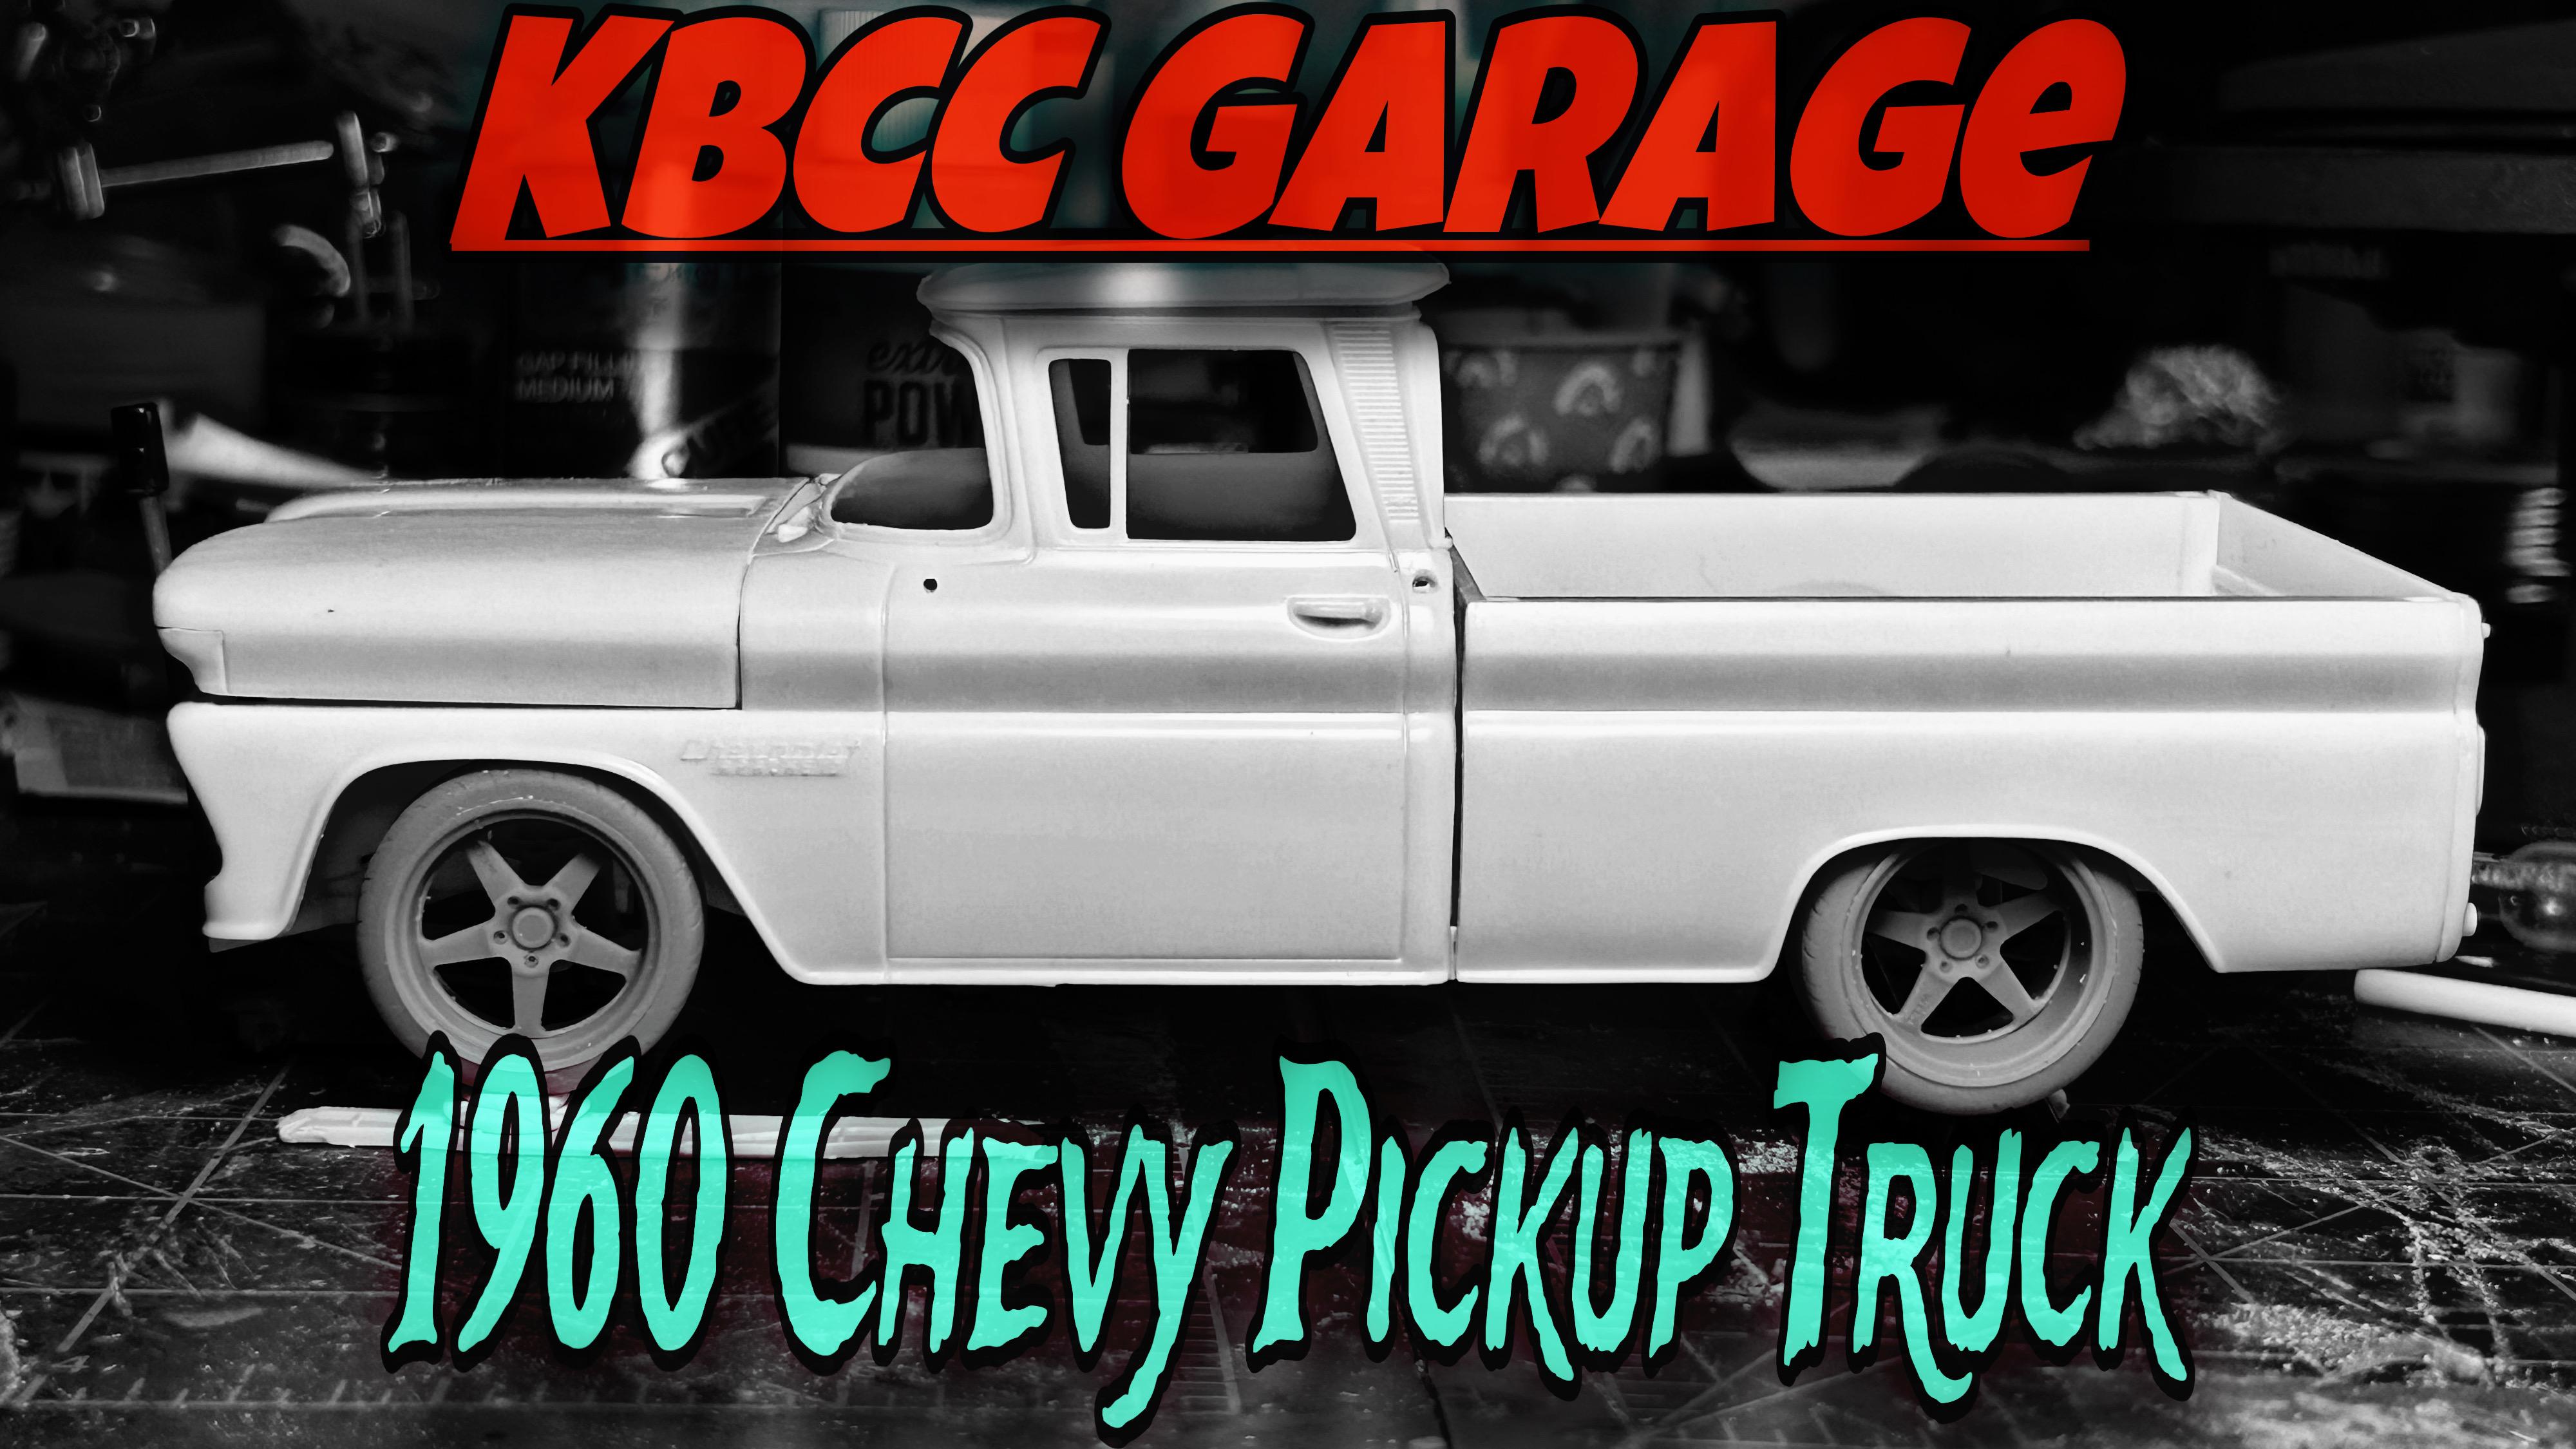
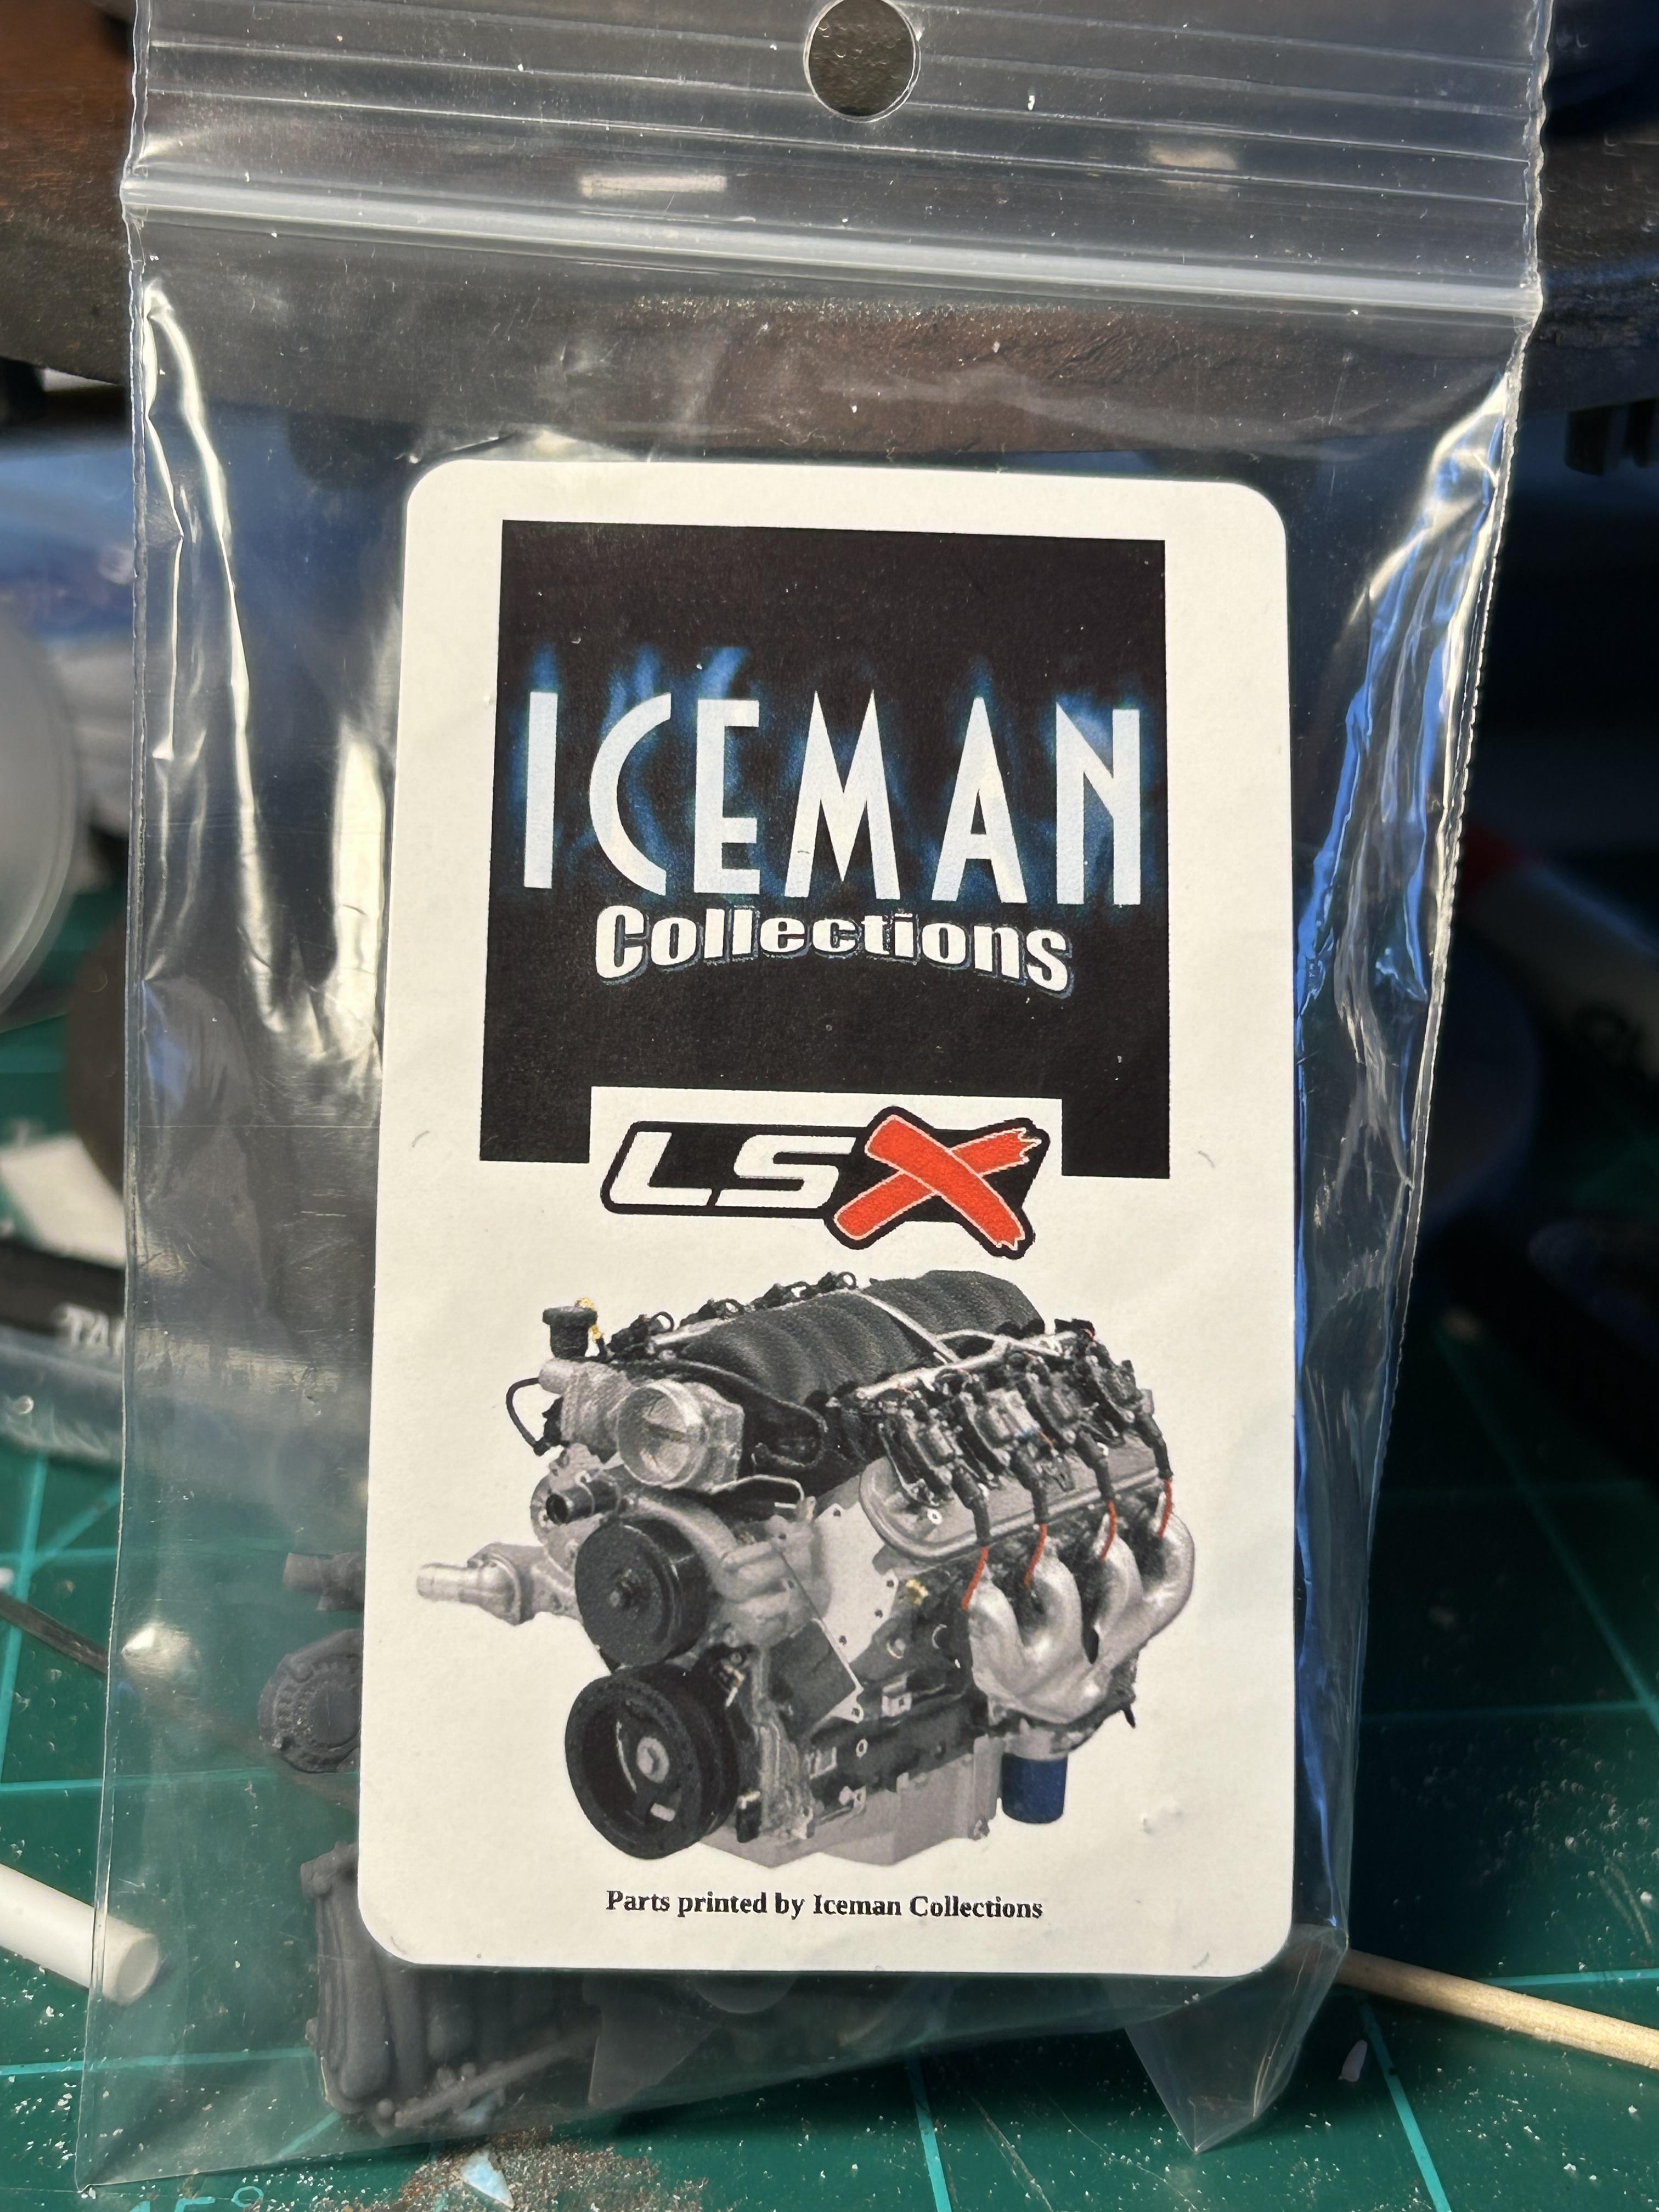
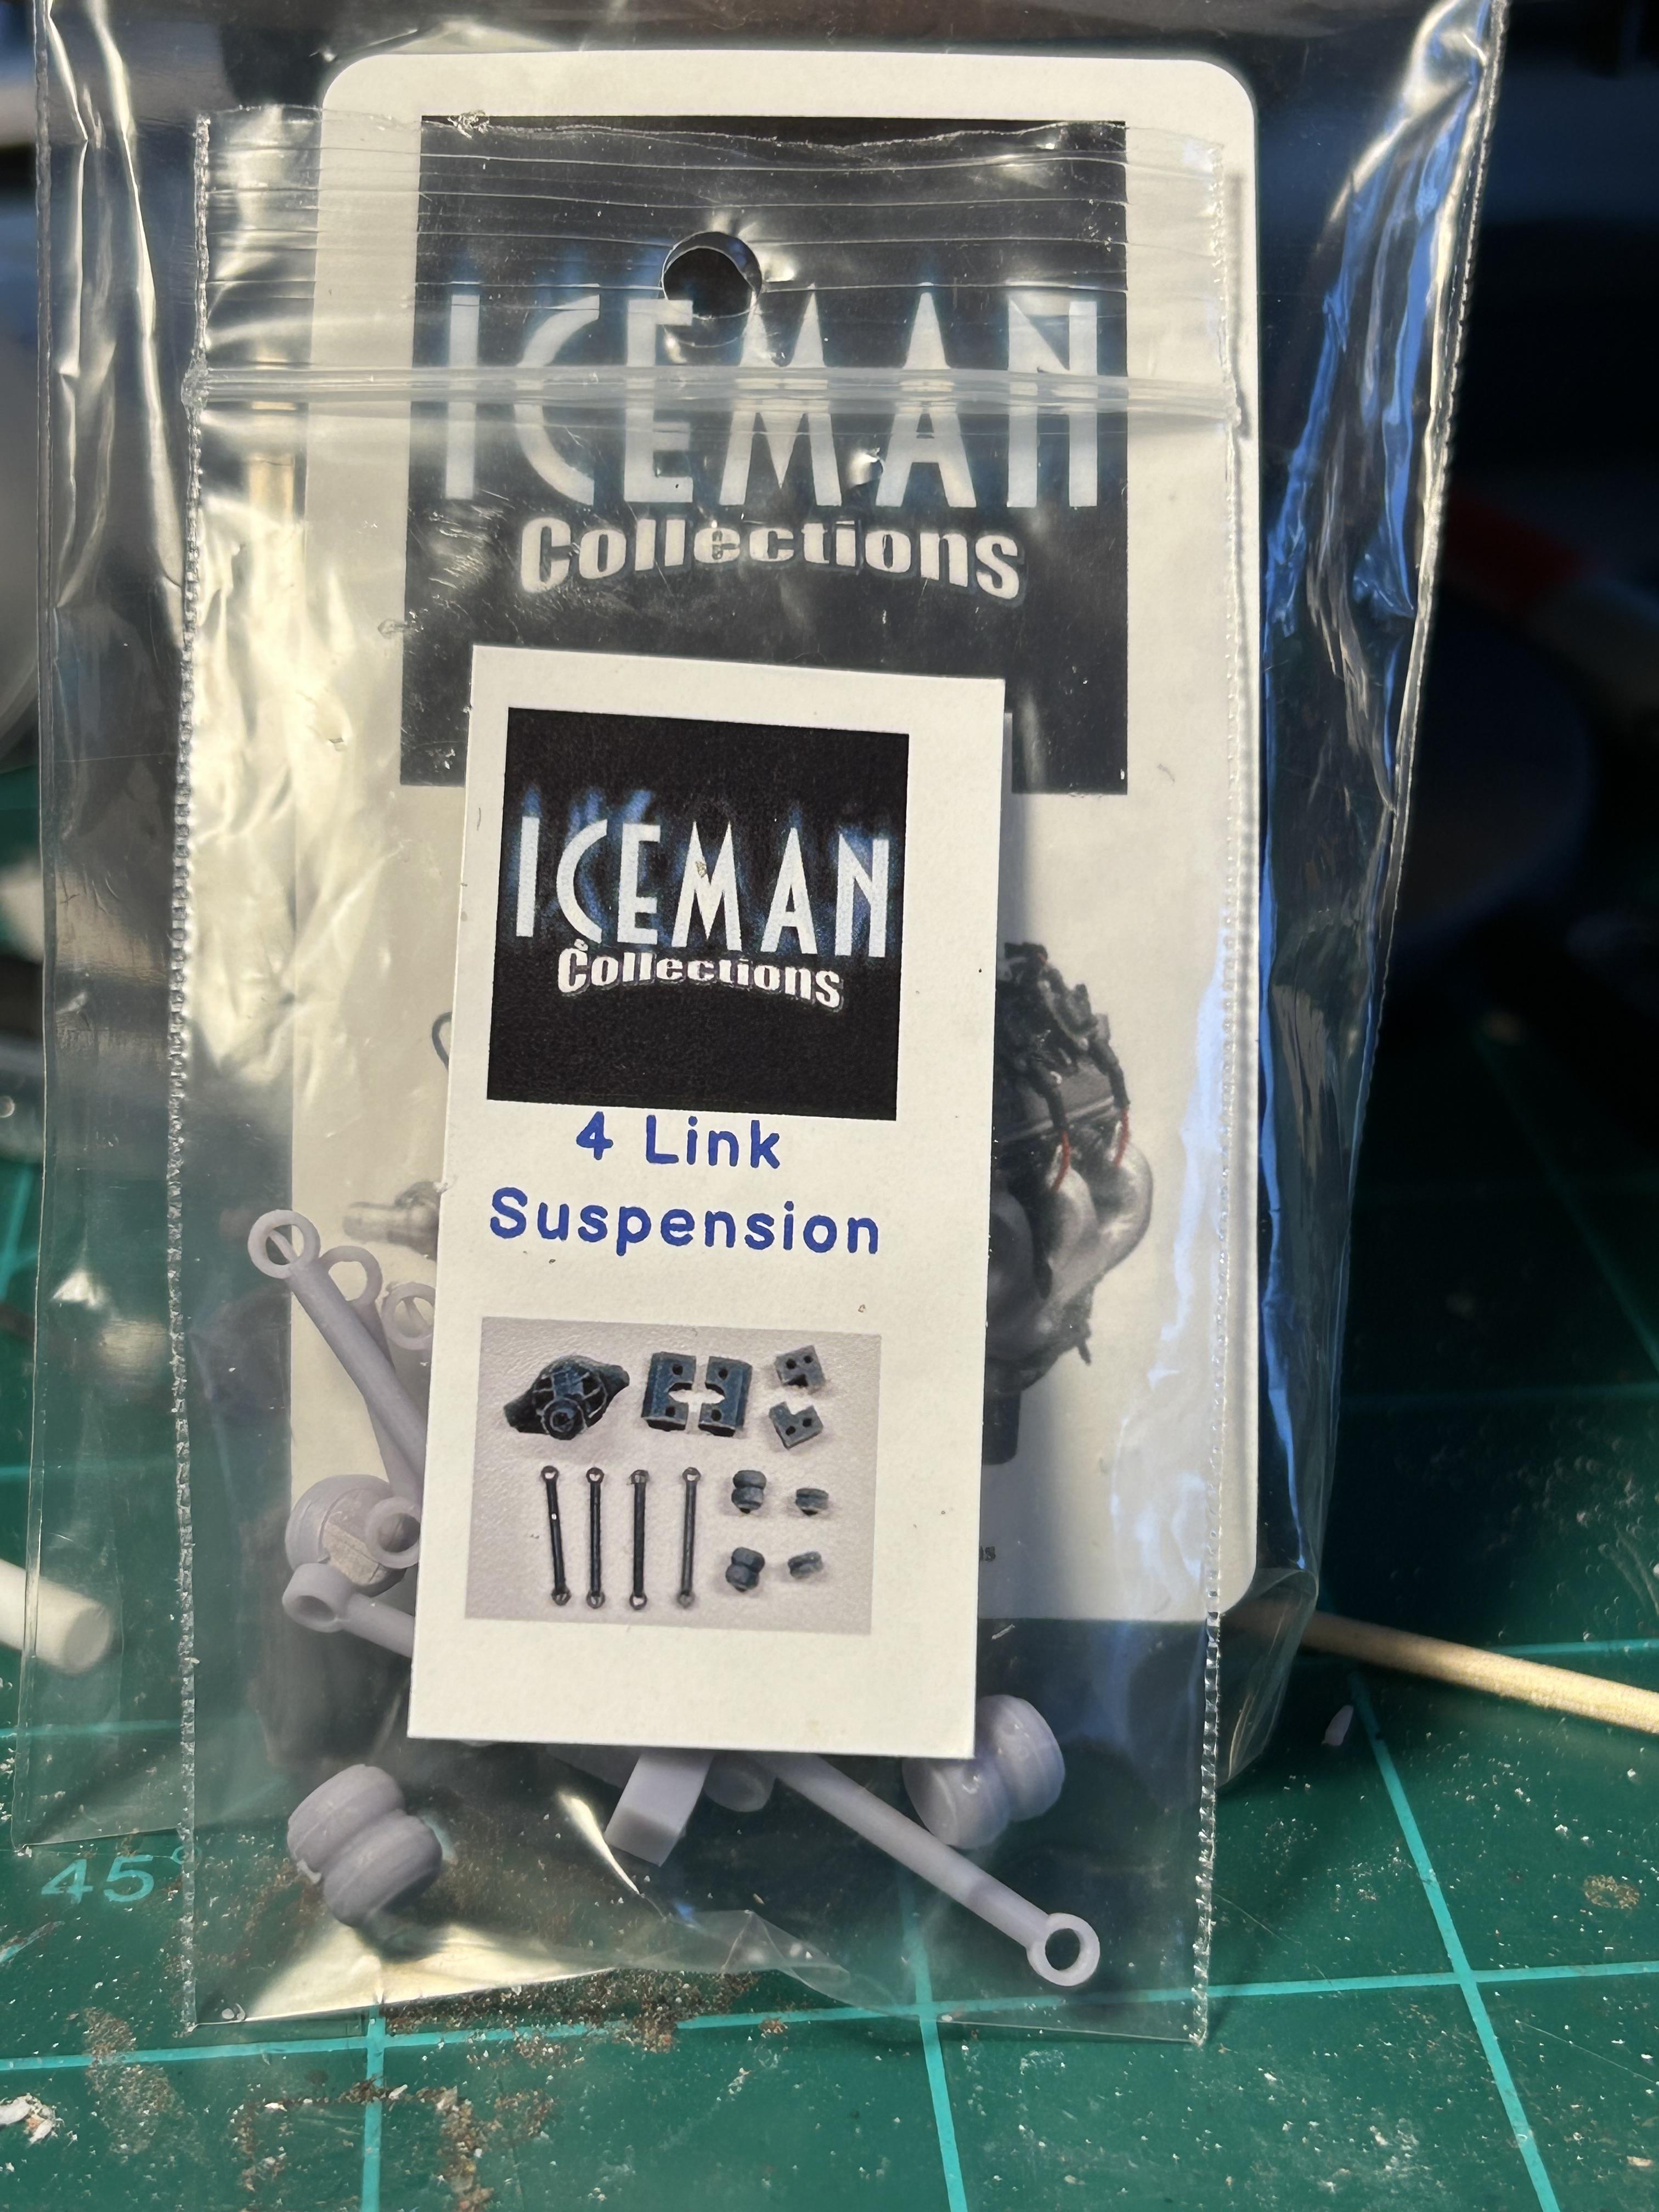
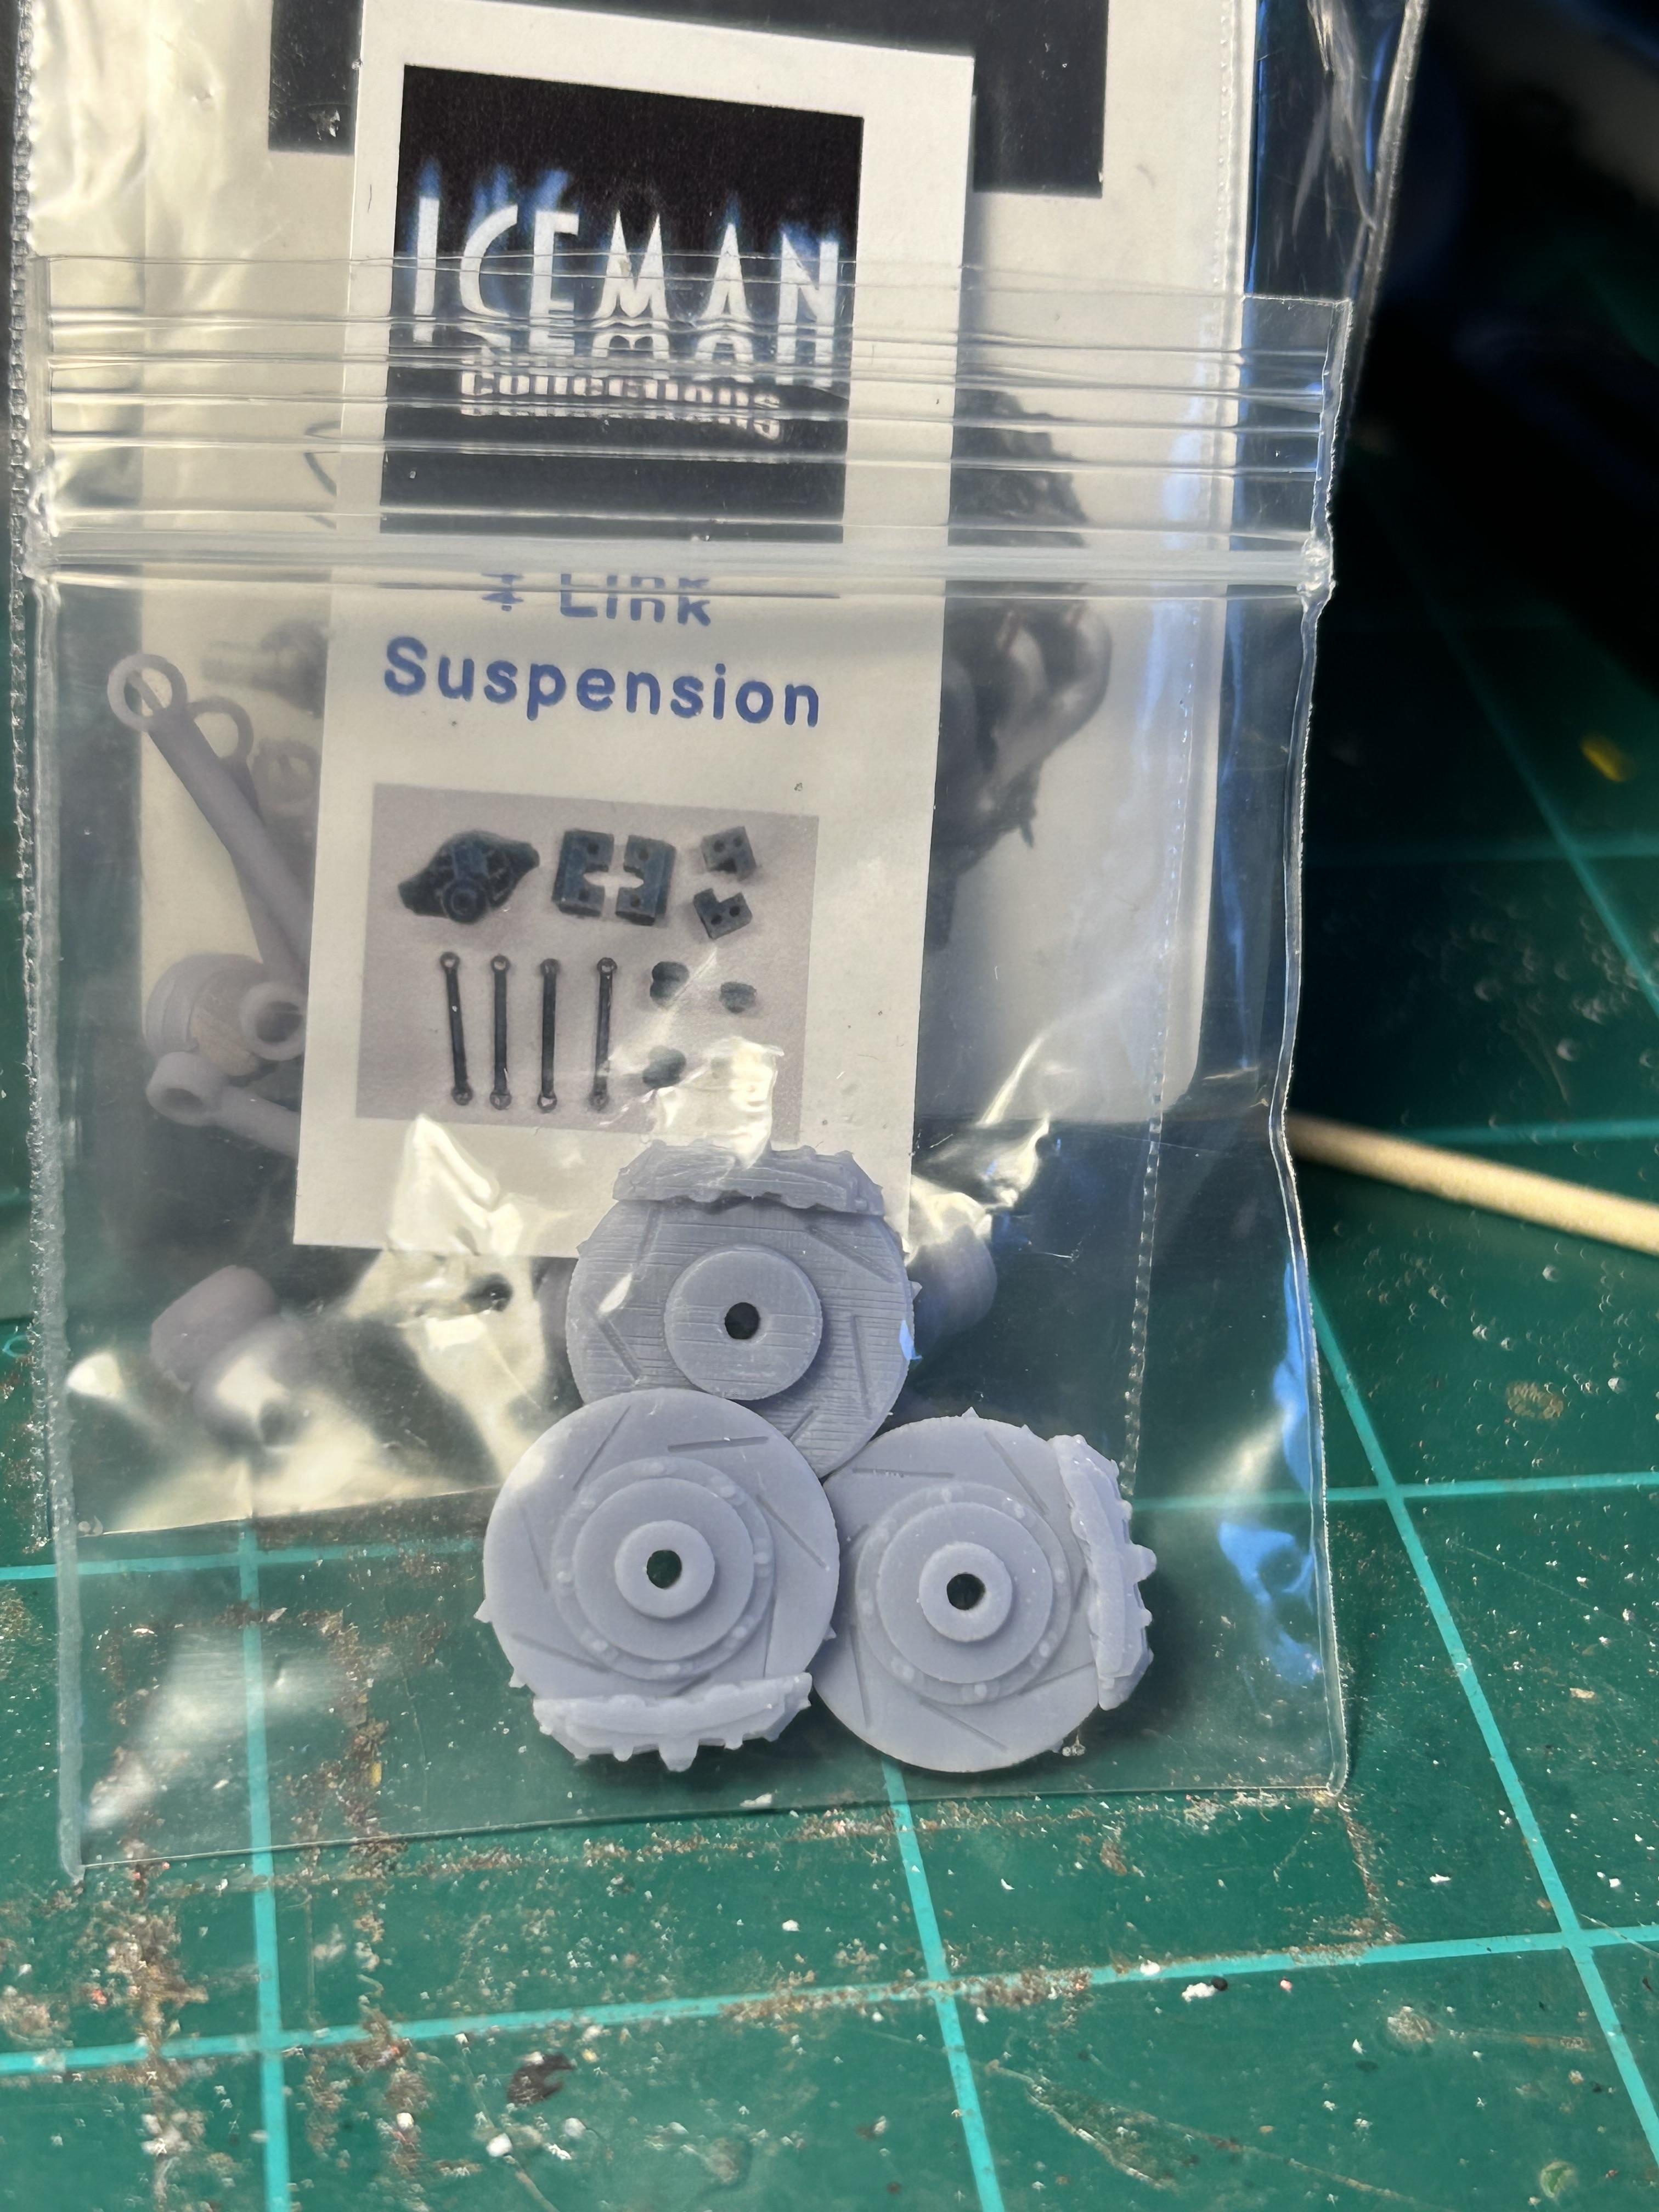
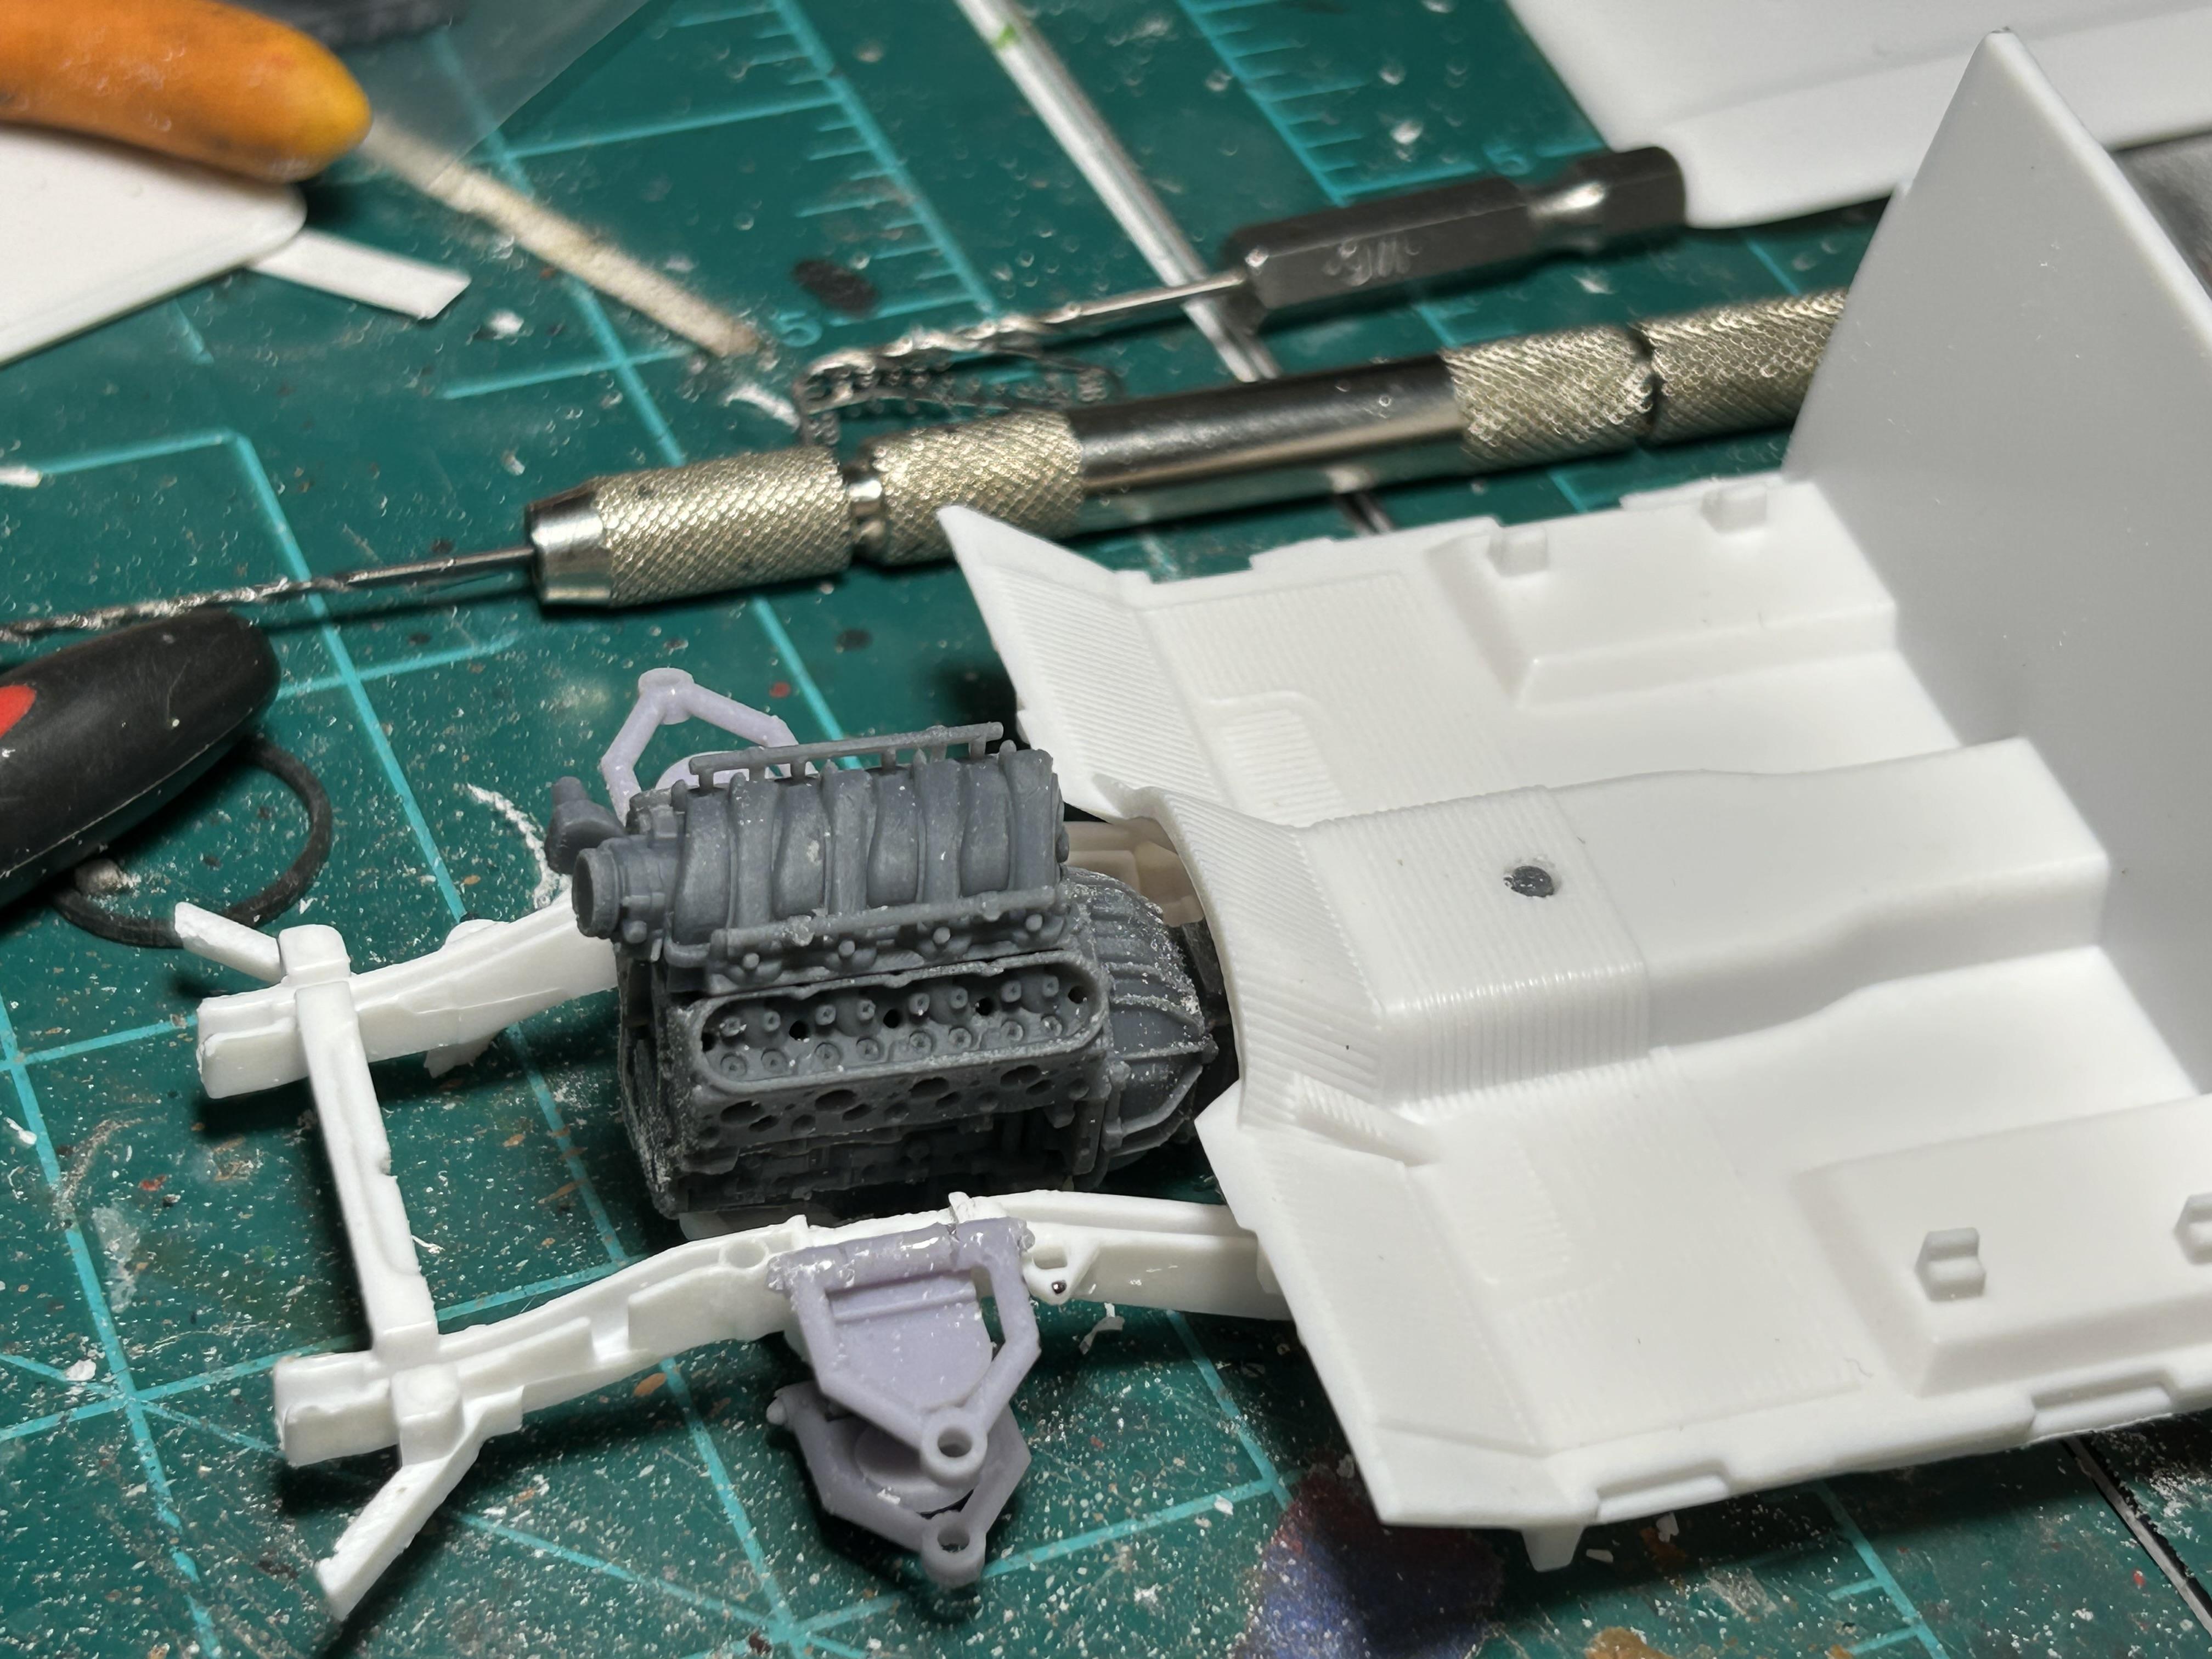
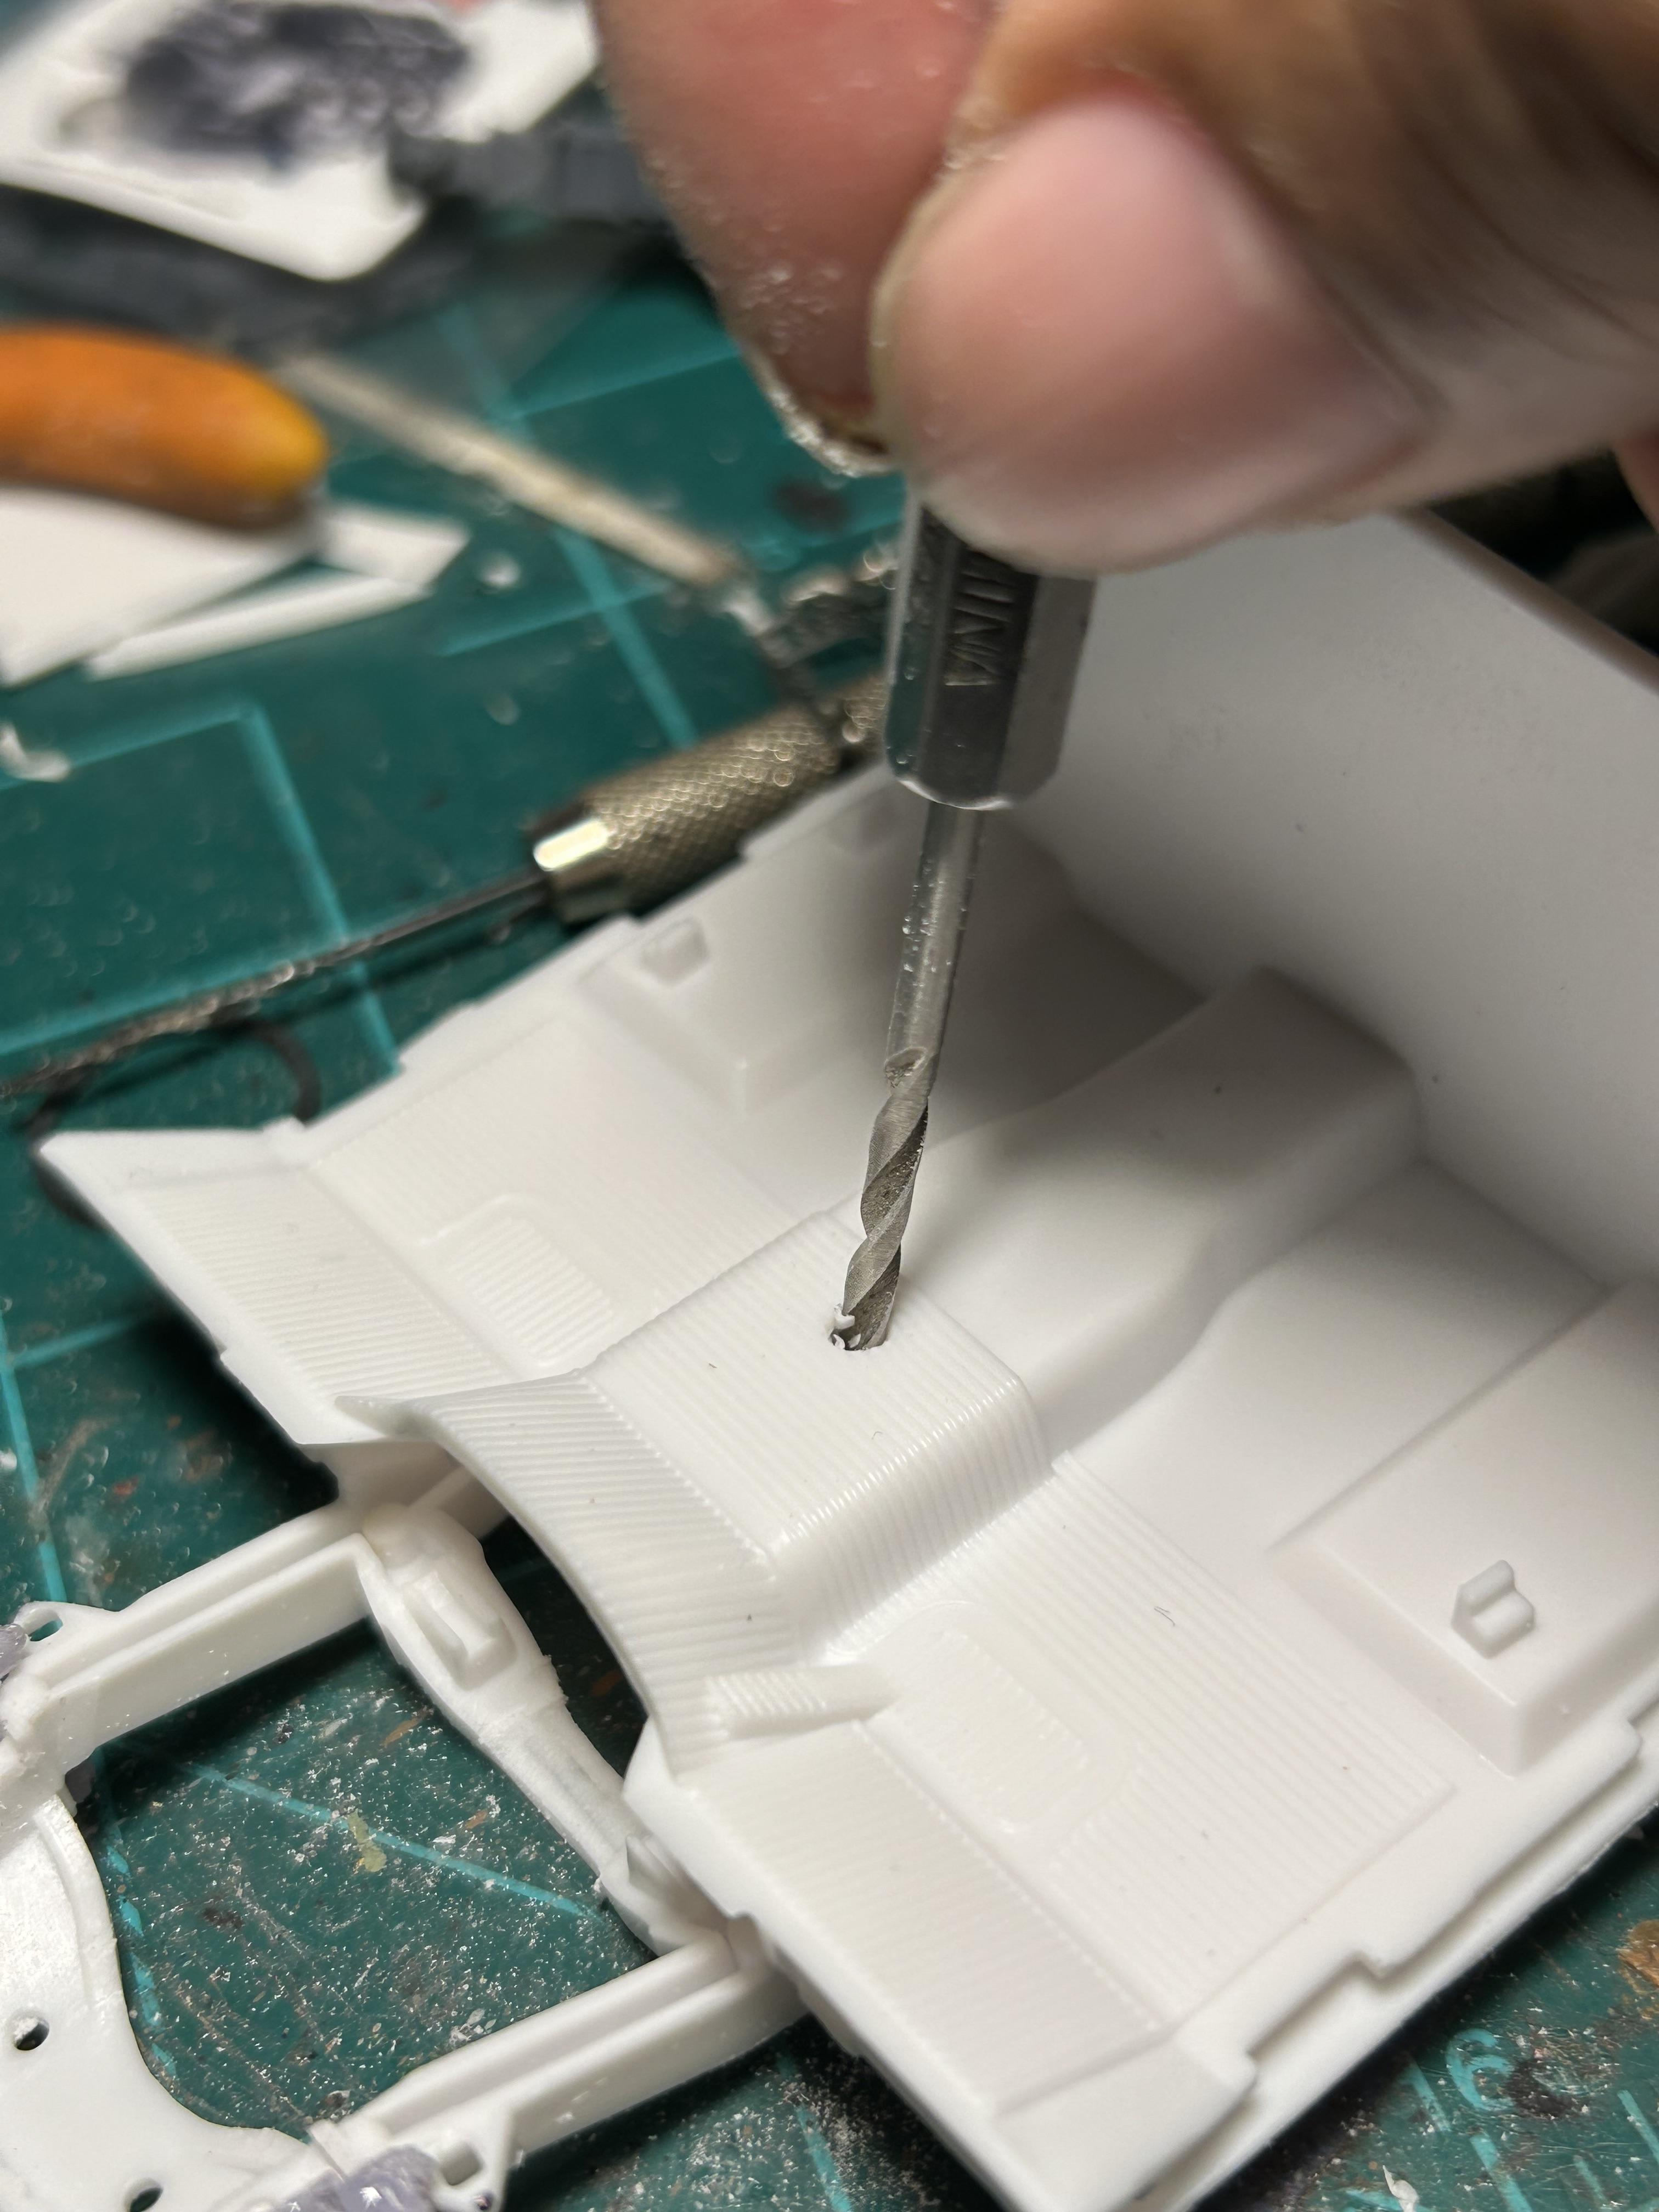
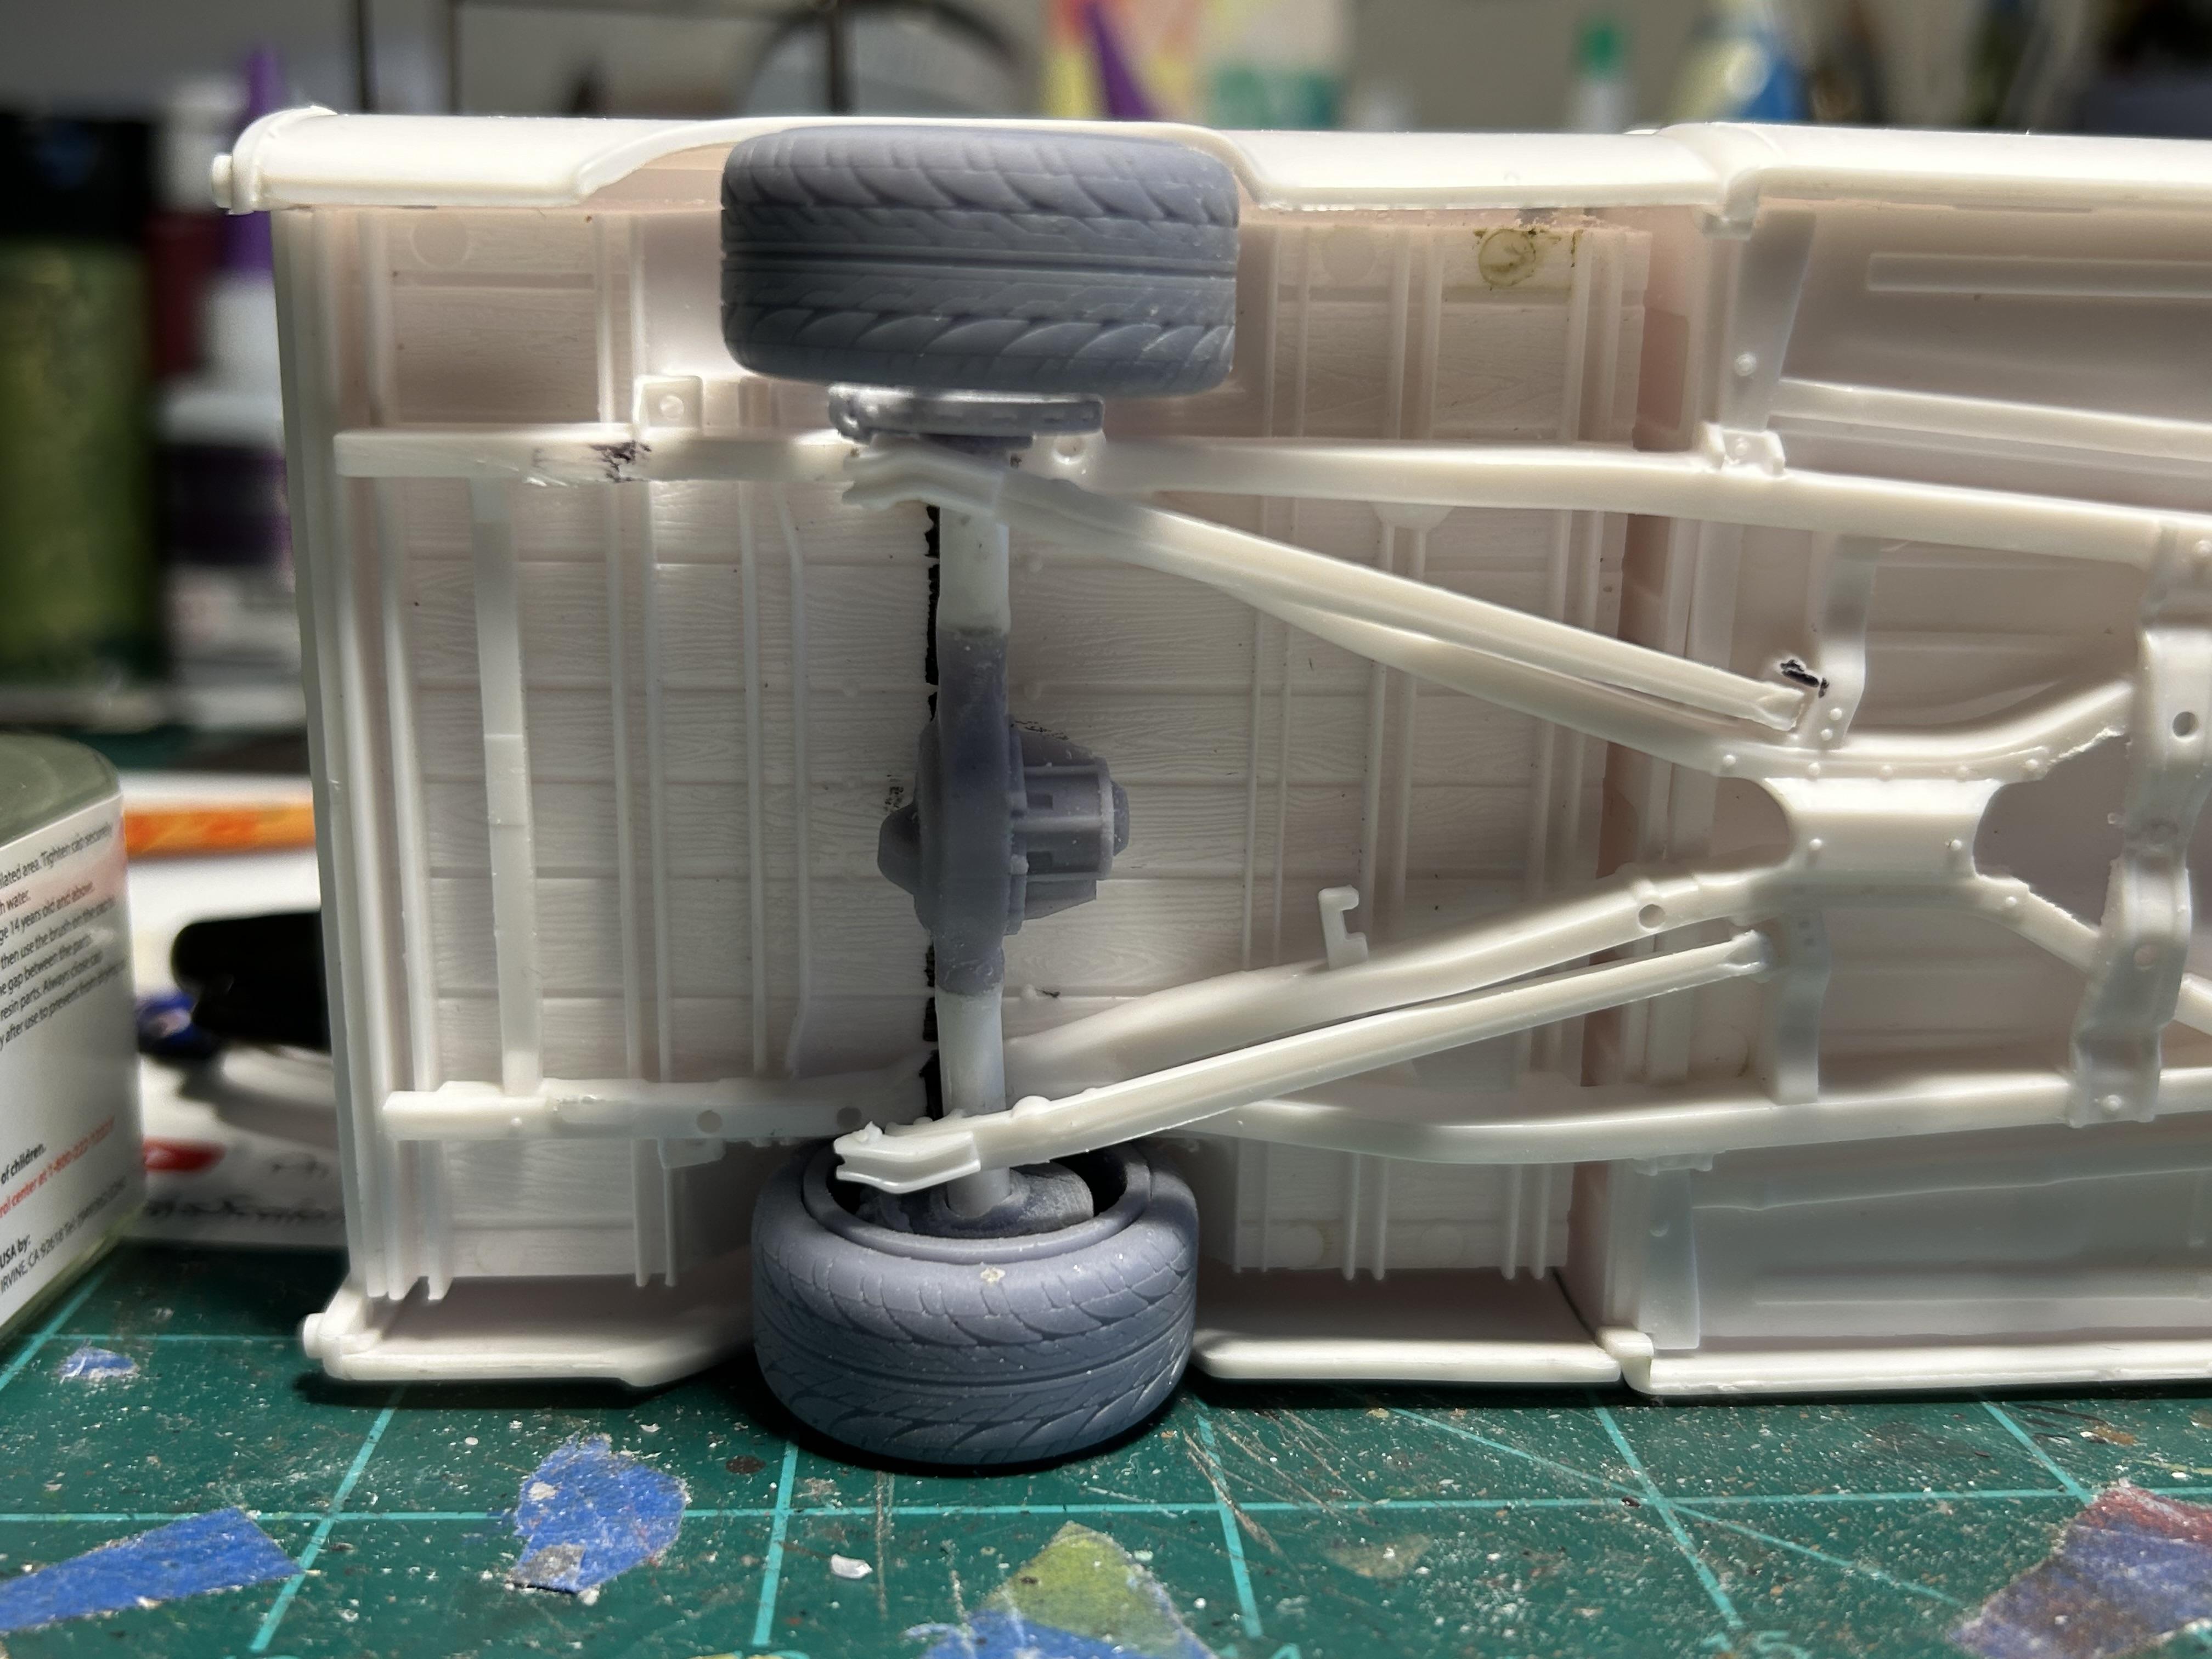
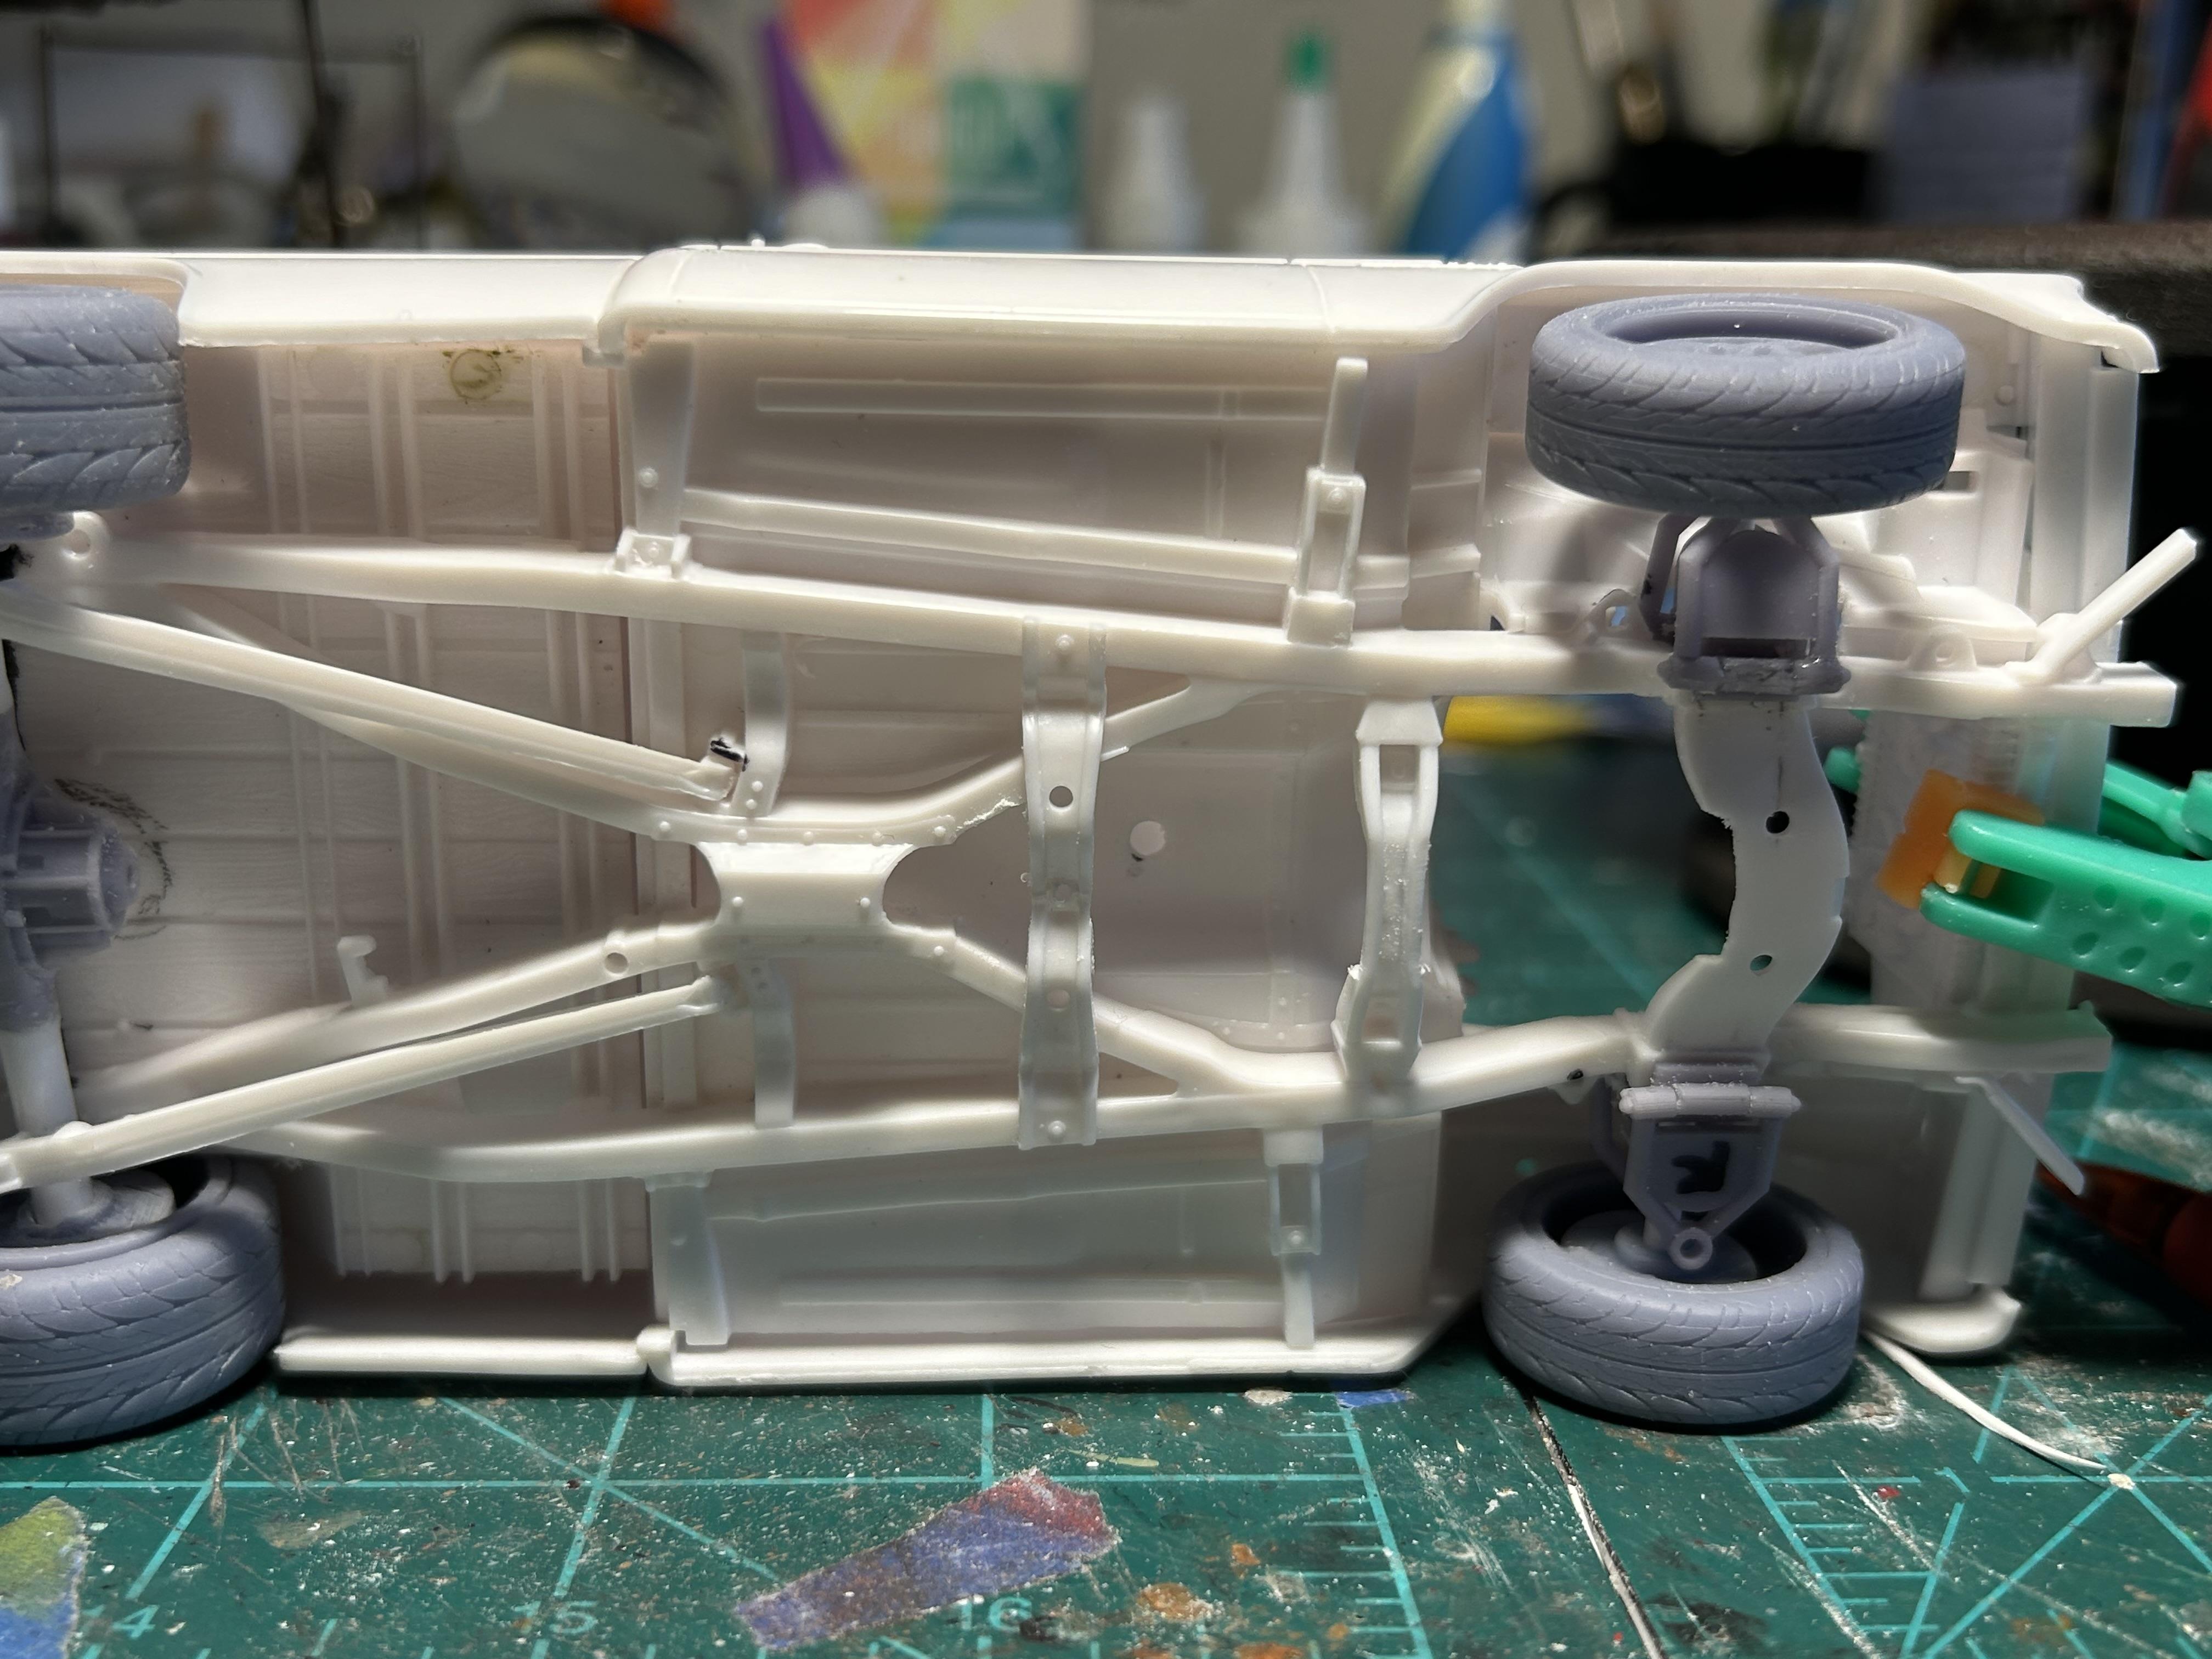
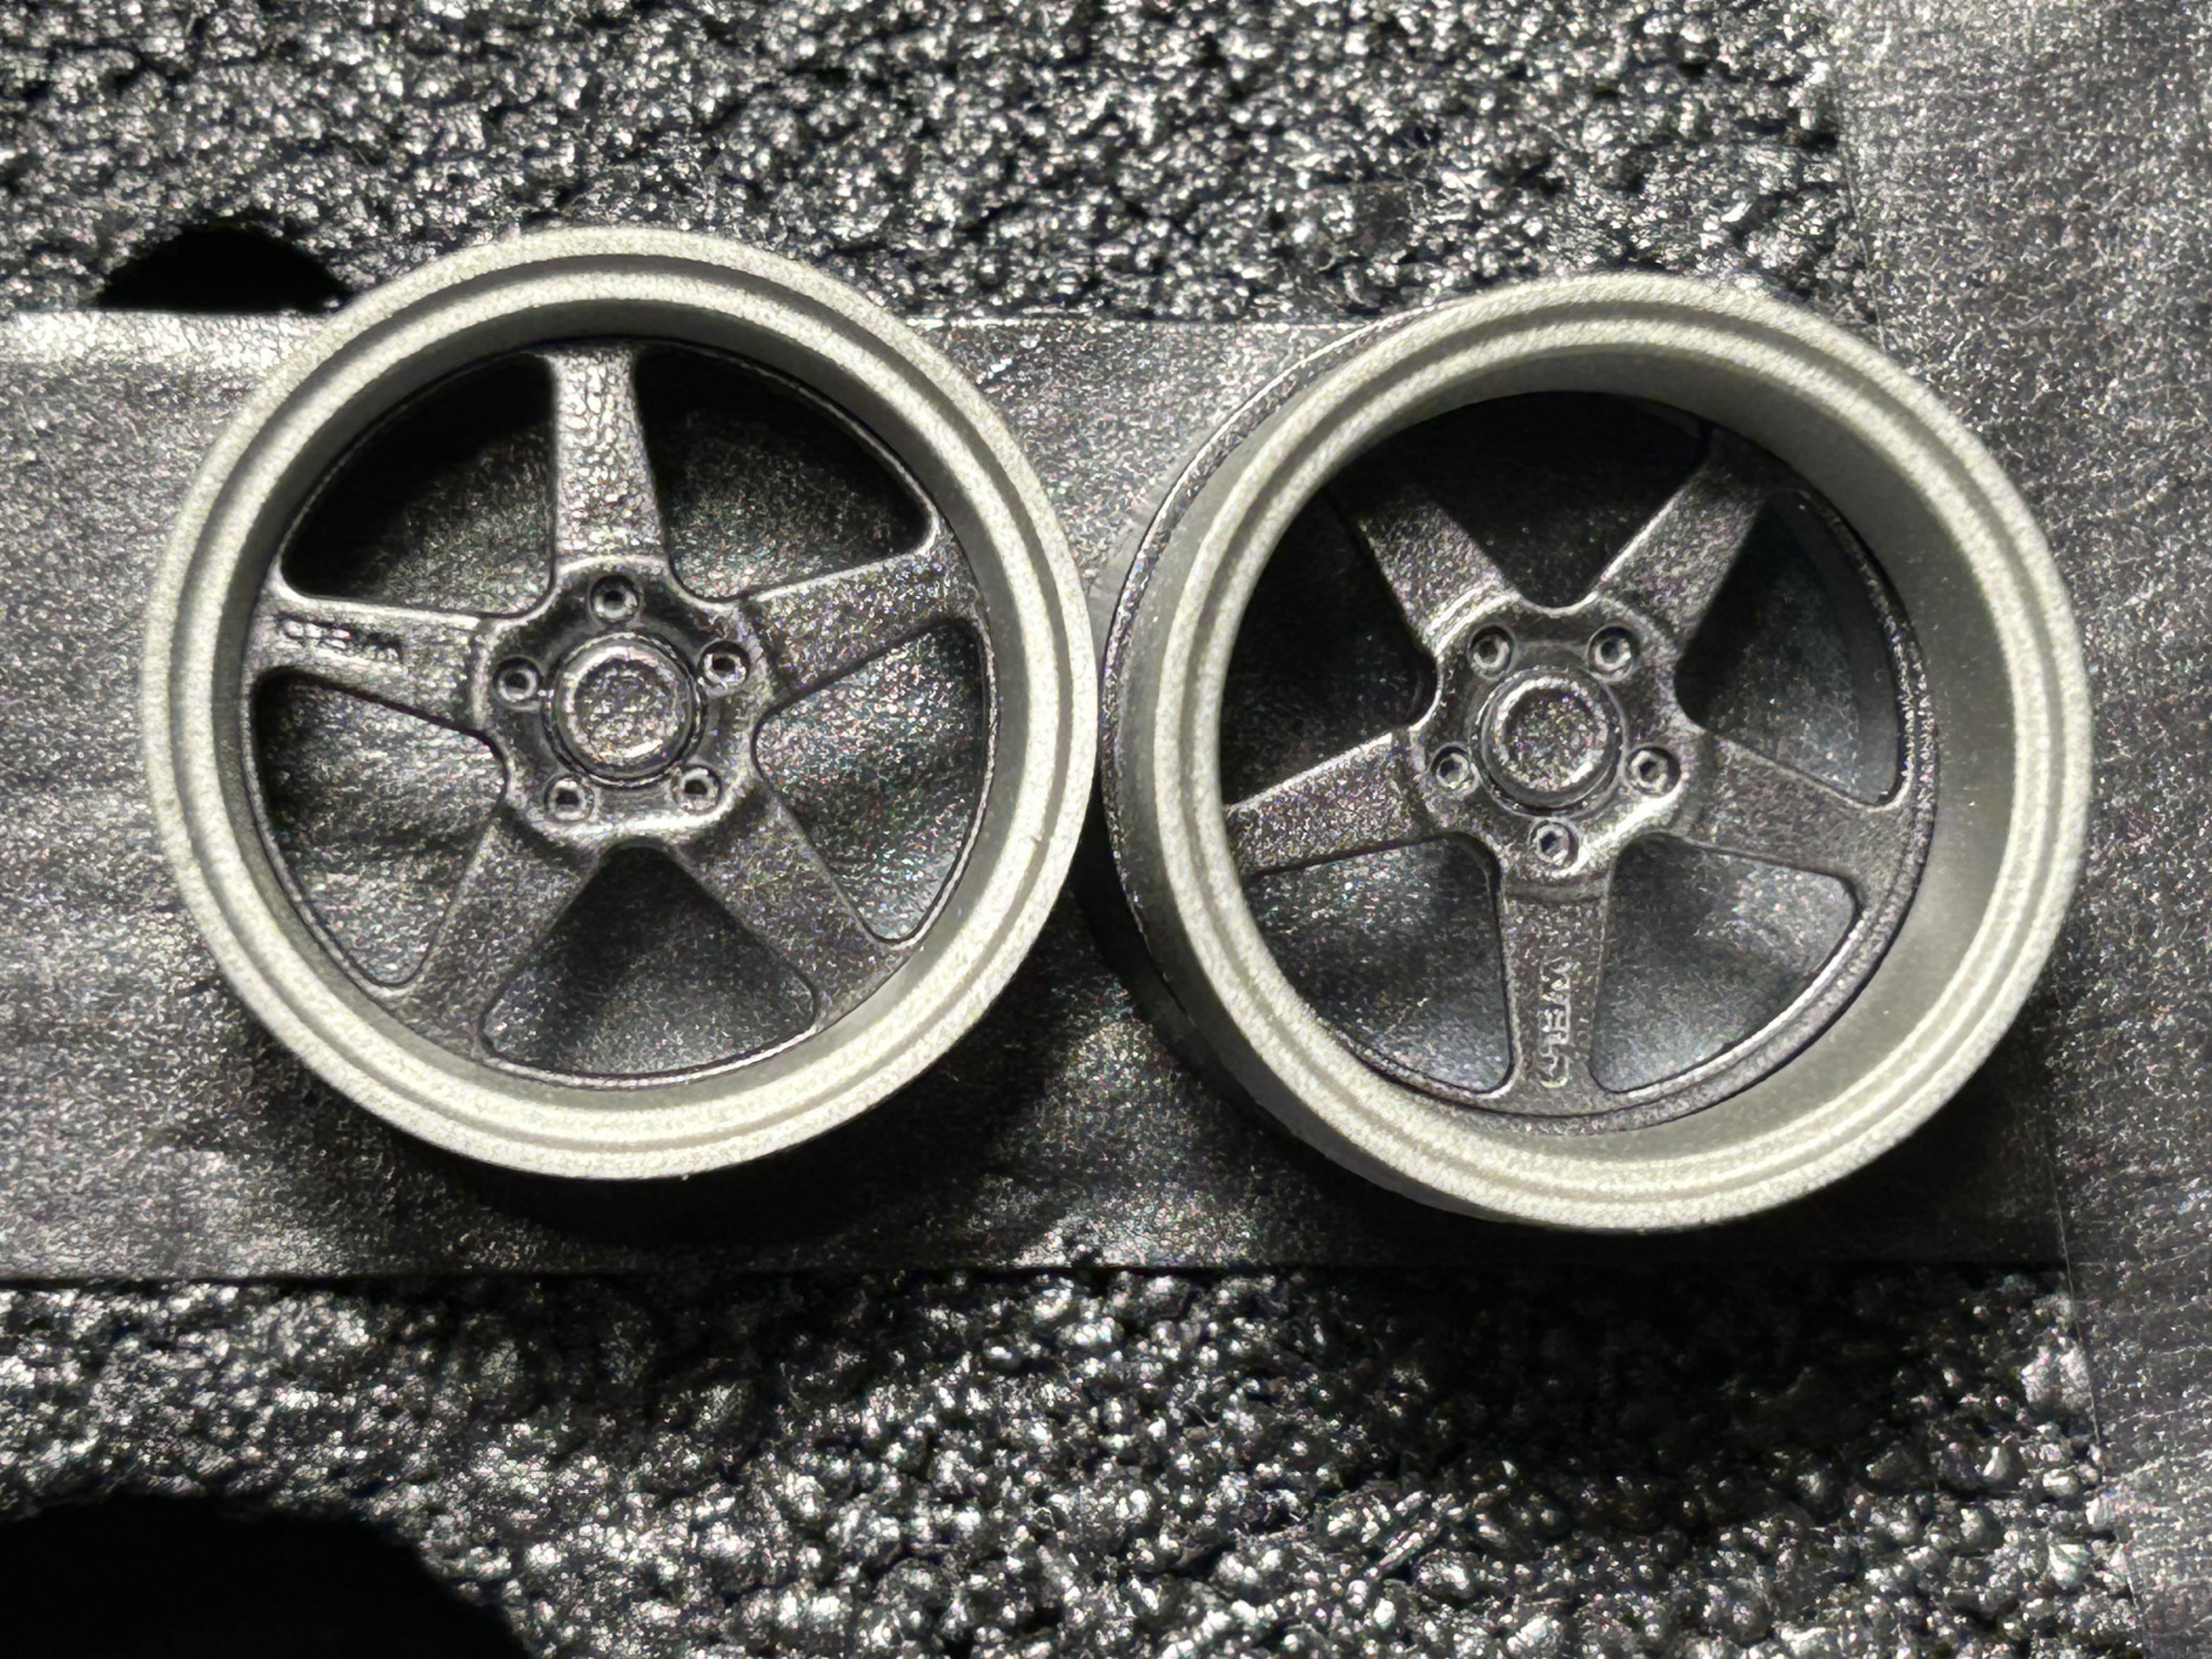
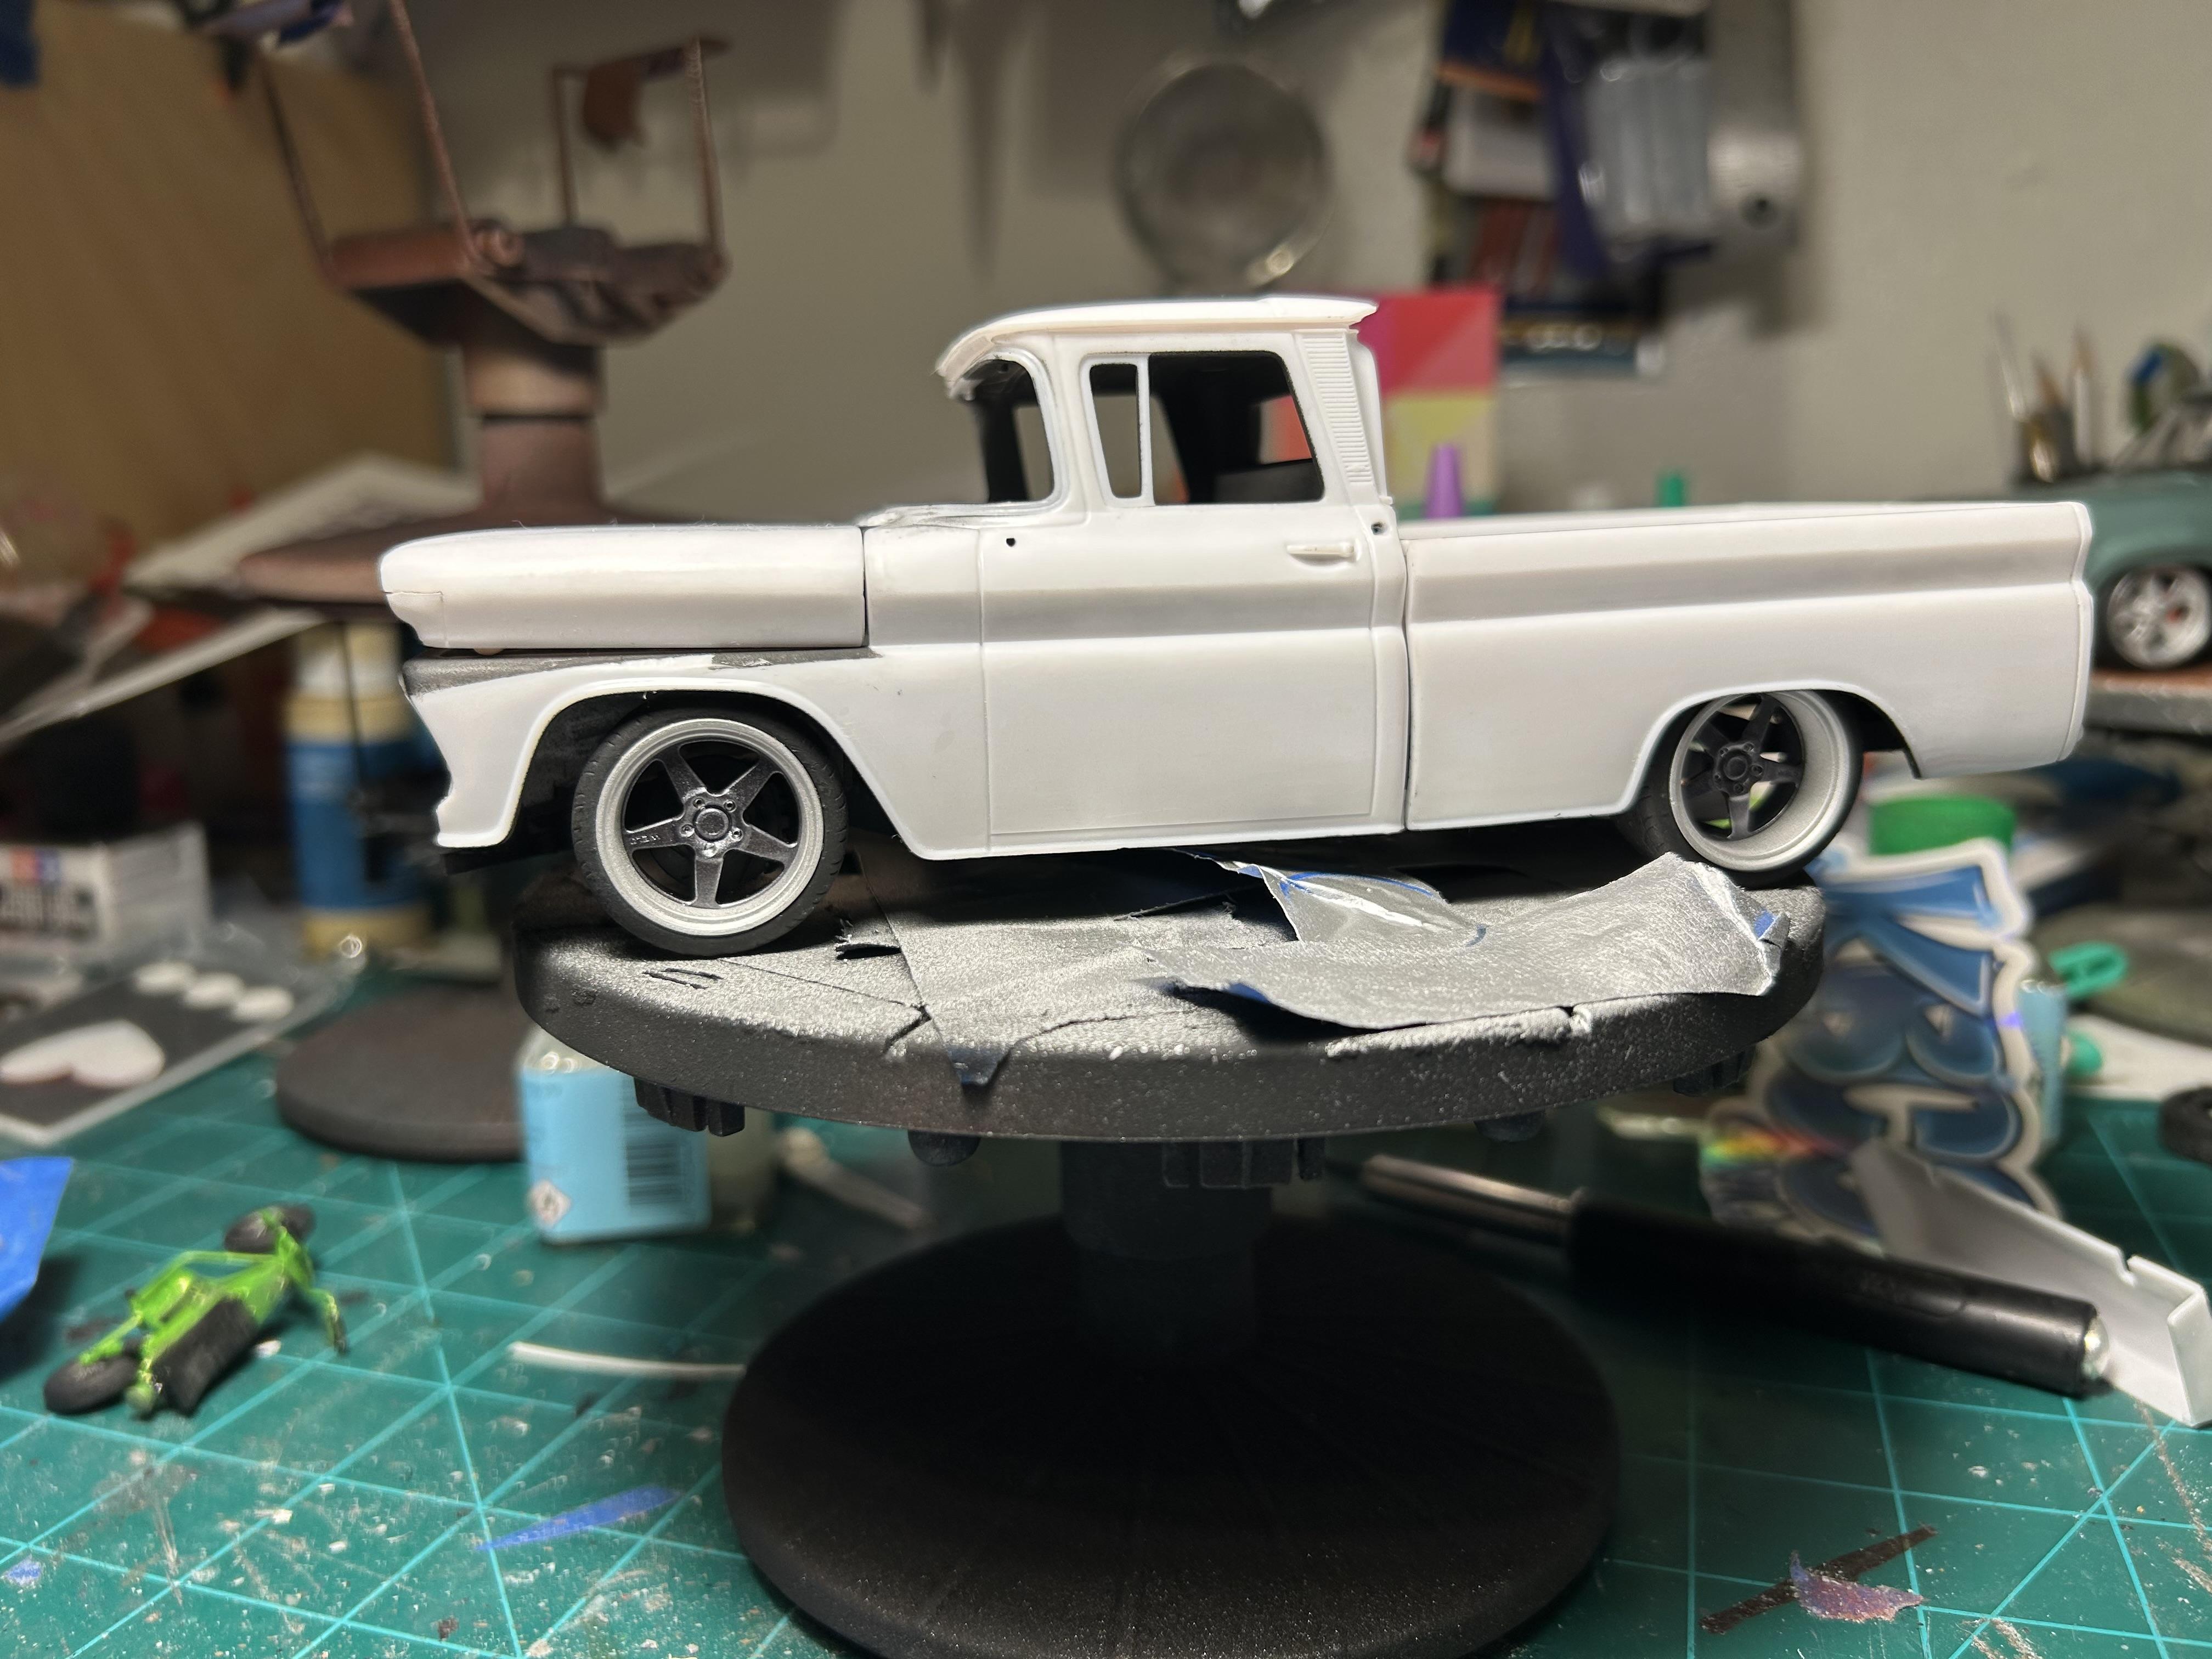
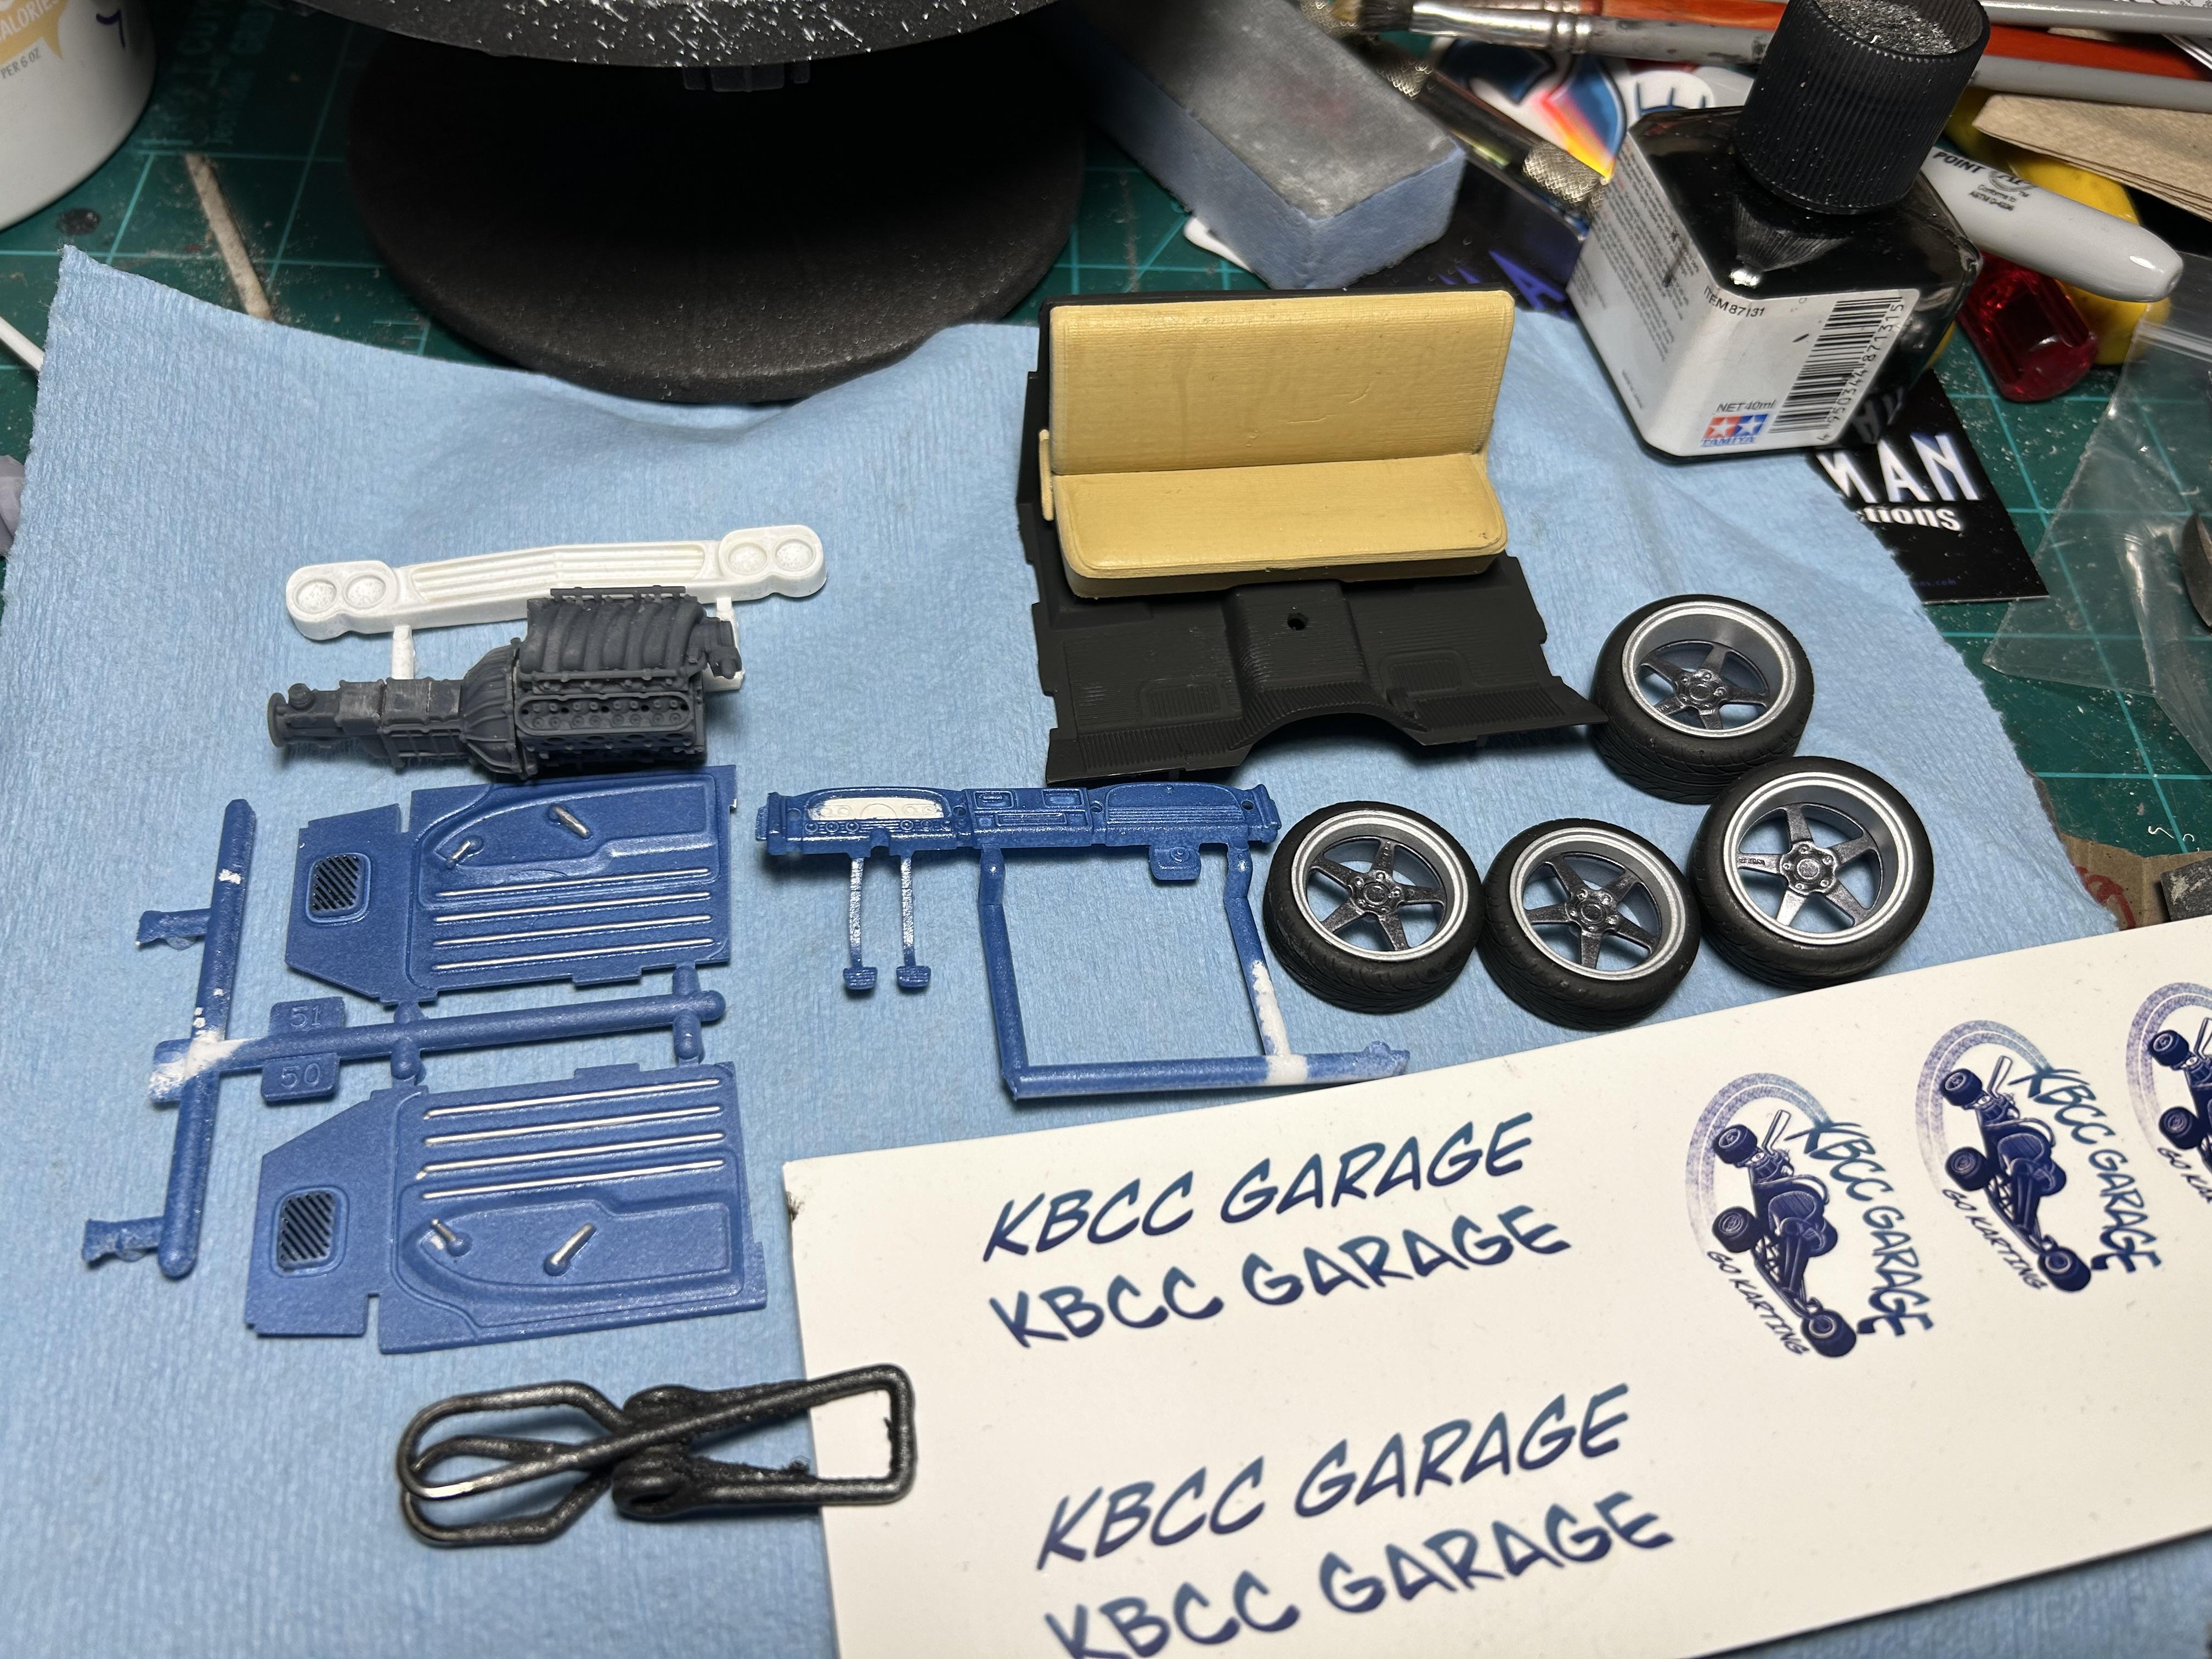
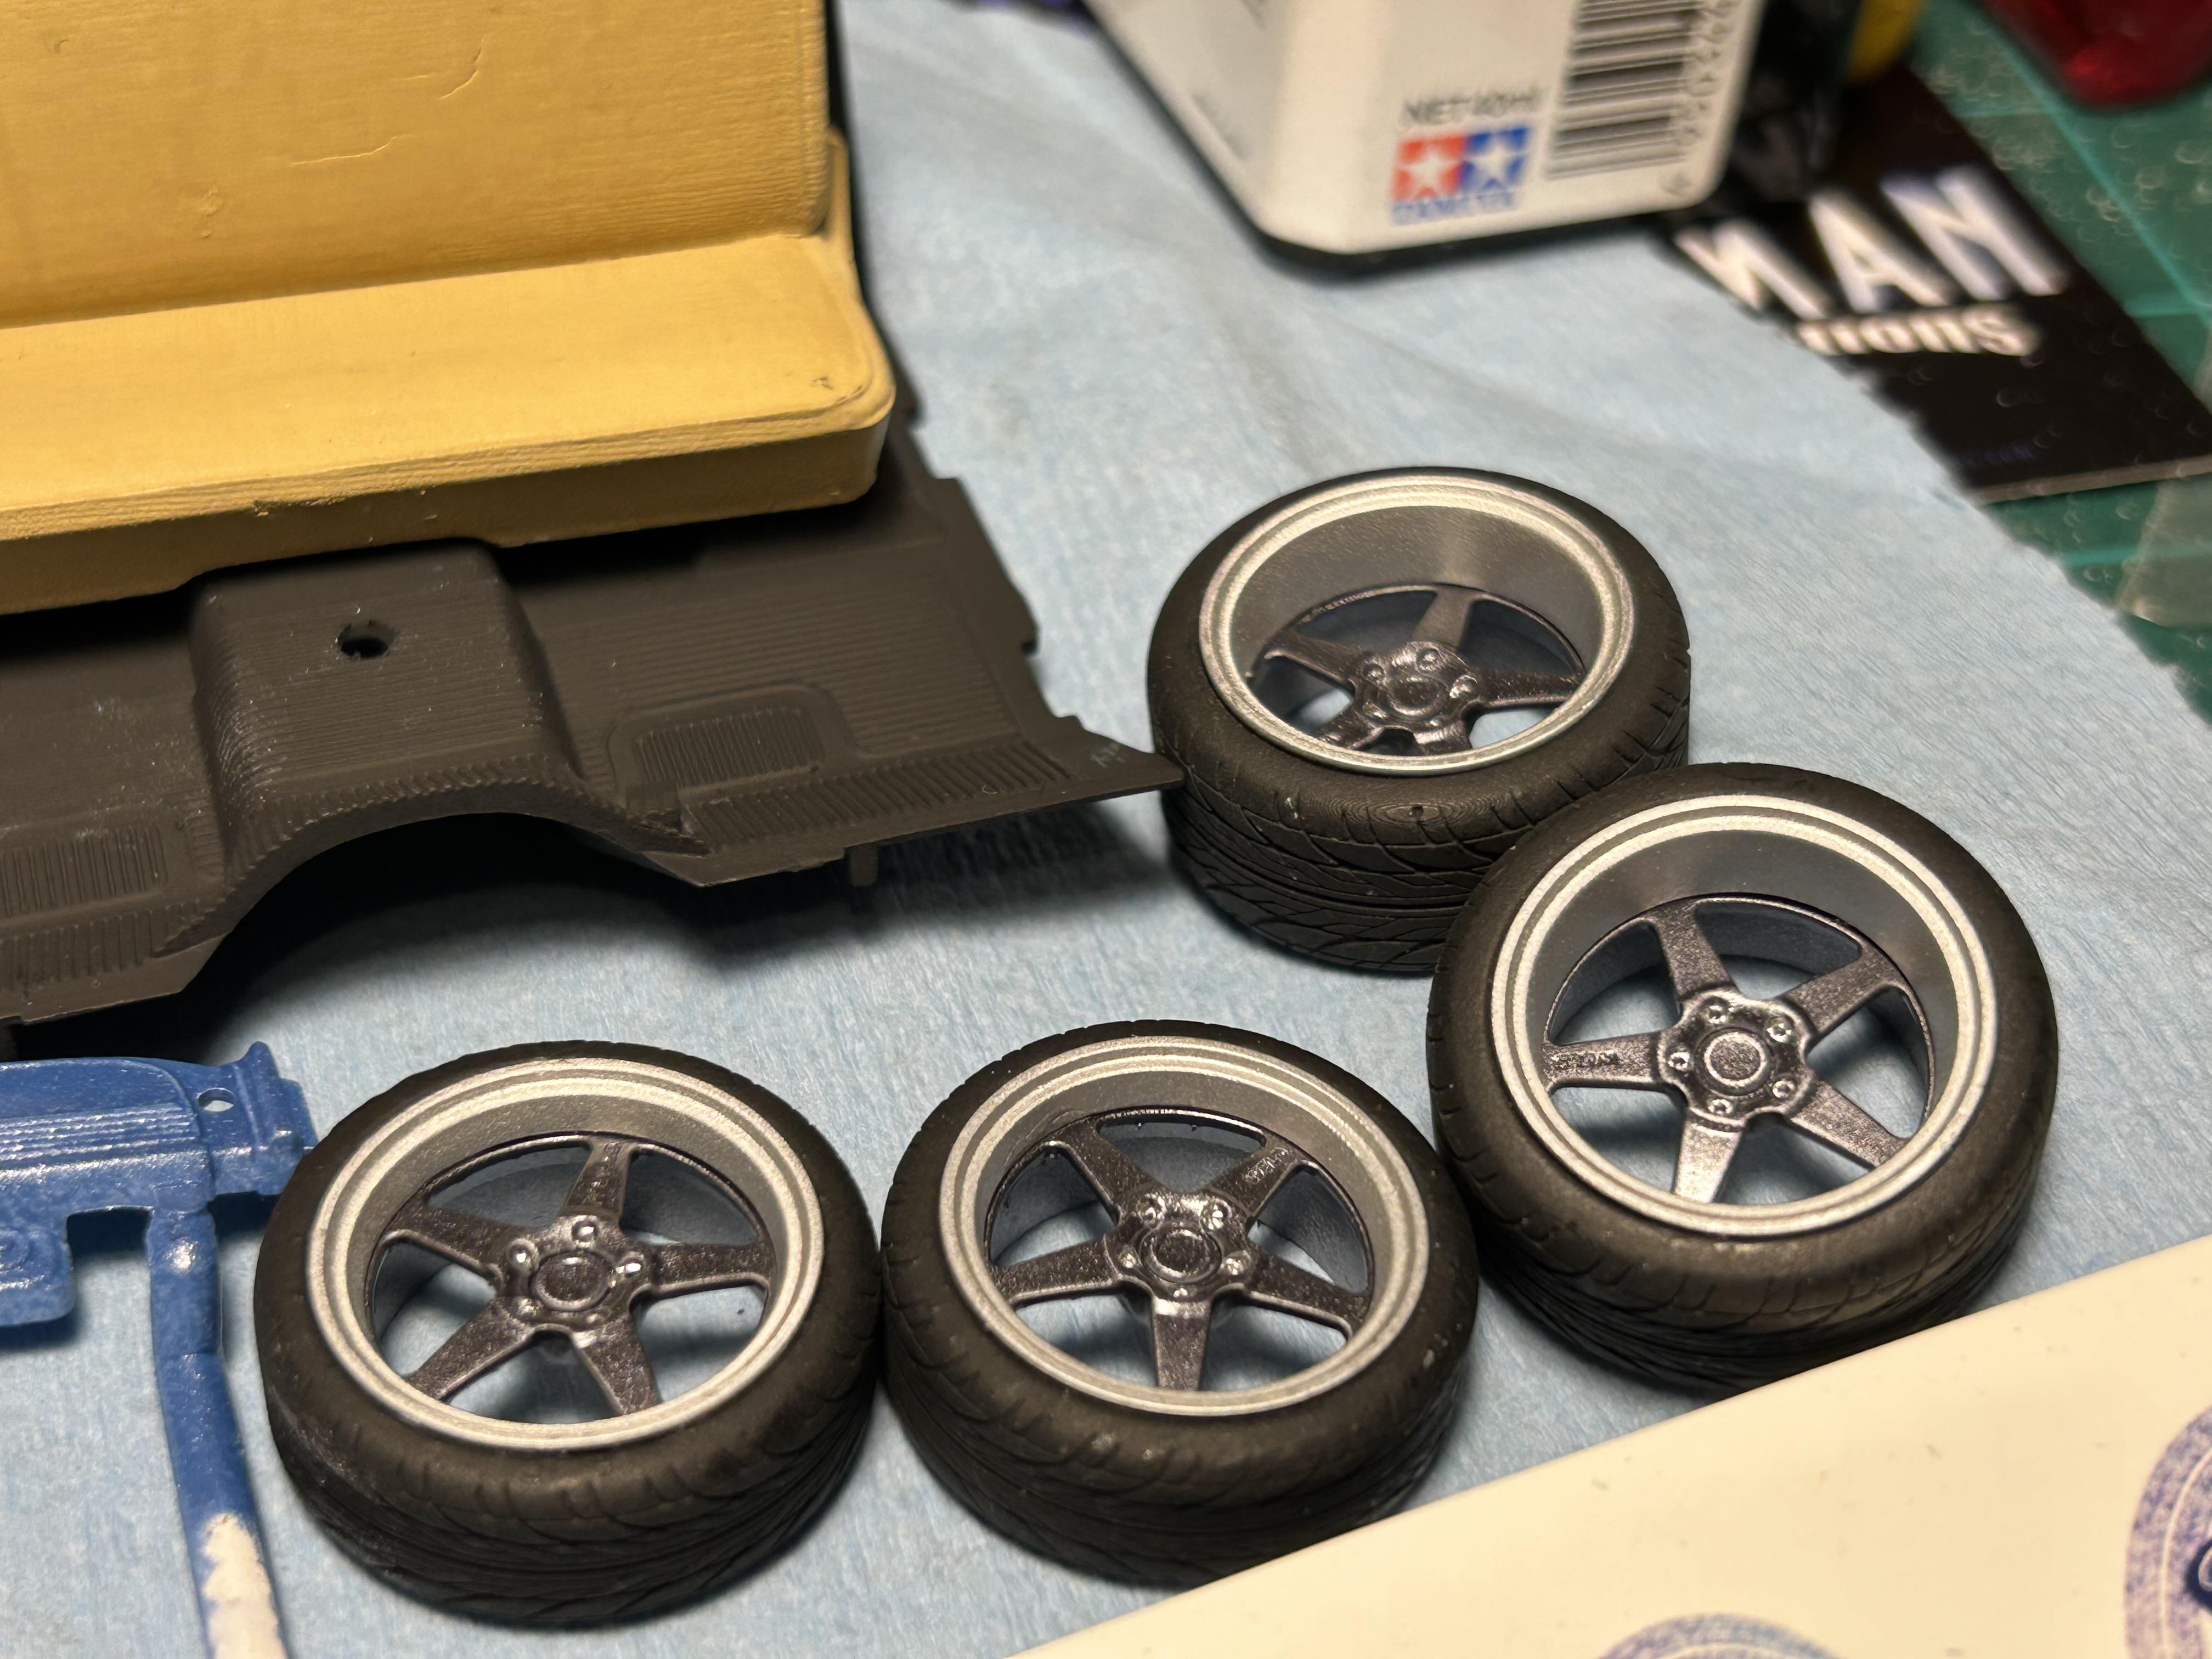
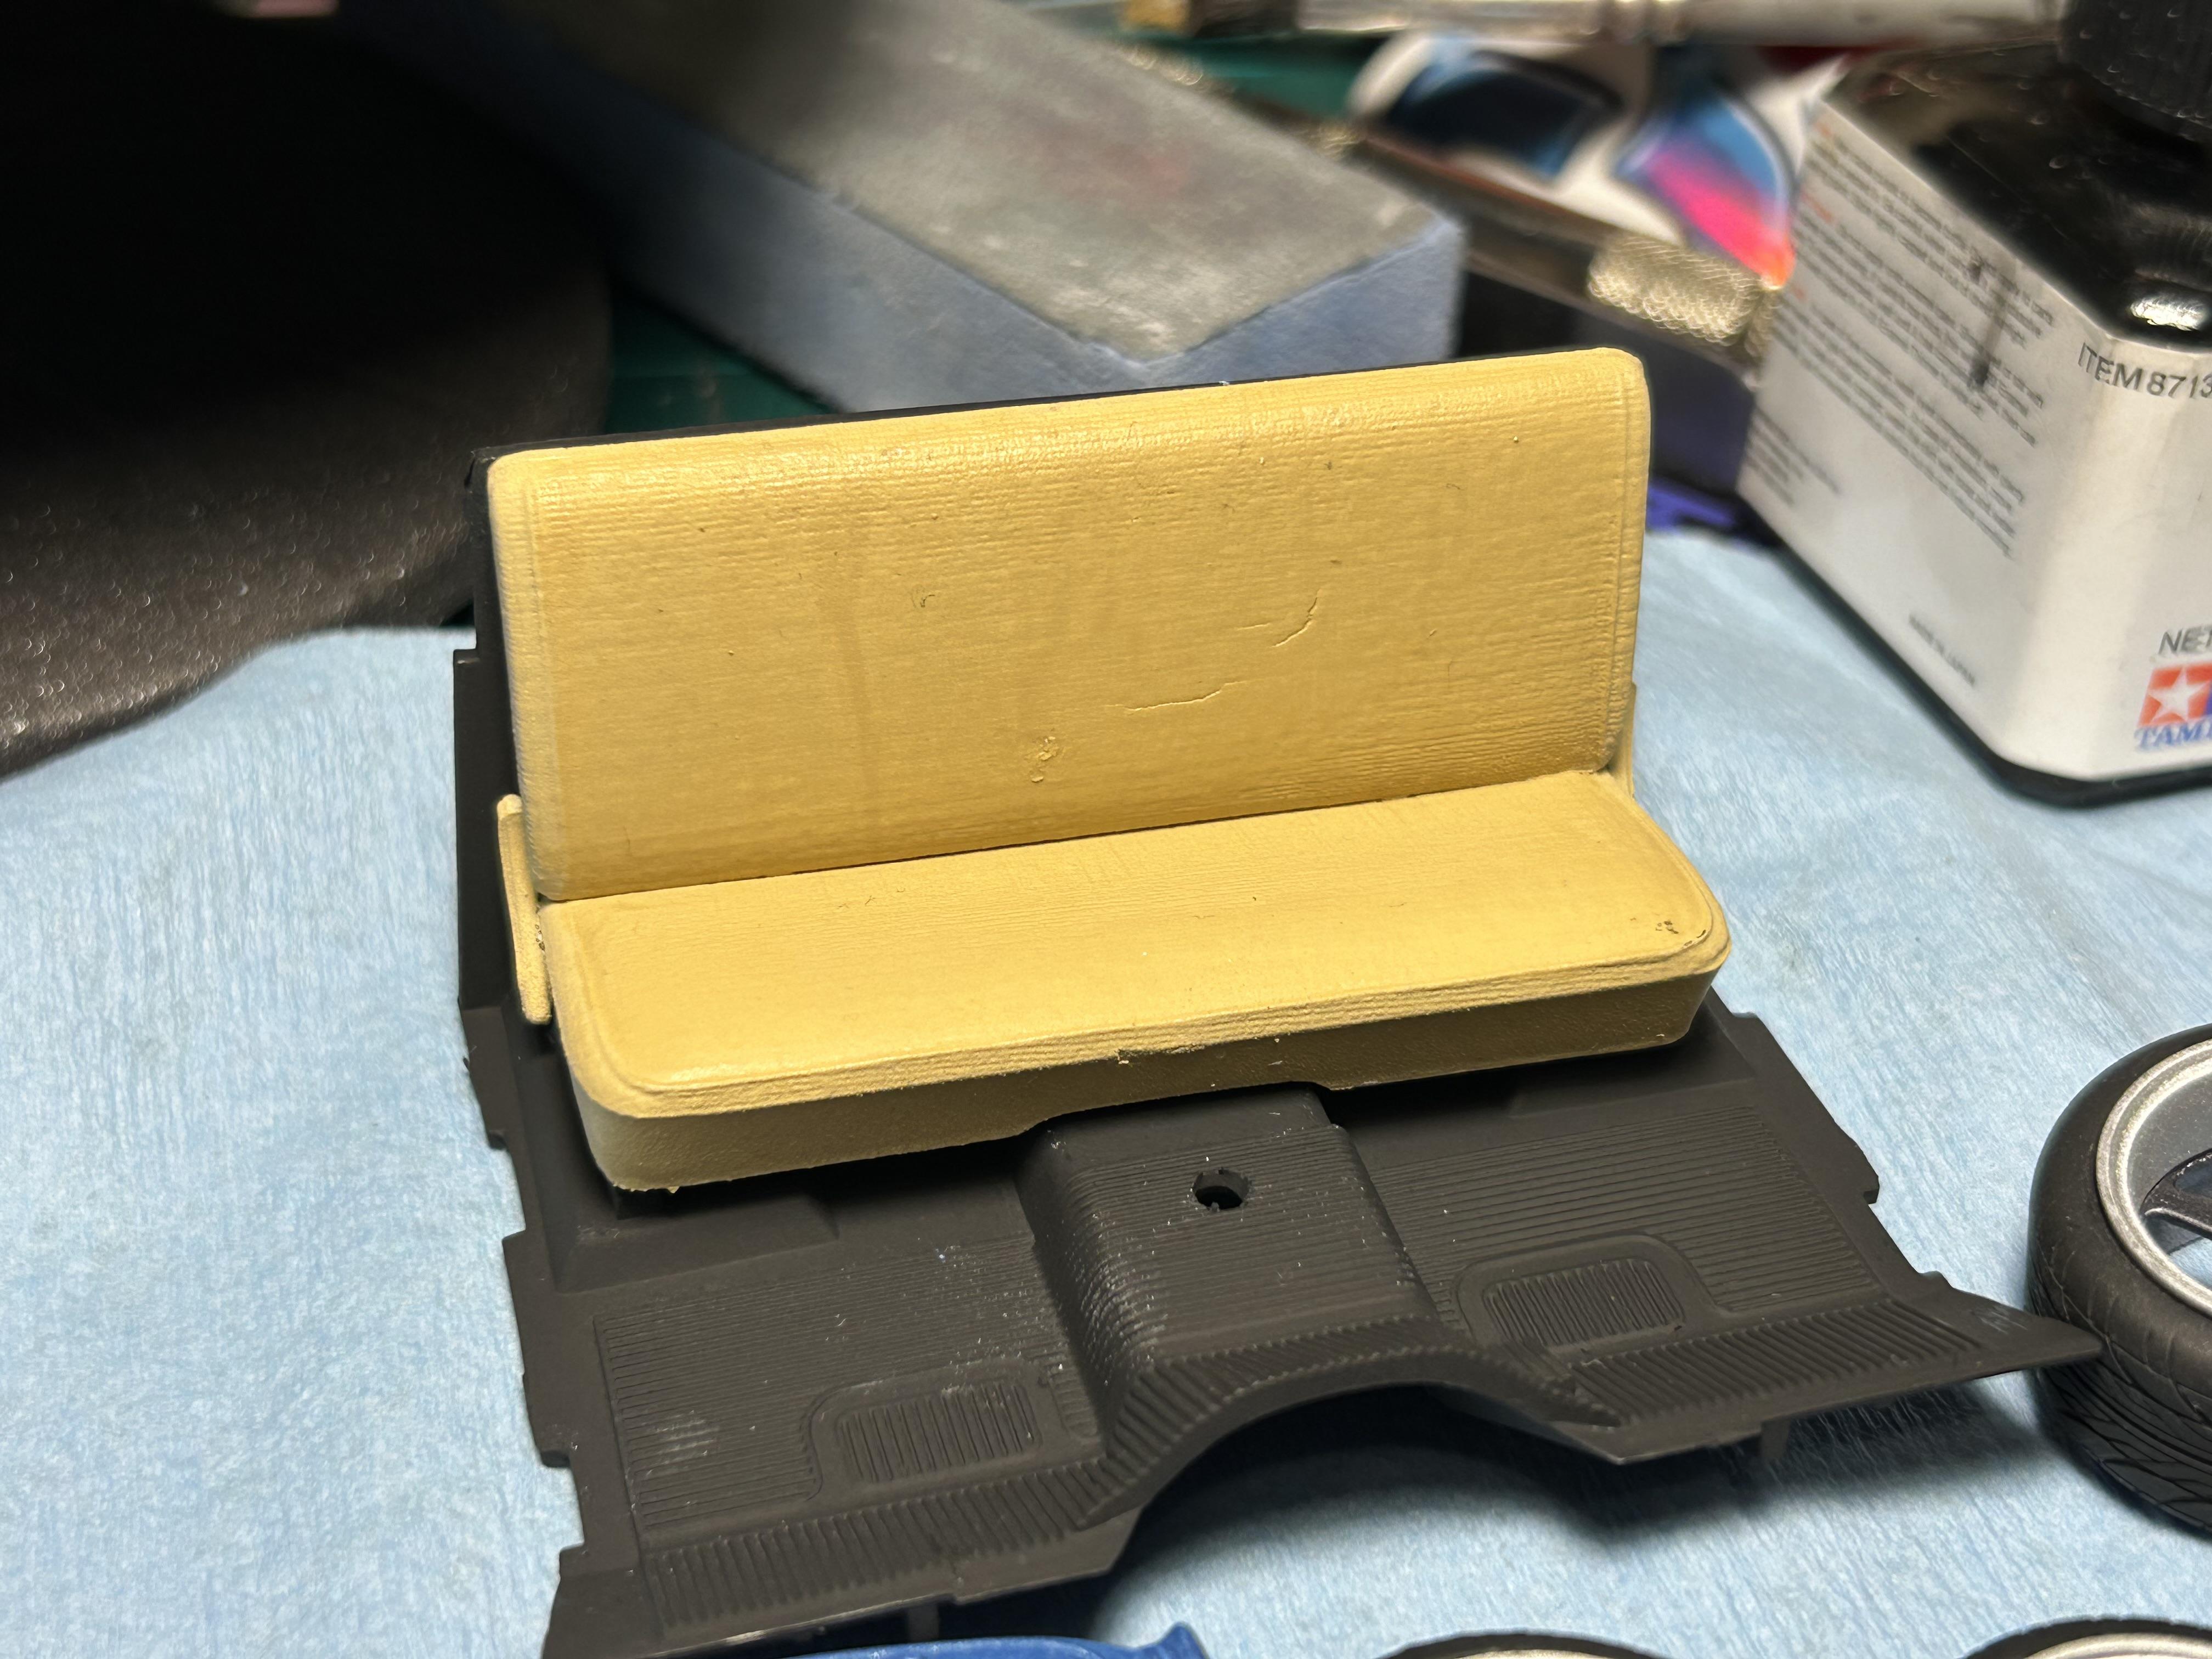
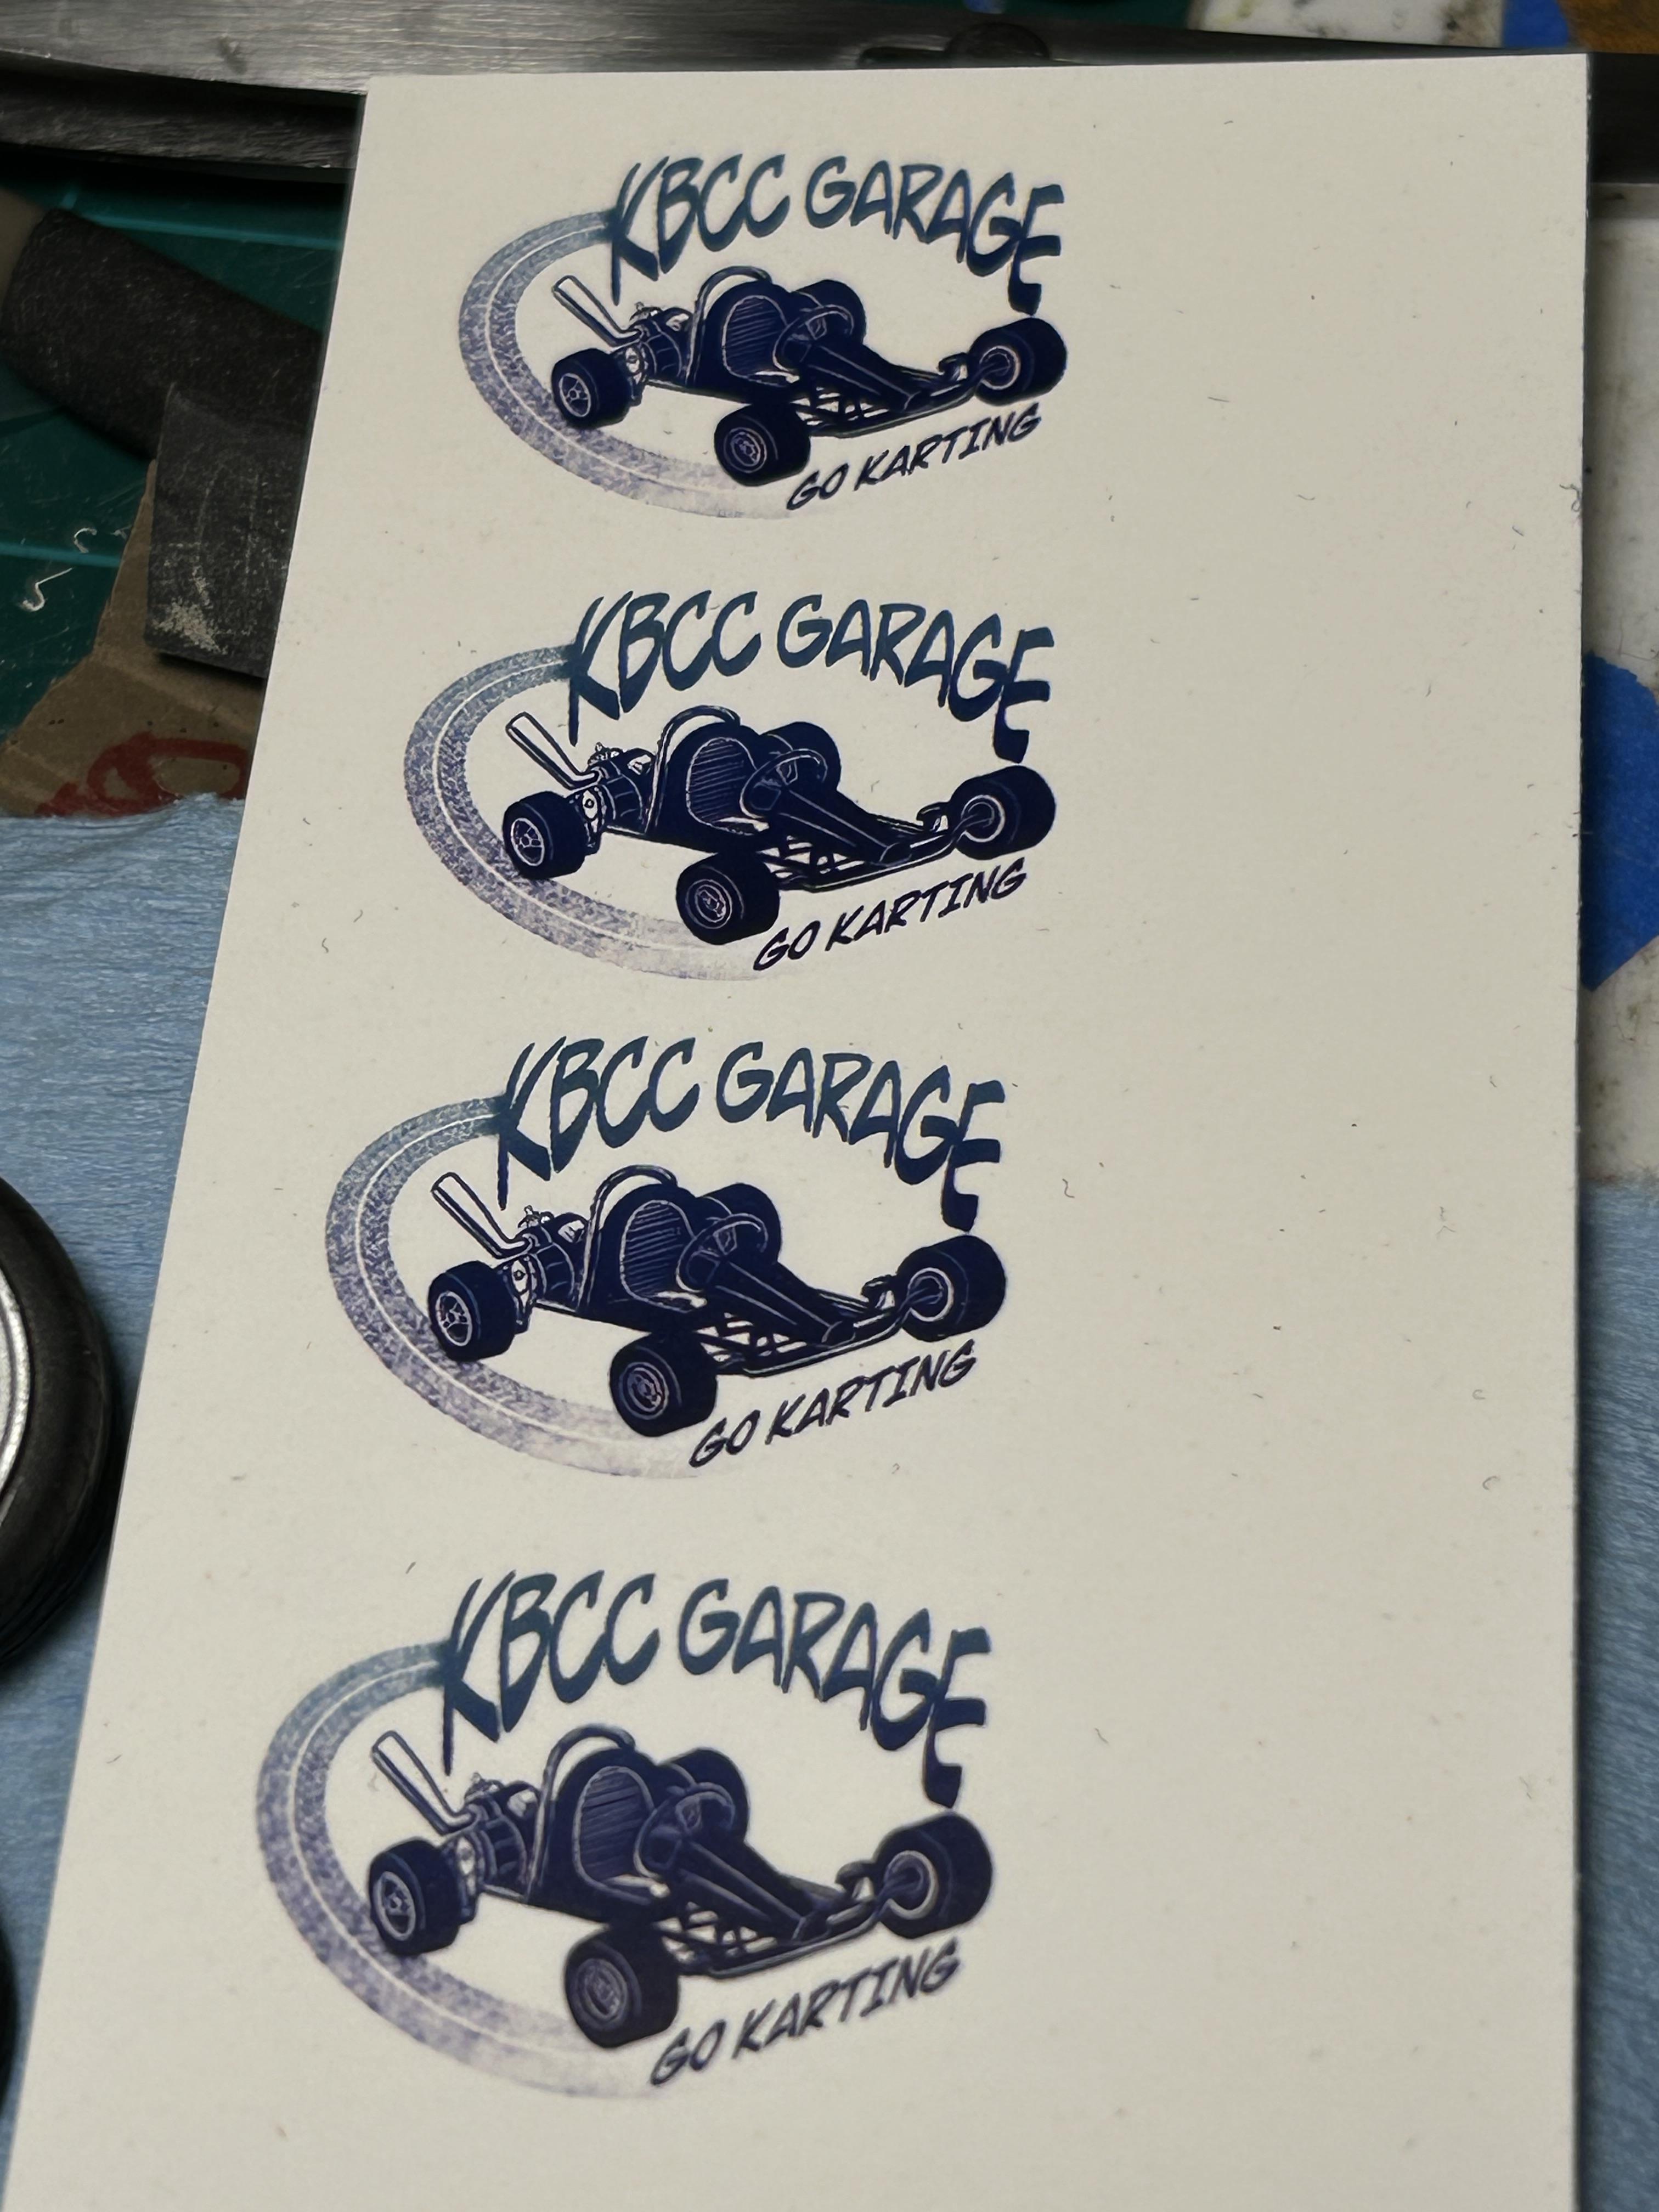
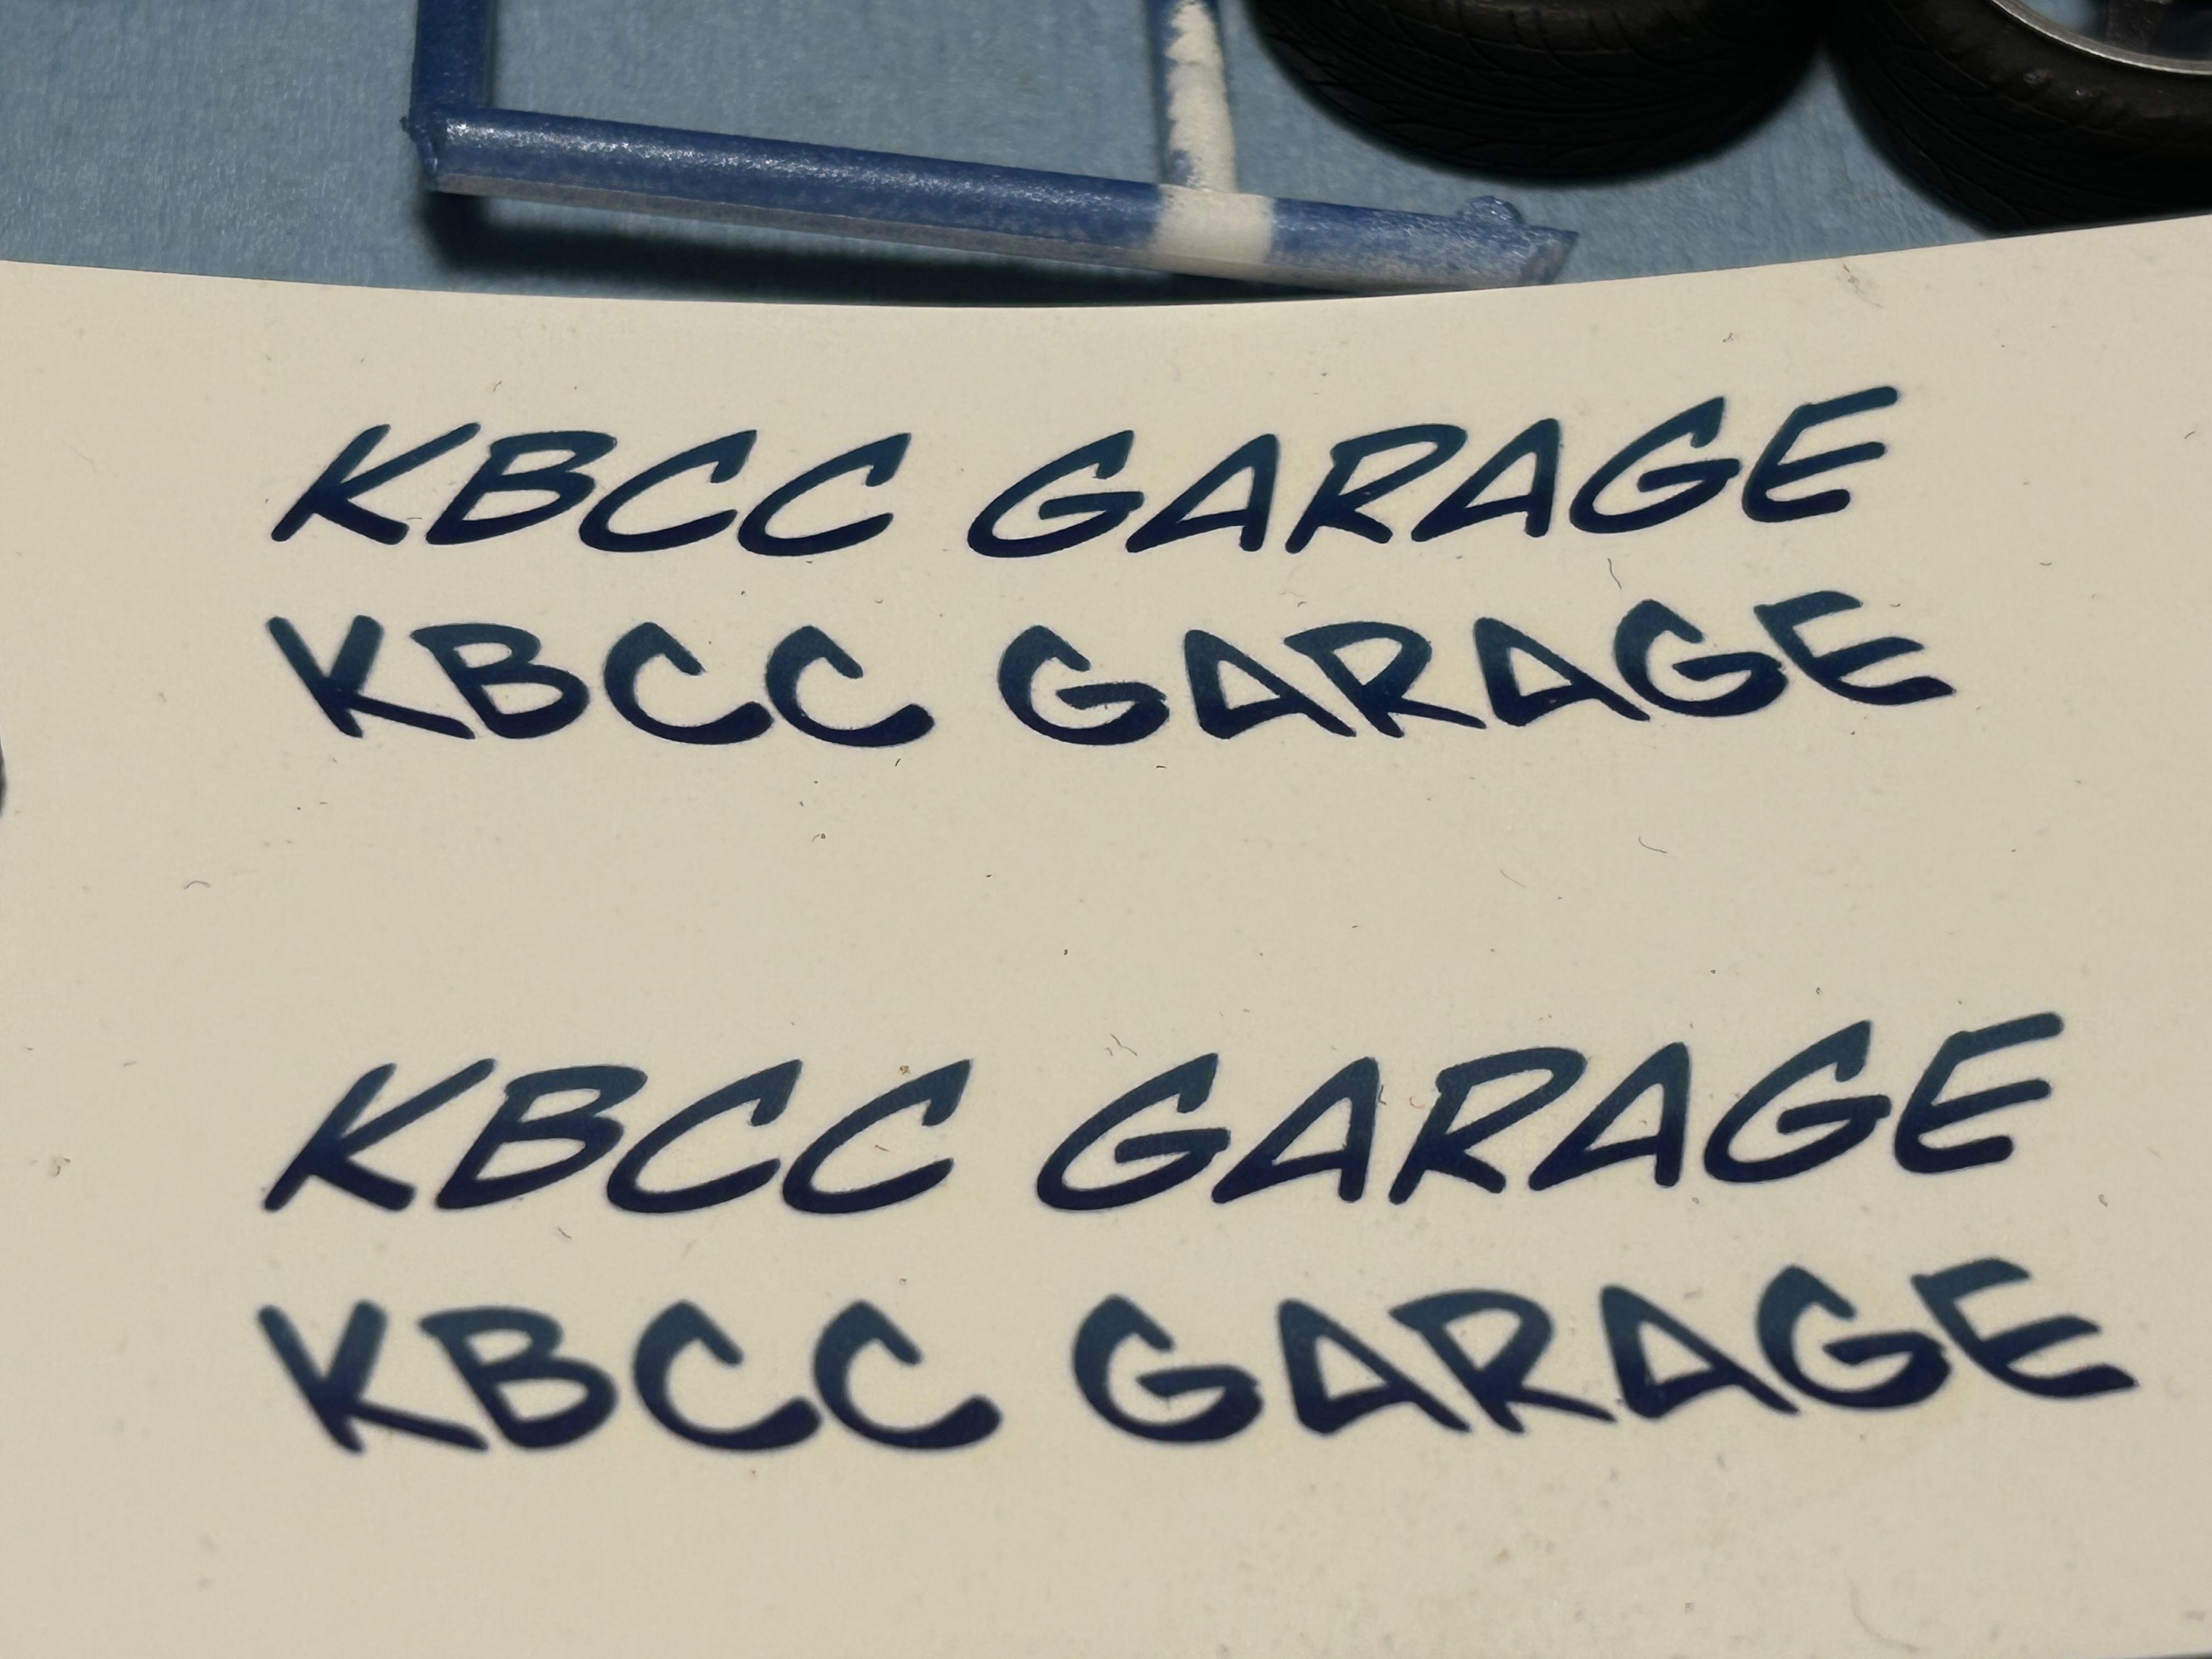
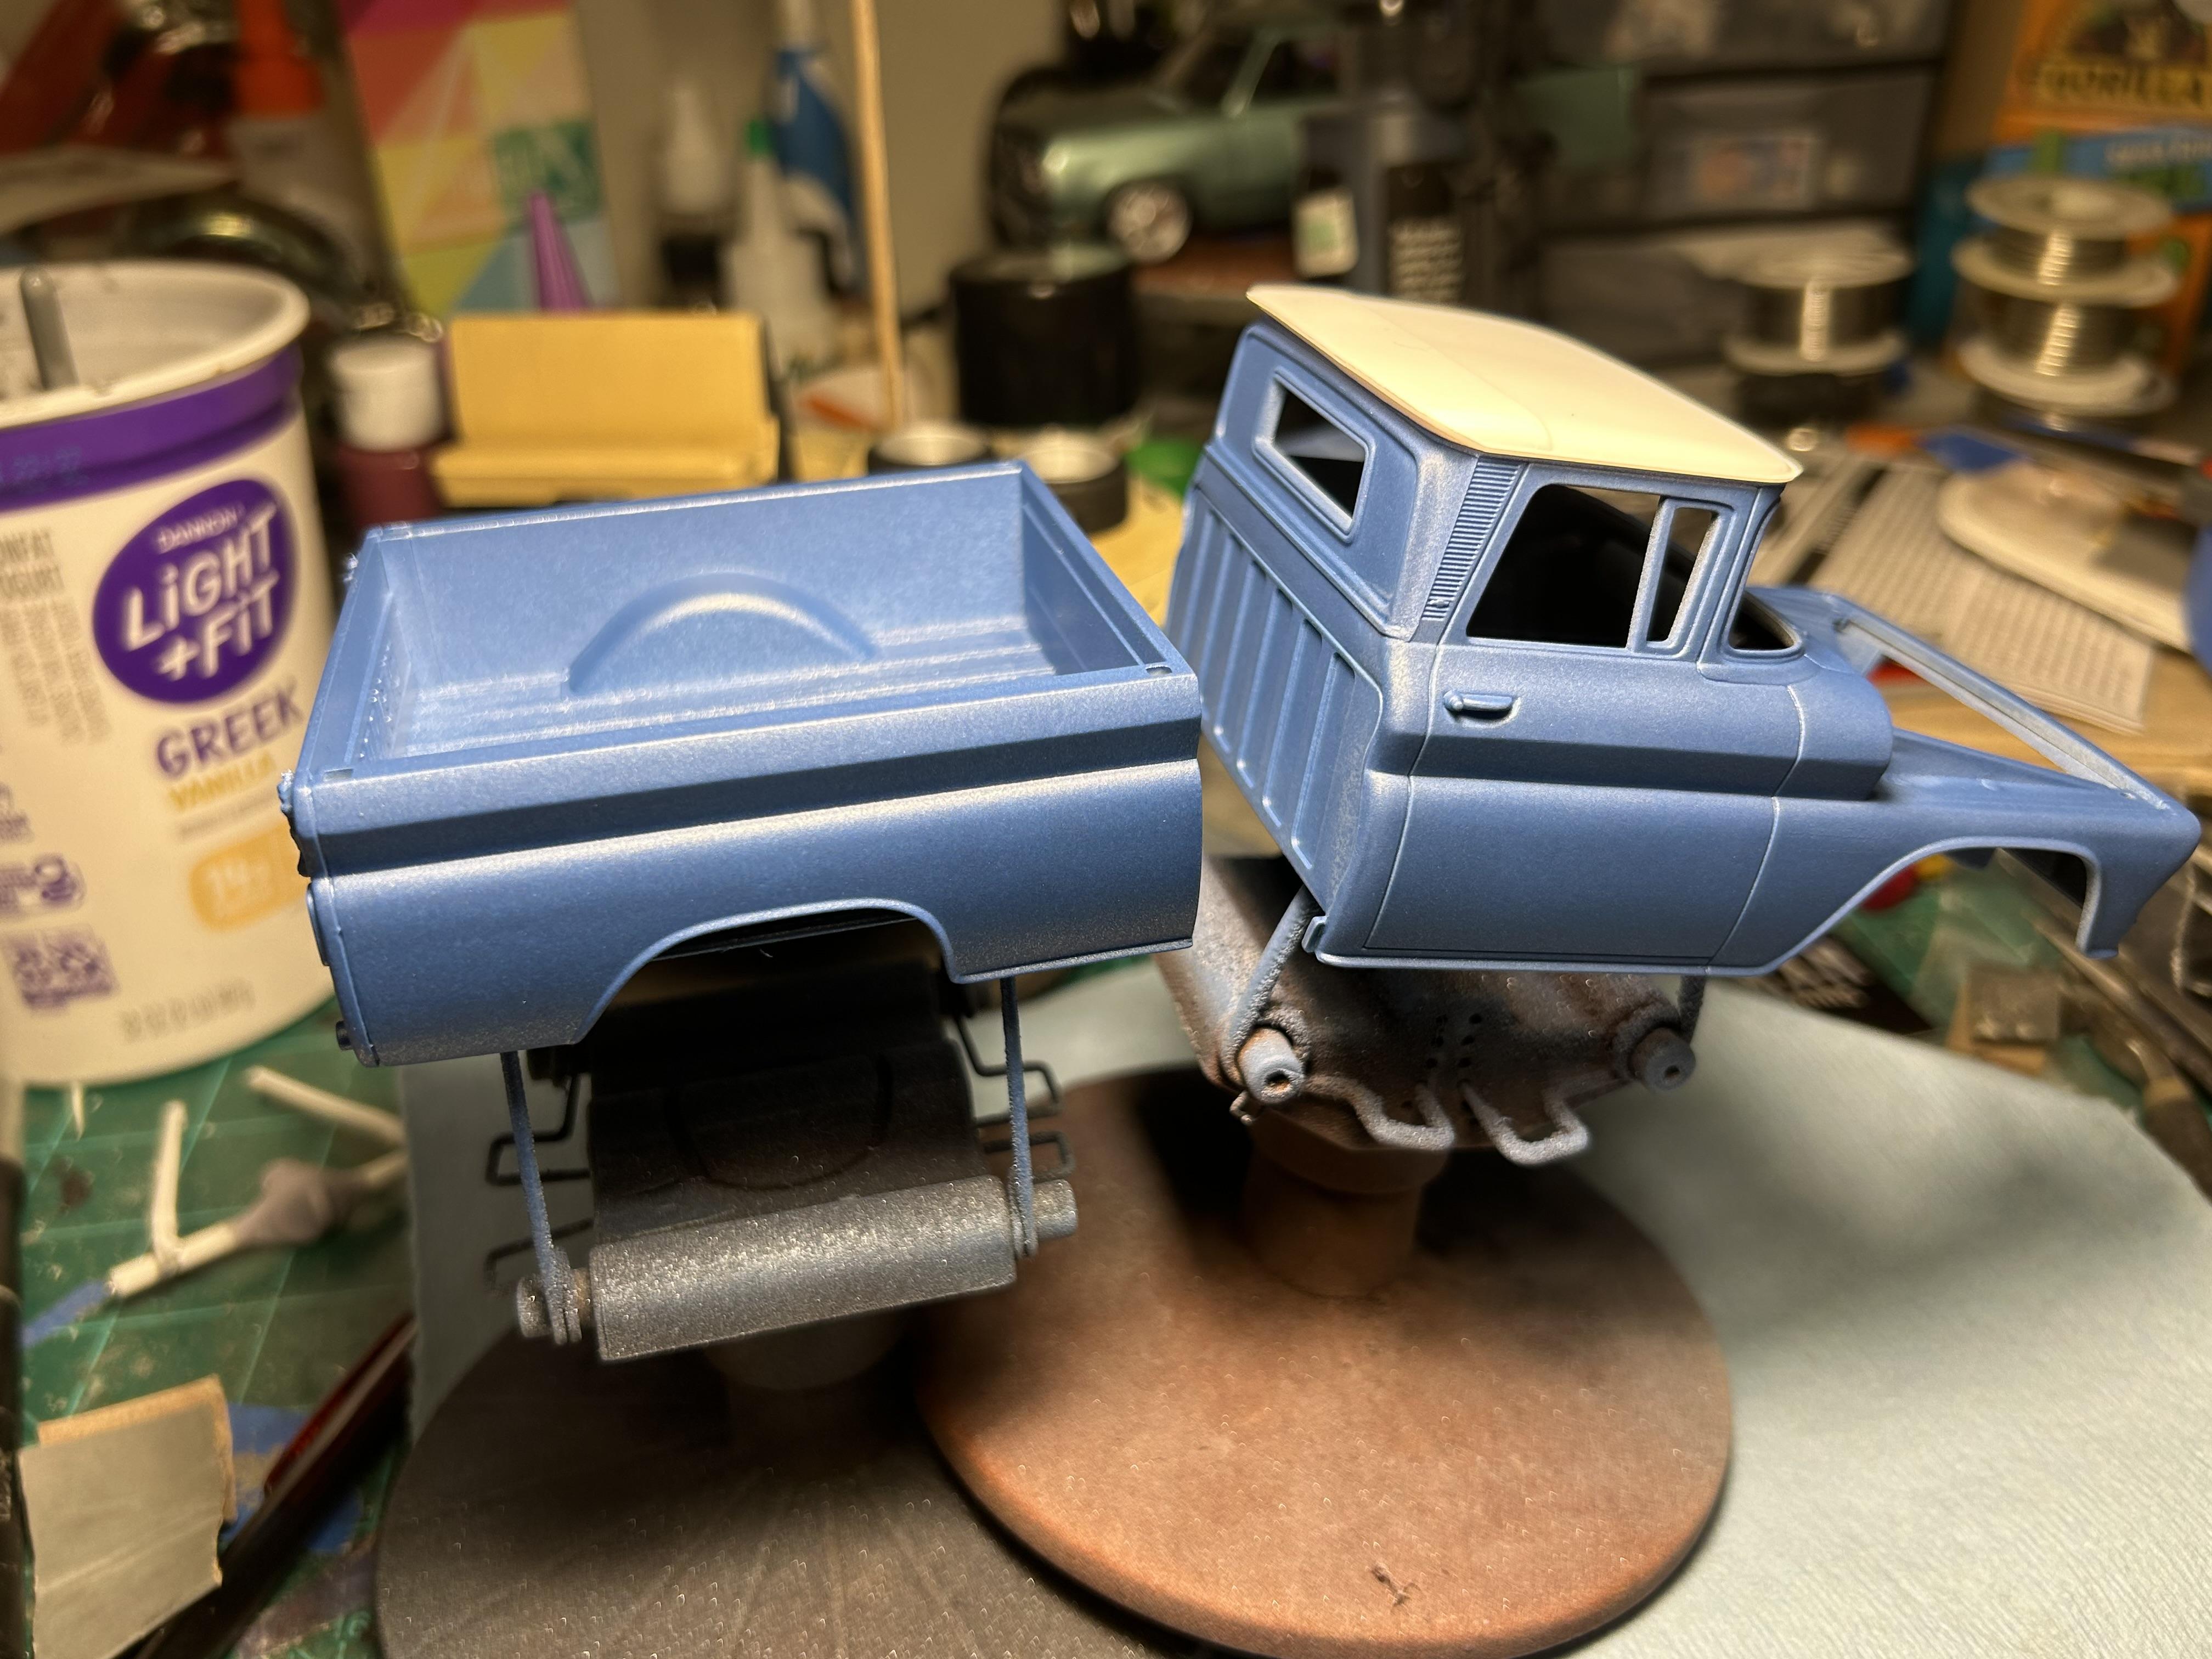
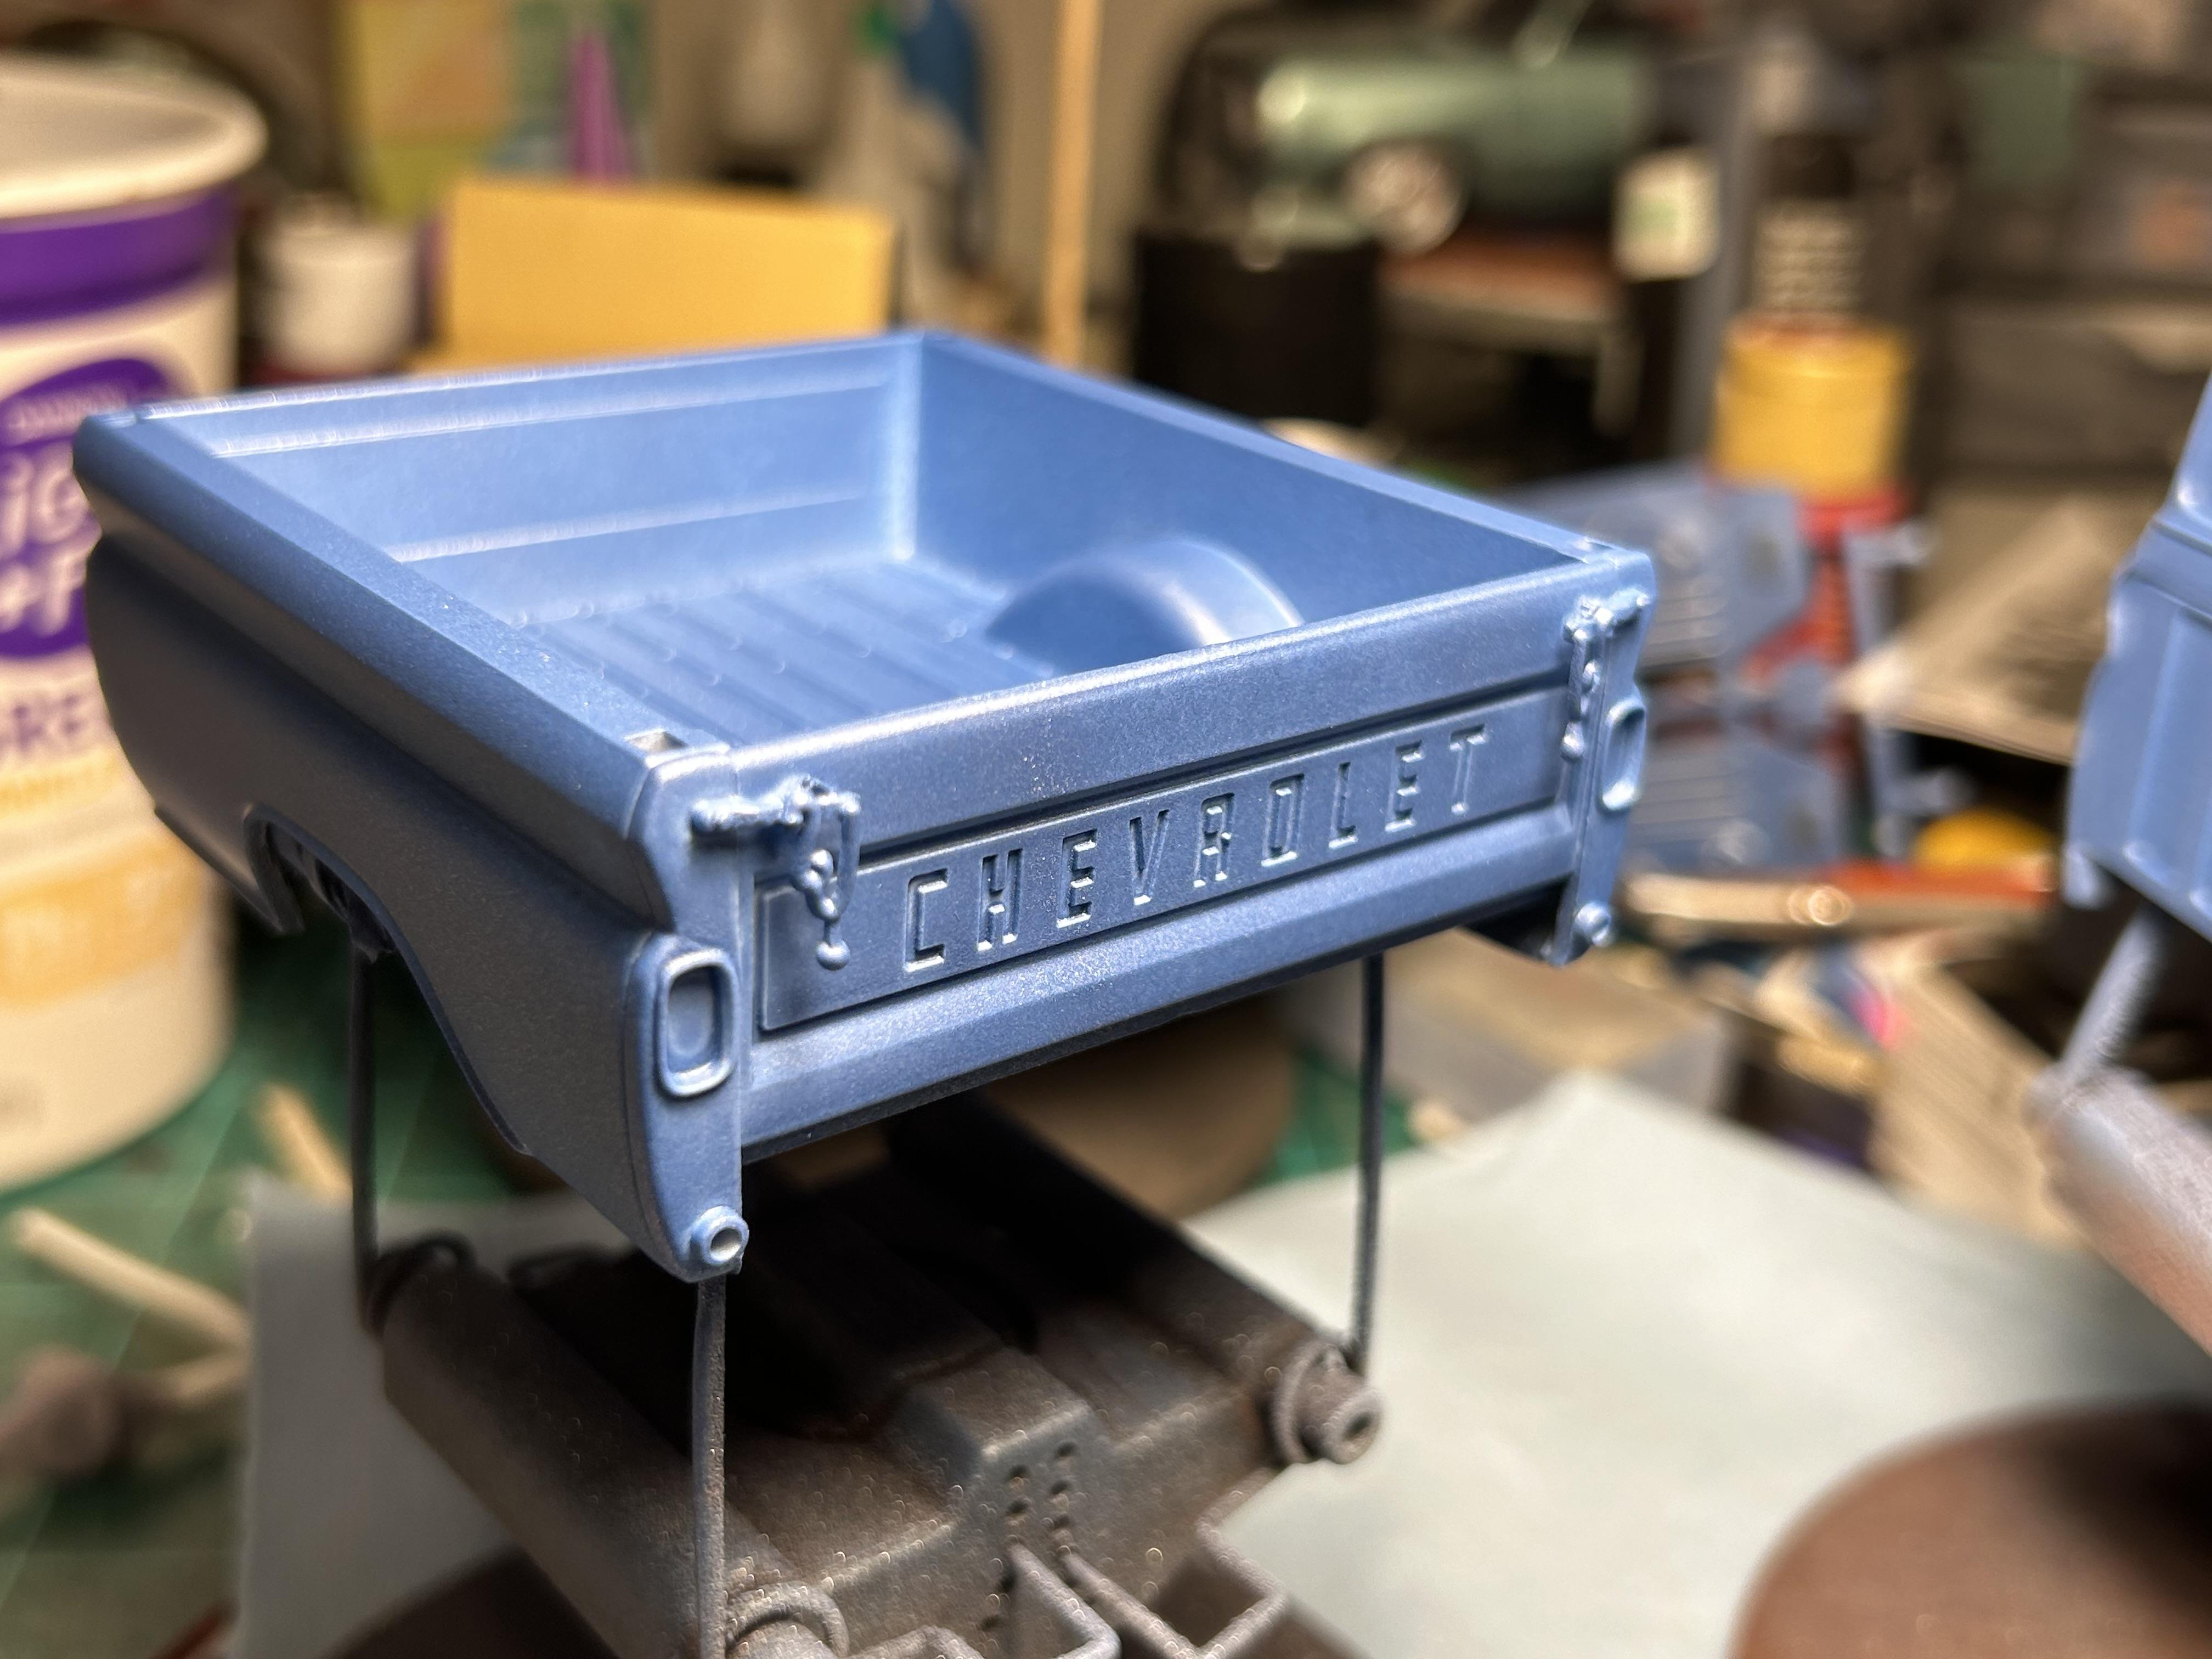
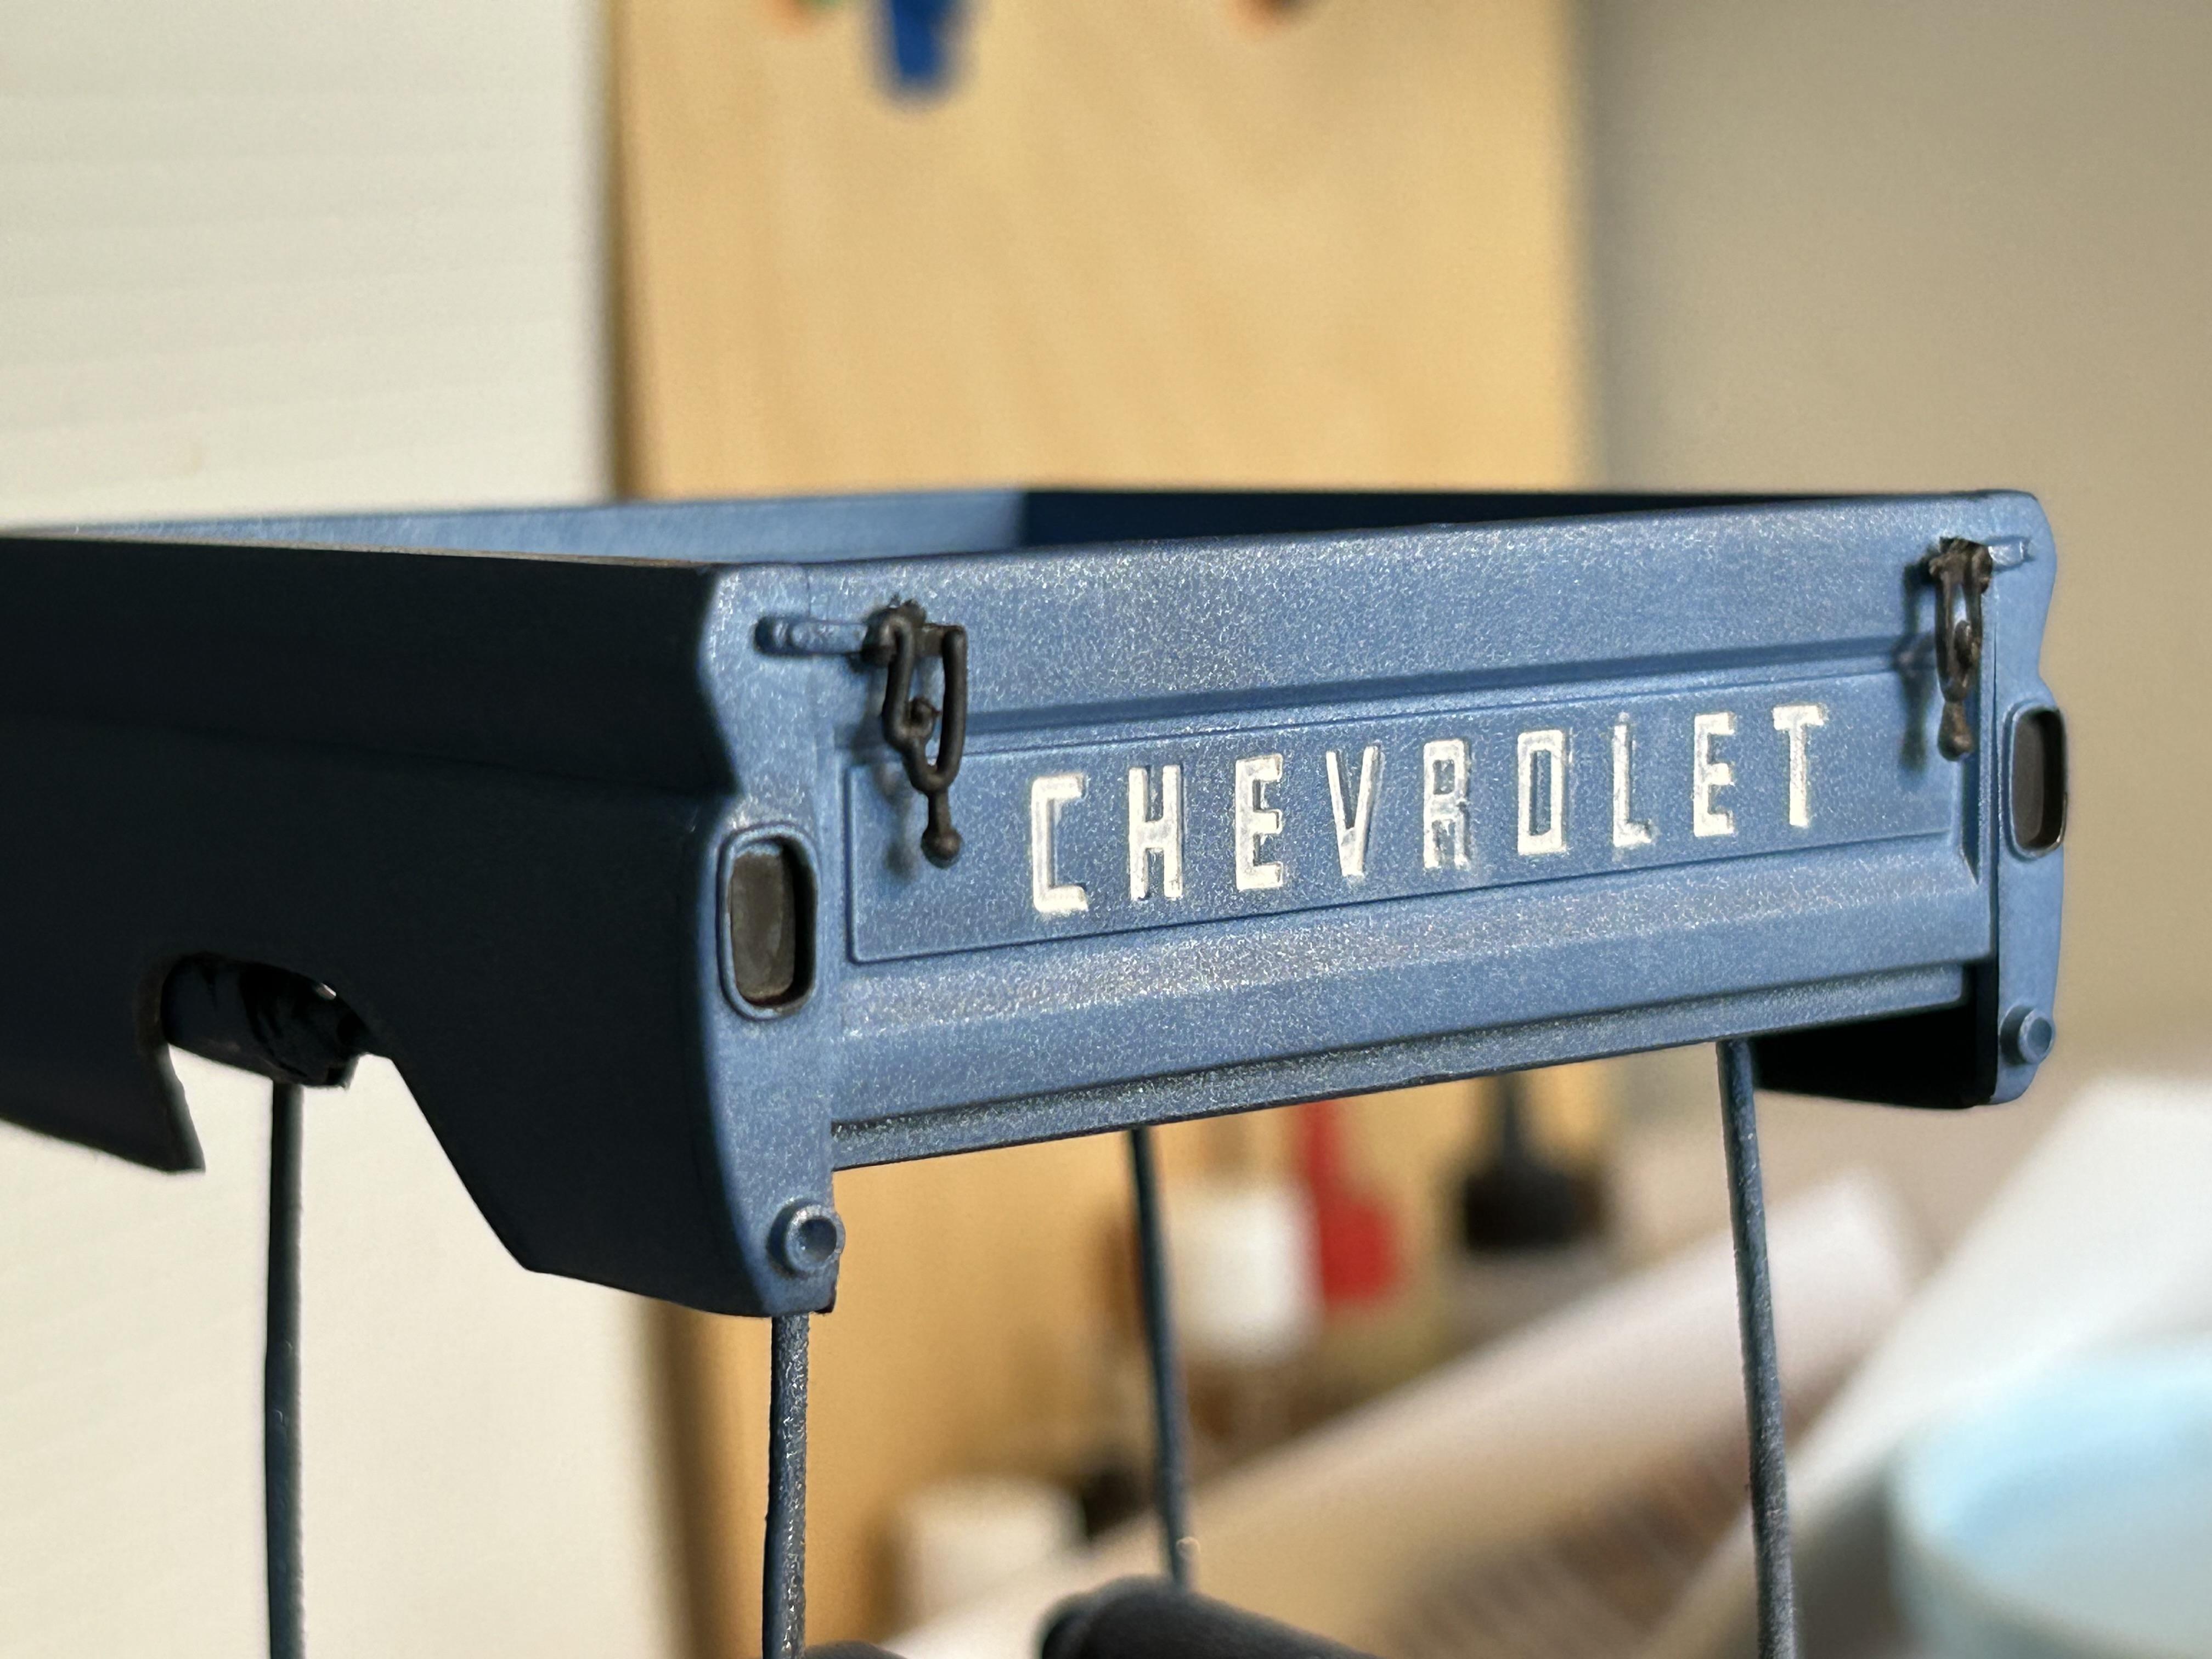
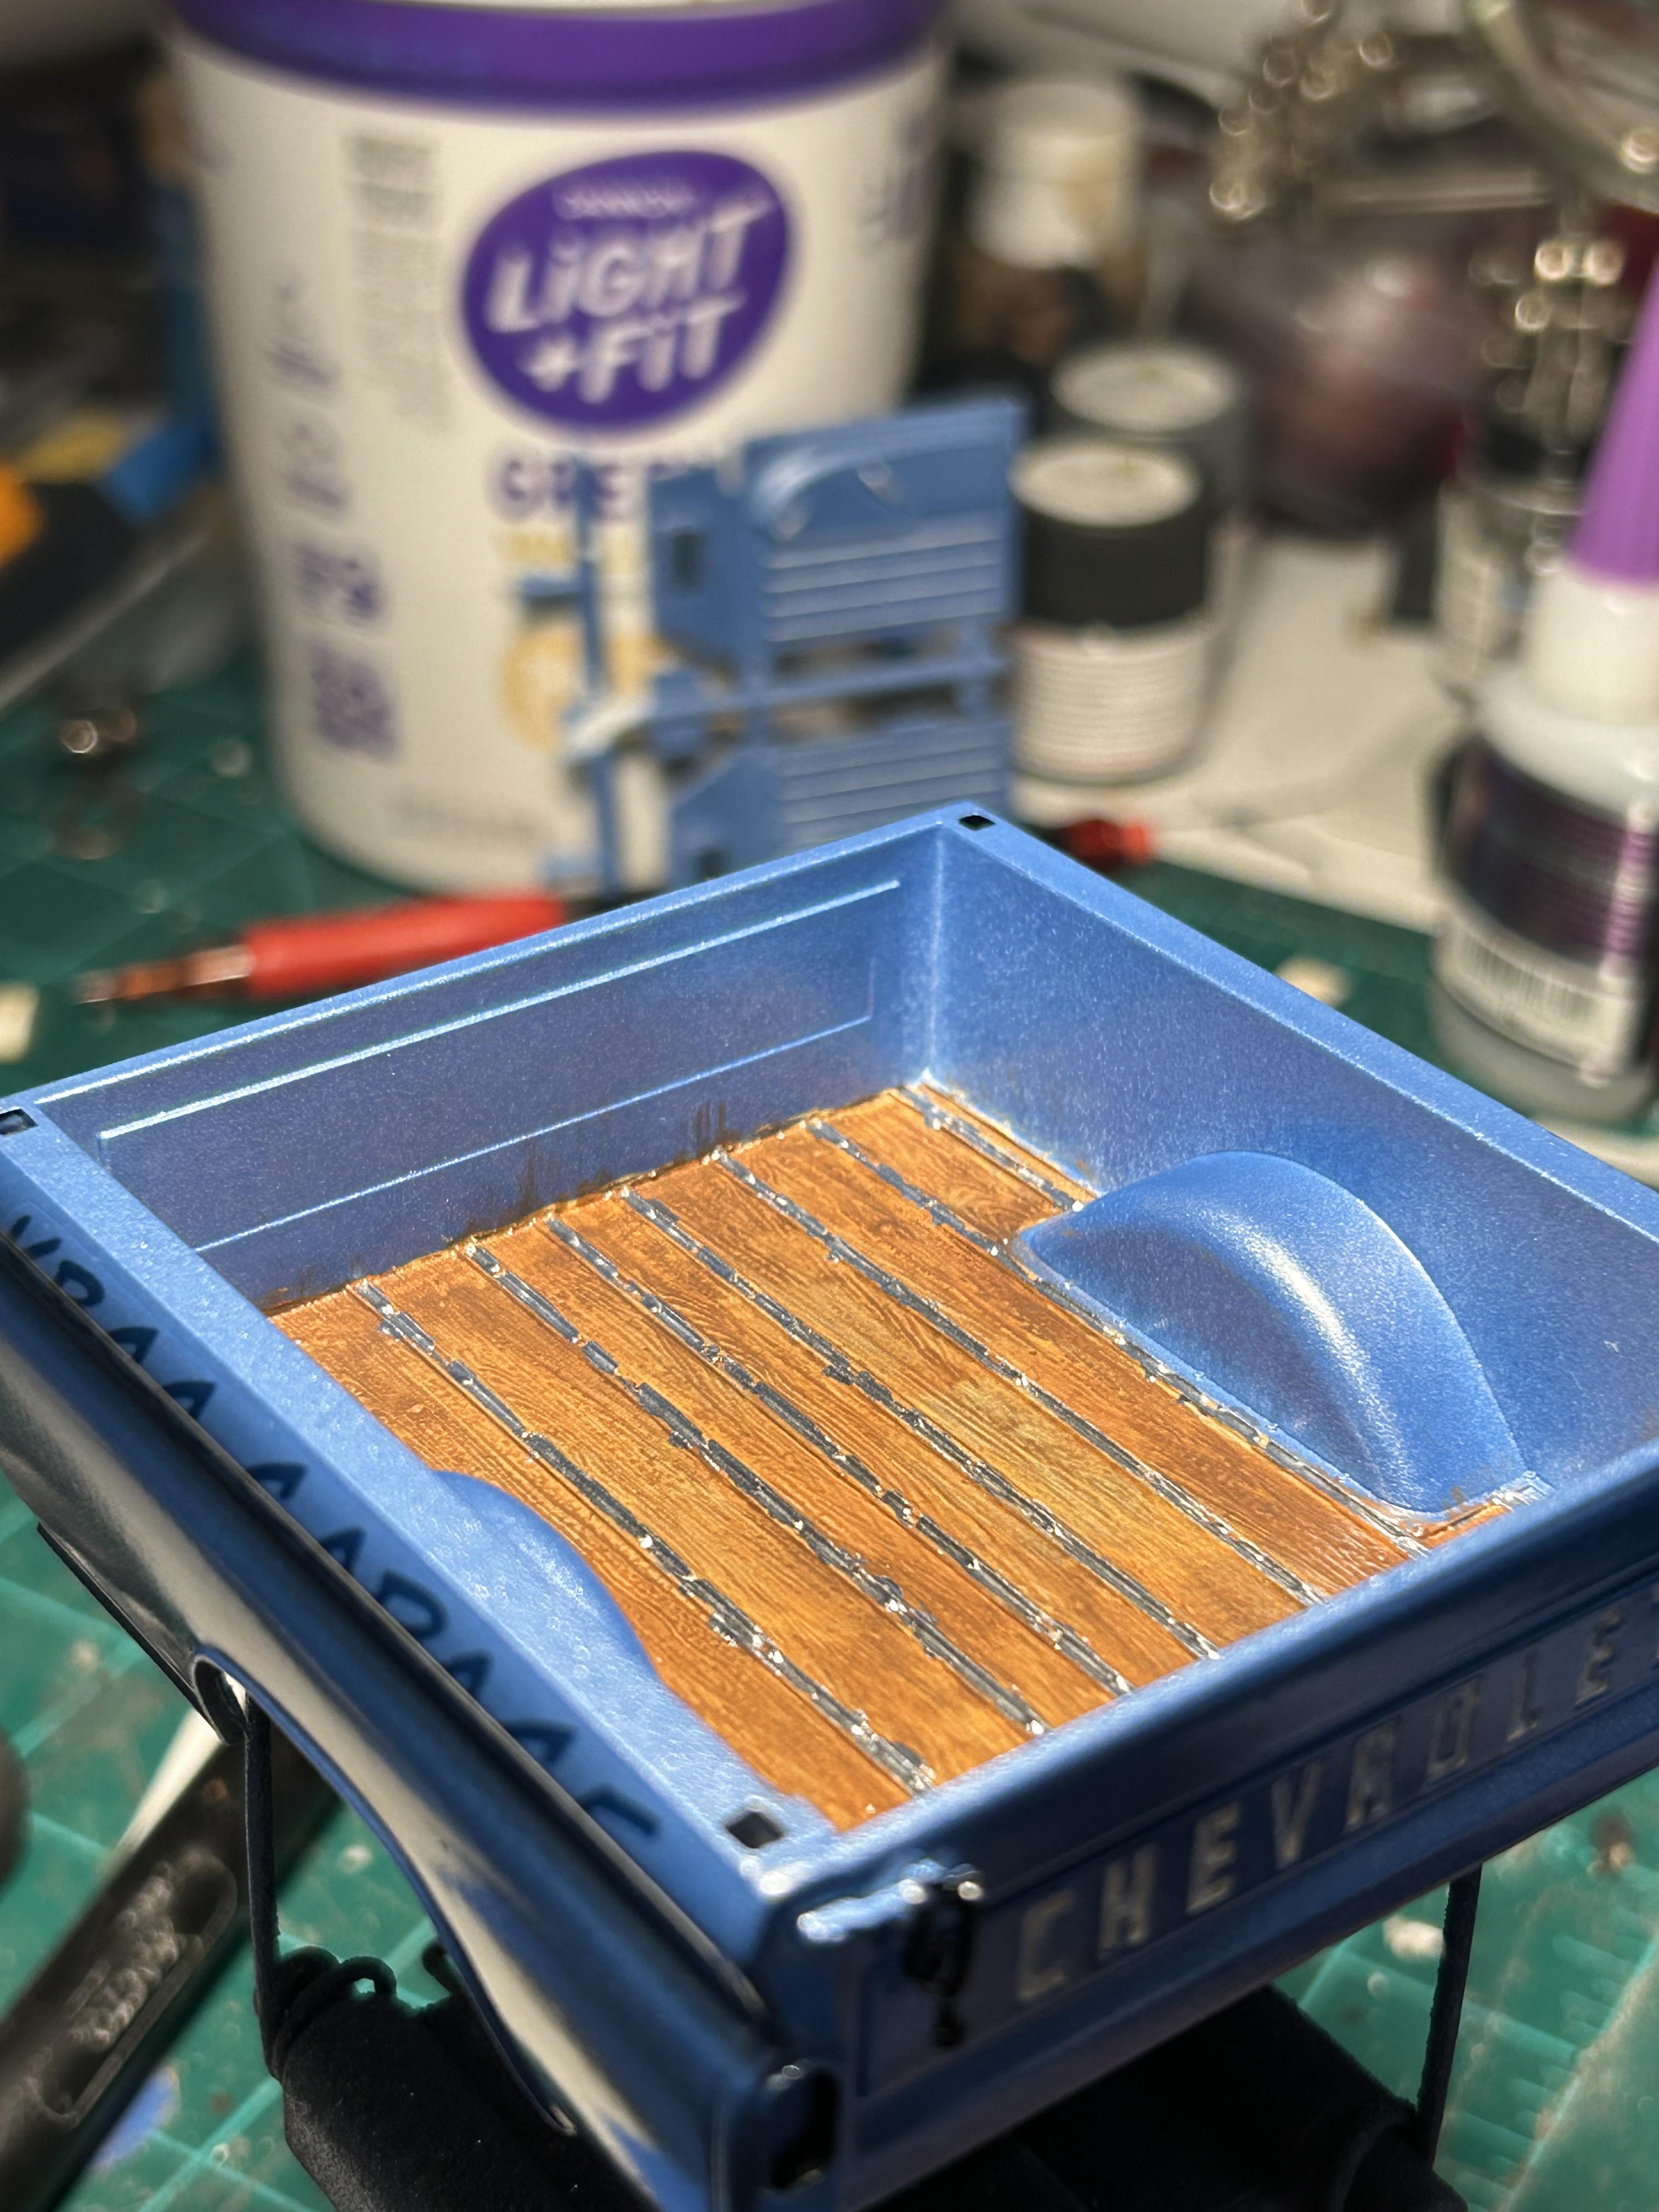
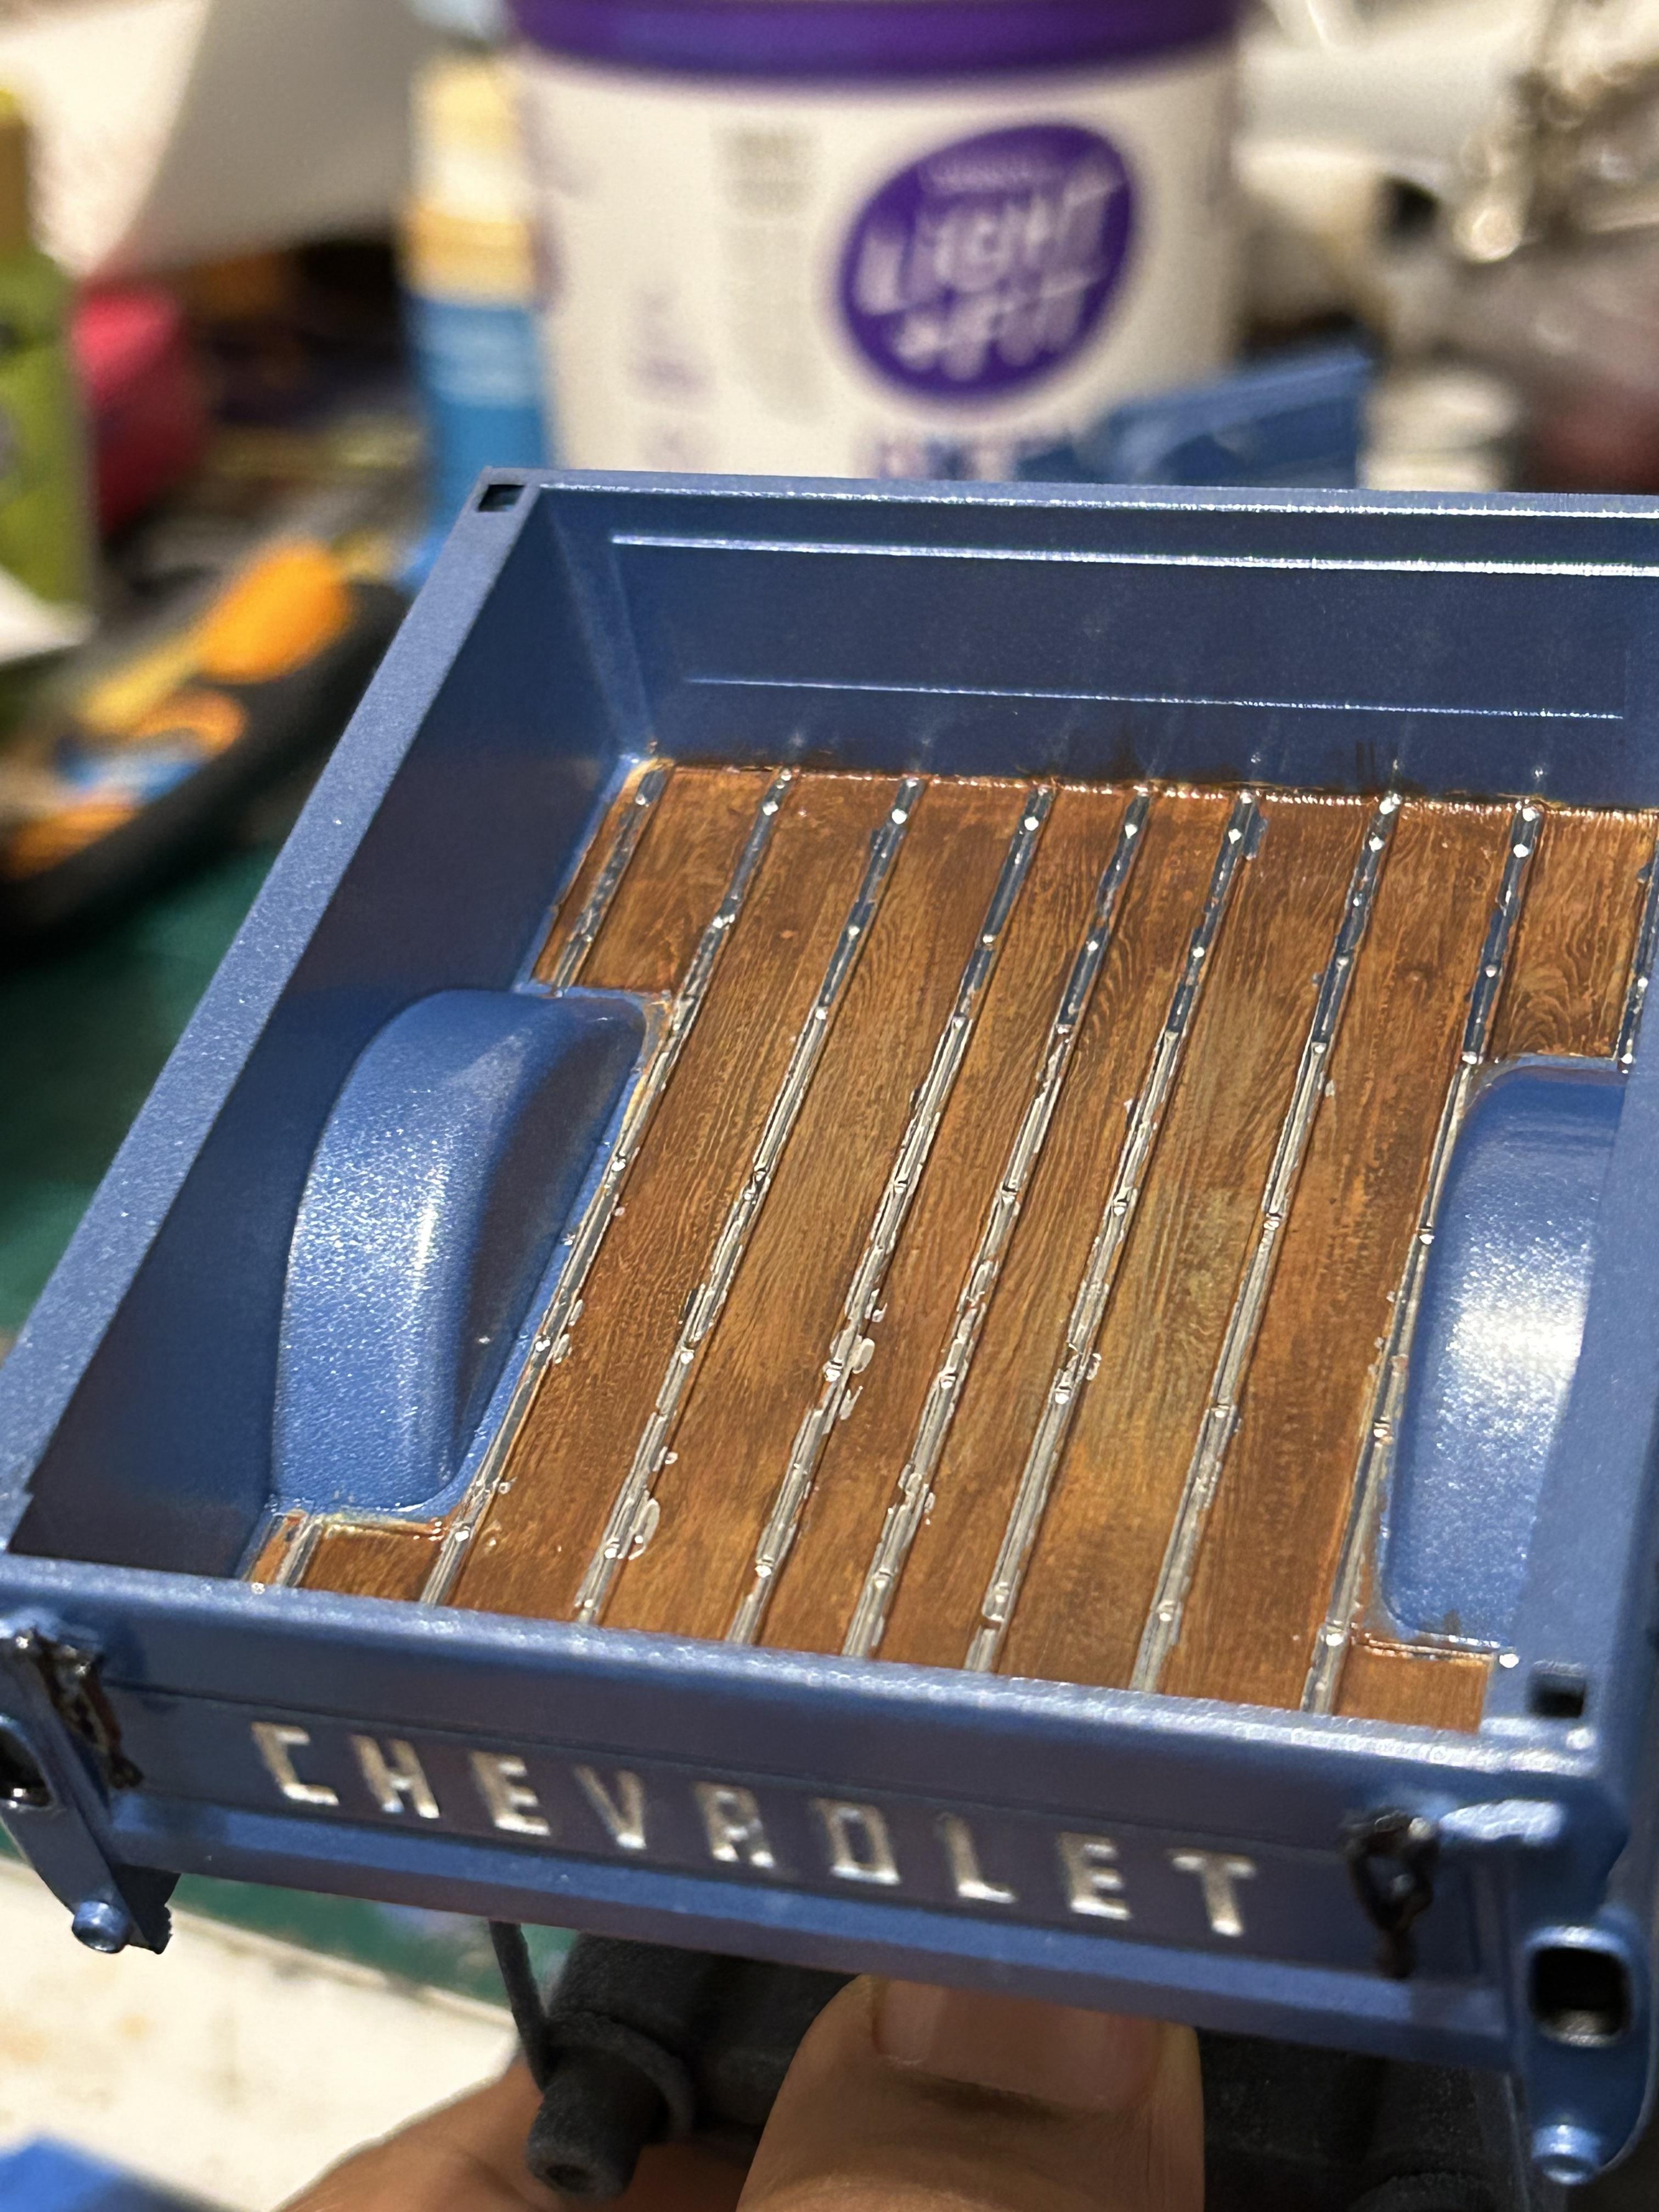
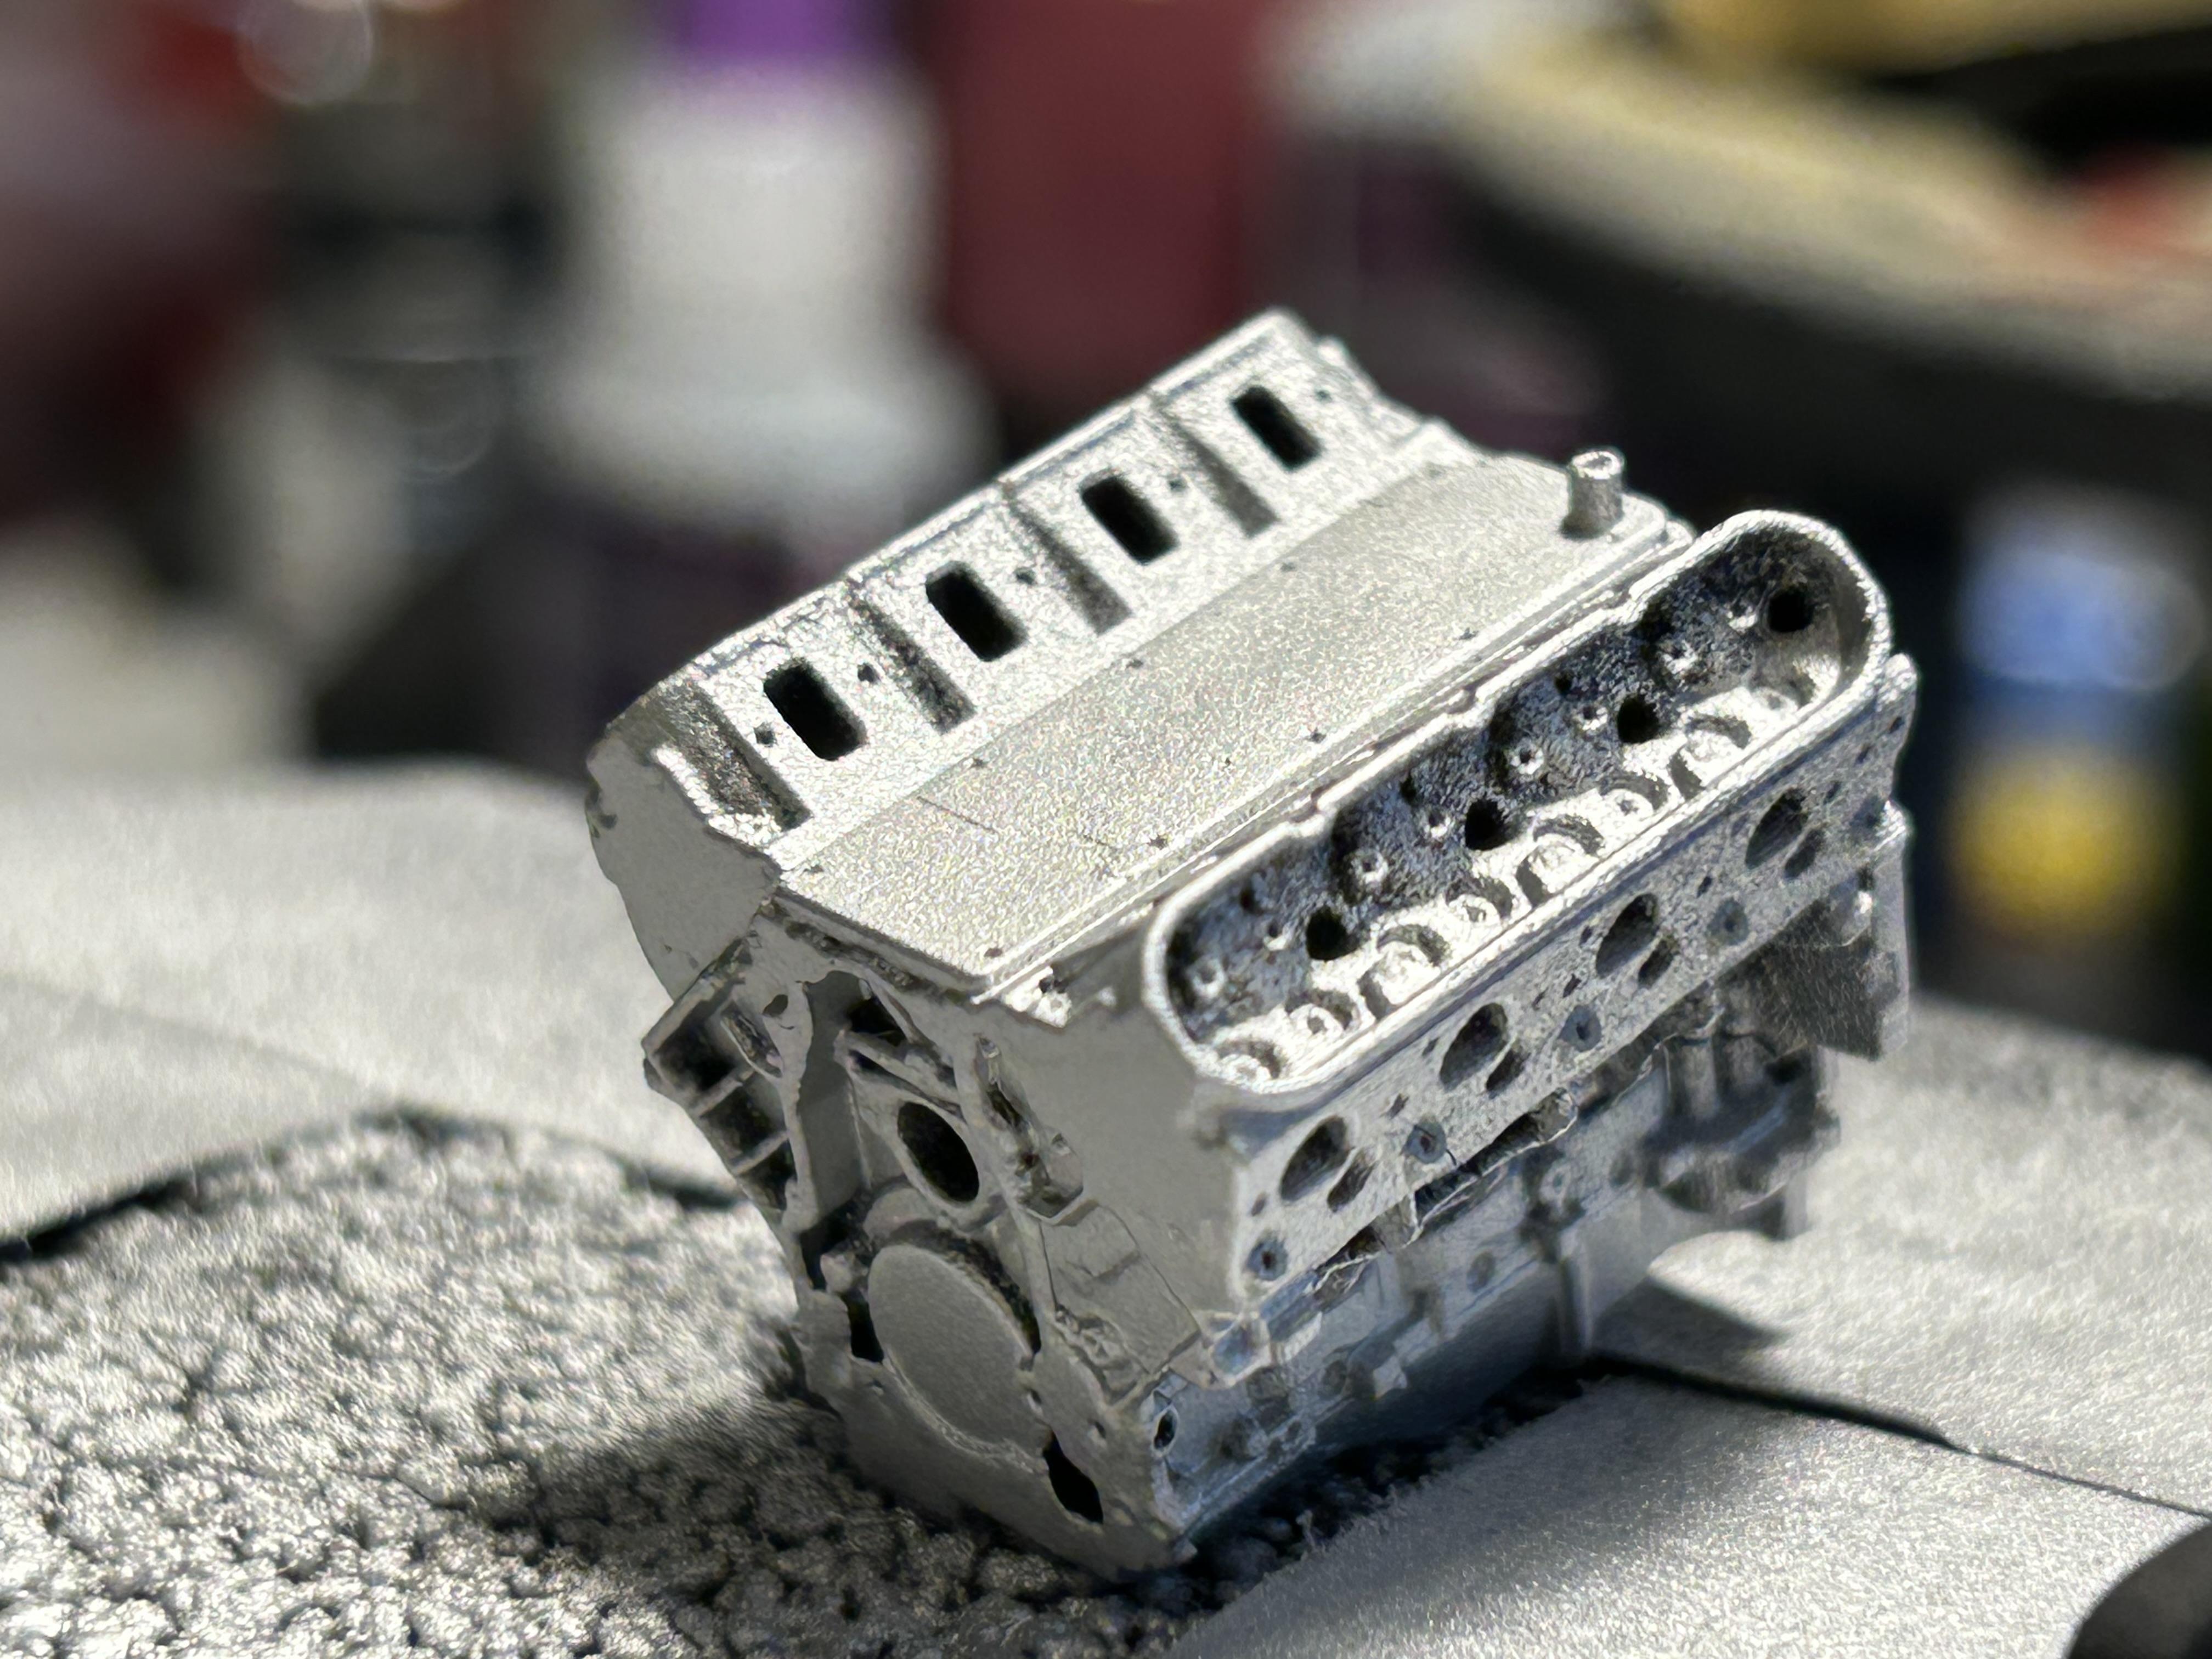
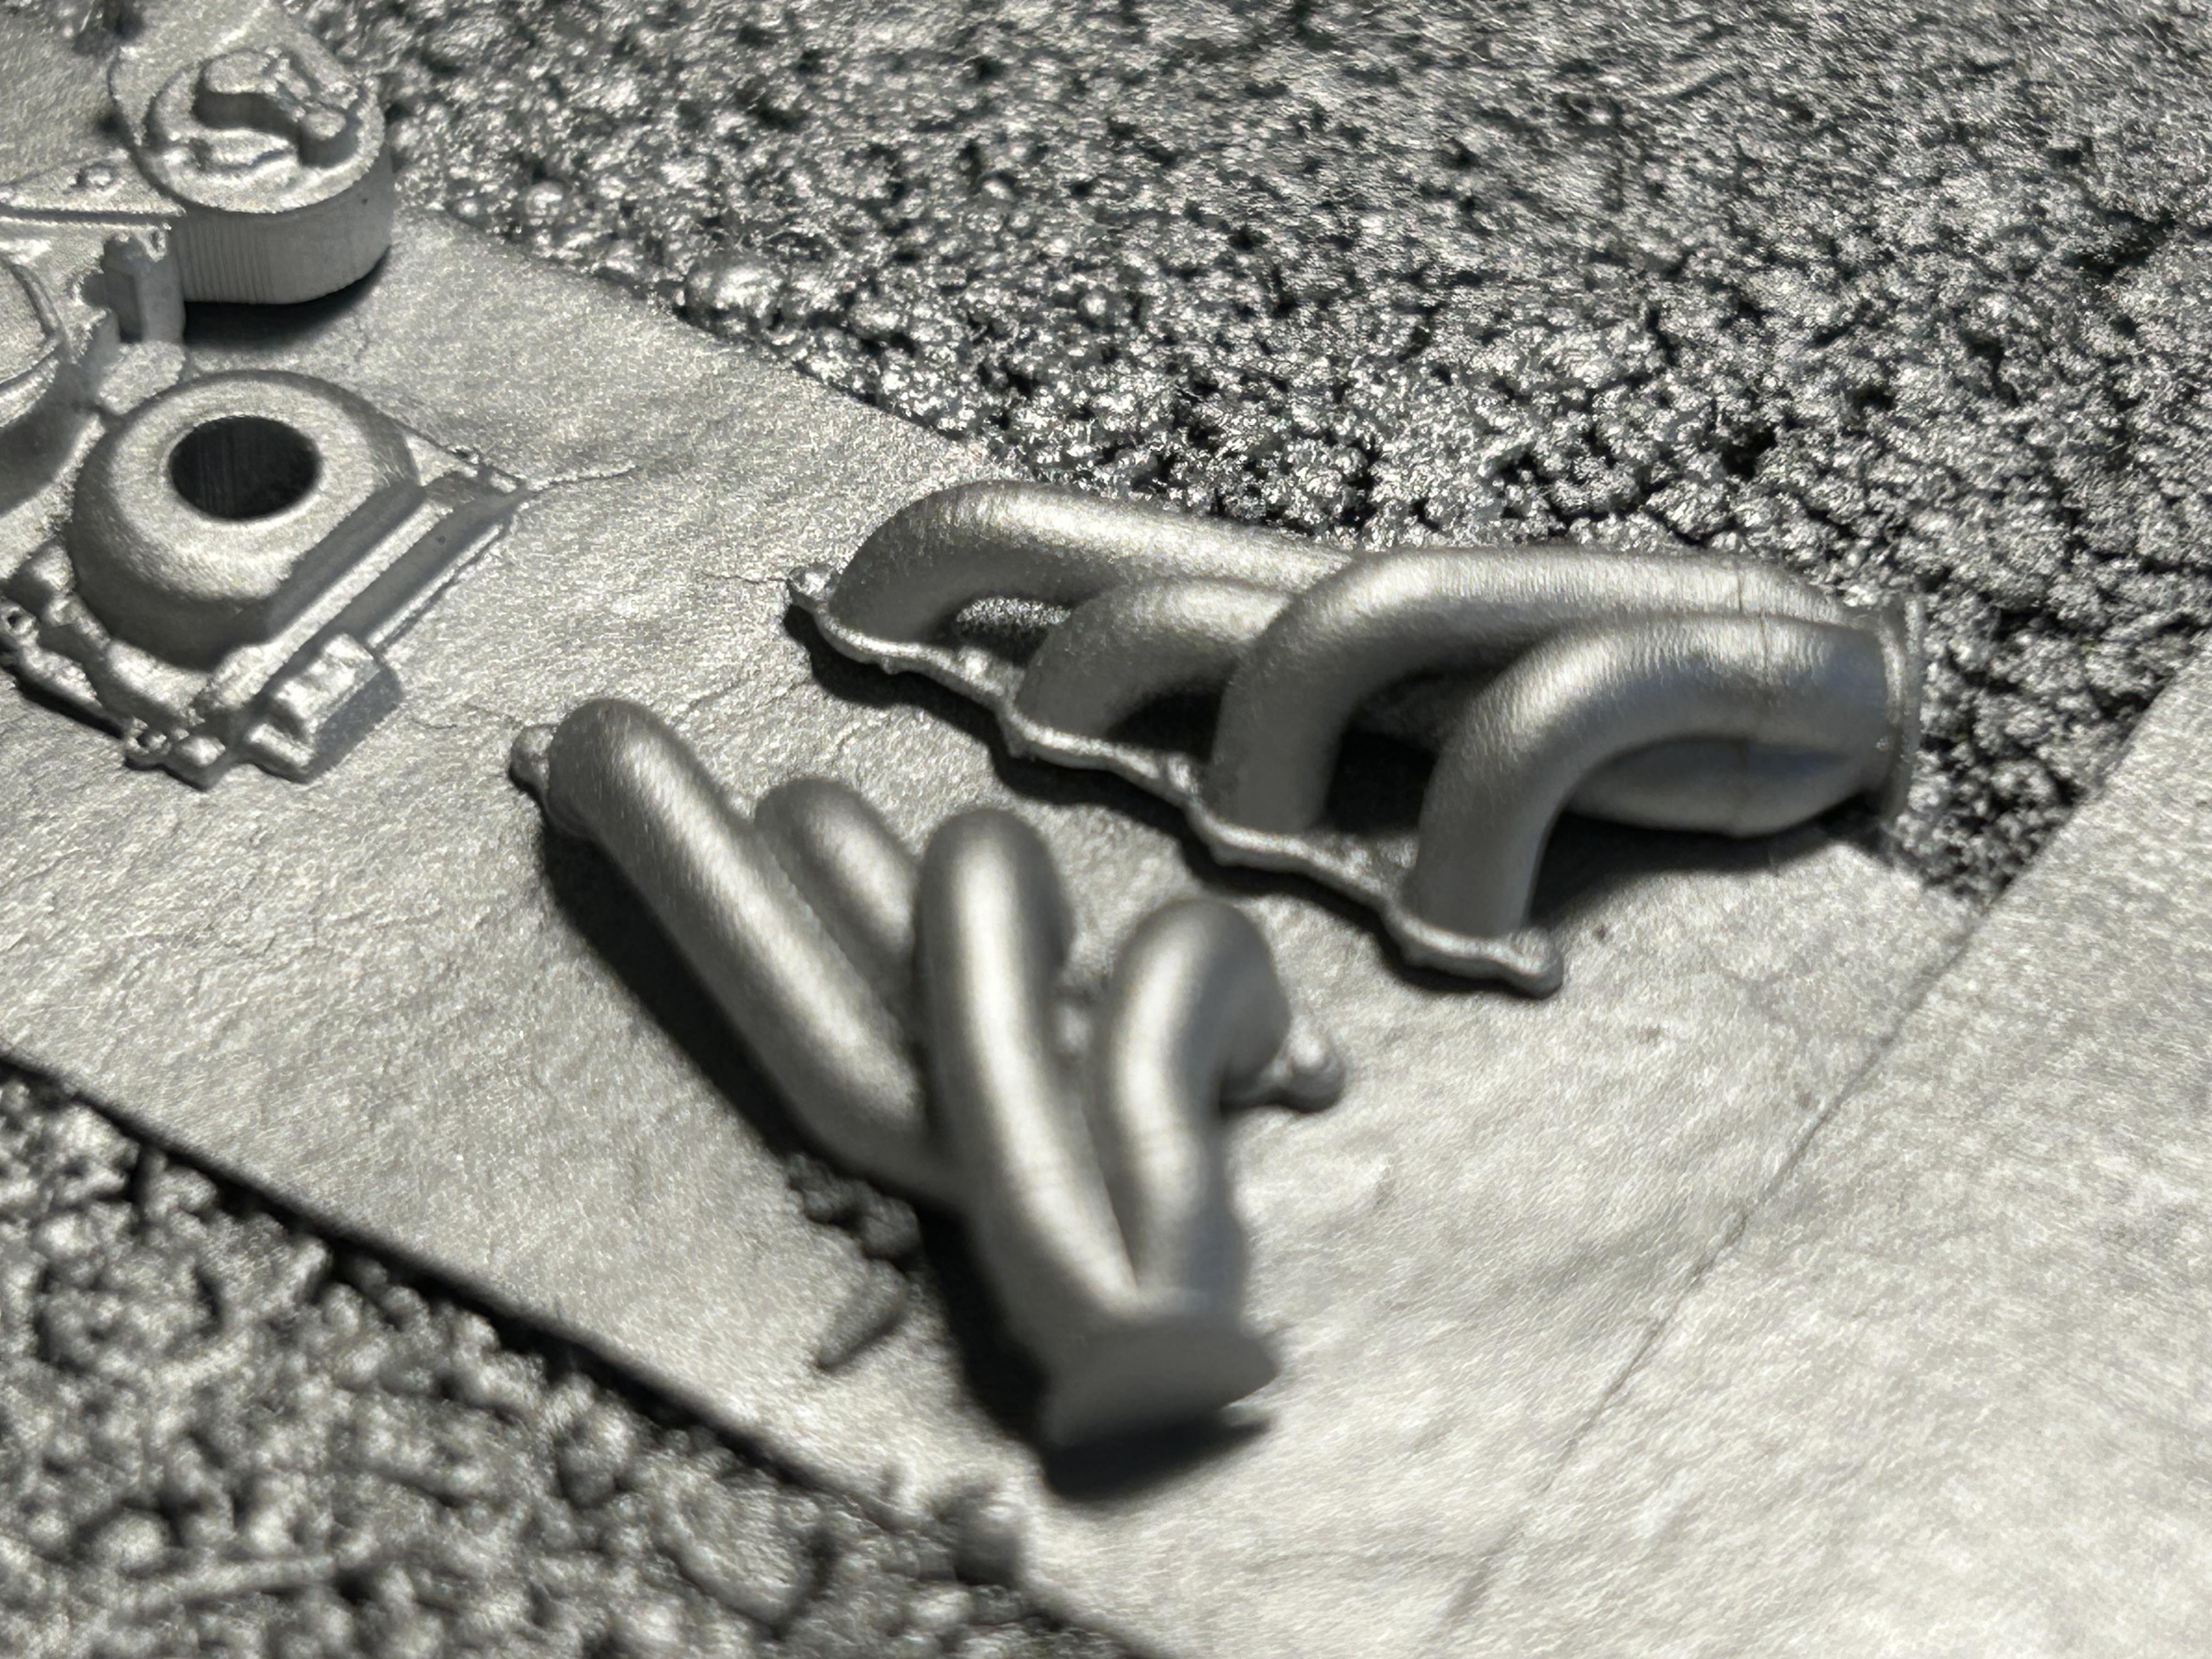
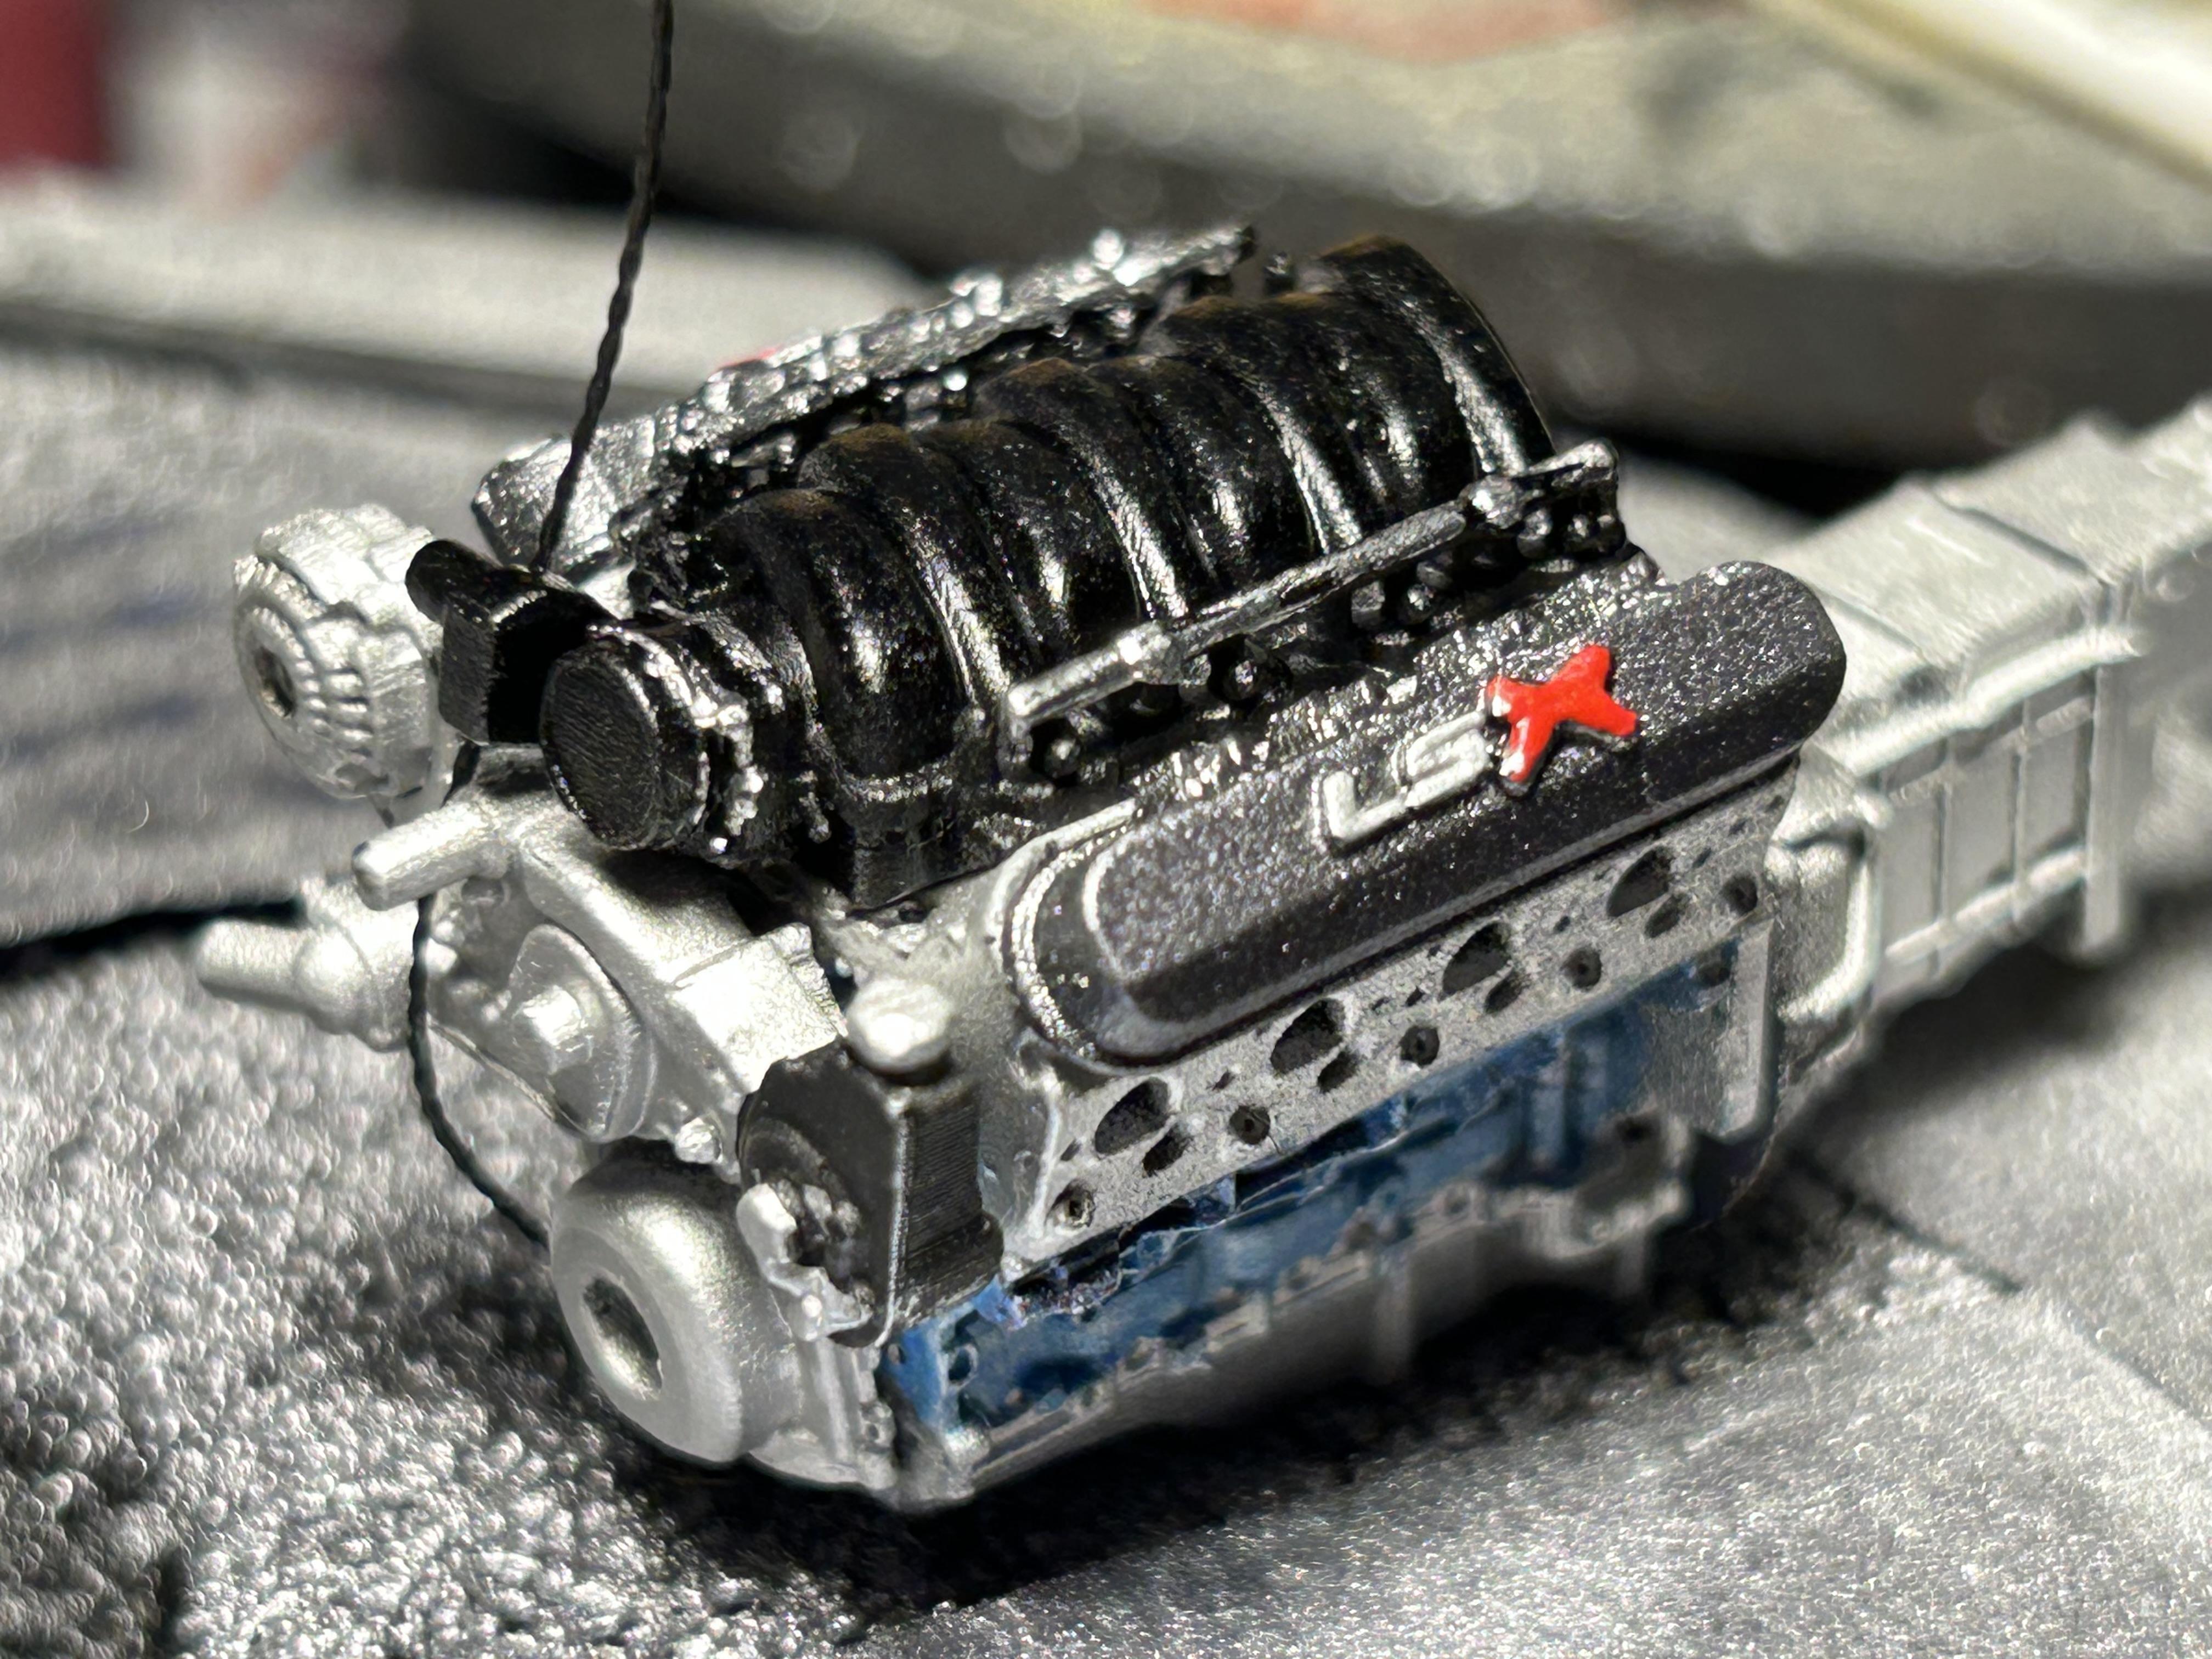
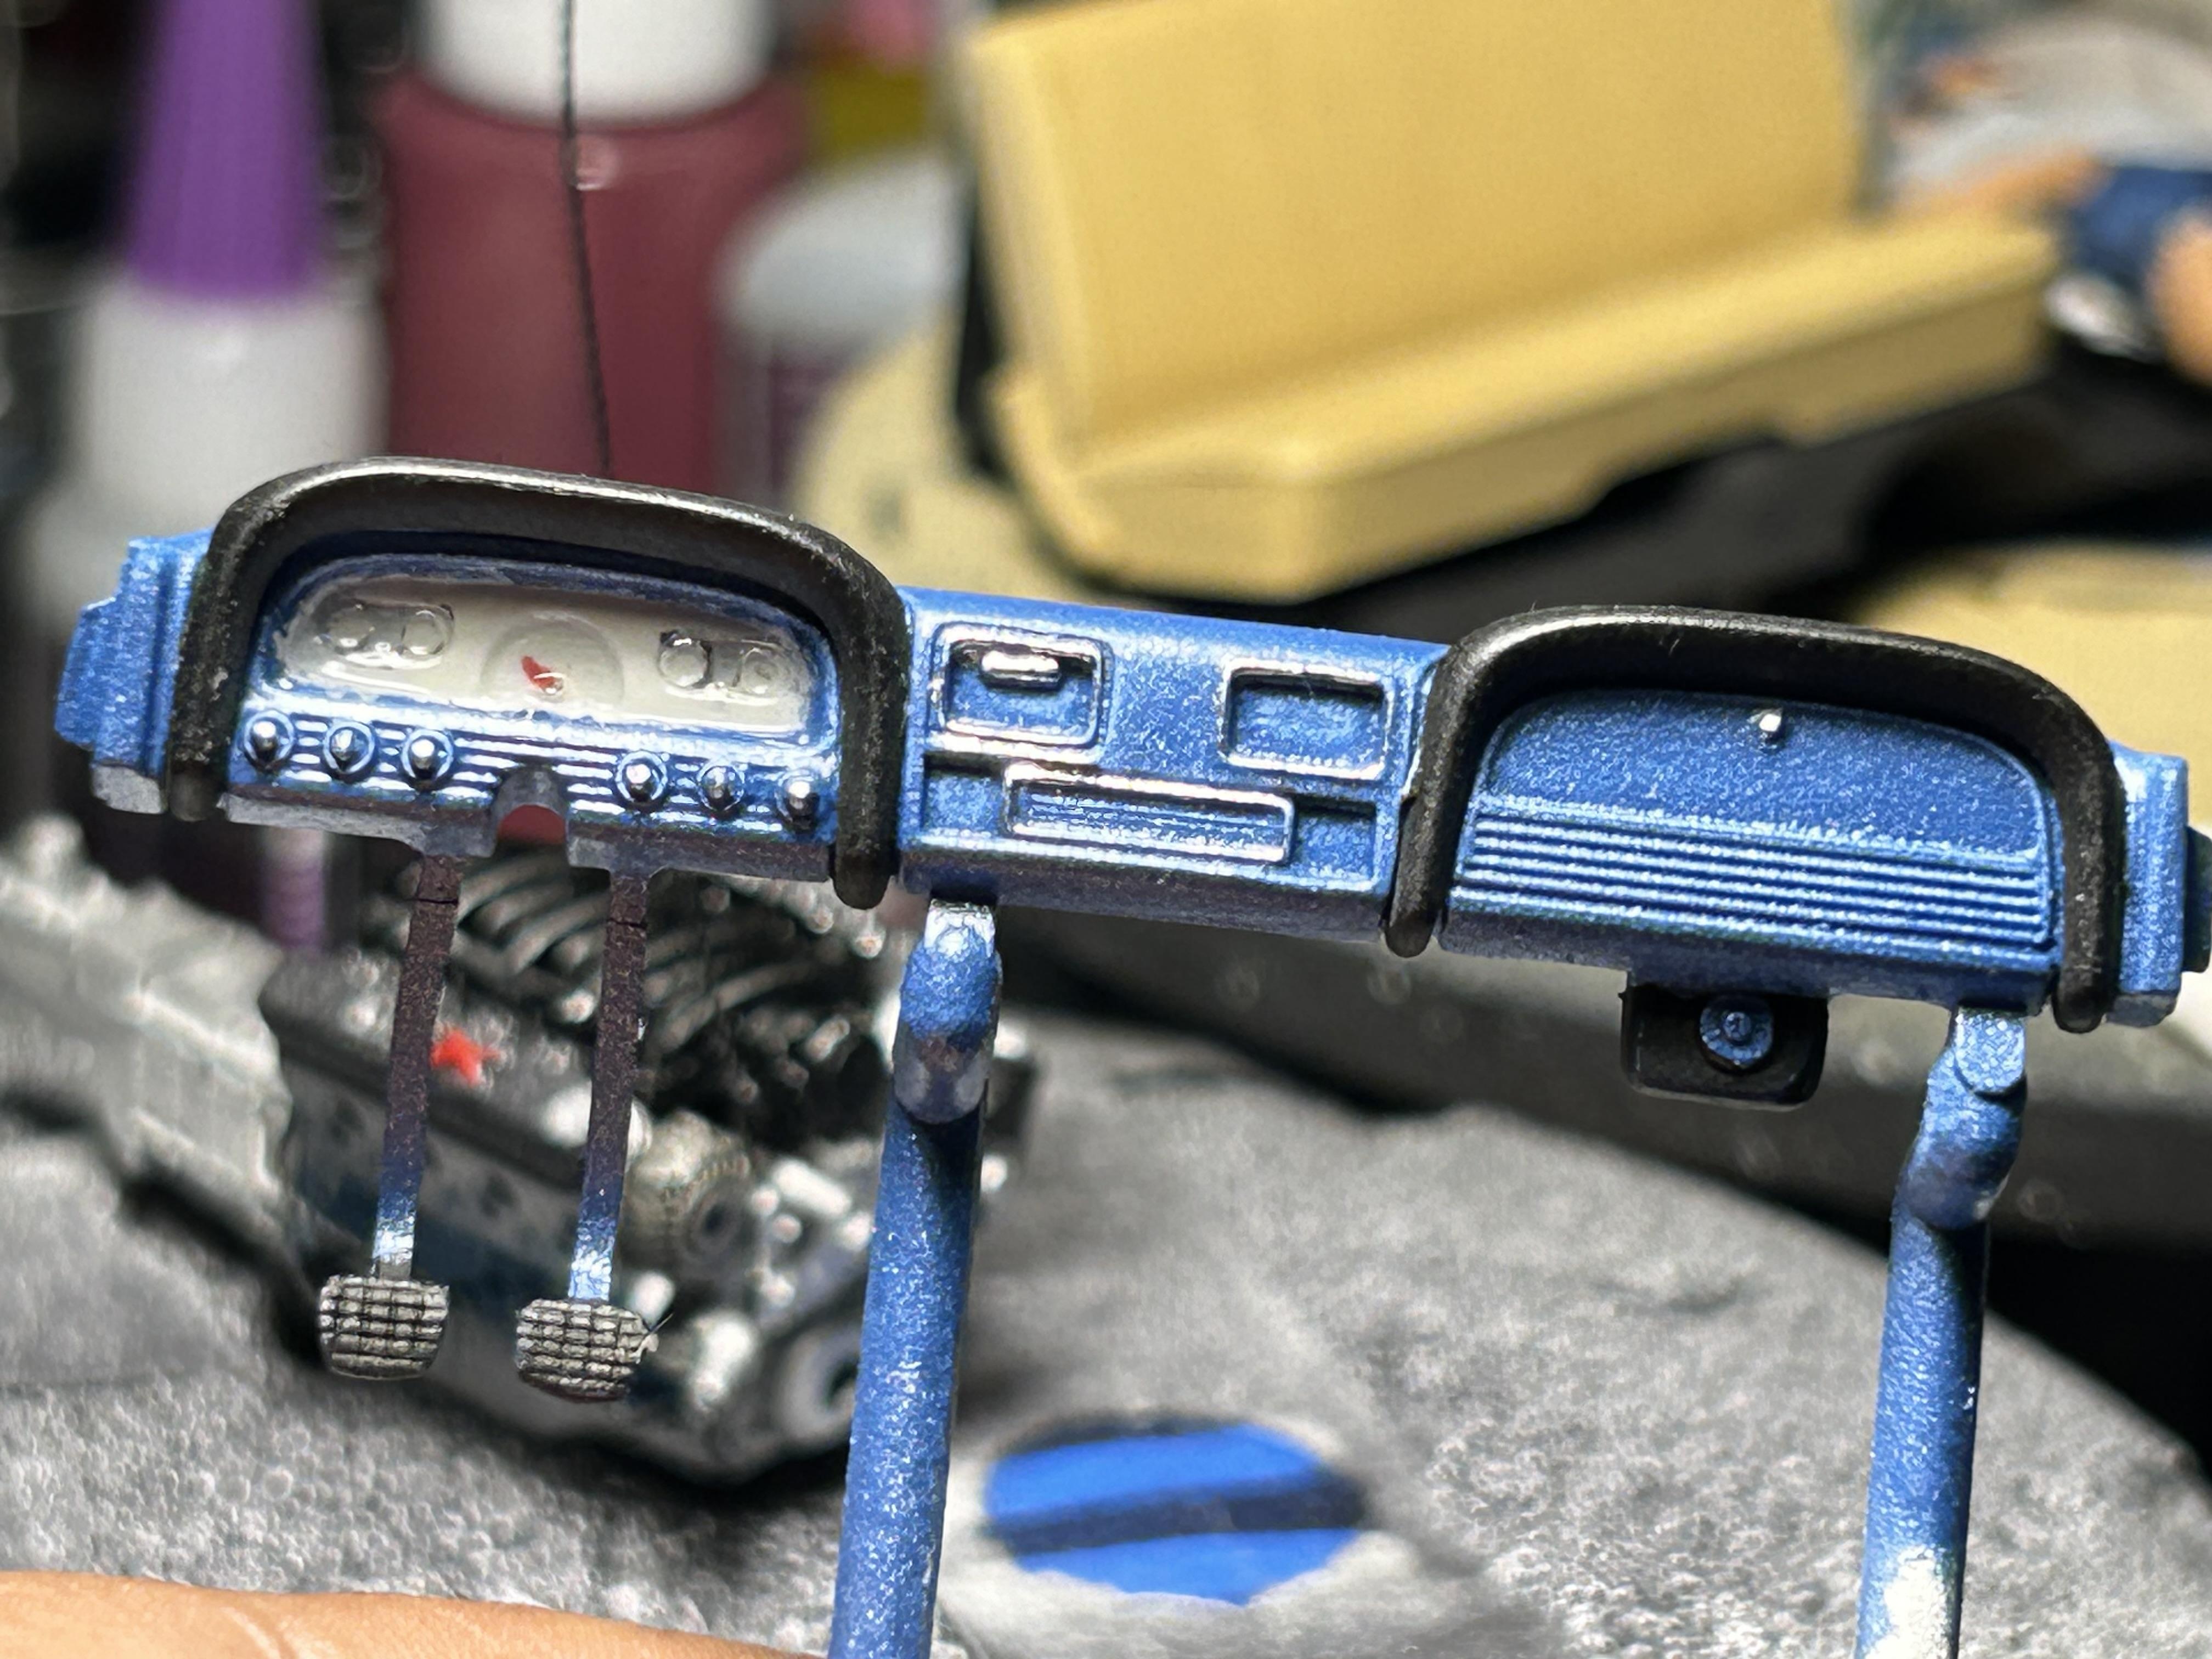
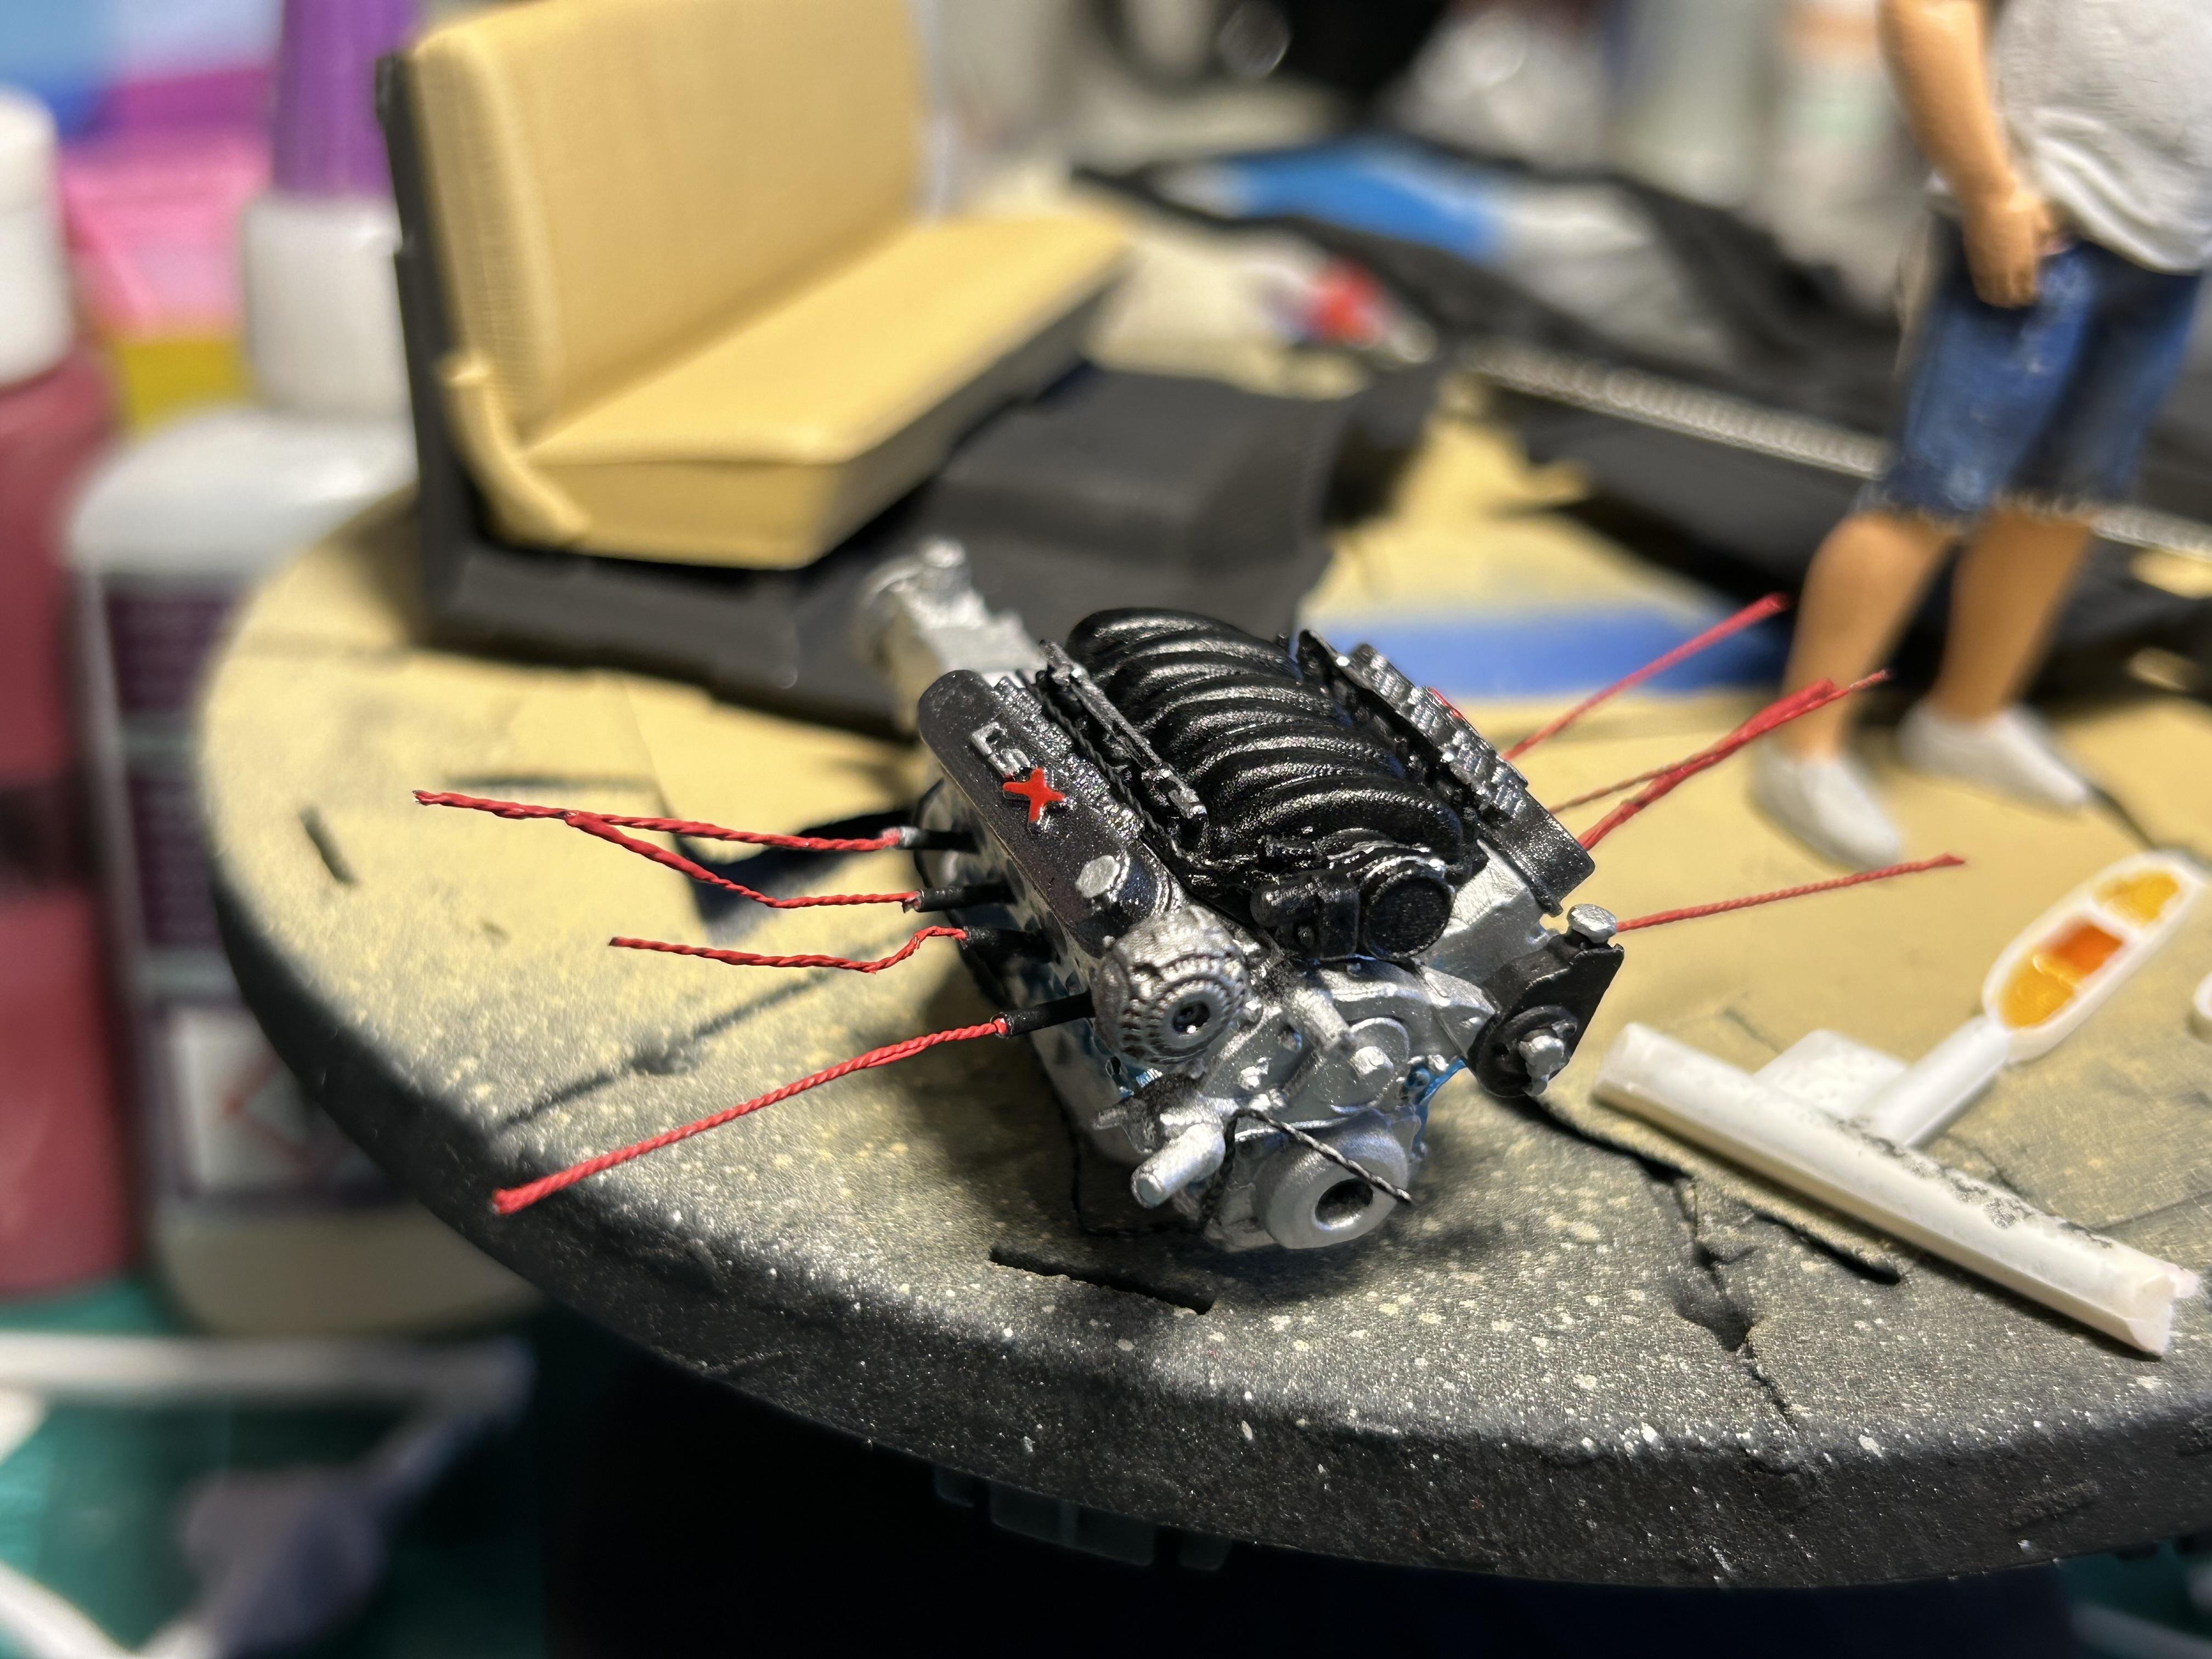
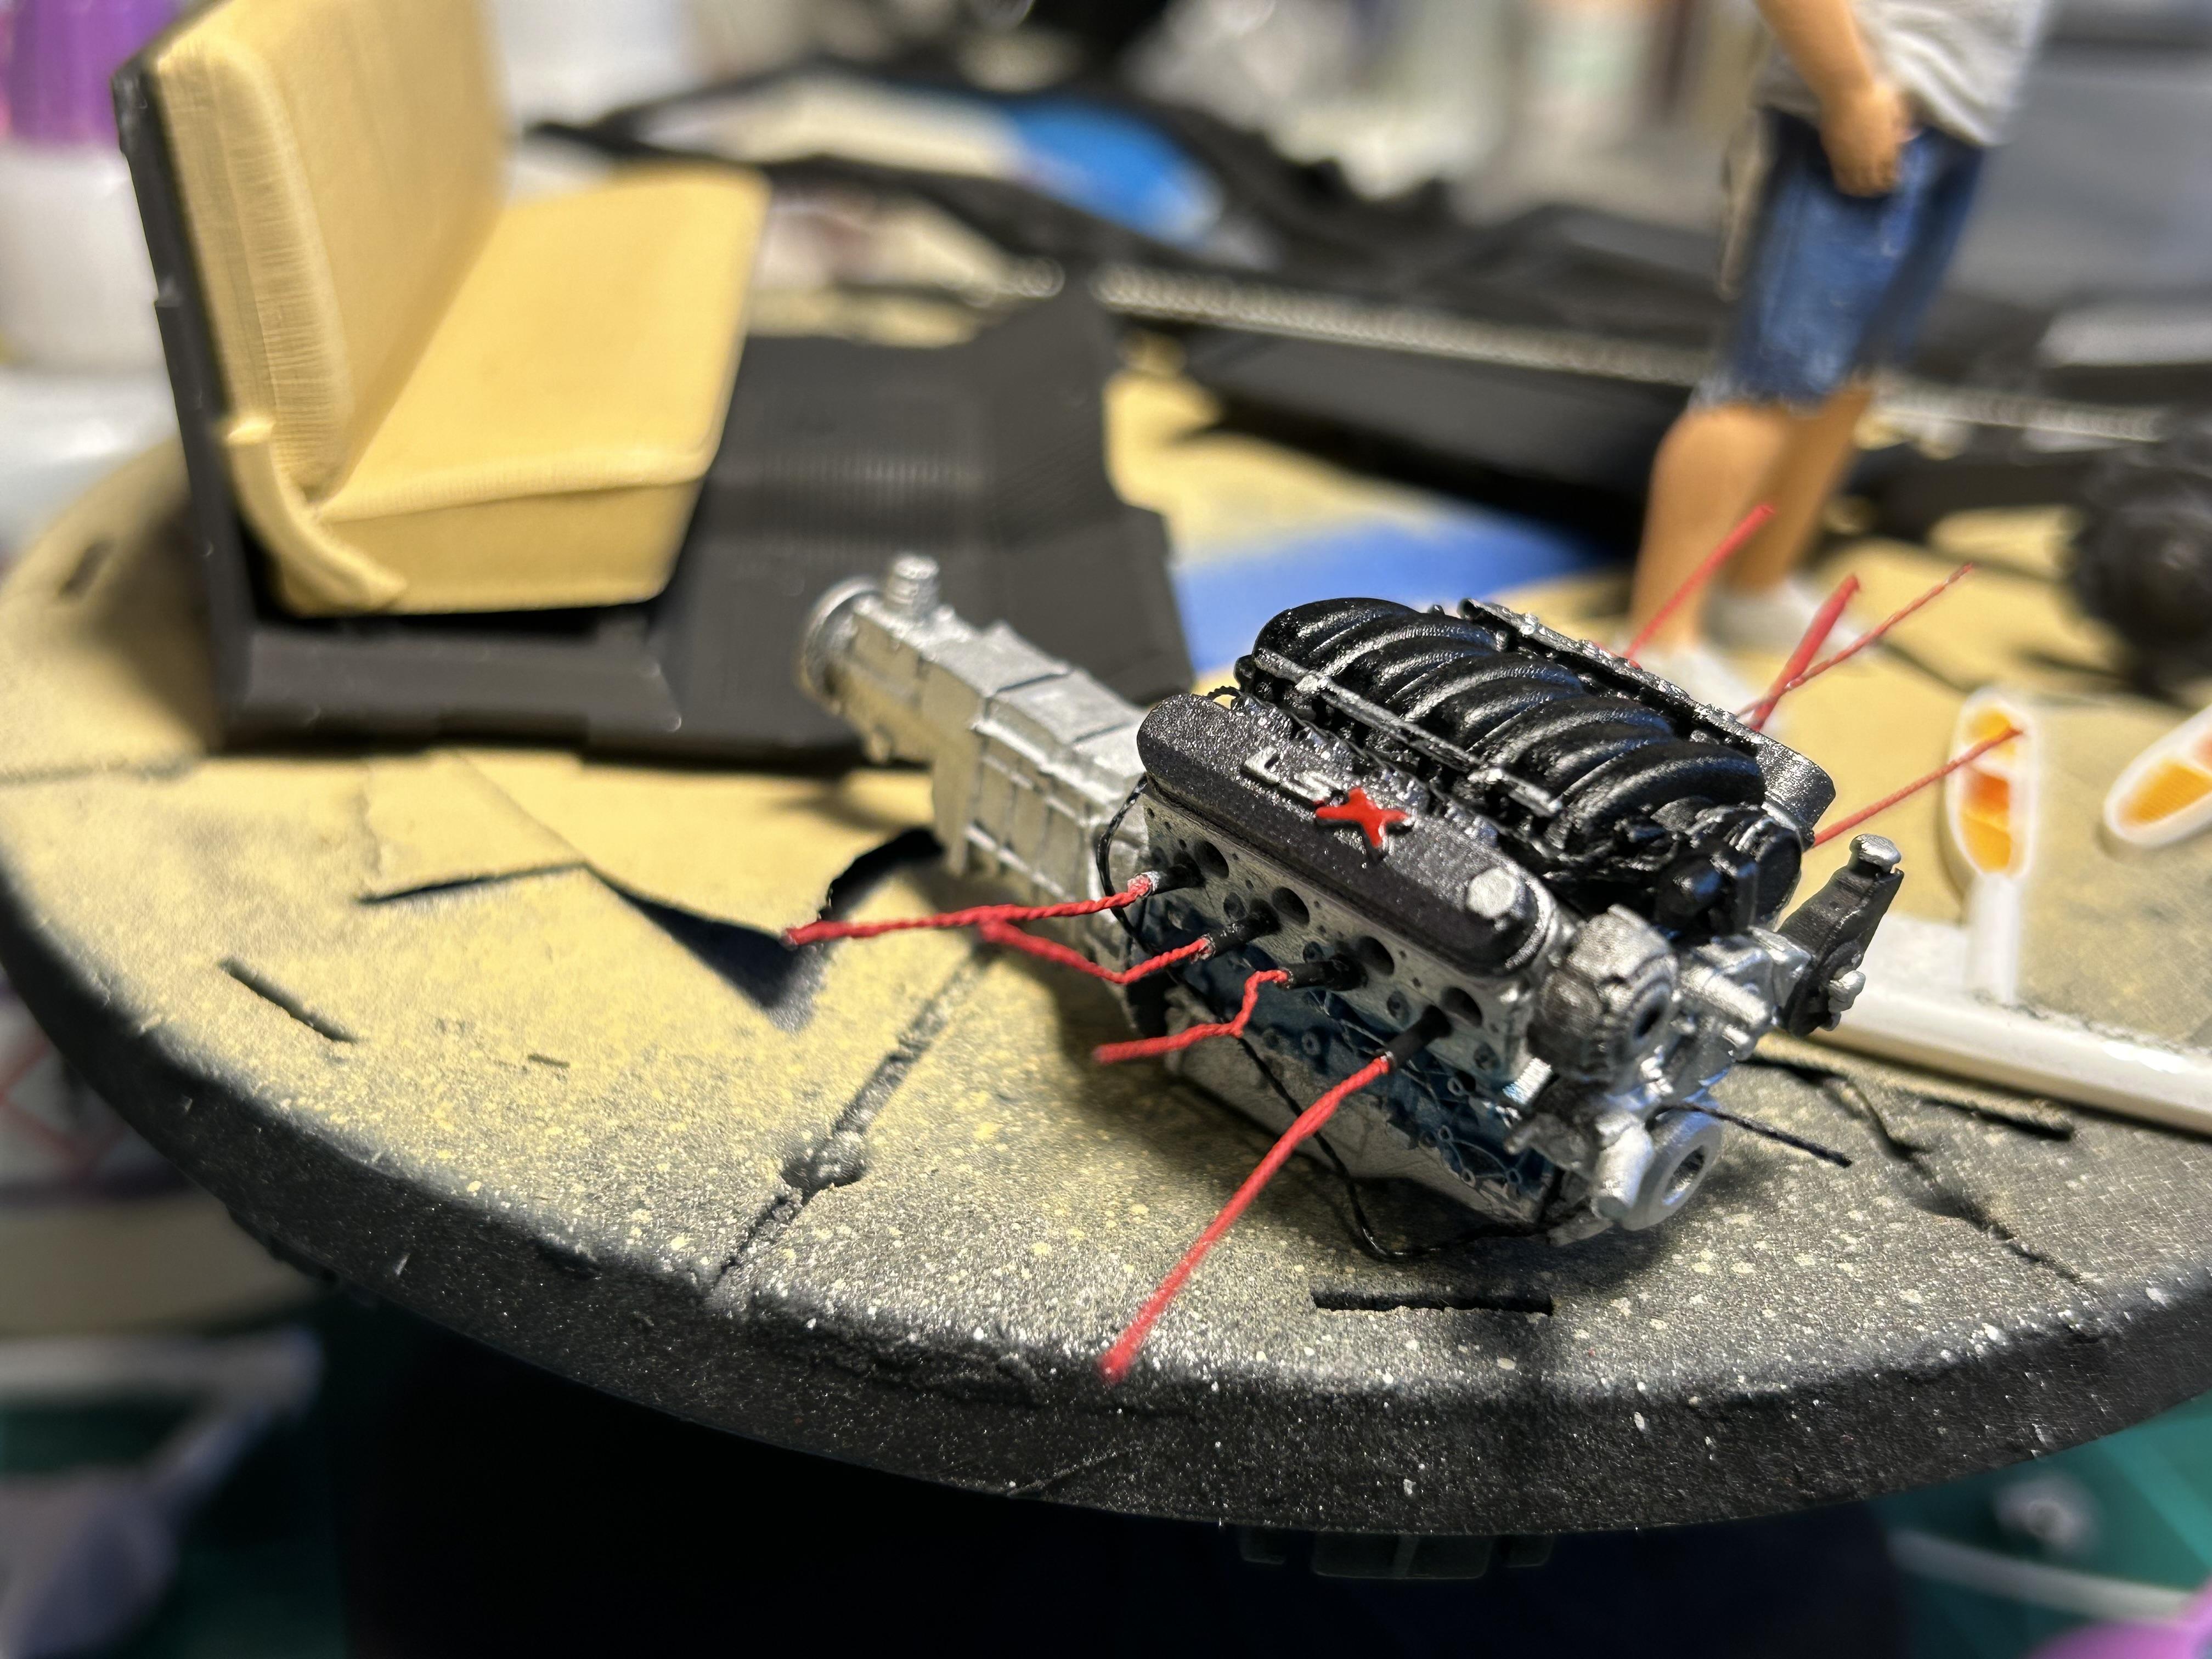
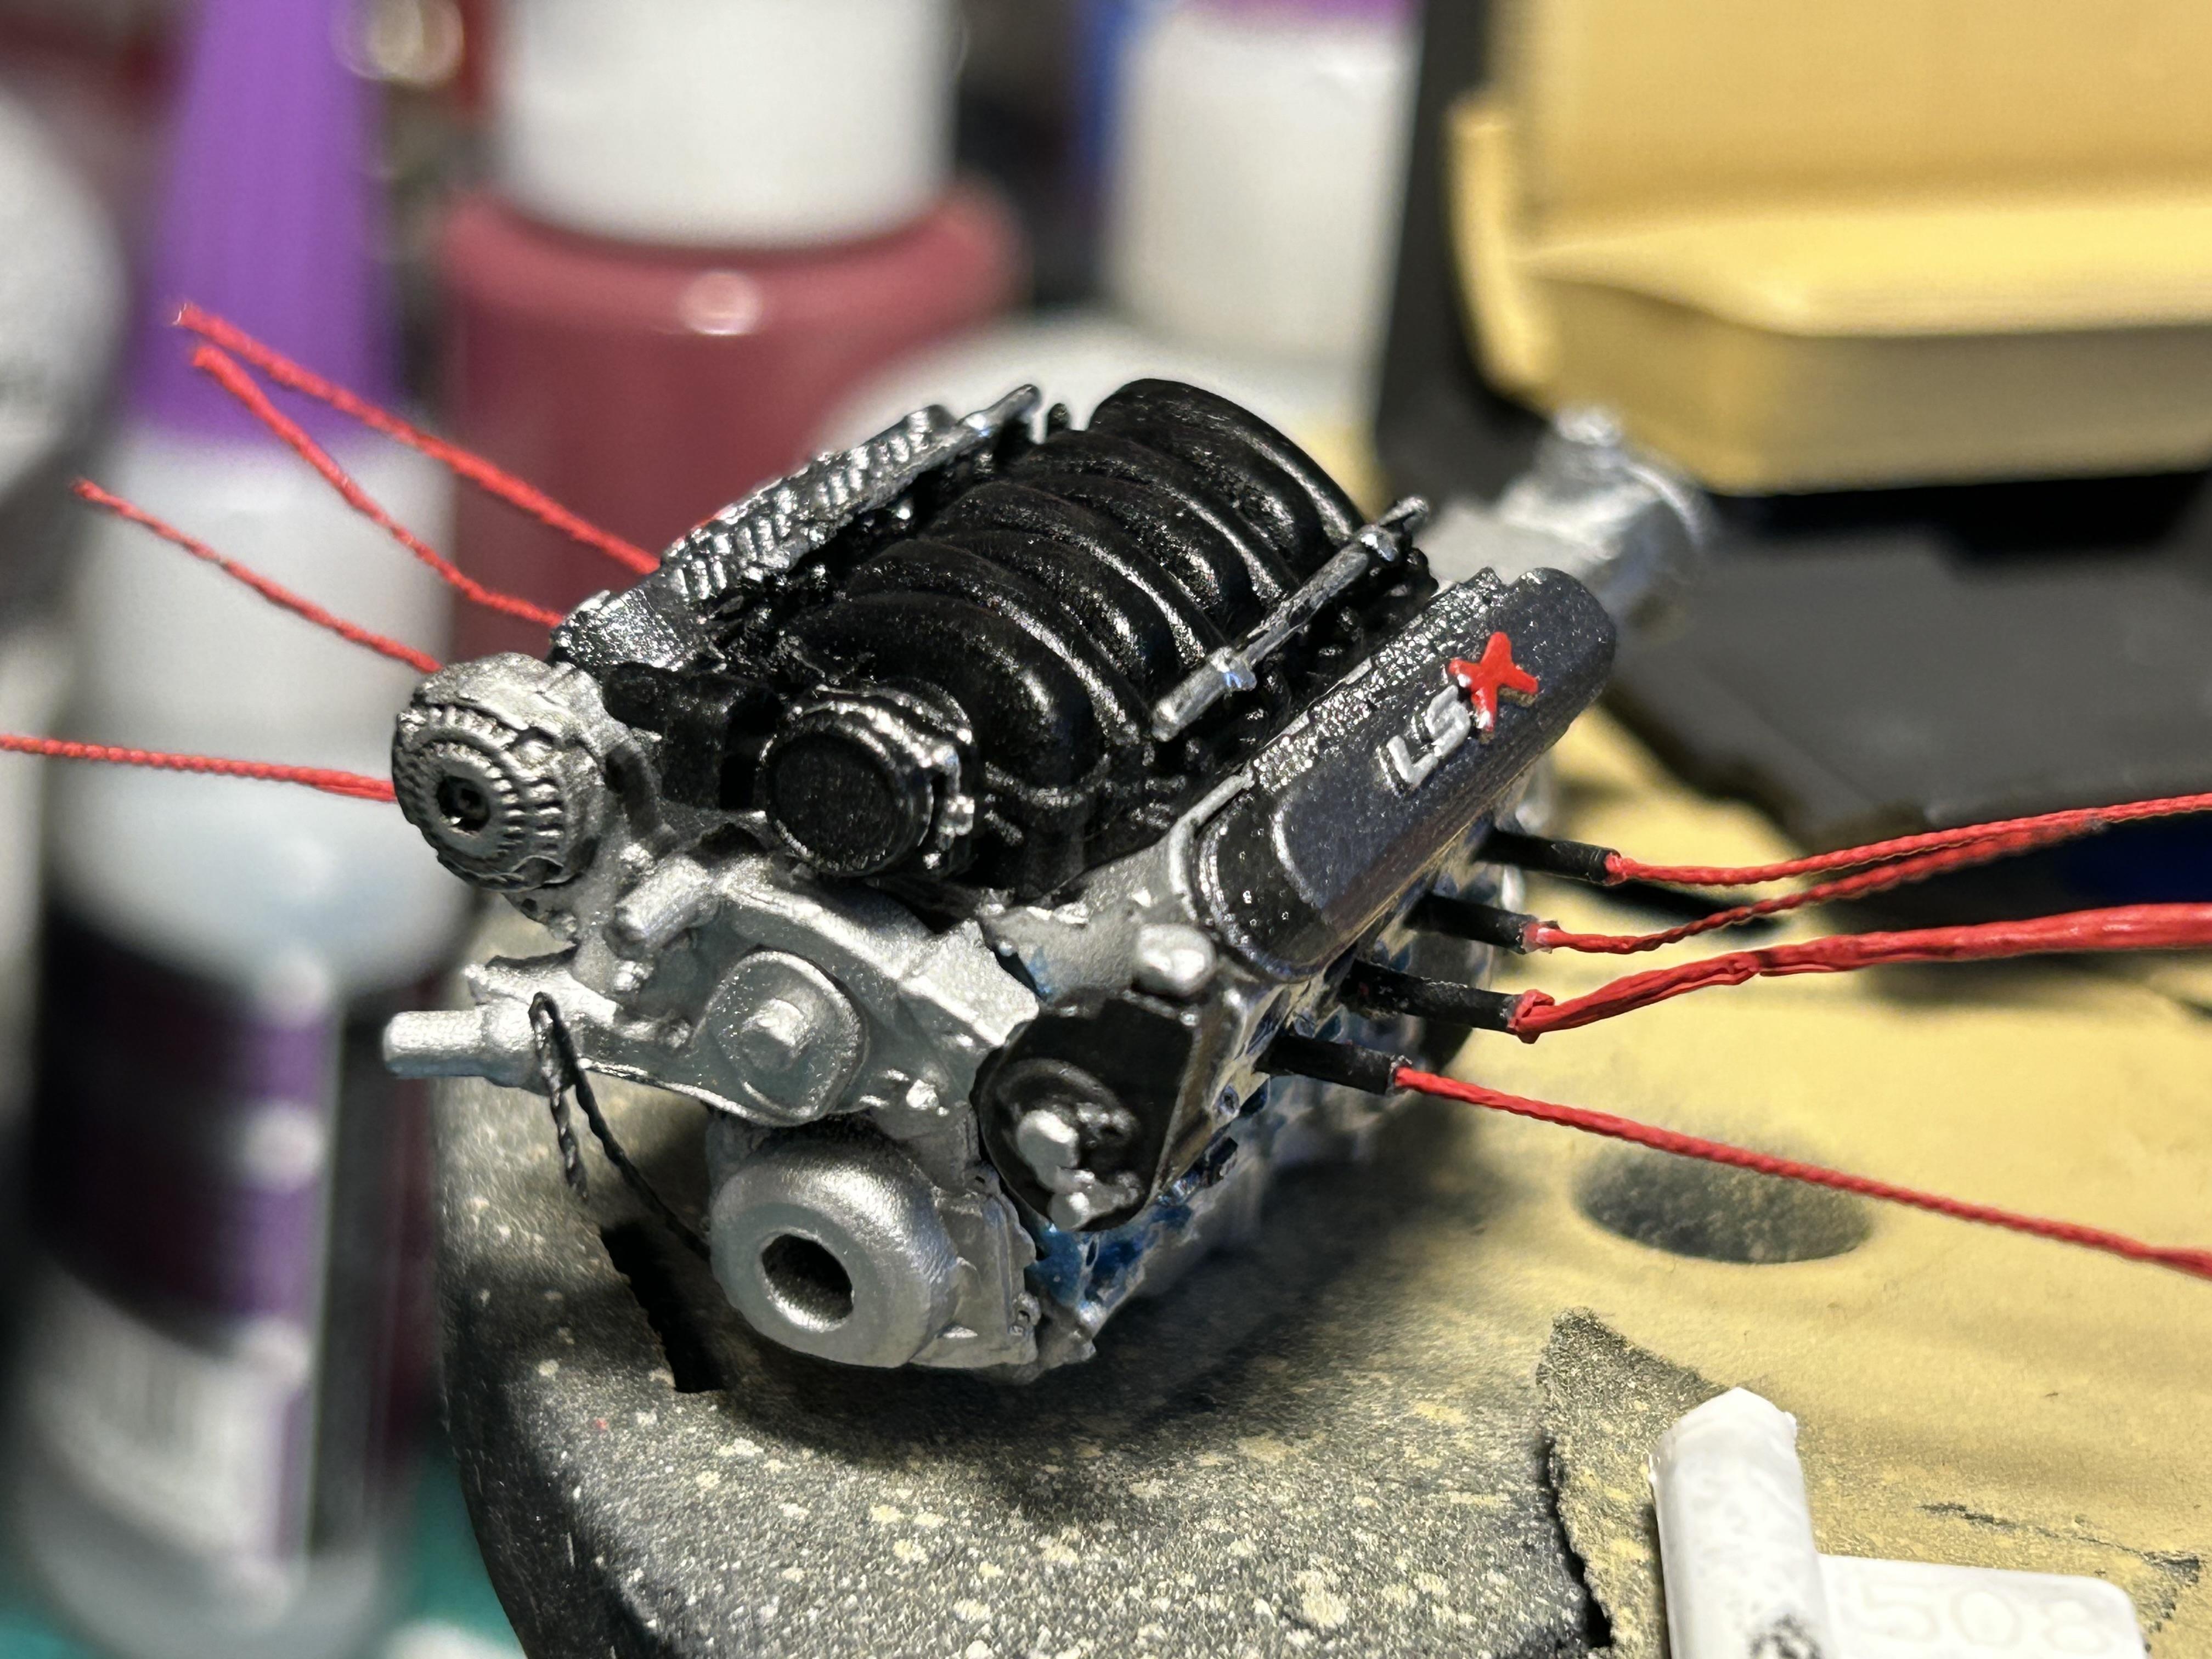
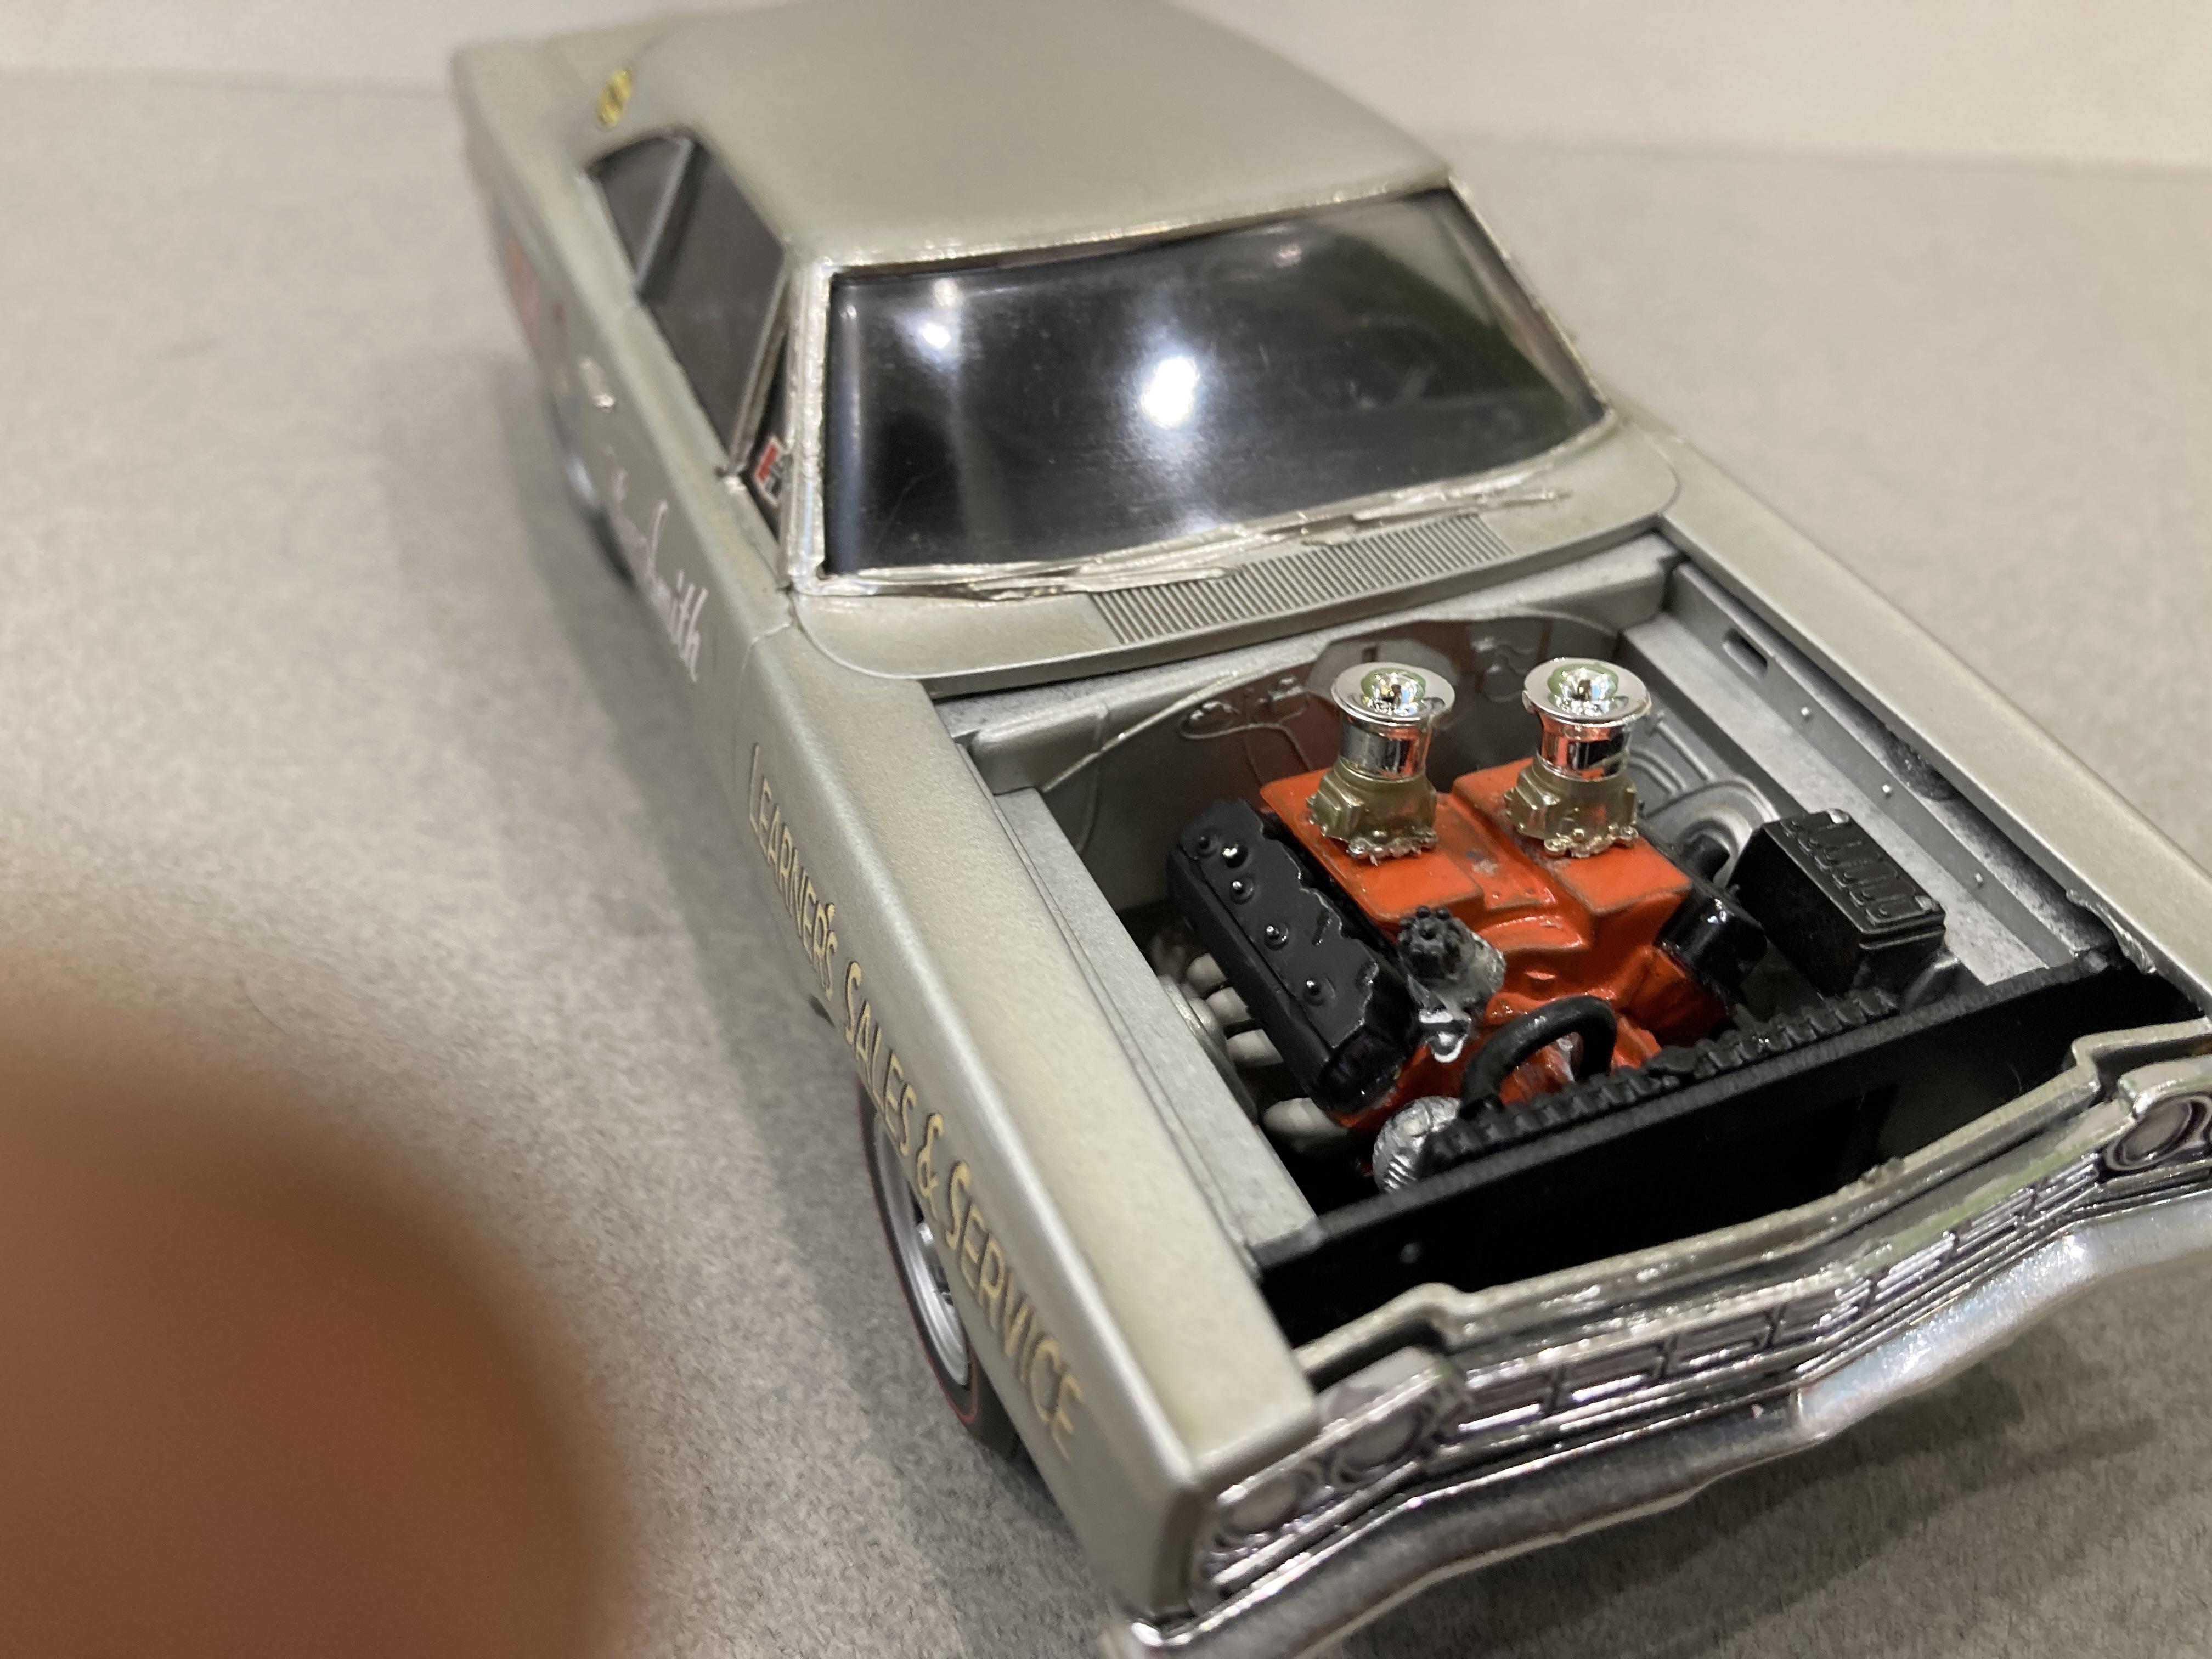
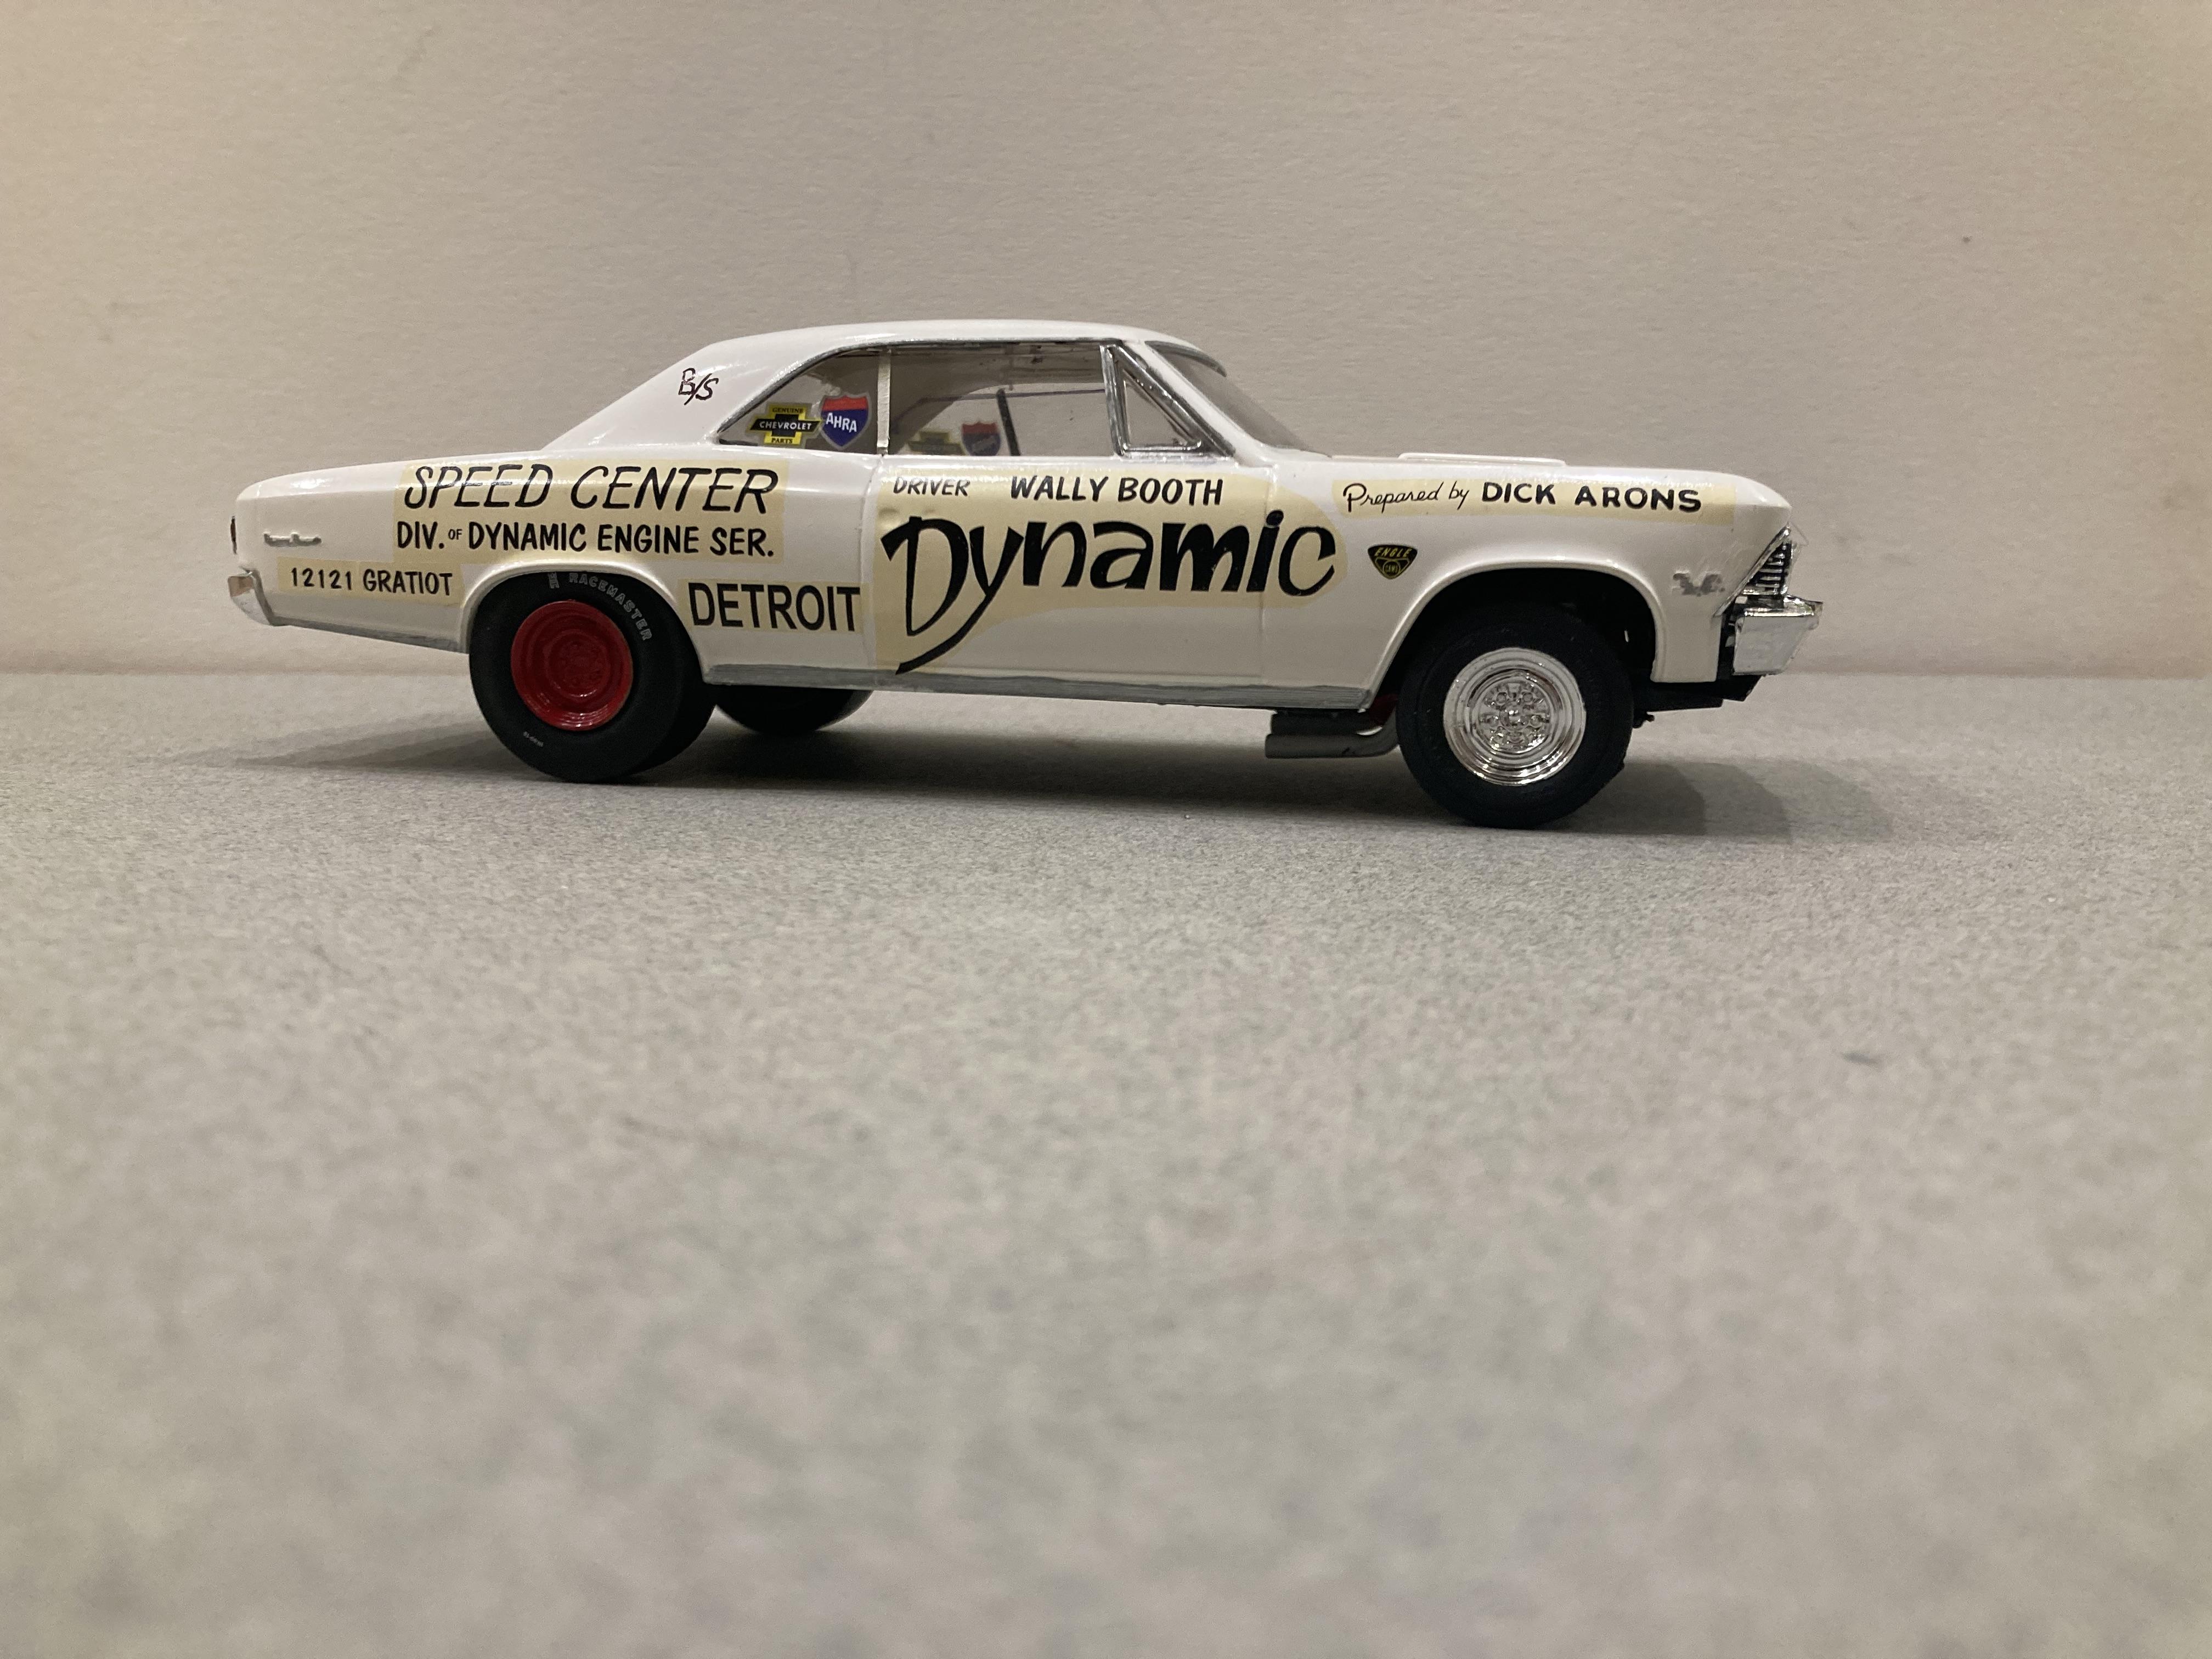
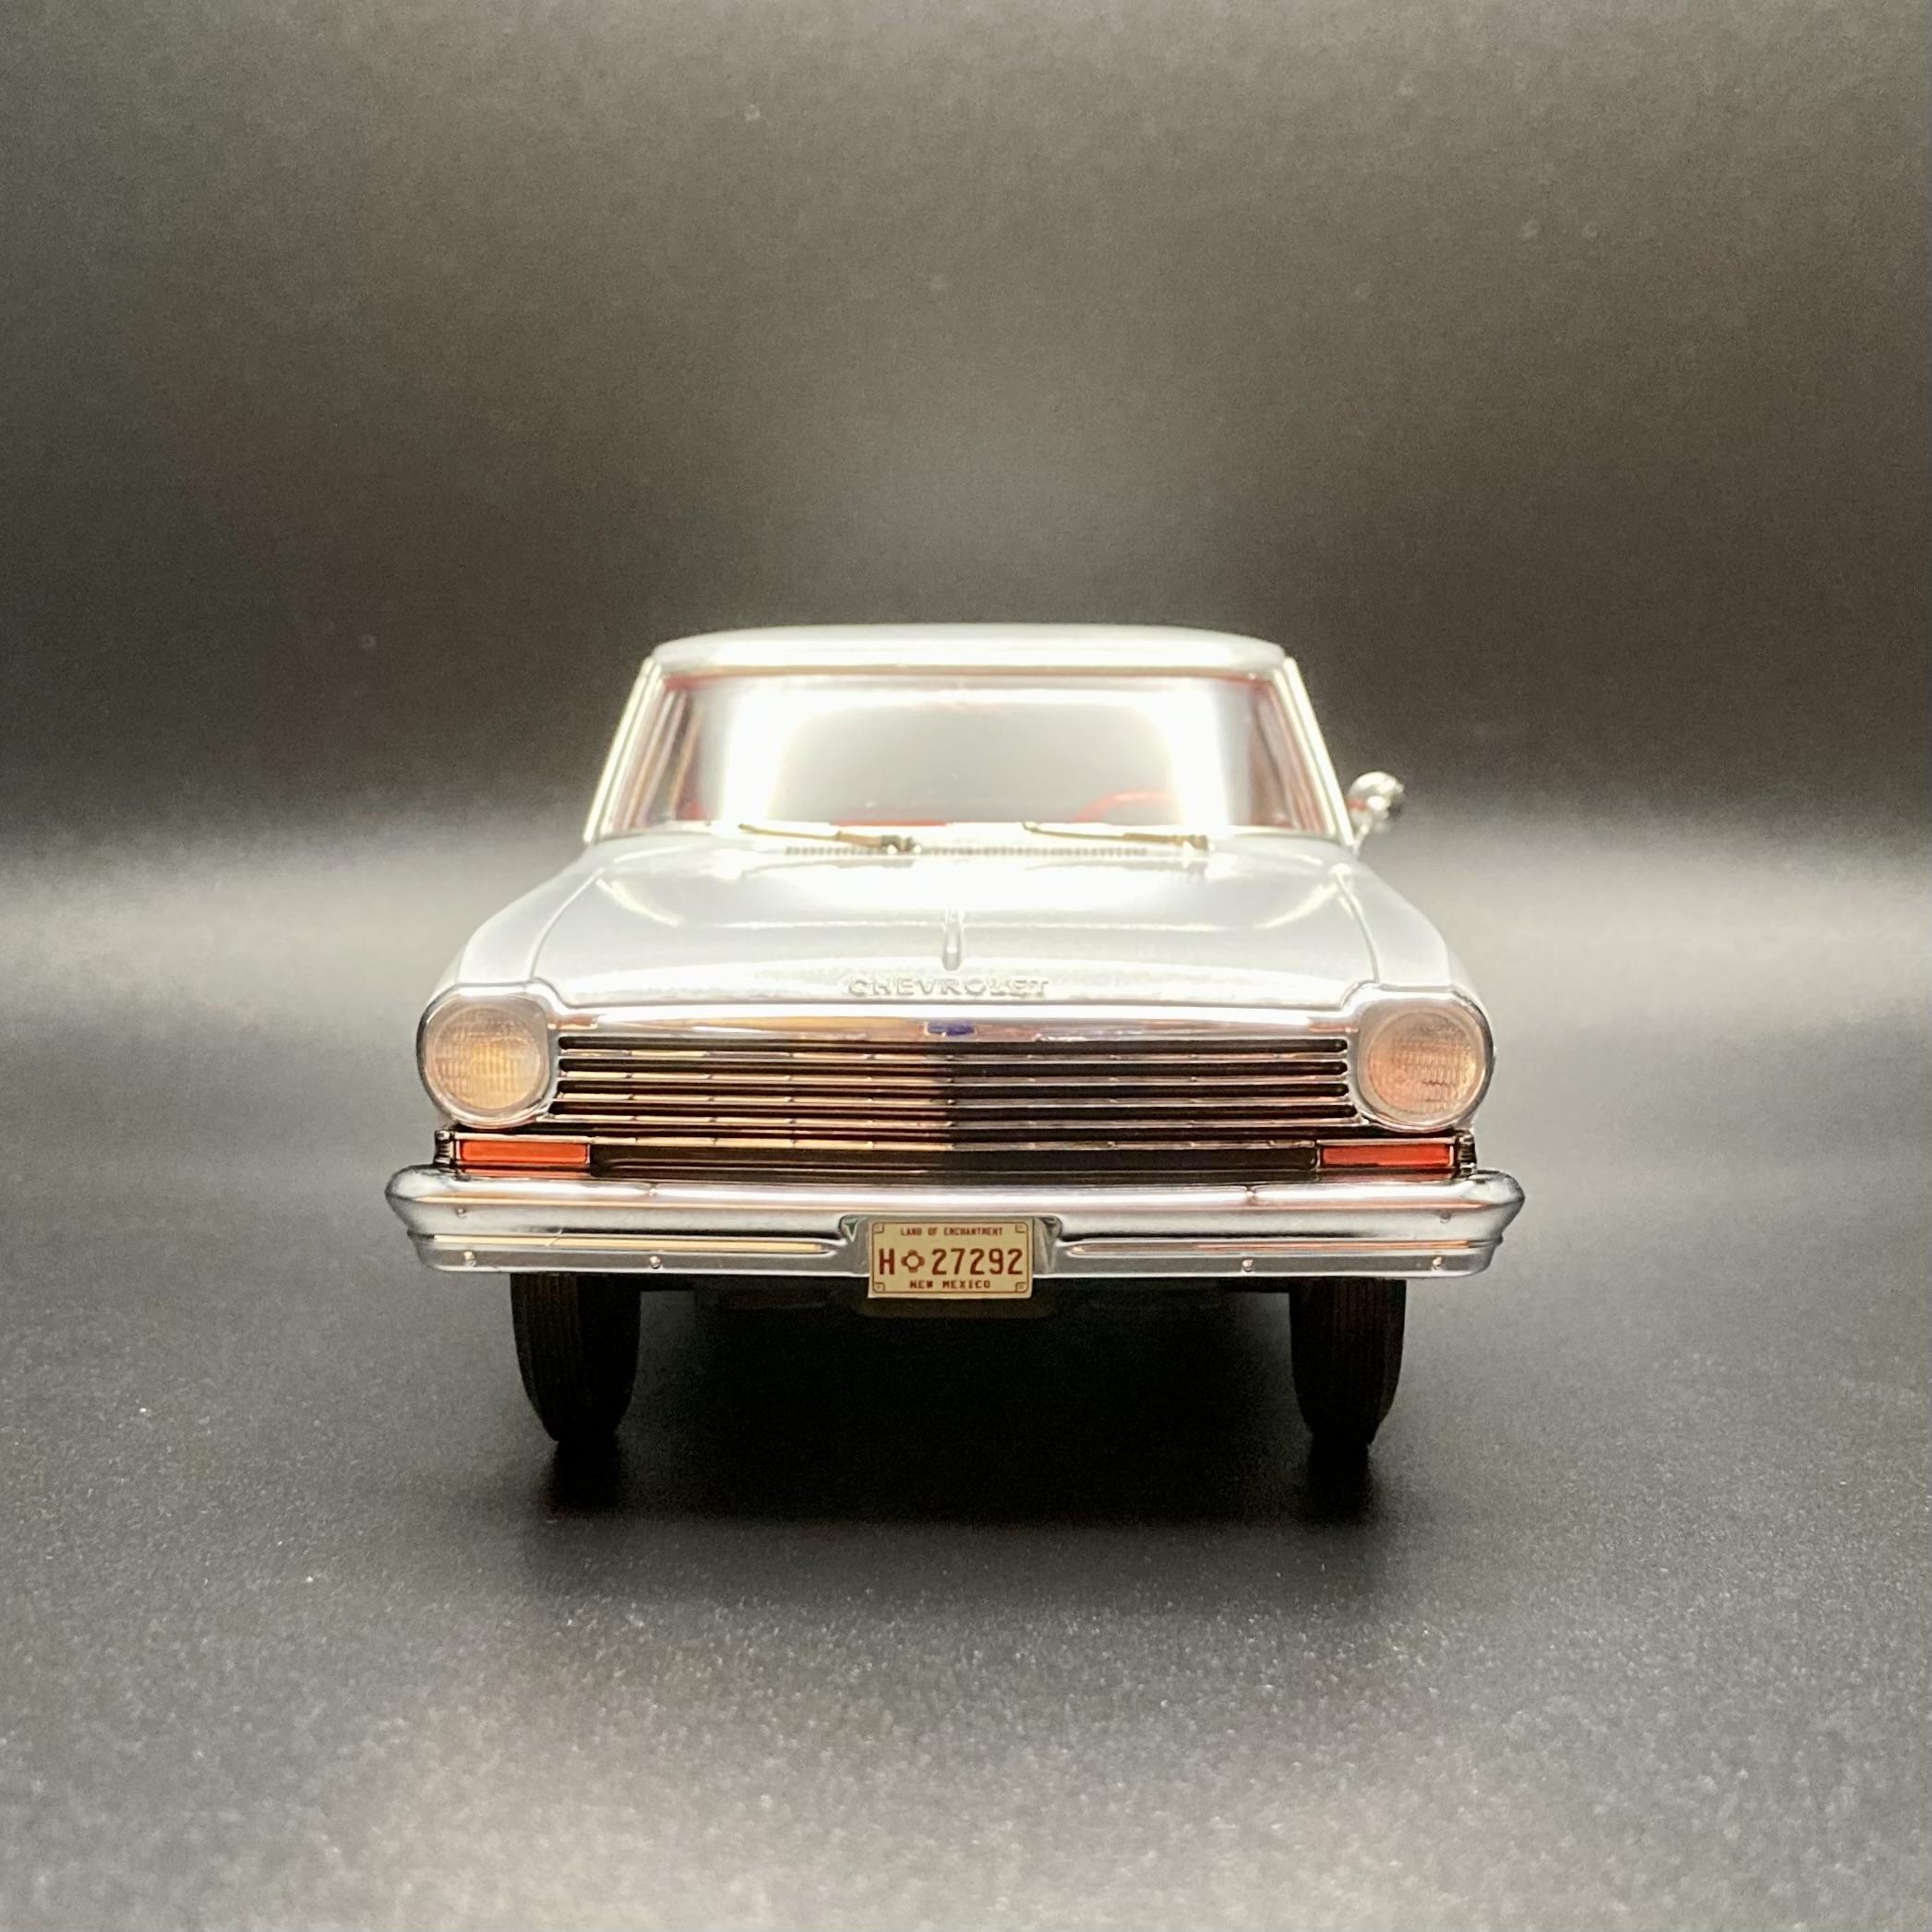
 I decided to build the AMT 1960 Chevy Apache 100 pick up truck. I have this truck in the stash for quite some time, and I knew I definitely wanted to do a engine swap. I was not sure what engine I was going to put in it at the time. I wanted to lower the truck so I added Iceman Collections suspension parts. See the pictures below for my progress on this work in progress. Feel free to let me know what you think. The the build of the kit is on my YouTube channel, KBCC garage This is the kit we started with. It’s been in my collection for a few years now I believe. Iceman collections LSX power plant. It’s pretty good. I really dig it. Miscellaneous suspension and brake parts from iceman collections Mocking up the LSX in the frame. Drilling a hole in the center for the shifter to go through. Marking up the rear suspension. The center section is from Iceman collections, the trailing arms are the kit parts and the wheels and tires are MCV Products. Here is the underside with all of the iceman collections parts mocked up. Here you see MCV Products weld Venturas. I really dig these wheels.. first markup on the wheels painted several parts together with a little paint . I really really dig these wheels. They look nice in a two-tone color. The centers are Tamiya gunmetal and the lips are model, master metalizer aluminum. DupliColor saddle tan over black primer. I also use a mix of tans and brown for the seat cushion. All decals were designed by my wife at DawnSmithArt. Finally, we have color. I went with a two tone. The main body is metallic light blue by DupliColor. Believe it or not I have had this scan of light blue paint since 1999 and I have painted at least five models with this same can. I really like how the recessed white paint went into the tailgate. This is all acrylic paint for the Chevrolet emblem. Using acrylic mixes of browns and light, browns and tans I created woodgrain in the bed. Molotow chrome on the areas between the wood. Probably needs a little cleanup, but I will get to it. No worries. 😉 Here we see the exhaust headers I have painted them in model master aluminum metalizer I tried to replicate a little bit of the heat soak into the headers. Turned out OK 👍🏾 Iceman collections LSX all painted up, but there are more details needed. The two tone dashboard with white gauge face. The dash is painted the body color to match the body. Stopping point for the moment. Adding the coil wires. More to come as I work on this. I’m having as much fun as I can. Thanks for following.
-
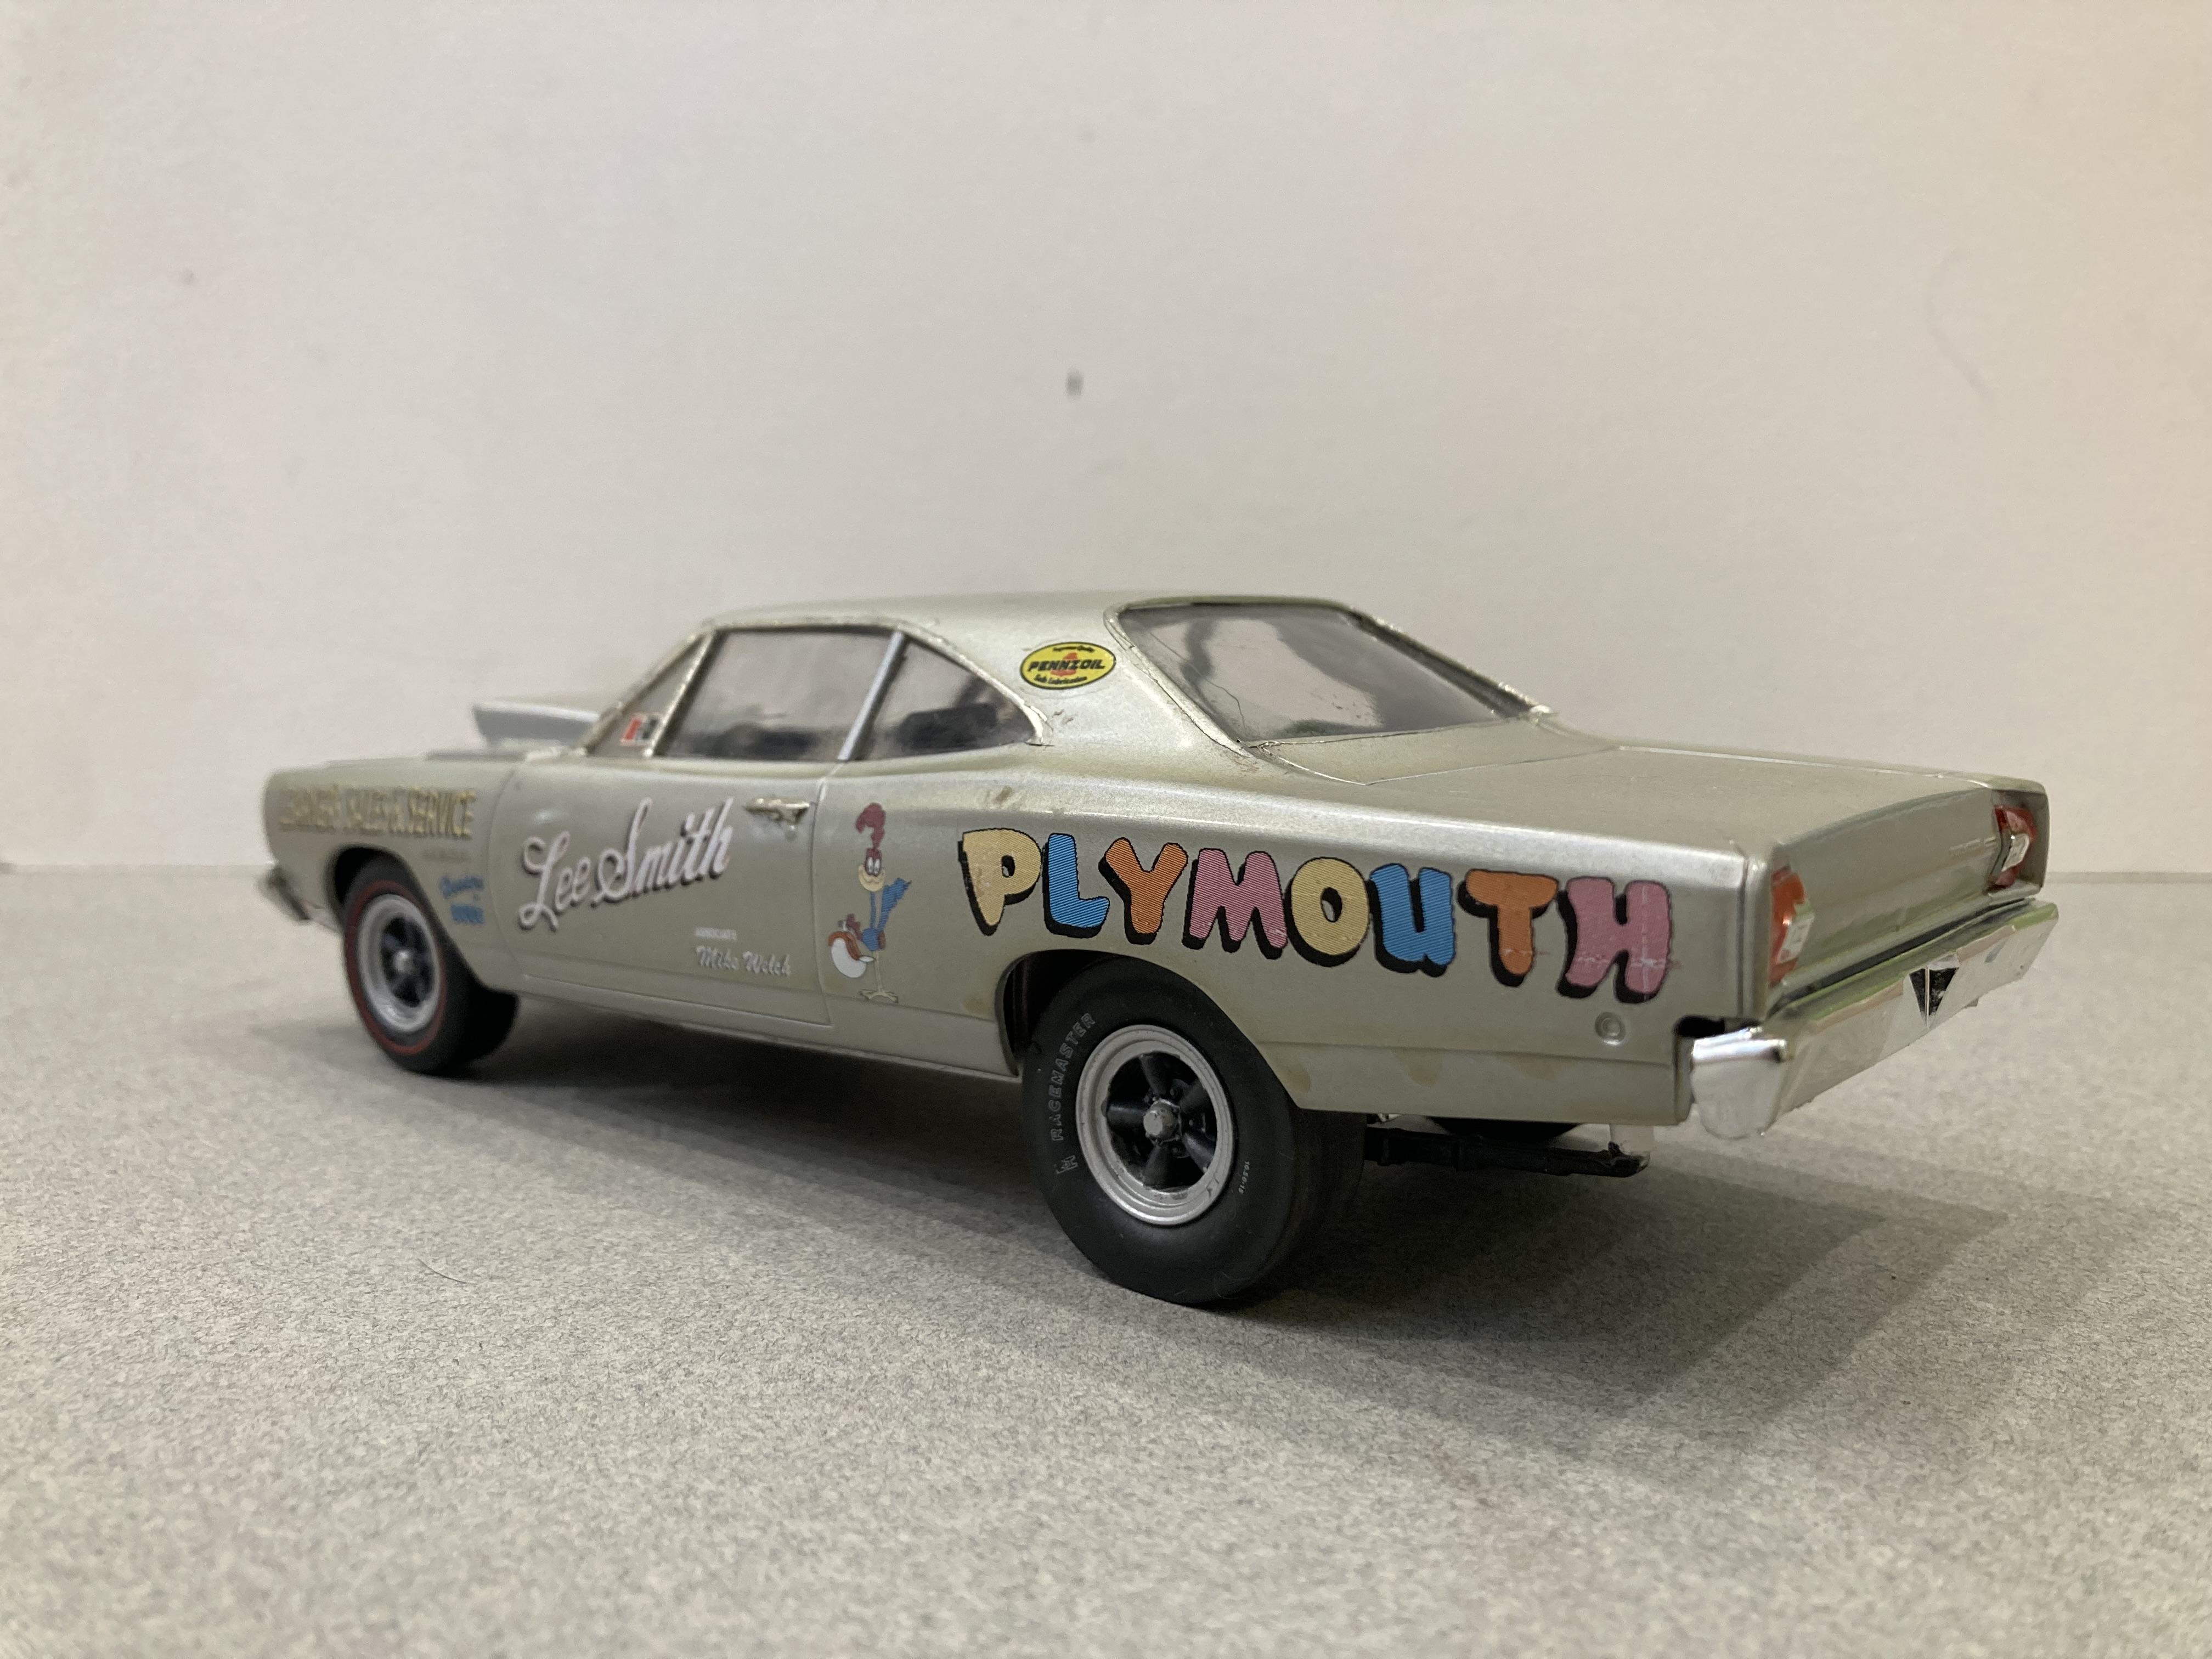
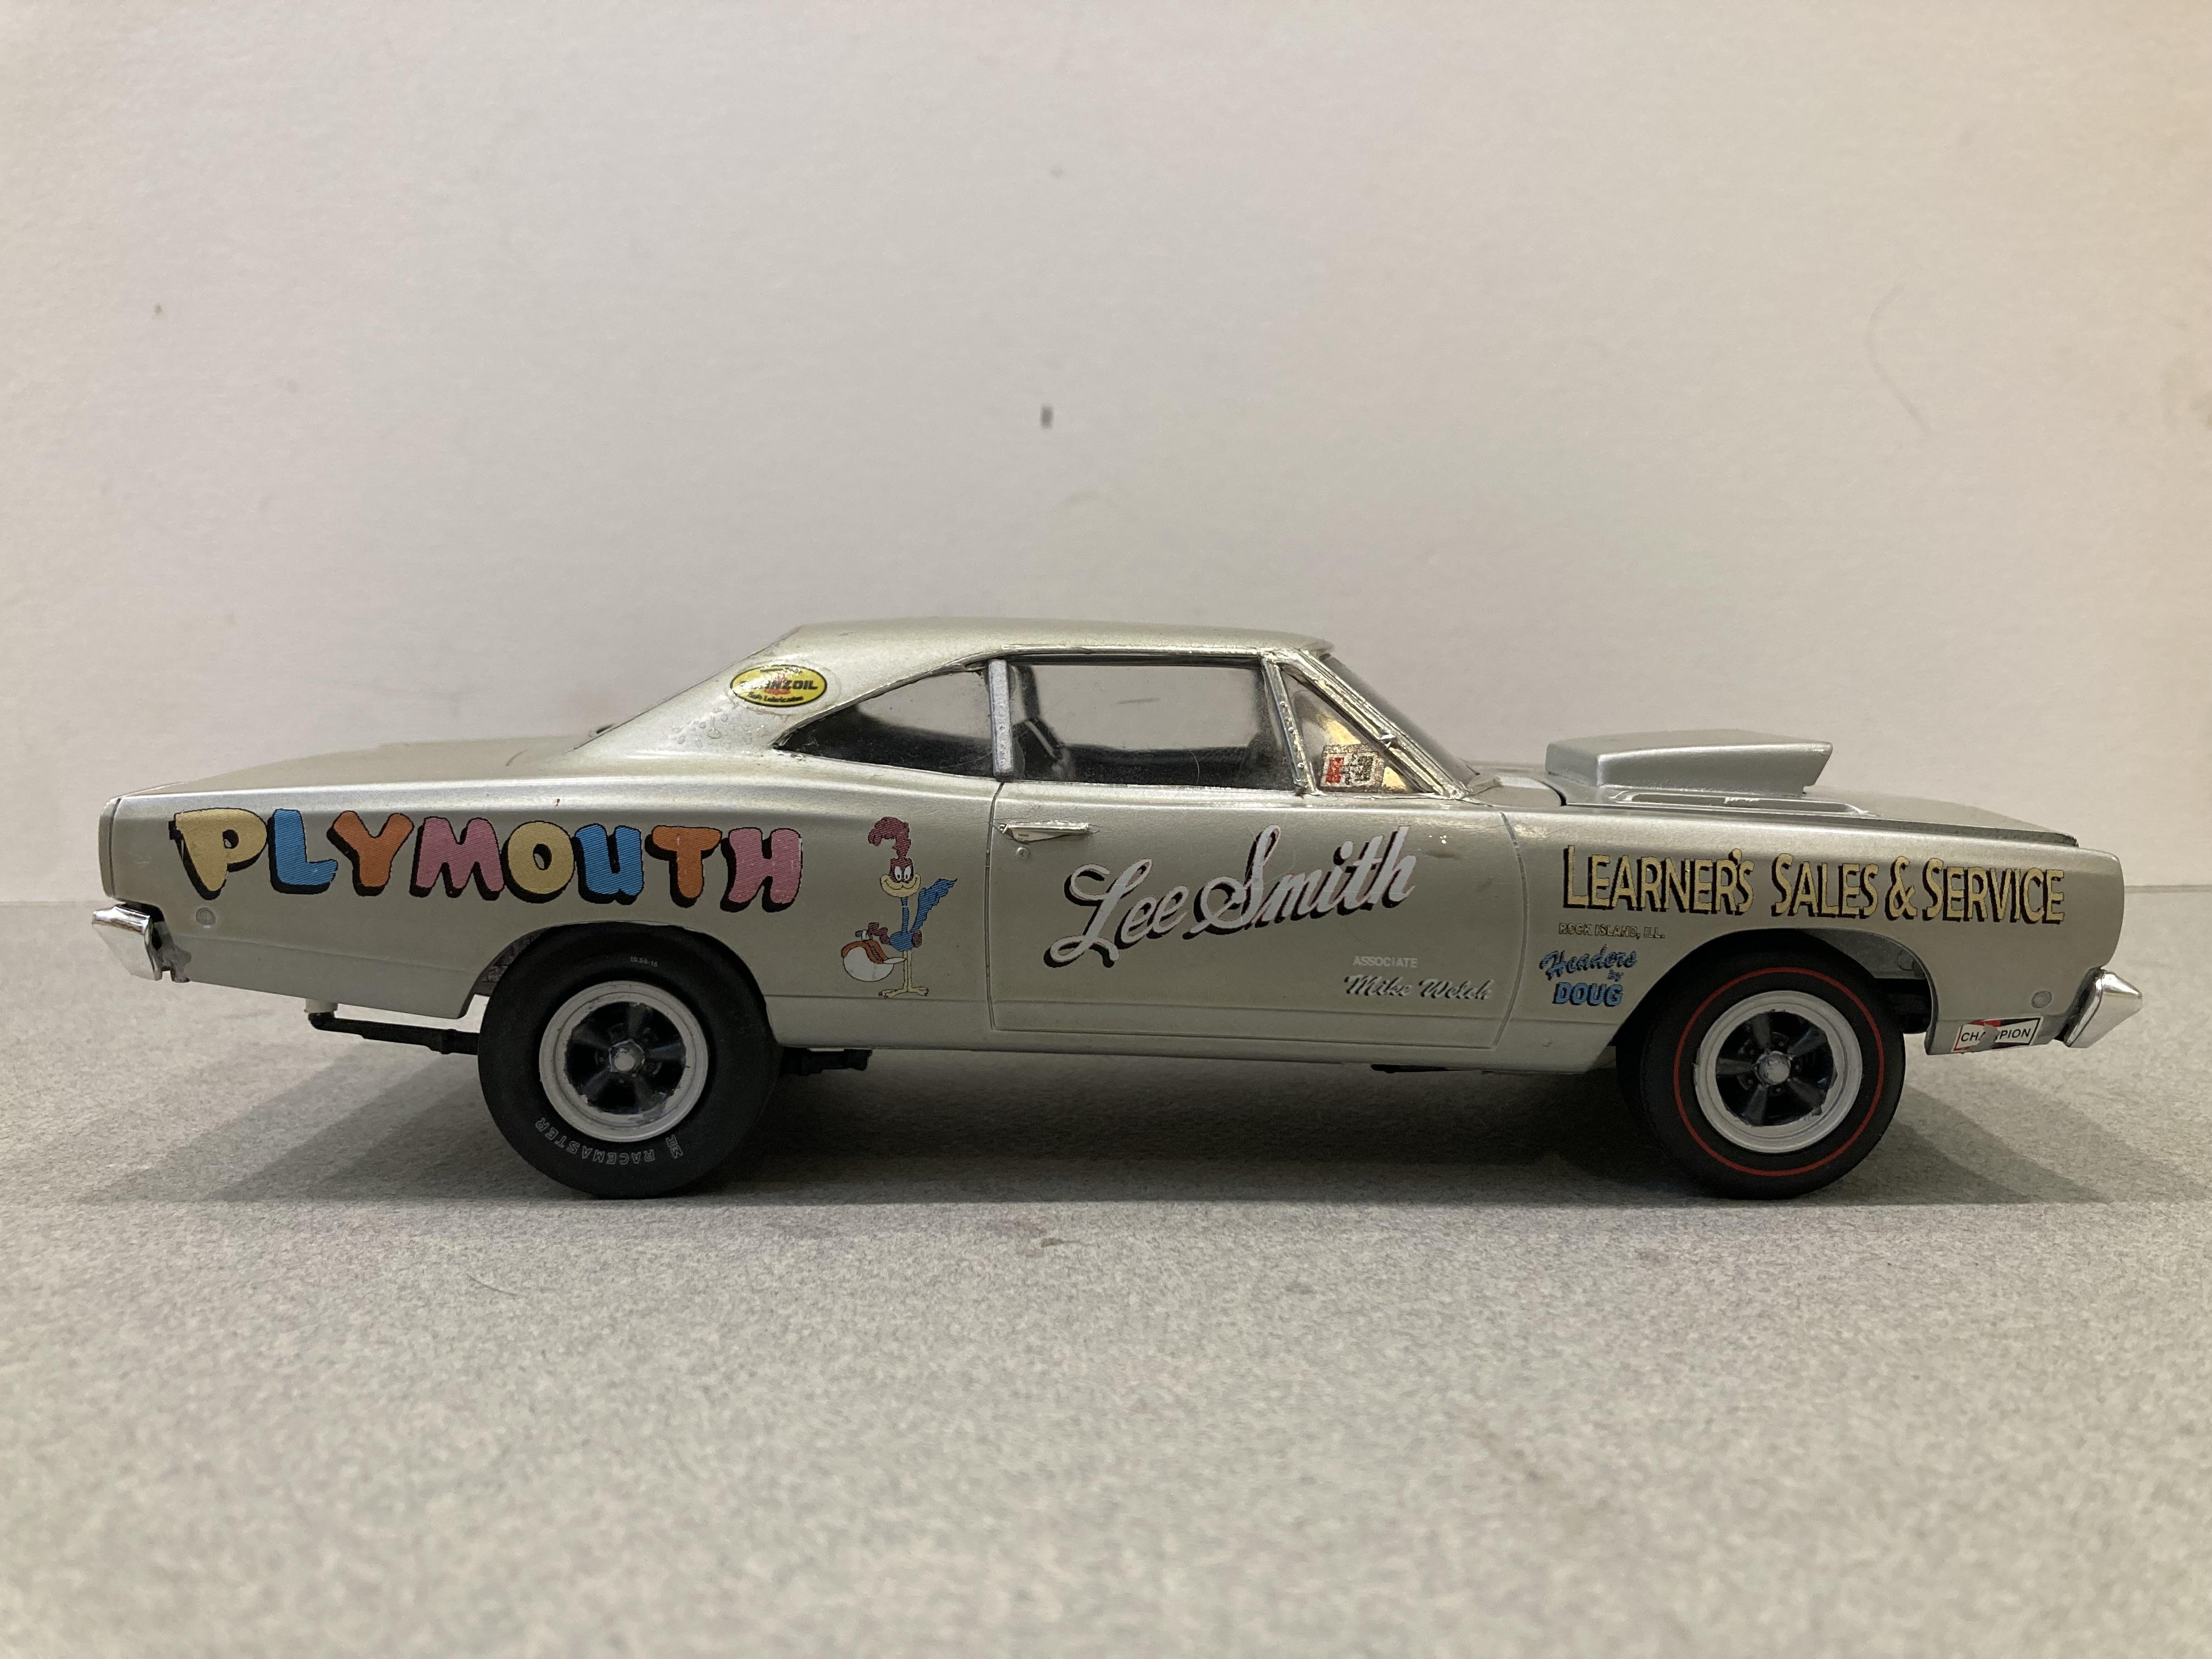
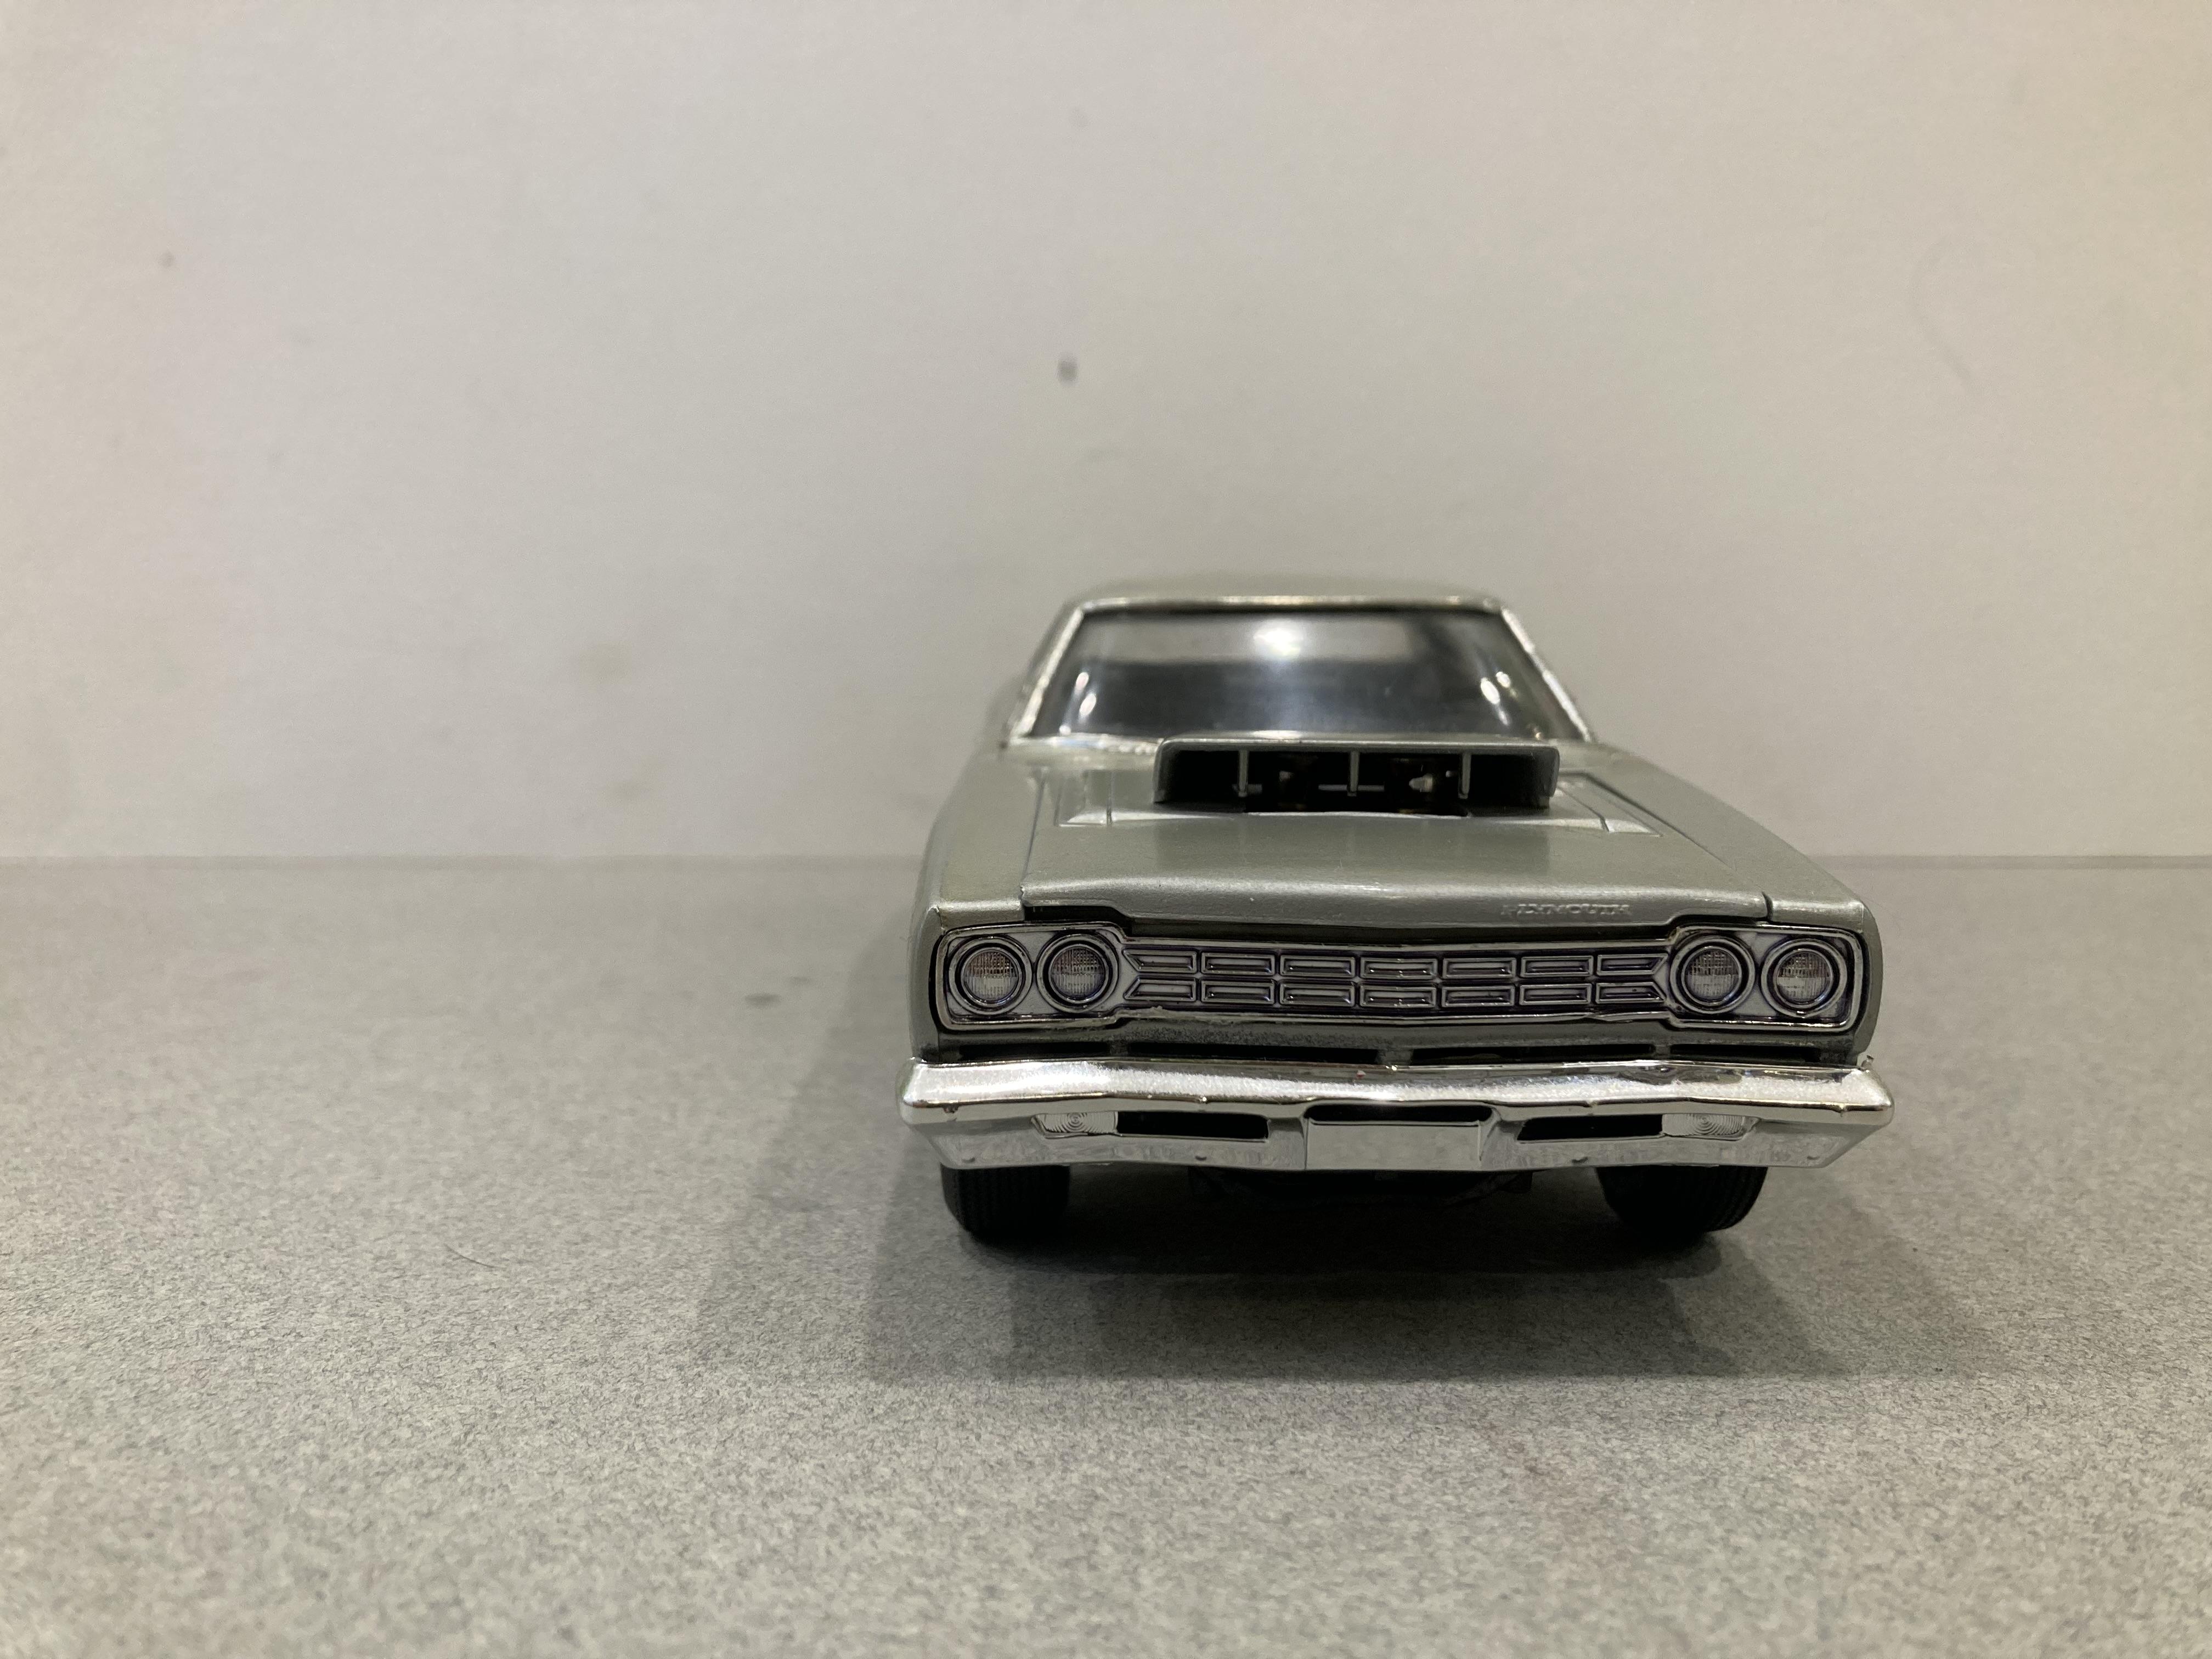
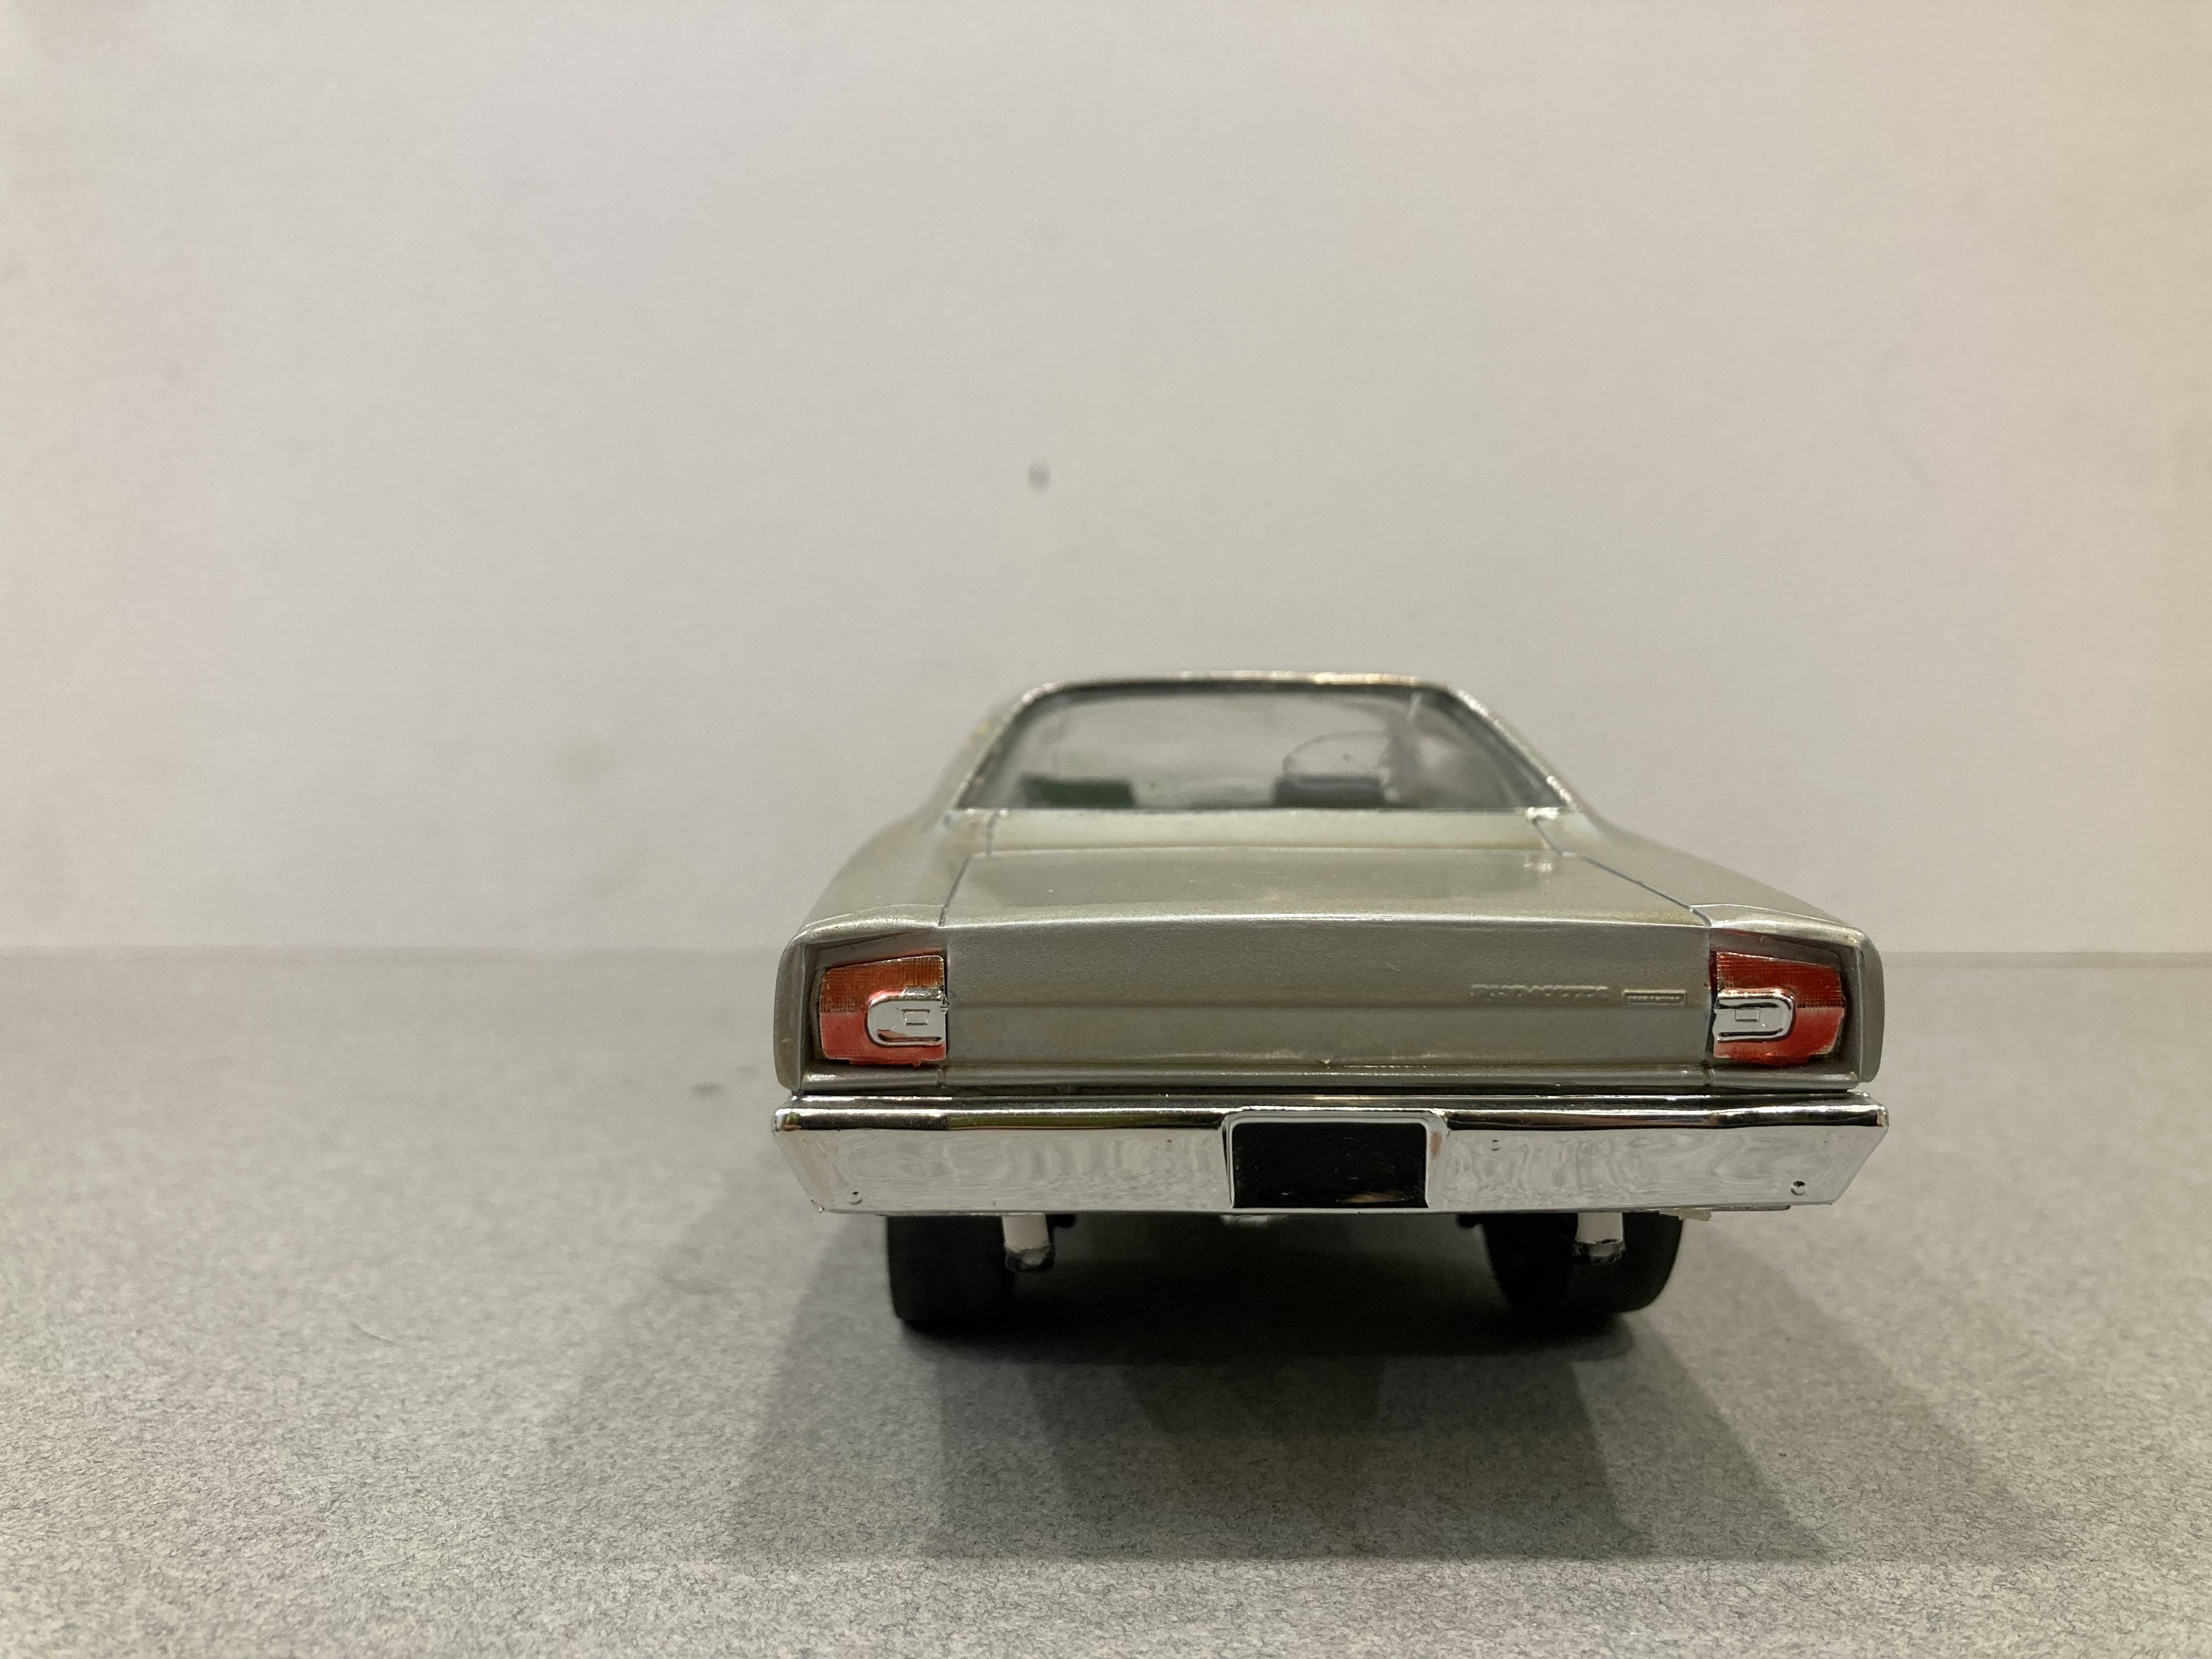
This was a pretty simple build. I just used the amt 1968 road runner kit and added the wheels from the super stock 62 belair kit the slicks are standard amt parts. The hood scoop was pirated from the revell hemi dart . The clear lacquer yellowed the testors silver enamel a little the decals came by way of Chris Walsh . Until next time thanks for looking, Mike
-
This is the amt kit with parts box wheels testors white enamel , and smp decals . Until next time thanks for looking, Mike
-
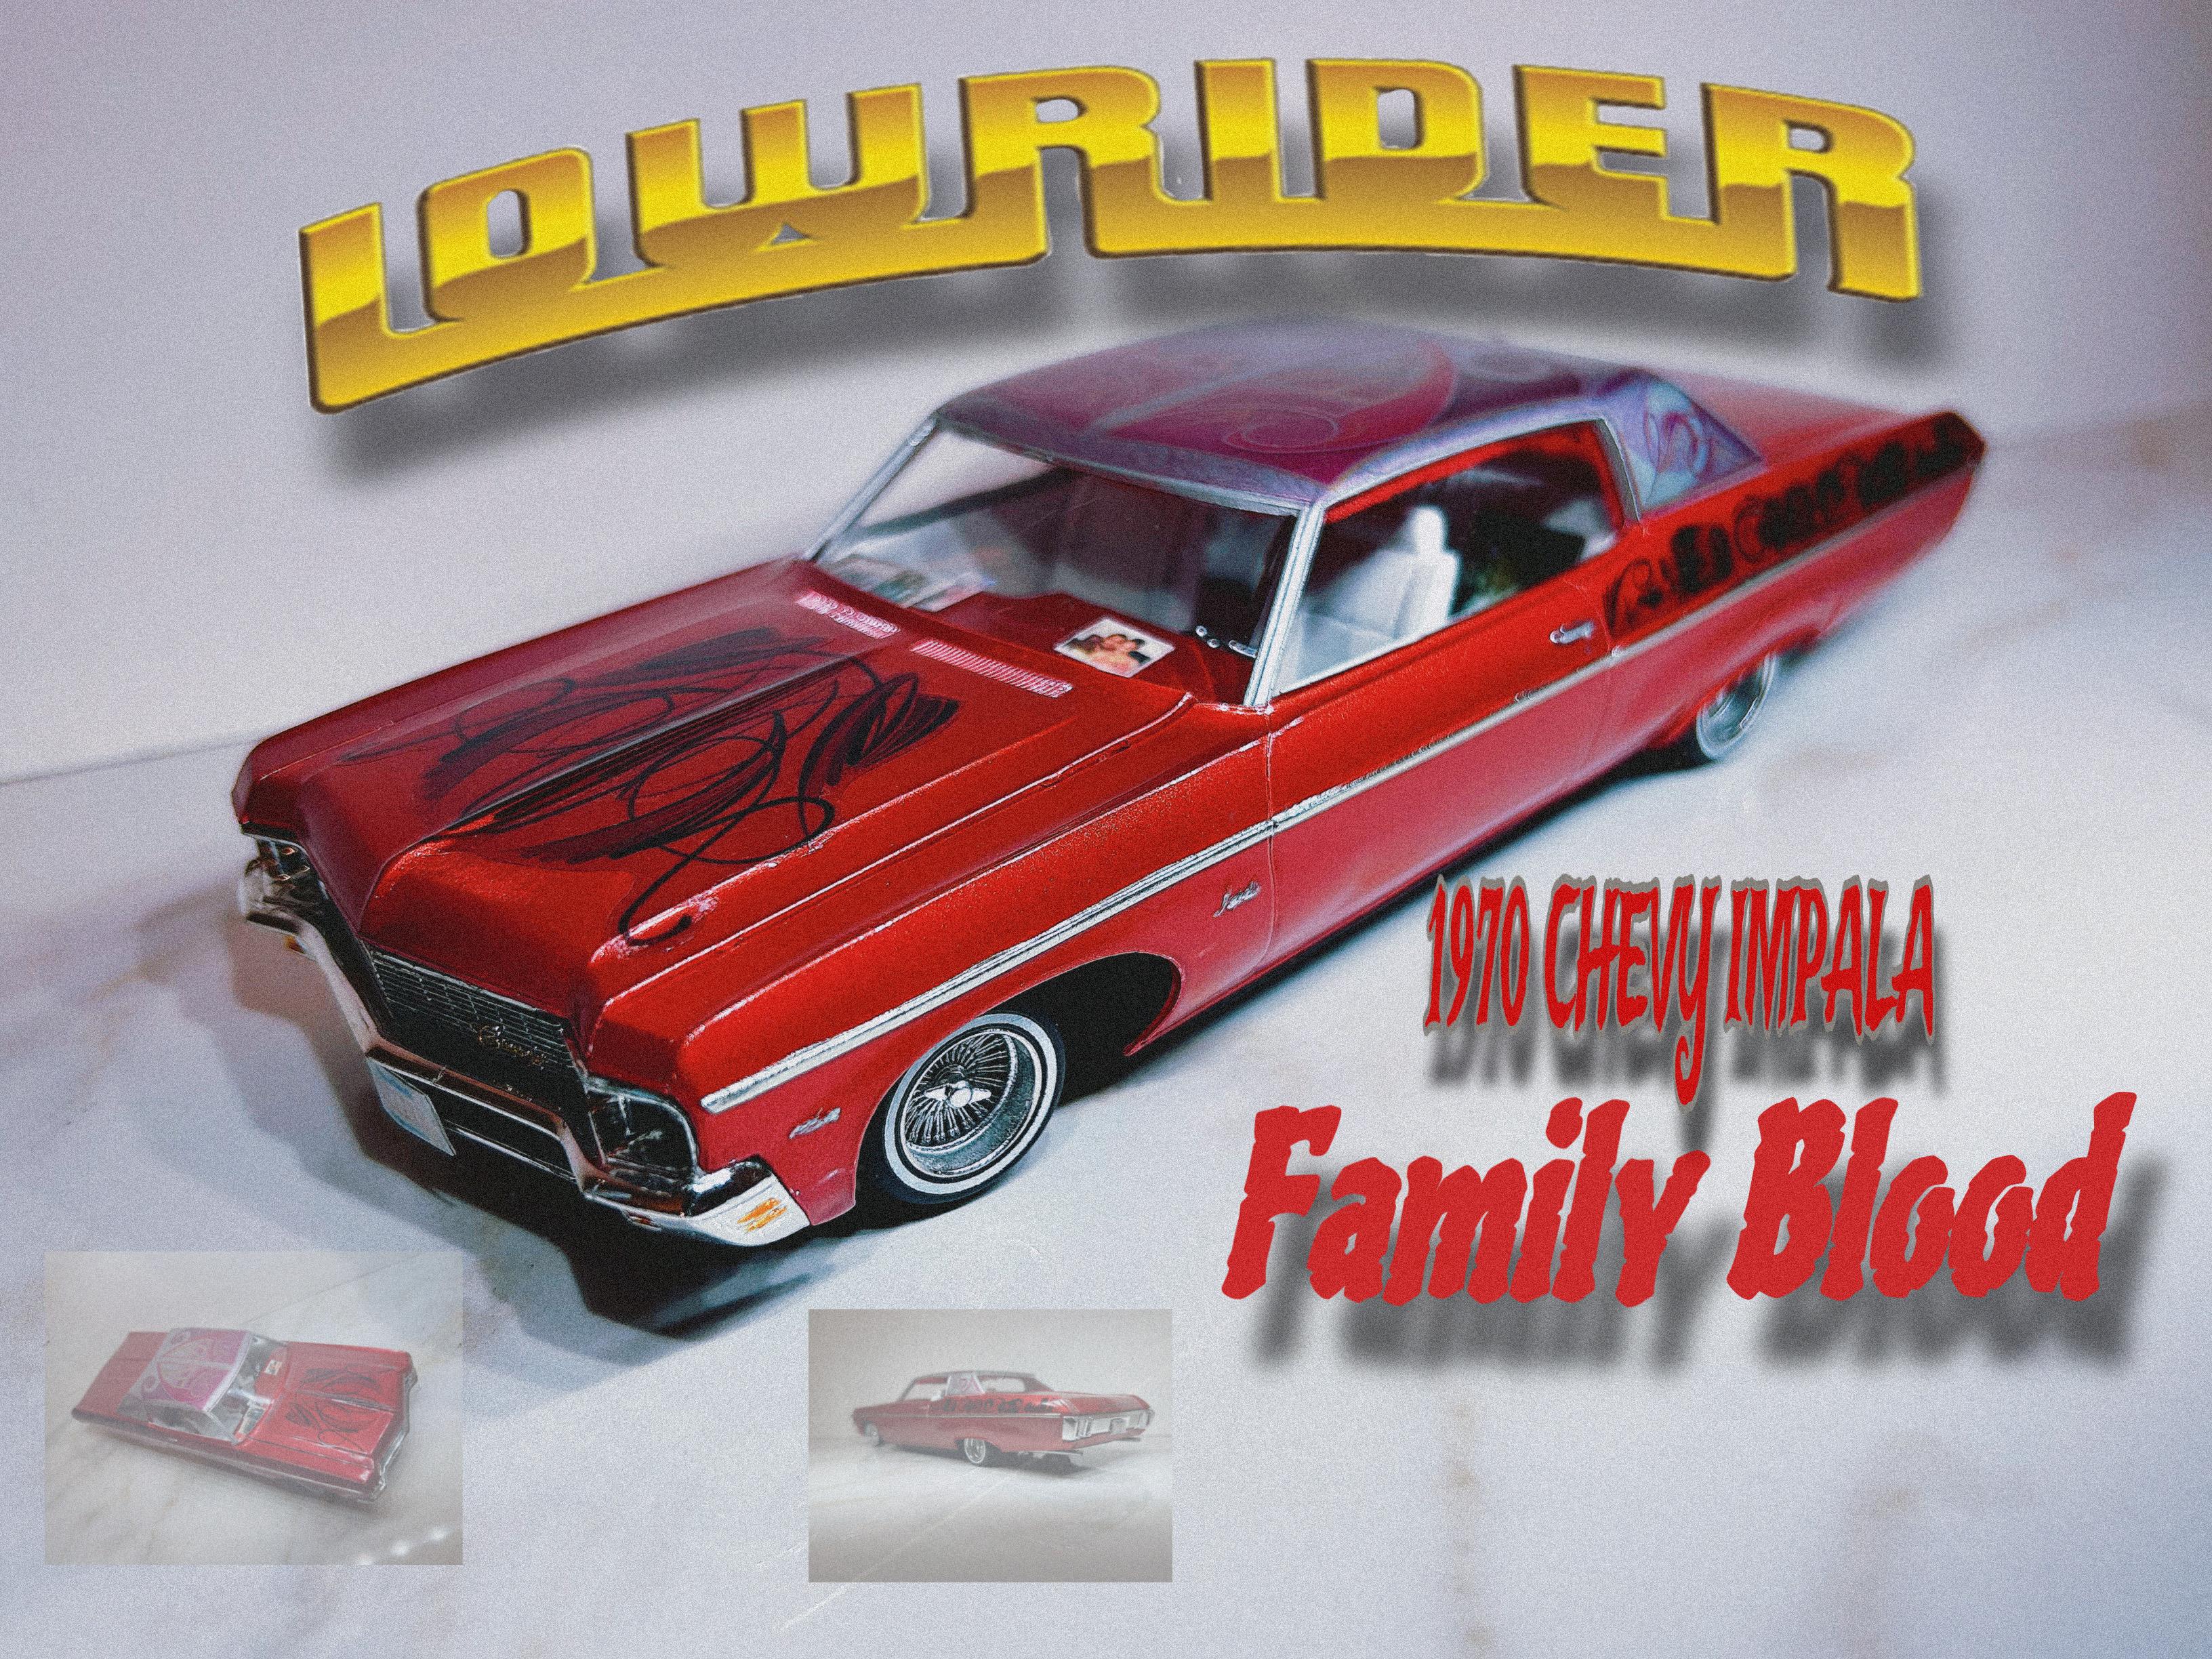
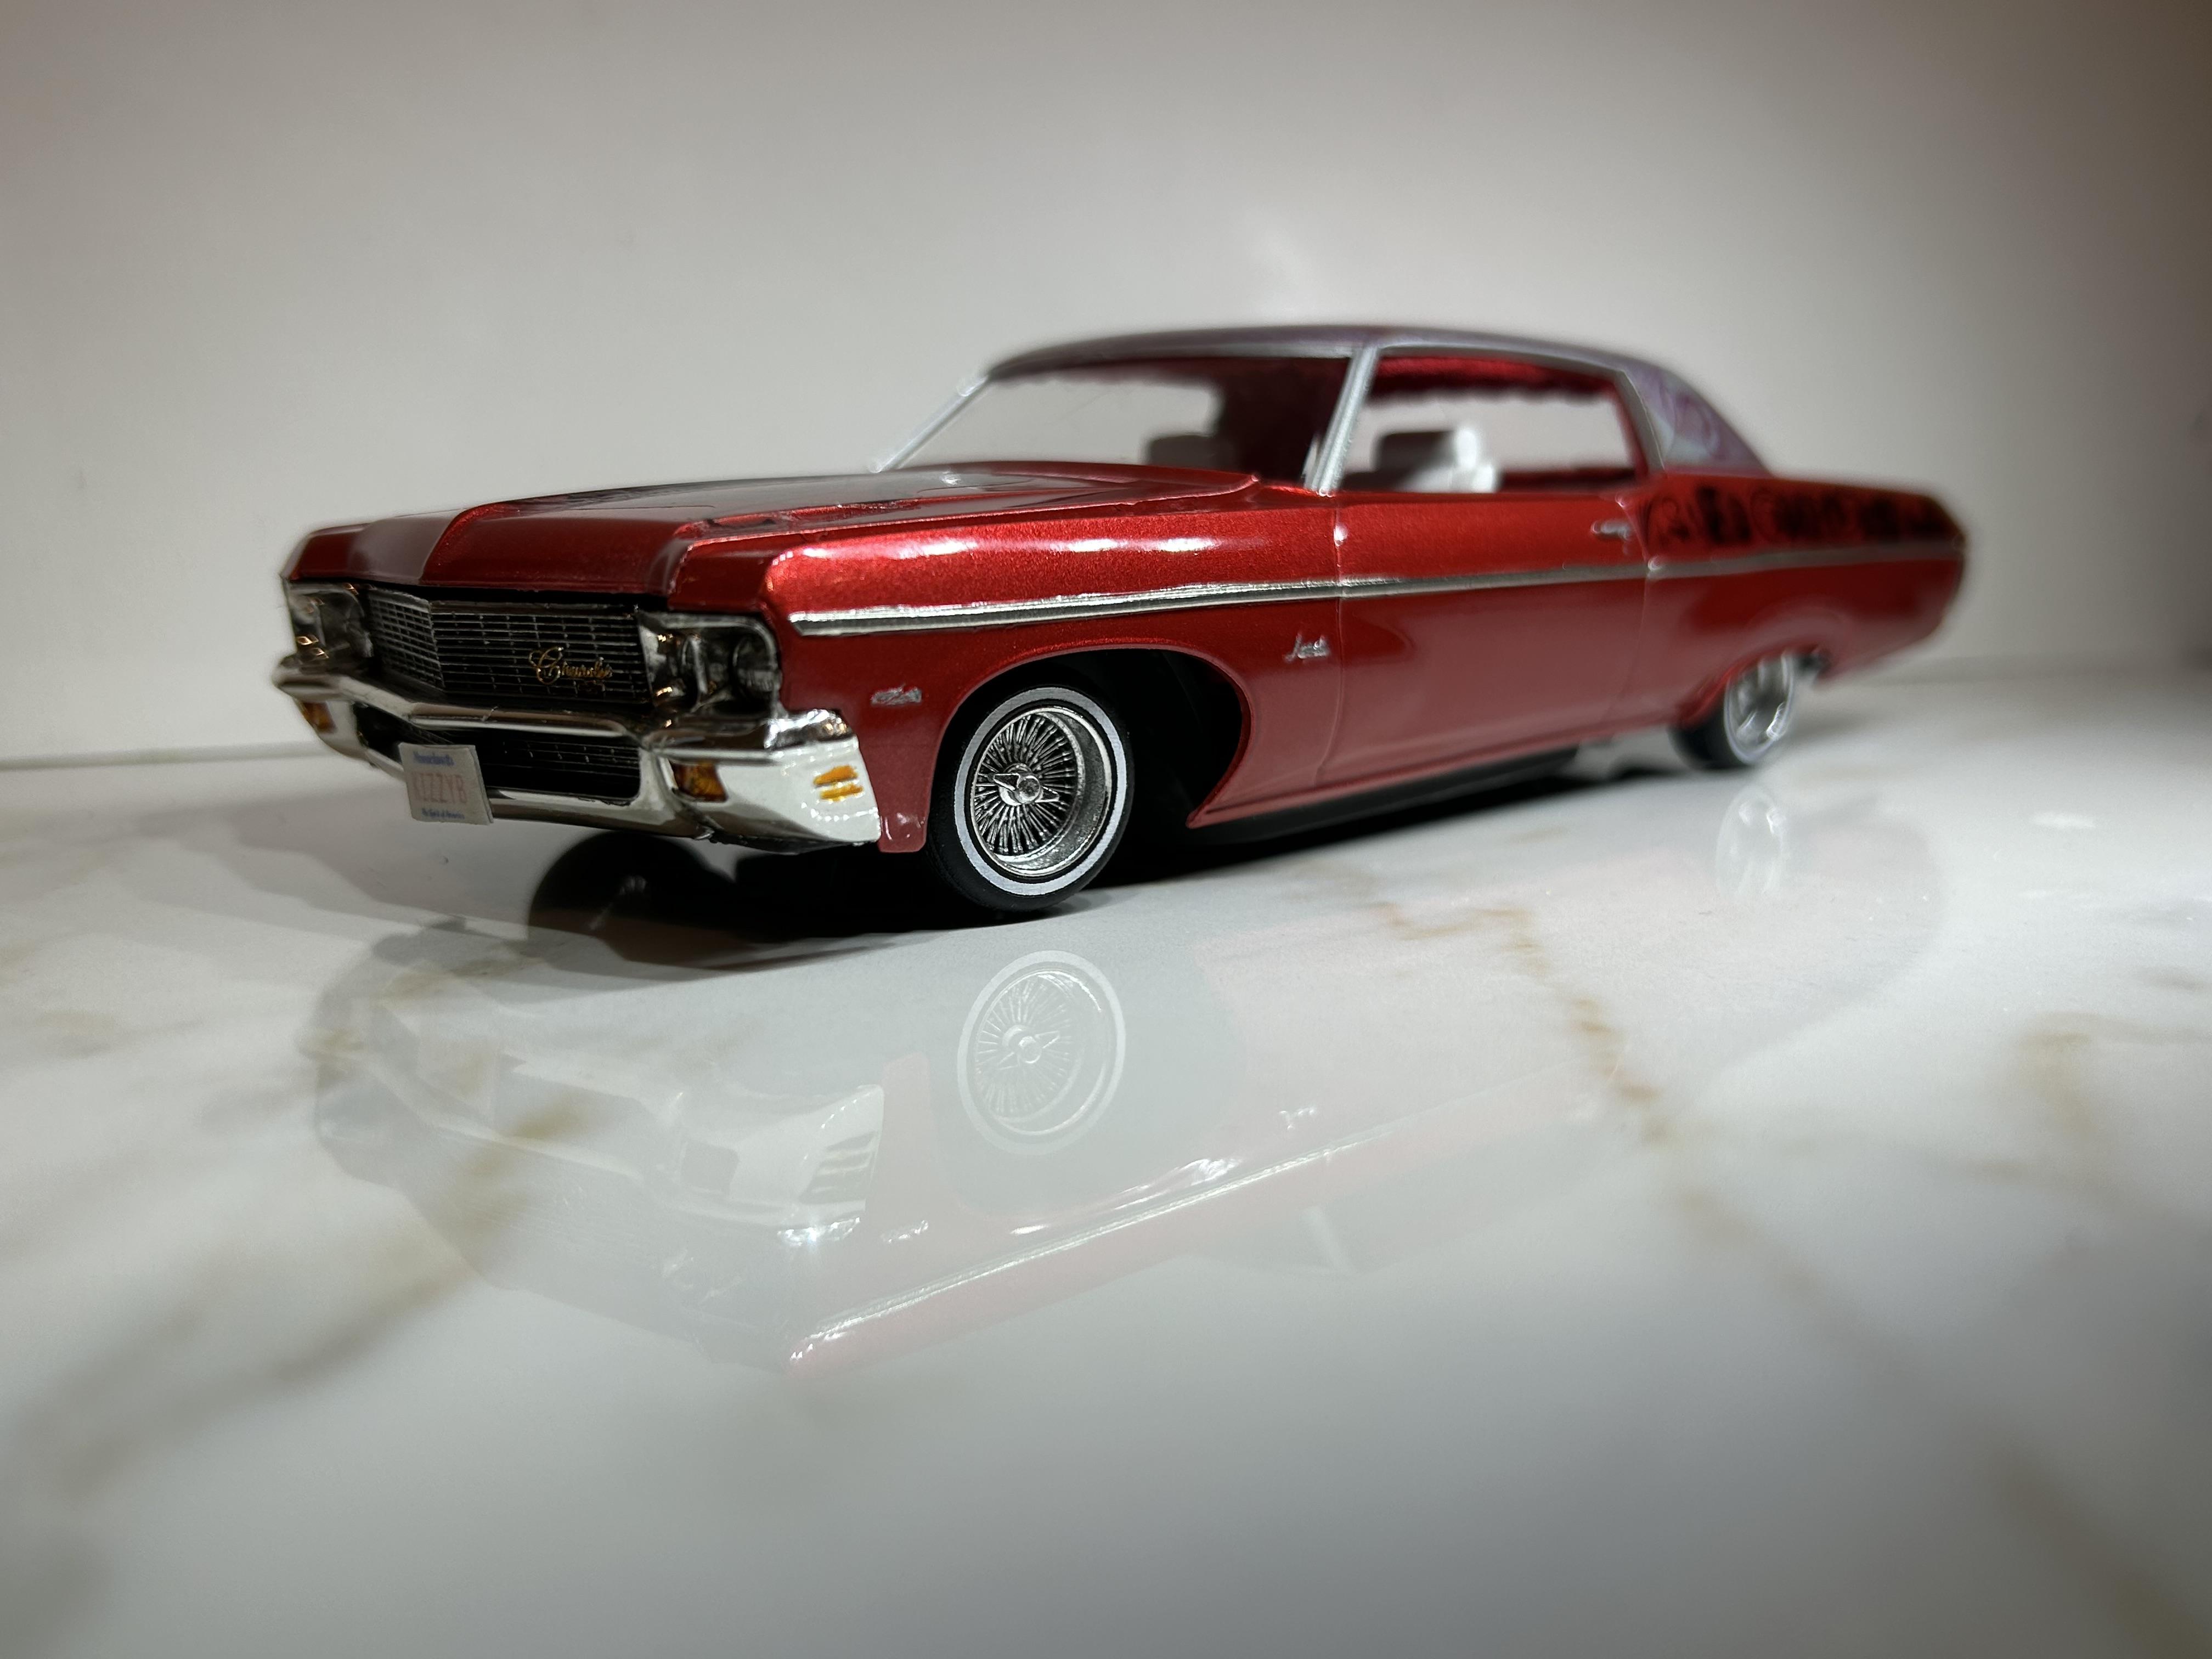
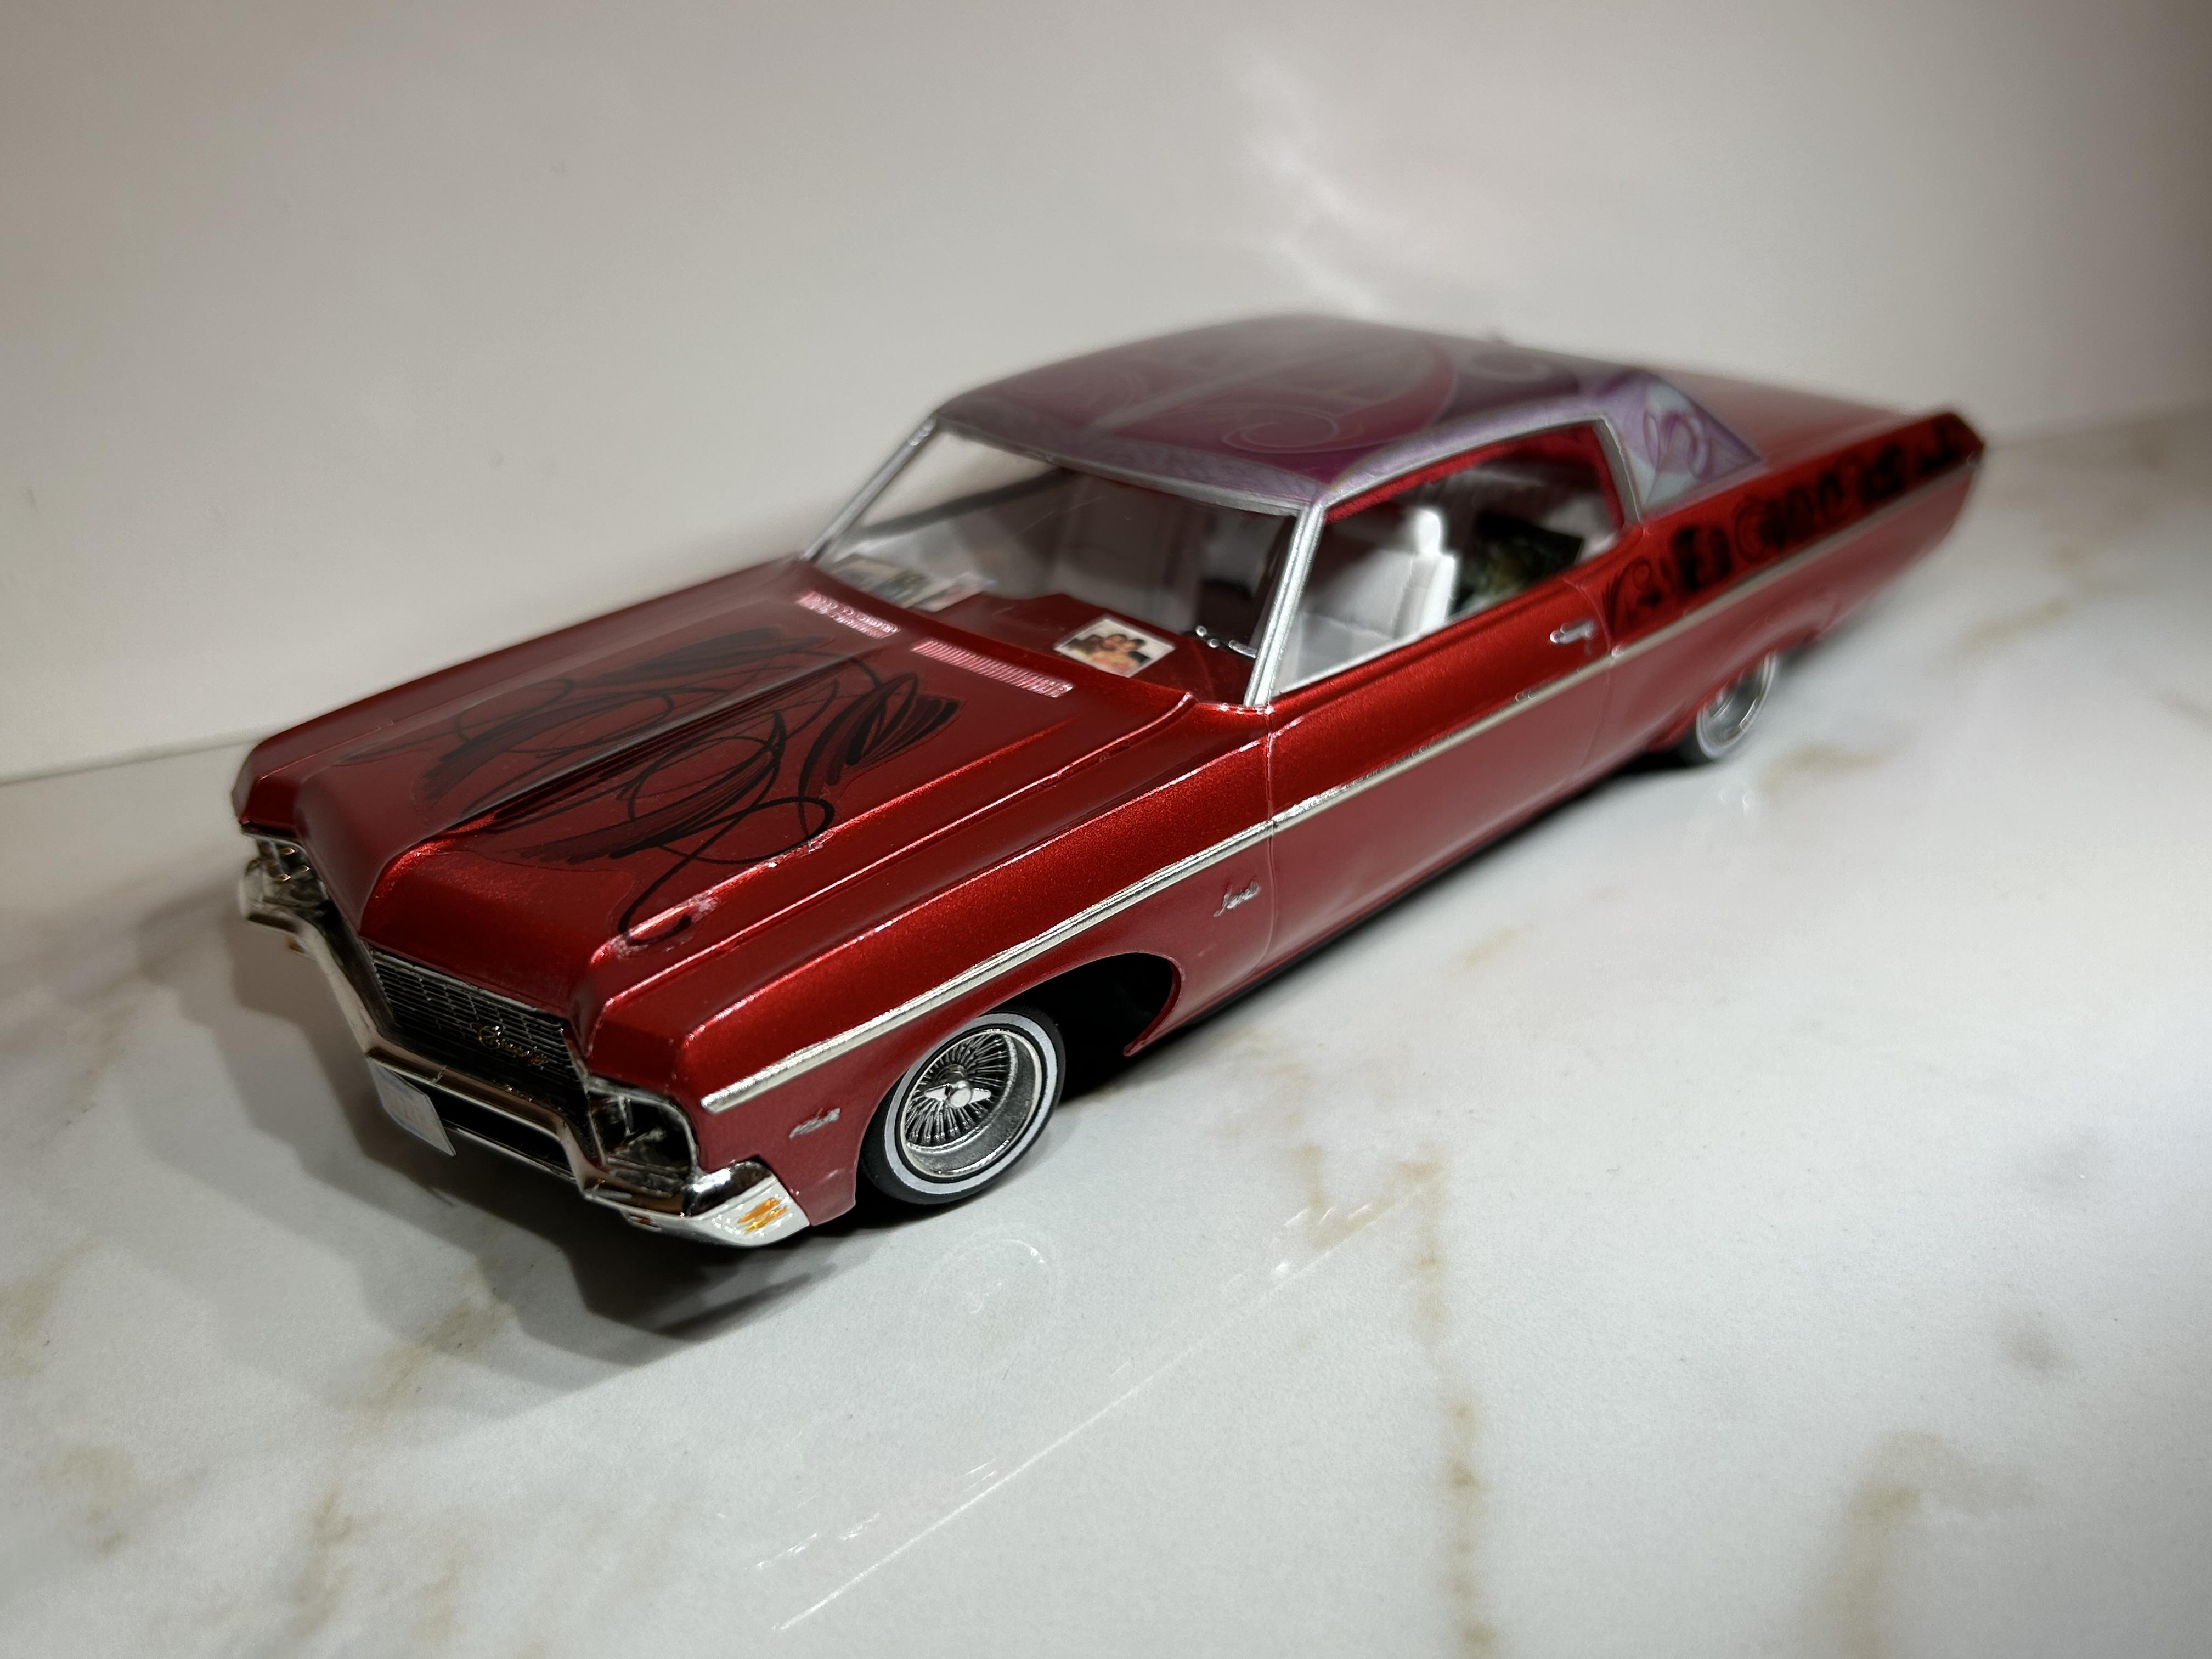
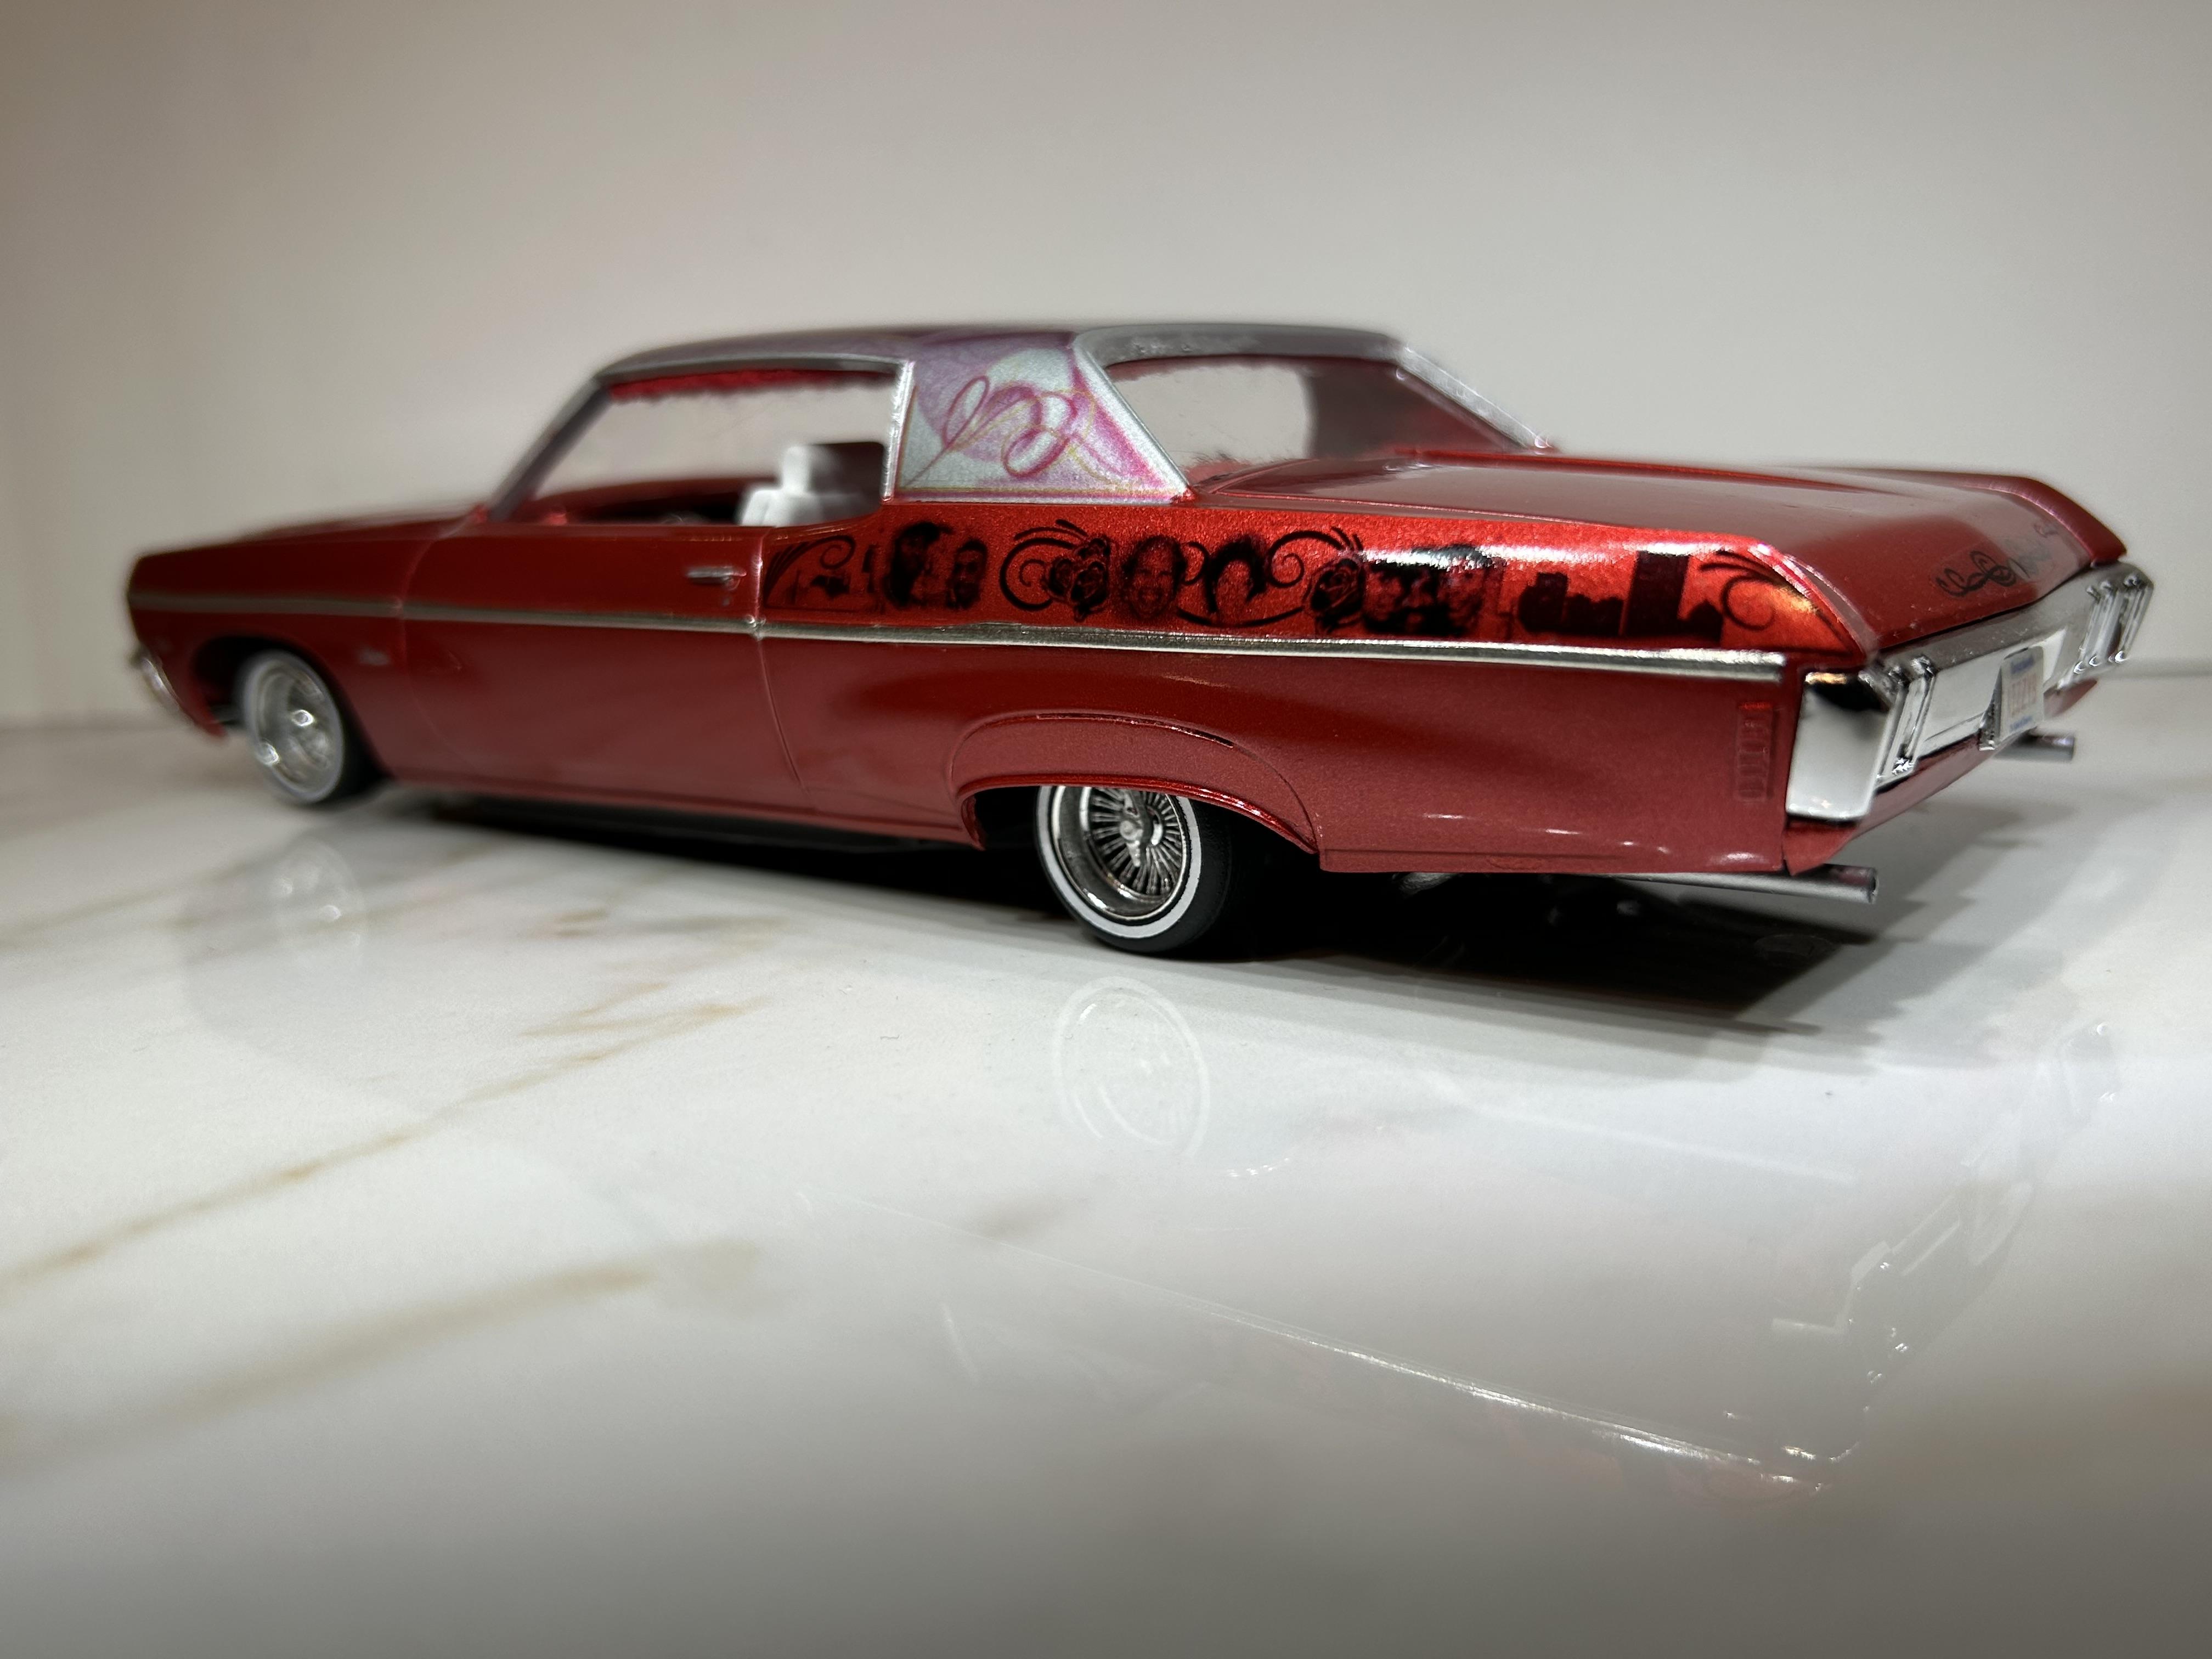
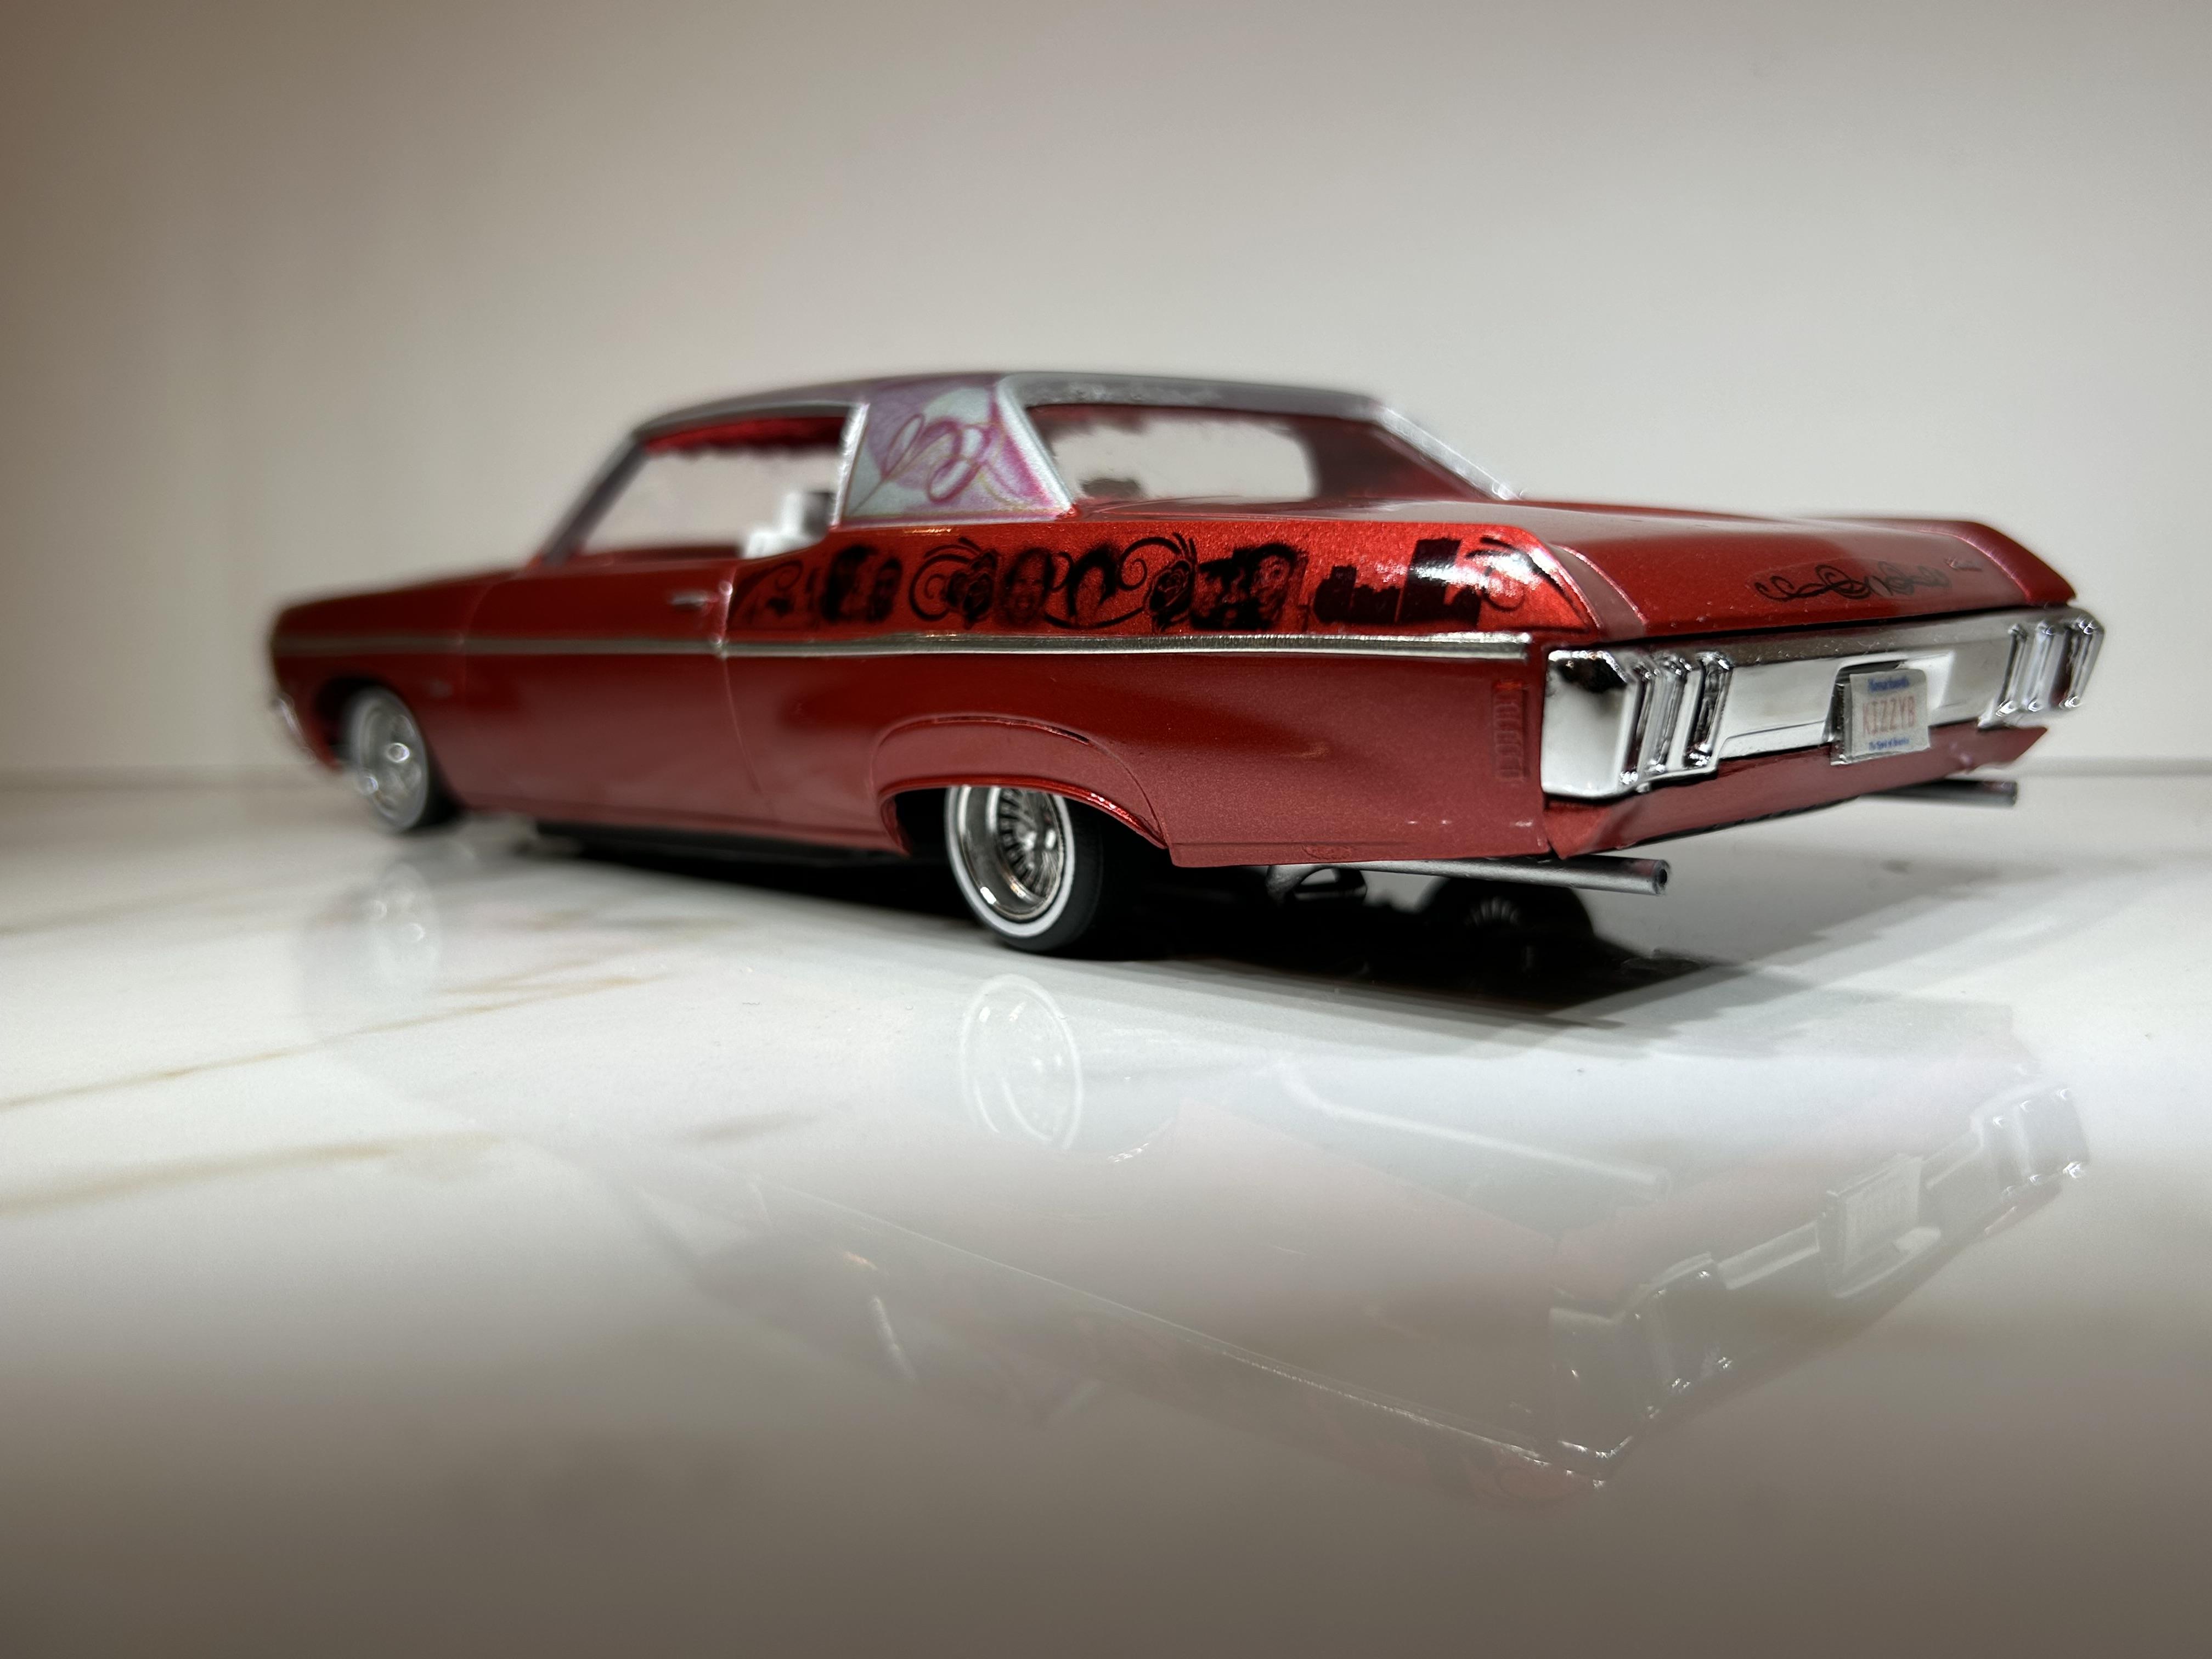
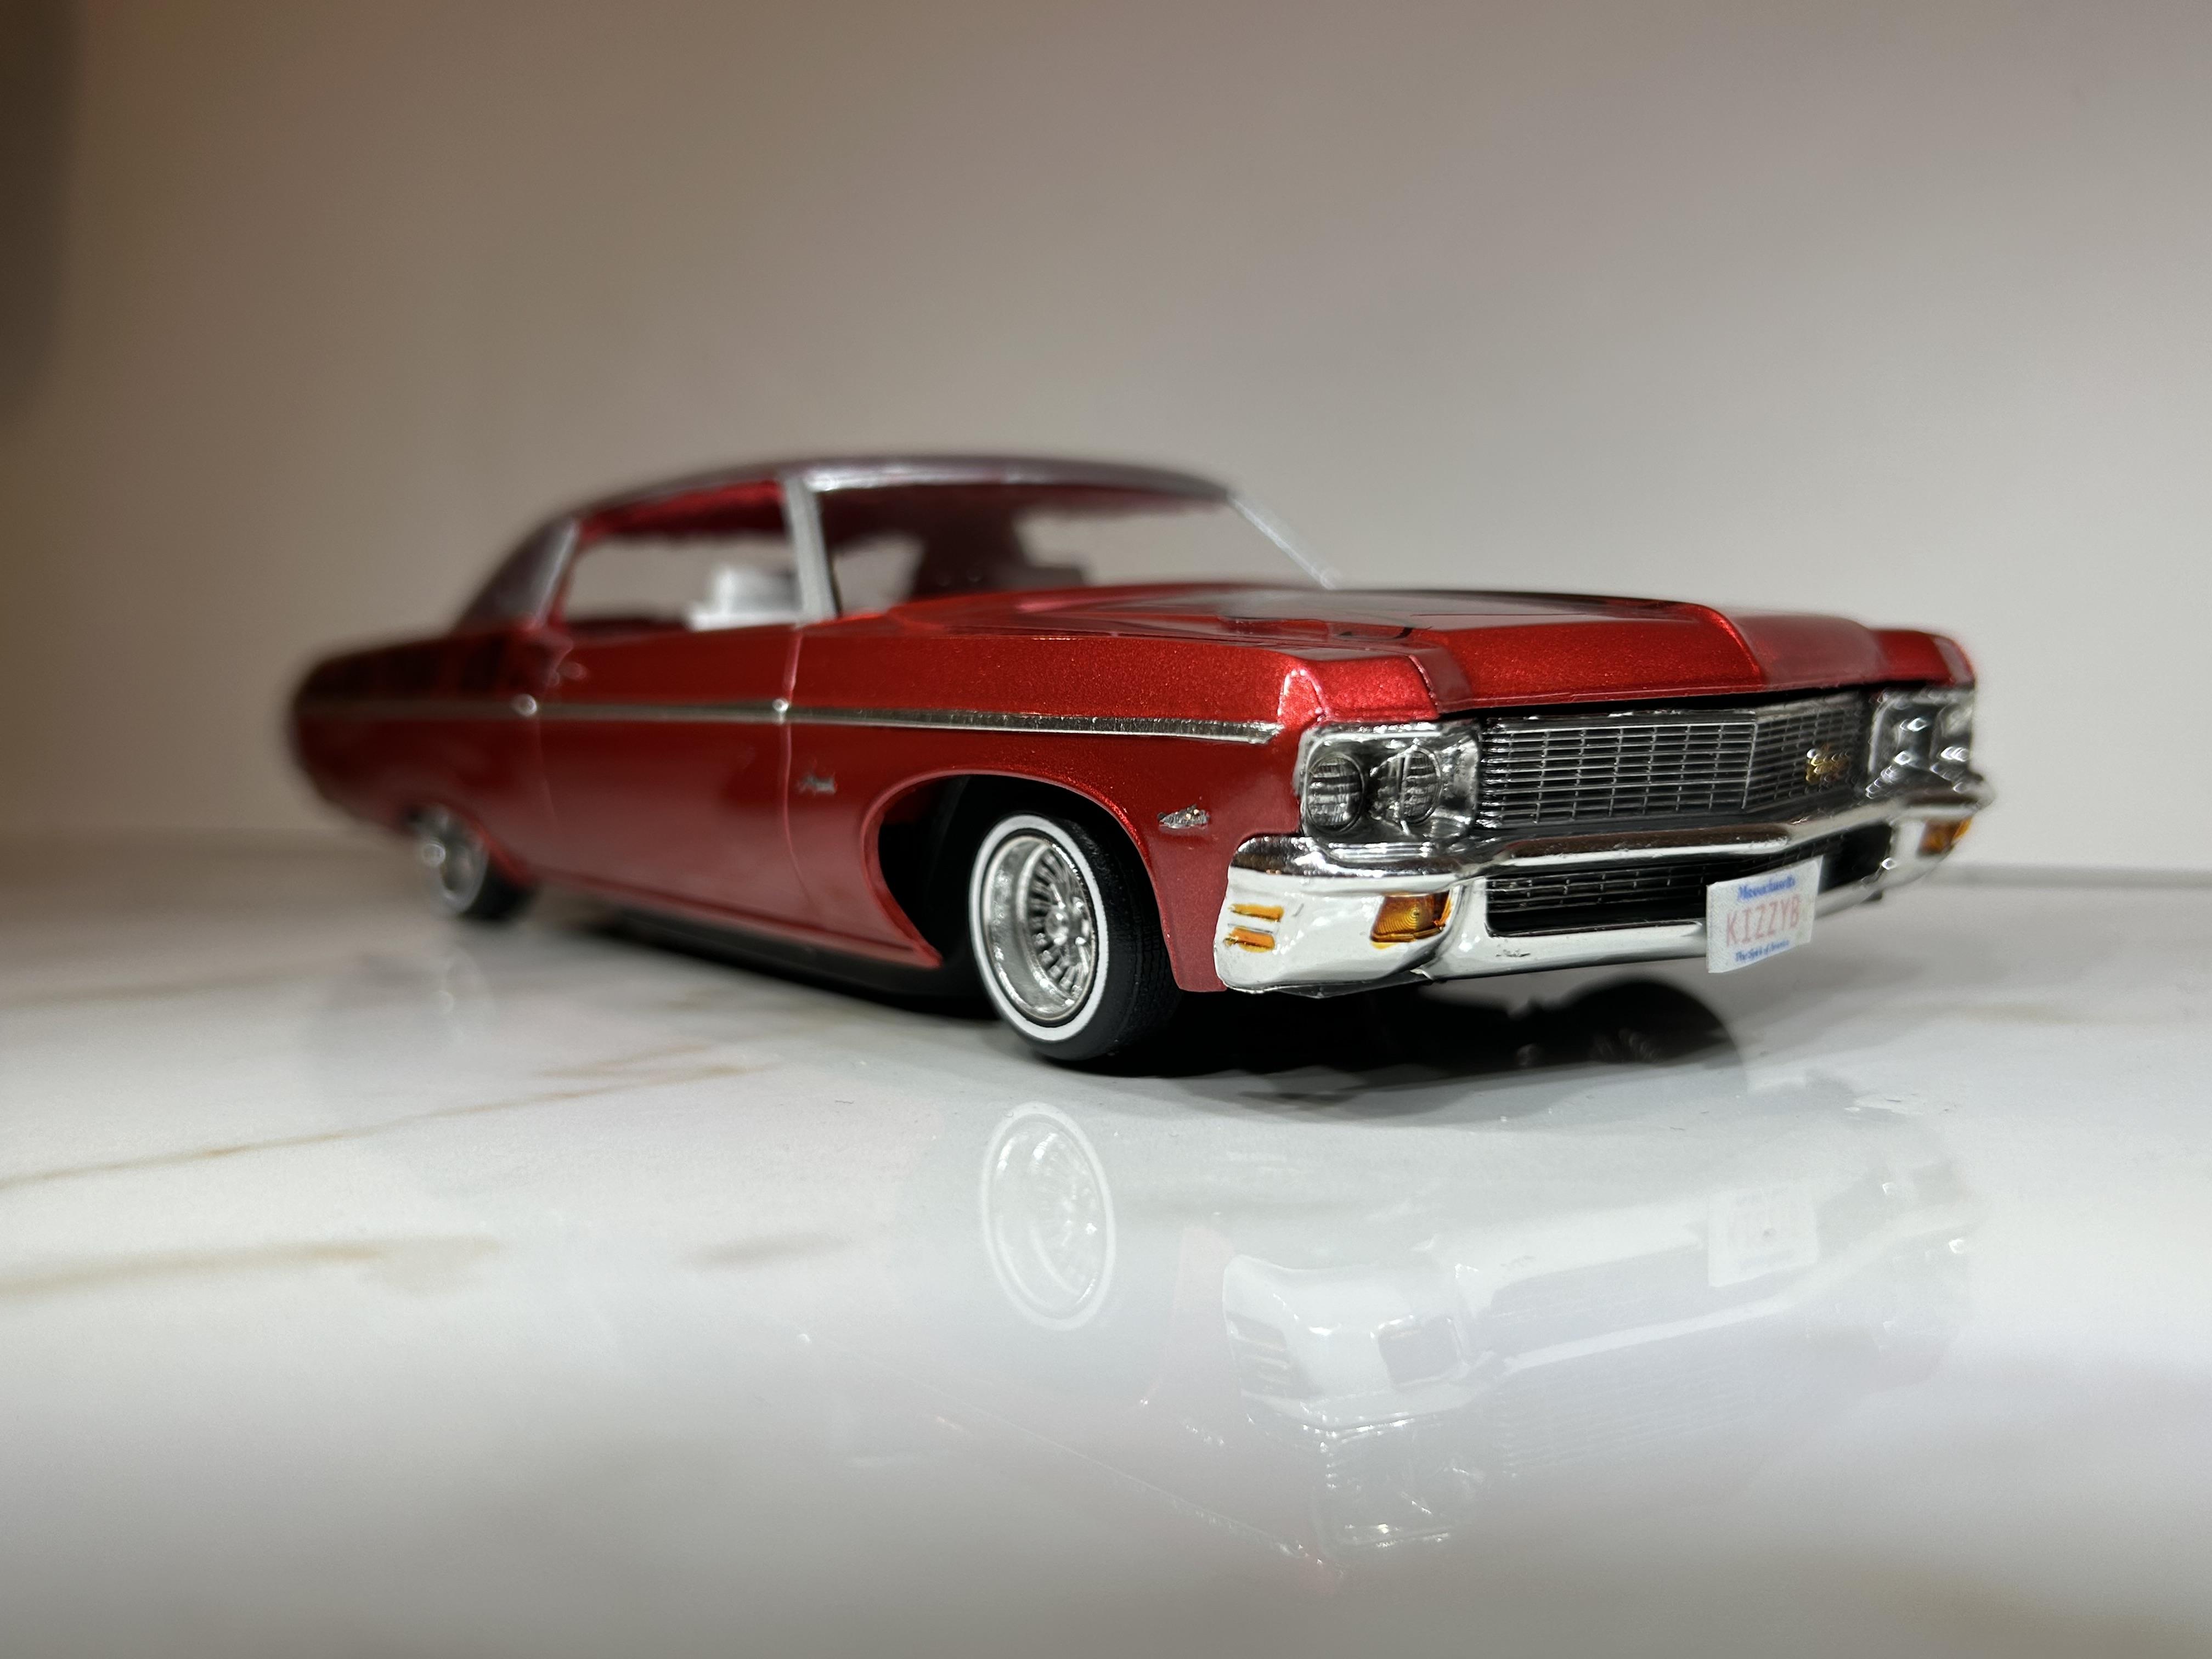
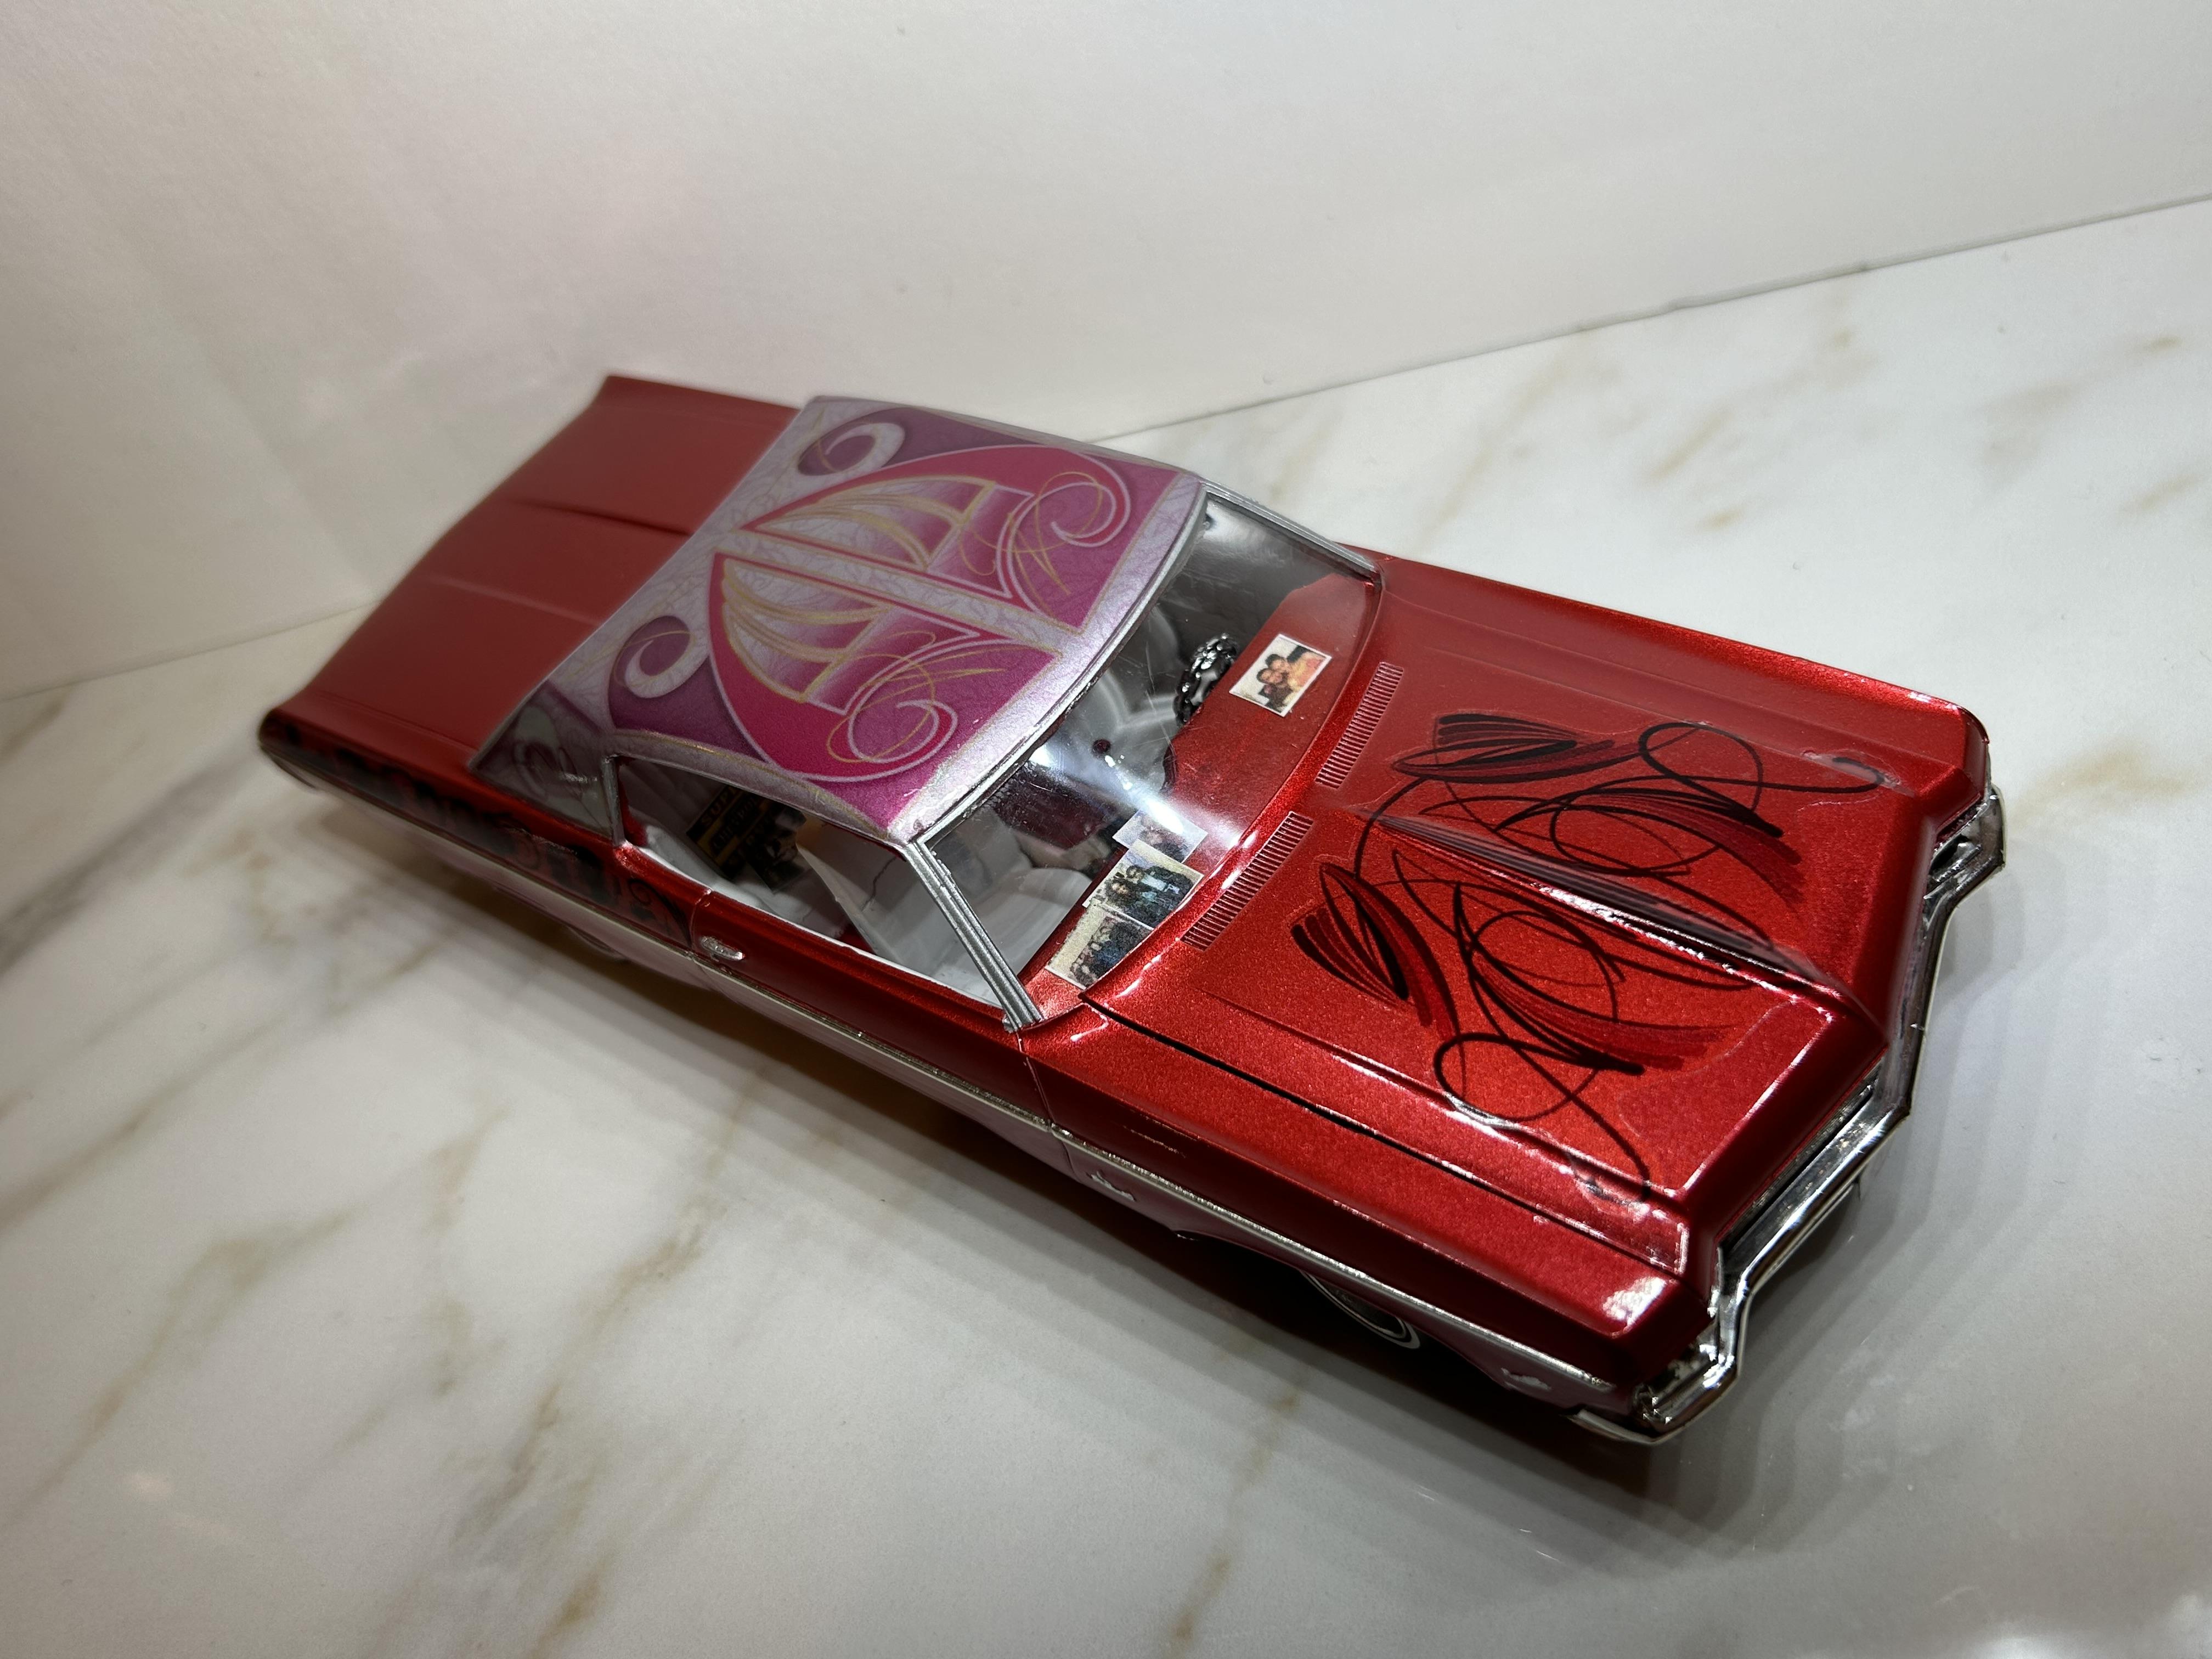
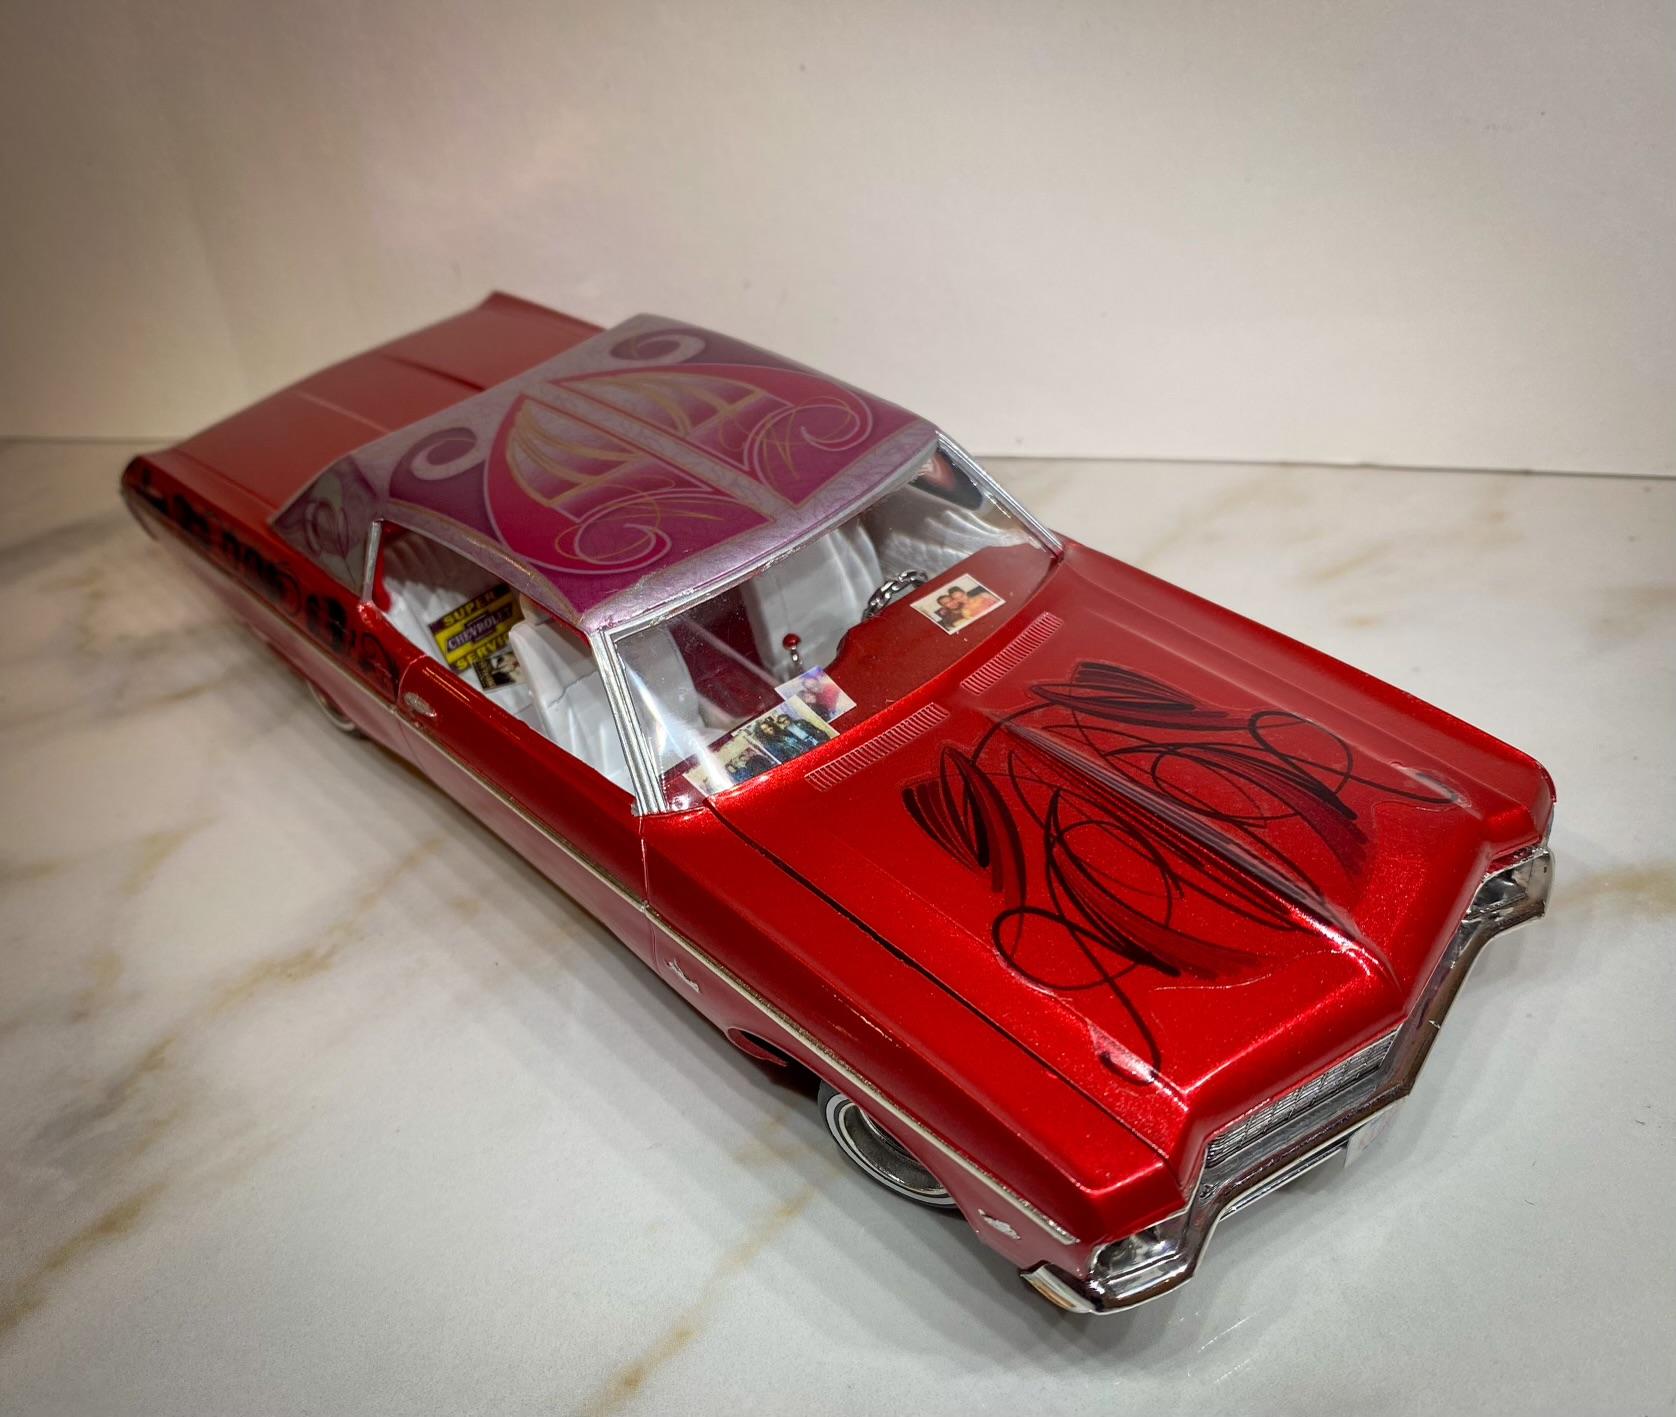
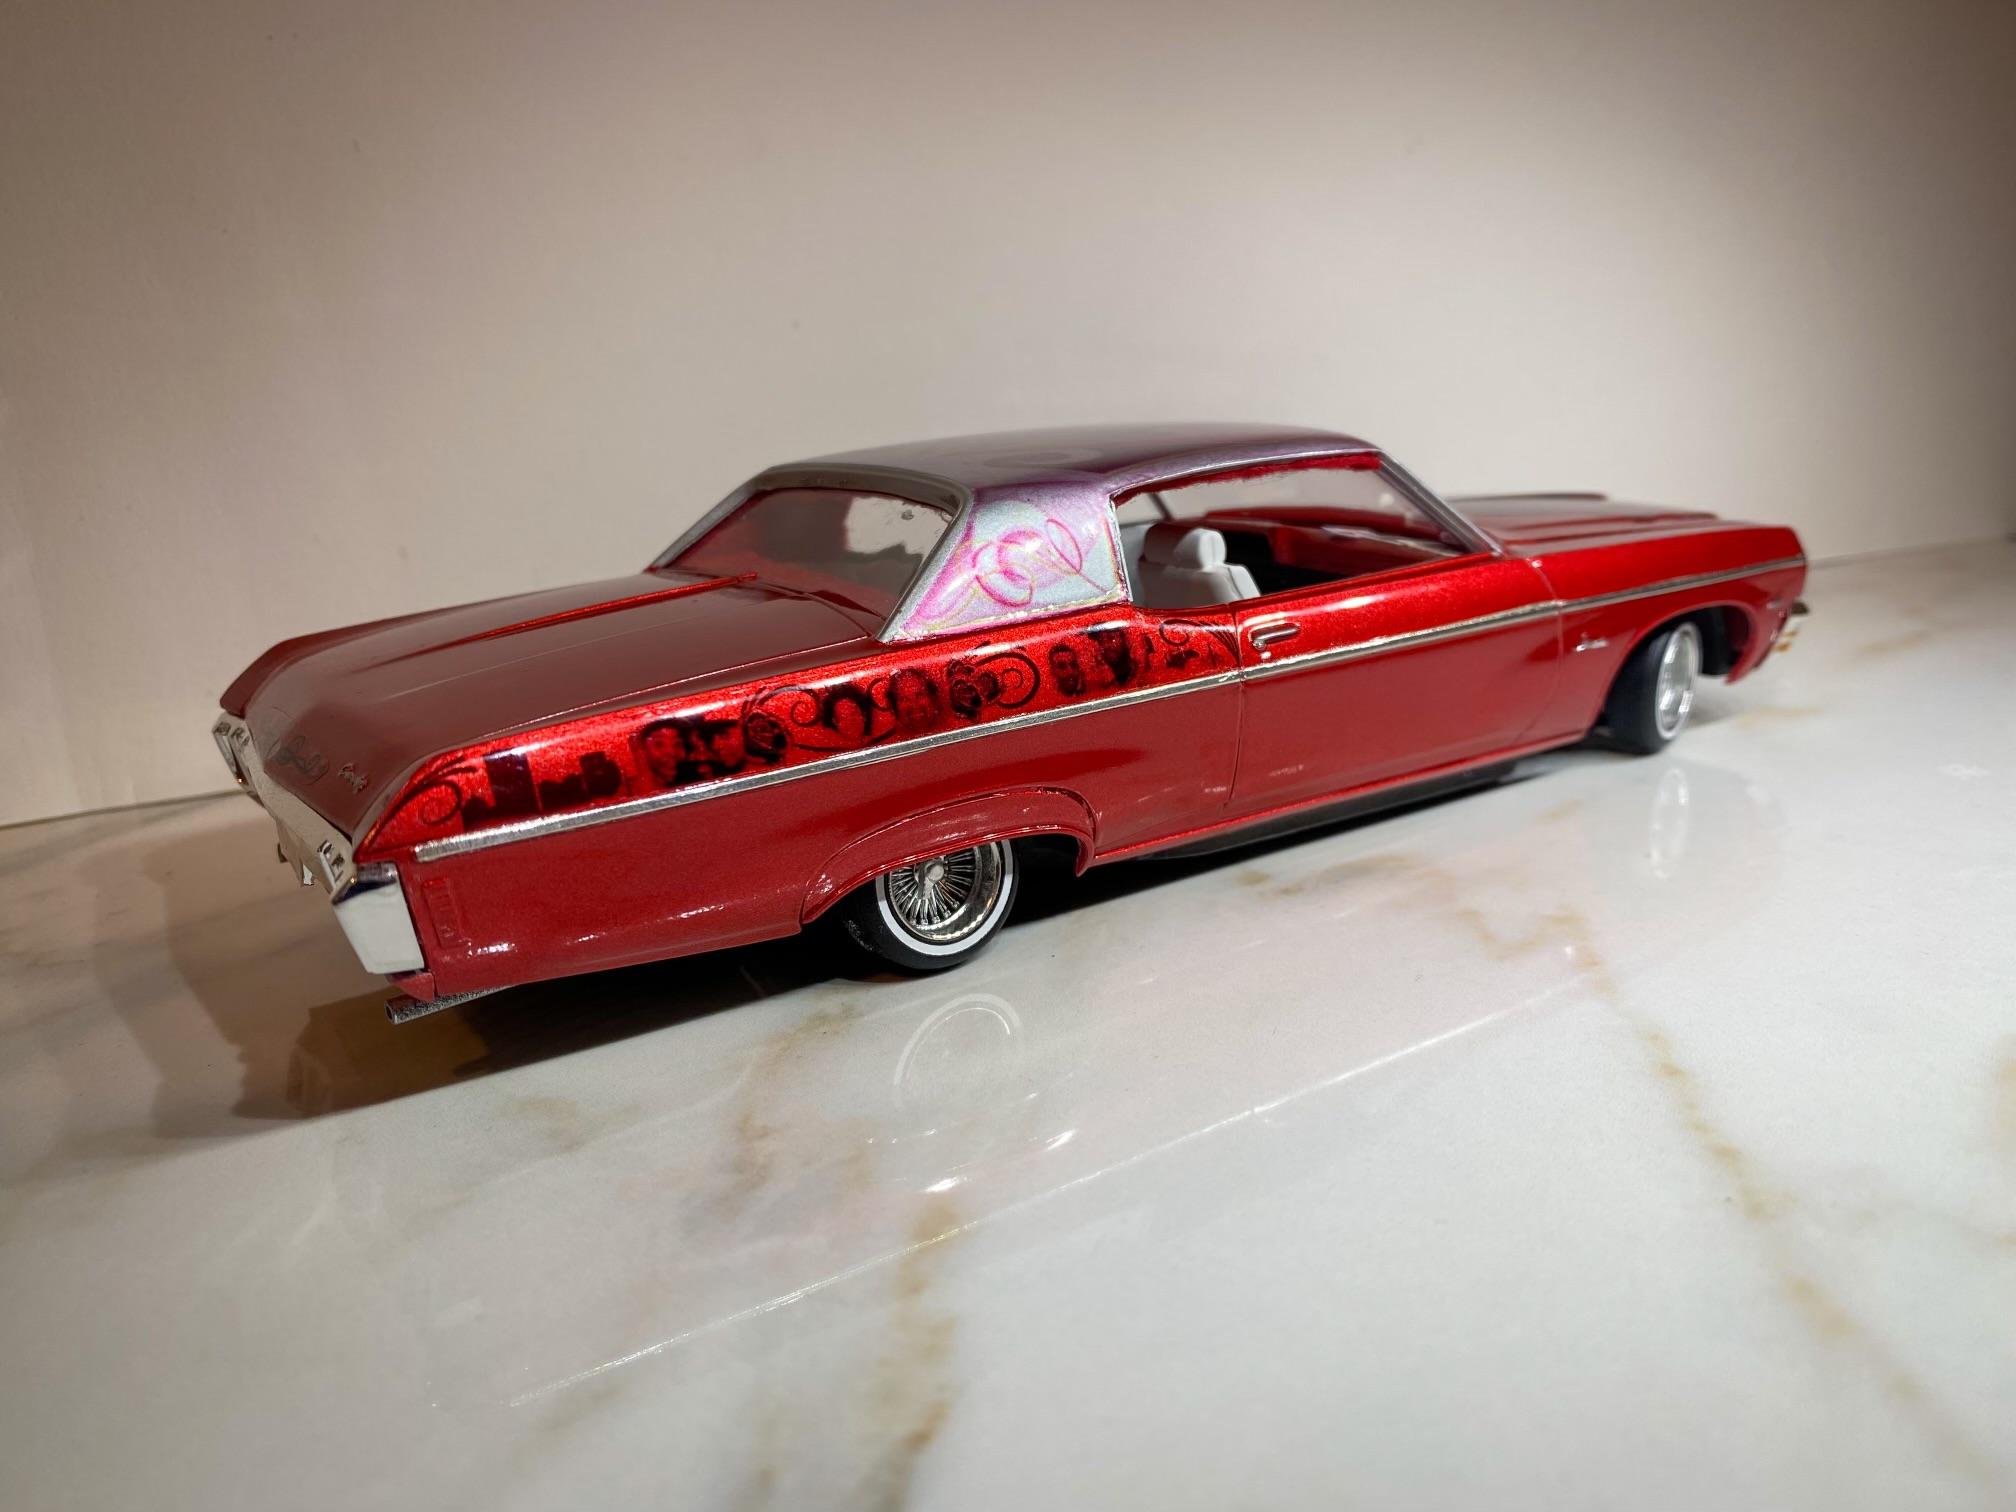
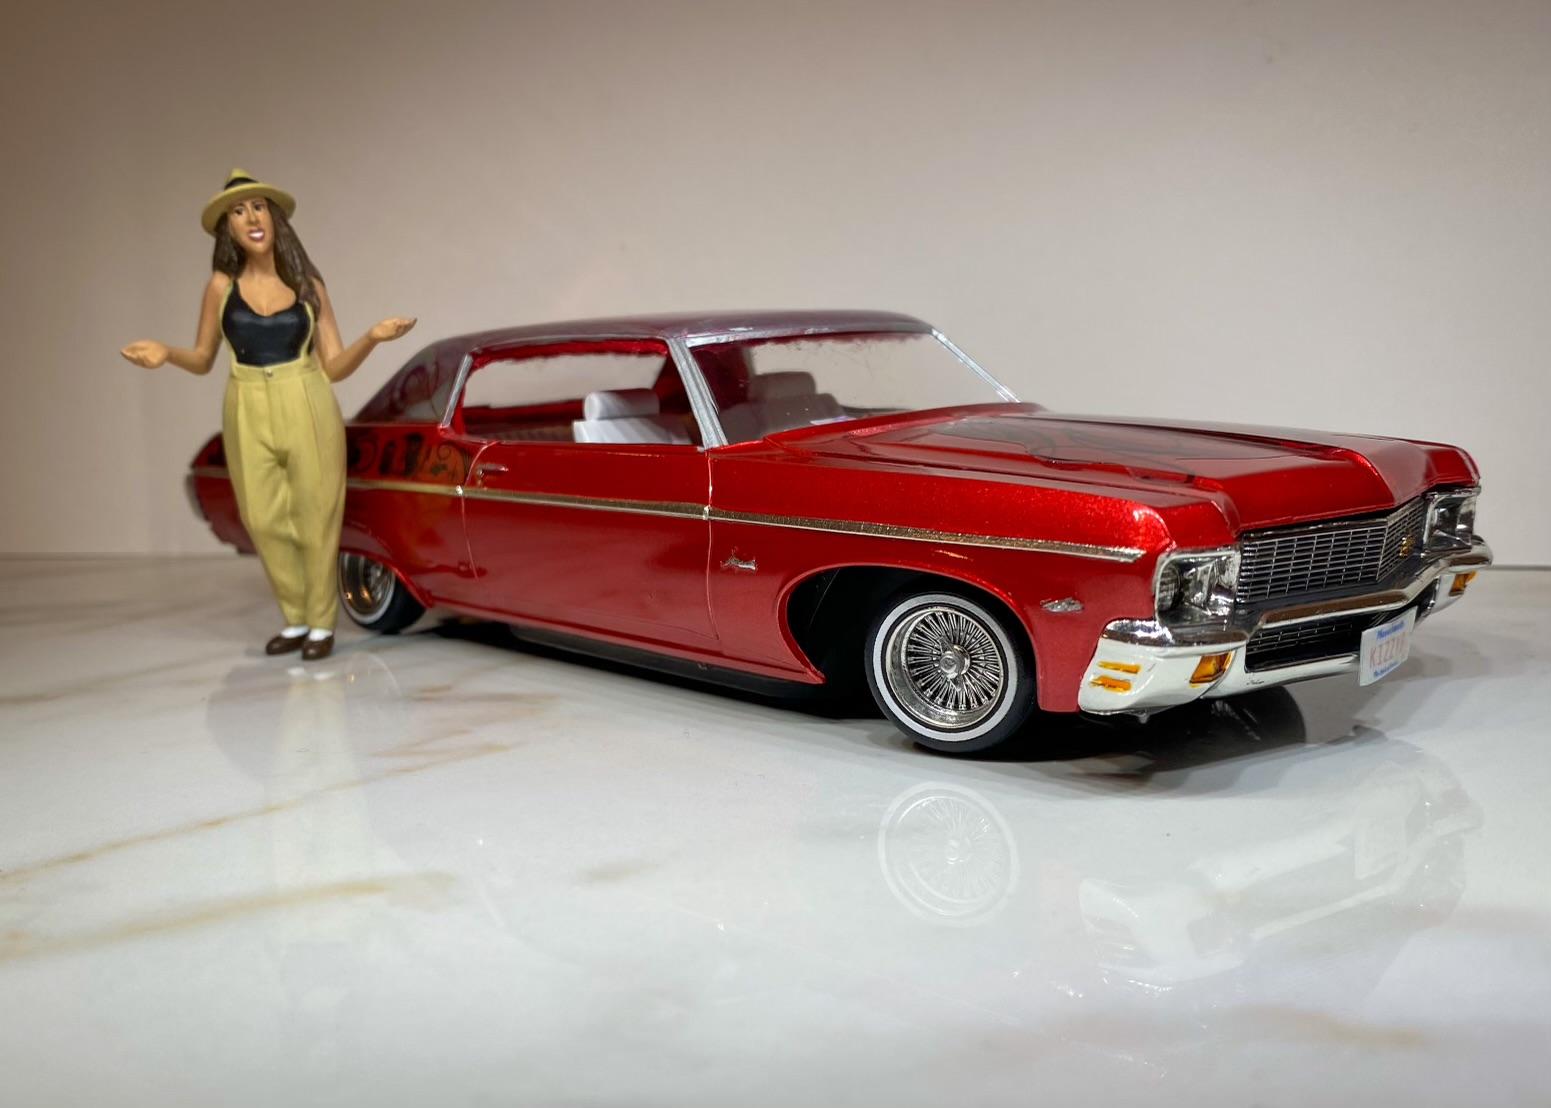
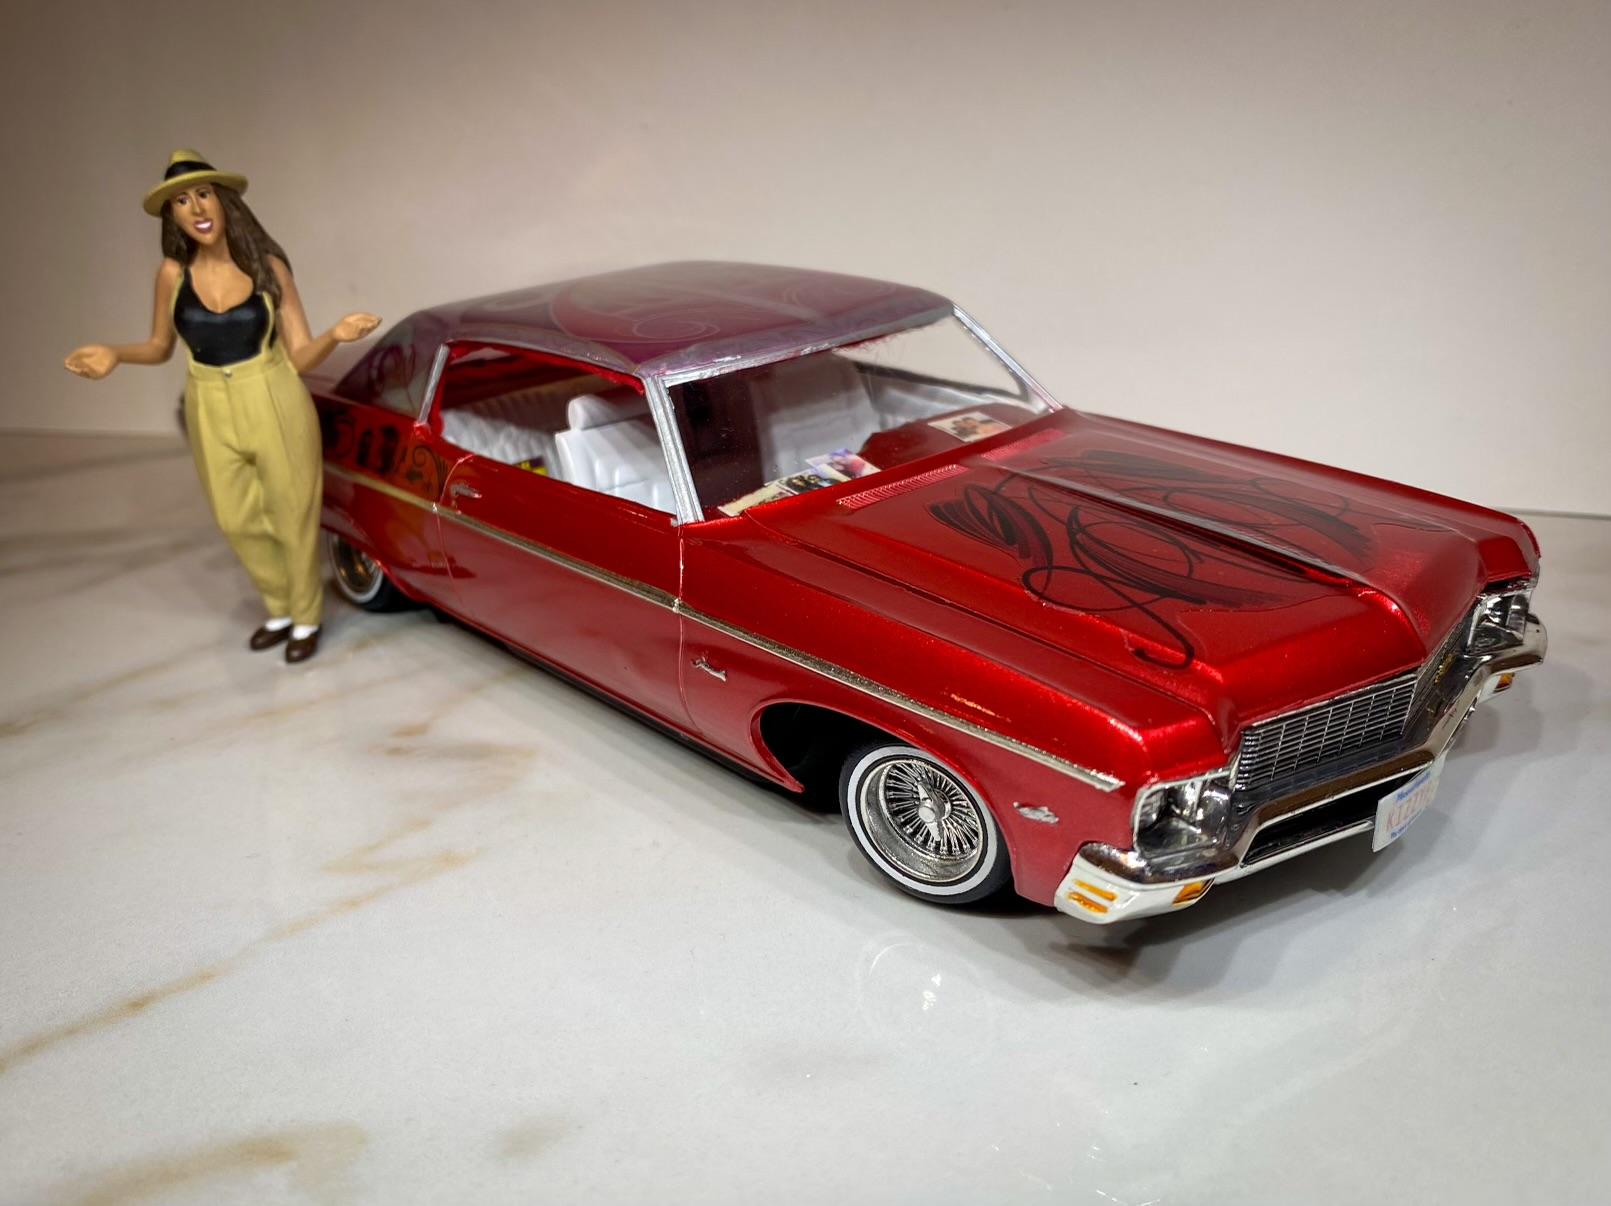
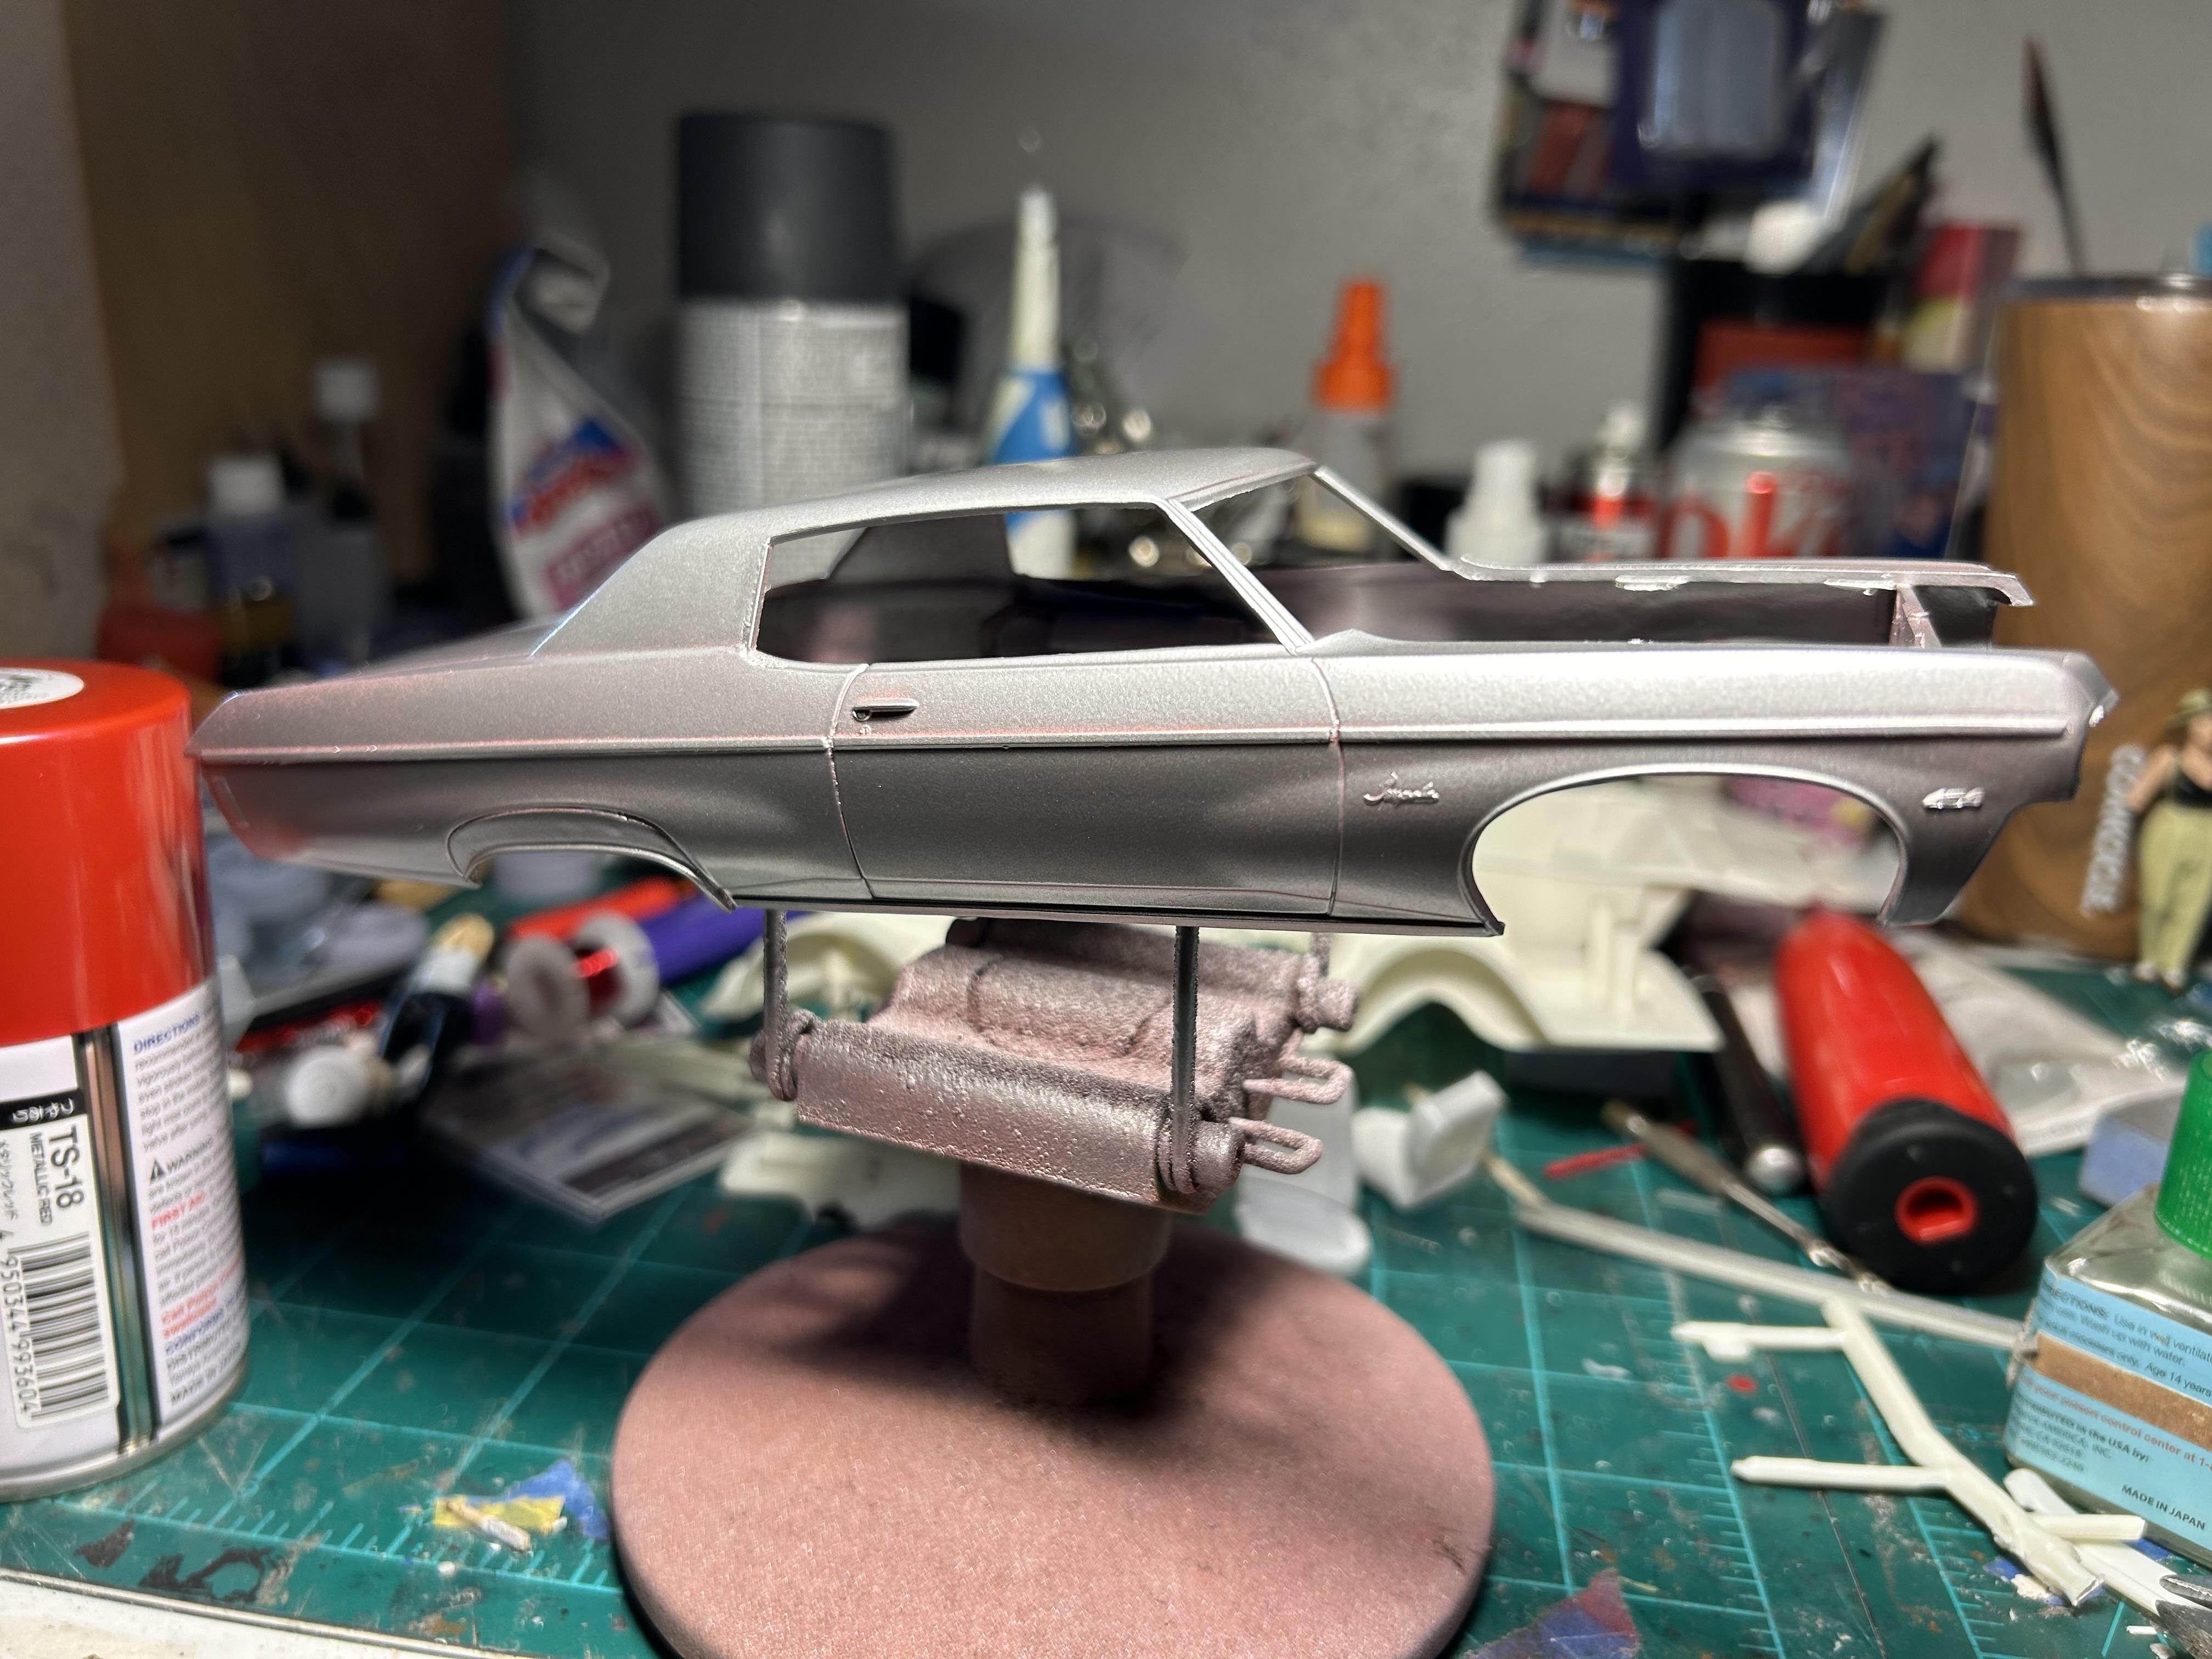
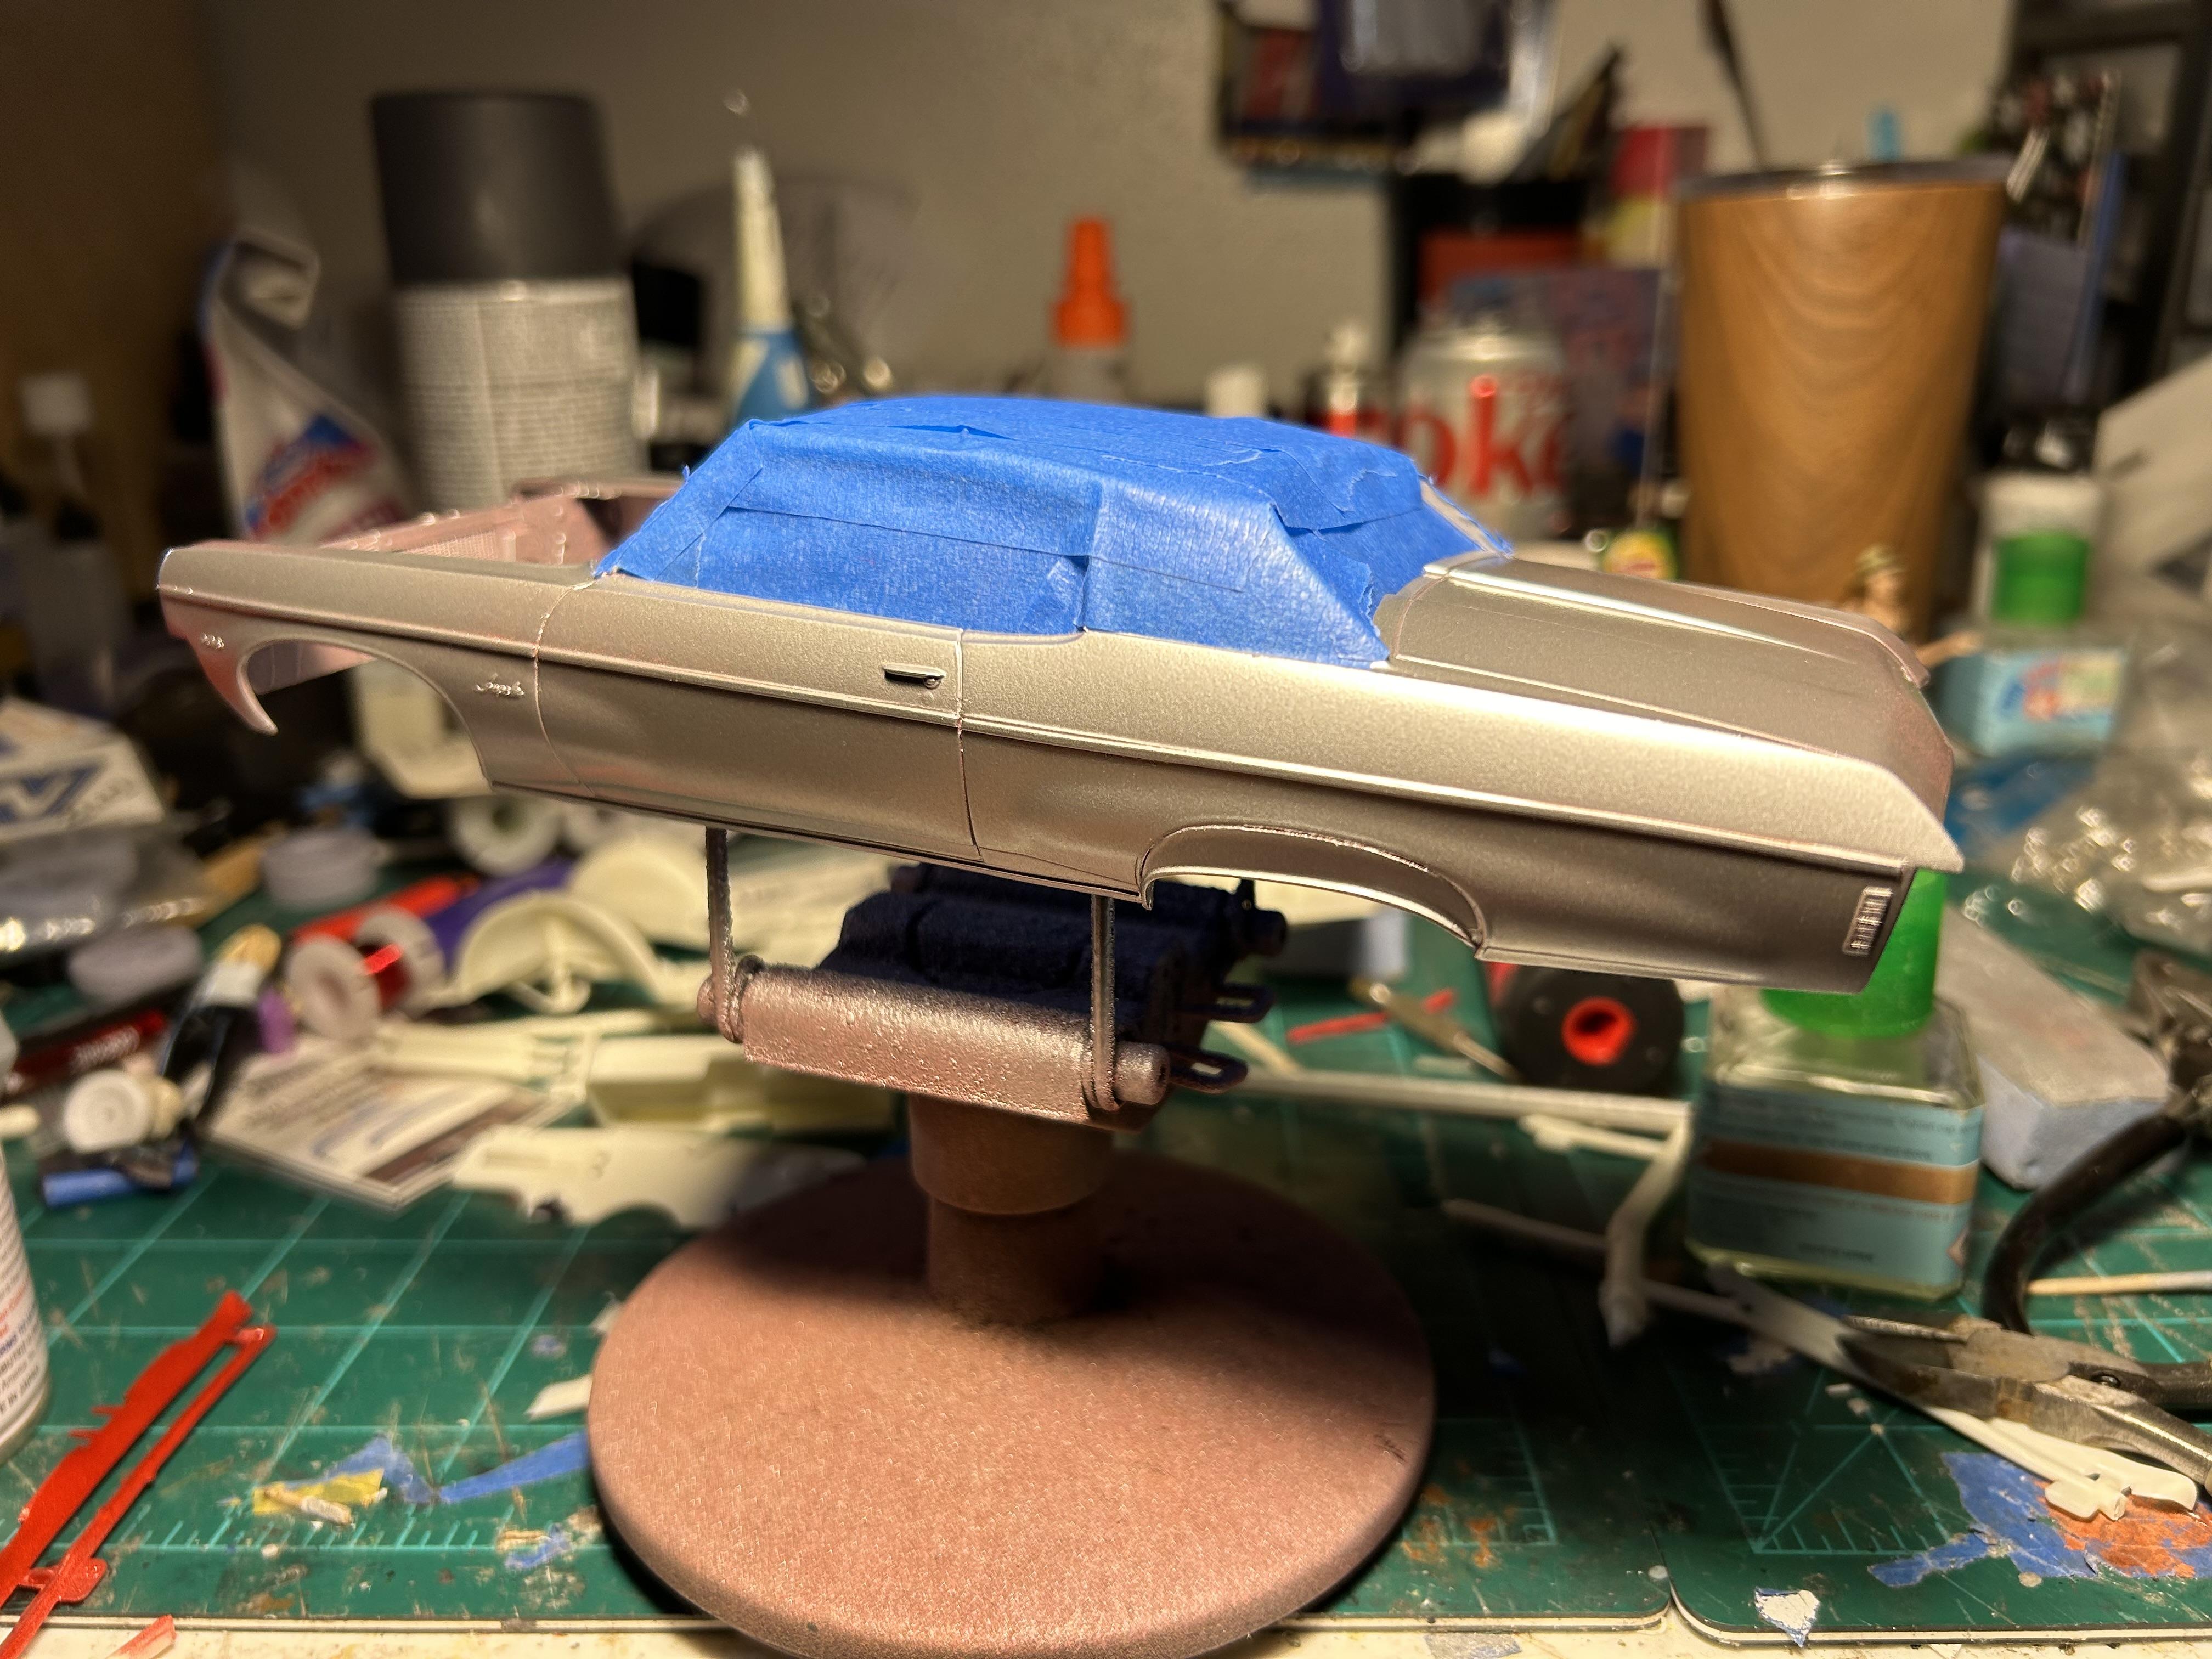
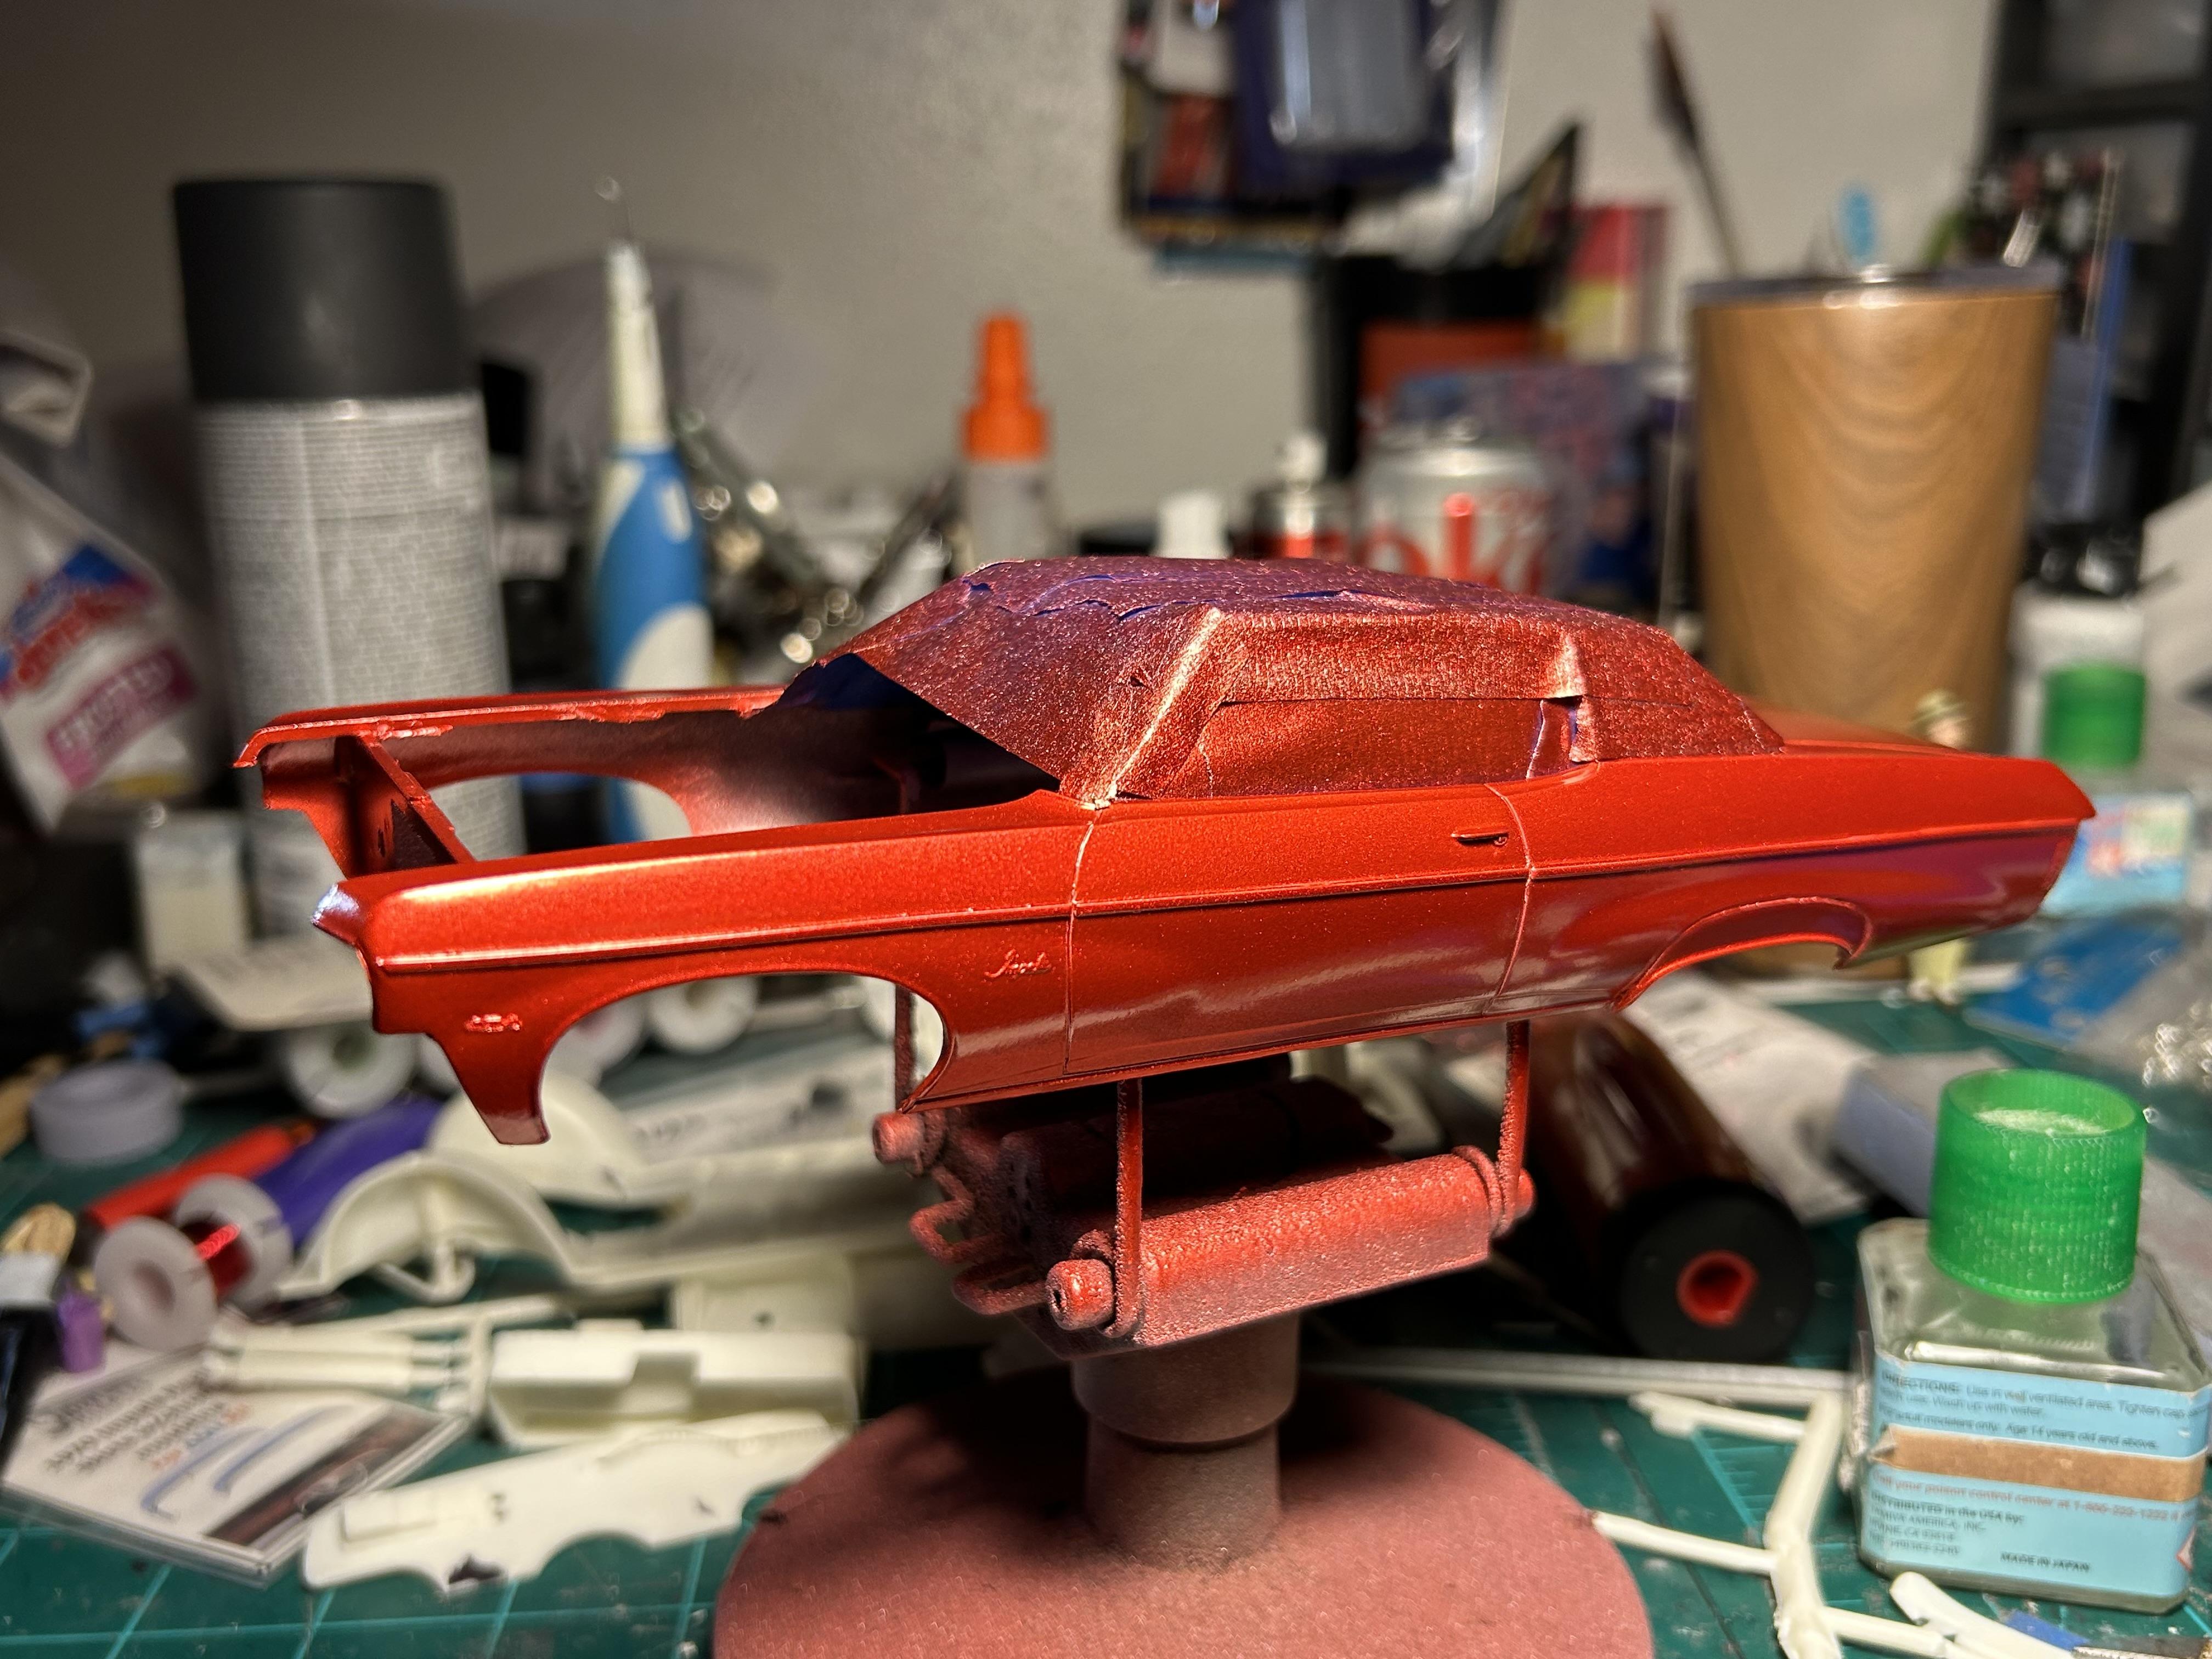
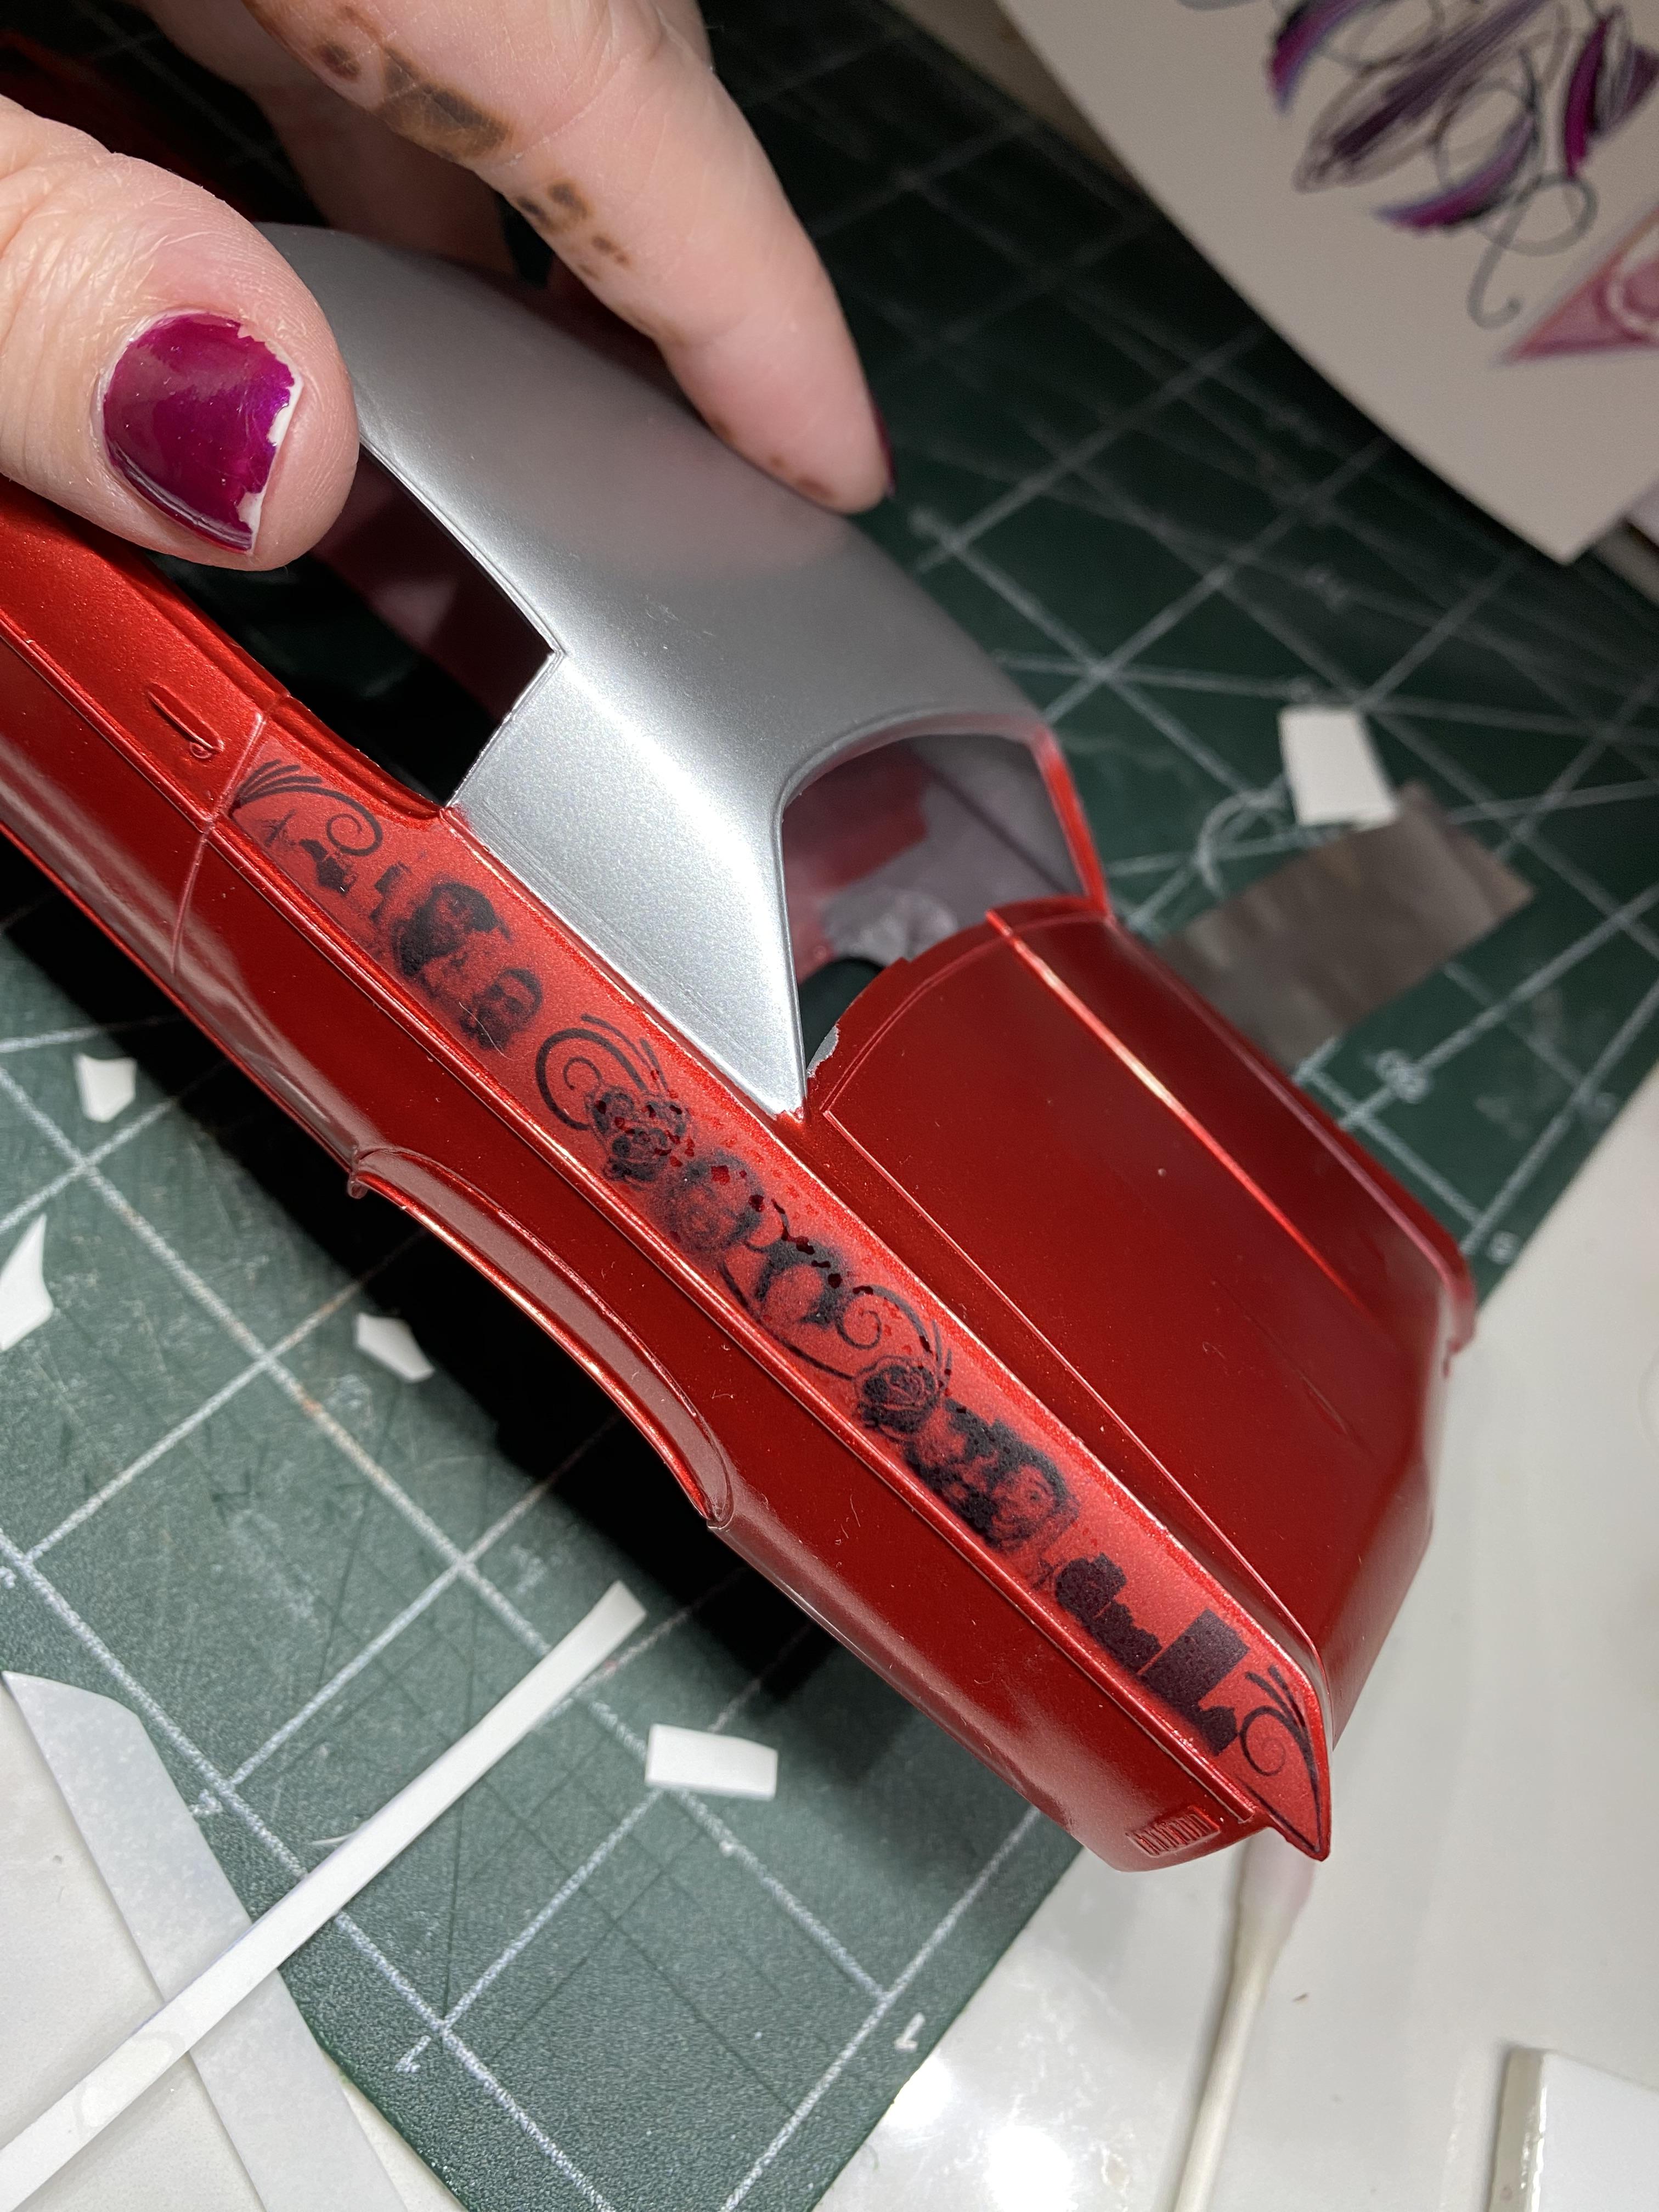
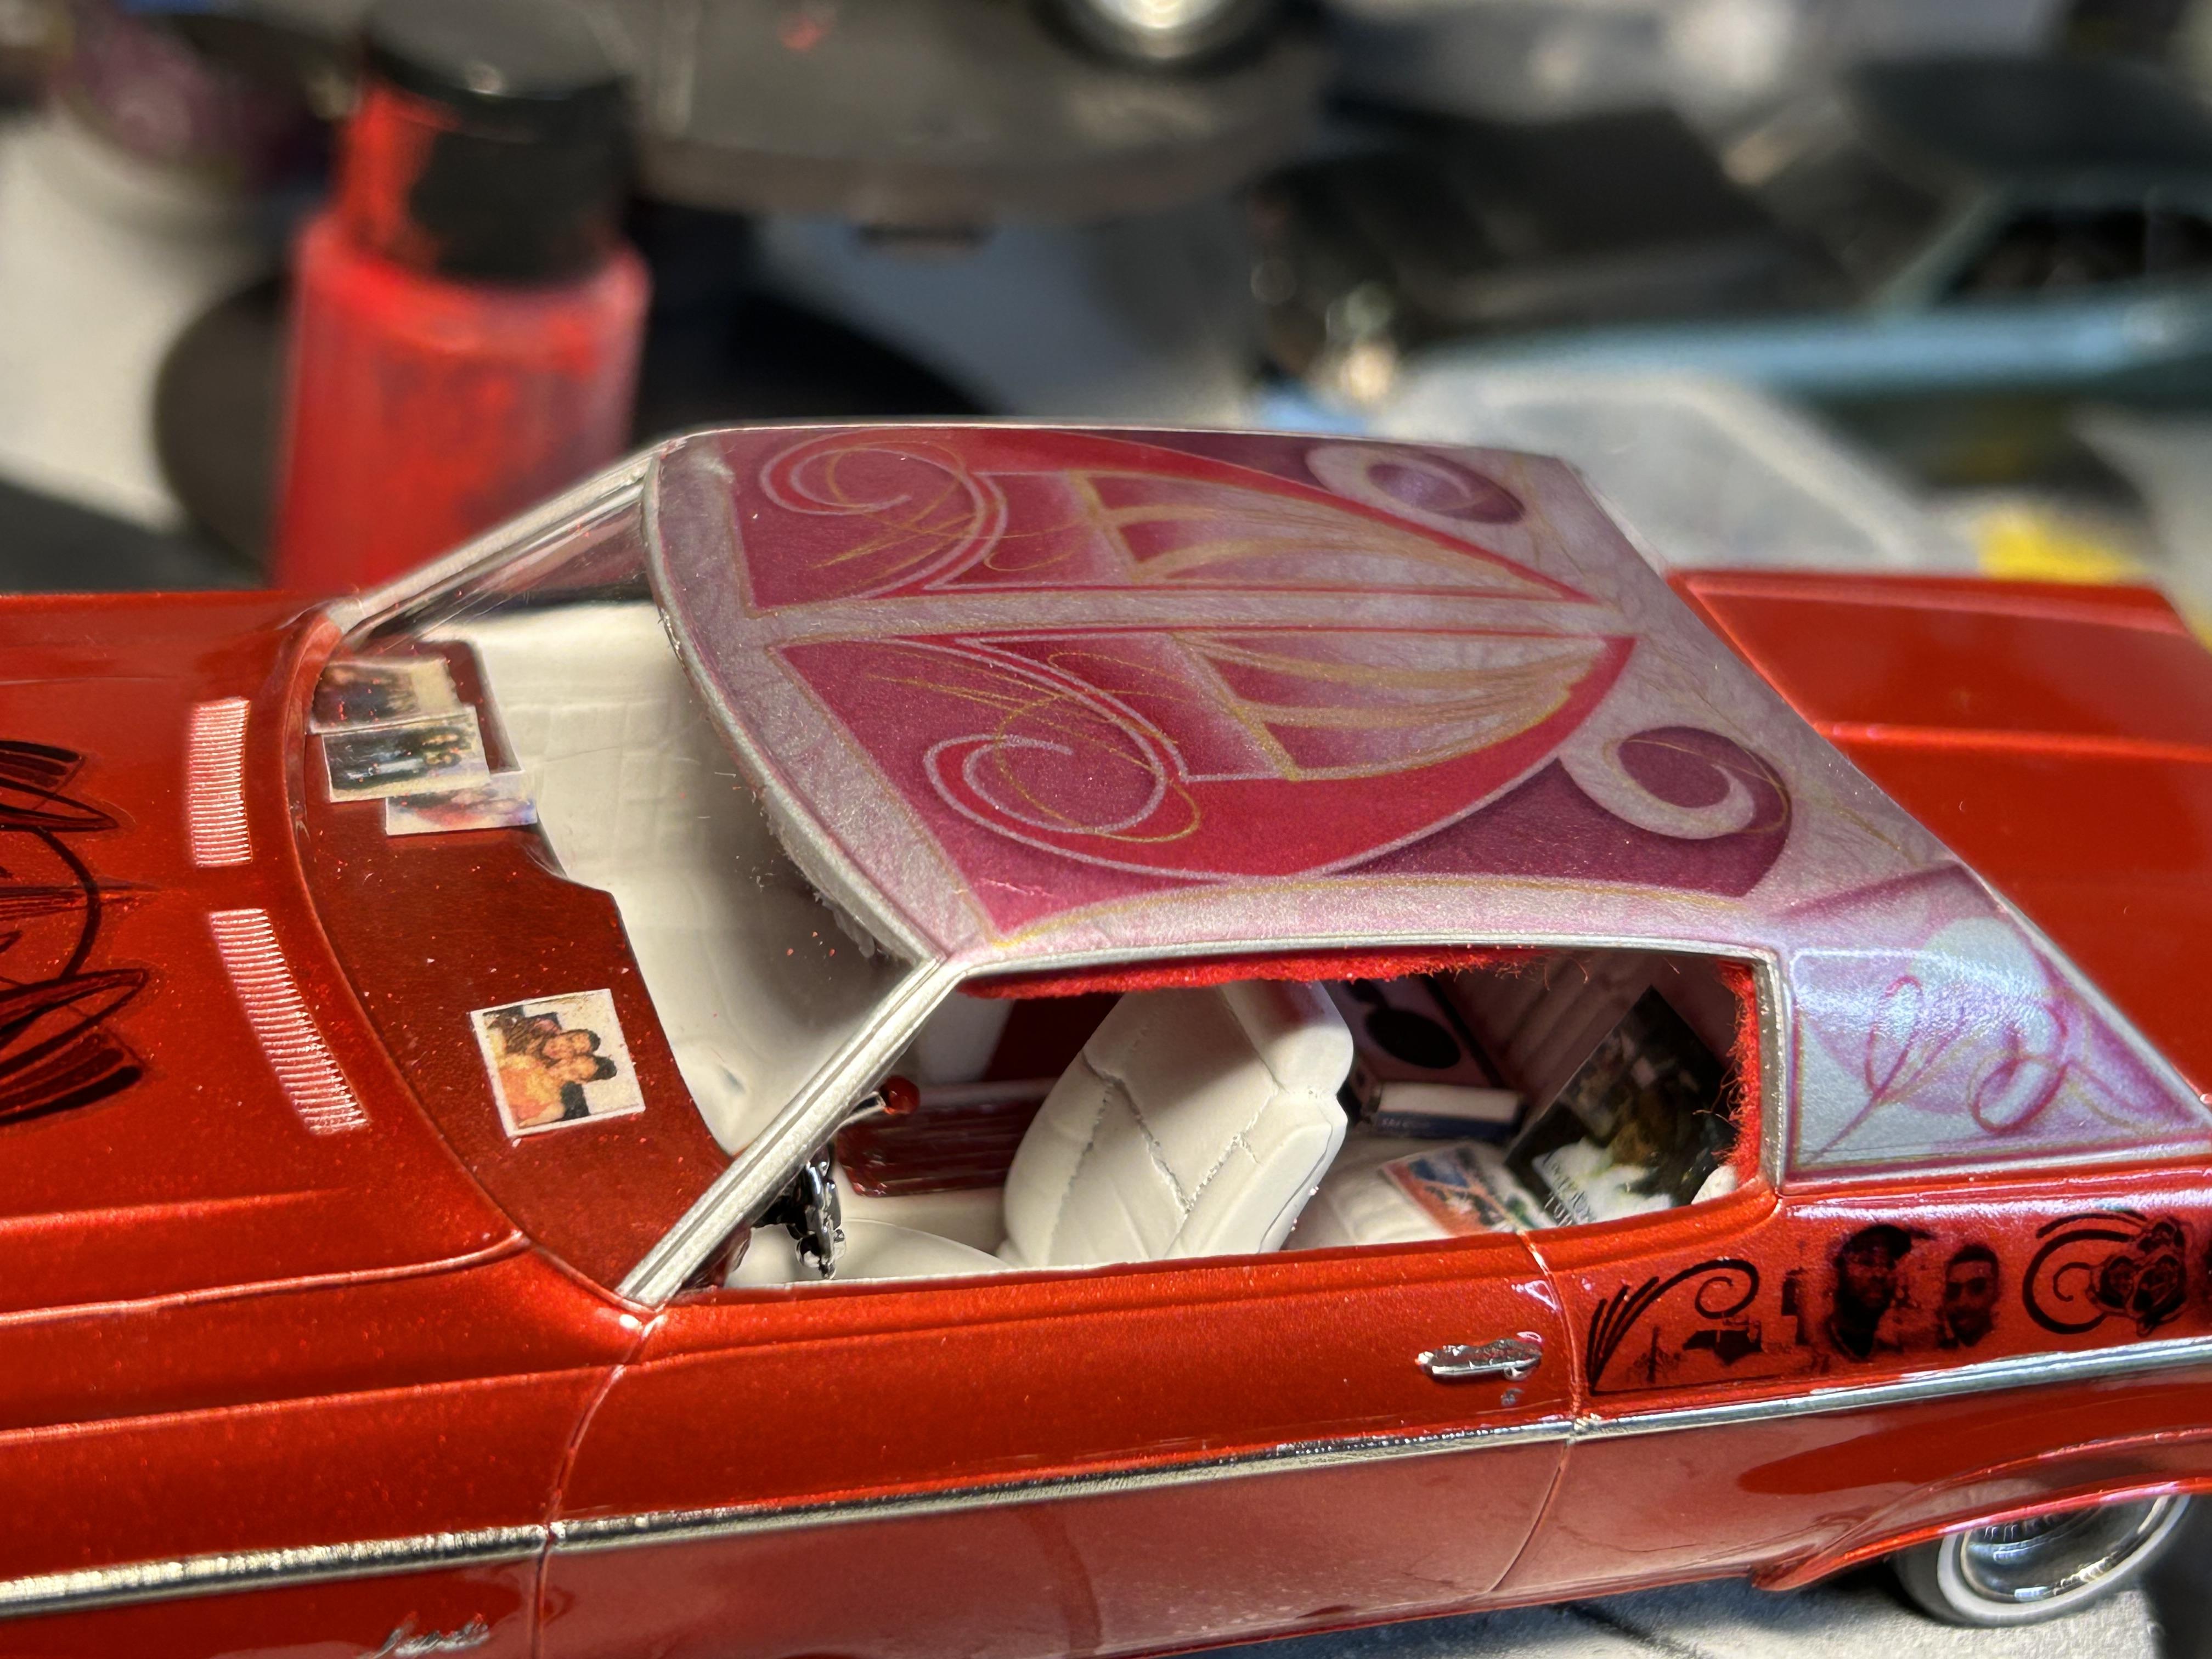
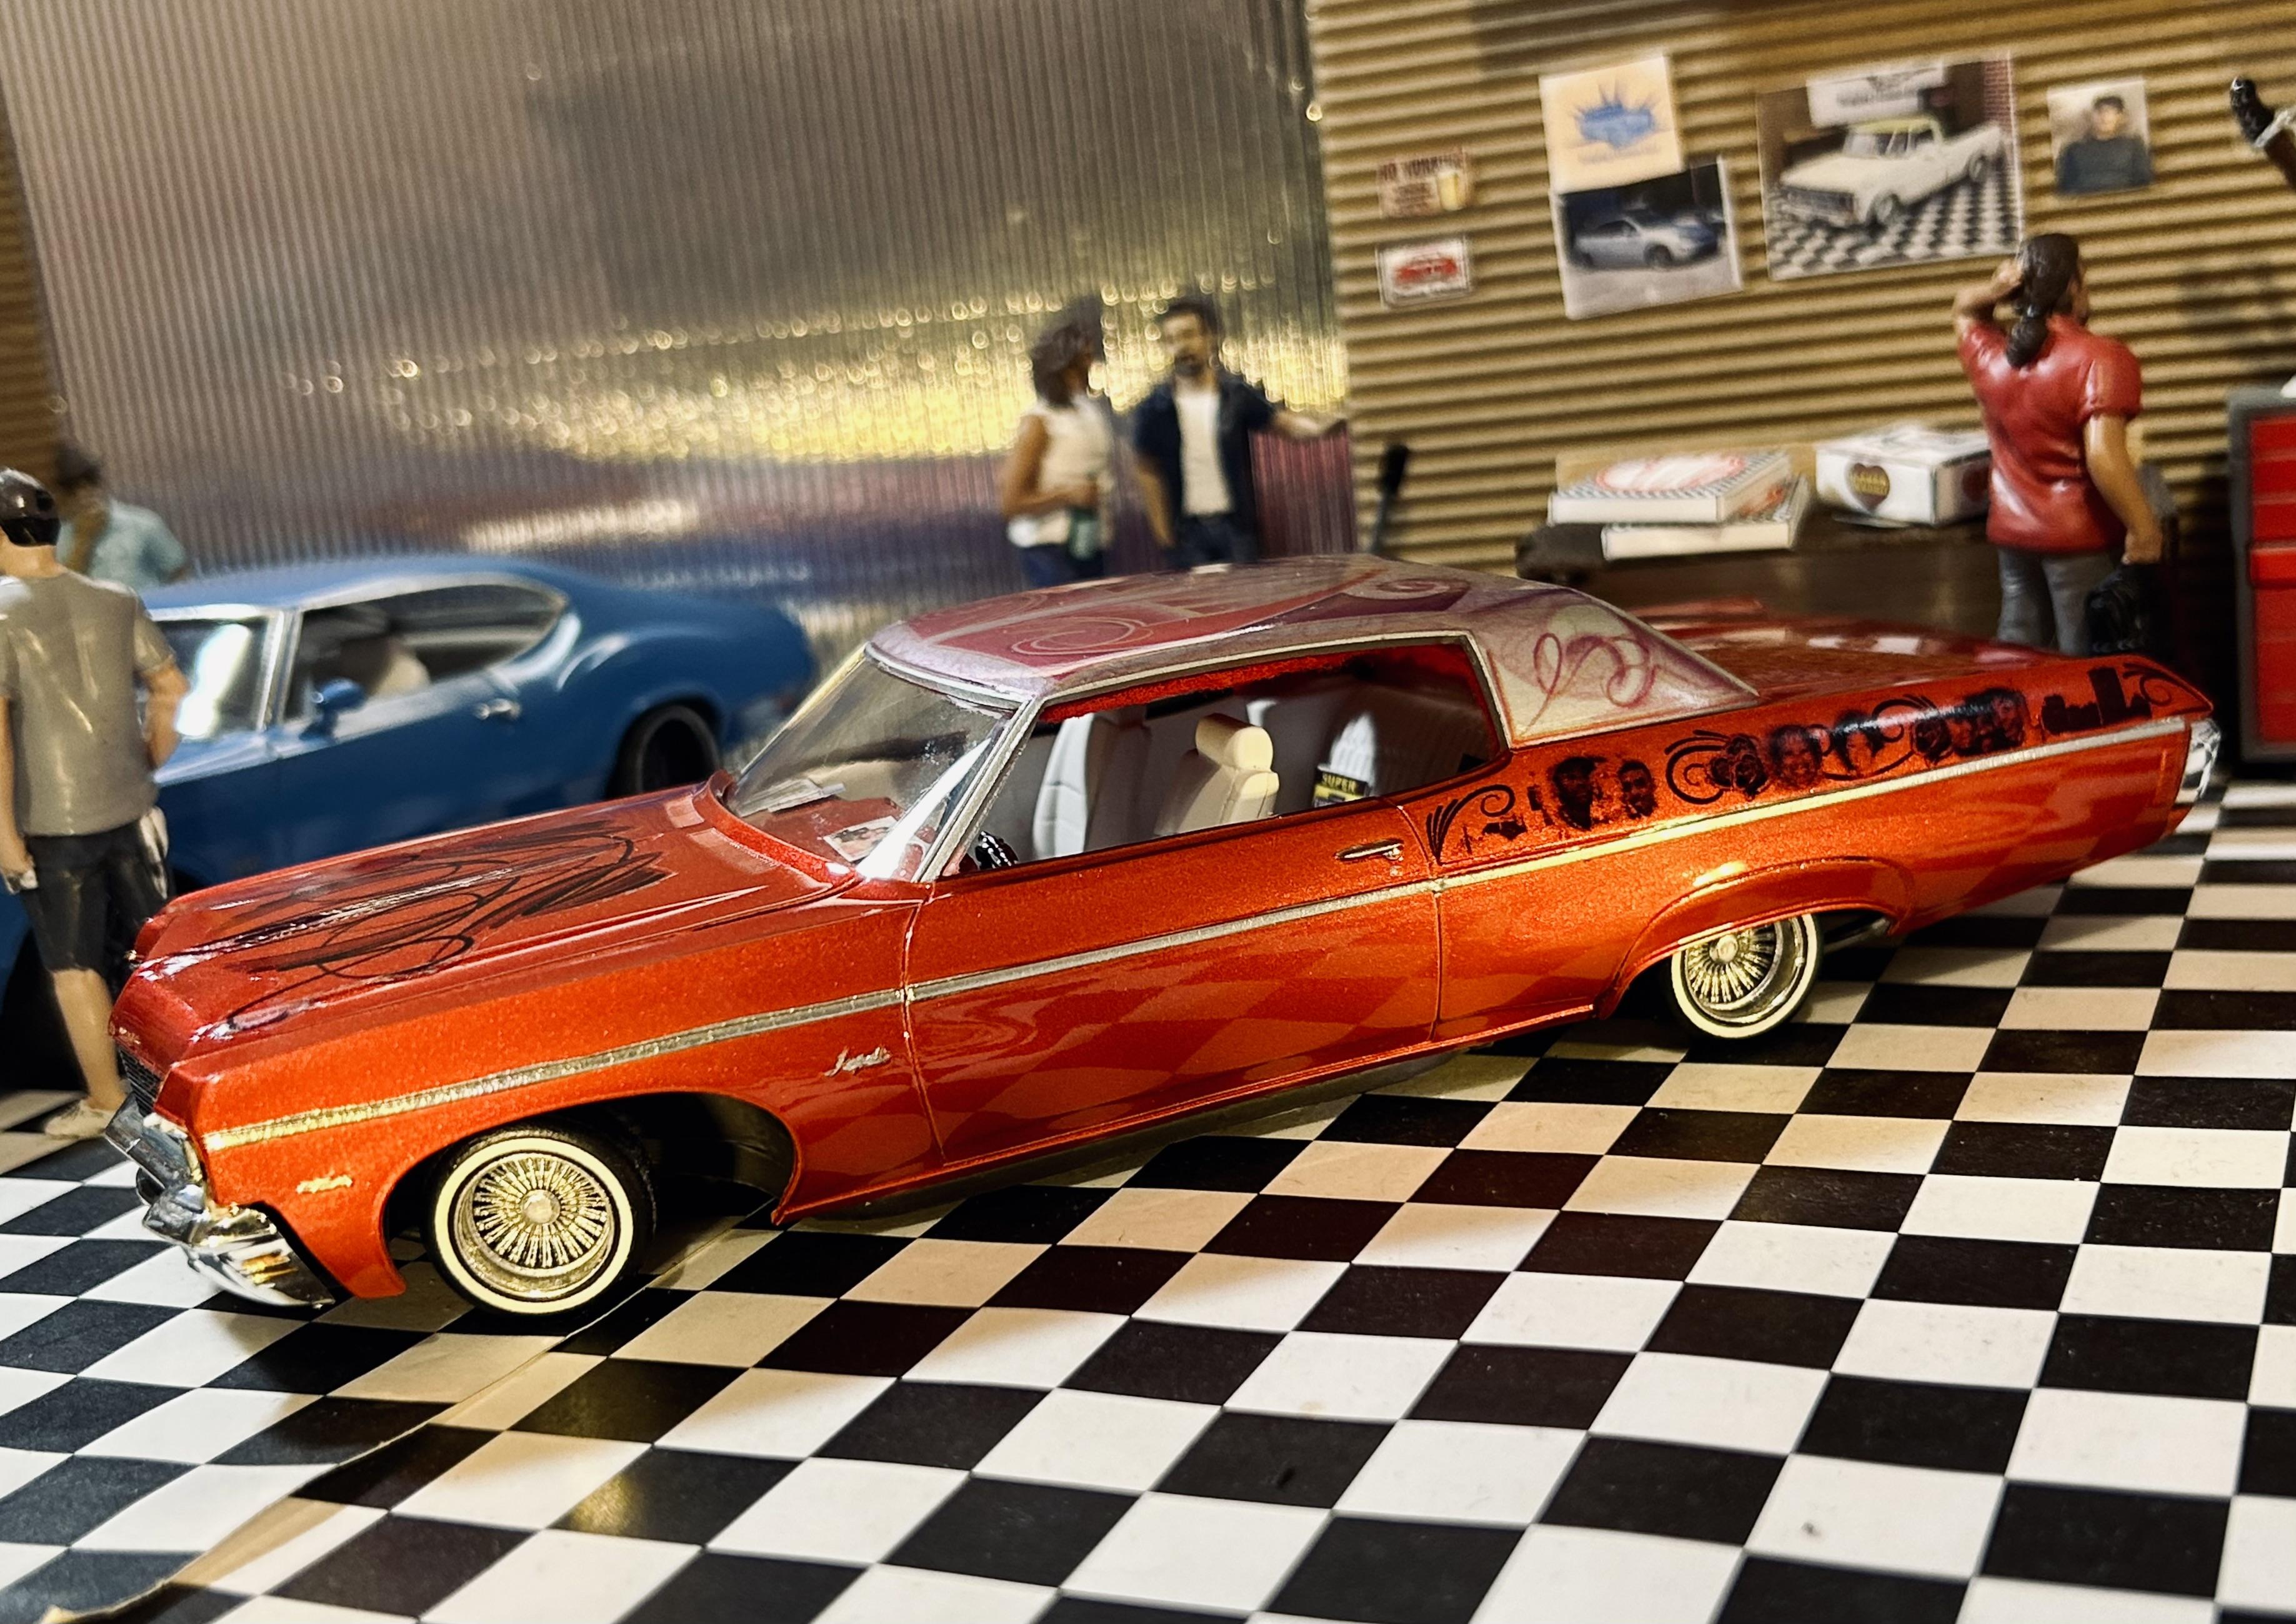
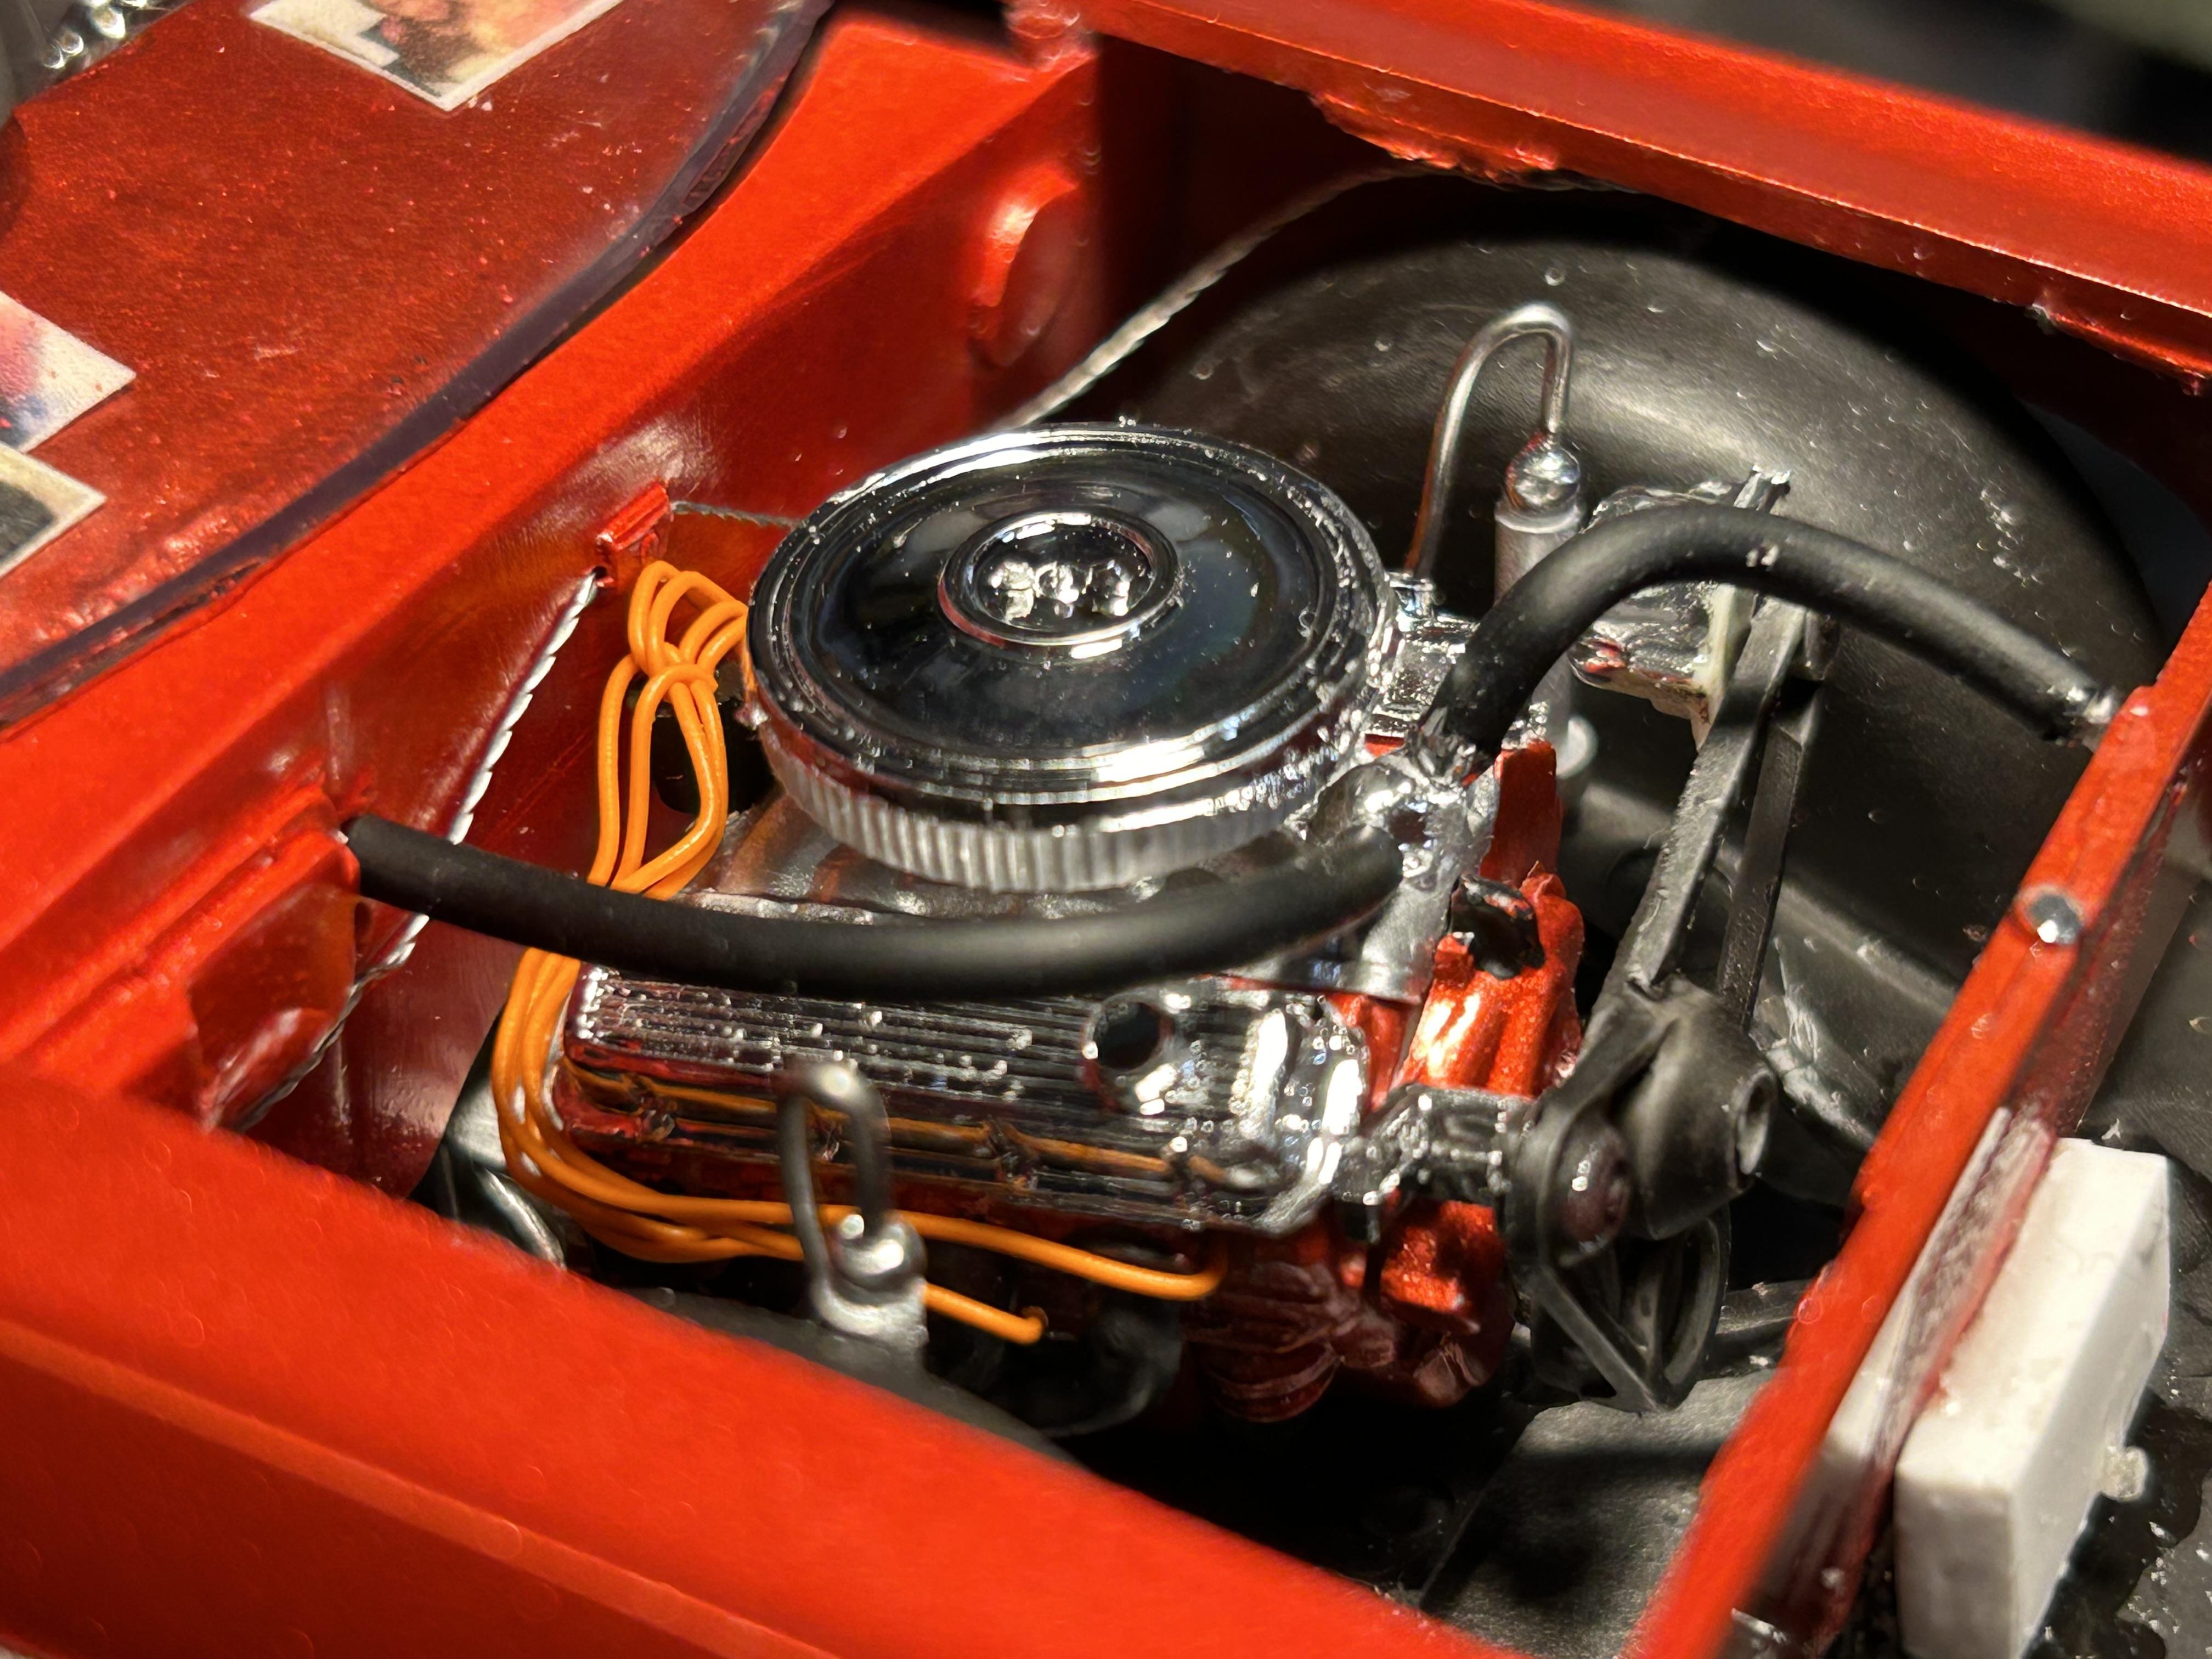
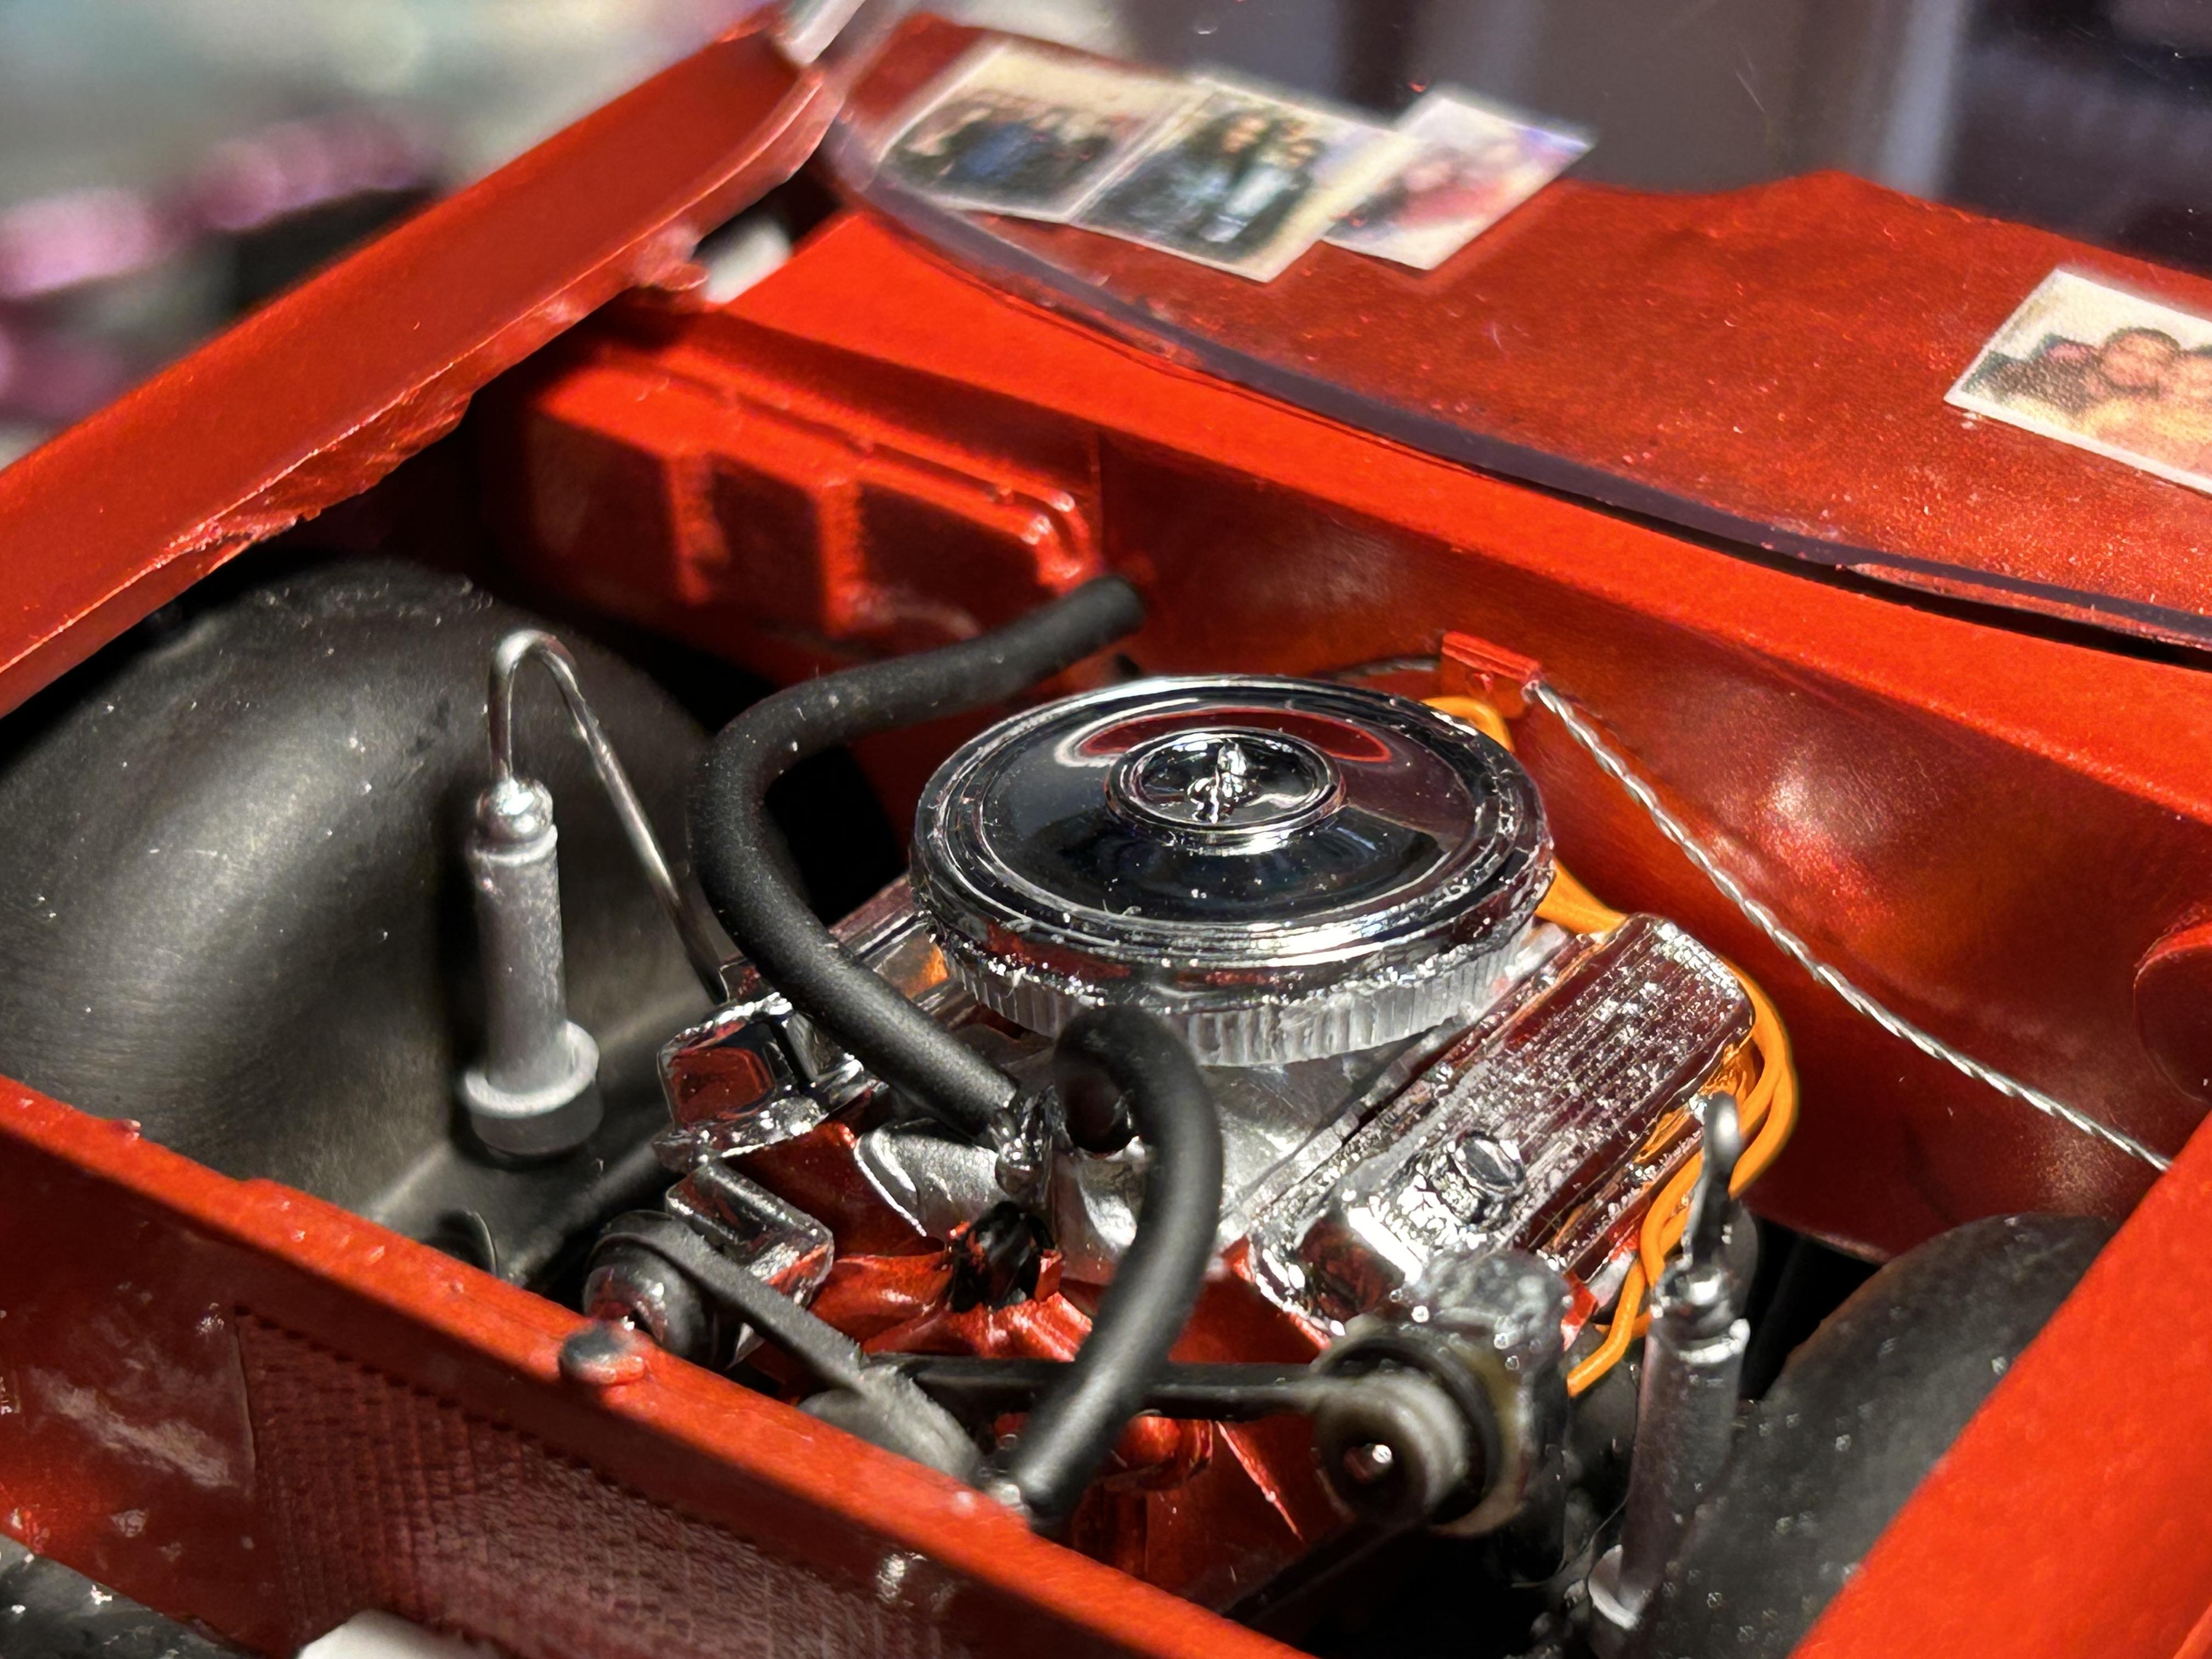
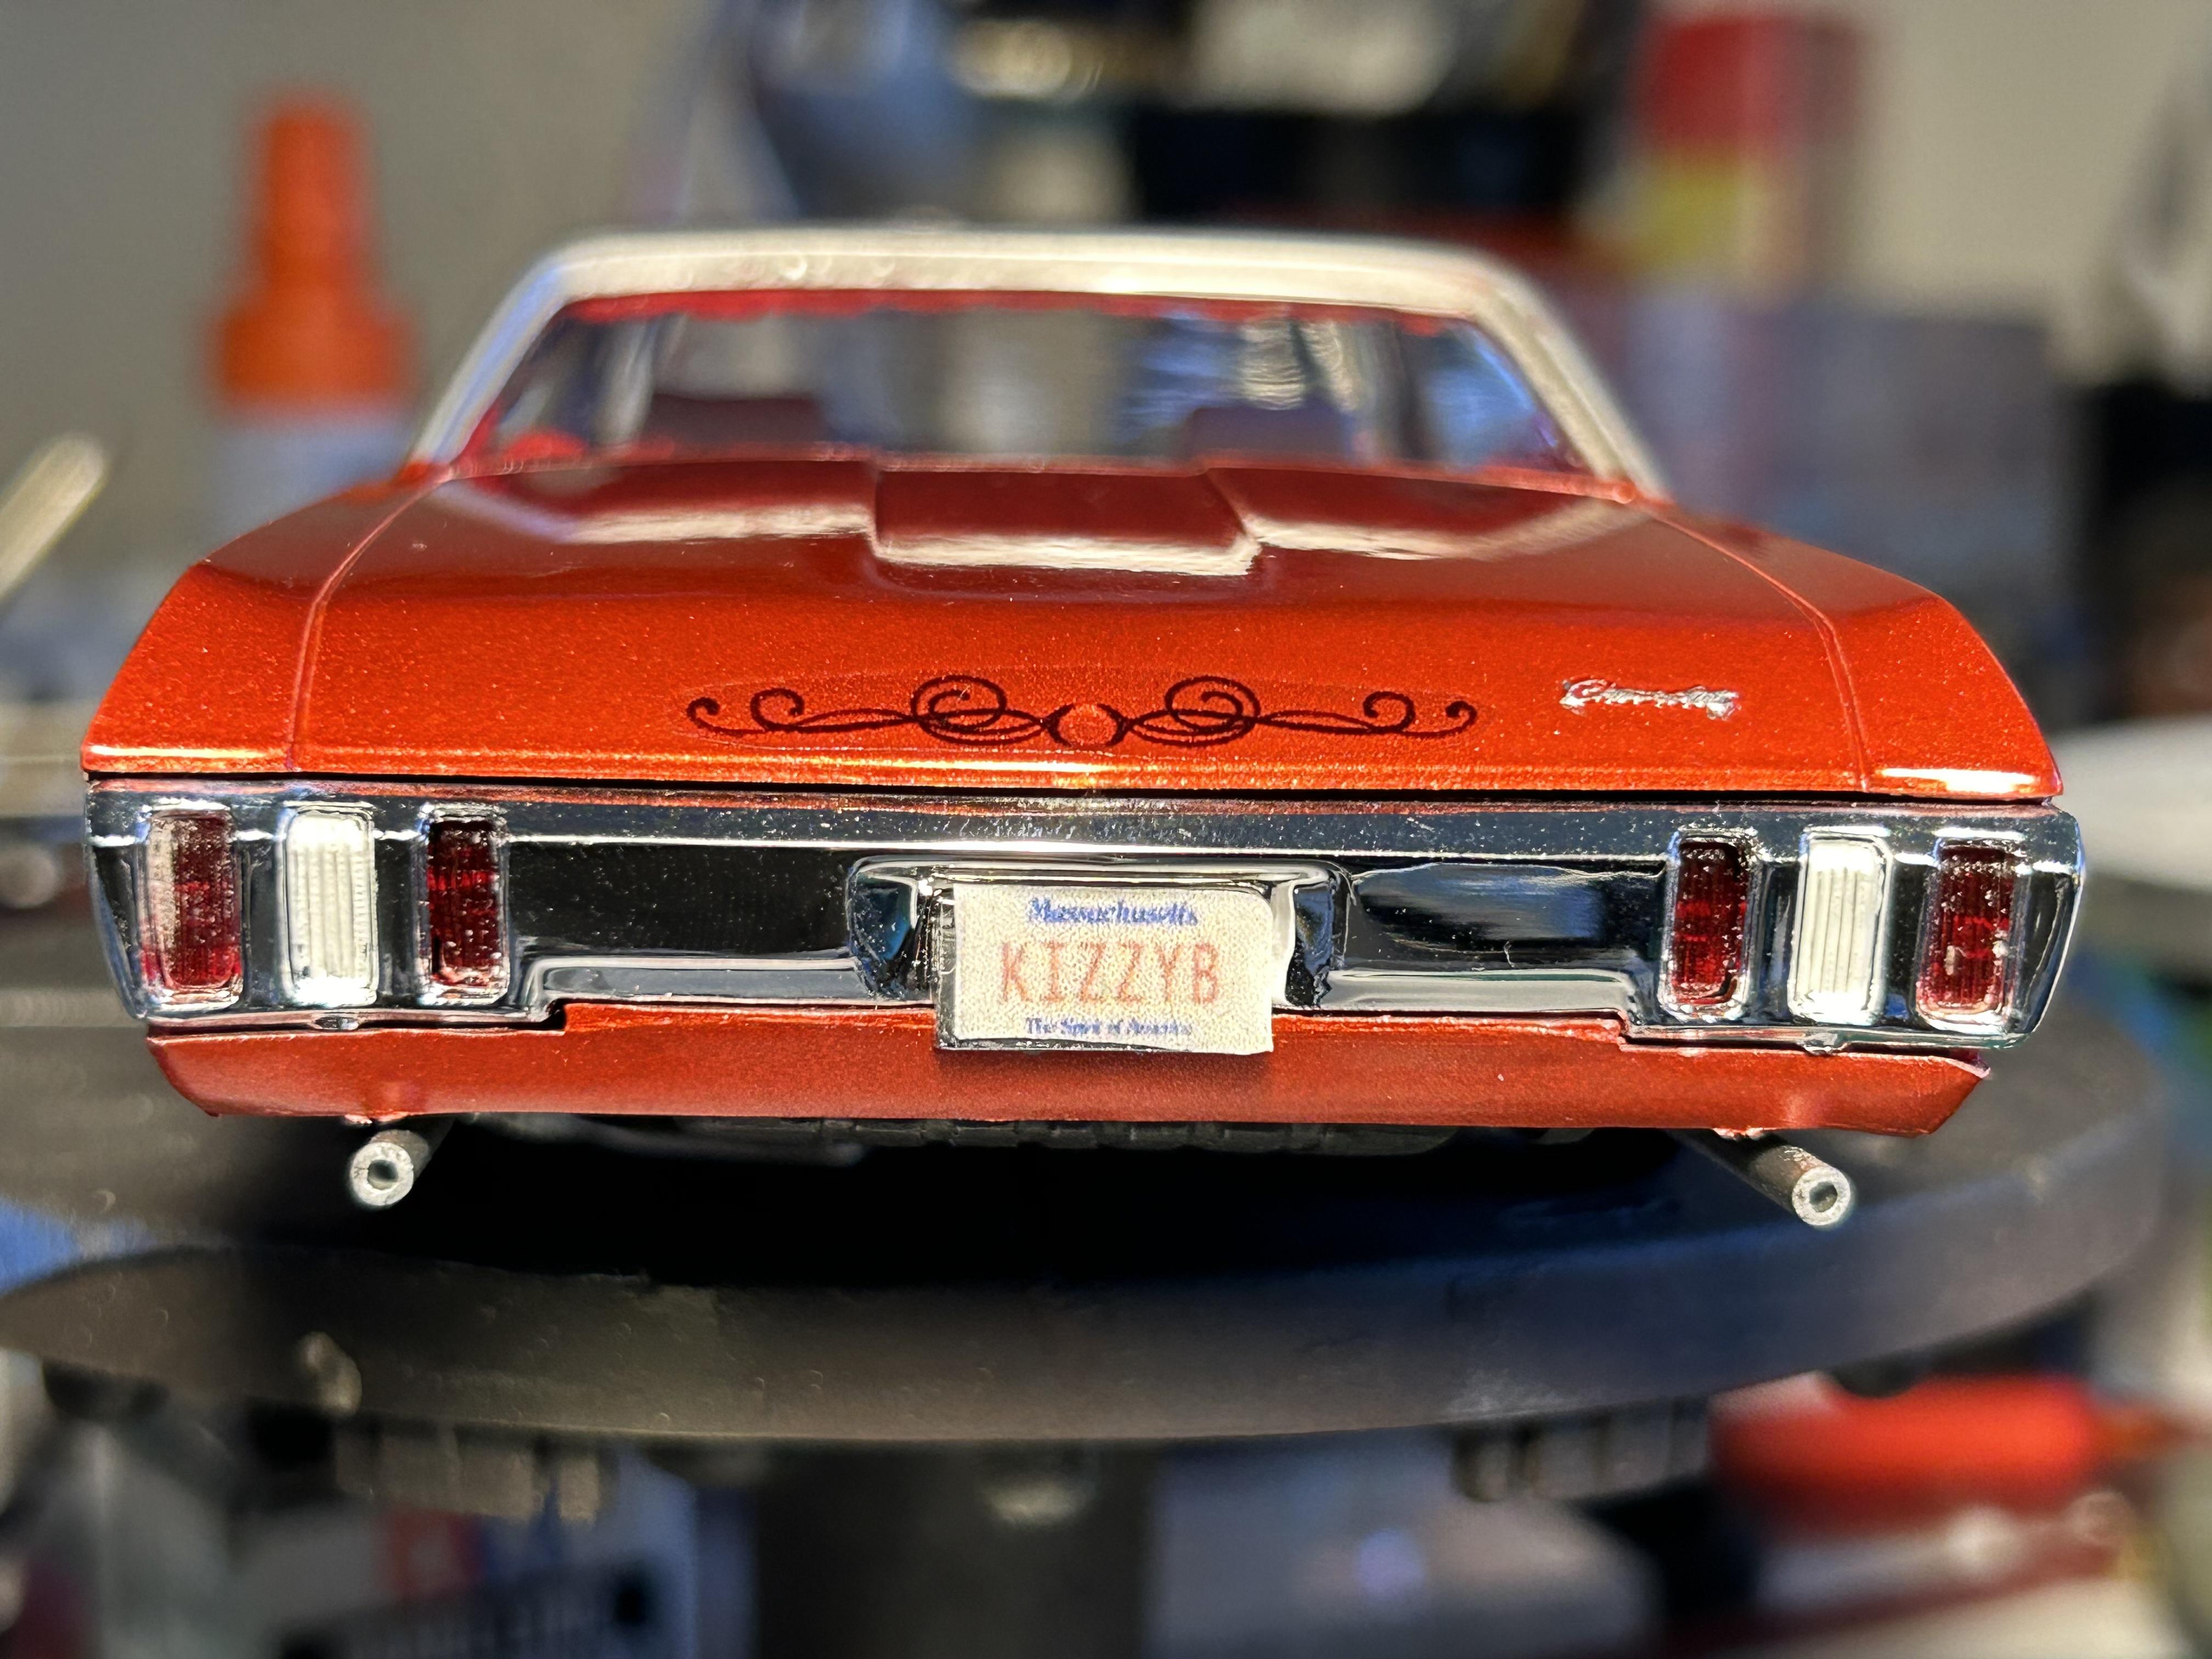
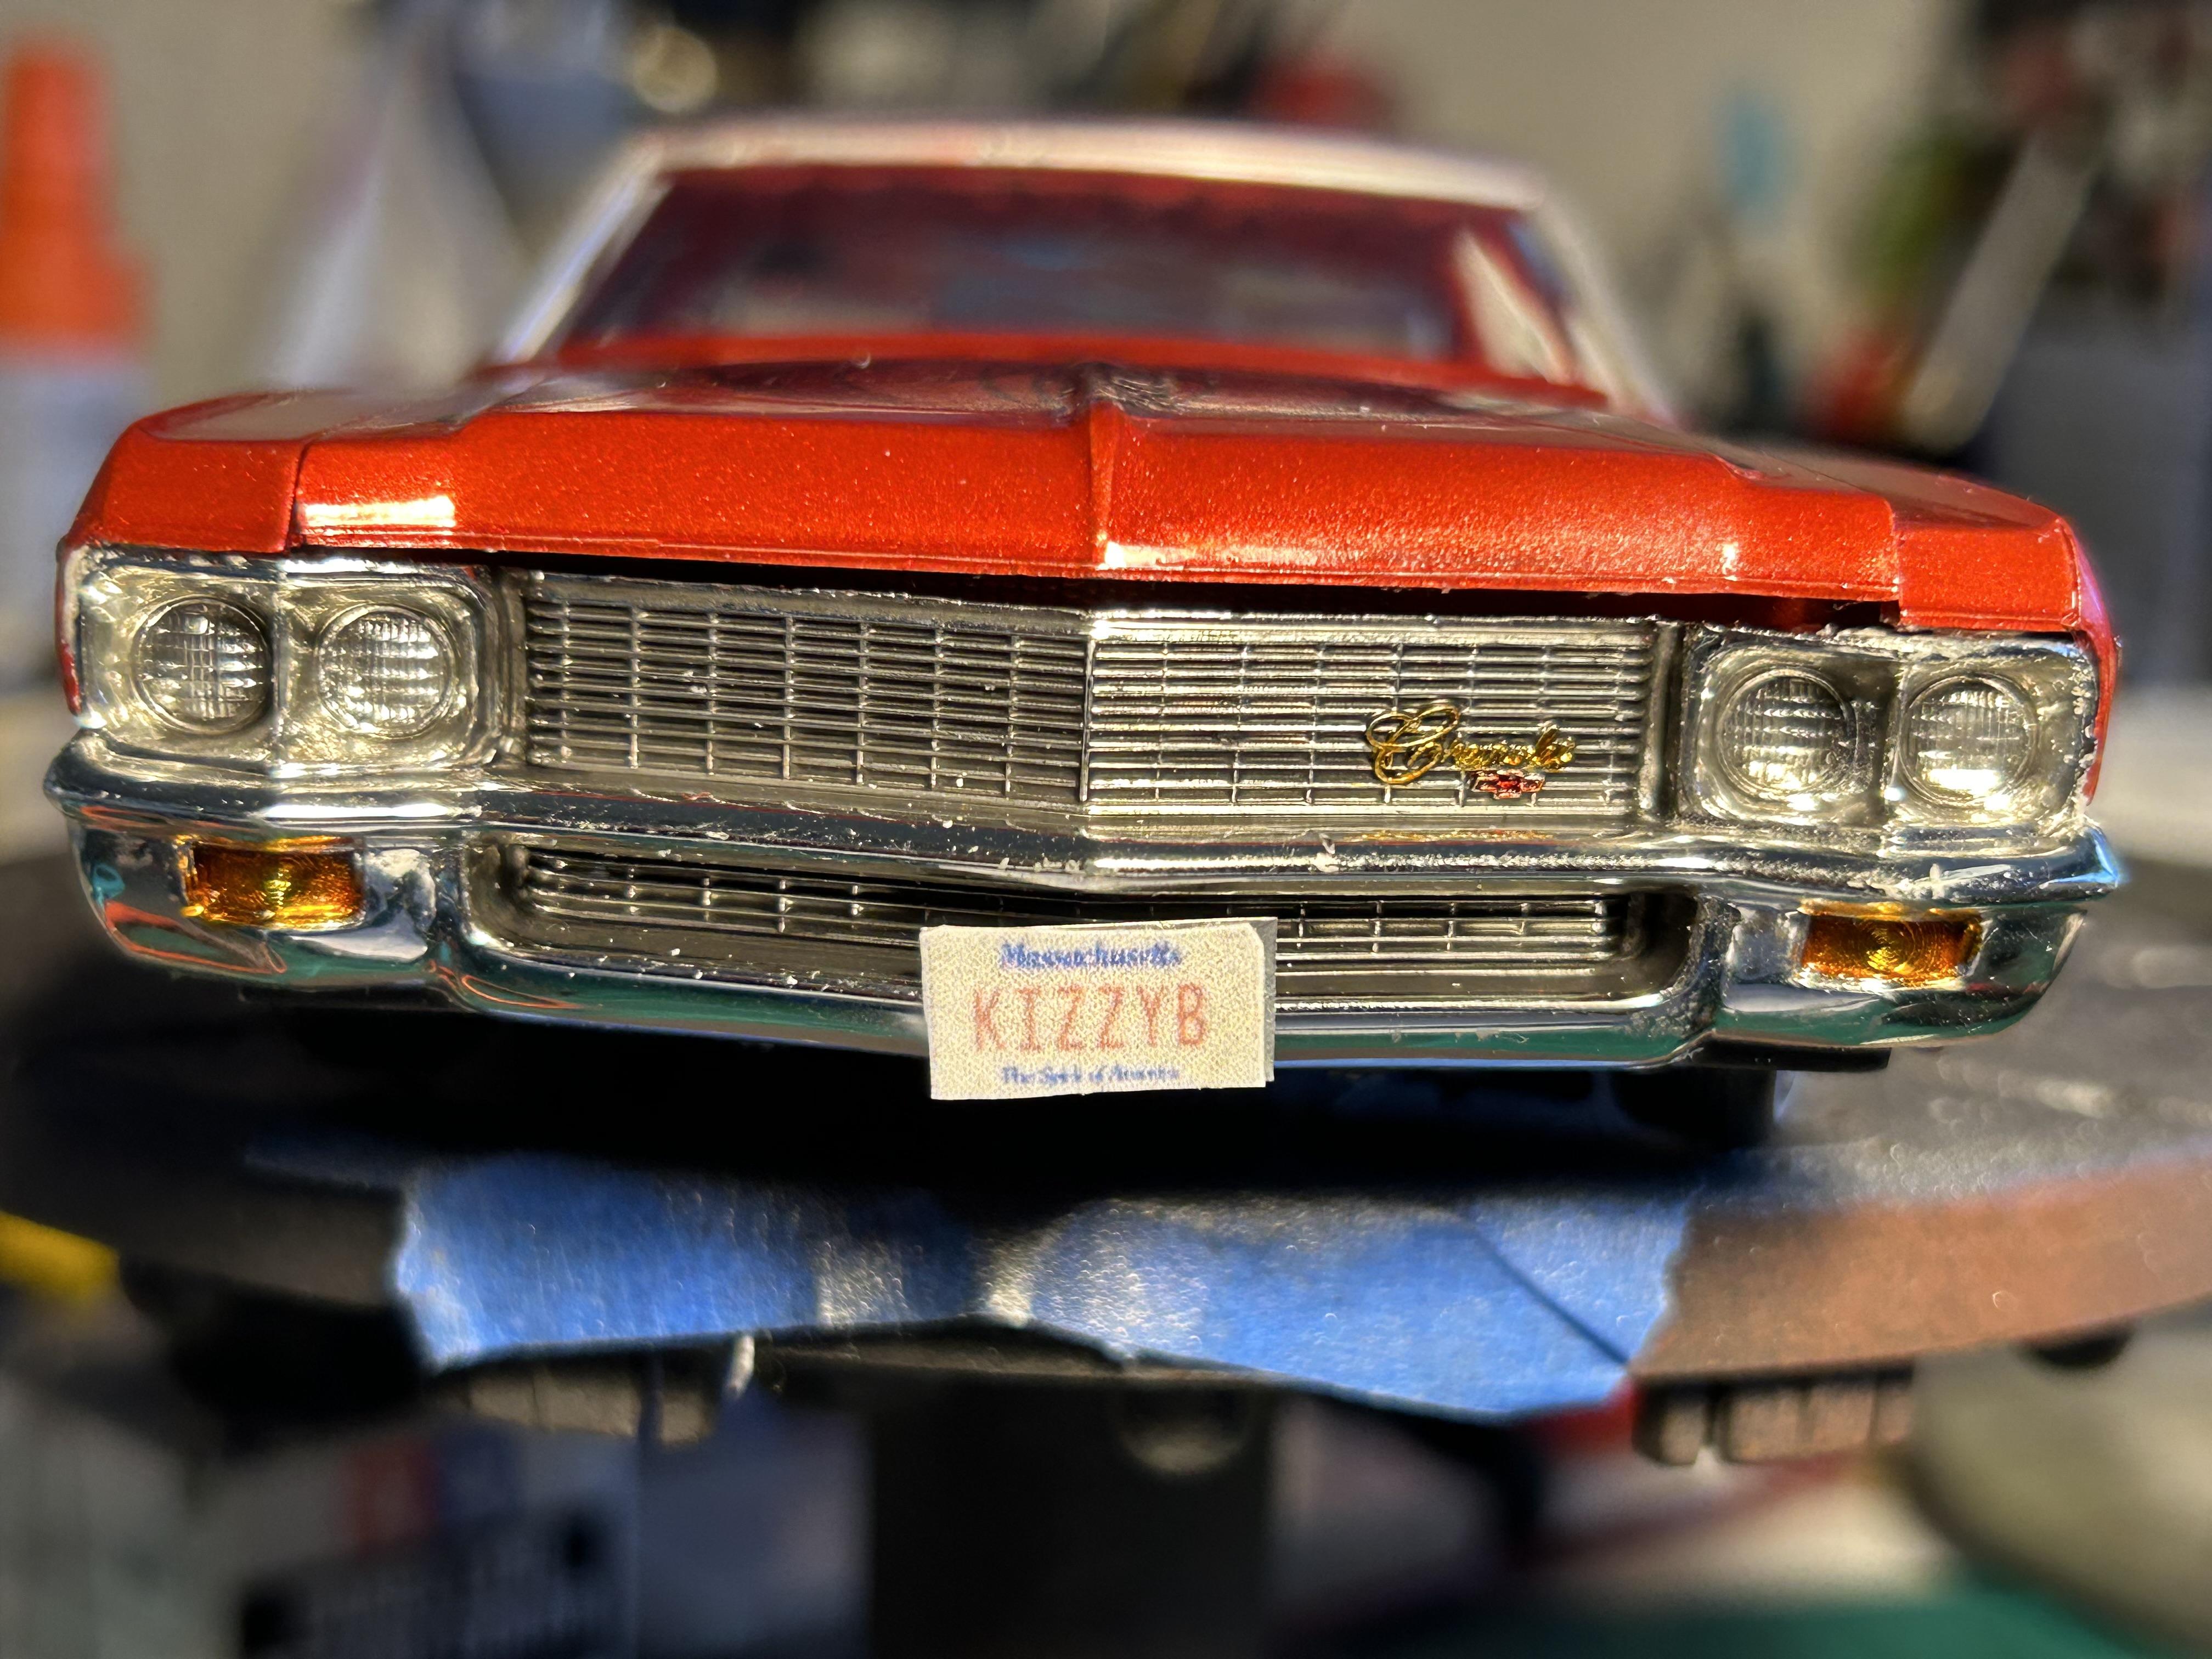
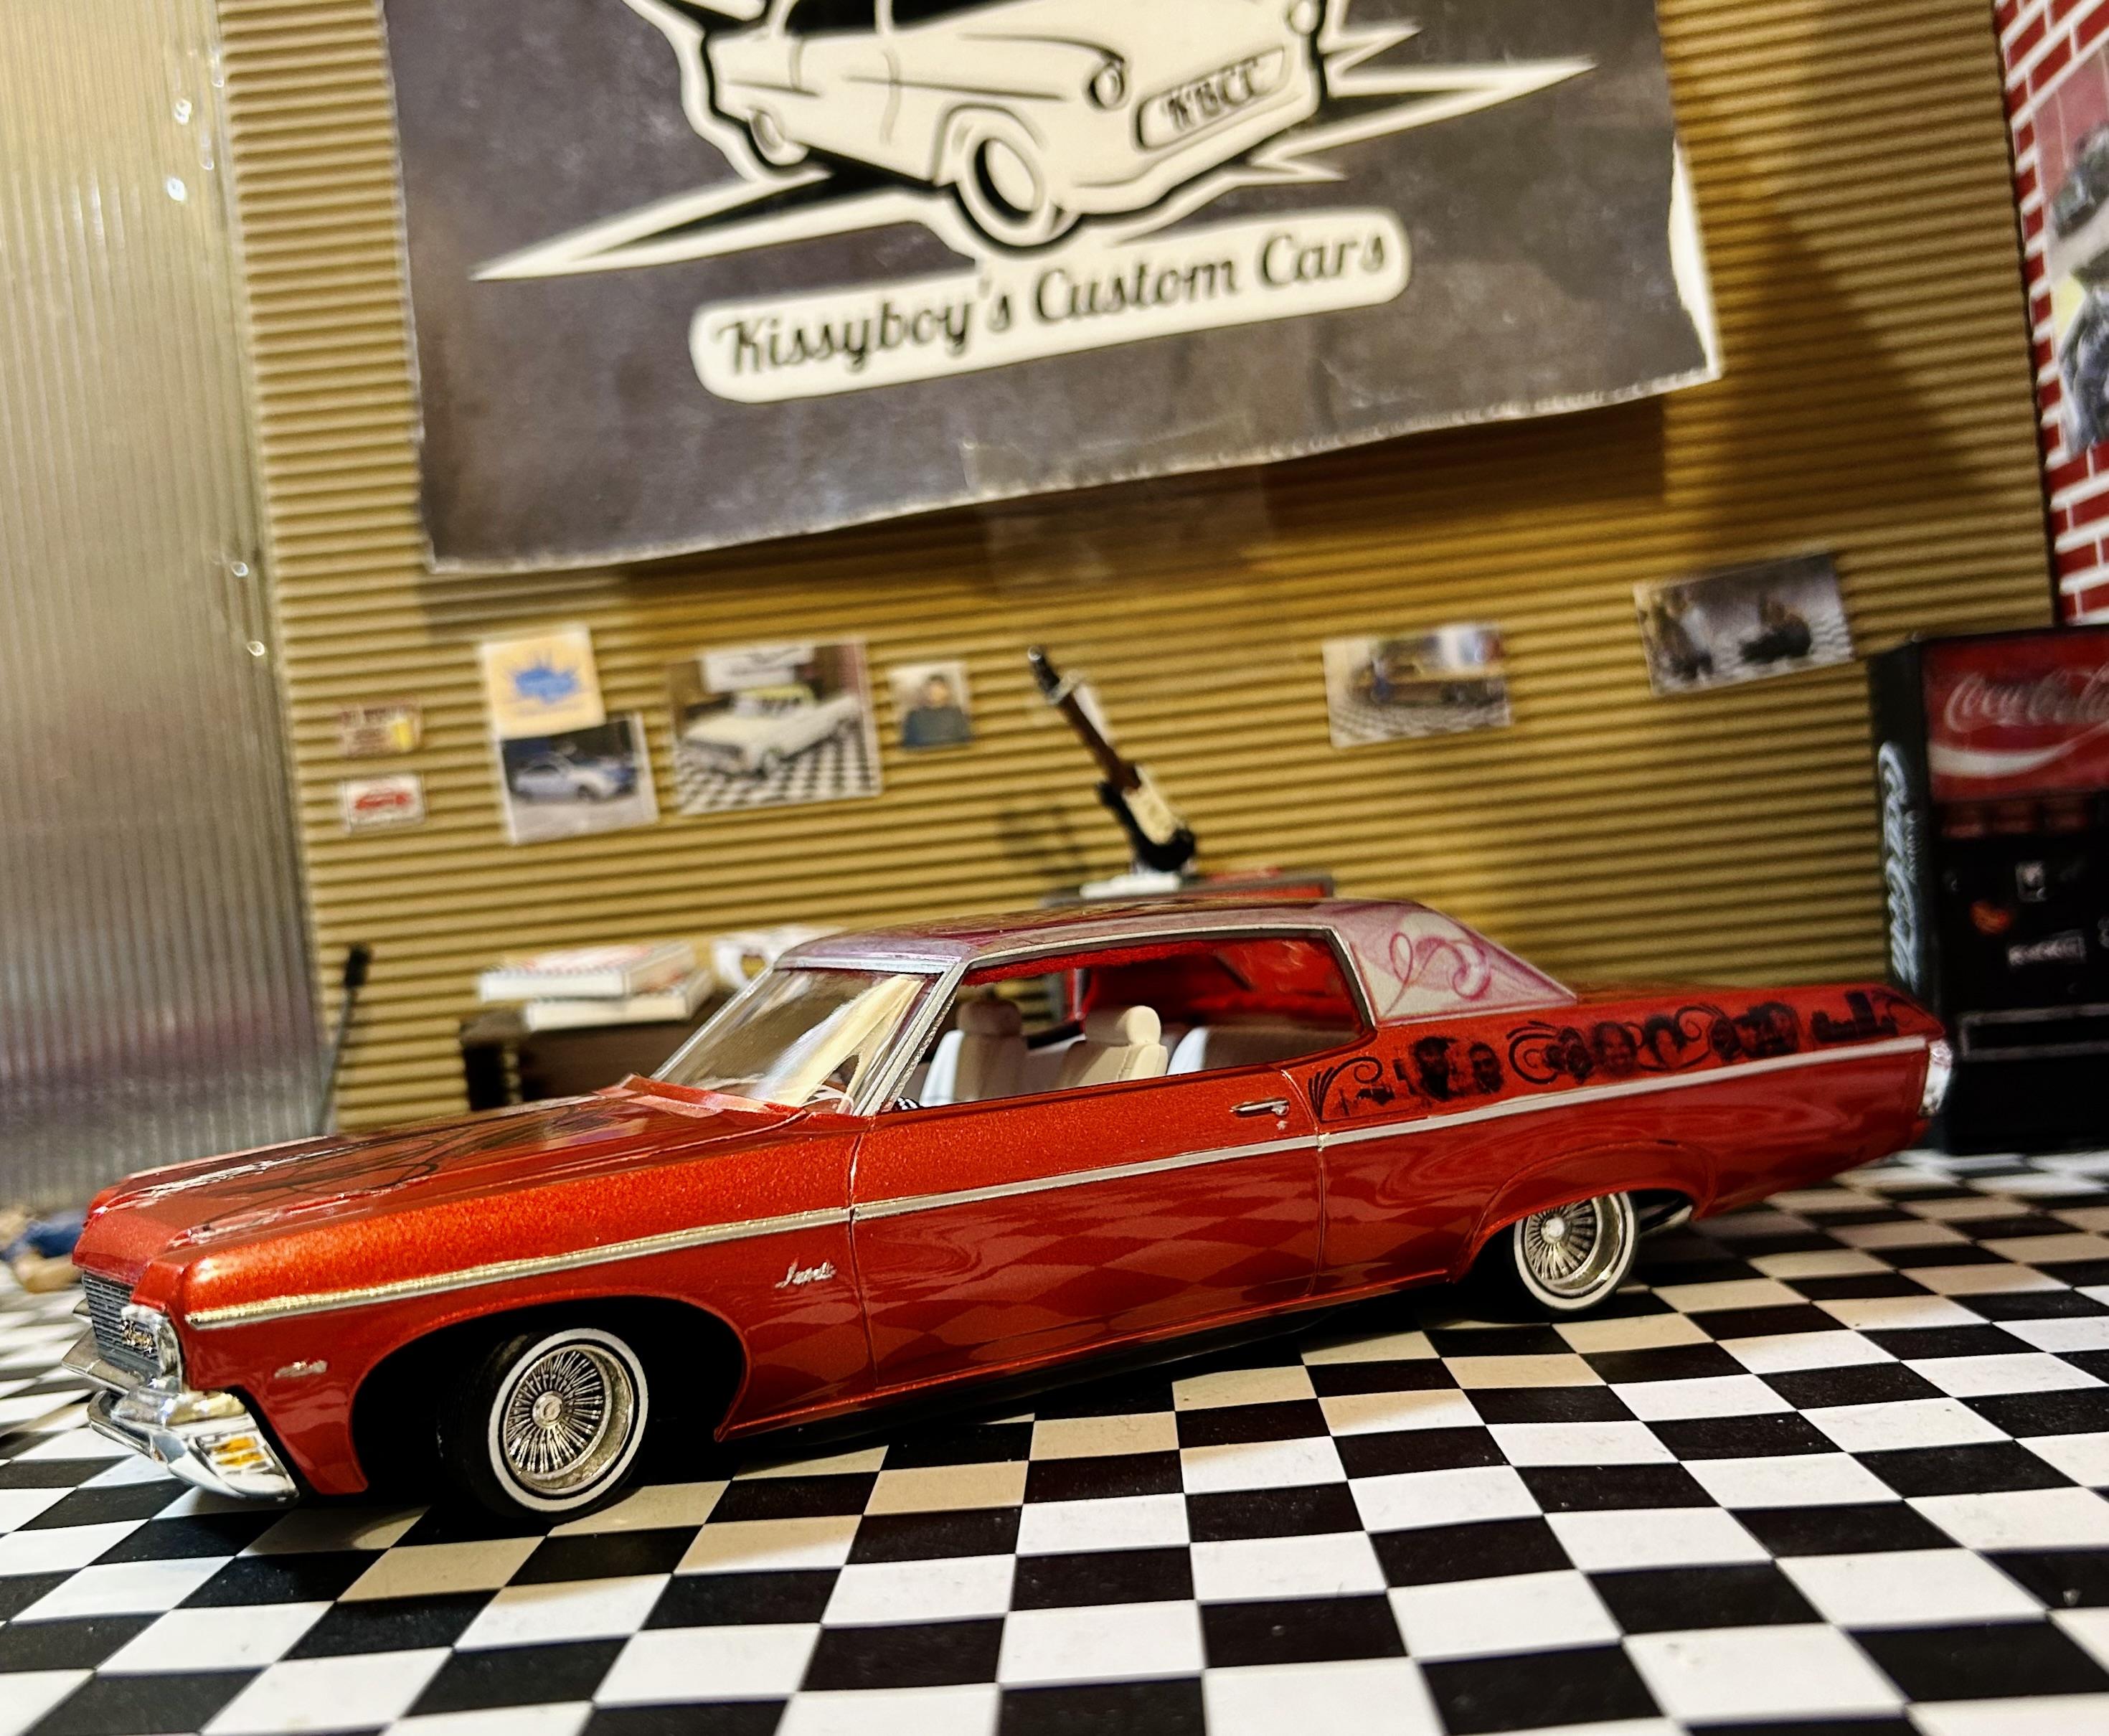
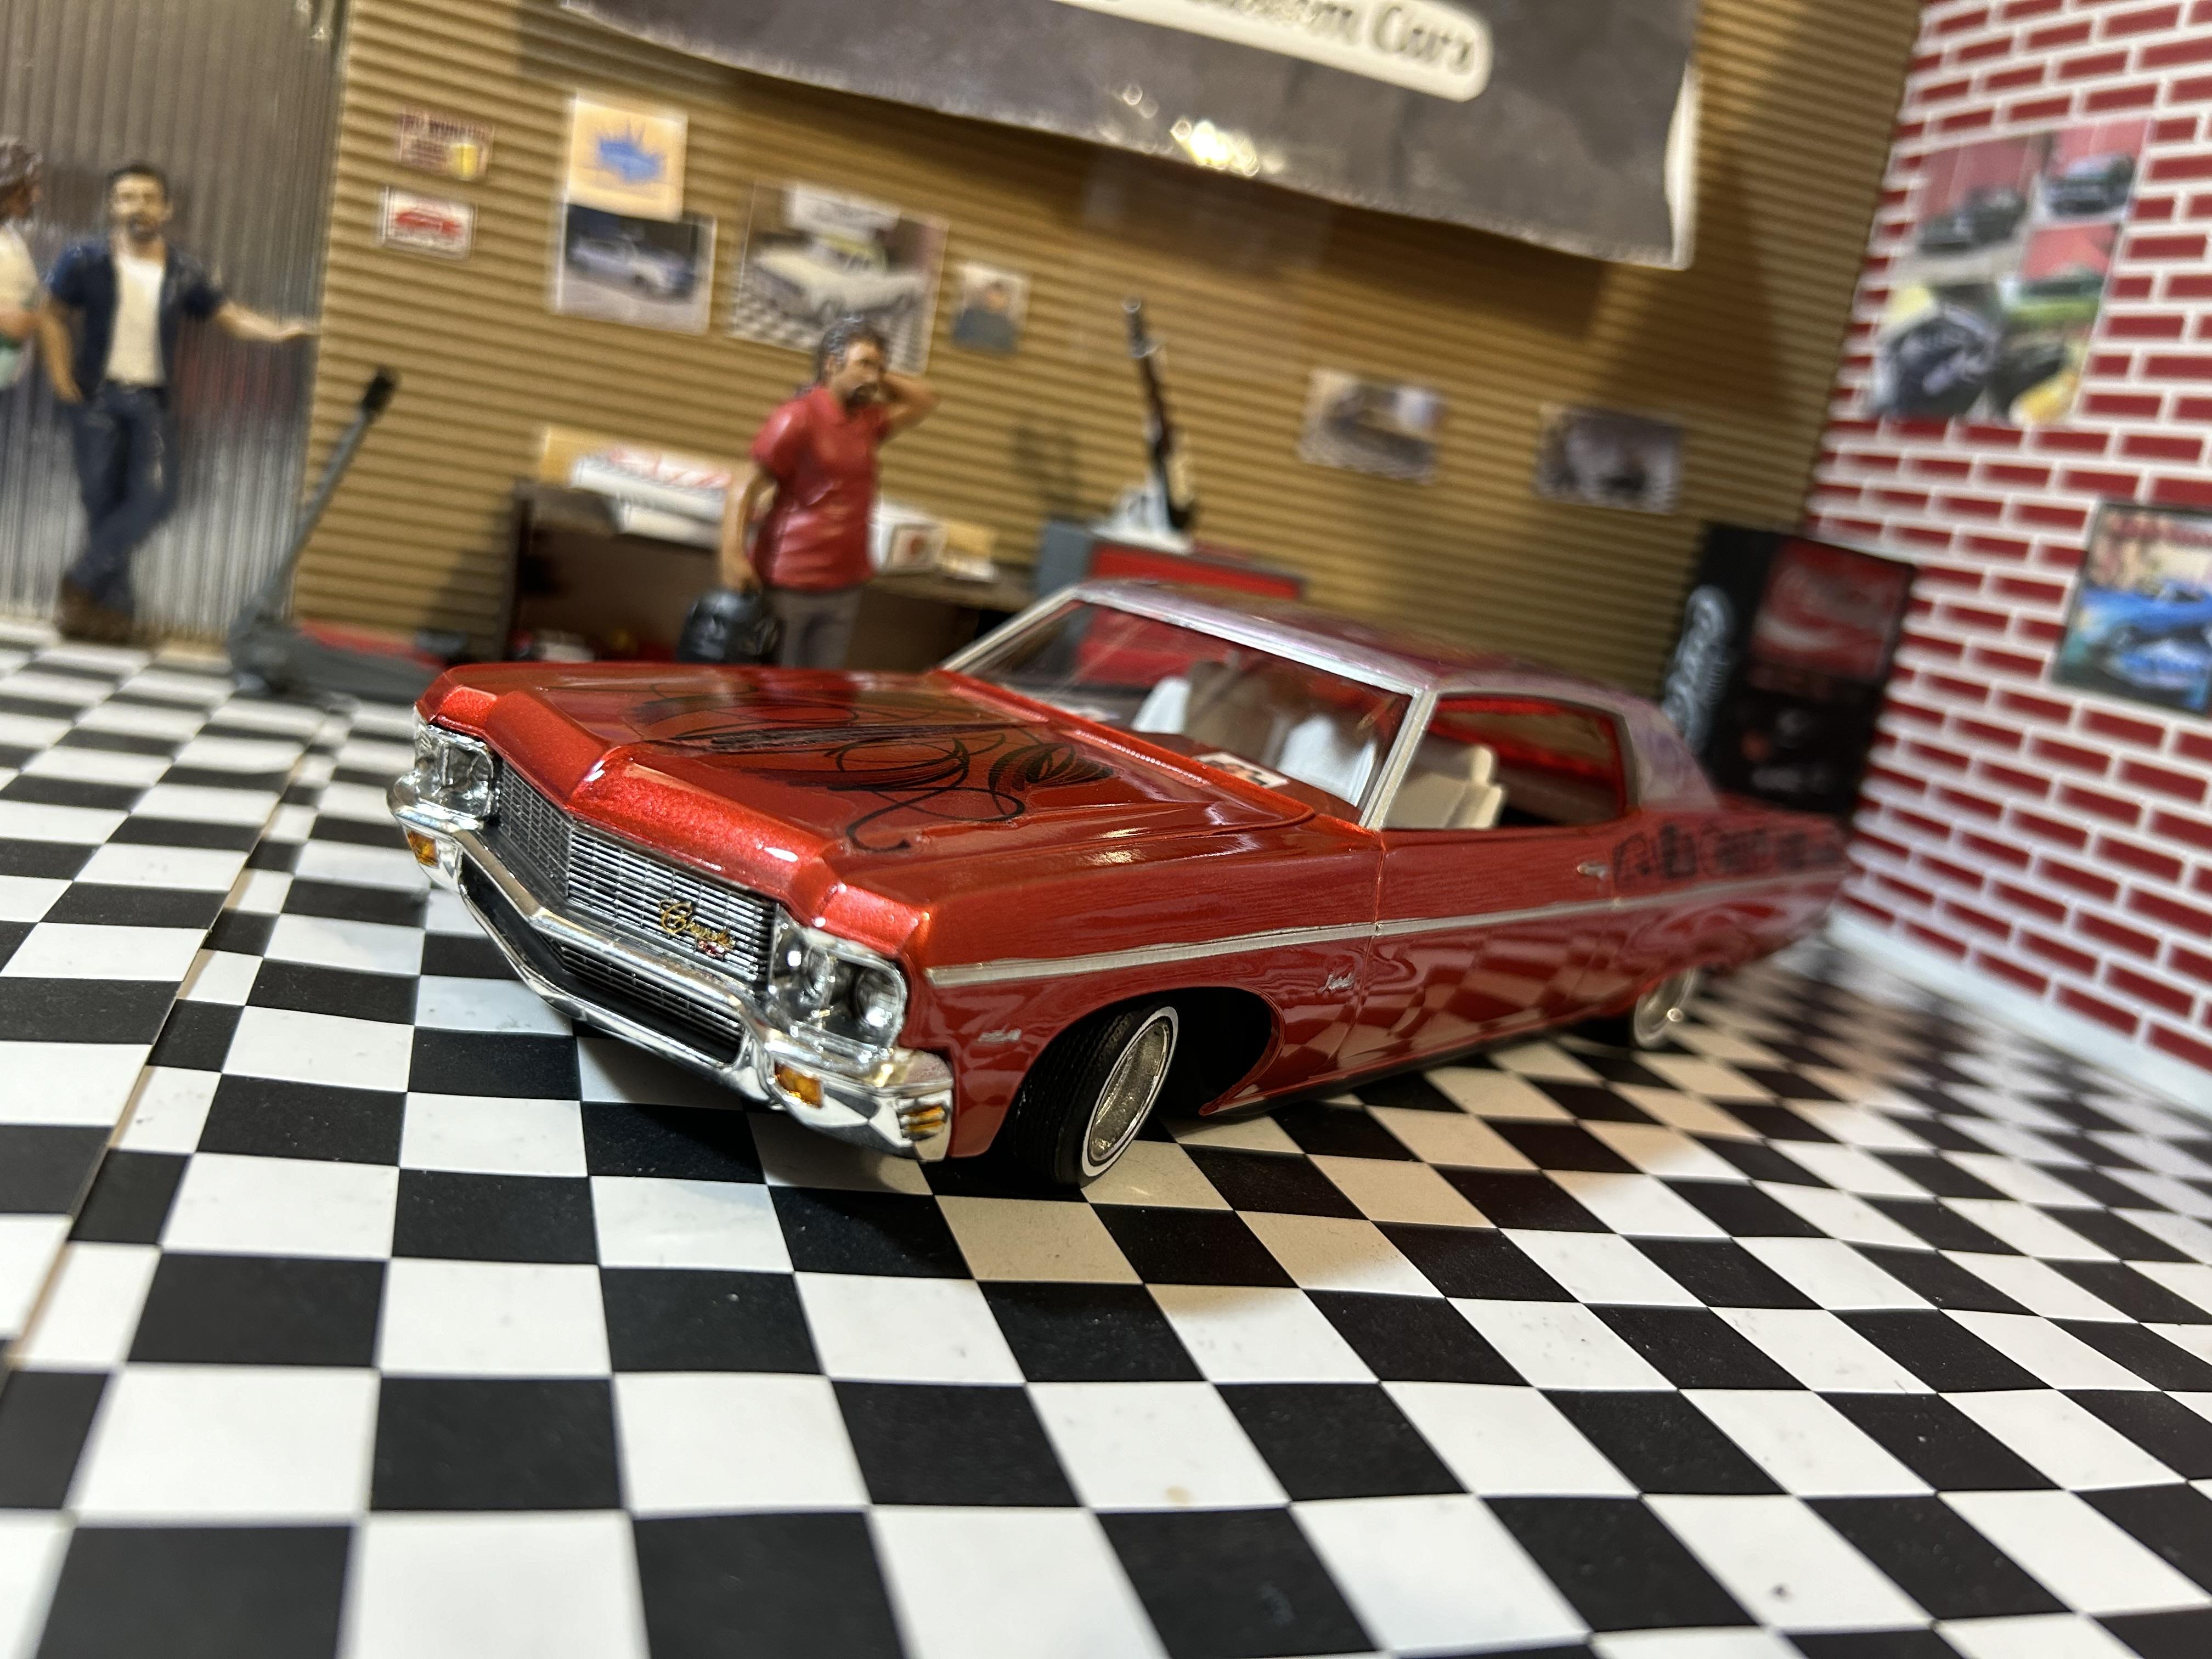
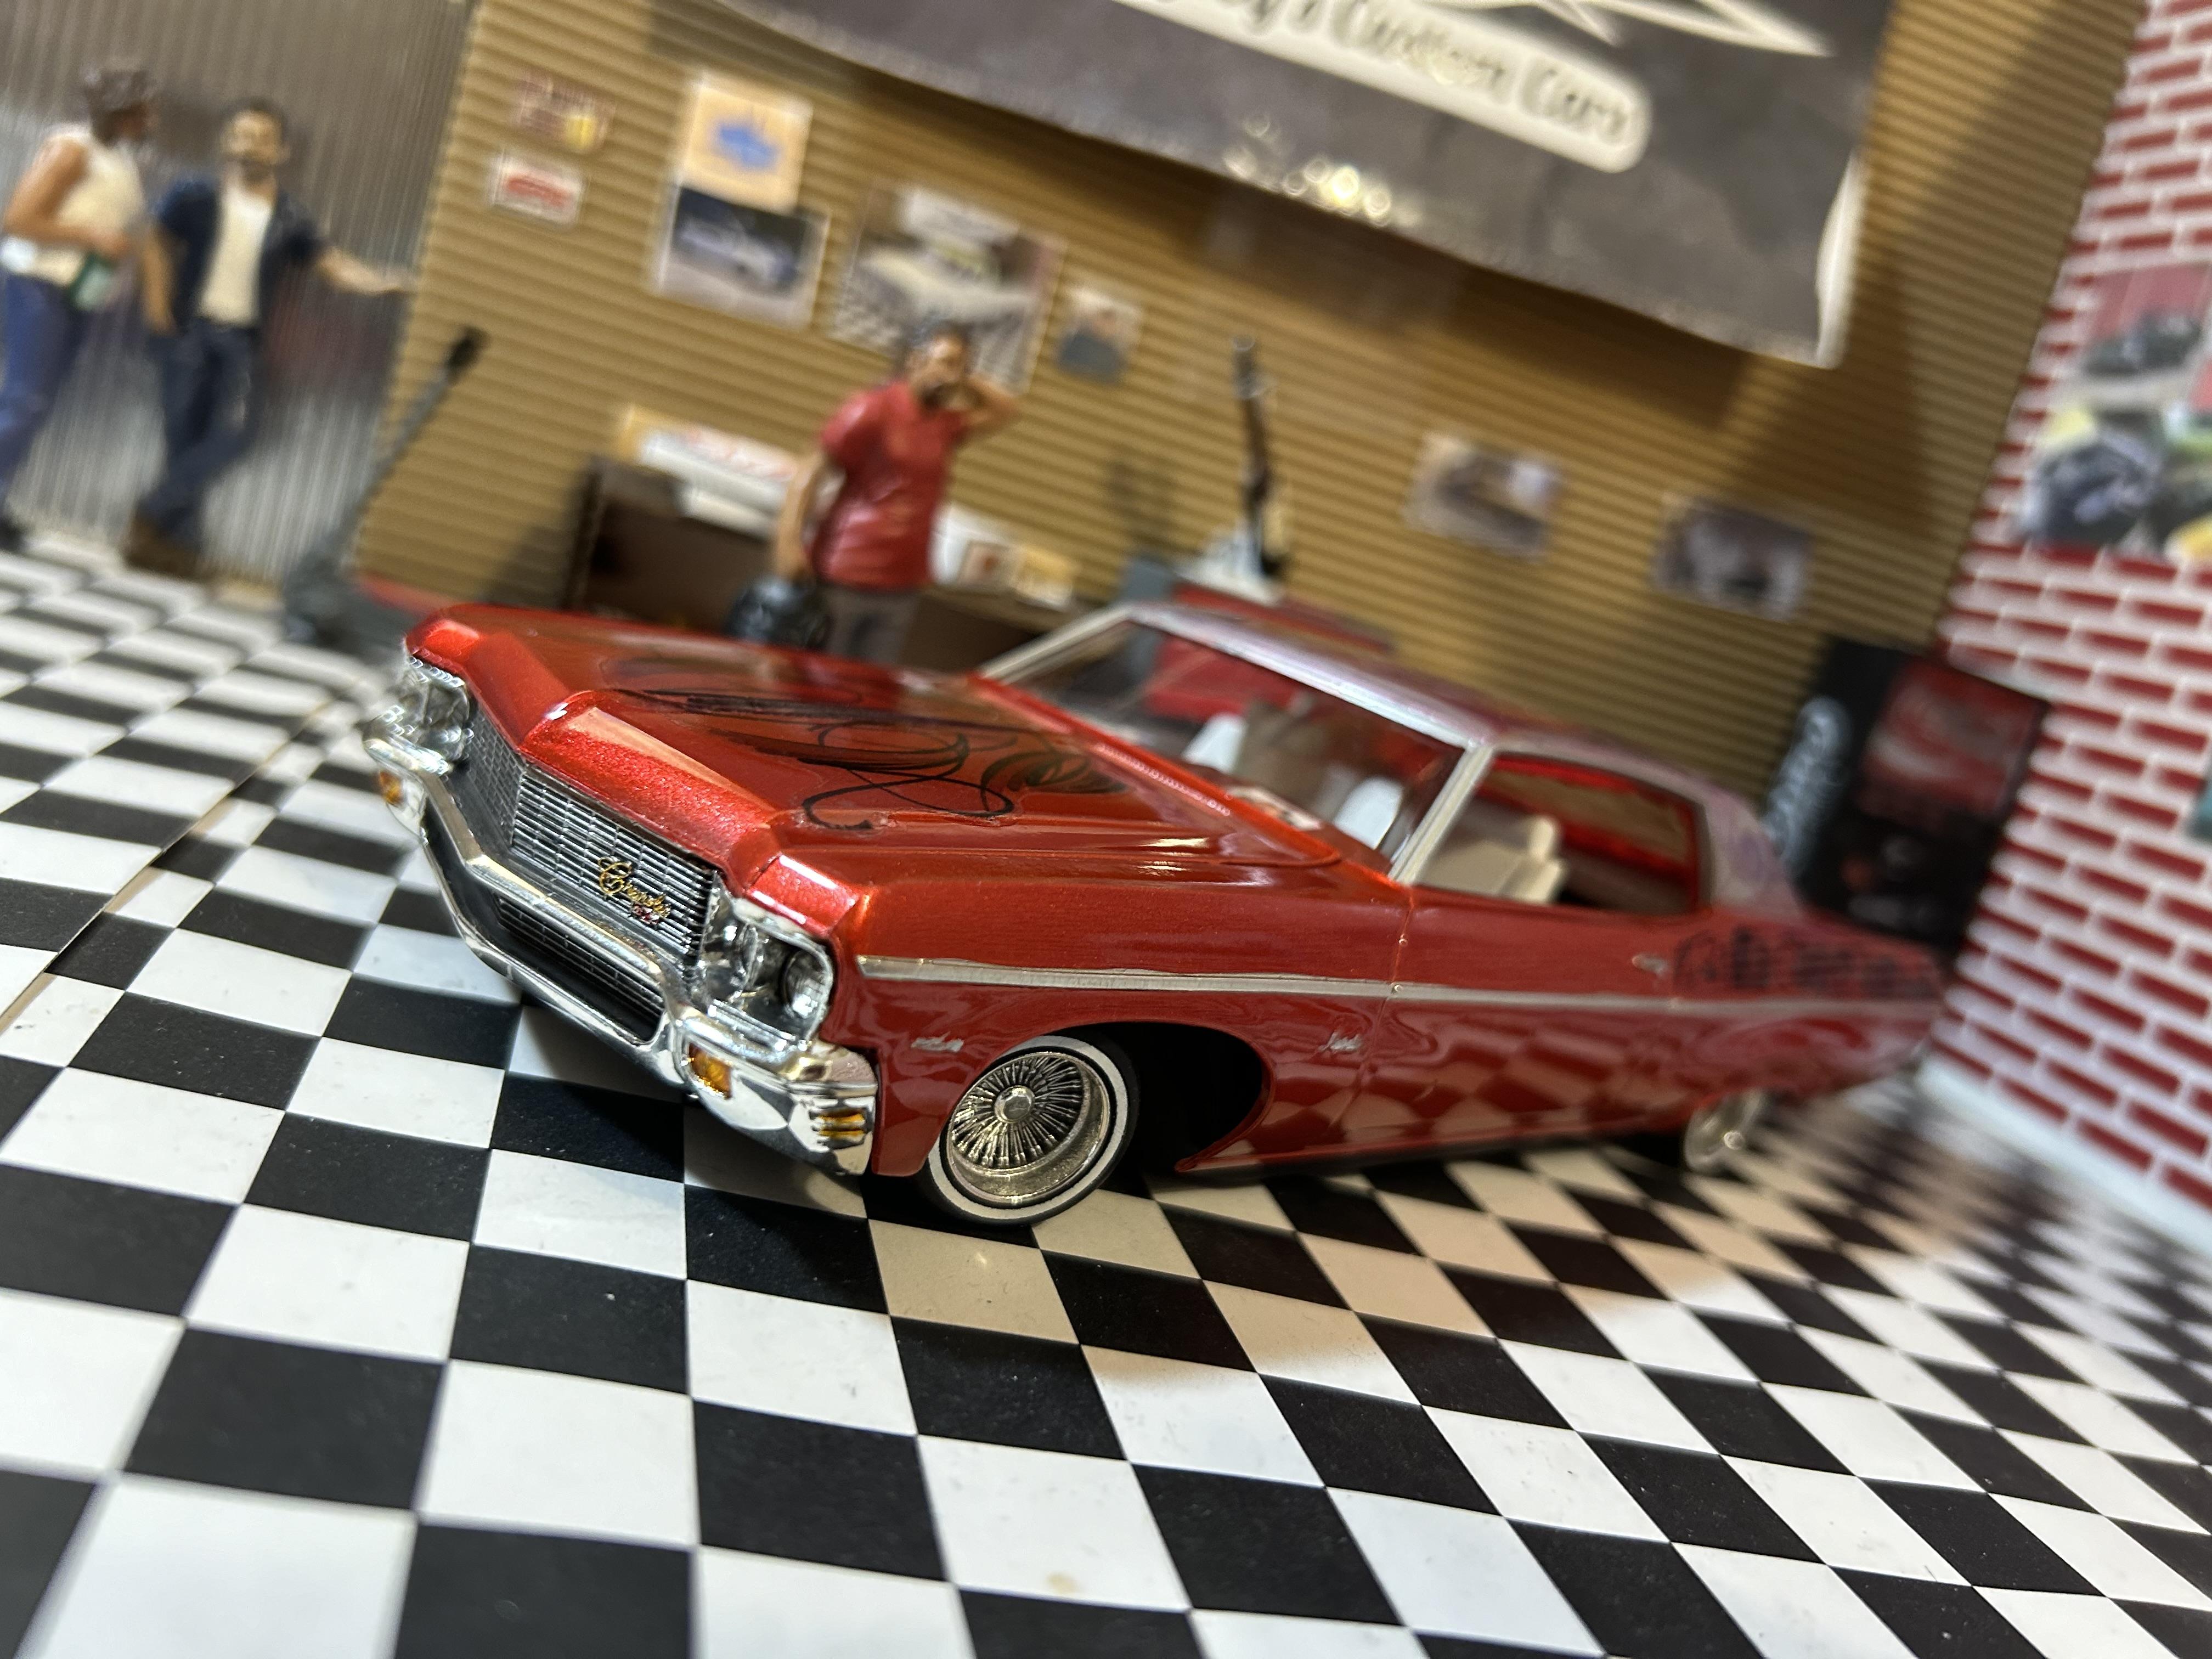
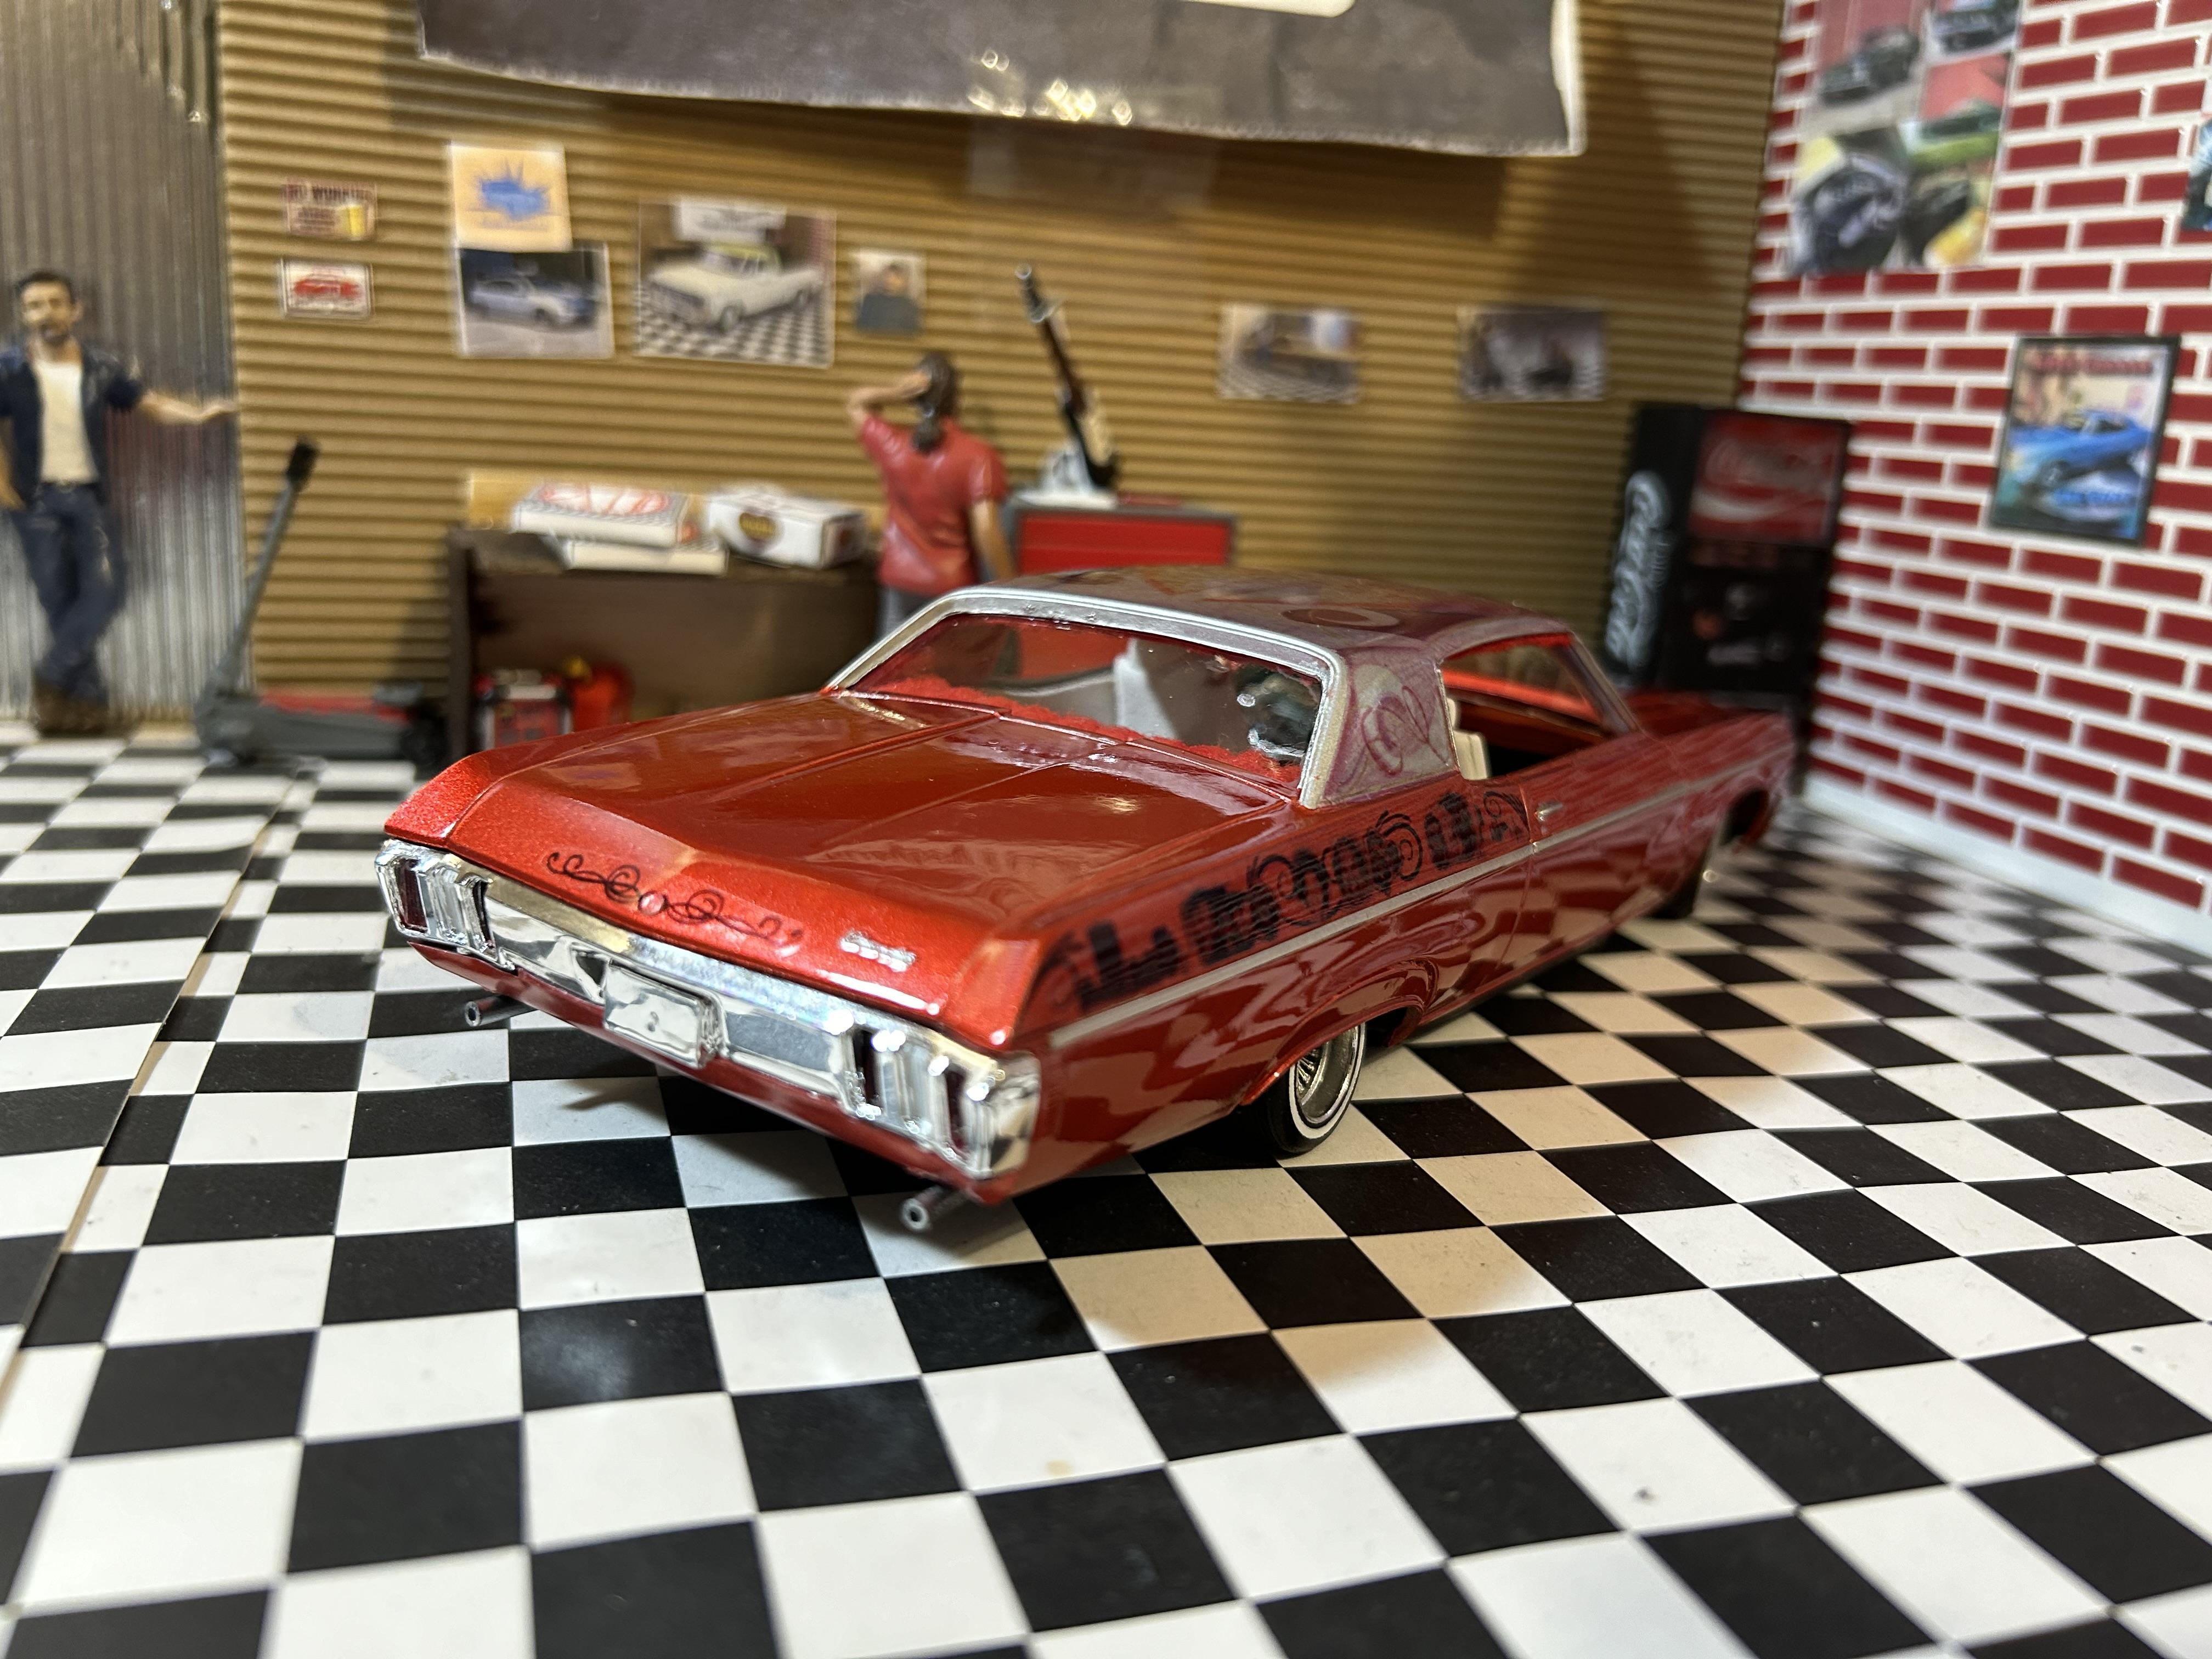
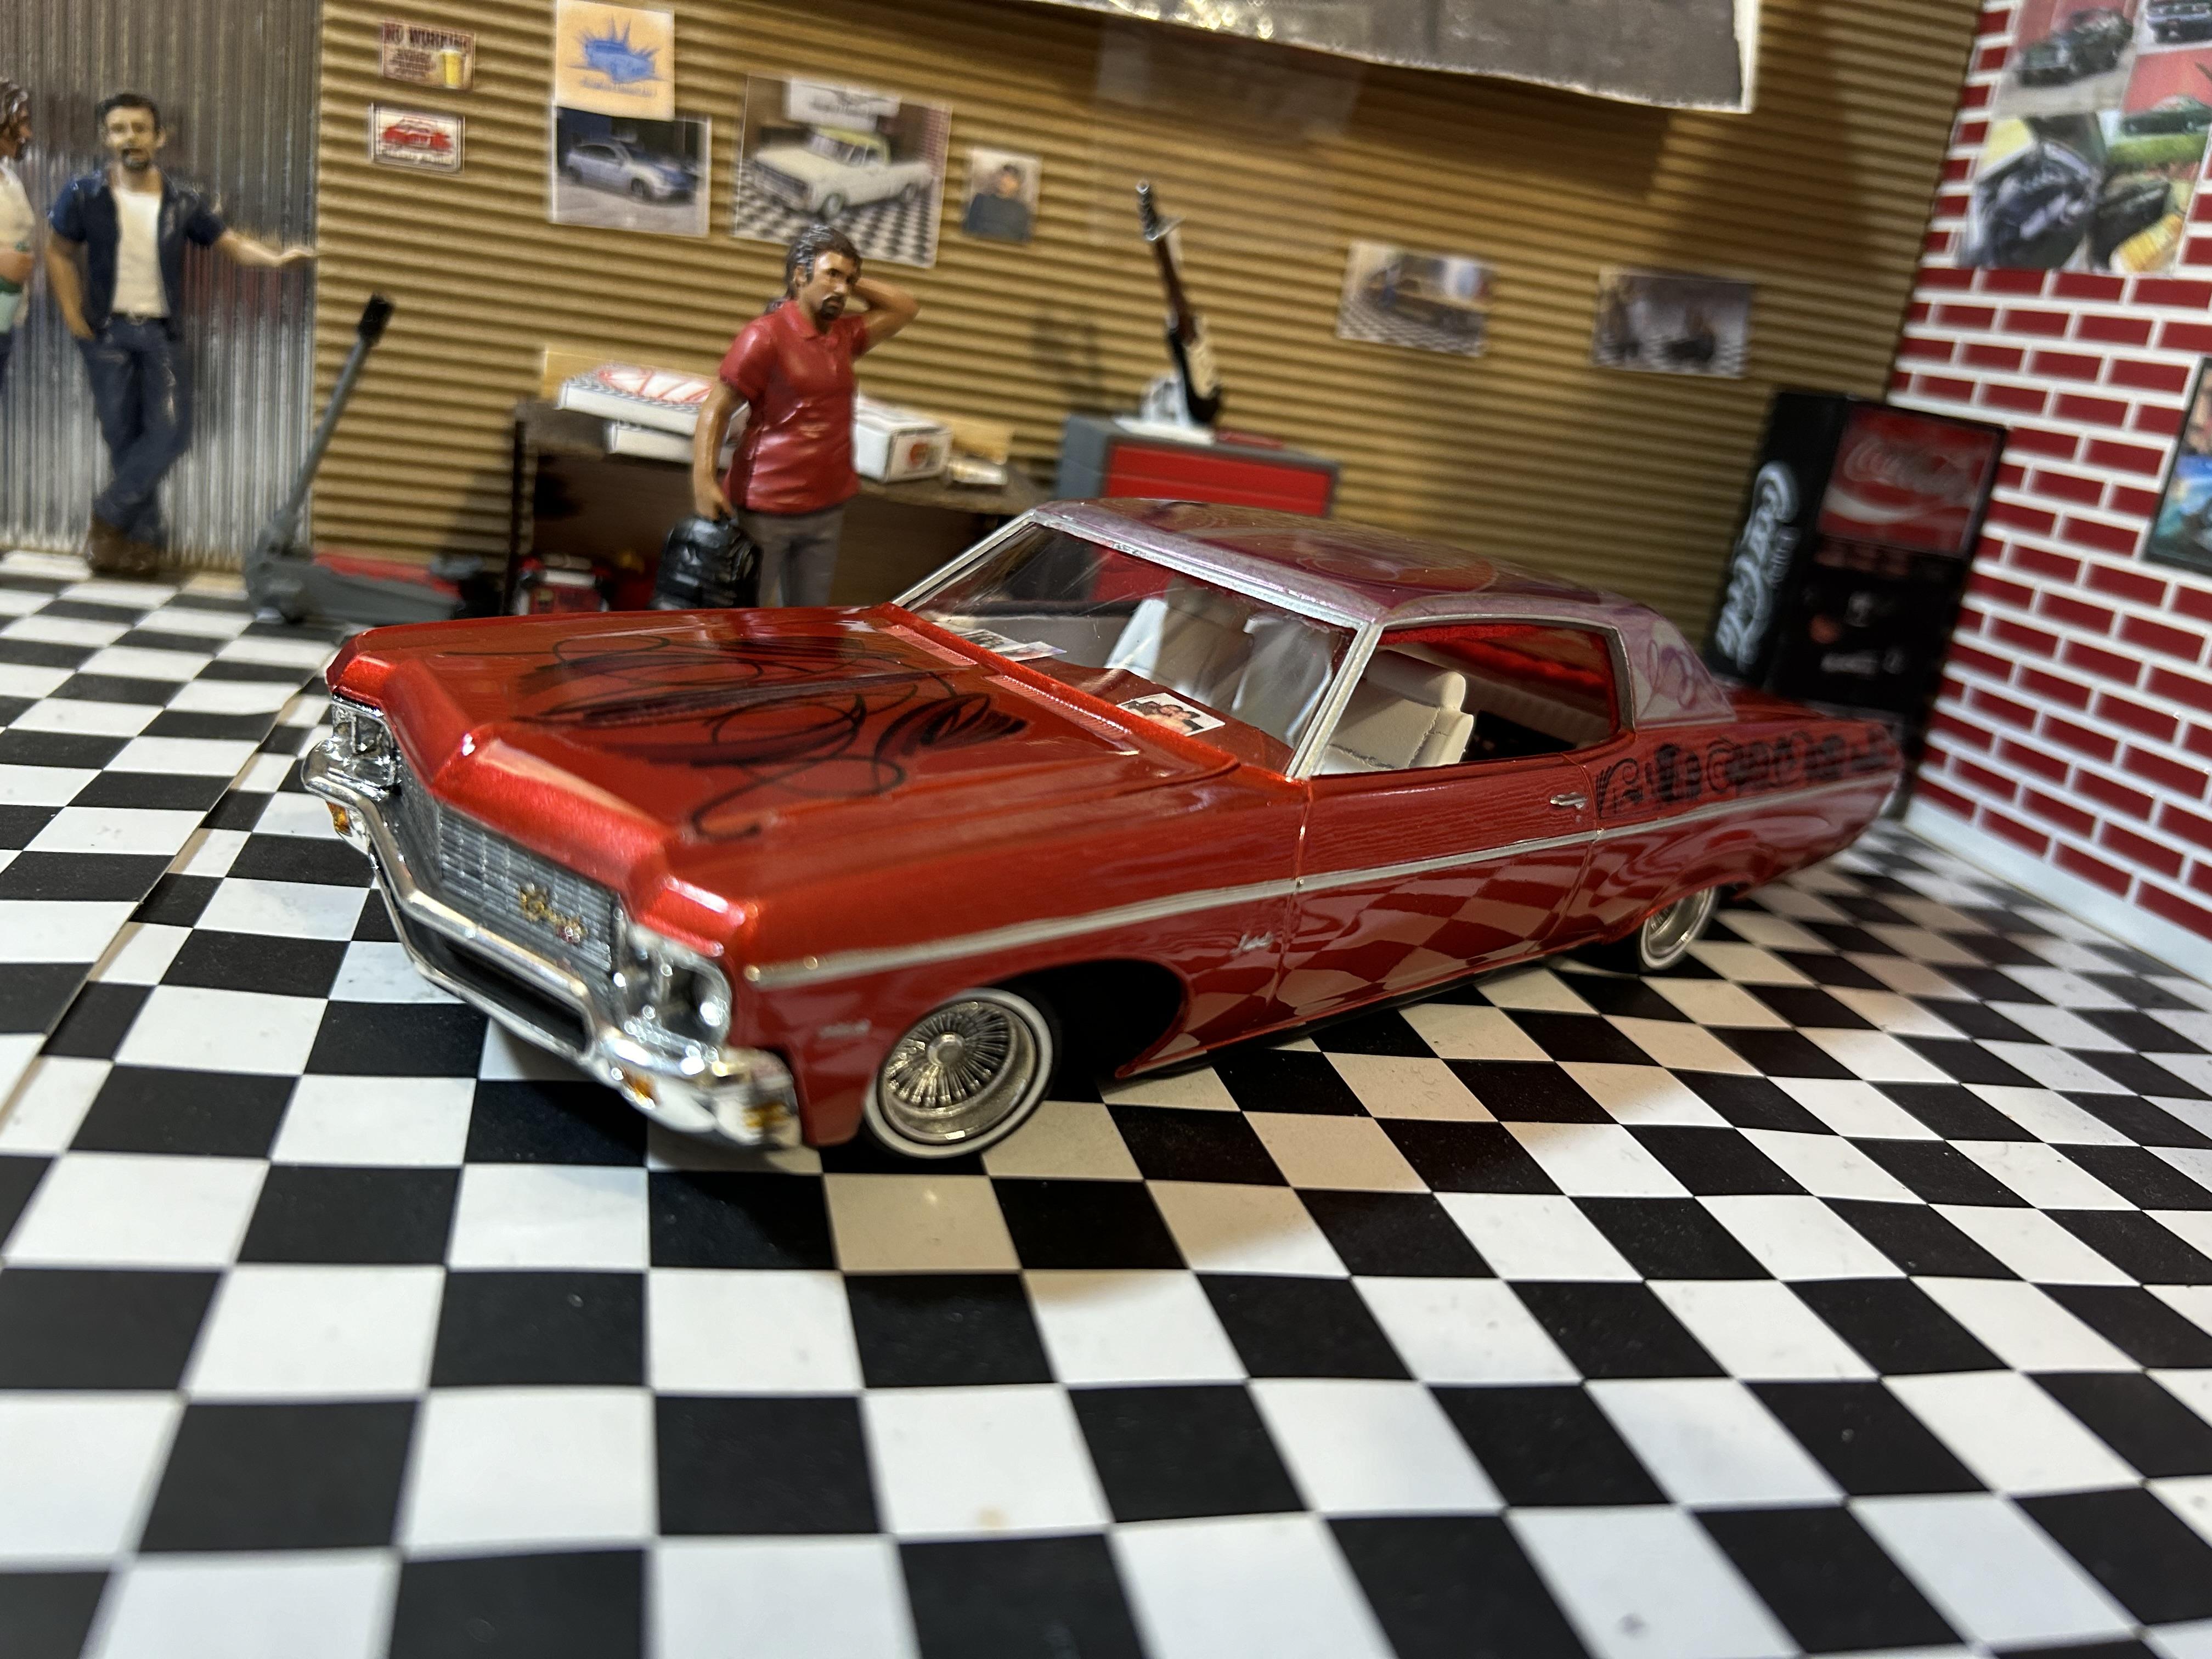
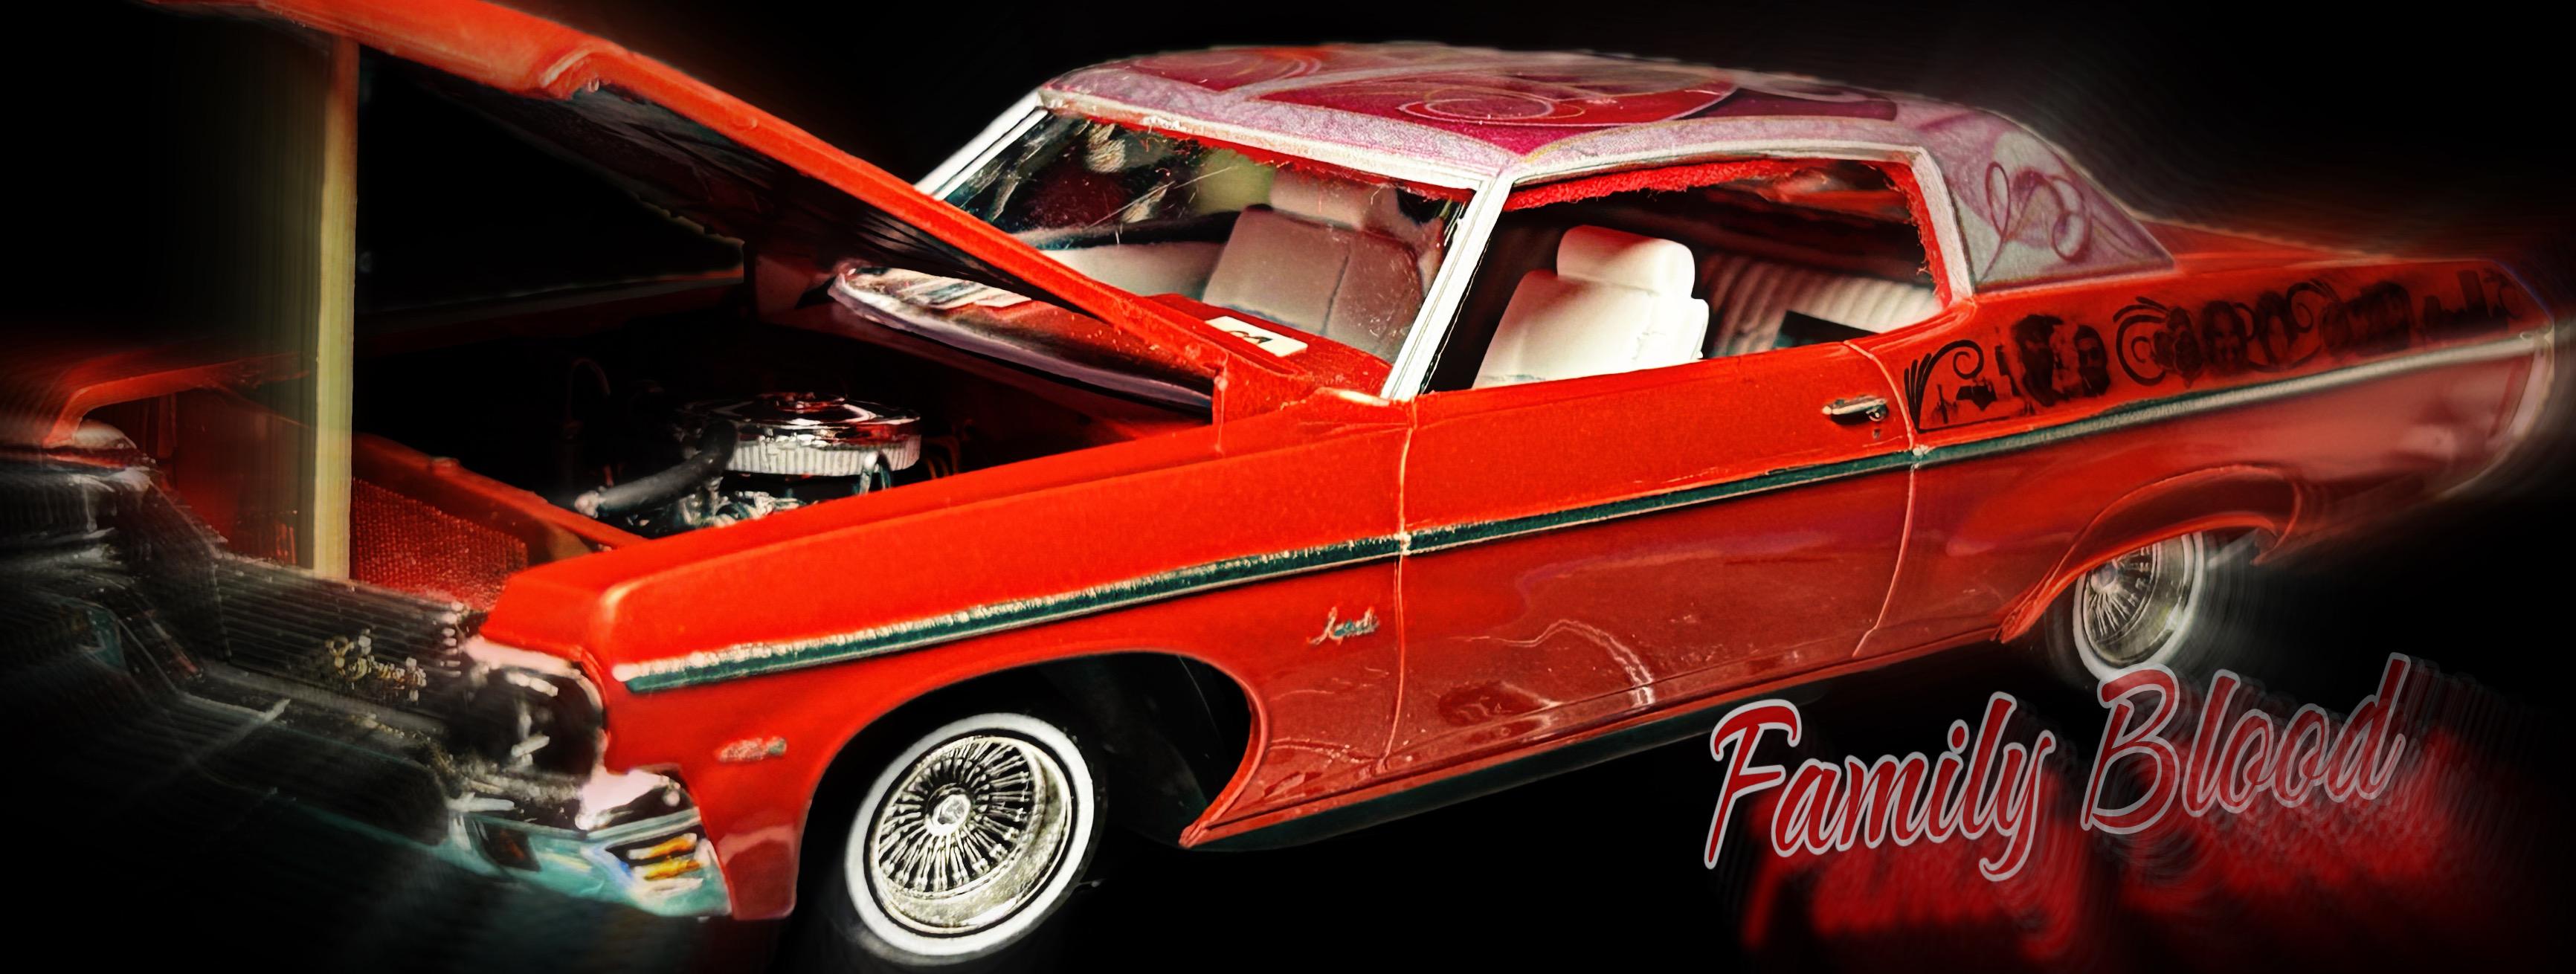
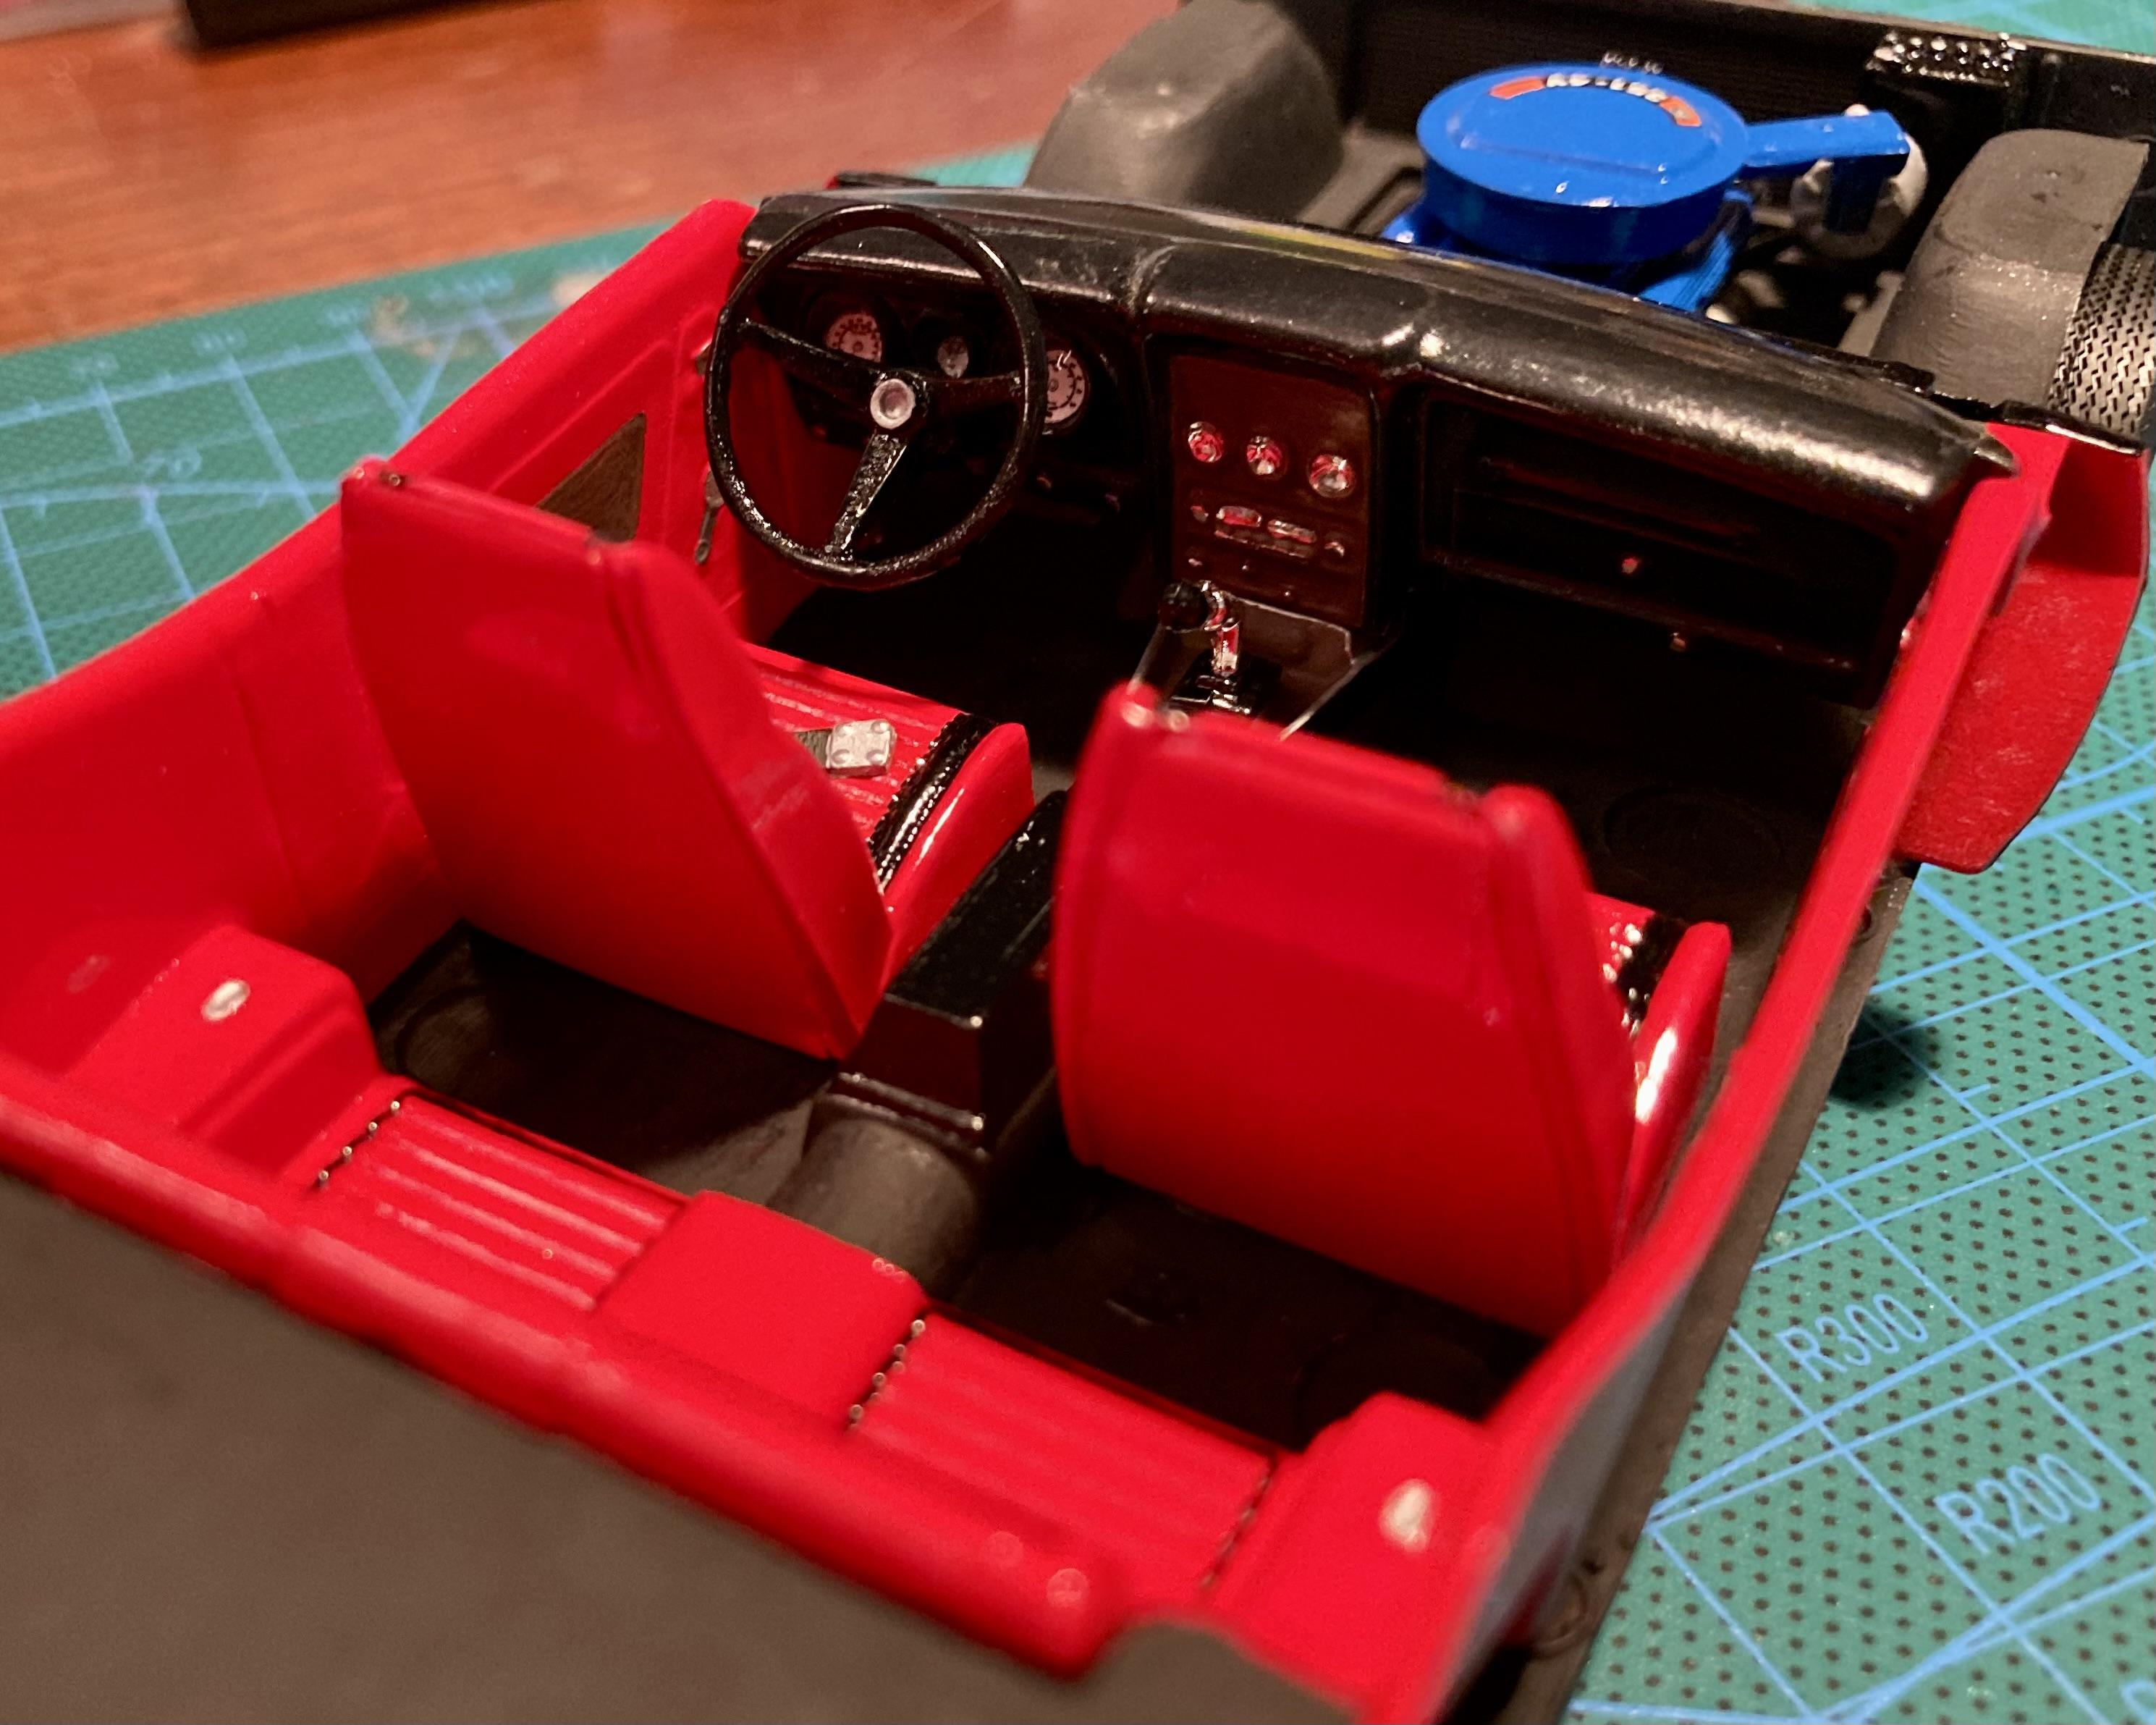
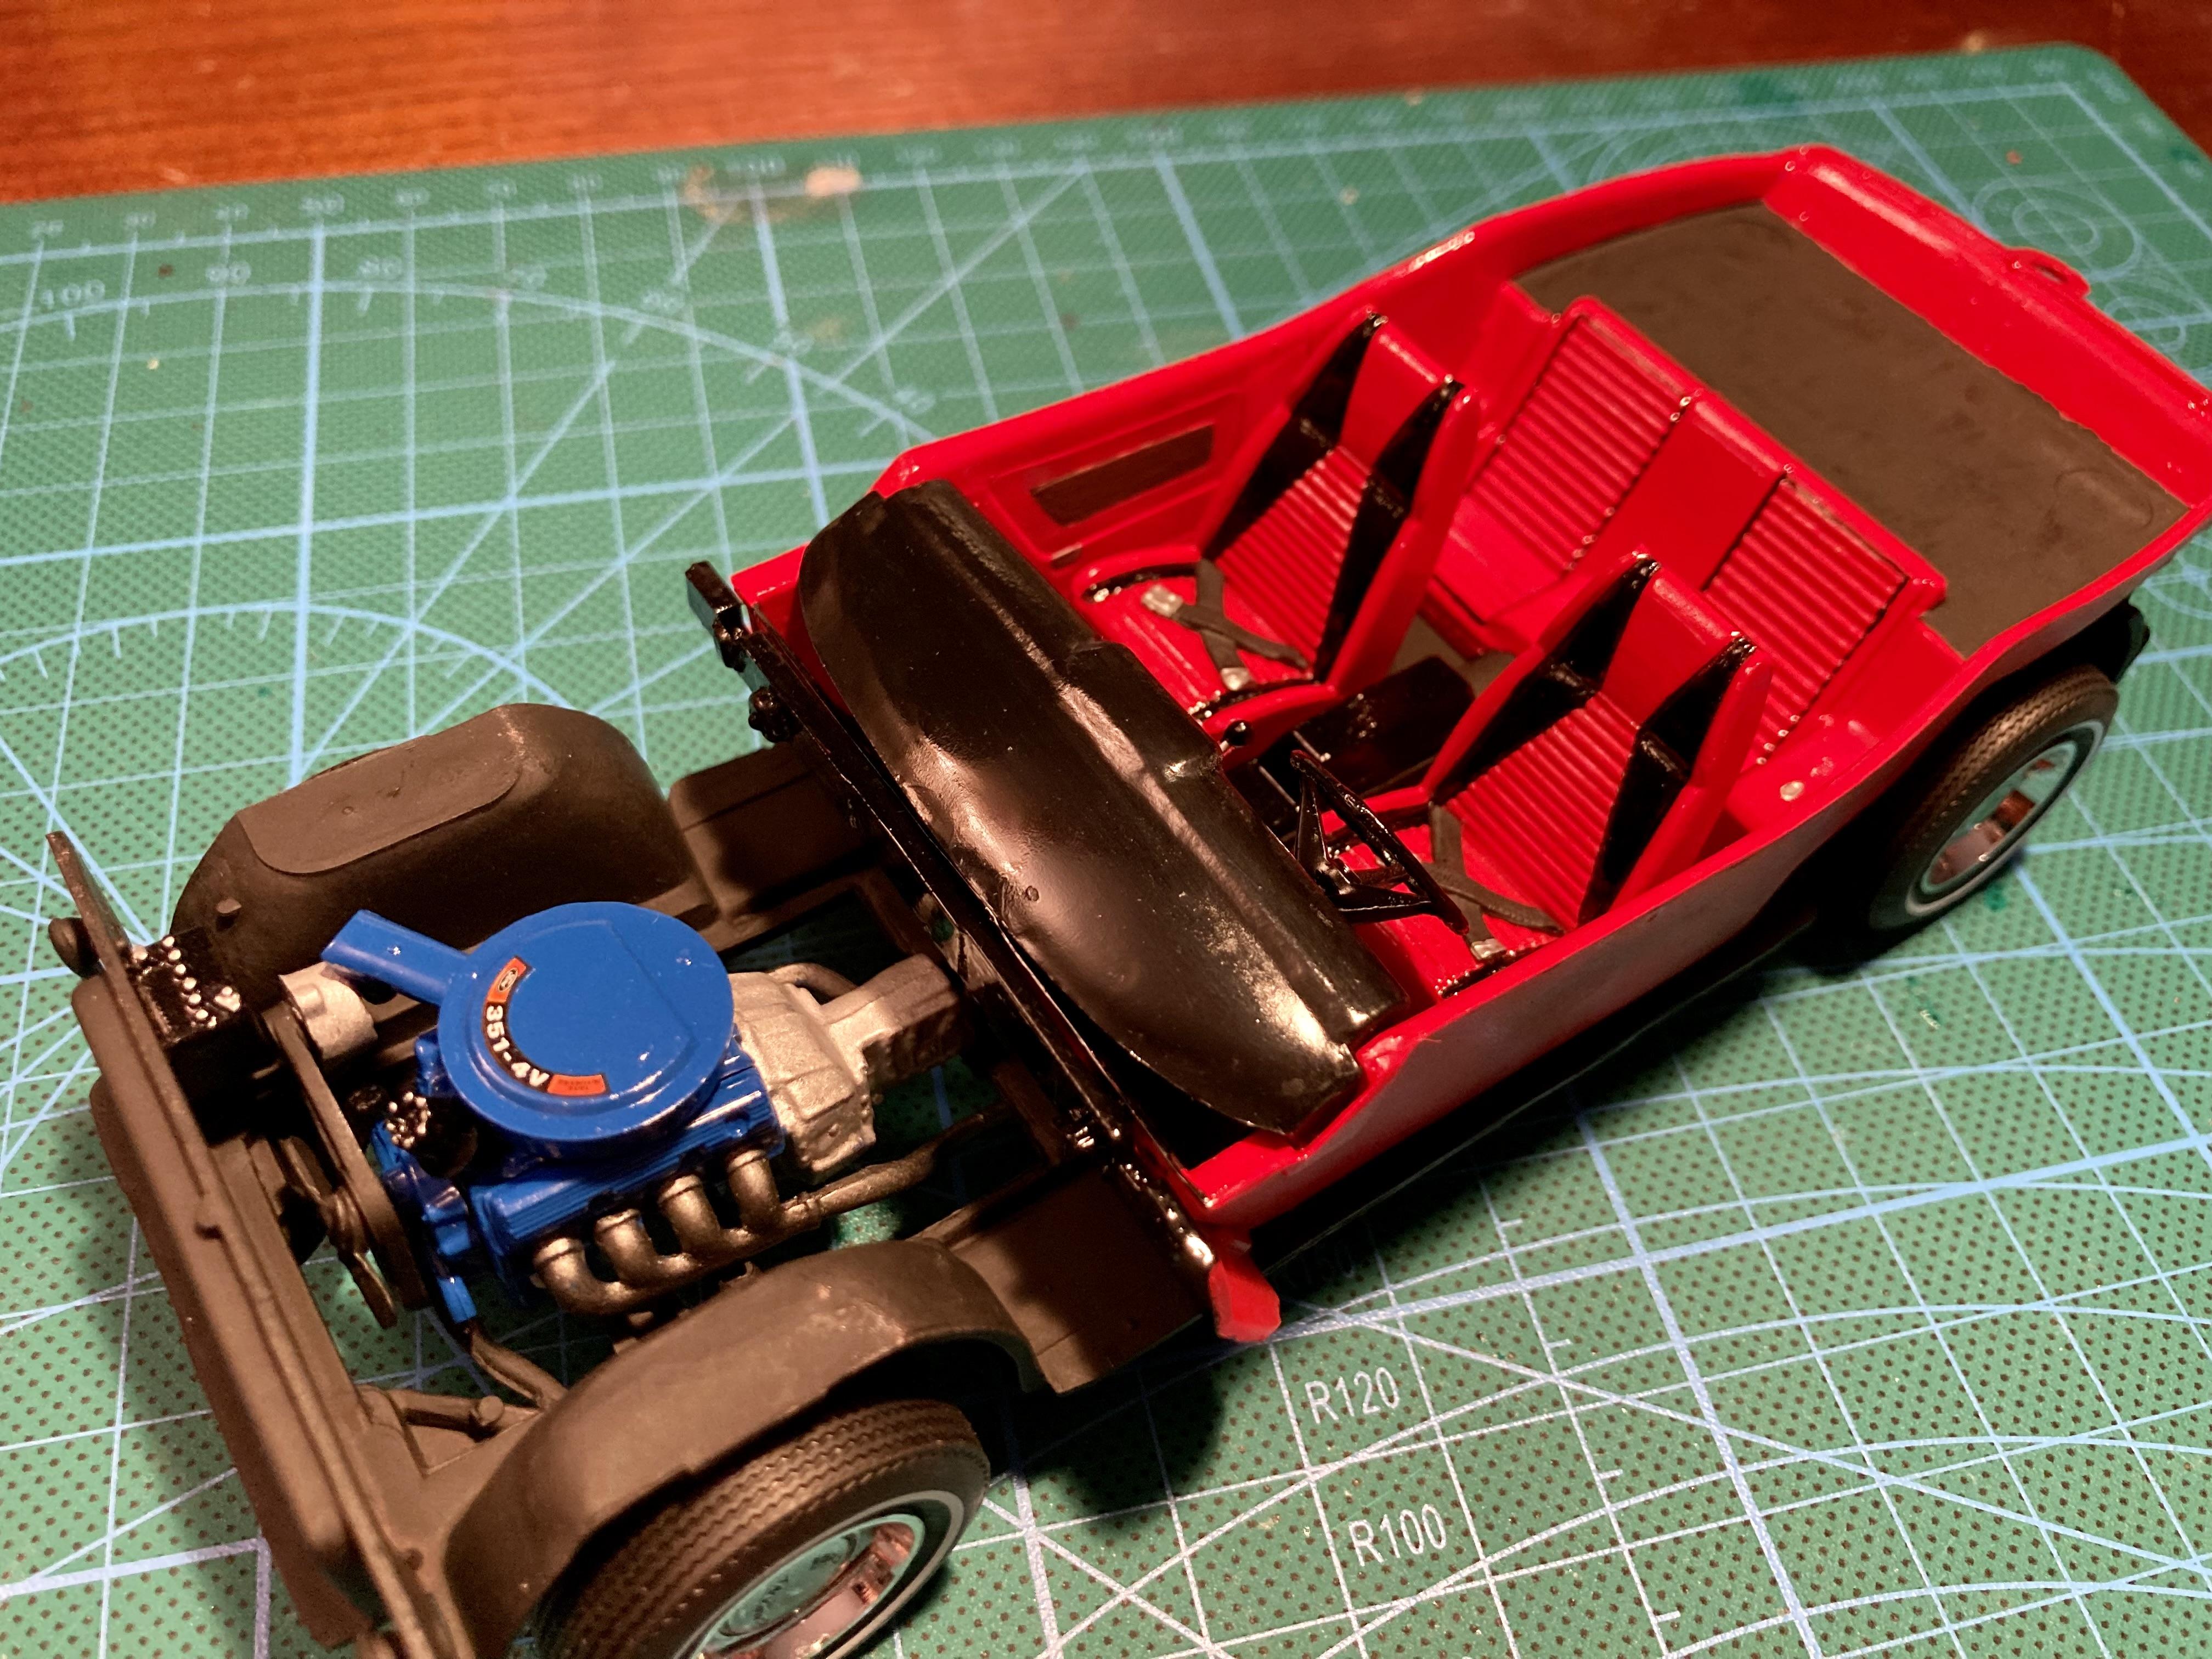
I had this AMT 1970 Chevy Impala kit stashed away a couple years at least. I was 100% sure I was going to do it as a lowrider, but I was not sure of the direction I wanted to go. I was holding out until I could get ahold of some more appropriately sized spokes. The Pegasus gold D’s are just a little too BIG for a lowrider (in my opinion.) Most of my cars have a static stance…meaning I haven’t built one that actually raises and lowers since the early 2000’s. So, with this one I locked it in low down…as if the driver let all the cylinders compress after they parked it. Anyway, I wanted to do a nice street cruising old school with murals. After I saw a YouTube video with a red metallic 69 Impala lowrider, I knew the color I wanted, and what direction I wanted to go. All of my builds have a name… or a theme. I built a lowrider dedicated to my niece in 2022, so I decided to do this one dedicated to rest of my family. My wife came up with the name, “Family Blood” because of the color and it includes my blood…my family in the side murals. My wife, an AMAZING artist, designed ALL of the roof and hood patterns and the murals on the rear quarter panels. The build features Showcase Hobbies fender skirts, Iceman Collections wire wheels, and DawnSmithArt designed decals over Tamiya Metallic red and Aluminum paint (clear coated with DupliColor 1k clear) Thanks for checking this out! Keep sharing your amazing work too fellow builders! 😎👍🏾
-
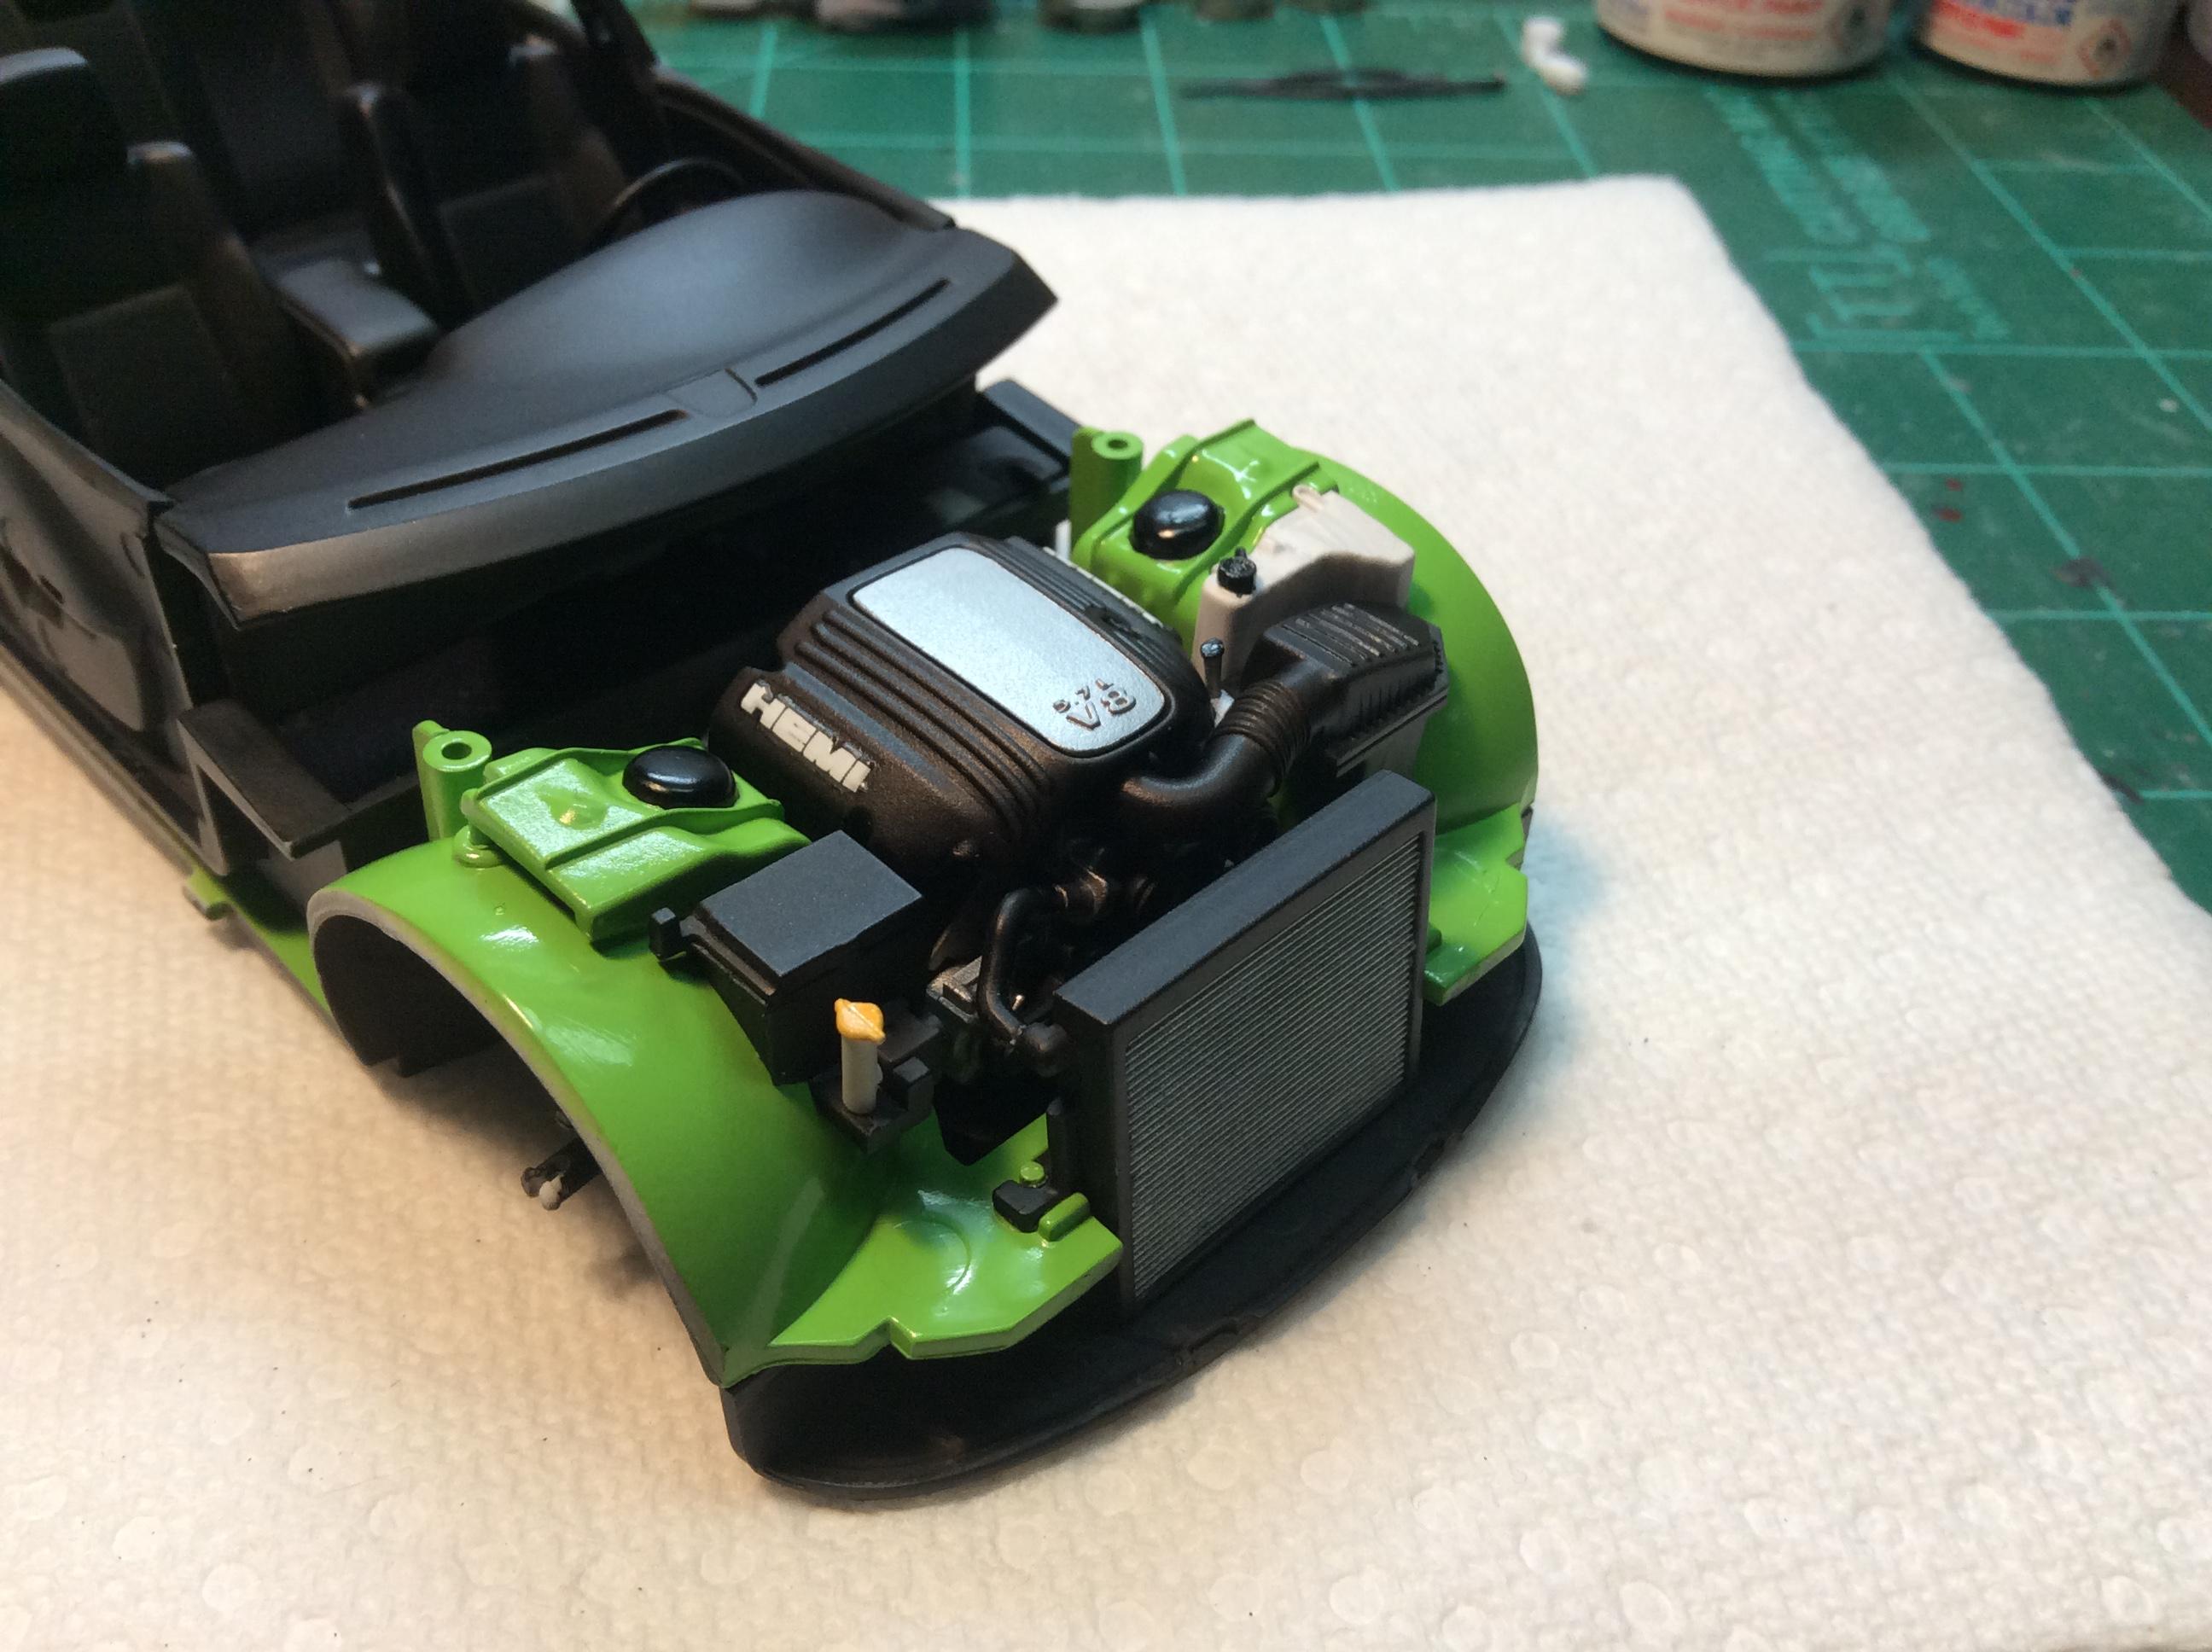
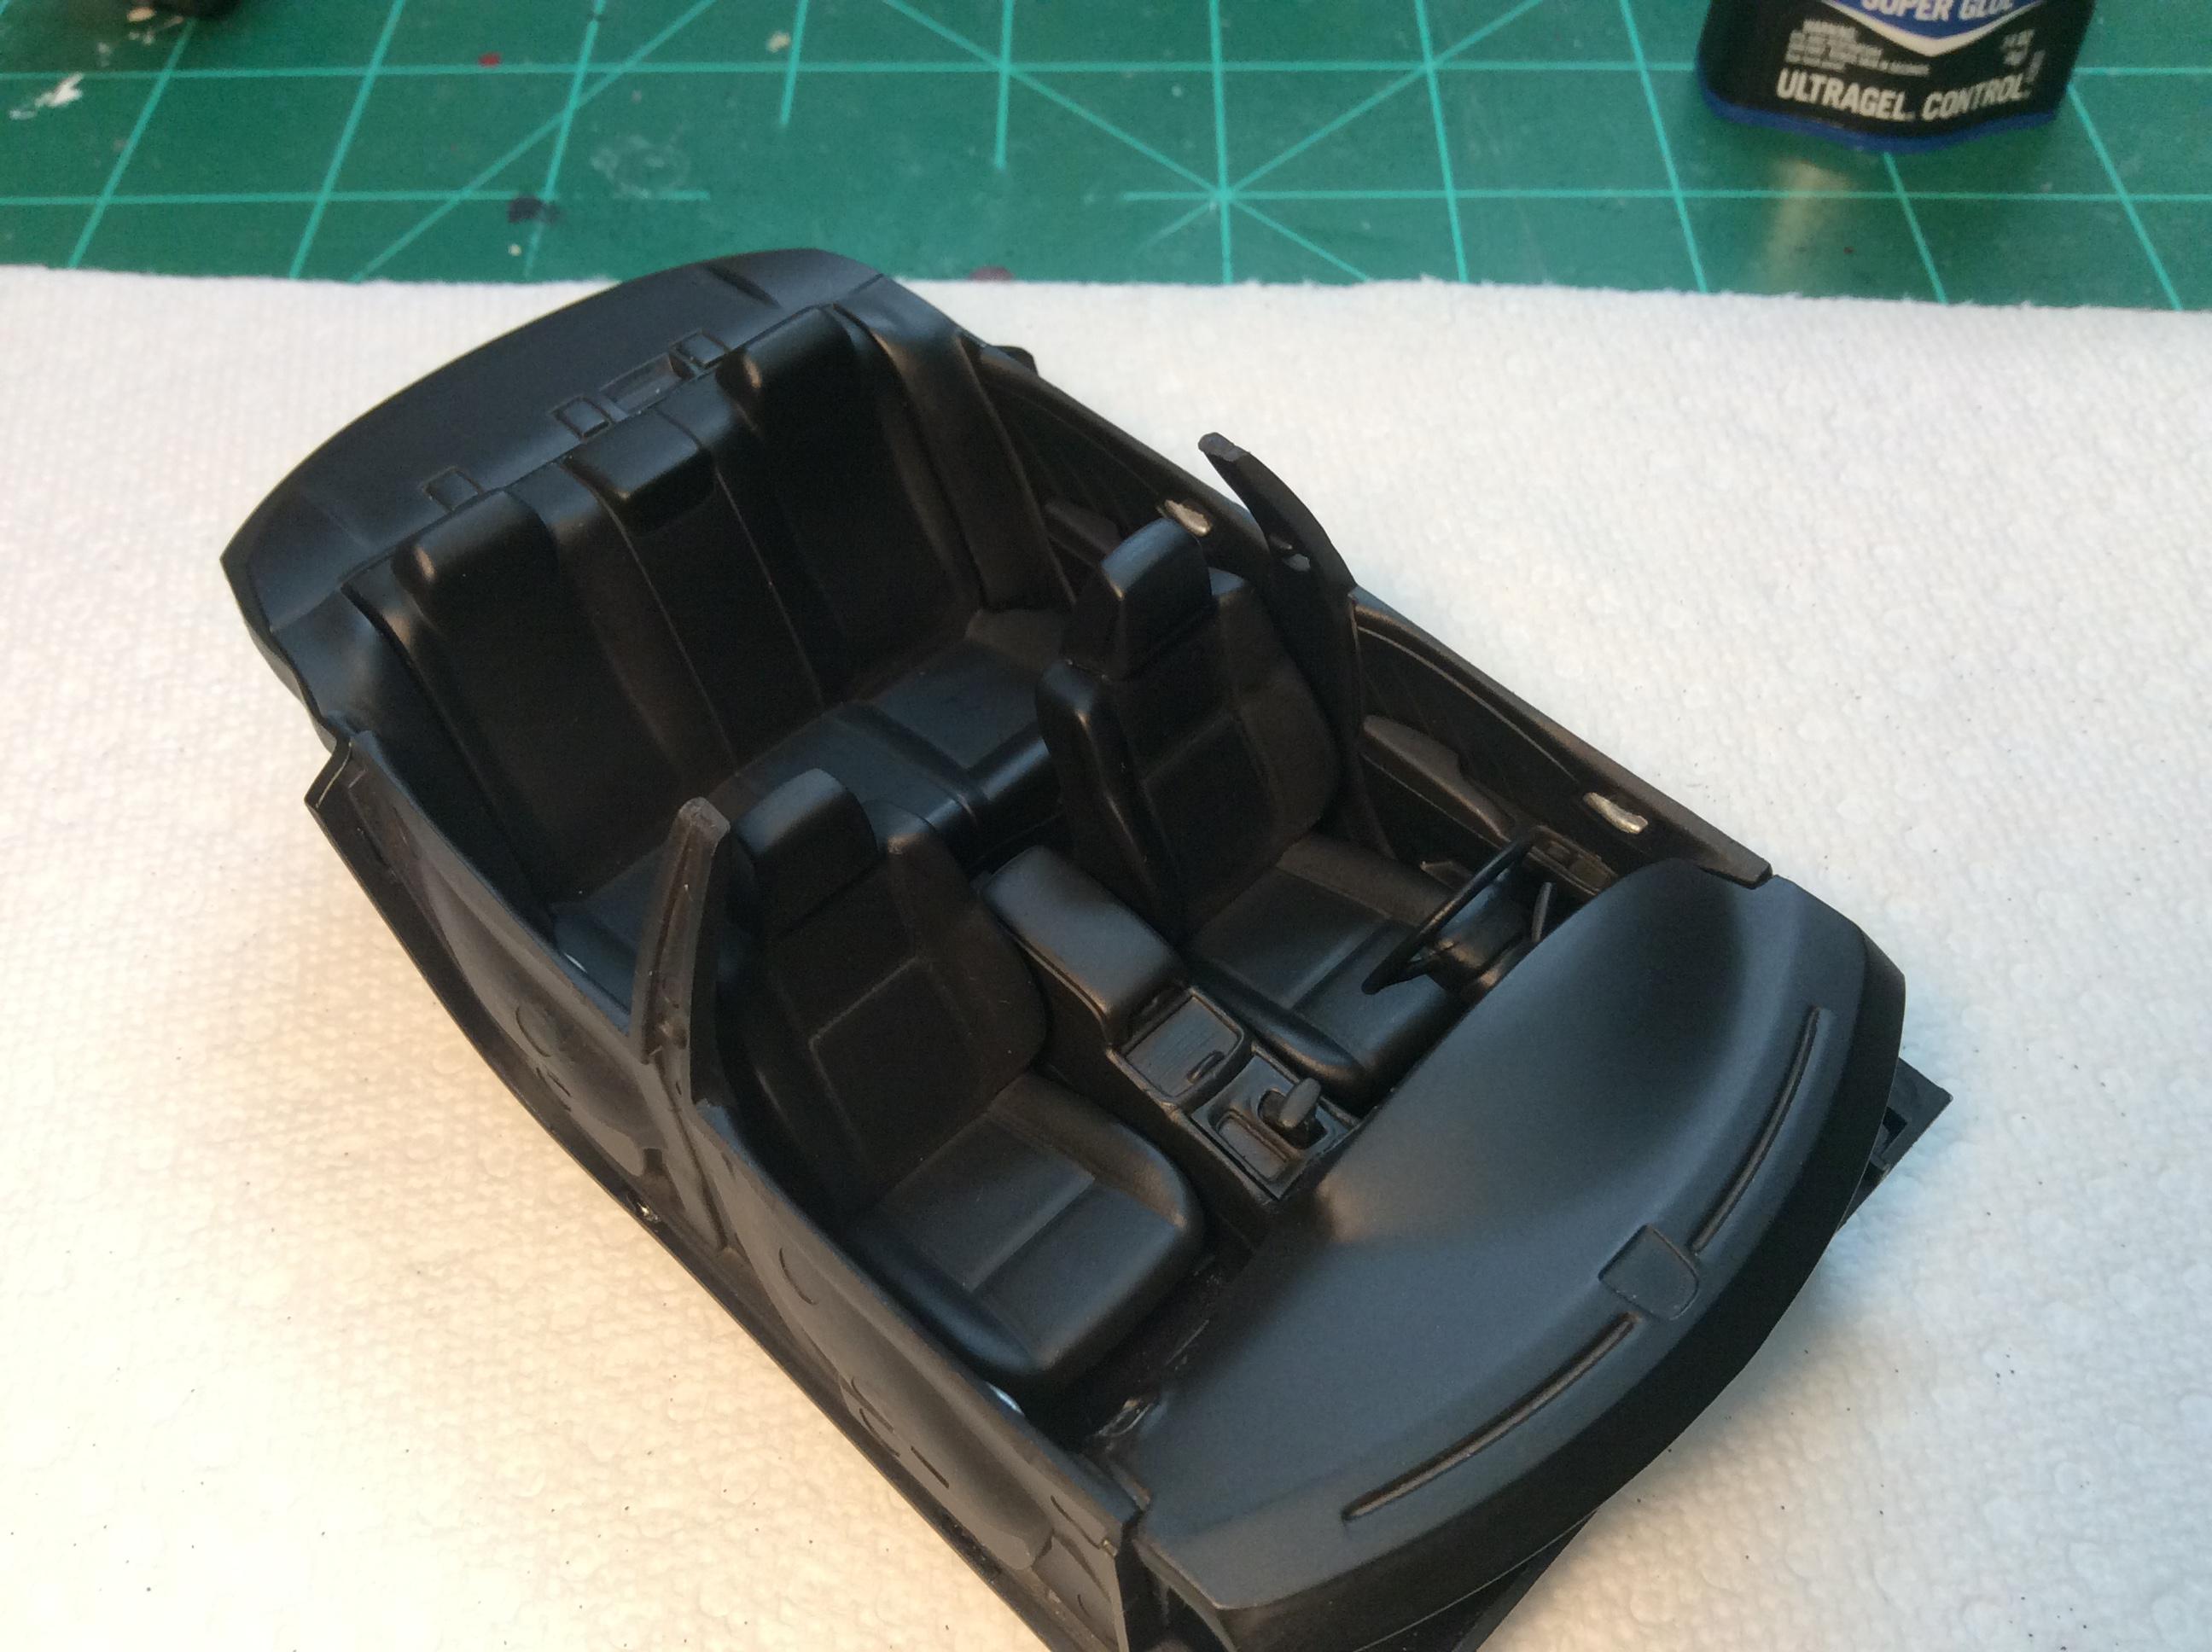
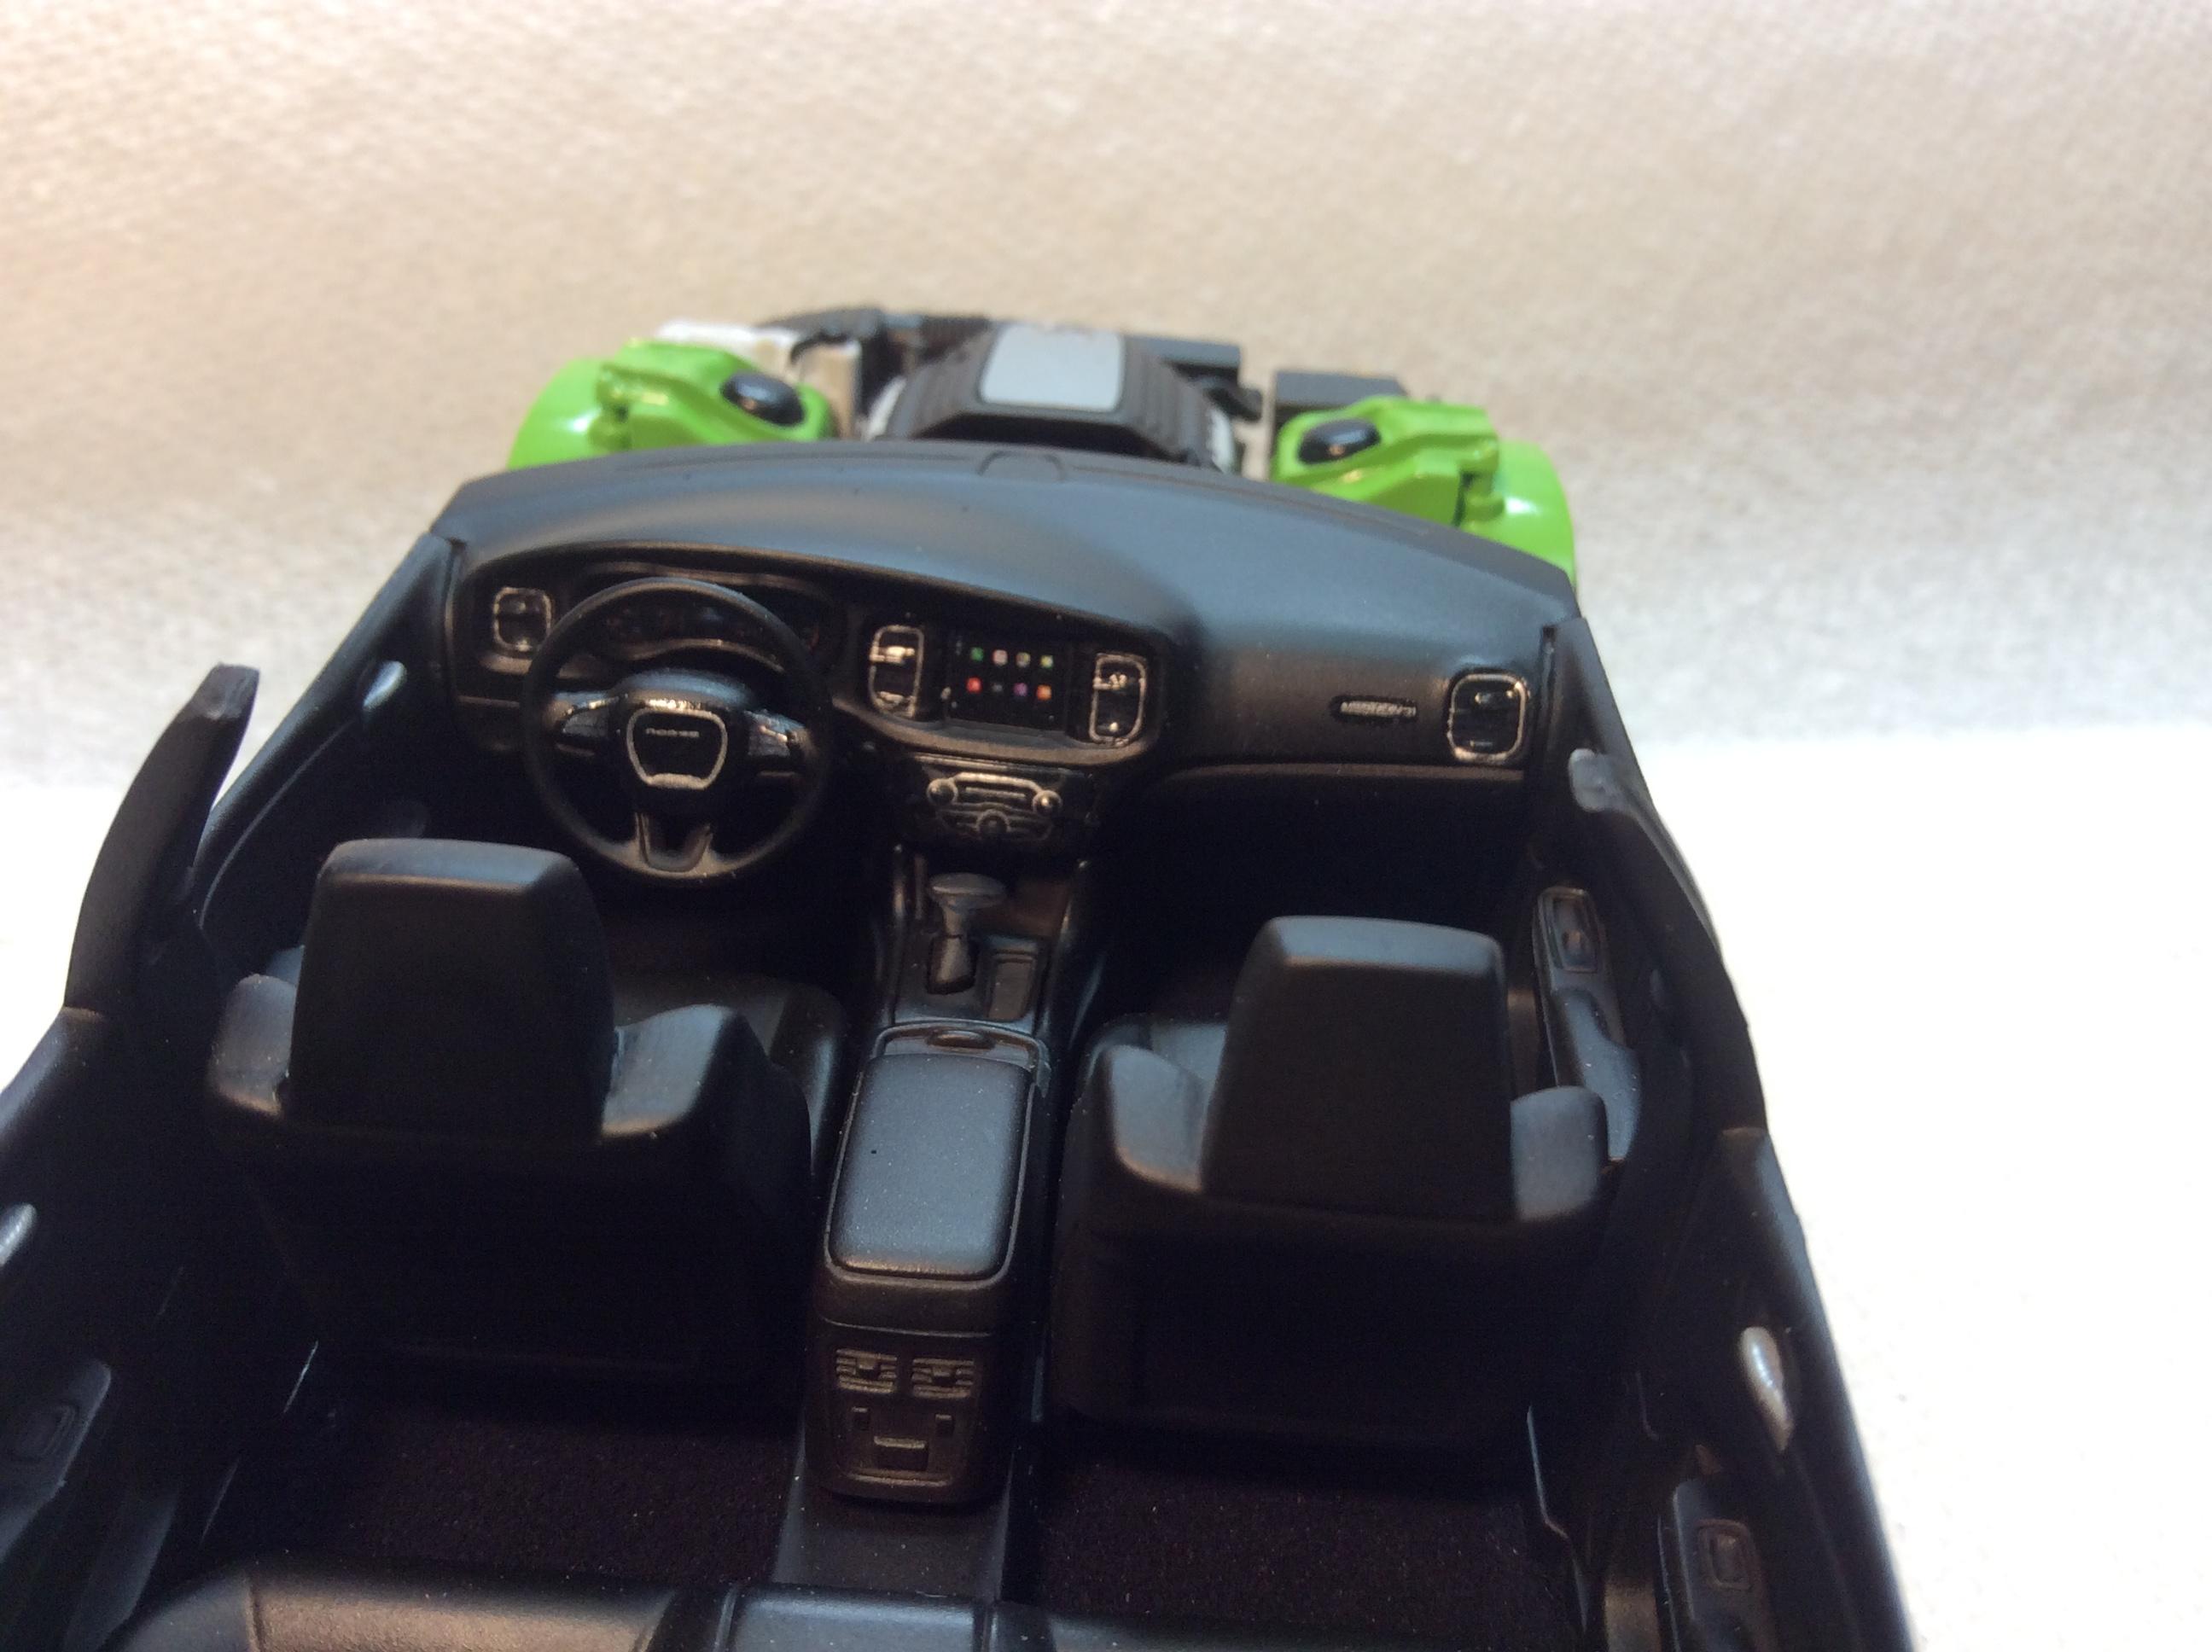
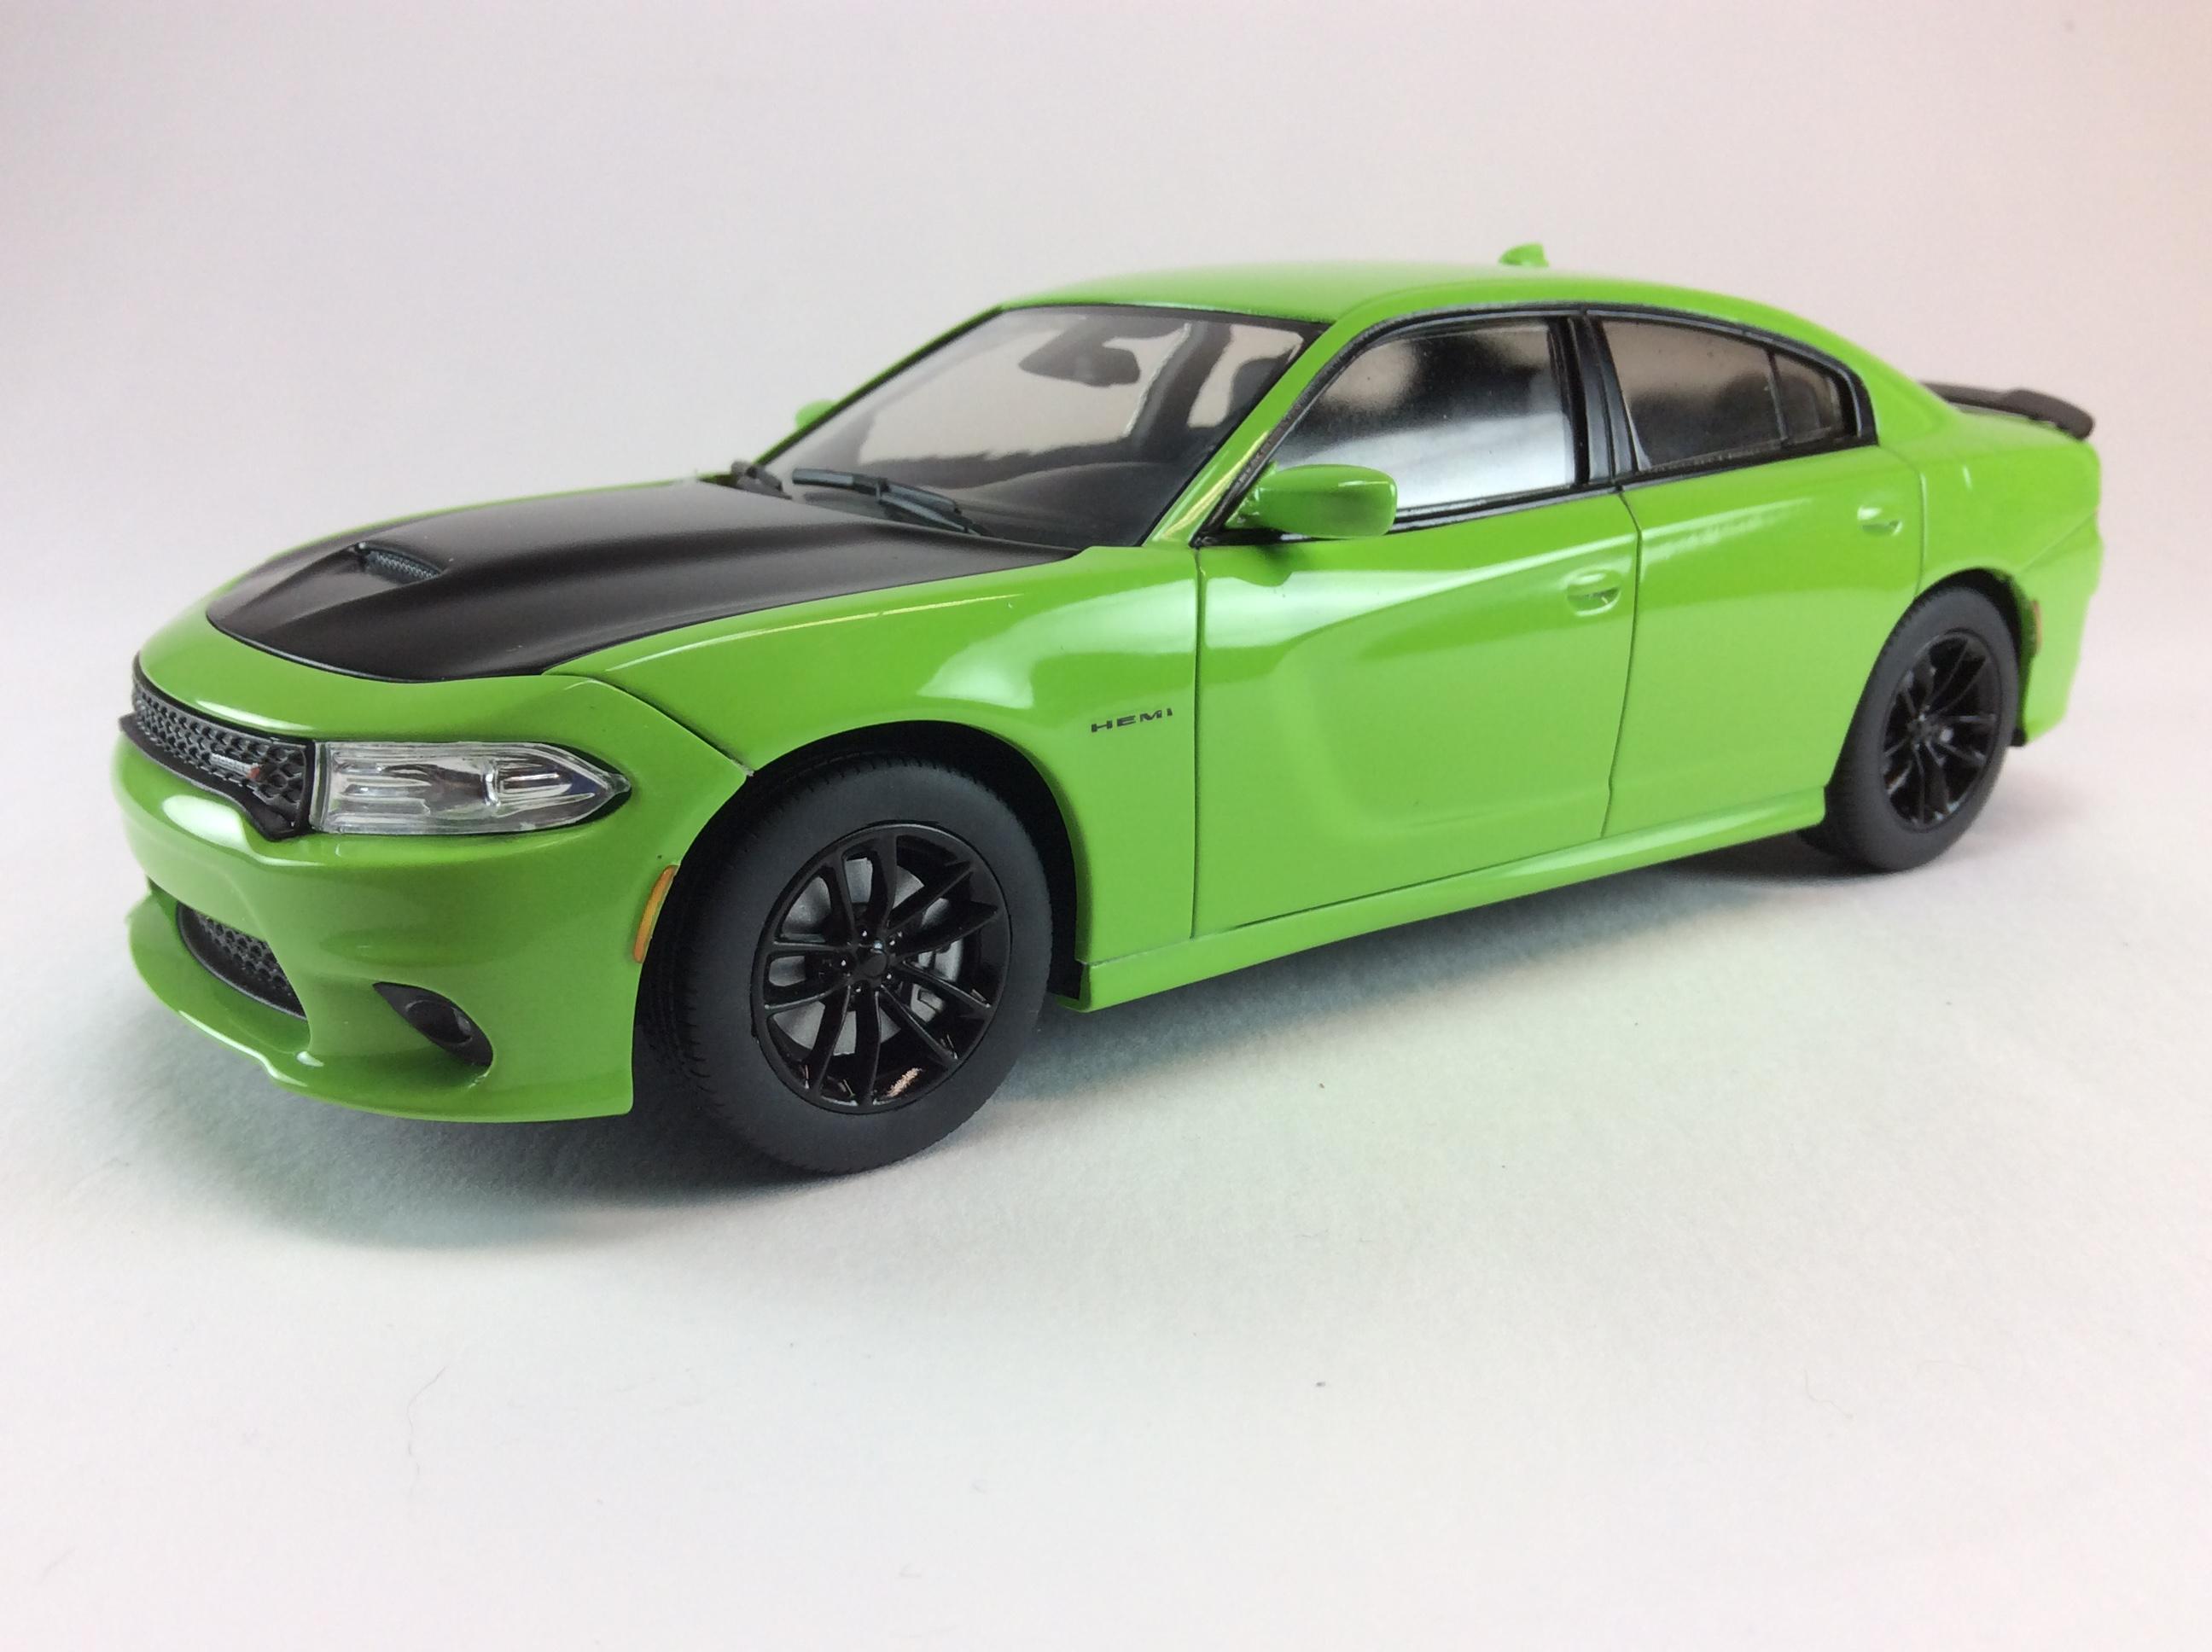
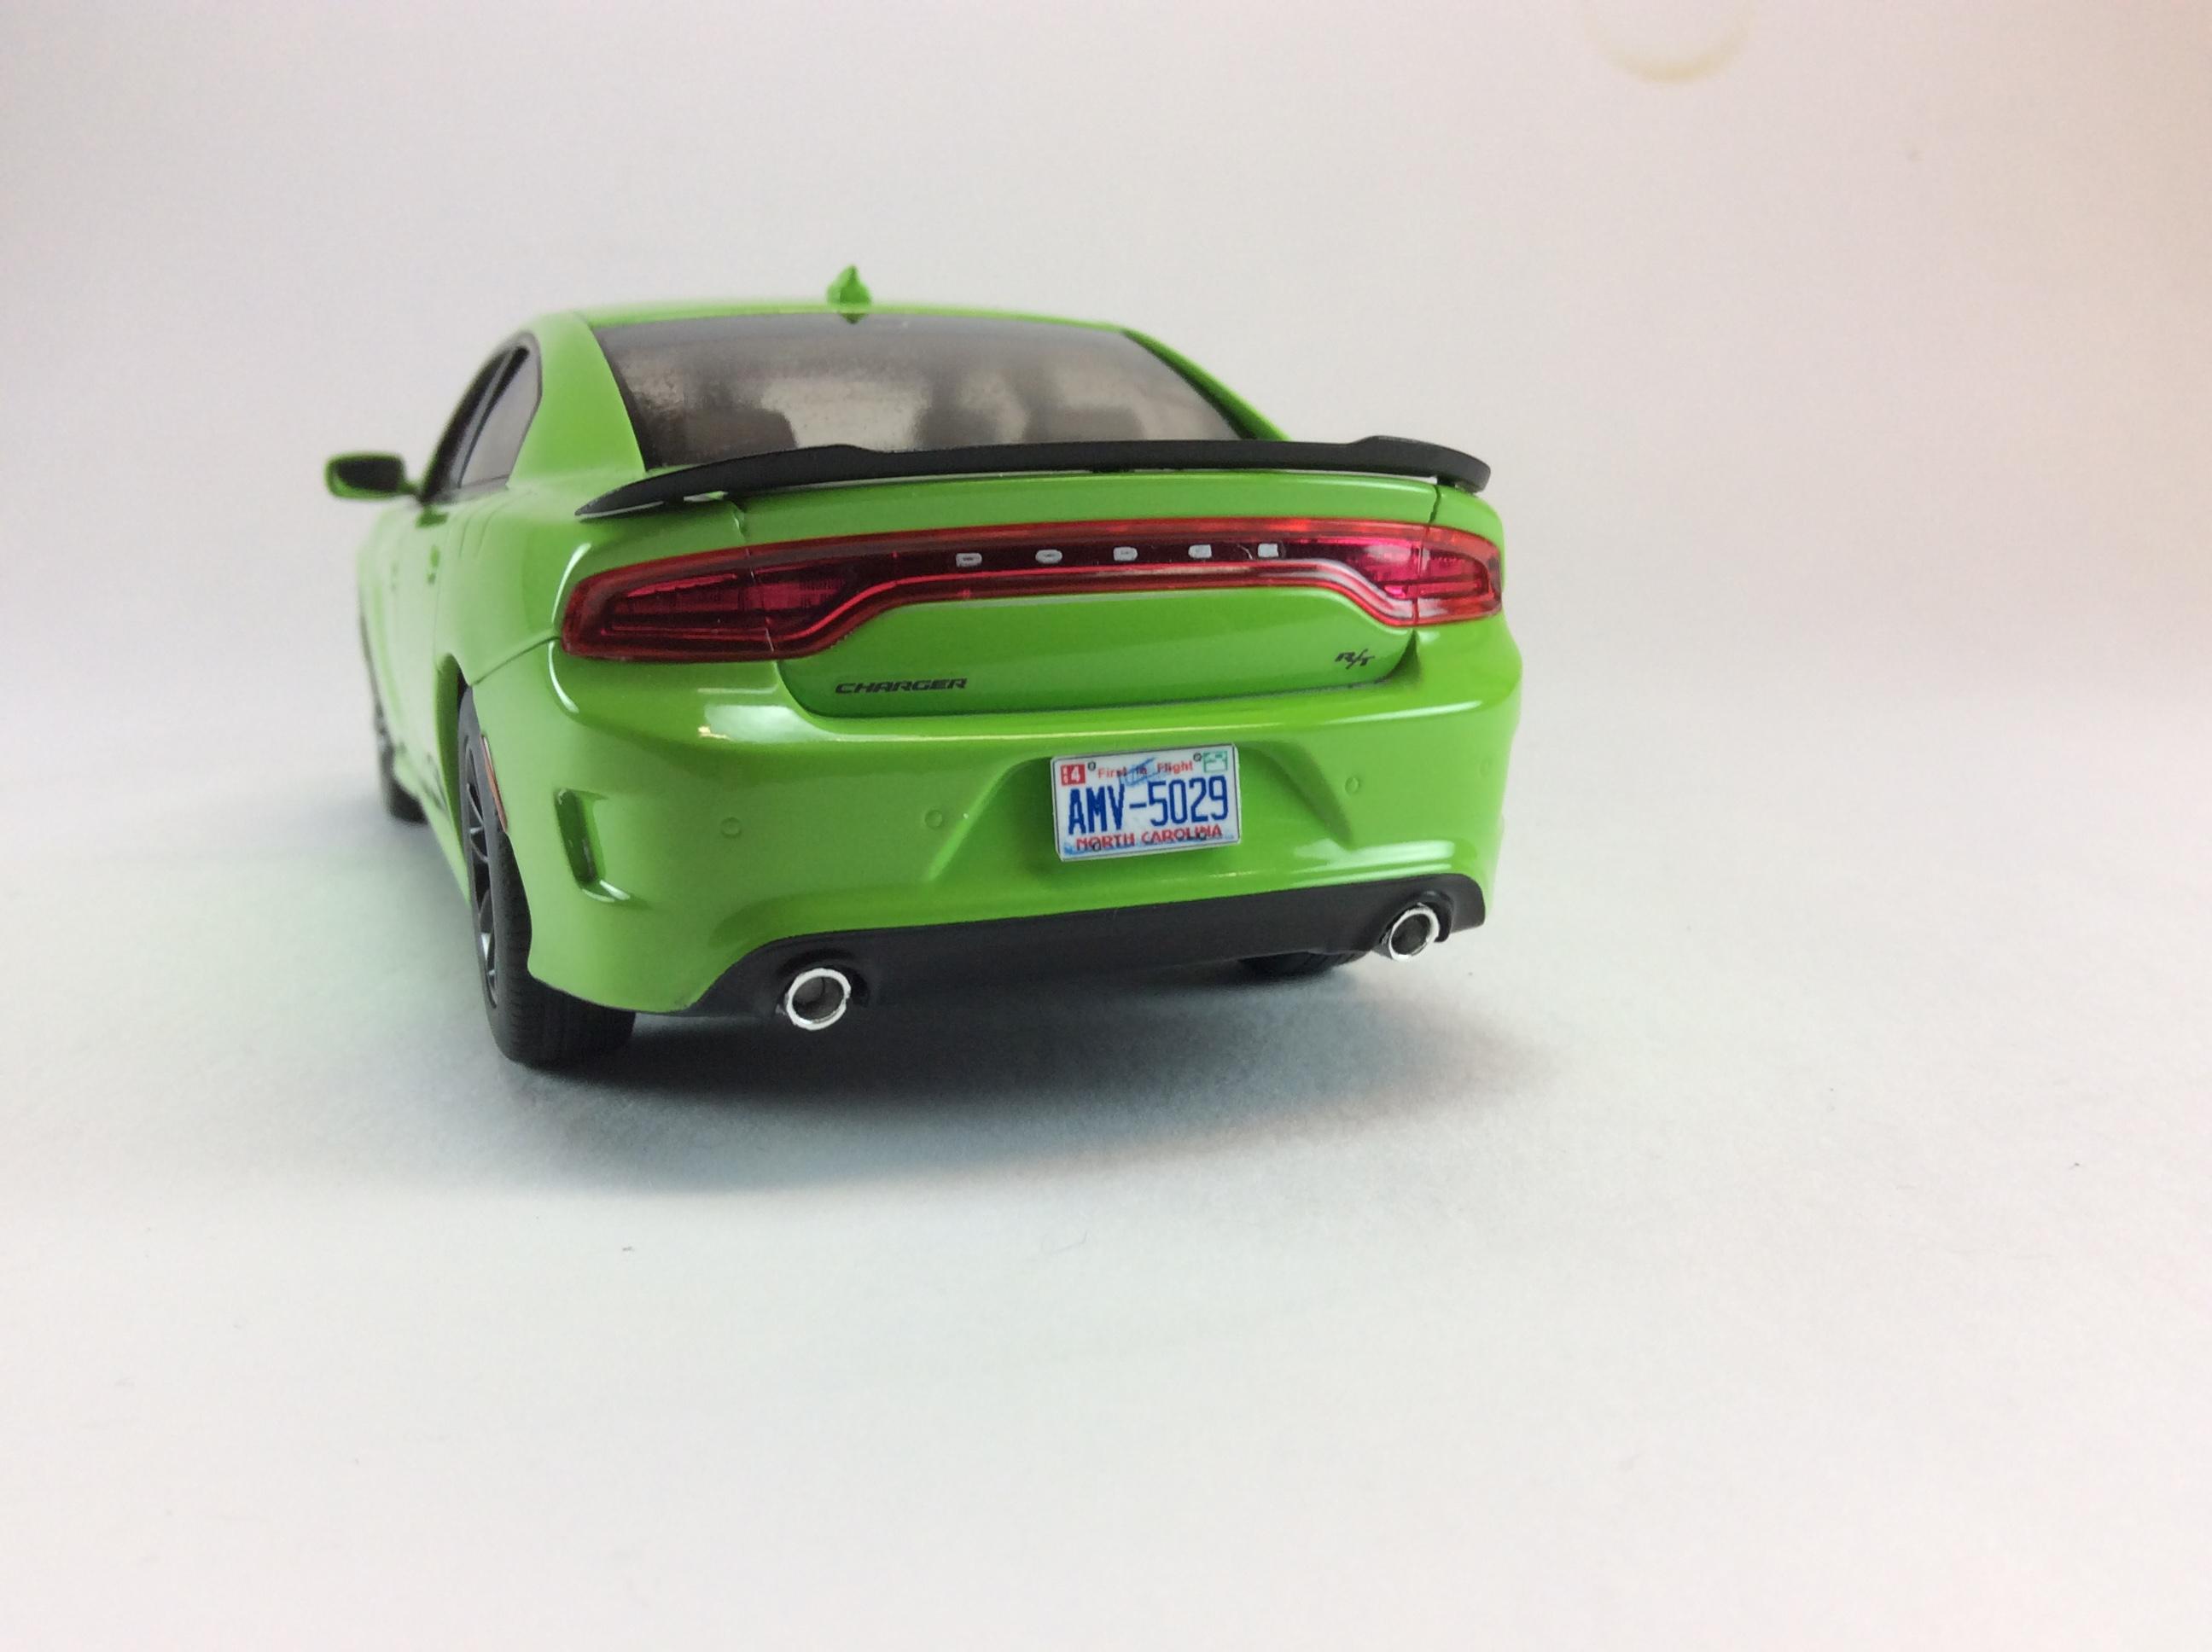
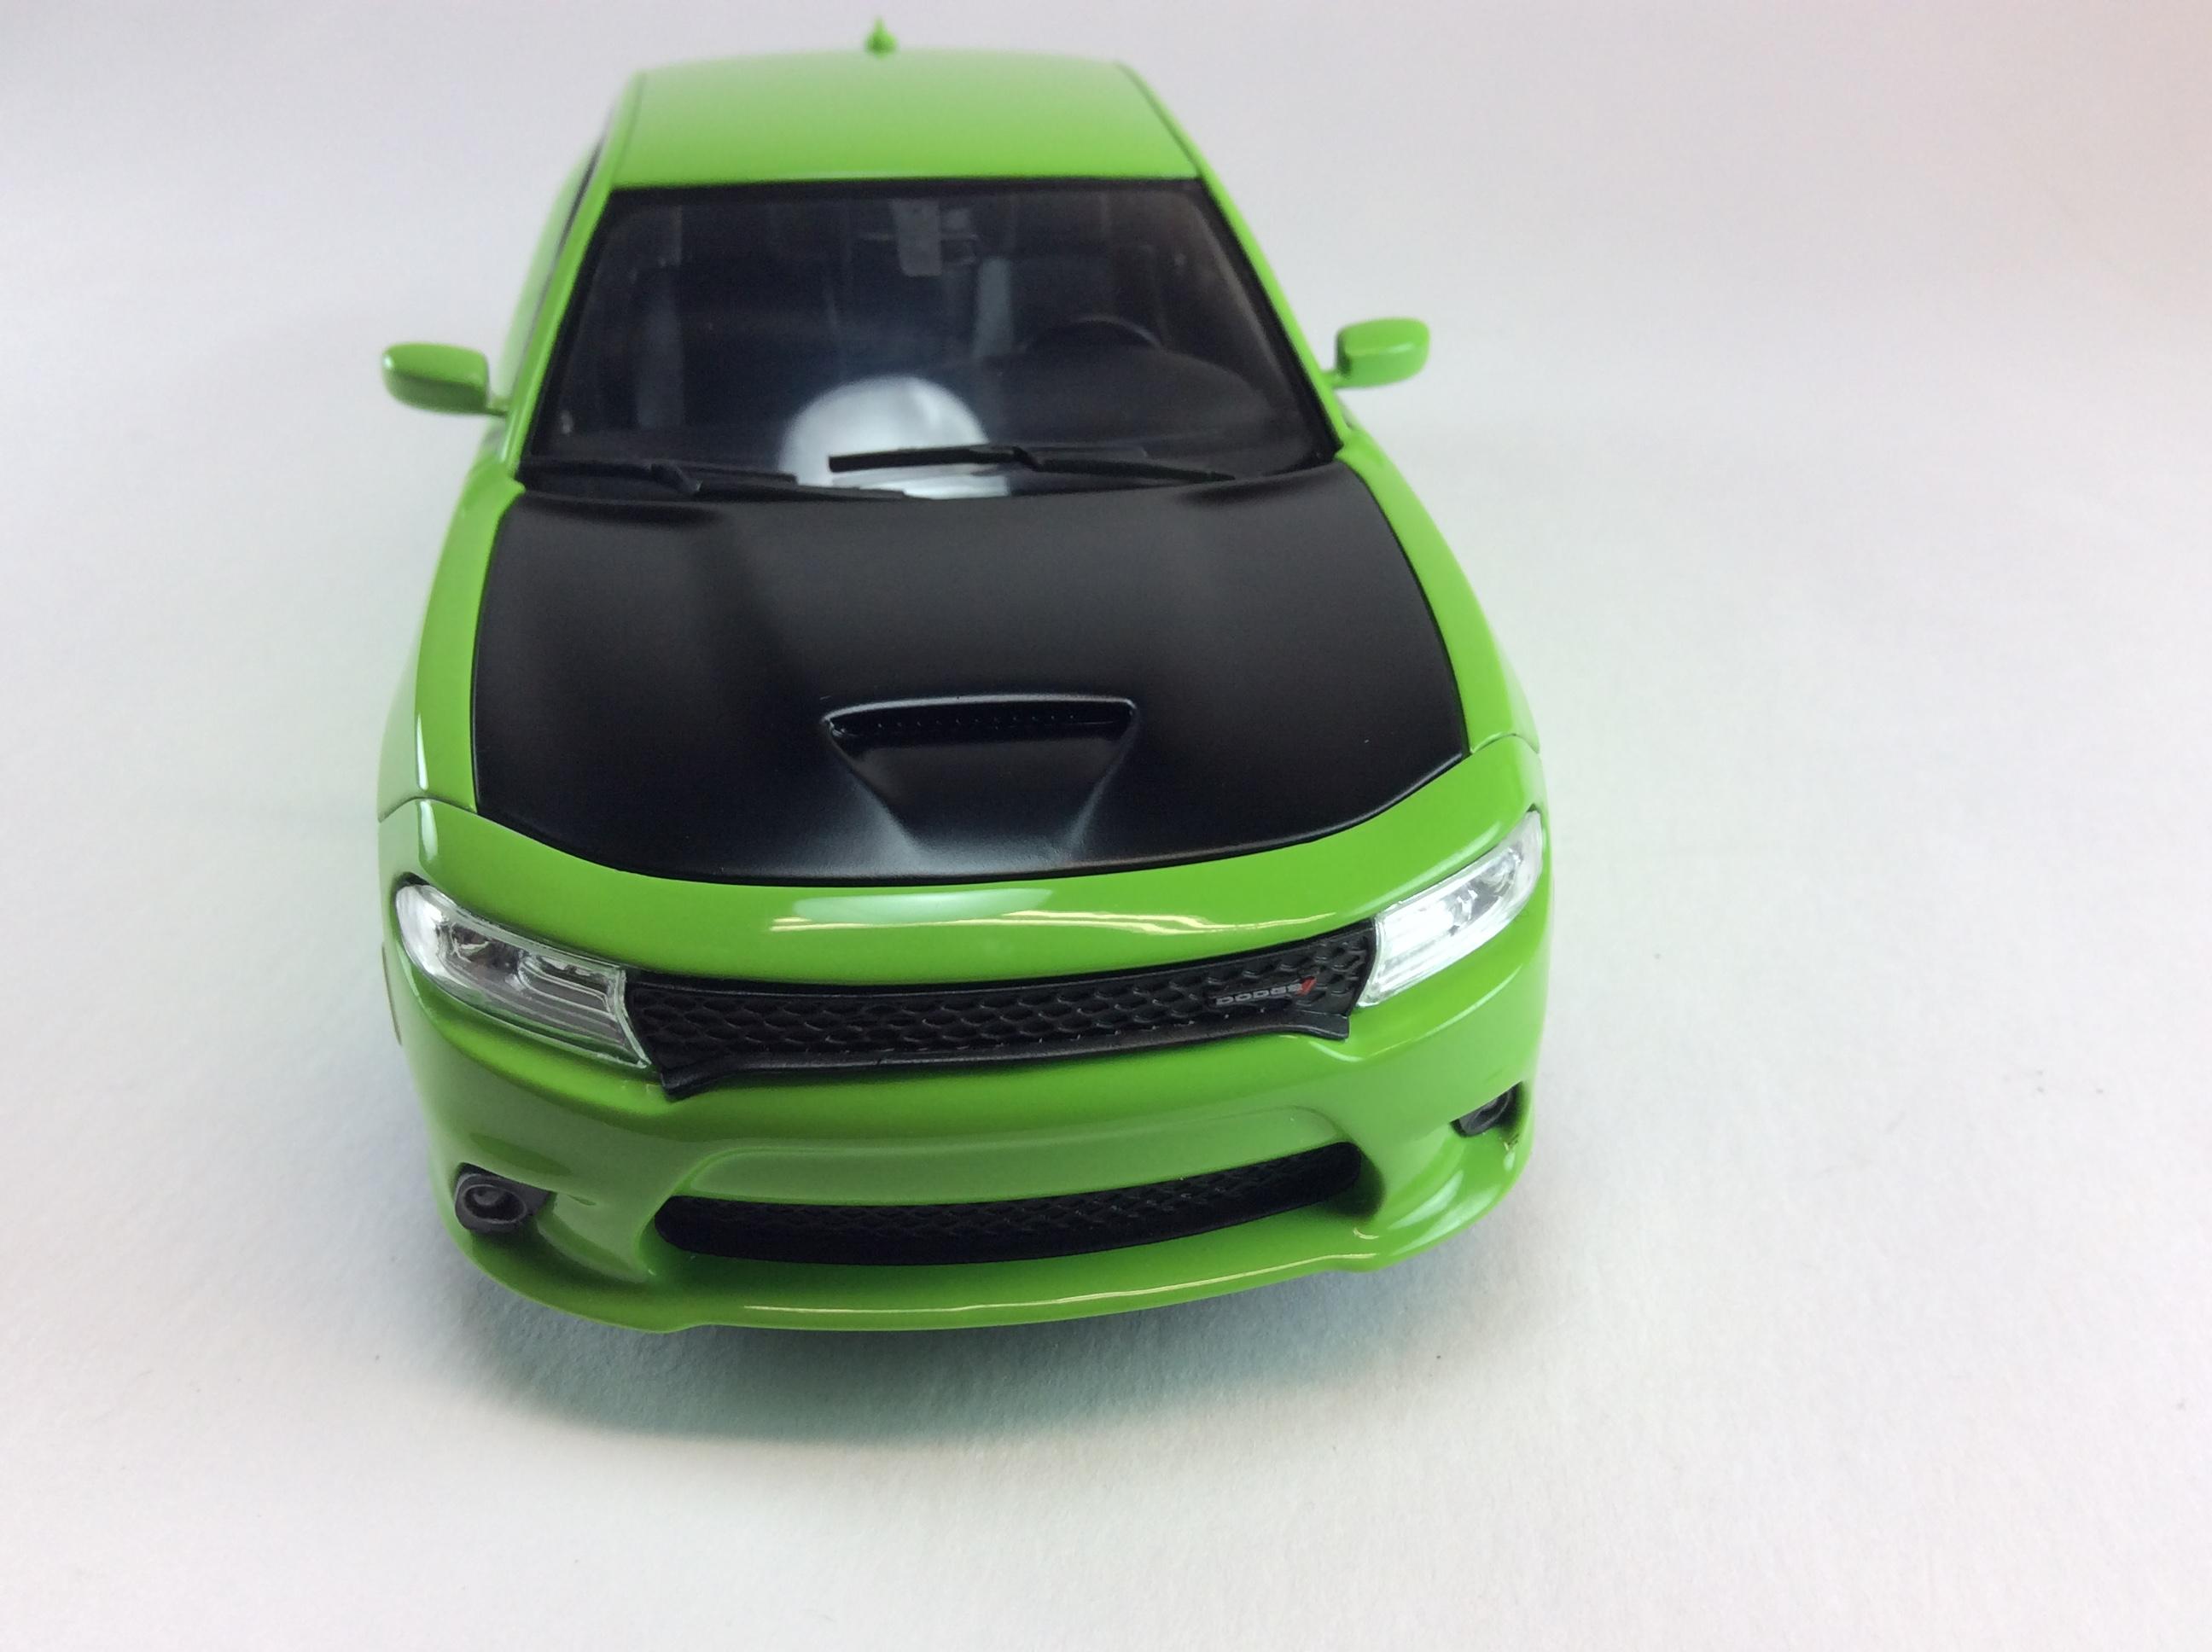
AMT 2021 Dodge Charger, this could very well be the best AMT kit I’ve ever built! Paint is Model Master sublime green and Testors wet look clear, wet sanded and polished with Tamiya compounds, interior is painted with Tamiya semi gloss black also used embossing powder for carpet and I also used a variety of model master metalizer paints for the metal colors. Thanks for taking a look.8
-
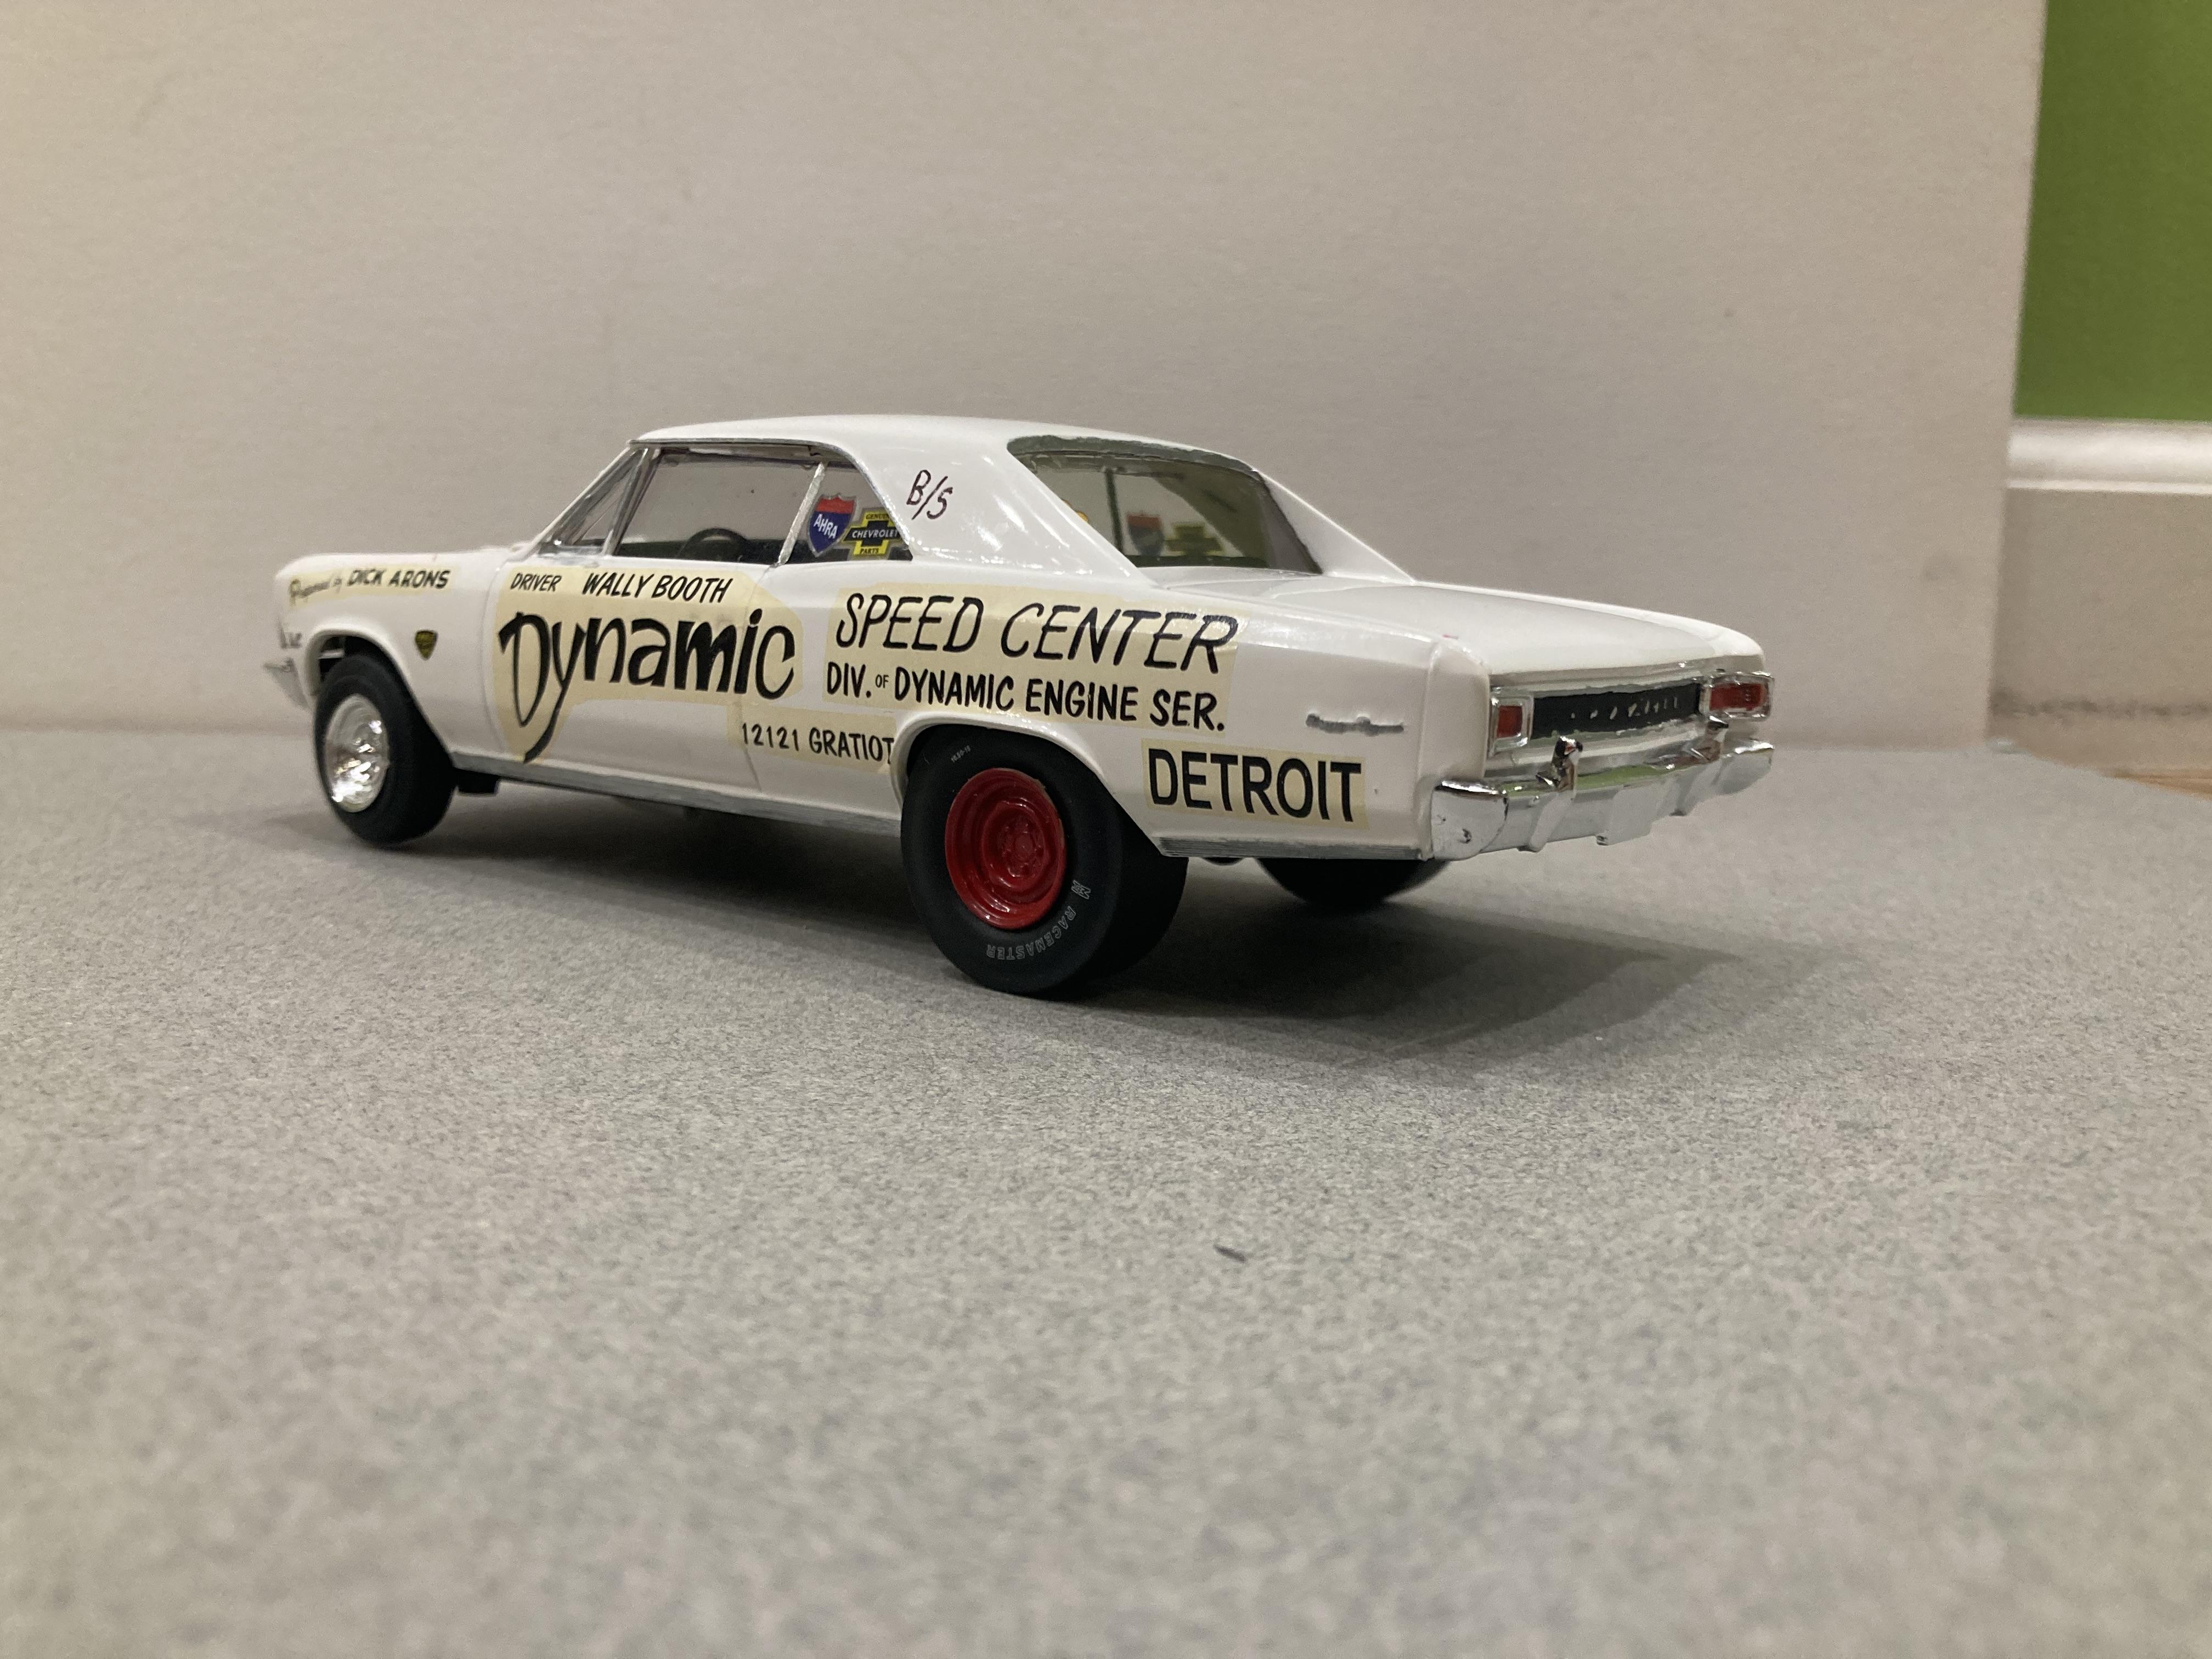
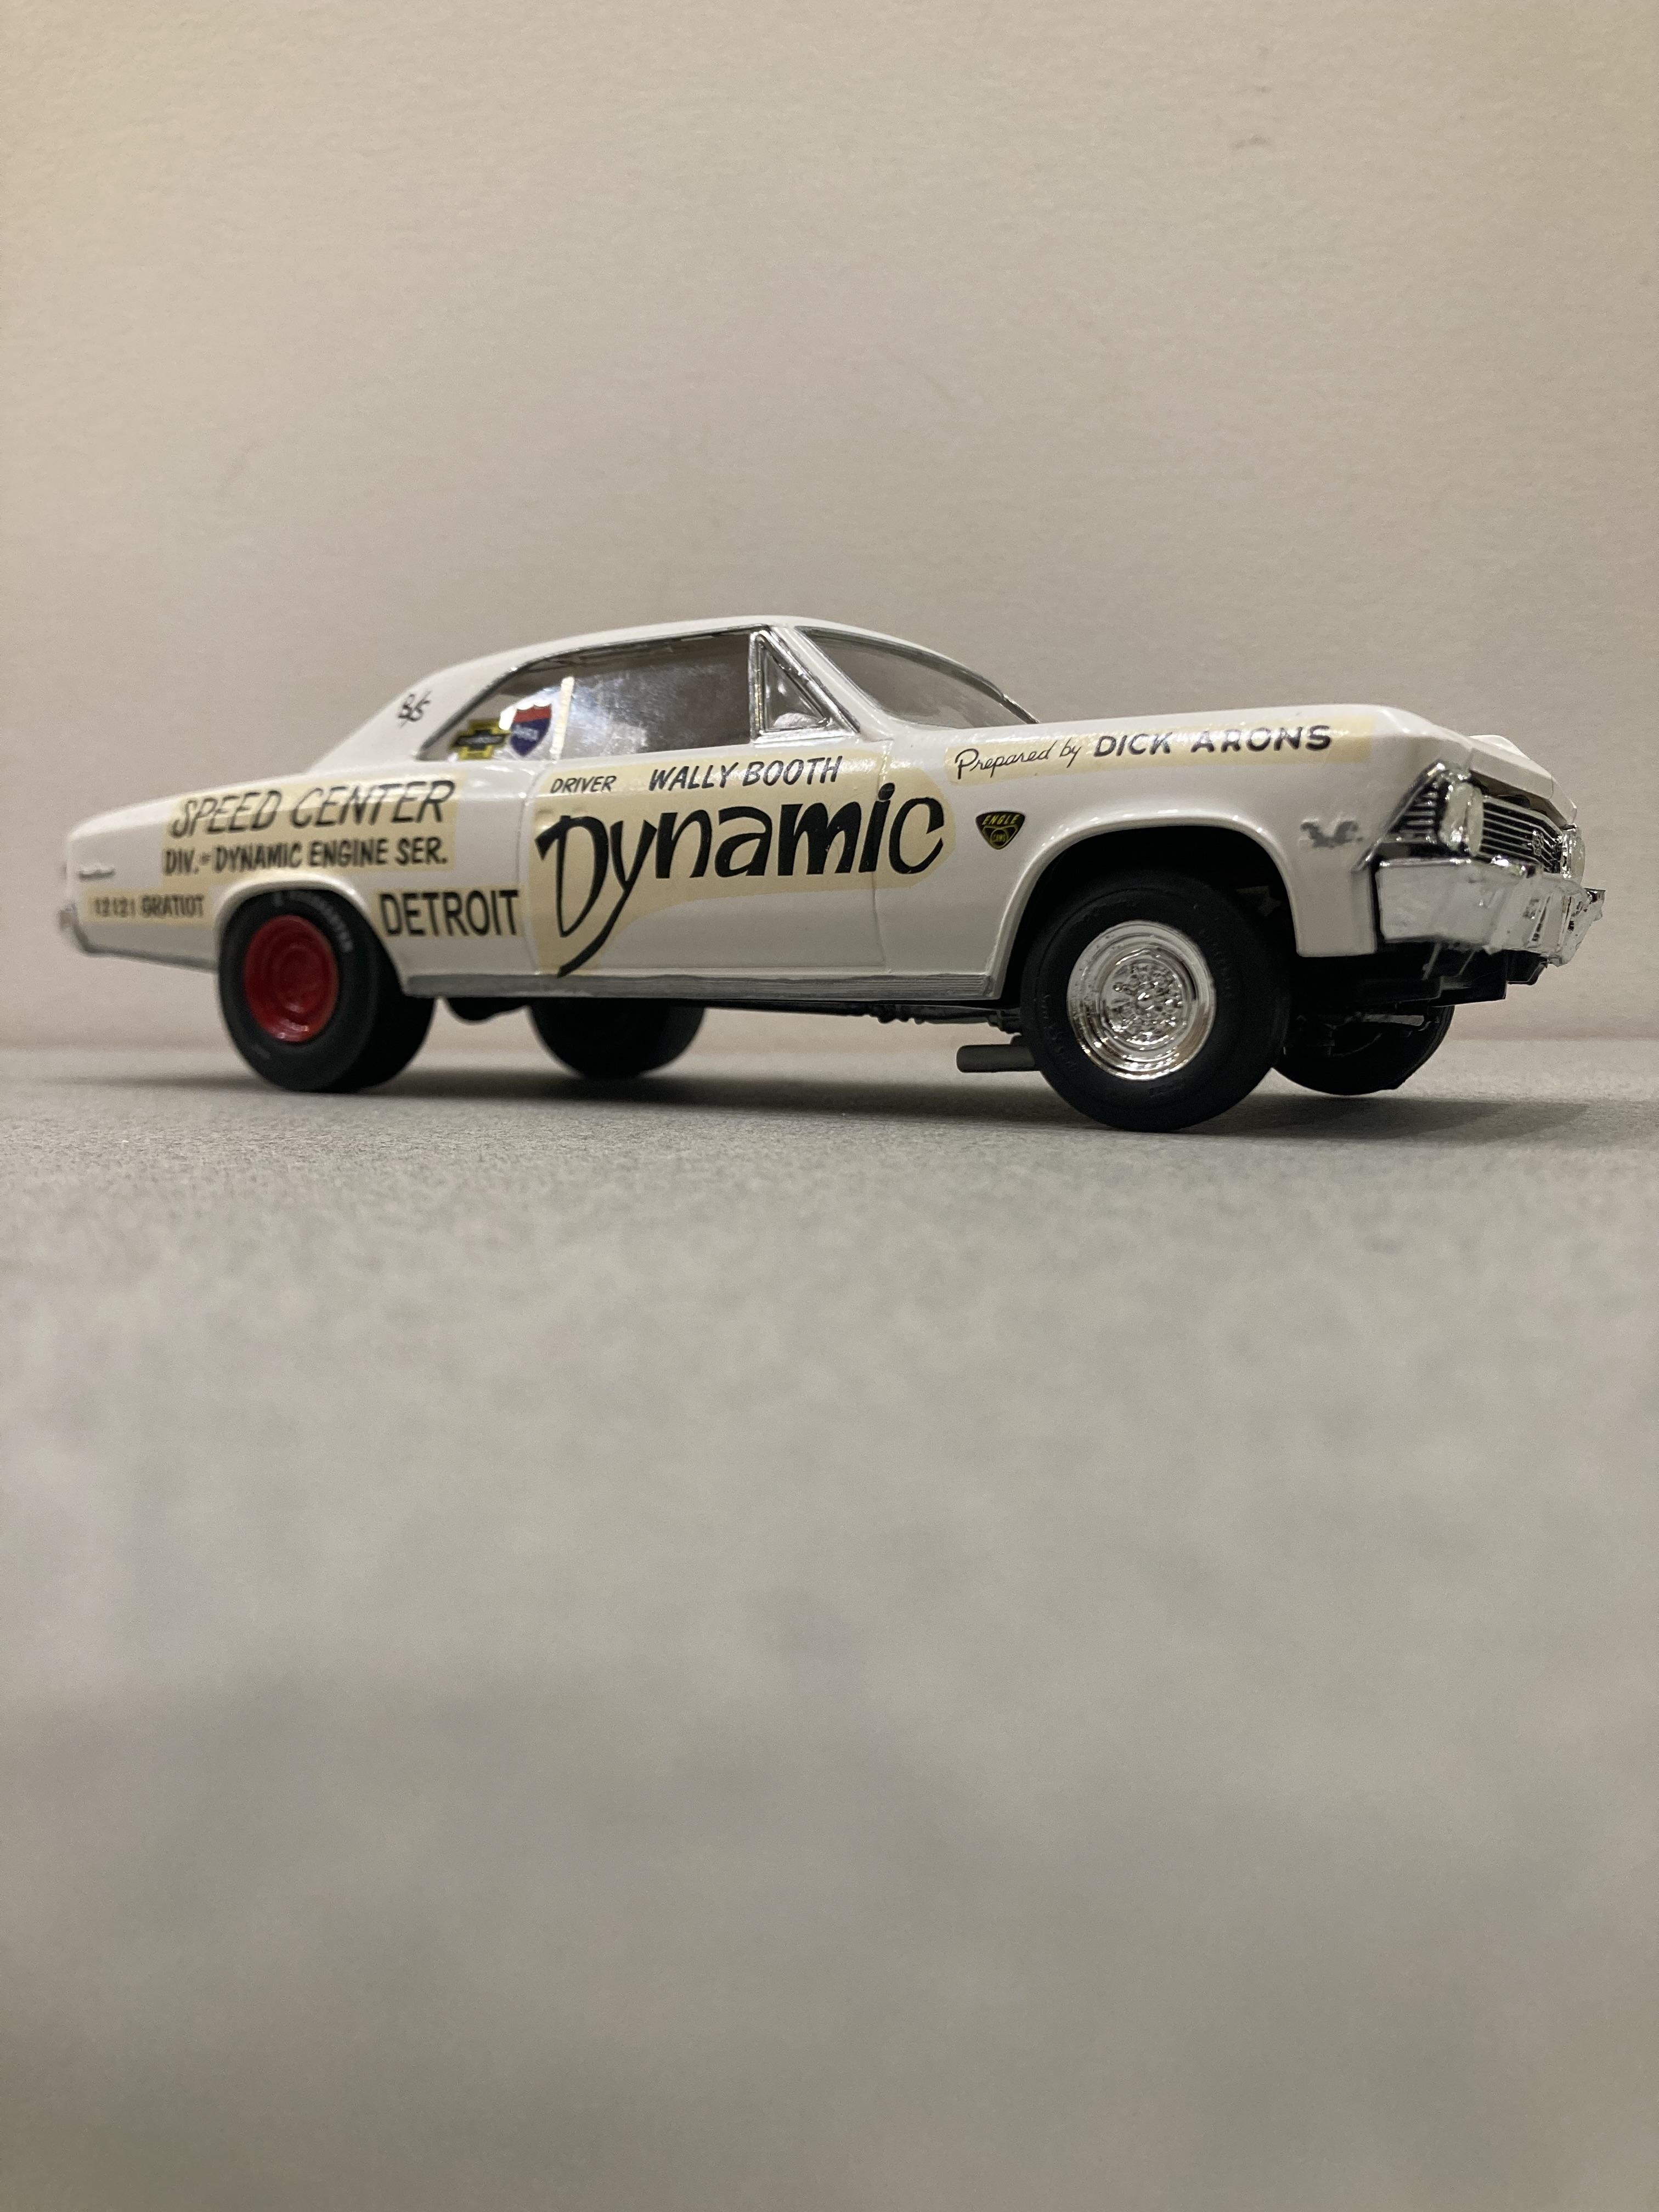
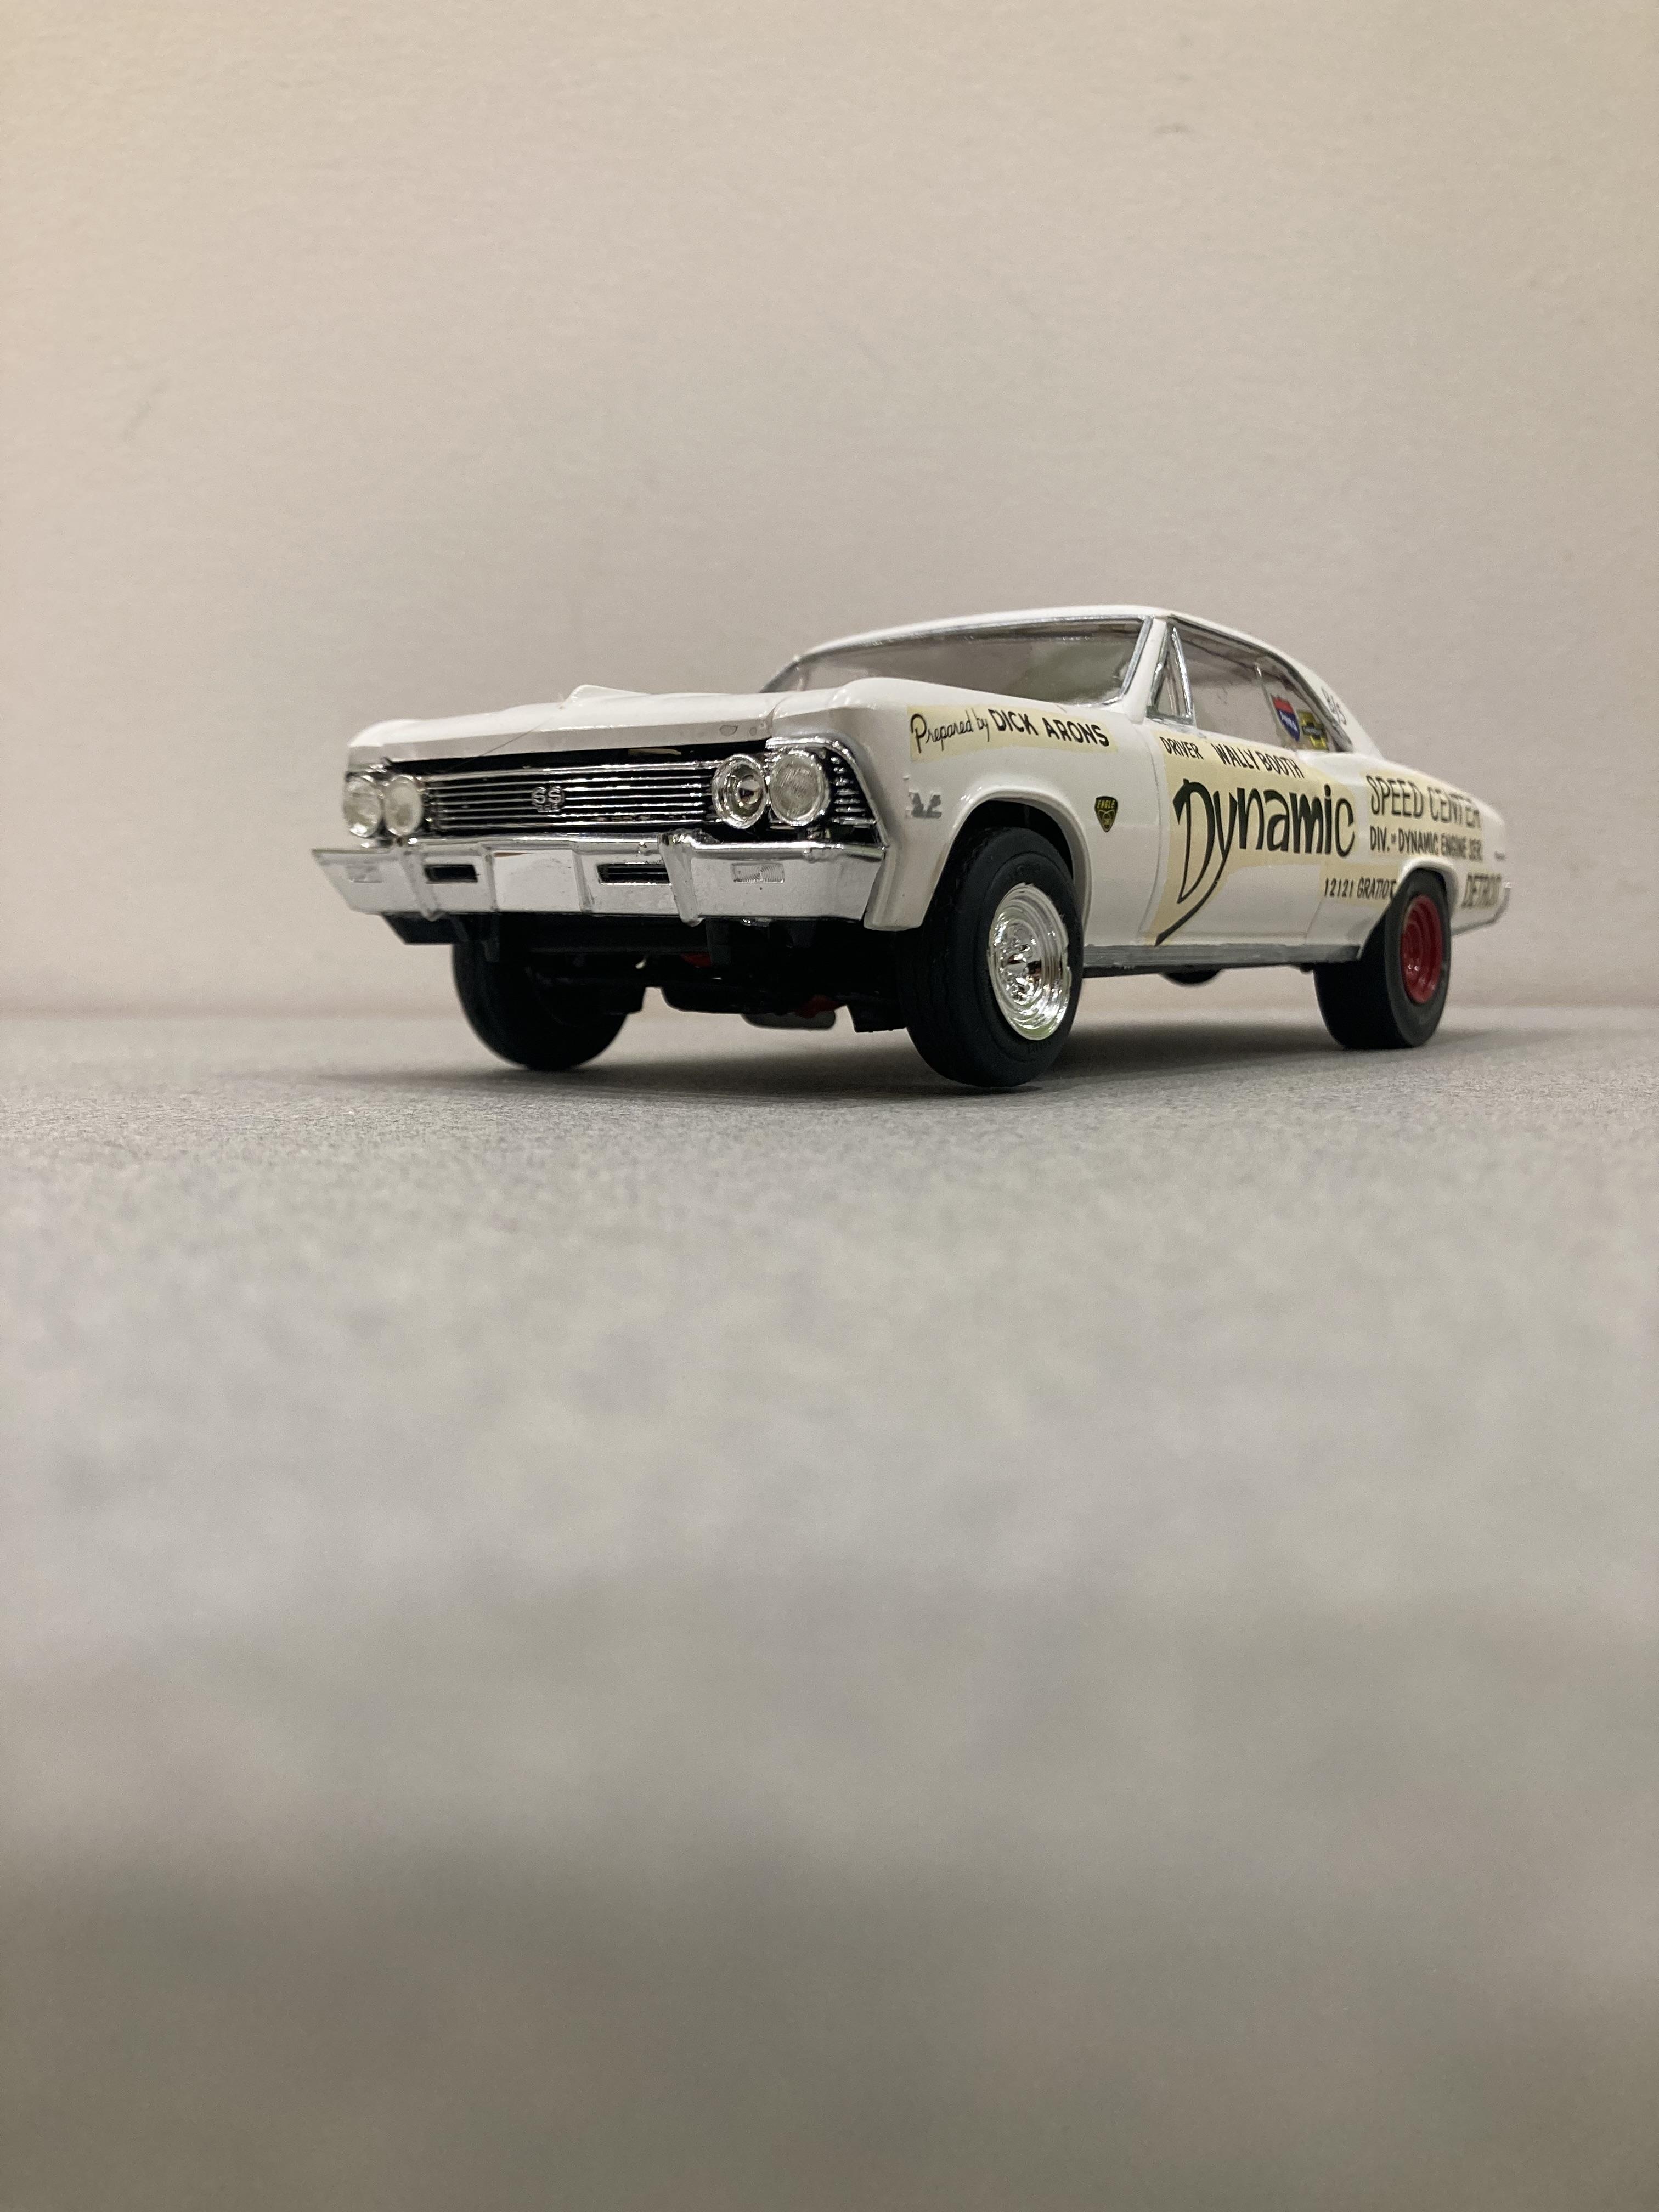
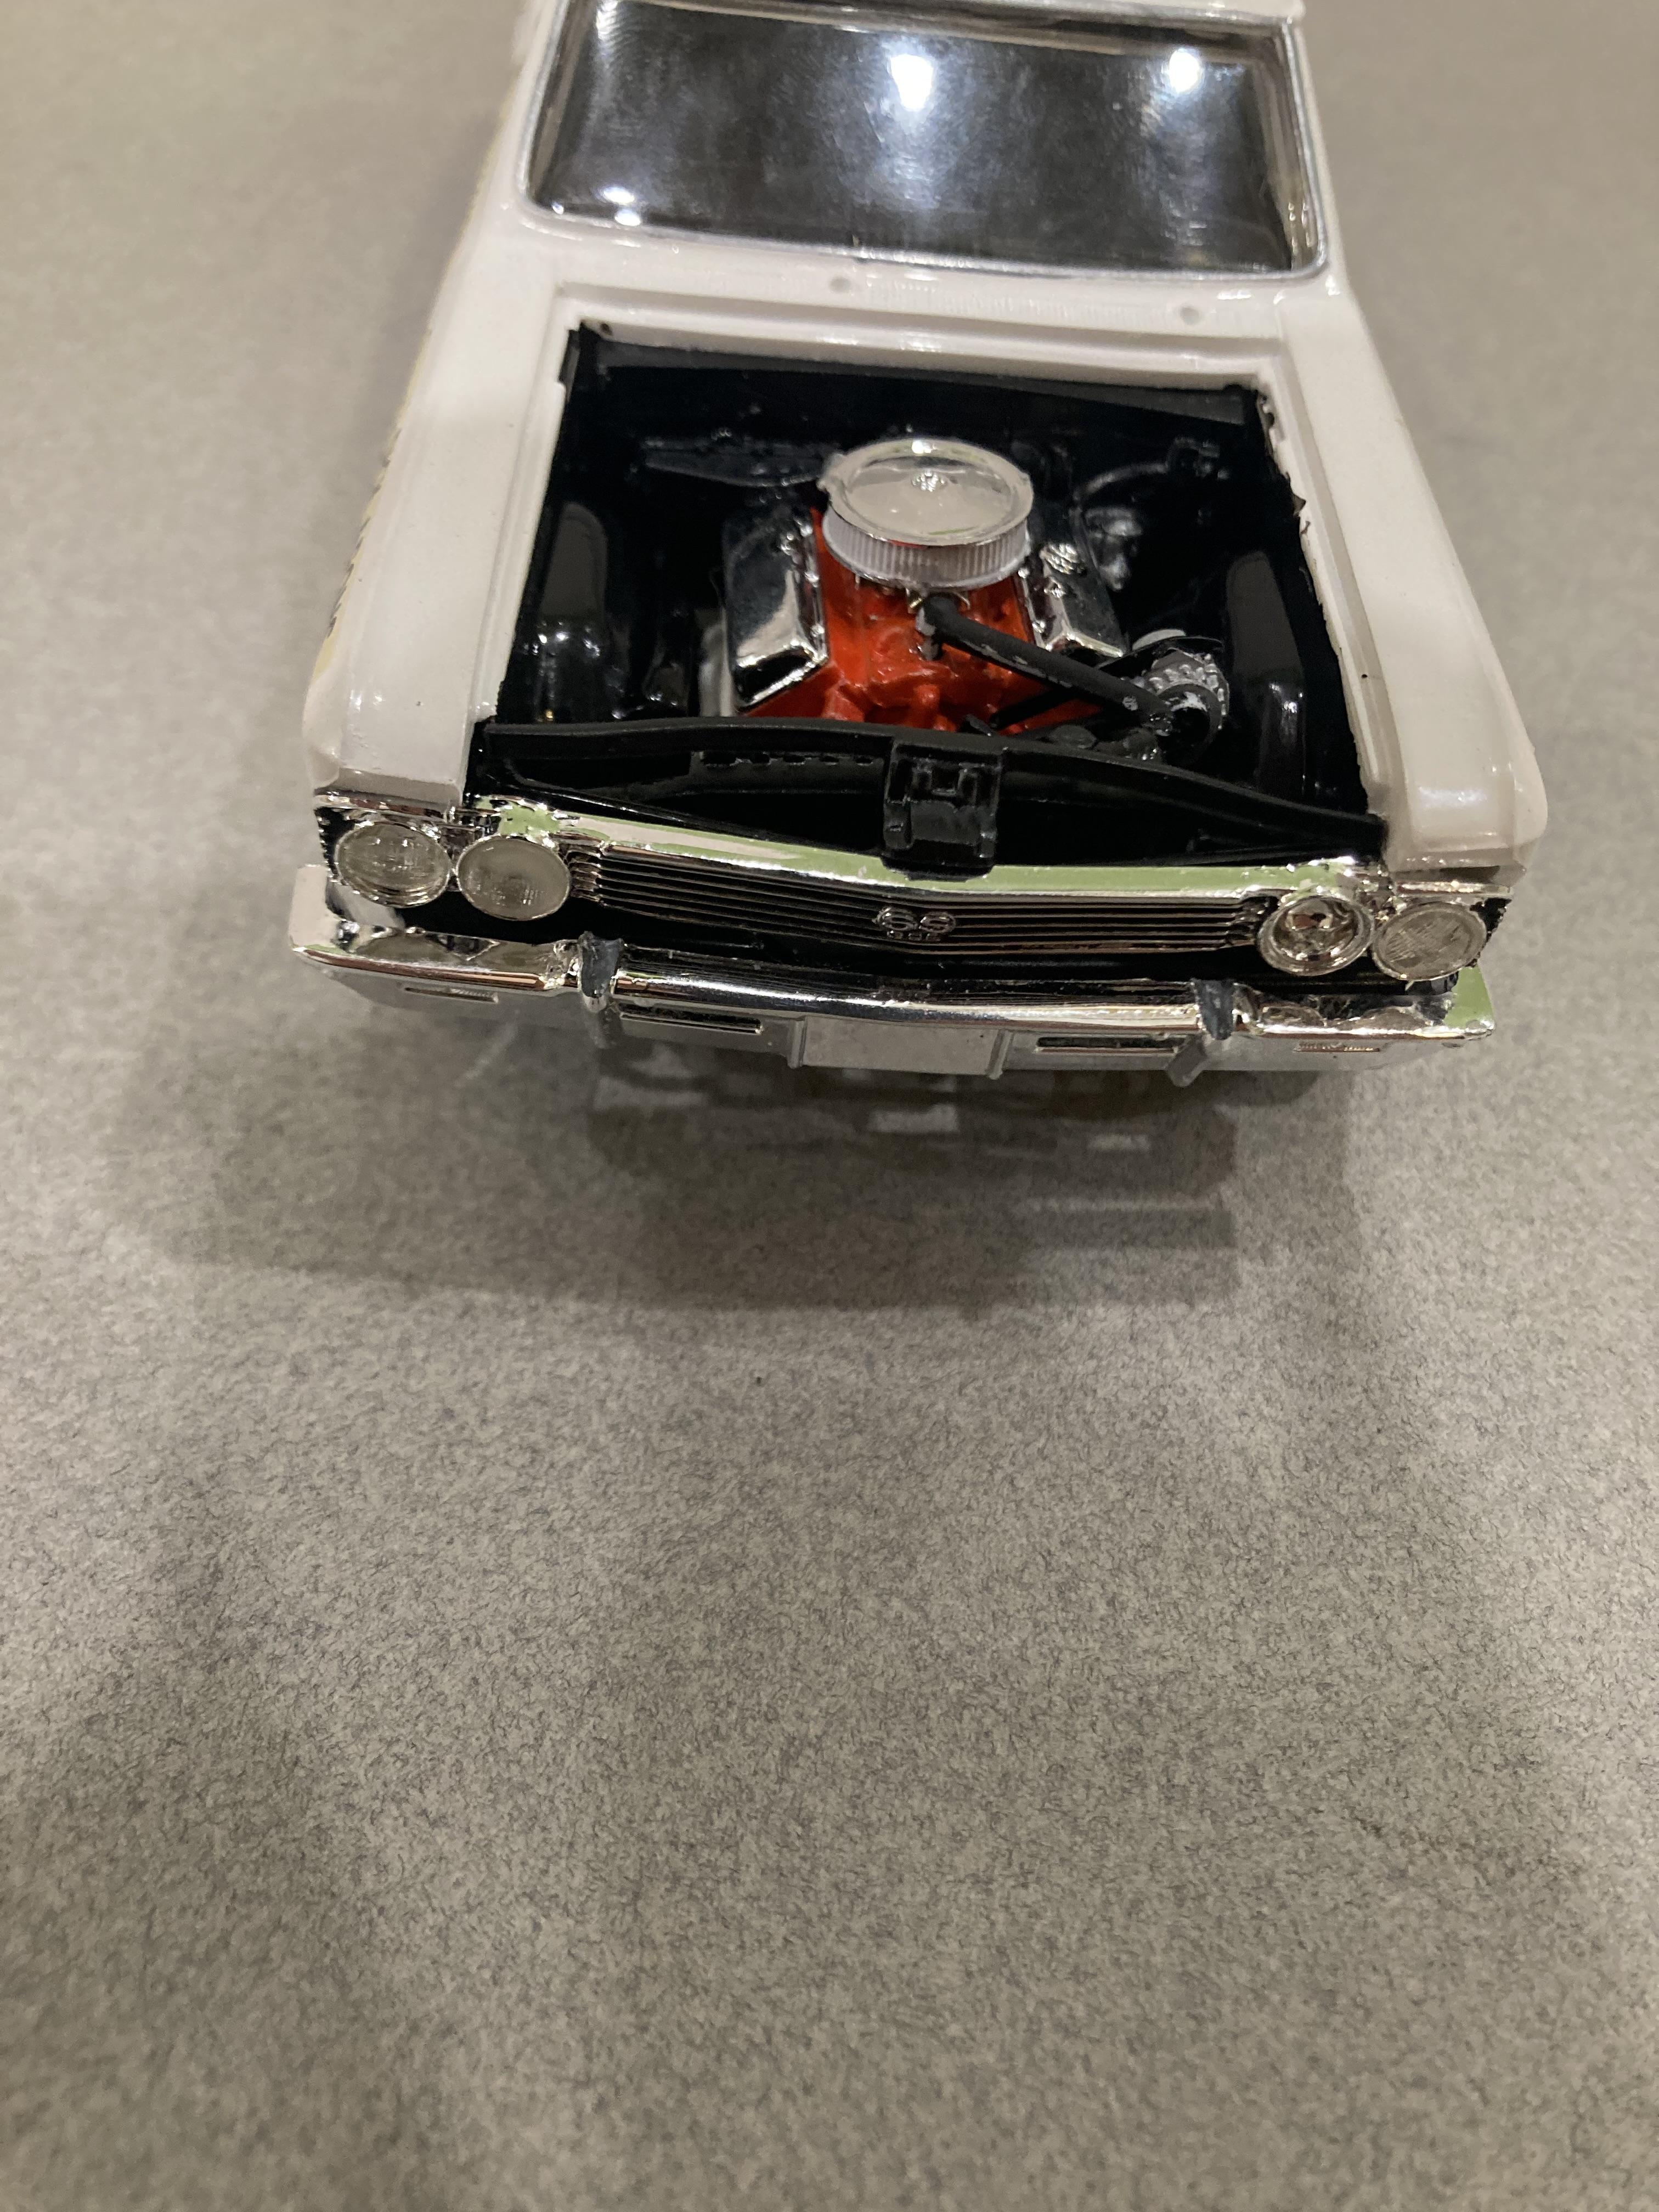
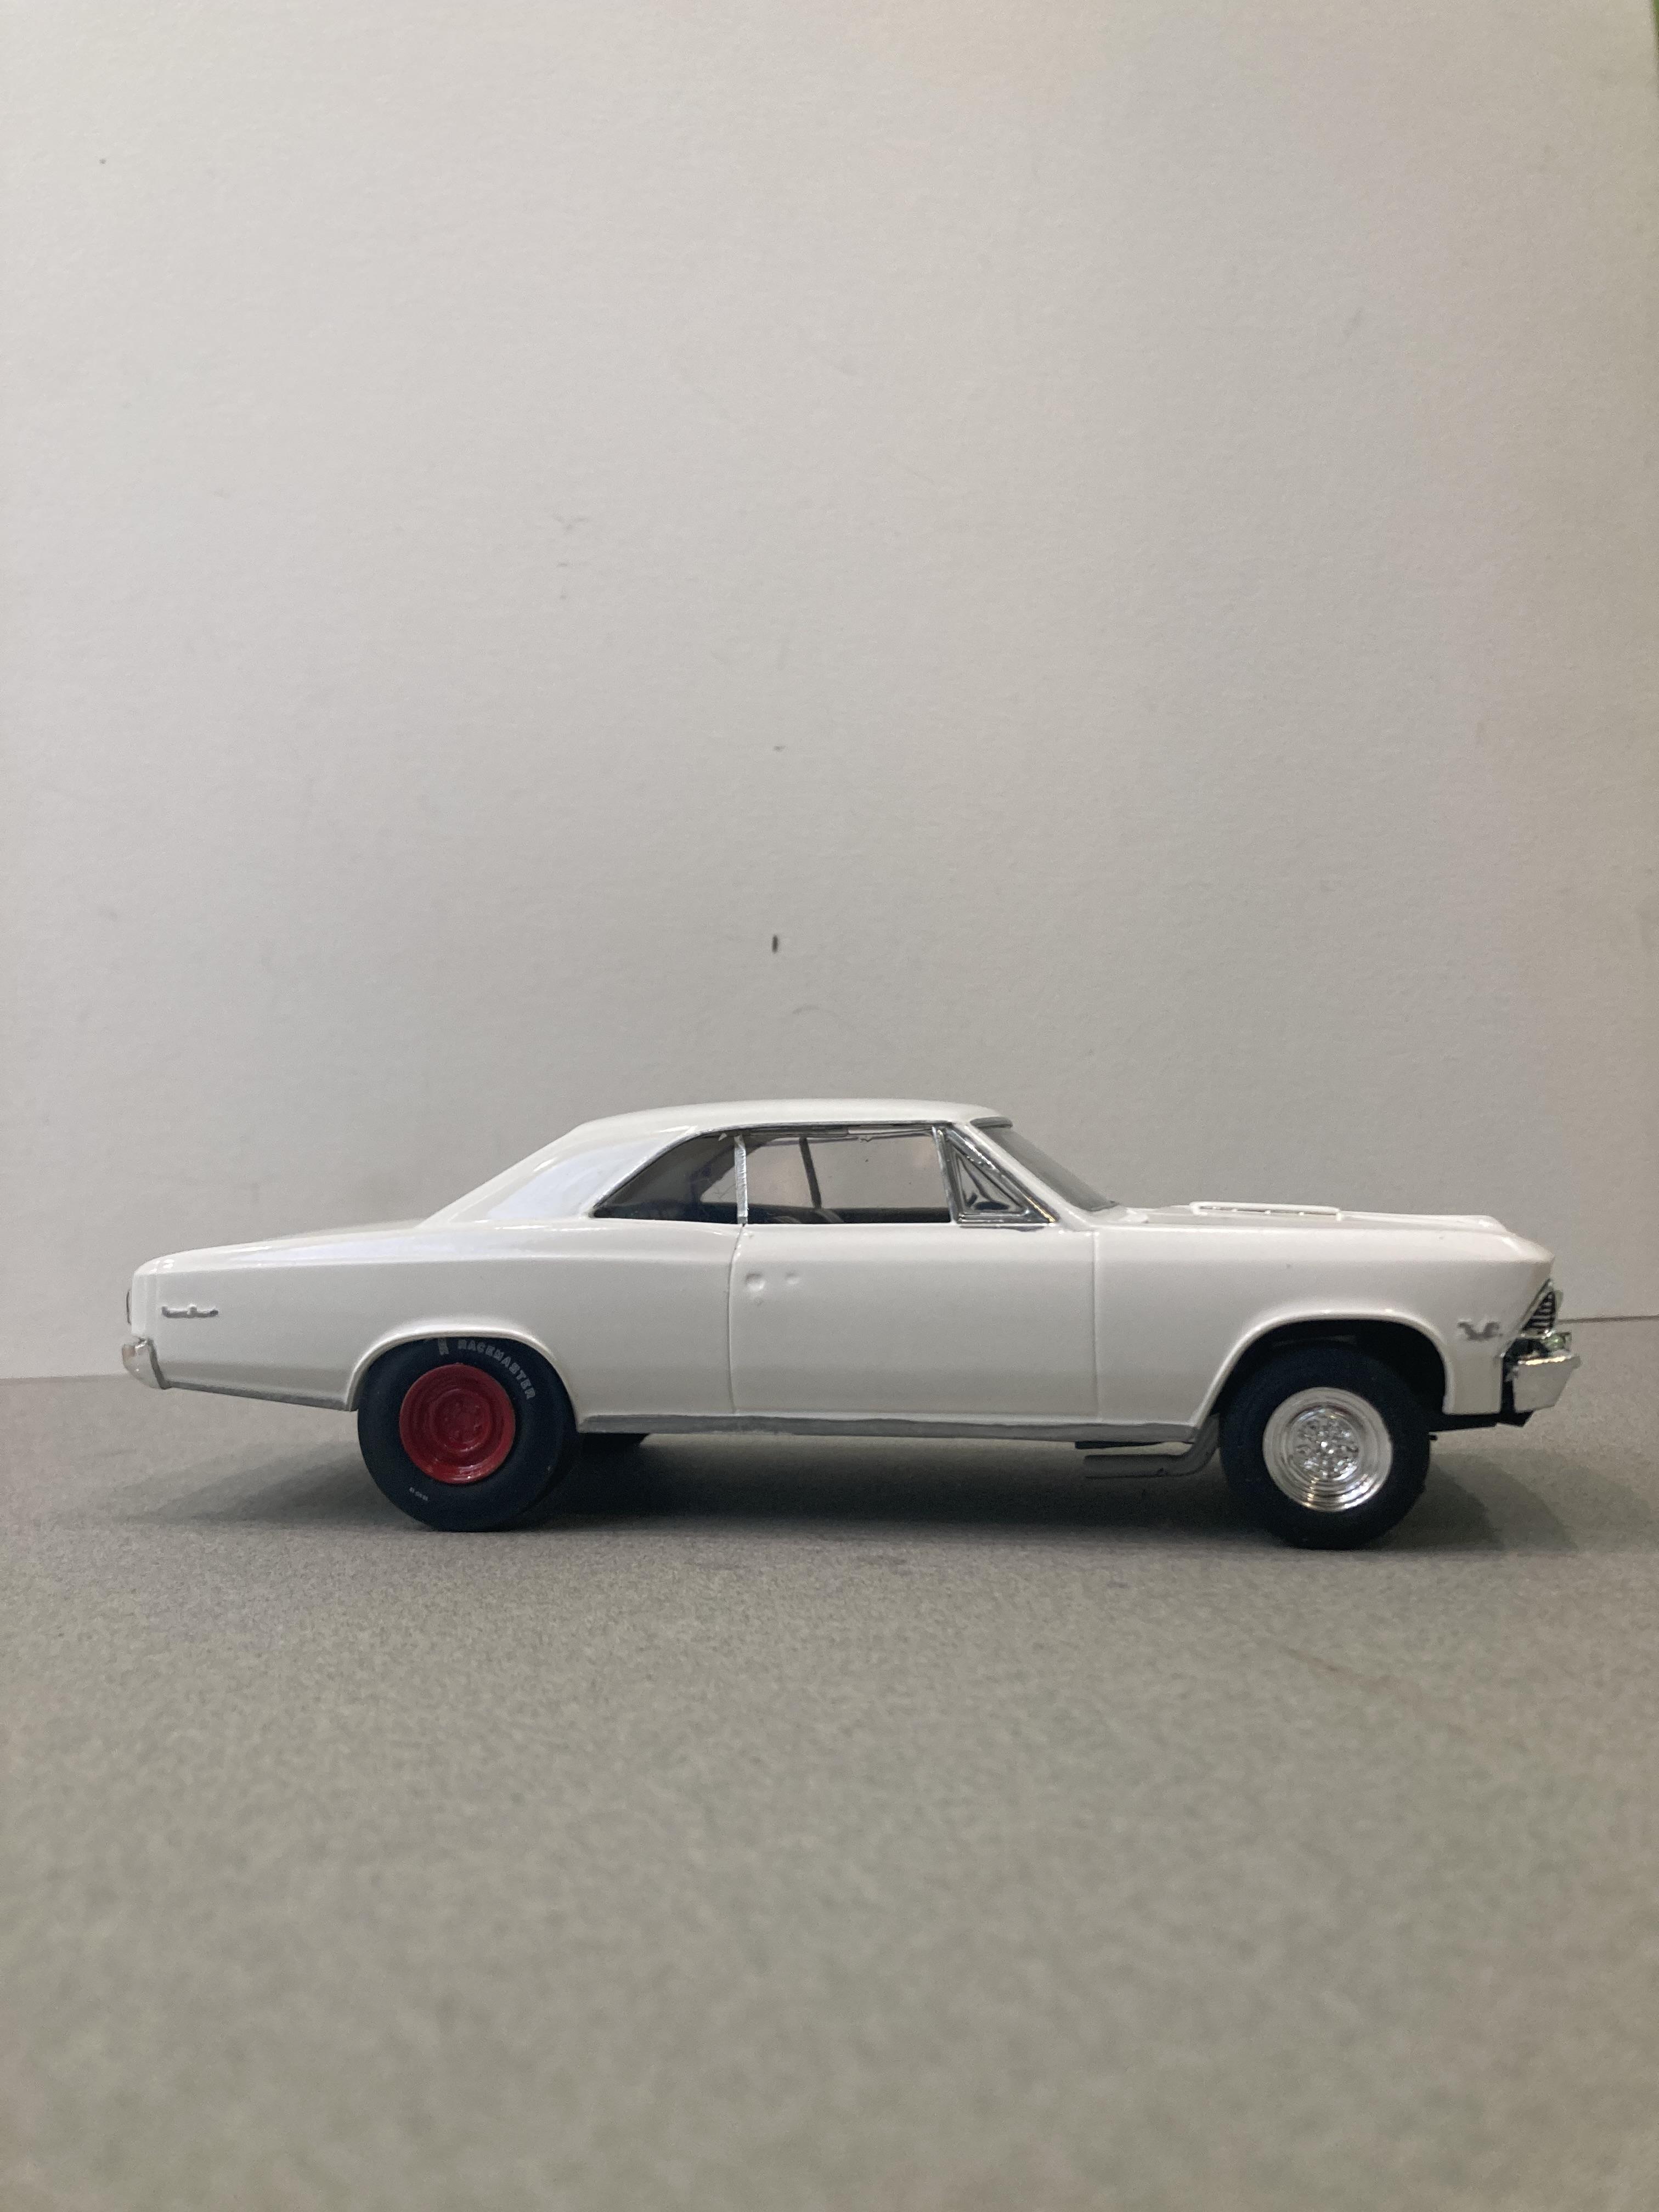
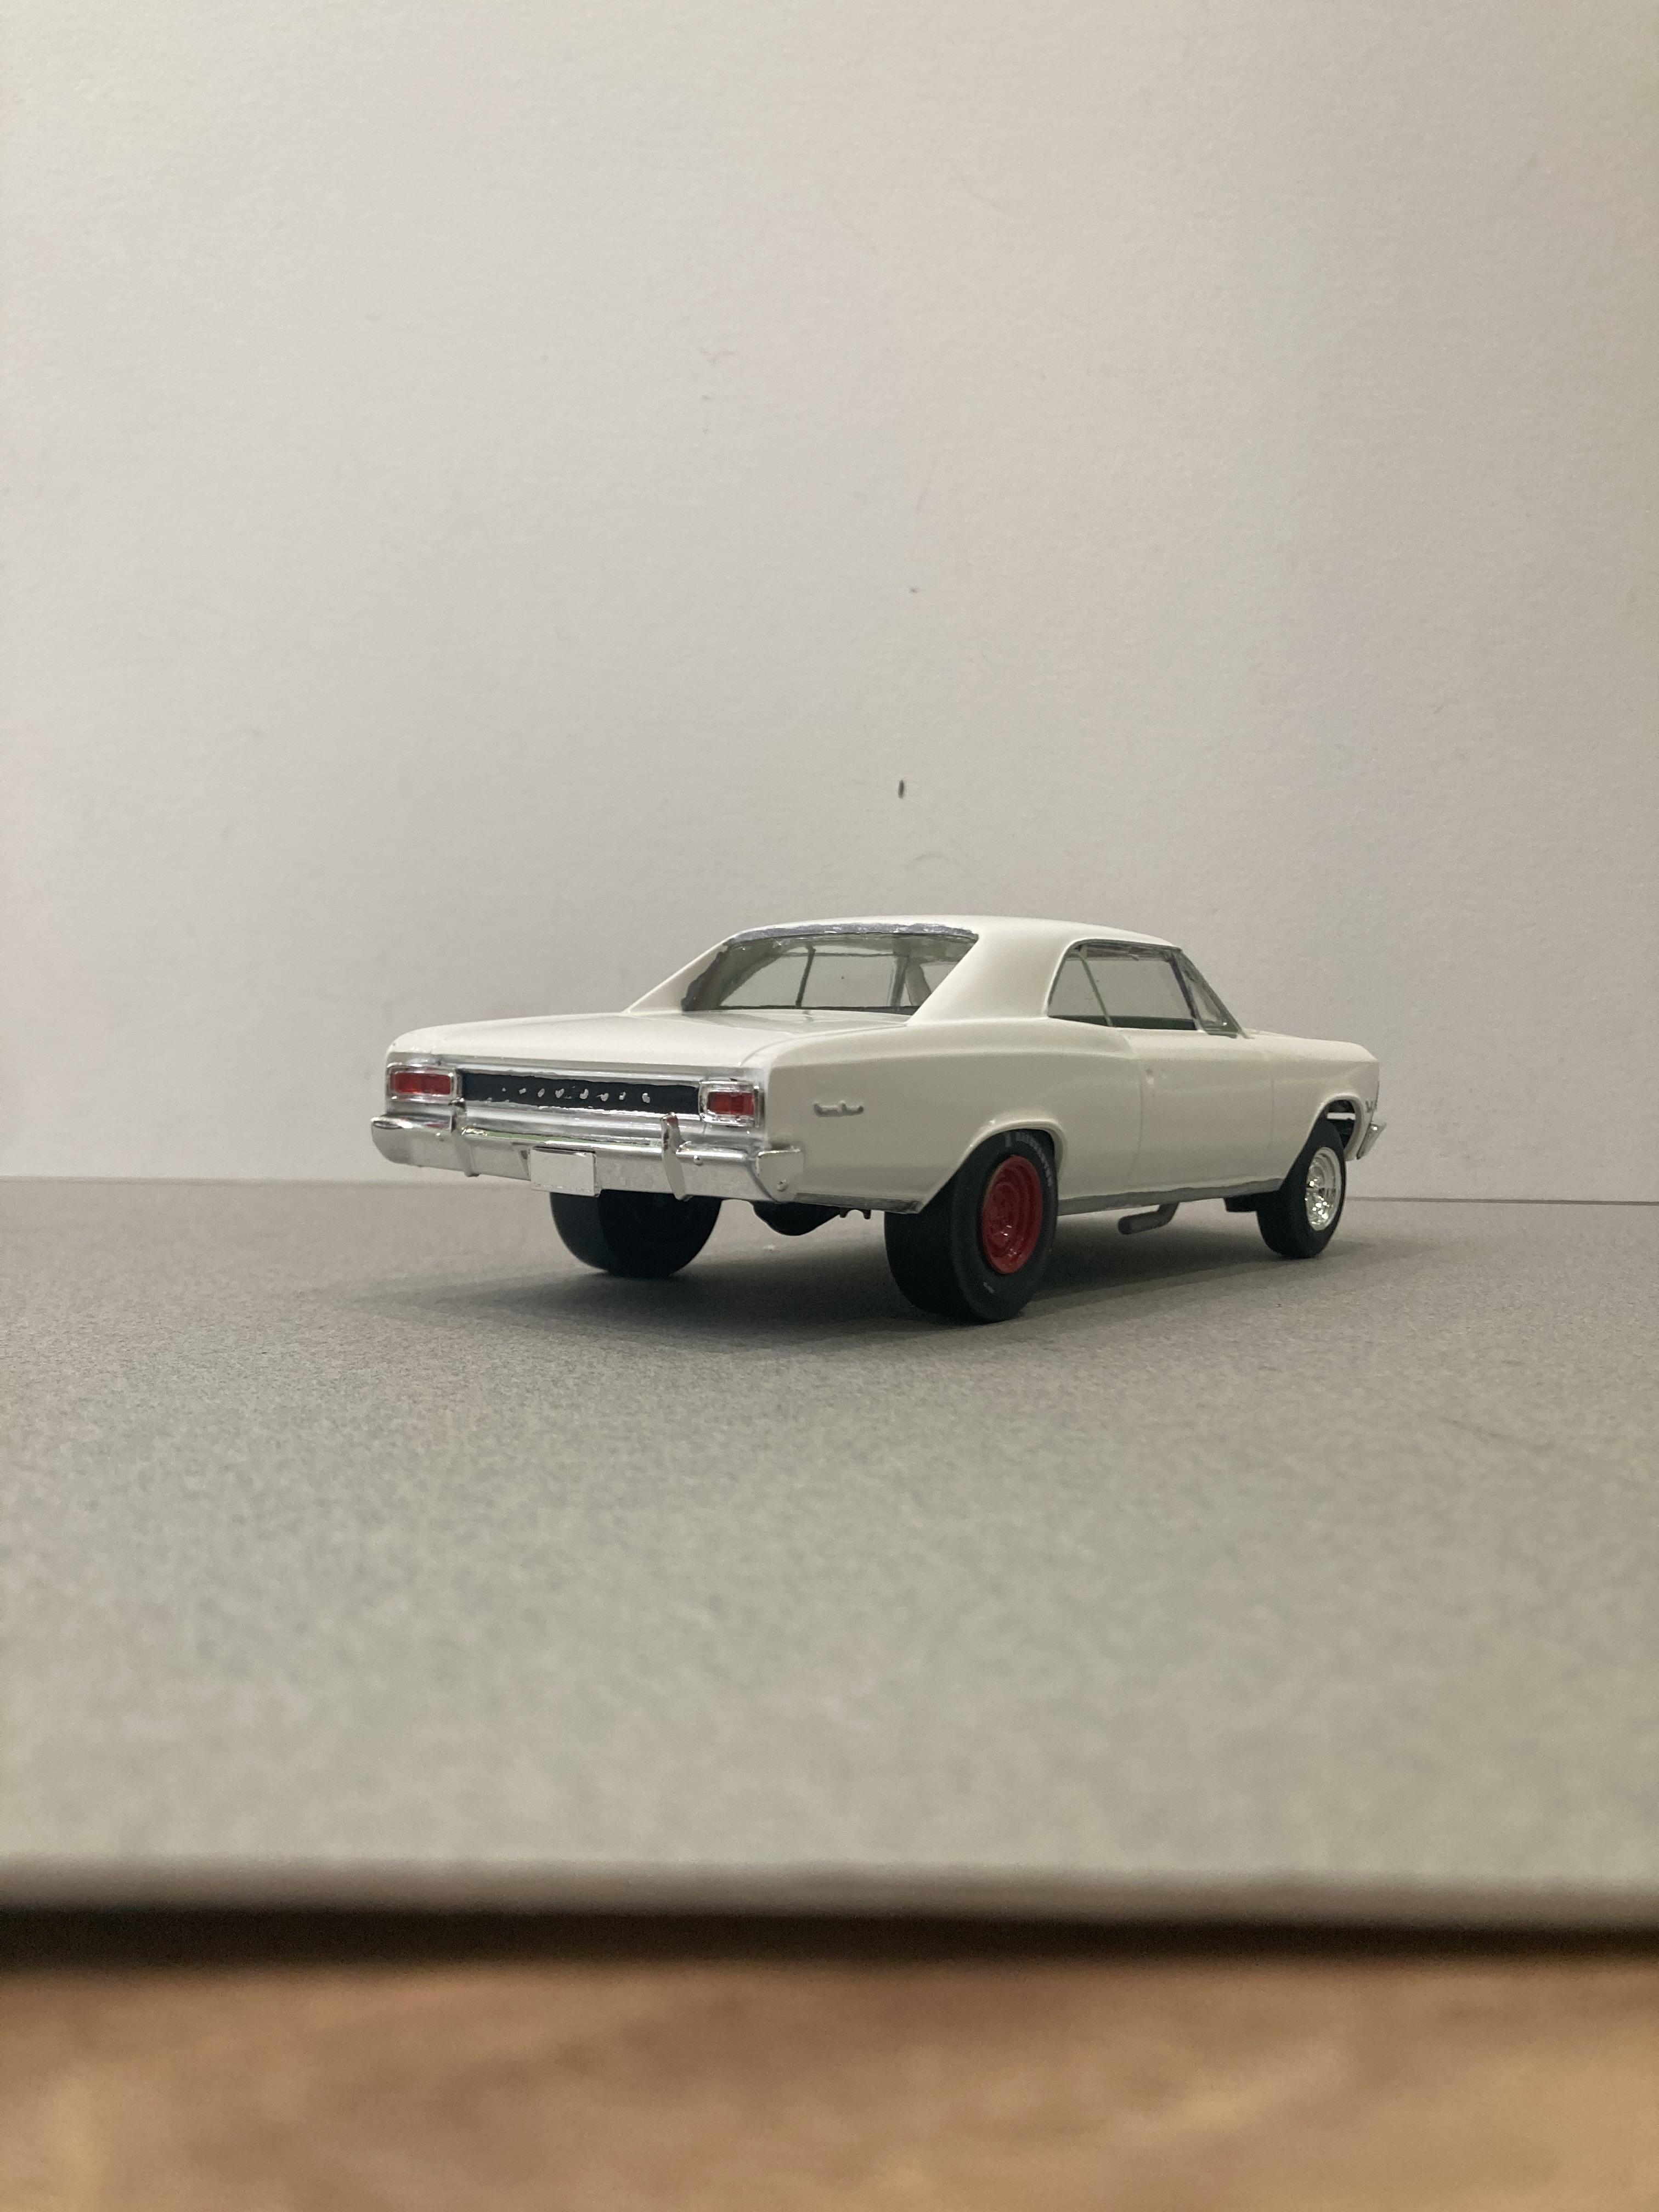
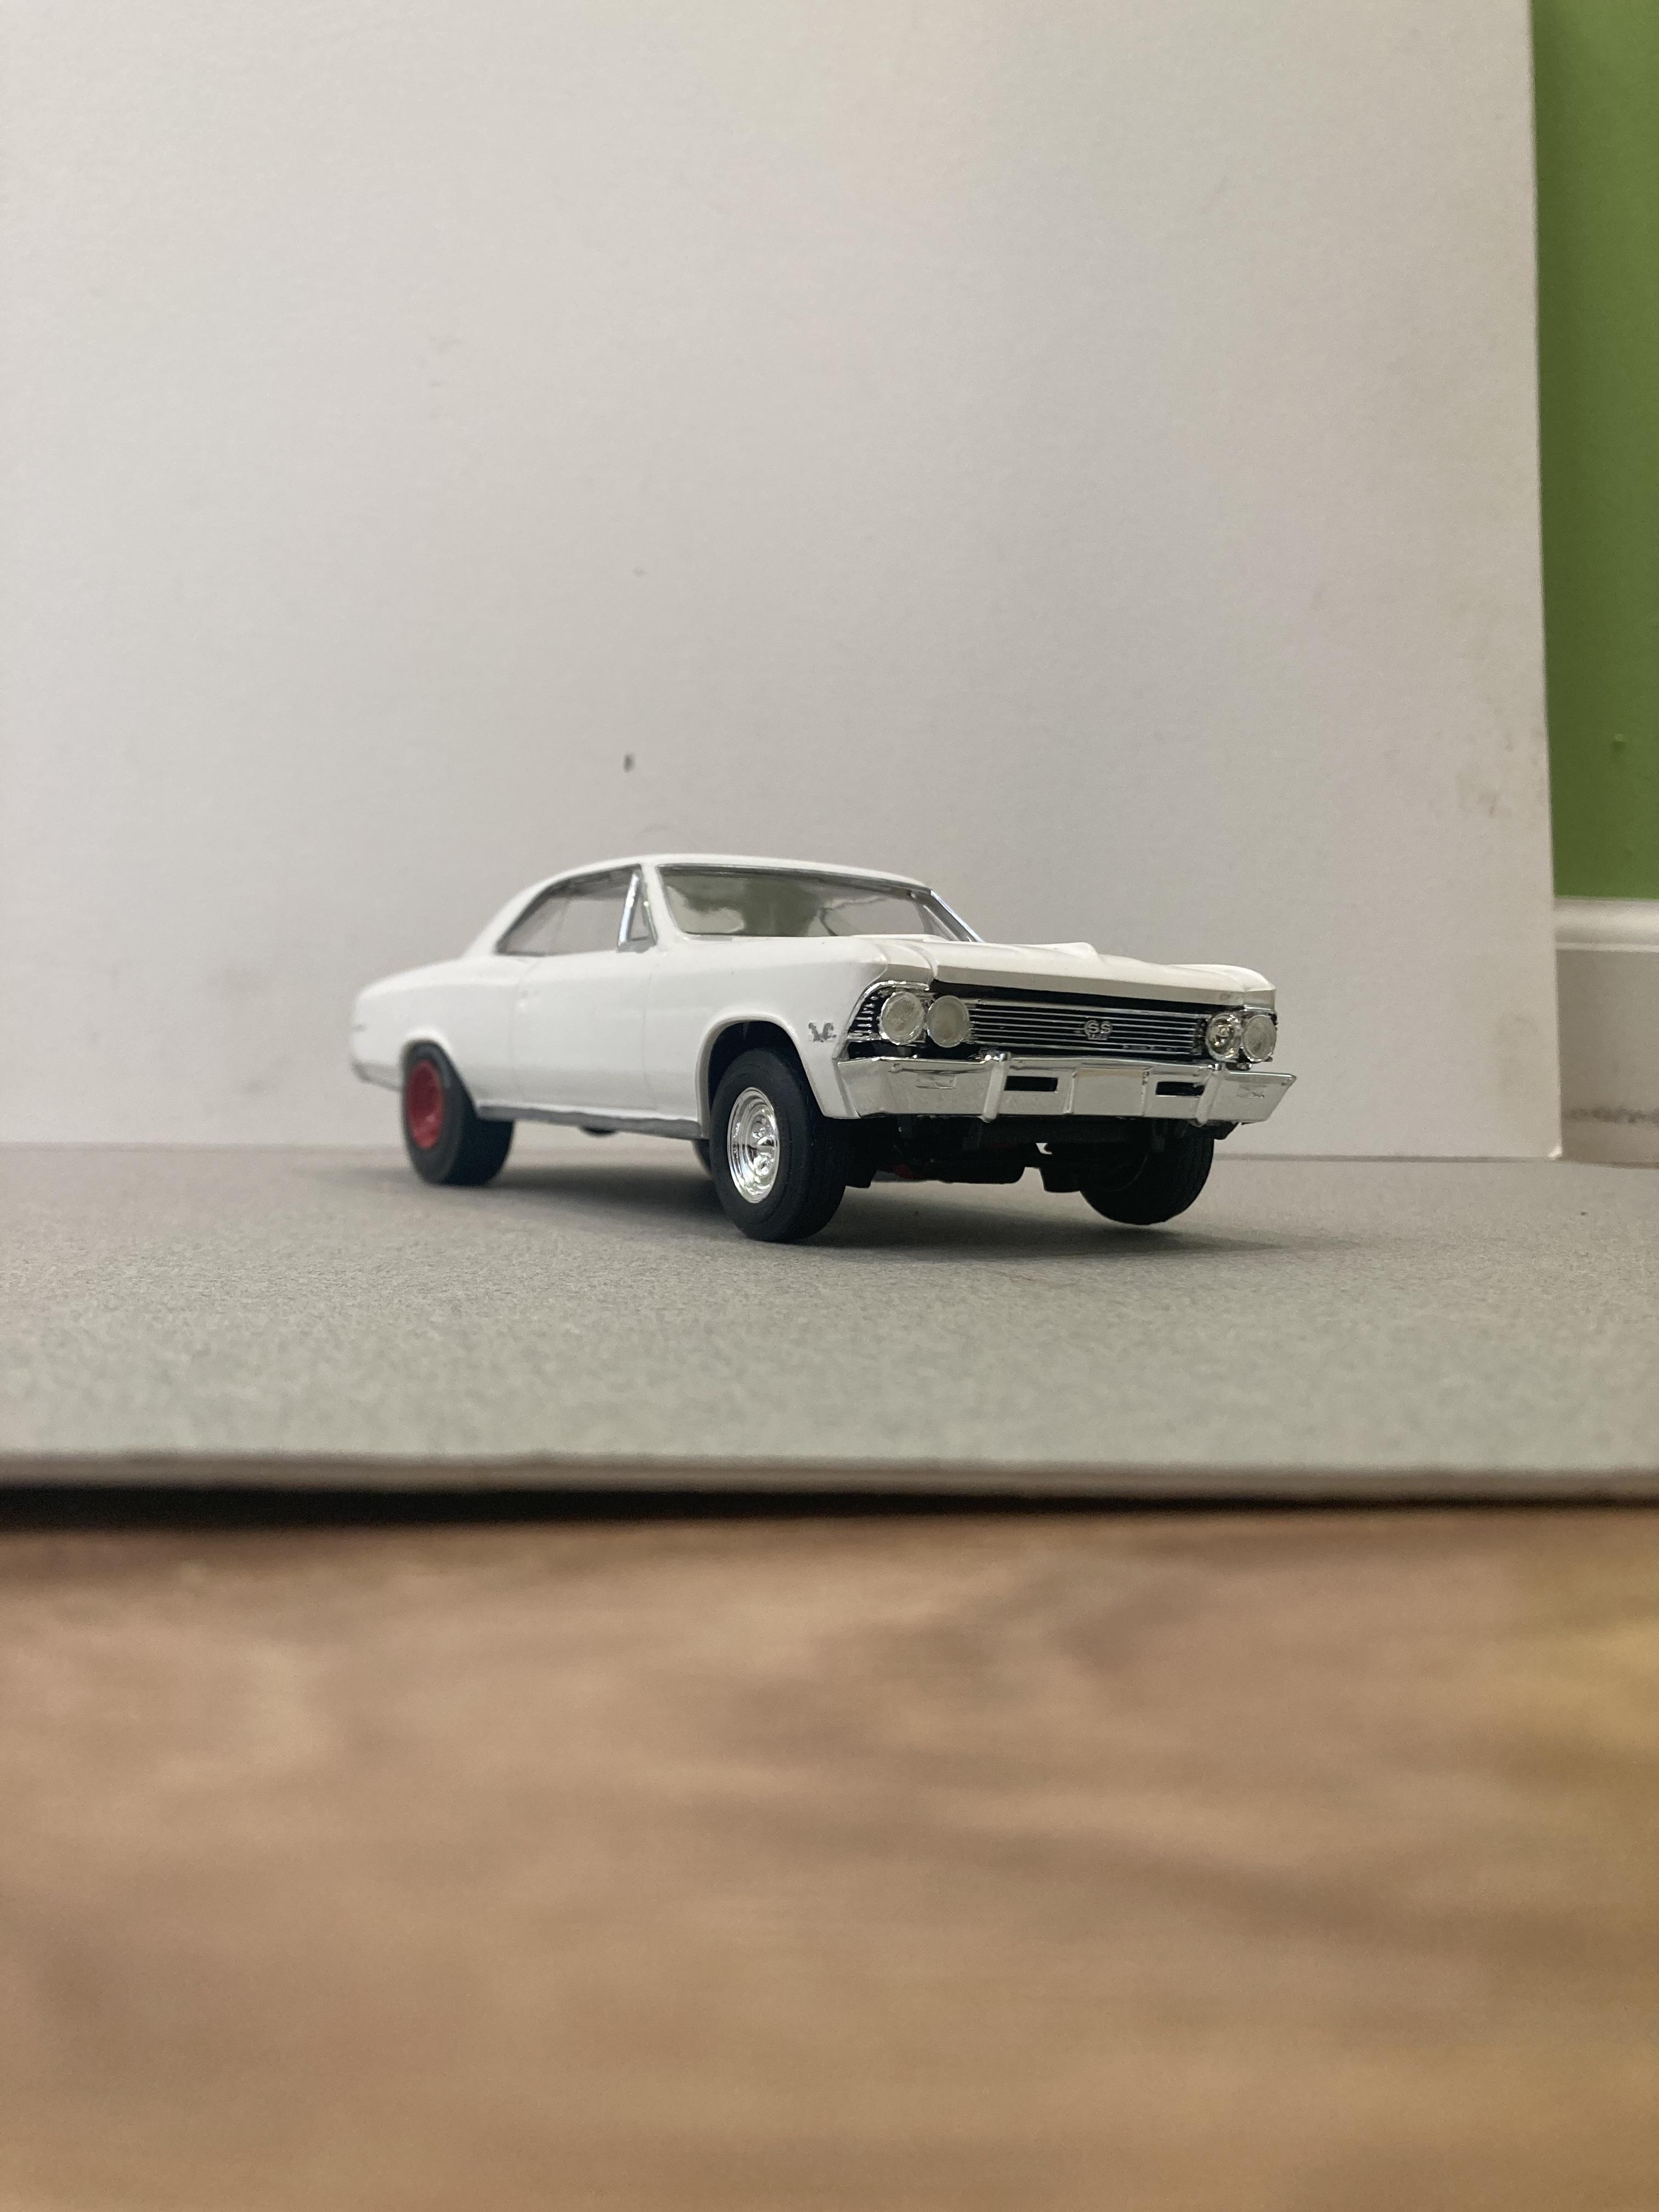
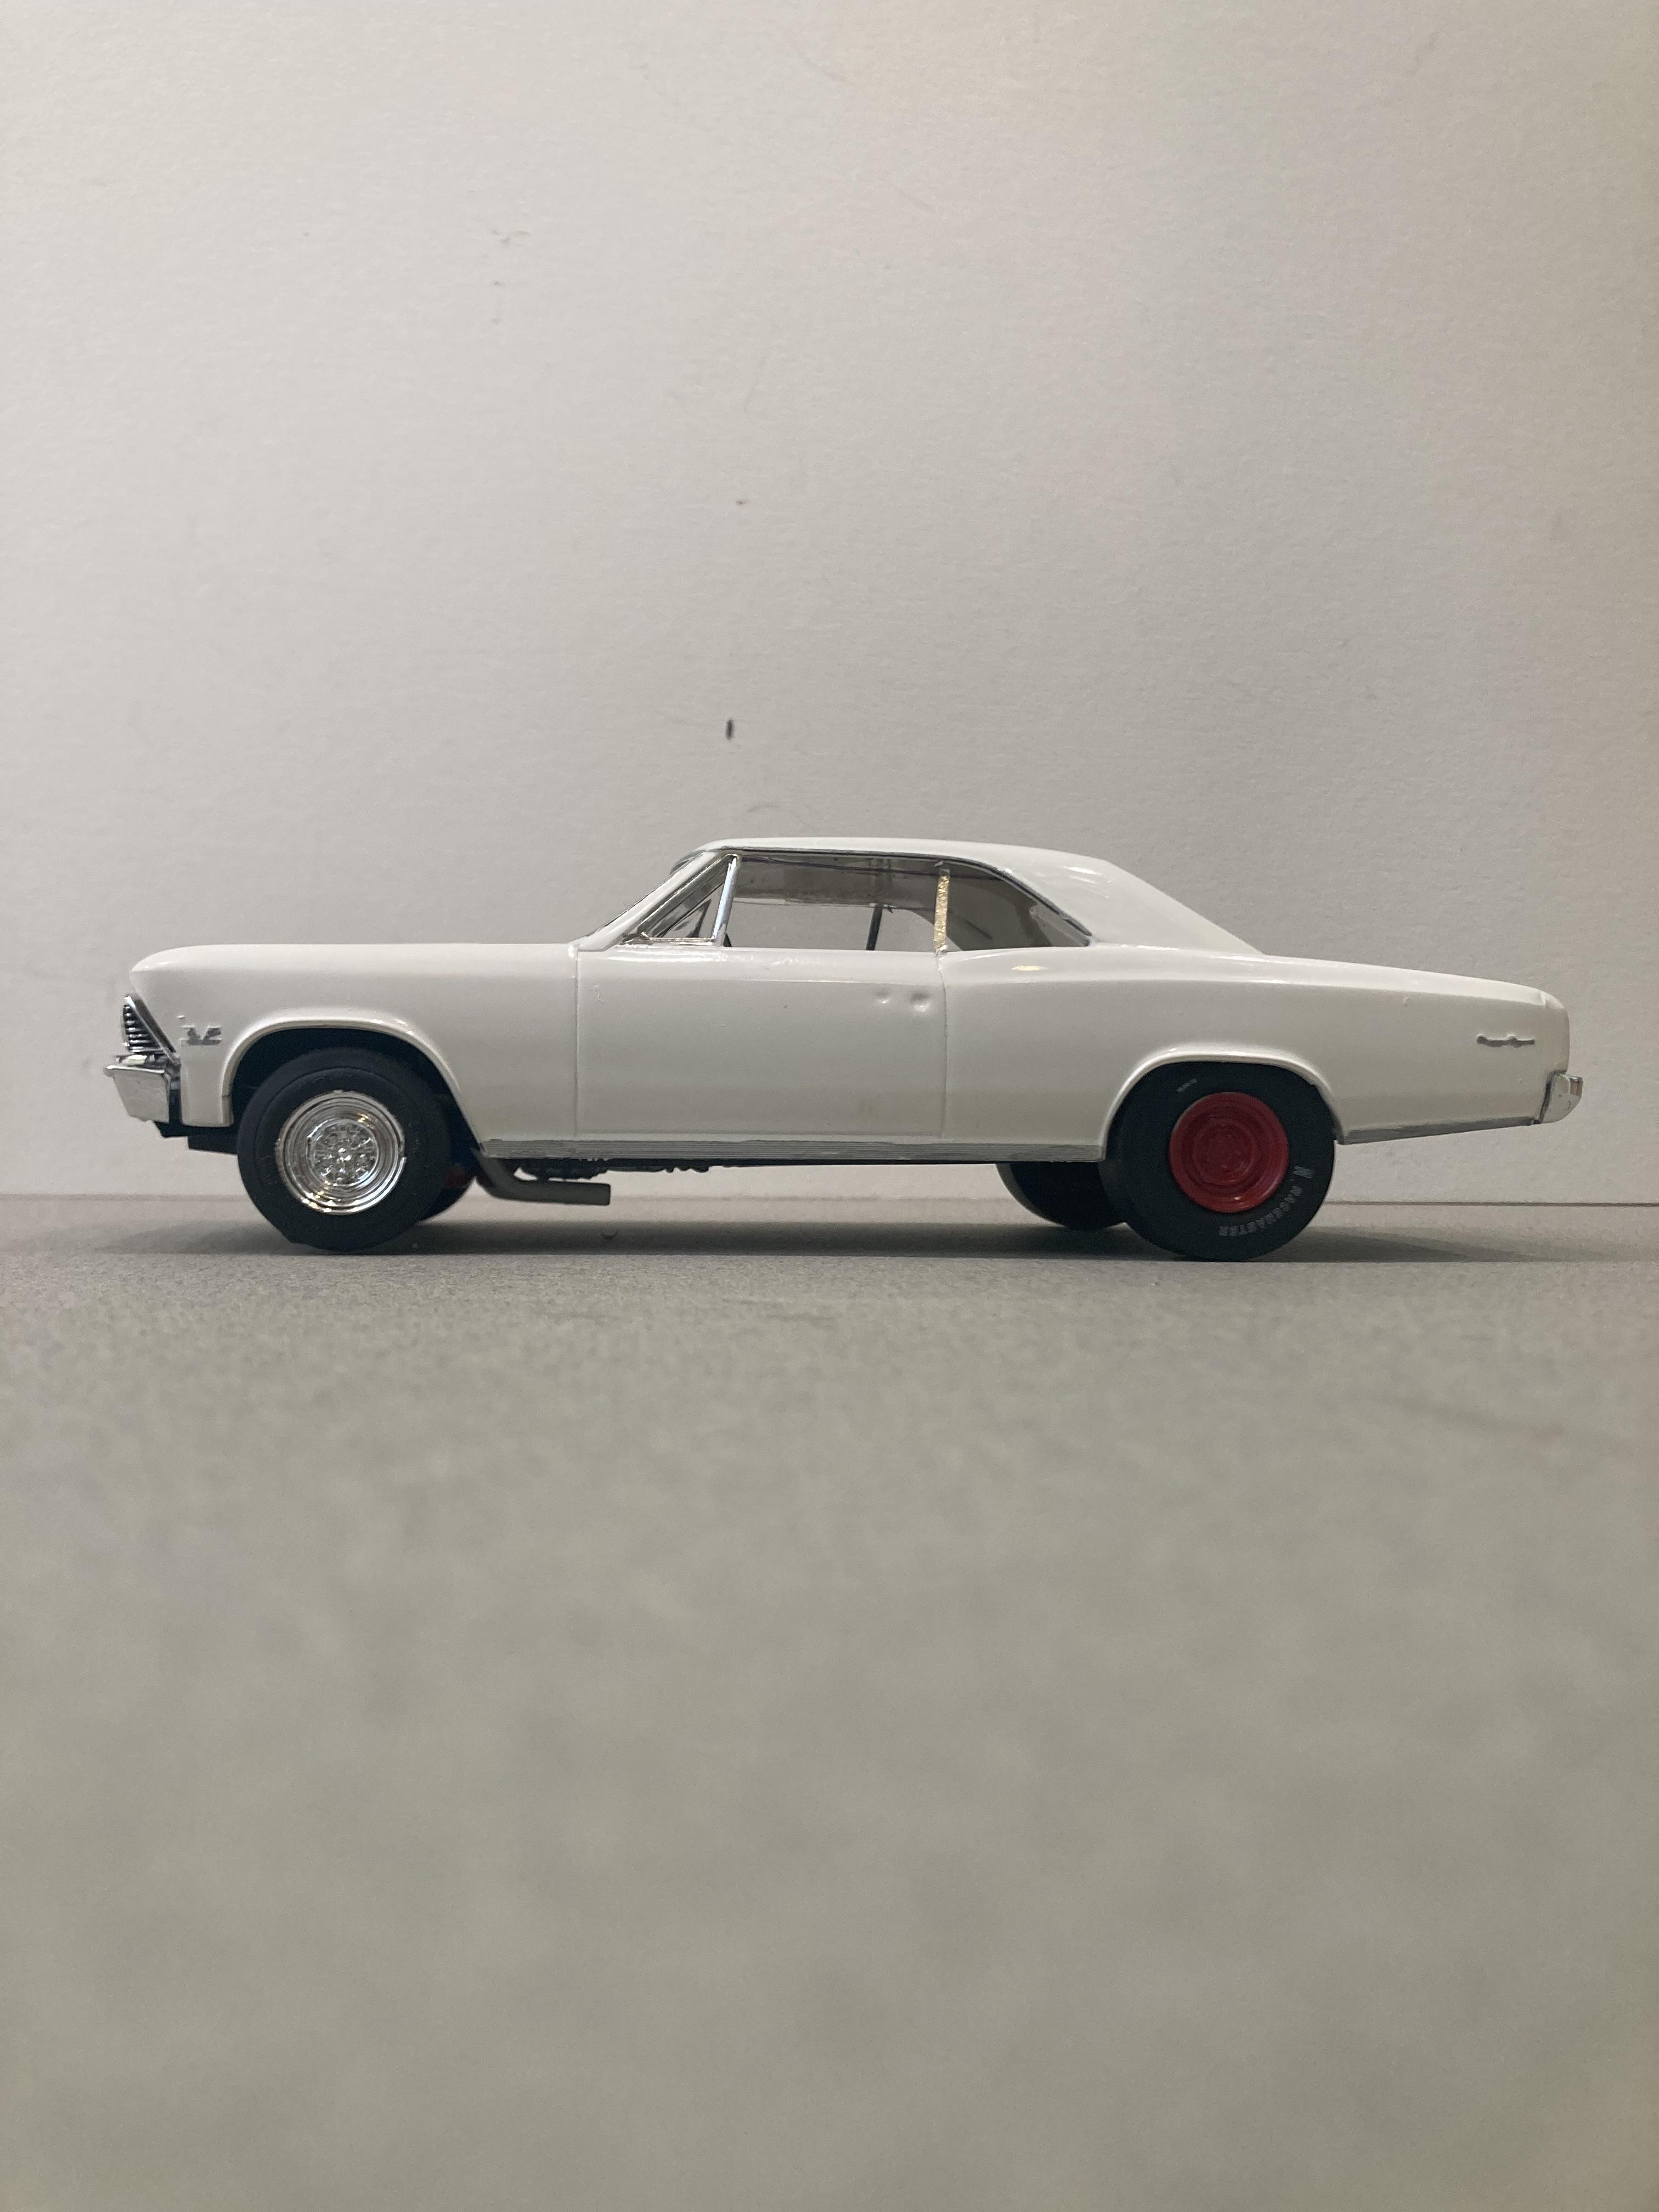
I just got this one finished it’s the AMT 1966 Chevelle . The kit wheels were swapped out for some steel wheels out of the parts box I believe they are Johann . I used the headers from the old pro nova kit and the slicks are AMT. The paint job is testors white enamel. As for the decals I have no clue who made them or how old they are, but what I didn’t find out until I put them on is that the clear that they used to seal them must’ve yellowed. I’m not real happy with how they came out. Unless I can get new ones made it’s what I’m stuck with. It’s still a pretty cool replica of a seldom seen stocker . Until next time thanks for looking. Mike
-
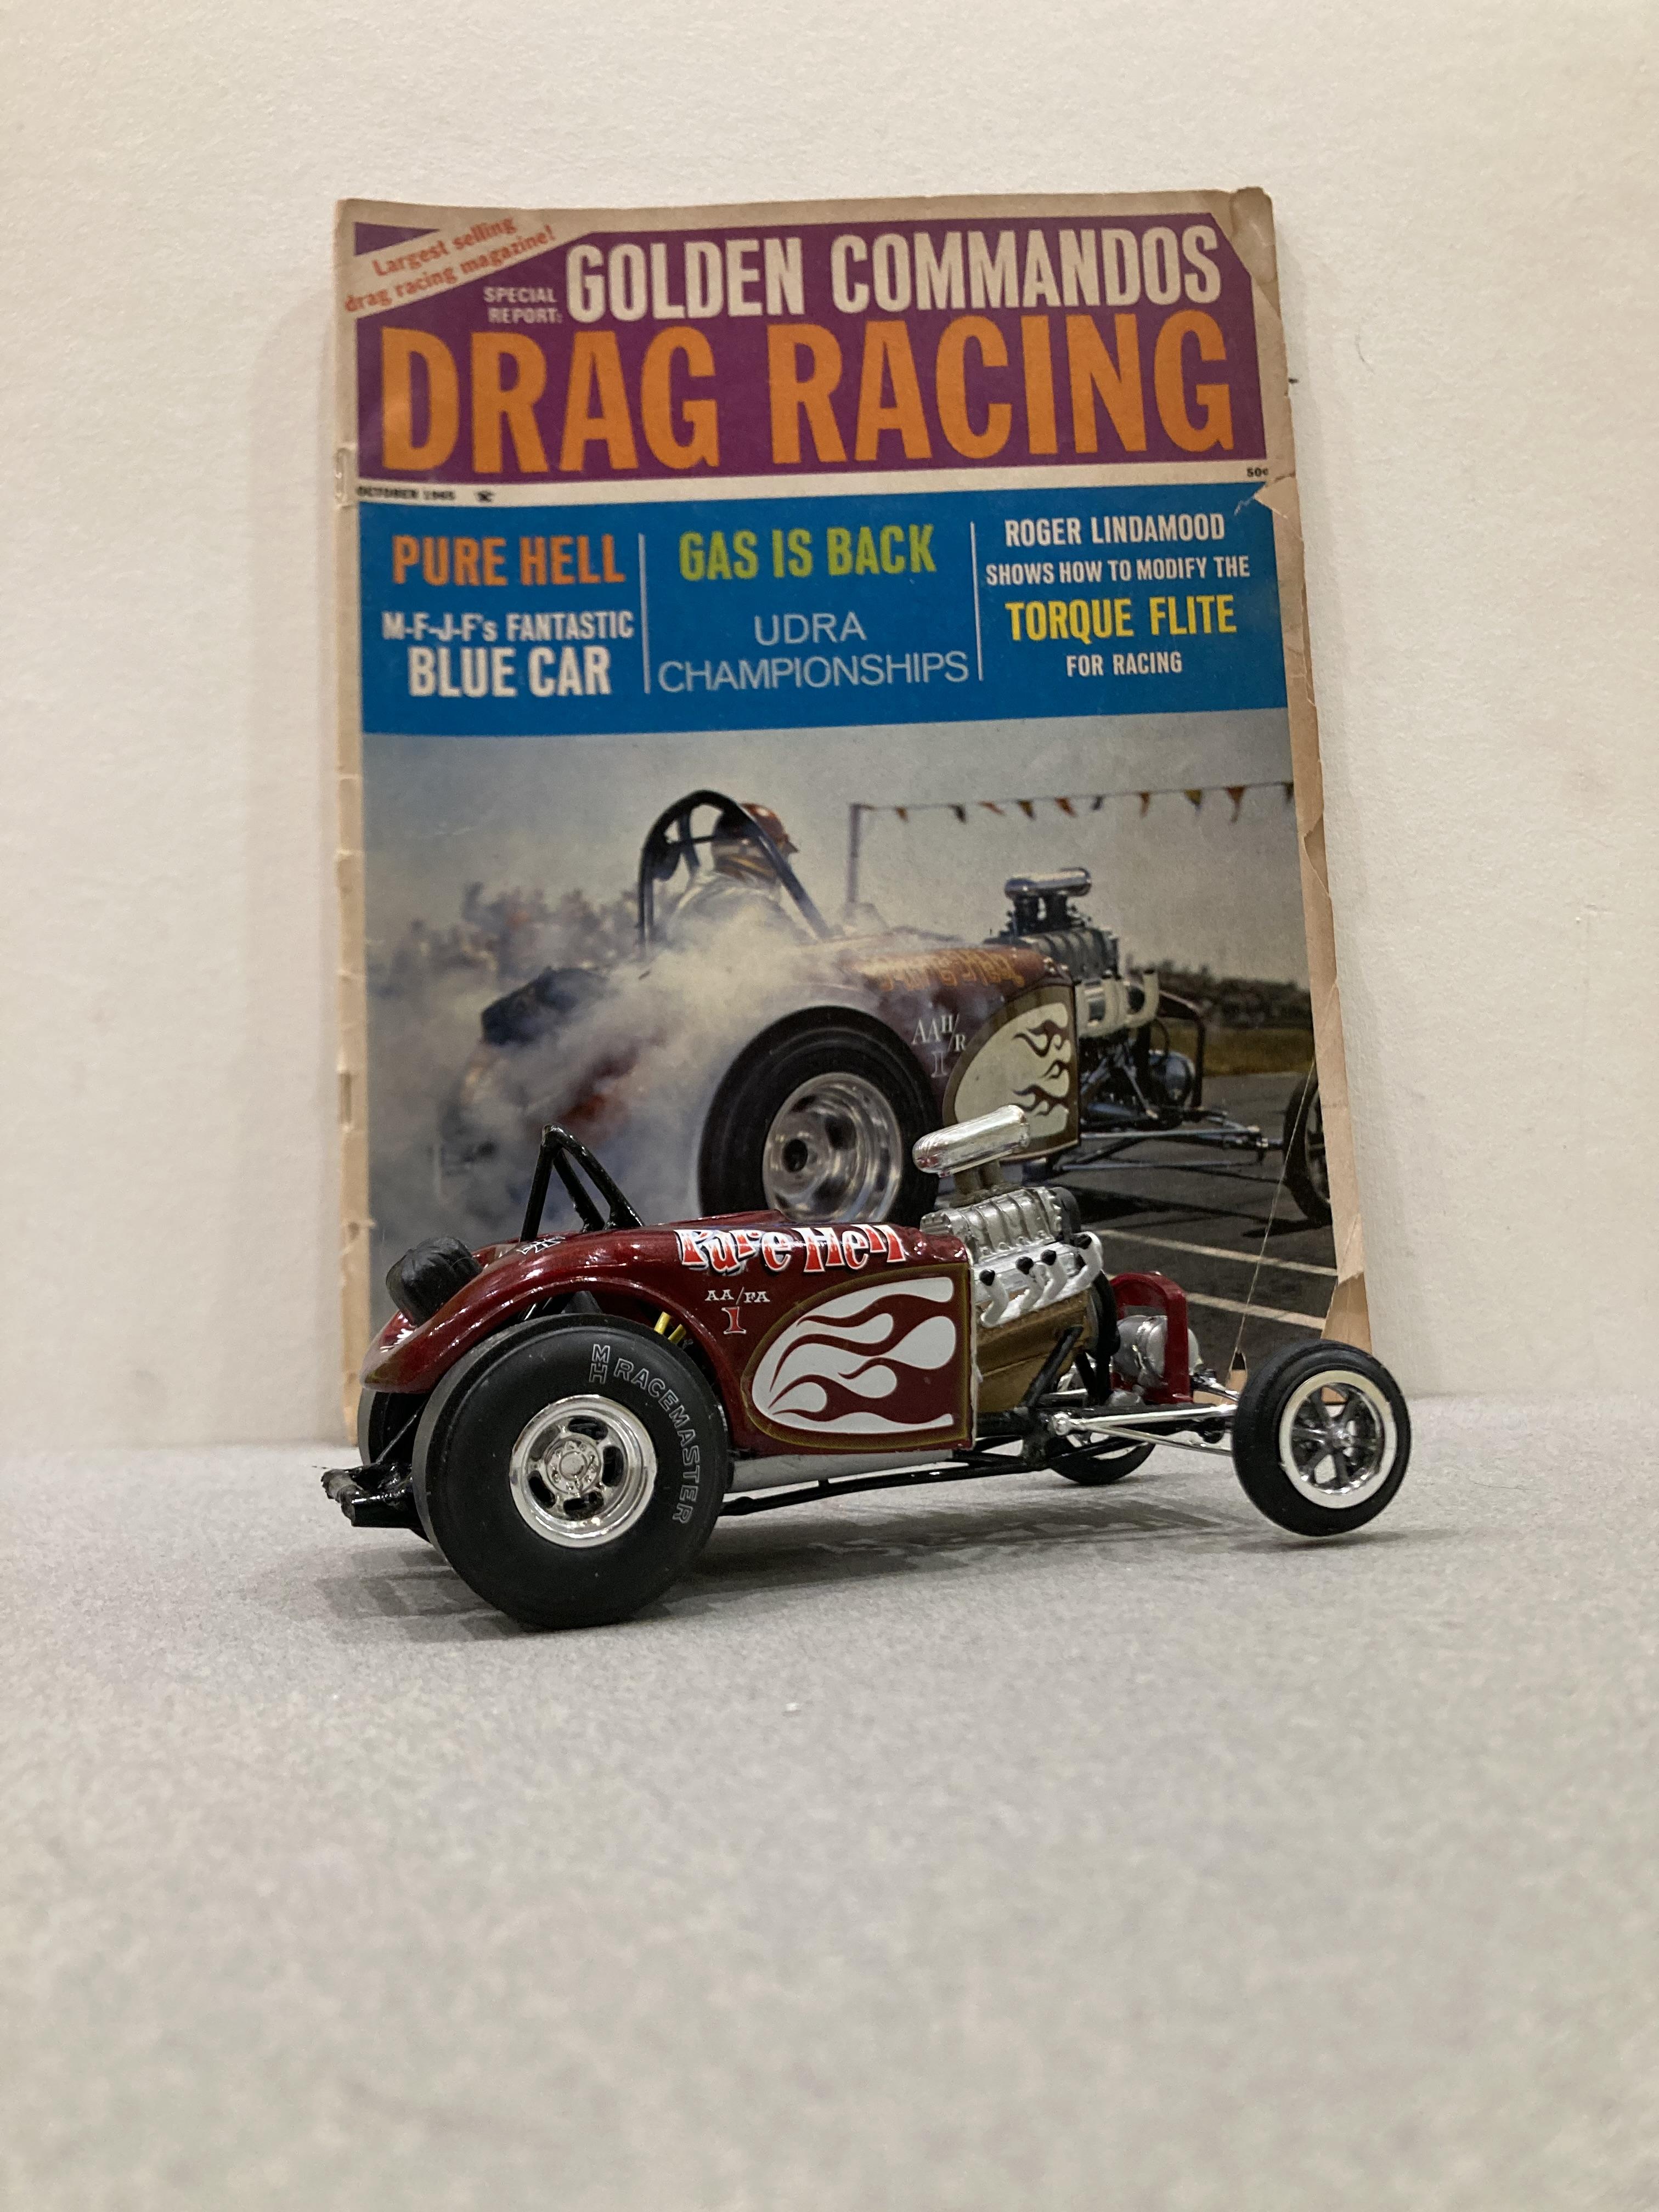
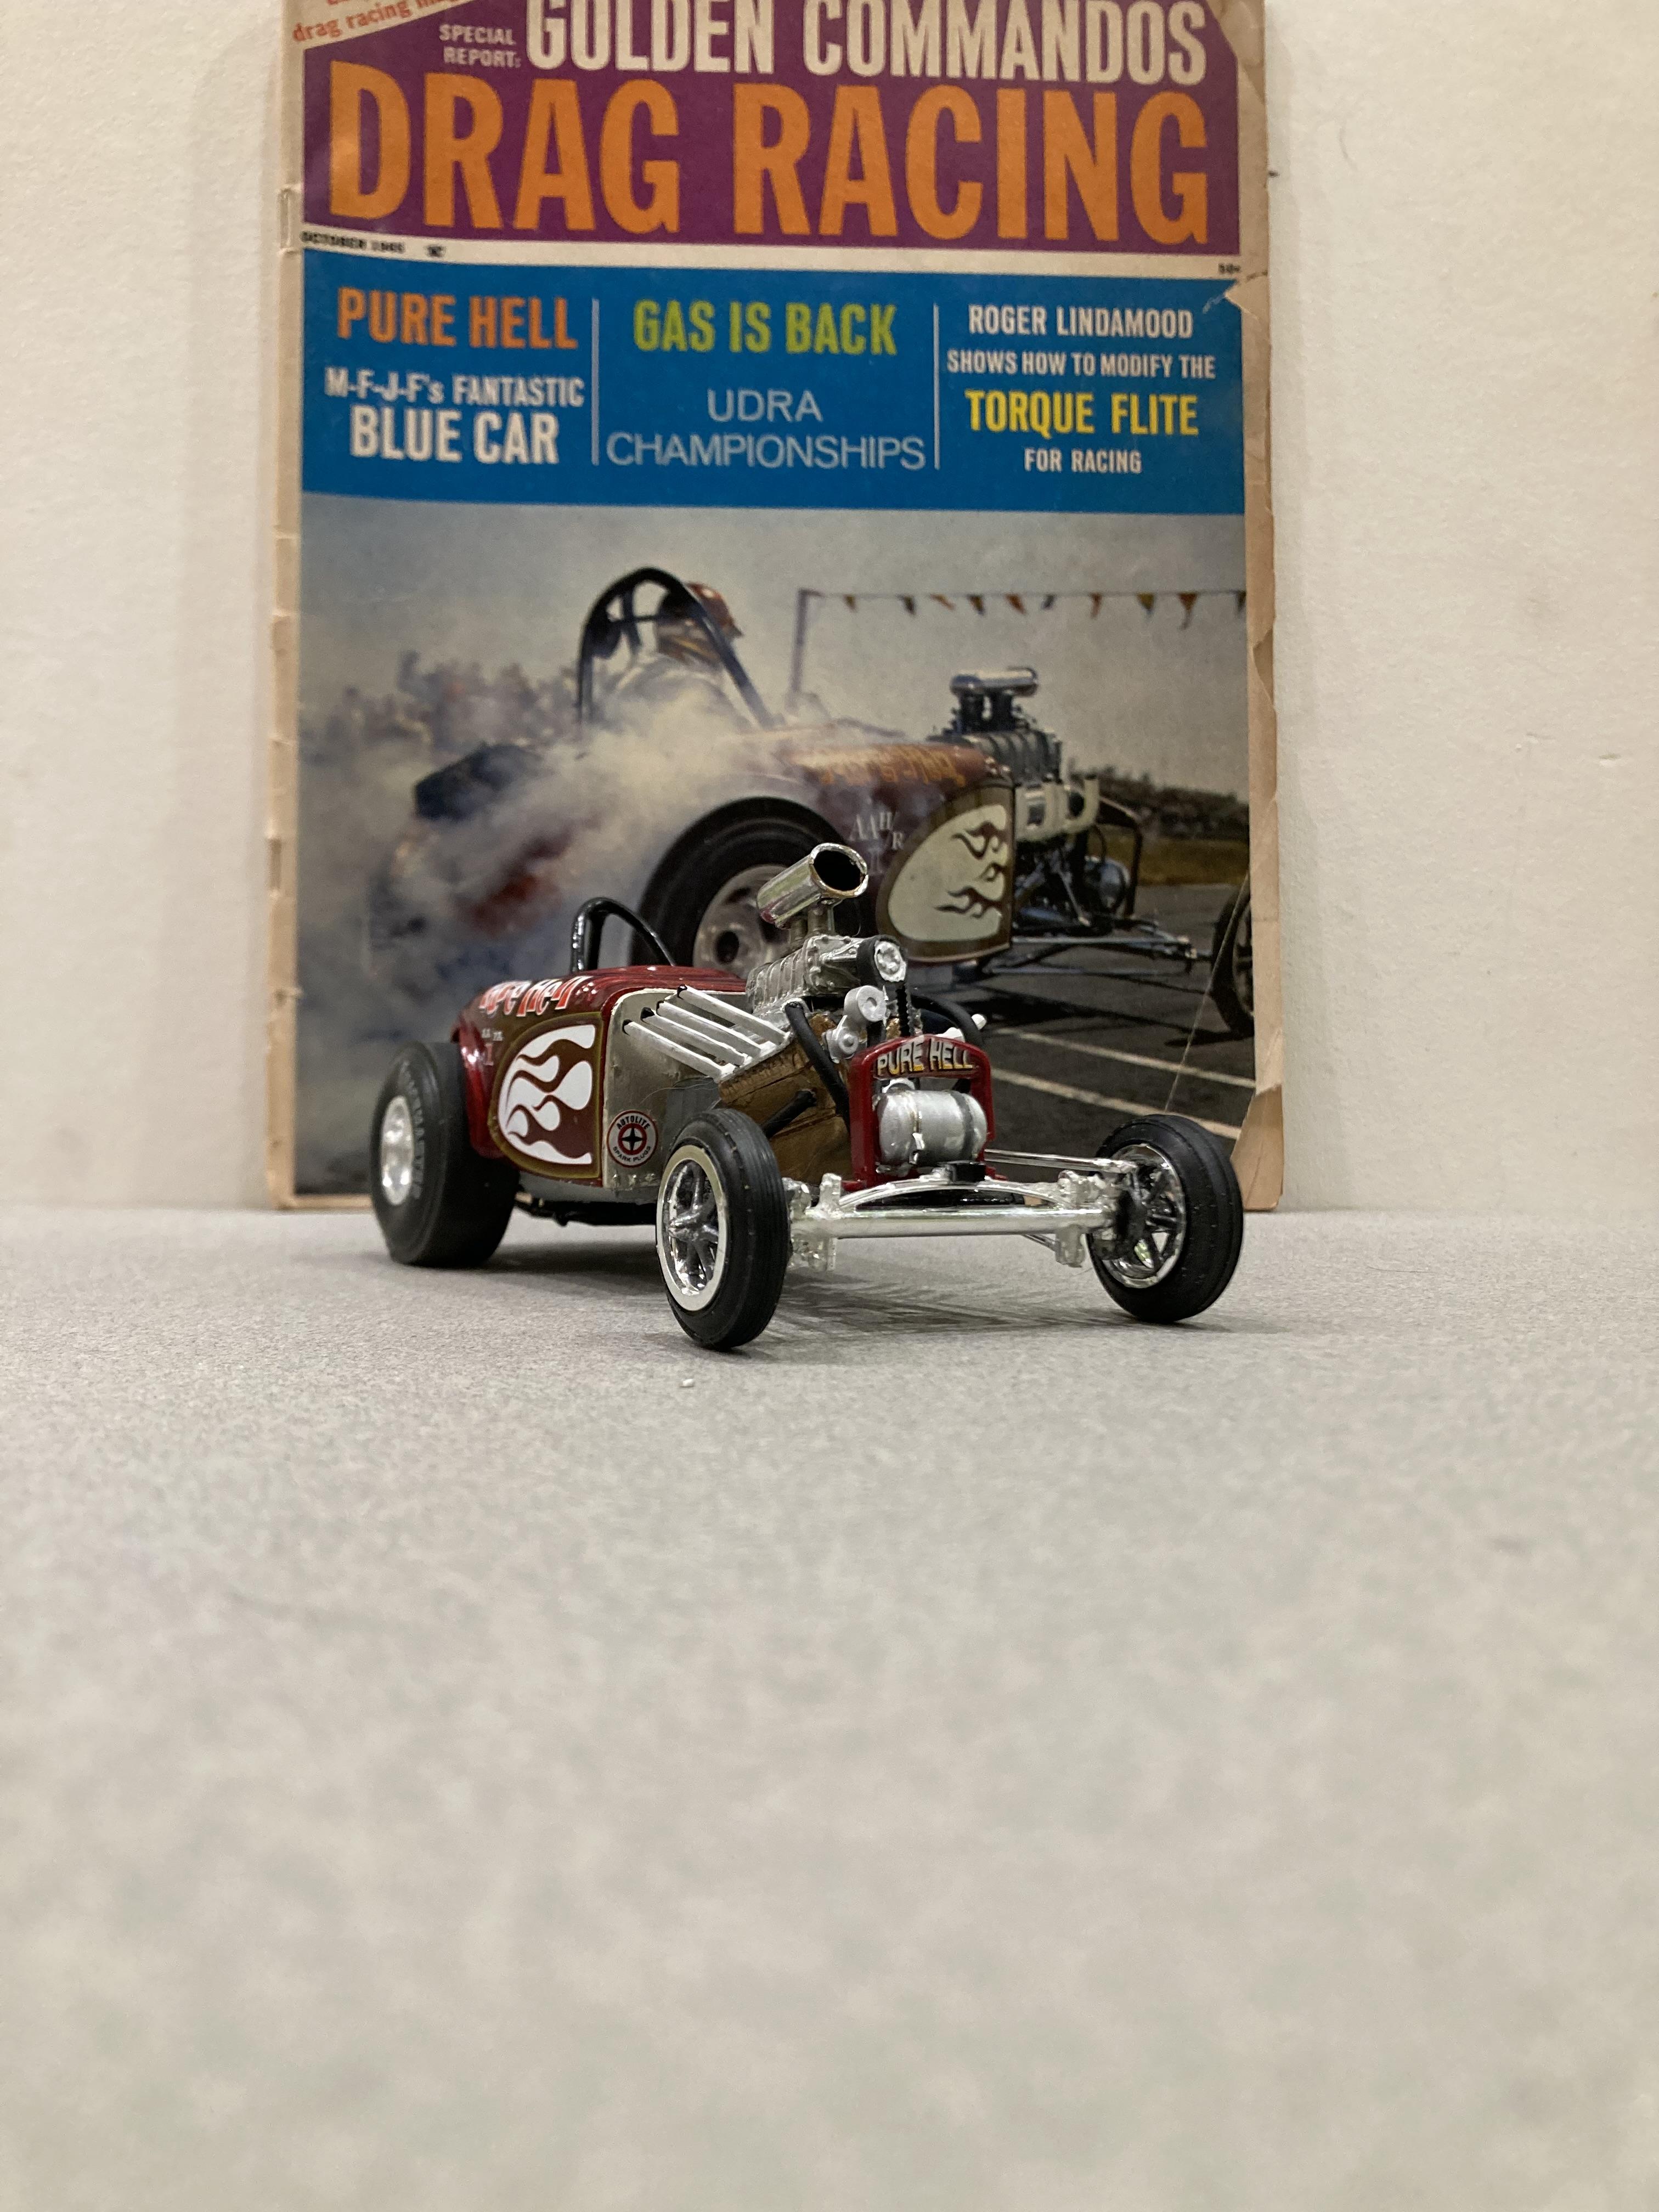
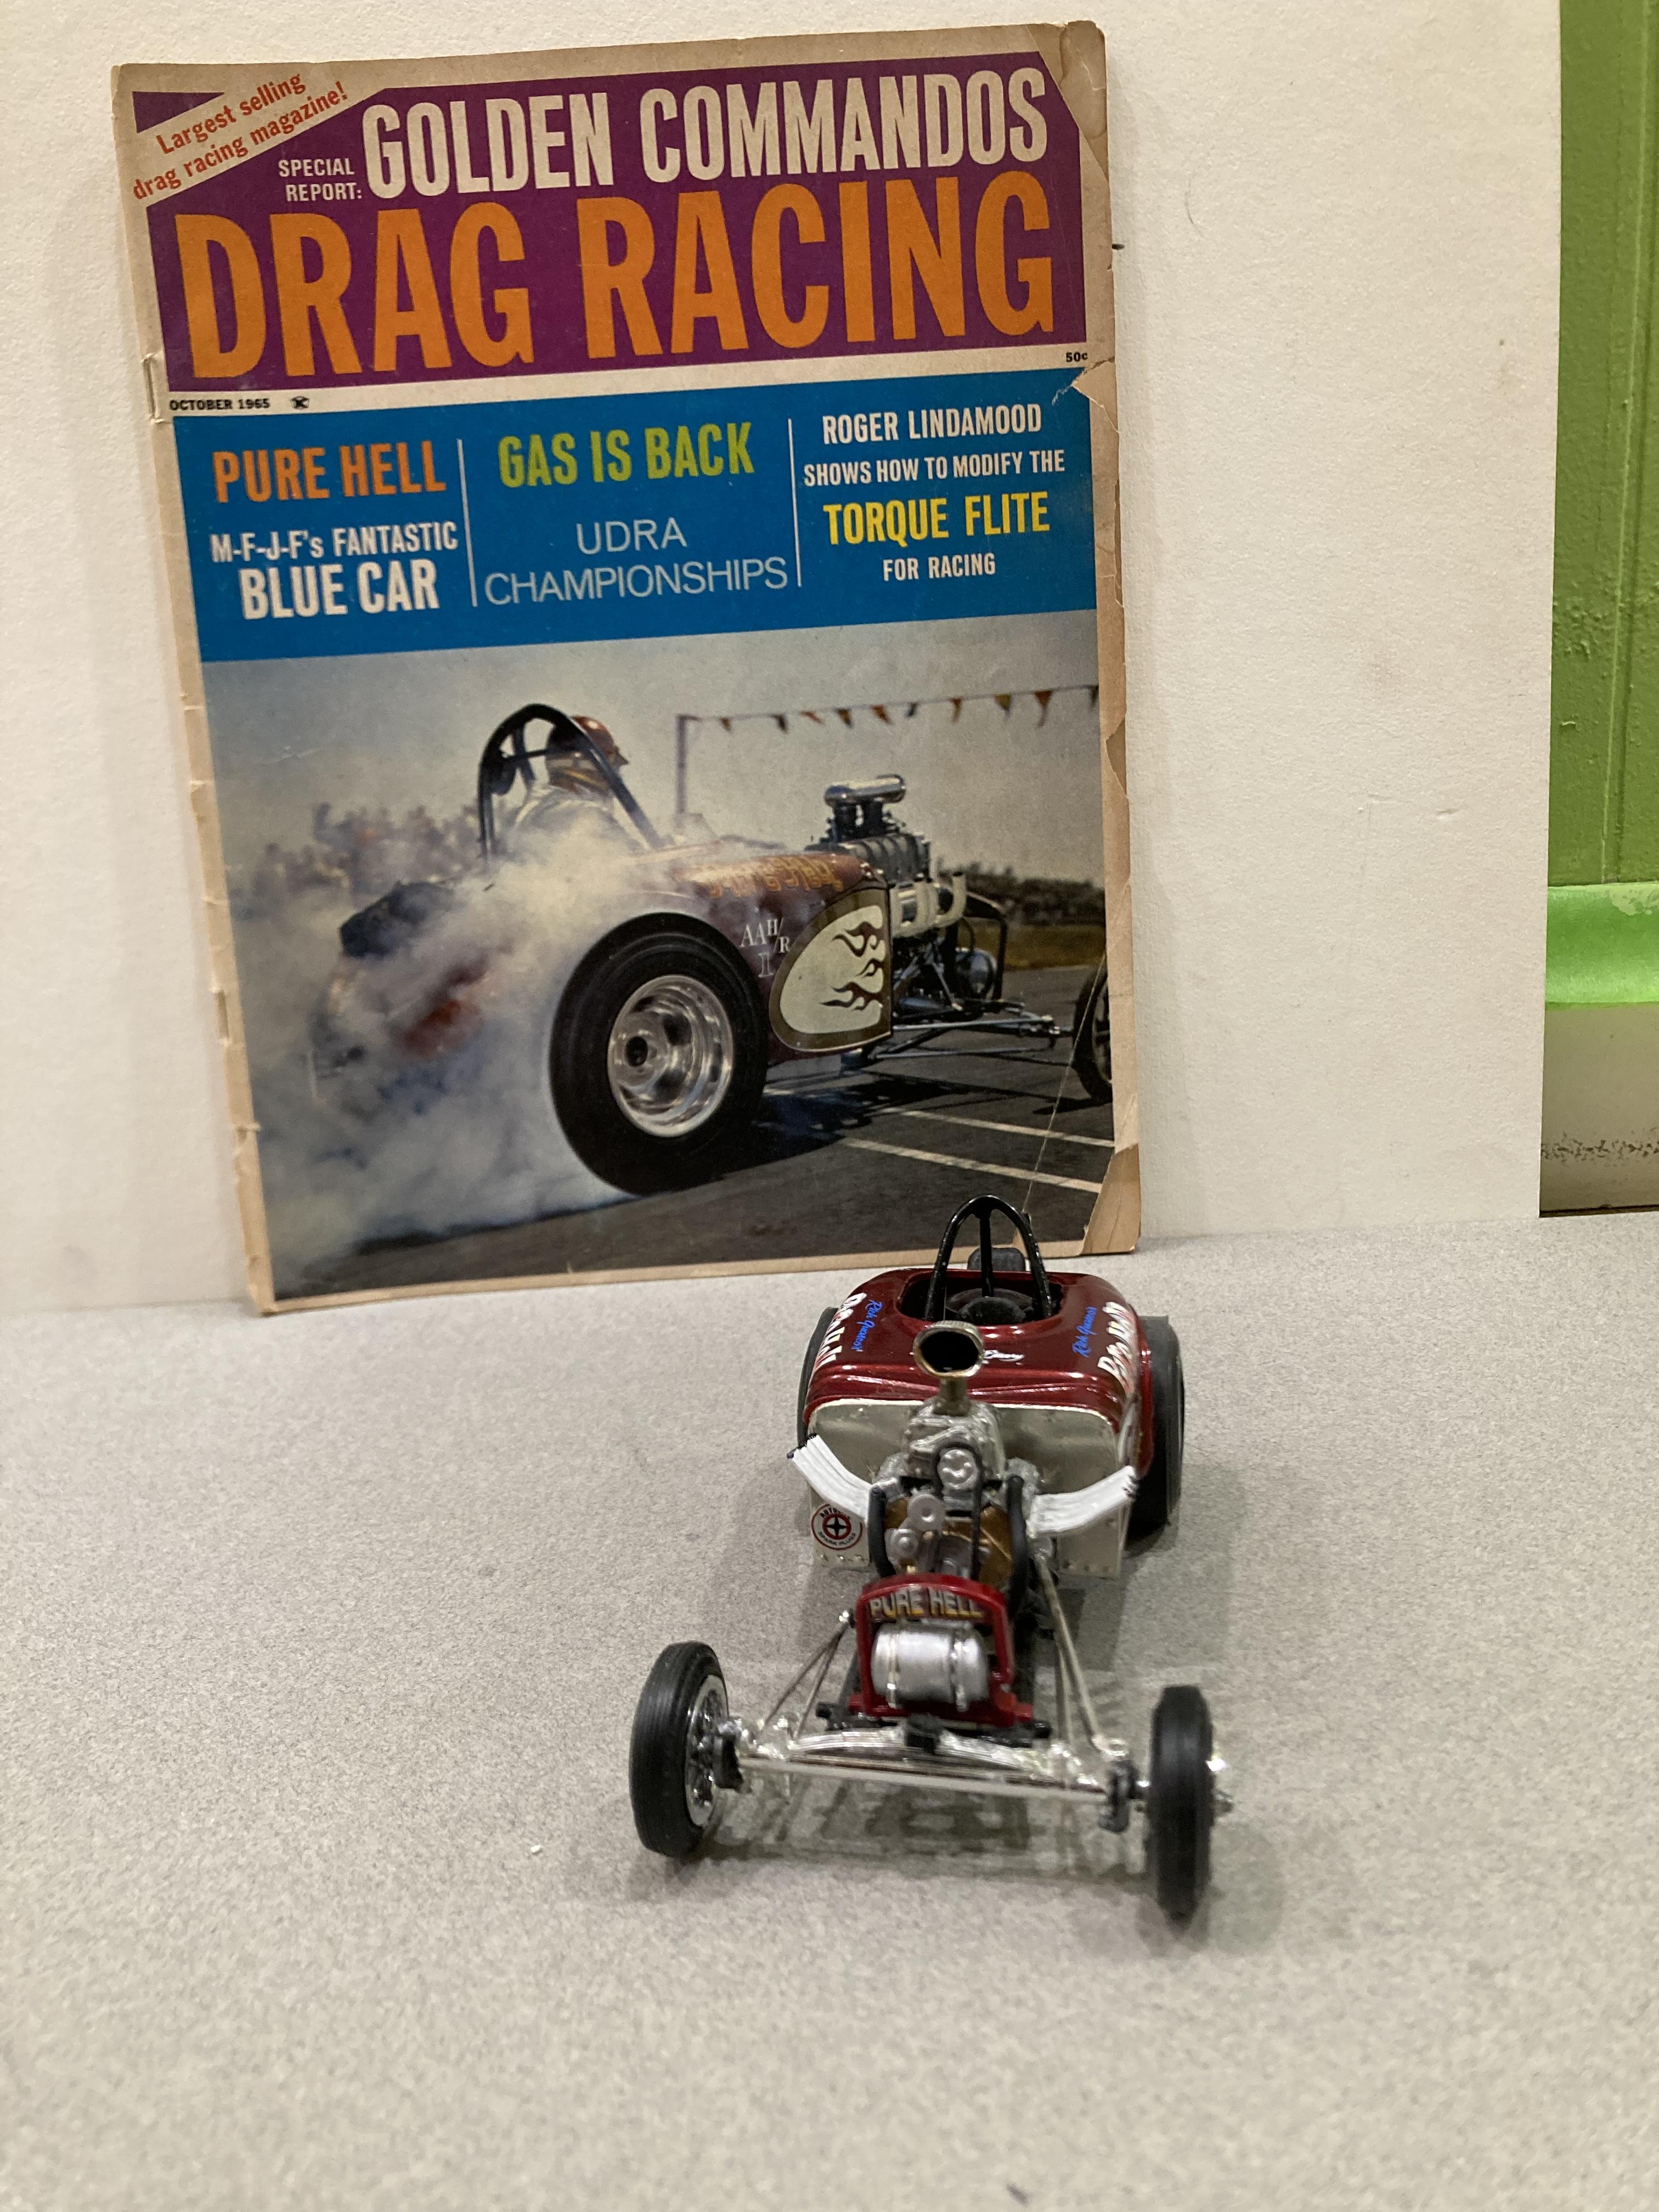
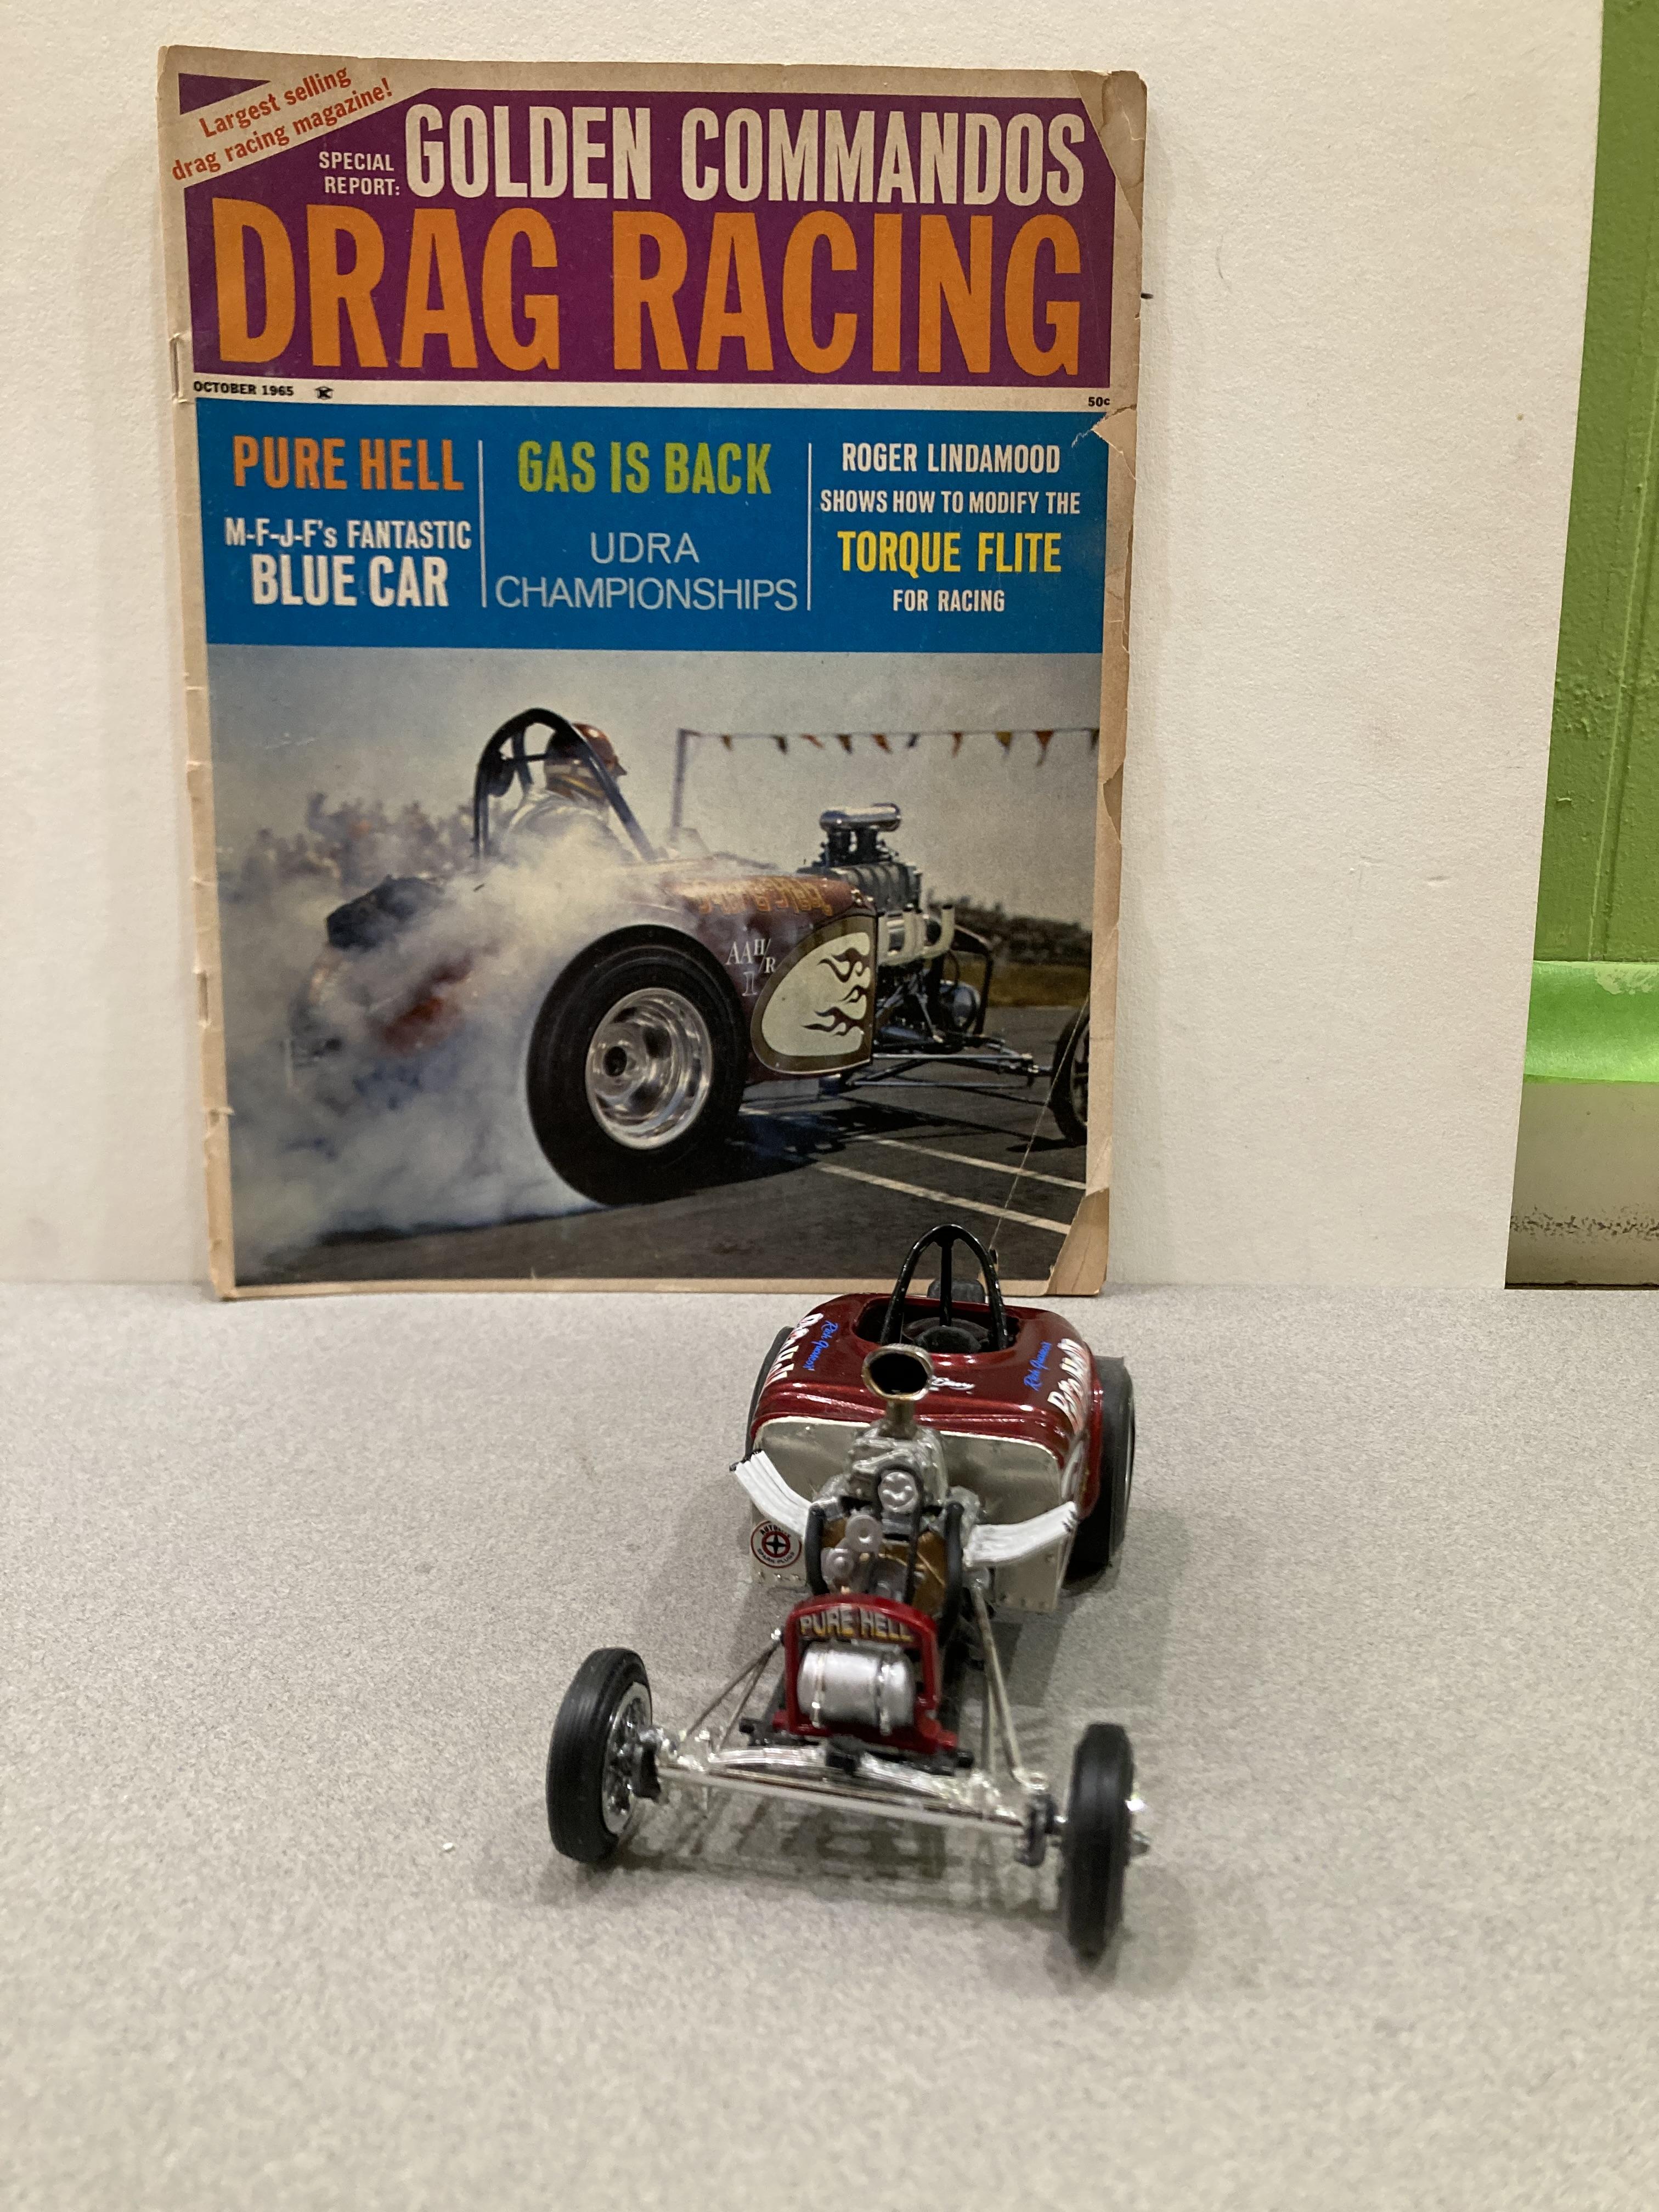
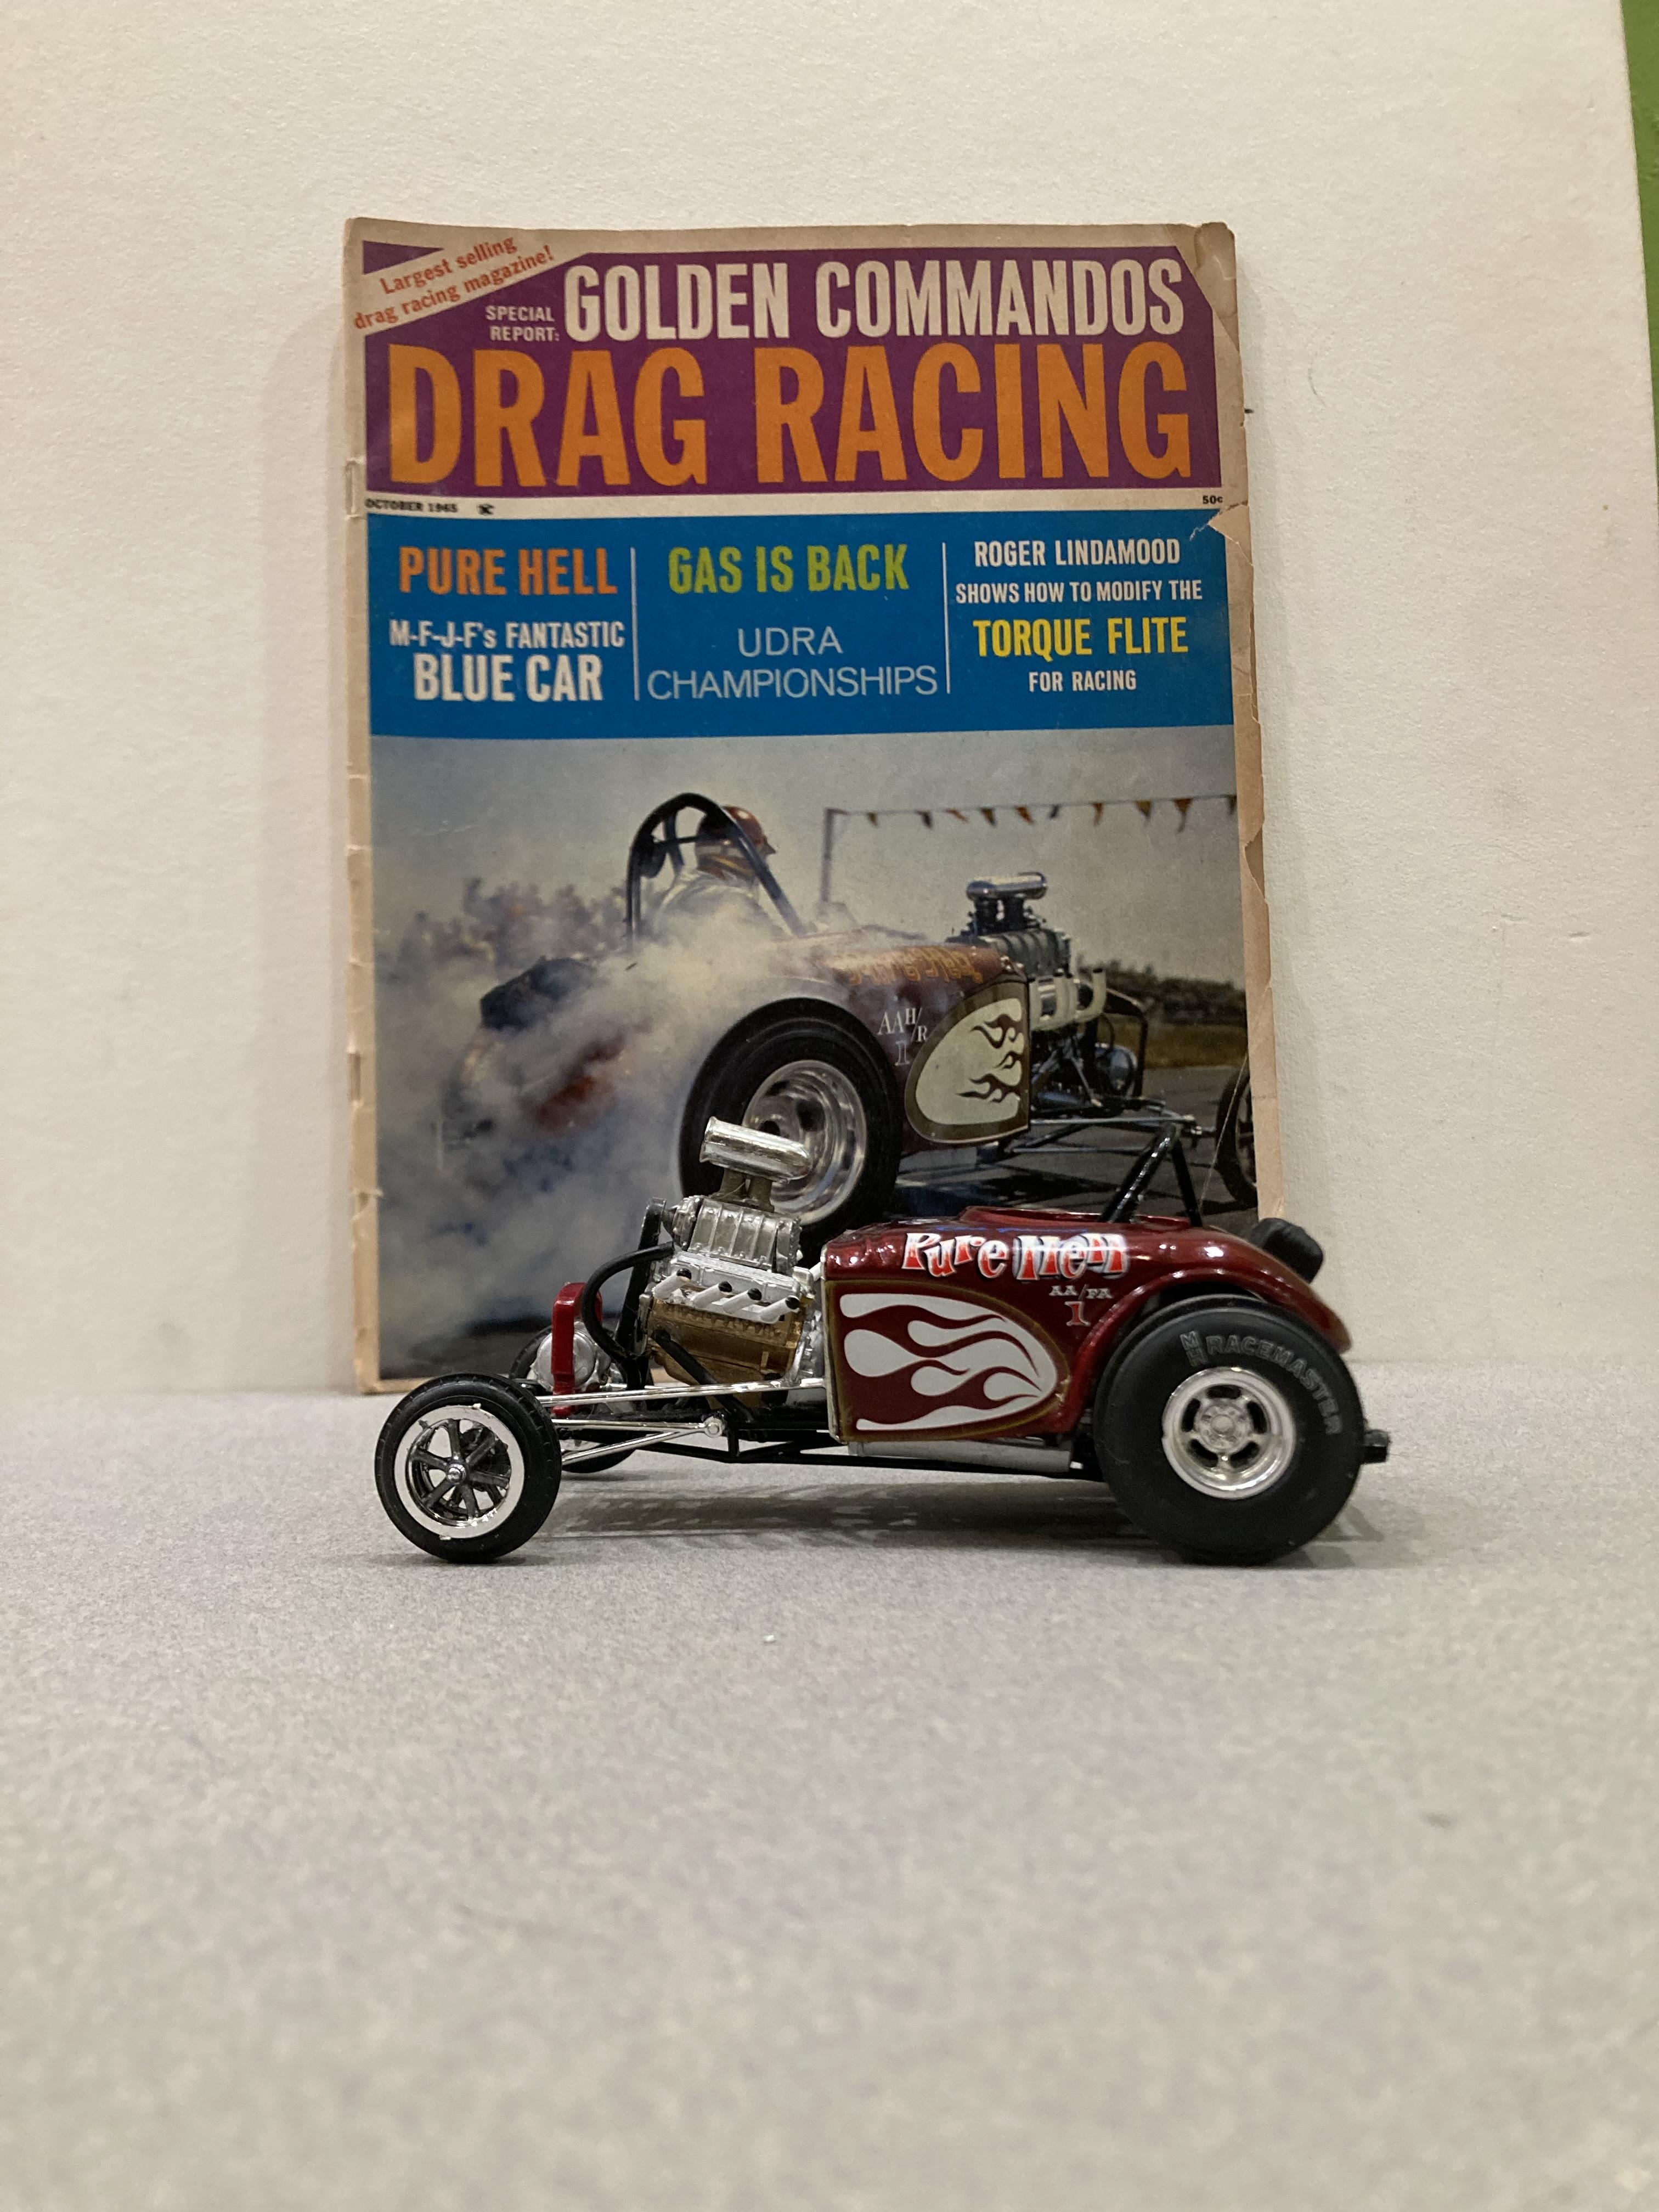
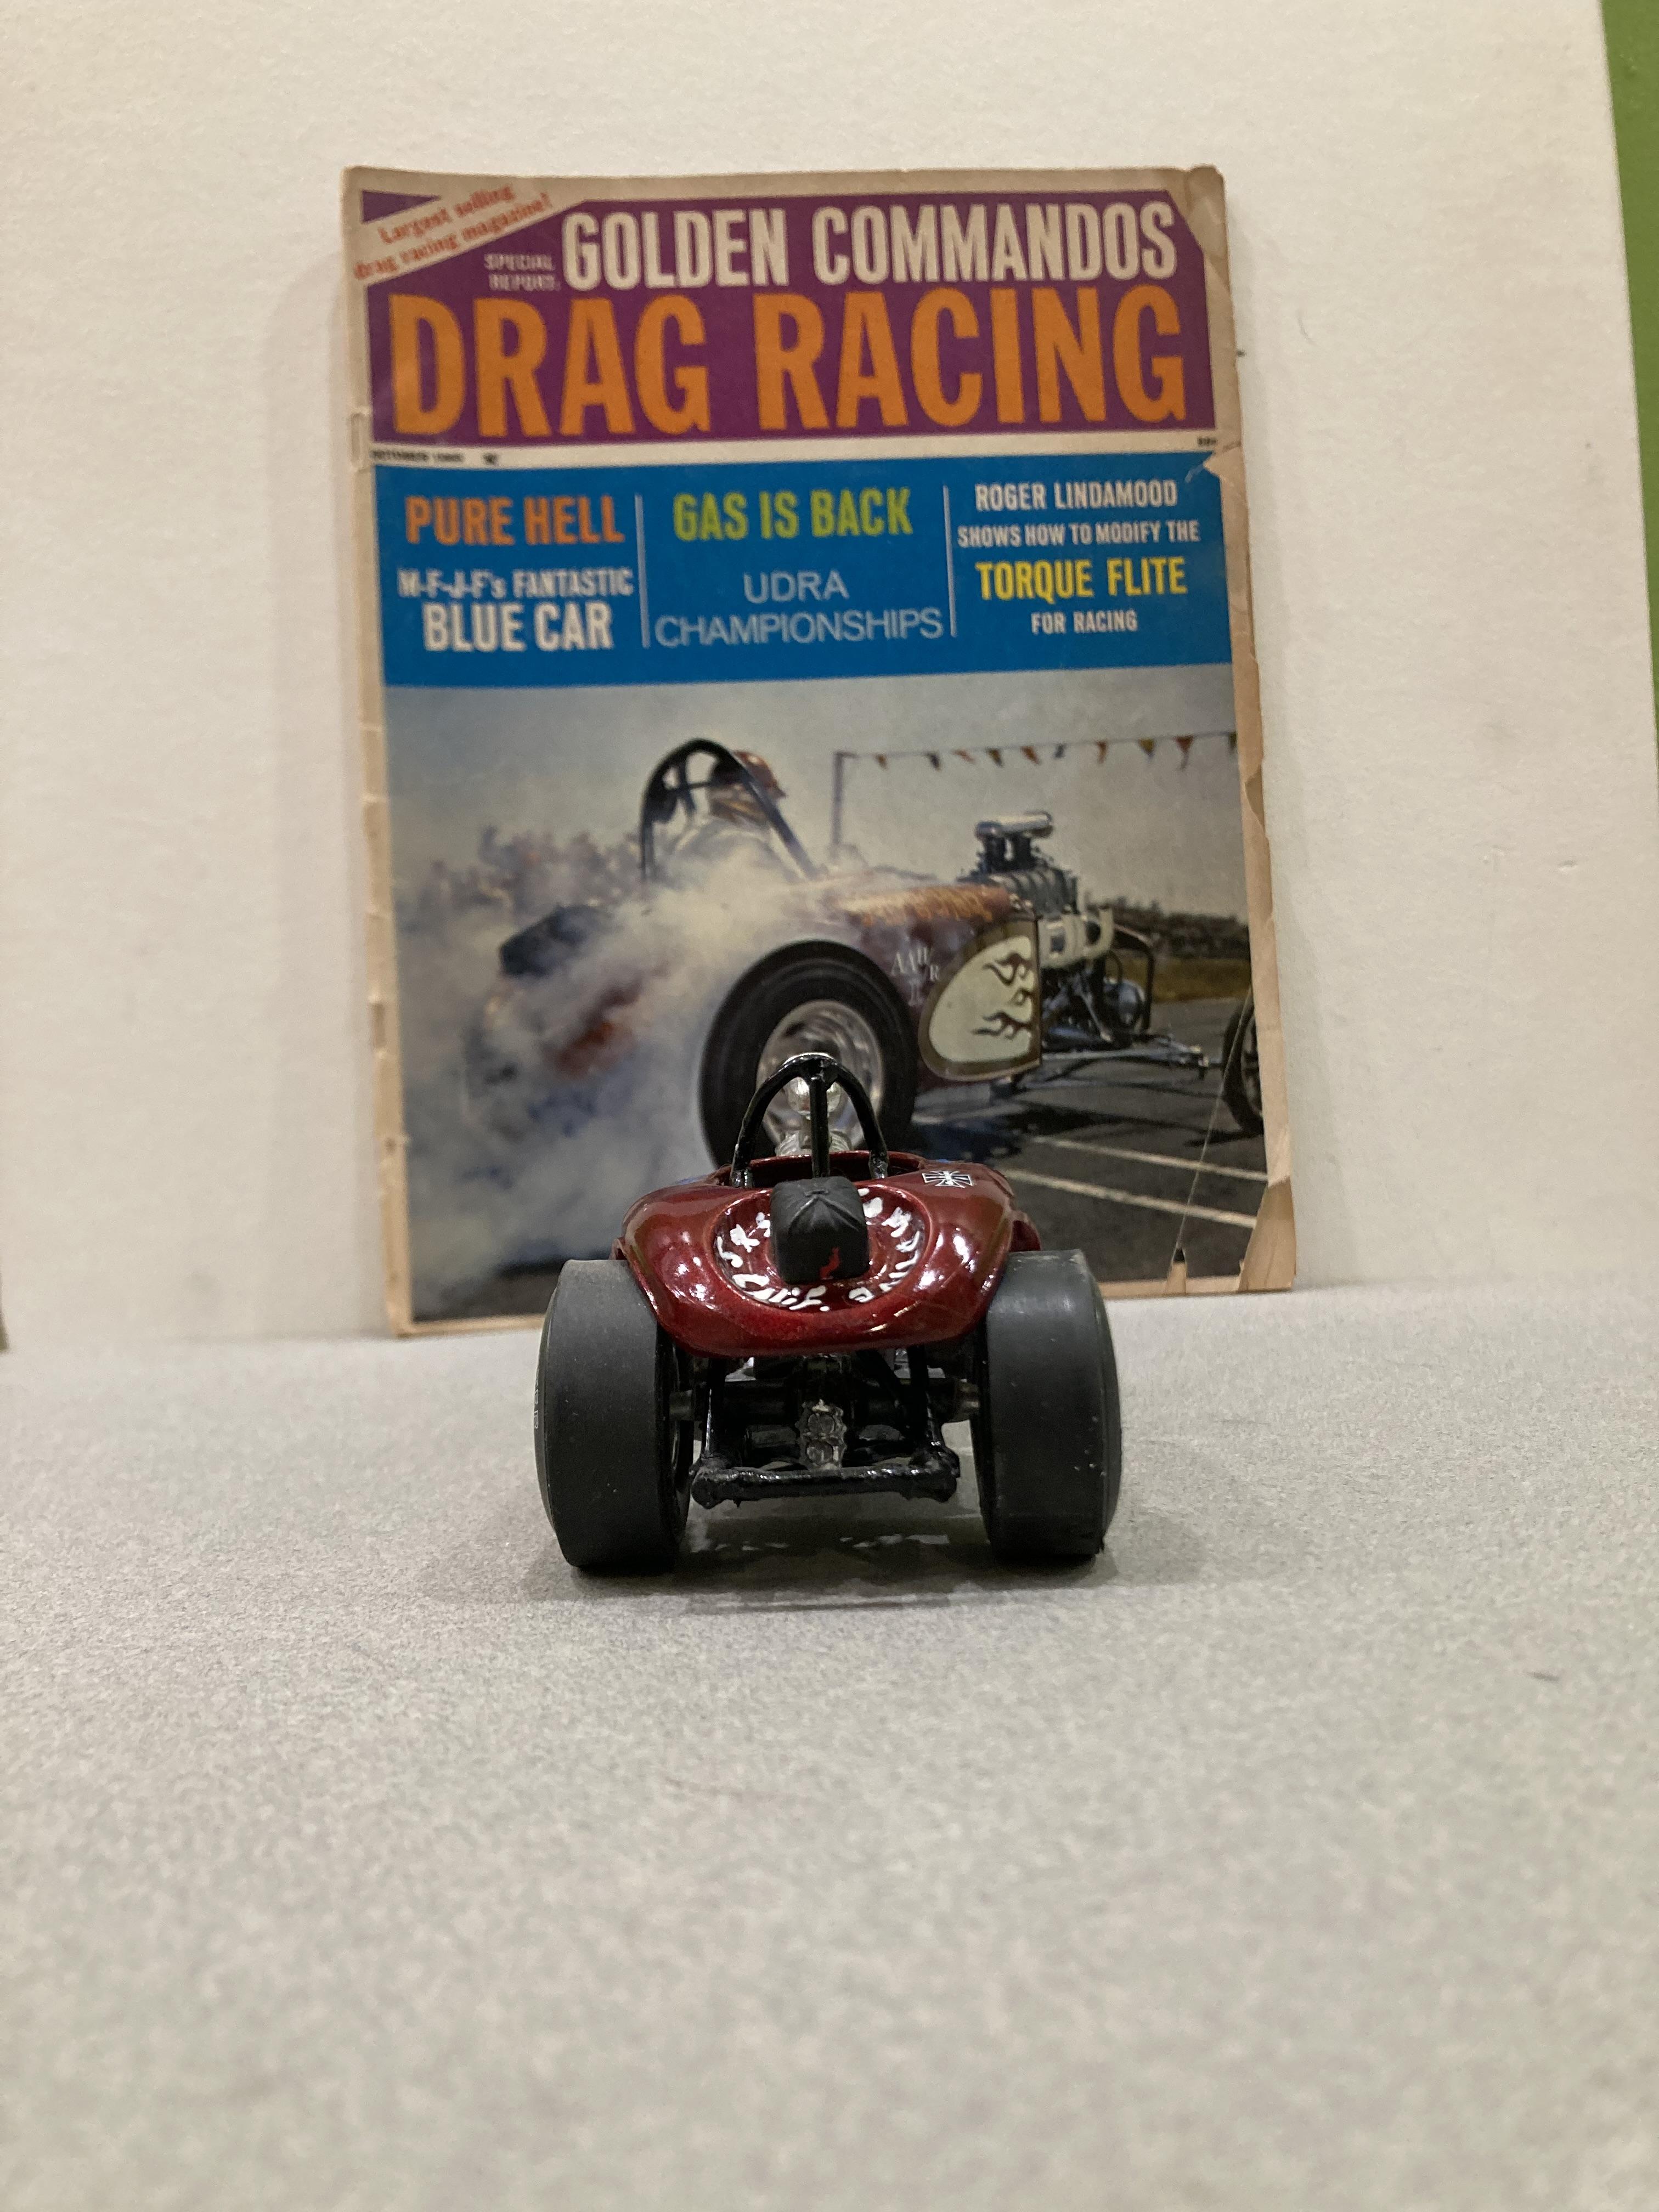
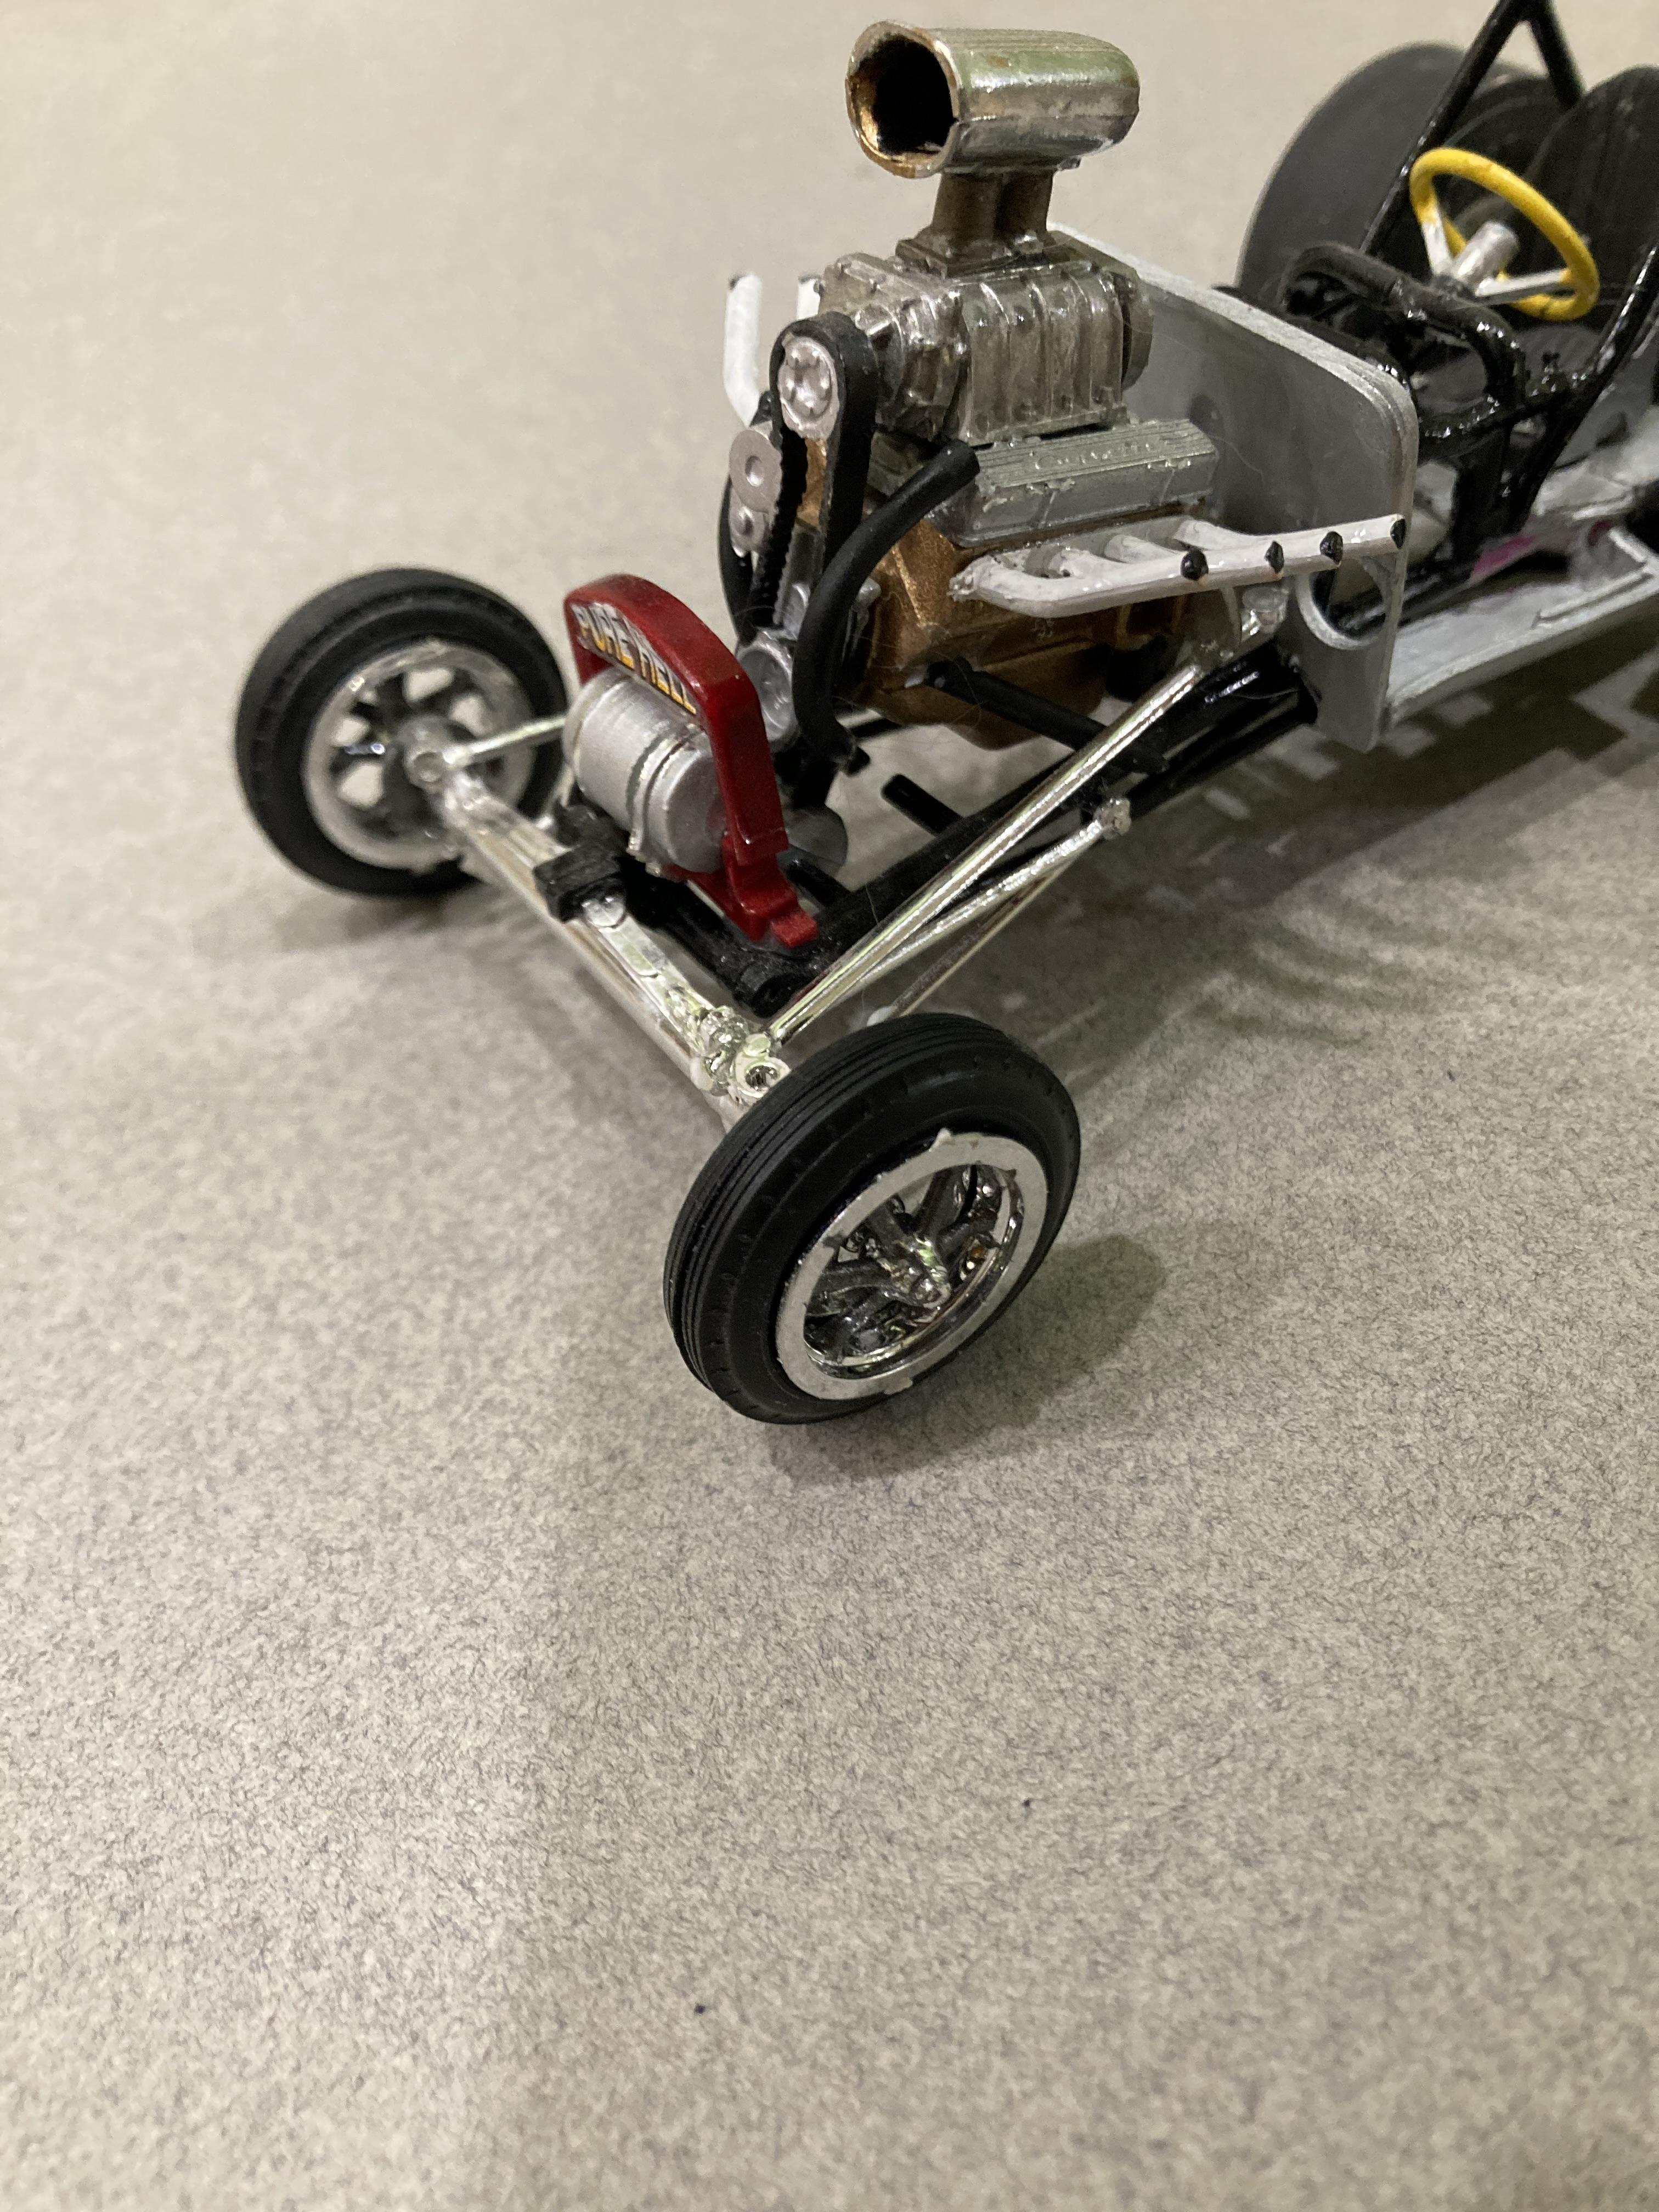
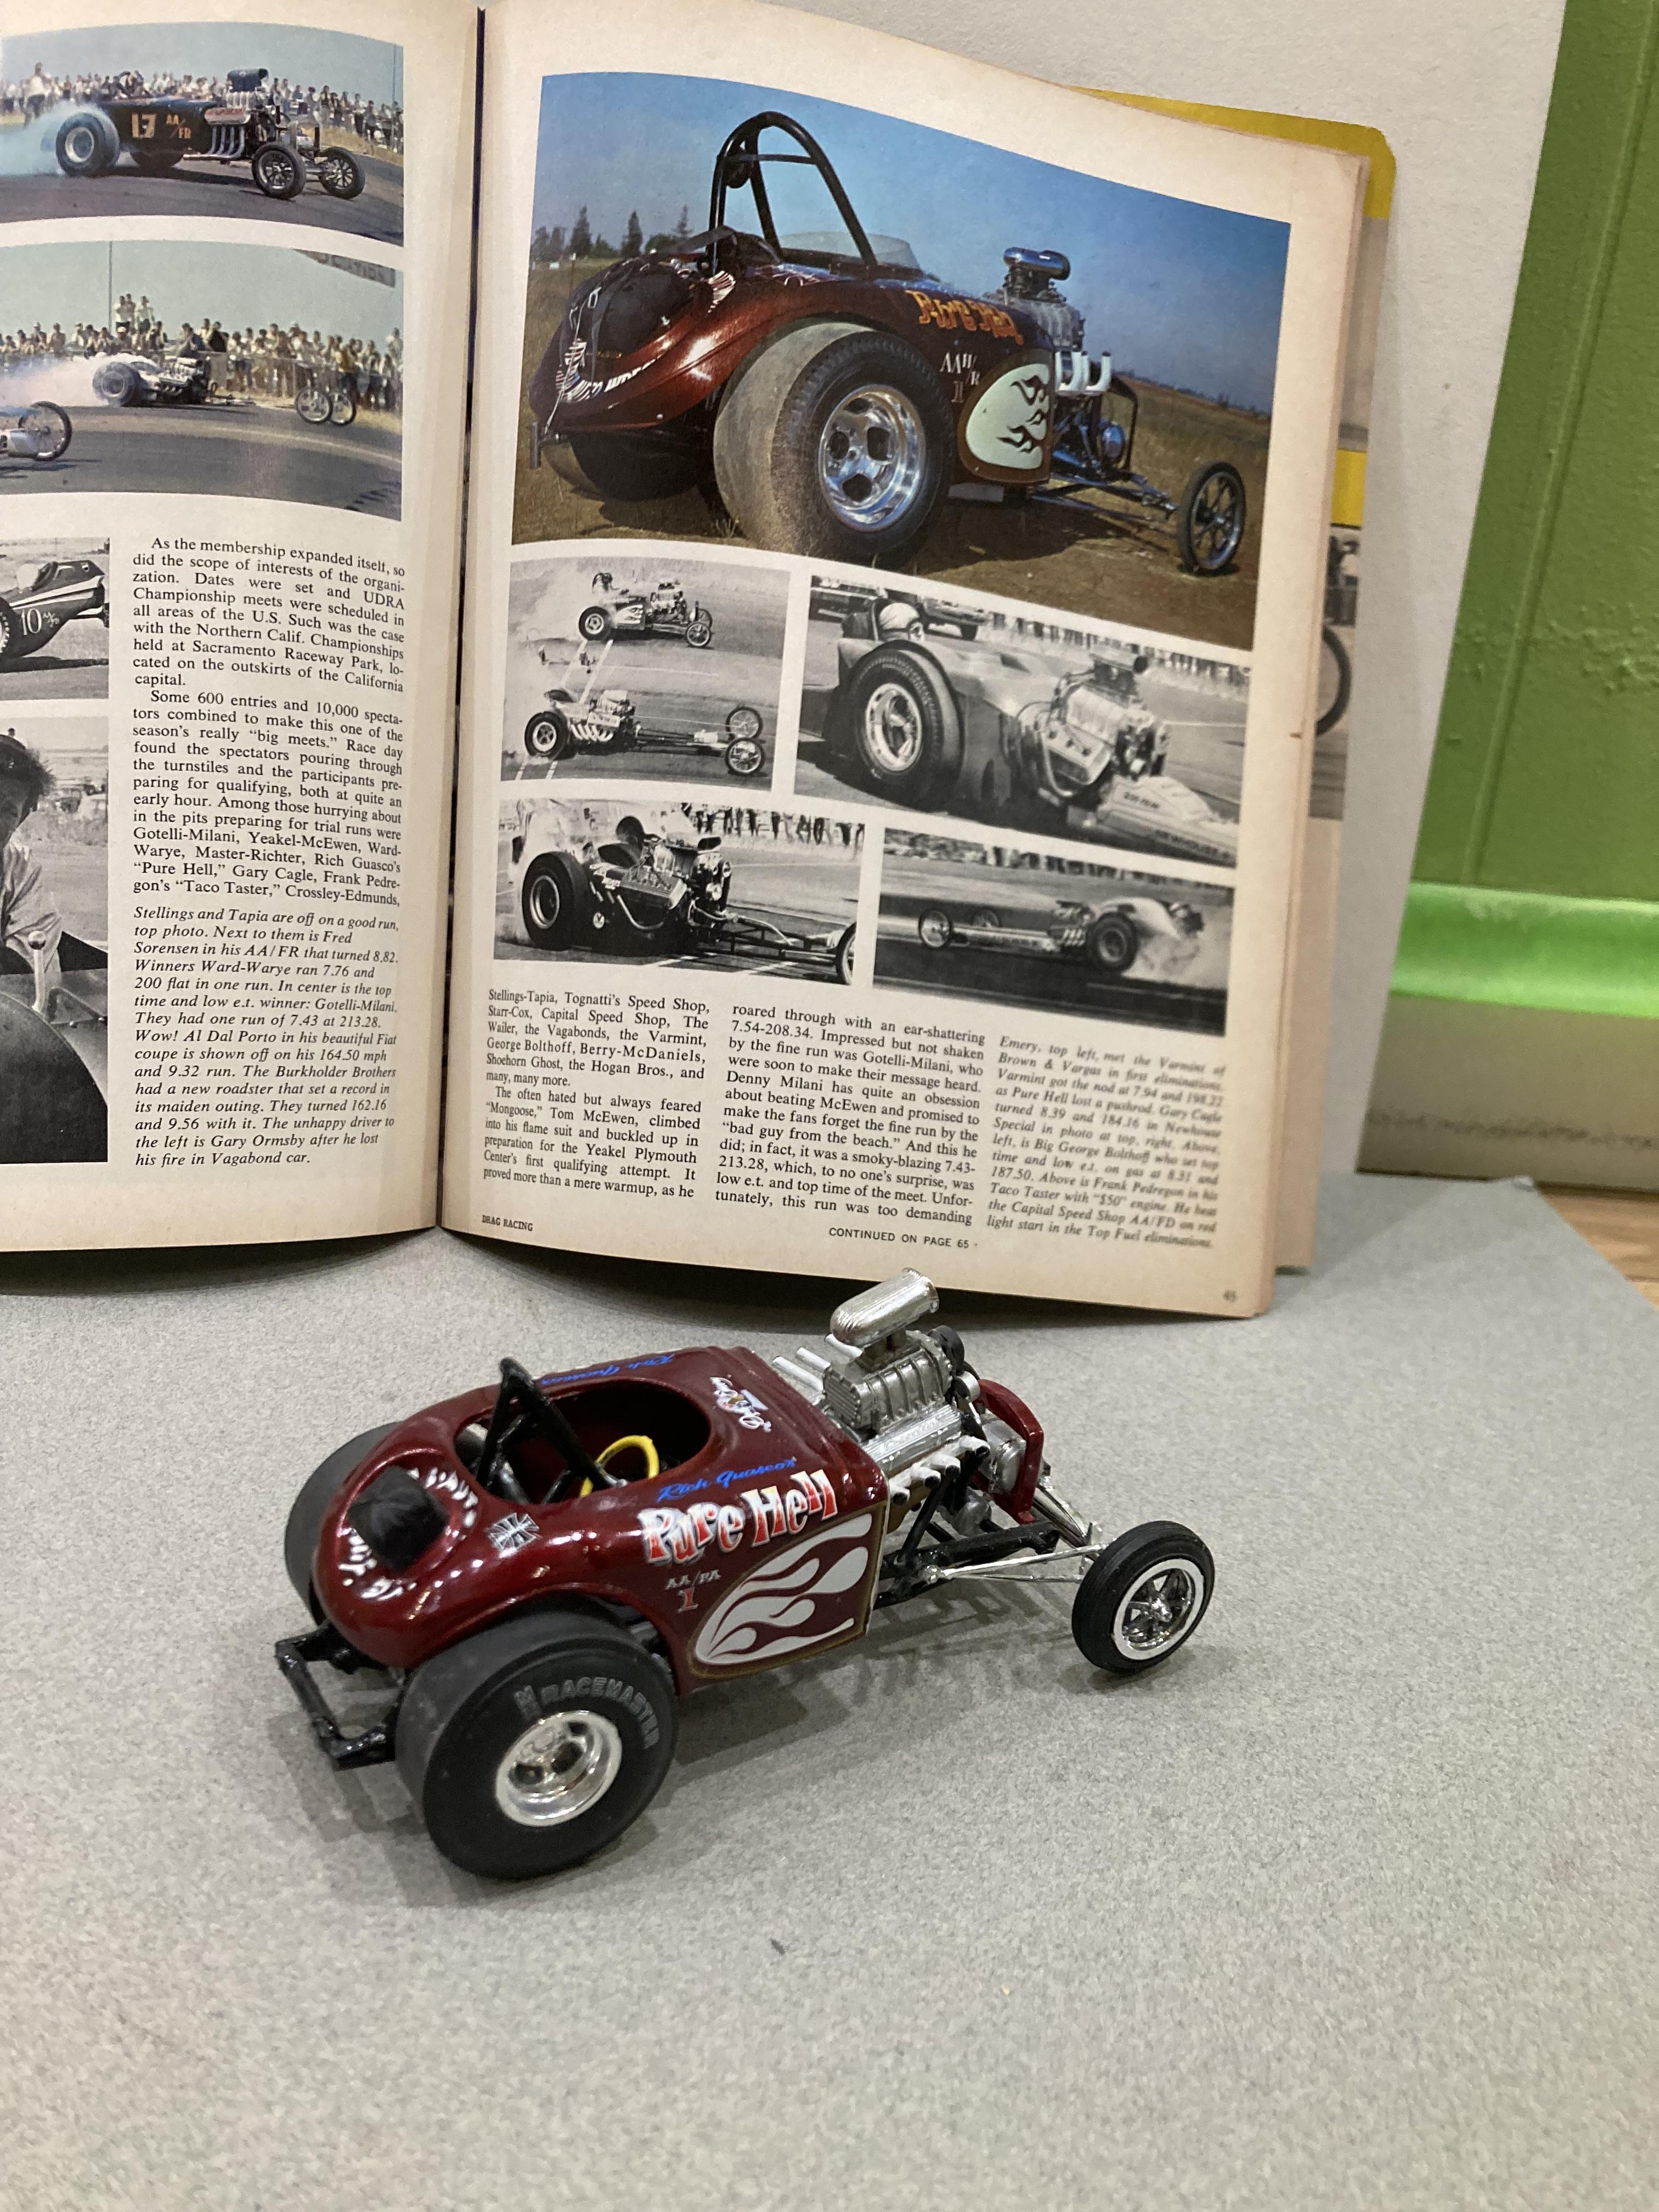
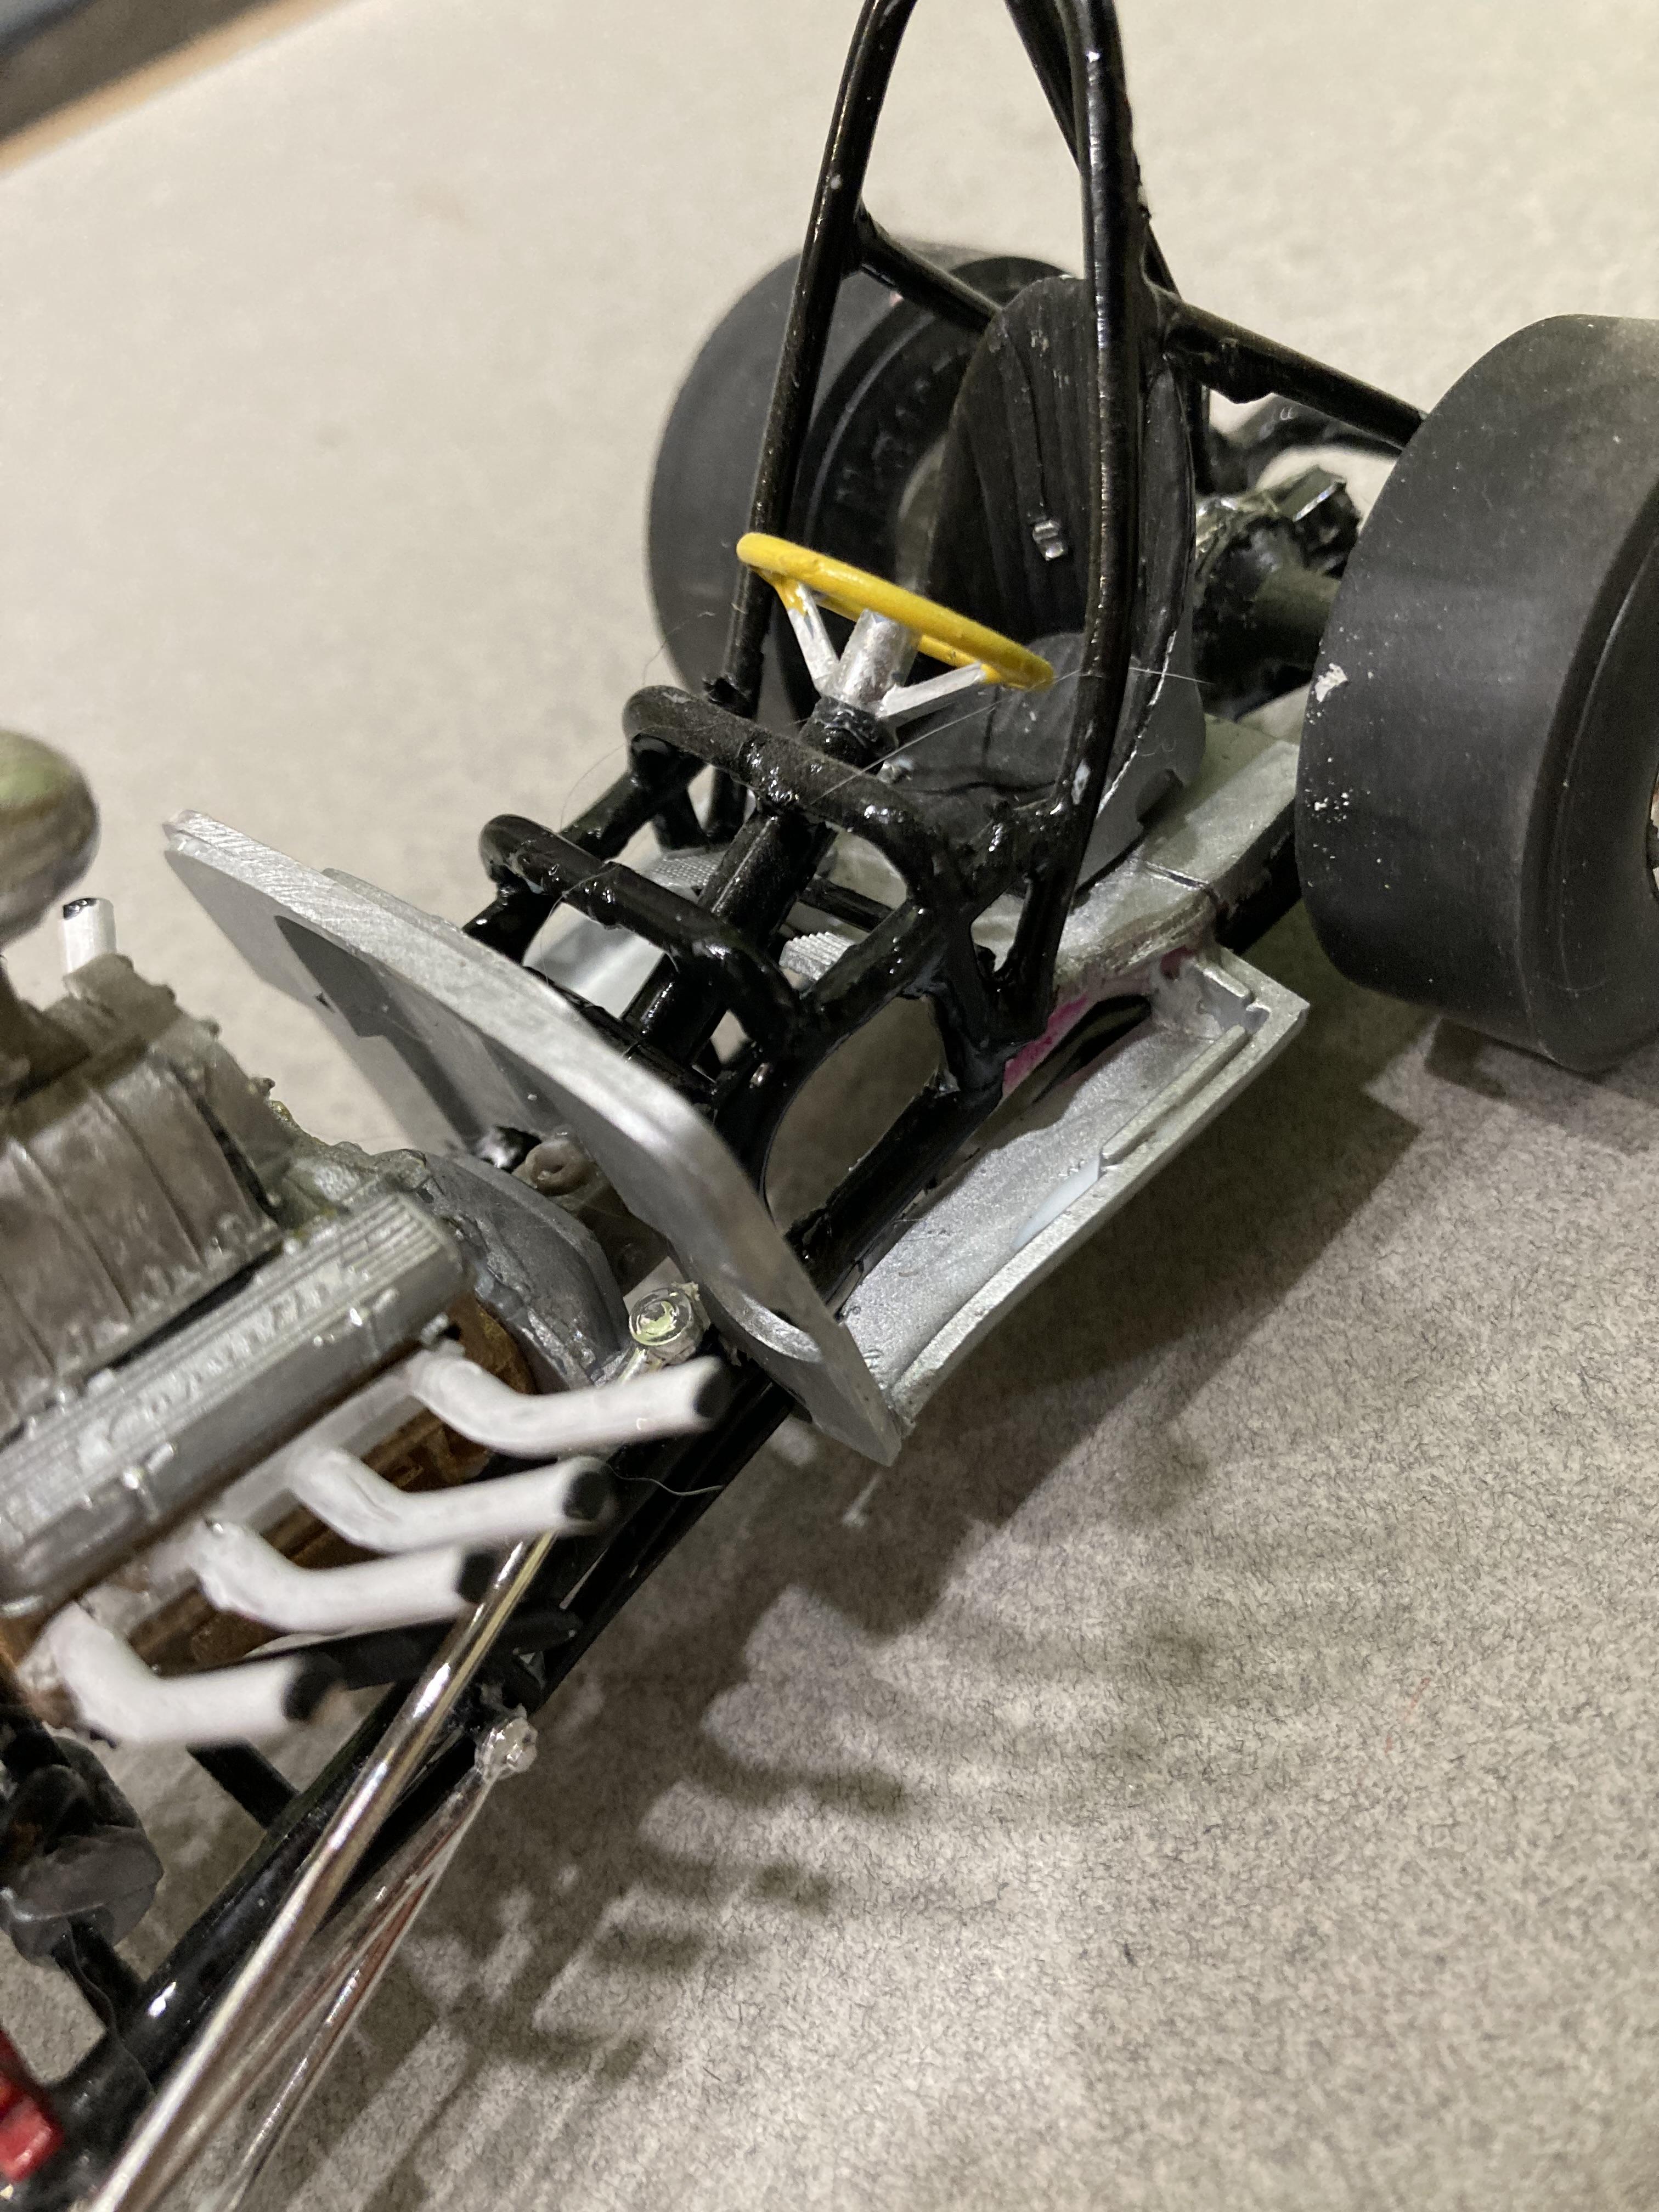
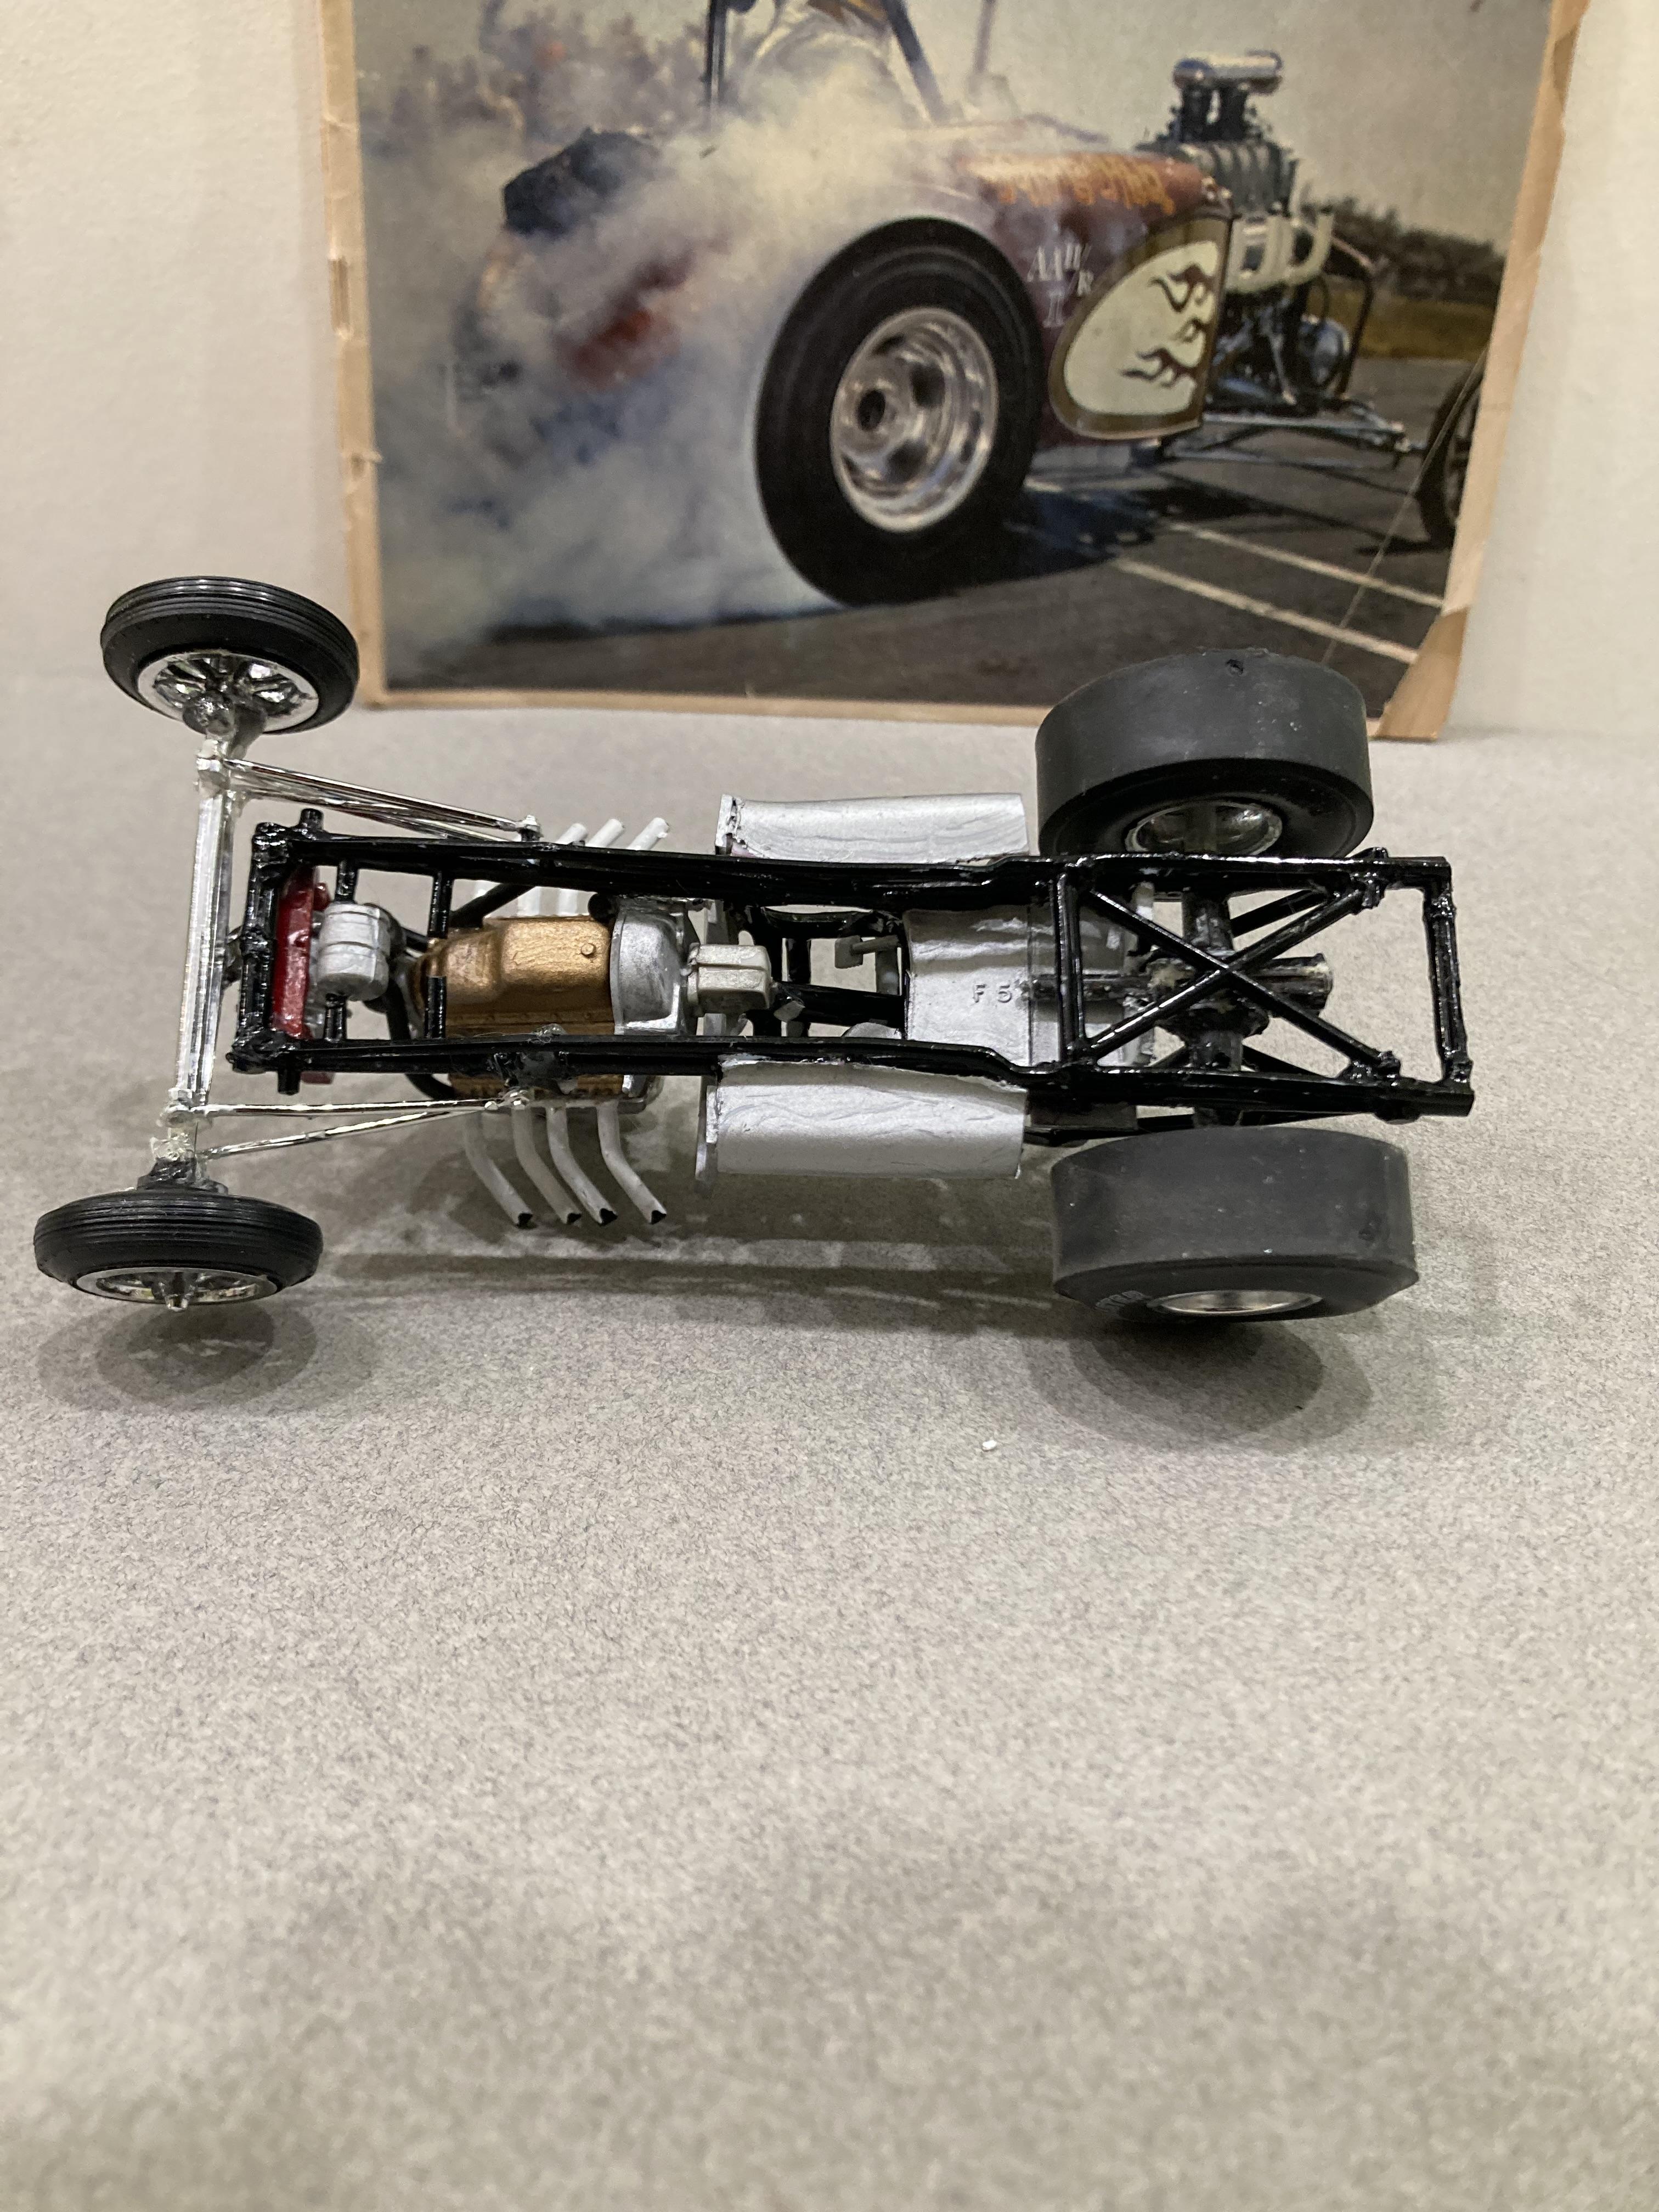
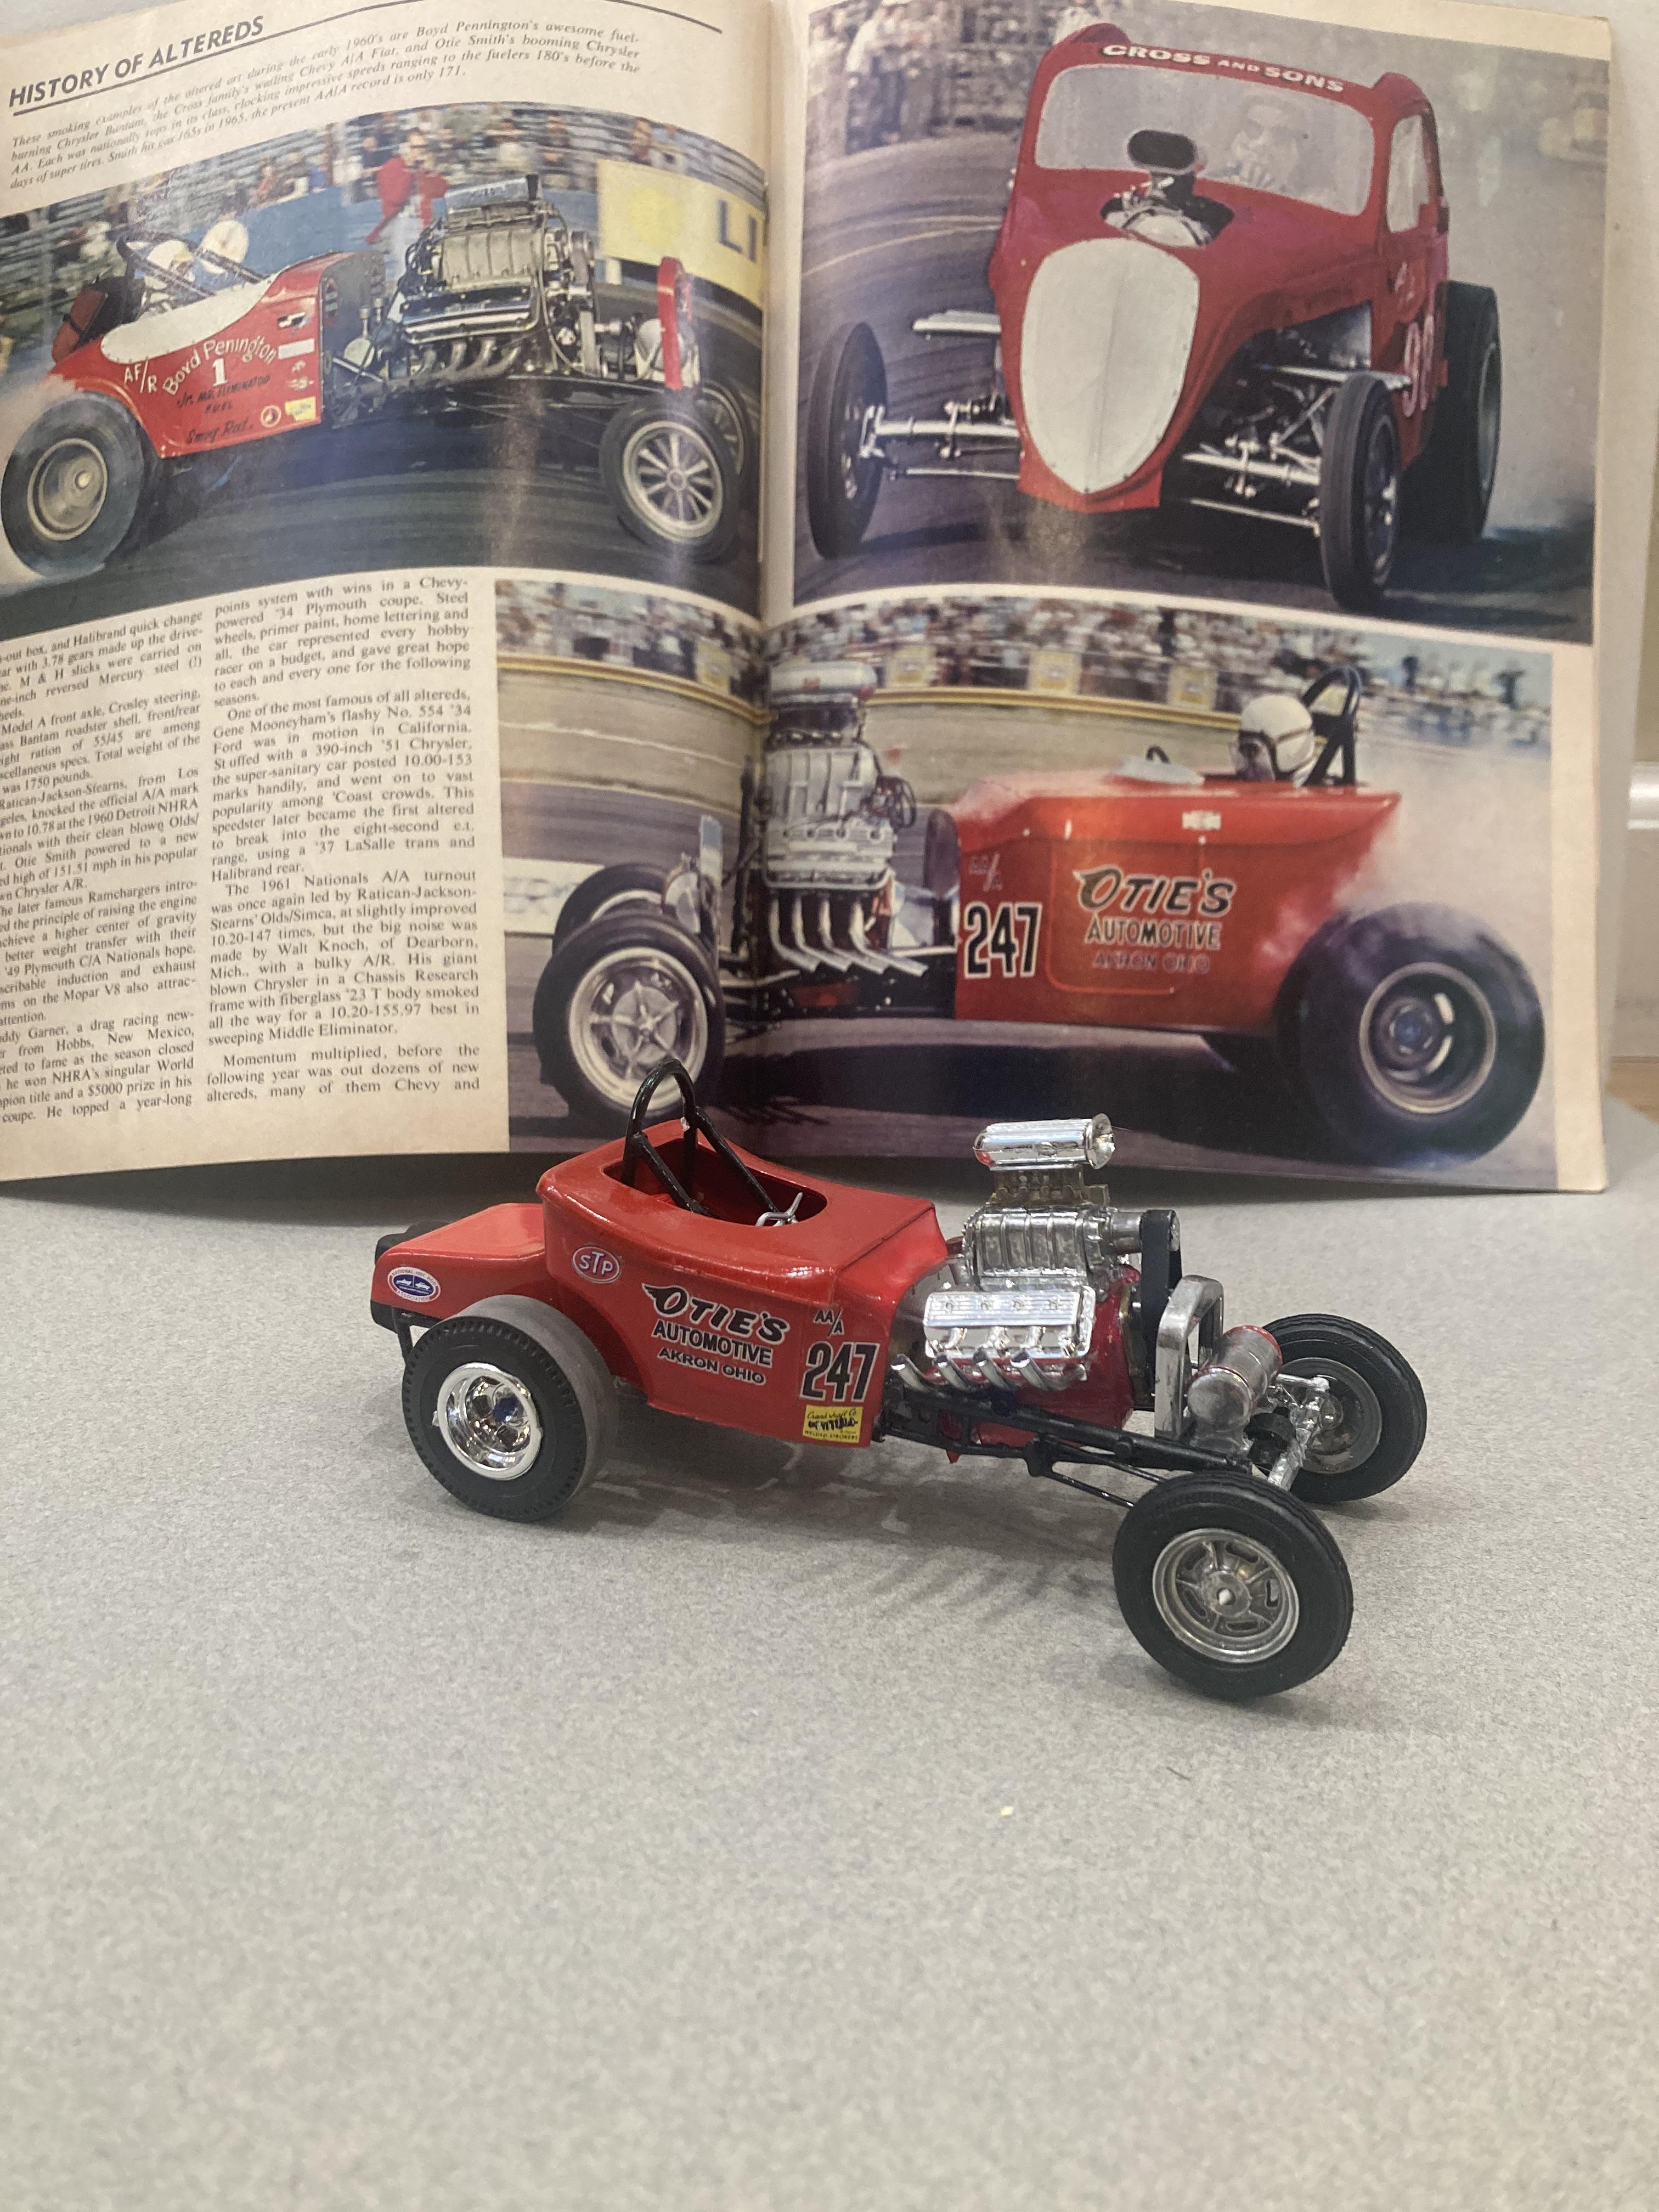
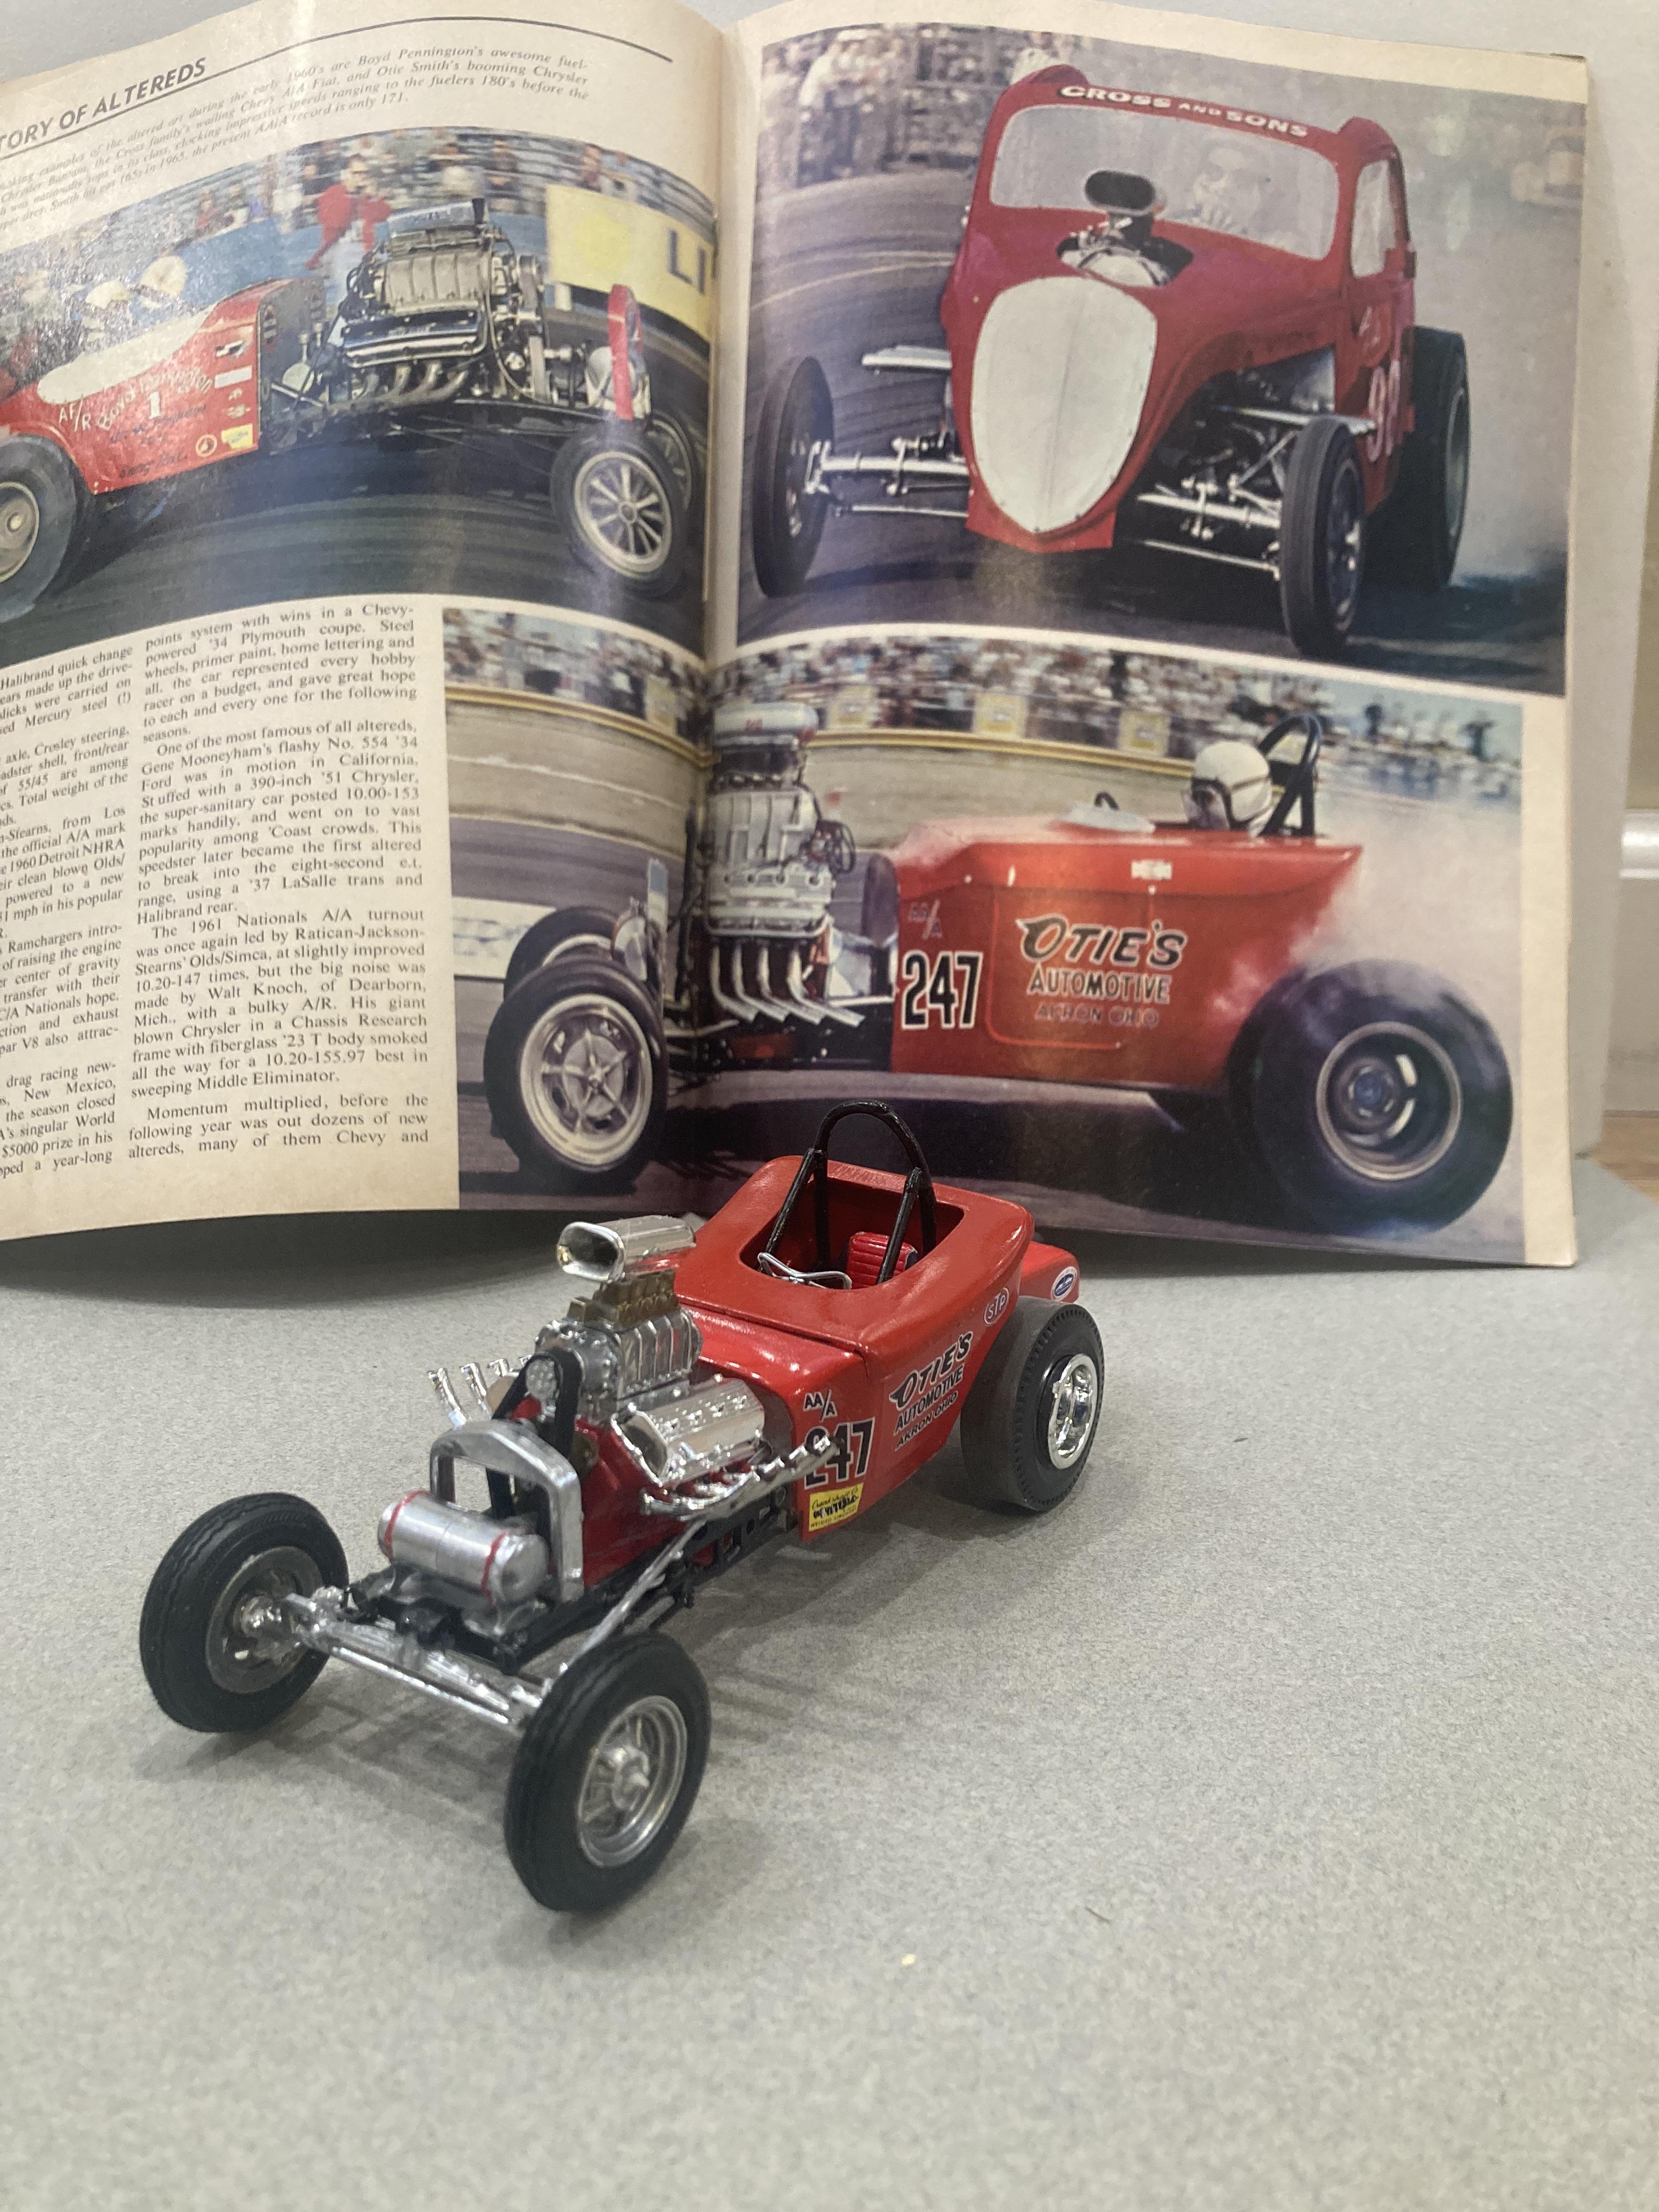
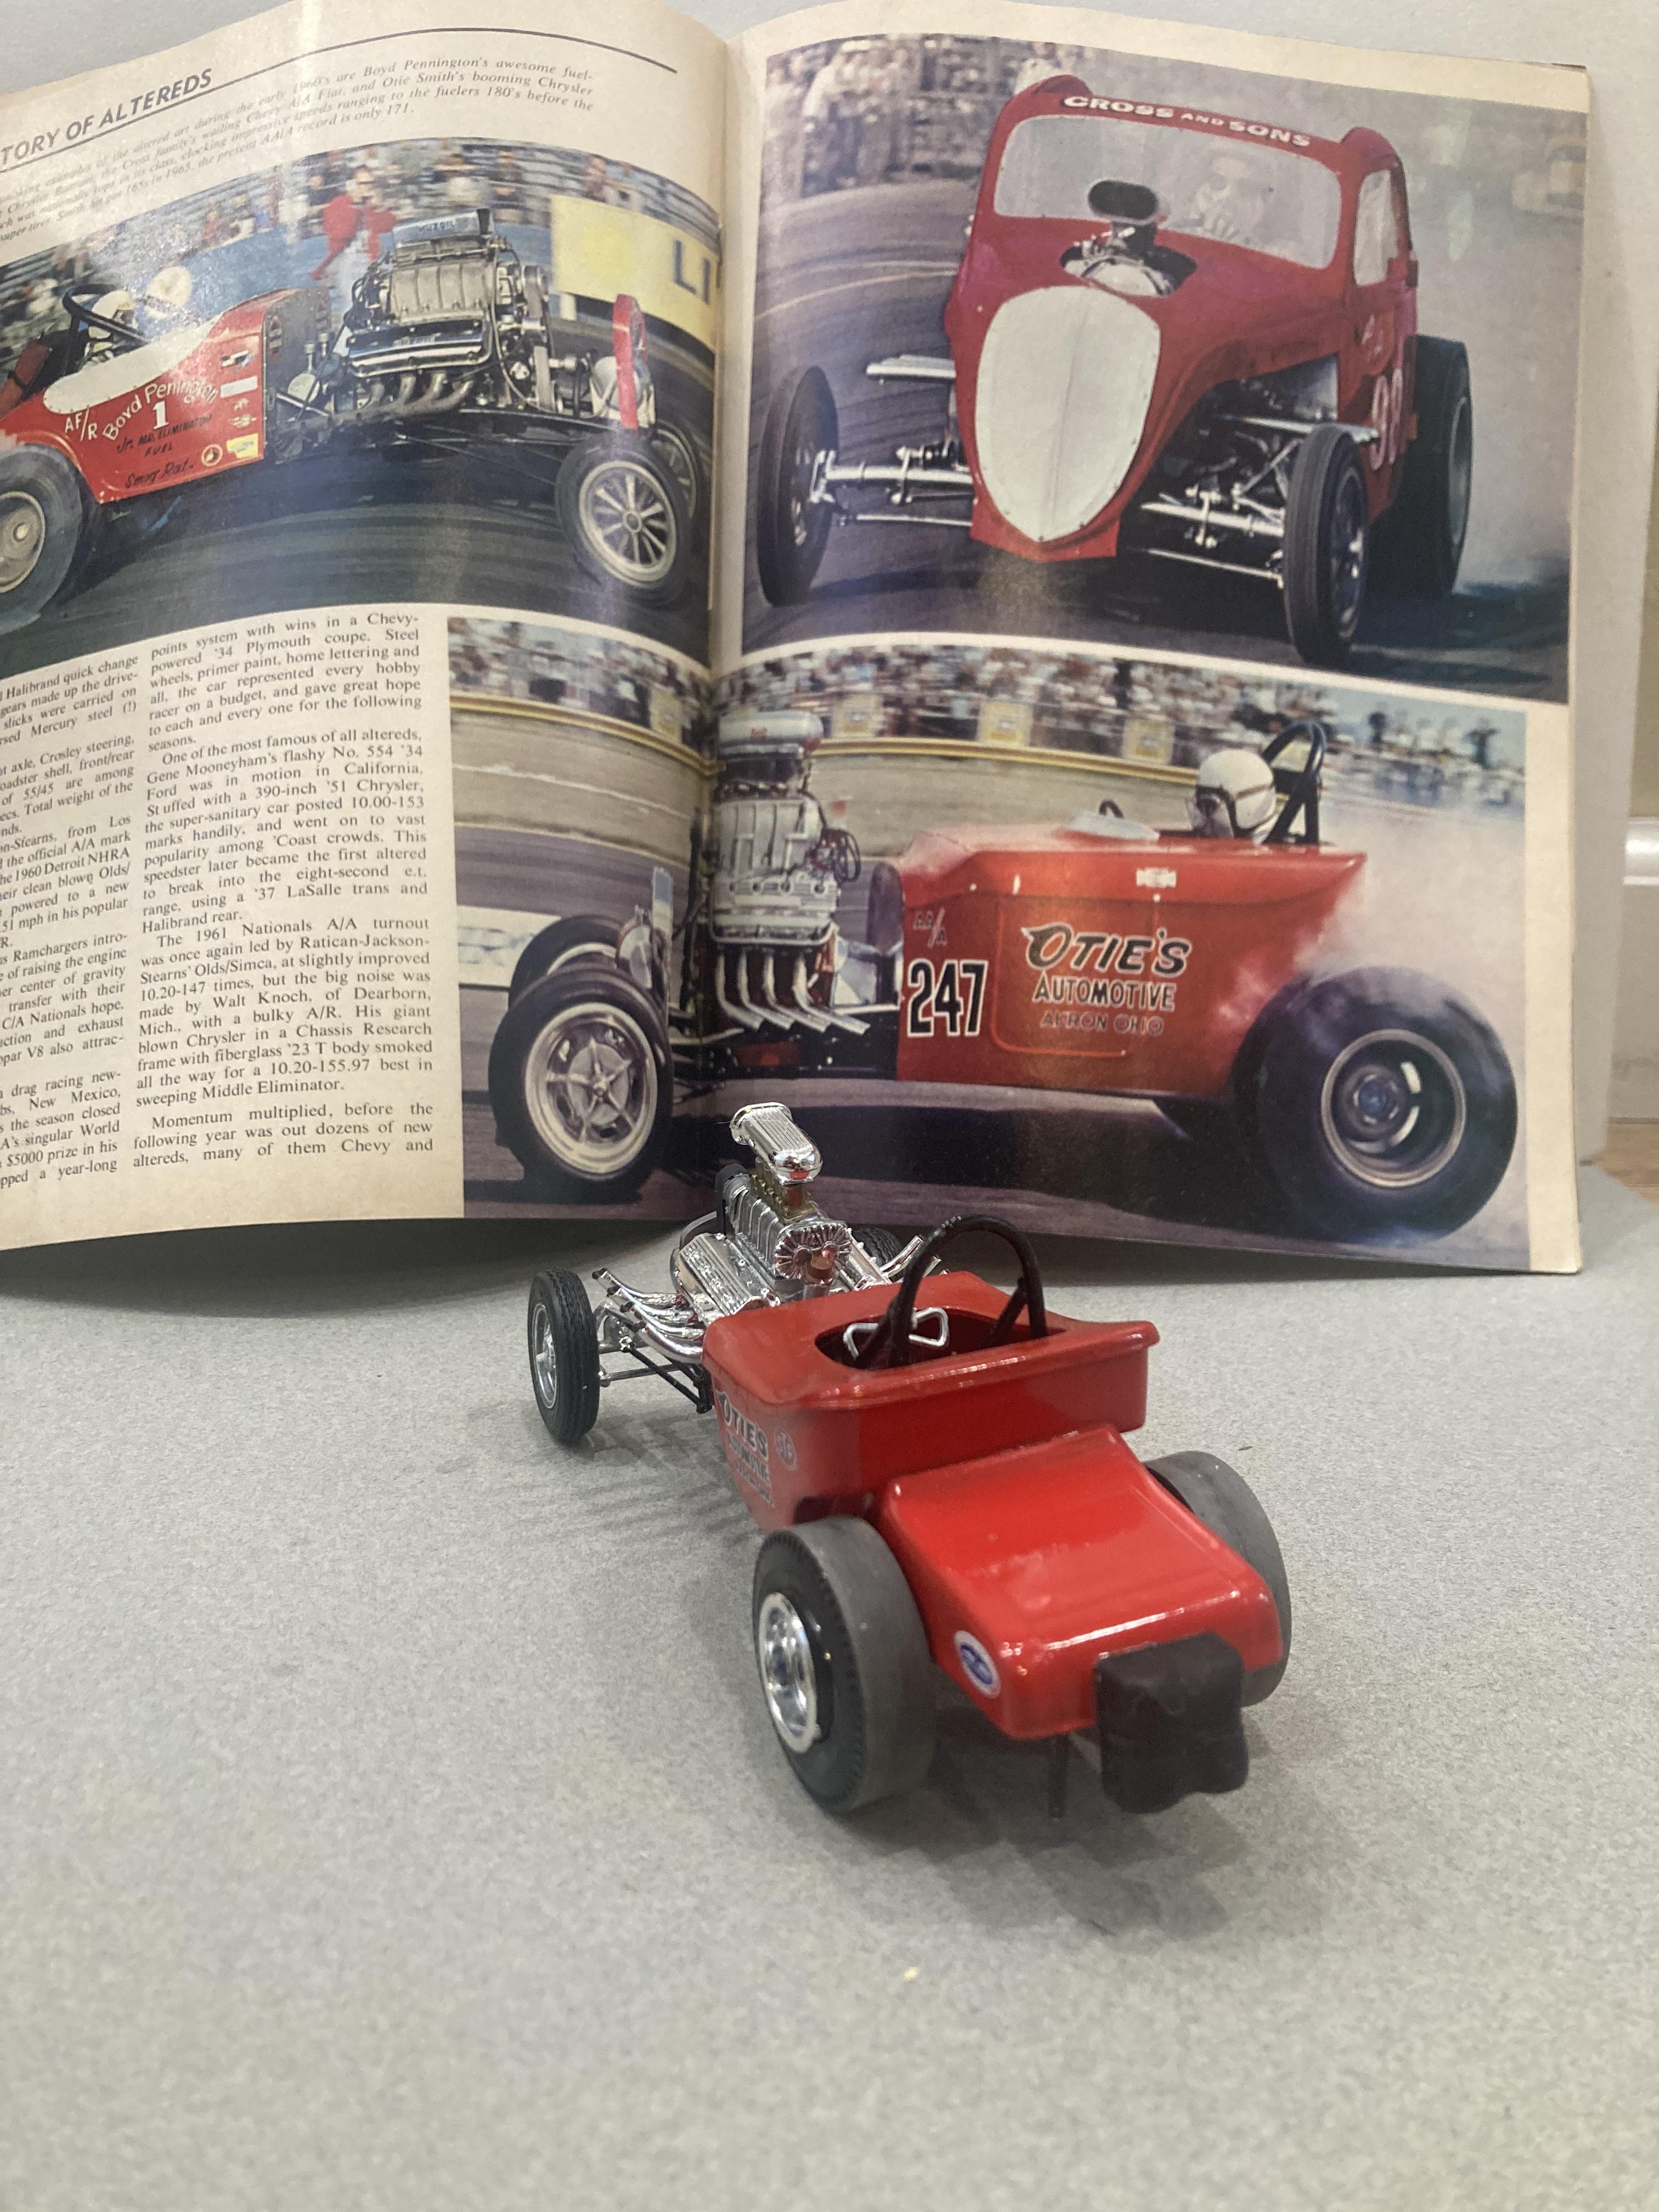
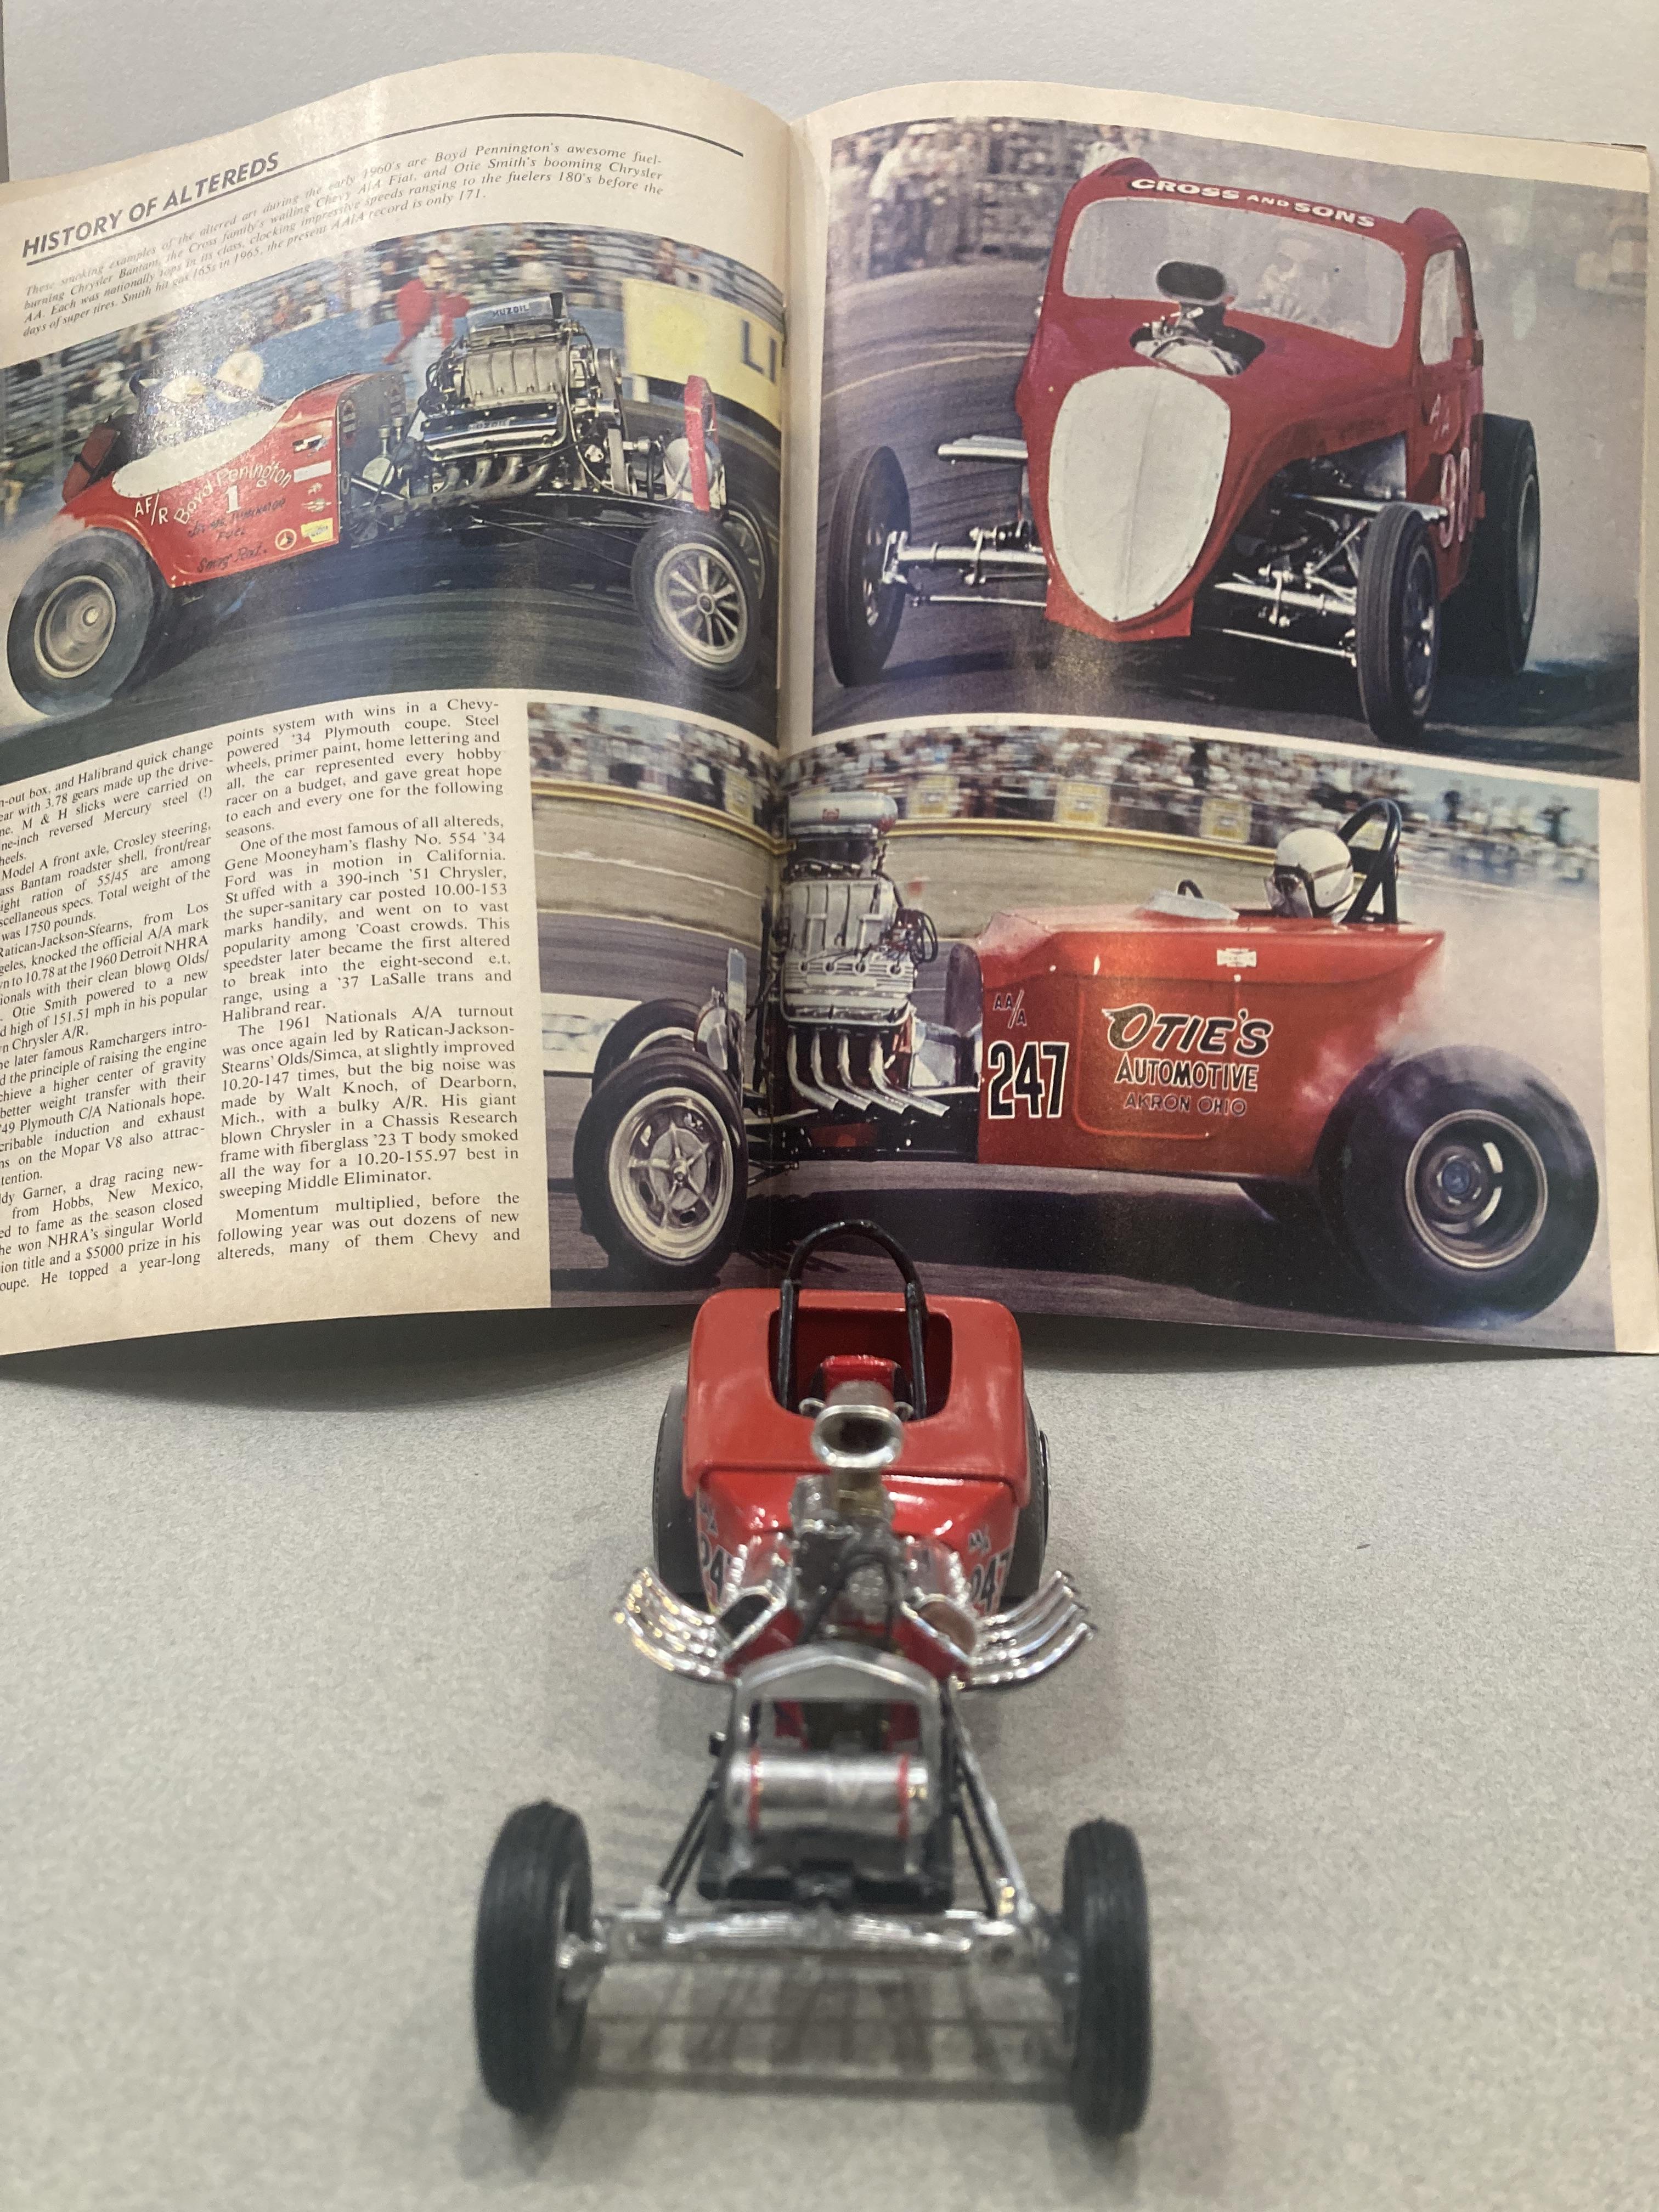
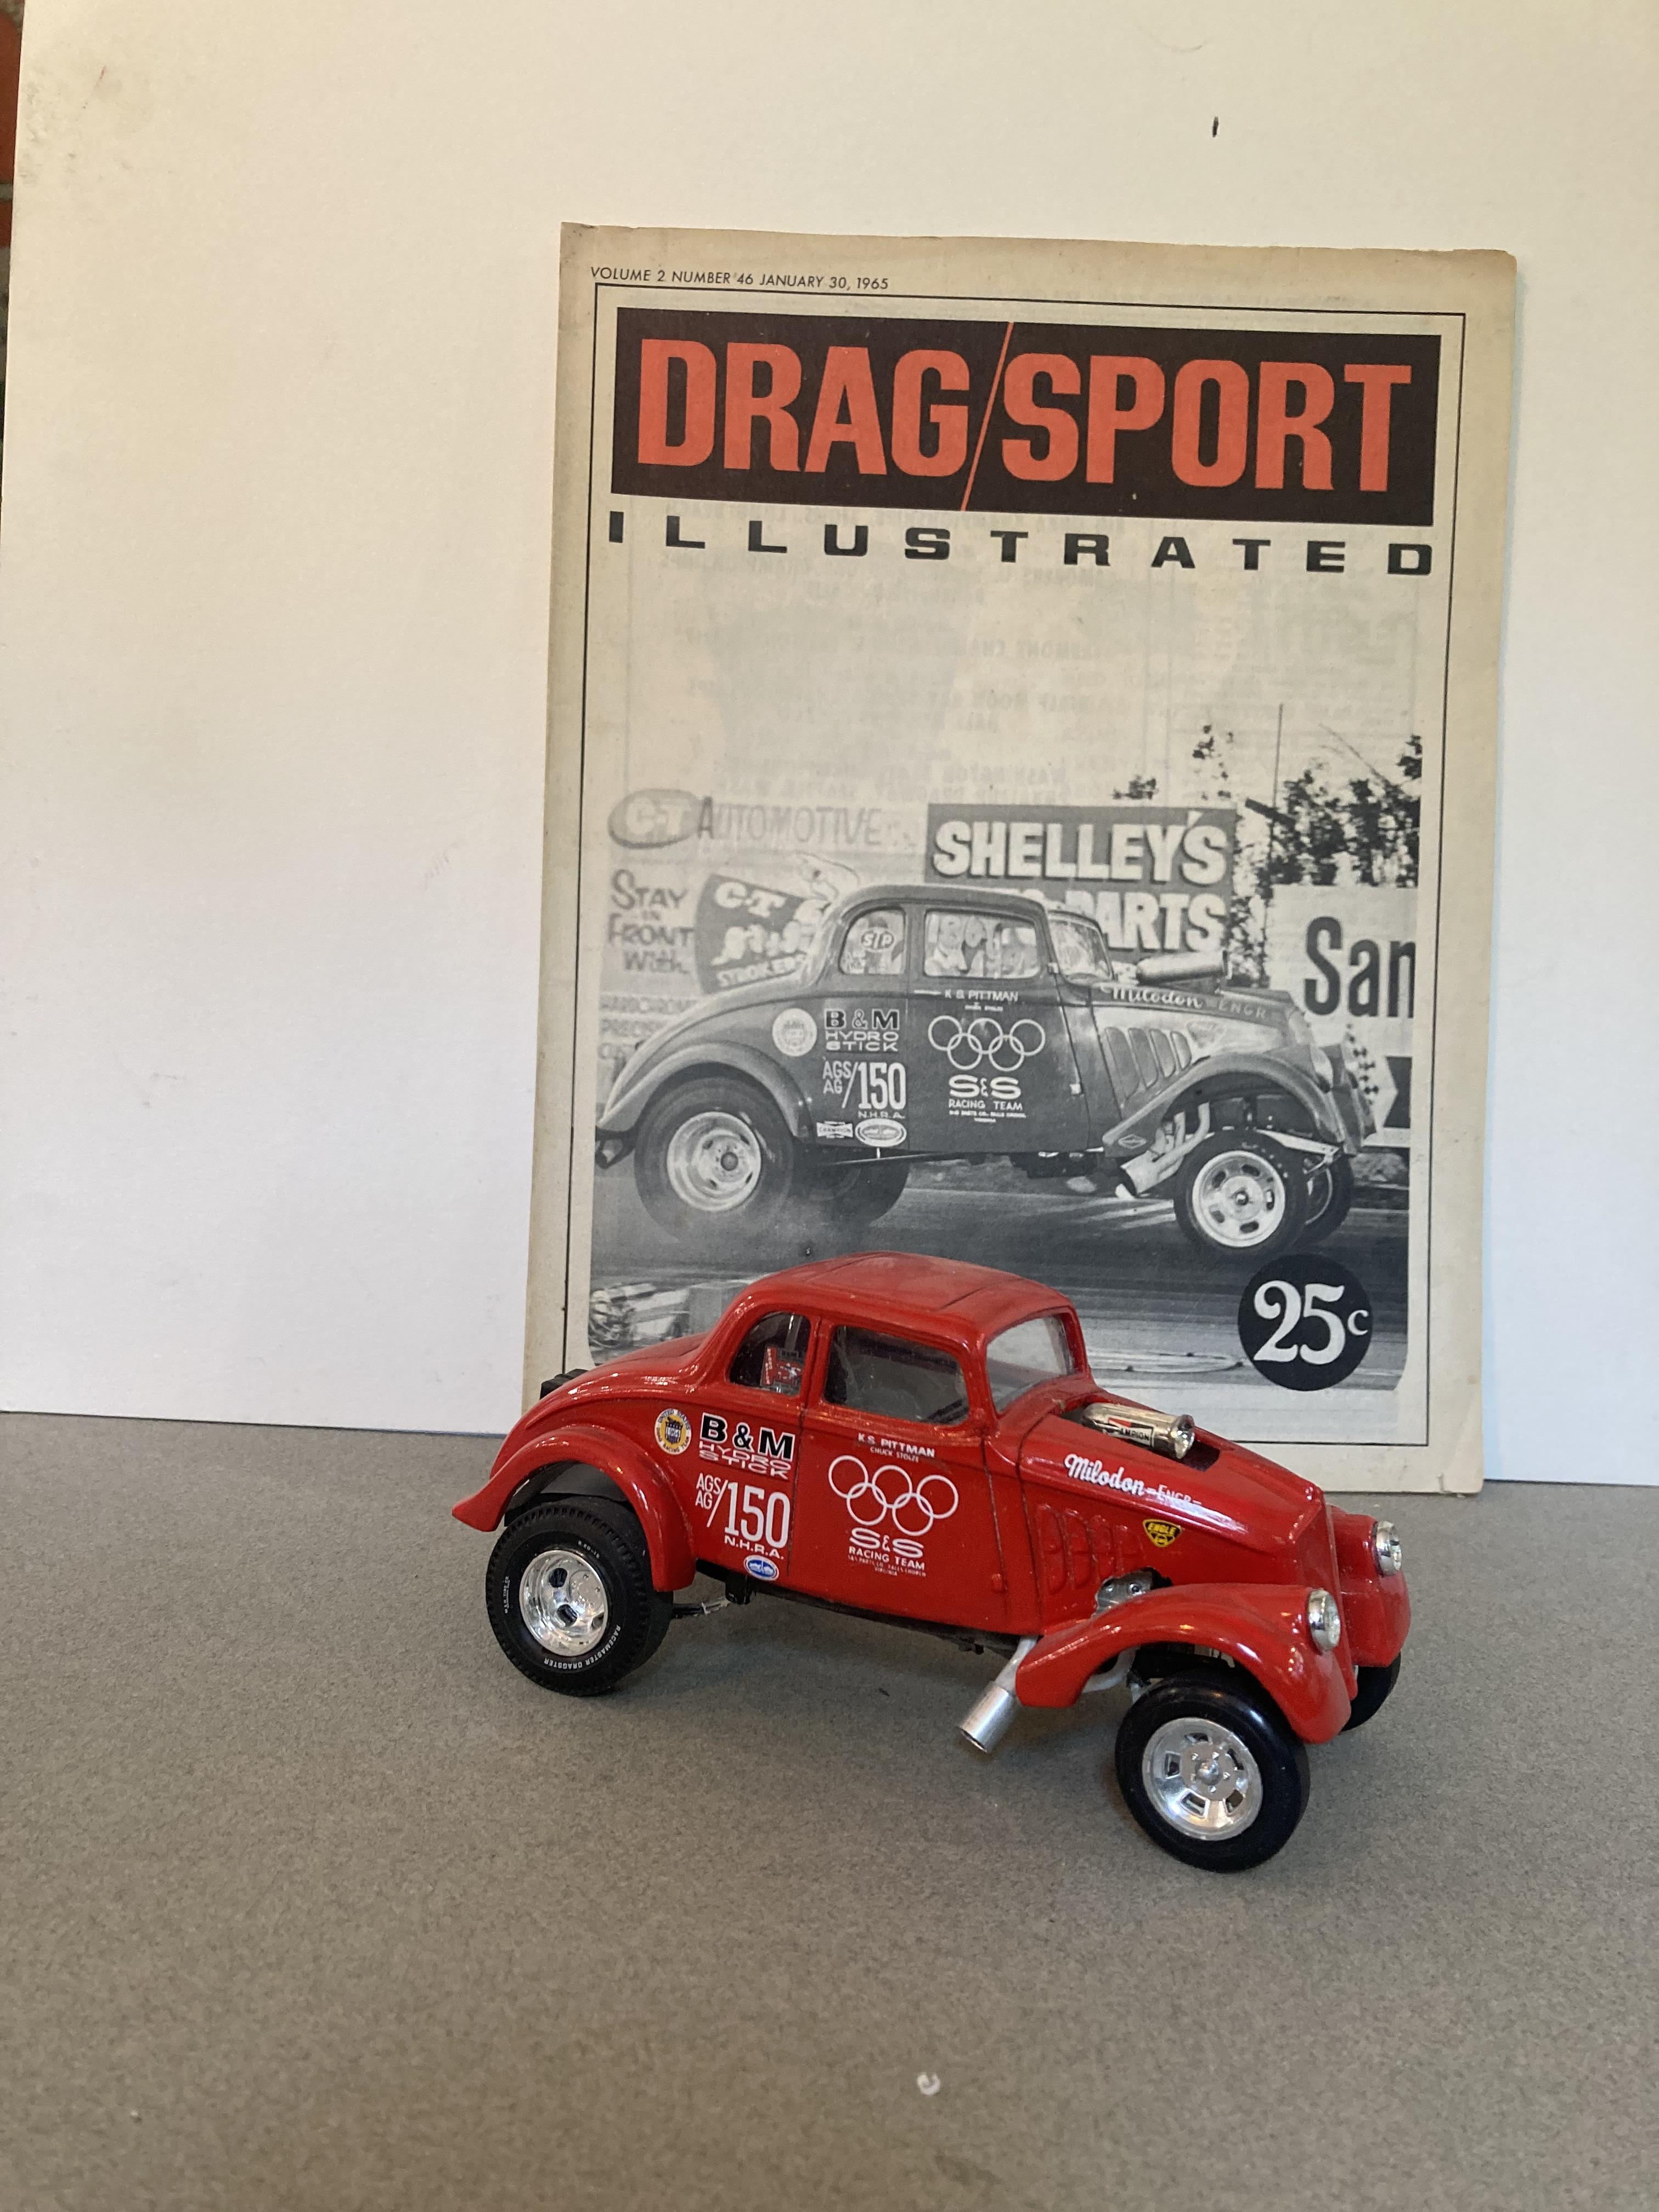
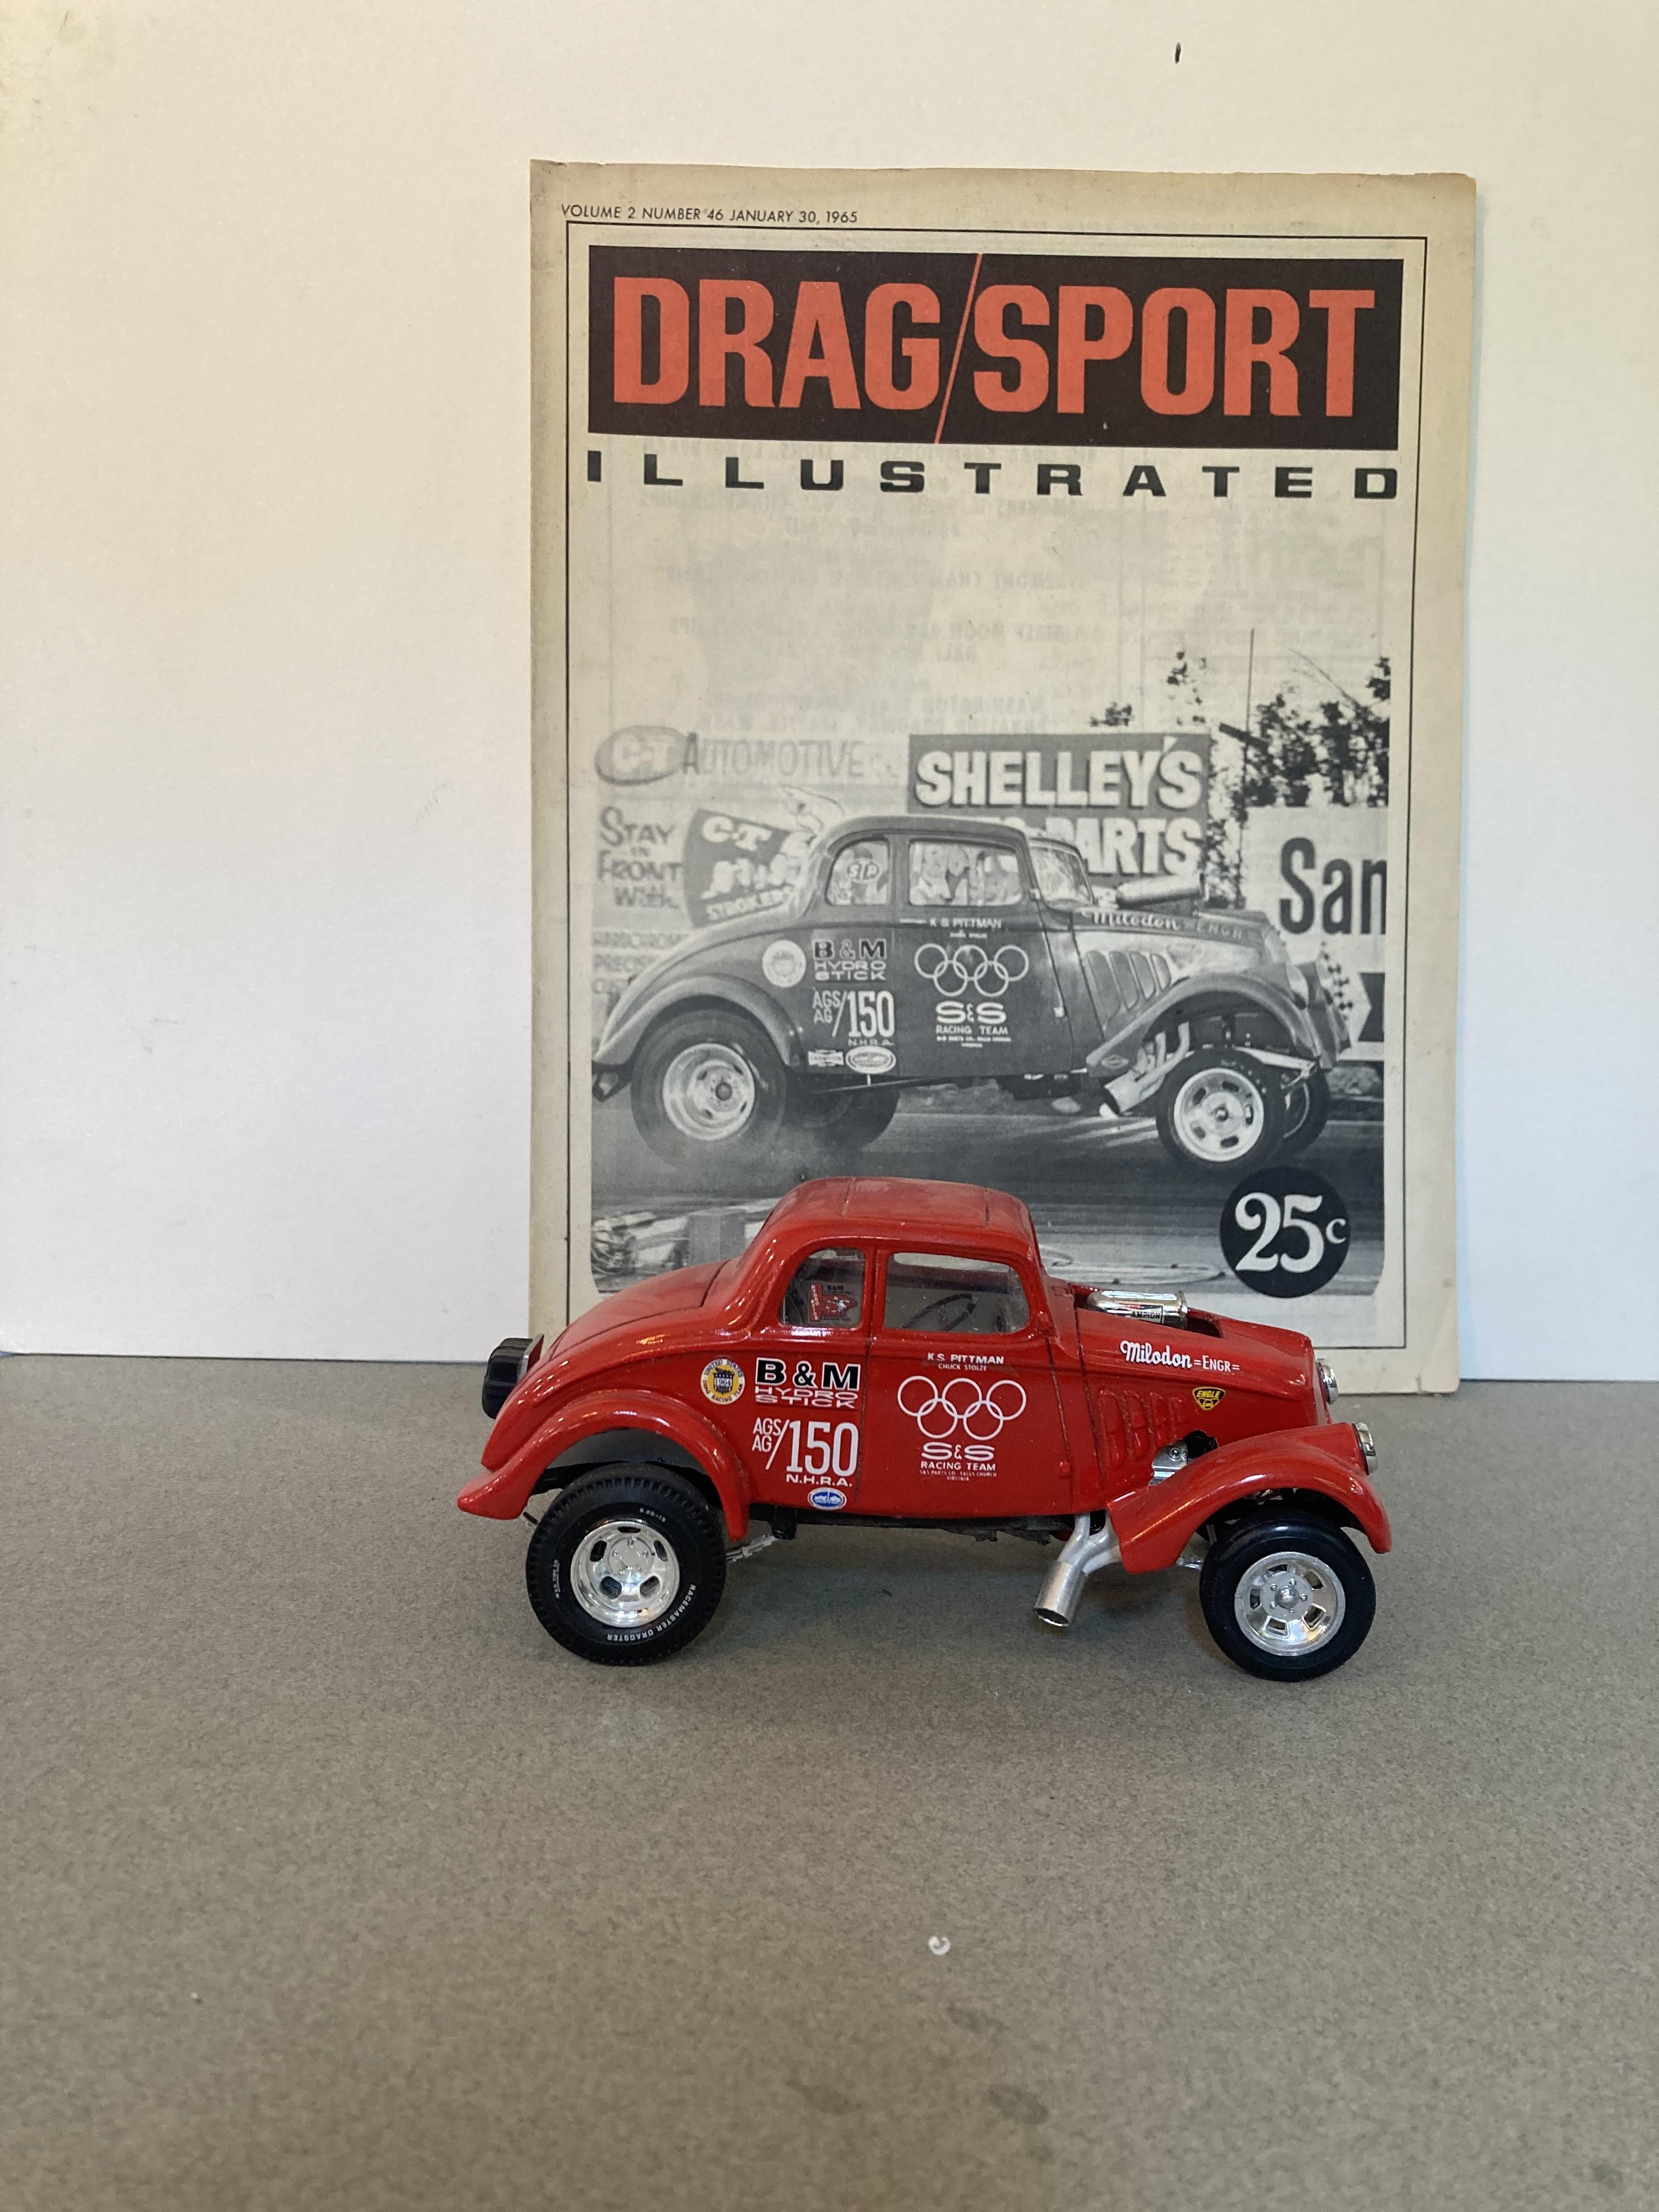
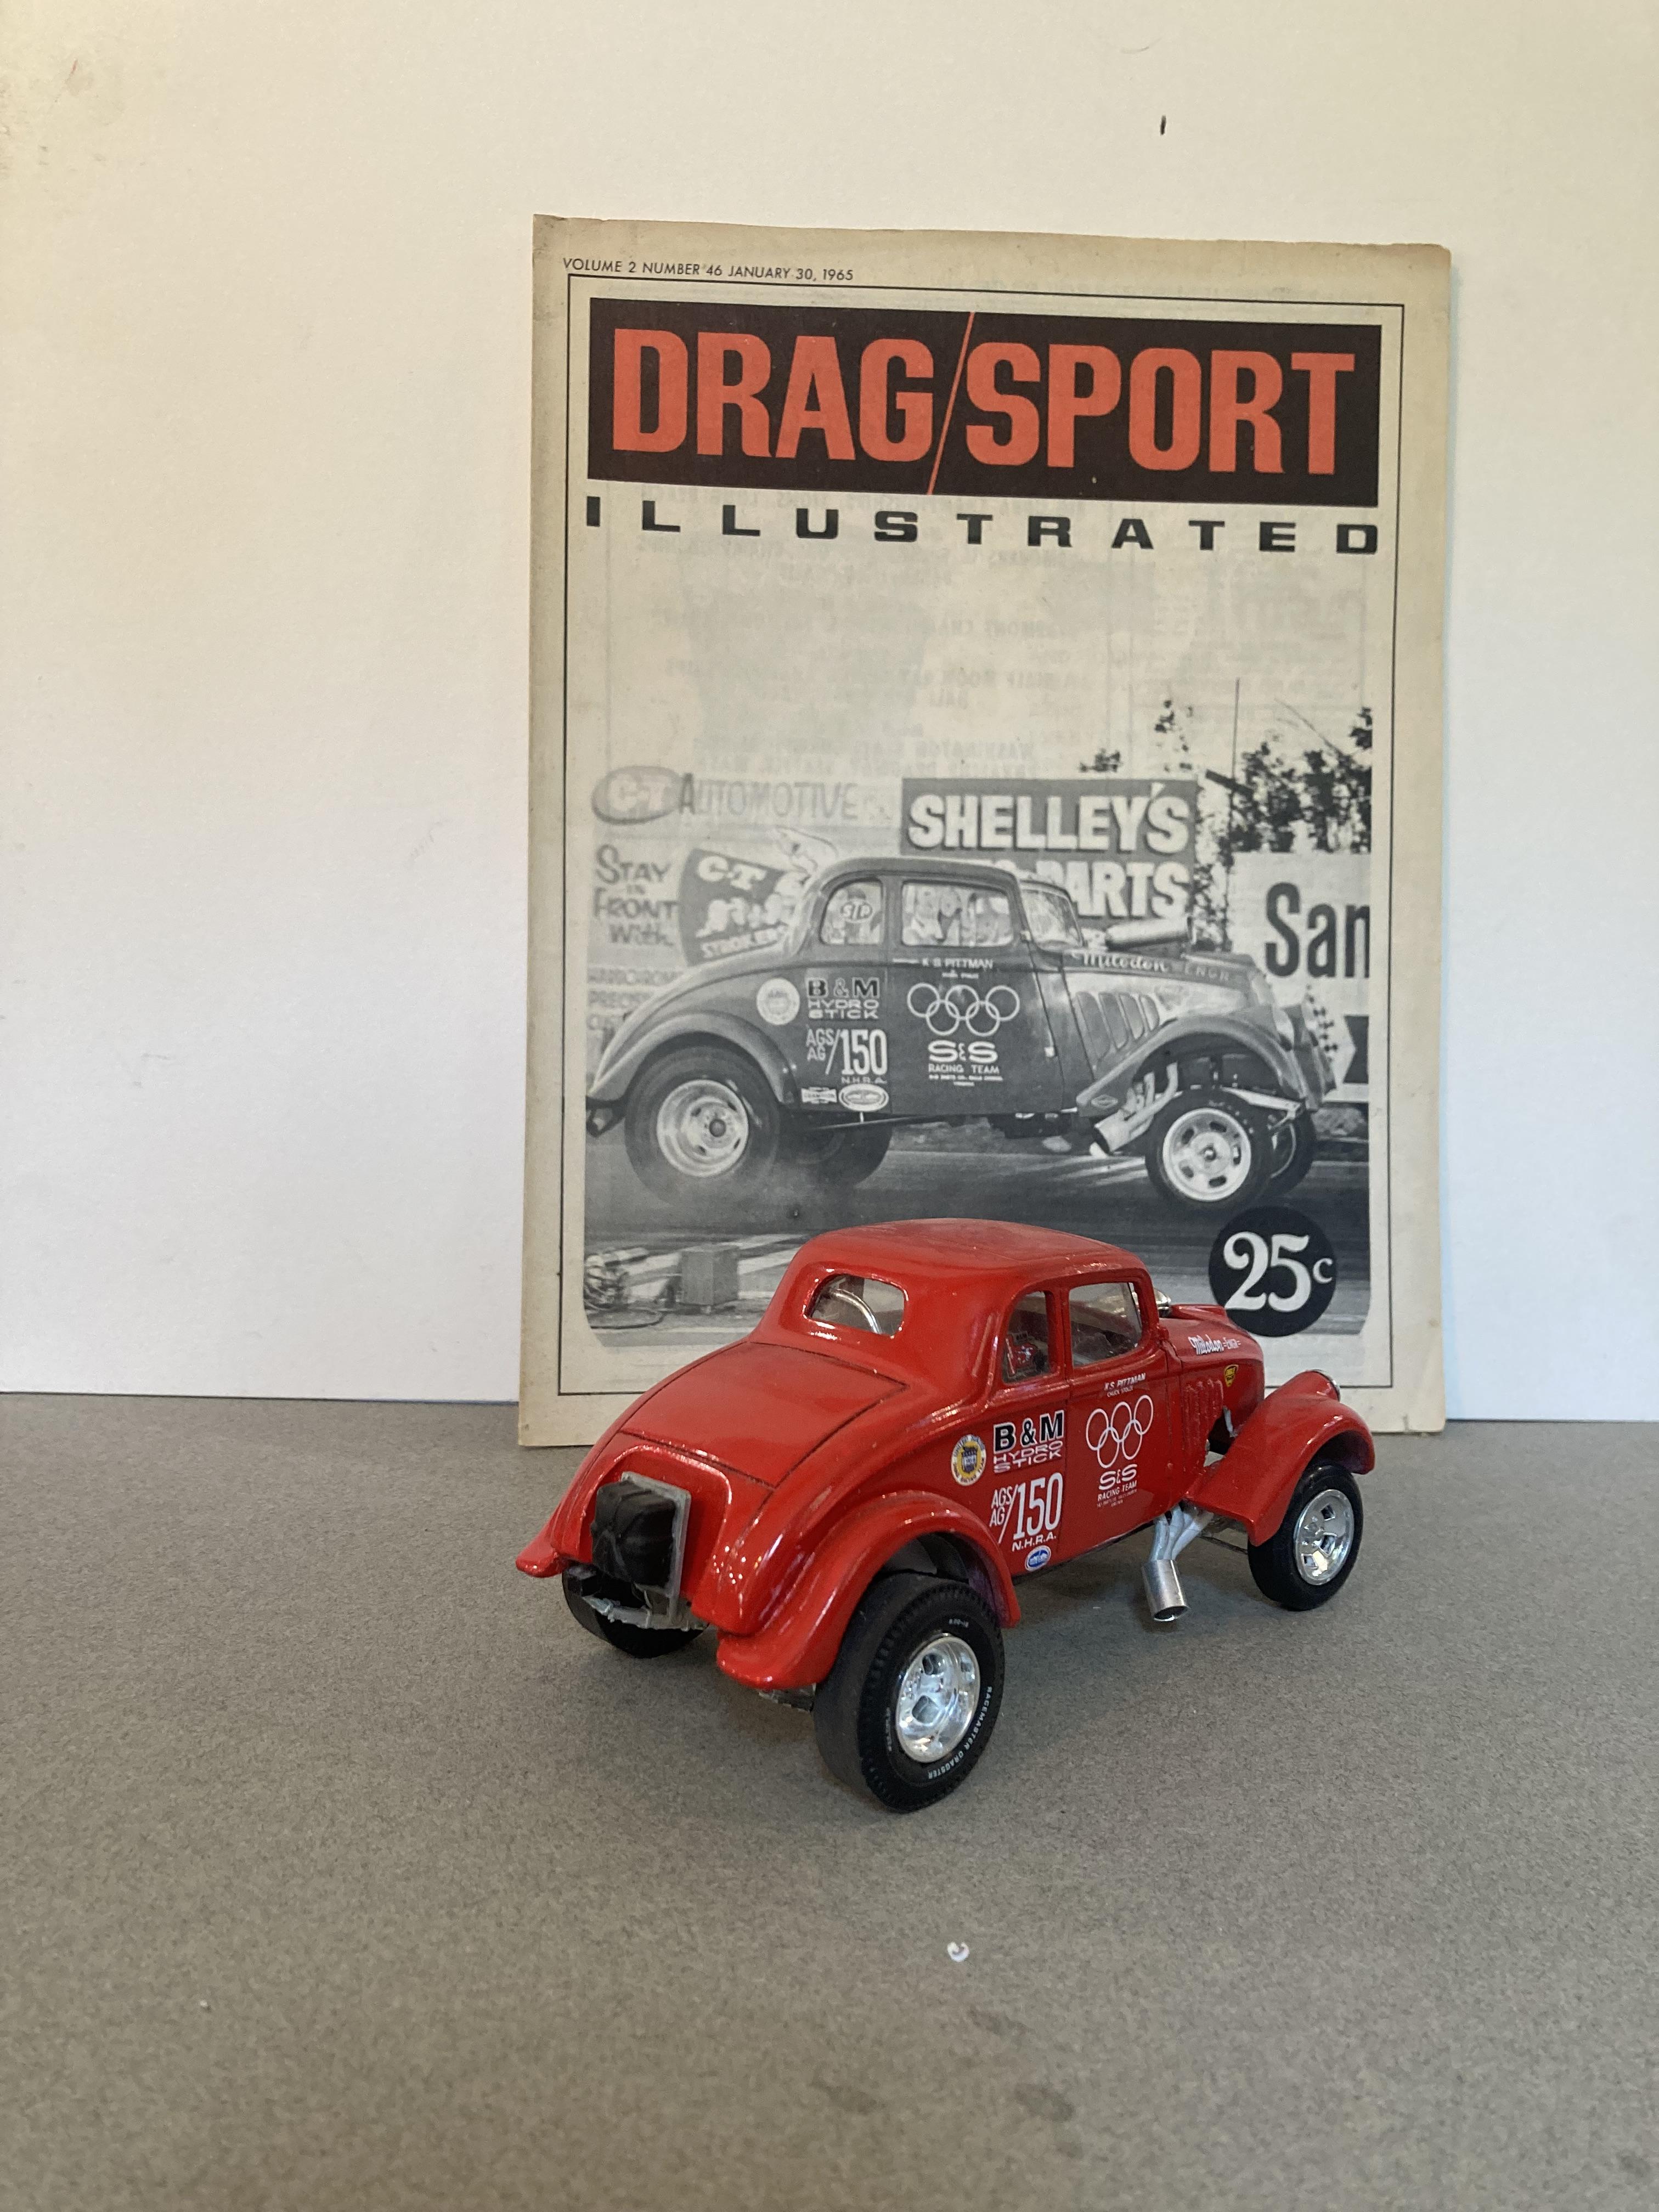
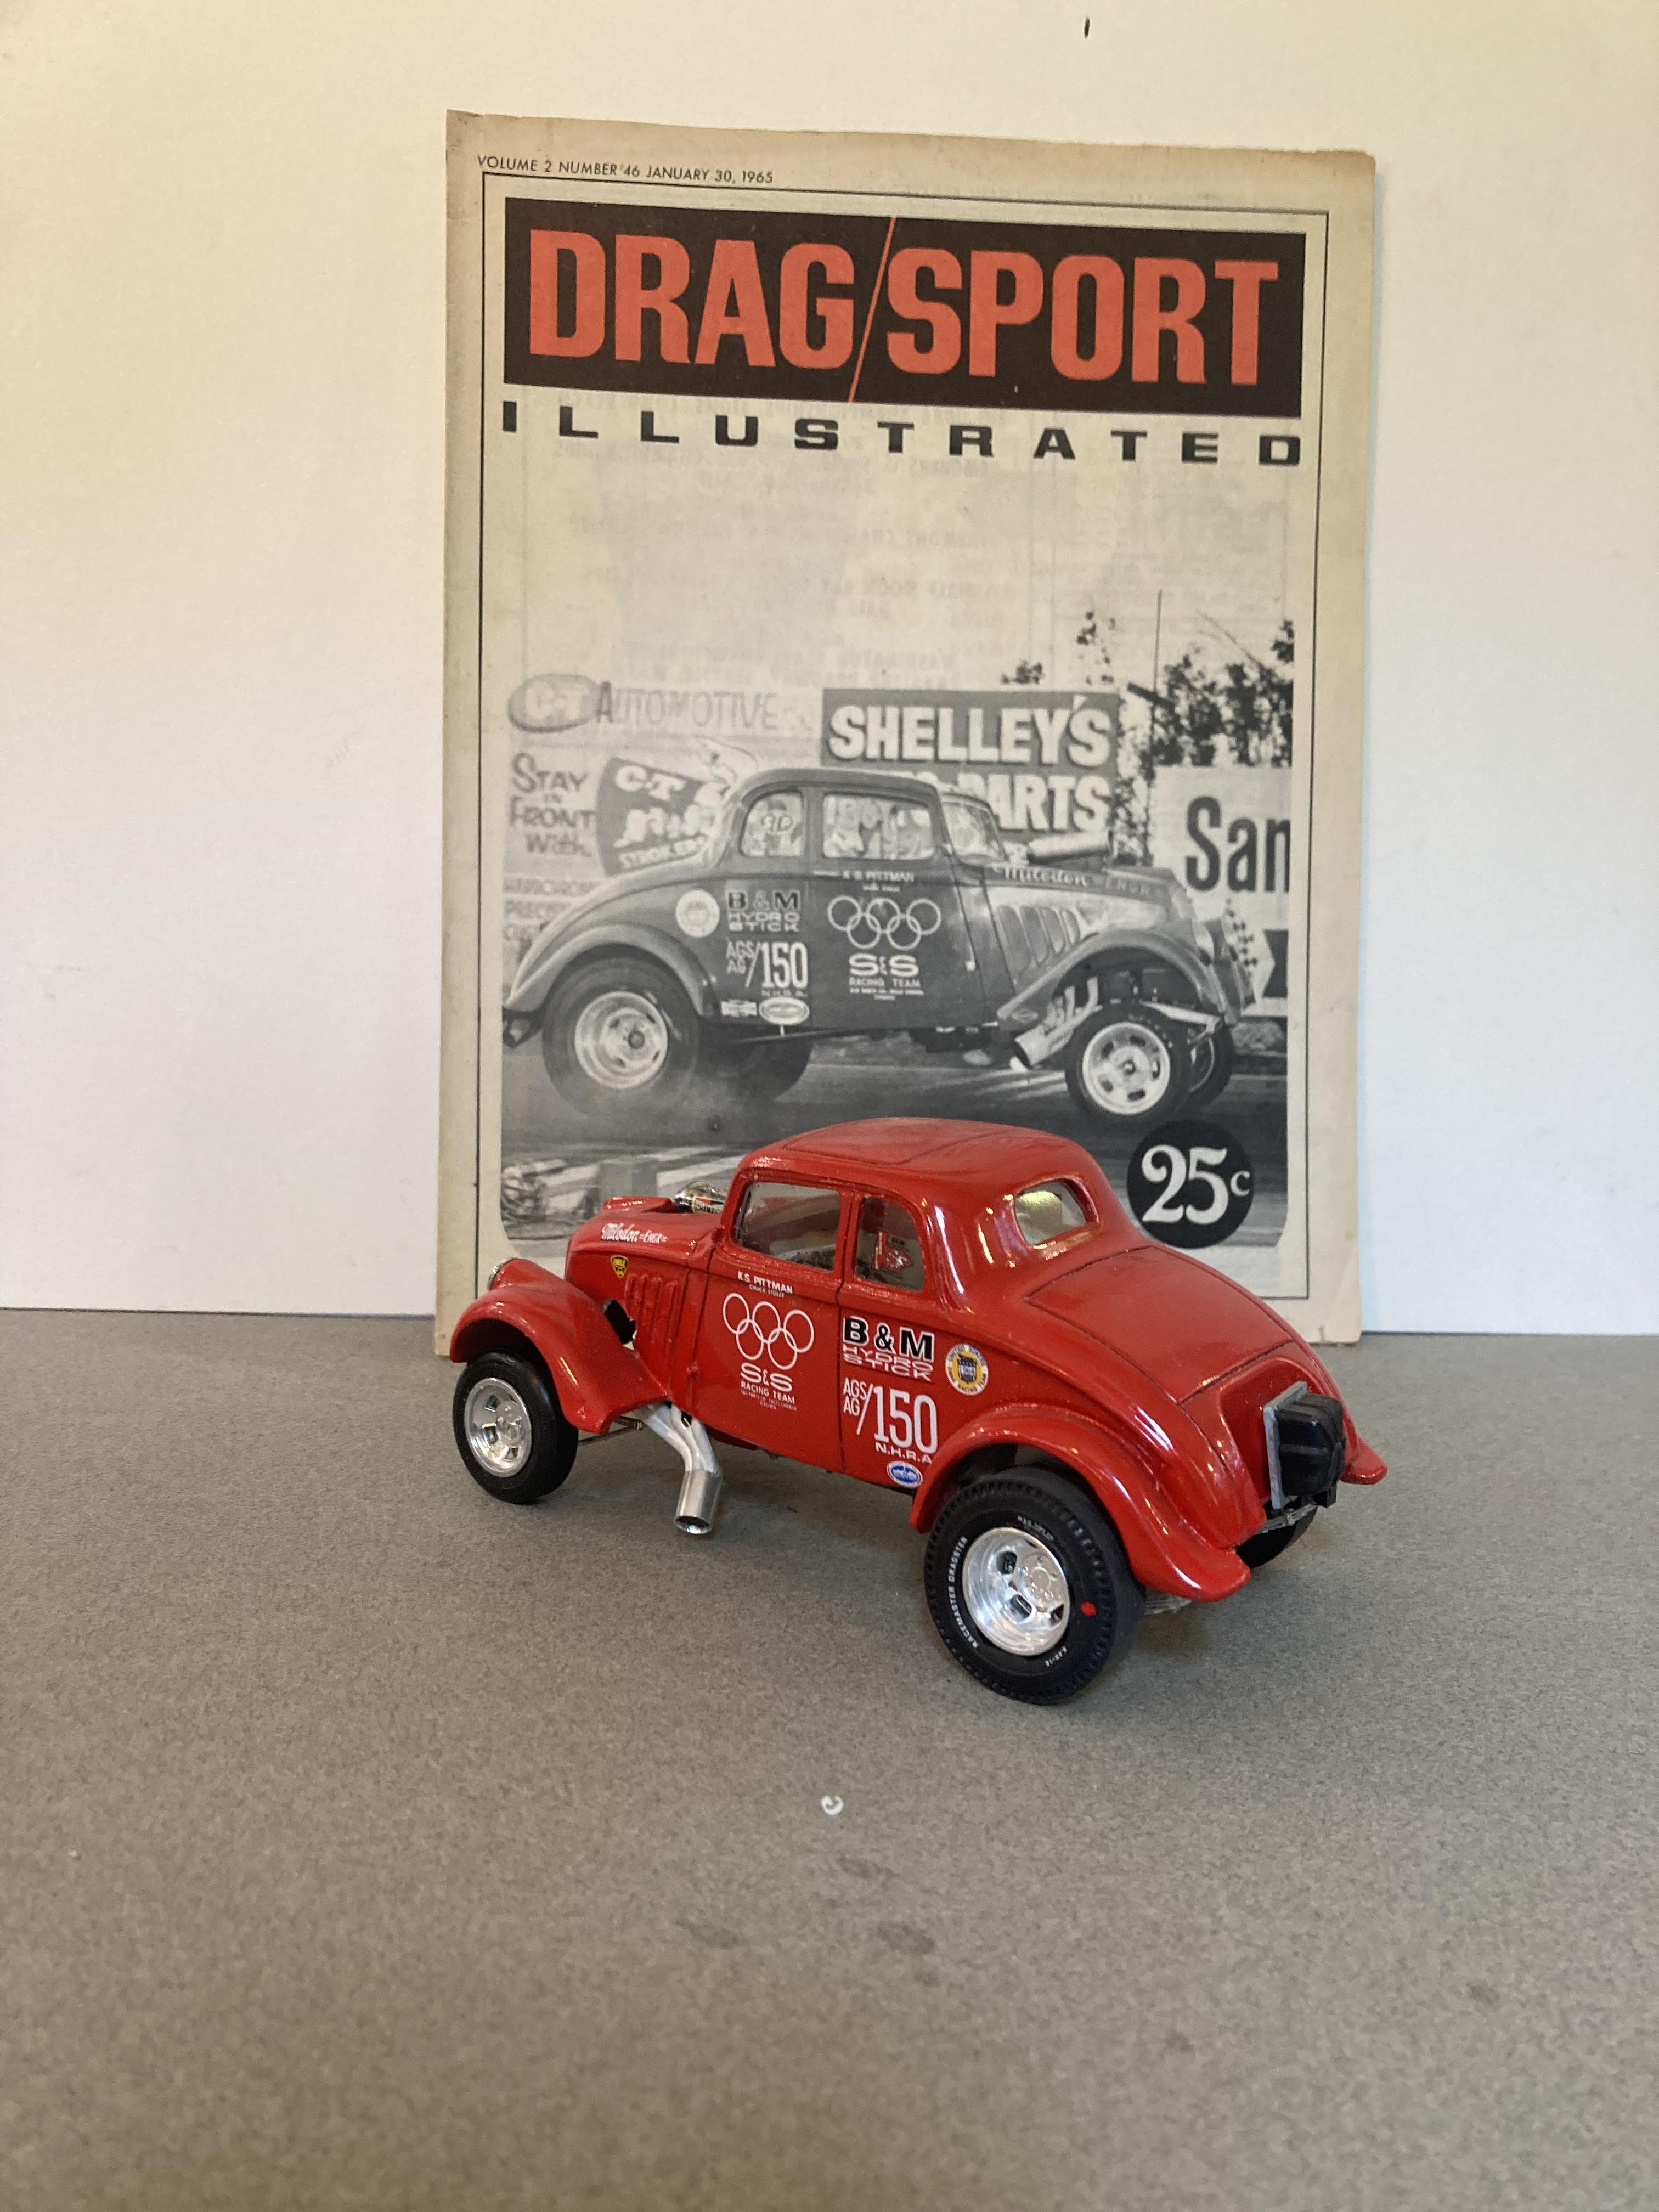
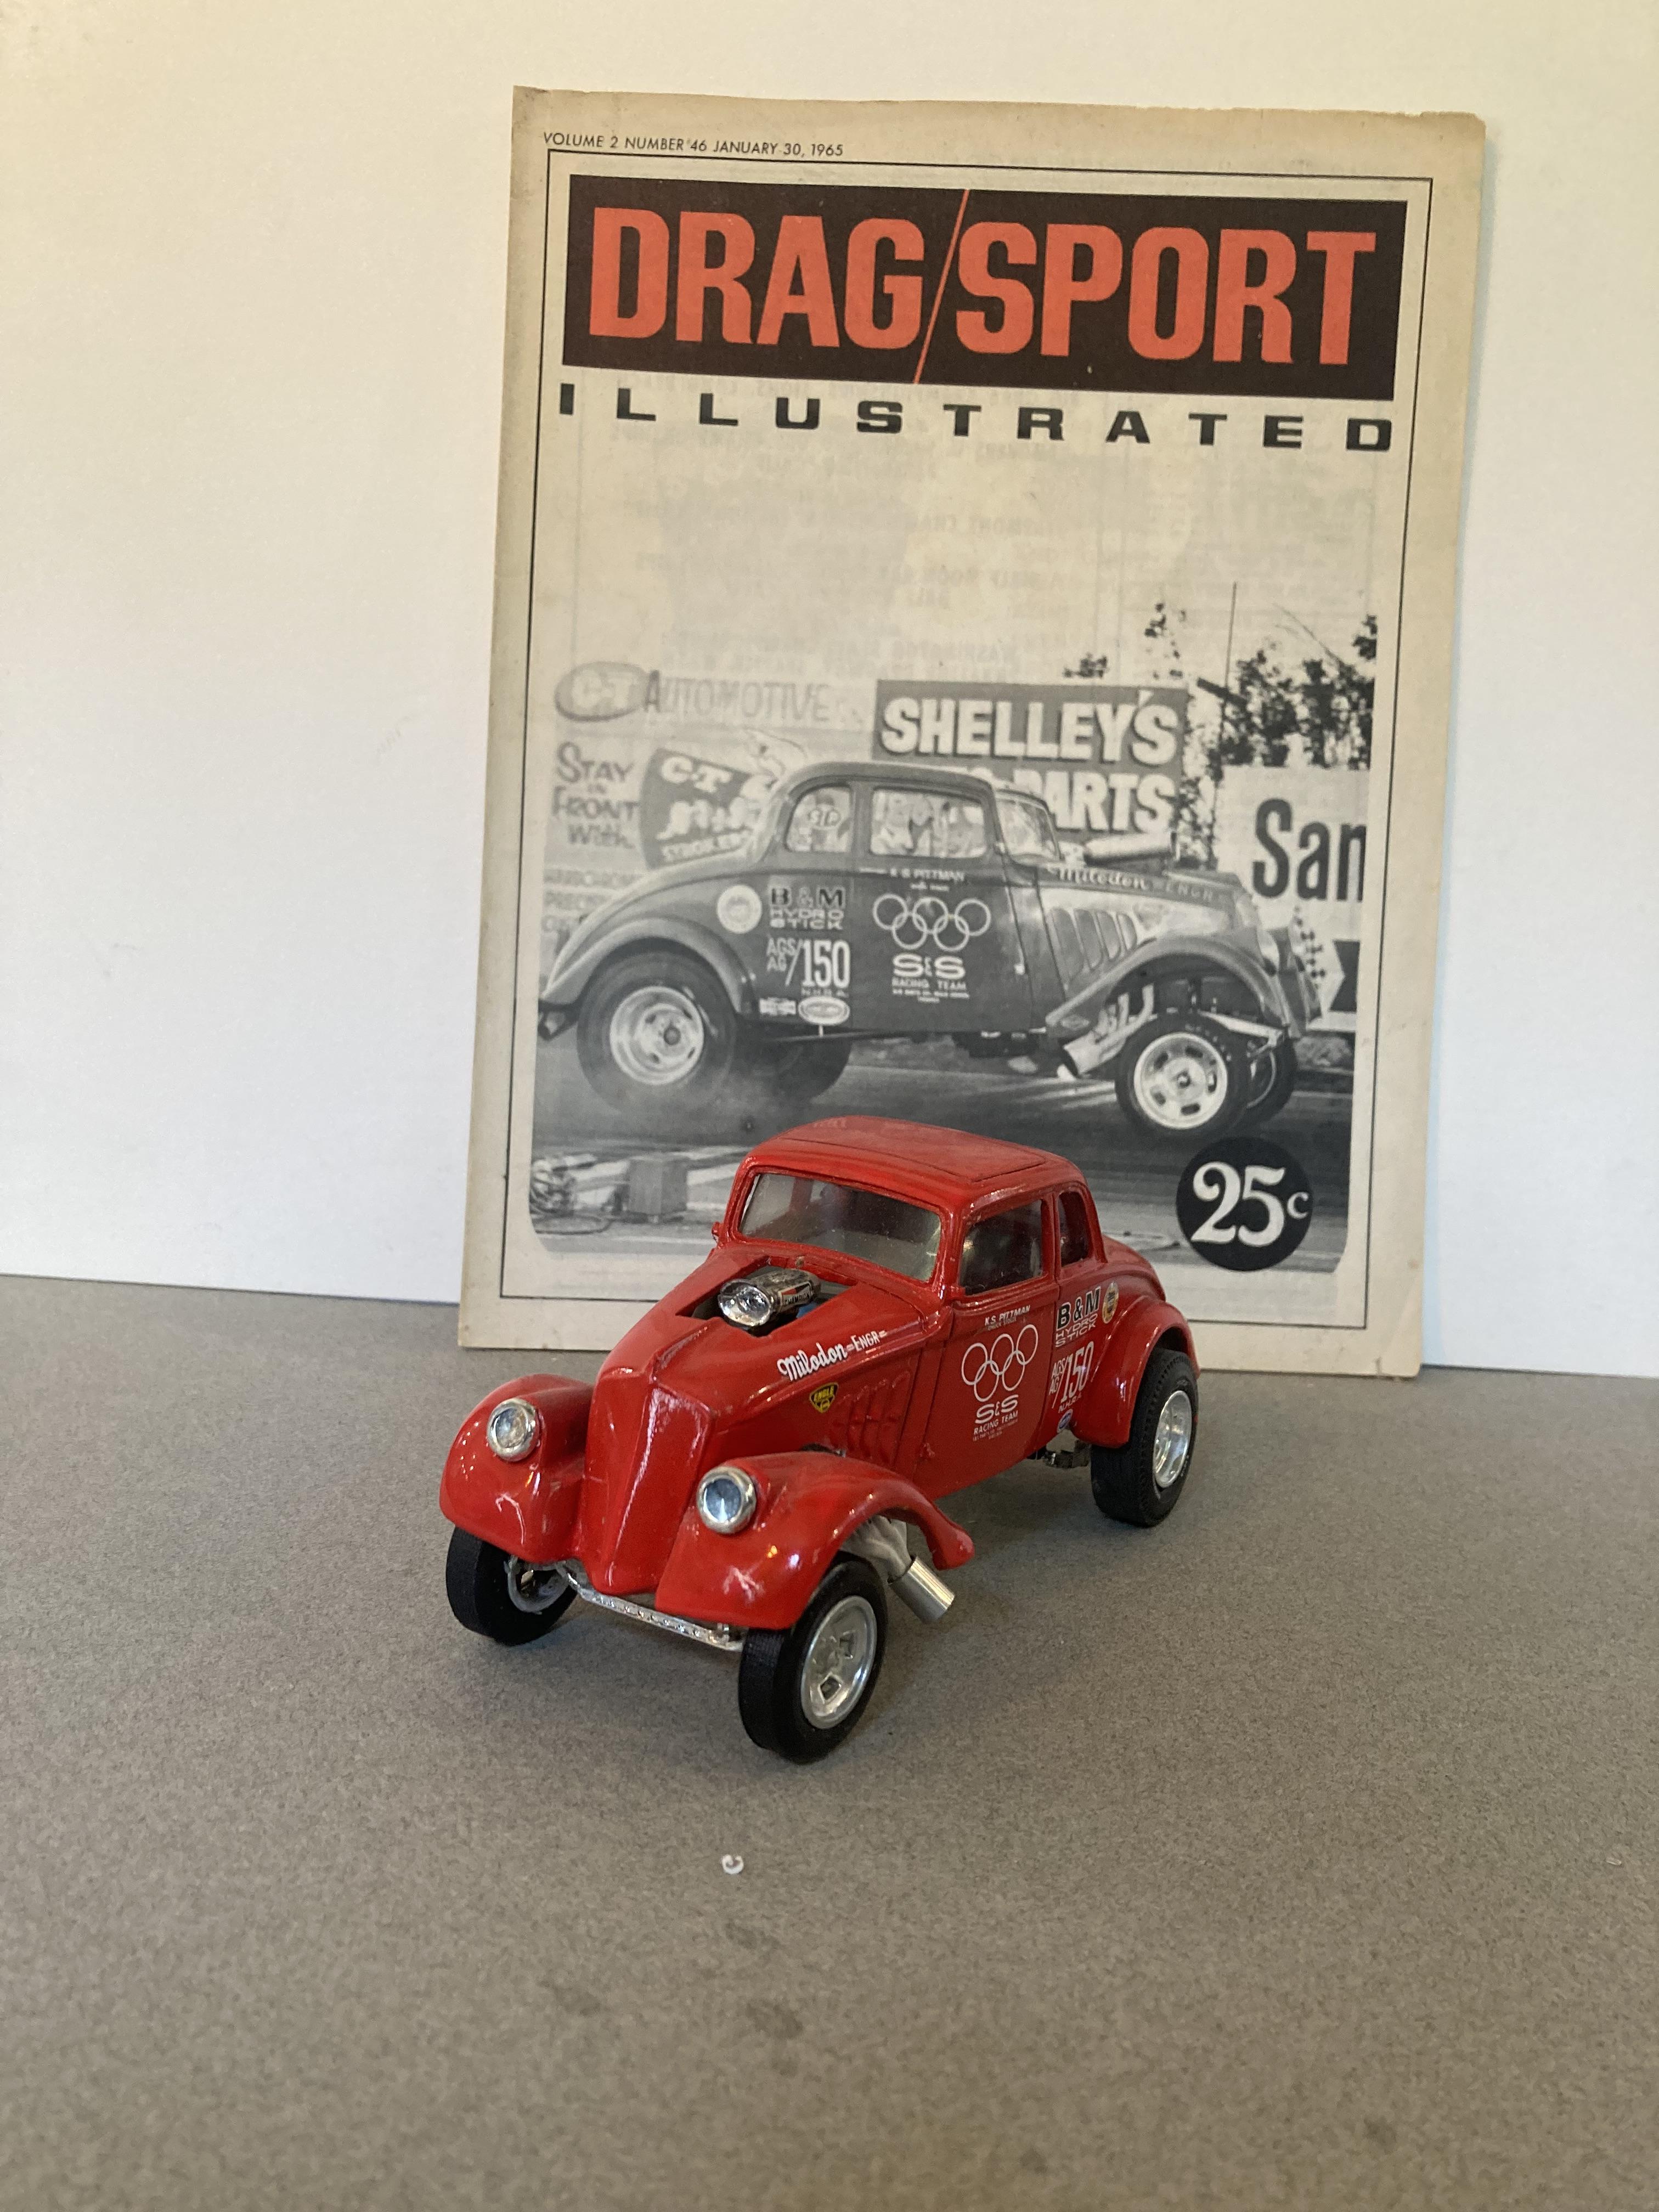
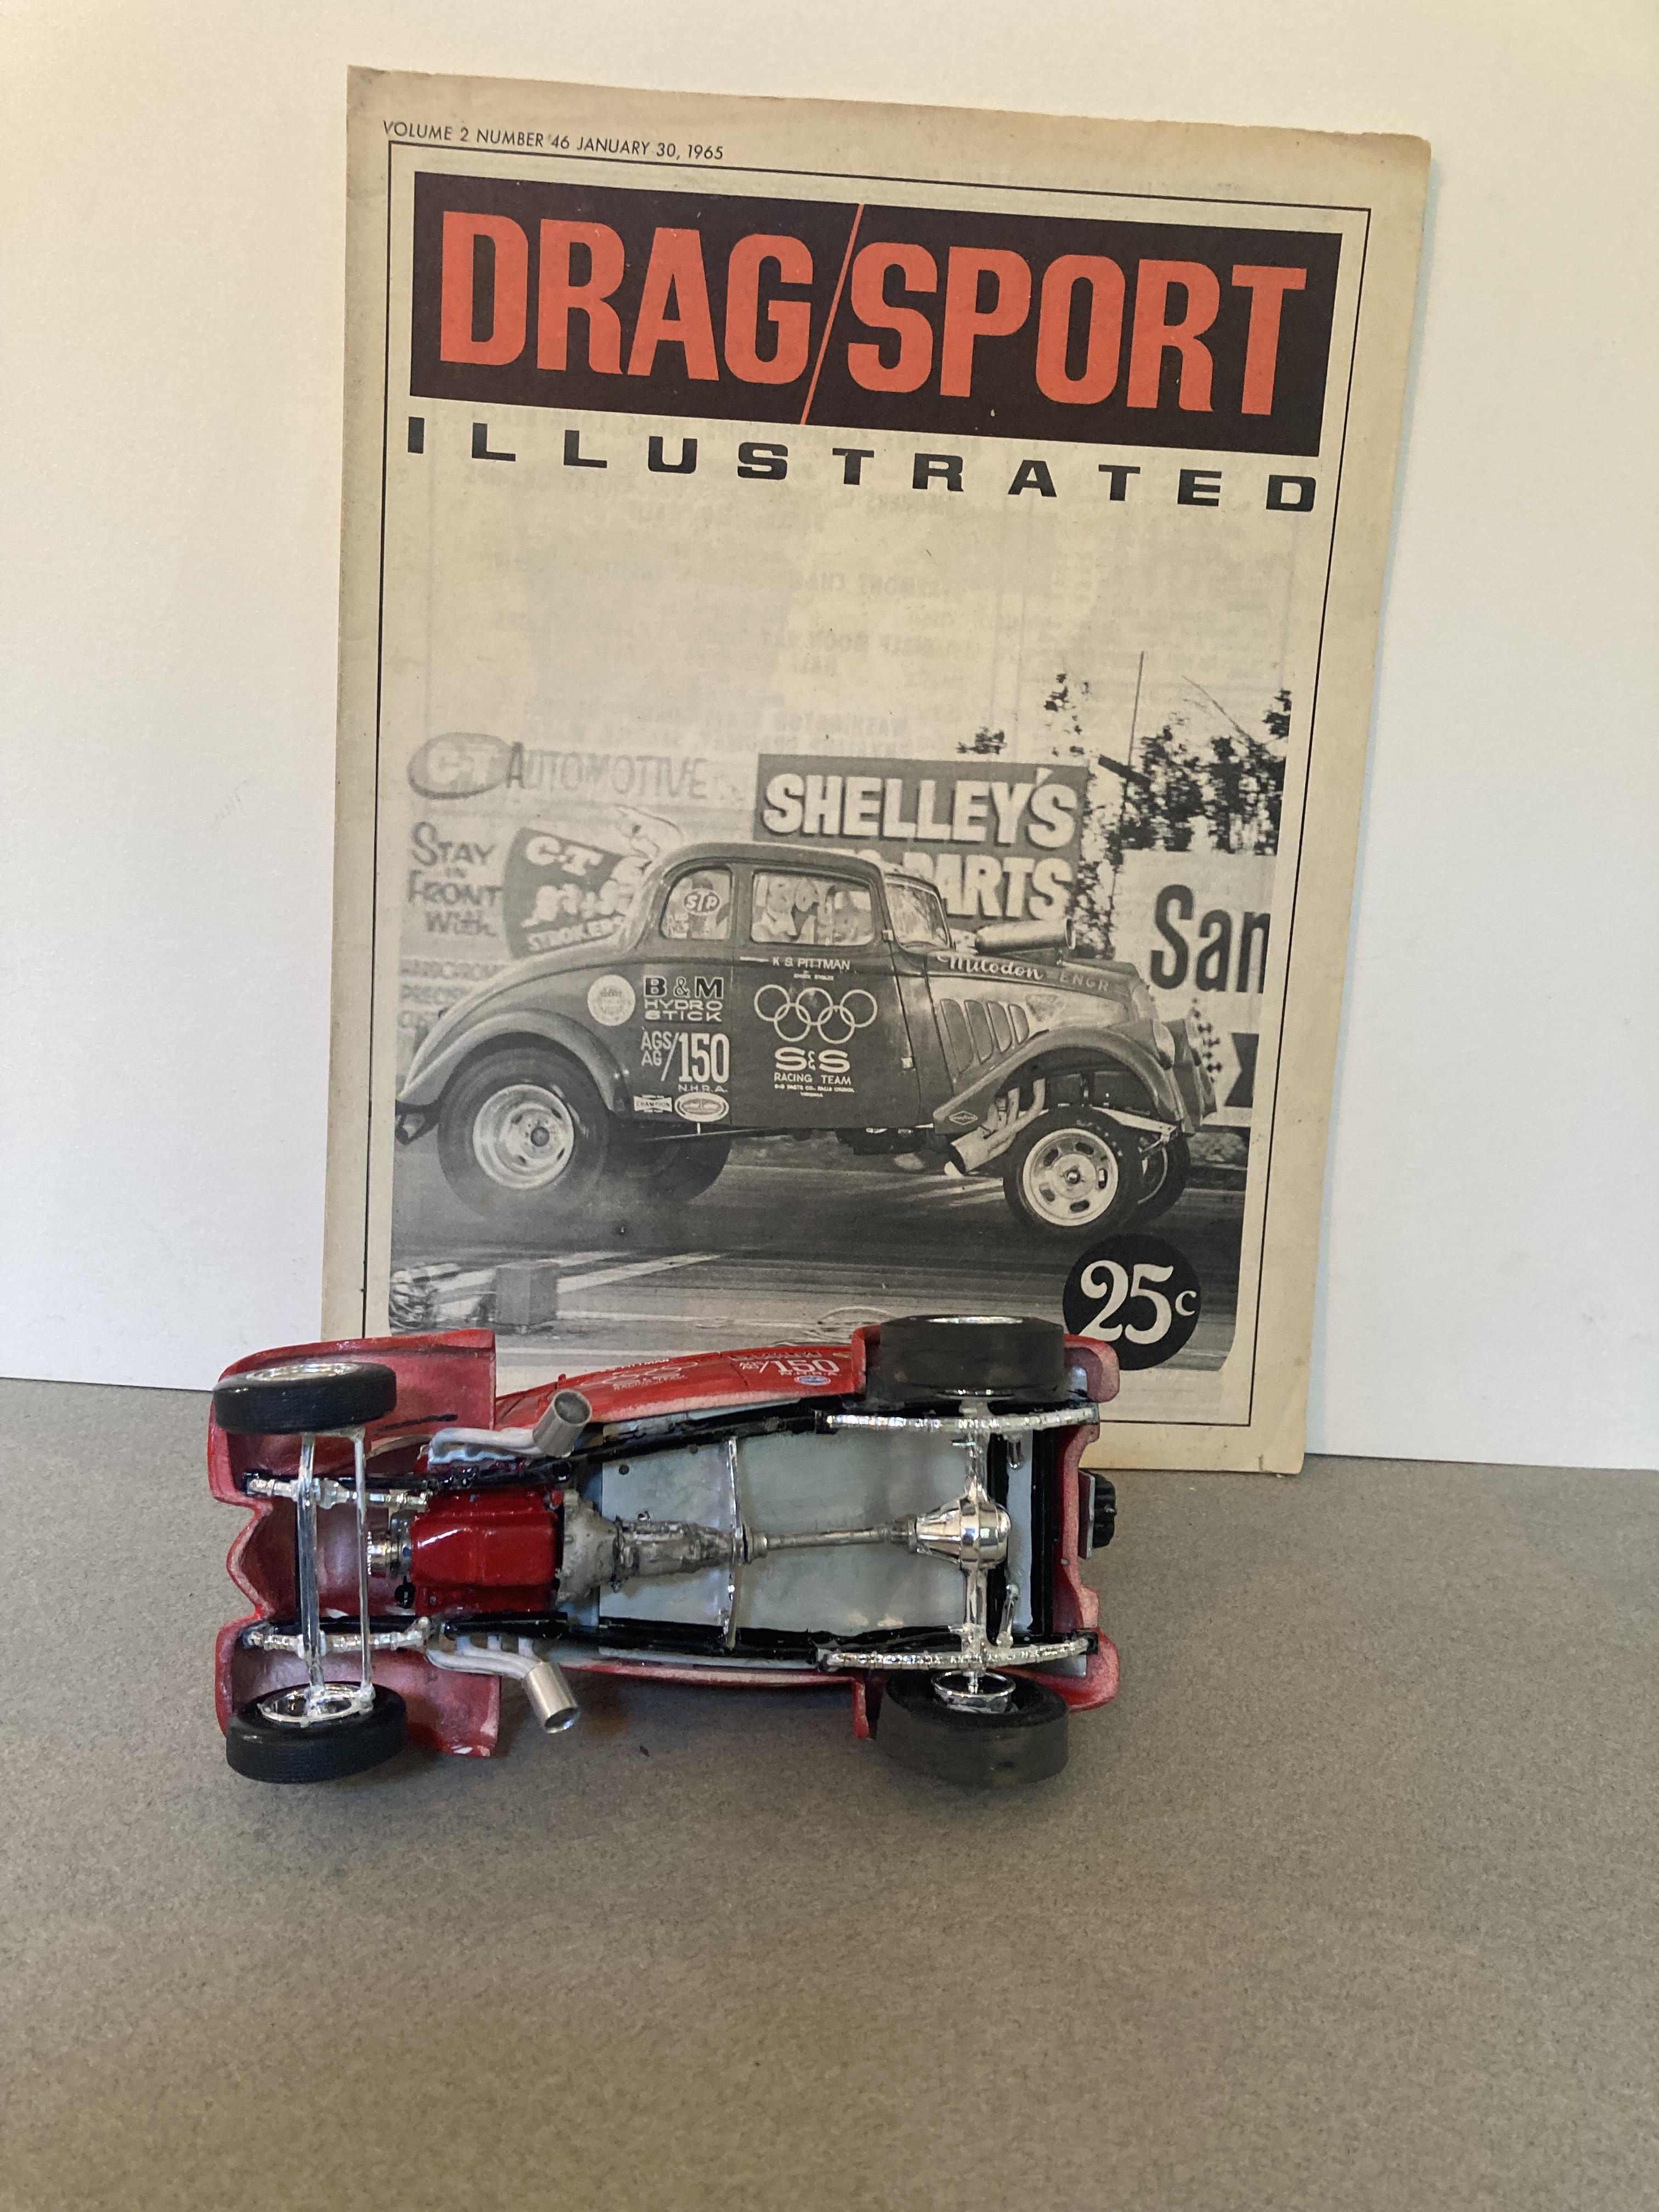
 This one’s a combination of parts from The AMT double dragster and a body from the MPC bantam blast. The big slicks are from the AMT parts pack. The double dragster frame was modified to fit the bantam body shell. The long block is also double dragster with the blower pieces coming from my parts box. It’s painted with testors metallic red topped with slixx decals. This issue of DRAG RACING MAGAZINE has great reference photos with a good article about this car it also is a great reference for the GOLDEN COMMANDOS awb 65 Plymouth. Until next time thanks for looking . Mike
-
Not mine, pics from collected eBay listings, but would be great to hear this survives and can/will be reissued.
-
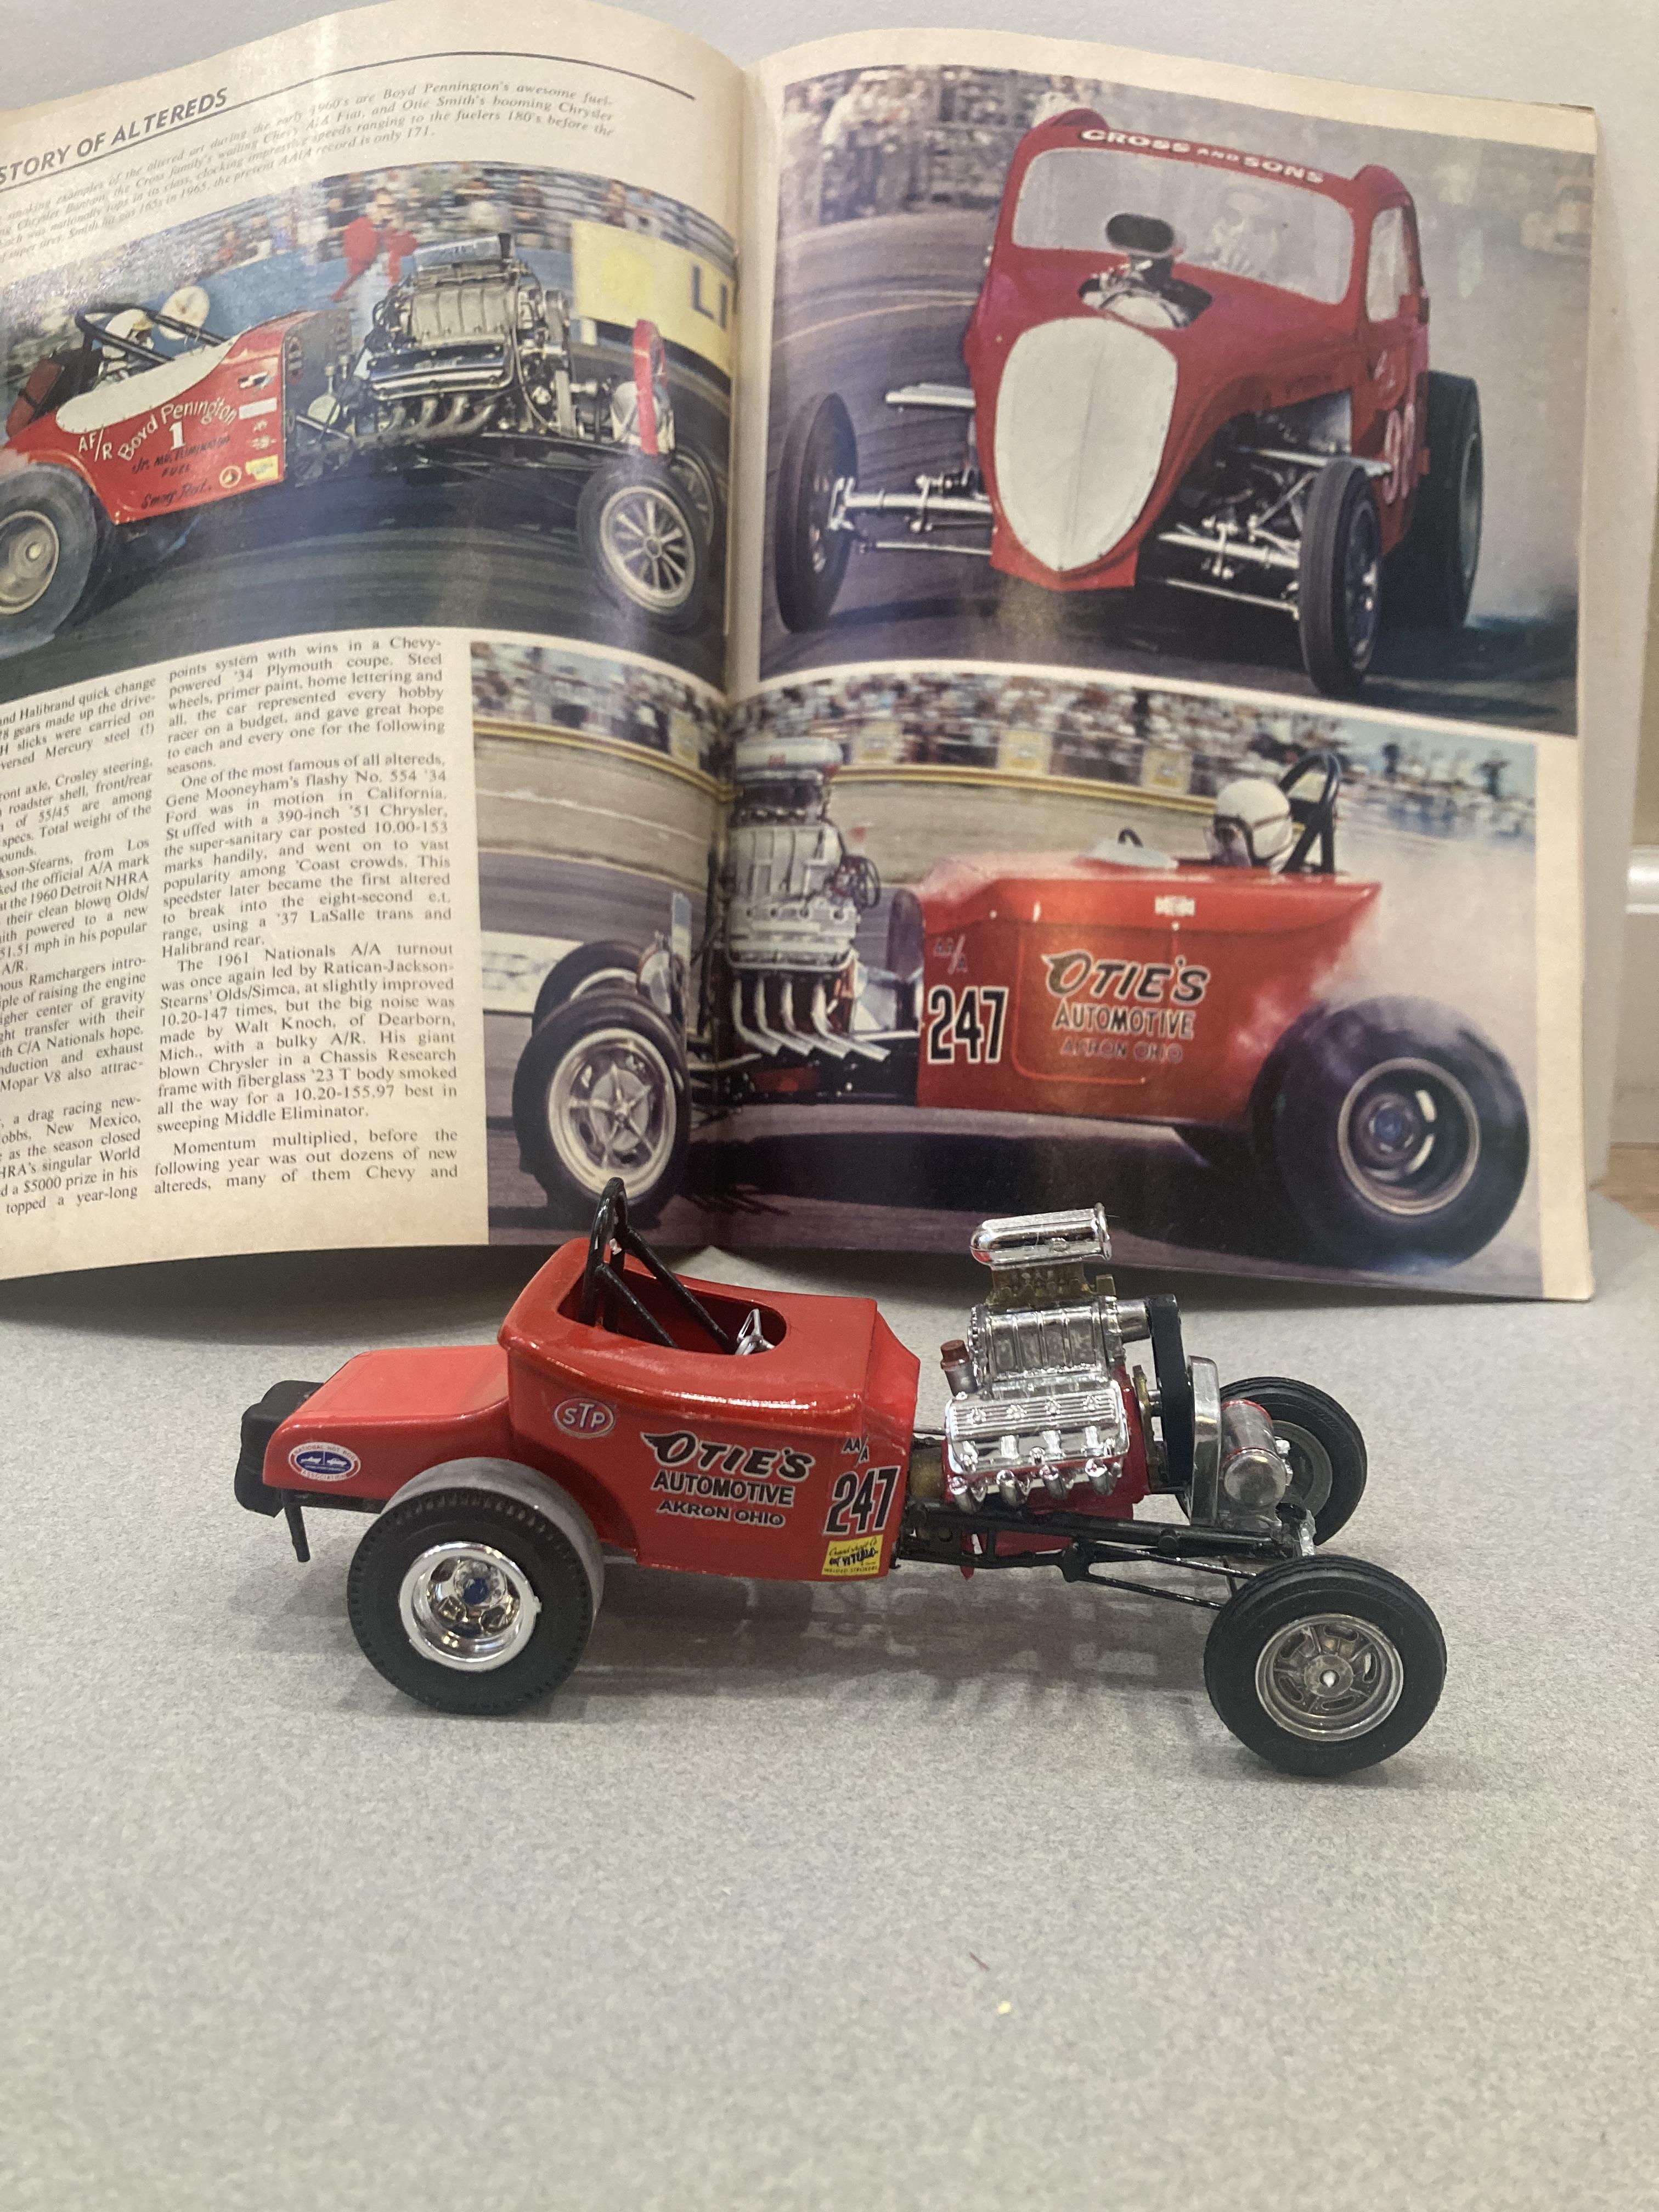
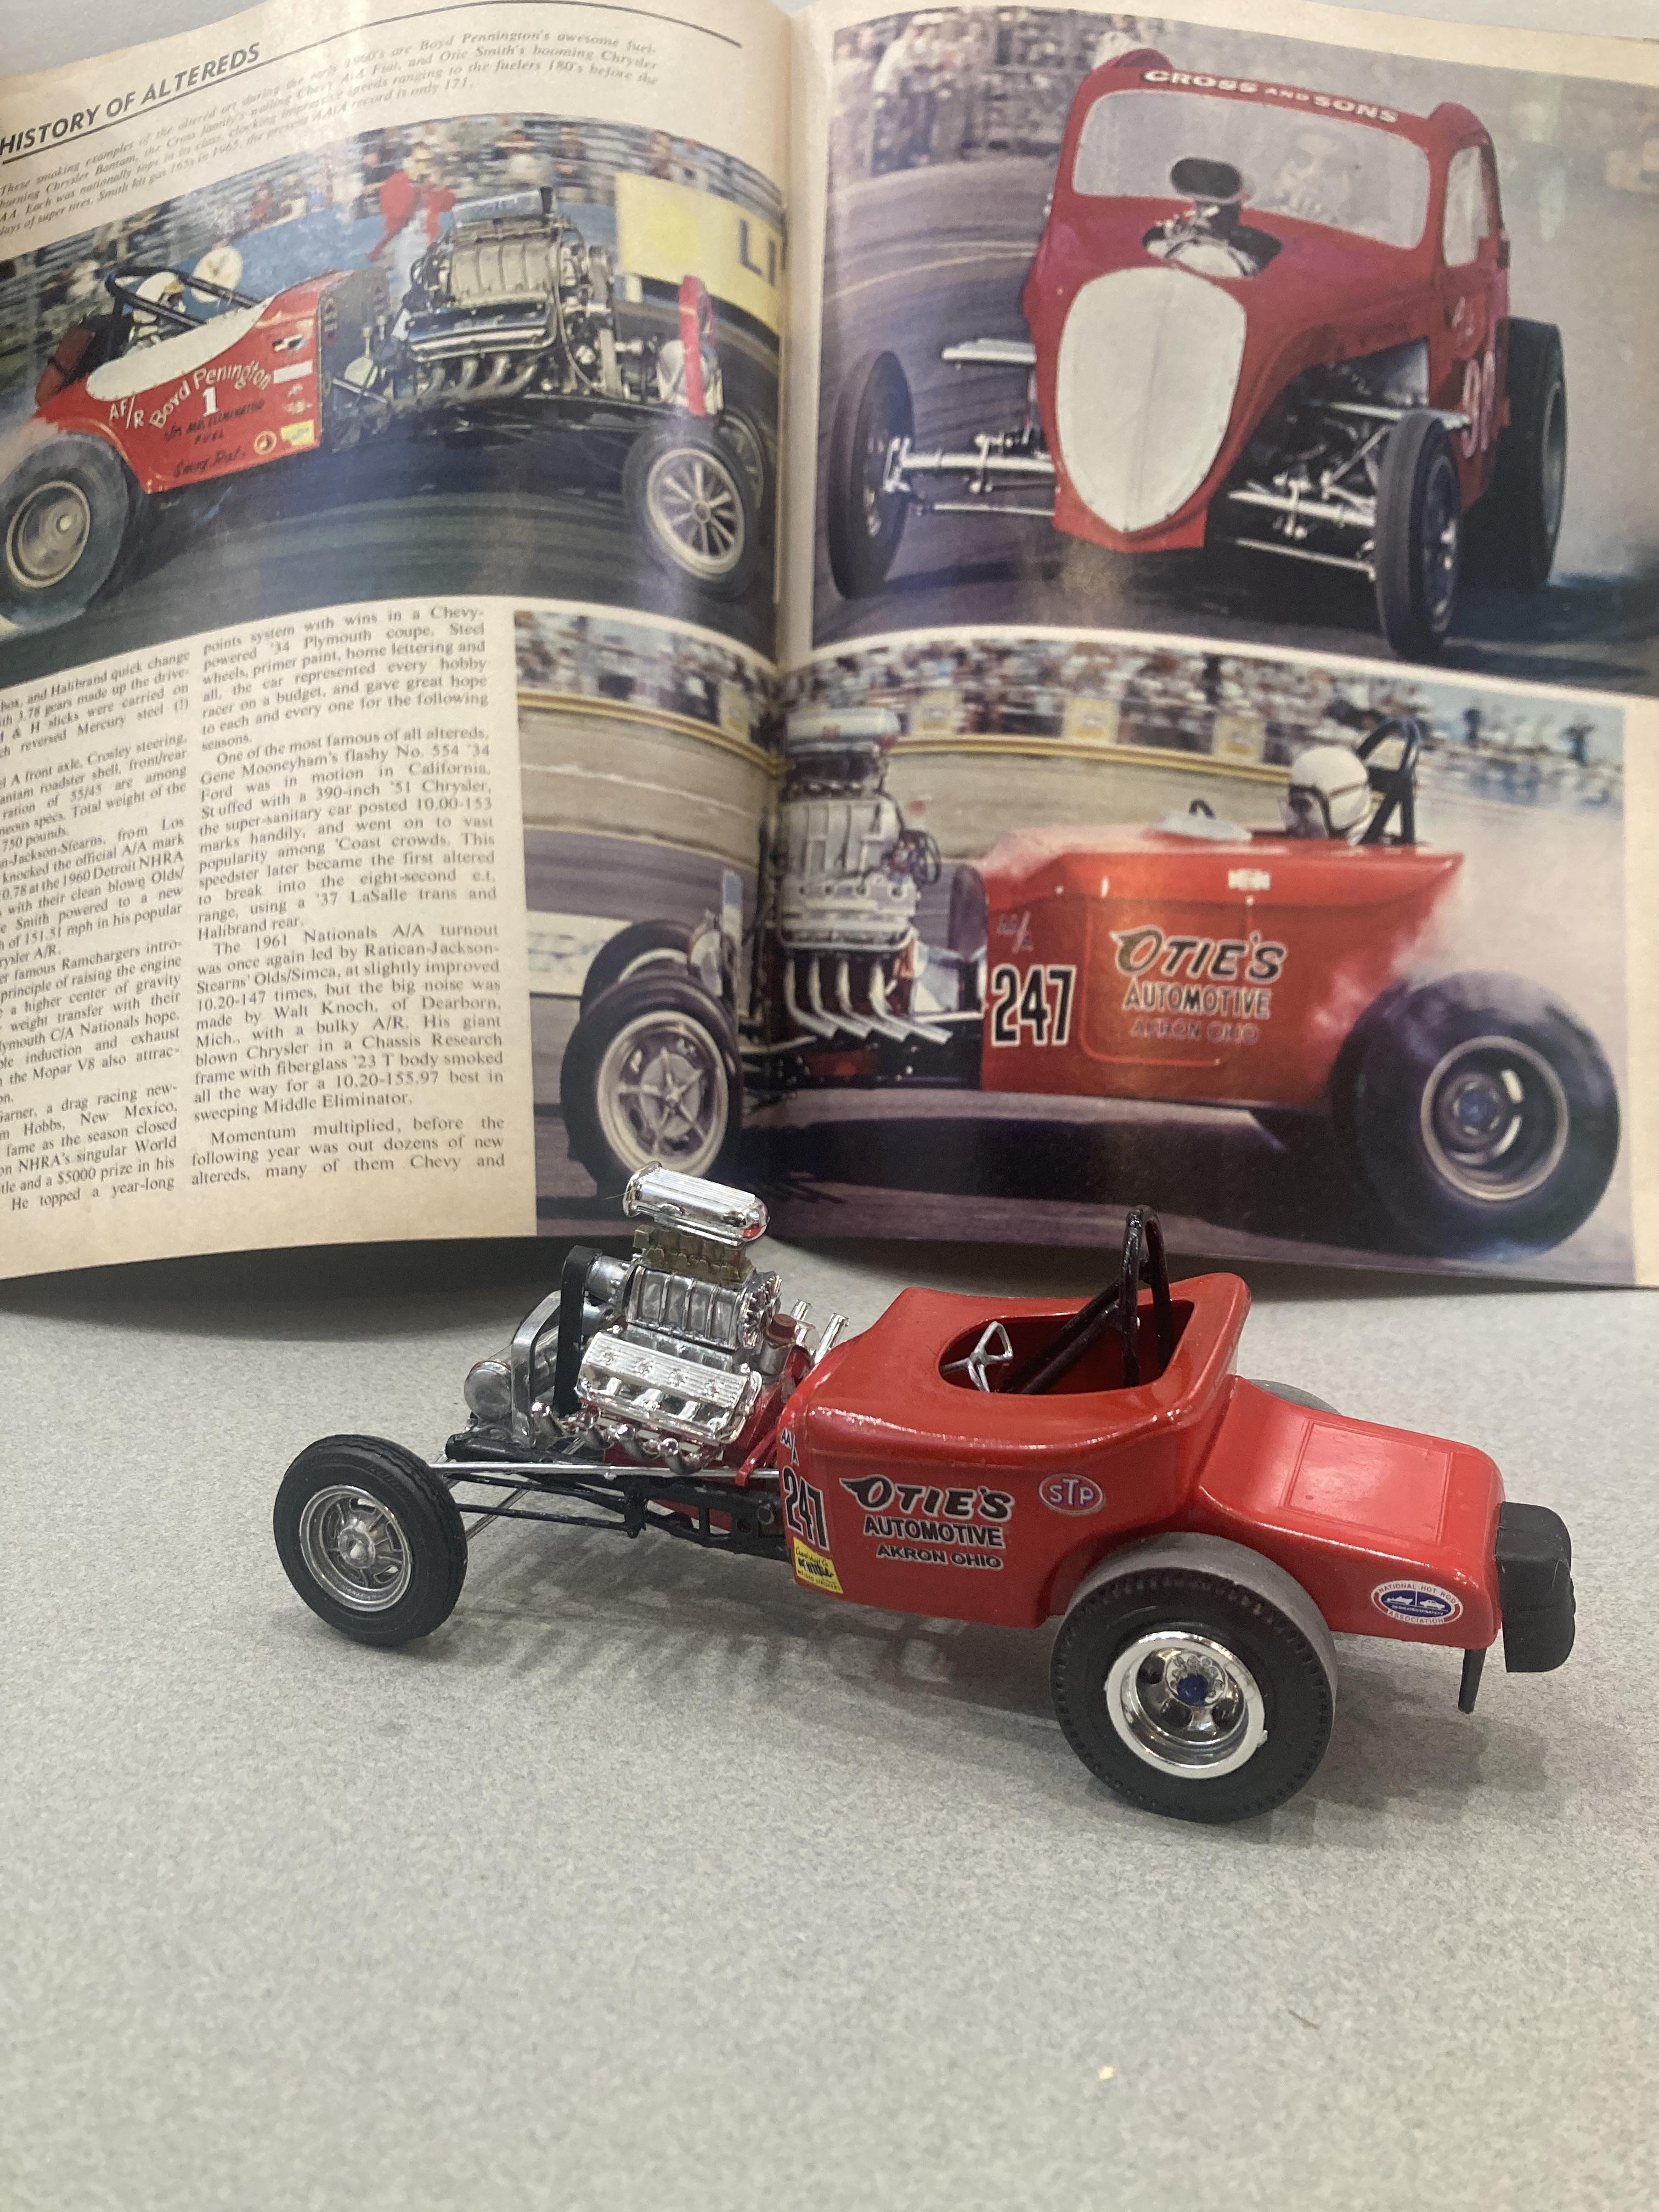
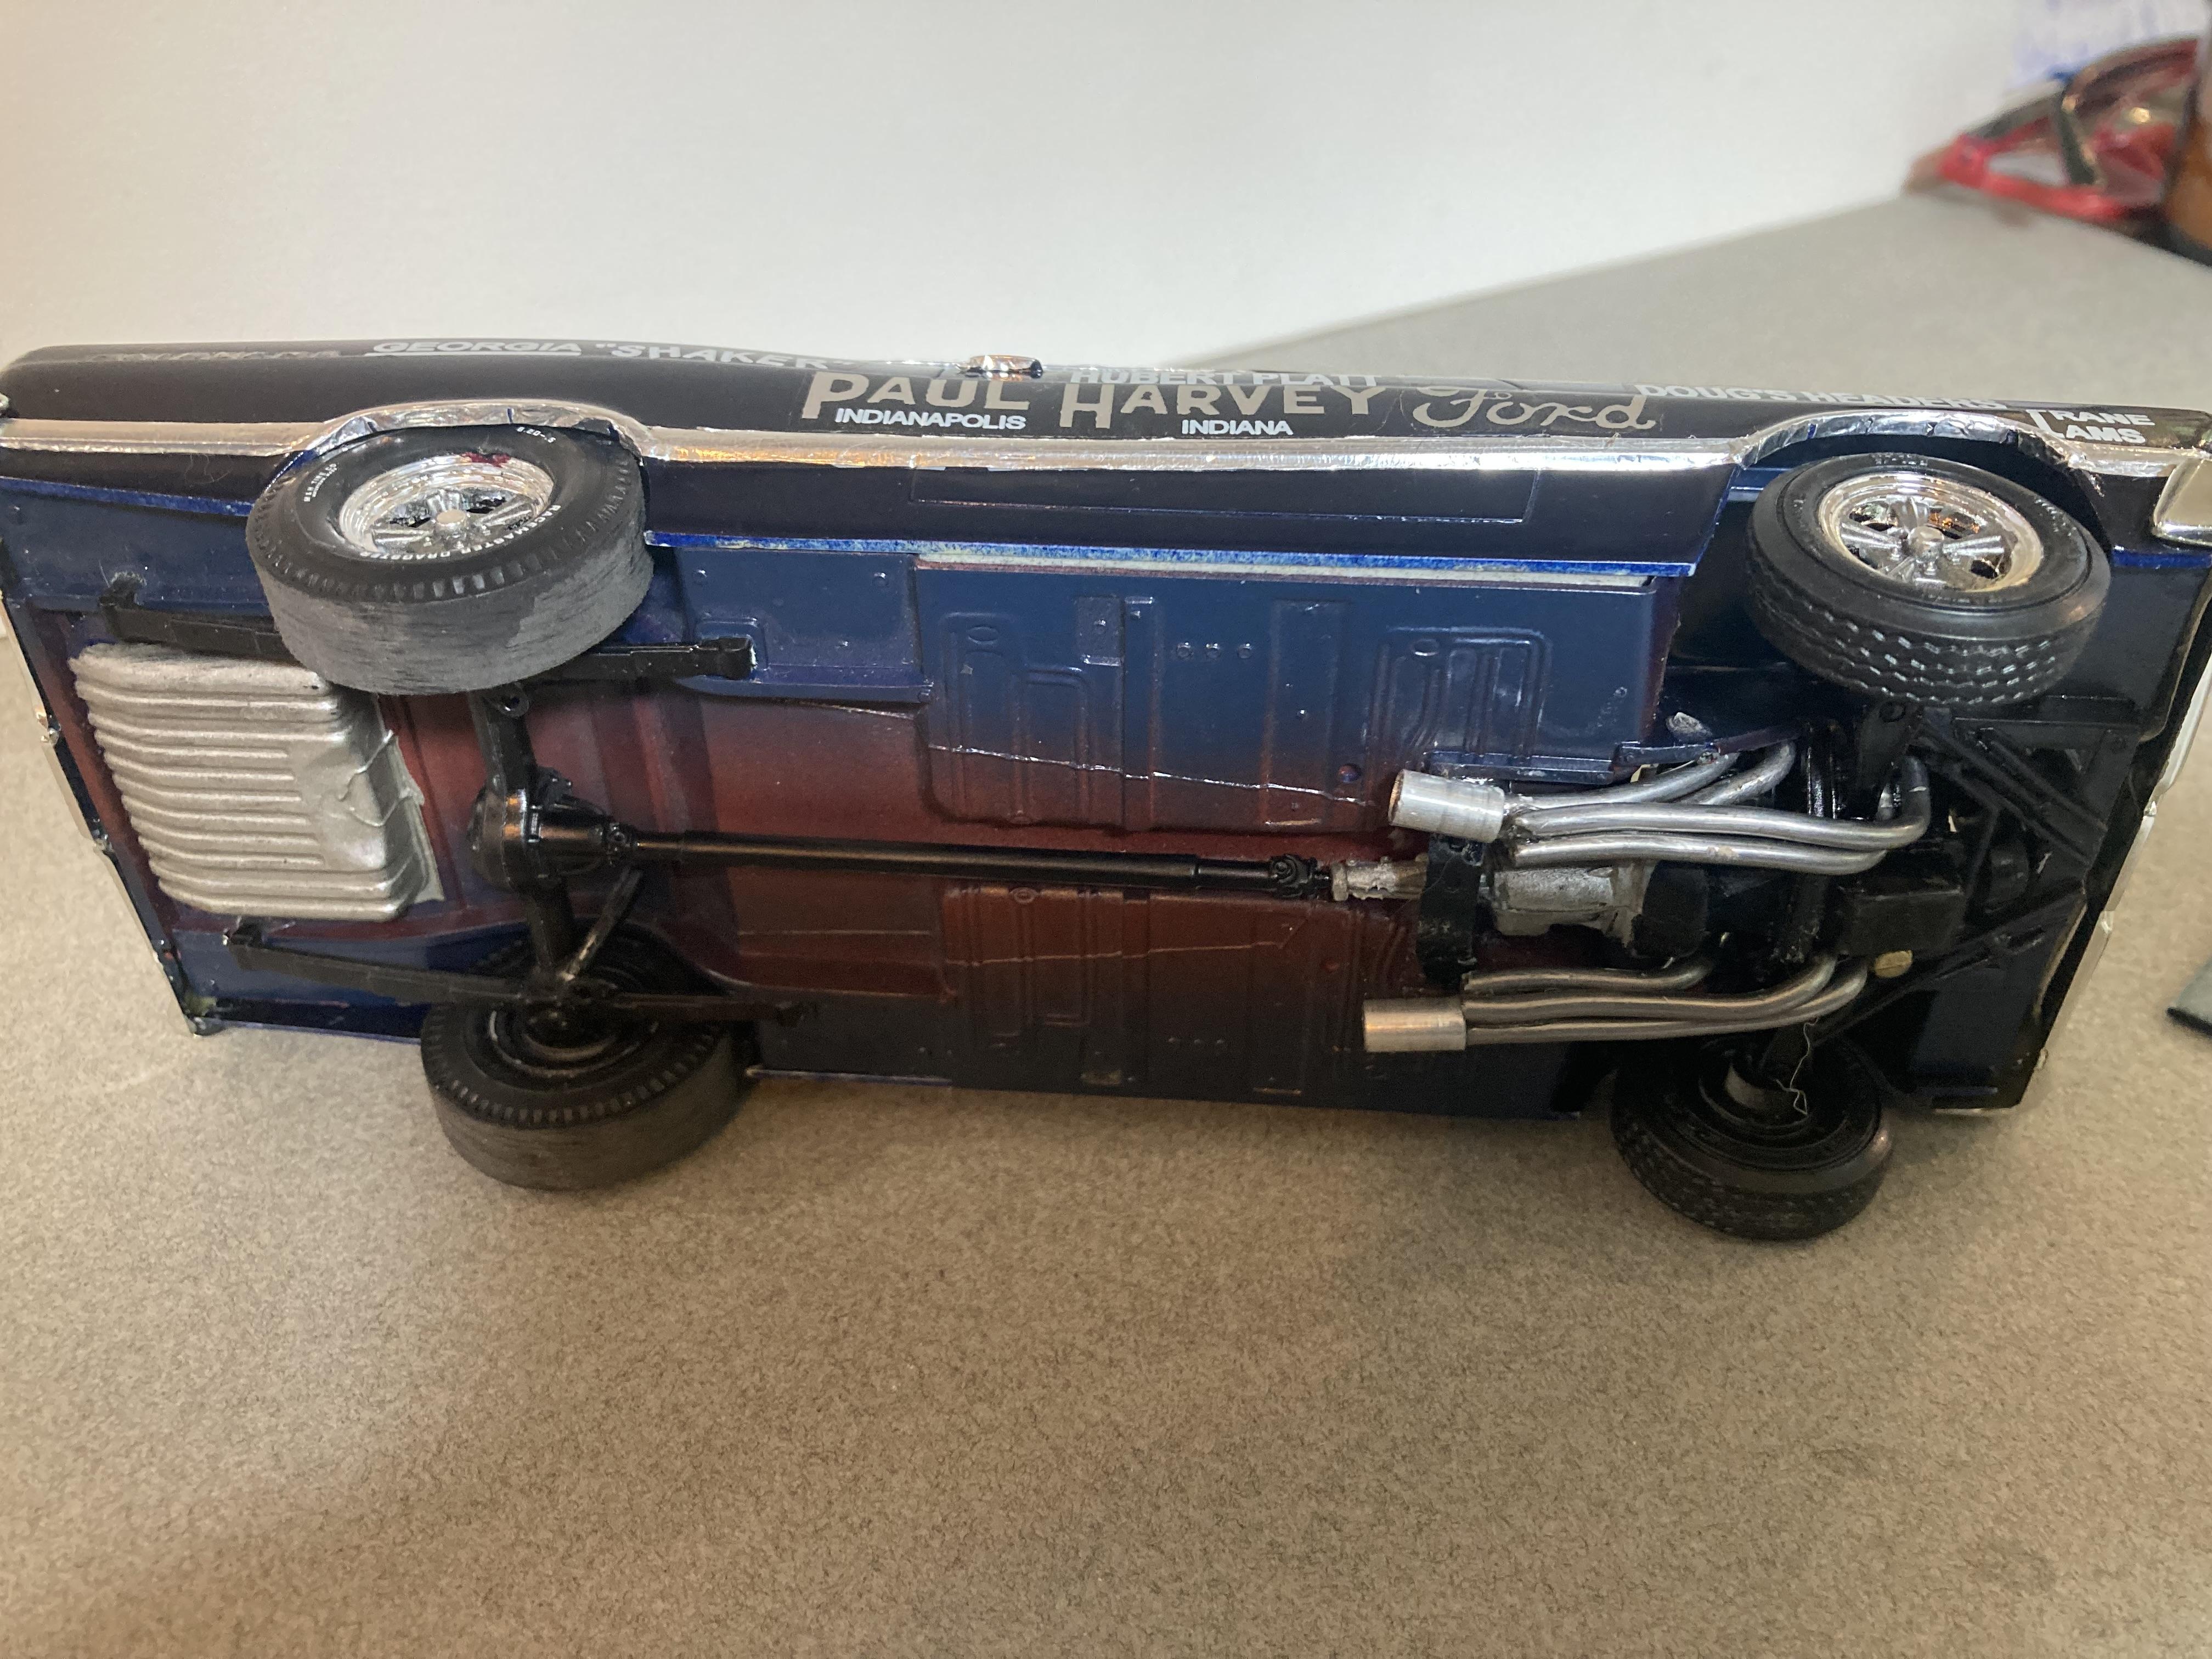
This is constructed from a mix of parts starting with the AMT T body parts pack. The frame is a combination of the double dragster fiat for the back half with front half of the single engine dragster frame. The front axle and spring are left overs from the Atlantis fiat. The roll bar hoop is made of 0.80 styrene rod. The 392 hemi is from the MPC bantam blast kit the headers are actually the hemi injector tubes from a couple of double dragster kits. The rear wheels are some left overs from the AMT 40 Willy’s kit with AMT pie crust slicks. The front wheels are from the MPC Winged Express warped with some spare AMT hollow Firestone supremes . The red paint on the bucket is Testors red enamel with wet look clear. The Tuanna cover is painted with a Krylon red to get a slight contrast. The decals are available from Chris Walsh . I did add the NHRA , and the welded strokers crankshaft decals from a random Slixx sheet. The reference photo is from an early 70’s issue of DRAG RACING USA. Until next time thanks for looking. Mike
-
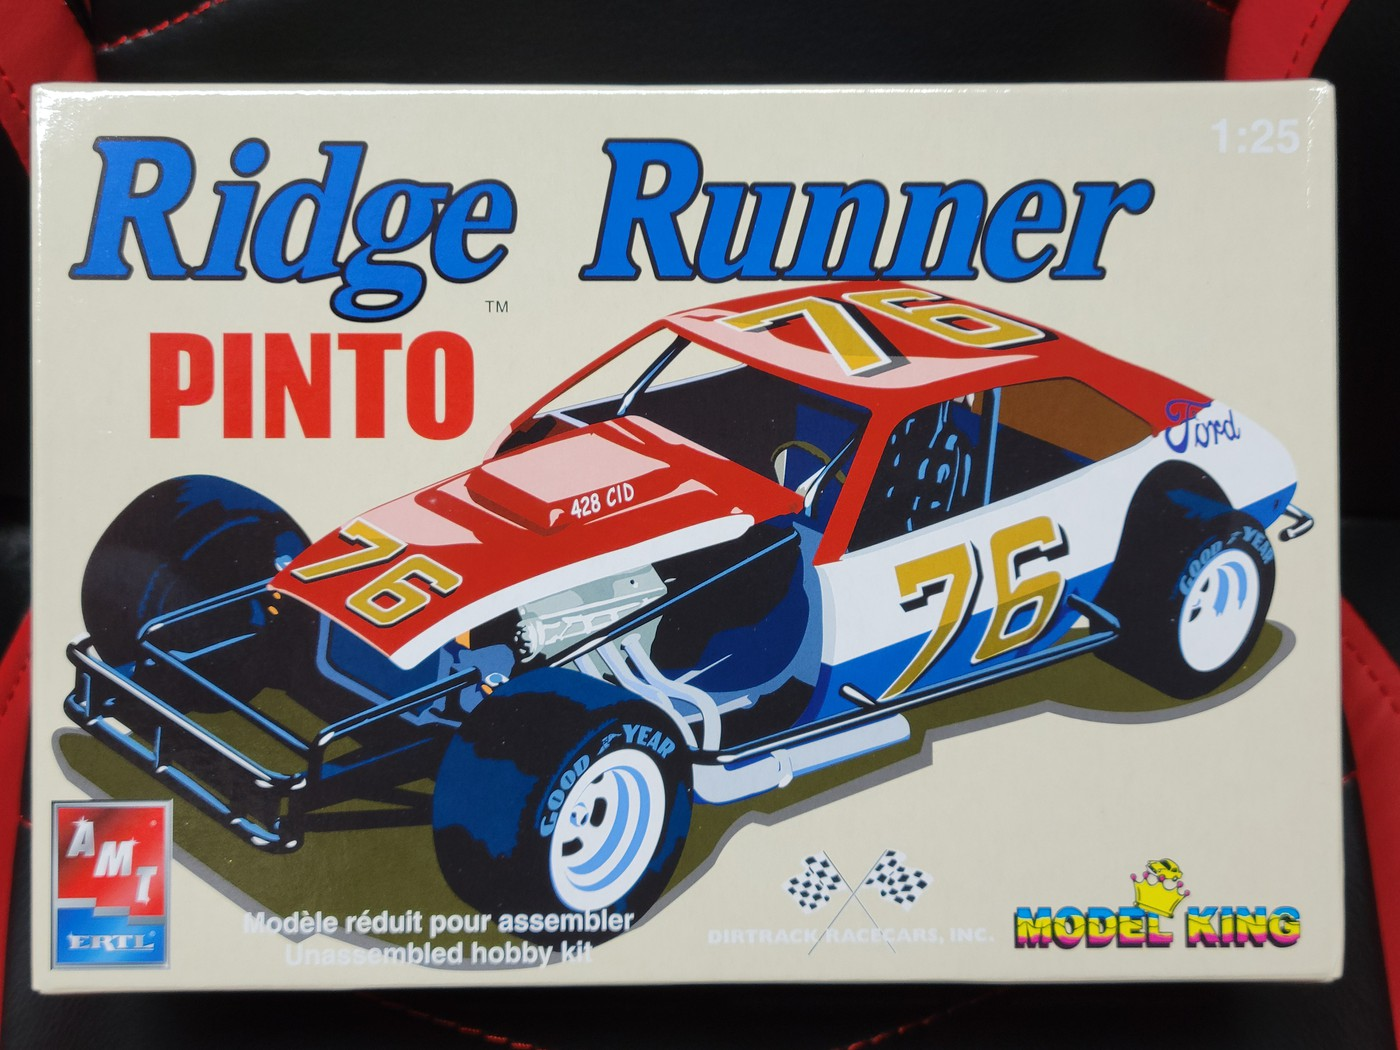
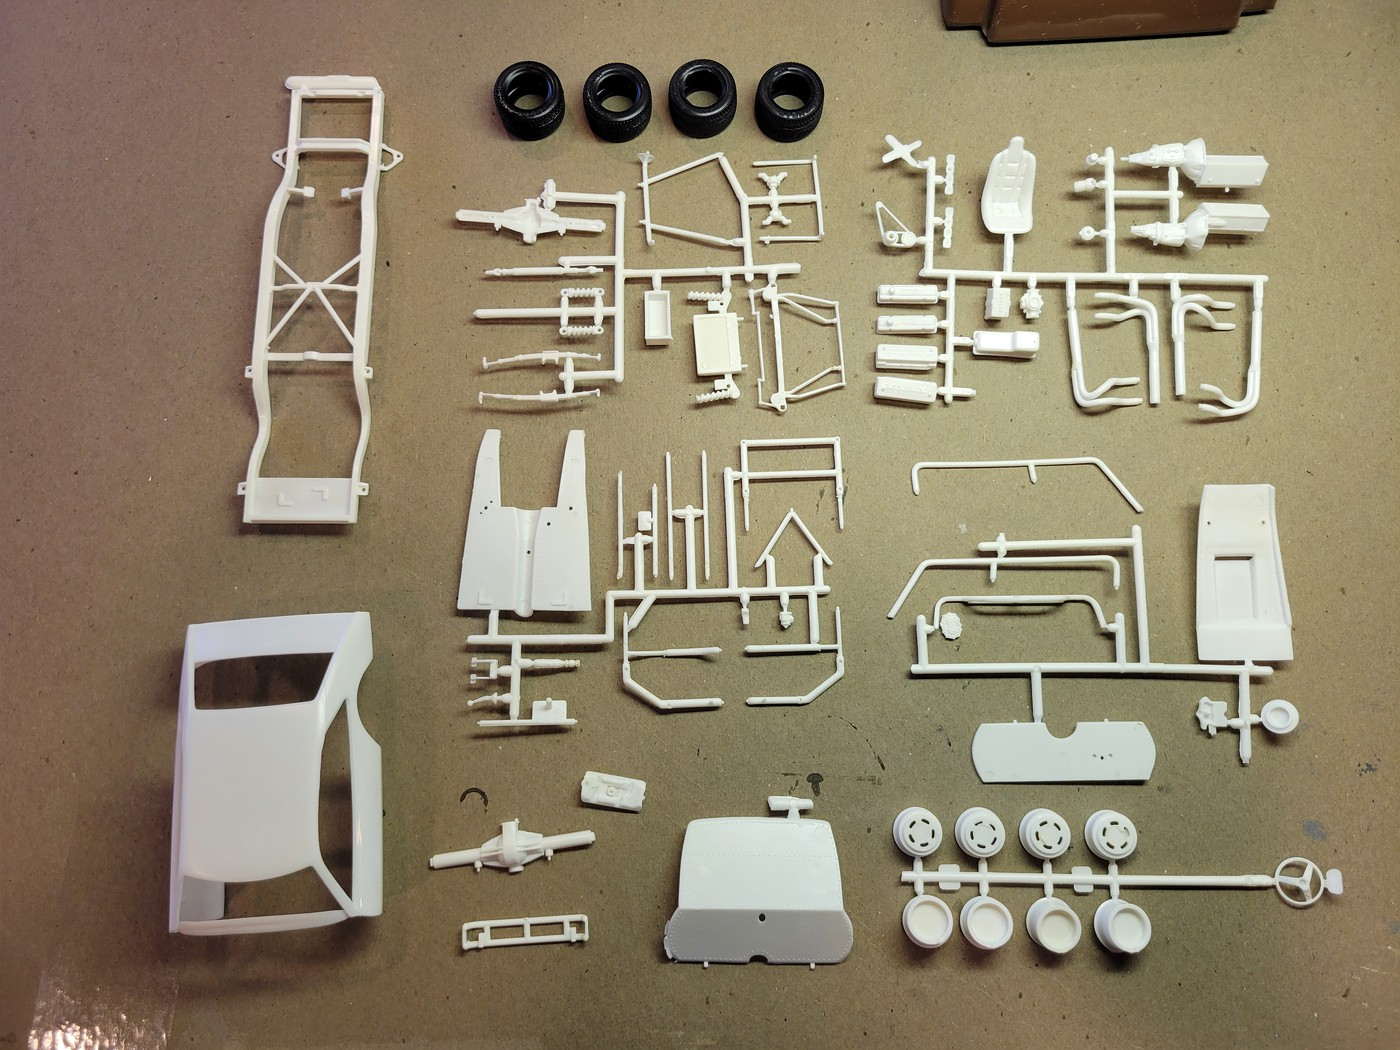
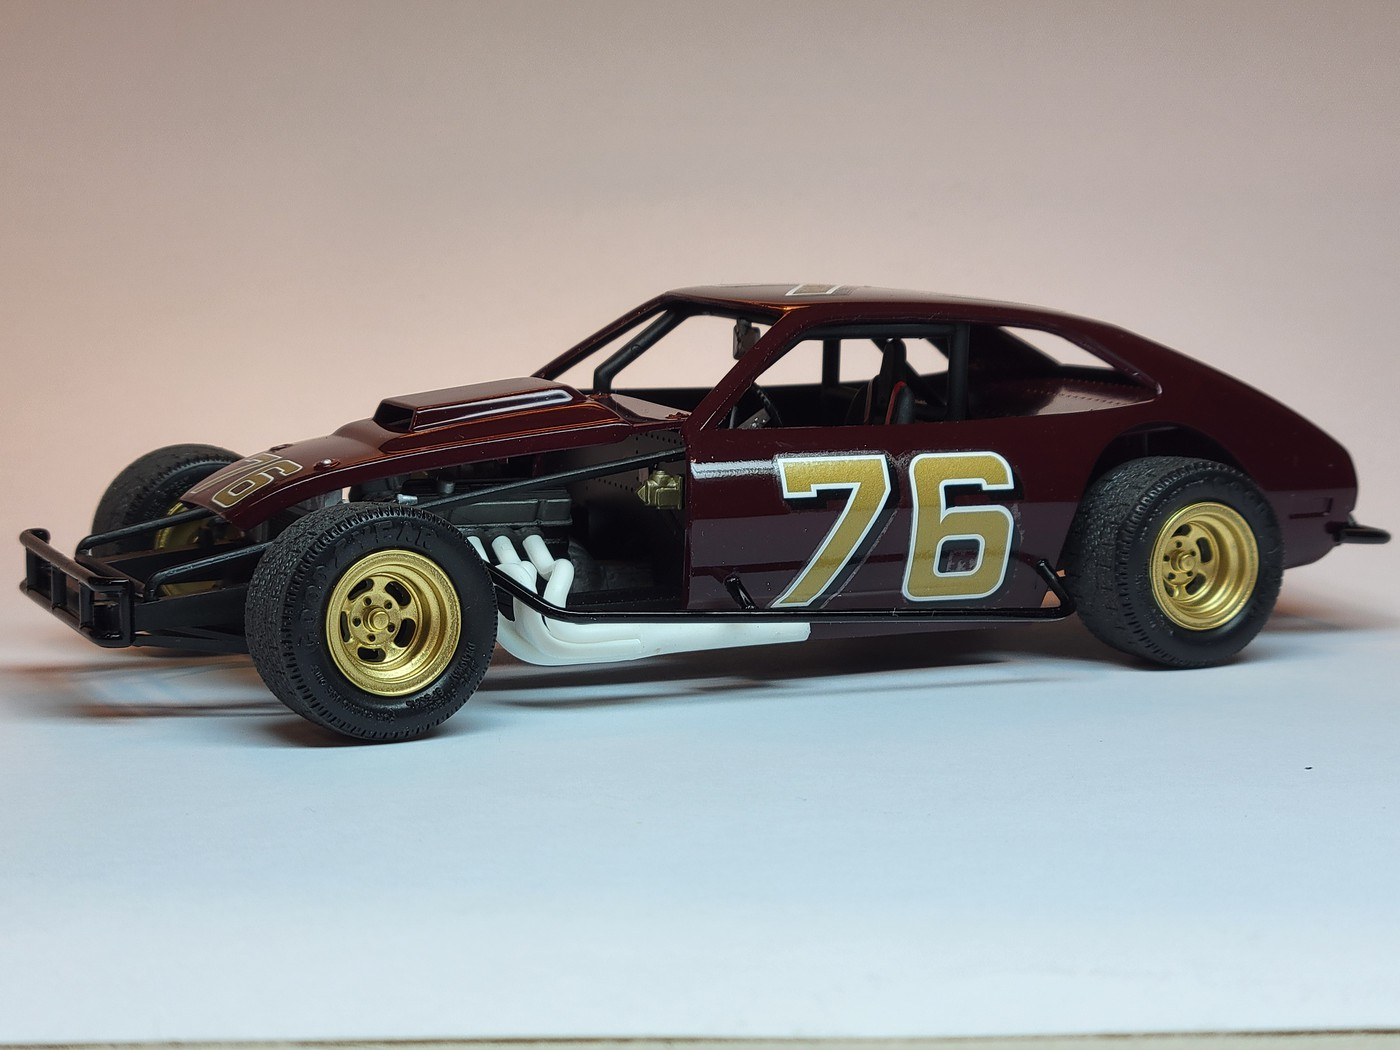
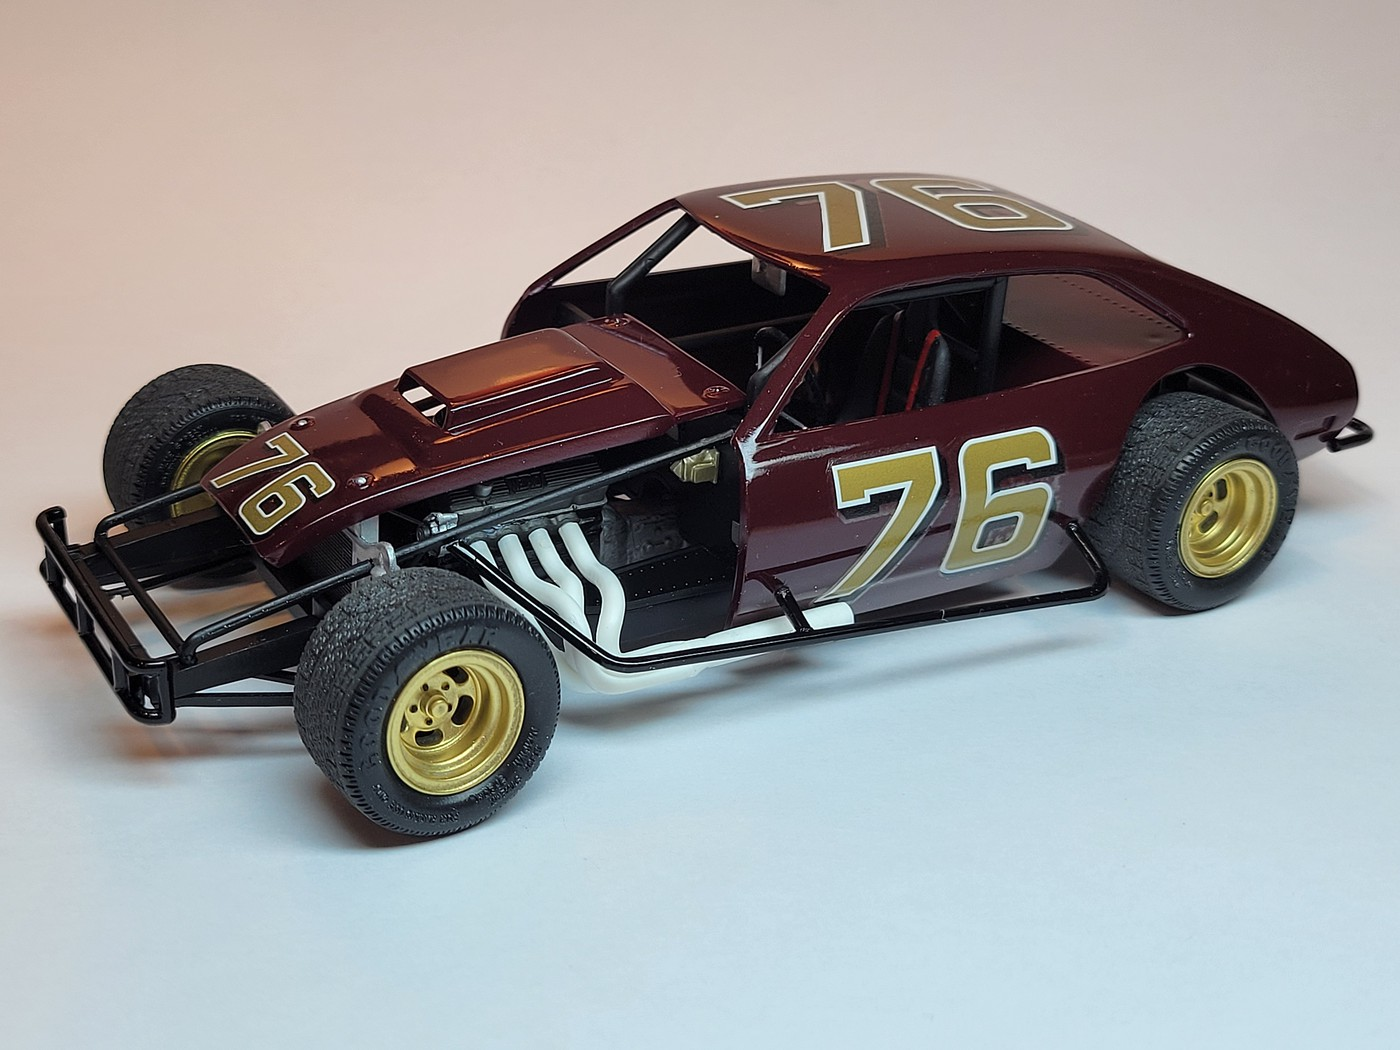
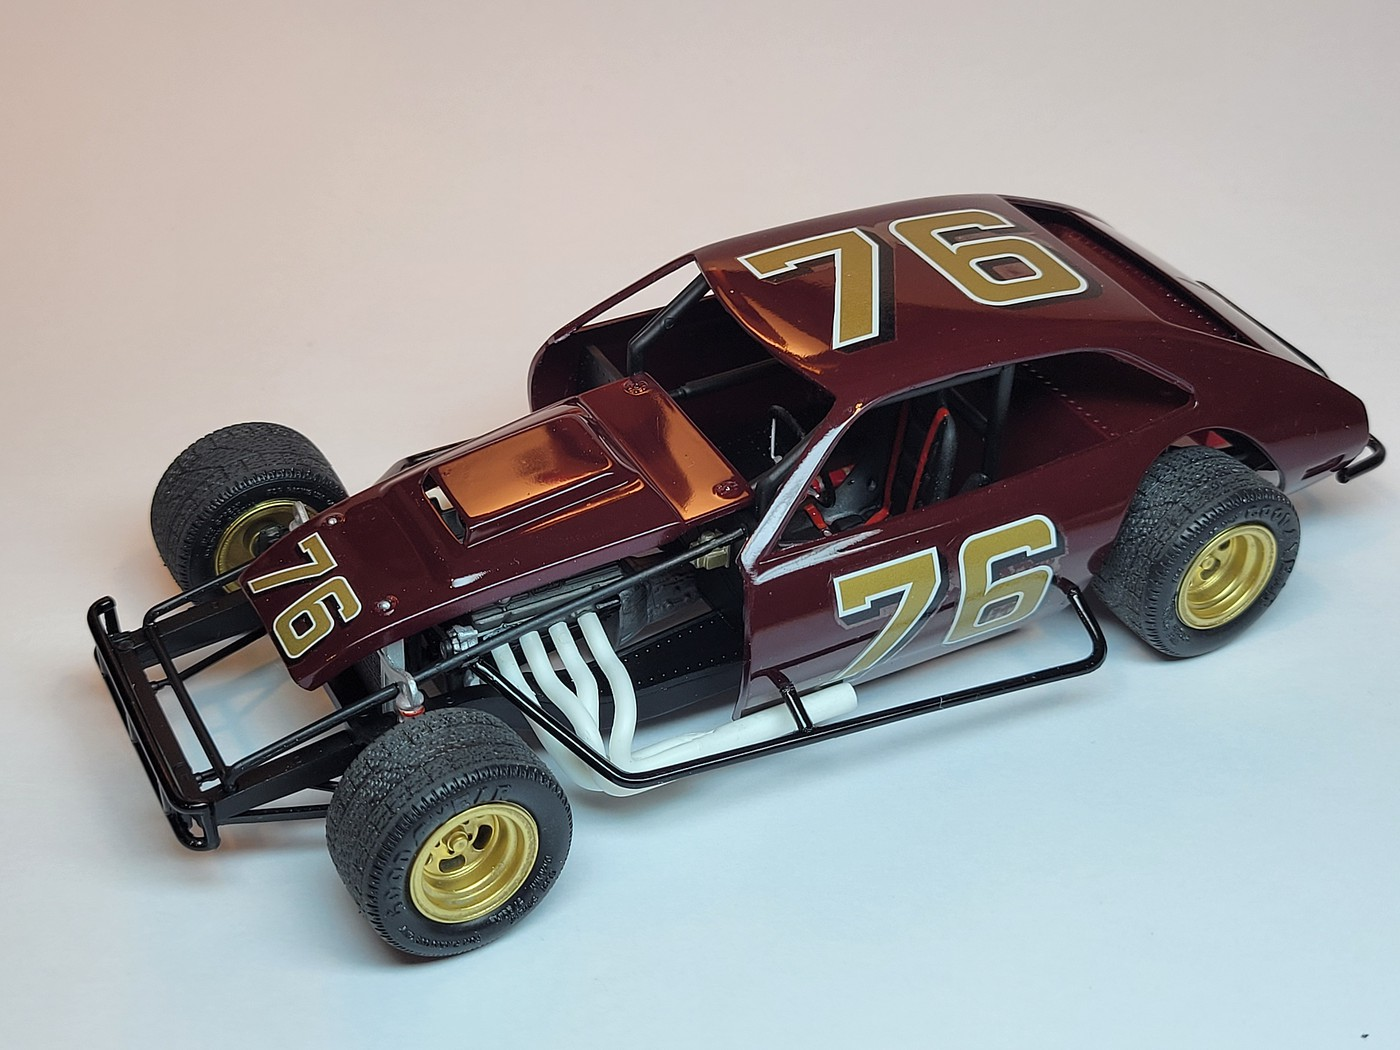
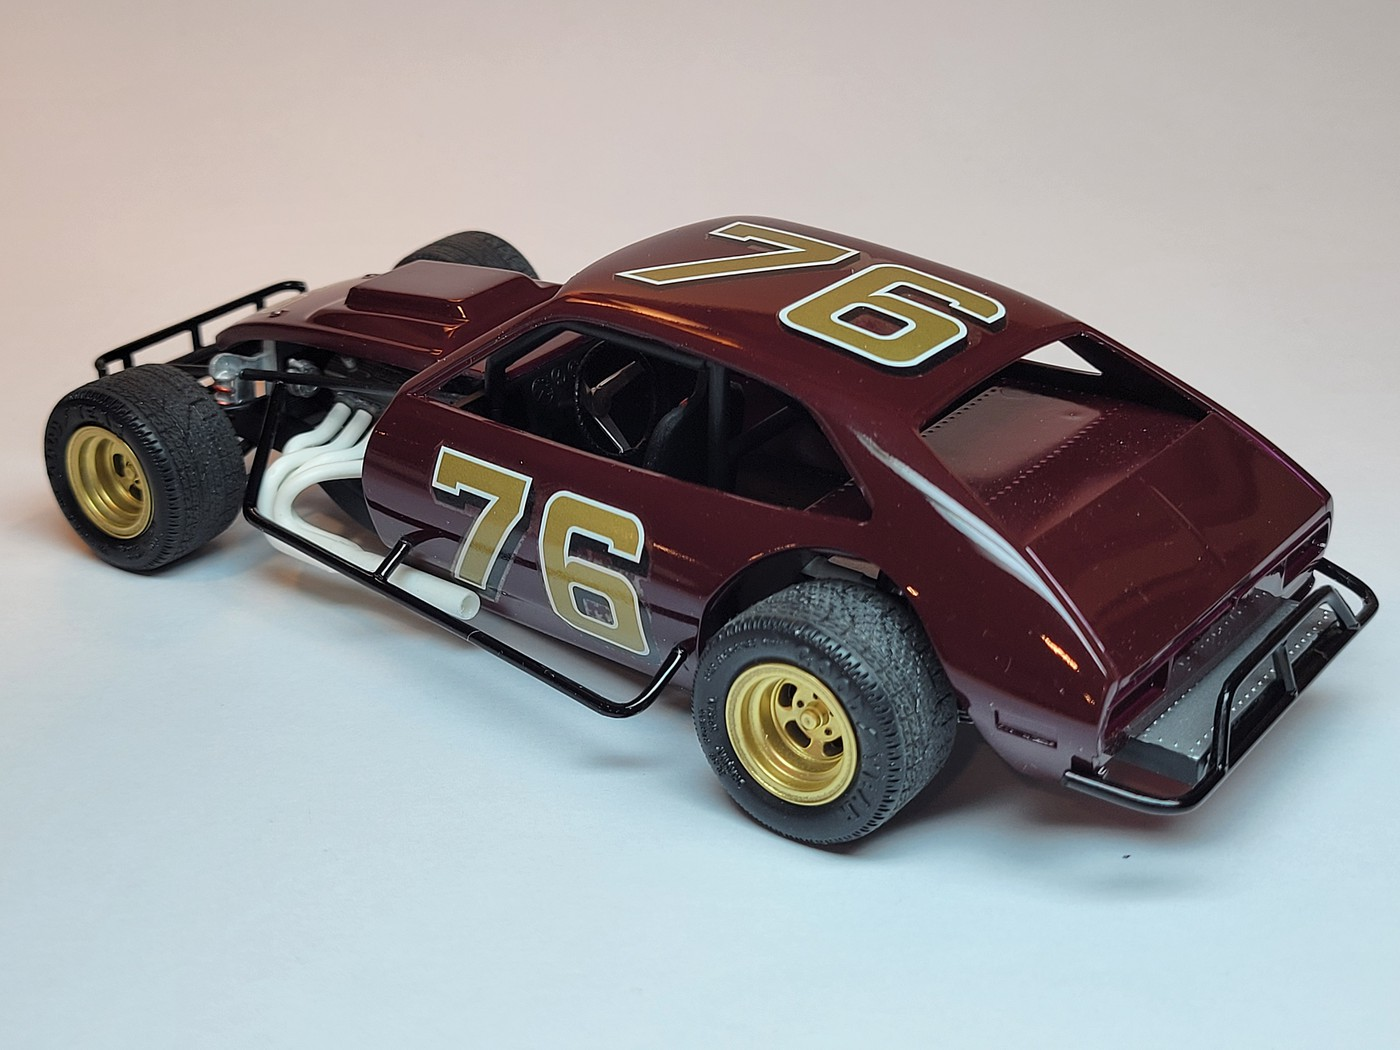
 I thought I would share my 2024, 24 Annual Model Build entry with you. The build took place this weekend on Saturday the 27th at noon until Sunday the 28th at noon. This was the 18th year for this event. I have done all 18 years as I am one of the founding members of this event. It wasn't an event 18 years ago, it was 5 friends getting together to build a new, untouched model in 24 hours and watching the Rolex 24 Hours of Daytona and various car movies. We had such a blast that we decided to do it again the next year, and as they say, the rest is history. This model is the Model King issue of what I believe is an MPC kit. My box says AMT, but Scale Mates says MPC was the original version of this kit. All I did this model prior to the 24 hour build was wash the parts. I was able to finish in about 22 hours. Color is Tamiya Maroon straight from the can. The pictures of the finished model were taken immediately after it was finished. I may tweak a few things and I may add a few sponsorship decals. I may just leave it as it is and put it in a display case. Thanks for looking. Let me know what you think and let me know if you have any questions about the Annual 24 Hour Build.
-
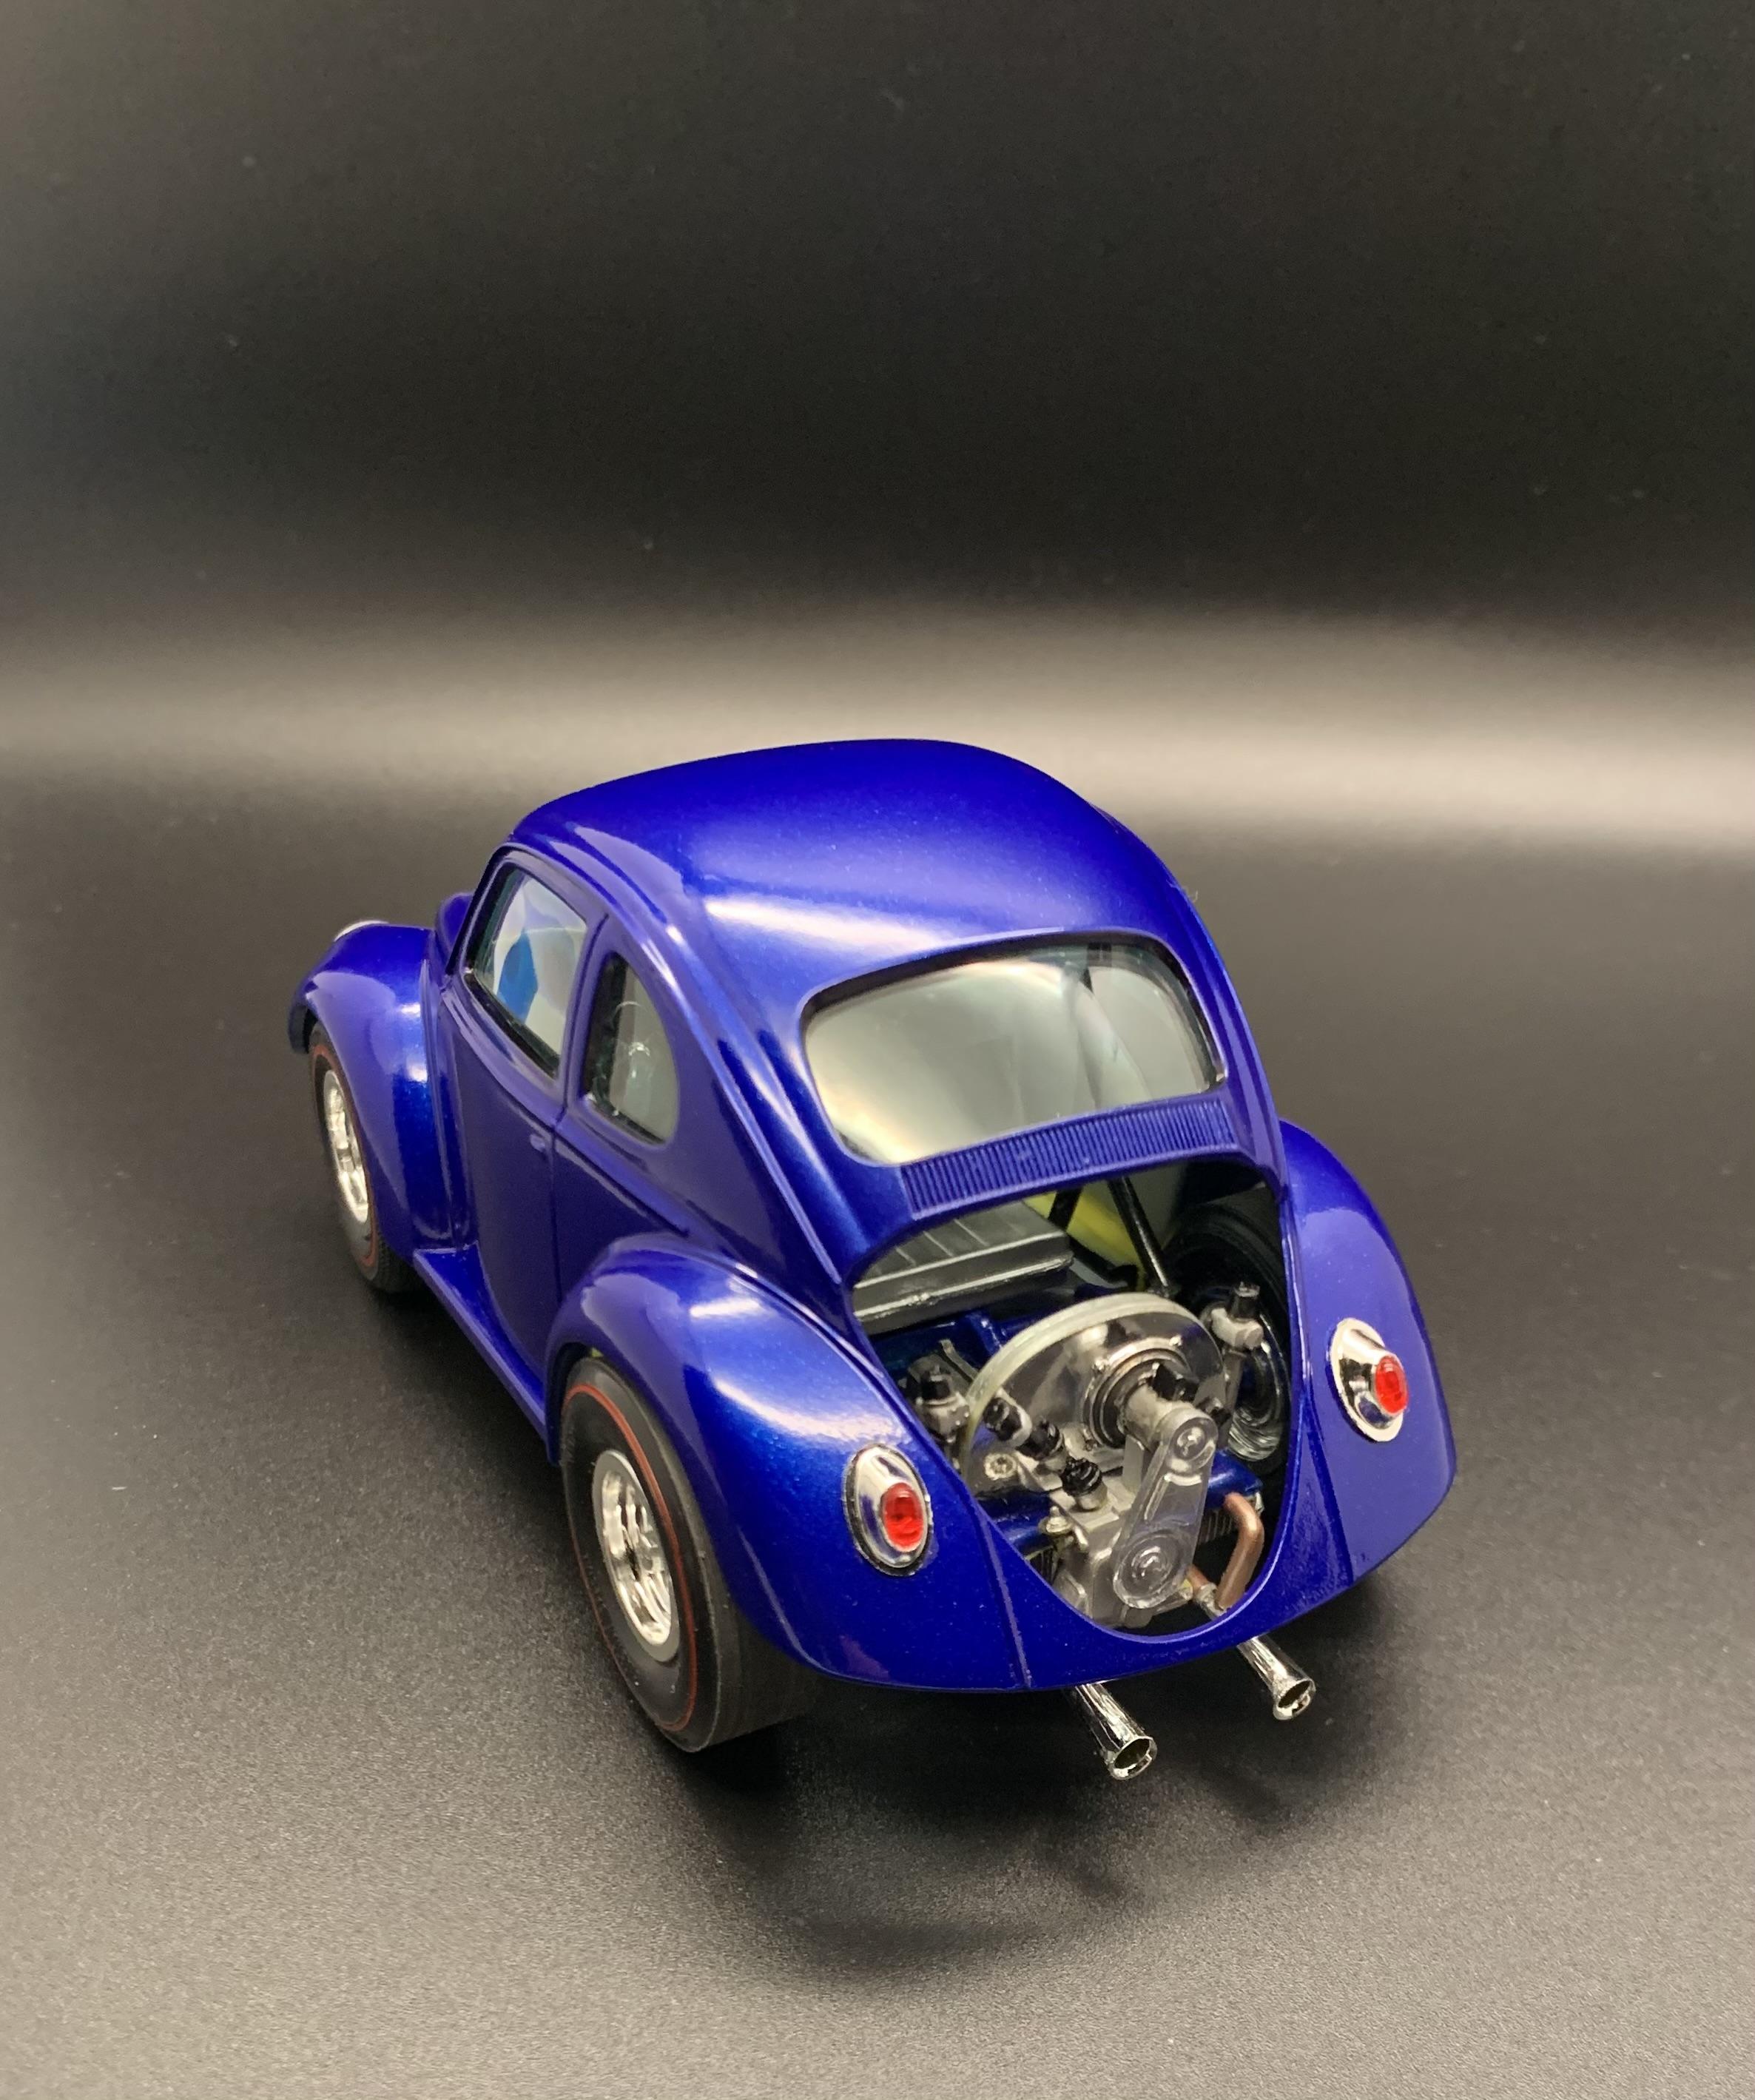
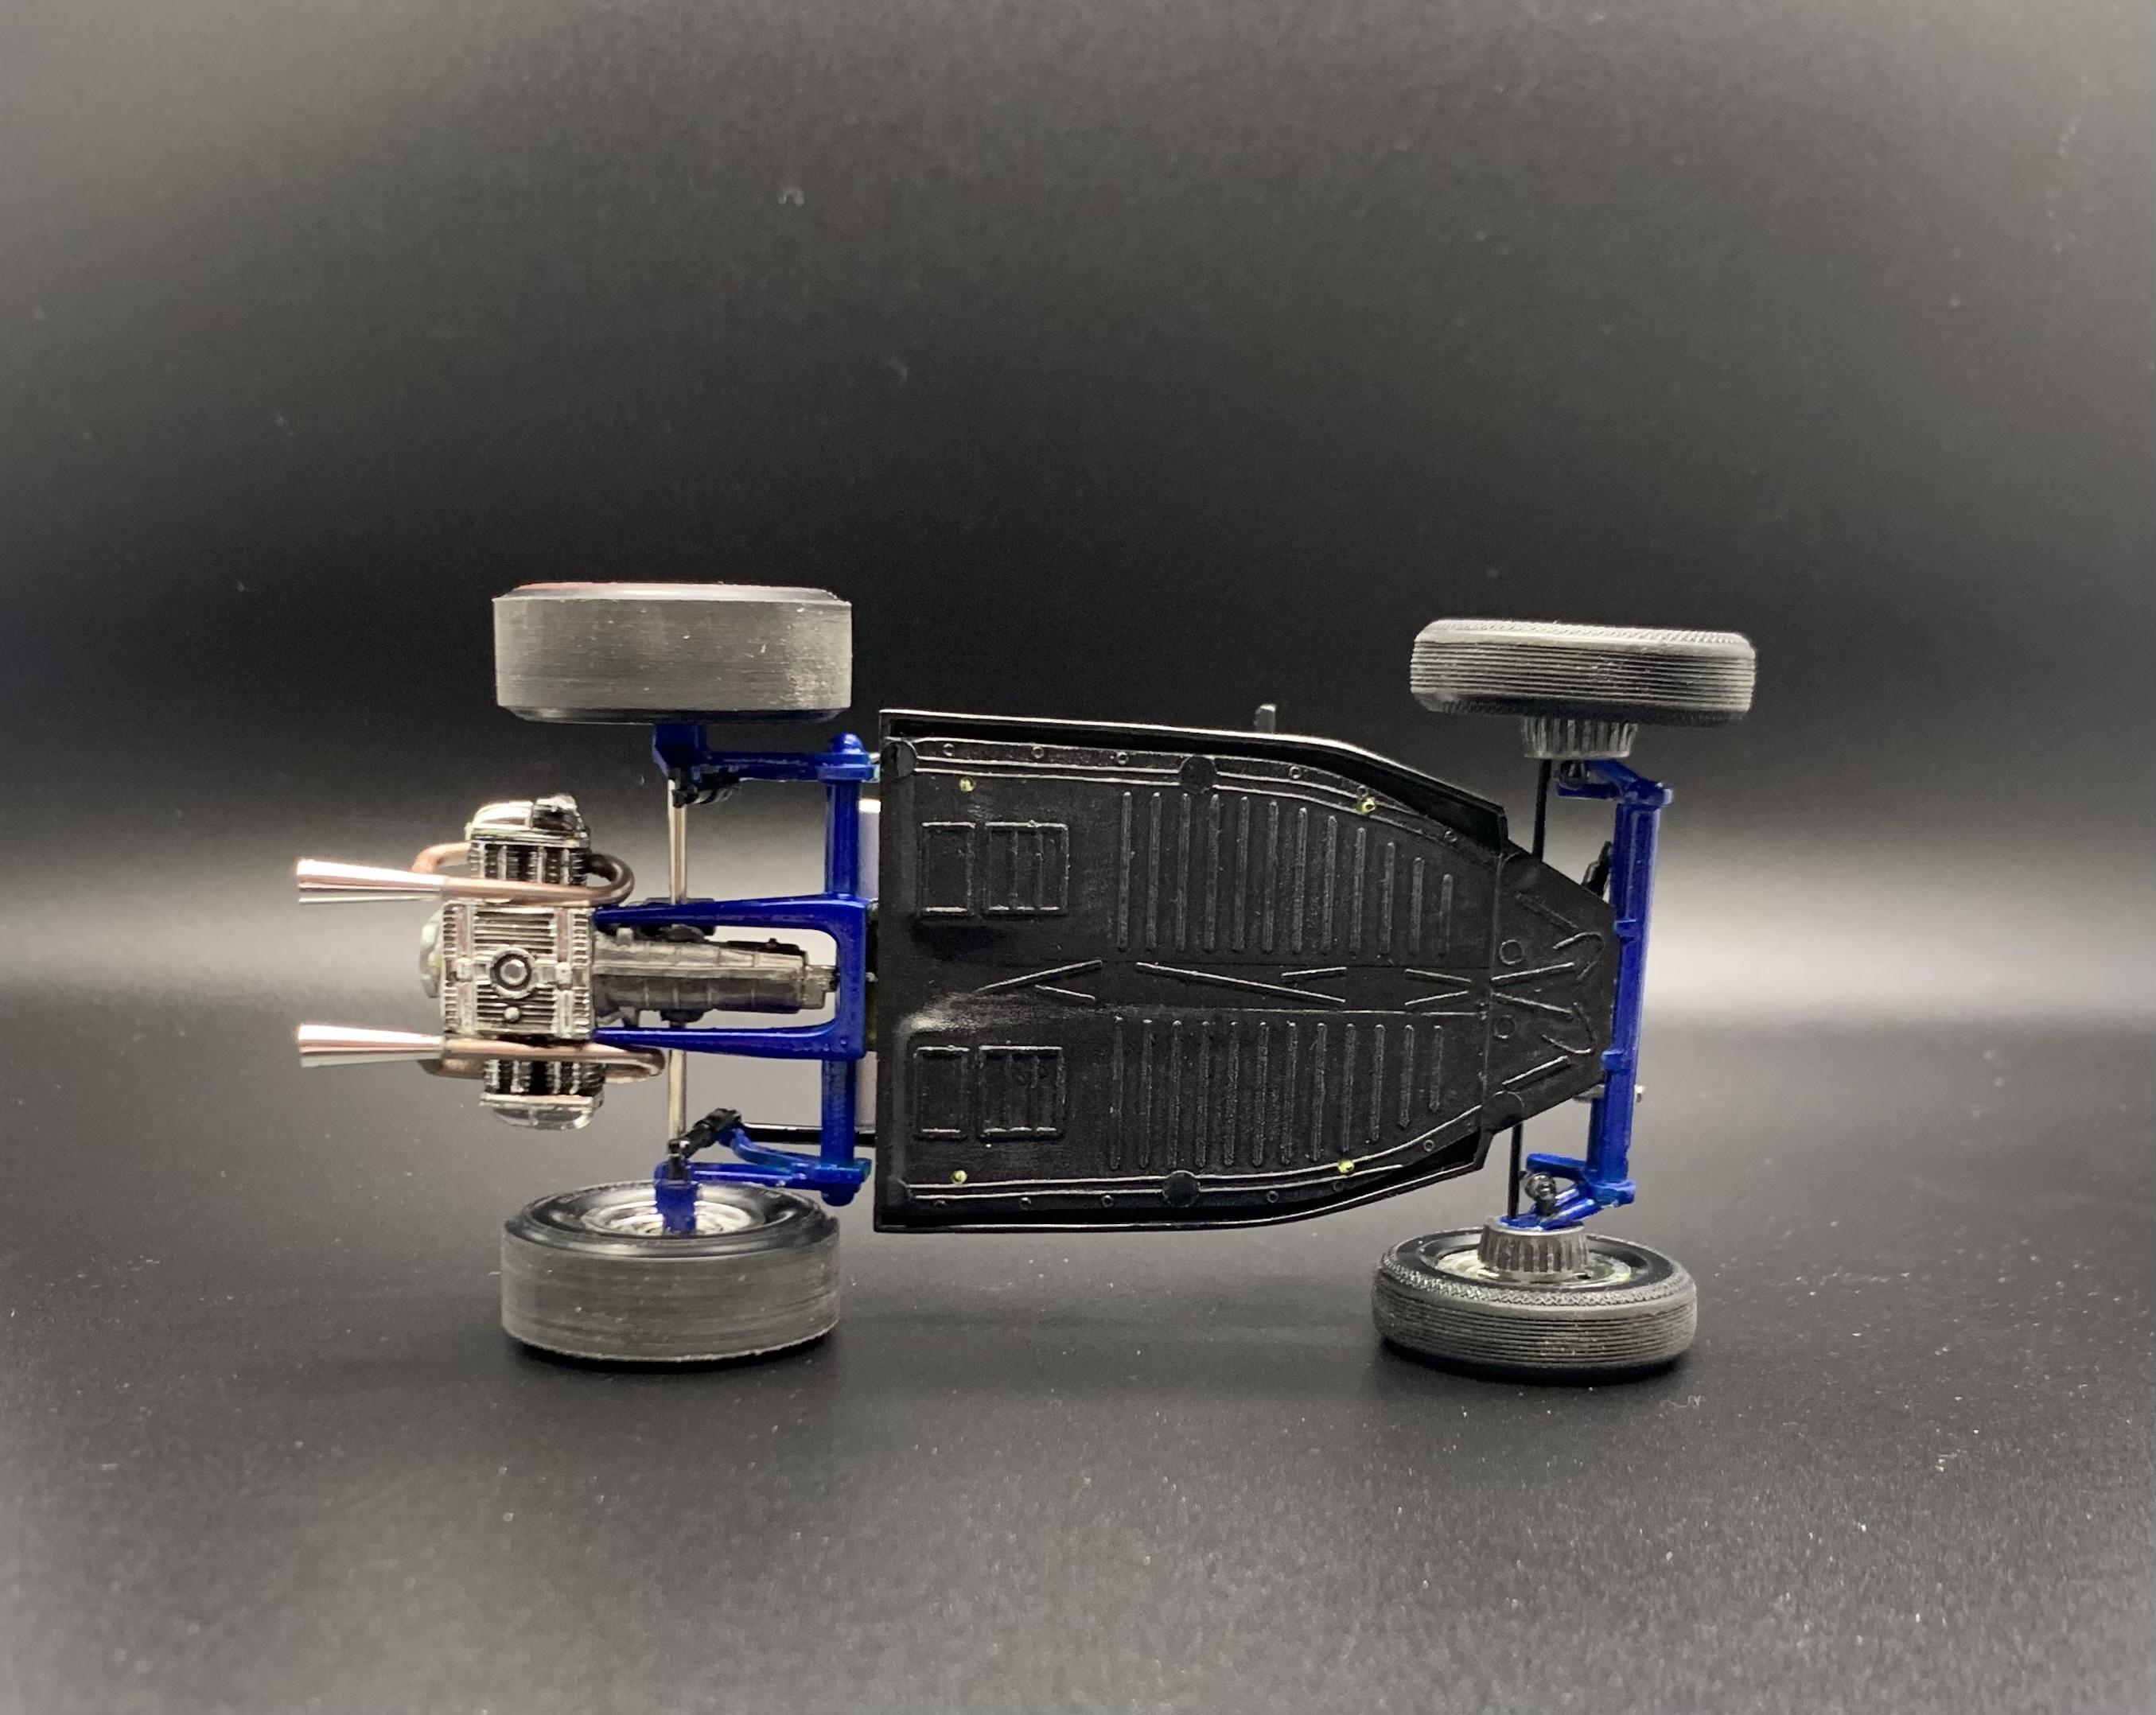
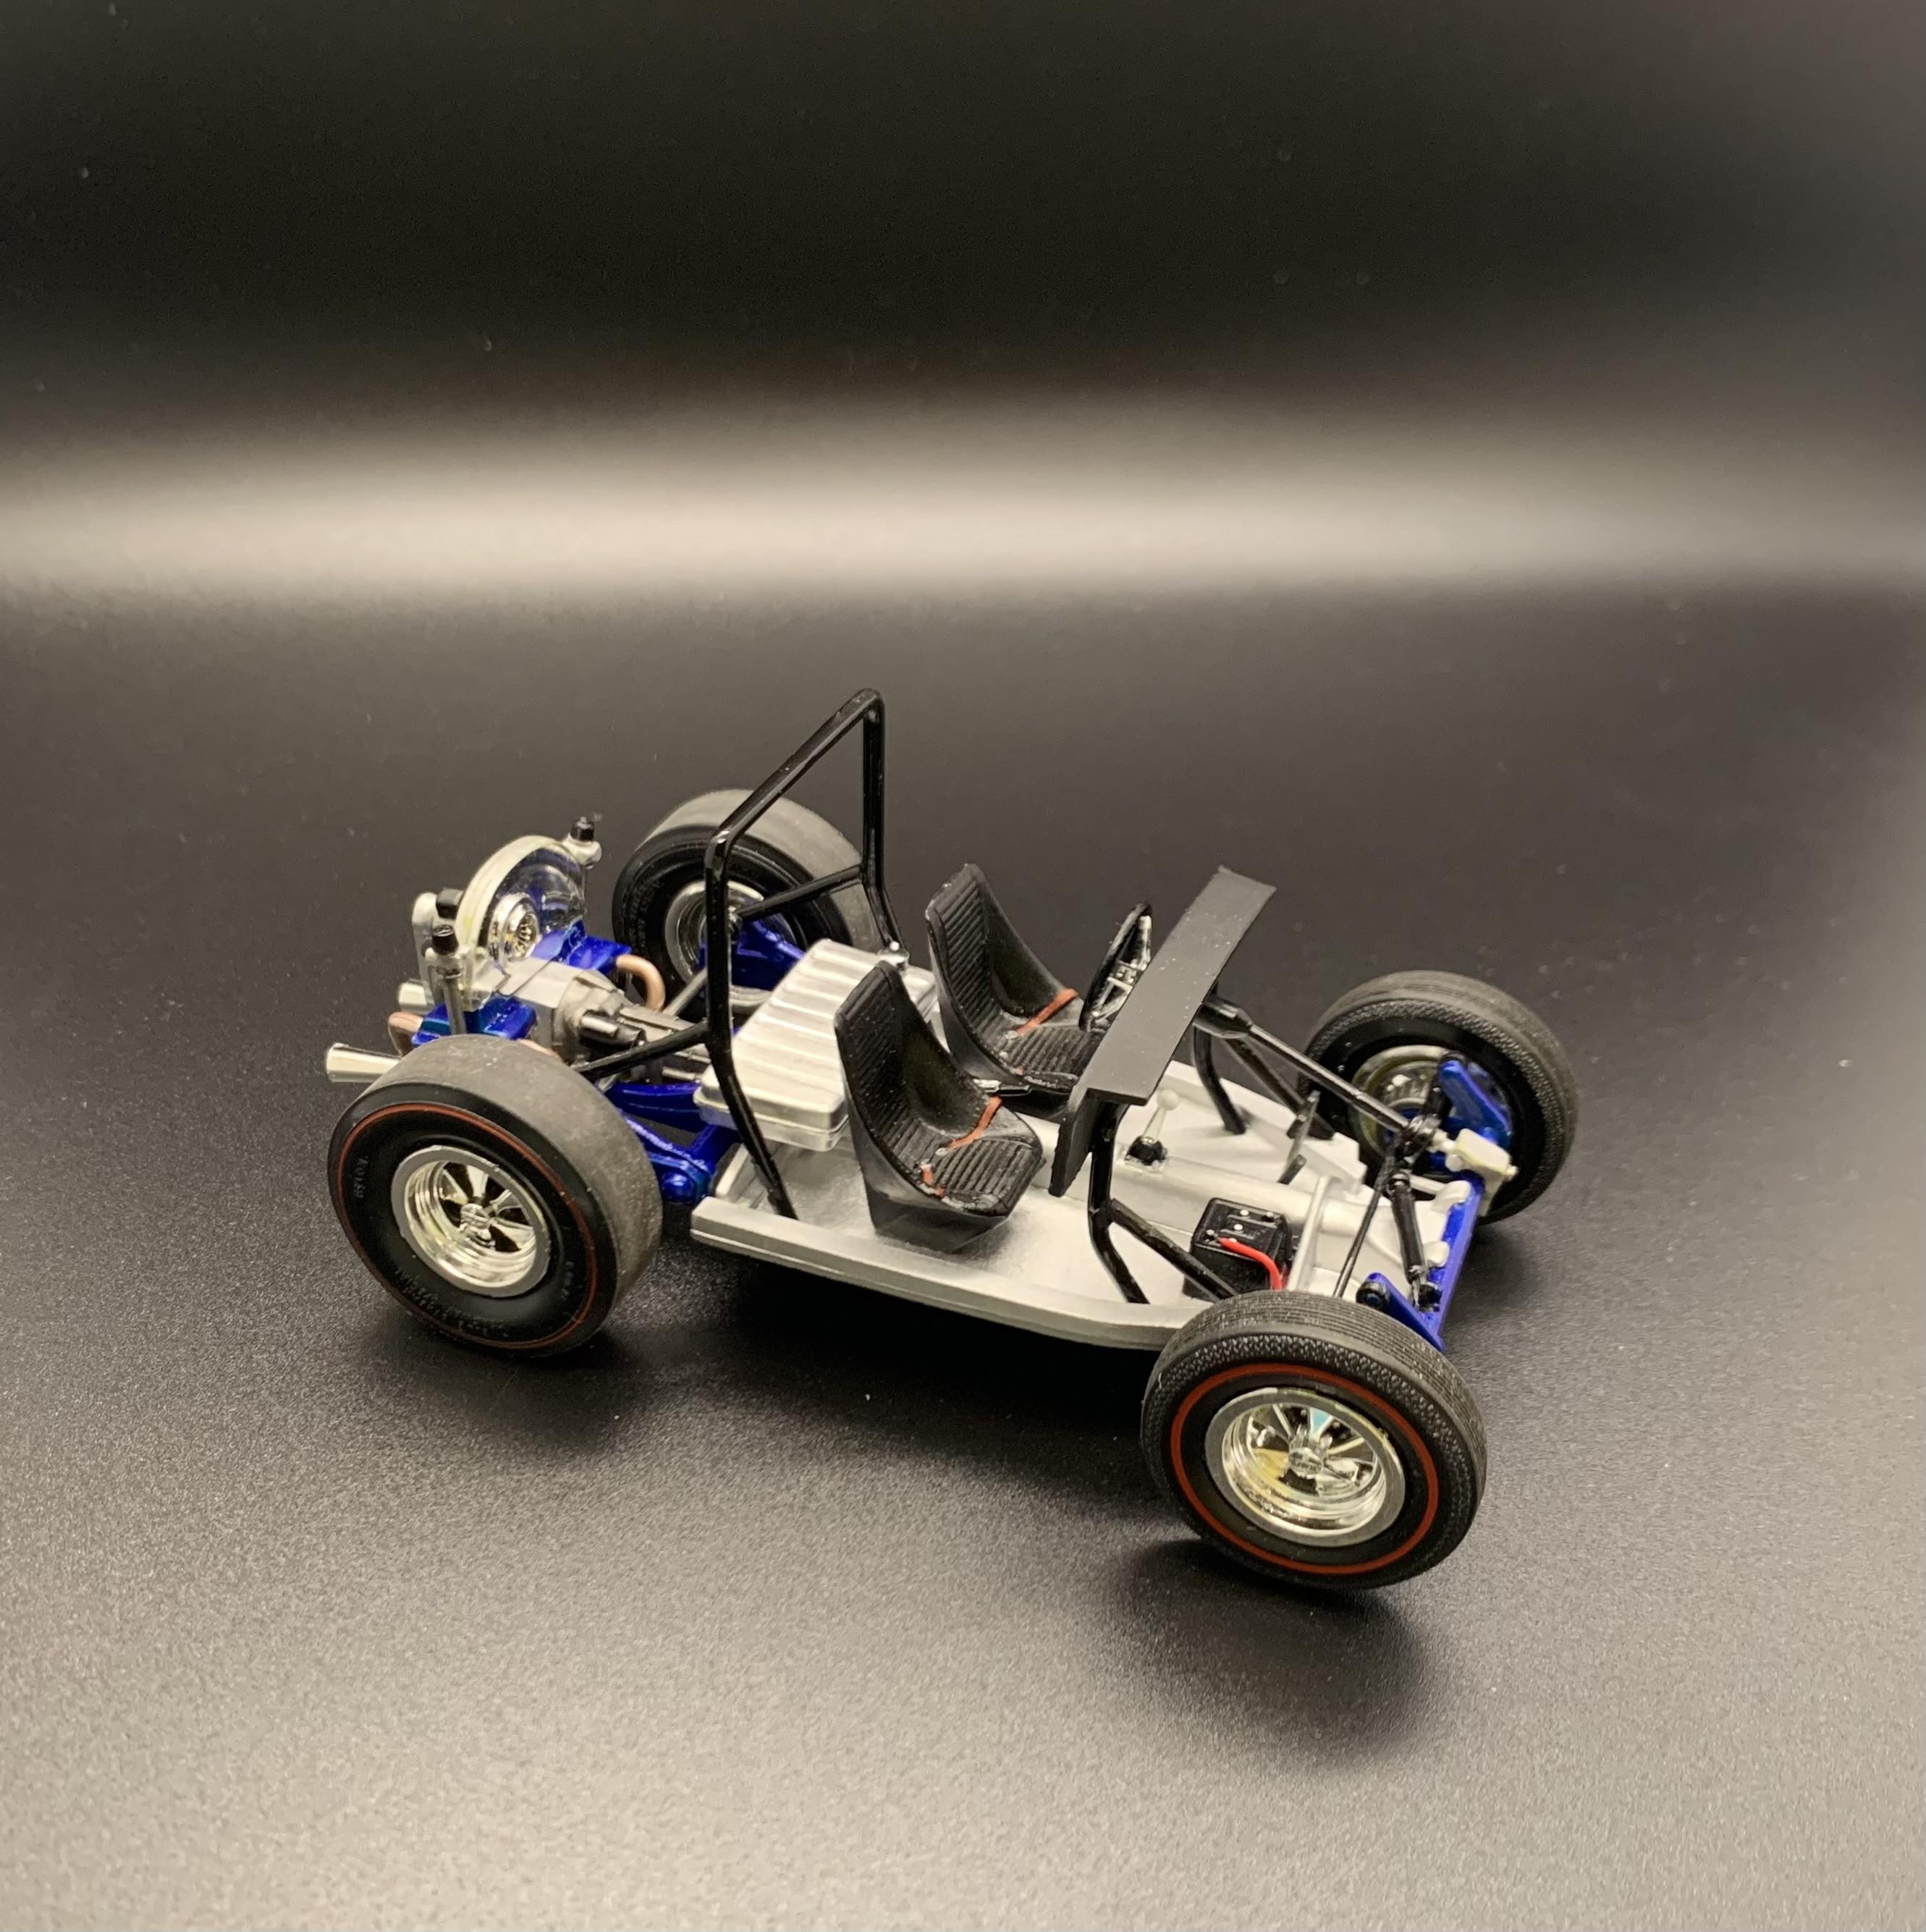
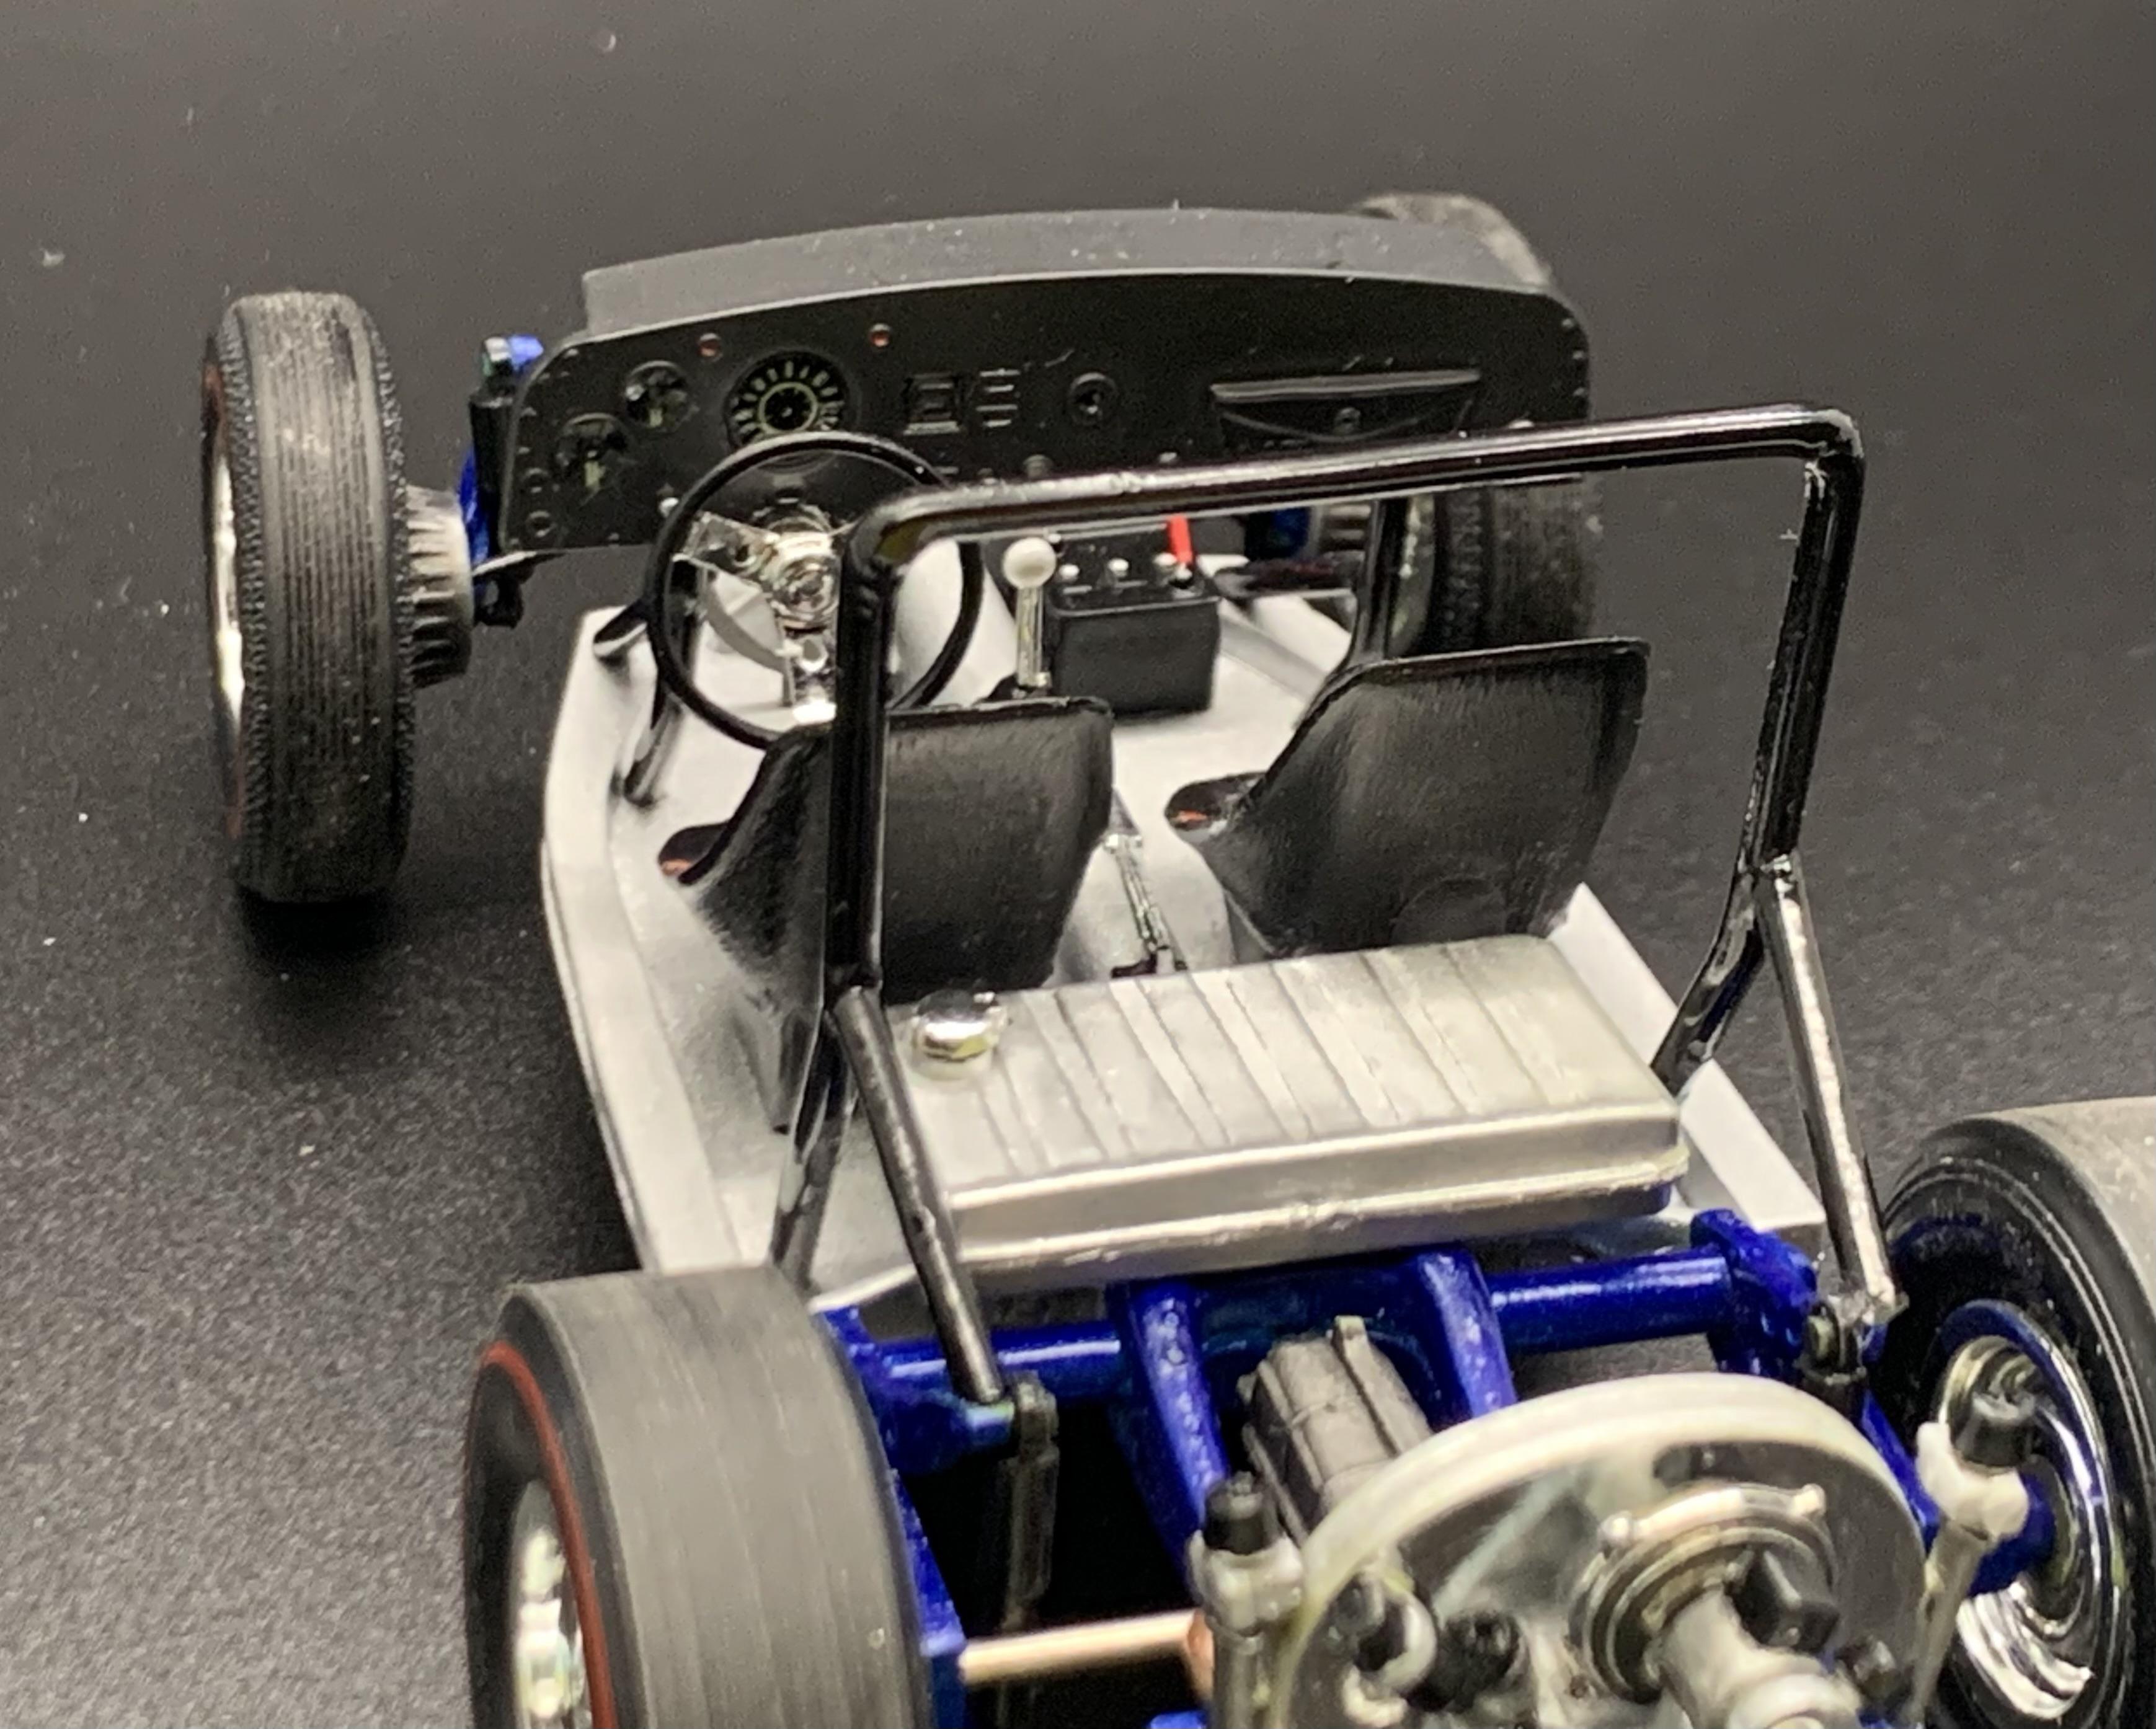
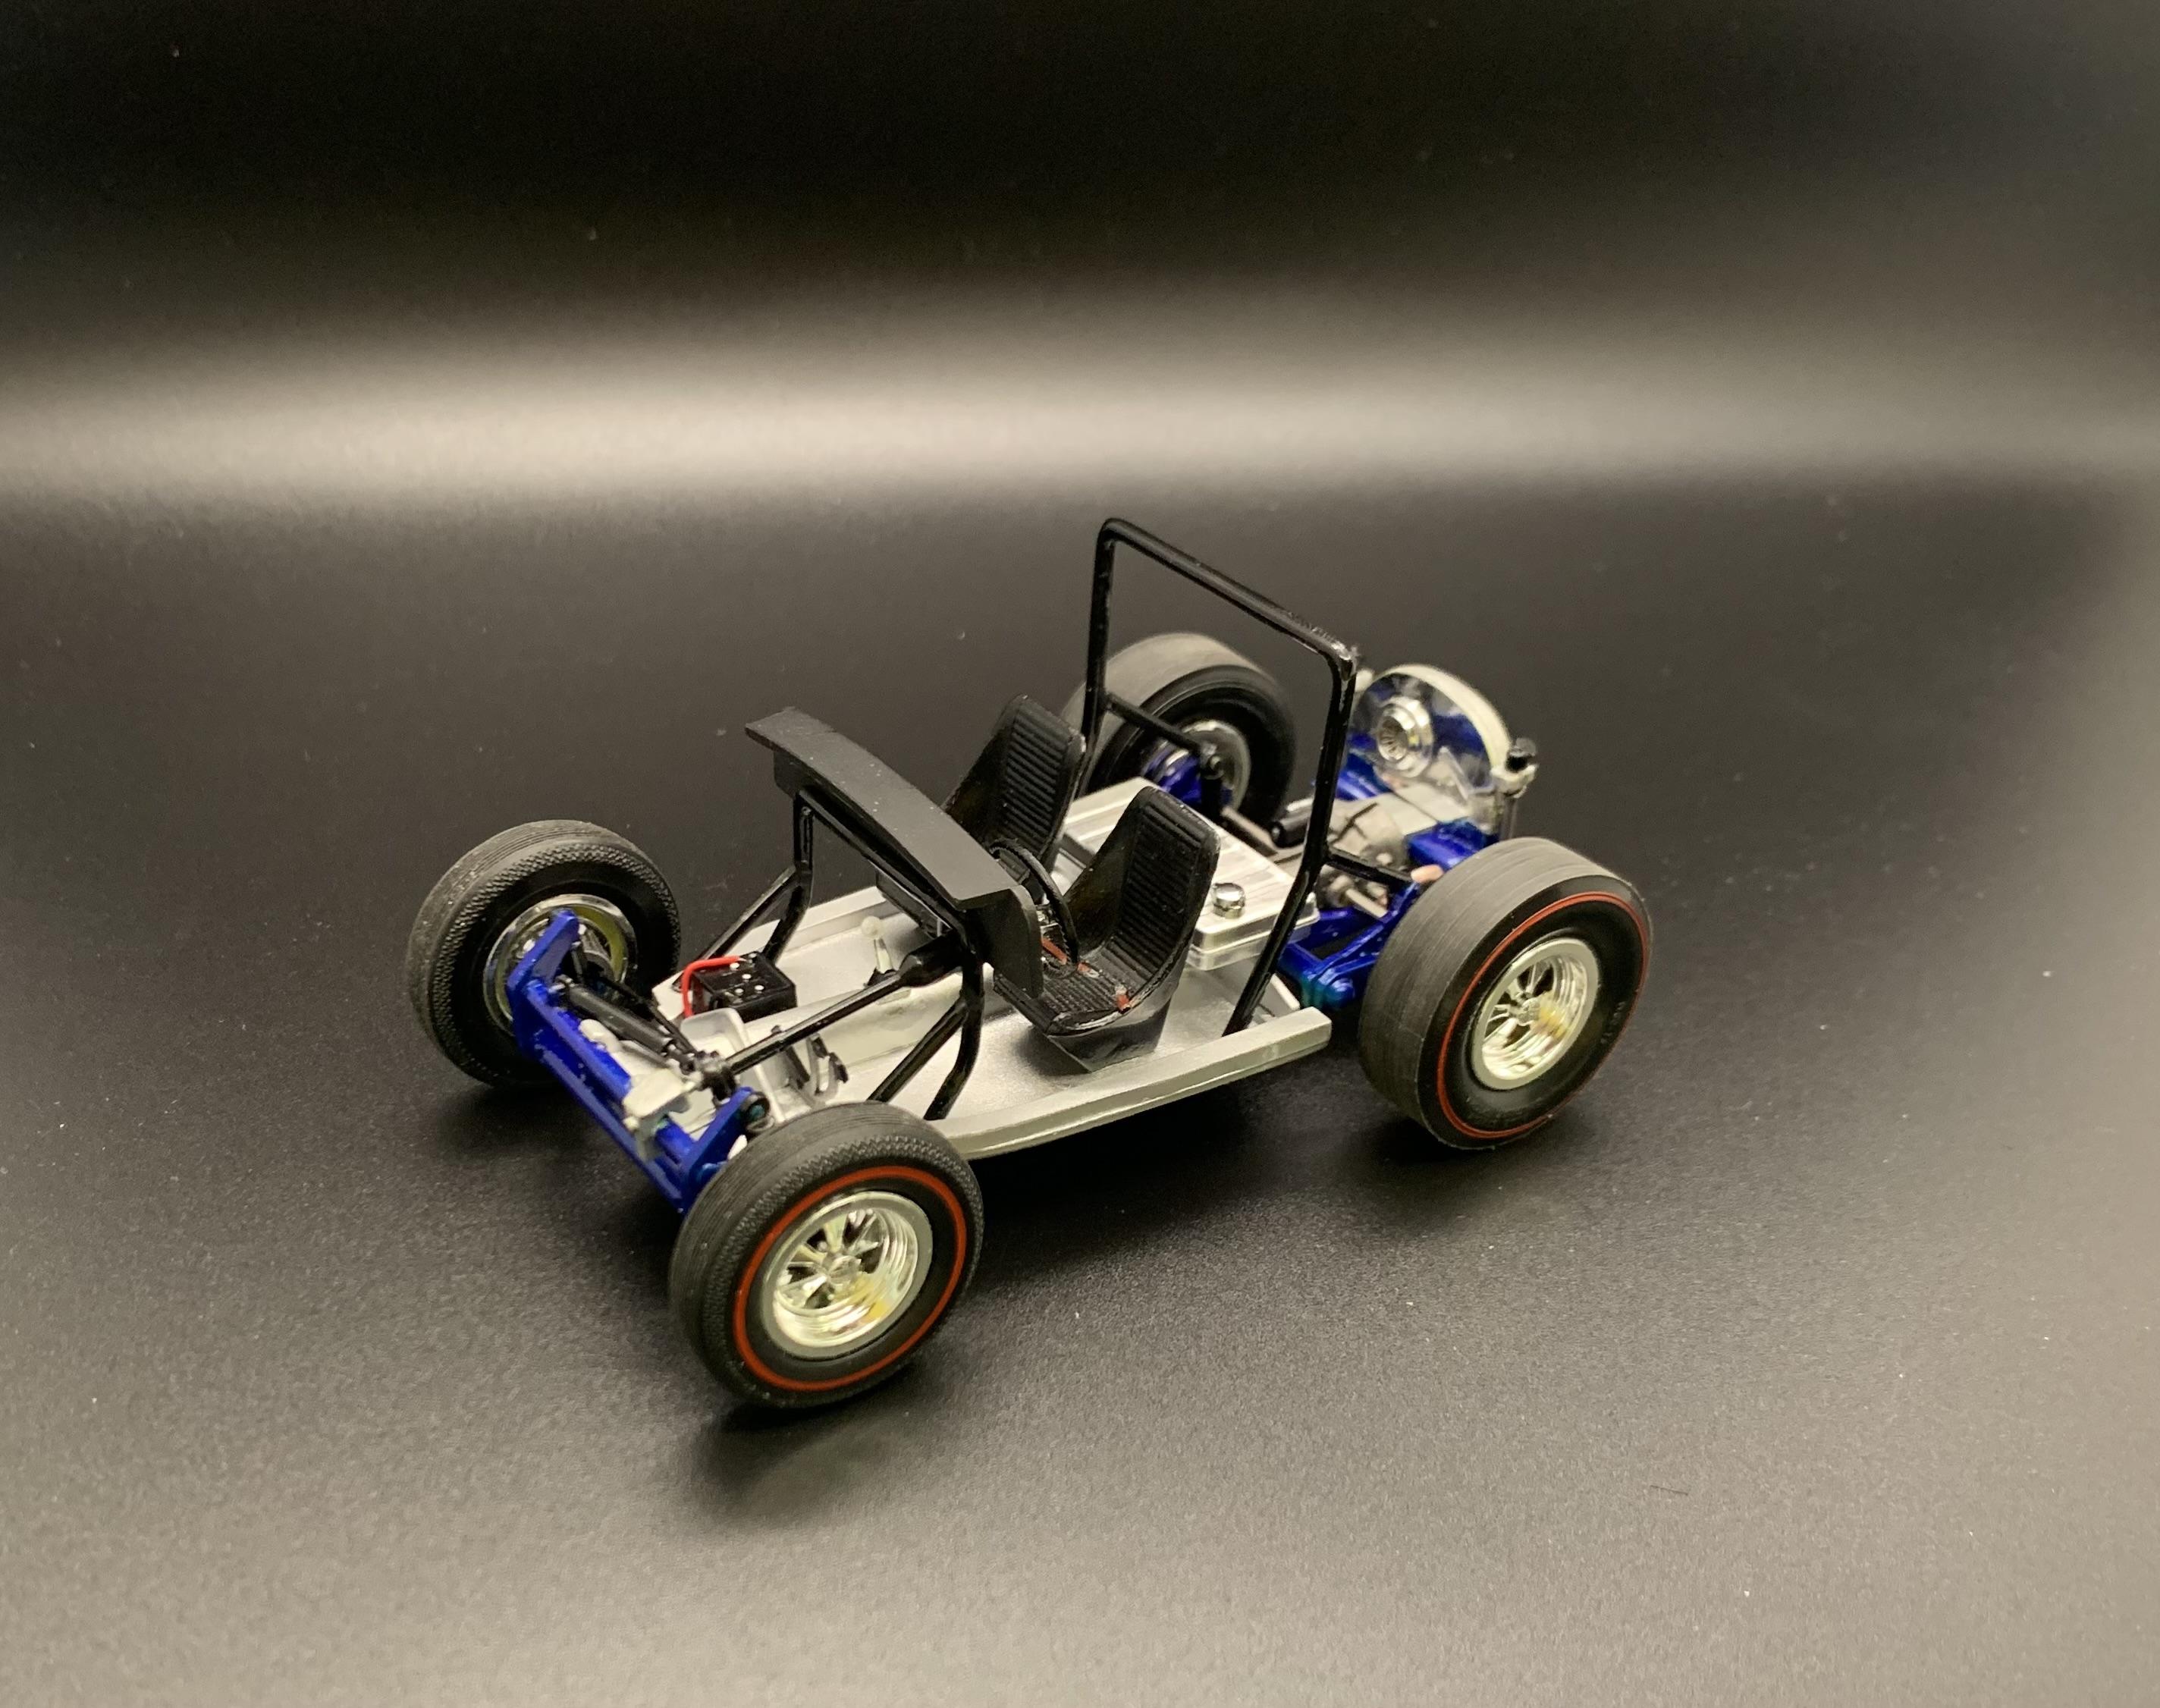
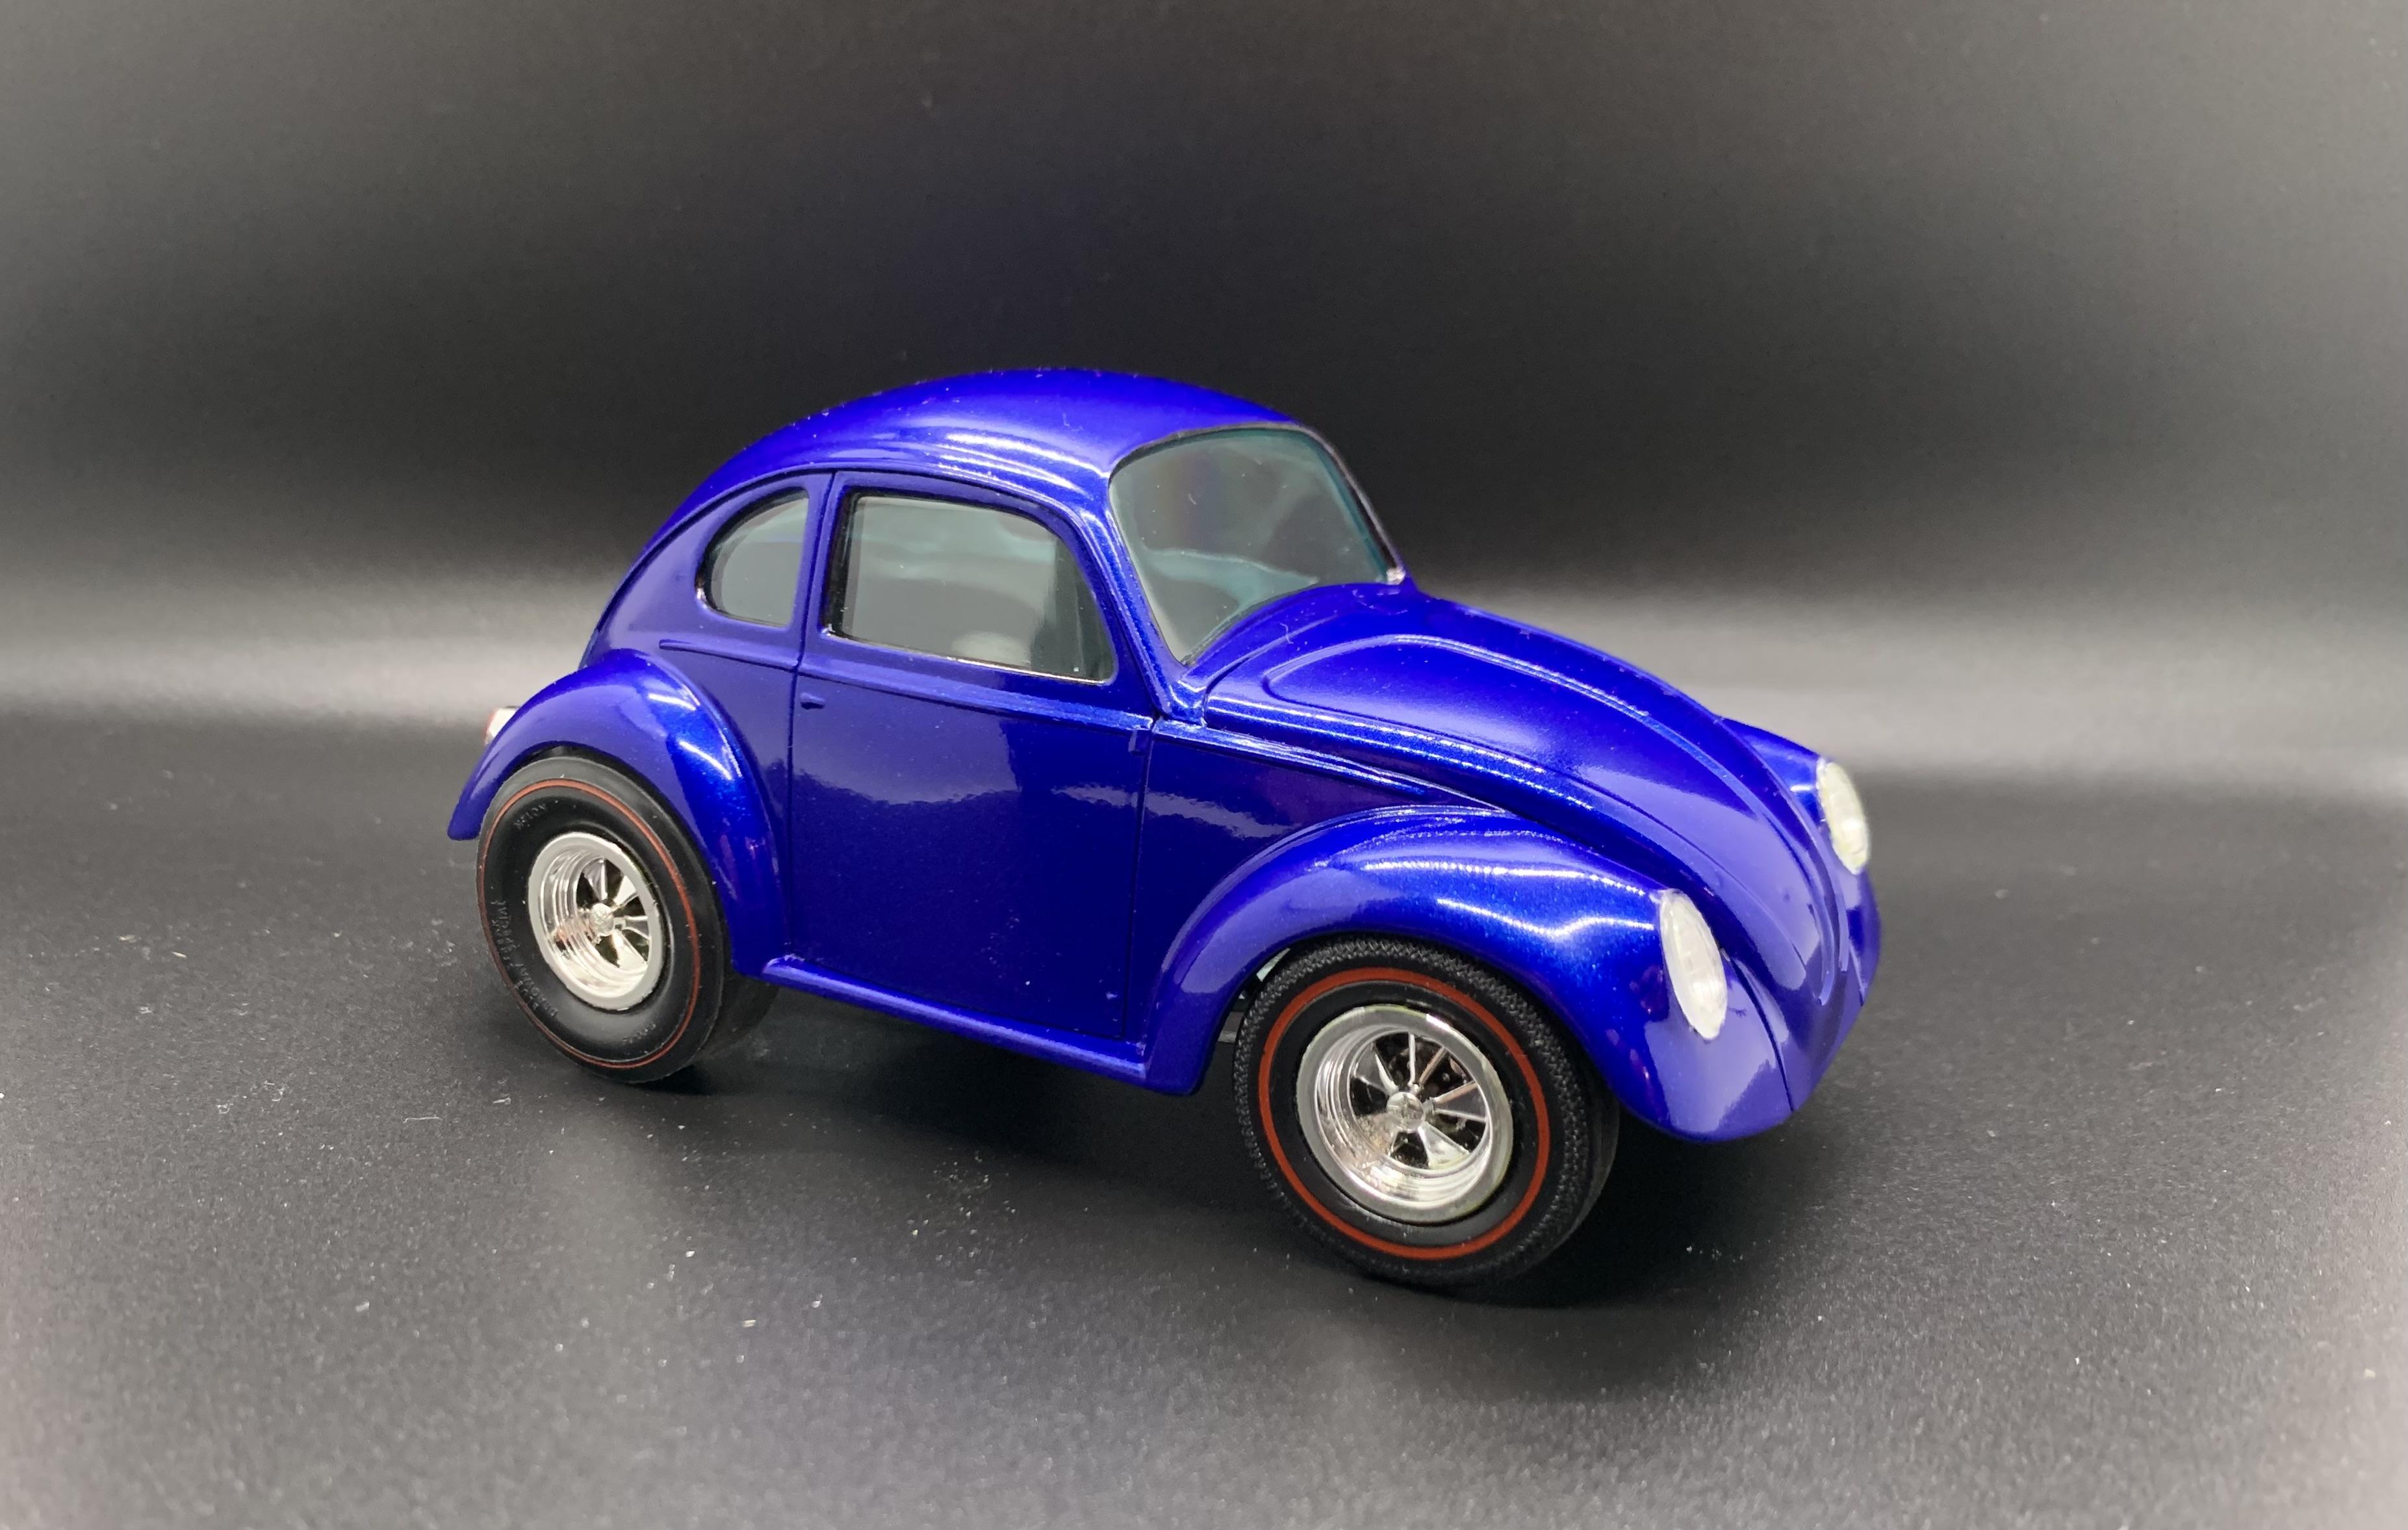
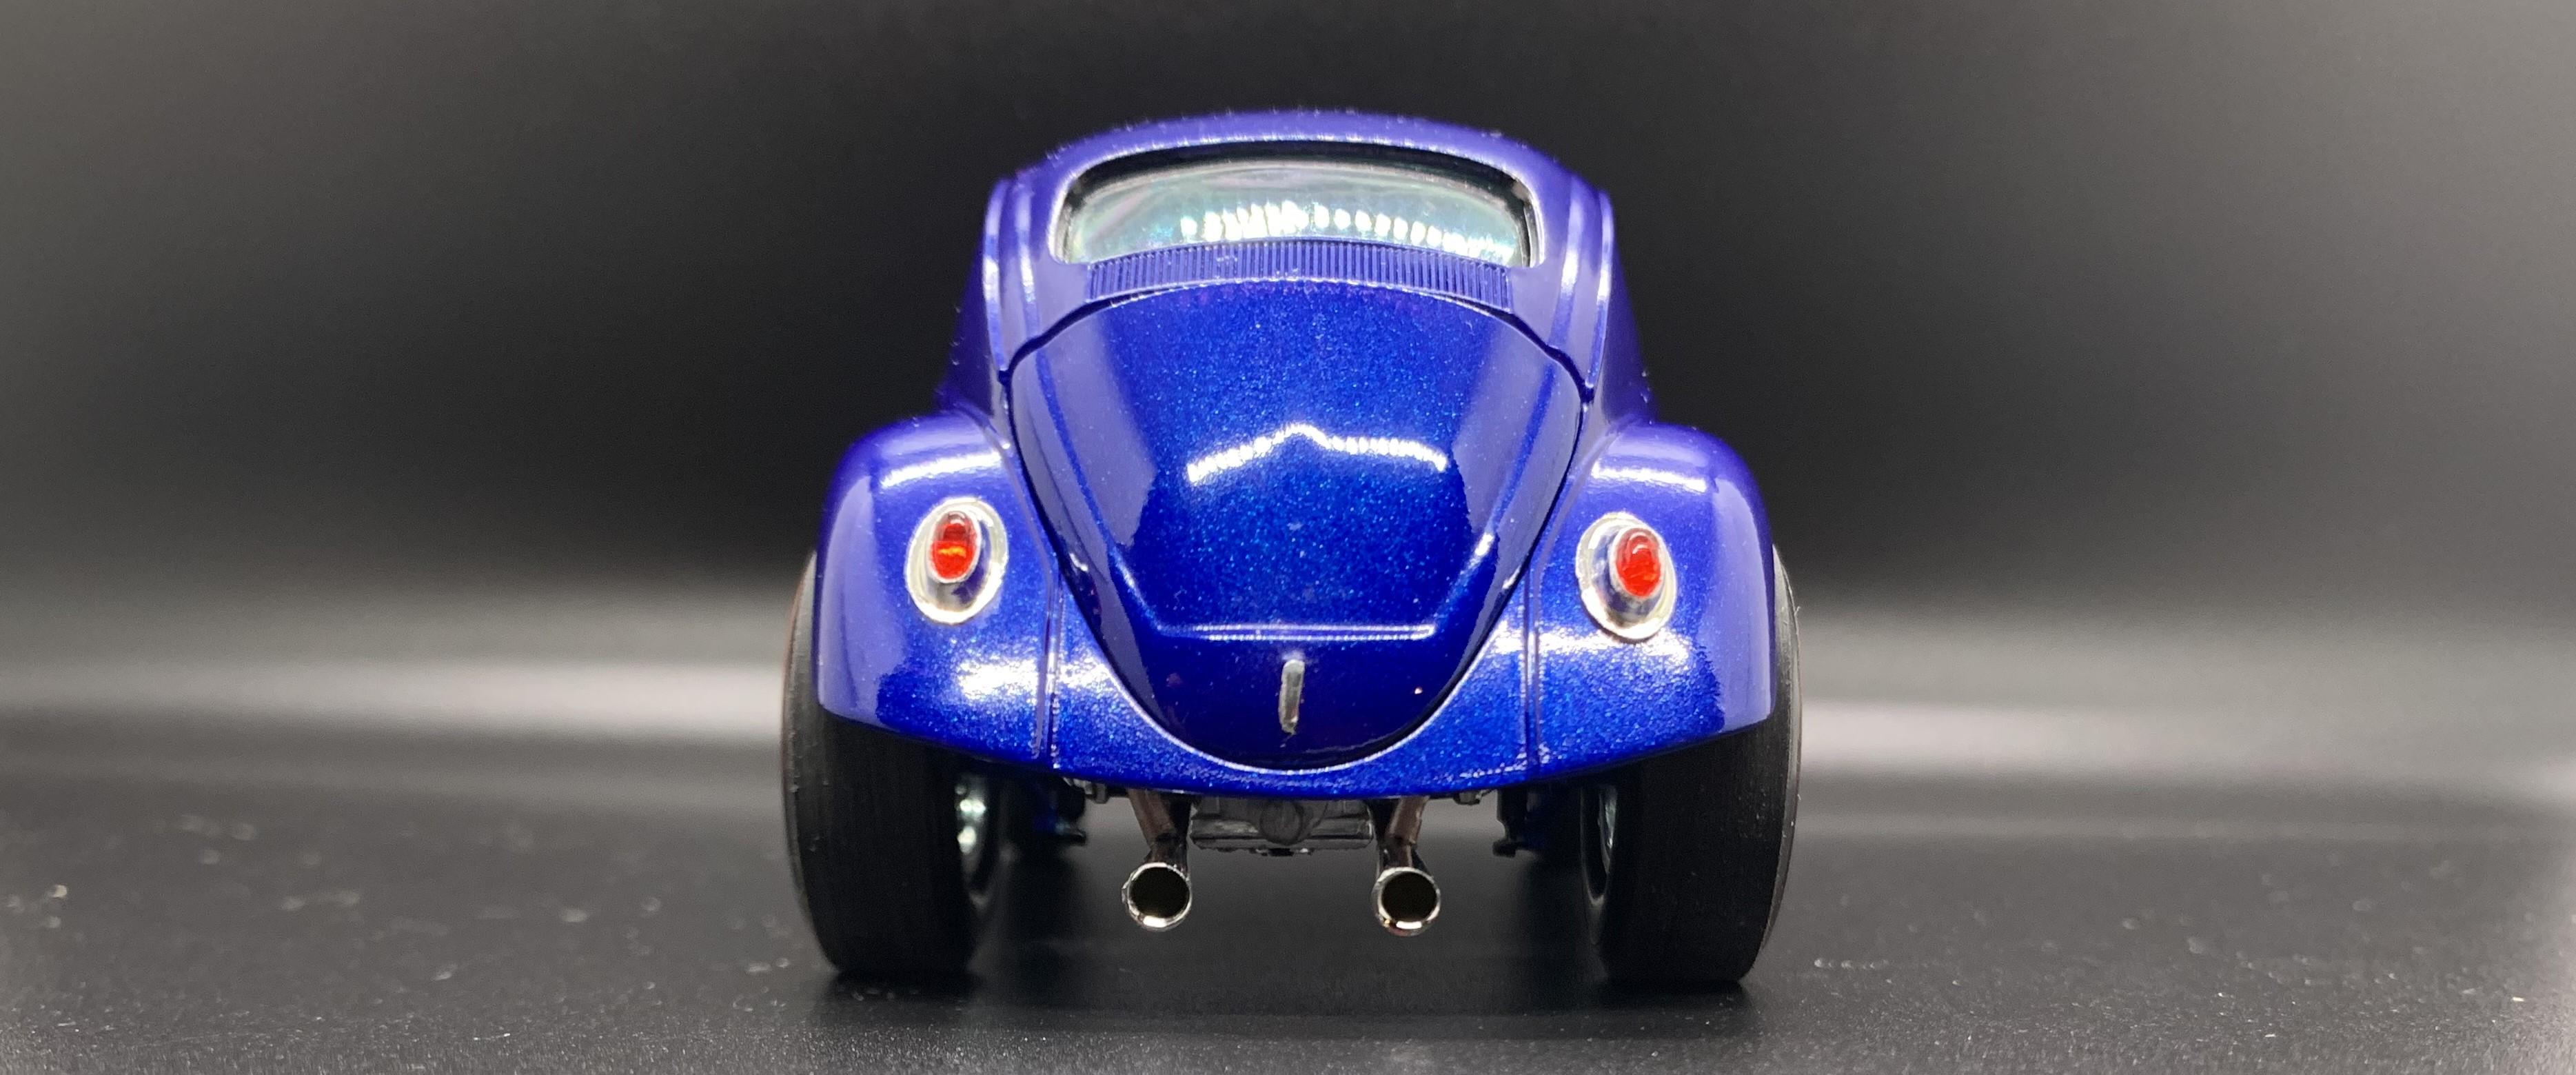
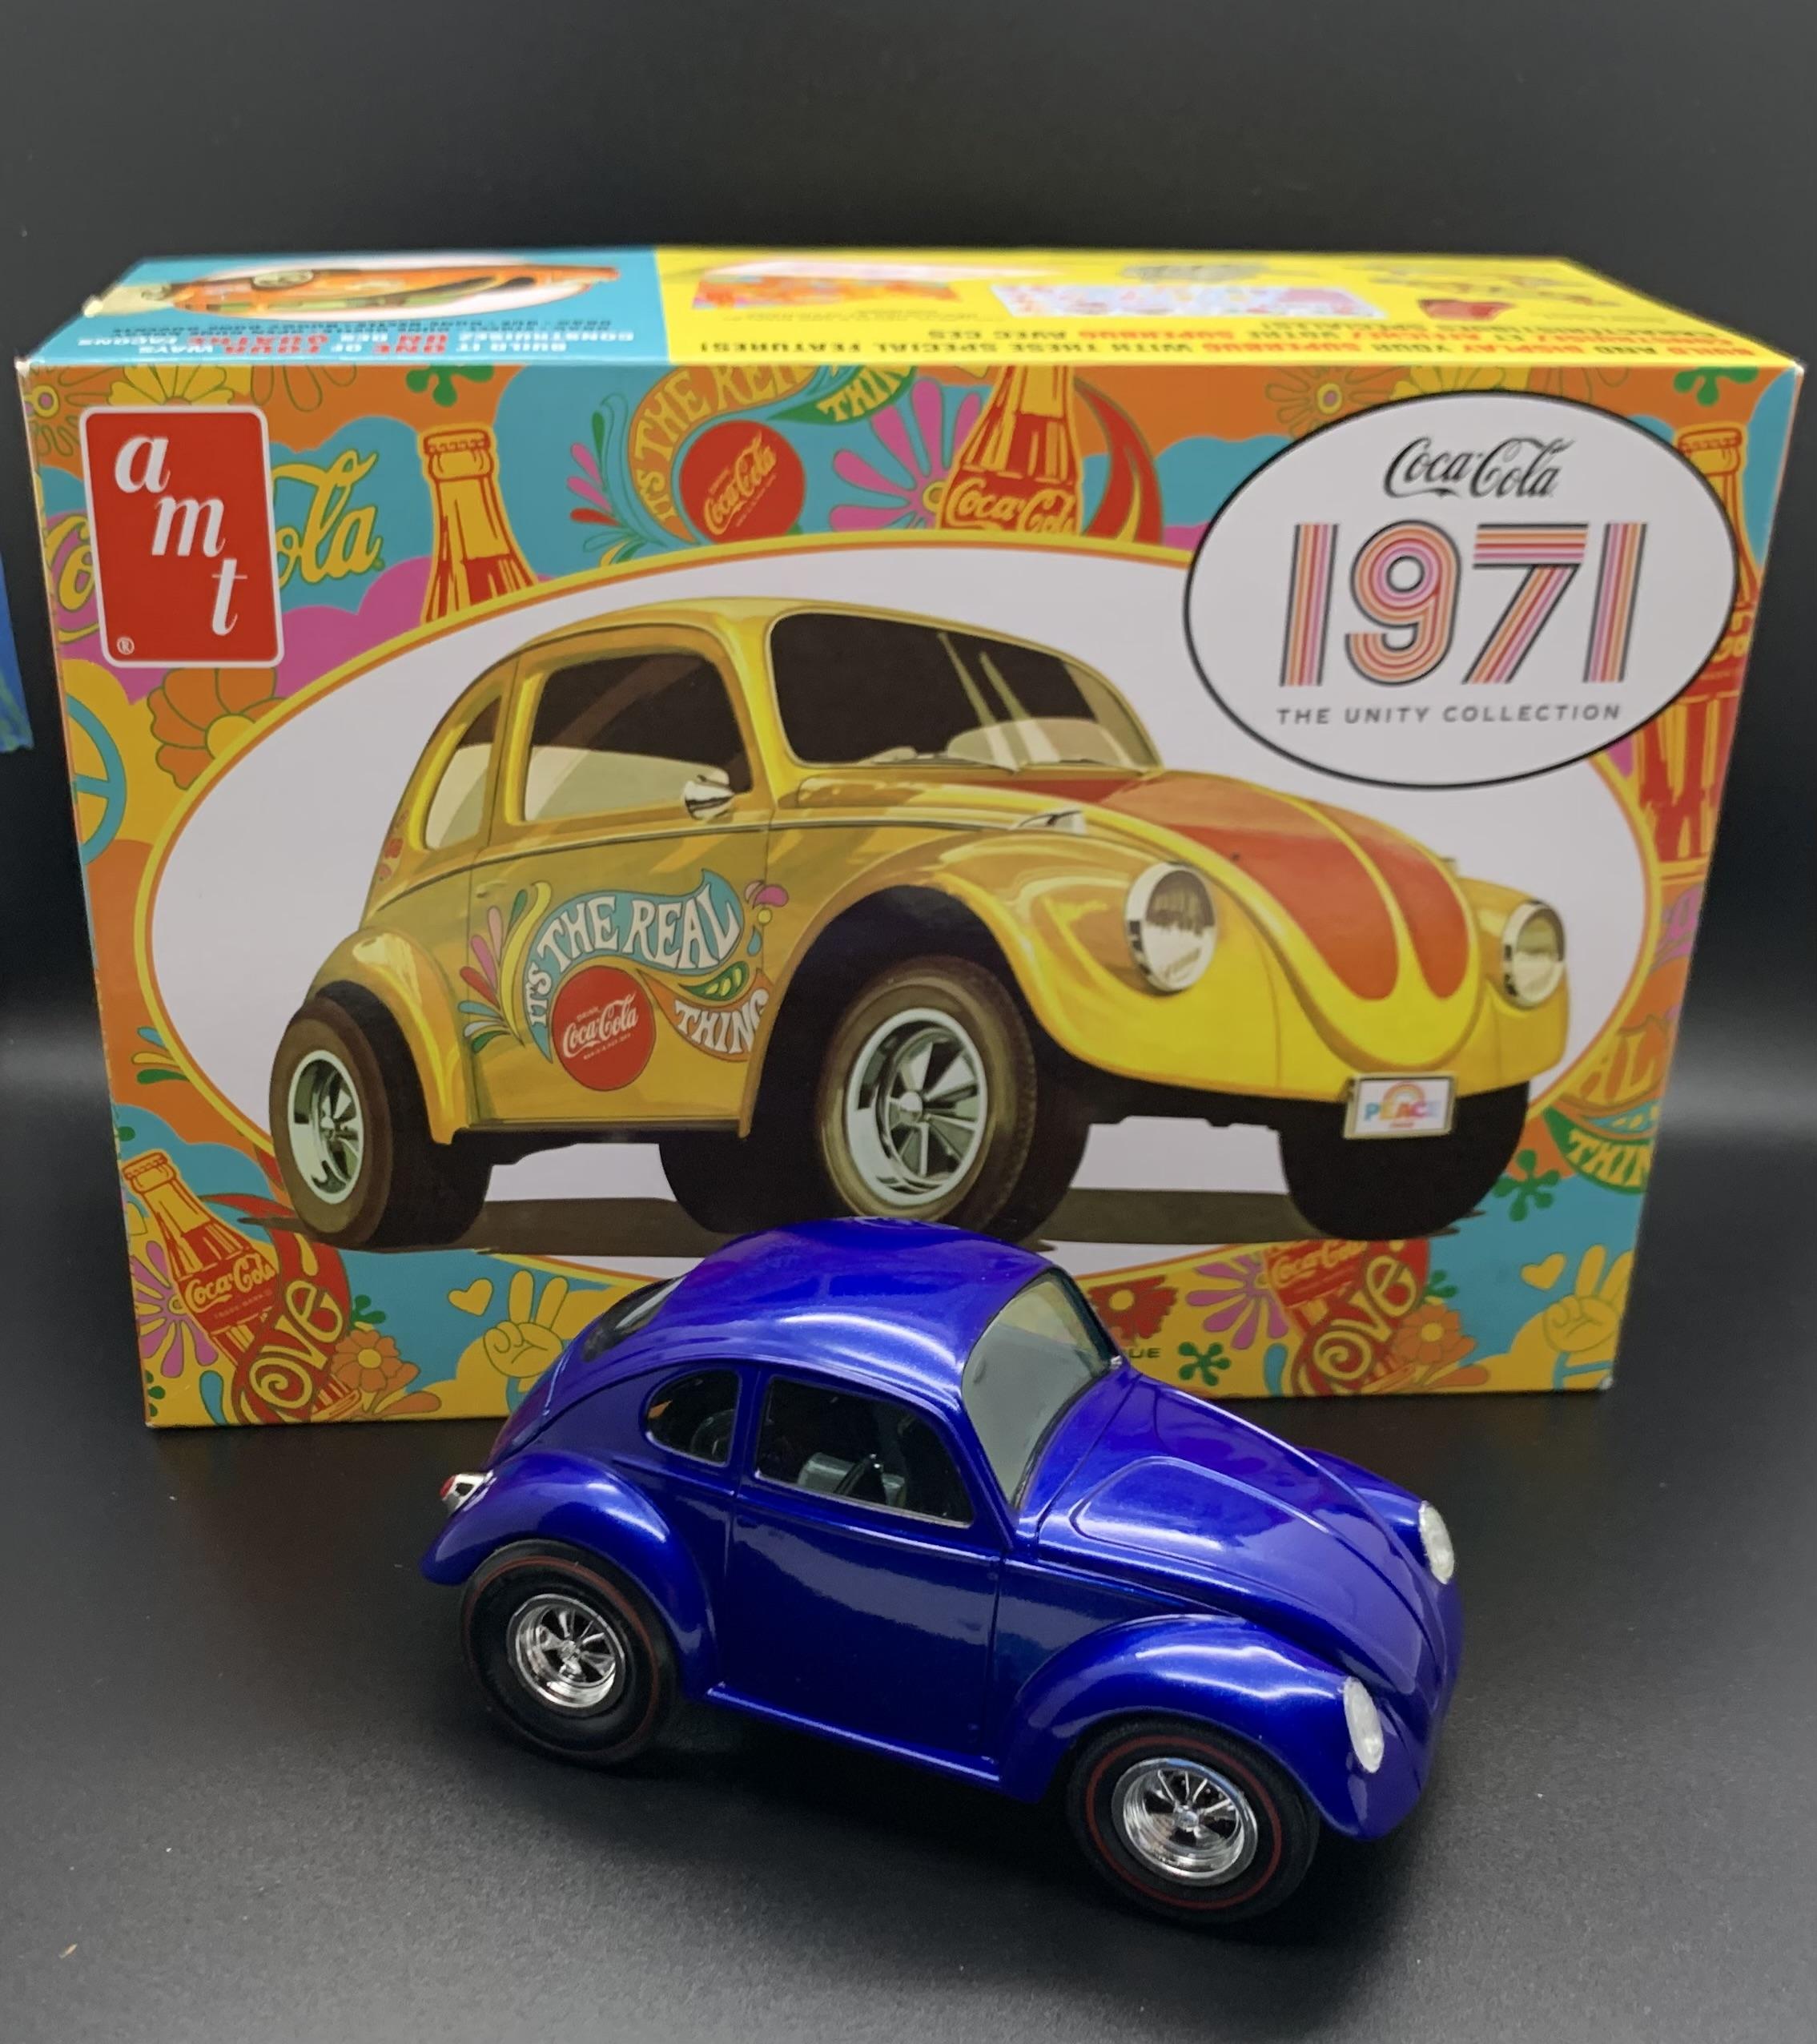
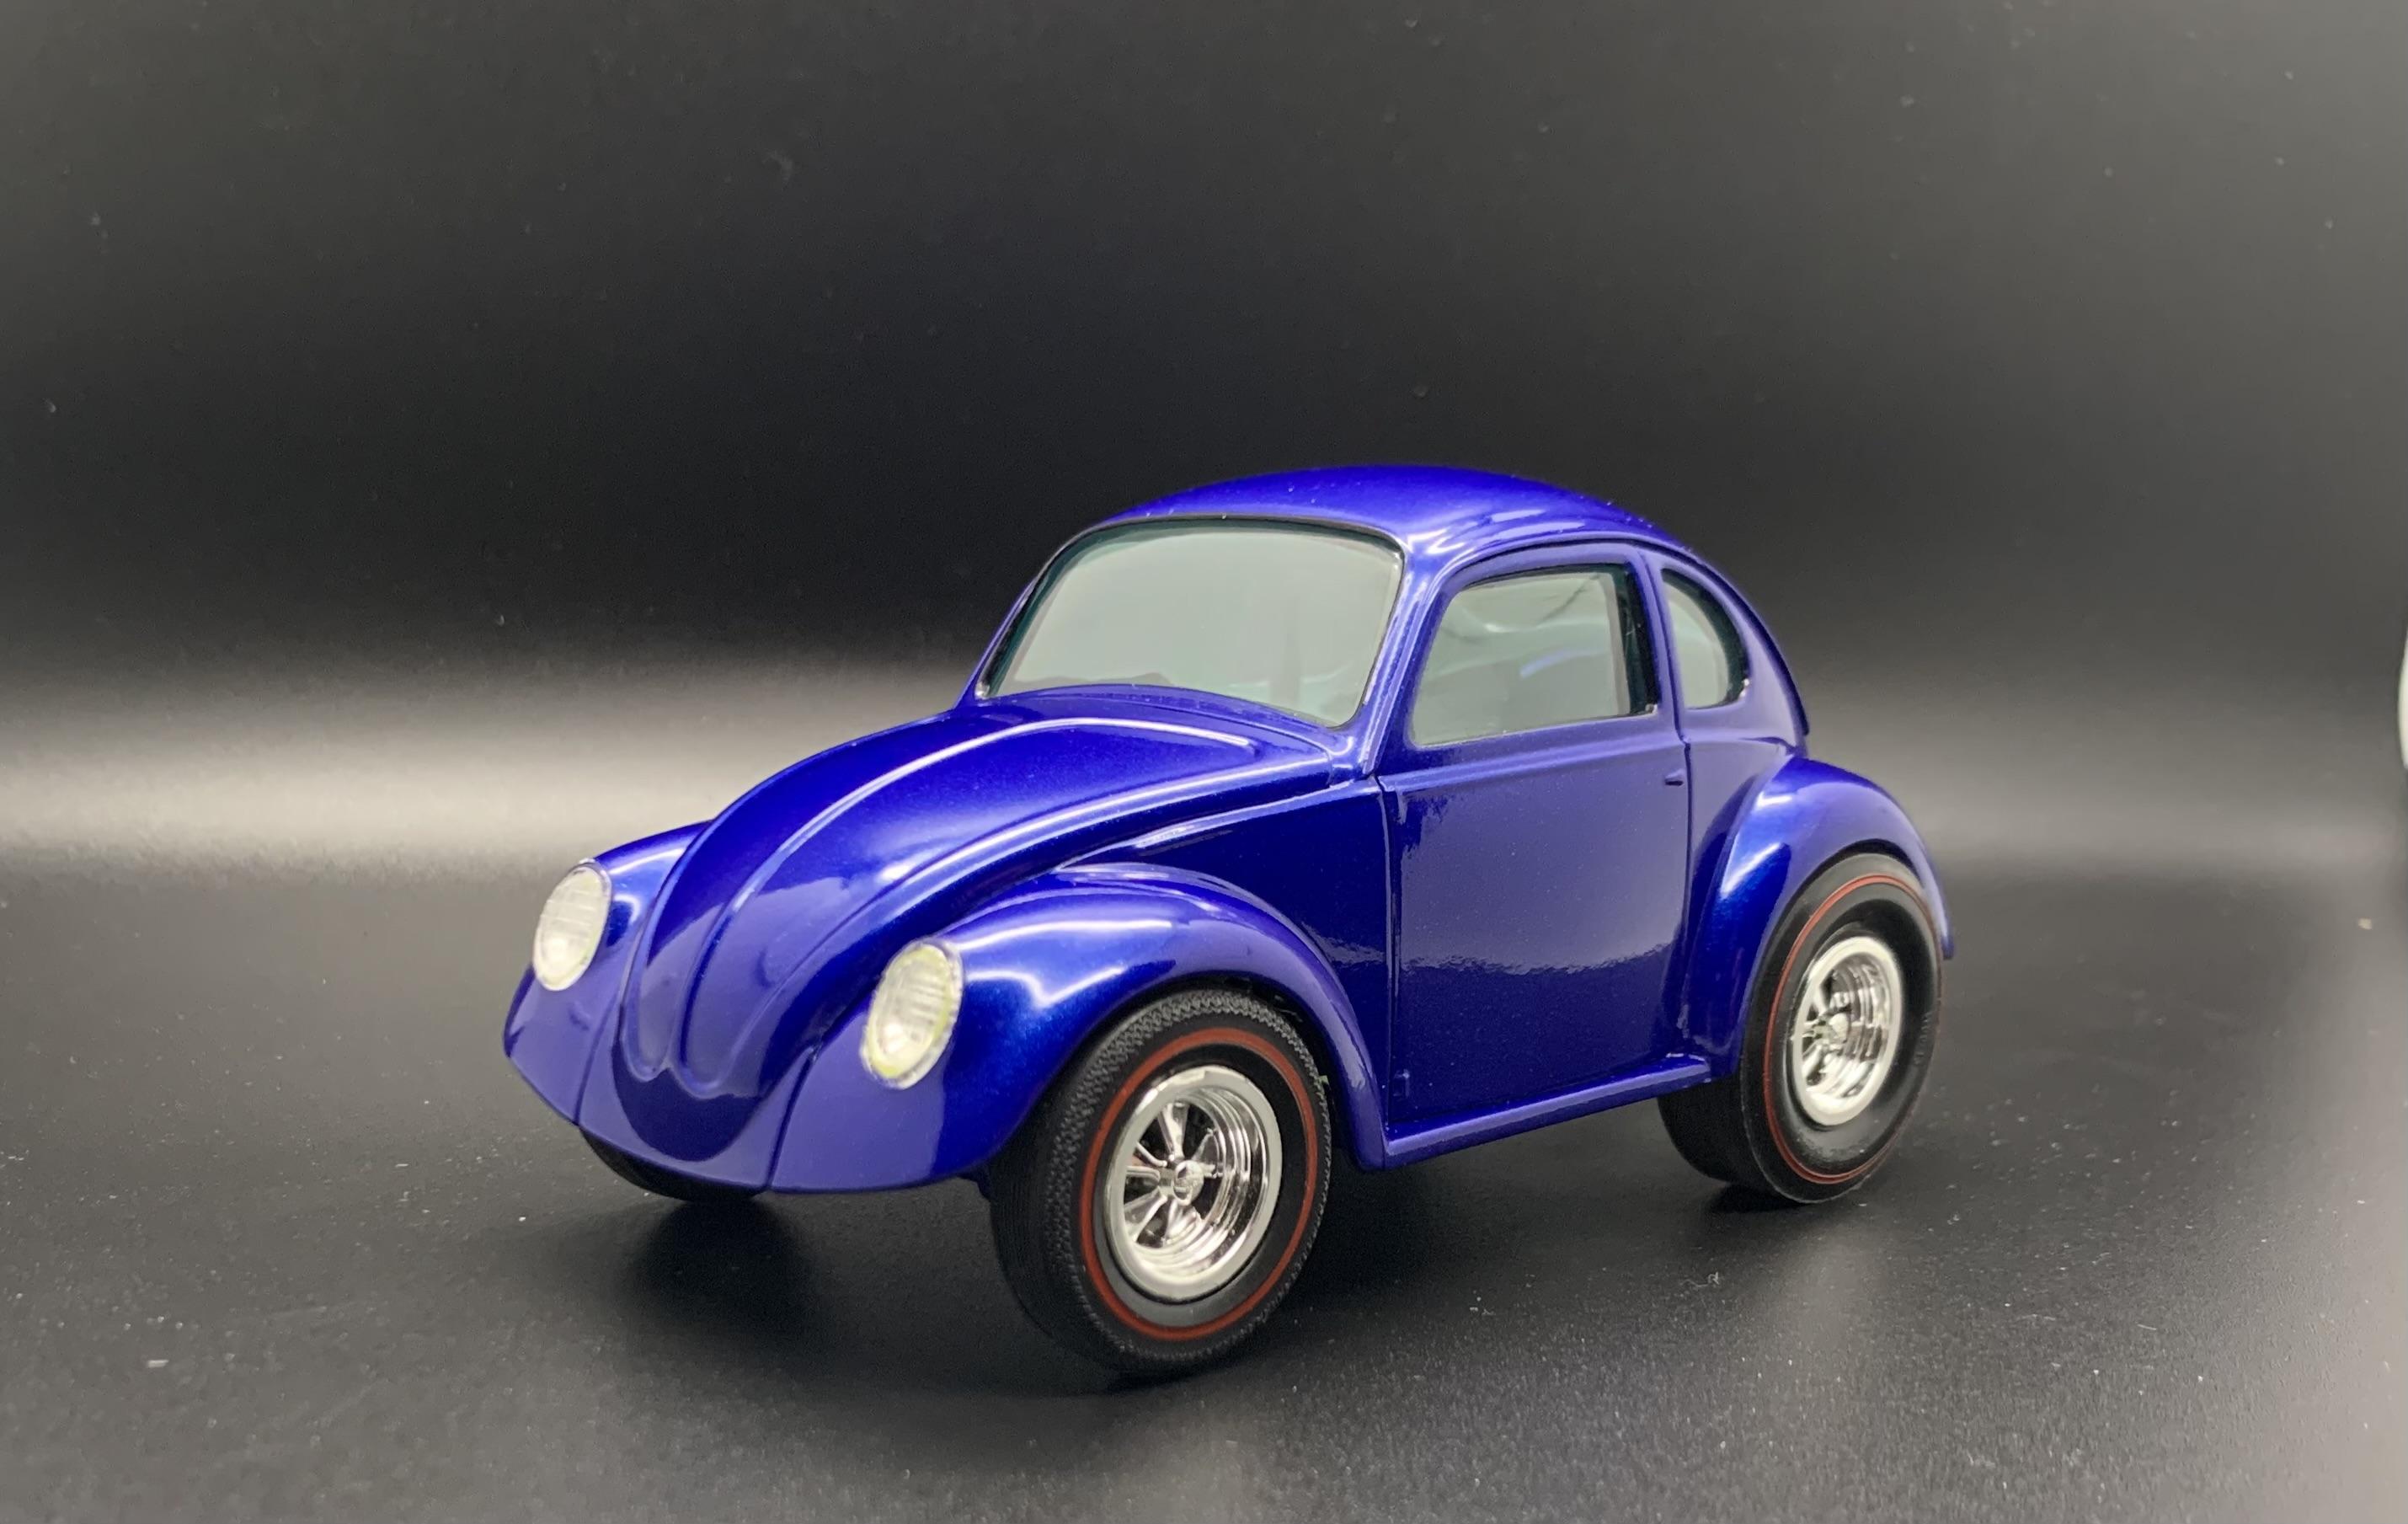
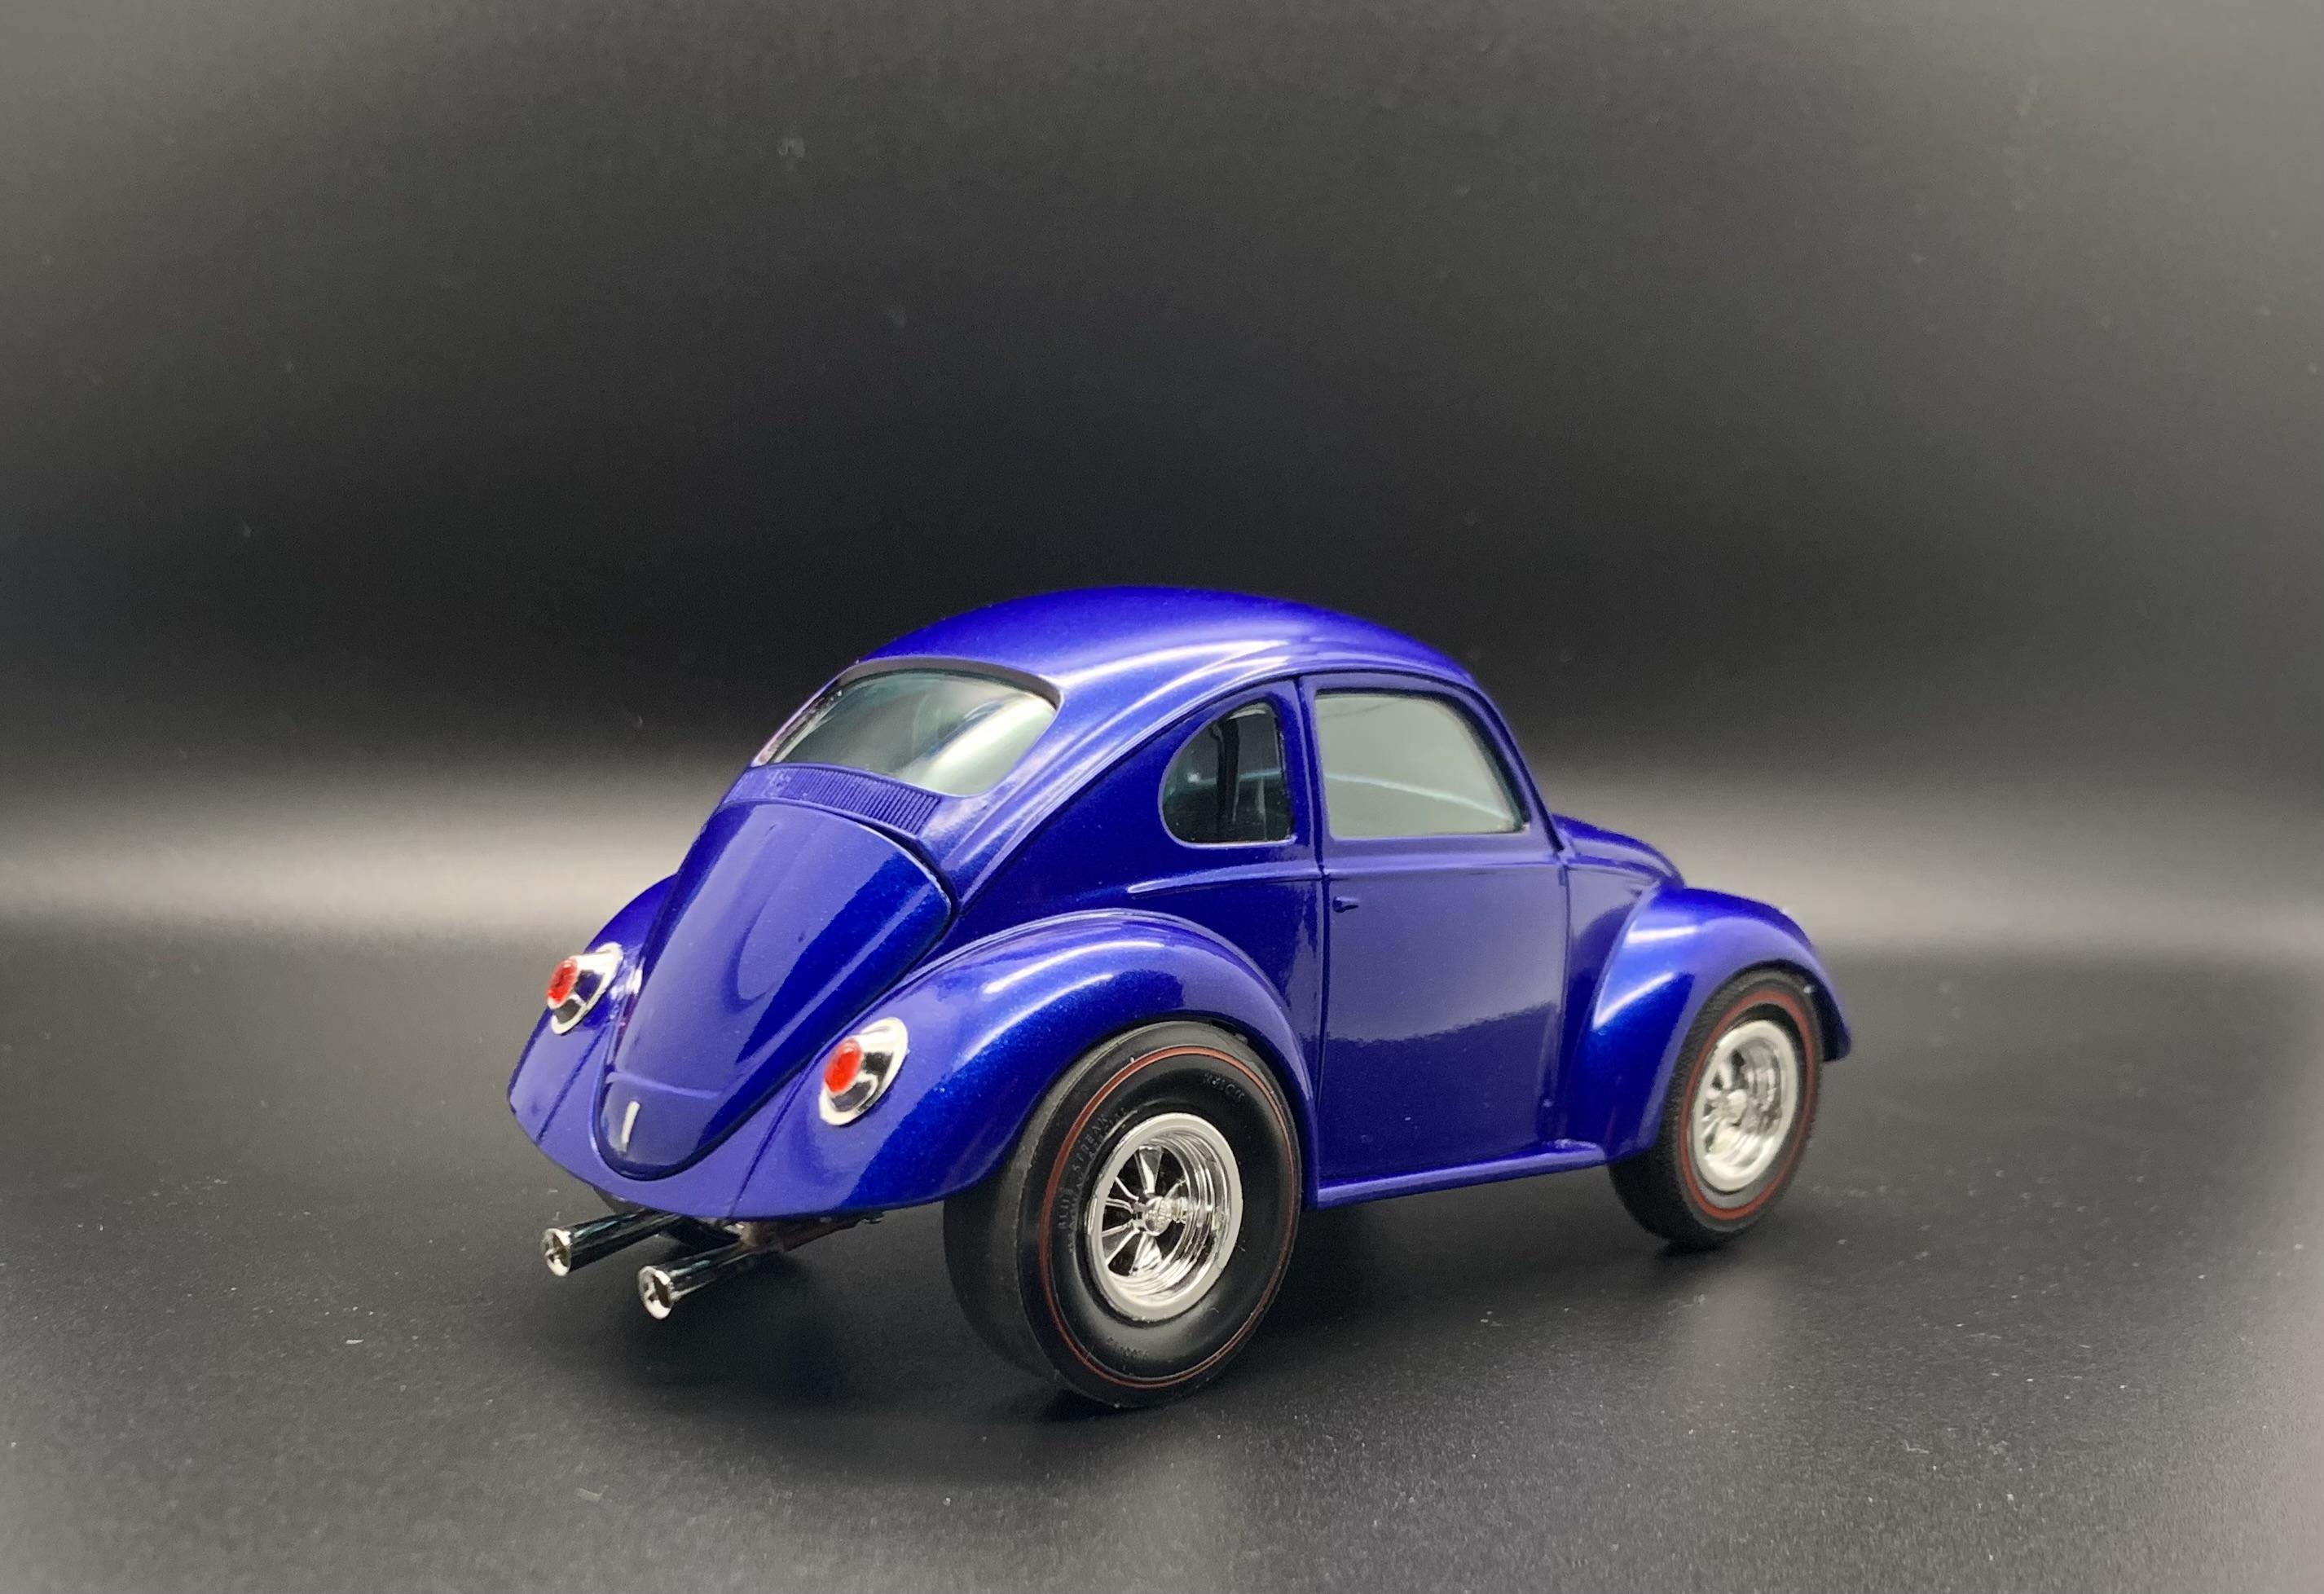
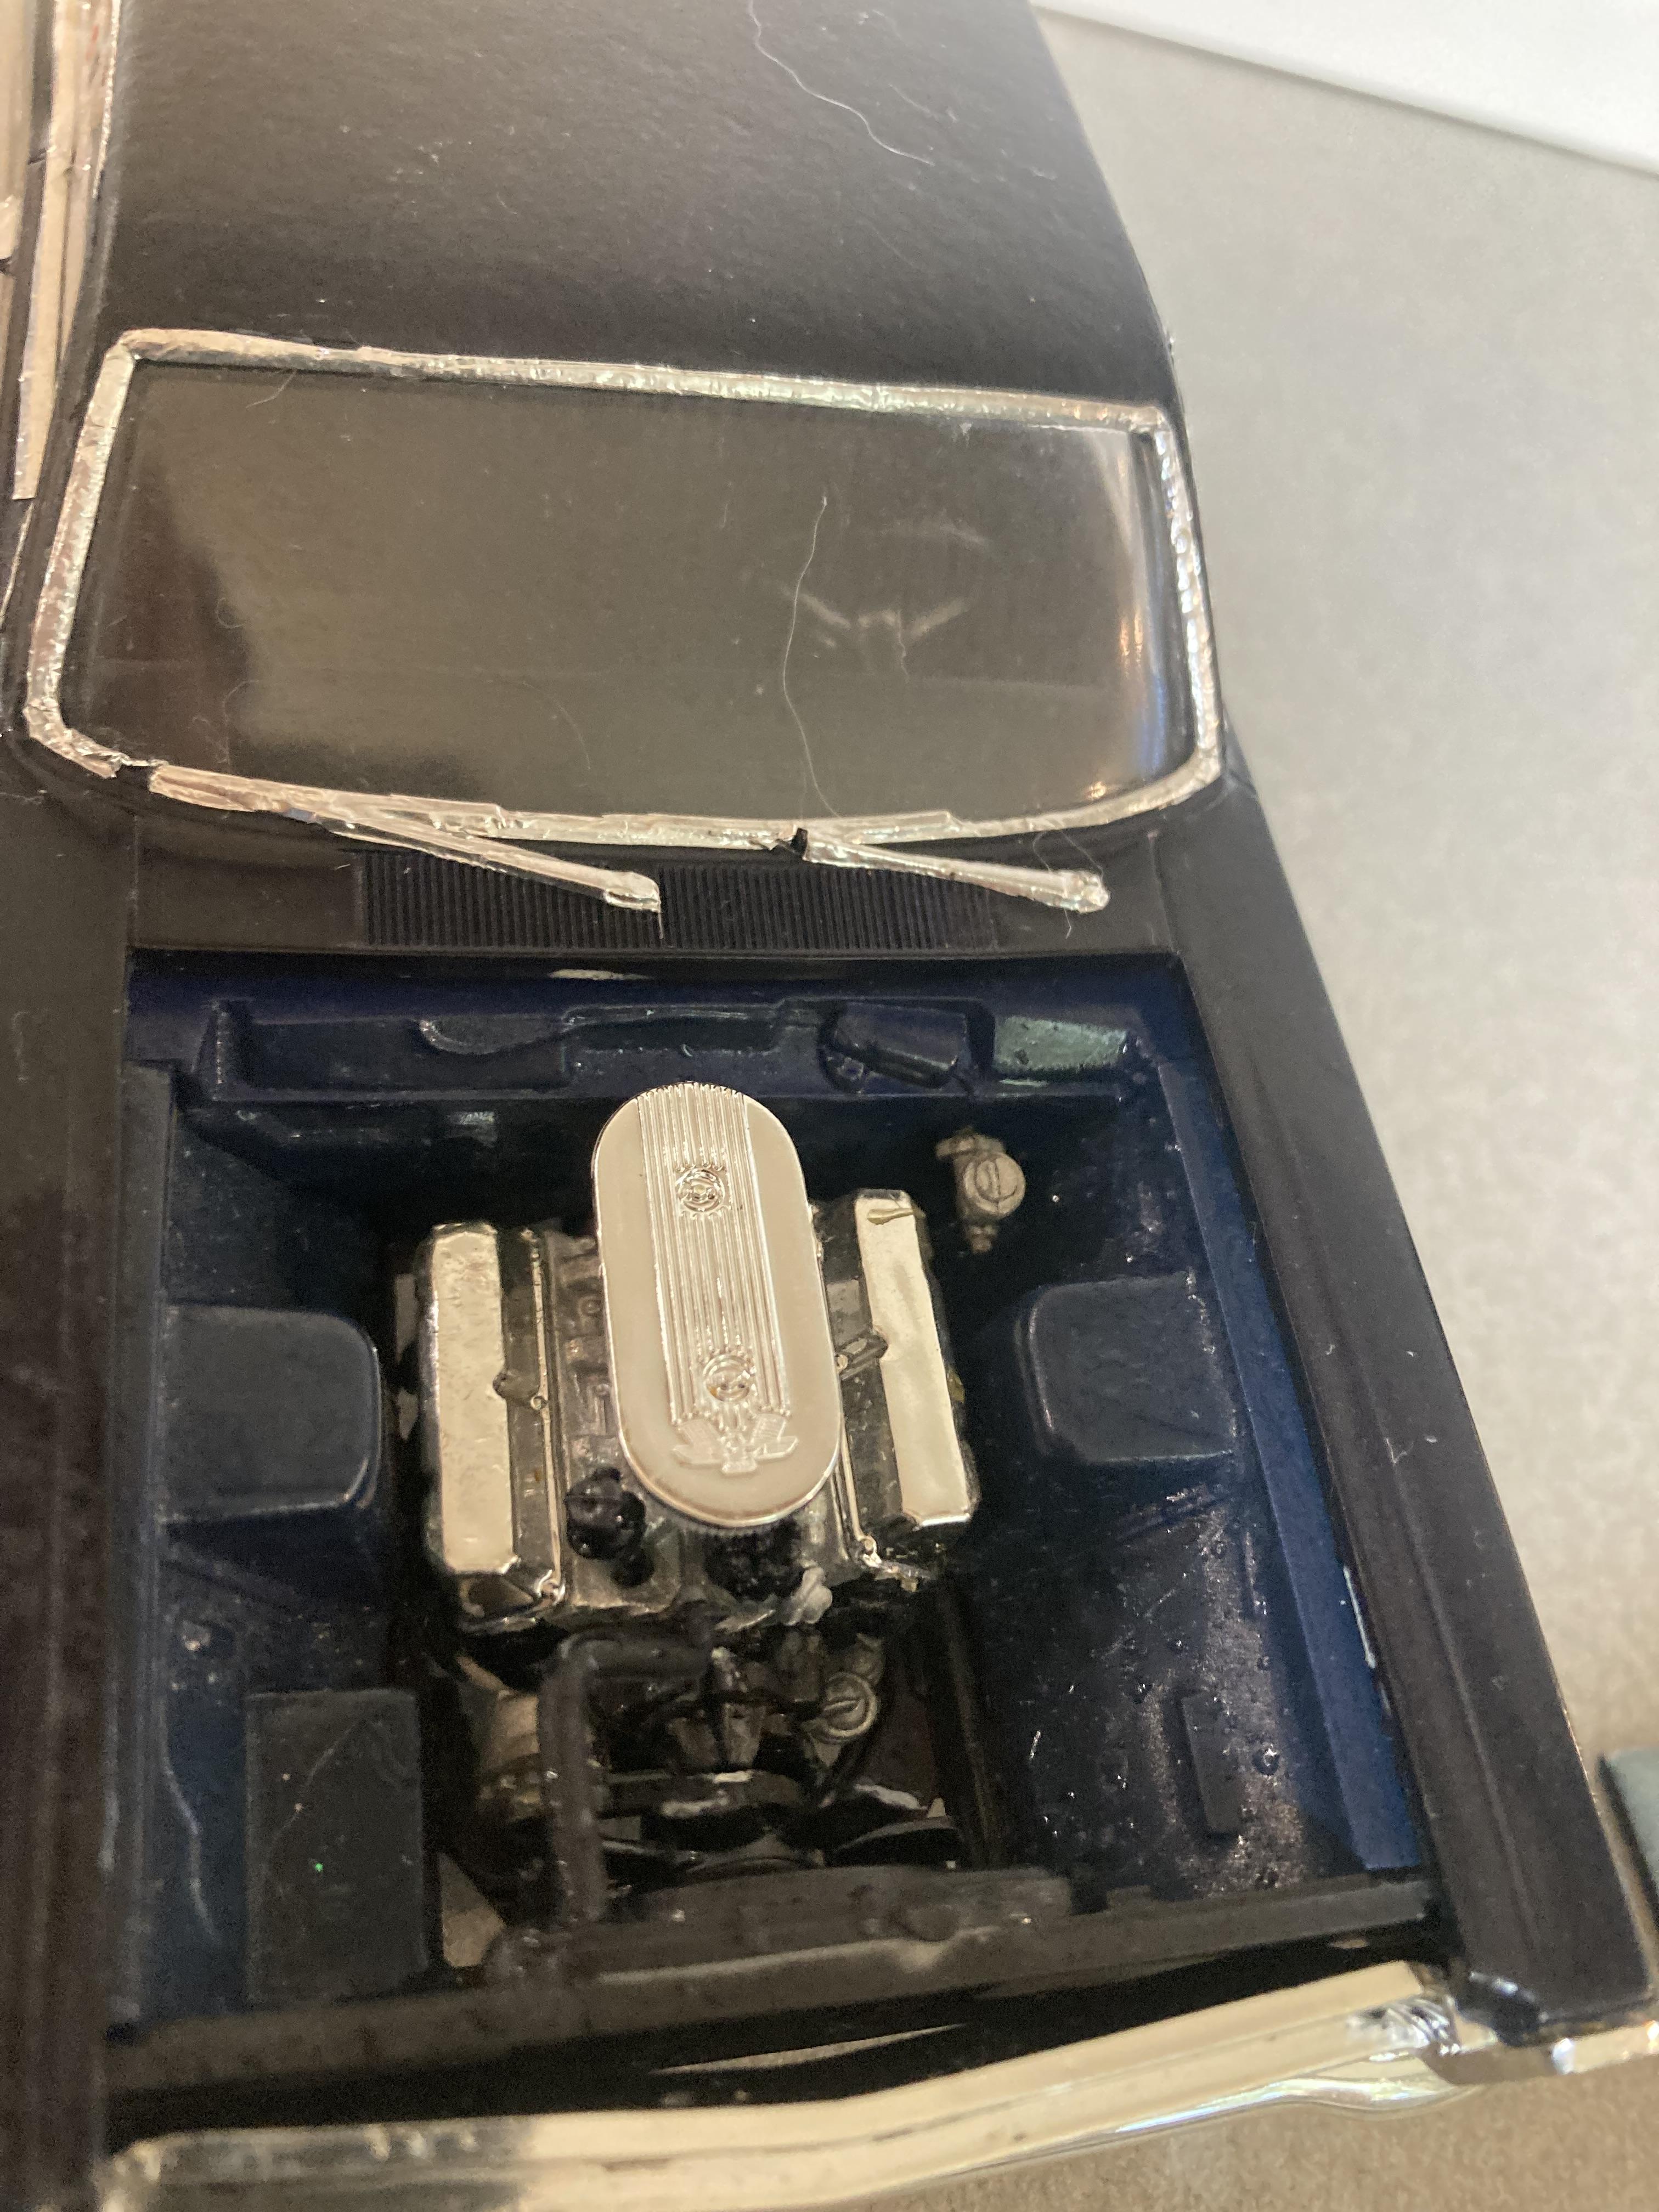
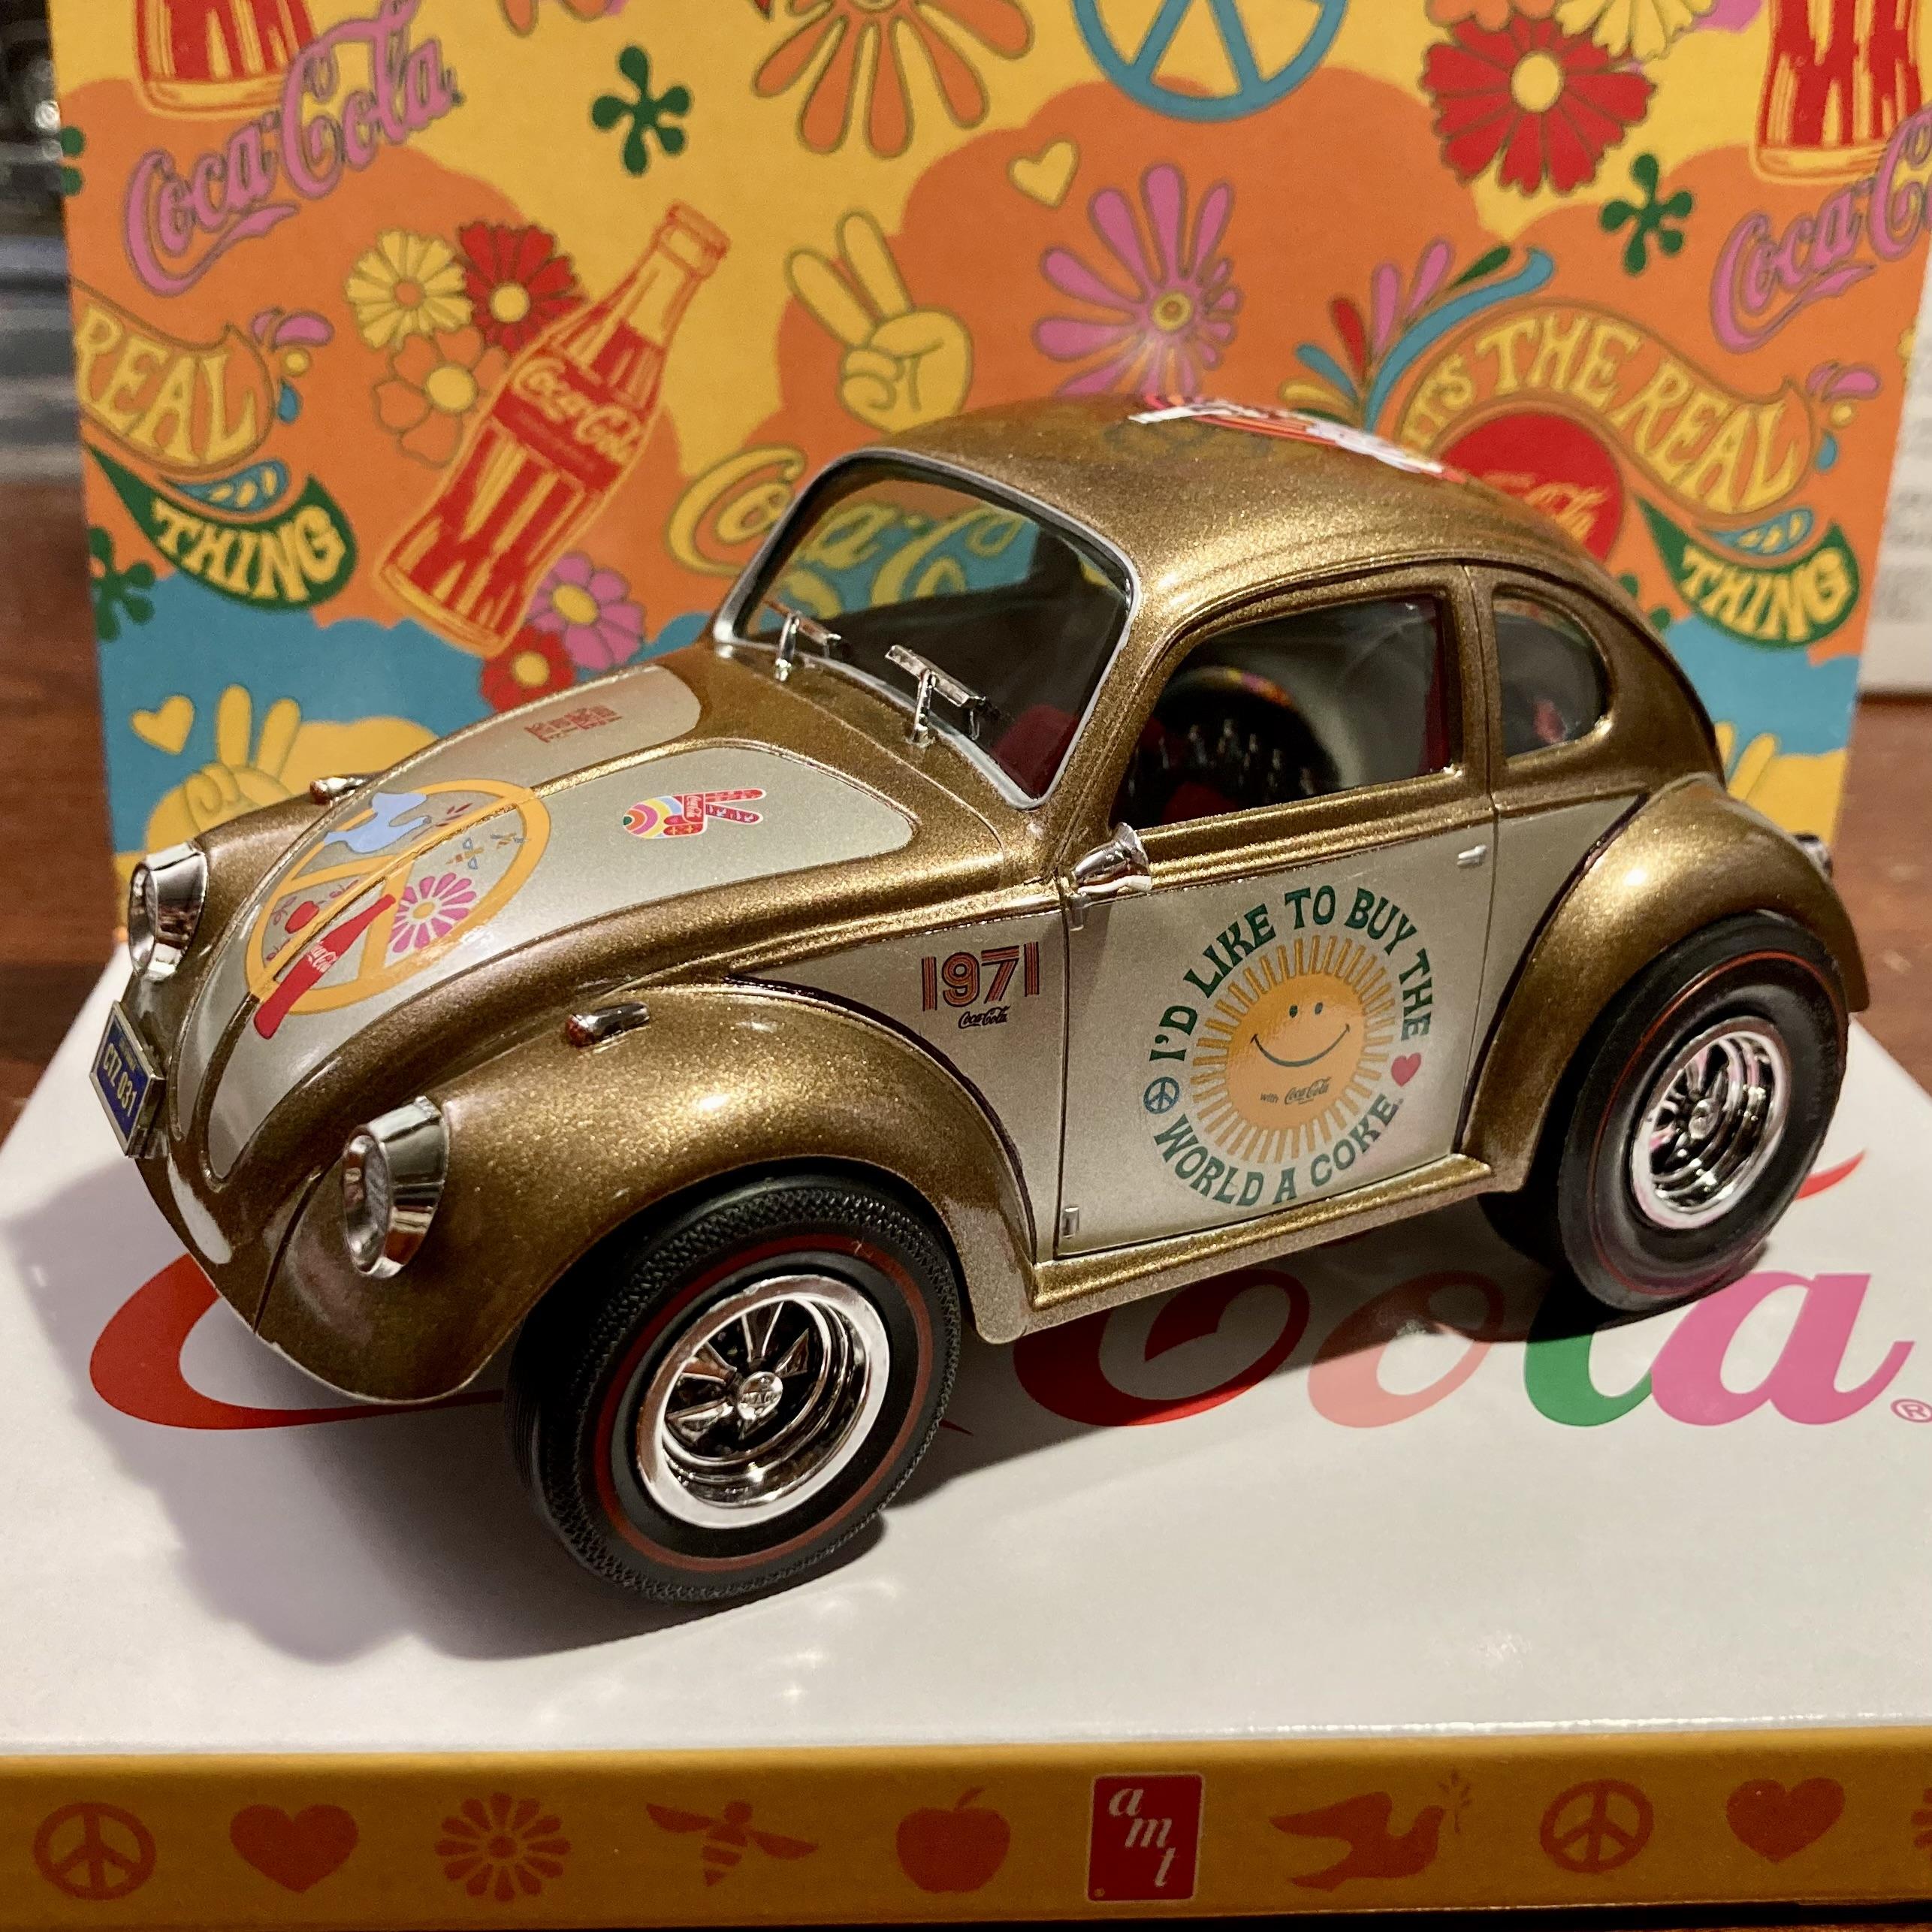
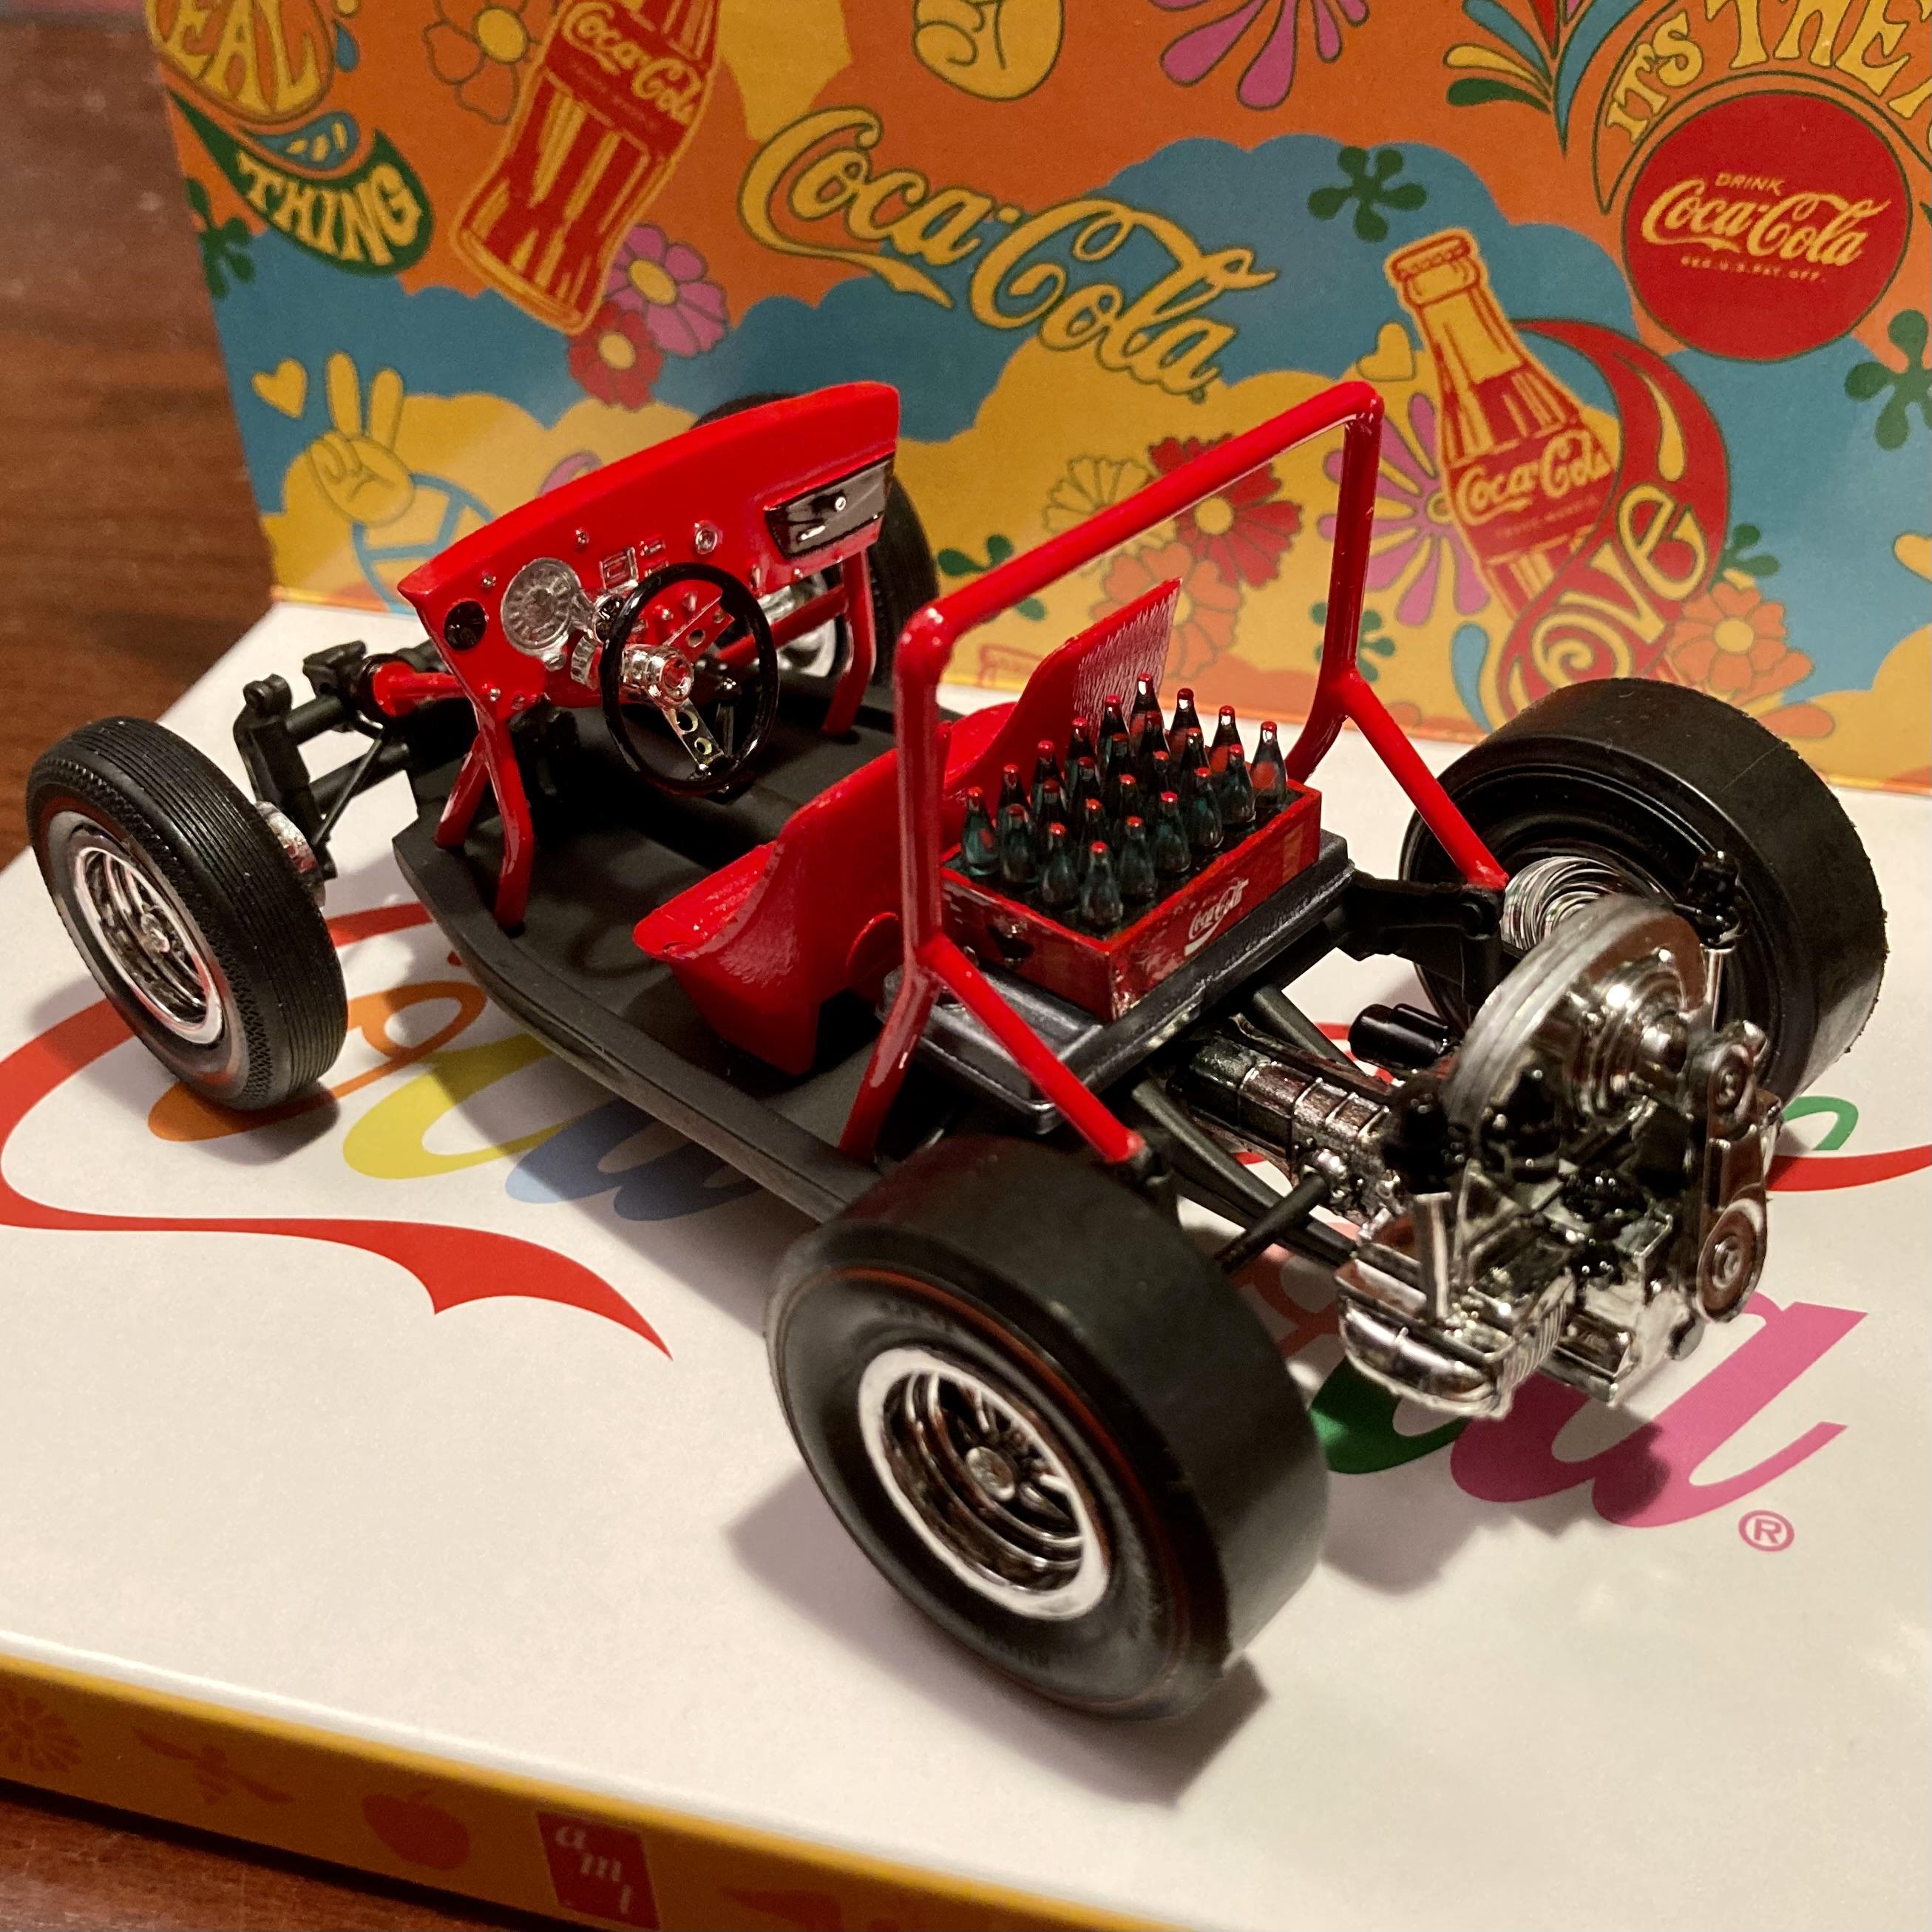
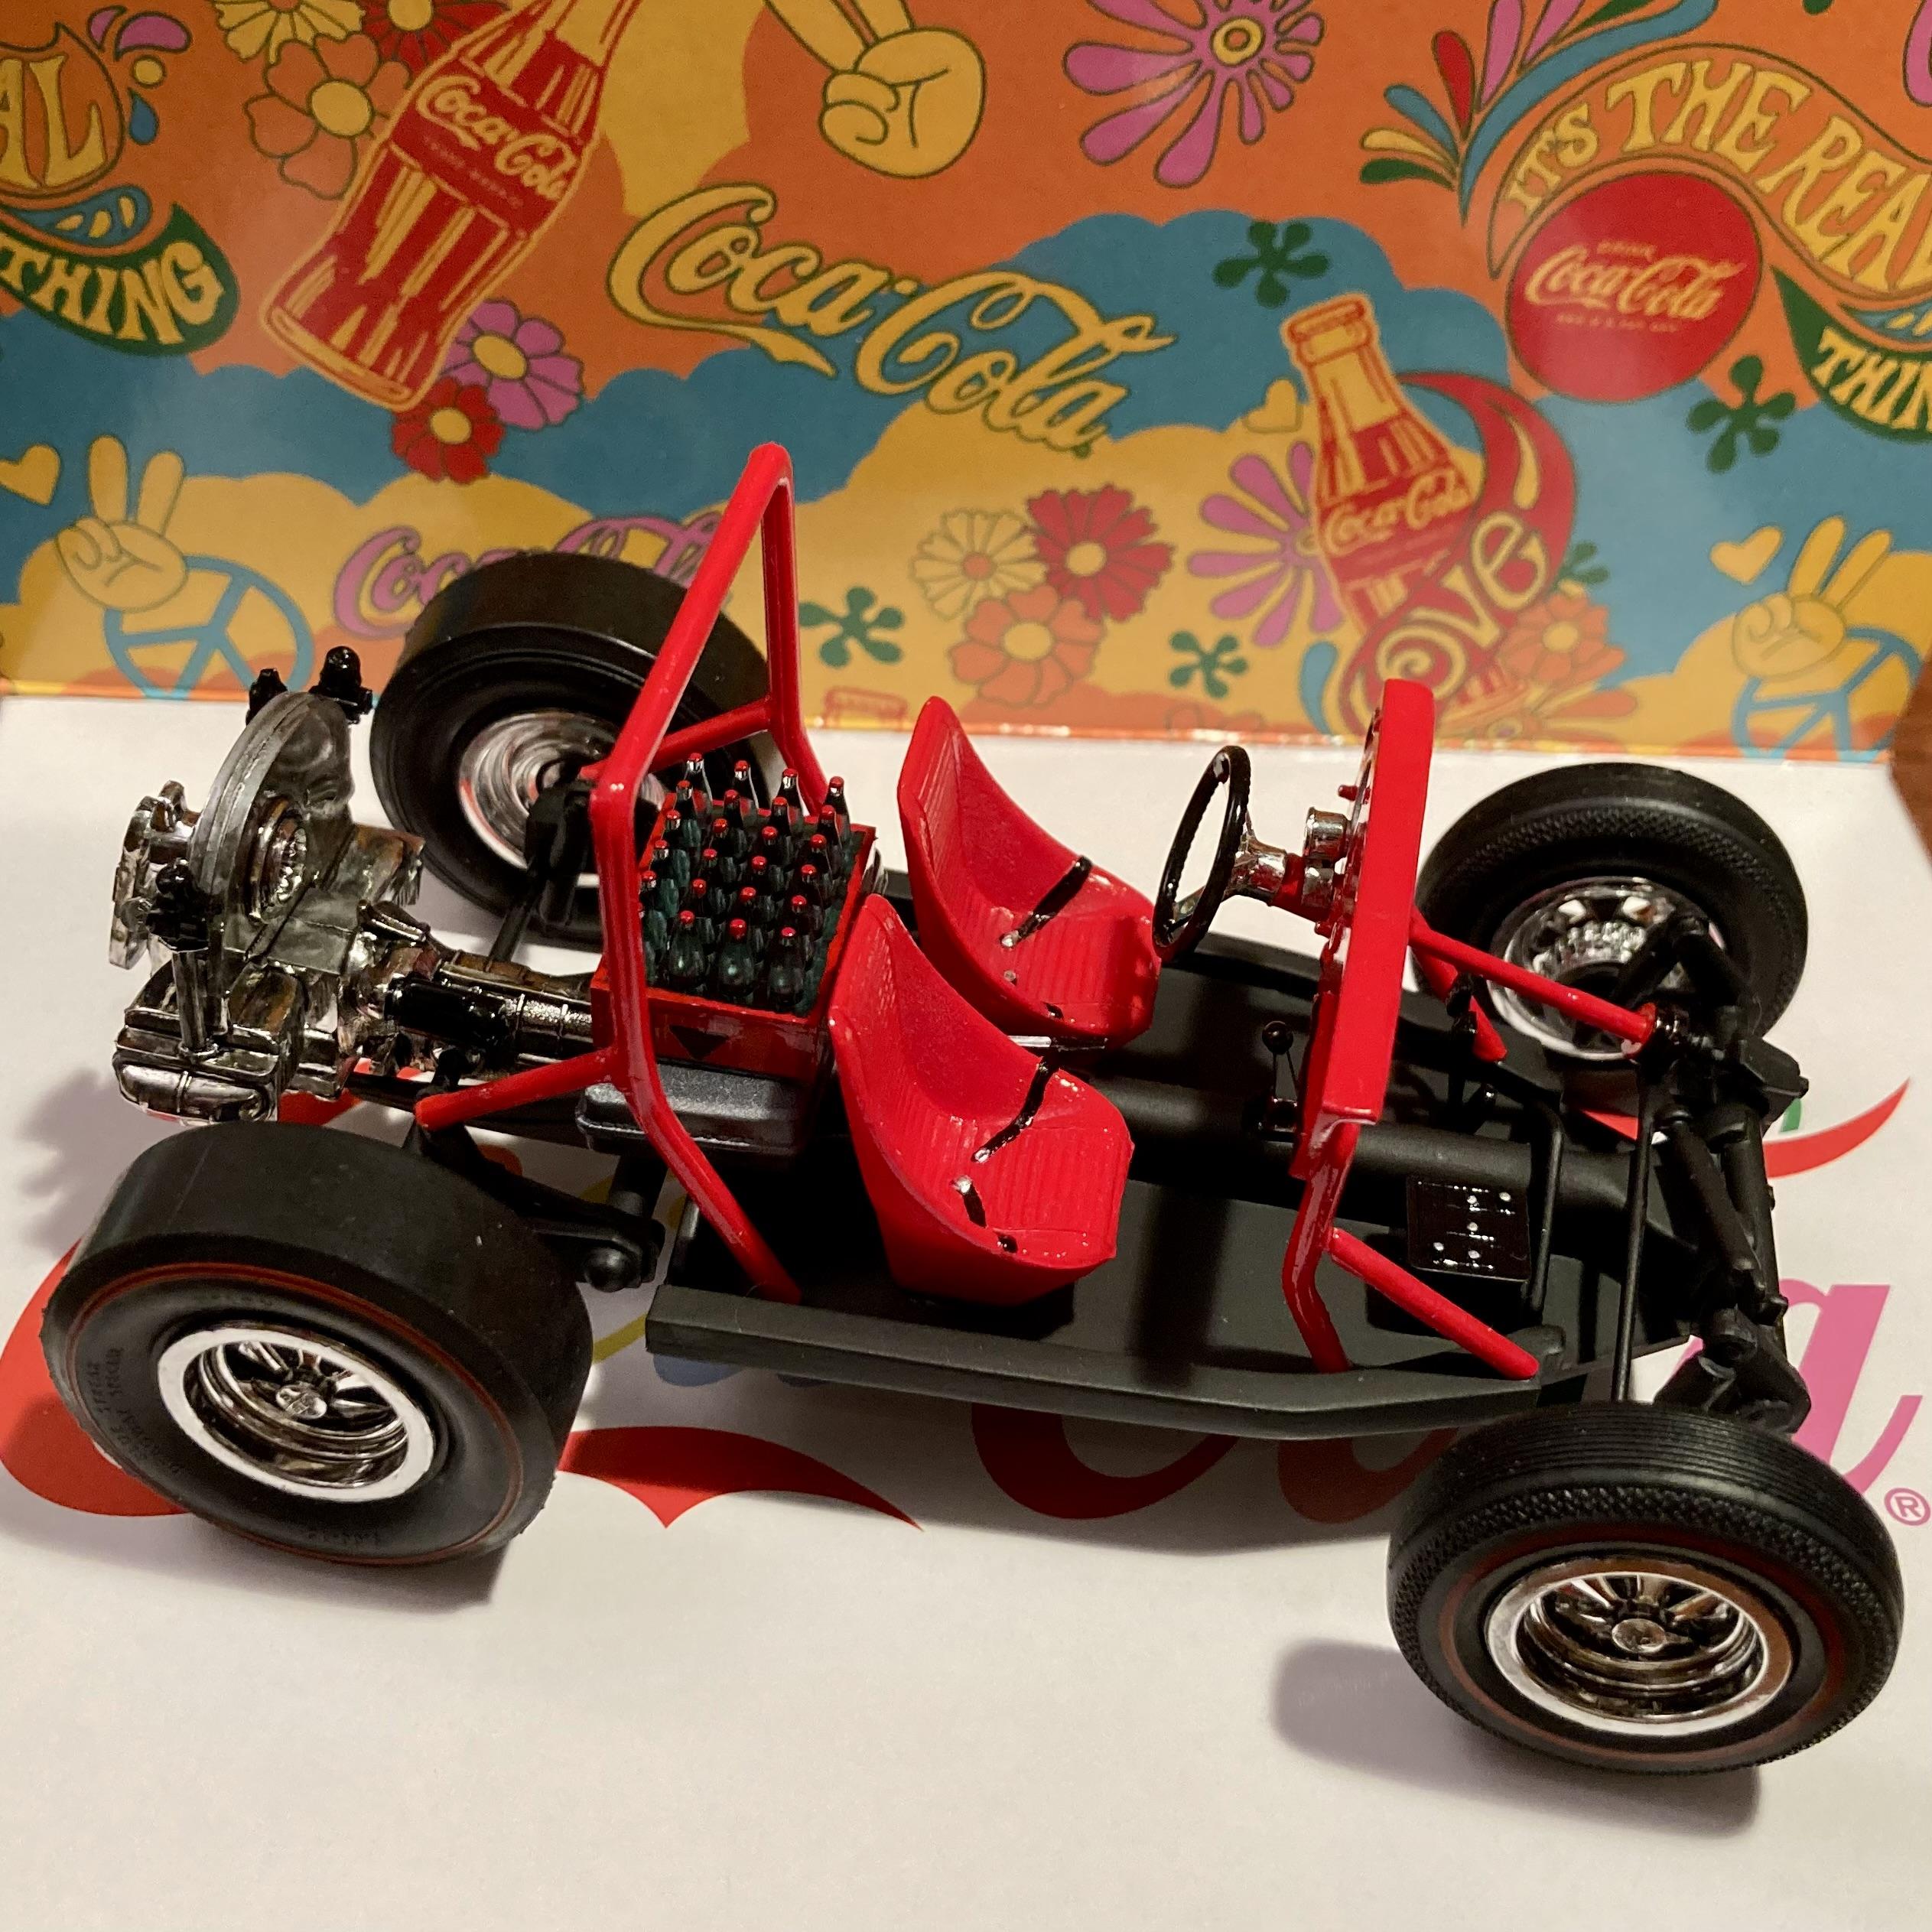
I finished this one a little over a week ago, but I was waiting for my new light box to arrive. Then I picked up a wicked head cold, so it had to wait another week to be revealed. This is the AMT 1971 Superbug Gasser, from the Coca-Cola Unity Collection. I picked this kit up for $5, thinking it would be cool to have a Beetle in the stash. I didn't realize it was the short-body version, so upon opening the box and seeing the body, my first thought was "this will never get built". But as luck would have it, last summer was spent learning to paint. For a fiver, I figured it would be a practice body, and that would be the end of it. As I was really just using it for practice, it got painted and stripped something like 3-4 times before getting it right. But the final paint job turned out to be one of my better attempts. This inspired me to continue on and finish the little bug. Speaking of paint, the color is Testors Extreme Lacquer Star Spangled Blue, straight from the can, followed up with clear lacquer (I forget the brand). The idea for the build was to create a tribute to one of my favorite old red-line Hot Wheels cars. Most of the kit was built straight from the box, but a few modifications were made for various reasons. The hydraulic steering damper was reworked, because the original part feels like it's not even from the same kit. Doesn't even come close to fitting properly. Battery cables were added just for fun and because I'd never done it before. Also, the exhaust was completely reworked. The kit supplies two exhaust options, neither one of which did much for me. Finally, if built straight out of the box, the engine cover won't close. Instructions even tell you to glue it open. I couldn't live with that, so the engine was moved inward and modified. For those that are interested in the build, the WIP can be found here: Without further ado, here's my take on the AMT '71 Superbug Gasser. As always, questions, comment, and constructive criticism are always welcome. Thanks for looking!
-
 Round2 has brought back the 57 Thunderbird after a 17 year absence. In true Round 2 fashion, this isn't just a straight re-issue. Many parts from previous incarnations as far back as 1962 have found their way back into the box. These include parts from the 1962 3 in 1 kit, and the Here Comes The Judge Drag version. These photos are just an appetizer. Click the link at the bottom of the post to see what's in the box. Let's take a look. BTW, My build features a resin porthole hardtop by Drag City Casting, and Kelsey Hayes Wire Wheels courtesy of Round 2. Click here to see what's in the box, with a detailed description of what's new! https://public.fotki.com/DWDarby/model_cars/kit-reviews/amt-round2-57-thund/?view=roll
 -
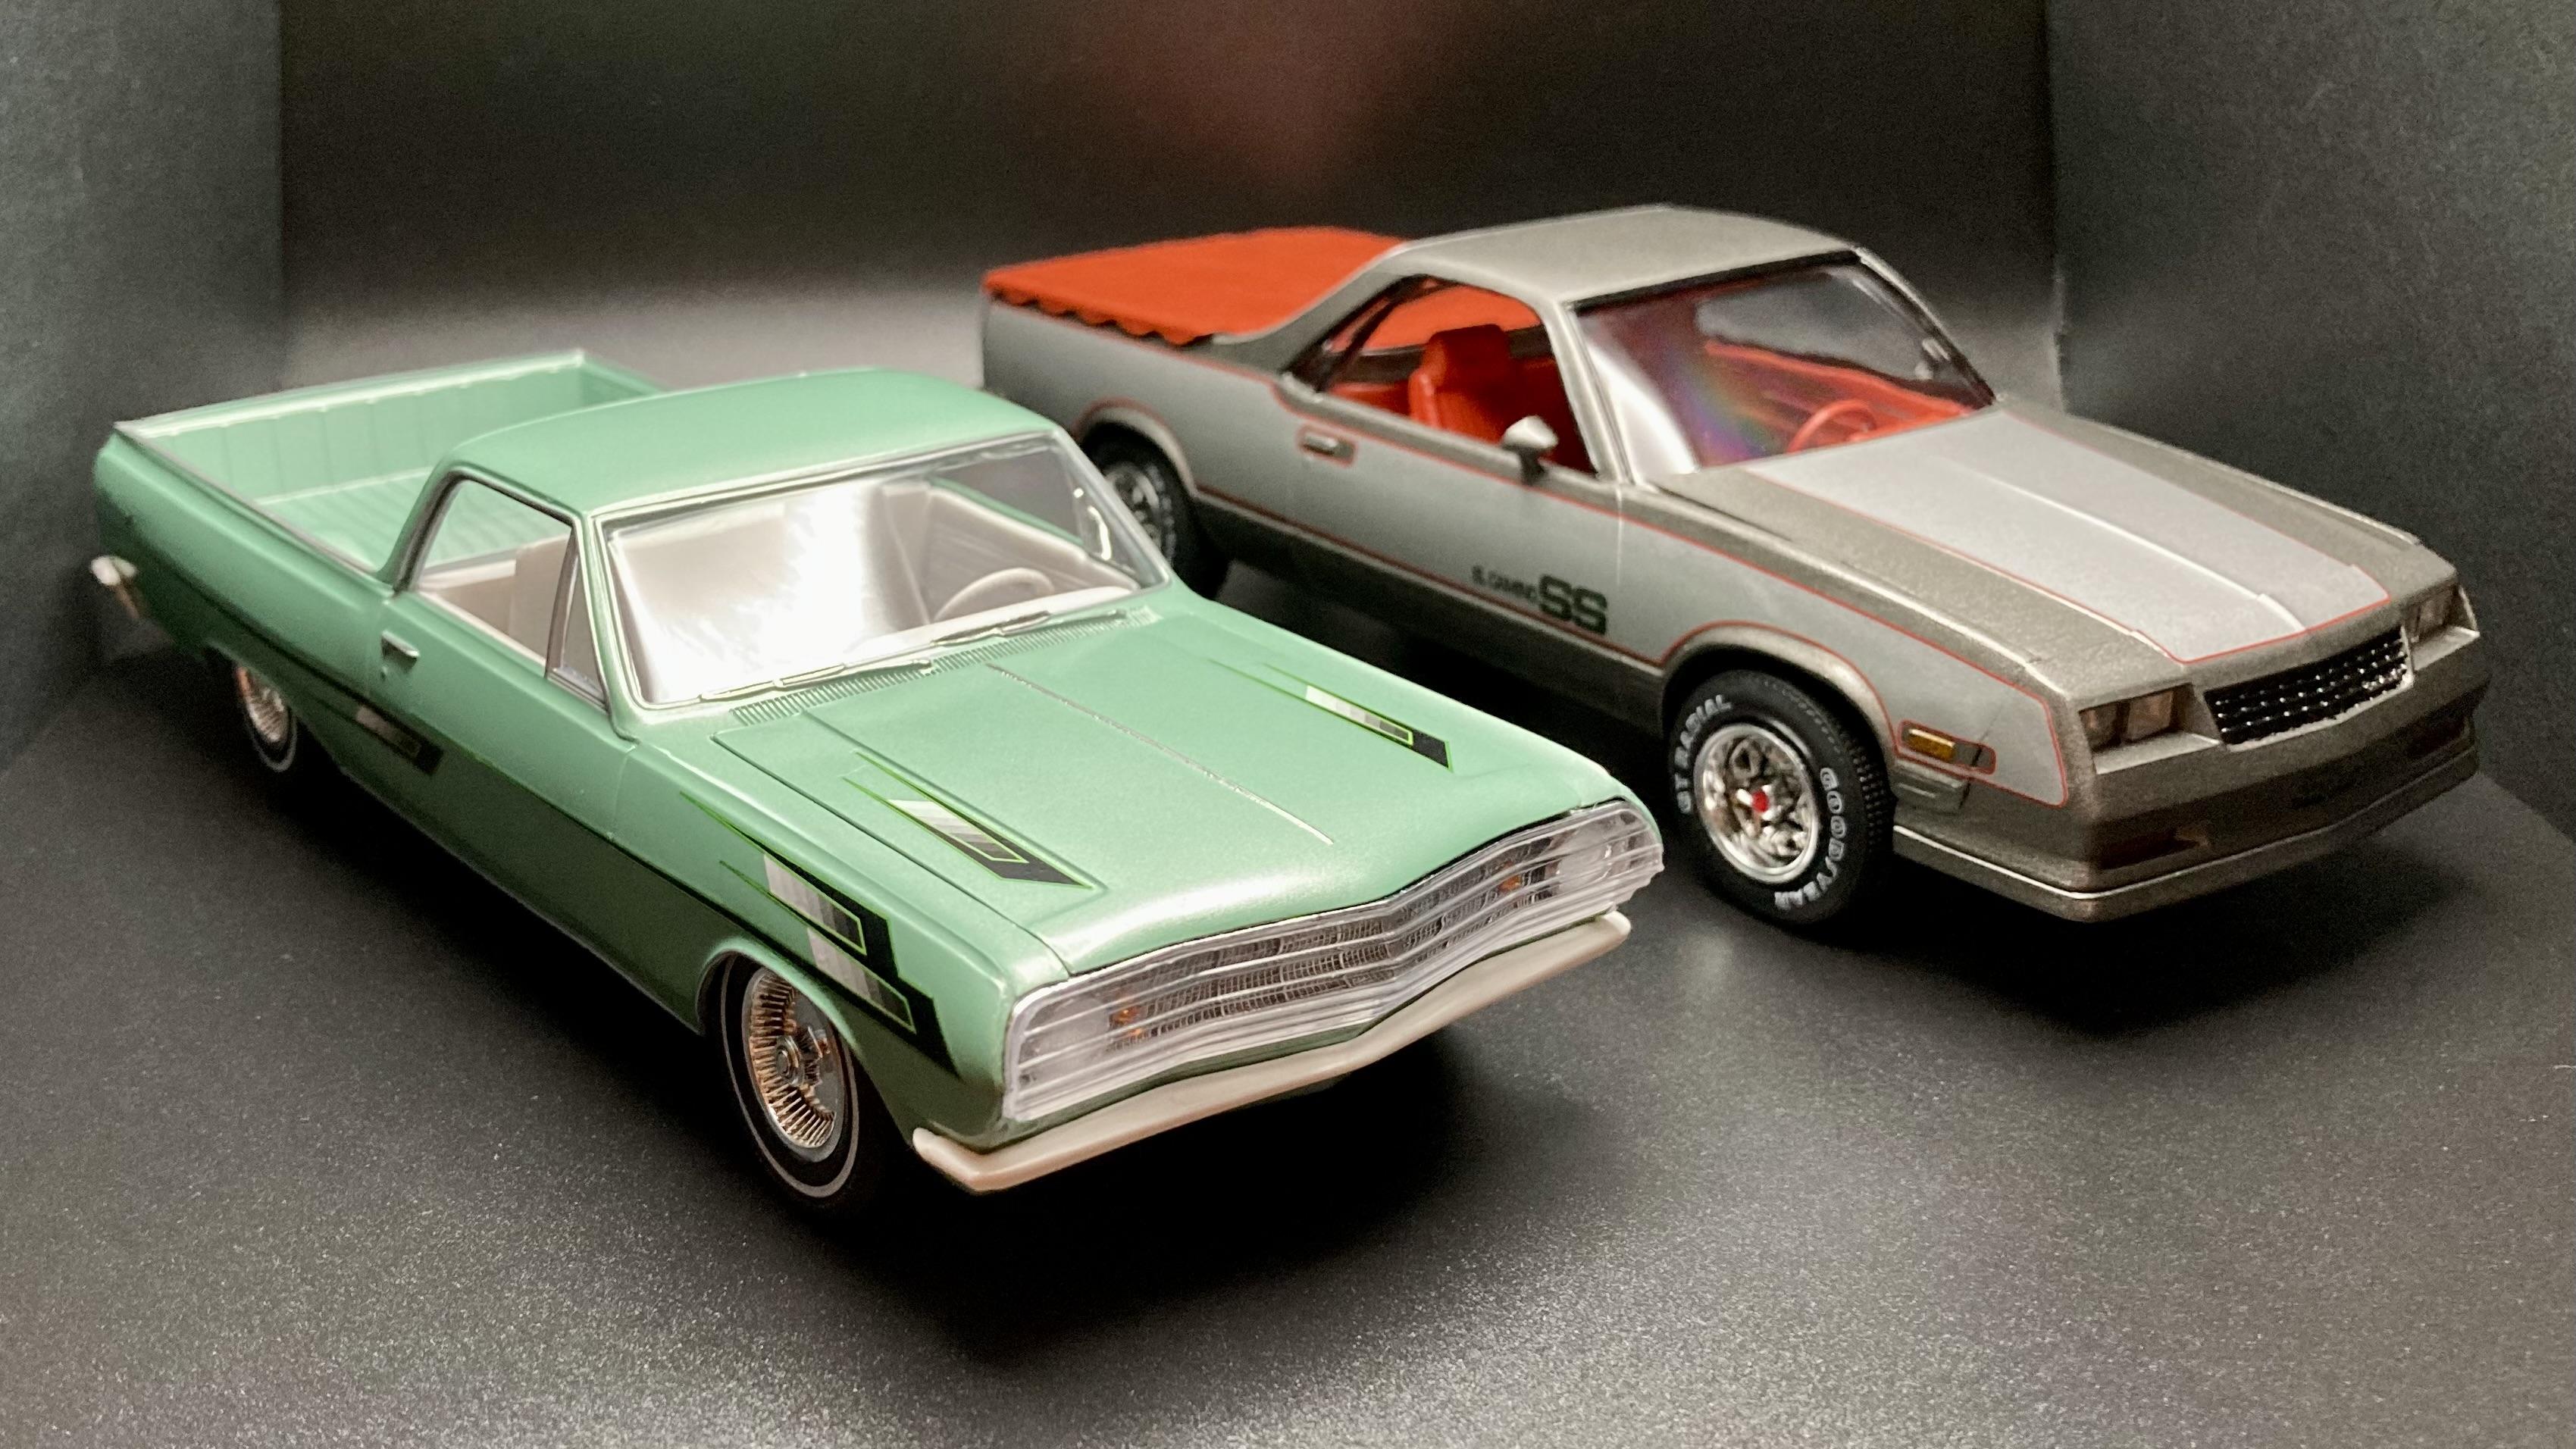
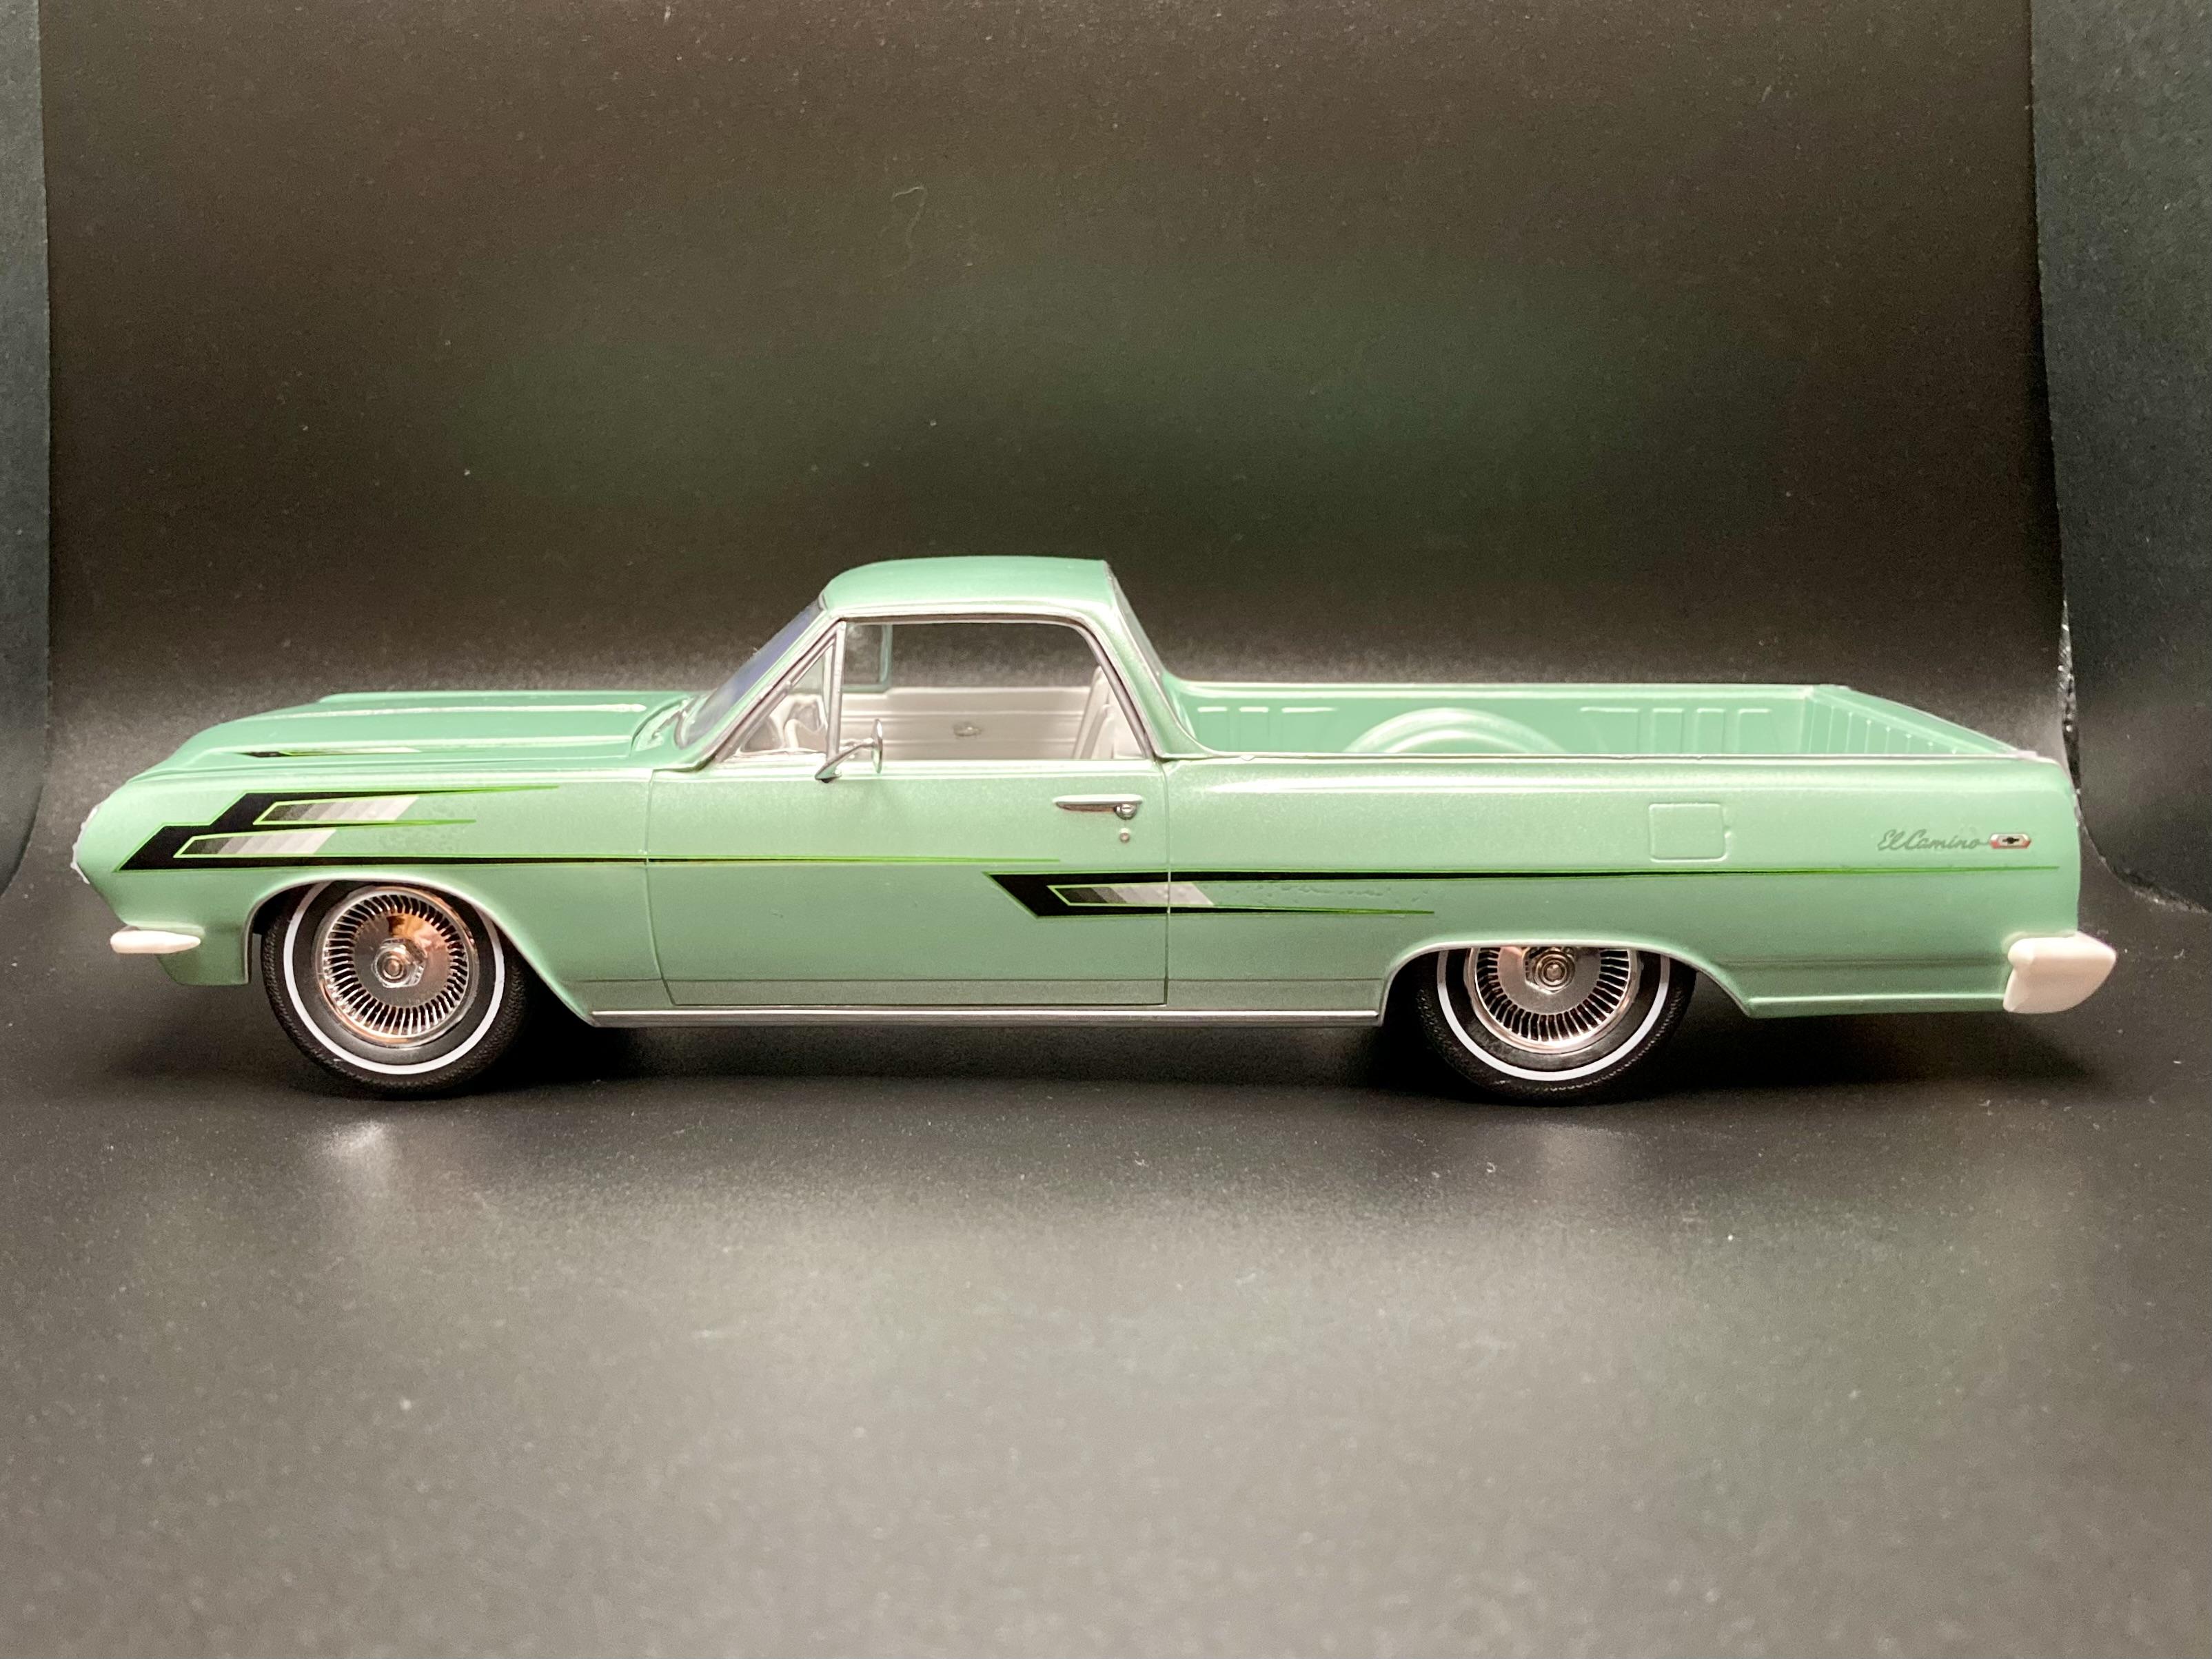
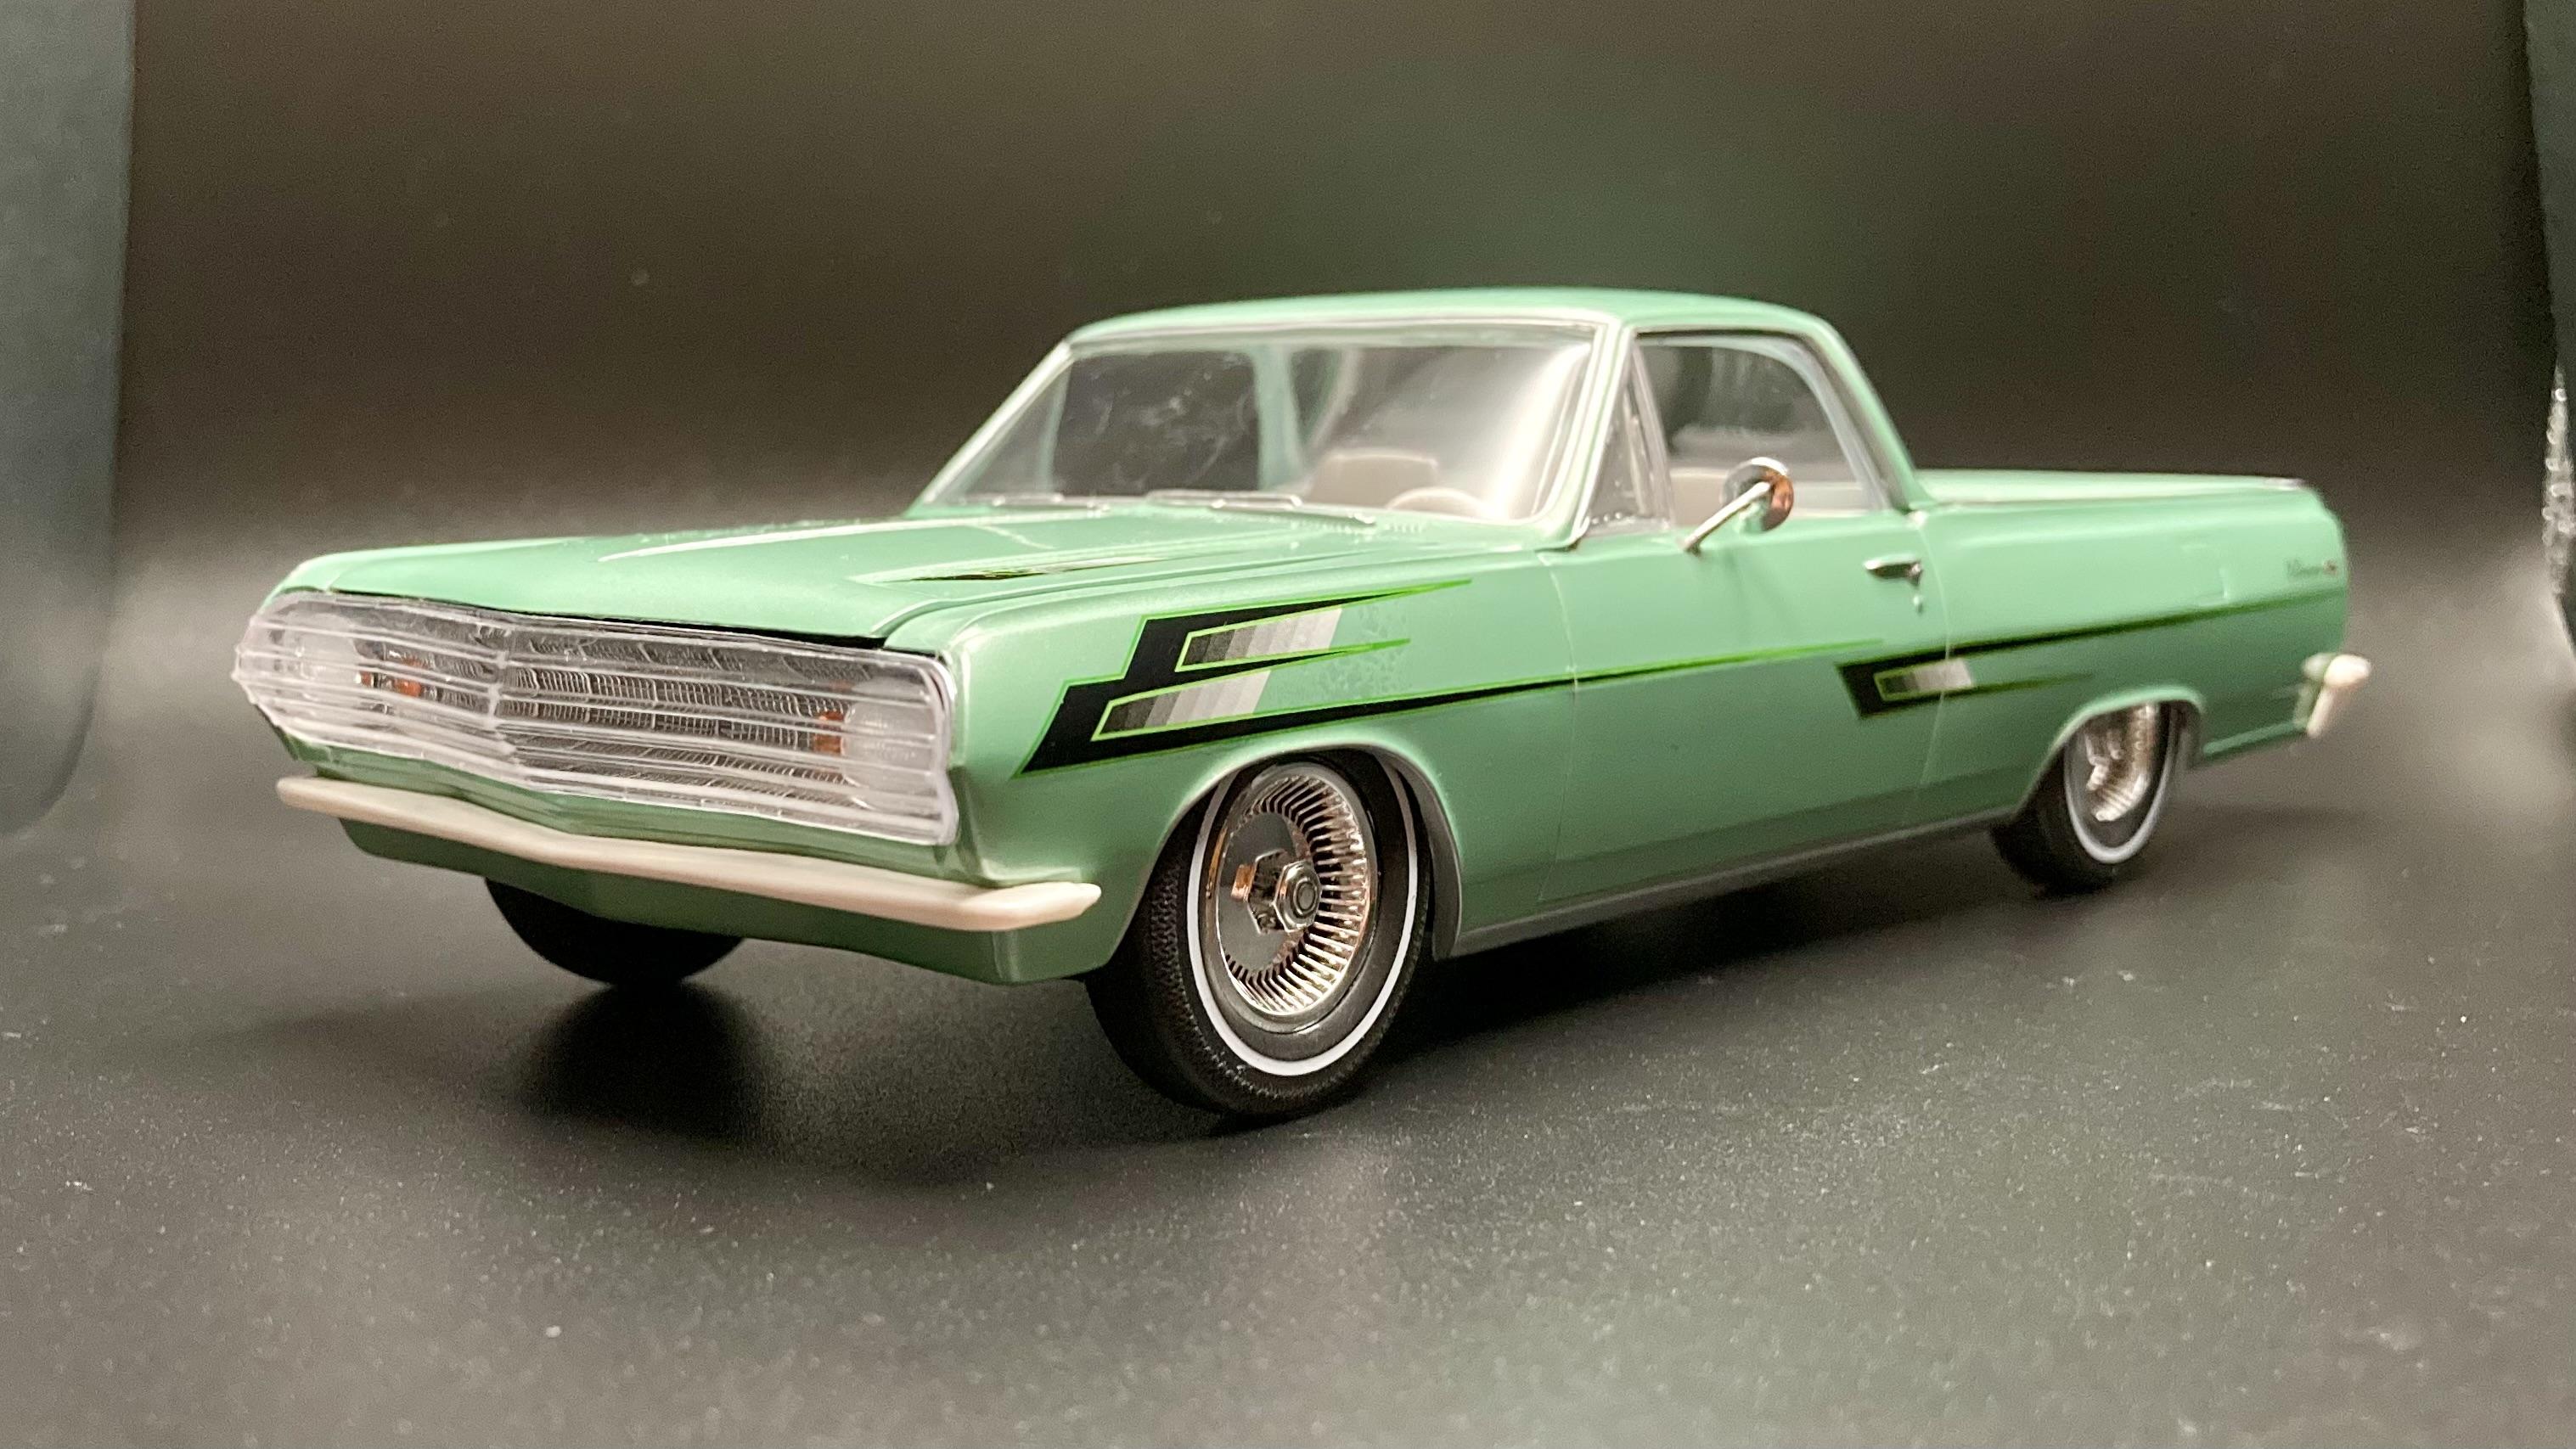
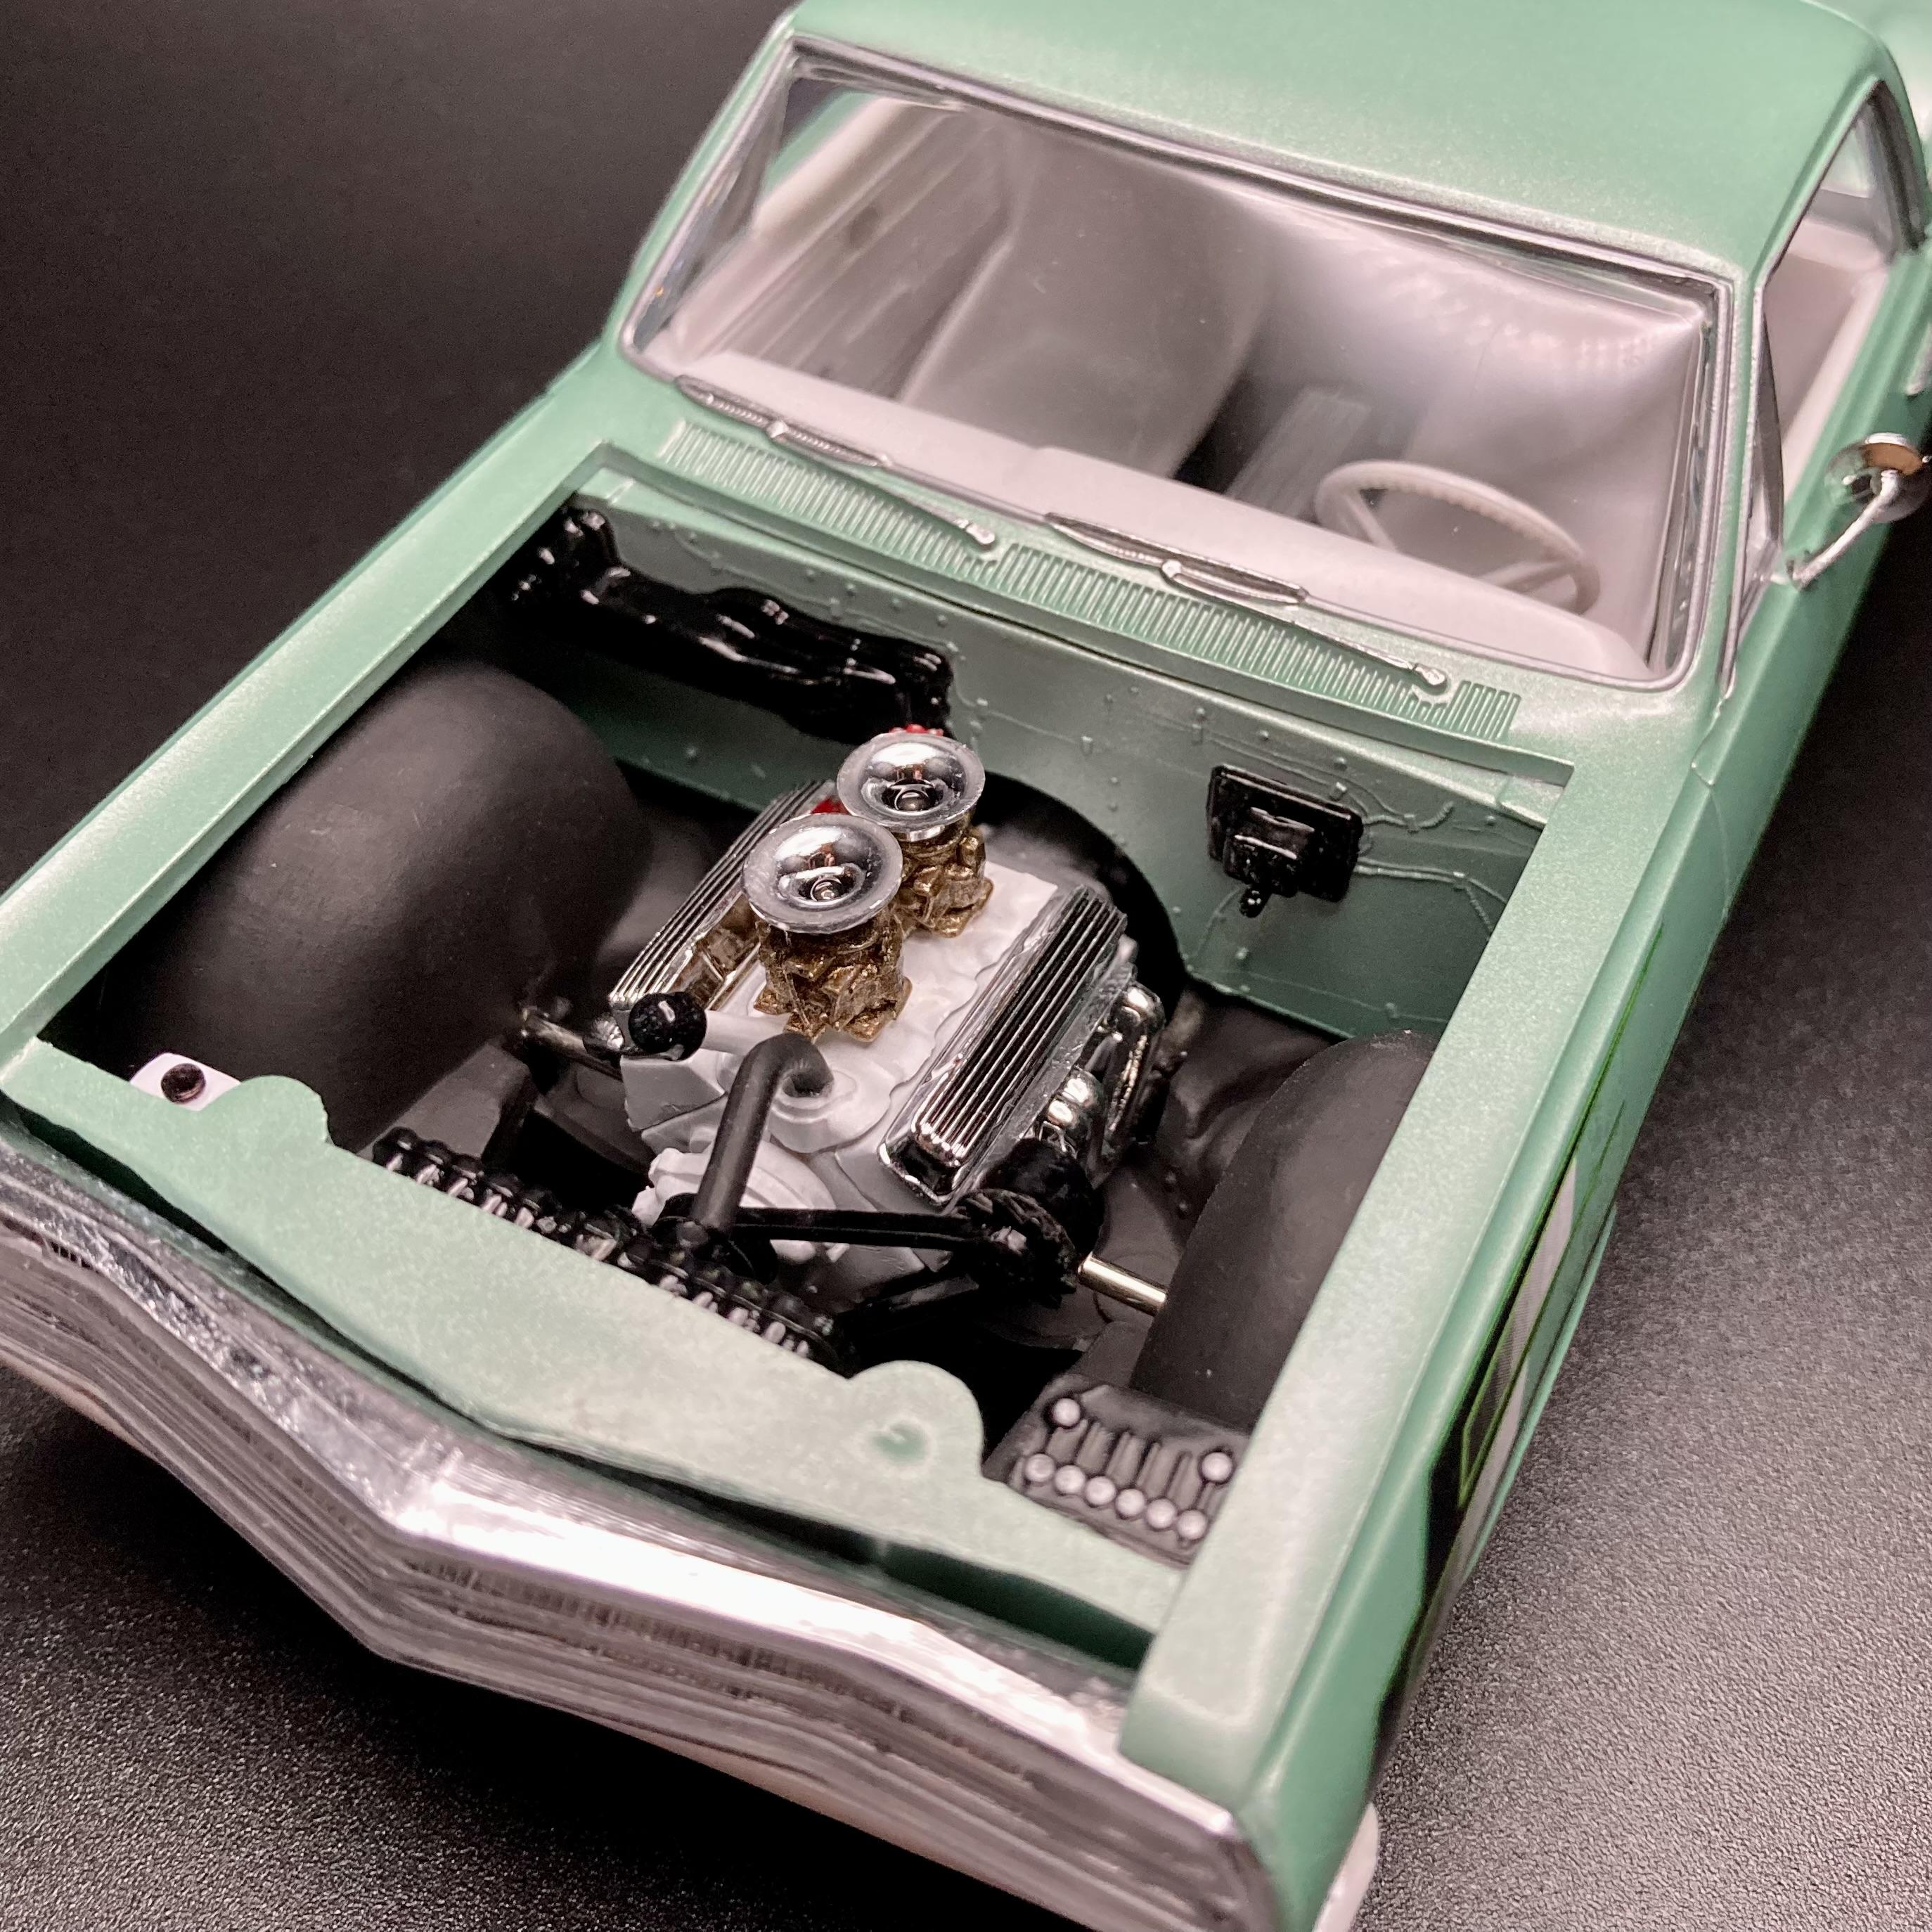
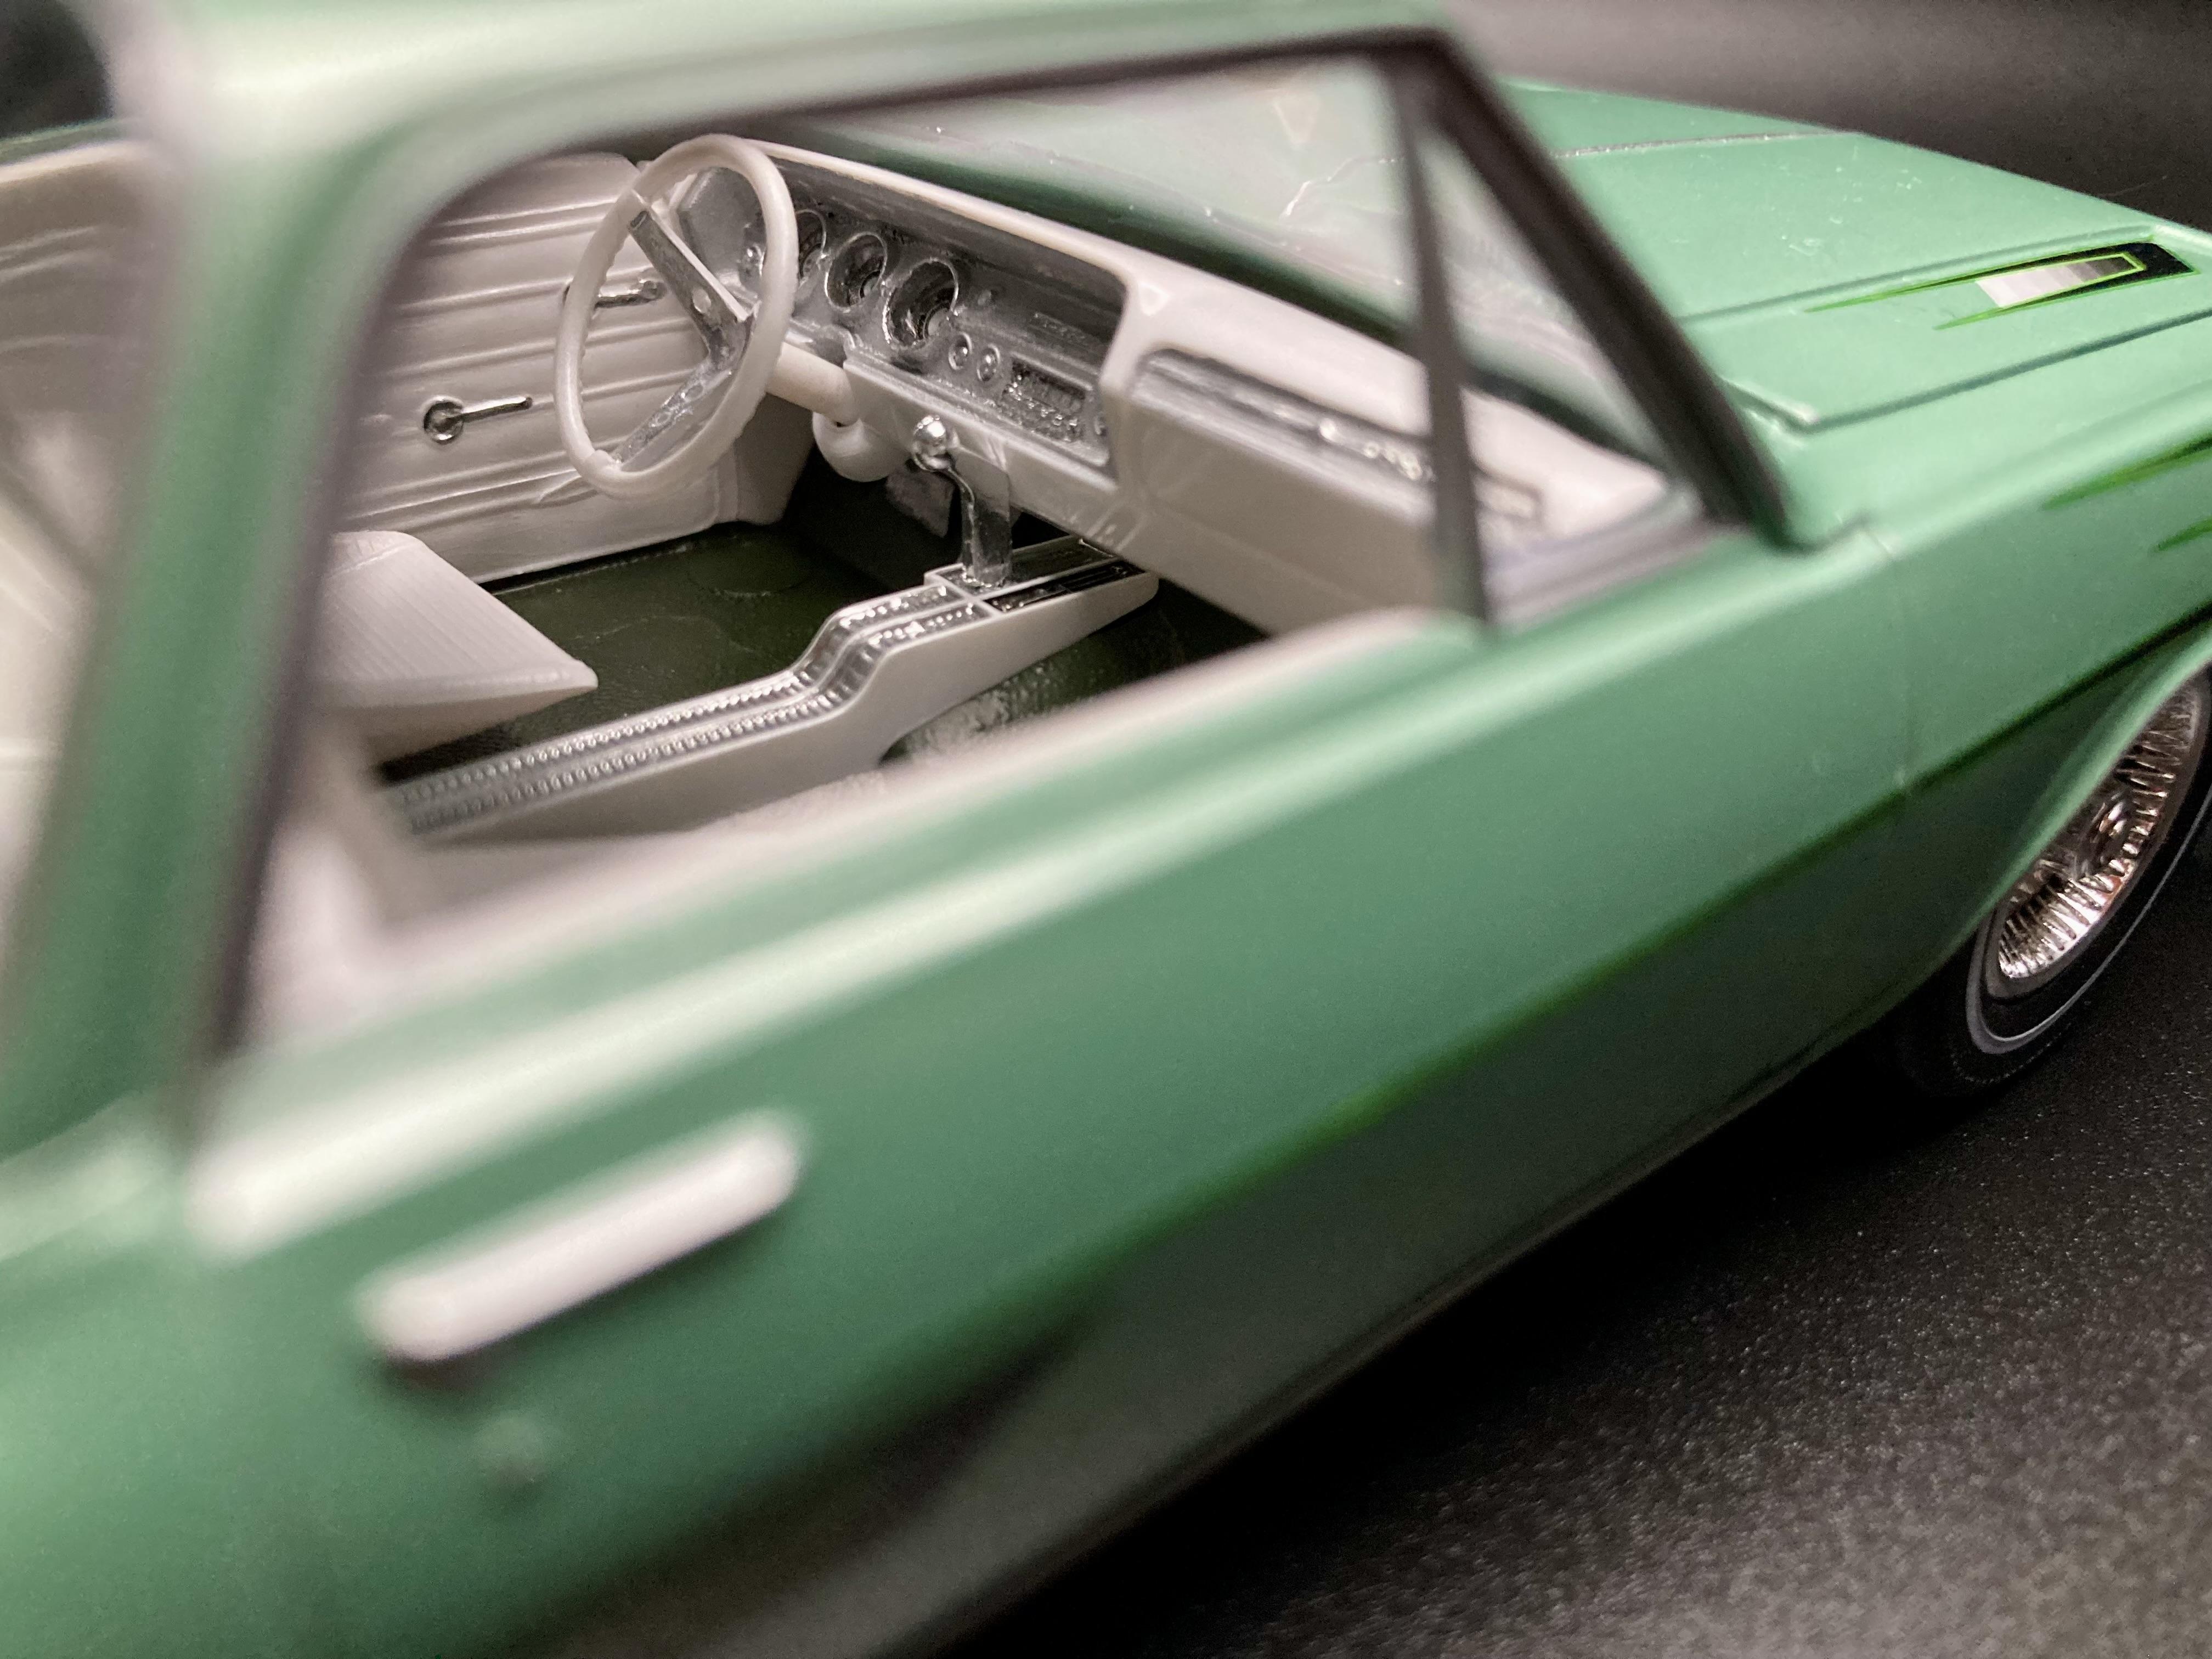
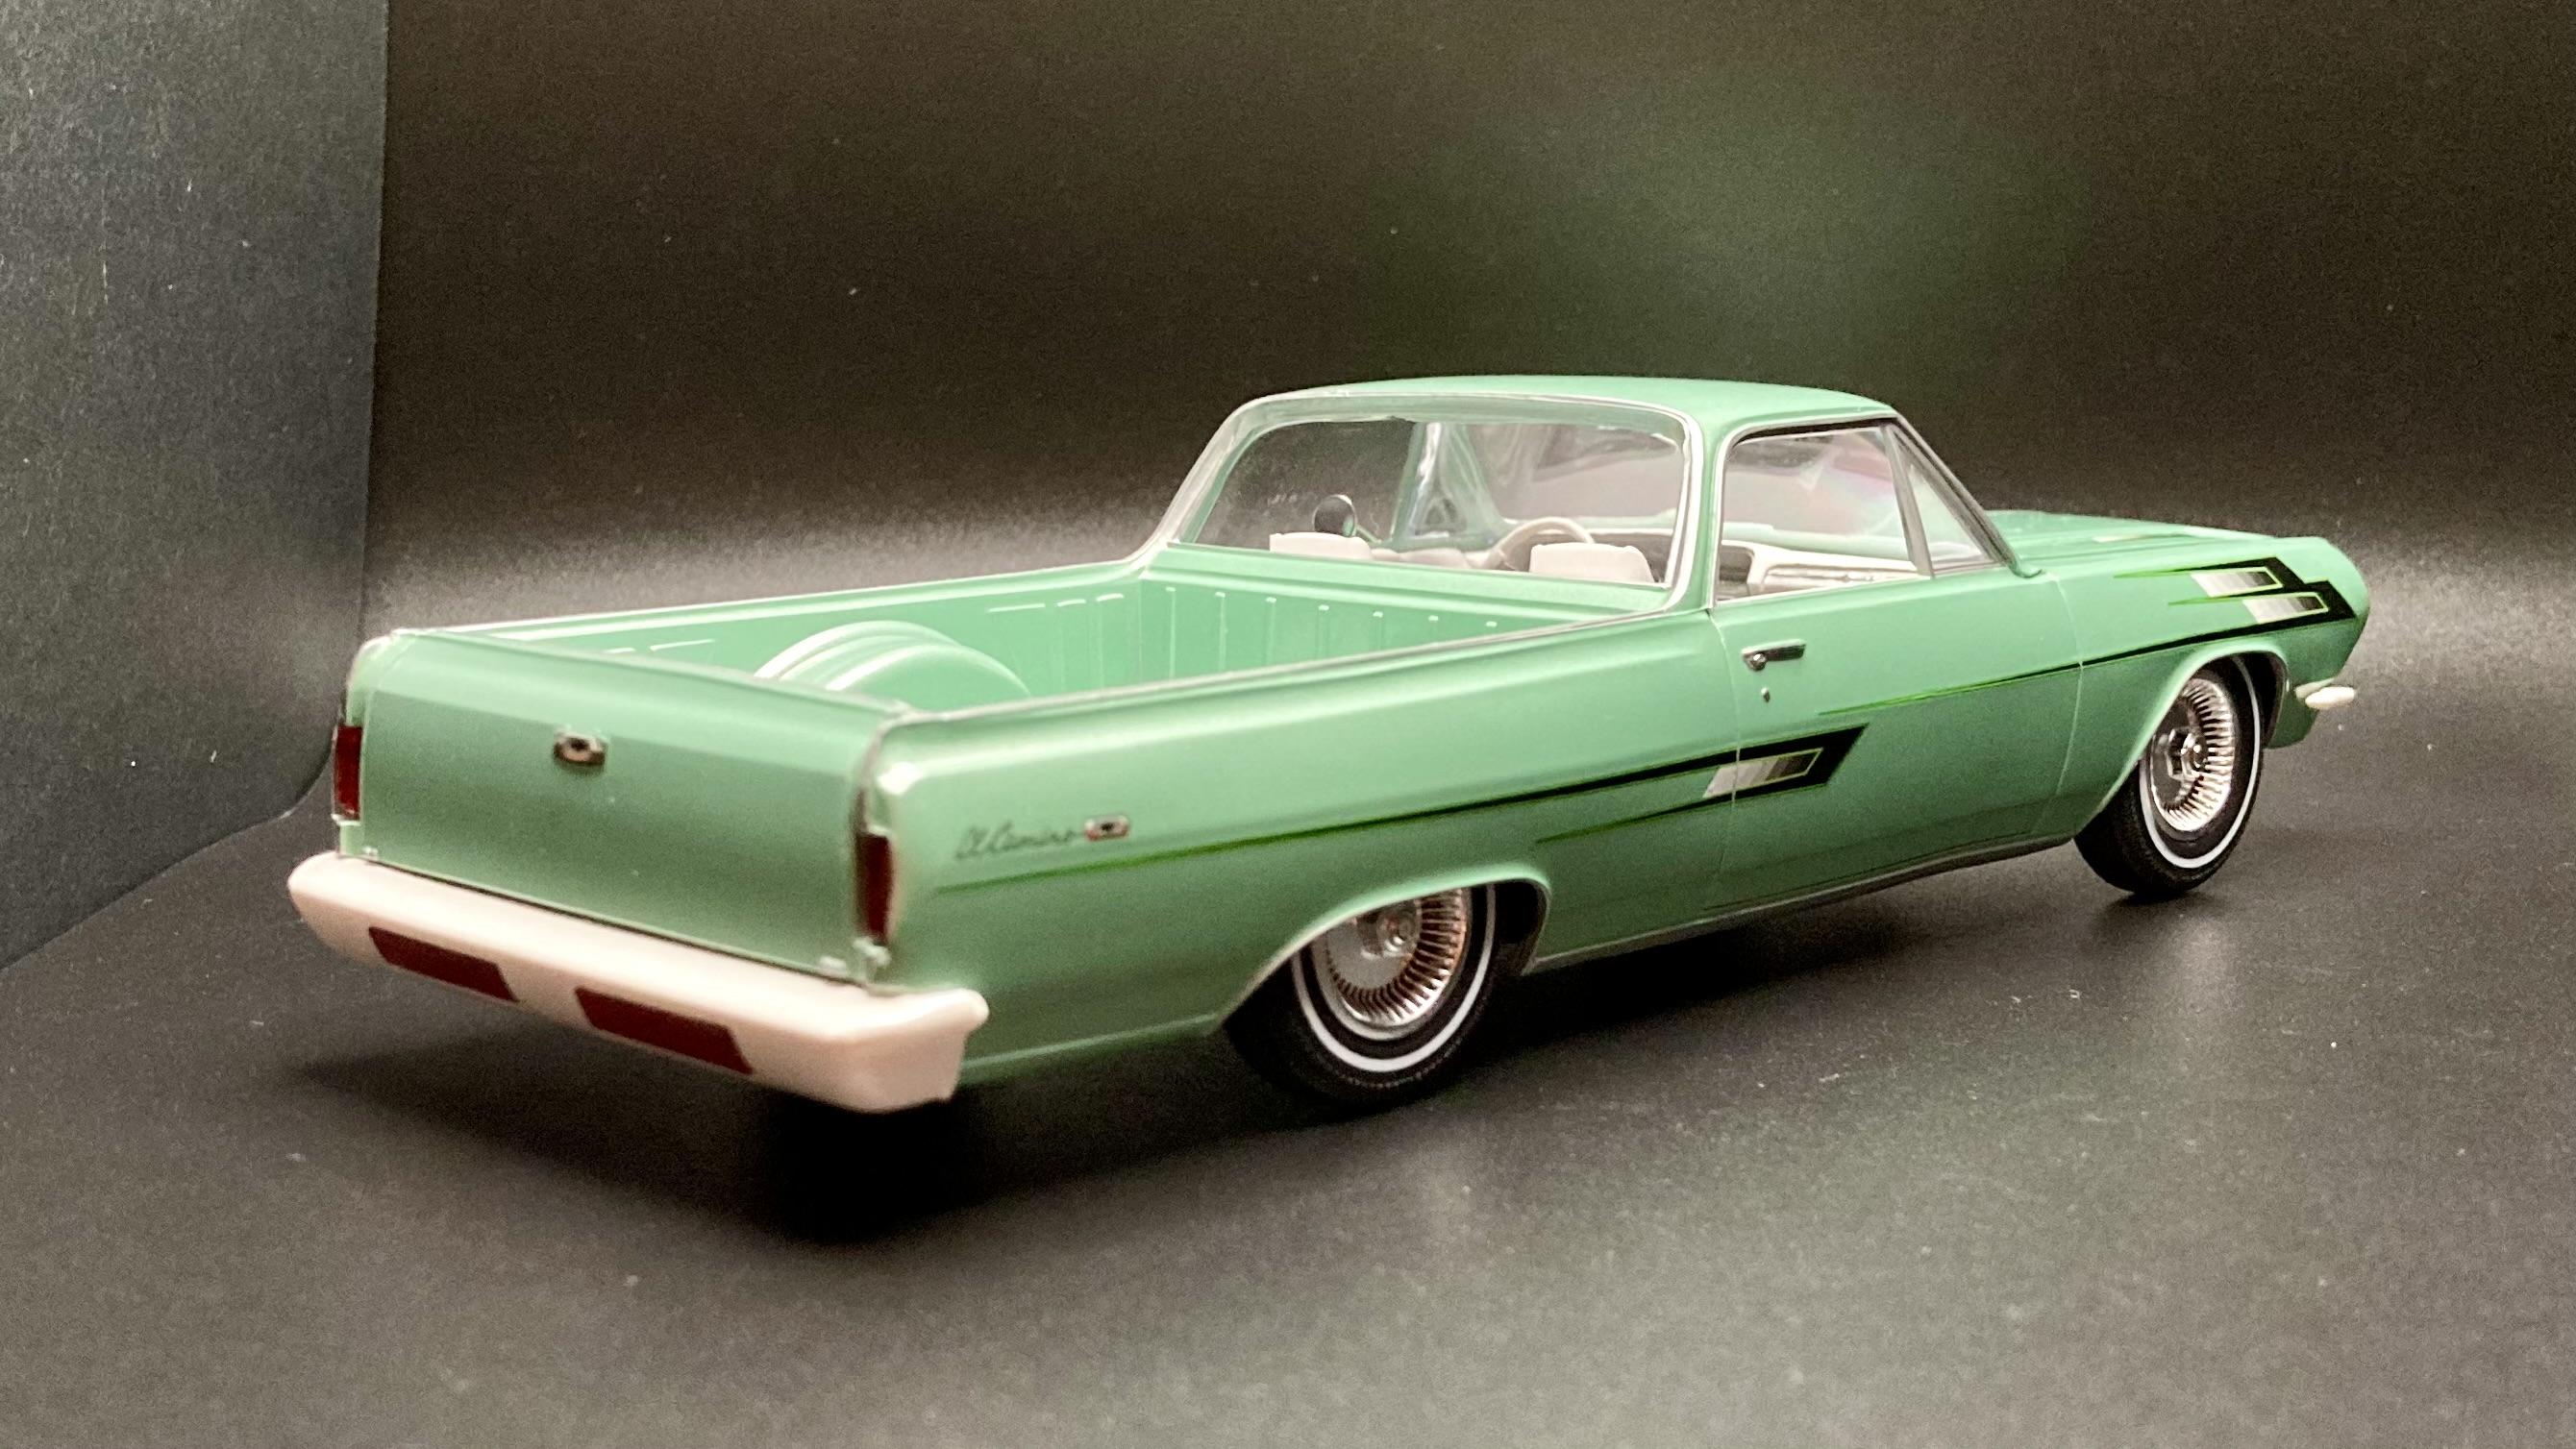
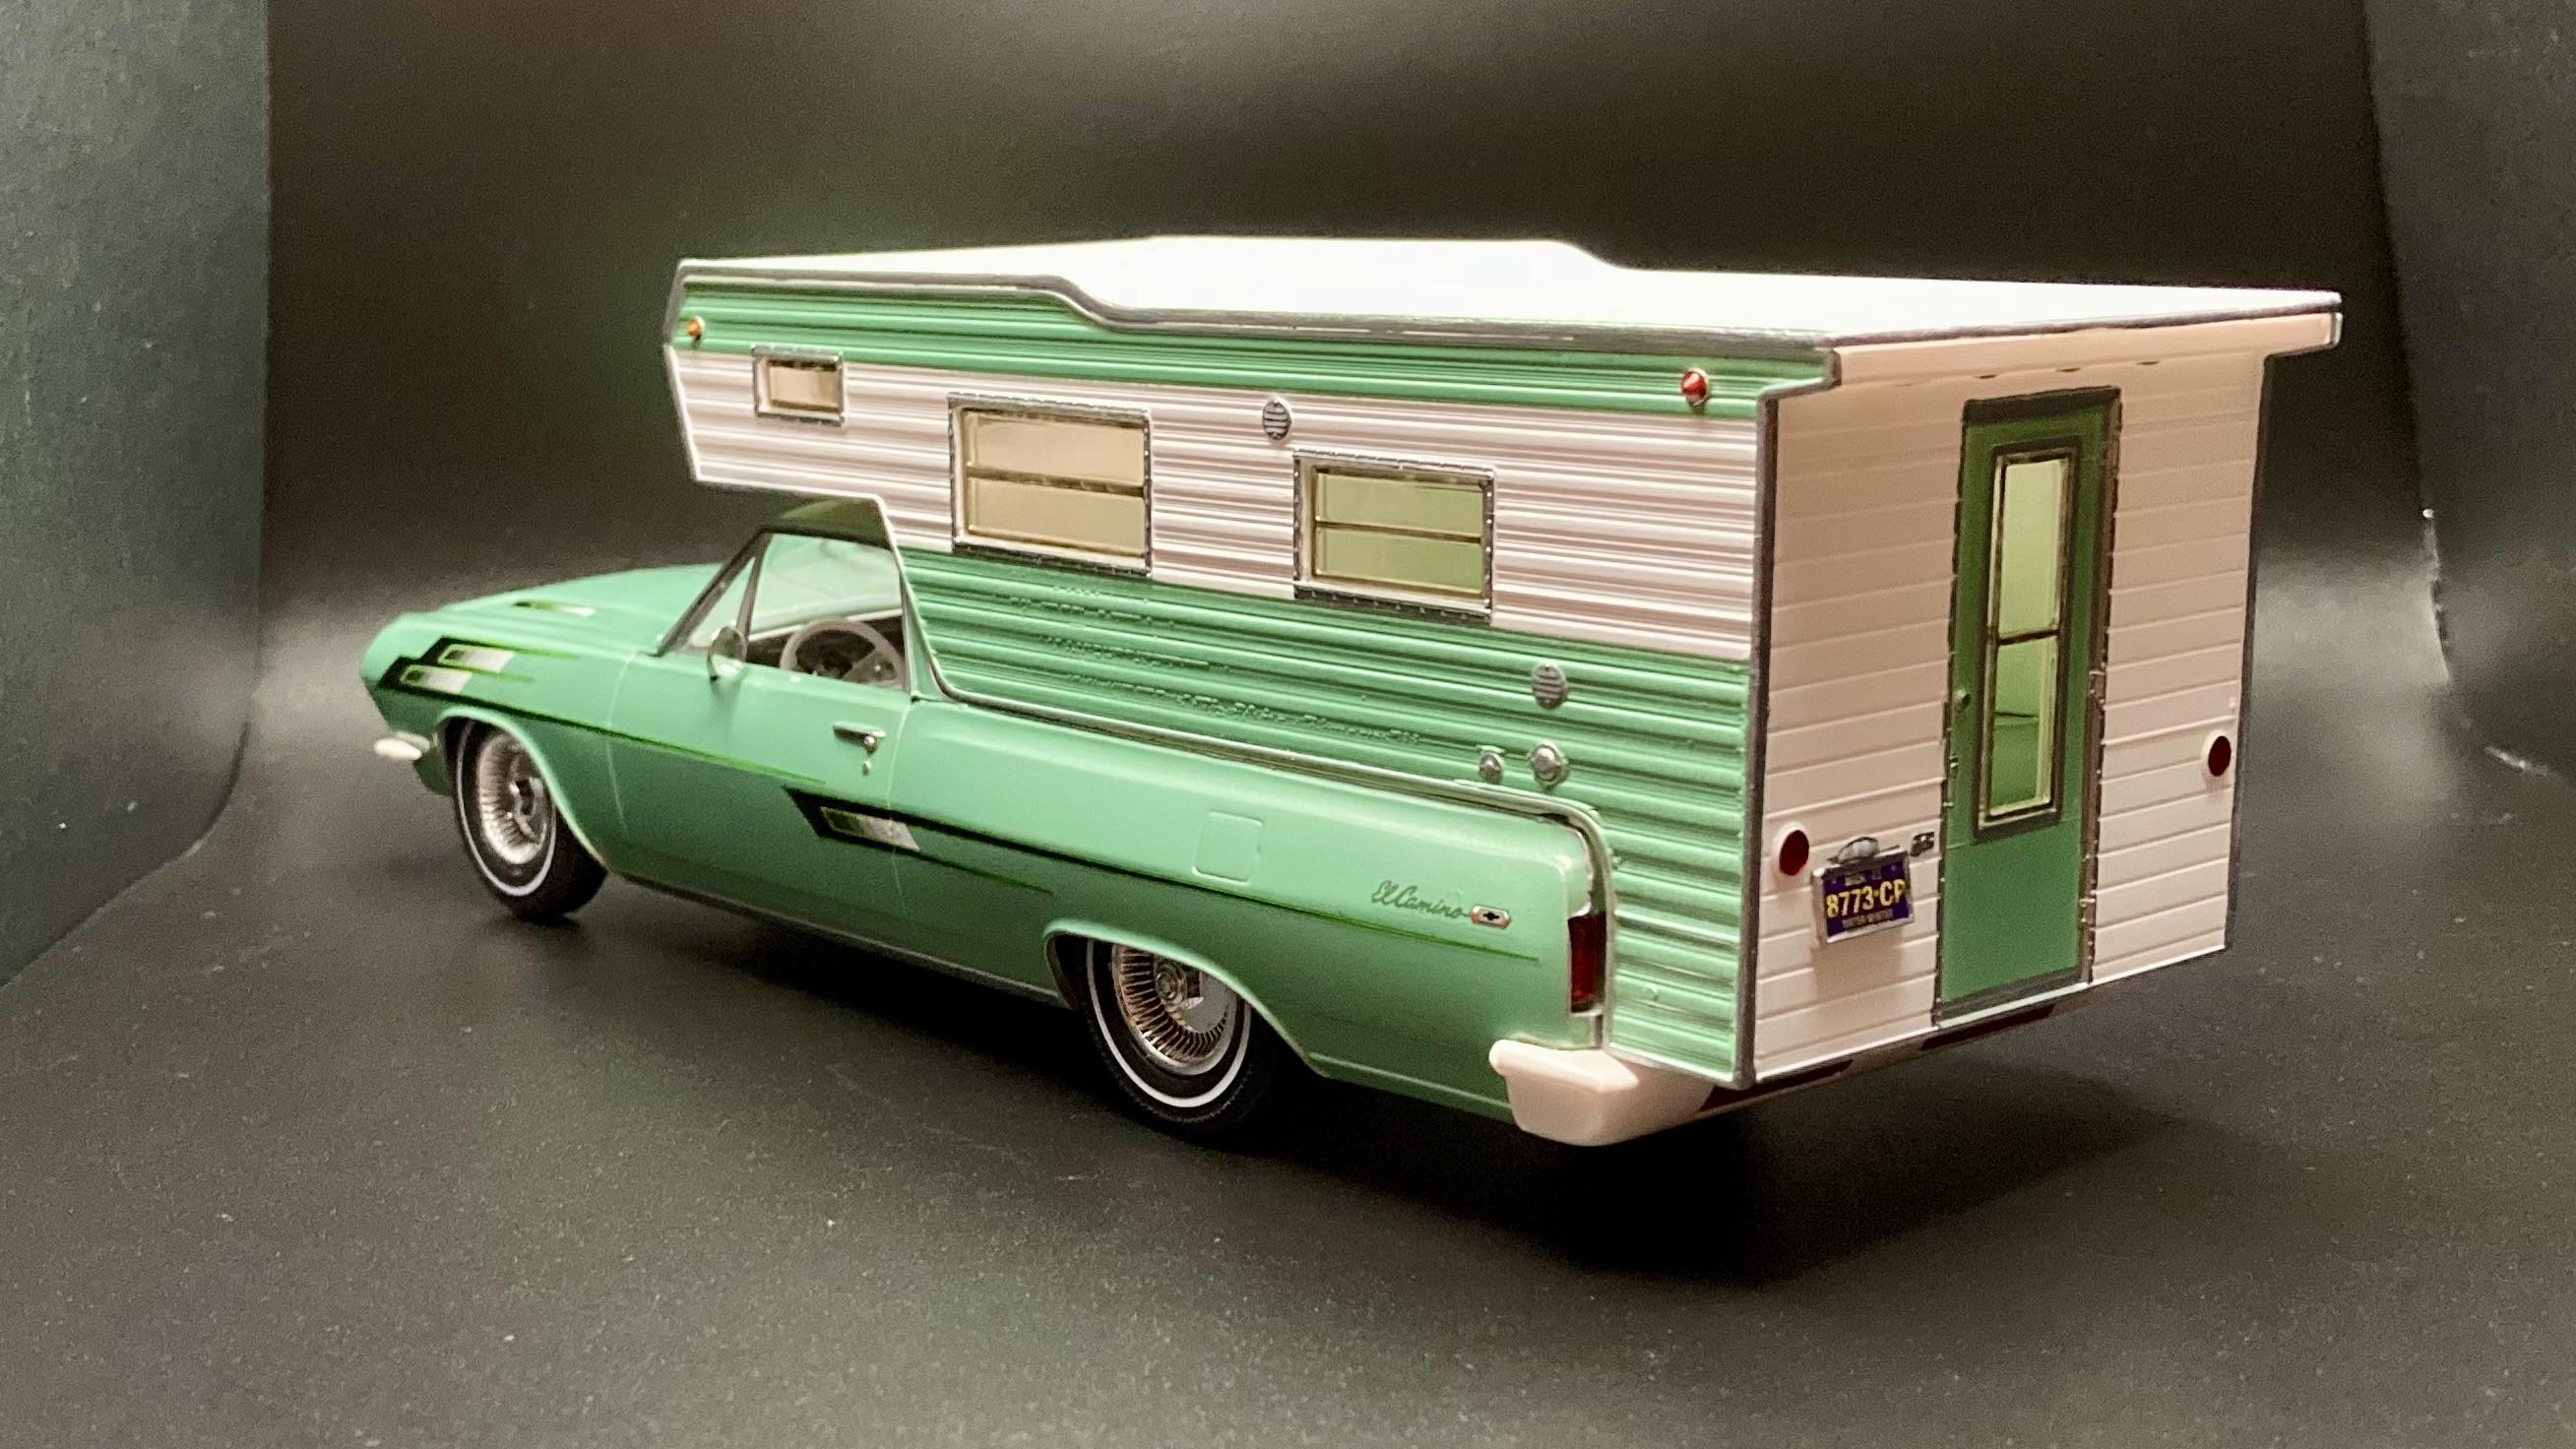
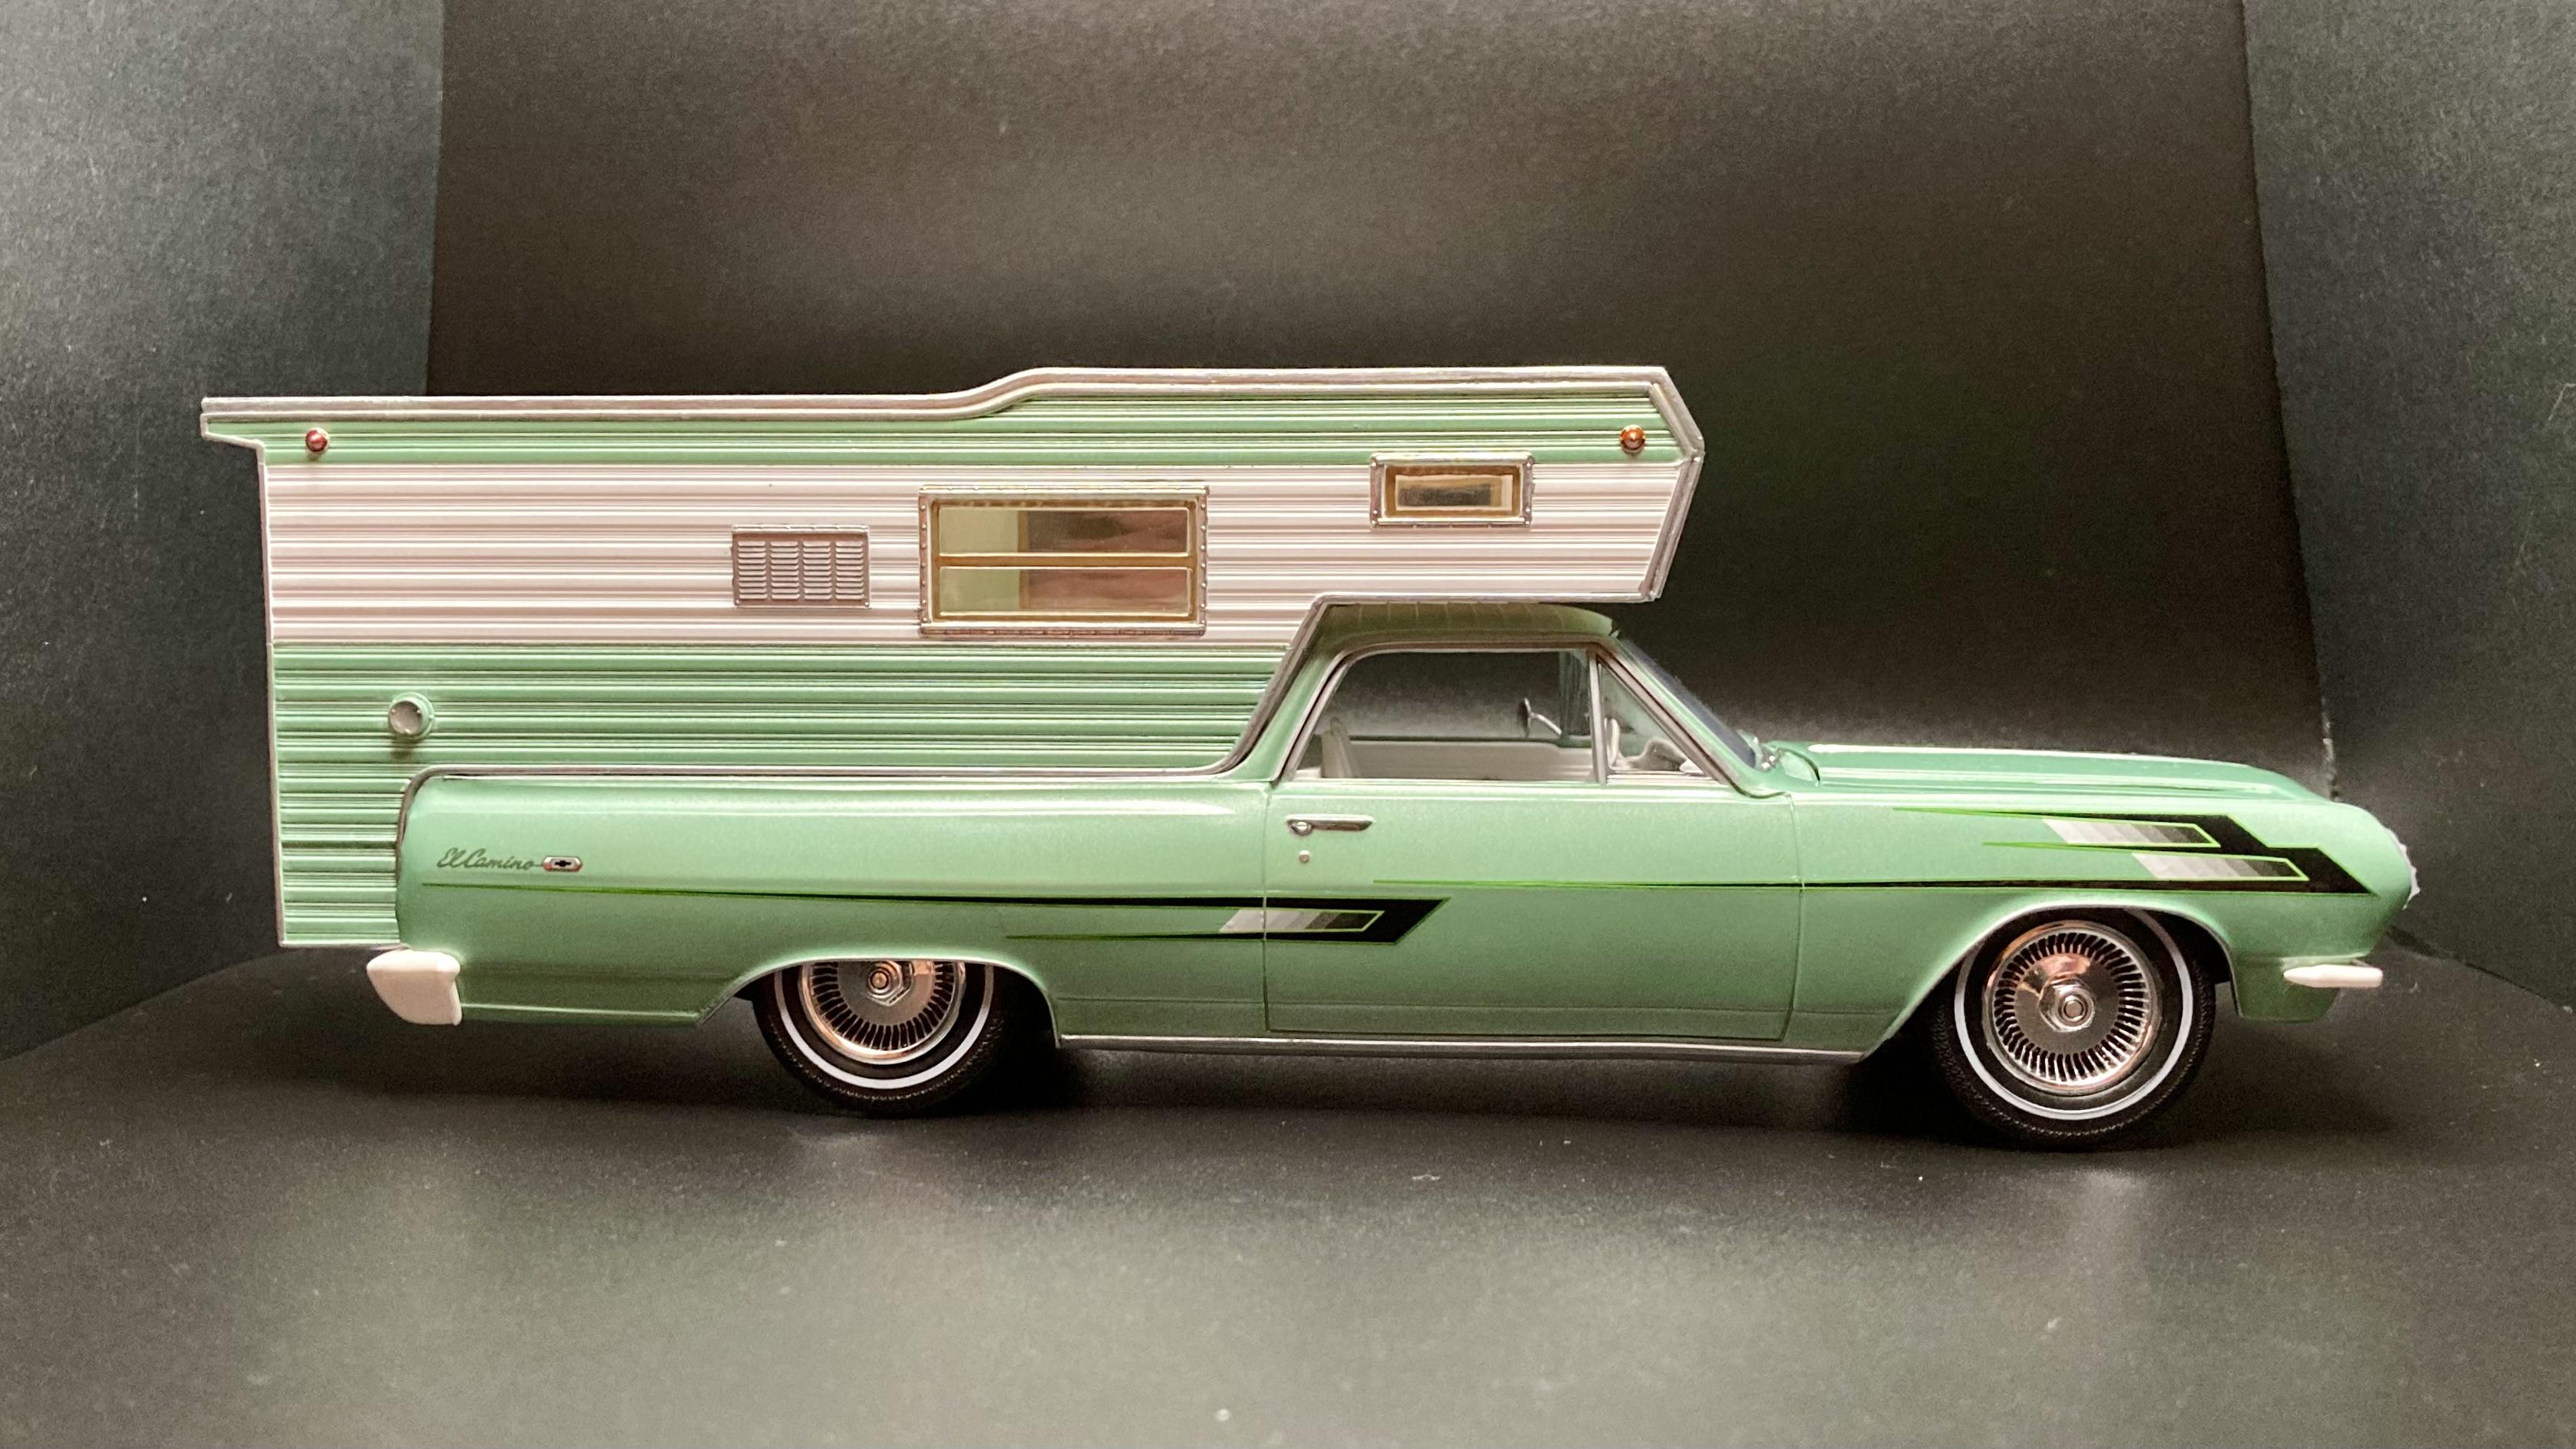
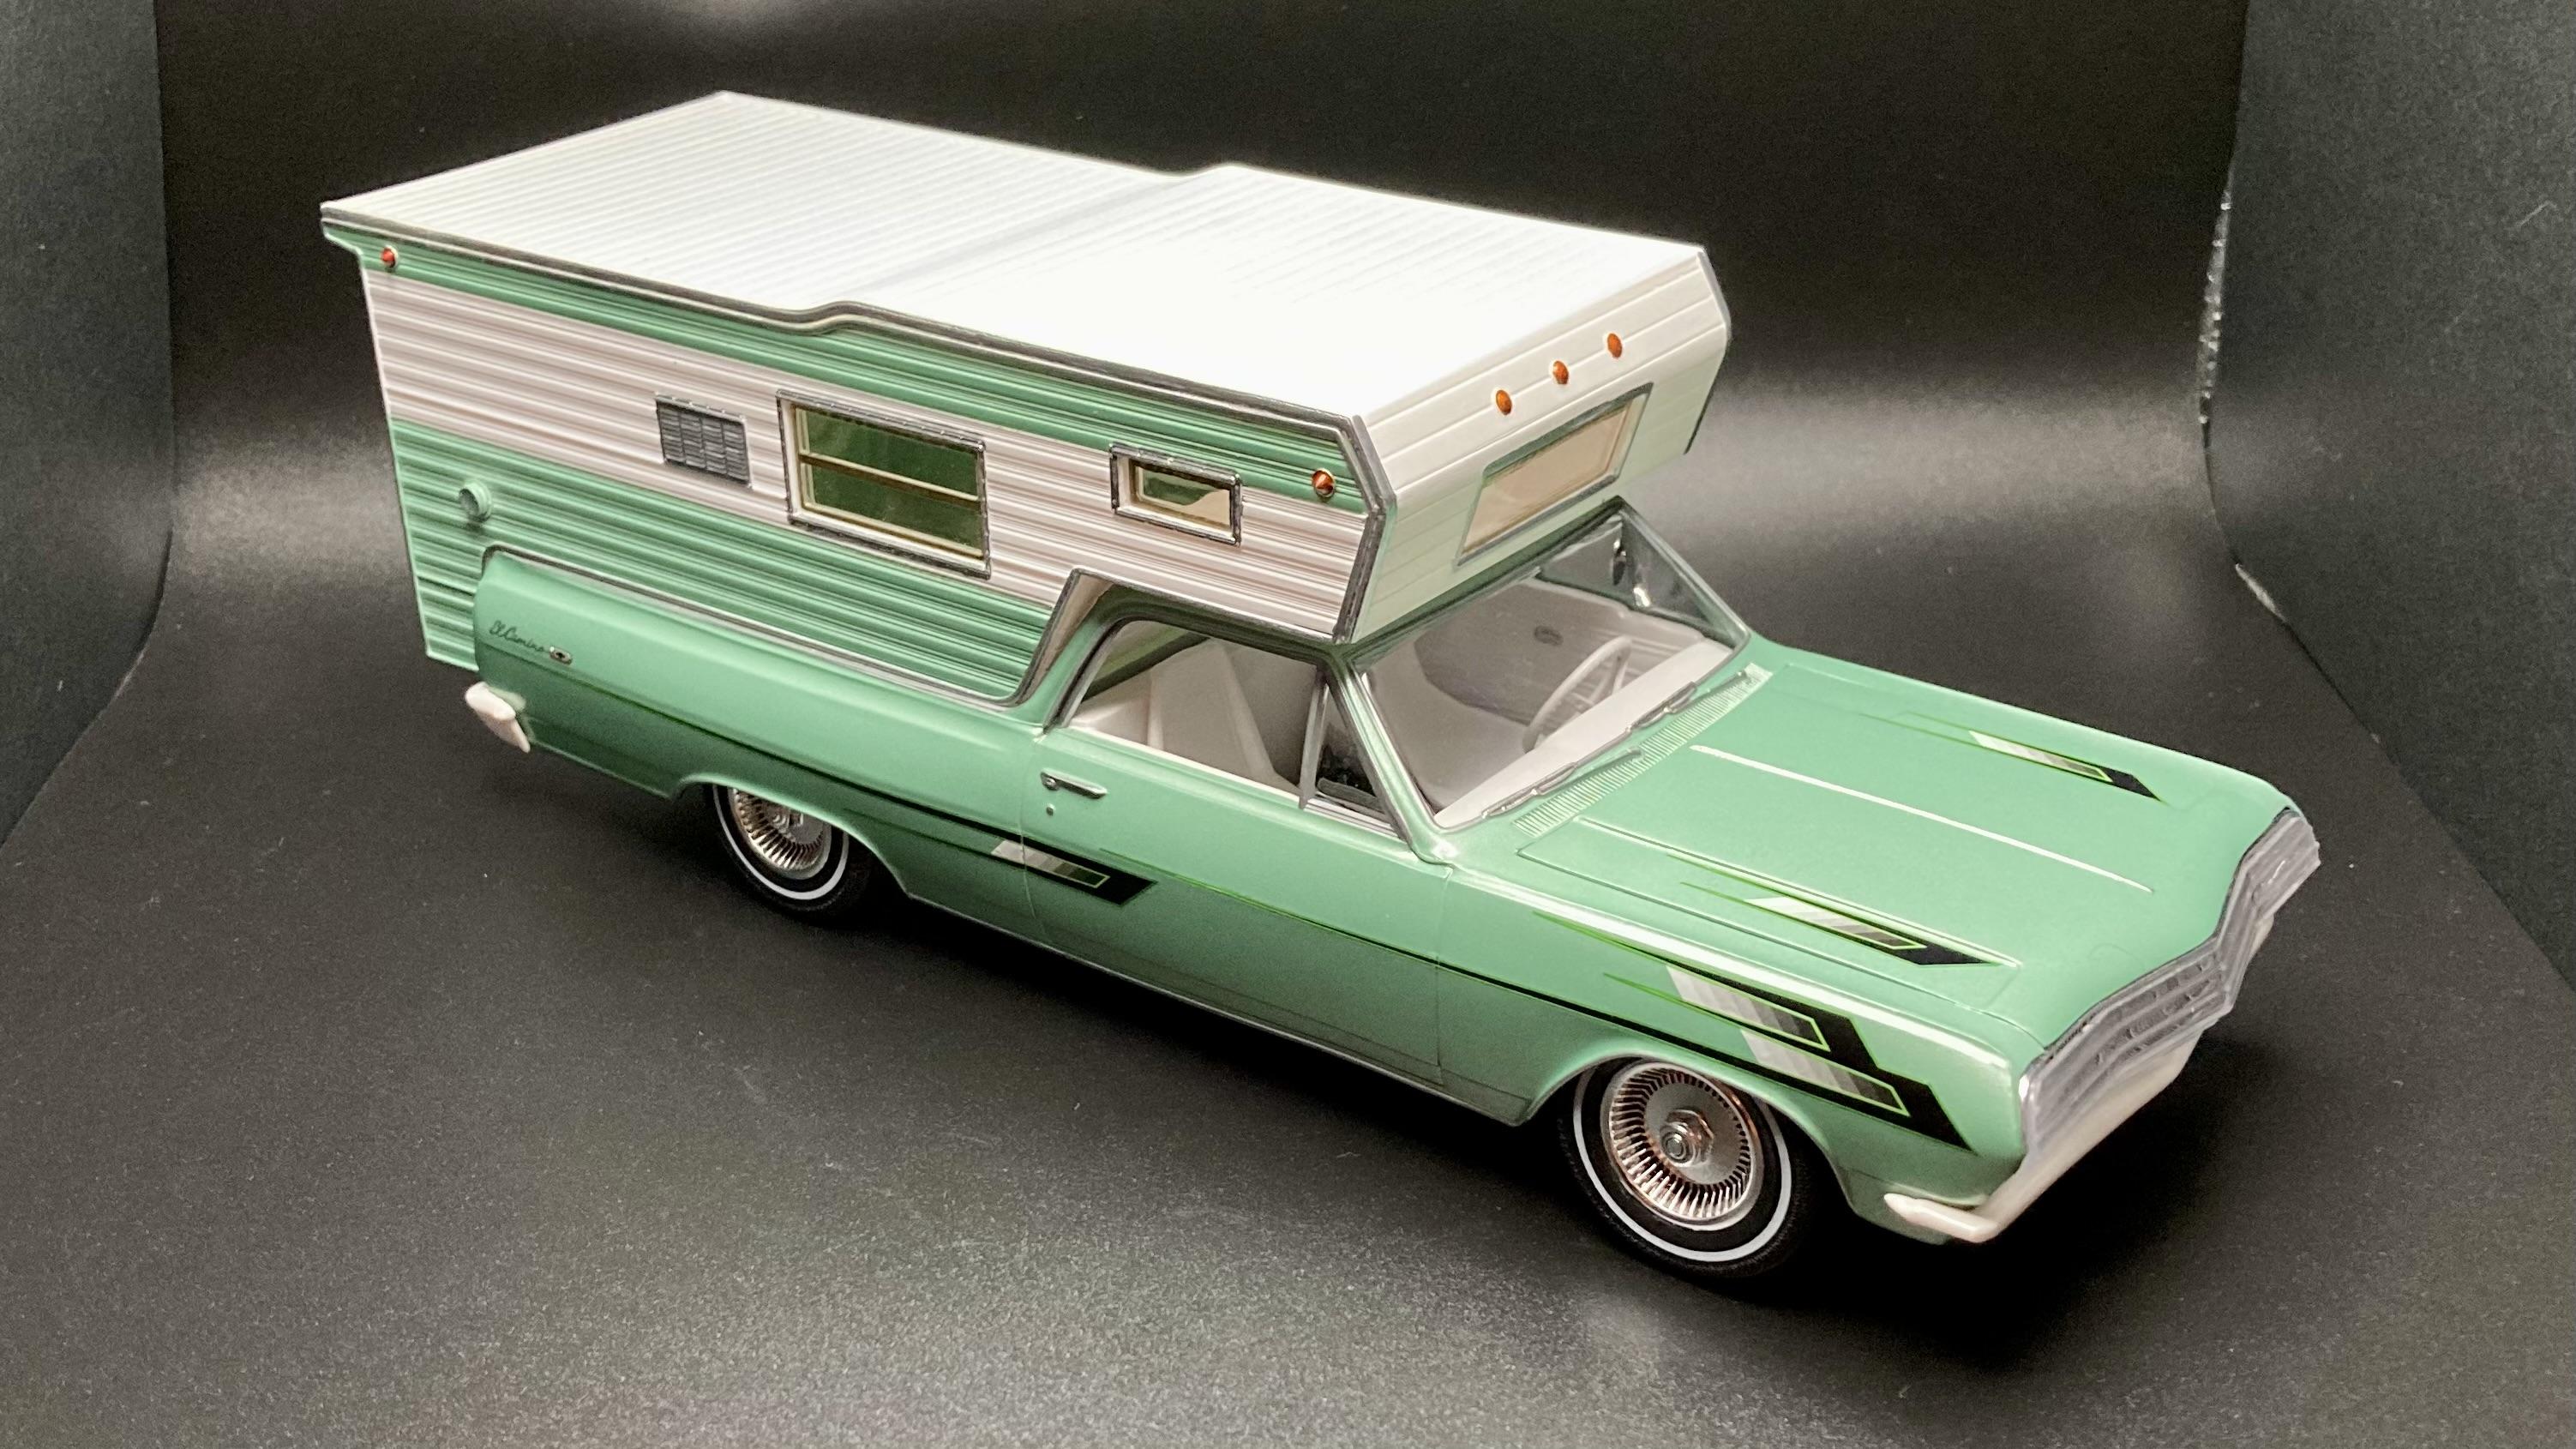
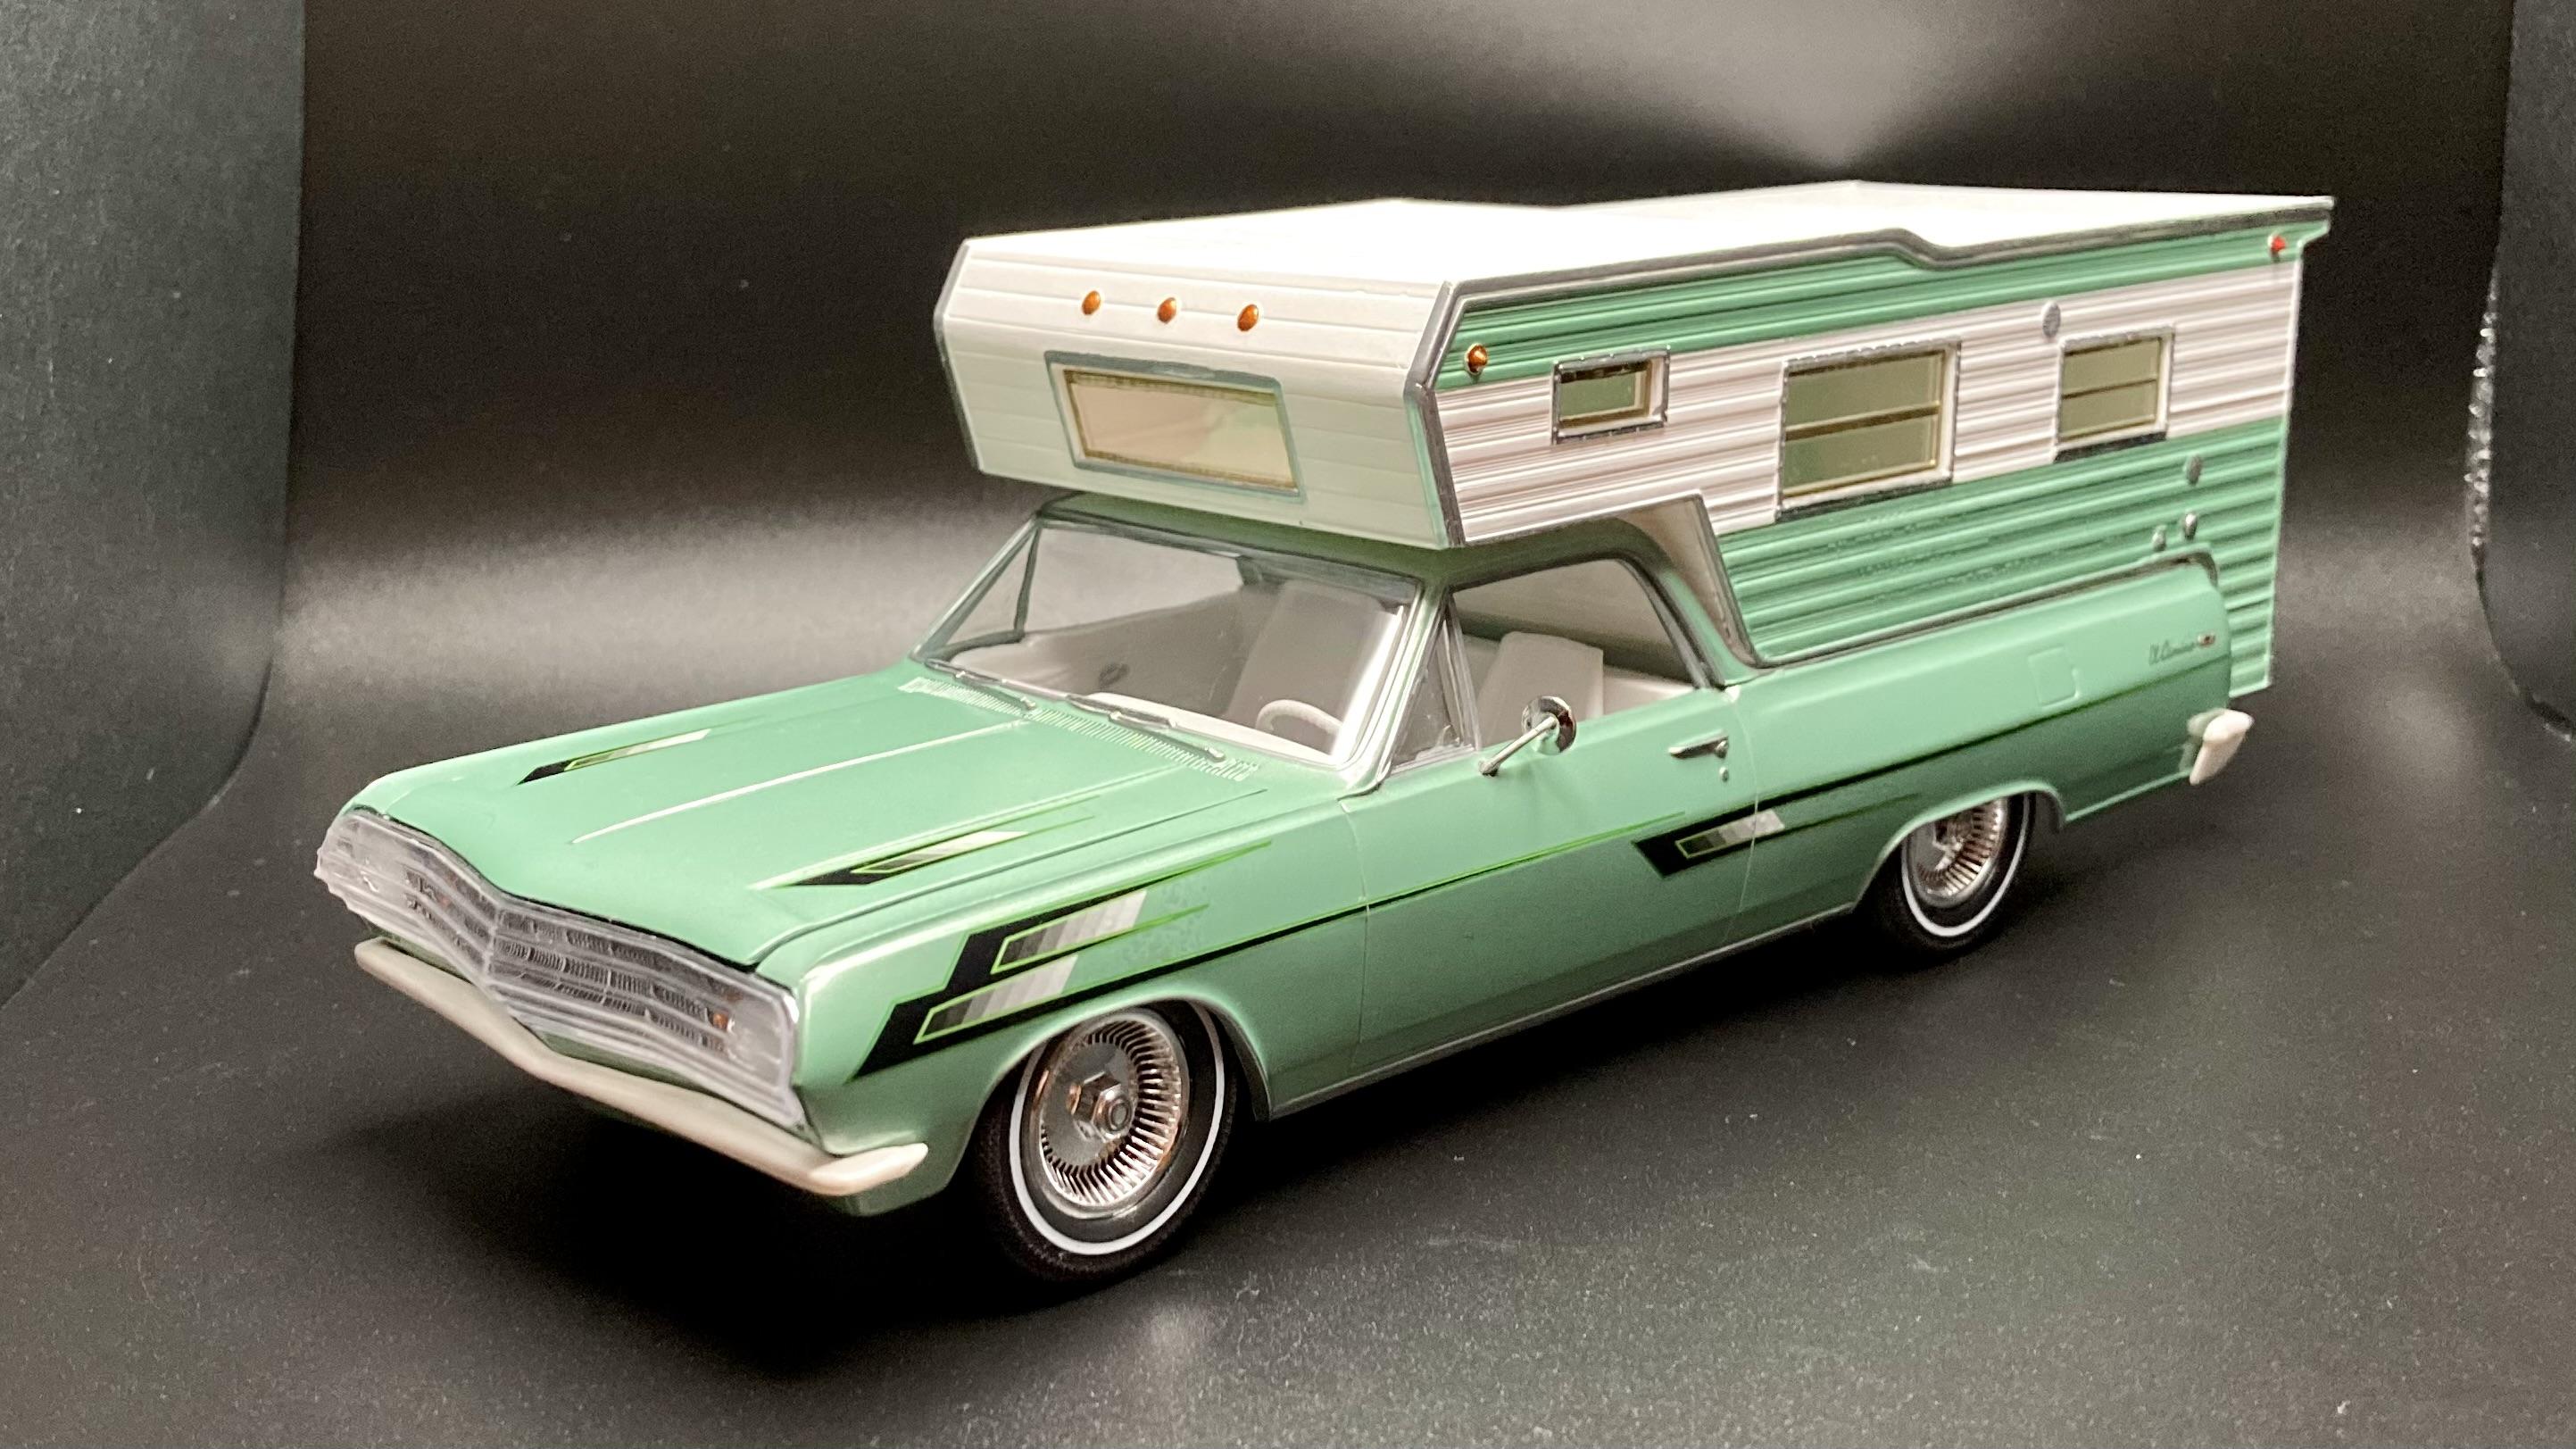
 Here’s my build of the recent release of AMT’s ‘65 El Camino Camper! I liked the custom fluted glass-looking grill/headlight cover so I decided to go custom with this one. In my mind, the camper manufacturer built this custom show truck to promote their new El Camino Campers! It’s painted Tamiya Light Green with Tamiya Pearl White for the bumpers and interior. The cab carpet is Tamiya Dark Green, and the white paint on the camper shell is Tamiya white primer. The decals came from the recent release AMT ‘65 Bonneville, and the wheels are from the parts box (I believe from the MPC “Bad Company” Dodge Van). I drilled new axle holes in the chassis to lower the stance. This is a very basic promo style kit but it has some cool custom parts, and 10 pad printed tires. I had a lot of fun with this build!
-
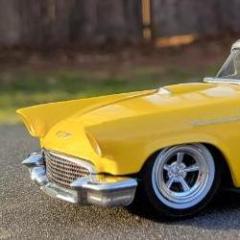
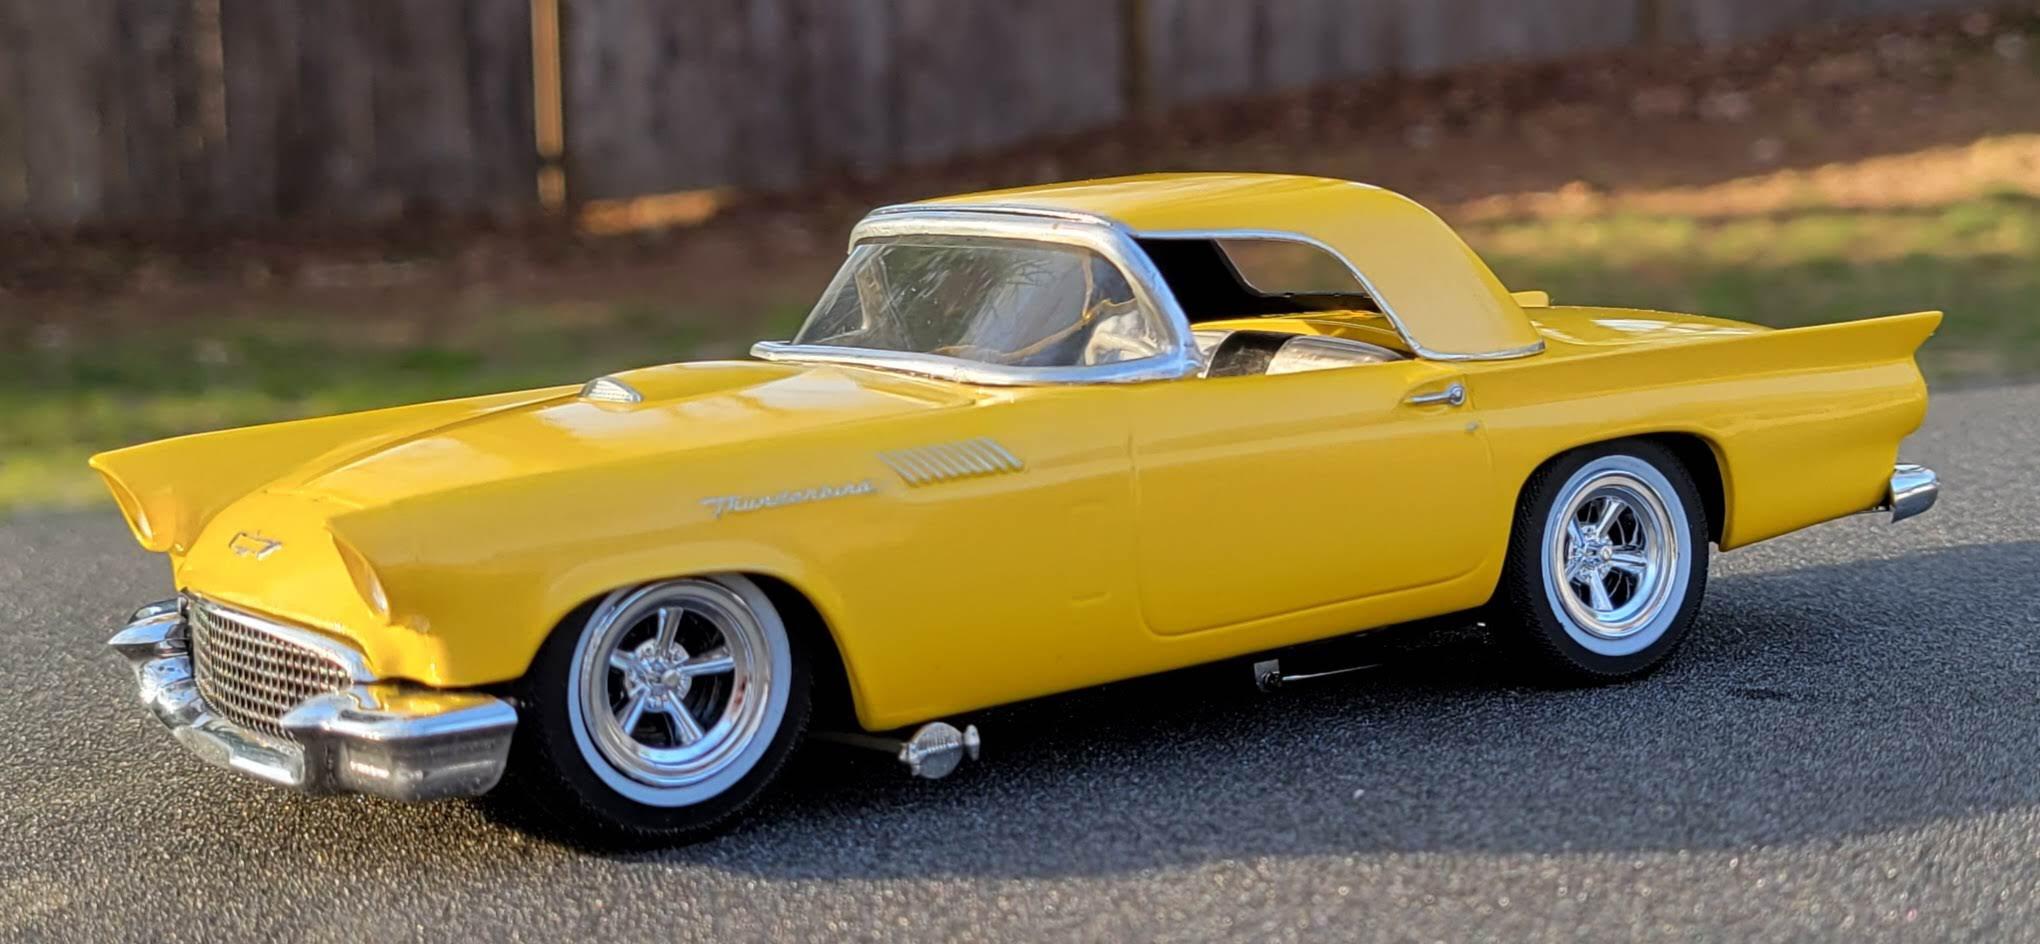
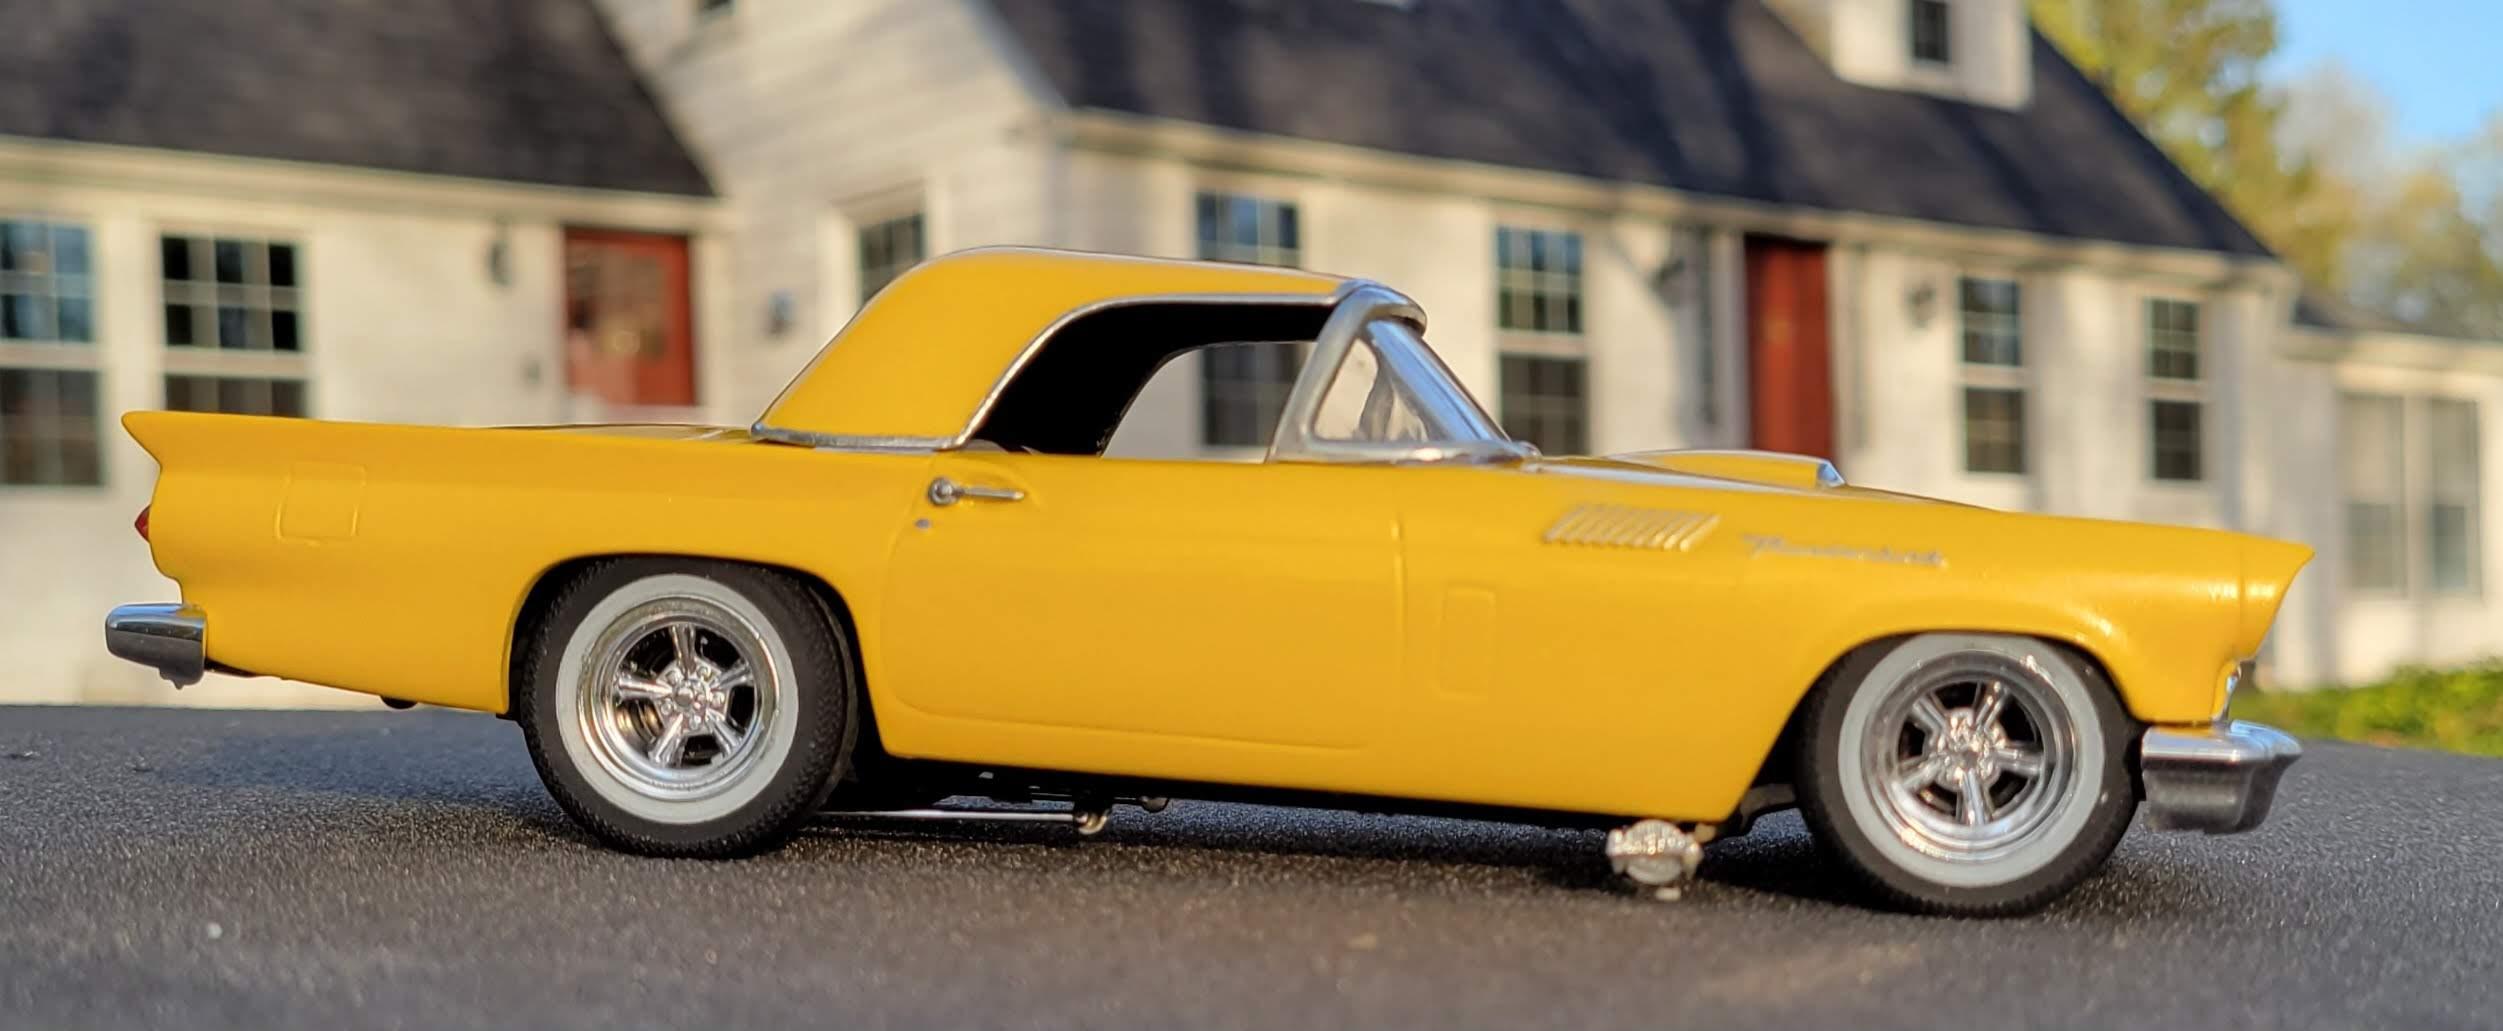
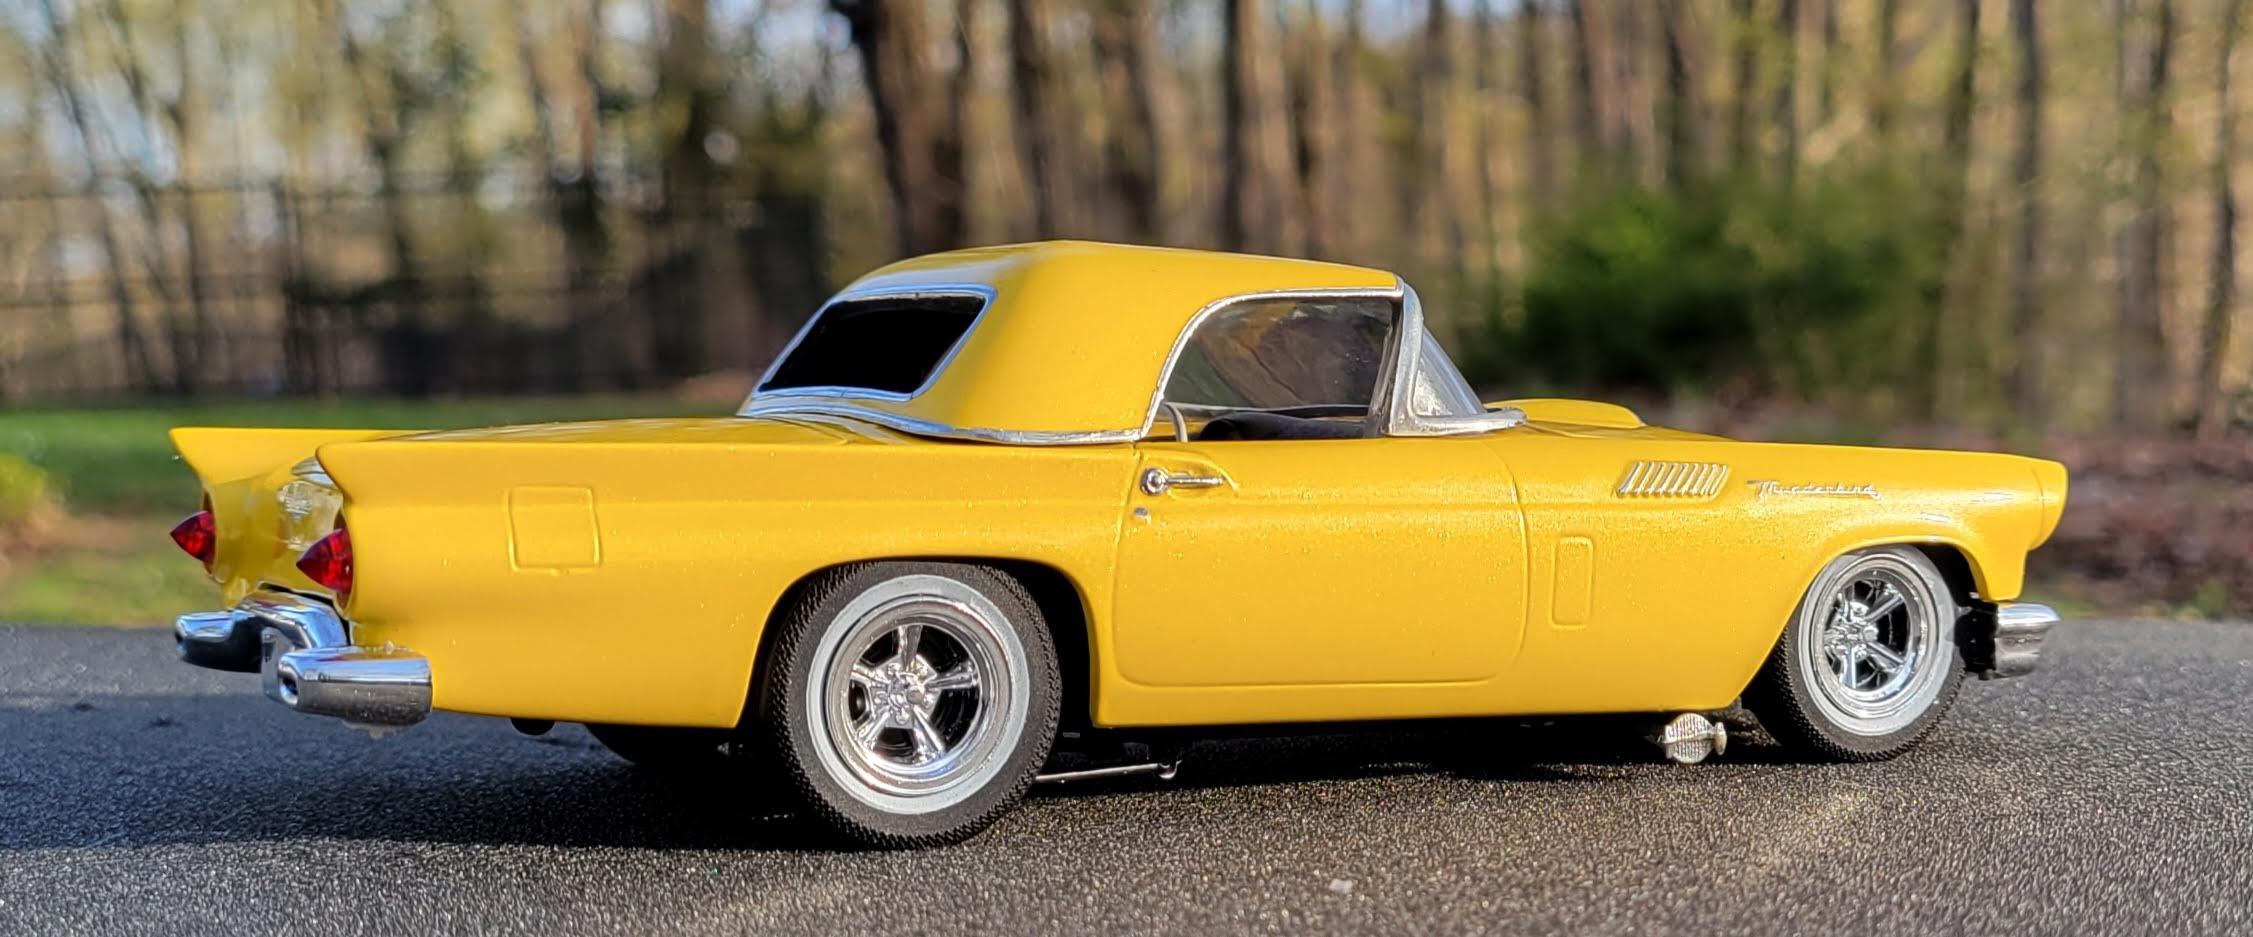
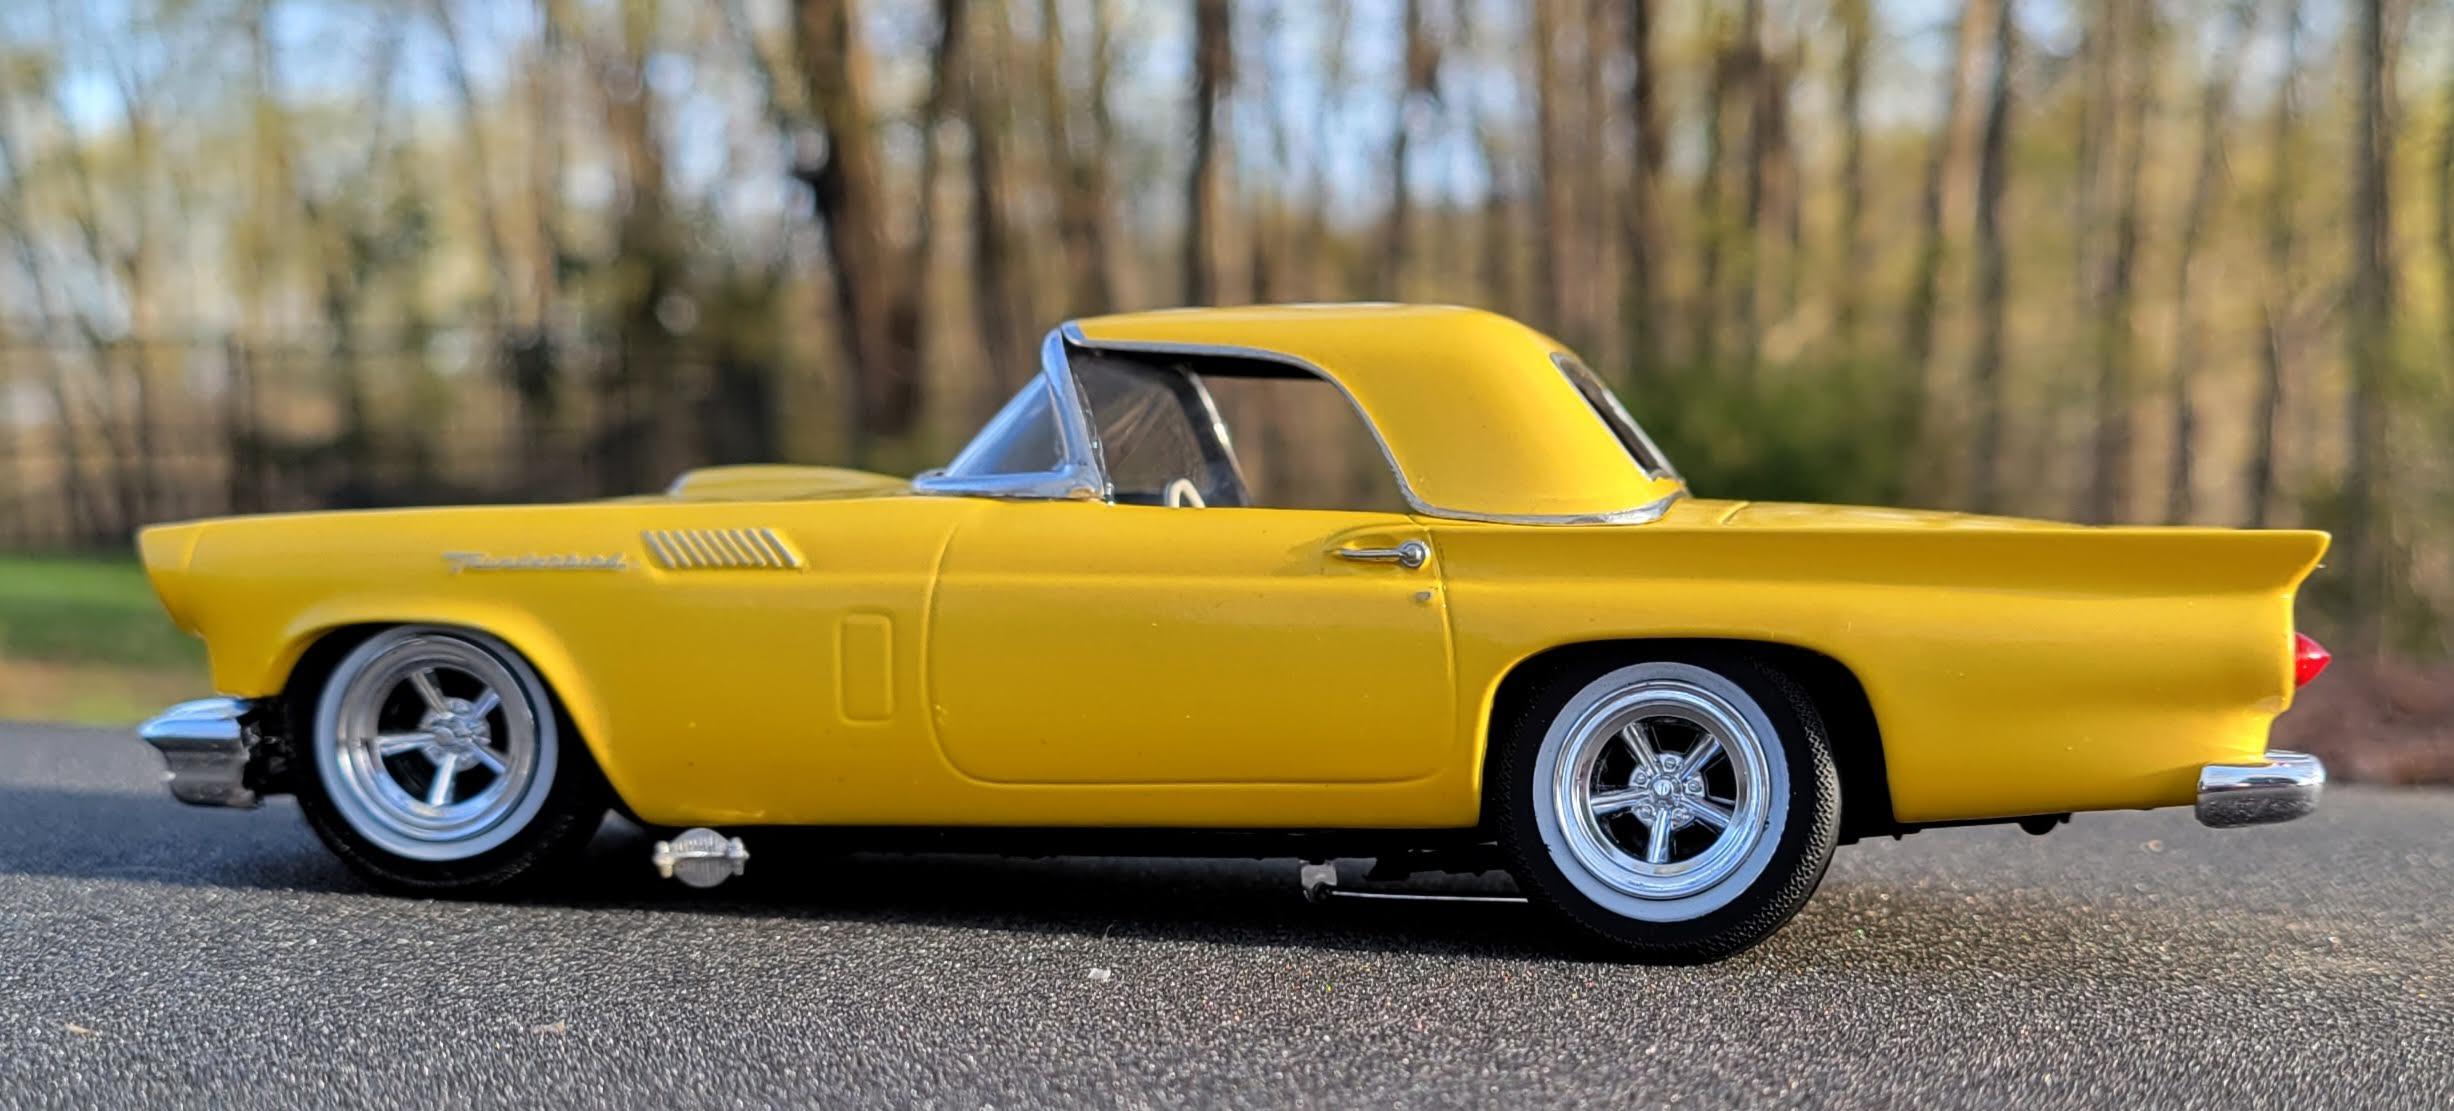
I always loved the body style of the 57 T-Birds and wanted to build an early street machine version of one. I built this using the AMT 57 Thunderbird kit. Paint is Tamiyas Yellow Pearl over Tamiyas white primer then coated with Testors Wet Coat. Mags and tires are parts box finds. New axles were made using weld wire to bring the wheels out to a correct position. The sneaker pipes are from AMT's 49 Ford. Taillights are from AMT's 56 Ford as are the traction bars. Windshield frame and headlight brows are from a vintage issue of the 57. Overall it was a fun build however, the windshield did not want to cooperate no matter what glass or frame I used.
- 19 replies
-
- 9
-

-
- ford
- thunderbird
- (and 2 more)
-
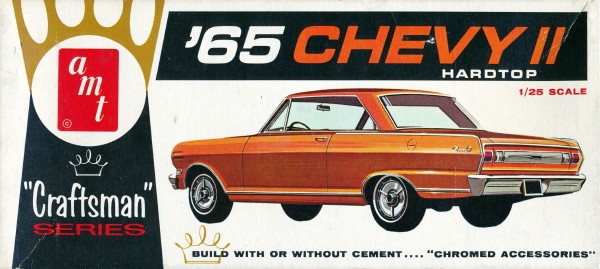
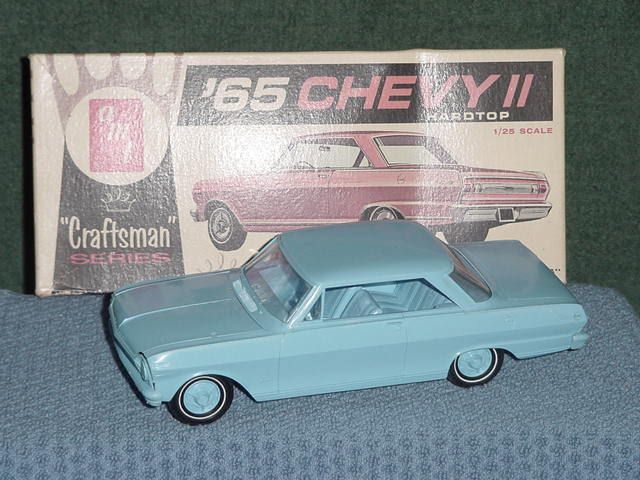
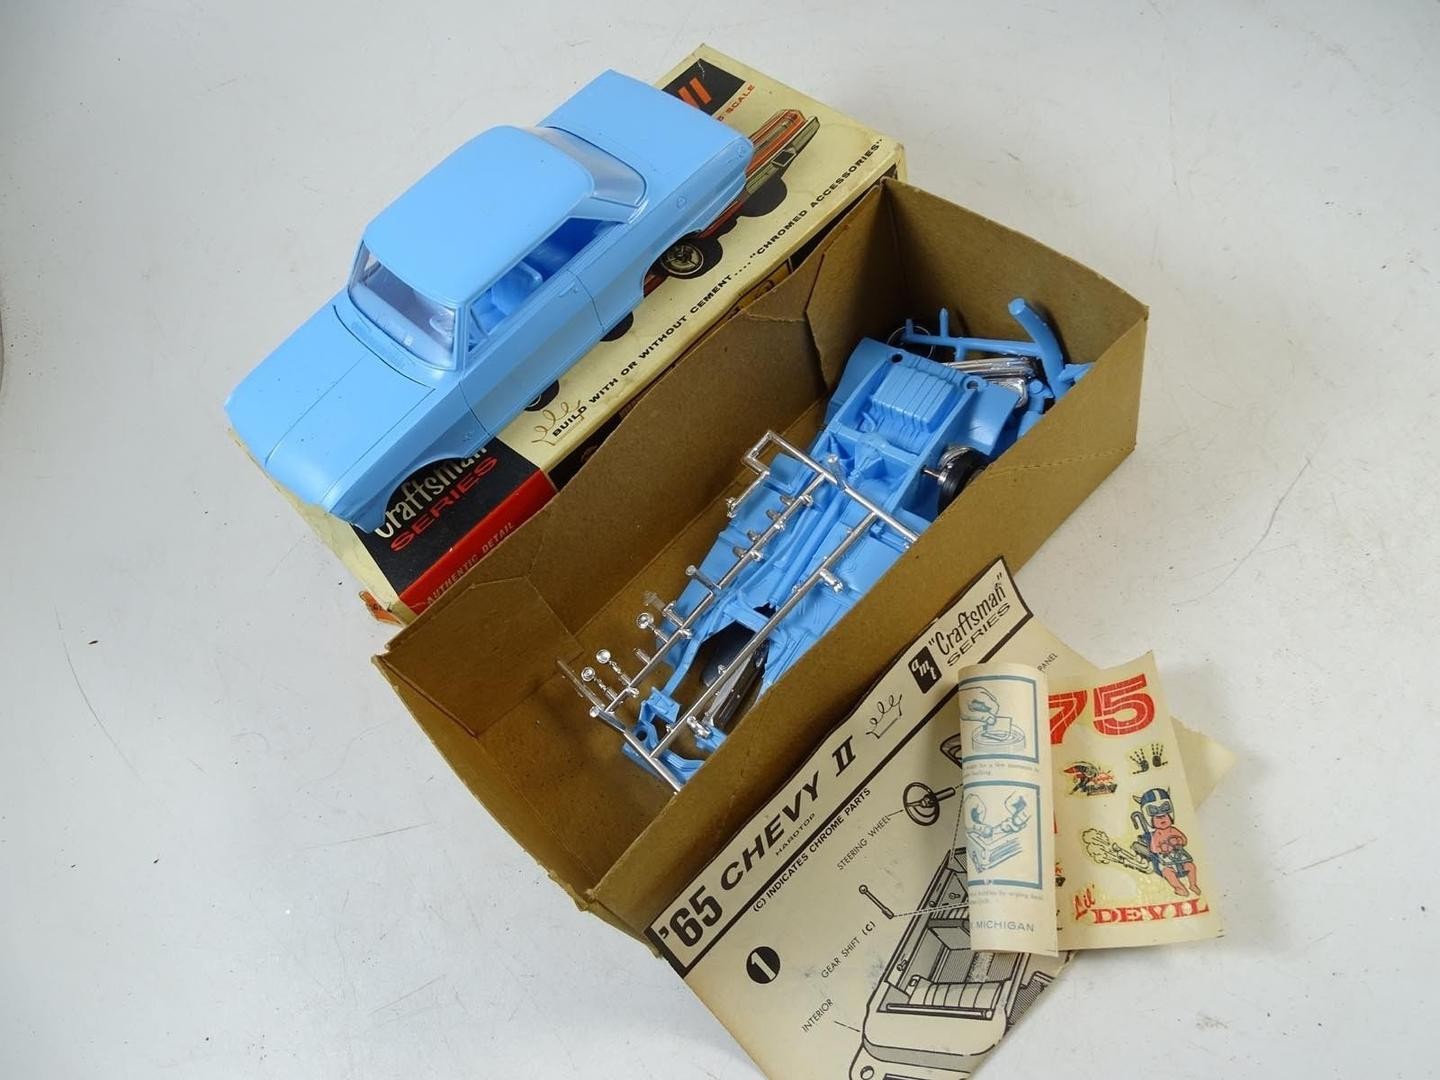
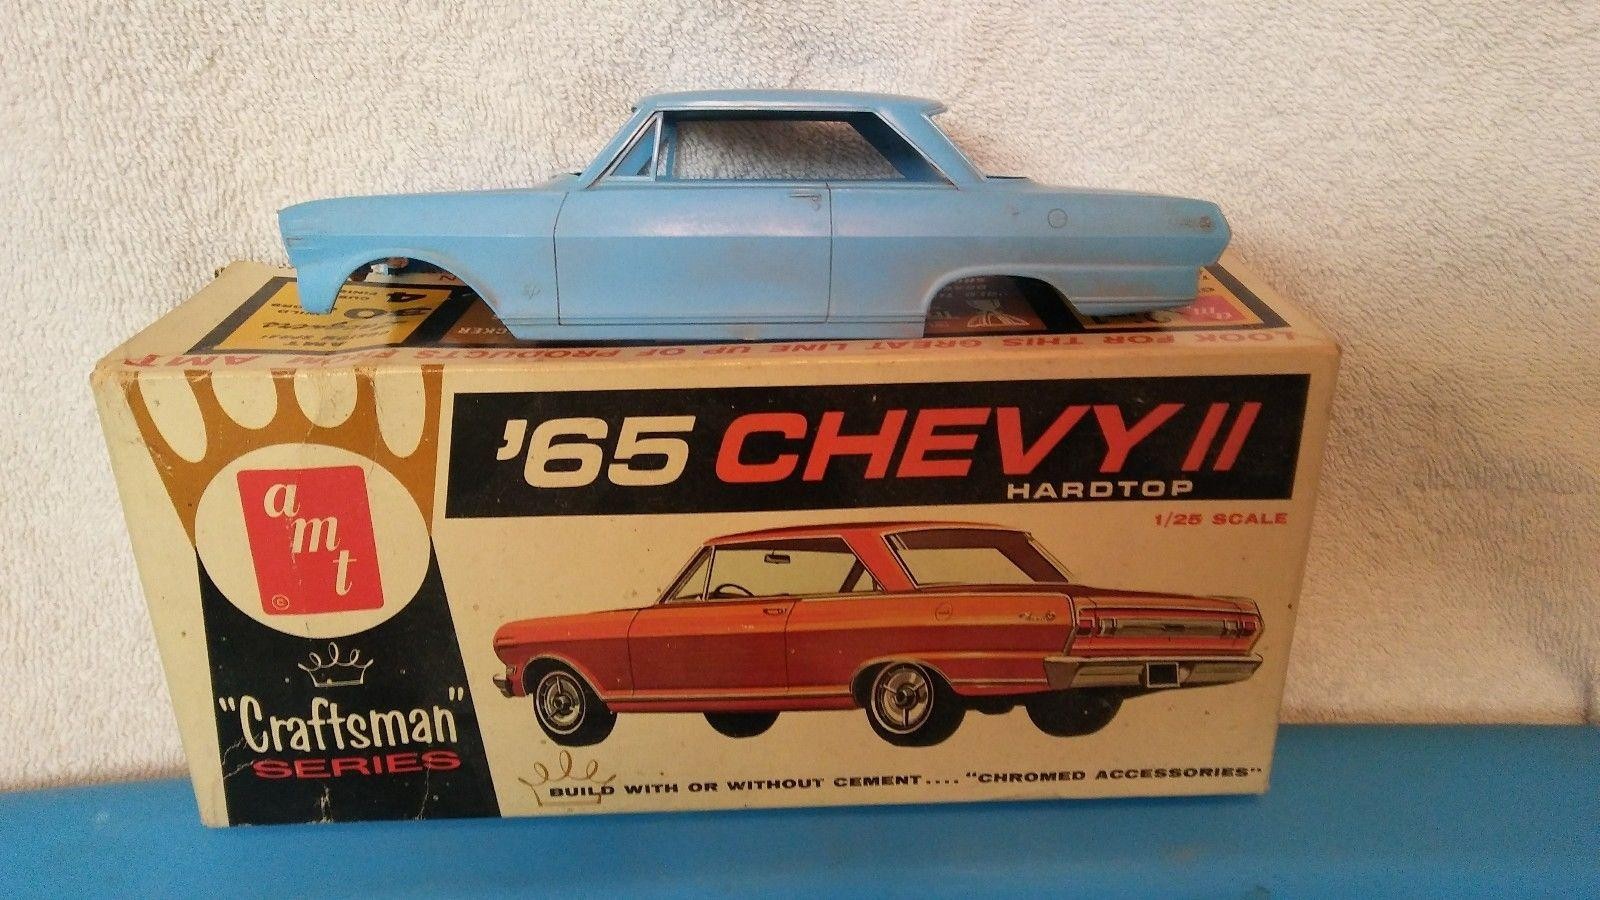
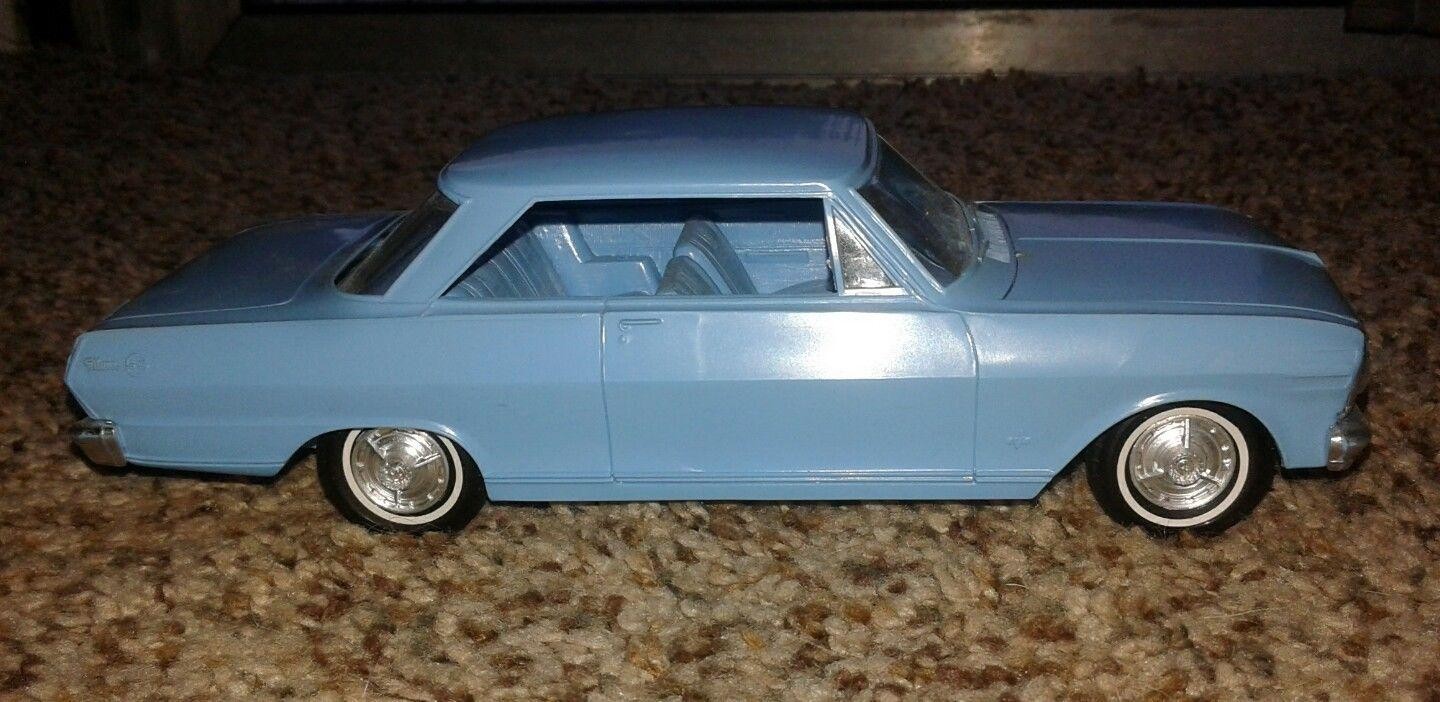
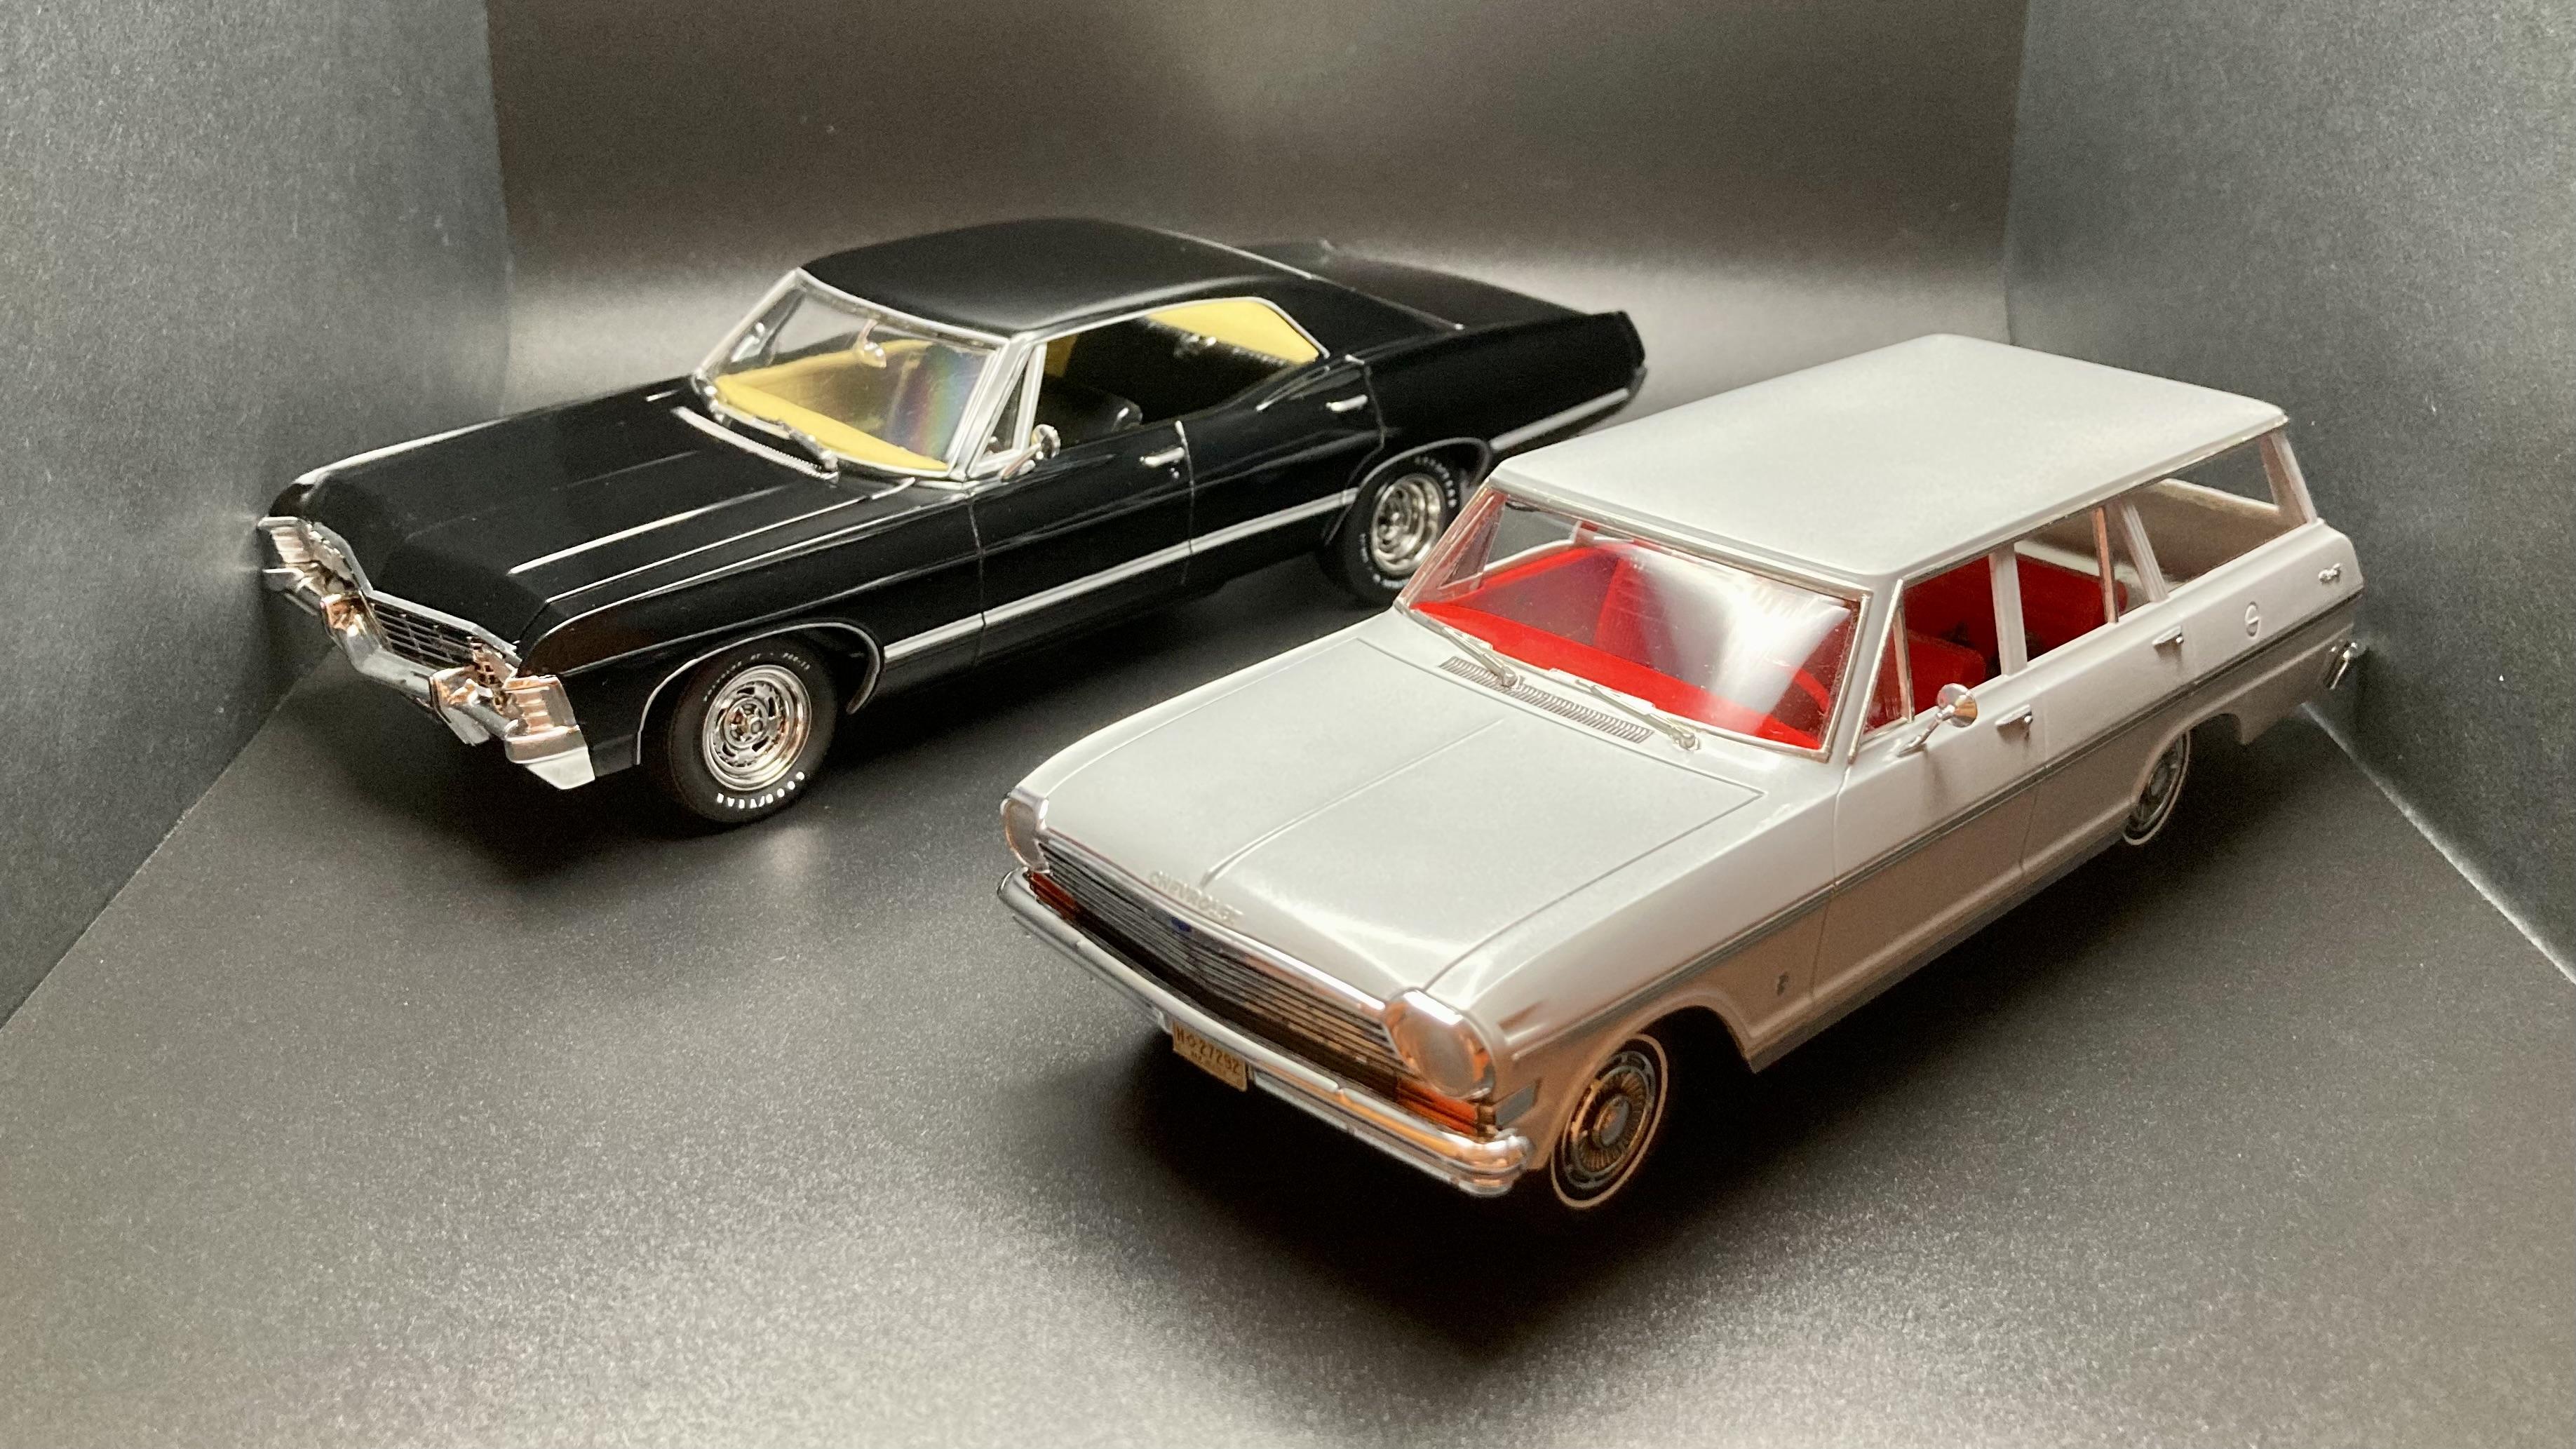
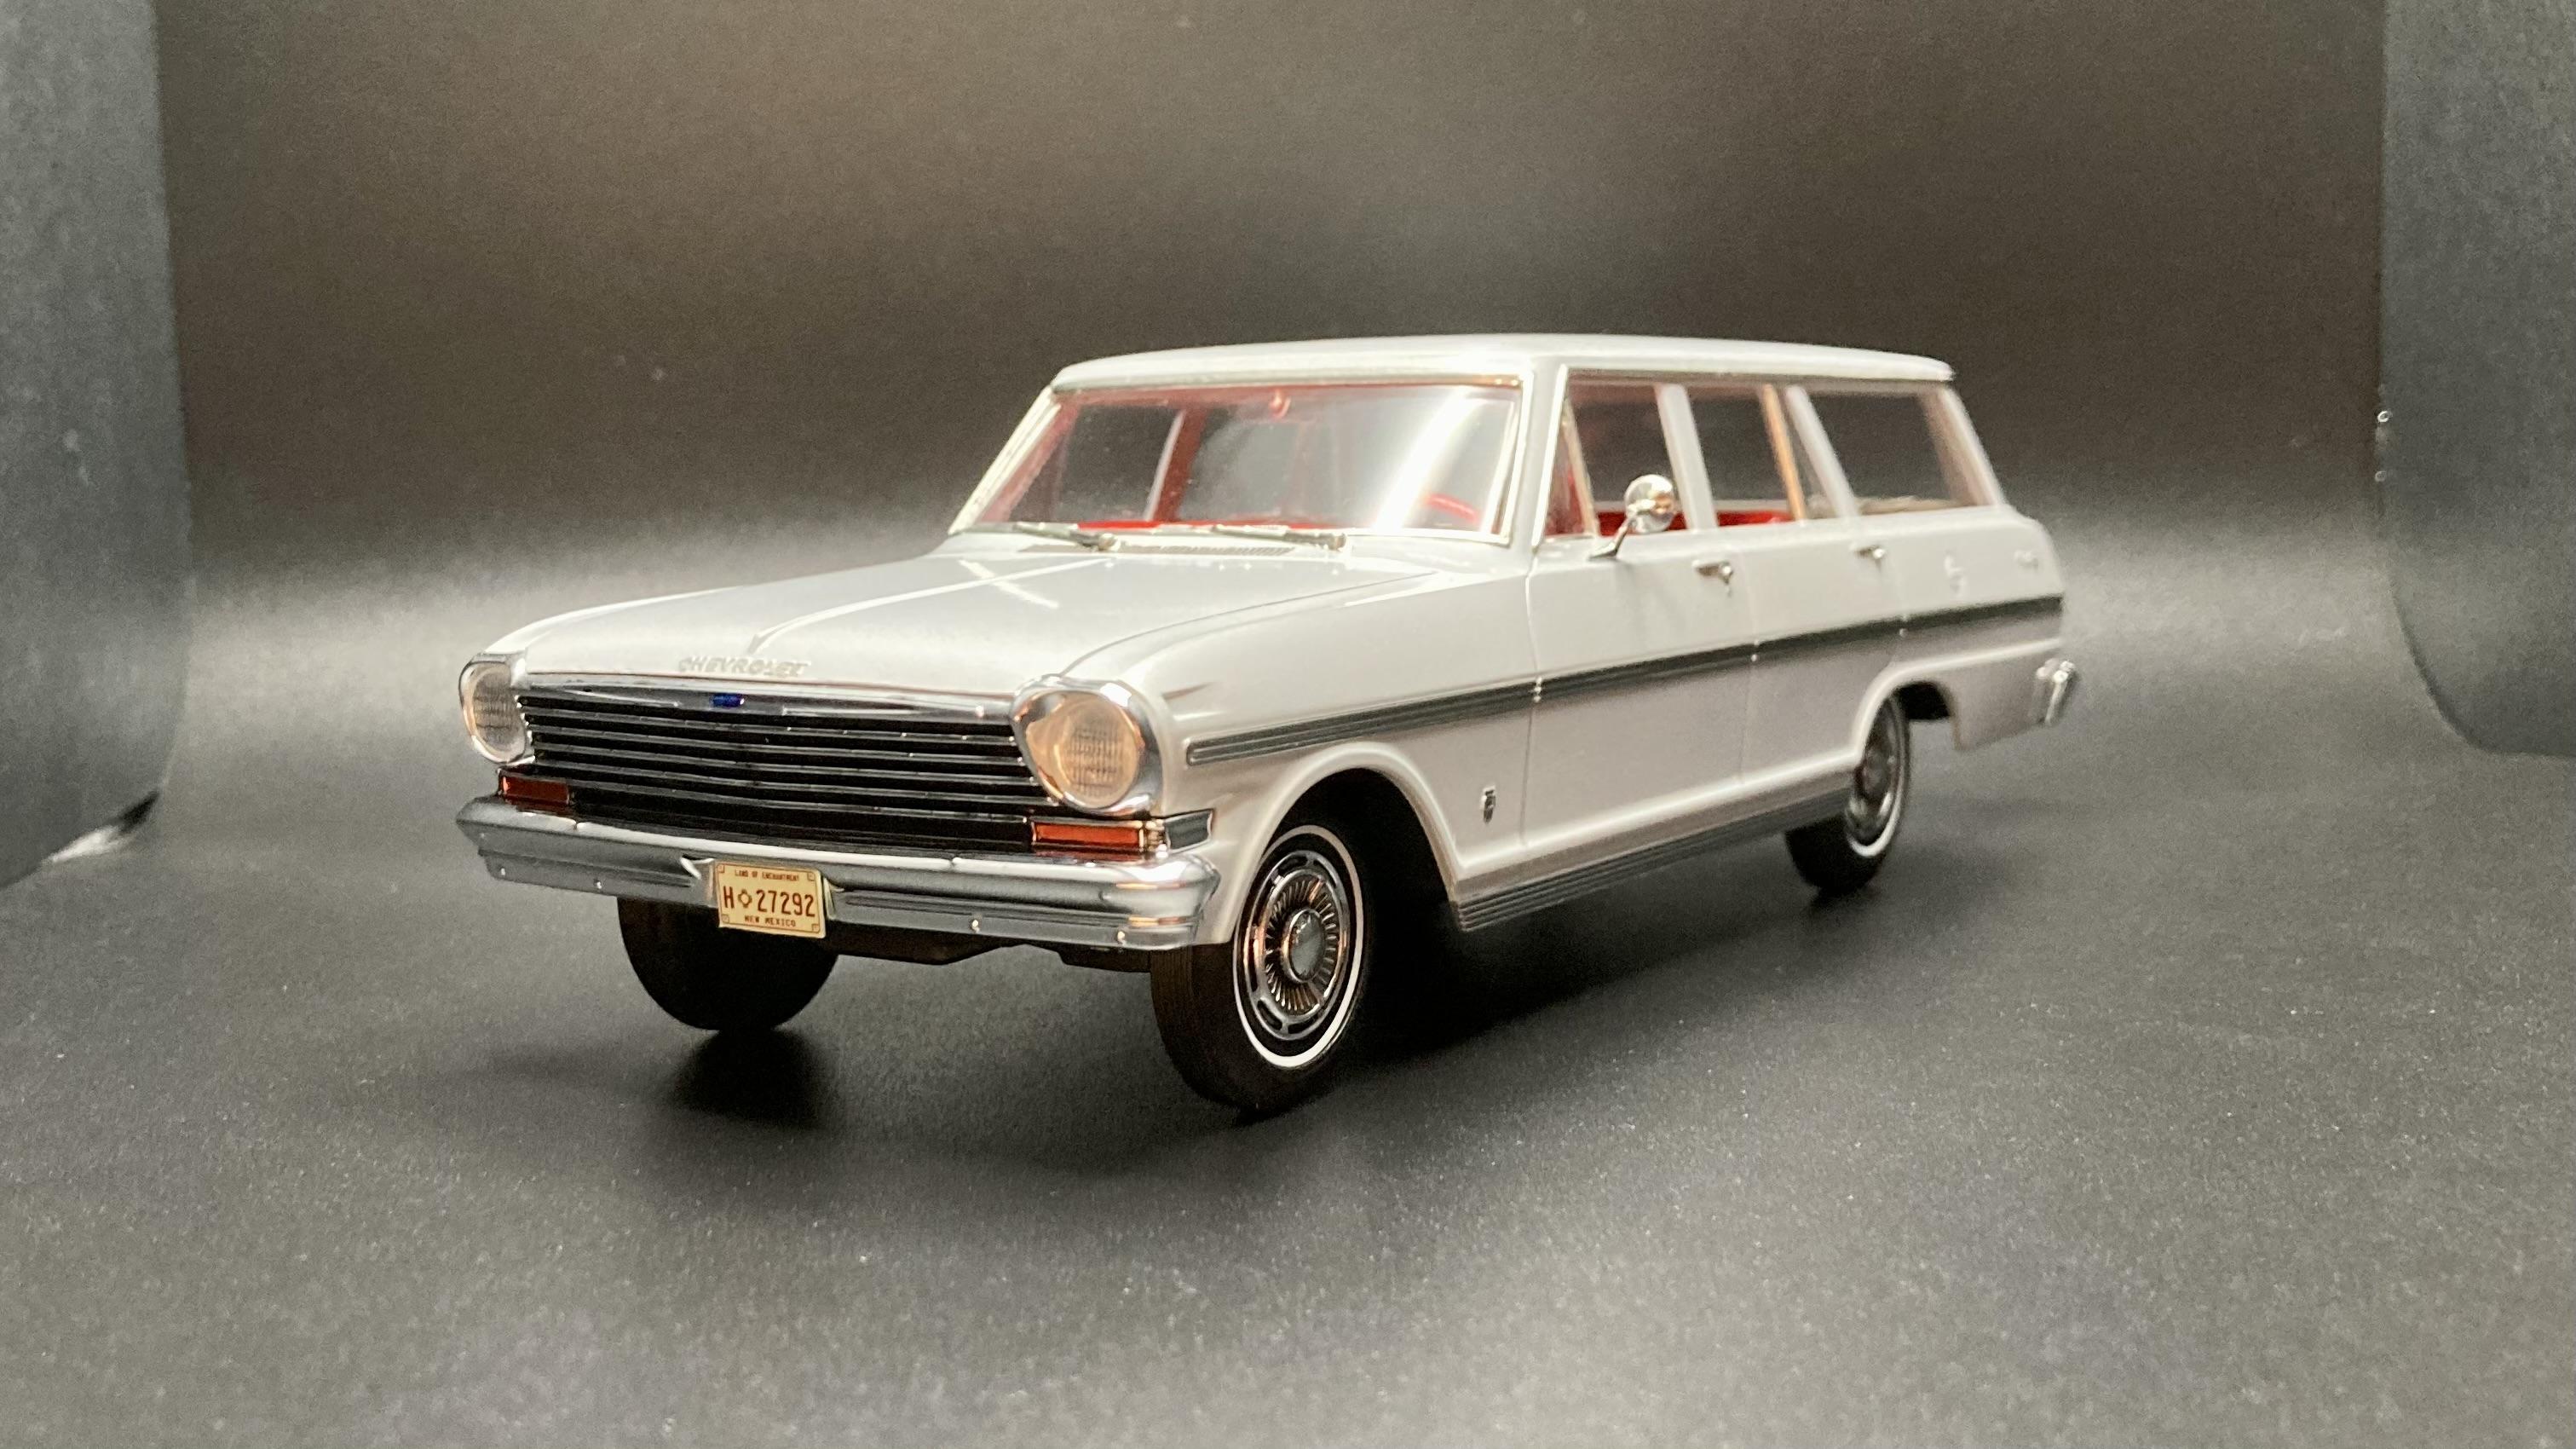
By chance does anyone happen to have an AMT '65 Chevy II Hardtop "Craftsman" kit, and be willing to share some pictures of the contents? With Moebius' upcoming '64/'65 Chevy II Sedans, I thought it might be a good time to look over and discuss the good, bad, and ugly regarding the vintage AMT kit, which is never to return. I appears AMT captured the body shape quite well...: ...but the chassis is promo style, with molded in everything and an engine 'plate' insert:
-
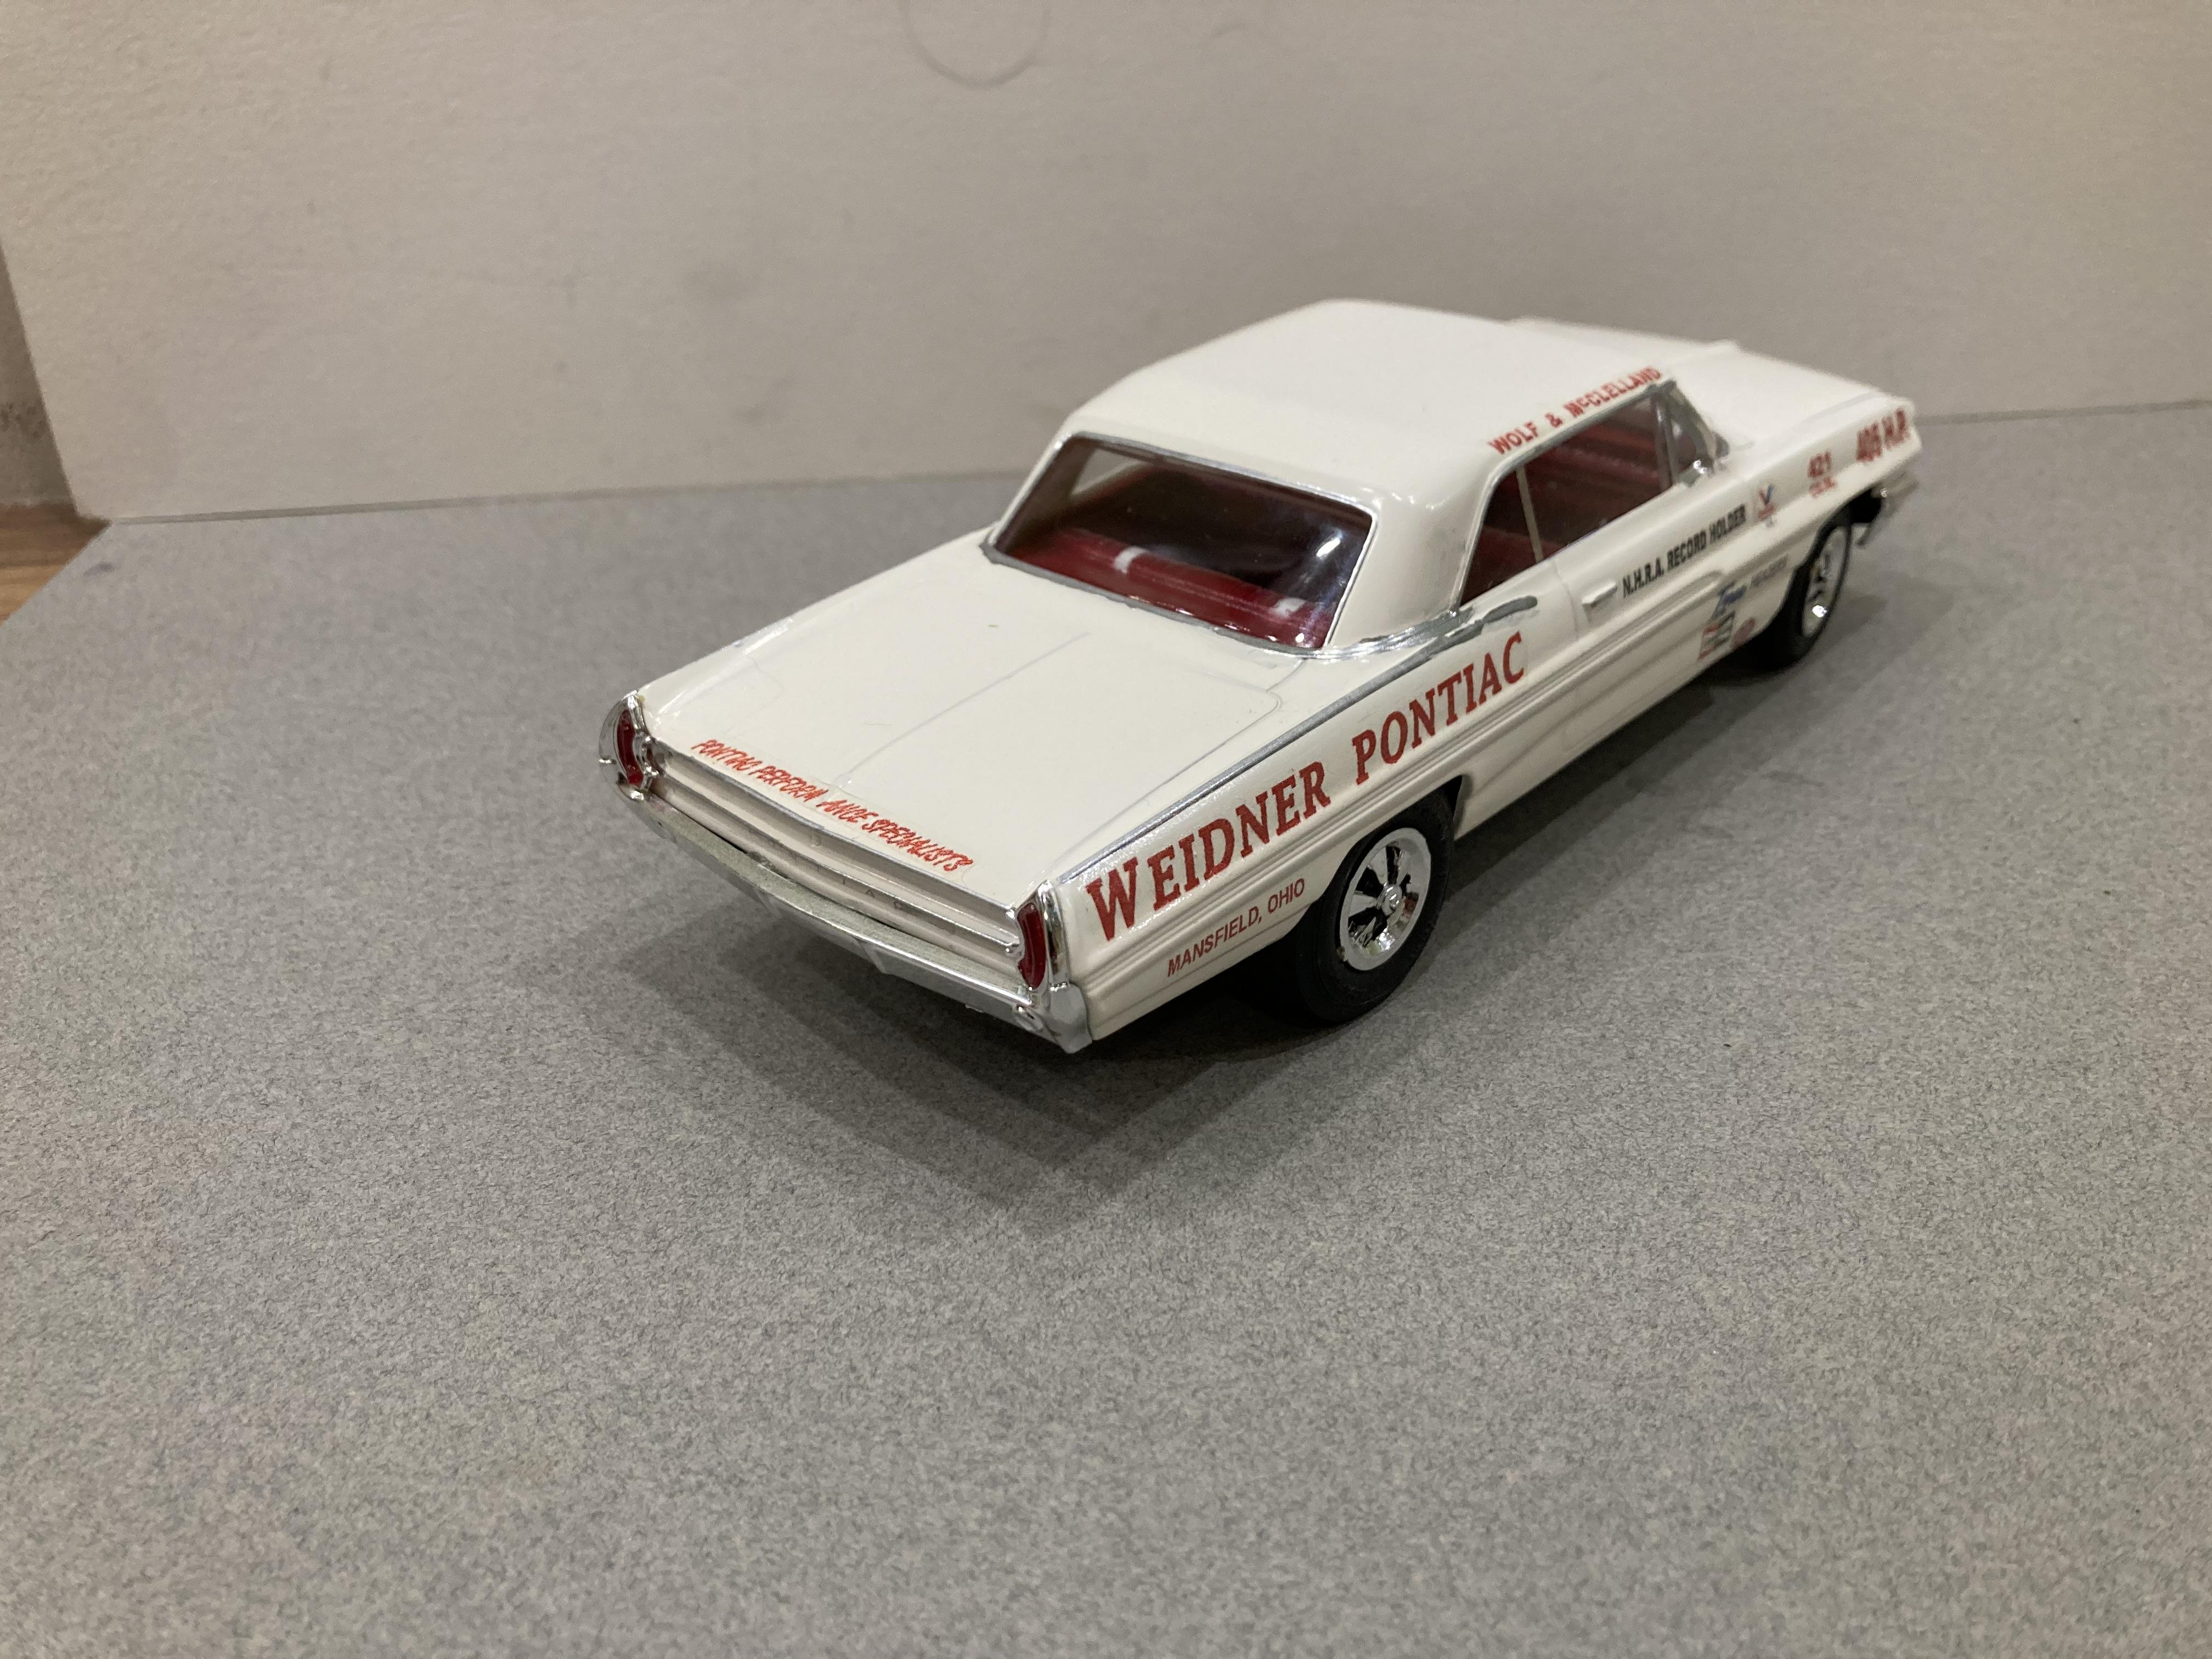
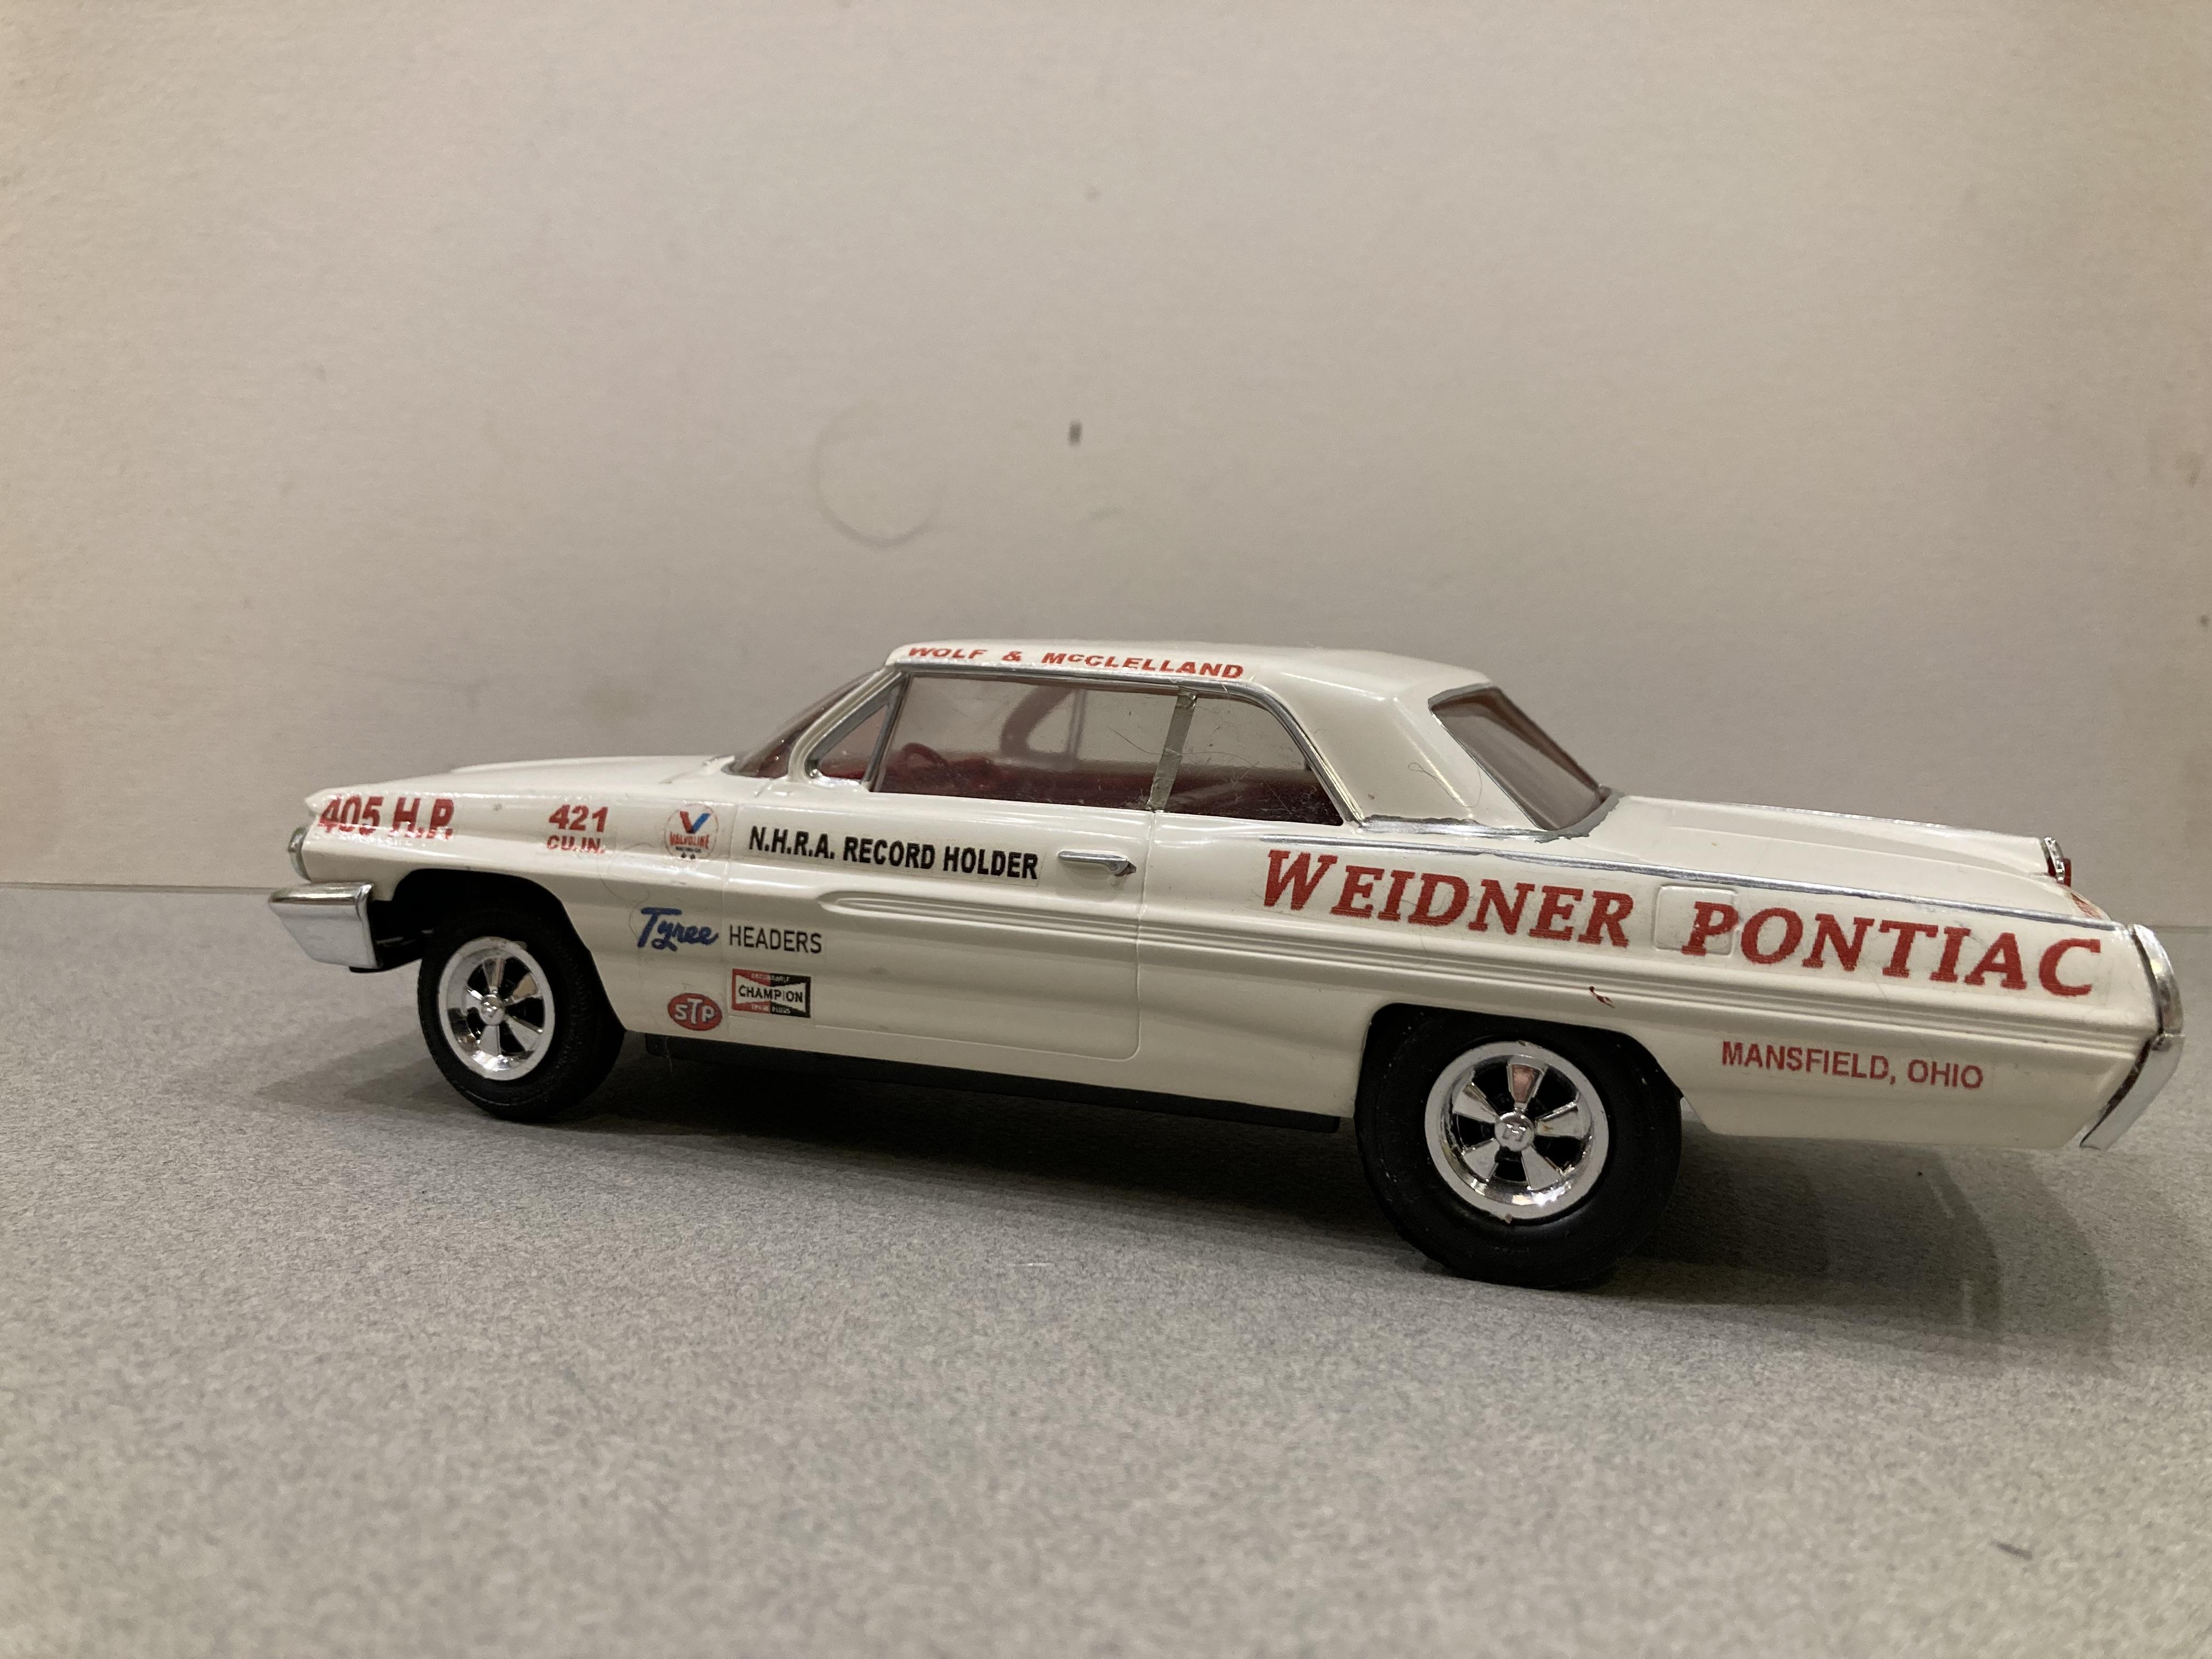
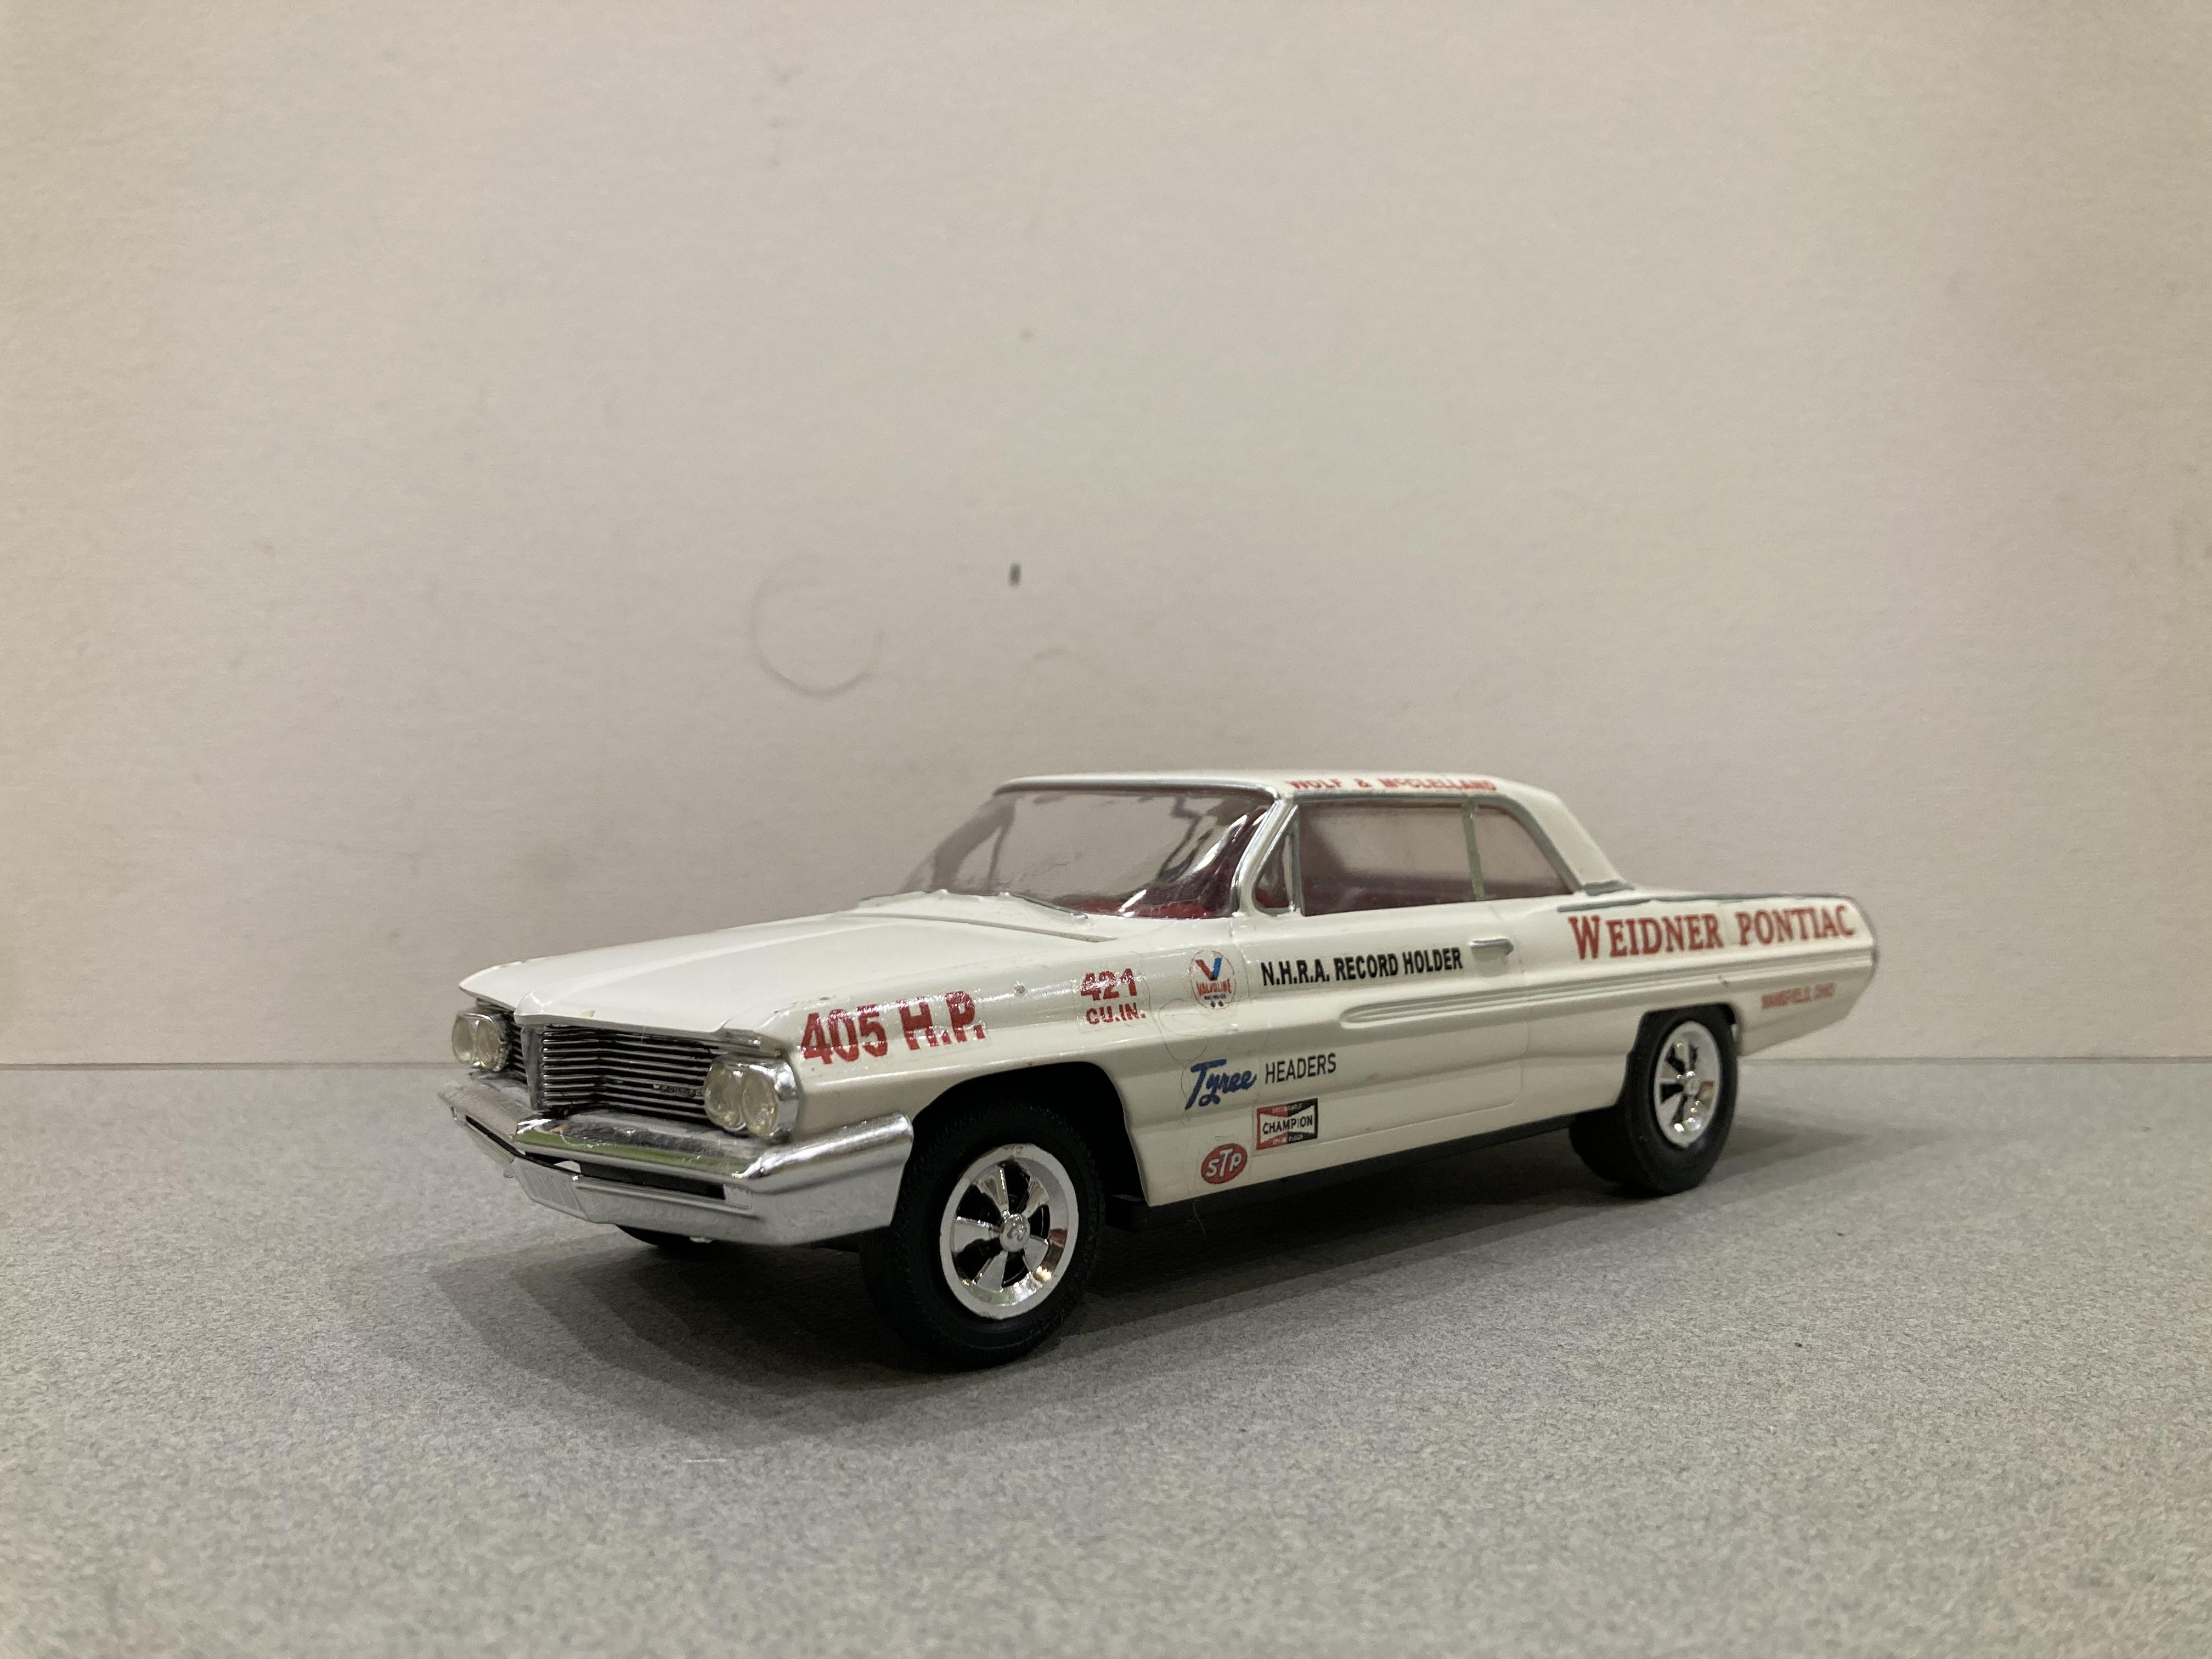
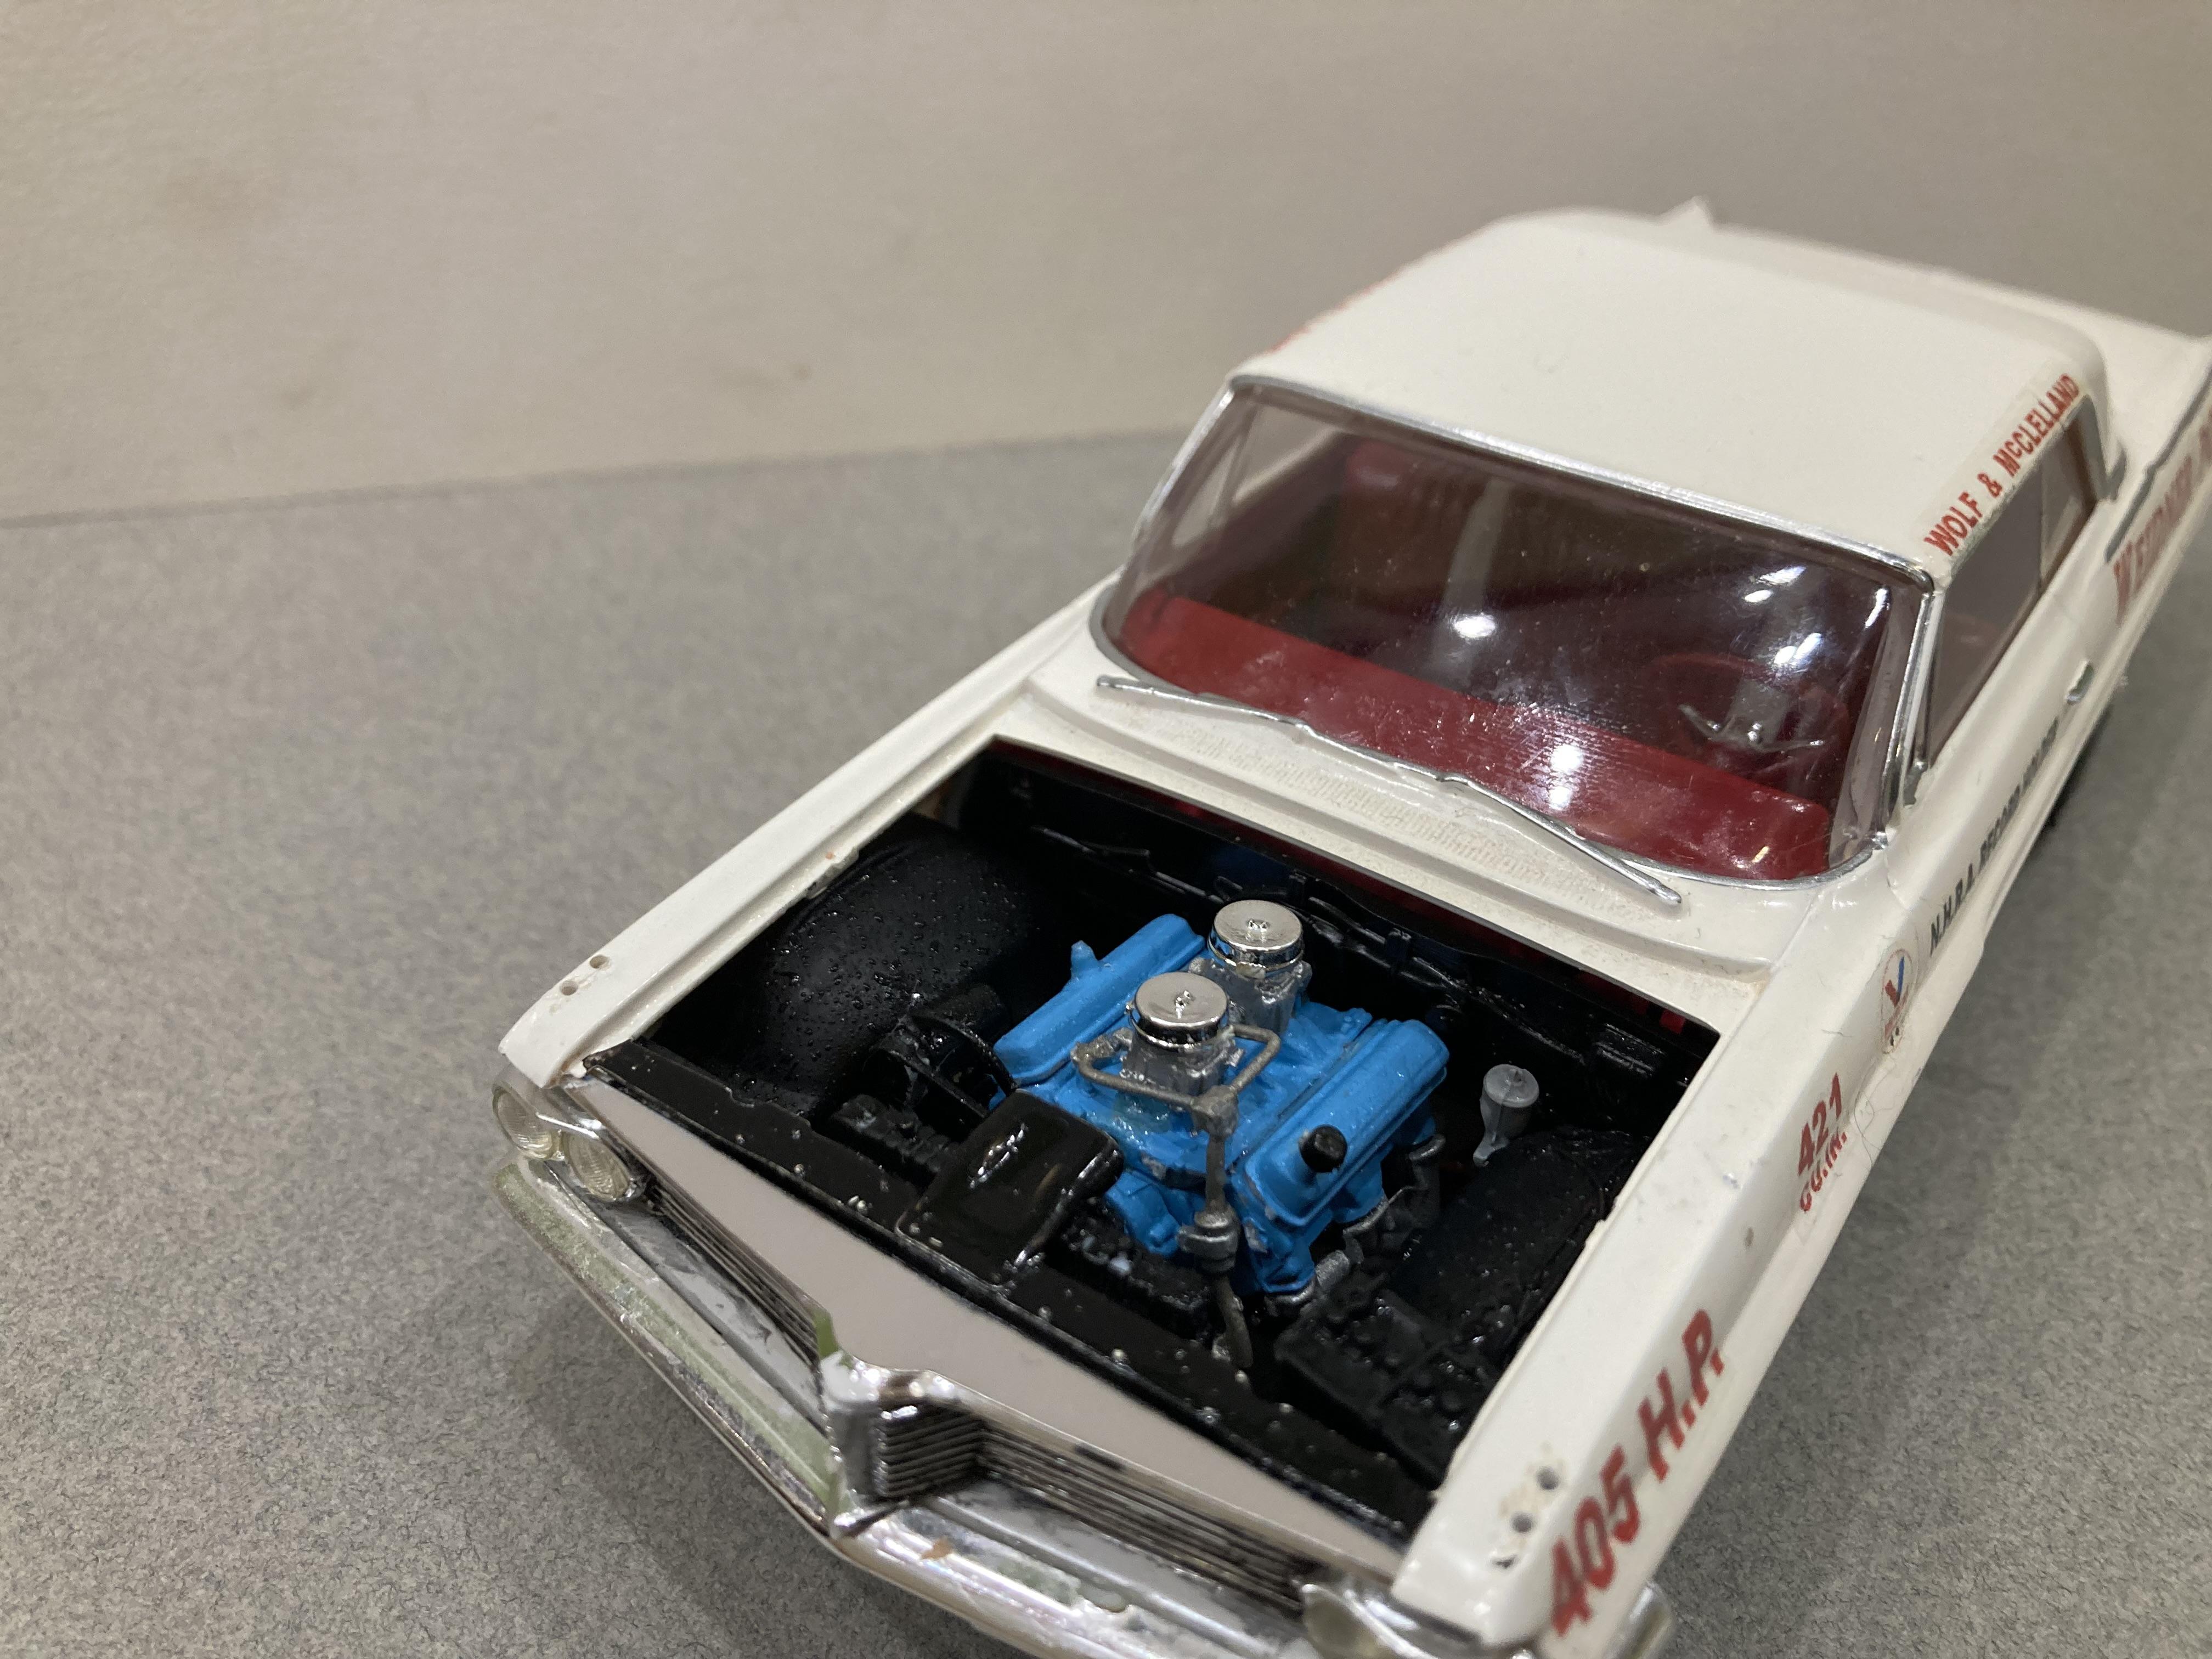
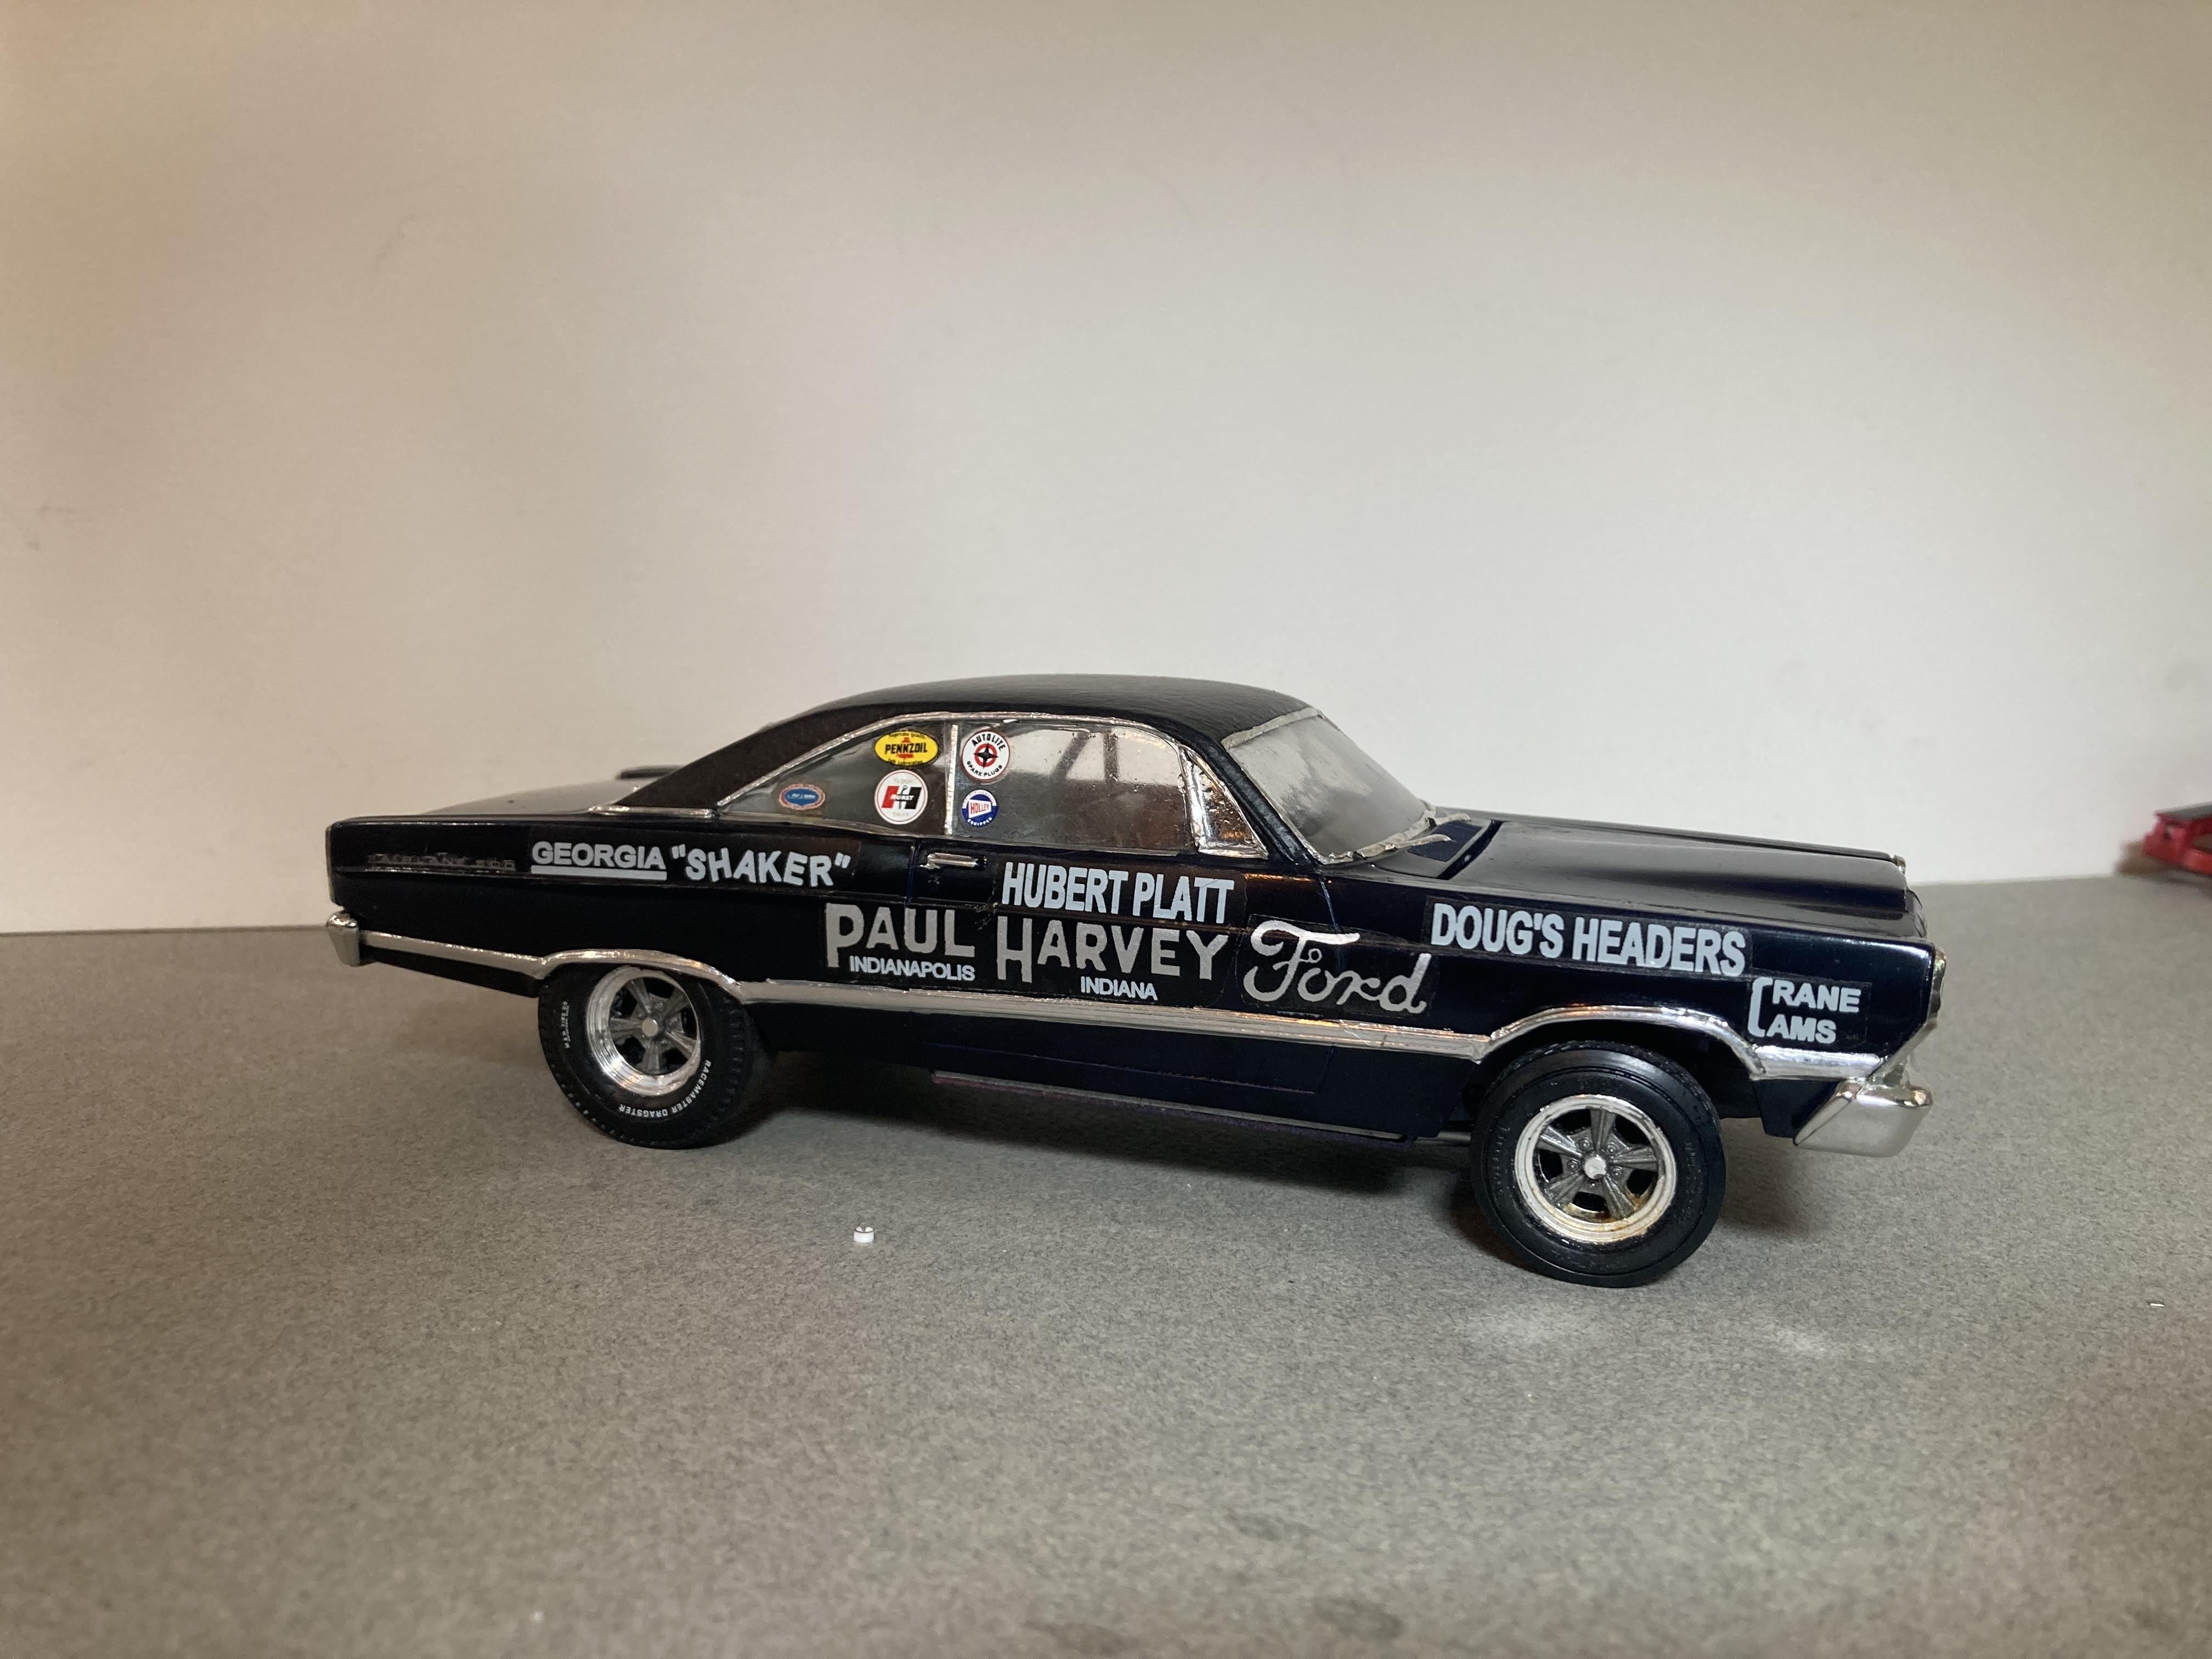
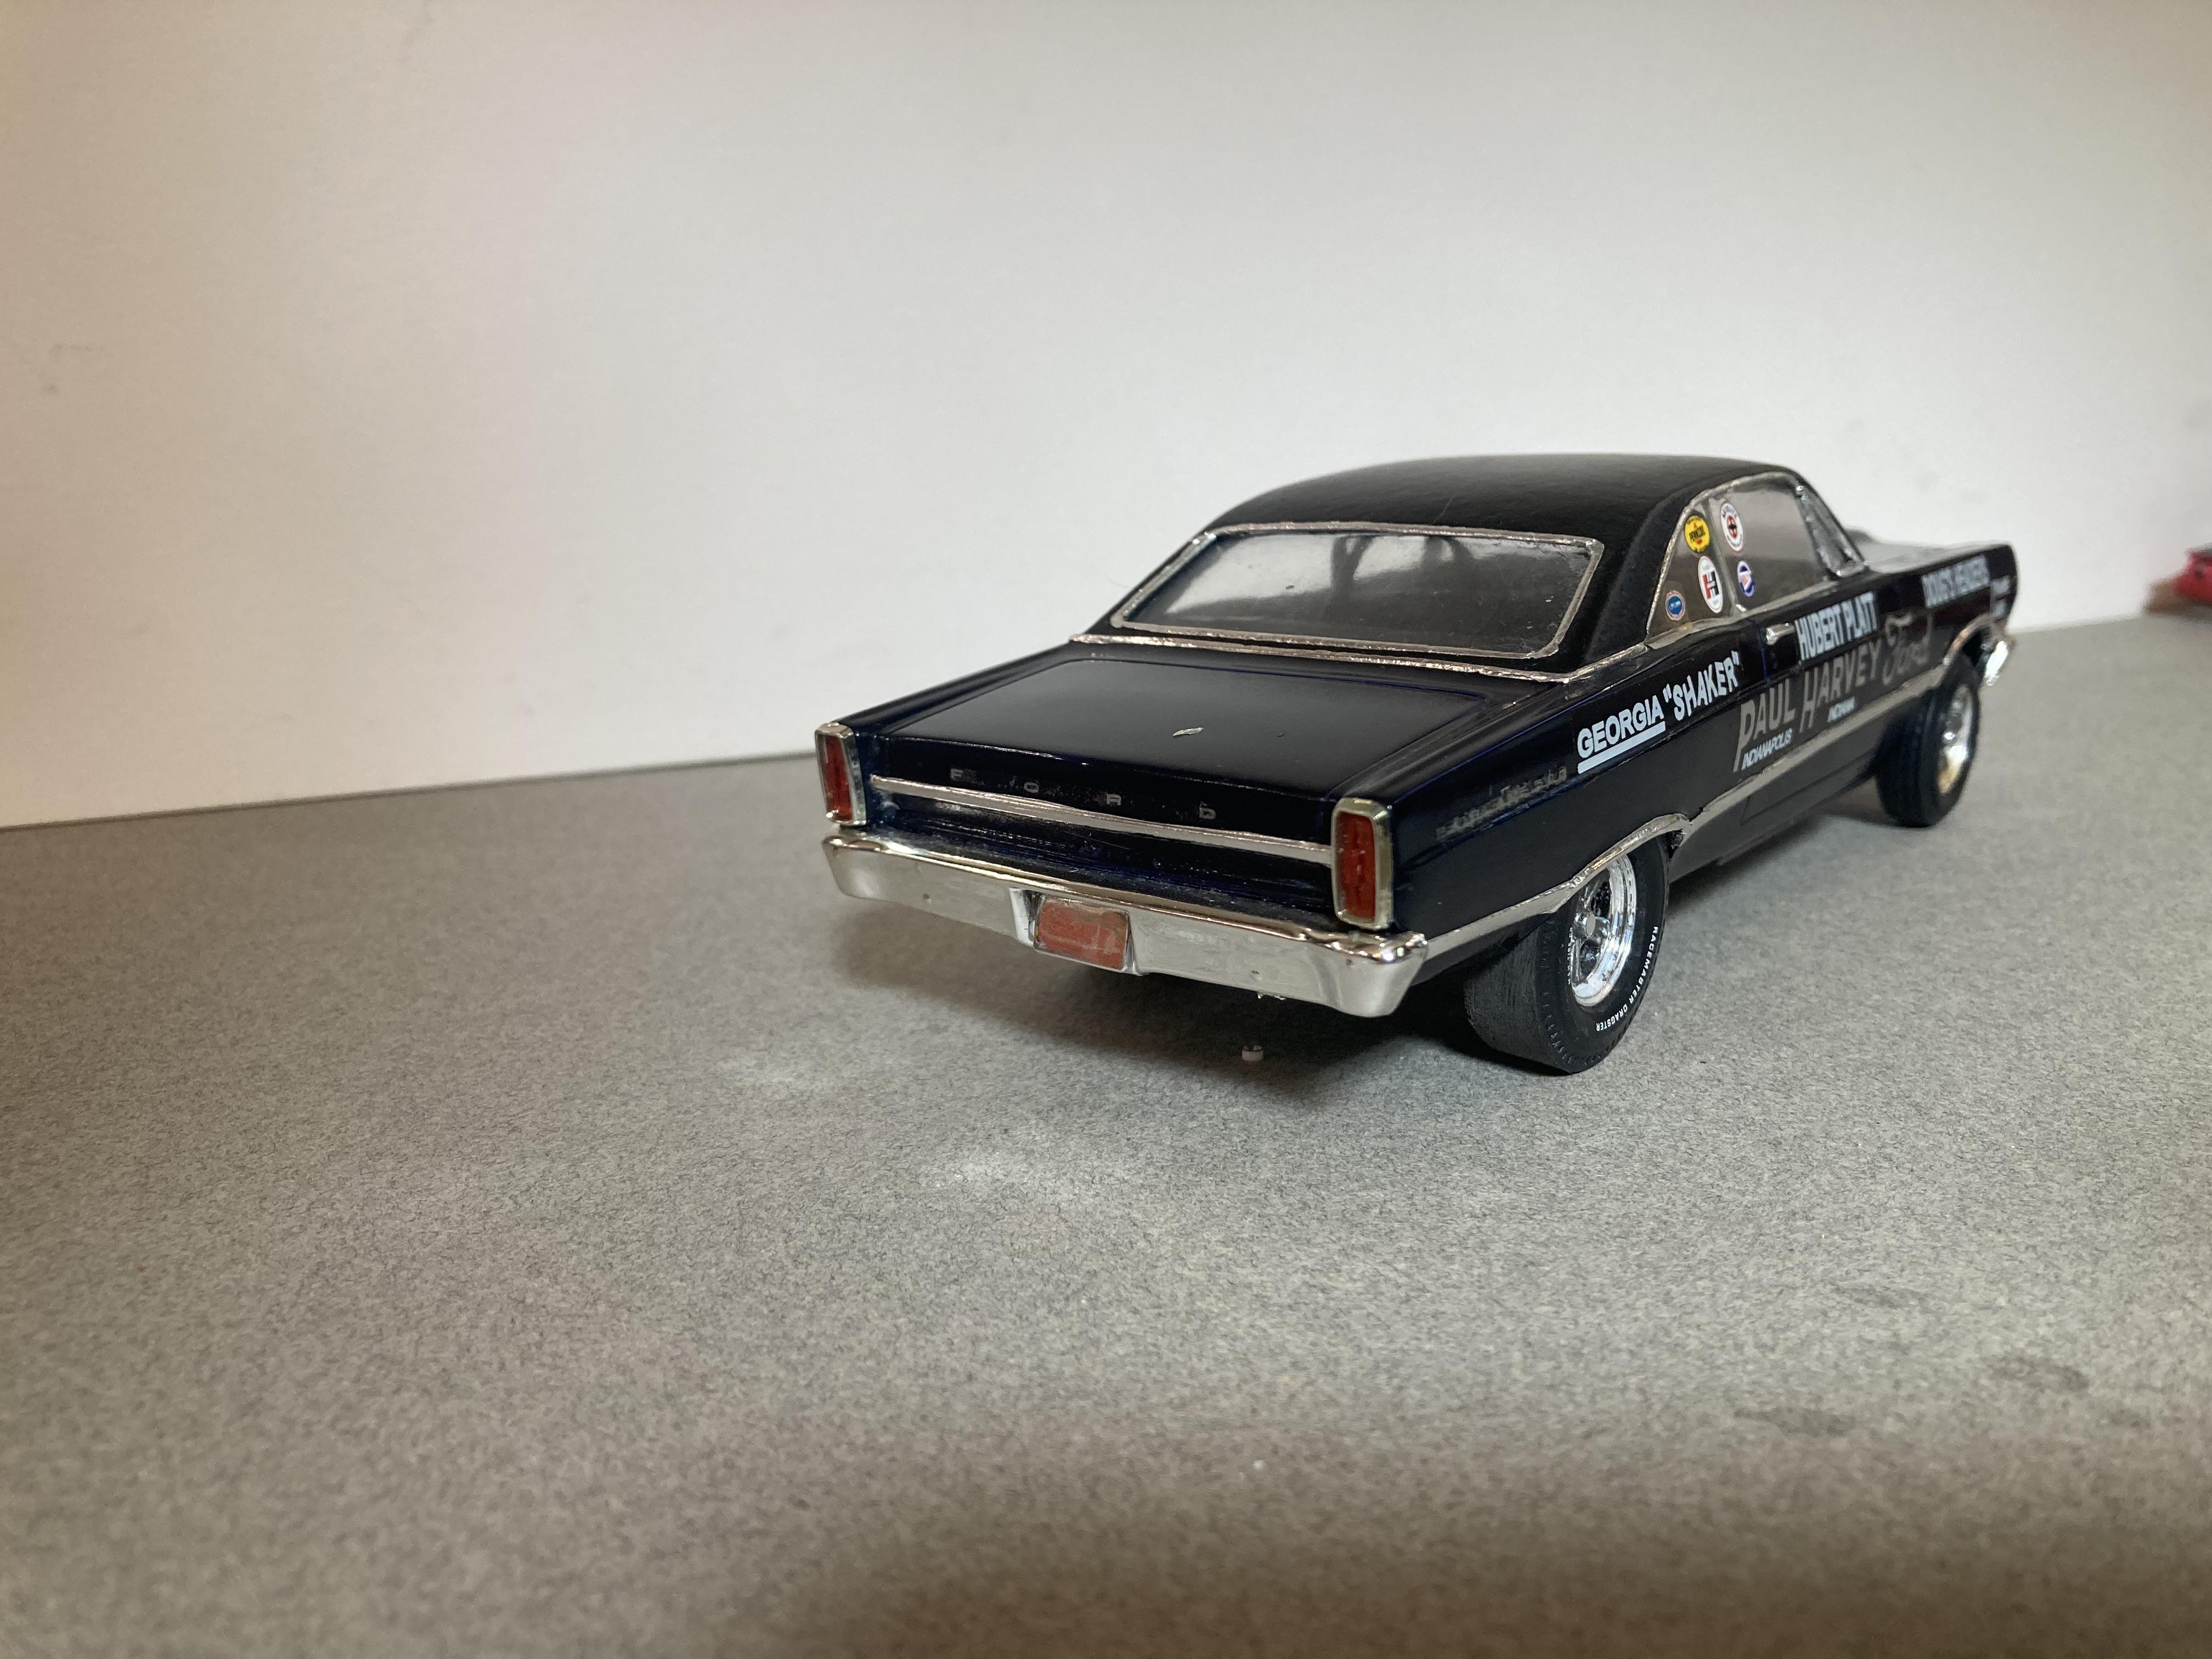
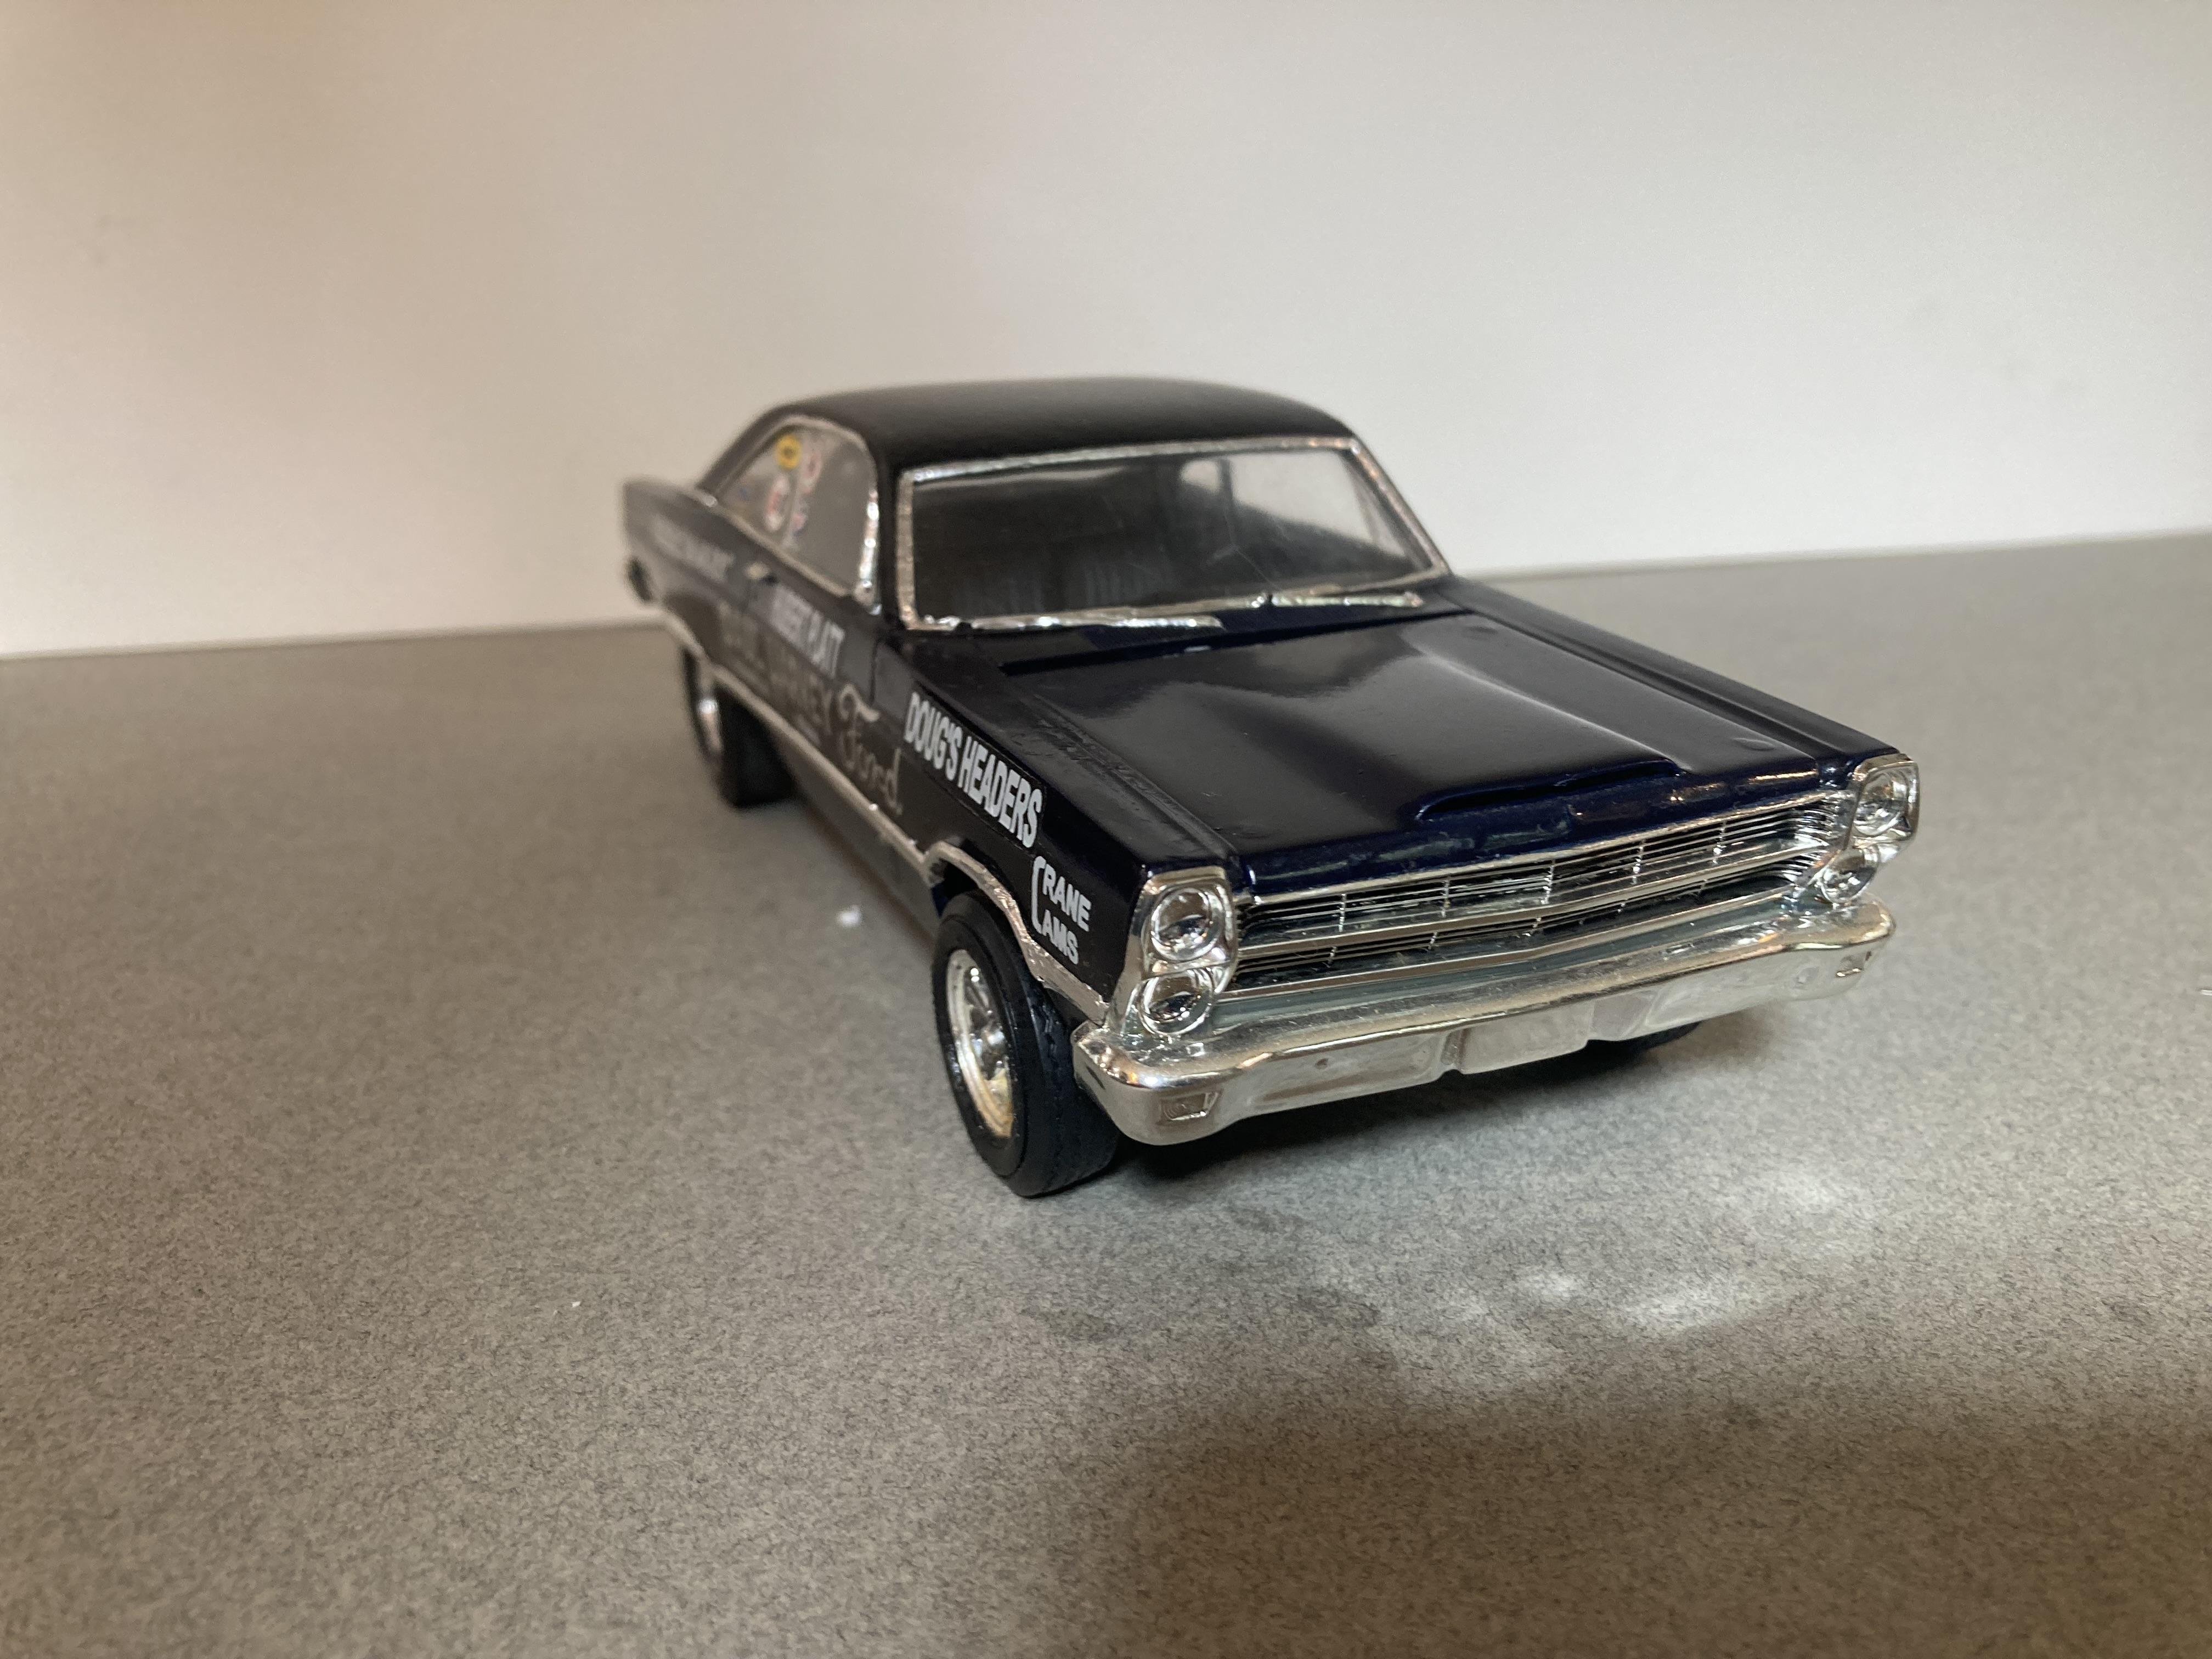
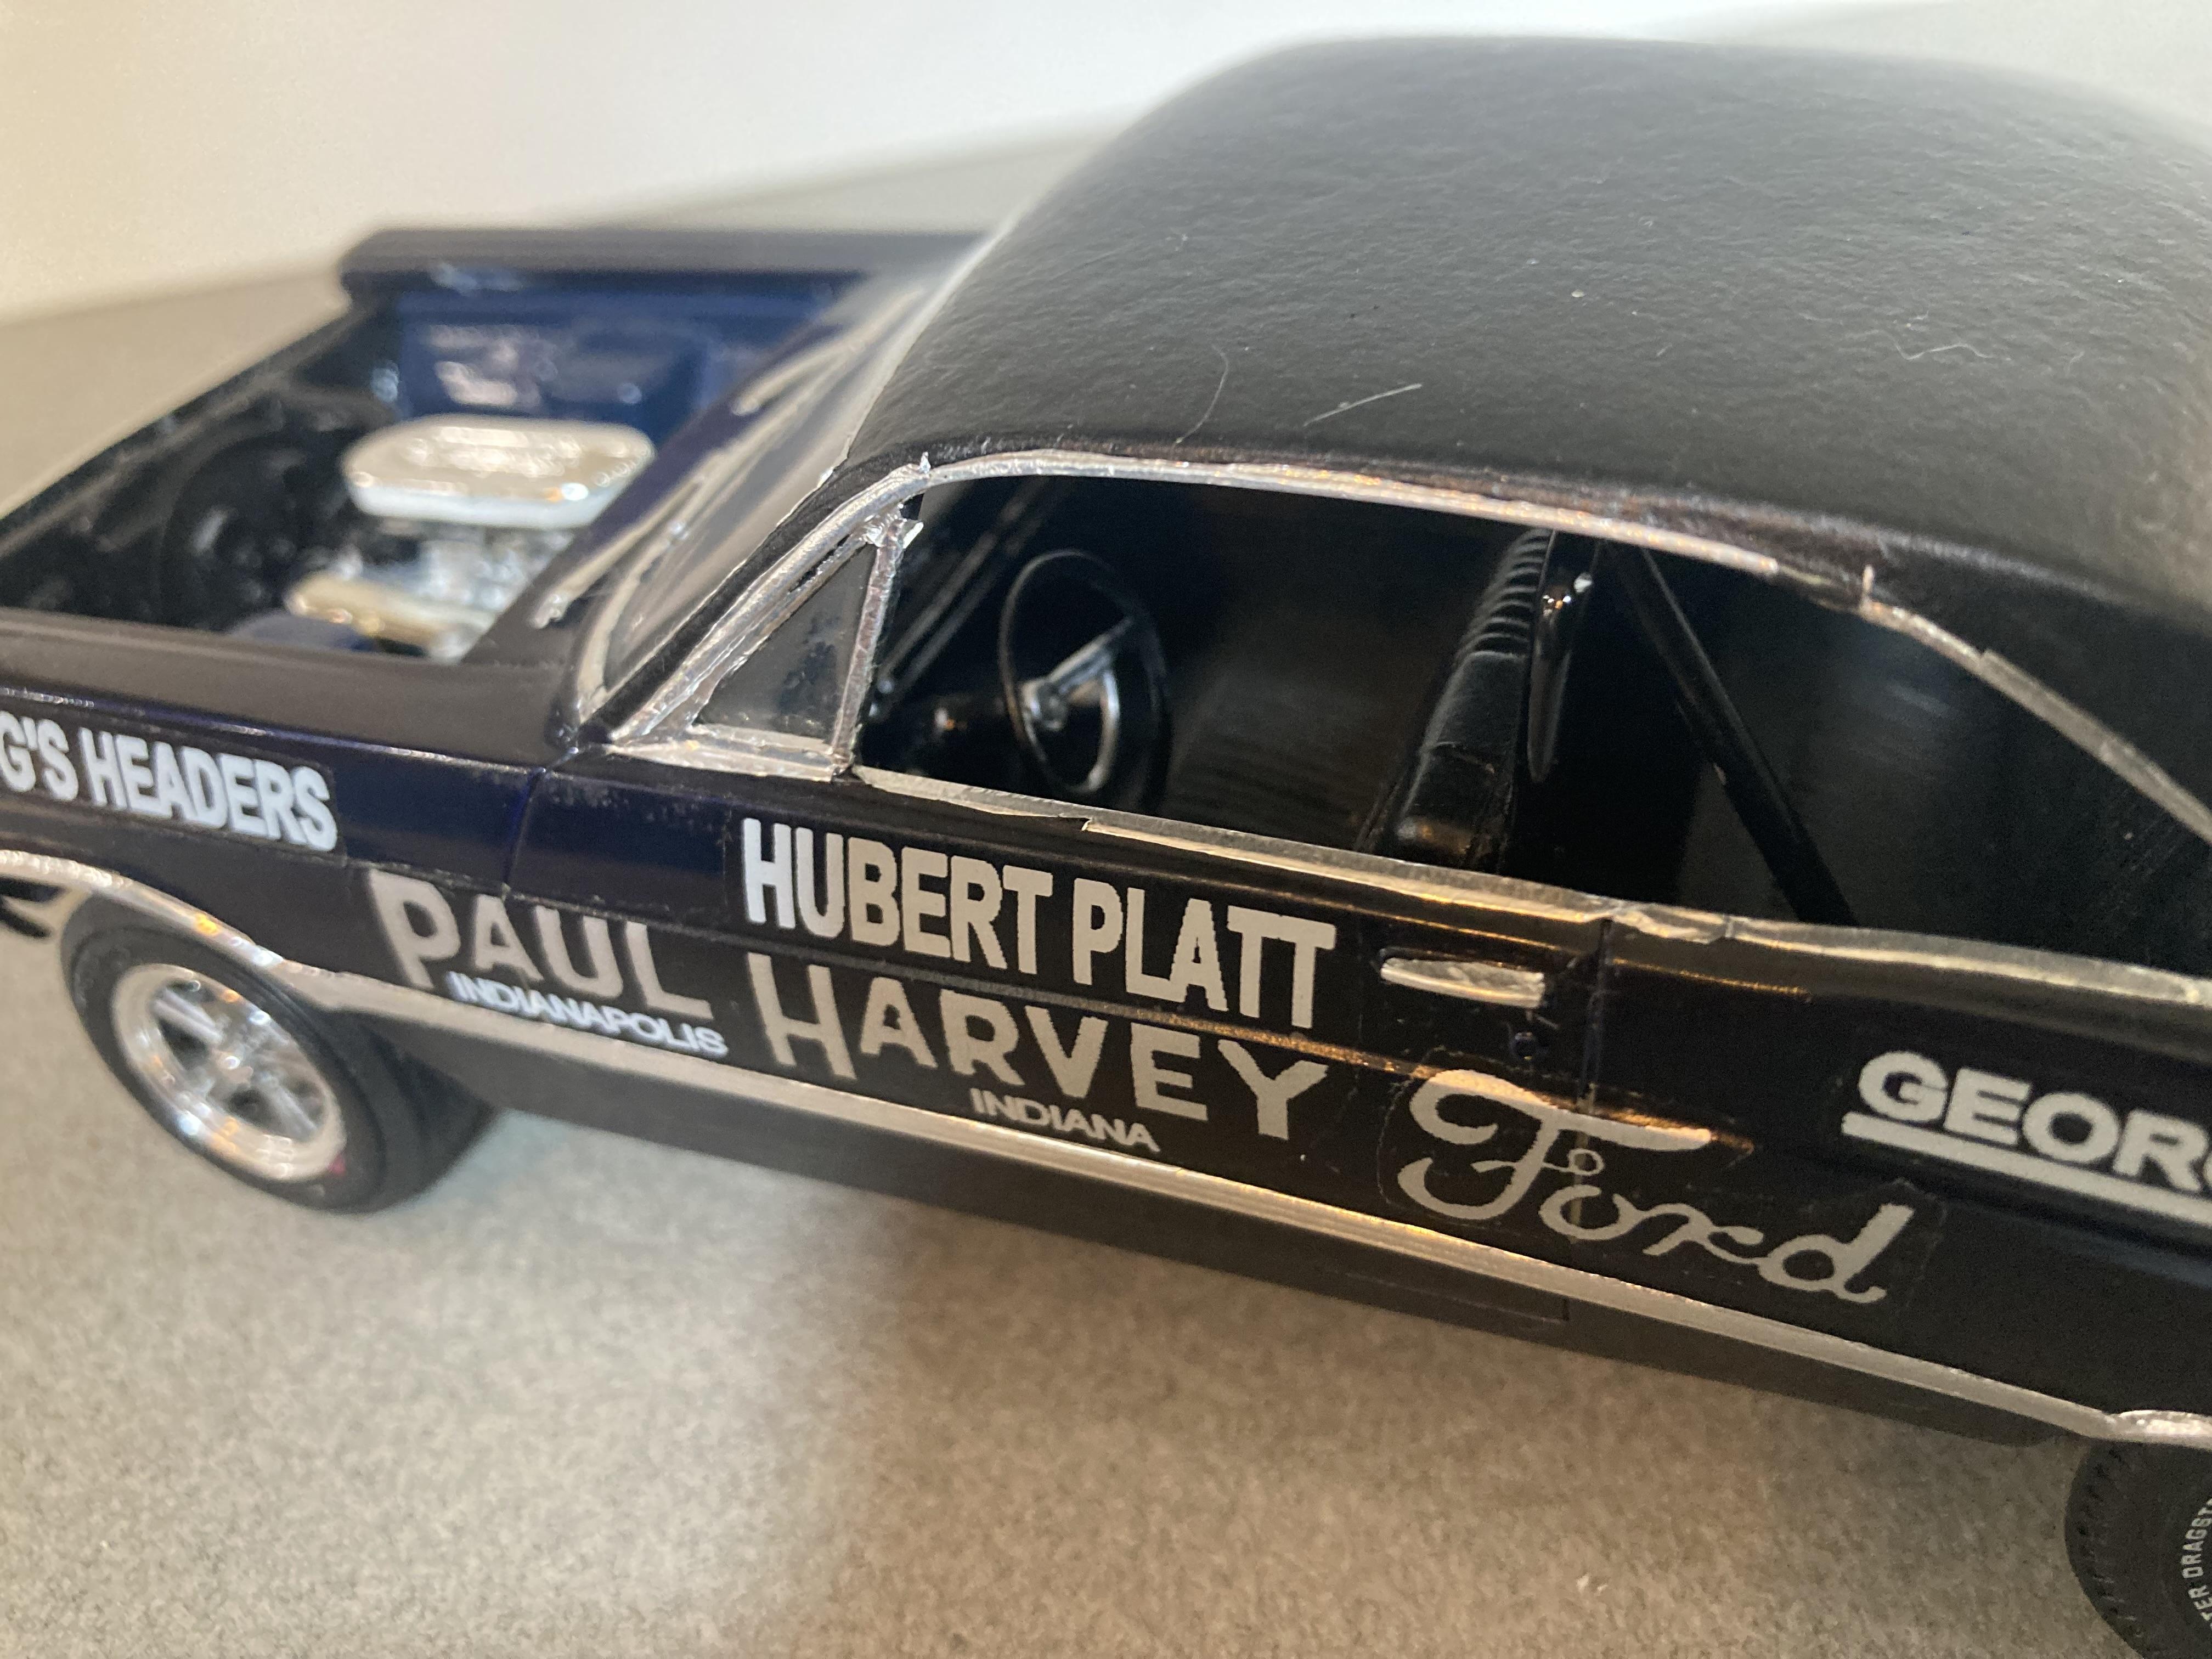
I used the amt kit for most of everything, the wheels came from revell’s thunderbolt, the slicks are amt the headers are custom made to fit the chassis. I have lost count of how many times I glued my fingers to the body attaching all the side trim and trim for the vinyl top. I painted it tamyia dark blue which almost looks black which I believe was the original color of the car . The decals are old Billy gooche. This was a complicated build getting the body’s trim right and sanded around. Until next time thanks for looking 👀, Mike
-
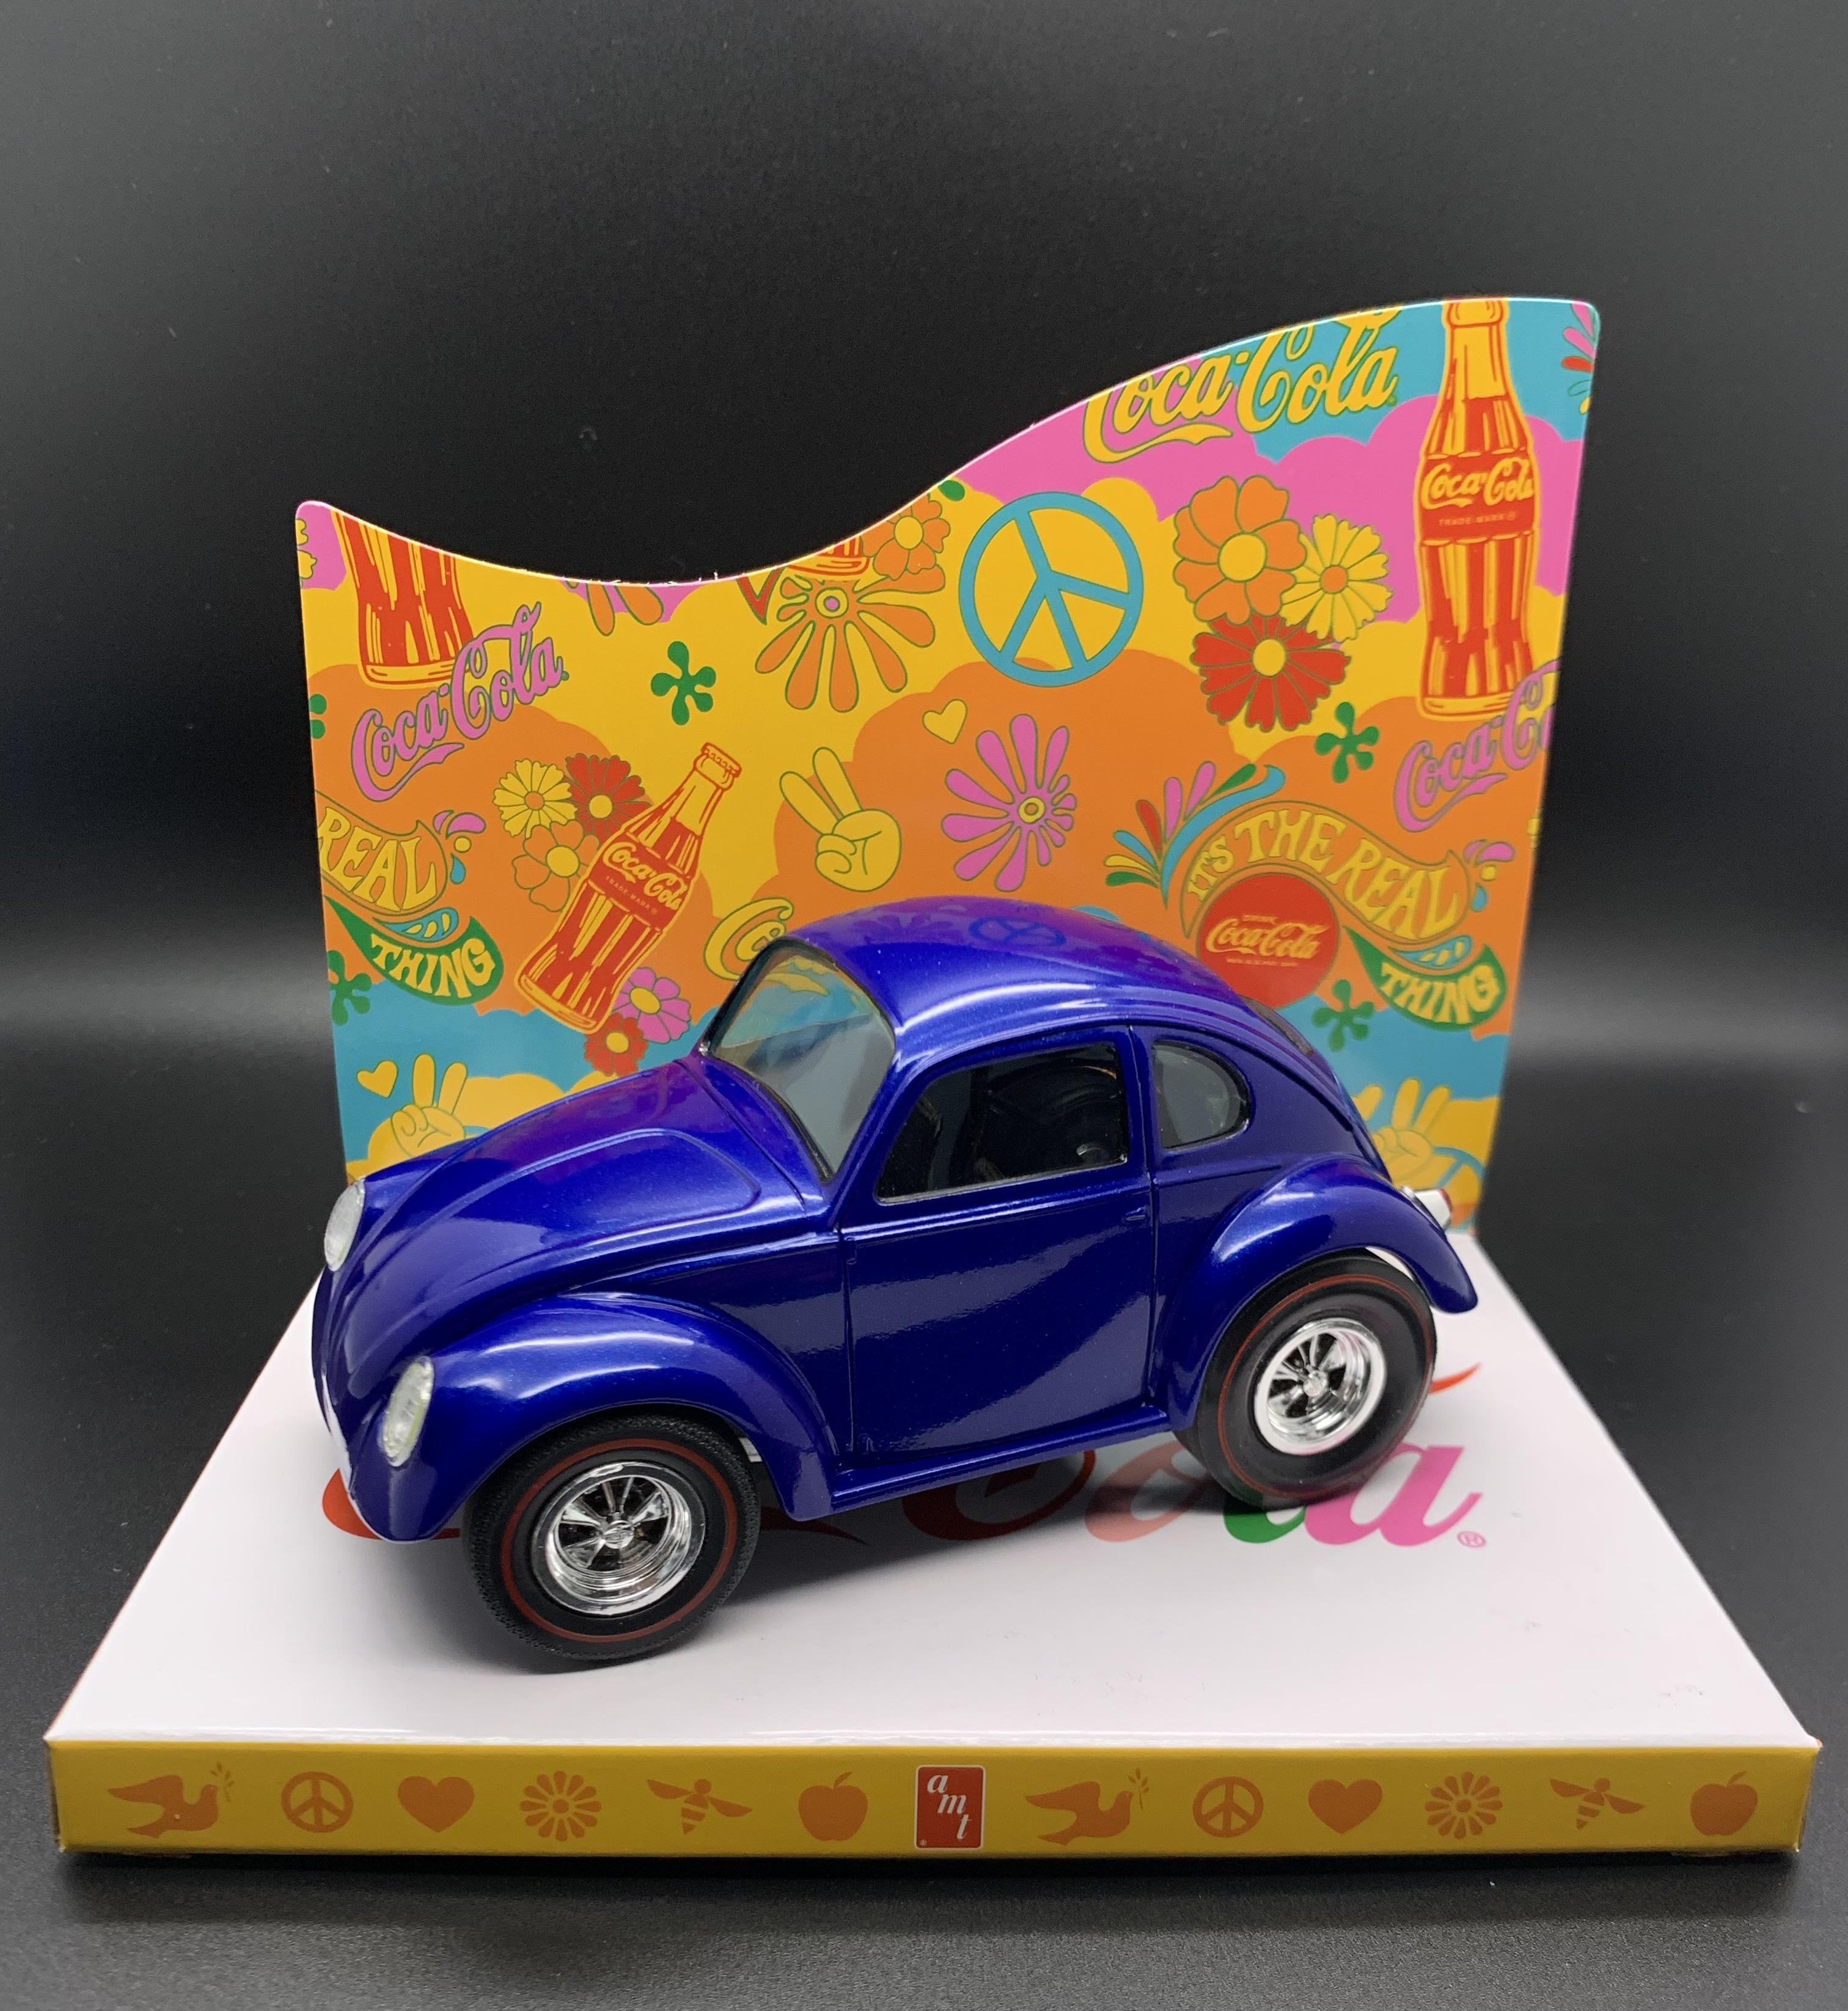
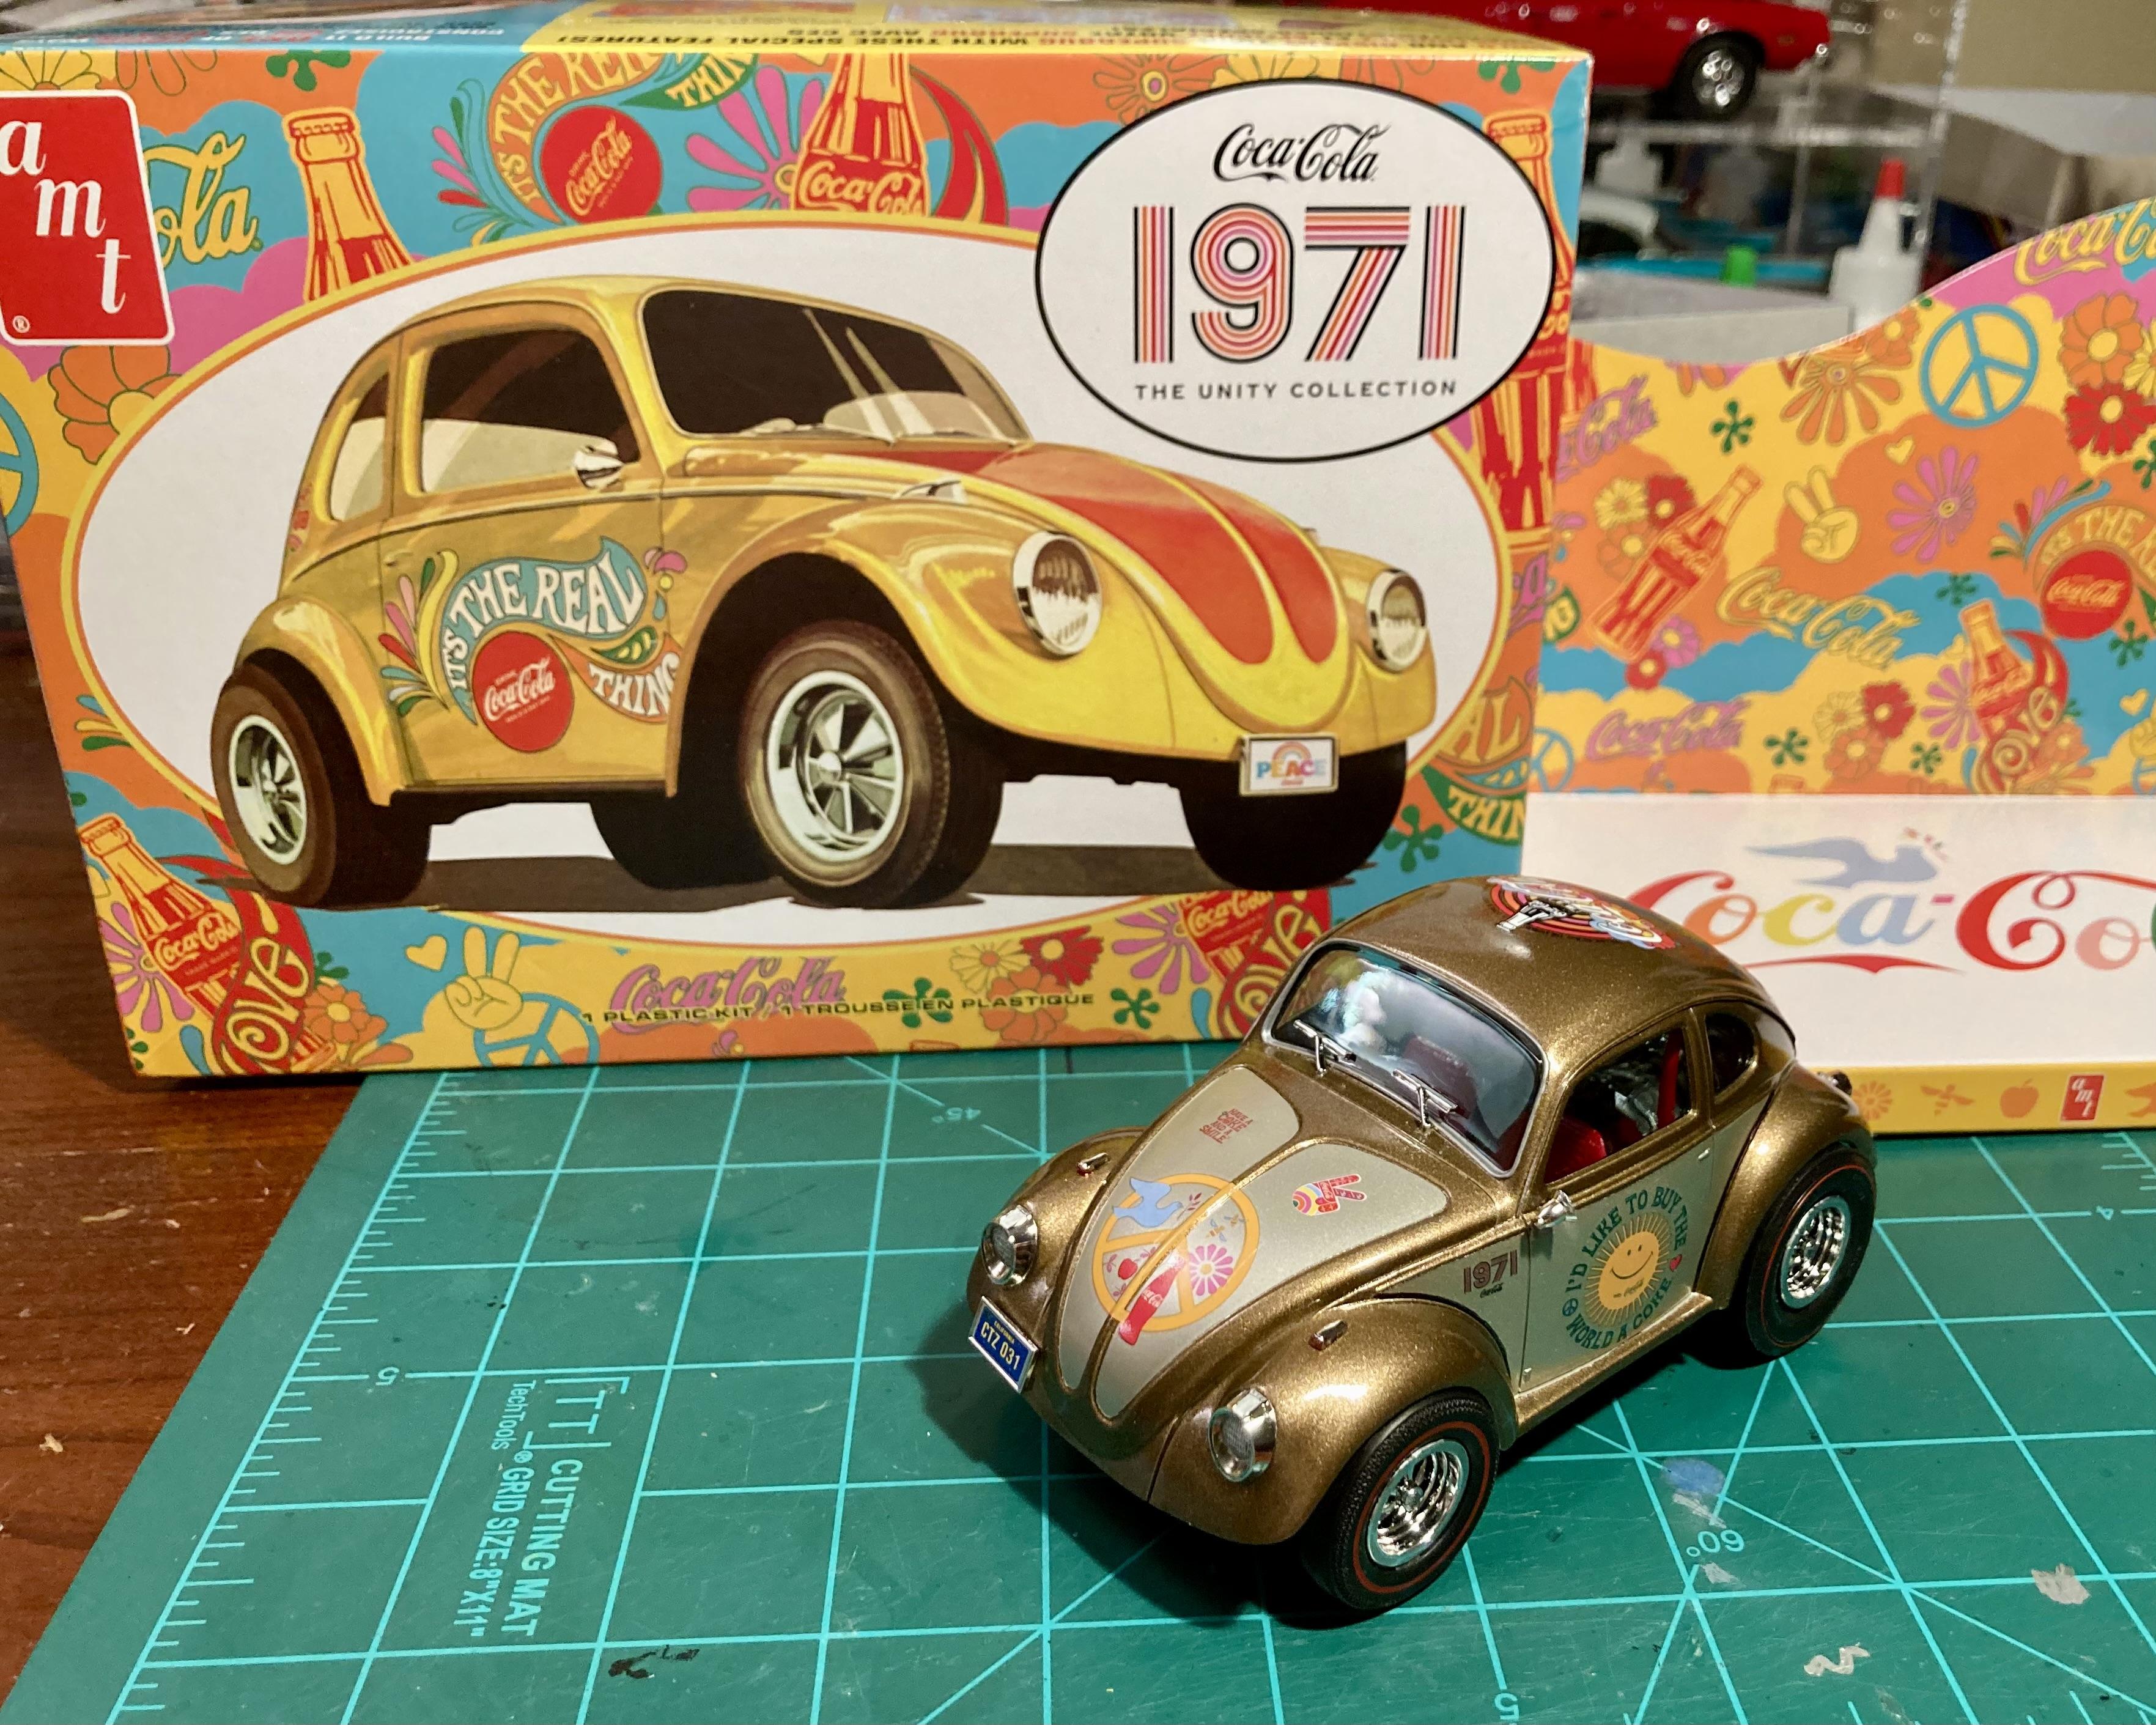
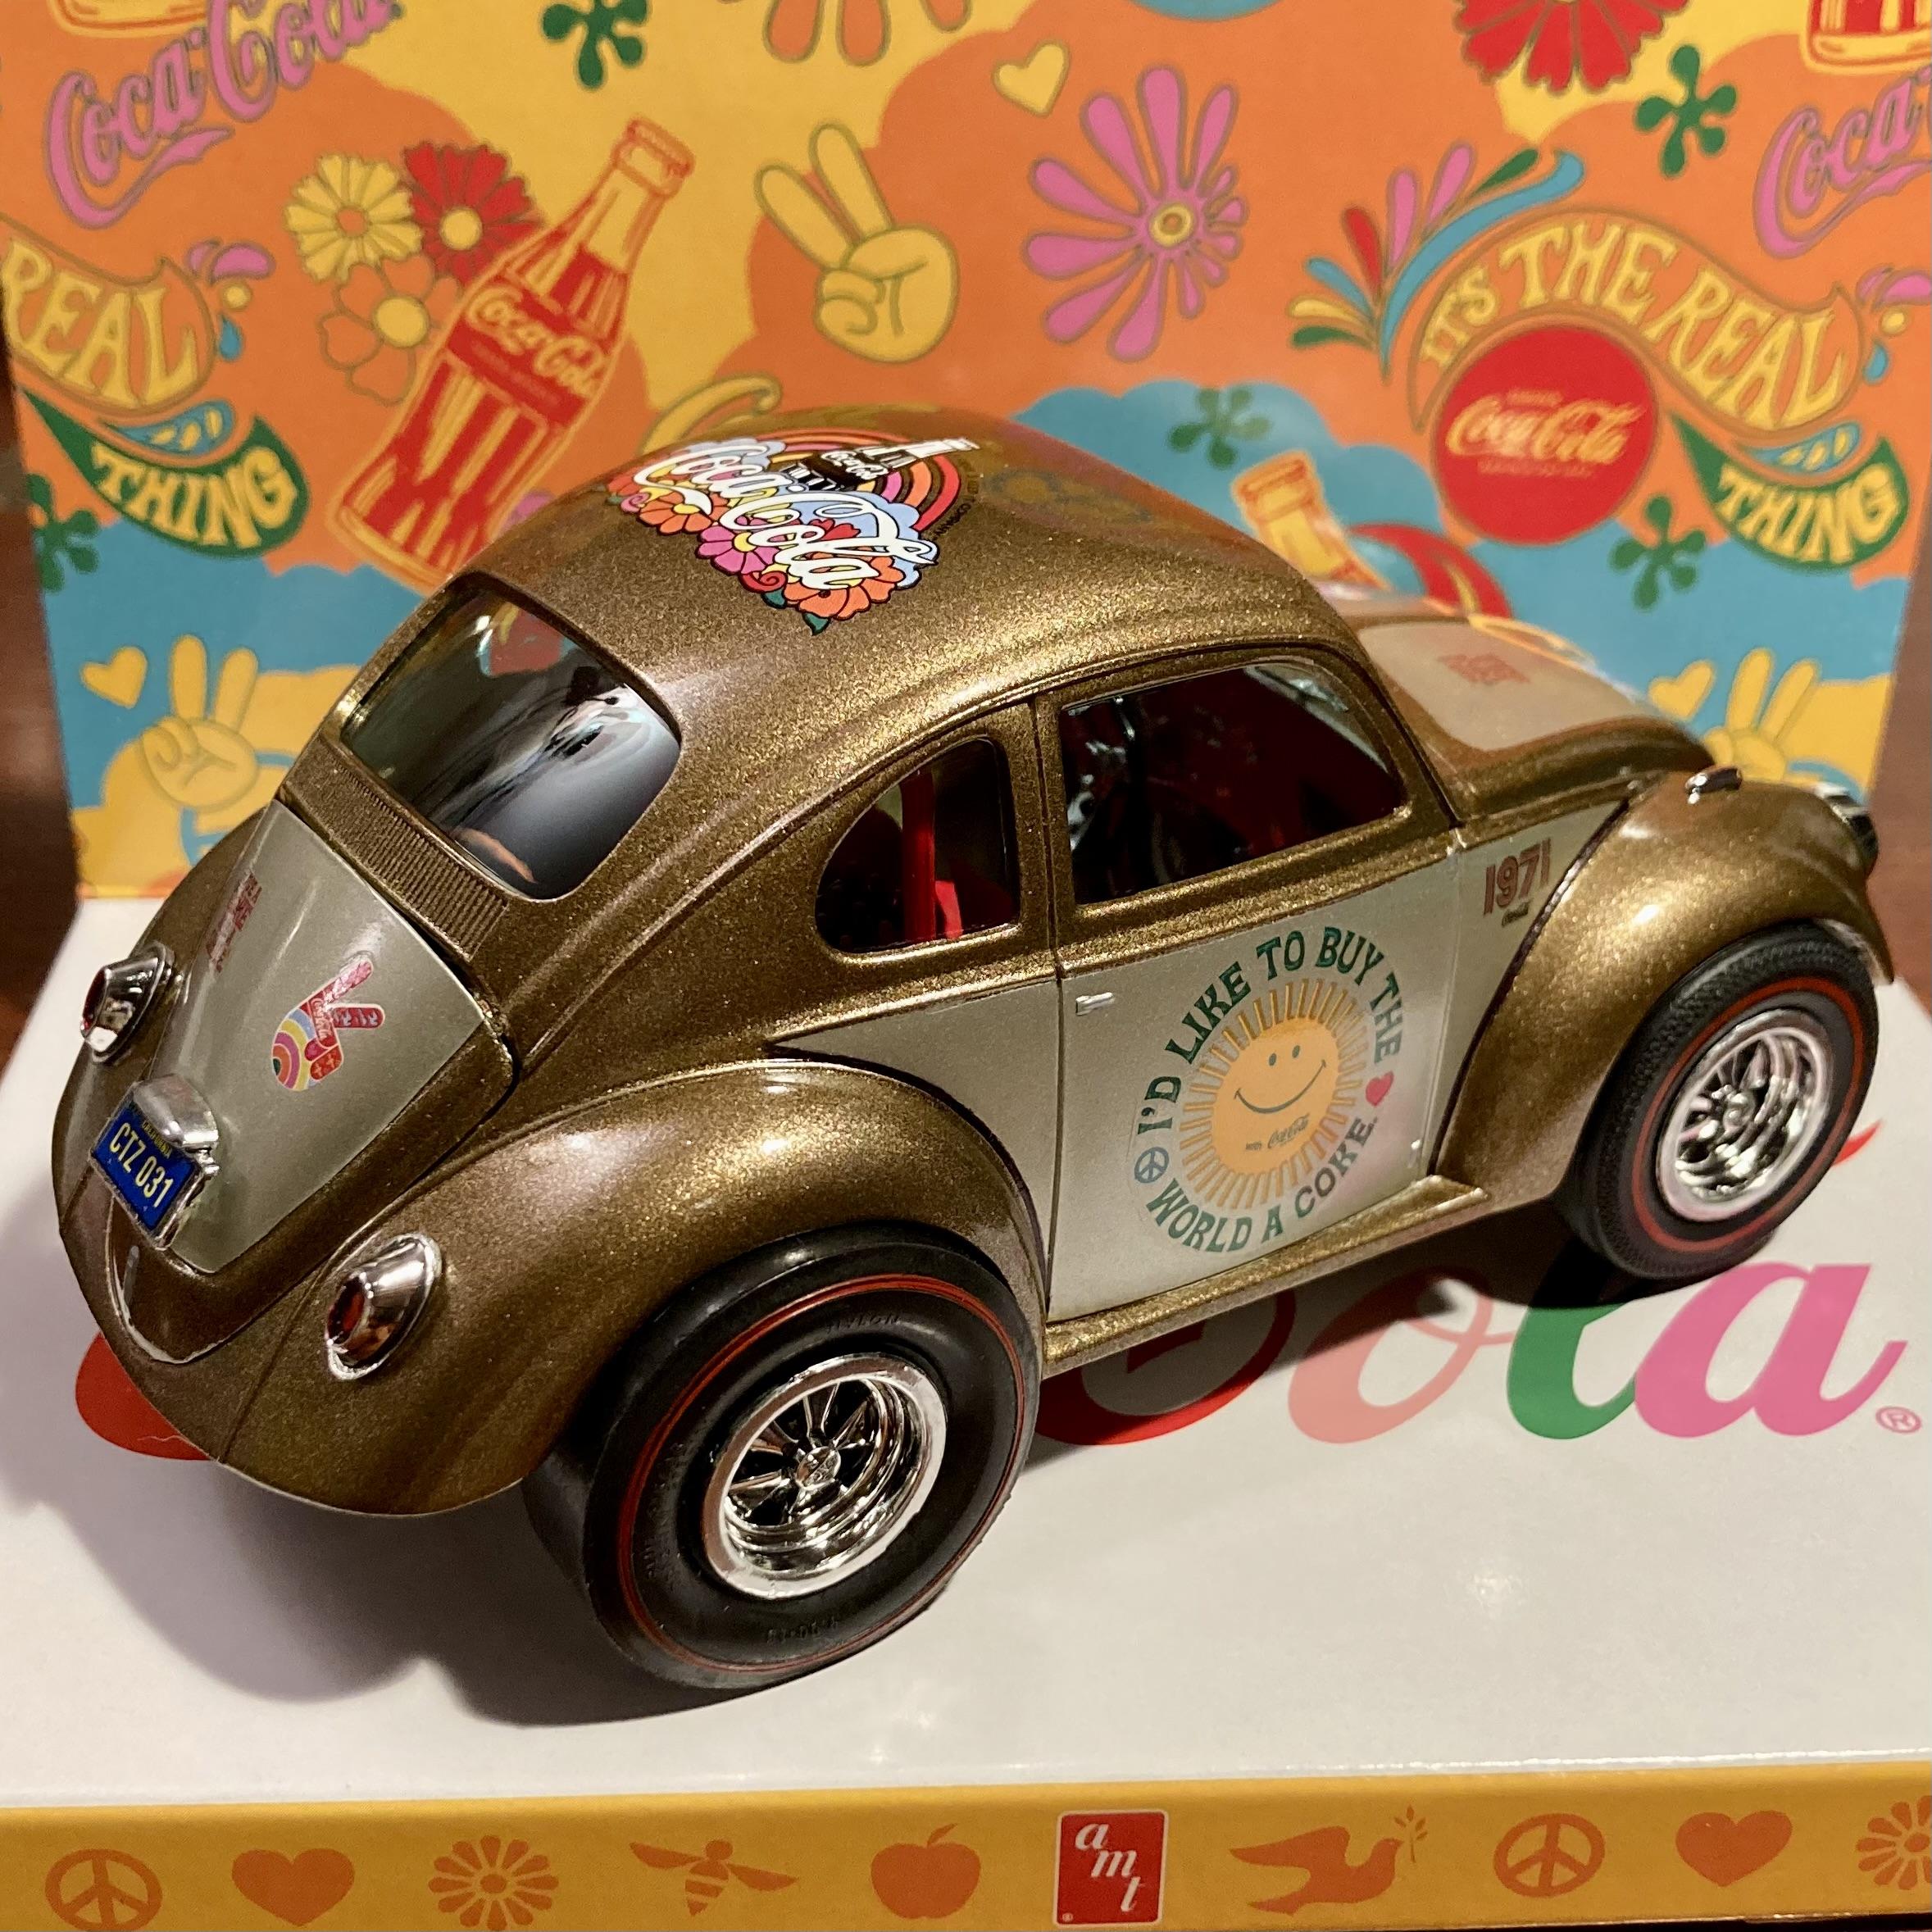
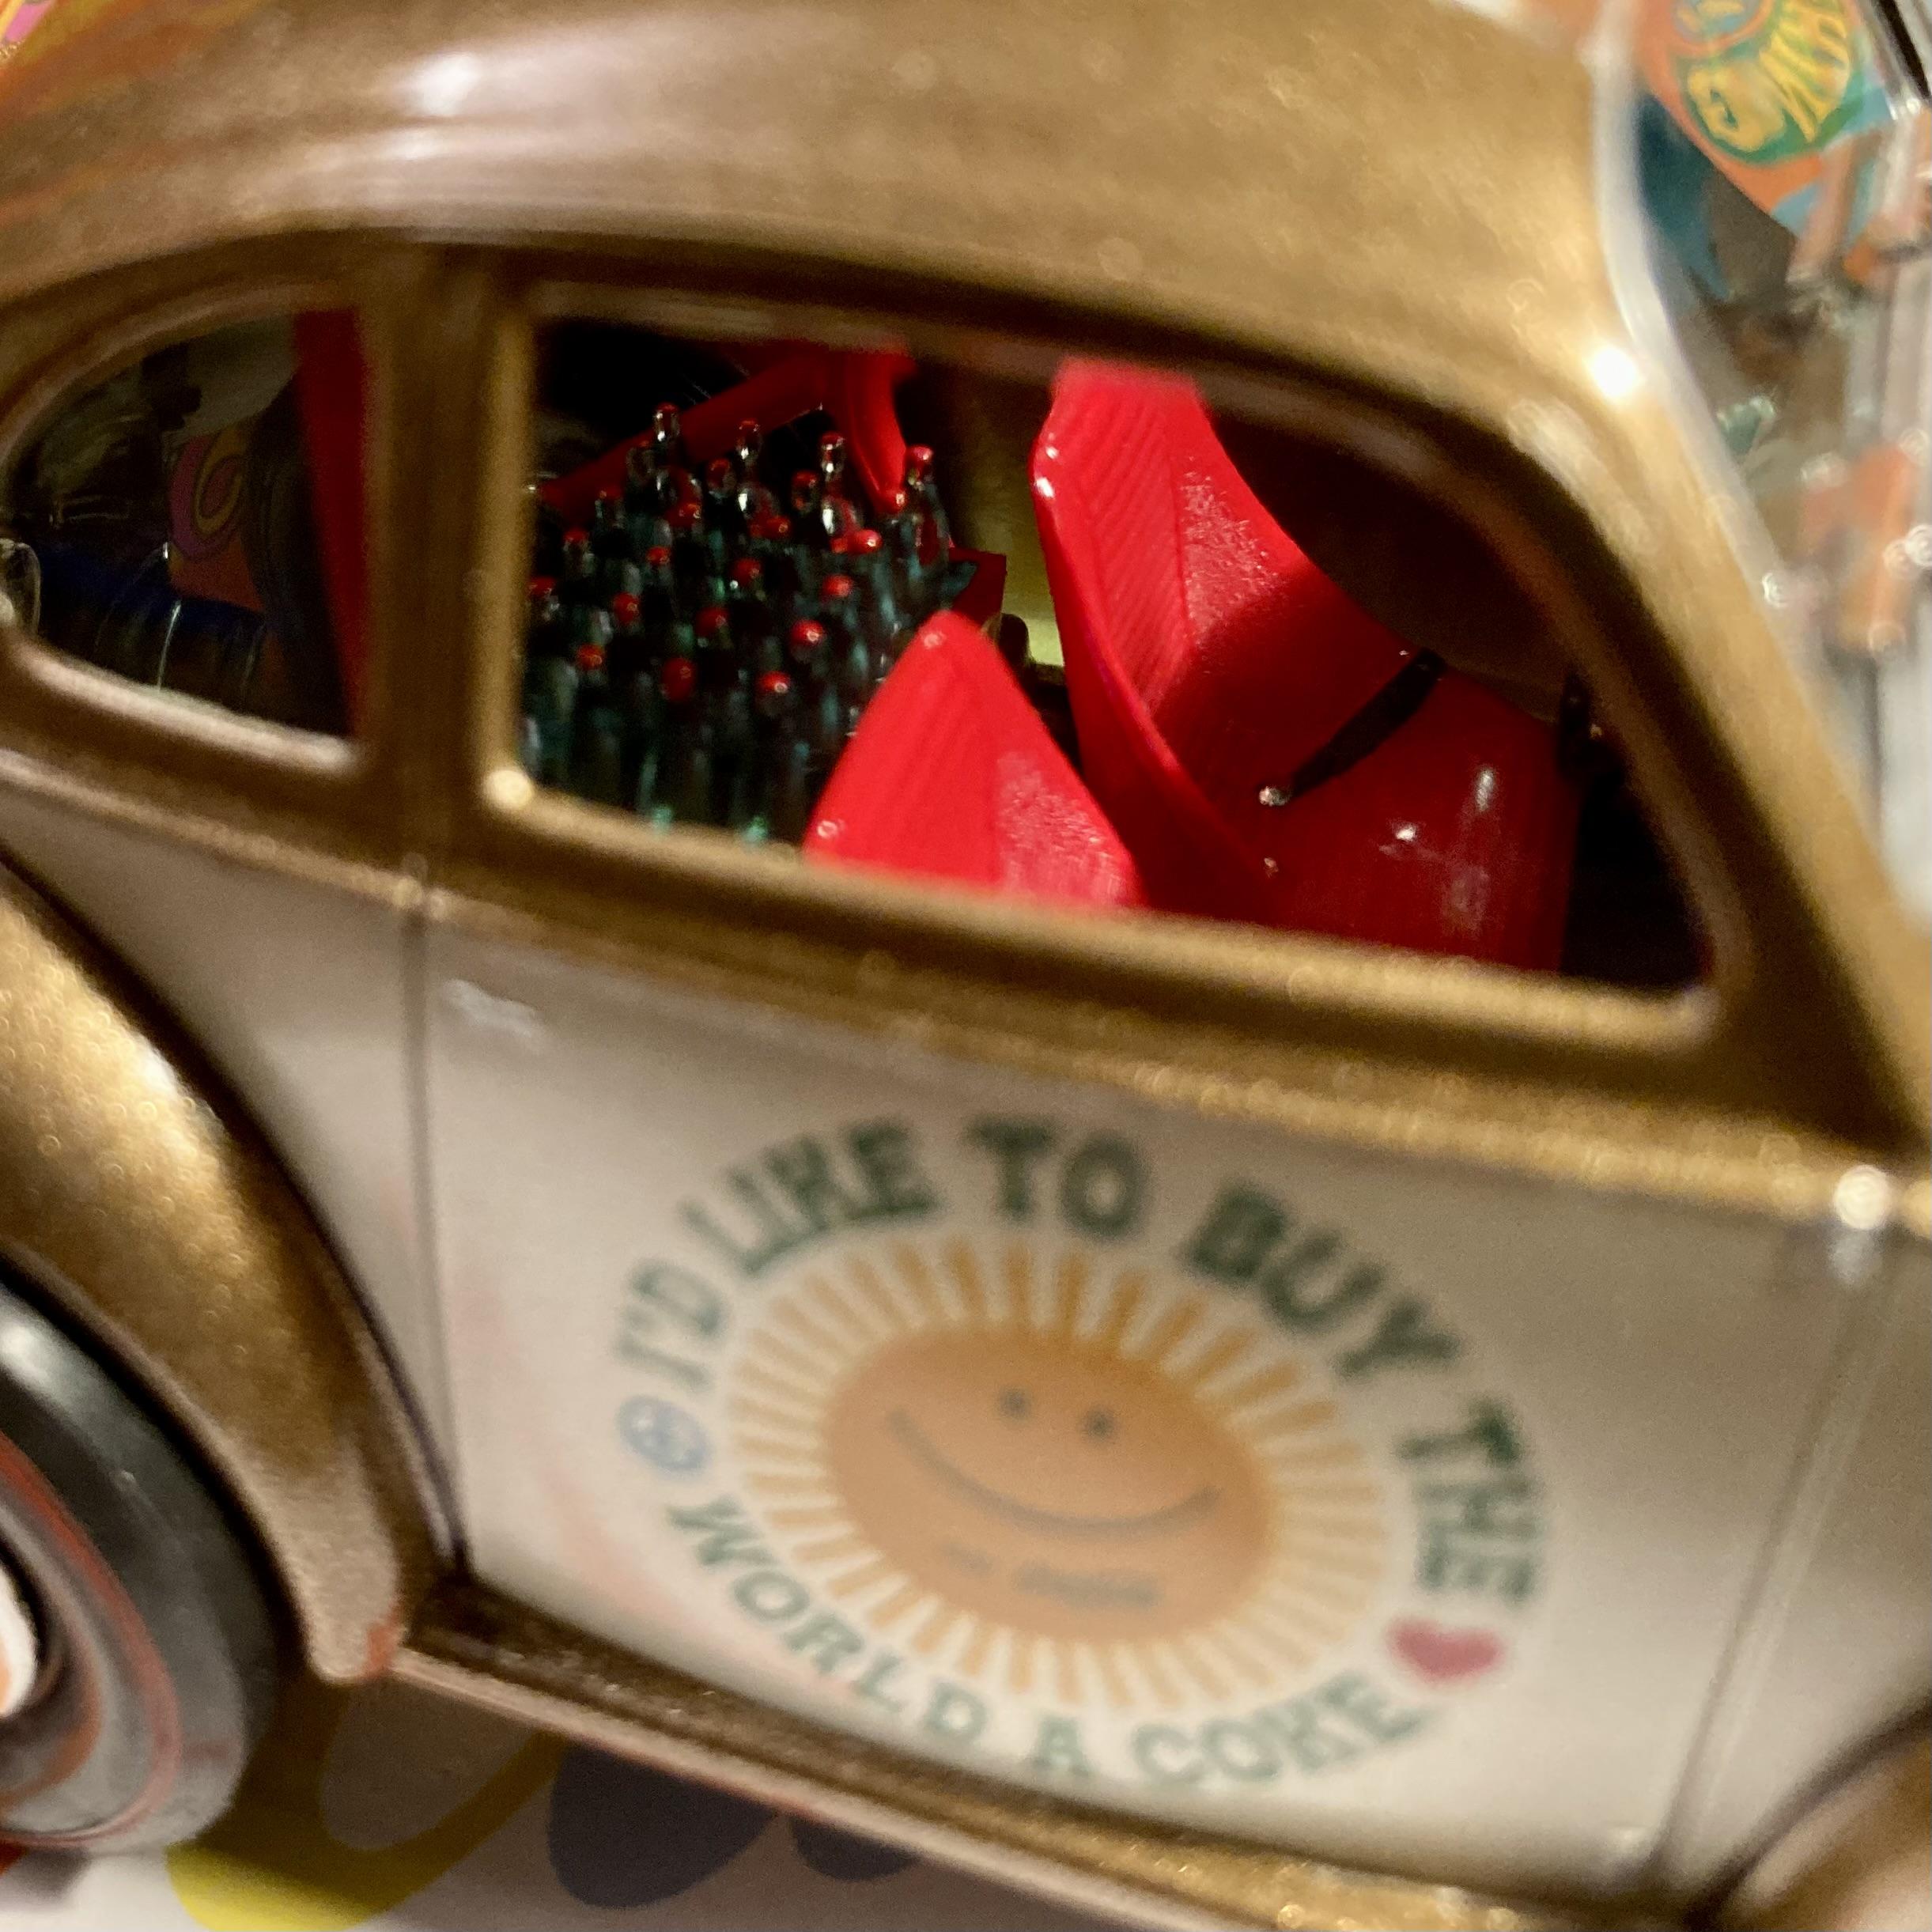
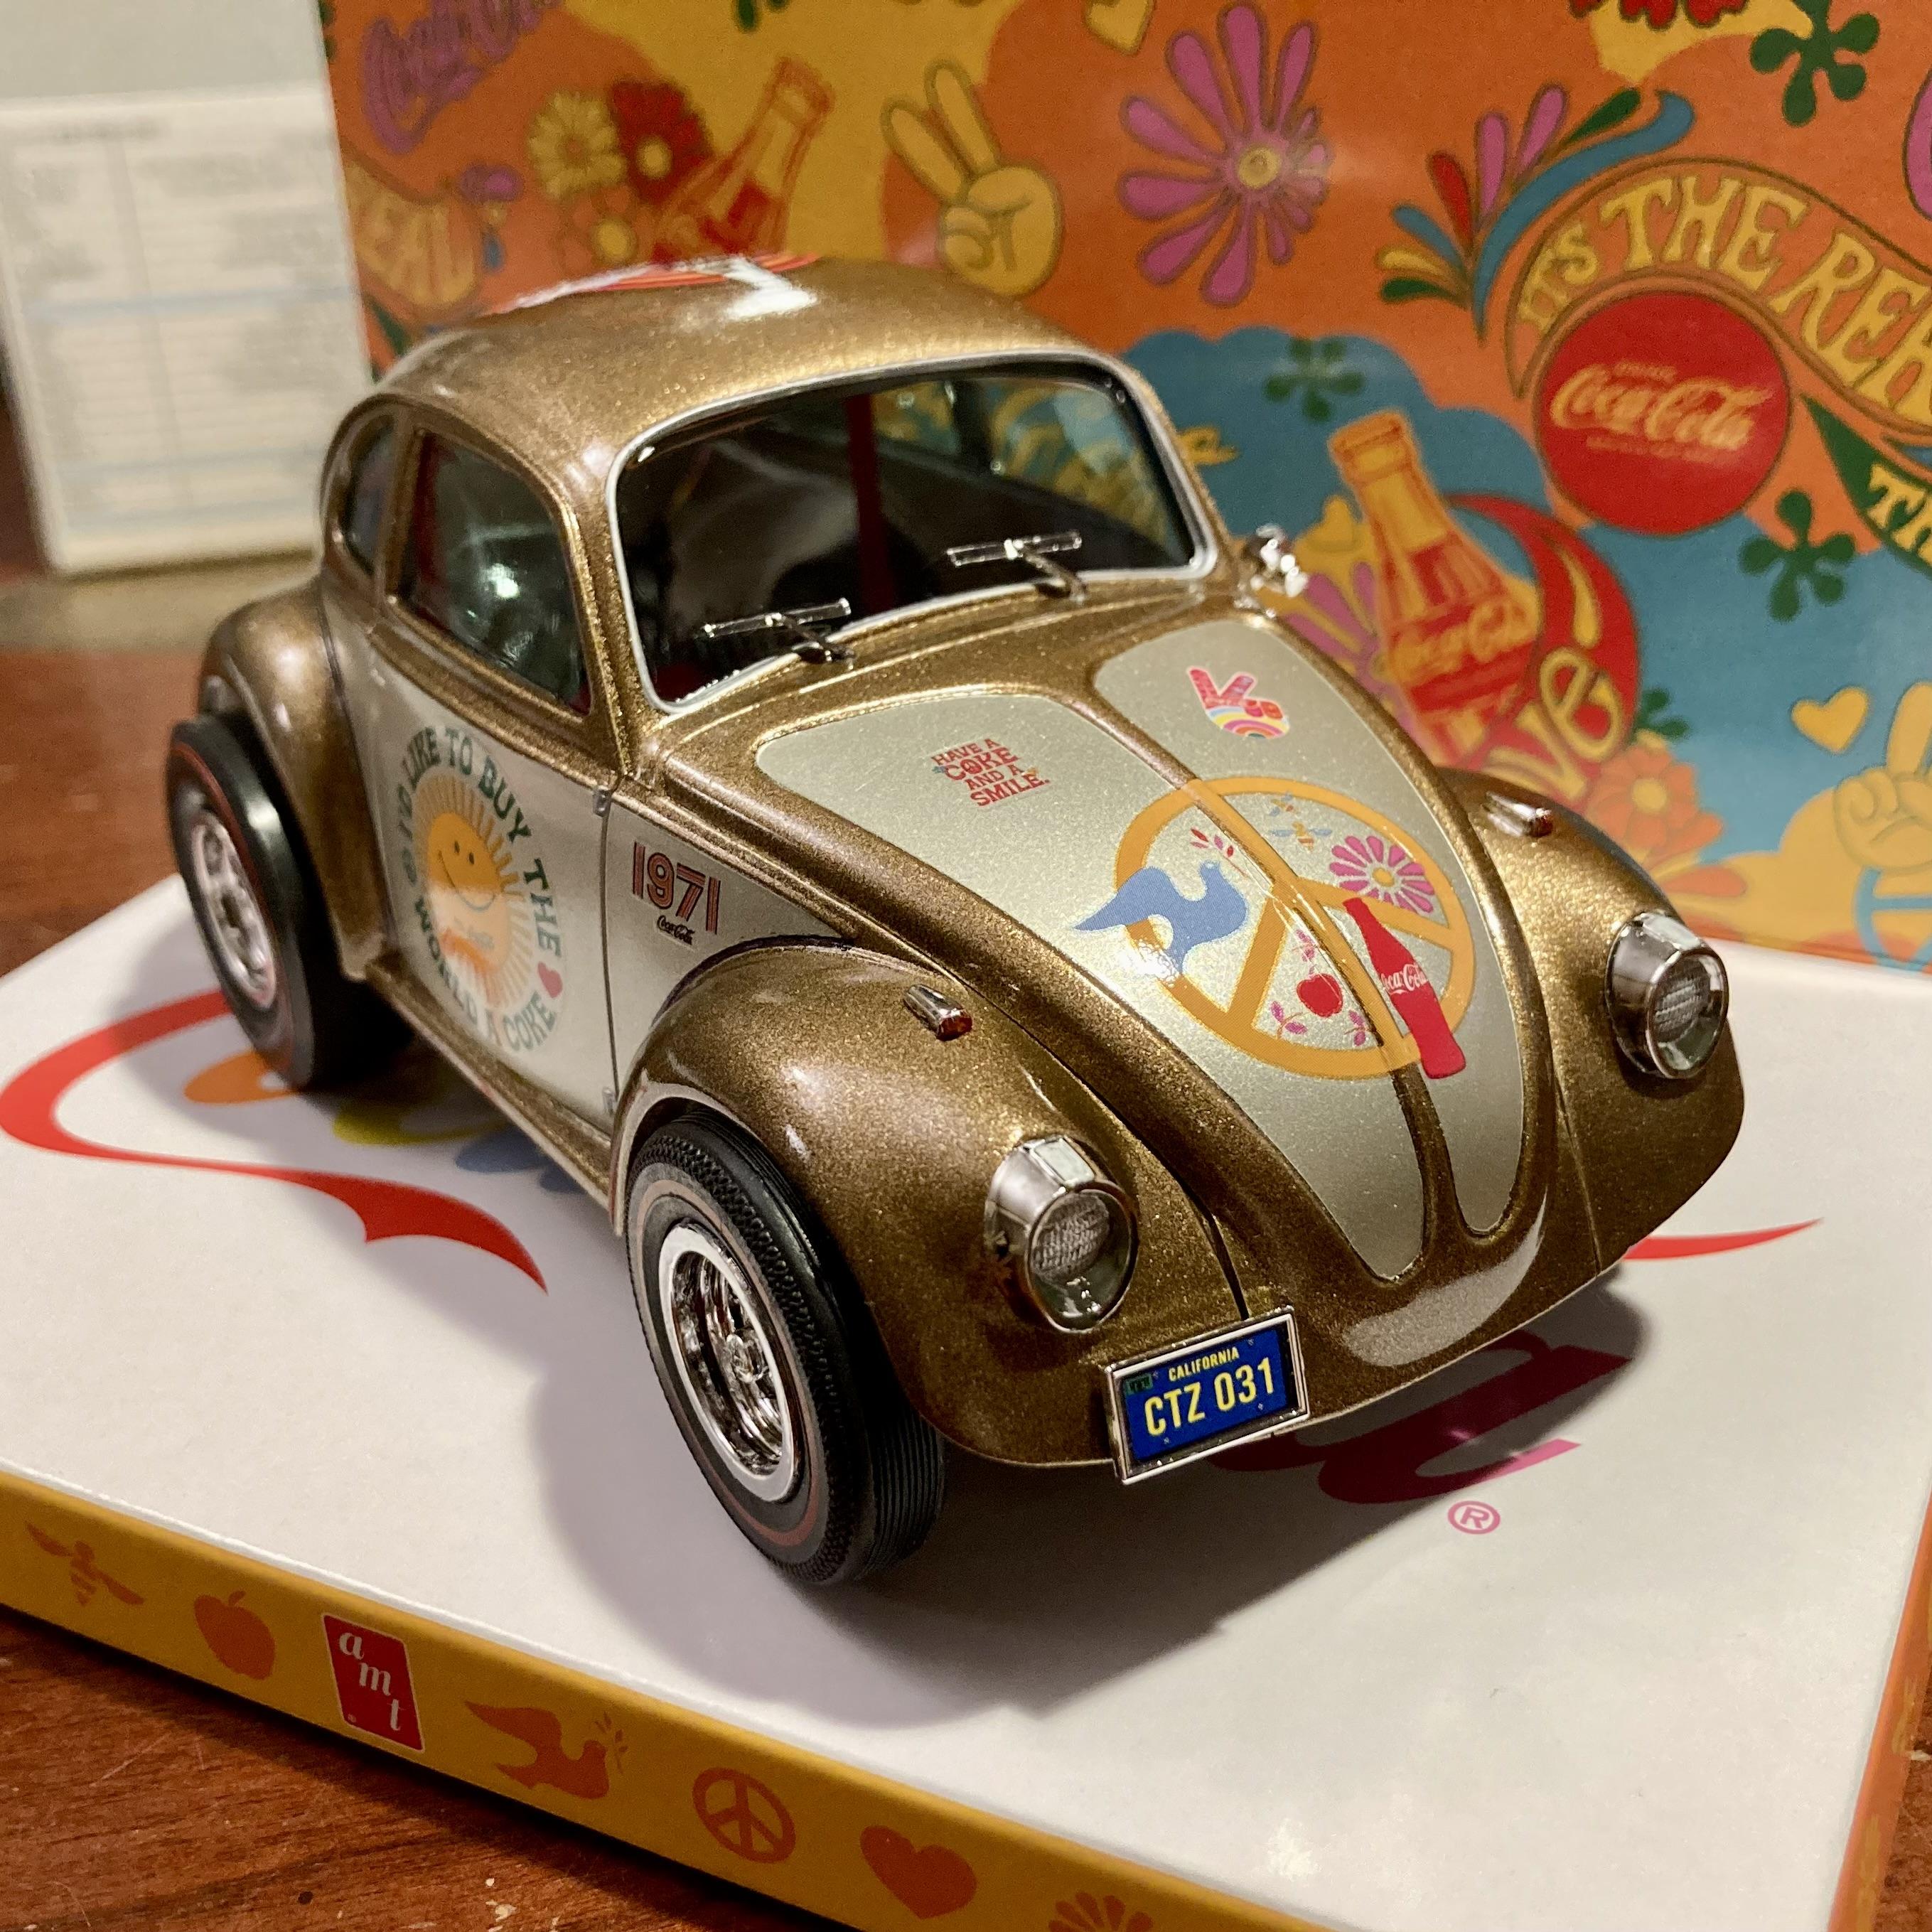
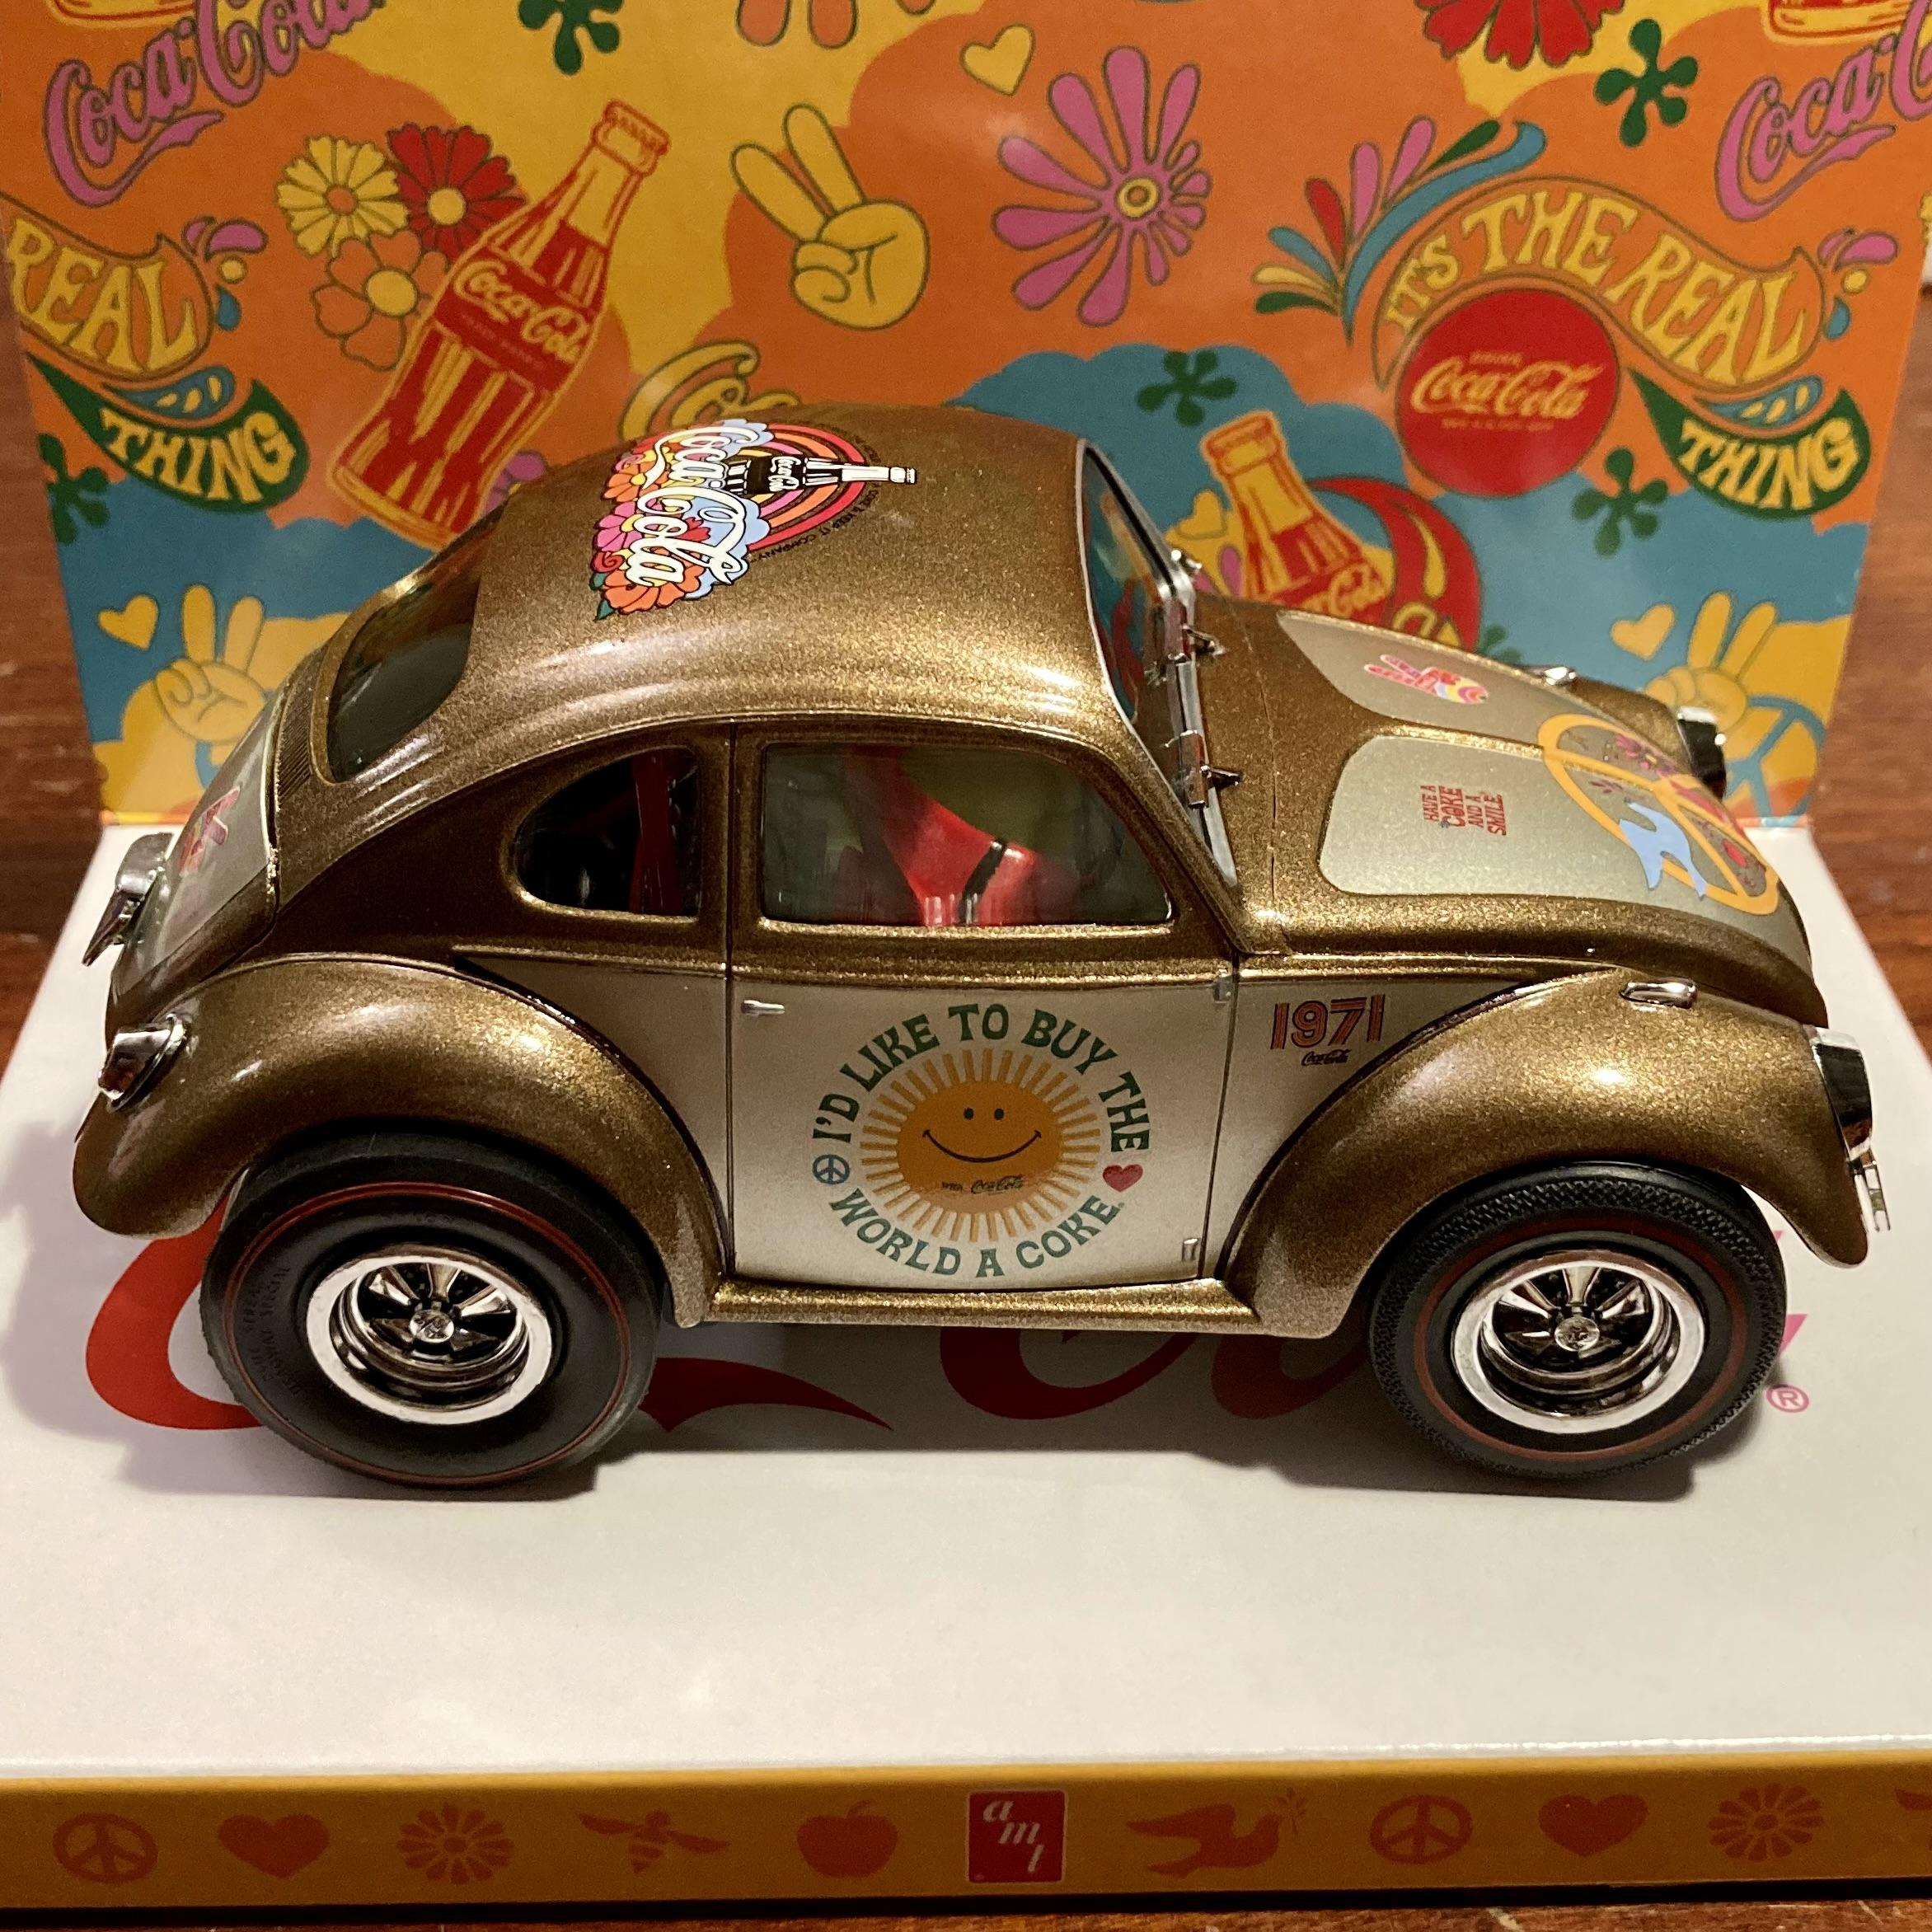
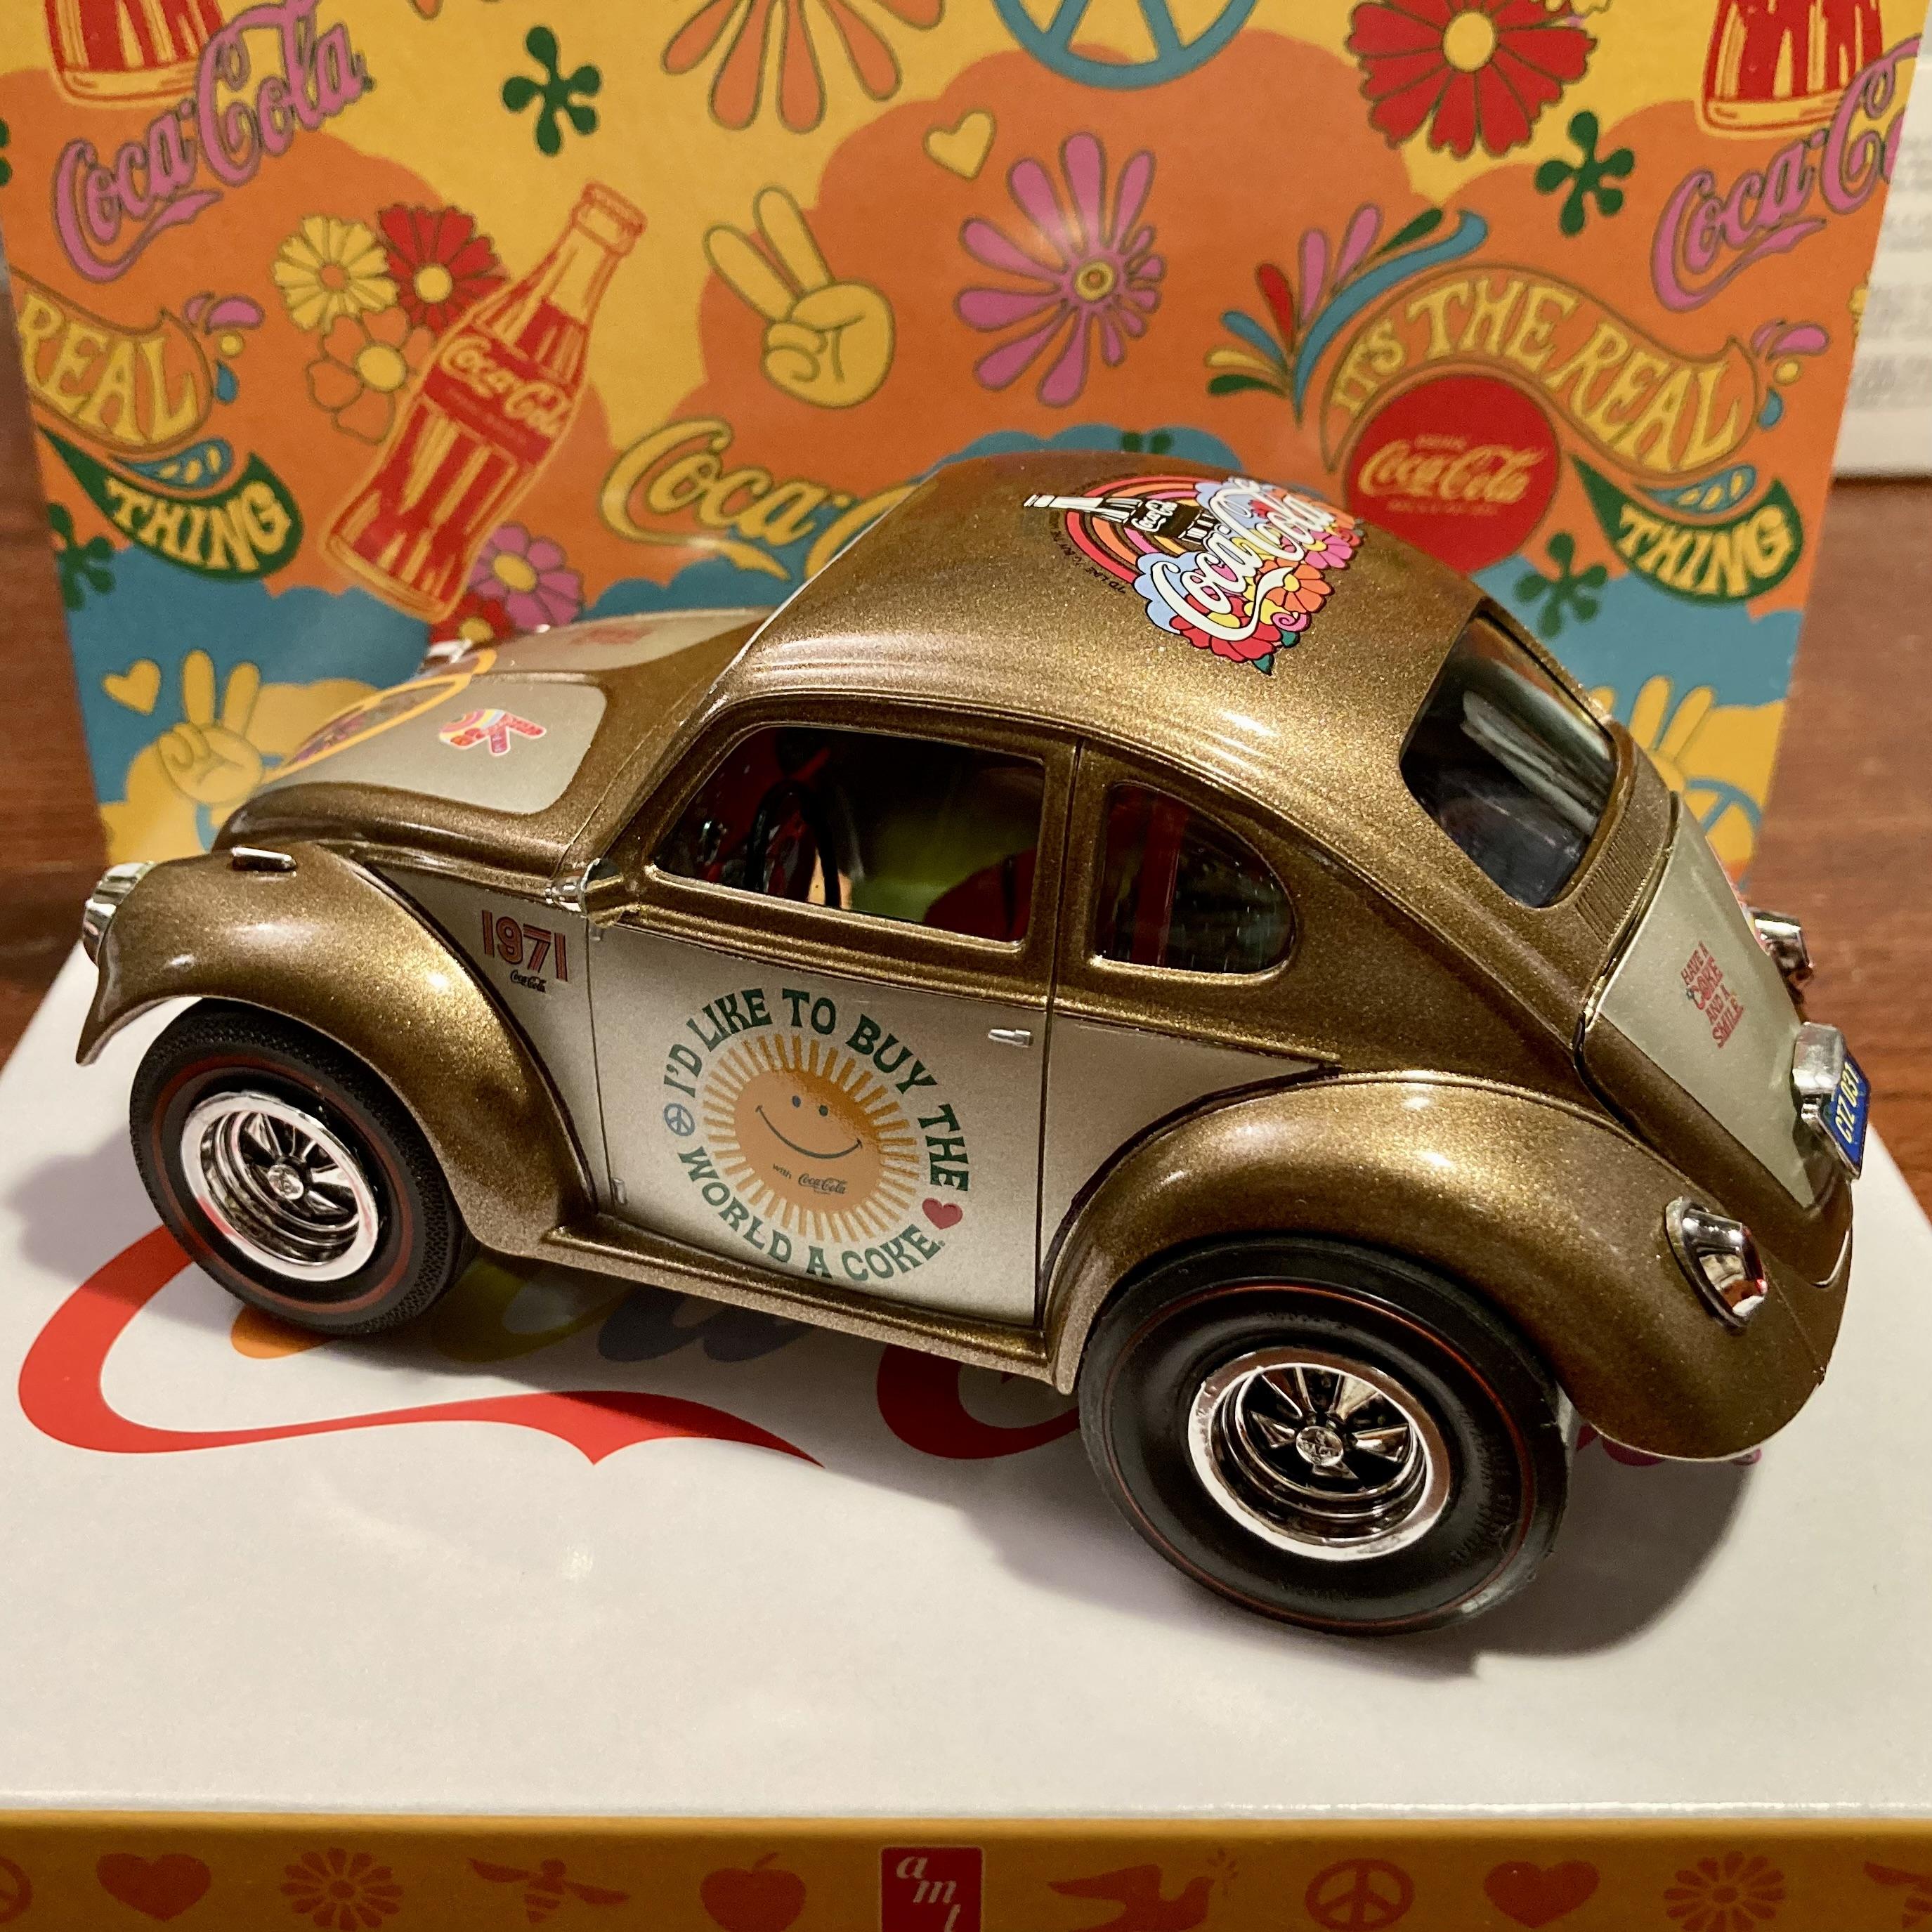
Here’s my AMT 1971 Coca-Cola Shorty Beetle! I have several Coke kits in the stash that will likely not get Coke livery, so I figured I should do at least one with Coke graphics. It was fun picking out which decals to use from this kit’s huge selection of wild “Unity Collection” decals. I love how you can make the body removable so you can see the dune buggy chassis. The red is Krylon’s Apple Red. The kit includes a stock-ish VW dashboard, but the instructions don’t mention where it goes (I think you’re supposed to glue it into the body, but I don’t know how you’d align the steering shaft properly). I cut it down and glued it to the tubular dash structure to give the interior more detail. I could not get those fragile individual exhaust tubes to align properly so I gave up and left them off. The Coke crate comes from the Dodge D-50 Coke kit. The body is painted Testors Extreme Lacquer “Bronze” with the inserts done in Tamiya TS75 “Champagne Gold”. Part fit up is not great. The fragile roll bars are a nightmare to align, the chassis/front suspension ended up warped and the engine cover won’t close. I cut the generator belt/pulleys off and shaved their mounts down to pull it closer to the engine. Both hoods are glued shut. Overall this was a fun kit to build despite its foibles, with lots of customization opportunities. I picked up another one cheap from Ollies that will get a whole different look (eventually).
-
This was made from a altered states resin stock height 1933 Willy’s body with a amt donor kit. The hemi is sourced from a amt parts pack. It’s painted in tamyia bright red with slixx decals . The square hole halibrand front wheels are resin pieces I brought off eBay. Until next time thanks for looking 👀. Mike
-
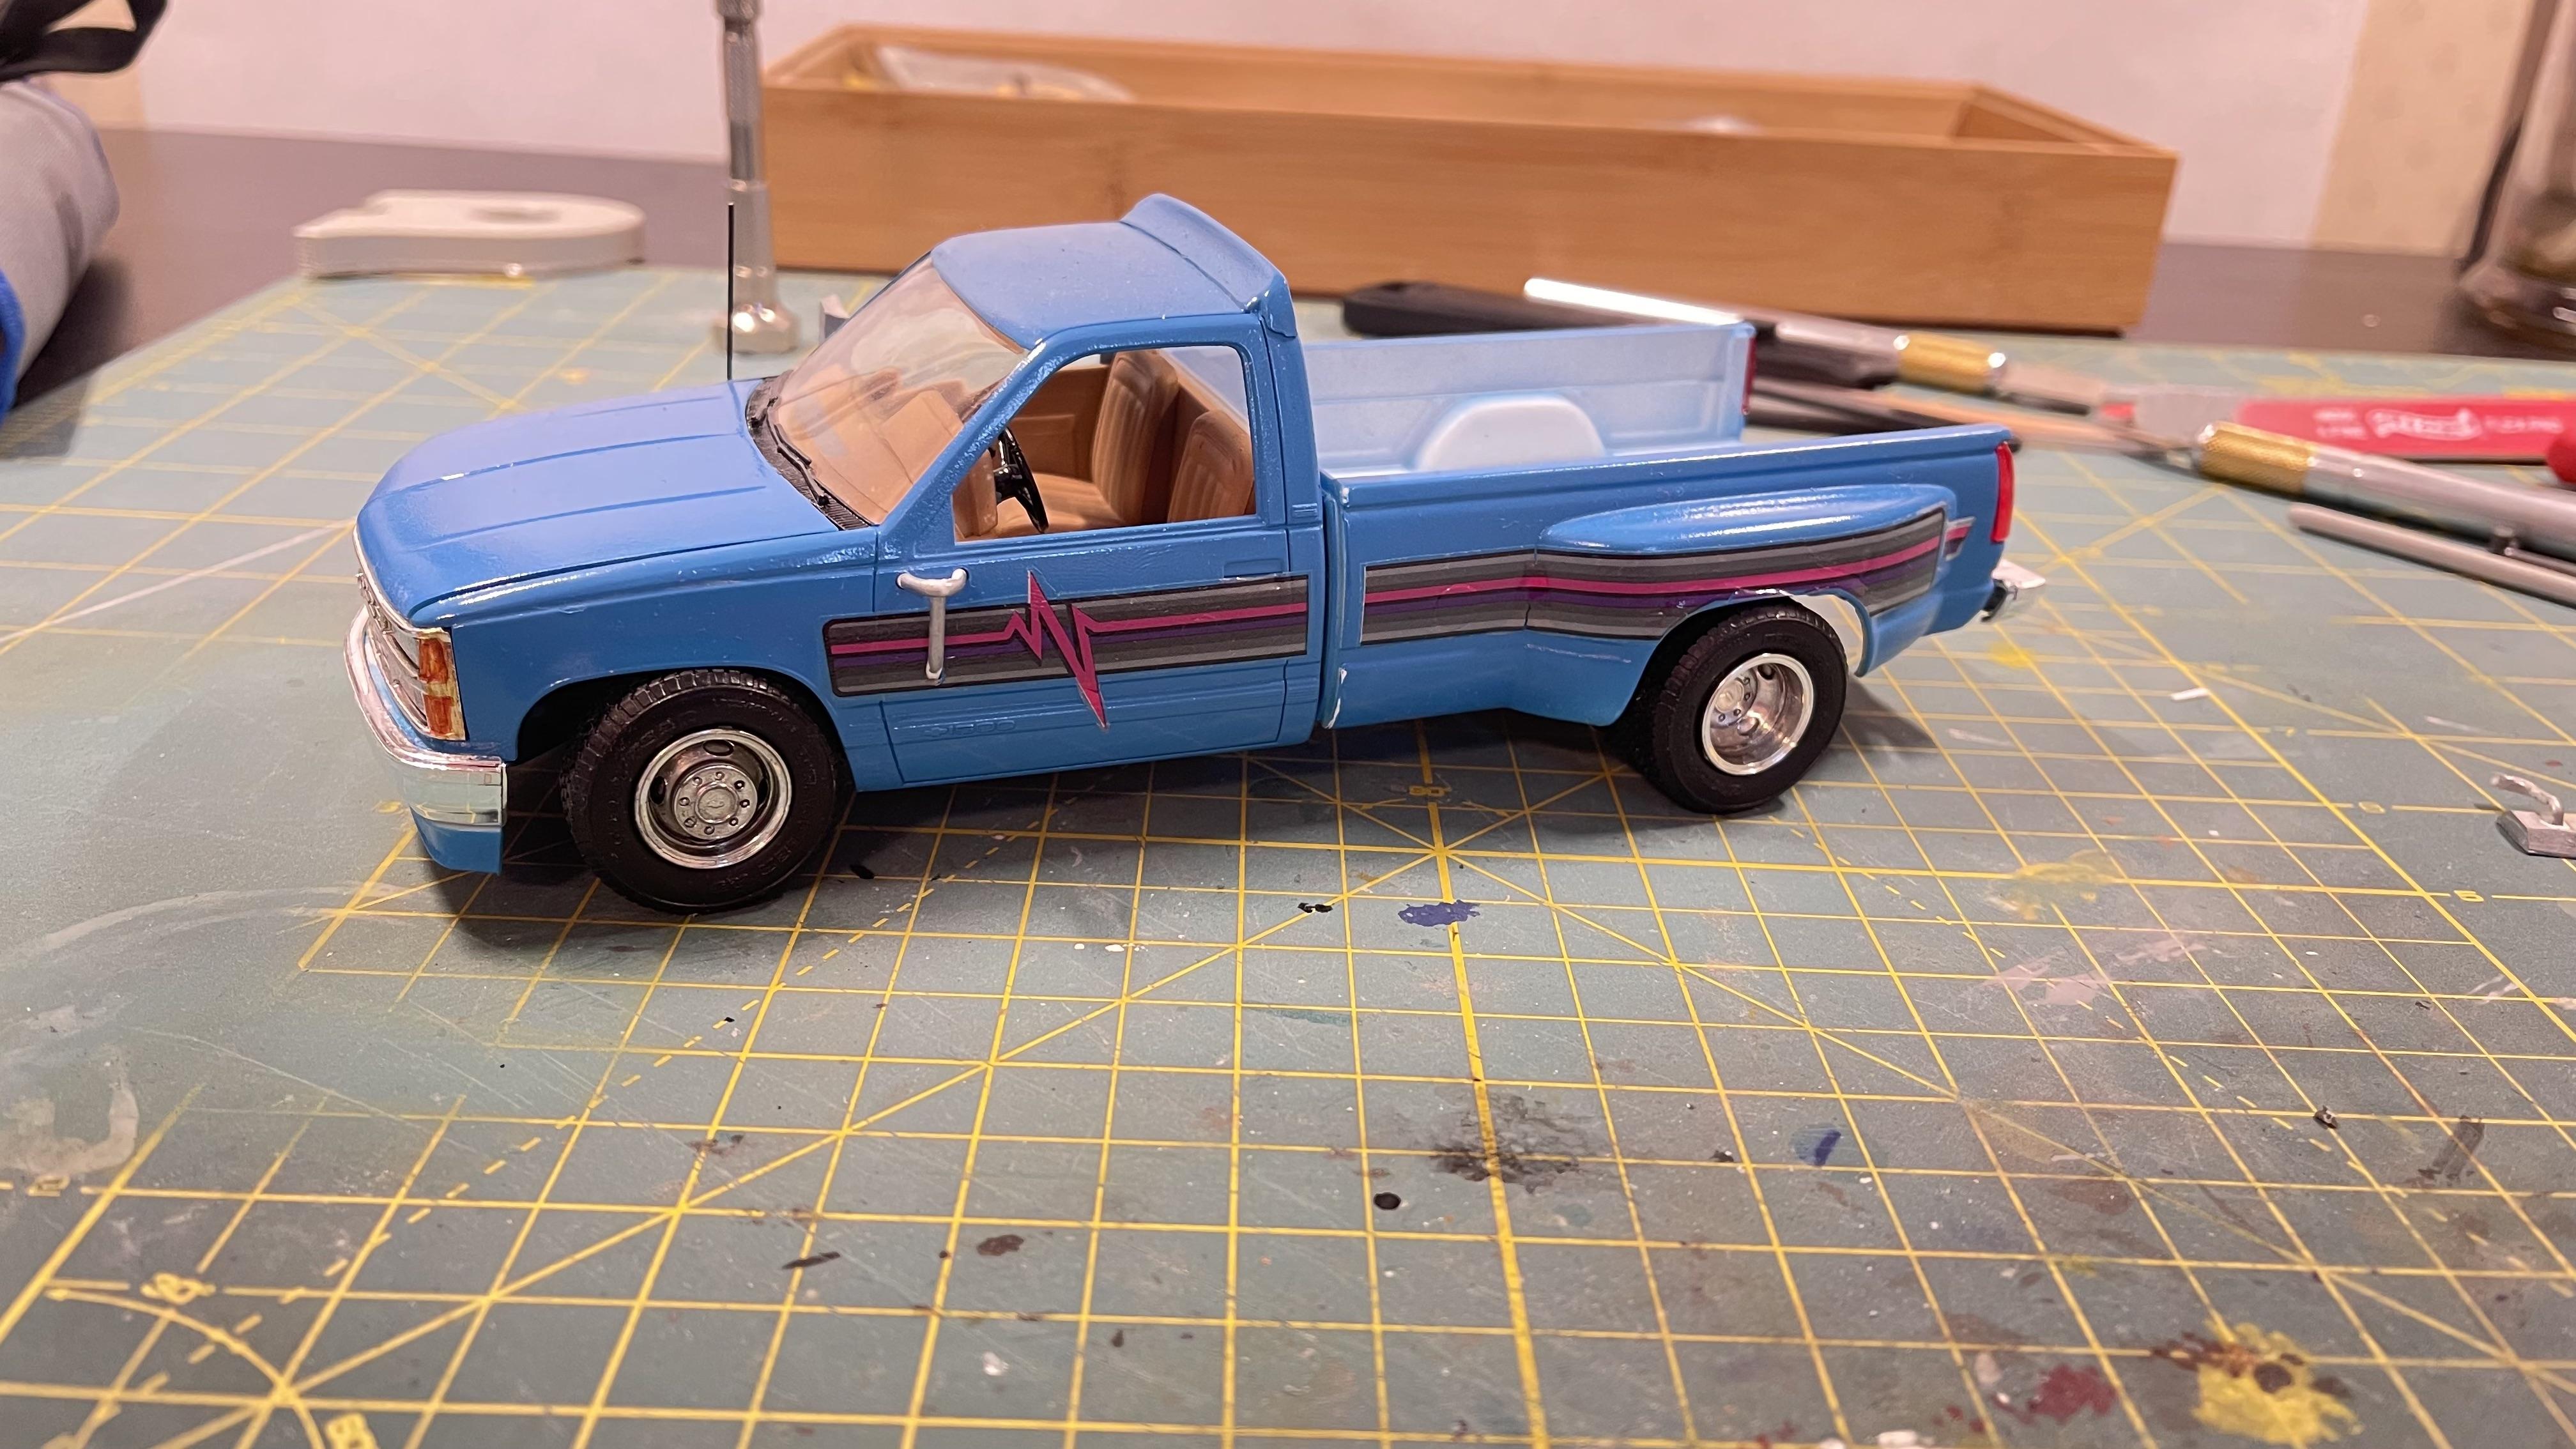
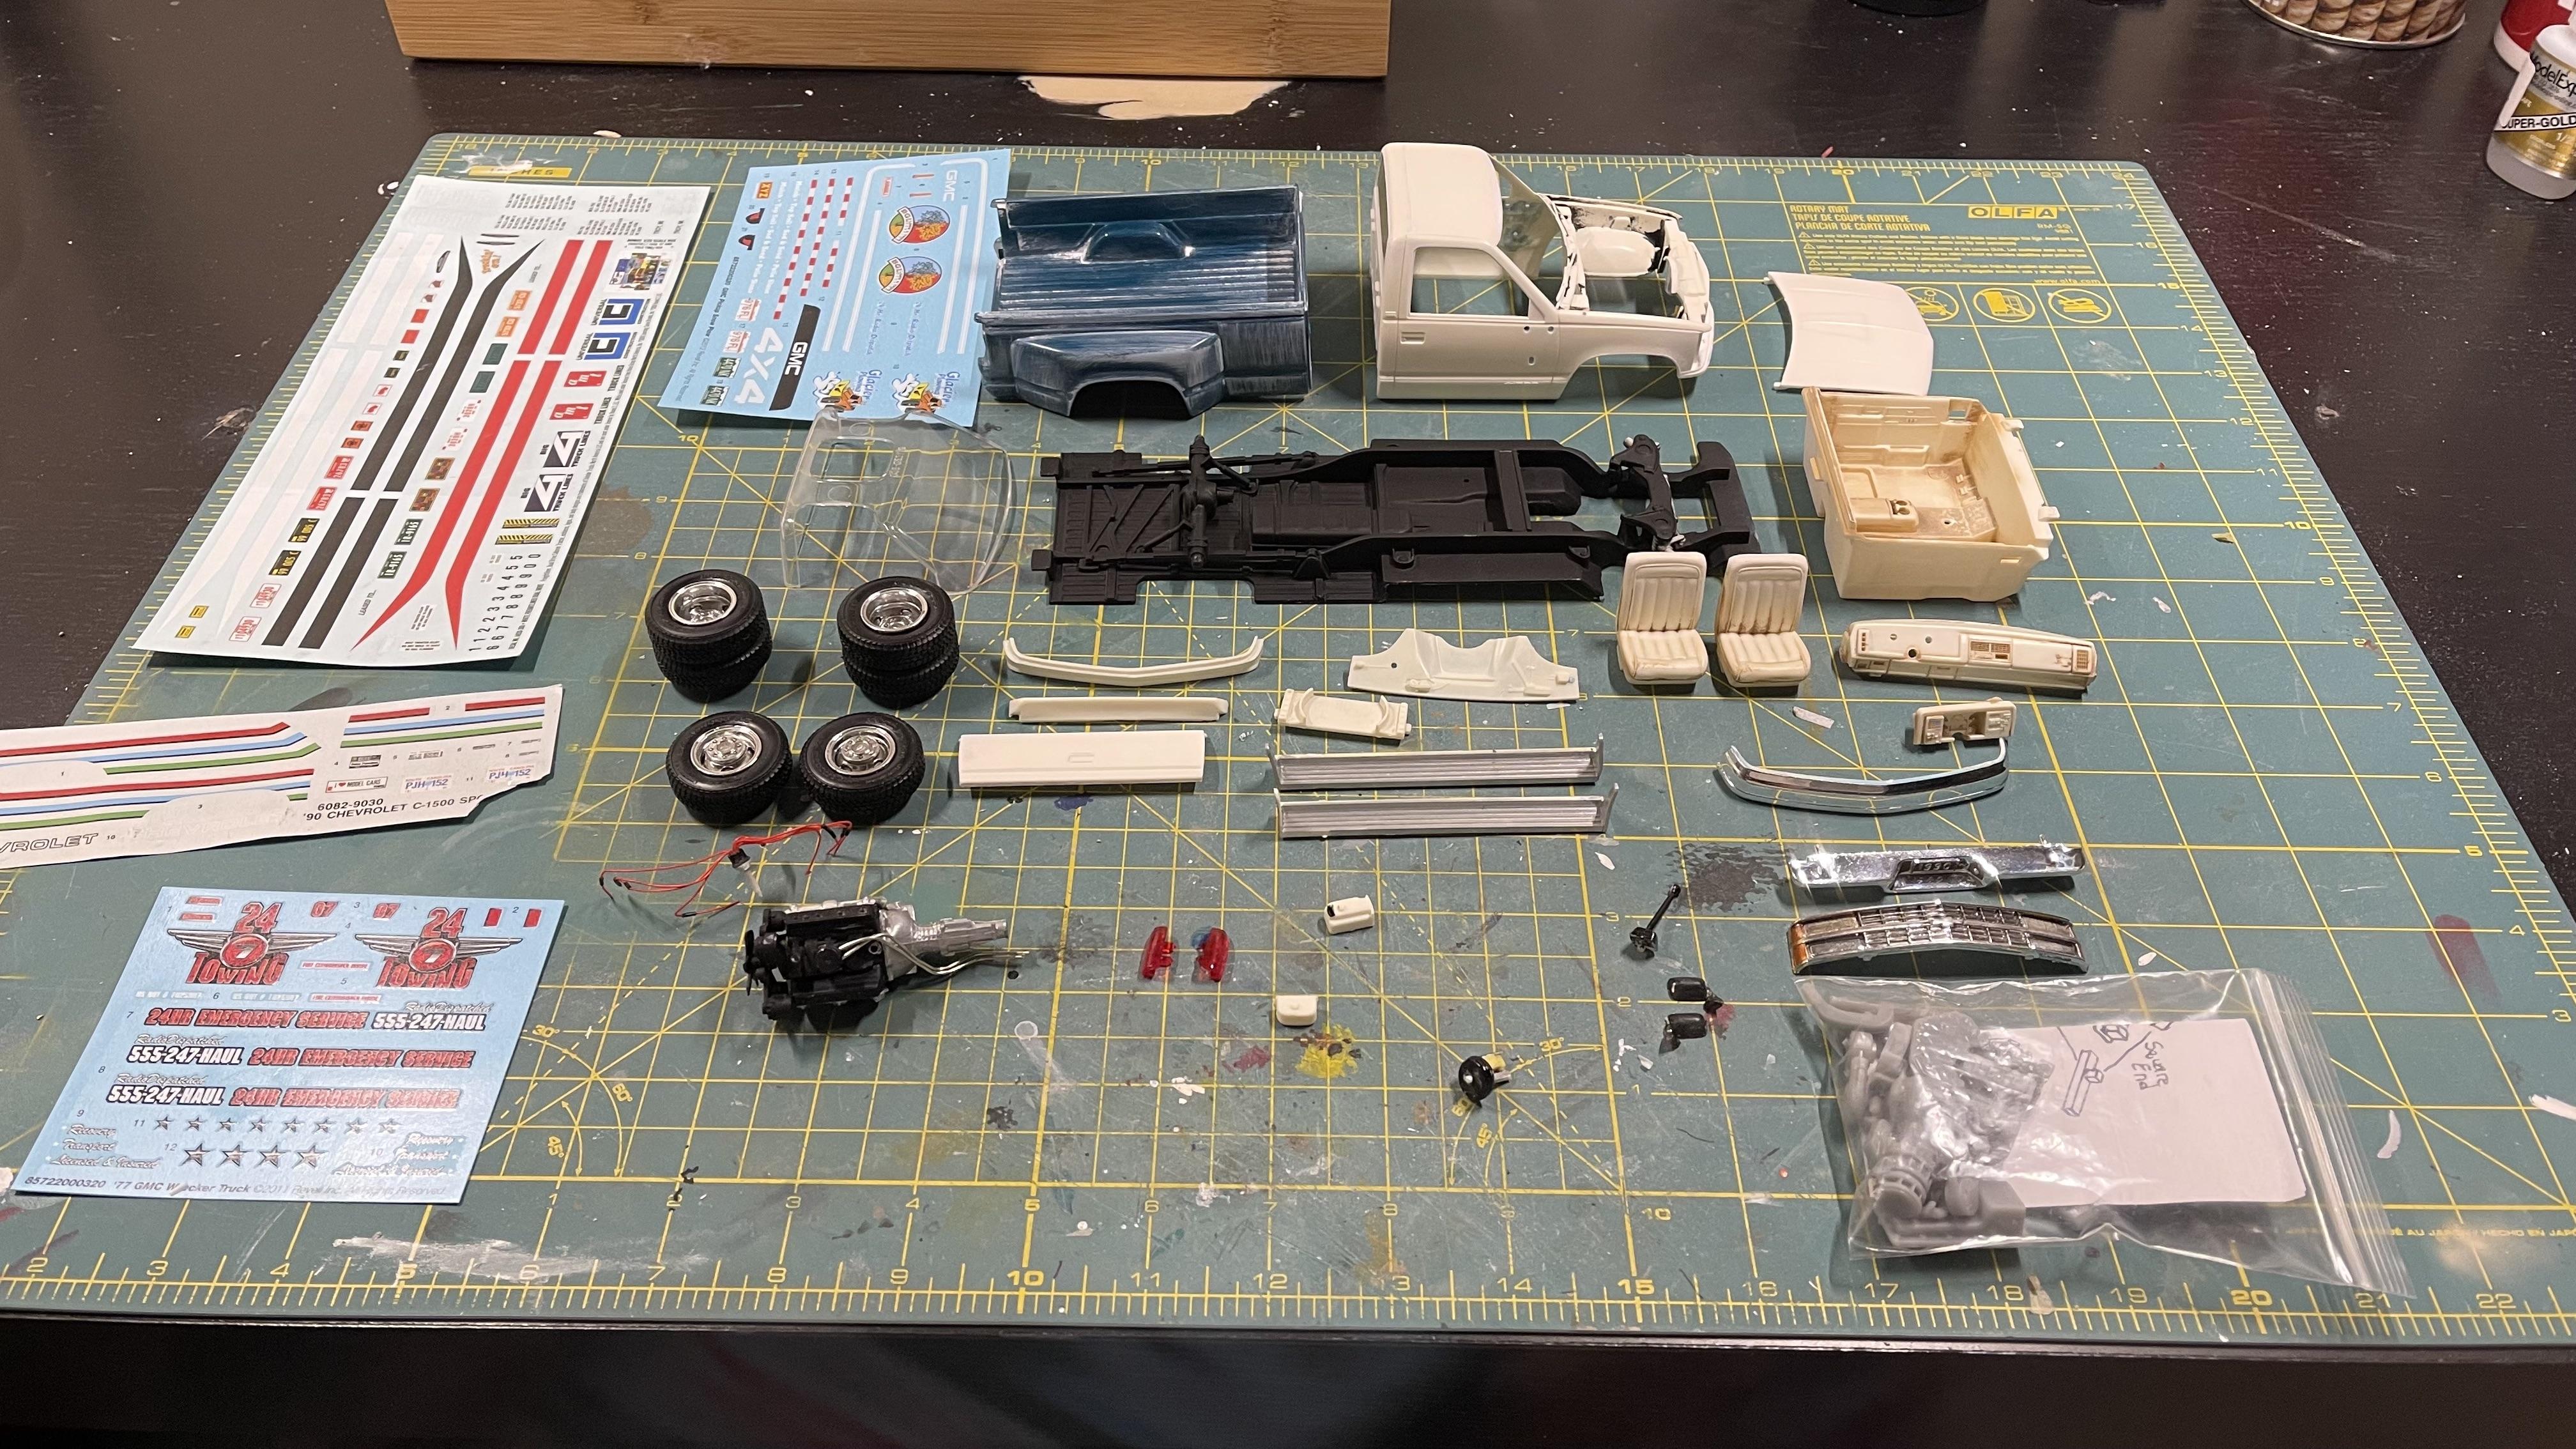
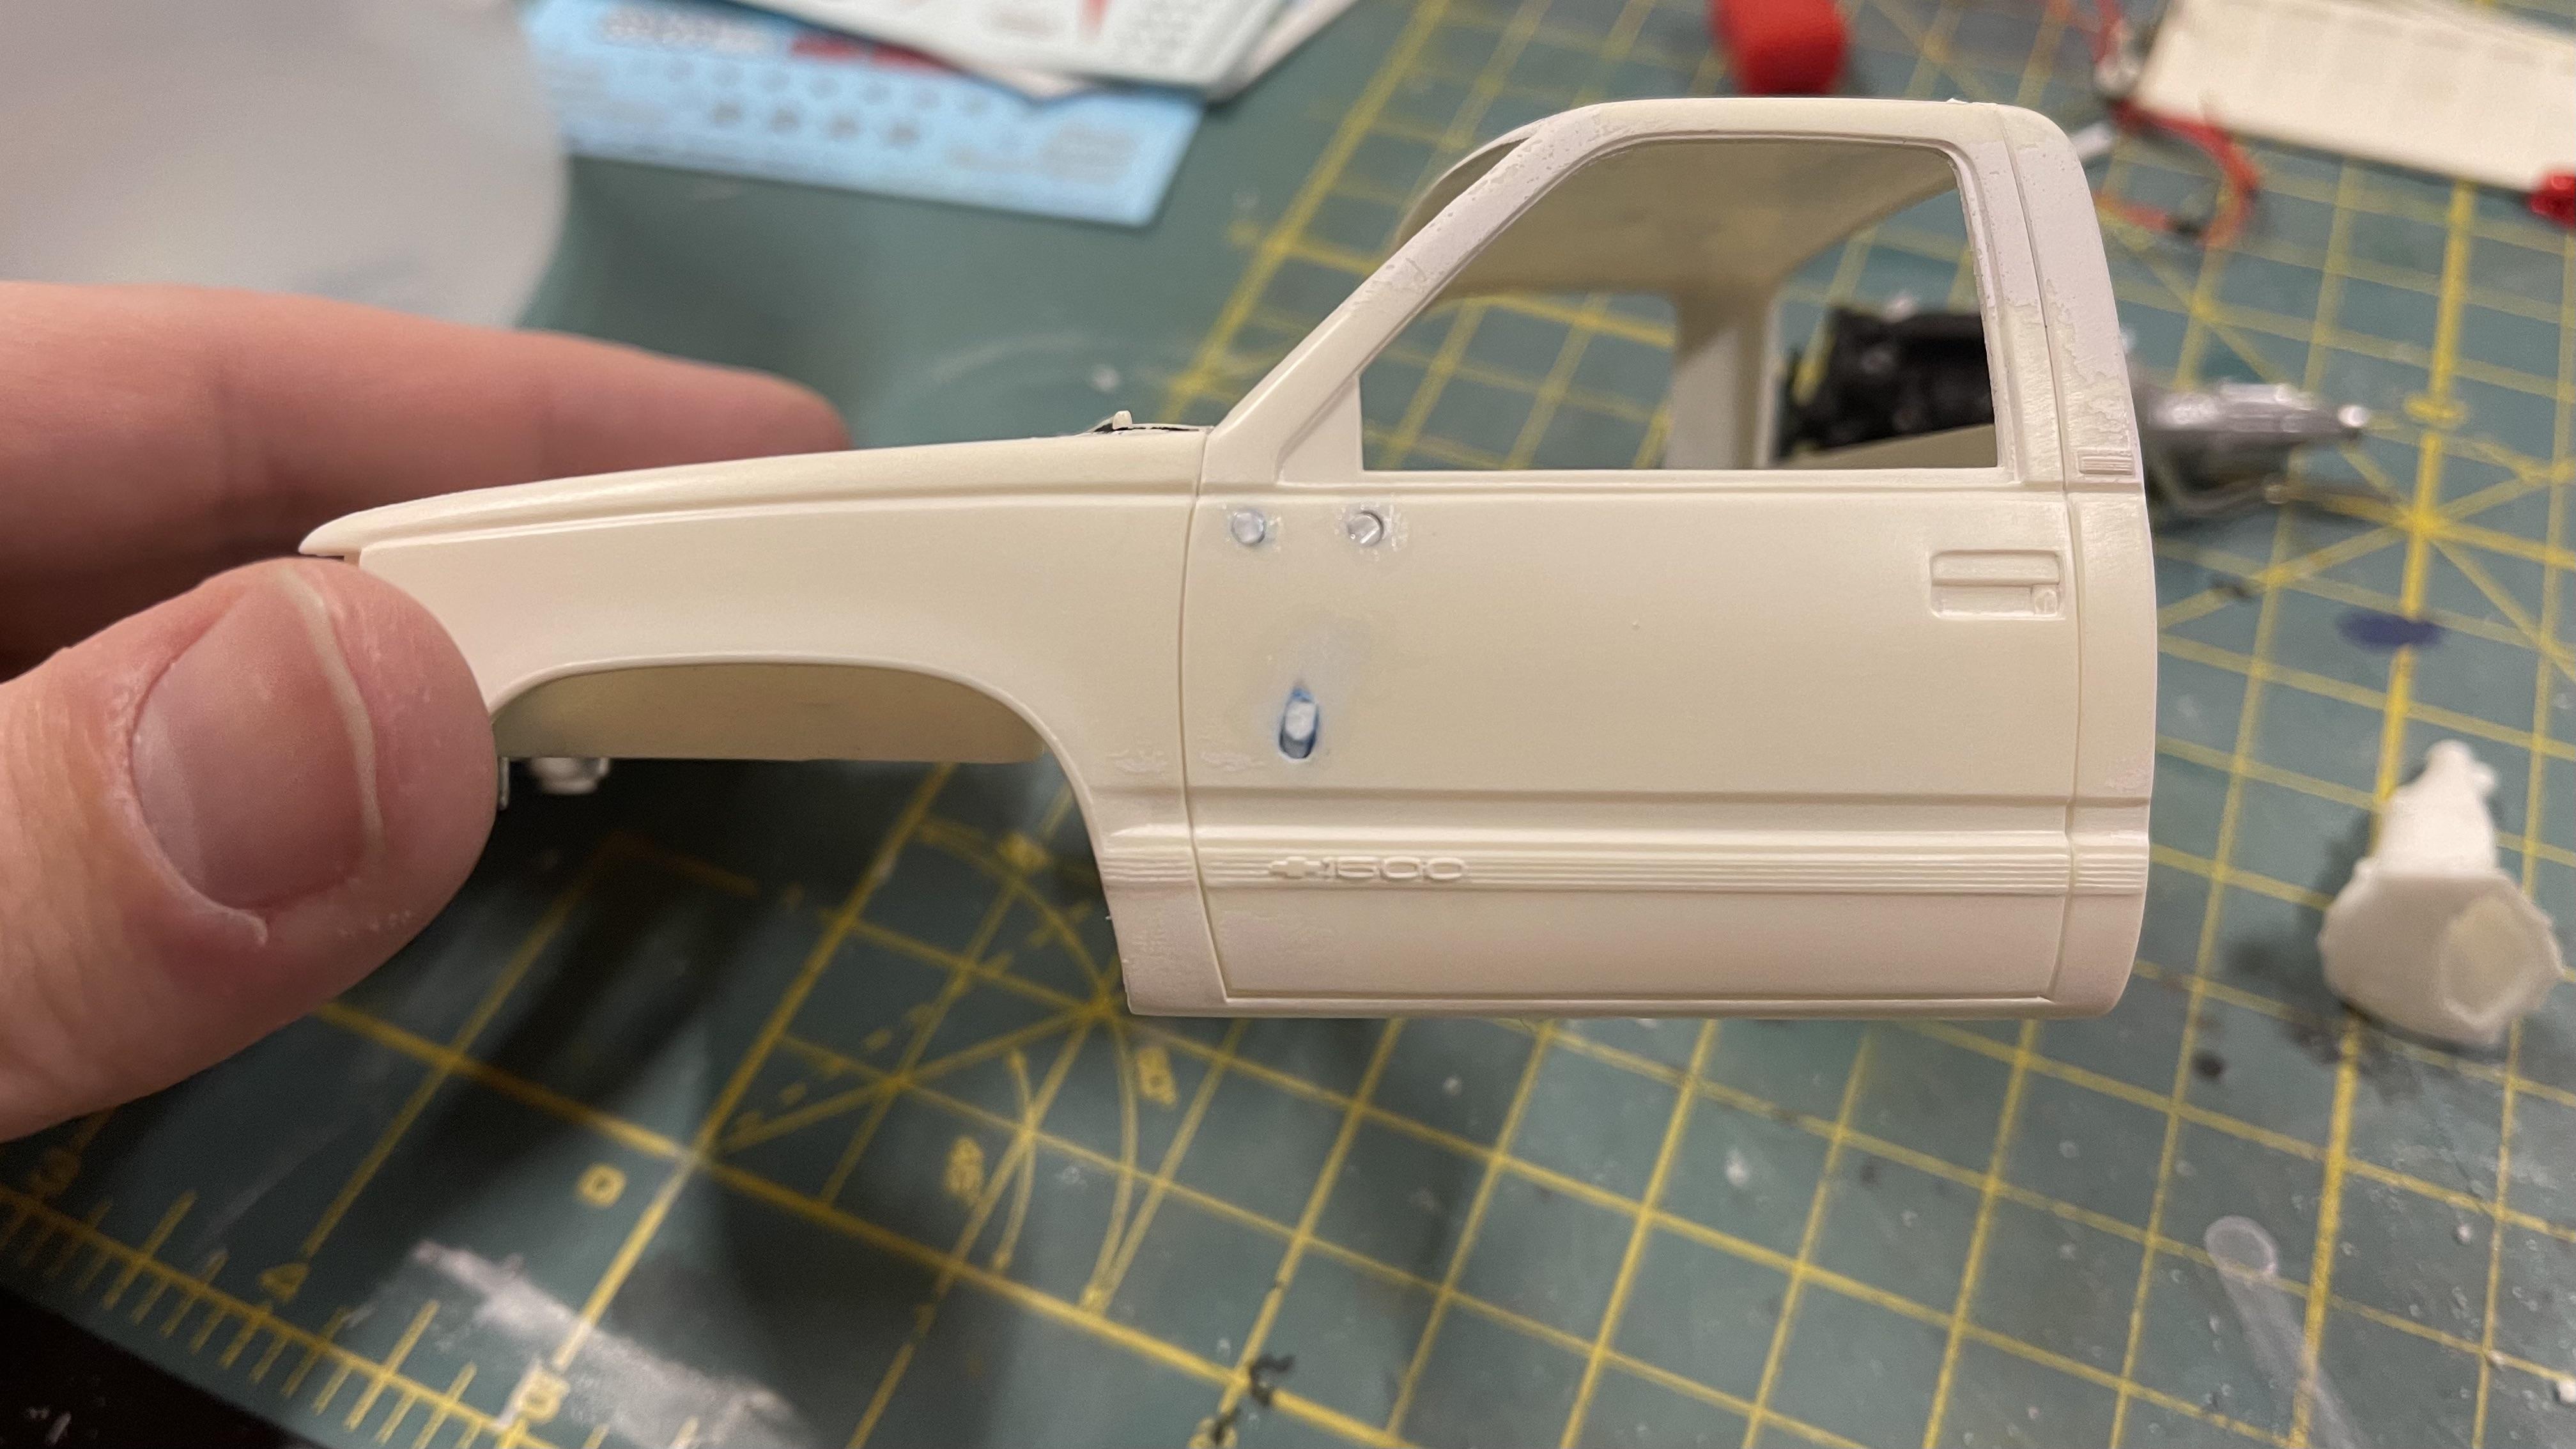
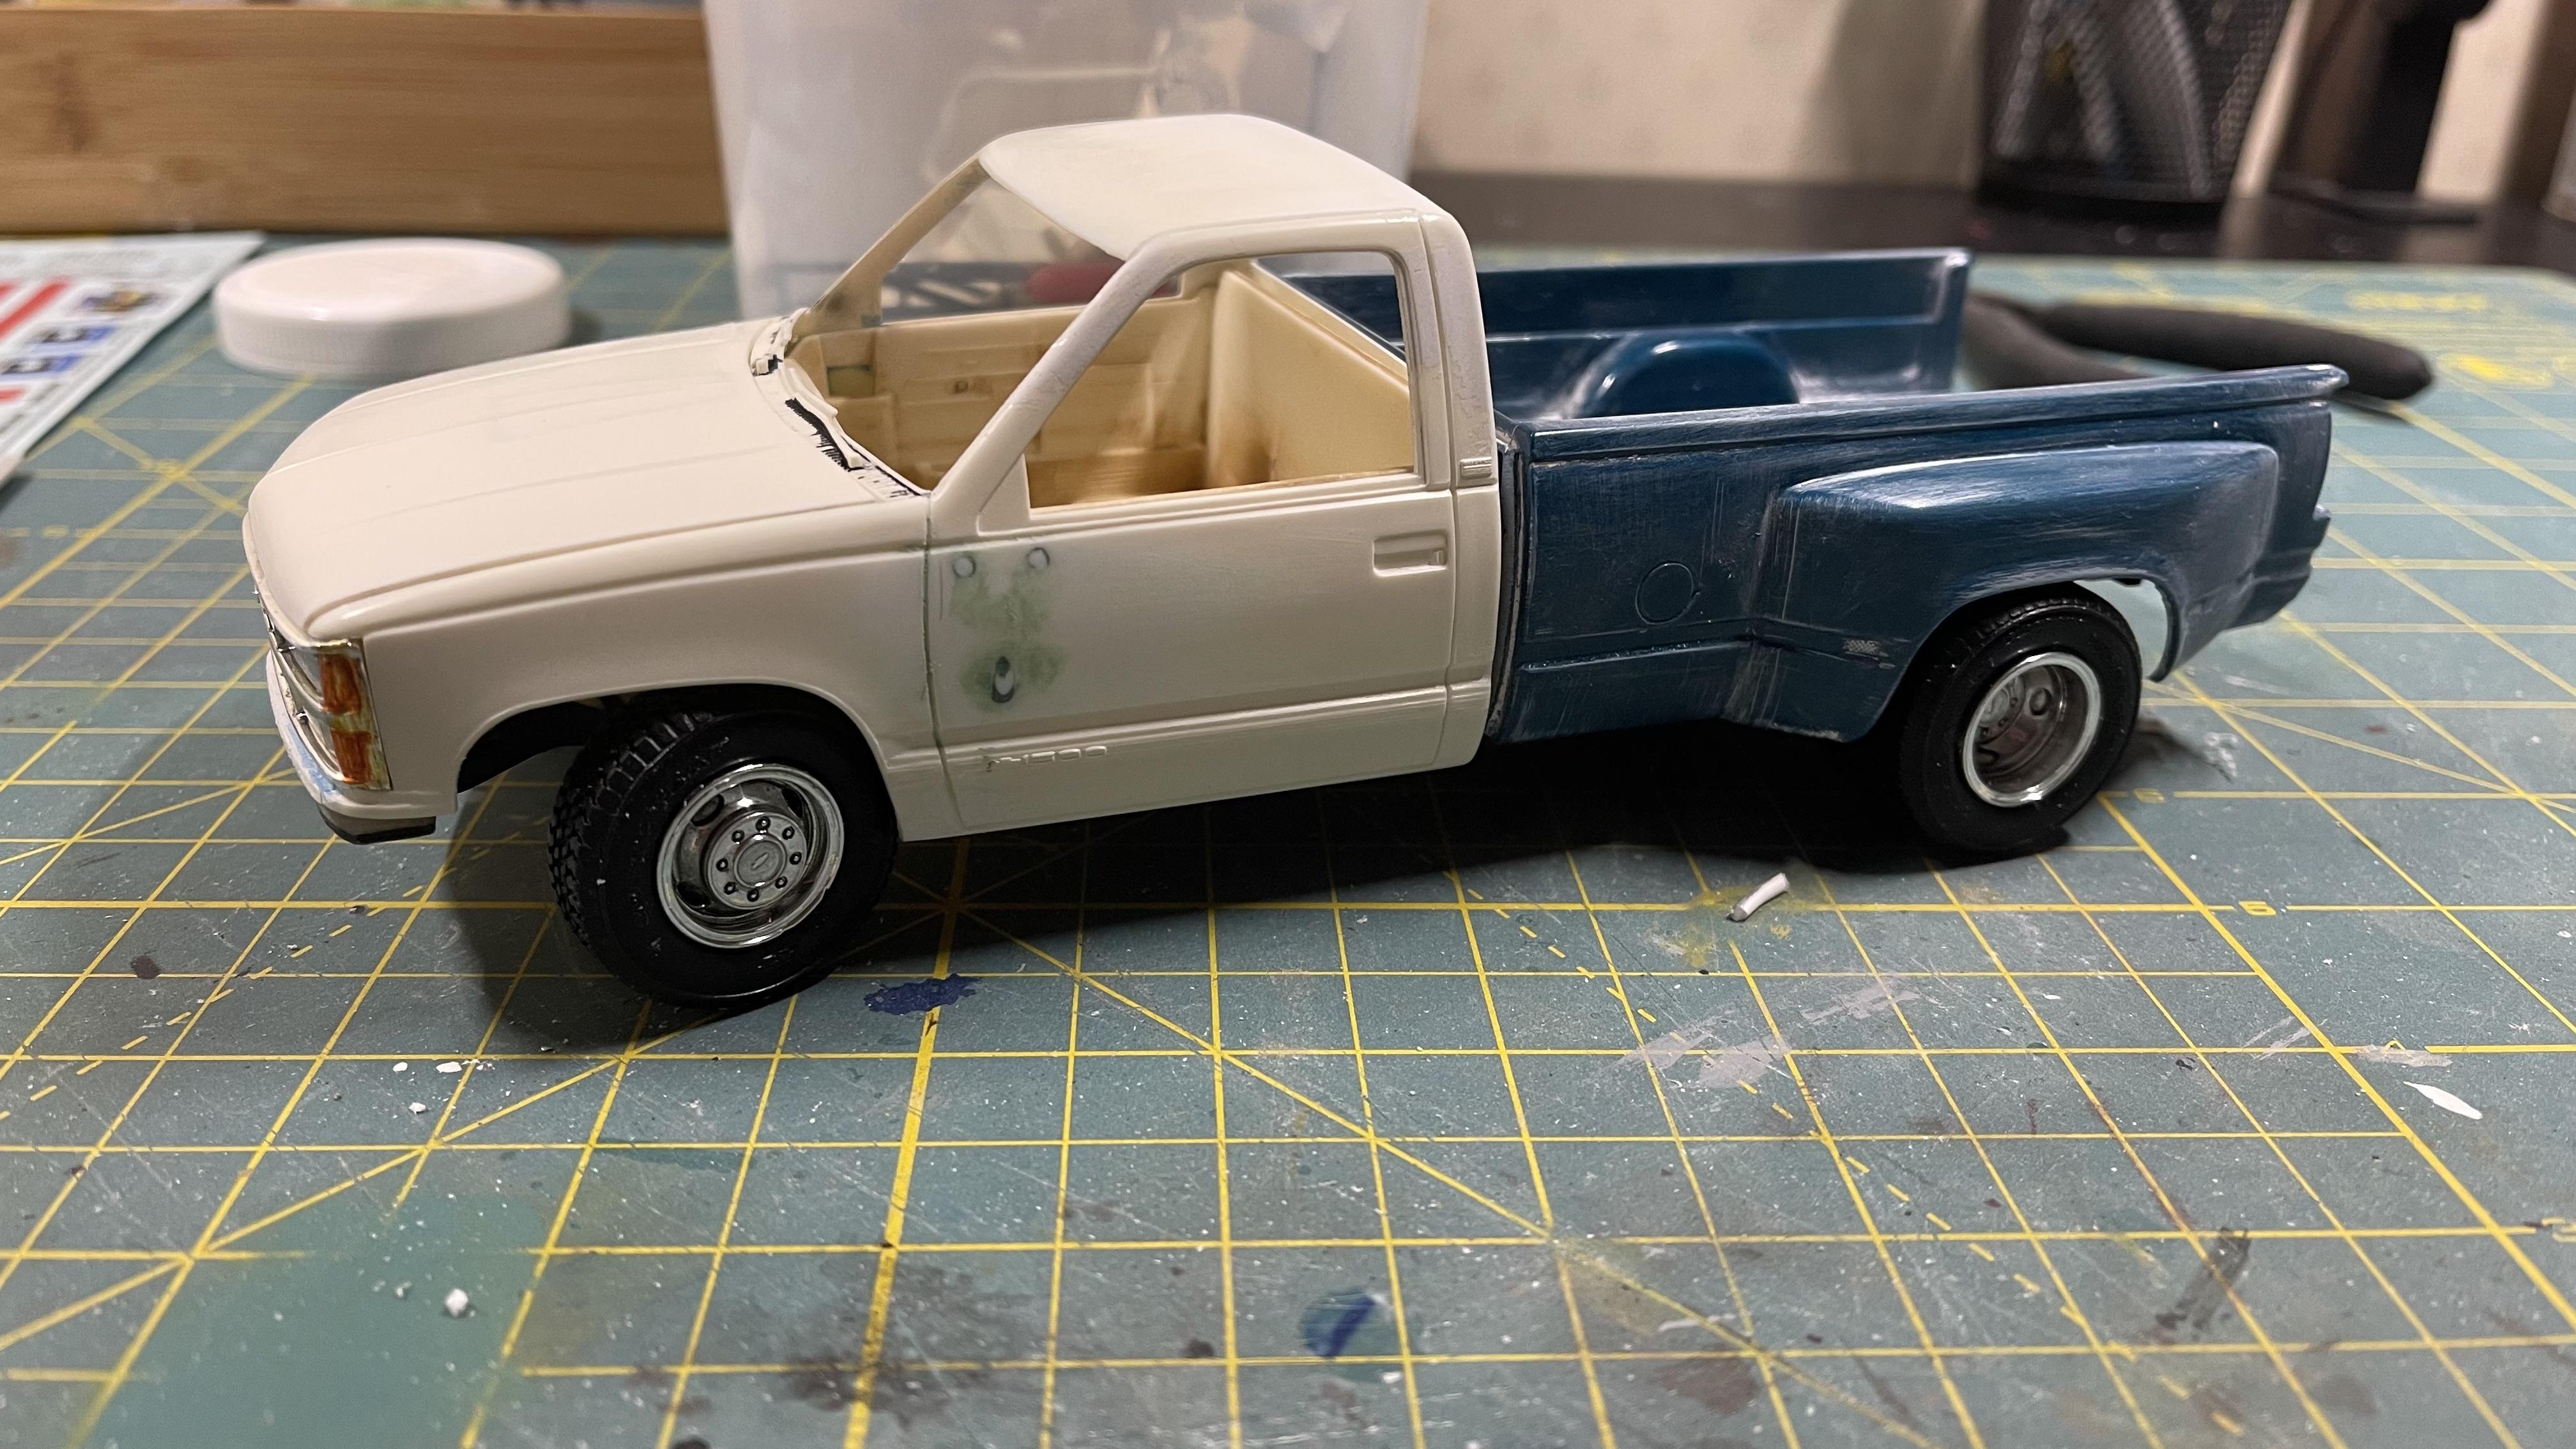
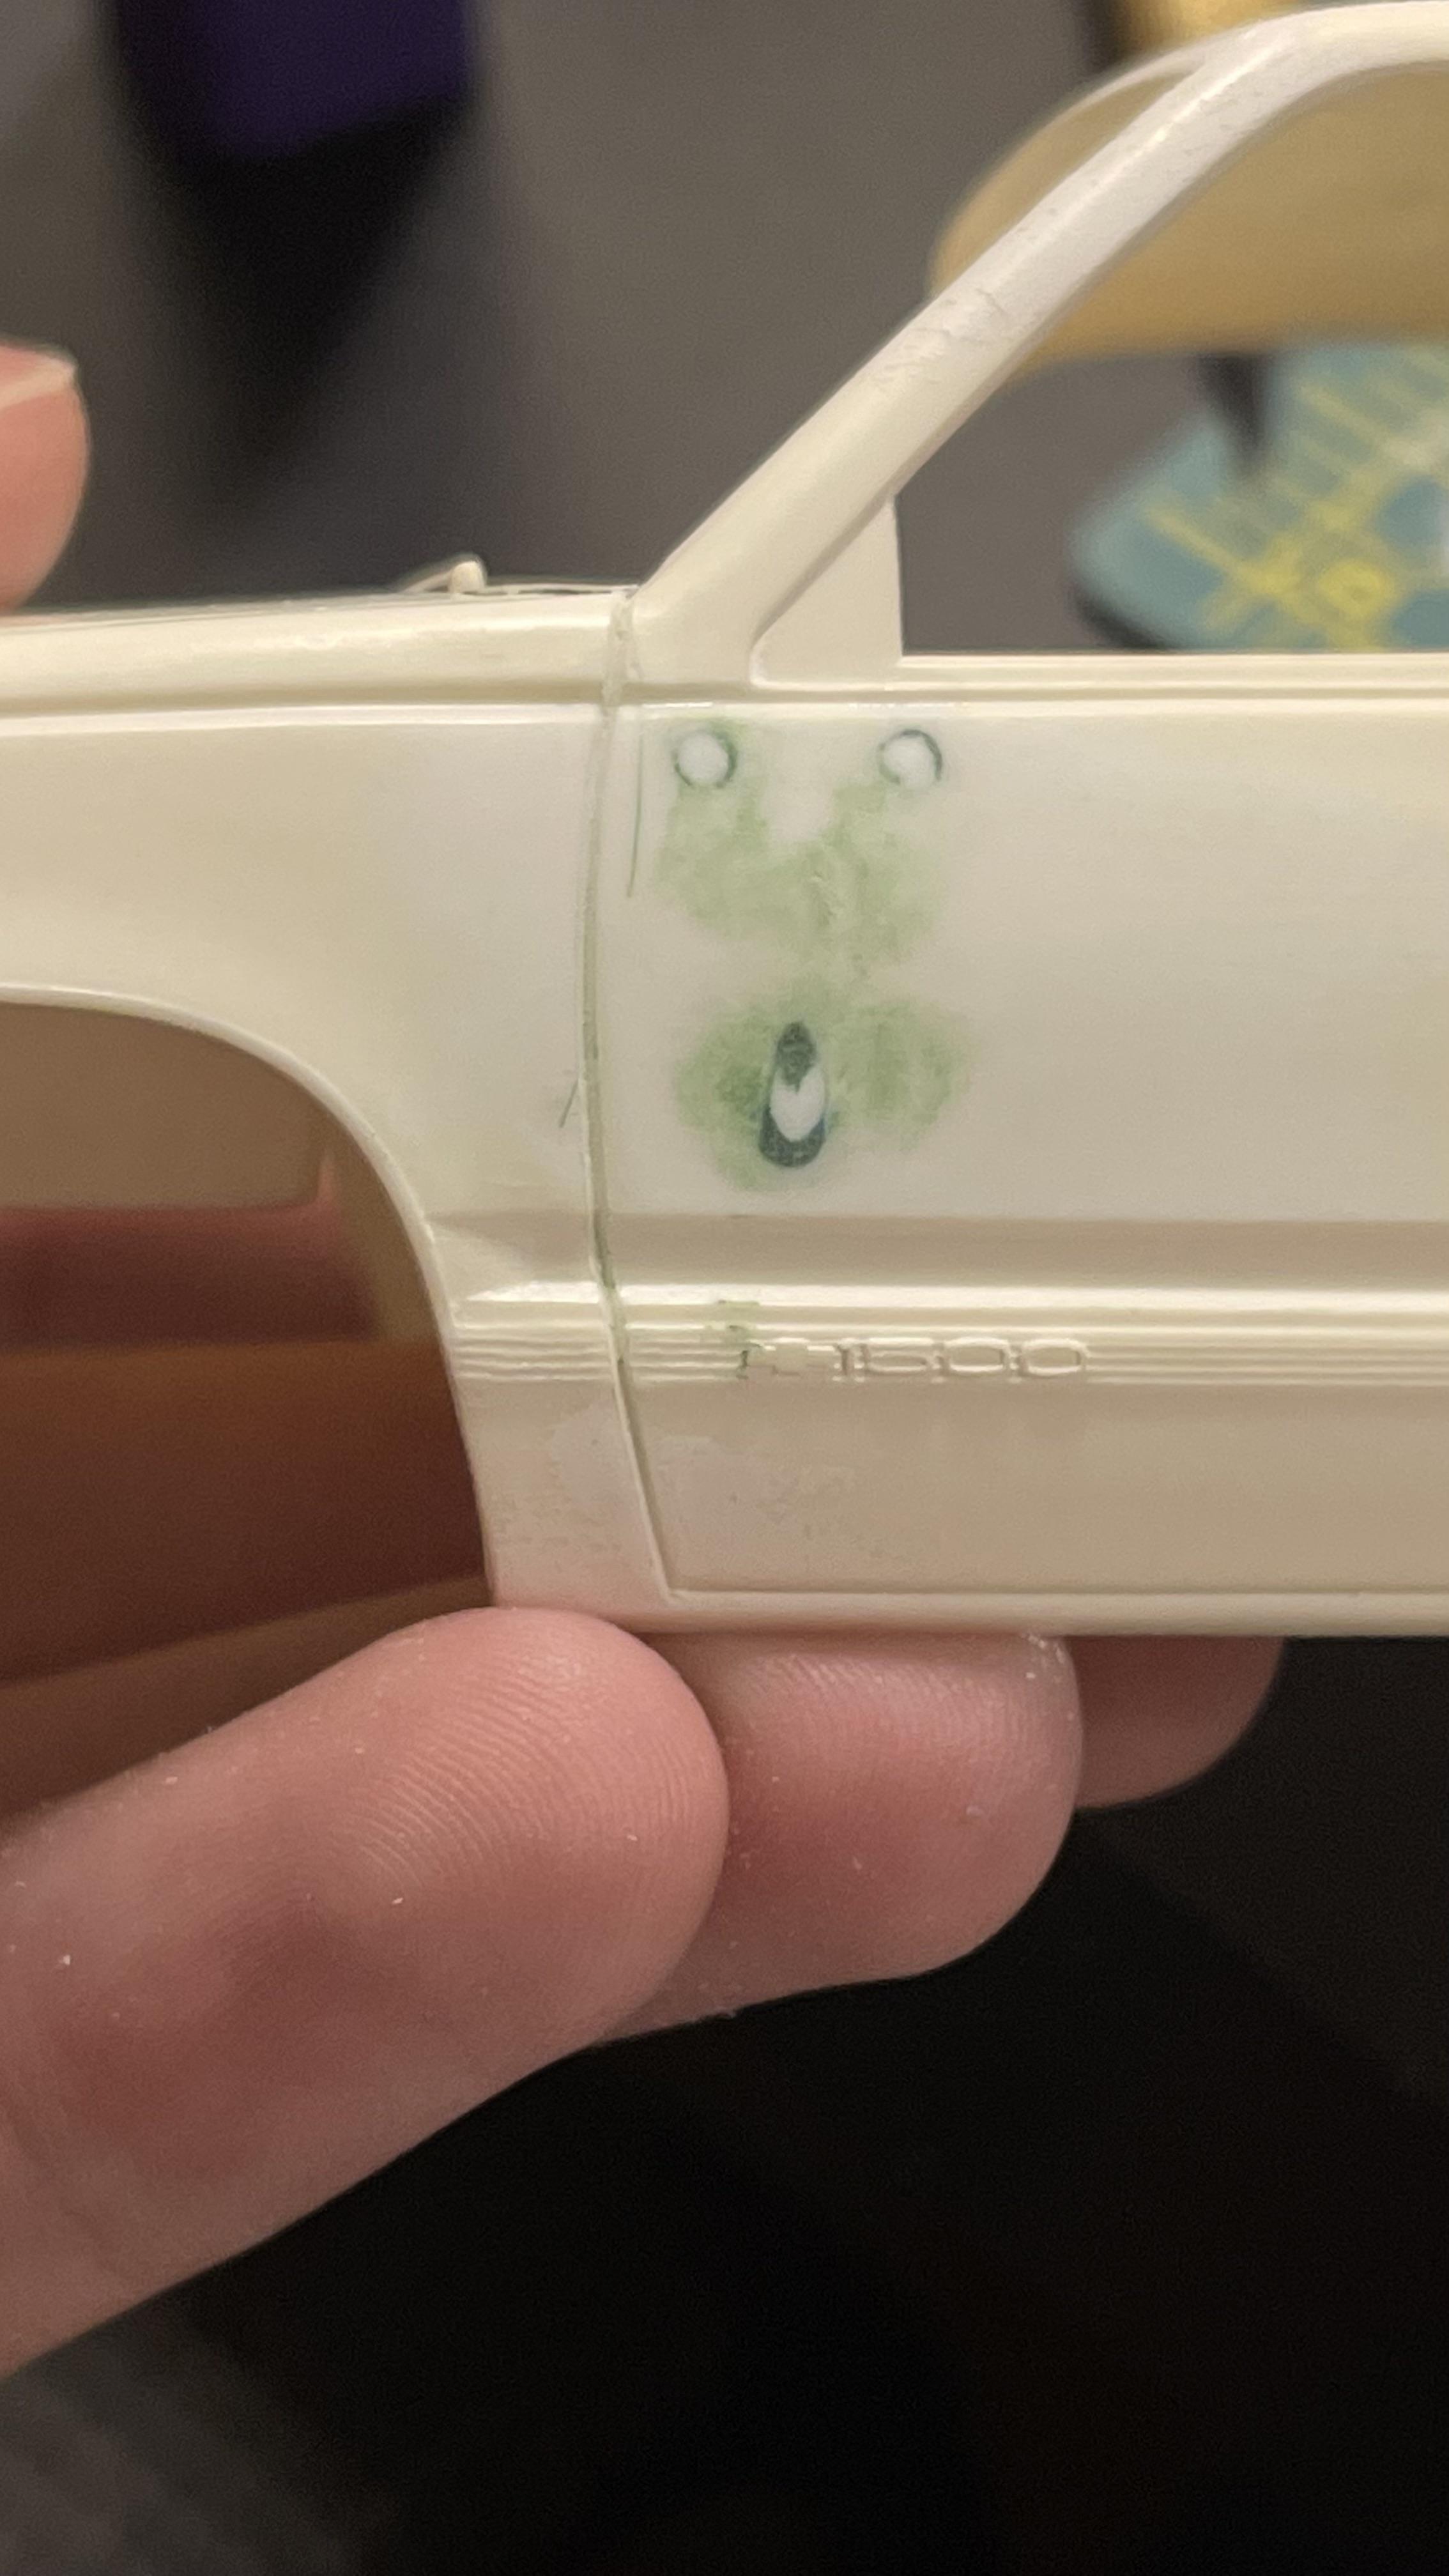
 I wanted to build a nice work truck for my model fleet and garage diorama. I have a soft spot for GMT400 pickups (I wish they would re-release these kits!) so naturally this was an easy choice for a build. So here we go.. I had this built-up that I did several years ago. It was ok. So I stripped it clean. Here it is stripped and all laid out. The chassis won't need modified, so I left that alone. I can weather over all of that anyways. I am planning on ditching the kit motor and using a resin 5.9 Cummins from Trailer Trash Kustomz. I would like to paint the truck red, but think a navy blue would look good as well. The kit decals are pretty rough, so i purchased some new decals from Rays Decals. Looking forward to getting them. I'll try to scratch build some tool boxes for the bed. I had added some poorly scratch built tow mirrors to the first build and they left some large holes in the doors. I had to fill those right away! I filled them with styrene rod first... And a little bit of putty and sanding... There it sits now.
-
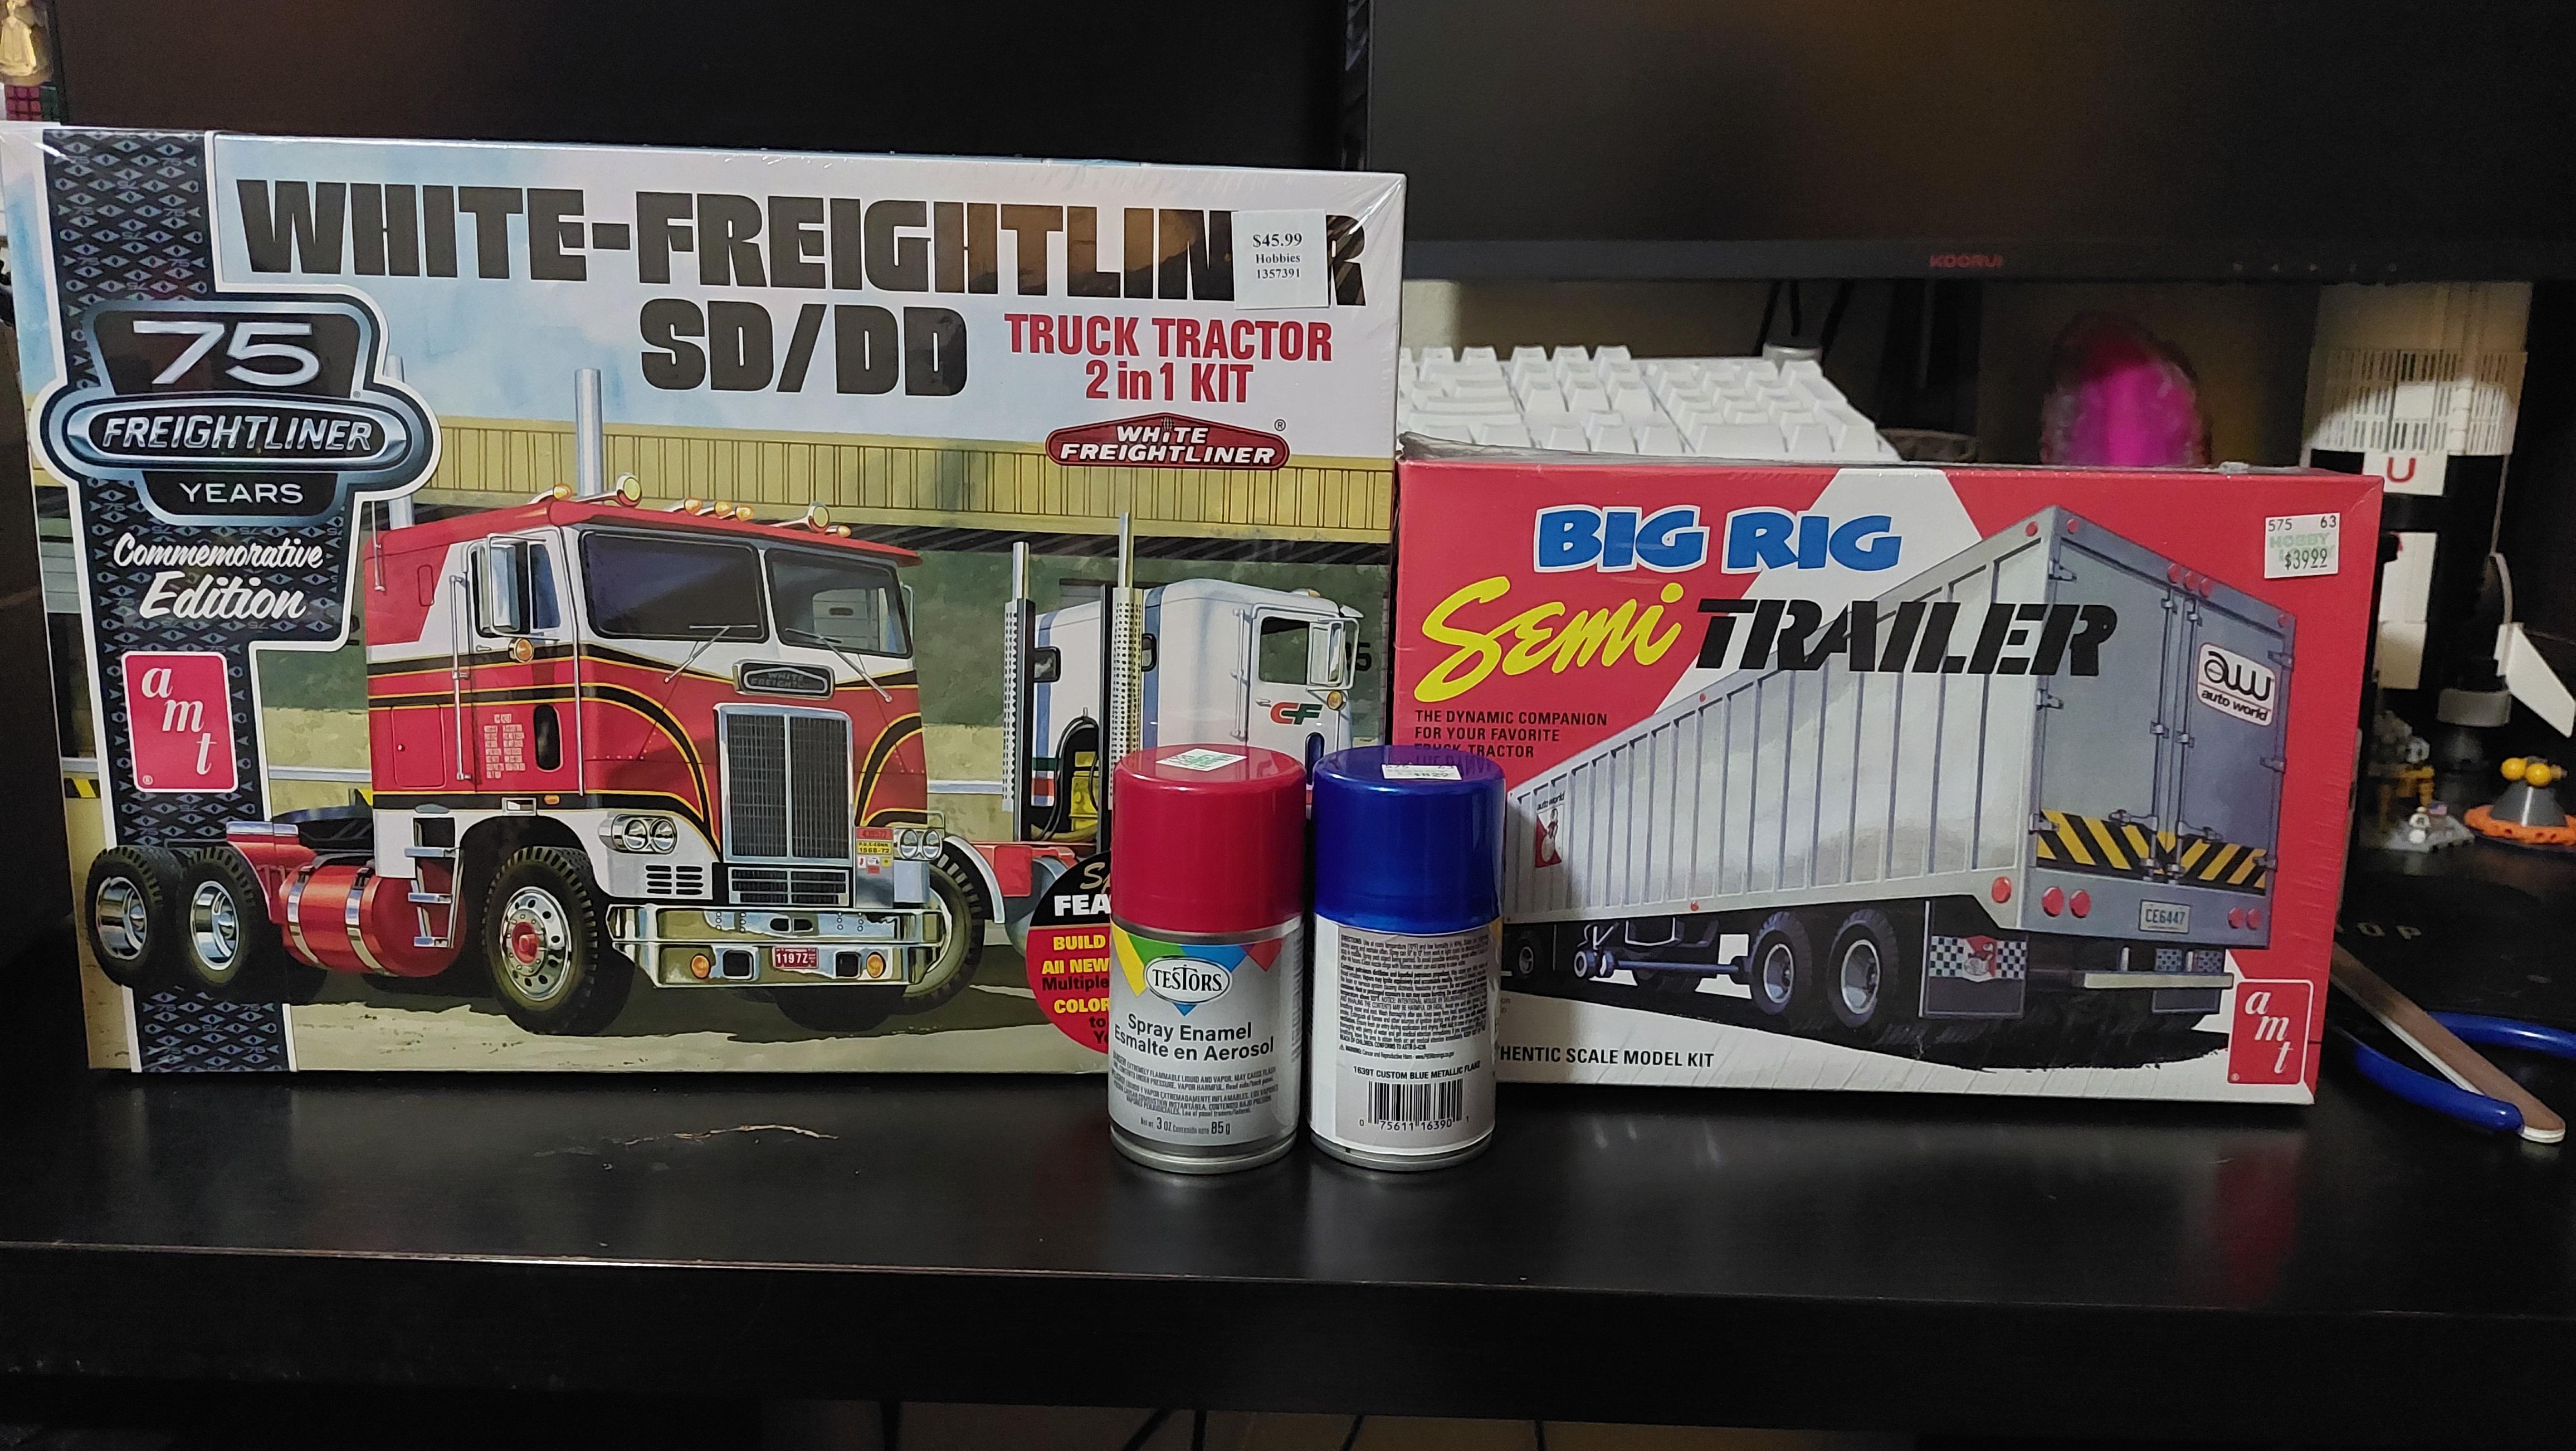
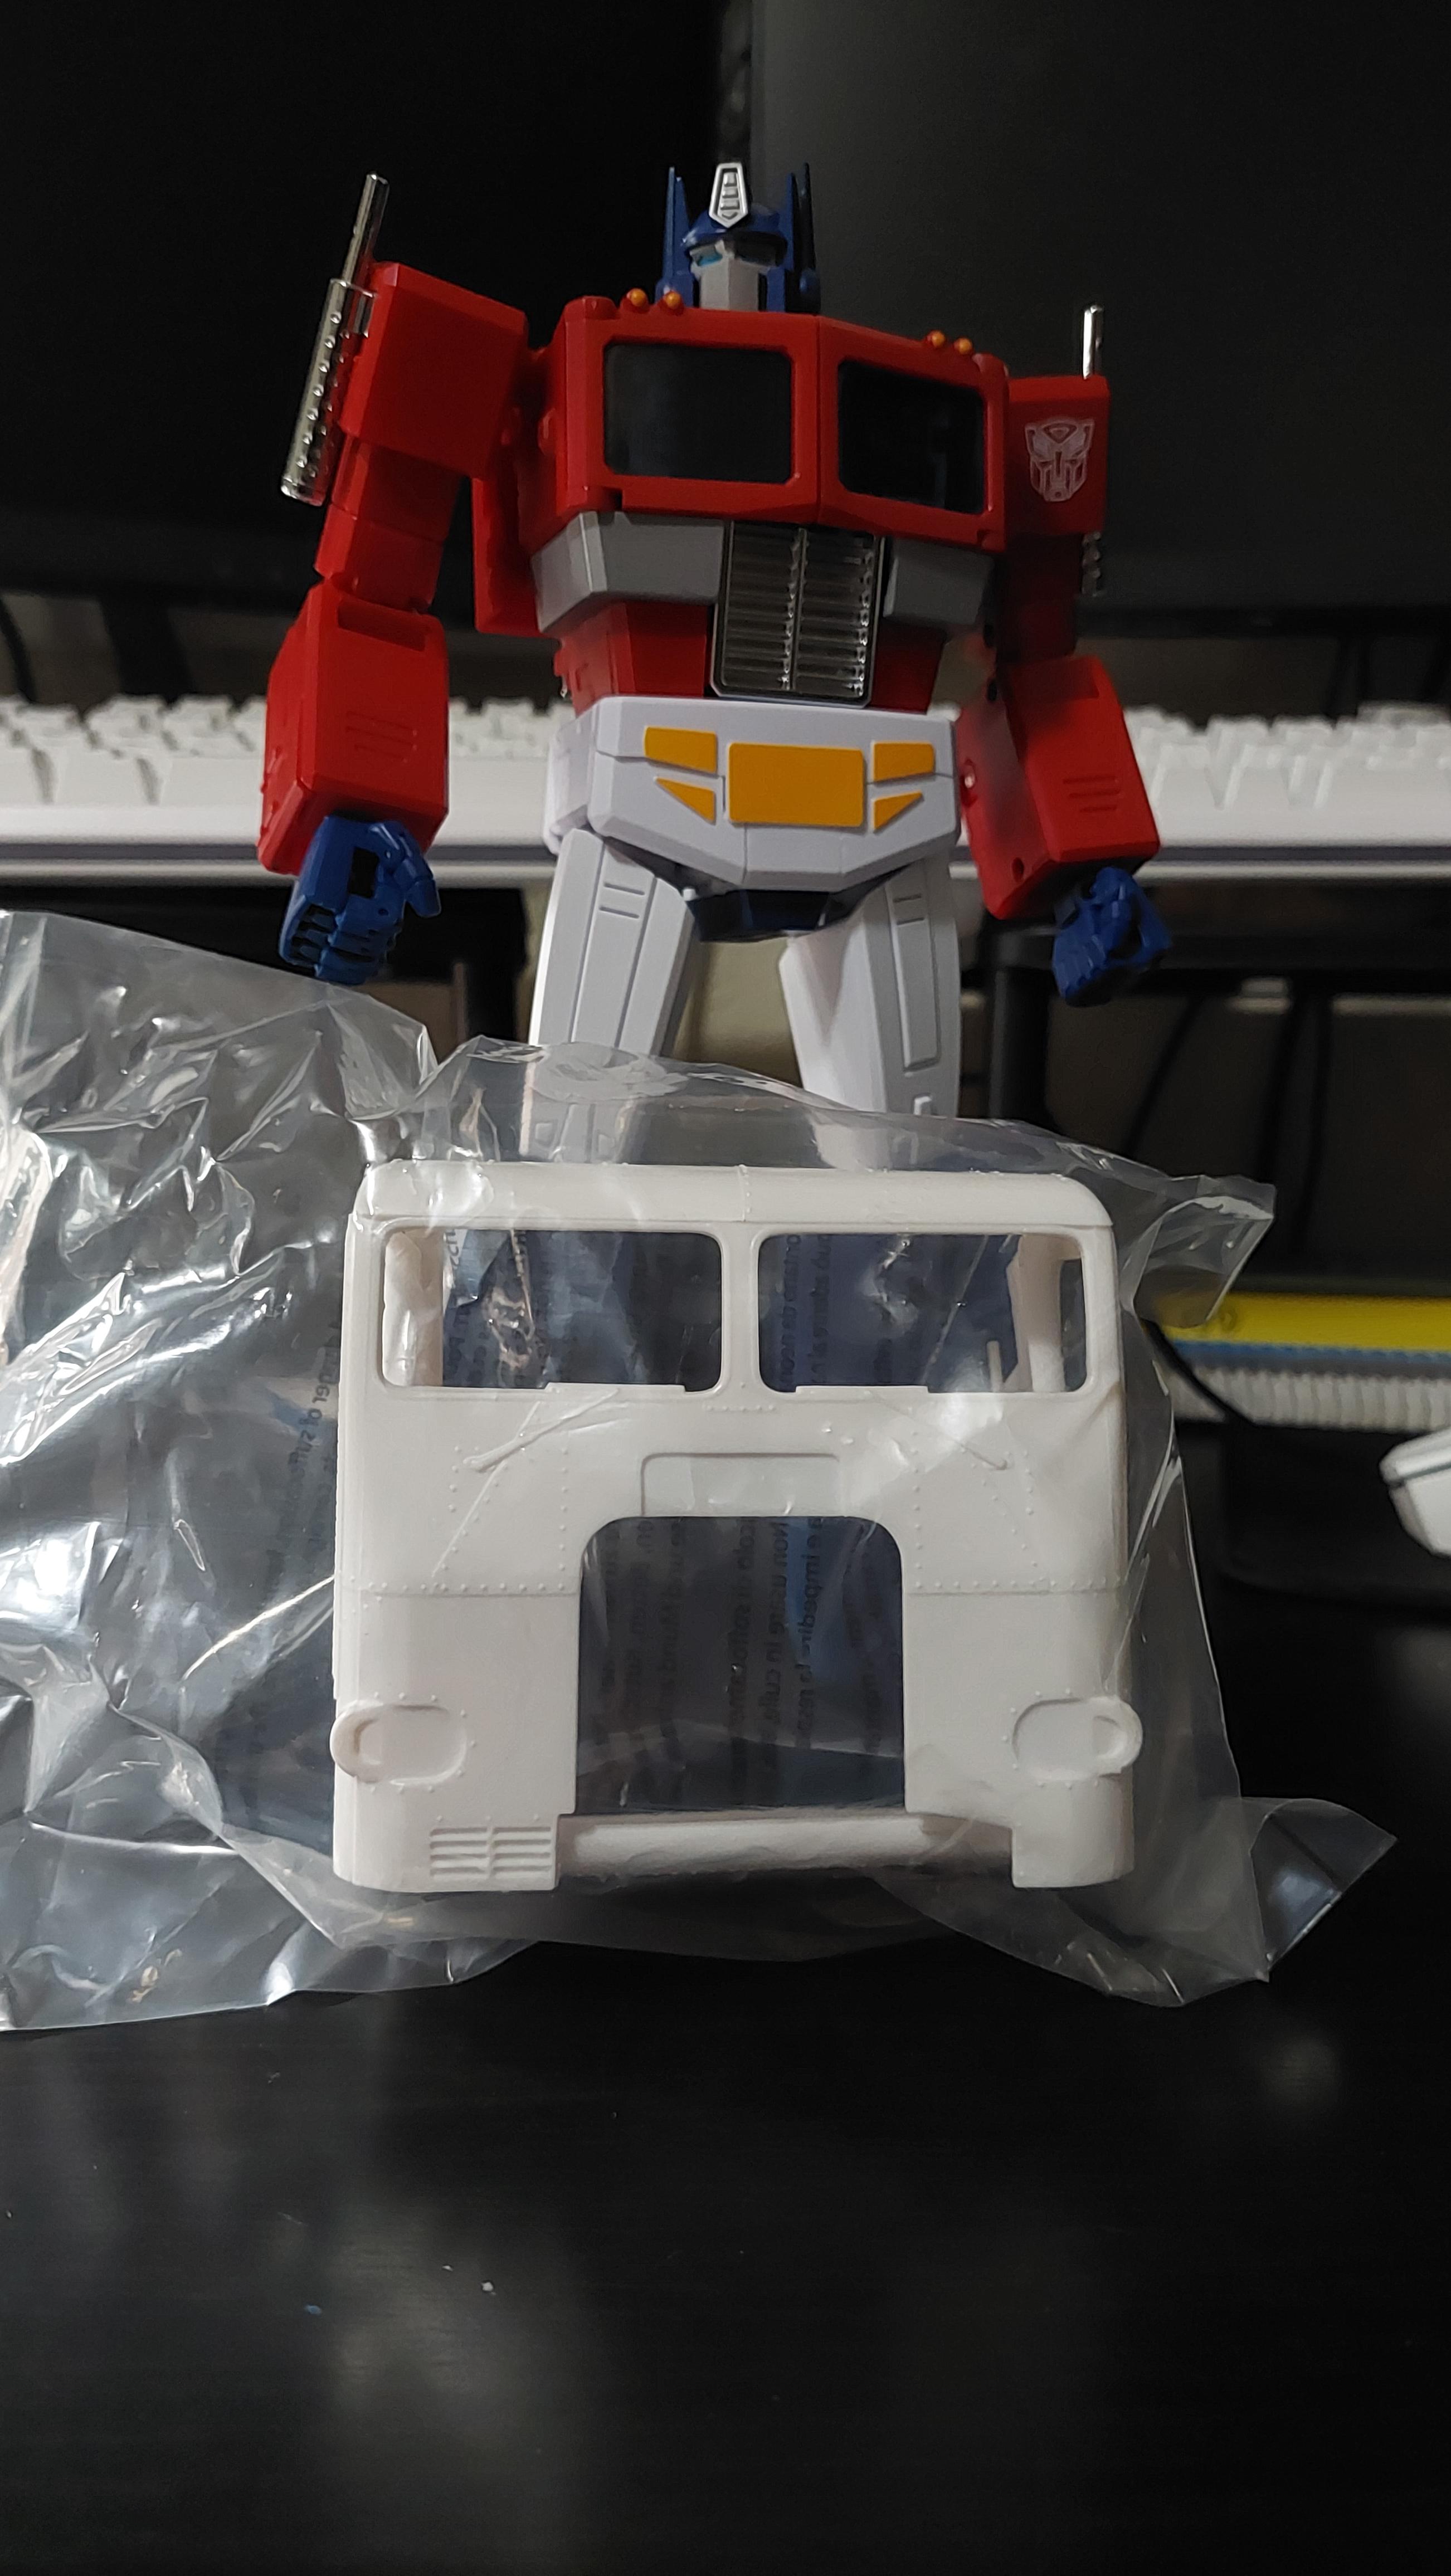
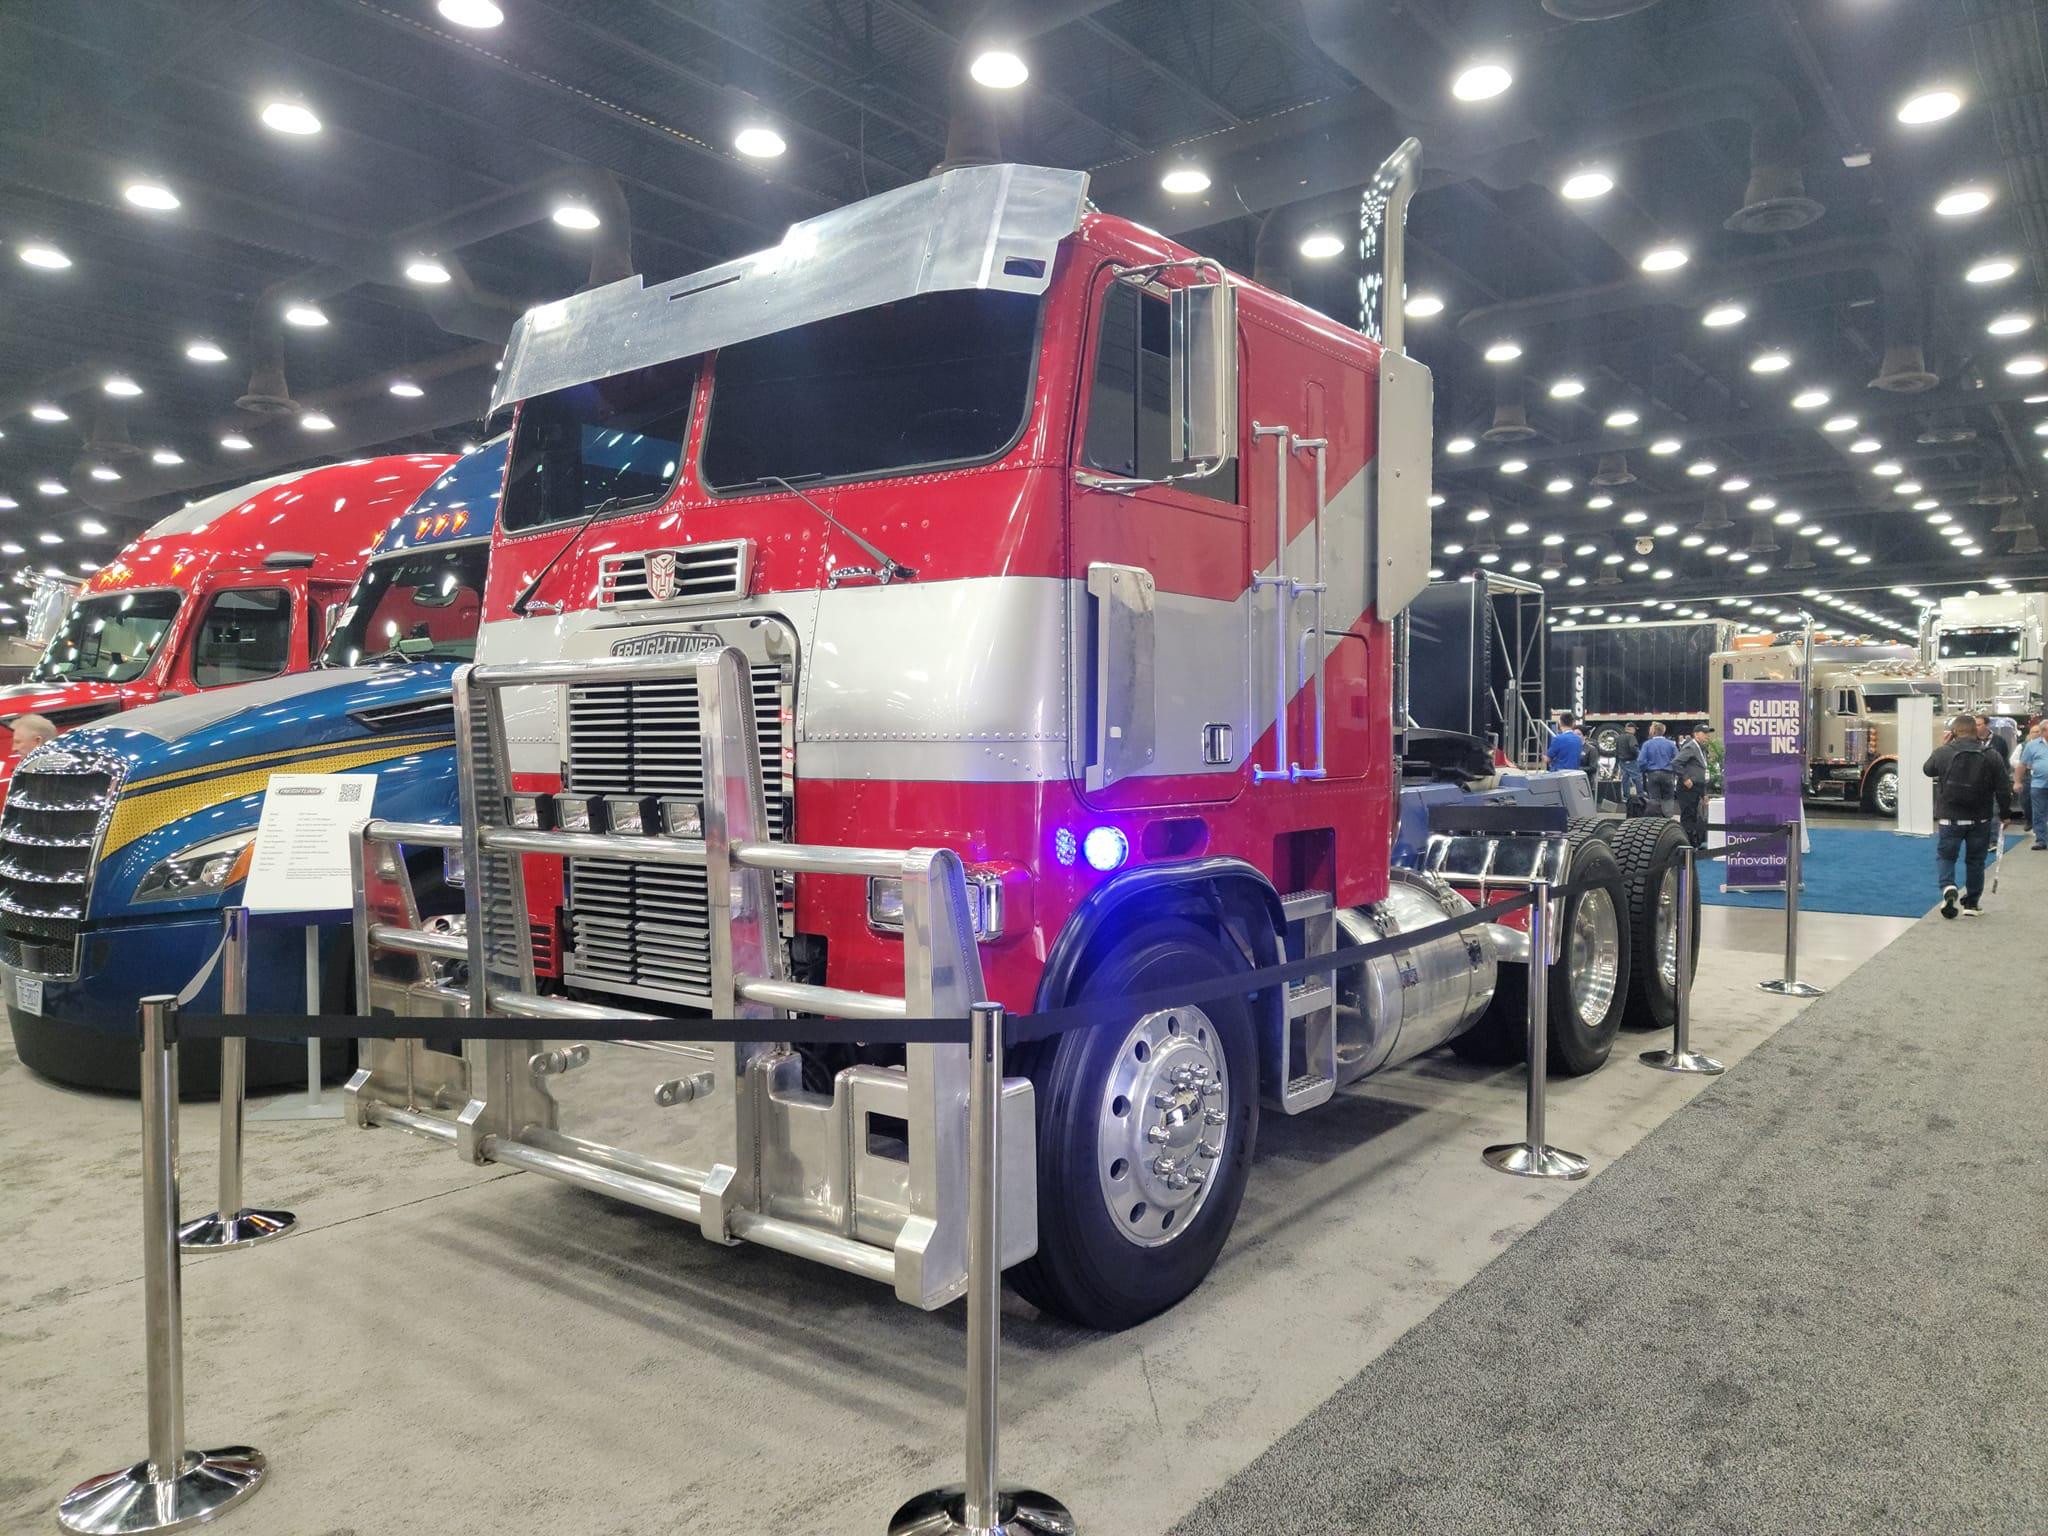
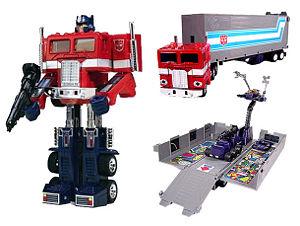
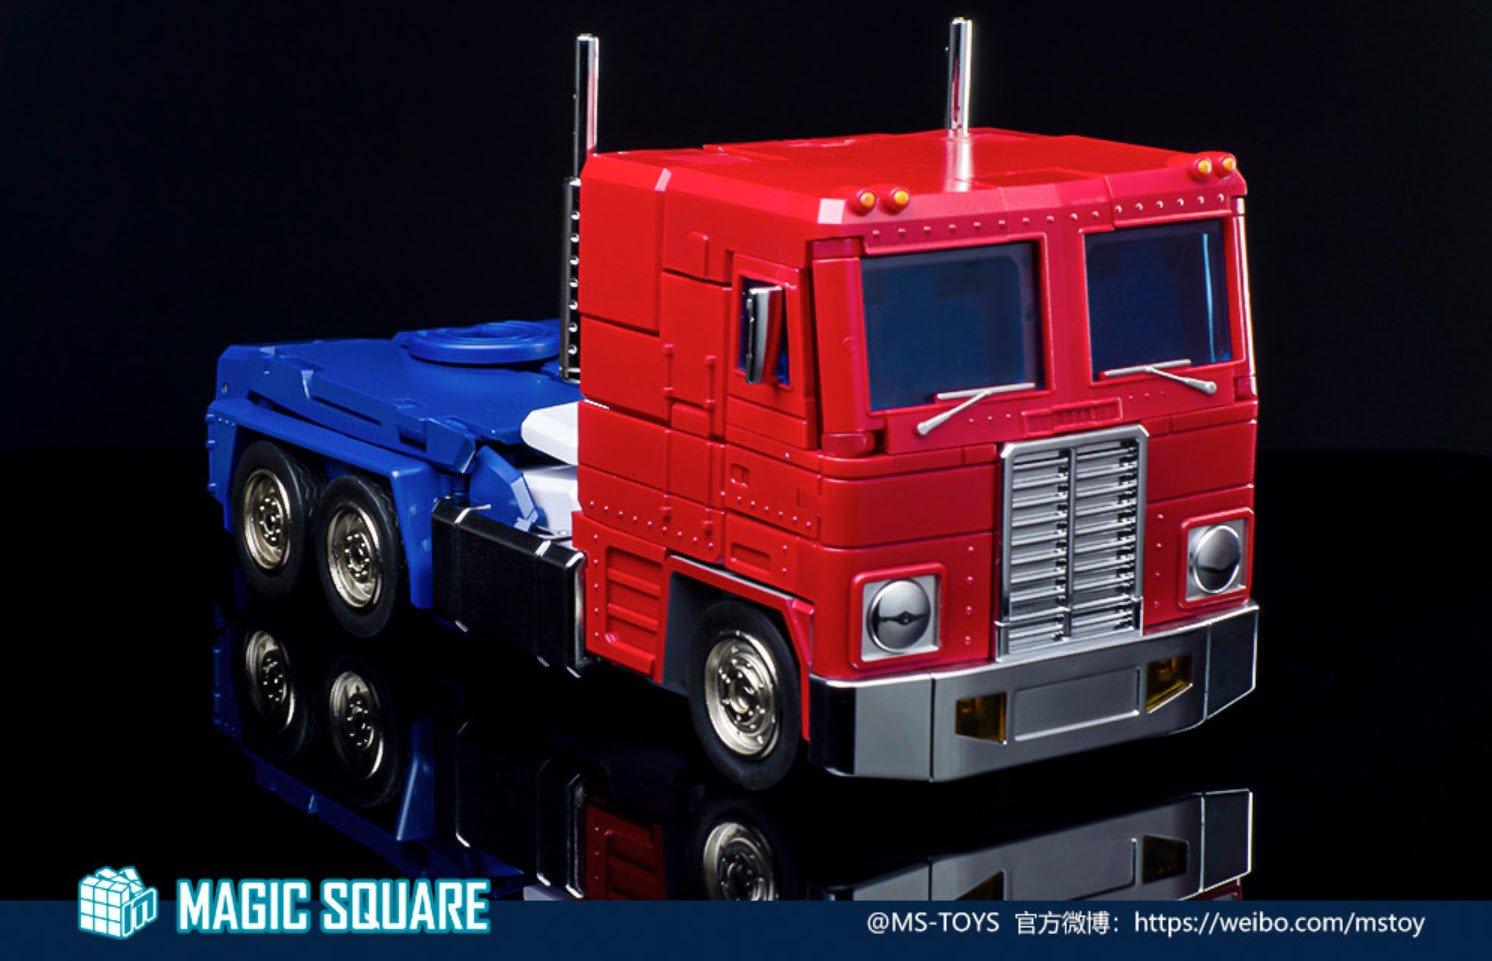
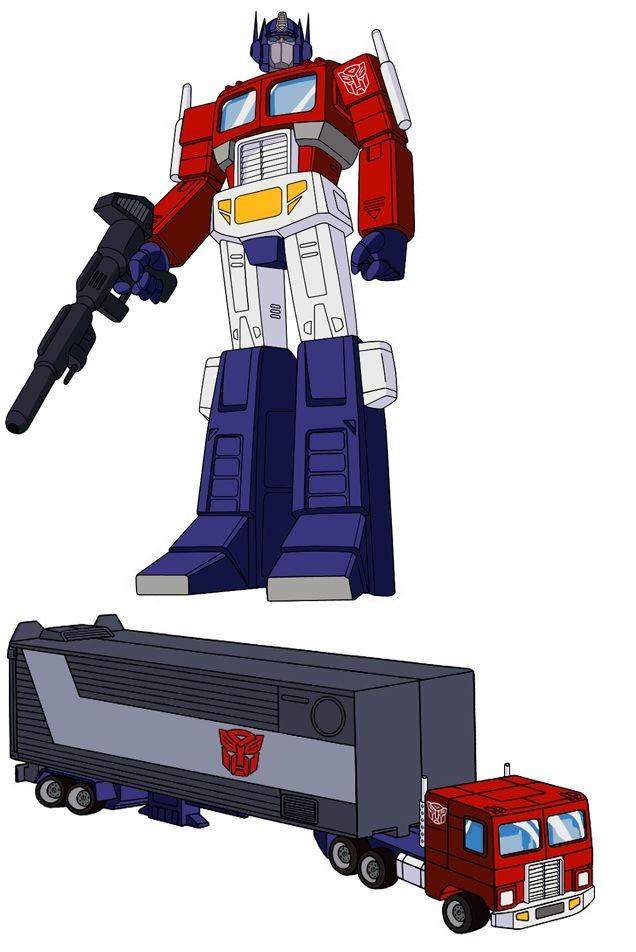
 Hello all. I went for a stroll around a hobby shop and found the AMT White-Freightliner kit. Being a transformers fan I knew immediately I wanted to make it an Optimus Prime look-a-like. The kit isn't any exact Prime alt mode so I hope to be blending aspects from all. I know other people have already done this based on my research and it was great to get inspiration! Right next to it just so happened to be a 1/25 scale trailer too! This solidified the idea. I hope to use polystyrene sheets to fill in the ridges along the side in the shape of his iconic stripe, in theory to make it smooth all the way along just like the original toy.
-
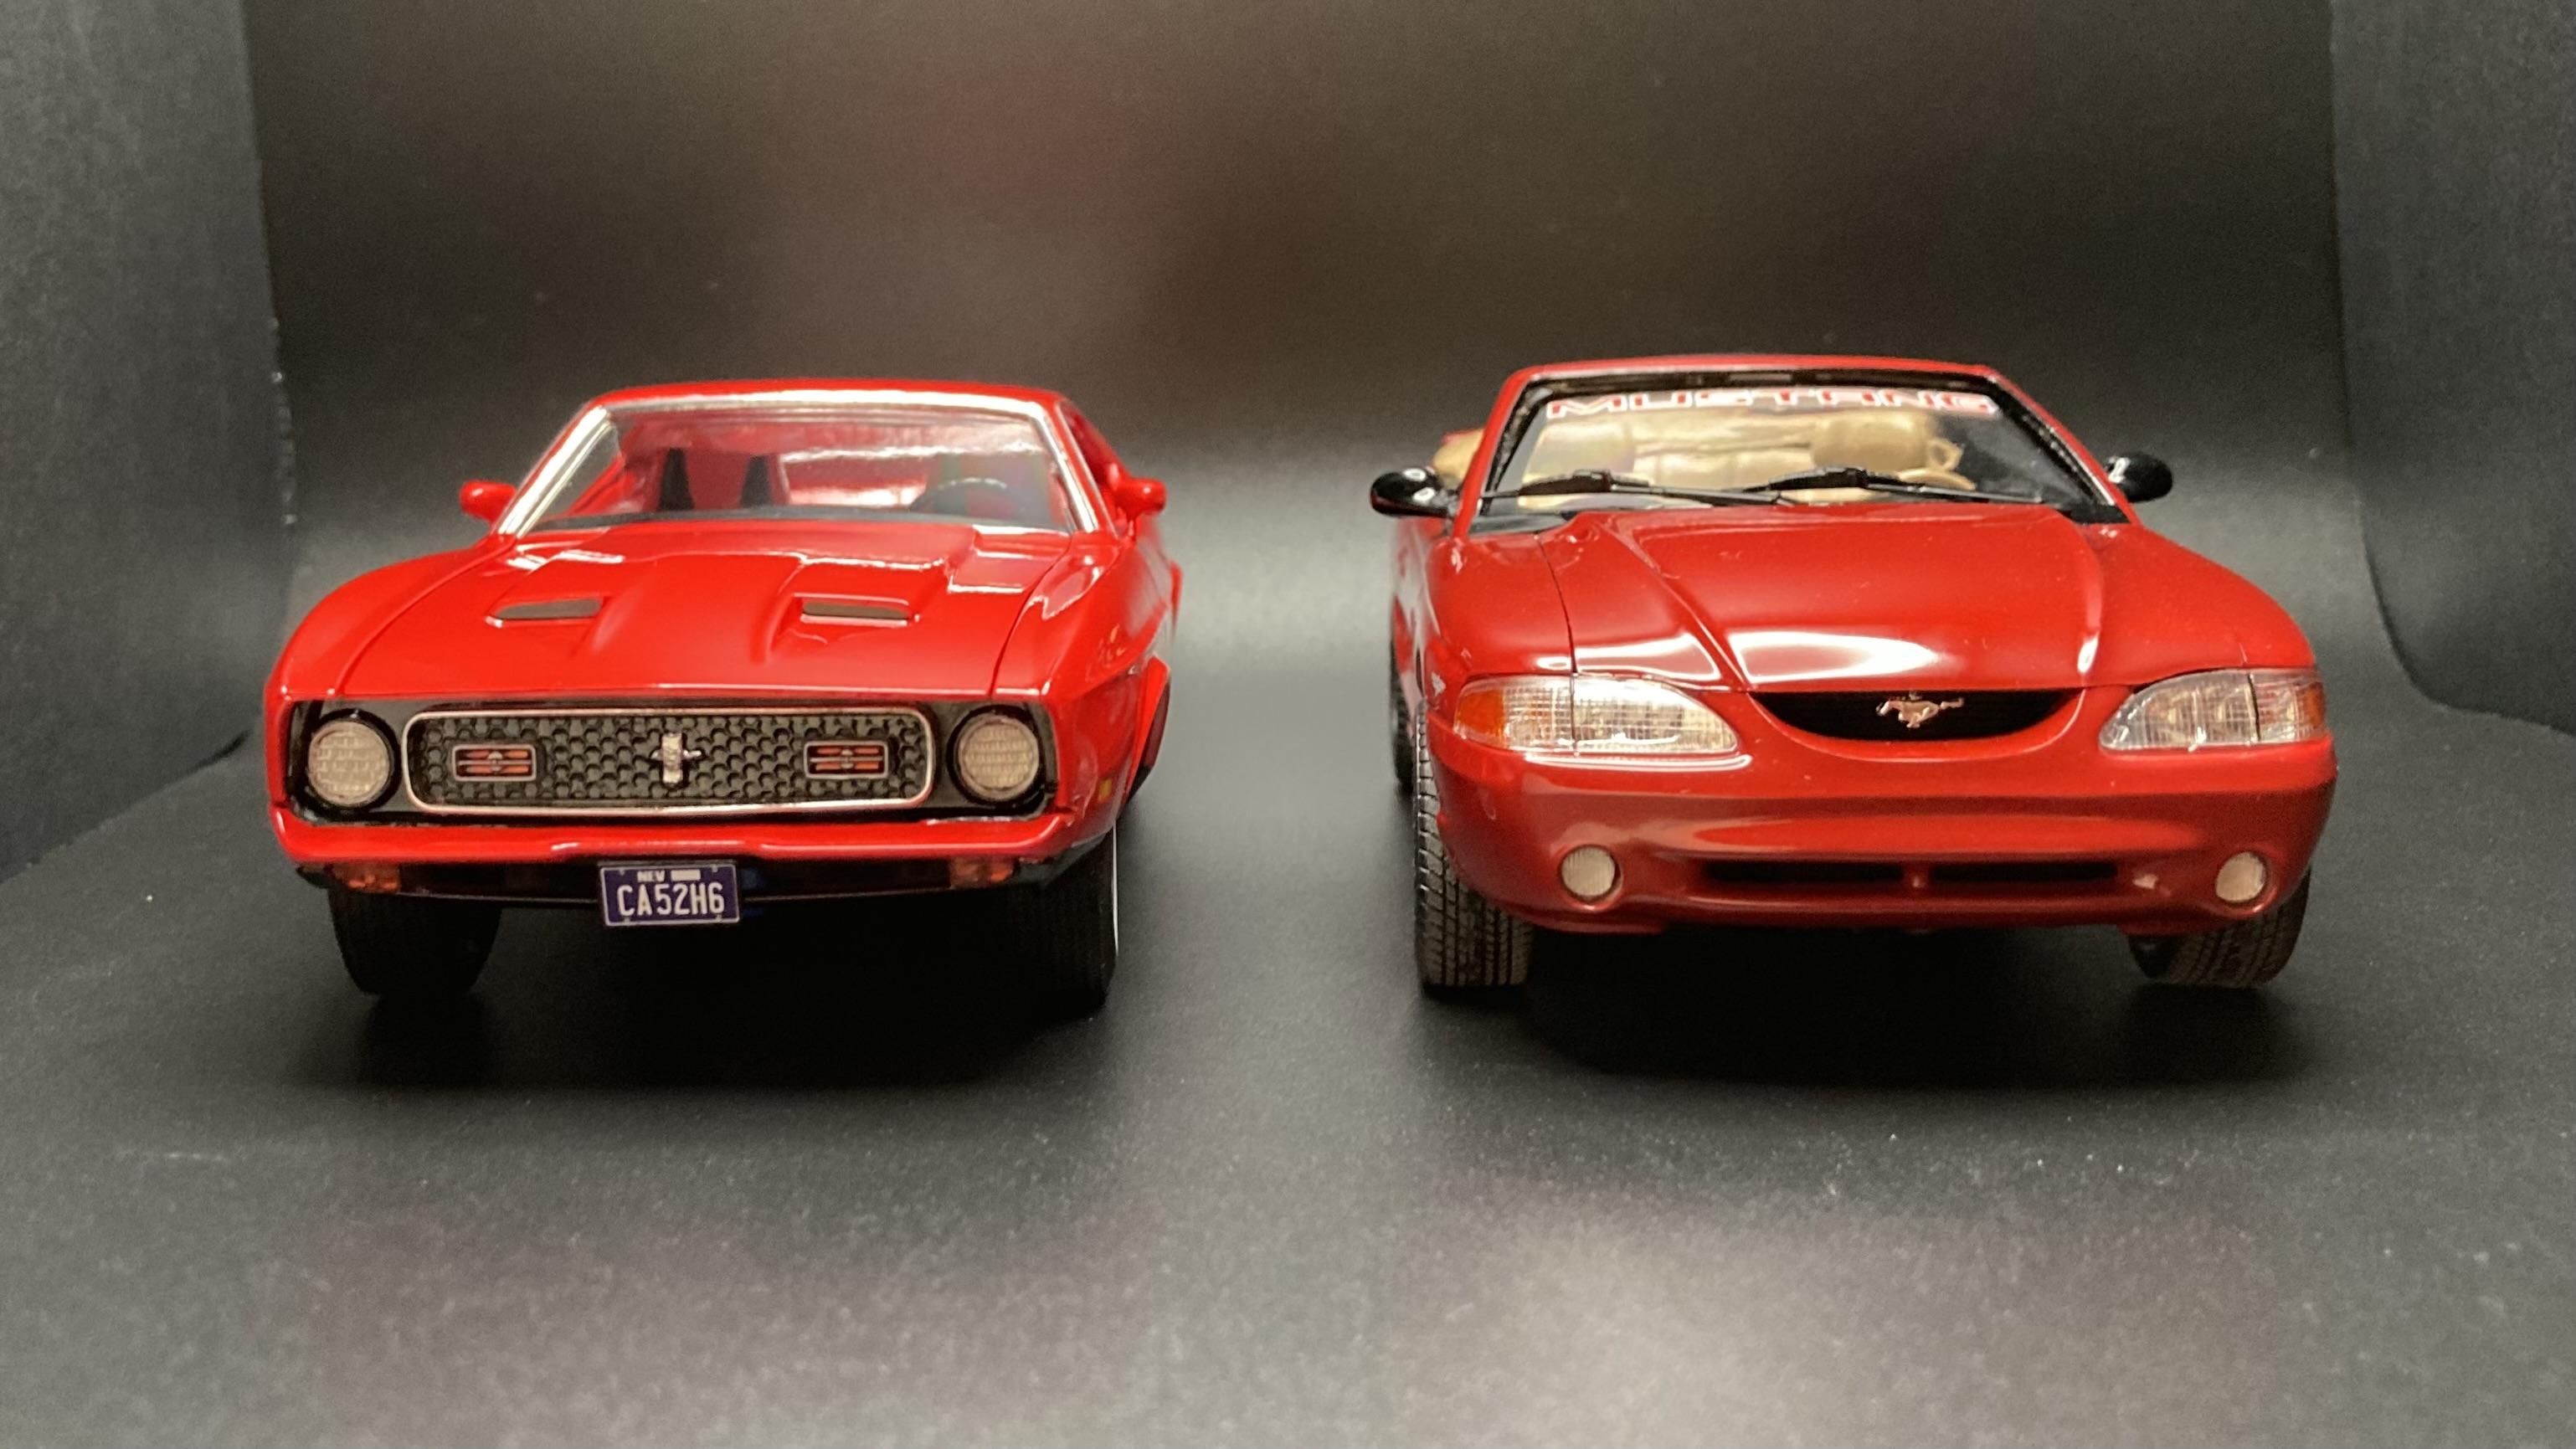
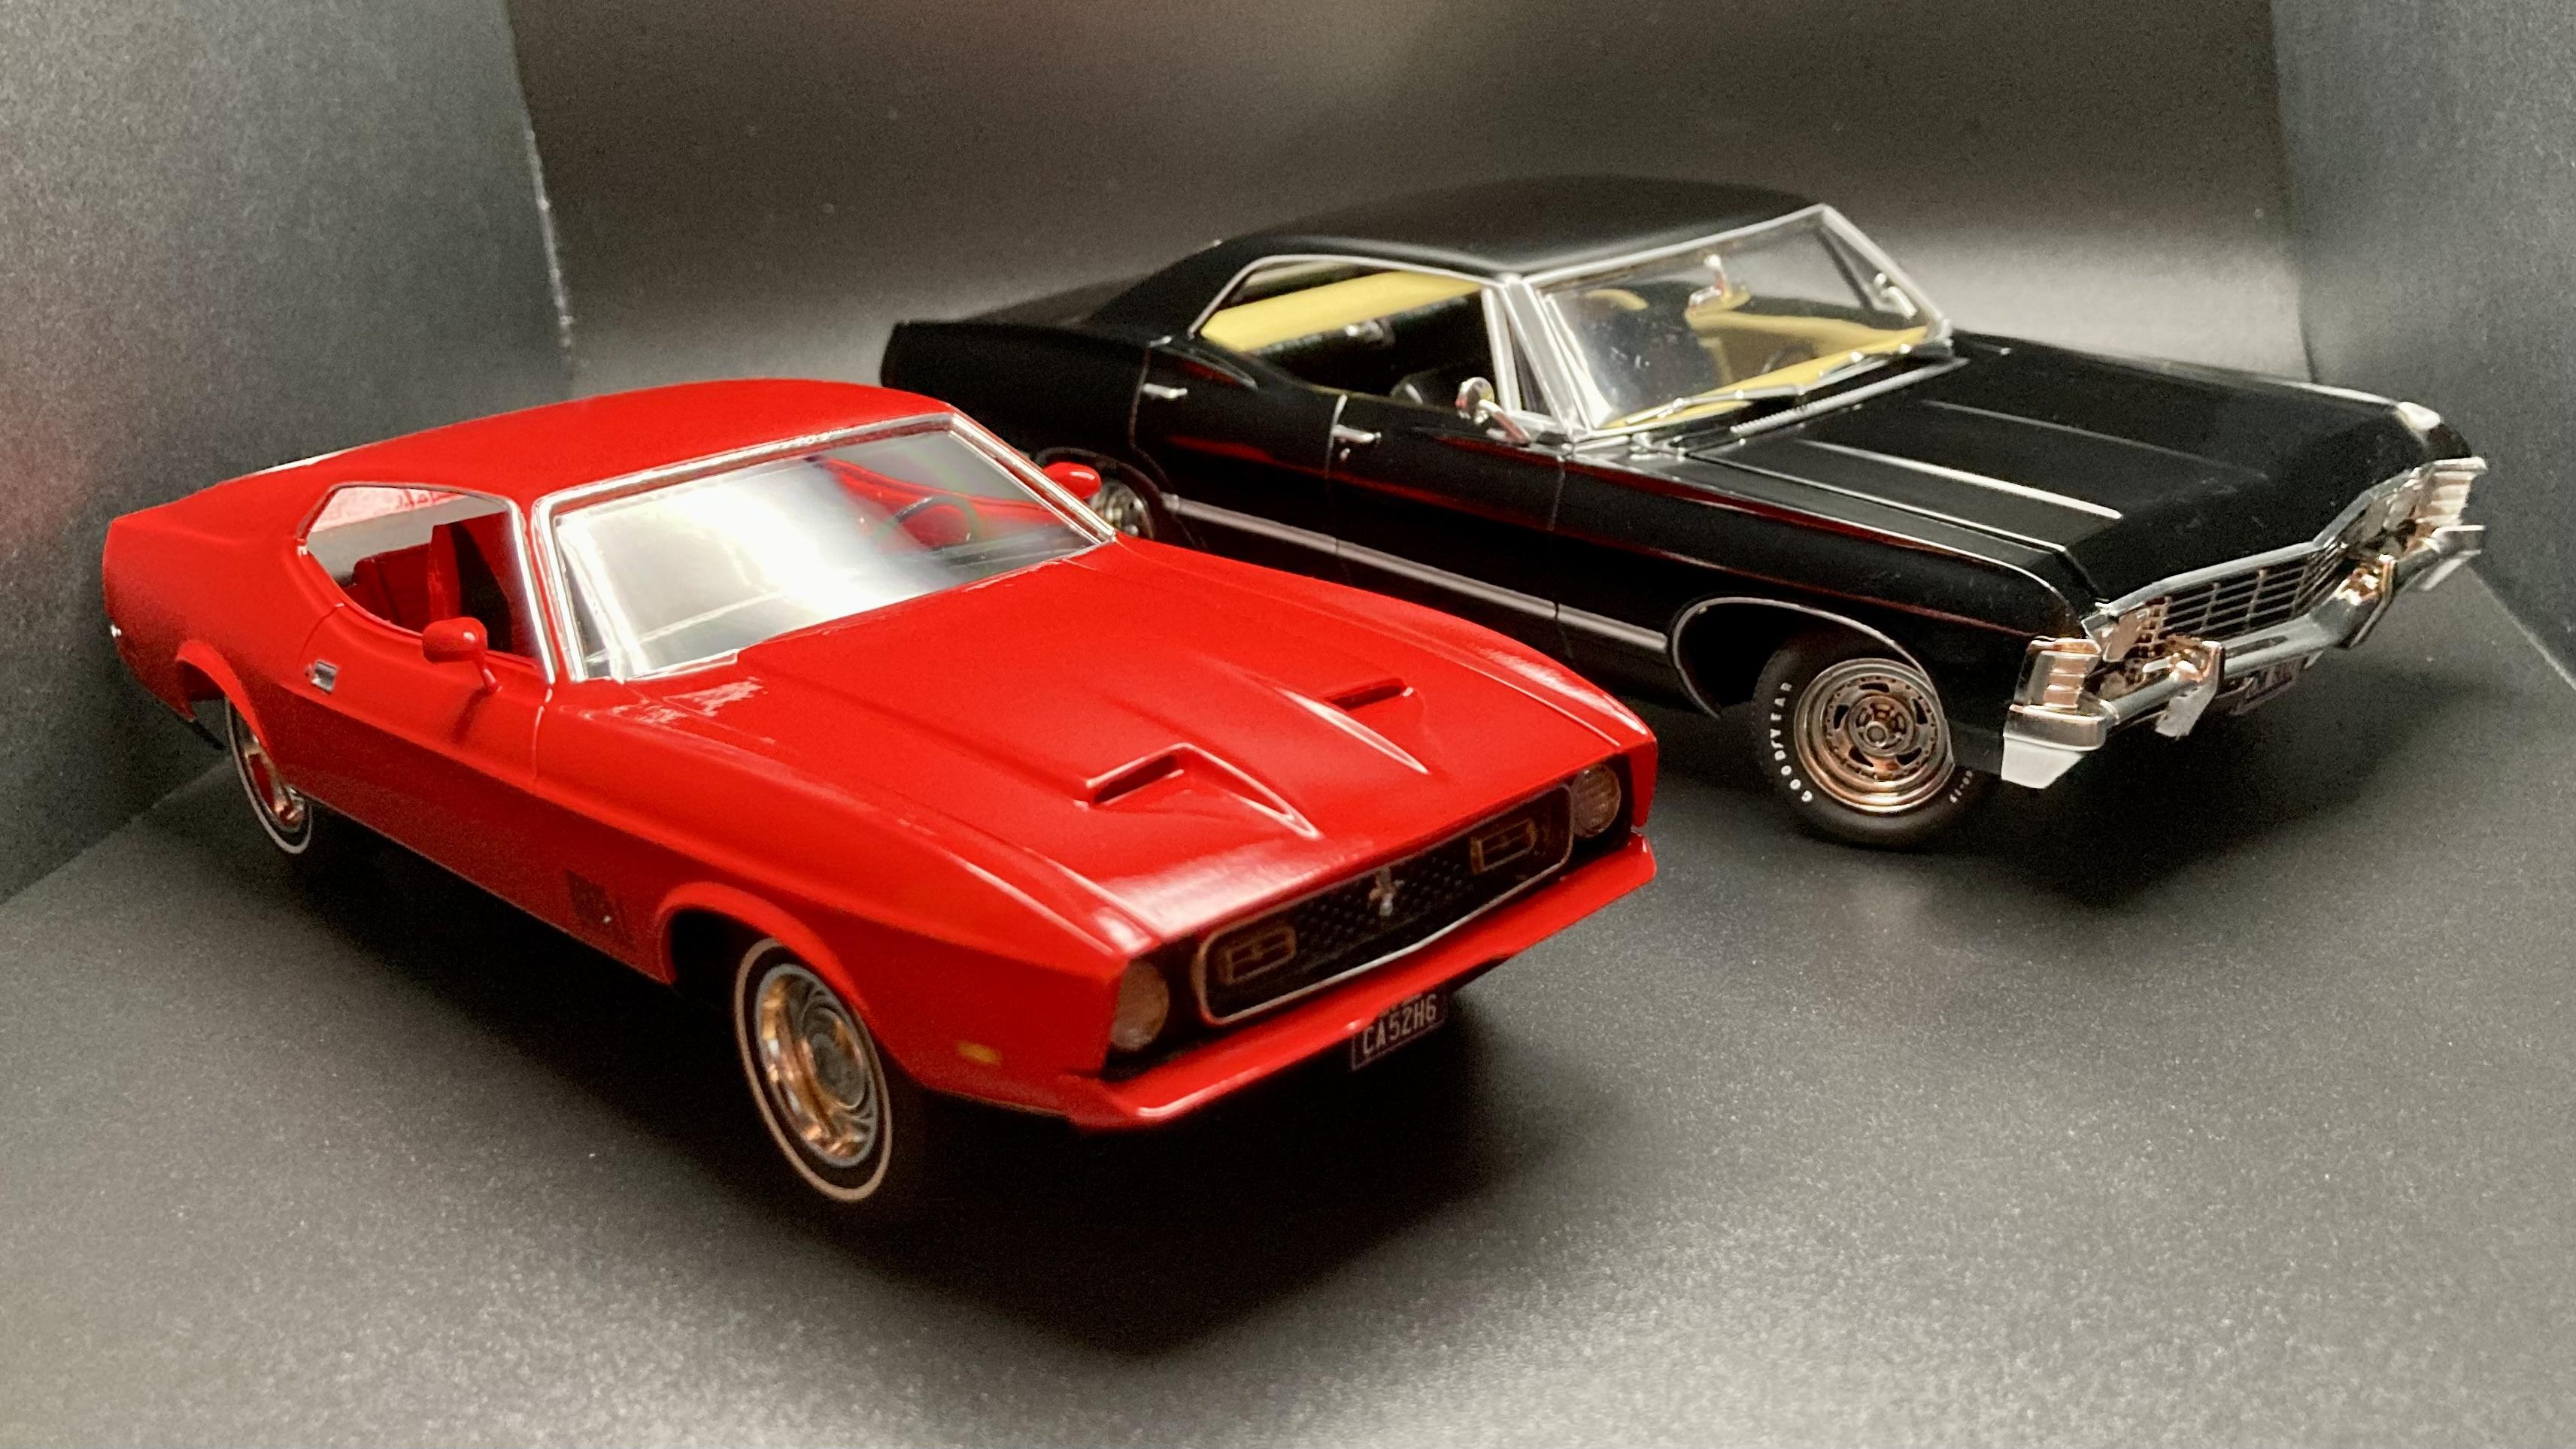
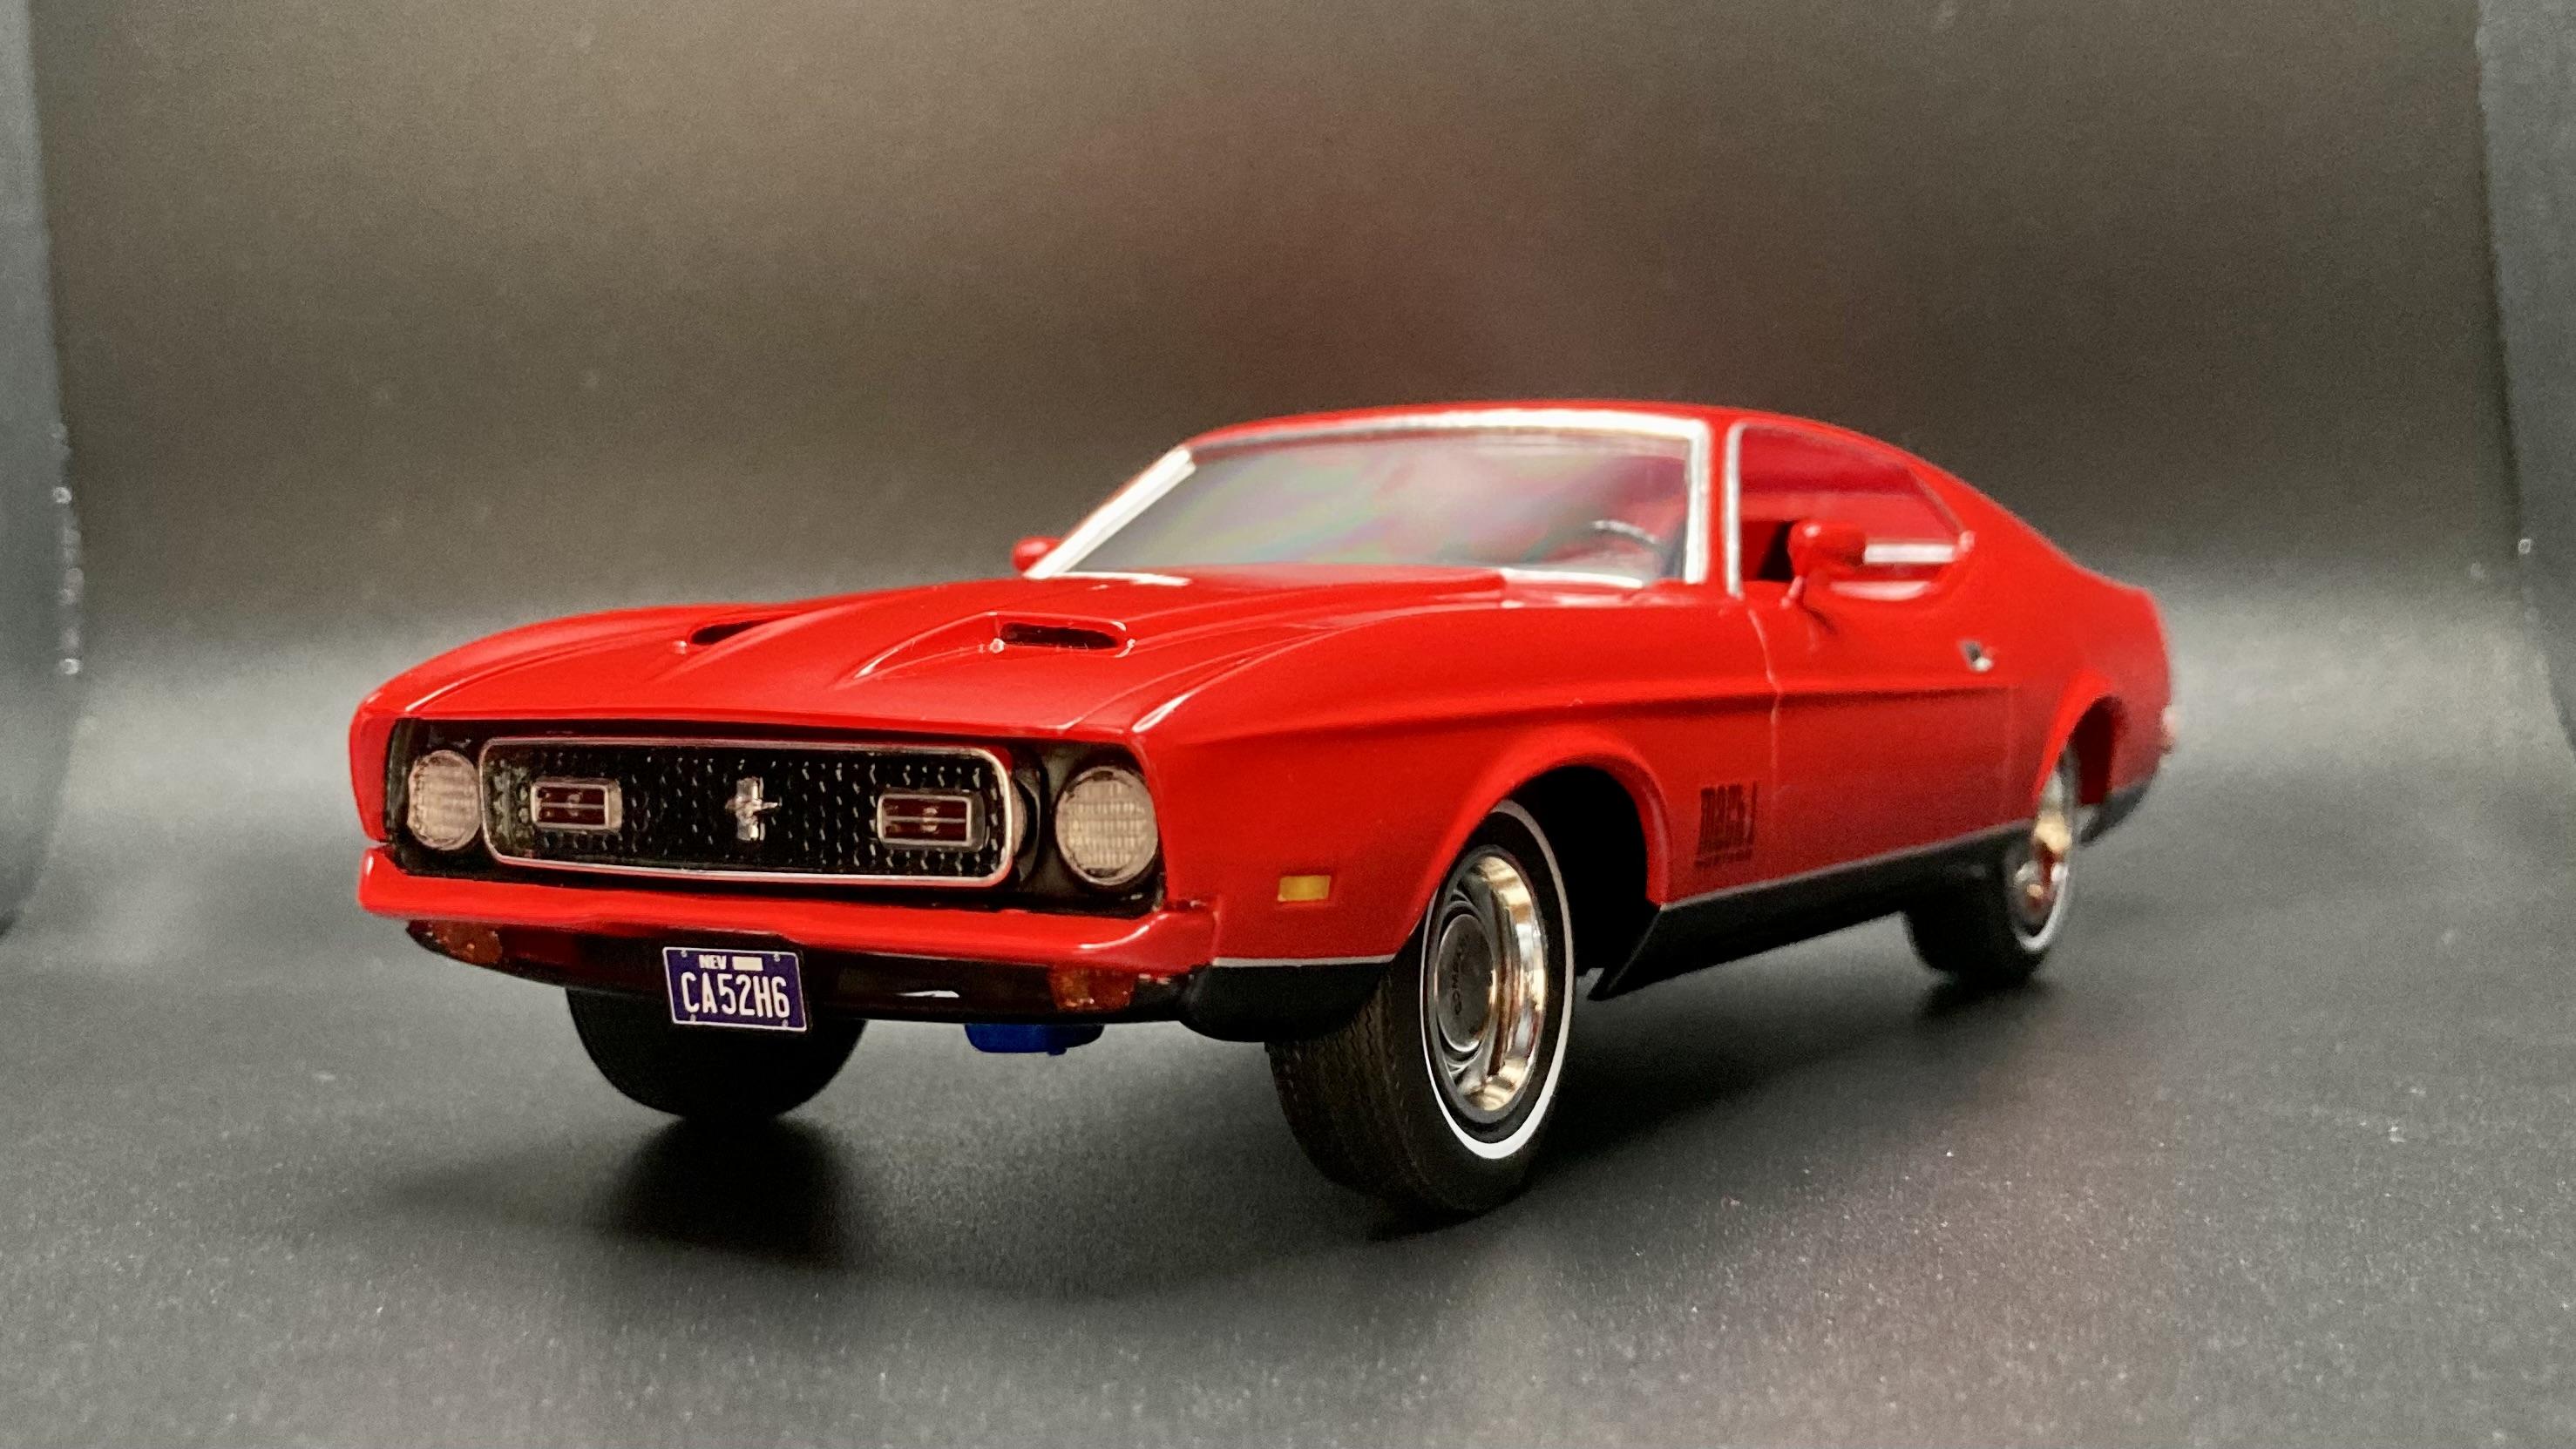
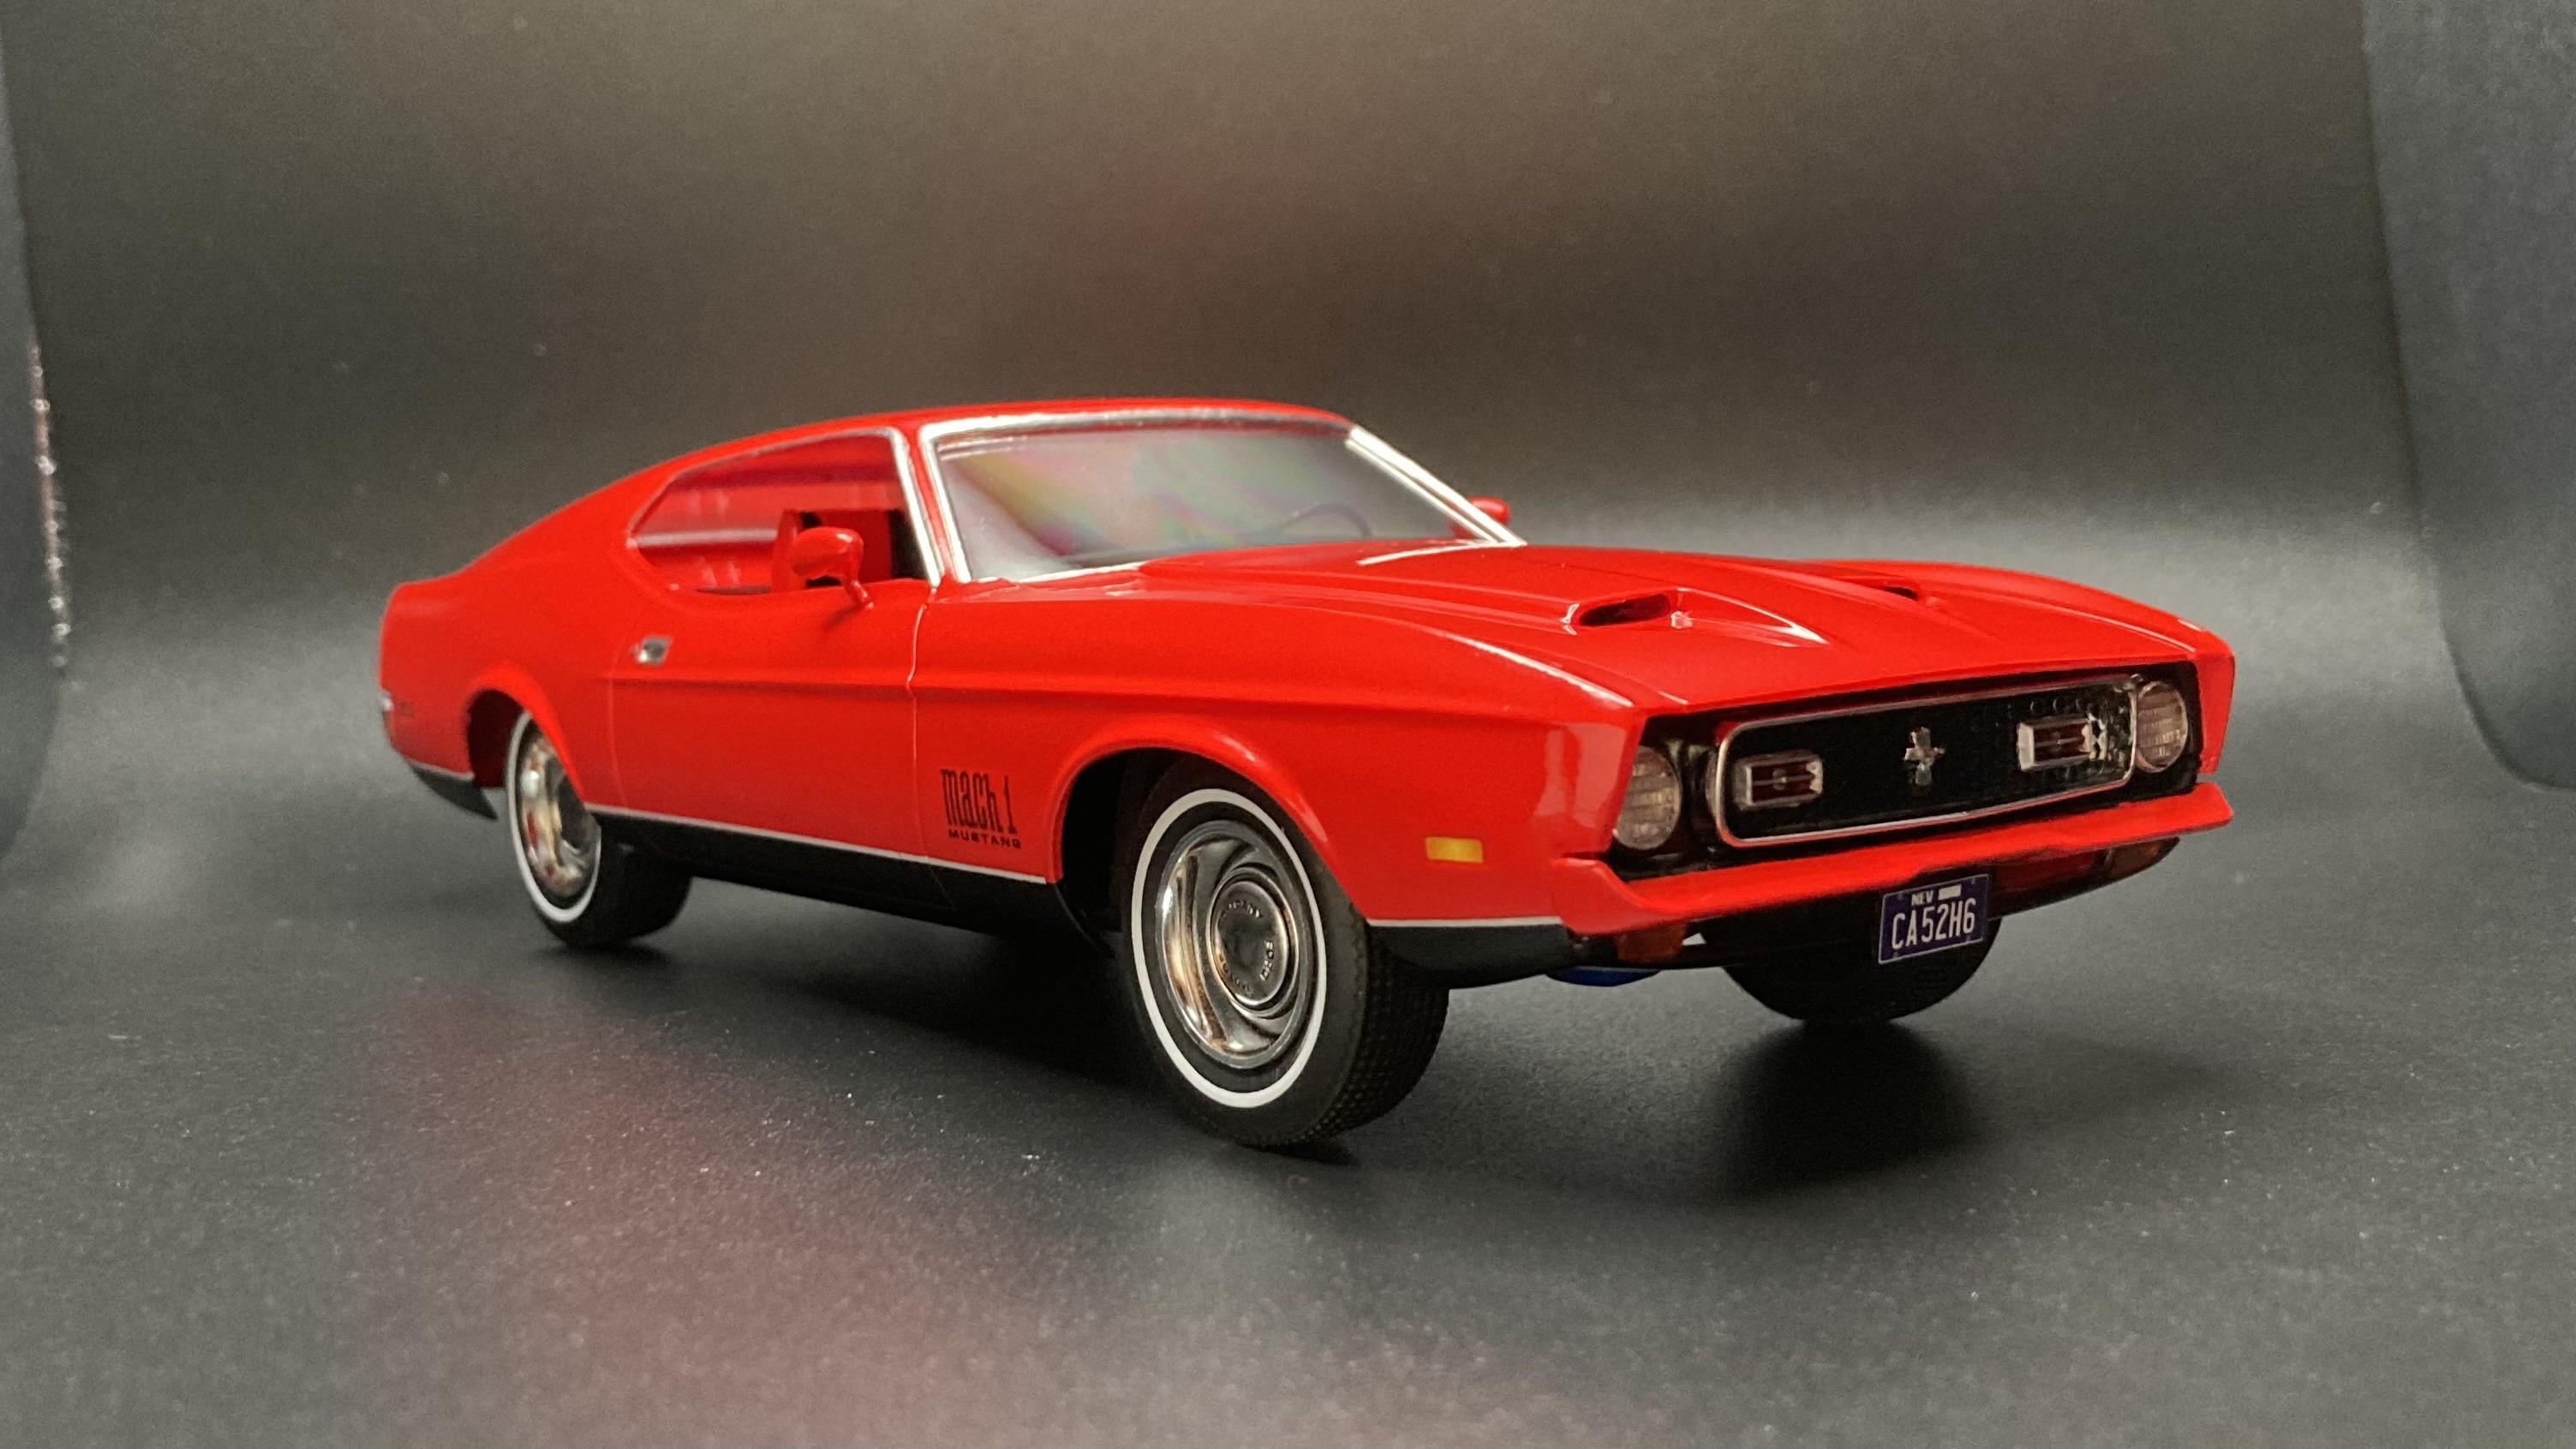
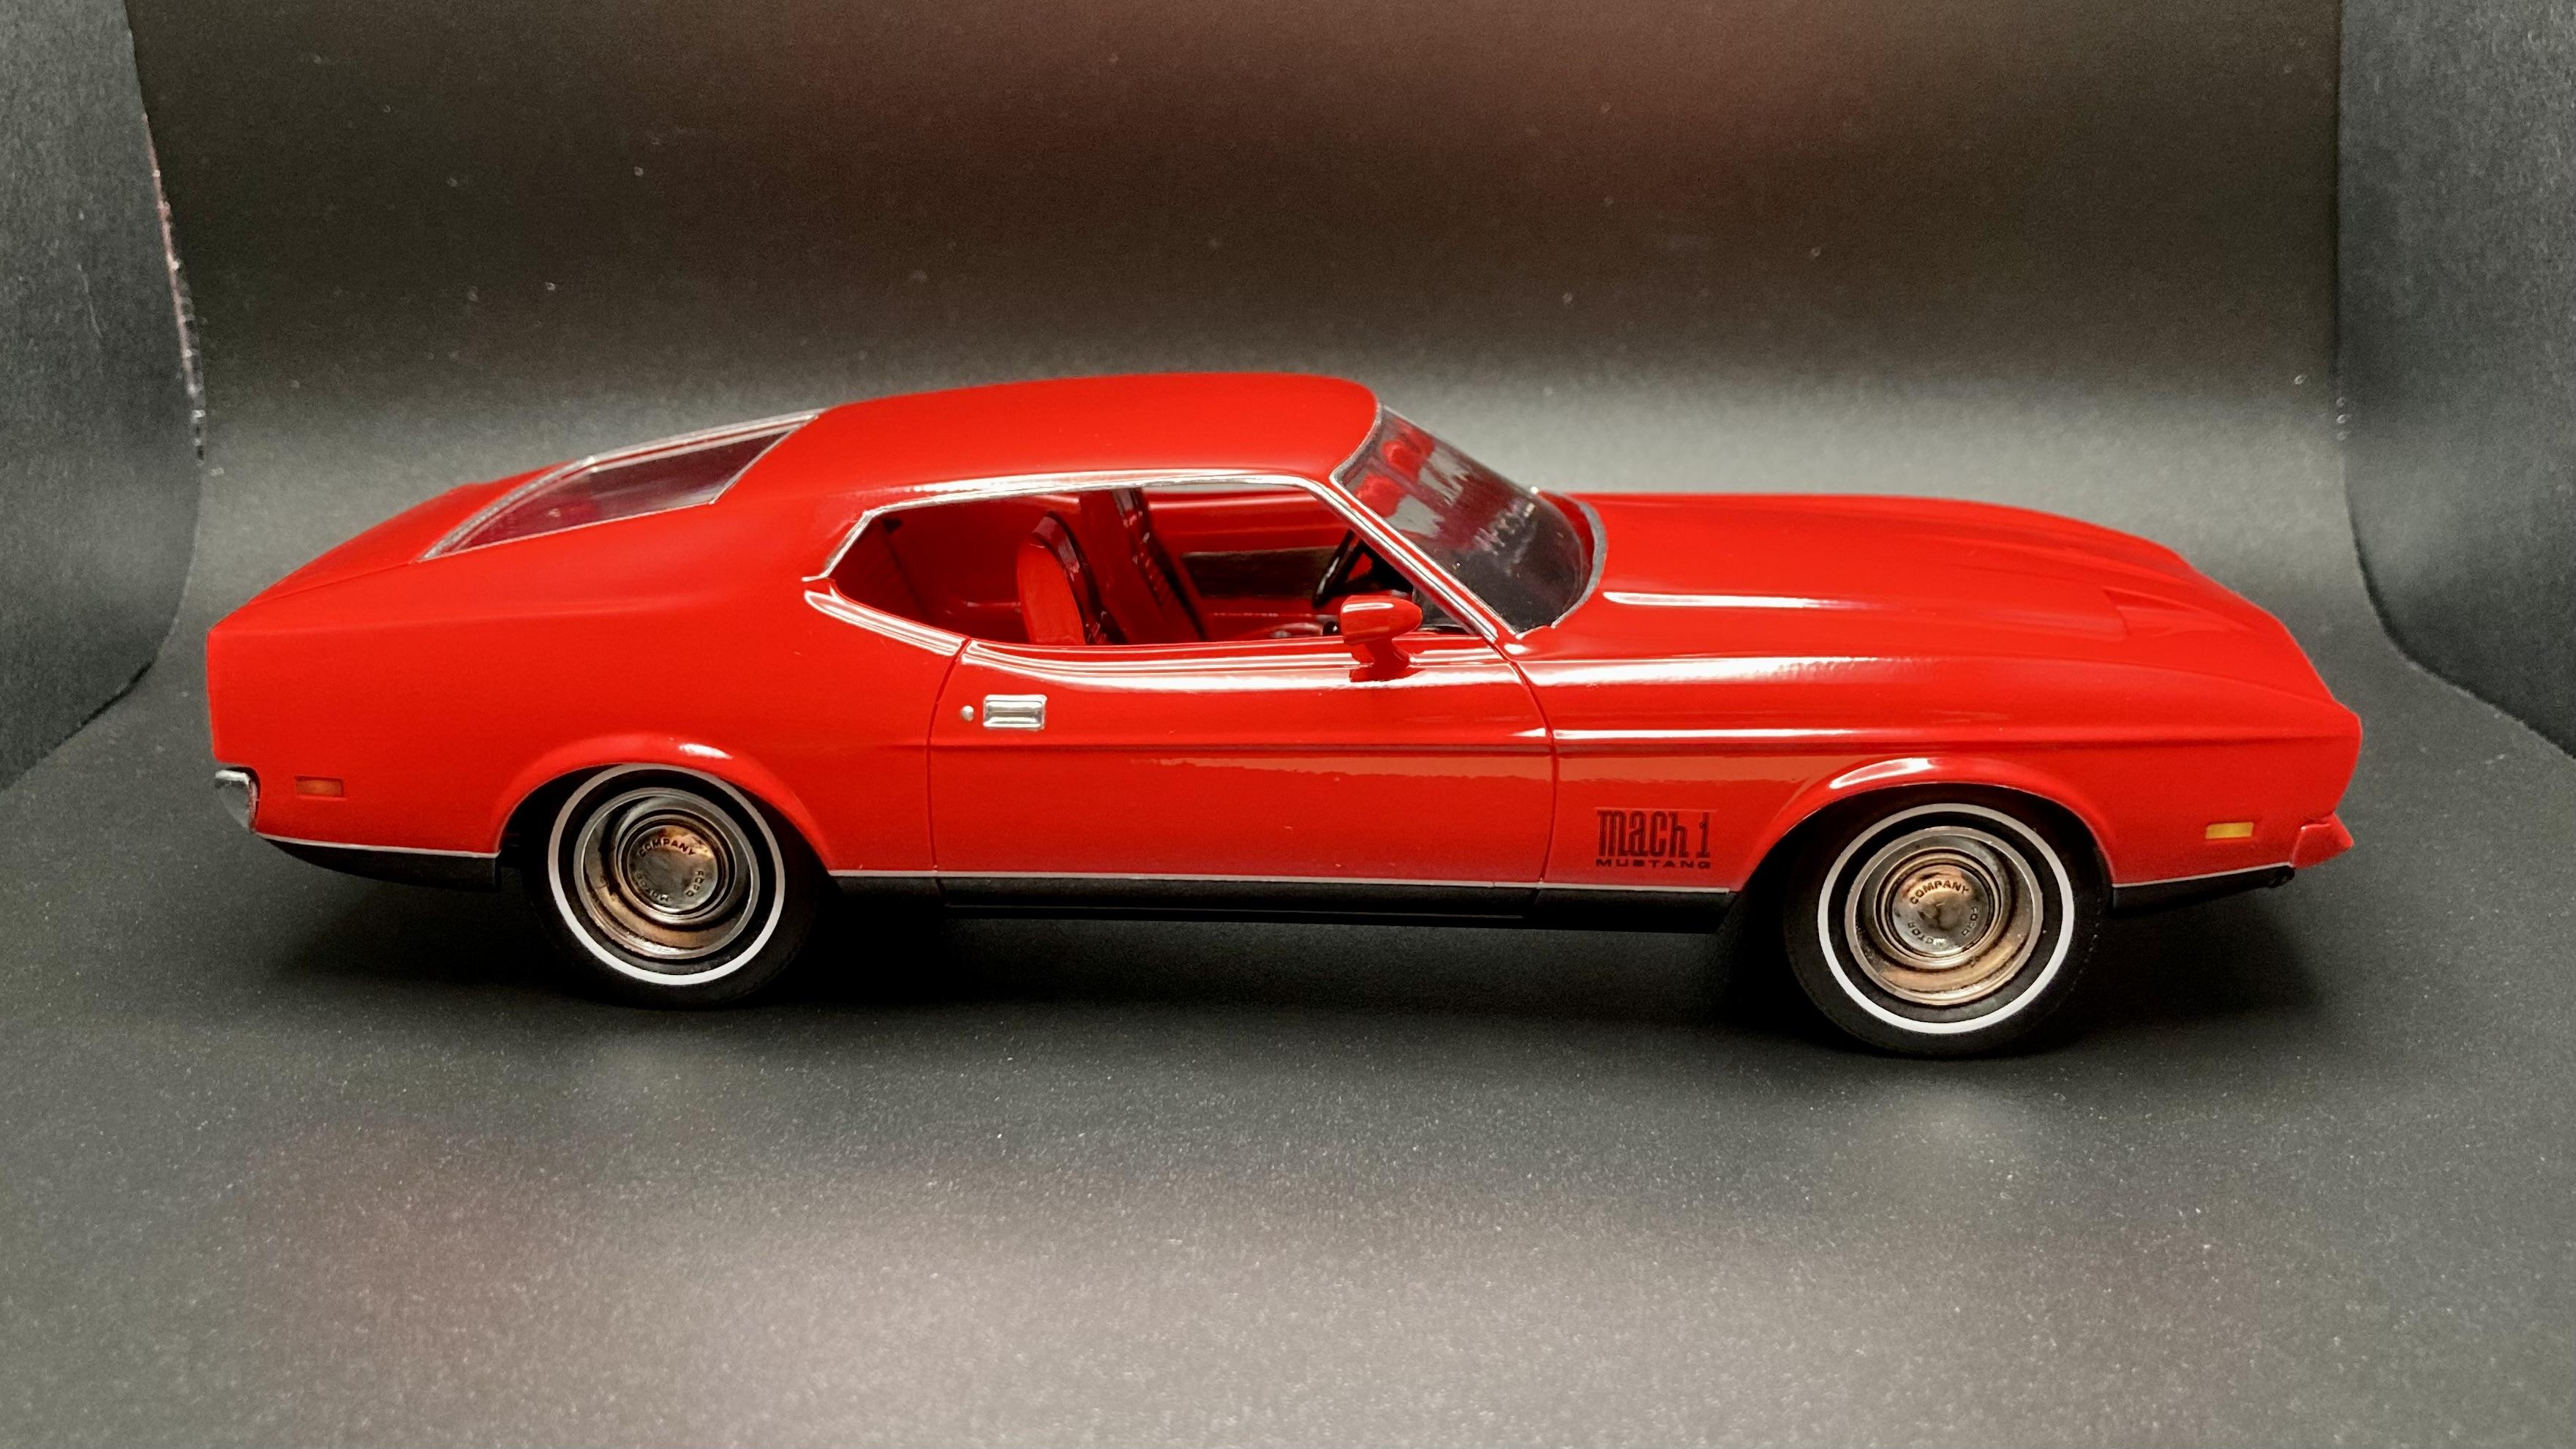
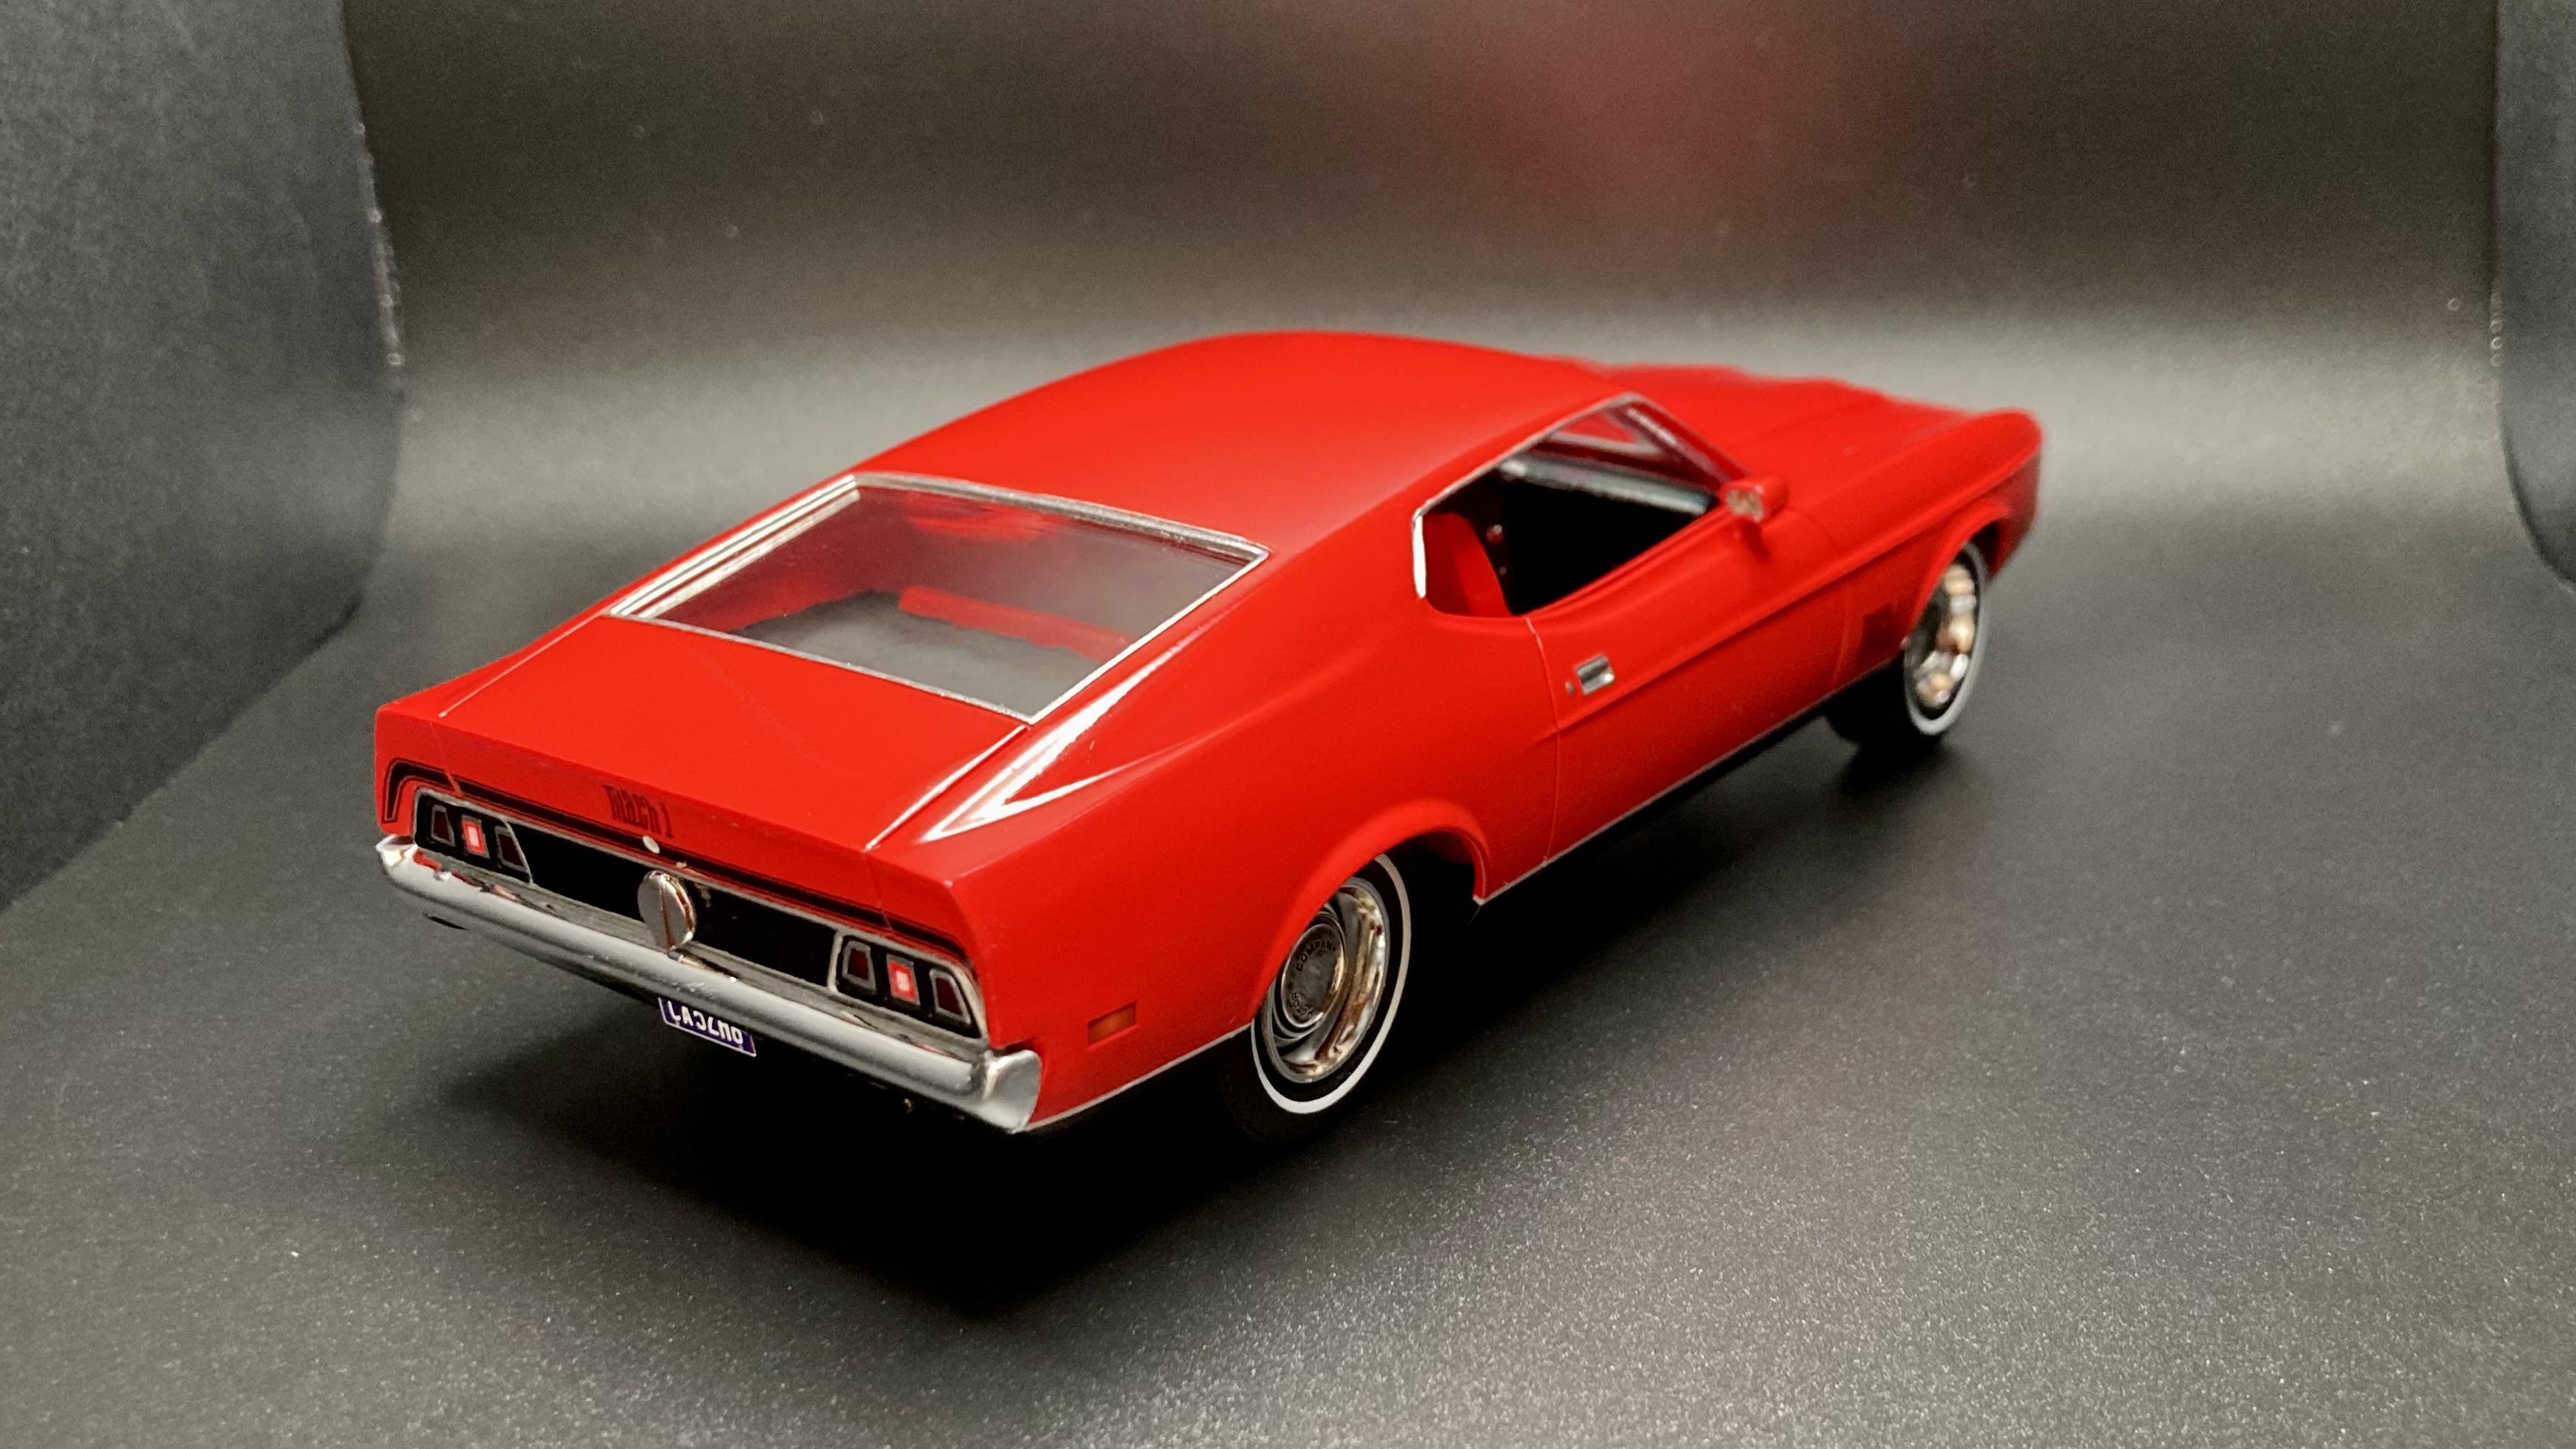
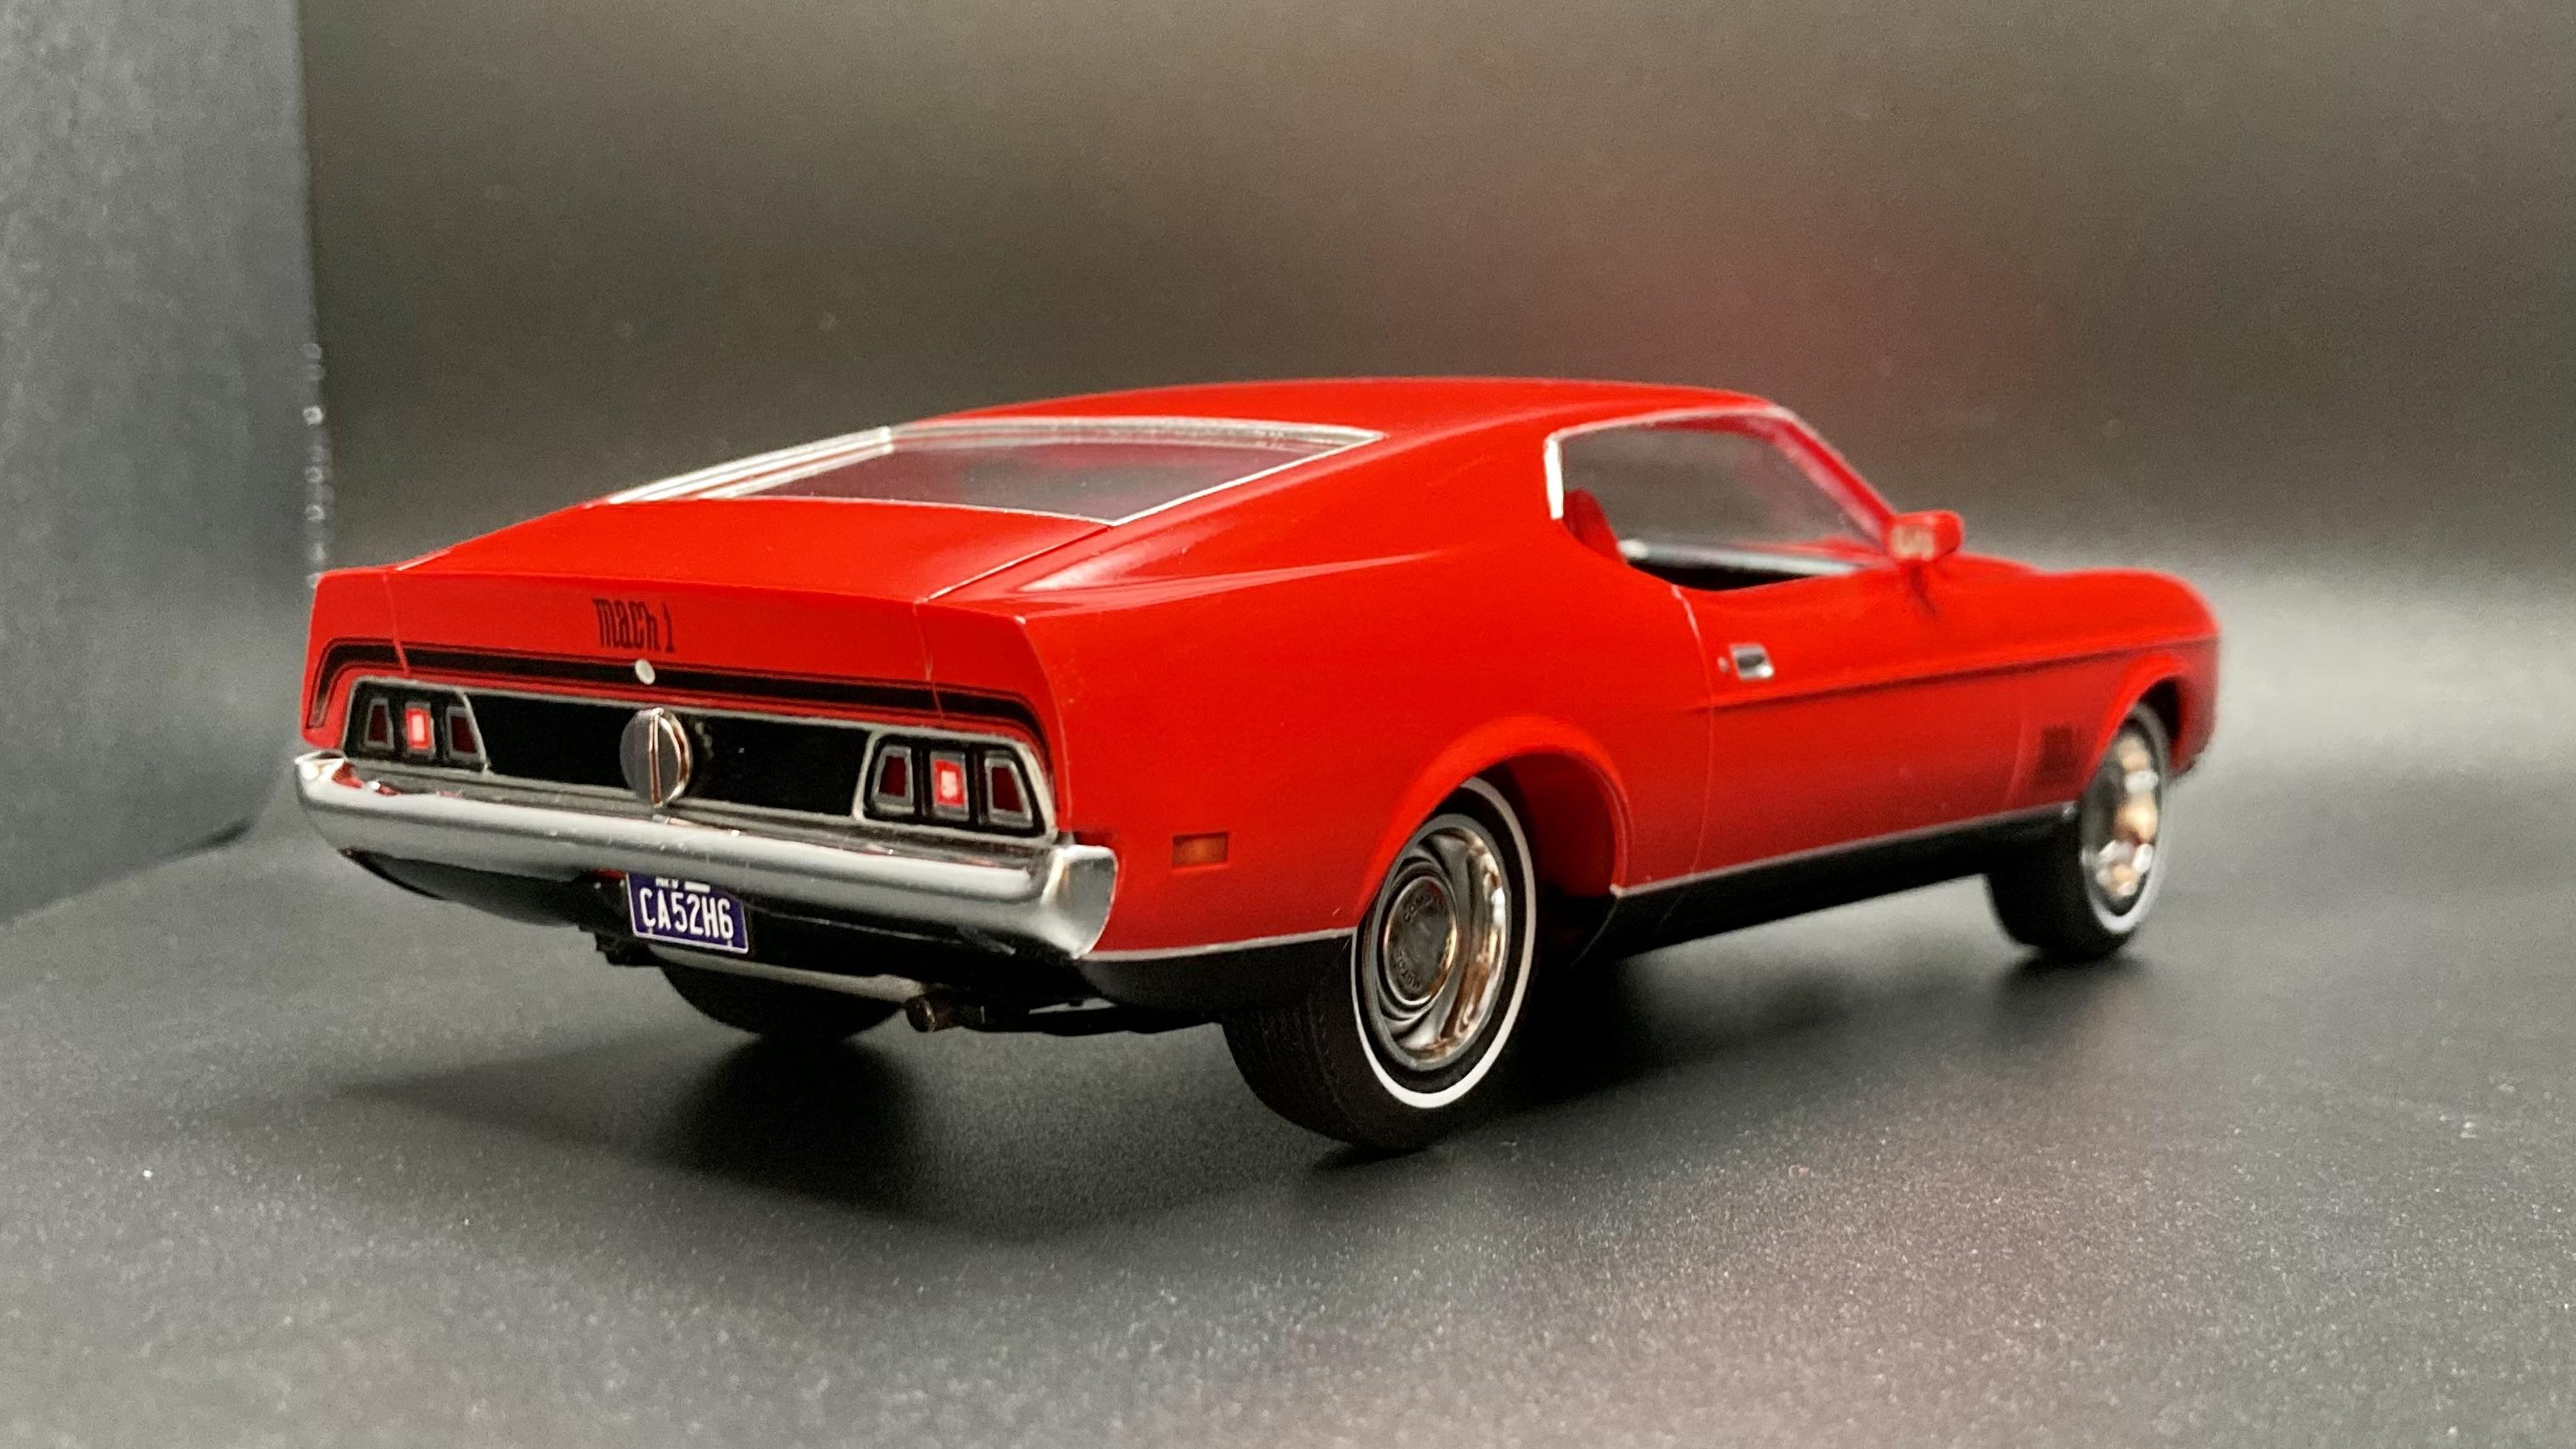
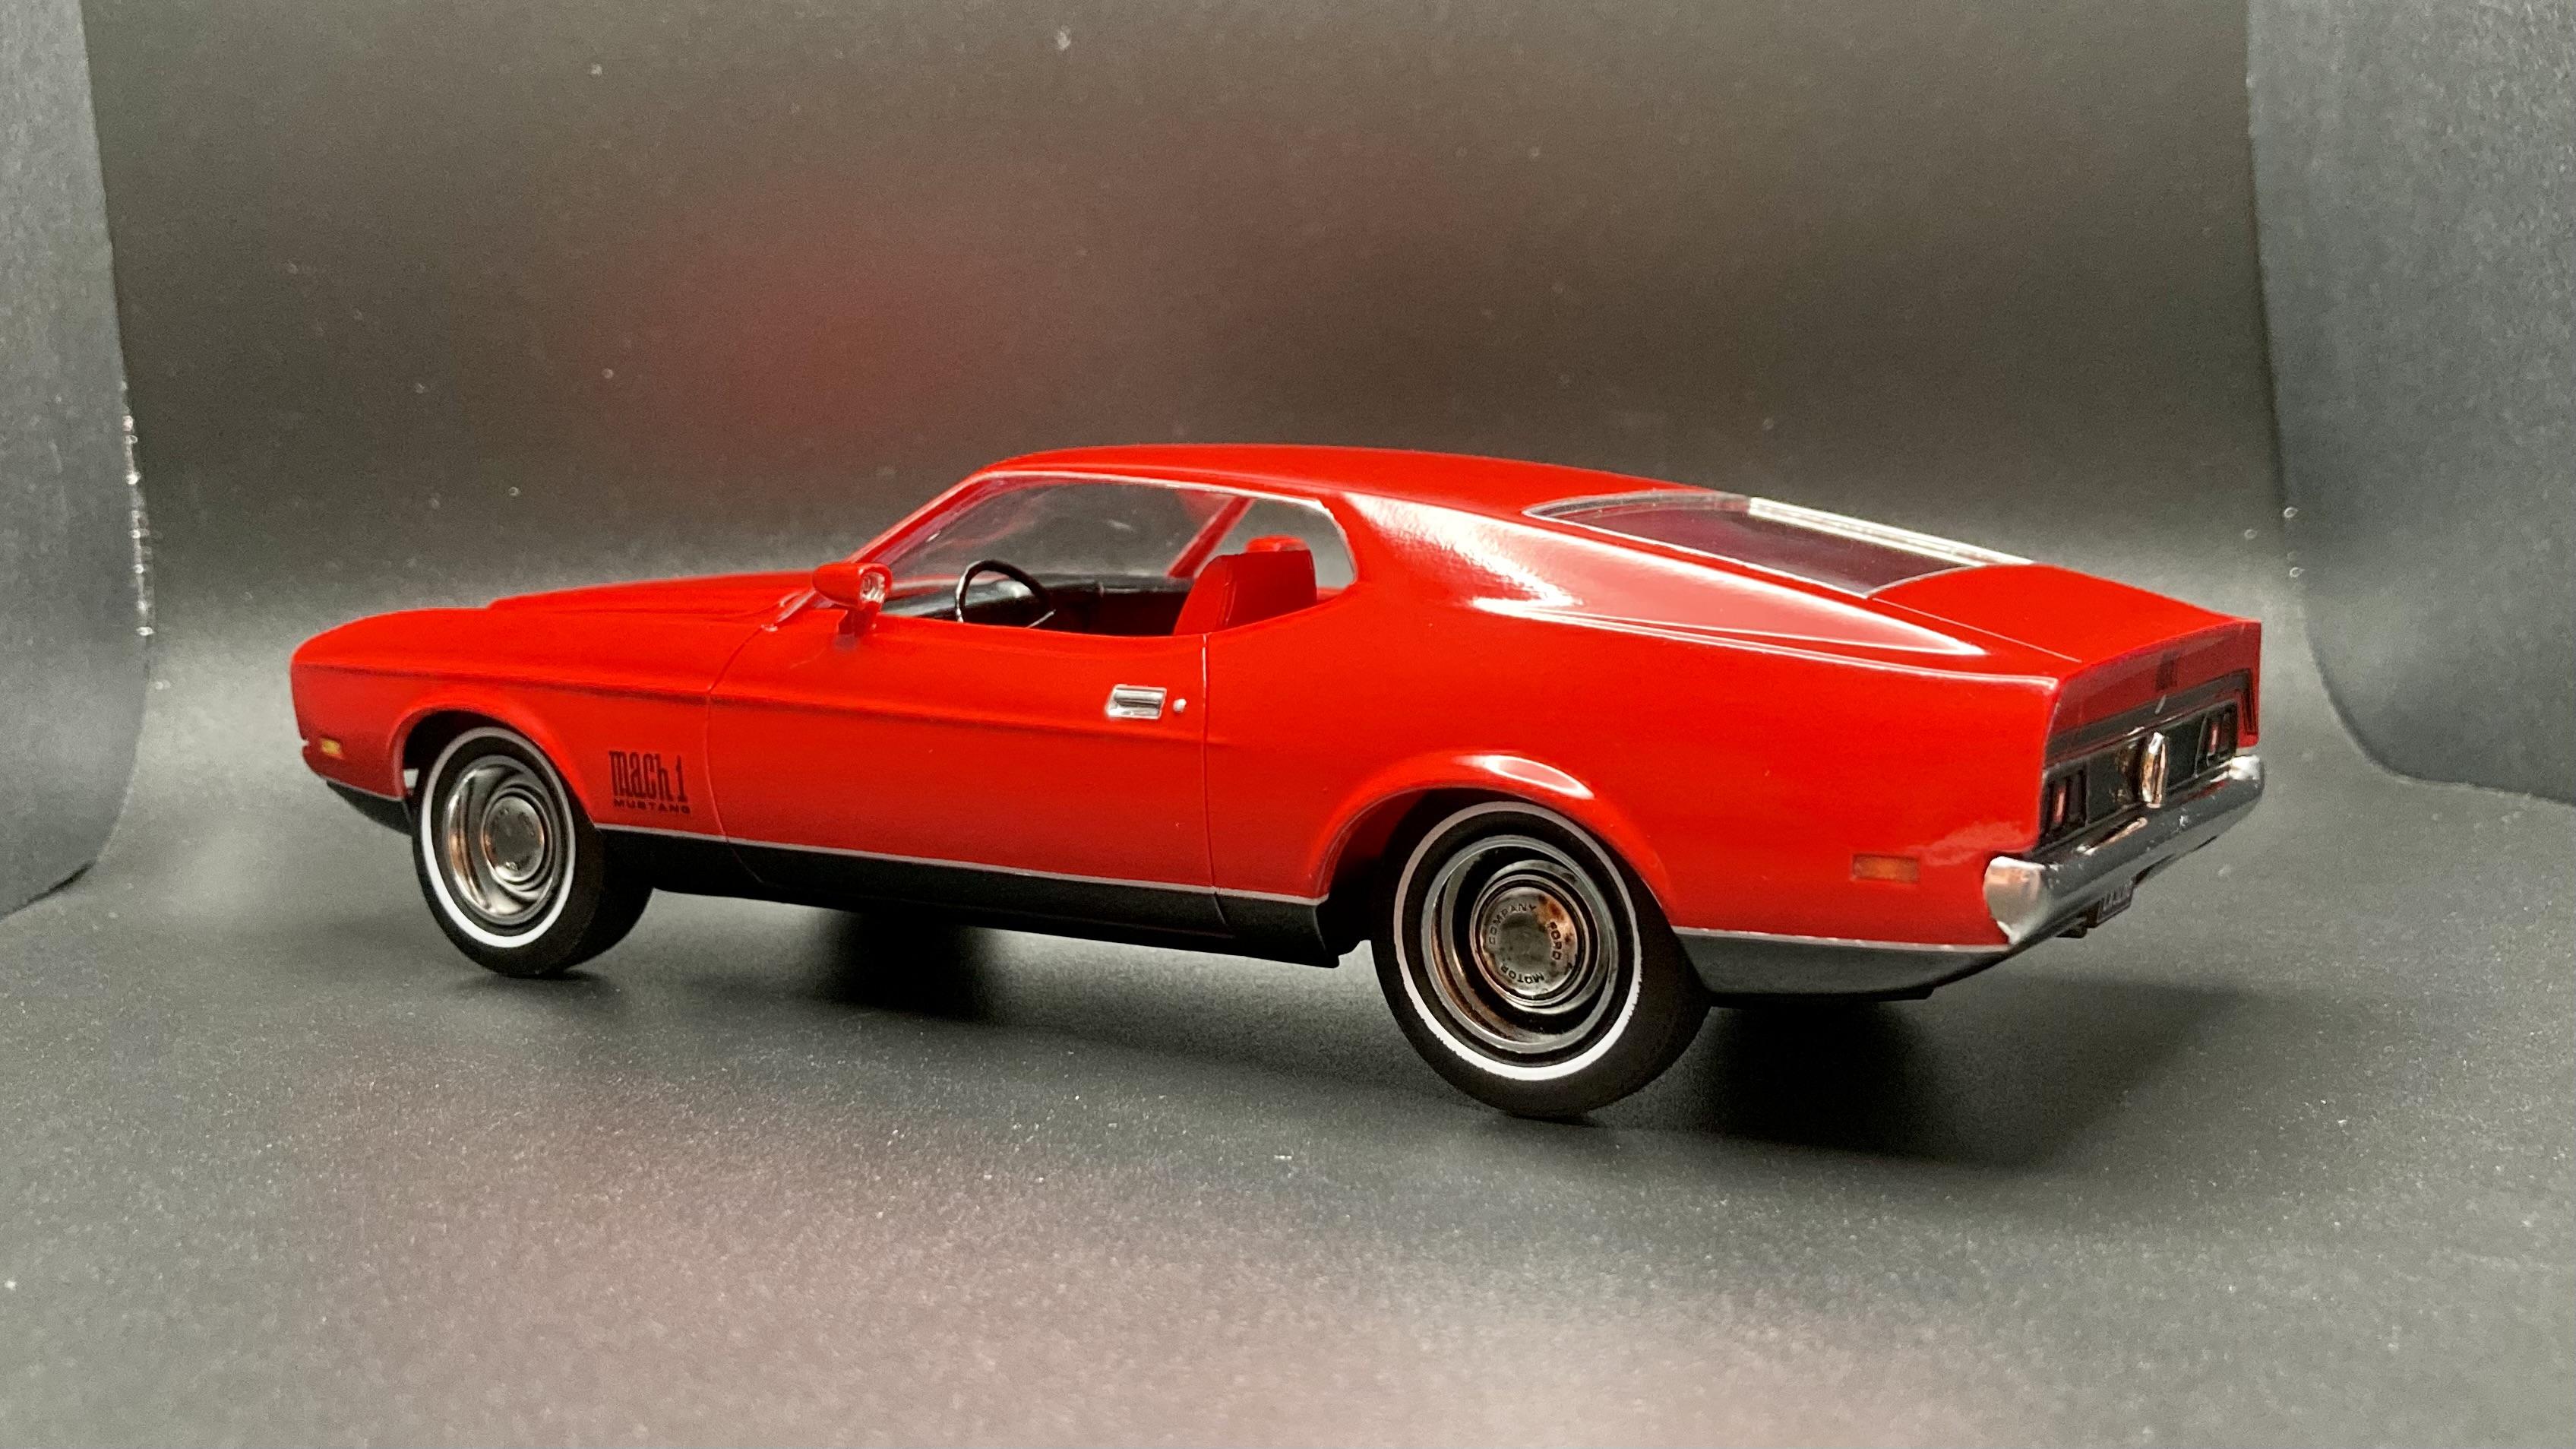
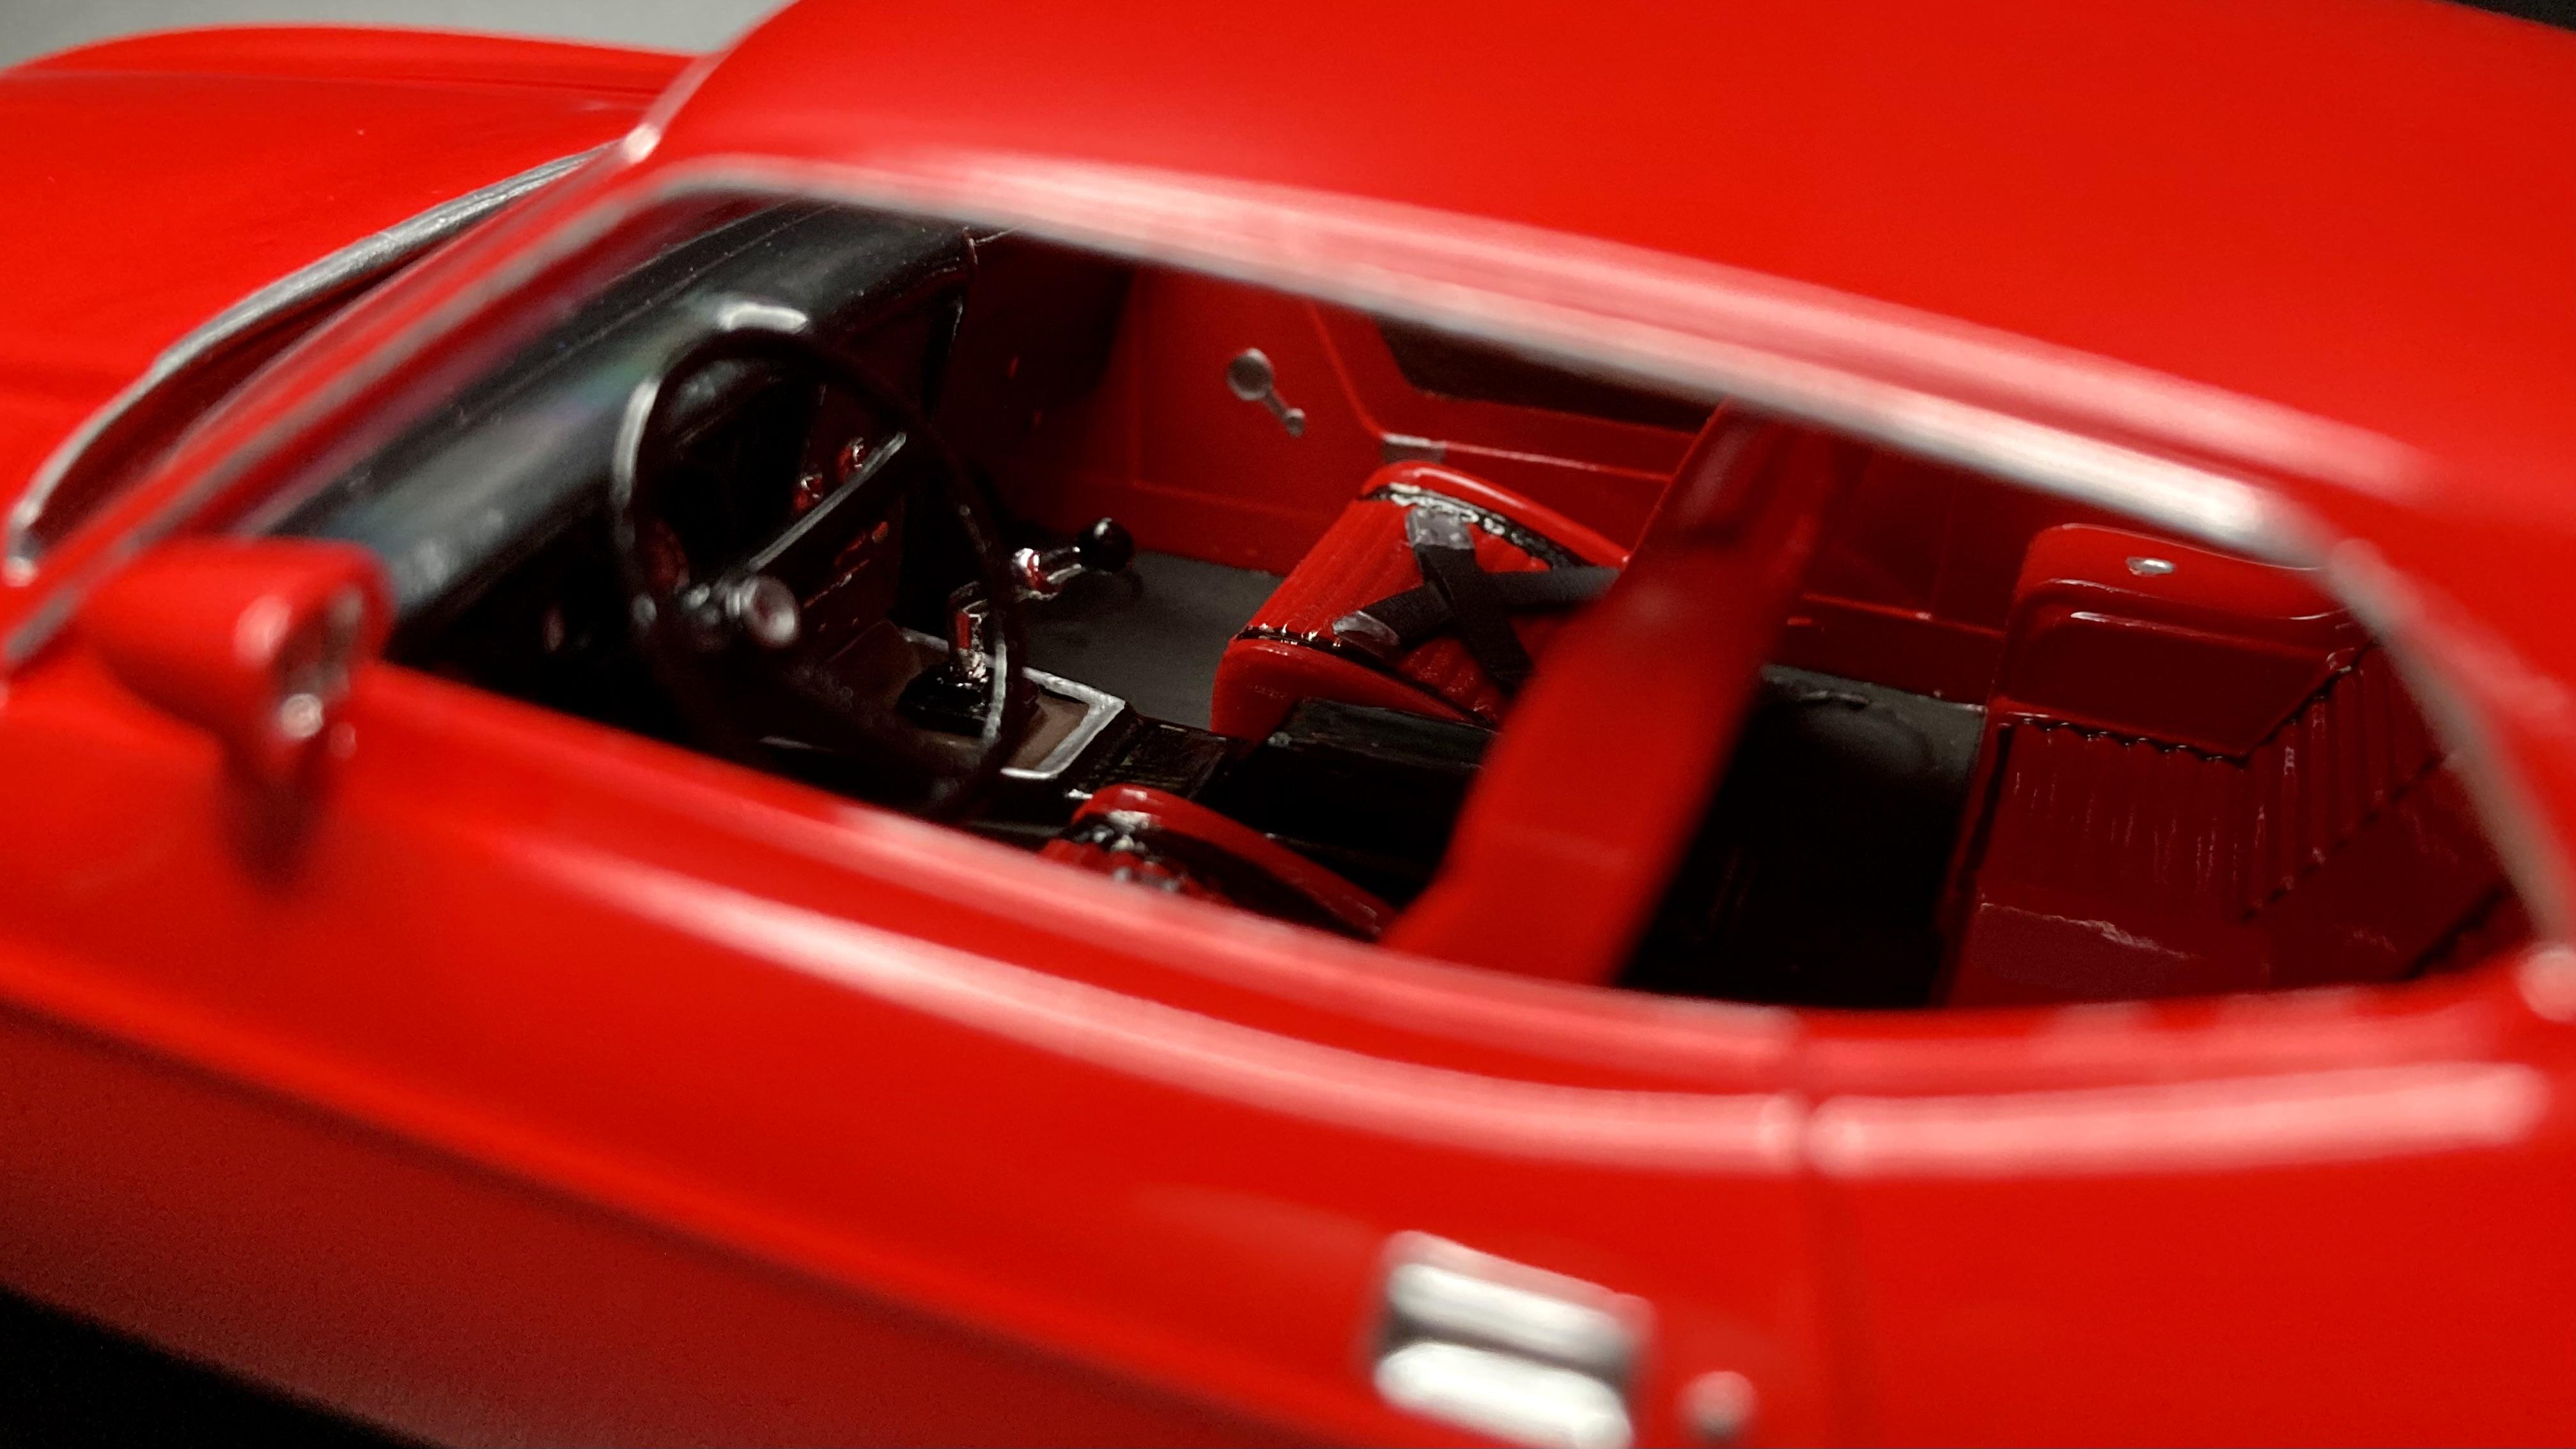
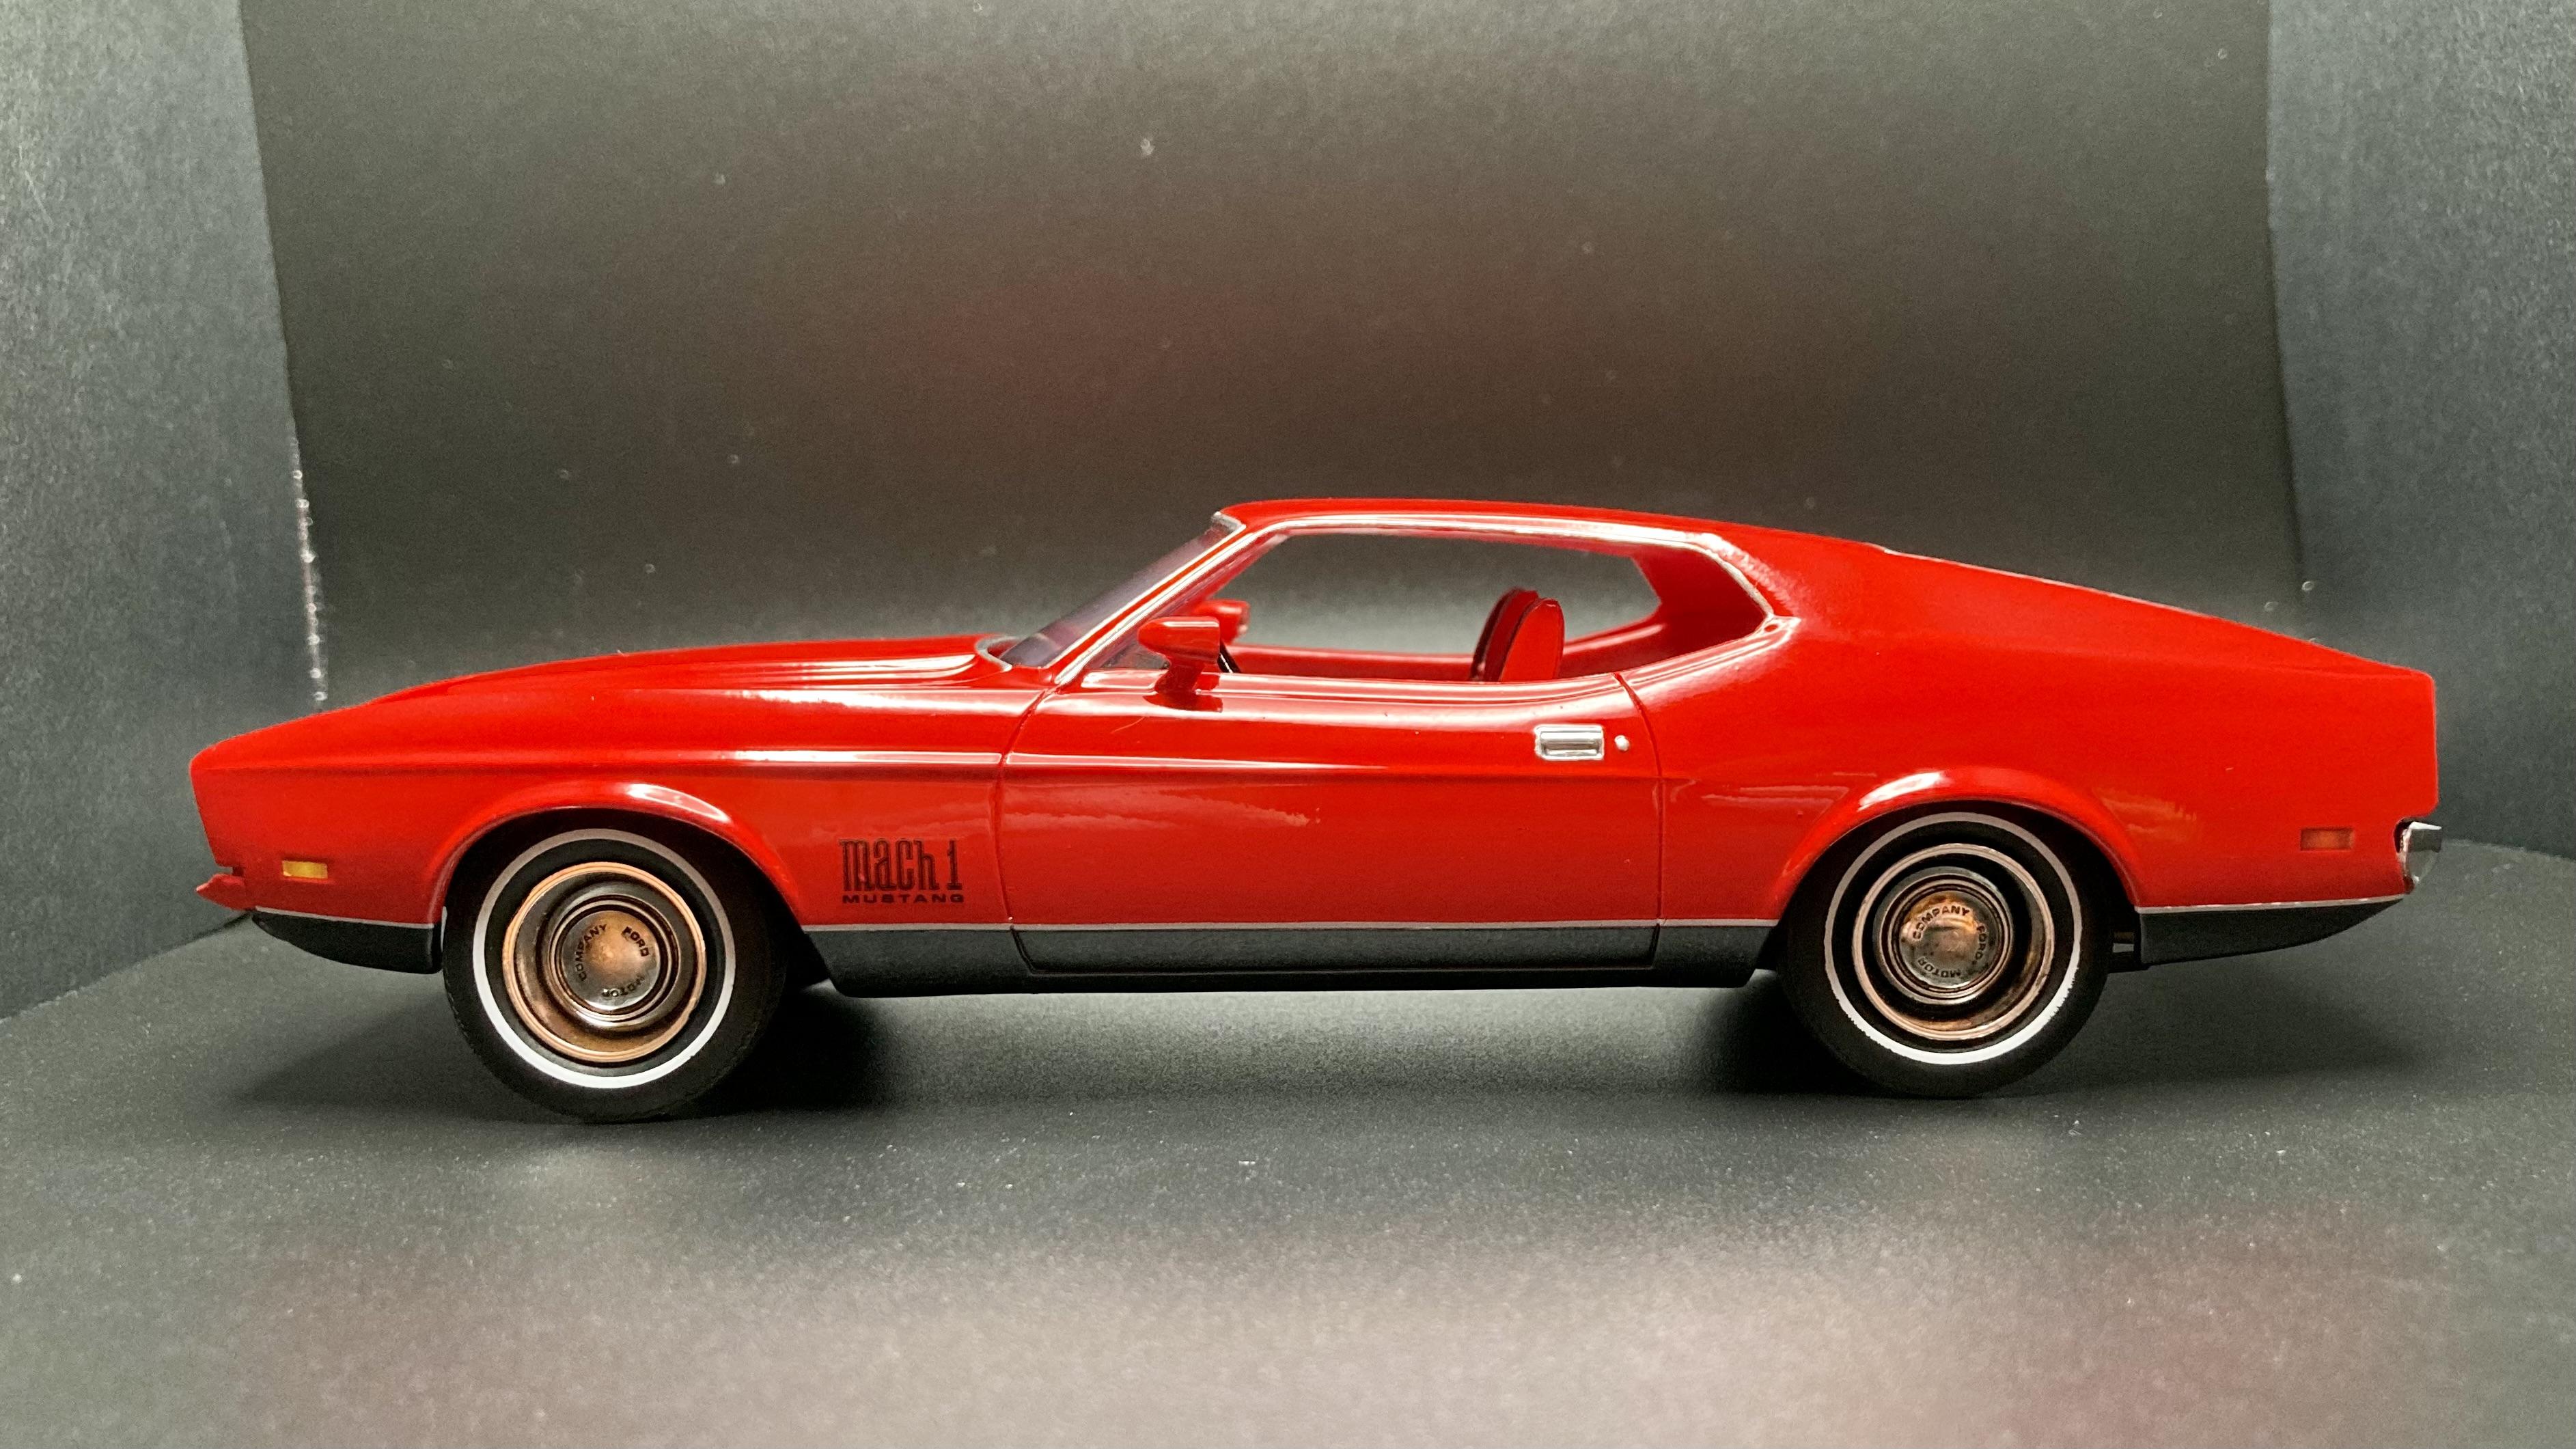
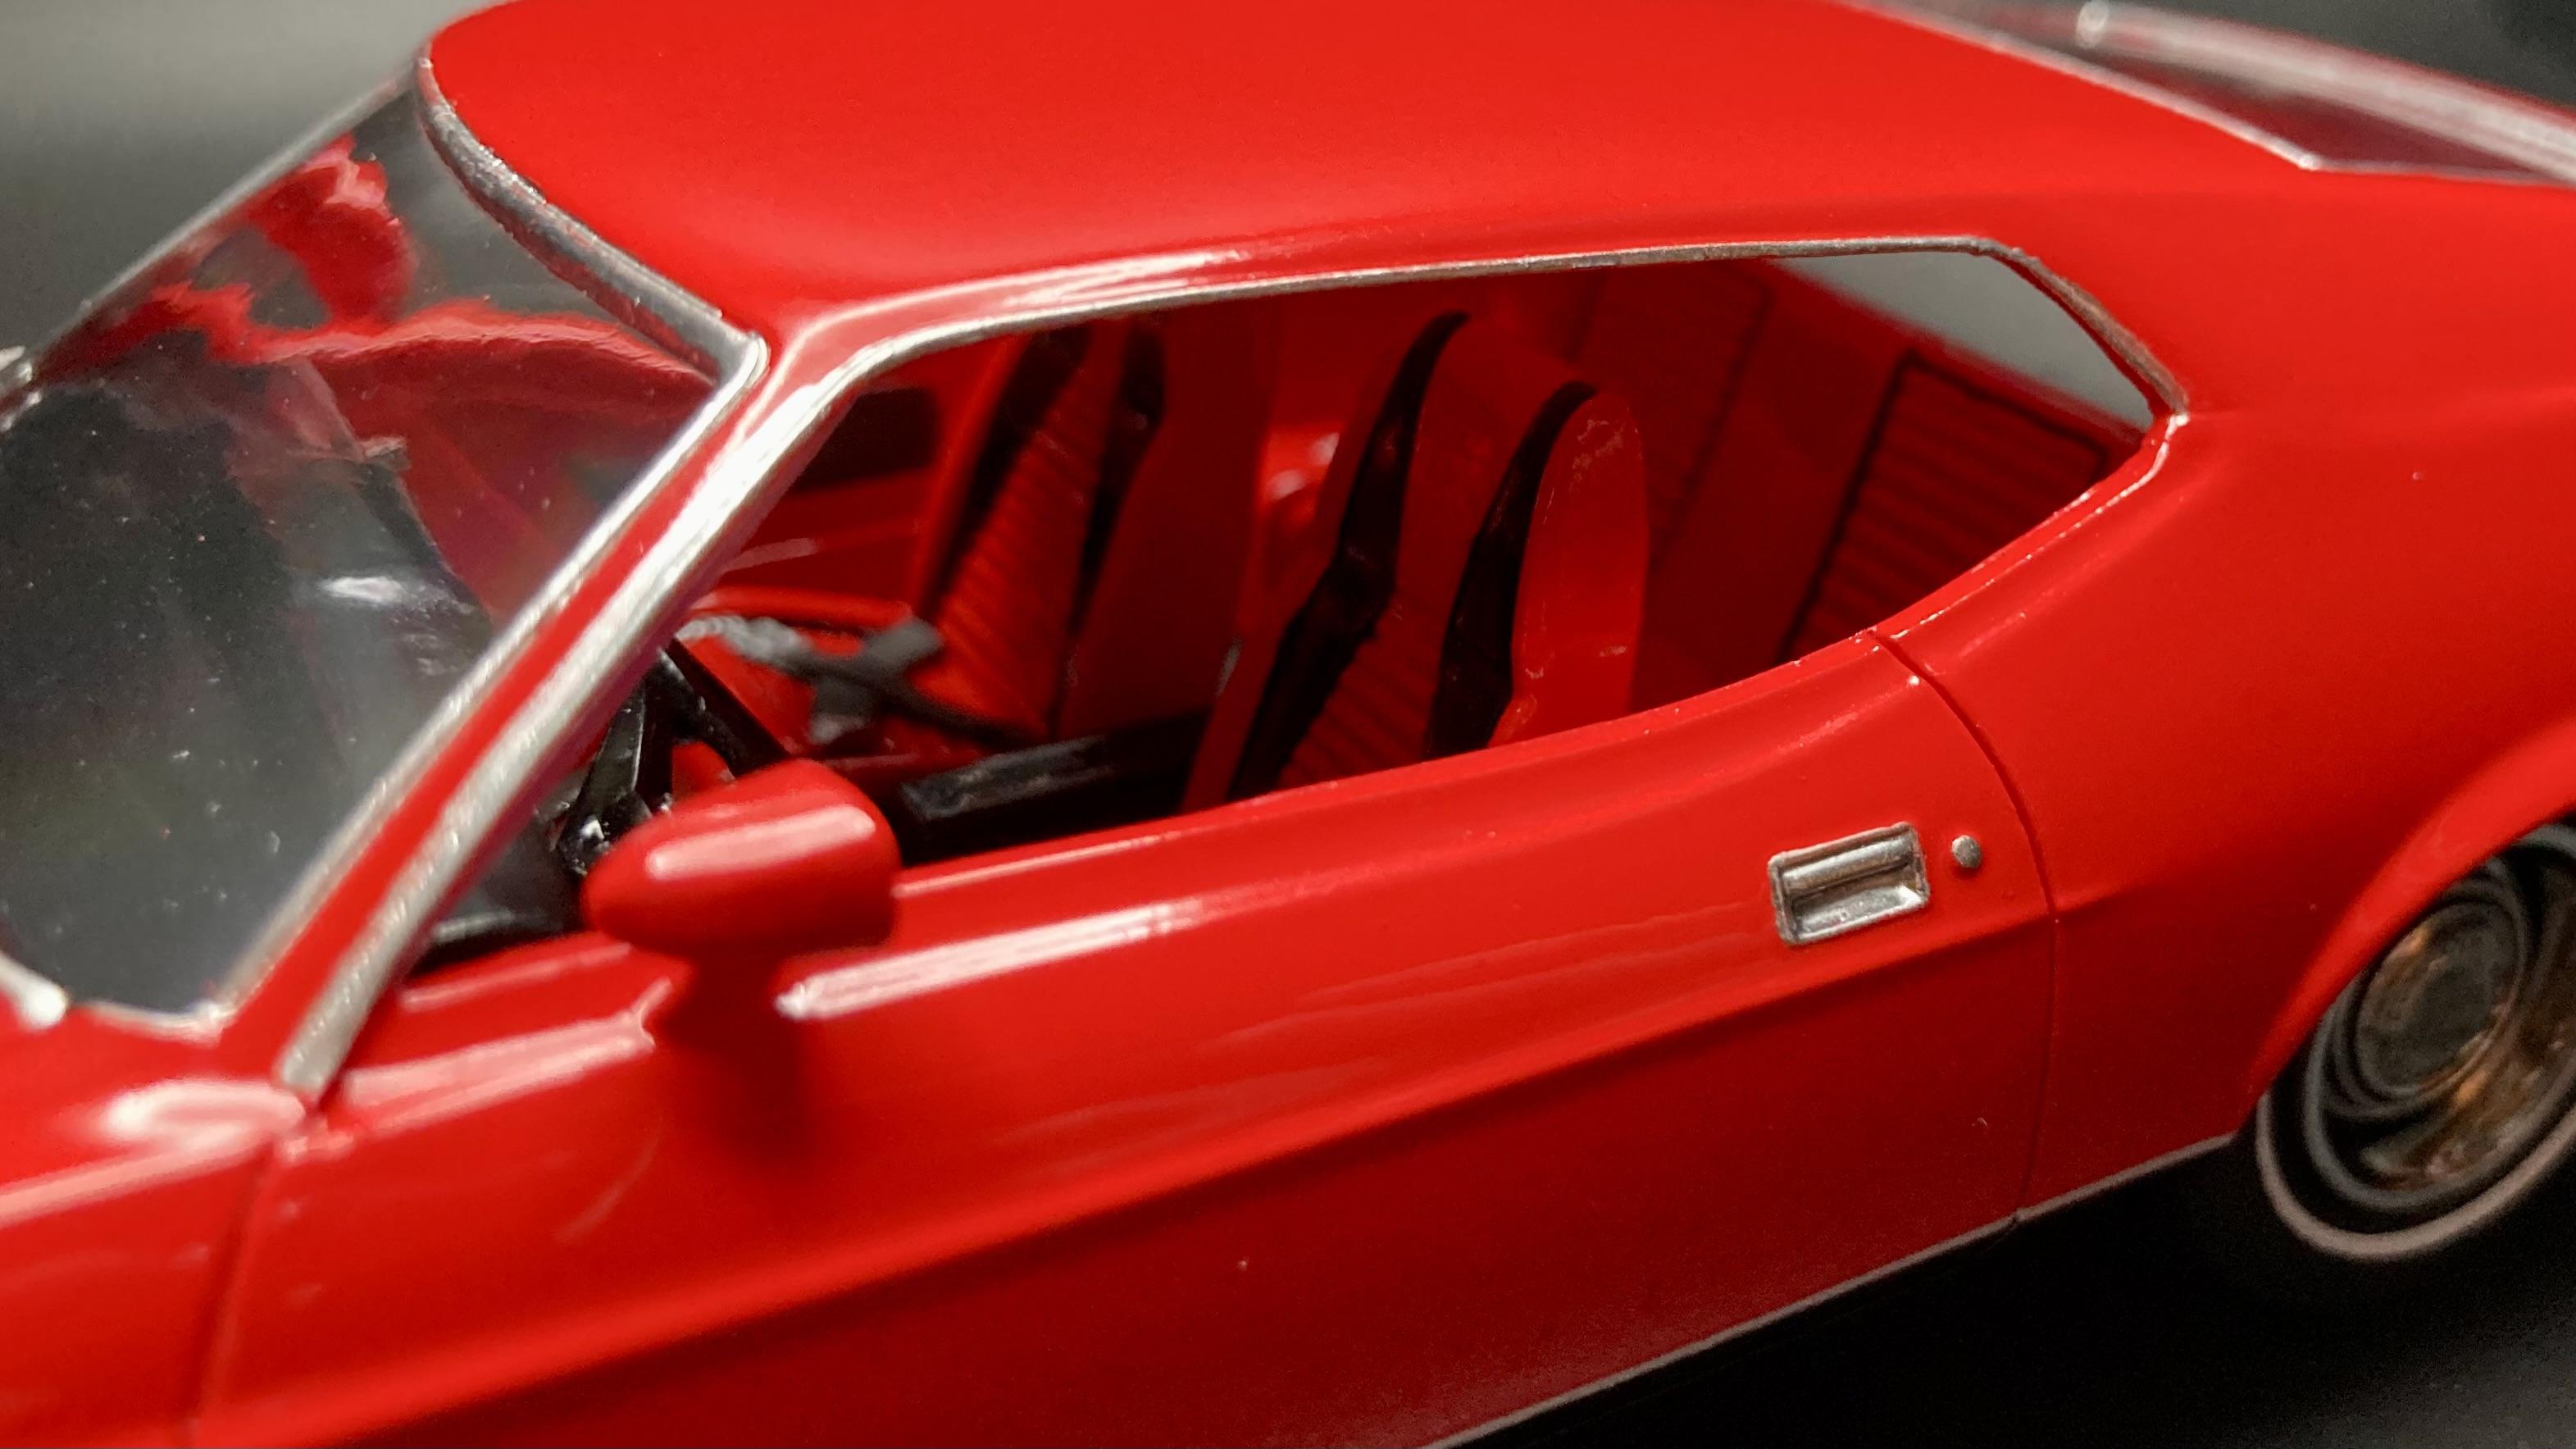
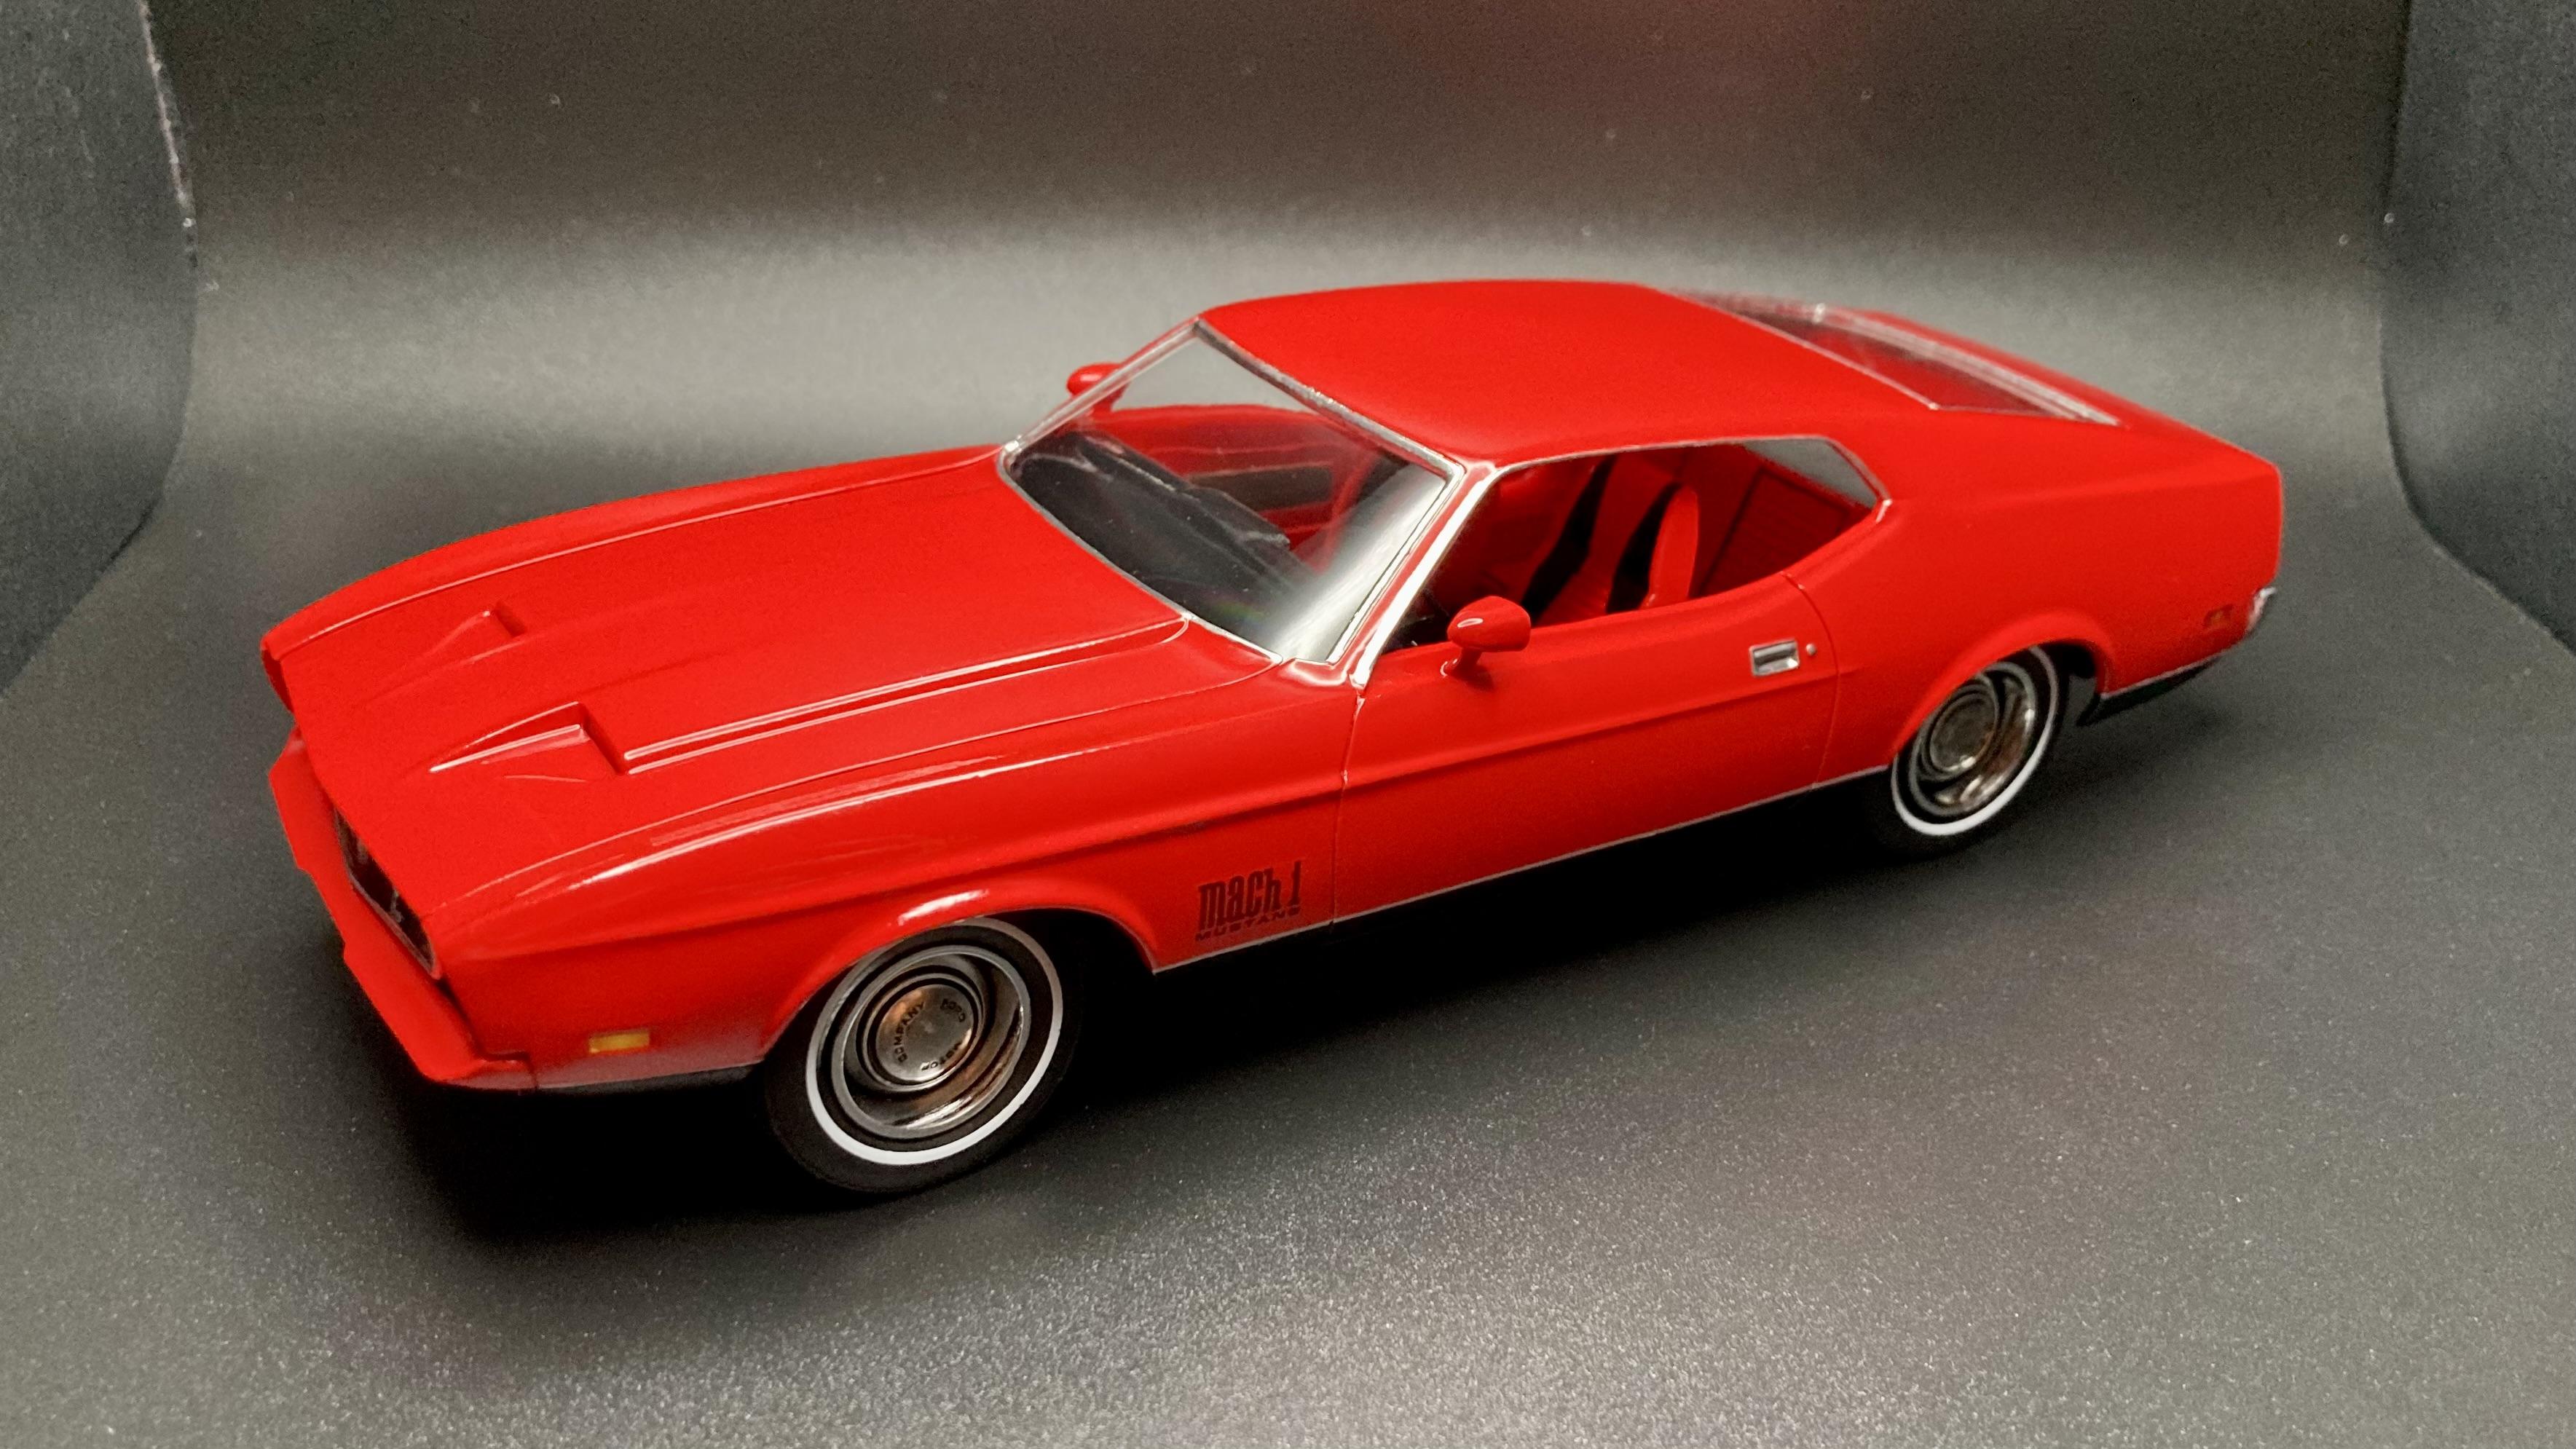
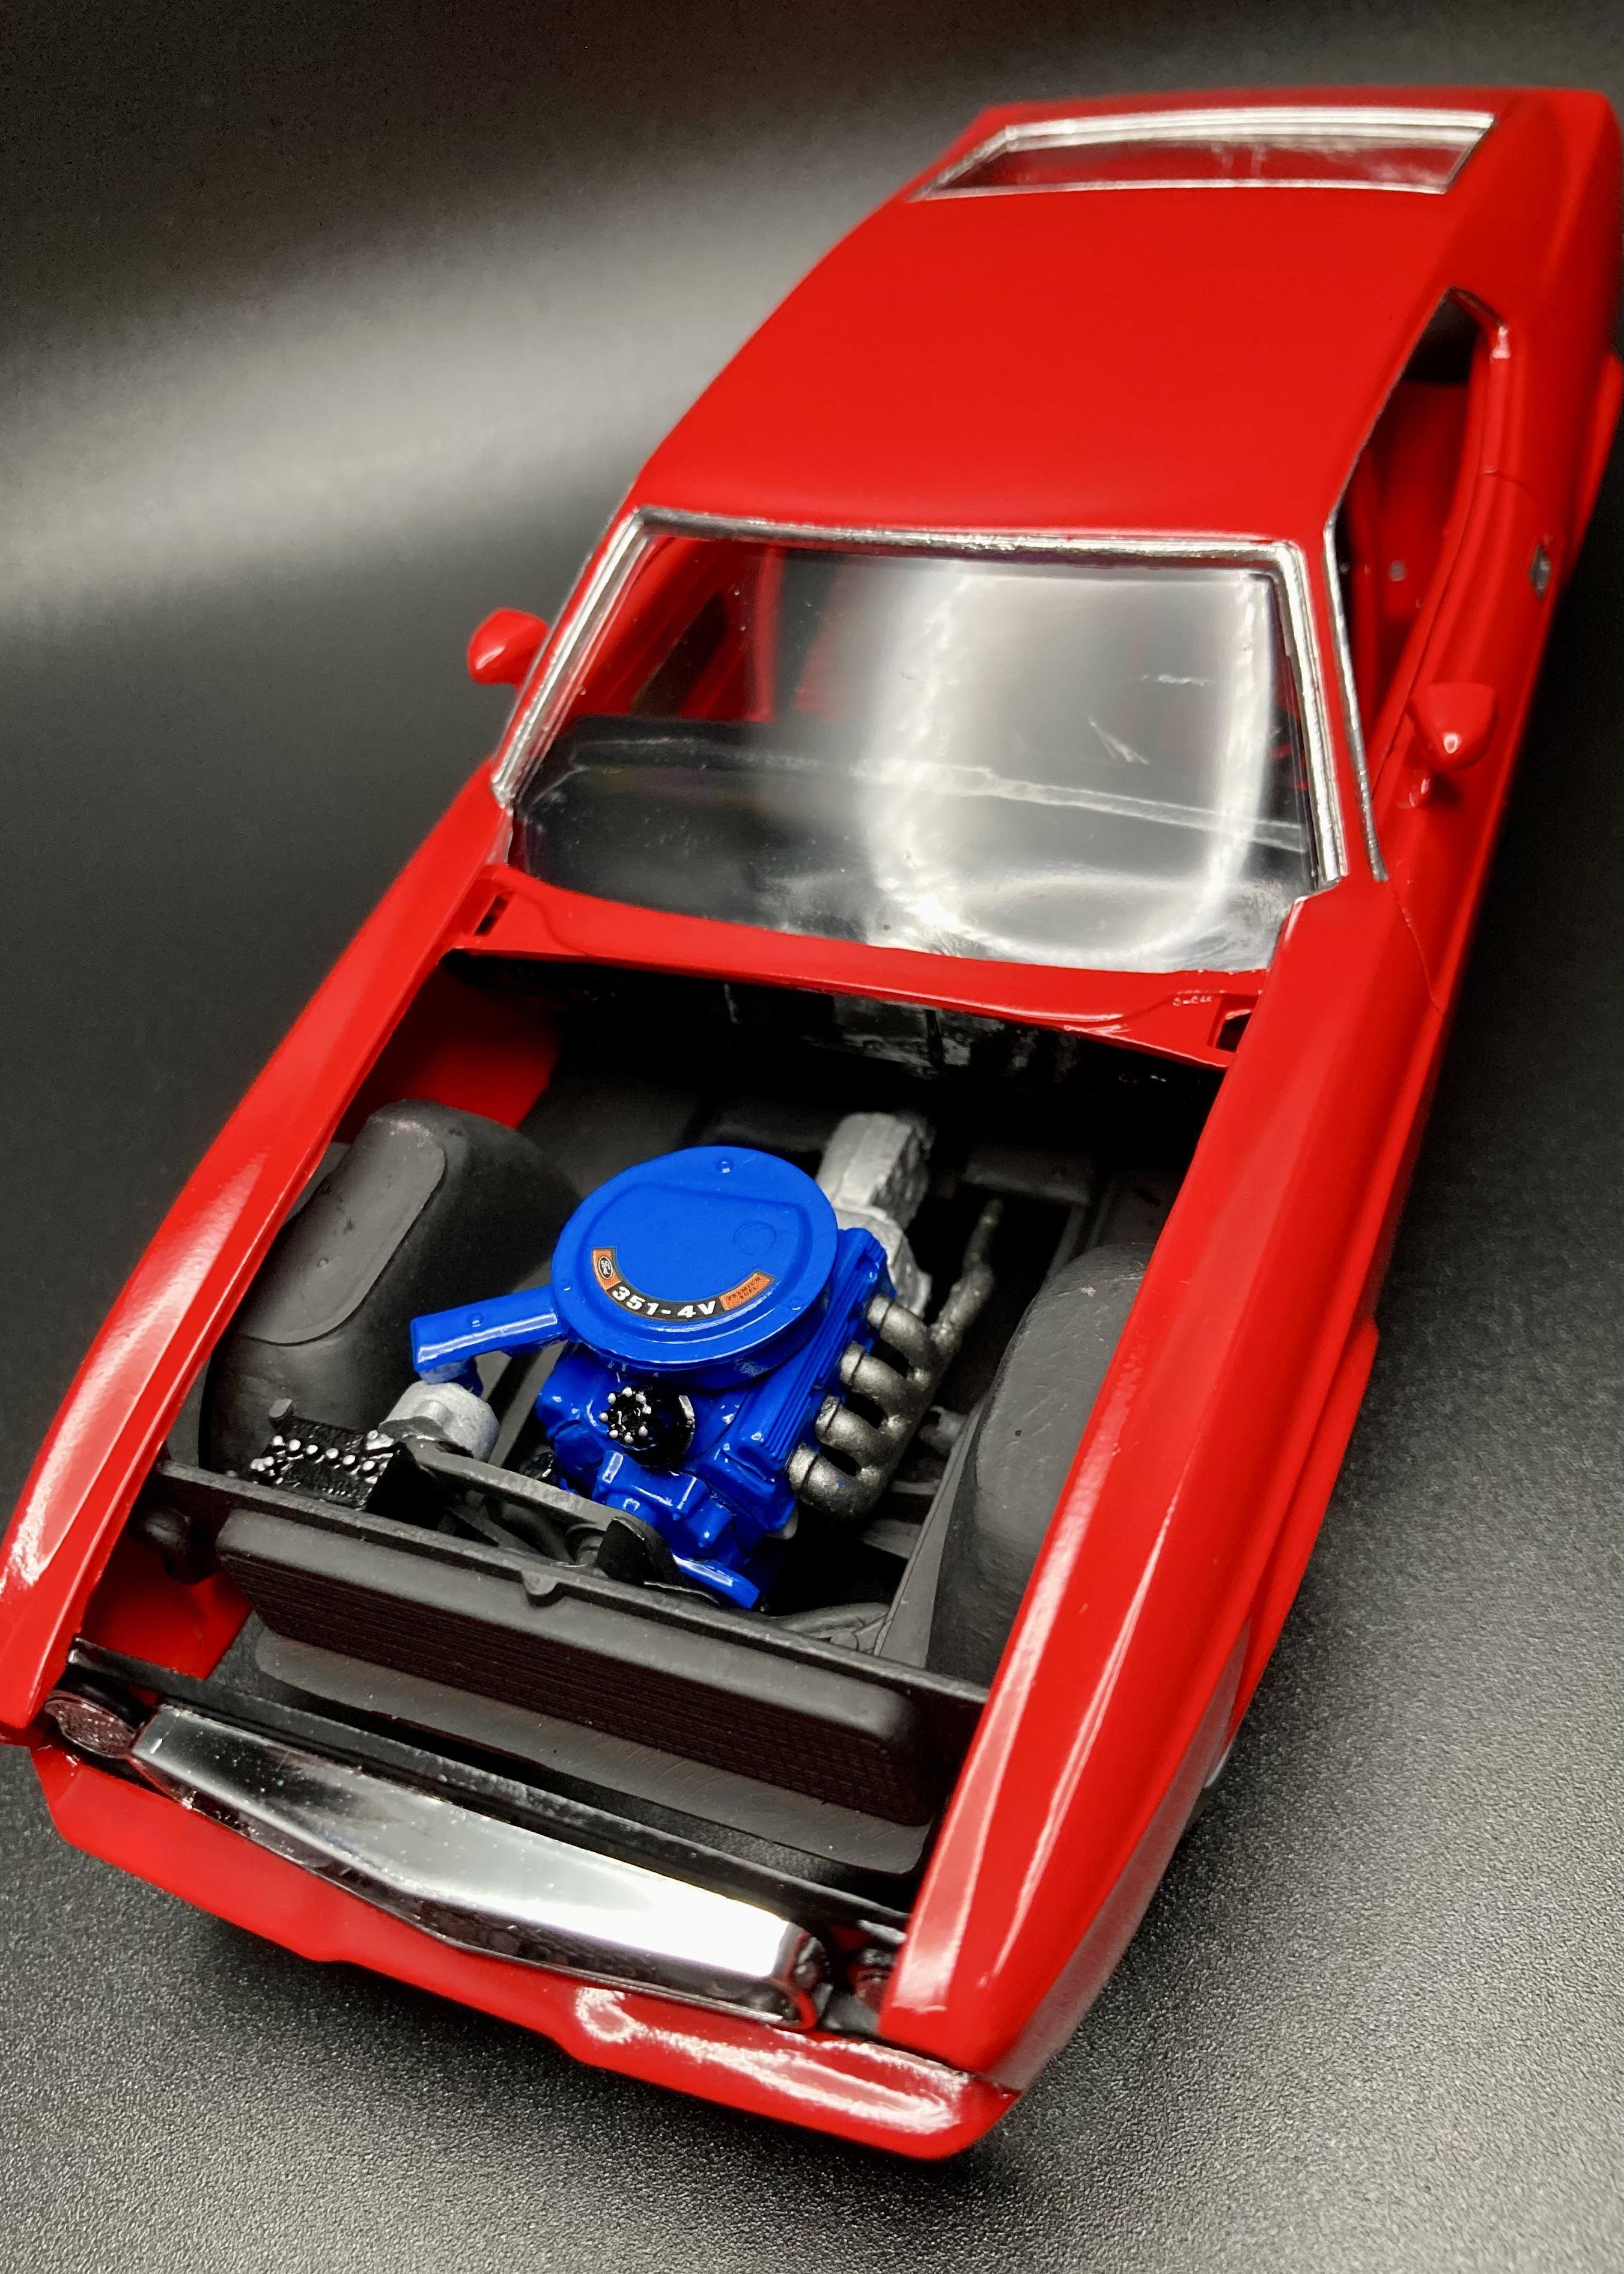
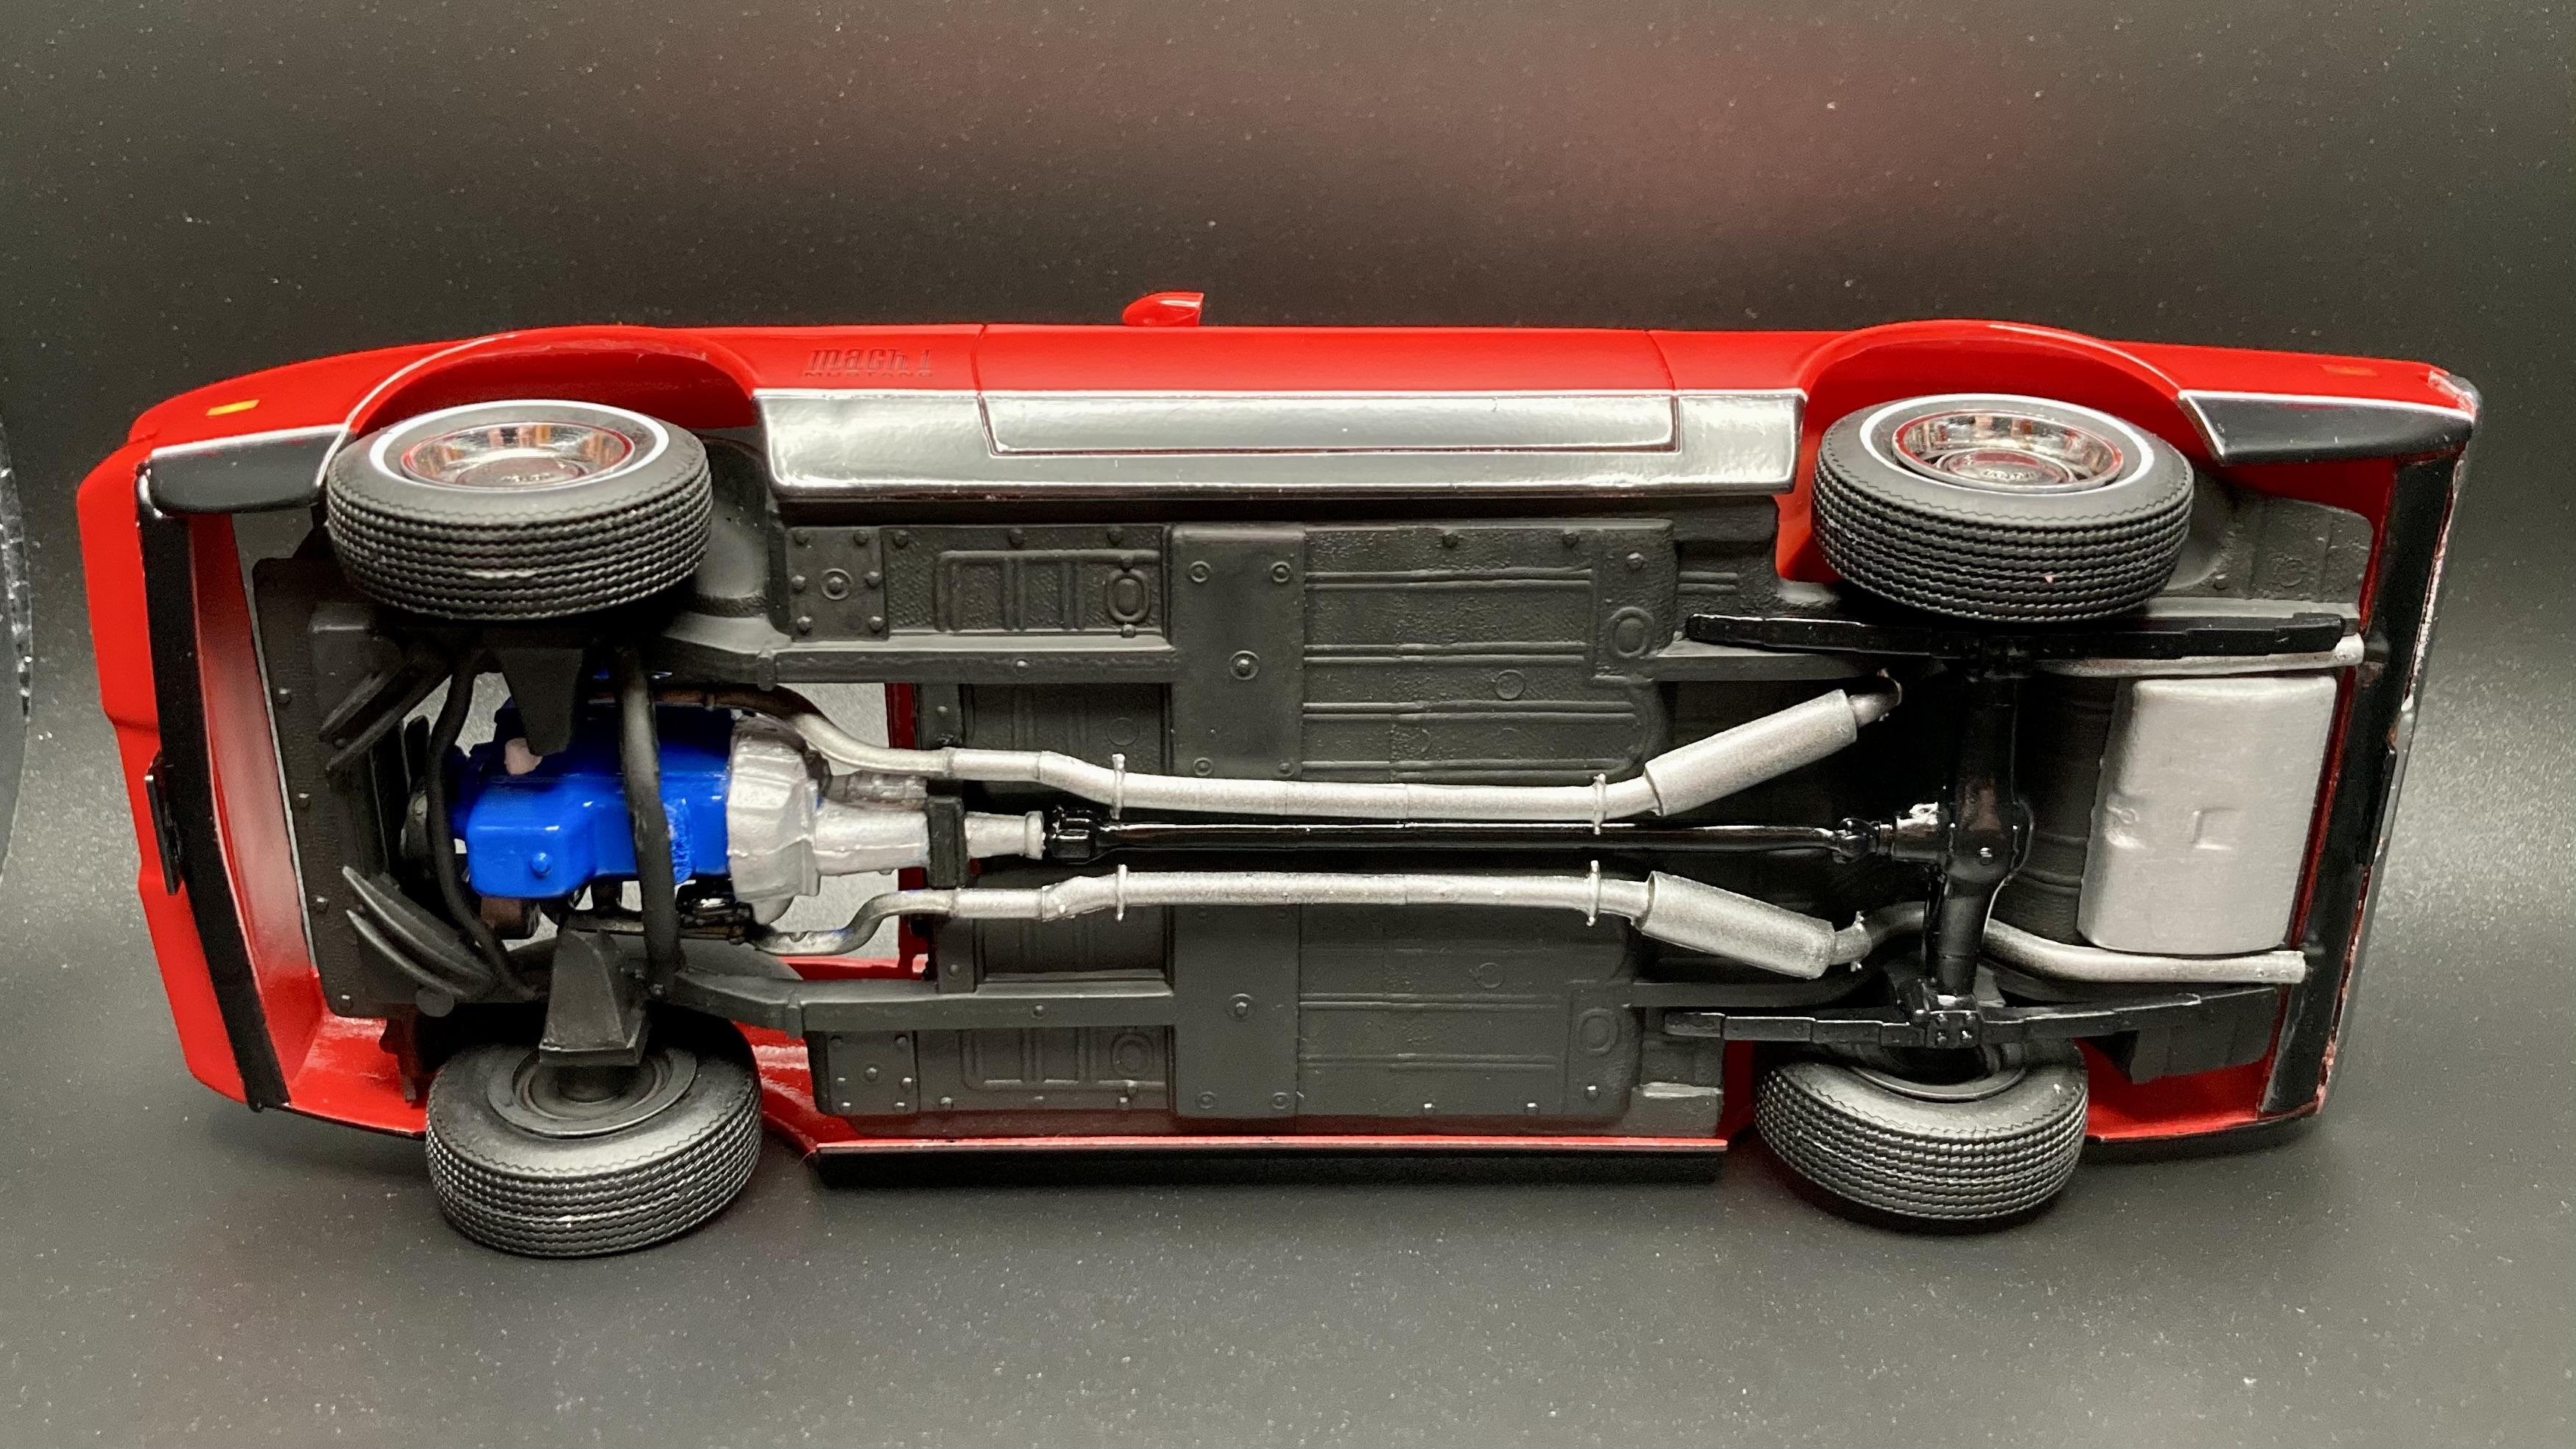
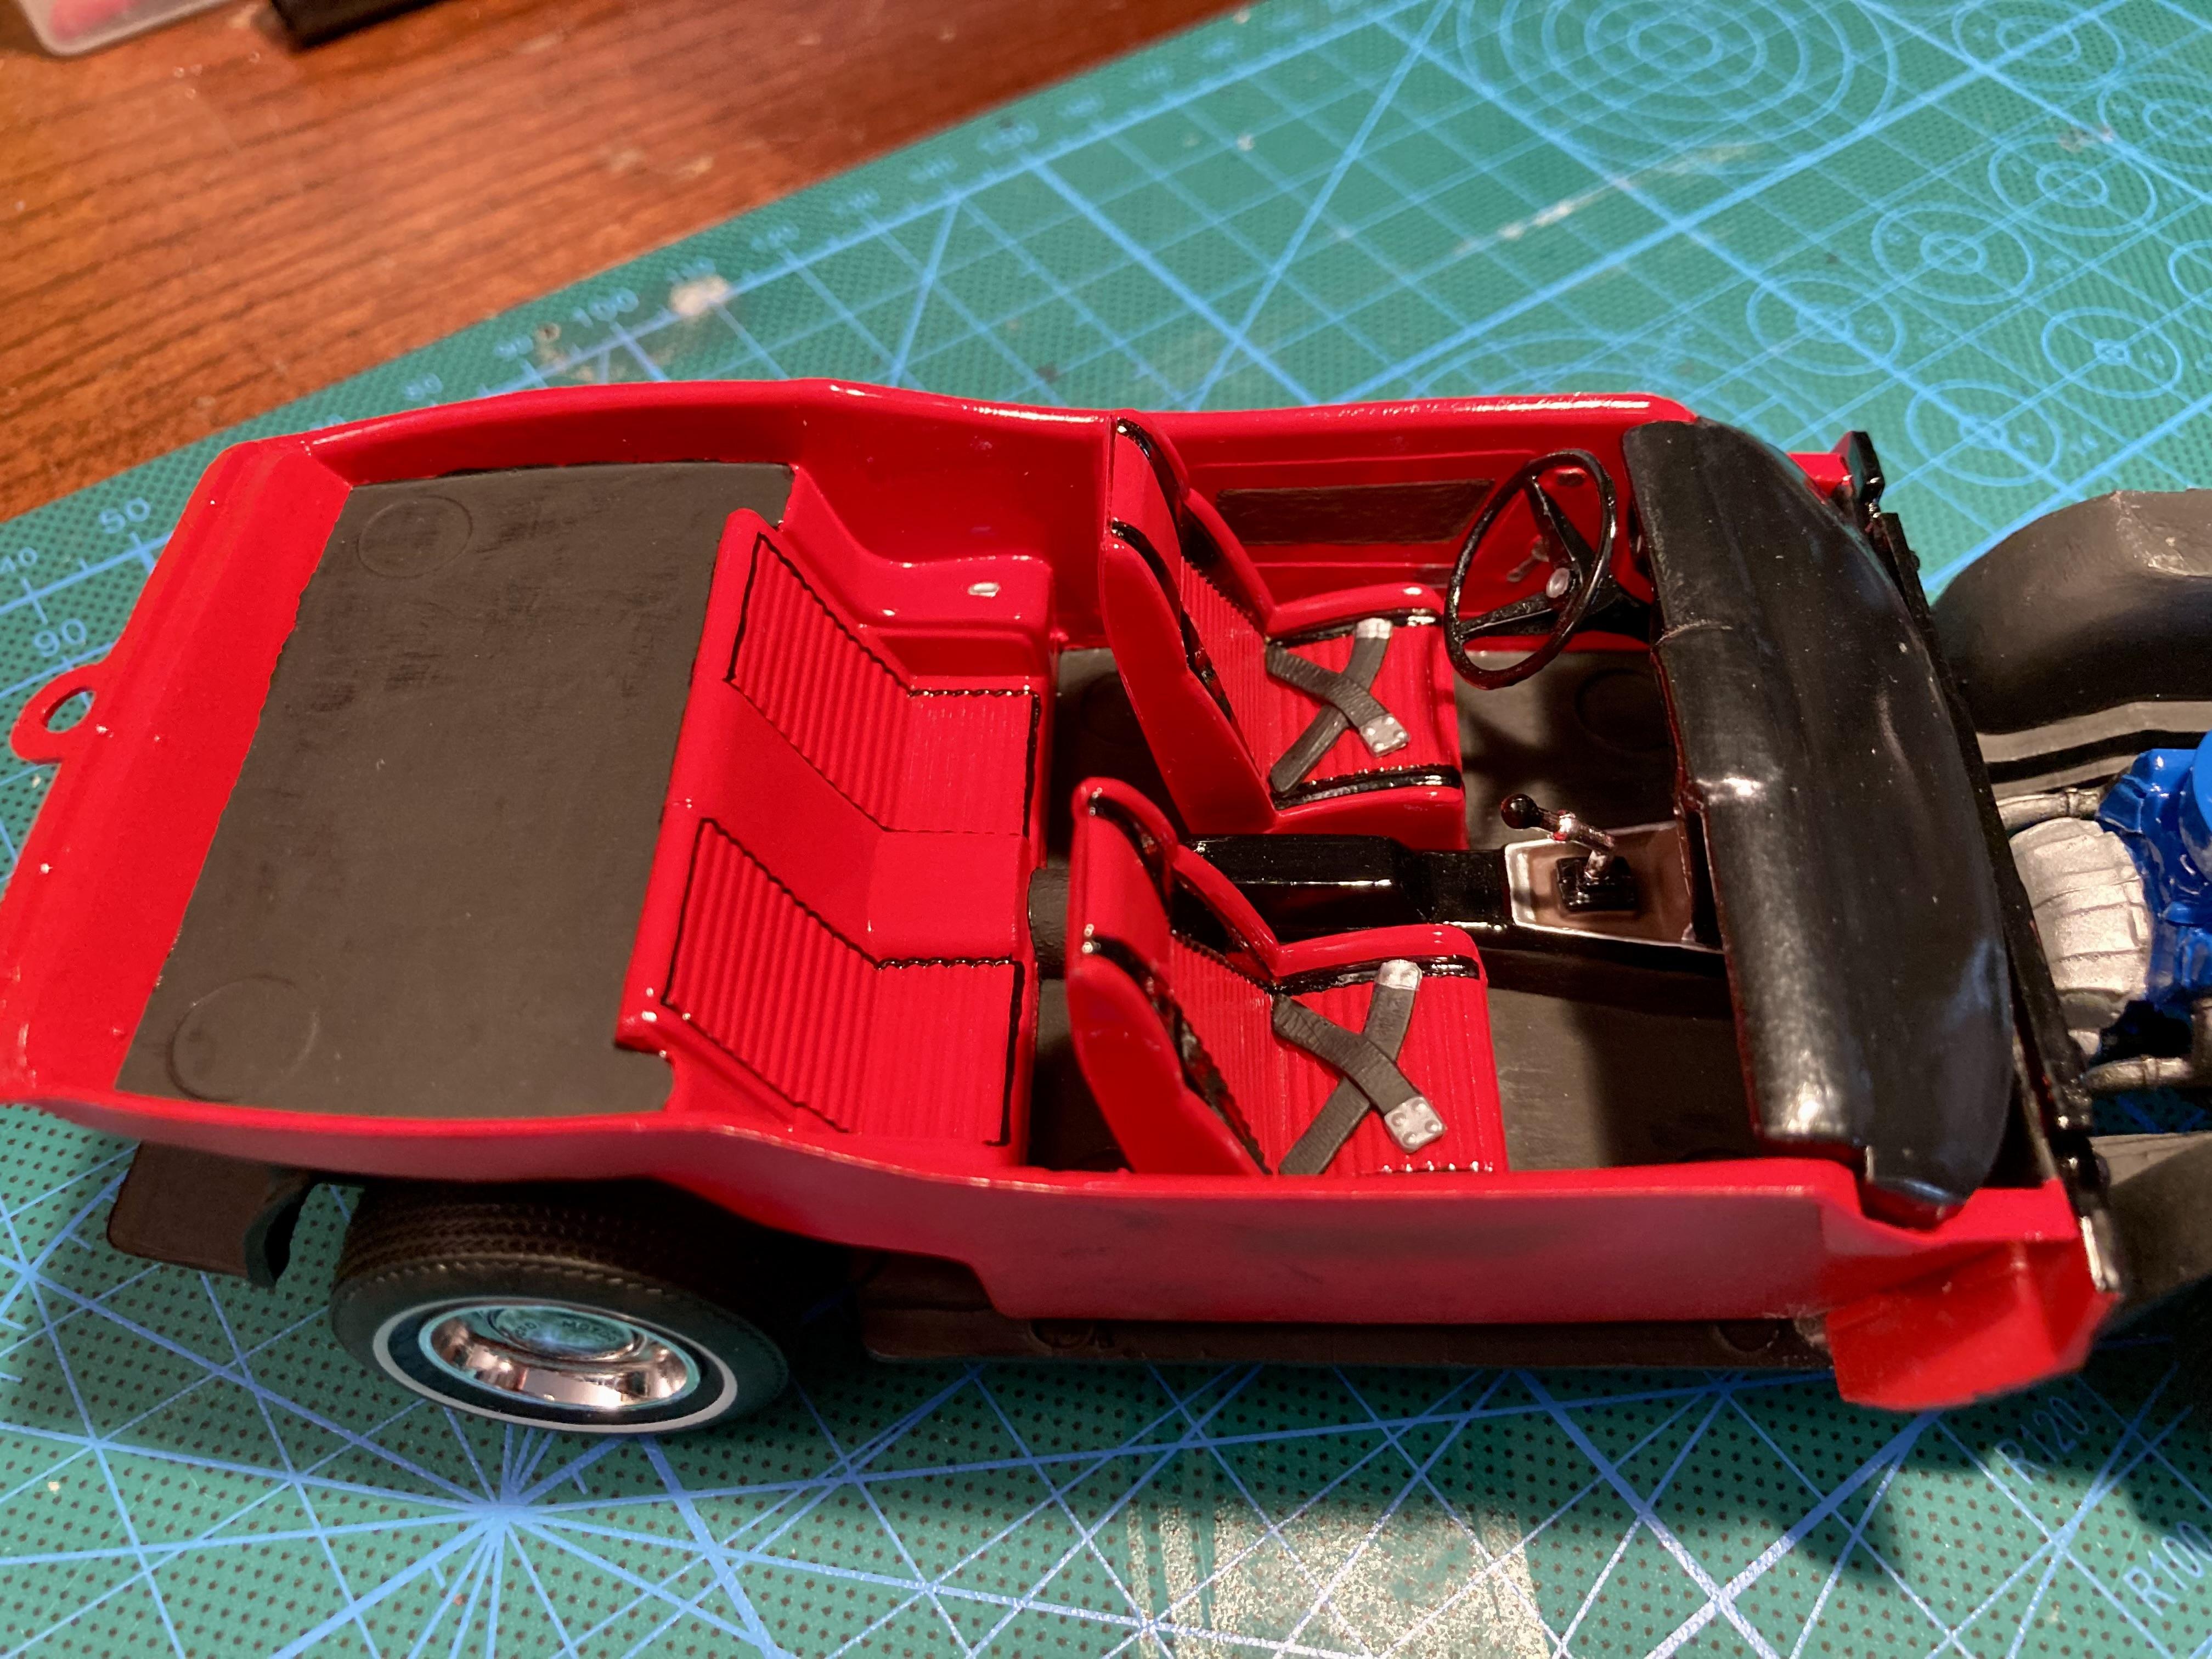
Now that Revell has made the MPC/AMT ‘71-‘73 Mustang kits obsolete… here’s my AMT 007 Mustang Mach 1! I left most of the kit’s inaccuracies intact, and built it as-is out of box. I did fill in the hood vent though. Body and interior are painted Rustoleum Gloss Apple Red over Tamiya pink primer with Krylon semigloss Black for the lower body. Cleared with Pledge floor gloss. I mistakenly glued the firewall to the interior tub and didn’t notice until final assembly. It should be glued into the body shell, further forward. I had to trim the firewall sides down to get the glued chassis and tub into the body. I managed to make the grossly inaccurate engine bay even worse! Exterior shots: Companion shots:007 Mach 1 with Supernatural Impala‘71 Fastback with ‘66 Coupe’71 Fastback with ‘94 Convertible Thanks for looking!
-
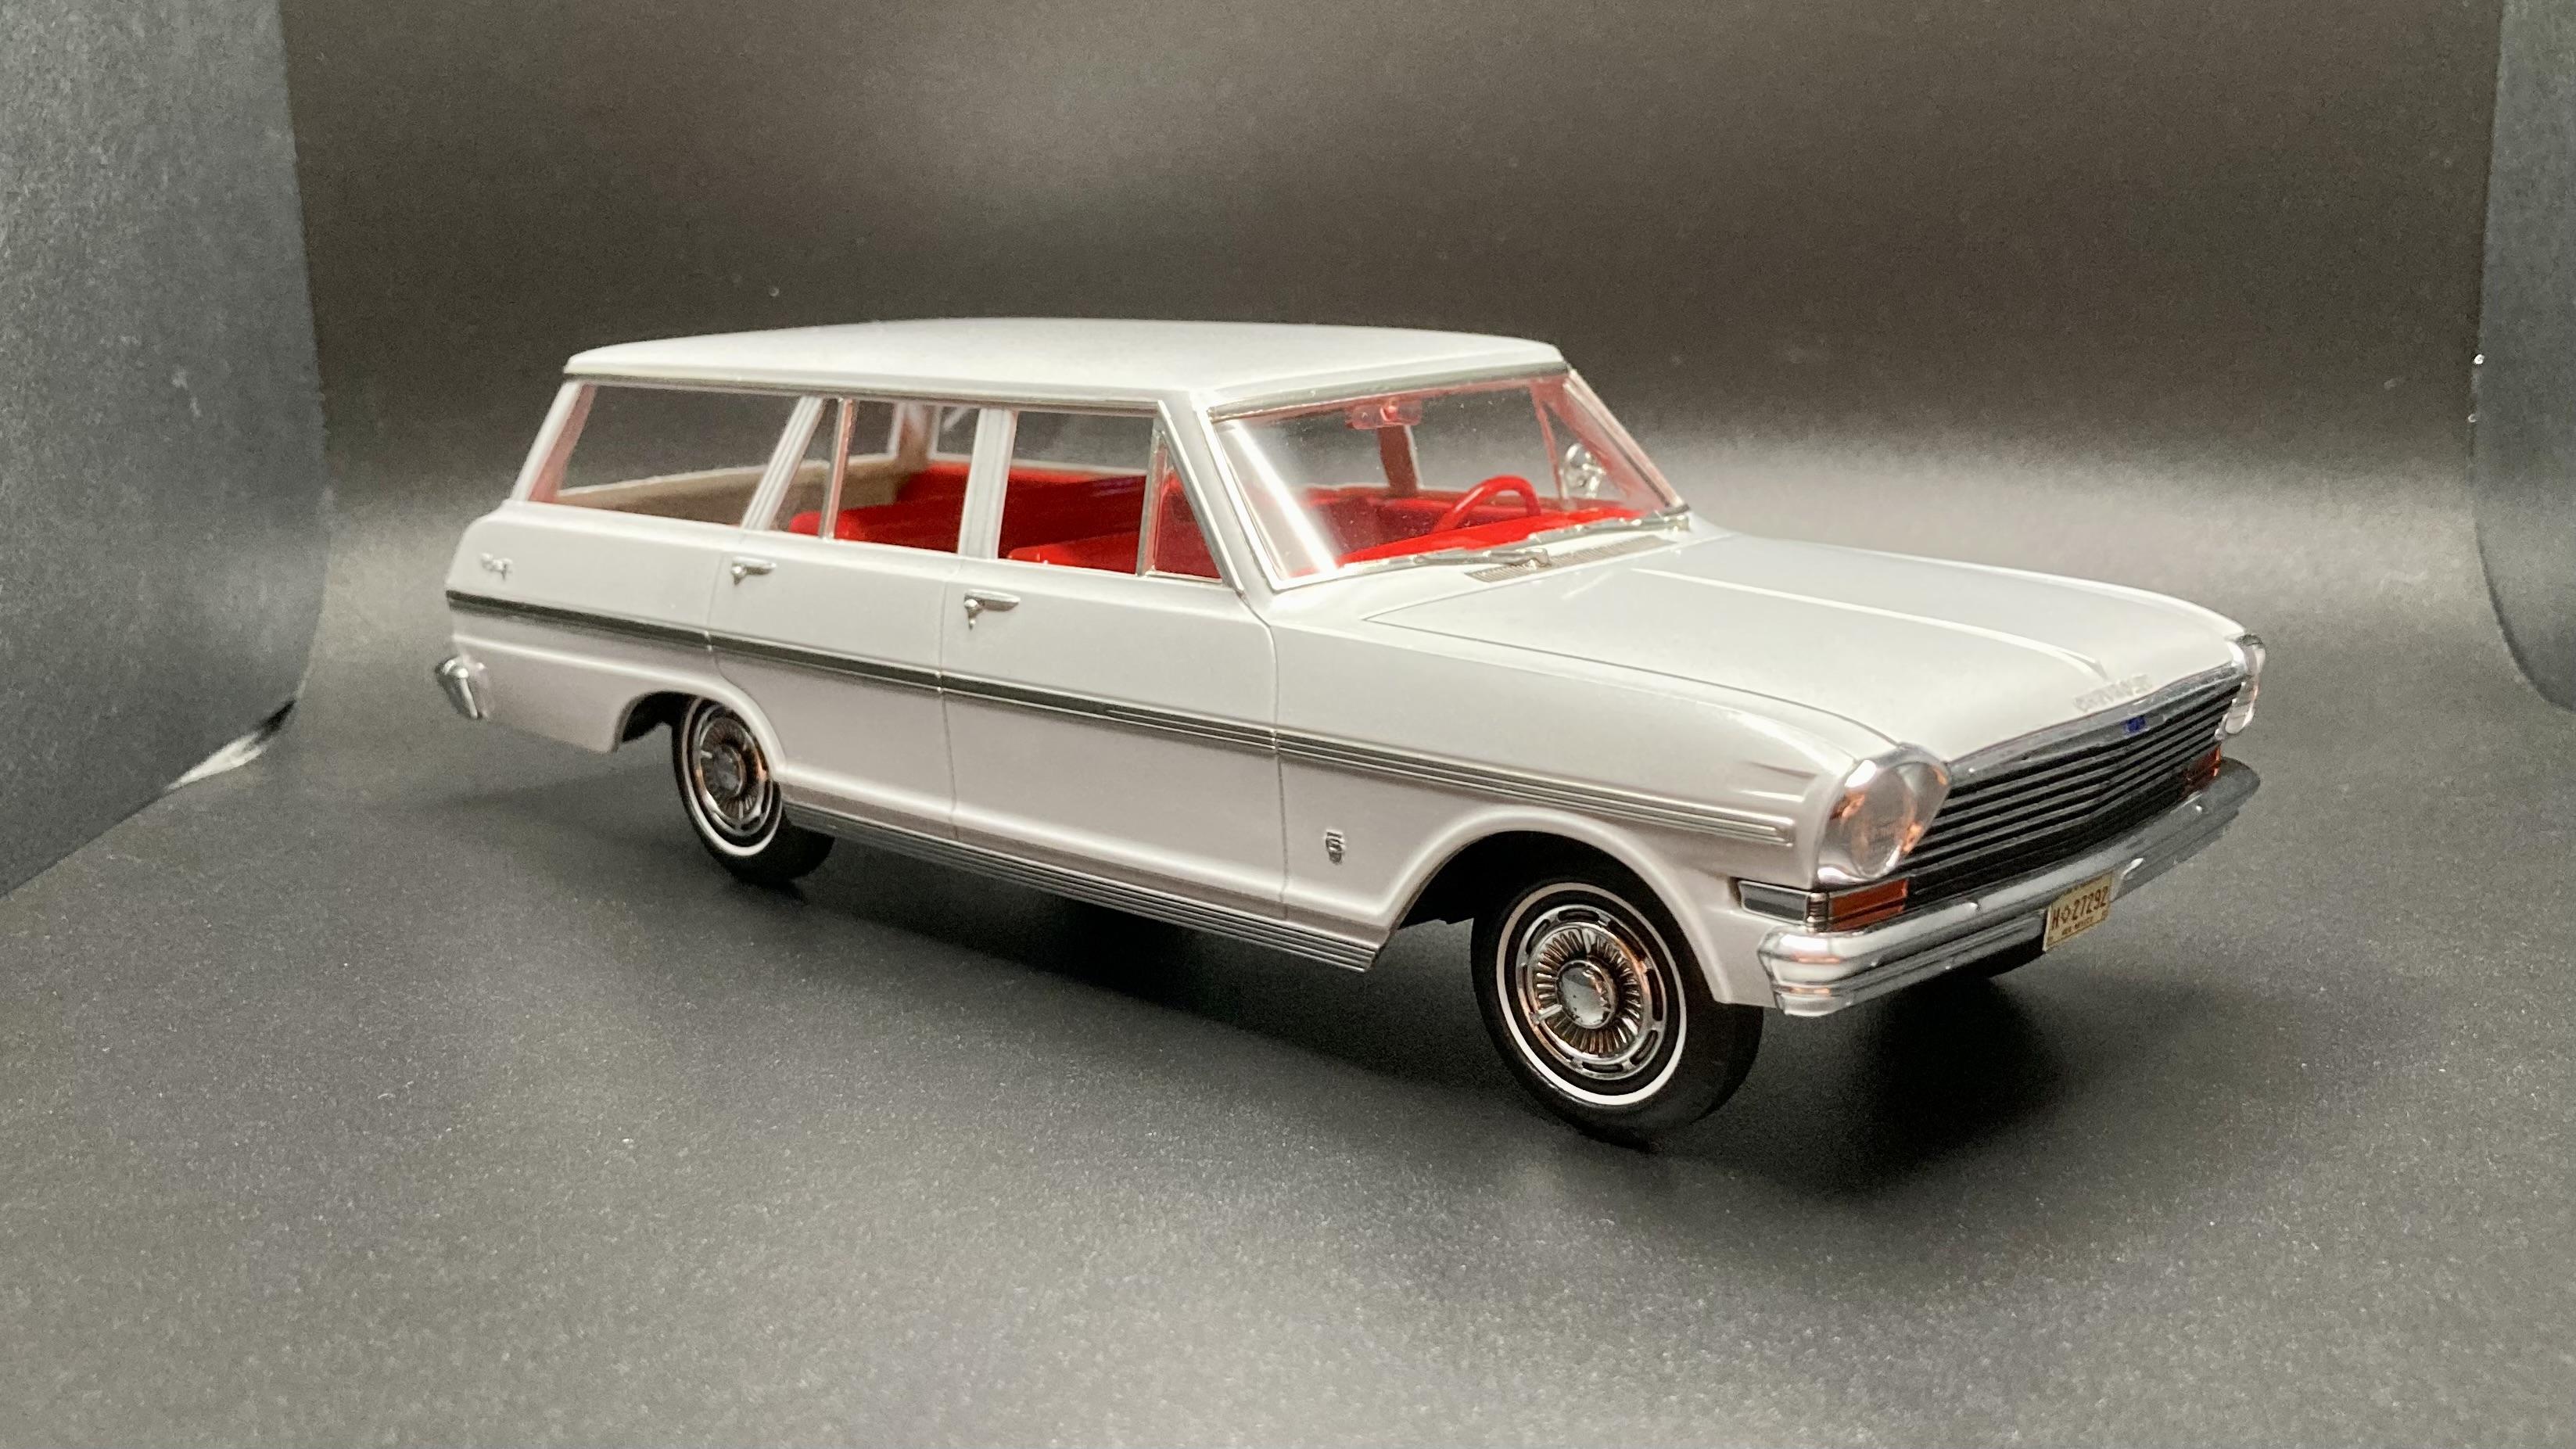
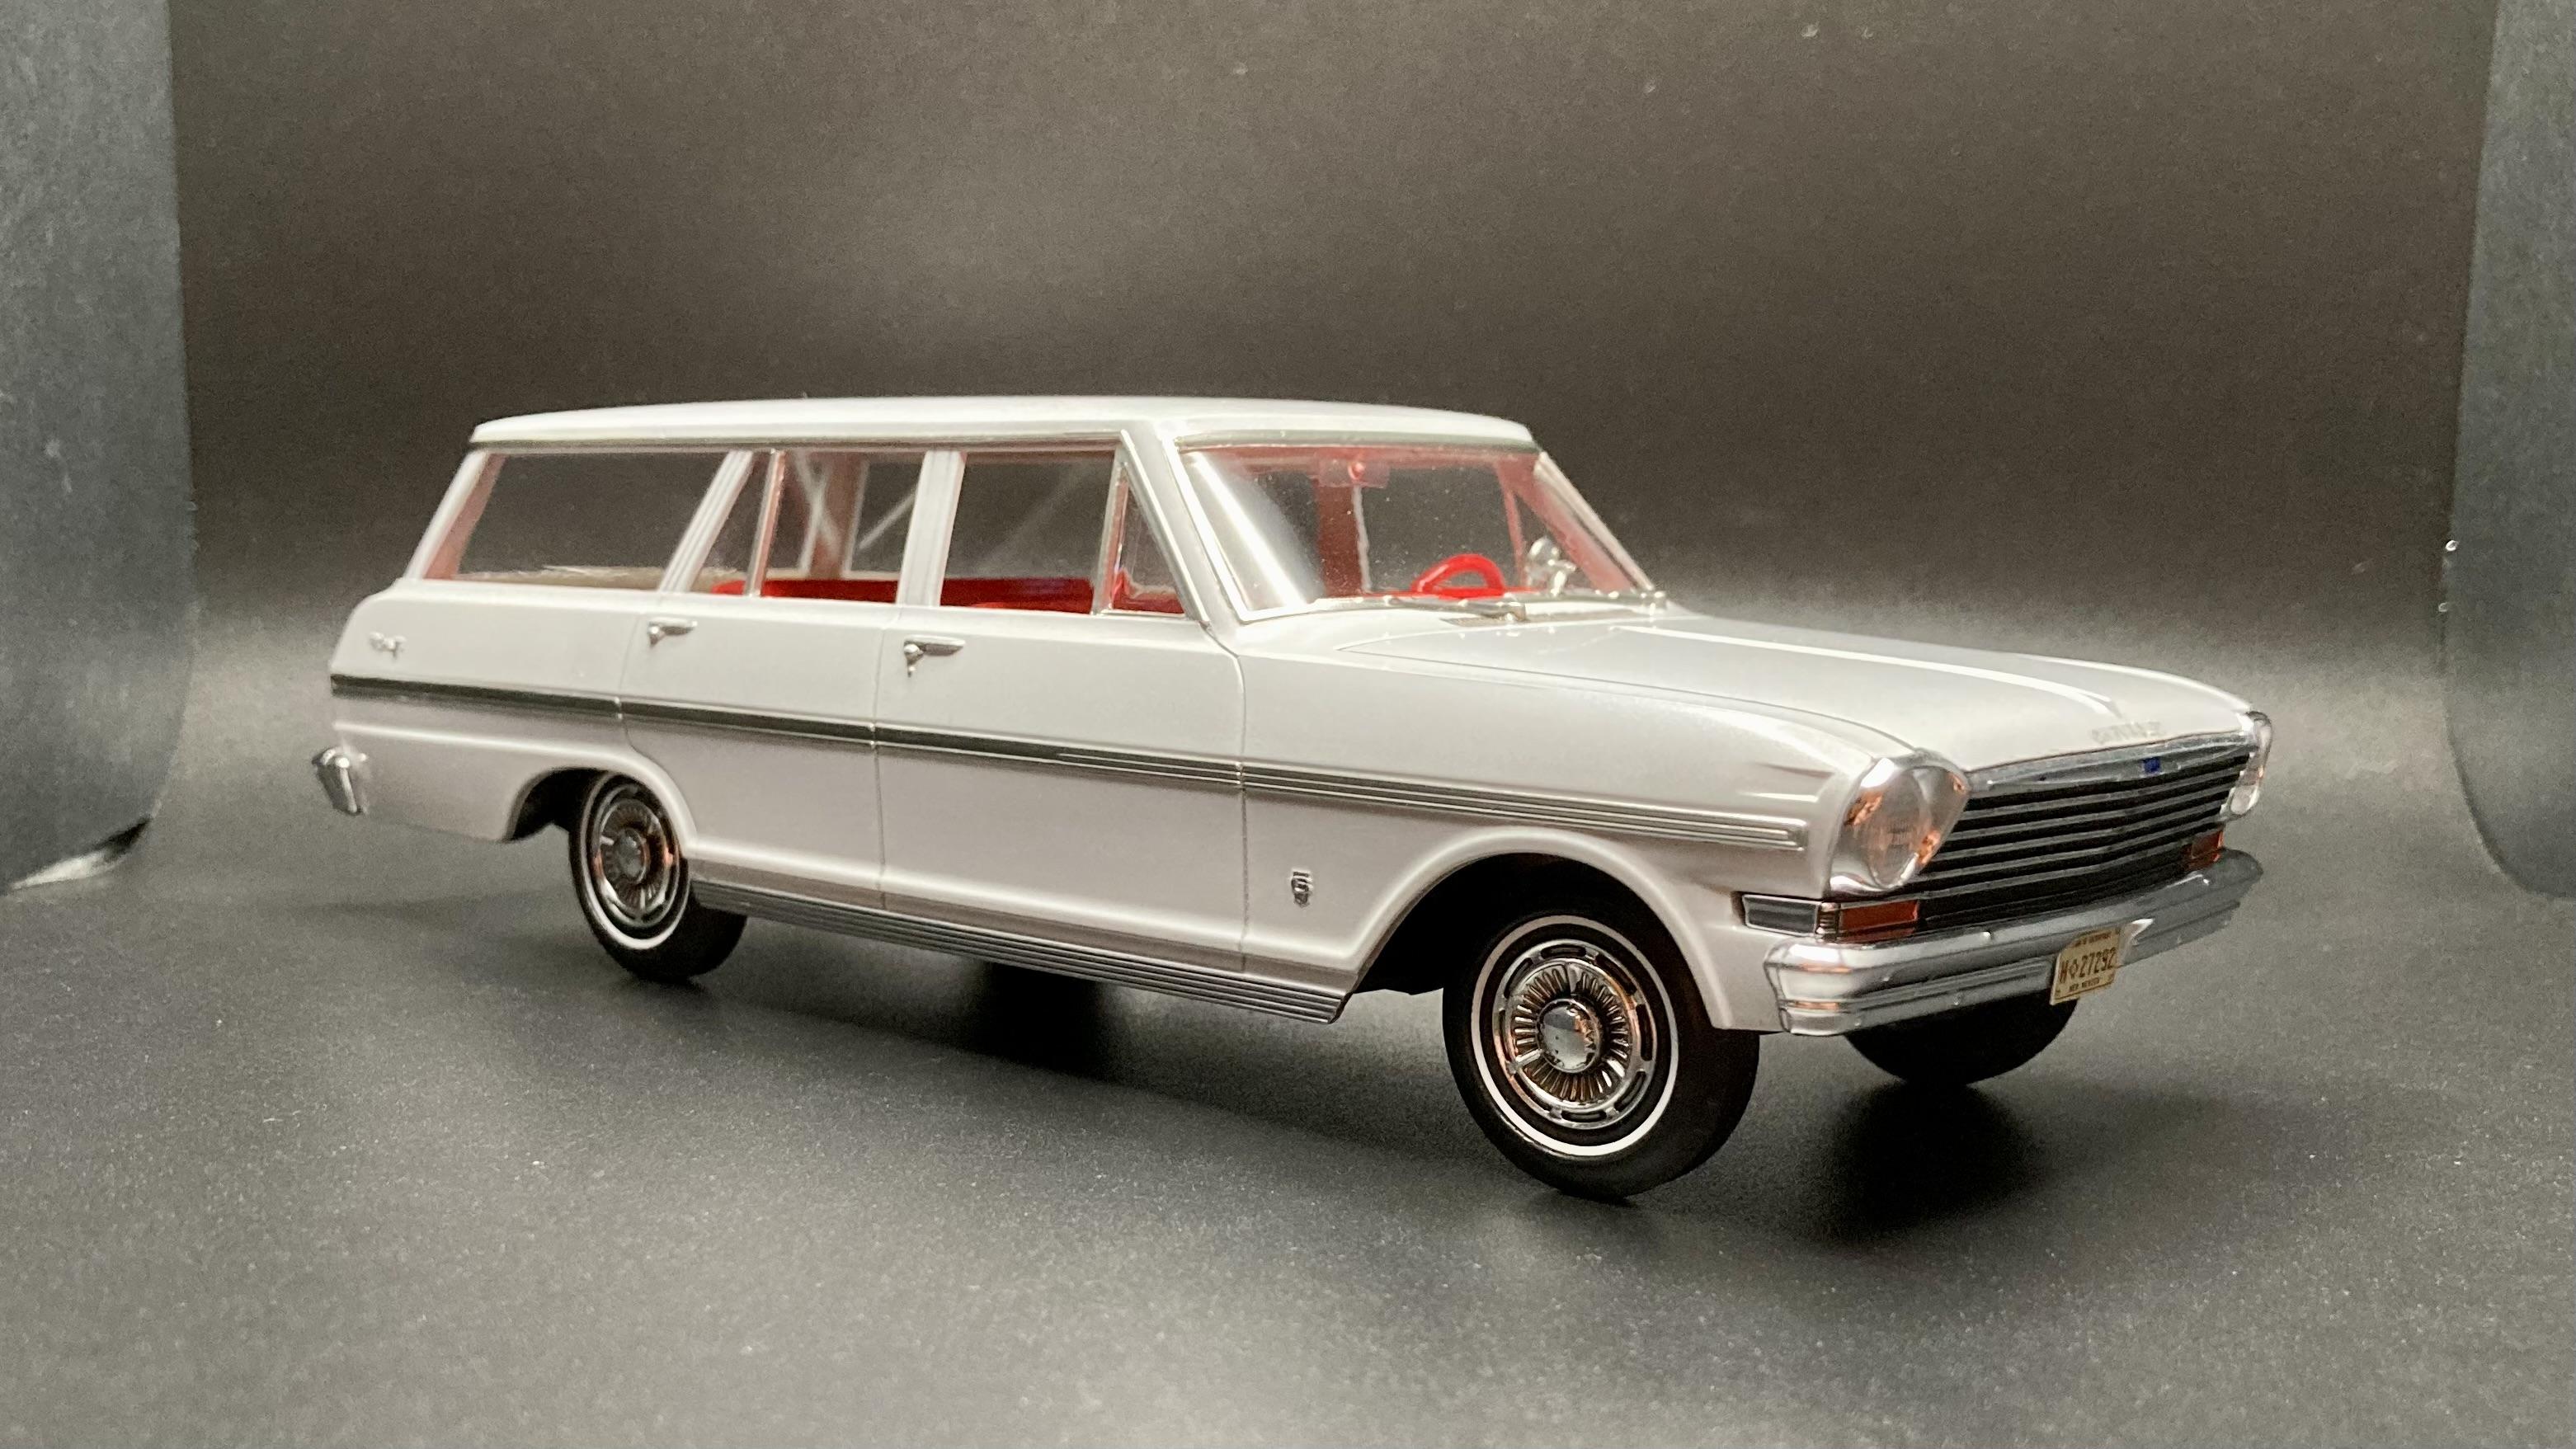
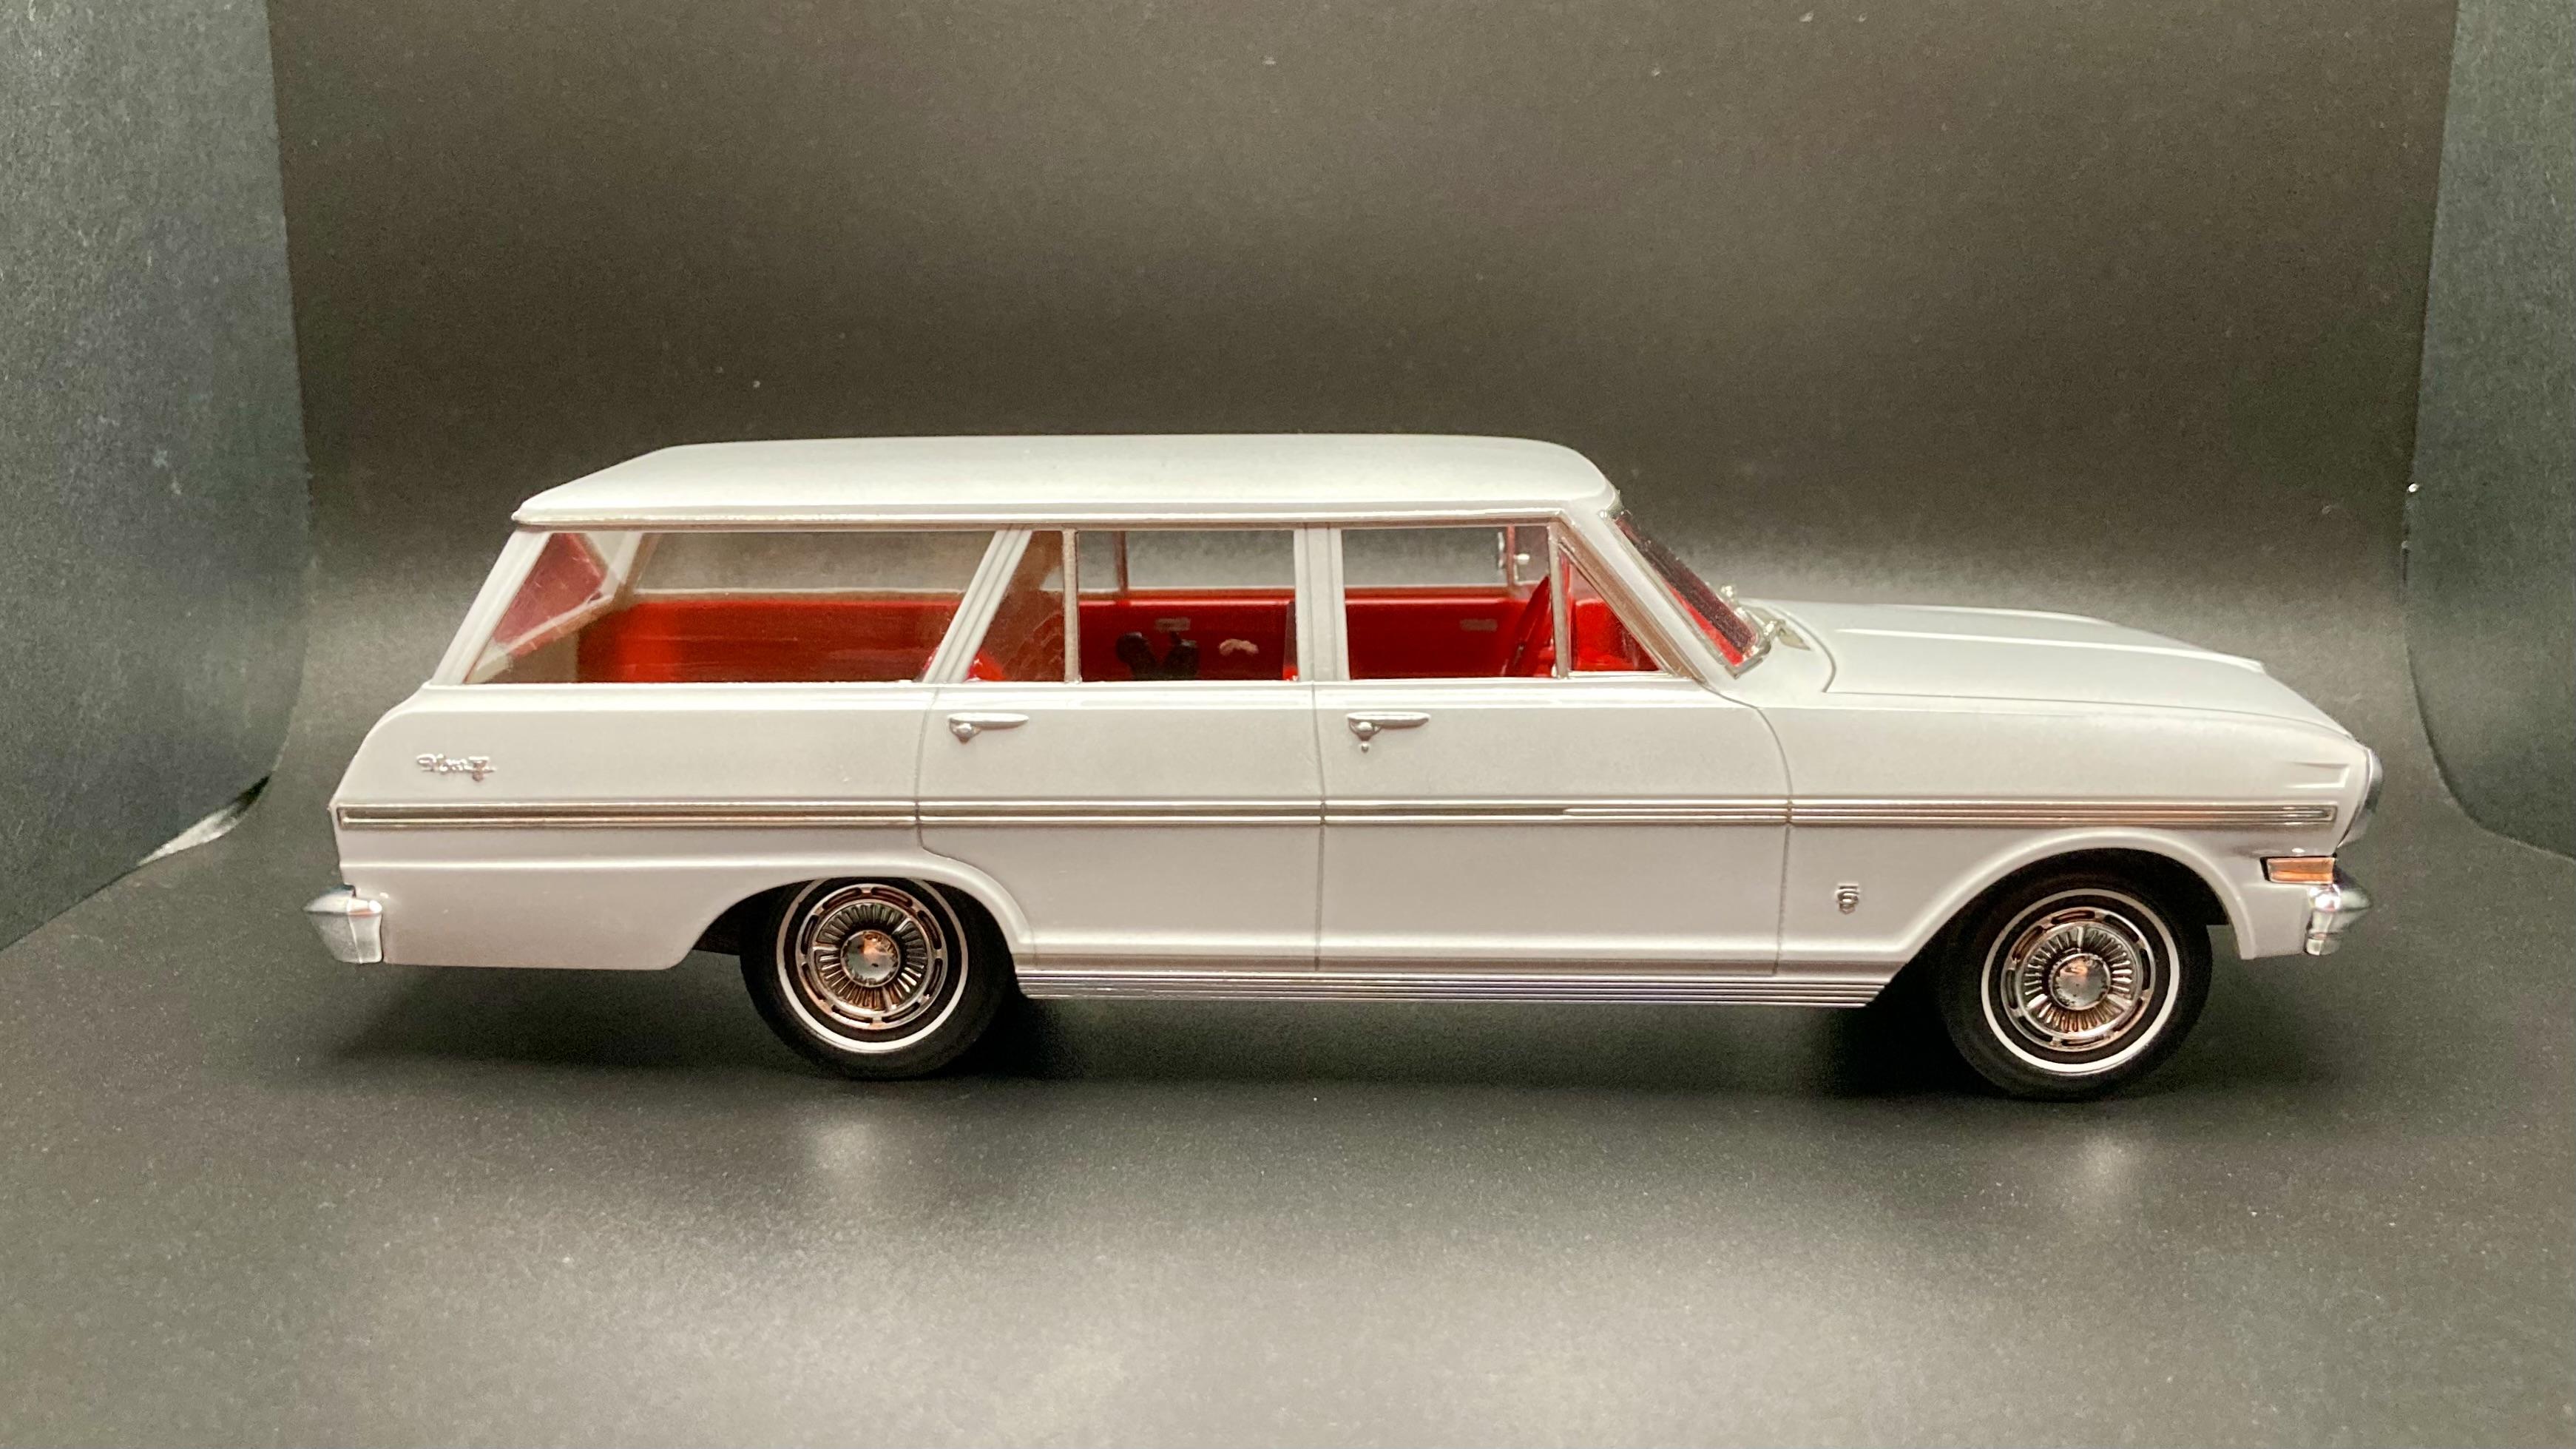
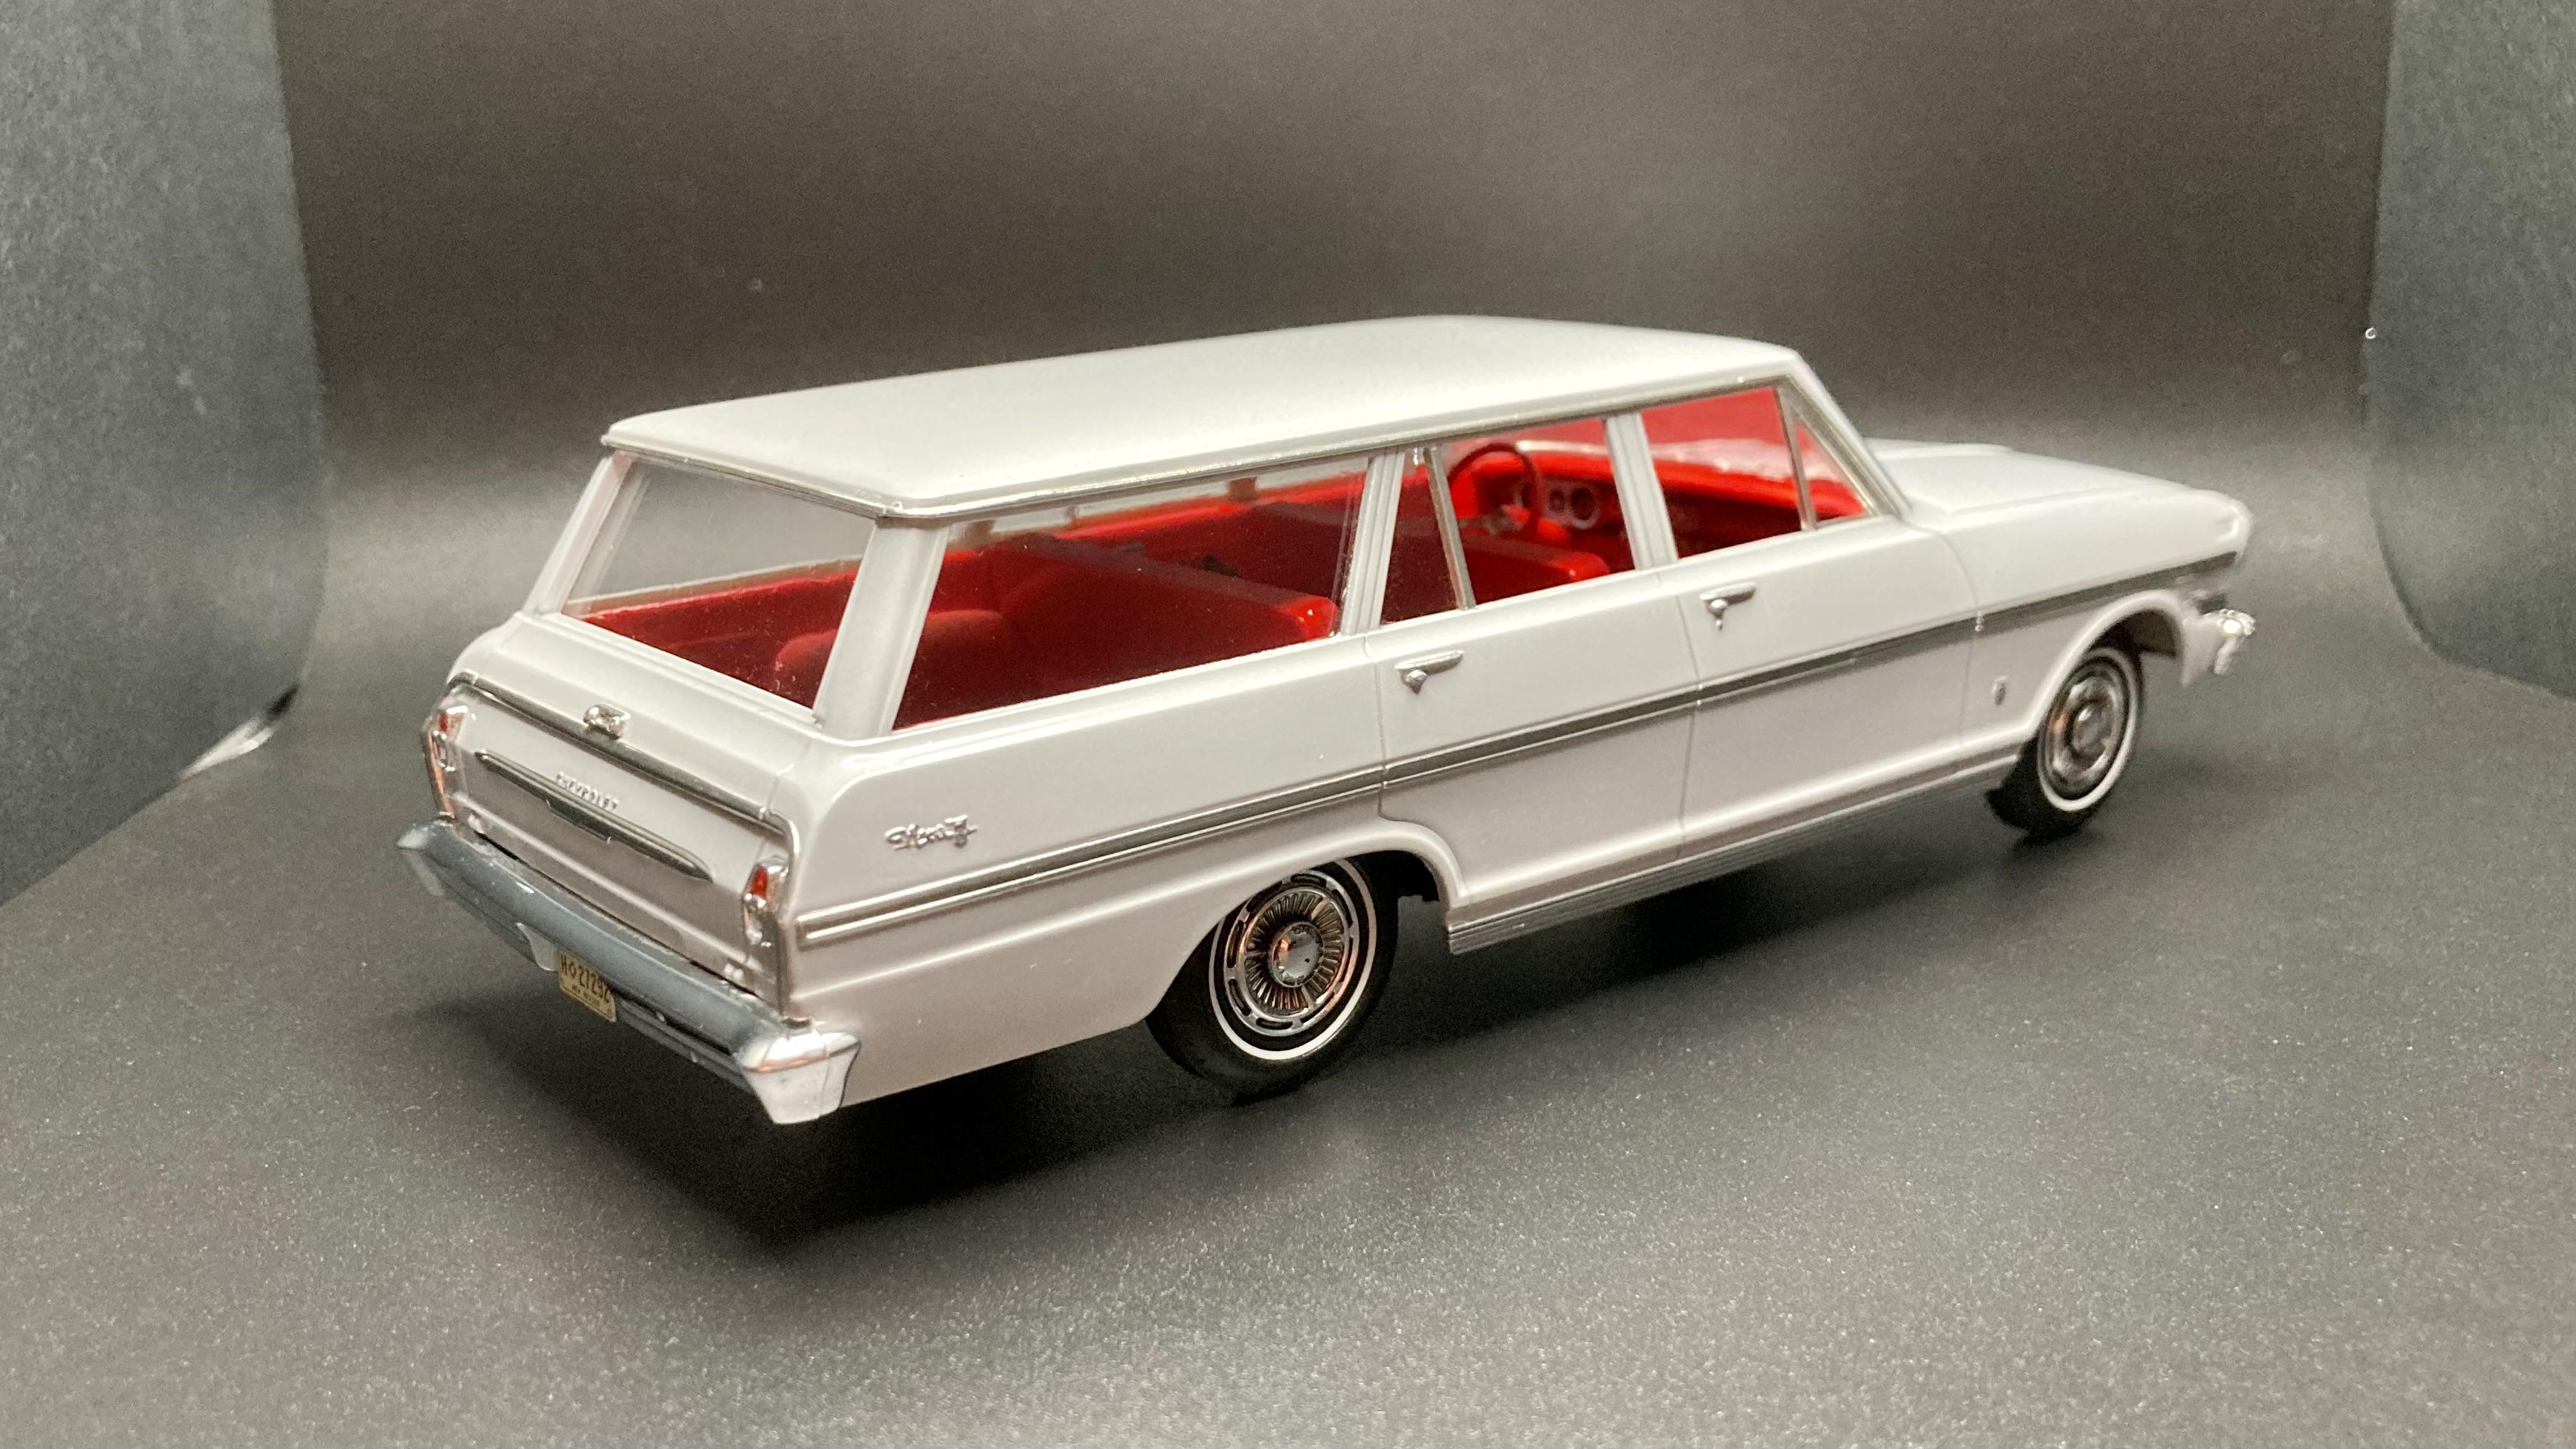
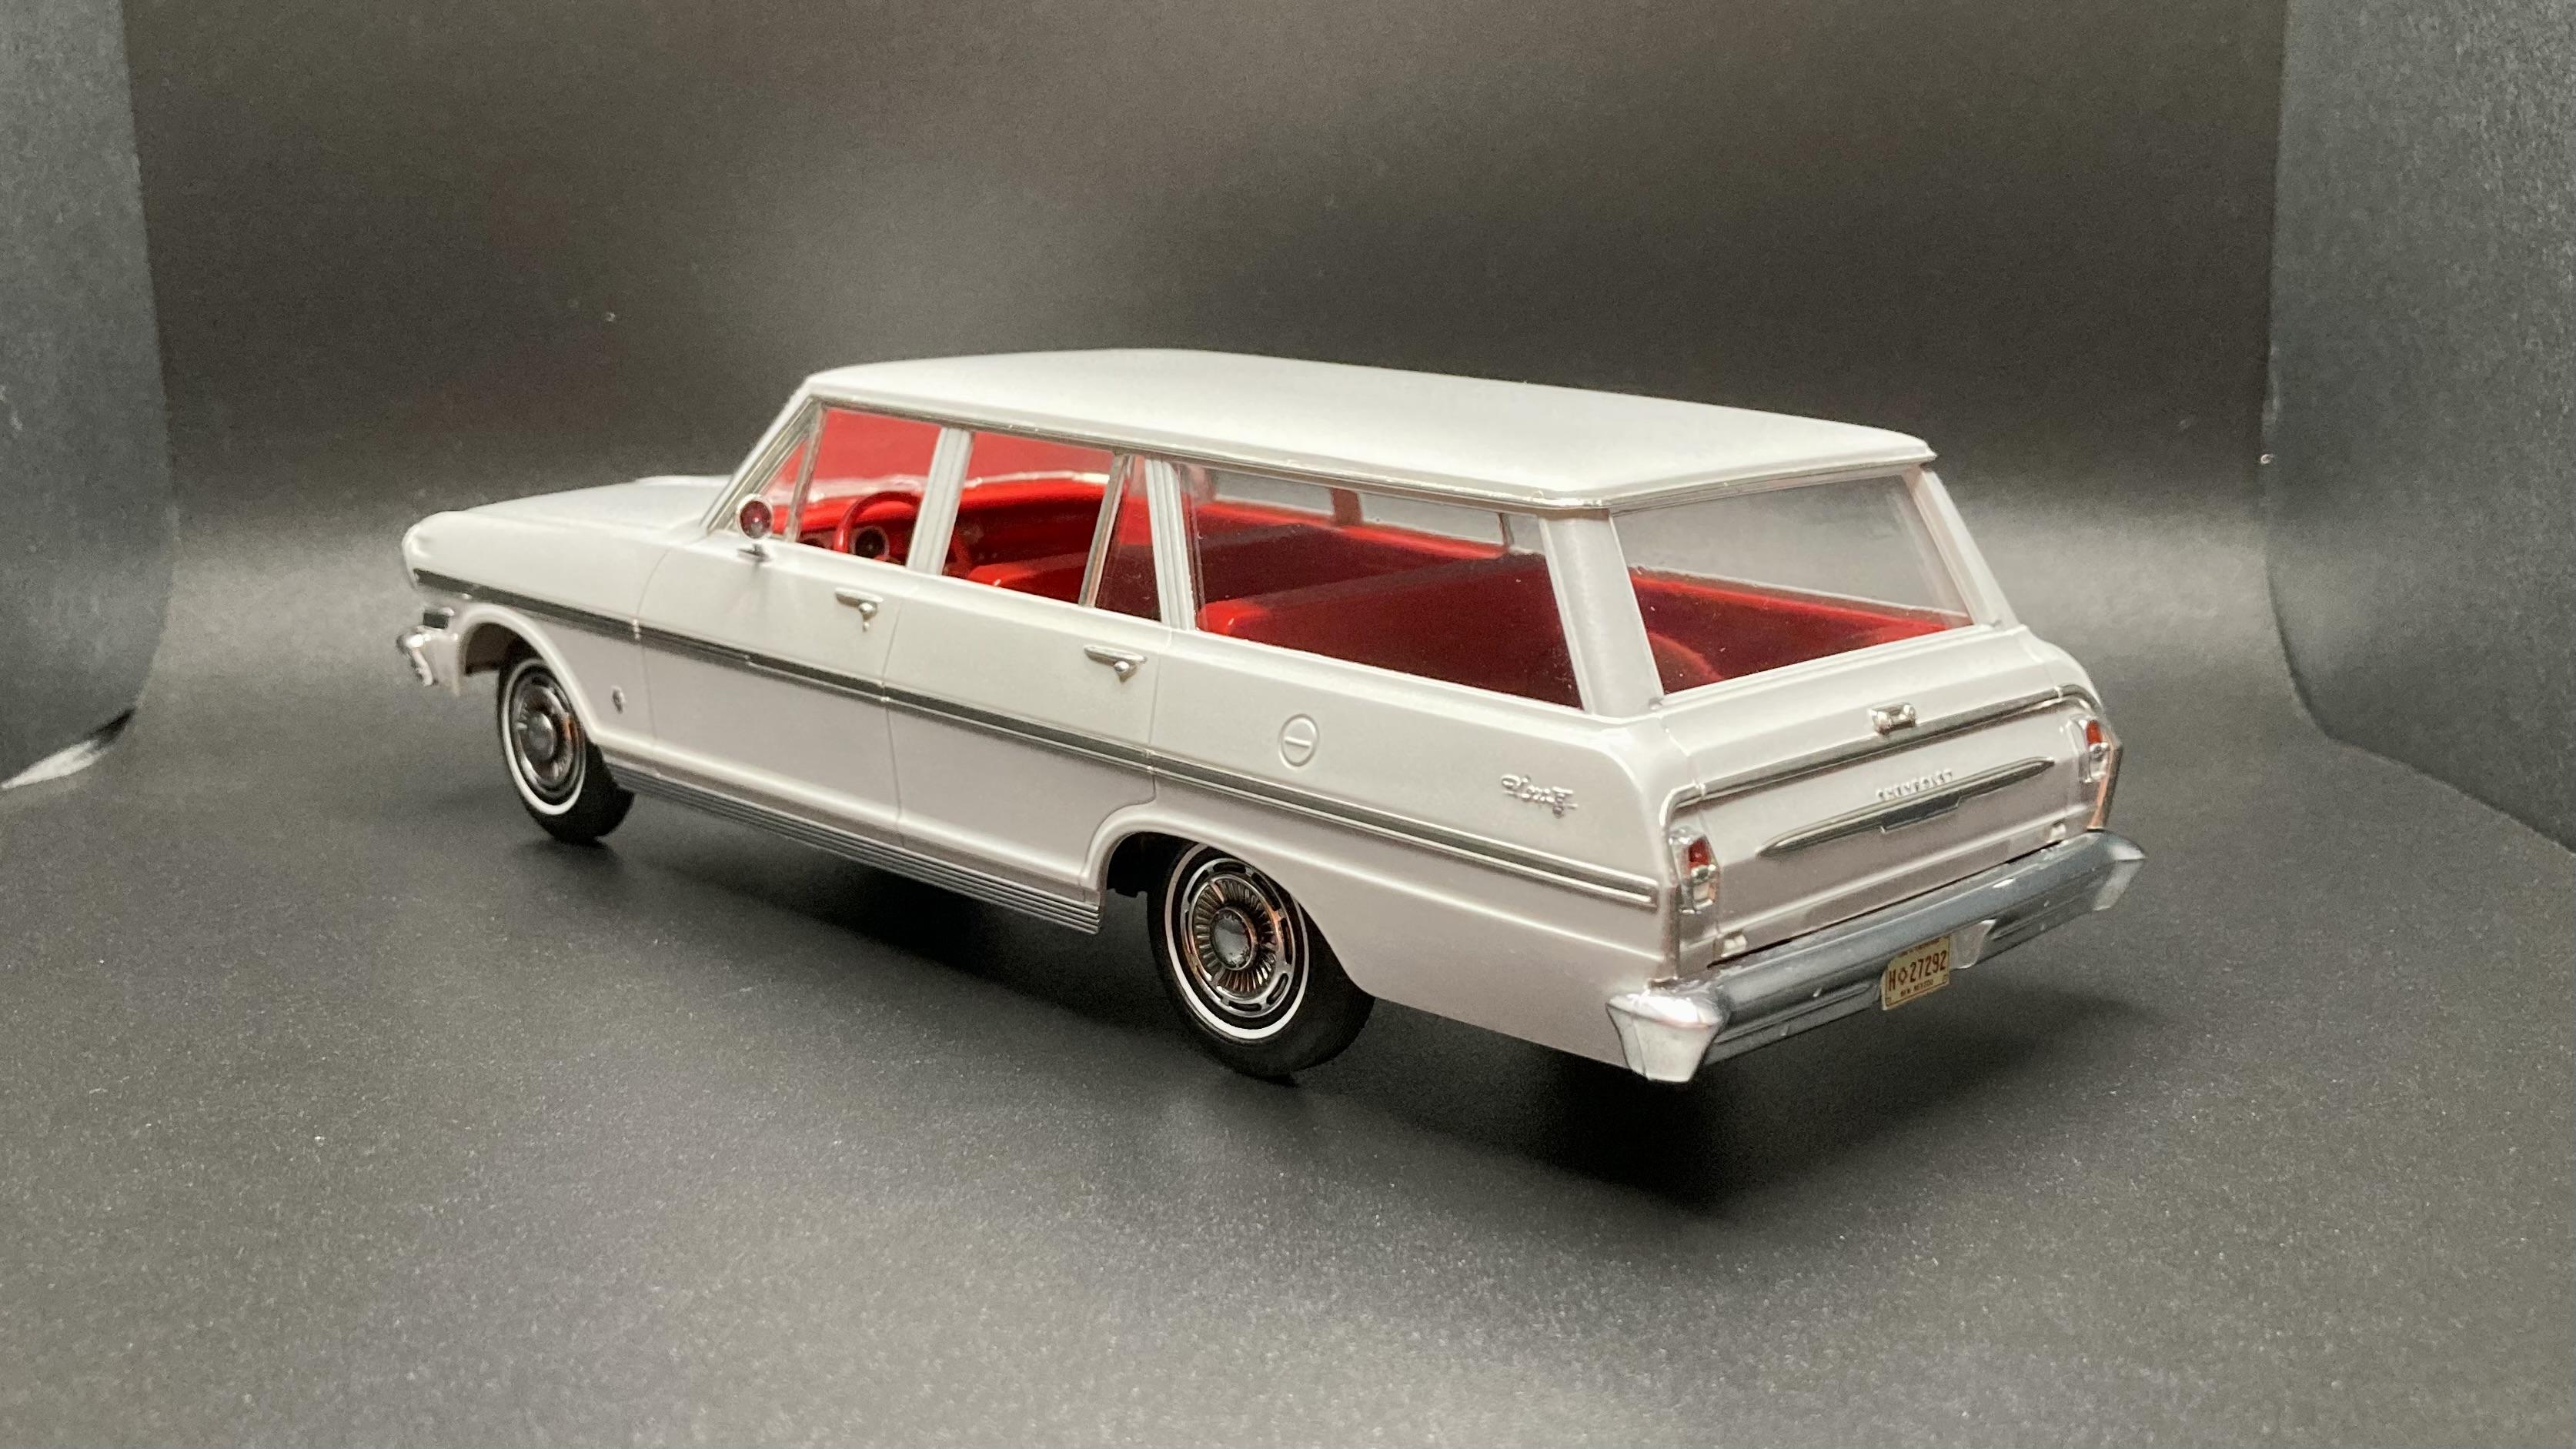
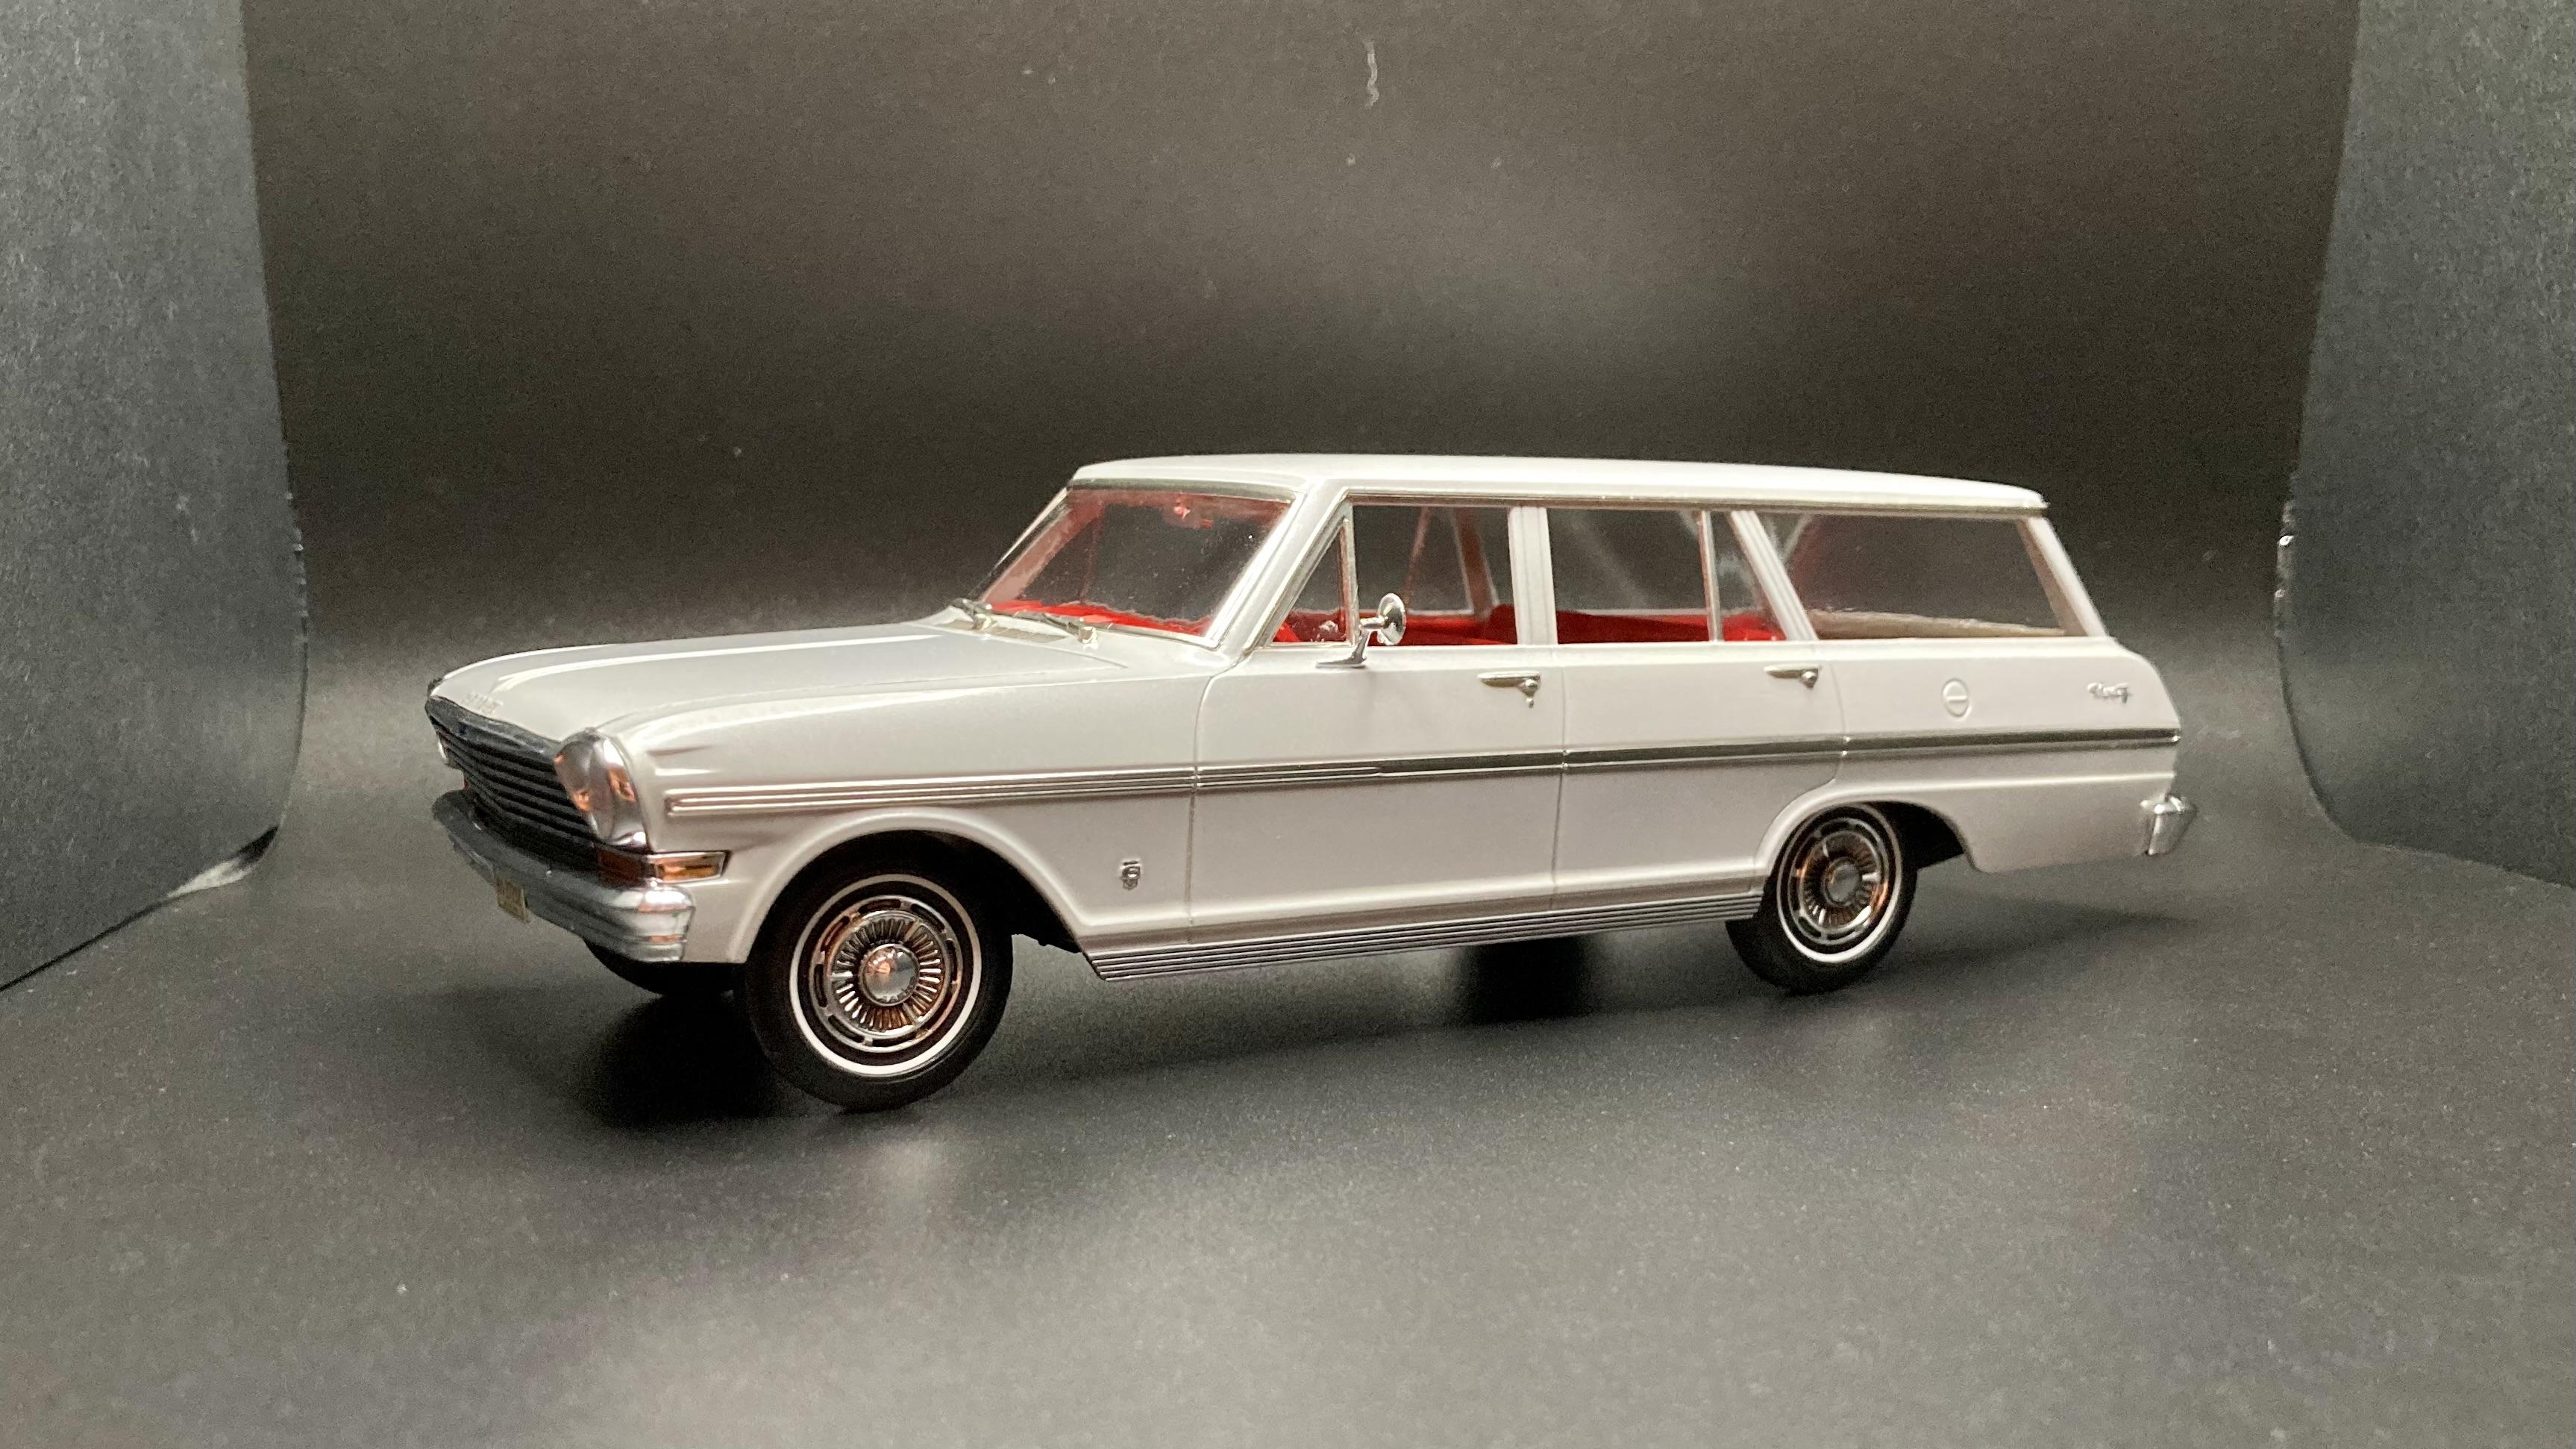
Here’s my build of the recent Craftsman Plus release of the ‘63 Nova wagon. I picked this kit up cheap from Ollie’s and figured it would be a quick build to practice bare metal foil on. My last and only other car I’ve foiled was a ‘57 Chevy… and while this Nova turned out well, I still don’t enjoy foiling. 😅 If you’re trying foiling out for the first time, this is a great kit for it because the trim details are super crisp and it’s easy to cut the foil cleanly. The body is painted Tamiya TS45 Pearl White over grey primer and the interior is Rustoleum Apple Red. The pearl white looks more silvery/dove grey in person over that grey primer than a pearl white but I think it looks good with the red interior.The roof on that ‘57 is the same TS45 pearl white, but over white primer.
- 21 replies
-
- 11
-
-
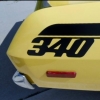
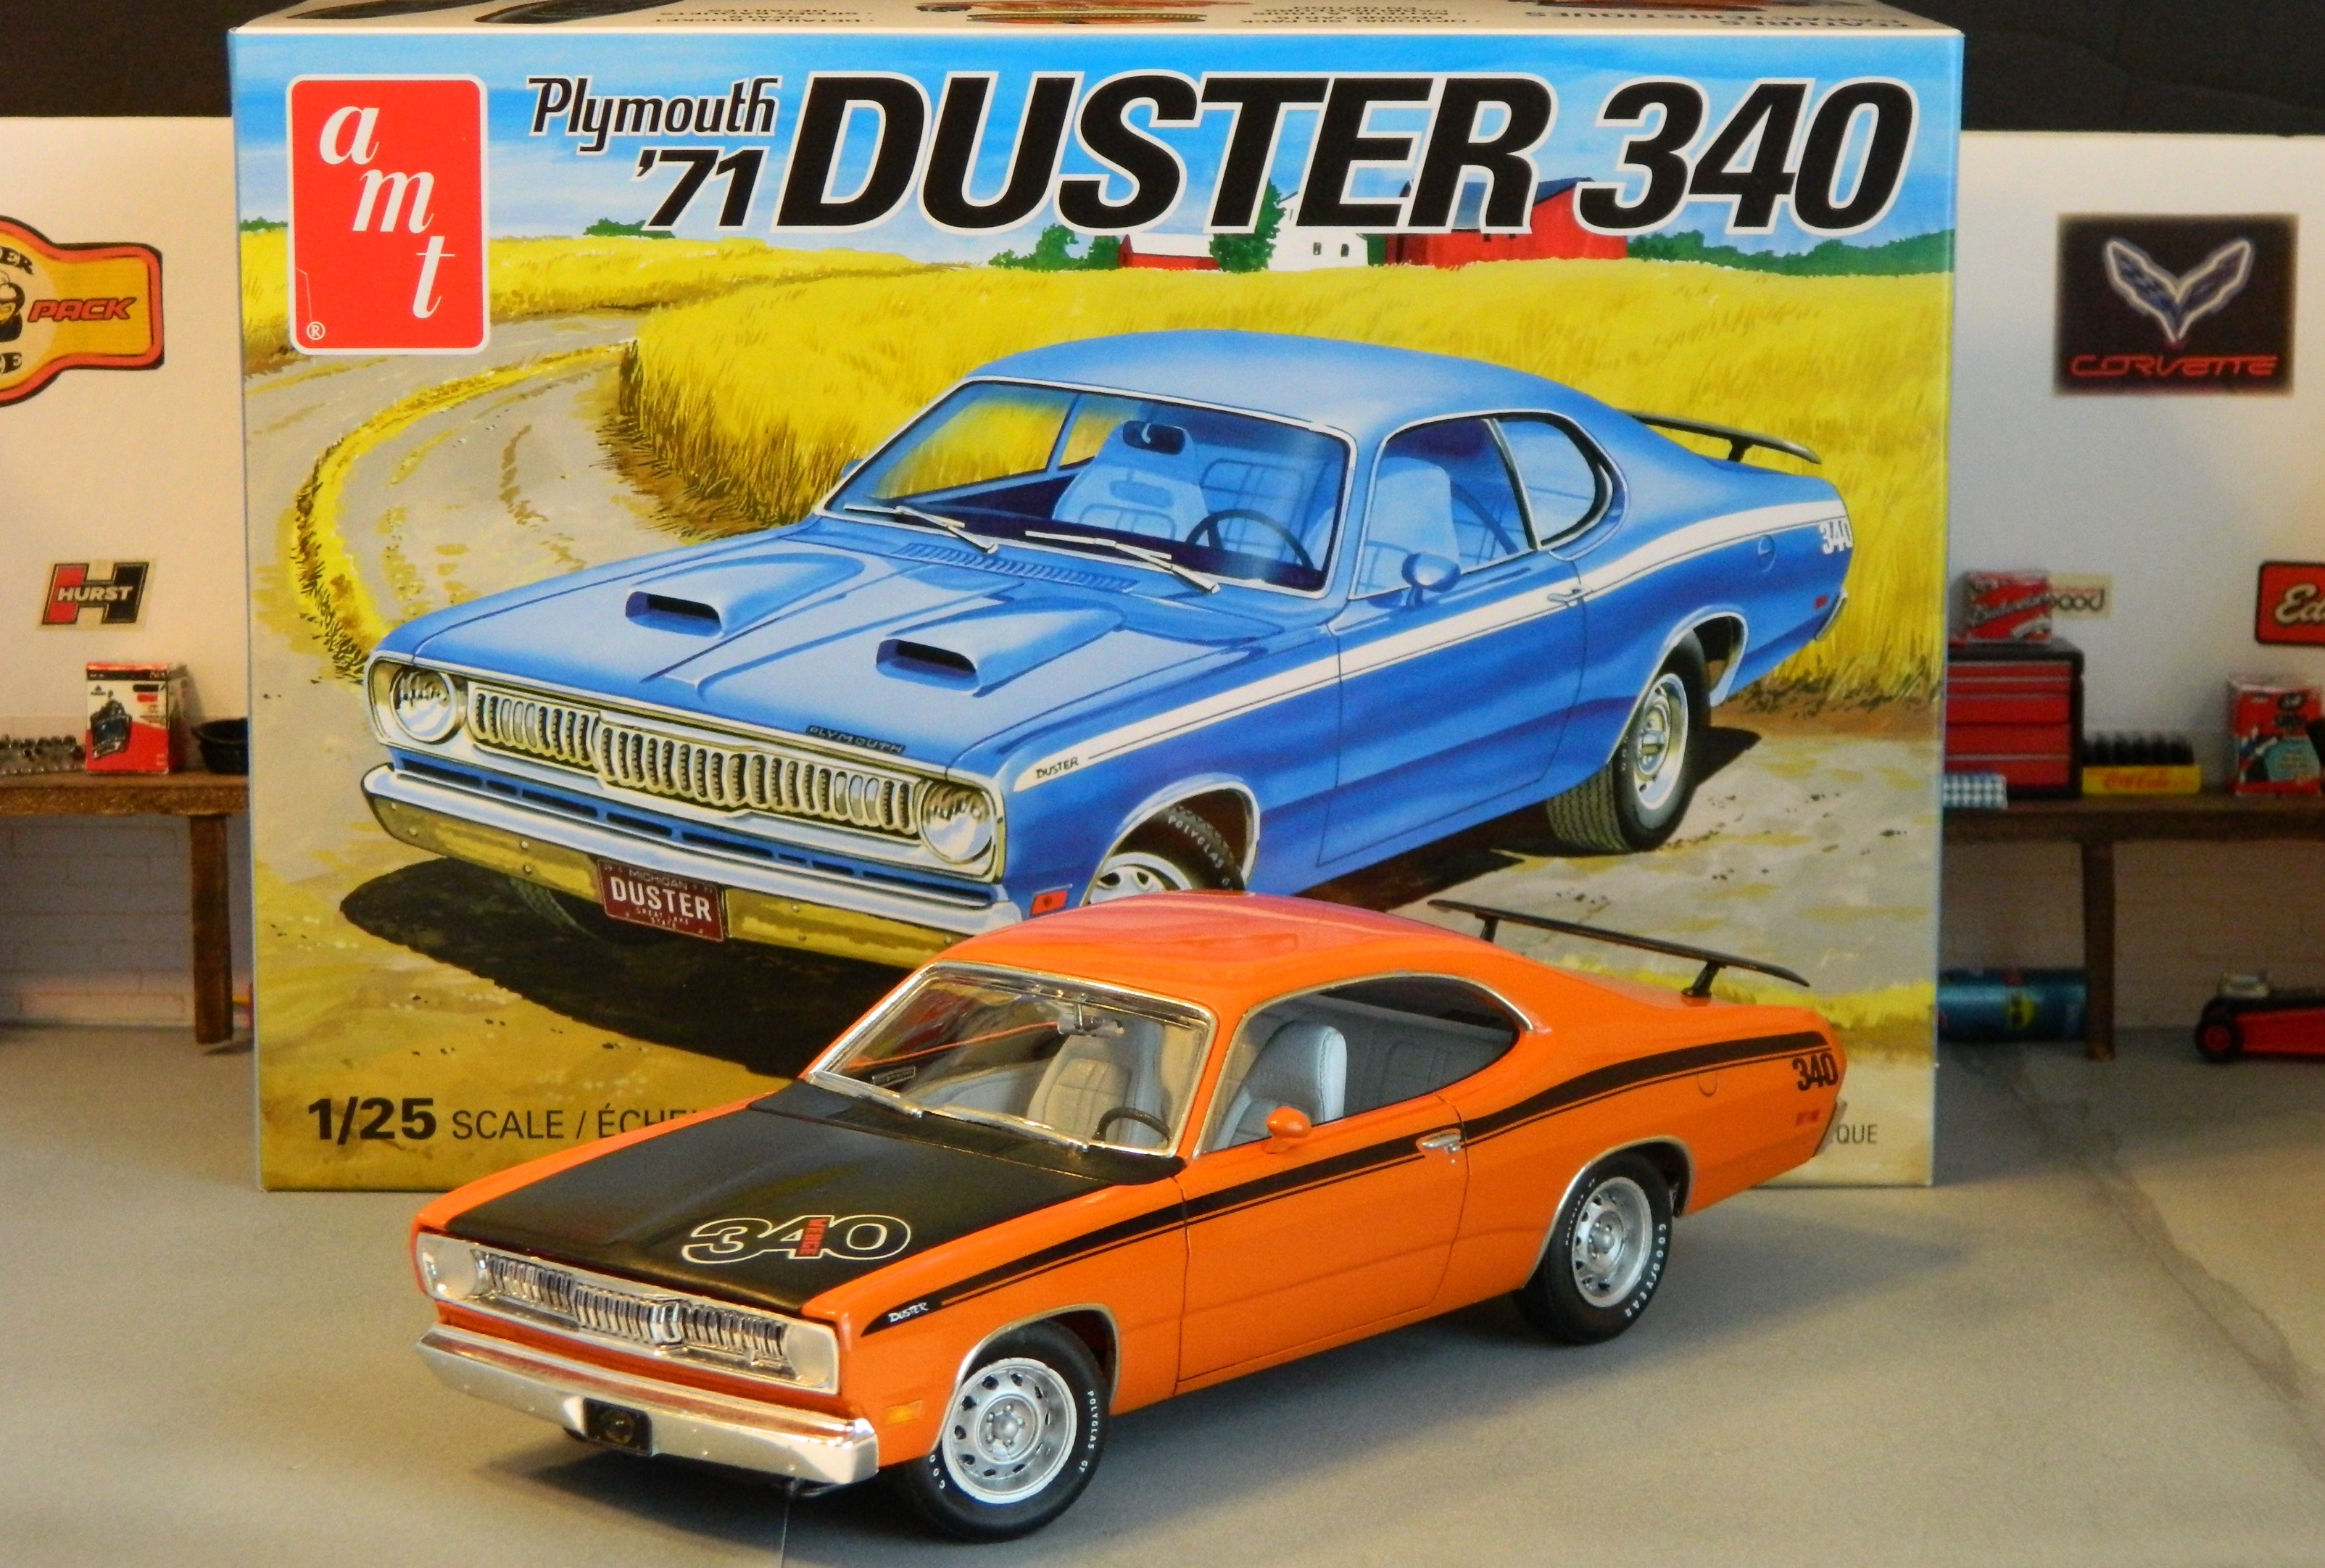
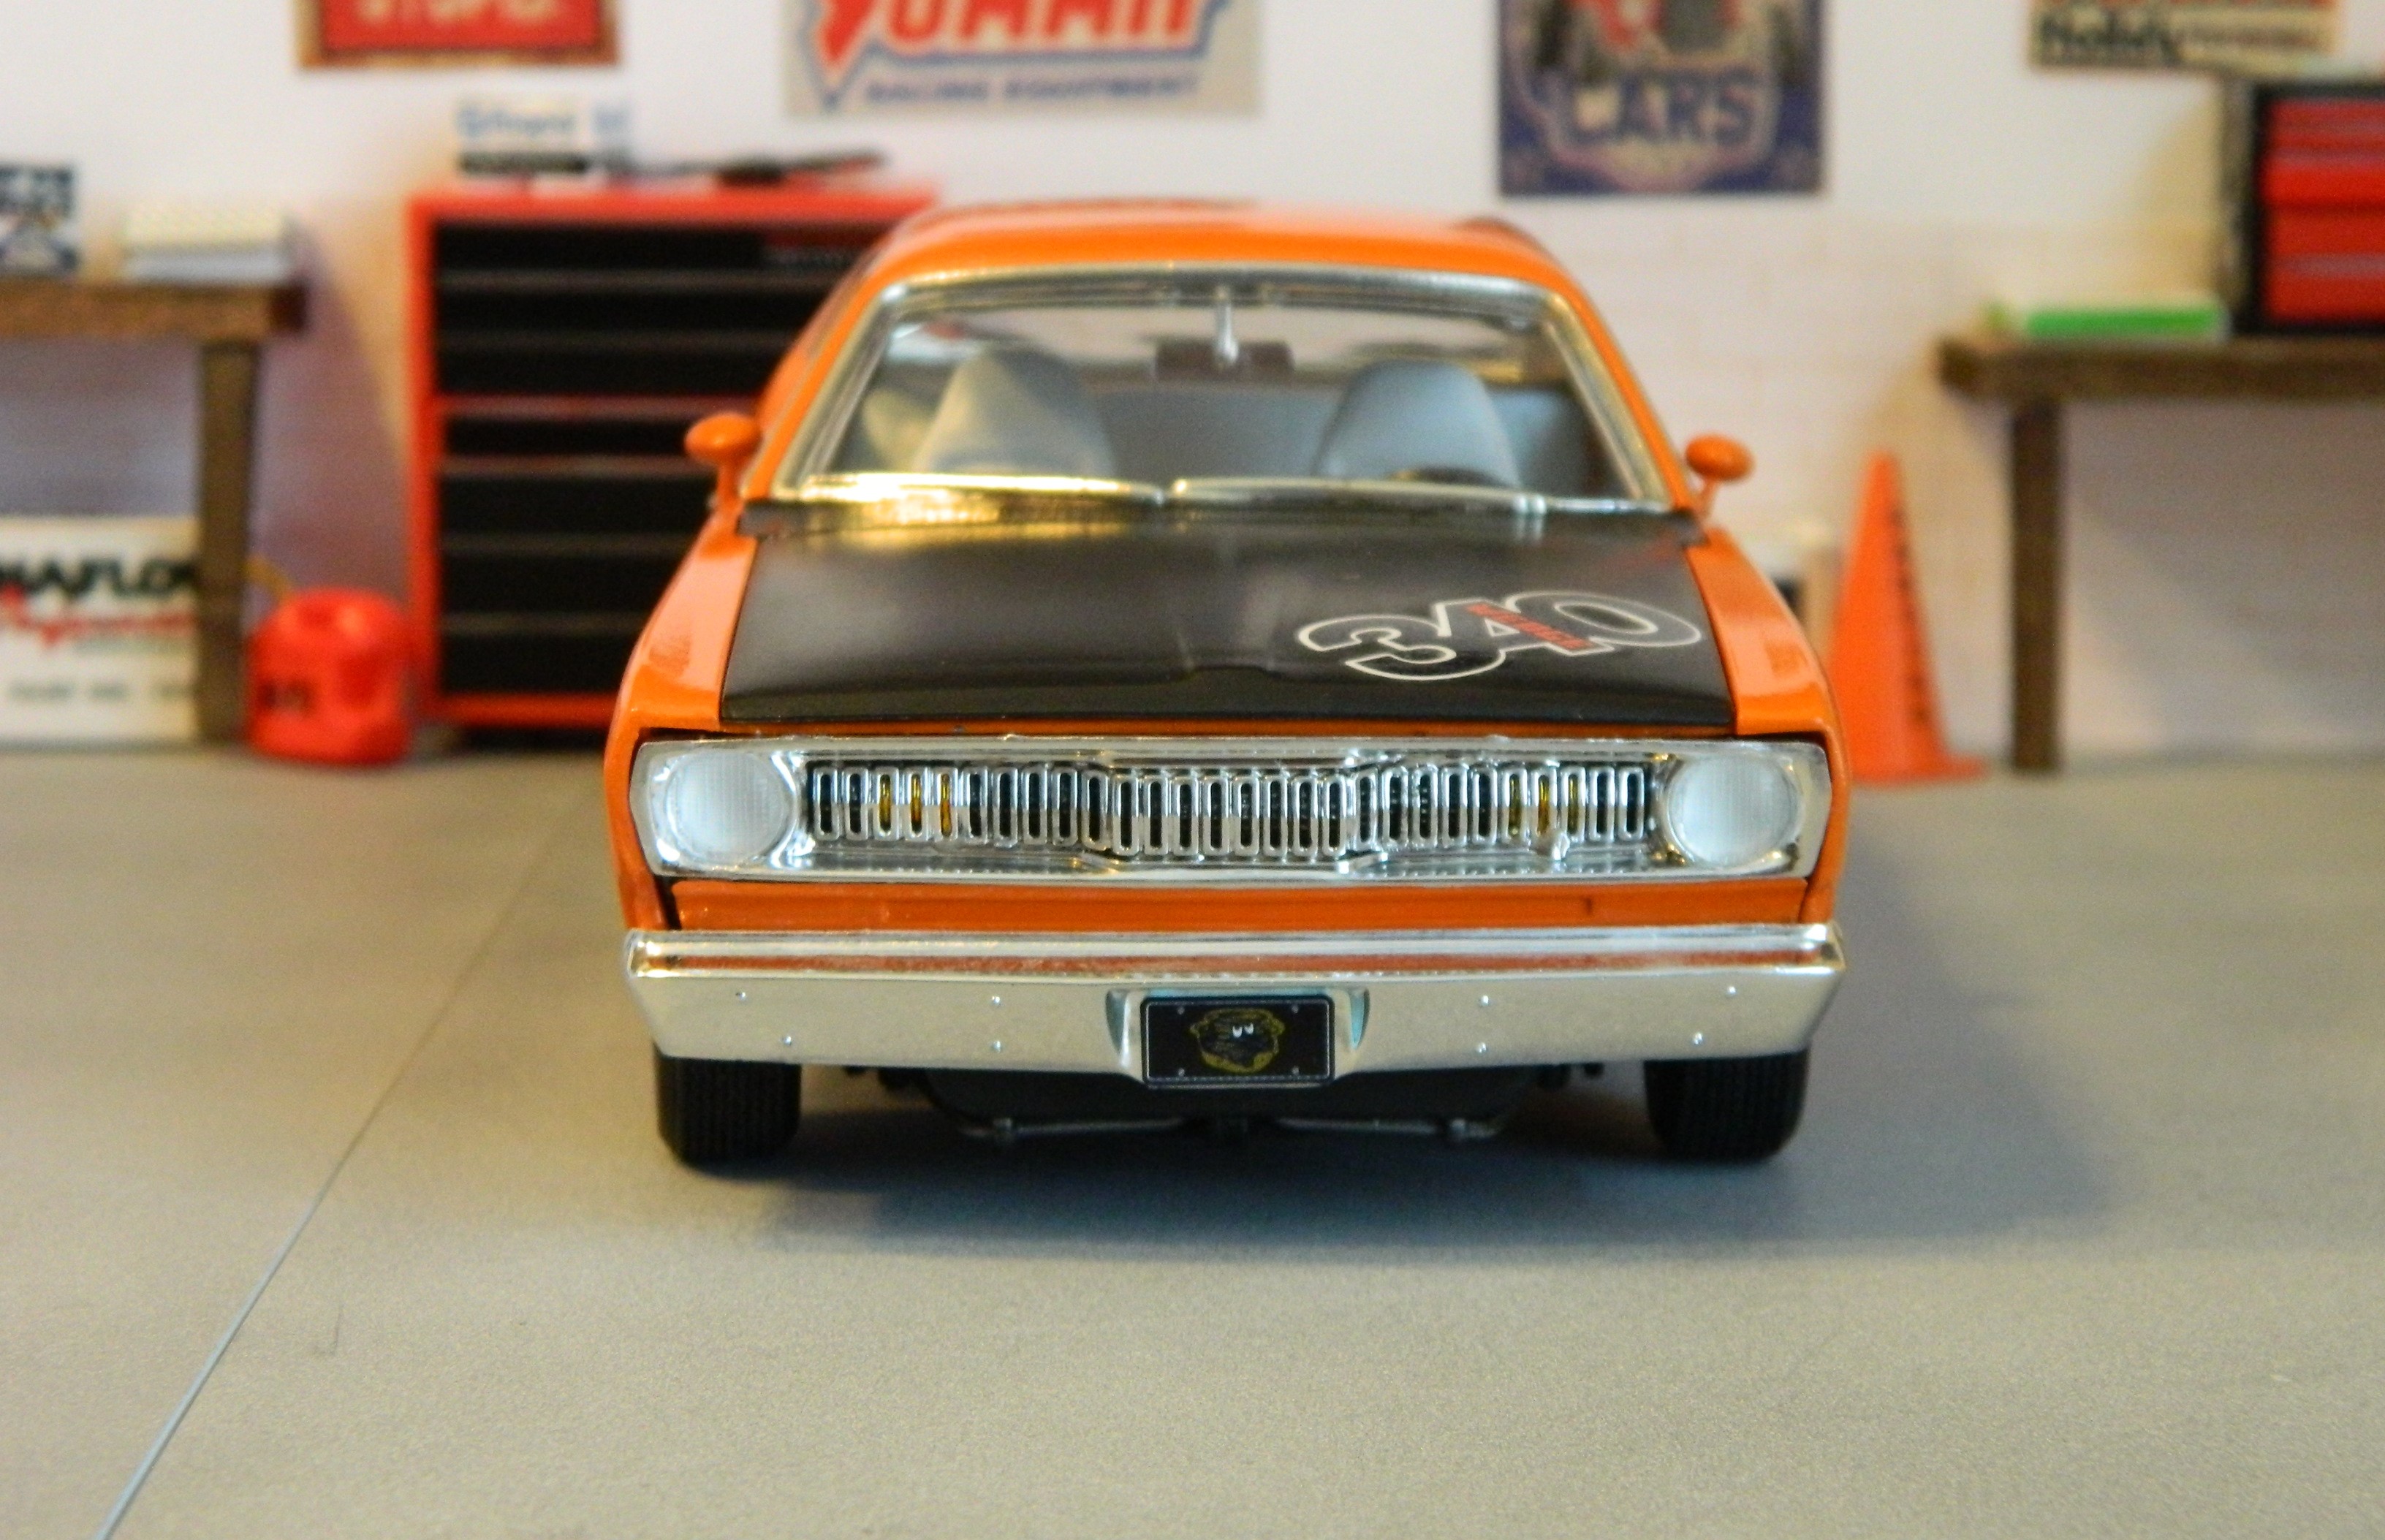
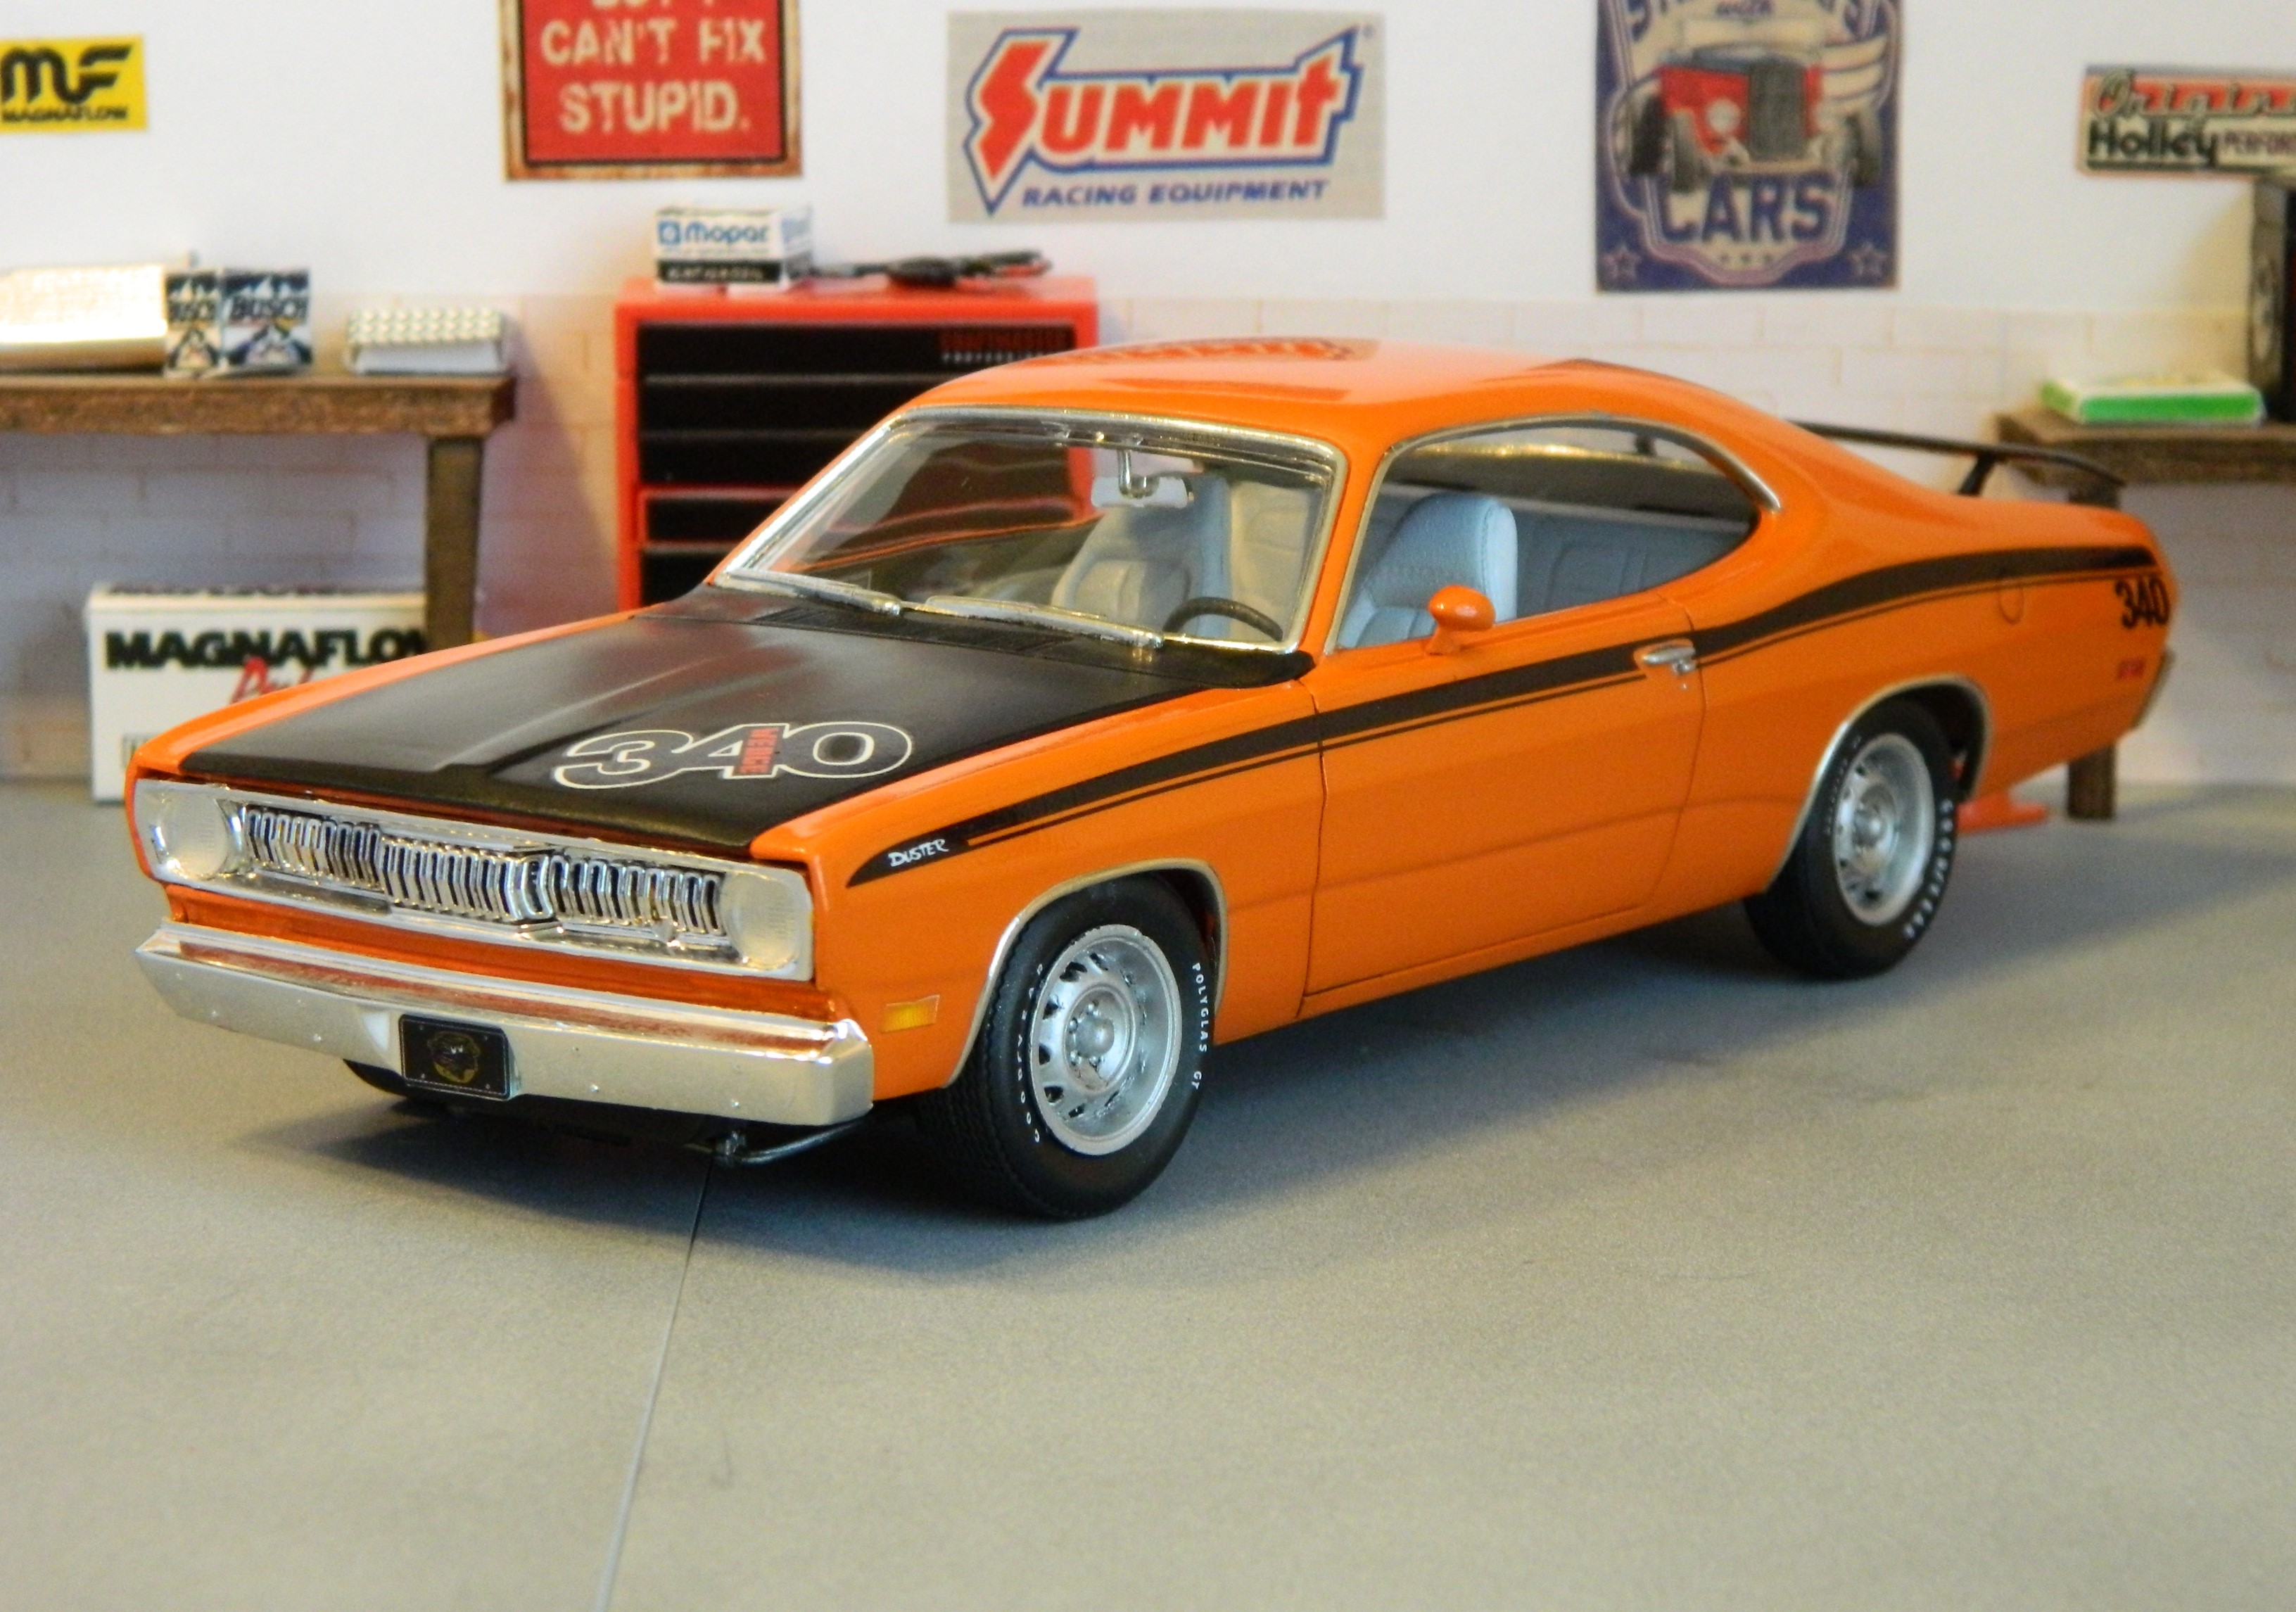
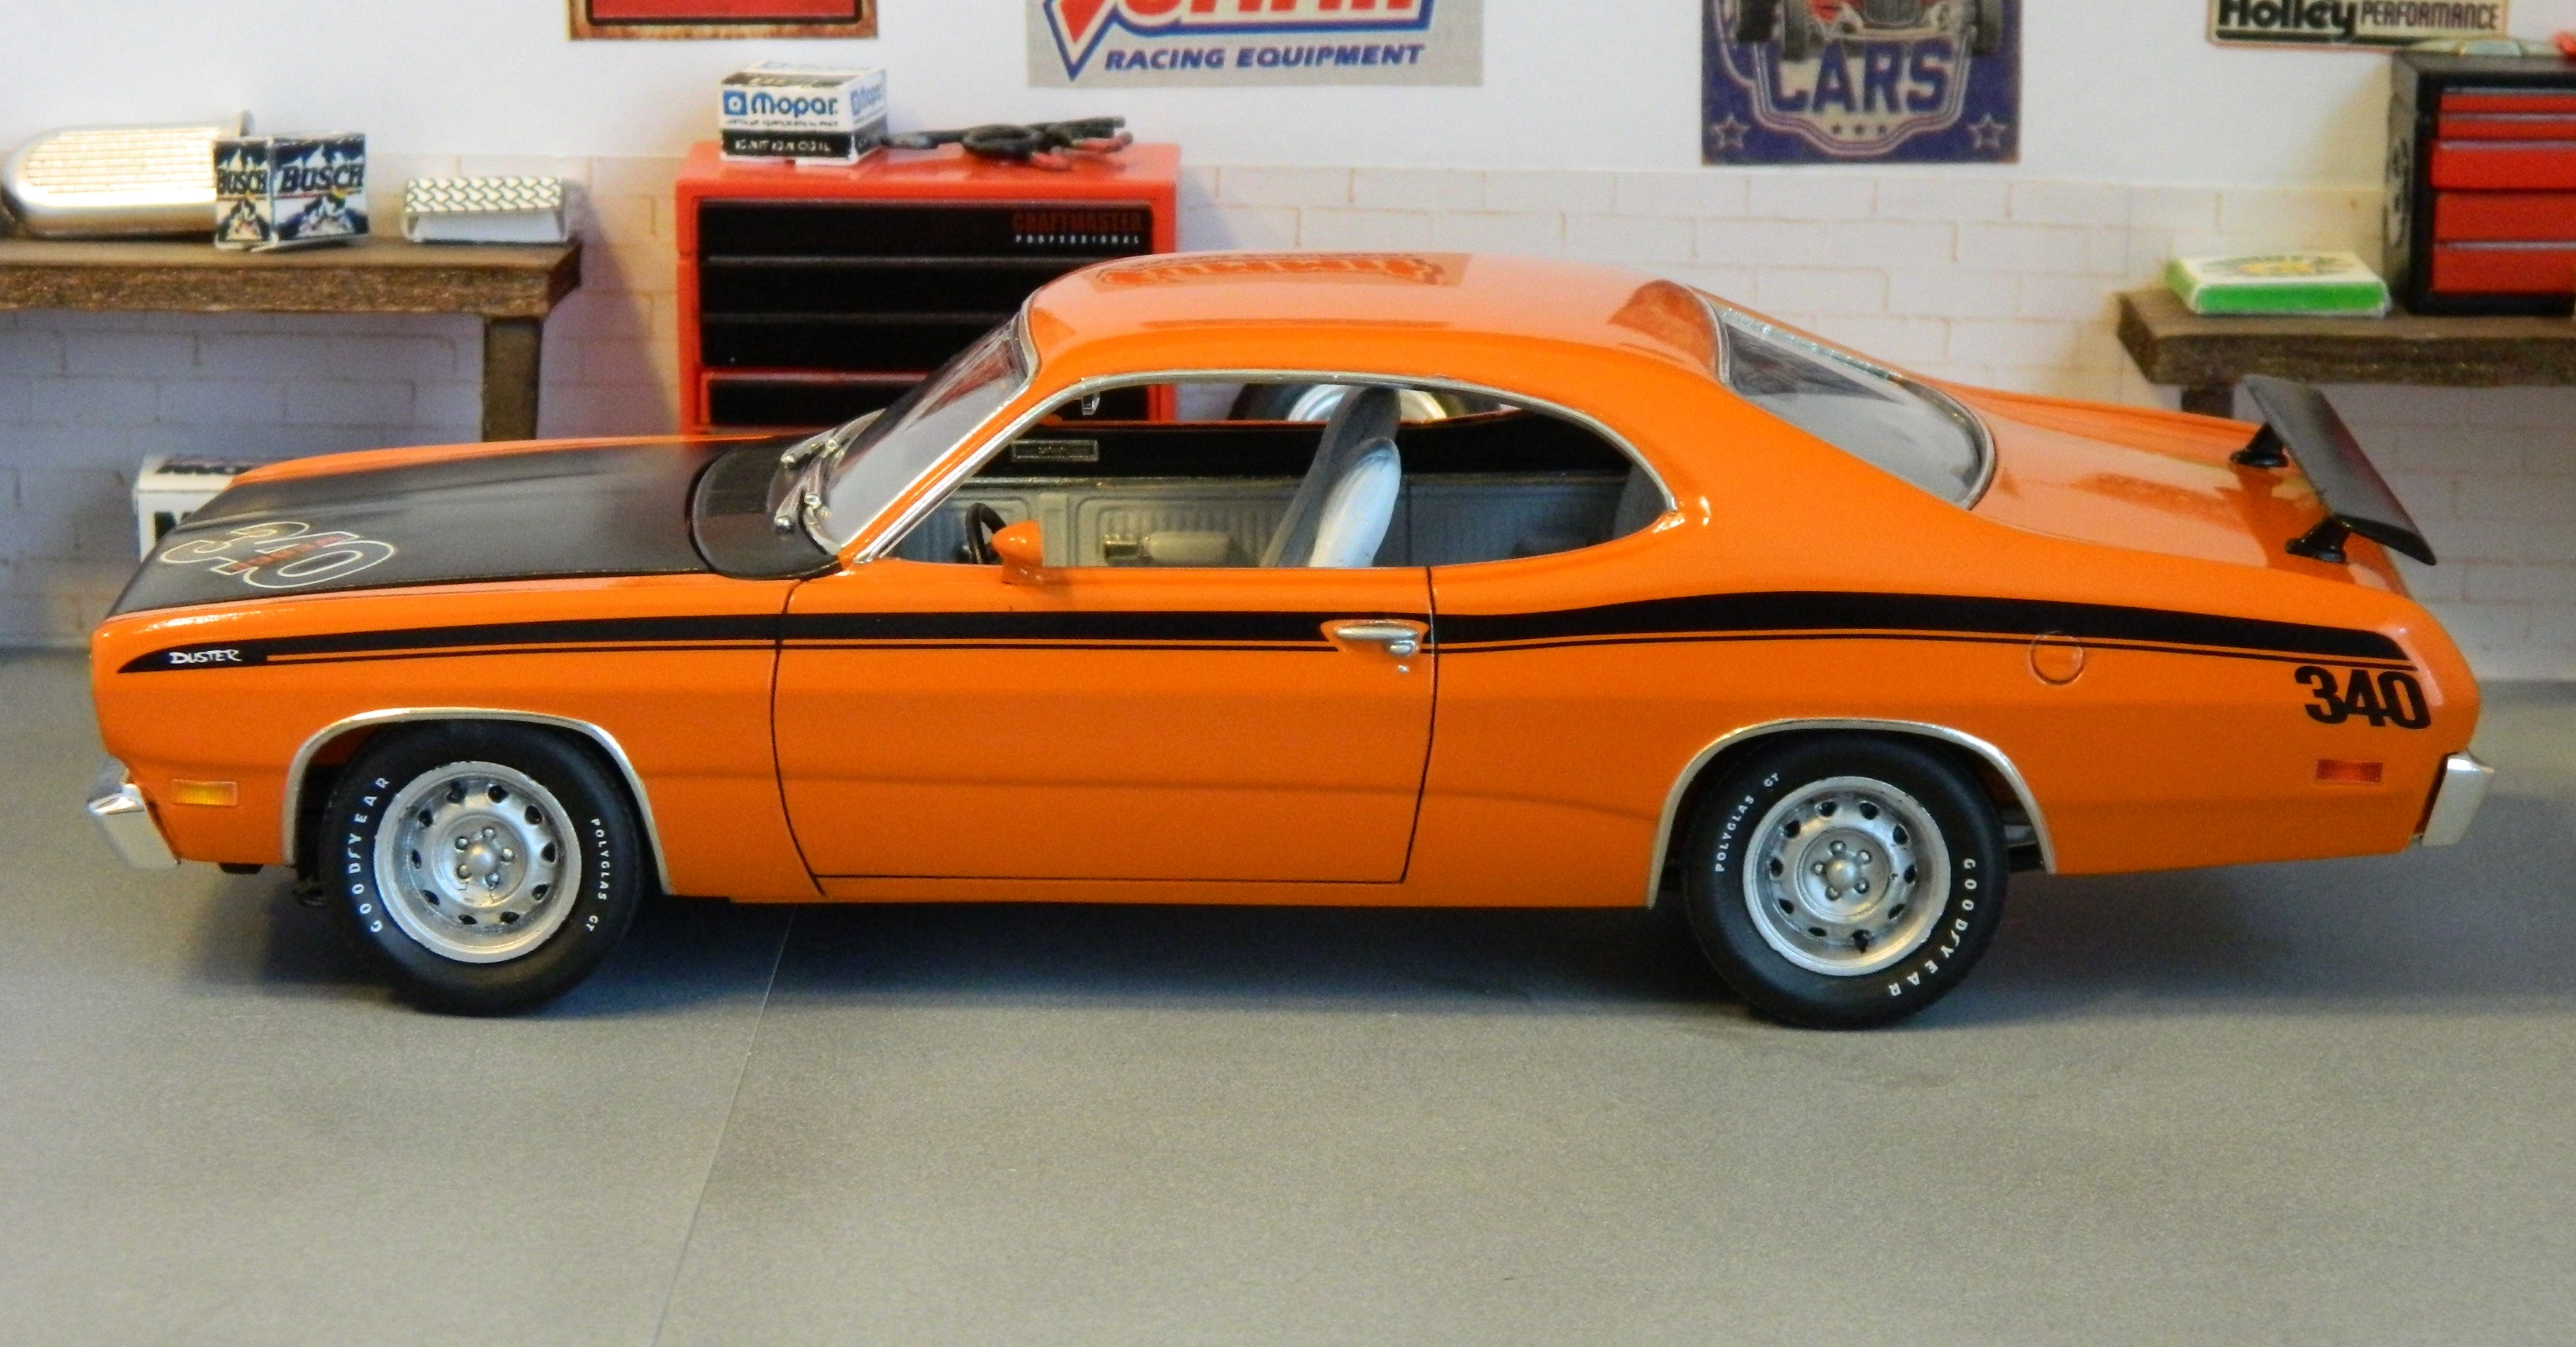
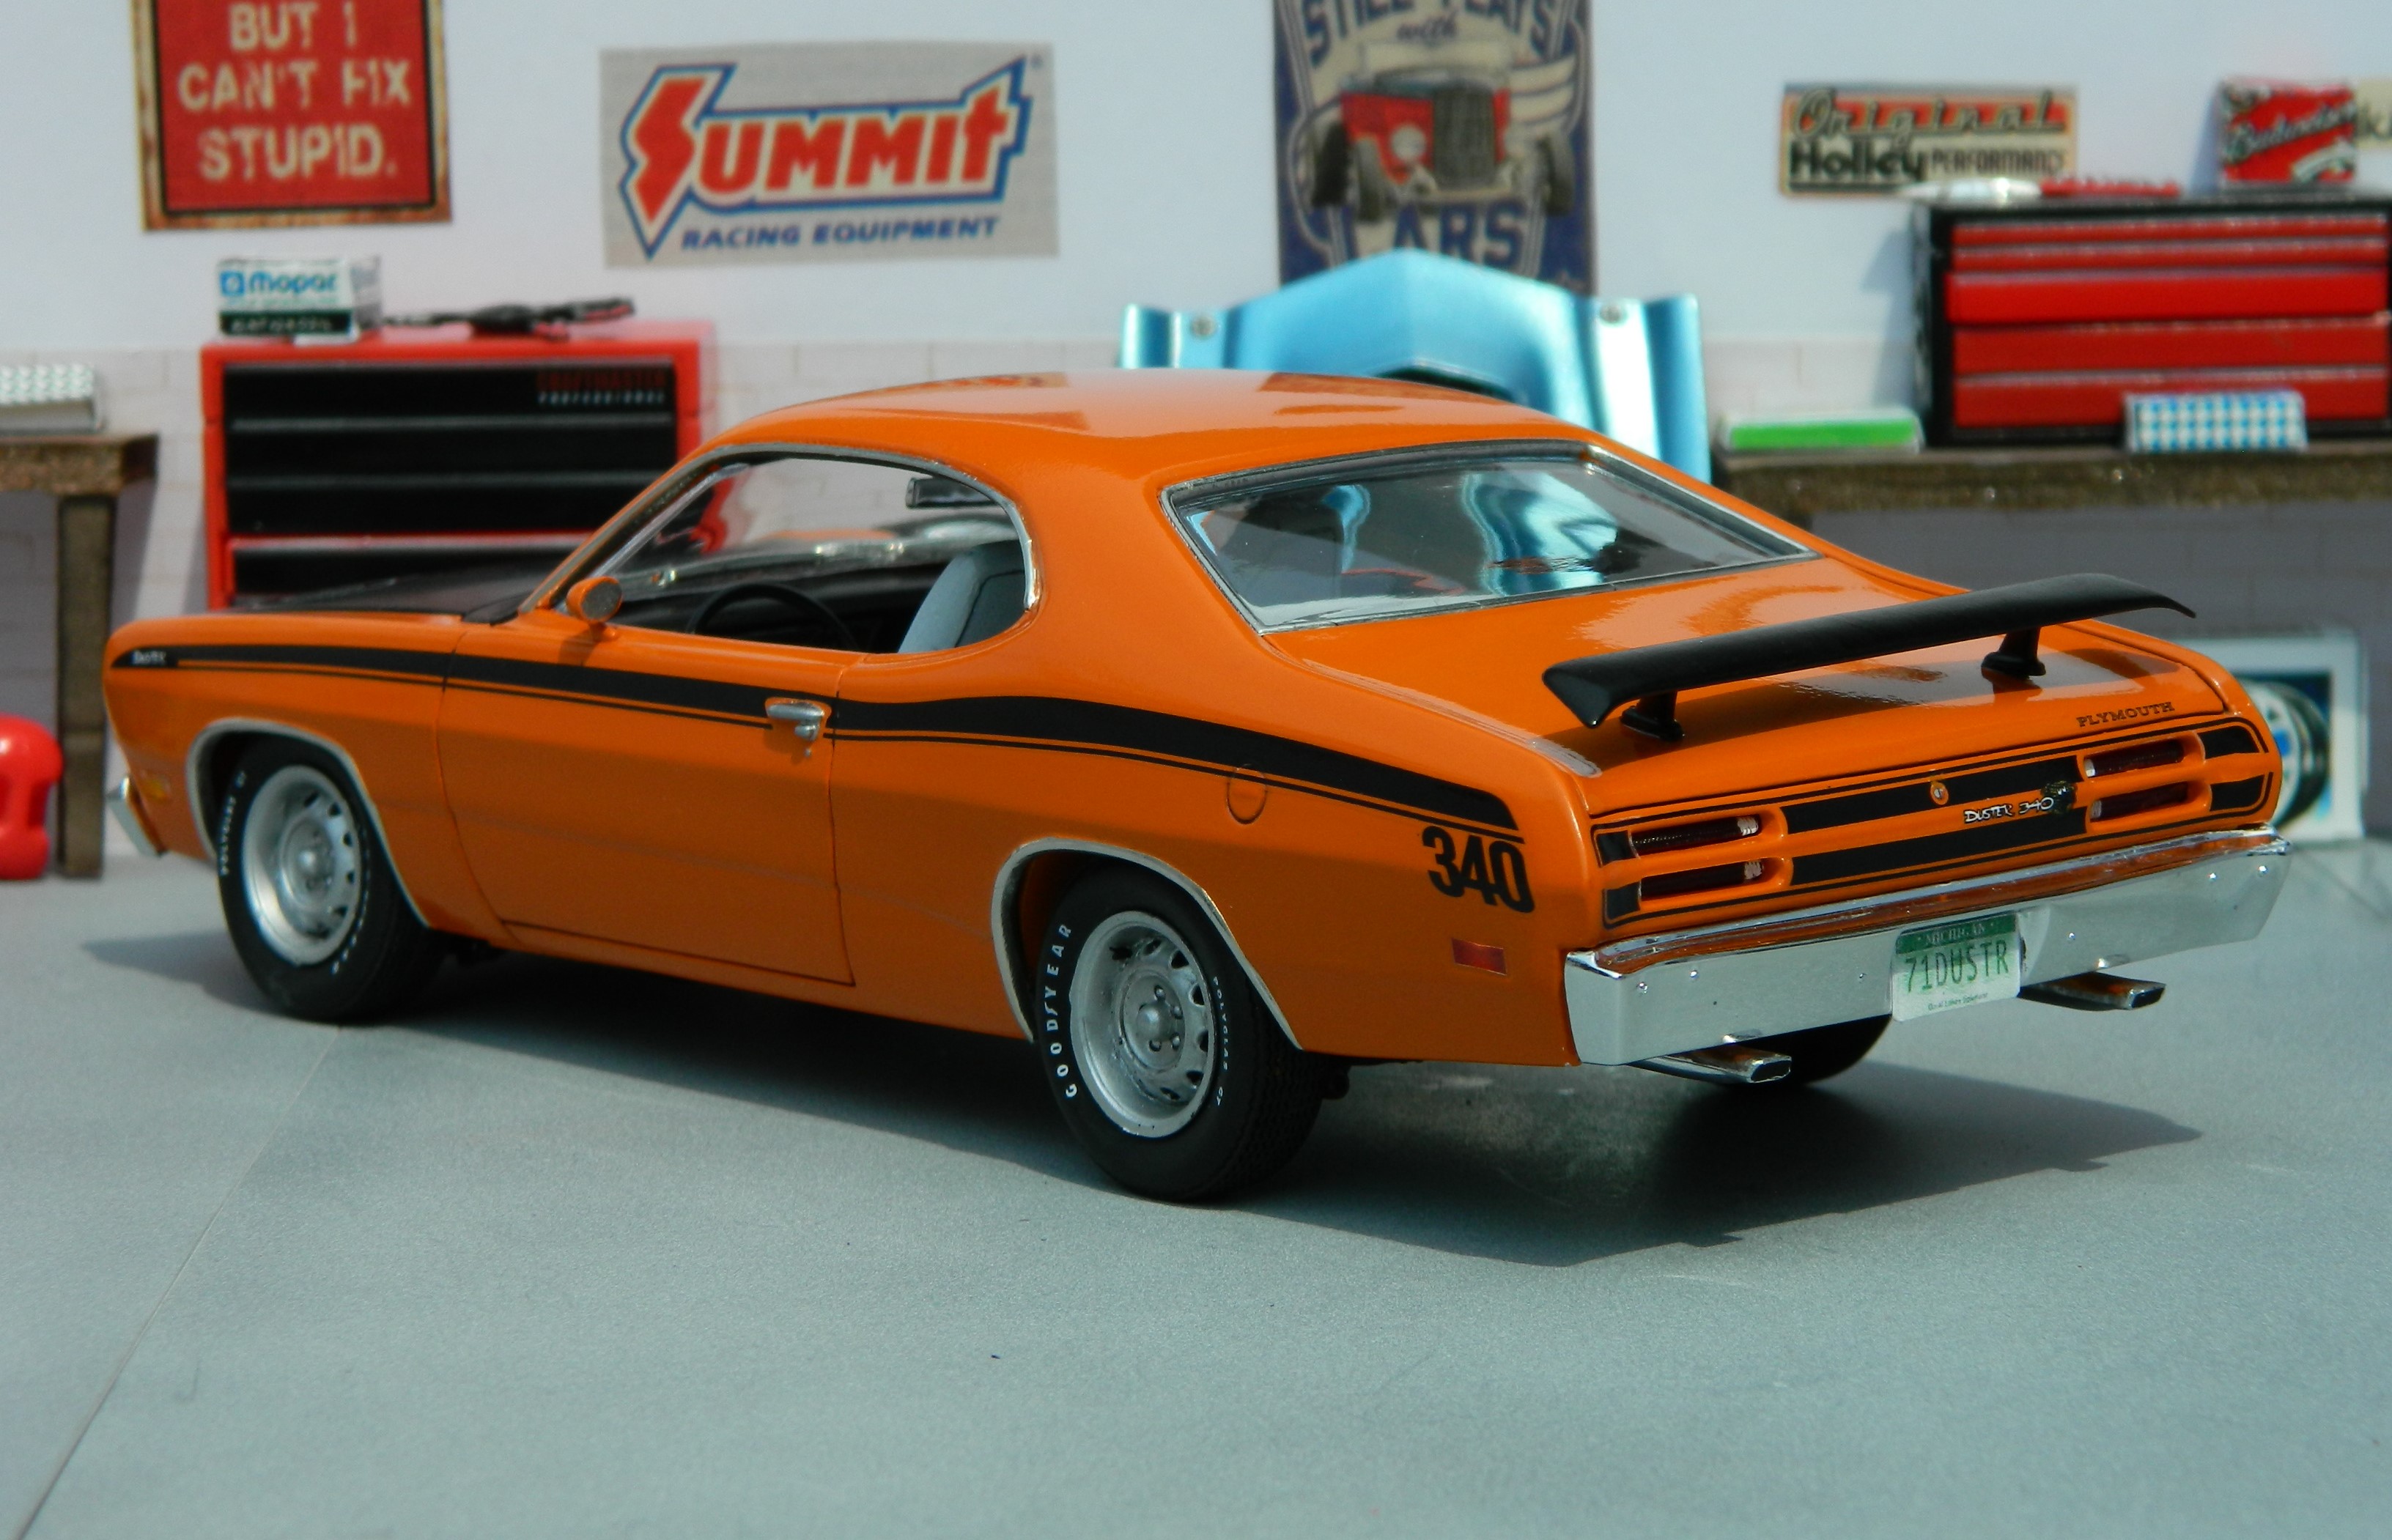
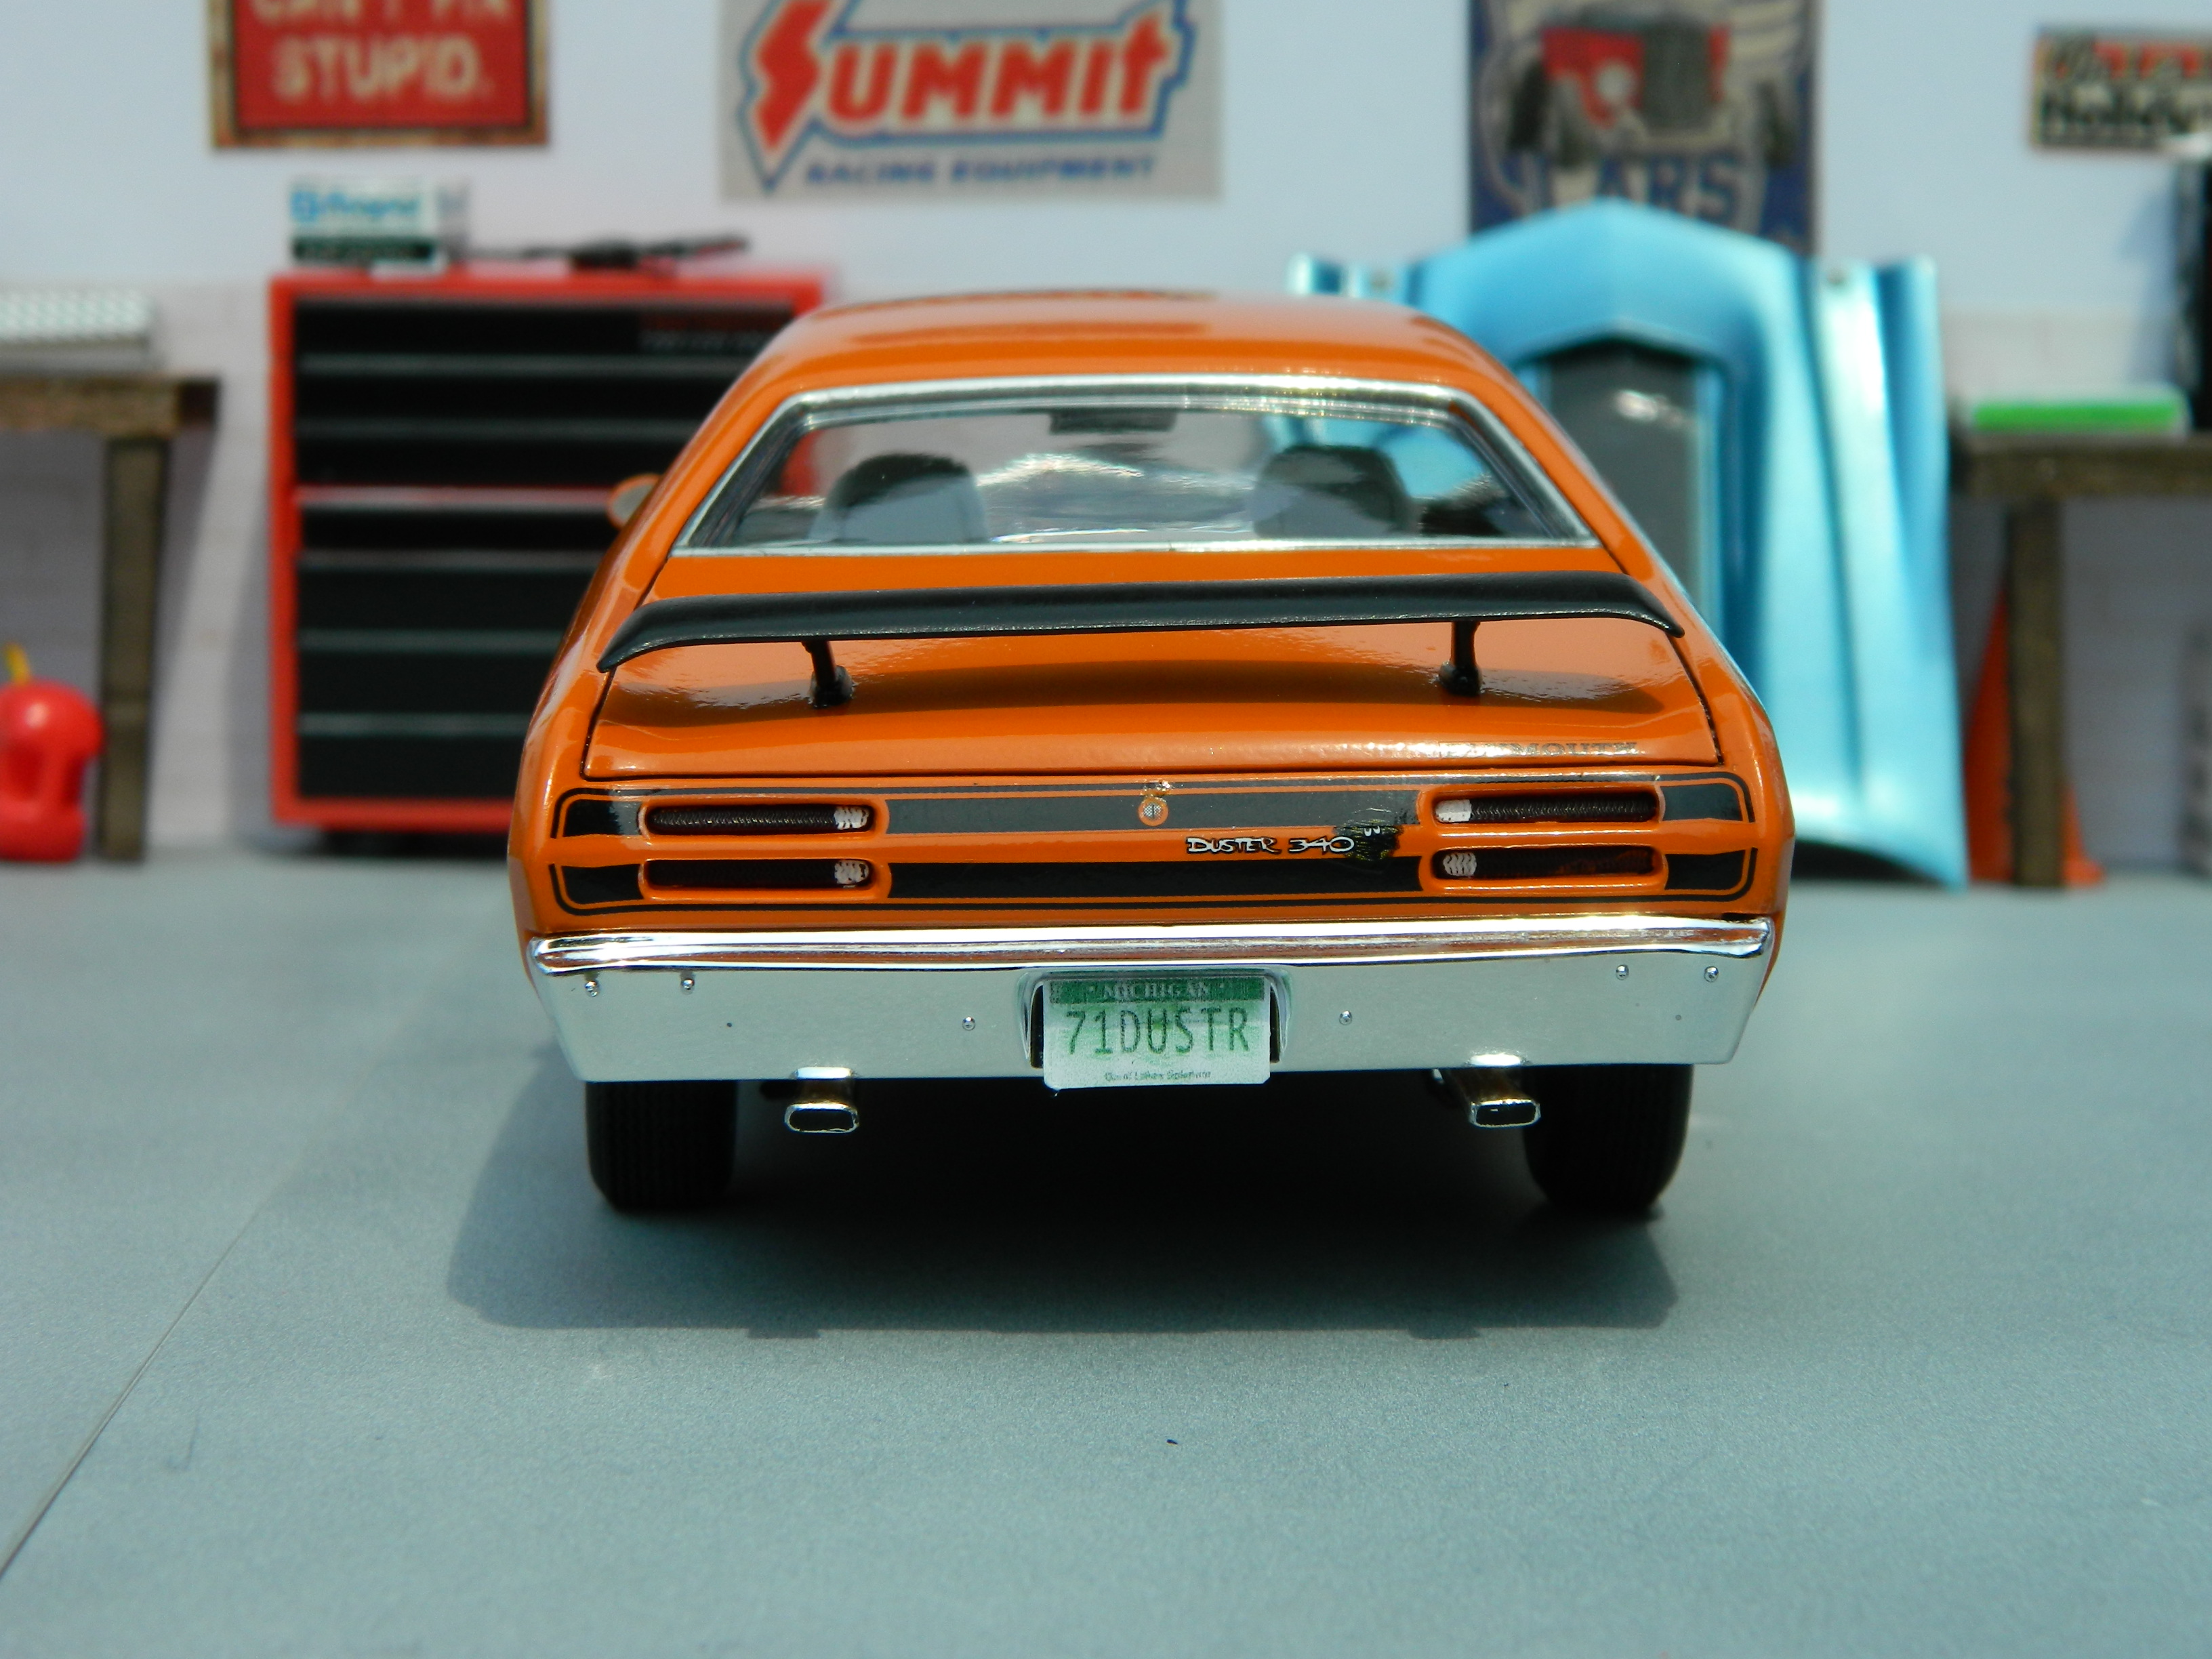
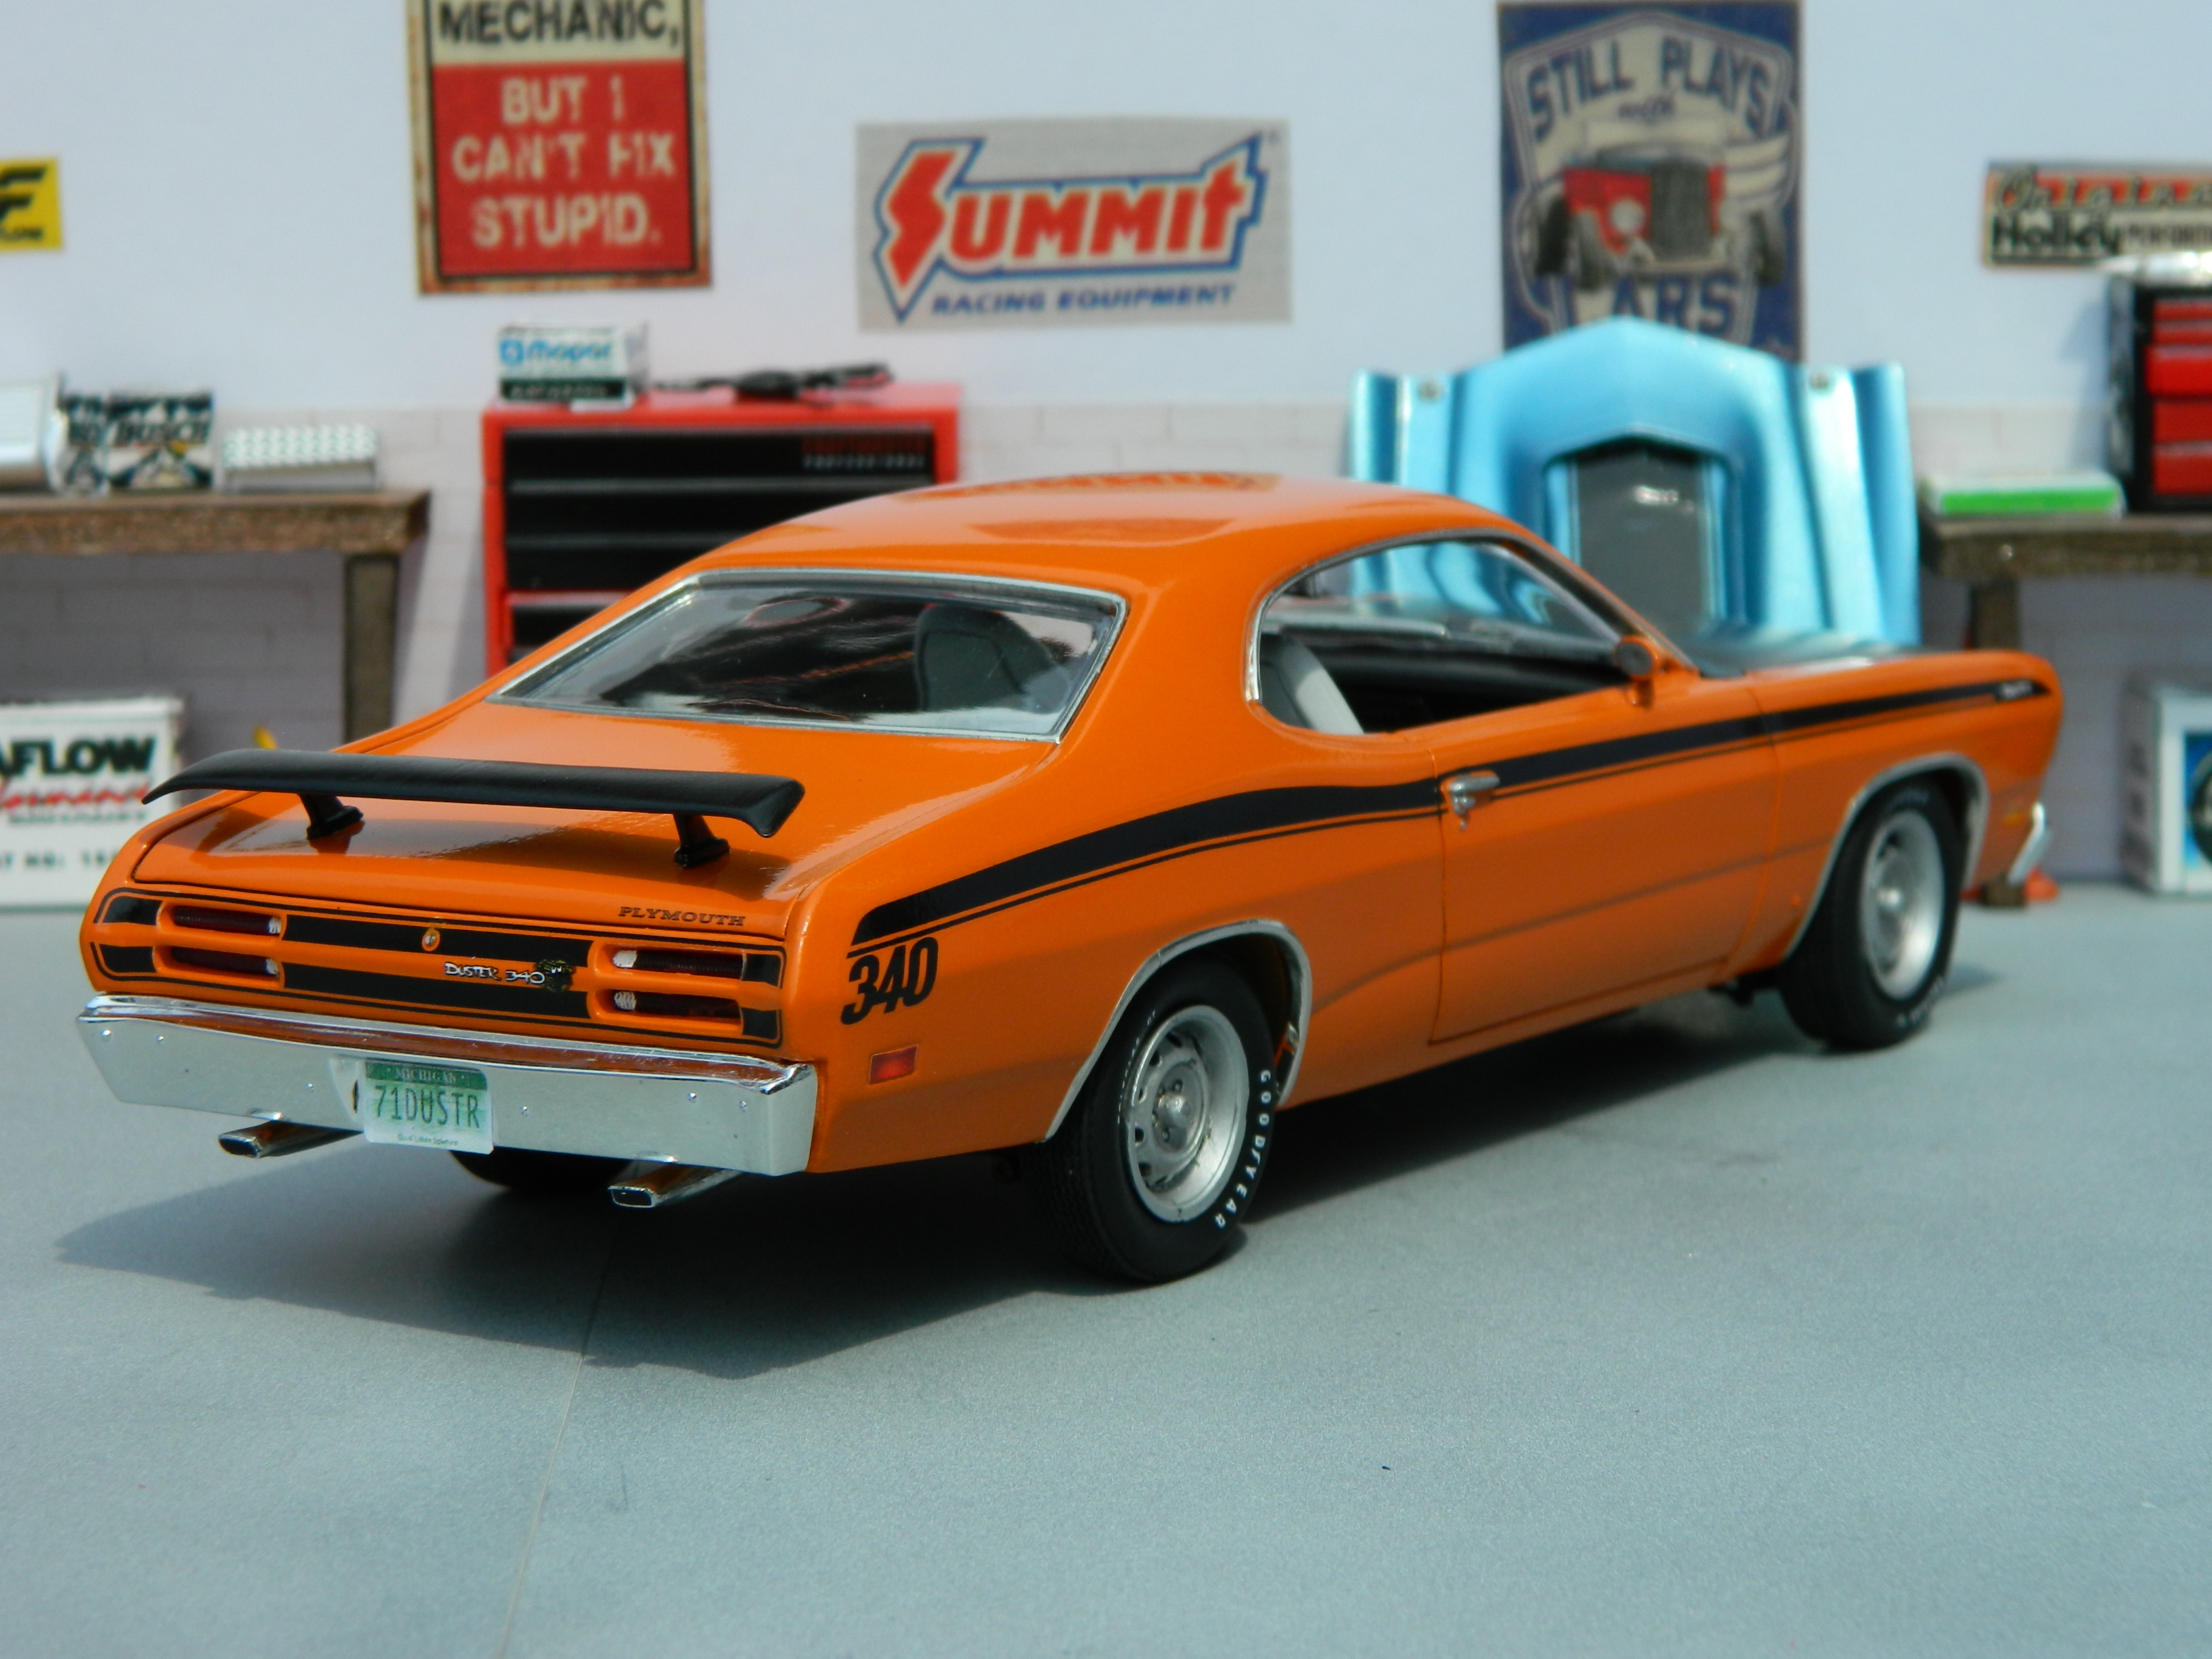
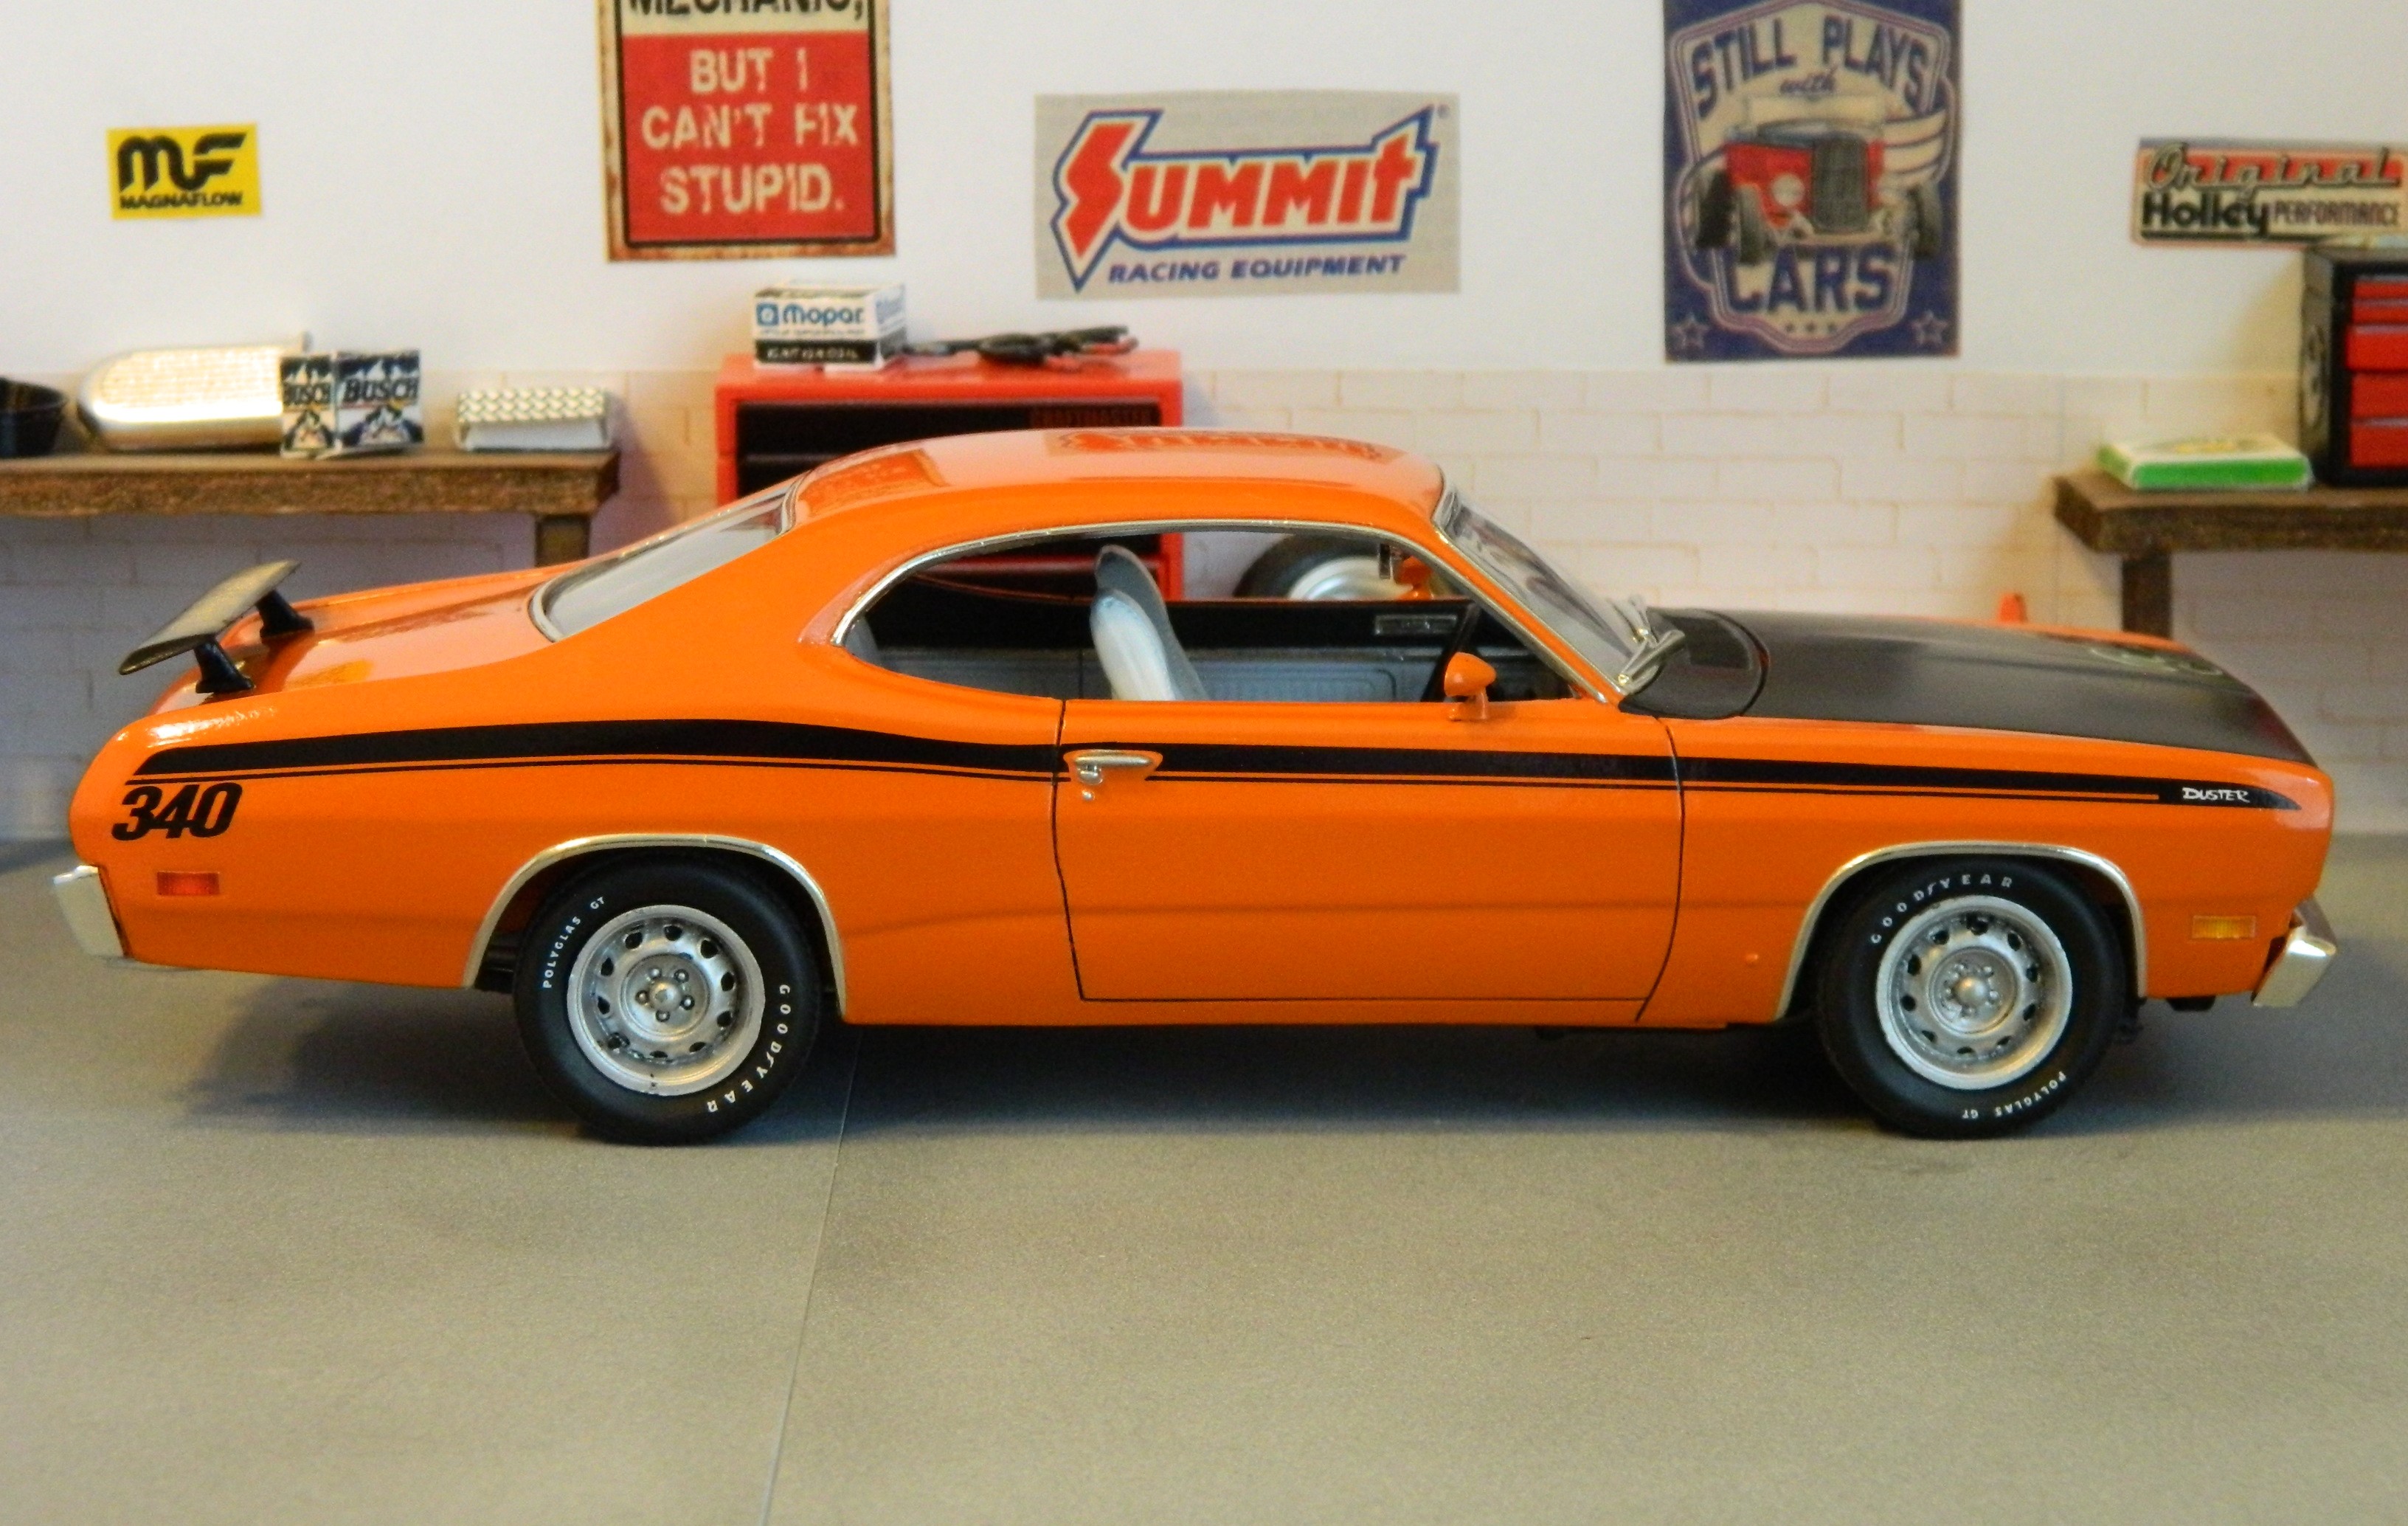
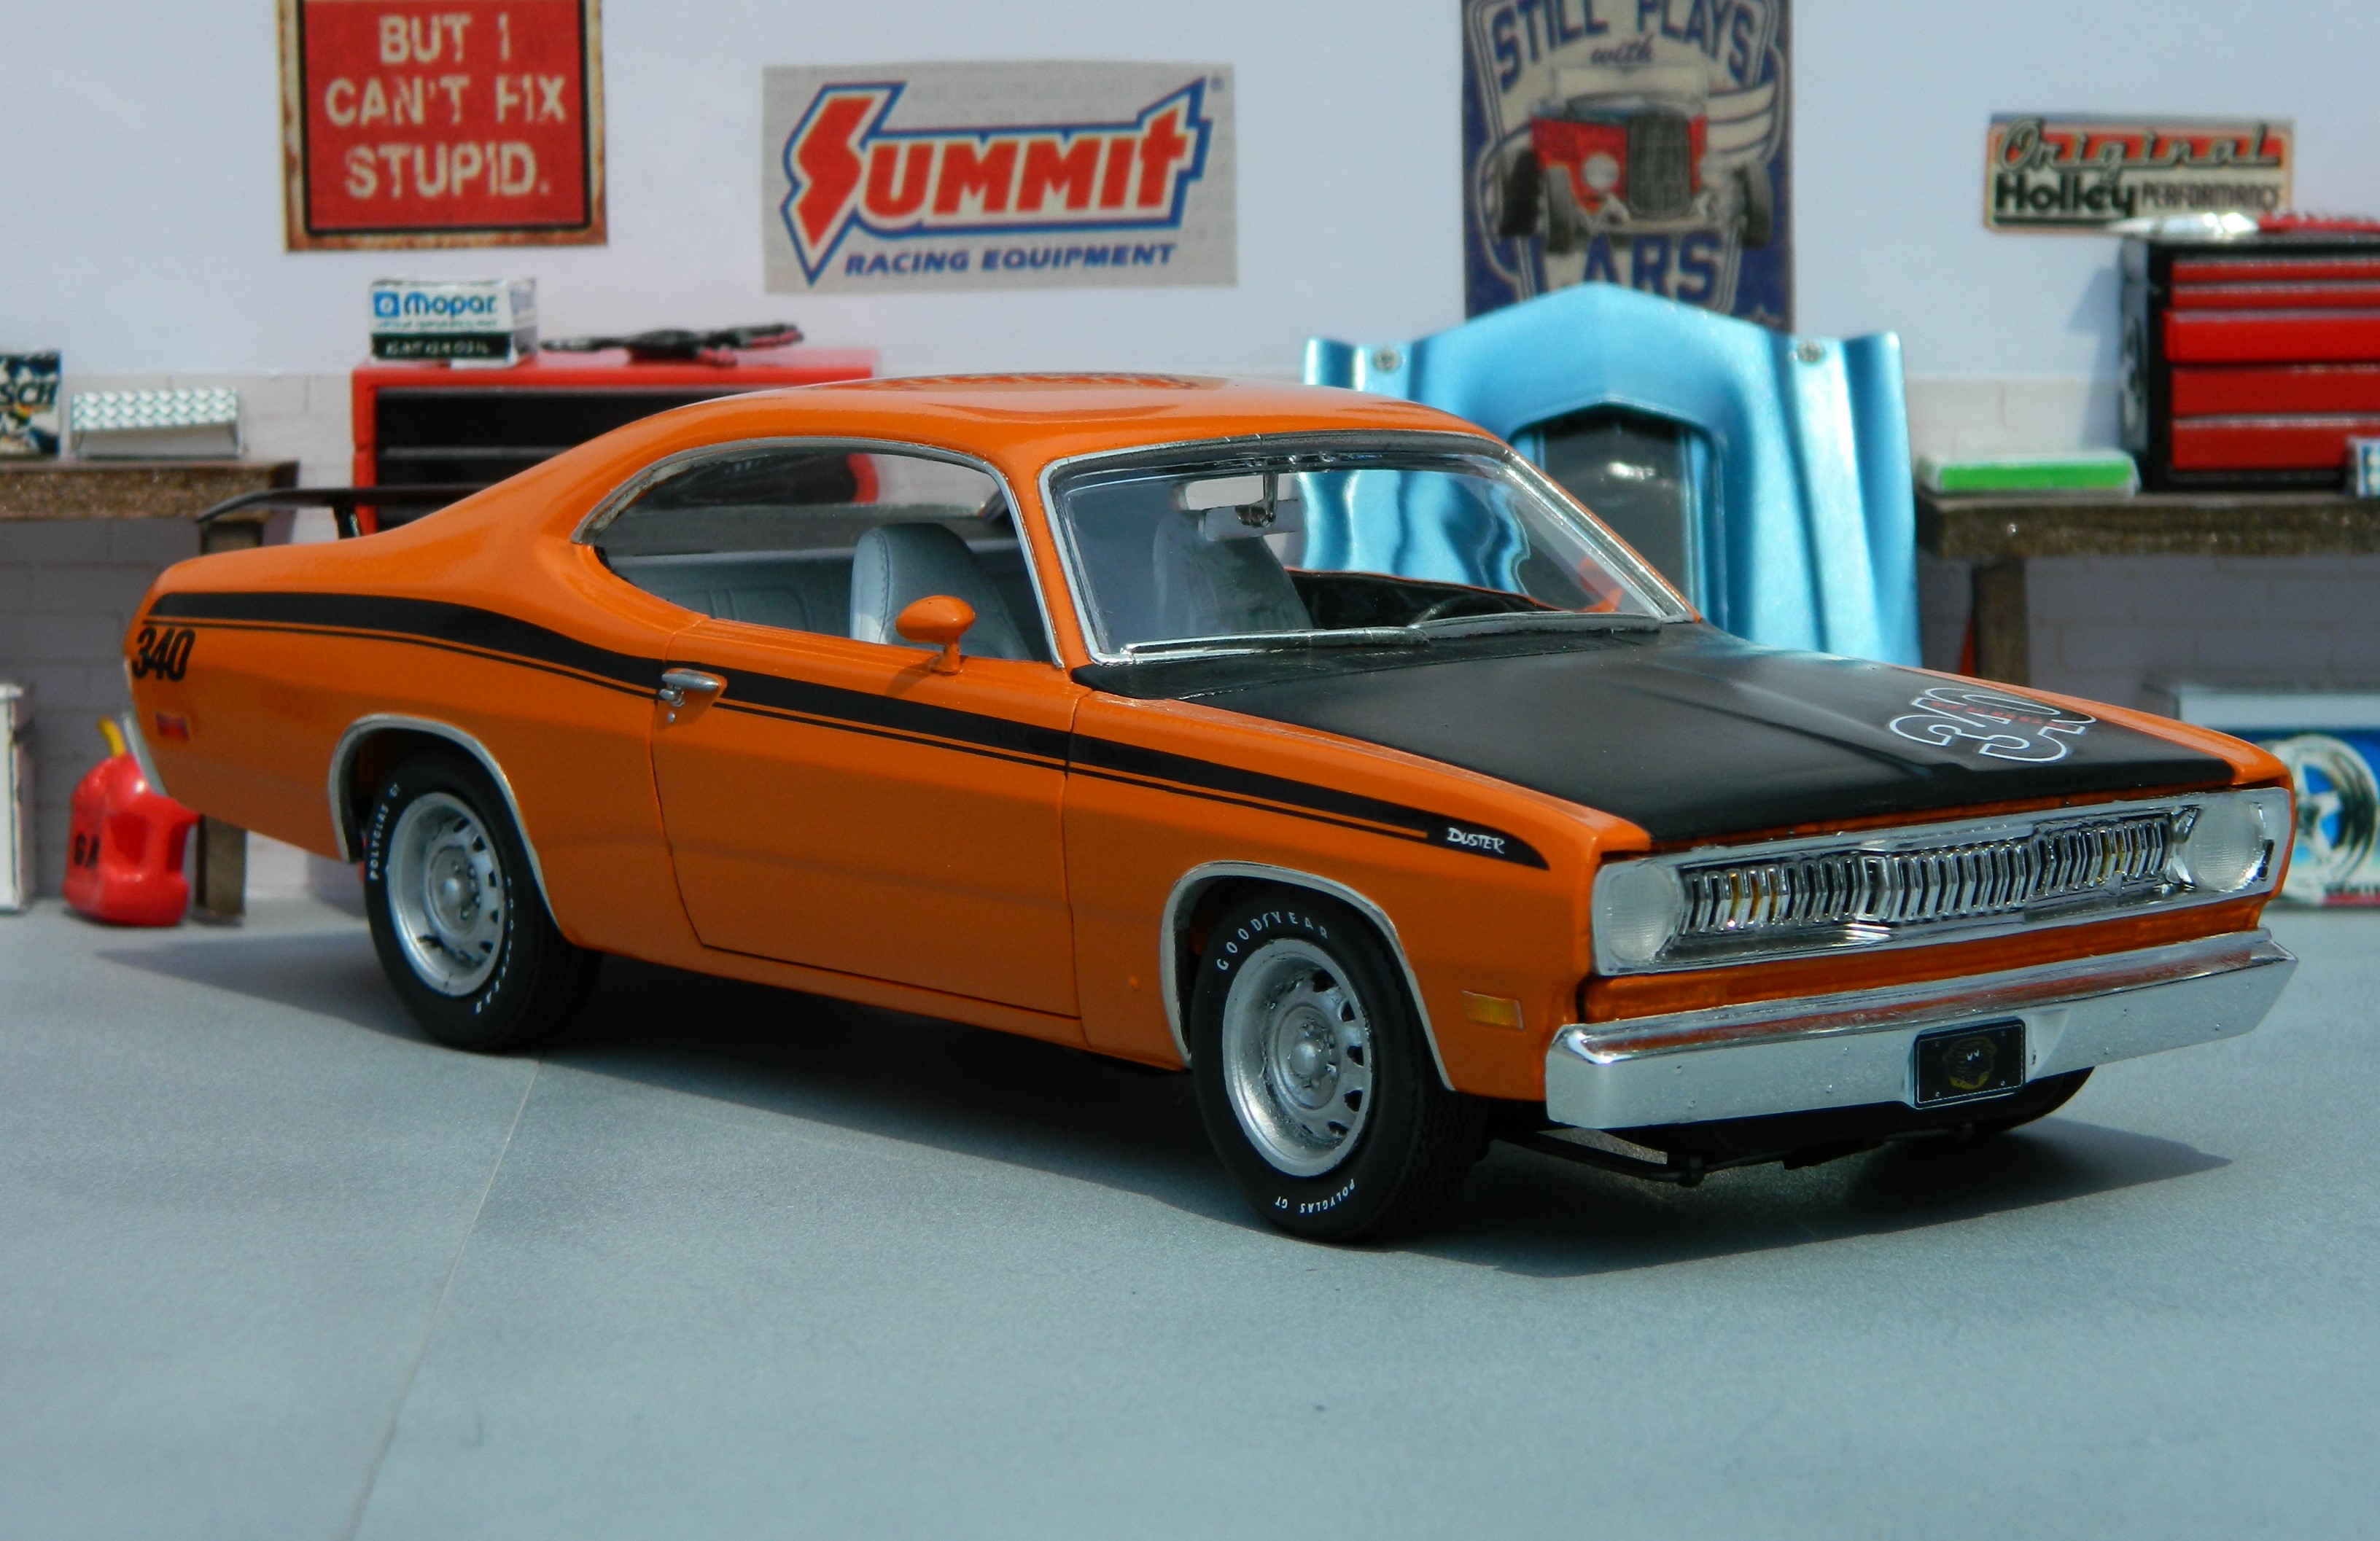
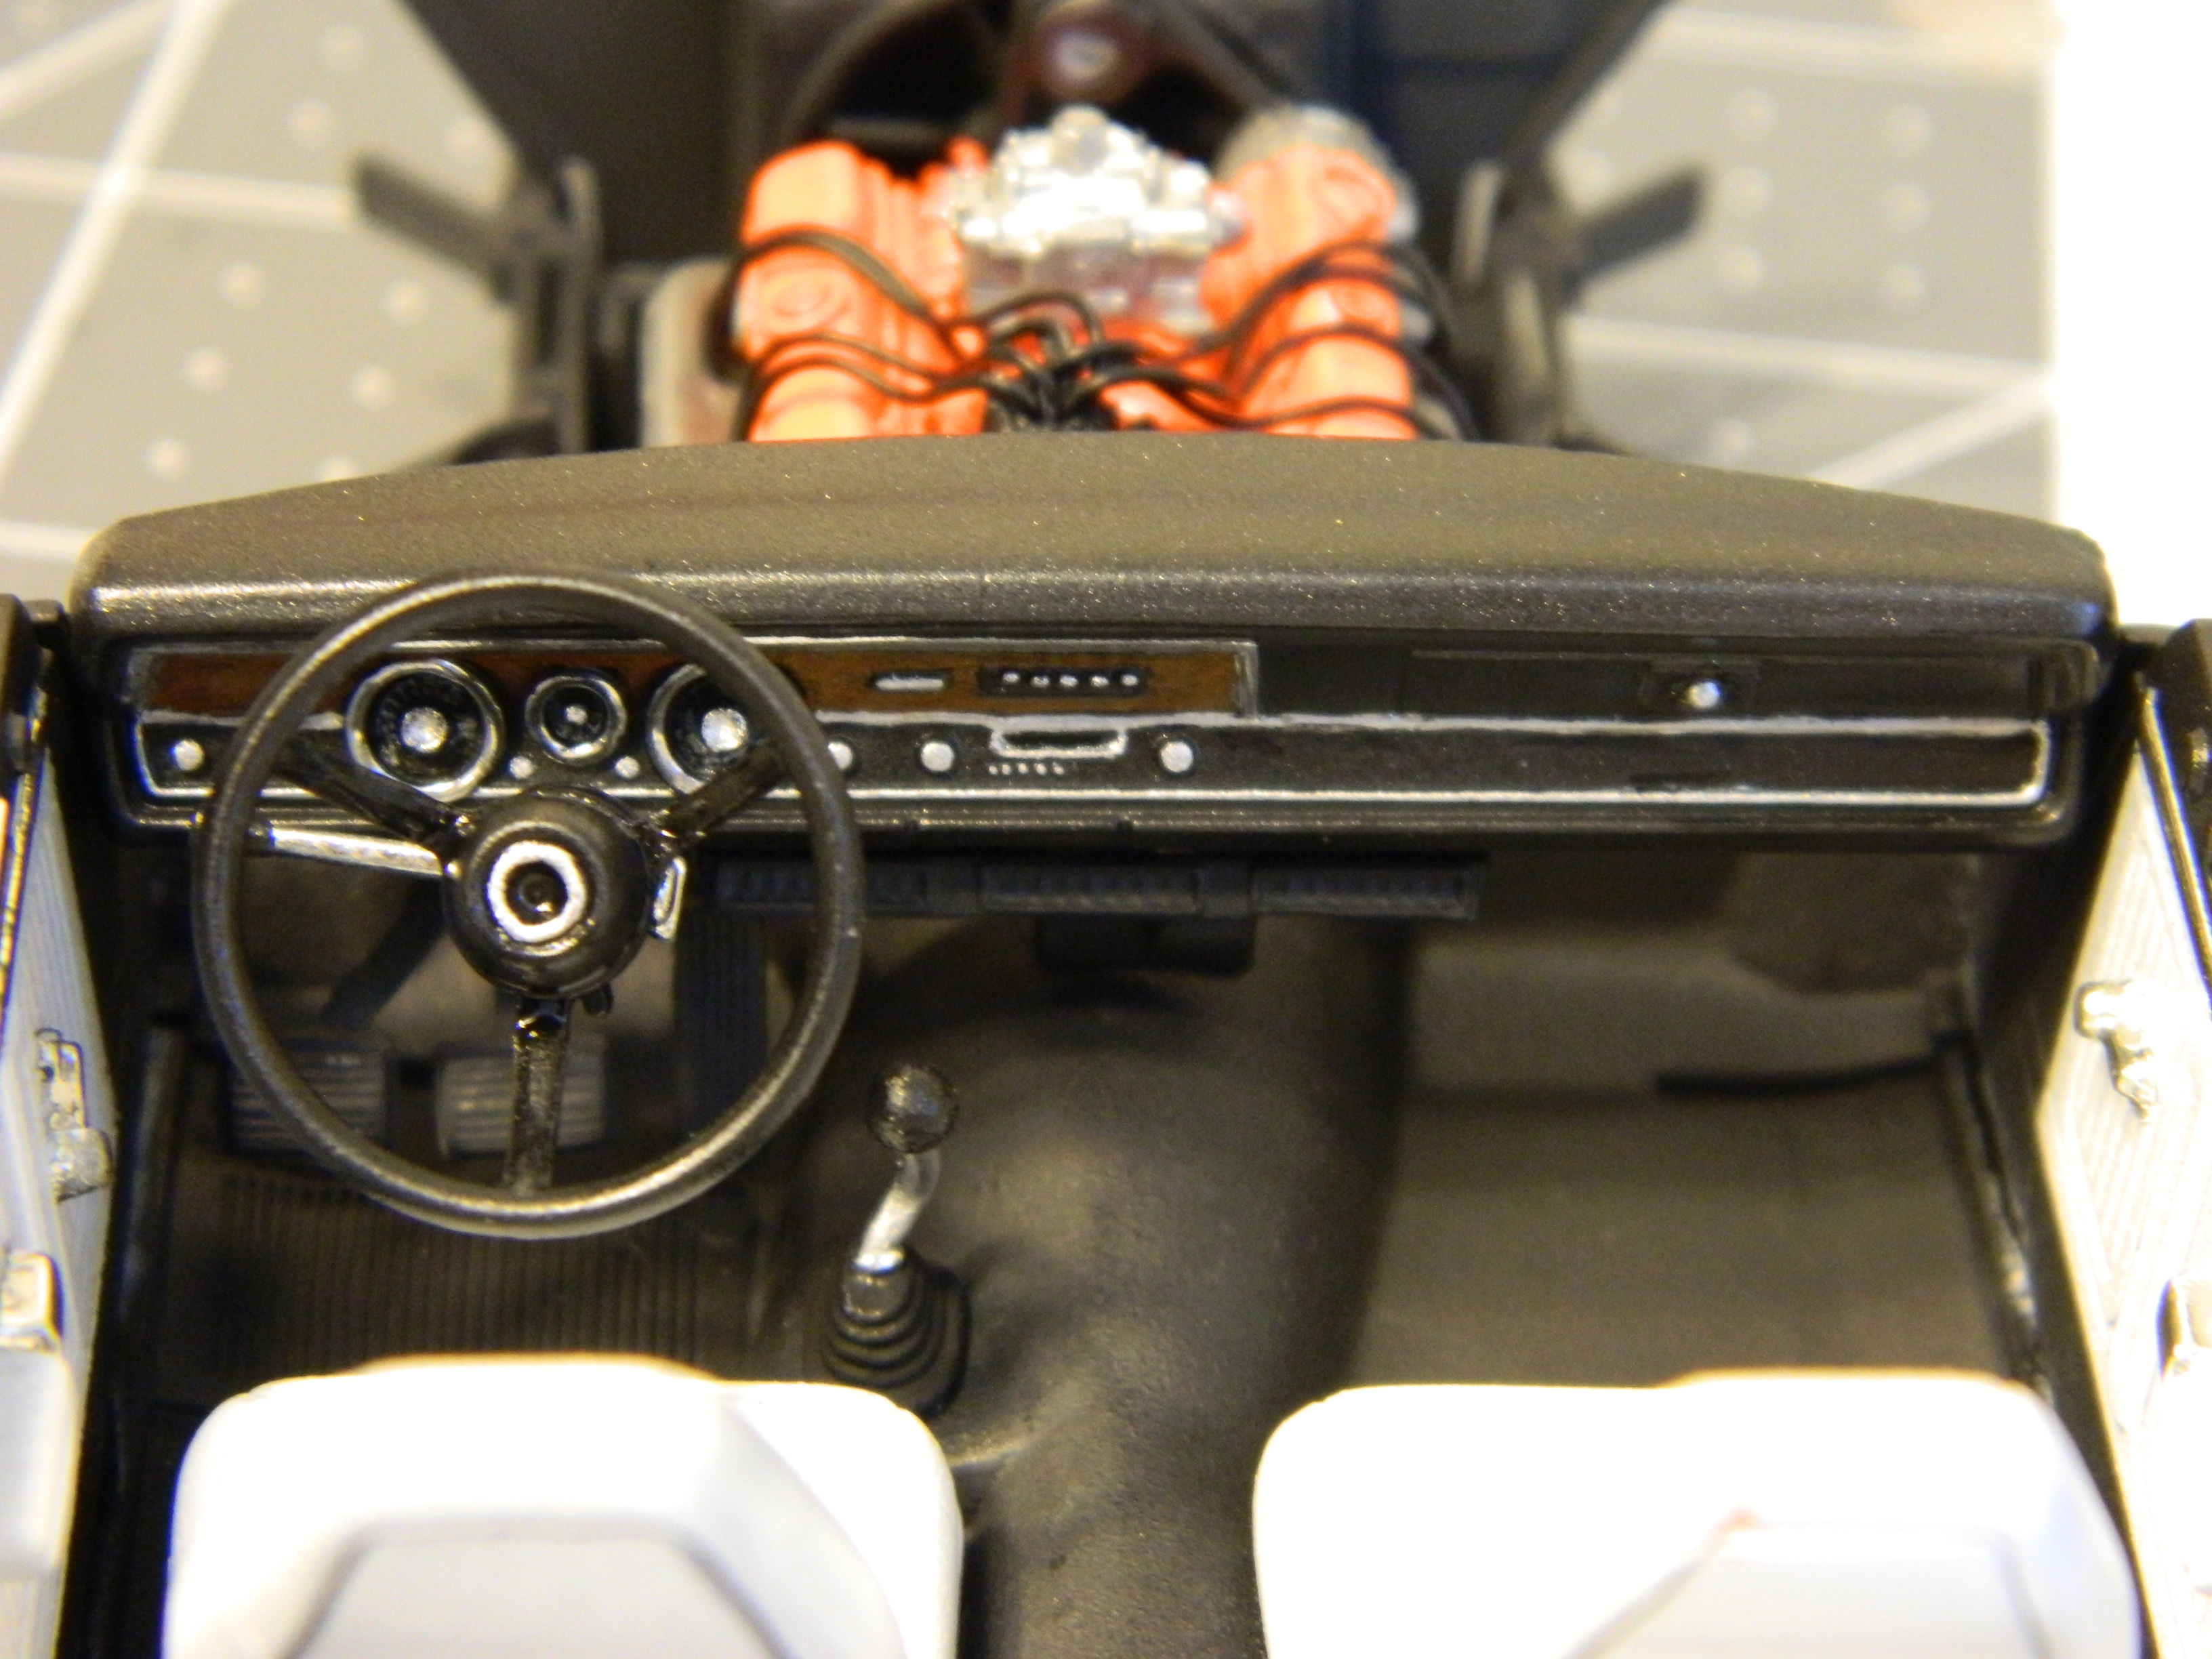
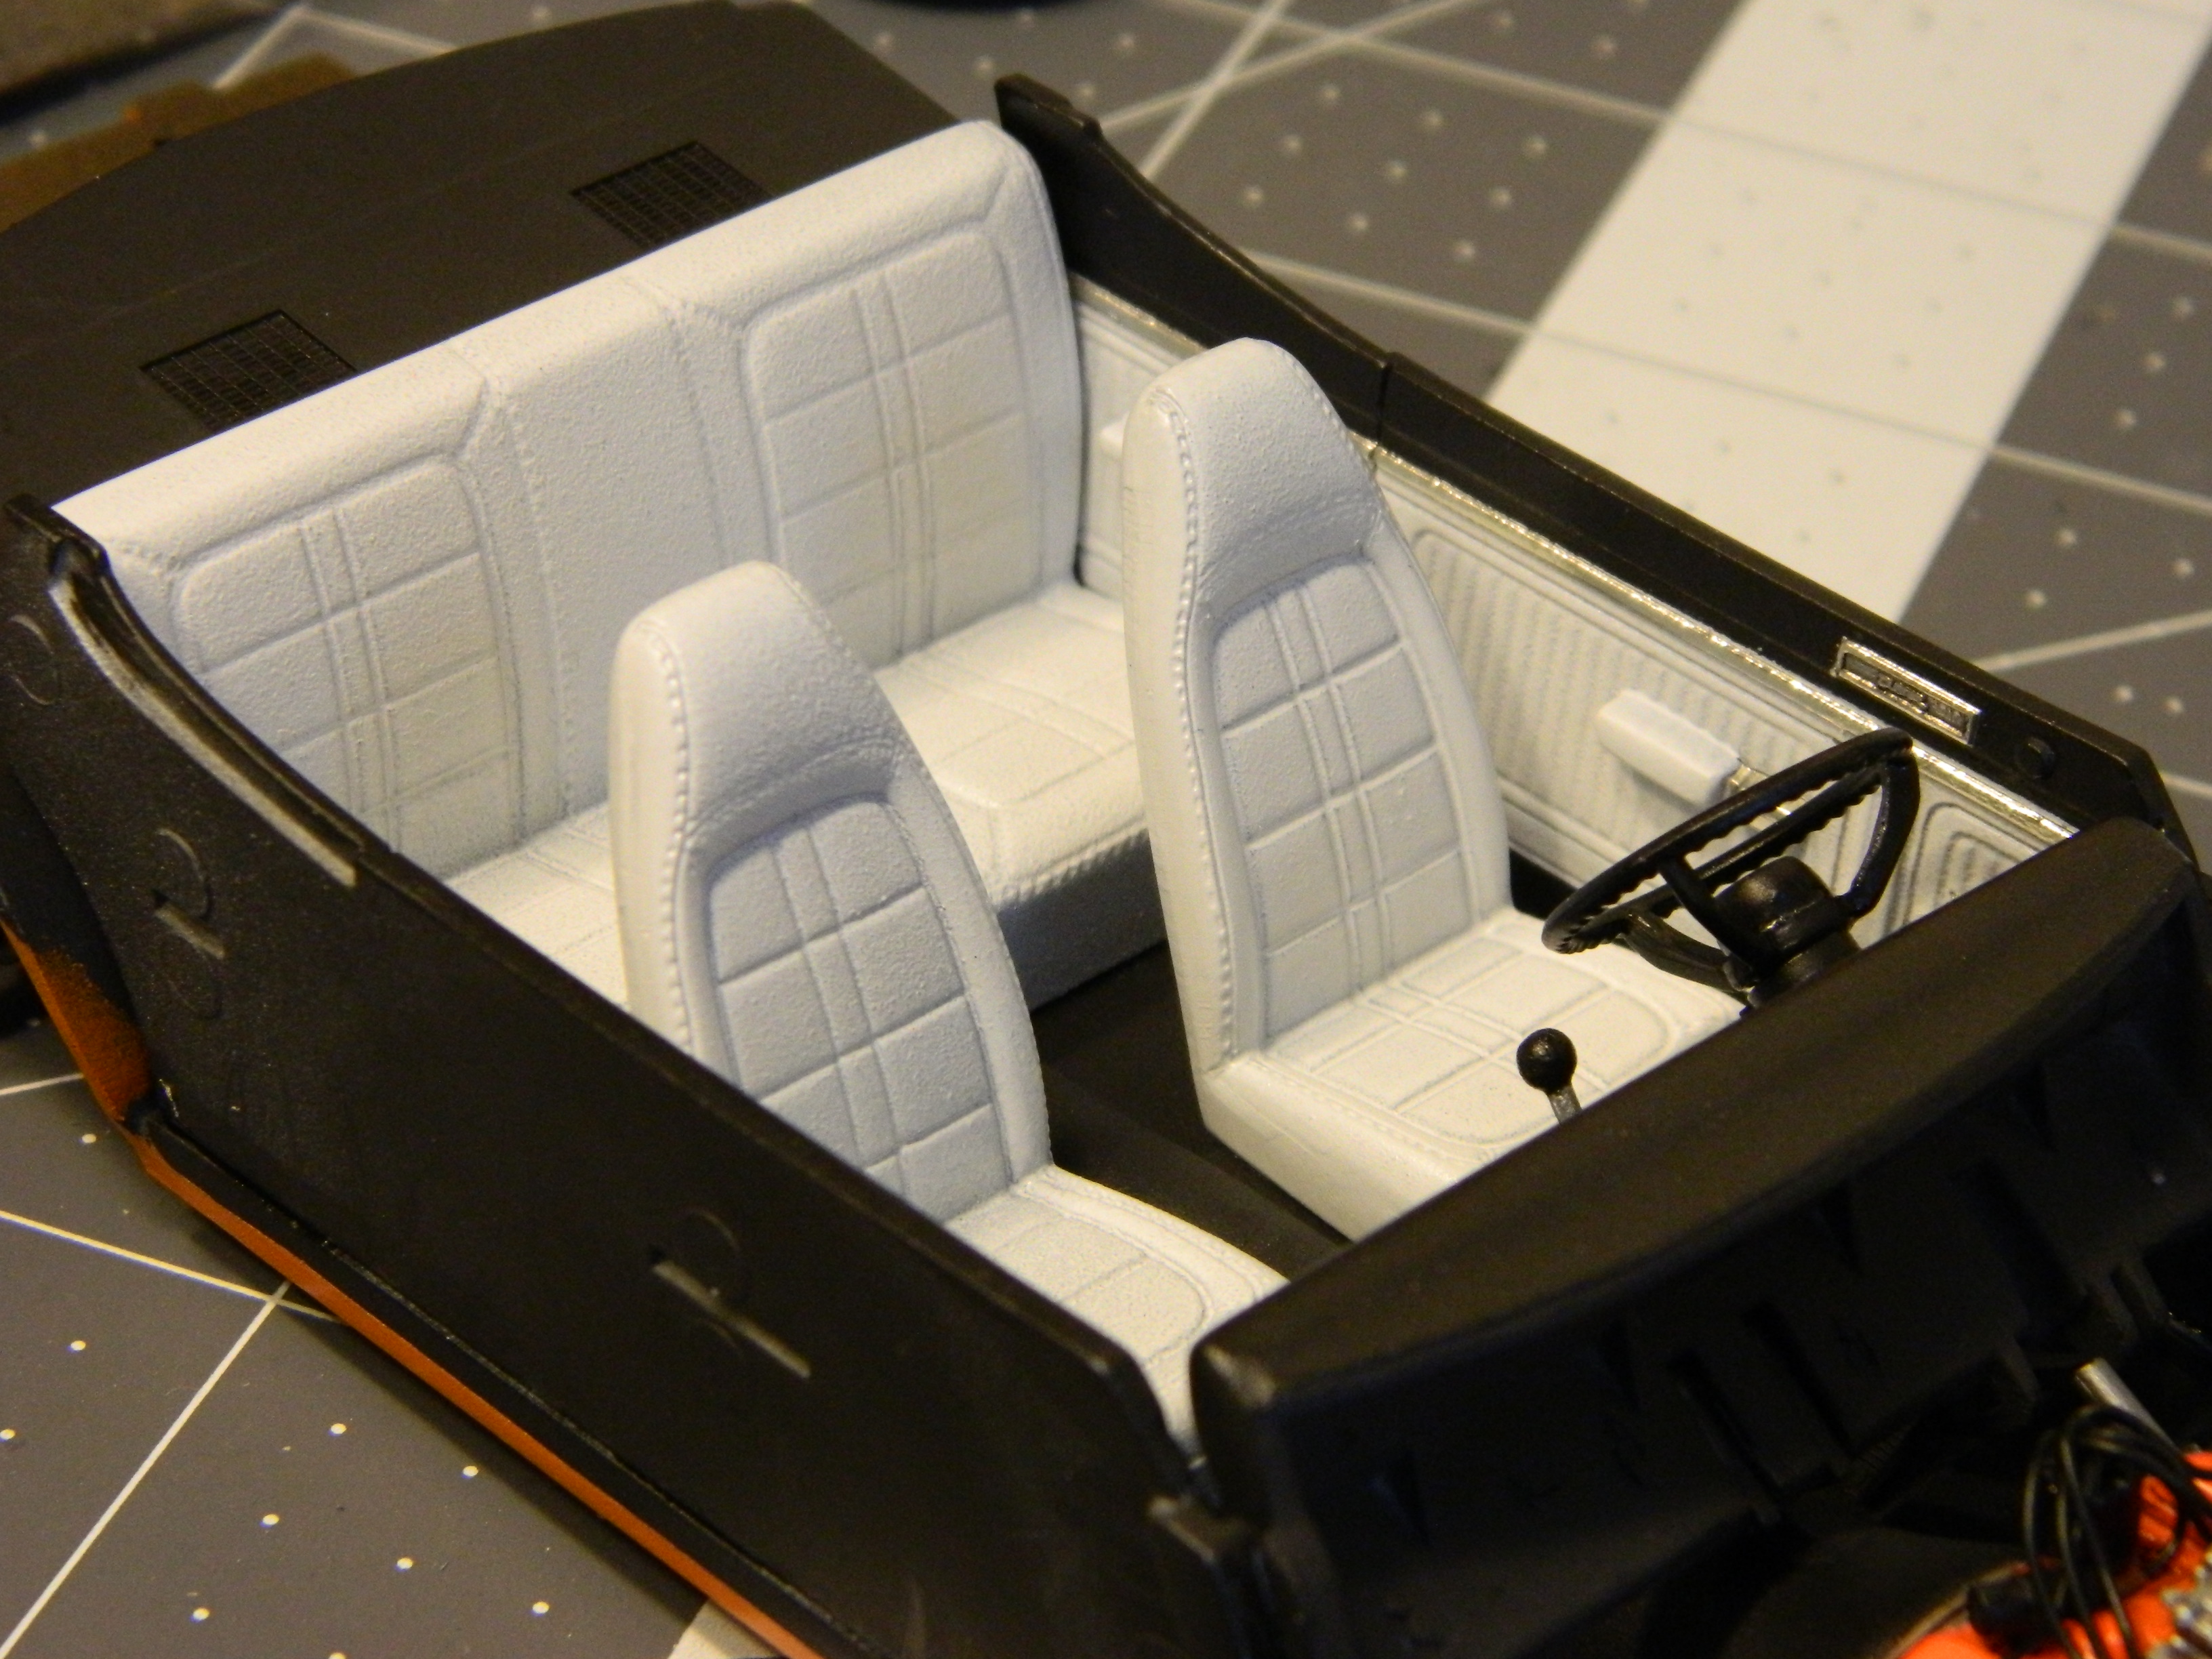
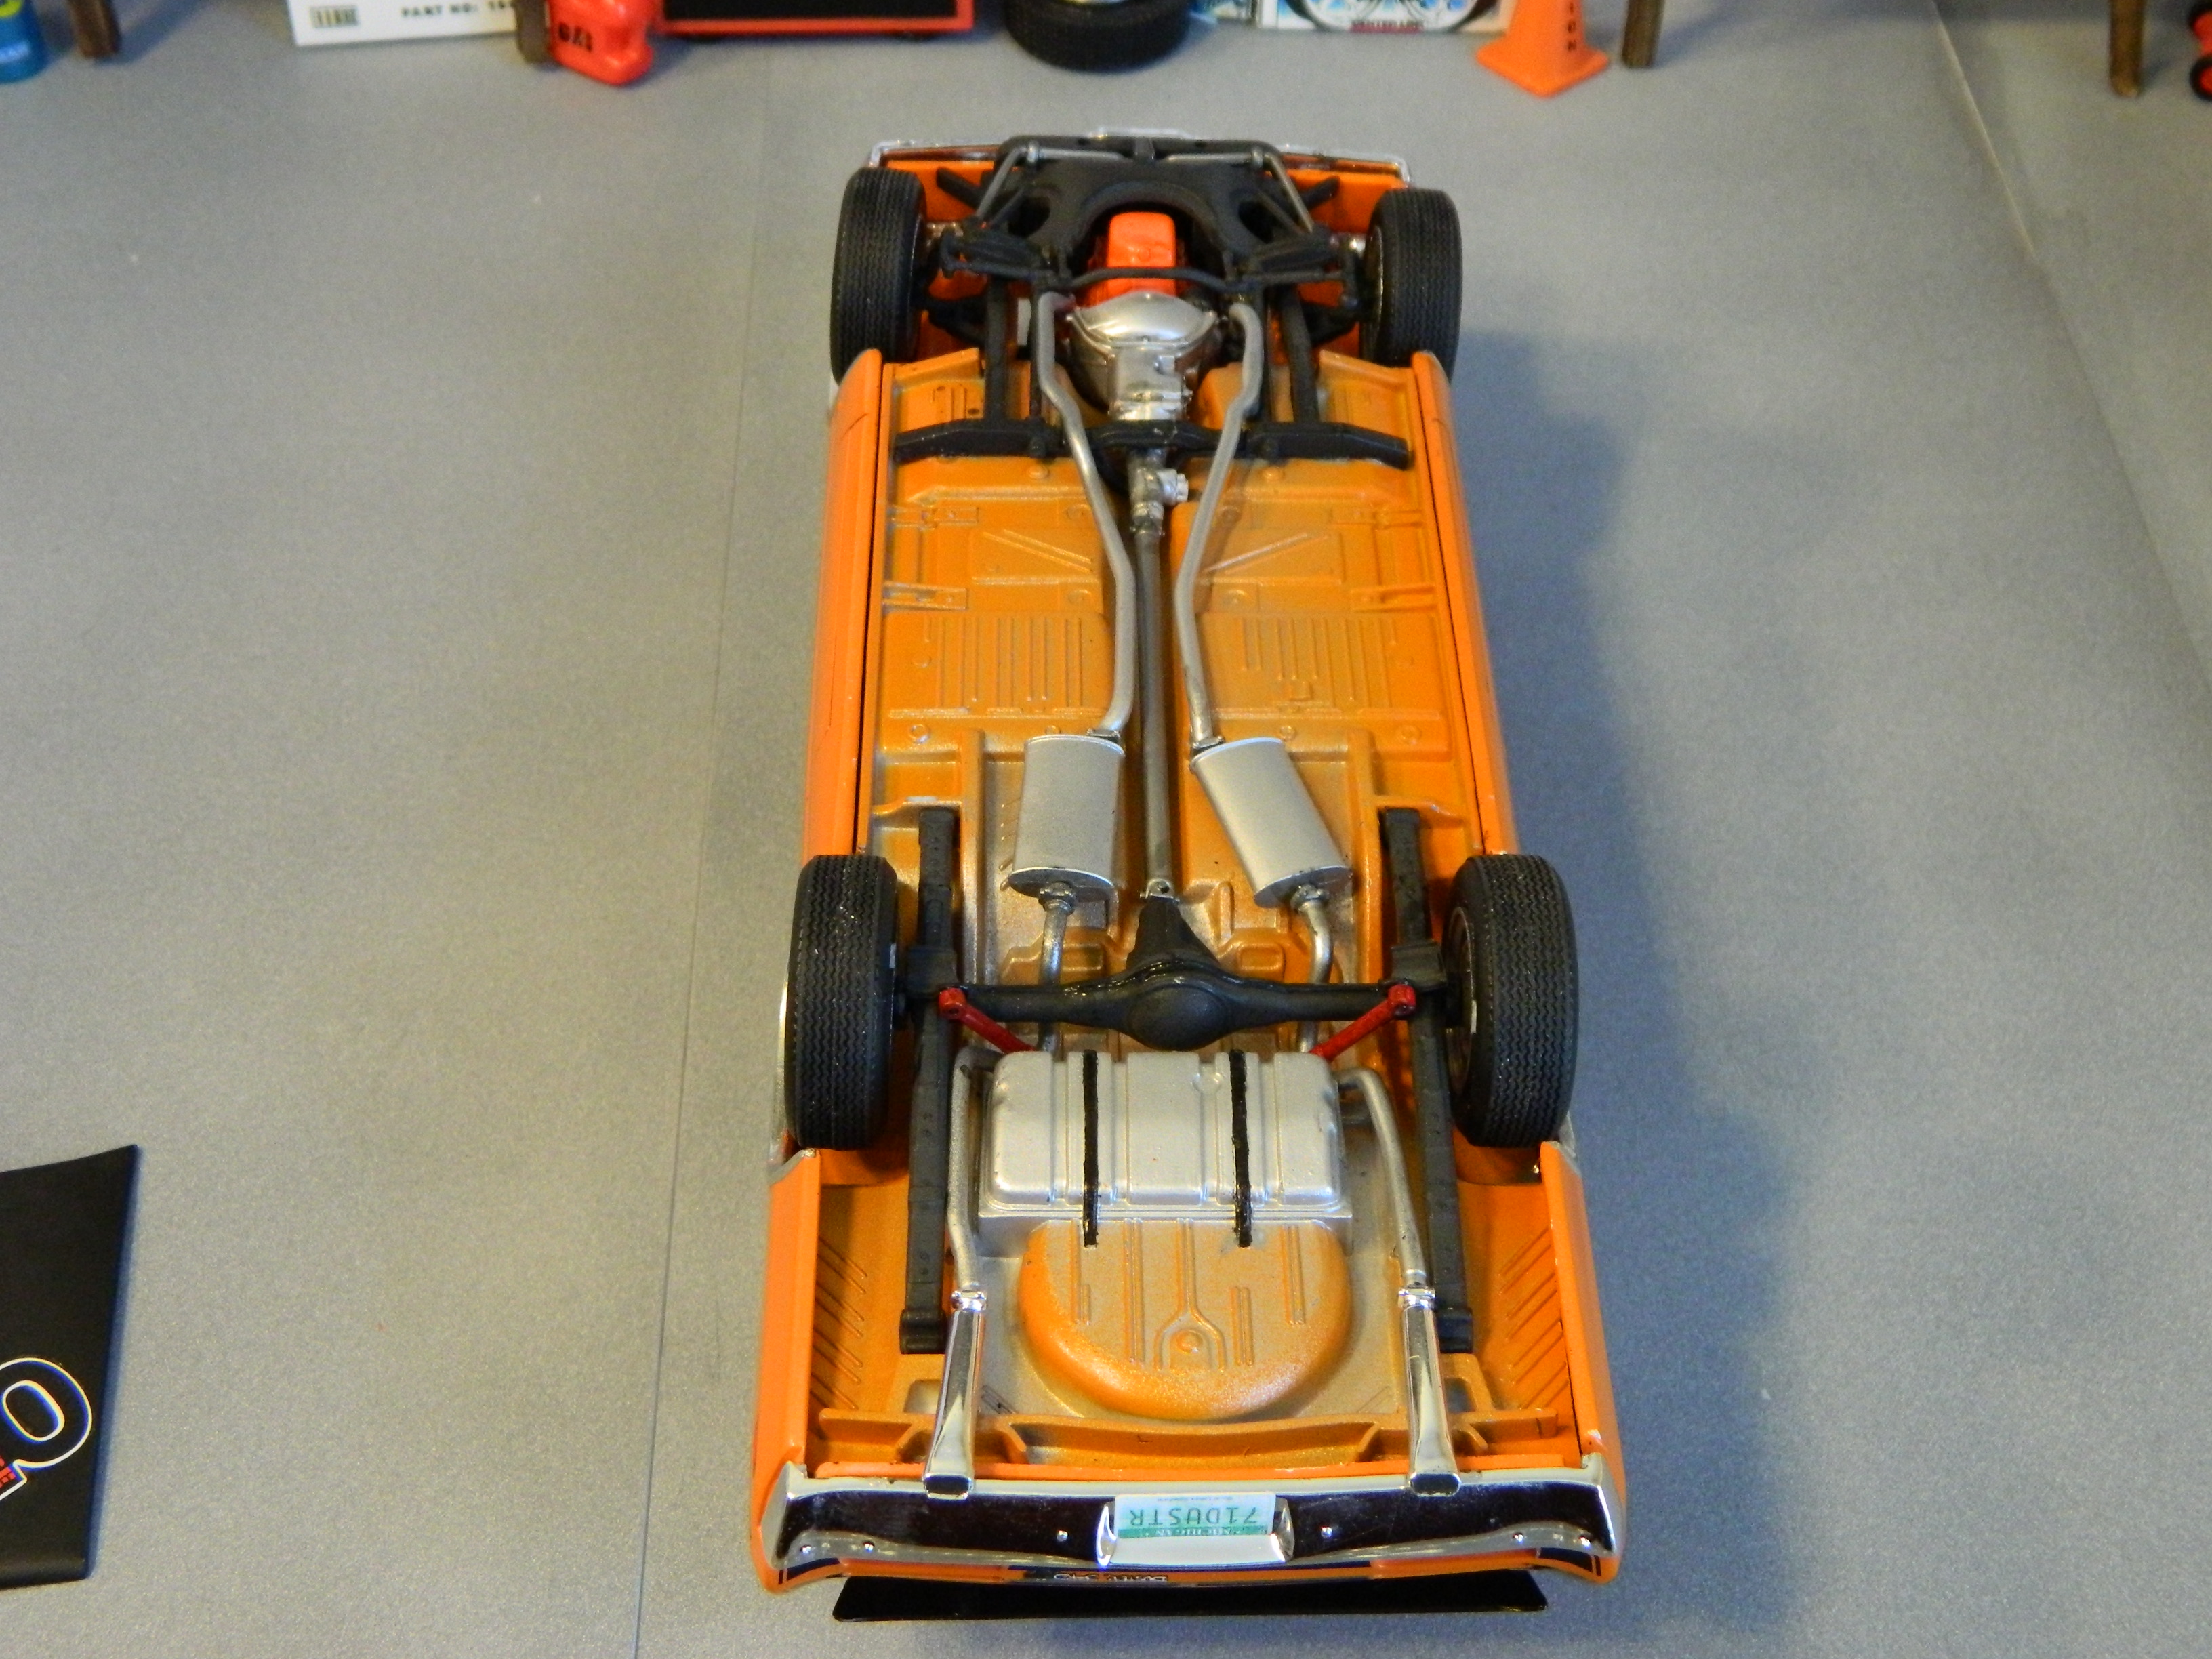
With special thanks to a fellow Forum member for sending me a missing part, I was finally able to finish the '71 Duster 340 yesterday. The paint is Model Master Go Mango Orange with MM clear, while the hood is just black primer with satin clear brushed on. The interior is just white primer with satin clear airbrushed on and the black floors and dash are also black primer with Pledge brushed on the dash. The gauges are decals and the dash trim is very carefully brushed on Molotow Chrome. I added ignition wires to the engine, and valve stems on the wheels, while the window trim is Bare Metal Foil. What a great kit overall, and a generally fun build. Thanks for looking!
-
THIS IS A RE-BOOT OF MY OLD THREAD. I first started work on this Galaxie in 2013. The thread for that can be seen here. I hit a problem with the body paint and put the kit back on the shelf… until now! Unfortunately, soon after I put the kit away, Image Shack started charging for their image hosting and all my pictures on that thread were lost! This is why I'm having to re-boot the thread. This kit has always had a special place in my memories. I built a Barris 'Cruisin USA' kit when I was a kid - it was one of my first models I ever build. It came out pretty well (by my standard of the day). I wish I had kept it, but many years down the line I have no idea what happened to that model (but I a few of the parts have turned up in my spare parts box!). I found a more recent re-issue of the Galaxie on eBay. It has been started and is missing the engine. I thought it would be great to do this kit again - only this time, I'd like to think I have a better set of building skills. My intention is to build a 'tough as nails' street machine with modern day 'real-world' upgrades. I'm thinking lowered suspension and monster V8, standard bodywork with simple de-badging and plenty of detail. The first area needing attention is the floor/chassis... Well, that's as much as I can add in one post. There are over 100 more pics chronicling the build right up to the body paint stage - where it all went wrong! I will try to get this thread up to the current stage by posting a batch of images at a time (as I find them). With a little encouragement from everyone out there I hope to rekindle my enthusiasm in this build and finish it off.
-
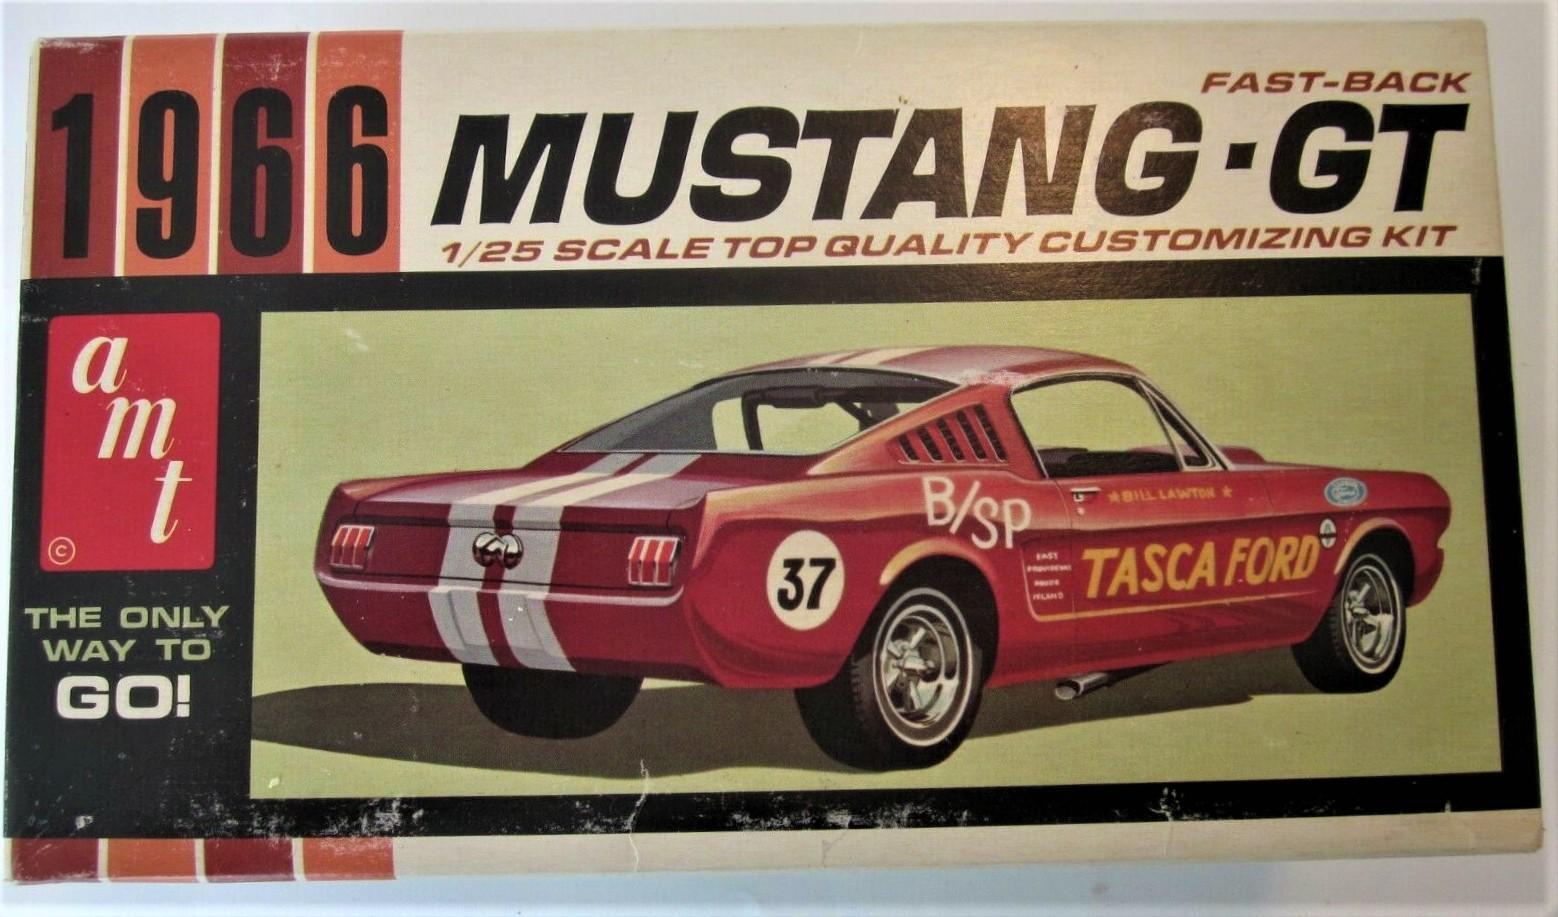
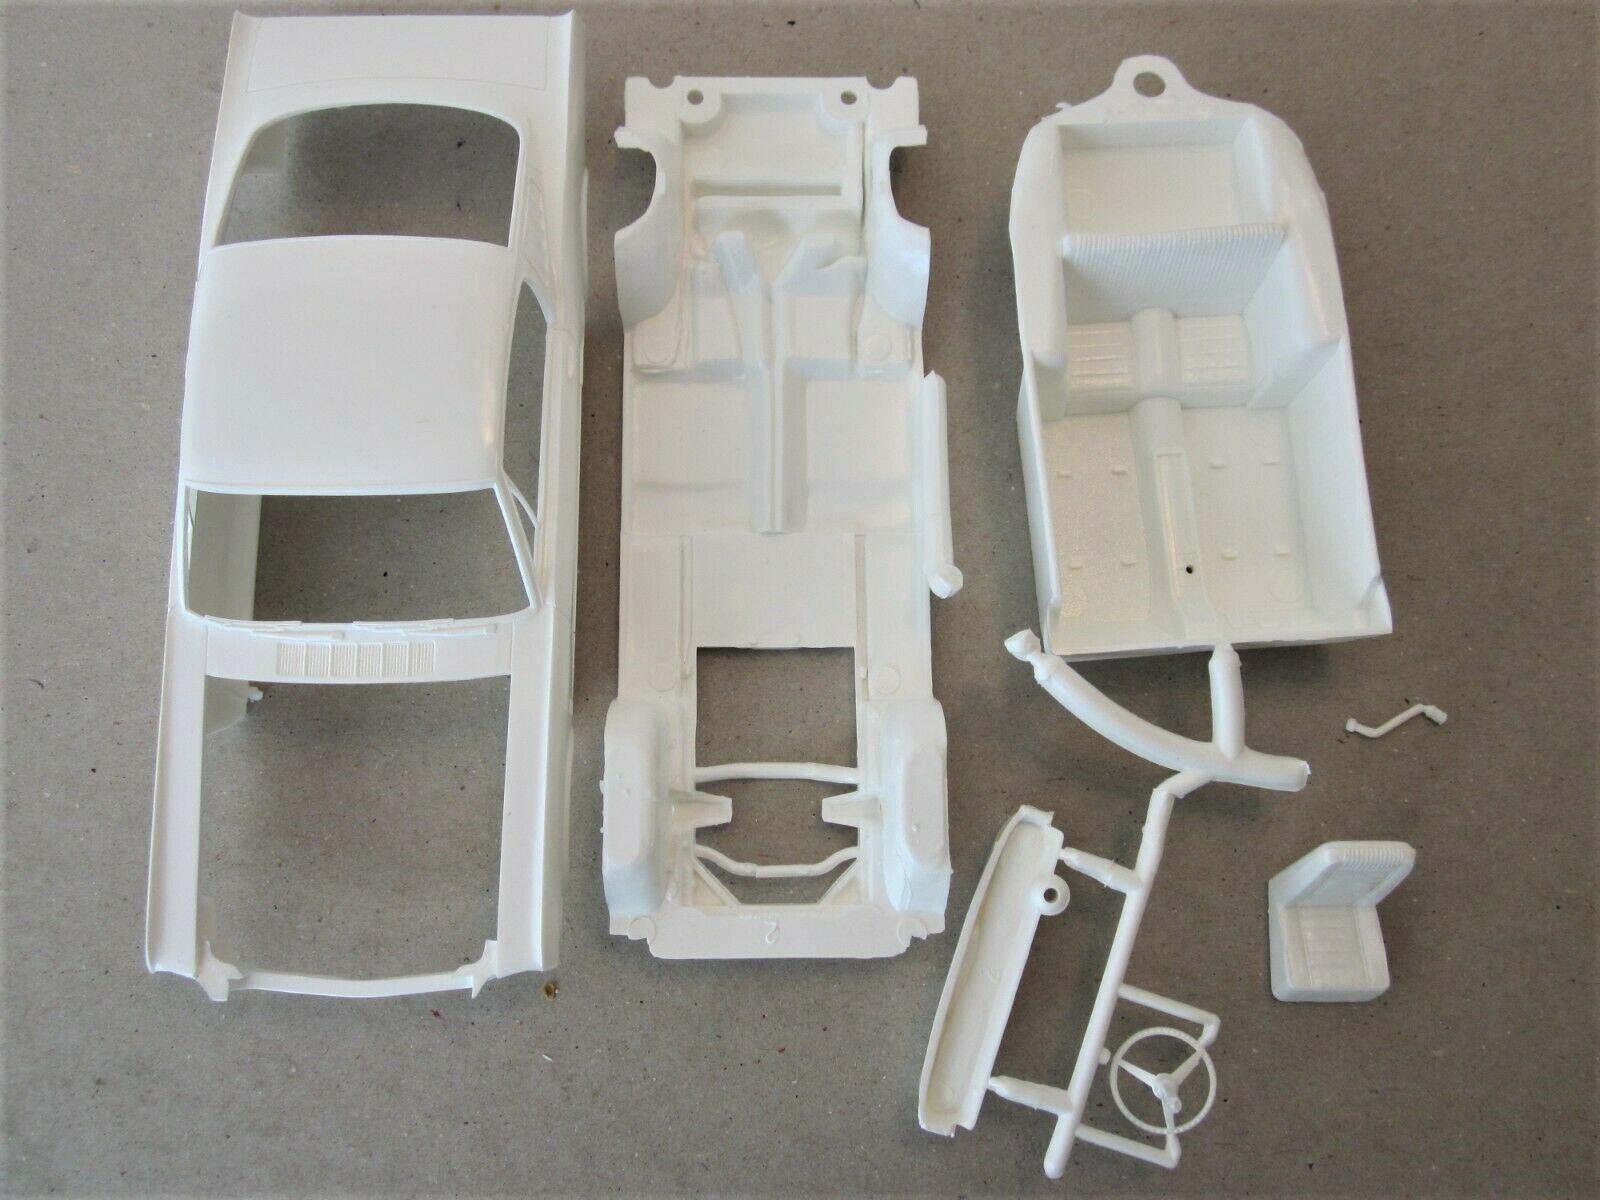
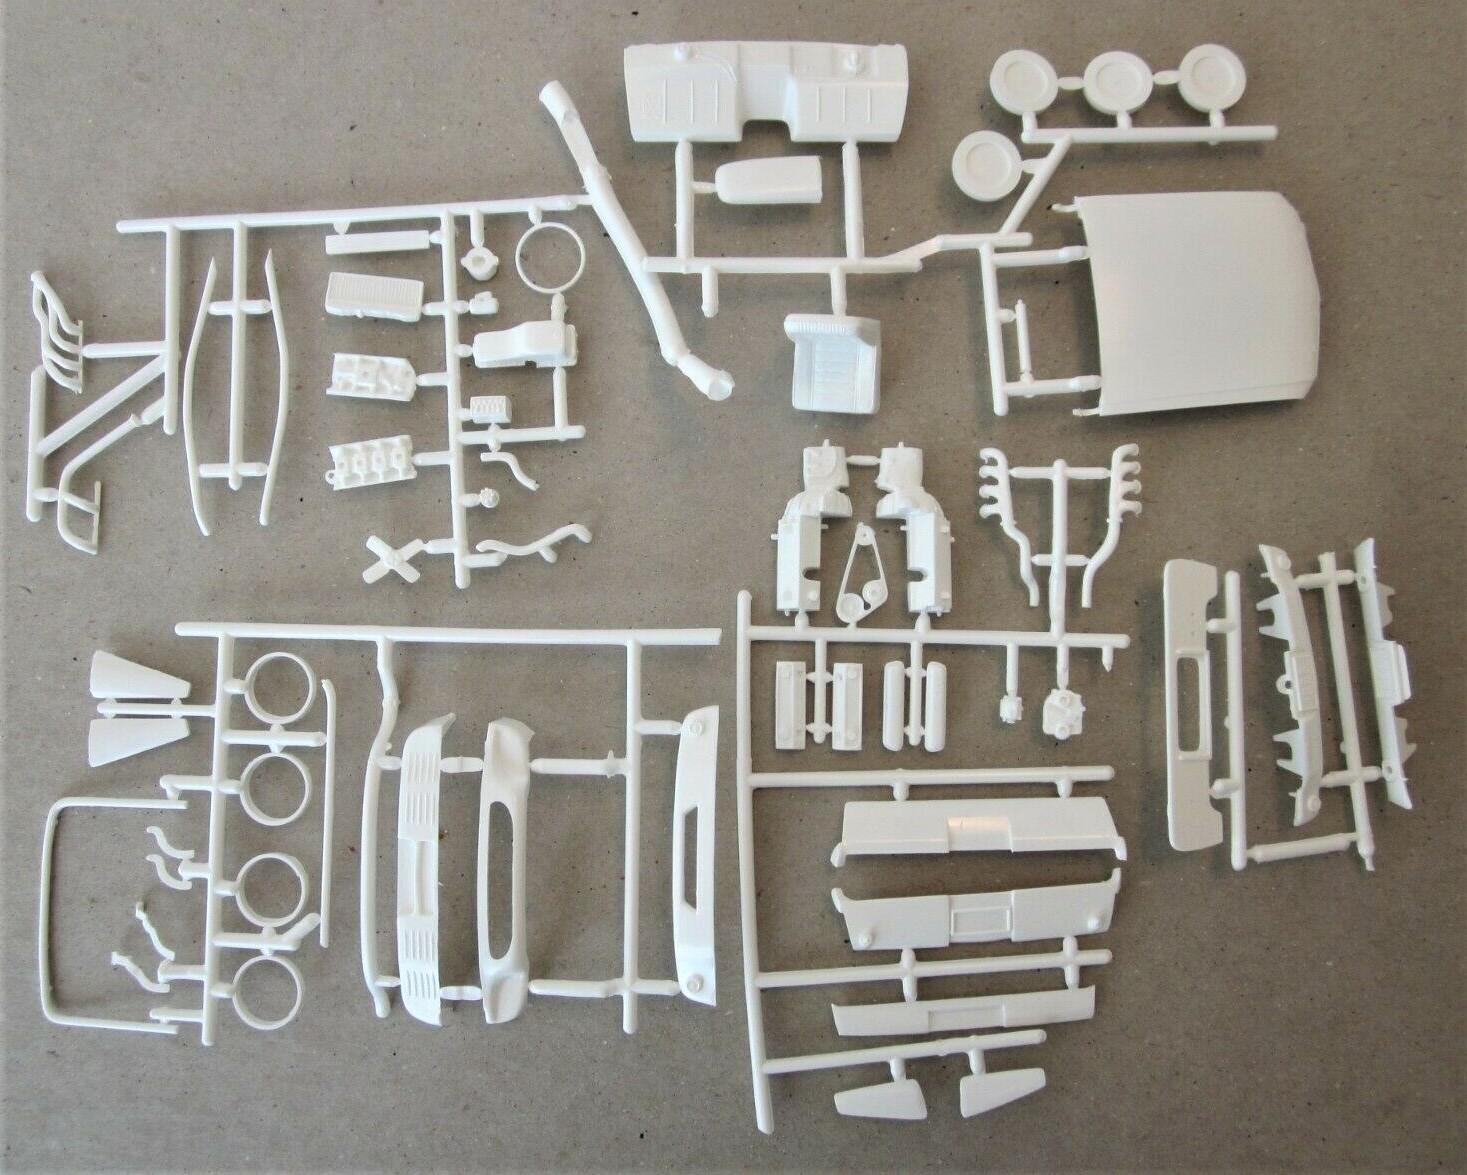
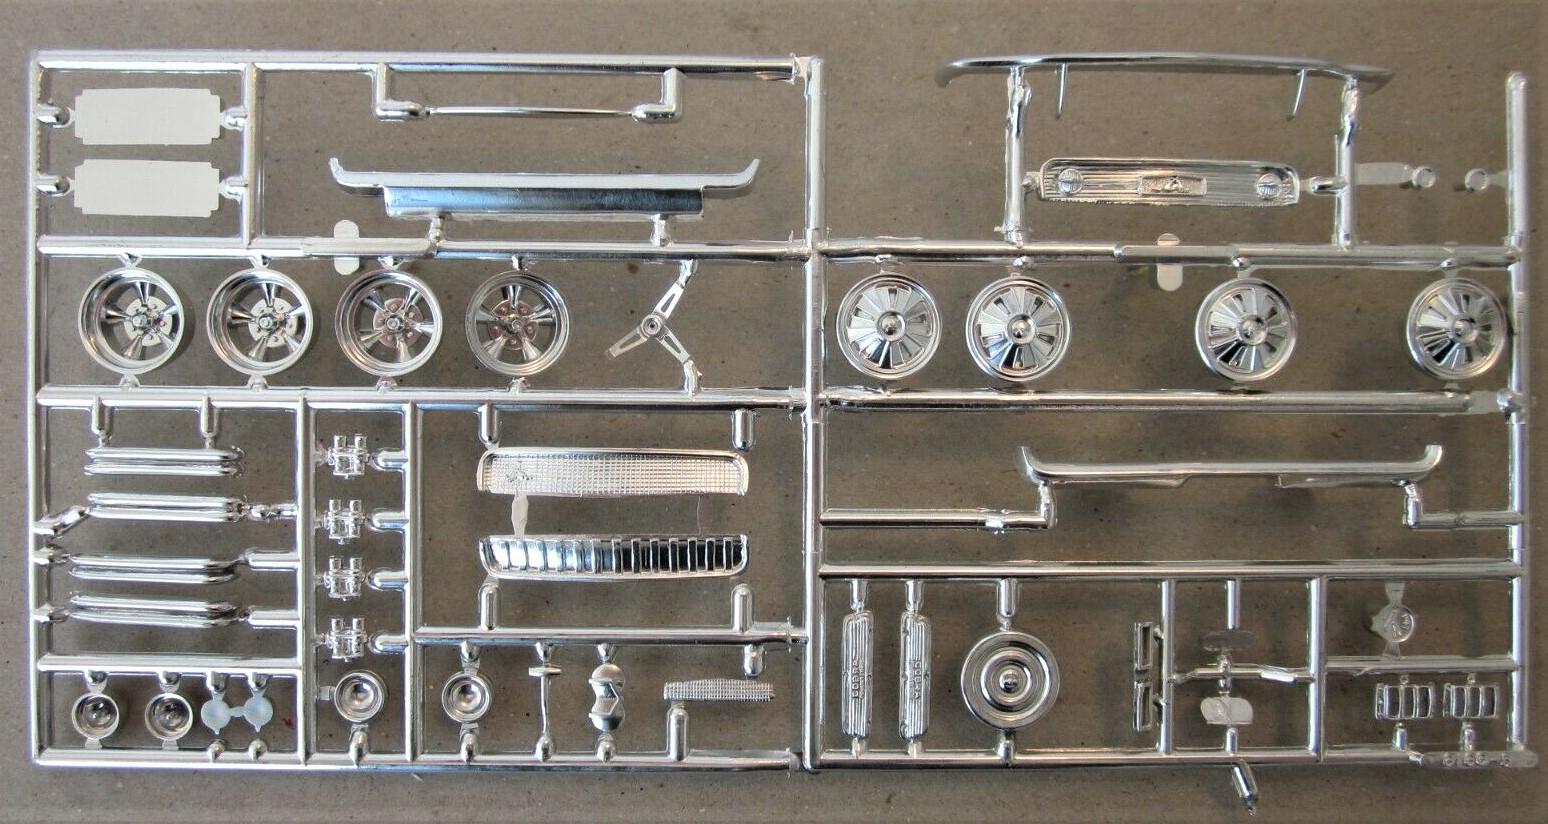
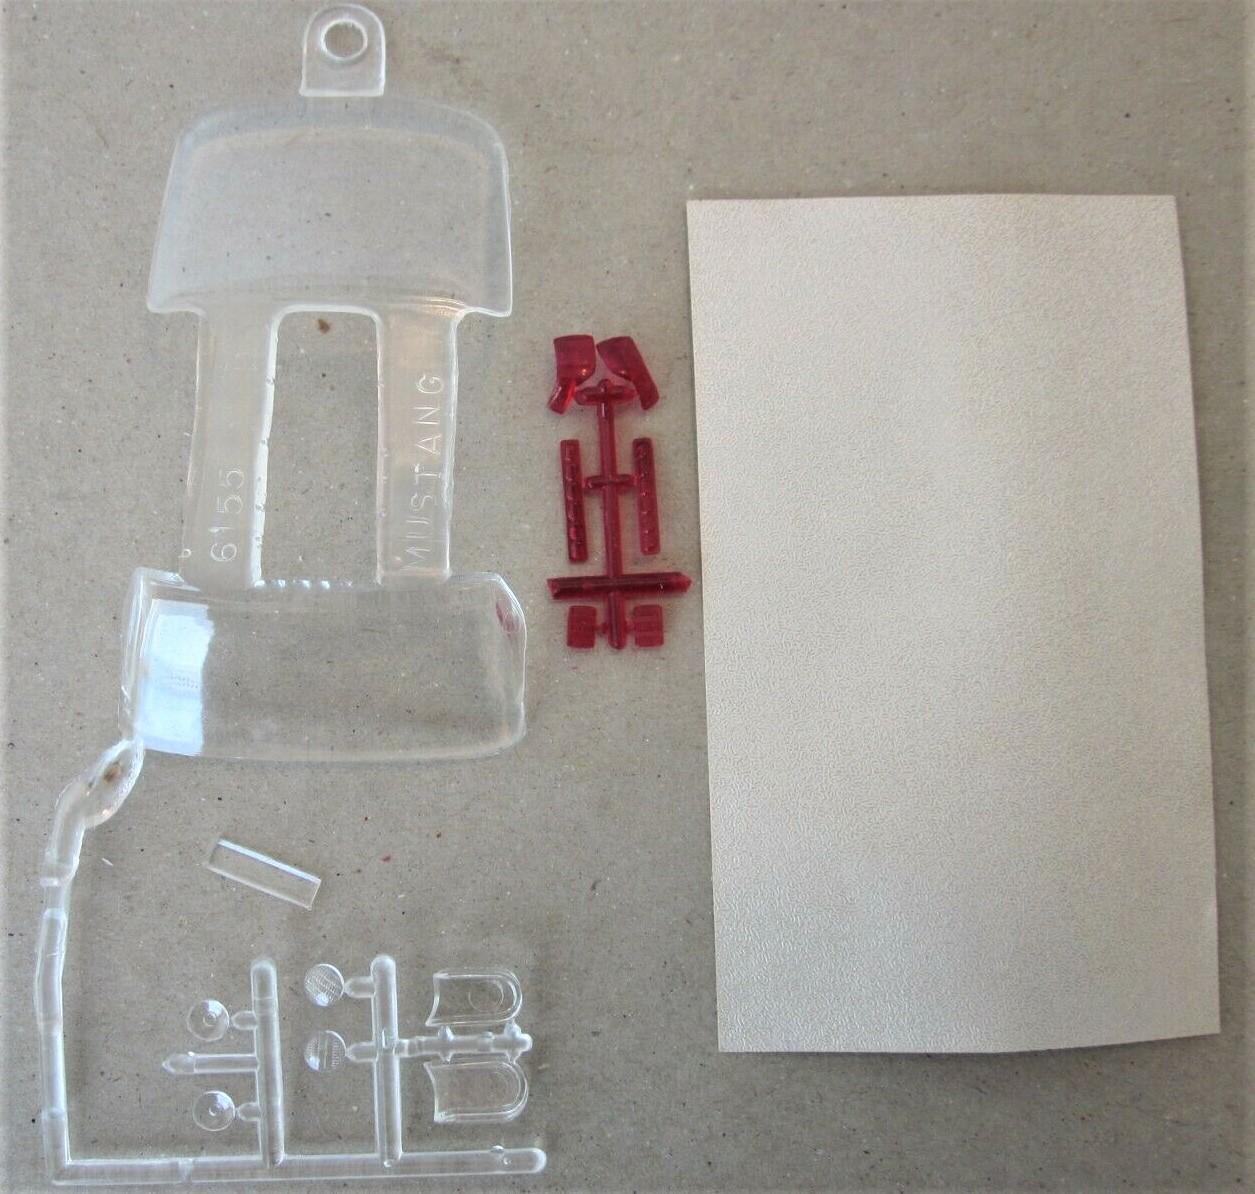
.thumb.jpg.e0420fe52e683c60d19e843462316523.jpg) Saw this complete, original 1/25 AMT 1966 Mustang GT Fastback kit on eBay, so have a look at the (partial, I didn't save every image) contents. Might be useful for comparison when the re-created '66 Mustang Fastback debuts later in 2022 from Round2.
Saw this complete, original 1/25 AMT 1966 Mustang GT Fastback kit on eBay, so have a look at the (partial, I didn't save every image) contents. Might be useful for comparison when the re-created '66 Mustang Fastback debuts later in 2022 from Round2.
- 216 replies
-
- 5
-
-
- 1966 mustang
- mustang gt
- (and 2 more)