Search the Community
Showing results for tags 'pinto'.
Found 4 results
-
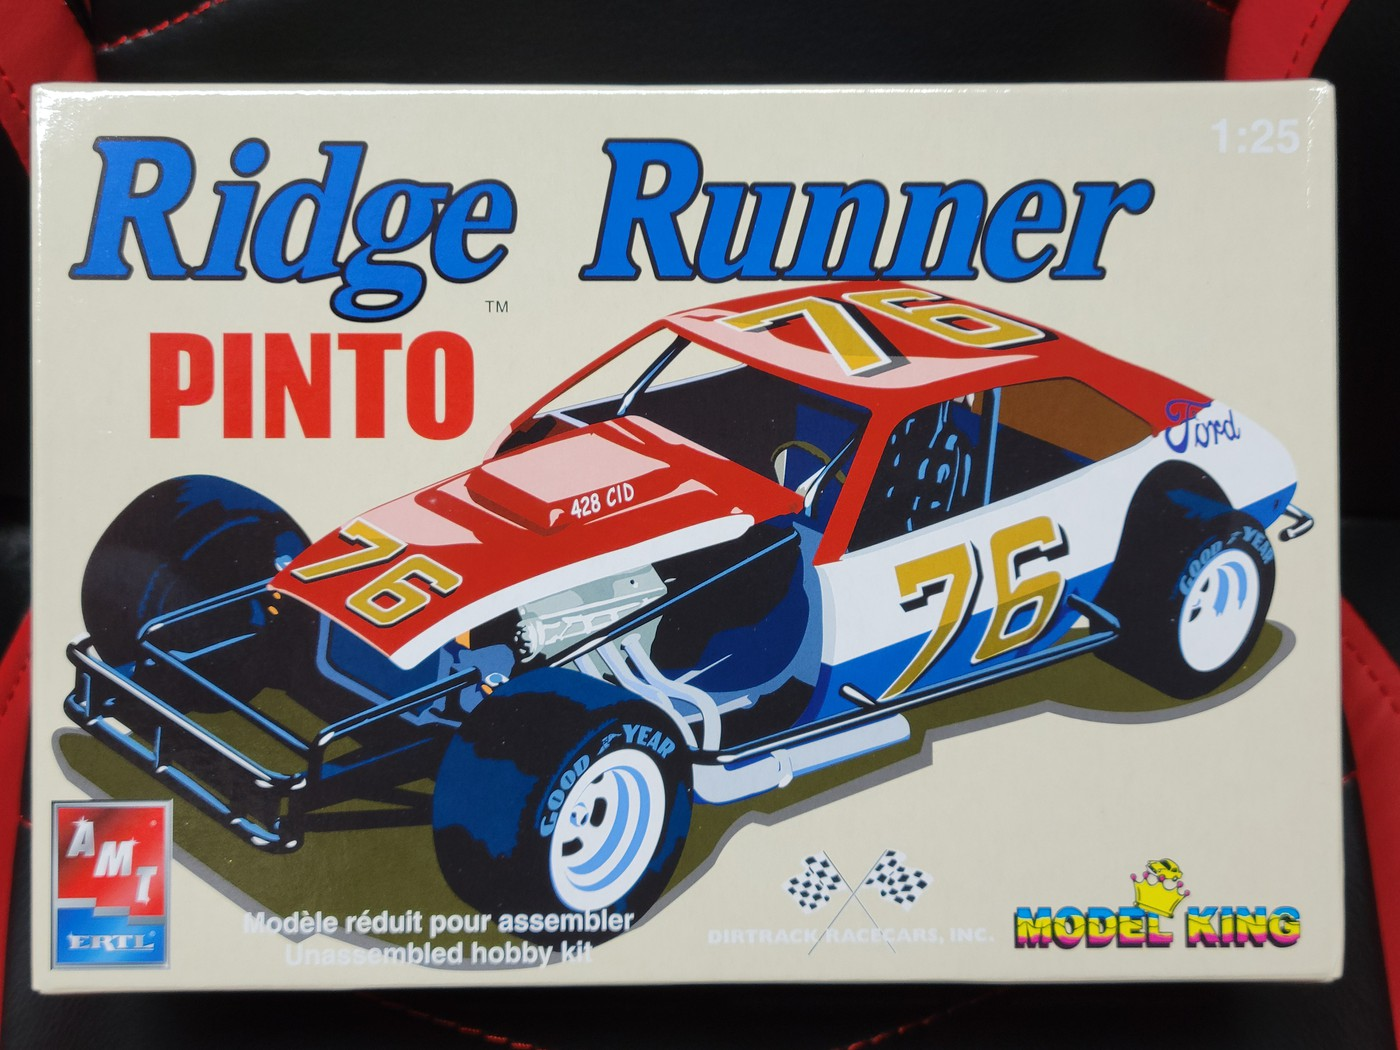
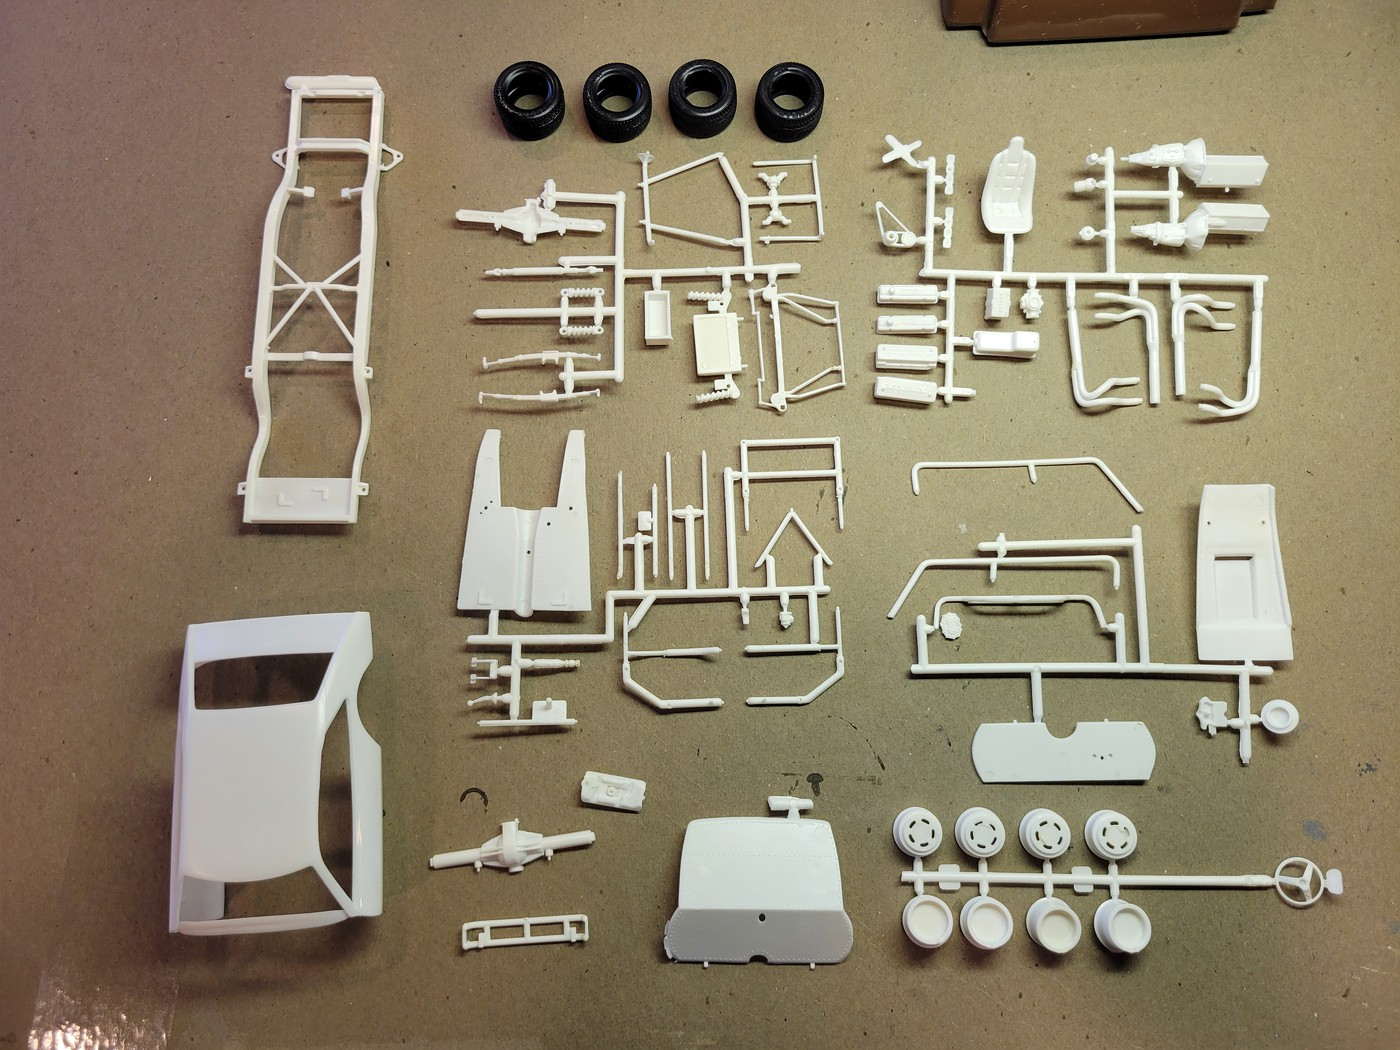
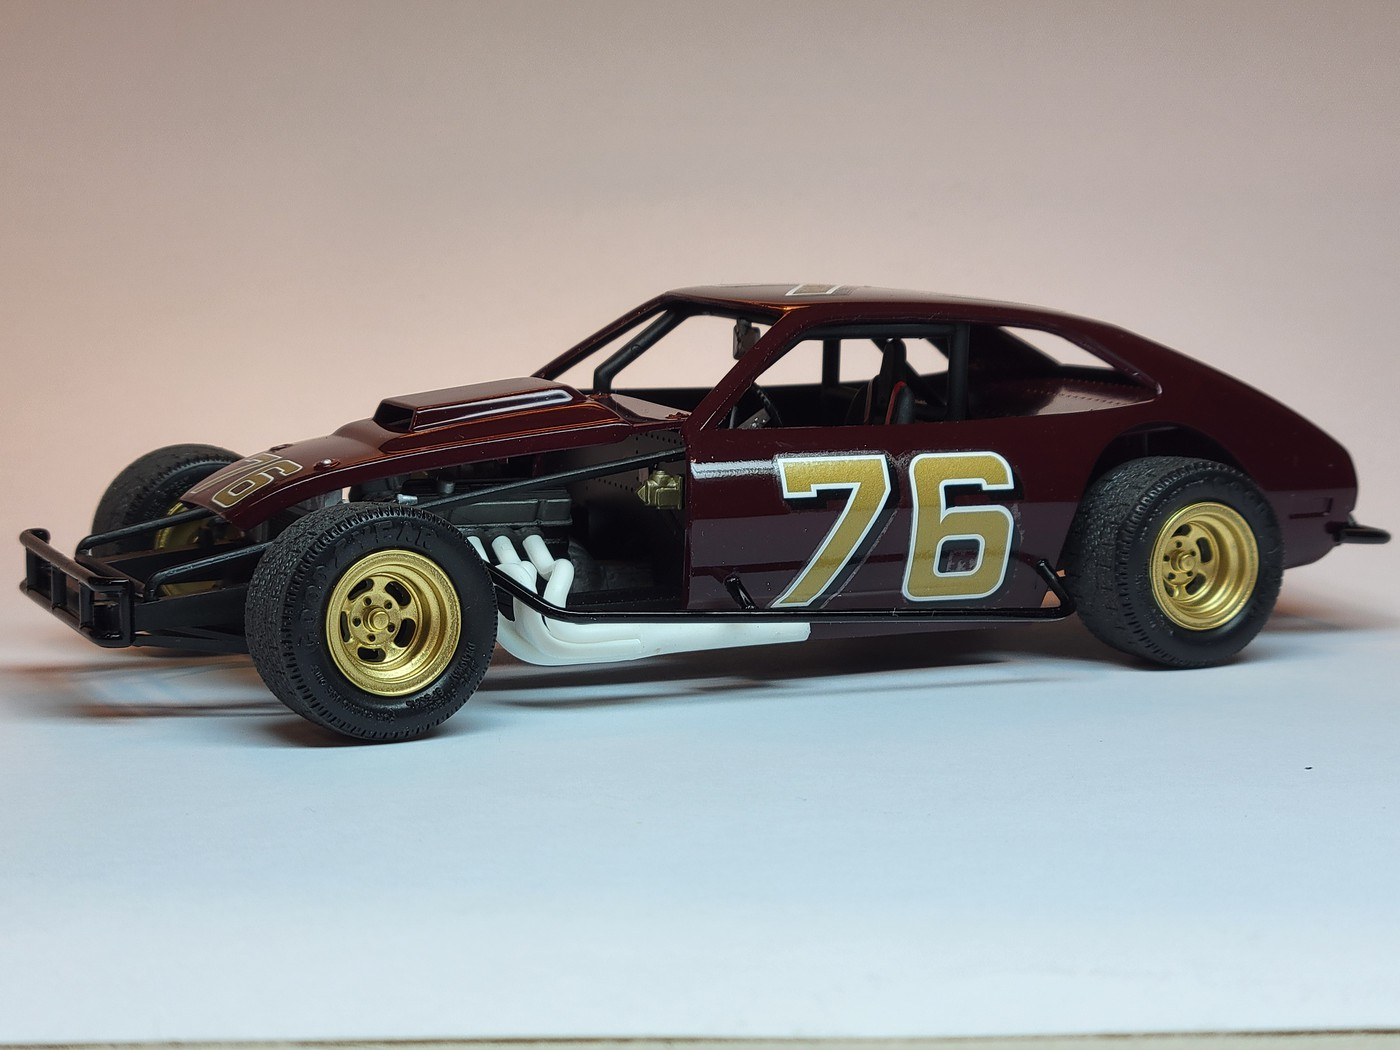
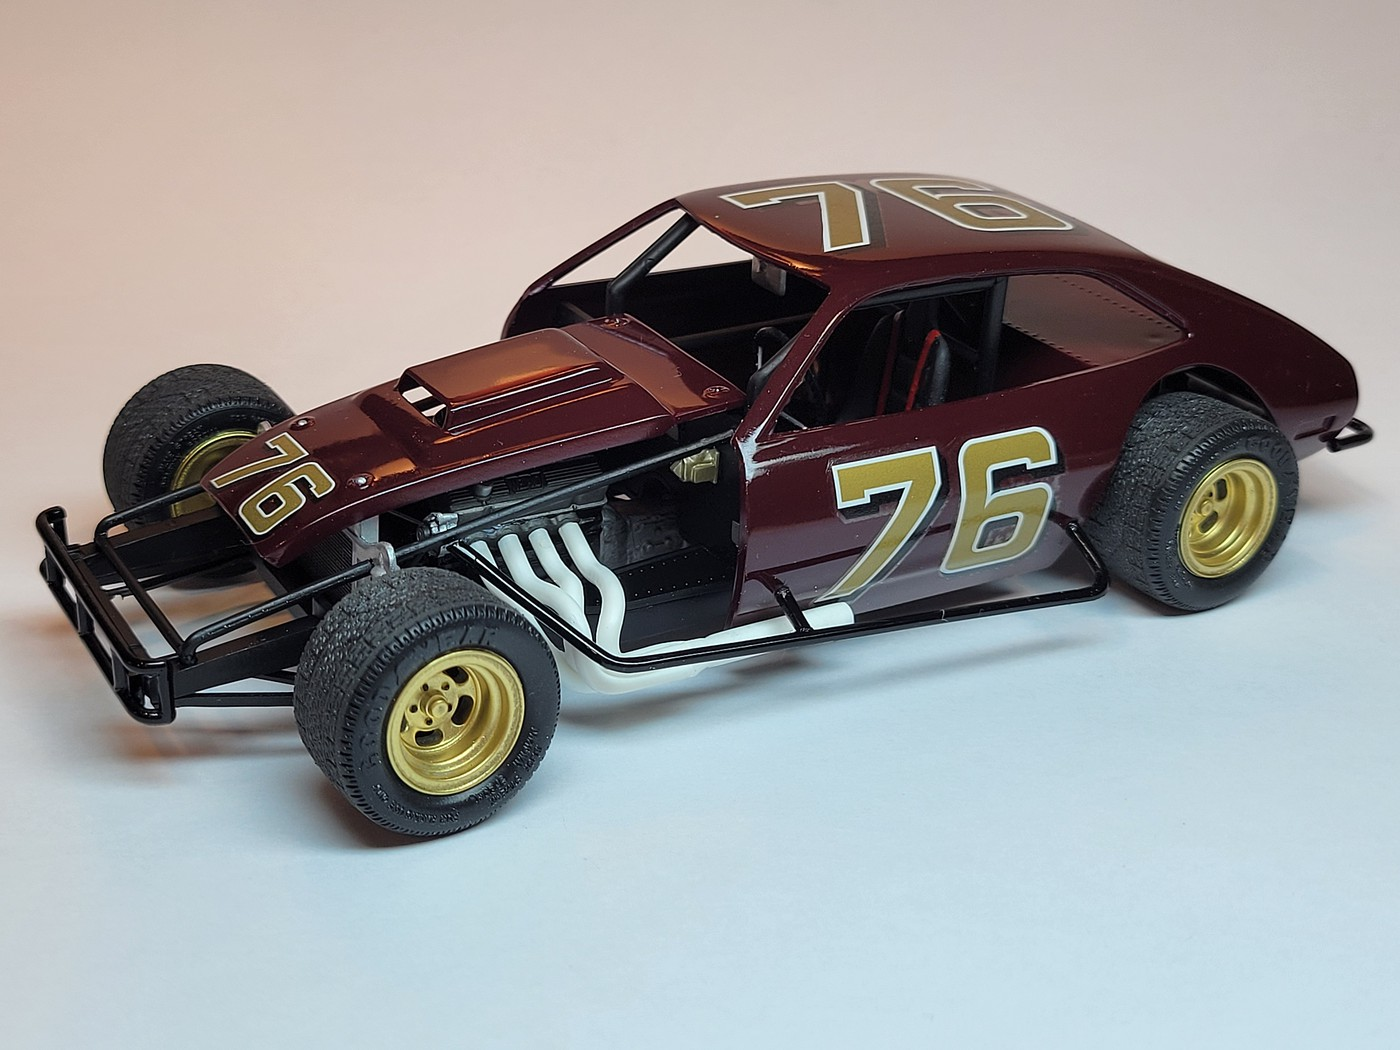
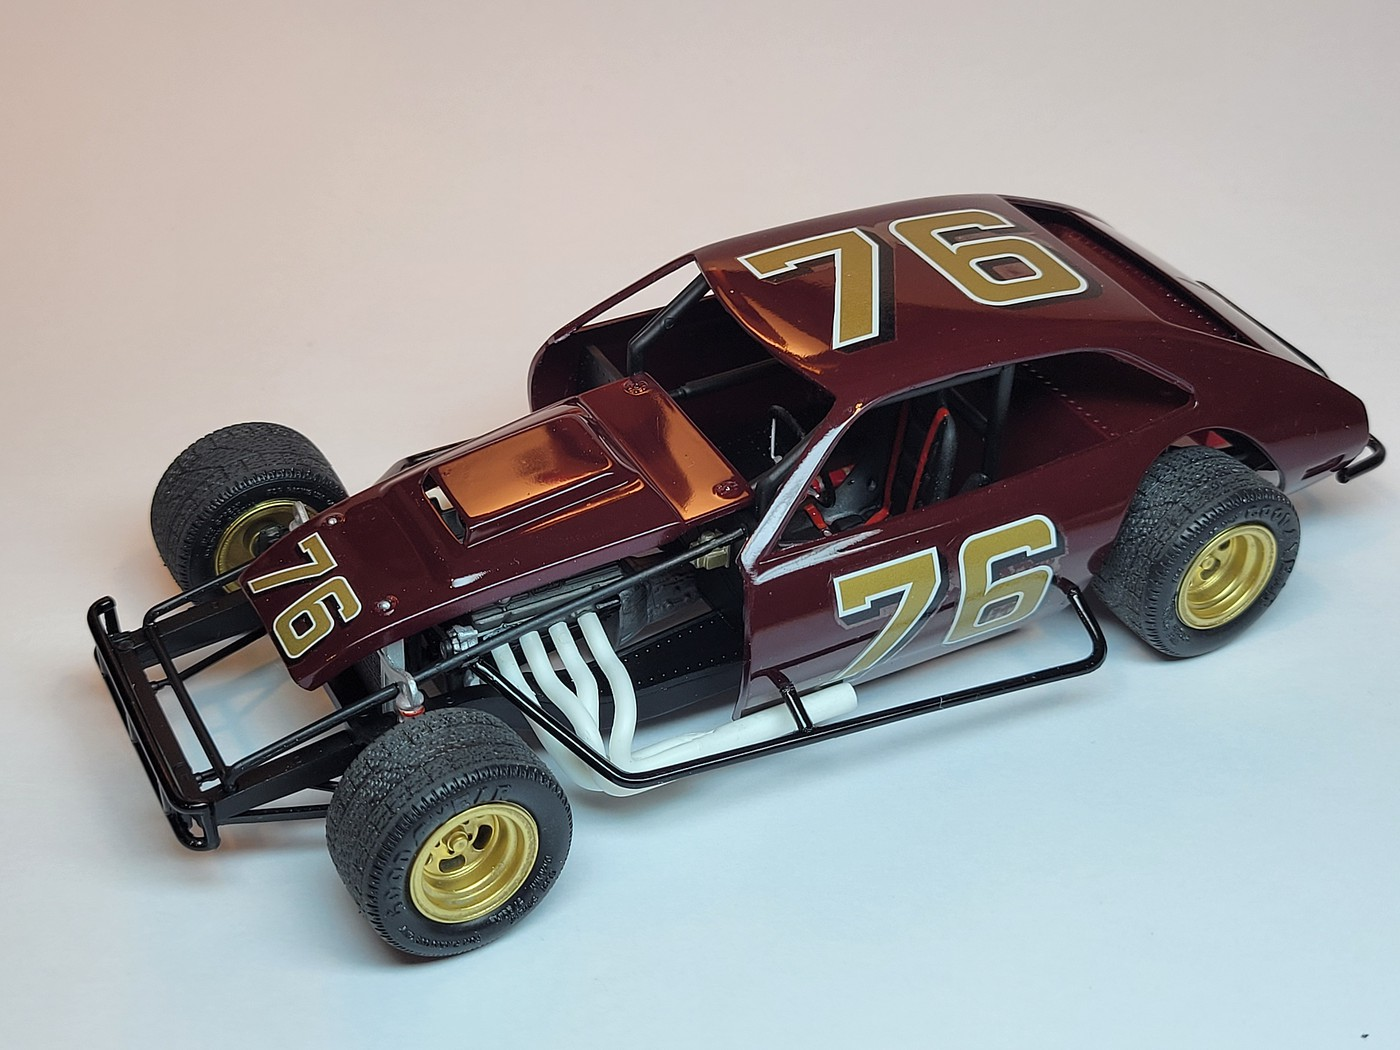
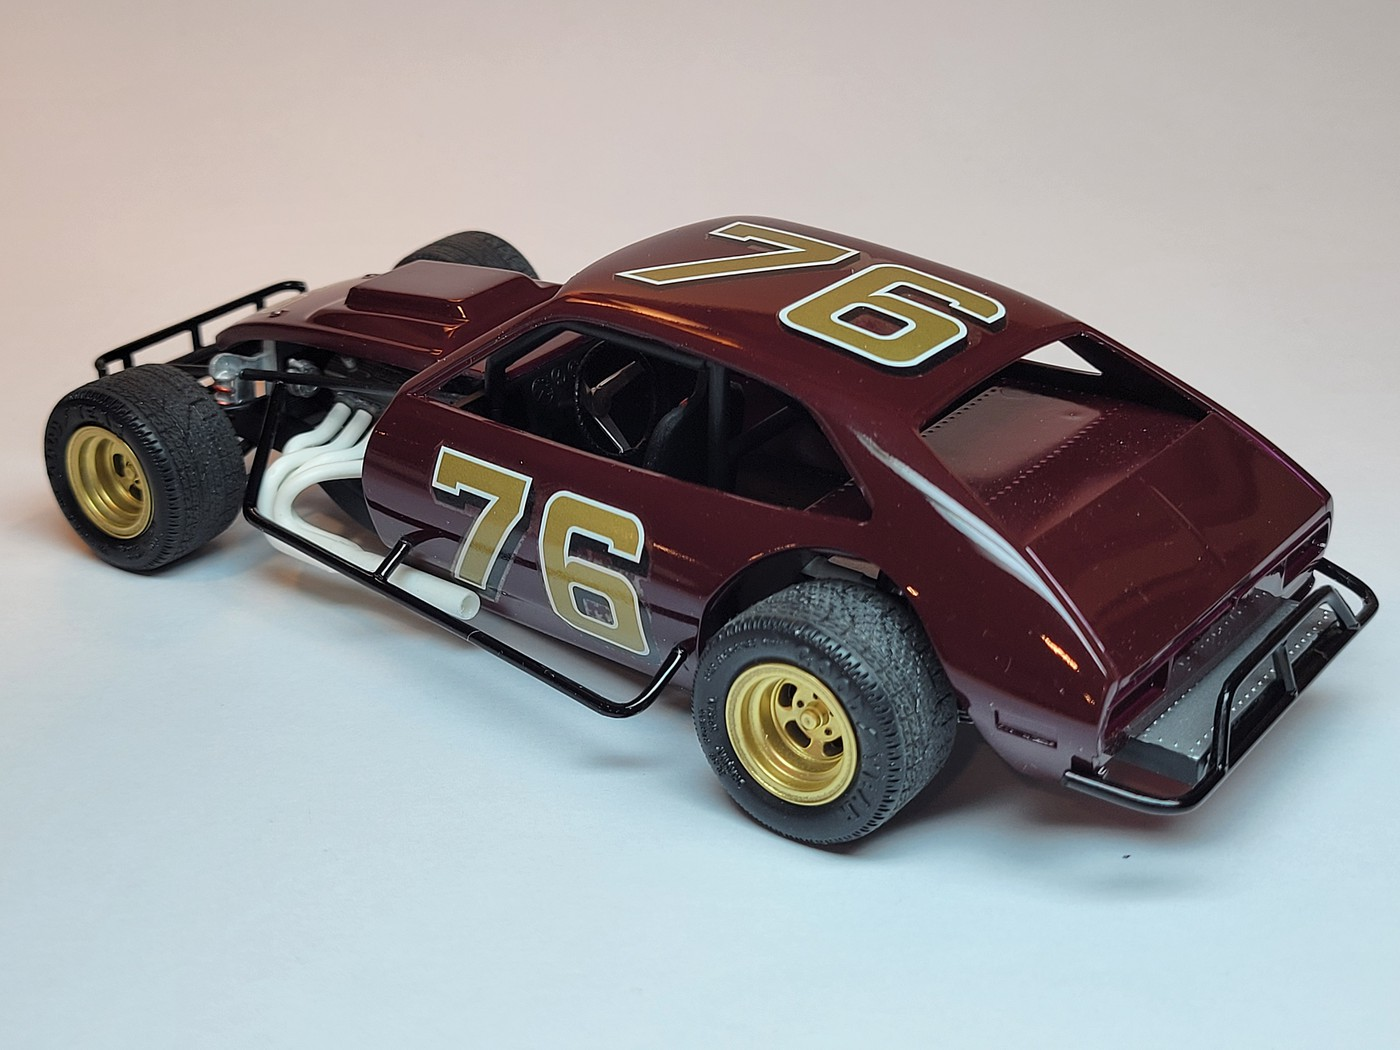
 I thought I would share my 2024, 24 Annual Model Build entry with you. The build took place this weekend on Saturday the 27th at noon until Sunday the 28th at noon. This was the 18th year for this event. I have done all 18 years as I am one of the founding members of this event. It wasn't an event 18 years ago, it was 5 friends getting together to build a new, untouched model in 24 hours and watching the Rolex 24 Hours of Daytona and various car movies. We had such a blast that we decided to do it again the next year, and as they say, the rest is history. This model is the Model King issue of what I believe is an MPC kit. My box says AMT, but Scale Mates says MPC was the original version of this kit. All I did this model prior to the 24 hour build was wash the parts. I was able to finish in about 22 hours. Color is Tamiya Maroon straight from the can. The pictures of the finished model were taken immediately after it was finished. I may tweak a few things and I may add a few sponsorship decals. I may just leave it as it is and put it in a display case. Thanks for looking. Let me know what you think and let me know if you have any questions about the Annual 24 Hour Build.
-
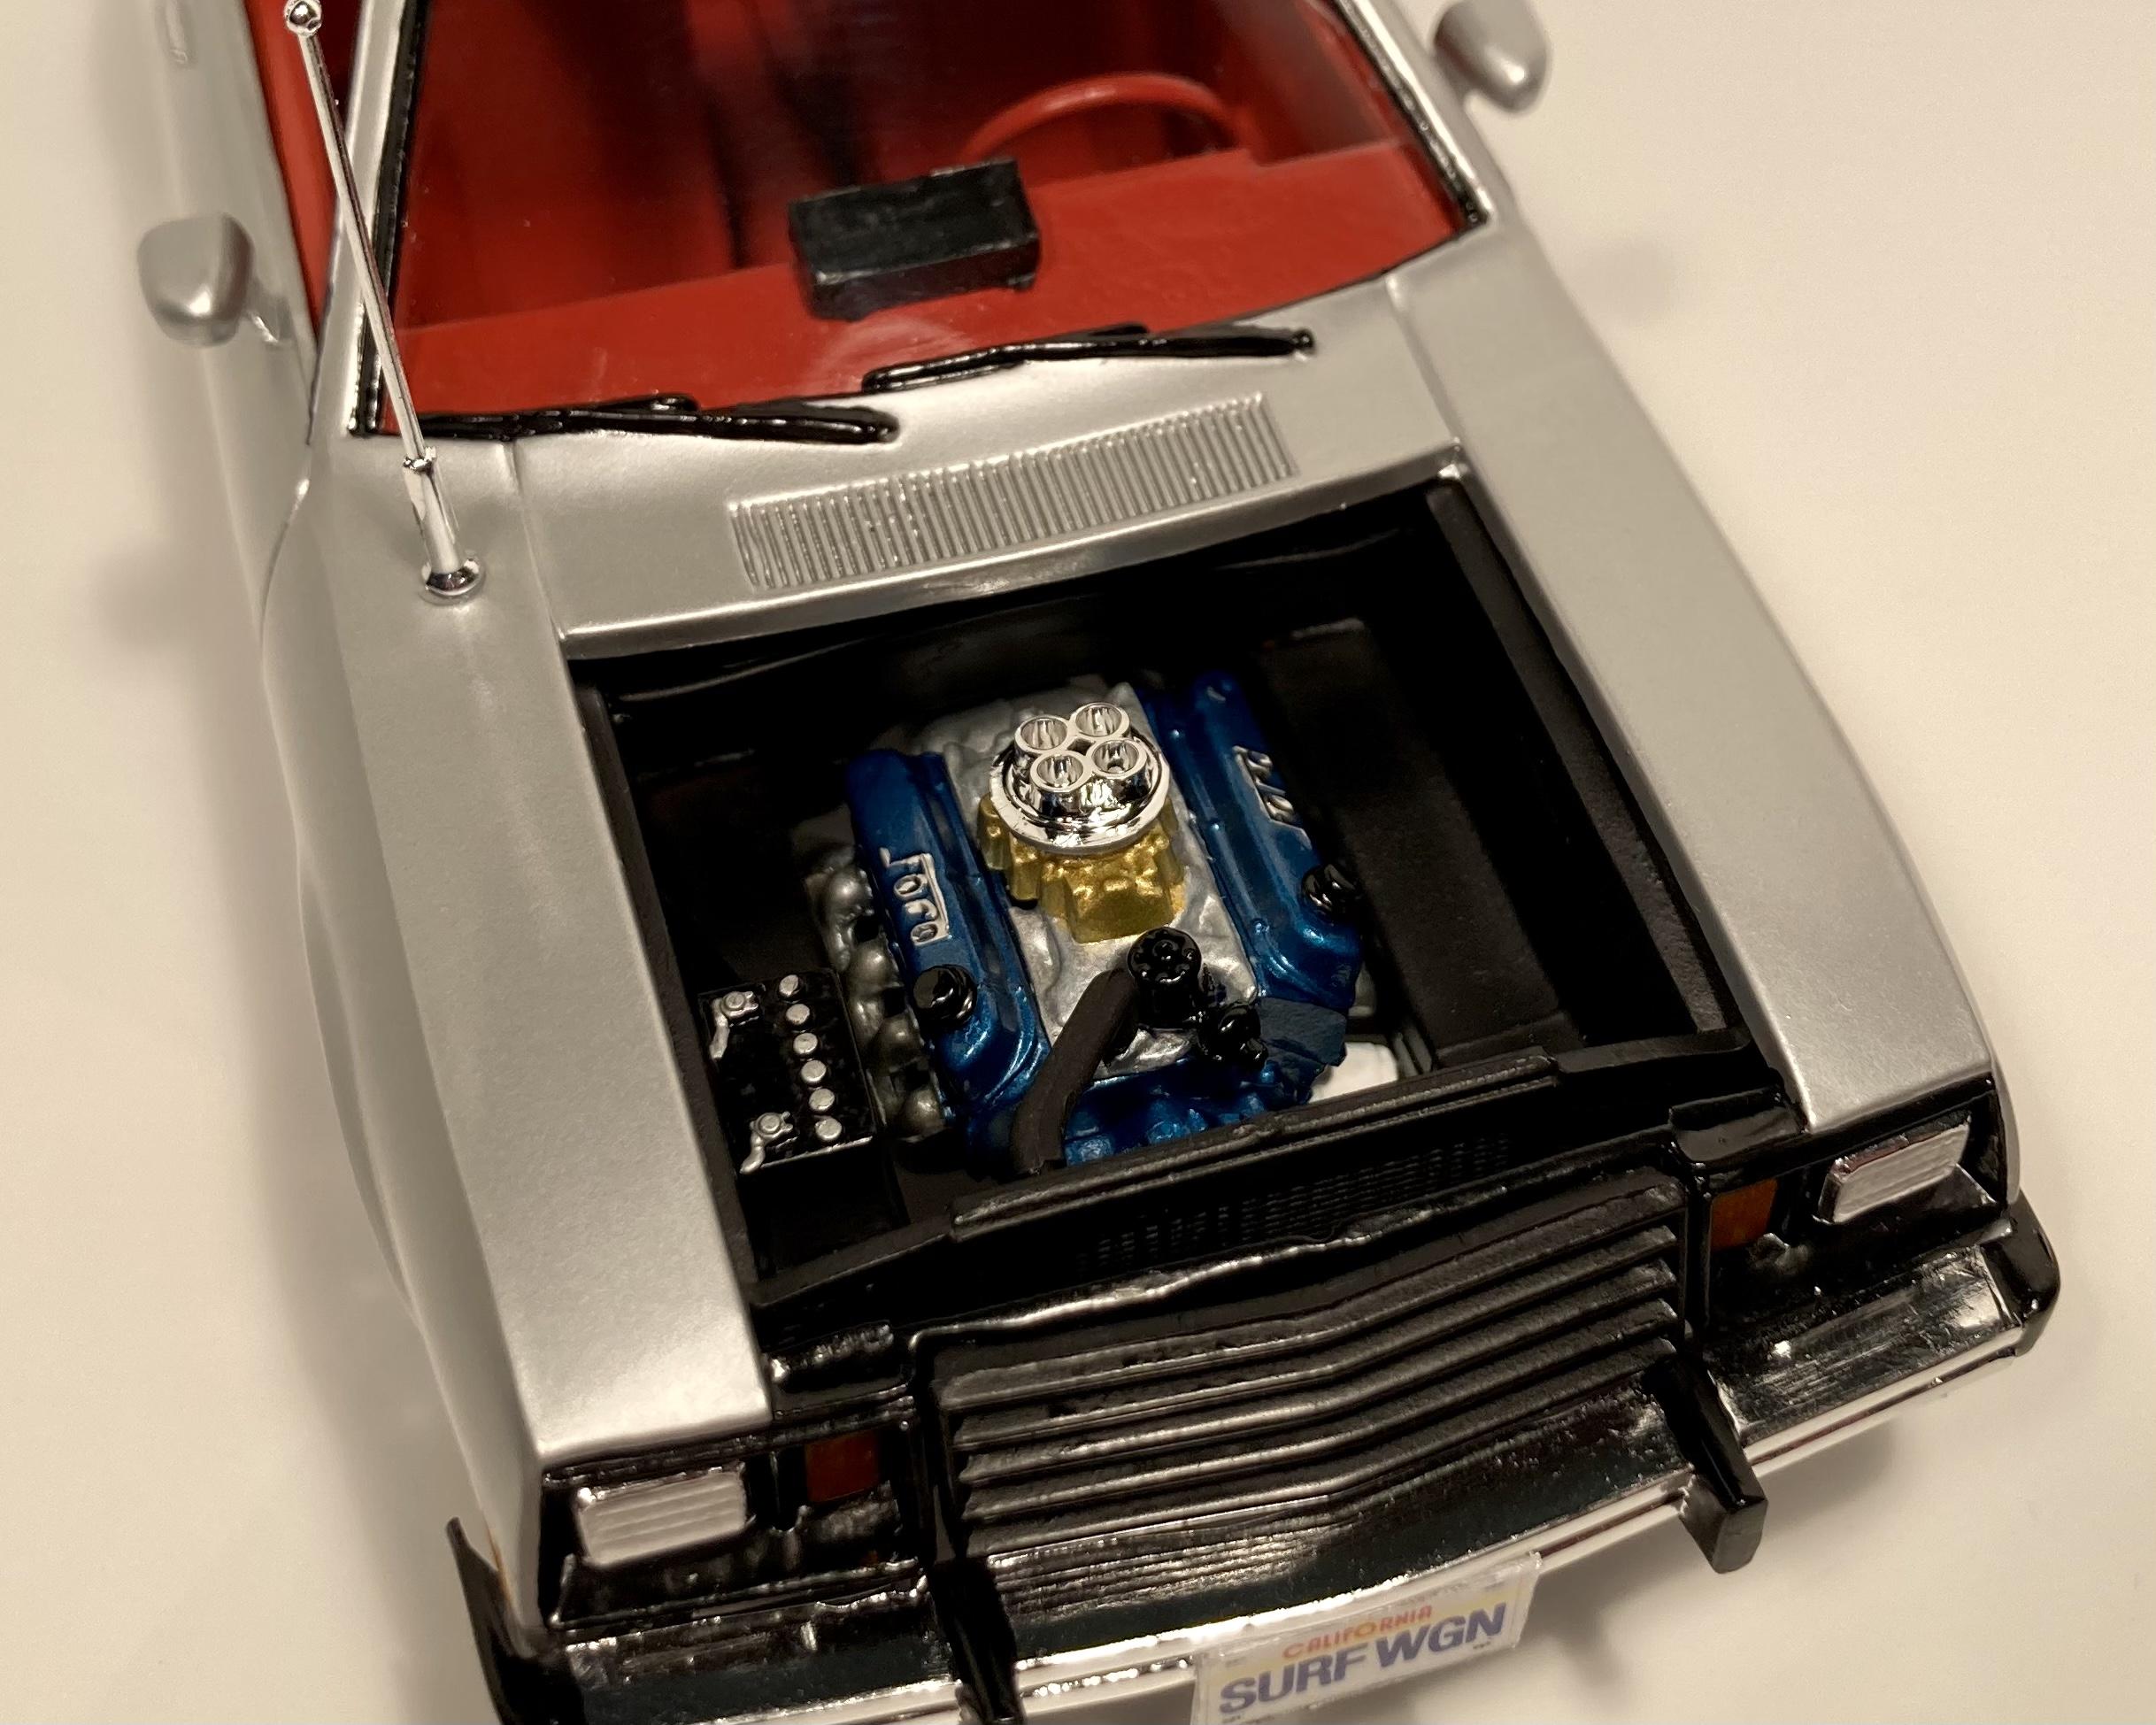
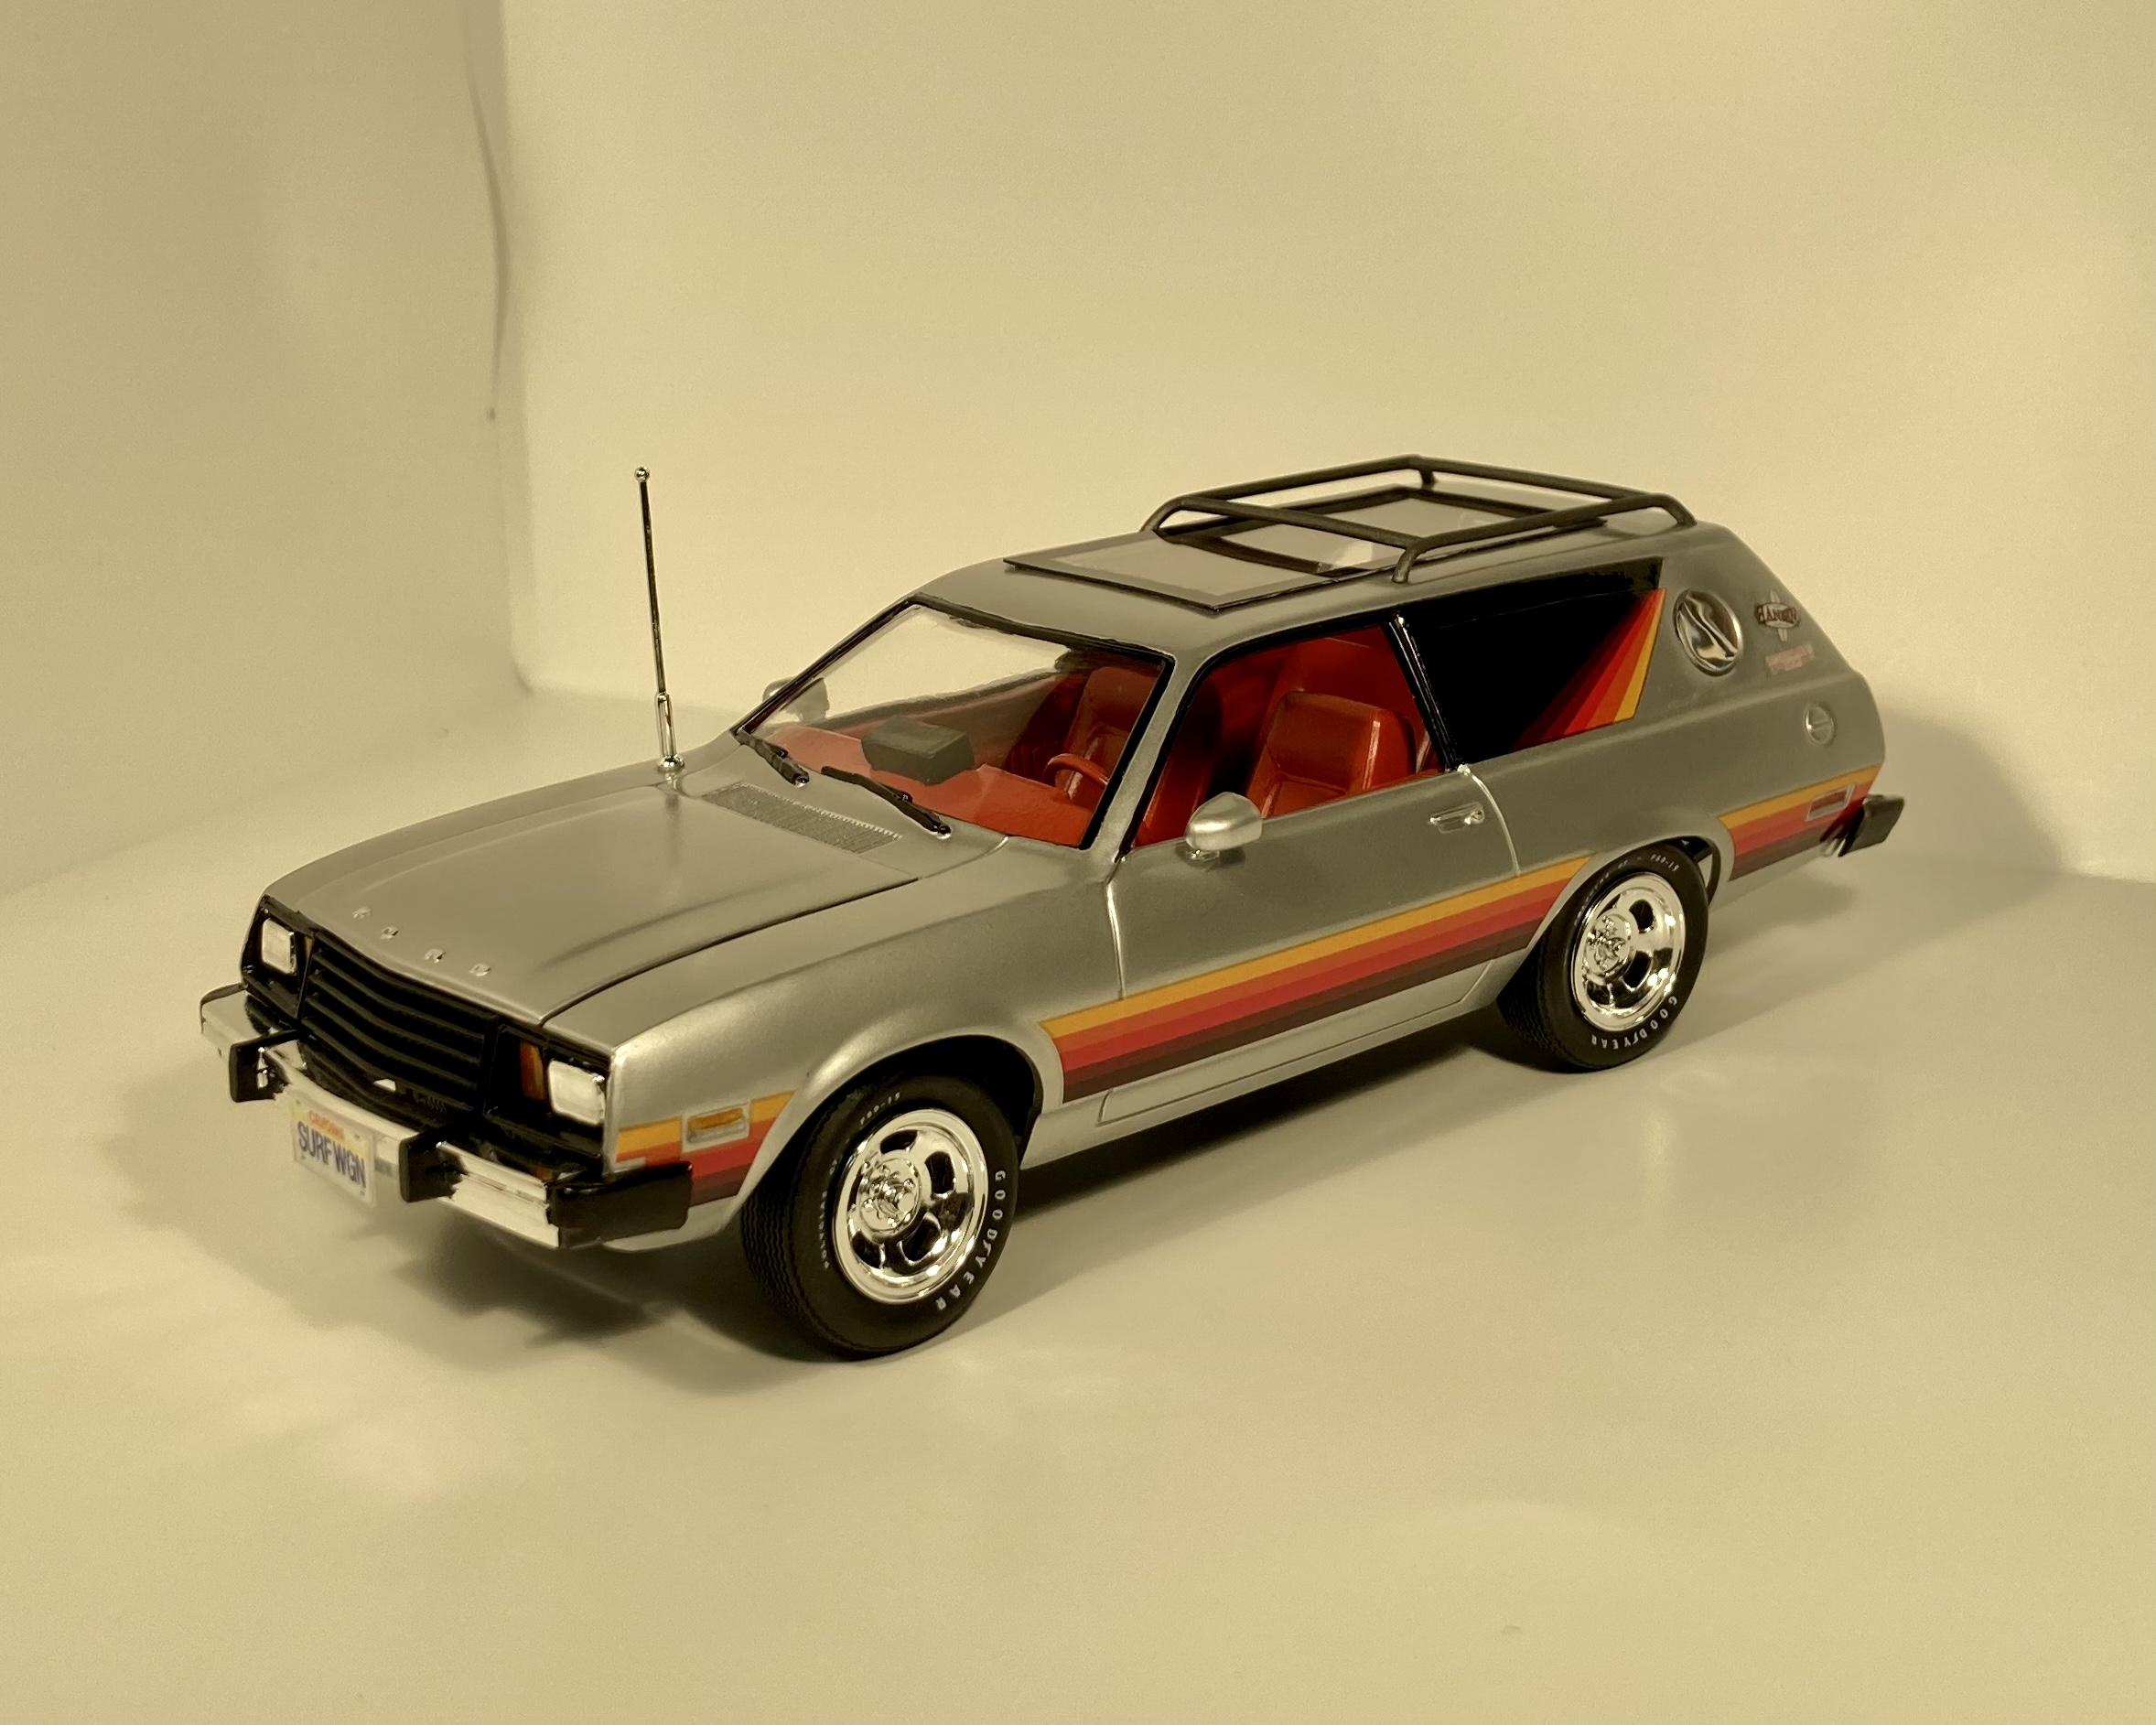
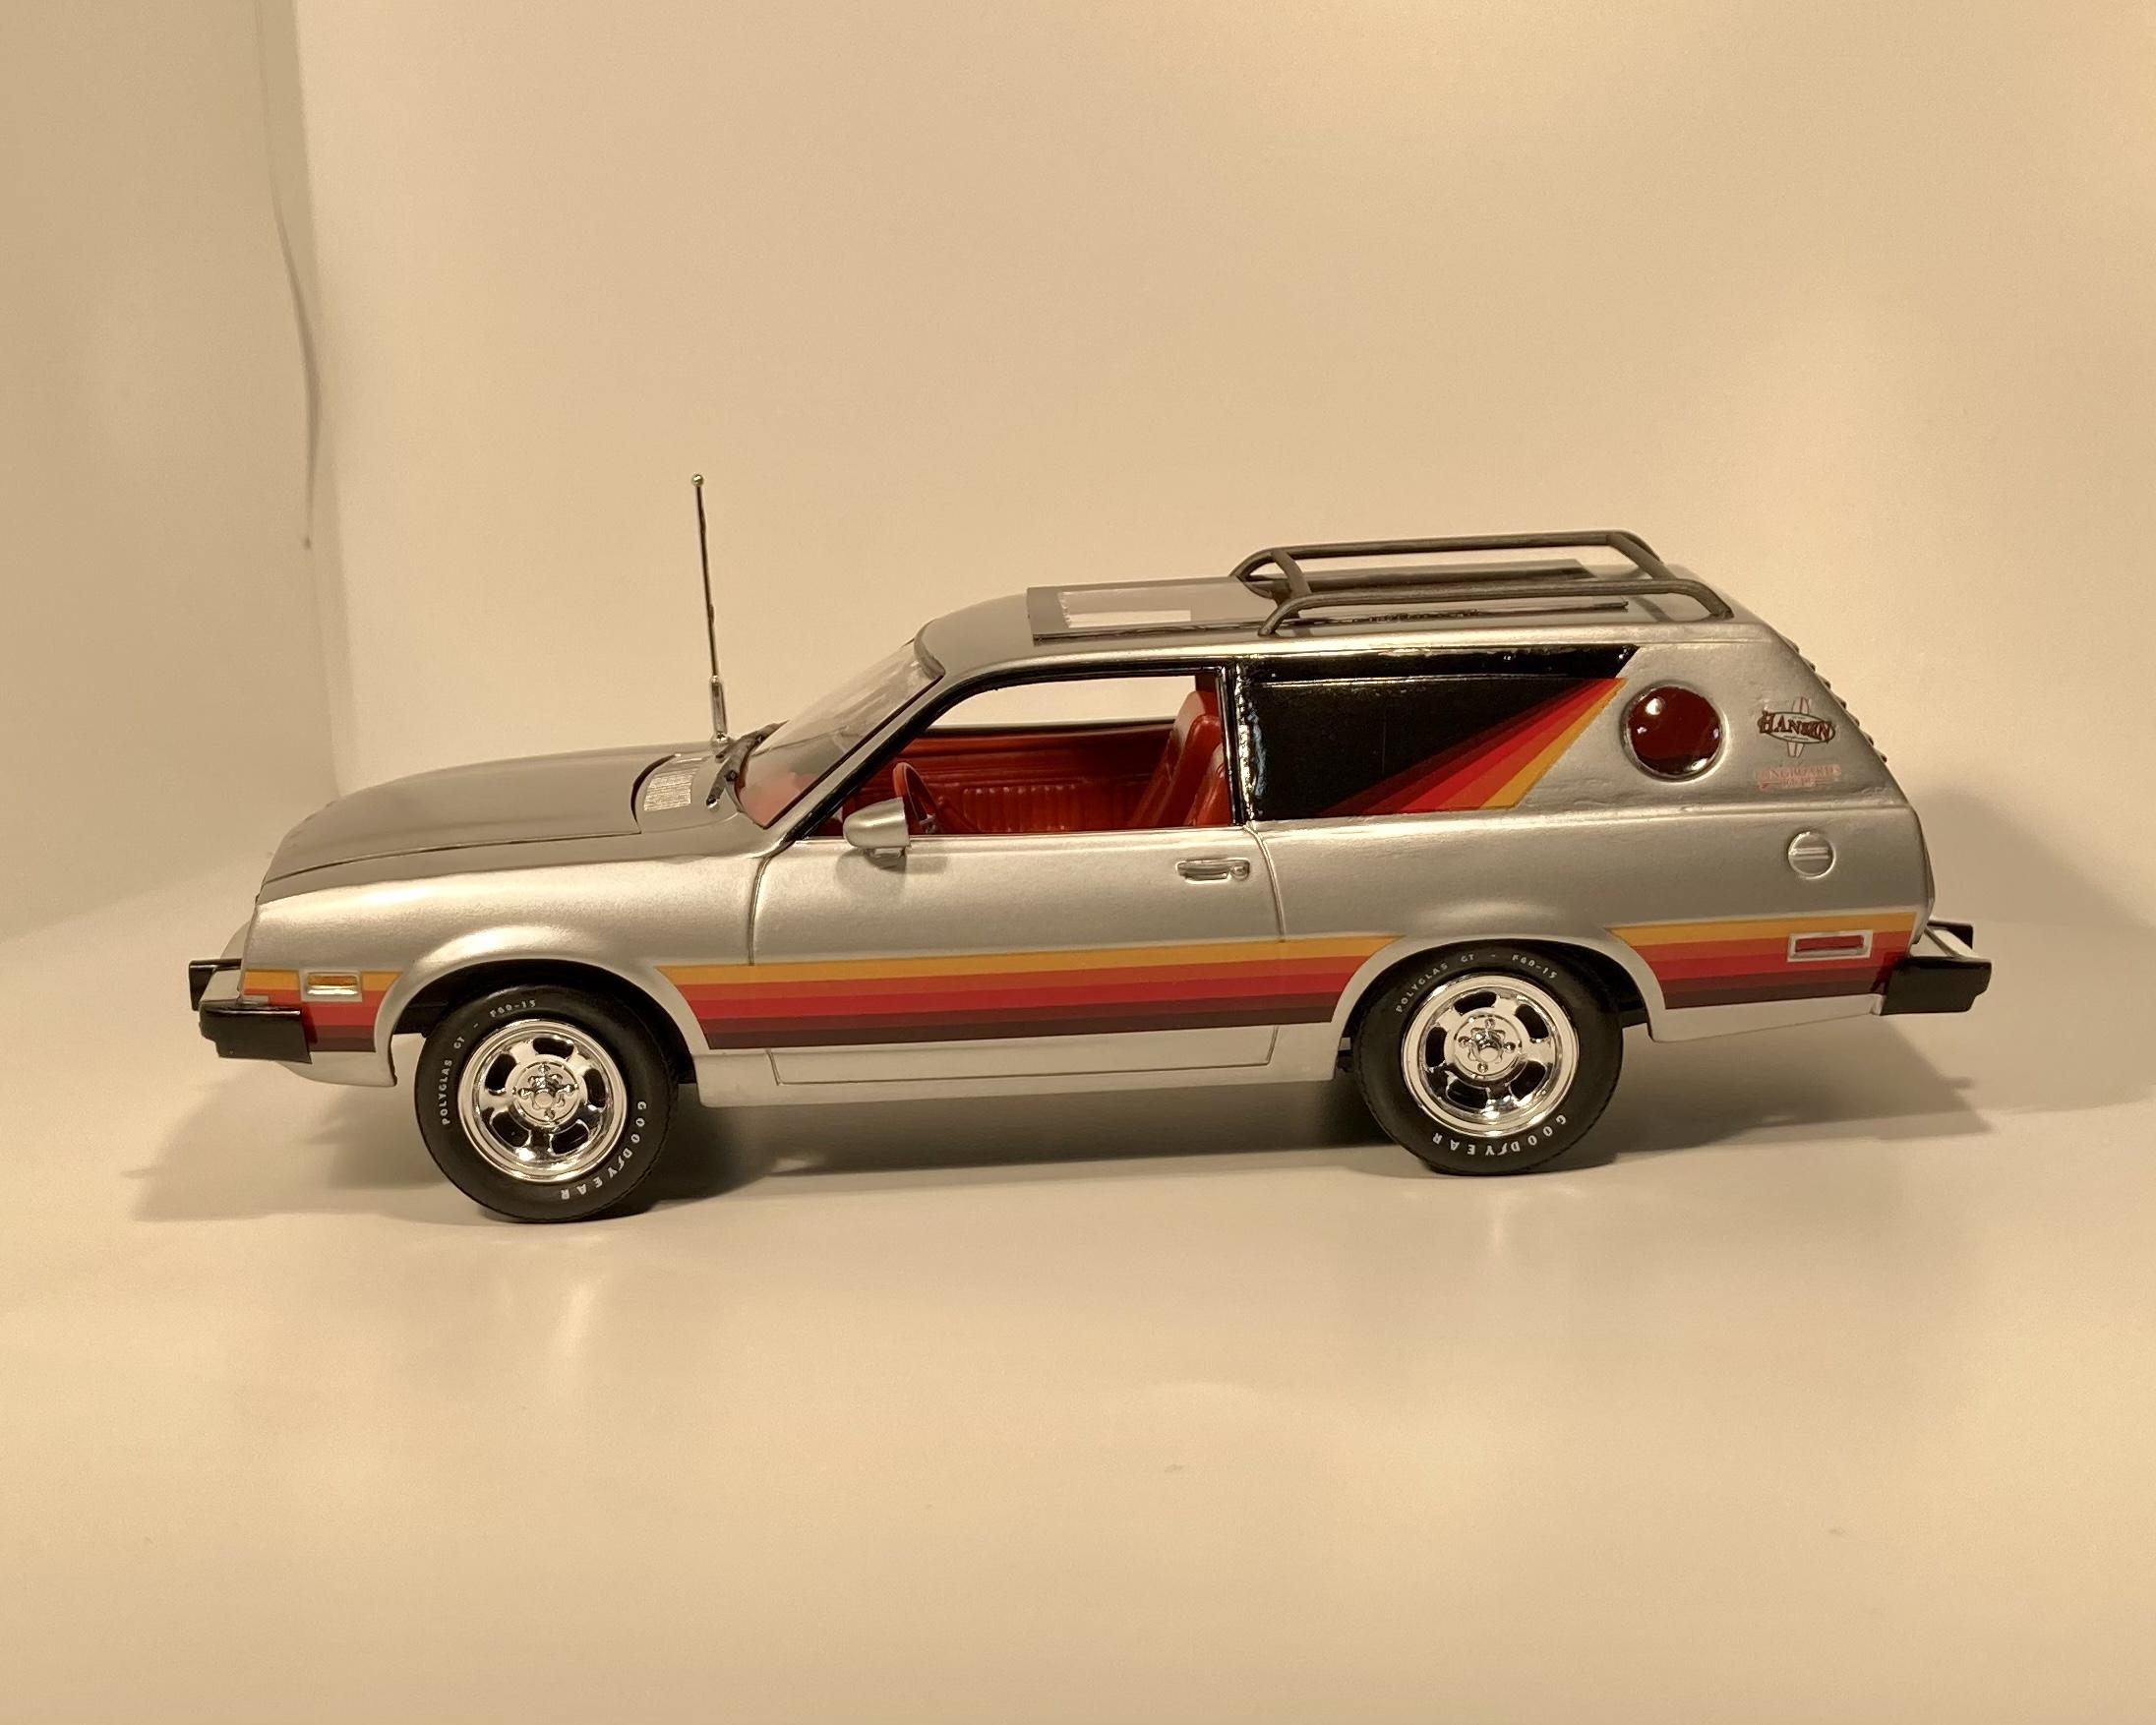
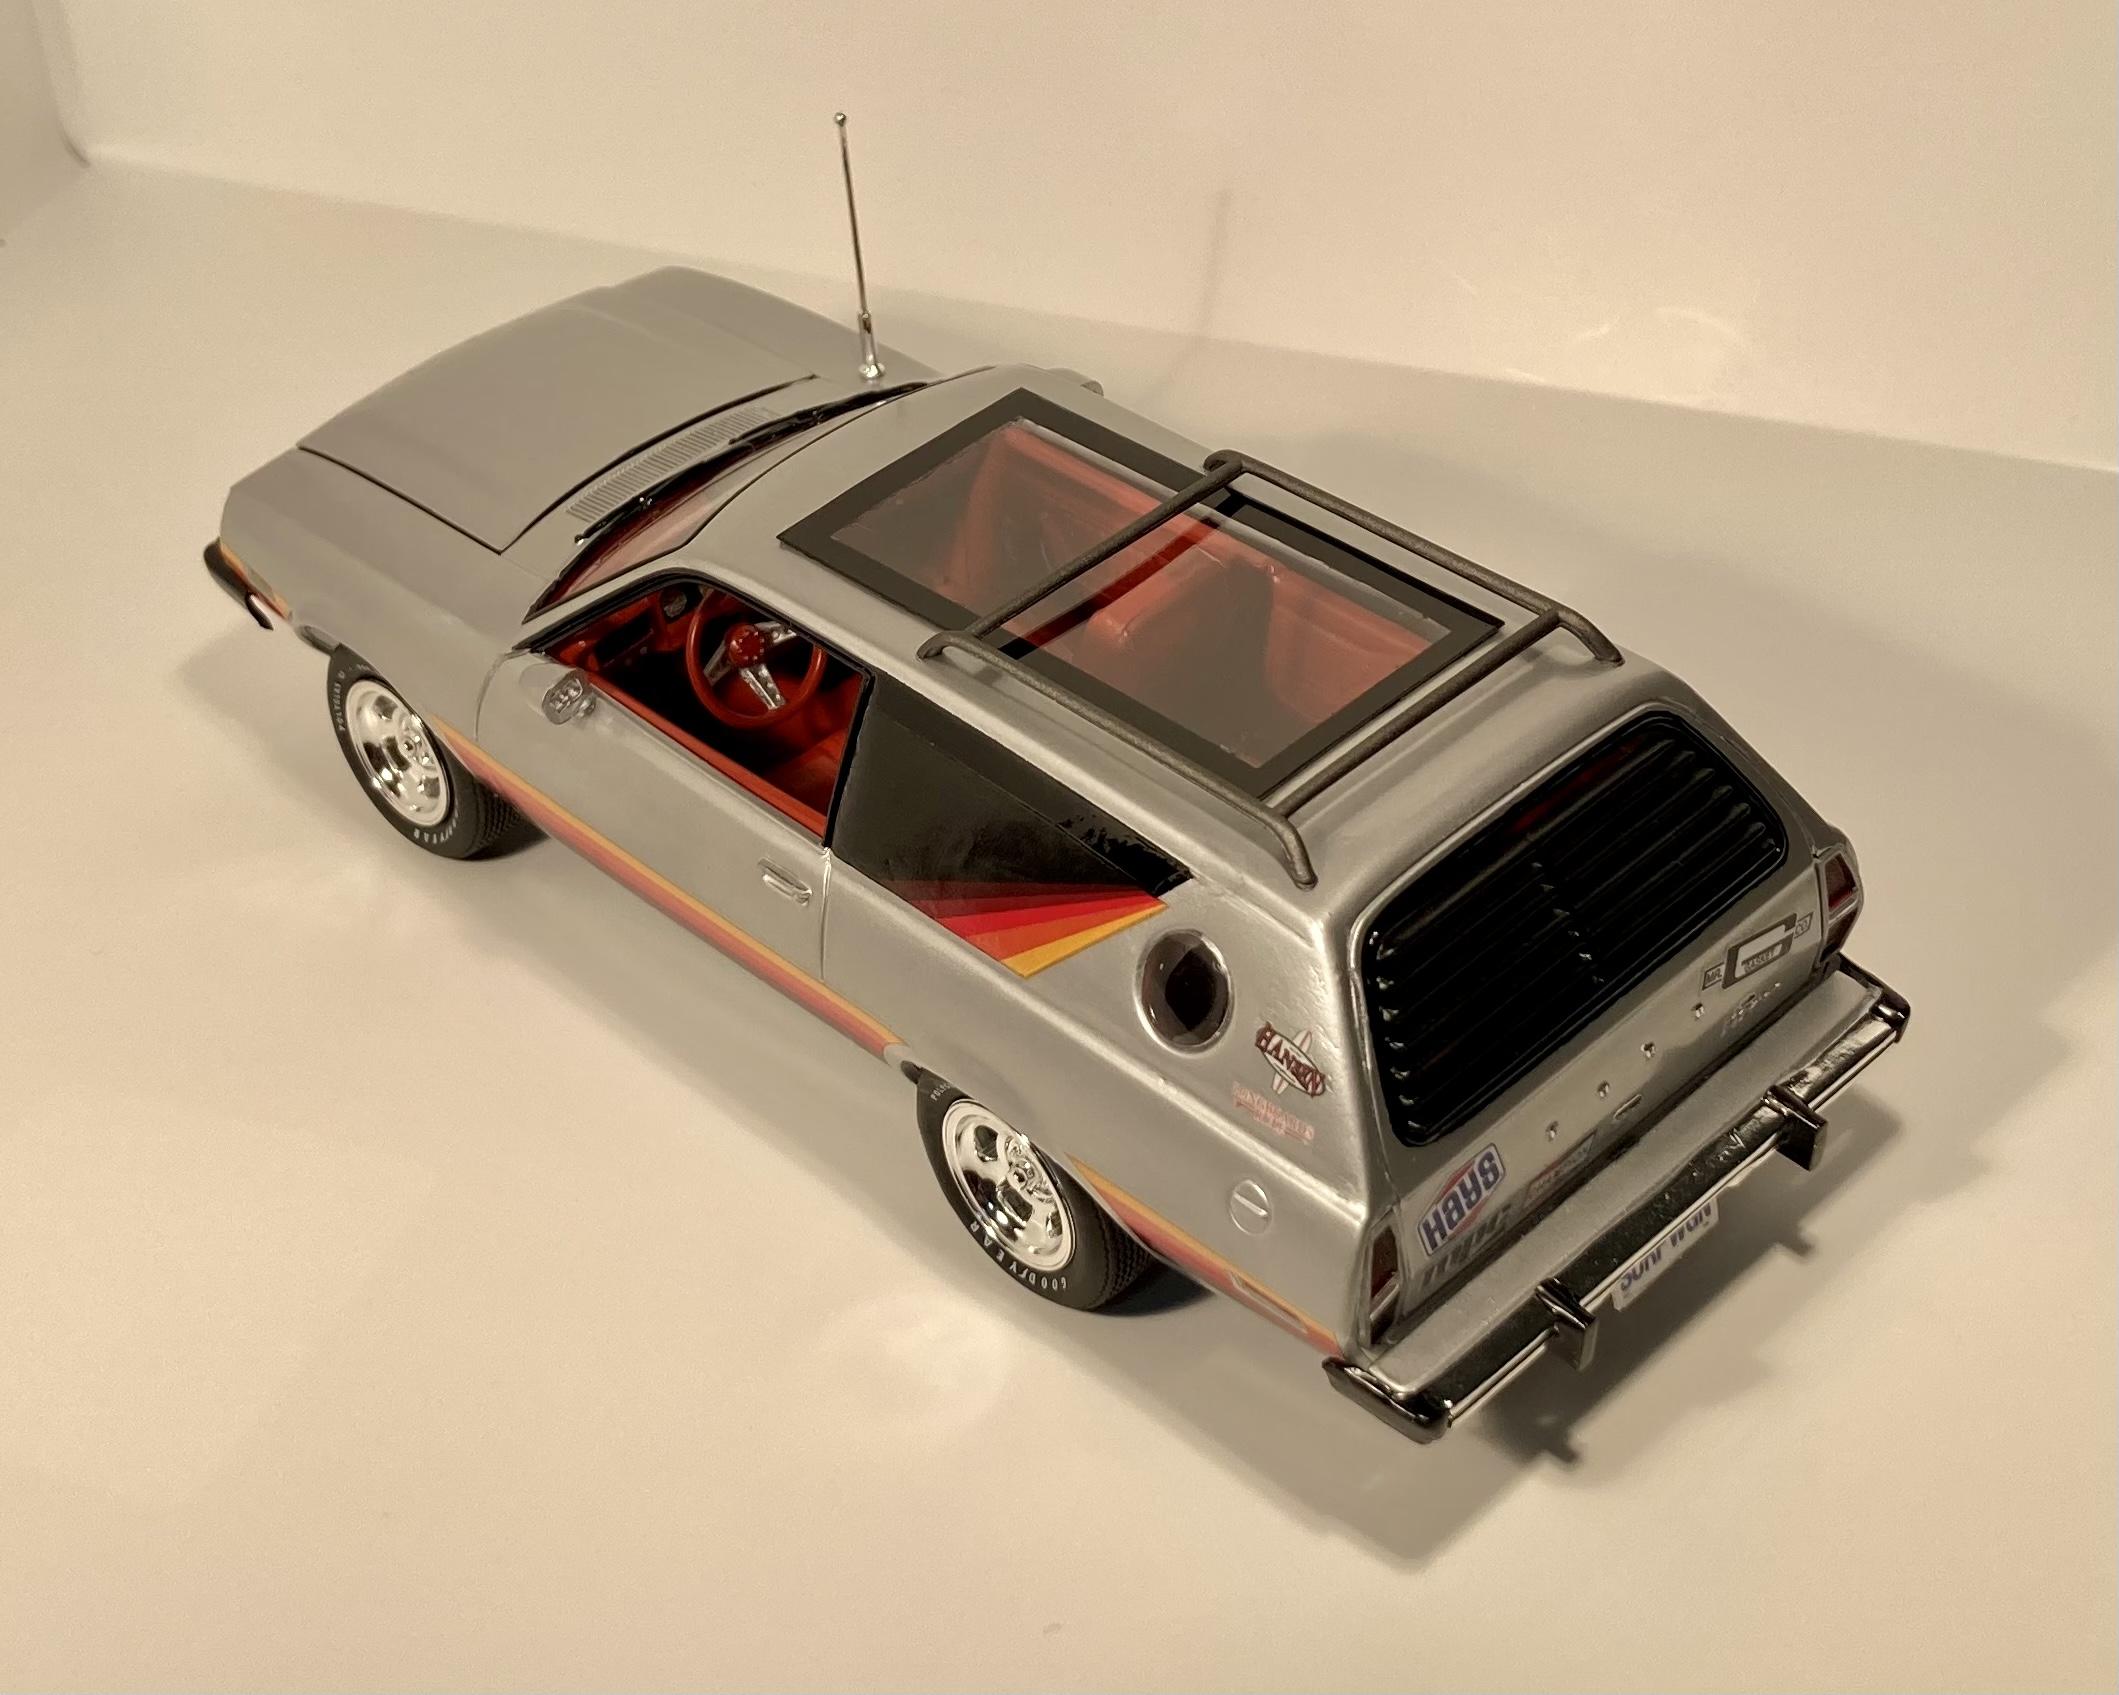
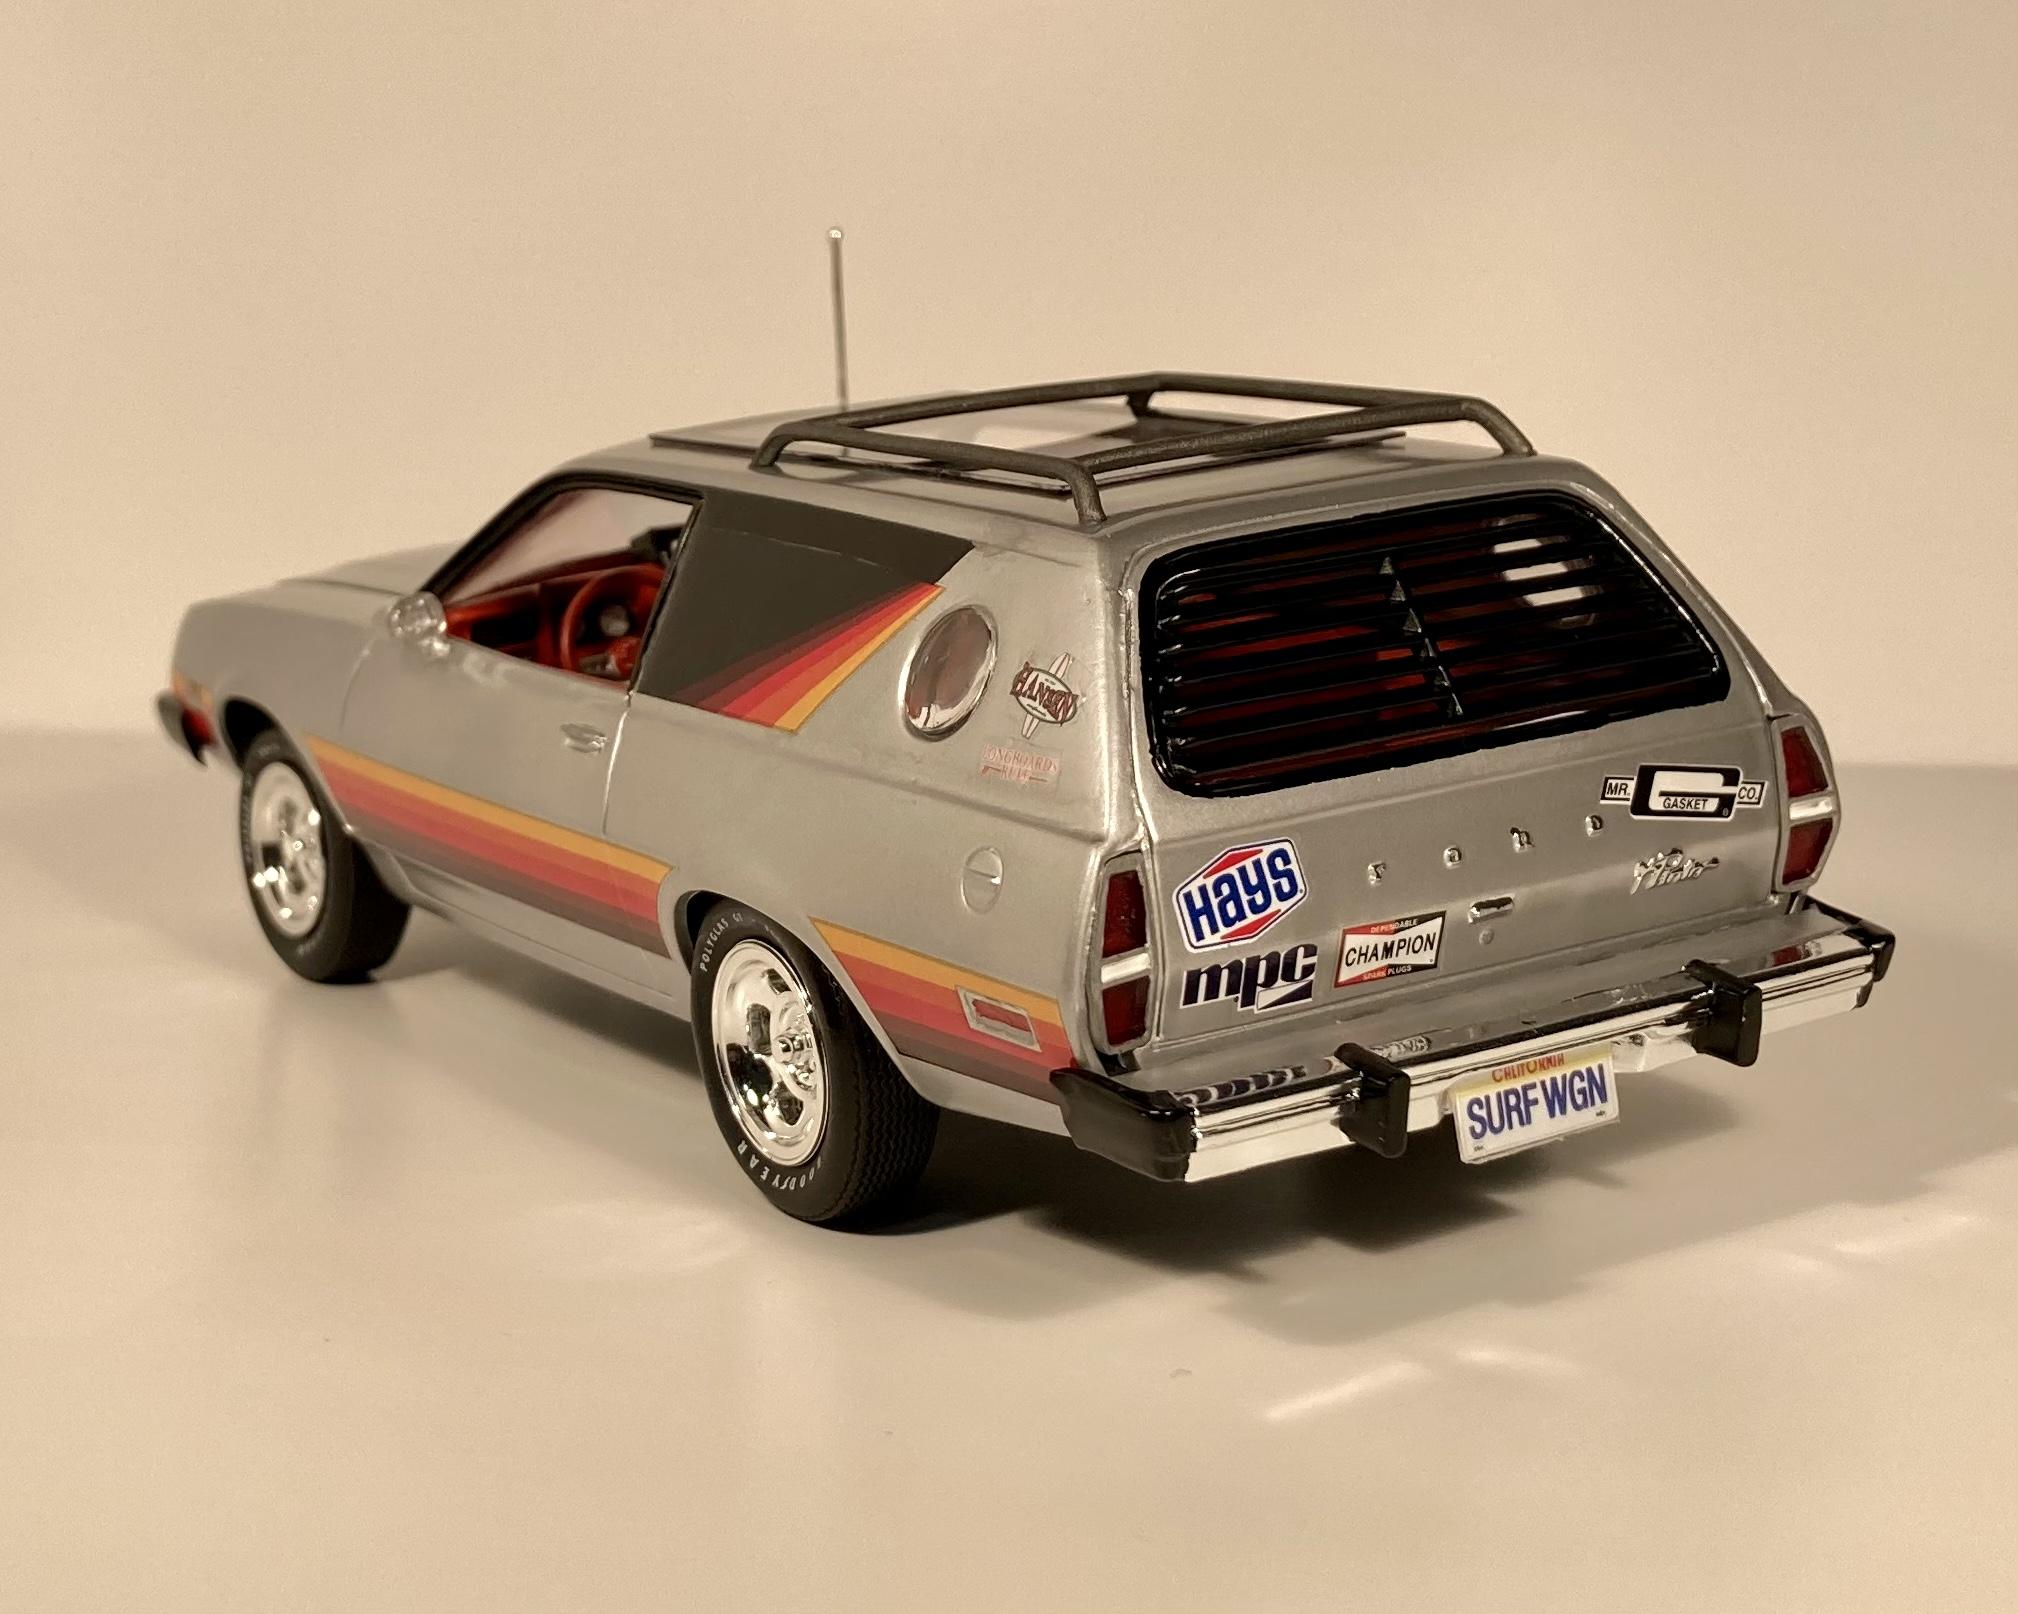
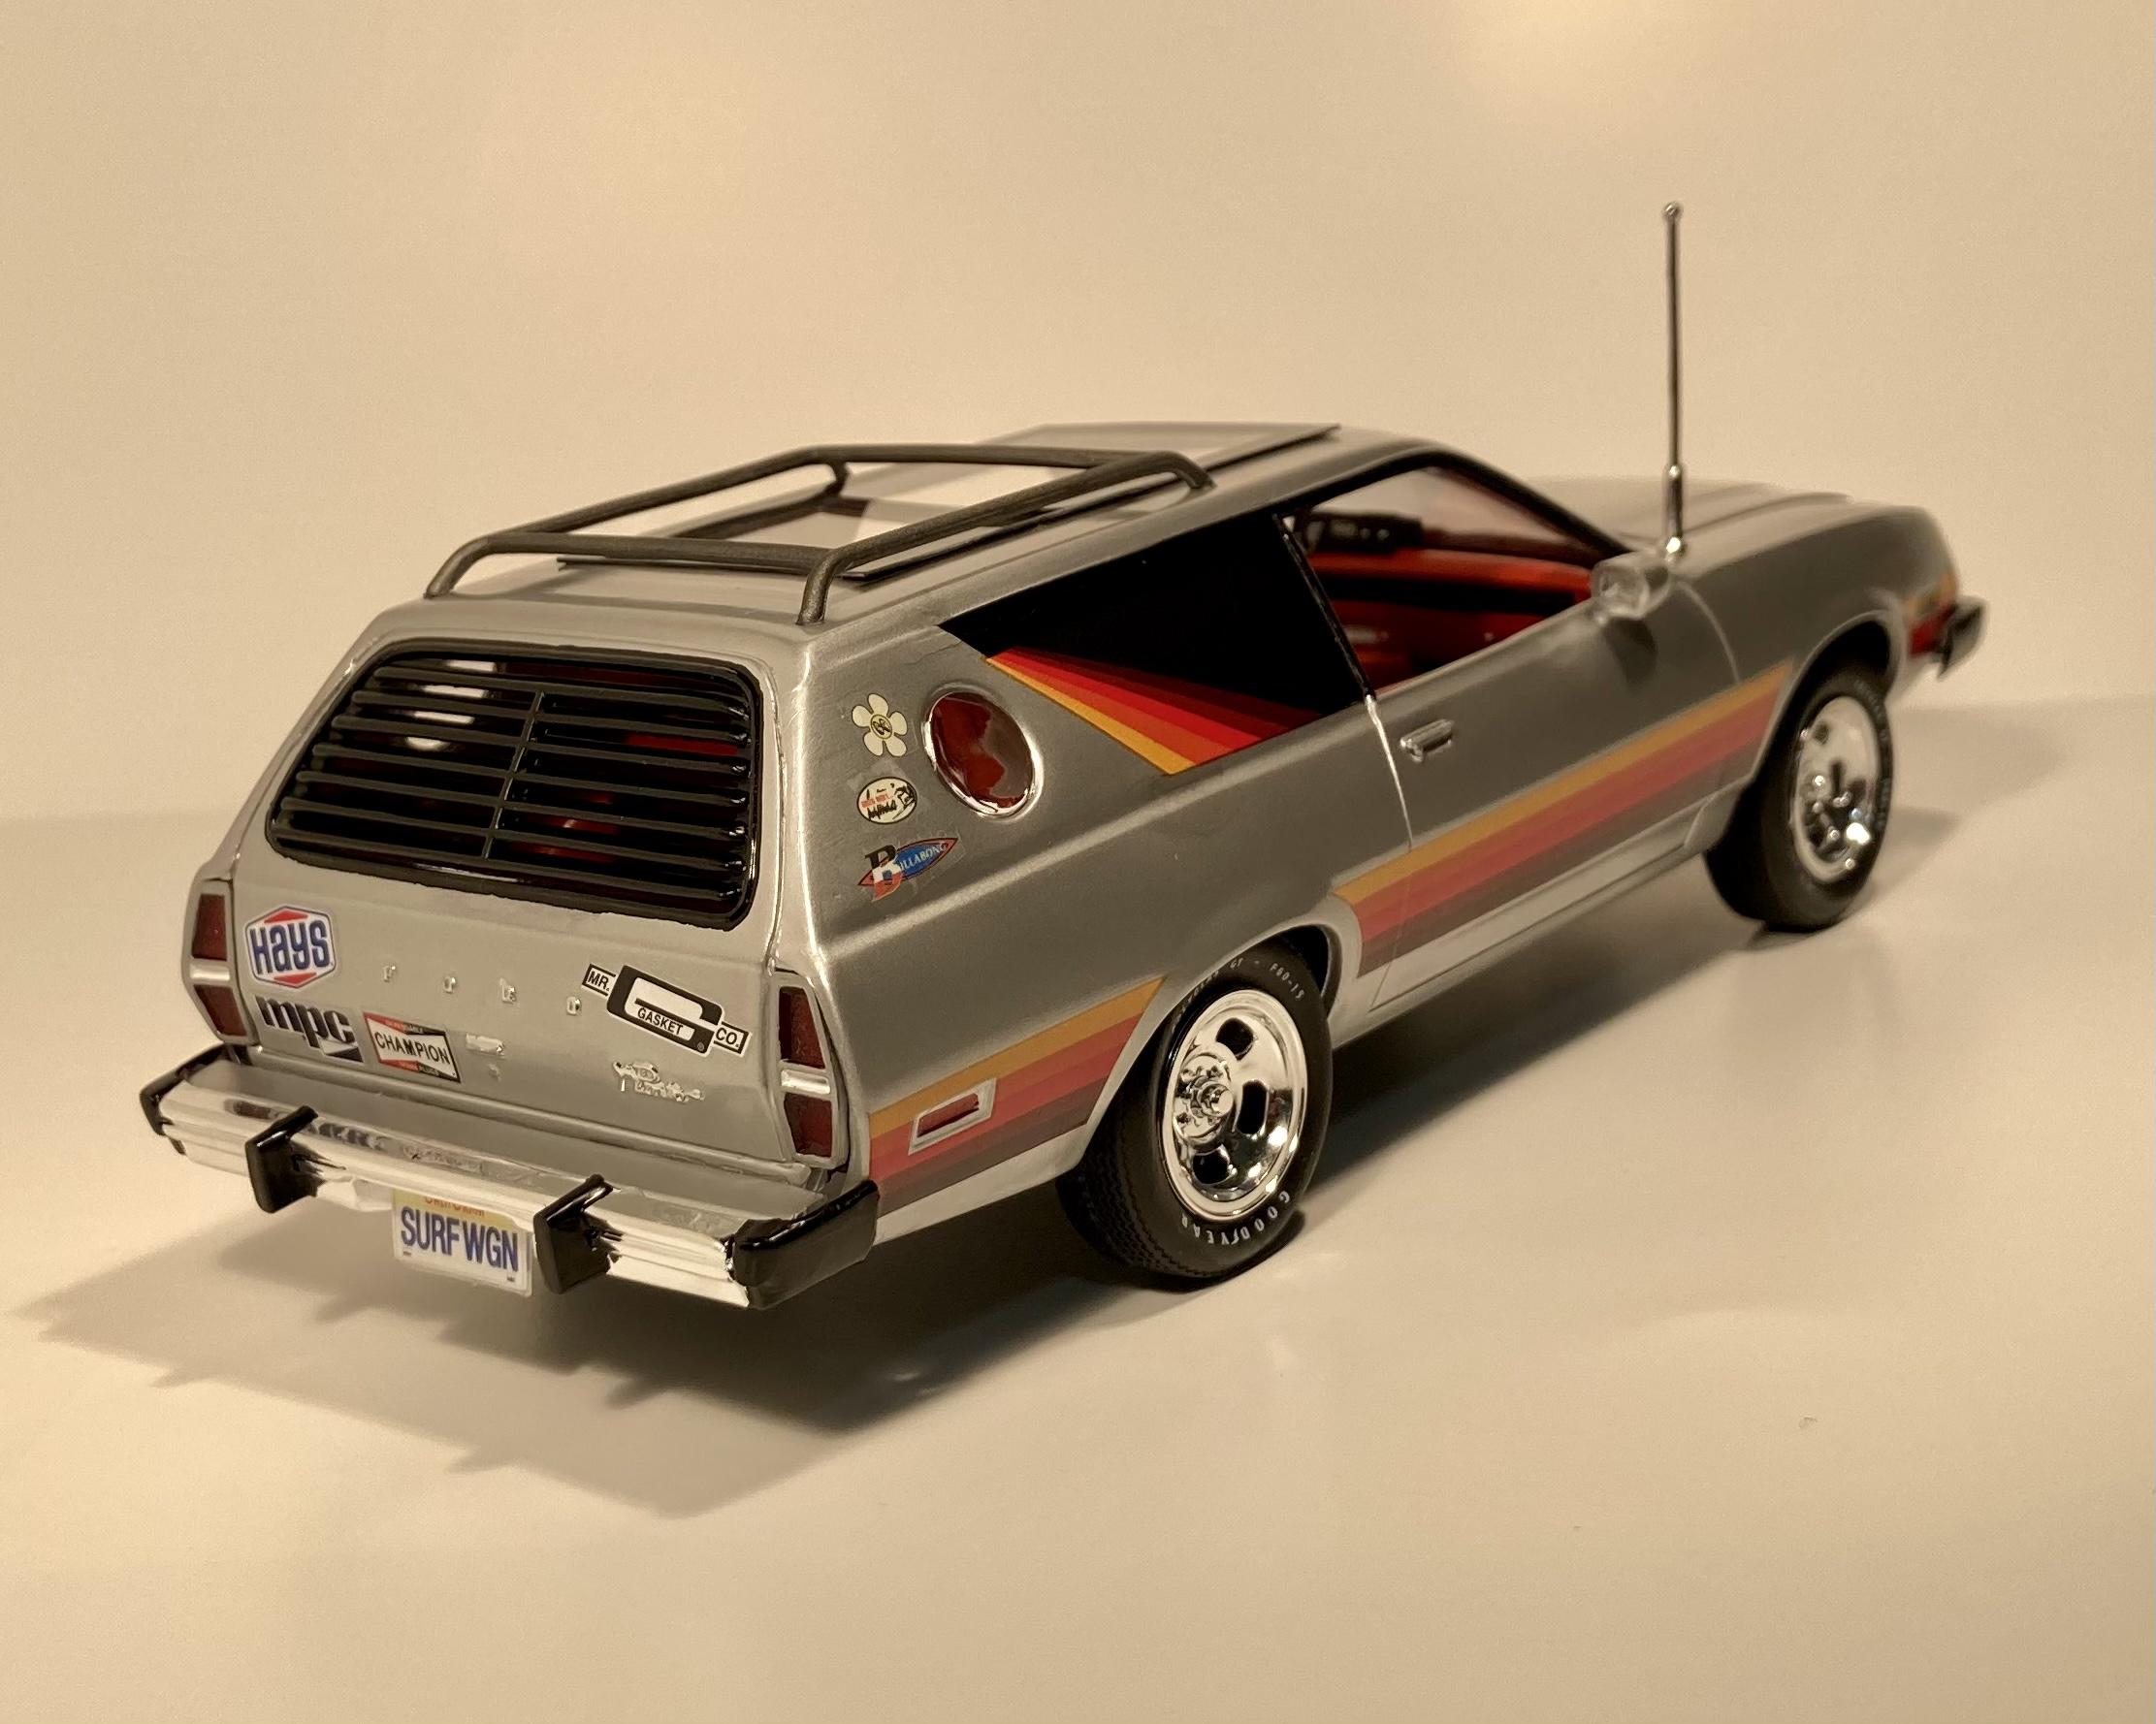
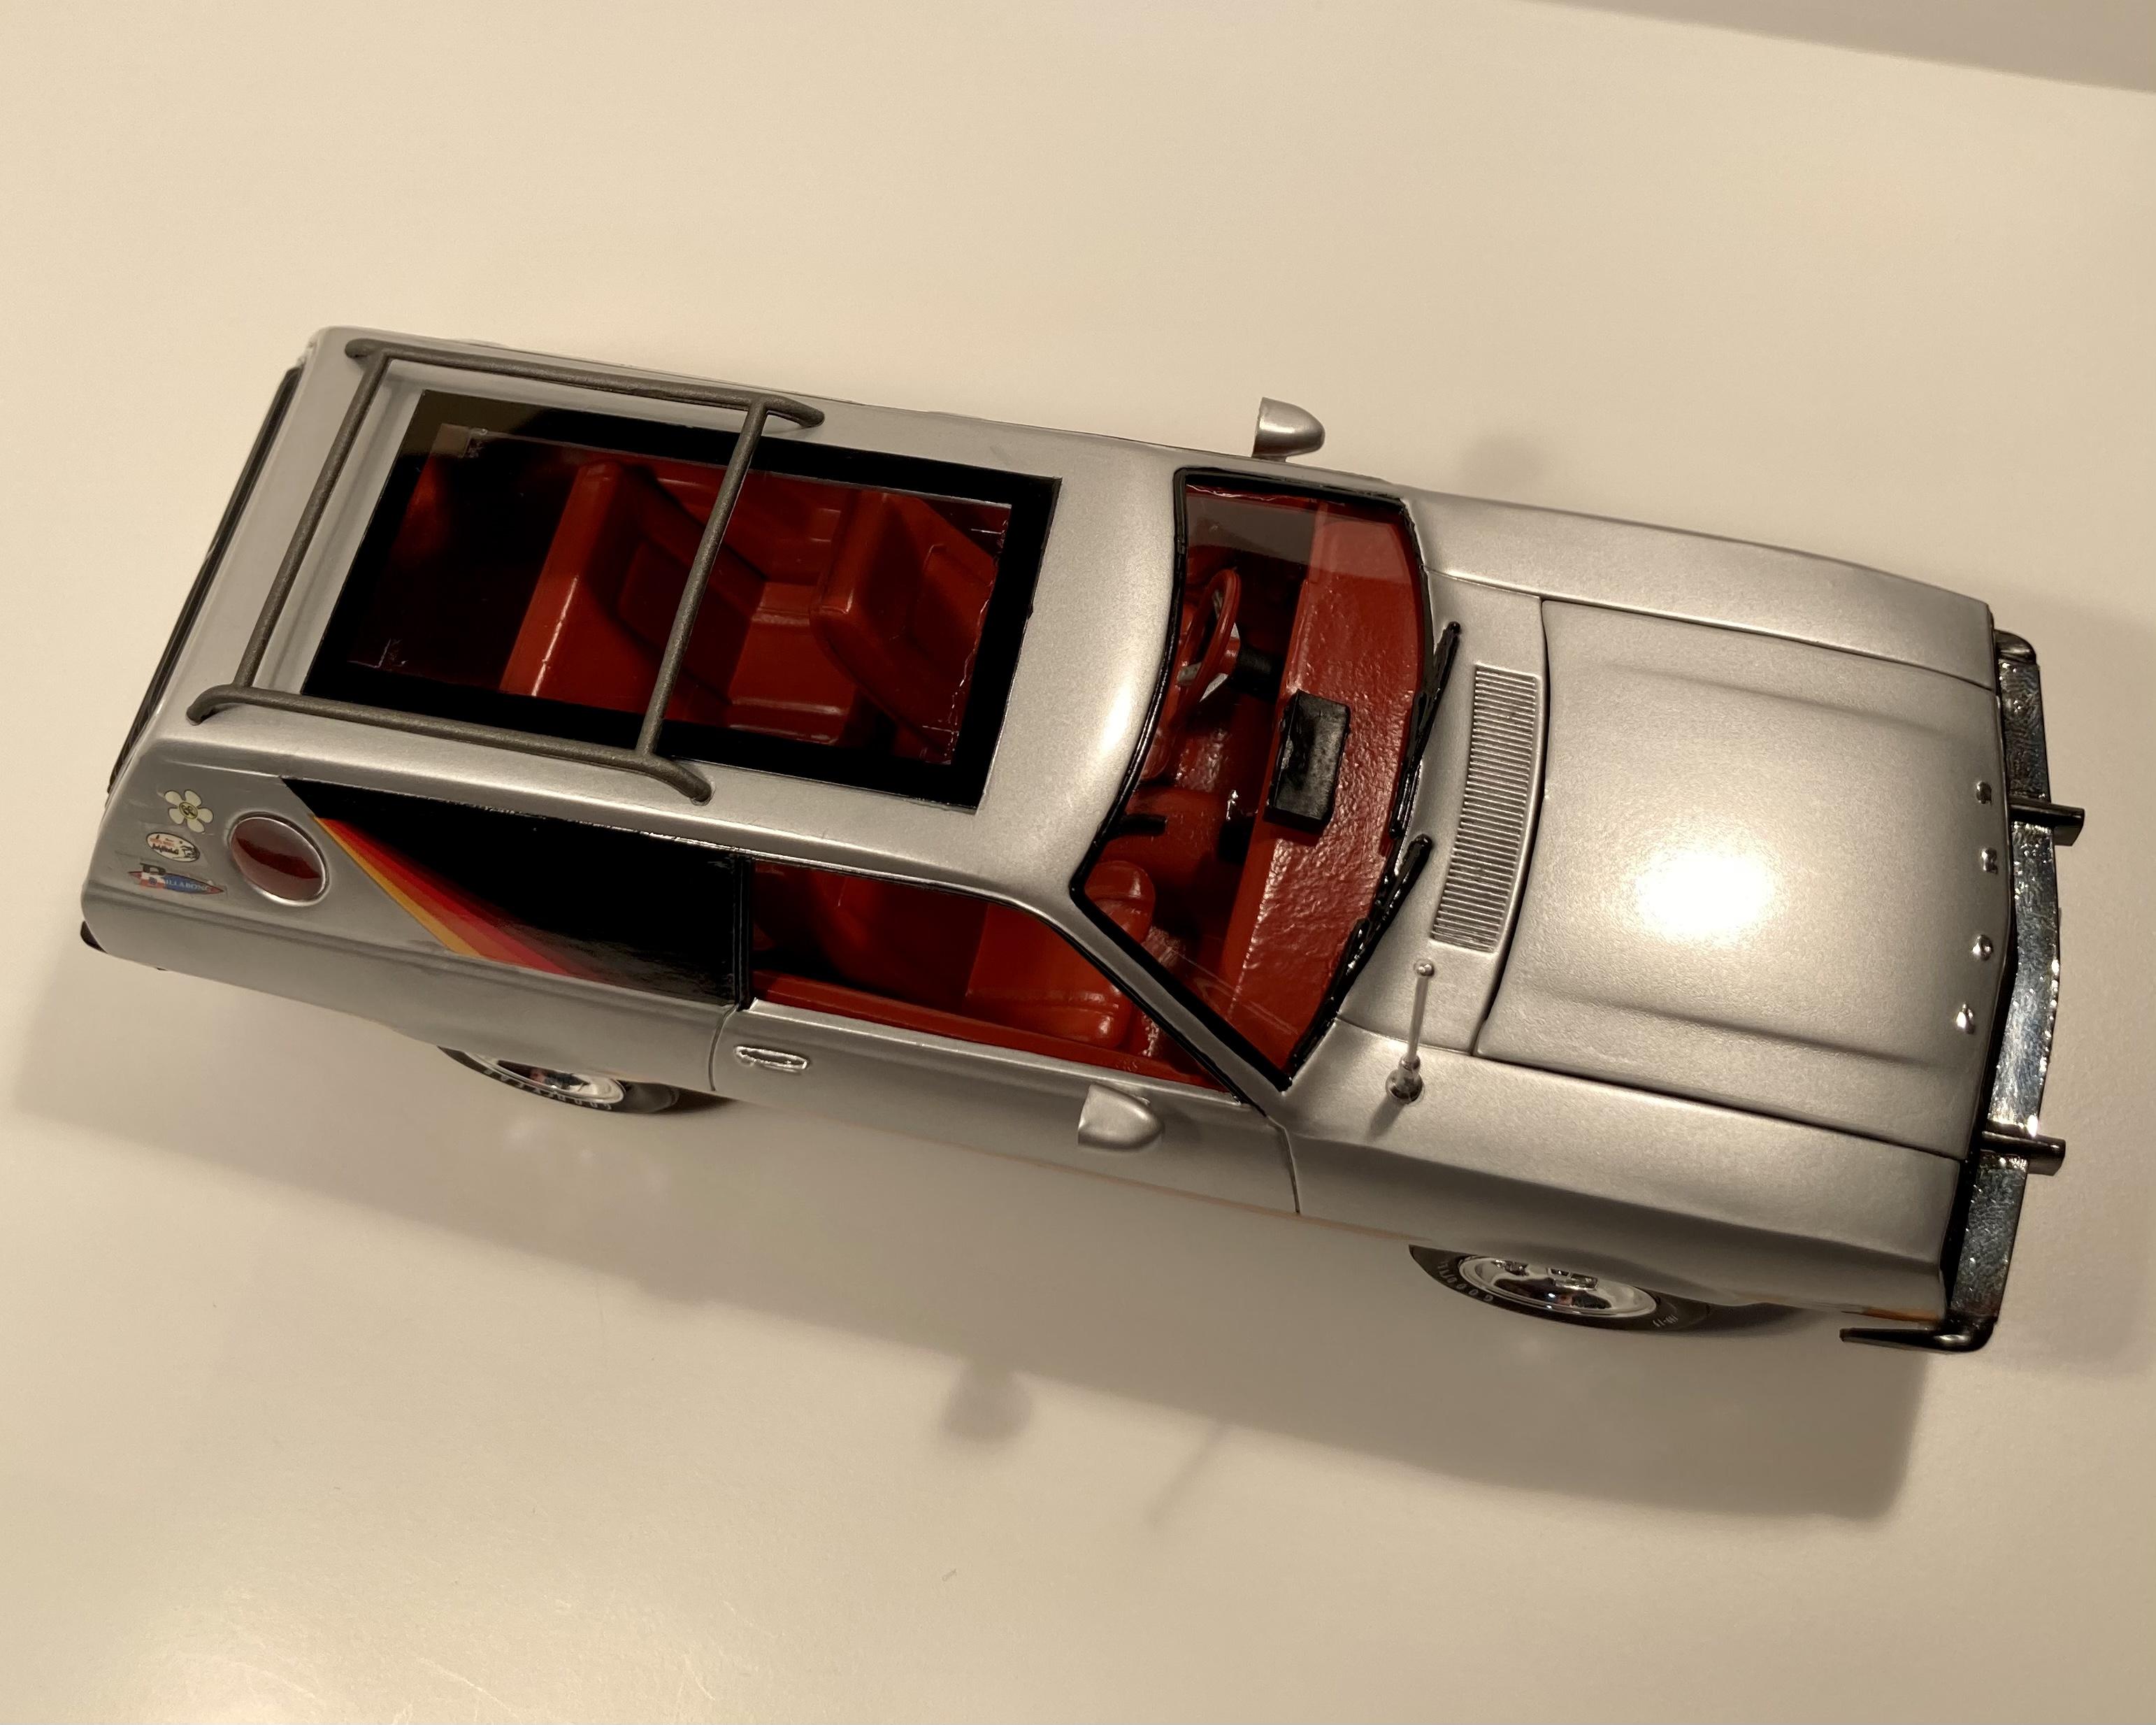
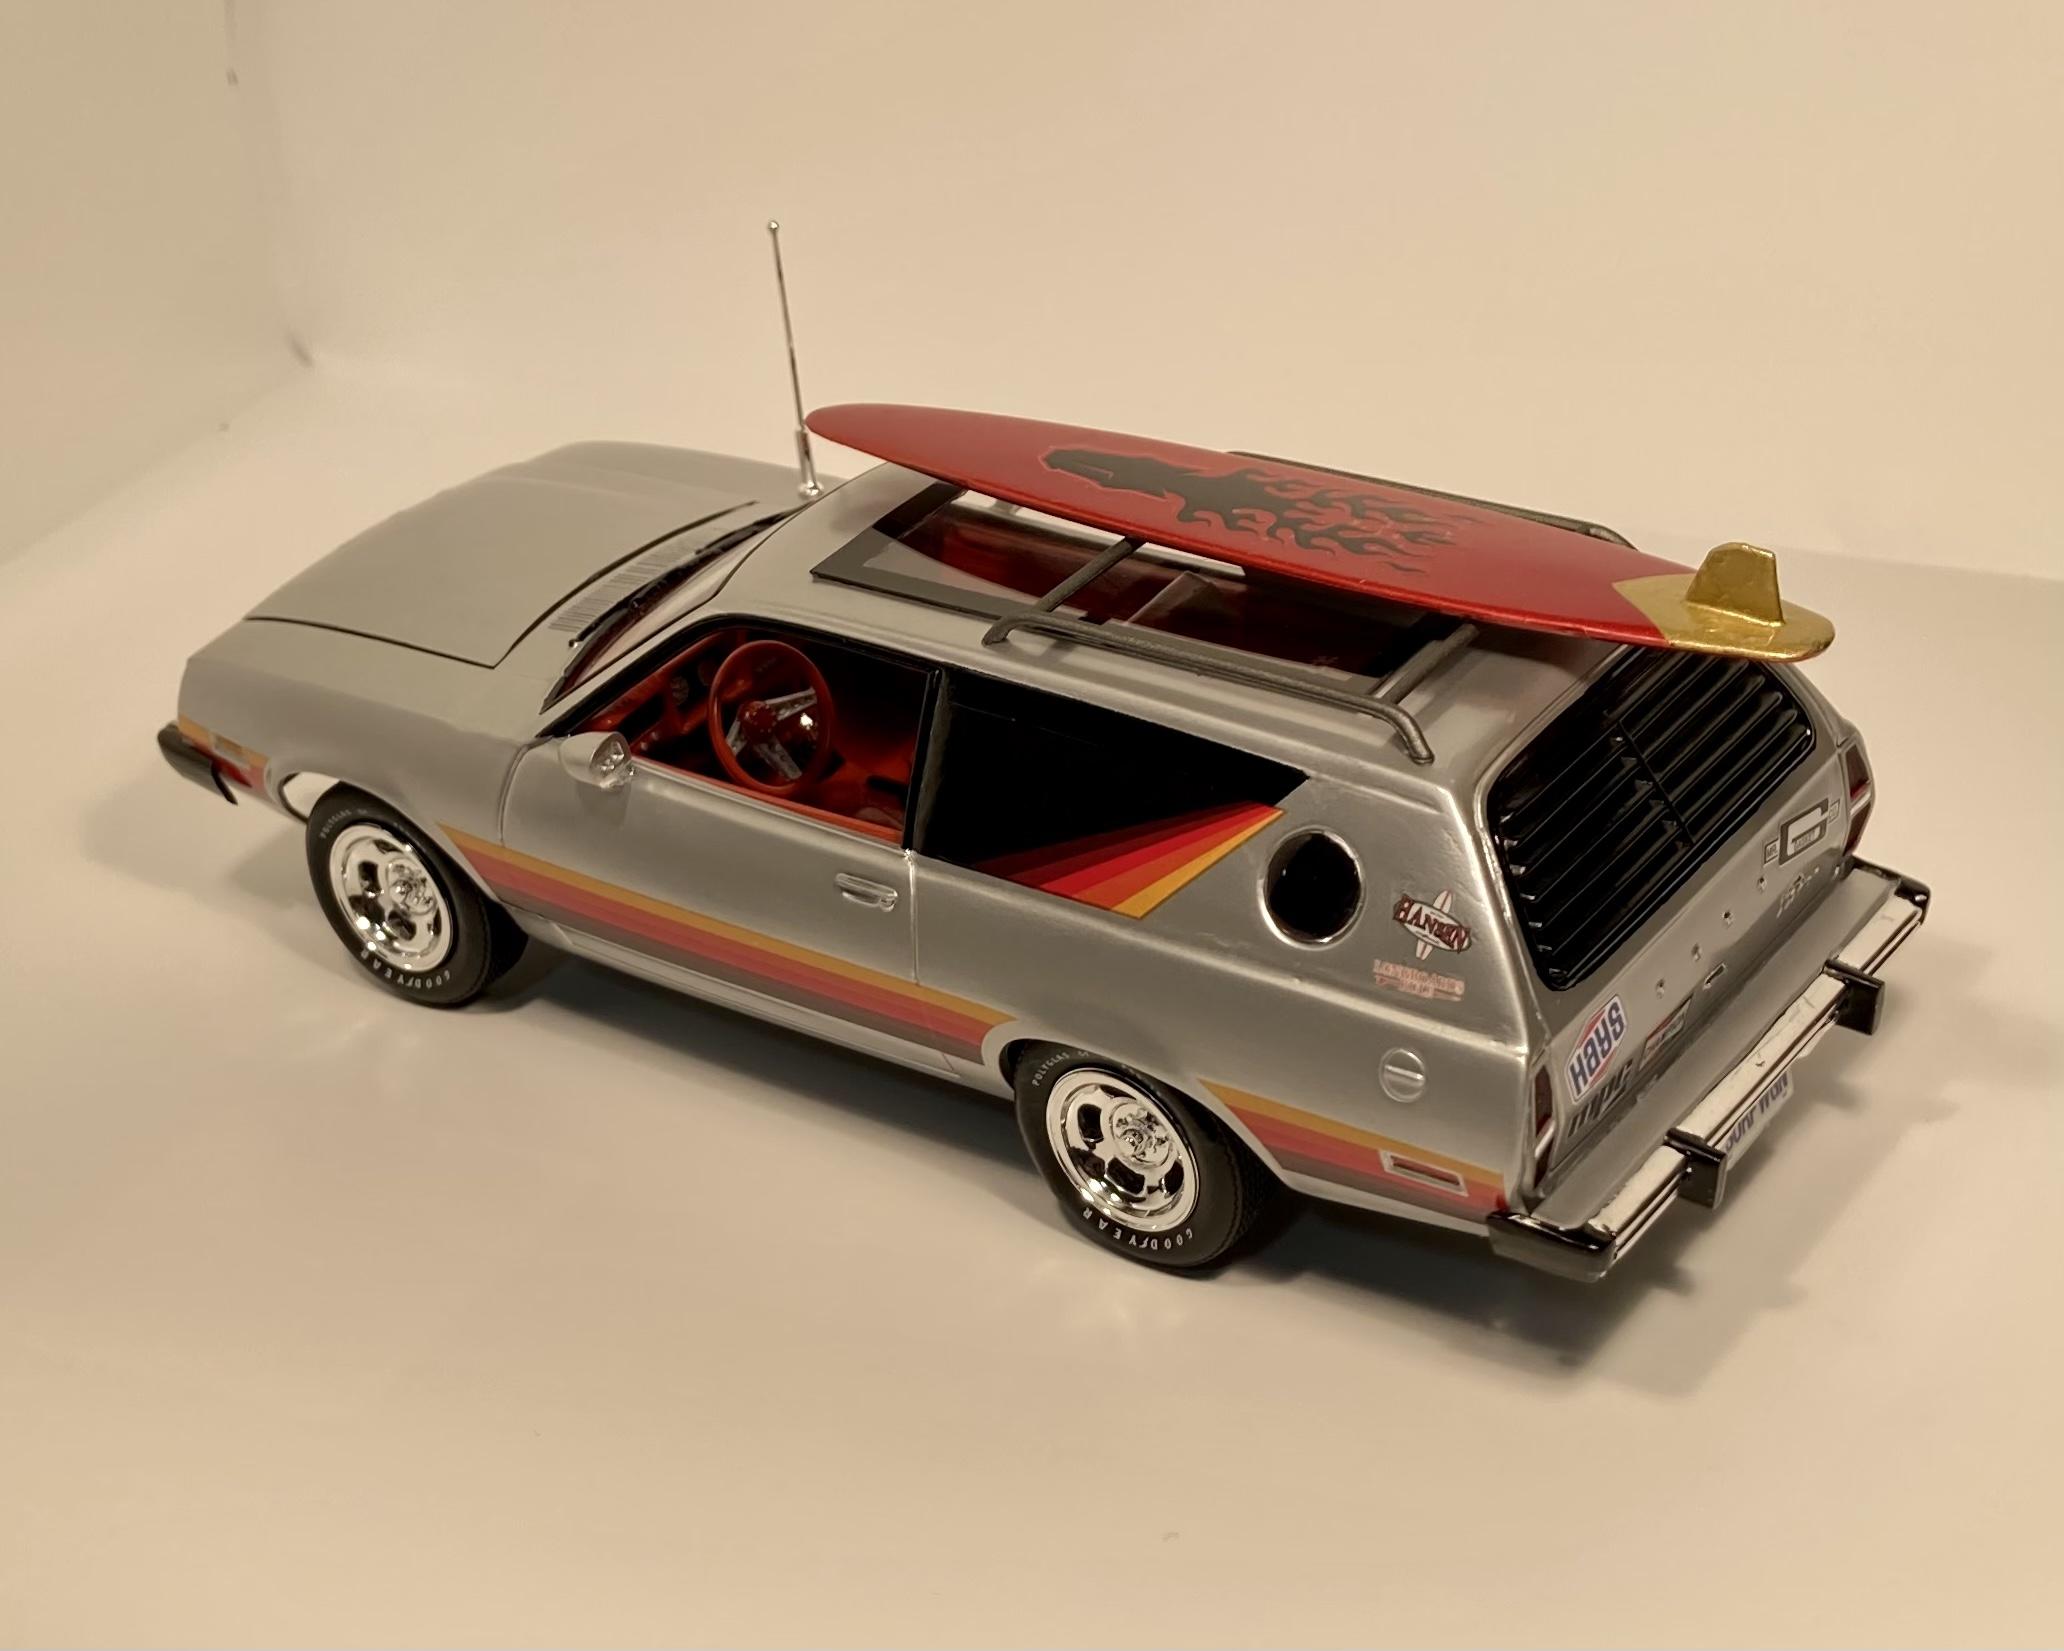
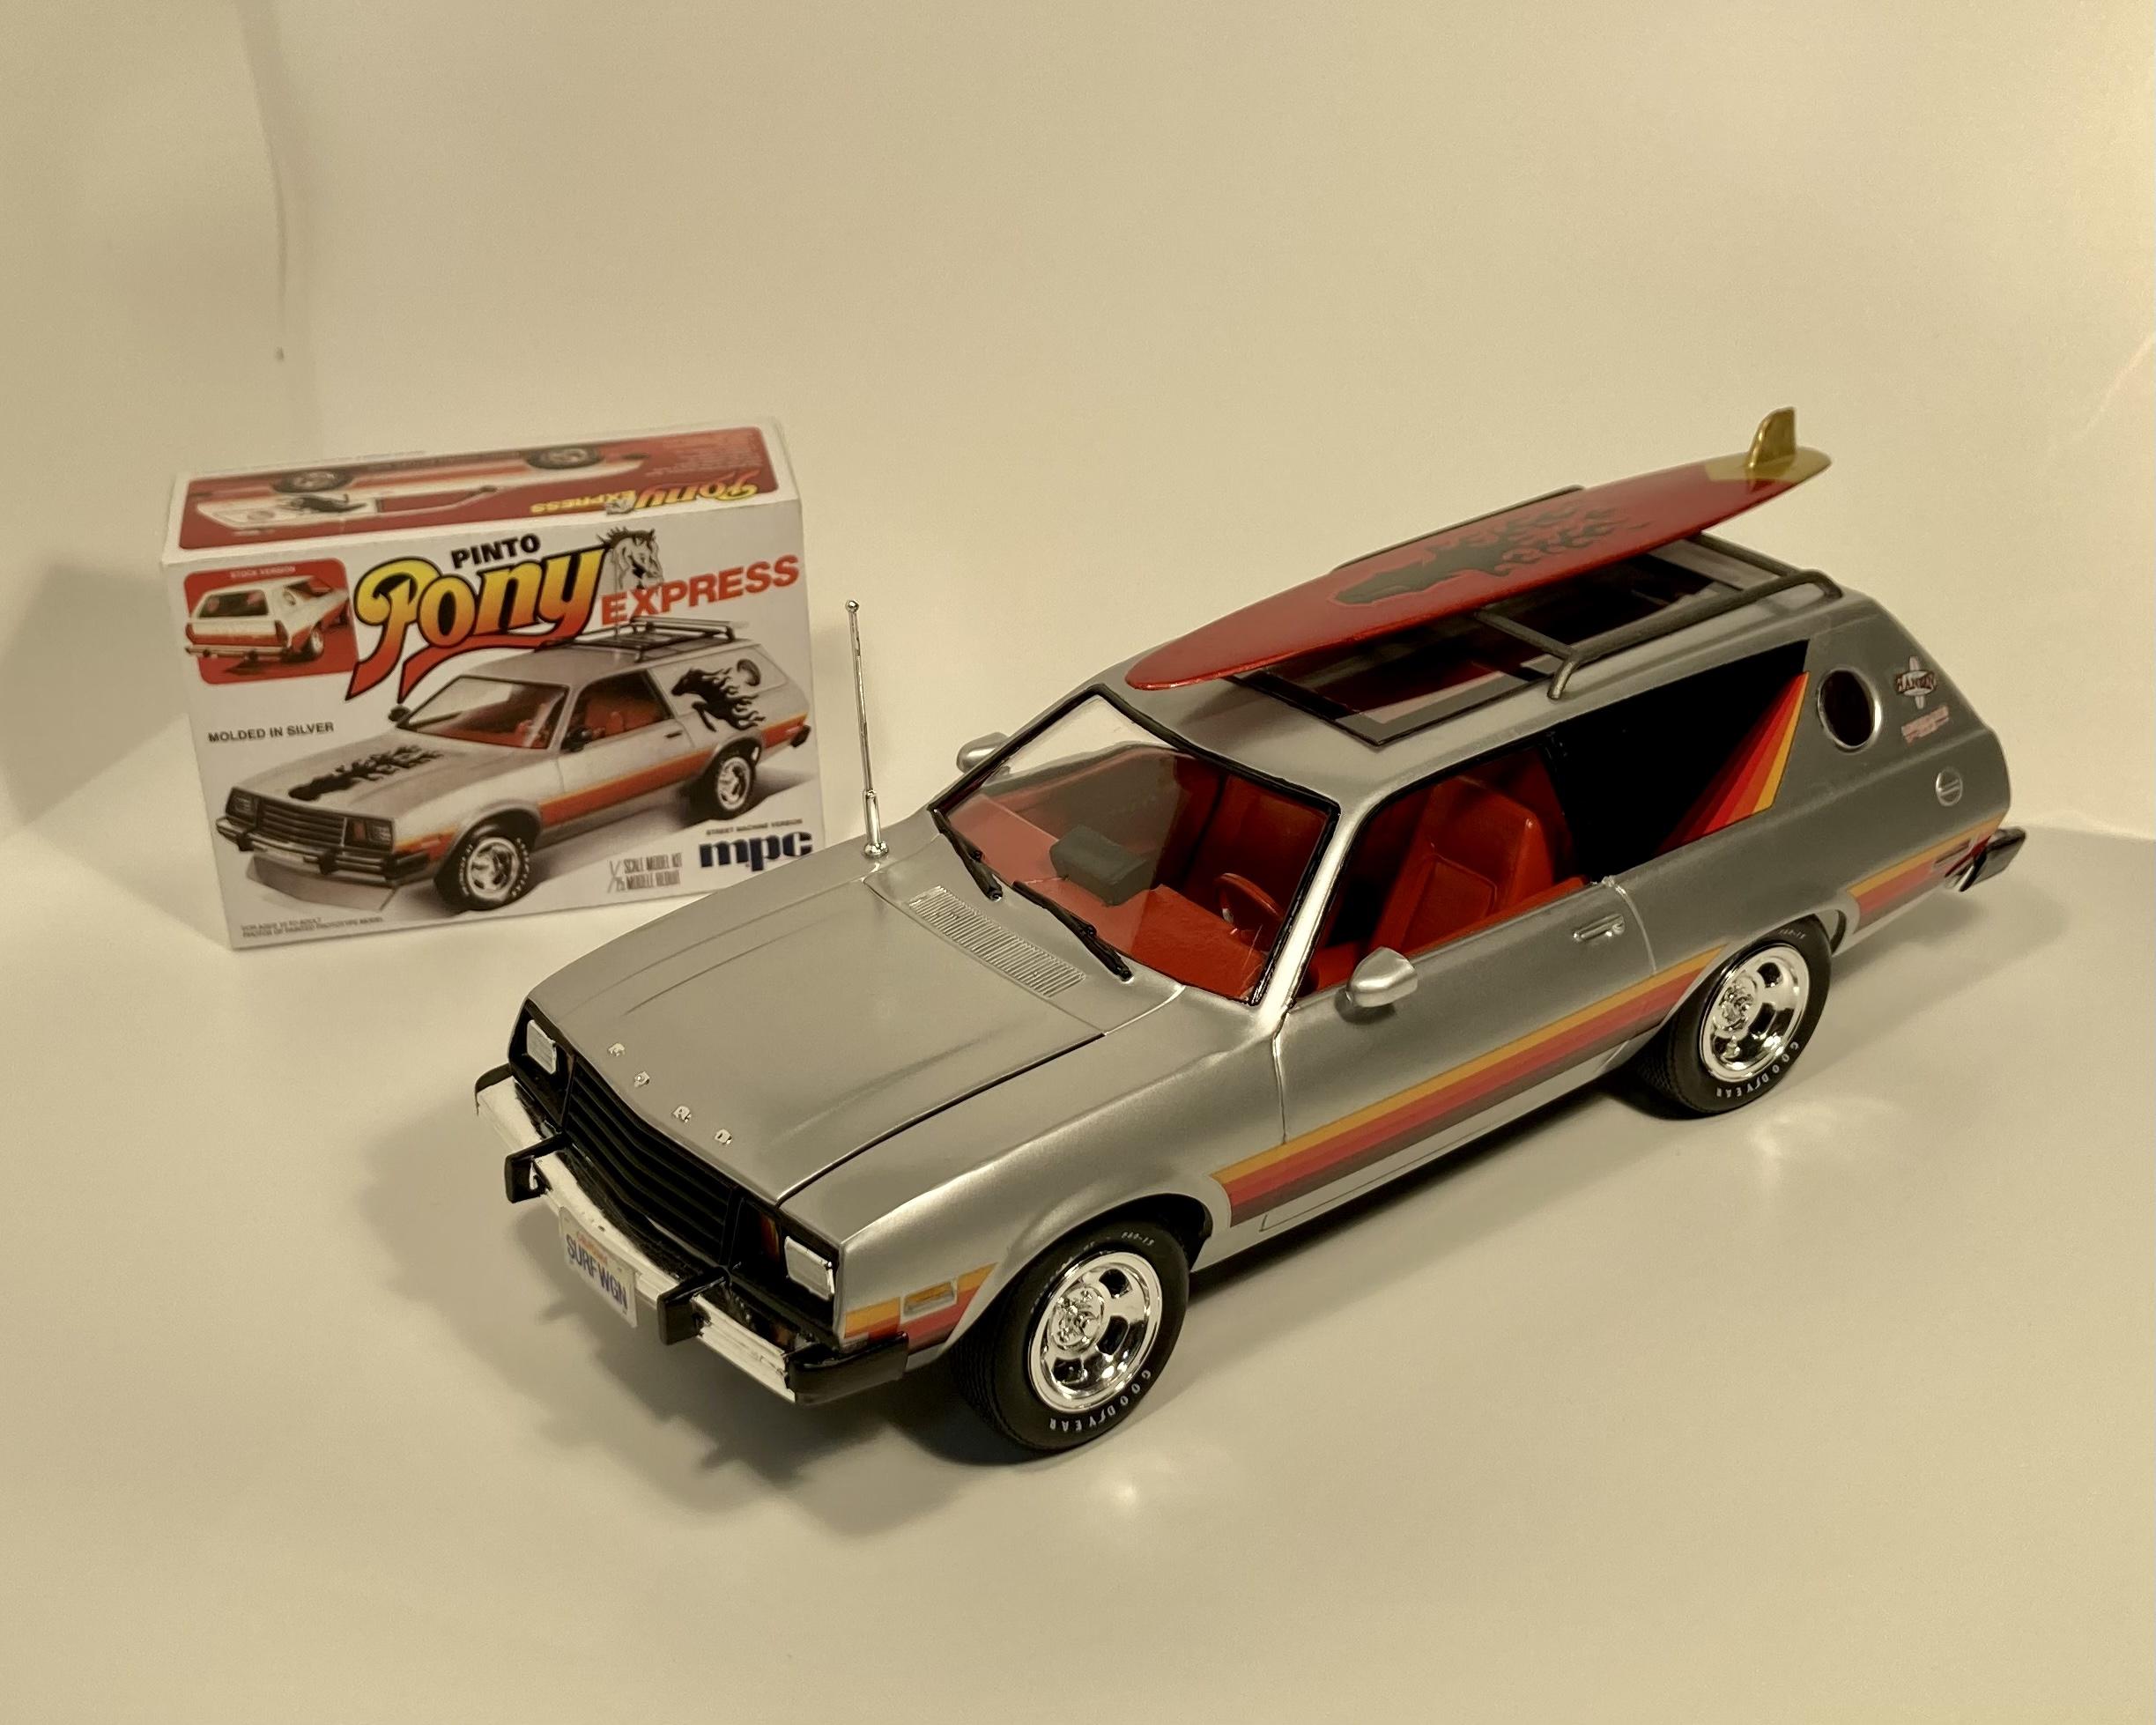
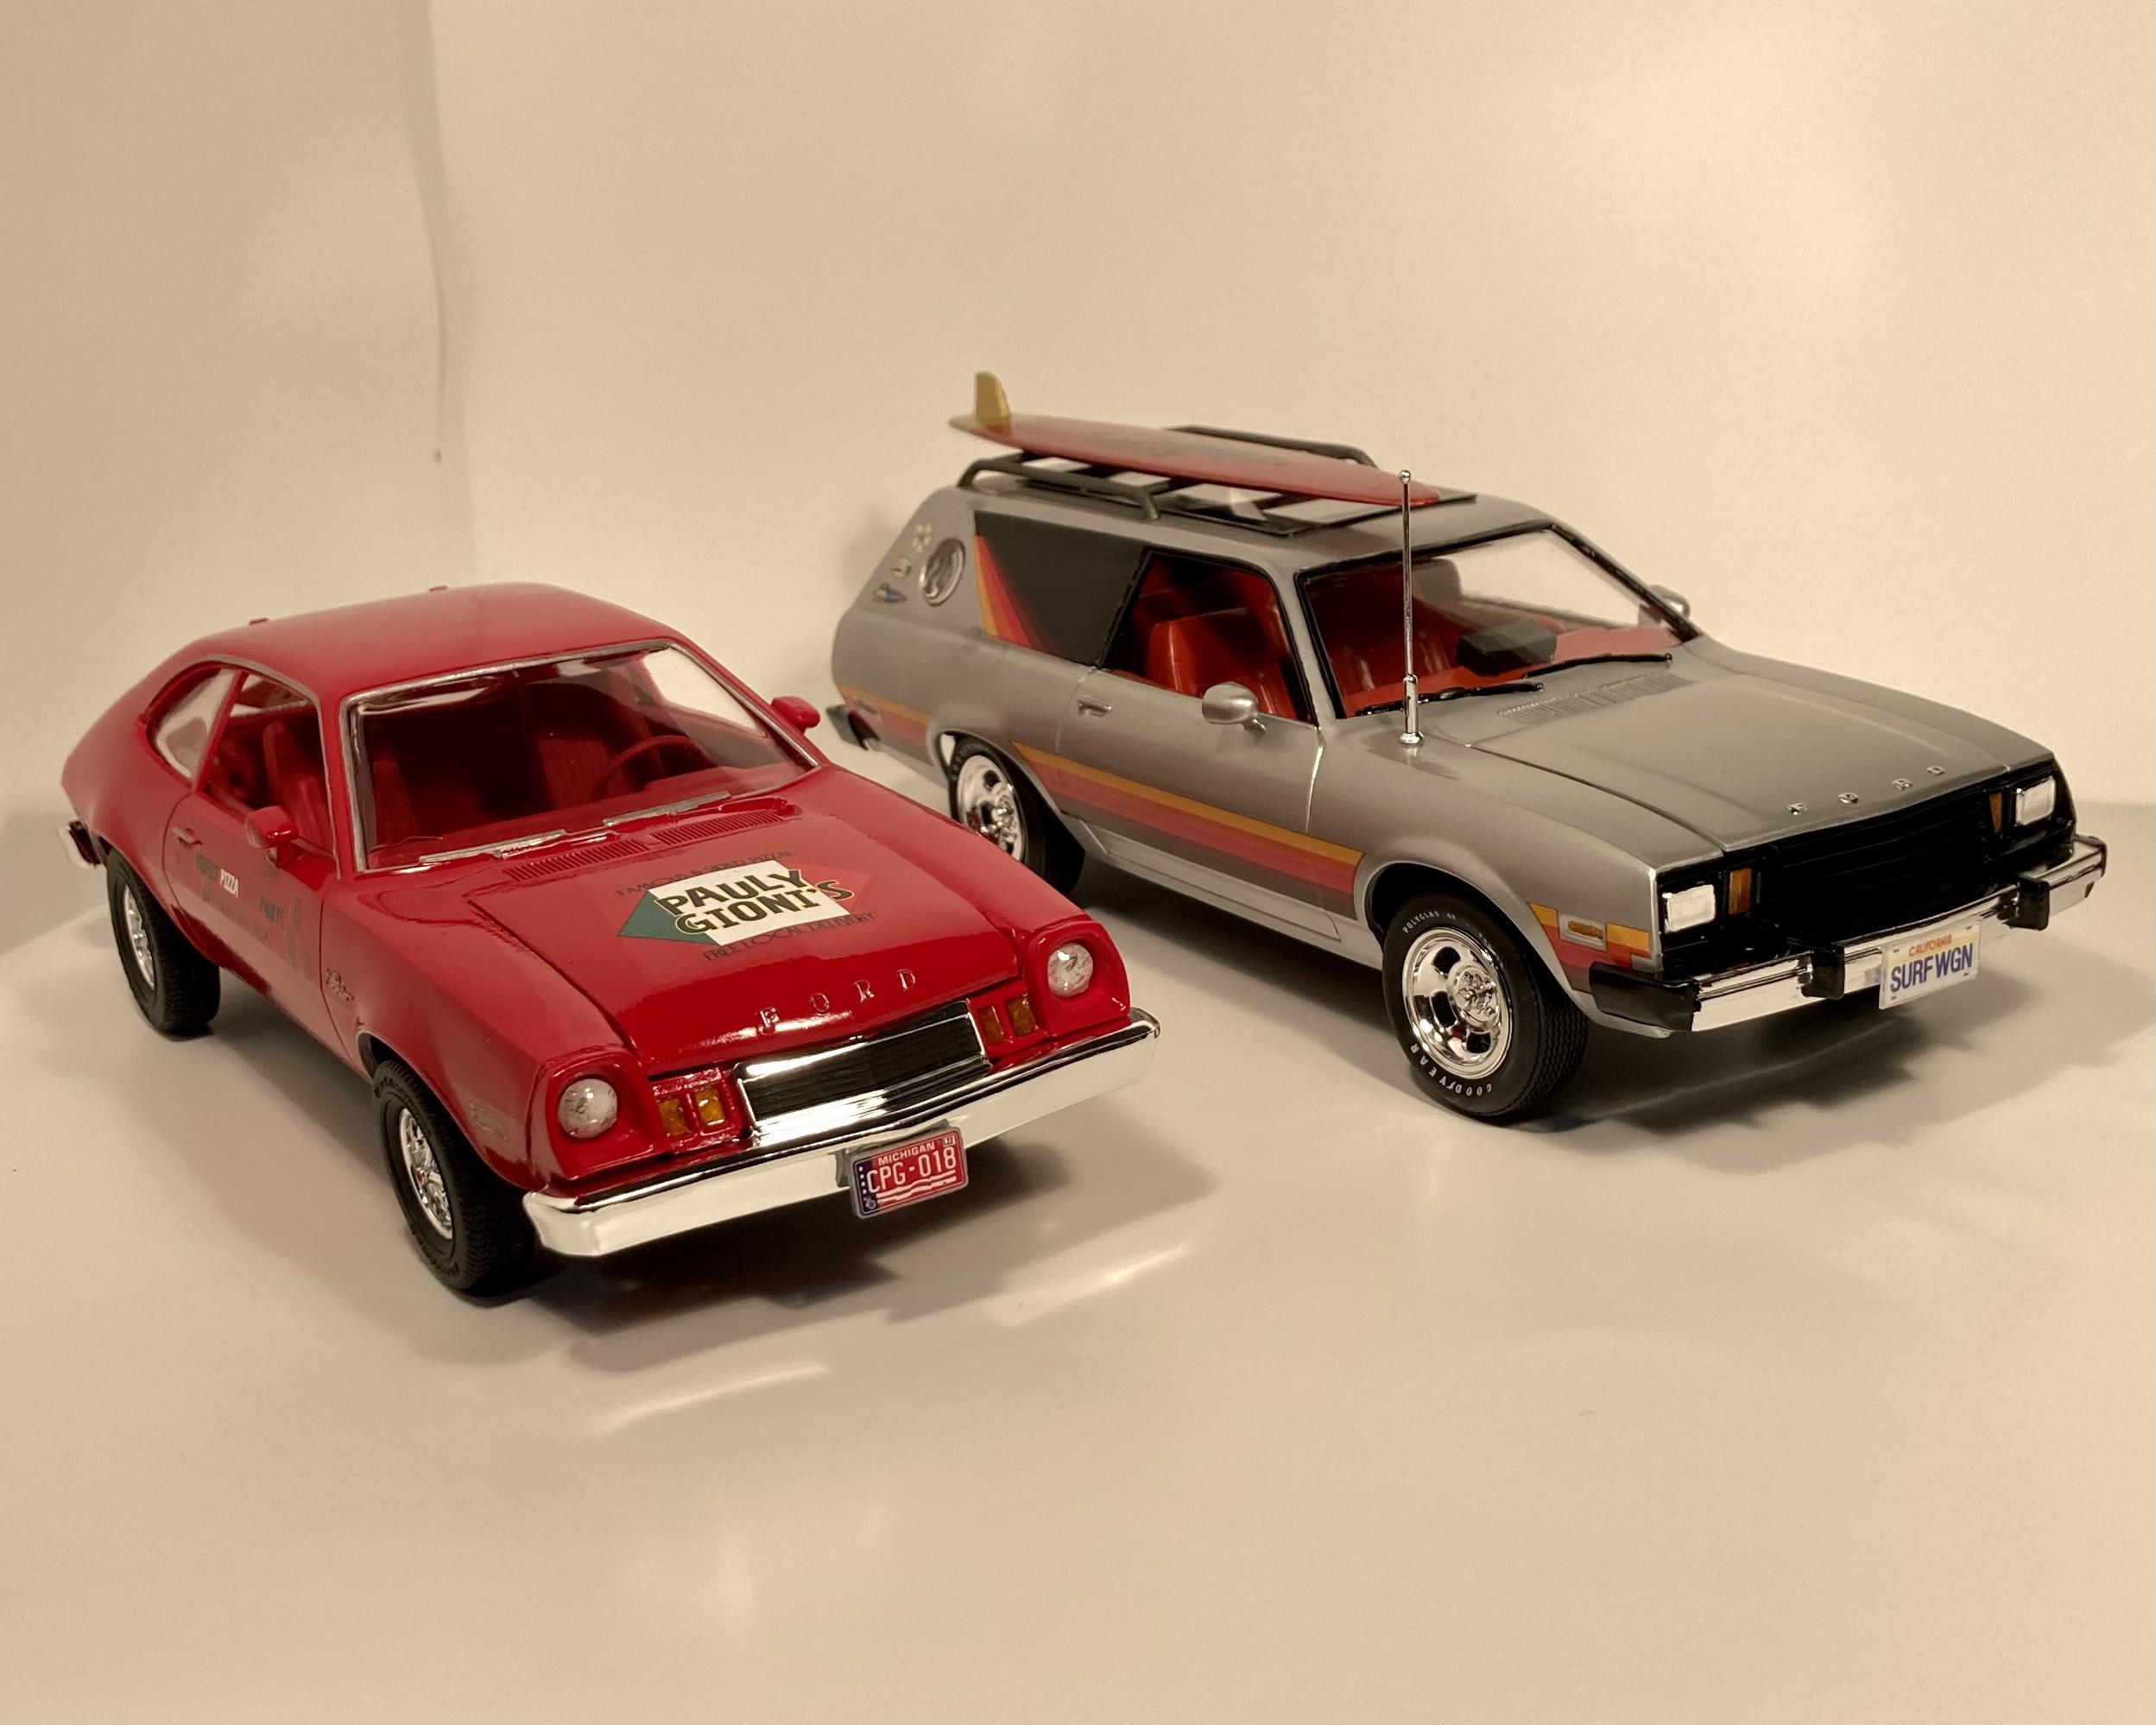
Here’s my ‘79 Pinto Cruising Wagon! I added a custom panoramic moon roof, smoothed out the window filler panels as best as I could, and I swiped the surf board and surf decals from Revell’s ‘32 Ford “Rat Rod” kit. Otherwise it’s box stock. It’s painted Tamiya TS-30 Silver Leaf outside, Krylon “Pimento” inside. This kit was definitely a challenge but overall it goes together pretty well!
-
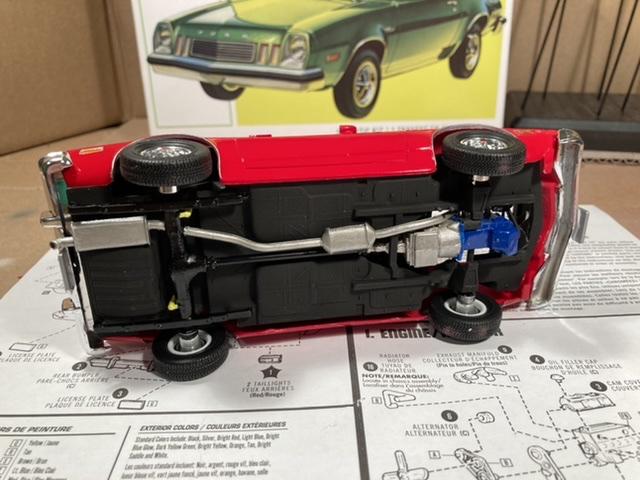
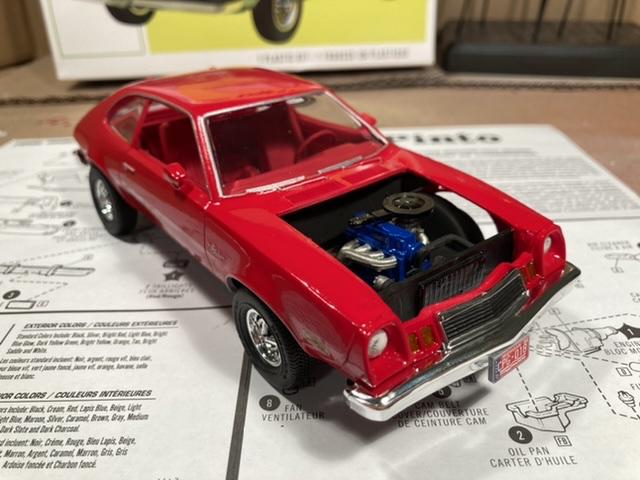
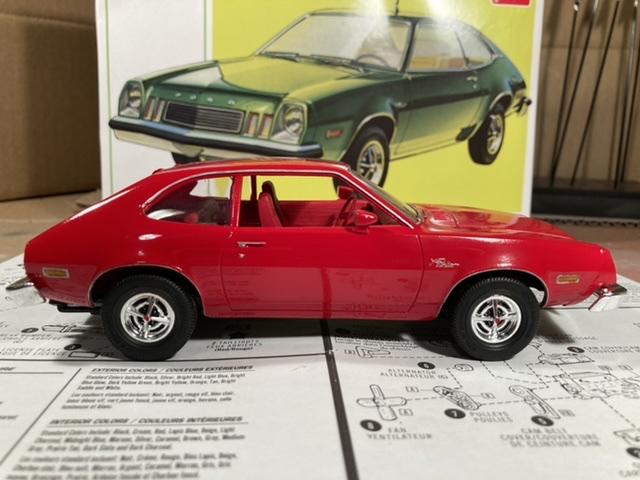
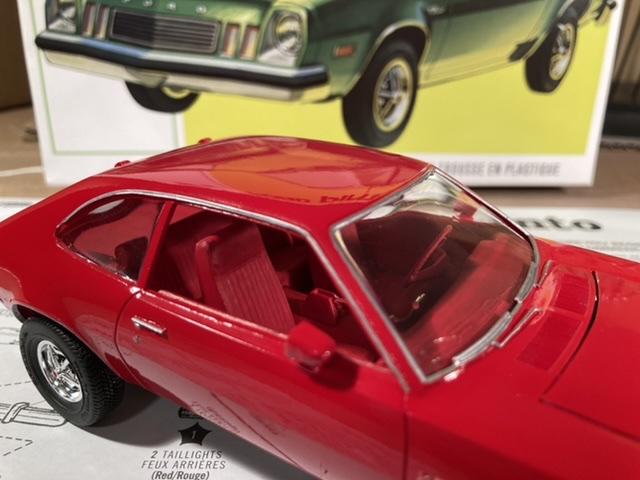
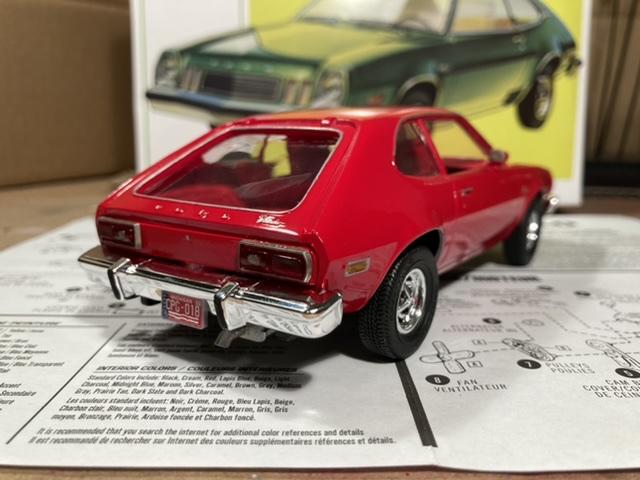
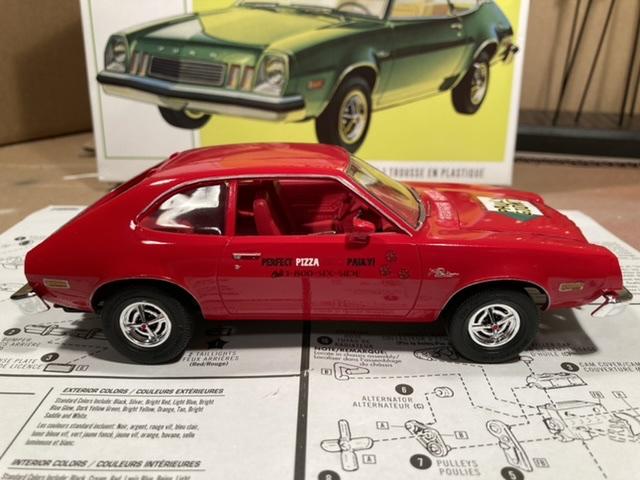
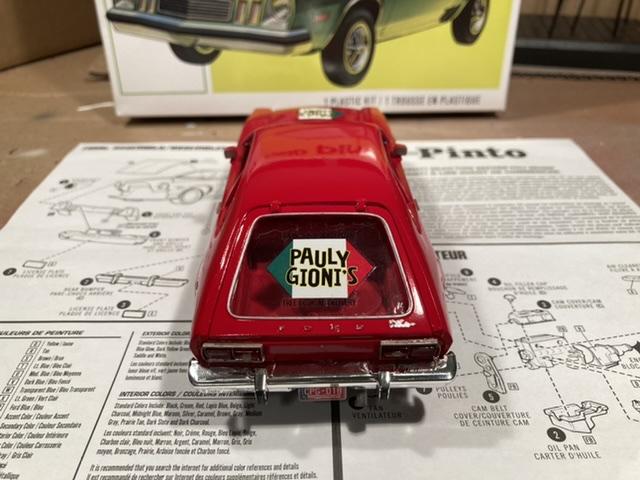
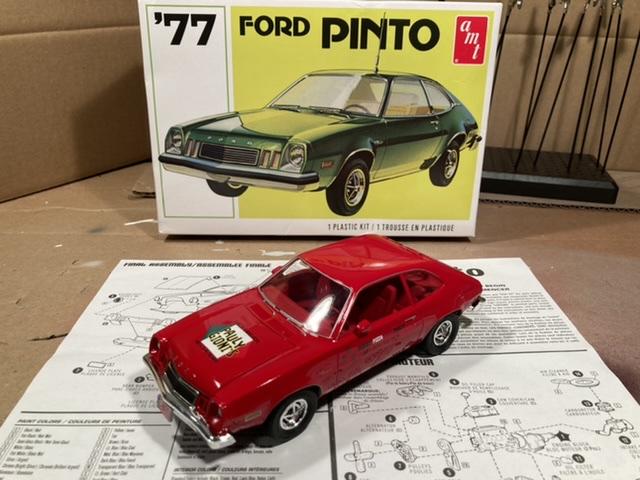
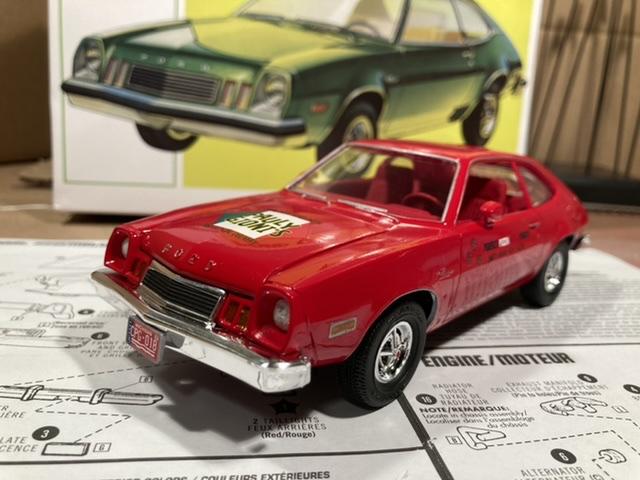
Here’s my AMT ‘77 Pinto! Painted Tamiya X-7 gloss red exterior with Folk Art Engine Red craft paint on the interior. This kit is pretty low in detail and the final fit and finish isn’t great, but it all comes together pretty good in the end. I’m definitely pleased with the final results!
-
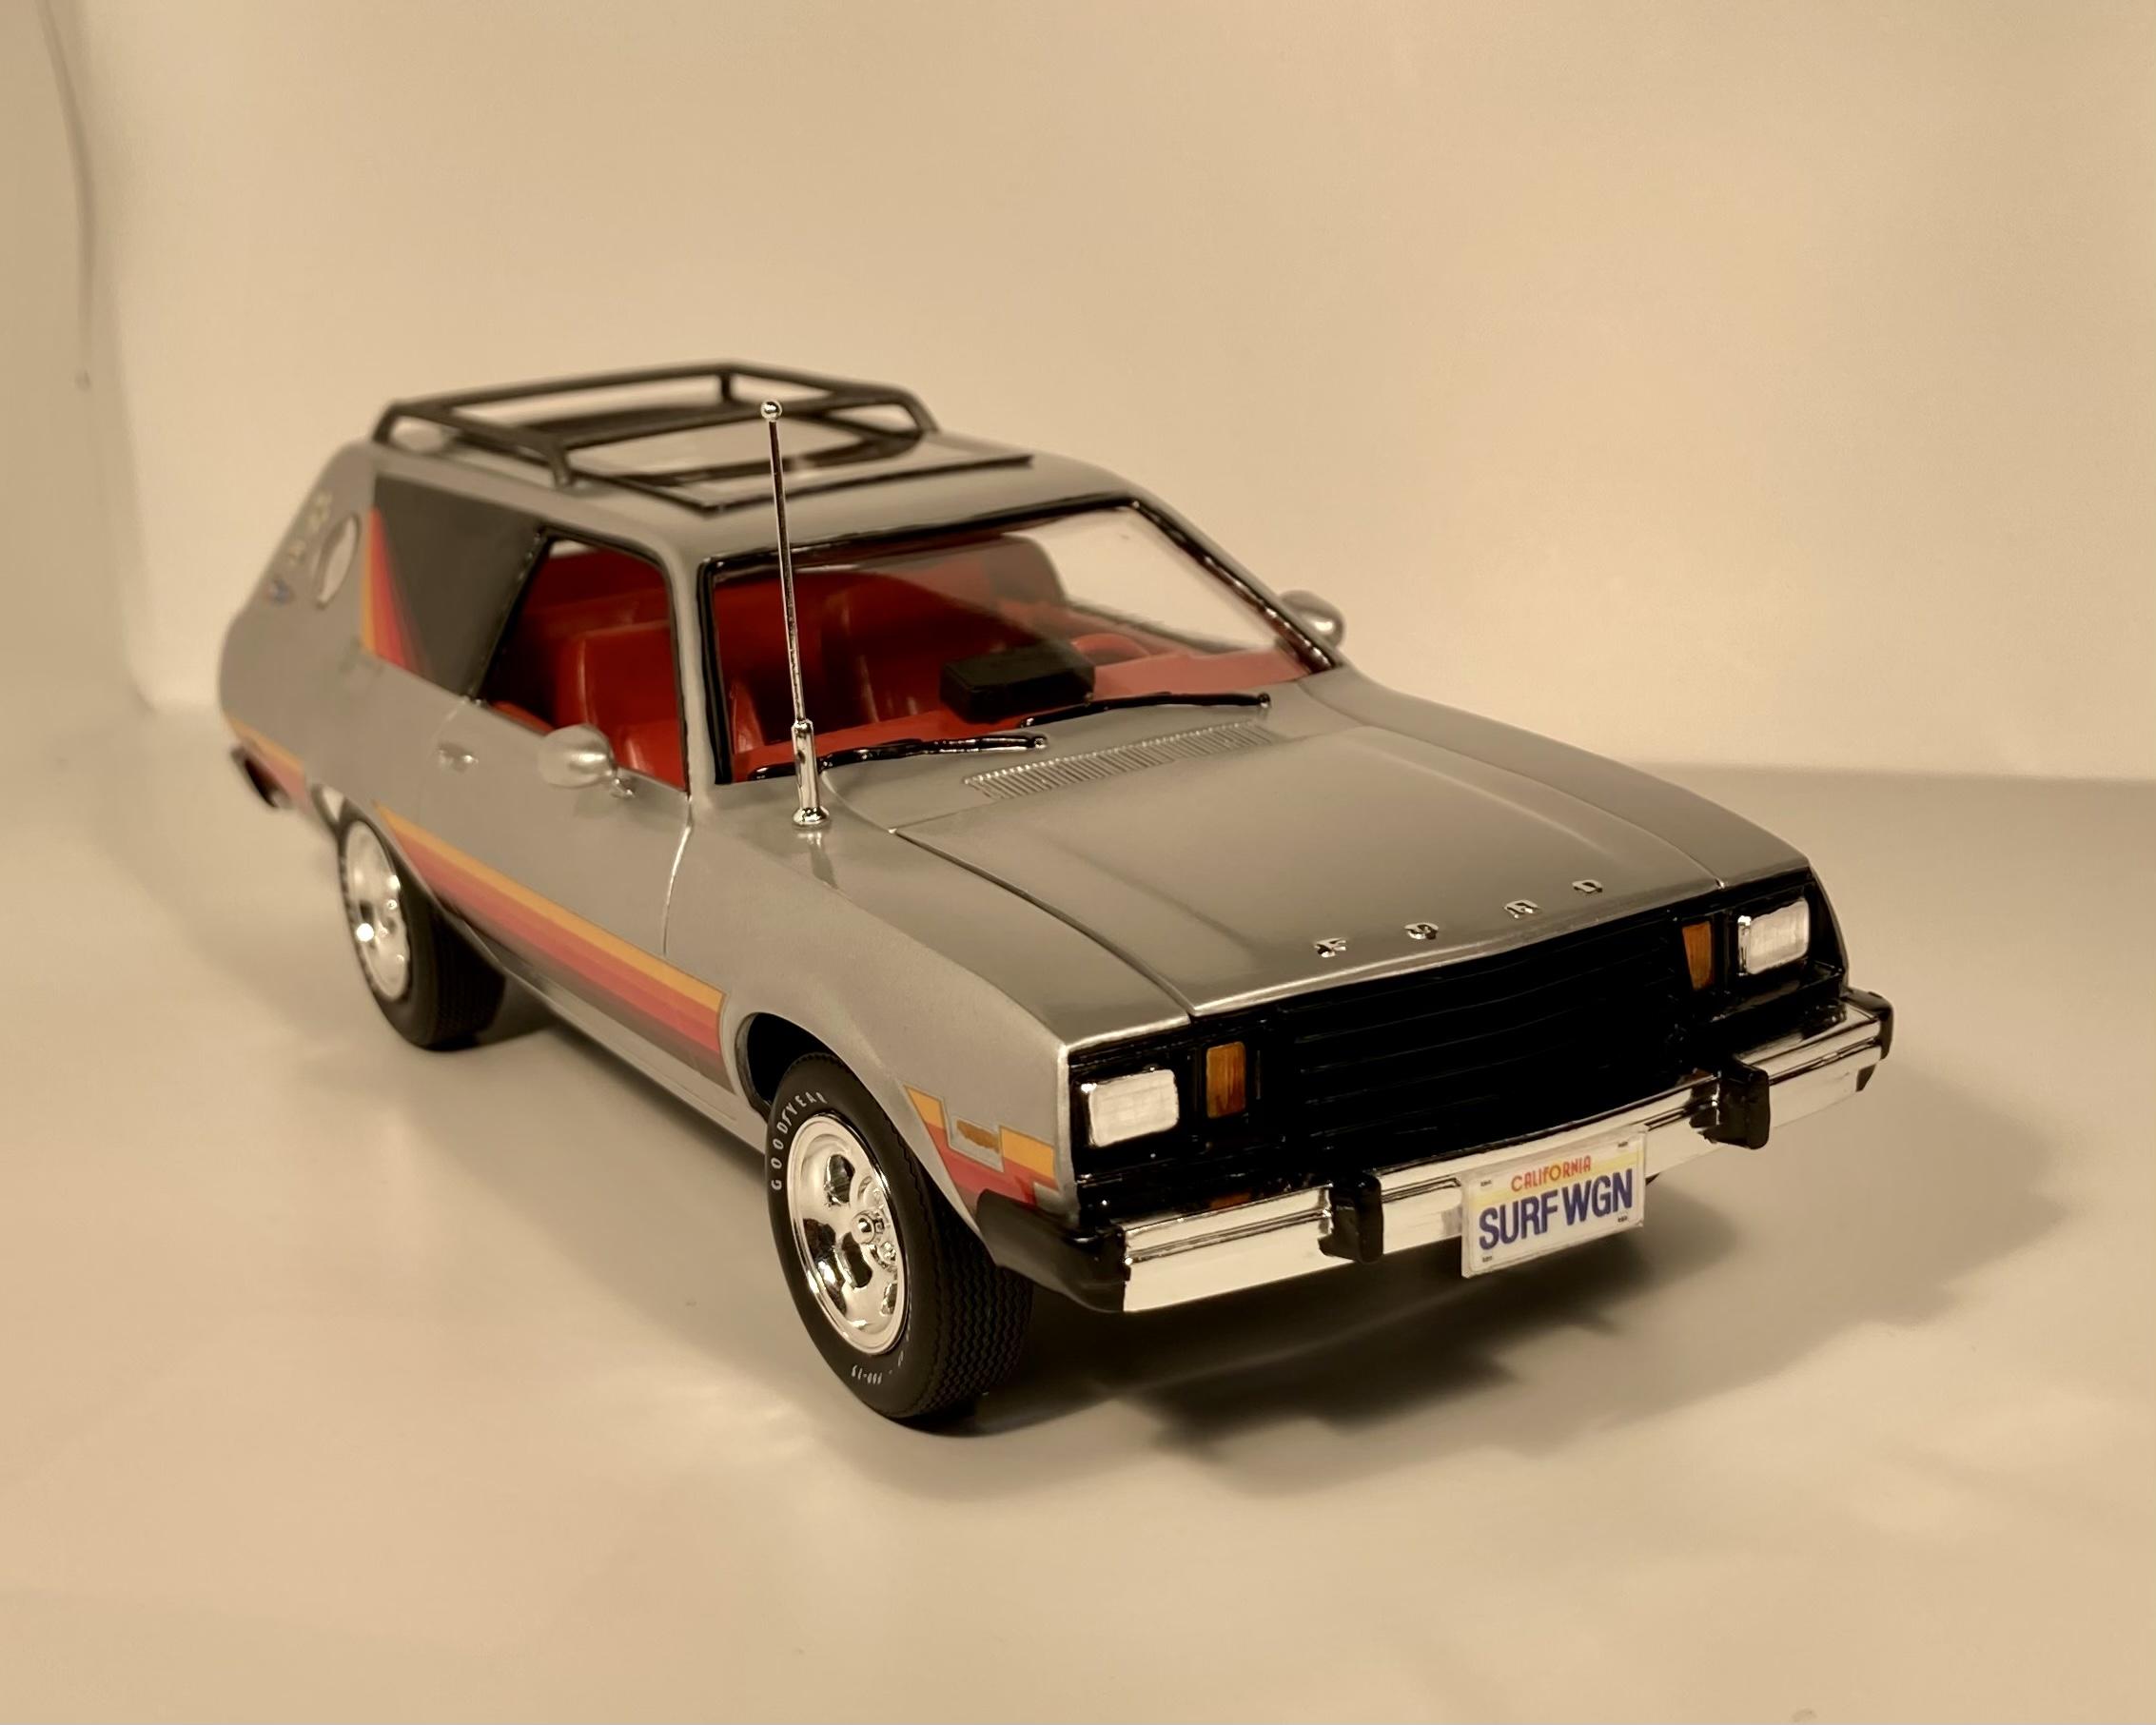
So I wasn't really going to do a build log on this, but I'm excited to share the progress. I have been kicking this idea around since I heard about the release of this kit, and when it came out it was sort of a "clear the bench" type of project. I like the simplistic nature of this kind of project in the summer, since my bench time is limited and sporadic. I'm still very excited about my Formula style model A, but when you don't get bench time for weeks on end, its hard to keep my head into something that complex. This is simple, relaxing and most of all quite fun. The basic idea was to build a pinto wagon that would have toured the indoor show circuit in the early 80's. Lots of chrome, shiny paint, and over the top everything. If you have seen my gremlin build, something like that... but a bit more complex and a bit more aggressive stance. Here are a couple inspiration images: Stance like this= Color scheme something like this= So getting started I grabbed the rear slicks from the JawBreaker Dragster, and started cutting up the rear fenders till the stance was pretty close Then I fully sanded the toy-like detail off the chassis plate... Using the Ford 9" from the new 29 roadster and some brass tubing, I realized rear-end clearance will be an issue. Some sheet styrene and wendys spoons to the rescue. Using my scrapbook cutter I drew up and cut out the springs, plates and ladderbars. Then started building the rear suspension: added some beading wire u-bolts: