okazaki0511
-
Posts
30 -
Joined
-
Last visited
okazaki0511's Achievements
MCM Regular (3/6)
-

1/20 DTM Ferrari SF-24
okazaki0511 replied to okazaki0511's topic in WIP: Other Racing: Road Racing, Land Speed Racers
Thank you for your appreciation. I’m working on the other red parts as well. The rear wing also needs to be glued and the gaps filled first, but it’s quite tricky to get the alignment and symmetry right.
-
1/20 DTM Ferrari SF-24
okazaki0511 replied to okazaki0511's topic in WIP: Other Racing: Road Racing, Land Speed Racers
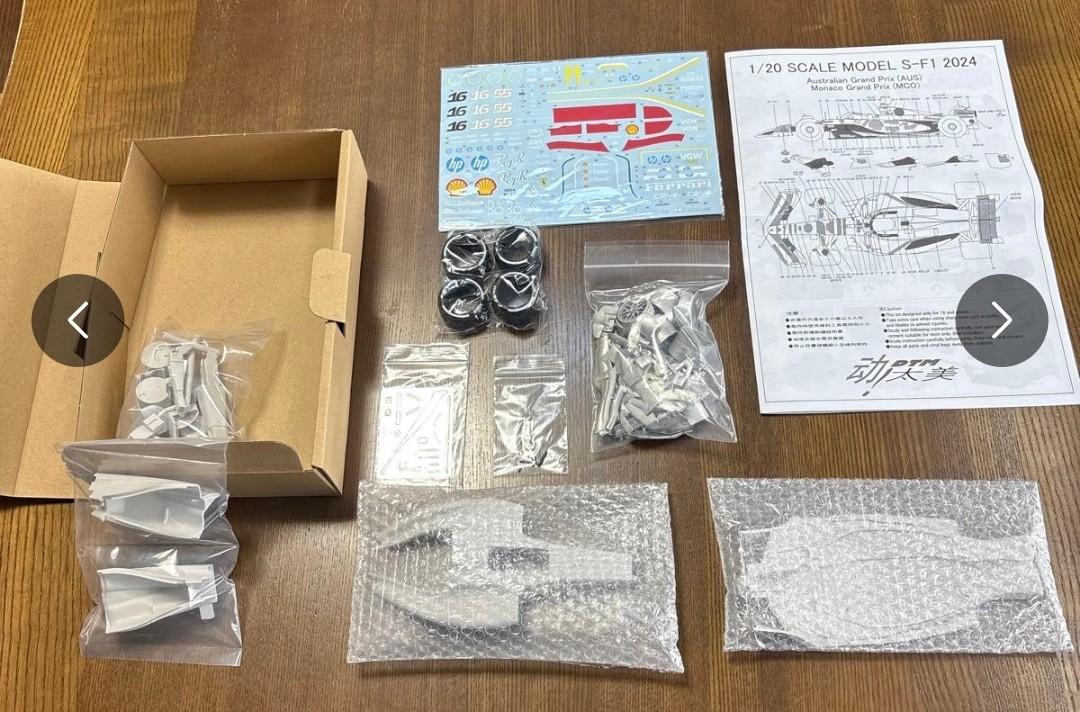
I used super glue mixed with regular gray putty to fill the panel lines. It’s also my first time building a kit from this manufacturer — it’s a Yokohama Hobby Forum limited edition, and it’s basically similar to Studio27's kit...
-
1/20 DTM Ferrari SF-24
okazaki0511 replied to okazaki0511's topic in WIP: Other Racing: Road Racing, Land Speed Racers
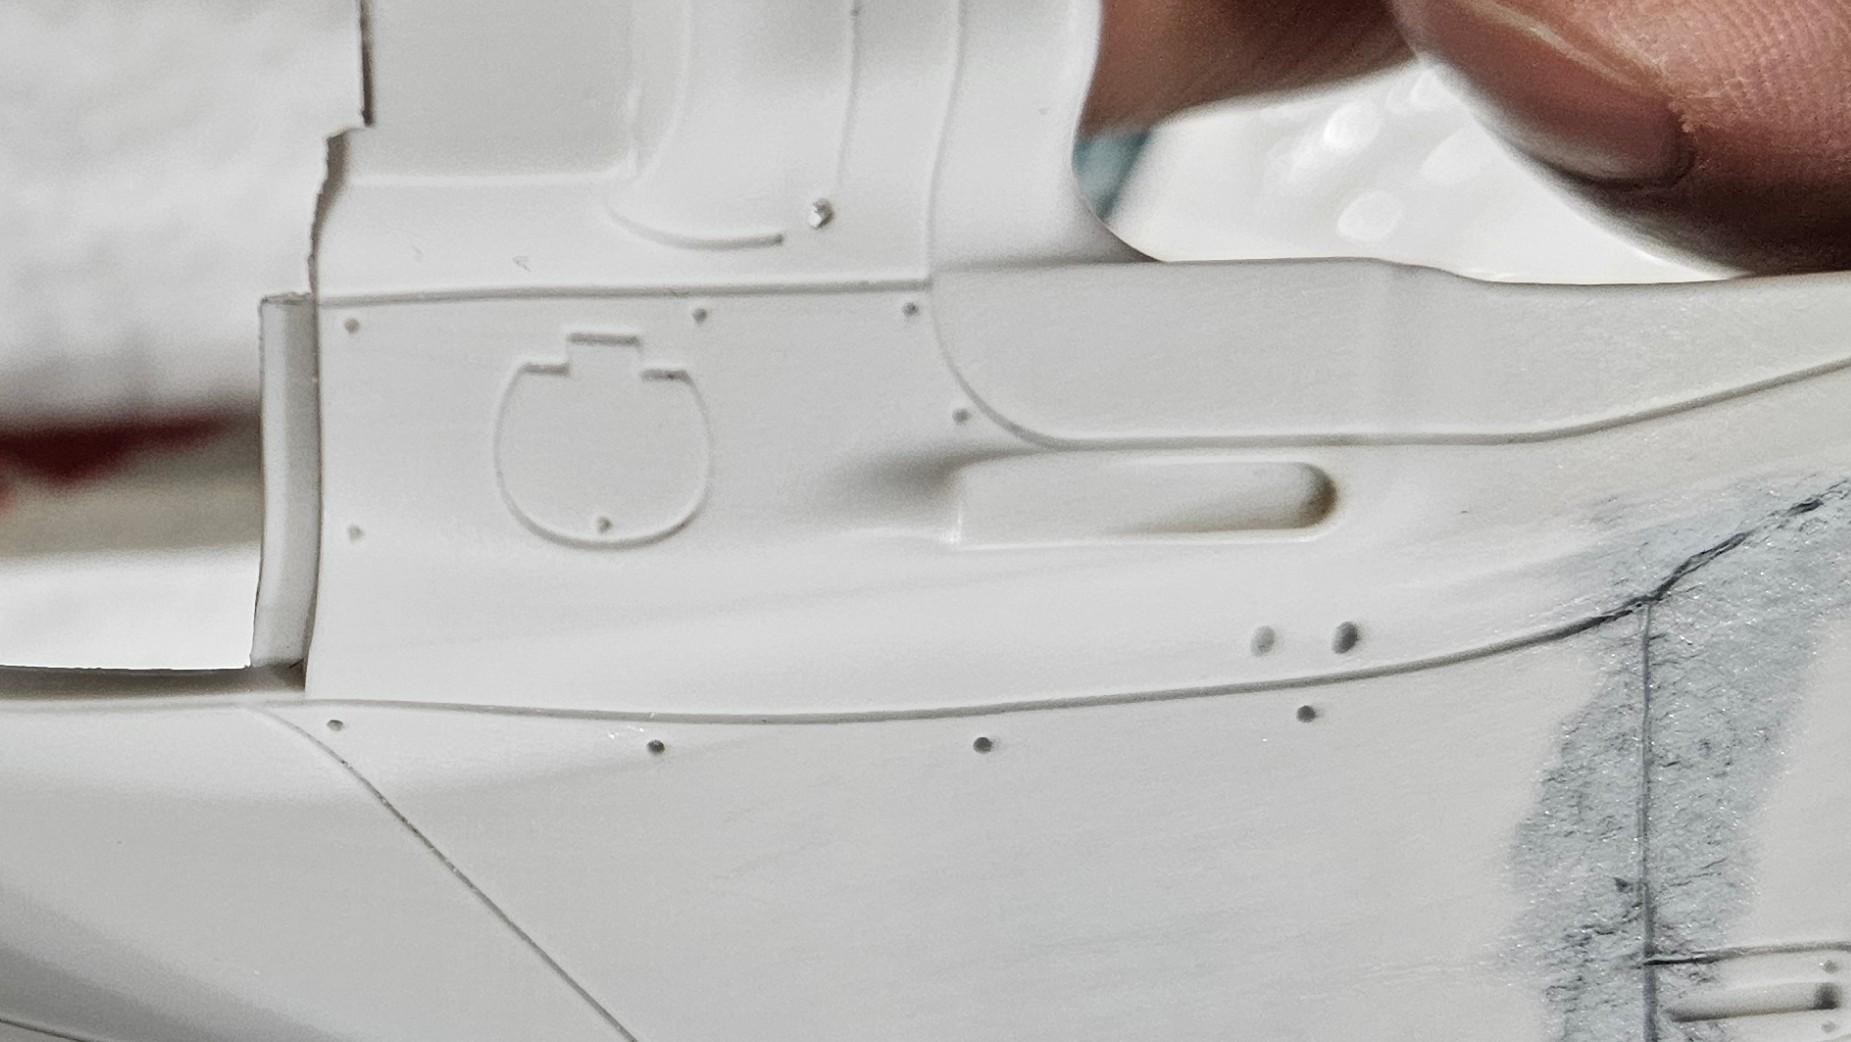
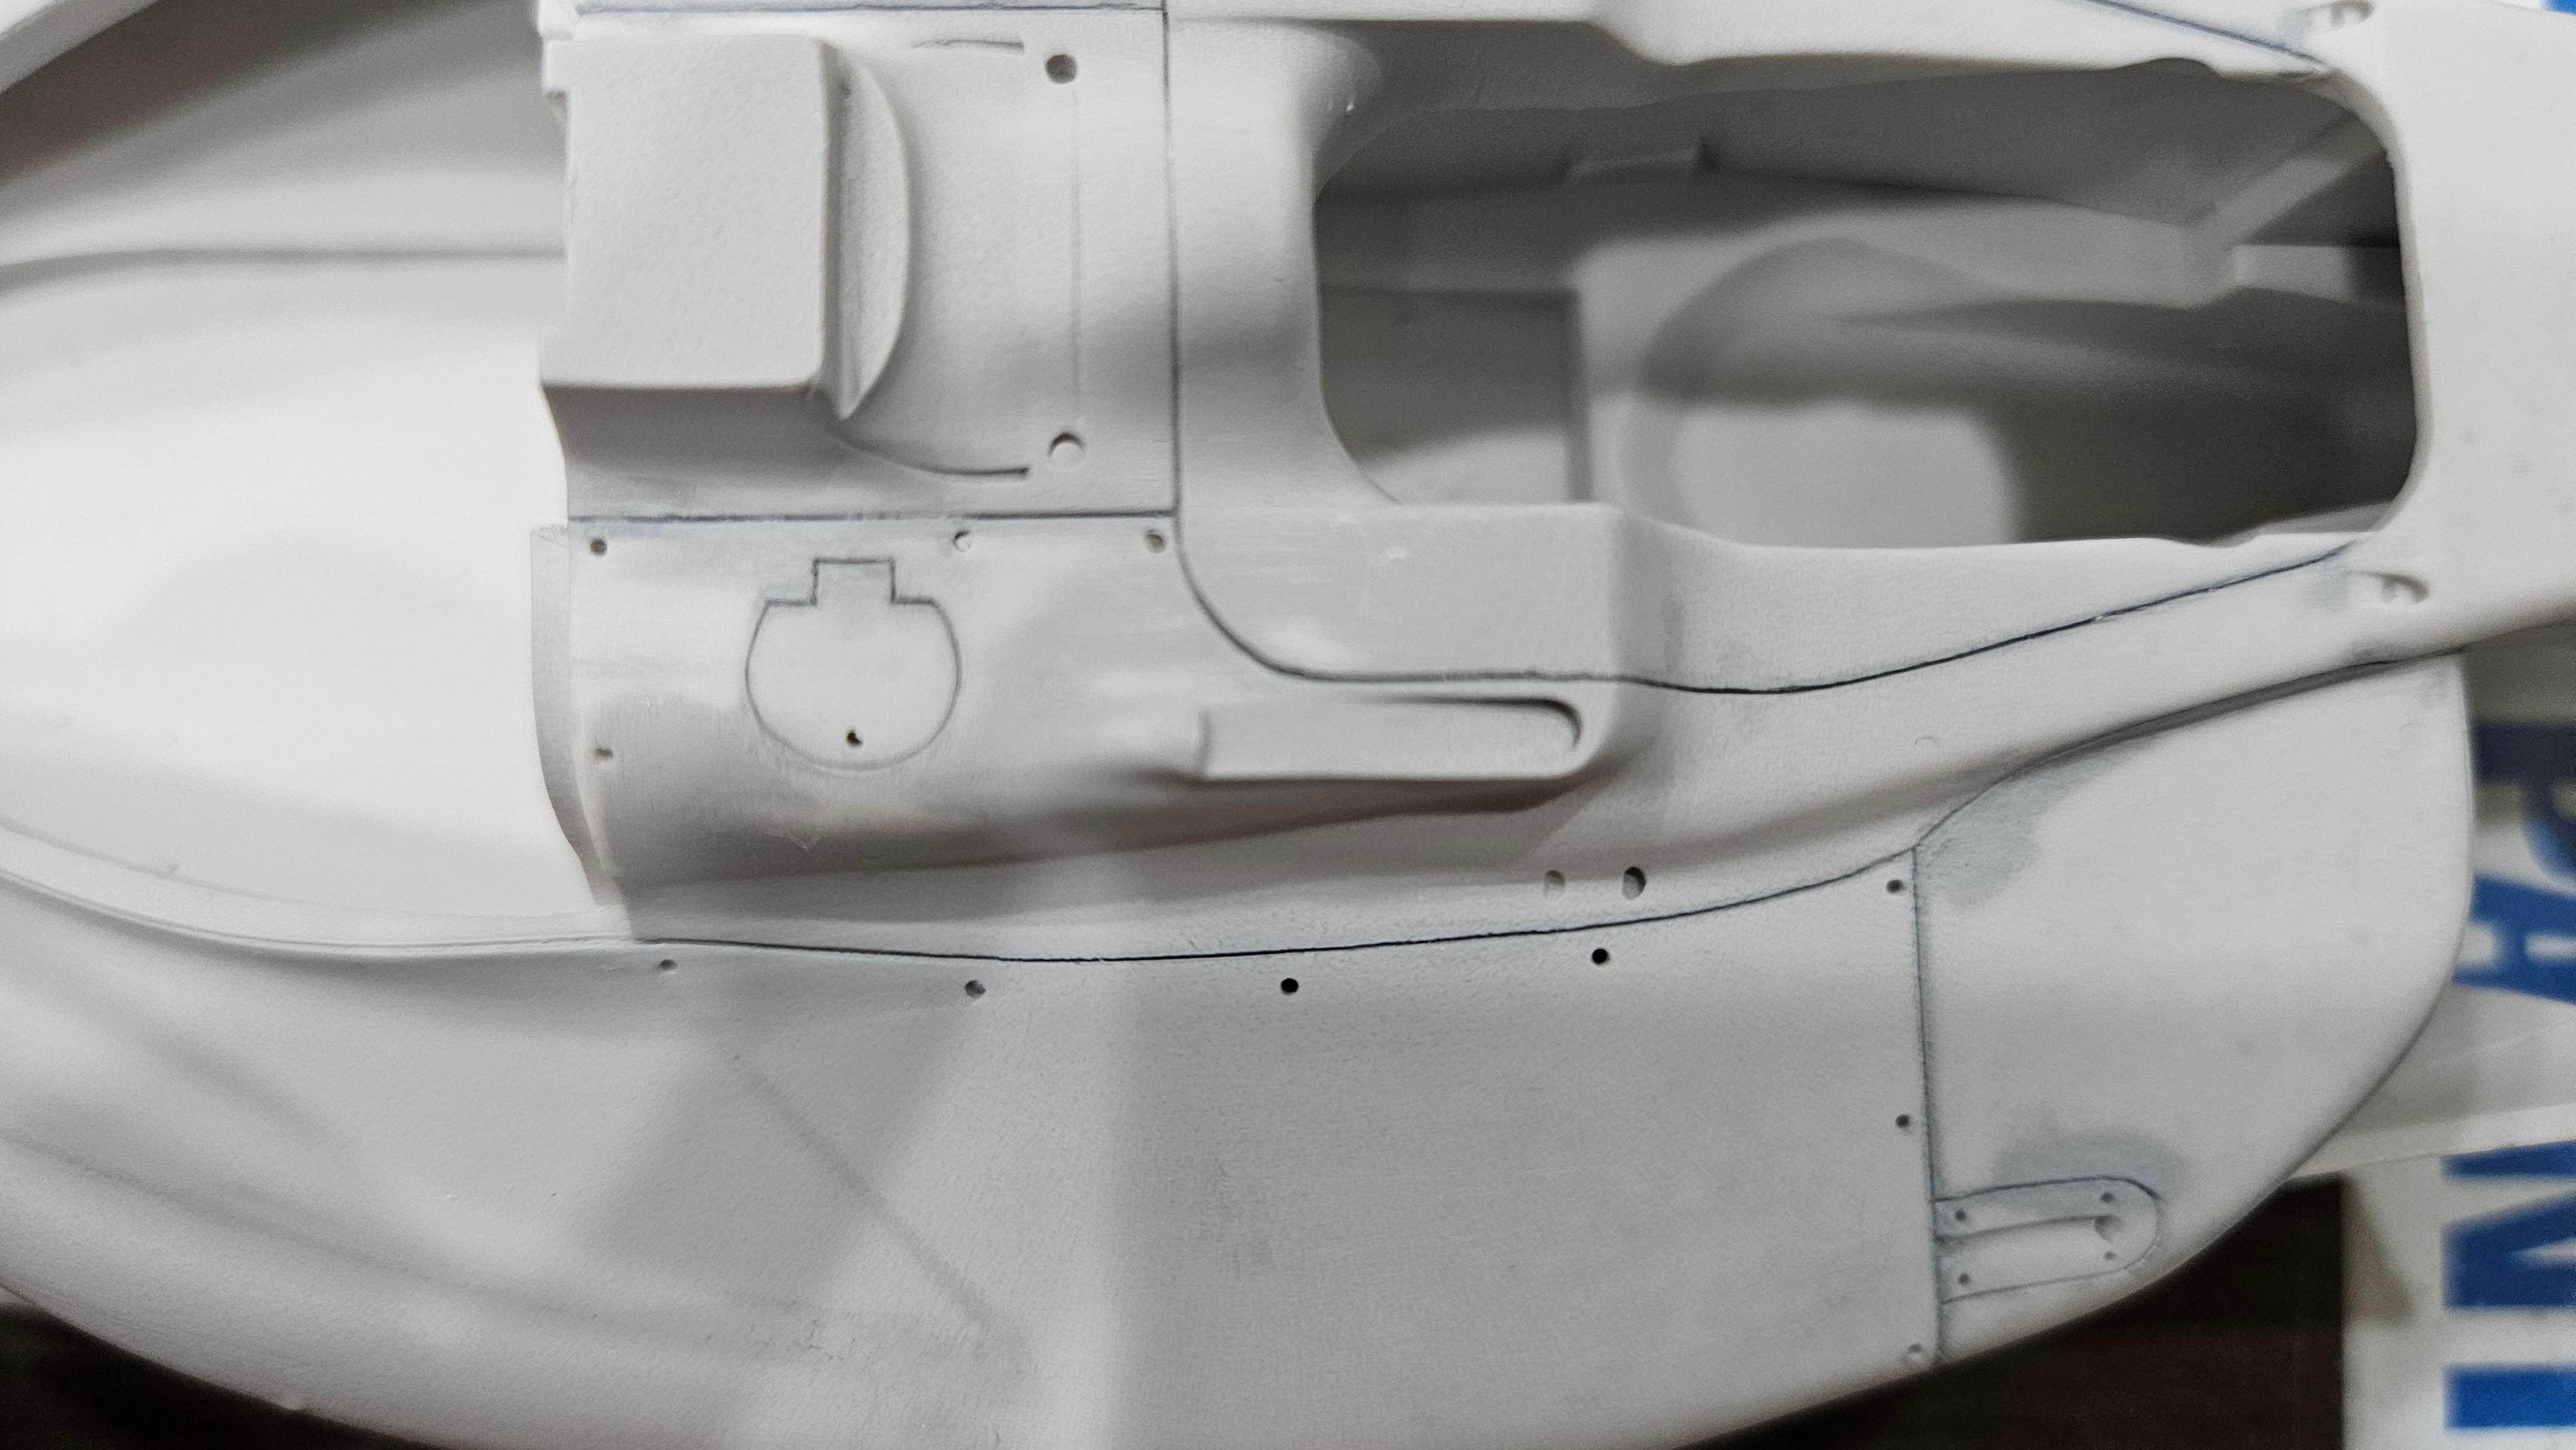
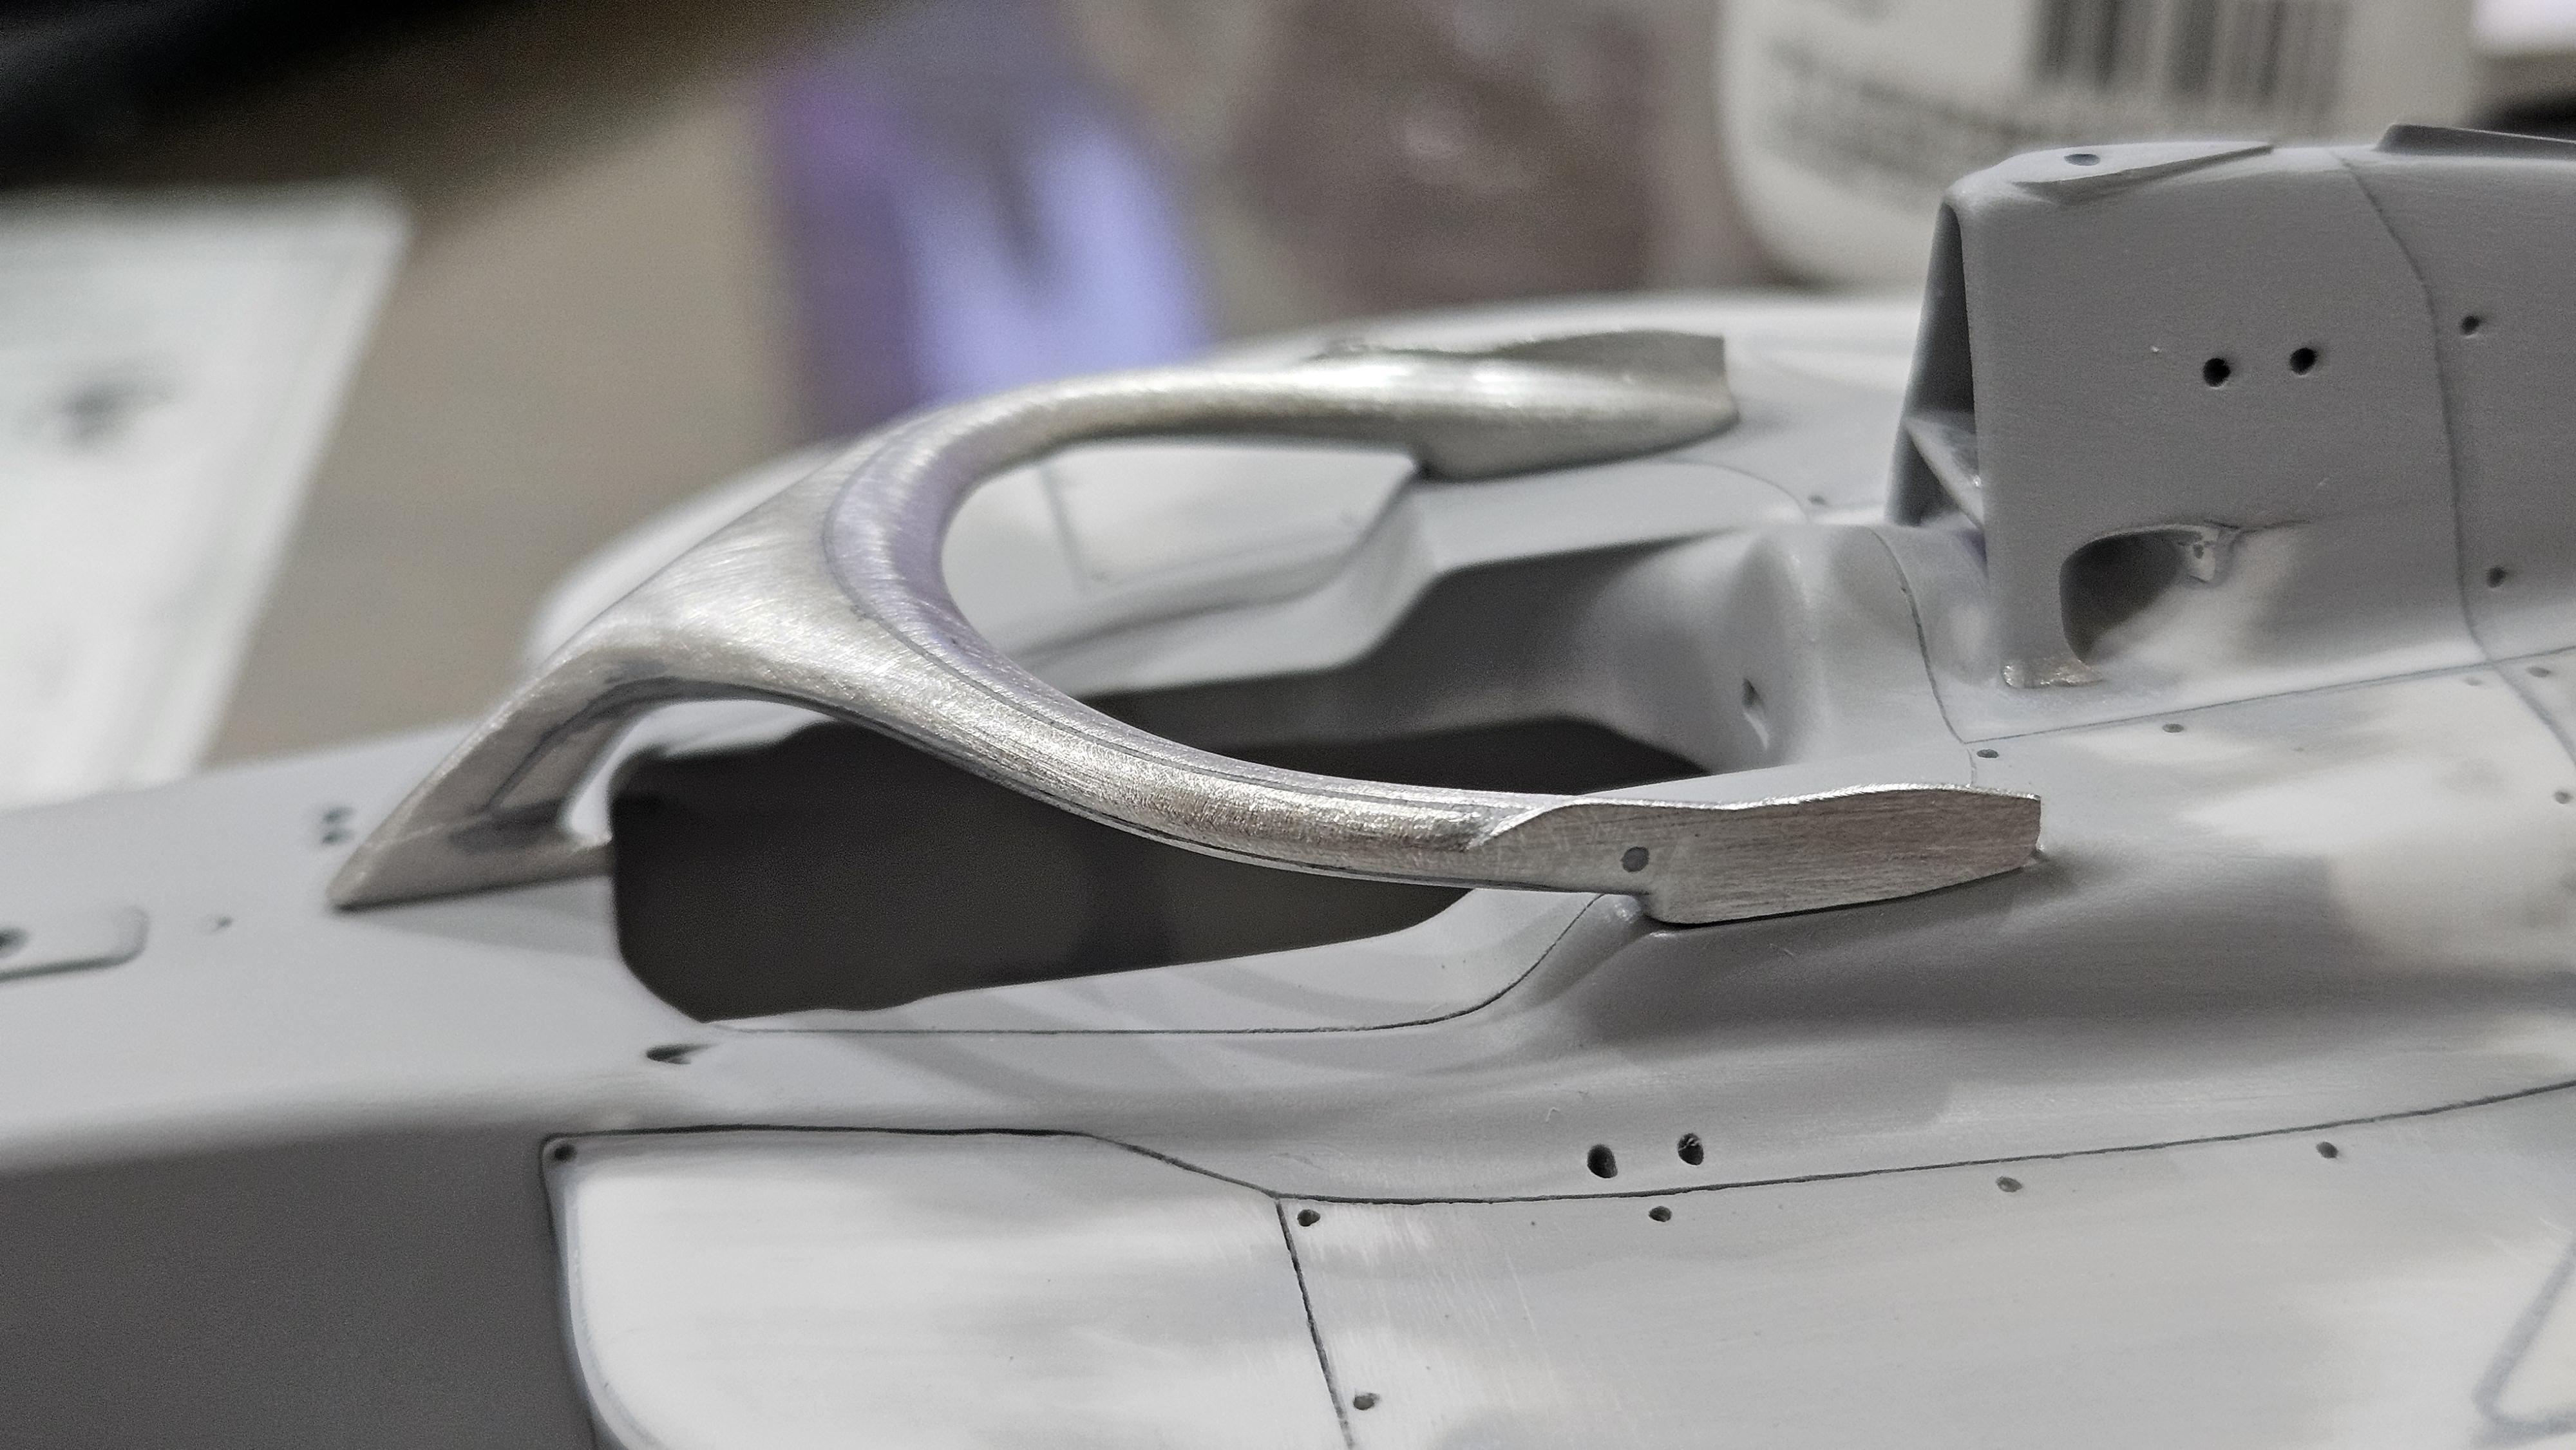
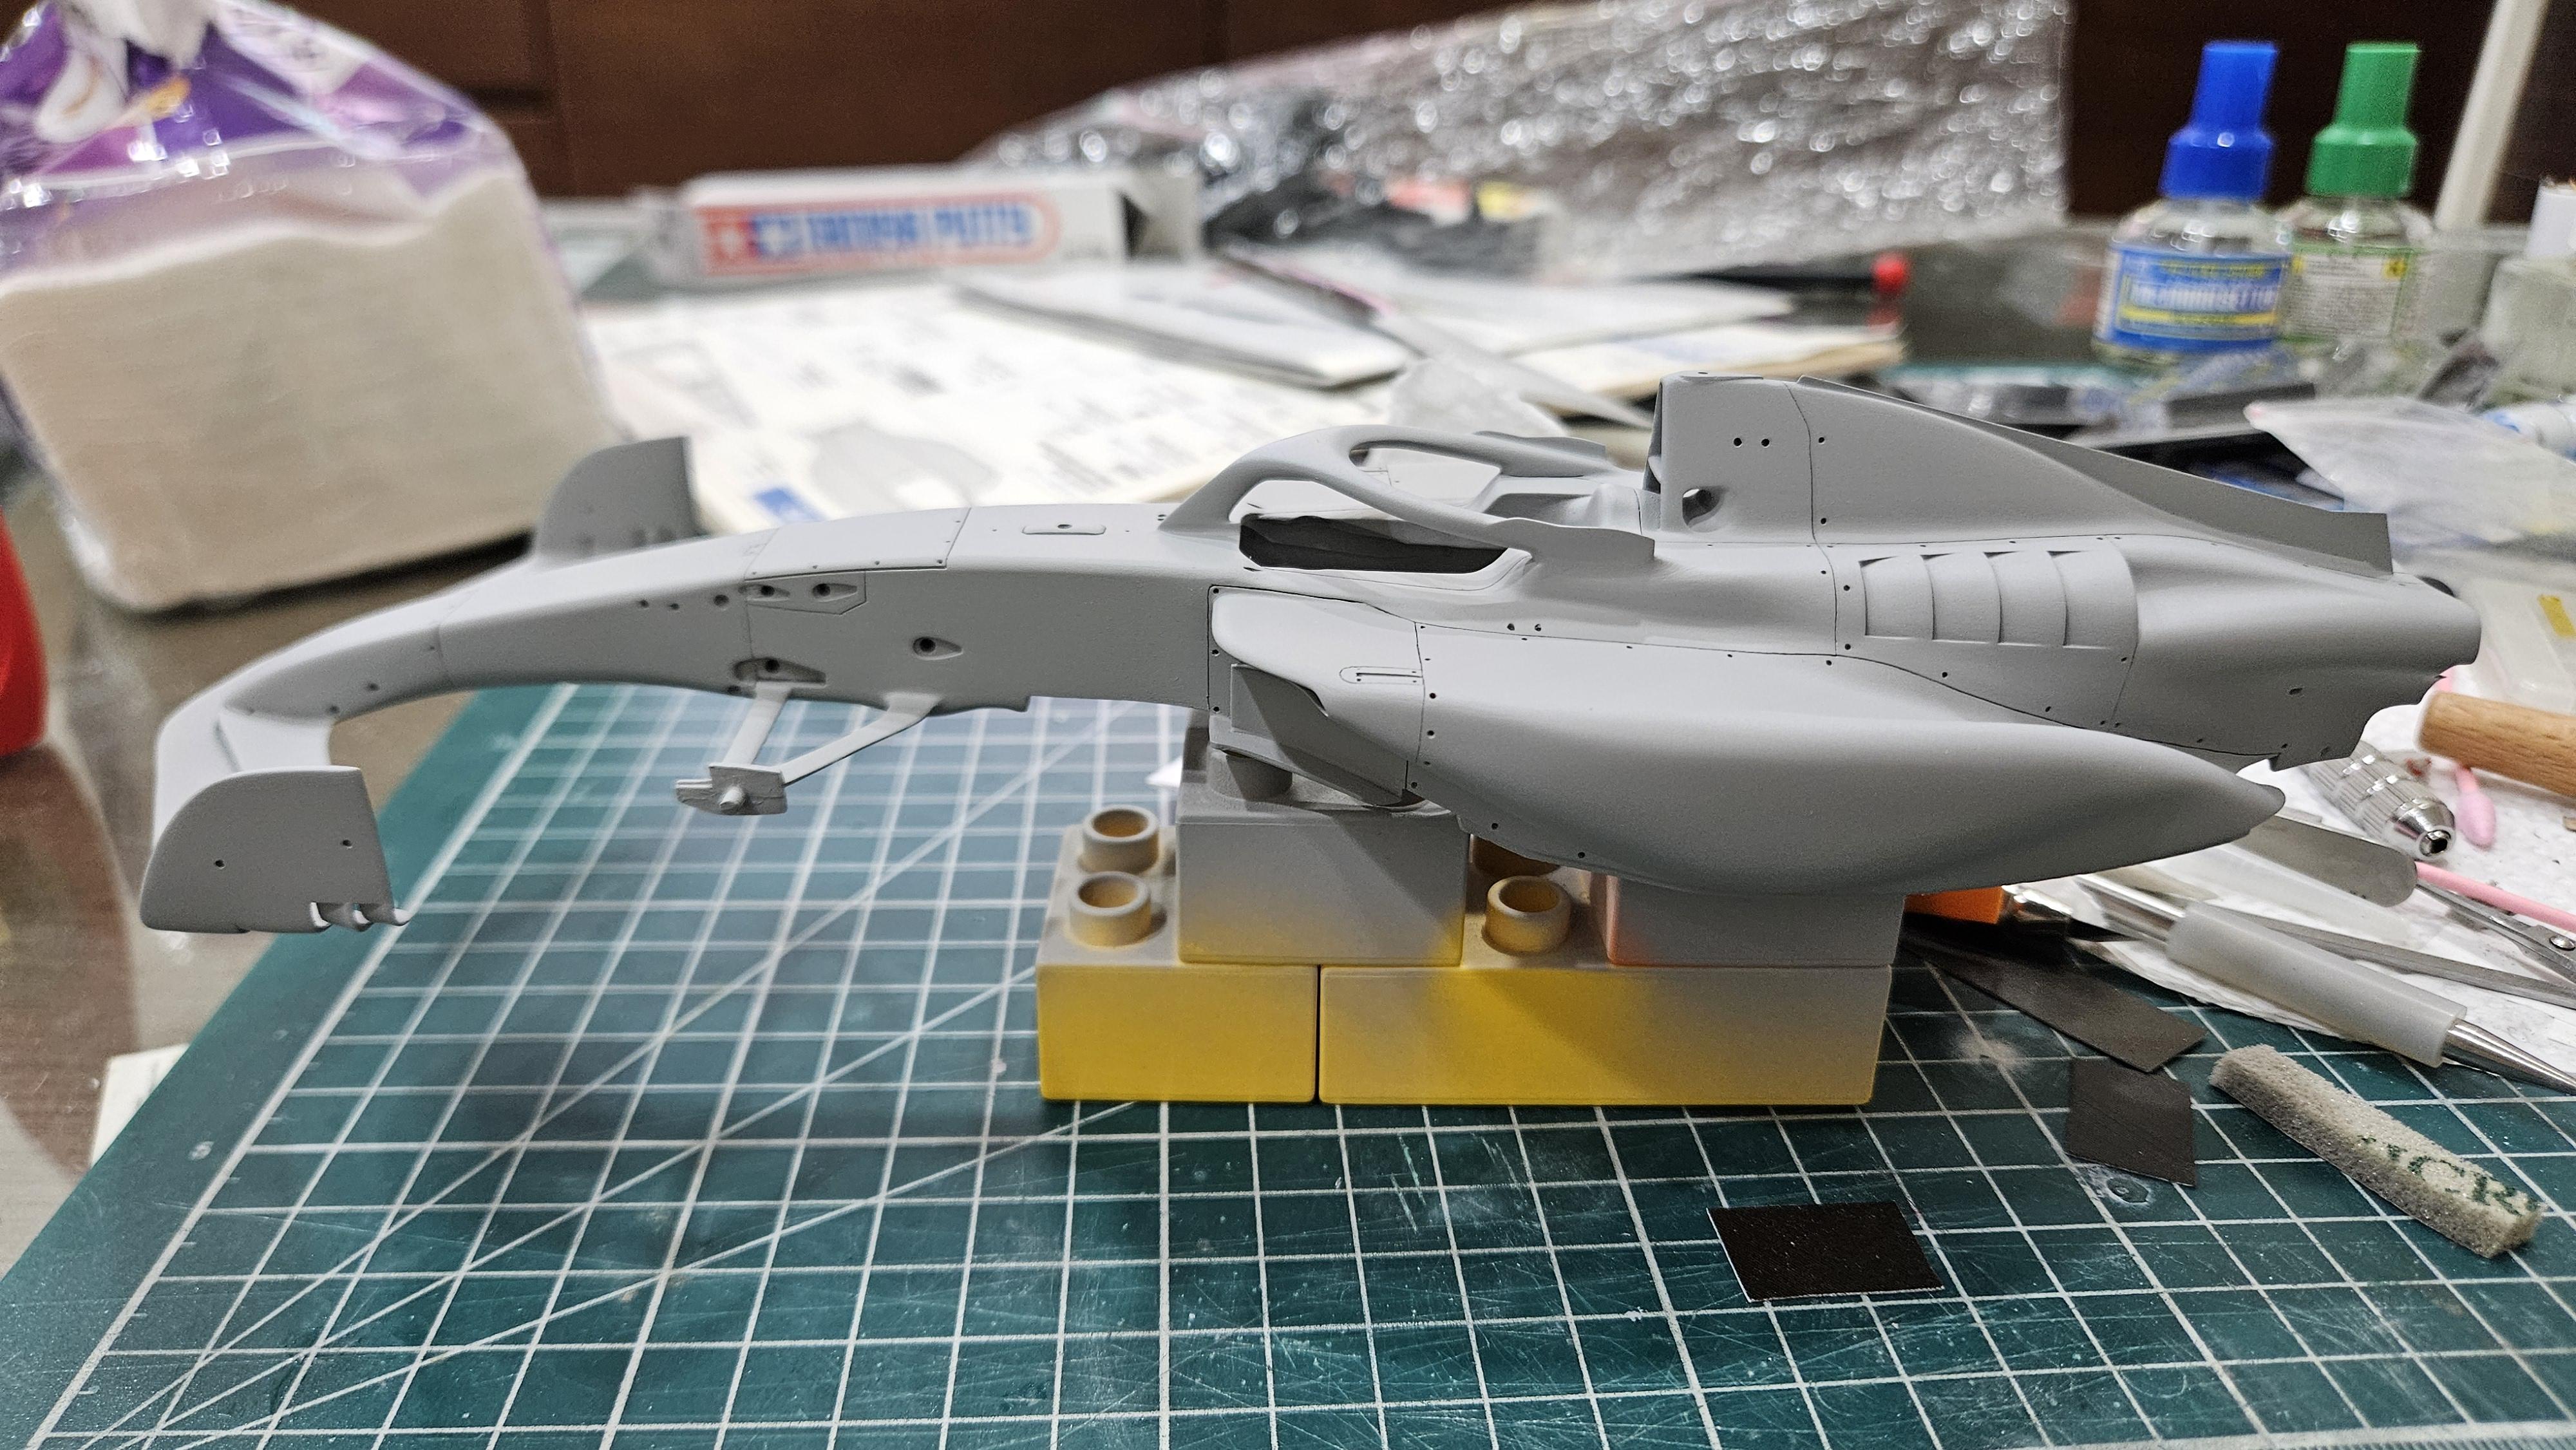
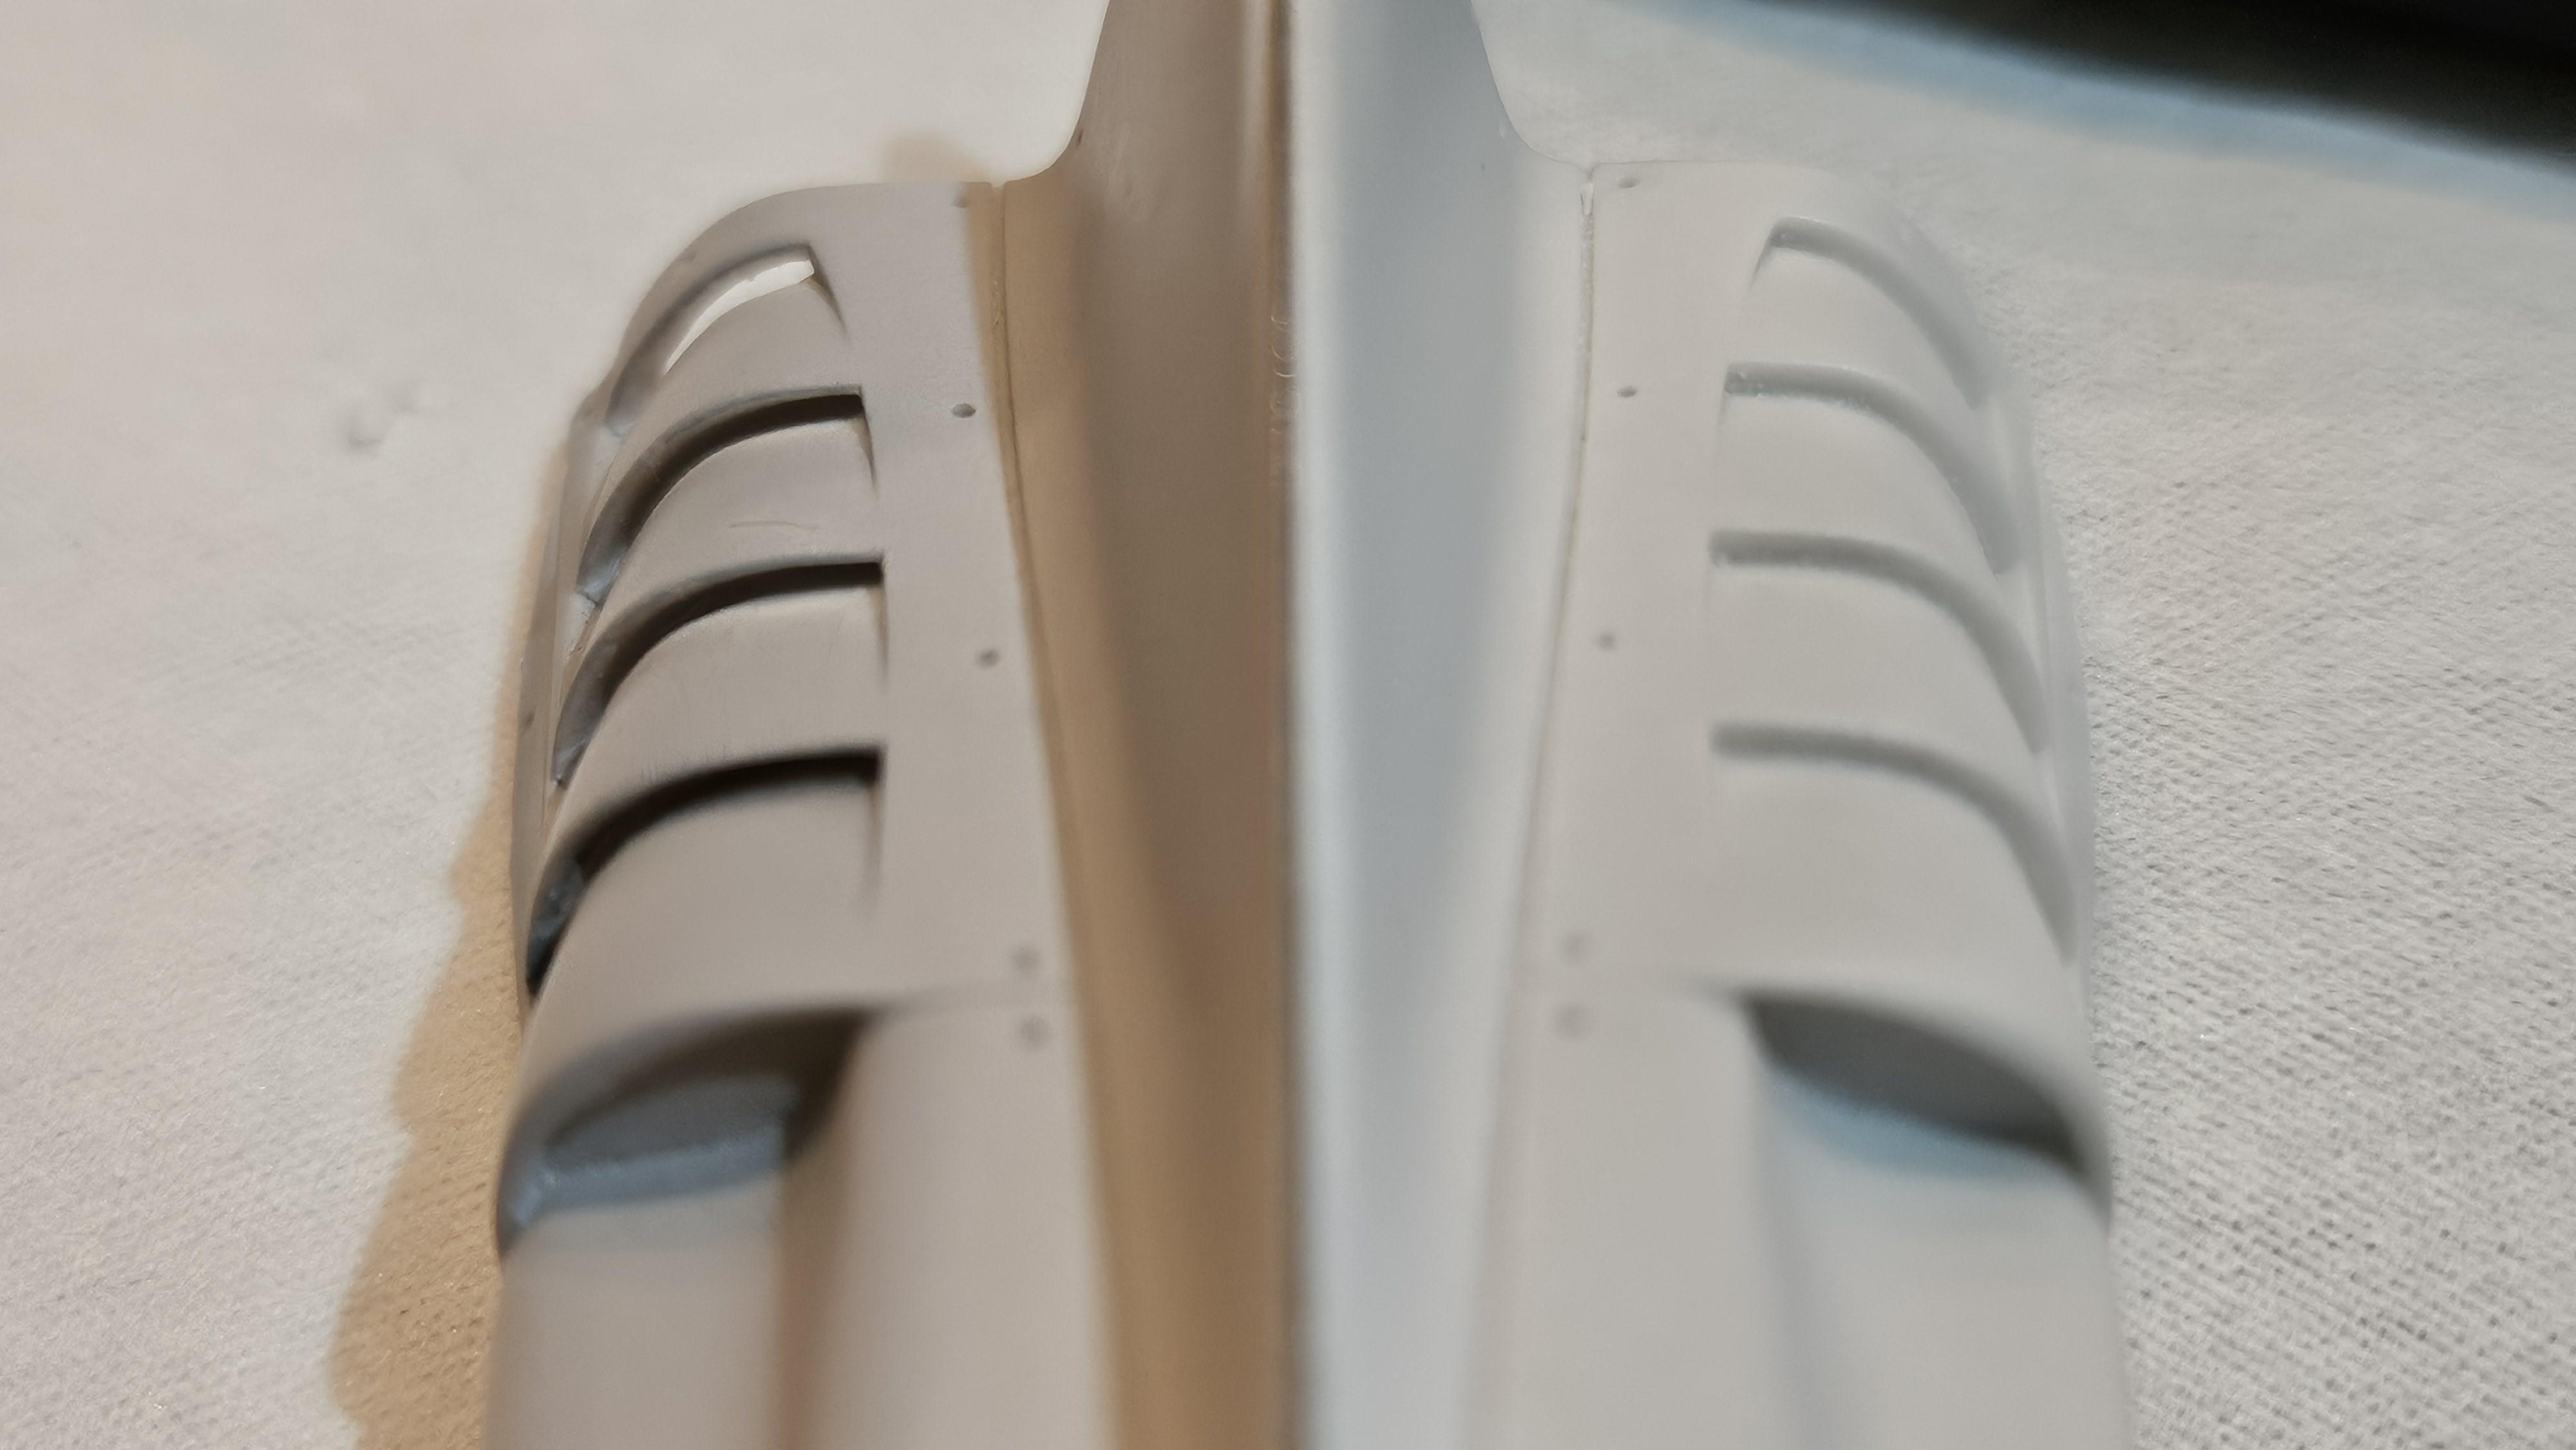
Update some progress Almost all the panel lines are too thick so I filled them in and re-scribed everything, especially since the fuel cap was misaligned. As with the Halo, I glued it in place first, filled the gaps, and then applied gray primer at the end to check the surface.
-
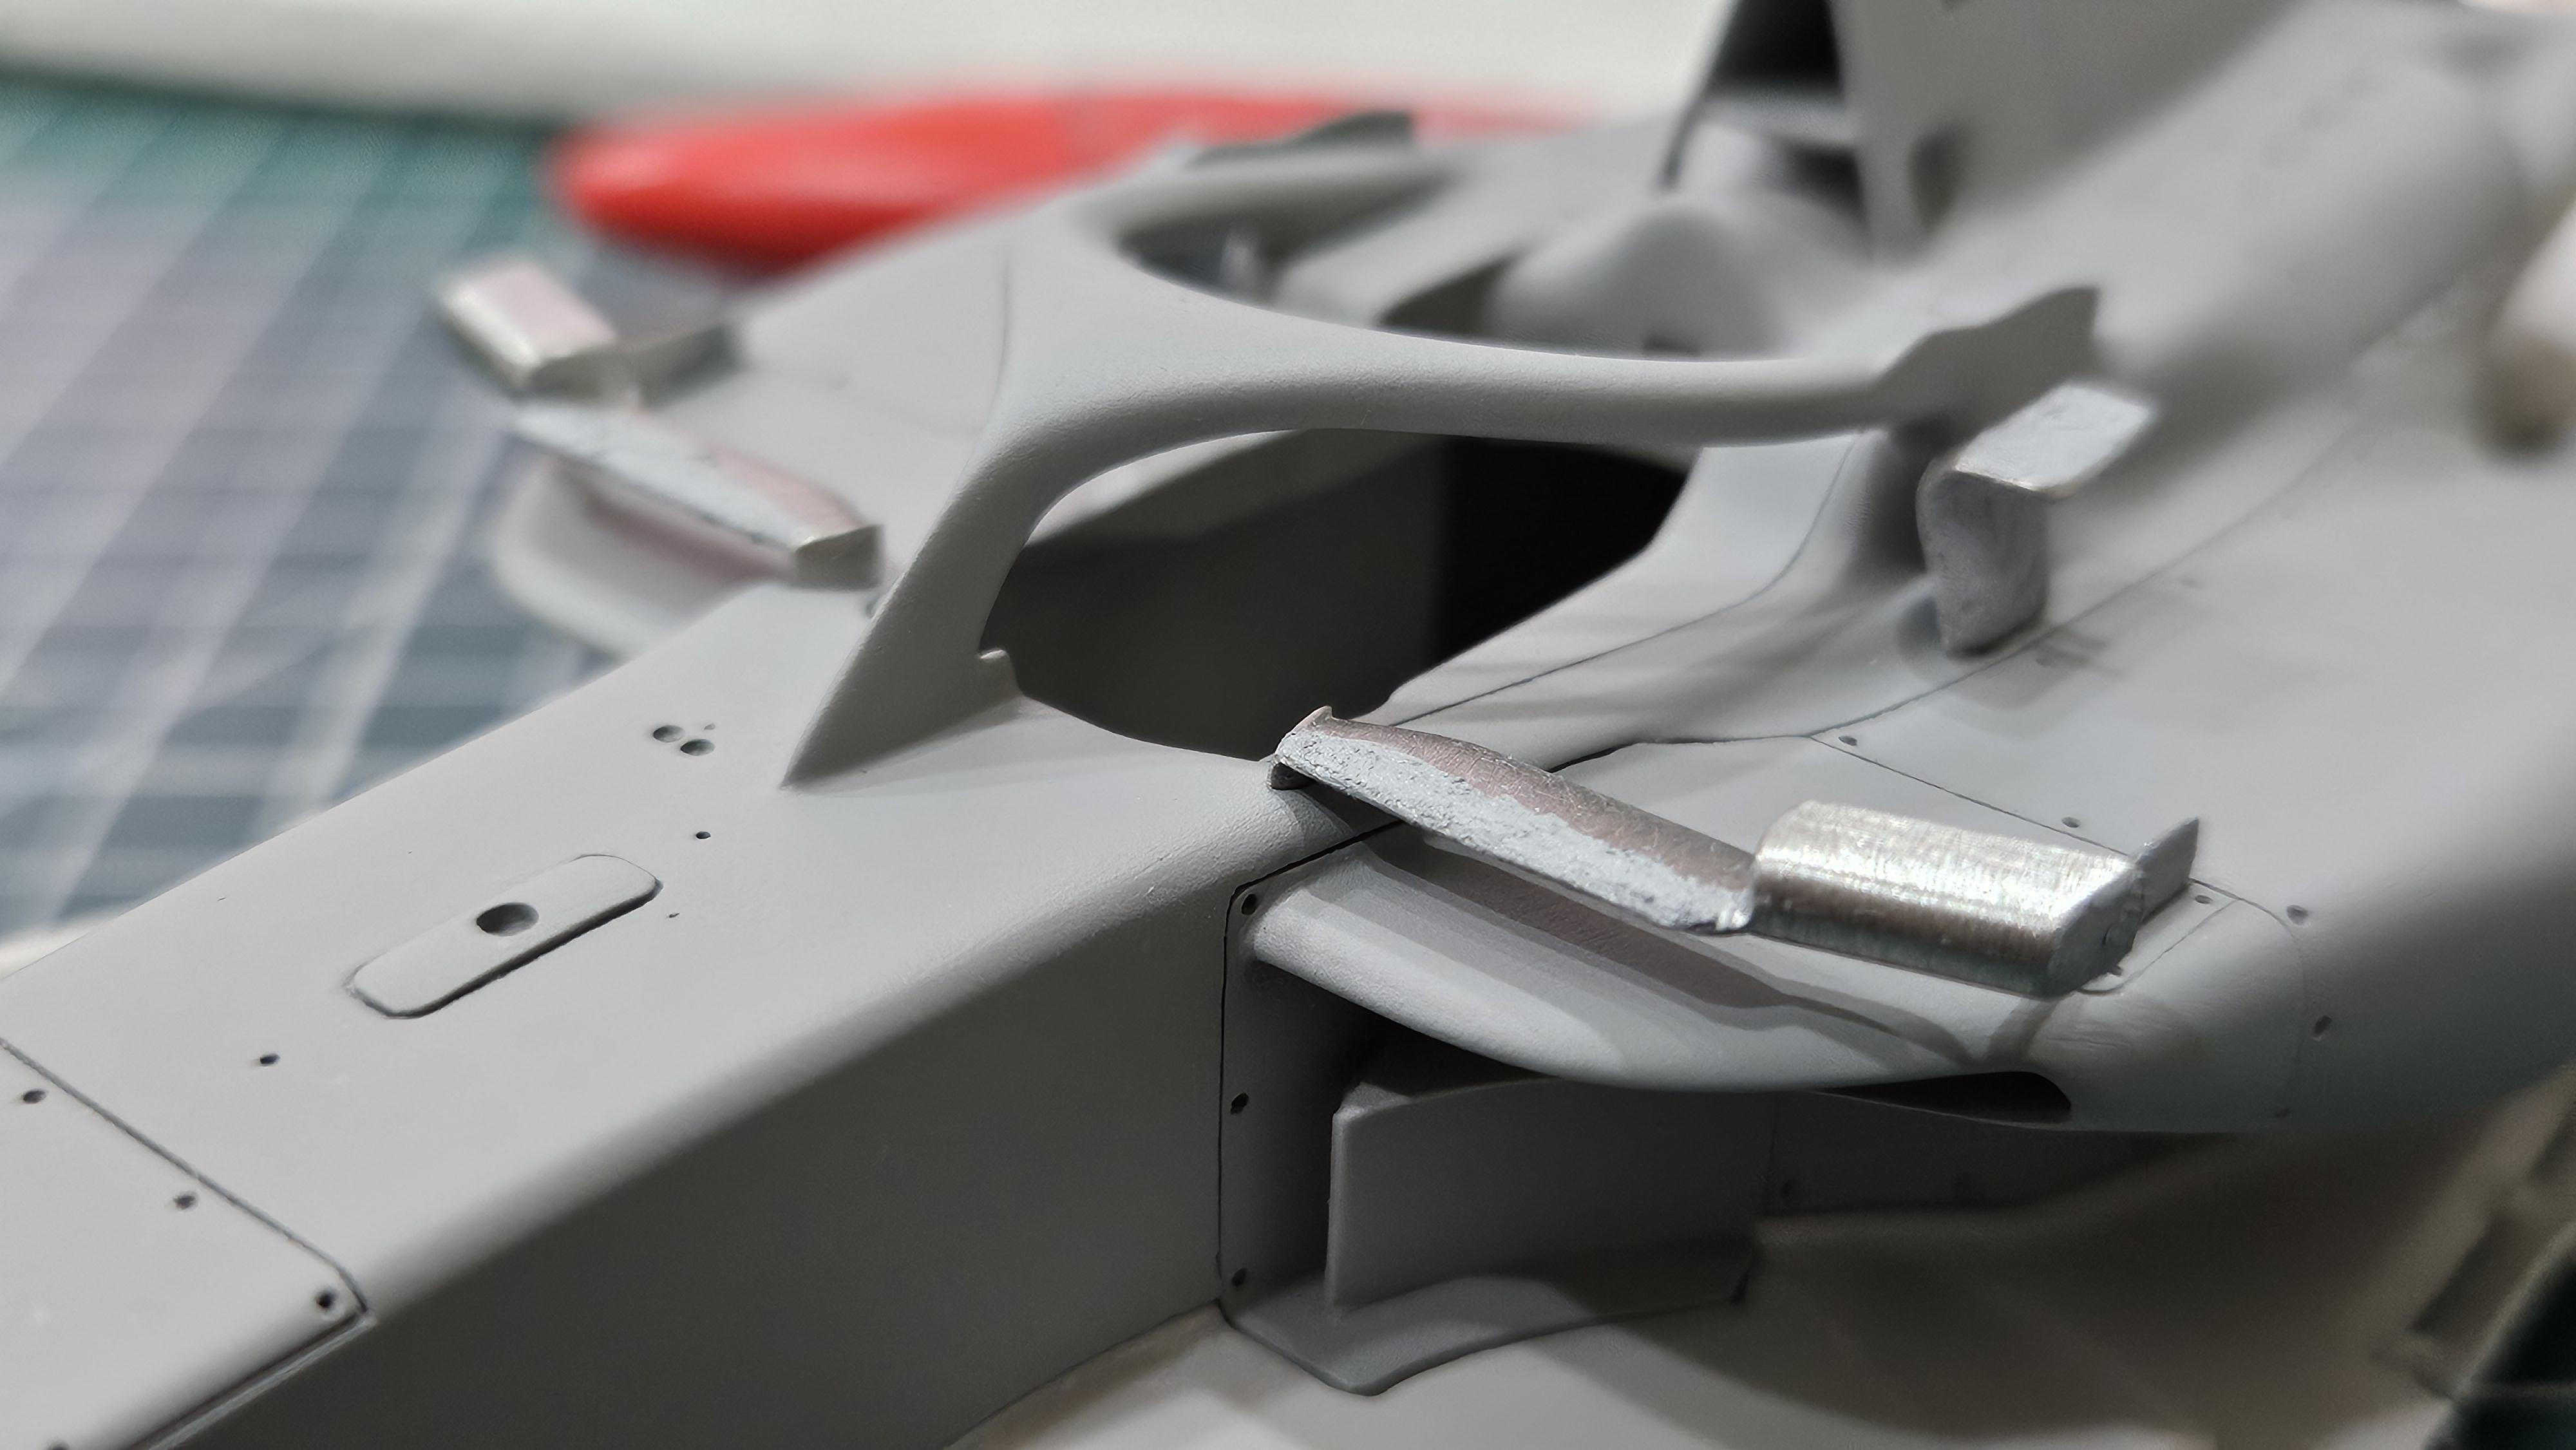
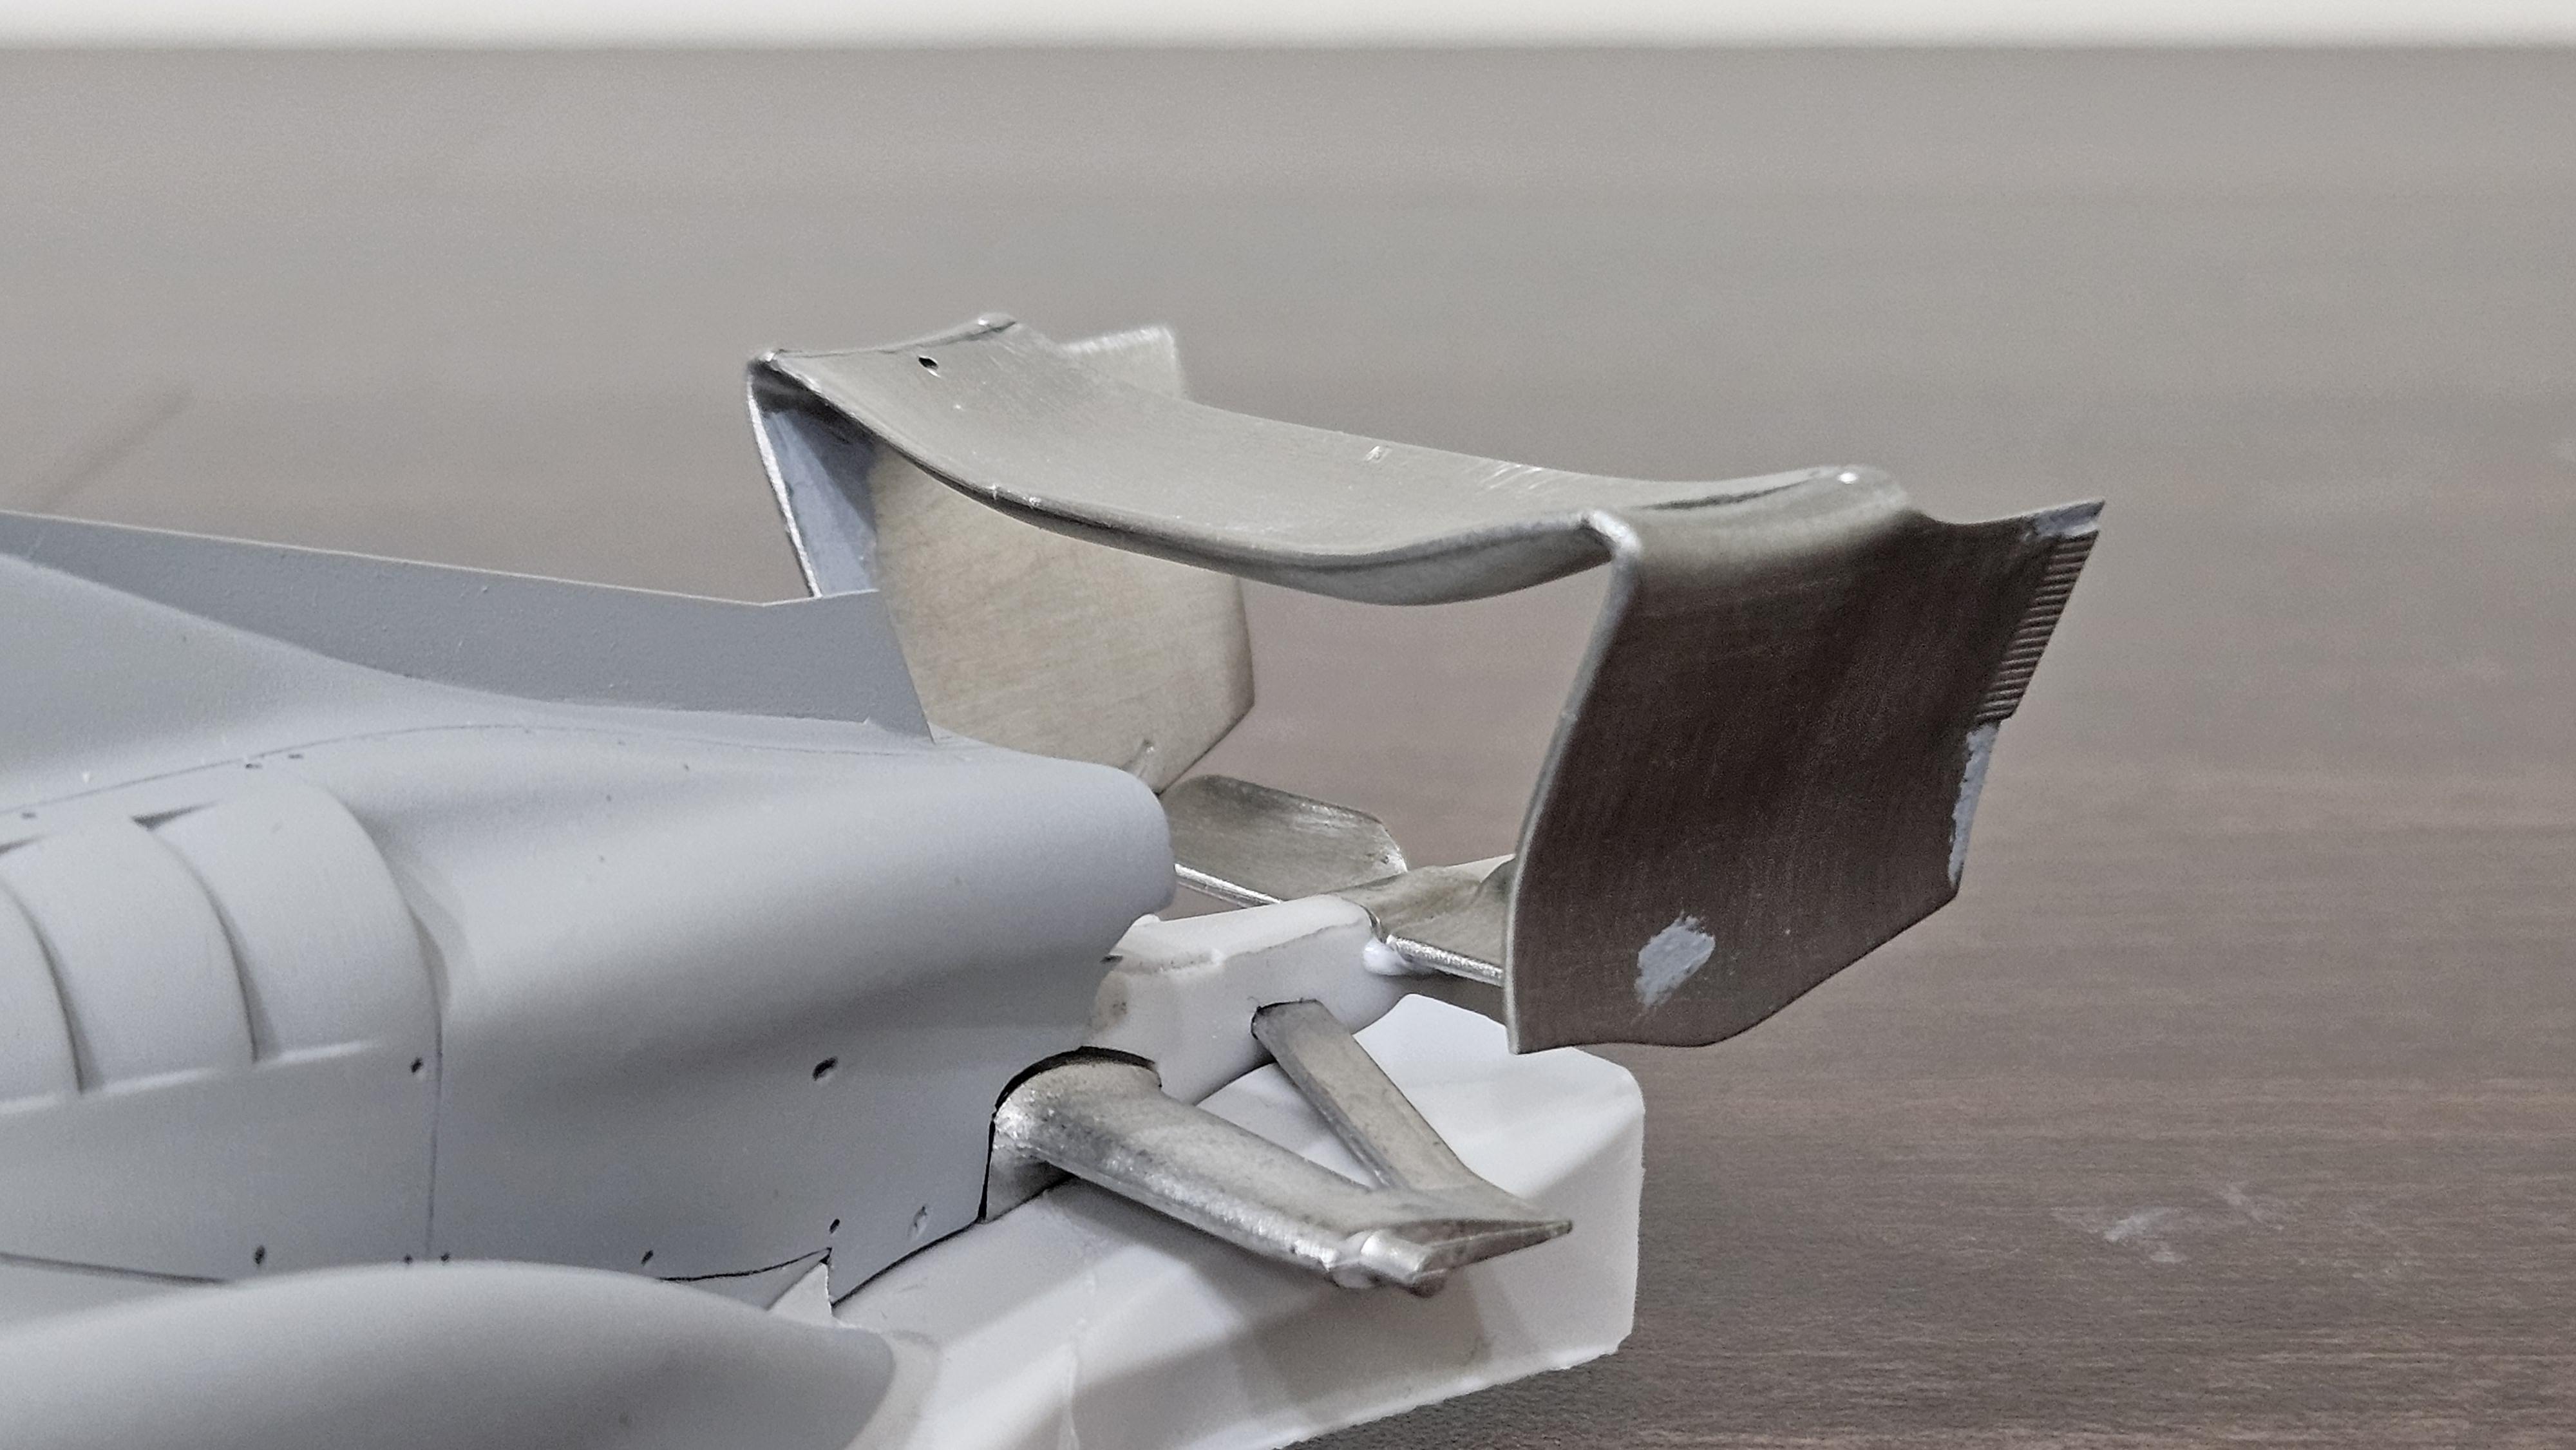
1/12 Mclaren MP4/6
okazaki0511 replied to okazaki0511's topic in WIP: Other Racing: Road Racing, Land Speed Racers
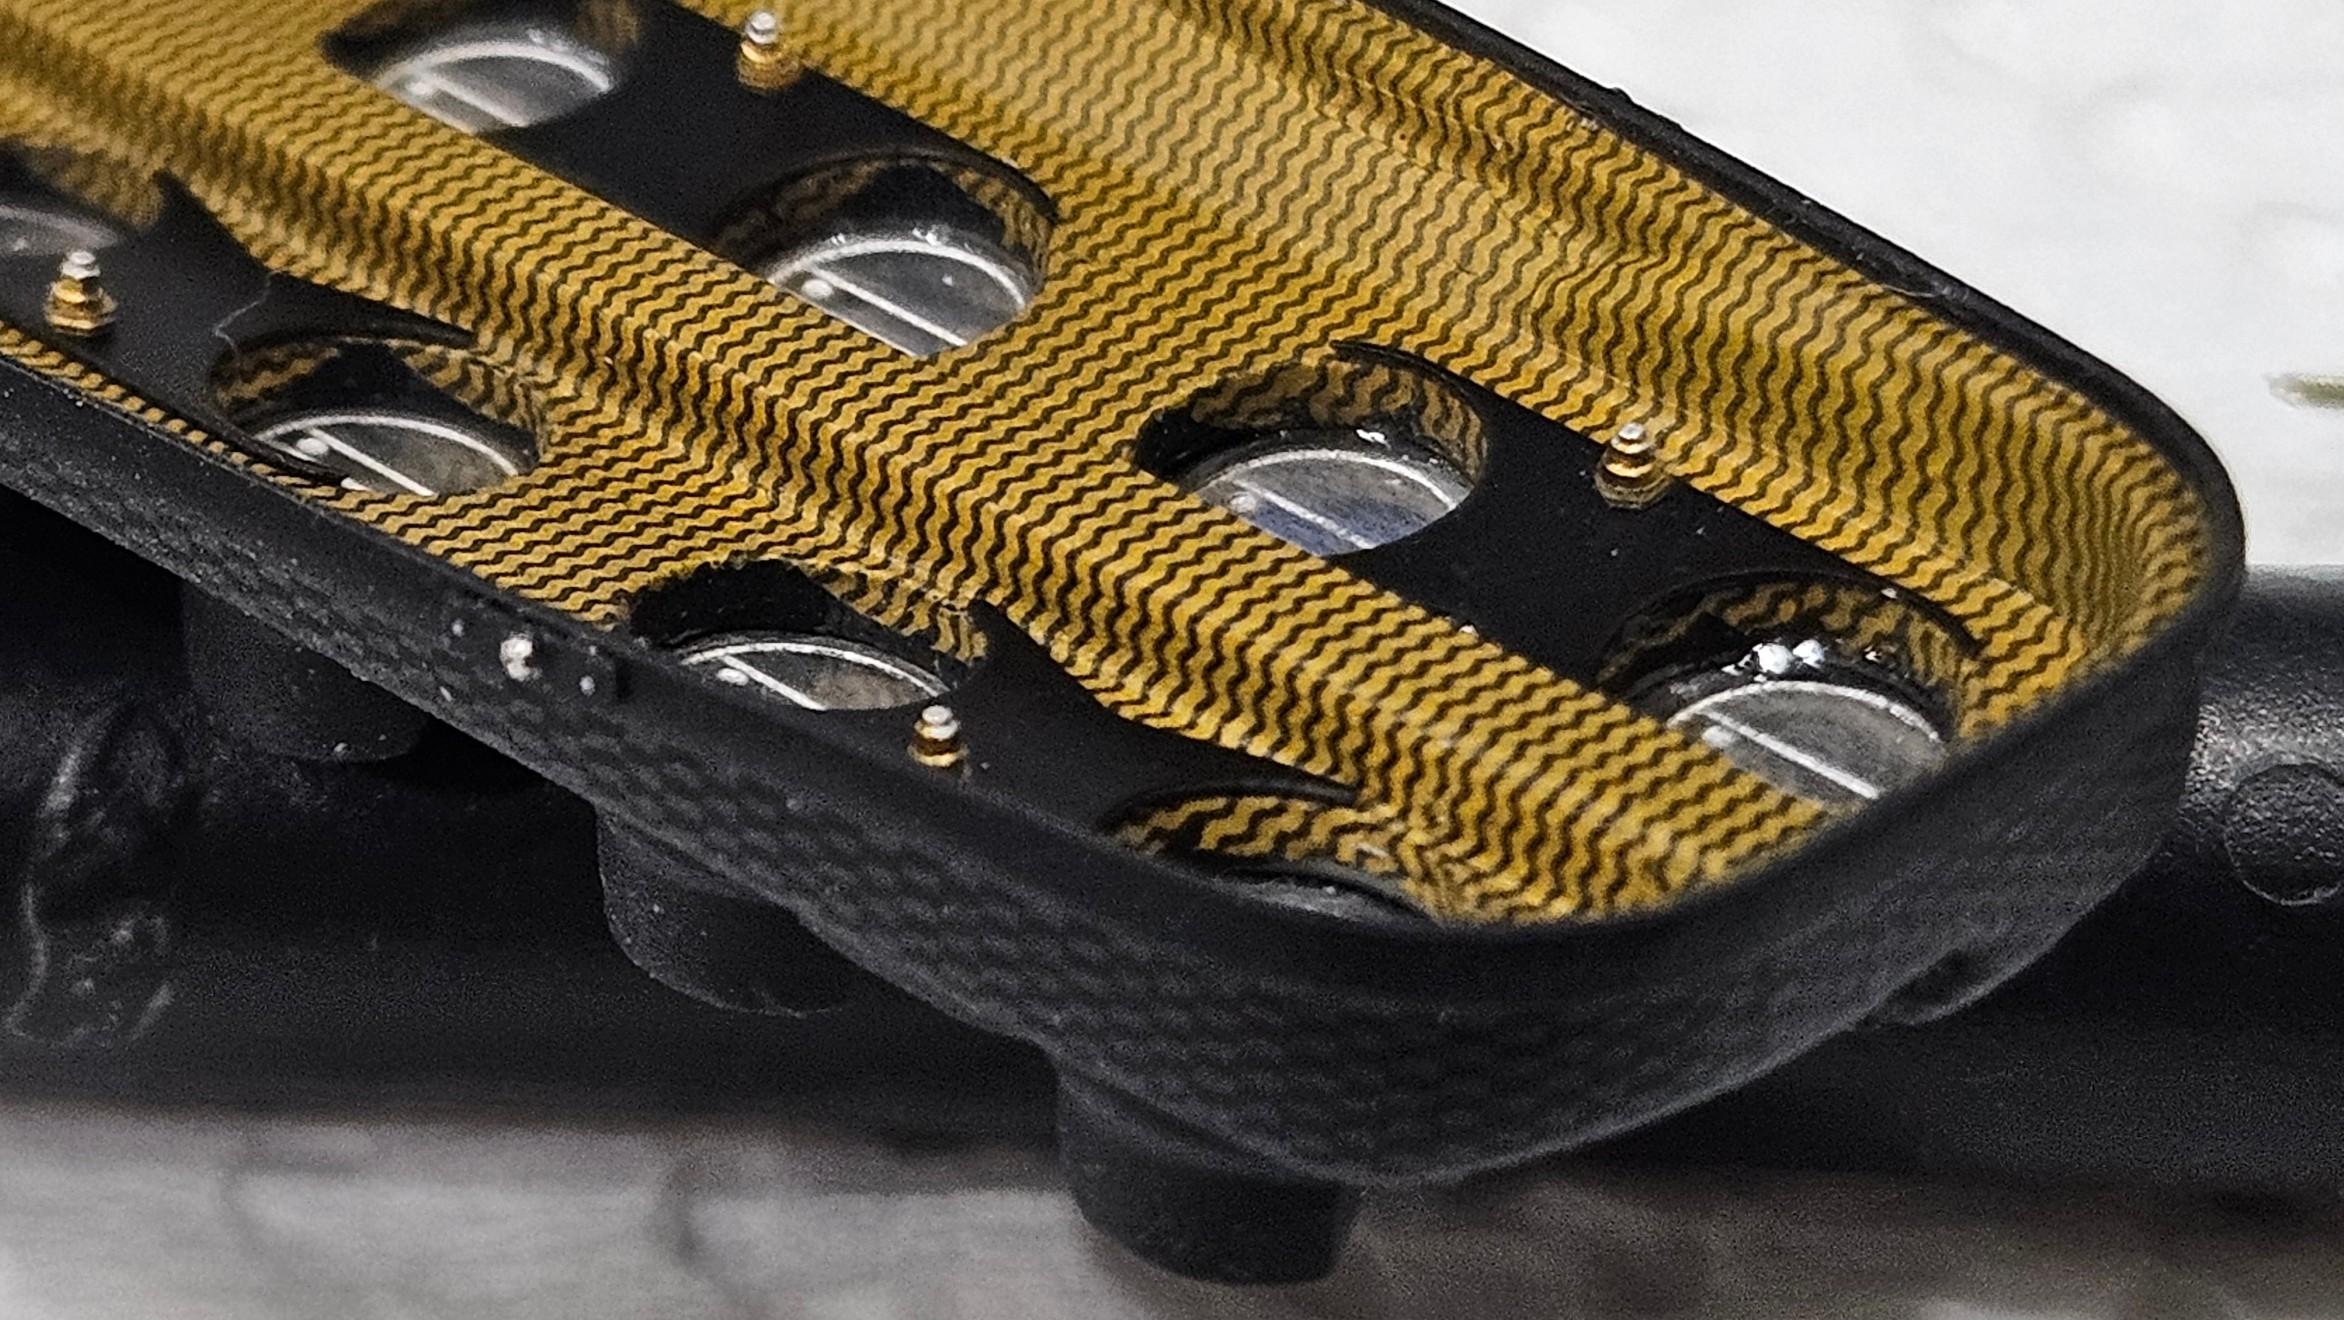
Update some progress. Finished the air funnel part.
-
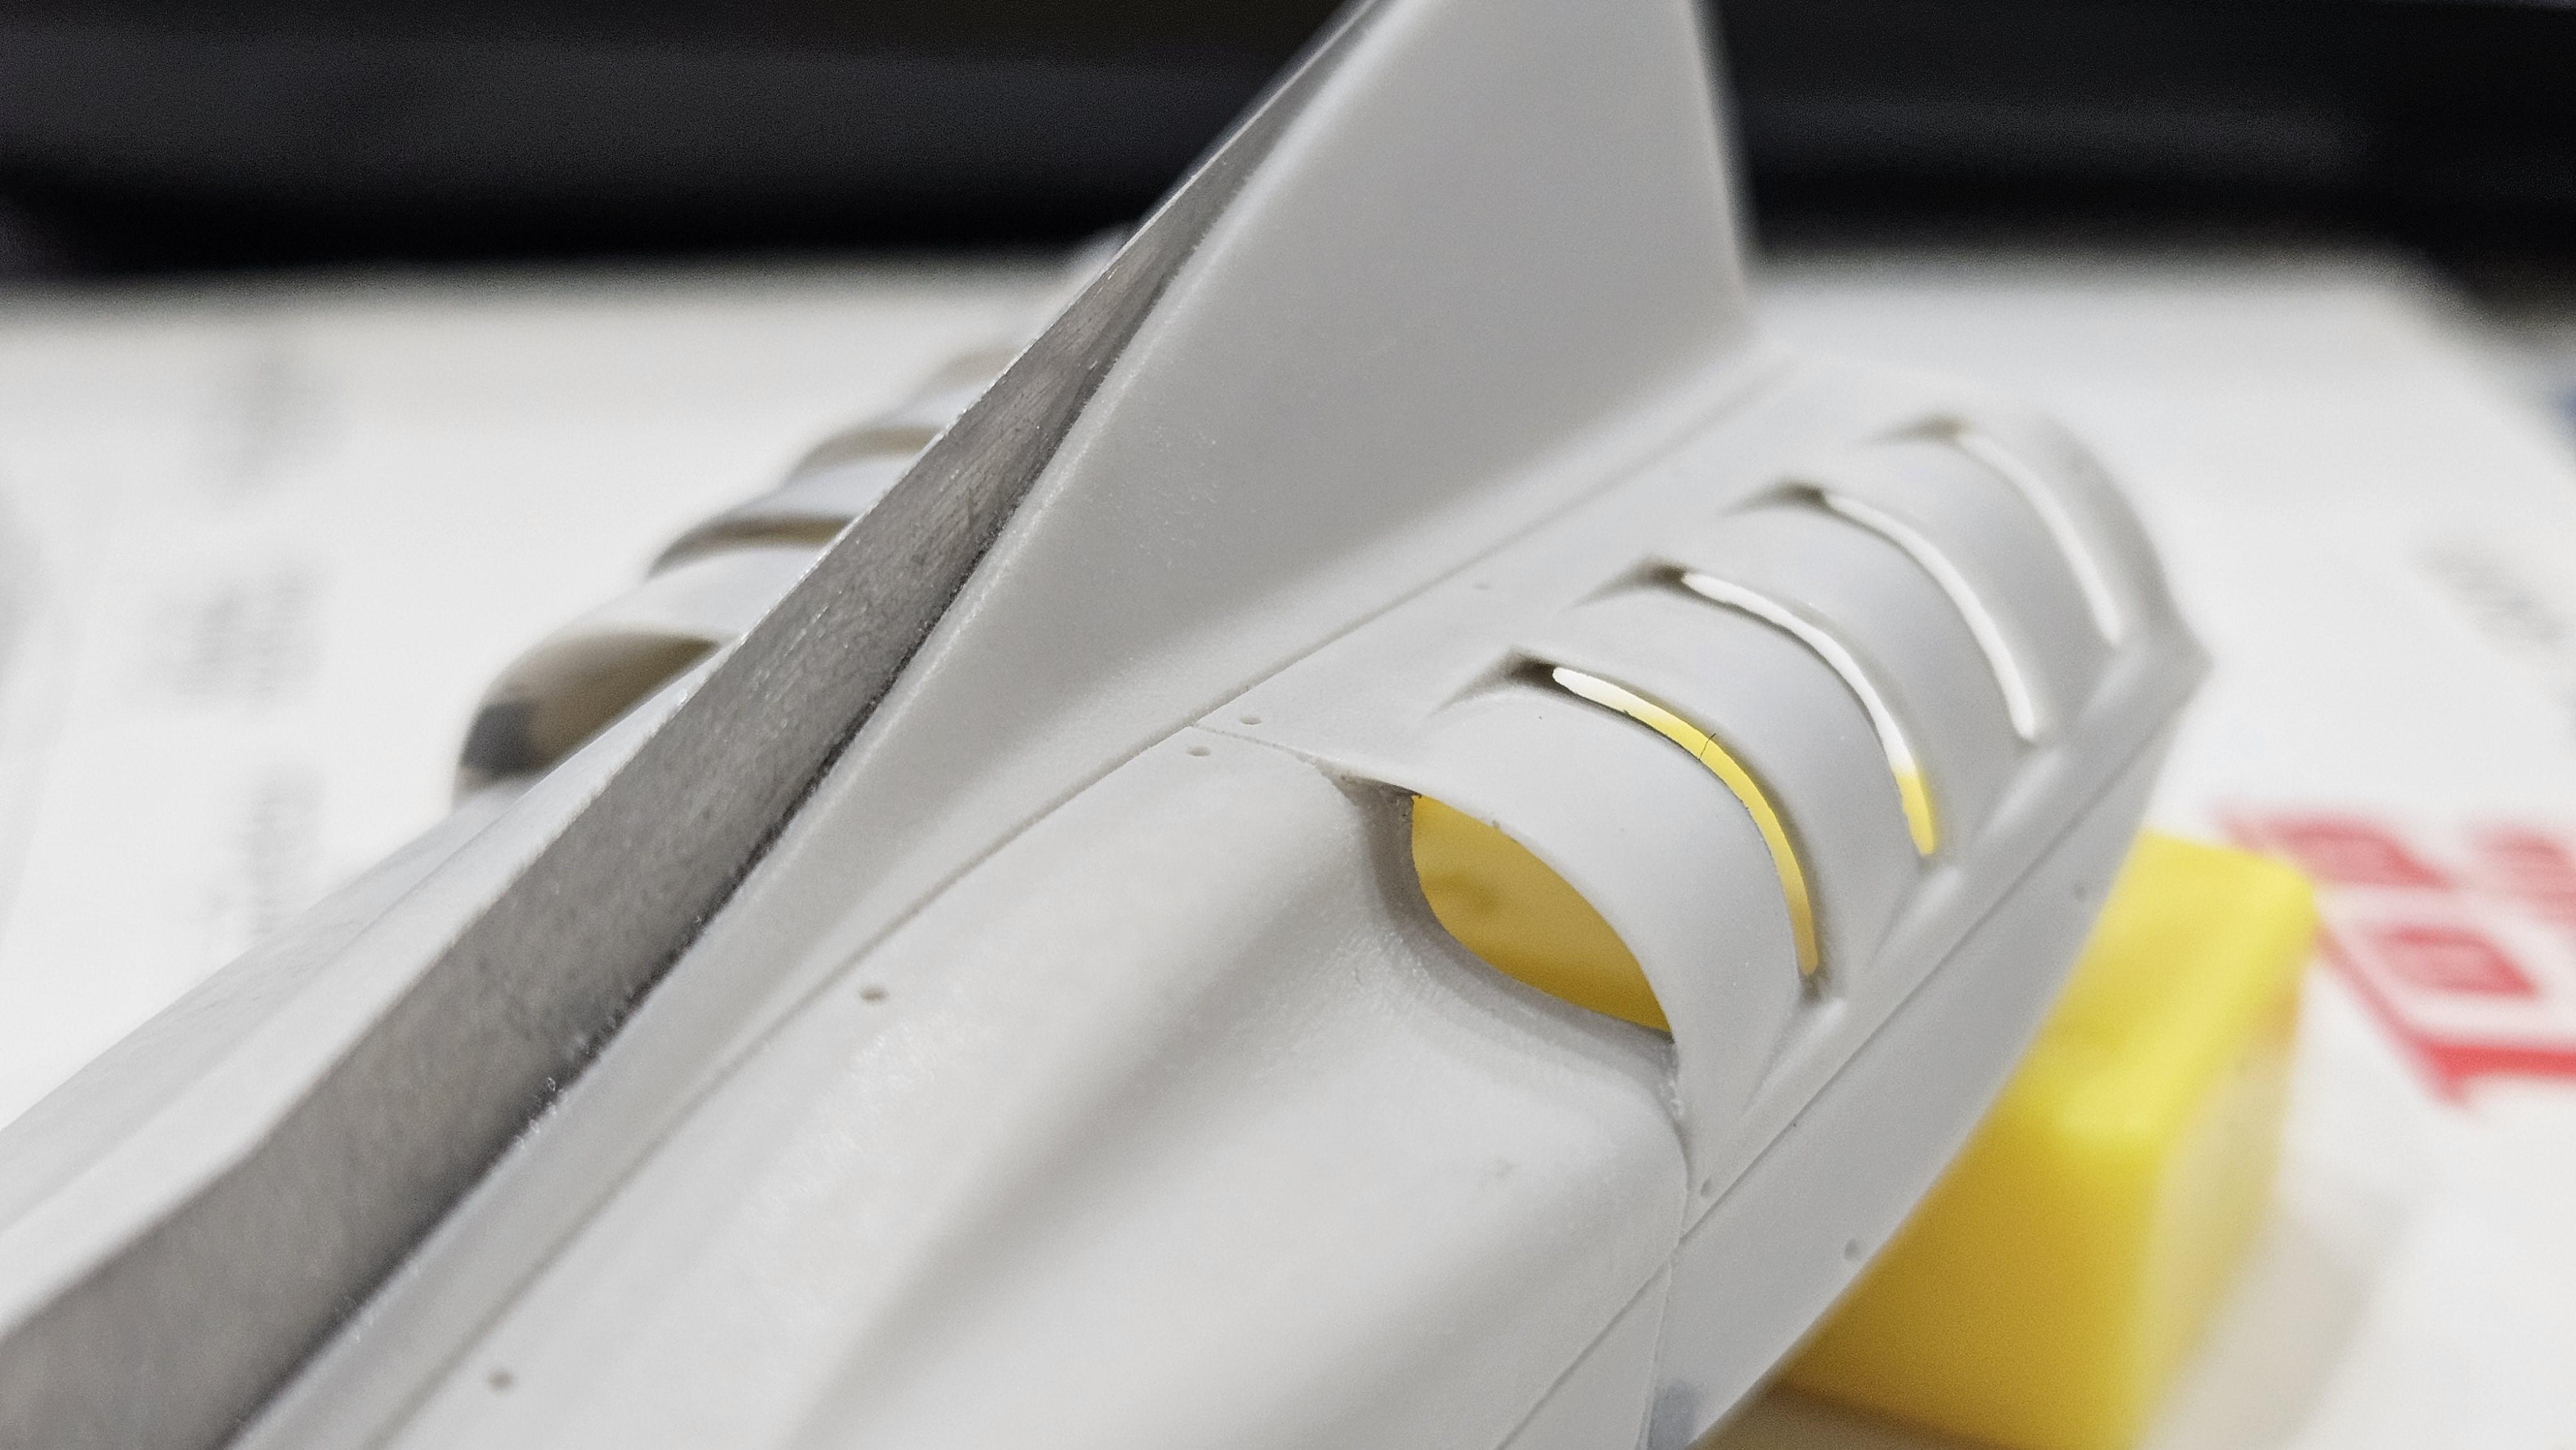
Drilled the cooling vents and thinned the connecting parts of front wing.
-
1/12 Mclaren MP4/6
okazaki0511 replied to okazaki0511's topic in WIP: Other Racing: Road Racing, Land Speed Racers
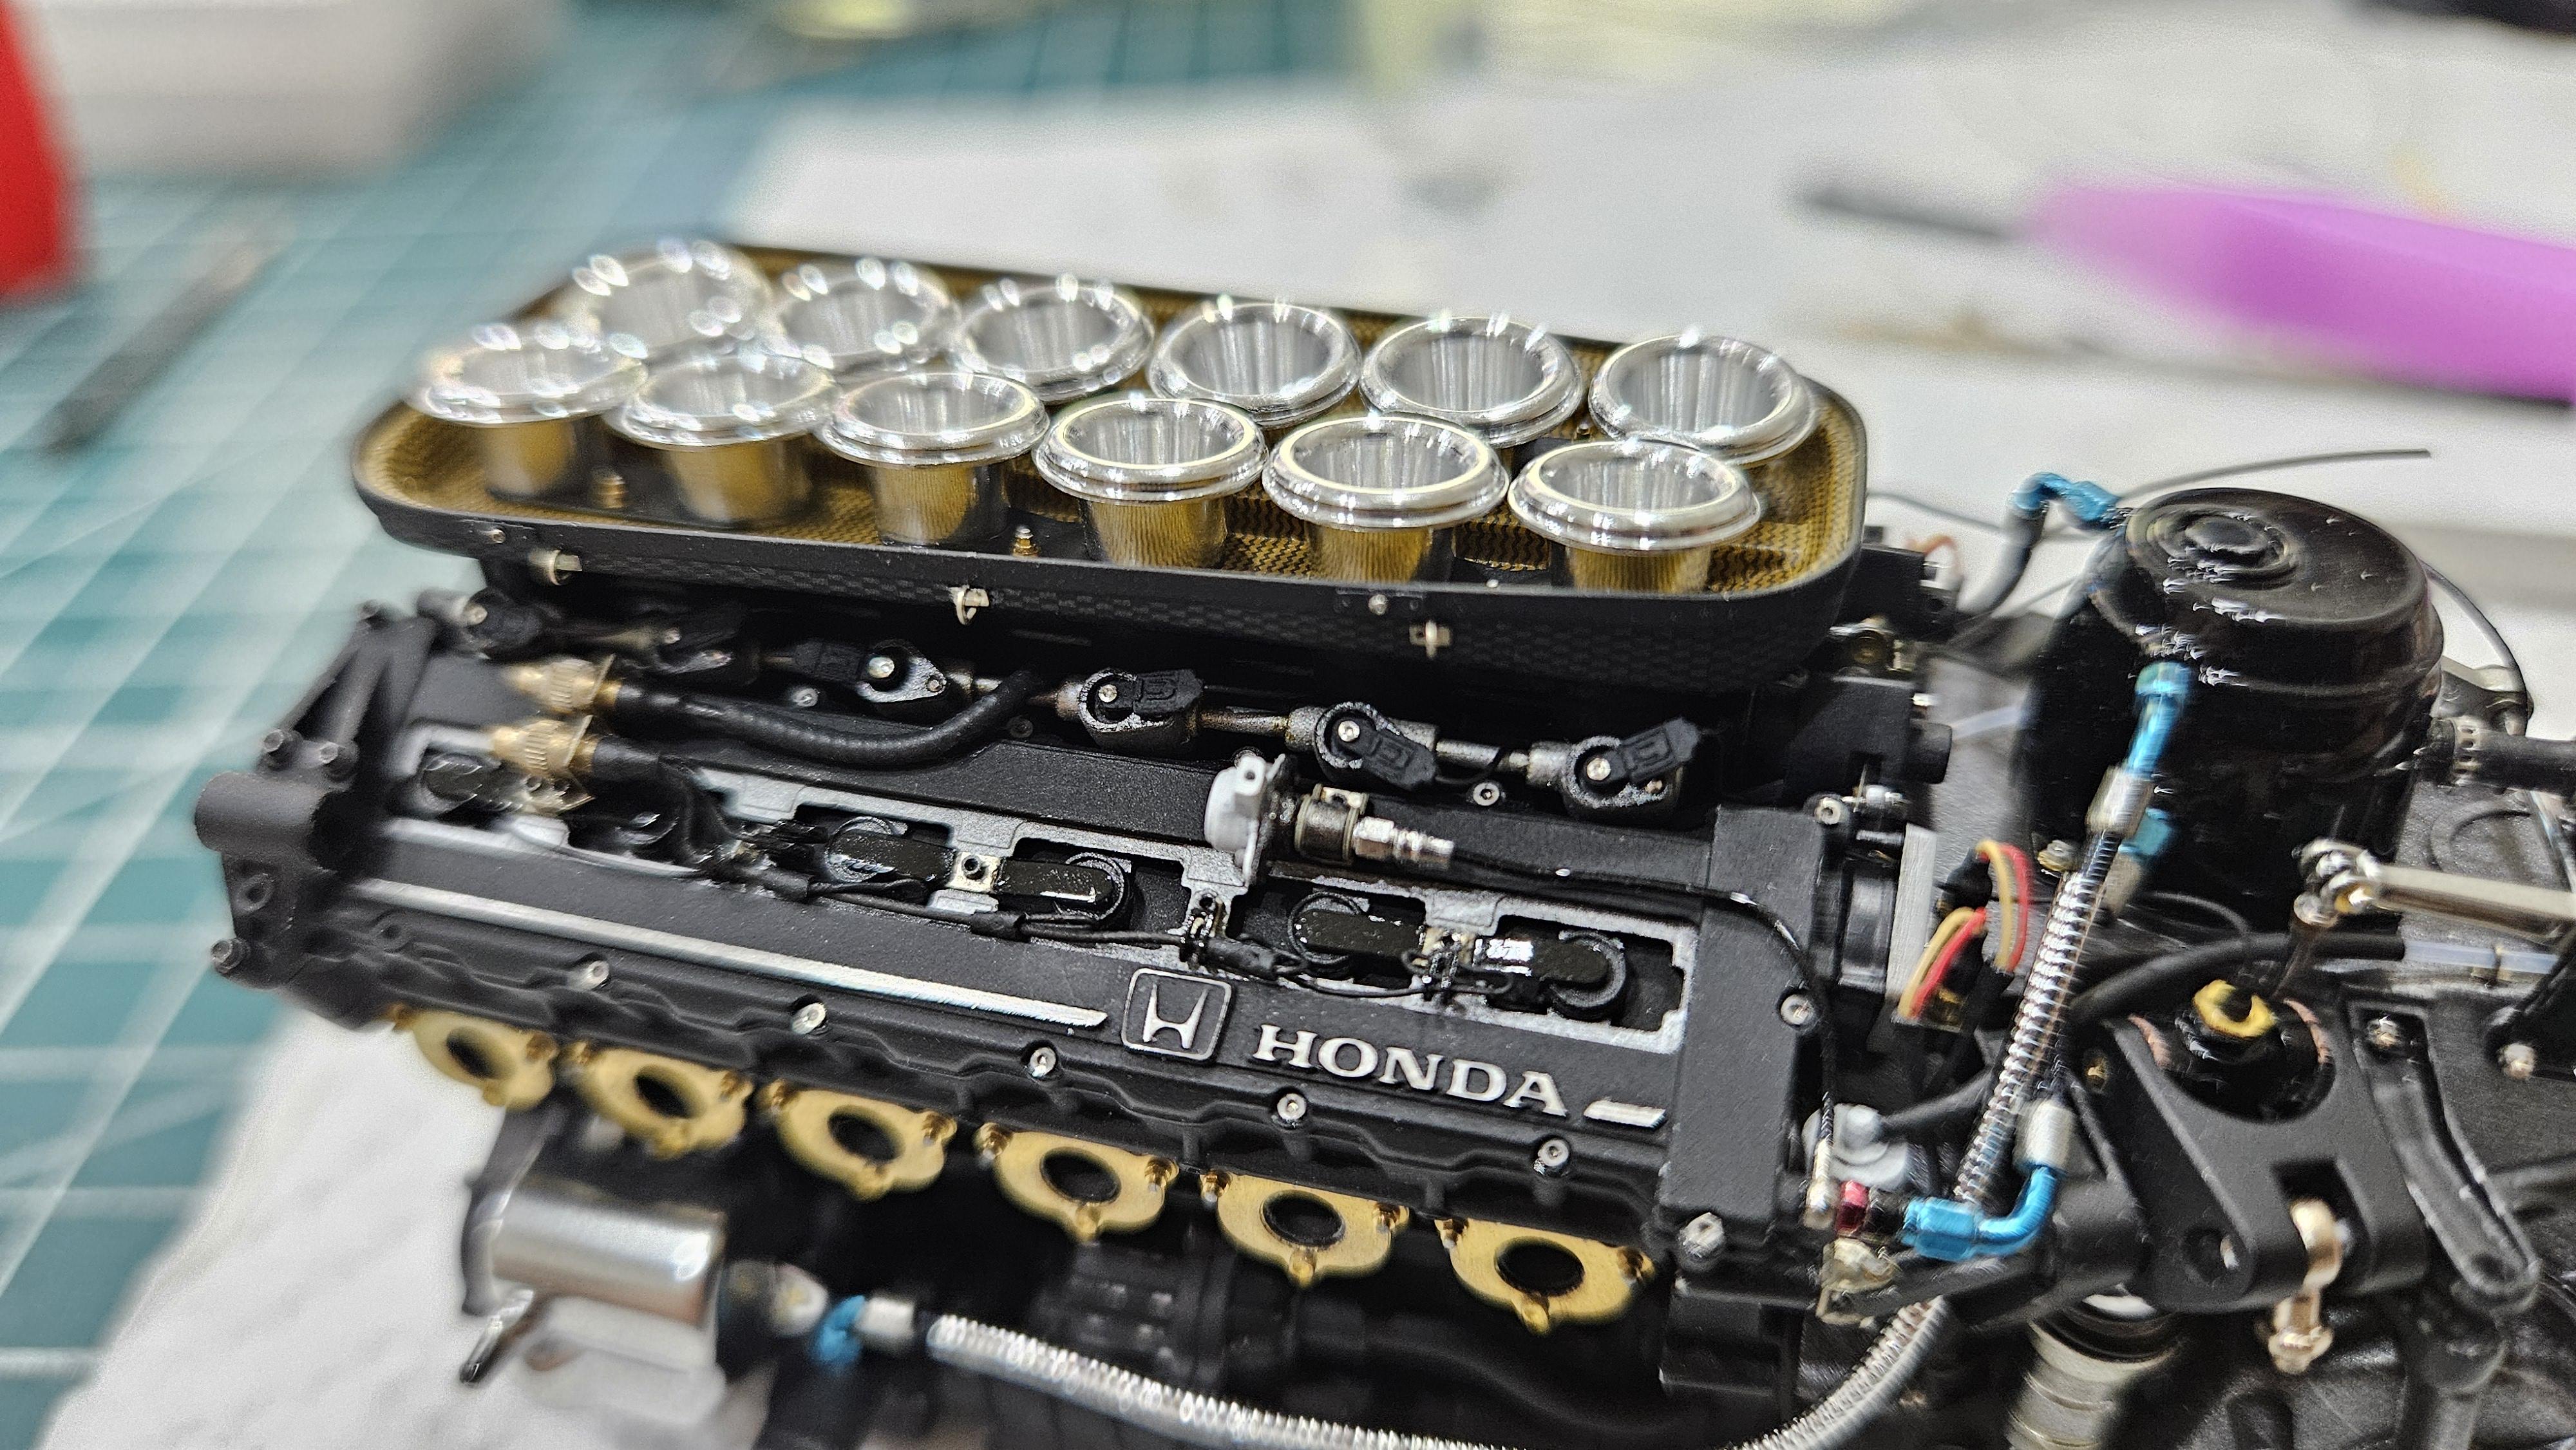
Update some progress Use 1mm spring to simulate duct hose and use checkered heat shield sticker.
-
1/12 Mclaren MP4/6
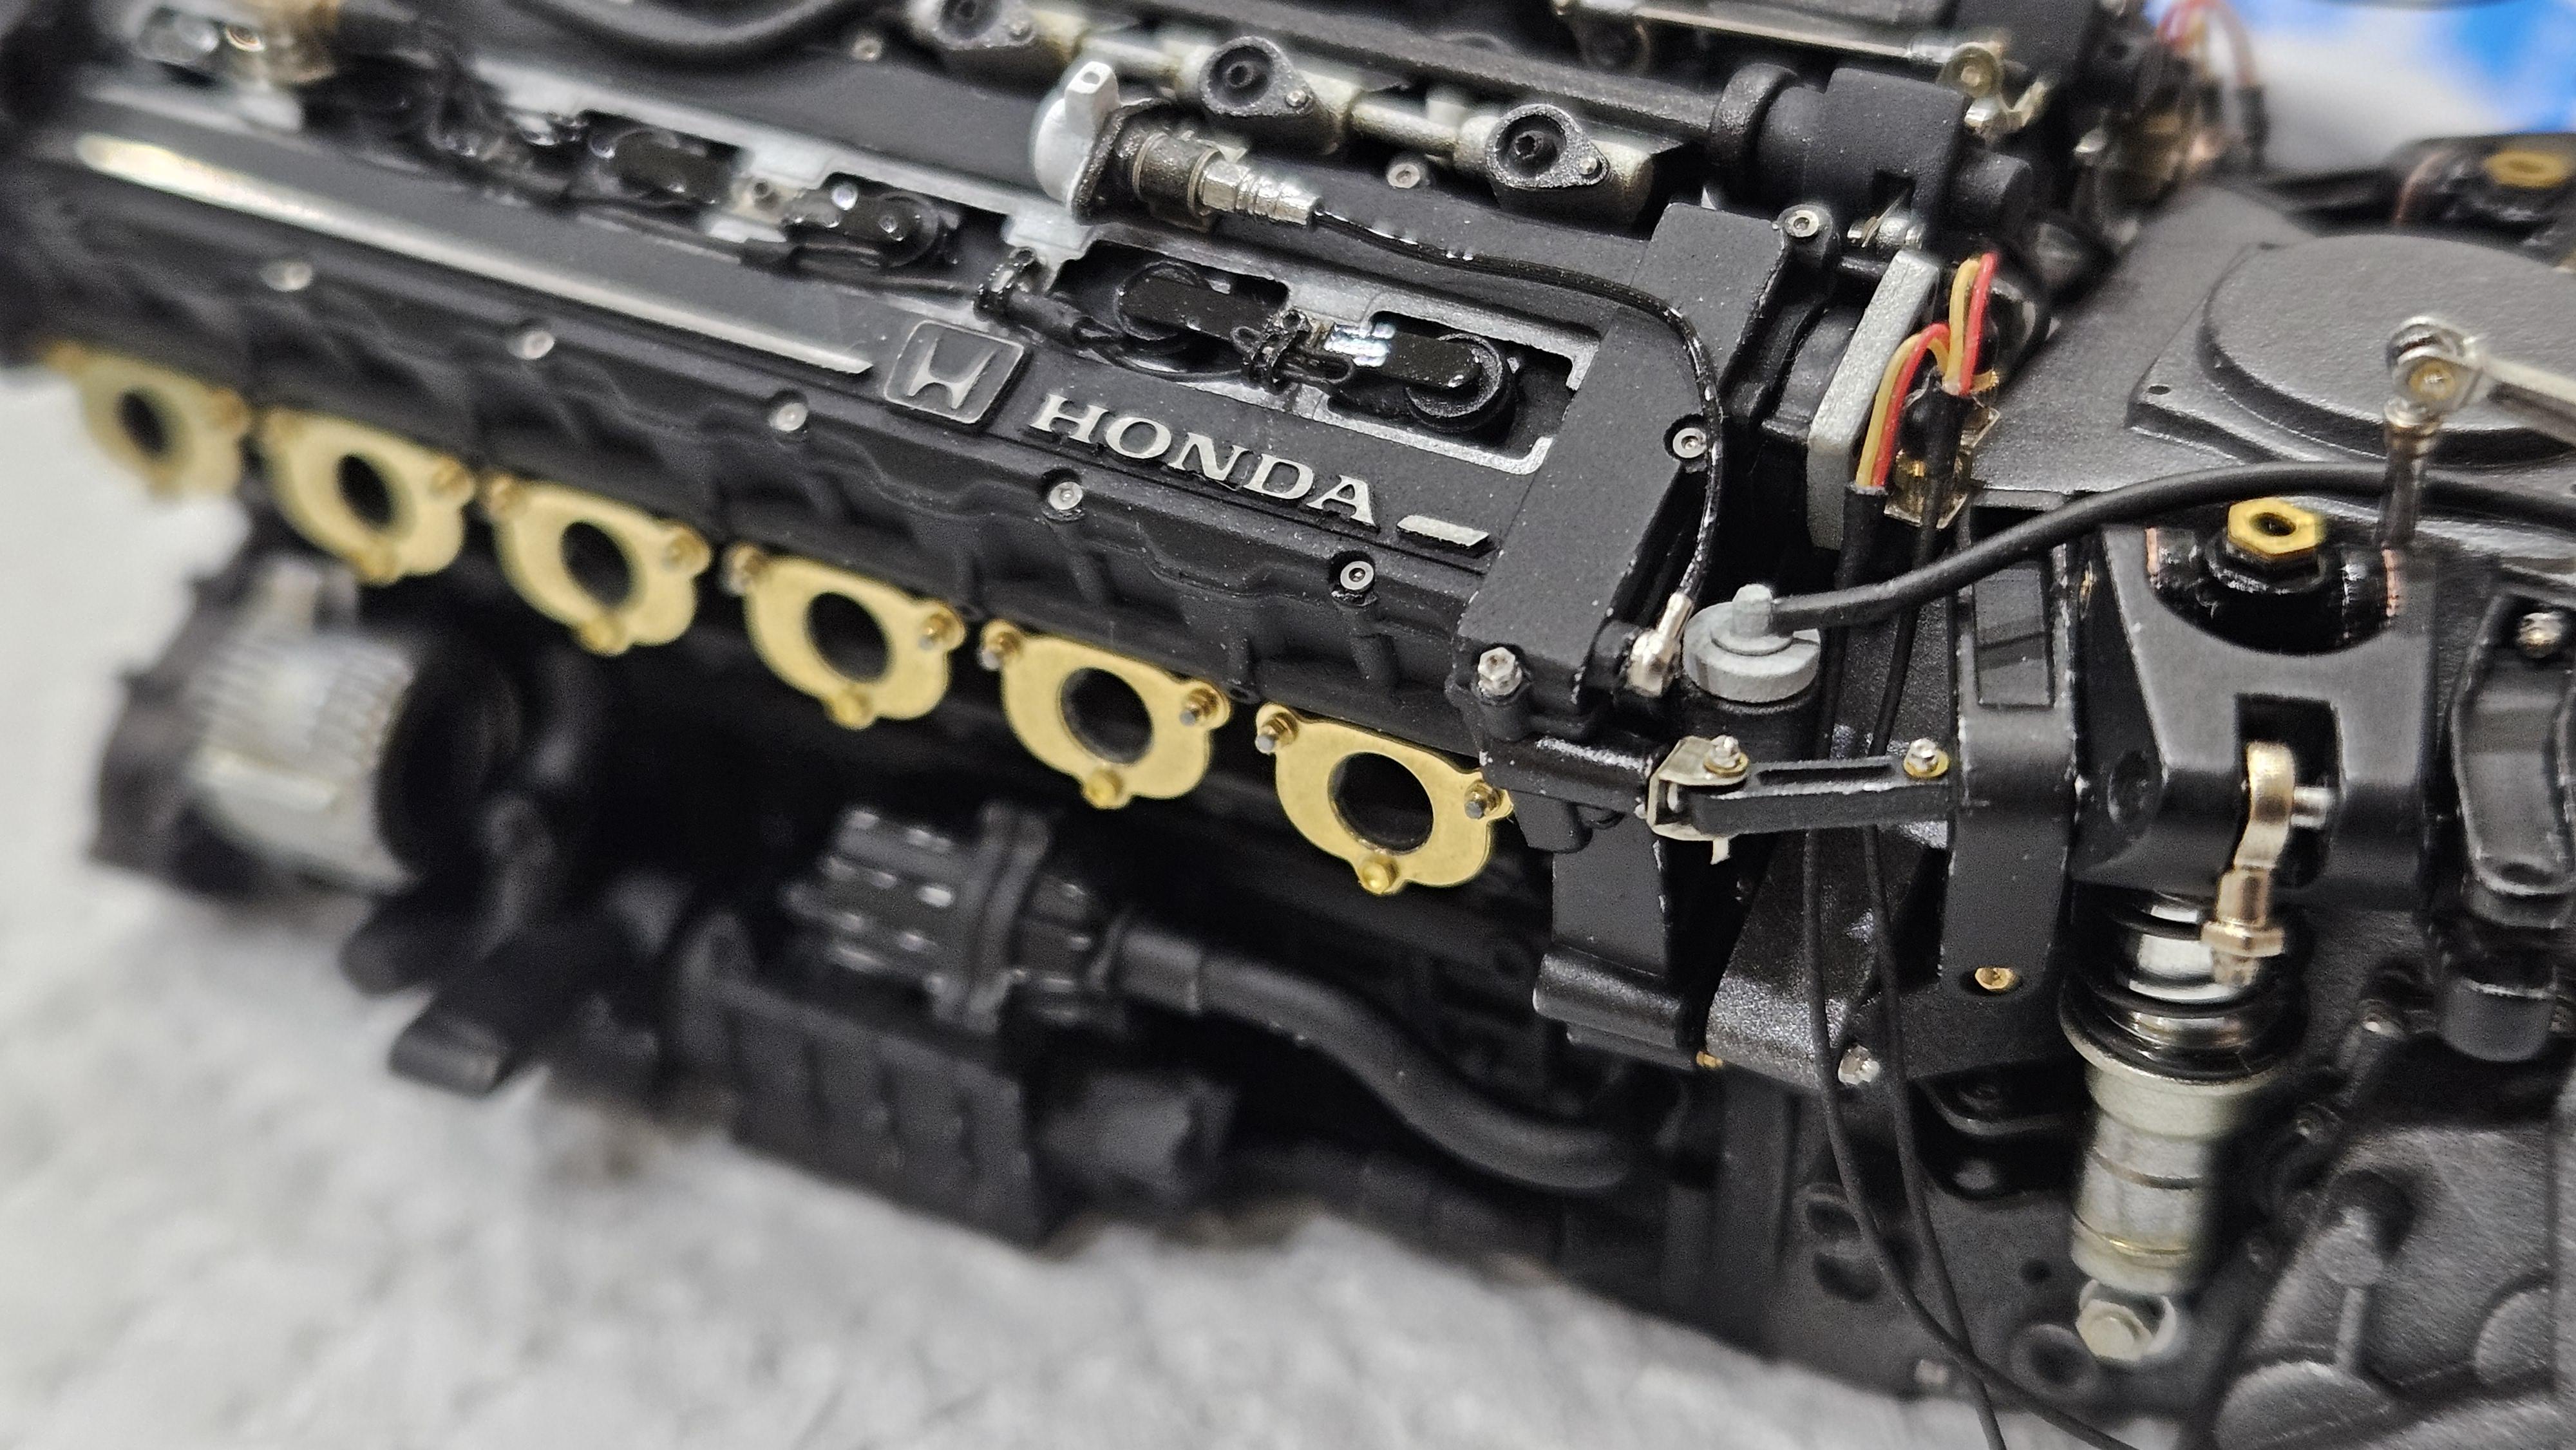
okazaki0511 replied to okazaki0511's topic in WIP: Other Racing: Road Racing, Land Speed Racers
Thanks a lot, I hope it almost perfect. Yes, I used Tamiya wih TopStudio's set. The wishbone is Tamiya's parts, they probably used metal for all 1/12 F1 car. The MFH detail book just uses for reference. I did some modifications based on it. -
1/12 Mclaren MP4/6
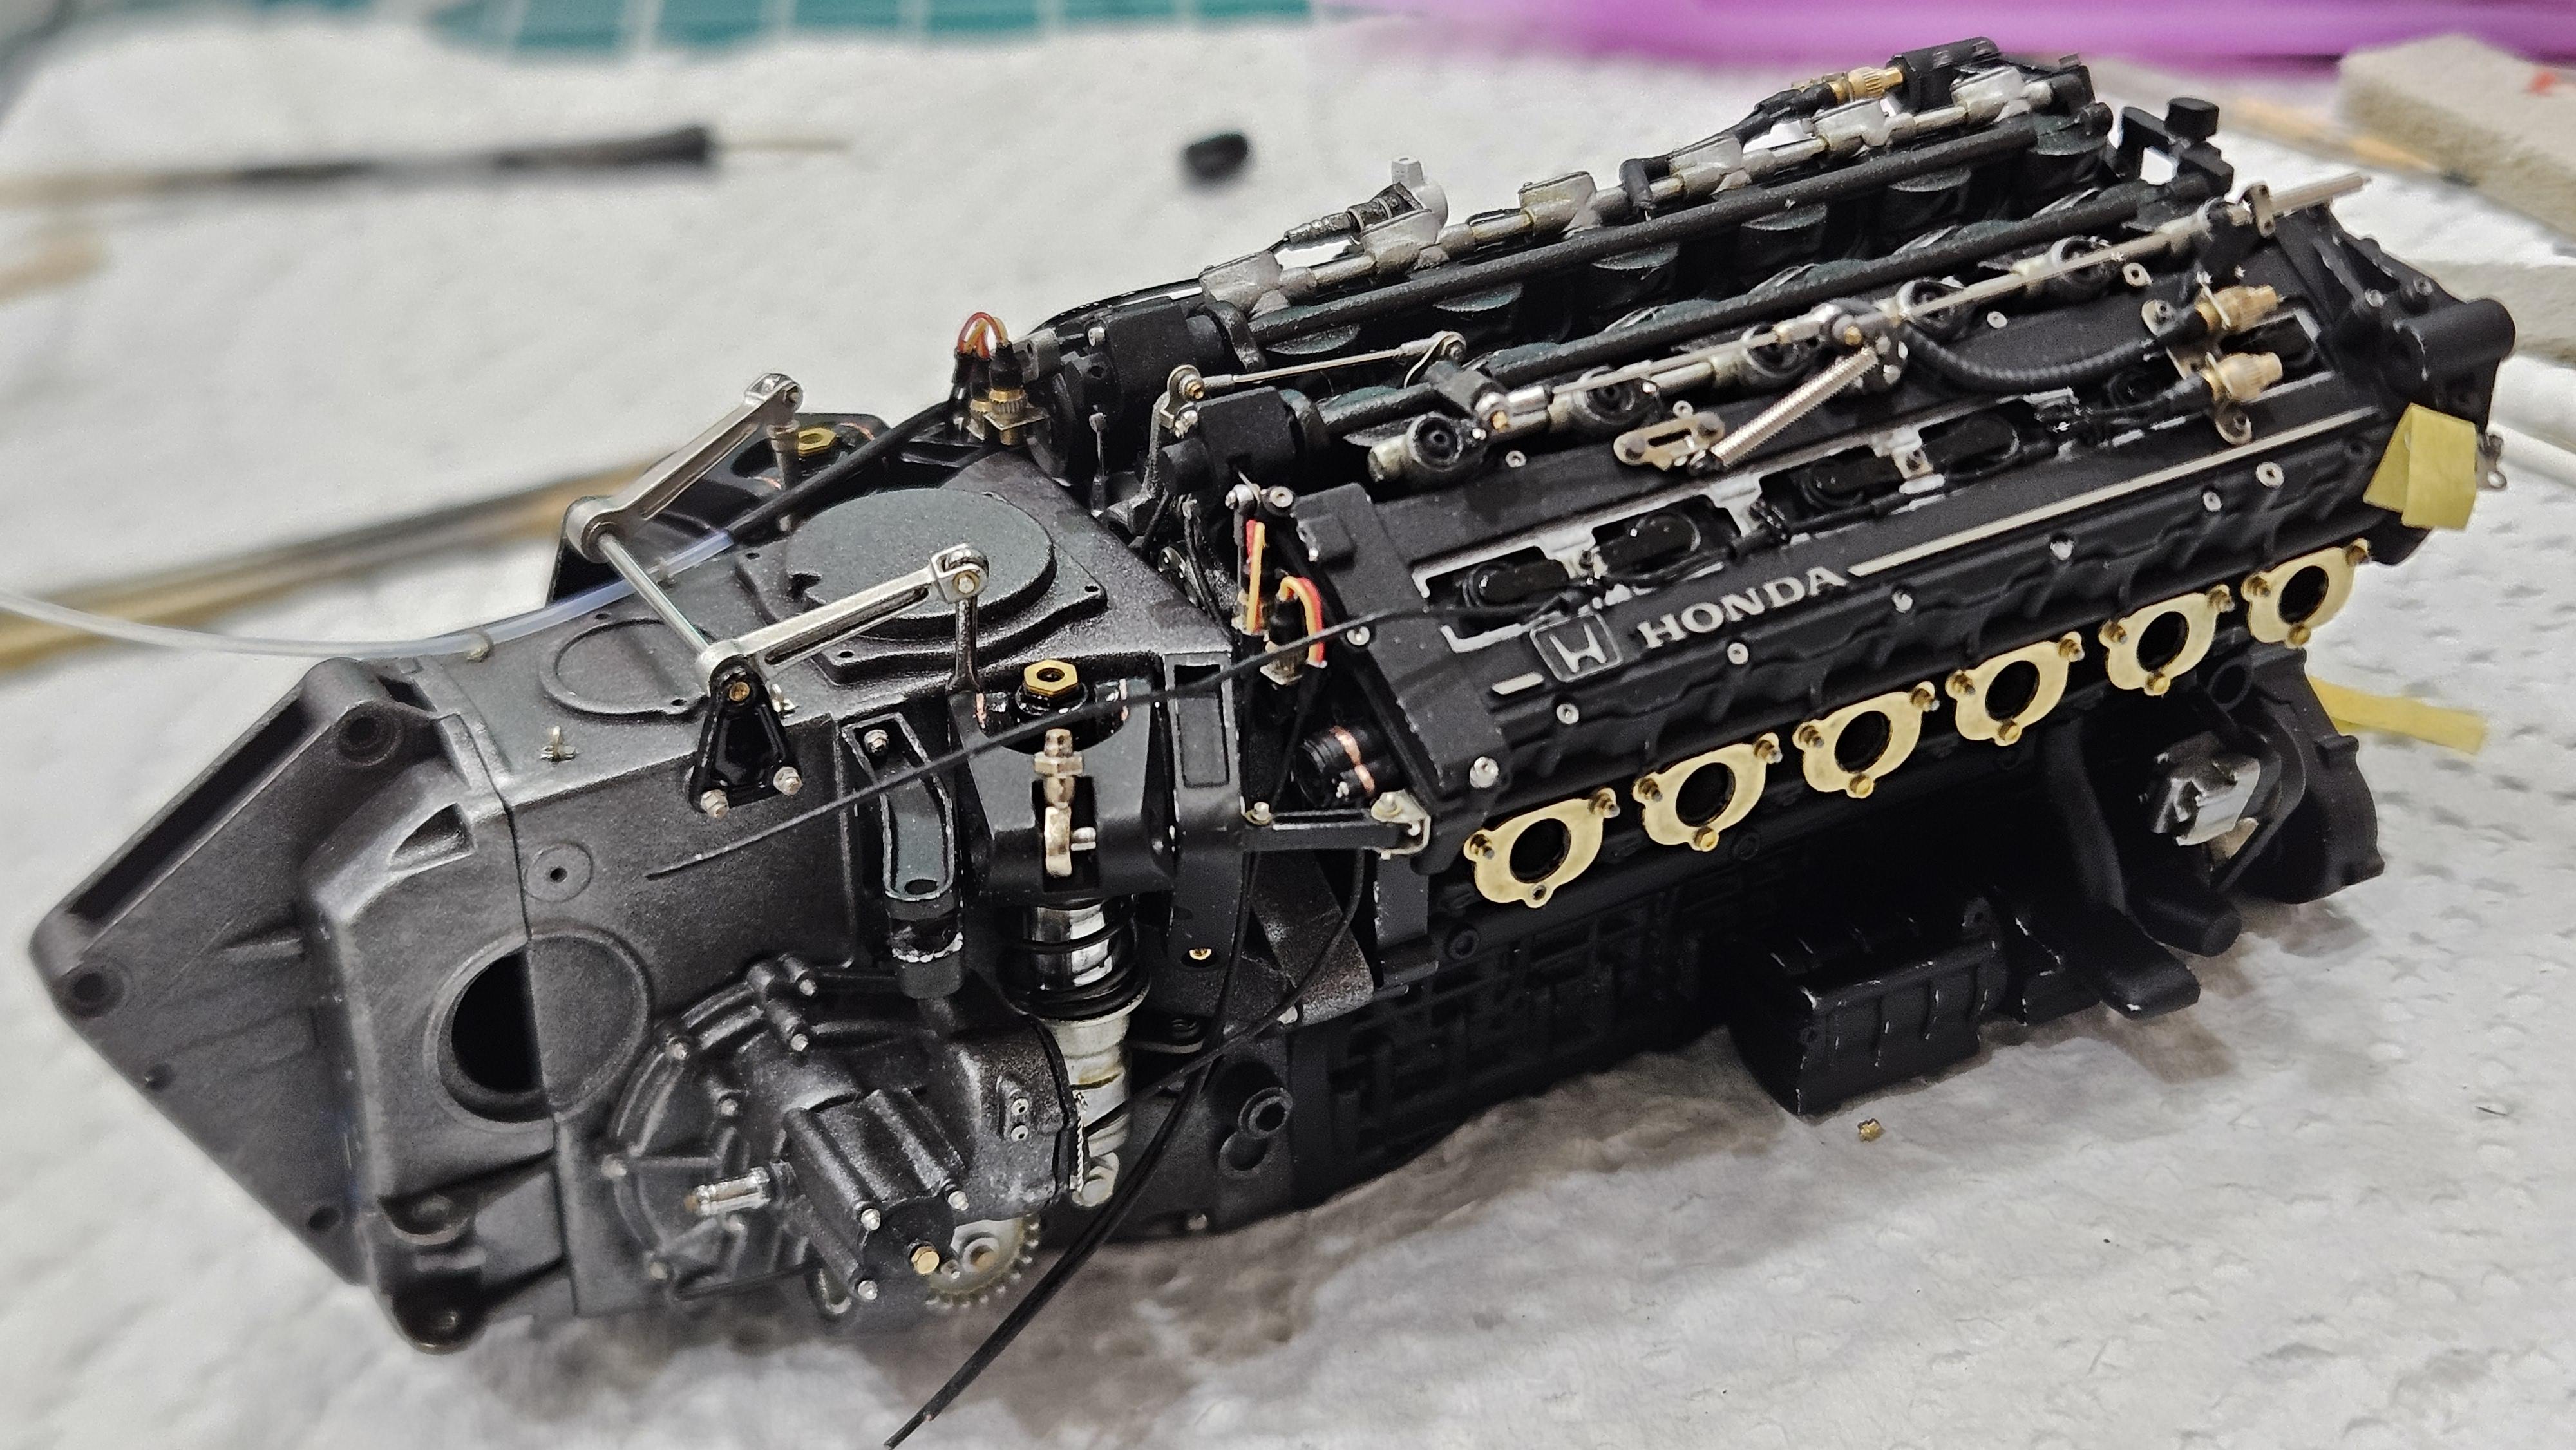
okazaki0511 replied to okazaki0511's topic in WIP: Other Racing: Road Racing, Land Speed Racers
Update some progress
-
1/12 Mclaren MP4/6
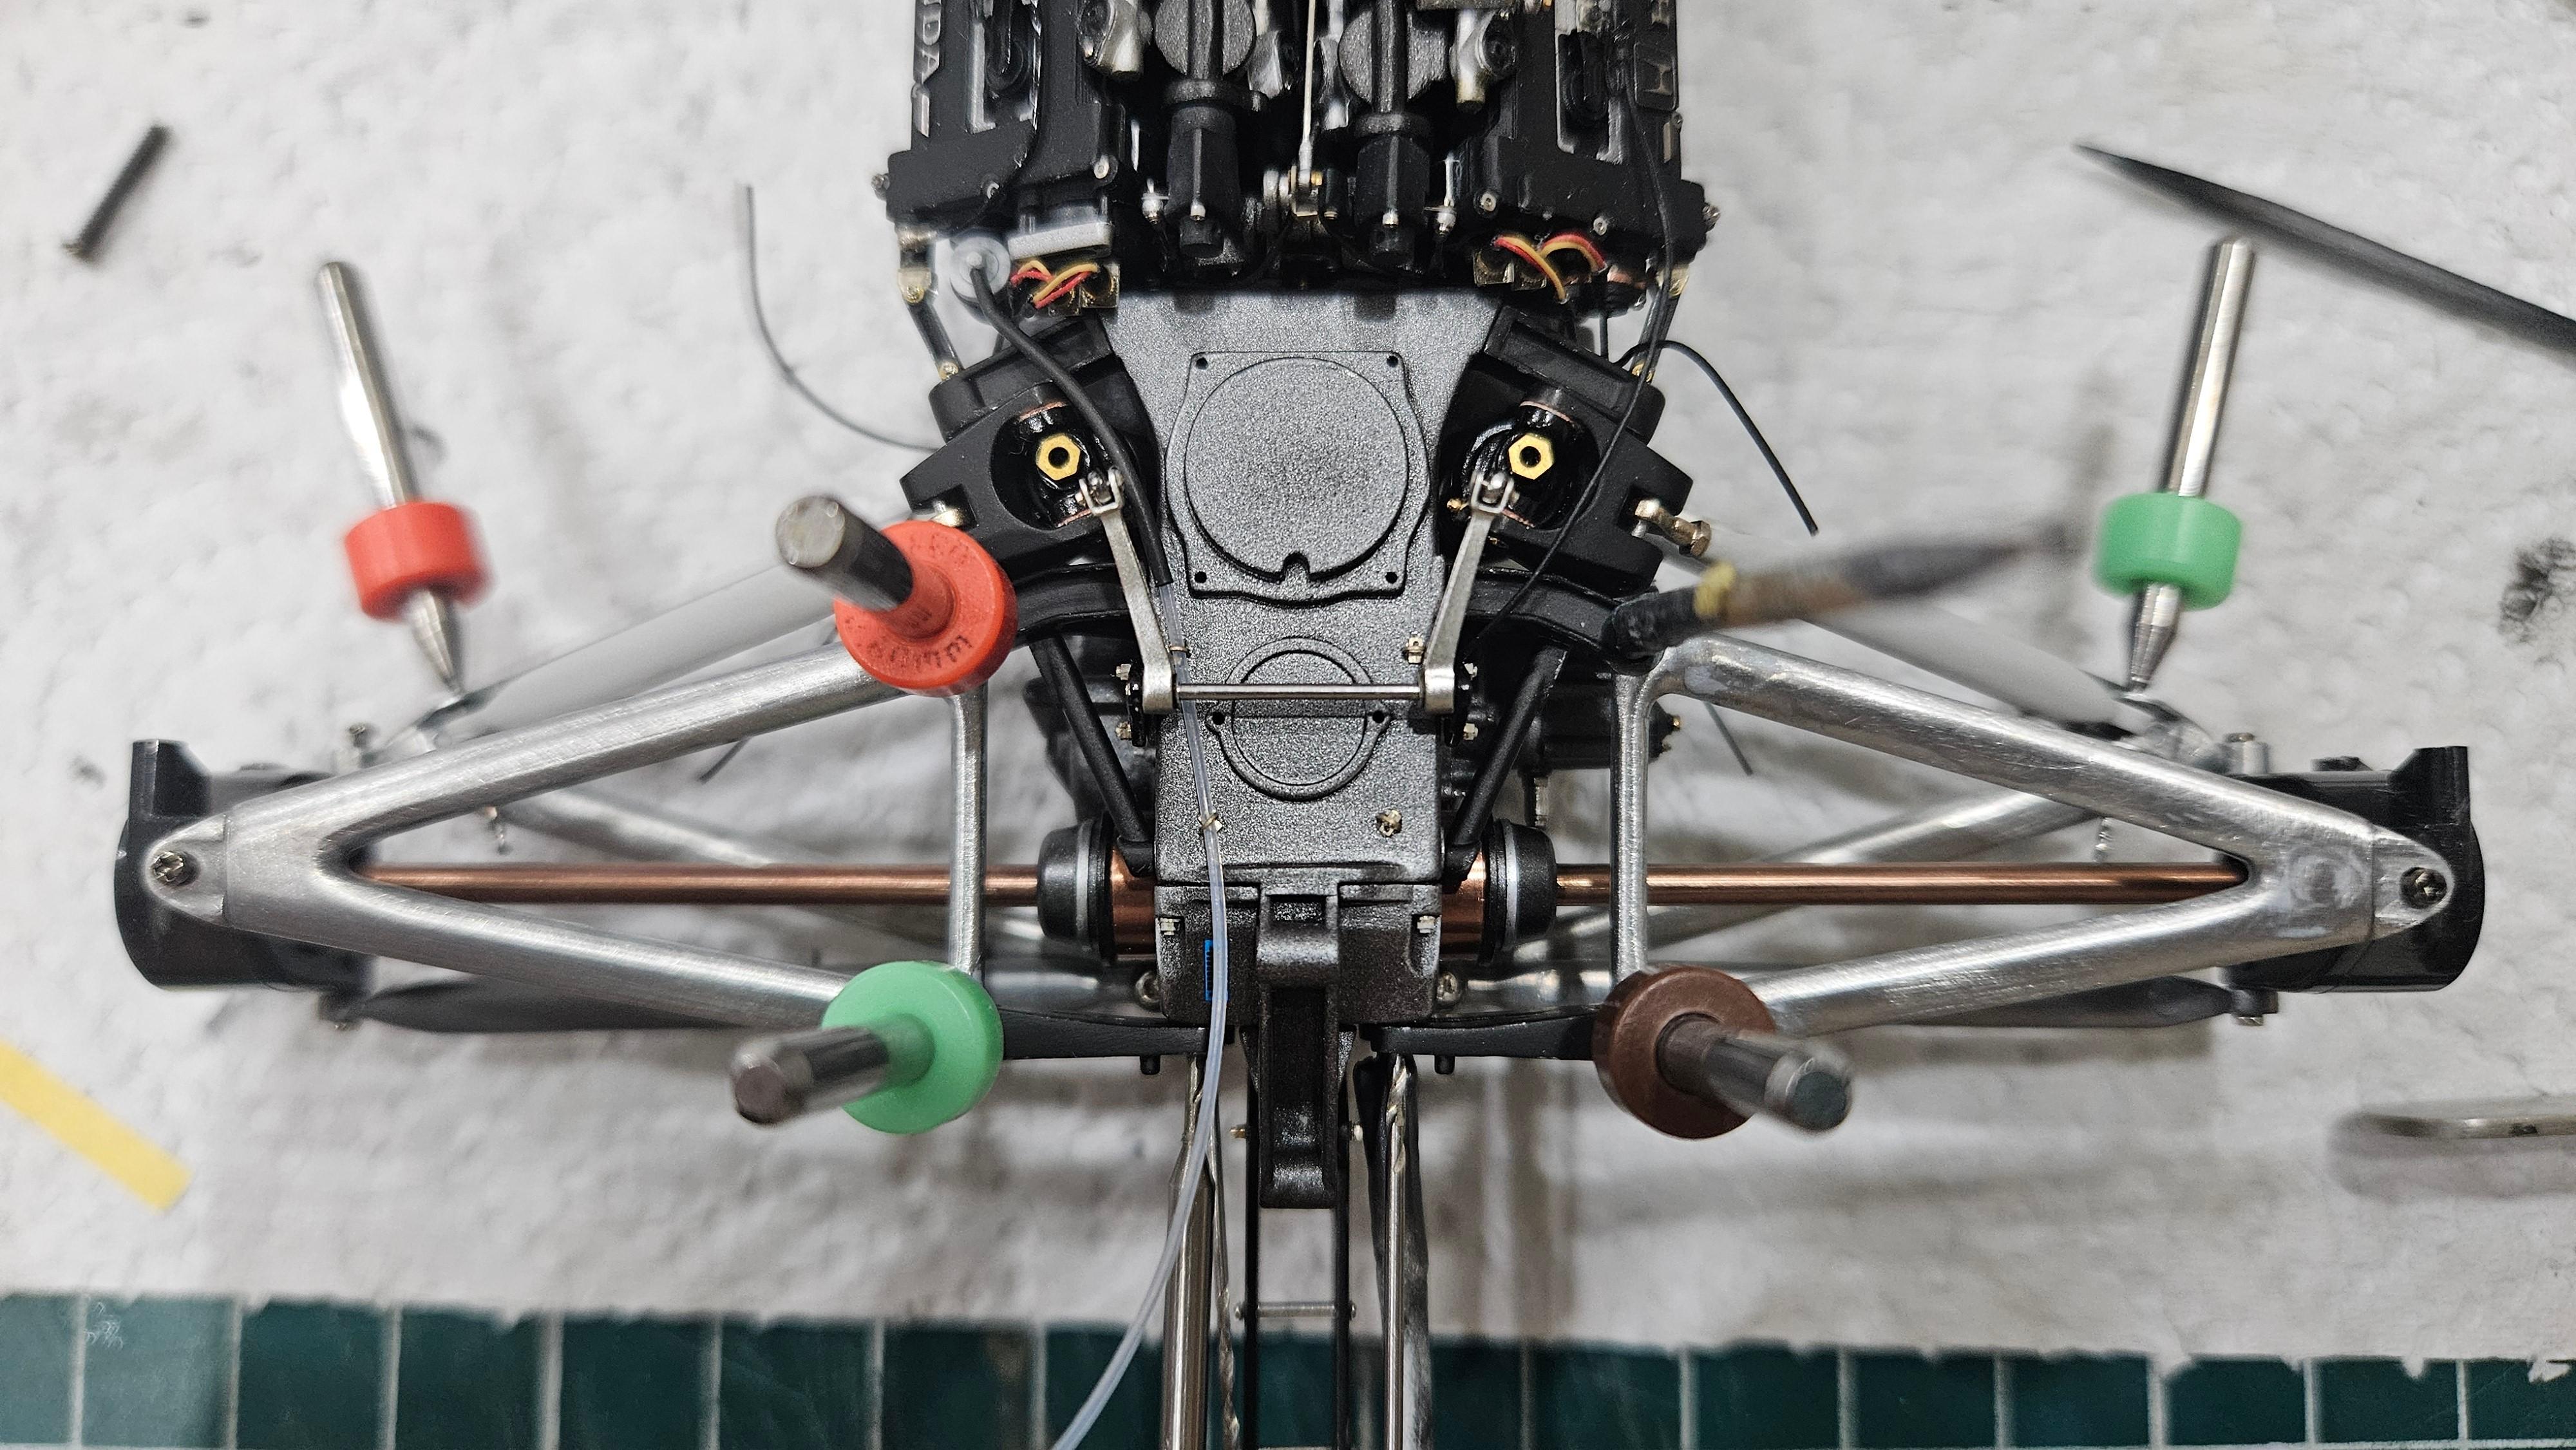
okazaki0511 replied to okazaki0511's topic in WIP: Other Racing: Road Racing, Land Speed Racers
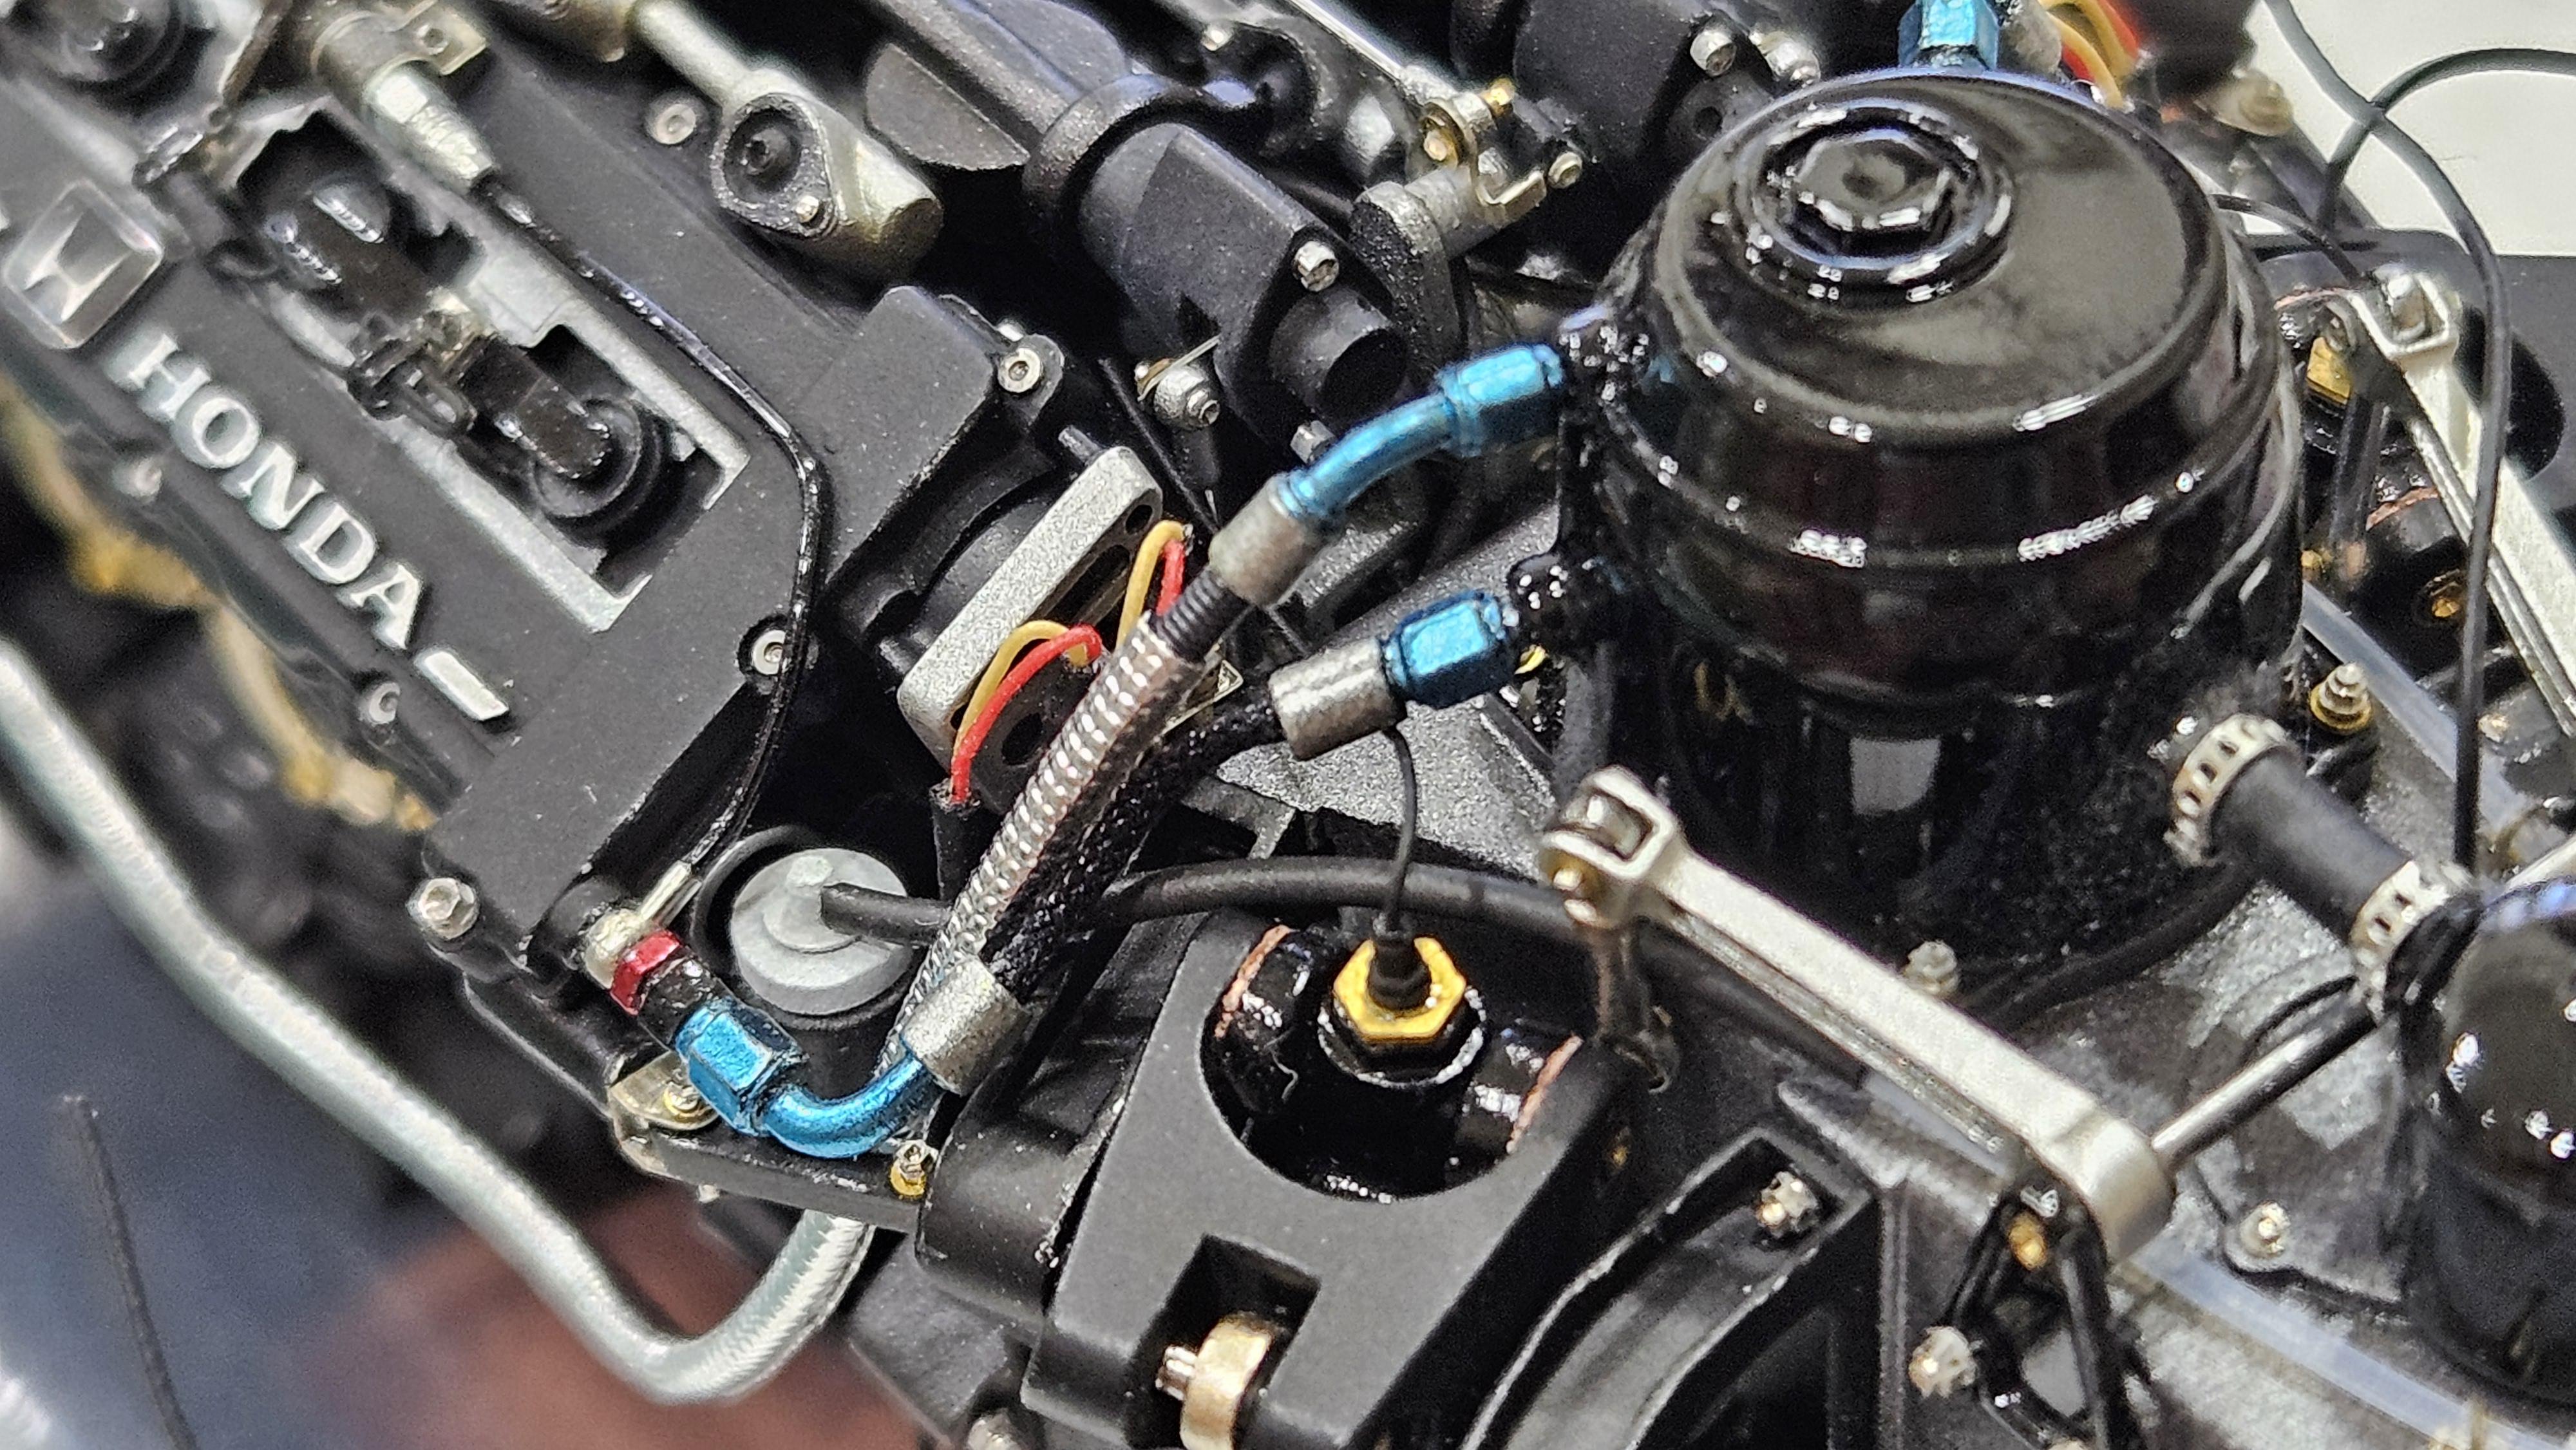
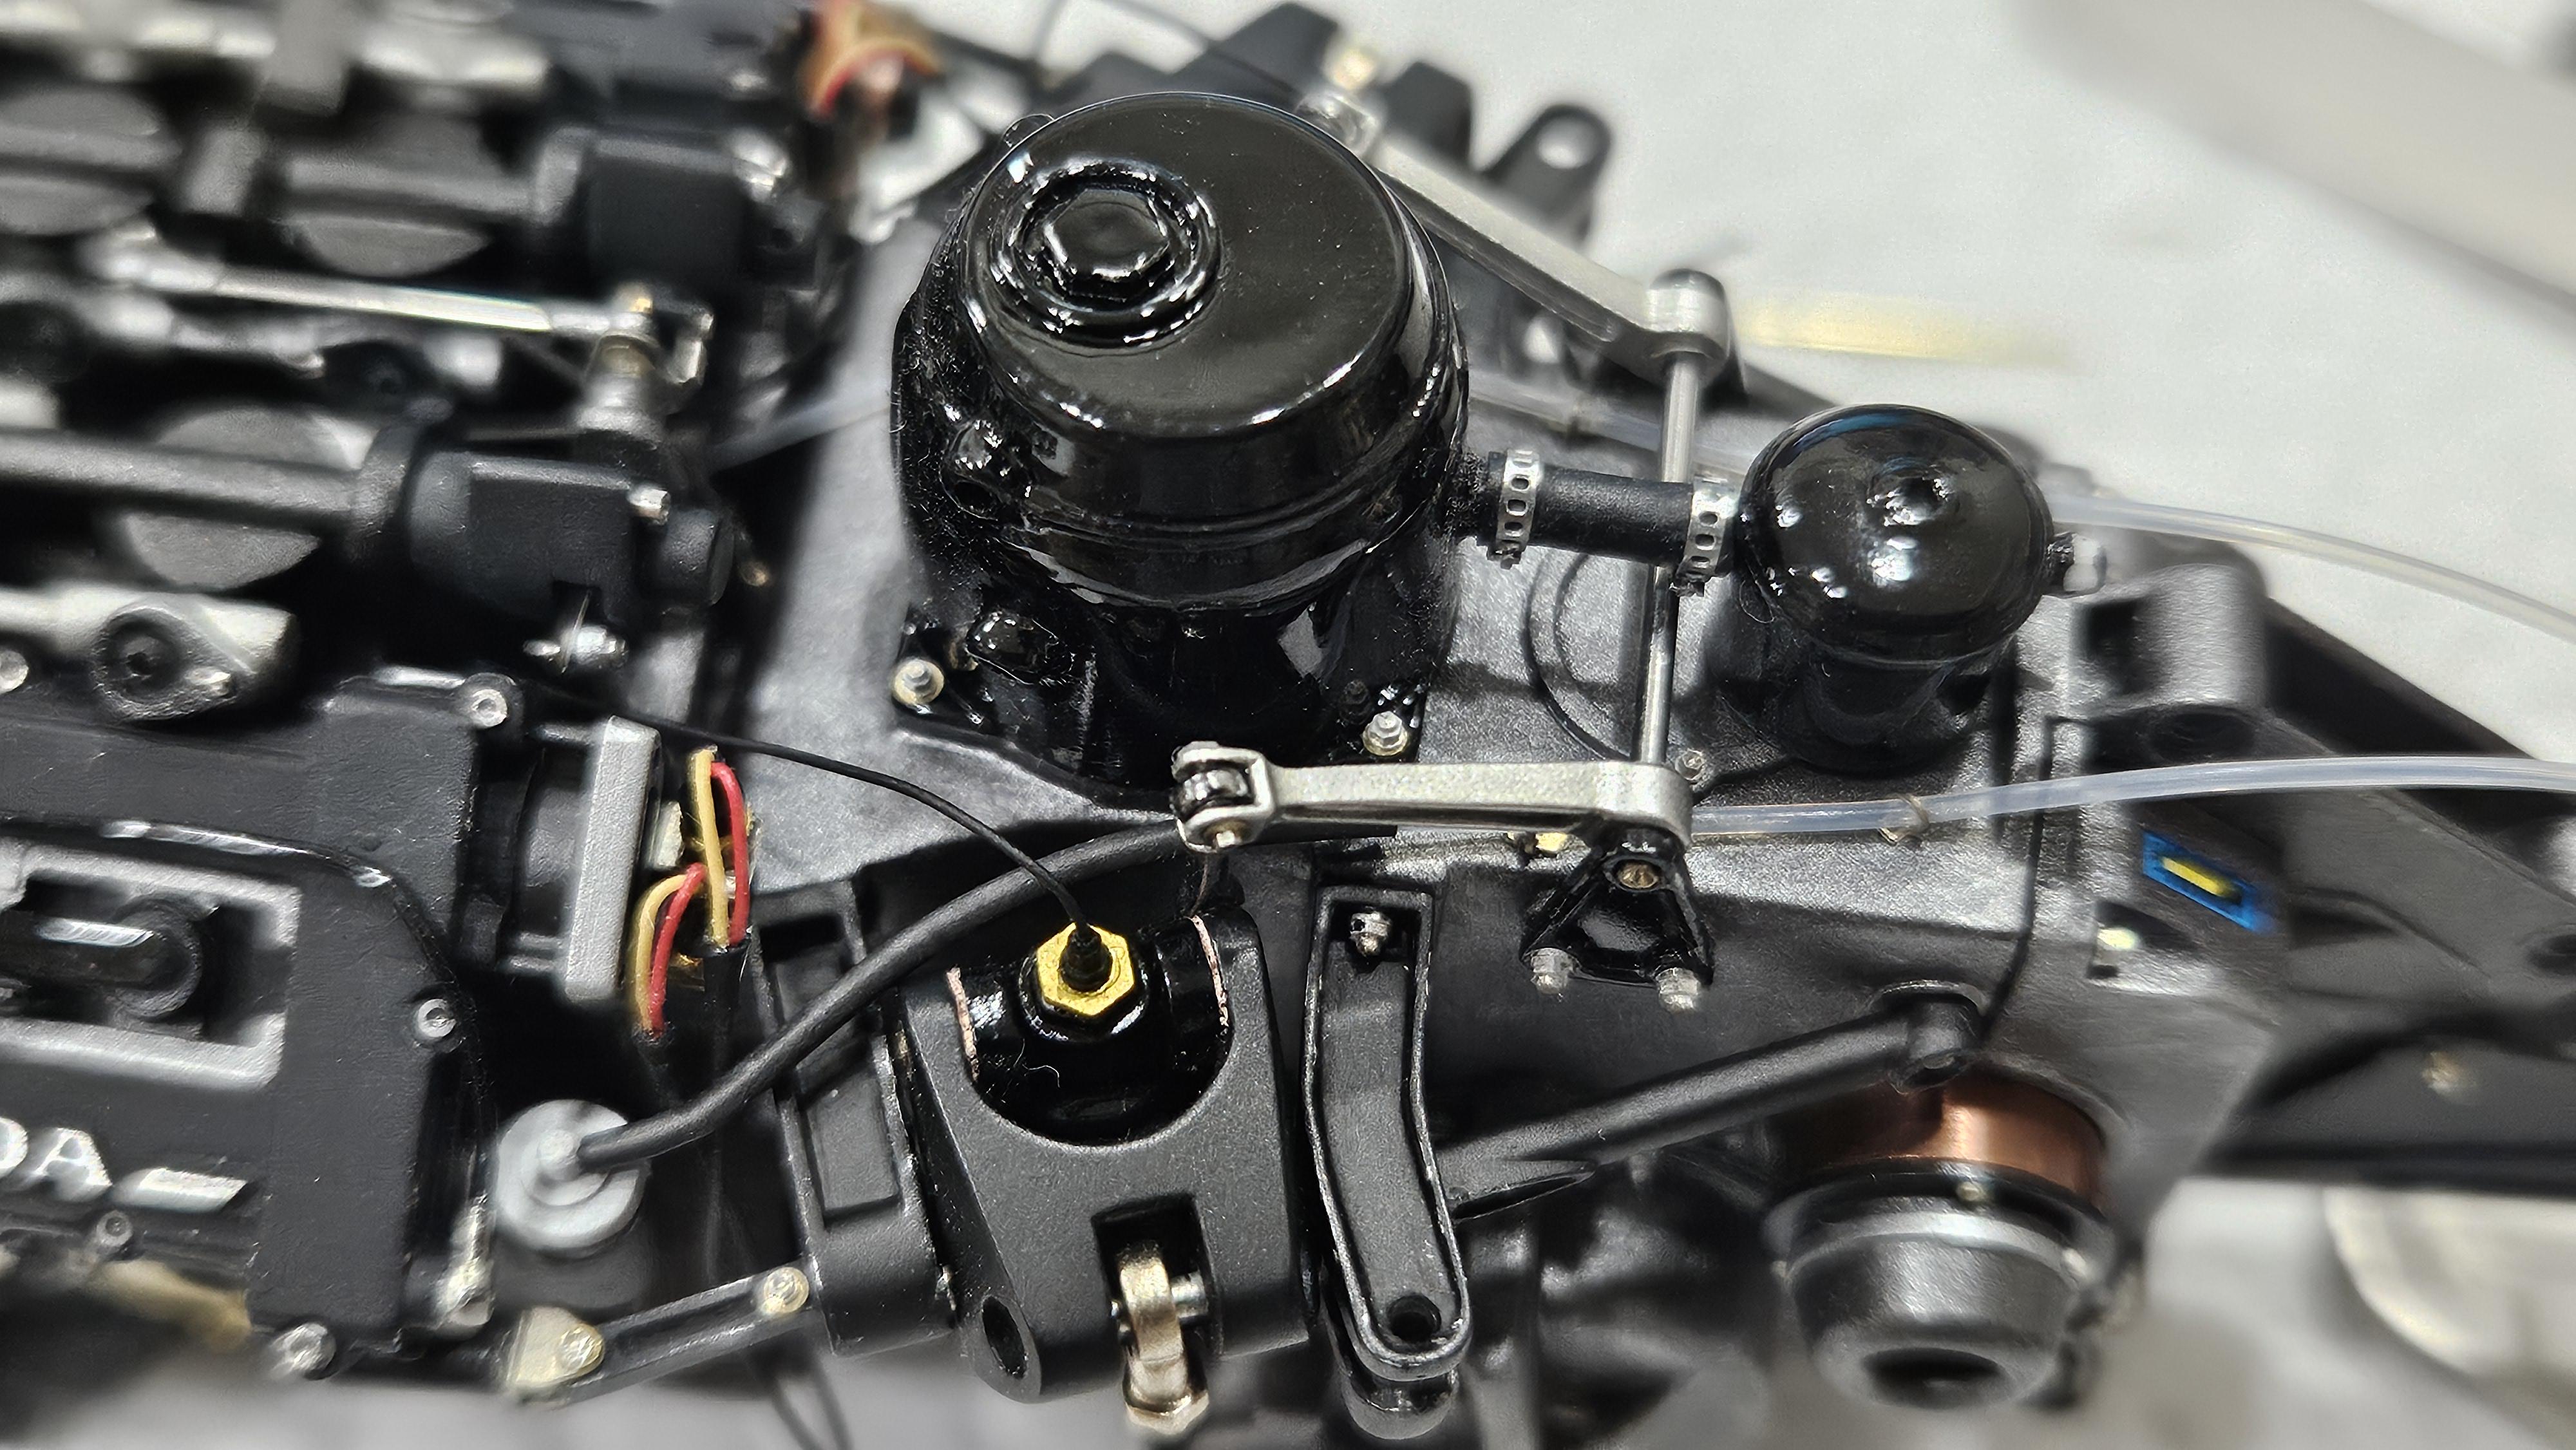
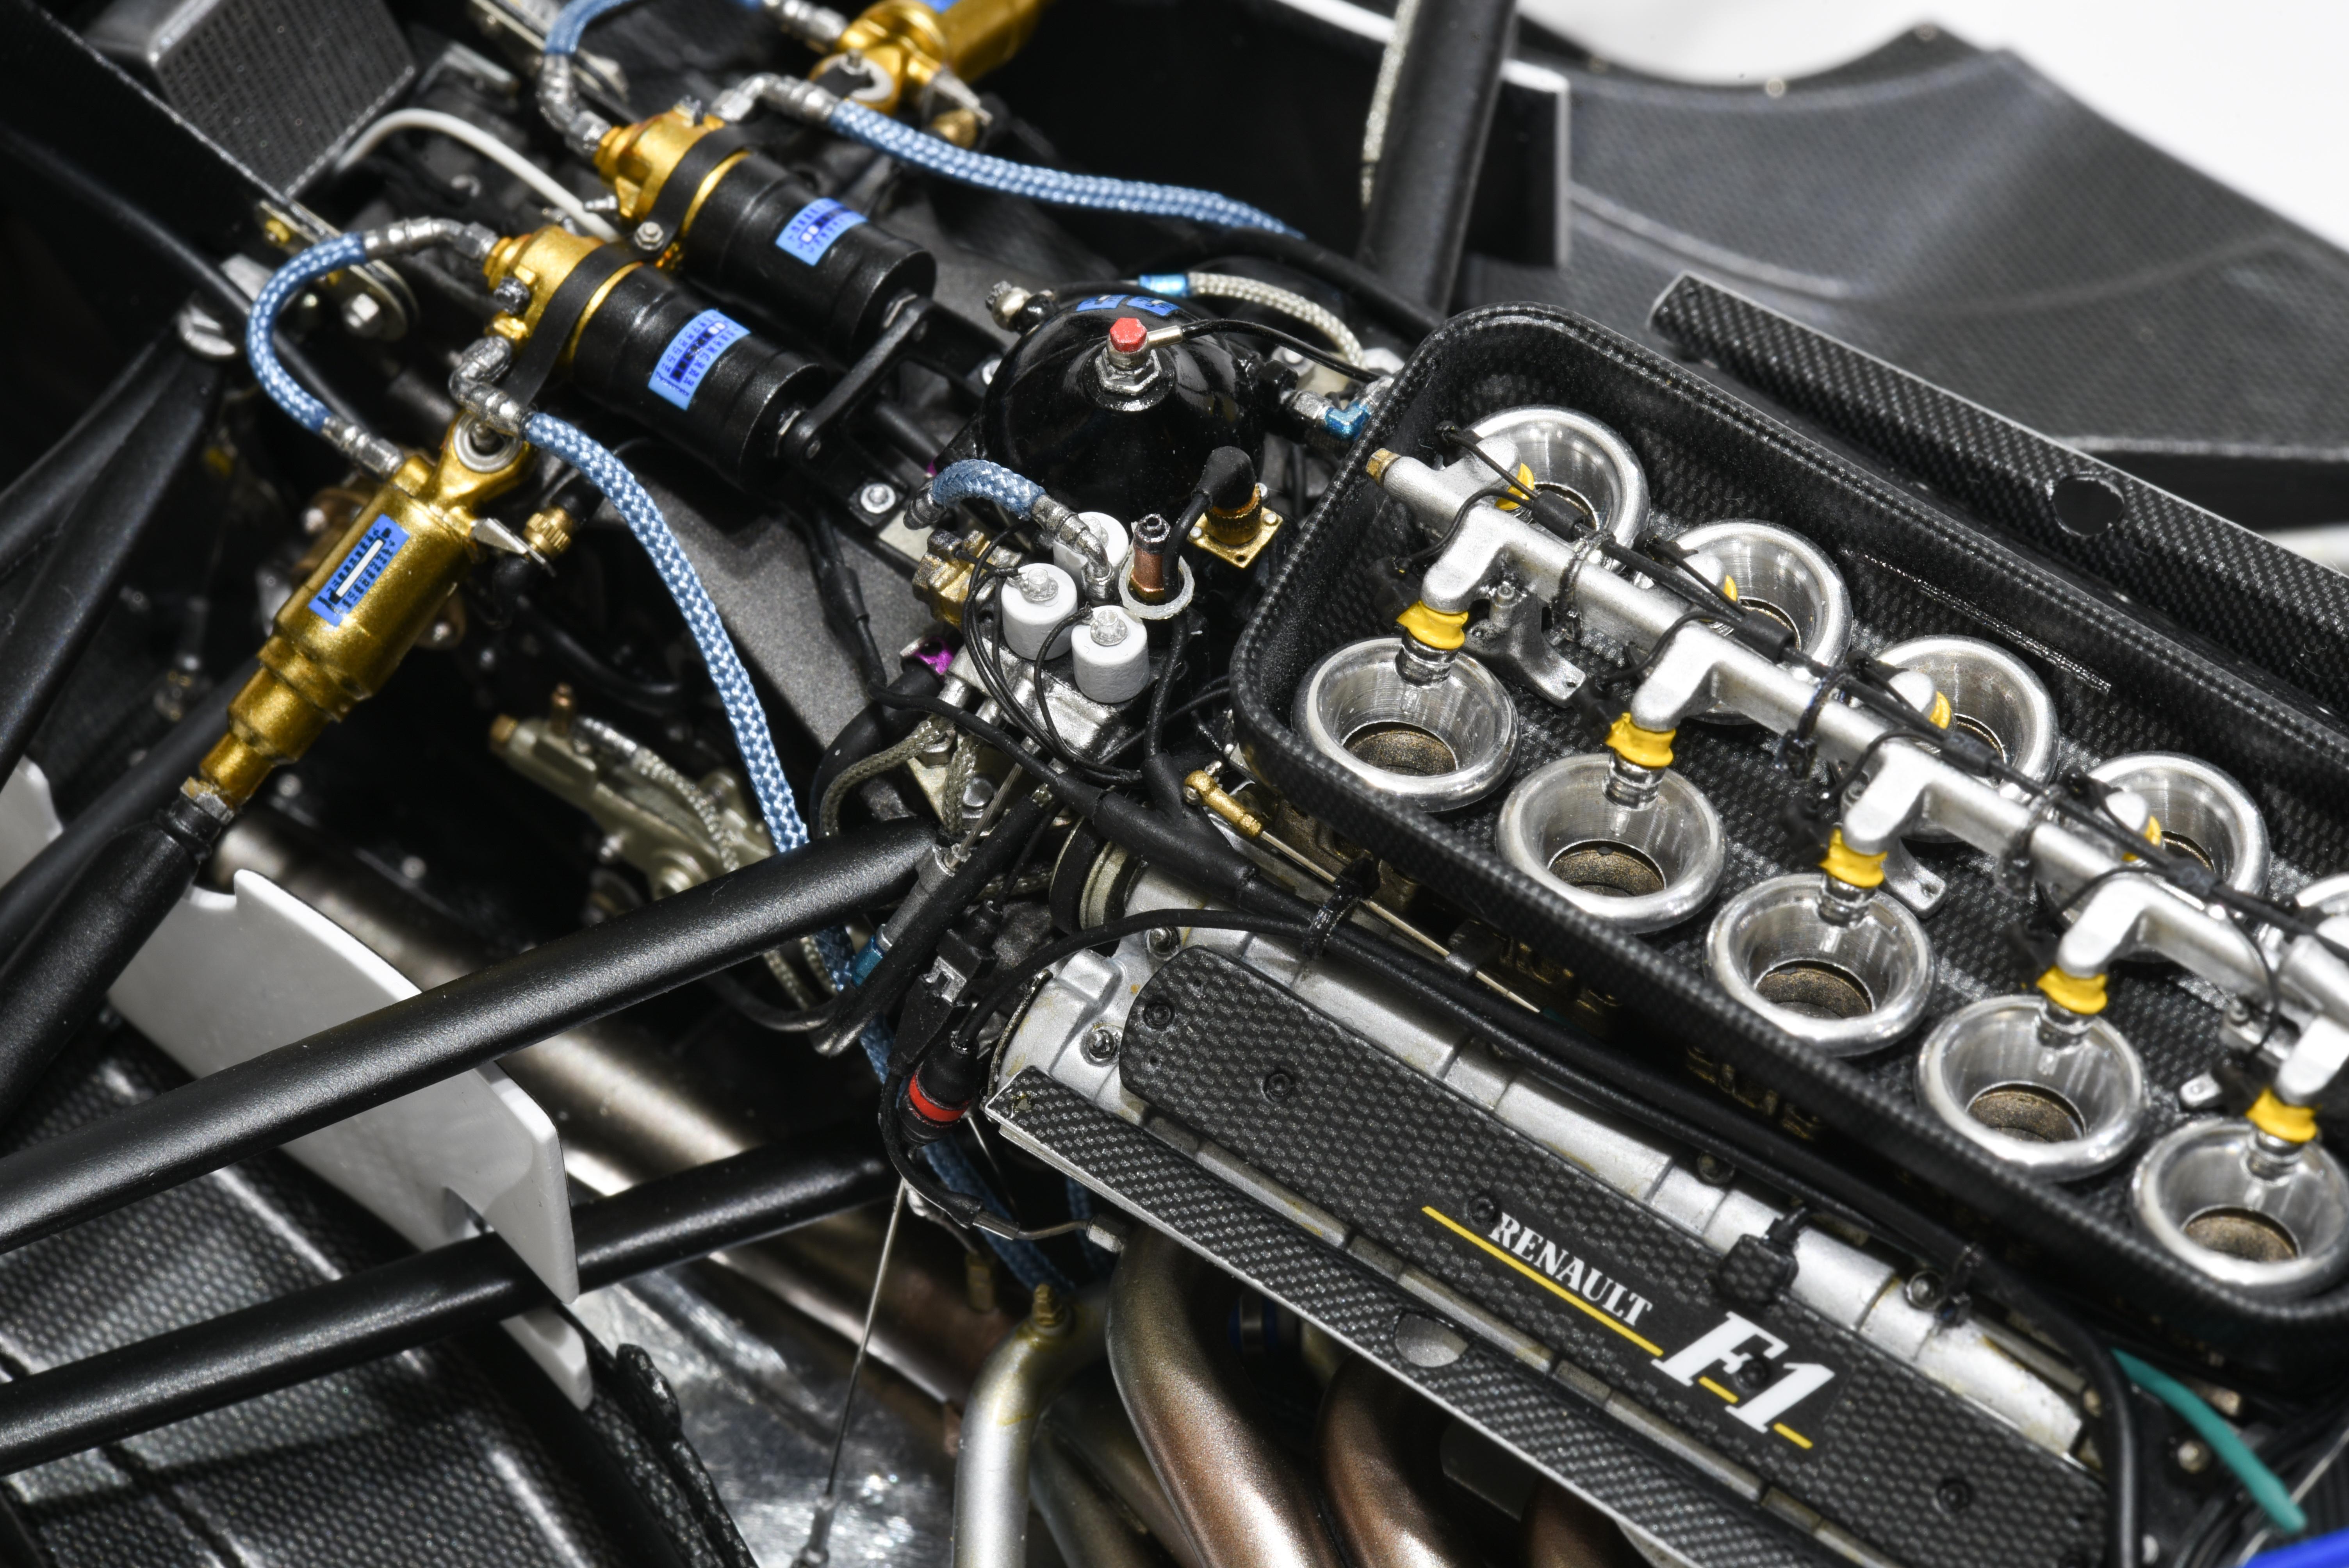
update some progress Added the addtional oil cup and changed the red and yellow cable for the exhaust O2 sensor.
-
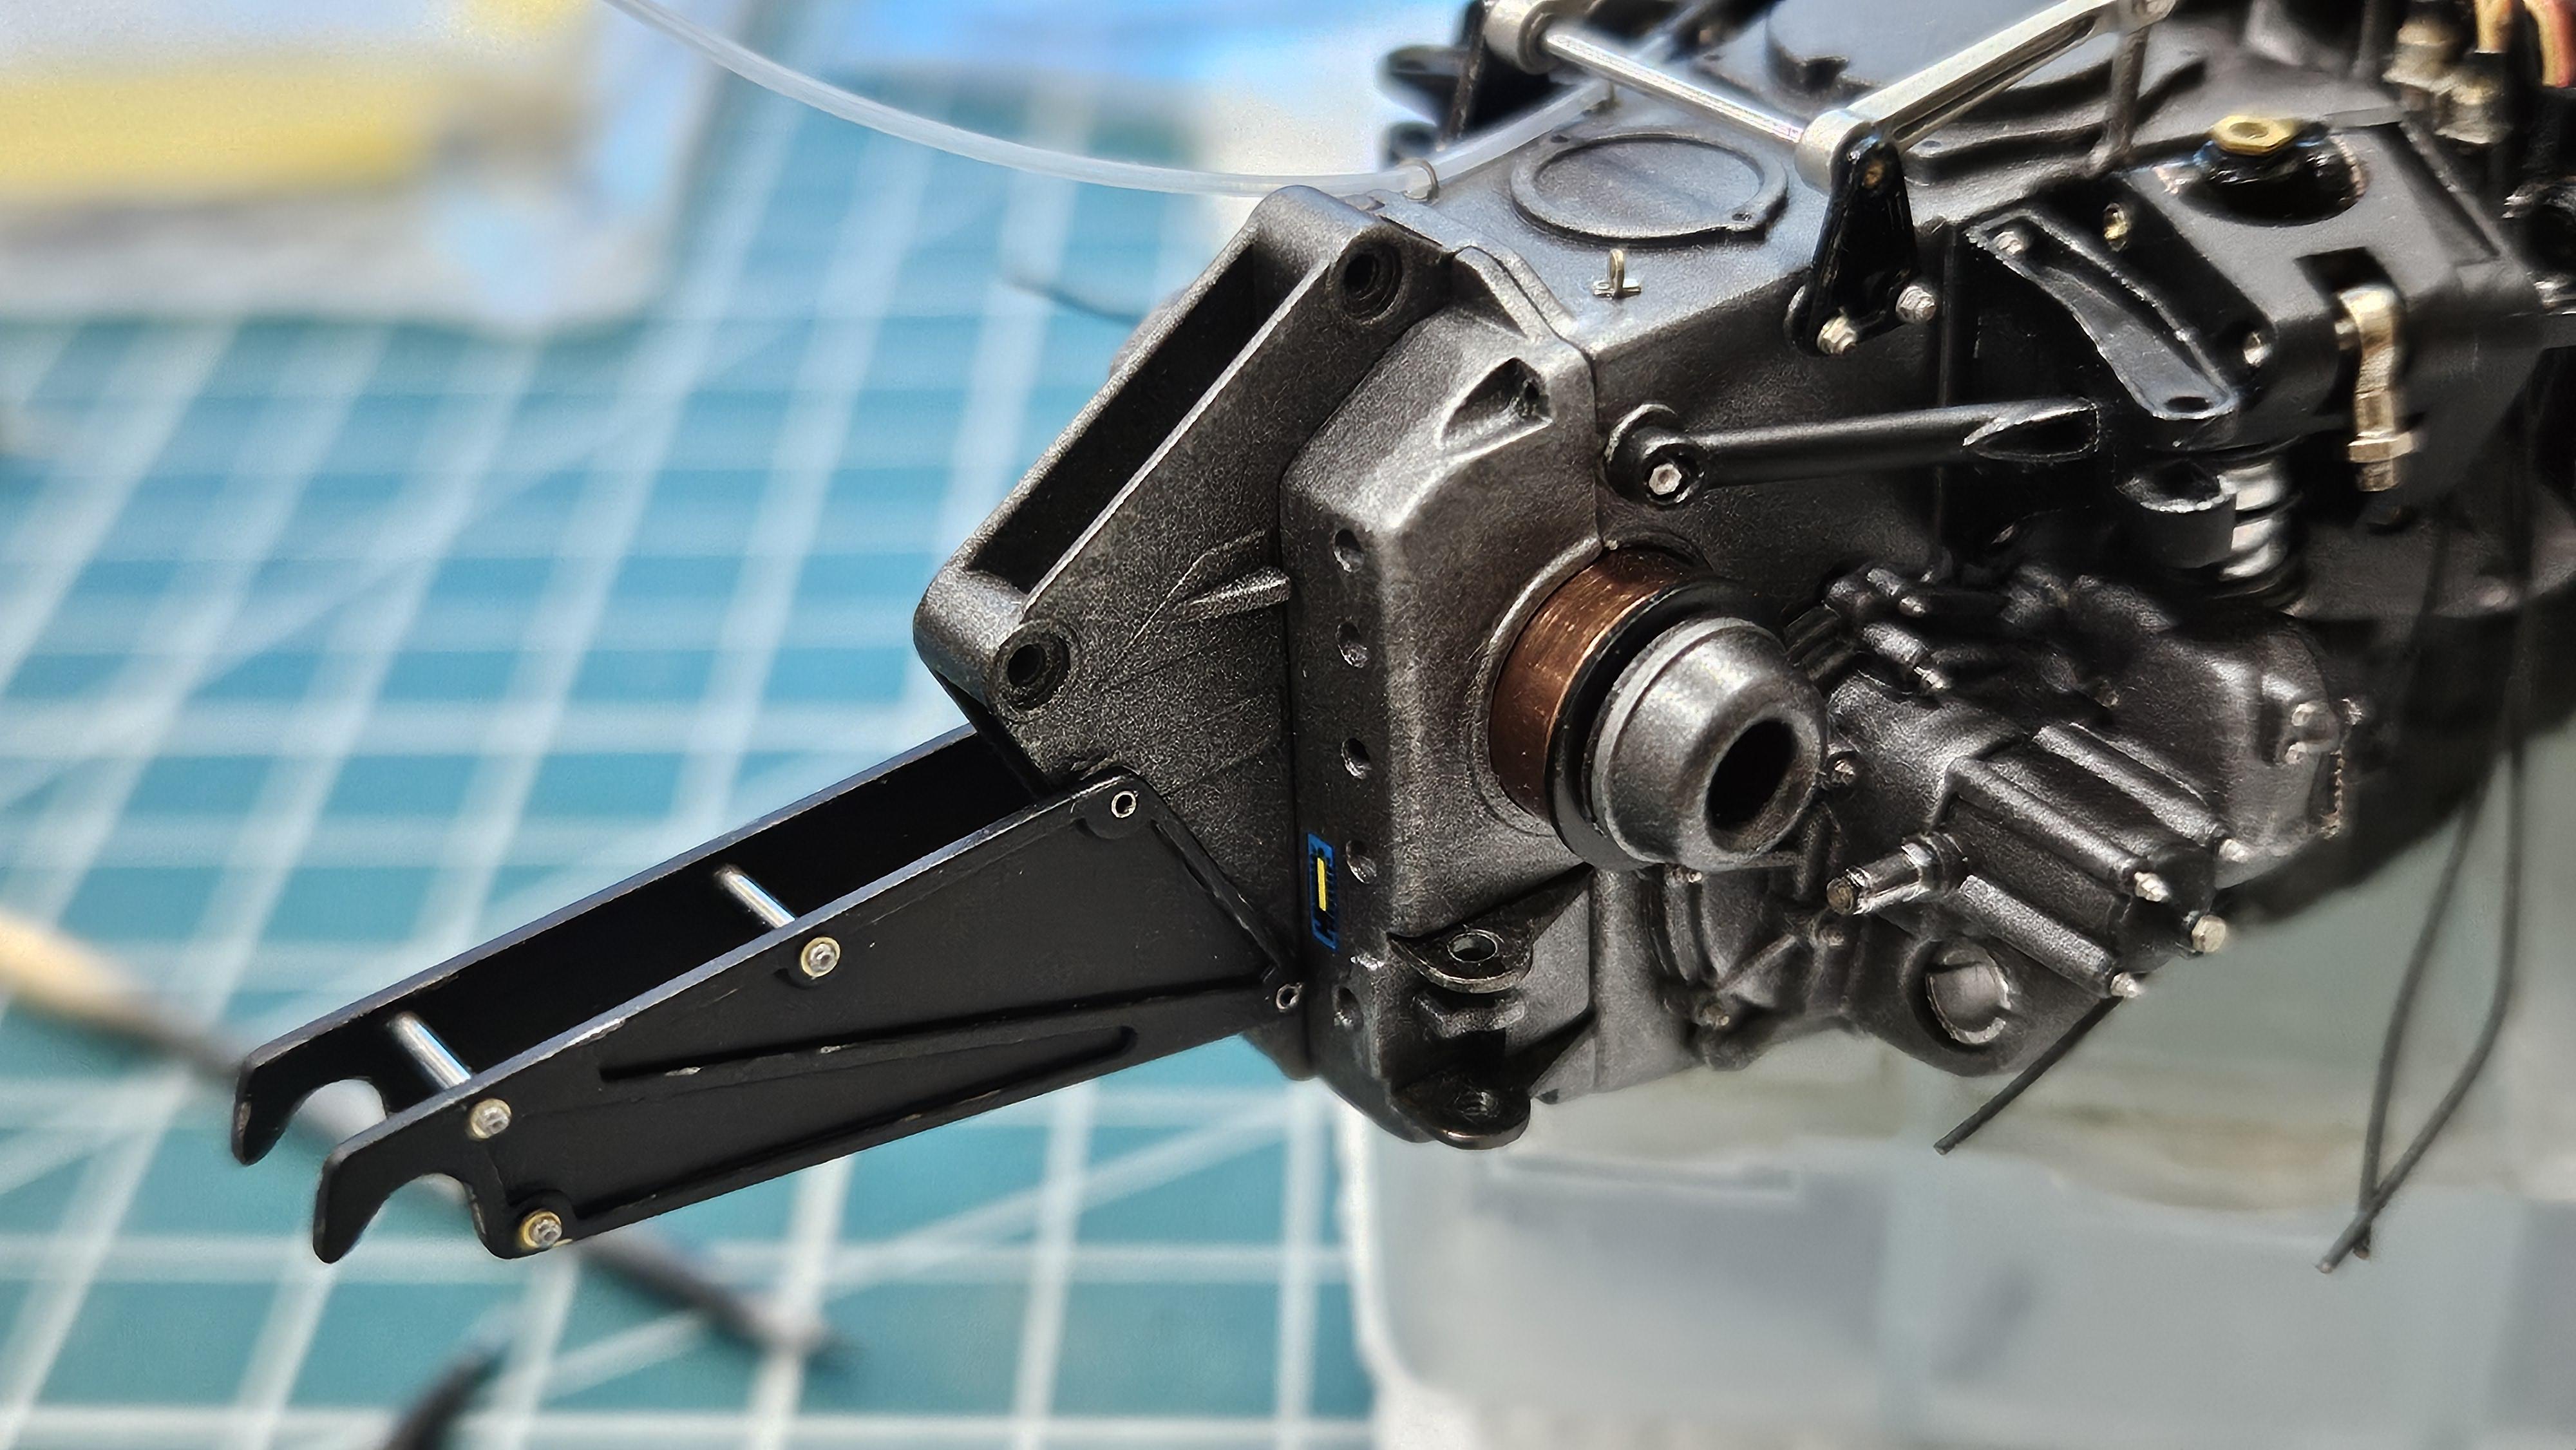
1/12 Mclaren MP4/6
okazaki0511 replied to okazaki0511's topic in WIP: Other Racing: Road Racing, Land Speed Racers
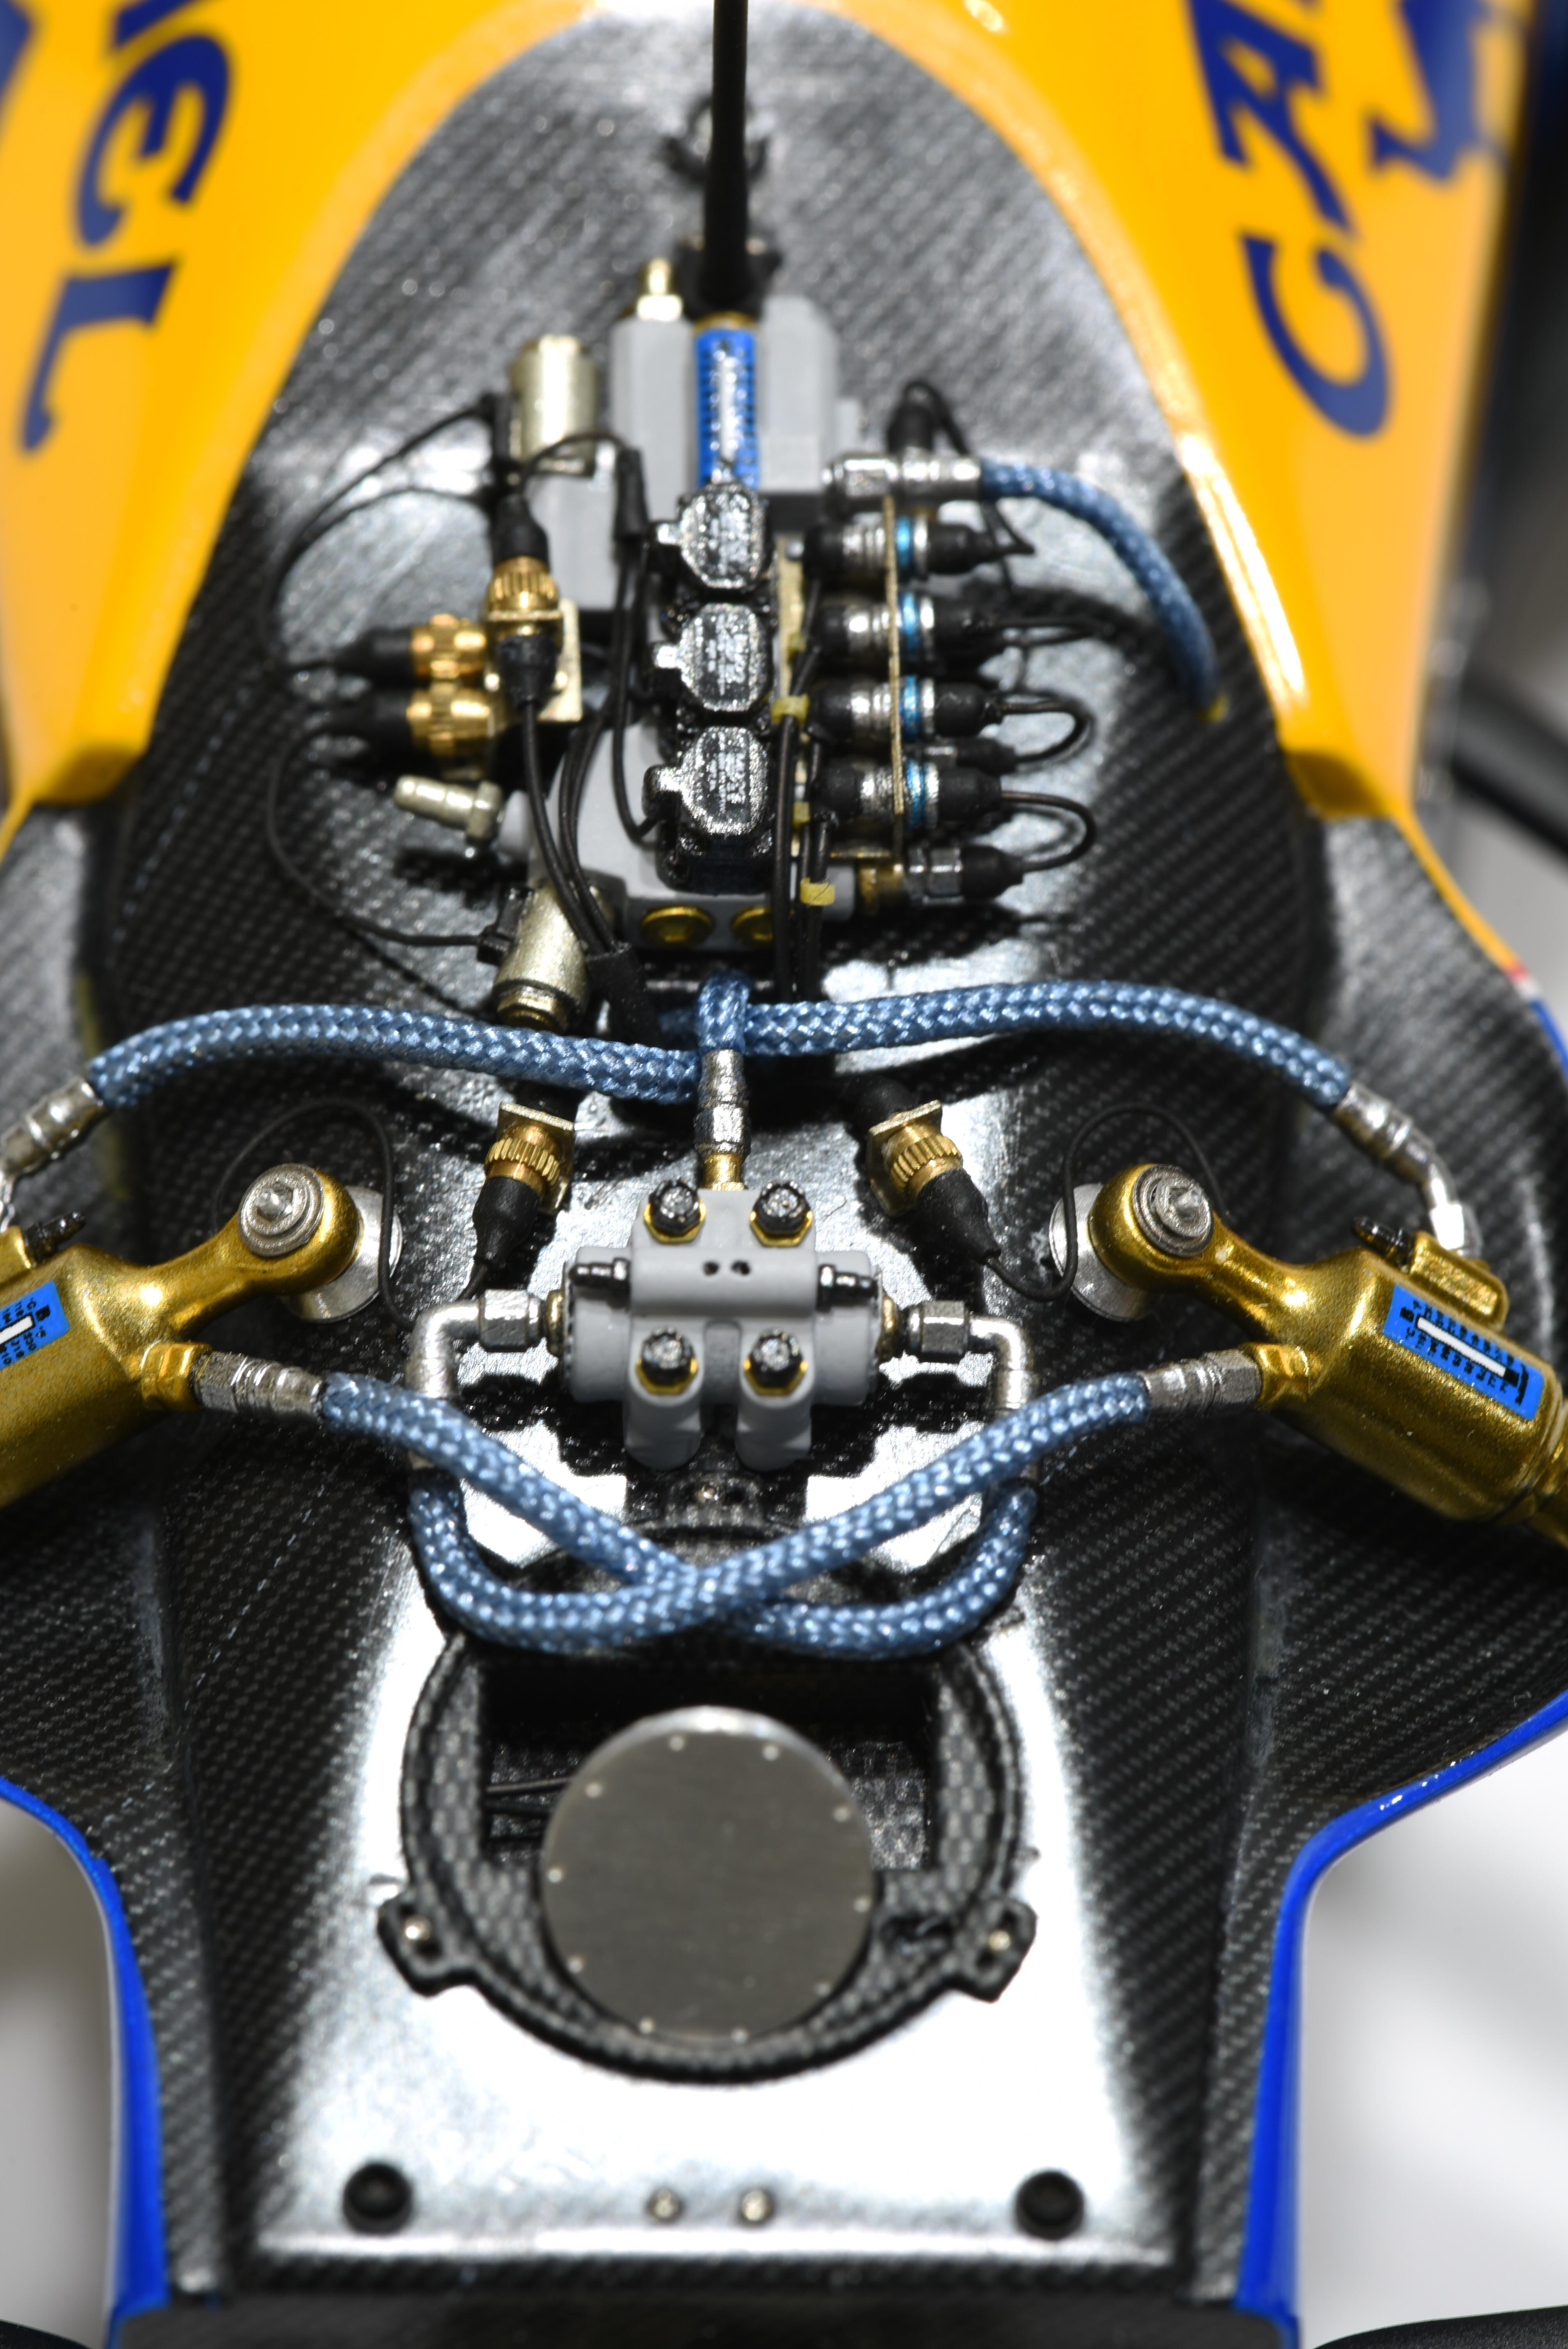
update some progress The painting and wiring just followed MFH's detail book. Also weathered the rivets.
-
Still use TopStudio's upgrade parts. Added weathering to accentuate the detail.
-
Thanks, but I didn't join the SMW last year.
-
Hope you like it.
-
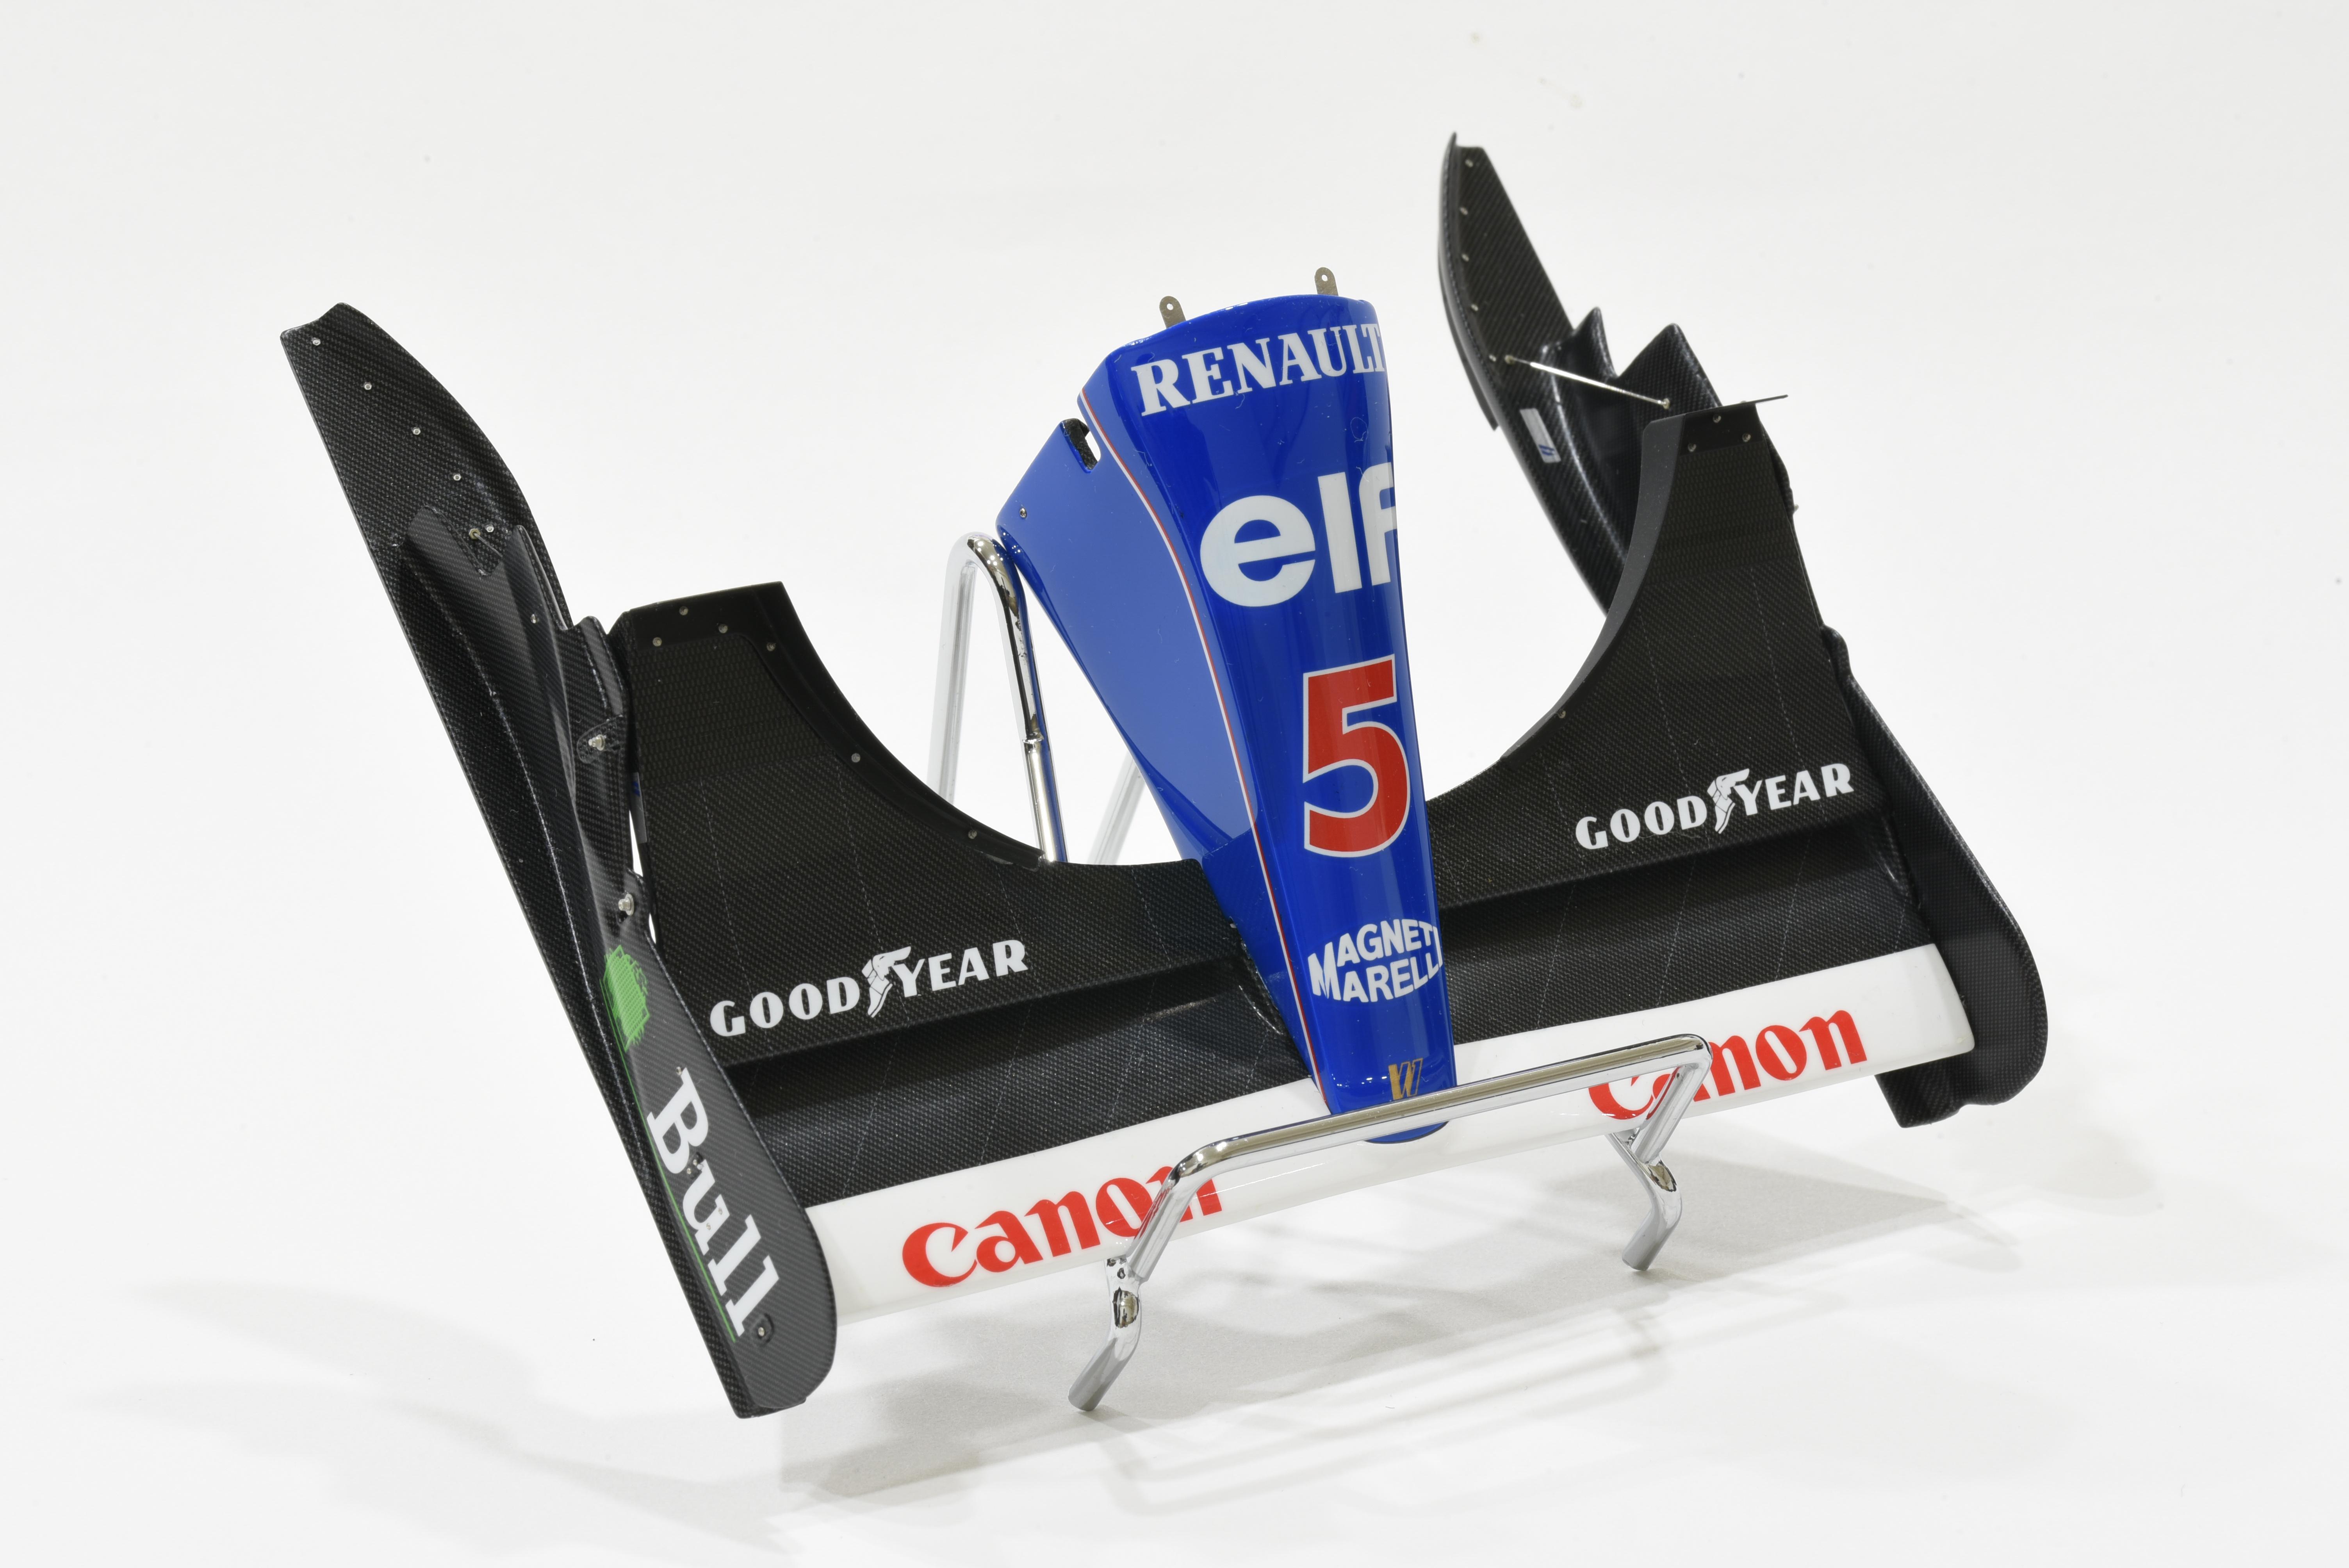
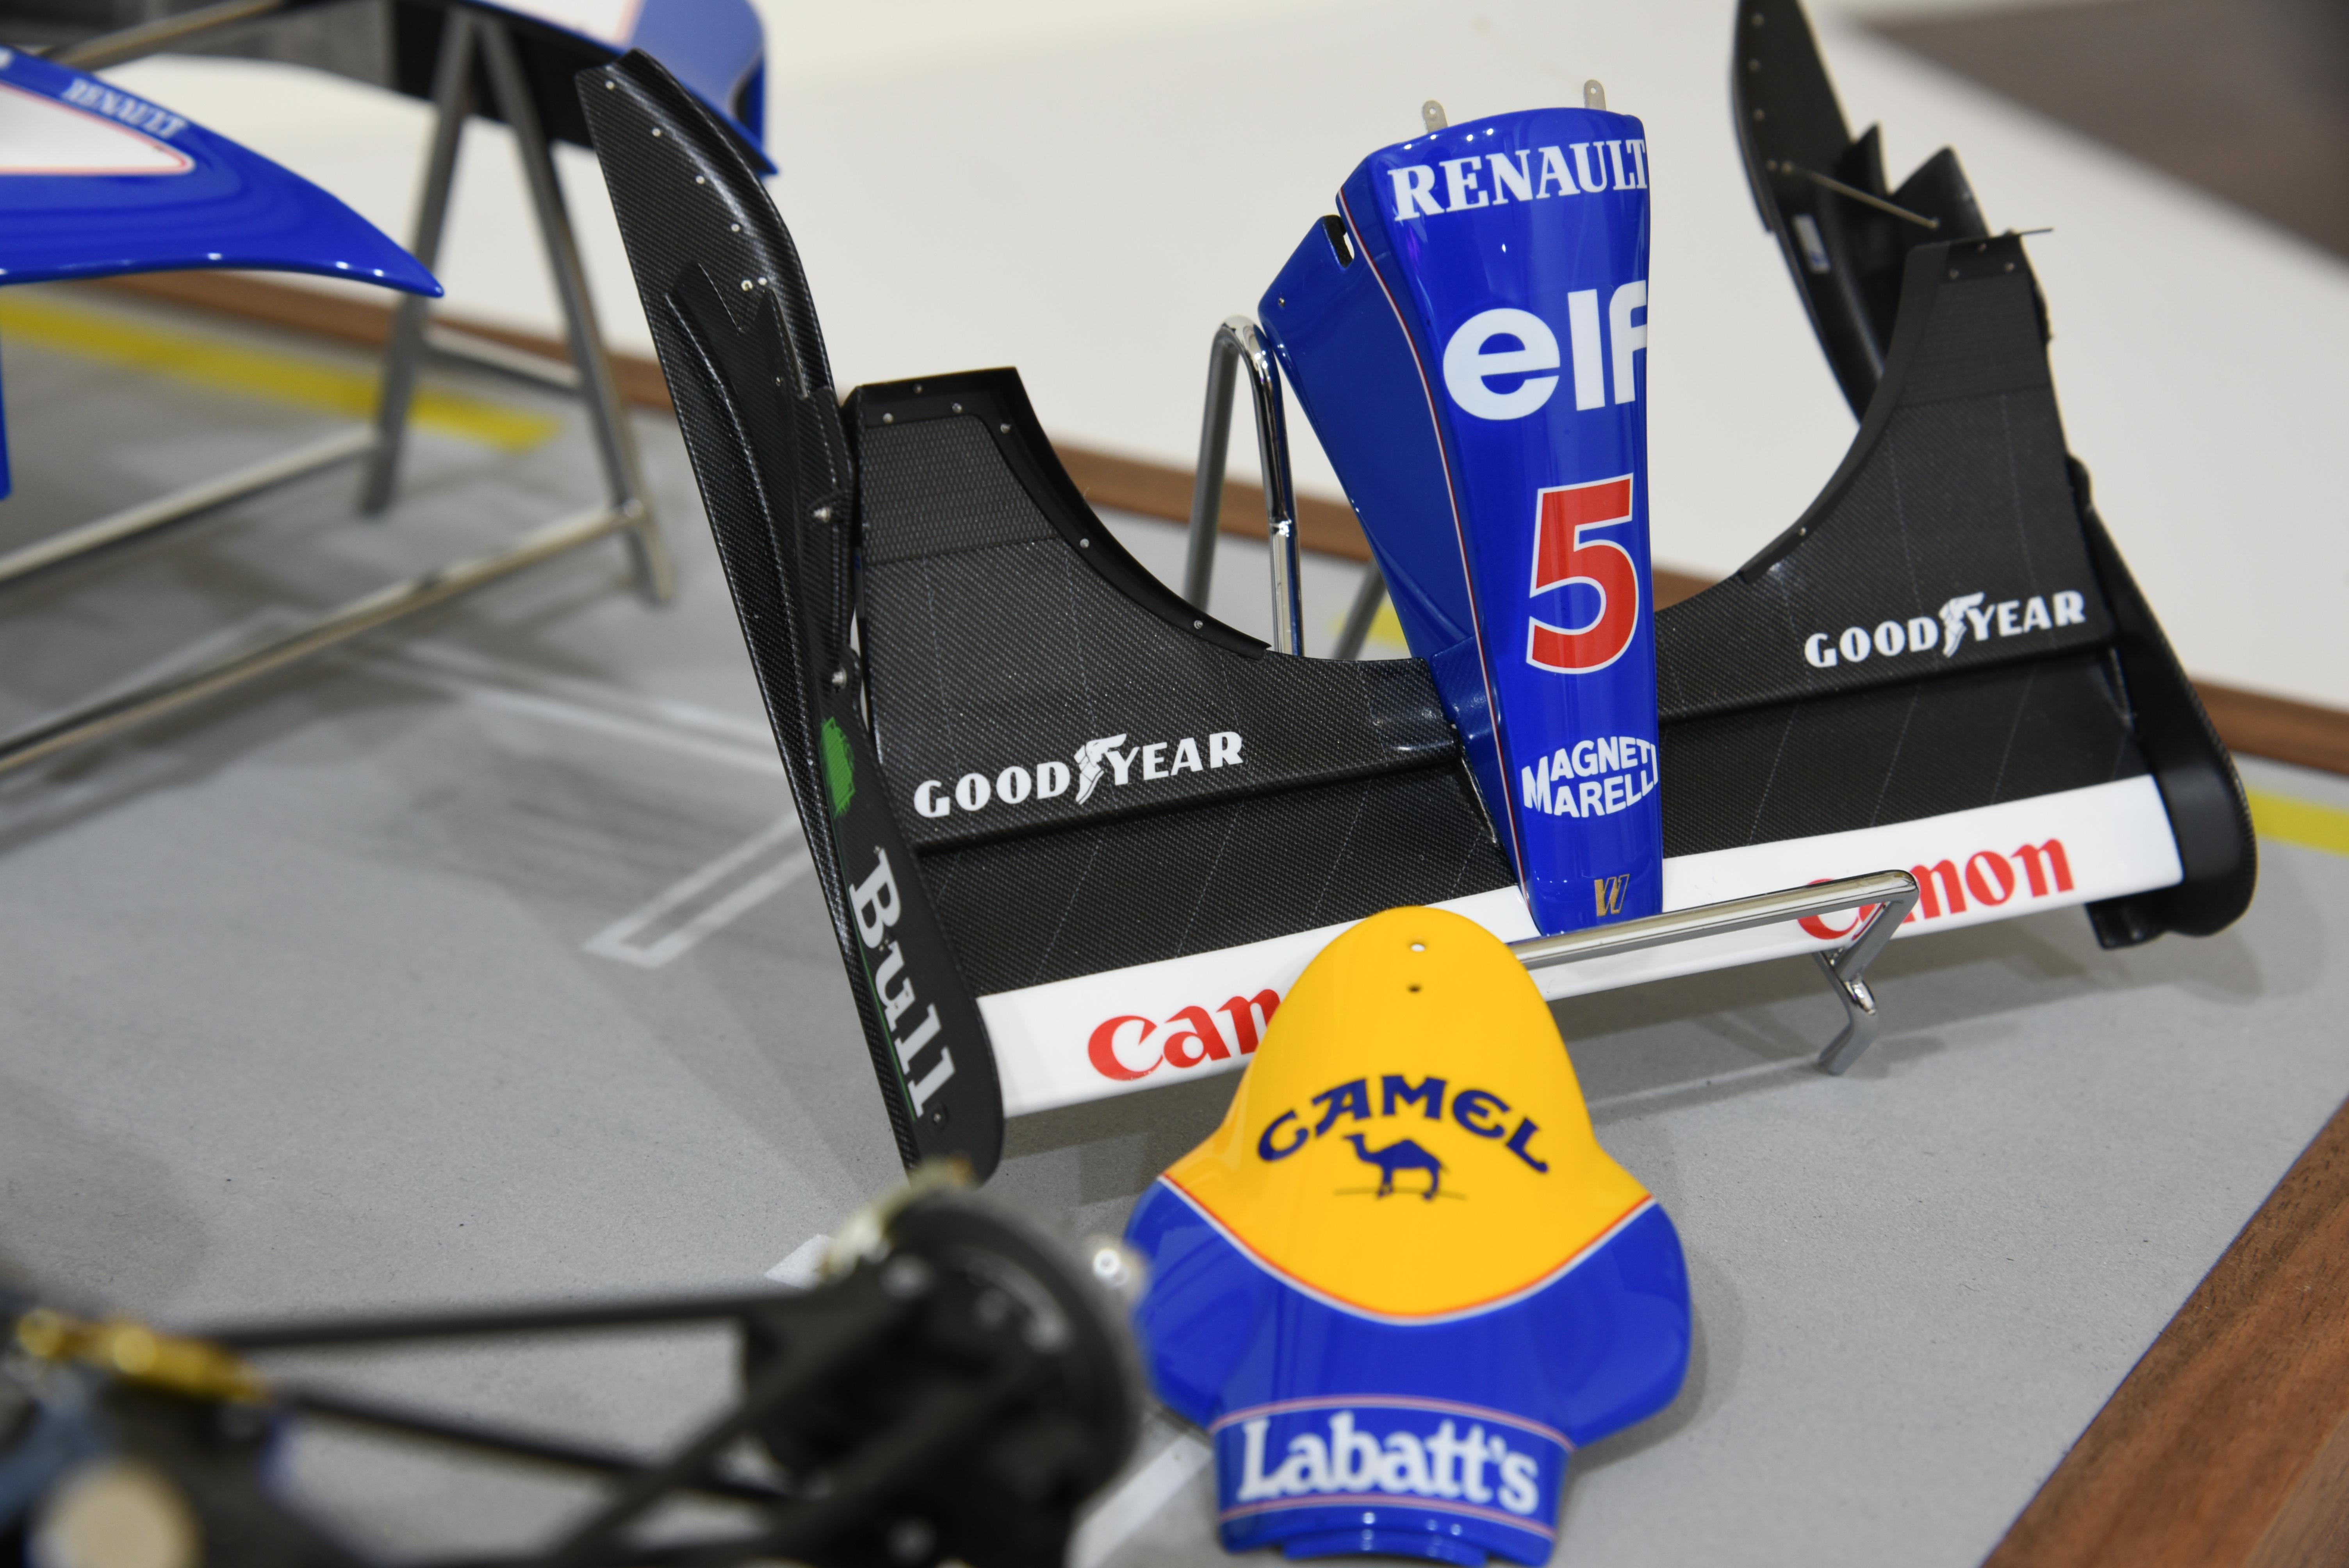
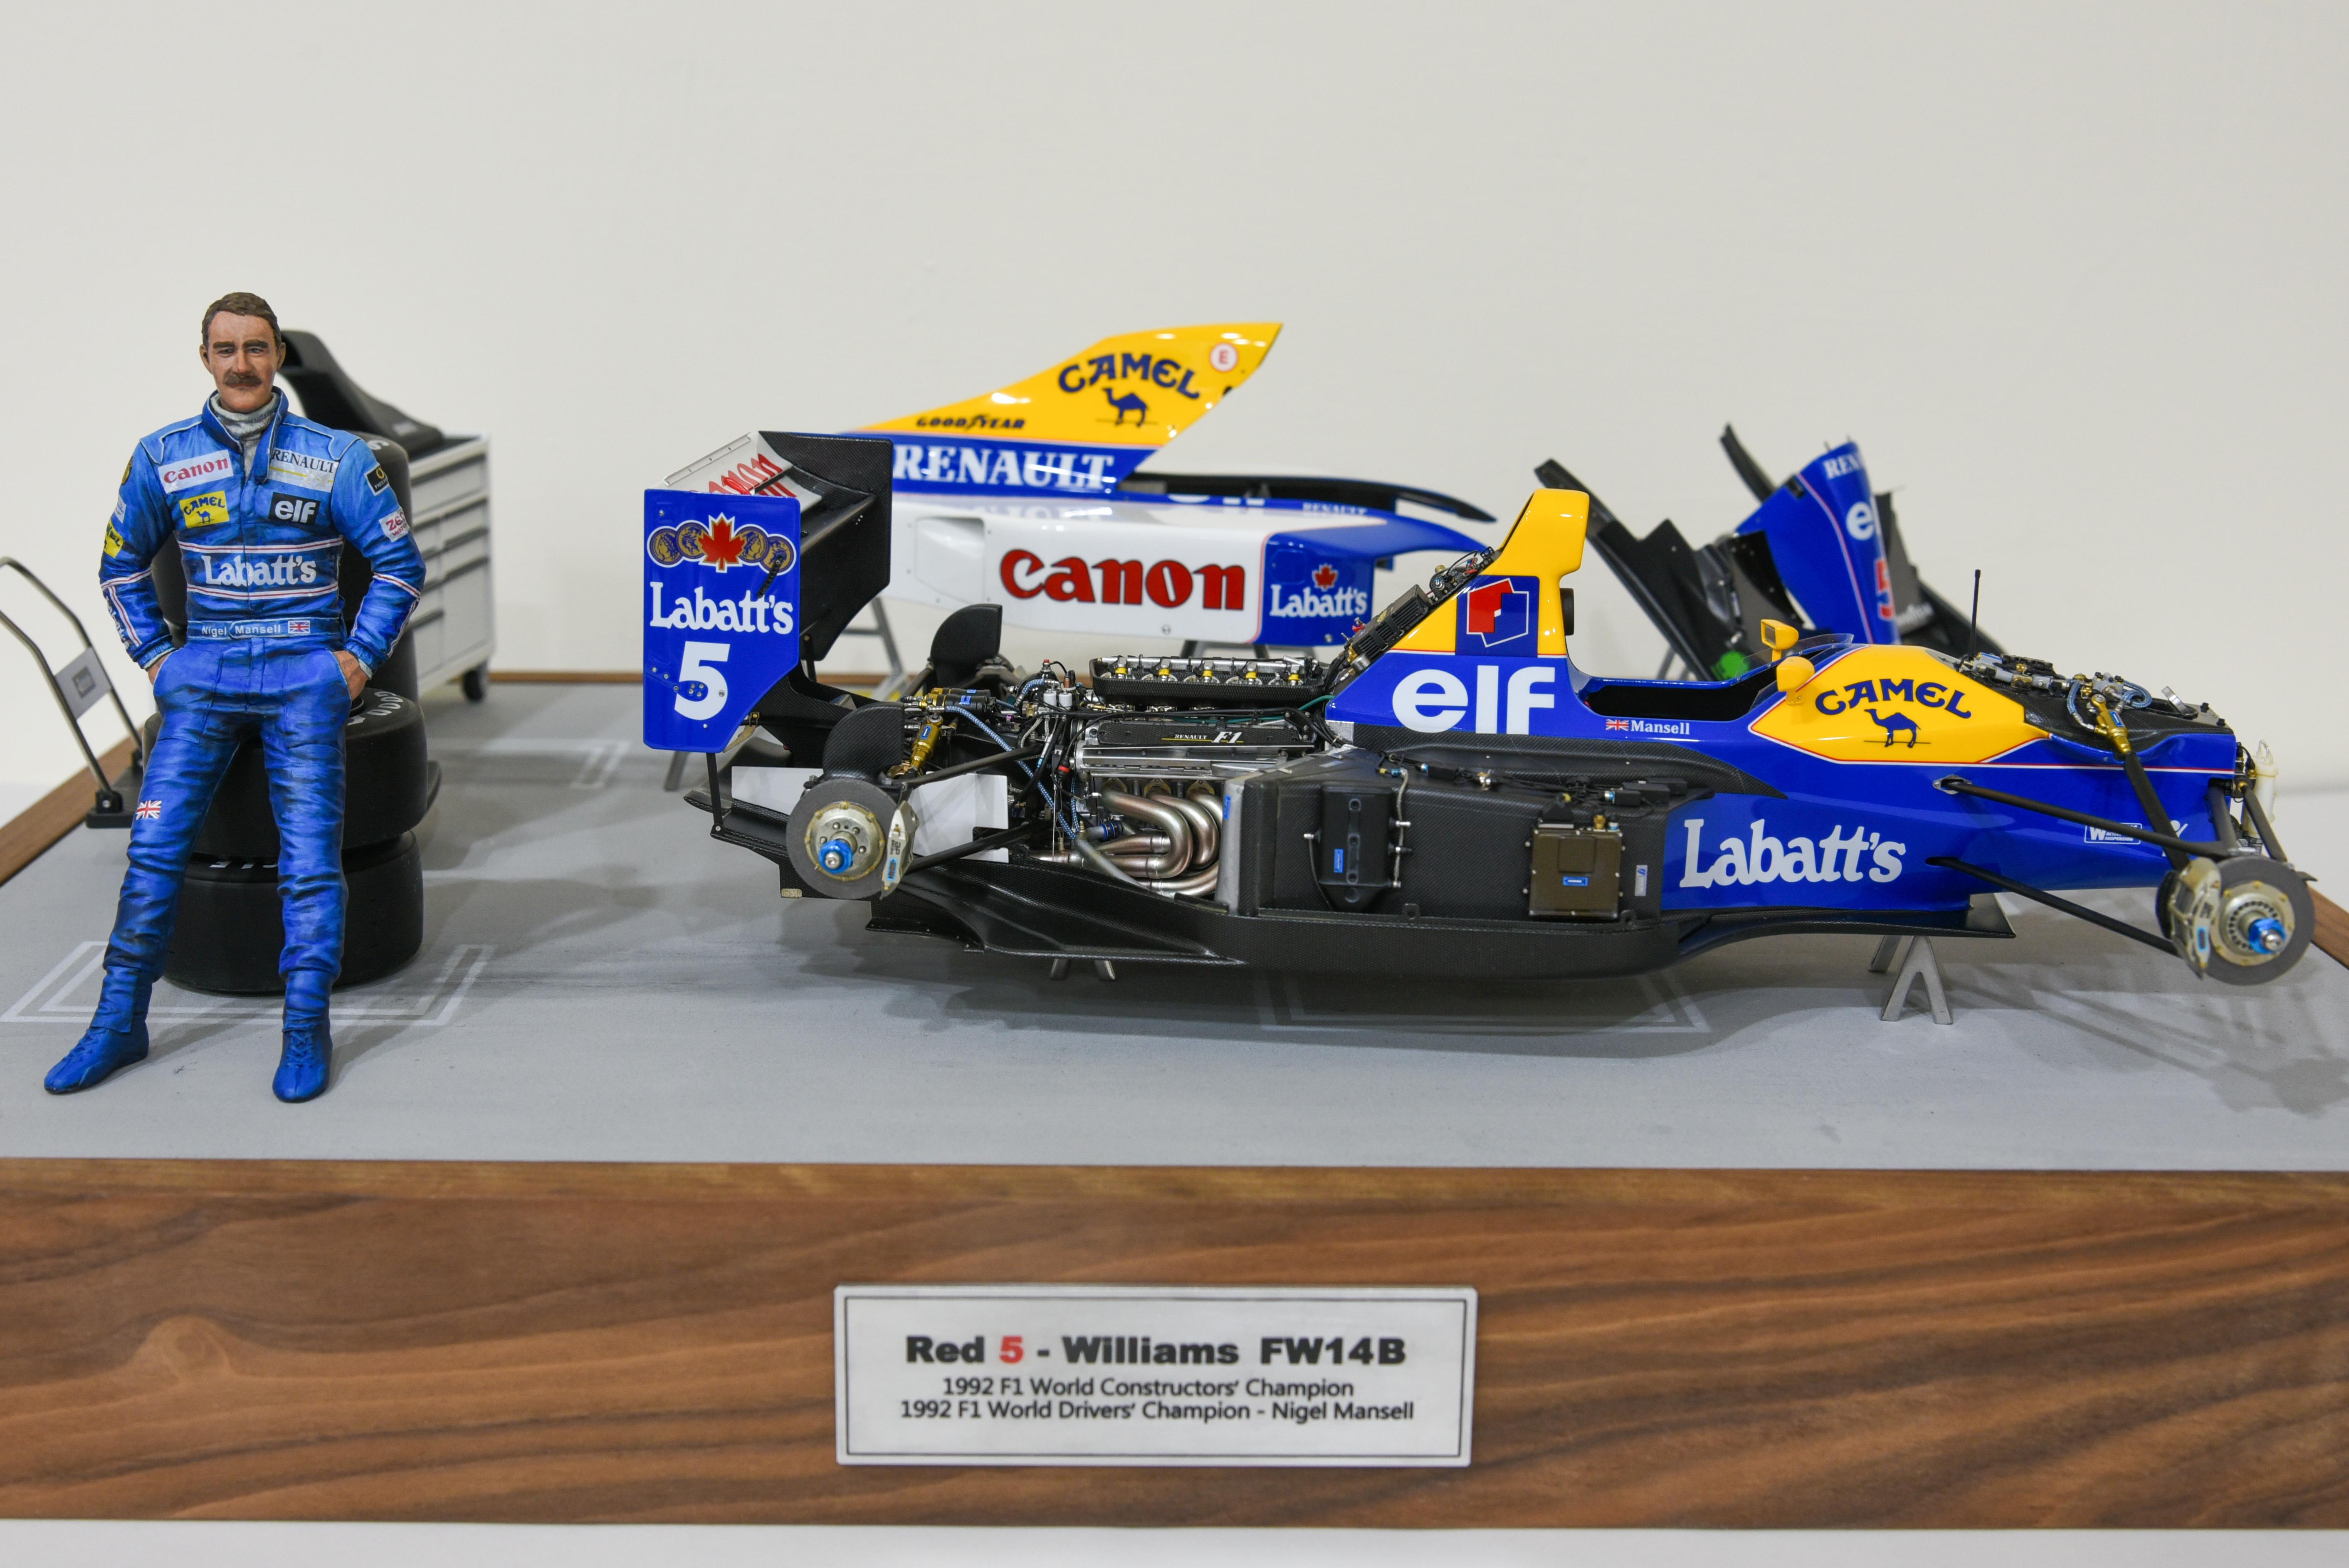
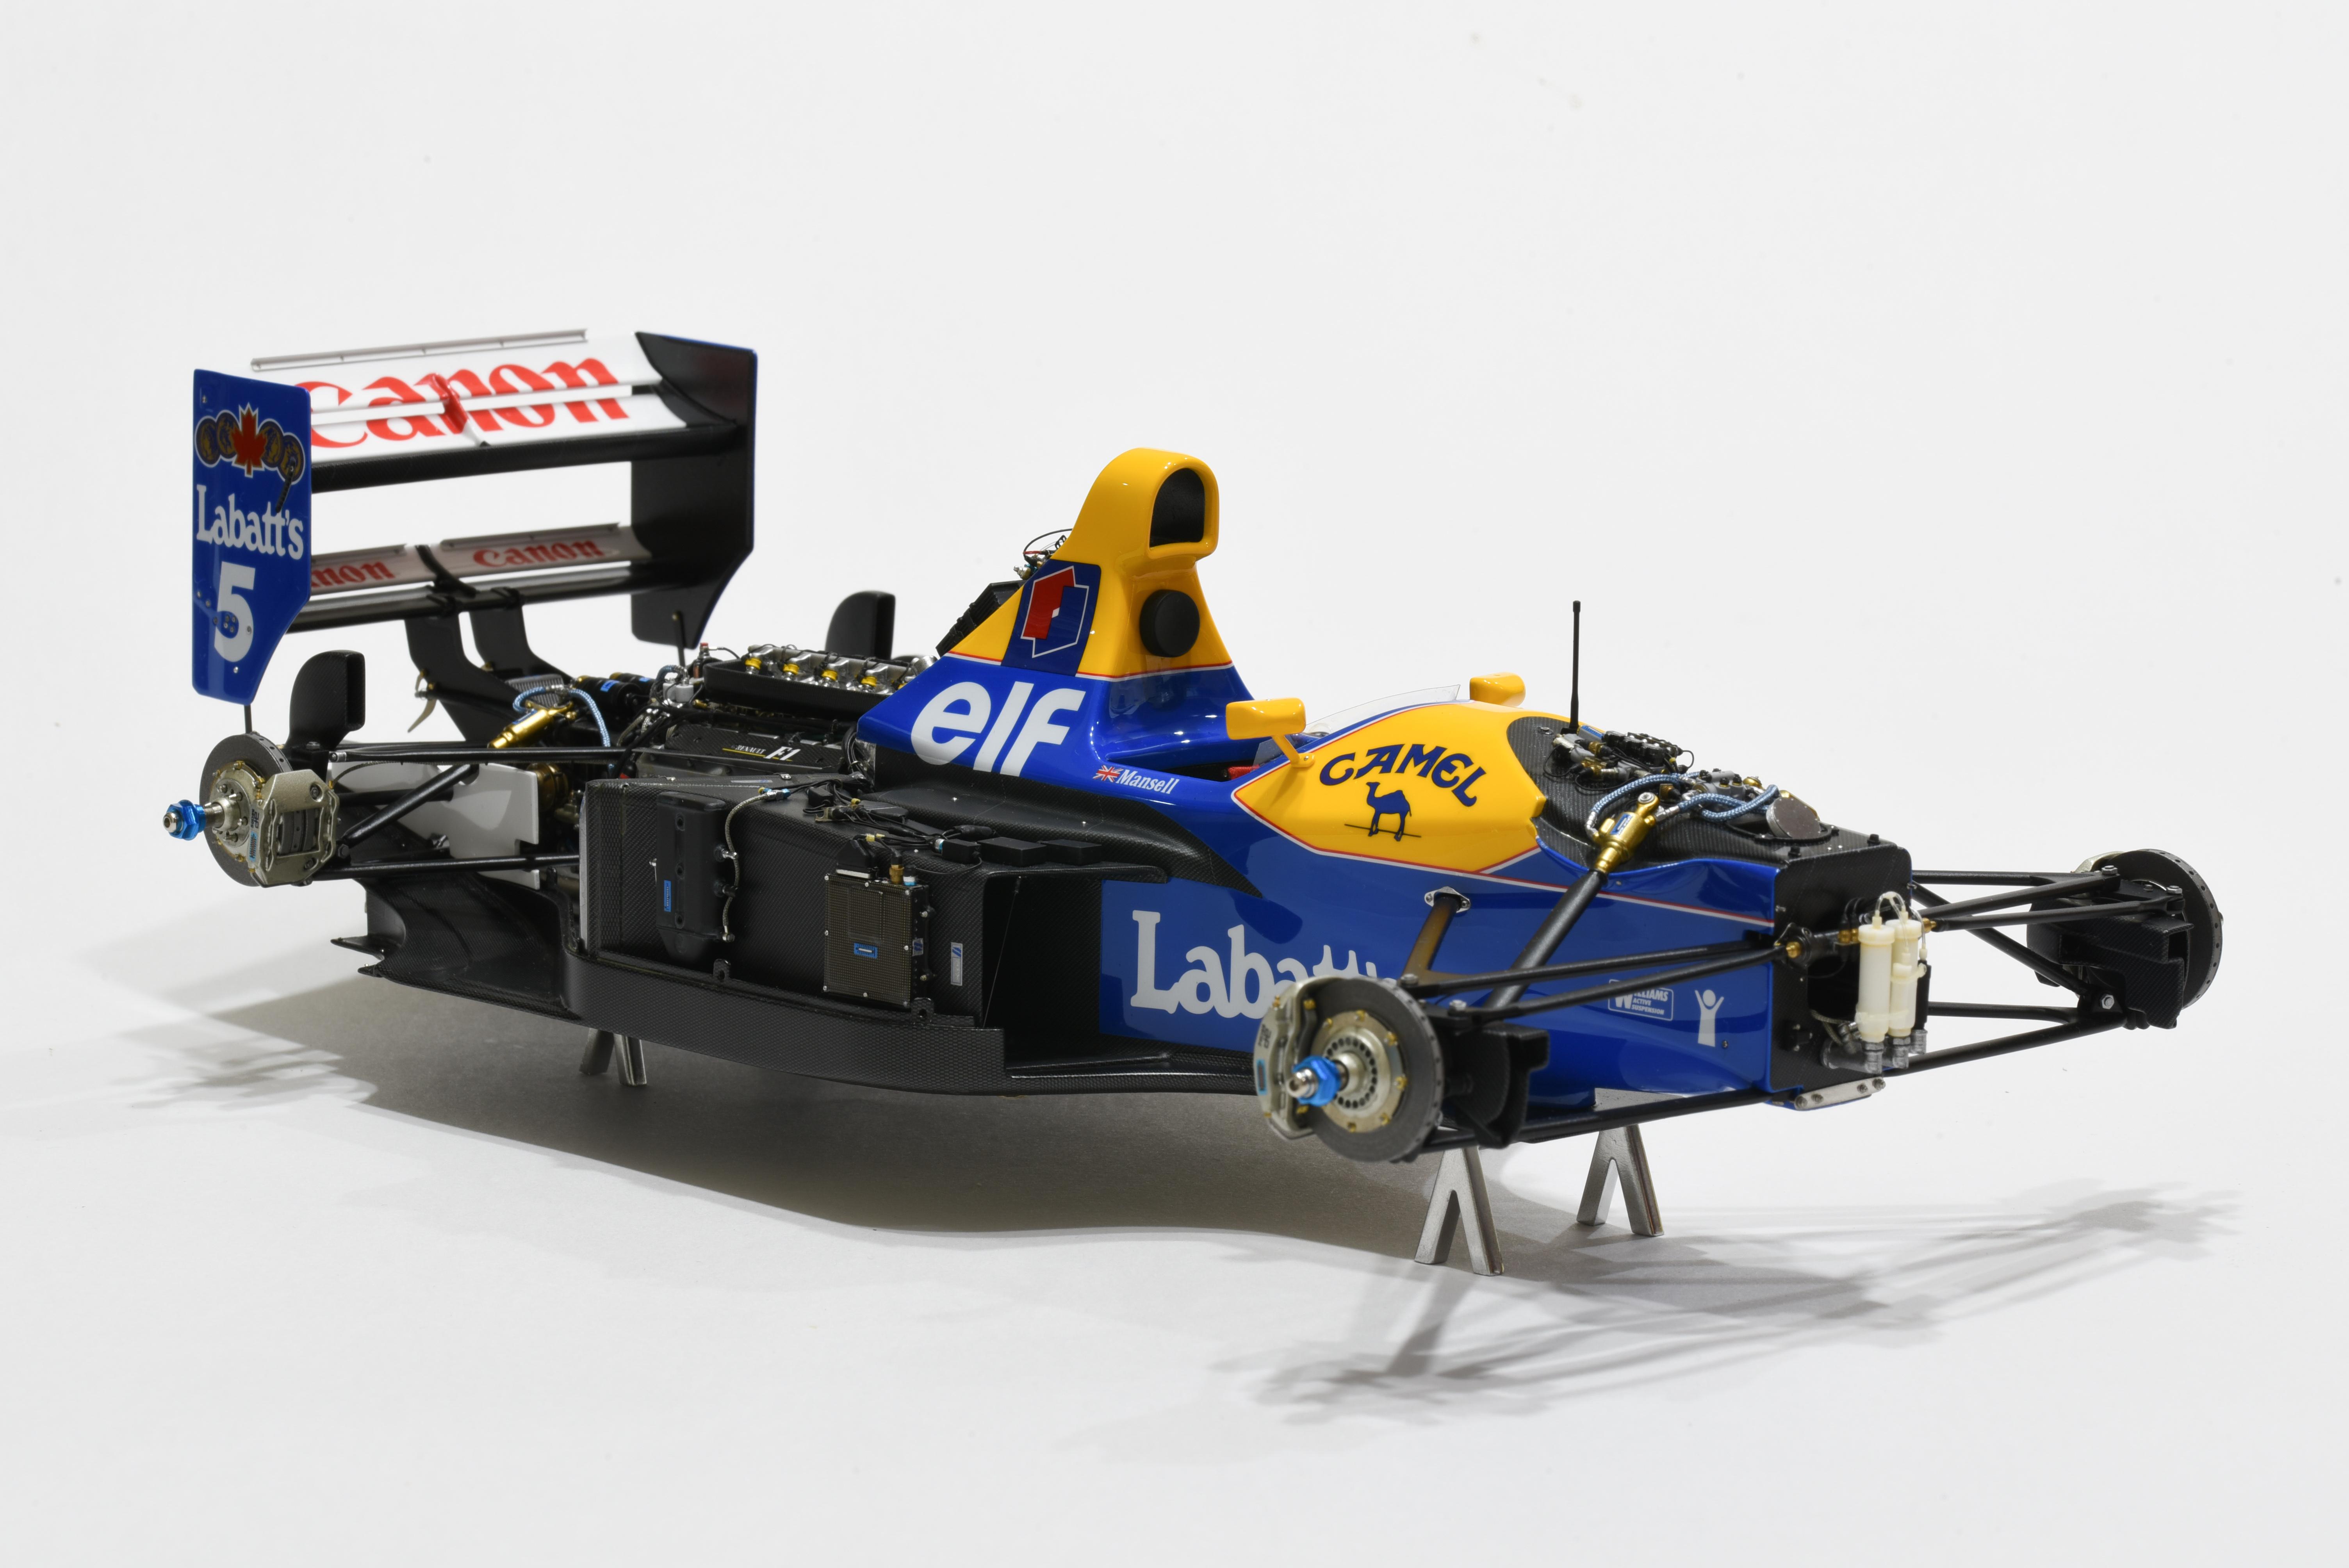
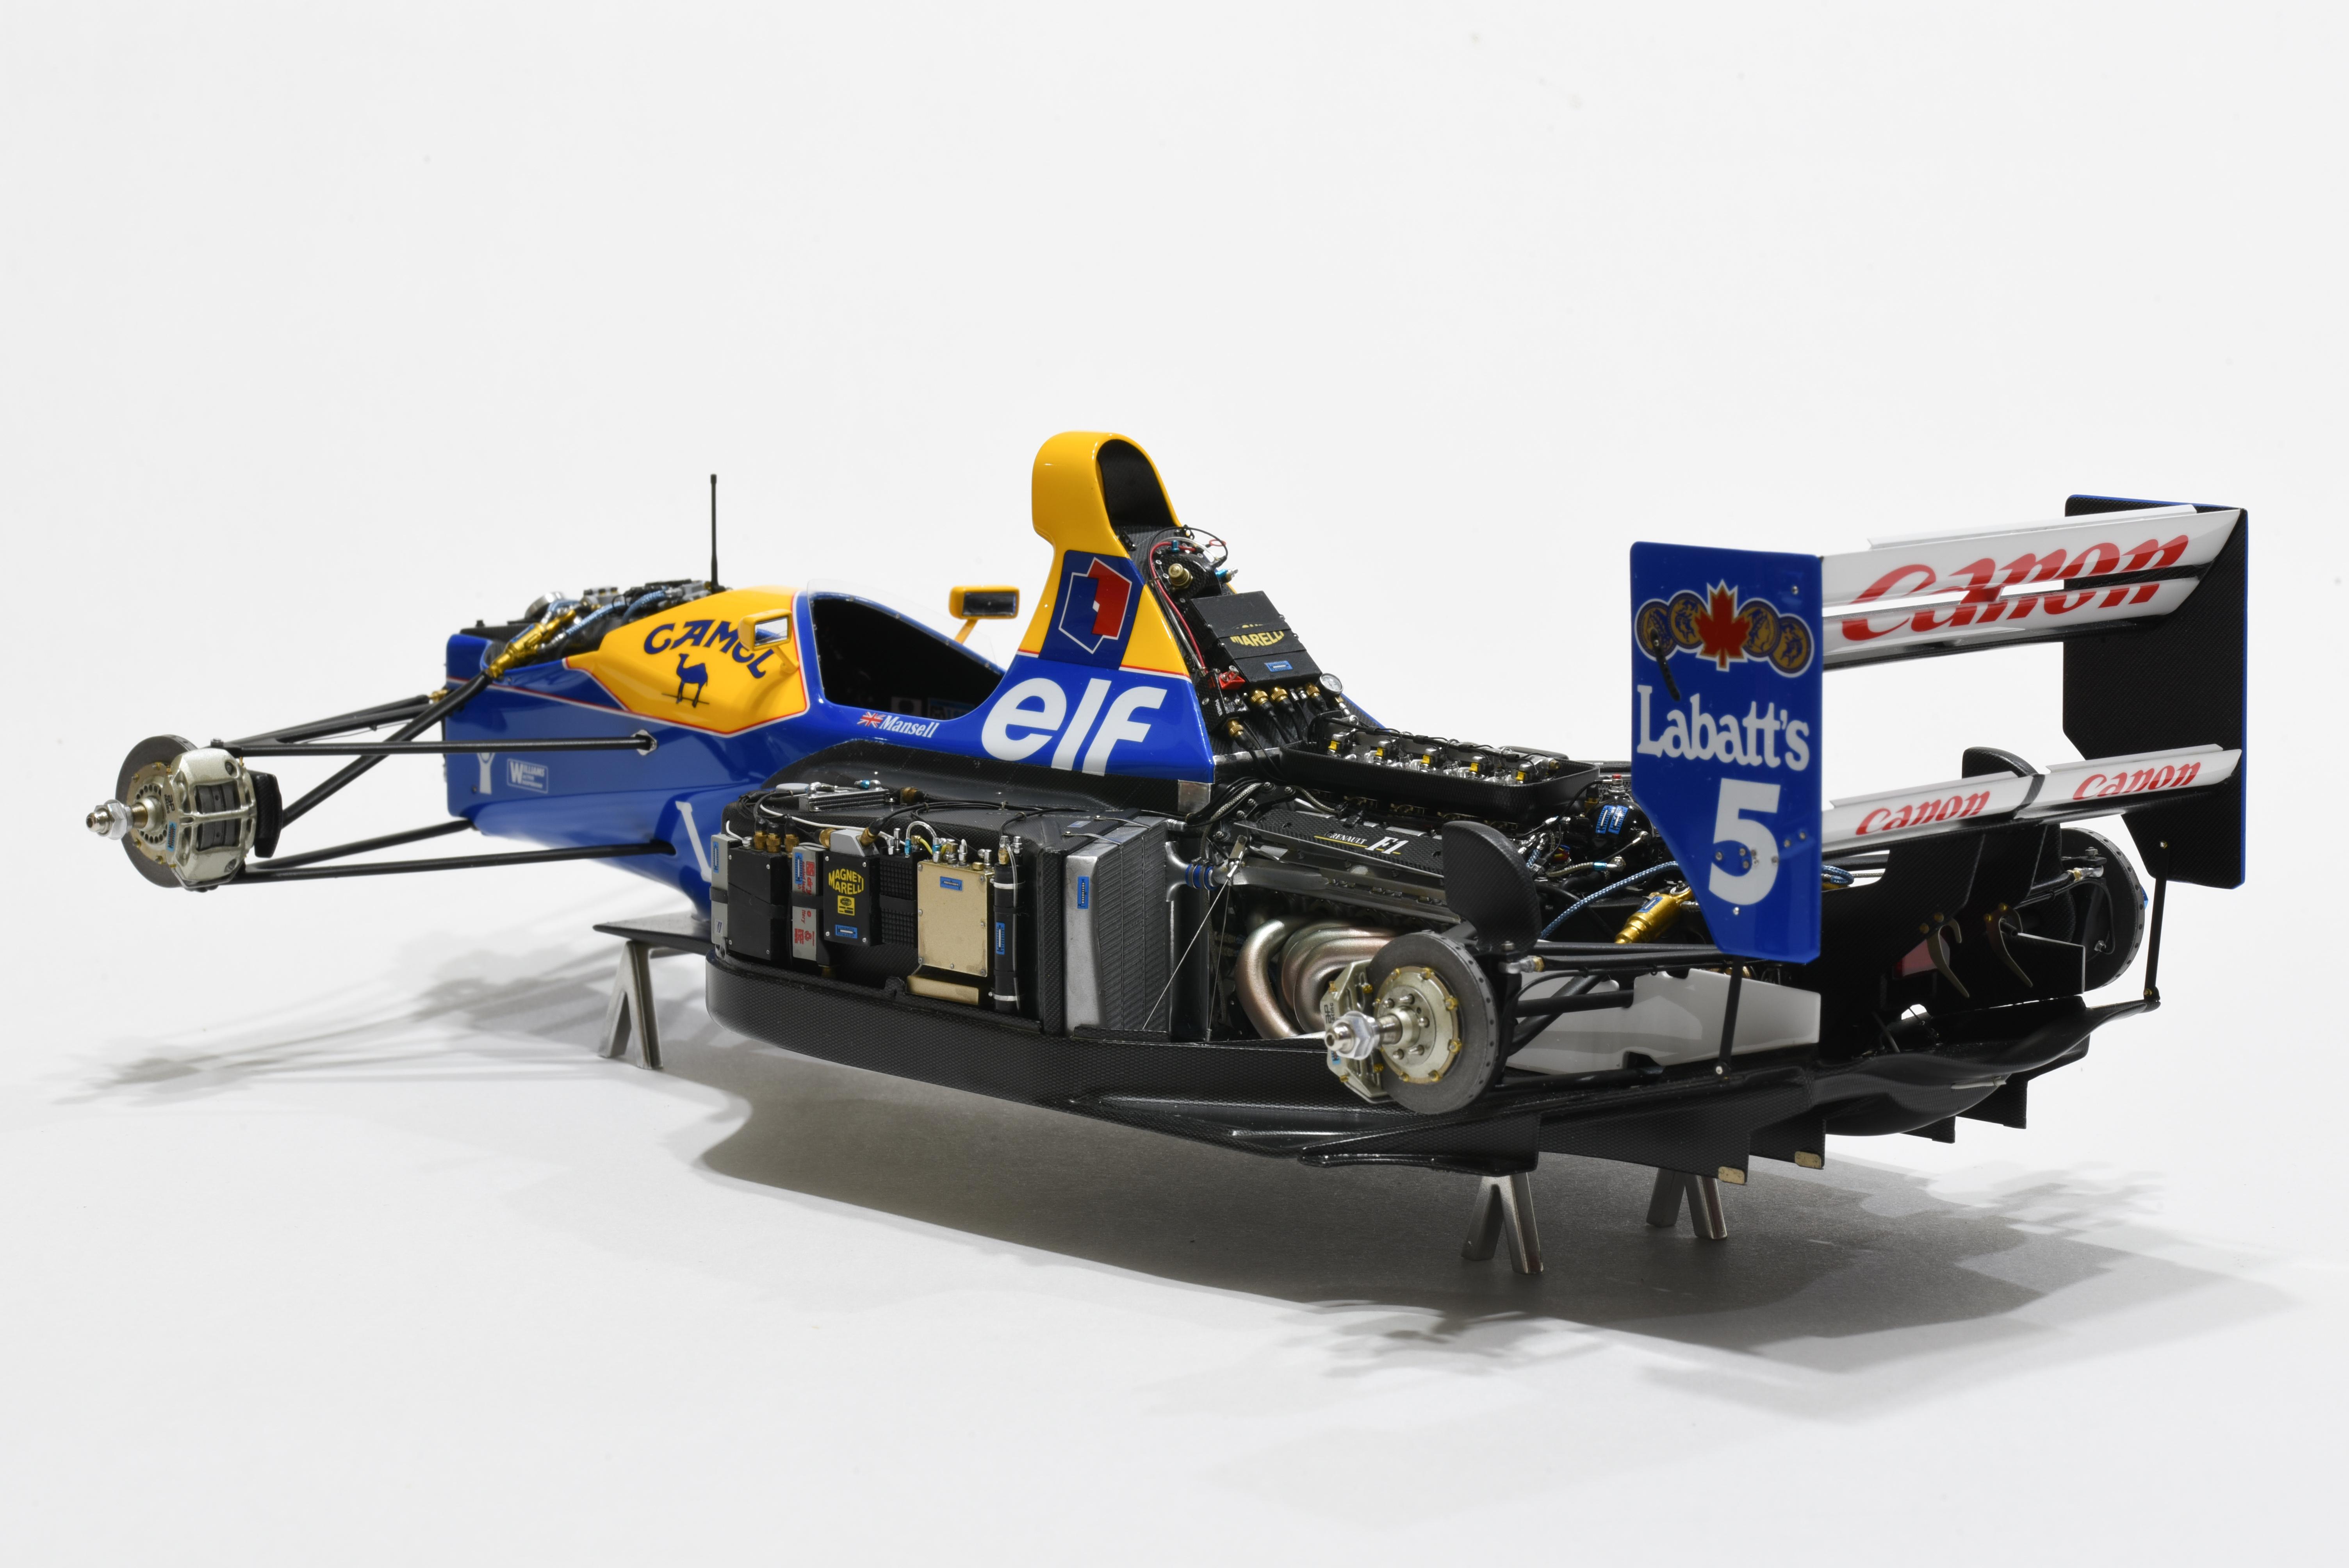
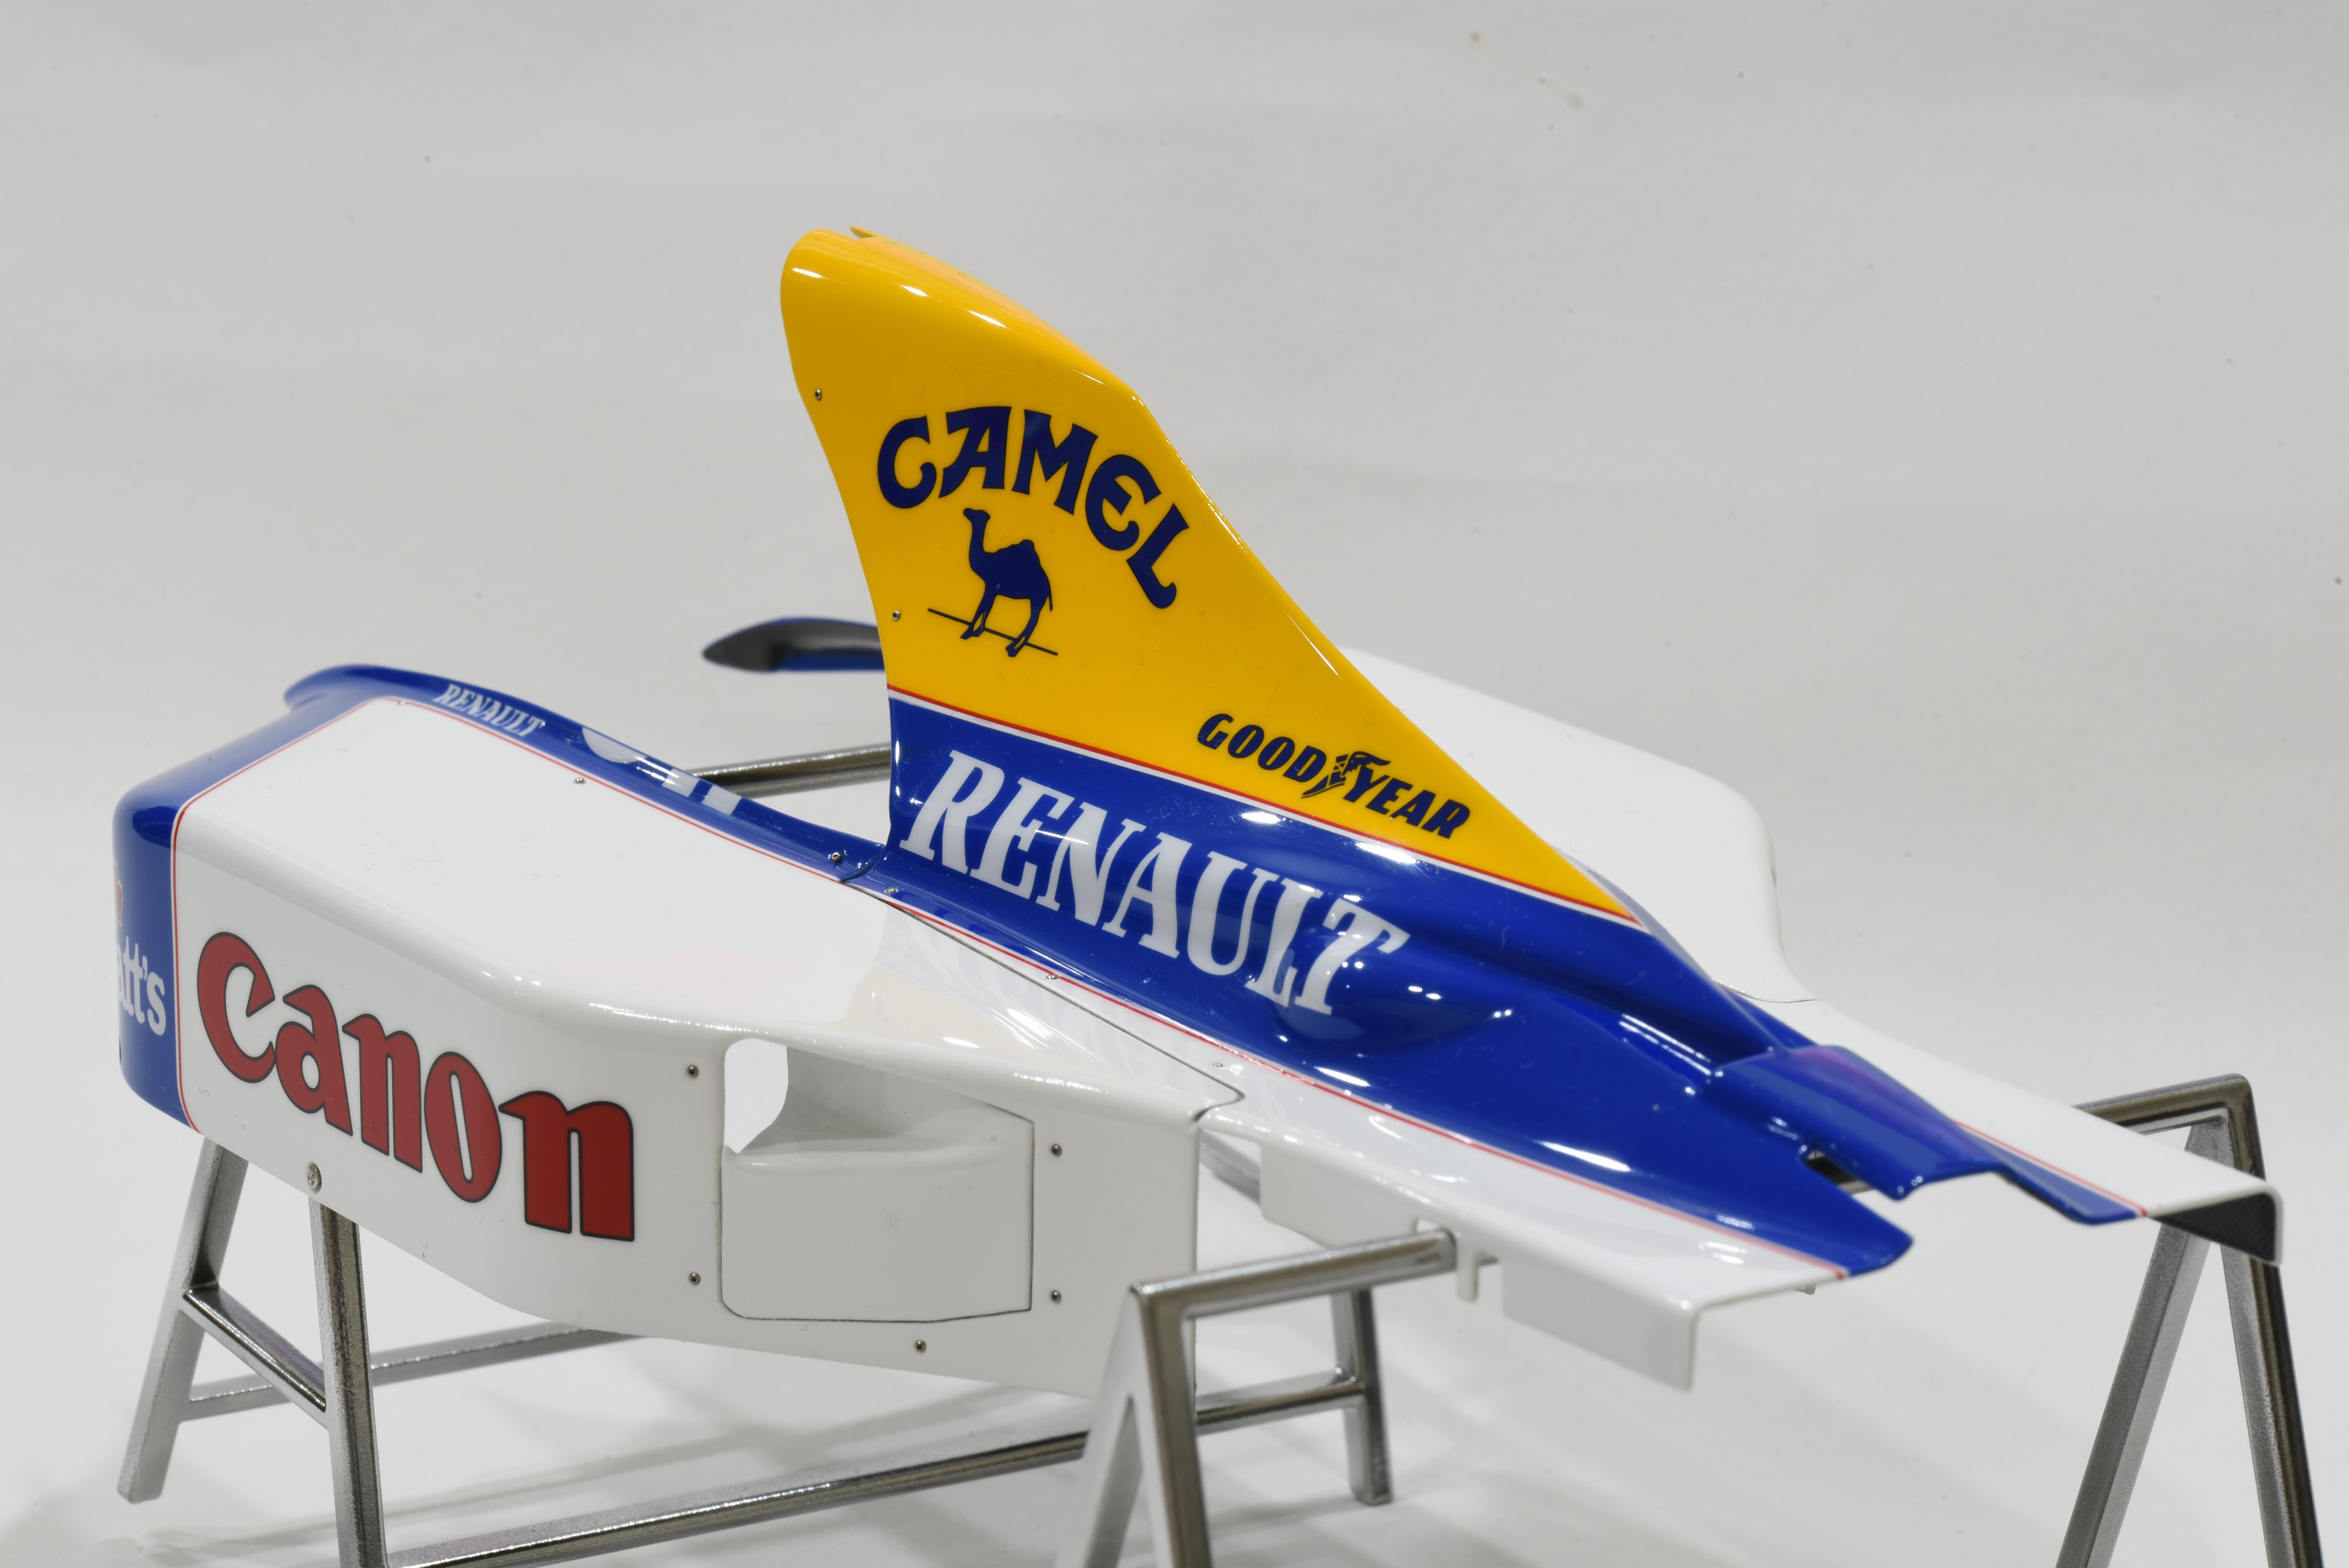
1/12 Tamiya Williams FW14B
okazaki0511 replied to okazaki0511's topic in WIP: Other Racing: Road Racing, Land Speed Racers
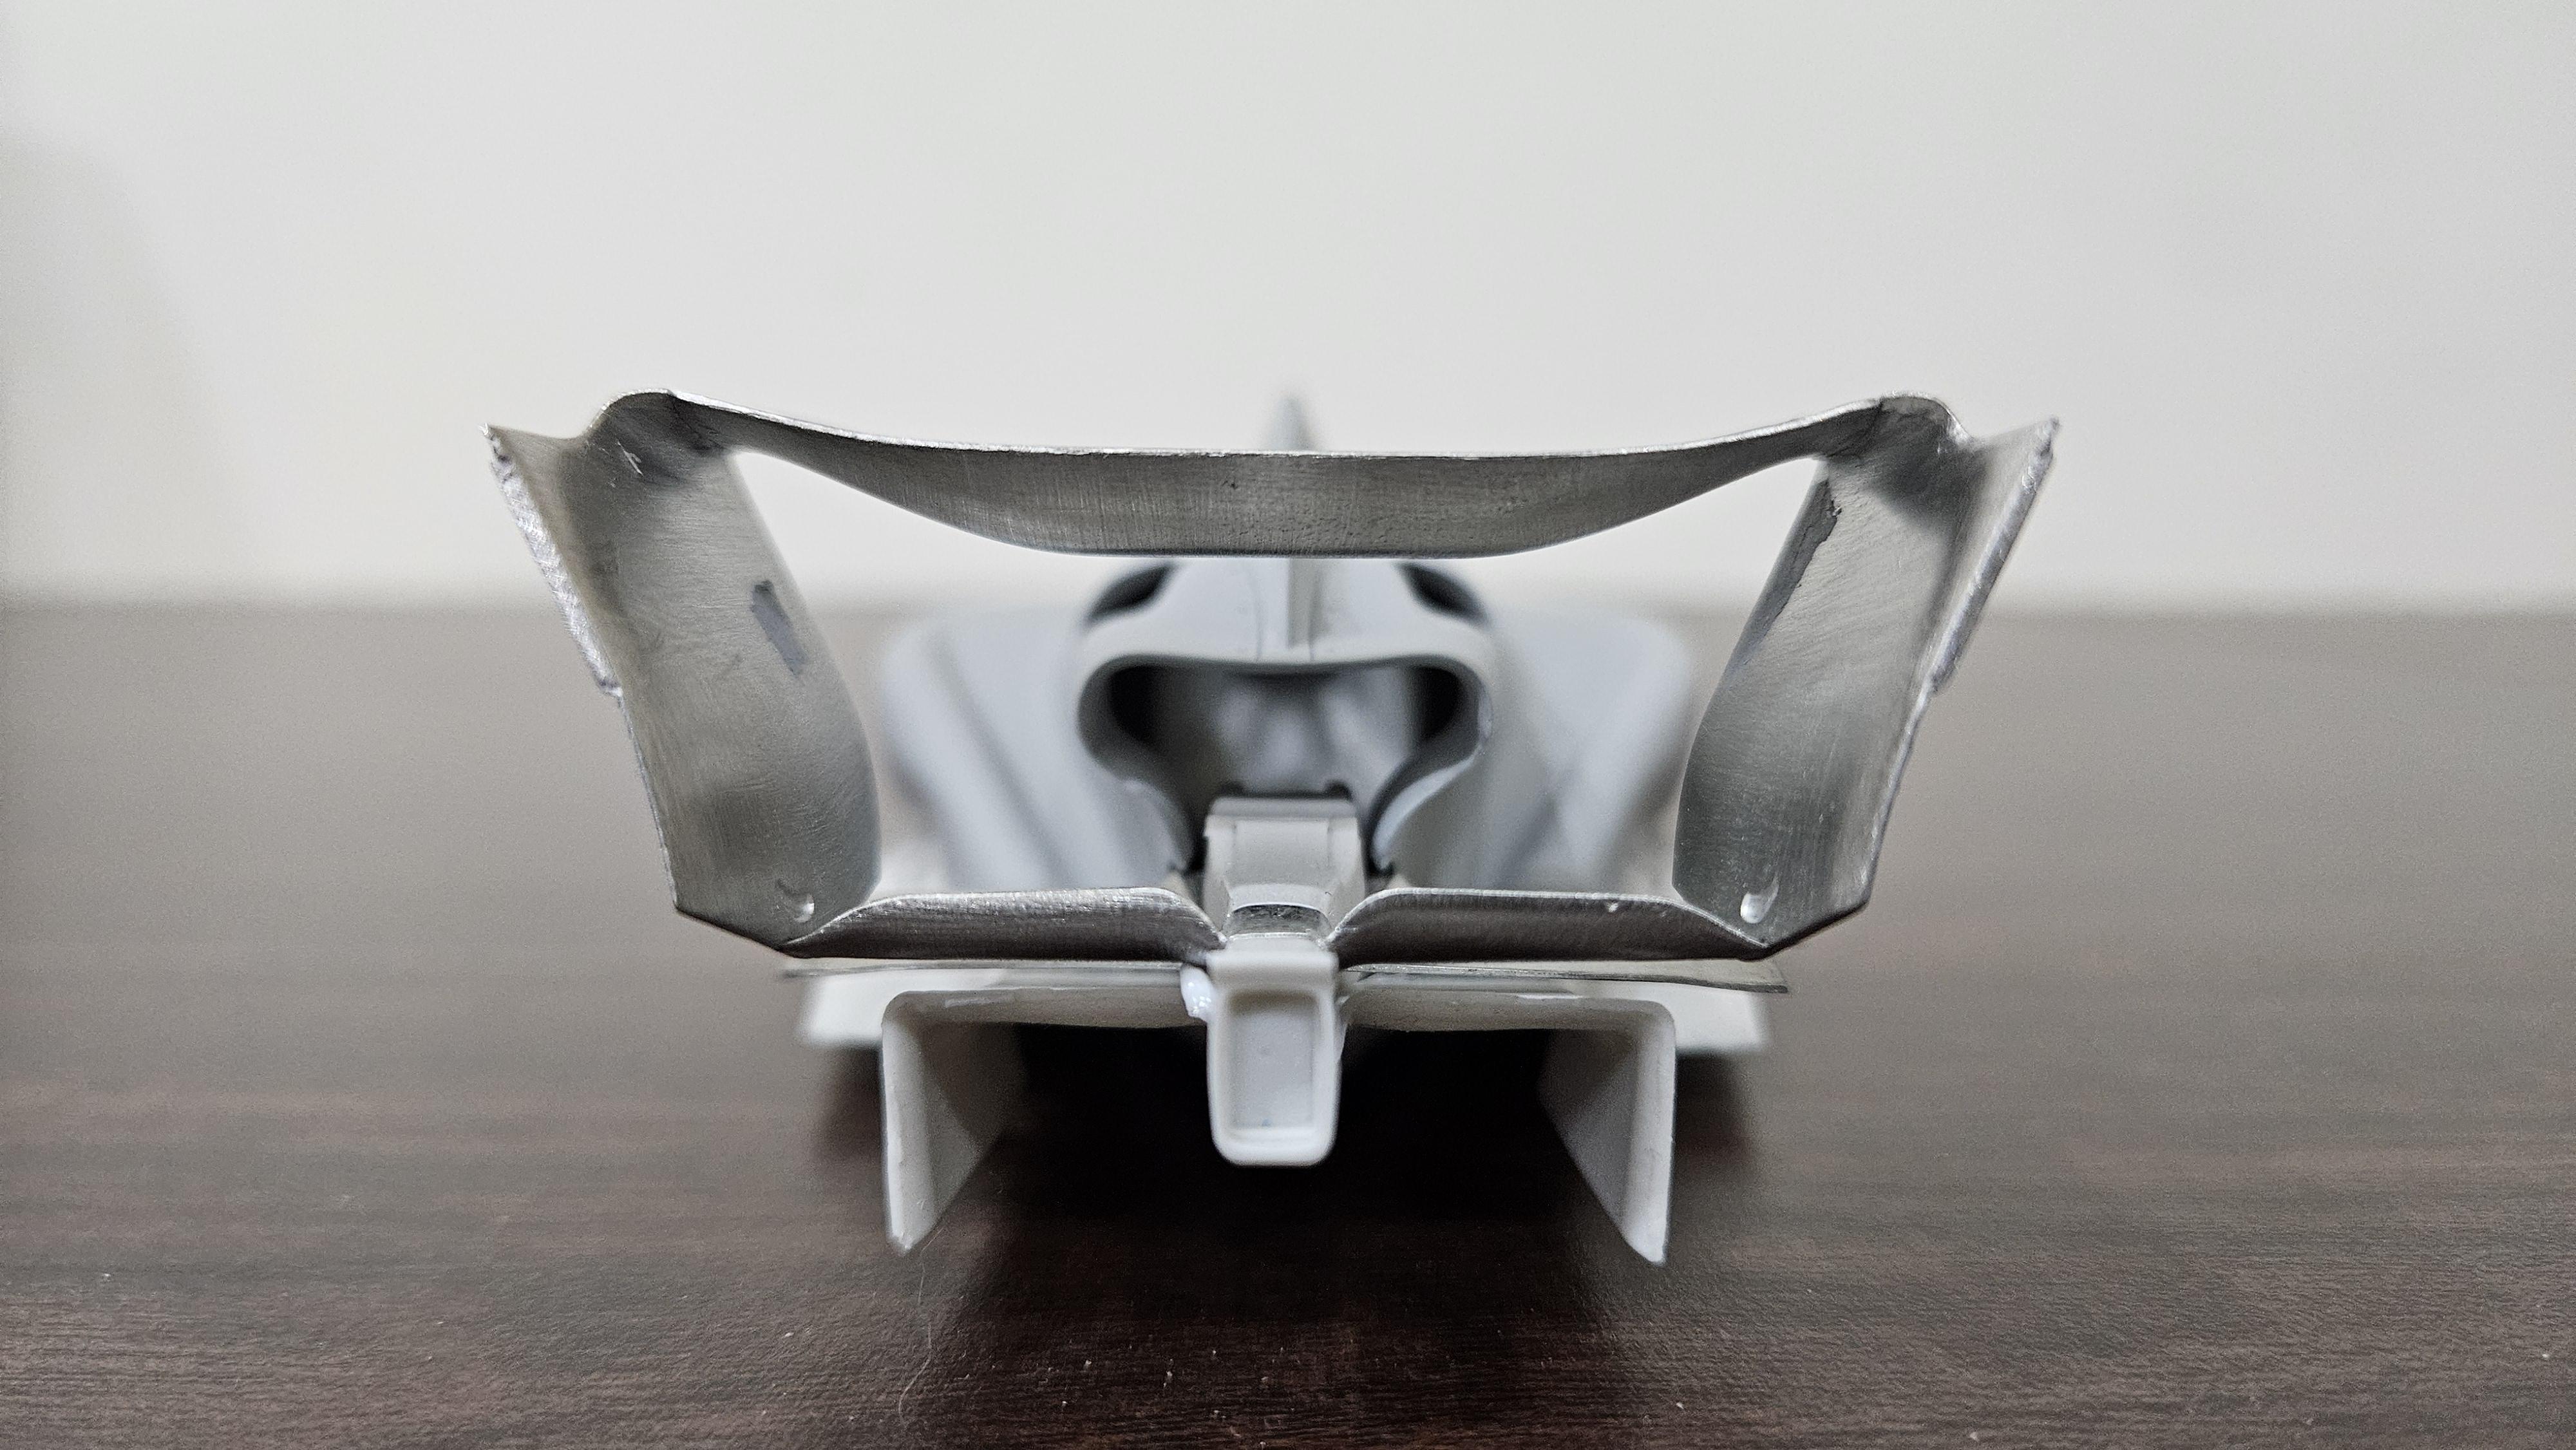
Updated some progress. Finished the rear wing. Thinned down the end-plate and adjusted the groove for the assembly.
-
1/12 Tamiya Williams FW14B
okazaki0511 replied to okazaki0511's topic in WIP: Other Racing: Road Racing, Land Speed Racers
I used some clear pictures to calculate the pitch. And asked someone to help to print it. The steering wheel just uses smaller design.


.jpg.79d31bfa016e95a636c57c24f07282c3.jpg)