Carlo.d
-
Posts
37 -
Joined
-
Last visited
Content Type
Profiles
Forums
Events
Gallery
Everything posted by Carlo.d
-
 Patw, i am pretty sure that you are writing from the UK. I also am ready to bet that you have a copy of the "Quadrophenia" movie. The sixties.... We were younger and our hair were much longer....
 -
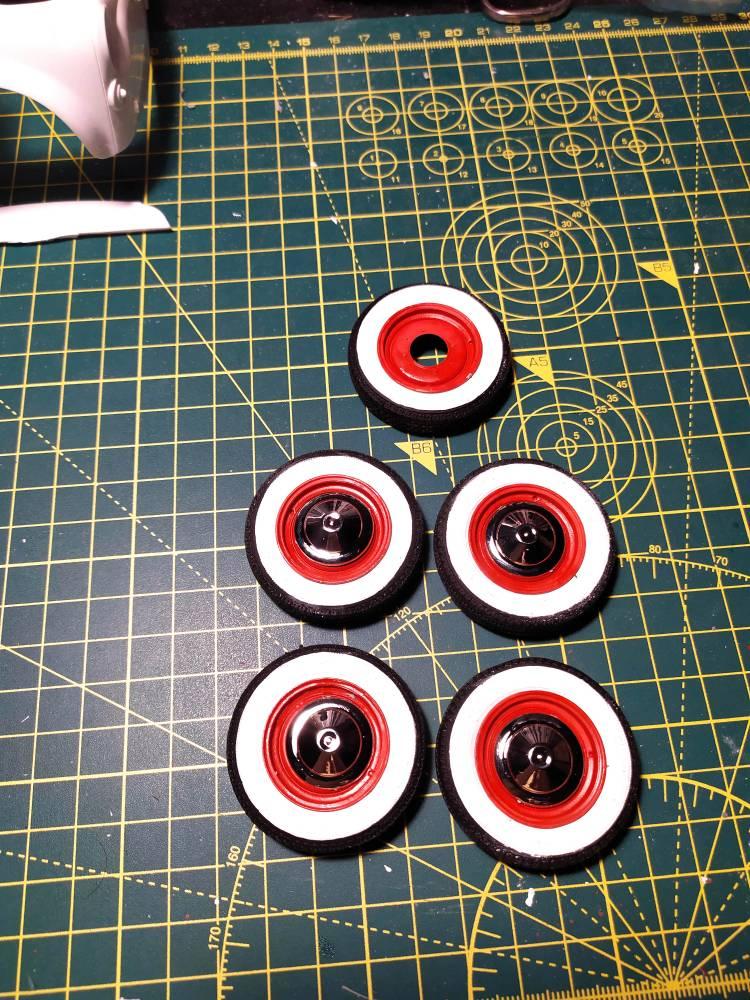
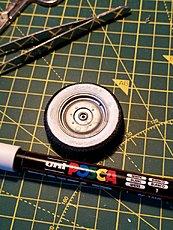
Next challenge, the wheels. The kit's tires are obviously black, whilst the Jolly sported white wall tires. First of all I planned to paint the tires, but I was dubious of my skill for masking properly the tires and get a nice well defined edge. So I used a safer procedure: I simply painted the walls with my faithful Uniposca white felt pen. Below you can see an intermediate step. And this is the final result. I painted the rims with the body colour and I am happy with it.

-
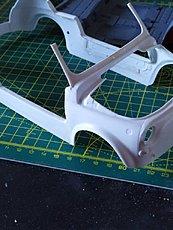
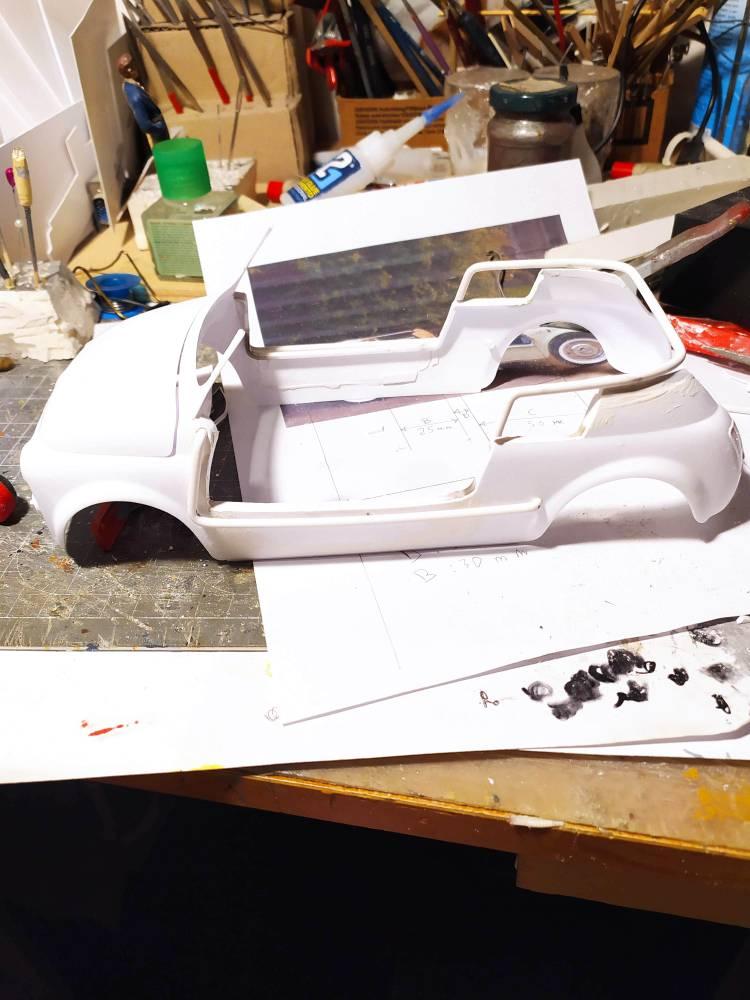
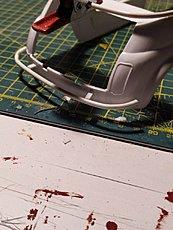
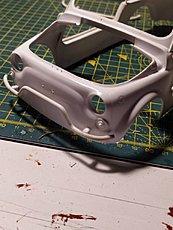
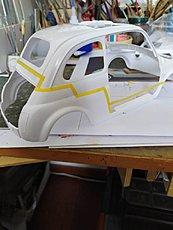
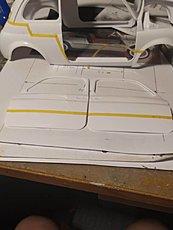
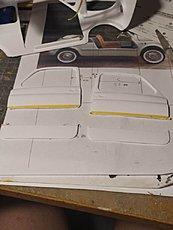
Next steps. I had to modify the doors openings. The threshold have been raised and the front edge now is slightly bent back . To do so I used some slices of the original doors, glued, plastered with putty and carefully sanded. In the pictures you can see the shape of the openings, before and after. Another interesting step. The coachbuilder surrounded the body with some chromed bars. I am led to believe that these bars were necessary in order to strengthen the chassis. At the same time they had a strong visual appeal. I built the bars with plasticard tube. With the same tube I built the front and rear bumpers, custom made by the coachbuilder.
-
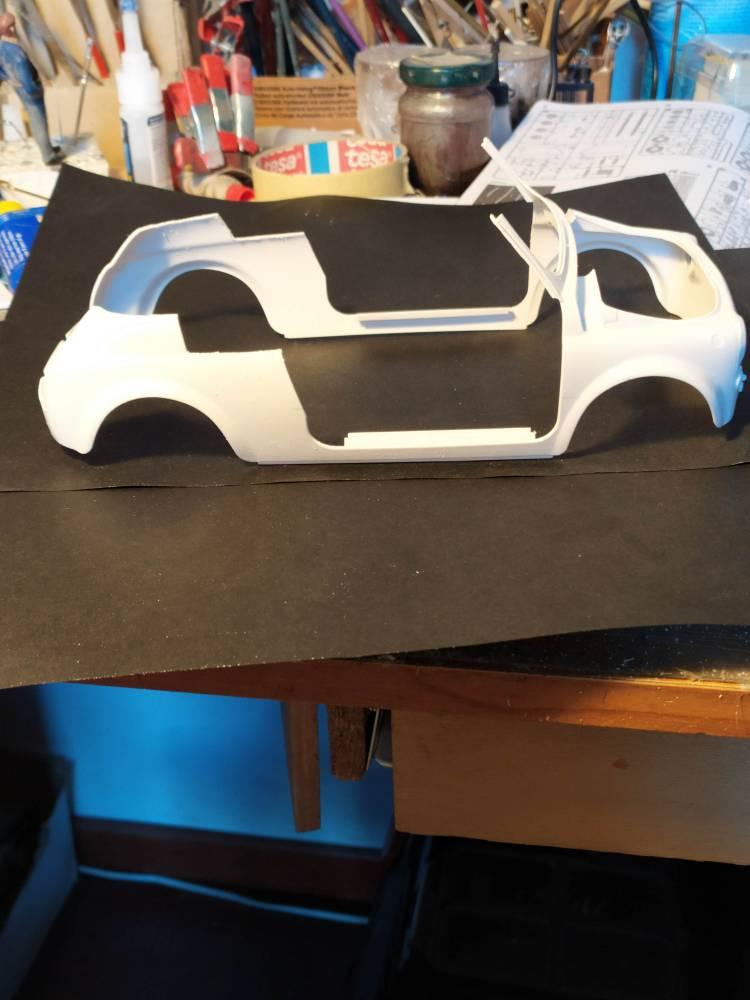
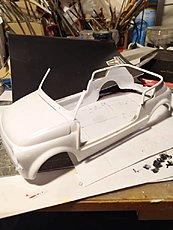
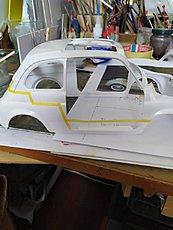
Now it was time to begin work on the body of the 500. Firt of all i put some tape on the body in order to have a clear idea of where to cut. For time being i decide to leave in place the grille above the engine hood, in order to keep in shape the body. The doors too had to be cut. I believe that the coachbuilder had to insert some structure in order to mantain the strenght of the car: without the roof the structure have been weakened, And here is the body badly cut, There is no turning back.
-
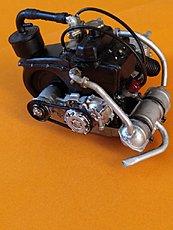
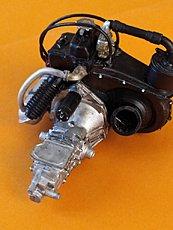
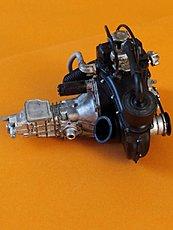
Thanks stitchdutp ! After weeks of works with needle and wires, i decided to relax a little bit and to build the engine. The car will be shown with the hood closed, but never mind, better to build it. This is a cute engine, parallel twin, aircooled, 500 cubic centimeters, equals to 30.5 cubic inches. Delivers 18 mighty horses and pushes the little car at the majestic speed of 95 kilometers per hour.
-
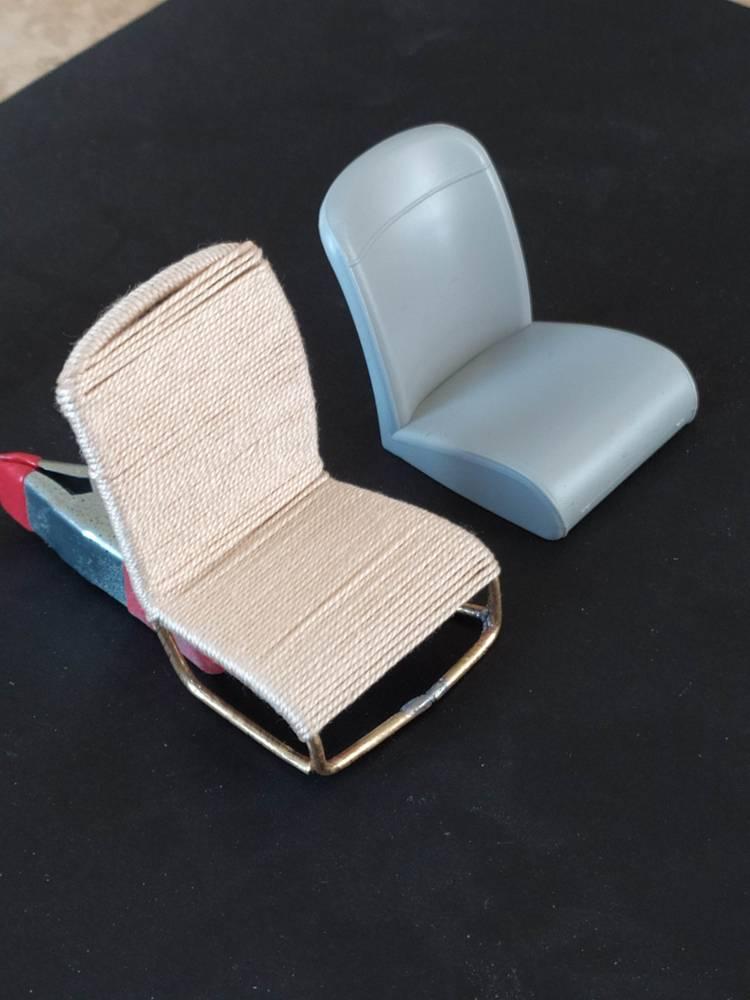
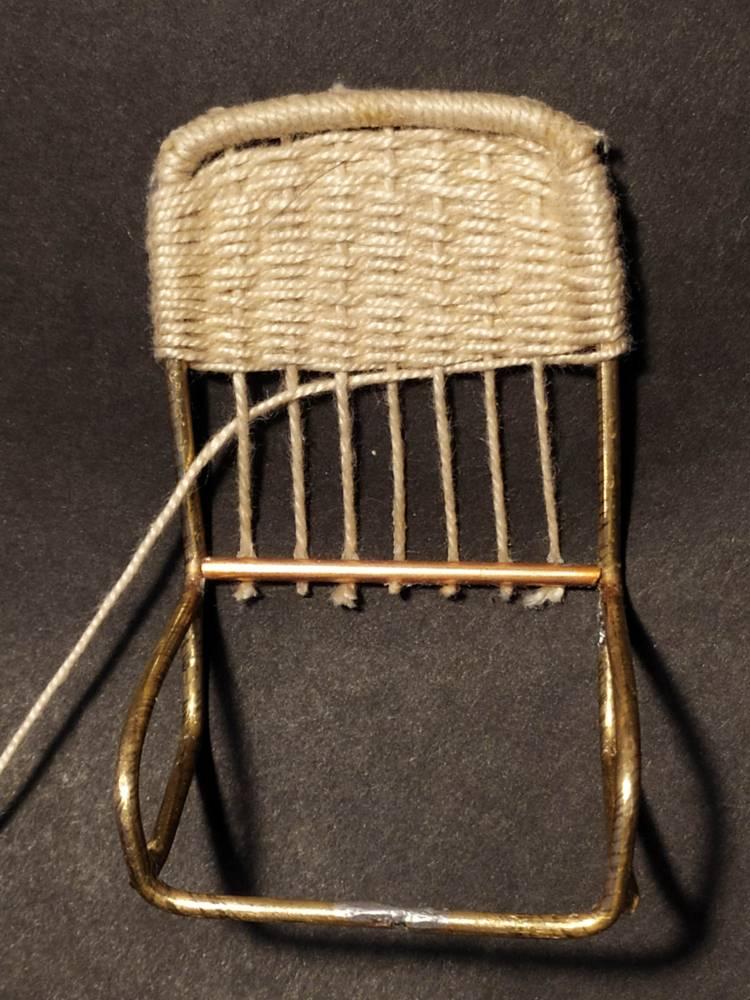
Ok. This is the Italeri kit. It was clear to me from the very beginning that there was a big challenge: the wicker seats. The seats have a strong visual impact, without some good seats it is absolutely useless to cut and destroy a nice kit. So first thing first. I said to myself: if a can do some nice seats, i will go on. Otherwise i'll do the Fiat 500 out of the box. So i made a frame in brass rod and i made a first trial. I just took some wire and wrapped it around the frame. This is the result, shown together with the original seat. It was immediately clear that this solution was too simplified and was lacking visual appeal. So i tried a better procedure. I crossed the wires, in the same way of the original seats. I prepared just a small part of the seat. In this case the wire was completely out of scale and the aspect was very poor. The sewing thread also was very furry, really ugly to see. I went shopping for a better wire, but i faced the same furry aspect. I received a lot of suggestions: the member of a local forum suggestd many different solutions, such as welding wire, nylon fishing line, dental floss ( ! ). At the end, a clever friend told me to try the wire which is used by navy modelers for the intricate spider web of wires on sail ships. This was the right one, The appearance was less furry and the wire itself was easier to handle. I used wire by 0.75 mm for the vertical threads and 0.5 mm for the horizontal ones, crossed on the seats using a big sewing needle. At the end this is the result. Far from perfect, but this was my very best. It took six different trials for the driver's seat. Once learned the trick, the other seats were easier to make. As i said, far from perfect, but once you see them inside the car, they are very nice to look at.
-
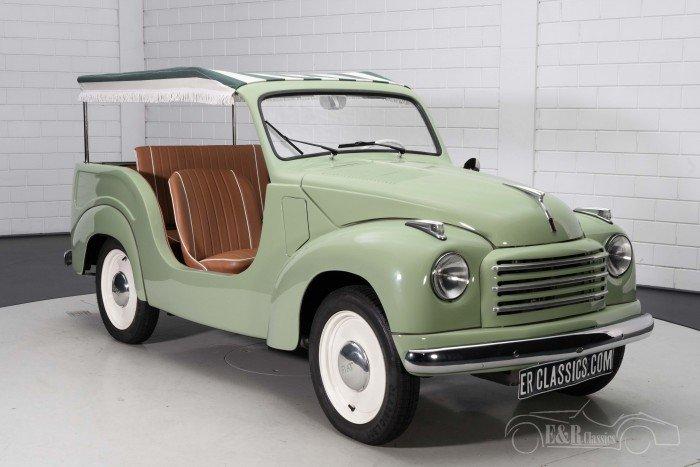
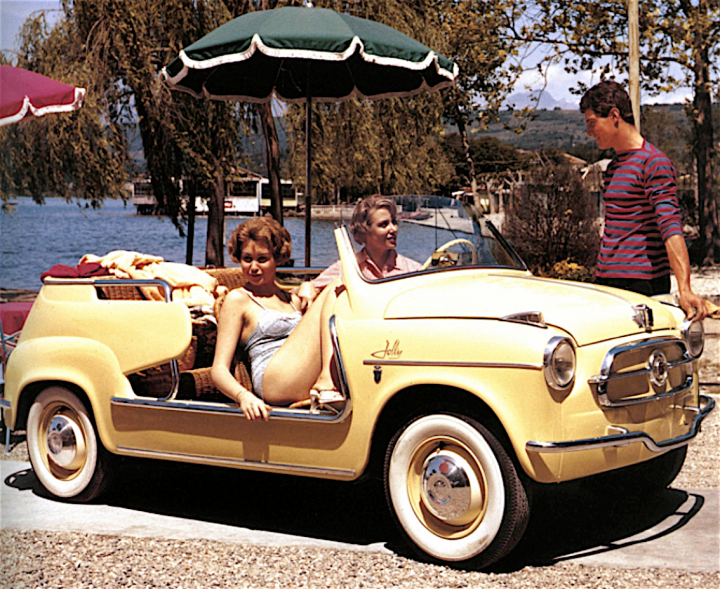
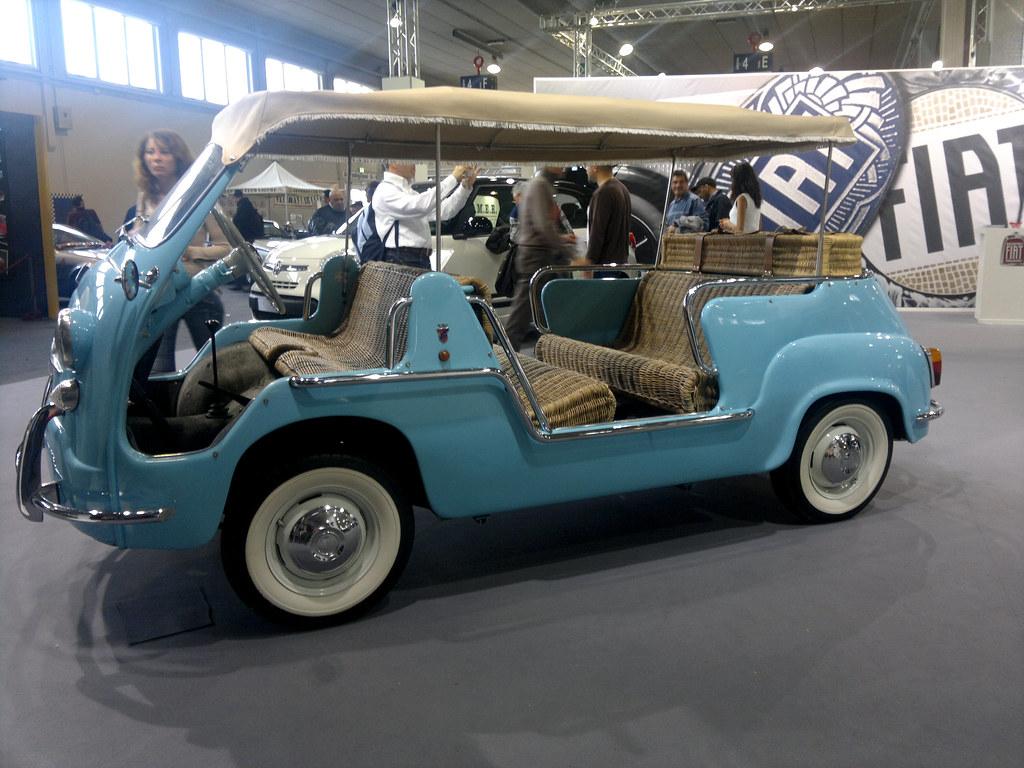
The fifties have been a golden period for Italian coachbuilders. The wealthy people and the celebrities were eager to show themselves onboard Gran Turismo cars and names such as Pininfarina and Bertone were more than happy to build and sell their gorgeous bodyworks. One of these firms, Carrozzeria Ghia, built some very special cars on humble mechanics. These cars were nicknamed "Spiaggina", which you can freely translate as "small beach car". The Spiaggina style was quite simple: Ghia cut some small cars, took away roof and doors, replaced the seats upholstery with wicker, more suitable if you wear a wet swimsuit. One of the first Spiaggina was based on a Fiat Topolino Giardinetta. Other popular ones were based on the Fiat 600 sedan and on the Fiat 600 Multipla, whose larger internal space permitted to allocate two bench seats. These funny beach cars were popular at sea resorts. In places such as Ischia or Taormina they were used as hotel shuttle cars or were available for hire. One of the last and the most popular of these cars was based on the Fiat 500. This small and inexpensive car was easily transformed into a cute luxury item. Called "Jolly", the funny car was very popular, even if the price was more then twice the price of the original Fiat 500. Many celebrities were seen onboard the Jolly: amongst others, Prince Rainier of Monaco with Grace Kelly and his family. The Jolly was exported to the States, with some strange bigger lights needed to comply with your rules But let's come back to scale models. Italeri is producing a nice 1/12 model of the Fiat 500. So I said to myself: I will cut the body and I will build my Spiaggina.
-
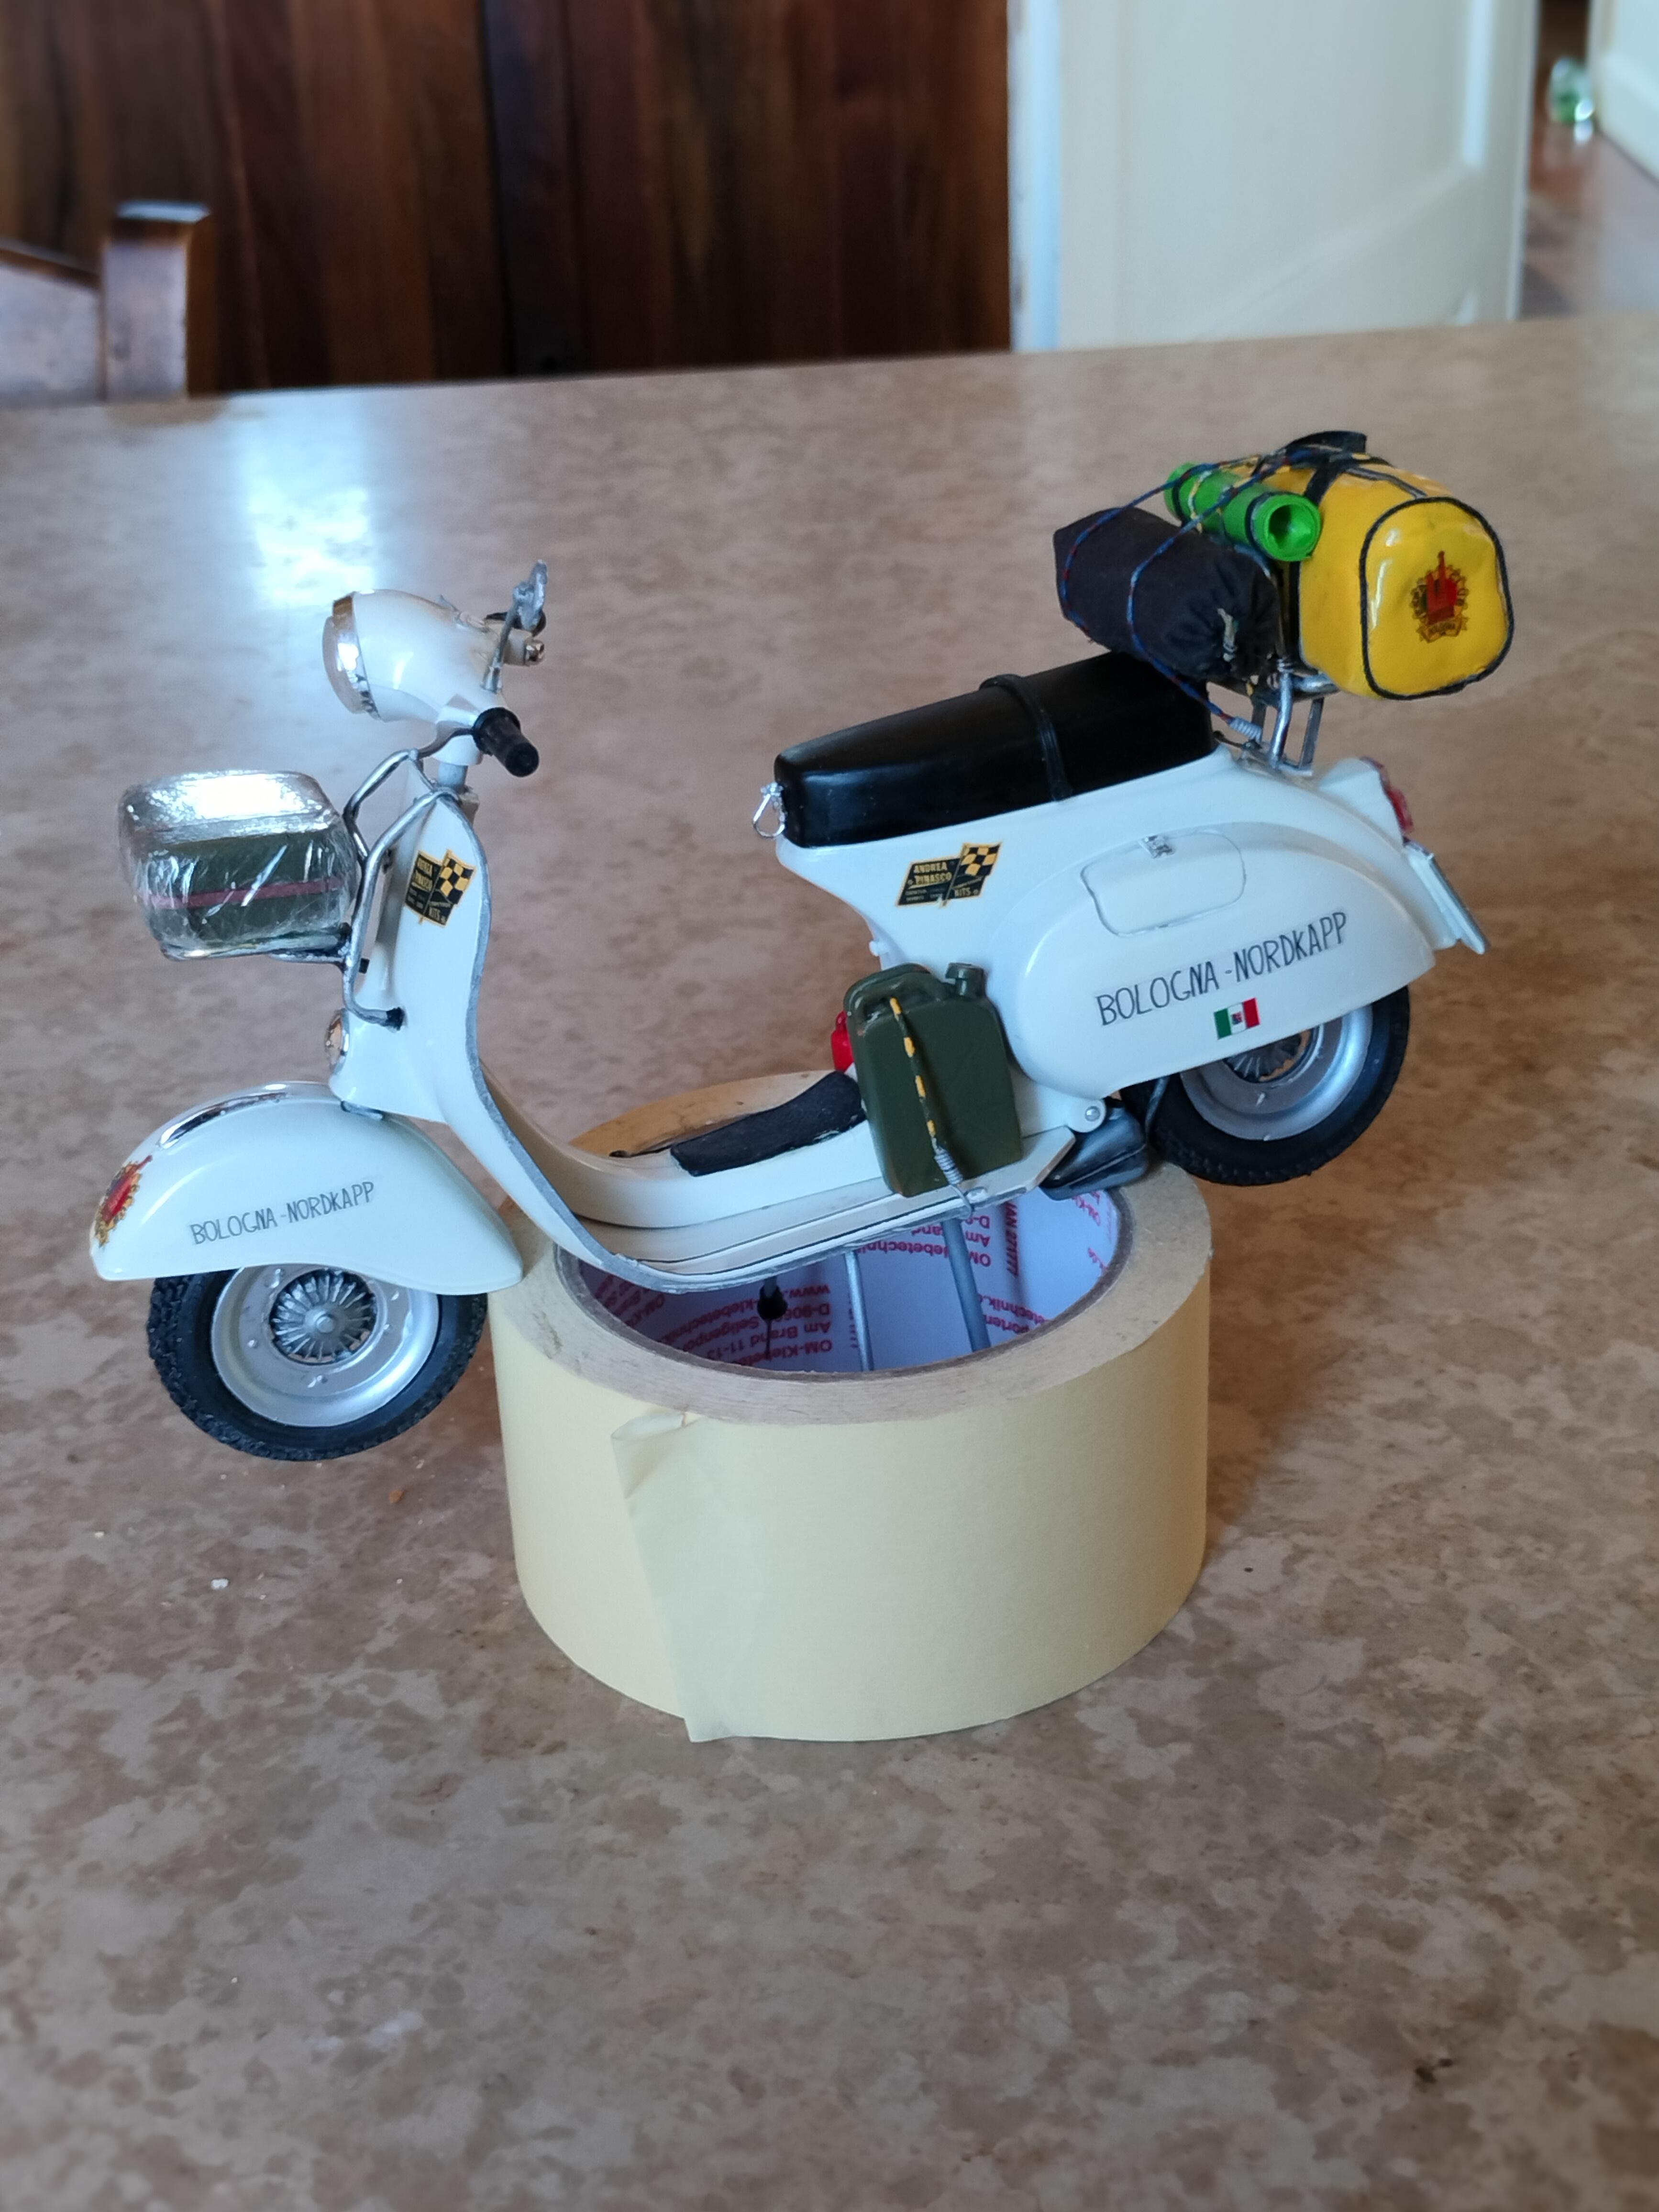
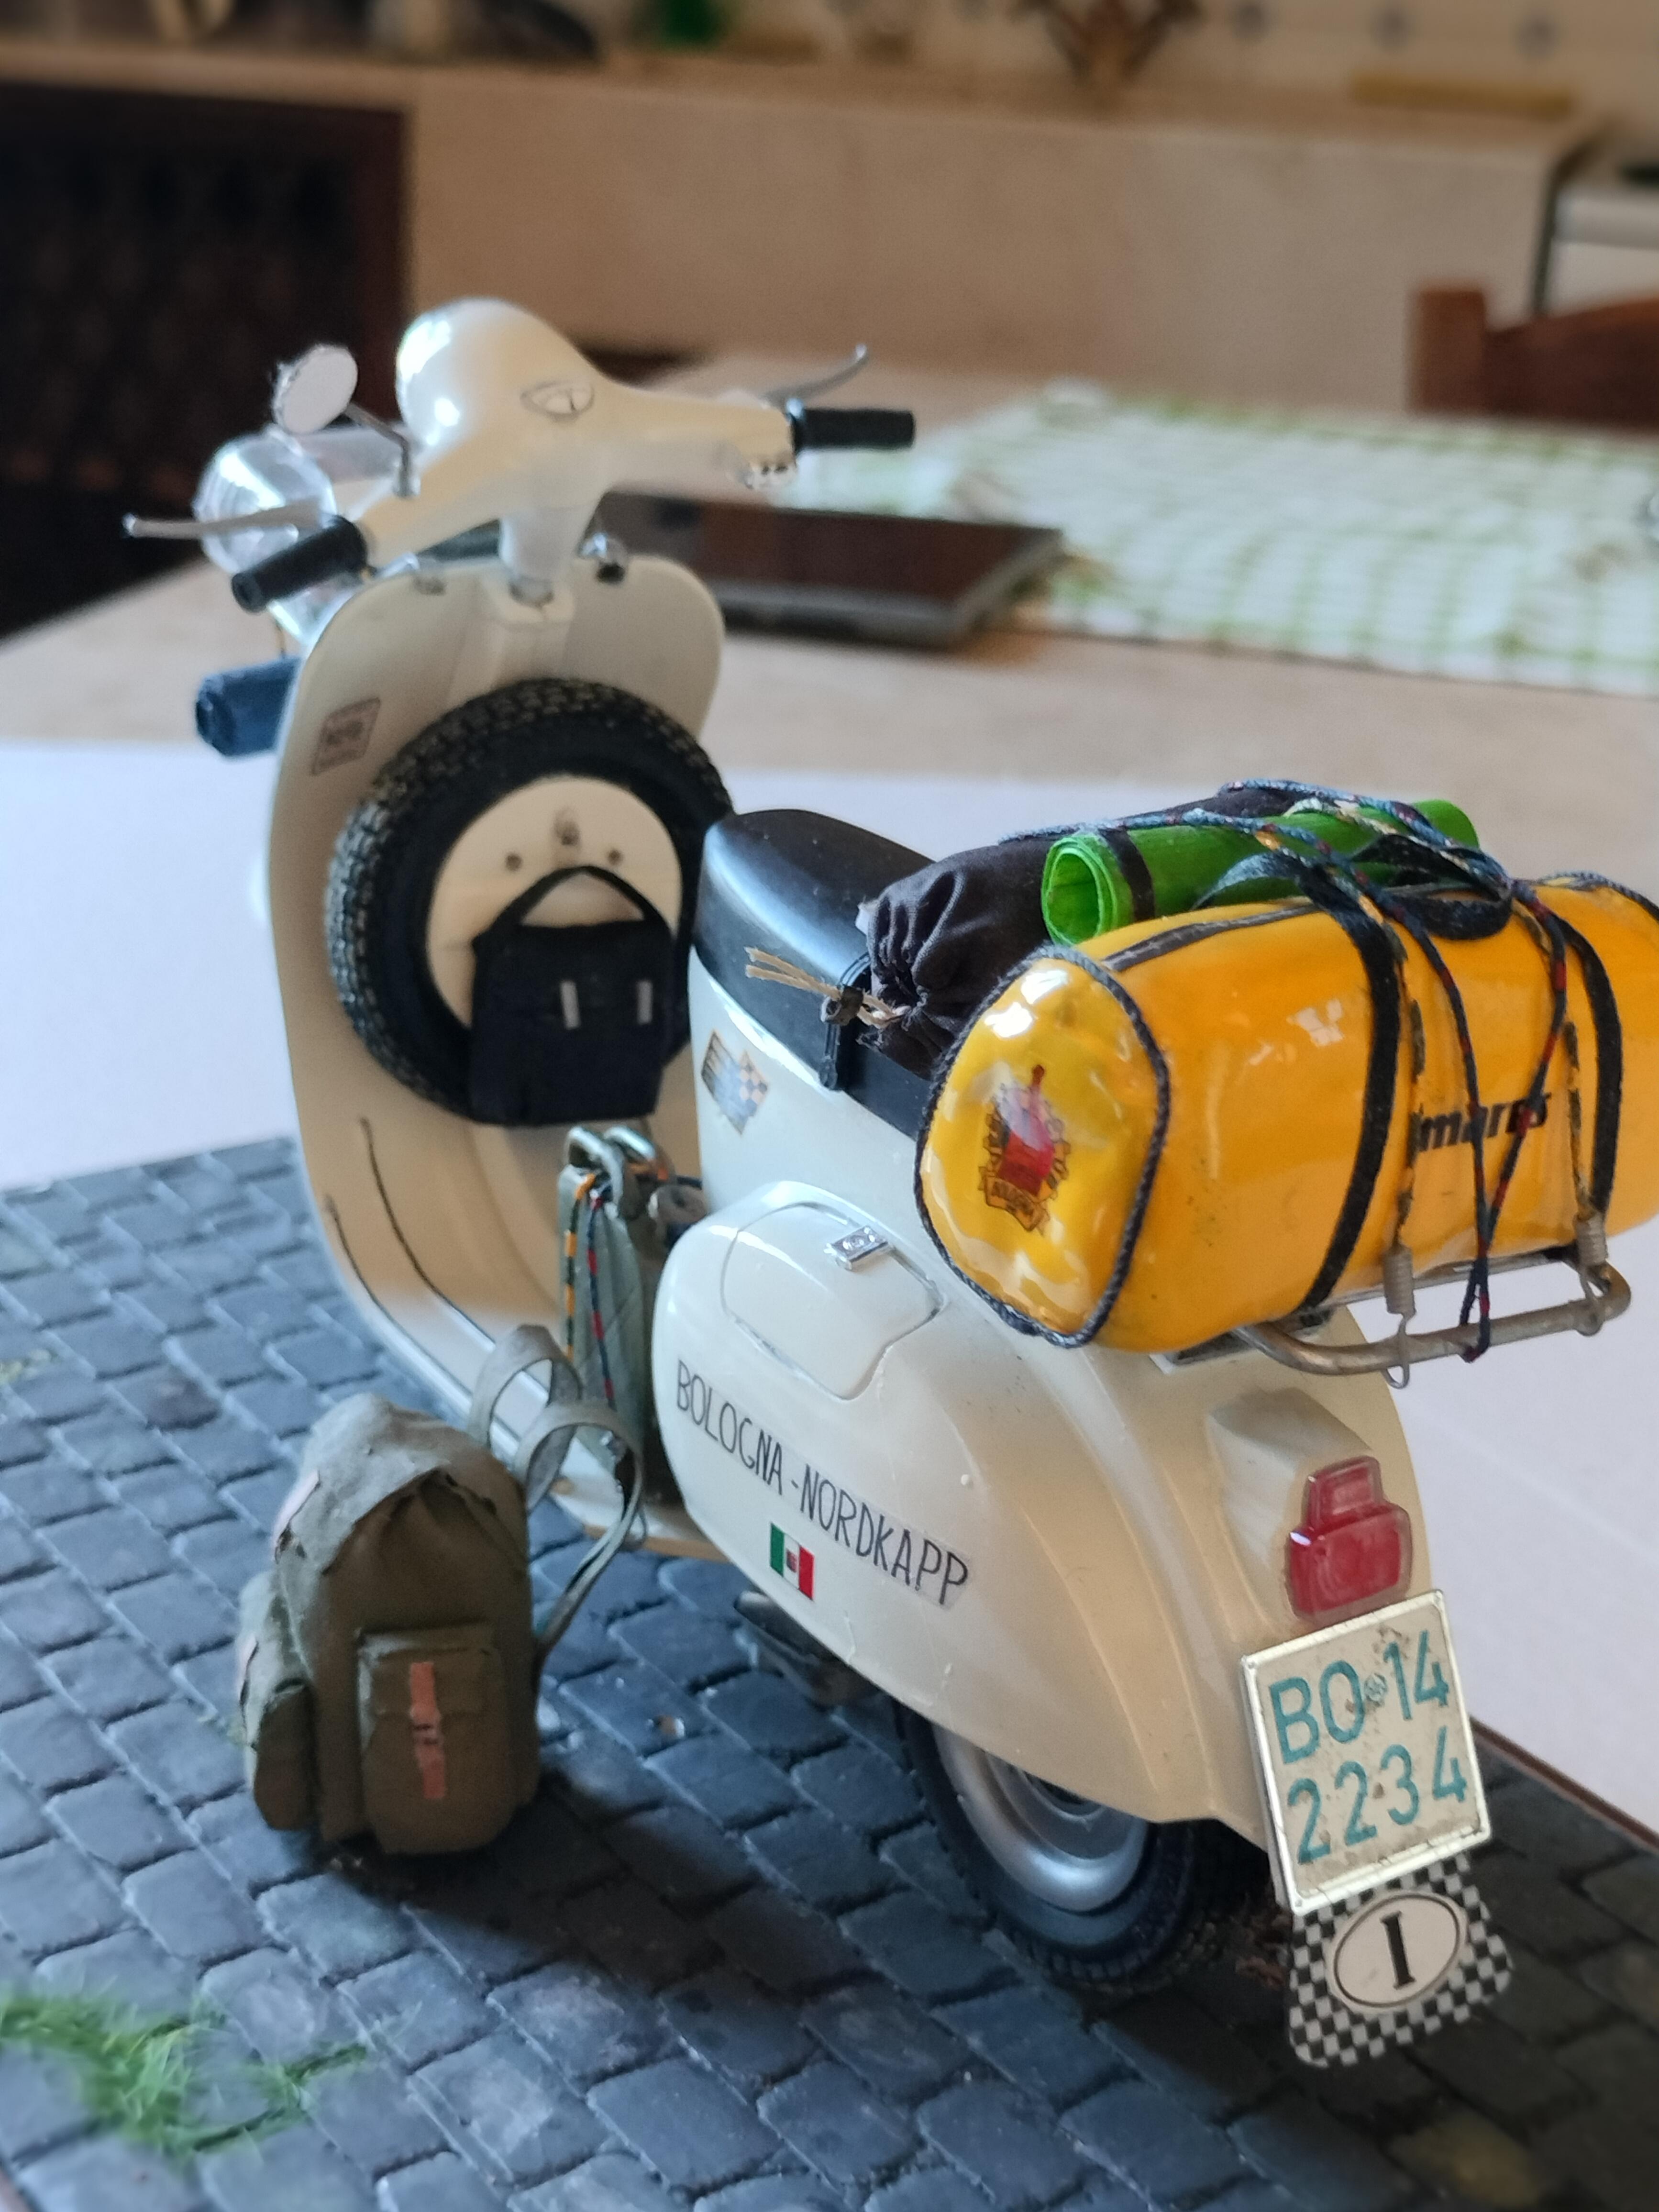
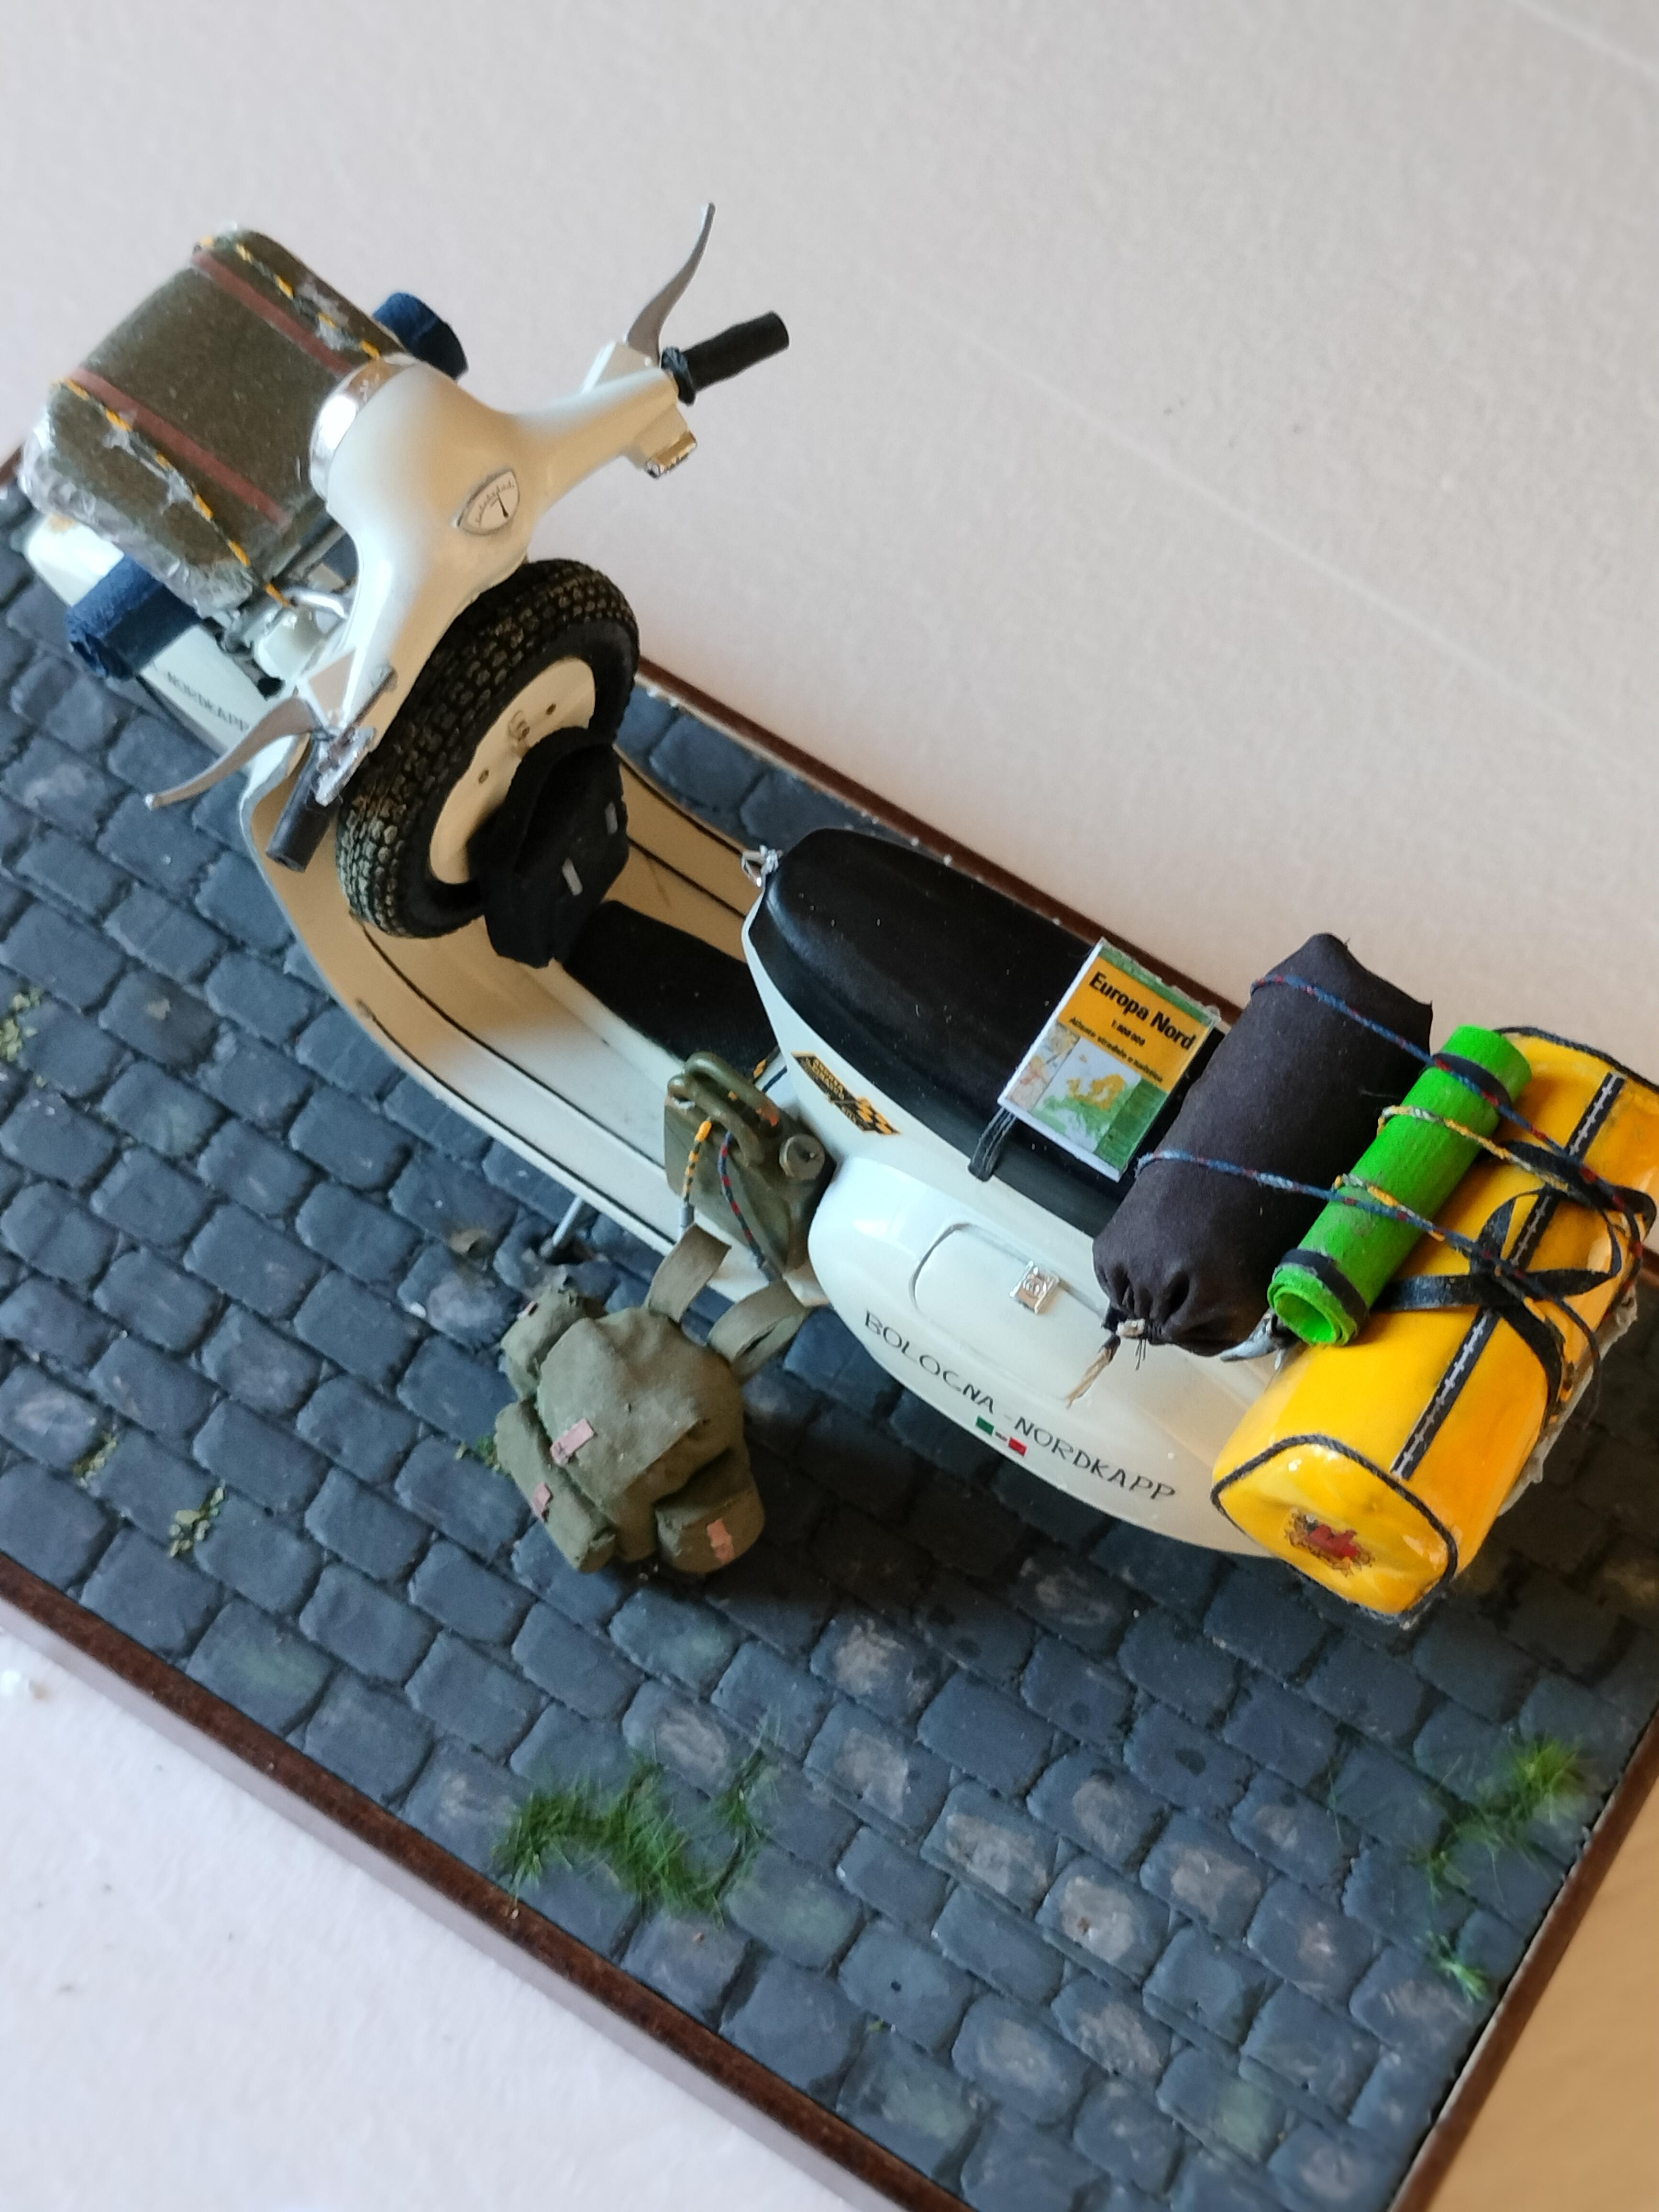
Now we are near to the end of this wip. My Vespa is fully equipped, it's time to prepare the luggage. Of course, self built. One bag go on the front rack and is covered with a nylon sheet. One big waterproof bag plus some other items go on the back. Other items are one small canister for two stroke oil and a bigger one for gasoline. Near the scooter there is a backpack. My driver will keep it on his back during the trip. Under the plate I put a mud flap with the International Italy sign. That's all. My model was appreciated and received some medals in various national contests. I hope you too will like it.
-
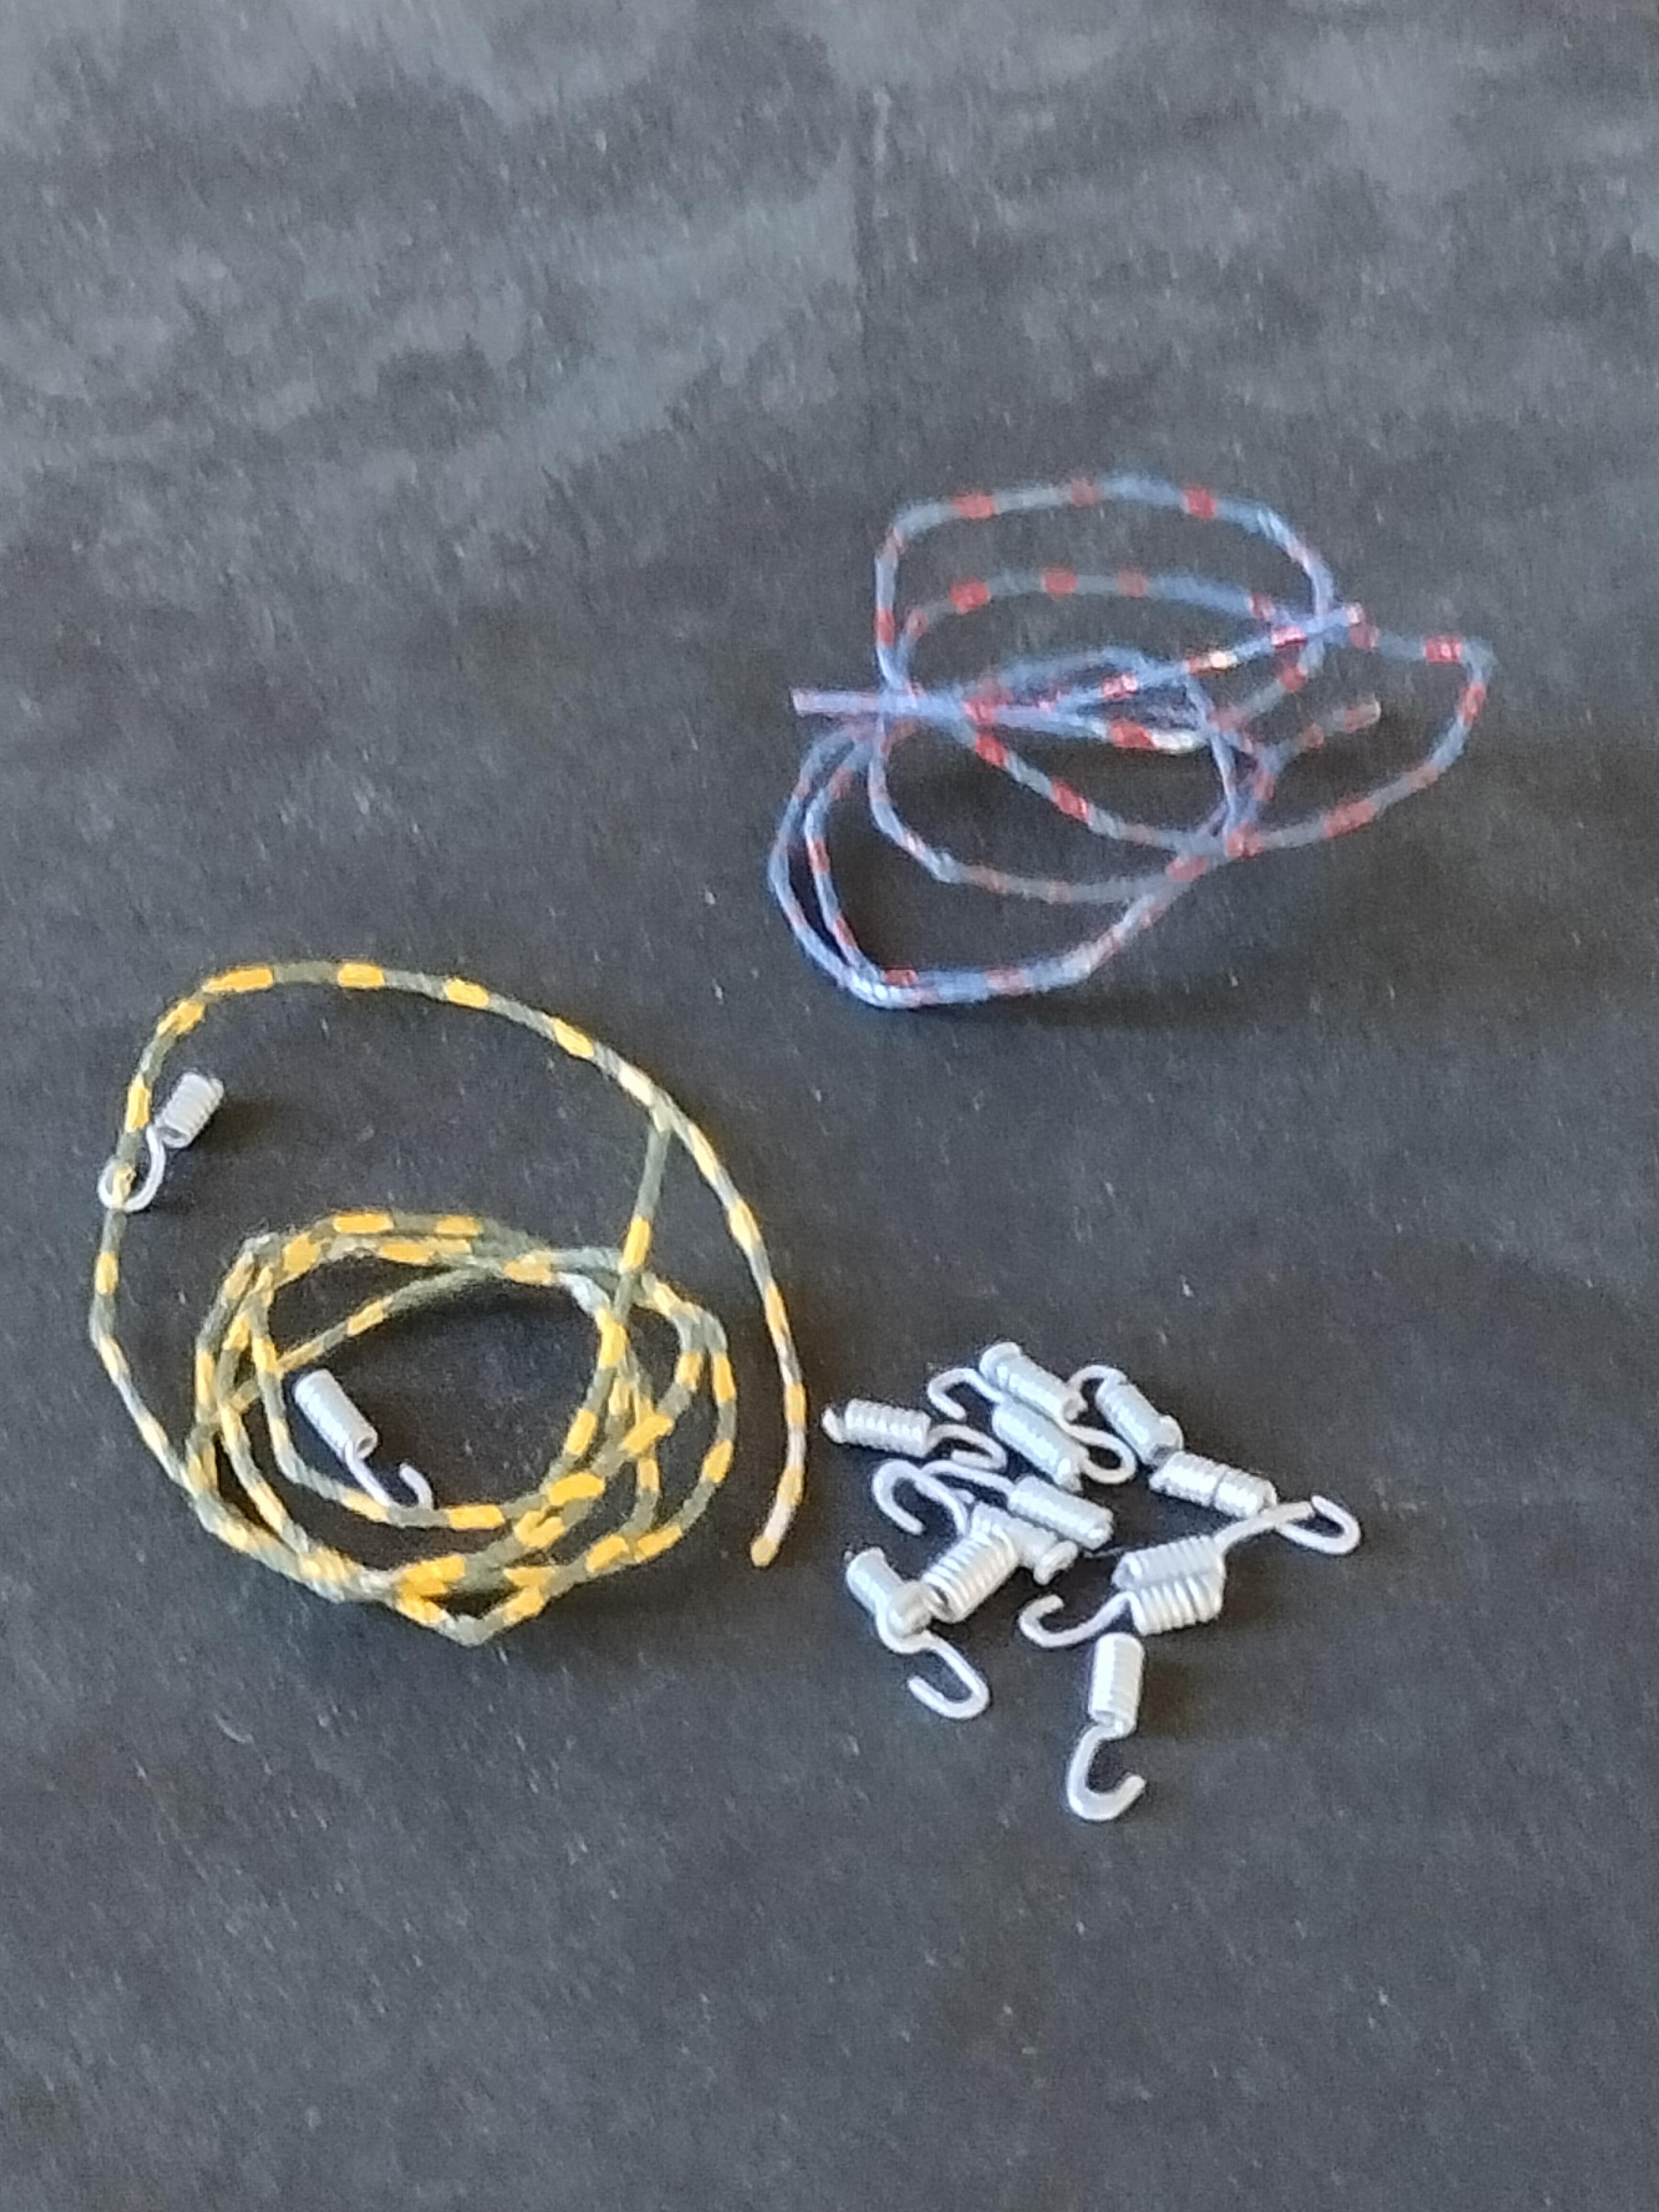
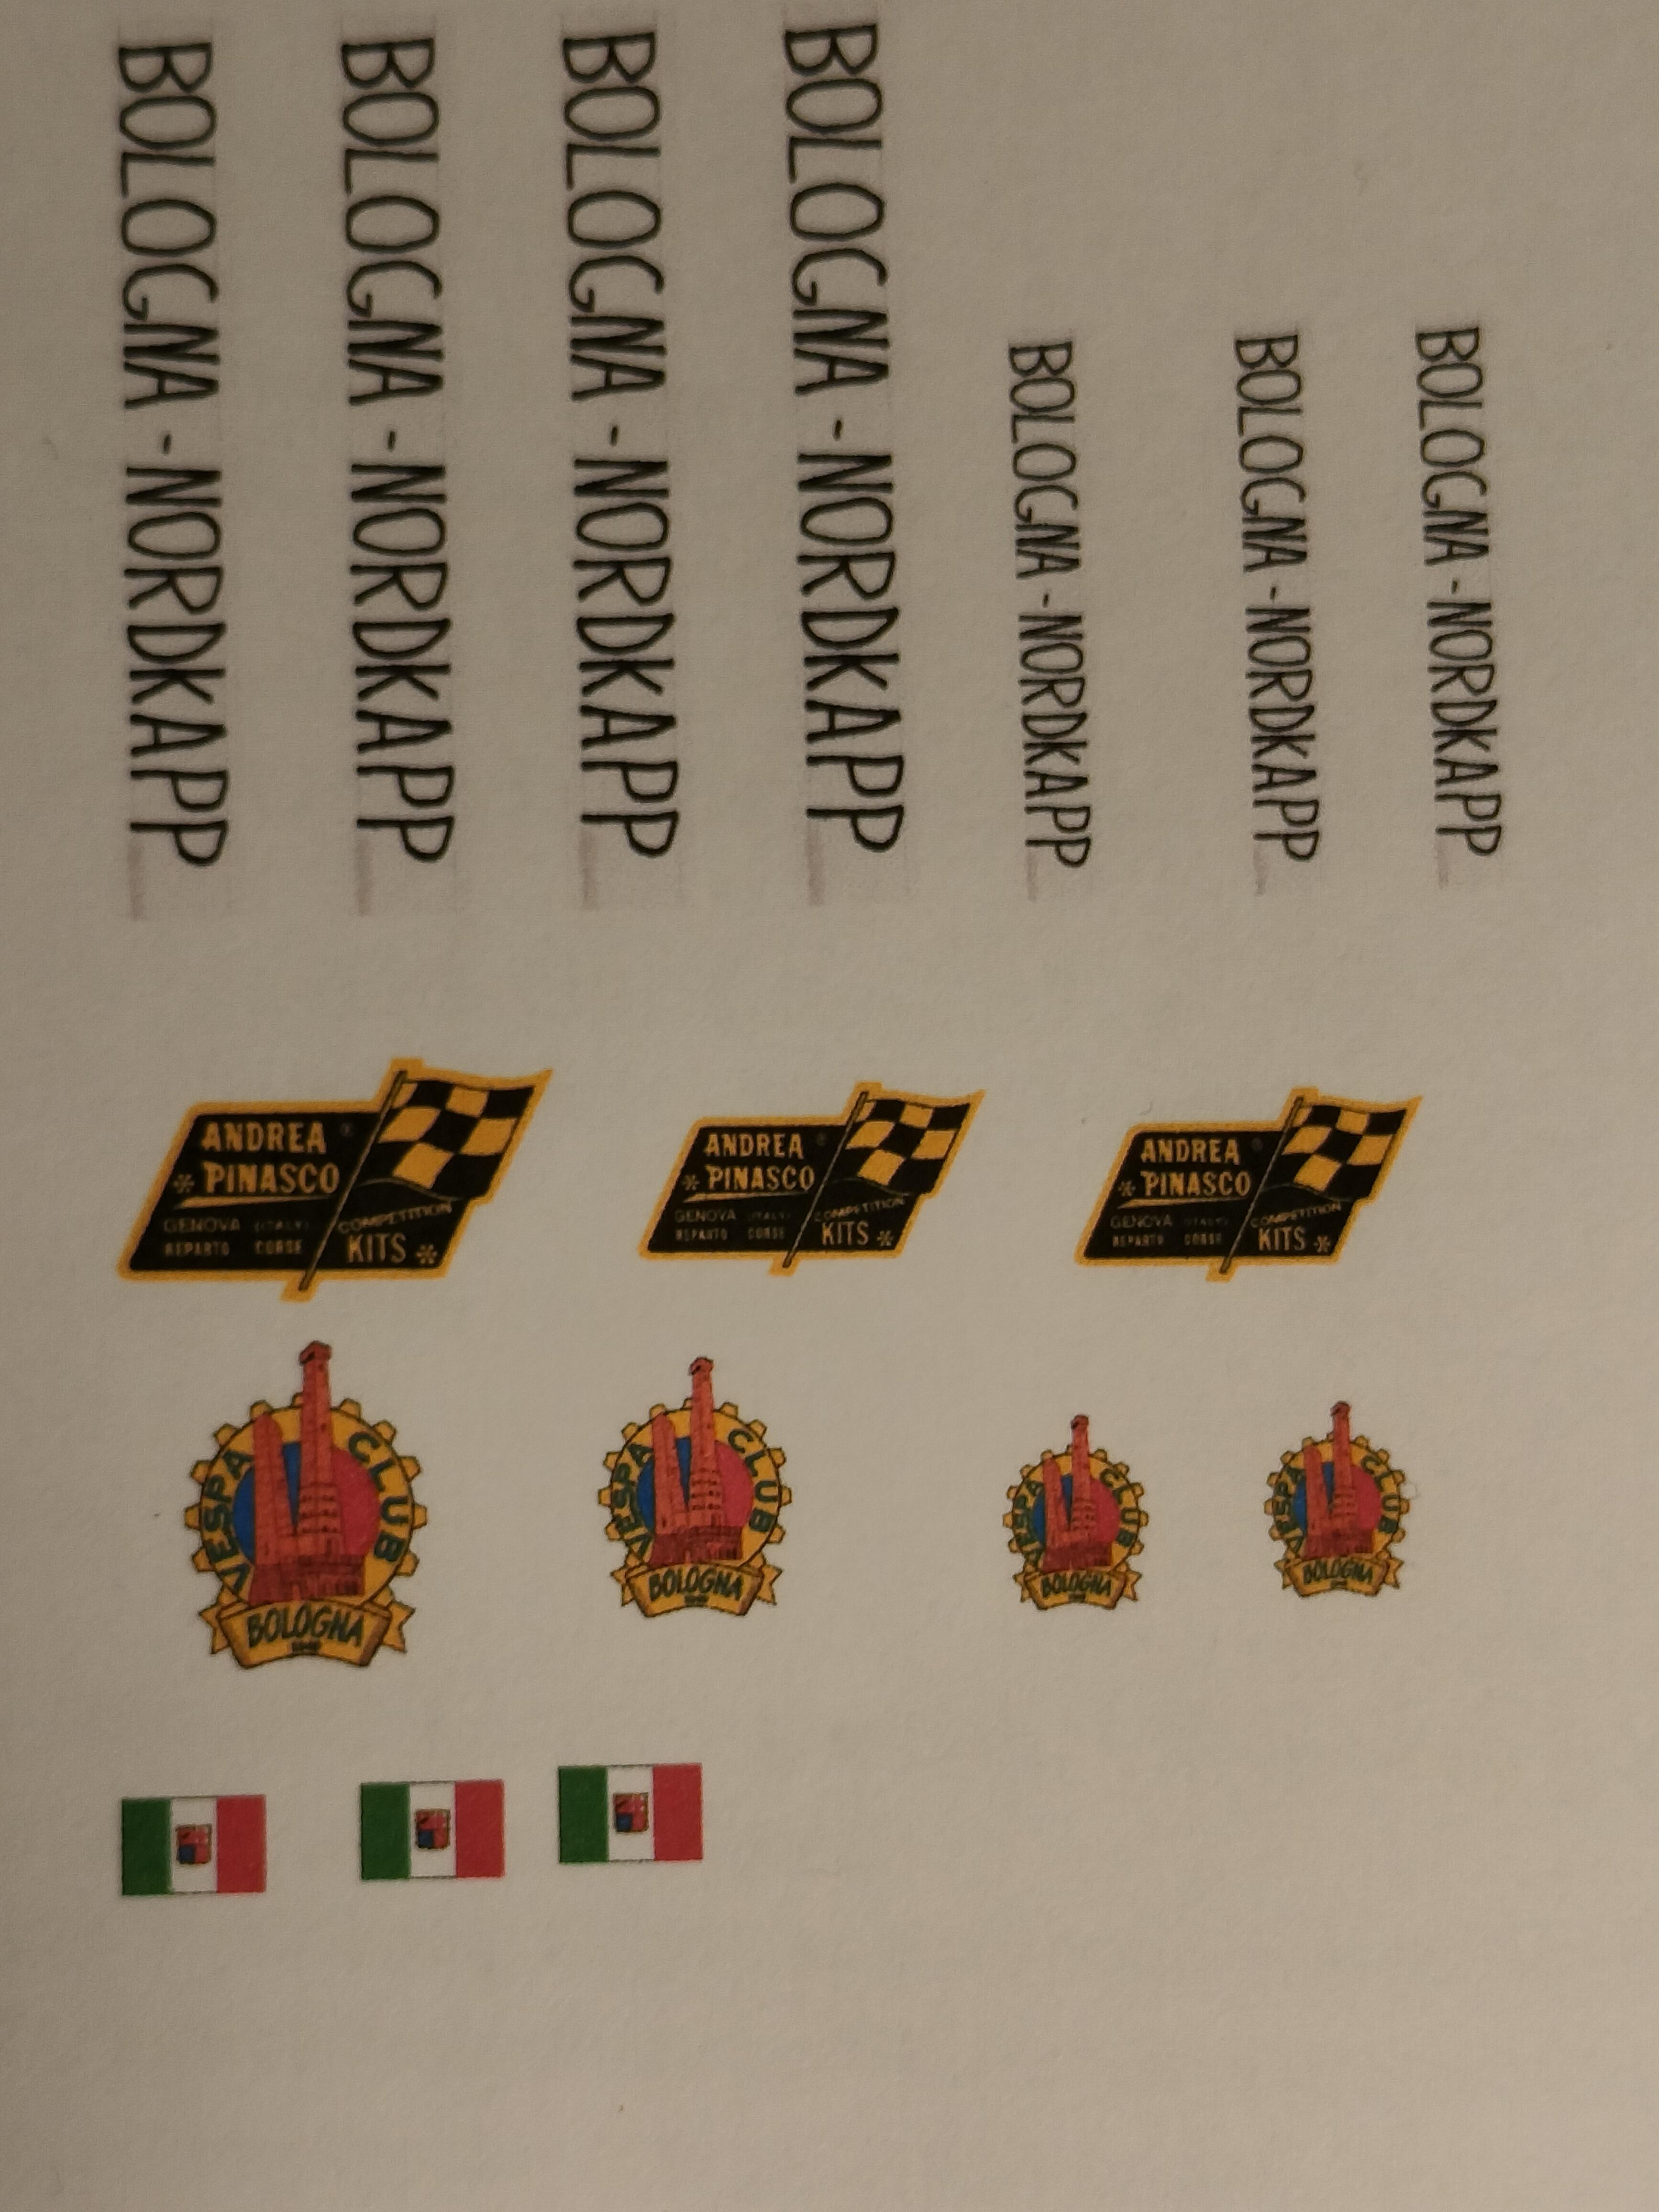
Proceeding with the model. I produced some bungee cords and a base . The base is made out of polistirene and Is engraved to reproduce a stone paved road. Also I made some decals . A sign "Bologna - Nordkapp", the logo of Bologna Vespa Club and the logo of "Andrea Pinasco" well known seller of tuning parts for Vespa.
-
First of all want to apologize for my poor English, hope my explanations will be clear enough. Now it's time to prepare some equipment for all the camping gear, clothing and so on. I built two luggage rack, front and rear, based on autentical vintage model. By the way, we are in the seventies. The racks are made with brass rod (1.5 mm) tin soldered. Now my Vespa is fully kitted.
-
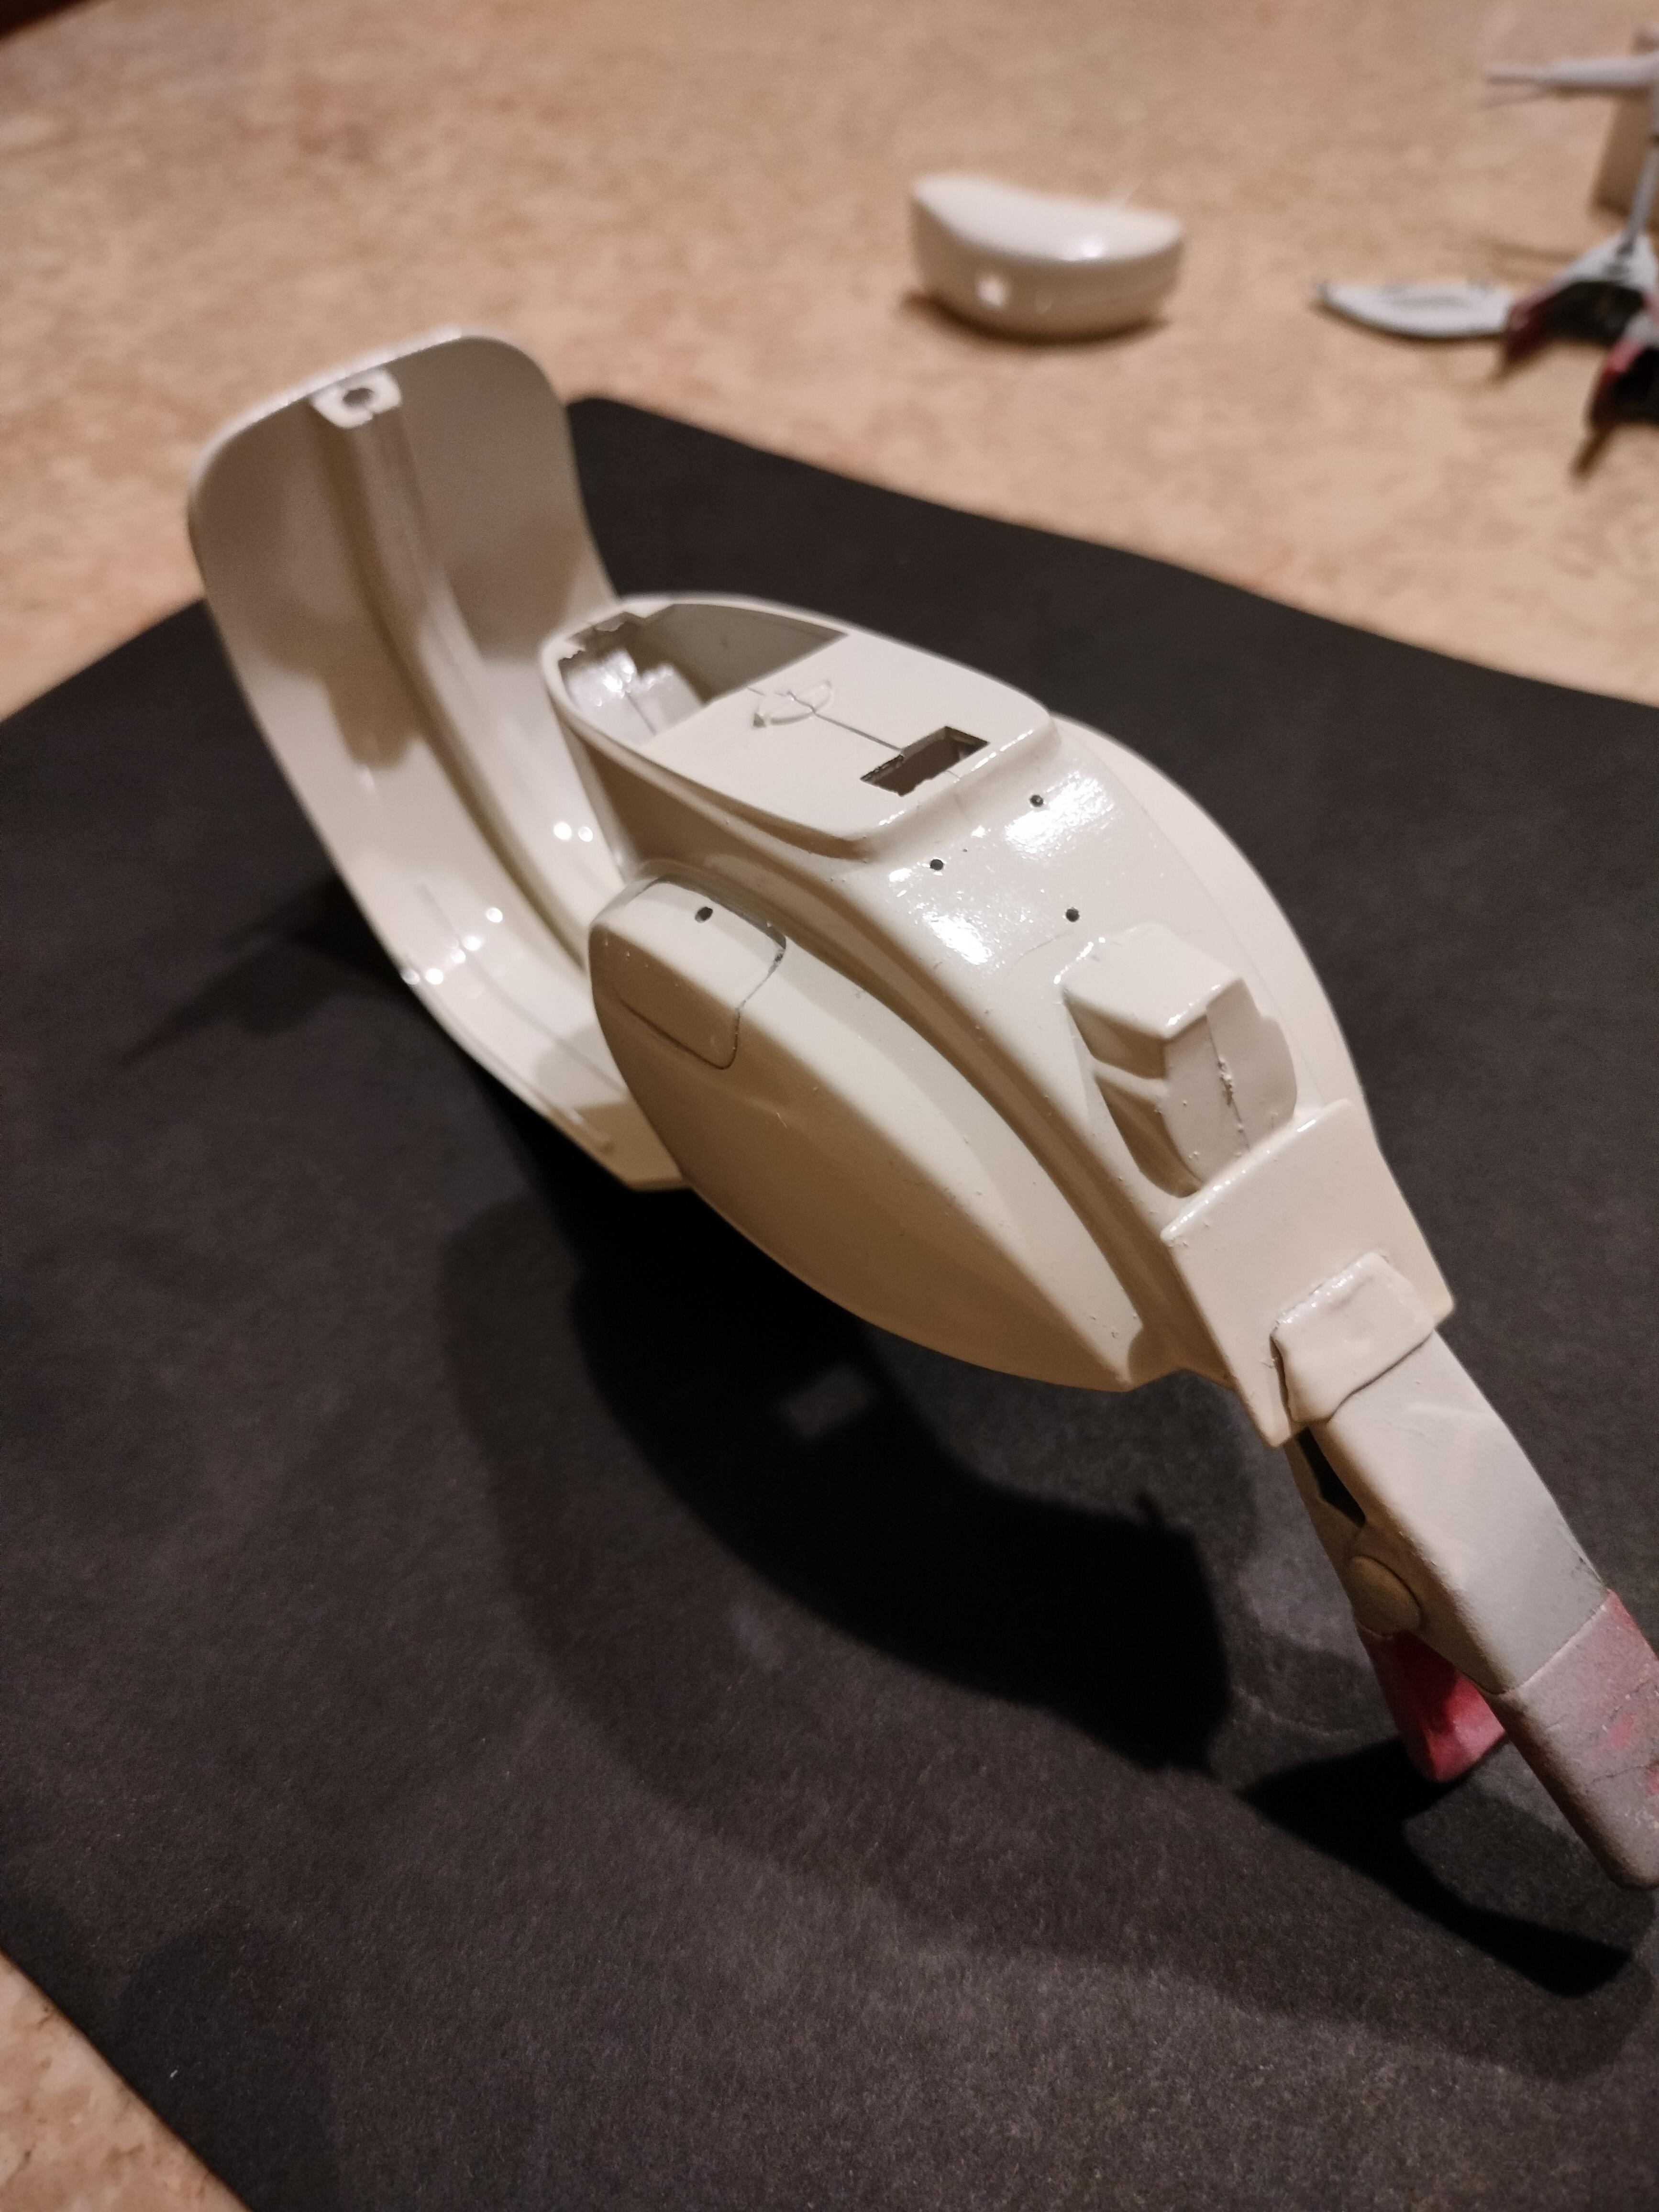
The Vespa Primavera is a rather unusual motorcycle in the States. On the other hand, this small 125 cc scooter was very popular in Italy, about 220.000 were built from 1967 to 1982. Thanks to low purchase price, low consumption and simple mechanic many teenagers were happy to drive around town with their girlfriends. I decided to build this model thinking to many brave souls who used this scooter for long voyages. My fictional teen actually is ready to leave from Bologna to North Cape, more than 8000 kilometers round trip. The starting point is a kit from Italeri in 1/9 scale. The kit is quite simple, but the scooter itself is a simple machine: a pressed steel body, the majority of the mechanical parts are well hidden. I completed the Vespa put of the box, sprayed with Tamiya Racing white. This is a light cream white, very similar to the original colour. Once the kit is completed, I will begin to prepare the necessary equipment for a long trip.
-
Good day to everybody. My name is Carlo and I live in Ravenna, on the Adriatic coast of Italy. I am retired and enjoying our wonderful hobby. All the best.