
torinobradley
-
Posts
645 -
Joined
-
Last visited
Content Type
Profiles
Forums
Events
Gallery
Posts posted by torinobradley
-
-
I will now. I don't have the mag here so I didn't know who created the gem. I will do so. Thanks so much!
-
In one of the last MCMs, there was a beautifully detailed and weathered tractor. It used mylar strips for the cooling veins for the radiator. Anyone know of a souce for such a thing? The radiator came out very realistic and I hate kit radiators and don't much like the photo-etched faces either.
I thought about making some sort of press but if there is something available, there would be no need.
Thanks in advance!
-
I would have to say the amount of planning that goes into a build is very dependant on the subject. Examples in my recent projects are my Boyds Smoothster took virtually no planning other than picking colors, while my Grand Sport and Penske L88 have lots of planning. Some projects, I'll start by opening the box and others will start with an idea sketched out on paper or maybe test-fitting a few parts together. Other projects take a lot of time researching, gathering parts, test fitting, buying part-doner kits/books/parts/reference materials, etc...
Sometimes, the research is the only modeling I get to do.
I, like most of you I believe, have already built the kit I'm looking at a half-dozen times in my head before I actually snap the first piece off the sprues...
-
How does the Chrysler Turbine fare accuracy wise? I was impressed that it had molded springs that were springs and spindles that looked like spindles instead of pegs with a hole for an axle. I've seen Bill's build up of it and was also very impressed. I know it takes a lot of finagling and finesse to get it together, but what about accuracy?
-
It's looking pretty good so far.
Your not the only one to keep track of your work. I started doing that with my latest build. I wanted to see just how much time I put into building a model.
I want to do one of these in a black over graphite with color keyed trim, wheels and bumpers. Maybe some type of fuel injection on that 429. Can't wait to see how your paint turns out.
Oh, and the last one of these I did was way back when it first came out. Took it and the suspension from the 4X4 Ramcharger and made a flamed blue monster Mustang...

-
I love the boneshaker. Awesome job with the paint!
I have several of these as well and hope to someday get around to redoing a few. I have a couple of the old Johnny Lightning T Streetrod kits in this scale and they are great because they come with a lot of extra parts. Might want to try and find one. Was planning on trying a little mix and match with them (motors and wheels) and see what I come up with.
-
I'm scared to ask about the former paint job on this car...
-
A quick search reveals a lot of Fords, Chevys, Dodges, Macks, Marmons, Mercurys, Whites and Internationals but no Petes... Maybe you can use one of them as a starting point. Here's the search:
http://www.rocketfin.com/resin_search_results.cfm
Put COE in the search box.
-
There are 'bad' drivers everywhere. I live down here is San Antonio, Texas and have more than my fair share of stupid driver stories. When they get ice, sleet or snow, they close the city, including the highways. That don't stop 'em. The slow still drive slow and the fast still drive fast, at least until they hit something else which tends to happen with not-so-surprising frequency. A few years ago, I was driving up to an overpass exchange during a hard rain and thought there was a major accident all the way across both sides under the overpass. All I saw were flashing lights. As I got closer, I realized it was just a whole lot of dorks (for lack of an explative) sitting, on the higway, under the overpass with their flashers on, blocking traffic going both ways hiding from the hail that was only marble sized. My horn got a lot of use that day.
Then, there was the one car airial acrobatic stunt show I saw when the roads were iced over and the freeways were closed. The lady was driving along and talking up a storm (pun intended) to whomever was in the passenger seat (as evident by the turned head and exagerated hand gestures) and heading at high speed toward the barracade barring entrance onto the highway. She would have plowed right into it if her passenger had not pointed at said barracade, causing her to do a radical, last ditch effort to miss the barracade. The car swerved right, into the ditch missing the barracade, then, with great momentum, swerved left using the embankment of the ditch as a ramp and cleared the entire two lane highway in a single bound before unceremoniously spinning to a stop in the median. I don't think she ever stopped talking...
-
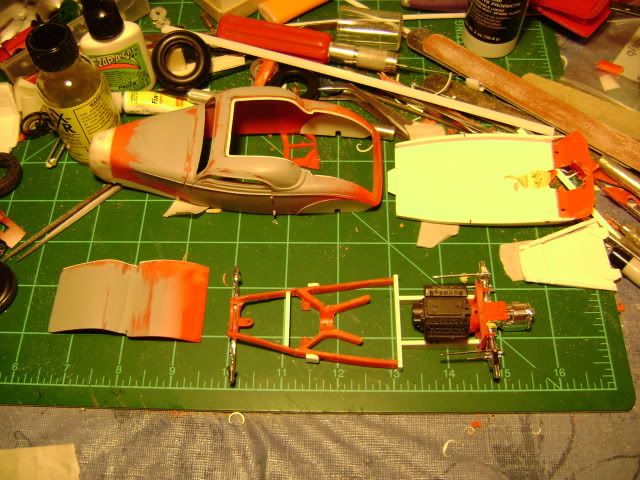
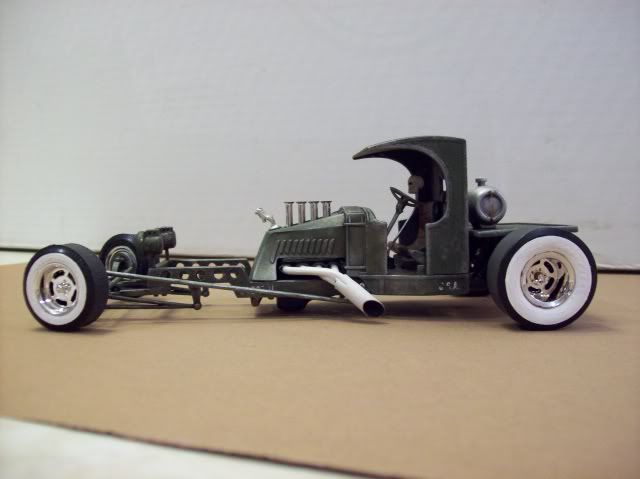
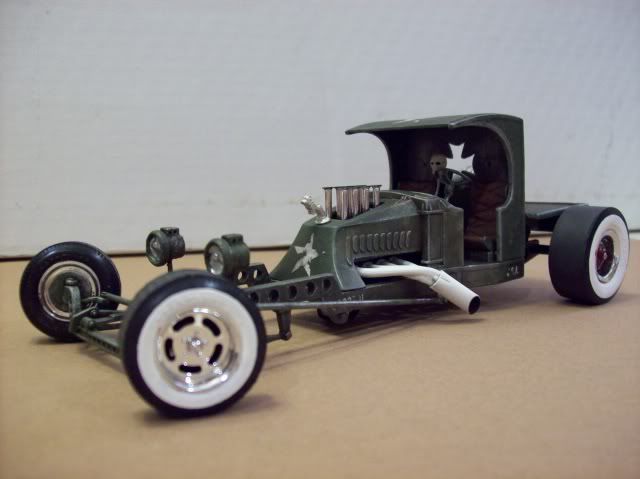
I had started one a while back for a simular build on another board but it lost momentum. Just want to share a pic or three with you guys for inspiration but it won't qualify for the build, and, I doubt I could get it done in time with all my current responsibilities.
Has an AMT Parts Pack hemi with Flamethrower magneto, rear transaxle and suspension from a GT40, pinched frame, modified track nose, full louvered belly pan, disks and tires from a Monogram Green Hornet and a lot of other bits & pieces. I'm sure I will finish it someday as it looks really cool. Was going to paint it to match the Mooneyes ones.
-
-
I did some on my Bully rat rod. I did the gloss coat where the decals would go, then put little dabs of rubber cement in various places. Then, apply the decals over the rubber cement and once dry, you can rub off the cement with your fingers. That will do the chipping. Then, using some fine sandpaper, start sanding areas of the decal, some more than others to make that area more faded. Once your happy, a coat of dullcoat will make it all look better. Hope this helps, it worked for me.
Post the results!
-
Hey Torino; thanks for the response. Where do these fittings go on the block or head? Underneath the exhaust-manifolds? Remember that I intend to convert a top-fuel engine into something that is water-cooled to race on the salt flats. Thanks again.
I believe most motors have one set of entry points where the water pump mounts to, one on each side of the front of the block, then exit points where the water passage of the intake is (where the thermostat/upper hose attaches. With the blower, I was planning on putting a fitting on each side of the front of the block, where the water pump would mount, and then another pair of fittings at the very front, top inside of the head.
This is for the parts pack small block I was using. I know some motors have original or modified water ports on the front of th e heads as well. When all is said and done, make it like you want it. I don't think you'll have much of an overheating problem in your 1/25th car, after all...
-
Graft on the front end of a 53-56 Ford F100, Throw in a few additional styling cues along the Ford lines, blown late-model Mustang power and driveline, and you got a looker. At least, that's what I'd try.
-
One of my projects is a '34 LSR with the front mounted blown SBC and my plan was to run a pair of water lines from each side down the frame rails to the radiator/reservoir with a pair of inline electric pumps. Just need to mount fittings where the water enters and exits the block.
-
Whoo hooo! I get to be the first to say...
This is your Wurst one yet!!!!
All fun aside, love it!
-
Andrew,
I just happen to have one exhaust pipe for the Ice-T. Looks to me that it would be the passenger side. If you want it, it's yours. Just PM your address.
That's one heck of a find for $20!
Thanks and thanks!
Let me check my parts stash first. I seem to remember a set of them in there somewhere.
-
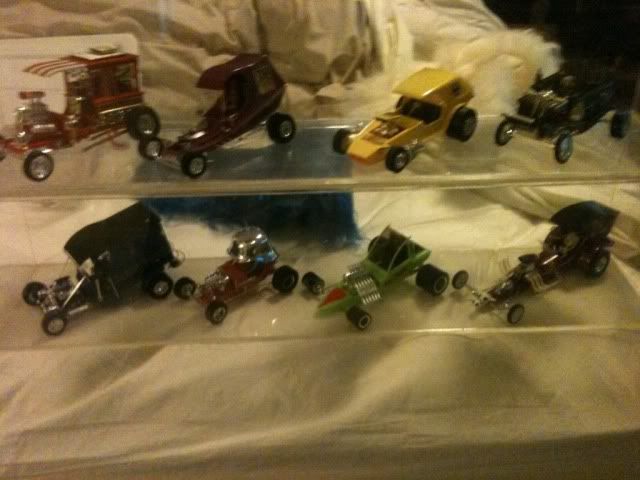
I found these on CraigsList and within an hour, they were on thier way home with me. Total price, including the display cabinets and funky fur for the bottom, $20!
Only found one date on the bottom of them and that was 1971. Most of the pieces were there and from what I can see, it is only missing one exhaust pipe for the Ice T. I'm thanking my lucky stars for this one. Sorry for the bad photo. It was taken with my phone.
-
That is so impressive that I'm gonna pack all my toys up, go home and sulk...
-
From what I can see, that little 32nd-er has more detail that a lot of the 24th/25th that are out there. Will have to see about picking this one up soon and will definitely be watching along! Looks like this one is on it's way to a thing of beauty!
-
United Kingdom...
While "weald" means something else over there (woodlands), I'm sure it was a simple word confusion like to, too and two. We spell things wierd over here in the Colonies...
Color = colour
etc...
Did get lotz of grate I D-us and sore ses, thow...
-
I have used an ribbon epoxy to create them. Just roll it out very thin after kneading and detail it with whatever tool you have at the time. Though, the ribbon stuff is hard to find these days. Comes in a blue and yellow ribbon that you cut off a chunk, knead it until it's green and you have about 30-45 minutes of work time before it sets. I've used it to make all kinds of things including fender flares, air dams, GT350 nose (before the plastic one came out), dinosaur nose and toes, severed dragon arms, gryphons, cat tails, rats and books....
There is also photo-etched brass ones from Aber as well as resin ones (MIG and TIG) on decal film from Archer.
-
I don't know about you guys but when I see all those custom parts on models or drawn in the instruction sheets, I WANT THOSE PARTS! My mind reels with what I could do with them.
Bad model companies! Shame on you for denying us of what some of us consider the best part of a model kit!
Does anyone know if those Lucas lights listed in step 10 are still in the current issues of that kit? I have some chewed up ones in my parts box from somewhere and would like to see if they would be a possible fit for my Penske Vette. If so, I will have to go dig the kit out of storage.
That, or is there any other kit that has those lights?
-
Okay, stole some time to do a bit more than grok the kit and here's where I got.
Am planning on using the little fishing lure bearings for the light buckets and some of them have this little 'tab' attached to the hole. I looked at it and saw it looked like the center portion of the Lucas lights so with a little test fitting, this is what I got...
Cut the molded-in light covers out (very tricky with the bottom grill surround) and filled it with plastic.
A little preview of the headlights.
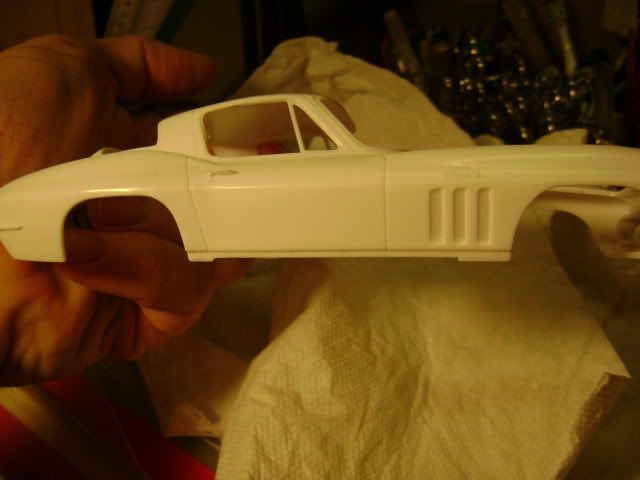
I had previously trimmed the rocker pannel to match the real car.
And this is the nose I cut off another body and am in the process of filling the headlight covers so I can vacu-form clear plastic over it and make fairly thin covers.
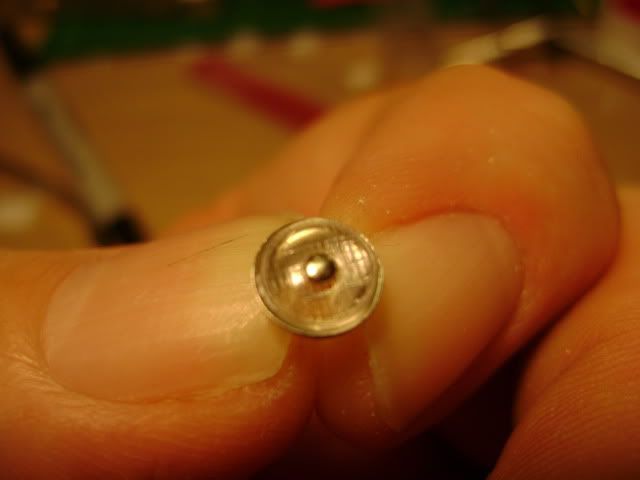
Still doing research and gathering parts. Gotta find a photo-etched alternator fan because I found two watch parts that fit together and look like the deep-groove pully. Will order it from MCG and get a nice fan and alternator bracket to boot..
As always, comments and questions welcome and encouraged.


Deltawing Project 56 for Le Mans 2012 - engine area complete - Oct.20 update
in WIP: Model Cars
Posted
Awesome project, great subject and great start! Will follow this one for sure.
Now, about the car. Maybe I'm too old-school but I don't currently understand just how this thing is going to turn. With no weight and no down force, 23 degrees of steering and only 4 inch tires, this thing seems like a LSR rather than a race car expected to pull a g or two in the corners. I hope I am wrong and they don't sink this missle a few feet into the first hairpin wall...