

ddonaca351
-
Posts
41 -
Joined
-
Last visited
Content Type
Profiles
Forums
Events
Gallery
Posts posted by ddonaca351
-
-
The wind-up key is priceless... nice job.

-
big wheels and tires, big brakes, big hp engine, road race style cage, and you should be good to go....
-
Great lookin 'camino.
My grand-dad had a comp orange one, just about like that... (396 hood though instead of the cowl)
Good lookin early flopper in the background too!
EDIT:oohhh yeah, +1 for what Mike said, hammer the lid.
-
For the wood trim, I painted it with Testors flat brown, then brushed some Tamiya Smoke X-19 over the brown. This is the first time I've tried this, I think it looks convincing enough.
...heck yeah, i think it looks great.
Keep up the very nice work.
-
...a 1969 Dodge Charger 500, precursor to the Daytona. This first aero car by Dodge had a flush rear window, (ala the Daytona), & a flush grille with exposed headlights, (a 1968 Dodge Coronet grille in fact), ...
That's the one, the Charger 500.
Thank you, I couldn't remember what it was called.
Thanks for the history too... always love knowing the why, when and how behind things.
-
Omg, nice looking kit.
They paint is awesome.
And the interrior is... wow, the wood and the trim on the door pannels... wow.
How did you do the wood look on the wheel and the console???
(*i think*... my memory ain't what it used to be) :
The charger came with several diff grille and window configs... the window on the daytonas was flush with the rear roof line for aero, the regular config was set back in (even a little more than this kit shows) then they also sold a charger (dont remember the model designation) that had a flush front grille also for nascar advantage (like the torino talladega). Although I think the stock grille with the headlights recessed, looks much better. They were very low production numbers, but they were out there... that may be one reason so many of the companies get the things mixed up, they just dont know which model within the same year they are trying to match (although they should).
-
+1 for SLIXX
Their classic funnycar decals are first rate.
Try this place , this is where i get most of my decals from and never had a problem with them falling apart.http://www.slixx.com/catalog.htm
Good luck.
-
Good call.
I've also had good luck with small diamater safety wire. Its bendable, comes in different sizes (to fit your scale) and it can be cut with any old wire snippers (or scissors as long as you dont tell the boss...
)You can get it at most good auto parts stores.
-
I use the red and blue over fittings painted aluminum to give them the anodized look.
Dang, good call... hadn't thought of that.
Thank you...
-
I just started using them after reading about them on here.
Have worked ok so far, but I did have the black bleed on a tan interrior after aplying clear over it... I might not have let it dry long enough (only like 24 hours).
Found the silver ones at wally world, they've been working good for wipers and gauges, etc... so far.
-
Great start to it... and wow is that sucker ever ORANGE!!!
It reminds me of Twig Ziglers pizza haven funny car.
-
###### you guys are good;
The right color on the manifolds, the right color on the motor, the floc work, the speaker grils, even the rb 90 deg filter mount... and the foil work, wow (i never have been able to do that right) in some ways looking on her is inspirational, in others it's depressing LOL
Great job on the charger.
(my first car, but mine was green... i still miss that car)
-
lol... man ya gotta be quick to help out around here.
I also have a ta hood for it if you need one.
Dave
-
I'm thinking about getting a '10 GT convertible in 2010 for my 40th birthday.
LOL... me too.
My four-oh is 09', but I kinda want to wait for 2010, so that way I'll have a 70, a 90 and the 10. (an every 20 years kinda thing...
) -
* finding the same decals as the concept has
if you have any suggestions or might know an anwser to the problems/needs i still have for this build please feel free to post here
I might have a set of old T/A challenger decals in my parts box...(1:24/5), they'll be for an "old school" challenger not the new one... but if I have em' you're welcome to them.
I'll look in the morning, when I get home from work and I can drop them in the mail if you think they'll help.
Dave
-
Sorry to burst your bubble, but the 93 Cobras used SVO taillights, NOT LX tails as you answered. And to be more precise, they were 1984 and Early 85 SVO tails, as they were striped Black; late 85 and 86 SVOs were Charcoal in color. I own 5 Full sized Foxes, one being a 1984 GT Turbo (baby SVO), 3 being 4eyed.....the 4eye cars (1983-86) have the same tails as the SVO minus the striping.
Like I said... "lx STYLE lenses" [you'll note they look identical to those in my LX, with the exception of the clear turnsignal area & amber bulb configuration (also as noted)]
When I specifically talked about the "LX lenses" I was talking about GT guys that r2 their windowshades for LX lenses (since the svt lenses are $)
Good to know about the diff between the early and late svo lenses, I didnt know they changed them.
Thanks for playing mustang trivia... we now return you to your regularly scheduled 1:24/5 scale thread.
-
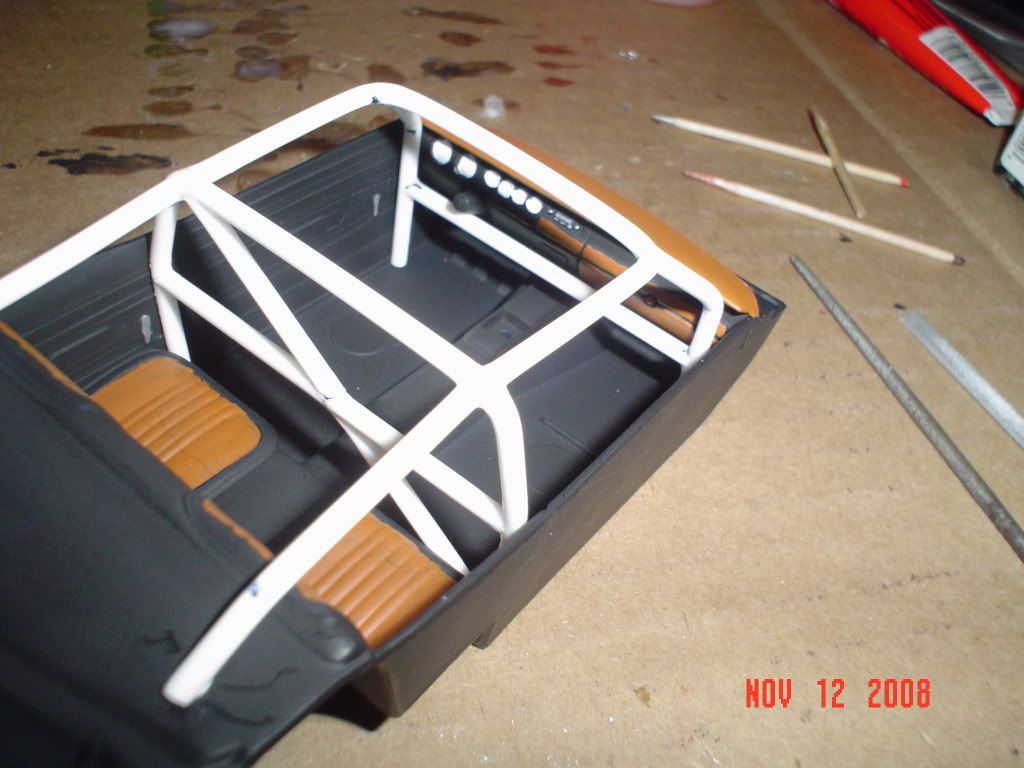
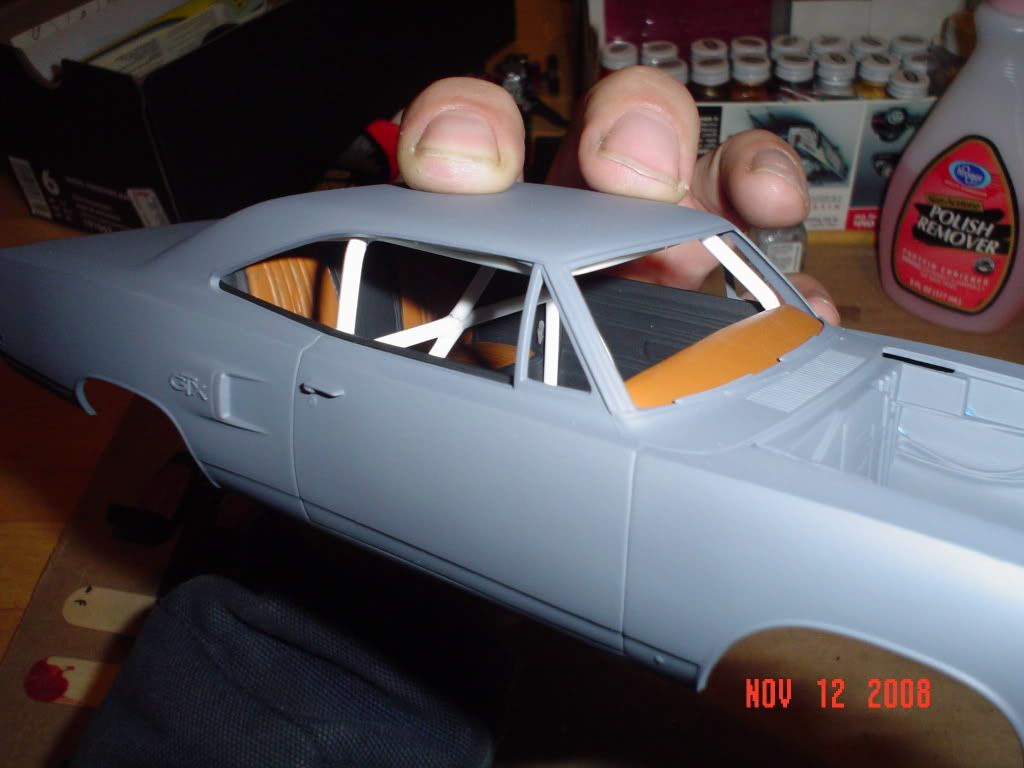
Here's one that I'm working on, in a GTX:
It's done now (the cage) but I don't have any new pics yet... it's just .080 rod, hand bent.
(it's a little large to be correct, scales out at 2"... but it's close, and the GTX is a "big" car, so it looks right)
*make sure you cut all the "bars" long by 1/2 the thickness of the material (on EACH end), that way after you notch it to fit, it is still the right length*
-
Hey guys,
Well now that I'm getting back in practice again... I decided for my dads birthday, I'm going to build him a model of one of his dragsters.
Now I think I can get through all the scratch building on it (if not I know where to ask... lol) but I'm woried about the decals for it.
All I have to go by are a some old pictures and a couple magazine articles.
I dont have any fancy graphic design software and probably wouldn't be that good with it, even if I did...
SOOO my question is:
Can a guy make custom decals with just a scanner, photoshop (or similar), and enough patience?
(and then obviously some decal paper, a good color lazer printer, etc...)
Can it have good results and if so what is my best course of action to obtain said "good results"?
Thanks in advance for your help,
Dave-
-
-
Everyone knows who broke into my shop but we cannot prove it!
lilsquirt
1 st: Prayers and well-wishes for a speedy recovery.
2nd: Go to the local wal-mart, or whatever... go to the magazine section... tear out a subscription card from every magazine they carry... EVERY ONE!!! Then fill in the persons name and address and check the "bill me later" box. Then mail them all in (no postage necessary).
3rd: Sit back and relax, content in the knowledge that all is right with the world. (repeat as often as is necessary to keep this feeling...)
Dave-
-
They look REALLLYYY good.
(espitially since it's your first try!!!!!) wow!
Just like in 1:1, work from dark to light. You can also add depth with a layer of purple or blue pearl on the early layers, and then some silver or gold over the yellows and whites later on... if you like. As with all flames, it's a personal taste thing...
They look great.
Dave-
-
wow.
<<< speachless...
(and I just learned several techniques from your pictures, so THANK YOU for being willing to show such detail about your build process... class act all the way!)
Dave-
-
I'll bet the blown elephant with BDS injection (looks just like an enderle), motivates it a whole lott better than the original motor did...
-
That is gorgeous work, no question.
Veerrrryyyy nice.
Dave-
whispering
( dont forget if the plugs are in front of the headers on one side, they are behind them on the other )


 )
)


"Choppers" new 41 Lincoln coupe.
in Model Cars
Posted · Edited by ddonaca351
wow.
i know guys who don't put that much work into their 1:1's...
amazing.