
shawnh24n43
-
Posts
23 -
Joined
-
Last visited
Content Type
Profiles
Forums
Events
Gallery
Everything posted by shawnh24n43
-
1/16 Scale Army Vega Funny Car - Finished 10/14/2018
shawnh24n43 replied to Mooneyzs's topic in WIP: Drag Racing Models
It's absolutely a piece of jewelry Chris!!! -
What's your opinion on clearcoating over decals?
shawnh24n43 replied to Terry Sumner's topic in WIP: NASCAR
Well you guys have me convinced, I won't post another build here. Between having my last build thread actually locked, because I was accused of it being a die cast and having to post pics to prove myself, and basically being told here that my builds really are not worth posting here because they're all wrong by being clear coated, really doesn't do much for the support and enjoyment of the hobby to me here any more. -
who is going to the KC Slammers show sunday june 10th?
shawnh24n43 replied to route66modeler's topic in Contests and Shows
I'll be there! FYI, if you're entering builds, registration is 2-7 (IIRC) on Sat., and the show and vendor part is Sun. -
Autism Crusher
shawnh24n43 replied to Models by Bear's topic in WIP: Model Trucks: Pickups, Vans, SUVs, Light Commercial
Chris, while you did a really nice job on this truck, I know this build came from a special place in your heart, and greatly appreciate you building it for your stepson. I also have an ASD, and me and my family also know and live the signifigance of the puzzle pieces, that you so awesomely implemented in your build. -
Nice job! Your extra time and effort shows! Marty's Charger is on my "must build someday" list. Looks to be the Polar Lights kit, and Sunset decals?
-
Jay had PM'ed me an apology already, yesterday evening, just wanted you guys to know. Apparently it was also my mistake to not include what kit it is in my original description.
-
What's your opinion on clearcoating over decals?
shawnh24n43 replied to Terry Sumner's topic in WIP: NASCAR
I will add myself to the list of those that clear over the decals. I'm with MonoPed and Scuderia on the clear adding durability to your decals. I've got cars over 20 years old that I've reccently polished again, without any incidents regarding decals, and they look good with the rest of the cars in the case. The decals they use on the real cars are 3mm thick on average, kinda hard to replicate in scale. My other opinion is, if you want ultra realism by having the decals not cleared, you have to cut out every letter, number and logo, because there is no clear film around any of the graphics on the real cars. Of course, there isn't a single contest judge here in the midwest that will pick a car over another because the decals aren't cleared. Do not consider my opinion a slam on anybody's opinion by any means! I have my opinion that I'm happy with, and won't judge others on a different choice. Shoot, this question is almost as debated as "What is correct for Petty blue! -
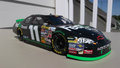
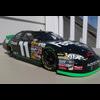
Here's pics of the engine and underside. Revell 06/07 kit, JWTBM decals with a couple Powerslide pieces. The only non kit pieces are in the original description and some modification of the front engine compartment bars, otherwise it's out of the box, or modified kit pieces, no resin either. Harry, just had to get home from work today to post the pics.
-
Thanks Jay, guess I won't worry about posting my stuff, don't want to bother everyone with die-cast looking builds.
-
Thought I'd post my most recent build. Modified nose and wheel openings, fuel filler and overflow and flipped exhaust to right, added dash wiring, antenna and roof camera pod.
-
Southern Motorsports Hobbies lists an 80 Caprice and an 80 Malibu in the SMH resins line.
-
Thanks guys! Steven, he does make some shows in Ok or Neb, but mostly sticks to tracks here in Kansas. If you want to build something like this, stay tuned at Dirt modeler, a less intimidating way to build one is in the works.
-
A small but not so small update. Interior and deck are done and ready for paint. This step has taken a while, but realized there is 26 seperate pieces in the interior and 43 in the deck. The interior had strips added to the edges of it,to simulate where they overlap and rivet the pieces together. The deck is ready for paint, and will fit flat when all the pieces are glued together. Here is a shot from below, to show the "folded over" strips, where the deck pieces are riveted on the real car, and how I'll glue mine together.
-
Got the deck finally fitted on this one, built like the real car. Some minor fitting to do,and will call this step done.
-
Got my interior built, and deck support braces mocked up. The front brace is mocked up complete, the rear needs tabs and supports. I had to do some real thinking about how to make the interior one piece, and yet removable for painting purposes. I decided to cut the bar into pieces running through the interior, and drill the rods out, and install pins. The interior is removable, and yet it reassembles easy and yet is still strong.
-
The plans are pretty decent. I made an error in printing out the plans at first, (you need to set the printer to copy at 100% and not the default setting of print to page) but on the flip side, some thinking and trial and error are still necessary. His plans and parts are for a 2007, and the car I'm using is a 2010 so some variation from the plans has been necessary.
-
Mike, all the brass pieces are photoetch, sold on the dirt modeler website for this type of car.
-
The tires in the AMT kit are way too big, and the wheels are too deep, especially if you don't cut out the front inner fenders on the Torino kit. (I've got one of those built that had problems because of that.) The correct tires for that car are treaded ones, like in the PL kit, anyway. You could cast up a set of wheels and tires from the PL kit, or use some wheels and tires from PPP to use on the Torino to make your life easier, and make it more correct. Hope this helps.
-
Here it is as of today The front bumper and body mount done, some of the support bars are white glued in for the mockup. The rear bumper,body mount and fuel cell bracket and mounts done. There is a LOT of finish work to be done on this before it's ready for paint, but will have to wait until the chassis and body mockup is done.
-
Thought I'd share my latest project, a detailed build of a dirt late model that is driven by a friend of mine. What I'm replicating Here's the build progress so far,based off of the plans and pieces from dirt modeler.
-
Another small update,the chassis bar mockup is done. Next on the agenda is to fix or replace some of the bars that don't look quite right,and do a little refinishing. At that point it's time for all the little mounting tabs on the car then the interior and top sheetmetal mockup. oldcars,the chassis has 50 hours in it.............so far :roll:
-
Bobby,if you recognize it as a GRT then I must be doing something right! :wink:
-
Just wanted to share my short track build I've got going. It's gonna be my effort to try and keep up with Clay Kemp This is a car of a local driver who just happens to have a couple track championships and is a really great guy! Here's the car I'm trying to build Here's the body mocked up with sheet plastic (scratchbuilt) Here's where I'm at on the chassis (scratchbuilt) I know these cars aren't the most popular subject,but I hope you enjoy what I've got going!