

Intmd8r
-
Posts
2,261 -
Joined
-
Last visited
Content Type
Profiles
Forums
Events
Gallery
Posts posted by Intmd8r
-
-
I love the work and dedication to this project so far, but I got to ask, why a Beretta?
-
Good find. Have fun with it

-
Its a shame to not be able to see this one finished
I totally agree. This is some truely amazing work and dedication to detail. PLEASE BRING THE EVO BACK!
-
It's almost difficult to beleive that parts of this car were scratch built and it's all paint and no decals. Great work!
-
I share your frustration. My Fujimi Ford GT40 project had a similar fate with the decals. With all the time I have invested in the kit, I just can't bring myself to stripping the body. Kudos to you for trying something else. I agree with everyone that the results are fantastic.
-
So this is based on a real car? I didn't know that such a beast existed. Great work and good stuff!
-
Awesome work. Especially the Work Meister wheels. Did you make or buy those. If you bought them, where from!?
-
Great Job! The second last pic looks like my 1:1 grarage at home (less the classic muscle car).
-
Let me know if I can help, shipping to canada is less than 5 bucks, well-packed!. So, if you need me to be a 'distribution-point', let me know and we work through the details. Charging 40 bucks for a couple of decals is just complete ridiculous.
Thanks for the kind offer, but I managed to source the same decals I saw for $40 on e-bay from a vendor in NY state shortly after posting this. They would ship to my home in Canada for less than $15. Still more than I want to pay for decals but more reasonable.
-
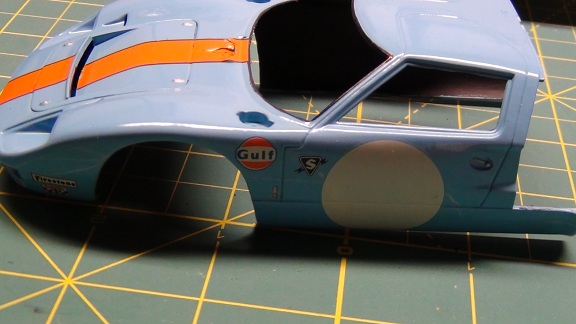
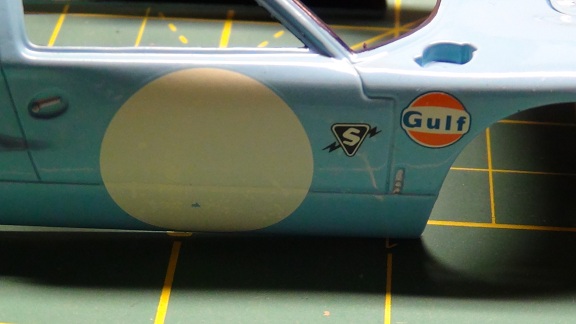
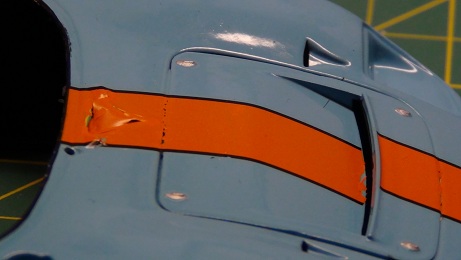
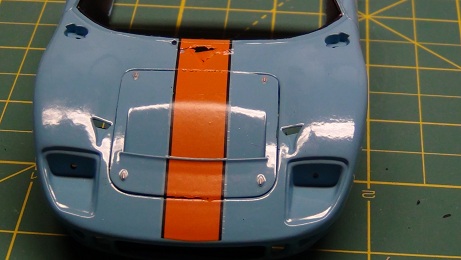
Now the bad: I attempted to apply the decals with terrible results. Most of the decals tared and cracked before I even removed them fromthe water. Considering I opened a sealed plastic bag out of the box from Fujimi to get to the decals, I never had any indication that they would pose to be a problem. To add to the insult, the decals that didn't disolve in the water chipped and cracked when applyed to the body after I tried to gently position them in place and smoothe out the air bubbles gently with a papper towel. For a last effort, I let the decals dry and applied a couple coats of Testors decal set, but it showed little improvement. By far this has been my worst experience with decals since I started building models at the age of 10 (I'm now 30
). What really confuses me is that I've built Fujimi kit before without this issue. The build is once again put un hold until I can source a set of '68 Le Mans decals for a Ford GT40. So far the onlly set I've found is in Belgium and is $40 shipped to me here in Canada. That's more than what I've spent thus far on the model kit, paint, and PE parts! -
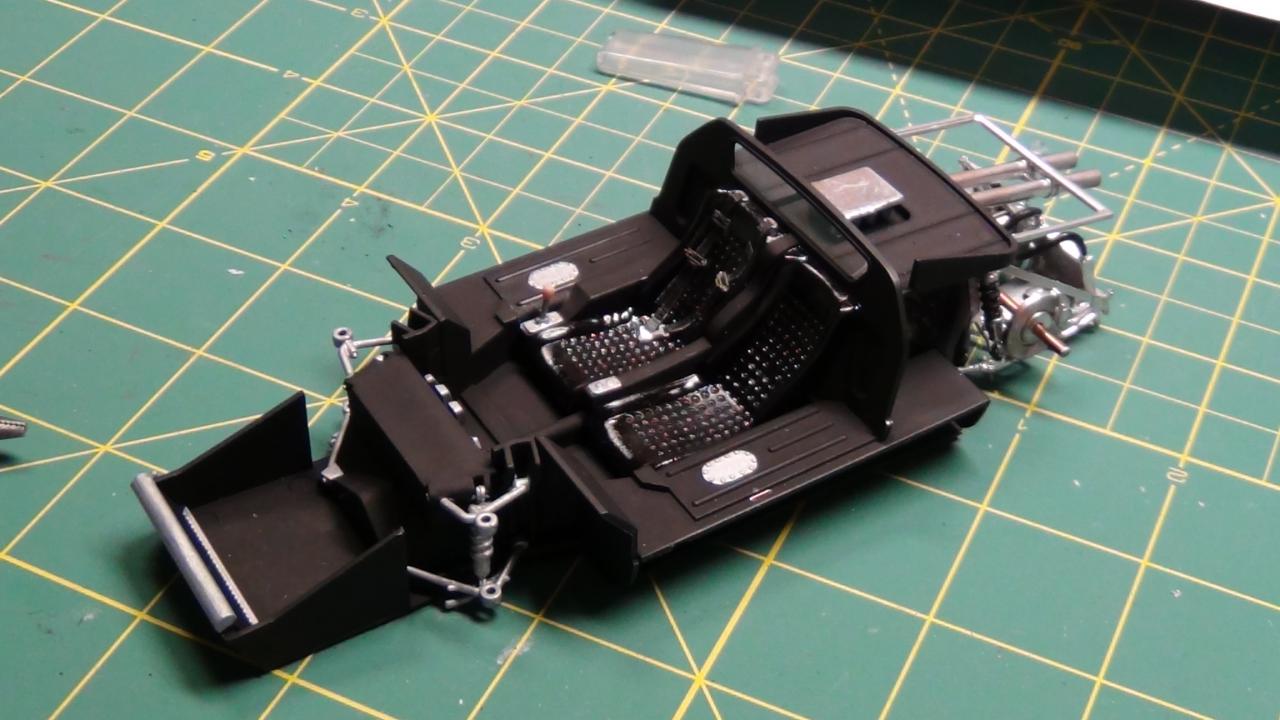
PROGRESS UPDATE: 2 Steps forward, 1 Step Back!
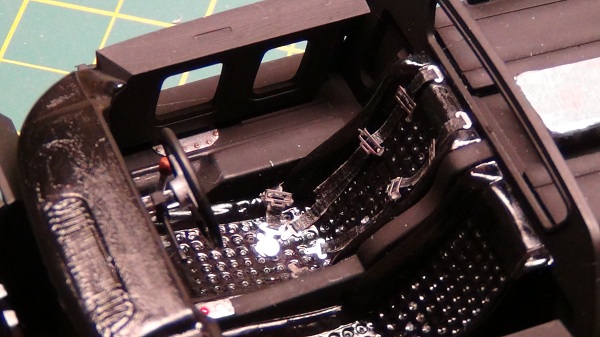
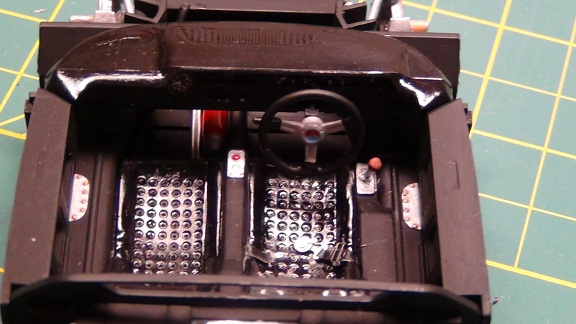
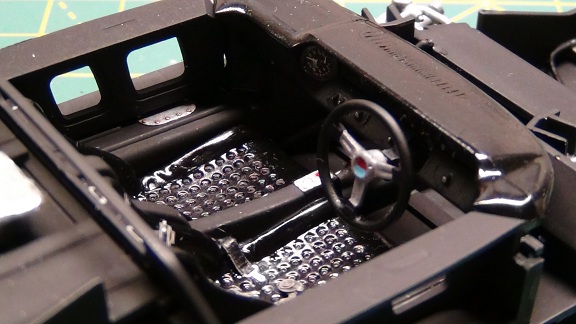
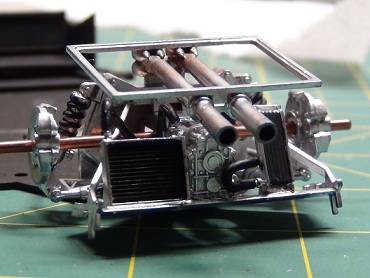
I finished the harness, added some lines in the interior and created the front rad hoses using some twist ties. I know very little of it will be shown with the body on as it's a curbside kit, but I like knowing that theadditonal details are there.
Now the good:
-
Nicely done! The time & effort made for the masking paid off.
-
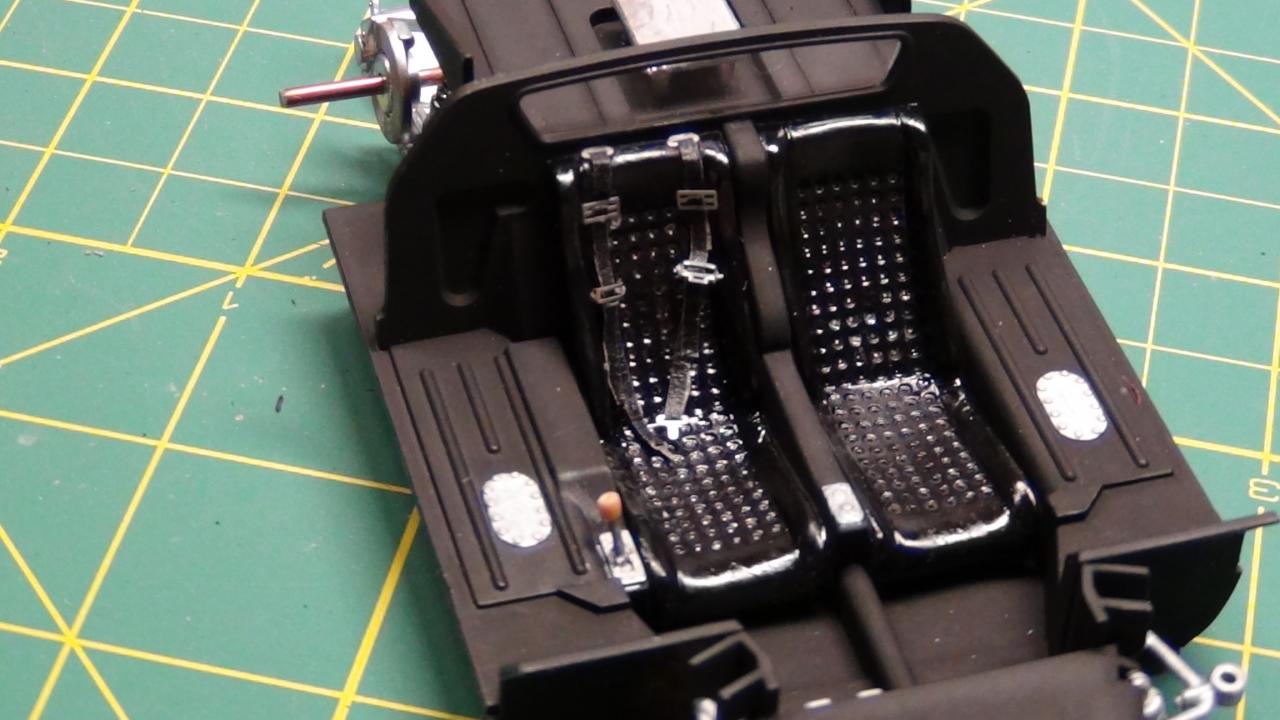
Small progress update. I've moved on to finishing the interior. I spent 3 hours at making the racing harness the other day. What a PITA! I don't think it turned out too bad considering it is my first effort. The finished product was worth the it. I have mopre pics, but the attached will have to do for now
-
Great job. You really captured the spirit of vintage NASCAR with these.
-
Love the attention you gave to the shift knob as well as the rest of the interior. Keep up the good work.
-
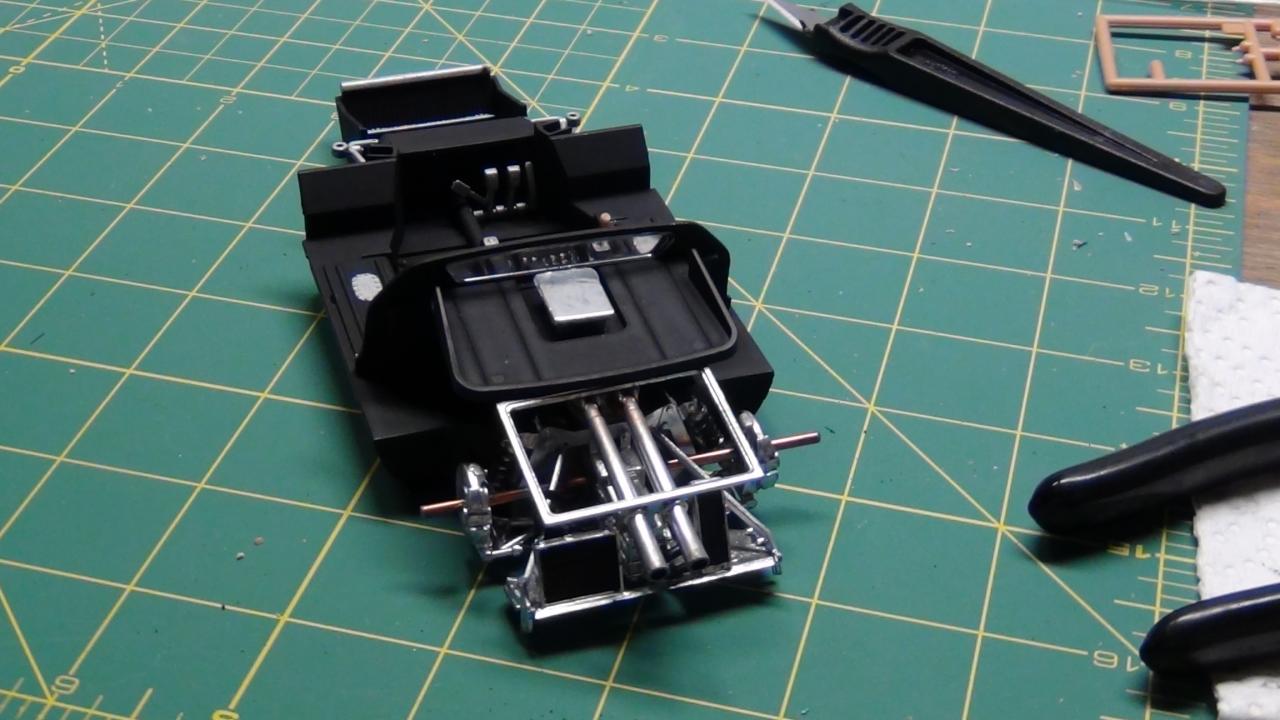
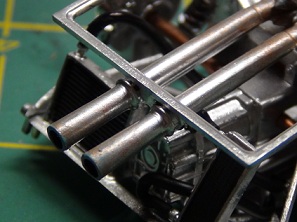
The hood pins used on the back hatch are PE parts from Detail Master. This is a great kit, but I wich there were a more detailed engine. As an example, I glued twist ties to the oil coolers and painted them flat black for the lack of hoses in this kit. At the moment, the only extra parts I plan on adding are PE racing harness and PE wheel knock offs.
-
You can see more pics and progress here: http://s1146.photobucket.com/albums/o533/Intmd8r01/
-
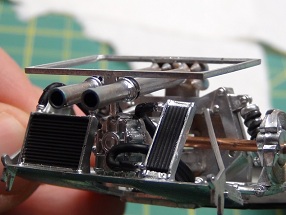
Just a little something that I've been working on for a while. After a frustrating and disaointing experience with Strada Sports, the build is under way again. The body isn't anything to write about yet, but I'm pleased about the chasis. Check out the pics so far:
-
I can't get enough of road race builds. Great Job! Love the detail around the tail pipes. Care to share how you did that?
-
Nice touch on the intake. If you didn't know what you're looking for, you might have overlooked it.
-
Nice work. I'm a sucker for the "Barn Find" E-bodies.
-
The windsheild is a funny story. It fell off my bench and I acutally stepped on it as you can see from the virtical crack down the middle. To salvage it, I used a sharp knife for the lines (or cracks) and cut a hole into what was left of the windshield. Not at all what I intended, but I guess it turned out OK.
-
I just thought that I would share this. If you watch much Speed TV, then you are probably familiar with Legenday Motor Car or LMC. They are loced roughly an hour north of me. While I've never been there, I'm a big fan of their work. They do Barret Jackson quality restorations from Musscle cars, to exotics, to vintage race cars. What I find so great about this web site is that they have available high res and detailed pics of restored cars and the restoration pics (which I find useful for scale model building) from past and present cars.
http://www.legendarymotorcar.com/site/index.php
I pland on visiting this website often for a futrue Shelby GT 350-R build of mine.
Oh, and if you find yourself with some extra cash, you can upgrade from the 1:24 version to the real thing ; )
-
Thanks for the positive coments. Aparently my photo files are too large to upload, so you can see the rest of them here:http://s1146.photobucket.com/albums/o533/Intmd8r01/ ; )
-For additional detail, I used garbage bag ties for the fuel and brake lines. I just stripped the paper and super glued them in place.
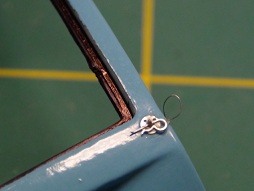
-The hood hinges were scratch built using left over plastic trees and throtle return springs from Model Car Garage.
-For the oil leaks, I used Indian Ink. The engine "gunk" is Indian Ink brushed over putty.
-The base is what's left over from and Acrylic display case that had an unfortunate shelf accident. I sprayed it with Ashphalft undercoating. No happy with the result, I took a quilted papper towel to it while it was still wet to give it a more realistic texture. Next I misted grey primer and then a little flat black over that. I couldn't be more thrilled with how it turned out!
-For the debris, I was going to purchase some Diorama leaves at $12 a bag. Upon closer inspection, I realized that it didn't look any different than fish food, so I went to my local Dollar store and purchased some Goldfish Flakes.
The base looks unfinished to me, but I haven't seen any sort of extras that would make it more complete yet. Perhaps something will jump out at me later.
Now if anyone has some hungry Gold Fish, I have more than enough flakes to go around........

 ). What really confuses me is that I've built Fujimi kit before without this issue. The build is once again put un hold until I can source a set of '68 Le Mans decals for a Ford GT40. So far the onlly set I've found is in Belgium and is $40 shipped to me here in Canada. That's more than what I've spent thus far on the model kit, paint, and PE parts!
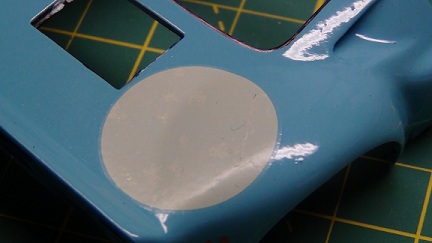


My first ever dio
in WIP: Dioramas
Posted
Your skills are much better than mine was at 13. Keep up the good work and have fun.