Search the Community
Showing results for tags '1/16 fujimi'.
Found 3 results
-
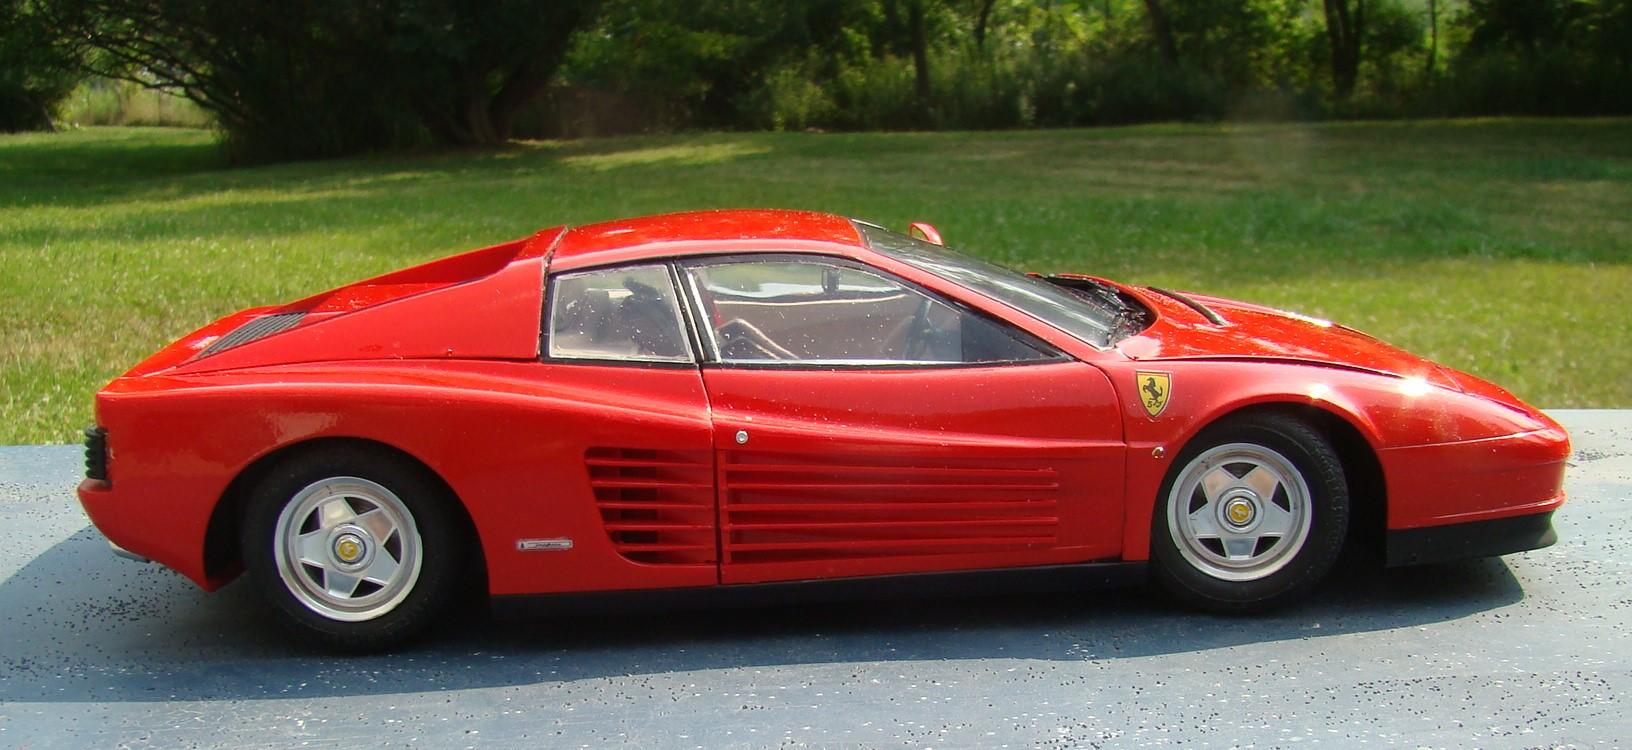
The second car in my series of Fujimi 1/16 kits (1 more to go) This is the berlinatta (coupe) version of my last post. Link is here 1/16 Ferrari Testarossa spyder - Model Cars - Model Cars Magazine Forum. Both cars had the same chassis and I did all three of those at once. Which accounts for the speed of this build. Although, this is one of those kits that fought me to the bitter end. Details in the captions. Color on this is Tamiya LS50 Bright red. Thanks for looking and comments welcome. Finished product. None of the glass really fit. Much grinding, filing and sanding allowed them to finally fit flush. Front hood was a ;little better than the spyder but still warped and required some special pins to hold it down. Interior was just as well appointed and I used the same colors just changed it up a little. Dor was alsoi fitted with magnets. Rear end and particulr the engine cover gave me fits. Hinge had to be replaced with metal as the kit one was probably made of toilet paper. This piece was also slightly warped and once again required pins to hold it in place. It still opens and the engine is the same as the spyder. Rear glass was also problematic. I am really glad this one is done. It looks good in the case next to the spyder and both reds are very close. Thanks for looking.

-
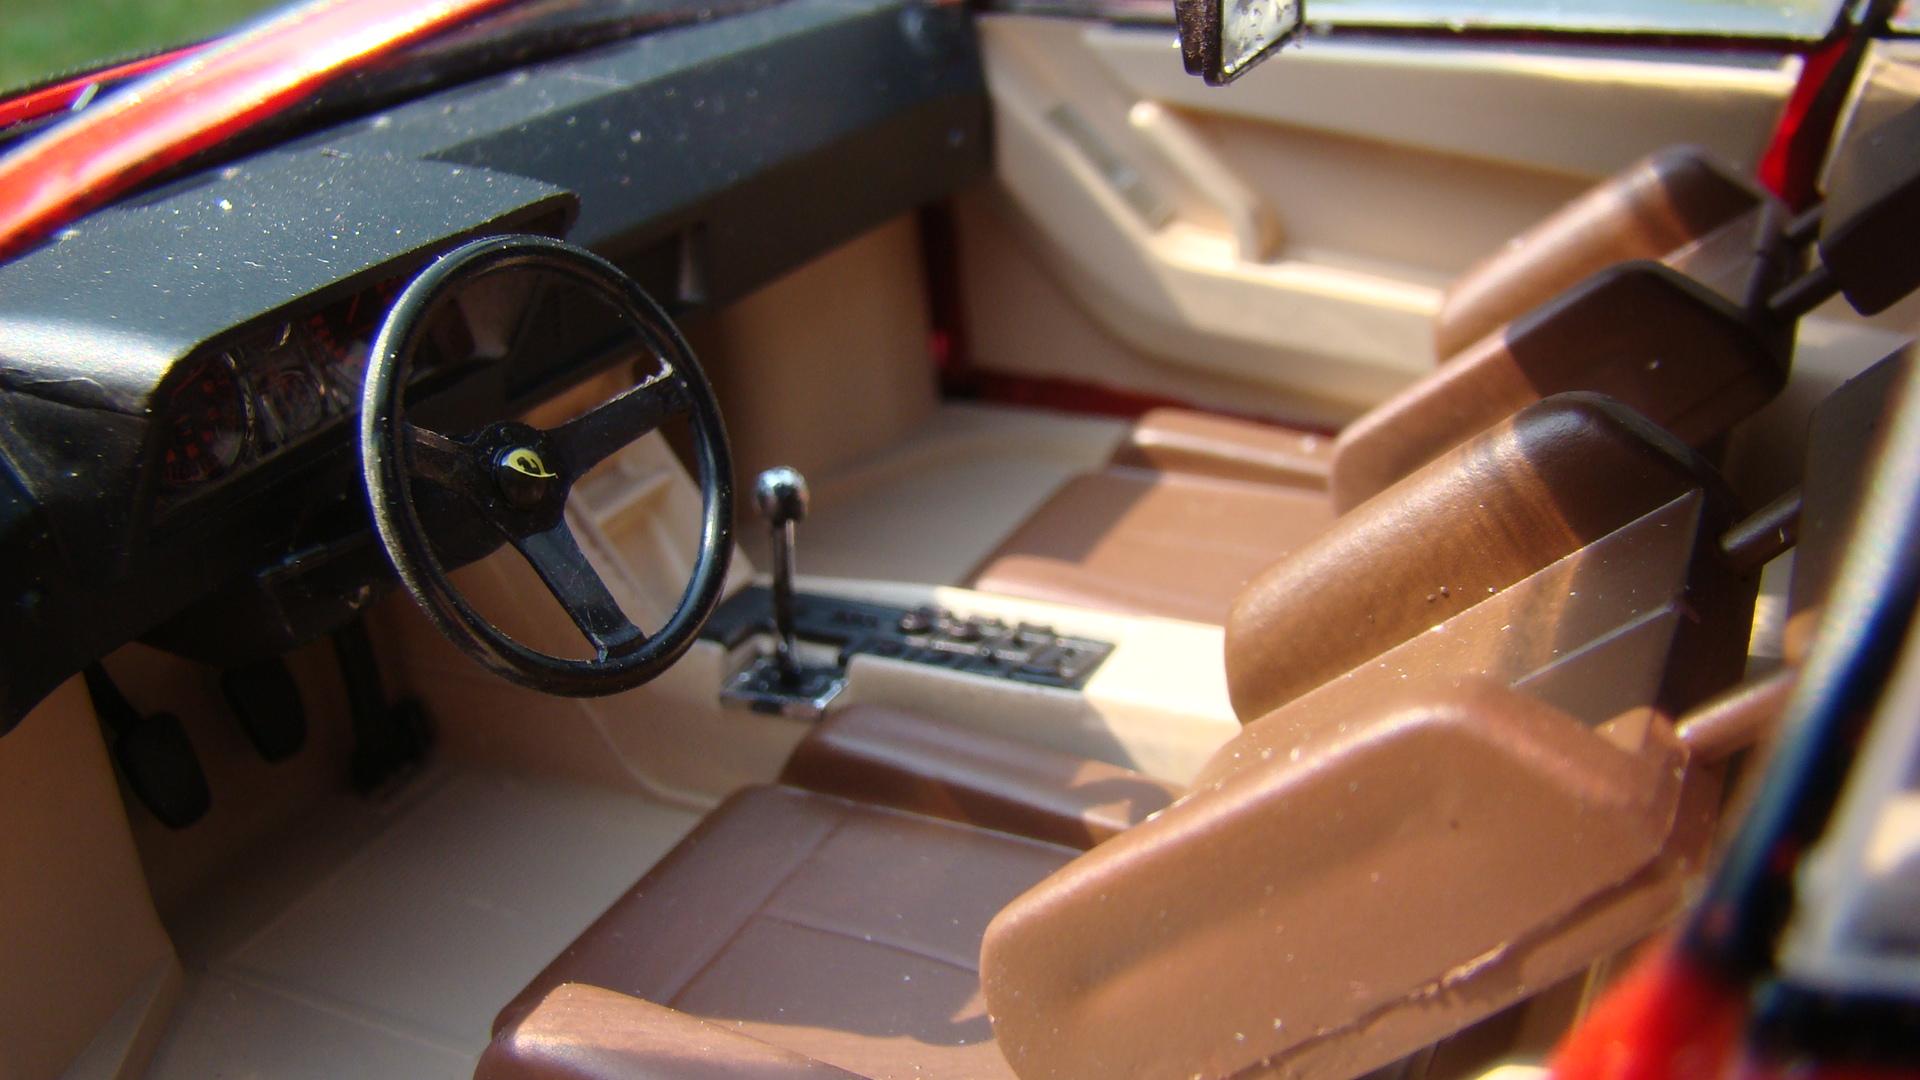
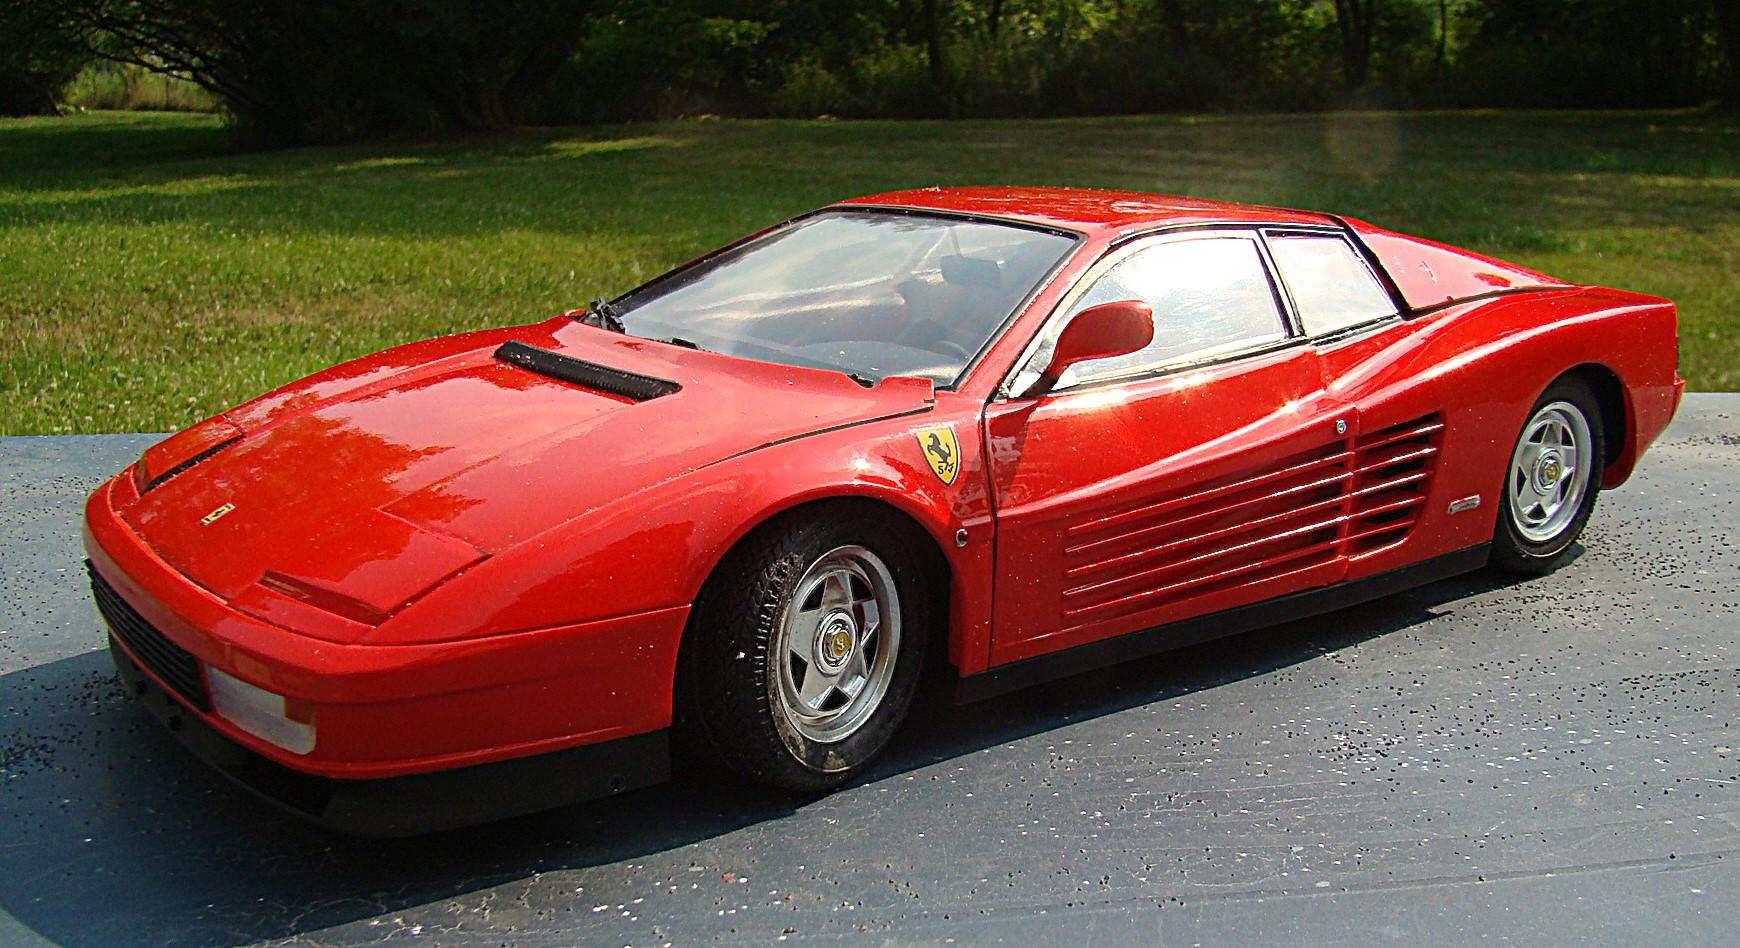
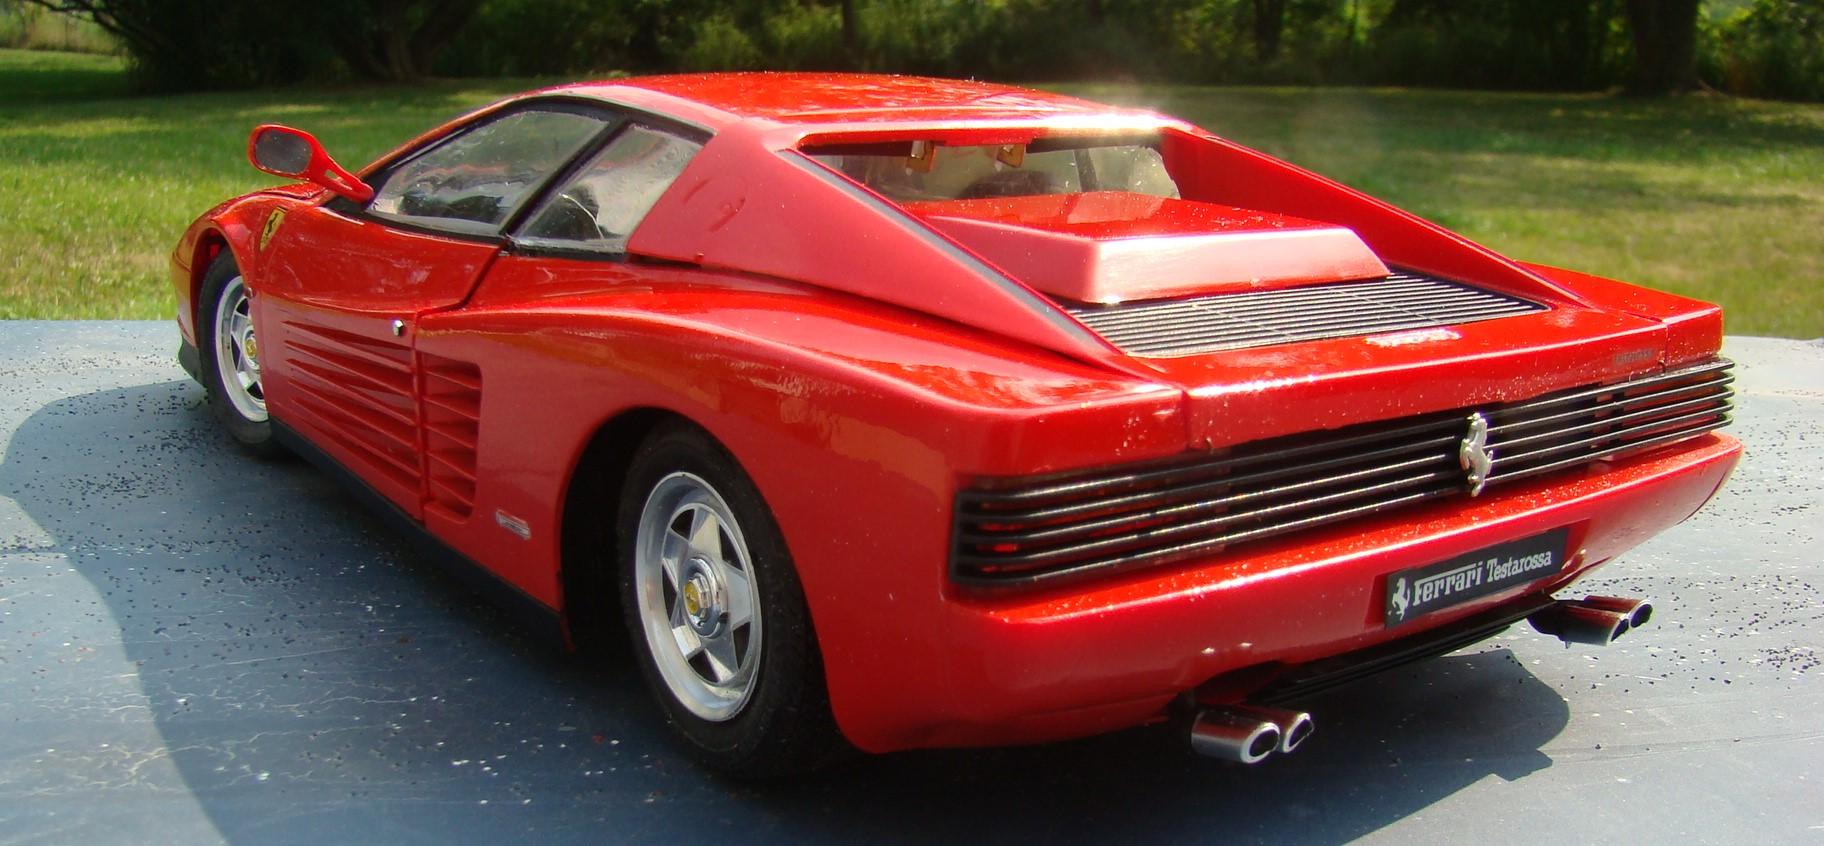
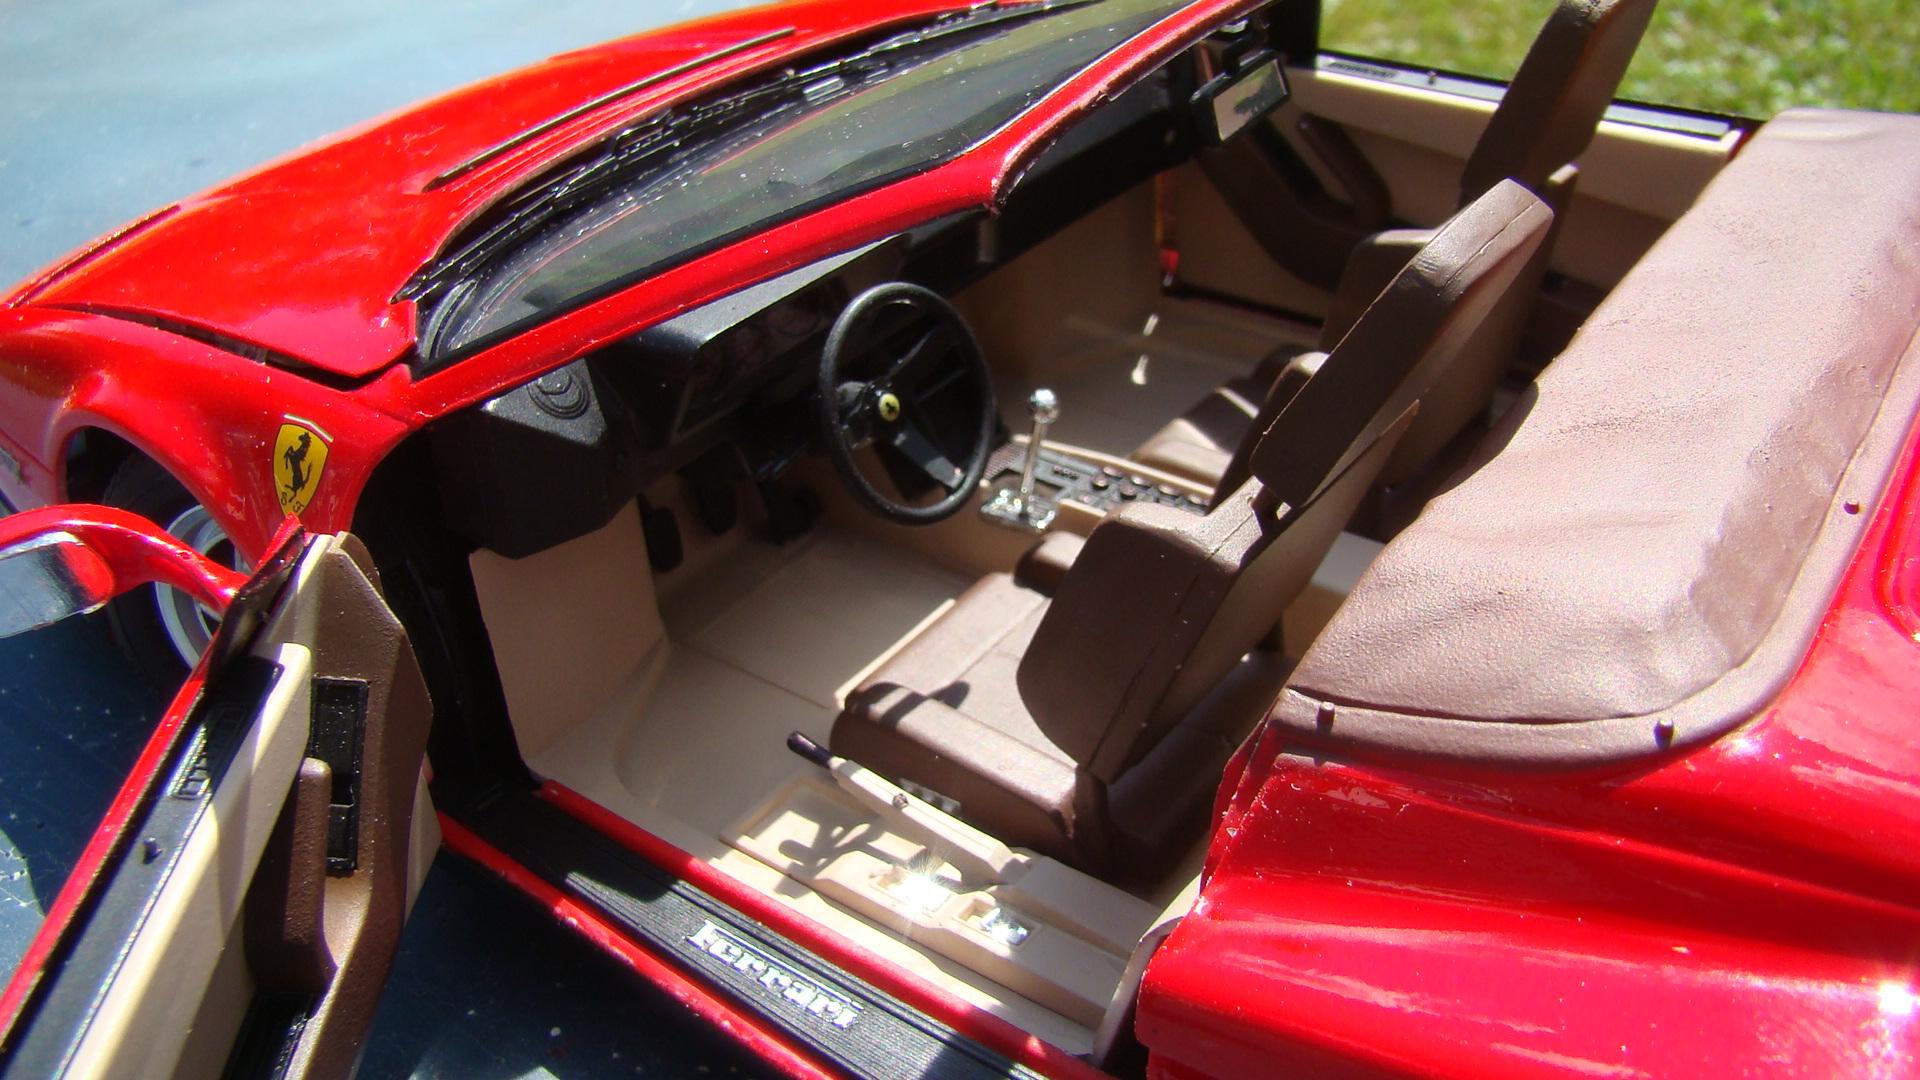
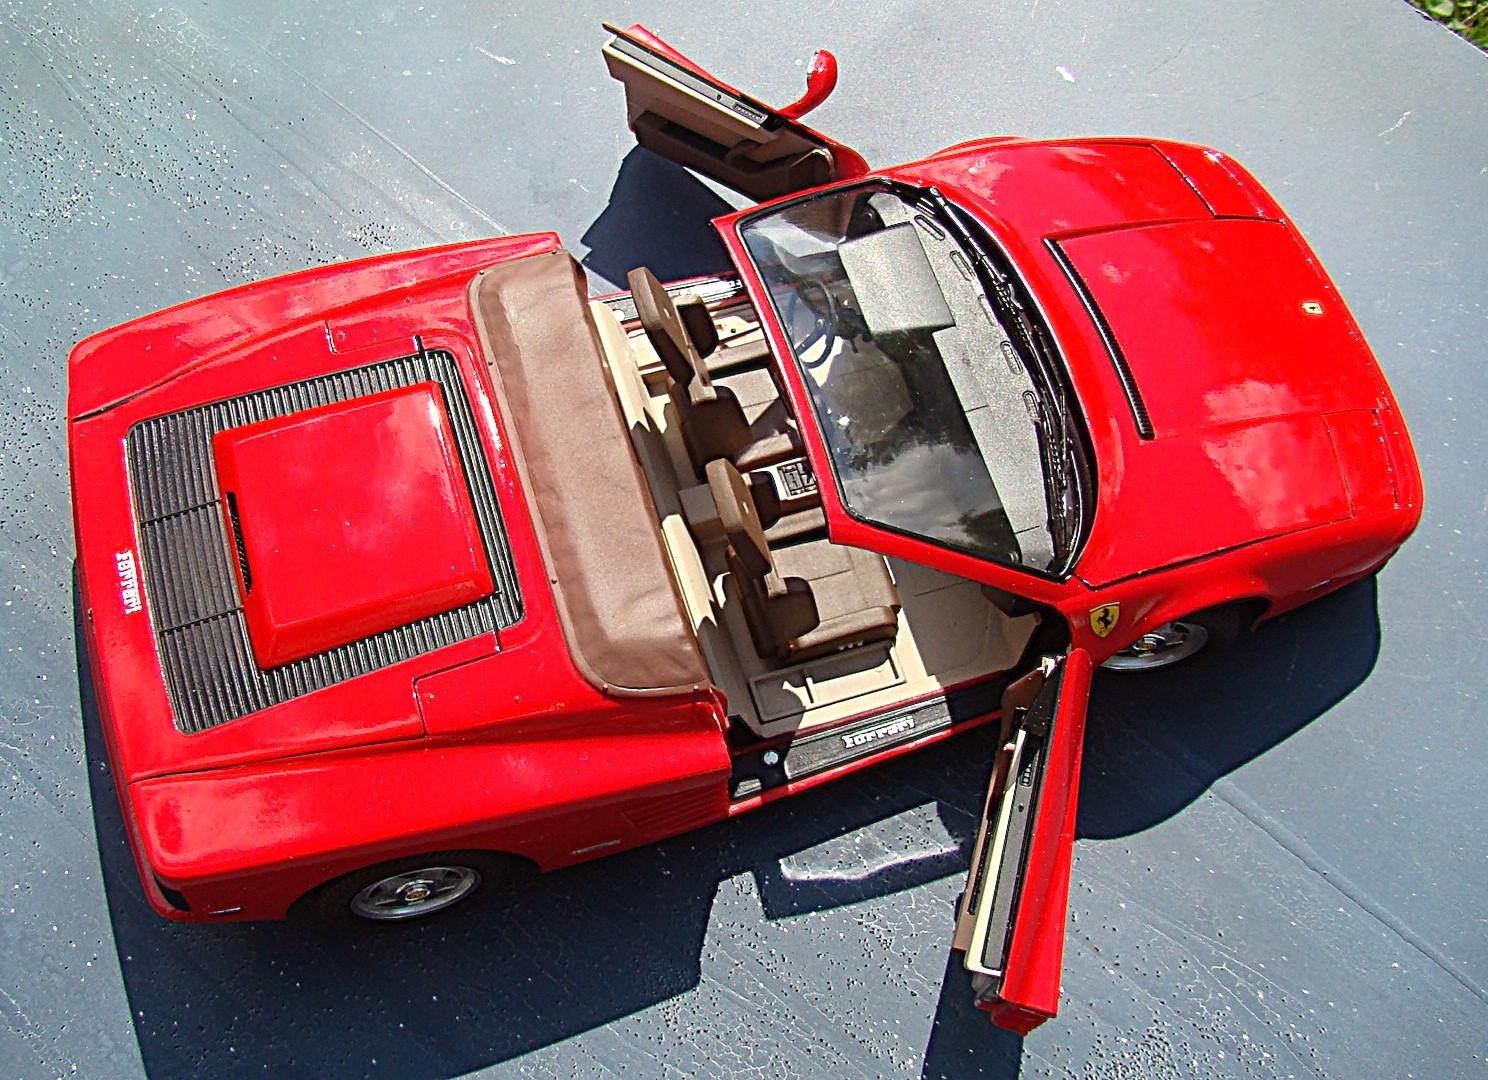
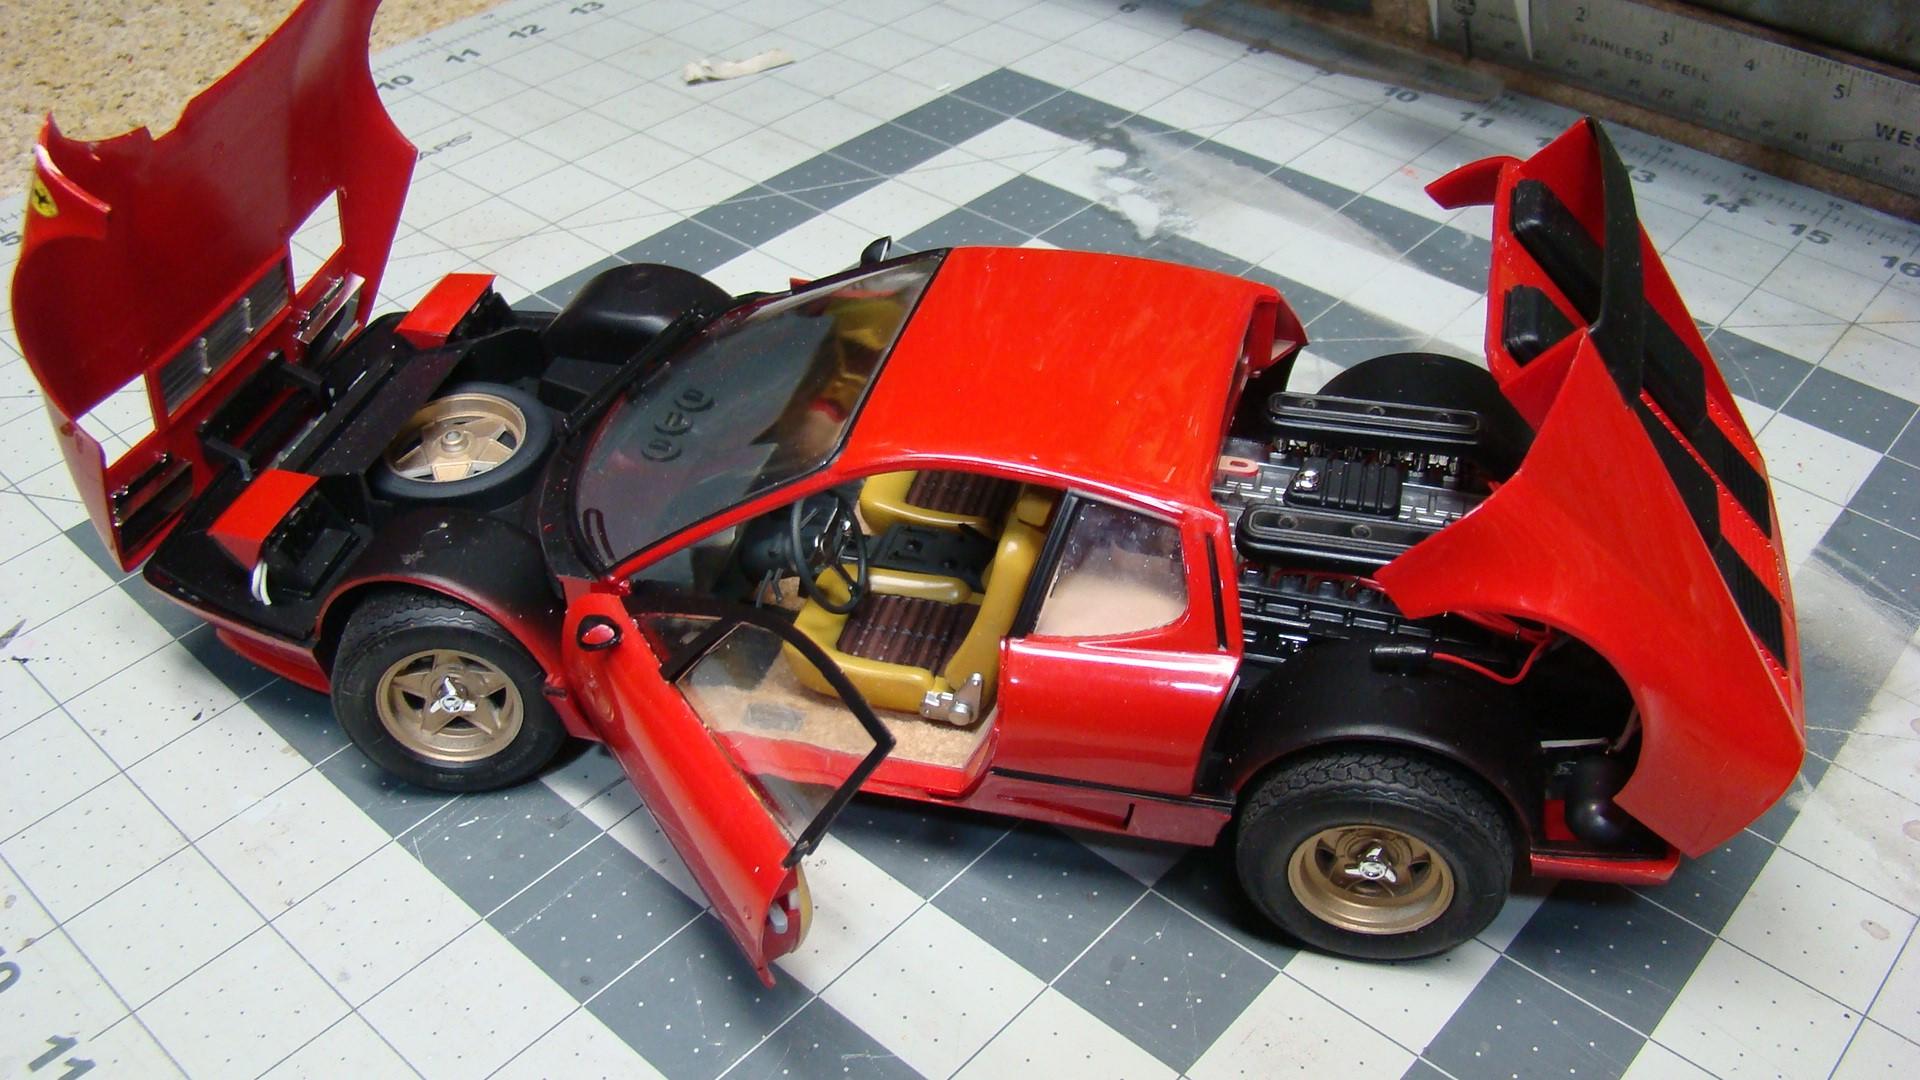
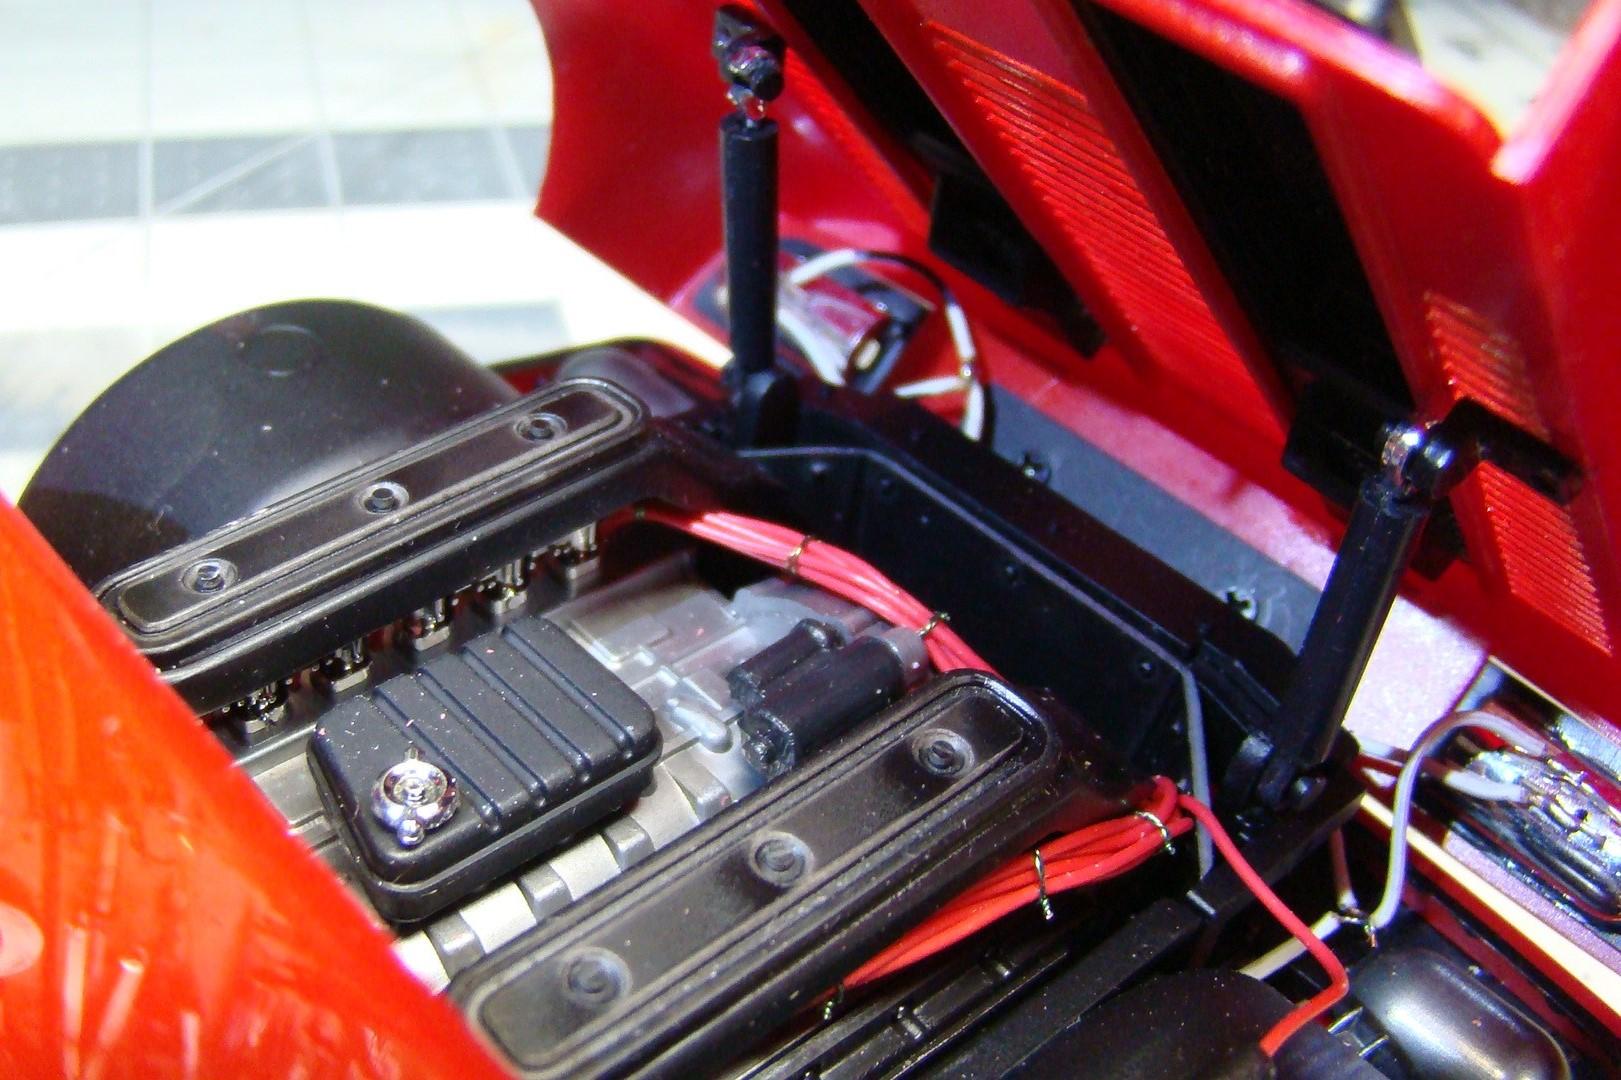
This is the first of 3 Testarossa's I currently have on the bench. All the bodies are painted and chassis complete. Thought I would finish this one first because I like the lines of the car. I bought 4 of these Fujimi kits at the same time a very long time ago. Got a bargain price on them and over the years have been itching to do them. Now that I am retired and have nothing better to do, I think its time. So next post will be the berlinetta and the Koinig modified twin turbo. Color on thhis is Gravity GC 1133 Ferrari F1 rossa. More details on this build in the picture captions. Really dig the lines of this car. From any angle it just looks fast. Kit went together relatively trouble free. Really like some fo the details like the engraving ib the wheel centers. Painted it yellow then rubbed the paint off the cavalinno That is the prancing horse figure on the Ferrari badge. Lots of detail back here. tail lights hidden behind the grill, seperate cavalinno badge and more. This shot give a good view of the lines of this car. Seats are adjustable and the wheels steer (kit features) Interior was well appointed. Color is Tamiya LP75 Buff and Lp59 Nato brown. Rear engine cover opens to reveal a wired and plumbed flat 12. Fit of all these components was a little iffy at first but once you did one the rest fell into place. Engine is a model all by itself and Fujimi included an engine stand if you wanted to do so. Interesting photo I don't usually take but it really shows off the opening doors , which, if you were careful went together flawlessly. I used magnets to hold the doors shut and they close with a satisfying "snick" One of the magnets is shown on the left side of the rocker panel. This car was the "go to" sports car in one of my favorite Sega video games.....Outrun.
-
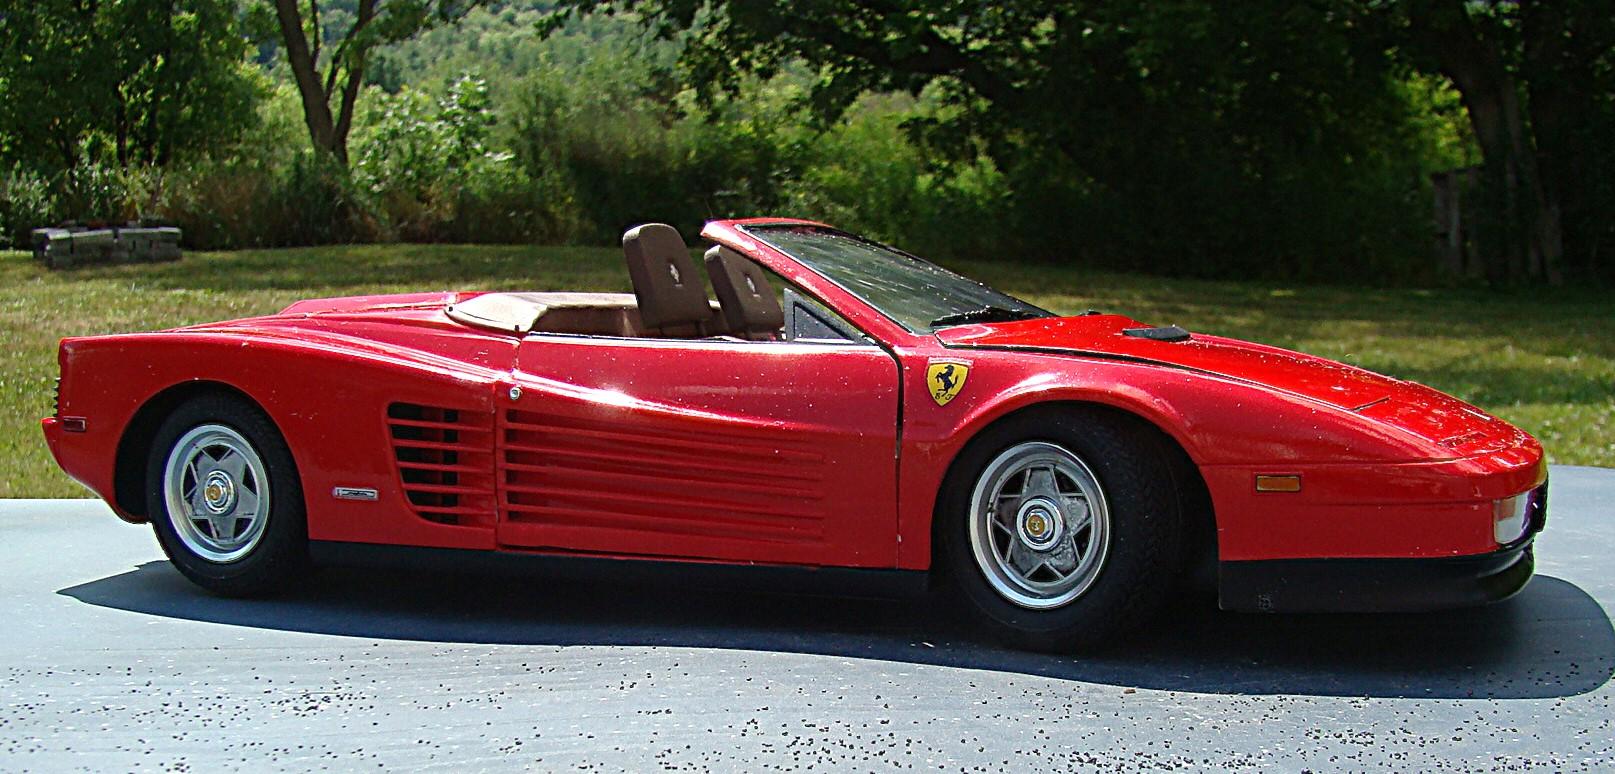
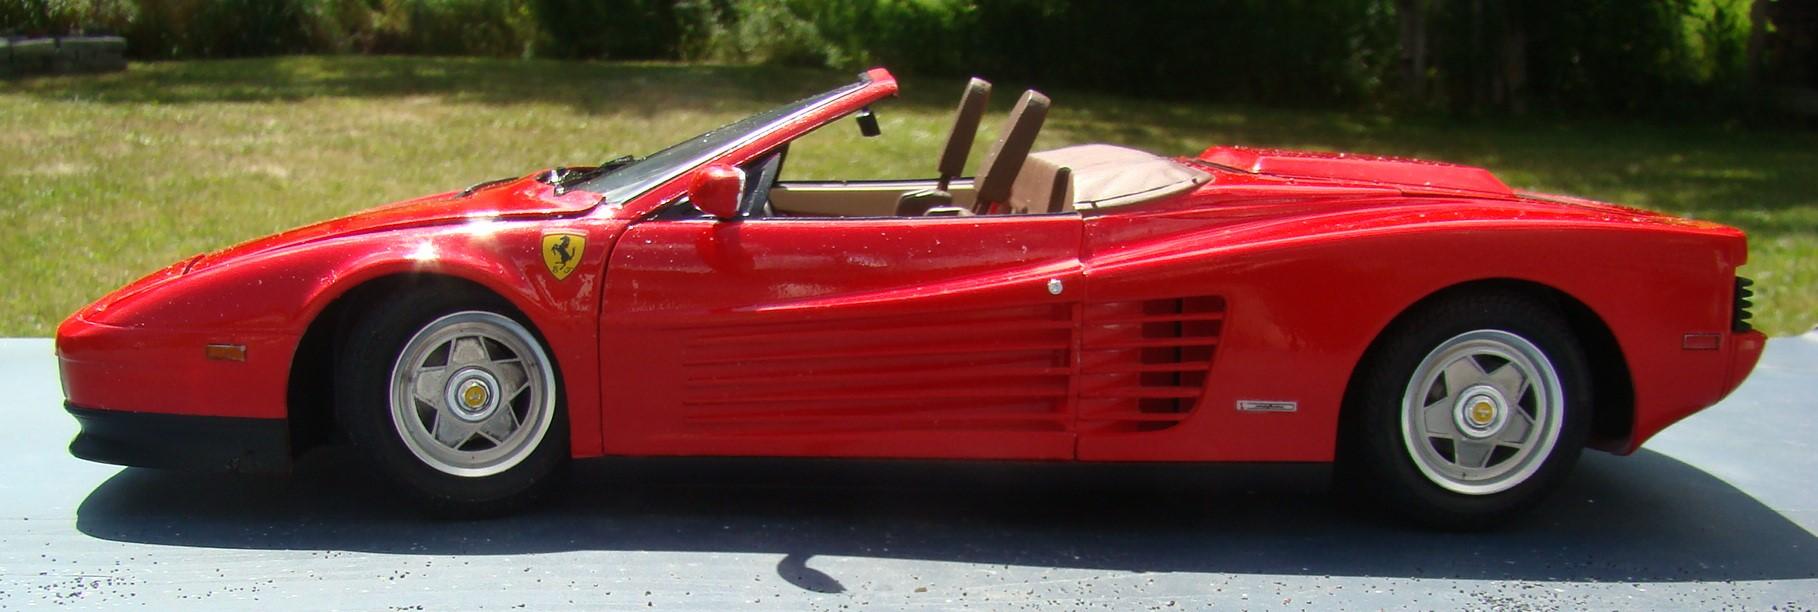
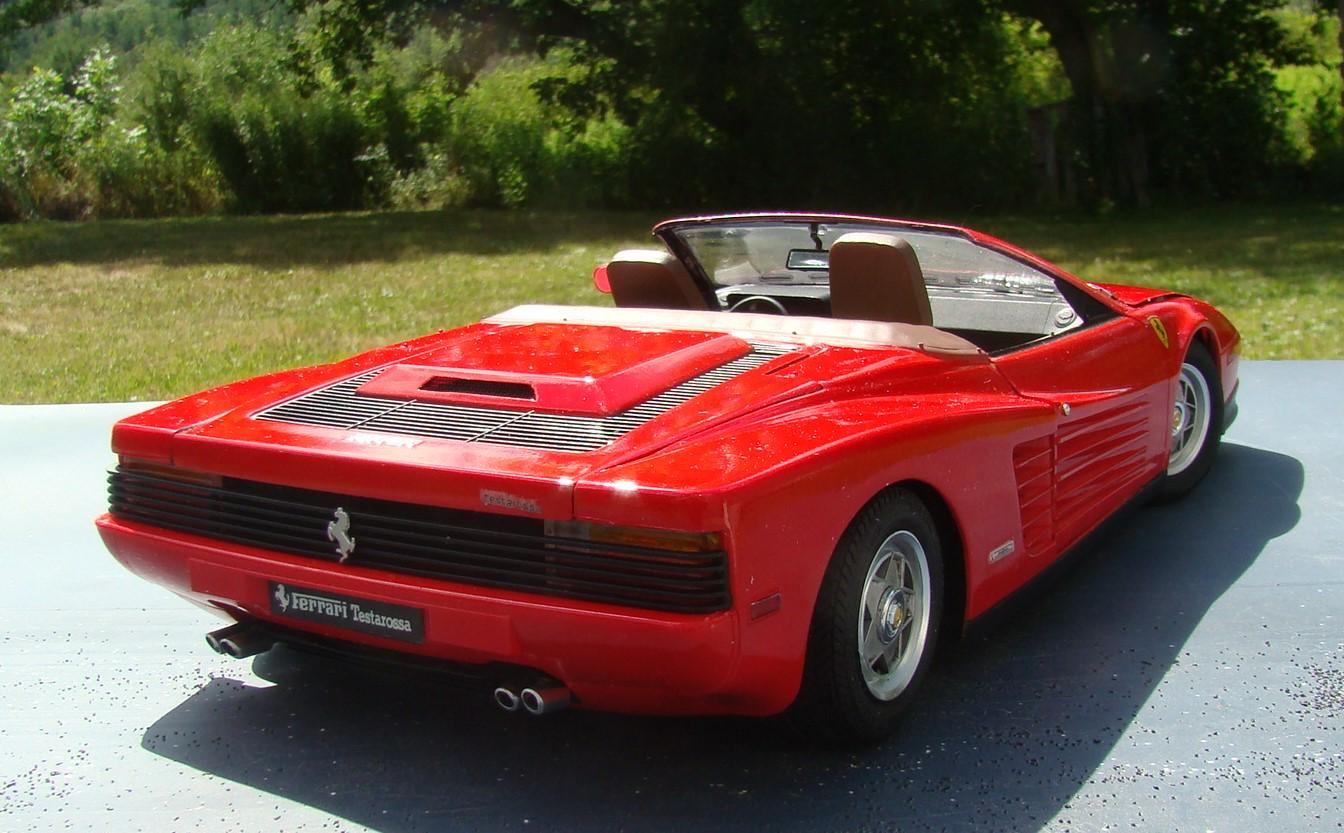
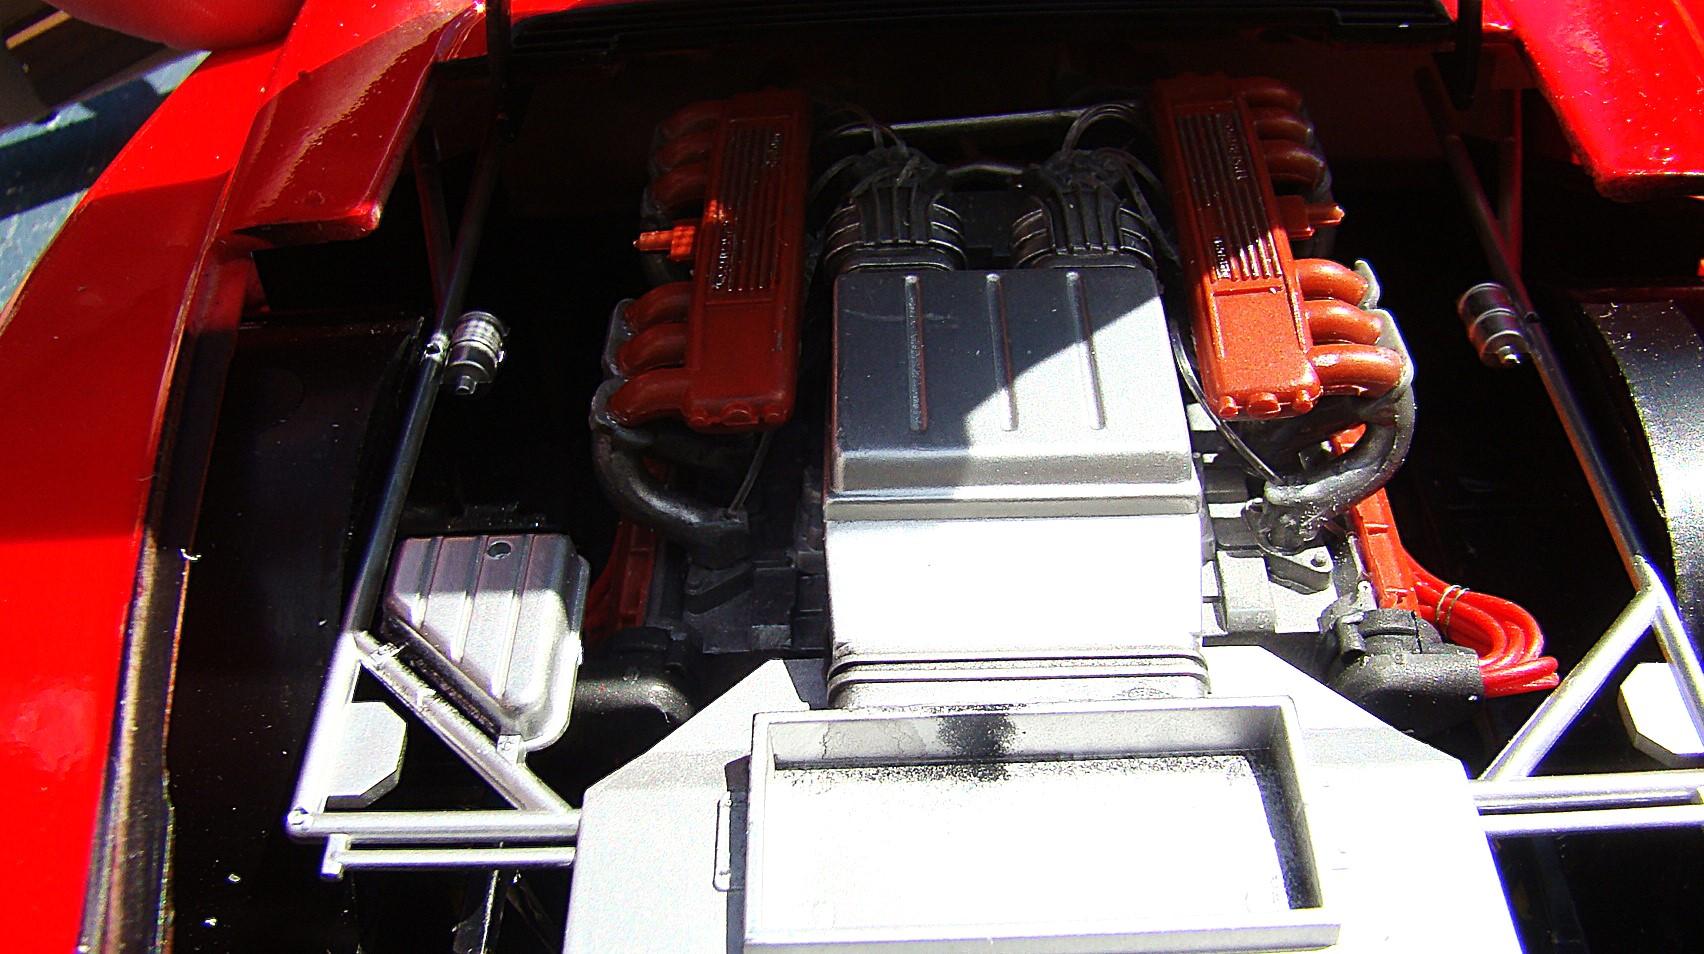
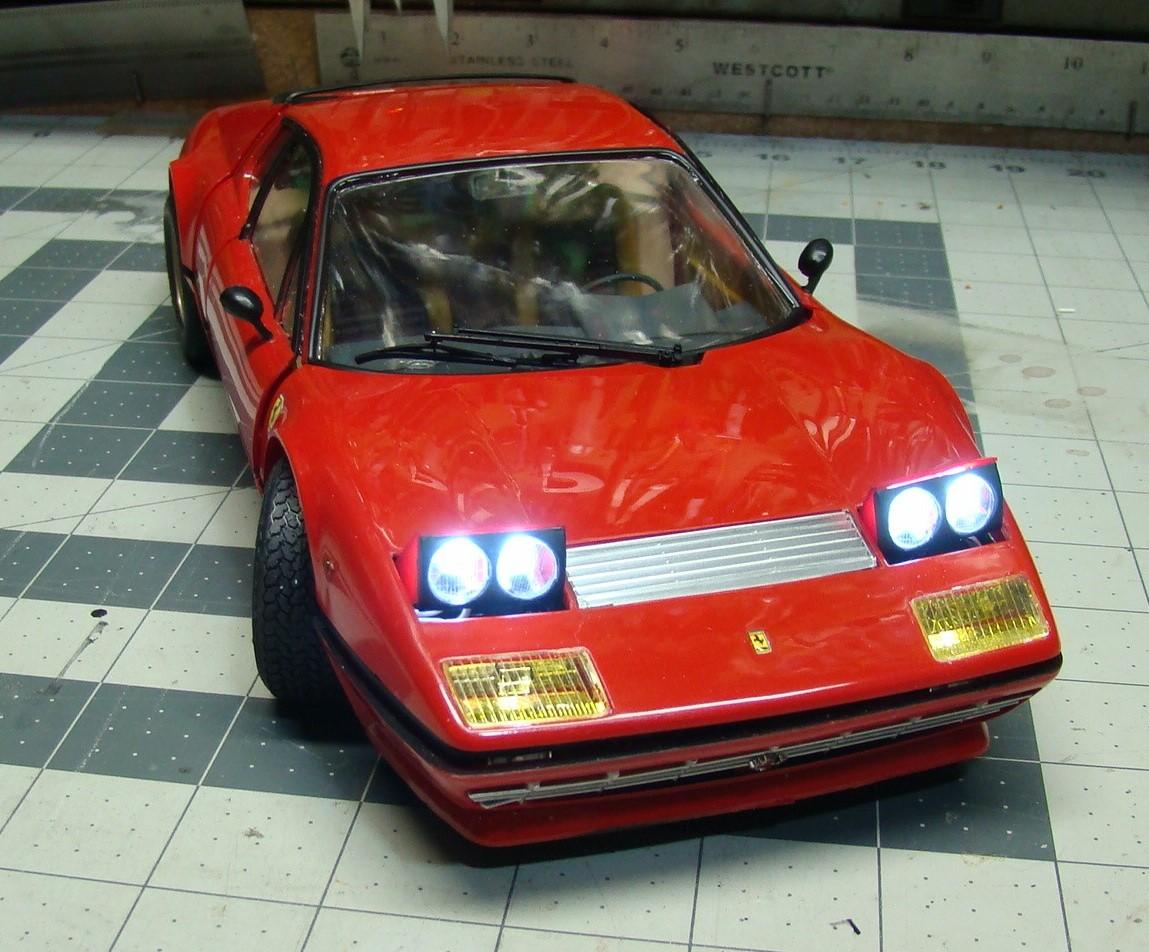
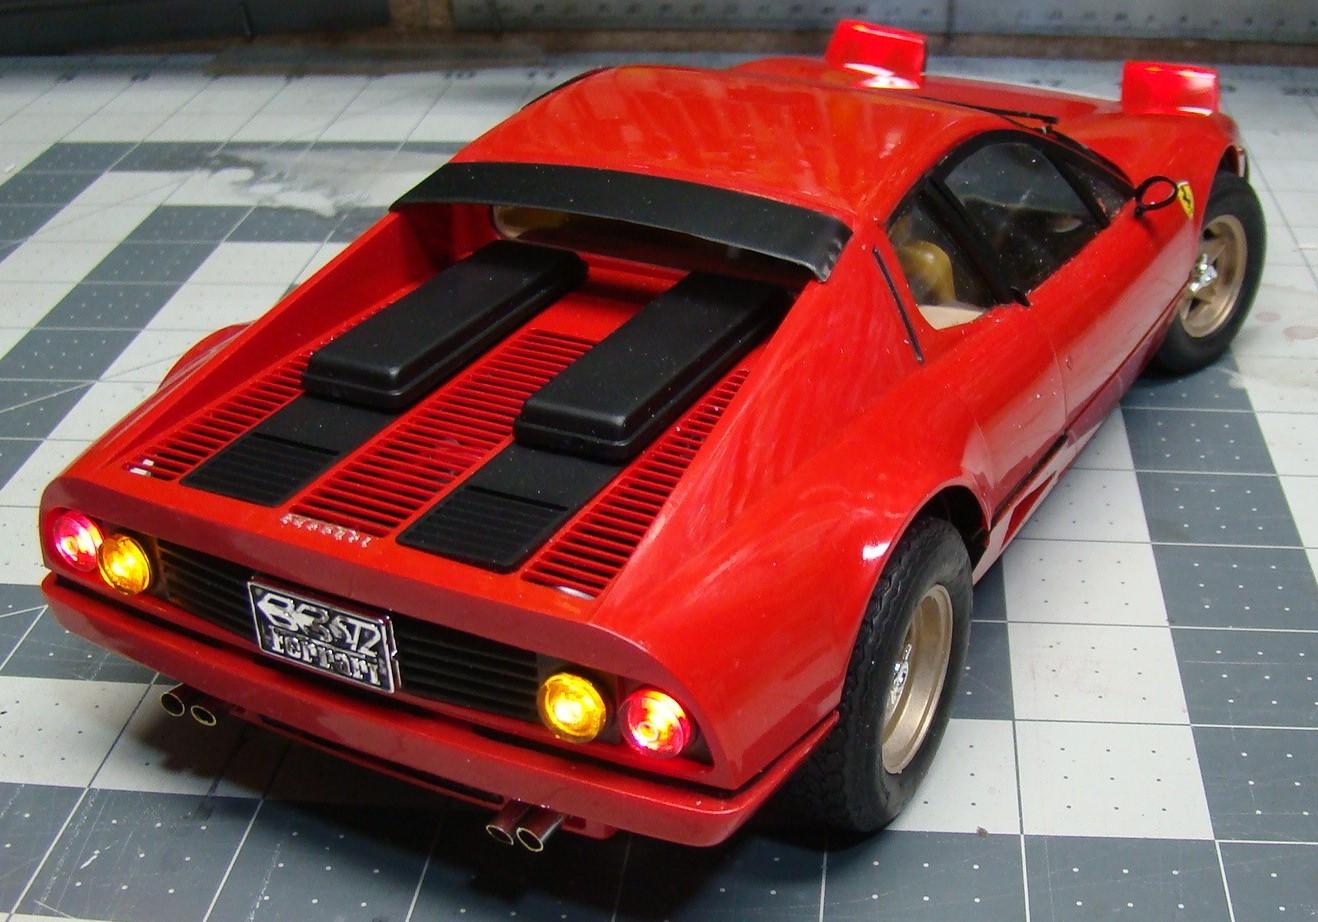
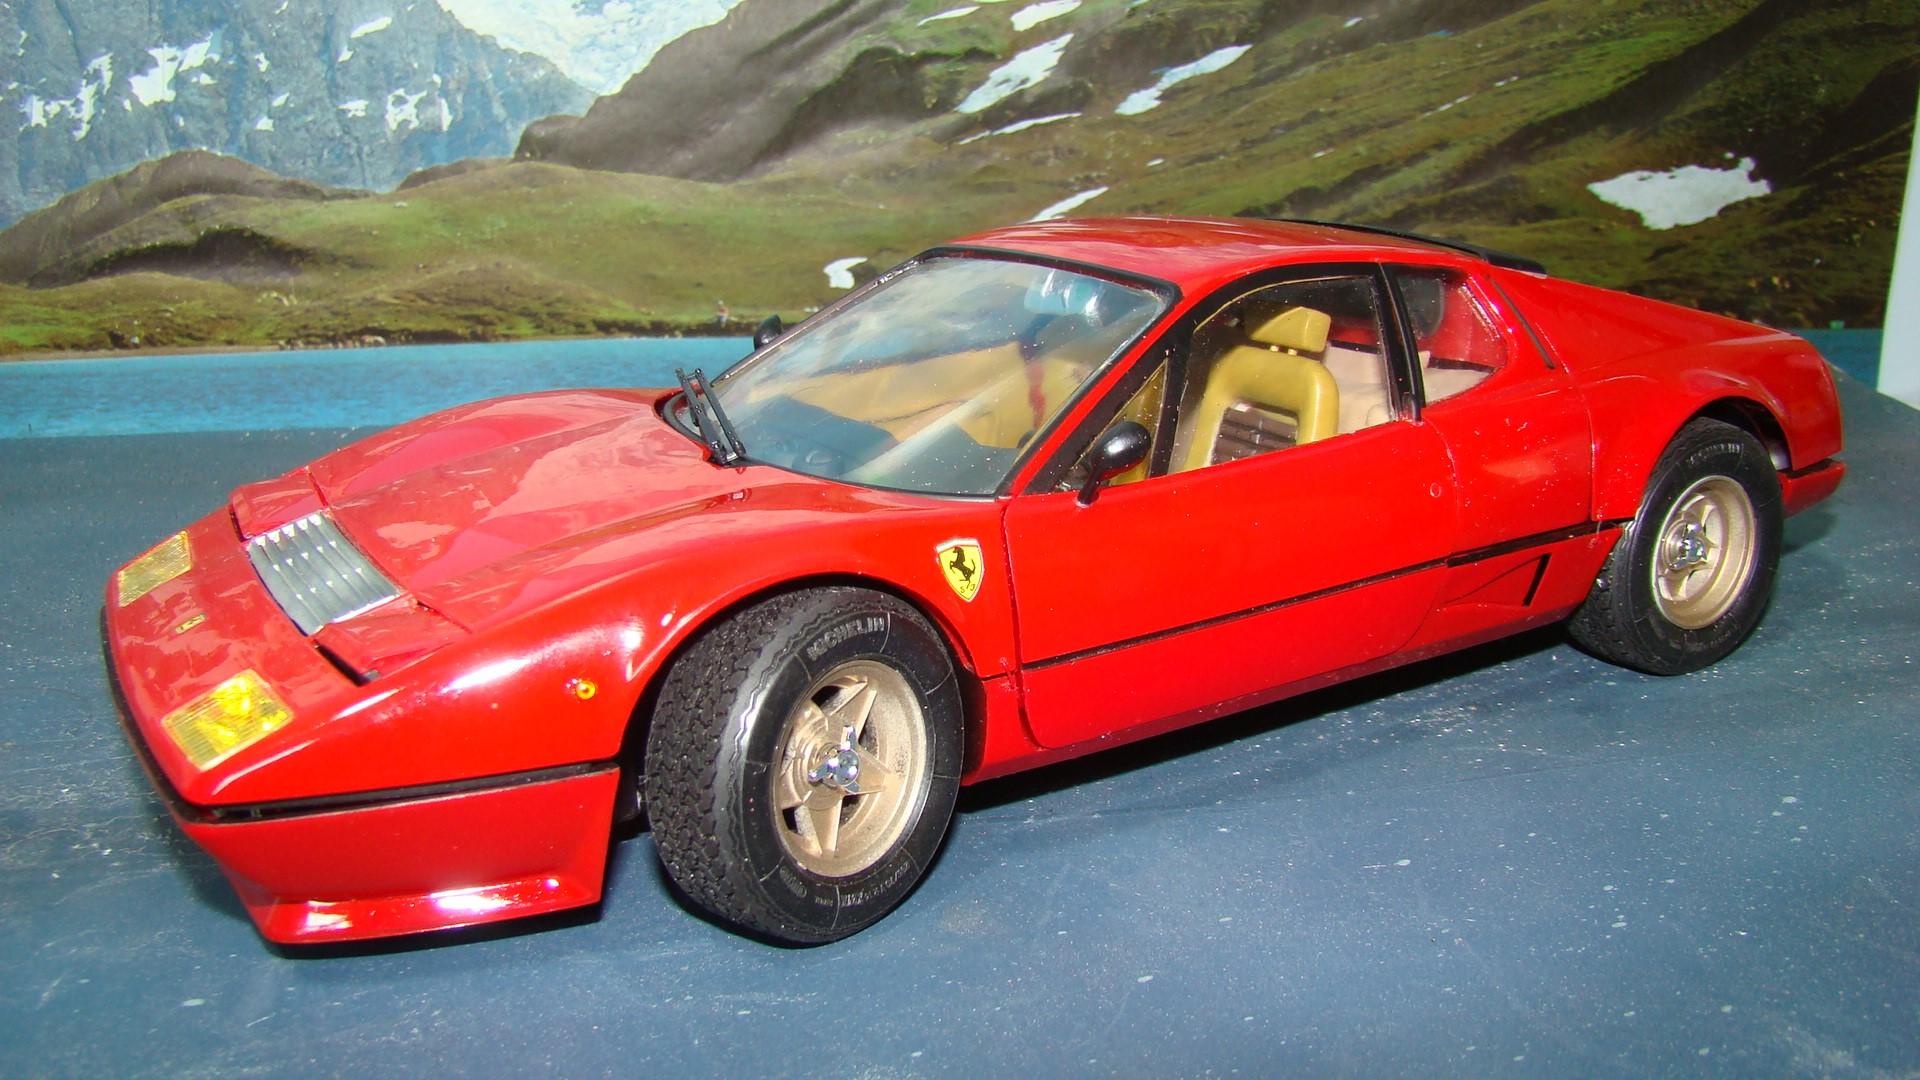
This kit hold special memories for me. It was purchased from a department store along with 3 other Fujimi kits in the same scale. They were all $20 but the store was getting out of the model business so they were 20% off. The other three were Ferrari Testarossa spyder and berlinetta and the Porsche 959. These kits have a wealth of detail plus a lot of working features which is what atrracted me to this scale in the first place. A long time on the priority list I finally painted the body in 2020. Testors Model Master Guards red was the choice and their clear for the top coat. I also sorted and painted all the parts. Since it was enamel I knew it would be a good month before it cured so everything went back in the box. That is until now. Details of this build are below the pictures. Completed car with everything open. Getting all this to work and fit was a chore. Seats are a color of Gunze Aqueous called Middlestone H71. It represents the leather used in this period Ferrari quite well. Flocking for carpet. There are four screws (two on each side) that hold the upper body, interior floor pan and chassis all together. Glue was never going to hold this assembly in place so the screws were the answer. Considering this kit is motorized the engine was quite well detailed and engineered. The struts holing up the rear deck were included in the kit. I opened the vents in the deck and would up eliminating the attachment points for the struts. It wasn't easy getting them attached where they were supposed to be but in the end it all worked perfectly. Grain of wheat bulbs were included in the kit but I replaced them with LEDs. They fit better and look better. The headlights go up and lock in place but were very fiddly to get right. Rear veiw with the lights on. Tail pipes are chrome tubing ( I lost one of the kit ones anyway.) It took forever to open all those vents. Rear Ferrari emblem was bare metal foiled before painting then exposed before clear coating. Full side veiw. Body fit on this kit was not bad but still needed some tweaking. Wheel color is a mixture of gold /silver/copper. Campagnolo cast these wheels special for Ferrari and this is the actual color of the metal they used. They were not painted. Thanks for looking and comments welcome.