Search the Community
Showing results for tags '1/16 italeri'.
Found 2 results
-
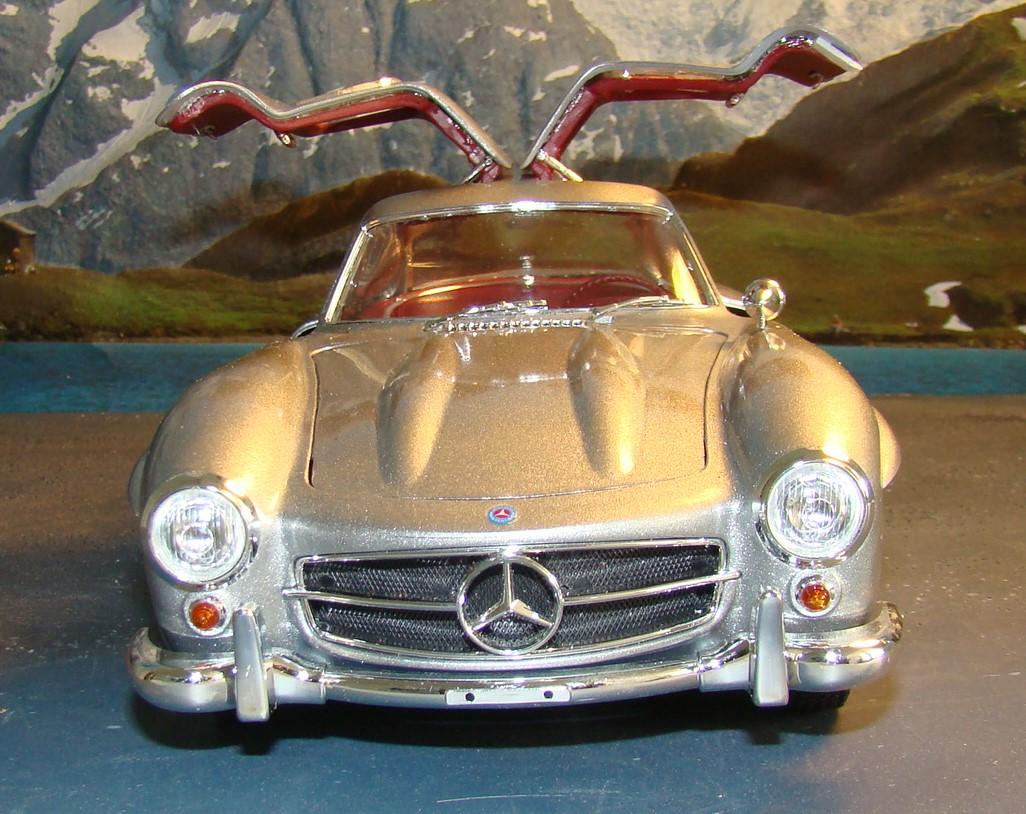
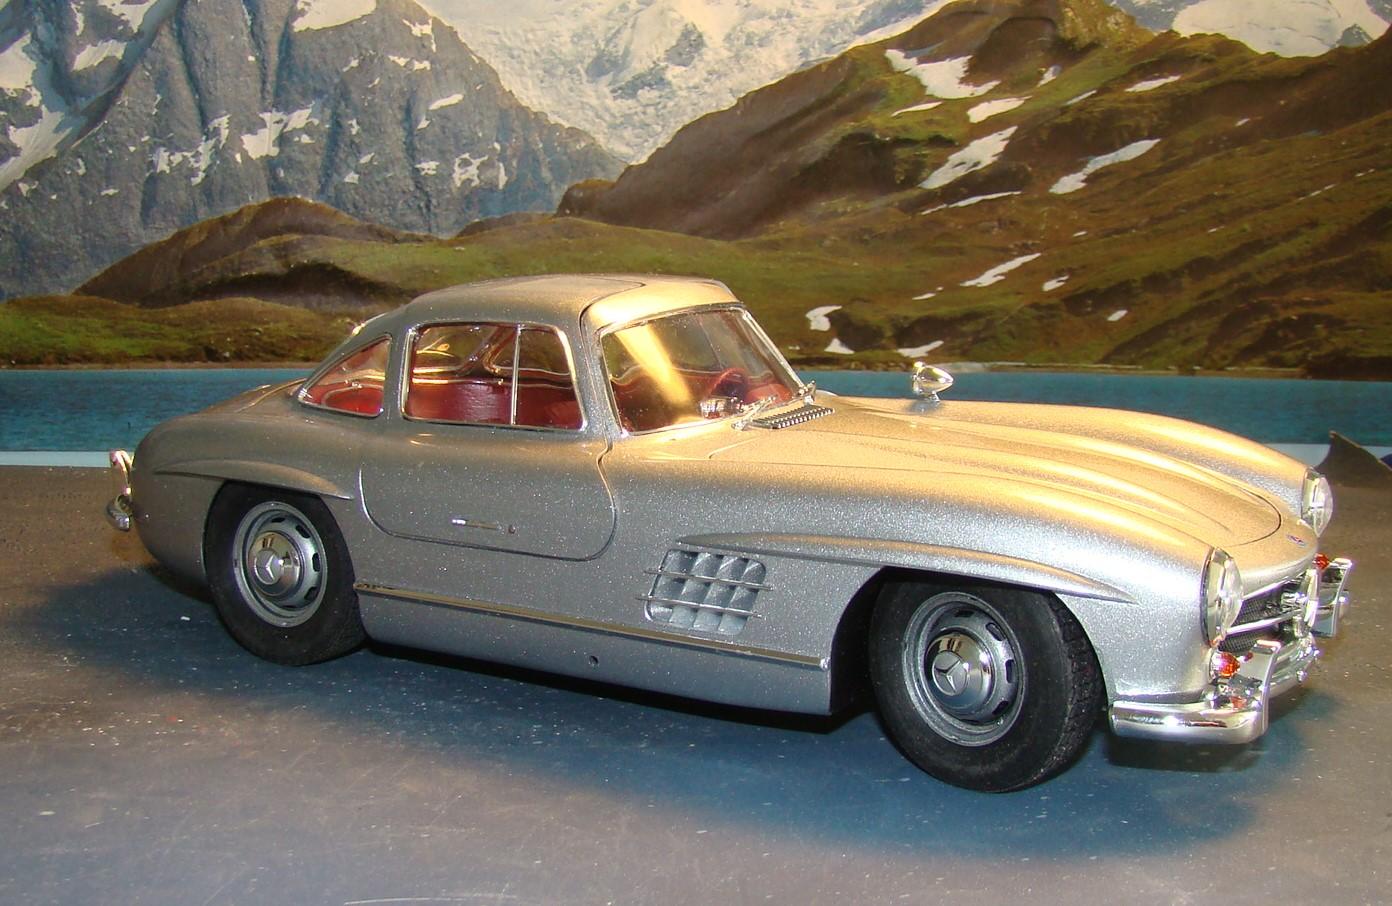
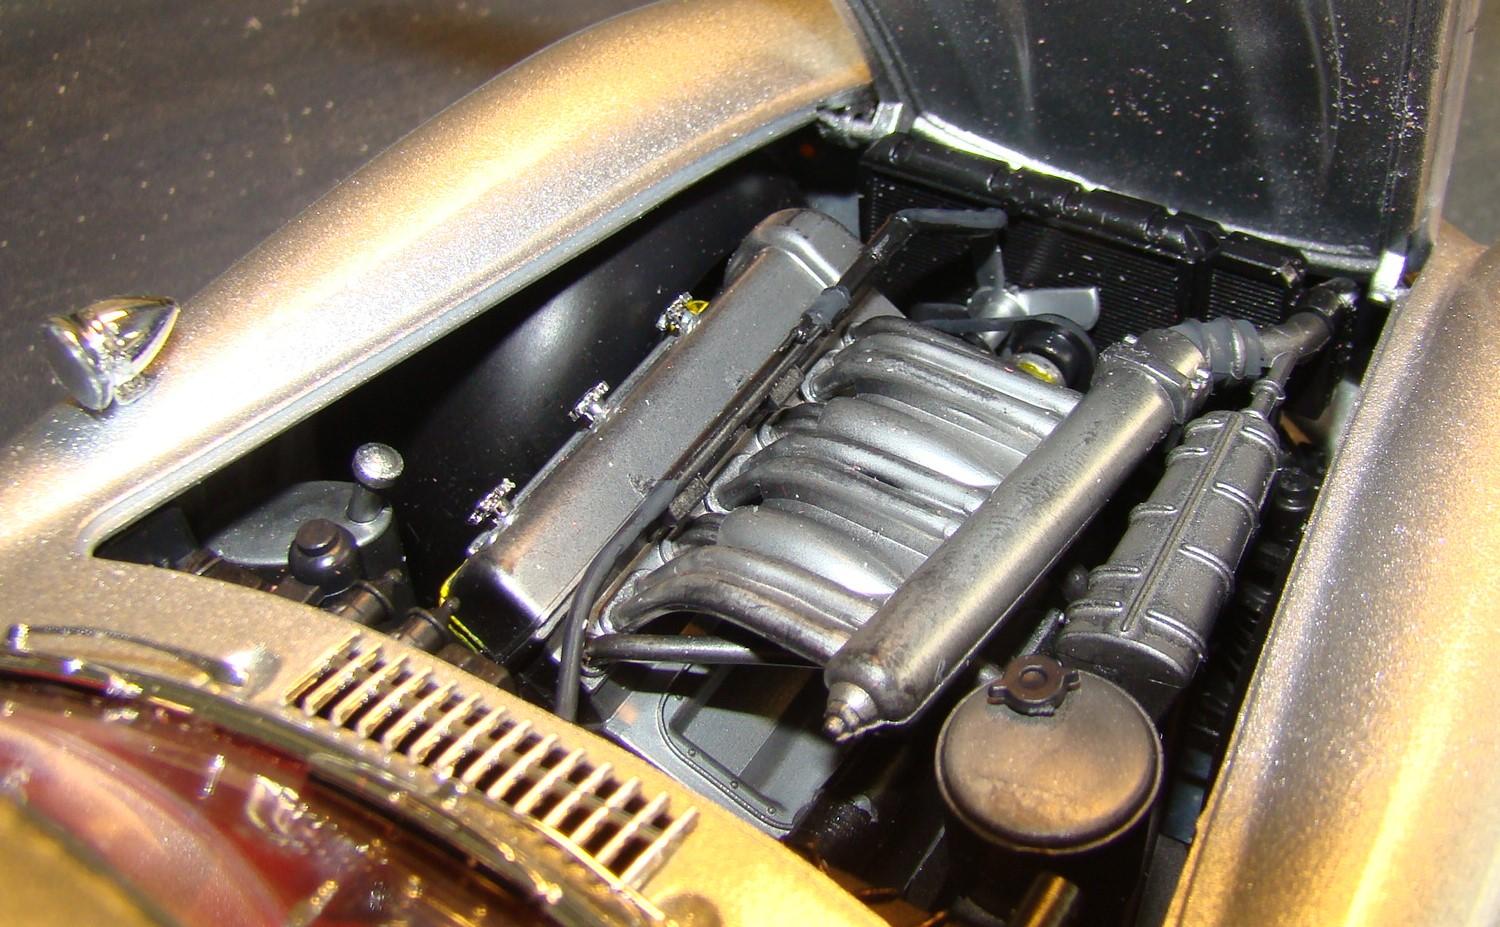
This is a kit that almost didn't get built. While rummaging through my stash I accidentally leaned on top of this box and crushed the roof in on the painted and polished body. I had been excited to finish this kit but not so much now. Months later I decided to attempt a repair. After much careful gluing, filling, sanding and repainting I was successful. I recently polished the roof out and decided it was time to finish this. Color is Testor One Coat Laquer #1803 Diamond Mist. Can't say this was exactly a joy to build as it is an early Italeri. almost all of the alignment holes had to be enlarged and there were many fit issues. But the kit has its good points too. In particular the glass and chrome surrounds worked very well. Below are comments below the pictures for the rest of the details on this build. Thanks for looking and comments welcome. Wouldn't be a Mercedes Gullwing with out this shot. This particular car has to be the most modeled subject. I have this car in several scales from 1/87 to 1/12. Its a cool collection. Interior with drivers door open. I chose a darker red than normal and like the regal look it affords. I also had a flocking to match. Interior was very well appointed with all the approprioated chrome doo-dads. Dash was chrome but painted to match the exterior which is common to this car. Finished car on its wheels. Hood, trunk, and doors all open. Wheels steer through the steering wheel. Chrome trim fit was excellent and most enjoyable part of this build. Rear veiw has some good detail. That 300SL chrome logo has an interesting story. I used Micro Liquitape to apply these and left this logo on my bench to dry. Later when i went to attach it , it had magically disappeared. What had happened it is it had attached itself to my sleeve (its a contact cement) and I had gone upstairs to take a nap. Several hours later and just before going to bed I discovered the logo in the blanket. I rushed downstairs and attached it. You just don't usually get this kind of lucky. Side veiw shows the nioce fit of the window trim and glass. The chrome surrounds were seperate pieces and I worried that it would be a problem. Not so. The doors on ths other had, consumed a lot of time to get working properly. Italeri included the hydraulic struts to keep them open and eventually this all worked out. The true test of a Mrecedes Gullwing kit is how the doors fit. During mock-up they fit great but when the glass was installed not so much. This side looks good, the other is marginal. Italeri did a nice job on the fuel injected six. The engine is laid over at a 45 deg angle. The nice detail on the injector and distributor is hidden. The hood fit down nicely. Thanks for looking

-
Have you ever had one of those projects that just seems to drag on and on. Well this was one of them. I spent a lot of time drilling out holes, filing things to fit, adding pins and waiting over night for glue to dry. This was an early Italeri kit and the engineering was...well...not as good as their current kits. And being 1/16 scale meant that everything important had to fit. Big scale kits are like that. But it is done now (sigh!!) and for the most part I am pleased with the results. Color on this one is Splash SP-059 Rosso Scuderia. Clear is 2K. Model particulars are in the captions. Thanks for looking. Engine on this kit was fairly well detailed and fit. Rear suspension...not so much. I added some wiring and hoses. All done and ready to race. The overall stance and look of the model came out well. The rear deck on this kit gave me the most problems. It fit but tended to spring apart. Locater tabs and pins were required. There are two small handmade latches for the fenders and two more pins on the rear. Another u-shaped clip on the other side was needed as well. The glass fit well but that was about it. Drivers side view. That tiny clip is just behind the rear tires. Wheel centers were sprayed flat metallic grey. Doors open and close quite nicely thanks to some magnets. One can be seen on the lower door sill. just push them closed and they fit with a satisfying "snick" Interesting feature of this kit is the wheels steer through the steering wheel. Interior is kinda sparse so I added seatbelts and some wires and hoses. Front cover opens and there is some nice detail here. Getting that hinge glued in place and working was a real challenge. Front cover rests oon two square pins in the bodywork just in front of the door. The plastic in this kit was brittle and a lot of the delicate body pieces broke and had to be re-inforced. That included those square pins which were replaced with square styrene rod and with metal centers. Thanks for looking. Comments welcome.