Search the Community
Showing results for tags 'gtr'.
Found 4 results
-
Finished this one back in the summer. It is tamiya's R34 gtr. Pretty much box stock other then the aoshima wheels. Very nice kit and builds up great. The paint is tamiya chrome yellow.
-
Continuing with the 50 years of GT-R theme here is my 2 gen GT-R I build from the LB Works kit. It’s all OOB stock. Here’s a little info from Japanese Nostalgic Cars website. “At the 1972 Tokyo Motor Show the most anticipated race car in Japan was unveiled at the Nissan stand. The Hakosuka Skyline GT-R was the most beloved touring car in the country, but its time was coming to an end. Nissan was unveiling the next generation of Skyline GT-R, the Kenmeri, and was so confident of its ability to continue the legacy that it debuted the car in race guise and gold Kobe Seiko 8-spoke wheels. Except, it never raced. The “73” on the side indicated the year the Kenmeri GT-R was supposed to storm the track. Before it could, though, the 1973 oil crisis happened and Nissan canceled plans to race it.”
-
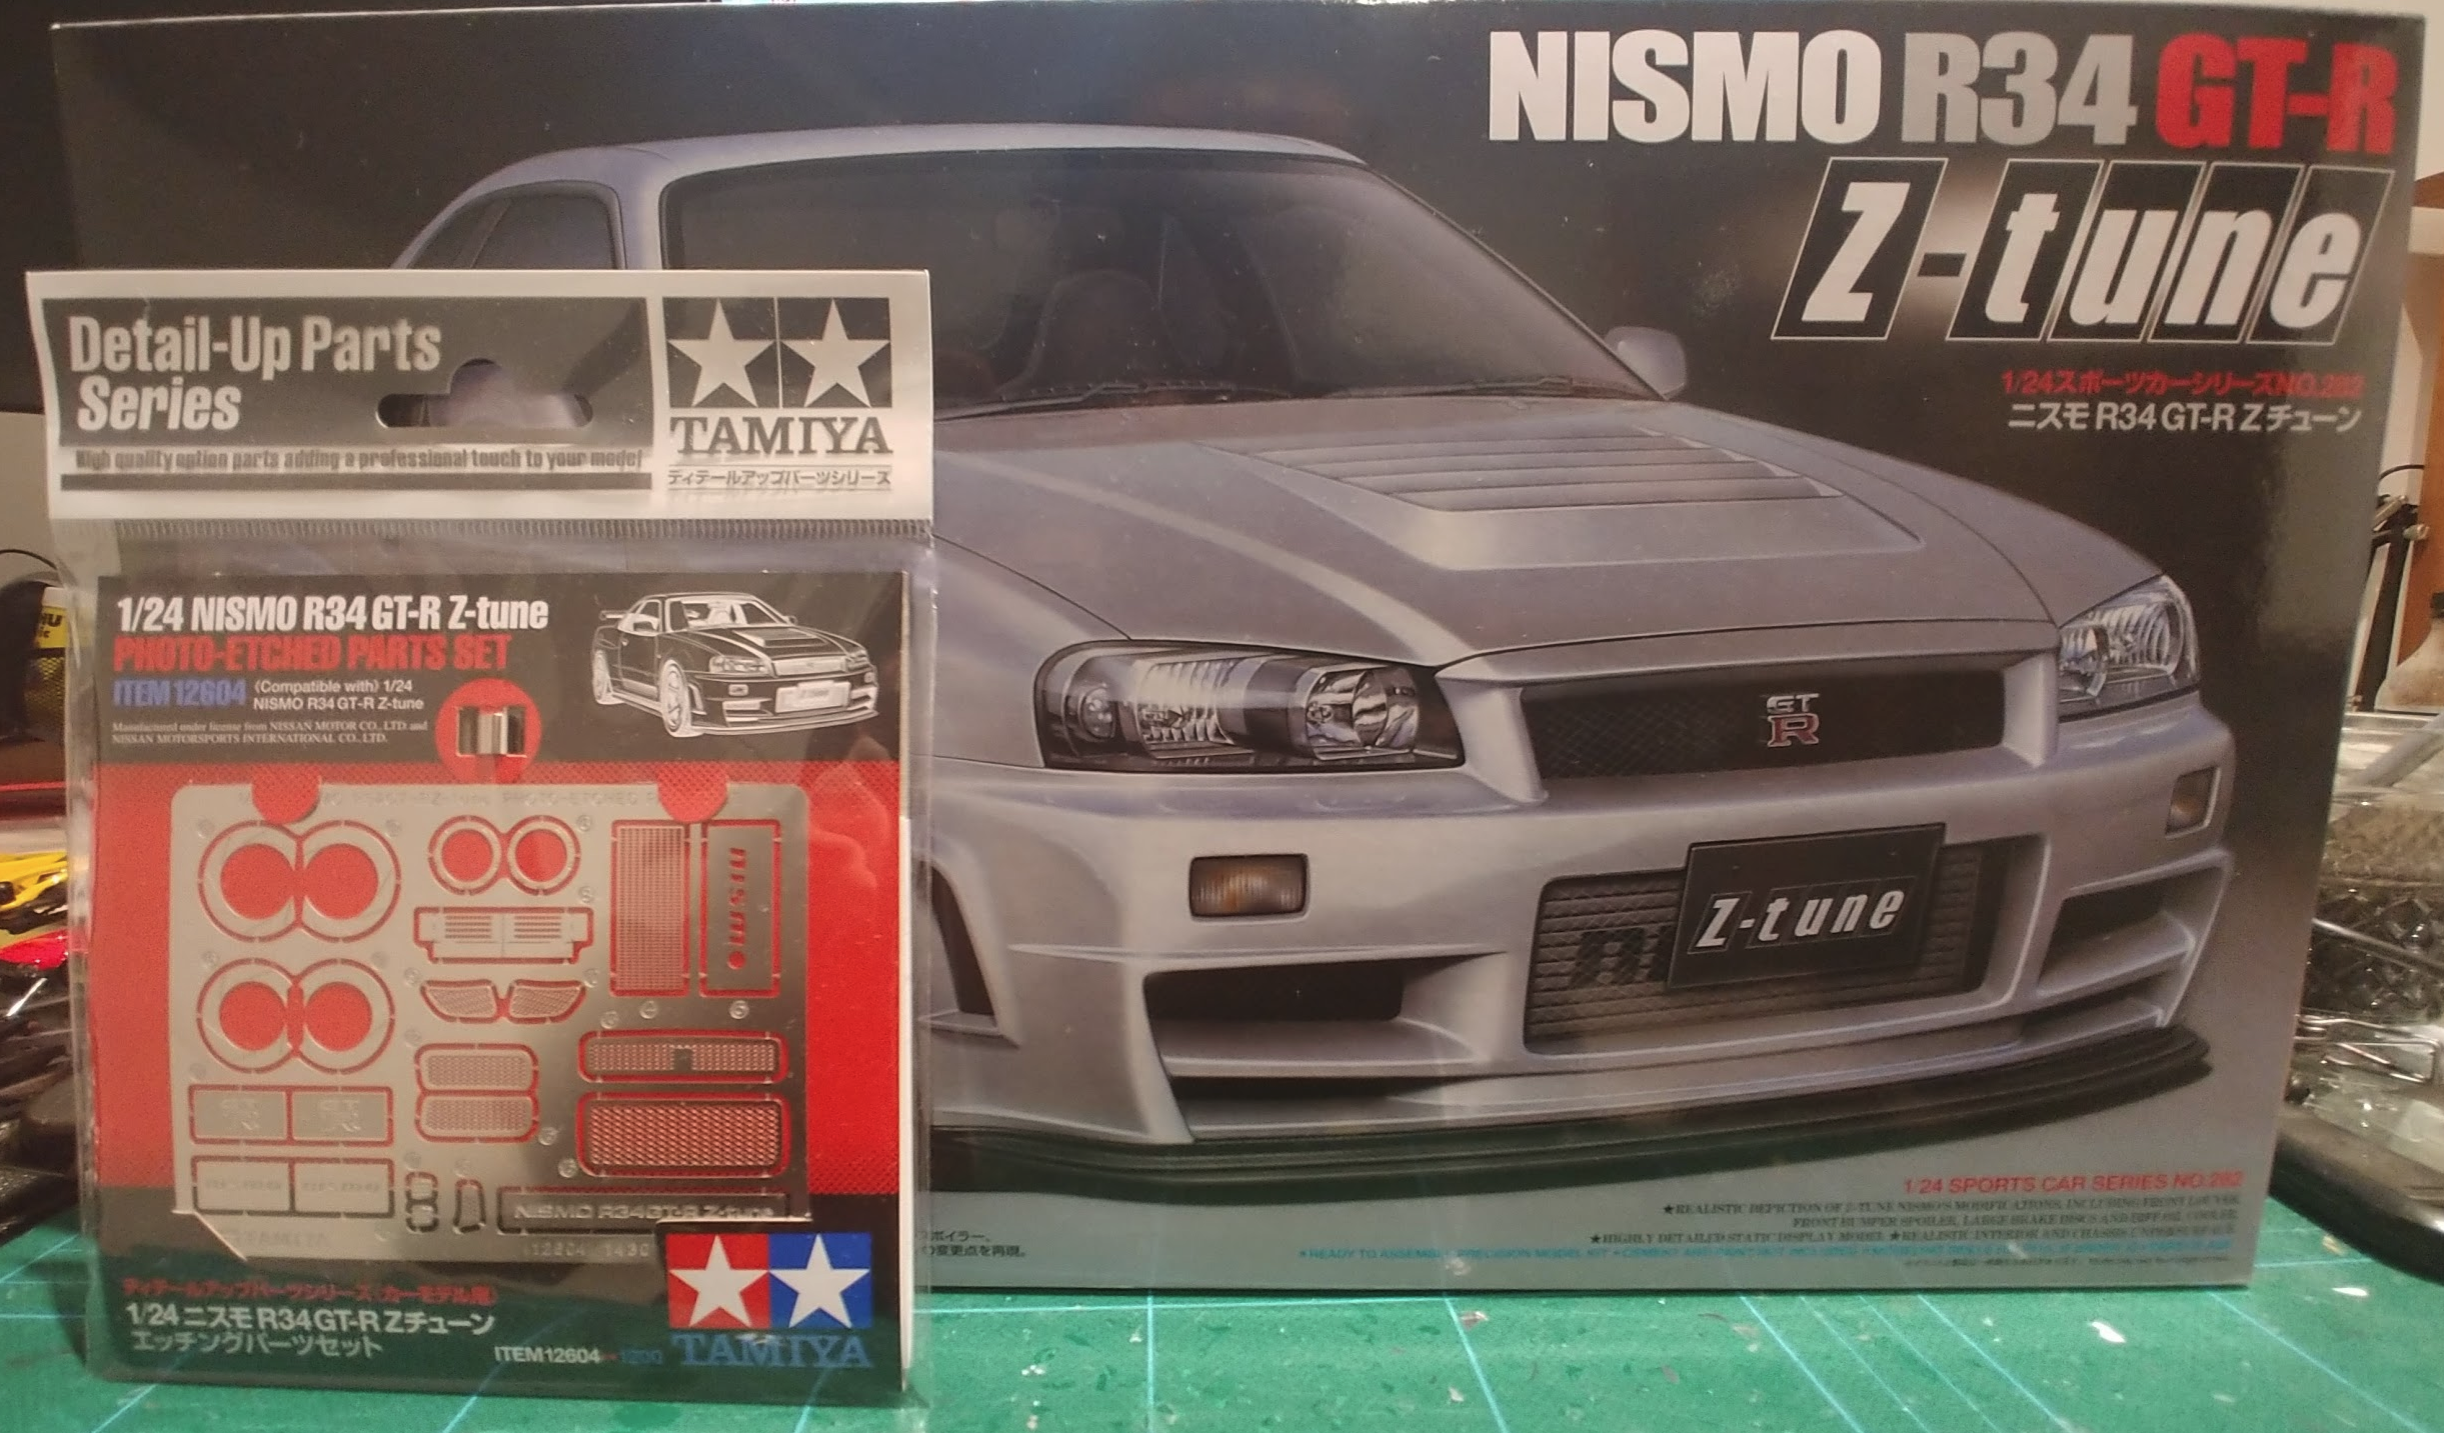
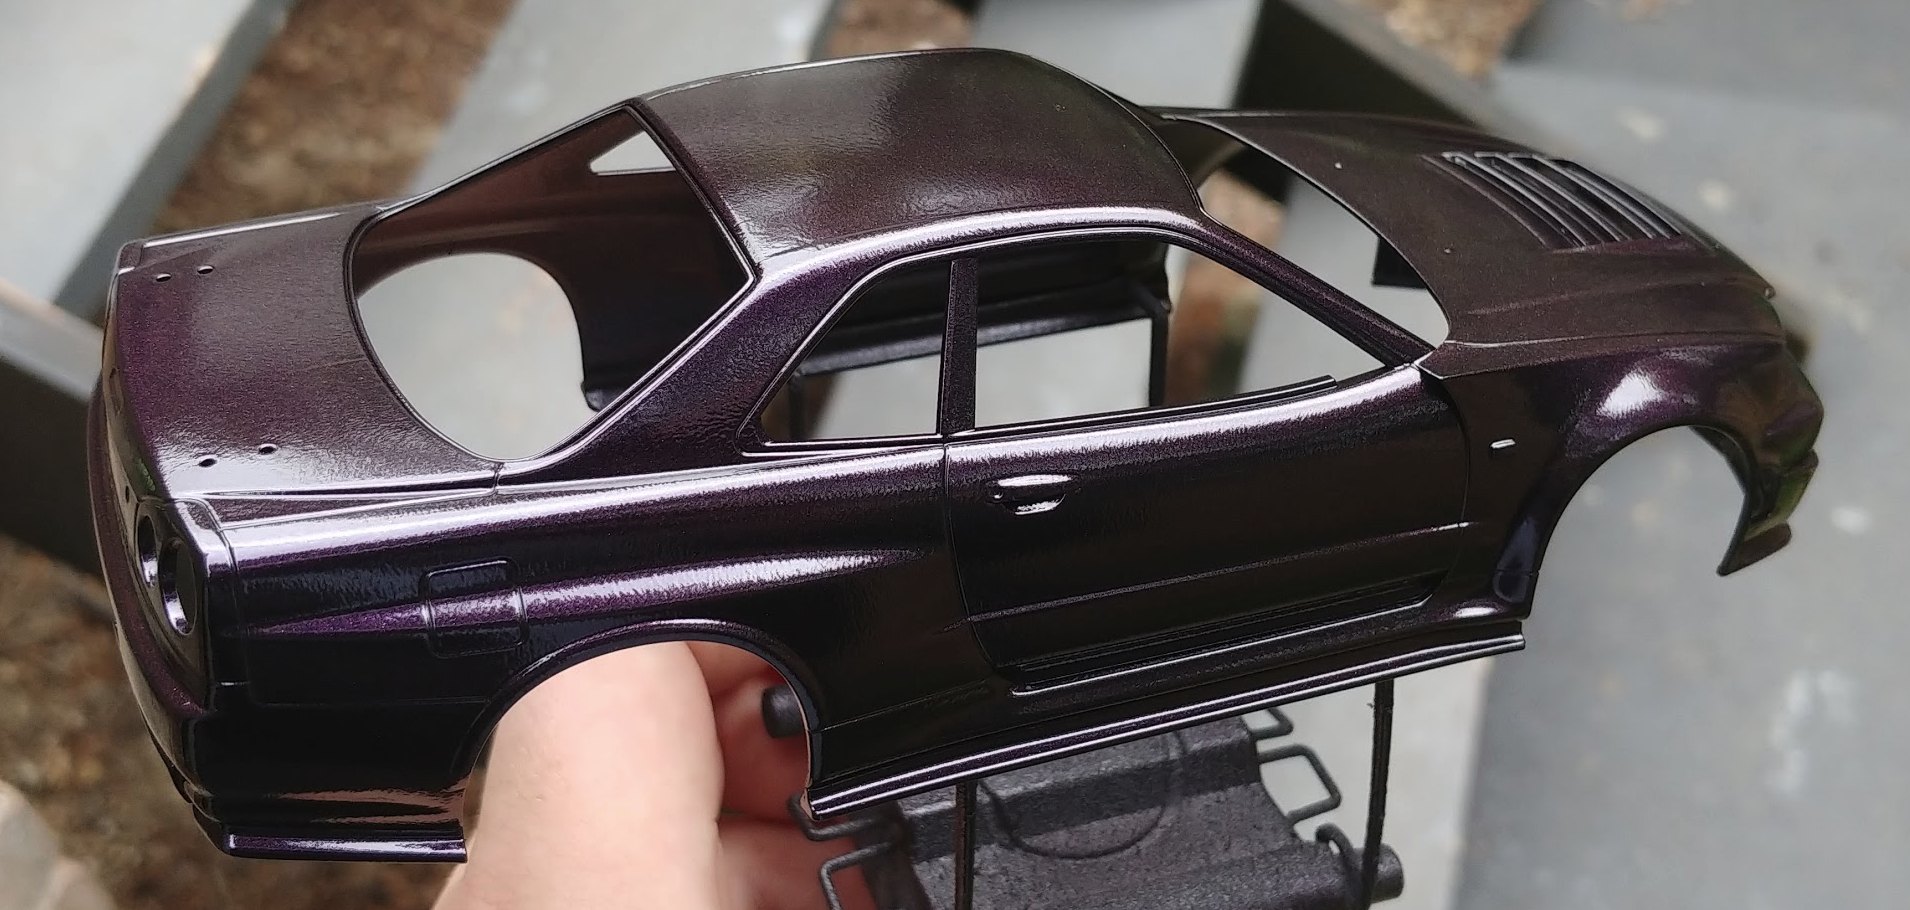
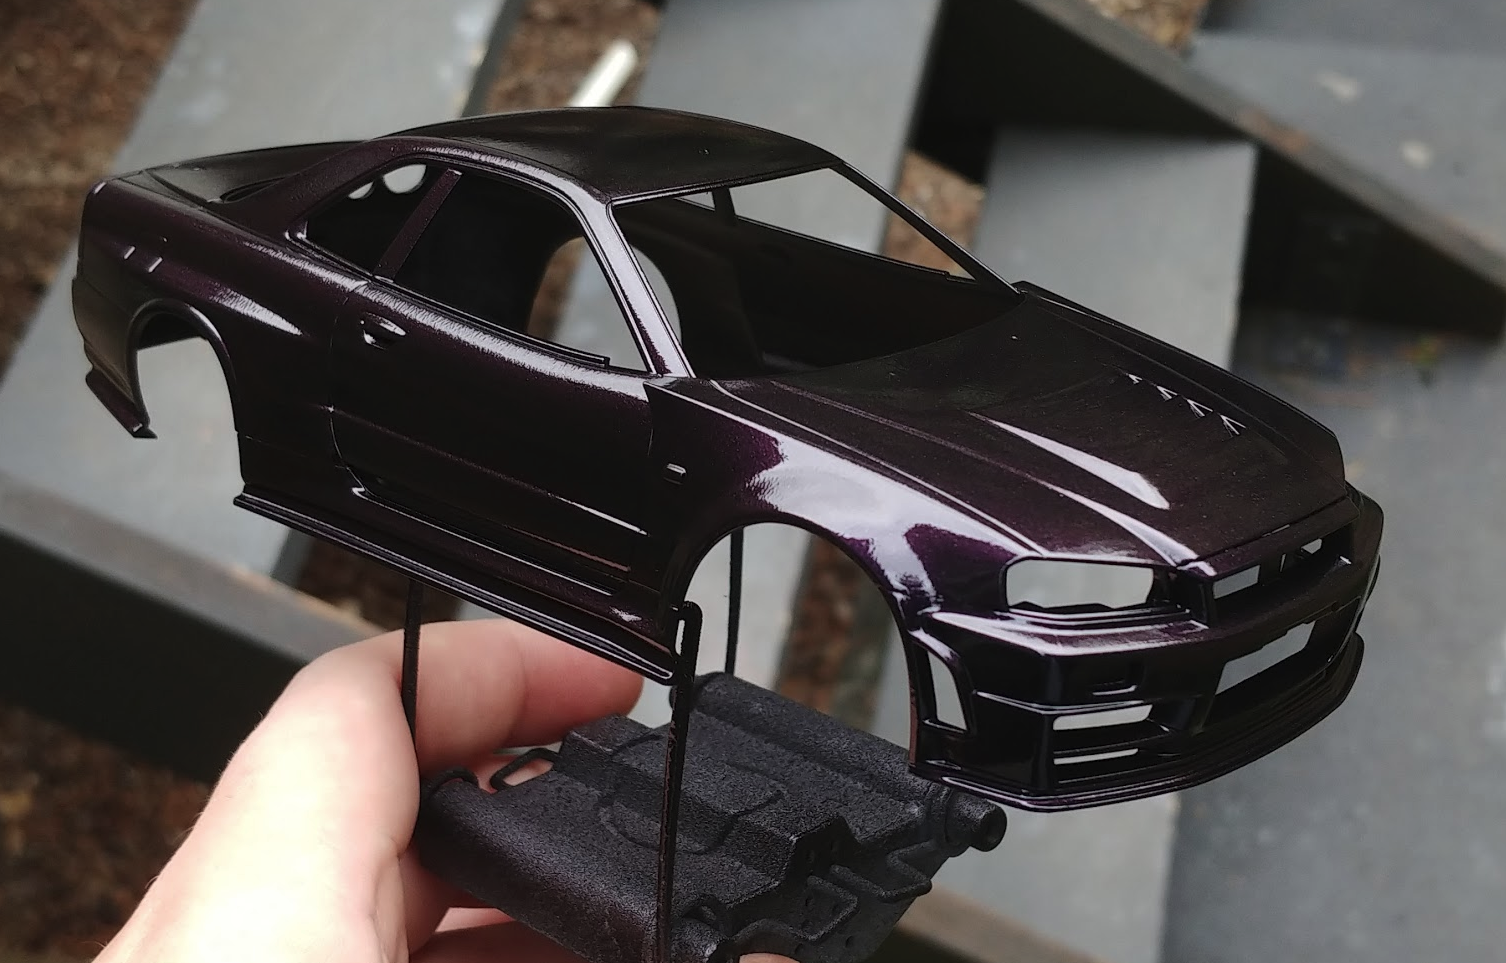
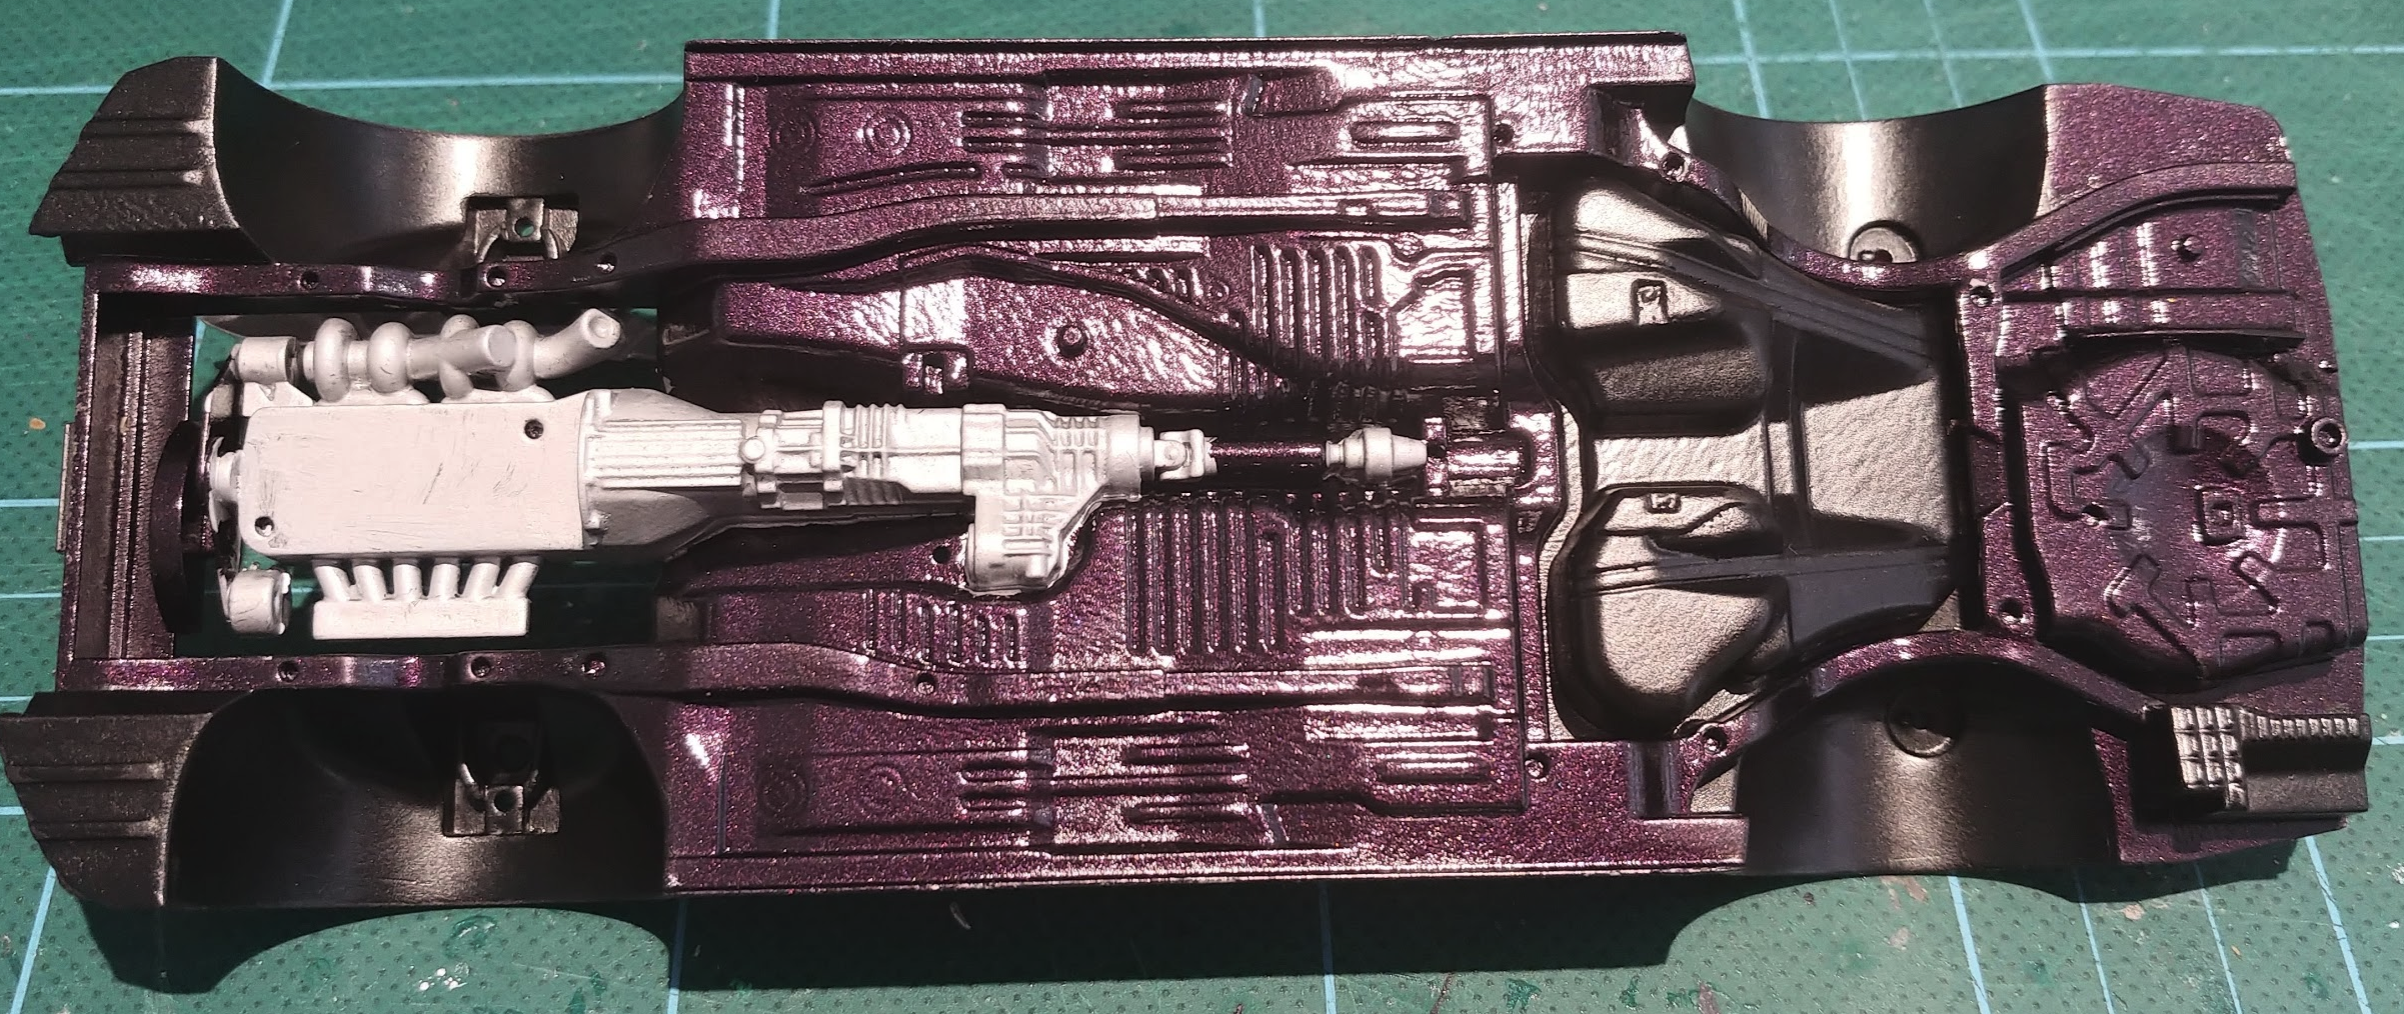
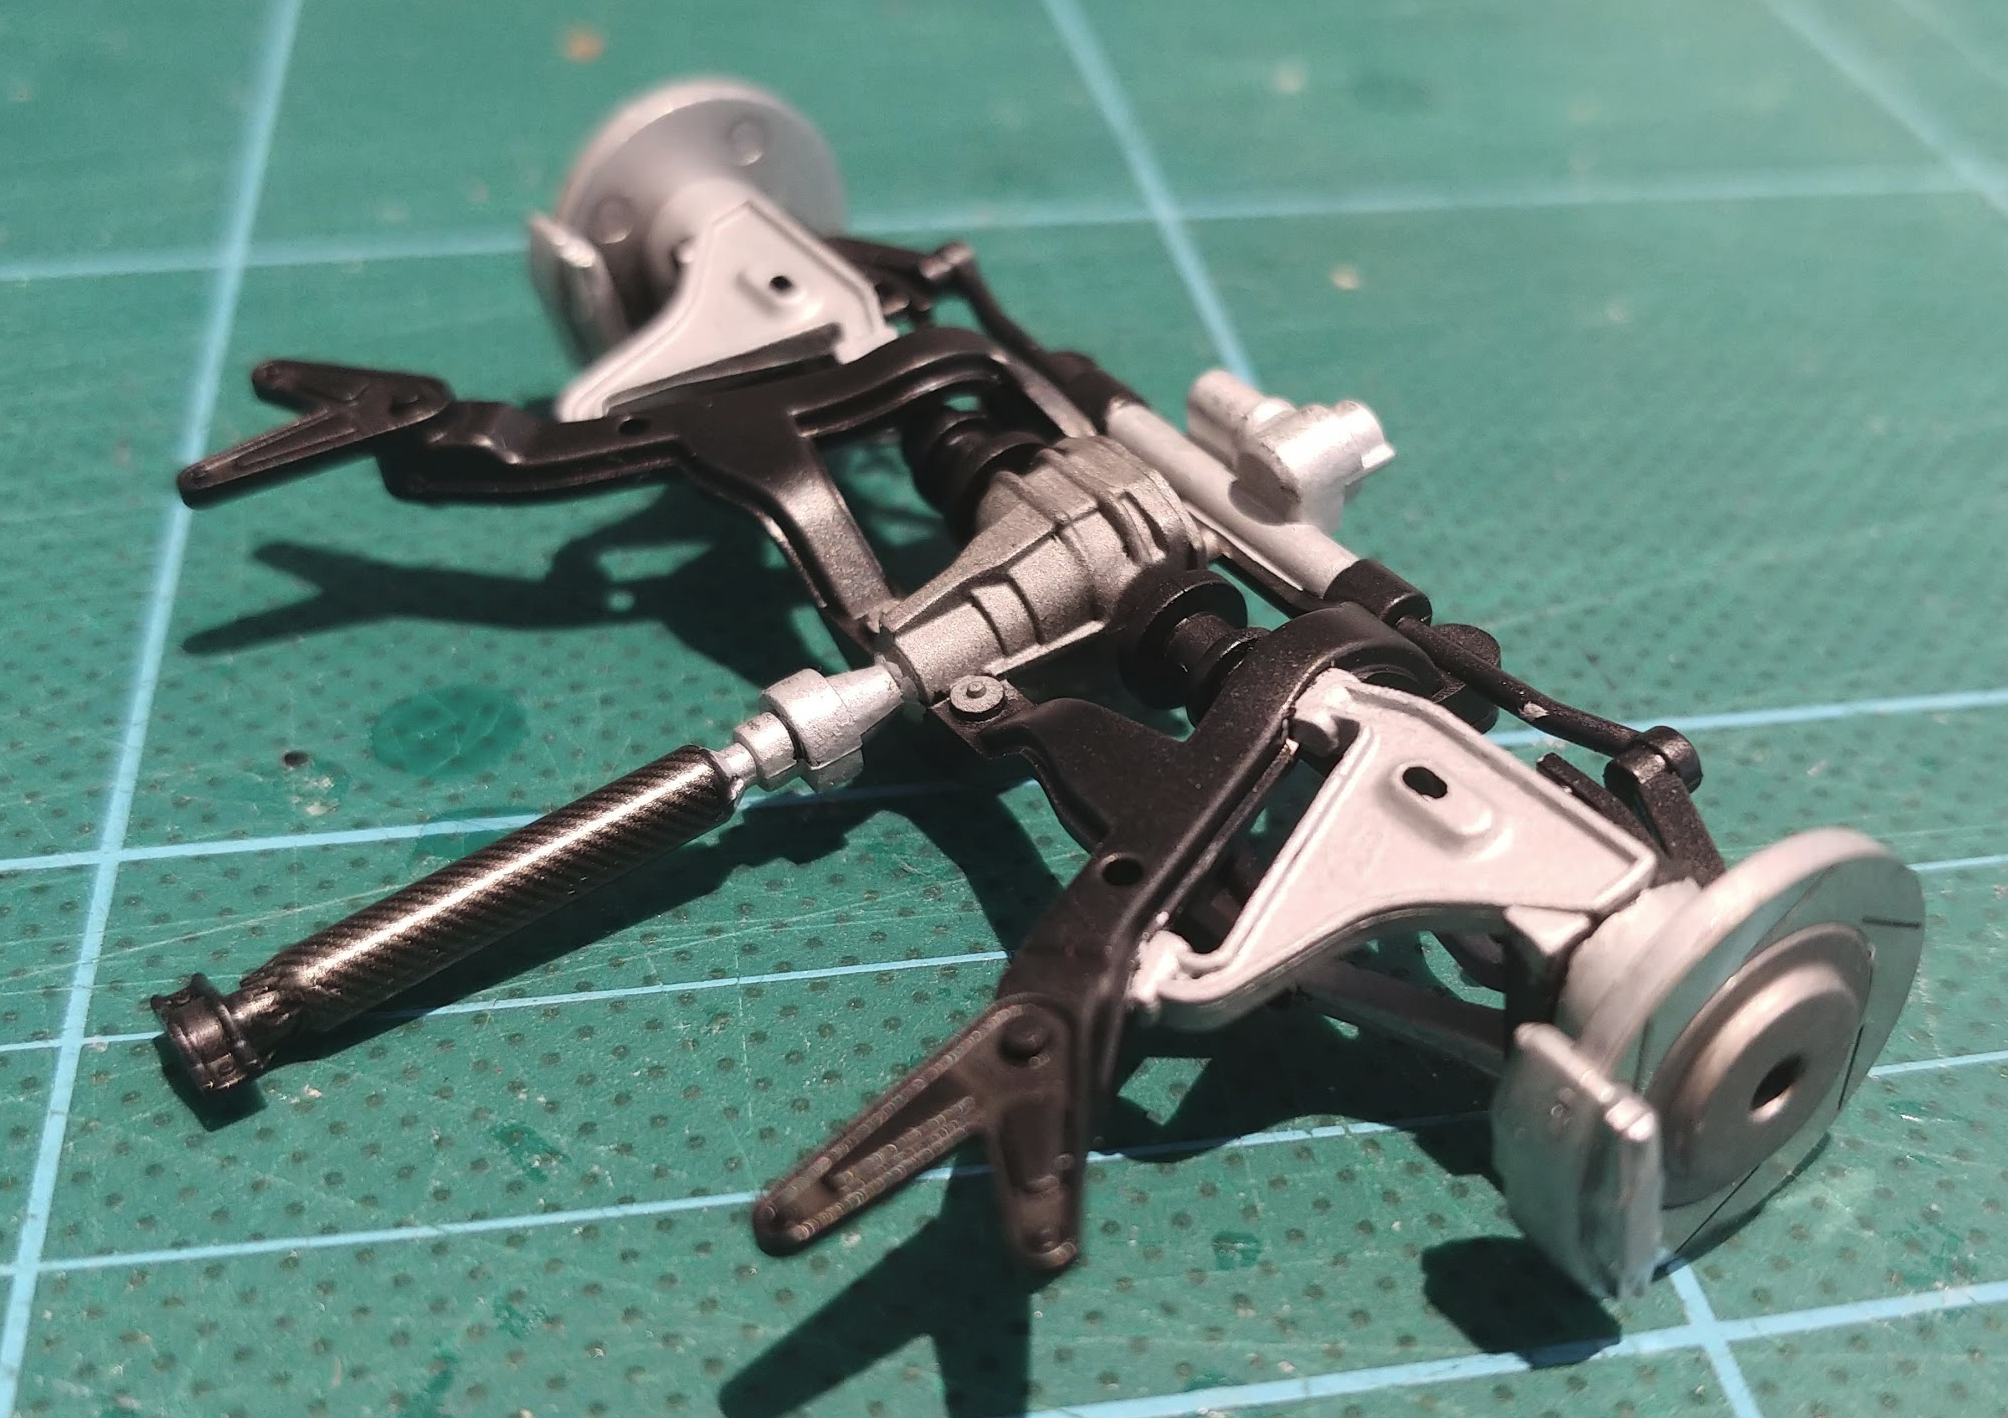
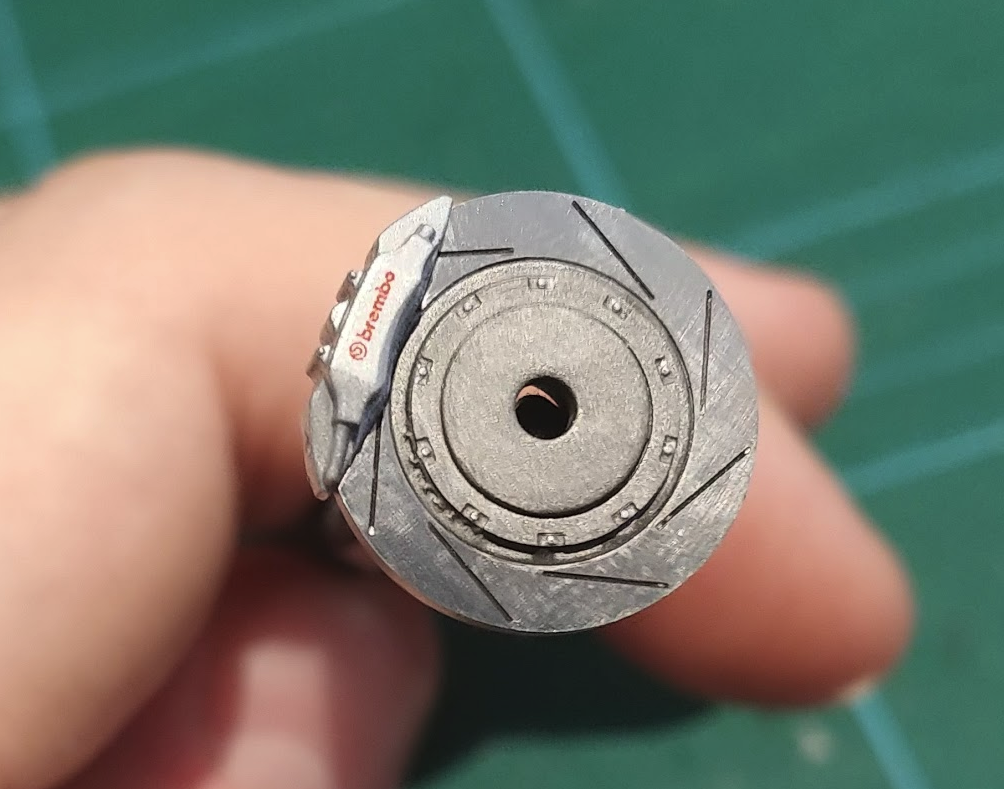
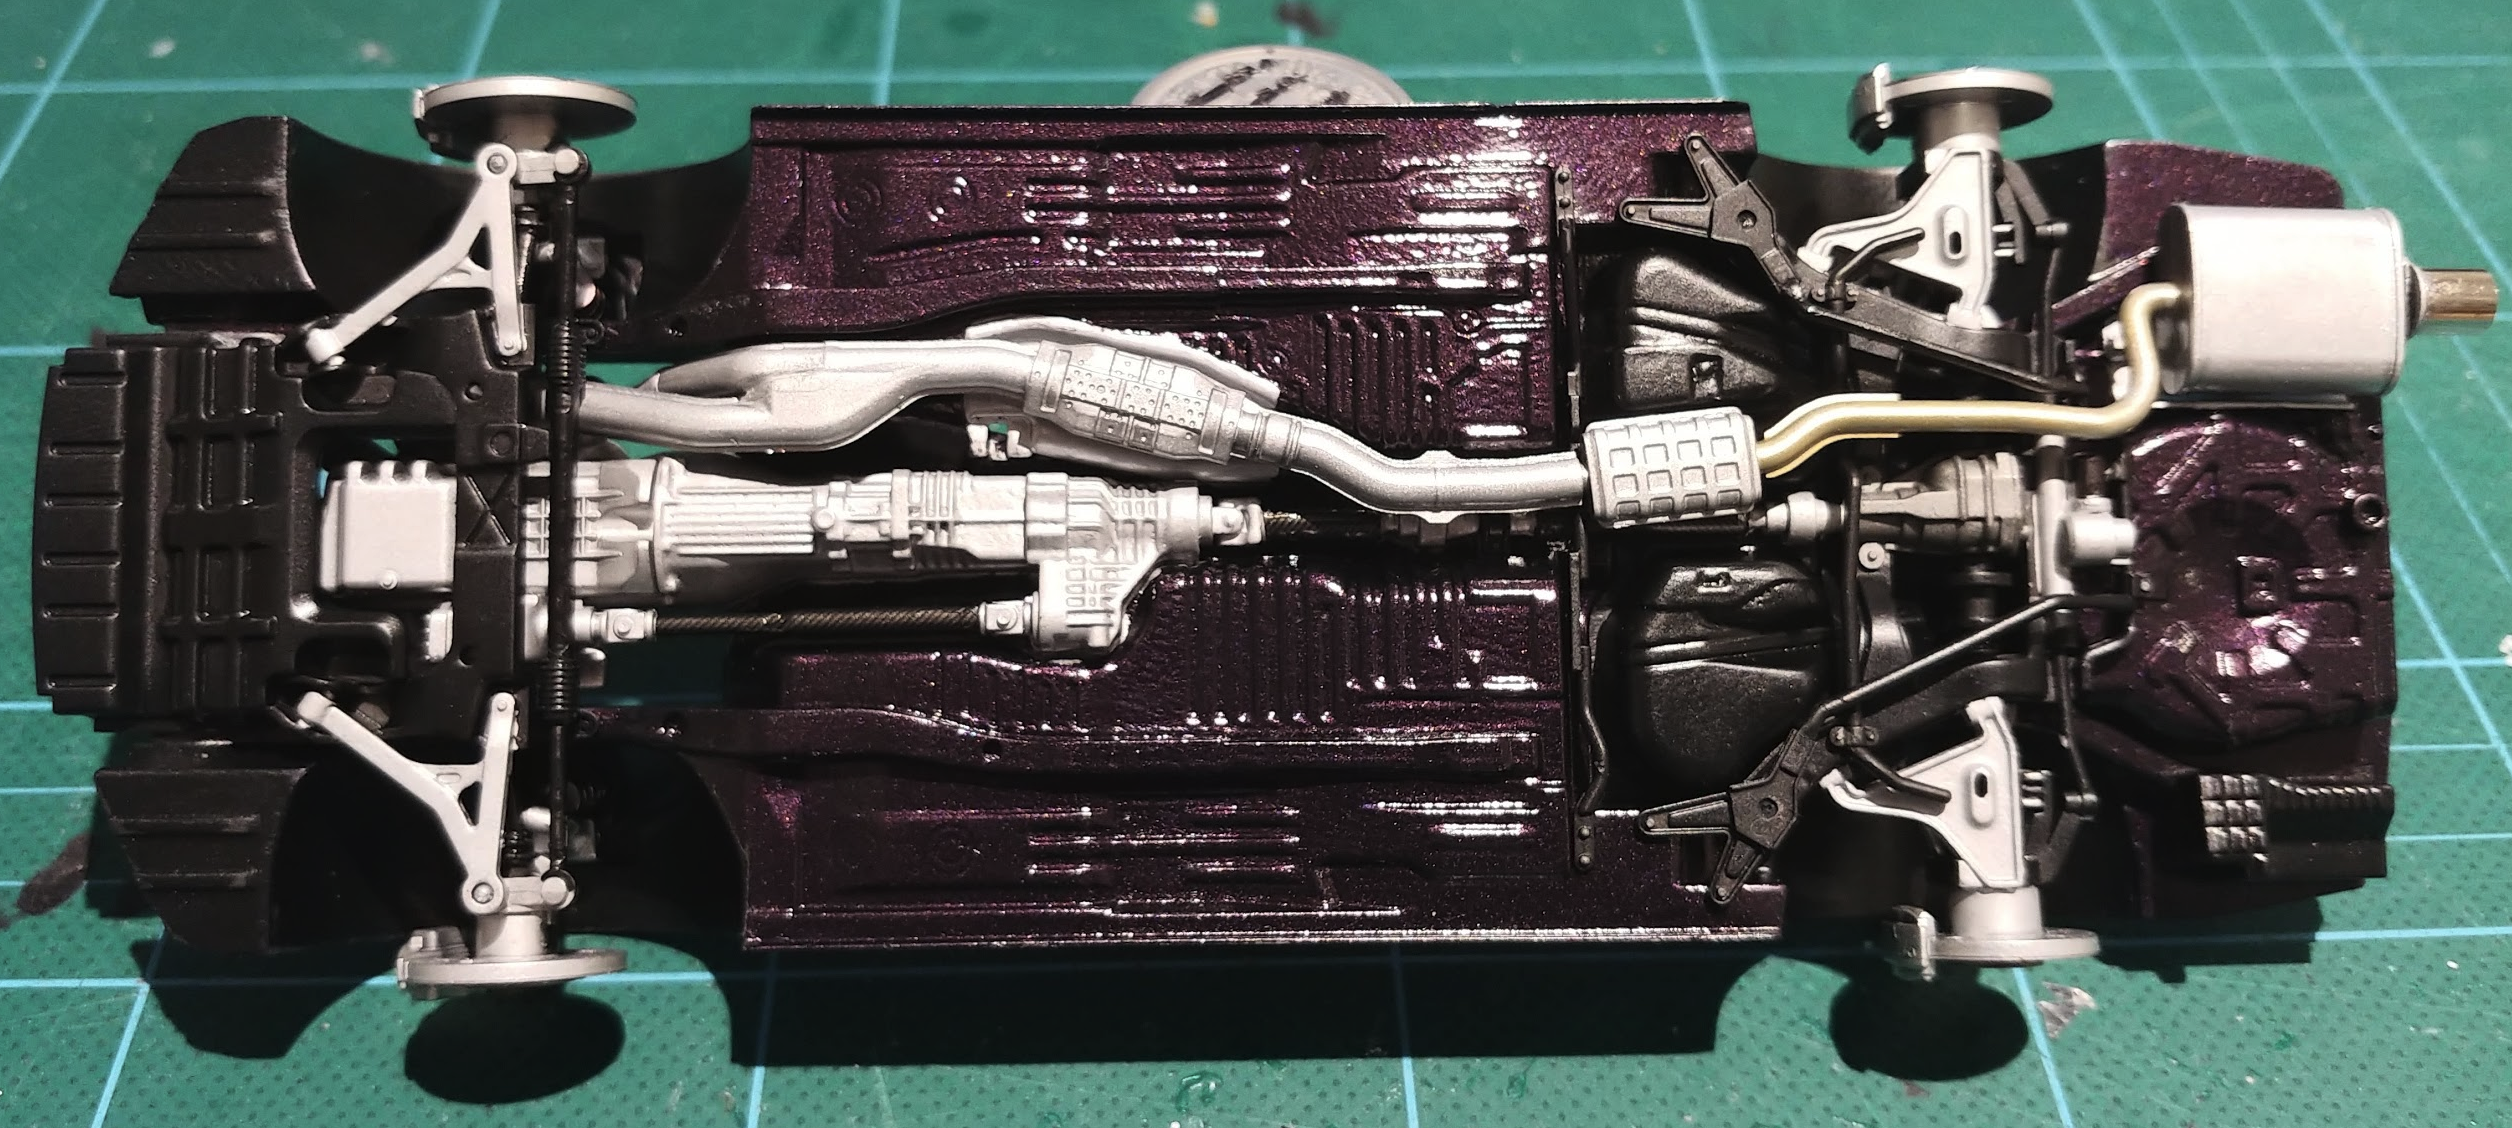
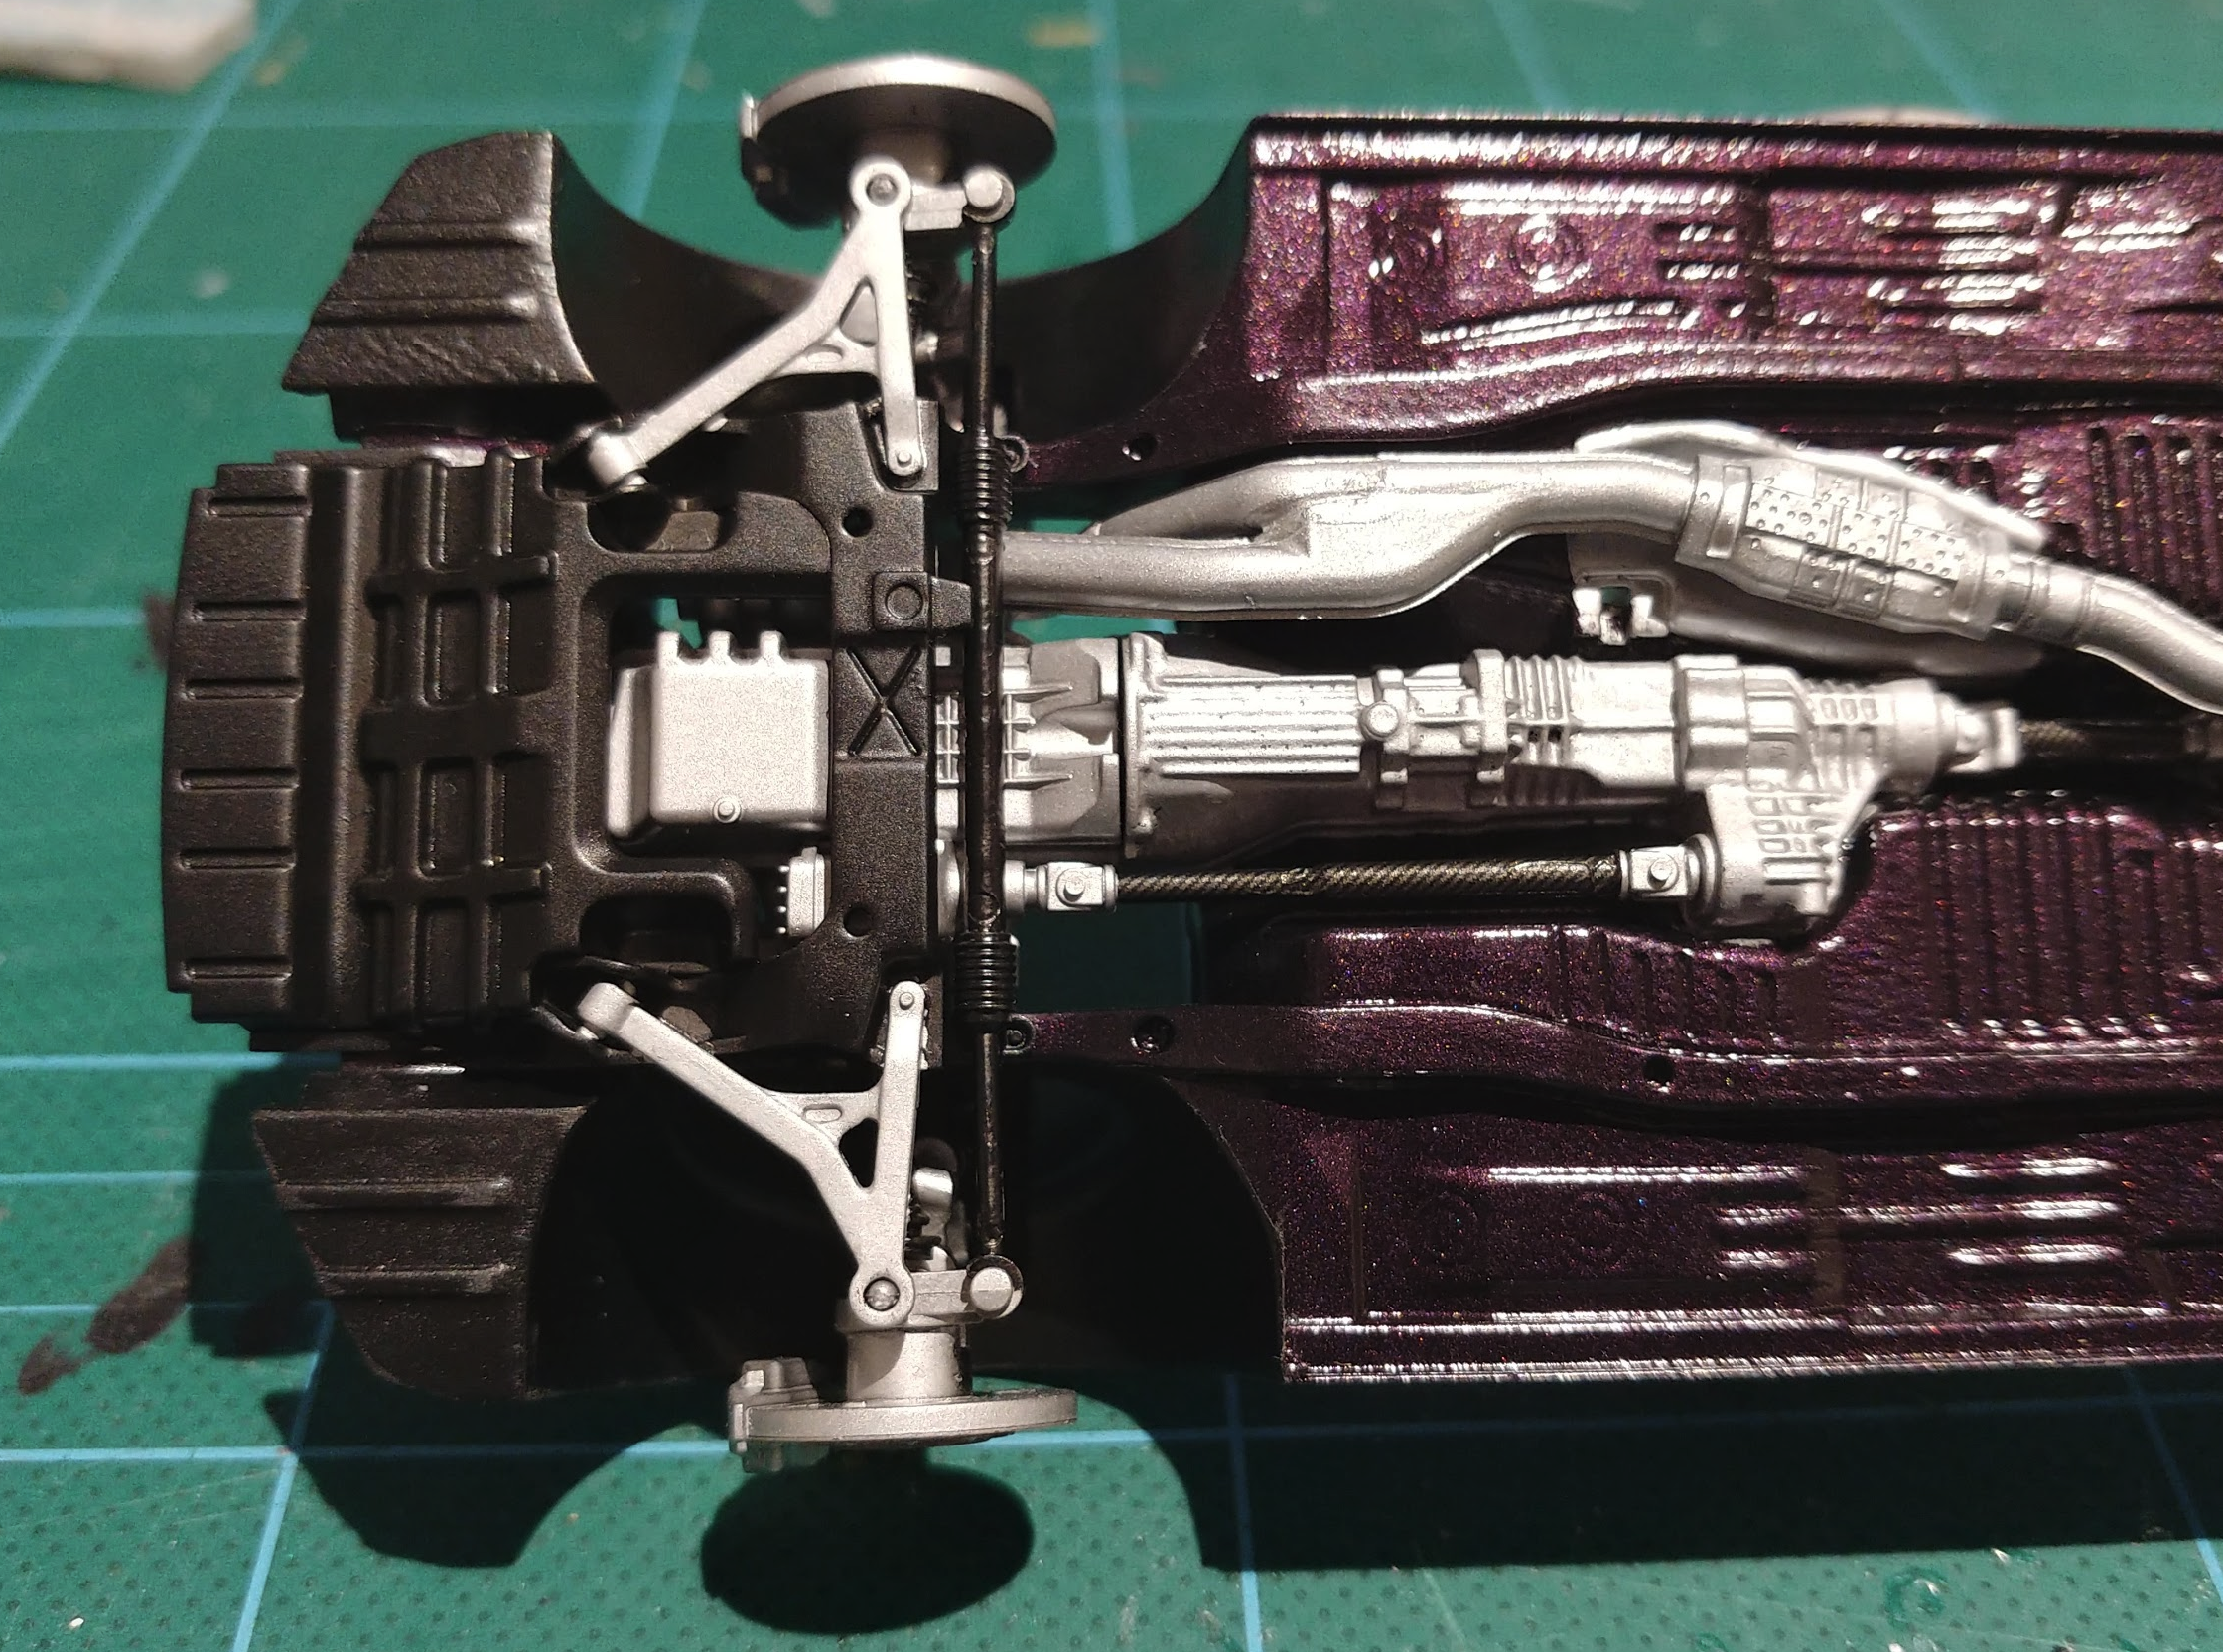
Hi All, I recently started my next project which is the Nissan Skyline R34 GTR Z-tune by Tamiya. Along with the kit, i bougt the tamiya detail up set for a bit more detail and realism. The Z-tune is my favourite version of the R34 skyline, and also the most rare, with only 19 produced worldwide. 18 of the 19 were produced in silver, but one was built in Midnight Purple. This is one of my all time favourite car colours. It apprears black in shadows, and purple in the light. In order to get this colour, I had to go to the autostore, and get them to mix me a can of touch up spray paint to the correct paint paint code (Nissan LP2) I know that zero paints make their own version of this colour, but its not available in Australia (and i dont have an airbrush...) so spray can it had to be. Unfortunately, the spray nozzle didn't allow the paint to lay very flat. There was a fair bit of orange peel in the body & chassis. The body can be fixed with a sanding and then polish, but that will have to wait until it is properly cured. While the body cured, i got working on the chassis. Most of this had to be the same as the body colour. Again, because of the spray nozzle being too blotchy, the finish didn't come out great, but it looks ok. A few areas were masked off and semi gloss black was applied. The orange peel in the purple actually helped with the black, to make it look like a textured black finish that is often found on the underside of a car. The moulded in engine and gearbox were hand painted in flat aluminium paint. Next up was the front and rear suspension sub assemblies. These parts were very accurately detailed and went together perfectly. (like all tamiya kits) From some research i did, i found that some of the paint insrtuctions were a bit off, and i found that the drive shafts are actually made from carbon fibre. so i made those changes, and added some carbon decals. Im really happy with how the brakes came out. the PE disk rotors look really realistic. I added some black paint to the slots, and sanded back the face to look like they had been used. Final Chassis assembly. Thanks for looking, Nathan

-
Hi, I am new here and have to say that there are amazing models in the forum. Although I rarely do cars I do enjoy it very much. This video is somewhat experimental for me and I will be thankful to see your feedback! Best regards M.