Search the Community
Showing results for tags 'solido bmw 2002'.
Found 1 result
-
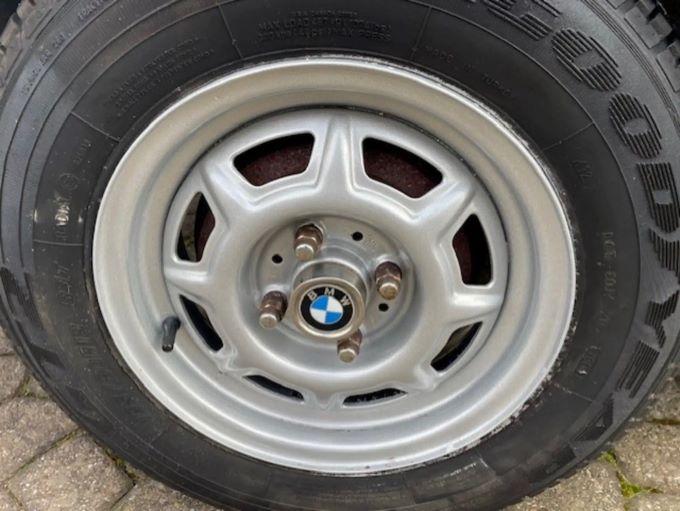
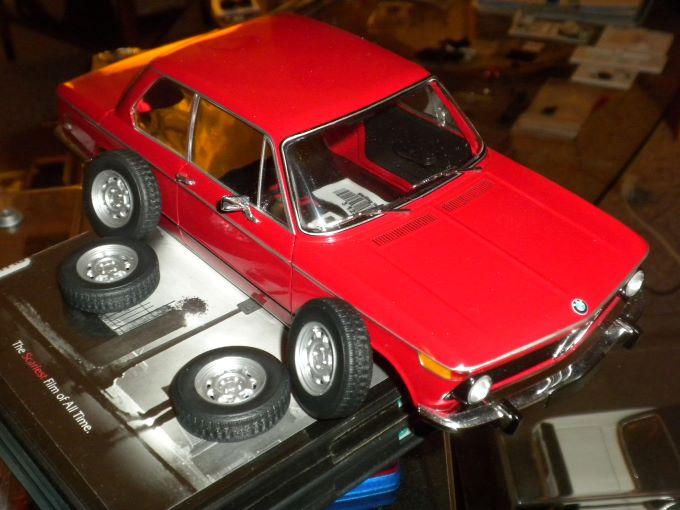
 Greetings, I haven't seen many modified new-school (now made in Bangladesh!) 1:18th Solido diecast models to date, whereas here I'm trying to make changes on their spuriously identified '71 BMW 1602 which is actually a '74 and later car judging for trim changes including the taillights. The model isn't AutoART or Kyosho quality, but then it isn't priced as such and generally comes off (as does the new Solido range) as representing honest effort. In particular I do like the job made on the late styled pressed steel wheels which was the common everyday fitment to most of the '74 and later examples imported into the U.S. market, hence unlikely most AutoART and Kyosho variants, the absolute rarest and best wasn't strictly modeled here. The tires are quite good too, appearing to be appropriately-sized and treaded Michelin XZX's and far better rendered than what's found on the few KK releases featuring them. As witnessed above, the wheel arch shape/contour seems a bit off both front and rear, whereas the wheels strike me as being finished in too bright a hue even as the center trim caps should suggest aluminum stampings. At first I'd hoped to leave the wheels in place and reshoot the rims for squeezing the tires off the rims to a certain degree, but the stiffness of the tires just precluded my ambitions here. Heating the wheel/tire assemblies to render the tires pliable didn't achieve much, hence another matter to be alert to. Even with the other wheels saved to further experiment upon, taping off the center cap and refinishing them didn't come off as well as I would have hoped, while below I've included a 1:1 photograph that suggest how things ought to appear. Brake detail is minimal or wholly in error (the rears are rendered as drilled discs), hence with one broken wheel I've had to start upon rebuilding things to ensure new mounts would be strong and stable, the track front and rear reasonably accurate. Working up molds to come up with replacement rims in two parts less the trim cap has taken both time and effort. Seen below would be a very stately '74 in Verona (Red), telegraphing what would be the final aim concerning spec. and appearance less the auxiliary lighting. Words of caution are voiced - disassembly of this tool isn't without it's hazards; i.e. don't expect it to neatly fall apart in an manner akin to something like a Yat Ming/Road Legends model, whereas things broke and other parts/assemblies have just been painted in-situ given no clean way could be devised to remove this or that without risking breakage. I ruined one styled press 'steel' wheel given the weak link wasn't the hub - it was the wheel itself, whereas don't expect to remove the bumpers for grinding off the tips of the plastic mounts that pass through the metal shell for neither bumper can strictly be shifted no matter how determined I was to make this happen. The nose panel is a separate piece that seems to break off when removing the chassis, while the attachment points are a bit hidden. Mind you this isn't a terrible model - just be alert to special needs as it were on the disassembly front and be prepared to work within limits. A bit of application across the interior this. Nonstock speaker grilles otherwise found on the package shelf have been filed and sanded flat here, whereas the front seats have been removed and repainted given the hinges were finished incorrectly, the casting of the cushions and related bits somewhat rough. The rear seat cushions aren't removable, hence masking to isolate the 'salt and pepper' low-pile carpeting with matt black as a base and a deliberately sloppy dusting of matt white was required. A non-tii '02 in late spec. would typically have a fairly slick plastic steering wheel rim, hence the safety pad in the center of this example was masked before applying a coat of gloss black to those surfaces that remained exposed. Relevant areas were masked on the dashboard assembly which is removable to apply a heavier gloss, while the casting here is relatively good and well thought out. The pedal assembly otherwise expected isn't present here given it's being redone; i.e. Solido didn't tool it as floor-hinged, while it seems possible to just work up something appropriate to rectify the situation. A bottom pad contoured to fit the underside of the steering column and wrap beneath where one would insert a key to start the automobile wasn't tooled or is included, although in fairness many a 1:1 BMW '02 example is missing this bit of interior trim given large key chains tend to dig into the top surfaces of such and render it so much junk. I suppose I could pick up a scrap AutoART Spares-sourced late interior and transfer parts over, although here I think I'll just scale back ambitions and further flesh out what's seen and call it done. Seen above, the side front indicators have been filled out with amber metallic paint to suggest some other spec. than what Solido rendered, whereas the bumper guard rub strips, body paint and perimeter aluminum trim have been touched in here and there to clean up the overall appearance. I wasn't able to remove and resize the front and rear license plates, although for careful masking they've been overshot with a suitable semigloss black. The rims seen here are resin clones of two wheel faces saved out of a set of four. The third and only other survivor was cut to save the inner rim detail to basically match to the copied outer surfaces, while scratch built new center trim caps will be finished separately with a BMW emblem applied and added later. I suppose if I'd mixed the translucent red and amber paints I have with greater intent and knowledge the front indicator paint might look better still. I'd hoped to remove the wiper arms/blades to refinish them in semigloss black, although again it seems that I'll have to mask each in-place for no amount of force exerted from behind will move them. AA Spares inventory exhausted in this regard concerning their '02 stocks as it were. Last image this. The unshiftable rear license plate is witnessed refinished in semigloss black again, whereas the somewhat clumsy '1602' tampo print identification on the tail panel has been scrubbed off and replaced with a '2002' waterslide decal commissioned some time ago to 3 Amigos decals. Hoping to wrap up matters with this limited project soon. Thanks for your review of this post. Mike K./Swede 70