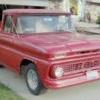
StepsideC10 Posted November 15, 2009 Posted November 15, 2009 The sum of my questions are probably going to be remedial for you, so bear with my inexperience. I'm eyeballing a '65 Chevy C10 stepside 2-in-1 kit. I'm so interested in it because I have a '63 C10 stepside that I'm restoring right now. So, naturally, I would love nothing more than to re-create it. The '65 is a good base because 98% of it is the same. Key differences: --The kit is a large-rear-window cab, my truck is a small rear window cab. --My '63 has a wraparound windshield, forward-leaning A-pillars, and differently-shaped window wings than the '65. --The '63 and '65 have different grilles. --They have different dashboard configurations, gauge clusters, glove boxes, and a lot of inside detail. --I believe the model kit includes no kind of "cab trim"--that is, the little aluminum details behind the side windows. I also have those aluminum window covers so the windows can be cracked in the rain. --The wood decals the kit has are a little too light; I'll probably be using walnut or a dark-stained light wood for my bed. So much, however, is good--I'll probably be replacing the wheels on my truck with Torq-thrusts, the '65 kit comes with a V8 that I can dress up to look like my 454 BBC, and there's plenty of chrome (just like what my truck will come out looking like). The other good news: --I will be replacing the grille of my truck with a '64-'66 style grille. --I have an AMT '55 Cameo Carrier 1:25 kit with the windshield, pillars, and wings that I need. So, my first volley of questions: --I've never kitbashed before. Call it a hunch, but I don't think it's going to be just as easy as cutting the A-pillars out of the '65 cab, cutting the donor pillars out of the '55, and gluing them into the '65. What can I do to make the fit natural and smooth? How would I fill in the lines where the new piece will be glued in? I have Testors contour putty but I have very little success with it. When I go to sand it back out smooth, it's just so crumbly, it comes right back out. --What would I do about this back window situation? A.) What am I going to use to fabricate the replacement metal to fill where the big window goes? B.) What would I use to fabricate the small window to go into part A's filler? --What would I use to fabricate the trim pieces? I have a few sheets of print-your-own decal paper and an inkjet printer, so I think I can make my own new wood in photoshop. I'm guessing, somewhere out there, I can just get pieces of stock plastic to tool around with for my fabrication questions, but I would have no idea where to find it and I certainly have no idea how to manipulate it. Even trickier would be finding and manipulating clear plastic for the rear window. Any help would be greatly appreciated.
MrObsessive Posted November 15, 2009 Posted November 15, 2009 Hi and welcome! I would try to fit the hood and front end to the AMT '60 Chevy pickup as they were built on the same platform. I'm not up much on truck kits, but this would give you the wraparound windshield you need, (minimizing breakage of those) and you could kitbash the rear bed from the '65 to the '60 as well. I think the '60 also has the large window-----I would fill that in with sheet plastic for the smaller configuration. As far as the Testor's Putty-------------Bleccchhh!! Stay away from that junk! Get yourself some automotive putty such as Dynatron Putty Cote, or Evercoat Glazing Putty. Others here might recommend other brands which work well for them. A well stocked hobby/train shop should have the sheet plastic such as Evergreen or Plastruct stryene for what you need. I would start with a .020" thickness sheet for starters. Just as and aside, so we know who we're talking to here------one of the rules is to have your full name in your signature area. You can just go to My Controls>Personal Profile>Edit My Signature> then you can put your name in the signature area which will show up everytime you post. Hope this helps!
StepsideC10 Posted November 15, 2009 Author Posted November 15, 2009 Wow, great advice. I hadn't heard of the '60 kit but that sounds a lot more foolproof. And if I have both the '65 and the '60, I'd have the '65 cab to practice the small rear window conversion on, so when it comes to trying it on the '60, I'll know what I'm doing. The Evergreen site says they sell clear and white sheets in different thicknesses--sounds awesome. I'm guessing (since I'm no expert on free-handing) I should get a good picture of the 1:1 truck's back window, scale the image to be 1/25 the real one, print it at that scale, trace it onto cardboard to make a stencil, trace that onto the clear sheet with a sharpie, and cut it out of the sheet? Then, to actually make the filler sheet metal, trace my new rear window onto the white sheet, cut the hole in it, sand it open to fit, and fit it to the cab. This is sounding very... doable. The other trim sounds pretty easy too, if i have sheets of thin plastic to play around with. It looks affordable enough to give me some practice, too. I'm guessing this stuff can be heated and bent? What are some good tools for cutting, etching, carving, sanding, trimming, and otherwise manipulating this "stock plastic"? If possible, I might be taking bits of the '60 dash to be more '63, but I'm sure I'll need to scratchbuild more.
MrObsessive Posted November 15, 2009 Posted November 15, 2009 Aaron, good reference photos are always a super plus when wanting to replicate something in scale. As far as cutting and shaping the plastic, some good sharp scissors, an X-acto knife, and some decent files and several grit sandpapers ought to be a good start. Practicing on the '65 as well as making a template for the window is a good idea too, I always recommend to ones who are treading into uncharted waters, to test out what they want to do first on a junk body instead of prized project. Be it painting, or body conversions, or some other new technique-----in never hurts to practice, practice and practice again.
dave riggs Posted November 15, 2009 Posted November 15, 2009 I was just at my model bench, and the 60 chevy caught my eye. I was just going to tell Aaron the same thing. The AMT kit has the small rear window in it, and I believe all the trim also. This should save you a LOT of scratch building! Here is a link to one on E-bay so you know what to look for. http://cgi.ebay.com/AMT-ERTL-60-Custom-Fle...=item2a02796338 Dave
randx0 Posted November 15, 2009 Posted November 15, 2009 (edited) When you get your hands on the sheet plastic (evergreen or plastruc)look at the different sizes and shapes they have if you see a size or shape you like get the size you think you need and a size smaller and one bigger you'll thank yourself when you get home.as for filling the window one technique that will help get you close pretty fast, place tape over the opening, trace the opening on the tape,remove tape and place it on your plastic cut out(you can get by with a good pair of scissors up to about .030 or .040 thick) and trim to fit . hope this helps good luck! Edited November 15, 2009 by randx0
StepsideC10 Posted November 15, 2009 Author Posted November 15, 2009 Wow, thanks Dave. All I saw was the '60 "street machine" kit with the big window--but the '60 "custom fleetside" you linked does have the small window. The '60 chassis, cab/fenders, and interior with the '65 grille, hood, bed and wheels would make my truck PERFECTLY with almost no scratchbuilding. The rest of the parts-gathering is going to be for the engine bay. The finished product should look amazing in a display case on the dash of the 1:1 product at car shows.
dave riggs Posted November 15, 2009 Posted November 15, 2009 I am not totally sure what front suspension your 1:1 truck has, but I think you might be better off with the 65 frame and suspension. The 60 chevy has torsion bar front end, and the 65 has the coil springs. I think your truck has coil springs in front, right? Dave
StepsideC10 Posted November 15, 2009 Author Posted November 15, 2009 Yeah Dave, the 1:1 is spring front, and by the time it's done, it will have slightly dropped spindles. I've never tried to modify a model kit's suspension, so if it looks like it'll need a slight drop, I'll surely be here with another slew of questions. There's also a very messy engine bay, with lots of hoses and wires all over the place. I would love to recreate it as well. I'll end up scratchbuilding a oil cooler with some round styrene piping and a piece of an old radiator (I have a bunch of old NASCAR ones that would work). I might end up cutting the mesh out of the '65 grille if I can find (or make) some suitable grated mesh (wide rectangles) to replace it, to make it transparent and show off the oil cooler. That'd be pretty awesome.
Harold Posted November 18, 2009 Posted November 18, 2009 (edited) Welcome and good luck with your conversion. I bought a 3- pack of Evergreen sheet at the LHS with .010, .020 and .040. As for the filler, automotive products are the best. Like Bill says, Evercoat, puttycoat or my personal choice, Bondo (just mix up a small batch and apply it with an old #11 blade). Edited November 18, 2009 by Harold
Recommended Posts
Create an account or sign in to comment
You need to be a member in order to leave a comment
Create an account
Sign up for a new account in our community. It's easy!
Register a new accountSign in
Already have an account? Sign in here.
Sign In Now