Porky Posted February 23, 2010 Posted February 23, 2010 Hey Eelco, hard to belive that started out as a nascar kit, looking good !!! How's the wife and lil one doing ??? all good I hope.
diymirage Posted February 24, 2010 Author Posted February 24, 2010 thanks the wife and baby are both good it sure does take some getting used to i miss the nights where i decided when to sleep and when not
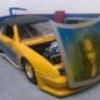
diymirage Posted February 25, 2010 Author Posted February 25, 2010 got some more work done today i scratchbuild the headlight housings it is all i can do to them untill im done painting the rest of the body then ill detail in bulbs, reflectores and lenses these also show off the final stand nicely not quite as low as i wanted the rear to be but i guess it looks pretty impressive any opinions ? (in case any one is following this)
Jared Roach Posted February 25, 2010 Posted February 25, 2010 got some more work done today i scratchbuild the headlight housings it is all i can do to them untill im done painting the rest of the body then ill detail in bulbs, reflectores and lenses these also show off the final stand nicely not quite as low as i wanted the rear to be but i guess it looks pretty impressive any opinions ? (in case any one is following this) This is looking fantastic! But I think those revell lowrider wheels are killing it?? They seem too small or something to me. If you could find some pegas rims or something along those lines I think it would look alot better, because it looks like it needs something to fill those wheel wells.
diymirage Posted February 25, 2010 Author Posted February 25, 2010 This is looking fantastic! But I think those revell lowrider wheels are killing it?? They seem too small or something to me. If you could find some pegas rims or something along those lines I think it would look alot better, because it looks like it needs something to fill those wheel wells. thanks for the compliment your probably right maybe ill fill in the front wheel wells a little bit more to narrow the gap some because i really do like the design of those rims and to be honoust, i pulled the rear end off about 4 times before i got it where i wanted it and id hate to redo all of that
Railfreak78 Posted February 25, 2010 Posted February 25, 2010 I like the start of your headlight section. The fact that this is a Pontiac Grand Prix body, The headlights look to me almost like a Baretta or Corsica or Celebrity, style minus the "Euro" cover they did on them. I know I named all Chevy's there but Pontiac had their own such as 6000 and such. It's period correct "looking" if the clear lens over the housing was missing.
Porky Posted February 25, 2010 Posted February 25, 2010 (edited) thanks the wife and baby are both good it sure does take some getting used to i miss the nights where i decided when to sleep and when not Hey Eelco Glad to hear the family is good. Hey brother it gets better after about a year on the sleep thing Hang in there Edited February 25, 2010 by Porky
diymirage Posted February 25, 2010 Author Posted February 25, 2010 I like the start of your headlight section. The fact that this is a Pontiac Grand Prix body, The headlights look to me almost like a Baretta or Corsica or Celebrity, style minus the "Euro" cover they did on them. I know I named all Chevy's there but Pontiac had their own such as 6000 and such. It's period correct "looking" if the clear lens over the housing was missing. to be honoust...im not sure yet if i am planning on putting a clear lens over them right now im thinking of going with something more "projecter: light looking the housing themselves need some more putty and sanding but you're right, they do look like the berretas you know what they REALLY look like ? (im gonna hate myself for saying this) a geo metro im not hating the look of it though Hey Eelco Glad to hear the family is good. Hey brother it gets better after about a year on the sleep thing Hang in there he did pretty good last night, slept for 4 hours straight of course, i had something going on in my eye so i was on benadril which might have made things mroe bareble for me
Railfreak78 Posted February 25, 2010 Posted February 25, 2010 LOL@ Metro now that I look again It would be like un-masking the soon to be wifes Dodge Shadow. It does really look good on your car man I am most impressed!
diymirage Posted February 25, 2010 Author Posted February 25, 2010 LOL@ Metro now that I look again It would be like un-masking the soon to be wifes Dodge Shadow. It does really look good on your car man I am most impressed! thanks im very pleased with the way this is coming out so far (though the idea of some peggies does roll around my head now)
diymirage Posted February 26, 2010 Author Posted February 26, 2010 Thats looking pretty cool so far! thanks im making pretty decent progress with it here is a sneak peak at the exhaust im planning on making (this will be my first time custom building headers from solder and pipes from aluminum so bare with me here) this is just a quick mock up, the final version will have the exit horizontal rather then pointing slightly down anyone notice those tires i found in the partsbox ? its like mounting a set of 16X195/65 tires on a 14J6 rim but luckily the good people at lock-tite make superglue now too
diymirage Posted March 1, 2010 Author Posted March 1, 2010 well, got a little more work done as you might be able to tell, i finished up the trim around the headlights i got about as much done as i can before paint sooooooo i started paint as you might have caught somewhere else i screwed up my decal but im gonna run with it anyway it just means i have to change the paint scheme some now the colours will be RAF training yellow (like the cuda in my avatar) with blue and silver and a black top the first coat went on last night it is model masters german silver metallic funny thing when everything is said and done this silver will look (hopefully) like it lays on top of the rest of the car
Railfreak78 Posted March 2, 2010 Posted March 2, 2010 I cant quit watching, this thing is going to be great buddy.
diymirage Posted March 2, 2010 Author Posted March 2, 2010 I cant quit watching, this thing is going to be great buddy. thanks i apreciate the input as we speak i am waiting on the second coat to dry this is actually the base coat of RAF training yellow which looks a LOT like mopars butterscotch which is why i bought it in the firstplace for my chicken of the sea cant wait to see how the taped of parts will look once the paint dries properly then comes the hard part, decal placement and the final coat of paint before the clearcoat if you are wanting a sneak peak of the paint look up my sardinechallenger i will be using the same tecniques on the sides of this one
diymirage Posted March 2, 2010 Author Posted March 2, 2010 got some pictures of the second coat so for we have have model masters RAF training yellow and modelmasters german silver now i need to apply the hood decal (my first custom decal) then do a lot of taping and finish shooting the last colour, modelmasters ford engine blue hopefully onces that is on it will no longer look like a new york taxi cab
diymirage Posted March 3, 2010 Author Posted March 3, 2010 got the 3rd coat of paint done AND slapped on the decal (actually slapped on the decal between the 2nd and 3rd coat) so...here is a paint revail (keep in mind, i still need to paint the top black) starting on the back and then the driver side and finally a shot of the decal anyone wanna gues who modeled for the hood ? passenger side for good measure and a birds eye view the way i painted the hood was as follows first i shot a coat of german silver then i taped of the sides of it (like a frame) and shot a coat of RAF trainer yellow (shot it to look like a rising sun) once that dried i put on the decal and when that dried i taped a piece of screen door over the hood with the screen door in place a shot a coat of modelmasters true blue pearl (tried to shoot the ford engine bleu but it was to thick and wouldnt pass through the screen) with the true blue i shot basically half a coat to hit everything that i didnt hit with the trainer yellow noooooooow i gotta finish up the interior and call it good thoughts ?
Railfreak78 Posted March 3, 2010 Posted March 3, 2010 hopefully onces that is on it will no longer look like a new york taxi cab
diymirage Posted March 3, 2010 Author Posted March 3, 2010 hopefully onces that is on it will no longer look like a new york taxi cab More like an L.A. Cab On a serious note the screen thing is a cool idea and one thing that I noticed after my last visit and did not say anything about was the body lines on the rear from the mold tail light area. When you added in you smaller lights I thought it would look odd with that gap under the spoiler area. The way you did your stripe detracted from that and it looks really good. My one concern is how big your dividers are for the top. That big I would maybe (with out glue of course) play around with a rag top or vinyl top? Just a thought.
diymirage Posted March 3, 2010 Author Posted March 3, 2010 so you modeled for your hood ???? close but no i thought of putting my mug on the trunk that should keep the tailgaters off
diymirage Posted March 5, 2010 Author Posted March 5, 2010 started on the hinge today i figured if this was my 1:1 id want to be able to show of the hood even when its open so i went with you basic flip-flop hinge (i believe that is the technical term) no pictures of the hinge itself (trade secret and all that) but here is a mockup of the hinged hood superglued in place (i like to use teeny tiny drops of superglue for mockups like this so i can tear it apart and redo it properly once i know exaclty where it goes) so, mockup with the hood in place slightly opened and completly open i know its a little bit cockeyed in that last picture but that is why its a mockup i took the body and put her back into the paintbooth for a quick coat or two of cleat just to be sure i dont rub the paint off doing all this mocking upping
diymirage Posted March 10, 2010 Author Posted March 10, 2010 got a little bit more work done to the pontiac today the main thing i did was finish the vinyl roof this was my first time installing a vinyl roof (though i have changed a few of them into hardtops) i used paper tape to achieve the texture i also wired and mocked up the engine i got rid of the powerfull pontiac race engine for the 302 cross barrel chevy i even went as far as move the distributor to the front of the engine where it belongs ( why in the world chevy put it in the back i'll never know but i fixed it for them and now it fits in the engine bay)
rustybill1960 Posted March 10, 2010 Posted March 10, 2010 I would not have believed it, if I had not seen it with my own eyes! A stock car into a low rider?!?!?! WOW! You have shown quite the "intestinal fortitude" with such a build! My plastic building hat is off to you Sir! Great job! Really like the bondo work on the rear wheel wells, I will attempt said on the '74 Chevelle convert to a '73 Chevelle, as soon as I find the '74 again! Thank You for sharing Later Russ
Recommended Posts
Create an account or sign in to comment
You need to be a member in order to leave a comment
Create an account
Sign up for a new account in our community. It's easy!
Register a new accountSign in
Already have an account? Sign in here.
Sign In Now