BigBeze Posted February 21, 2010 Posted February 21, 2010 I saw this kit on here before some where and I really liked it so I thought I would give it a try. It is a Revell Basic Builder, but I took the liberty to spie it up a littl so it wasn't so basic any more. I went to Lowes and scored some computer wire for something like 90 cents a foot and in the computer wire there are 8 different wires orange green blue brown and four white ones and they lloked pretty close to scale to me, being a amature at this Im sure Im wrong but it makes for nice spark plug wires instead of a plain distributor just sitting on the front of the engine. I ran a fuel line from the fuel tank bak and I also ran a hose from the pressure tank to the water tank (not really sure thats how it goes but looks pretty neat). I also scrubbed down the slicks but there is this pesky gap all the way down the center if any one would give a suggestion on how to make it flat that would be nice. I still need to clear coat the whole thing cause I did cheat and just put the decals right on the pre colored body. Open to comments and Advice, please and thank you!
diymirage Posted February 21, 2010 Posted February 21, 2010 i like the way this is coming out the hoses make it look so much better i bought one of these for my little nephew last Christmass and there is no way this is a basic builder with that front end, i had a hard time putting it together
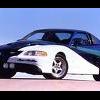
Railfreak78 Posted February 21, 2010 Posted February 21, 2010 Cool cop car! Hey you have any pictures of that monster truck in the back? Is it a box Chevy?
BigBeze Posted February 21, 2010 Author Posted February 21, 2010 Not sure what qualifies as a box chevy but its the usa-1 truck trying to 2 tone for the first time. and I took the grill from a cadillac escalade and have it in the process of onecting it to the headlights for this truck. I entered the truck jeep 4x4 build off hoping not to come in last. Its been sanded thats why the paint looks likie ######.
wgflatliner Posted February 21, 2010 Posted February 21, 2010 cool build so far. as far as doing 2-tone, i would recommend using bare metal foil as your masking tape because it's so thin. well that and tamiya. also - do lighter colors first (i'm sure you already knew that though) heres some pics to illustrate: 1. basic tape (you'd do this along the whole part you want masked) notice how i left the body line above it exposed, and also notice how on the door panel line, the tape isn't touching the body - if i used this tape alone, new paint would seep down into the line, thus causing bleeding: 2. bare metal foil overlaps the tamiya tape (don't mind the cotton hehe) as you can tell i left the right side of the foil lifted up so i can have slack to burnish into the door panel: 3. simple burnishing of the bare metal foil and using the toothpick to fill in the door panel line. afterwards, finish burnishing the foil the rest of the way (the slack you gave it earlier prevents the foil from breaking/ripping in the panel line) 4. with a NEW #11 xacto blade, using the weight of the blade itself - in other words, don't push down or you'll gouge the paint - cut along the body line 5. spray the new paint! wait until it's semi-tacky then remove all the masking tape, and let dry. the cool thing about this, is you can also cut out a pattern for your paint if you want. go with a wacky wavy two tone, or make pin stripes, etc. the only limit is your imagination at this point hope this helps
BigBeze Posted February 22, 2010 Author Posted February 22, 2010 That helps a lot. The masking tape did not go in the cracks and I was wondering what to do.
Recommended Posts
Create an account or sign in to comment
You need to be a member in order to leave a comment
Create an account
Sign up for a new account in our community. It's easy!
Register a new accountSign in
Already have an account? Sign in here.
Sign In Now