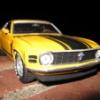
nails3825 Posted March 4, 2010 Posted March 4, 2010 I have three shoe boxes filled with models I've done over the years, all of them are from fifteen or more years ago... the '94 F-150 was my last "restore" from those boxes and now I'm going to start on this '92 Mustang GT It seems that every time I open that shoe box this poor mustang screams for me to rebuild it, and so I thought why not. It never had a hood, not sure what happened to it. I do have a donor kit ~ but the hood from that kit has a hole cut out of it for "big engine" clearance. Hmmm... Anyway, I took this kit apart and did the interior today... a major step, I know I'm going to keep it the same color as it is (two tone) but maybe with a deeper shade of blue, not sure yet. Here's my progress so far, it's going to be slow going (at least for me) but I'll post as I go along Thanks for looking!
whale392 Posted March 4, 2010 Posted March 4, 2010 That body color combo is what my 91GT wears, only mine is a hatch versus a convert. I look forward to seeing this one restored.
nails3825 Posted March 5, 2010 Author Posted March 5, 2010 Hey whale, thanks for stopping by. There was a mustang convertible with the same color combination driving around town years ago... it was what inspired me to paint this one as I did. In my opinion, it's the best color combination for this style body ~ unless it's straight up BLACK or maybe all white with a red stripe in the ground effects I did the wheels, that mustang emblem in the center... it's a sloppy job ~ my hands shake something terrible these days. I was thinking about painting them aluminum as well, but after searching the internet for reference photos I came across some chrome rims. Also, I started on the hood... filled the hole with J-B Kwik (JB Weld) and sanded it down ~ sorry I don't have photos of the before and after, got caught up in the moment and didn't think of taking any. The donor mustang was a quick build I did years ago, finished in a day because I had "an idea" and wanted to get it done fast. lol, it was fun while it lasted... here are some more photos! Thanks for checking in
nails3825 Posted March 6, 2010 Author Posted March 6, 2010 So... I finished sanding the hood today ~ after putting down a couple coats of primer it's ready for paint. The body still needs a little work, I'll do that tonight. I'm going to "try" to prime the body tonight and paint them both tomorrow (hood and body). Here are the photos so far: There are quite a few different shades of blue in my "collection" of spray paint... thinking strongly on using the darker shade, Dupli Color Dark Blue Metal flake ~ with the bottom half of the car painted with Kilz Casual Colors Satin Nickel. I think the two together will be a perfect match for what I'm looking for. And not to make this any longer, haha... while browsing the store shelves of walmart, this fabric caught my eye ~ for only $1.49 They are nylon patches, self adhesive but the fine thread look seemed to be perfect for scale models... fabric seats or vinyl tops? What do you guys think? I used it on the dash of this mustang model just to see what it would look like ~ pretty good I thought. Guess you can't really see the pattern too clearly... but you get the idea. Thanks for looking! Your comments are much appreciated. Go on and say something
Greg D Posted March 6, 2010 Posted March 6, 2010 Cool build. The Pony wheels on GTs & normal 5.0 LXs were all painted silver from Ford. The Chrome ponys were originally exclusive to the Chrome Yellow 1993 Summer Special Edition or Feature cars. There 1503 of these built. Ford also made 1500 White SSEs which had white painted Pony wheels - except for 1 documented car that was ordered with the chrome ponys. These cars were based on the 5.0 LX convertible. 1992 Ford made the Feature Mustangs in Vibrant Red with the white Pony wheels. Pony wheels are still a popular addition to 4 lug Mustangs and are still sold new. http://www.triplewhitefox.com/mustang/ My 1985 Vert with Ponys. http://s300.photobucket.com/albums/nn38/GregDvsn/1985%20LX%20vert/
whale392 Posted March 6, 2010 Posted March 6, 2010 Yep, the Ponies were a Silver in color. Personal opinion here, but one of the best looking wheels Ford ever saw fit to grace the Fox with (I love the 93 Cobras). I no longer have the Ponies on my 91, it now wears a 5 lug swap and 96 Cobras (for the moment). You are doing a great job on this rebuild! Her paint is shot, due to Florida living, but her body is rock solid and the drivetrain has 270,000 unmolested miles on it.
nails3825 Posted March 6, 2010 Author Posted March 6, 2010 Thanks for the info on the wheels Greg, I'd like to paint them silver but they're already glued solid to the tires and I don't trust my shaky hands to do a very good job with the paint. Let's just say the "owner" of this car decided to buy some chrome ponies for his ride Your mustang's in great shape and looks perfect sitting on those wheels I saved a few of the photos to my computer, if that's alright with you... they are great for reference. Thanks! Whale, thanks for the photo... with the exception not being a convertible, that looks just like the one which inspired this build years ago! Beautiful paint combo ~ regardless of the shape the paint's in It's still a great looking mustang! The paint I used on this one the second time around is a bit darker than the original blue two tone color, but it still looks better than what it did when I first built it I painted everything last night, two coats and let it sit in the basement to dry ~ which is a cold damp place... The paint had a weird "fogging" effect once it dried but after giving it a gengle rub down/buff the color came through... thankfully! I then masked the bottom half and sprayed it with the silver/nikel I had picked out. Here is the end result, I still need to touch up a few places but don't want to handle it too much while the paint's still fresh. I also painted the bottom of the hood and added a decal... thought it would cover and/or disguise the evil "J-B Kwik blob" from the patched hole. It didn't turn out so bad, considering what it once looked like. That's all for now ~ more to come soon, I would hope Thanks for the comments!
nails3825 Posted March 7, 2010 Author Posted March 7, 2010 I'm really trying to teach myself patience with this build... but that's not going too well. Usually, when I paint the body of a model I end up working on it a few hours later ~ anxious to get it finished. On this one I'm at least trying to give the paint a few days to dry It's pretty difficult for me to do this... but with the extra time I had the chance to clean up the clear plastic headlight lenses and tail lights. I used a shaved down wooden coffee stir-stick to outline the headlights using acrylic enamal ~ which is easy to scrape off the excess paint without ruining the plastic. Most of the reference photos I've seen had a blackish outline to the headlamps, some of them weren't as noticeable and some were... it just makes them "pop" in my opinion As for the tail lights, wow! A lot of scraping involved here. The old glue habits of yesteryear, huge blobs of dry glue that melted into the plastic. They cleaned up pretty good... I bmf'd the back of them for that extra reflective look against the clear red and them spray painted them the body color. Before the paint had a chance to completely dry, I used a toothpick dipped in paint thinner to scrape out the grooves. Then, after all that I sprayed them with Testors gloss clear coat to make the red stand out a little better. This was probably the hardest part so far, they didn't turn out too bad... I'm happy with them. The one on the left is "finished" while the one on the right isn't The front window was in pretty good shape, surprisingly... all I did was scrape of the small line of glue from the top, redid the mirror and called it done. The ragtop window was in bad shape, to the point of being too damaged to use again. I made a new one using the plastic you find on many items in stores, you know... the packages that are hard to open? Also repainted the ragtop and side mirrors, along with the drop top cover thing. Here's the result... That's all for today, I'm going to give everything a good day or two of drying time then start on the trim work. Thanks for looking!
whale392 Posted March 7, 2010 Posted March 7, 2010 Looking good! You have taken it to a shade very similar to Dark Shadow Blue from its Twilight Blue hue. You are doing an excellent job with the resto of this kit. Thanks for the positive comment on my 91GT......she will be getting the body done and repainted in stock colors this year, plus getting a new set of wheels/tires.
nails3825 Posted March 8, 2010 Author Posted March 8, 2010 Got some trim work done today, put the luggage rack back on and put a little paint in the engine bay... not much more left, I'll probably be doing the headlights/tail lights later in the day. Here are the photos so far You may notice the crappy looking attempt at the ford emblems, the blue ovals... I scanned them on my computer, printed them out on regular paper and cut them out with scissors They aren't nearly as good as real decals but they turned out better then what would've been done with paint. Oh well... That's all for now... stay tuned ~ Thanks for looking ~ and whale, can't wait to see your mustang looking new again! Thanks for your comments too, much appreciated!
whale392 Posted March 8, 2010 Posted March 8, 2010 (edited) It's definately looking good James. If I might make a suggestion on the headlights and turn signals/corner marker lights........mask them off and shoot some of the chrome paint into them. Drill and add the tips of stick pins (the flat side) to simulate bulbs sitting in the buckets. Also, on the side marker lights, the heel that wraps around the side of the nose is a reflector (or at least has a section that is reflectorized); this can be simulated by adding a small section of cigarette wrapper cut to the desired shape and either Micro Krystal Clear or white glued into place. Thanks for the comments on my 'Glazed Doughnut' Mustang. I can't wait to see her sitting in fresh paint either, as I have known this car for almost its' whole life and have known 3 of the previous owners personally (it has had 4, including me). Edited March 8, 2010 by whale392
nails3825 Posted March 9, 2010 Author Posted March 9, 2010 Thanks for the comments guys, this one is just about finished Whale, thanks for the tips! I wish I would've seen your post about the headlights before I finished them, it's too late now... maybe the next one I build will have a little more detail put into them Got the headlights and tail lights on lastnight ~ I used 3-M spray adhesive on the tail lights, since model glue doesn't stick too well to metal surfaces As for the headlights, I BMF'd the center bazel? and painted the rest silver... the end result turned out to be better than expected, at least in my opinion. I scrumaged through my old decals and found a "stang" plate and thought it would be perfect for this car ~ seeing that it's blue and all. Here's what I have so far... I also got the window installed, a little tricky since there wasn't much area to glue the pieces together ~ I used a trick I learned on this very site, using tape to hold the window secure then spot glued it in place This site is teaching me a lot, seriously! The final assembly is all but over, just need to slap the parts together and call this one done. Didn't do much to the engine, painted the wire cap light brown but that's about it. I'll post the finished model on the "under glass" section soon ~ keep a look out, catch me if you can And thanks again for all of your comments! They are much appreciated...
whale392 Posted March 9, 2010 Posted March 9, 2010 The lights turned out great all the same! I would be proud to call that model 'Stang mine!
Casey429 Posted March 10, 2010 Posted March 10, 2010 Nice lookin' ragtop. I'm with everyone else on the pony wheel debate. The best looking stock wheel ever put on these cars. I really like the Bullitt wheel too, but it doesnt look right to me on a Fox. Whale392, the Cobras look good on your hatch, I've seen quite a few Foxes with these wheels, and must say they fit them very well. I've got quite a soft spot for 5.0 Foxes, and would love to get my hands on a 1:1 5.0/5spd LX coupe someday.
whale392 Posted March 10, 2010 Posted March 10, 2010 Casey, thanks for the compliment on the Cobras. I have a set of FR500s waiting to go on as well. As to the Bullitts, the car has to be the right car to make the Bullitts really shine. I also like the 10th Anny Cobras swapped to a Fox...............but I am biased as all 4 of my Foxes are 5 lugged. The GT is looking sweet; you going to lower it any?
Recommended Posts
Create an account or sign in to comment
You need to be a member in order to leave a comment
Create an account
Sign up for a new account in our community. It's easy!
Register a new accountSign in
Already have an account? Sign in here.
Sign In Now