cowboysevens Posted July 6, 2010 Author Posted July 6, 2010 The way those mock up pics look, Dennis would have the roof space to put both the a/c and air deflector on if he wanted. i think im gonna go with the wing air deflector i got from porky.so far my plan is to biuld a 53' spread air flat bed for the double bunk, so it wont need a big deflector plus it will leave me room underneath it to plumb a/c to the bunk. lol thats is the plan as of now lol but youall know how plans change on these trucks!!
cowboysevens Posted July 7, 2010 Author Posted July 7, 2010 (edited) heres a pic of the stock frame next to the extended frame. i sure hope this turns out like my visions and measurements say it will!! lol heres a pic of stuby frame for day cab on top, a stock frame and stretch frame below heres the frame before final glueing and clean up Edited July 9, 2010 by cowboysevens
cowboysevens Posted July 10, 2010 Author Posted July 10, 2010 heres an update on the daycab, got 2 coats of gloss white on it. heres the sonic pearl blue that will cover just the grill top/bottom, the molding strip will stay white all the way down and around the cab. the white stripe is gonna be wide from bottom of door to the bottom of the round part of cab all the way to about 6" from the down angle of the front molding (holding the same angle)and maybe the top of cab. sorry for the bad photos, they takin with my scratched up phone as i dont know how to put pics on the computor yet, lol.
cowboysevens Posted August 22, 2010 Author Posted August 22, 2010 ok ive been laggin on my biulds, but ive been away workin so now ive got some time to get back on them. i got the stretch frame and single drive frame primered with a few small places that need some attention, and i got 2 coats of white on the single cab and im fixin to put the blue on it, do i need to wet sand before i clear coat or just wet sand the clear coat? thanks dennis
Ben Posted August 23, 2010 Posted August 23, 2010 ok ive been laggin on my biulds, but ive been away workin so now ive got some time to get back on them. i got the stretch frame and single drive frame primered with a few small places that need some attention, and i got 2 coats of white on the single cab and im fixin to put the blue on it, do i need to wet sand before i clear coat or just wet sand the clear coat? thanks dennis It all depends on how shiny you want the paint. I would suggest wet sanding the primer, then wet sanding the paint. At that point, the clear may turn out nice enough to where you don't need to wet sand it. If it has any dust or orange peel, you should wet sand it though.
cowboysevens Posted August 23, 2010 Author Posted August 23, 2010 It all depends on how shiny you want the paint. I would suggest wet sanding the primer, then wet sanding the paint. At that point, the clear may turn out nice enough to where you don't need to wet sand it. If it has any dust or orange peel, you should wet sand it though. OOOPS!! i did not wet sand the primer before paint, i gave it an easy once over with 400 sandpaper. the paint does look nice and even but it is a lil ruff as far as a smooth finish. so i guess now i paint the blue then wet sand it then put a few coats of clear coat on. i want a shiny finish so should i wet sand every coat of clear or just the last?? thanks dennis
Scott S Posted August 29, 2010 Posted August 29, 2010 OOOPS!! i did not wet sand the primer before paint, i gave it an easy once over with 400 sandpaper. the paint does look nice and even but it is a lil ruff as far as a smooth finish. so i guess now i paint the blue then wet sand it then put a few coats of clear coat on. i want a shiny finish so should i wet sand every coat of clear or just the last?? thanks dennis Nice work Dennis, there is a 4070 double bunk sitting in a yard of a house on rt. 24 off west of rt 40 in turkey NC. (just outside warsaw) i see it reg. on my trips into Allens canning in turkey. i'll try n take some pics next trip down there. Scott
cowboysevens Posted August 29, 2010 Author Posted August 29, 2010 Nice work Dennis, there is a 4070 double bunk sitting in a yard of a house on rt. 24 off west of rt 40 in turkey NC. (just outside warsaw) i see it reg. on my trips into Allens canning in turkey. i'll try n take some pics next trip down there. Scott thanks scott that would be great. im thinkin im gonna put the air filters for the breathers at the bottom of the tubes behind the cab and draw them strait into the motor. i seen a custom show truck like that and it looked realy good. when you extend the sleeper on a cabover a whole lot more changes then on a conventional!! im excited to see your 4070 done, i really like the colors and then a reefer to match........ whooooo hooooo thats gonna be one sharp lookin rig. dennis
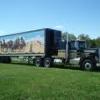
cowboysevens Posted August 31, 2010 Author Posted August 31, 2010 (edited) well im gettin closer on the single drive day cab, so i did a lil mock up. let me know whats missing or any suggestions please update pics of paint besides some sticky left overs from the tape, and a couple of bad lines that black pinstripe will take care of i was happy ........ untill i pulled the tape off the passenger side!! ouch this hurts i think maybe the frame is too long, its gonna be pullin either double boxes, double tanks, or double bull wagons. i guess ill have to mock it up with the trailers after exhaust and everything is on the frame. Edited August 31, 2010 by cowboysevens
Romell R Posted September 1, 2010 Posted September 1, 2010 Very nice builds I cant wait to see the double bunk done. keep up the good work.
cowboysevens Posted September 18, 2010 Author Posted September 18, 2010 heres a lil update on the singledrive daycab, i got interior painted and almost done with frame work: i went with blue and grey for interior colors: still got some touch up on interior, add door handles etc. and add tinted back window.any suggestions??
Old Albion Posted September 18, 2010 Posted September 18, 2010 Dennis, The interior details look great. I like the dash and the seats. Great work! Dave
Guest Johnny Posted September 18, 2010 Posted September 18, 2010 Those cabs are looking good so far. In post #3 the picture of that double bunk throws me off. I've never seen anything like that before. It actually looks cool. The truck w/ the bullbars and the two additional sleepers was definitly one of a kind. However I completely understand why the driver had it done. One of my former co worker's brother was an O/O w/ Atlas Van Lines (I think that's the company). He hired two extra hands that helped him move both residential and commercial. His truck was a COE Freightliner w/ a single bunk. This guy made his helpers sleep in the trailer using moving blanks for their bedding and covers. He refused them to sleep in his truck. I'm gonna guess the owner of this 4070 put the extra bunks on there for his hired help. Both sleepers look a little like 359 sleepers and also mounted under the bull bars looks alot like a pair of headlight buckets from a 359 as well. That is what I was thinking! The guy must have been dragging his lumpers around the country with him! Guess it was easier than recruiting them off of the street corner!
b_lever1 Posted September 19, 2010 Posted September 19, 2010 here is a pic of the 2 international 4070b glue bombs ive been workin on. this is first time tryin to put pics so i hope it works! lol this is cabs after interior out and off frame before any cutting this is what they look like as of 6/29/10 did alot of body work, the double sleeper had a bunch of cracks i had to fix lol they both were a trainwreck. now they primed and still have lots of body work left! youll notice i only have the back air vent on drivers side, figured i would have a closet and tv stand behind drivers seat. incase any body is curious about the double bunk length it is a 106" Uploaded with ImageShack.us im tryin to figure this pic thing out, please be patient with me. dennis nice stuff
cowboysevens Posted September 26, 2010 Author Posted September 26, 2010 (edited) slowly but surely makin progress on the day cab, frames painted ford blue sonic pearl, still need to install brake chambers, tanks, steering. i made my own exhaust and breather and the rack to hold them upright.the stack is a old style 6" strait with side blow, the breather tube also is a 6" strait tube. i didnt putty the angles on the stack so it kinda looks like welds the way they used to make em. the tanks will be white with blue caps. still have to rout the exhaust from motor to stack, and breather from canaster to super charger. it has a 290 8-v detroit / 13 speed. the tires and rims are temporary. any suggestions please?? as far as the cab goes, i had to strip the paint and start all over with body work . lol hopefully i get it right this next go around. and i found out the putty does not last thru a soaking in super clean, so i am back to square 1 lol!! i got the exhaust and air breather tube all plumed in, wow kind of a chore and about 6 differant peices to make the angles work. Edited September 29, 2010 by cowboysevens
cowboysevens Posted October 8, 2010 Author Posted October 8, 2010 ive been working on a few things with the double bunk, still fine tuning the cab body work , biult motor mount for the 3408 cat im puttin in it, also biult a set of "cozad ramps" for future thoughts of a RNG ( removable goose neck ) trailer. also got a metal front steerable axle from sour krout.
clayton Posted October 8, 2010 Posted October 8, 2010 slowly but surely makin progress on the day cab, frames painted ford blue sonic pearl, still need to install brake chambers, tanks, steering. i made my own exhaust and breather and the rack to hold them upright.the stack is a old style 6" strait with side blow, the breather tube also is a 6" strait tube. i didnt putty the angles on the stack so it kinda looks like welds the way they used to make em. the tanks will be white with blue caps. still have to rout the exhaust from motor to stack, and breather from canaster to super charger. it has a 290 8-v detroit / 13 speed. the tires and rims are temporary. any suggestions please?? as far as the cab goes, i had to strip the paint and start all over with body work . lol hopefully i get it right this next go around. and i found out the putty does not last thru a soaking in super clean, so i am back to square 1 lol!! i got the exhaust and air breather tube all plumed in, wow kind of a chore and about 6 differant peices to make the angles work. Nope it sure don't,I found out the hard way myself.
Recommended Posts
Create an account or sign in to comment
You need to be a member in order to leave a comment
Create an account
Sign up for a new account in our community. It's easy!
Register a new accountSign in
Already have an account? Sign in here.
Sign In Now