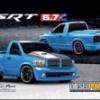
stewart Posted August 2, 2010 Share Posted August 2, 2010 (edited) This is a "transplanted" WIP from the Scale Auto forums. I decided to expand my horizons a little and start posting a little bit on this forum. I have heard good things about it and wanted to see how it is different from the other, so here goes. About 8 months ago, I ran into the InsideLine videos of the Fast and Furious Fuel heist trucks and really wanted to build them (believe it or not, I have never seen the movie). So I started with this, And this For this For the 67 I started with the 72 chevy truck by AMT. The WIP is actually nearing completion but I will post some of my progress throughout the build. Edited August 2, 2010 by stewart Quote Link to comment Share on other sites More sharing options...
stewart Posted August 2, 2010 Author Share Posted August 2, 2010 (edited) The engine for the 89 crewcab was going to be this. However, it was much to large to fit in the engine bay so I made the decision to save this one for another project and go for a different engine that would look more like the one that was supposed to be in the truck. It is a 615 C.I. big block from one of the Revell Pro Sportsman kits. Here is the setup. With a muncie four-speed, movie spec, from Model Car Garage. Edited August 2, 2010 by stewart Quote Link to comment Share on other sites More sharing options...
stewart Posted August 2, 2010 Author Share Posted August 2, 2010 The engine for the 67 is supposed to be a cummins turbodiesel, so I had to scratchbuild the engine by laminating plastic and I took the transmission from a Revell Peterbilt 359. Quote Link to comment Share on other sites More sharing options...
stewart Posted August 2, 2010 Author Share Posted August 2, 2010 The interior for the 89. I scratched the roll bar from sprue. Seats are from some AMT kit, don't know which. Steering wheel and tach are from the Revell Acura RSX. I scratch built the dash from aluminum and a modified kit dash excuse me for deviating from the original car but I had to add a big tach right behind the steering wheel. Will be adding seatbelts soon. Quote Link to comment Share on other sites More sharing options...
stewart Posted August 2, 2010 Author Share Posted August 2, 2010 For the 67 Here is the cummins in the engine bay. That transmission is a real beast. I had to cut out the middle from the floor pan so it would fit and I will have to redo the tunnel. It just barely fits under the seats. Here is the modified tunnel Quote Link to comment Share on other sites More sharing options...
stewart Posted August 2, 2010 Author Share Posted August 2, 2010 The suspension mockup for the 67 Here is the rear axle. The bracket on the top of the one side is for another link to the frame. The frame for the 67. The back half is scratchbuilt and the front is from some Revell 60s pickup kit Stewart Quote Link to comment Share on other sites More sharing options...
stewart Posted August 2, 2010 Author Share Posted August 2, 2010 The 67 chevy's rear suspension is nearly complete. A few easily fixed leveling issues to take care of but that is all. But oh my goodness? What a pain in the neck that frame was. Build, test-fit, find a flaw, tear apart, reassemble. Repeat. Repeat. Repeat. Etc. You get the idea. Making some part is one thing. But when you have to check every other second that everything is square in 3 different ways that really gets to you. But, perseverance finally prevailed and the end is in sight. Here are the pics. Still a little to do. The wheel arches need to be adjusted and one needs paint. Rear Suspension: Sneak Peek: In order to stuff the two turbos and intercoolers plus all of the other stuff under the hood with the engine, I am going to have to get creative. Probably will end up with the very unconventional setup of the exhaust for three of the cylinders on the opposite side as the other three cylinders. Ditto for the air intake. The turbos will be right next to the firewall. Did I say this would be unconventional? [)] Quote Link to comment Share on other sites More sharing options...
stewart Posted August 2, 2010 Author Share Posted August 2, 2010 The engine will be painted soon as will the cab. I almost have the turbo, intercooler, headers, and air intake set up. I scrathbuilt a radiator using wire mesh and plastic angle stock. Dashboard is done and the shifter is next. I finished the shifter. Not exactly like the 1.1 but it looks an awful lot like it. Quote Link to comment Share on other sites More sharing options...
stewart Posted August 2, 2010 Author Share Posted August 2, 2010 Engine is almost completely plumbed. Just have to complete the pulleys and engine front. Here it is so far. Oh, and by the way, the beginnings of a propane tank I "turned" it on my drill. I finished the front of the engine with pulleys and everything. Not super accurate but nobody will see this part. I wanted a thicker belt than masking tape so I used pigskin, a leftover from one of my other hobbies lol. Here are the pics. Soon as the paint is dry on the body, fitting for the turbos, intercooler, and radiator will begin. Quote Link to comment Share on other sites More sharing options...
stewart Posted August 2, 2010 Author Share Posted August 2, 2010 A huge update. I love the Testors one coat lacquers. I did my first flawless paint job on this truck with the lacquer. Almost a perfect color too, just that its metal flake and not metallic. But here are the pics of the latest mockup. I put an electric, remote air compressor under the rear deck, a propane tank with plumbing up to the engine, and completed the rear suspension. I tried stuffing the engine under the hood and found that I will either have to modify the belt setup, or place the radiator off center. As soon as I figure everything out, I will put on the turbos. This is the hardest part because I have to be careful not to mess up the paint on all the parts but I still have to use quite a bit of strength to push them all into place. The grille is still presenting a problem but I think I figured out a way to fix it. Stewart Mockup, body looks great don't it Compressor Propane: the tube coming out of the side is a filler tube that comes up through the rear wheel arch. Engine The engine compartment just has to have the air cleaners put in for the turbos. Next big step will be either the exhaust stacks or the grille. Probably the grille since I do not have a good tube bender yet. Here is the latest mockup. Propane [}] Interior: Don't you just love that massive shifter? [] The engine: Yeeeeesssssss!!! [] Quote Link to comment Share on other sites More sharing options...
stewart Posted August 2, 2010 Author Share Posted August 2, 2010 Back to the 89 I could not find any wheels like the ones on the movie truck so I scratchbuilt my own from the wheels in the Monogram F-350 duallie Here are the pics of the completed body. I roughed it up a bit and chipped the paint just like the 1:1 Spoiler: Quote Link to comment Share on other sites More sharing options...
stewart Posted August 2, 2010 Author Share Posted August 2, 2010 Here are the pics of the engine. Tell me what you think of the setup. Is it accurate? is it a good setup or not? I still need to plumb the dry sump oil system. I used nuts from McMaster Carr, the braided line from necklace cord painted chrome, air cleaners from parts by parks, carbs and engine block from the Revel Pro Sportsman kit, nut and bolt head details from pro tech, and various scratchbuilt pieces. I am working on the oil pump and it will be made from aluminum tubing. This is the oil tank I turned from aluminum rod and a breather from one of the Revell Pro Sportsman kits. This is the frame I scratchbuilt. Quote Link to comment Share on other sites More sharing options...
stewart Posted August 2, 2010 Author Share Posted August 2, 2010 Well, back again to the 67, I got the grille for the truck from Modelhaus but is did not fit the 72. I was going to just make it work but I found out that RMR resins makes a 67 resin cab so I got it. The molding on the truck is very nice with only a couple bubbles and other imperfections. The prices are good too. Here are the pics. I decided just to replace the plastic cab because it is the easiest thing to do IMO. Working on cleaning it up, removing the trim, enlarging the rear window, and cutting out the wheel wells and other molded in underhood details. axles, links and such are done. Just have to mount them to the chassis. Here are some pics of one of the completed axles. Quote Link to comment Share on other sites More sharing options...
stewart Posted August 2, 2010 Author Share Posted August 2, 2010 I have completed and installed the interior bucket into my build. I put a tach behind the steering wheel (the other one fell off and got lost), and tried a seatbelt setup for the first time. This one was the 5-point harness from Detail Master and is a whole project in itself. It says it is for advanced modelers and it is (well what do you know LOL) It is very complicated and difficult to assemble [V]. I would not recommend buying it. Next time I get something like this, I am going to find something much simpler (Any ideas?) I also put on interior door handles, installed the wind shield, and put the windshield braces on. The engine is going on next with the frame. I am still trying to figure out the exhaust system. The headers will be interesting because I have to clear them over the frame. More pics to come. [] I have completed the radiator and engine and installed the dry sump oil tank and cooler. The whole assembly is now in the frame and I am debating whether I am able to put the frame on the truck yet or not. [][yeah] If I do, it might get in the way of installing the suspension. The sidepipes are also done and the headers. The headers are kind of strange because I had to fit them around the frame rails. However, I love it that you can see them from between the wheels and wheel arch. Now I start some serious work on completing the wheels, suspension, and rear deck. YAHOOOOO!!!!! [8-] [party] Quote Link to comment Share on other sites More sharing options...
stewart Posted August 2, 2010 Author Share Posted August 2, 2010 (edited) IMG]http://i969.photobucket.com/albums/ae179/Hemifan22/Fast%20and%20Furious%2089%20Crewcab%20Dually/DSCN2736.jpg These are the wheels I sent to Alan of Ma's Resin to cast I just finished making the nos bottles and am really pleased with how they turned out. [^] I turned them from 3/8" aluminum rod on my drill and polished them with sandpaper. The valves are simple. I used 3/8" long 0-80 bolts and nuts from Micro-Mark and McMaster-Carr and glued them into a hole in the top. The decals are from JB Hobbies - a cottage industry that does all kinds of nice custom machining for a good price. Here is the link to his catalog: http://jbhobbies.freewebspace.com/index.html The tie downs for the bottles are from aluminum ducting tape and the bottle supports are made from aluminum sheet. Edited August 3, 2010 by stewart Quote Link to comment Share on other sites More sharing options...
stewart Posted August 2, 2010 Author Share Posted August 2, 2010 I have all the wooden decking for the rear deck stained and ready to go in right after the suspension. Still waiting on those wheels from alan so I can do that. Here are some pics of it with the nos bottles on it. I still have to cut out the diamond plate and BMF it. Basically, once I get the wheels, everything will just fall together. I have to wait for the wheels because I have to make sure the axles are centered under the wheels arches just right. Front suspension on the way too. Any suggestions for improvement are welcome. Tell me what you think. I have all of the prep work done on the resin 67 chevy cab and just painted it with the lacquer. It will be going together soon. I finished the fronts suspension on the 89 crewcab and just need to make the transfer case, driveshafts, and side boxes. Then all that is left is to get the wheels from alan and put the thing together. Here are some pics of what I have been up to. Put is real working hood pins from detail master. They are gorgeous. front suspension from a Revell 98 saleen mustang. Quote Link to comment Share on other sites More sharing options...
stewart Posted August 2, 2010 Author Share Posted August 2, 2010 Got the body painted. Now just have to get everything foiled and reassembled. I am redoing the intercoolers and radiator as the last ones didn't look too great. Here is a teaser pic. That is all for now. Hope it wasn't too much to post at once. If you have any suggestions, please give them. I am open to constructive criticism STewart Quote Link to comment Share on other sites More sharing options...
highway Posted August 2, 2010 Share Posted August 2, 2010 This is a "transplanted" WIP from the Scale Auto forums. I decided to expand my horizons a little and start posting a little bit on this forum. I have heard good things about it and wanted to see how it is different from the other, so here goes. It's about time you came over here to play, buddy! I'm very happy to see you bring this over, now I don't have to go over there just to see how this is going. Quote Link to comment Share on other sites More sharing options...
stewart Posted August 2, 2010 Author Share Posted August 2, 2010 ^LOL I have actually been a member for some months now. Just not done much on here. Quote Link to comment Share on other sites More sharing options...
Railfreak78 Posted August 4, 2010 Share Posted August 4, 2010 I'm loving it. Great builds. I know you have a lot of work into it but I am surprised of the fit of an AMT/Ertl and Revell to make the Crew cab. I made a Suburban out of 2 Mad Mudder kits but It was not real proportionate. I was able to make it work since it was a made up Half track military style truck. I really wanted to do these and may build the black one someday since I love those box Chevy trucks. I'm certainly watching Quote Link to comment Share on other sites More sharing options...
stewart Posted August 4, 2010 Author Share Posted August 4, 2010 Actually, the two bodies don't fit exceptionally well together, it is just that I did not want to buy another of the AMT pickups and I already had the body for this one so I made it work. STewart Quote Link to comment Share on other sites More sharing options...
highway Posted August 4, 2010 Share Posted August 4, 2010 I really wanted to do these and may build the black one someday since I love those box Chevy trucks. Brian, I'm just surprised you didn't ask Stewart where he found the grille for the black truck from! Quote Link to comment Share on other sites More sharing options...
Rick Schmidt Posted August 4, 2010 Share Posted August 4, 2010 I opened this thread not knowin what to expect Fast an Furious trucks ?? I was thinkin trucks built like hondas or something. Man was I wrong but I sure did enjoy lookin this over. A lotta hard work going into a pair of unique looking vehicles. You've been doin some great work on them So Much so I'm thinkin I may need to try one Quote Link to comment Share on other sites More sharing options...
stewart Posted August 5, 2010 Author Share Posted August 5, 2010 I am glad you like it. I am not having much time to work on them these days as I just got my first 40 hour a week job working at a lumber yard. I'll see how soon I finish them. Quote Link to comment Share on other sites More sharing options...
stewart Posted November 10, 2010 Author Share Posted November 10, 2010 Well, after several months of waiting, Alan said he finally has my wheels done. He is going to send them out in the mail this week. Now I can finish those trucks!!!! As soon as they get here, I am going to get on top of finishing the 89 crewcab. Not a whole lot to do on it except put the suspension together, and then the flat bed. Look for more progress soon. STewart Quote Link to comment Share on other sites More sharing options...
Recommended Posts
Join the conversation
You can post now and register later. If you have an account, sign in now to post with your account.
Note: Your post will require moderator approval before it will be visible.