hookedonplastics Posted May 9, 2007 Posted May 9, 2007 I decided a couple of weeks ago that I wanted to do this model simply to replicate a paint job I had seen. I bought my House of Kolor Candy Brandywine and was set to make my idea come to life. Well, I had no idea how poorly this kit was done. Lots of flash and ejector marks and sink holes. This particular kit is the '85 reissue. After a couple of hours of sanding and filling, and one coat of primer, a lot of the imperfections showed up. There were more sunken spots than I could see on the naked plastic alone, and I decided that I didnt like the way the original exhaust ran up the side of the car. So I filled the mounting holes for the exhaust and refilled the sinks and cracks where the front facia met the body.
hookedonplastics Posted May 9, 2007 Author Posted May 9, 2007 The "lip" that was to locate the top for of car was not much more than flash in some areas and mostly non-existant in others, so I removed it. I then used 0.030" styrene to create a mounting surface and also raise it up a bit so that it didn't look so sunken in.
ismaelg Posted May 9, 2007 Posted May 9, 2007 Looking good Russ! All of that work will certainly pay off at the end.
MikeBoyle Posted May 9, 2007 Posted May 9, 2007 Looking good so far. Definatley not for the faint of heart.
MonoPed Posted May 9, 2007 Posted May 9, 2007 Cool project! I "built" a couple of these when I was a kid (it had a skeleton!!), and now only give it a look as a parts kit. Nice to see someone take a serious stab at a serious build of it.
hookedonplastics Posted May 9, 2007 Author Posted May 9, 2007 Here it is mocked up on the chassis. I have decided that in keeping with the "Show Rod" history of this car, I will be displaying it on a mirror base. Because of this, the lack of rear wheel wells need to be addressed. I will be making my own wheel wells to correct this. I am also unhappy with the locating bumps for the interior tub. I will need to try and cover this with more styrene.
MonoPed Posted May 10, 2007 Posted May 10, 2007 I noticed the front wheels in yours are as bad as the last ones I tried to use as far as ejector pins go. I used the wheels and tires on this Deuce, but ended up using front wheels from the parts box that are pretty close.
hookedonplastics Posted May 10, 2007 Author Posted May 10, 2007 You are right Brian. The ejector marks on the outter rims of the front wheels are just one more 'issue' with this kit. I read an article by someone else who fixed this problem by sanding just the outter edge smooth and then BMFing that surface. If that doesn't work, then I will just Allclad them.
MonoPed Posted May 10, 2007 Posted May 10, 2007 I had sanded the face of the wheels smooth, and shot them with Alclad which solved the pin marks, but I ended up with an odd looking gap beween the wheel and the whitewall insert.
hookedonplastics Posted May 12, 2007 Author Posted May 12, 2007 Here are some templates I made using the pan and the inside of the body cutout to trace the contours. These are the start of the wheel wells. Notice the notching on the left rear of the pan (right side in this photo) near the gas tank to create positive placement of the parts.
hookedonplastics Posted May 13, 2007 Author Posted May 13, 2007 Here are the fabbed wheel wells, just need to shave them down at the pencil lines to fit within the body.
Howard Cohen Posted May 20, 2007 Posted May 20, 2007 I have built a few over the years and I have one now that I am building the way the car was on the cover of Rod & Custom in November 1962. There are a few changes like adding a fan and a rear seat. The model car technology in the early 60's was not as advanced as it is today but it was a good kit for it's time and isn't too bad today. Good thing we have the patience and ability to correct errors. On a sidenote...Darryl Starbird is rebuilding the 1:1 L'il Coffin back to it's original state when the model was made.
hookedonplastics Posted May 23, 2007 Author Posted May 23, 2007 Howard, it will be interesting to see the reiteration from Darryl. While researching the real car, I found pictures of a Coffin Clone on Mark Gustavson’s sight.
novadose71 Posted May 23, 2007 Posted May 23, 2007 That clone looks awesome, one of my all time favorite show rods. Your model is lookin good also. A member of our club is midway through a build of this kit. Had his chassis and body mocked up last time I saw it and it sat with a gasser stance, nose high. Looked really cool, but he said it wasn't intentional and it was OOB. Doesn't look like you had the same results. Can't wait to see it finished.
Howard Cohen Posted May 24, 2007 Posted May 24, 2007 The clone was shown at Detroit a couple of years ago and made the rounds of indoor and outdoor shows. I took a few pics of it and drooled all over the carpet on three different days (I had a pass). It is a great car and very well done. I believe Darryl is rebuilding it the way it was when he did it for Monogram and it should look like a huge model car...and I hope it runs
hookedonplastics Posted June 1, 2007 Author Posted June 1, 2007 Nothing to update. Been at the hospital a lot for Mom's cancer surgery, and have had no time for anything, let alone modeling. Is it just me, or does modeling feel like a self indulgence that is really hard to enjoy when some other things are in the queue? Not meant to be a pity party, just letting anyone who is interested in this build know that I am not letting it fade away. I hope to be shooting color this weekend. Thanks.
Ken Posted June 1, 2007 Posted June 1, 2007 Actually, my dad had knee replacement yesterday. I was off from work and rather than sit and wait for mom to call with news, I pulled out a Fujimi 430 and started sanding mold lines off. I found that while I was still worried about my dad, I did not fixate on it and worry as much. That is part of why I do this hobby. It helps me get in a zone get to my 'happy place', which luckily is not a weirdly populated as Happy Gilmore's place...
Howard Cohen Posted June 2, 2007 Posted June 2, 2007 This is a photo of the car being restored. Lots of work, eh!
hookedonplastics Posted July 21, 2007 Author Posted July 21, 2007 OK, so after a ridiculously long hiatus, I am finally getting back to this project. I had initially wanted to do the bottom of the floor pan in Allclad; do a kind of over-the-top show rod chrome underside, but I really like the way the candy pagan gold frame looks against the gloss black, so I am leaving it this way. Does anybody have any reference pics for the type of master cylinder and clutch linkage you see on this chassis? The rear end was not molded complete. I didn't want to see any gaps either from the side or reflected in the black paint, so I will fill in the voids. I am not going bonkers on the engine; just some paint detailing and I will wire and plumb it. I DO need to raid the parts stash and come up with a pulley and alternator set, though......this is the pretty much all the kit offers for the engine
jasonbo Posted July 22, 2007 Posted July 22, 2007 A few More http://images18.fotki.com/v329/filenzzK/a6...35/P6190002.jpg http://images18.fotki.com/v329/fileuTxt/a6...oID00002188.jpg http://images116.fotki.com/v703/fileoFr1/a...35/P6190003.jpg http://images114.fotki.com/v651/fileABLN/a...35/P6190004.jpg http://images14.fotki.com/v20/filejAEQ/a6d...35/P6190001.jpg So basically little coffin has been turned into 4+ cars burned to the ground made into a delivery vehicle jeeze history
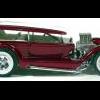
hookedonplastics Posted November 7, 2007 Author Posted November 7, 2007 Well, the Coffin is back in the shop! I re-stripped the paint (again) because the primer seemed to react with the plastic and made it 'soft'. It just didn't feel right when I was sanding it for the base coat. So, when I stripped the primer, I found out that glazing putty will not withstand the 'purple bath'. so it was back to the beginning. (what an idiot). This shot shows the doors being installed with a couple pieces of card stock to make sure there is clearance with the running boards: And here it is with the color. Finally!
RatRod Posted November 8, 2007 Posted November 8, 2007 Don't know if you have seen Tory Mucaro's very nicely done Lil Coffin, but it's worth a look!!!! http://www.showrods.com/gallery_pages/lil_coffin3.html He also did a second one, that is just as sweet.....enjoy, and get inspired!!! http://coffincorner.proboards89.com/index....read=1192206414
Dr. Cranky Posted November 8, 2007 Posted November 8, 2007 I like the way this is coming along. Very nice.
hookedonplastics Posted November 8, 2007 Author Posted November 8, 2007 Virgil, thank you for the kind words! John, how funny you bring up Tory Mucaro! His first Coffin is my inspiration on this build, and we have been in contact with each other during it! I consulted him on the paint.
Recommended Posts
Create an account or sign in to comment
You need to be a member in order to leave a comment
Create an account
Sign up for a new account in our community. It's easy!
Register a new accountSign in
Already have an account? Sign in here.
Sign In Now