Nick Winter Posted May 26, 2012 Author Share Posted May 26, 2012 Starting to shape up really well Niko. Nick Quote Link to comment Share on other sites More sharing options...
ChevyCoupe41 Posted May 26, 2012 Share Posted May 26, 2012 Niko your Camaro looks very good so far. Cant wait see it finished. Quote Link to comment Share on other sites More sharing options...
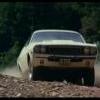
W-409 Posted May 27, 2012 Share Posted May 27, 2012 Thanks for the kind words! I built fuel lines from carburetors to fuel pump. The First Picture shows that connection part, I built for this fuel line. Fuel Line was built from metal wire, which was pretty easy to bend. I built throttle linkage too. It's made from same metal wire, and it was pretty hard to make since spark plug wires were disturbing a bit. But I managed to make it and this picture shows the parts, I needed to complete Throttle Linkage. I added few more details too, and then engine looked like this: Quote Link to comment Share on other sites More sharing options...
W-409 Posted May 27, 2012 Share Posted May 27, 2012 I made some bodywork too.... Still little rough, but it's slowly getting there.... Also painted inner fenders from the front after removing molded in battery cable from other fender. I can install the engine soon and then continue the detailing. Quote Link to comment Share on other sites More sharing options...
Nick Winter Posted May 27, 2012 Author Share Posted May 27, 2012 Niko, Fuel line looks great, I've been wondering how to do the one for my 426 Wedge, thanks. Nick Quote Link to comment Share on other sites More sharing options...
W-409 Posted May 28, 2012 Share Posted May 28, 2012 Thanks Nick! Glad to hear, that my pictures were helpful. More work done with the Camaro. I glued engine to chassis and it fitted very nicely on place. Then I decided to do little test fit, and realized that the Air Cleaner doesn't fit under the hood. Well I cut a hole on that hood with Trumpeter's Panel Scriber and saw. New Scoop is made from '57 Chevy's (Monogram) bottom part of the scoop. I had to modify it a bit before it looked good enough. Well enough talking, here are the pictures... "Houston, We Have A Problem!" One Minute Later: And Here Is The Scoop Basis: Little Cutting & Styrene... Quote Link to comment Share on other sites More sharing options...
W-409 Posted May 28, 2012 Share Posted May 28, 2012 Sanded The Body Smoother Too, Now It Needs Some More Bondo.... Engine: Quote Link to comment Share on other sites More sharing options...
W-409 Posted May 28, 2012 Share Posted May 28, 2012 I Wasn't going to use those unrealistic hood hinges, and firewall had big holes for them. So I took my sheet styrene, and after cutting two little styrene parts, I filled those holes. First Picture is Before, the second is After. Quote Link to comment Share on other sites More sharing options...
W-409 Posted June 1, 2012 Share Posted June 1, 2012 I'm in trouble with the Camaro. Paint has been removed from the body and chassis, and they are in bit bad condition. I knew it already, but I didn't guess that the problem was this bad. When I mocked up the chassis, everything went okay, but when I unassembled the chassis and body, this happened: Quote Link to comment Share on other sites More sharing options...
W-409 Posted June 27, 2012 Share Posted June 27, 2012 It has been a while since the latest update of the Camaro. Anyway, I was able to do some work today for it, and here we go. First I sanded all bondo-spots smooth, and actually it looked pretty good then. After that I decided to spray one primer coat on it, and now I can see what places need some more work, and what are good like that. I found correct seats for this one too. Now they are on the paint removal, hopefully tomorrow they are ready to be painted. I had to remove all of the wiring from that firewall. Applied little amount of putty there, too. Quote Link to comment Share on other sites More sharing options...
W-409 Posted June 27, 2012 Share Posted June 27, 2012 I didn't find good shifter from my spare parts boxes. So I took styrene sheet, and some red plastic tubing. Cut few pieces out of styrene, and there I had the basic components for building the shifter, as in first picture. I put those together, but after that I added still little styrene strips, and now the shifter is waiting for paint. Not perfect, but Okay for me. Quote Link to comment Share on other sites More sharing options...
Nick Winter Posted June 28, 2012 Author Share Posted June 28, 2012 Looking good, I'm hopeing to get some more done on the trans am Nick Quote Link to comment Share on other sites More sharing options...
Nick Winter Posted July 9, 2012 Author Share Posted July 9, 2012 Update on my FIREBird:Nearly Done Part 1 of this particular project. As it sits awaiting me to finish her up, well part one anyway interior Sunshade, Real Llumar Tint. Grille & Headlights Nick Quote Link to comment Share on other sites More sharing options...
CorvairJim Posted July 9, 2012 Share Posted July 9, 2012 (edited) You sure like your red Trans Ams, Nick! This one is gonna look real nice parked next to Sammy's car on your shelf. I'll be waiting for you with my mid-engine V-8 Corvair when you arrive in California with your pretty red T/A! Edited July 9, 2012 by CorvairJim Quote Link to comment Share on other sites More sharing options...
CorvairJim Posted July 10, 2012 Share Posted July 10, 2012 Glory, Hallelujah! I managed to spend about 3 hours up in my workroom this evening! I'm making strides on my mid-engined, ZR1-powered Corvair. I already had the chassis cut and had the front subframe from the 'Vette spliced into the 'Vair's pan, and had installed a crossmember for the front of the engine. I had to remove the custom crossmember that I had in place for the transaxle mount (too far forward) and fabricate another one. This required doing the basic assembly of the engine and attaching the Corvair's T10-based 4-speed transaxle. After cutting the rear springs one coil and tacking the rear trailing arms in place, I was able to slip the rear axle through the arms and the transaxle to get a read on where the rear transaxle crossmember had to go. I took some measurements and fabbed it up from Evergreen tube stock and some wire-core plastic rod for stiffness and bendability. I know what I want to do as far as hanging the mount from the crossmember goes, based on the original one that I had to remove. While I was at it, I reworked the interior bucket, removing the back seat and most of the package shelf area, just leaving the part that goes around te back - the hinges for the engine lid are attached there, and that section will also conceal the base of the rear window. Hopefully I'll think to shoot a few pictures of my progress tomorrow. Quote Link to comment Share on other sites More sharing options...
Nick Winter Posted July 11, 2012 Author Share Posted July 11, 2012 Can Hardly Wait to see! Nick Quote Link to comment Share on other sites More sharing options...
W-409 Posted July 11, 2012 Share Posted July 11, 2012 Firebird looks good! Very nice paint job and stance is just right. My Camaro needs just a little bondo, and then bit of sanding and (hopefully) the last primer coat... Quote Link to comment Share on other sites More sharing options...
CorvairJim Posted July 12, 2012 Share Posted July 12, 2012 I finally got around to taking a fer happy snaps of my progress on my "Widebody" mid-engine ZR-1/Corvair. The first couple of shots show the mid-engine chassis with the basic ZR-1 engine/Corvair transaxle assembly mocked in place with a nearly stock Corvair chassis for comparison purposes. That chassis is actually the one for my Flying Tigers Tribute model, and has been shortened 9 scale inches but it's good enough for comparison purposes. I've already installed the basic Corvette front suspension, but I still need to add springs, shocks and an anti-roll bar: Here's the model mocked up as it sits at the moment. It is shown with the wheels from the ZR-1 kit, but I plan on using a set of BBS-style lace spoke wheels on the completed model. The splitter for the front air dam, shown in front of the model, will be installed after the body and chassis are finally assembled, since it'll get in the way of assembly otherwise.: Quote Link to comment Share on other sites More sharing options...
Nick Winter Posted July 13, 2012 Author Share Posted July 13, 2012 I like it a lot Jim. Nick Quote Link to comment Share on other sites More sharing options...
hvymtl Posted July 13, 2012 Share Posted July 13, 2012 Dang Jim , looking good there i am impressed but you will still be seeing daytona taillights will have some pics soon had some problems sanding panel lines and not being able to find a new body i went and cut the door out . and didnt have anything to replace it . till i got a stashed promodeler 69 first issue Cut that door out and it fit except for the vent window. so i am back to my conundrum. Later Guys MIchael Quote Link to comment Share on other sites More sharing options...
CorvairJim Posted July 14, 2012 Share Posted July 14, 2012 The only time I'll be seeing Daytona taillights, son, is when I'm coming around again to lap your sorry butt, probably somewhere in Kansas... Seriously, forget about the vent window and go for the aerodynamics of fixed side glass like on a pro mod drag car. You'll have to fab up a window frame to rivet the plexiglass to, but that shouldn't be too tough. On the other hand, it WILL make toll booths harder, unless you have EZ-Pass. Then you just blitz the booth at about a buck ten and dare the smokies to try to catch you! Quote Link to comment Share on other sites More sharing options...
hvymtl Posted July 14, 2012 Share Posted July 14, 2012 going for the aero glass with the little sliding window who said anything about ez pass or stopping for tollbooths make some late model glass work remove the front vents. Michael Quote Link to comment Share on other sites More sharing options...
CorvairJim Posted July 15, 2012 Share Posted July 15, 2012 Sure, what was I thinking? You're blowing across the country at 2 to 3 times the speed limit (or in my case, considerably more than that!), so really, what difference does it make if we happen to, uh, "forget" to stop to pay any tolls? Quote Link to comment Share on other sites More sharing options...
W-409 Posted July 17, 2012 Share Posted July 17, 2012 The interior for my Camaro build is pretty much done. I wanted to keep it as simple as possible, bit like Sleeper style. No Roll Bar, no tachometer or other that kind of equipment. There might be still some cleanup and paint touches needed before I can install it, but otherwise it's done. I'm pretty happy about how it turned out. Quote Link to comment Share on other sites More sharing options...
hvymtl Posted July 21, 2012 Share Posted July 21, 2012 Interior looks really good Niko, Jim more than 3 times huh LMAO, what happens when you scoop up the first roadkill HD wipers man . MIchael Quote Link to comment Share on other sites More sharing options...
Recommended Posts
Join the conversation
You can post now and register later. If you have an account, sign in now to post with your account.
Note: Your post will require moderator approval before it will be visible.