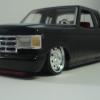
gautreau Posted January 22, 2013 Posted January 22, 2013 Hello everyone.I am going to be starting on this kit shortly. A friend has asked me to replicate this truck. I have ordered the conversion kit to turn it from a 378 into a 389.I will be replacing the Detroit with a Cummins.If anyone has any tips on doing this conversion I would greatly appreciate them. Thanx for lookin' Jeremy
kilrathy10 Posted January 22, 2013 Posted January 22, 2013 Man, if this is your first big rig, you sure can pick 'em....You're gonna have some fun, especially with a conversion kit...Don't get me wrong...I'm sure you can handle it, but I know I'd take my time with this one...But, by all means, have some fun with it....And I love the rig you're gonna tackle...Awesome truck...
gautreau Posted January 22, 2013 Author Posted January 22, 2013 Thanx.I will be taking my time. I think the Herd bumper will be another challenge as well.
ewaskew Posted January 22, 2013 Posted January 22, 2013 Well Jeremy, if you scratch build a lot,that bumper and a lot of other parts thats going to be needed will not be a problem. As for this being your first truck build you picked a good one for a challenge. I'll be following you on this one so keep us posted.
gautreau Posted January 22, 2013 Author Posted January 22, 2013 I do scratchbuild a lot of stuff.I have a thread in the pick-up section that has quite a few scratched parts.
Snakebite Customs Posted January 22, 2013 Posted January 22, 2013 I will be following this one as well. Should be a cool project!
gautreau Posted January 23, 2013 Author Posted January 23, 2013 Thanx I appreciate that.I will be starting on this as soon as my parts from P & P arrive.
mackinac359 Posted January 23, 2013 Posted January 23, 2013 You'll need Eric at P&P's 389 hood conversion, the raised roof piece and the newer cab side panels, and if you want to go further, his newer dash and door panels. Tim
Bennyg Posted January 23, 2013 Posted January 23, 2013 For the bullbar, I would look at auslowe model accessories in Australia. Google it, his bullbars look great. Ben
gautreau Posted January 24, 2013 Author Posted January 24, 2013 Thanx fellas.I have ordered the hood conversion,complete cab,dash and door panels from P & P.Thanx for the info on the bumpers I will look into them.
gautreau Posted February 4, 2013 Author Posted February 4, 2013 Finally got started on this build.I got the block painted. It was like Christmas yesterday at my bench.All the parts from P & P Resin showed up. I have a few questions for all you rig builders.I have to stretch the wheel base on this truck to 244".What is the best way to do this? Also where is the best part of the frame to stretch and what should I use styrene wise? Thanx for lookin' Jeremy
tribalgt03 Posted February 4, 2013 Posted February 4, 2013 those always reminded me of maximum overdrive lol...but it looks like it will be a fun challenge
Kostas Parchas Posted February 4, 2013 Posted February 4, 2013 (edited) Jeremy hi, IMO the best part of the frame to slice and strech is under the sleeper. There are many ways to do it. The most easy way is to use a piece of frame from another kit (shortened wheelbase for example) Otherwise you can use styrene. I am sorry but at the moment I don't have how_to pictures to post. I have done this a few times and I can tell you that I did it in diferent way every single time. I am sure that other guys here will be more helpfull than me. I recoment to you to take a look at www.timstrucks.com. Kostas. Edited February 4, 2013 by Kostas Parchas
Bennyg Posted February 4, 2013 Posted February 4, 2013 Finally got started on this build.I got the block painted. [img=http://i306.photobucket.com/albums/nn256/gautreau1971/Peterbilt%20388/Peterbilt389BuildUp2_zps65dc7745.jpg] It was like Christmas yesterday at my bench.All the parts from P & P Resin showed up. [img=http://i306.photobucket.com/albums/nn256/gautreau1971/Peterbilt%20388/Peterbilt389BuildUp3_zps8f478319.jpg] I have a few questions for all you rig builders.I have to stretch the wheel base on this truck to 244".What is the best way to do this? Also where is the best part of the frame to stretch and what should I use styrene wise? Thanx for lookin' Jeremy You might be able to get c channel from evergreen that matches the chassis, or specific chassis rails from sourkrauts model truck site. Ben
gautreau Posted February 5, 2013 Author Posted February 5, 2013 Thanx fellas.I appreciate the info. I got the Cummins all assembled. I found an old KW kit in my stash that had parts robbed out of it for another build.So I have my stretch materials. Thanx for lookin' Jeremy
Bennyg Posted February 5, 2013 Posted February 5, 2013 The work you've put in looks promising so far. Will be watching. Ben
mackinac359 Posted February 5, 2013 Posted February 5, 2013 The kit is already over 244" - it scales 246 if I remember. Tim
TUFF TIN Posted February 5, 2013 Posted February 5, 2013 Just in case you don't know...........Tim's word is straight from the Bible. No one has done more Peterbilts than Tim has and he does them very well. Listen to his remarks as he can be a big help to you. Mike
gautreau Posted February 5, 2013 Author Posted February 5, 2013 Thanx for the info fellas.Good to know.I was misinformed on where it was measured from. Tim I'm glad your comm enting on my build.I appreciate that the guru of all that is Peterbilt is lending his knowledge on this one. Thanx for the compliments as well.
Johnny1973 Posted February 6, 2013 Posted February 6, 2013 You are going to have a nice truck when finish.Like everyone said take your time you have alot of builting to do.Engine looks great I will watching this built.
gautreau Posted February 9, 2013 Author Posted February 9, 2013 I got the frame all assembled.It will see the paintbooth on Tuesday. Not sure if everyone paints the frame before or after they have assembled it.This just seemed easier. Thanx for lookin' Jeremy
Johnny1973 Posted February 11, 2013 Posted February 11, 2013 I would paint the frame before assembly.
mountaindewd Posted February 12, 2013 Posted February 12, 2013 (edited) Does the truck in your reference pic have a 48" sleeper? Hard to tell for sure from that angle. If so, you'll need to shorten the kit sleeper to match. Edited February 12, 2013 by mountaindewd
gautreau Posted February 12, 2013 Author Posted February 12, 2013 Thanx for the head up on the bunk. I will have to find out from my friend. Thanx for the advive on painiting the frame.
Recommended Posts
Create an account or sign in to comment
You need to be a member in order to leave a comment
Create an account
Sign up for a new account in our community. It's easy!
Register a new accountSign in
Already have an account? Sign in here.
Sign In Now