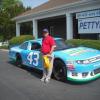
shafer Posted January 25, 2013 Posted January 25, 2013 I am going to show you what steps I take while building this car, Its going to take time , I have waited a year already for this kit to come out here it is cant wait to dig in all of the parts are here
shafer Posted January 25, 2013 Author Posted January 25, 2013 The first step I always take is the wheels, since this kit has chrome wheels I will be making a change. Everyone is going to build this with chrome however every 73 i see has blue except for the daytona car , so i choose to be different. time to soak in clorox cut out the centers and sand the treads time to paint good year after adding wheel weights detailing lugnuts and painting on some markers such as LR, LF these are the finished tires
shafer Posted January 25, 2013 Author Posted January 25, 2013 step 2 grill I really do not like the grill inserts for this kit but i can make them work.The instructions say paint them black , don't do that unless you are doing a 1977 paint scheme. I started by mixing 1 drop of black with 3 drops of argent silver, this made a nice gray color that was not too dark or light, well see for yourself
shafer Posted January 25, 2013 Author Posted January 25, 2013 Paint Prep I always paint my bodies before starting the actual build up- I do this because it gives the body plenty of time to cure before trying to rush it over a complete chasis I am very happy with the color of this mold so there will be no need to repaint the petty blue unless you just want to, once the clear coat goes on it will look like fresh paint. first thing is to work on the flashing , this kit has lots of excess flash , I used a hobbie knife to shave of big access and wet sanded the rest The next step is wet sanding - for this i used 600 grit and palmaloive dish detergent. I wet sand the whole car even though I am not repainting the blue, this will allow All paints and clear ro bite. Use dish deterent while sanding, I have found that round 2 kits have lots of oils on their bodys which can play fisheye havock when paint is applied
shafer Posted January 25, 2013 Author Posted January 25, 2013 masking I cut my maskiing tape in strips along the edges of the roll, the thinner strips allow me to make crucial bends needed to create this paint scheme, next use wader tape to finish mask up of body. I used parchment /wax paper to cover the inside.
shafer Posted January 25, 2013 Author Posted January 25, 2013 using the floresant orange required for this kit means that the under coat must be flat white. I achieve this by layering several thin coats, trying to lay the flat down heavy will cause cracking issues when you apply the orange 24 hours later - lightly wetsand and then spray the orange this is what I had the next day Before the decals go on i will wetsand the orange very carefully for a smooth finish
shafer Posted January 25, 2013 Author Posted January 25, 2013 starting on decals this shot shows the scheme after the first coat of clear coat has been applied
Plasticfanatic Posted January 25, 2013 Posted January 25, 2013 Looking GREAT, the paint job and decal work is sharp and fantastic.Like you I also built my original issue Petty Charger with blue painted wheels also, in my very personal opinion a quite nice look.
shafer Posted January 25, 2013 Author Posted January 25, 2013 Looking GREAT, the paint job and decal work is sharp and fantastic.Like you I also built my original issue Petty Charger with blue painted wheels also, in my very personal opinion a quite nice look. thanks
Mooneyzs Posted January 25, 2013 Posted January 25, 2013 Nice work so far on this build. It looks great!
shafer Posted January 25, 2013 Author Posted January 25, 2013 cool kit and build !! Nice work so far on this build. It looks great! thanks for the kind words
Bad Apple Posted January 25, 2013 Posted January 25, 2013 What clear works best on the bare plastic? I never cared much for the blue and orange/red paint scheme, i'm thinking of leaving my the solid blue whenever i get to it.
shafer Posted January 25, 2013 Author Posted January 25, 2013 What clear works best on the bare plastic? I never cared much for the blue and orange/red paint scheme, i'm thinking of leaving my the solid blue whenever i get to it. Believe it or not I have always used midwax high gloss polyurathane it is about $8 per can but leave the best shine and holds up well to age. FYI for your build - This is a great kit no matter what color you paint it. I don't know if you are aware or not Petty never had an all blue charger, that was the roadrunner. Same body style , just different grille bumpers and tail section.
MoparWoman Jamie Posted January 25, 2013 Posted January 25, 2013 I am digging this build already, but what happen around the corners at the rear side windows with the paint? I notice the same on the front fenders.. or am I just seeing things? (I am tired right now) but good job on the build so far, I'll be watching this project of yours.
shafer Posted January 26, 2013 Author Posted January 26, 2013 I am digging this build already, but what happen around the corners at the rear side windows with the paint? I notice the same on the front fenders.. or am I just seeing things? (I am tired right now) but good job on the build so far, I'll be watching this project of yours. not to fear , just some overspray wait til you see the fix , besides if i make it too perfect it will look storebought
shafer Posted January 26, 2013 Author Posted January 26, 2013 It has been kinda icy around here, currently I am continuing to work on the body - it is too cold to paint parts for roll cage assembly. pictures below are the kit with 2 more coats of clear for a final shine, you will notice I added some of the chrome parts, spoiler, and painted the window trim. I raided my wifes cross stich stash to make cables for the hood/trunk pins and fuel cap. After which a smal black line was painted to simulate the tape keeping the pins in place. Around the rear quarter window , I brushed it some aluminum silver to make the look of the bare metal that is usually on this car.
shafer Posted January 27, 2013 Author Posted January 27, 2013 today- windows and paint windows have been glued in using ordinary elmers school craft glue - this keeps them from hazing all of my parts to be painted have been washed and are set out ready to paint, I will spray paint them carfully while leaving them on the sprues. I just pick out the parts i want to paint. this ahs taken many years of practice but some how i get the color on the part i want w/o having to paint all of the other items the same color, i do this w/o tape. contrary to the instructions the engine should not be orange - this is a dodge thing , petty cars had petty blue engines so my engine is blue. my parts are painted based on what colors i have in my arsennal , not according to the instructions.
shafer Posted January 28, 2013 Author Posted January 28, 2013 these pix show the assembly of the front and rear suspension, some of the interior and a test fit of the body.
spkgibson Posted January 29, 2013 Posted January 29, 2013 Very nice job..Great job on the two tone paint.
Bowtienutz Posted January 29, 2013 Posted January 29, 2013 Nice Job so I'm looking forward to picking mine up Saturday. . I'm a bit disapoited it wasn't a clear body. Maybe I get creative and get a second cit and break out the dremel tool. and create a cutaway thanks for sharing Maybe you mentioned it maybe not but but cou you you elaborate on paints you you used Vince
Recommended Posts
Create an account or sign in to comment
You need to be a member in order to leave a comment
Create an account
Sign up for a new account in our community. It's easy!
Register a new accountSign in
Already have an account? Sign in here.
Sign In Now