tyrone Posted August 25, 2014 Author Posted August 25, 2014 (edited) Thanks alot for the kind words fellas... I really appreciate it... I was able to get a little time in today on this one... I got the racepack dash installed... I added some flocking for the floor mats... I'm still trying to get the hang of this alclad .. I painted the pedals with it... I also got some work done on the engine.... I used the kit engine plate.. I ground down the cast water pump and timing cover.. and made up a pulley from sheet styrene.. Edited August 25, 2014 by tyrone
Mooneyzs Posted August 25, 2014 Posted August 25, 2014 Tyrone... Looking good Brother!!! That Racepac gage looks great. Looks like you got hooked up to some power and the back light is on....lol Keep the pics coming. Nice work
tyrone Posted August 25, 2014 Author Posted August 25, 2014 here's a few more... I'll make the water pump tomorrow.... I've also added dzus fasteners to the bottom of the chassis I added PE washers and bolt head detail to the upper strut mounts...and modified the pontiac valve covers.. I ground them down with a dremel tool until the pontiac was gone.. filled in the breather hole with .062 rod... sanded them and painted with alclad...
1 bad55 stan Posted August 25, 2014 Posted August 25, 2014 I carn't get enough of your work Tyrone!Just blows me away every update....
shift13 Posted August 25, 2014 Posted August 25, 2014 Looks amazing but ive hot one question. Where are you getting your valve covers and heads from? I bought a few of the Fairlane pro sportsman kits and really do not want to use the ford engines so to speak
tyrone Posted August 25, 2014 Author Posted August 25, 2014 Looks amazing but ive hot one question. Where are you getting your valve covers and heads from? I bought a few of the Fairlane pro sportsman kits and really do not want to use the ford engines so to speak Allen... I've been using the engines from the pro sportsman 55 chevy kits... they have the pontiac "big chief" style heads... I take my dremel tool and grind them down until the pontiac engraved in them is gone.. the breather hole is filled with a piece of .062 rod, and then I sand and reshape them...
shift13 Posted August 25, 2014 Posted August 25, 2014 I was hoping you wouldn't say that lol the chevys are getting a Little pricey on the net. Ill have to try and find some in resin. Thanks Tyrone
tyrone Posted August 25, 2014 Author Posted August 25, 2014 I was hoping you wouldn't say that lol the chevys are getting a Little pricey on the net. Ill have to try and find some in resin. Thanks Tyrone I know what you mean Allen... I'm getting down to my last few sets of big chief heads too.. I have some of the 57 chevy engines with the moroso logo on them...
shift13 Posted August 25, 2014 Posted August 25, 2014 I wonder if only the heads and valve covers and heads are different? Is the block the same? With how popular youve made the pro sportsman chassis for kit bashing. I think I should cast some sets untill revell releases them again
tyrone Posted August 27, 2014 Author Posted August 27, 2014 got a small update for tonight.. I got the balancer, crank trigger, and water pump installed... I also got the seat covered... will make seat harness next... thanks for looking and comments welcome.... I'm going to re-do the valve covers.... think I can do a better job..
tyrone Posted August 27, 2014 Author Posted August 27, 2014 Thanks fellas... I really appreciate it...
ClayK Posted August 27, 2014 Posted August 27, 2014 I think redoing valve covers is going around Tyrone! Looks great man. Can't wait to see it in paint.
pharr7226 Posted August 27, 2014 Posted August 27, 2014 (edited) The crank trigger and water pump add realism to the look of the engine... killer work! Edited November 9, 2014 by pharr7226
tyrone Posted August 28, 2014 Author Posted August 28, 2014 Thanks alot fellas.... got the rear slicks sidewalls sanded to give them a more rounded look... I also got the seat harness done...
Mooneyzs Posted August 28, 2014 Posted August 28, 2014 Hot Diggity Dog Tyrone.... Those rear slicks look great and so does the 5 point harness... Very nice work. I love every update on this. What grit of paper did you use on the side walls?? It's making me wonder if I should sand the side walls on the Army Funny car build. Also Who's photo-etch belts did you use on this build. They turned out great.
tyrone Posted August 28, 2014 Author Posted August 28, 2014 Thanks Chris... I started with coarse, and worked my way down from there... I'll hit them with some dullcote later... the seat harness kit is from detail master... and thank you buddy... It means alot...
1 bad55 stan Posted August 28, 2014 Posted August 28, 2014 Those slicks do look good as does the harness.Very nice..
tyrone Posted August 29, 2014 Author Posted August 29, 2014 Thanks fellas... I made one of my electronics board and started on some of the electronics... I also added some bolt head detail to water pump and added pulley and belt for oil pump...
tyrone Posted August 29, 2014 Author Posted August 29, 2014 I also got wood steering wheel and cord done...
vc273 Posted August 29, 2014 Posted August 29, 2014 Hi Tyrone this is coming along awesome. If only I had half your skills I would be happy,
tyrone Posted August 29, 2014 Author Posted August 29, 2014 Hi Tyrone this is coming along awesome. If only I had half your skills I would be happy, Thanks Steve... I really appreciate it...
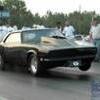
futurattraction Posted August 29, 2014 Posted August 29, 2014 Looking good, Tyrone. I really like that second (closeup) silhouette shot...
Recommended Posts
Create an account or sign in to comment
You need to be a member in order to leave a comment
Create an account
Sign up for a new account in our community. It's easy!
Register a new accountSign in
Already have an account? Sign in here.
Sign In Now