Dragracer Posted March 28, 2011 Share Posted March 28, 2011 I agree with everything written above, the car looking good, the stance looks great, I as always will be following this build! Quote Link to comment Share on other sites More sharing options...
brett Posted March 28, 2011 Share Posted March 28, 2011 I'm with him Quote Link to comment Share on other sites More sharing options...
tyrone Posted April 4, 2011 Author Share Posted April 4, 2011 what's up fellas thanks for the comments, I've got the chassis painted, rear end and wheelie bars painted, mocked up the engine to get the hood scoop out of the way, here's a few mock up pics. Quote Link to comment Share on other sites More sharing options...
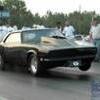
tyrone Posted April 4, 2011 Author Share Posted April 4, 2011 (edited) next I'll be working on the front end trying to make it look like these.. Edited April 4, 2011 by tyrone Quote Link to comment Share on other sites More sharing options...
hOLMS Posted April 5, 2011 Share Posted April 5, 2011 Excellent choice for the nose....that will be sharp. Looking fwd to seeing that!! Quote Link to comment Share on other sites More sharing options...
phatfender Posted April 5, 2011 Share Posted April 5, 2011 Very nice looking build, Tyrone. Great looking body work. I'm picturing this in a tangerine to go with the black wheels. Quote Link to comment Share on other sites More sharing options...
Mooneyzs Posted April 5, 2011 Share Posted April 5, 2011 Tyrone that engine looks nasty in there. is it a Ross Gibson engine. Chassis looks great painted and front end is coming together well. Quote Link to comment Share on other sites More sharing options...
Dragracer Posted April 5, 2011 Share Posted April 5, 2011 The Camaro is coming along well Tyrone, I agree and think the front spoiler needs a little more to it,waiting to see how it turns out, the Ross Gibson motor looks awesome, but then all the RGE's look awesome. Keep up the great work! Quote Link to comment Share on other sites More sharing options...
tyrone Posted April 6, 2011 Author Share Posted April 6, 2011 thanks for the comments fellas, I got some work done on the front end last night, I added a piece of styrene to the bottom of the front end and cut it so that it hung out farther in the front, then I added a piece of tube styrene to the front bumper and the used putty to fill it all in. I've got it all sanded down, it's not as aggresive as the front end in the pic, but I like it here's a few pics. before after Quote Link to comment Share on other sites More sharing options...
Dragracer Posted April 6, 2011 Share Posted April 6, 2011 Looking good. Quote Link to comment Share on other sites More sharing options...
dragmodeler1 Posted April 6, 2011 Share Posted April 6, 2011 Are you gonna make a truck and trailer to go with it? Quote Link to comment Share on other sites More sharing options...
tyrone Posted April 24, 2011 Author Share Posted April 24, 2011 (edited) what's up fellas, I took a little break from this one, but I got back to it today, I got clear on the chassis, front brakes, lines and hoses are done, I also got most of painting for the engine done also, playing around with the front wheels for some new looks (ideas) thanks for looking and comments welcome. Edited April 25, 2011 by tyrone Quote Link to comment Share on other sites More sharing options...
dragmodeler1 Posted April 24, 2011 Share Posted April 24, 2011 How'd The engine fit together? I'm thinking about getting one and I was wondering....looks amazing tyrone! I'll definitely be watching Quote Link to comment Share on other sites More sharing options...
hOLMS Posted April 24, 2011 Share Posted April 24, 2011 Hey Tyrone, Everything is coming together awesome (x2). Your car is looking great! I like what you've done to the front rims. The extra bumper work looks great too. Looks like you're headed for the home stretch. Love it! Quote Link to comment Share on other sites More sharing options...
1320wayne Posted April 24, 2011 Share Posted April 24, 2011 Progress is looking great Tyrone. Not to get too far off topic of your build but I was wondering if you were going to make the "Big Drag" show in Greenville/Simpsonville next month? I missed last year but will be back this year. Quote Link to comment Share on other sites More sharing options...
baddgass Posted April 24, 2011 Share Posted April 24, 2011 Super nice pro mod build. I'm geting some good ilde for my build. THANKS Quote Link to comment Share on other sites More sharing options...
Dogfish_7 Posted April 24, 2011 Share Posted April 24, 2011 Fantastic work!! Quote Link to comment Share on other sites More sharing options...
tyrone Posted April 25, 2011 Author Share Posted April 25, 2011 Thanks for the comments fellas, I started on the plumbing for the enigne, most of the oil lines are done, still need to do the dry sump, and fuel lines. I also started wiring the car and made up most of the electrical components too. Thanks for looking and comments welcome... Quote Link to comment Share on other sites More sharing options...
W-409 Posted April 25, 2011 Share Posted April 25, 2011 Great job with plumbing and detailing the engine. I like to watch these Pro Mod projects, because PM is one of my favorite Drag Race categories. I like the body and the rollcage. Nice job with it, this build is very interesting, I keep watching this one. Quote Link to comment Share on other sites More sharing options...
funhouse1 Posted April 30, 2011 Share Posted April 30, 2011 That's just too much...the level of detail boggles my mind. GREAT stuff! Quote Link to comment Share on other sites More sharing options...
tyrone Posted May 6, 2011 Author Share Posted May 6, 2011 Thanks for the comments fellas, I've put on most of the electronics and wires, next I'll get the nos bottles painted and mounted, get the rear batteries in and start on the drivers area.. thanks for looking and comments welcome.. Quote Link to comment Share on other sites More sharing options...
DWR Posted May 6, 2011 Share Posted May 6, 2011 Hi Tyrone, What size of styrene rod do you use for your roll cages? Quote Link to comment Share on other sites More sharing options...
hOLMS Posted May 7, 2011 Share Posted May 7, 2011 Wow Tyrone!! Everything's coming along quite well. What color is the chassis? Is it gunmetal? Looks a little darker than most and not as metallic, gives it a meaner, stealthy look. I like, I like! I don't know why the chassis color caught my eye so much on this viewing, but it did. I may go with a color similar to that on the Chevelle chassis. Good luck on the remainder of your build. Quote Link to comment Share on other sites More sharing options...
tyrone Posted May 28, 2011 Author Share Posted May 28, 2011 What's uo fellas thanks for the comments, holms the chassis is painted with detail master metalizer paint the color is titanium, it's airbrush ready and I like using for my chassis, I want to add some carbon fiber decals to my next project, Well I've had some time the past 2 days to make a little progress on this one, I've got the seat and harness done, steering wheel is in, rear batteries and cables are done, and I also got the nos bottles in and the transmission is almost done I also got the starter mounted more updates soon, thanks for looking and comments welcome. Quote Link to comment Share on other sites More sharing options...
tyrone Posted May 28, 2011 Author Share Posted May 28, 2011 a few more... Quote Link to comment Share on other sites More sharing options...
Recommended Posts
Join the conversation
You can post now and register later. If you have an account, sign in now to post with your account.
Note: Your post will require moderator approval before it will be visible.