mnwildpunk Posted June 28, 2012 Share Posted June 28, 2012 I'm putting together a revell 54 chevy panel custom. Right now I'm working on cleaning up the body. There are a bunch of mold lines to get rid of plus I'm removing the factory style rain drip rails that were molded in. who here has built this truck? Do you have any tips for me remember I'm just starting to learn how to add extra details. When I get to the engine I'm using the street version 409. It will probably take me a long time to get things right and I'm sure I'll be asking a ton of questions. Quote Link to comment Share on other sites More sharing options...
Joker Posted June 28, 2012 Share Posted June 28, 2012 You are right about the mold lines..it's an old kit. I converted mine from a delivery into a wagon. Keeping an eye on your build ...I haven't seen many built. here is my build link...http://www.modelcarsmag.com/forums/index.php?showtopic=57717&hl= James aka Joker Quote Link to comment Share on other sites More sharing options...
Bartster Posted June 28, 2012 Share Posted June 28, 2012 l haven't built this kit in about 40 years! lt was a gasser only kit then. l'll be watching to see how it goes together & how it's changed. Bart. Quote Link to comment Share on other sites More sharing options...
mnwildpunk Posted June 29, 2012 Author Share Posted June 29, 2012 Wow joker amazing. Do you mind if I steal your idea for rear fender skirts? How did you attach them? I'm working on taking pictures and posting tomorrow. Joker if I can make mine look only half as good as your's I'll be happy. Quote Link to comment Share on other sites More sharing options...
Joker Posted June 29, 2012 Share Posted June 29, 2012 Thanks Dave.. The fender skirts have an extra piece of styrene laminated on the bottom half to allow for the curvature of the skirt. This was done with making a pattern first out of those subscription cards that fall out of magazines. After making the skirts I glued thin styrene tabs on them and glued them on from the inside. I didn't paint or prime them separately because there has to be a seam when installed. Mine are the flush mounted type as aposed to bubble type skirts that cover the wheel well all together. James aka Joker Quote Link to comment Share on other sites More sharing options...
mnwildpunk Posted June 29, 2012 Author Share Posted June 29, 2012 Ok I'm seeing if I got this photobucket thing down this is some of mold issues I'm dealing with!! Quote Link to comment Share on other sites More sharing options...
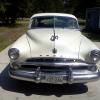
mnwildpunk Posted June 29, 2012 Author Share Posted June 29, 2012 Today I've have been continuing to prep the body I've been holding off doing anything until I buy a compressor for my air brush. this is the direction I'm thinking of going. Using those rims and tires and putting a 235ci. With a different intake dual or trip carbs? I'm nervous about doing that because it will be the first time I hacked up a frame. Quote Link to comment Share on other sites More sharing options...
Steven Zimmerman Posted June 29, 2012 Share Posted June 29, 2012 Sedan delivery, not panel truck....'Z' Quote Link to comment Share on other sites More sharing options...
mnwildpunk Posted June 29, 2012 Author Share Posted June 29, 2012 Just going off what revell calls it on the box Quote Link to comment Share on other sites More sharing options...
mnwildpunk Posted June 30, 2012 Author Share Posted June 30, 2012 In re-reading my last reply I it reads like I'm being a smart butt which I was not trying to do. Steve or anybody would you teach me the difference between a panel and sedan delivery? Quote Link to comment Share on other sites More sharing options...
signguy2108 Posted June 30, 2012 Share Posted June 30, 2012 Simply put, the sedan delivery is based on the car chassis/ sheet metal and the panel is based on the pickup/ suburban chassis/sheet metal. Quote Link to comment Share on other sites More sharing options...
Steven Zimmerman Posted June 30, 2012 Share Posted June 30, 2012 Dave,, in reading MY reply, I came across as rather abrupt, too....Sorry (grin)....Larry hit the nail on the head, and keep up the good work !....'Z' Quote Link to comment Share on other sites More sharing options...
mnwildpunk Posted July 1, 2012 Author Share Posted July 1, 2012 Not a whole bunch done pretty much prepping parts still while I wait for some $$ & time to grab my air compressor. I did do a little frame work I dremmeled a tiny bit off the front axle so the tires sit better in the frame. Removed the molded in gas tank. I need to figure out my crooked frame. I also want to drop the rear like I did my front. Quote Link to comment Share on other sites More sharing options...
mnwildpunk Posted July 1, 2012 Author Share Posted July 1, 2012 Now for some reason I can't post two pics in one message. I'm in need of suggestions on how best to attack my hood problem? I was thinking of just using filler for the 2 holes where the hood meets the cowl but I'm clueless on how to attack the gap issue on the right hand side? I have been thinking of how one could make a frame rack like the ones we use at my job. In my opinion working on models is harder then the real thing lol. Quote Link to comment Share on other sites More sharing options...
Joker Posted July 1, 2012 Share Posted July 1, 2012 Dave..I kept the fire wall holes..the only thing I did do was make the opening smaller so that the hood hindges would work. As far as the side hood gap..good ol' styrene will work. Place the hood on the car and you can see how much styrene needed to fill up the huge hindge openings. Keep up the good work Quote Link to comment Share on other sites More sharing options...
mnwildpunk Posted July 5, 2012 Author Share Posted July 5, 2012 I got my new toy today an air compressor for my air brush. I just have to say WOW I'll never use spray paint again!!! I'll only hand paint tiny details from now on. I got it home and I was like a little kid I couldn't wait to paint something. Sadly the only thing I had ready for paint was my frame. Since it's a daily diver type of build I went with flat black I have a few things I need to learn with my badger 200 but over all it's great. Quote Link to comment Share on other sites More sharing options...
mnwildpunk Posted July 5, 2012 Author Share Posted July 5, 2012 I have also been working on the engine. I have most of it assembled but not detailed with wires and such which leads me to a question the wire for the alt where should that lead to? I know from the battery ground goes to the frame and positive leads to the starter but wouldn't the alternator also run to the battery? Quote Link to comment Share on other sites More sharing options...
Jantrix Posted July 5, 2012 Share Posted July 5, 2012 (edited) I'm in need of suggestions on how best to attack my hood problem? I was thinking of just using filler for the 2 holes where the hood meets the cowl but I'm clueless on how to attack the gap issue on the right hand side? Looking at the pic it also looks like the hood is too long? Is that correct or is it just a gap on the side? I would get some sheet styrene and fill the cowl holes with that. Filling the whole gap with putty is asking for trouble down the line. If your gap on the side is your only issue, use some very thin sheet styrene and add plastic strips down the length of the hood edge. I like using Tenax or Plastruct liquid glues for this because it isn't adding any material to the fix, merely welding the plastic and then evaporating. Keep adding styrene until the hood is now too wide for the opening then slowly sand away the added styrene until it fits properly. I just did this recently for the optional hood on the AMT 49 Ford. It worked like a champ. Edited July 5, 2012 by Jantrix Quote Link to comment Share on other sites More sharing options...
mnwildpunk Posted July 5, 2012 Author Share Posted July 5, 2012 Well the picture of the hood doesn't show what is going on properly. As you can see there is the two gaps where the hinges are the hood lines up in the front but the hood gap gets bigger the farther you go back from the front it rises up and then in the picture you see the gap on the right side. Quote Link to comment Share on other sites More sharing options...
mnwildpunk Posted July 8, 2012 Author Share Posted July 8, 2012 Hey guys I need your opinion what would be a good color to paint my deliver? I have an idea but not sure if it's a good idea I was thinking of painting the top half white and then below the belt line I would have some other color? What do you guys think? Quote Link to comment Share on other sites More sharing options...
Jantrix Posted July 8, 2012 Share Posted July 8, 2012 Doing research on what has been done with 1:1's would be a good idea. Quote Link to comment Share on other sites More sharing options...
mnwildpunk Posted July 11, 2012 Author Share Posted July 11, 2012 Sorry I've been busy so not much to report . I feel a little silly about the frame issue; I was way over thinking things, all it took was two fingers and some light pressure to get it straight. I'm waiting for my pre-wired magneto to show up so I can finish up the engine. I'm still not real happy with the five blade fan that came in the kit. Thinking of finding a different one. I'm heading to my first M.C.C.M meeting tonight so I'm sure I'll get great tips from a model car club that has been around for 30 years. By the way I decided to go with a metallic blue body color. I'm also kicking around the idea of making script decals of my business Isle detail it! L.L.C on the sides. Testor makes a program that you can print your own decals right? Do you need special ink for that? Quote Link to comment Share on other sites More sharing options...
mnwildpunk Posted July 13, 2012 Author Share Posted July 13, 2012 Here is a little progress Before and after I still have to add filler and shape. I know it may not seem like much to you pros but I'm pretty proud of my first time trying my hand at filling a gap. I'll have more pictures this weekend I keep finding things I did that I don't like and going back and fixing them. Quote Link to comment Share on other sites More sharing options...
mnwildpunk Posted July 16, 2012 Author Share Posted July 16, 2012 Here are a few progress pictures of what I have been doing I finally got the engine detailed as much as I like. I found a driveshaft that looks better then the one that comes with the kit. The frame is straight and I got the rearend to sit closer to the body. I've cut the rear door open I guess it is on to the interior. Well thank you all for watching my post there should be more to report soon Quote Link to comment Share on other sites More sharing options...
Recommended Posts
Join the conversation
You can post now and register later. If you have an account, sign in now to post with your account.
Note: Your post will require moderator approval before it will be visible.