

ShakyCraftsman
-
Posts
705 -
Joined
-
Last visited
Content Type
Profiles
Forums
Events
Gallery
Posts posted by ShakyCraftsman
-
-
Welcome to the forum Bill. You picked a real dozzie of a kit to jump into trucks with, but it looks like your tackling it okay. If you need any help just ask we are here to help.
Ron G
-
 1
1
-
-
1 minute ago, BK9300 said:
Looks awesome, Ron - great detail work!
Thanks Brian
-
1
-
-
31 minutes ago, Jürgen M. said:
Coming along nicely! I like the Astro kit! Not a perfect fit but for AMT pretty good!
I like your gladhands and the hitches! Look really authentic!
Thanks Jürgen
Your build is looking good also.
Ron G
-
1
-
 1
1
-
-
Hey all
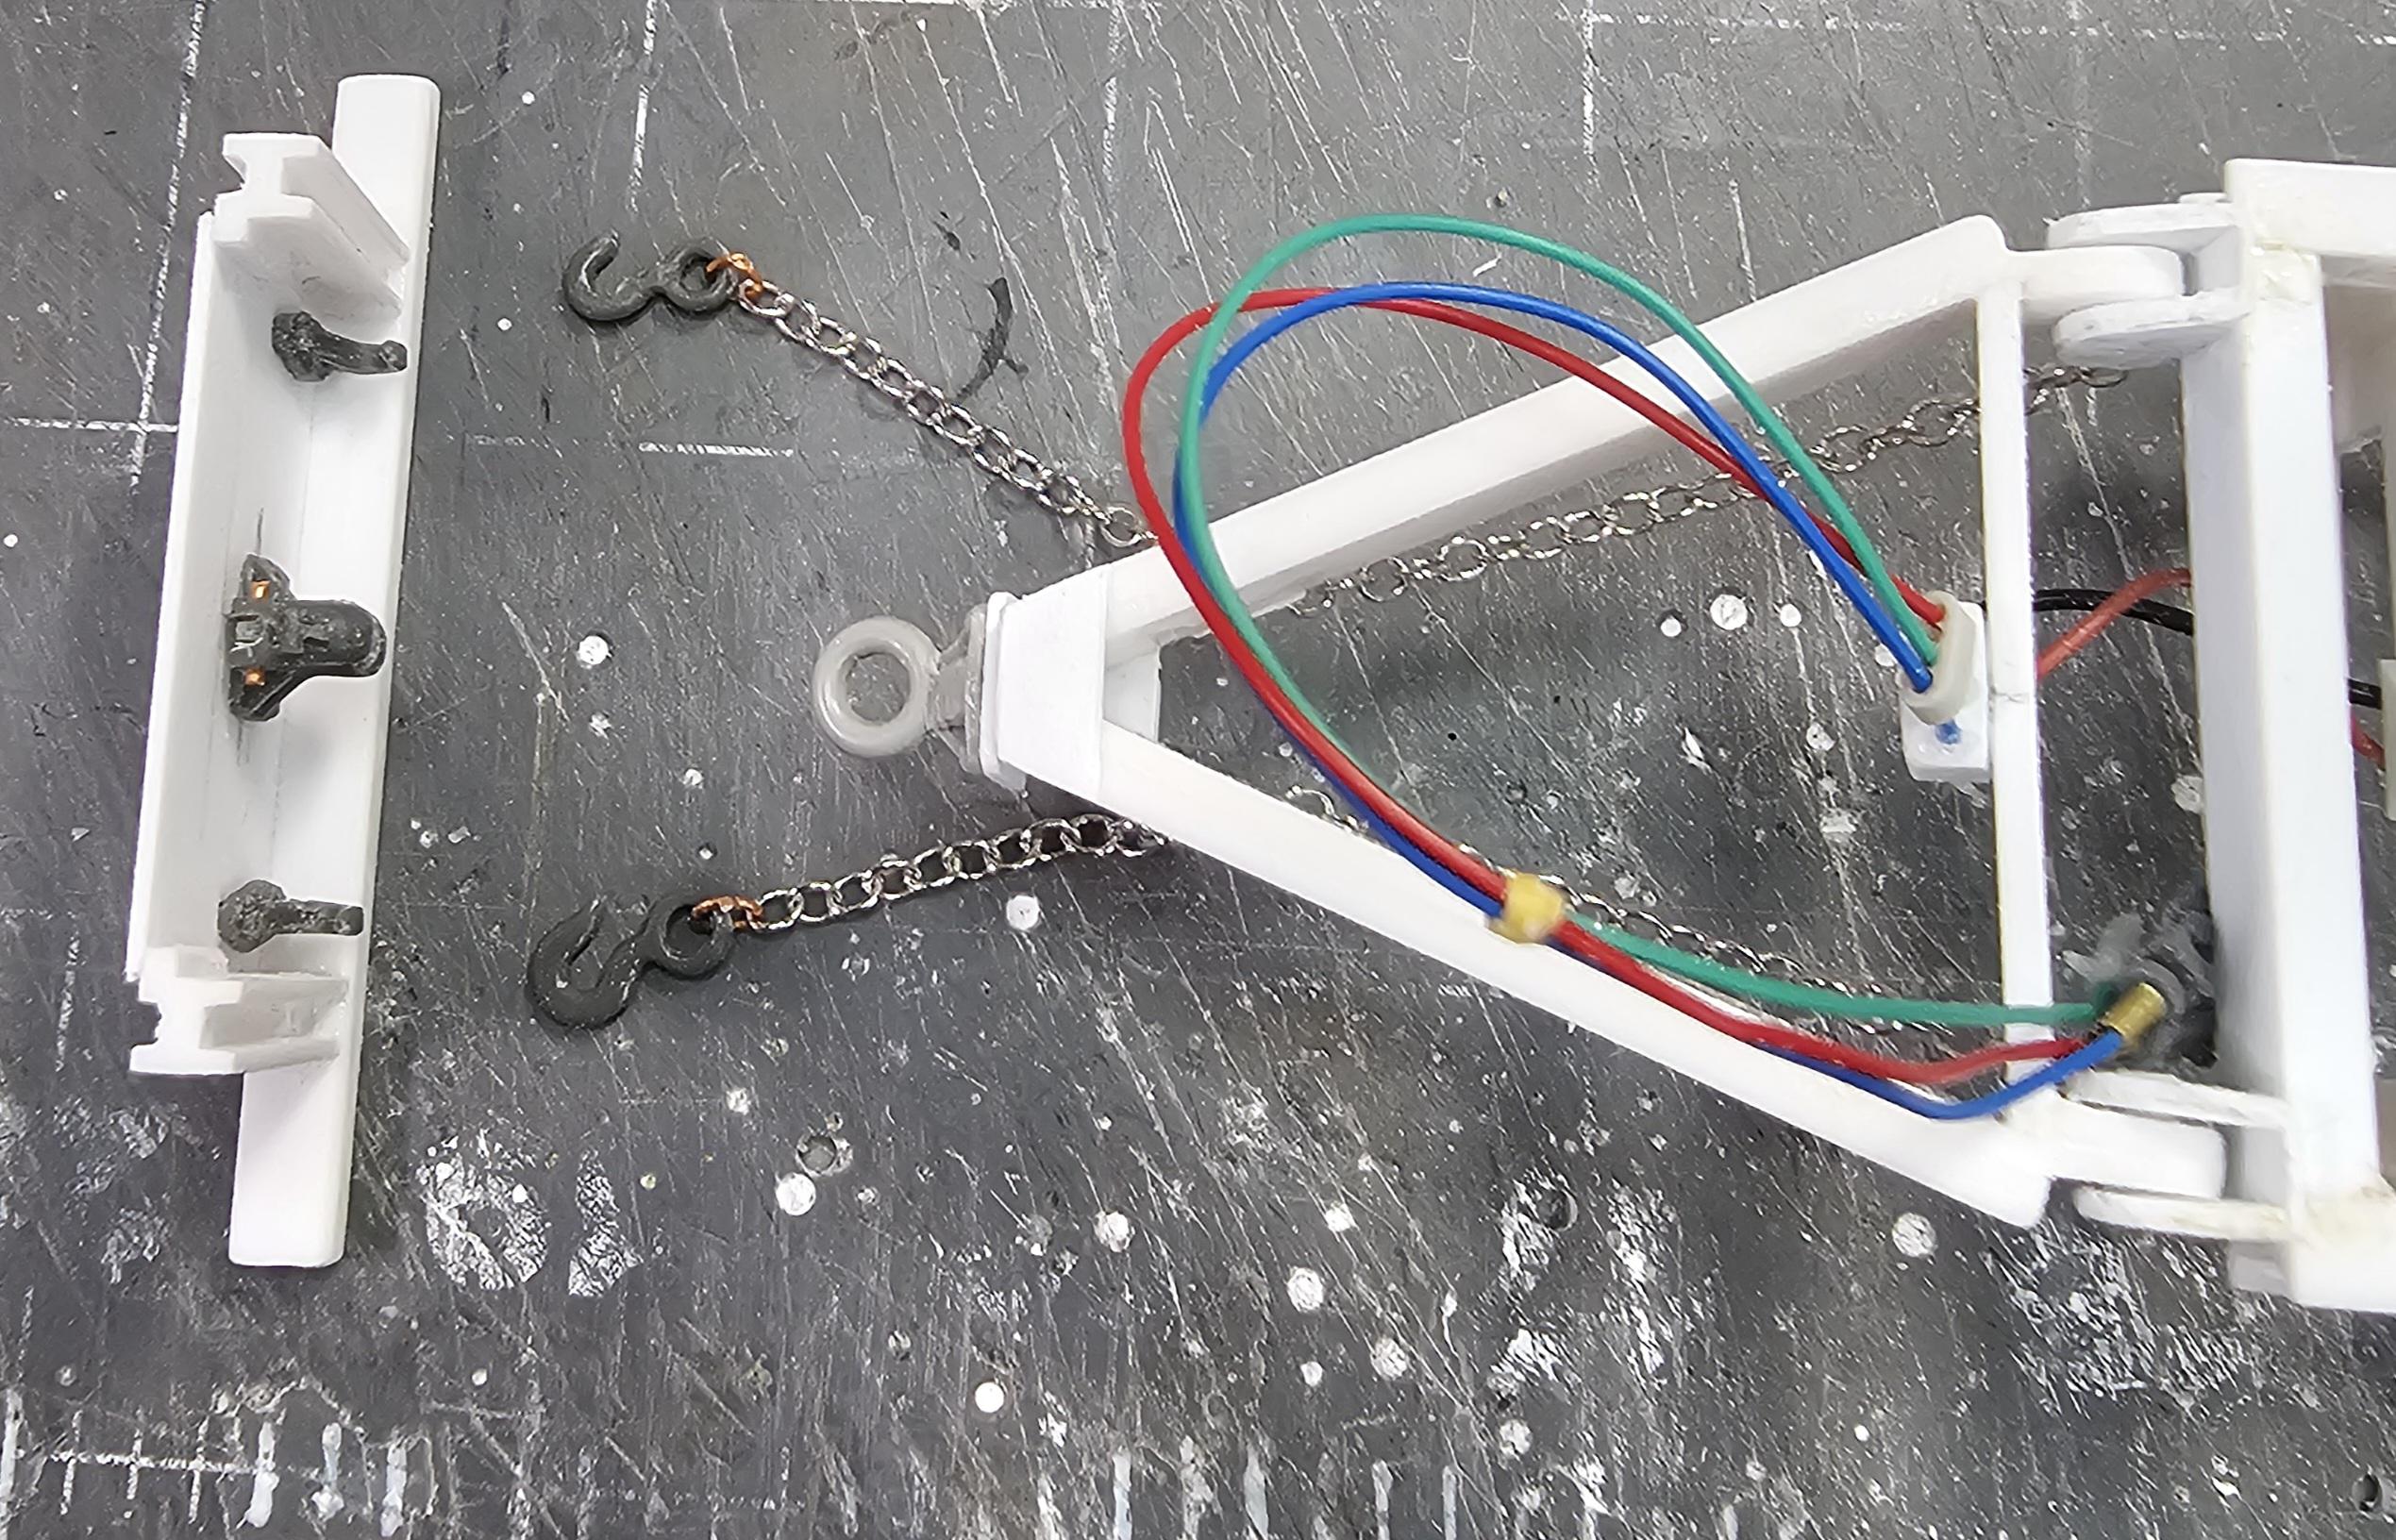
I did a little more work on the dolly. I added the safty chsins. And boy what a pain in the you know what!
 This view shows the chains with hooks, attached to the dolly. It also shows where they will hook up to the back of the front trailer.
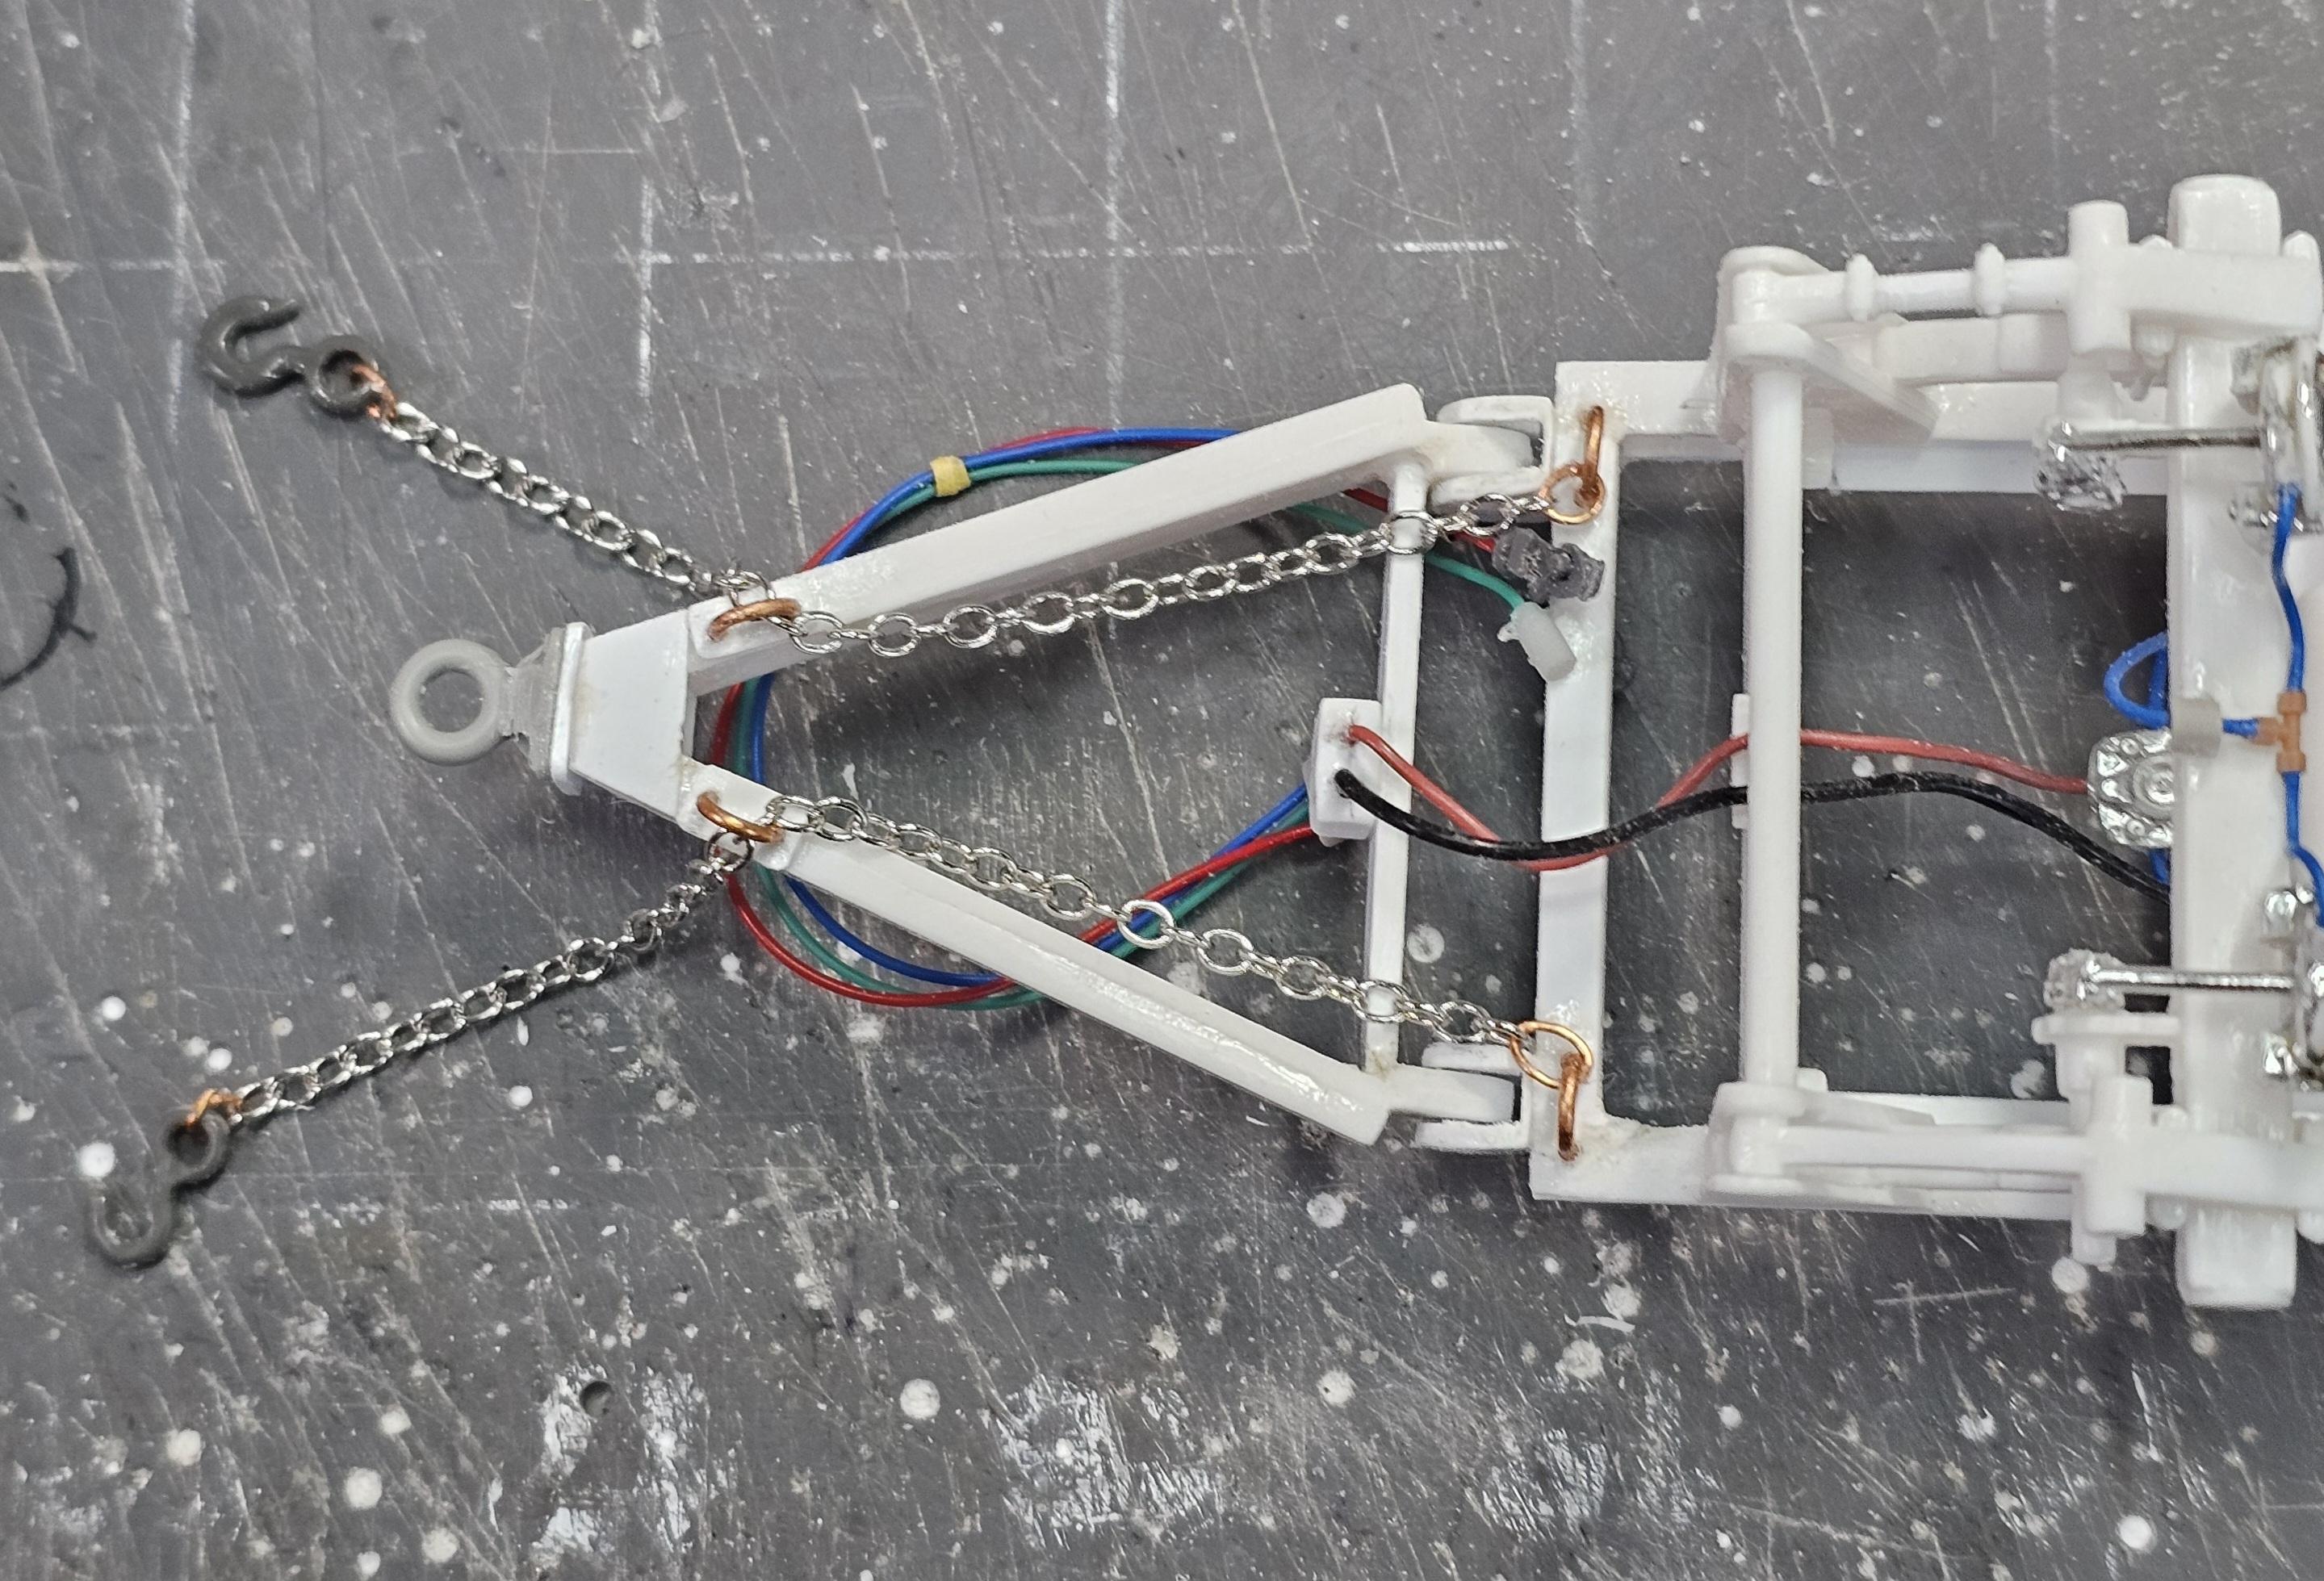
This view shows the bottom of the dolly. The rings at the rear of the dolly yoke were where I had all the trouble. Hooking up the chain ring, the chain and trying to connect everything involved alot of bad words! But I did get them attached. I'm working on the second/rear trailer right now. Well that's it for now be back soon.
This view shows the chains with hooks, attached to the dolly. It also shows where they will hook up to the back of the front trailer.
This view shows the bottom of the dolly. The rings at the rear of the dolly yoke were where I had all the trouble. Hooking up the chain ring, the chain and trying to connect everything involved alot of bad words! But I did get them attached. I'm working on the second/rear trailer right now. Well that's it for now be back soon.
Ron G
-
1
-
-
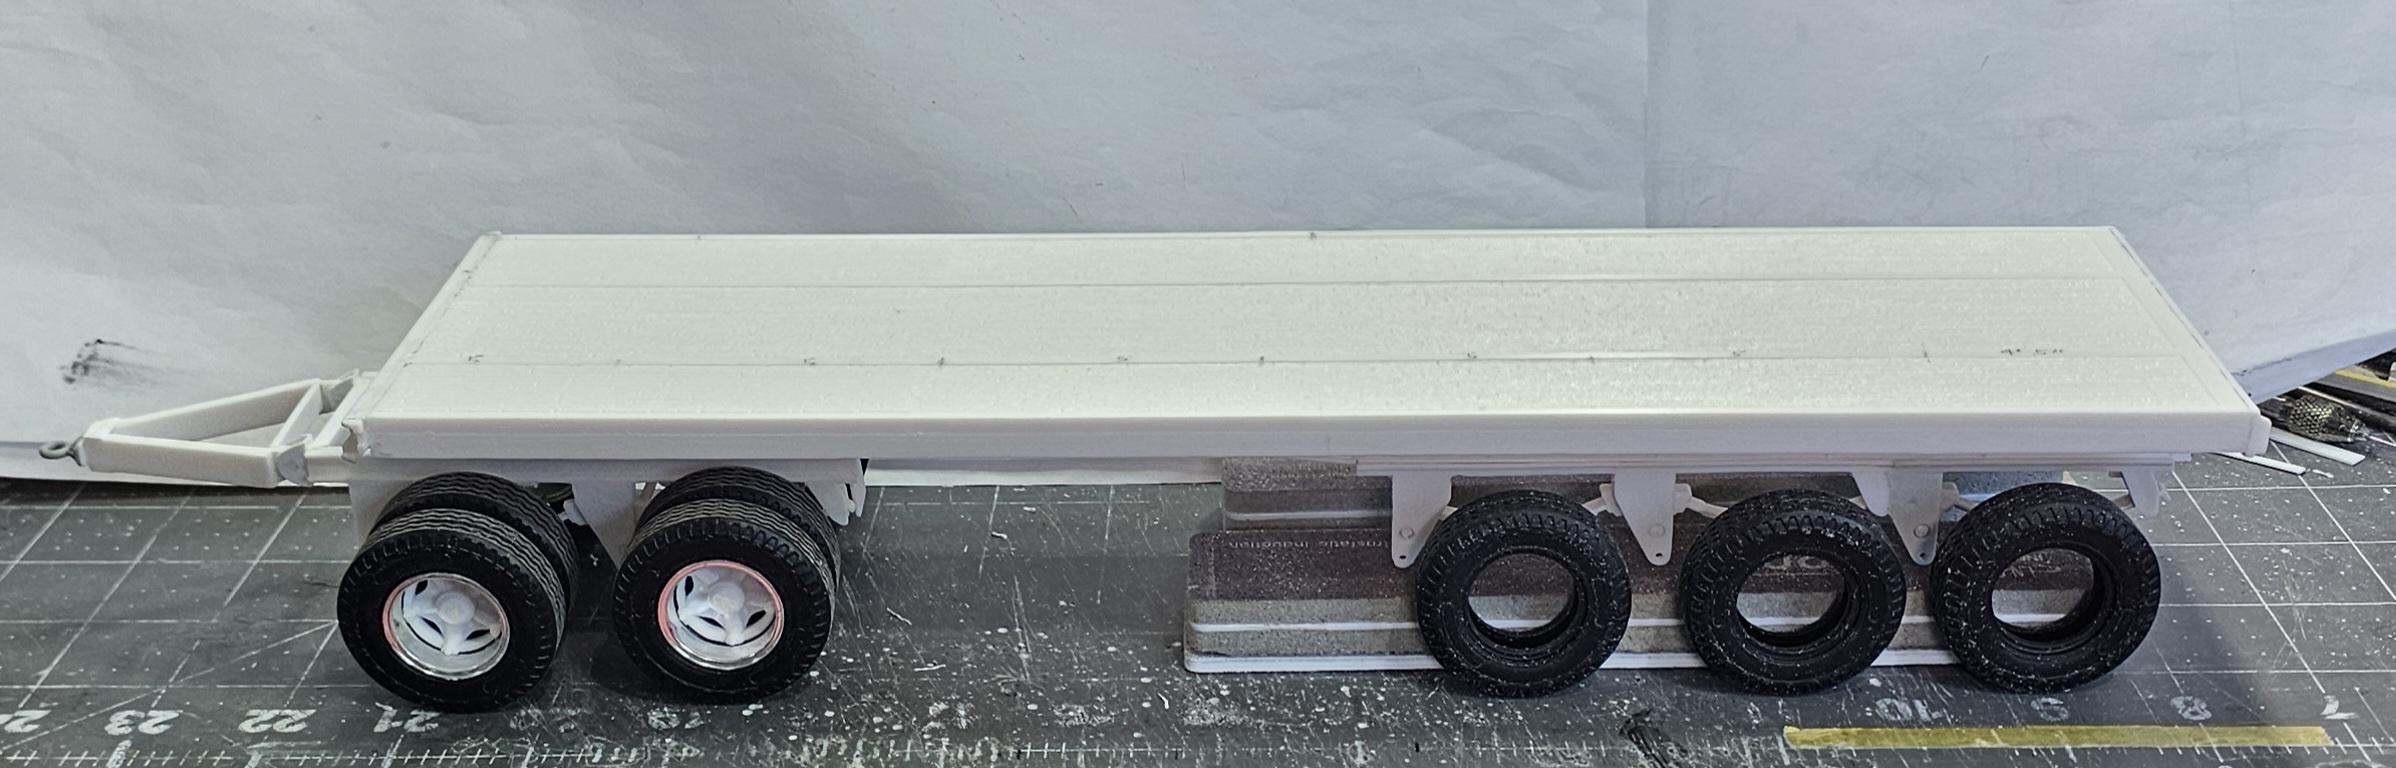
Hey all
Small update.
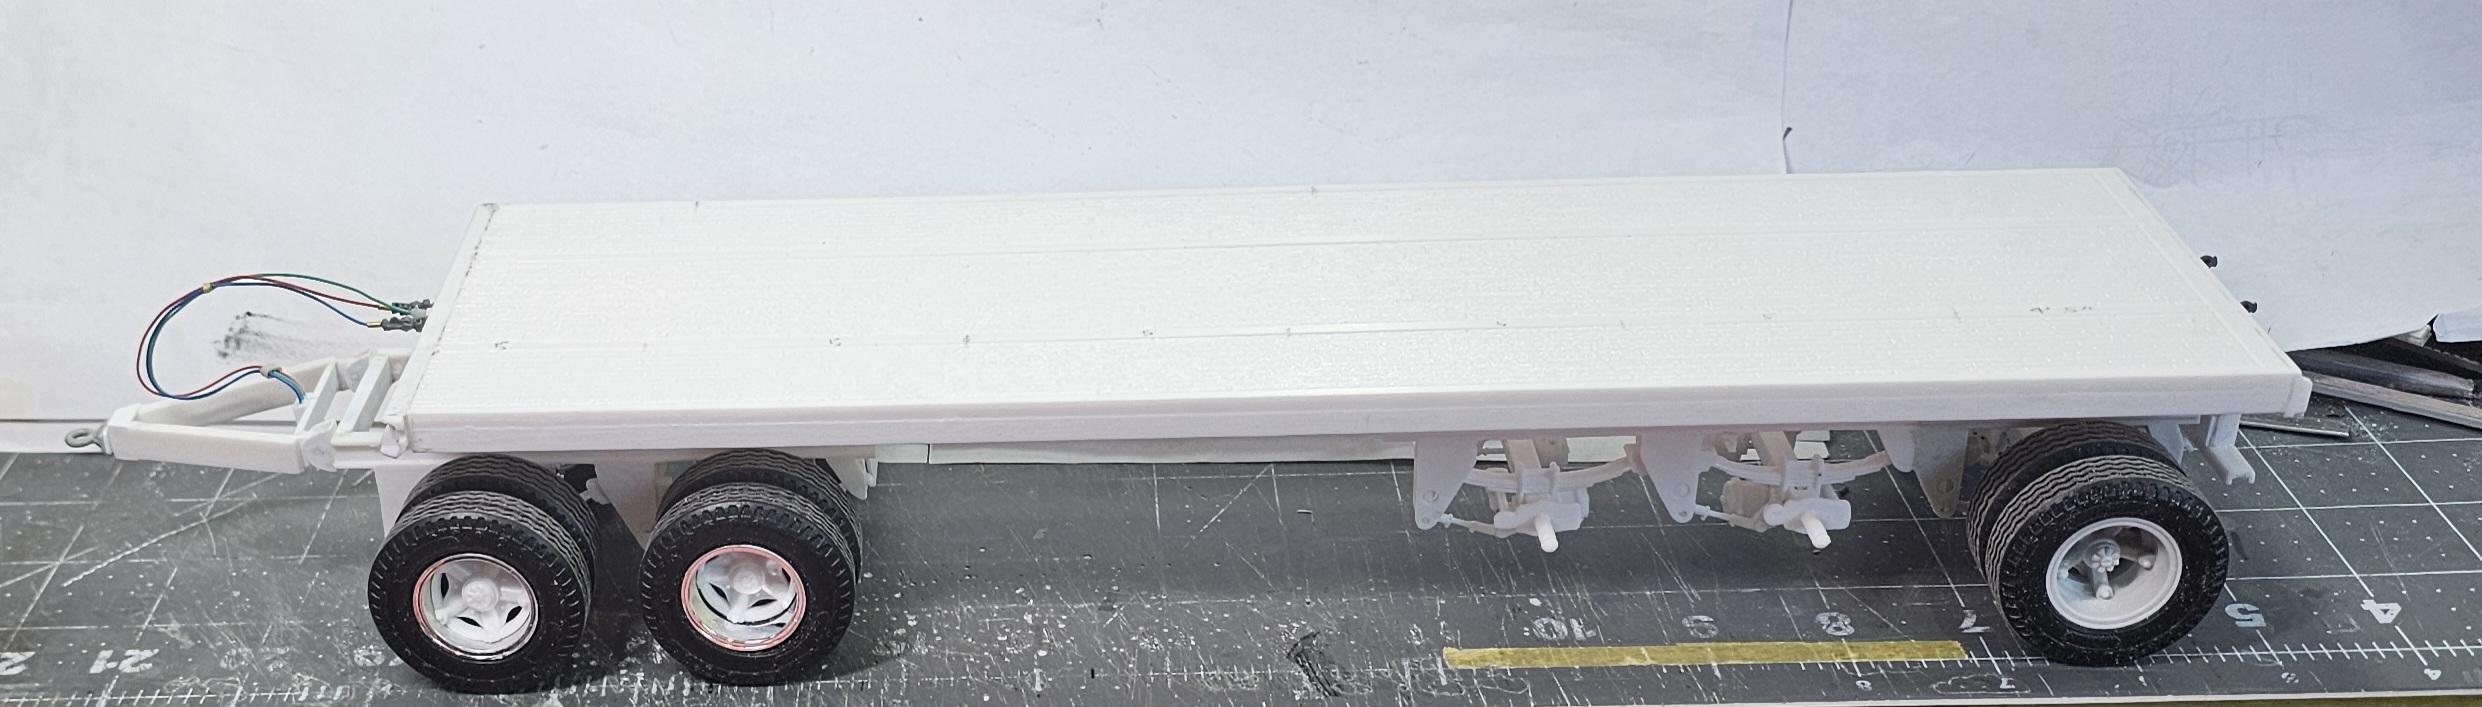
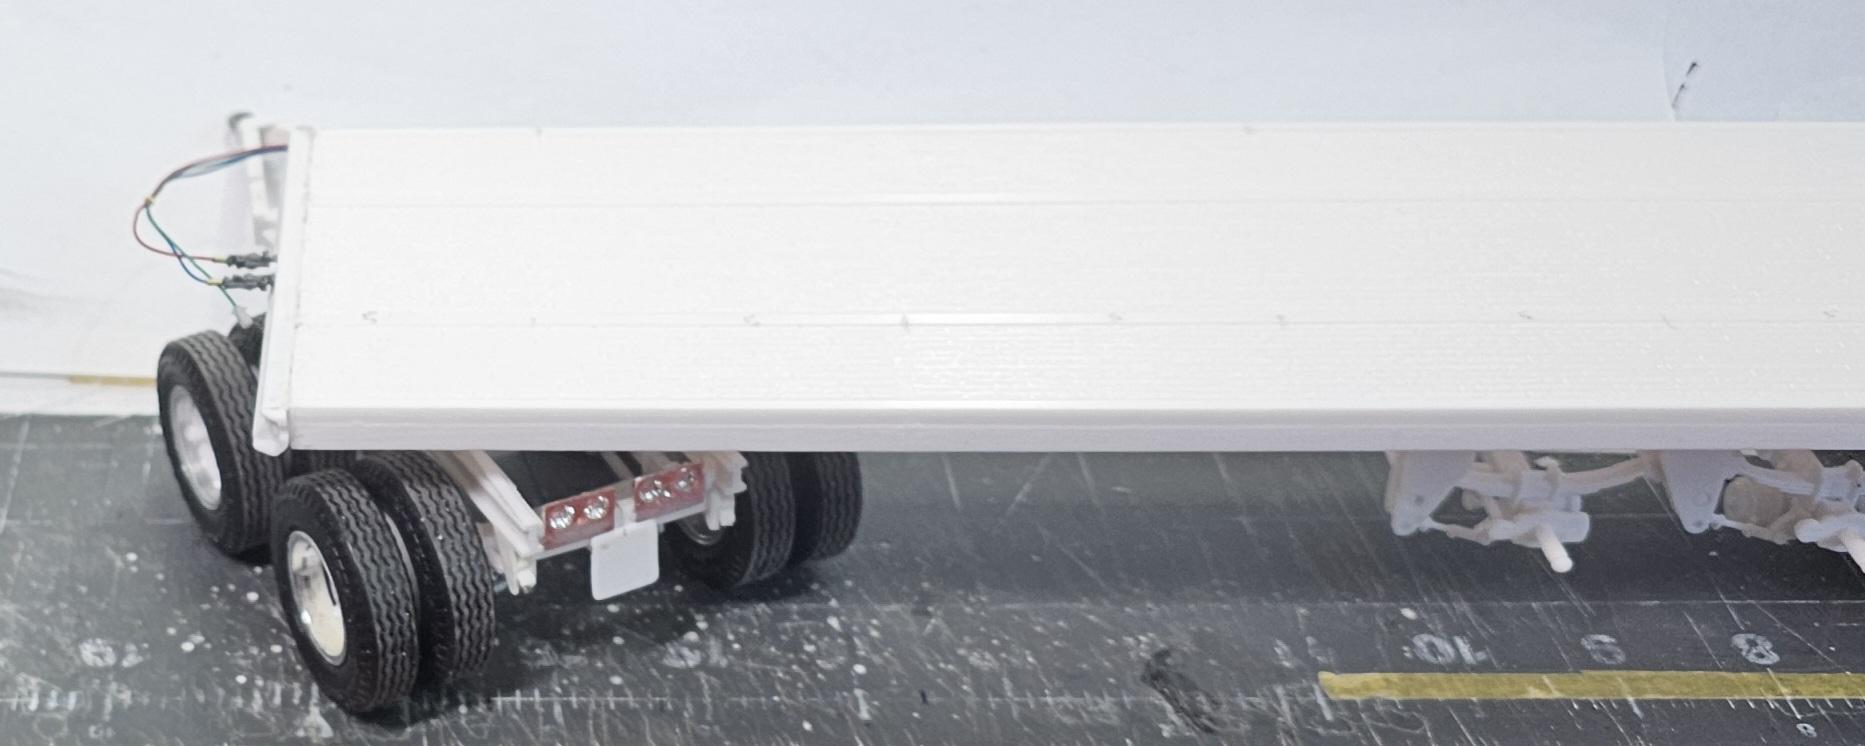
This view shows both trailers & dolly hooked up. There 30.25" (a scale 63' 1/25") long.
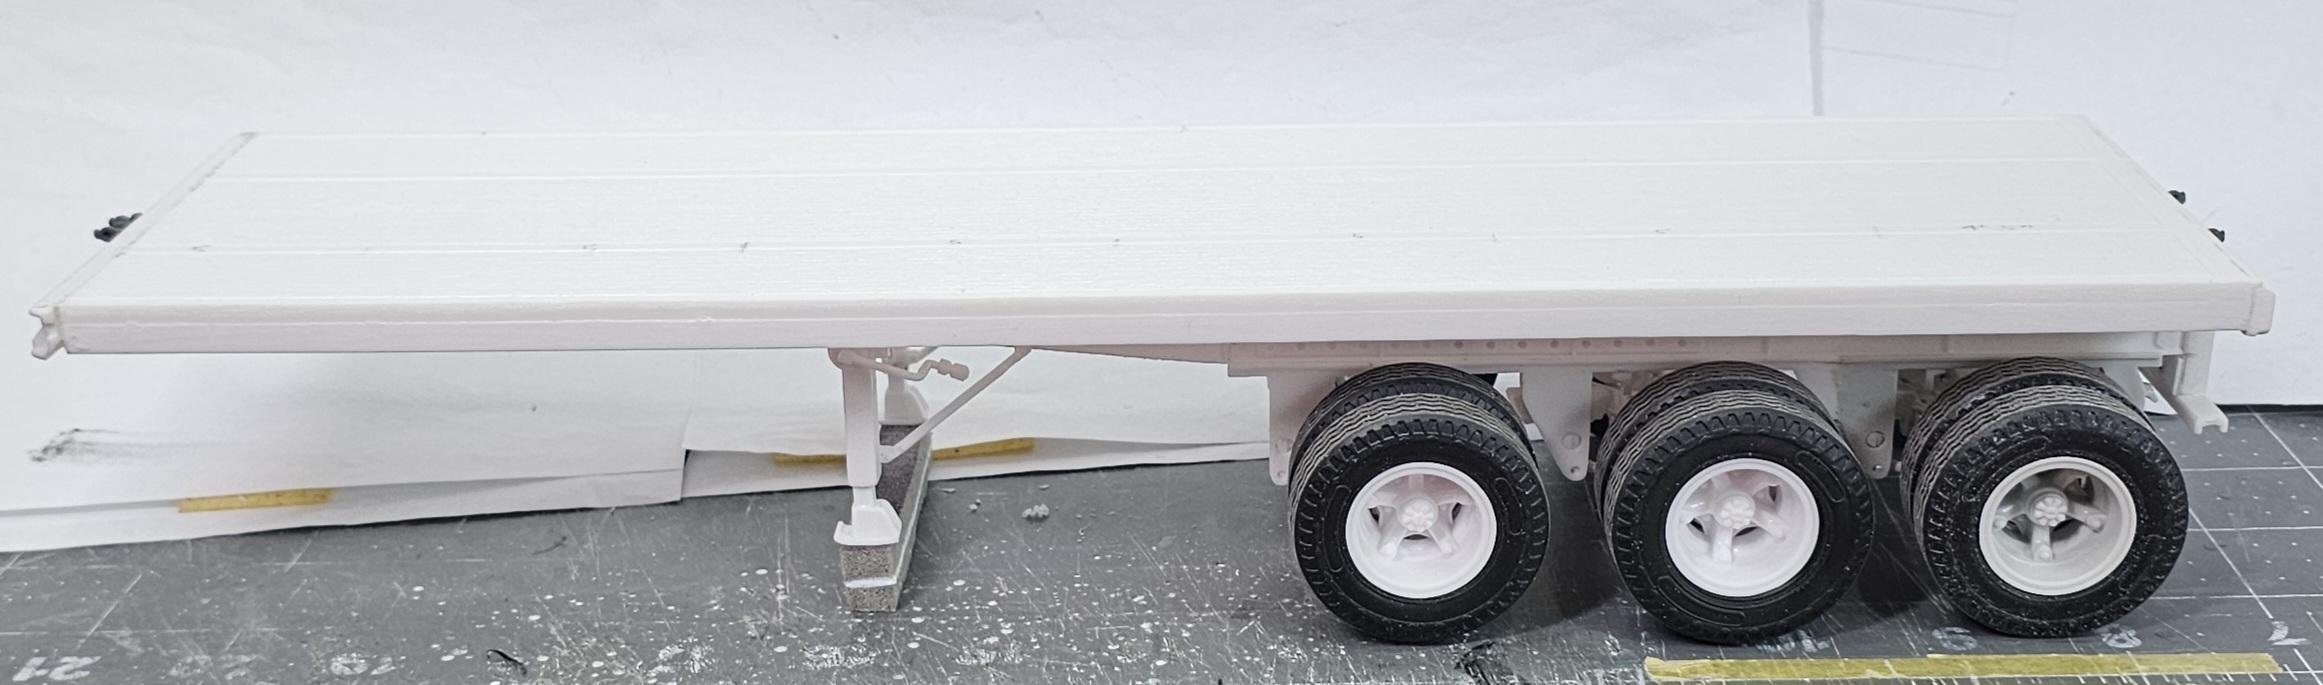
This view shows the front trailer done and ready for paint & plumbing. Still have to do the rear trailer and truck to do, long way to go yet.
Ron G
-
3
-
-
-
2 minutes ago, Gary Chastain said:
Hey Ron, where did you find those gladhands? Really like the fact they actually connect.
Hey Gary
St Supply has them in sets if 10 has 11 sets left.
Ron G
-
9 hours ago, Six Pack said:
Sweet. Are you going to load coils or beams on that rig ?
Coils, made from a steel colored heavy paper I have. They will be 72" diameter x 24" I.D. x 48" wide. Approximately 49,000 lbs. Each x 4 = 198,000 plus the truck and trailers.
Ron G
-
2
-
-
Hey all
Not an update just a few paint schemes that I might use.
Metallic Red and Black.
Metallic Turquoise and Black.
-
2
-
-
Hey all
I got a little more done on the front trailer. I added some air & electrical lines. So here are some pictures for yous to perose over.
This view shows the rear lower bumper. It also shows the chain hooks and working pintle hitch in the open position.
This view shows the pintle hitch in the closed position.
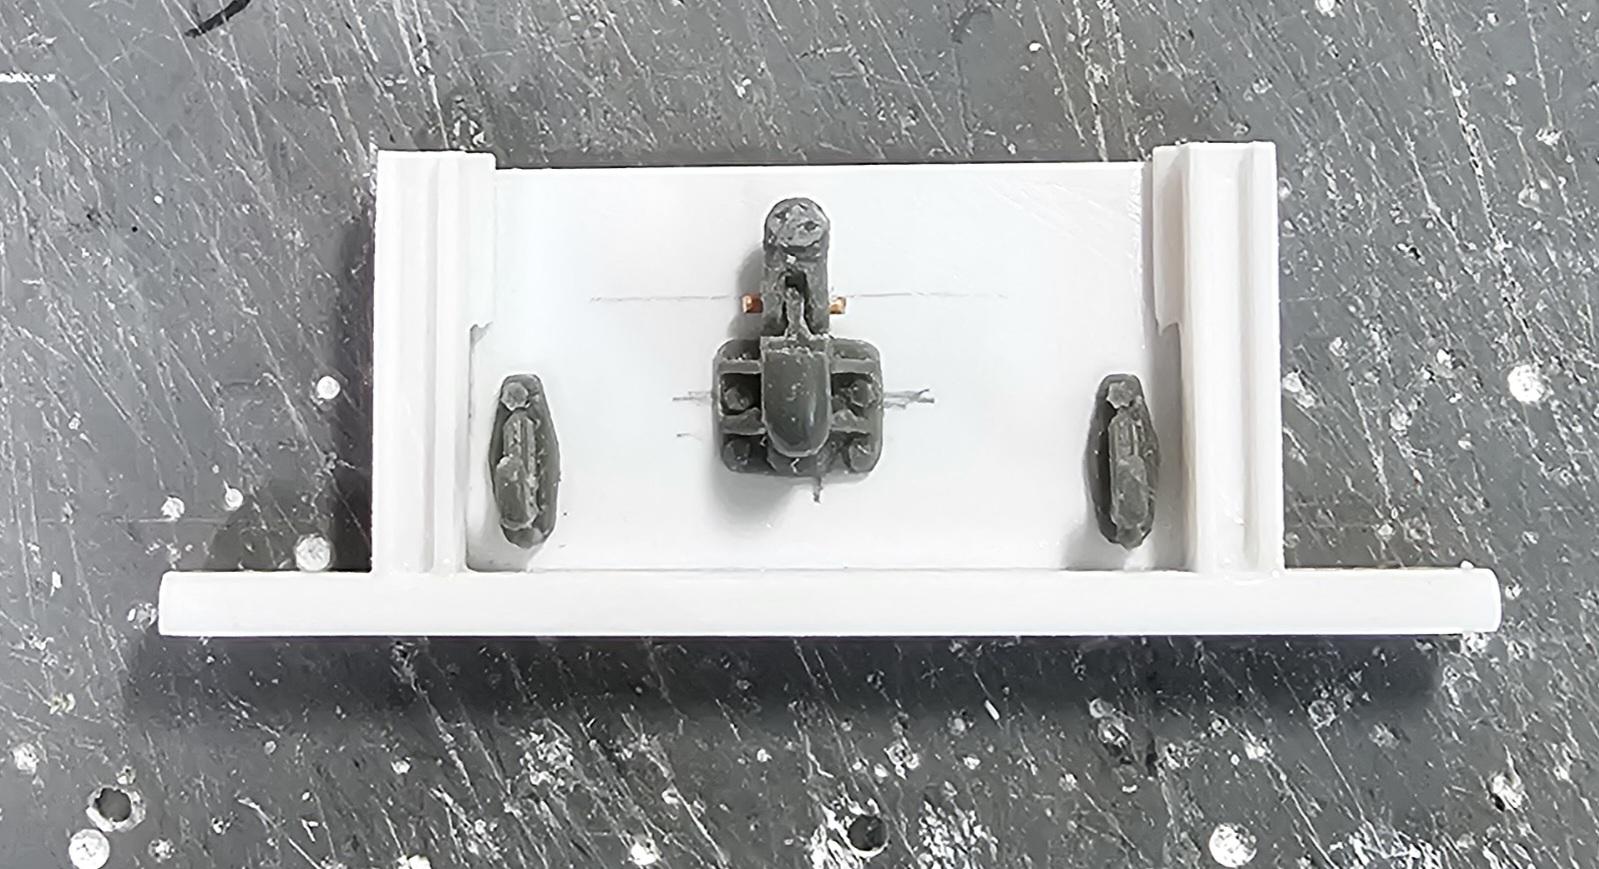
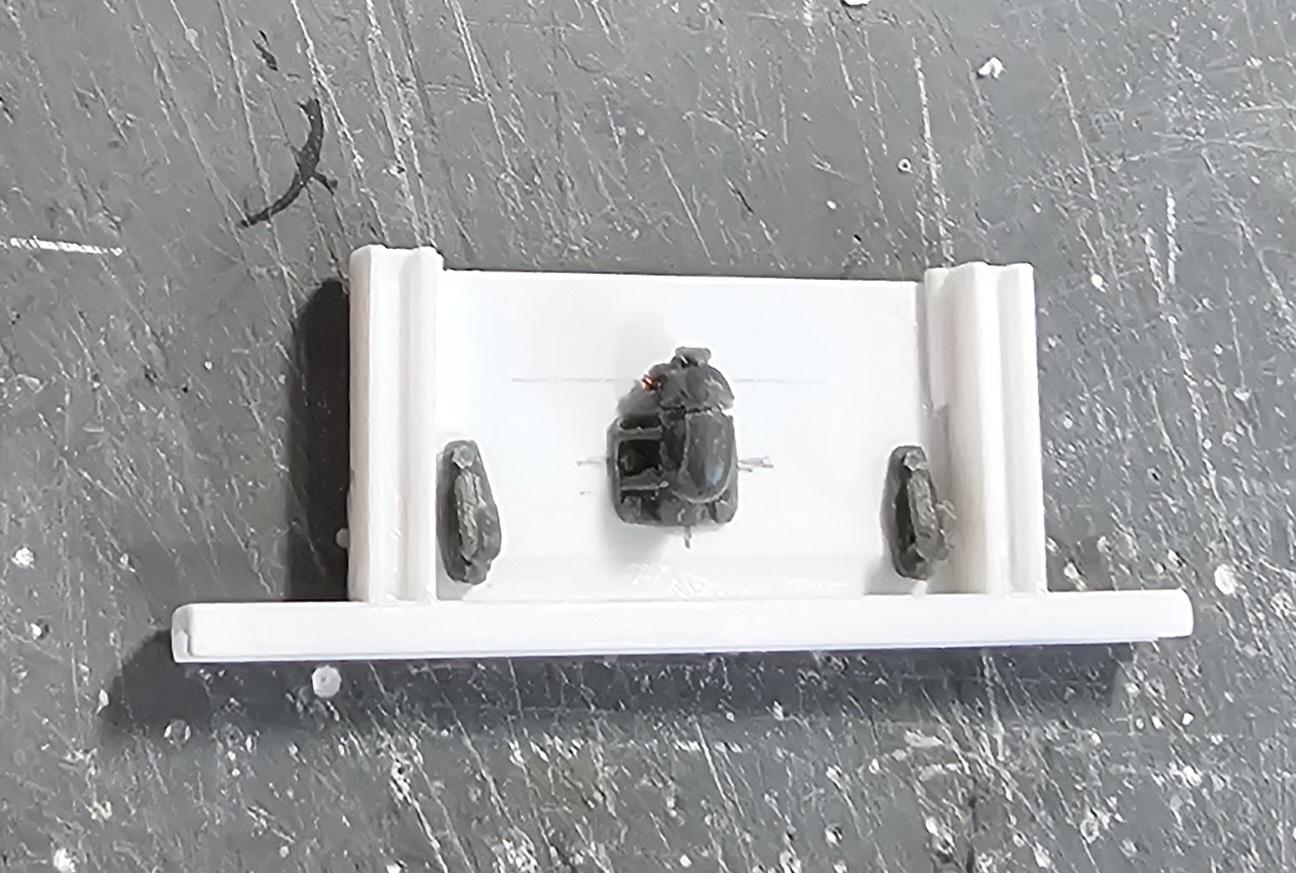
This view shows the items I'm using to plumb the dolly and trailer air and electrical connections.
These glad hands actually work, so I can hook up and unhook them.
This view shows the glad hands and electrical plug (in the middle) on the front of the trailer.
This view shows the same on the rear of the trailer.
This view shows the trailer sitting on the dolly with the air & electrical lines connected.
This view shows the dolly turned to the left and that the lines have enough slack.
This view shows the same thing turned to the right with enough slack. Well that's it for now be back soon with more updates.
Ron G
-
2
-
-
Sites acting up again. Wouldn't let me comment on my last post.☹️
Ron G
-
 1
1
-
-
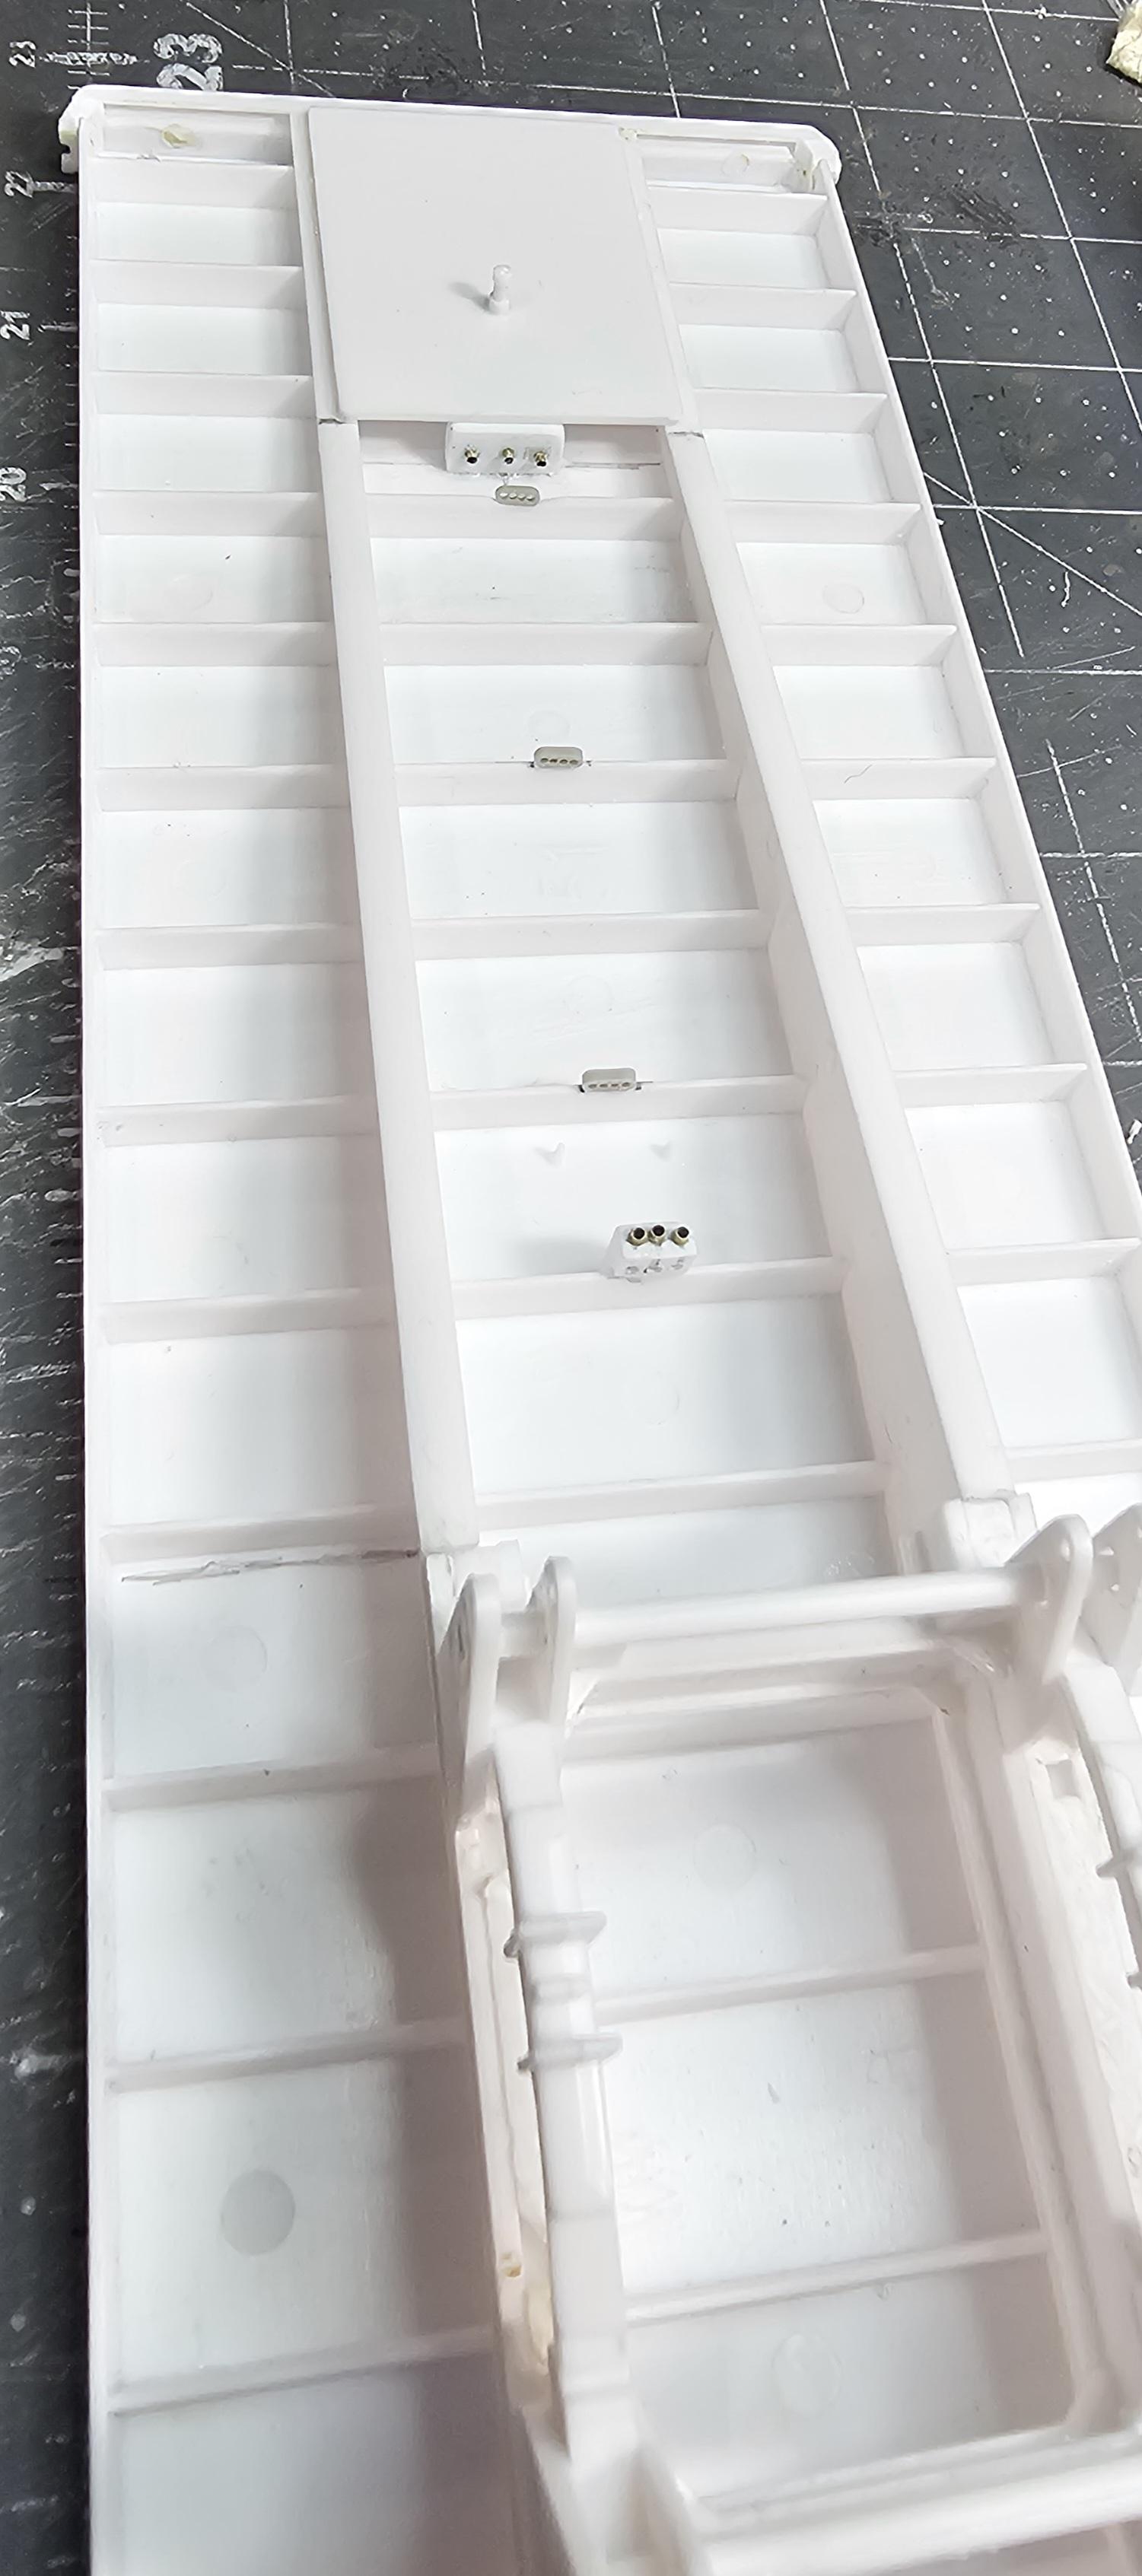
Hey all
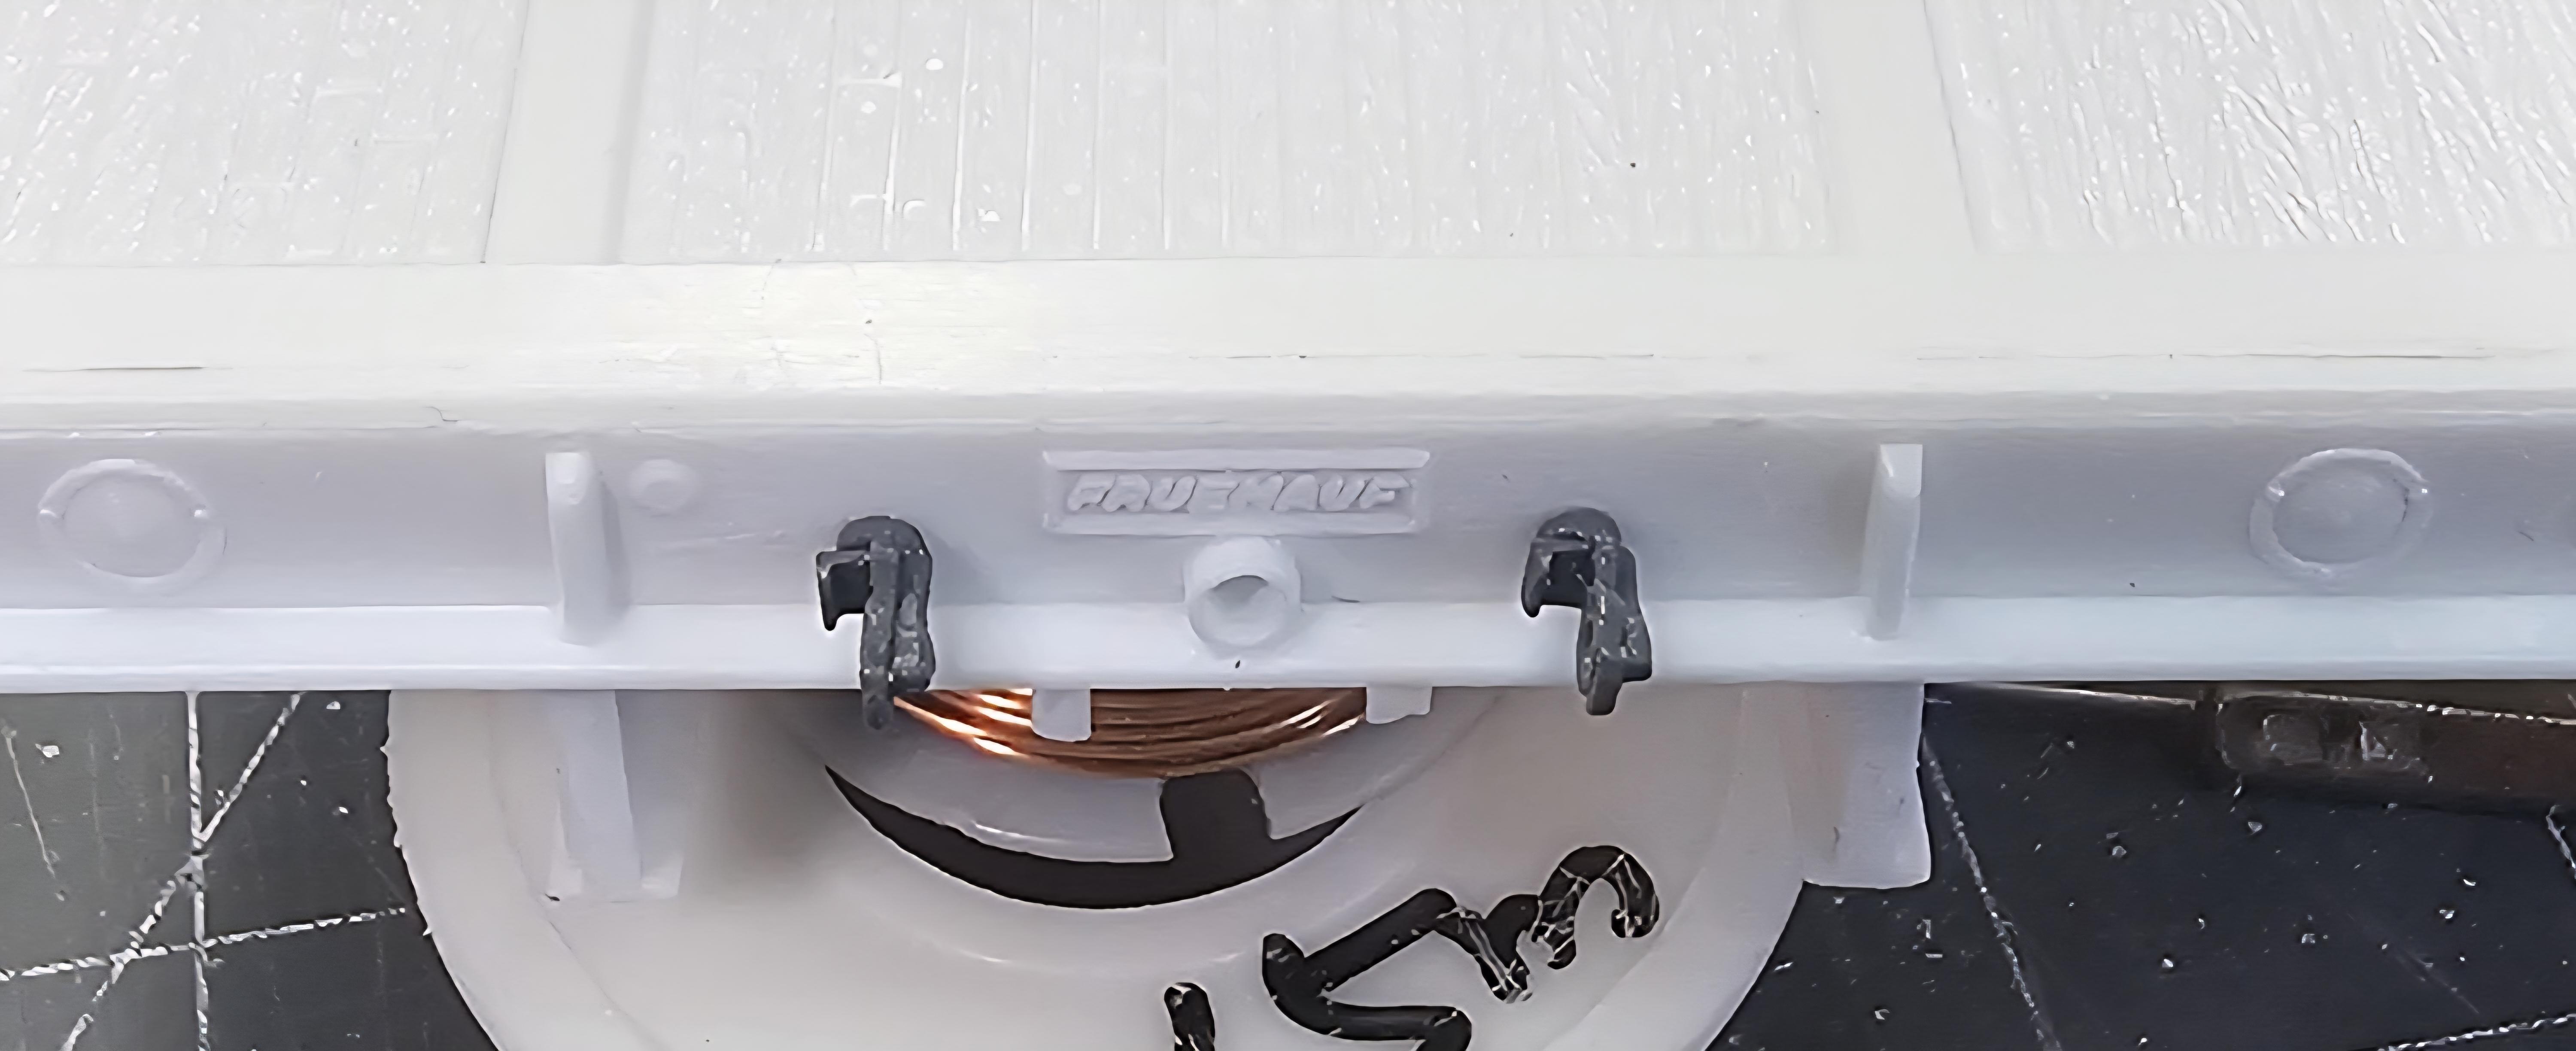
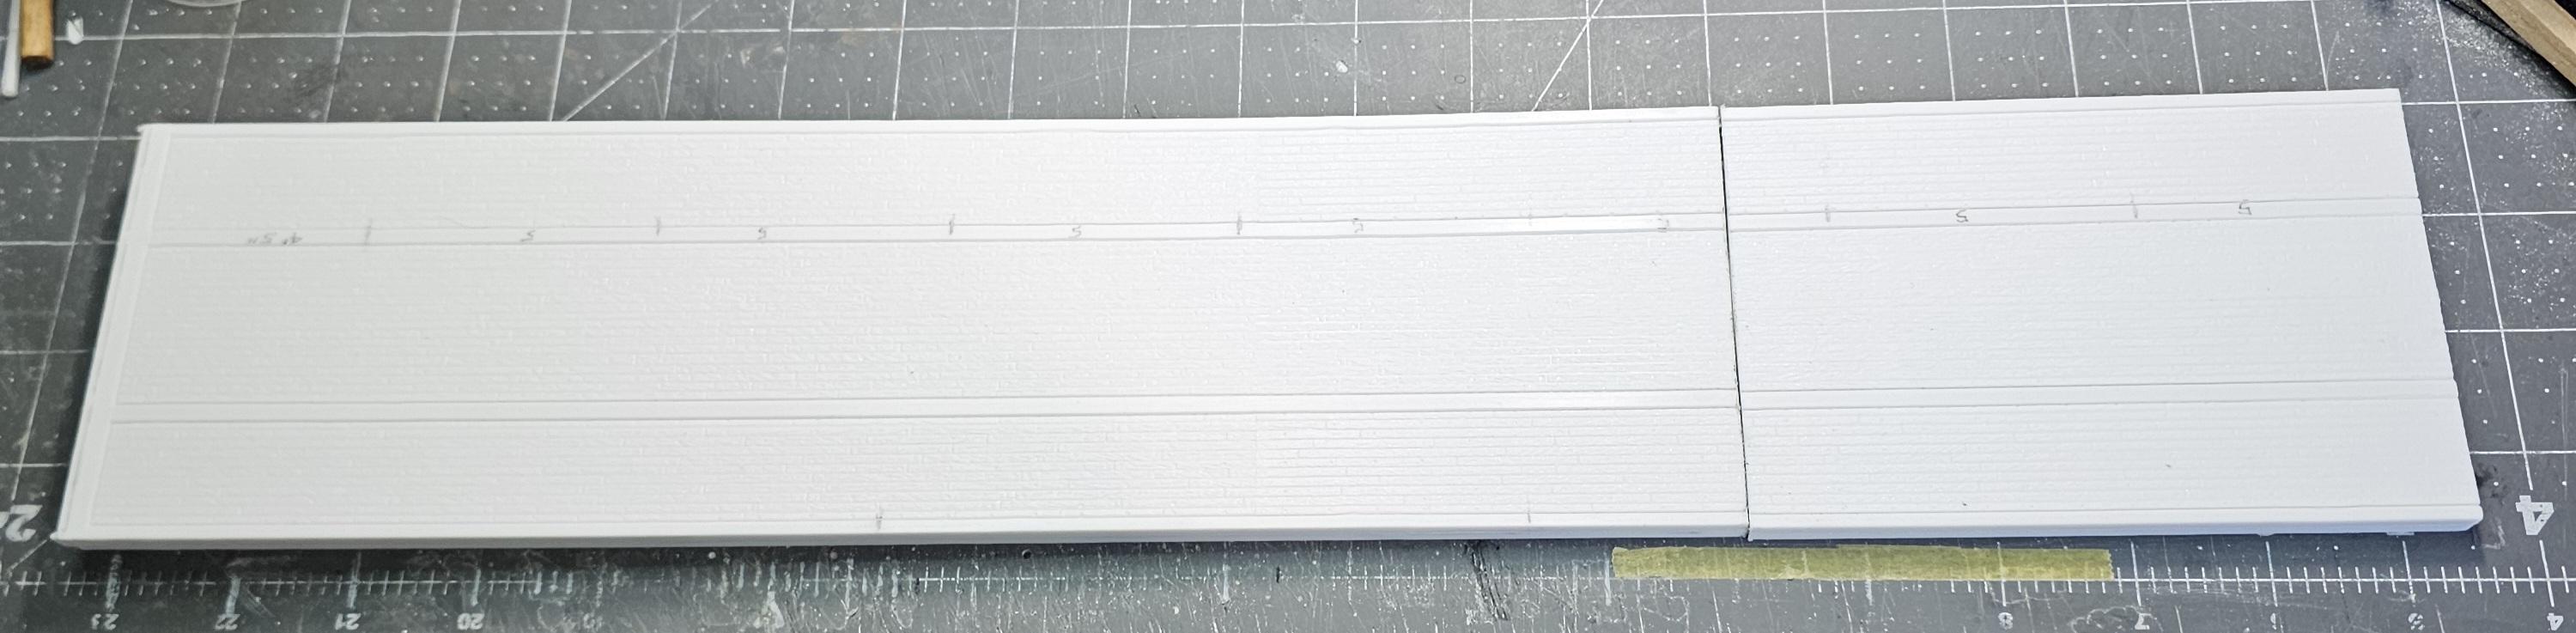
Well today I got one of the flatbed trailers cut down from 40' long to 28' long. I also modified two of the dual axle suspension systems into a tri-axle suspension system. Still alot more to do, plus I found out when converting the suspensions that I need another flatbed trailer kit (that makes four total😱). Here are some pictures for yous to perose over.

-
4
-
-
Thanks everyone
I did a little more work on this today. I have the dolly almost completely done. It needs some more plumbing & fittings and paint. 😁😉
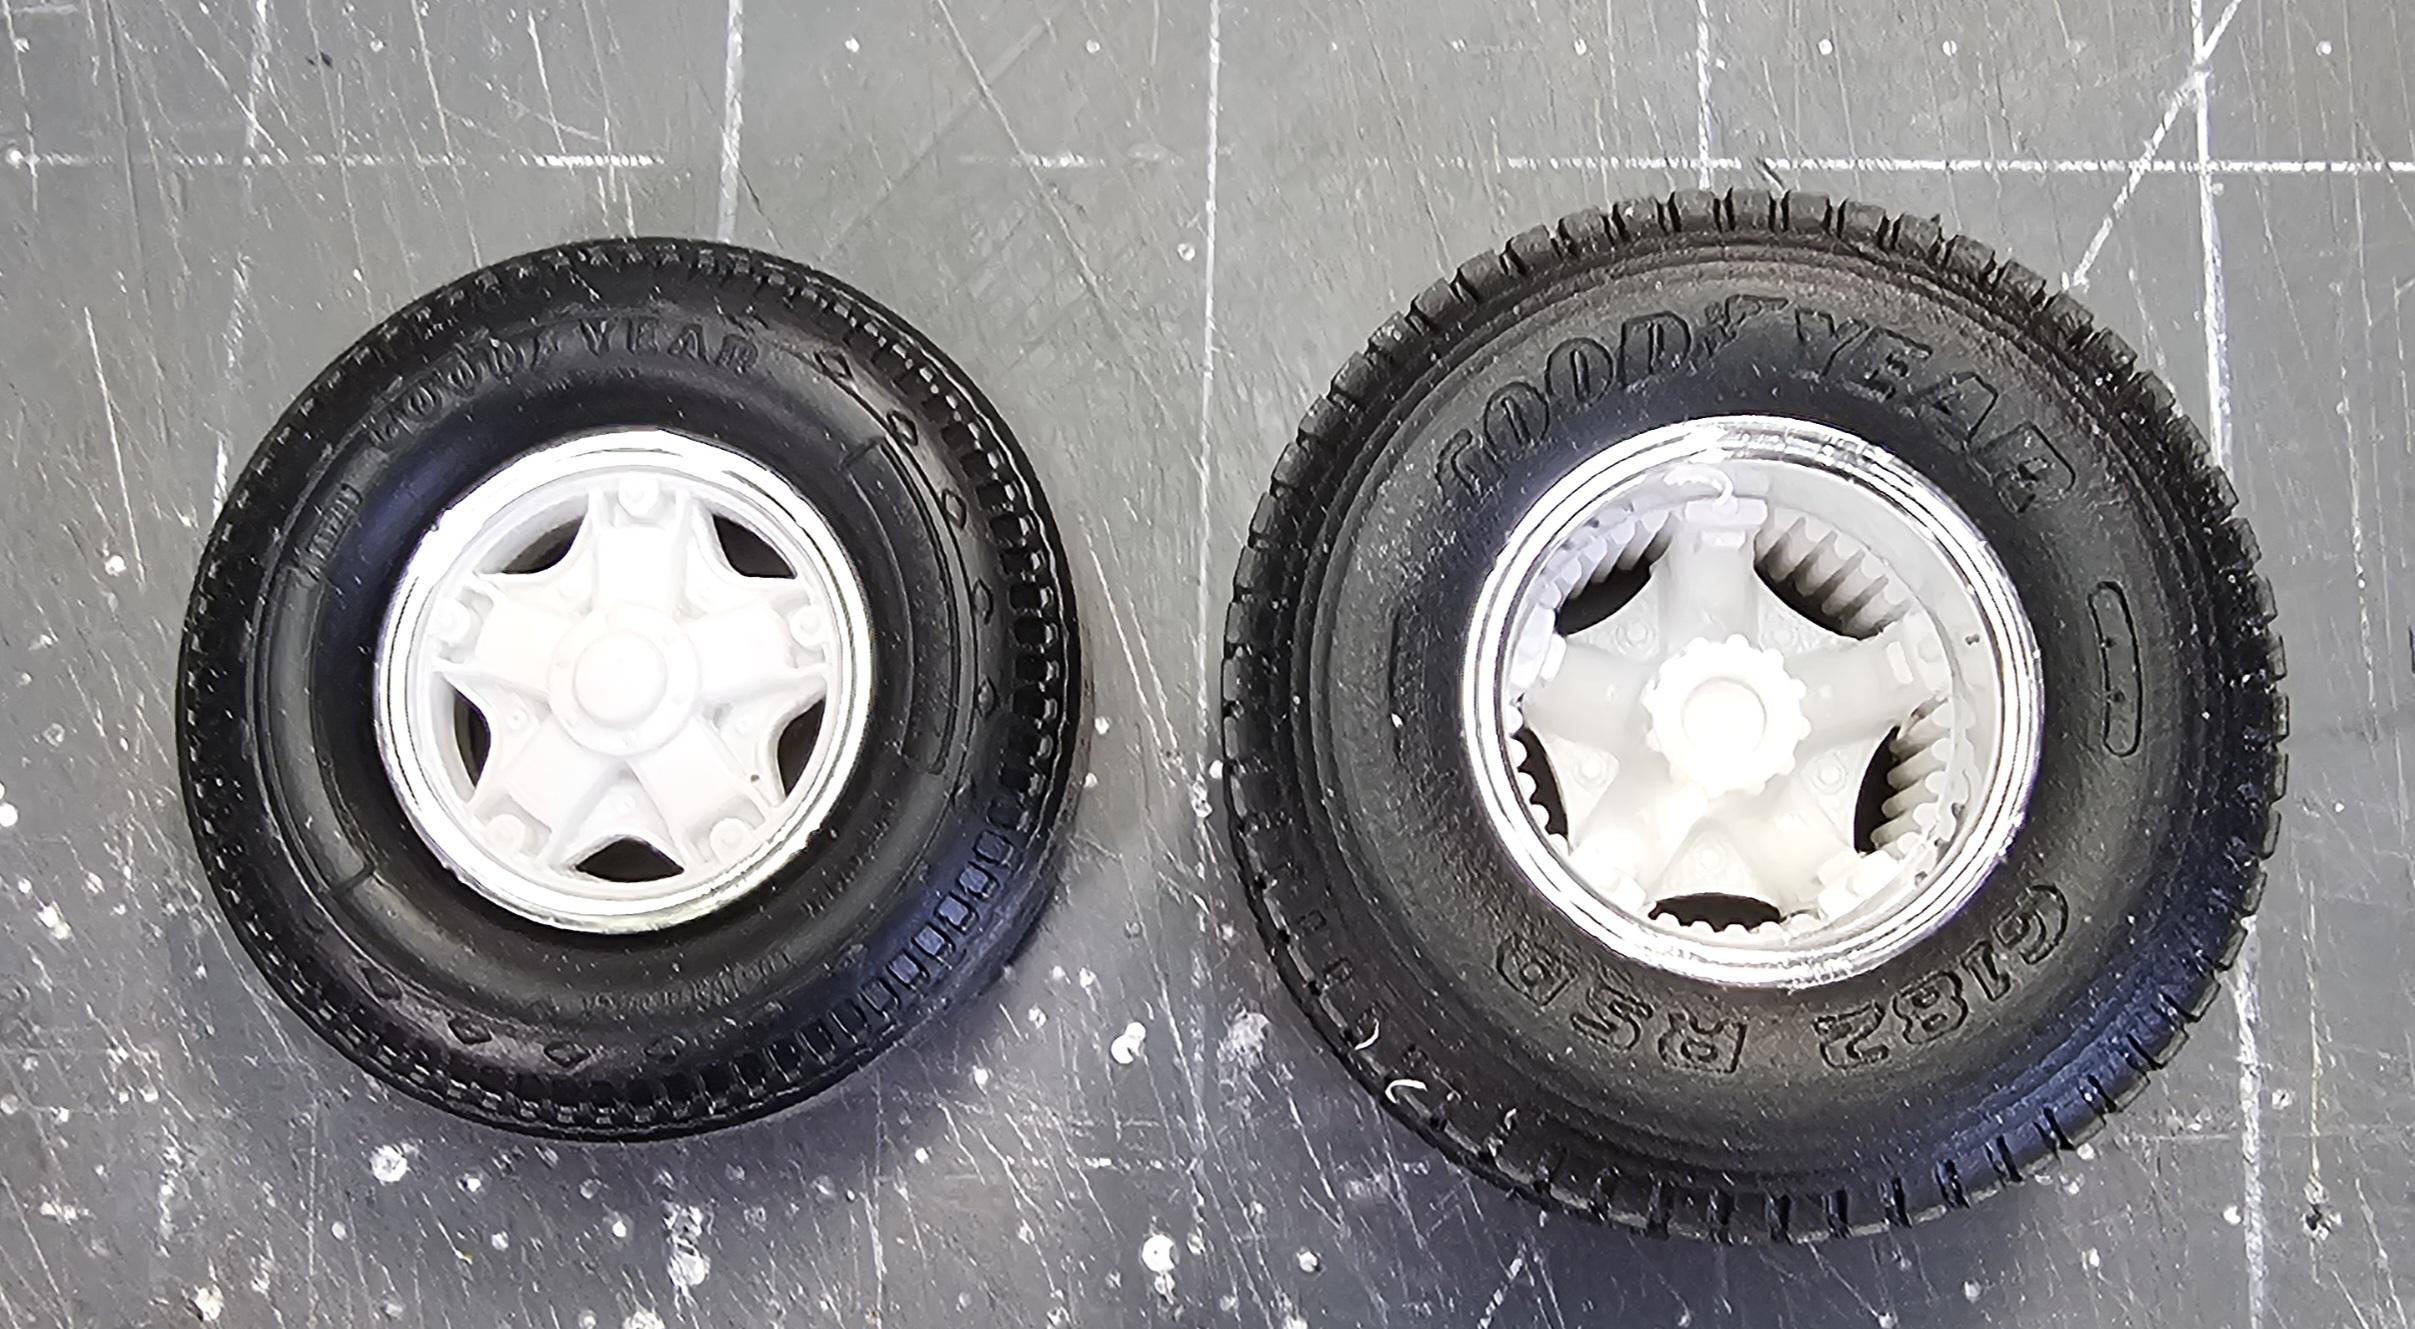
This view shows the dolly. I made this from an extra set of AMT trailer suspension, extra fifth wheel and AMT tires to match the tires on the two trailers that go with it.
Bottom view shows the start on the plumbing. The neck pivots for road changes. I used some 3/8" foam cord to fill out the tires on the rims, now they fit good. Well that's it for now be back soon.
Ron G
-
4
-
-
Hey all
I know have the Wheels and Tires permanently mounted on the truck. I still have along way to go on this, all the fiddly detail bits, plus painting the cab and hood, weathering,etc.😁😉 here are so.e mock-up pictures.
-
2
-
-
Hey all
Well I finally have the frame, wheels, grill guard, front fenders, fifth wheel and headache rack painted in the Tamiya X-15 light green. Most of it is still drying in the paint booth but here is the frame and wheels.
Ron G
-
2
-
-
Hey all
Well the "Buzzin Dozen" showed up today from Auslowe in Australia.
This is a nice casting from Auslowe, but they did short me the air compressor.🤔 I replaced it with one from the parts box.
It's going to be a squeeze to fit it in the A.H. Kenworth, especially with the twin turbos. 580 H.P. / 1,450 lb-ft torque.
Ron G
-
2
-
-
1 minute ago, Warren D said:
I have more than a few extra 5th wheels and plates from Autocar A64B kits and I should have at least 1 from the AMT General kit. Let me know if you want any of them.
Thanks Warren
I will definitely let you know.
Ron G
-
1
-
-
Hey all
Like I said this is a future project. Back in 1980 I almost bought one of these to go out on my own O.O.😁👍
But, alas it didn't happen, so I'm going to recreate the truck I almost owned in miniature. It will be a Michelin double. A dual flatbed trailer set-up for hauling Suicide Coils.
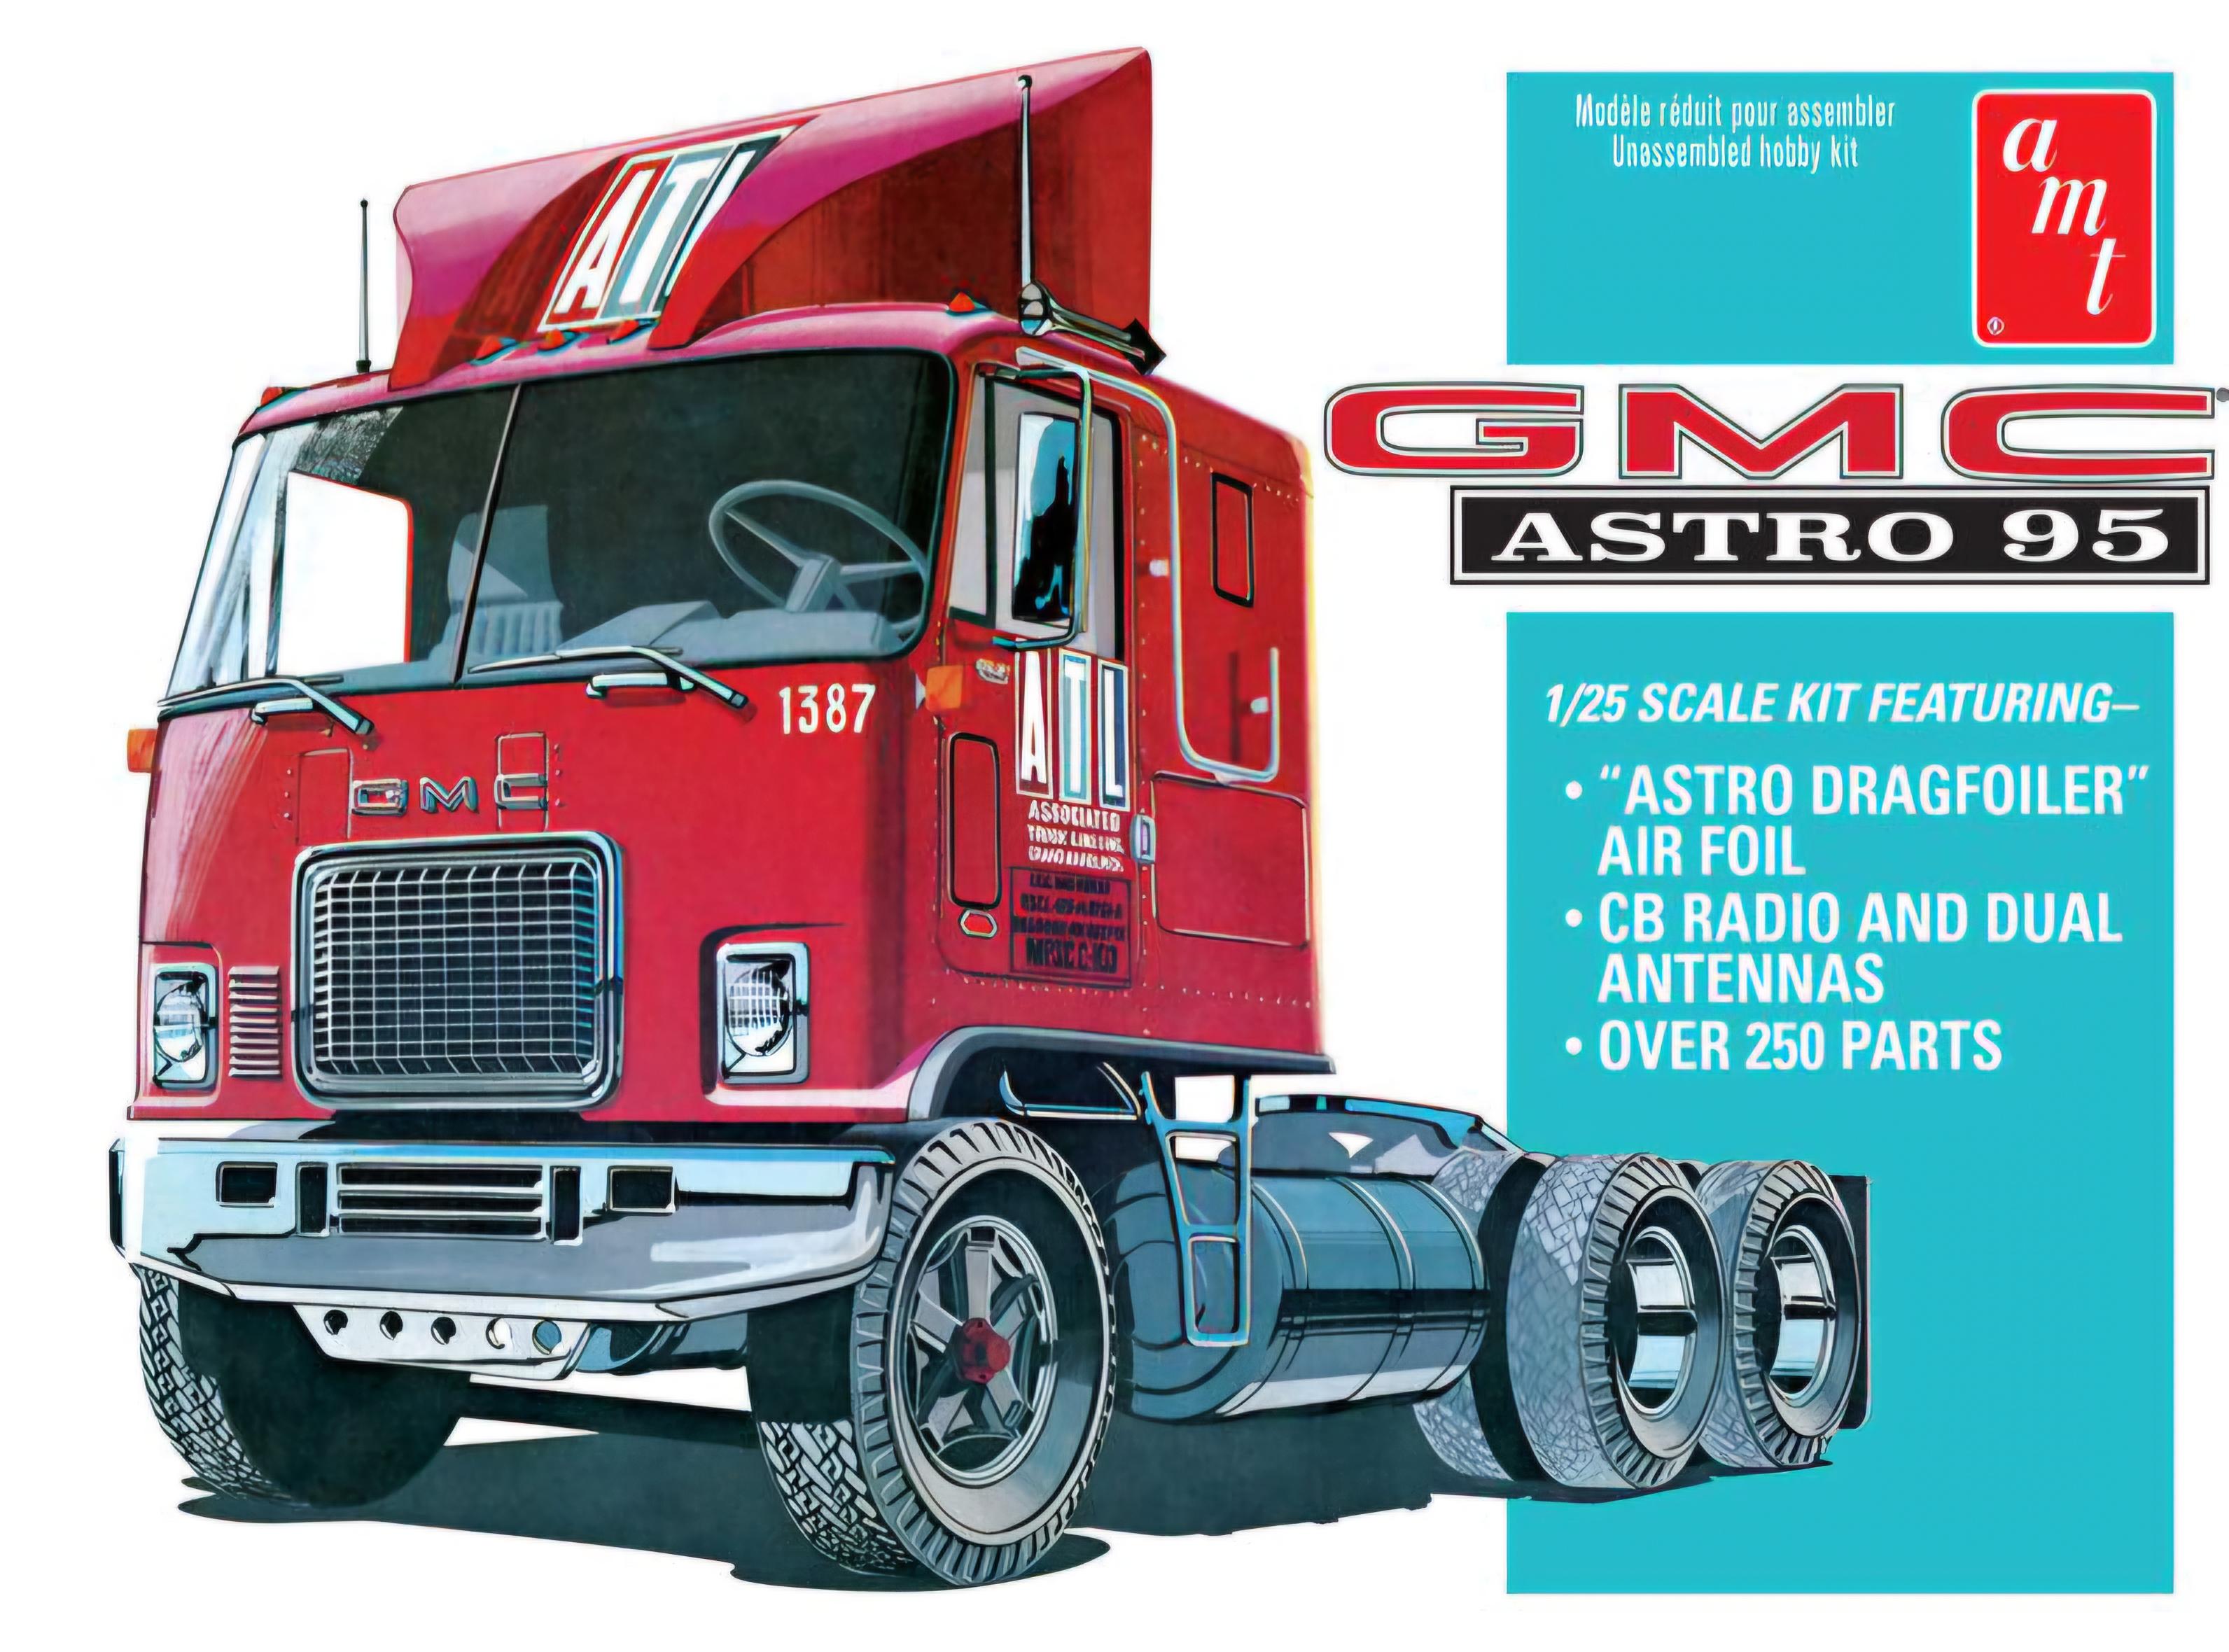
Right know I'm collecting the things I will need to complete this build. I need two to three AMT Fruehauf flatbed trailer kits, an extra fifth wheel, load binders, etc. I have the Astro 95 kit, a resin DD 8V92T, the materials I need to make the steel coil loads (steel grey craft paper) to simulate the rolled steel coils.
This view shows the overall concept of the whole rig.
This view shows the truck.
This view shows the wheels and tires.
Another view of the wheels and tires.
This is the kit I have.
This is the Auslowe resin D.D. 8V-92T. It will be awhile before I start on this I'm still working on the Autocar, plus everything else I have going on. I'll be back with more soon.
Ron G
-
5
-
-
WOWZZERS! Scott thats sweet.
Ron G
-
1
-
-
10 minutes ago, BK9300 said:
Good job with all the plumbing, Ron. Looks good with that paint choice - lots of detail still visible.
Thanks Brian
It's just the primer the final color will be Tamiya X15 light green for frame and wheels a d X5 for cab and hood.
Ron G
-
2
-
-
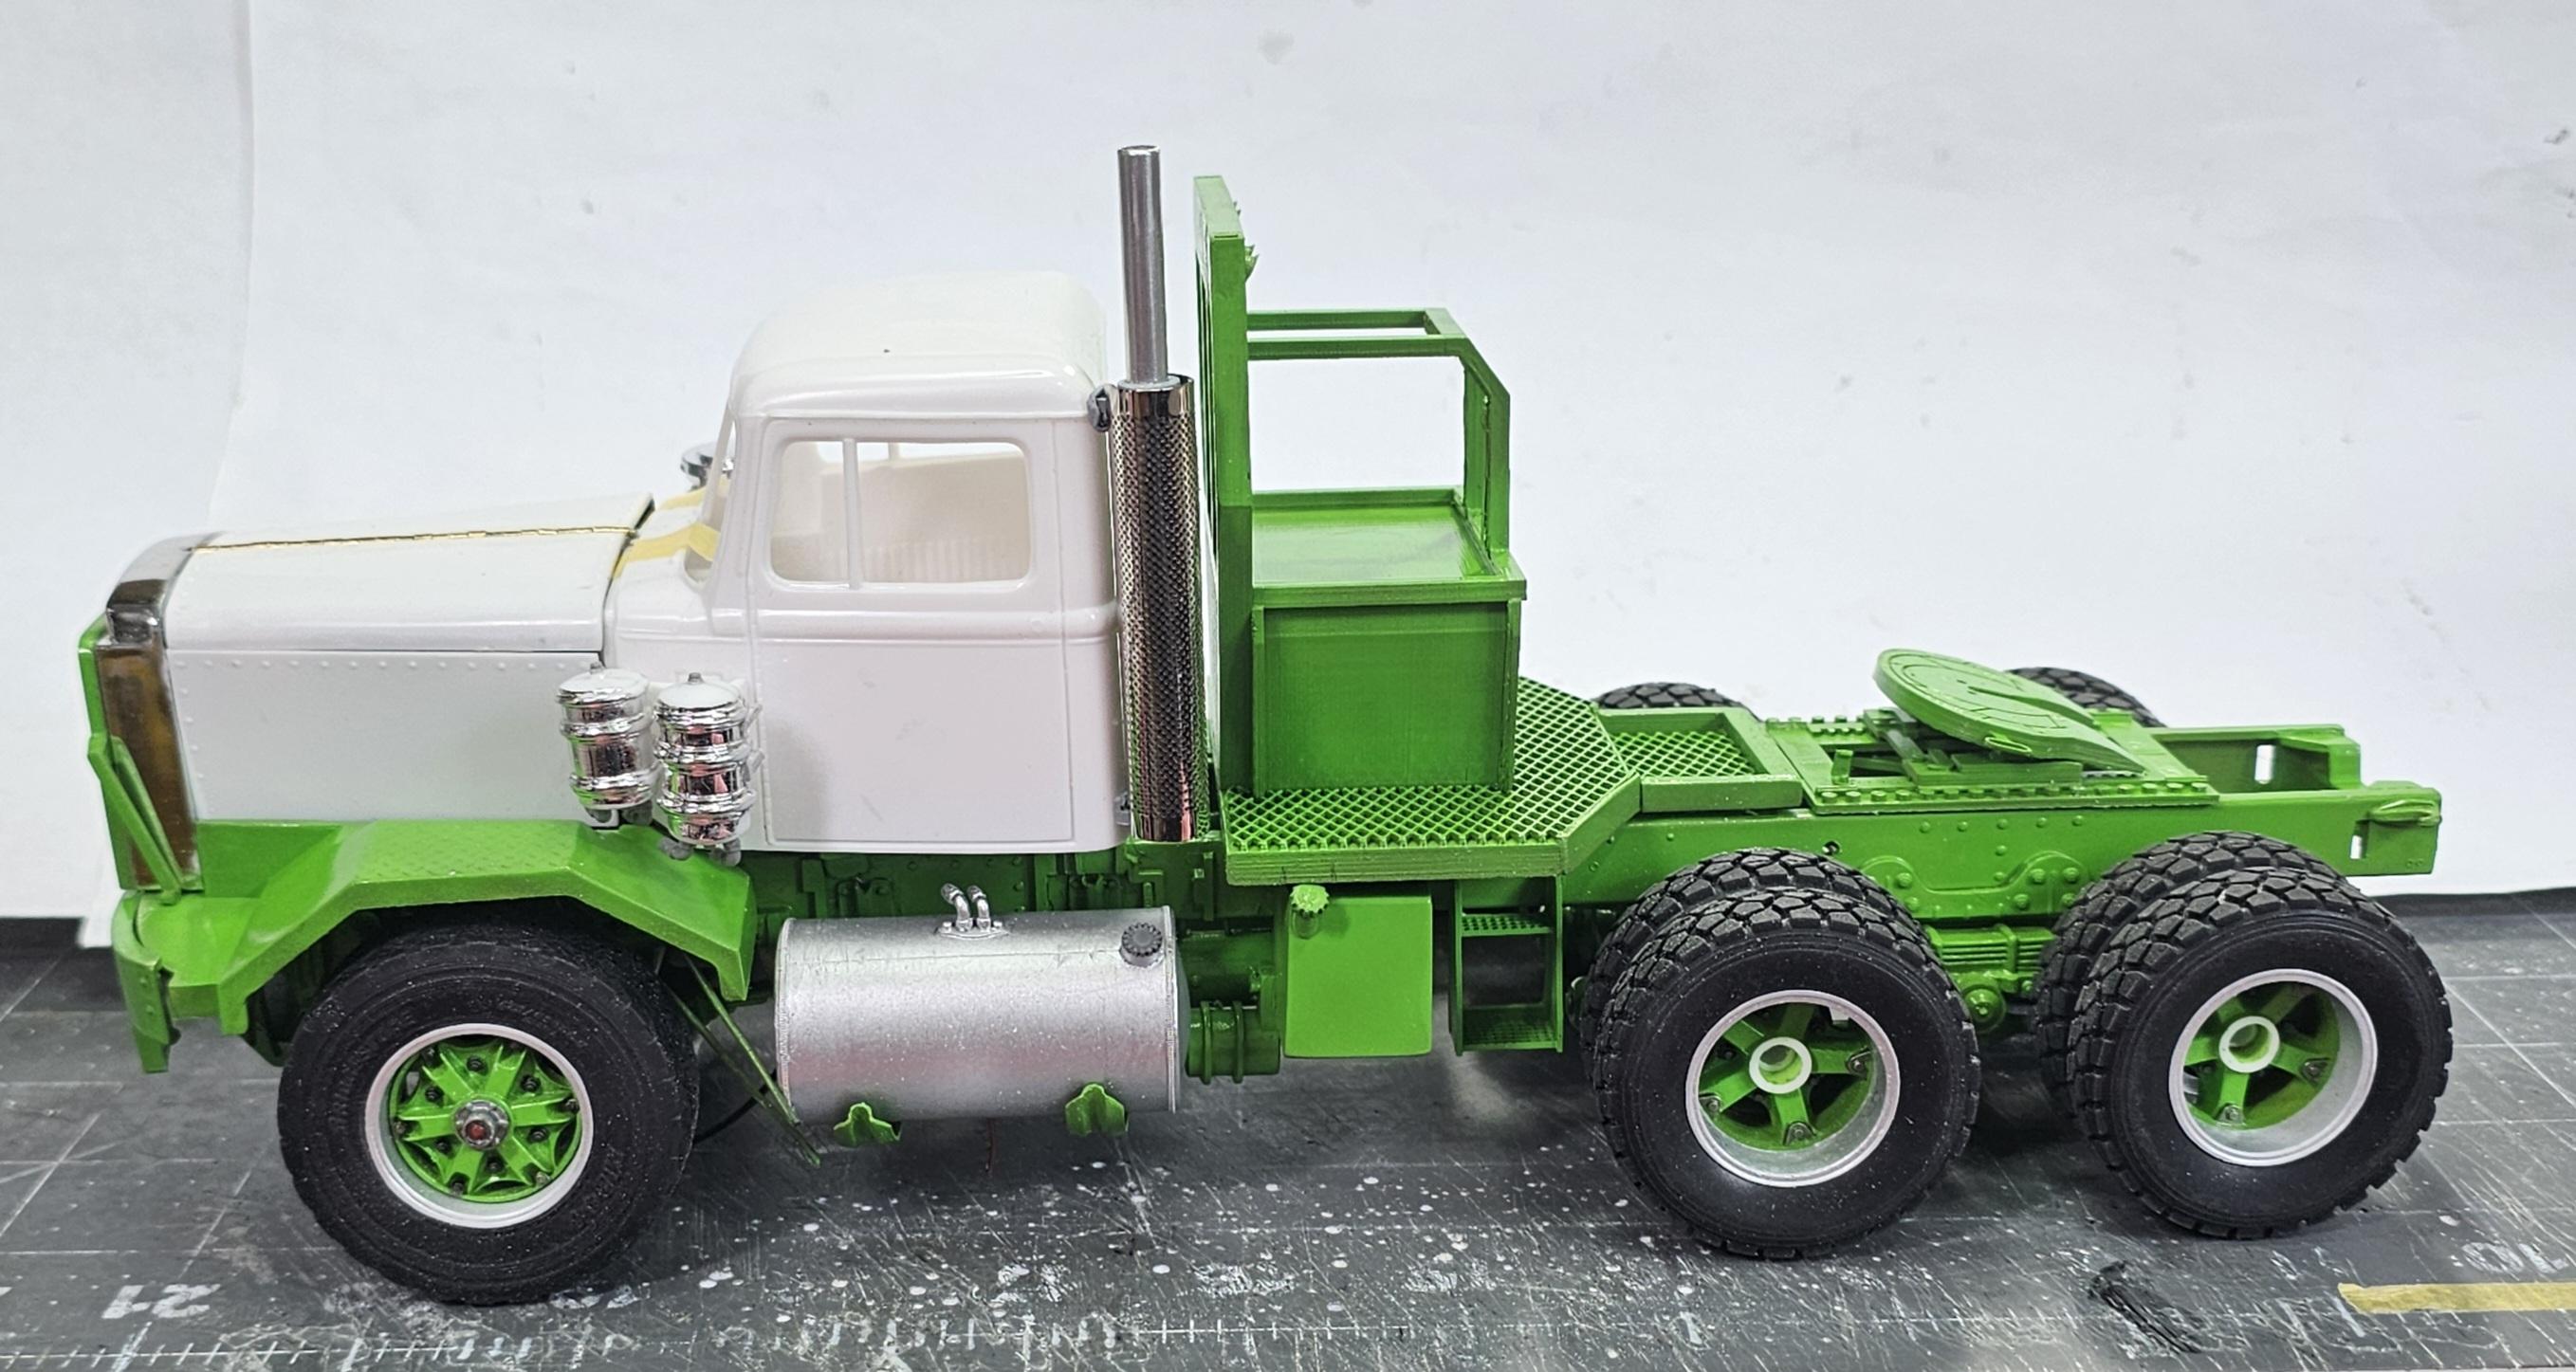
Hey all
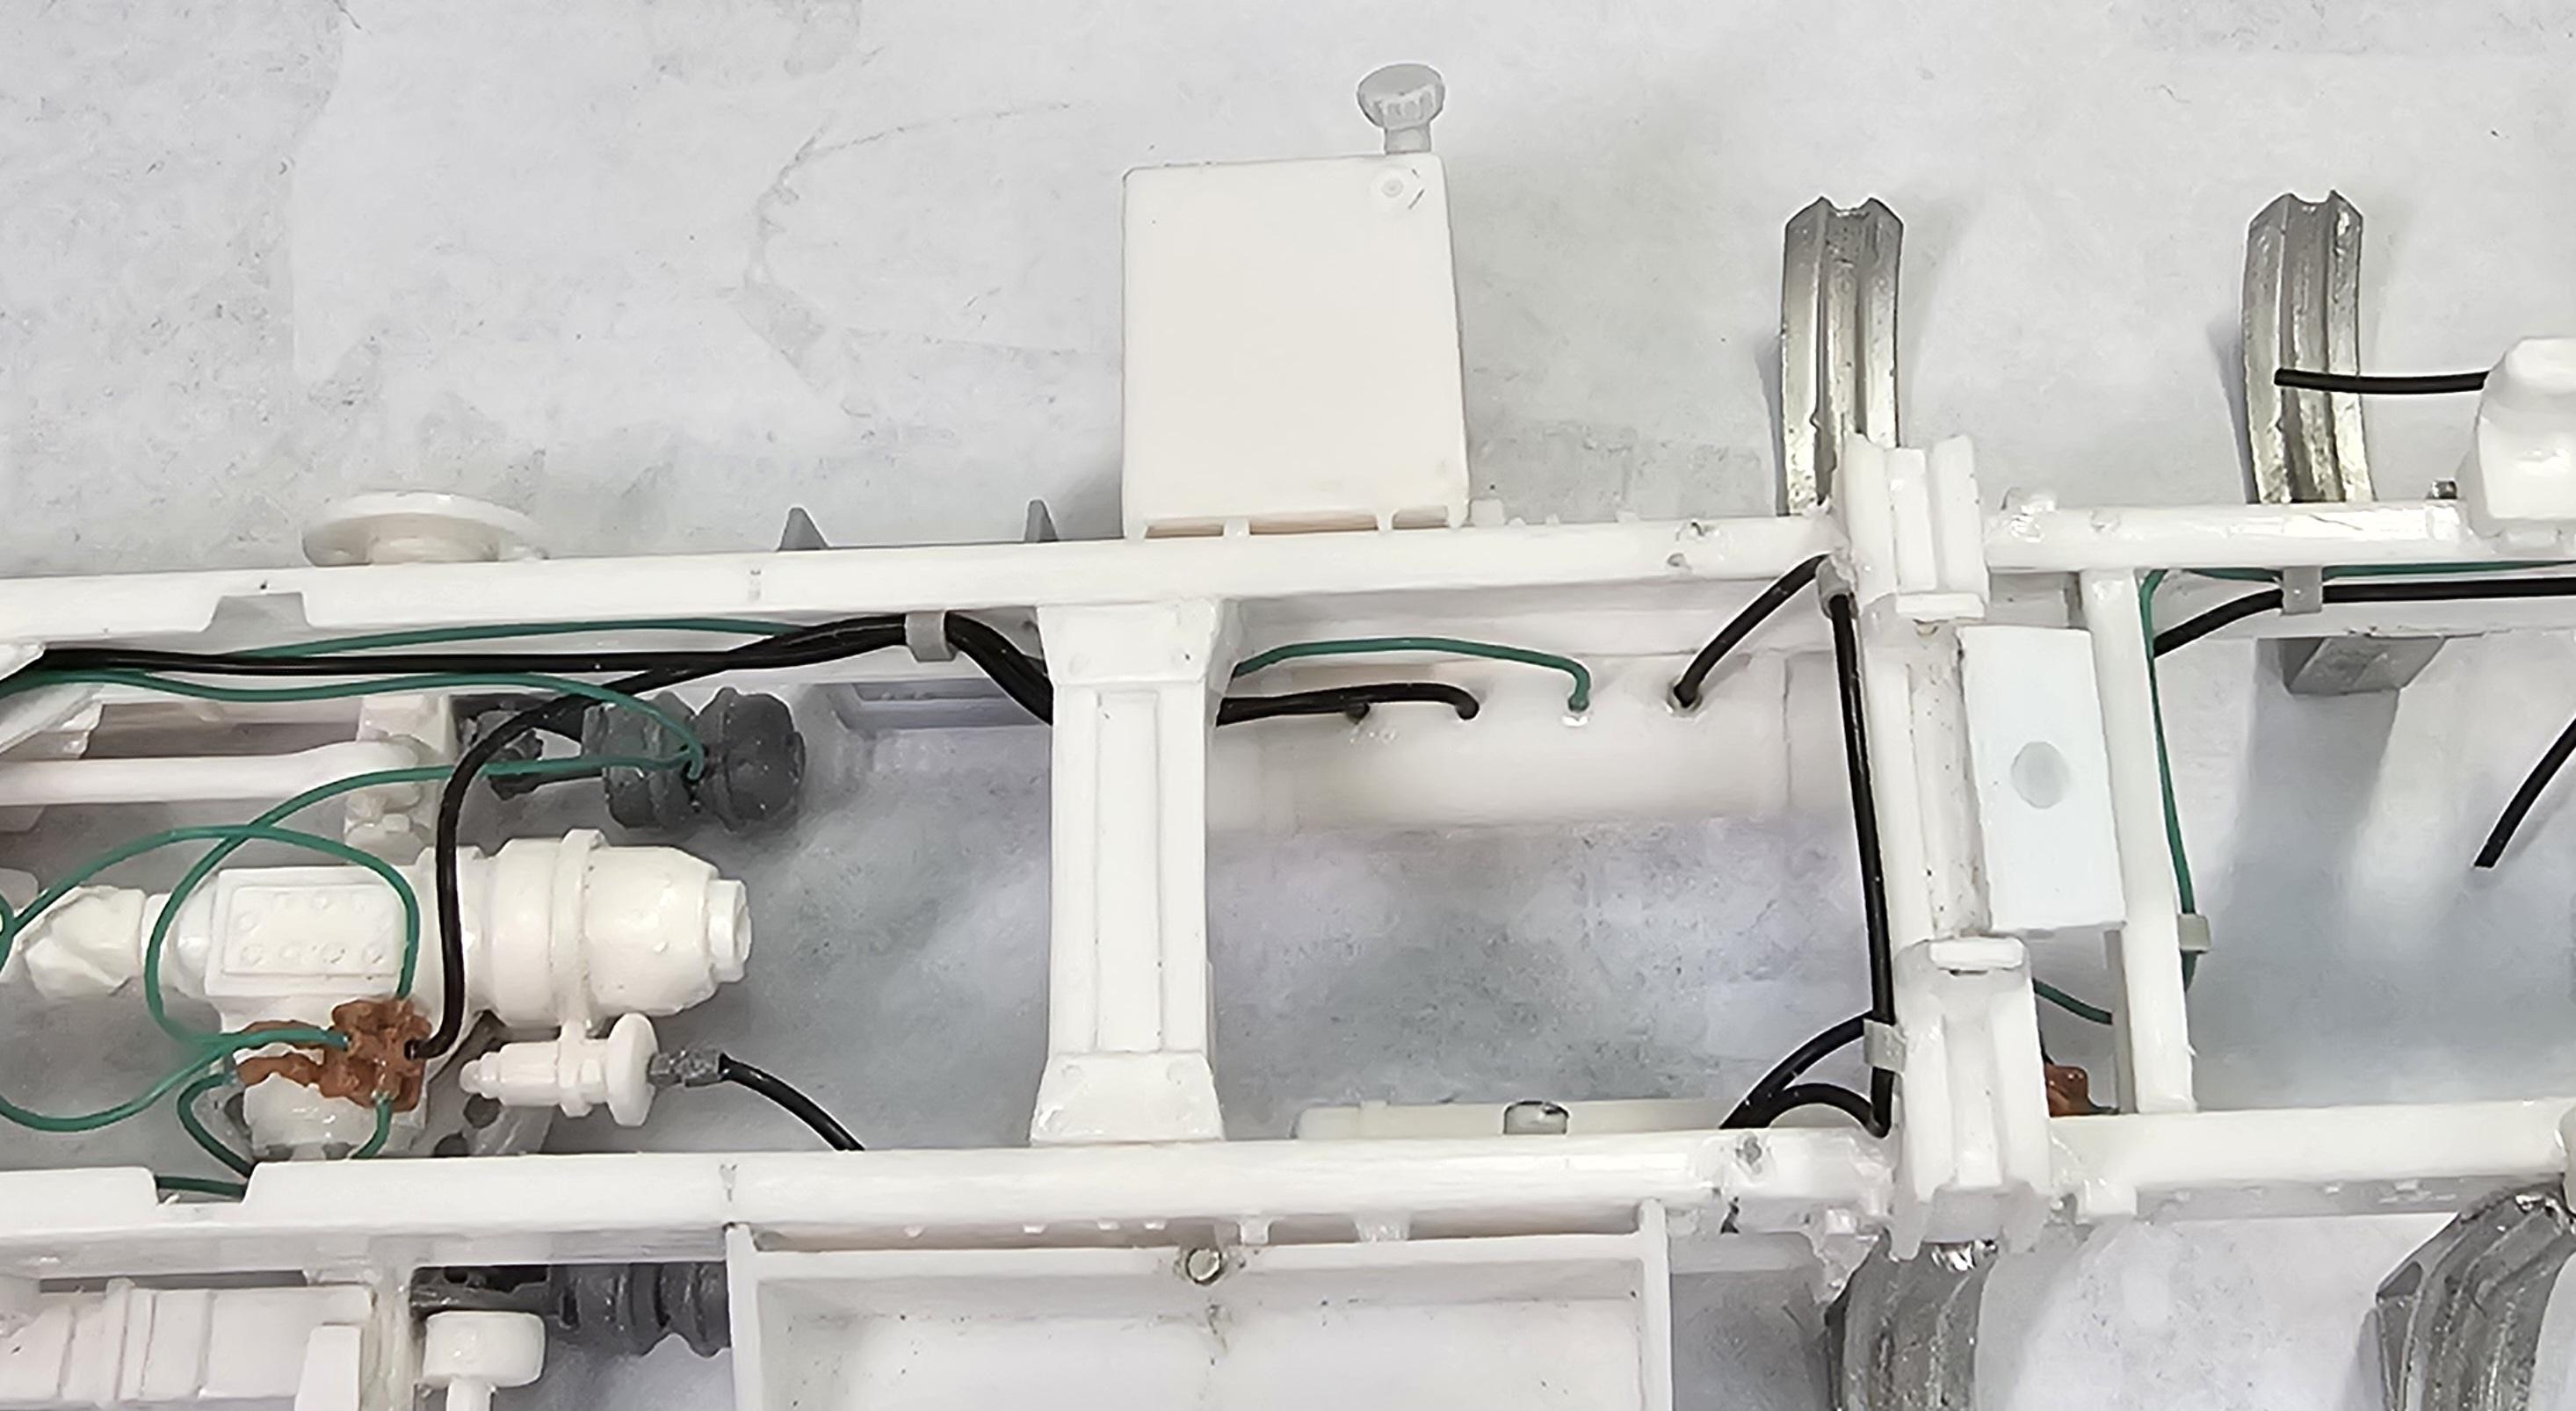
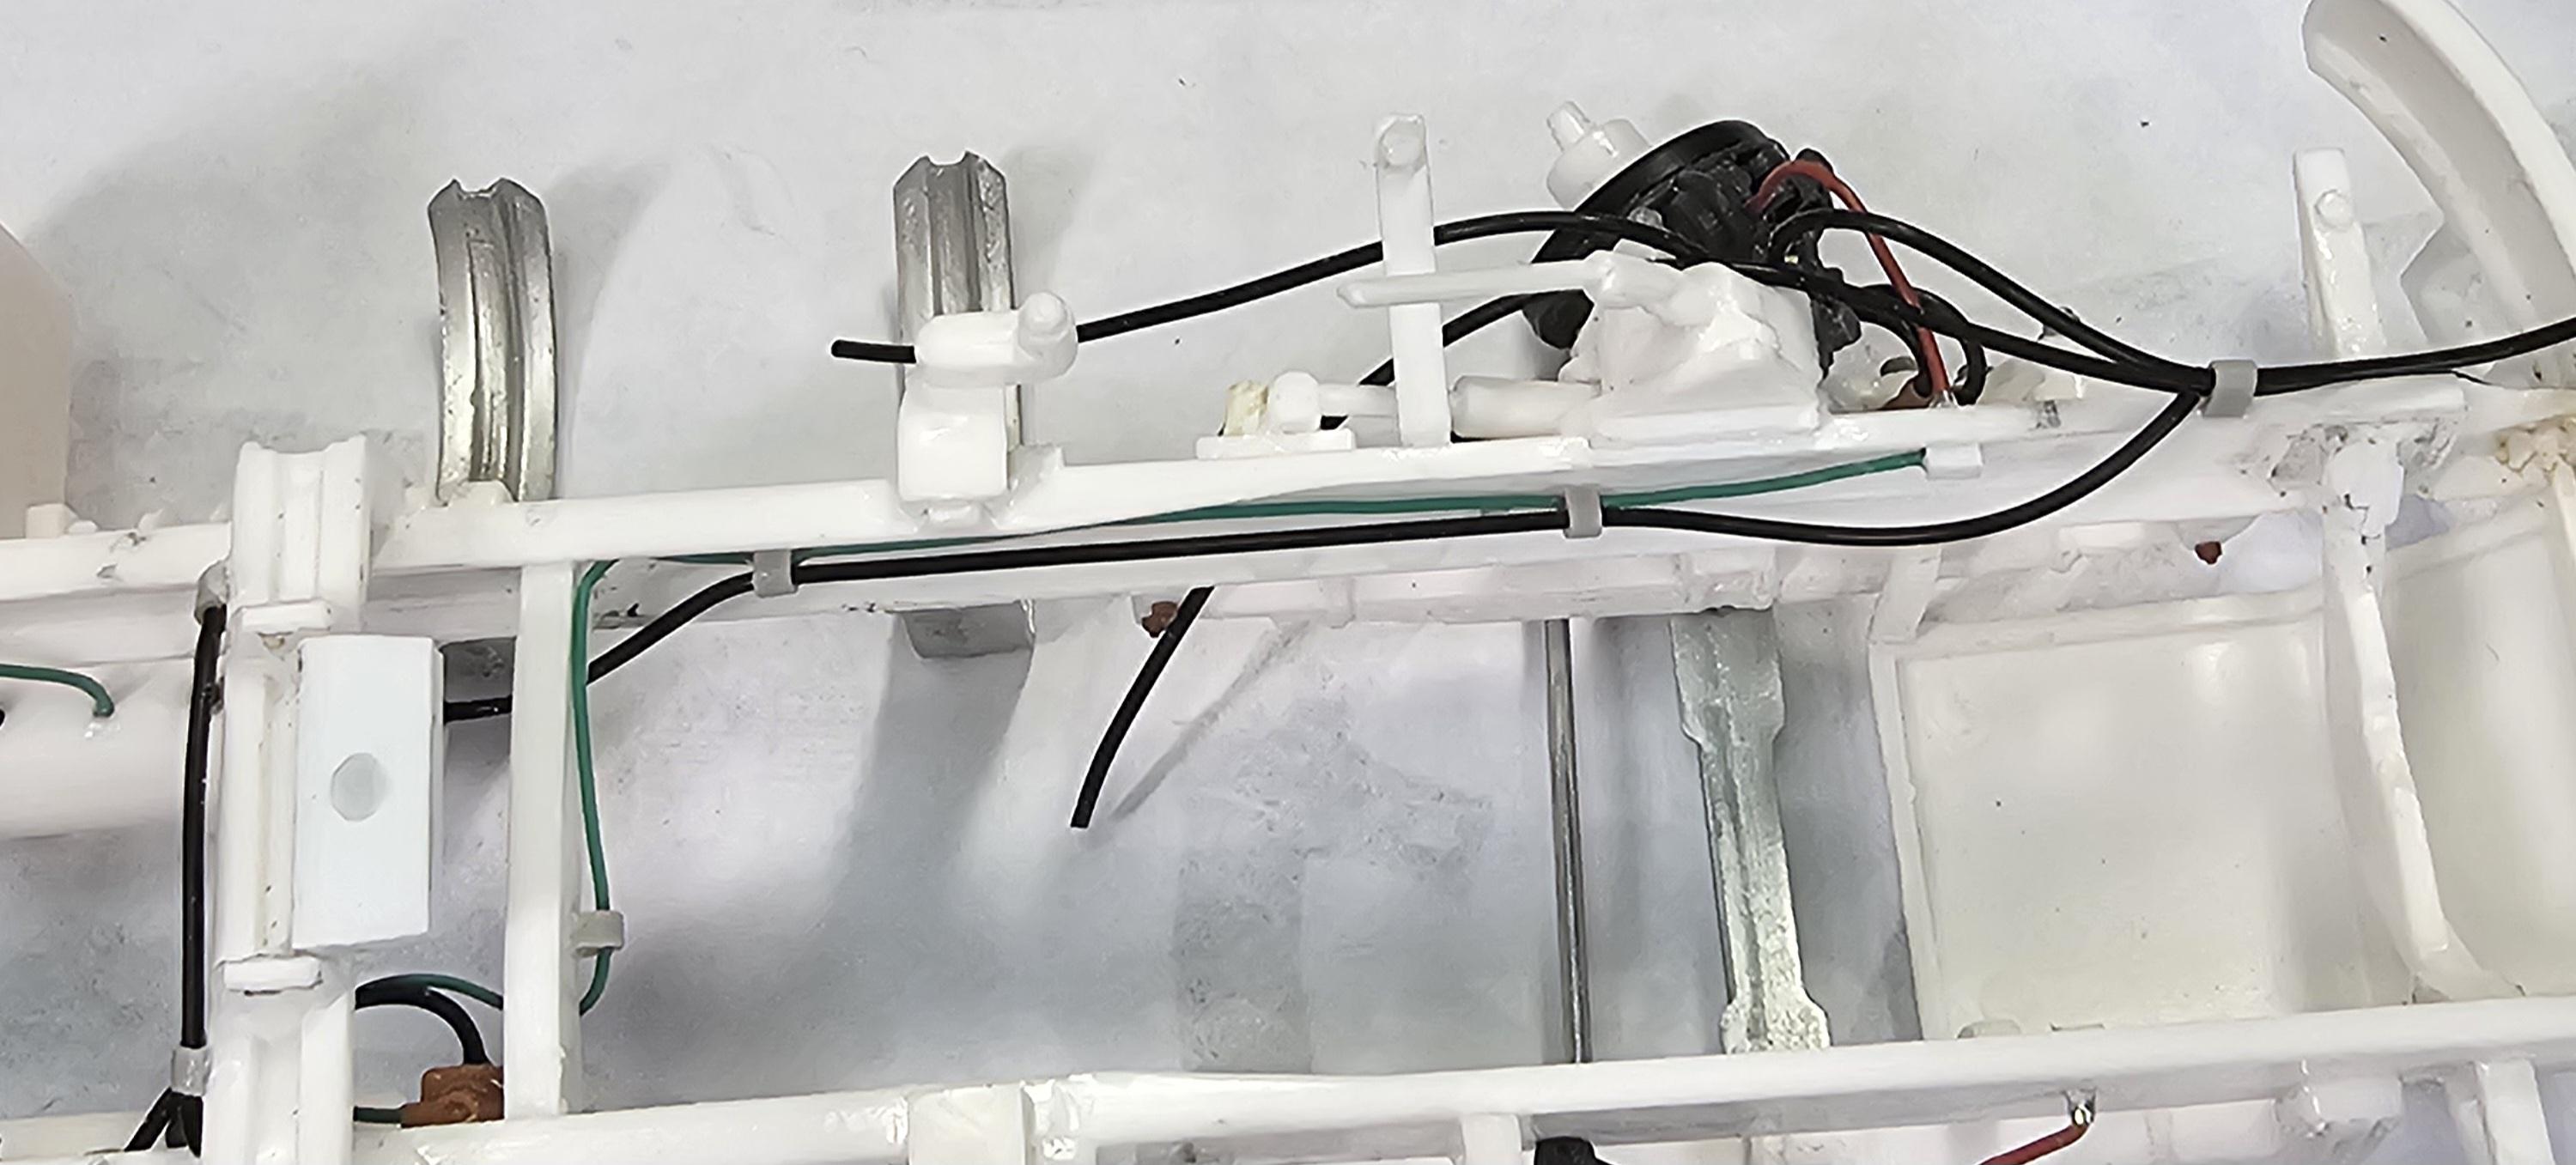
I got some more work done on this build.
I now have the rest of the air lines done
Another view of the front air lines.
I finally got this thing painted after being hounded by my Pal Jeff...lol. It's now a "Shrek" green.🤢 It's my primer coat, and at first it was giving me a real pain the you now what!
But I finally got the bugs worked out. So here are some pictures for yous all to look at.
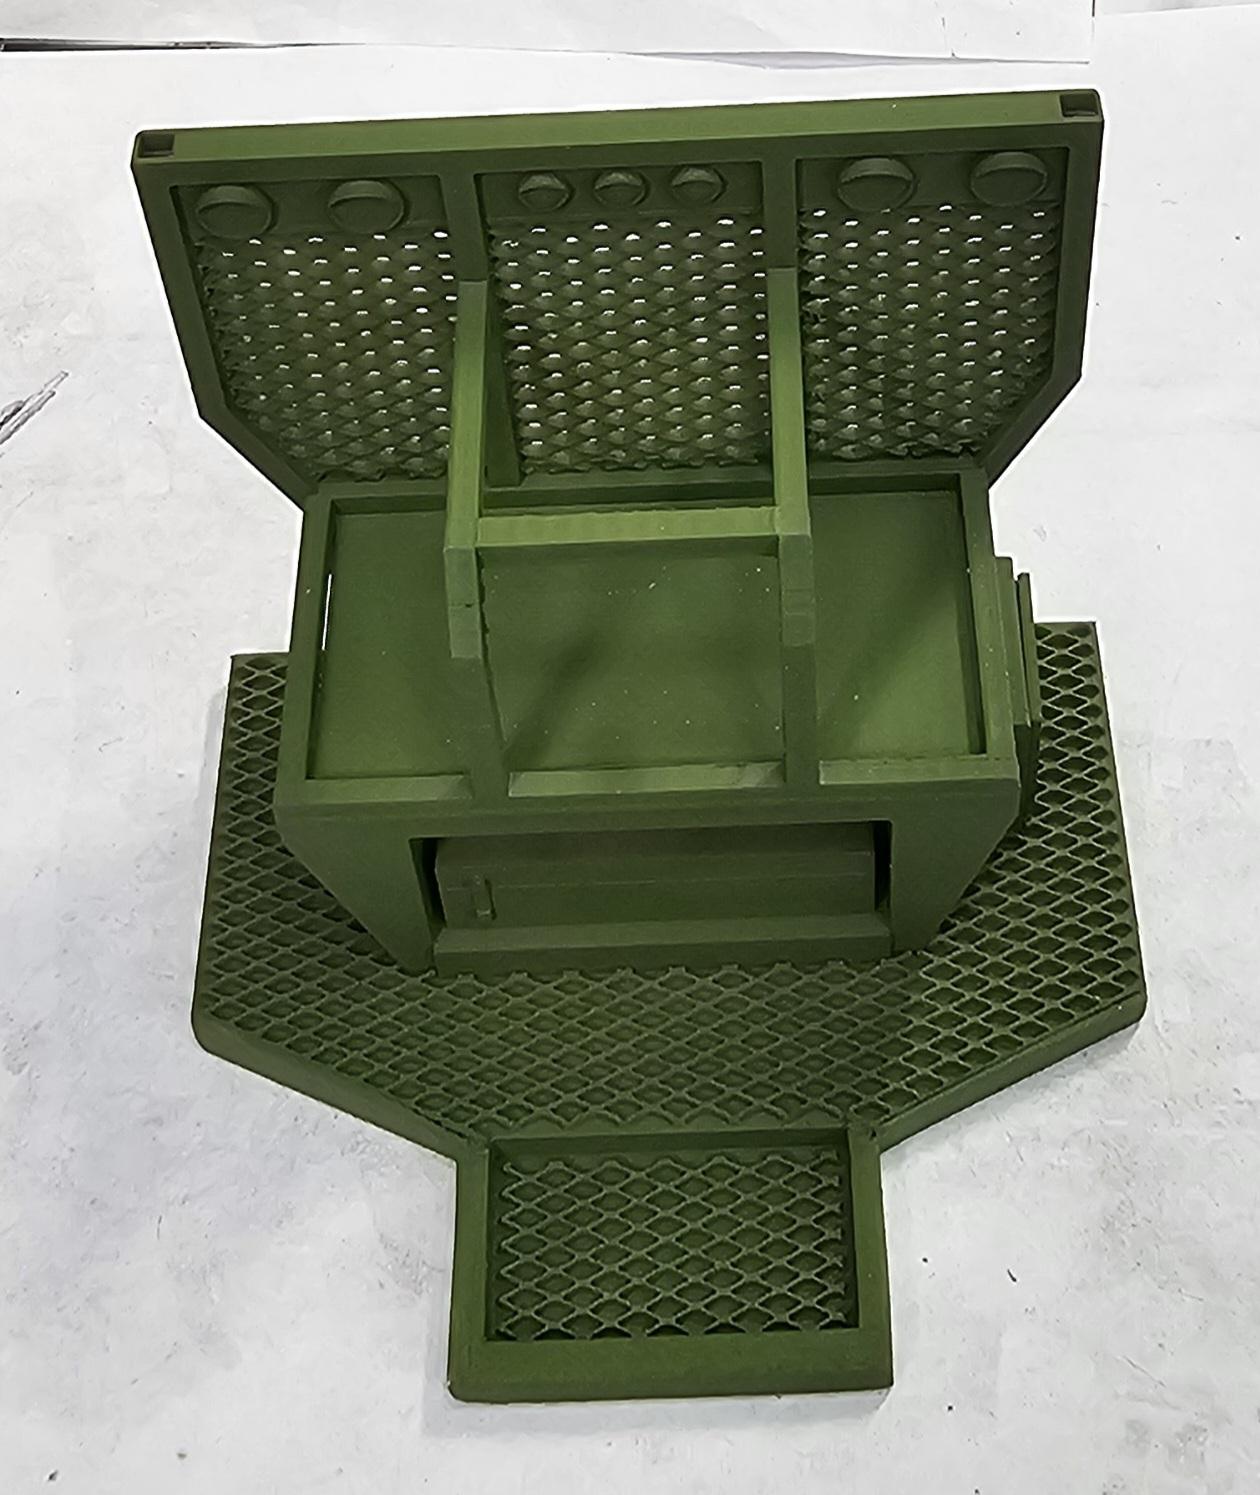
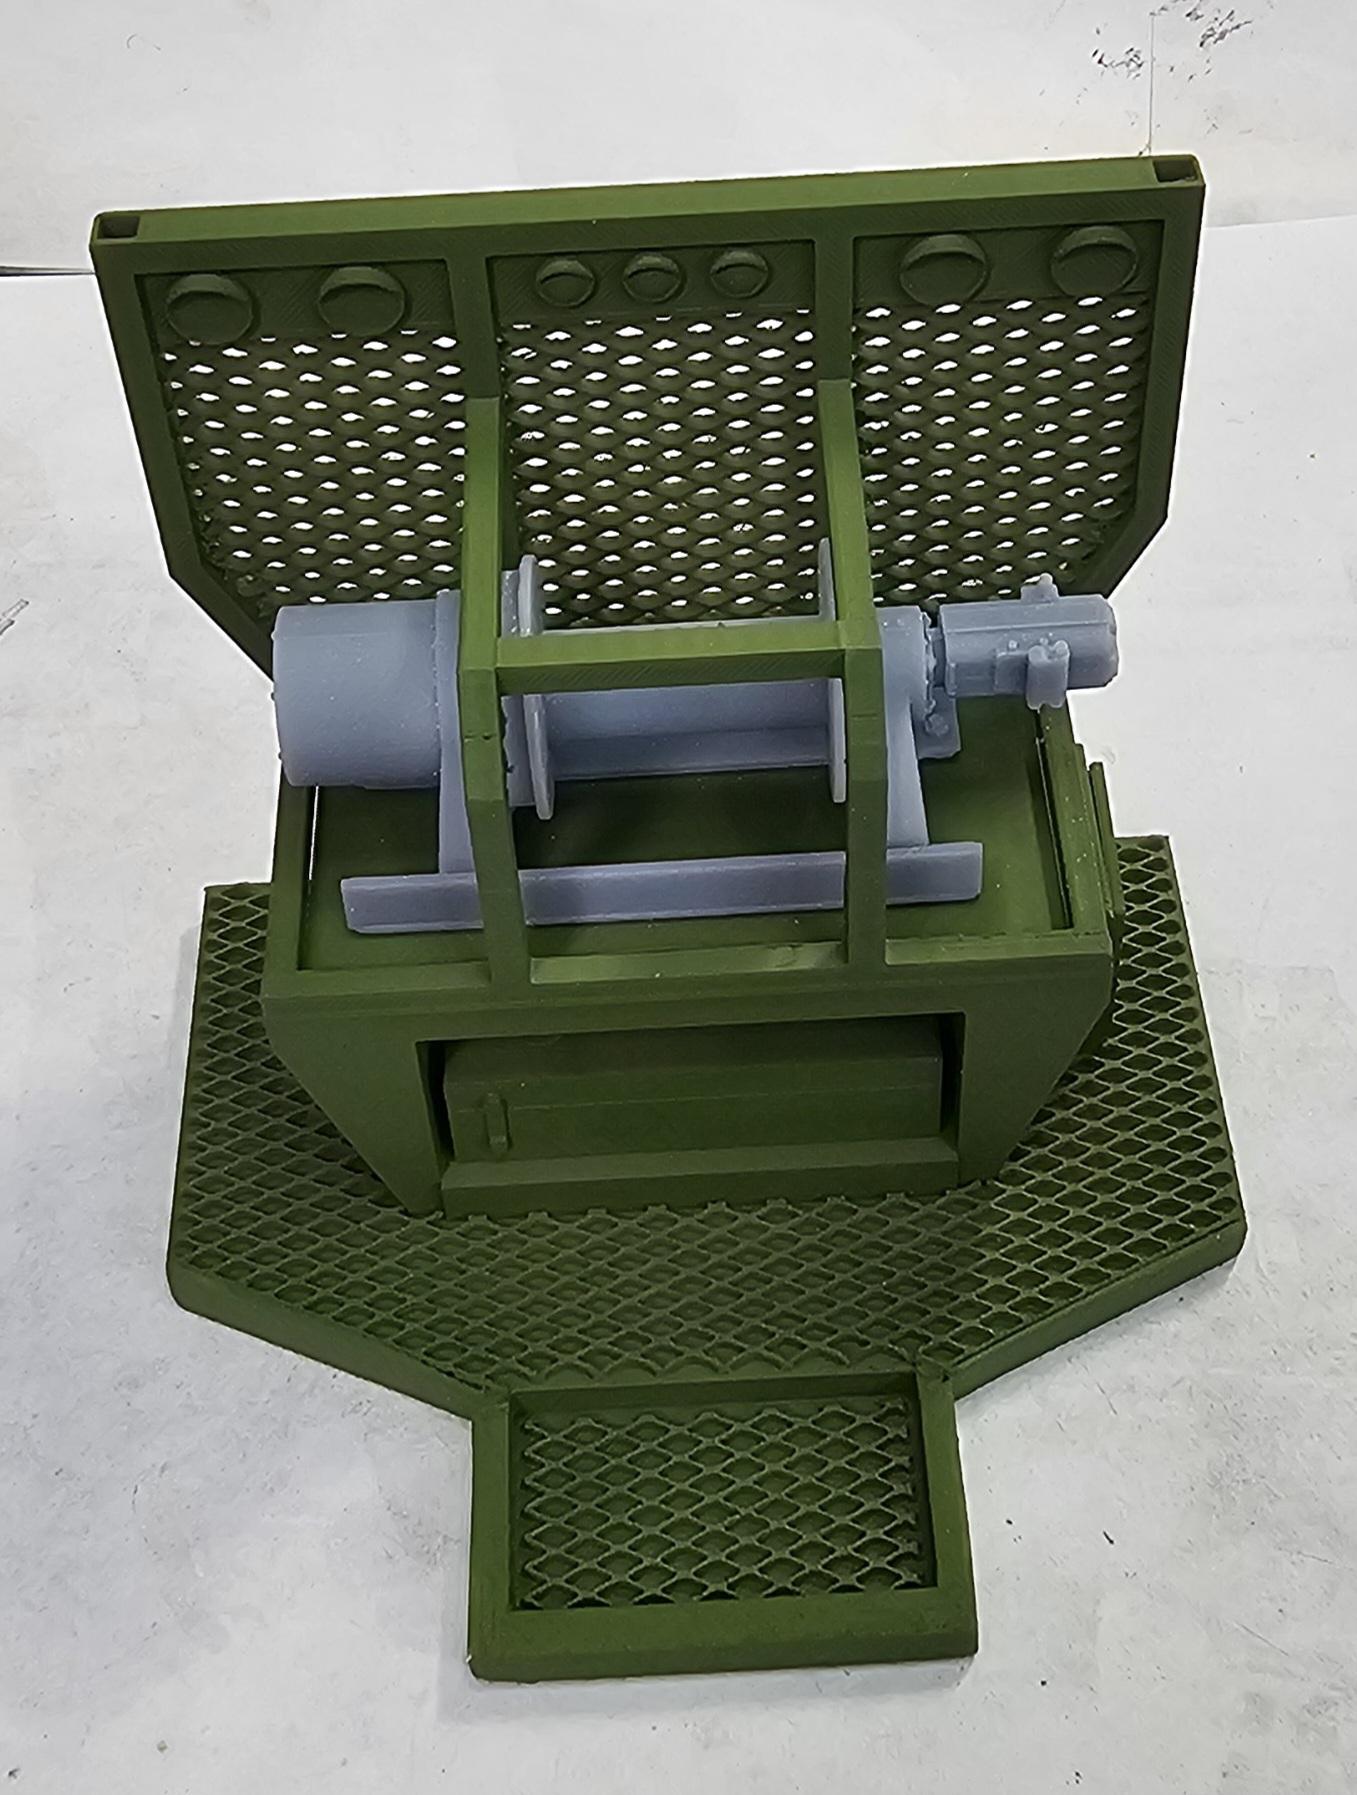
This view shows the headache rack.
This view shows the headache rack with the winch sitting in place.
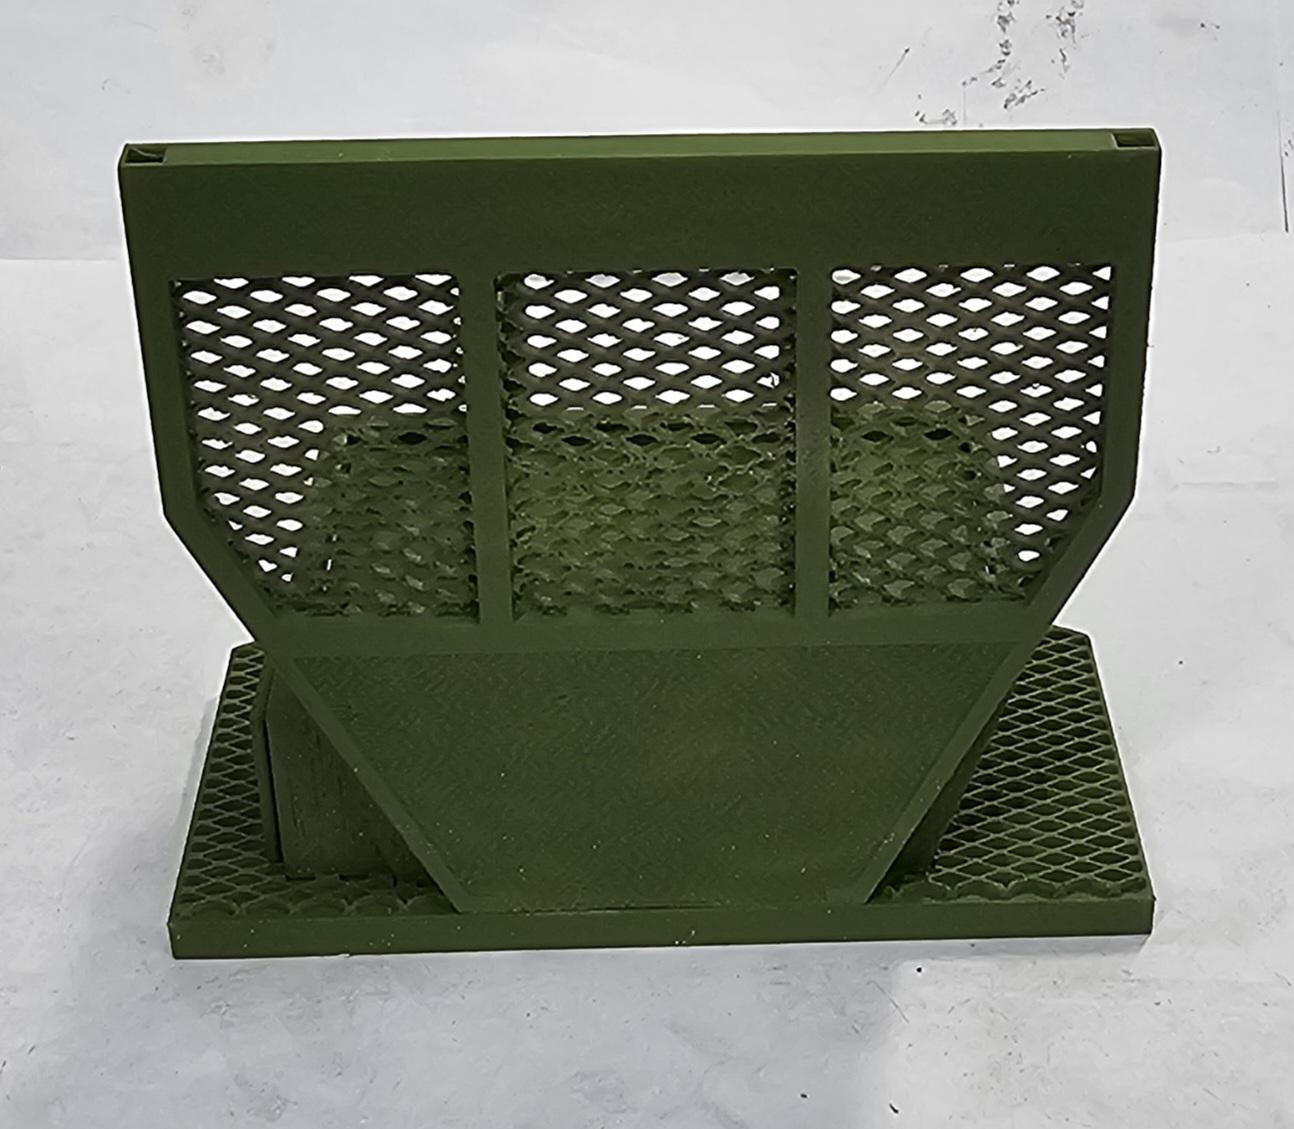
This is a view of the back of the headache rack.
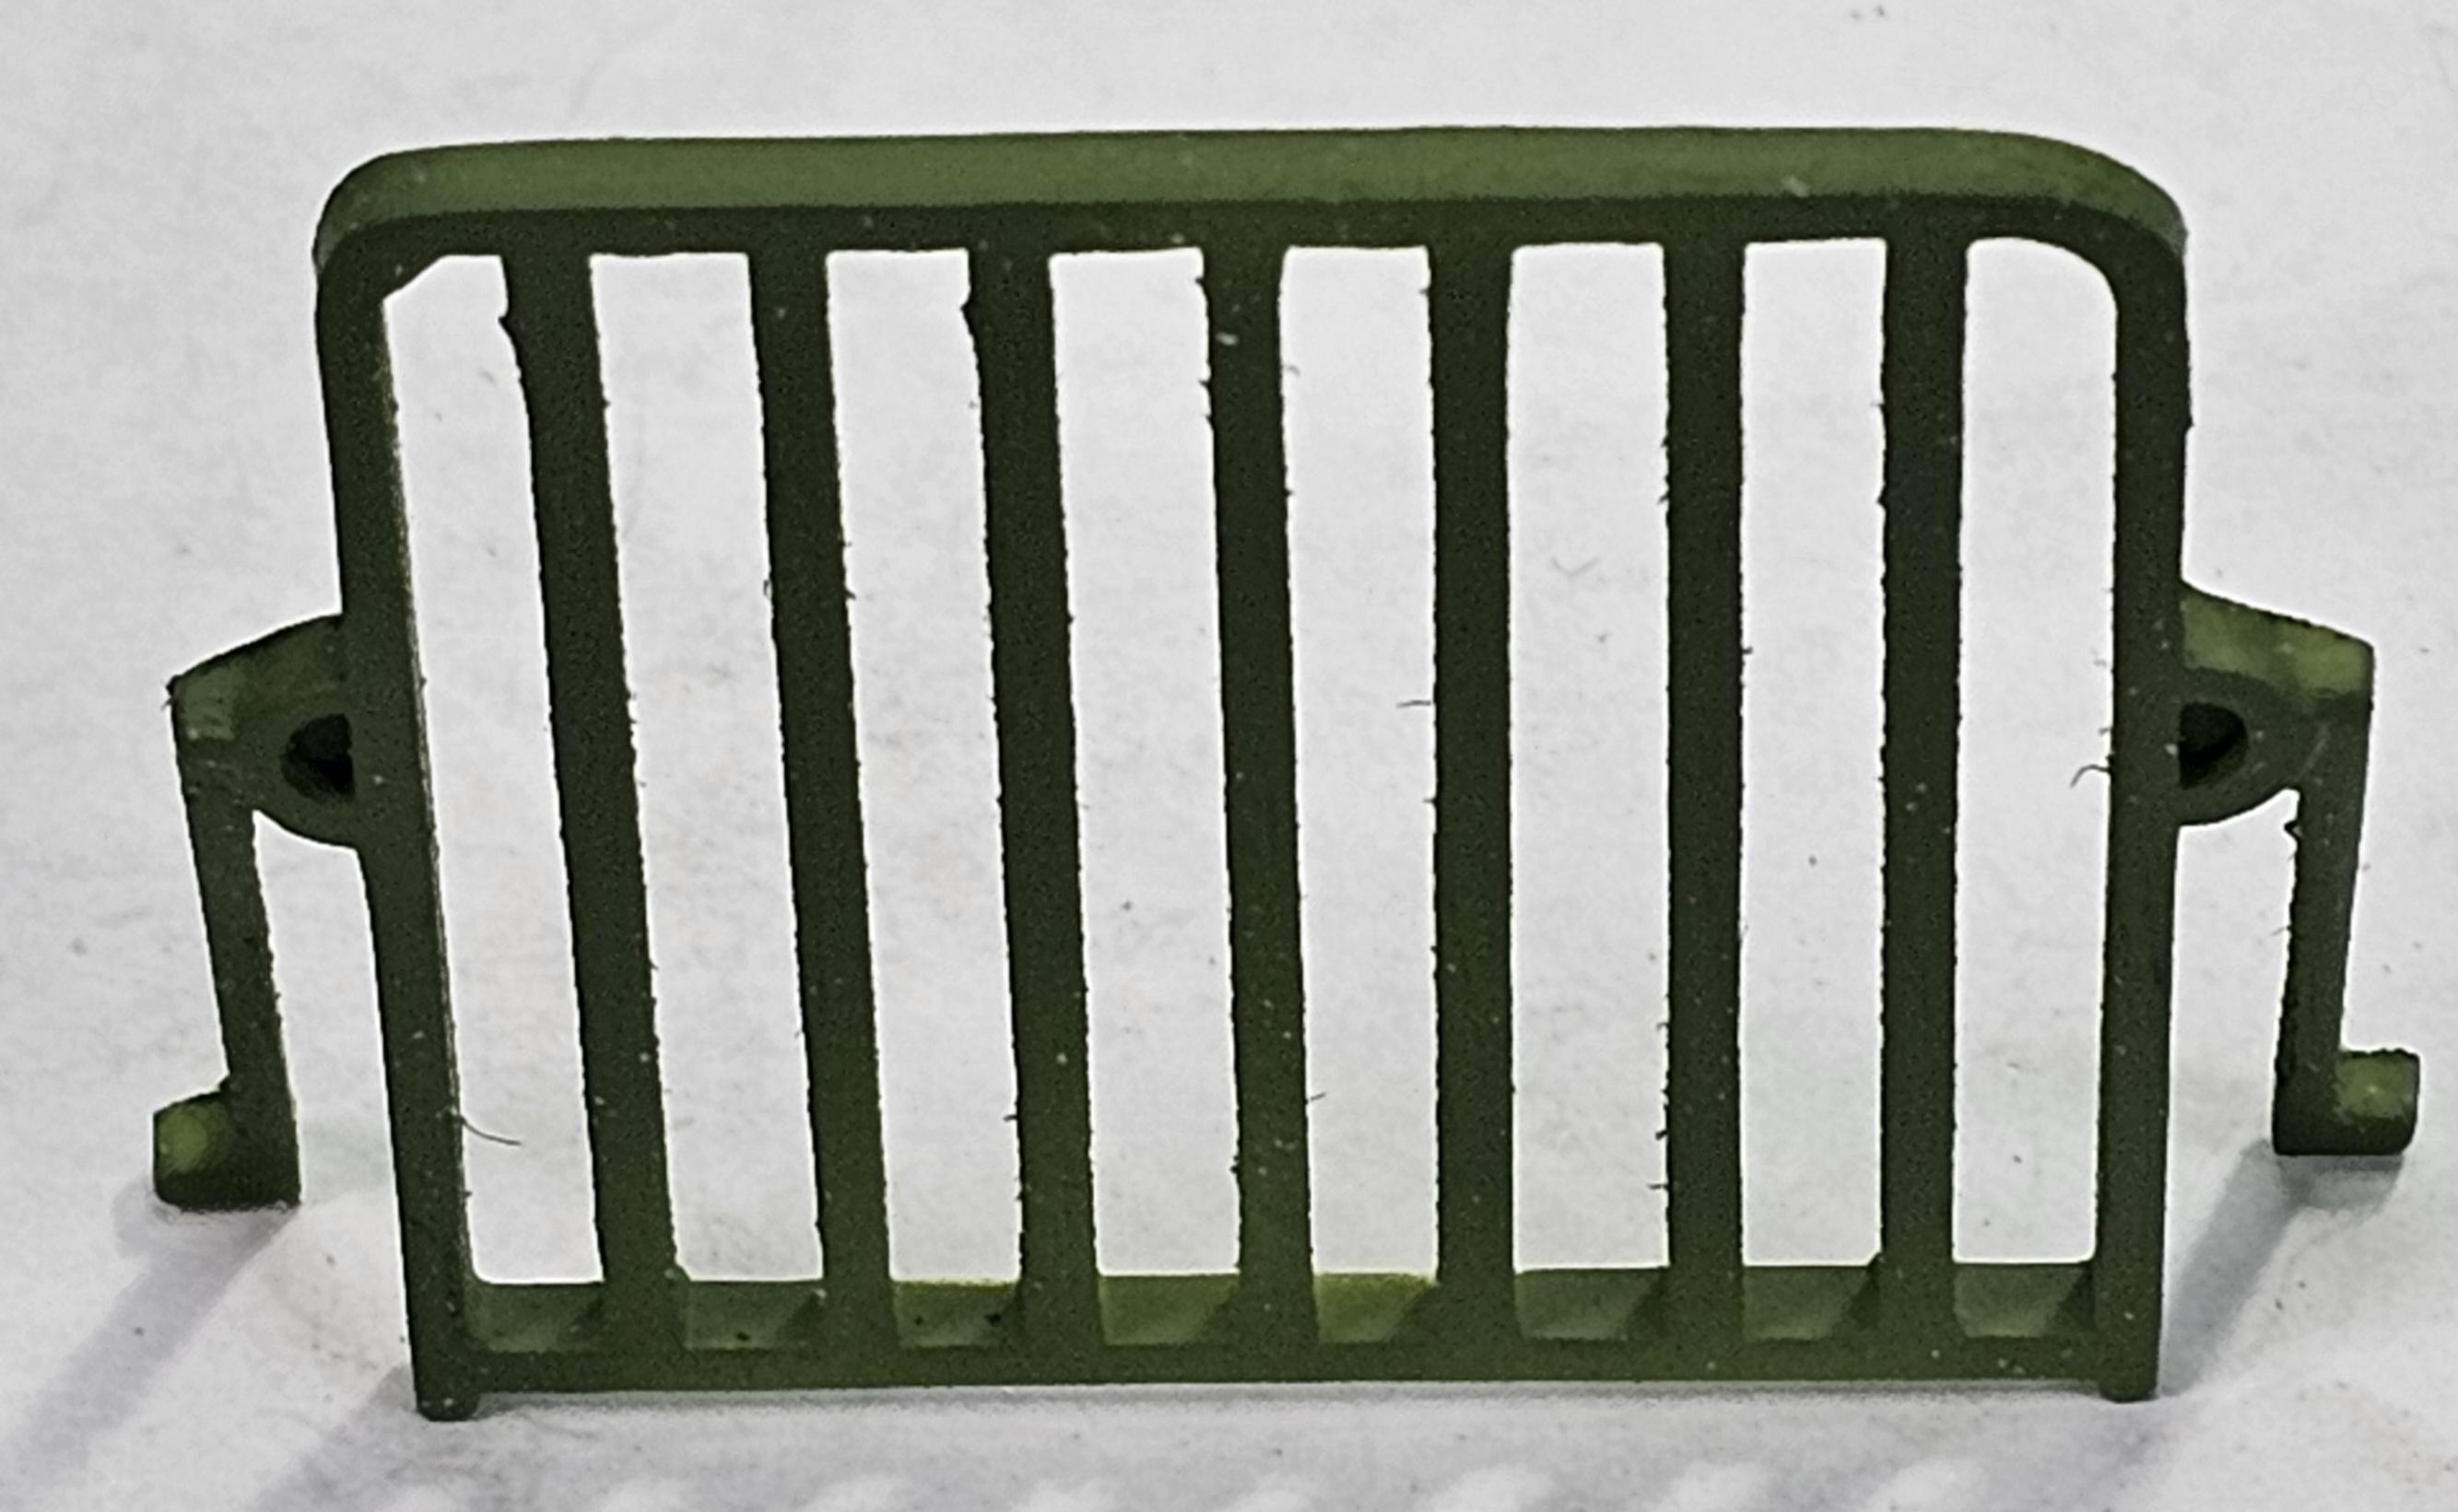
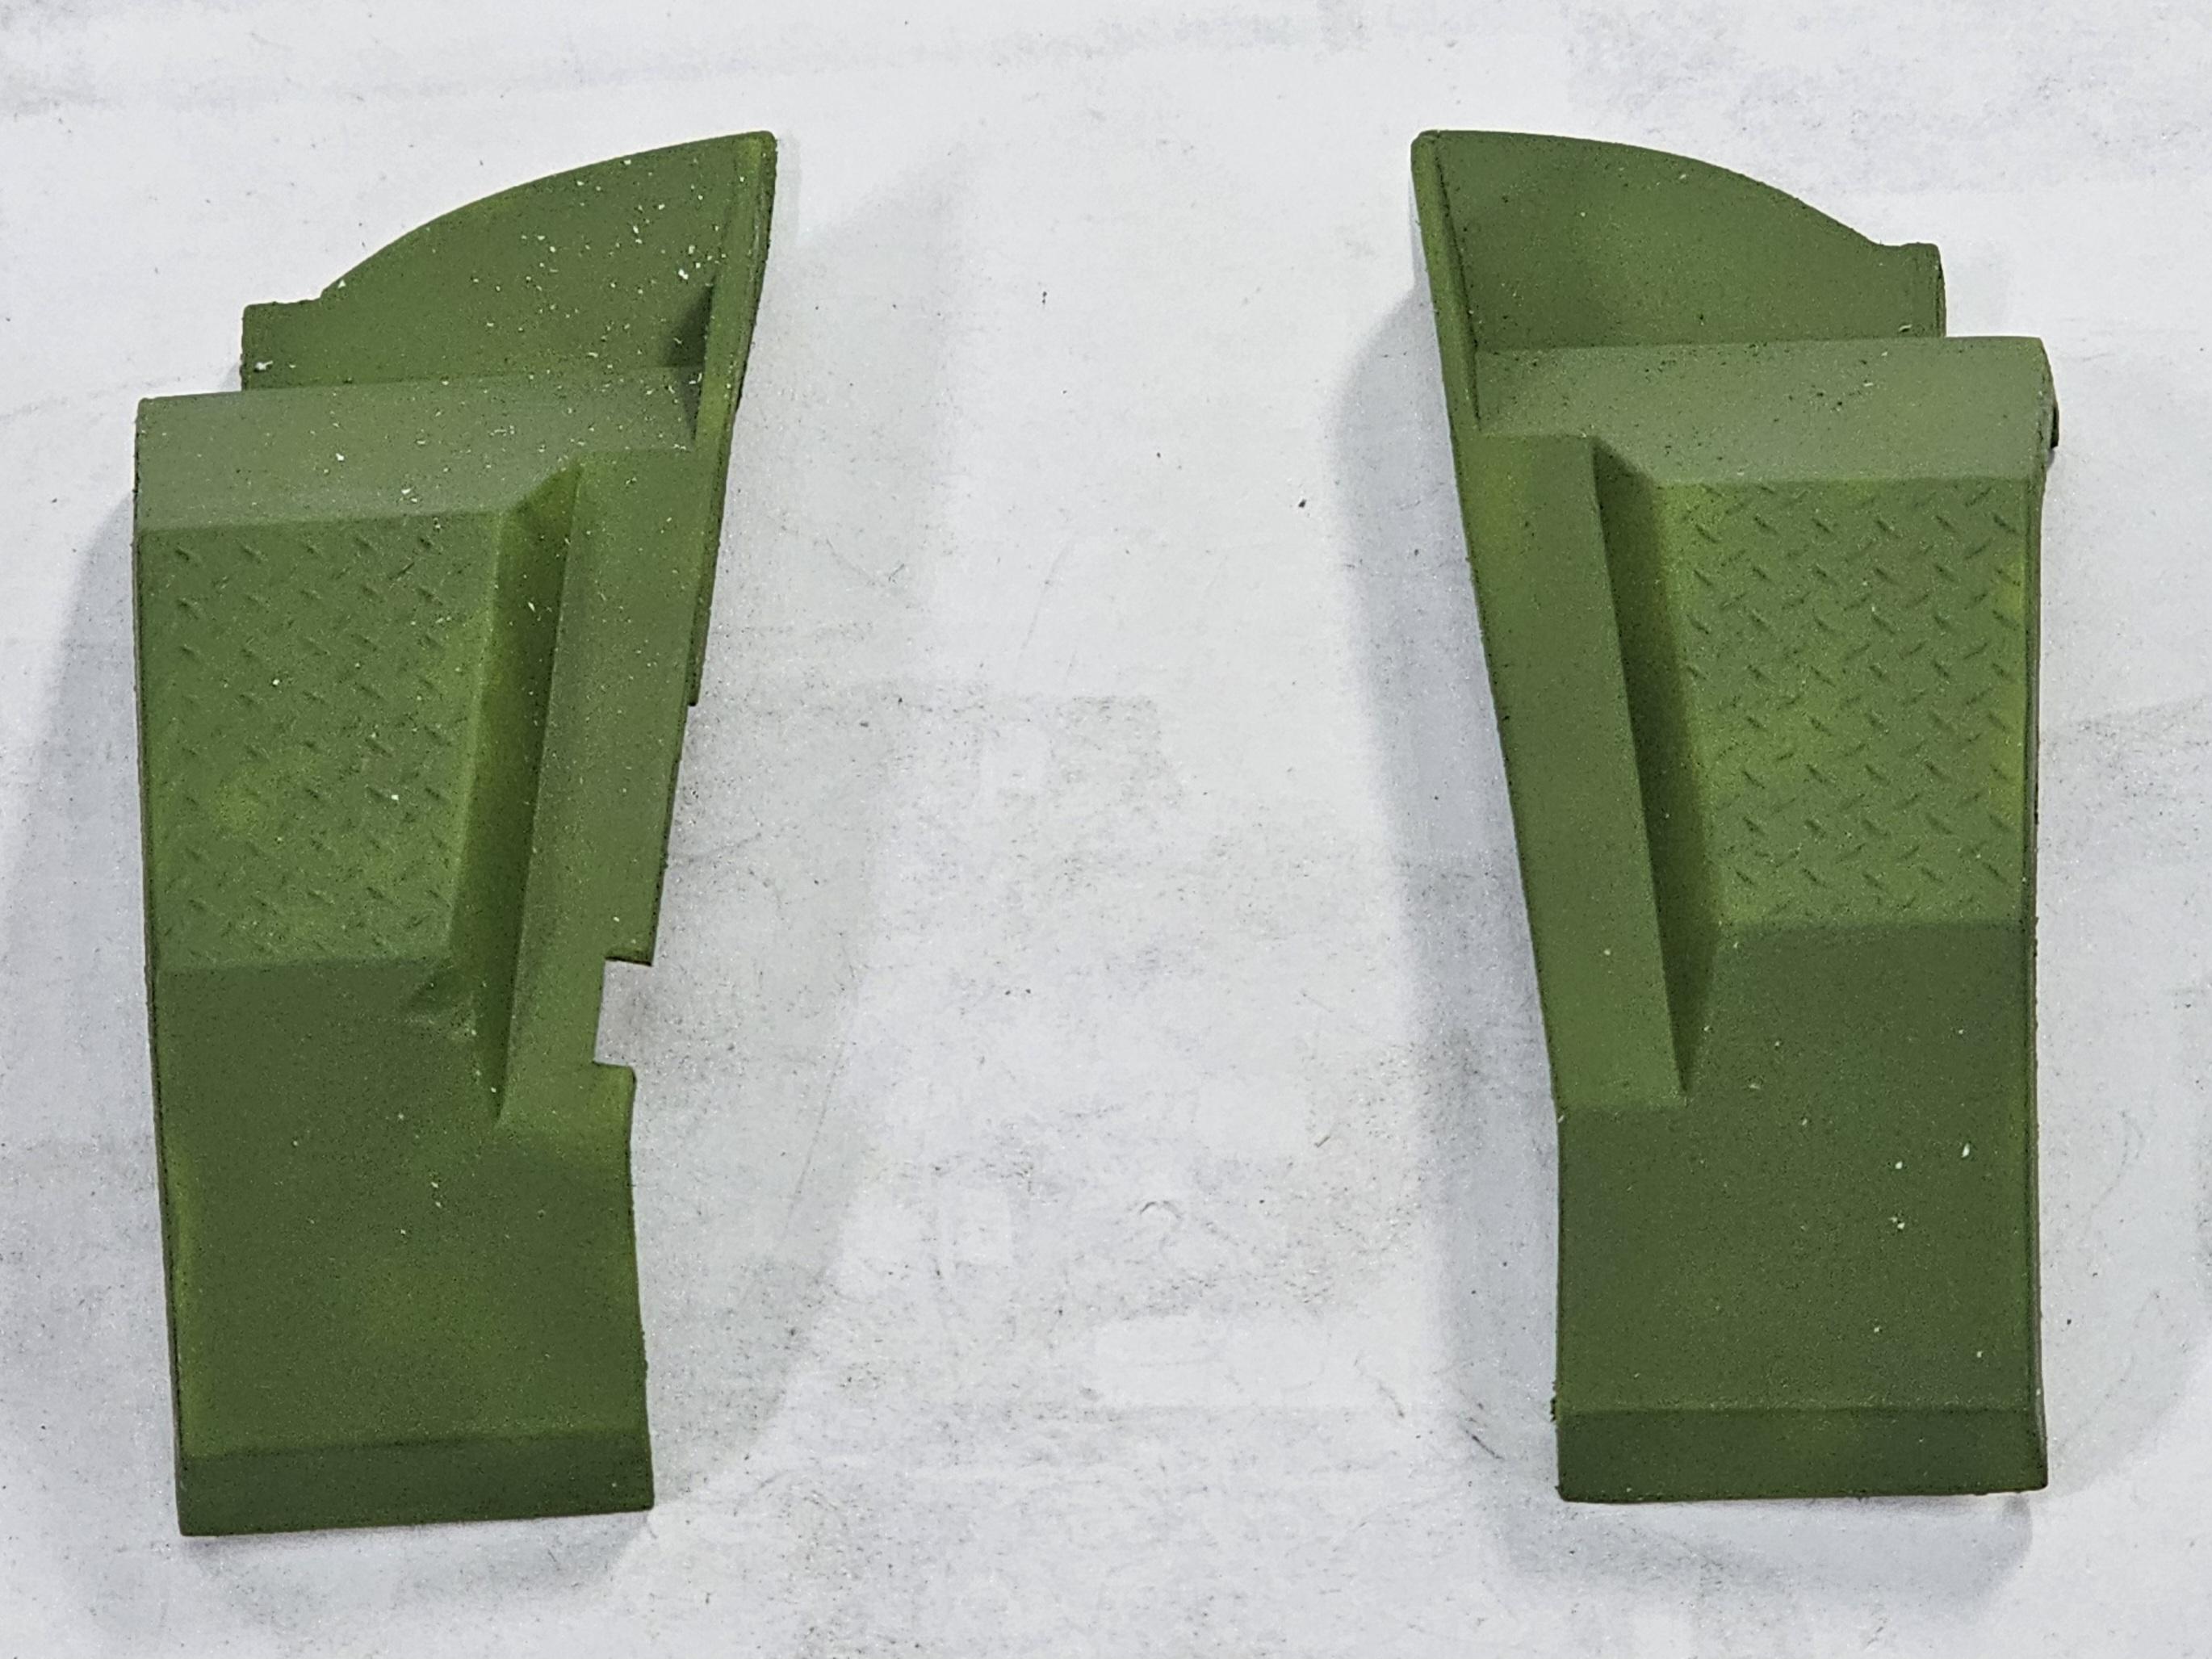
This view shows the front grill guard.
This view shows the battery box cover.
This is the inside of the battery box.
This is the three fifth wheel parts.
The fifth wheel assembly.
This view shows the front fenders.
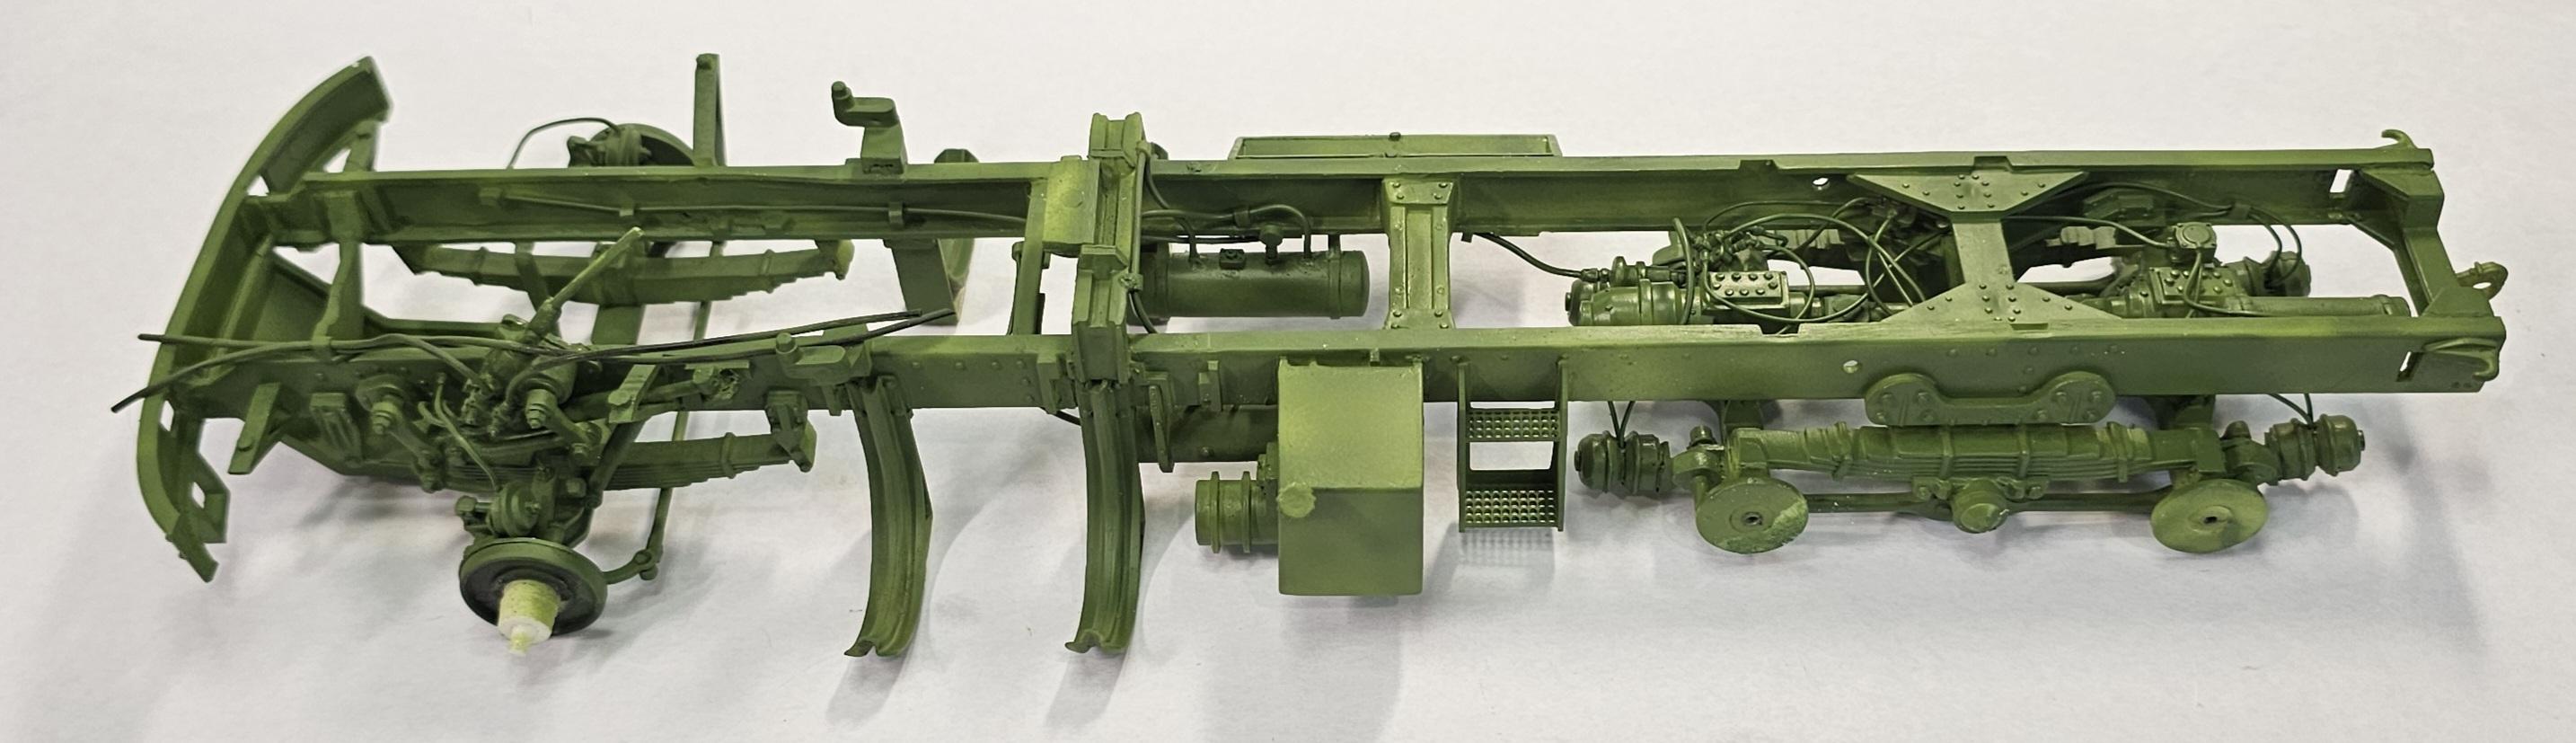
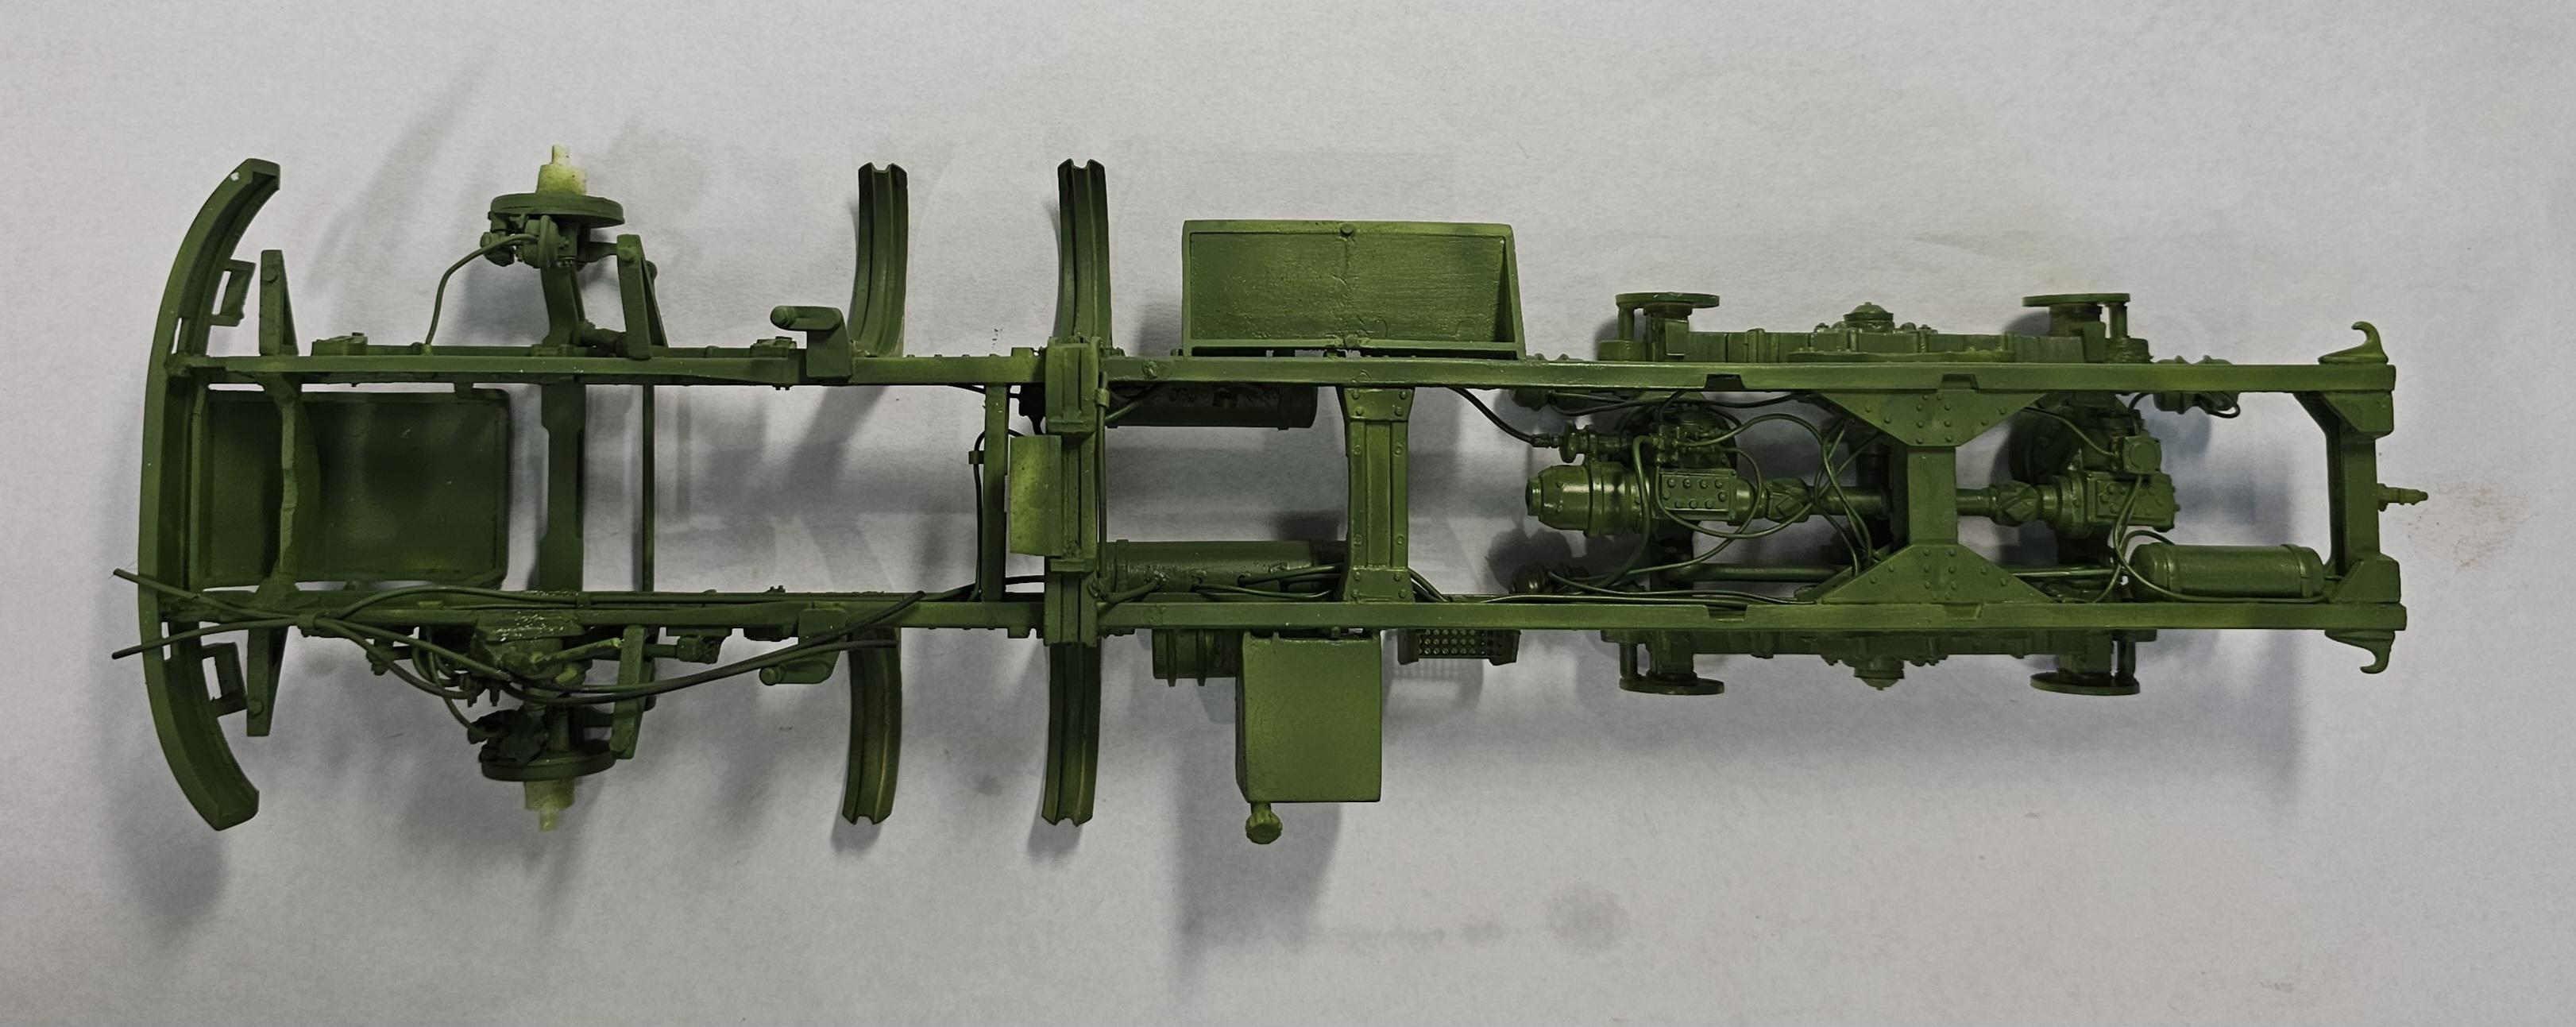
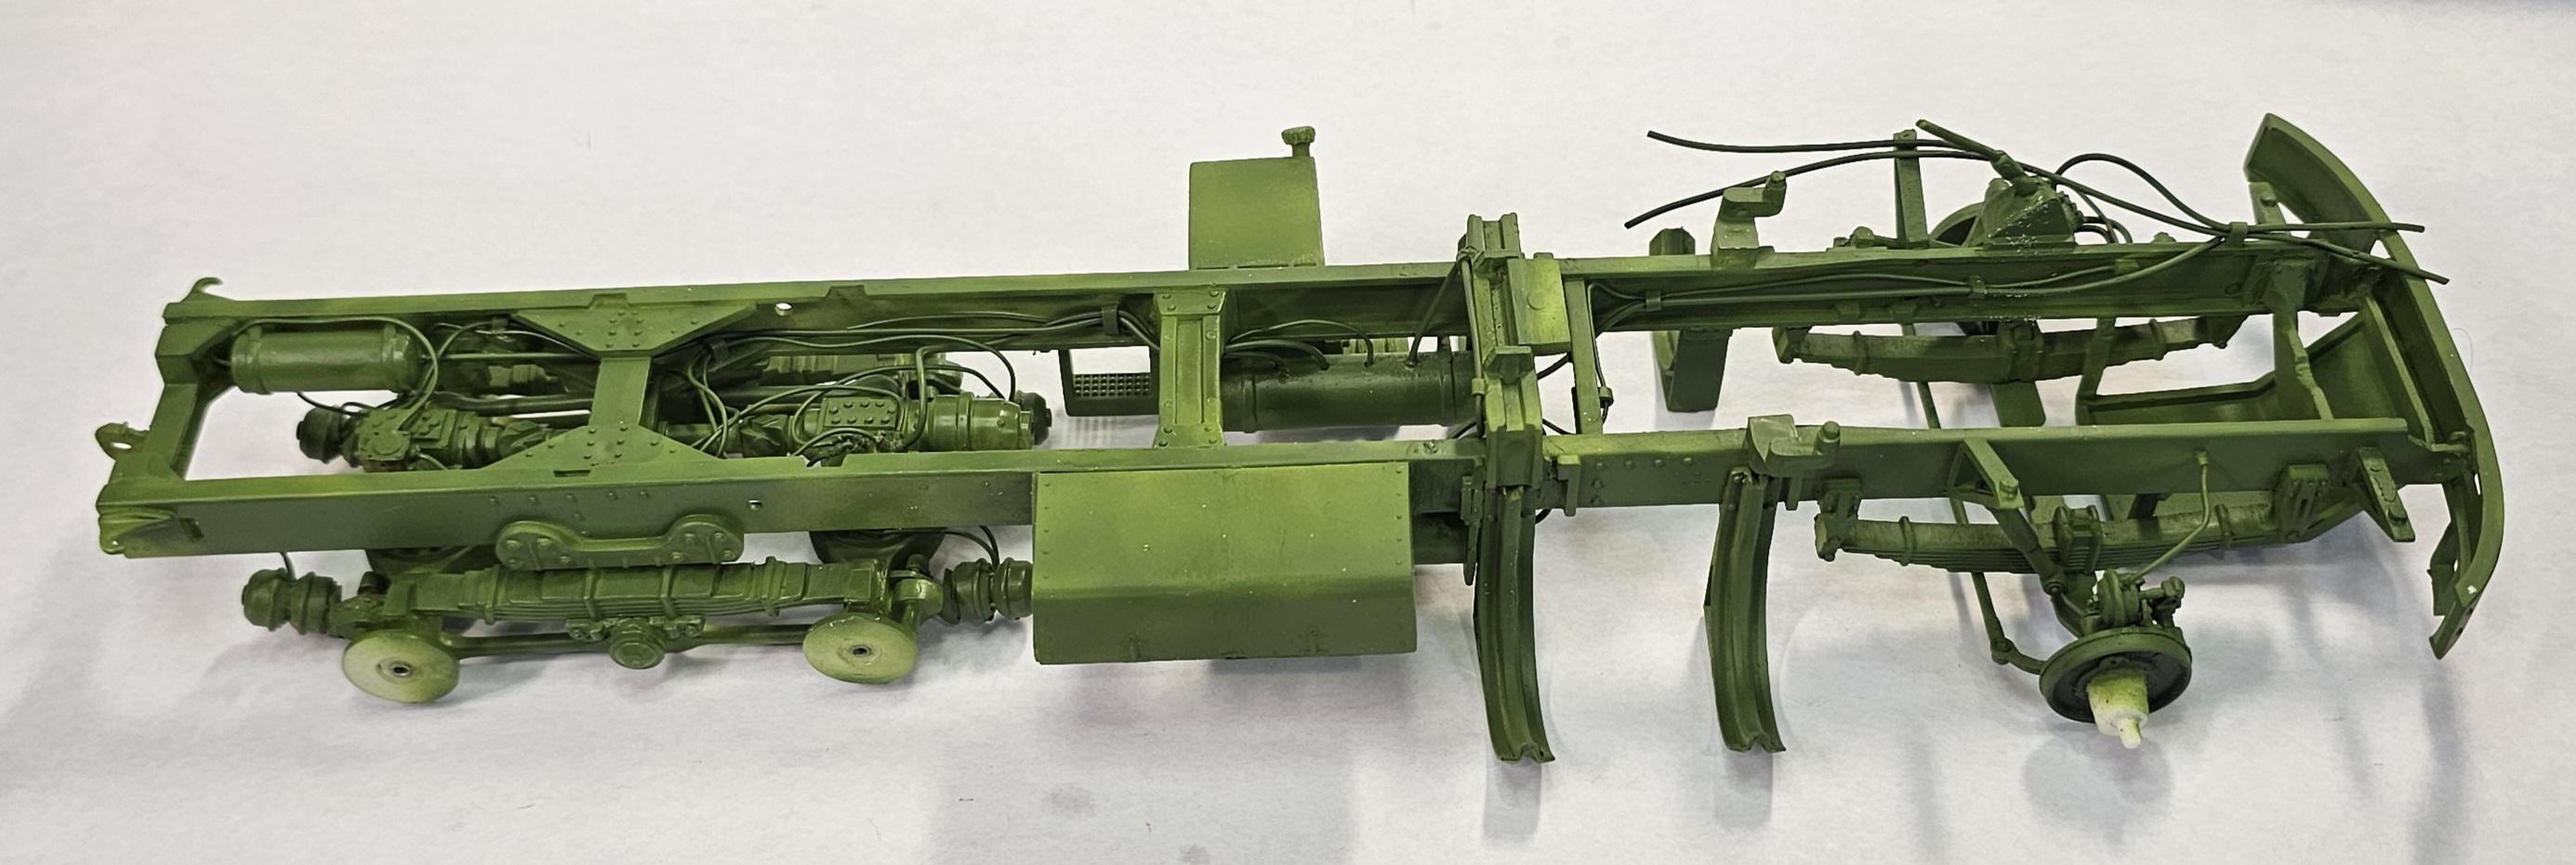
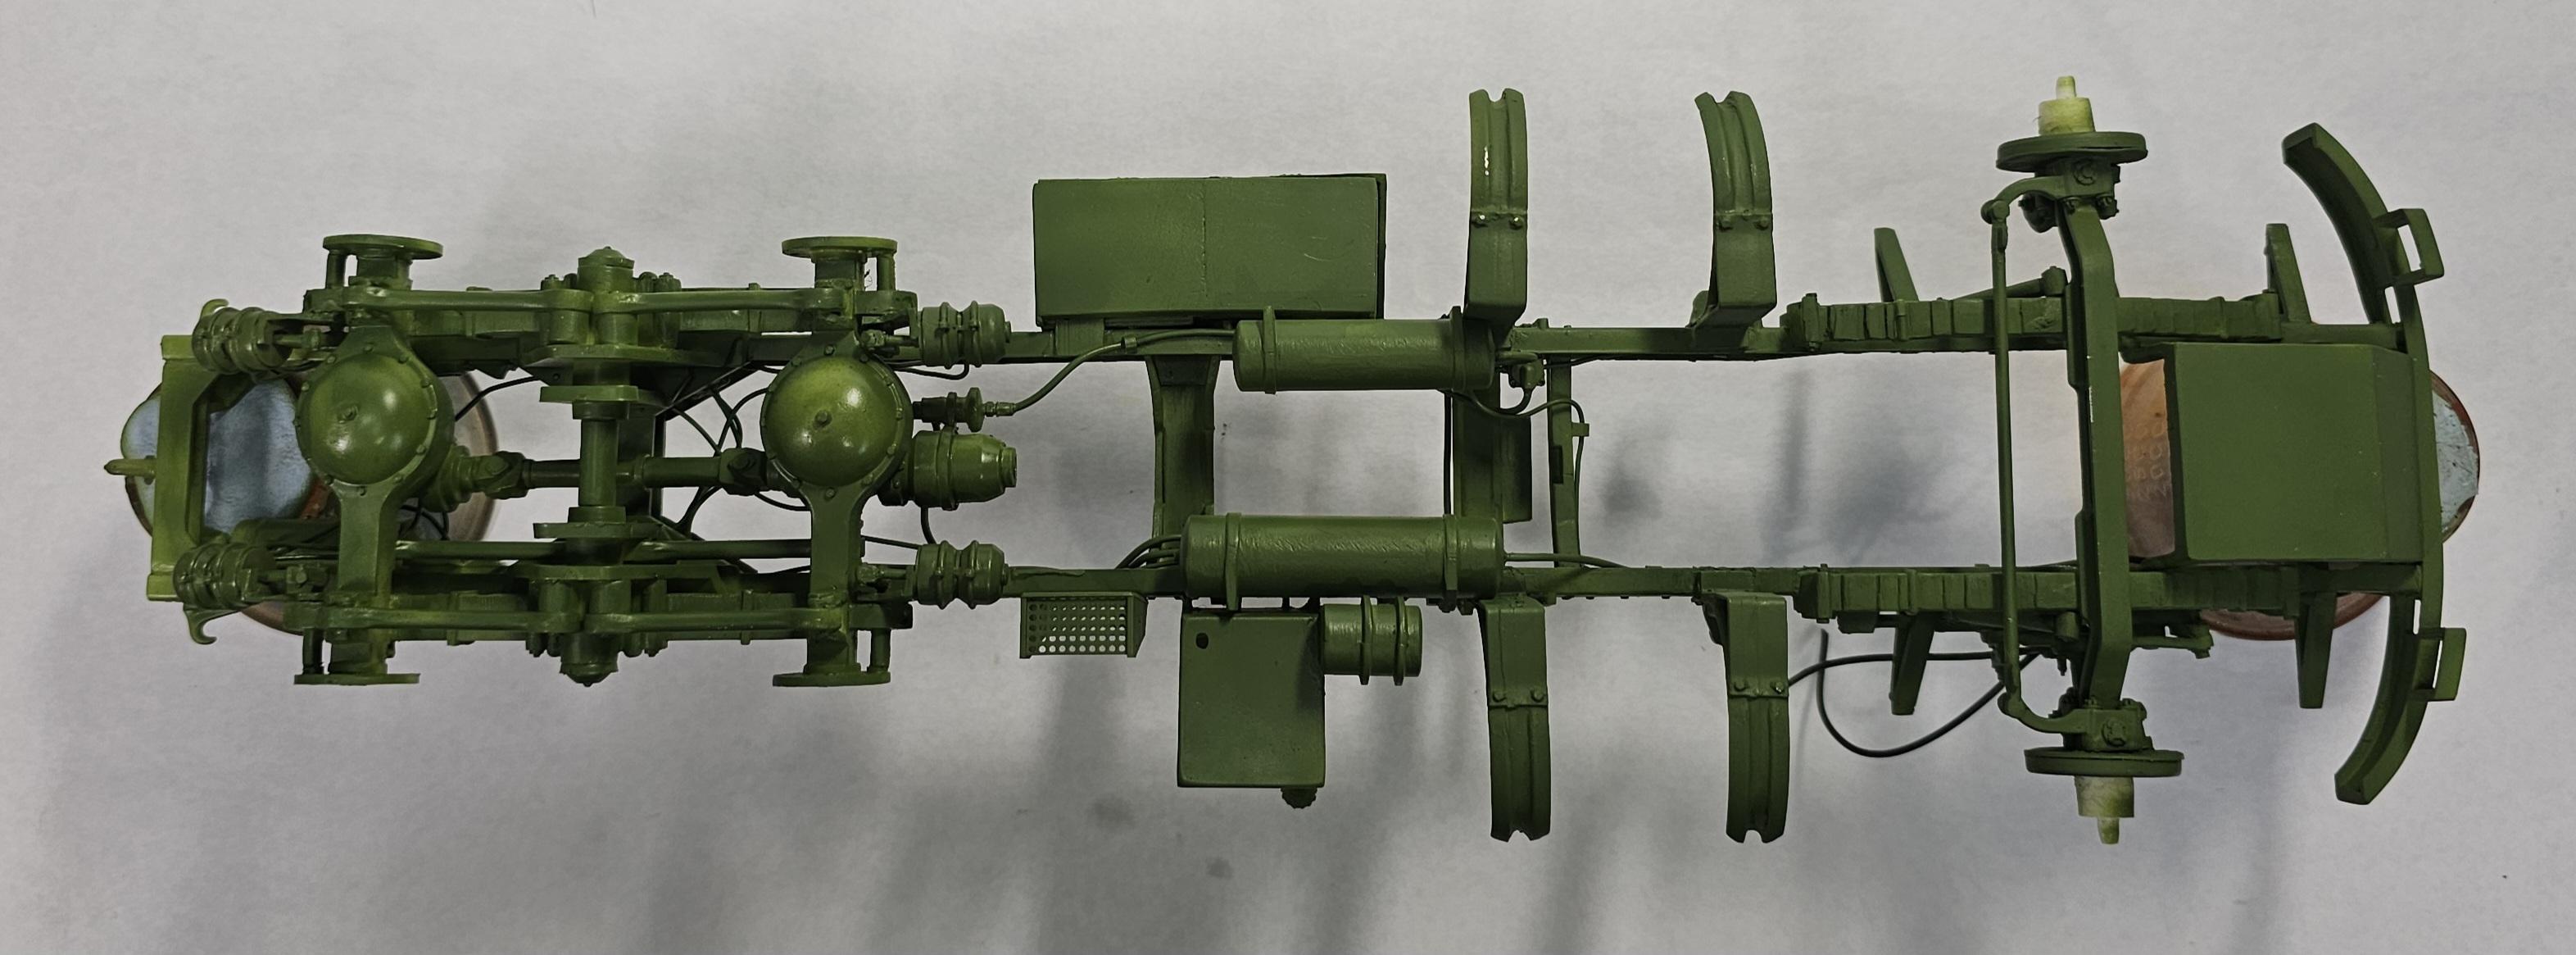
left hand side view of the frame.
Top view of the frame.
Right side view of the frame.
Bottom view of the frame.
A little mock-up veiw.
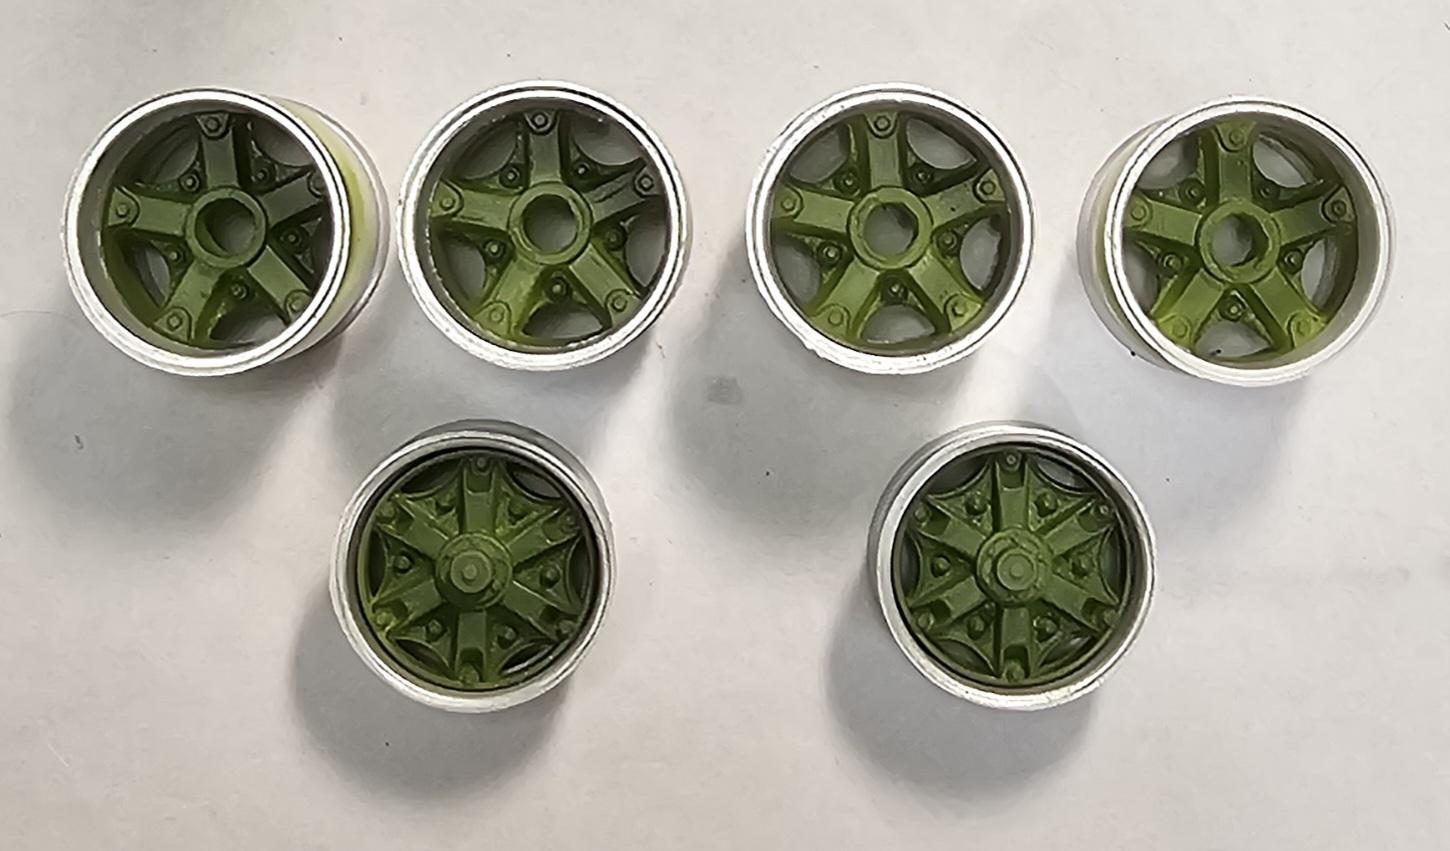
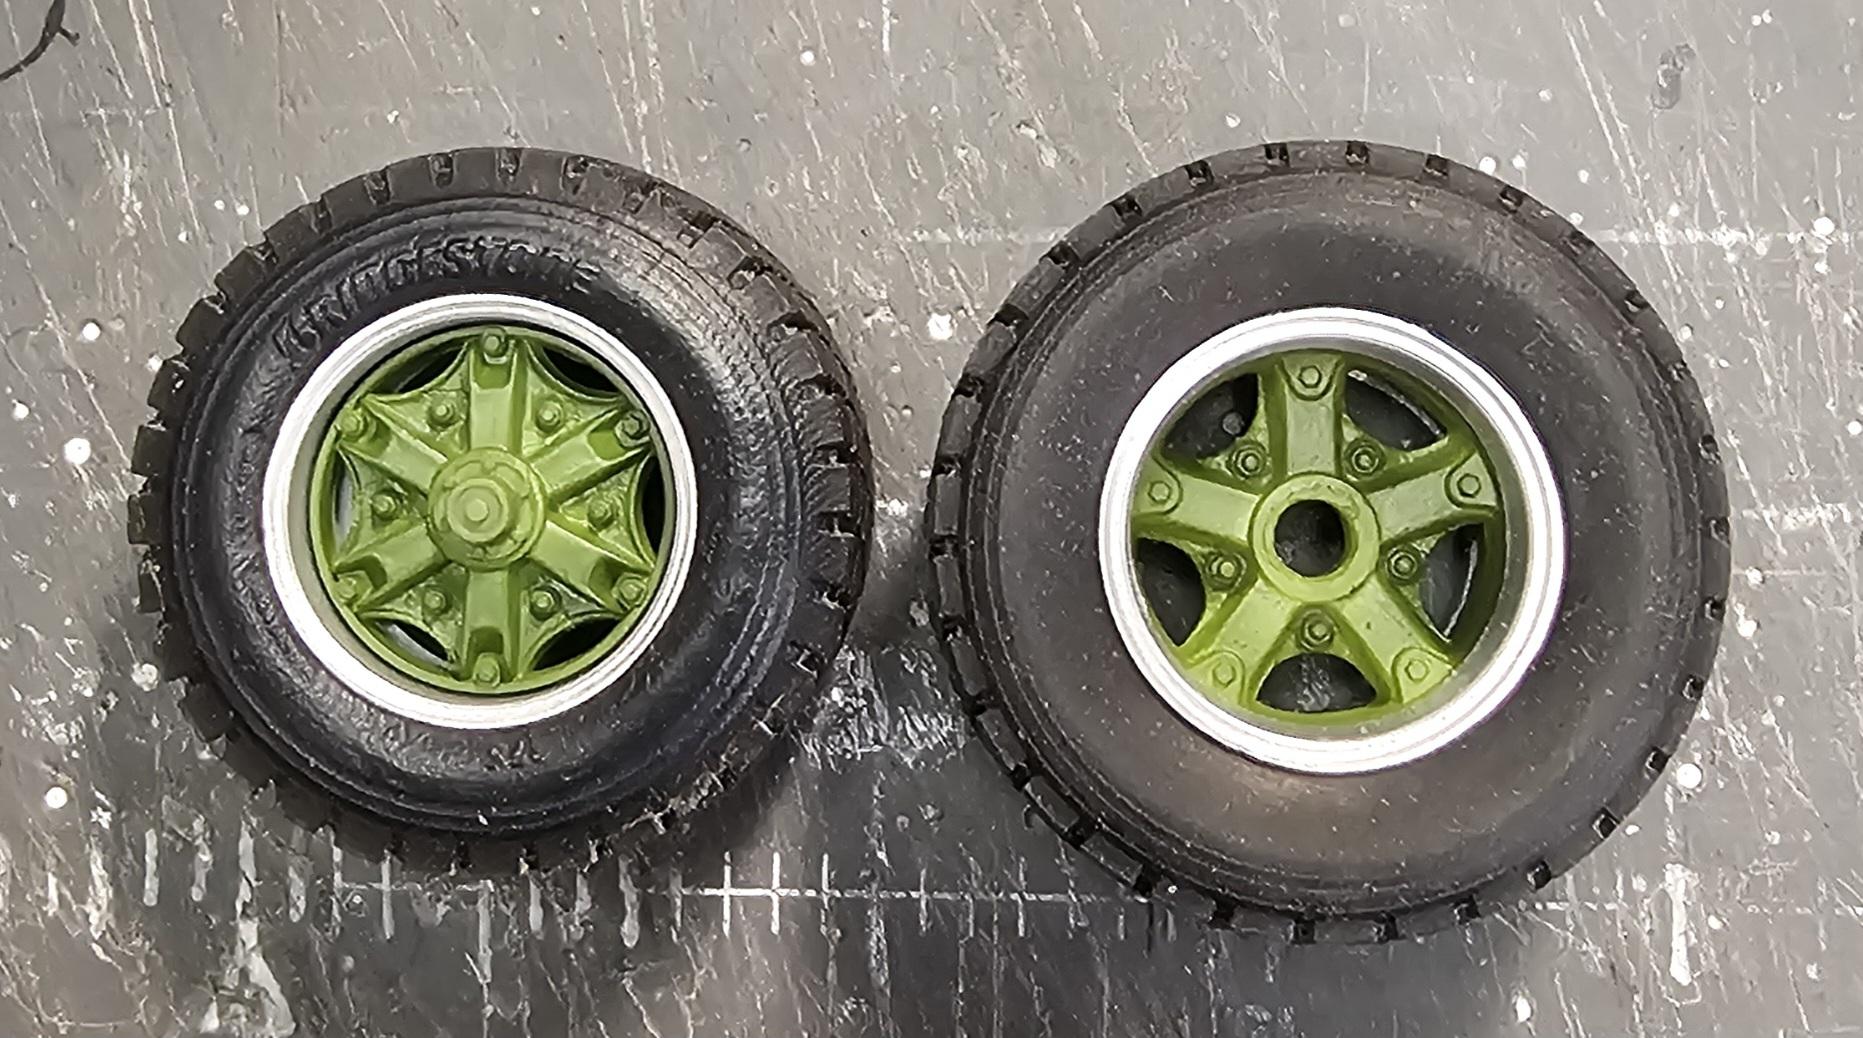
this view shows the front & rear wheels.
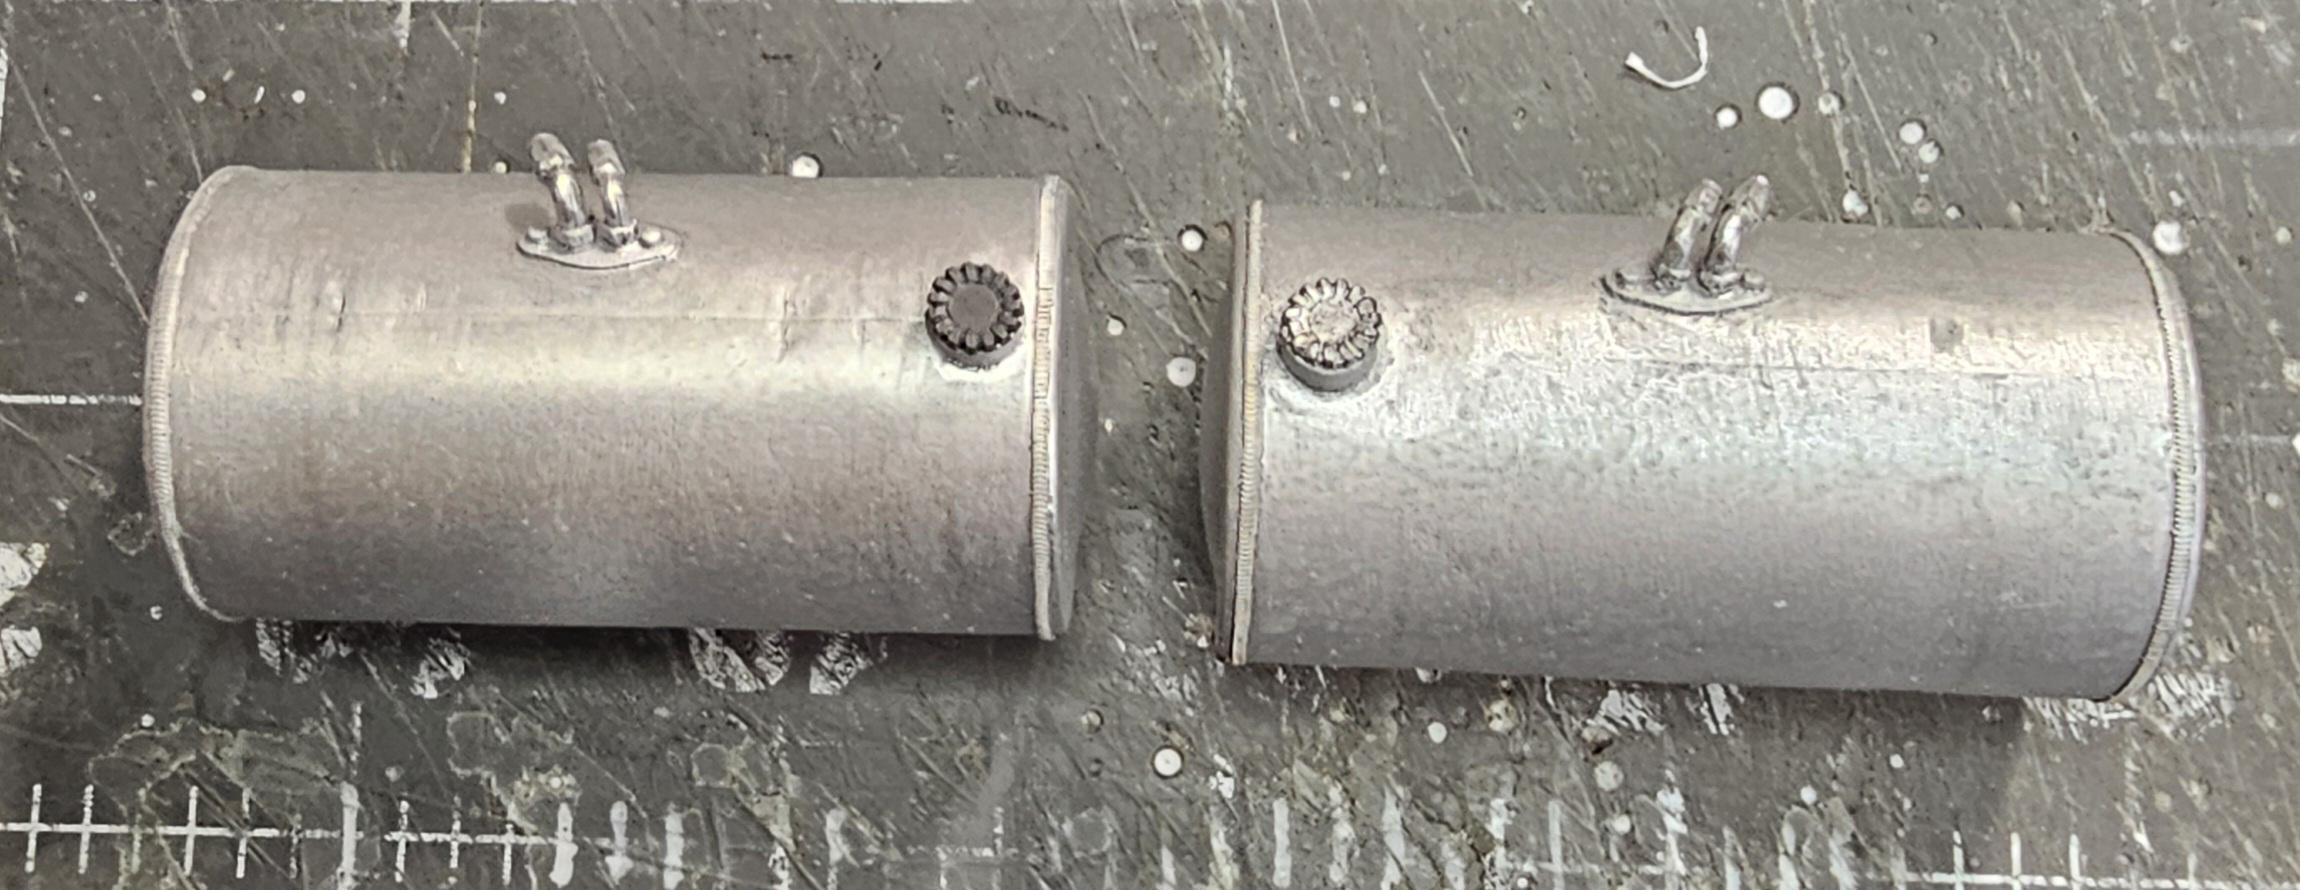
This view shows the fuel tanks and I can see I have some putty work to do on them.
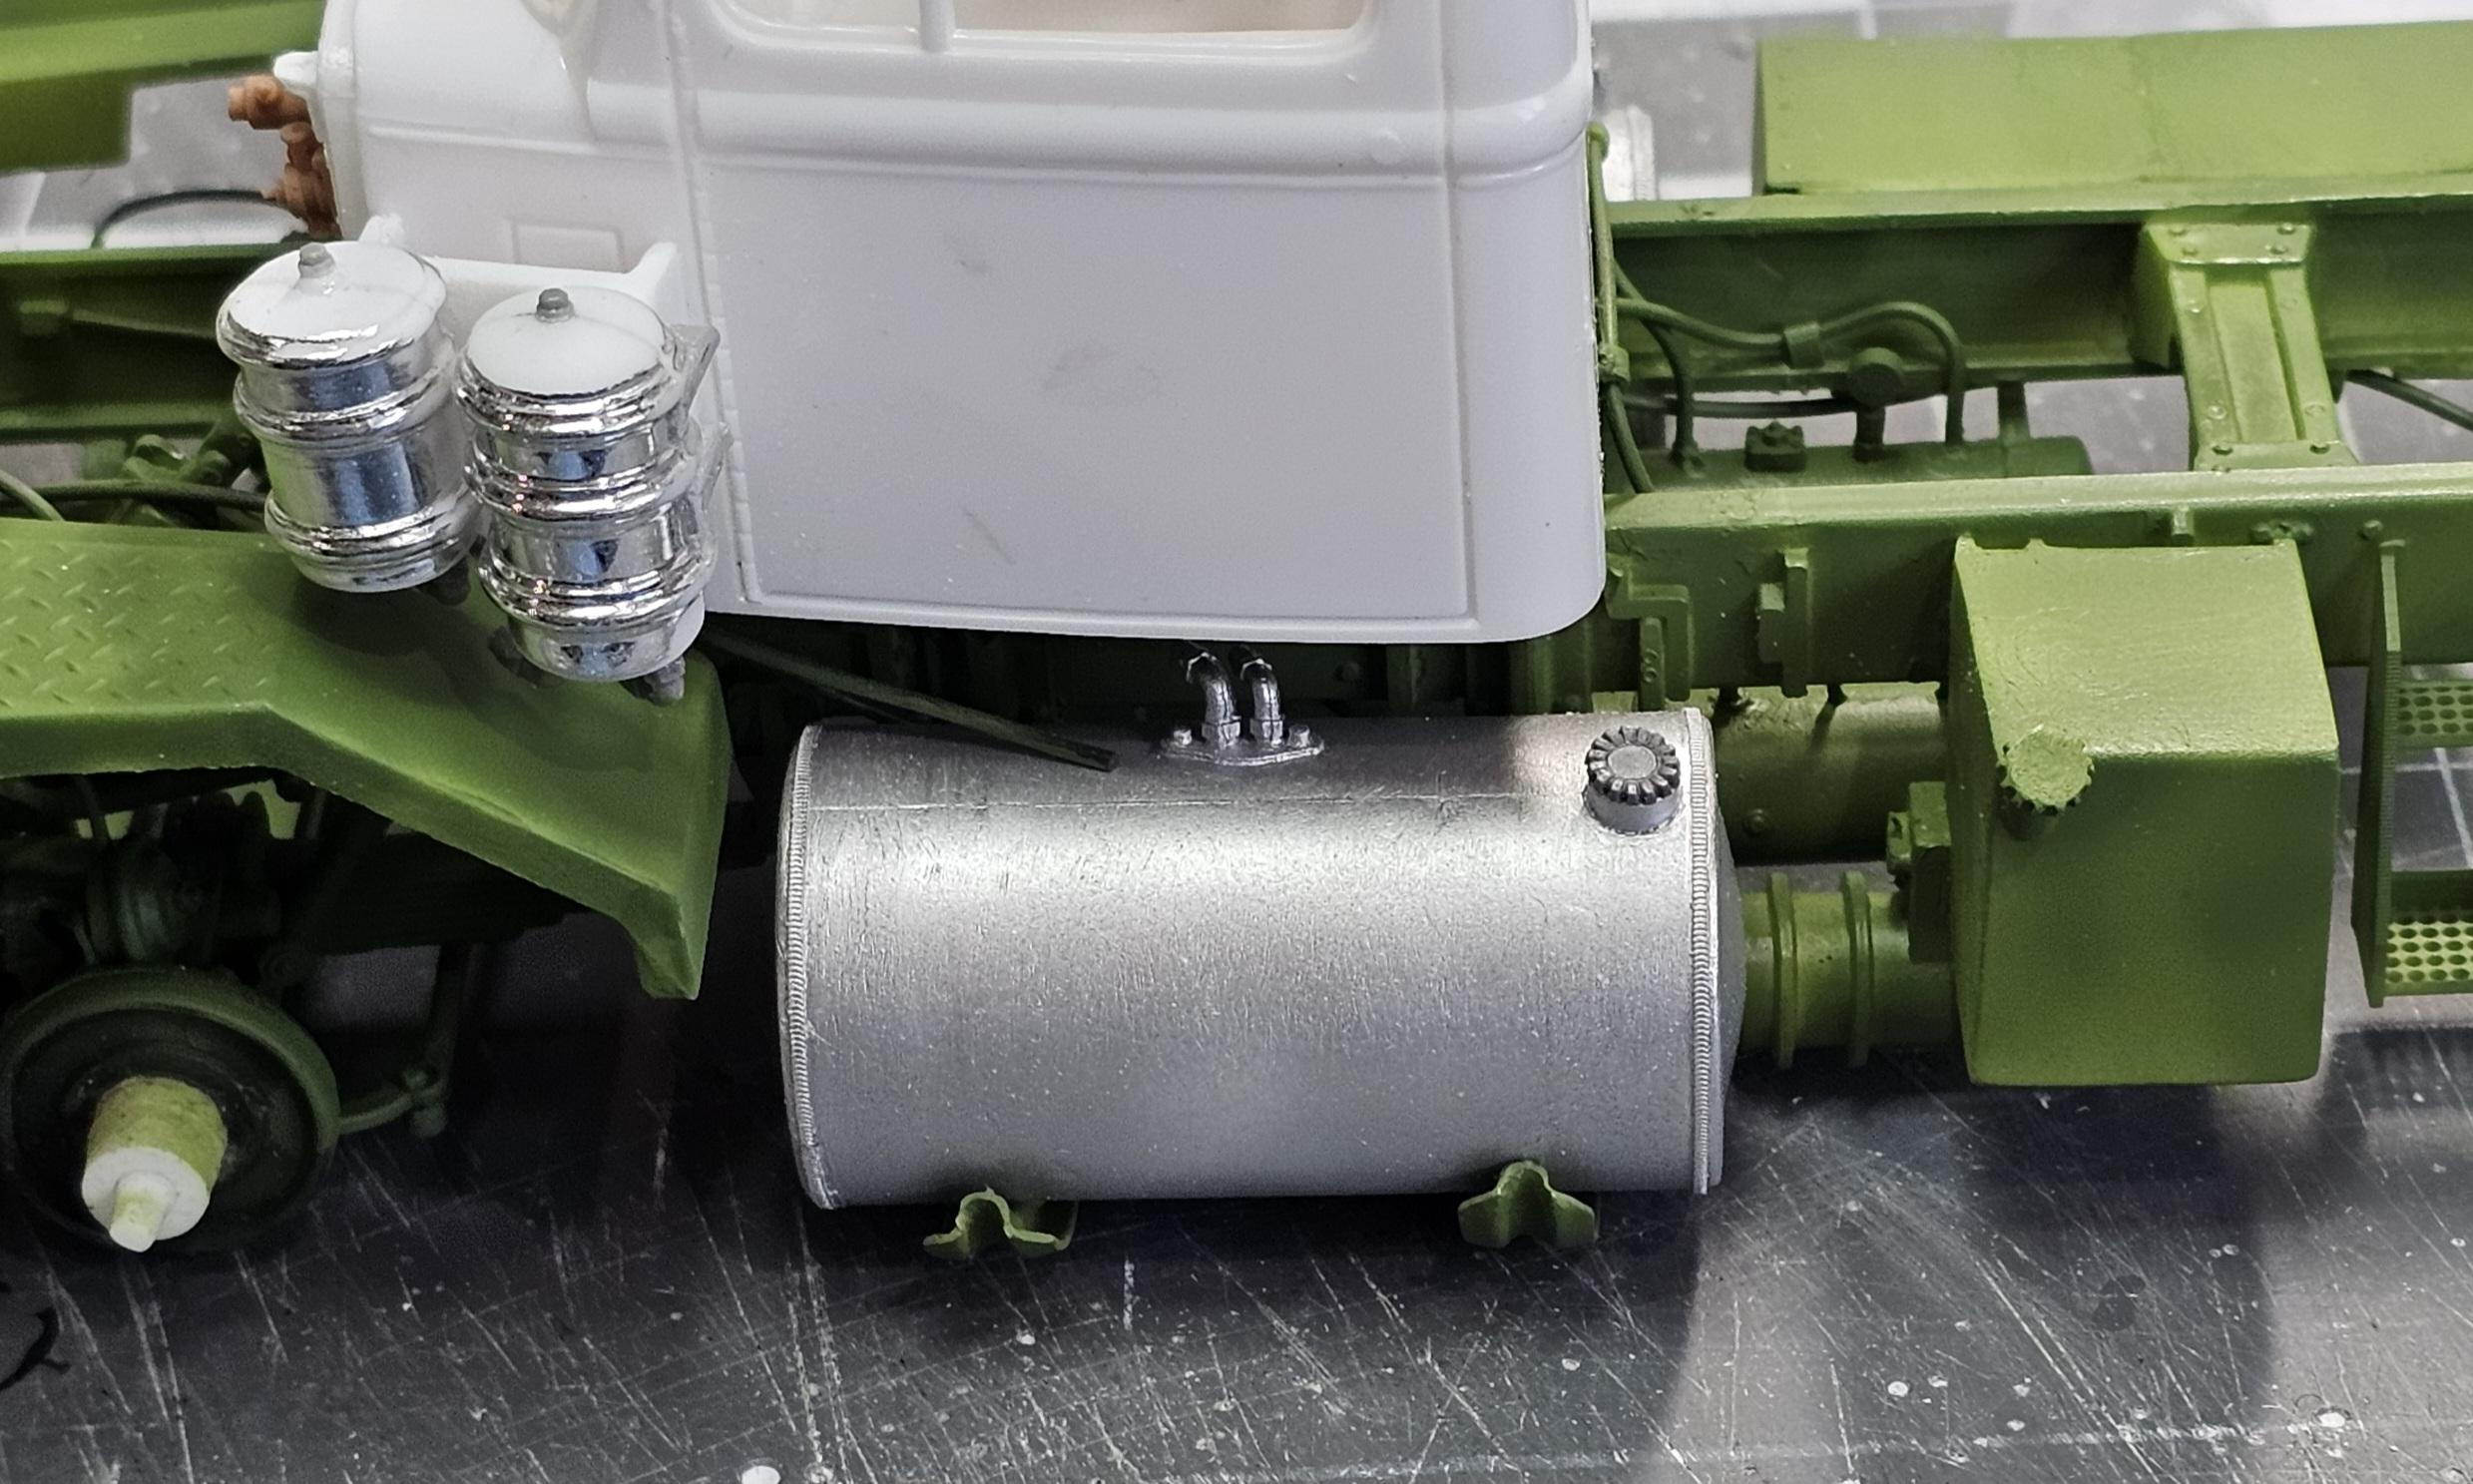
Tank in place. I painted them with Vallejo metal paints half white aluminum and half aluminum. It must not have been mixed well because it was very spputtery.
This view shows the wheels and the tires. Well that's all for now be back with more updates soon.
Ron G
-
1
-
-
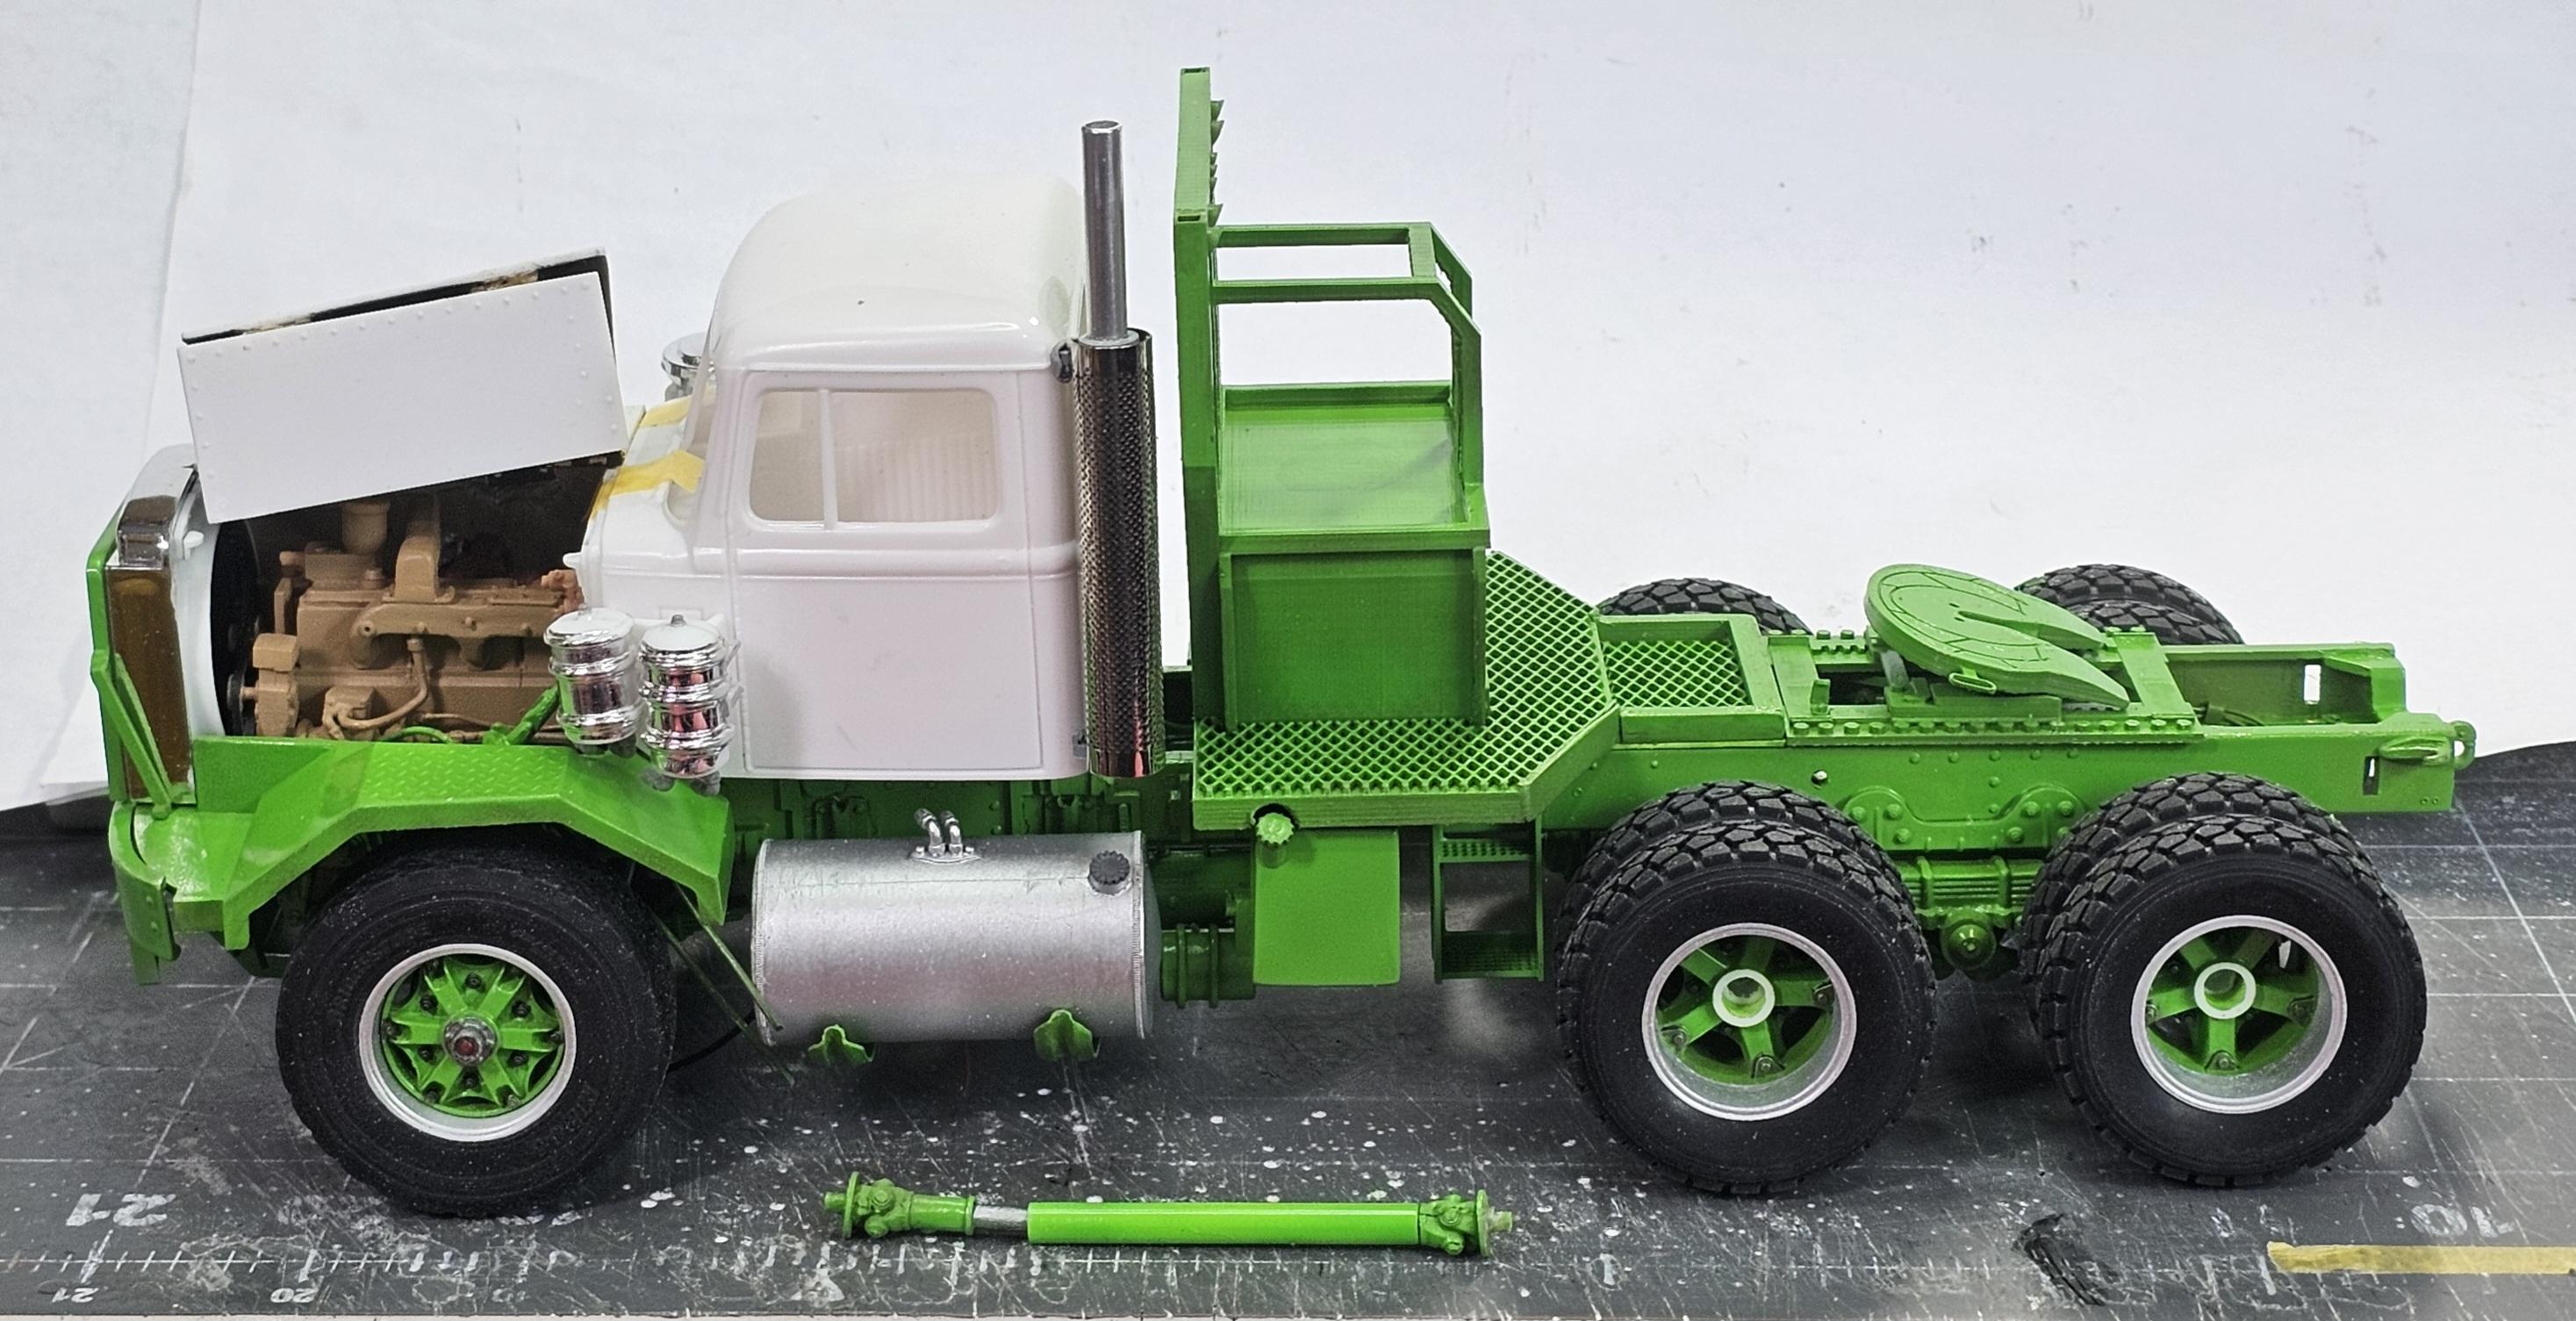
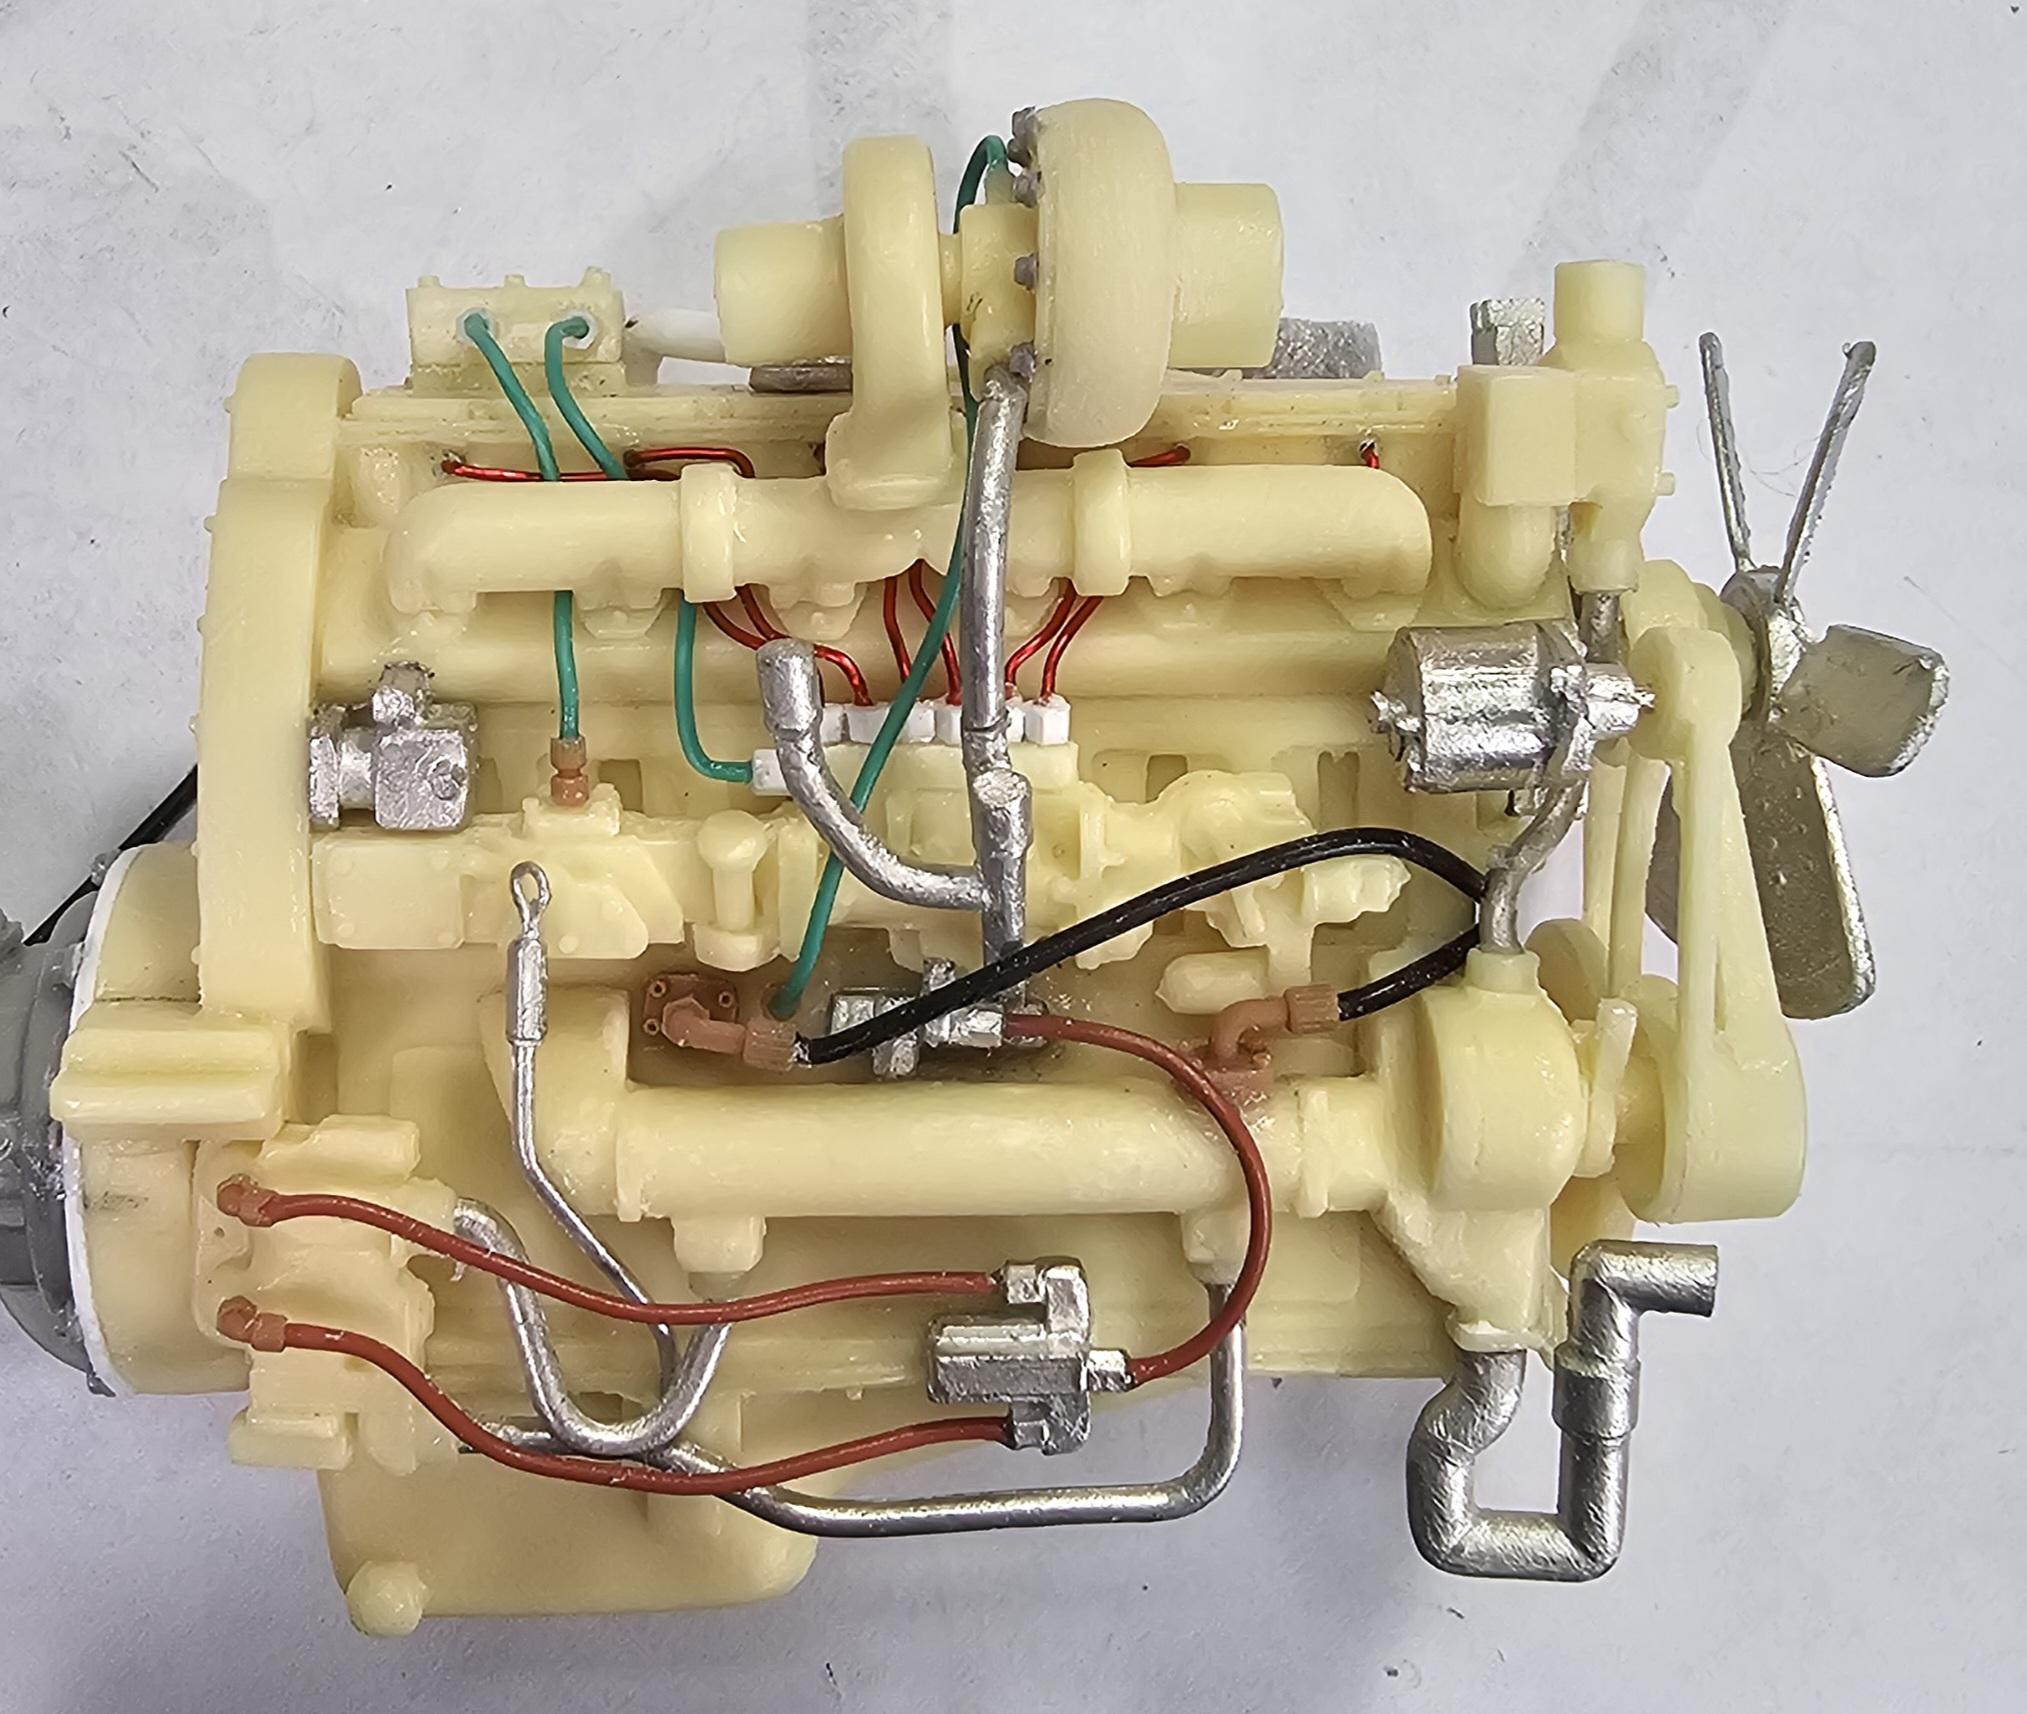
Hey all
A few more pictures for you to look at.
I added some lines from the fuel filters to the fuel pump. I also added the two oil lines for the turbos and some more oil lines on the oil cooler.
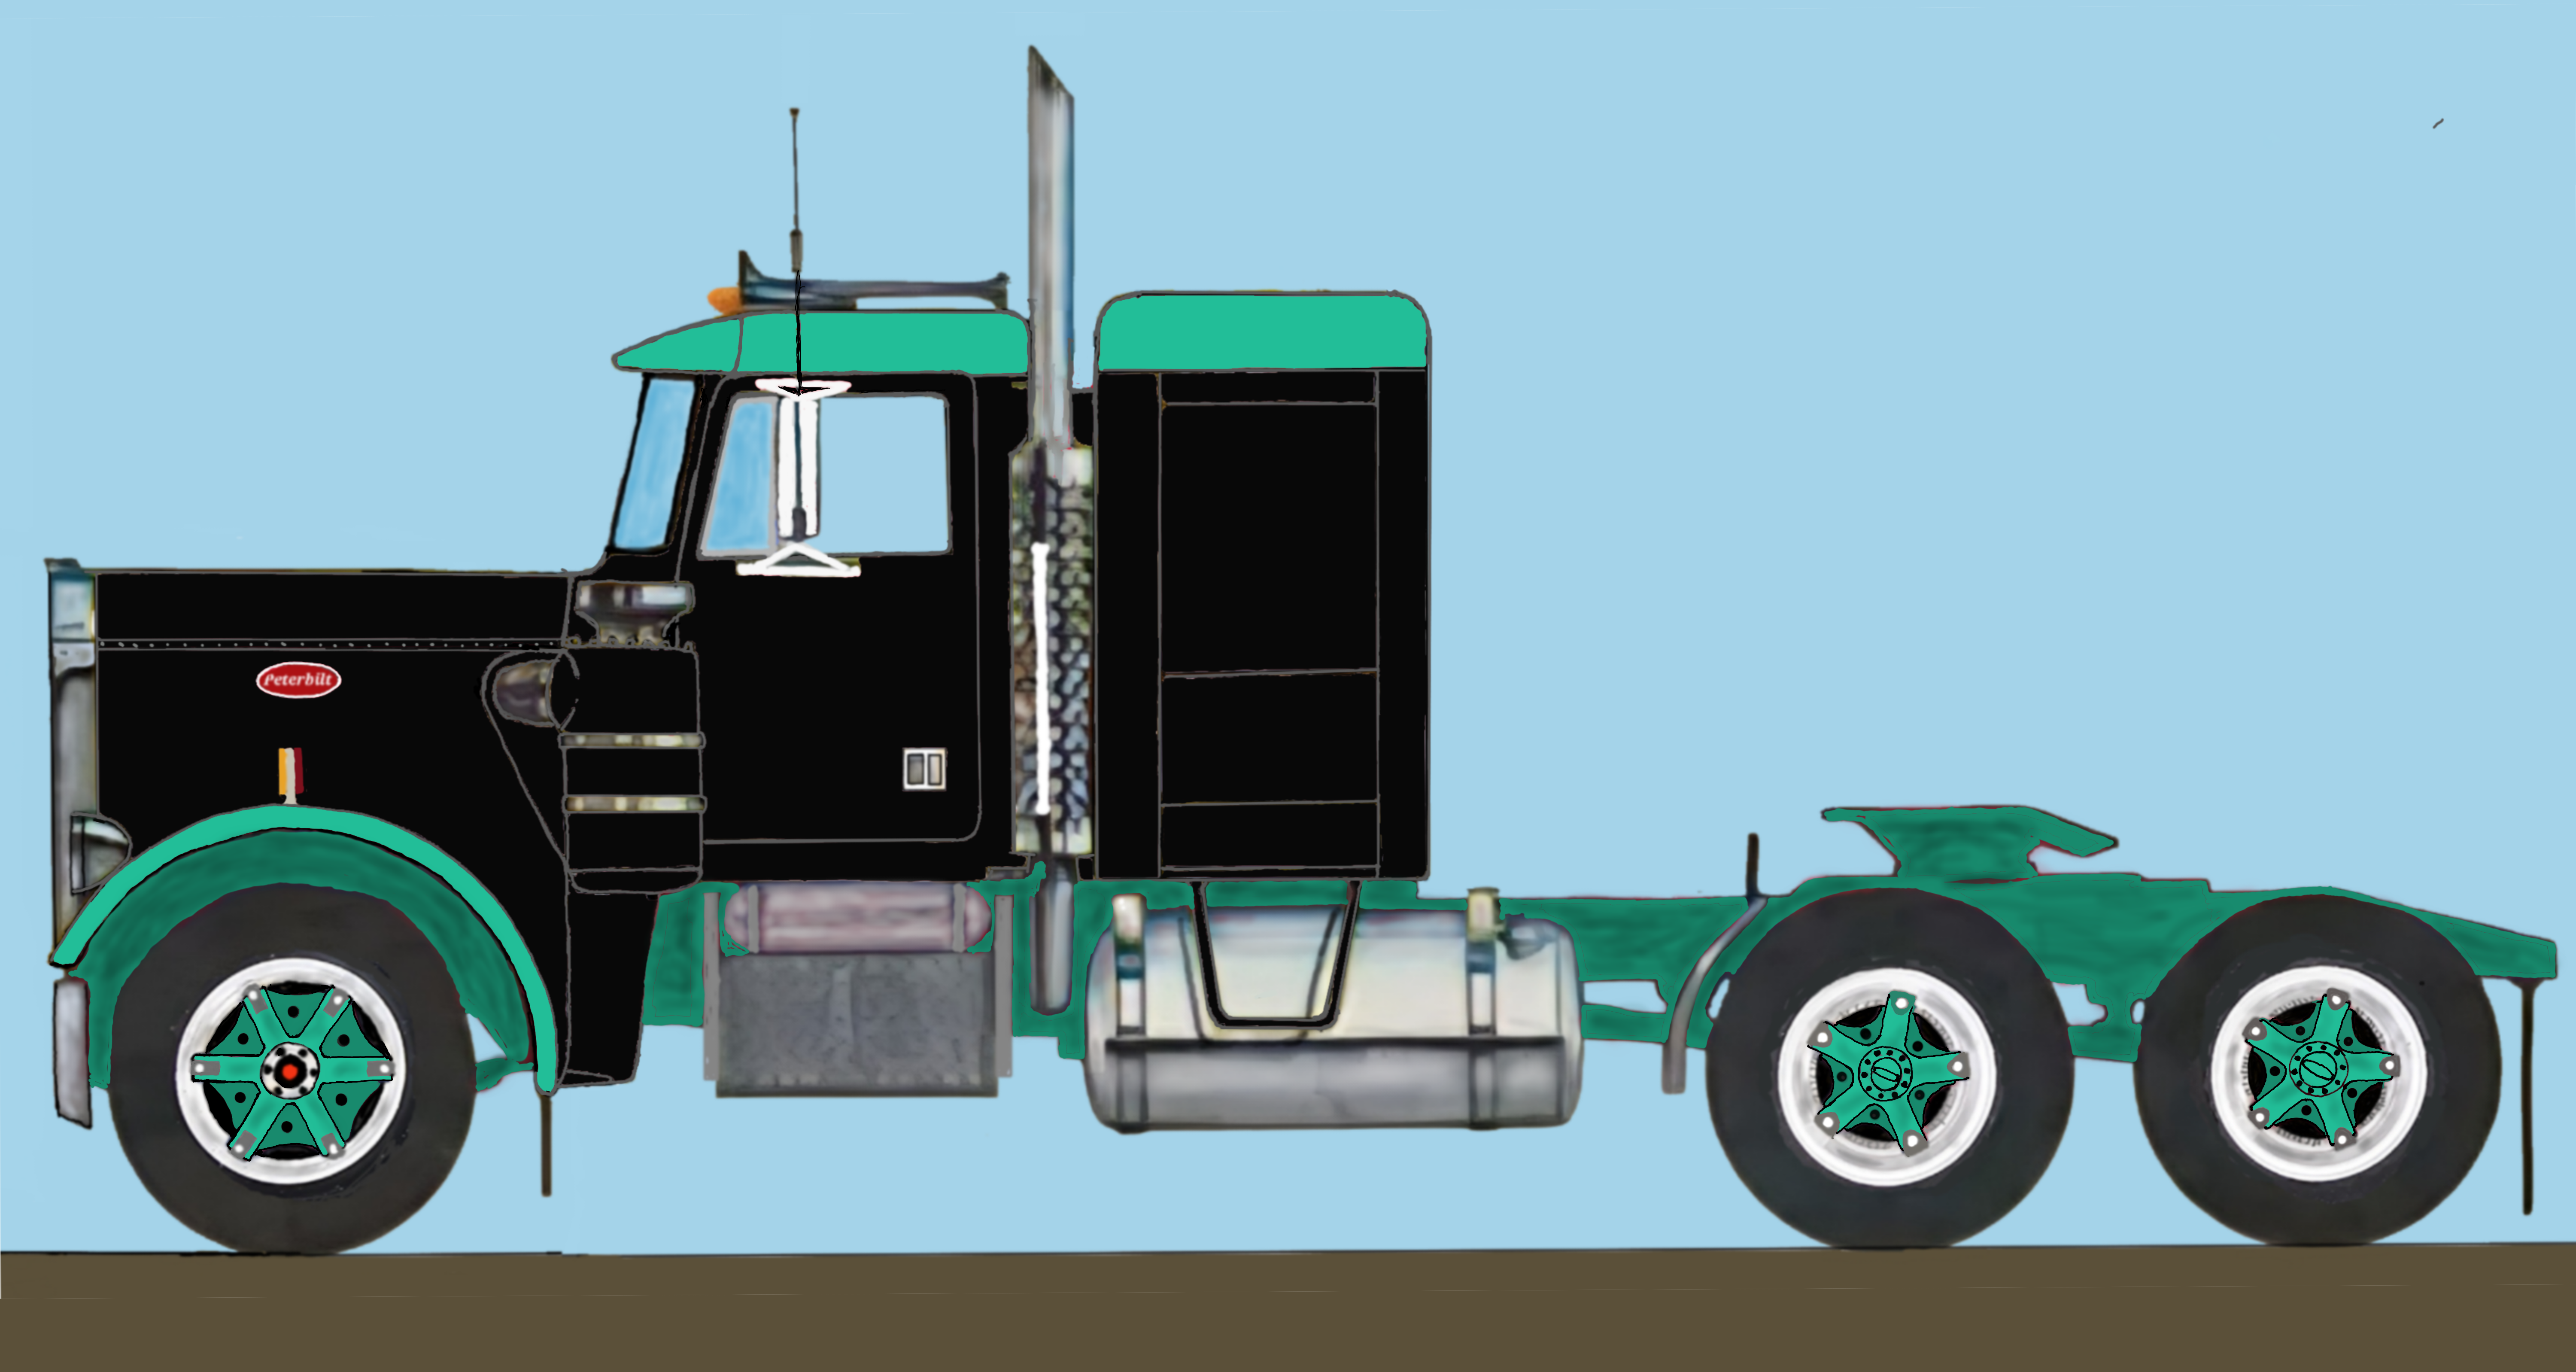
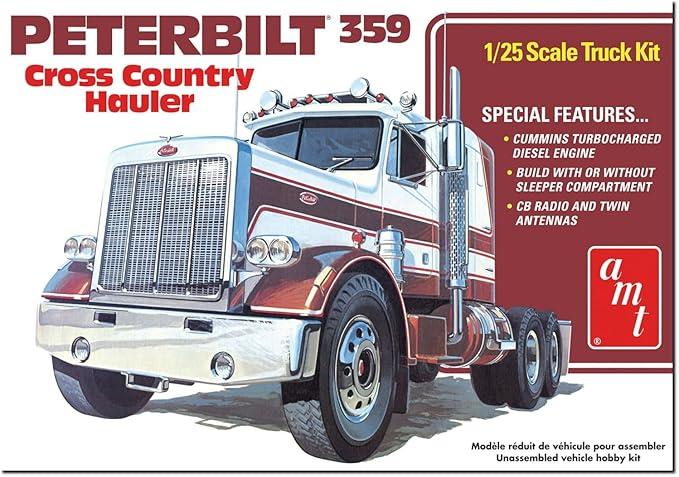
This is the truck it will be going in. AMT's new Peterbilt kit.
Ron G
-
2
-
-
25 minutes ago, Jim B said:
Great looking engine.
Yeah Jim, it's really very well made. Every thing fits good. The instructions are photos, not much advice, but I made it through.
-
1
-
-
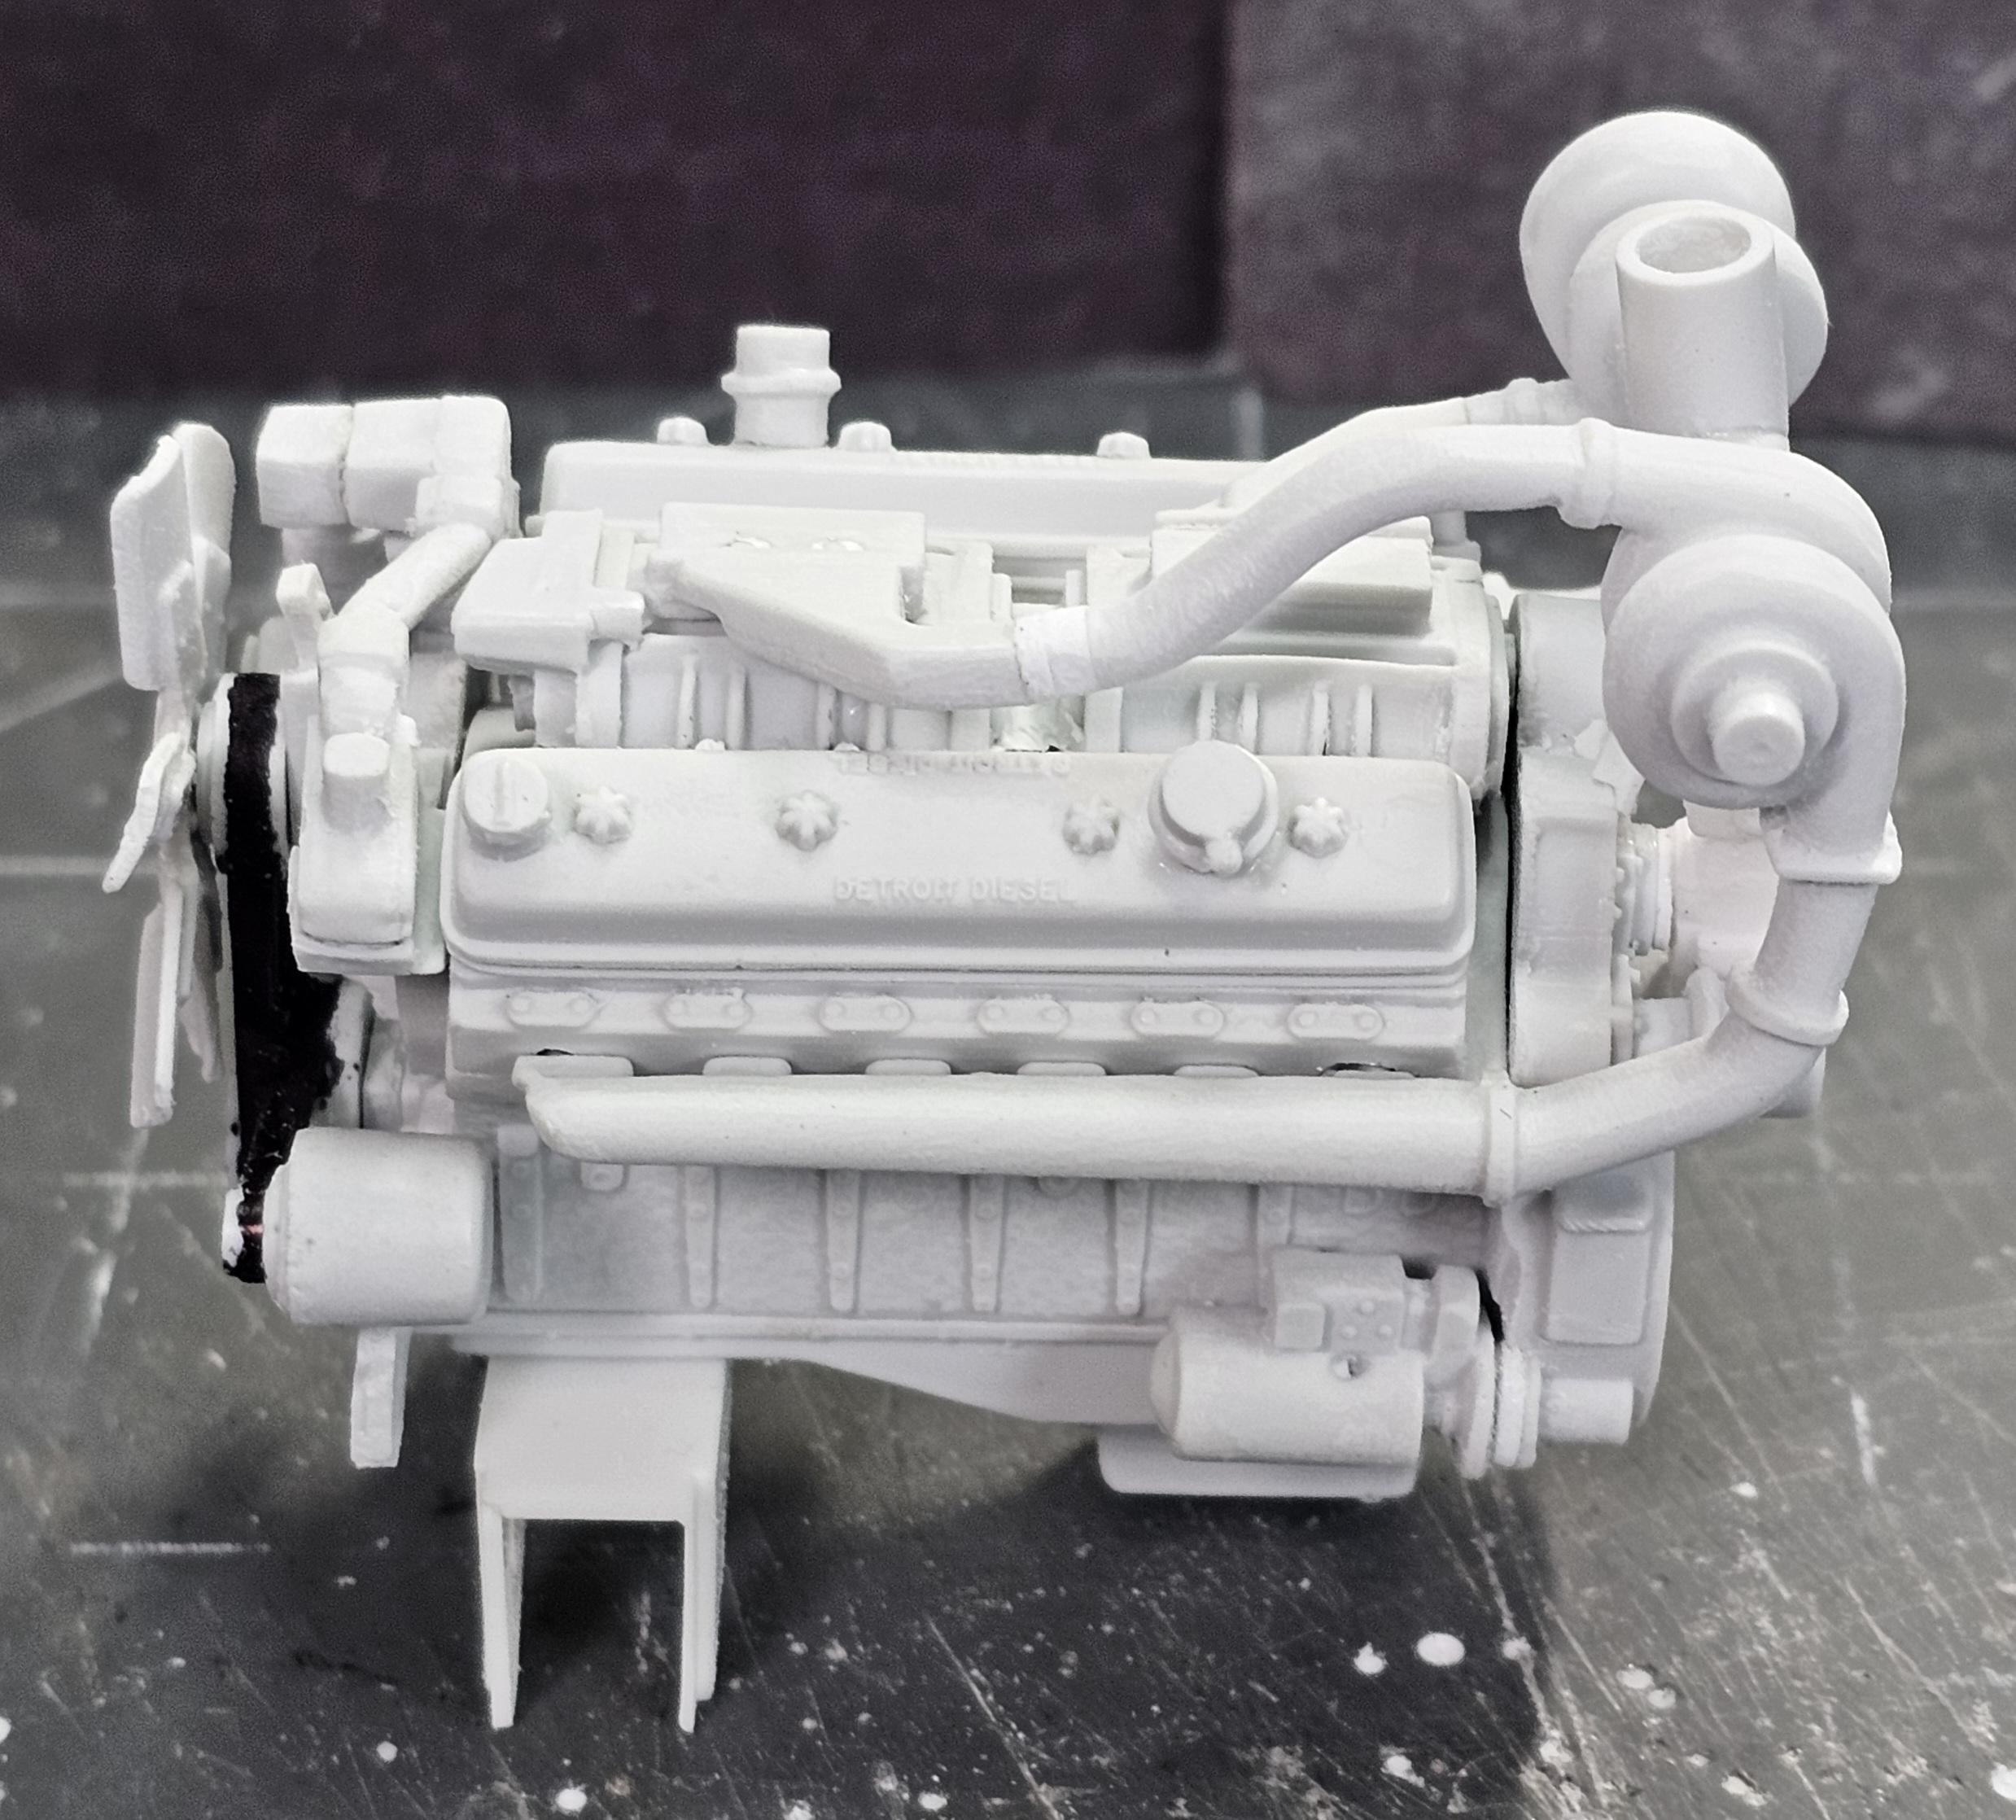
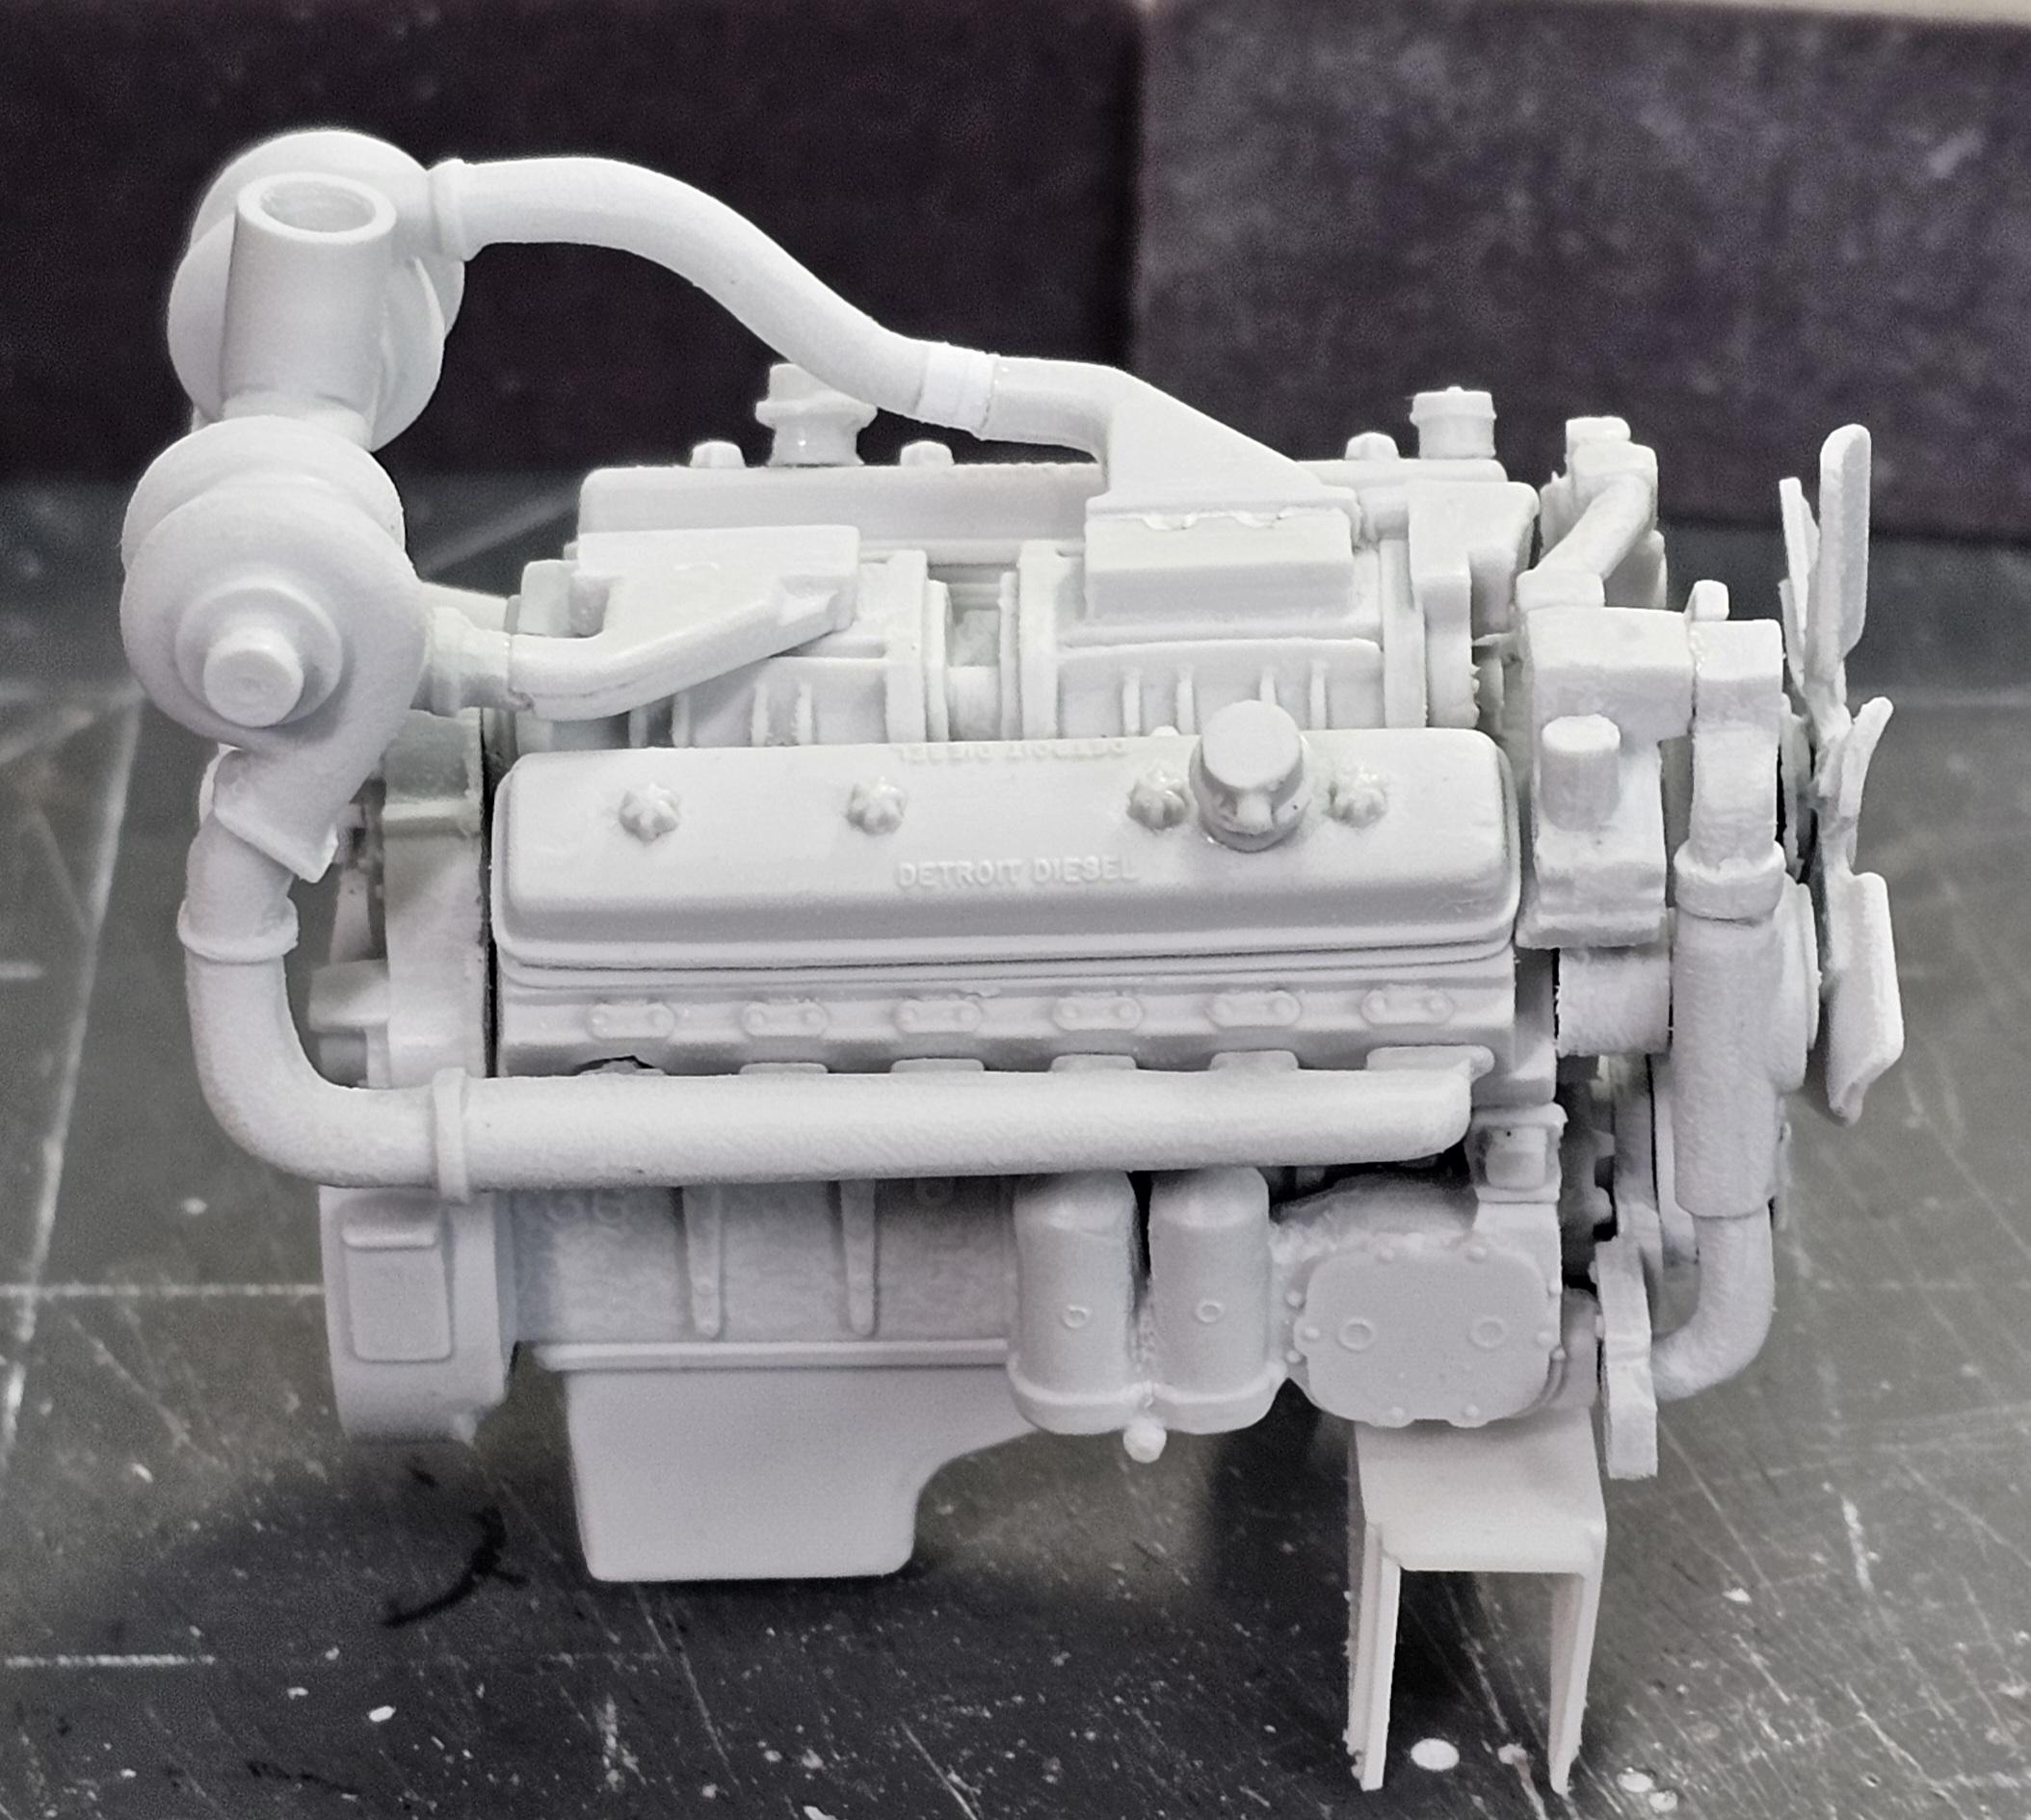
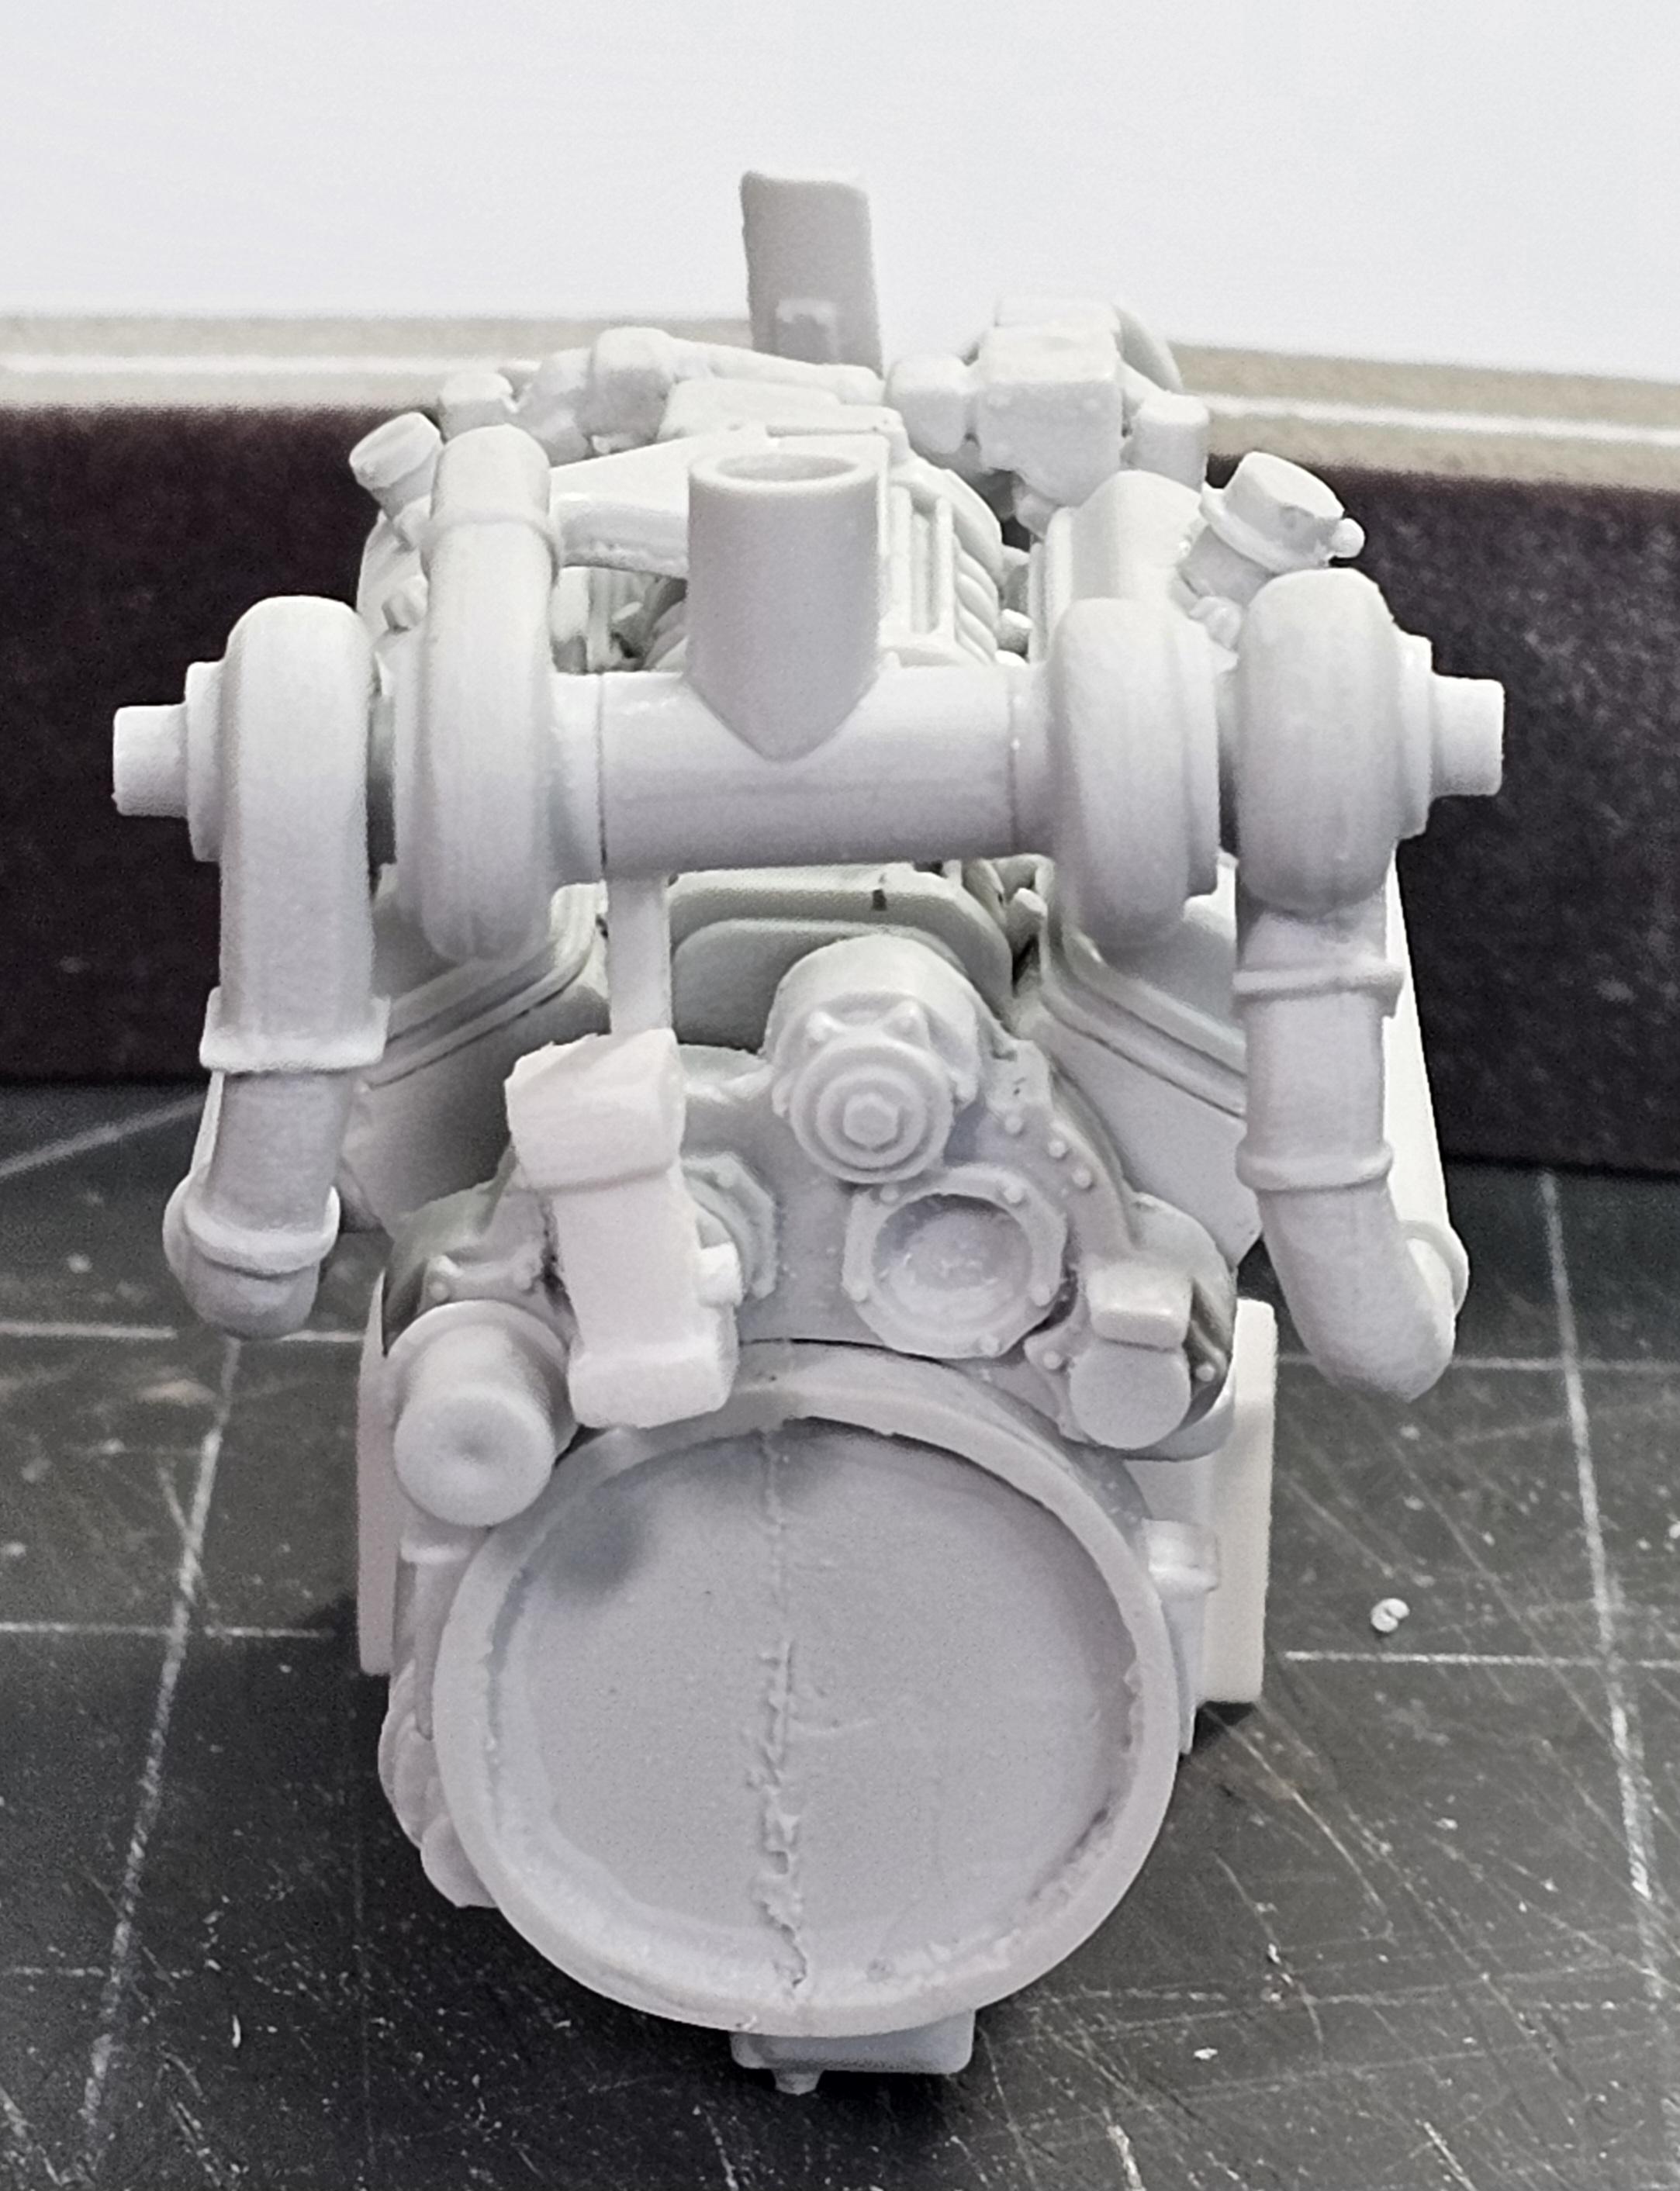
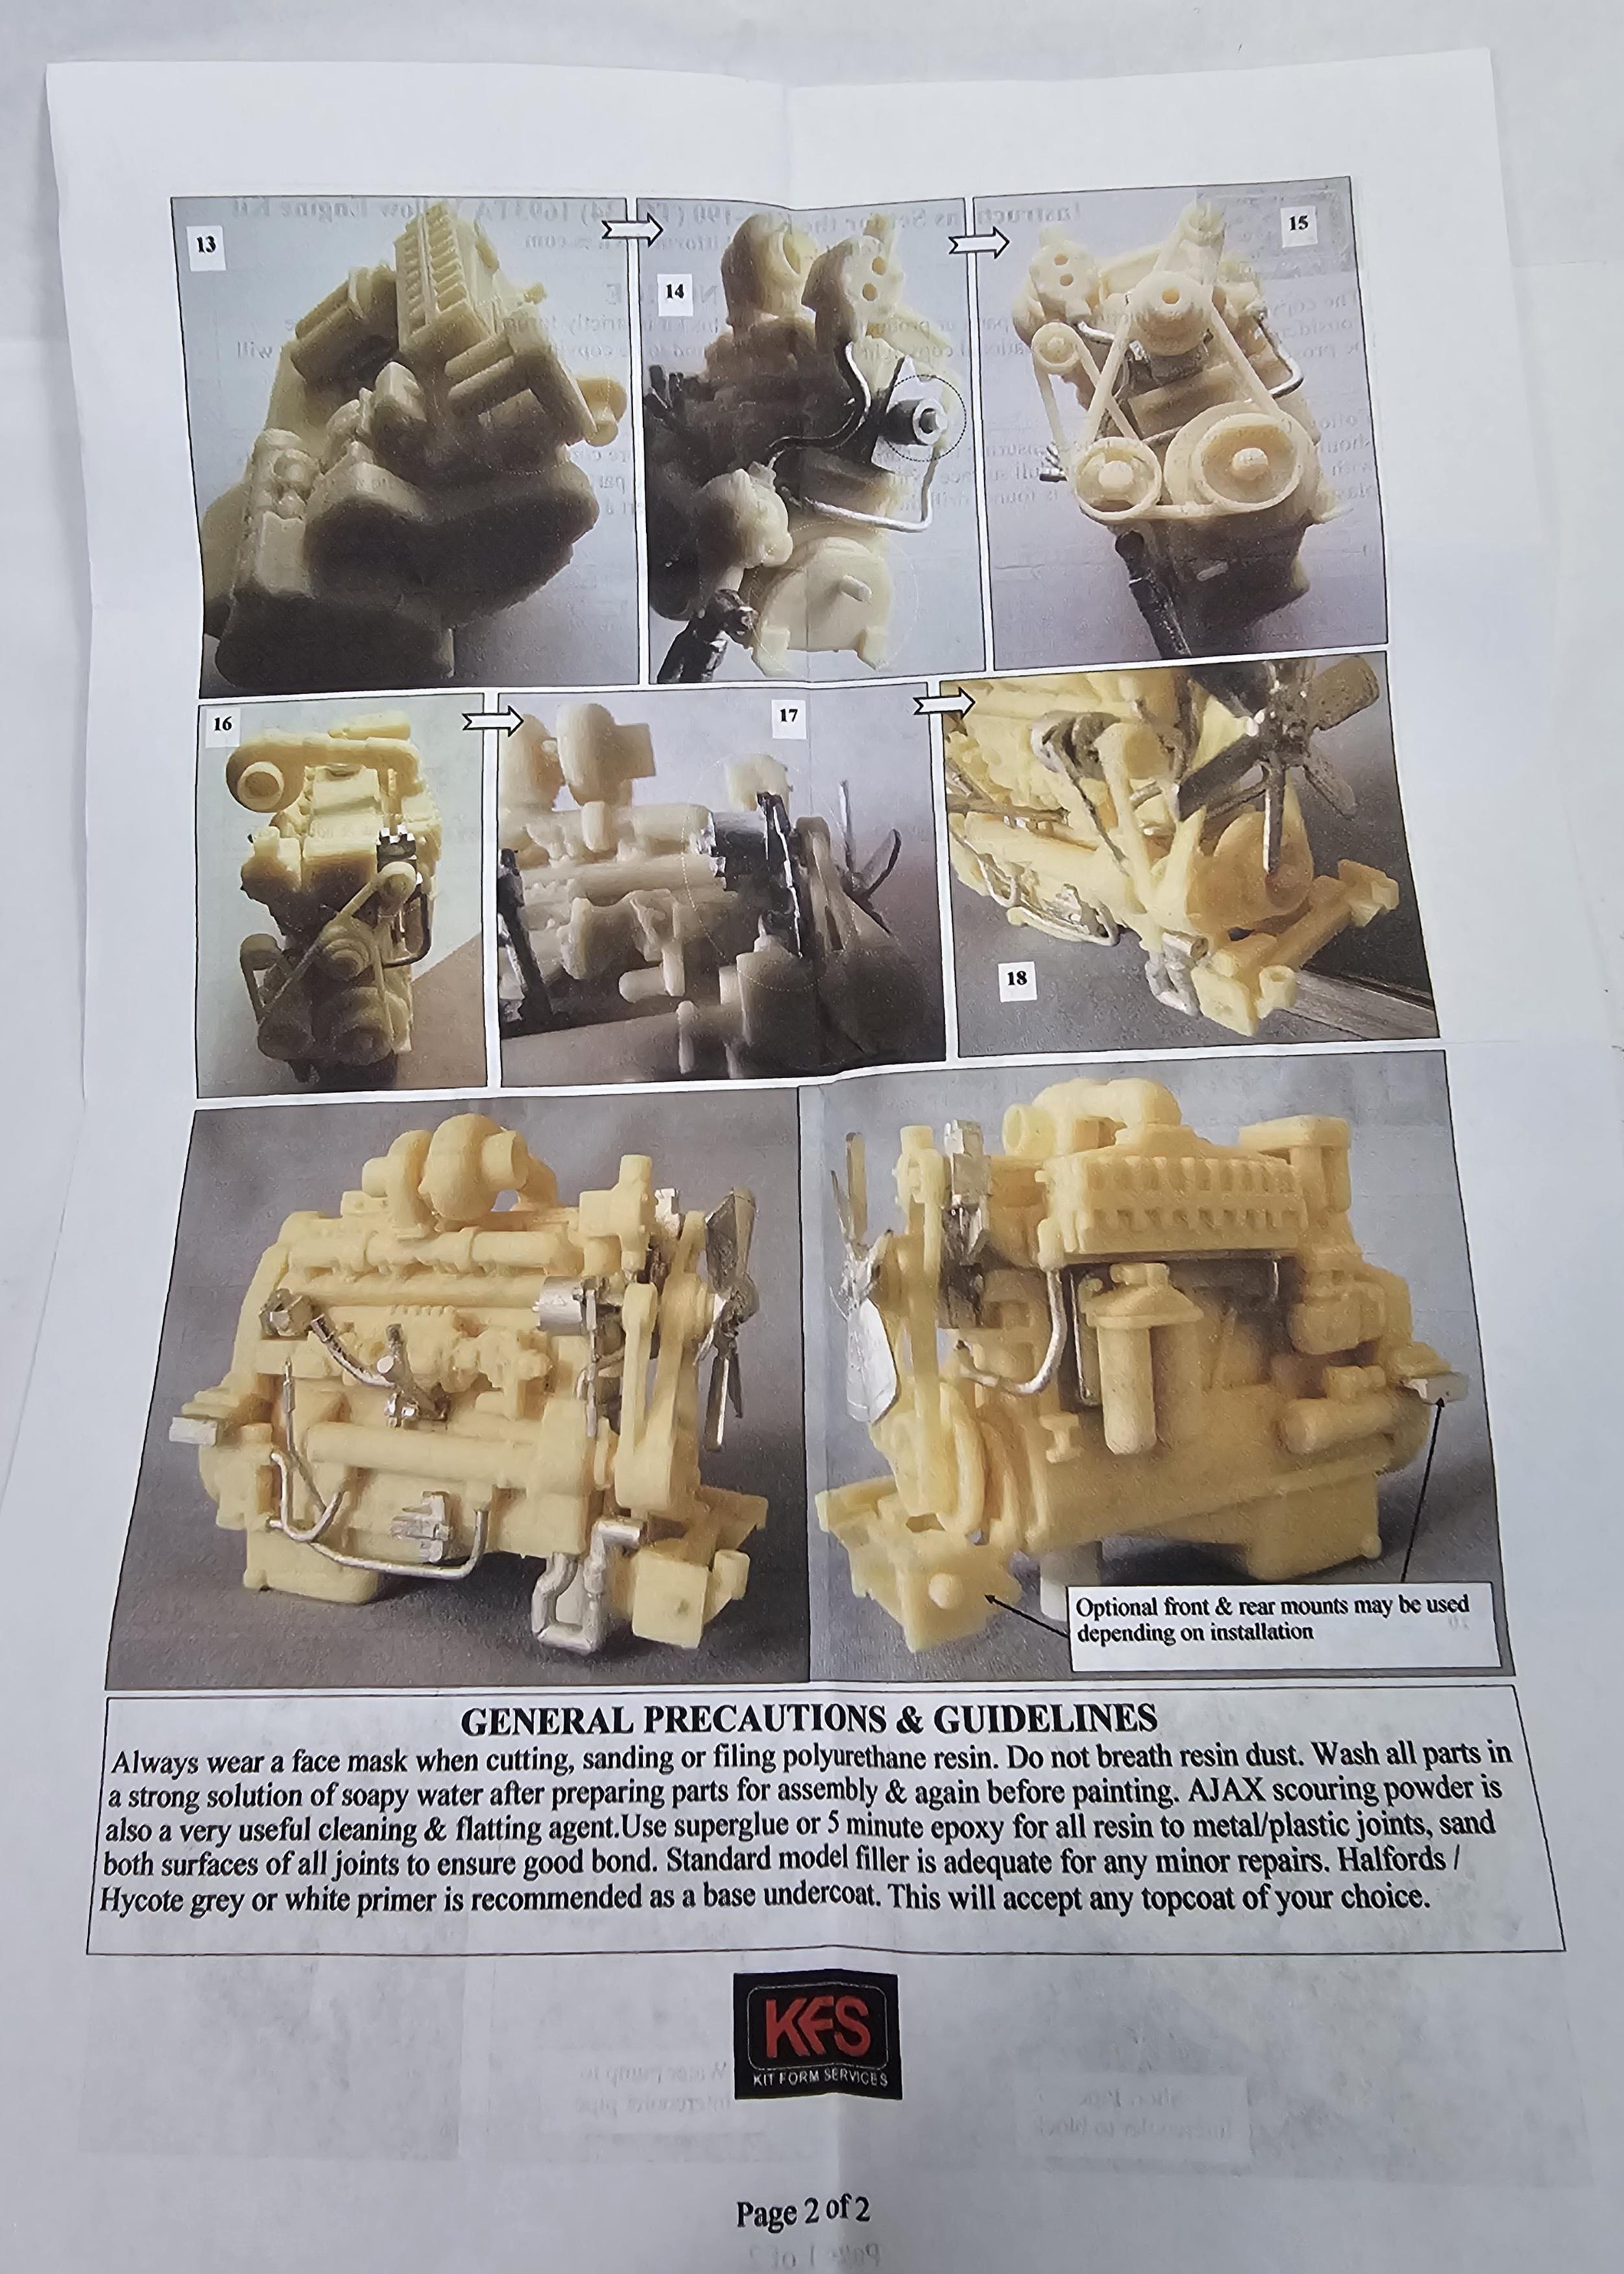
Hey all
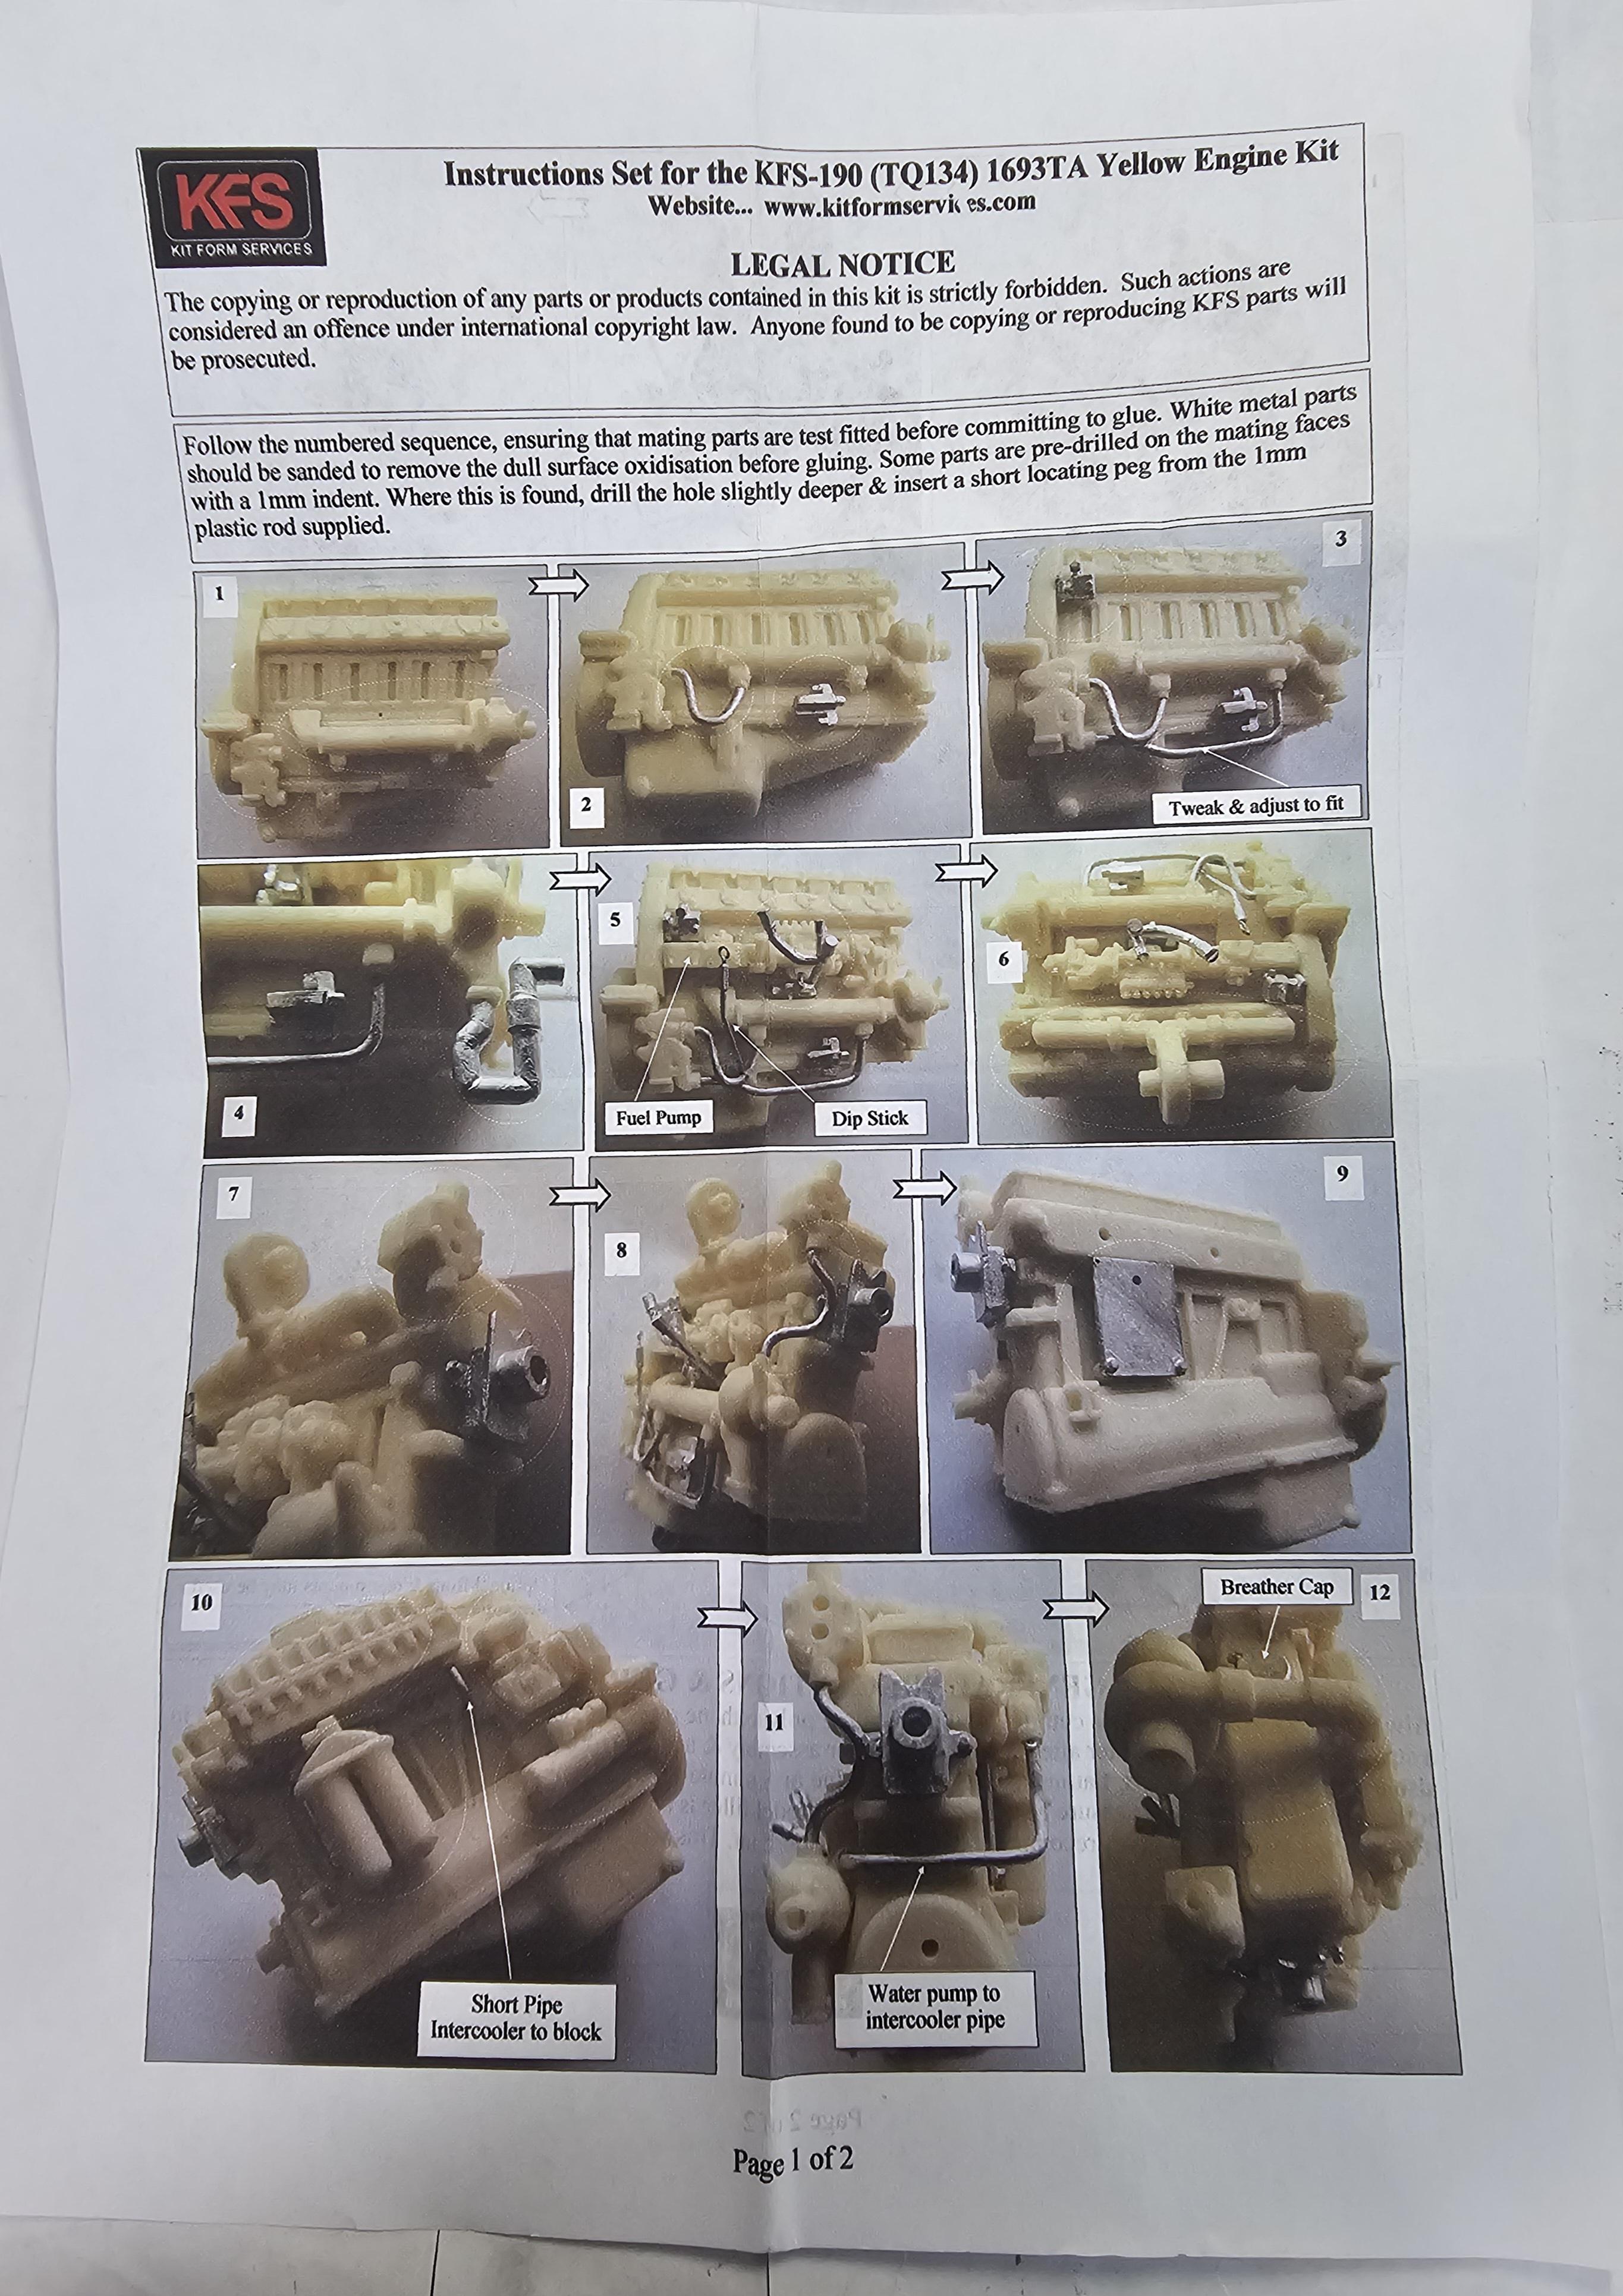
Okay, here we go on what I did to improve this engine and assemble it. I hope you guys enjoy this.
First page of the instructions.
Second page of the instructions.
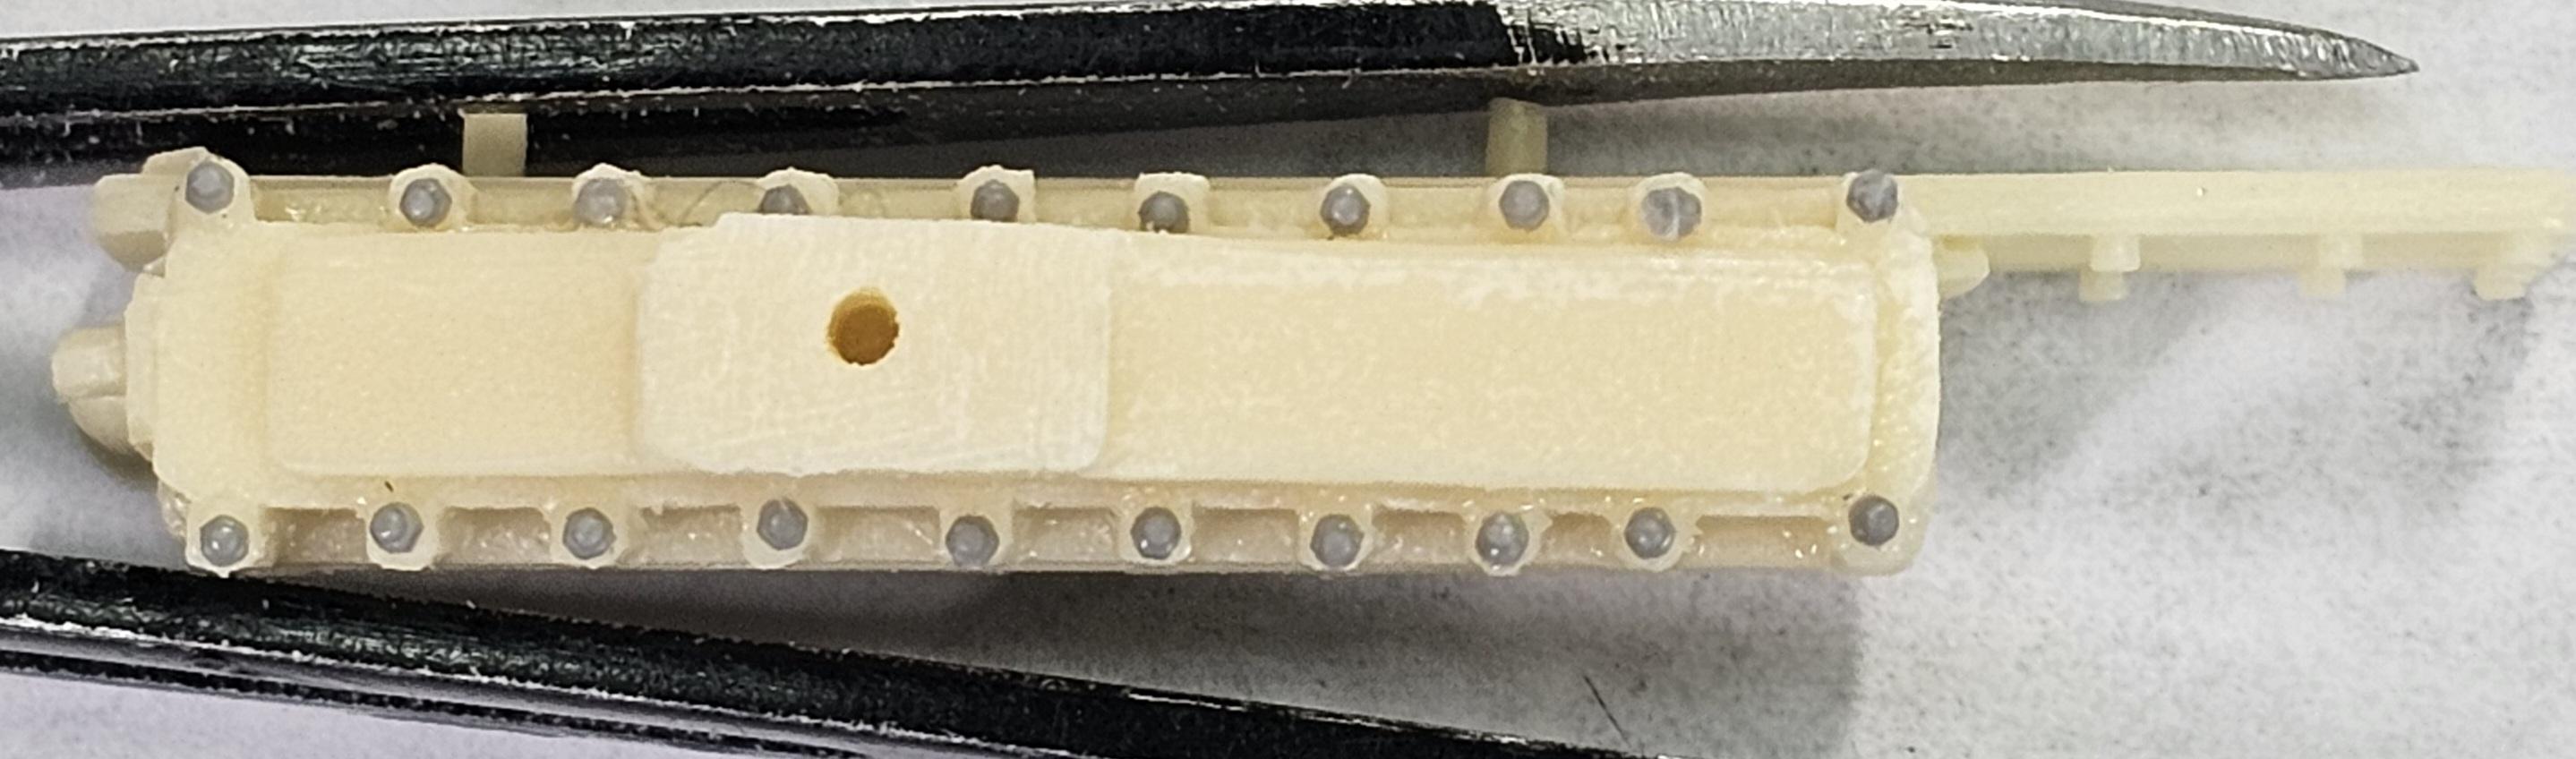
This view shows the Aftercooler. I added some 0.8mm (TINY!) Meng bolt heads to it.
Side view of the aftercooler.
Back side of the aftercooler.
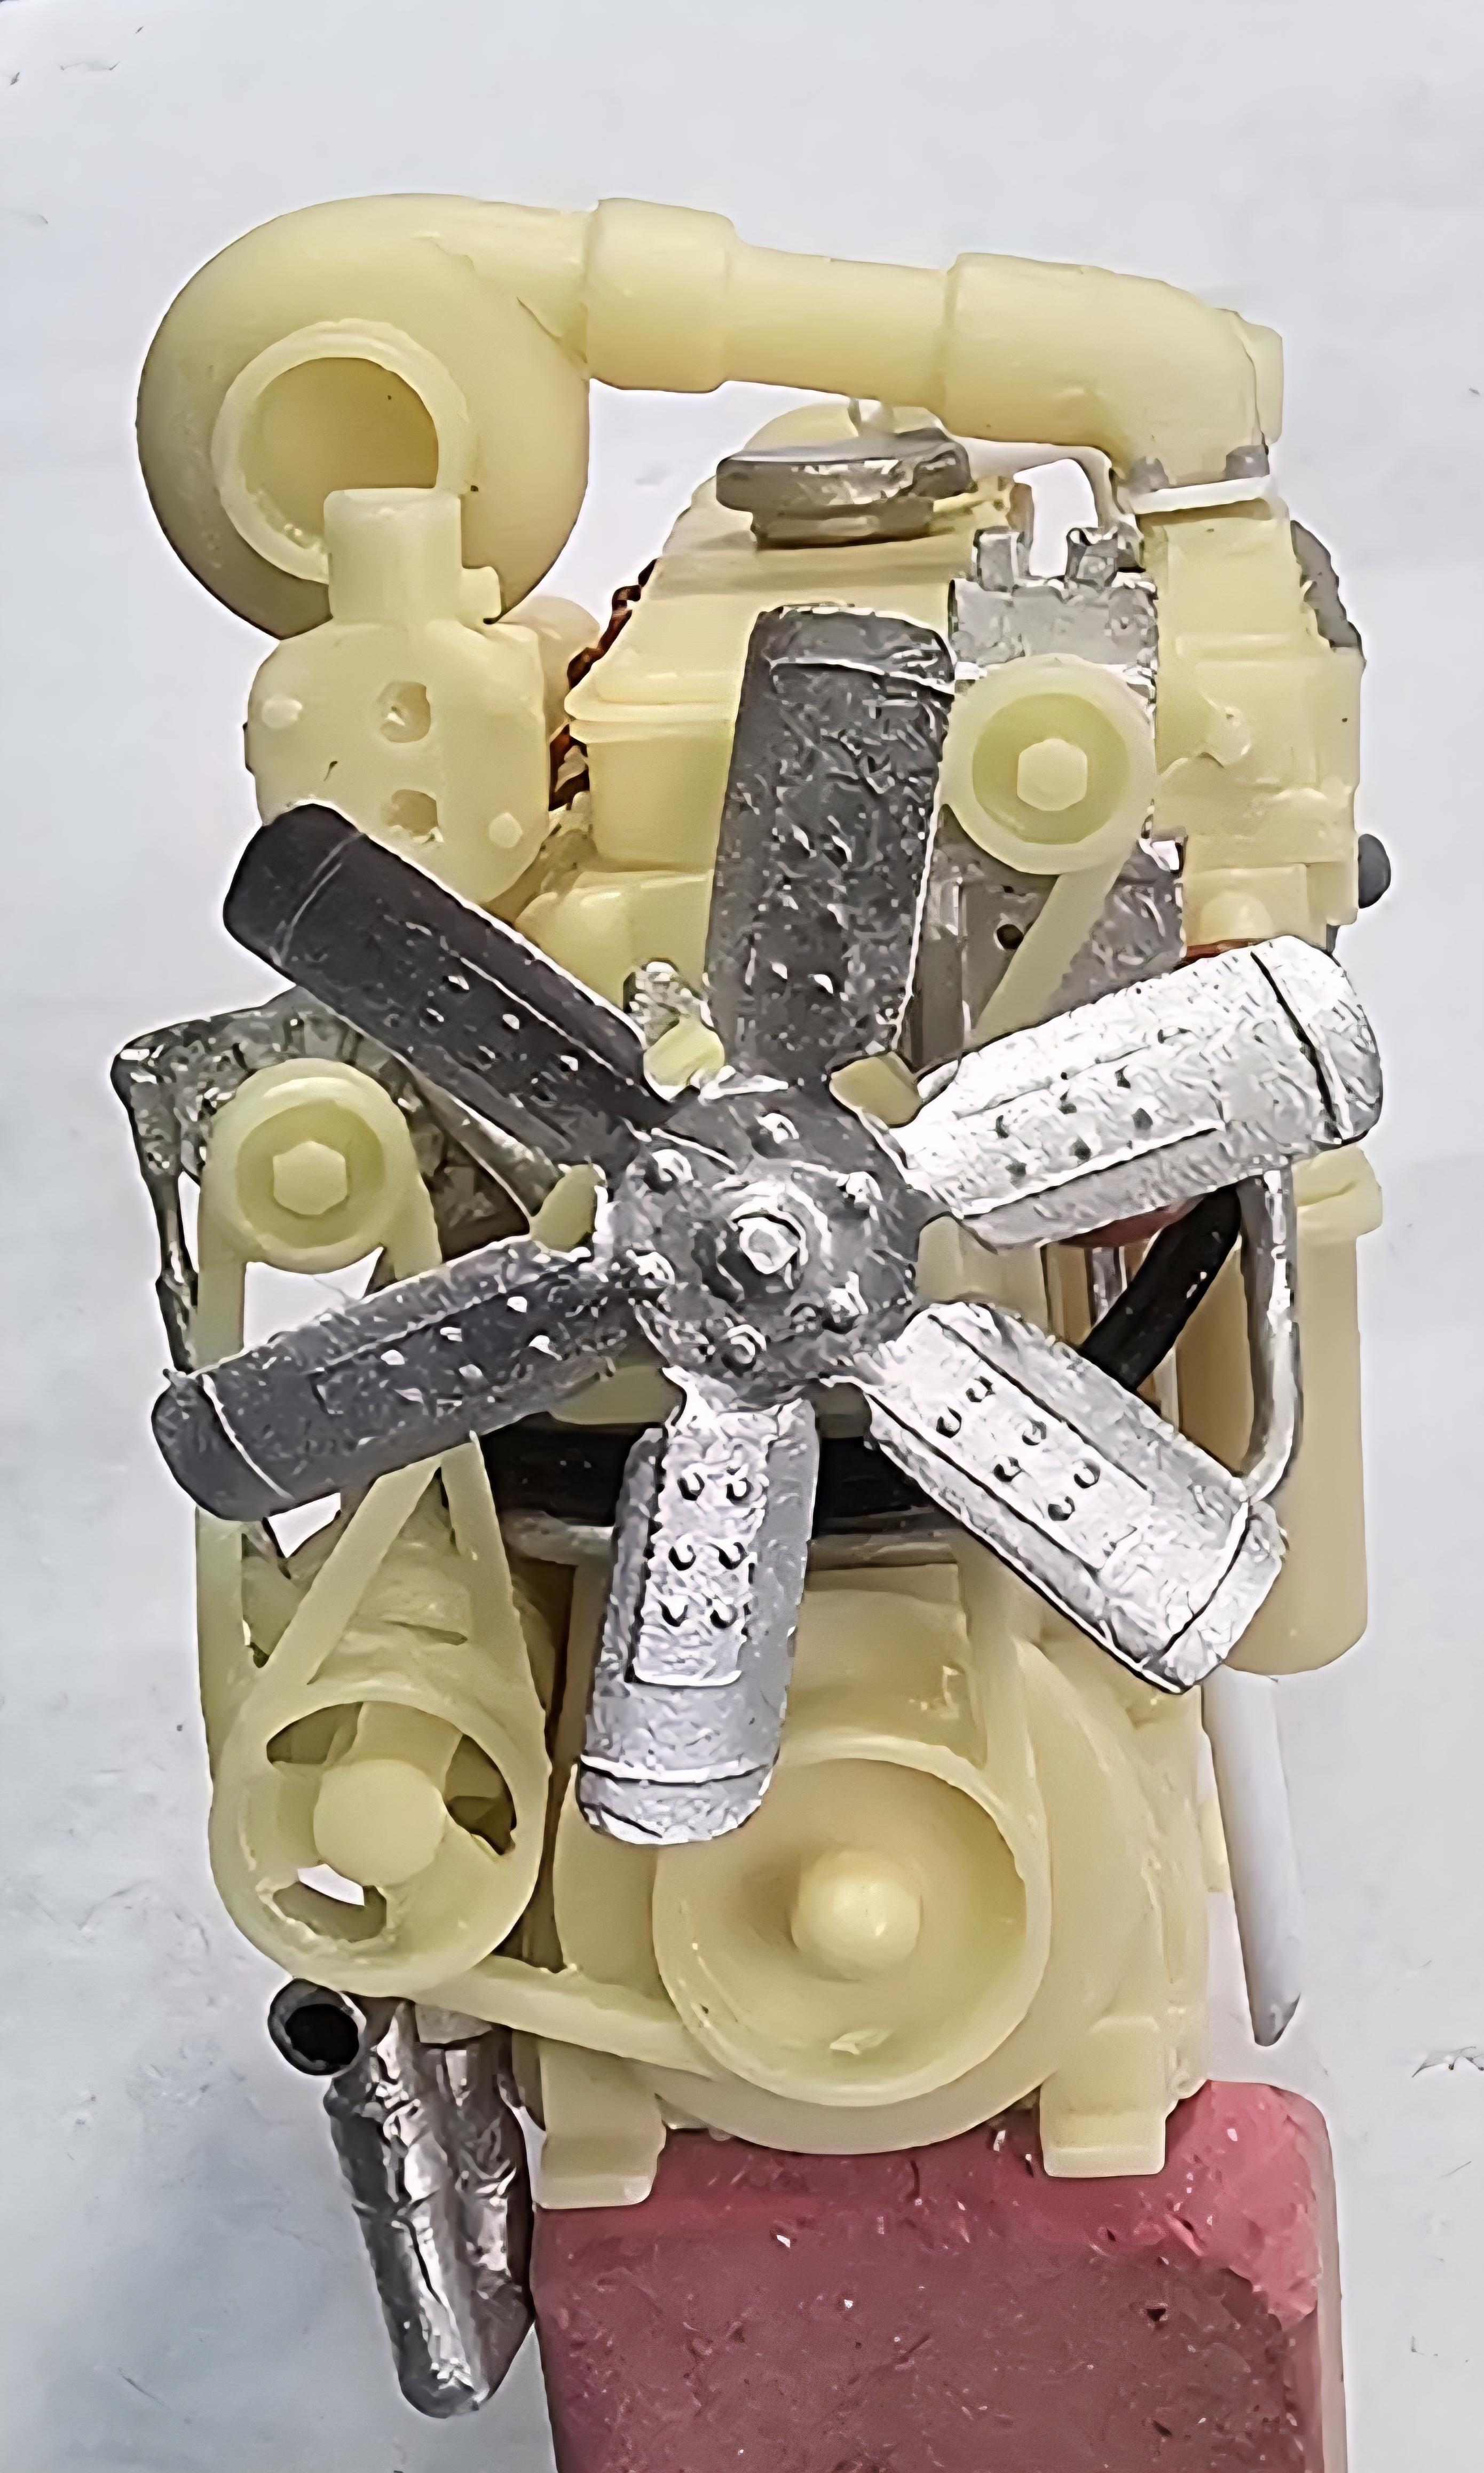
Front view of the engine with white plastic pin for the lower fan pully to attach to. (You get a peice of plastic rod in the kit)
This view shows the 18spd transmission that I'm using for this. I sanded off the mounting flange on the trans because it was to small (3/4" dia.) I then replaced it with one made from 0.03" plastic (7/8" dia.). Then I added some 1.4mm Meng bolt heads to the new flange.
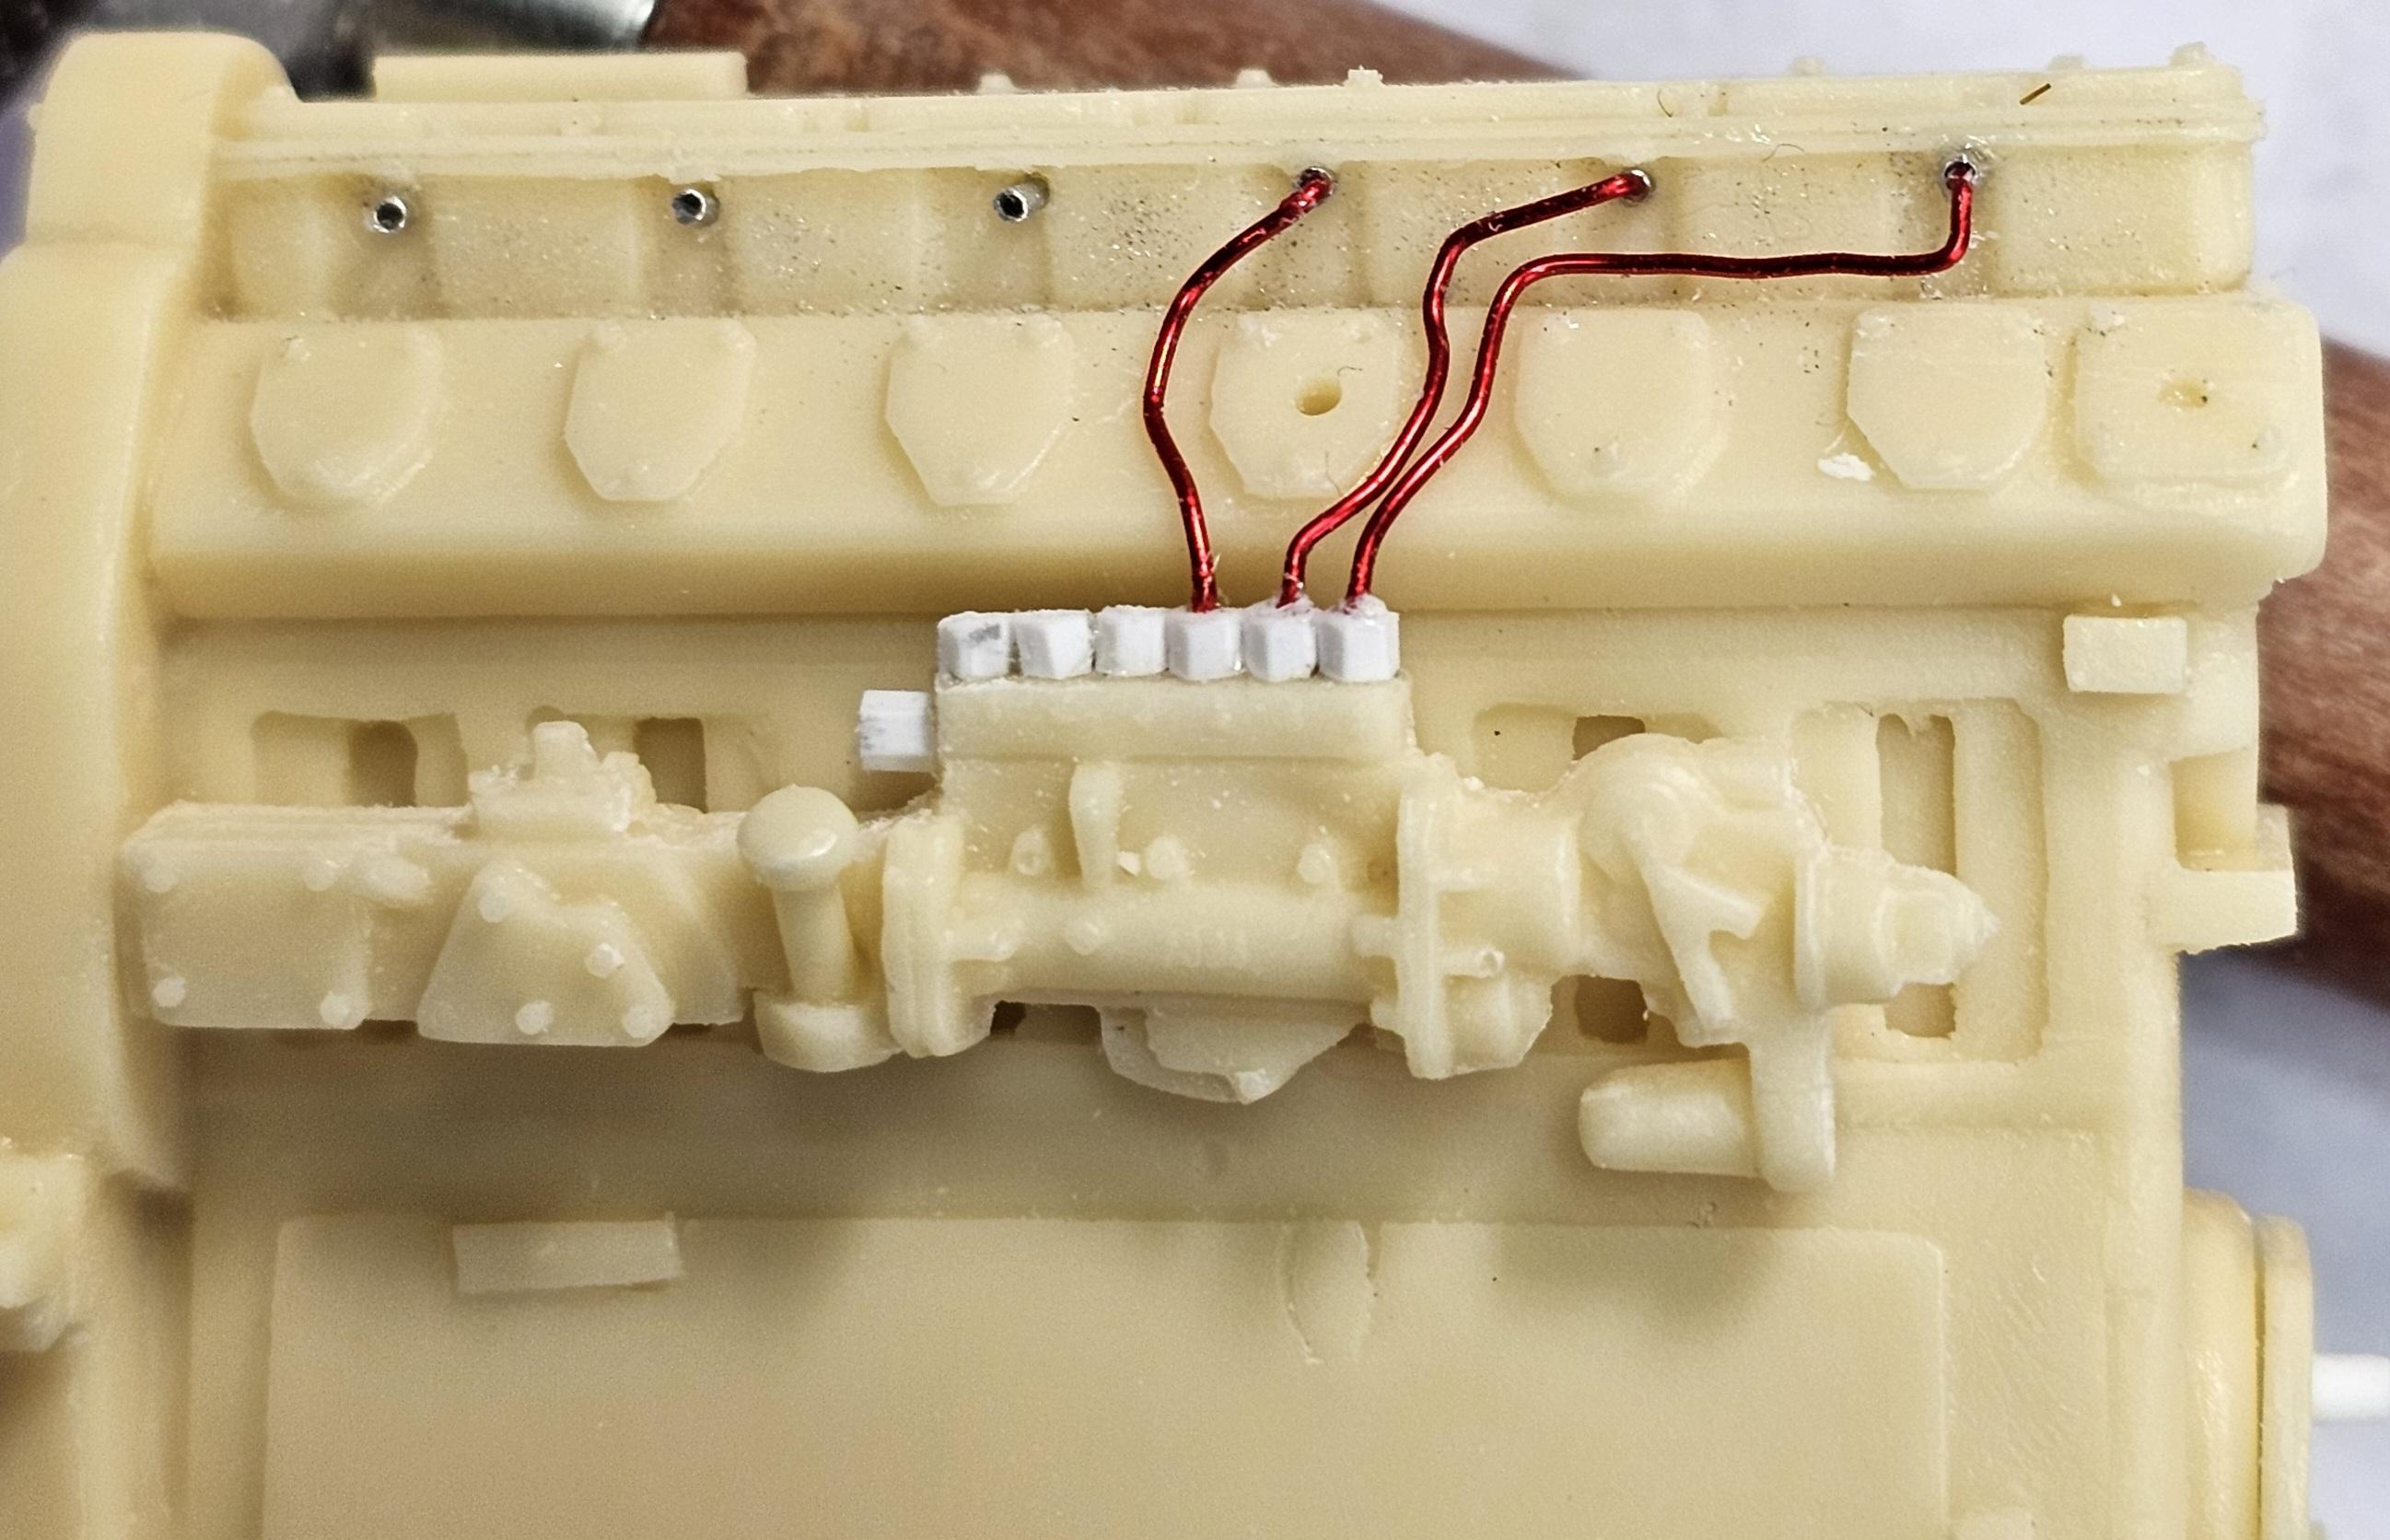
This view shows the start of my plumbing for the fuel pump. You can just barely see the Albion aluminum tubes I used for the fittings in the head. I tried to drill out the cast on fittings, but they were to small and broke, so I replaced them with the Albion aluminum tubes.
And here it is completed. The fittings on the pump the (white ones) are made from slicing off small lengths of Plastruct hexagonal plastic rods 0.06" to the correct length. I tried to drill out the cast on fittings, but they were to brittle and broke, so I replaced them with the Plastruct peices. 😢
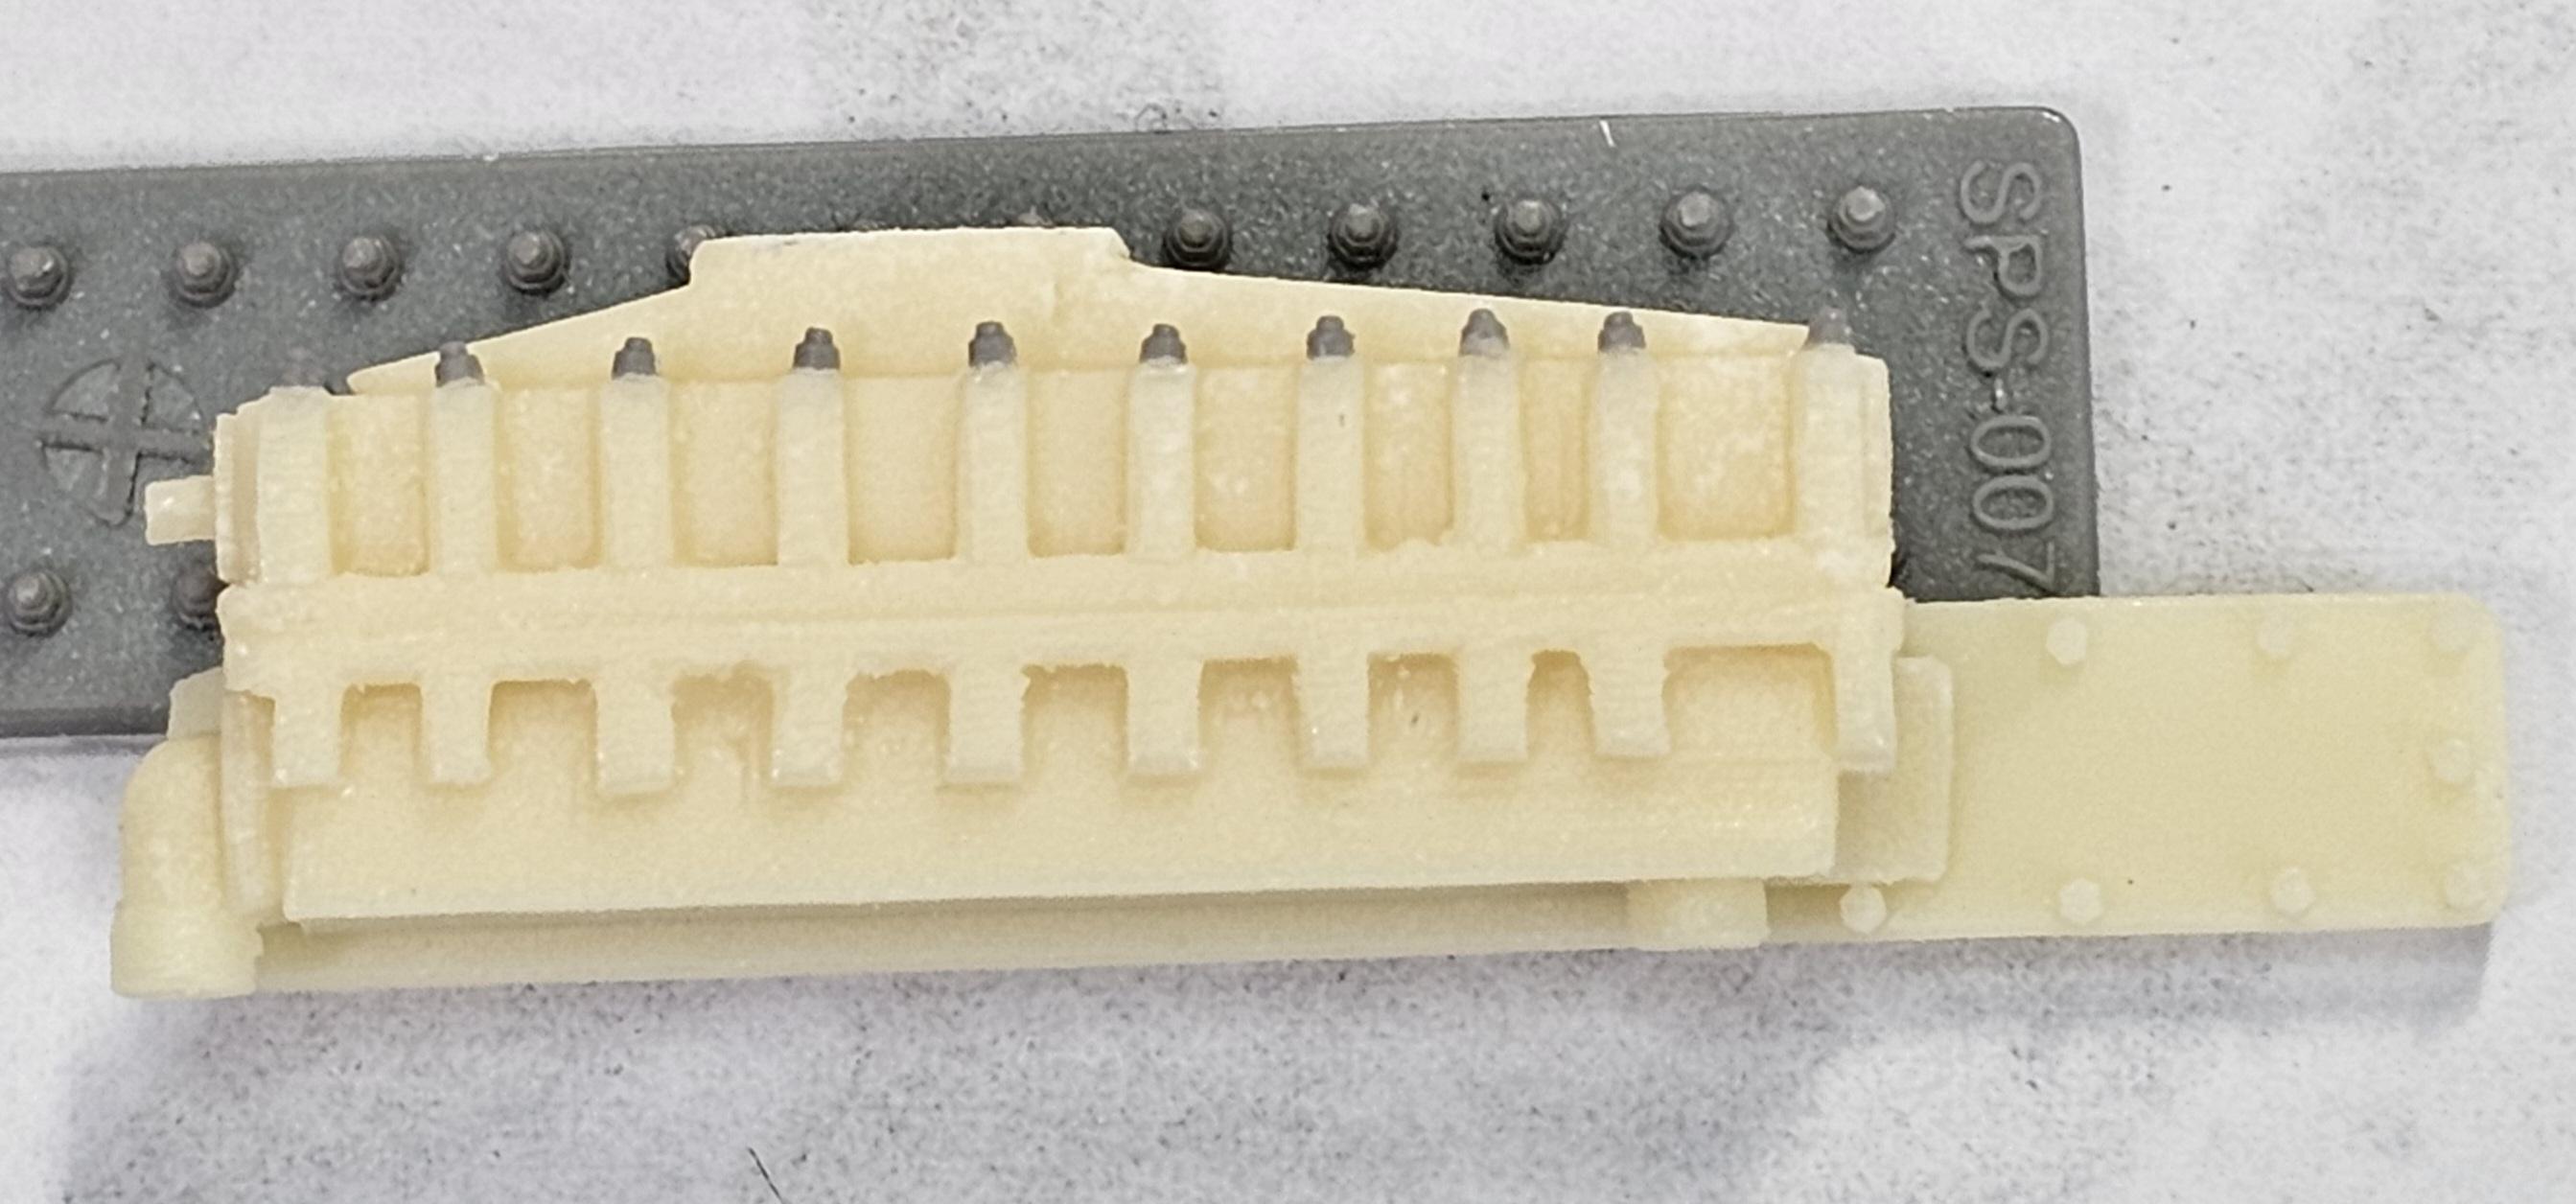
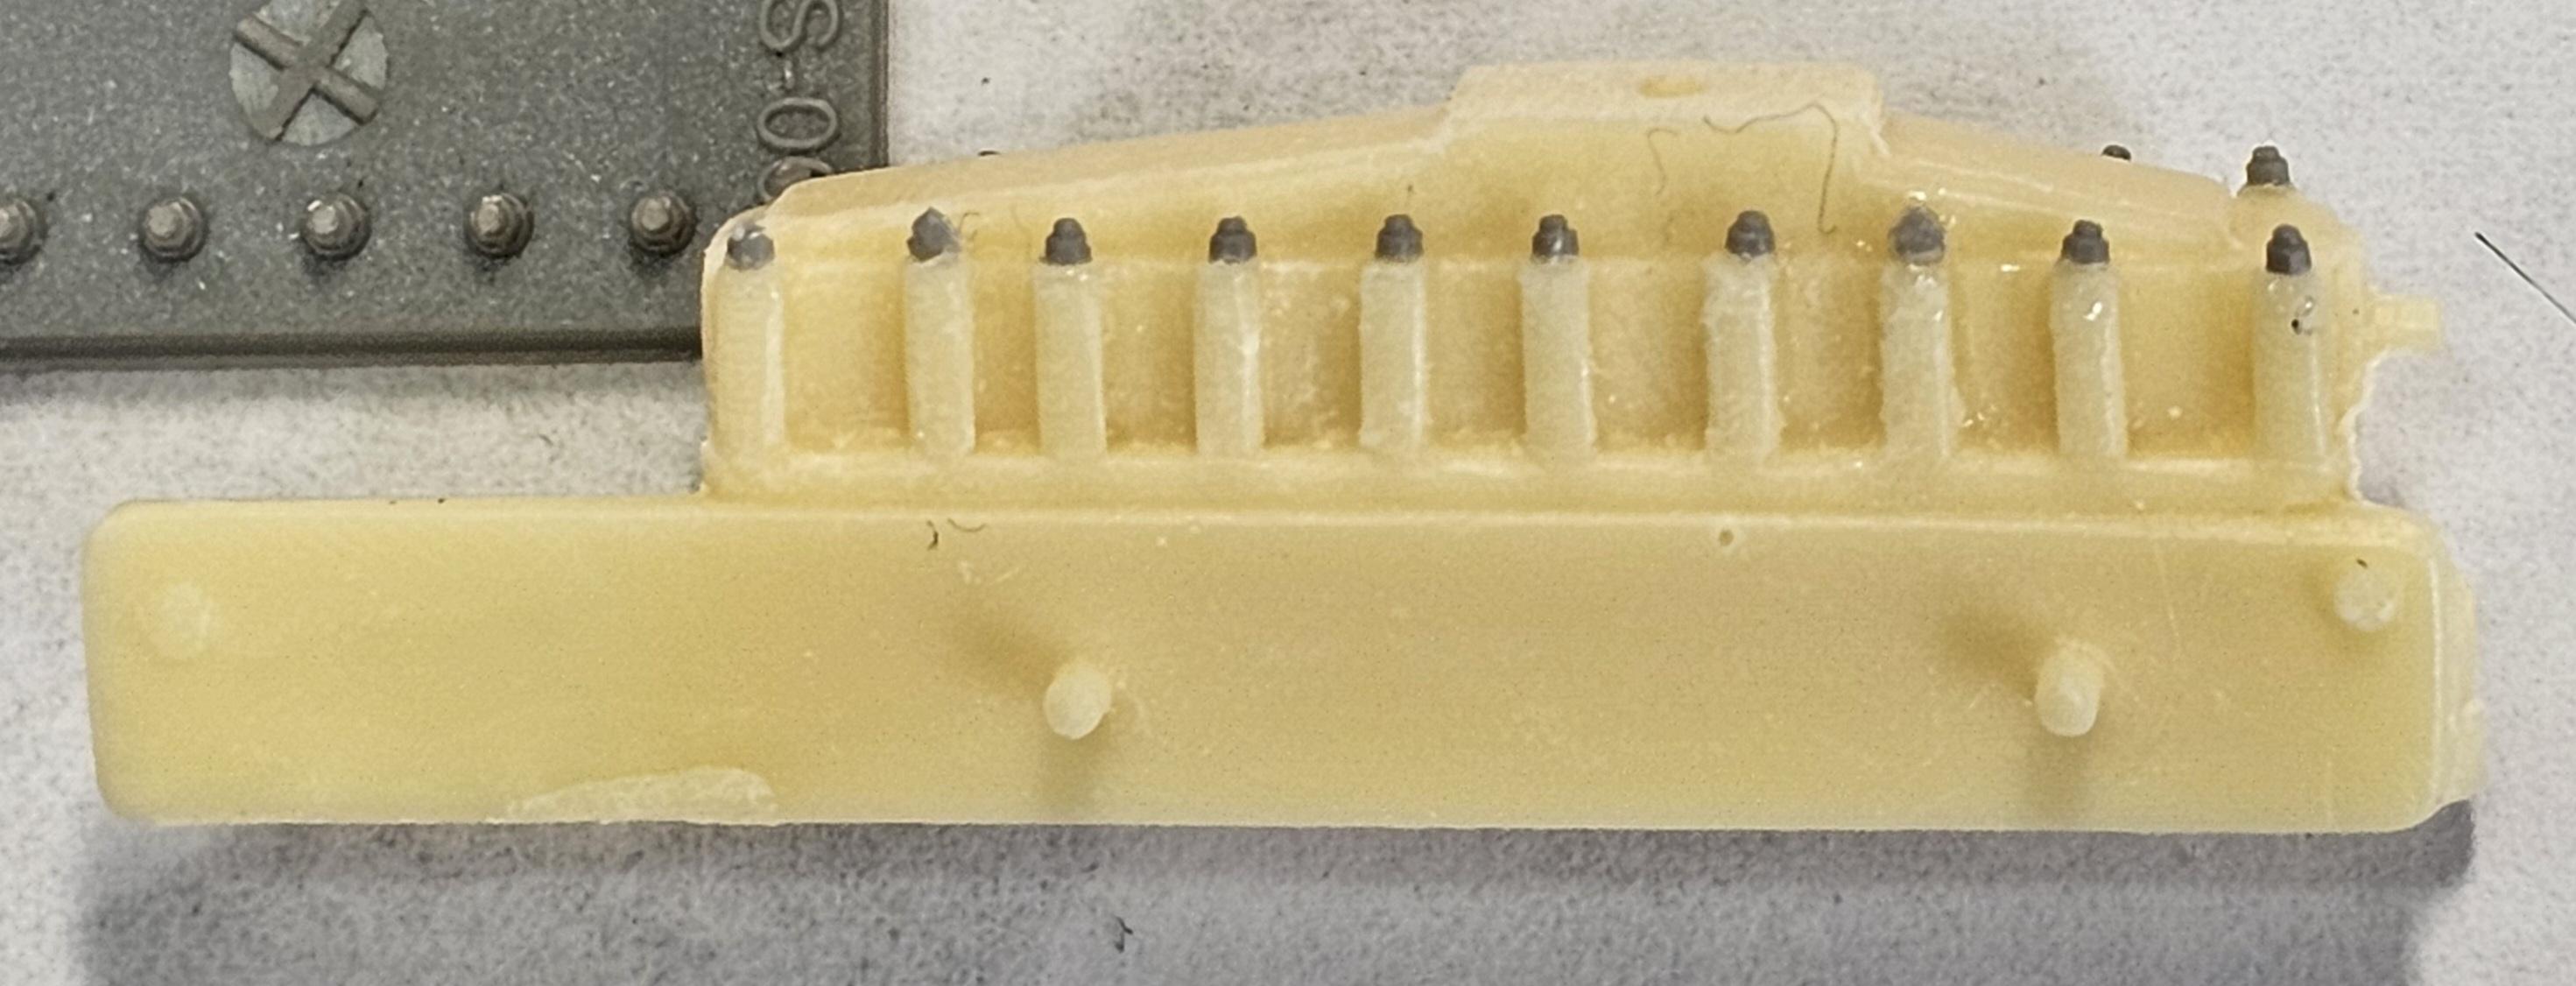
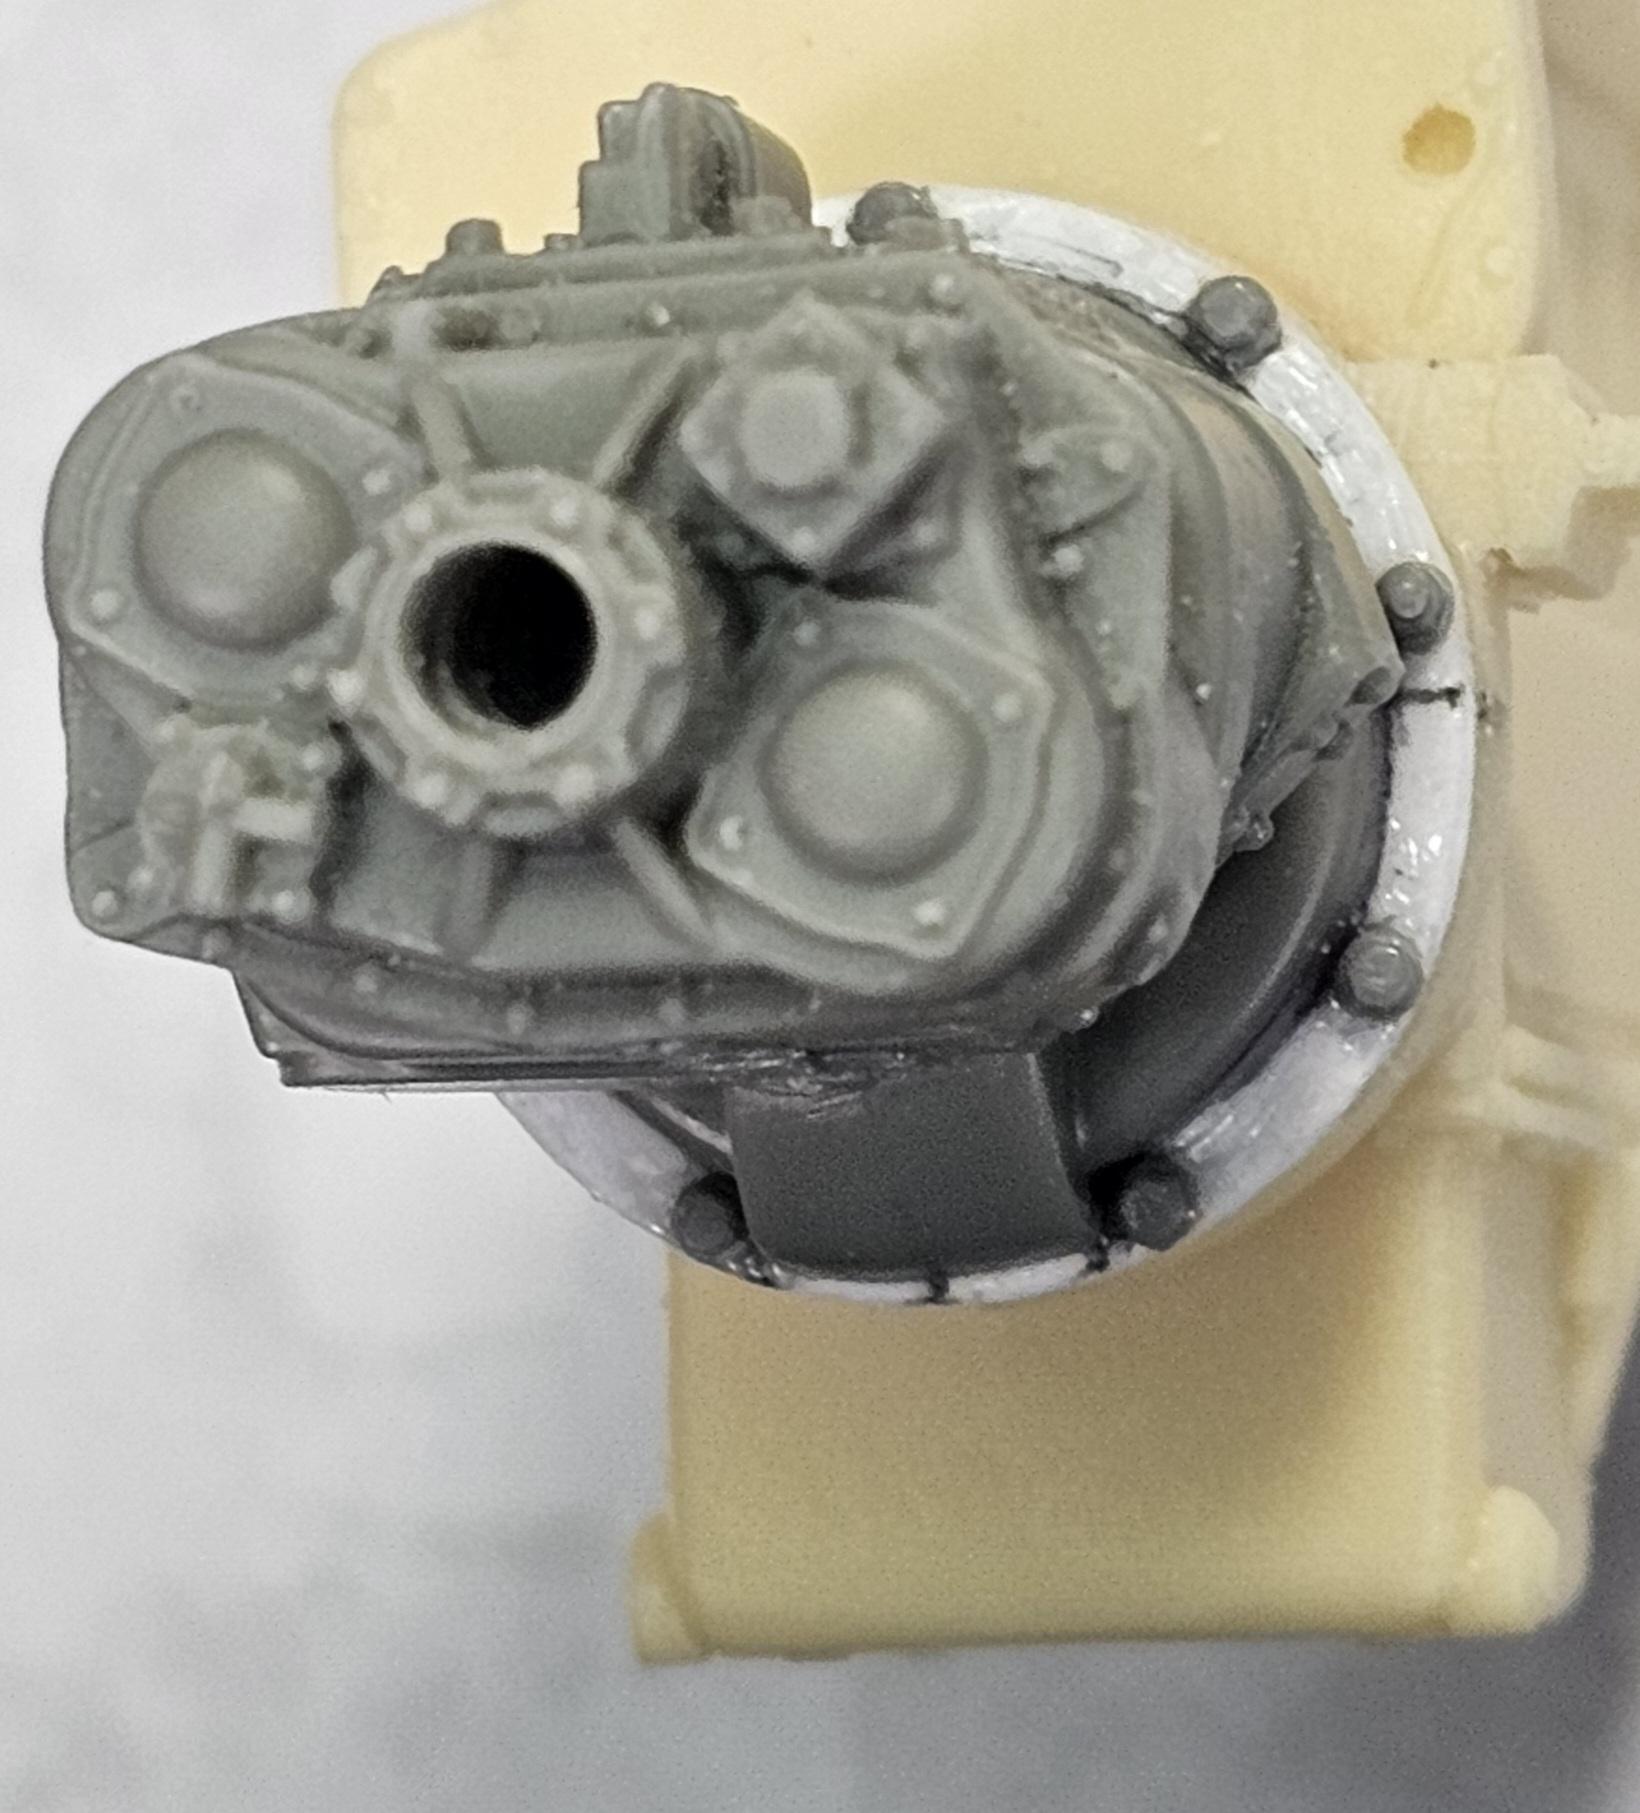
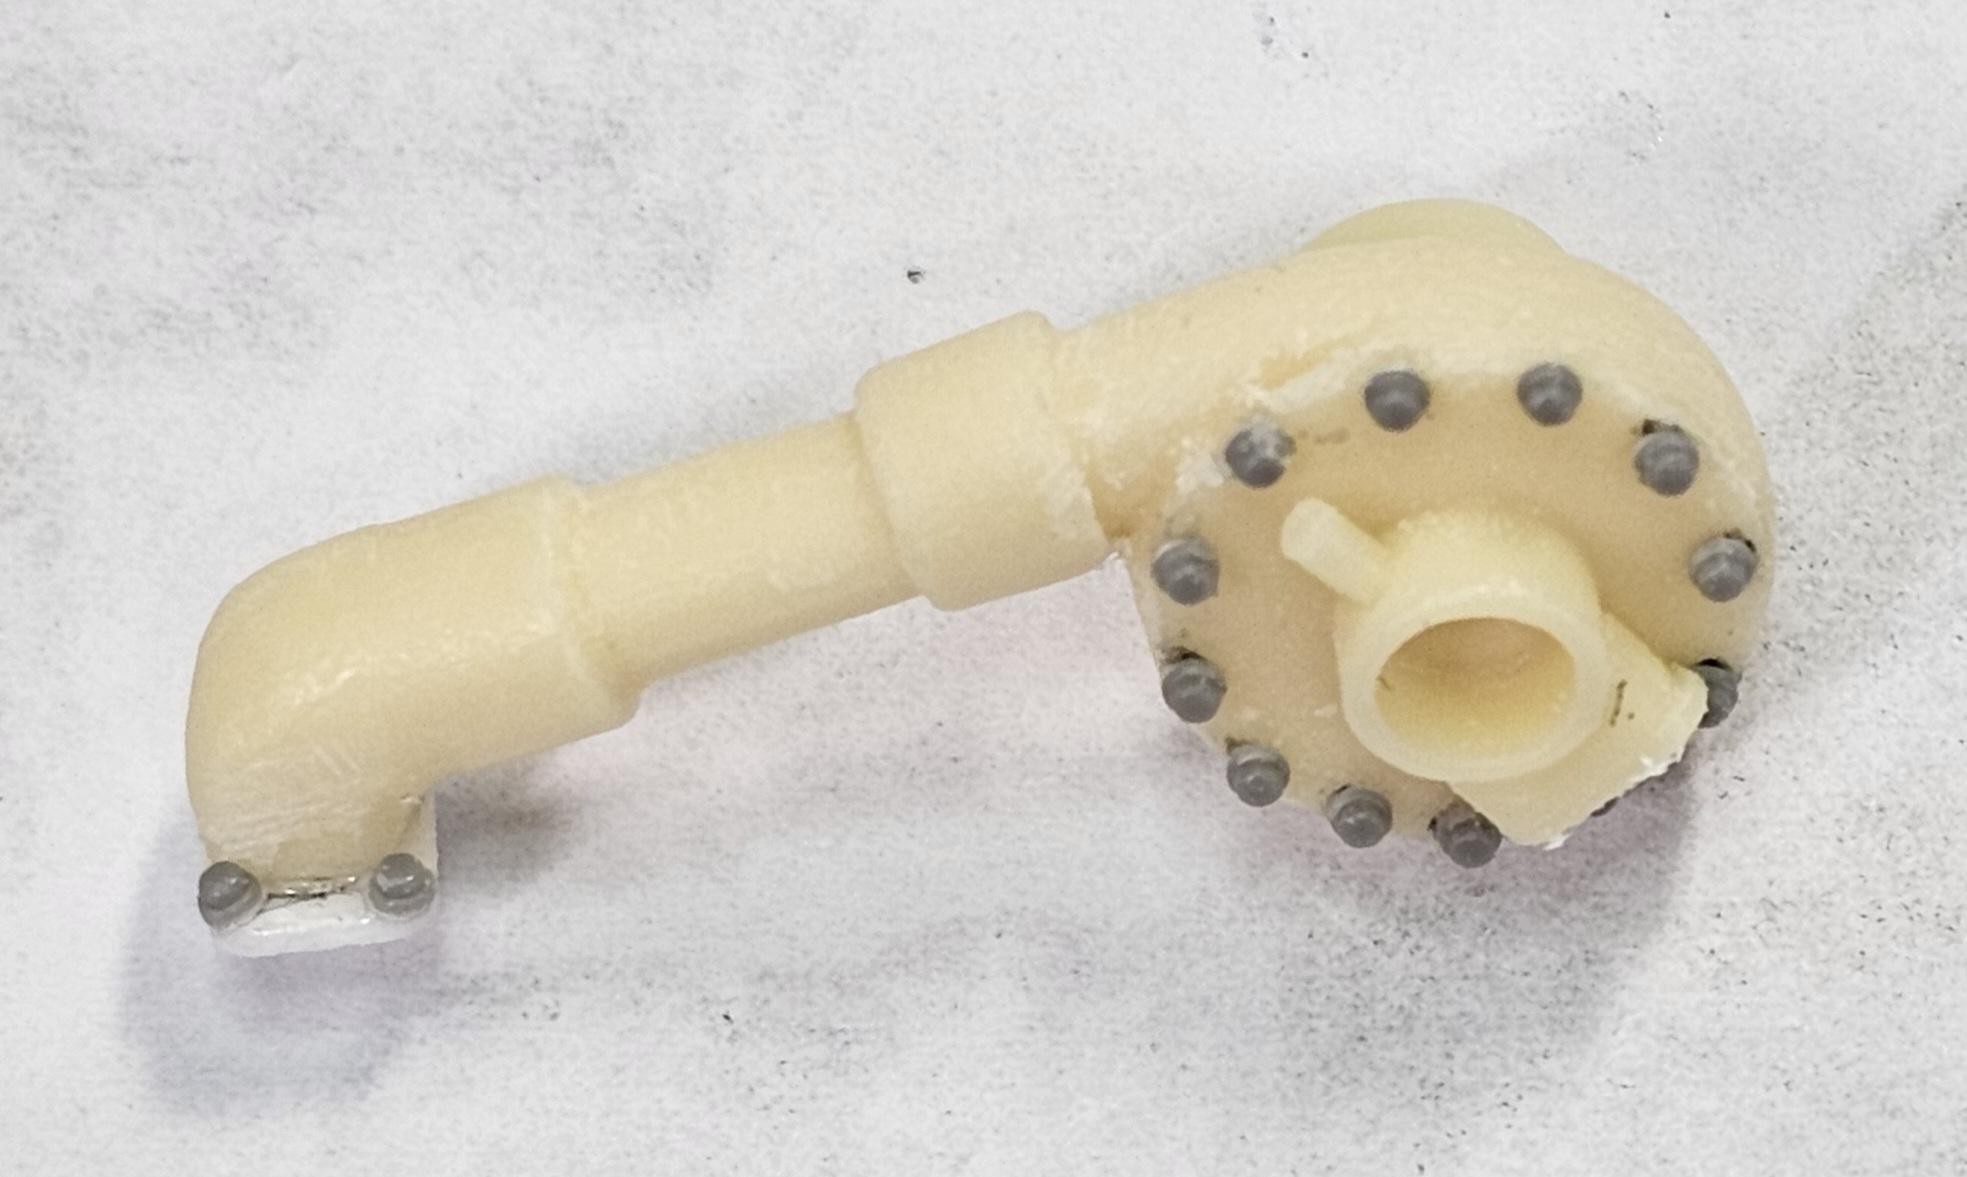
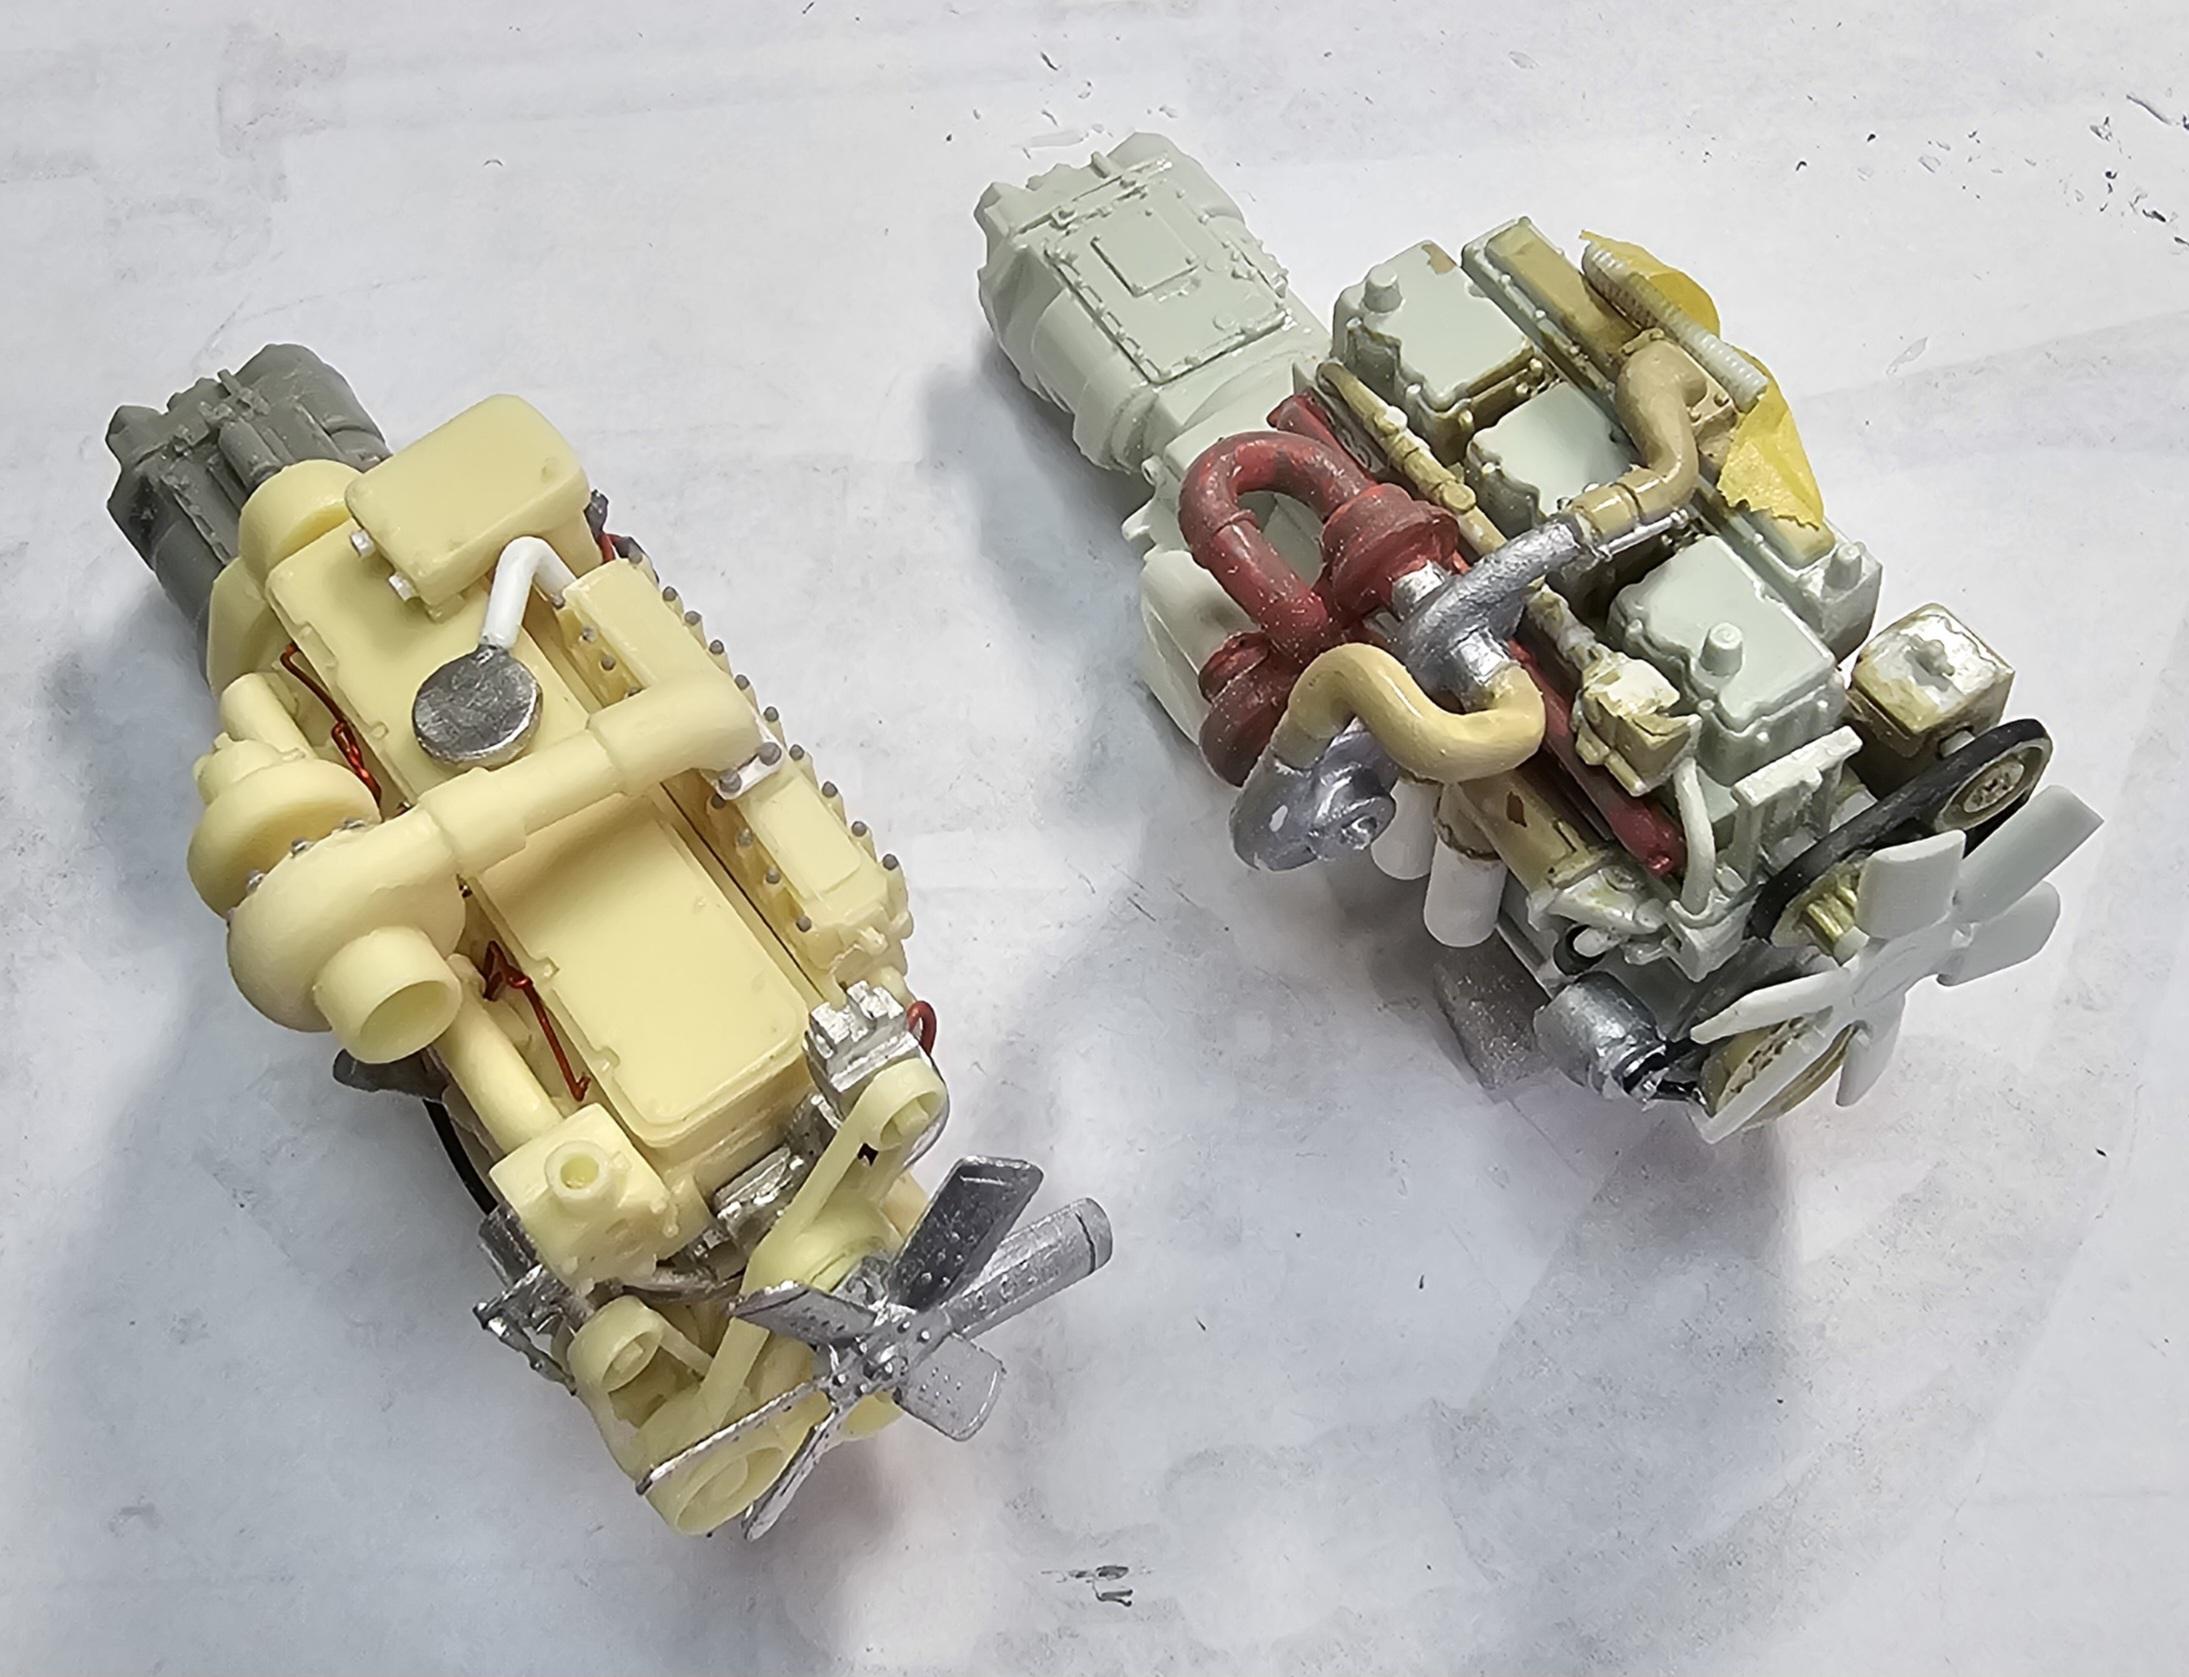
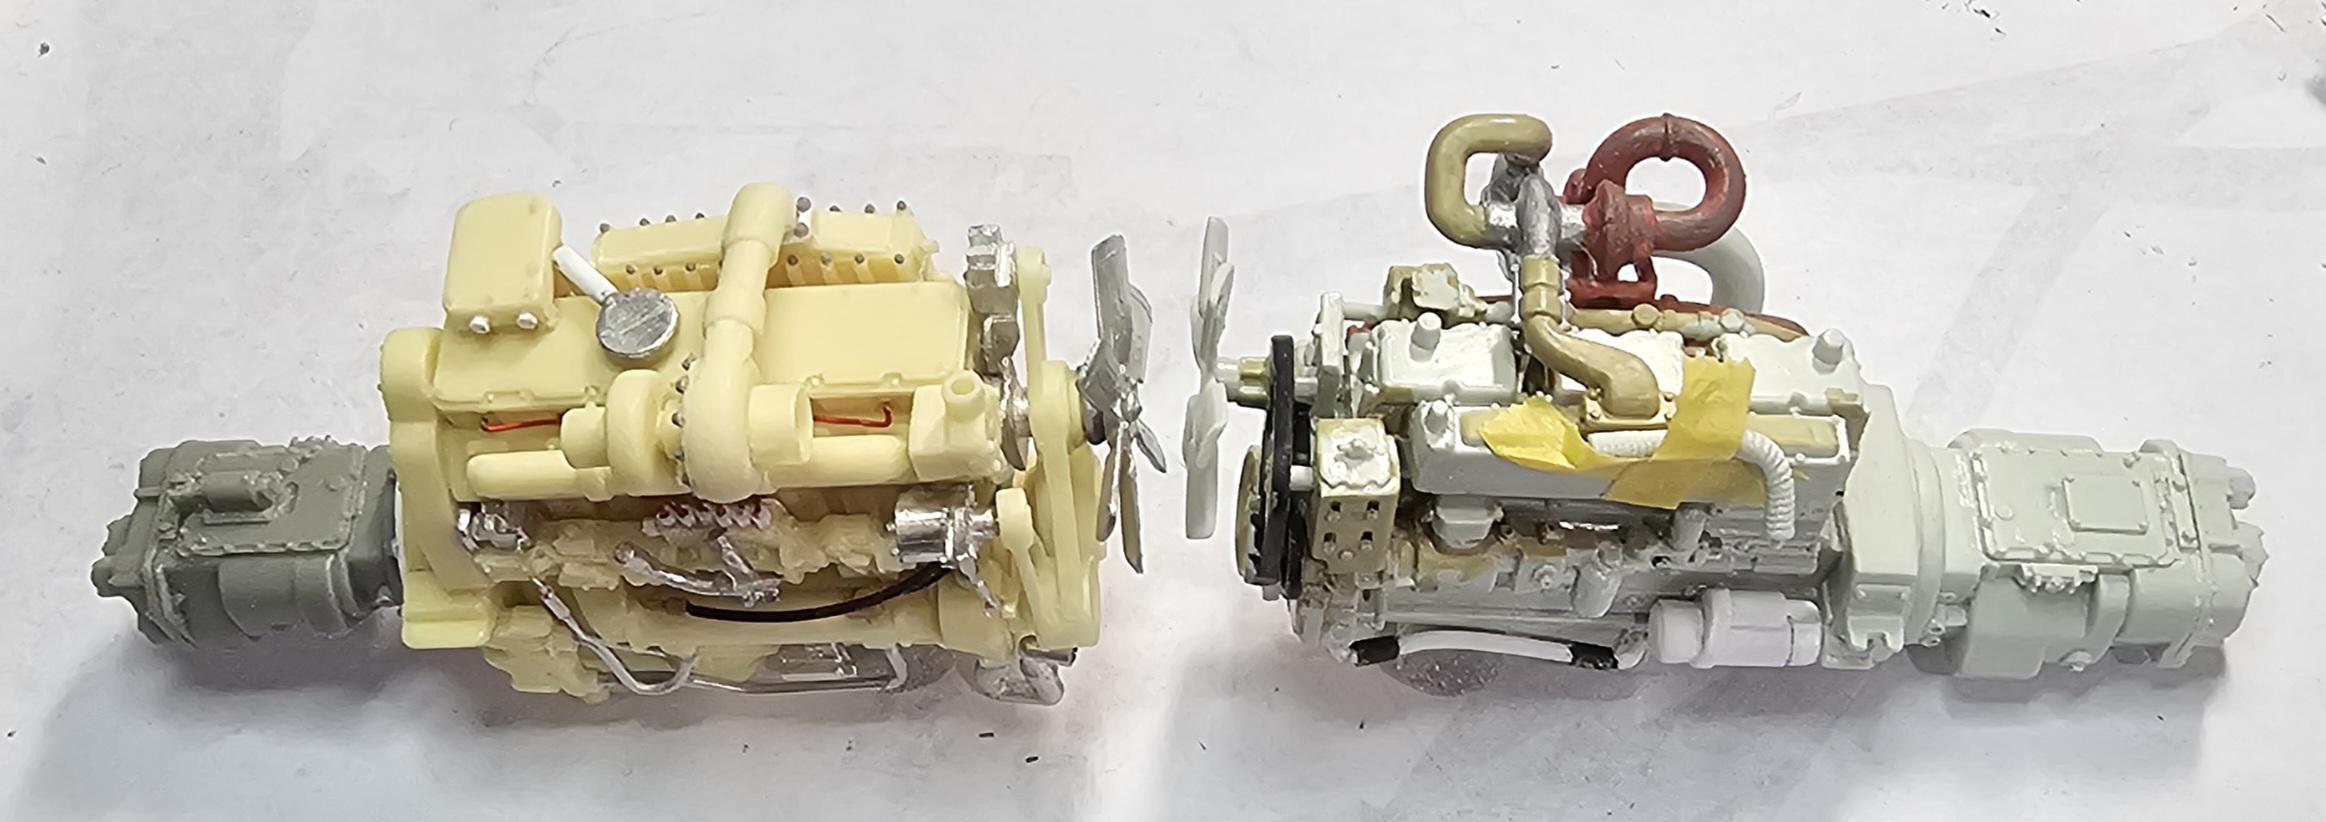
This view shows the intake turbo and pipe. I added some Meng bolt heads (4) 1.0mm to the flange & (12) to the intake compressor.(This picture got out of sequence). Top view of the Cat 1693TA and a Revell NTC-475 compound turbo Cummins for comparison.
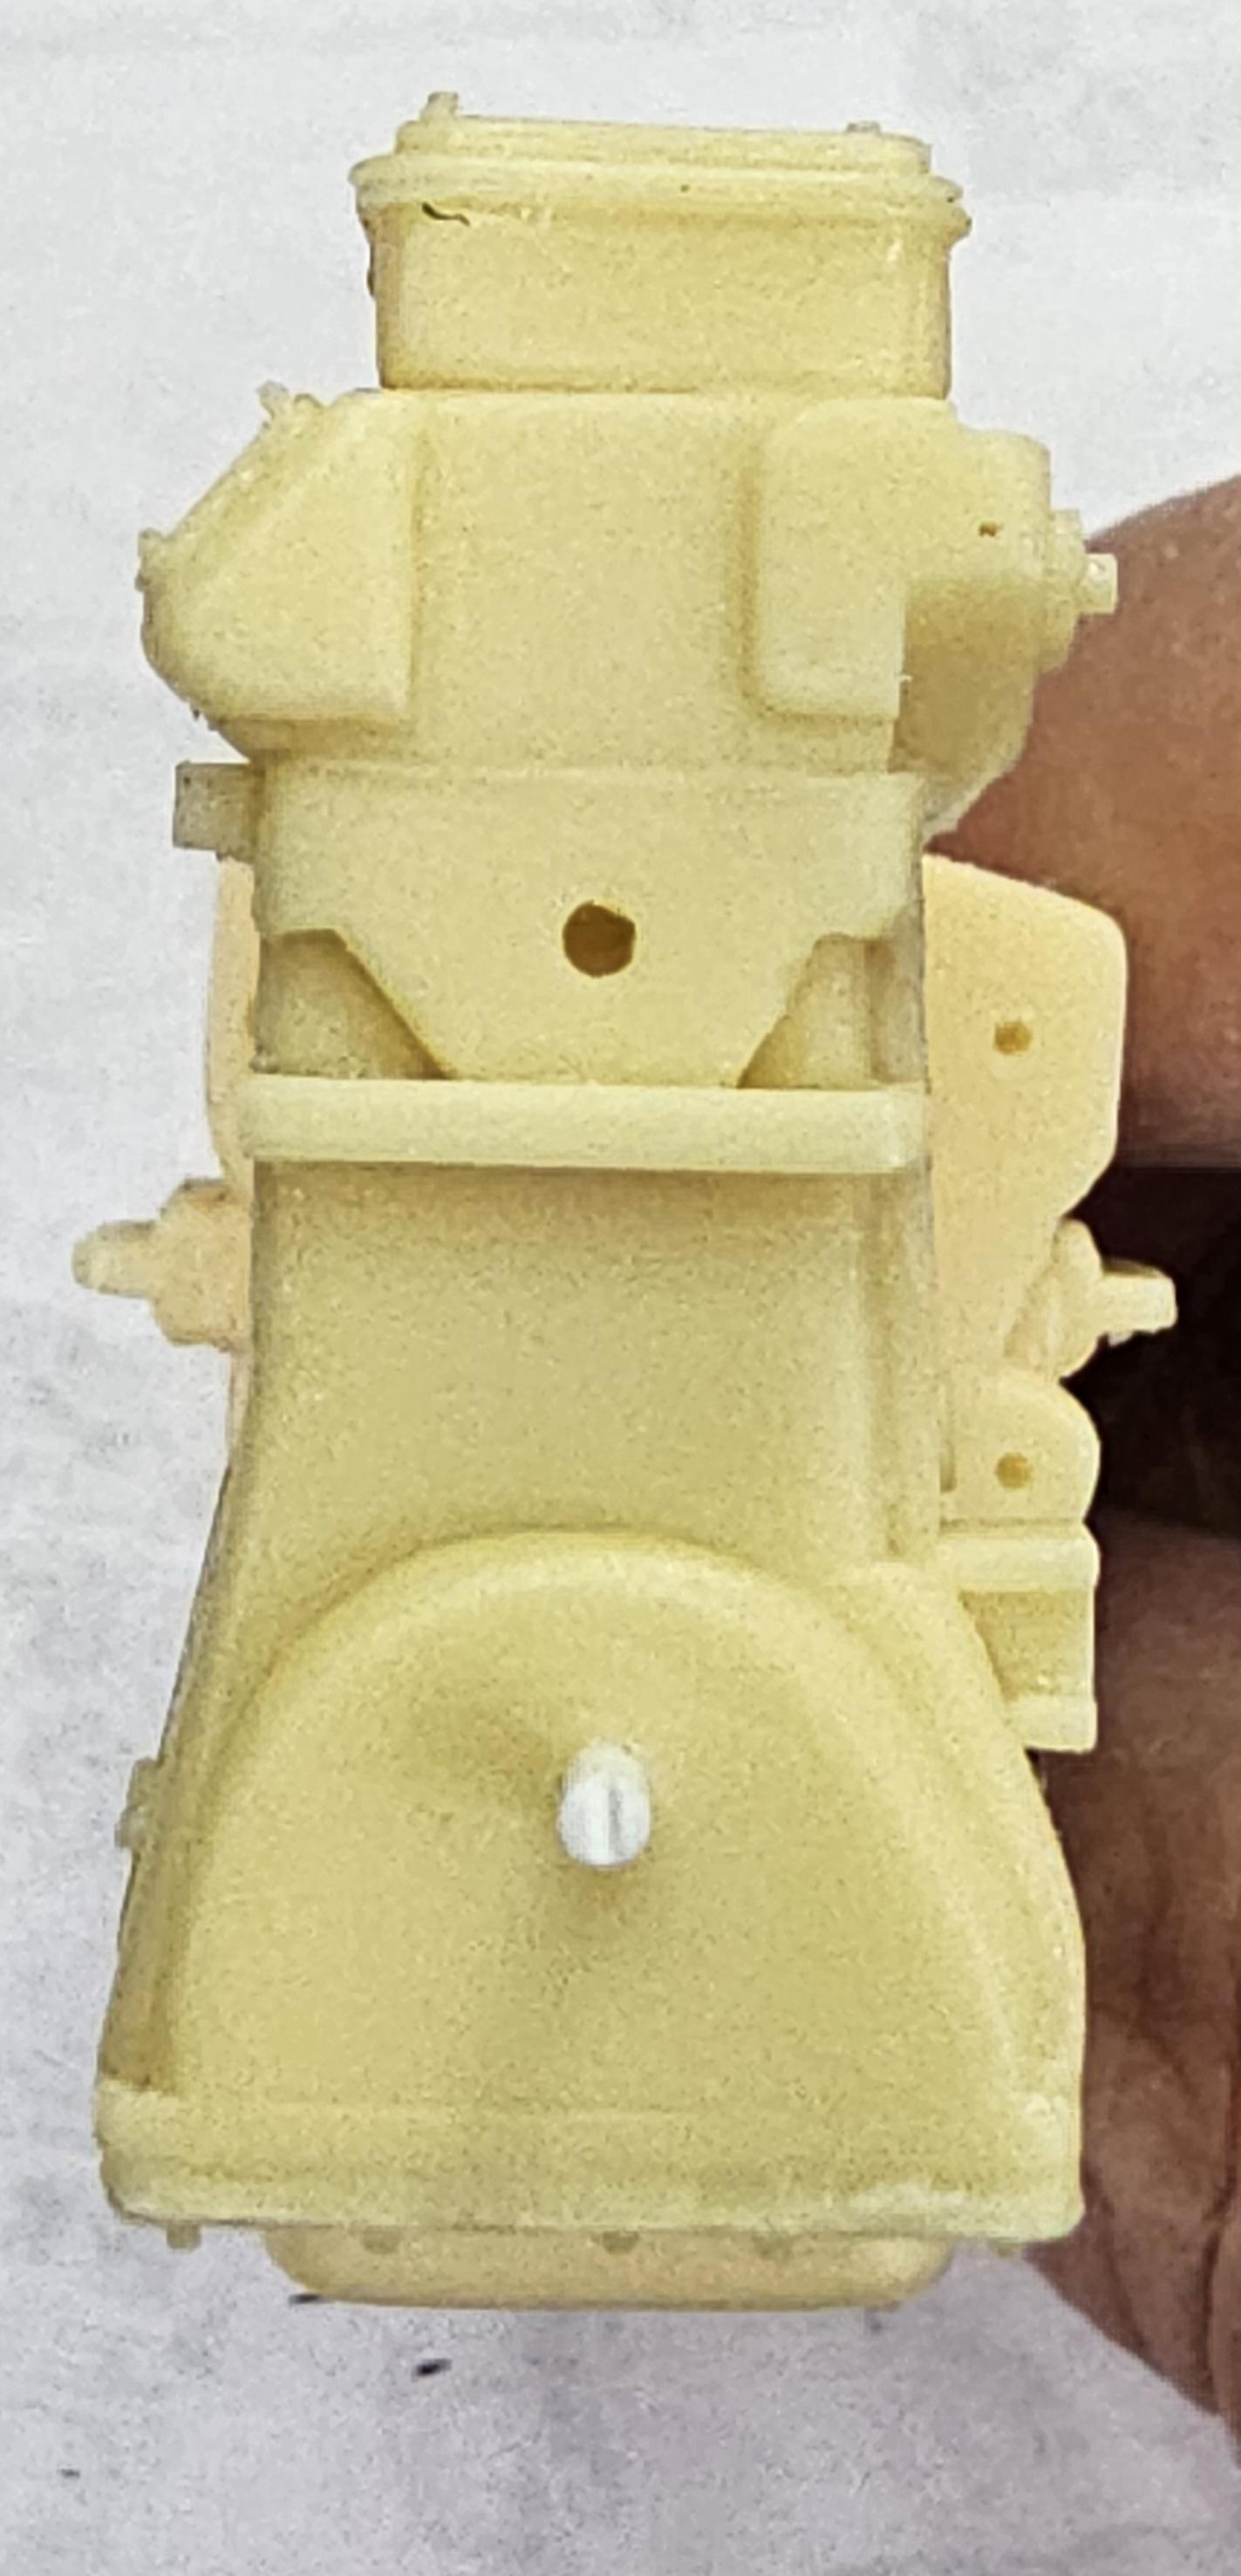
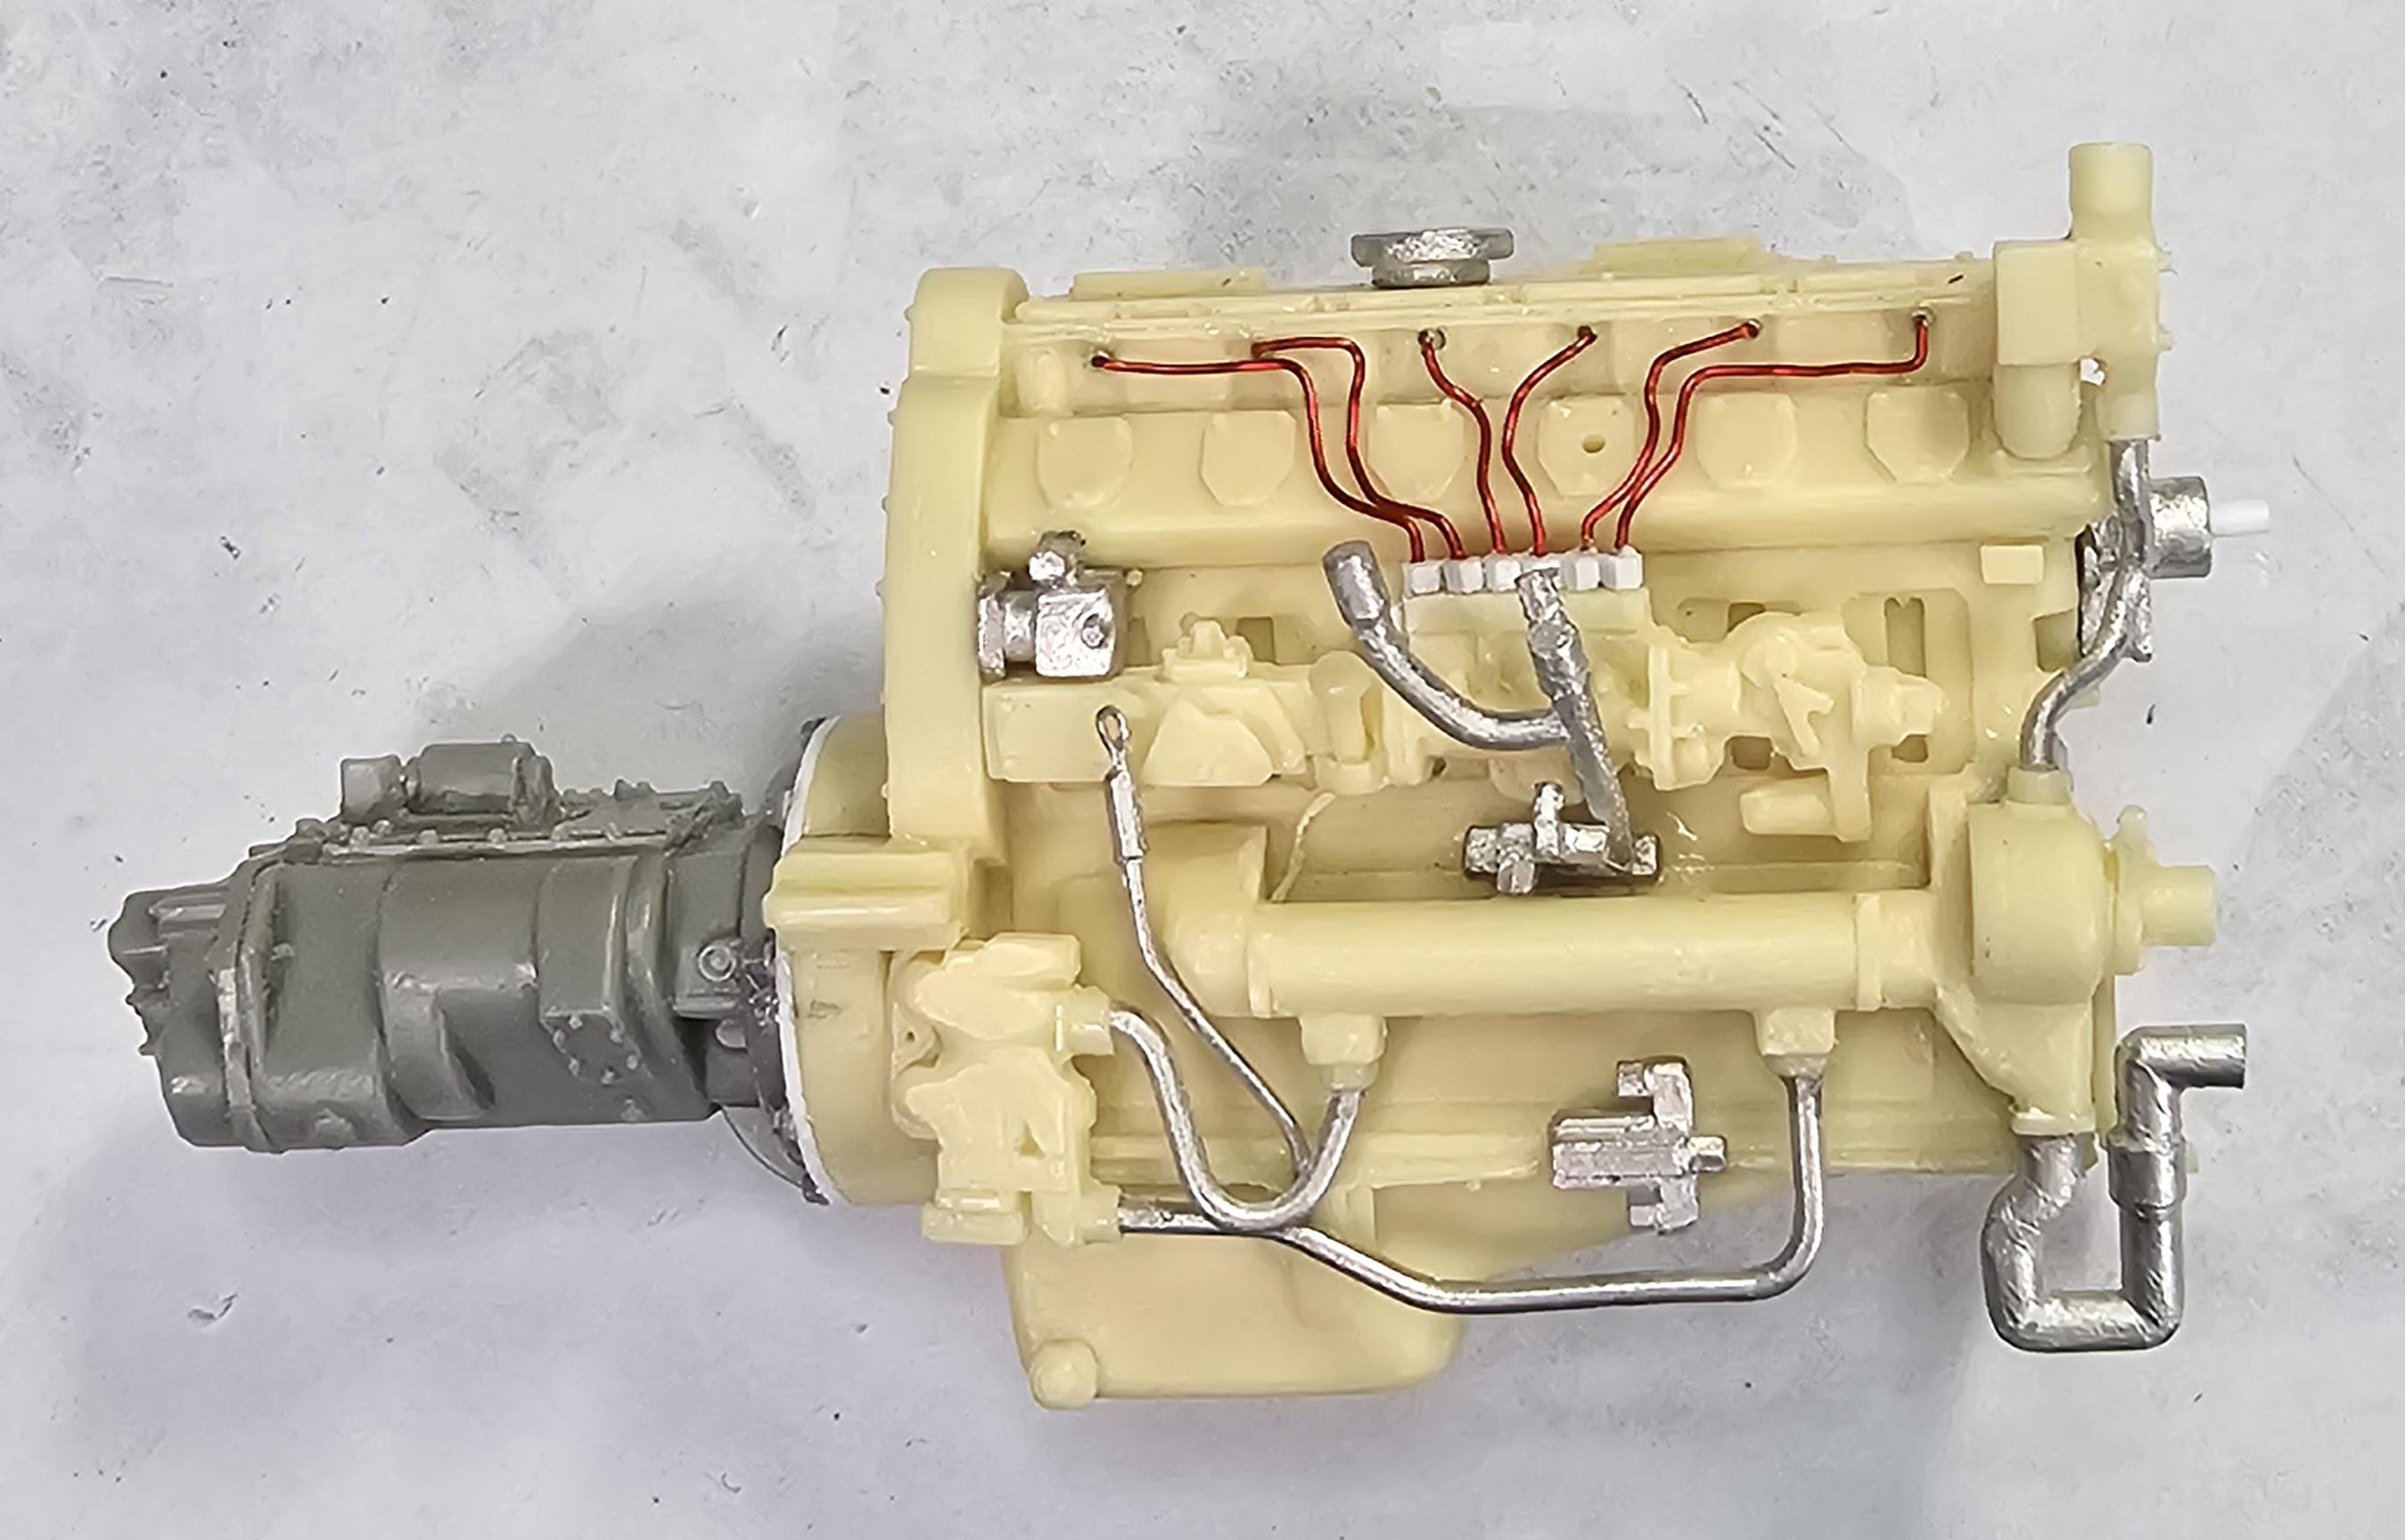
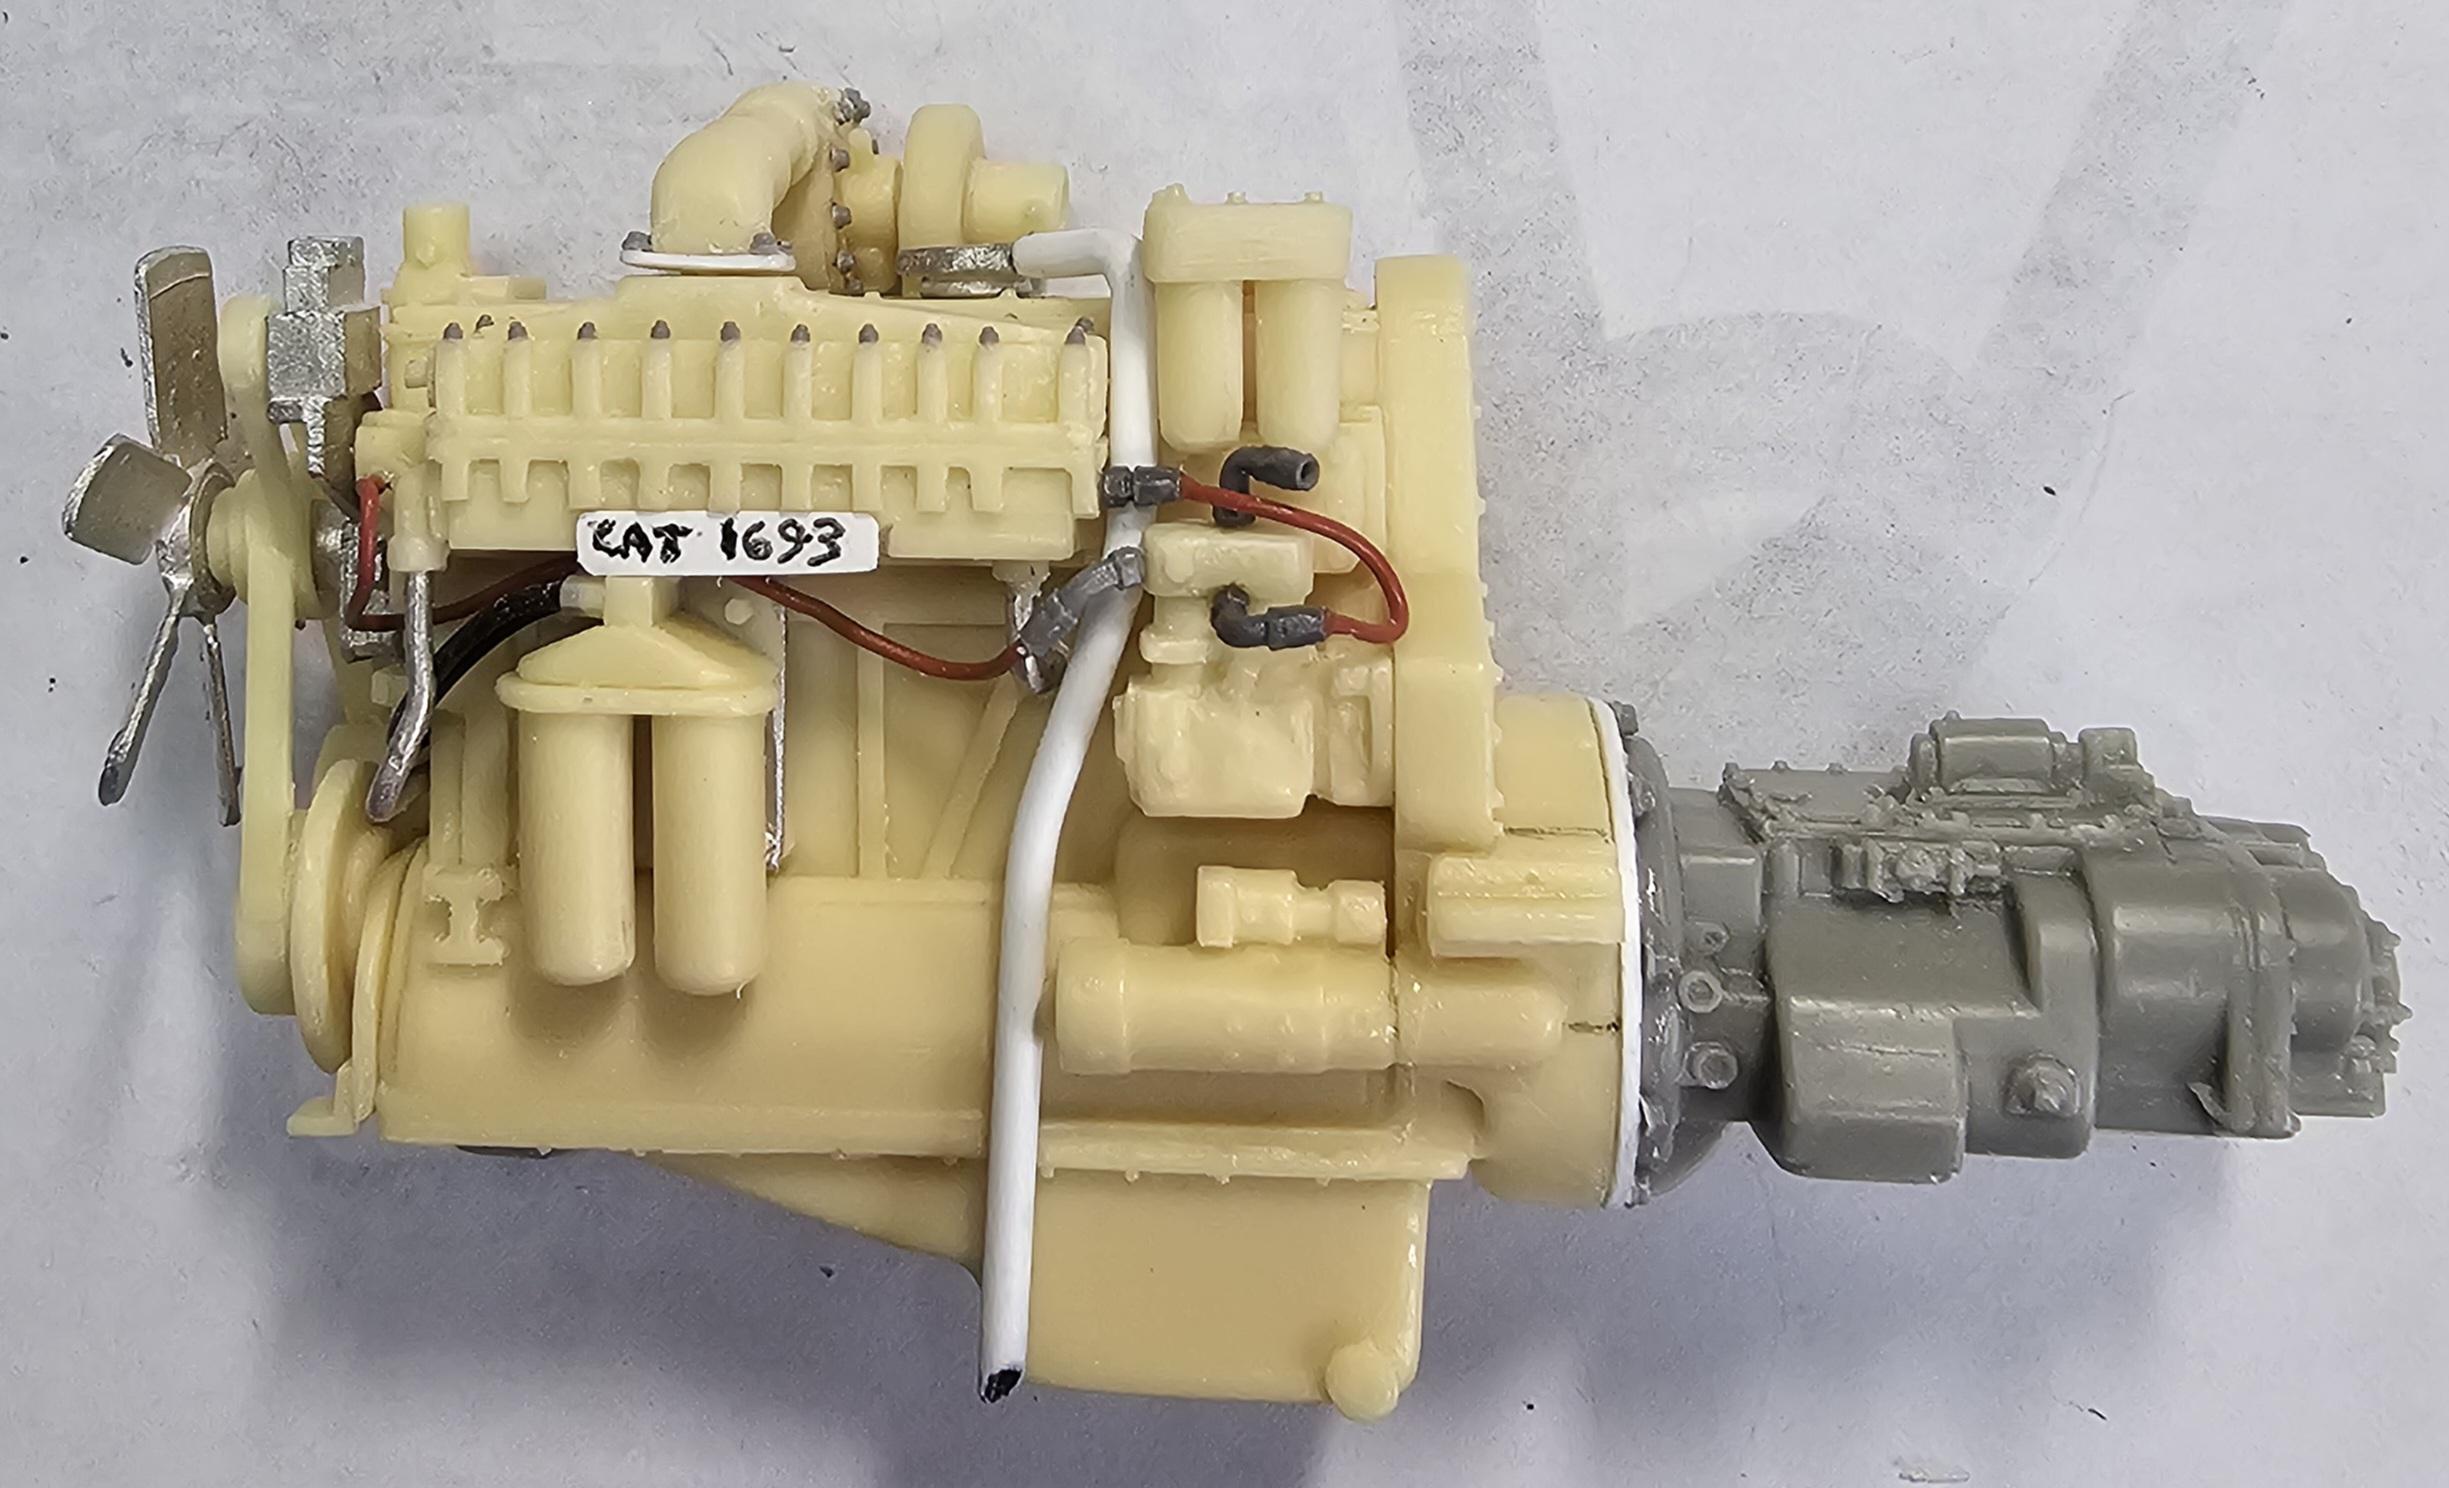
Right side view of the engine
Right side view of the engine completed. Note the two brownish fittings on the oil cooler, these go to the oil filters on the other side.
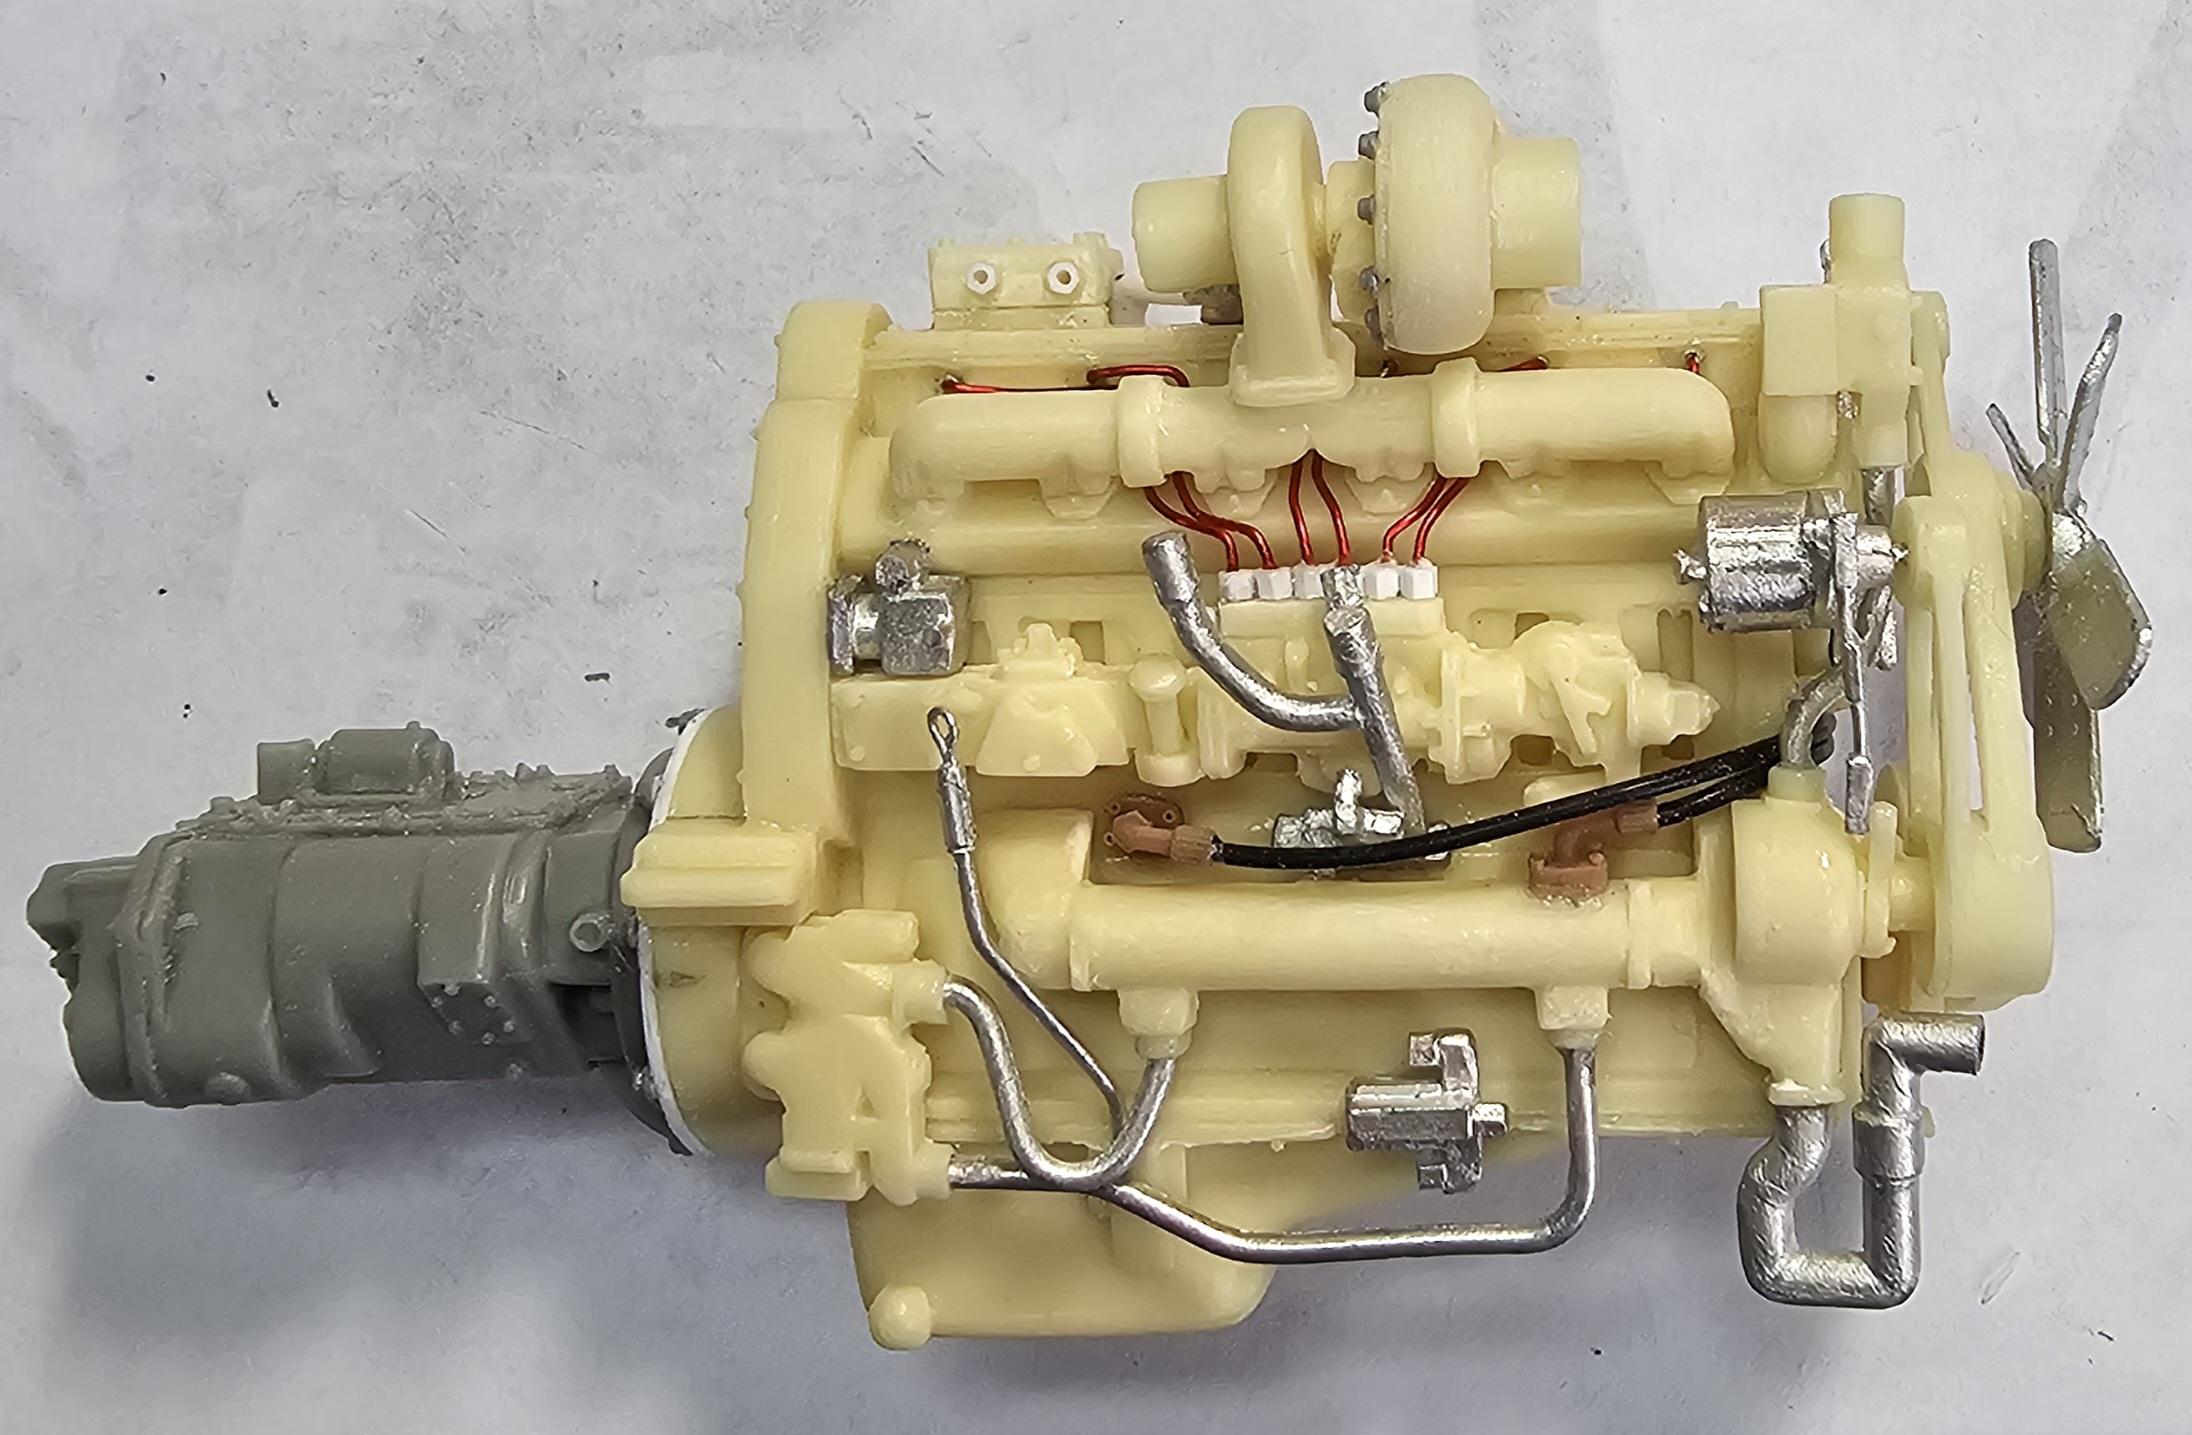
This view shows the left side of the engine. You can see the fittings on the air compressor the one with nothing attached to it is the feed to the air tank. The other two I did from a photo that I have.
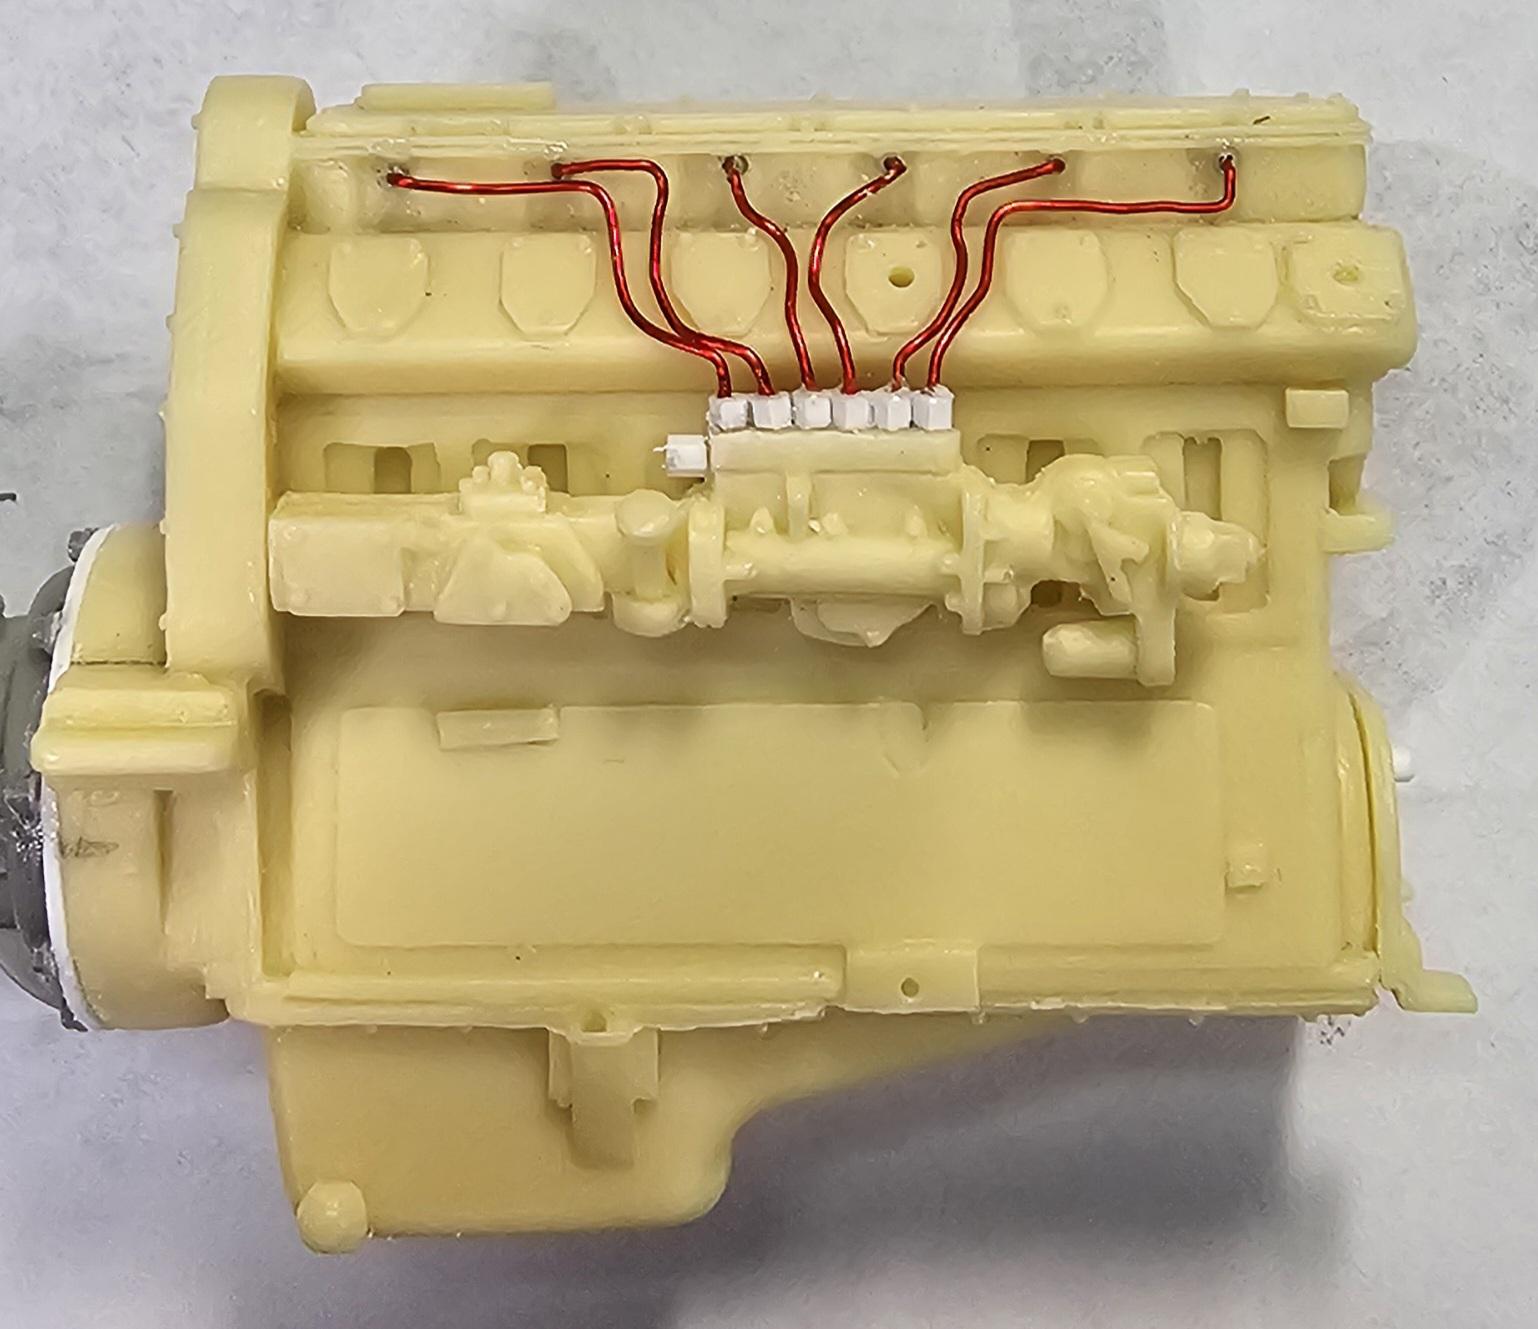
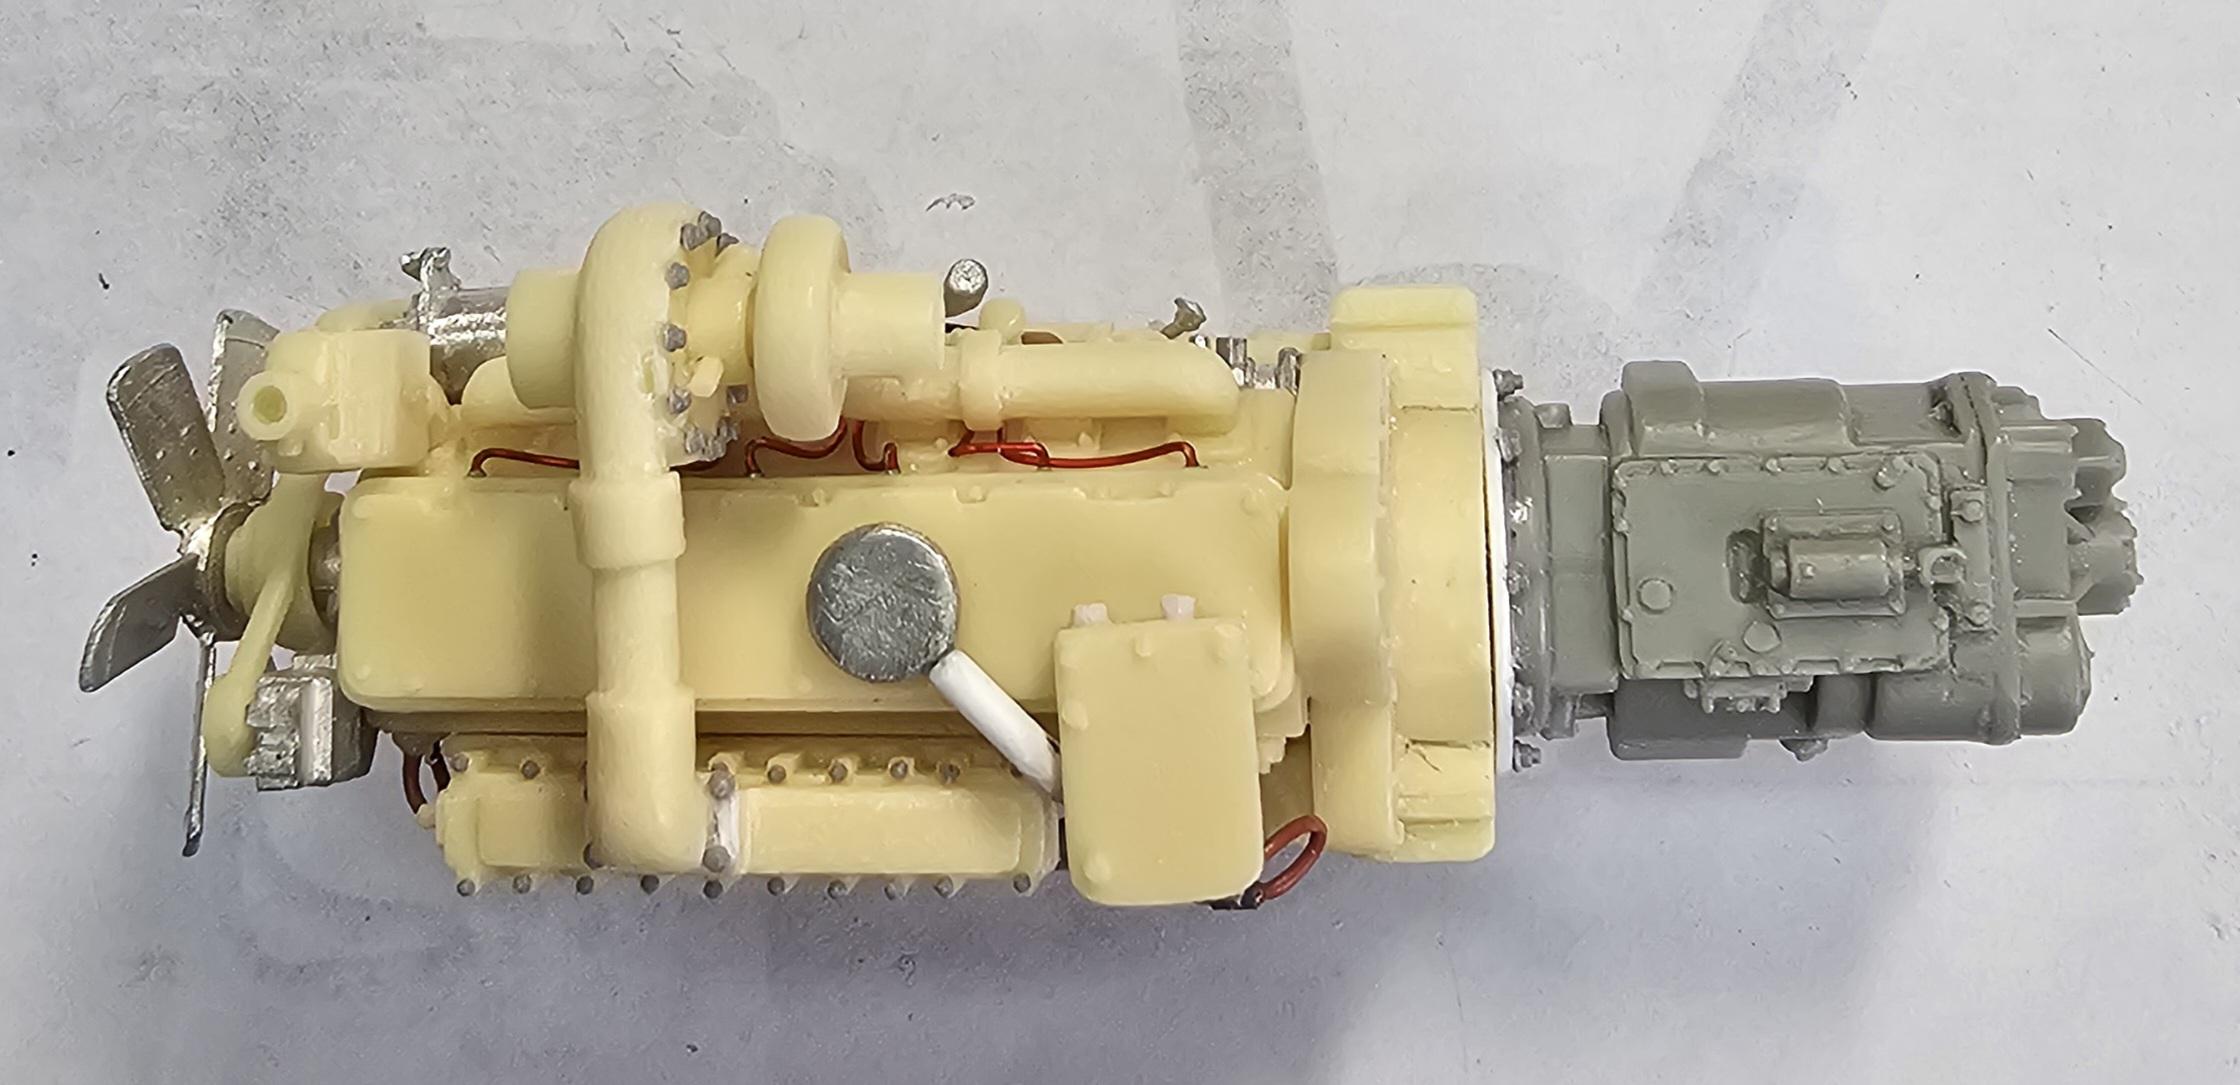
Top view of the engine.
Front view of the engine
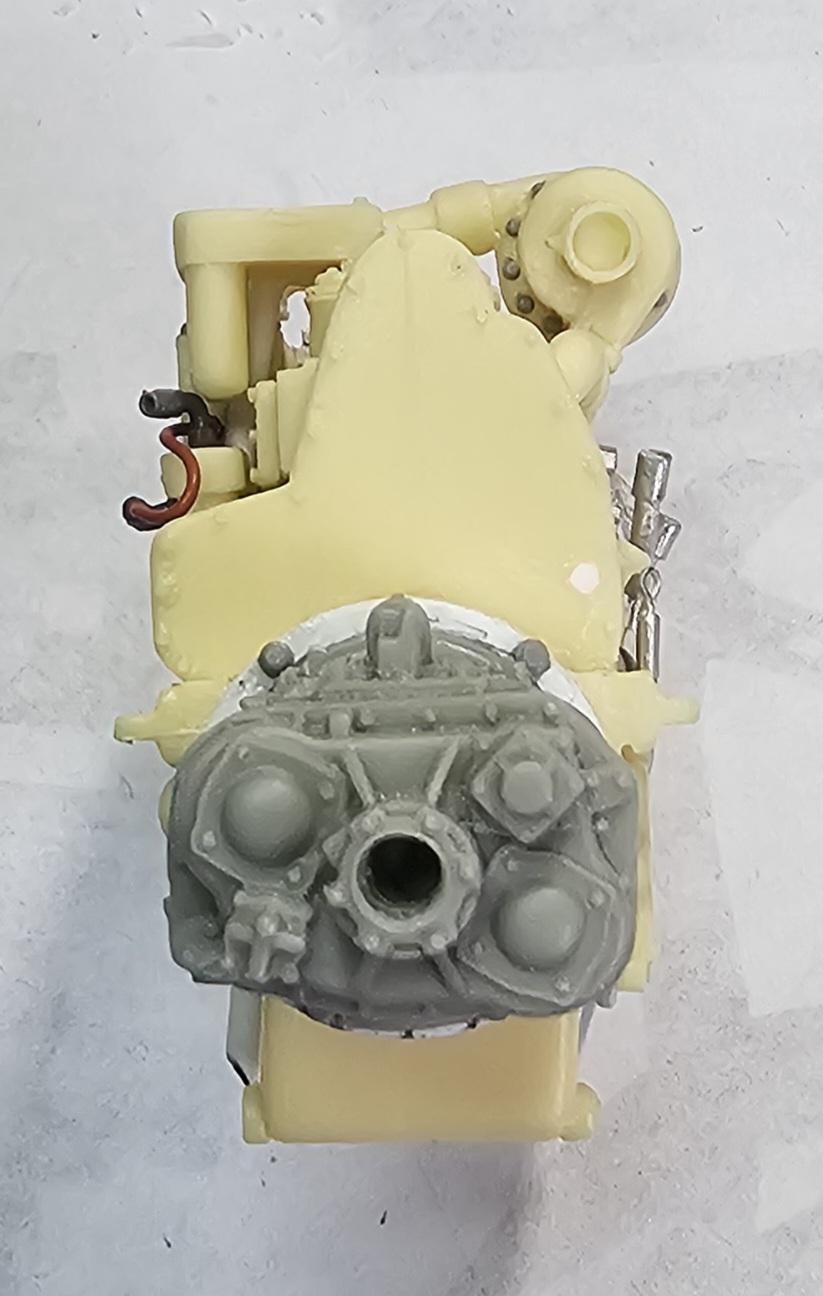
Rear view of the engine.
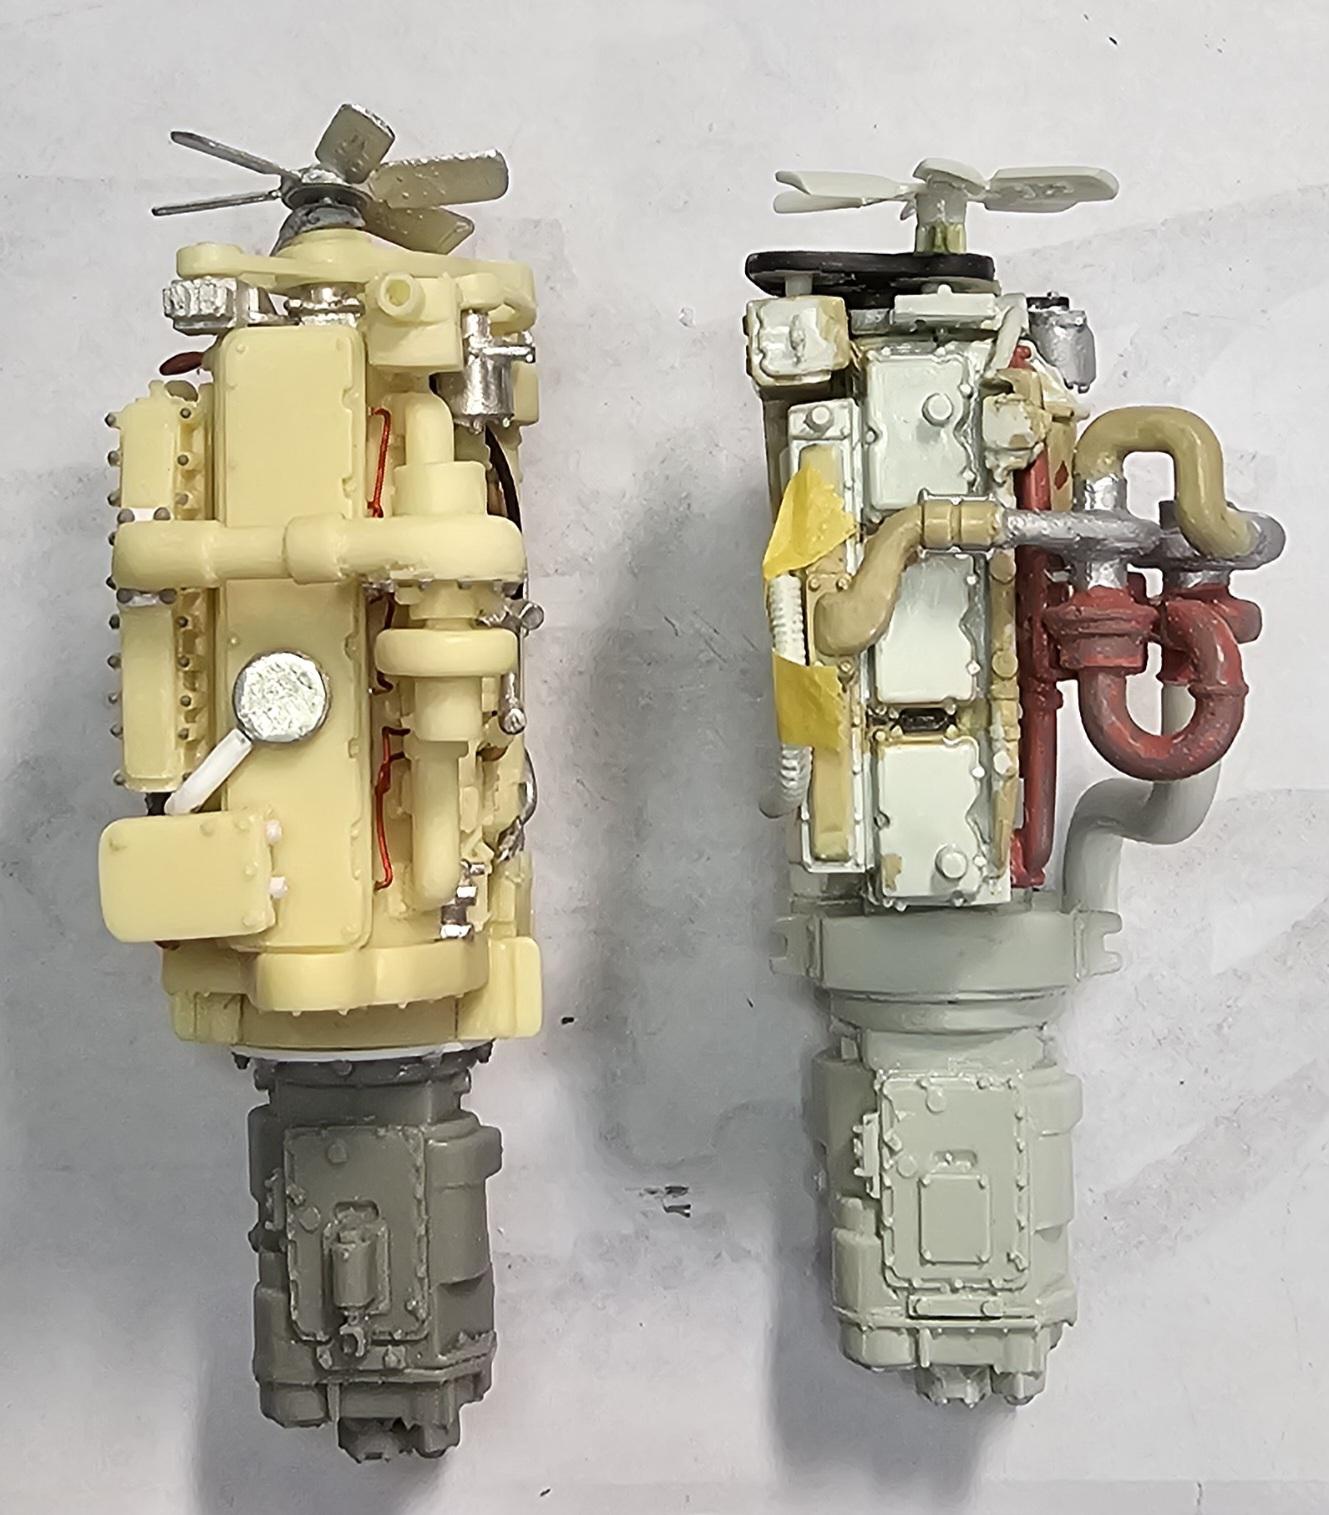
These next three pictures show the this engine compared to the Revell NTC-475 Cummins. It is a big motor! It's old, it came out in 1964 and was in production up till 1974 maybe a touch later.
Well that's it for now be back soon with more. I plan on putting this in a AMT " Cross Country Hauler" Peterbilt for power.
Ron G
-
4
-


 (This picture got out of sequence). Top view of the Cat 1693TA and a Revell NTC-475 compound turbo Cummins for comparison.
1970 Ford C 600
in WIP: Model Trucks: Big Rigs and Heavy Equipment
Posted
Looking really good Buddy.
Ron G