

ShakyCraftsman
-
Posts
351 -
Joined
-
Last visited
Content Type
Profiles
Forums
Events
Gallery
Posts posted by ShakyCraftsman
-
-
Hey guys
I have the doors mounted to the cab with there miniature piano hinges. This was a difficult, if not scary process. I had to grind down the surface on the inner side of tge cab and doors, both sides in order to fit the hinges. I did this with my trusty Foredom tool and various milling bits. I almost ground through the drivers side of the cab and had to do some repair, luckily all turned out good.
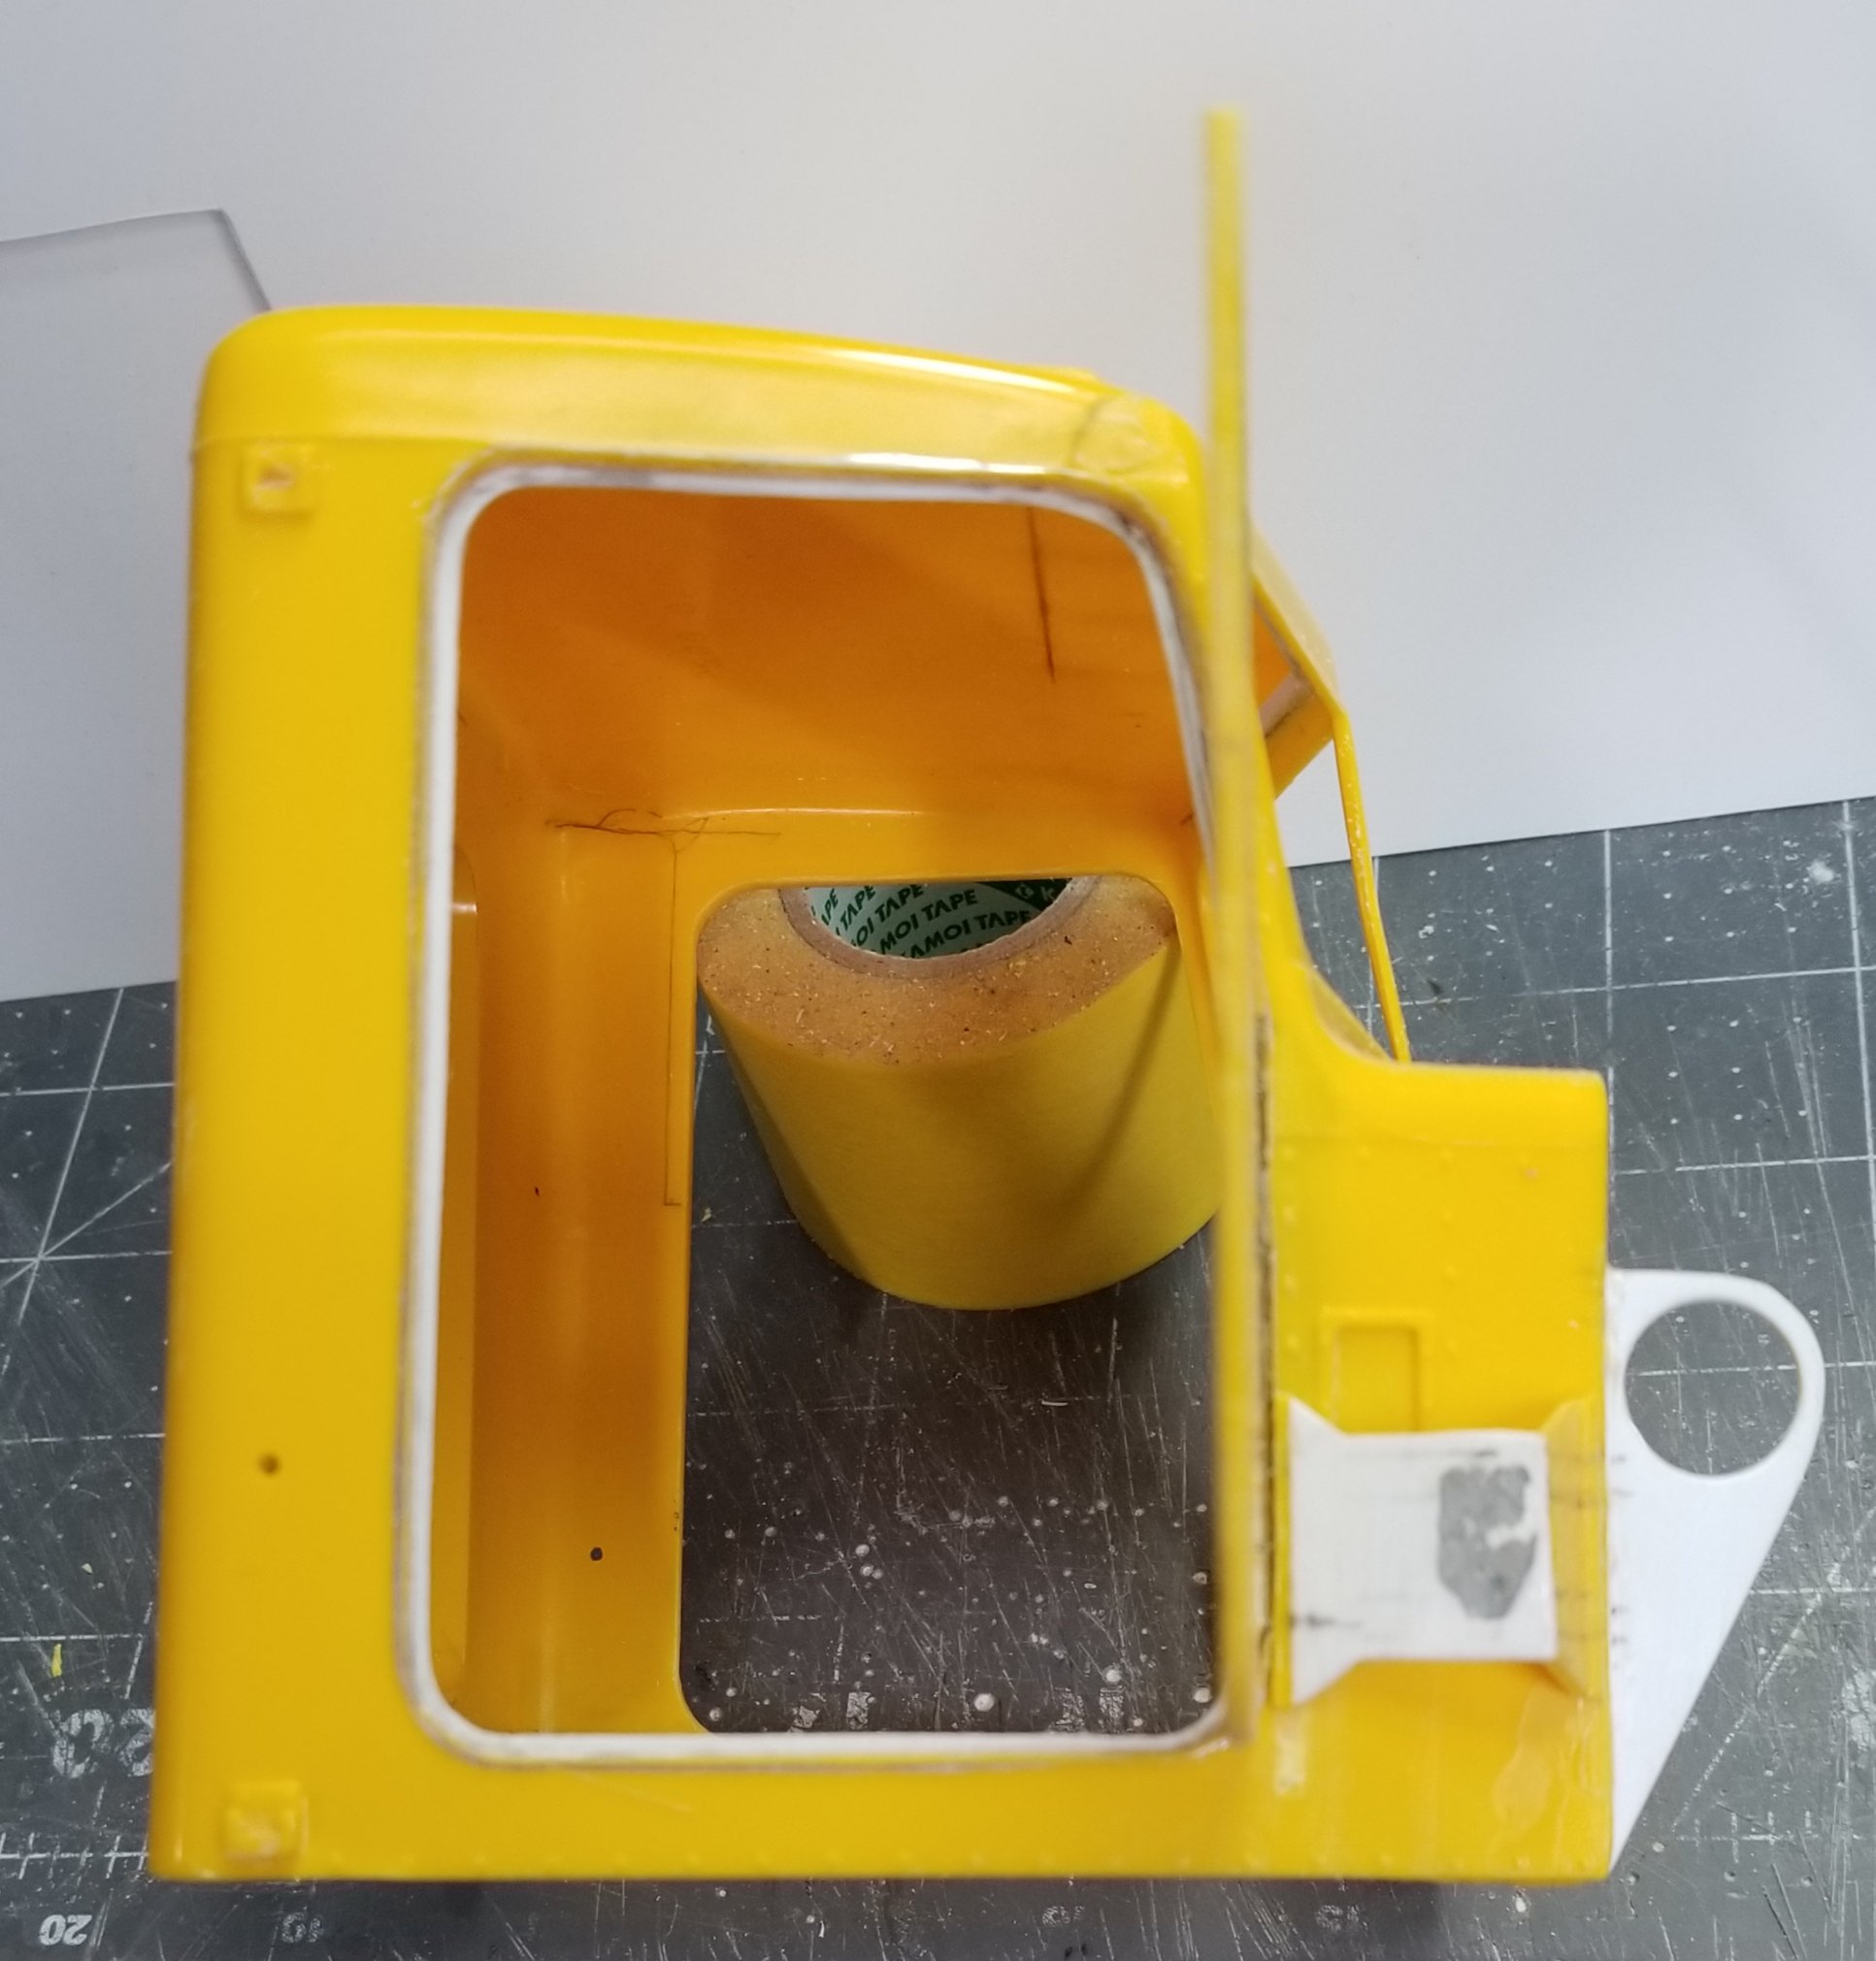
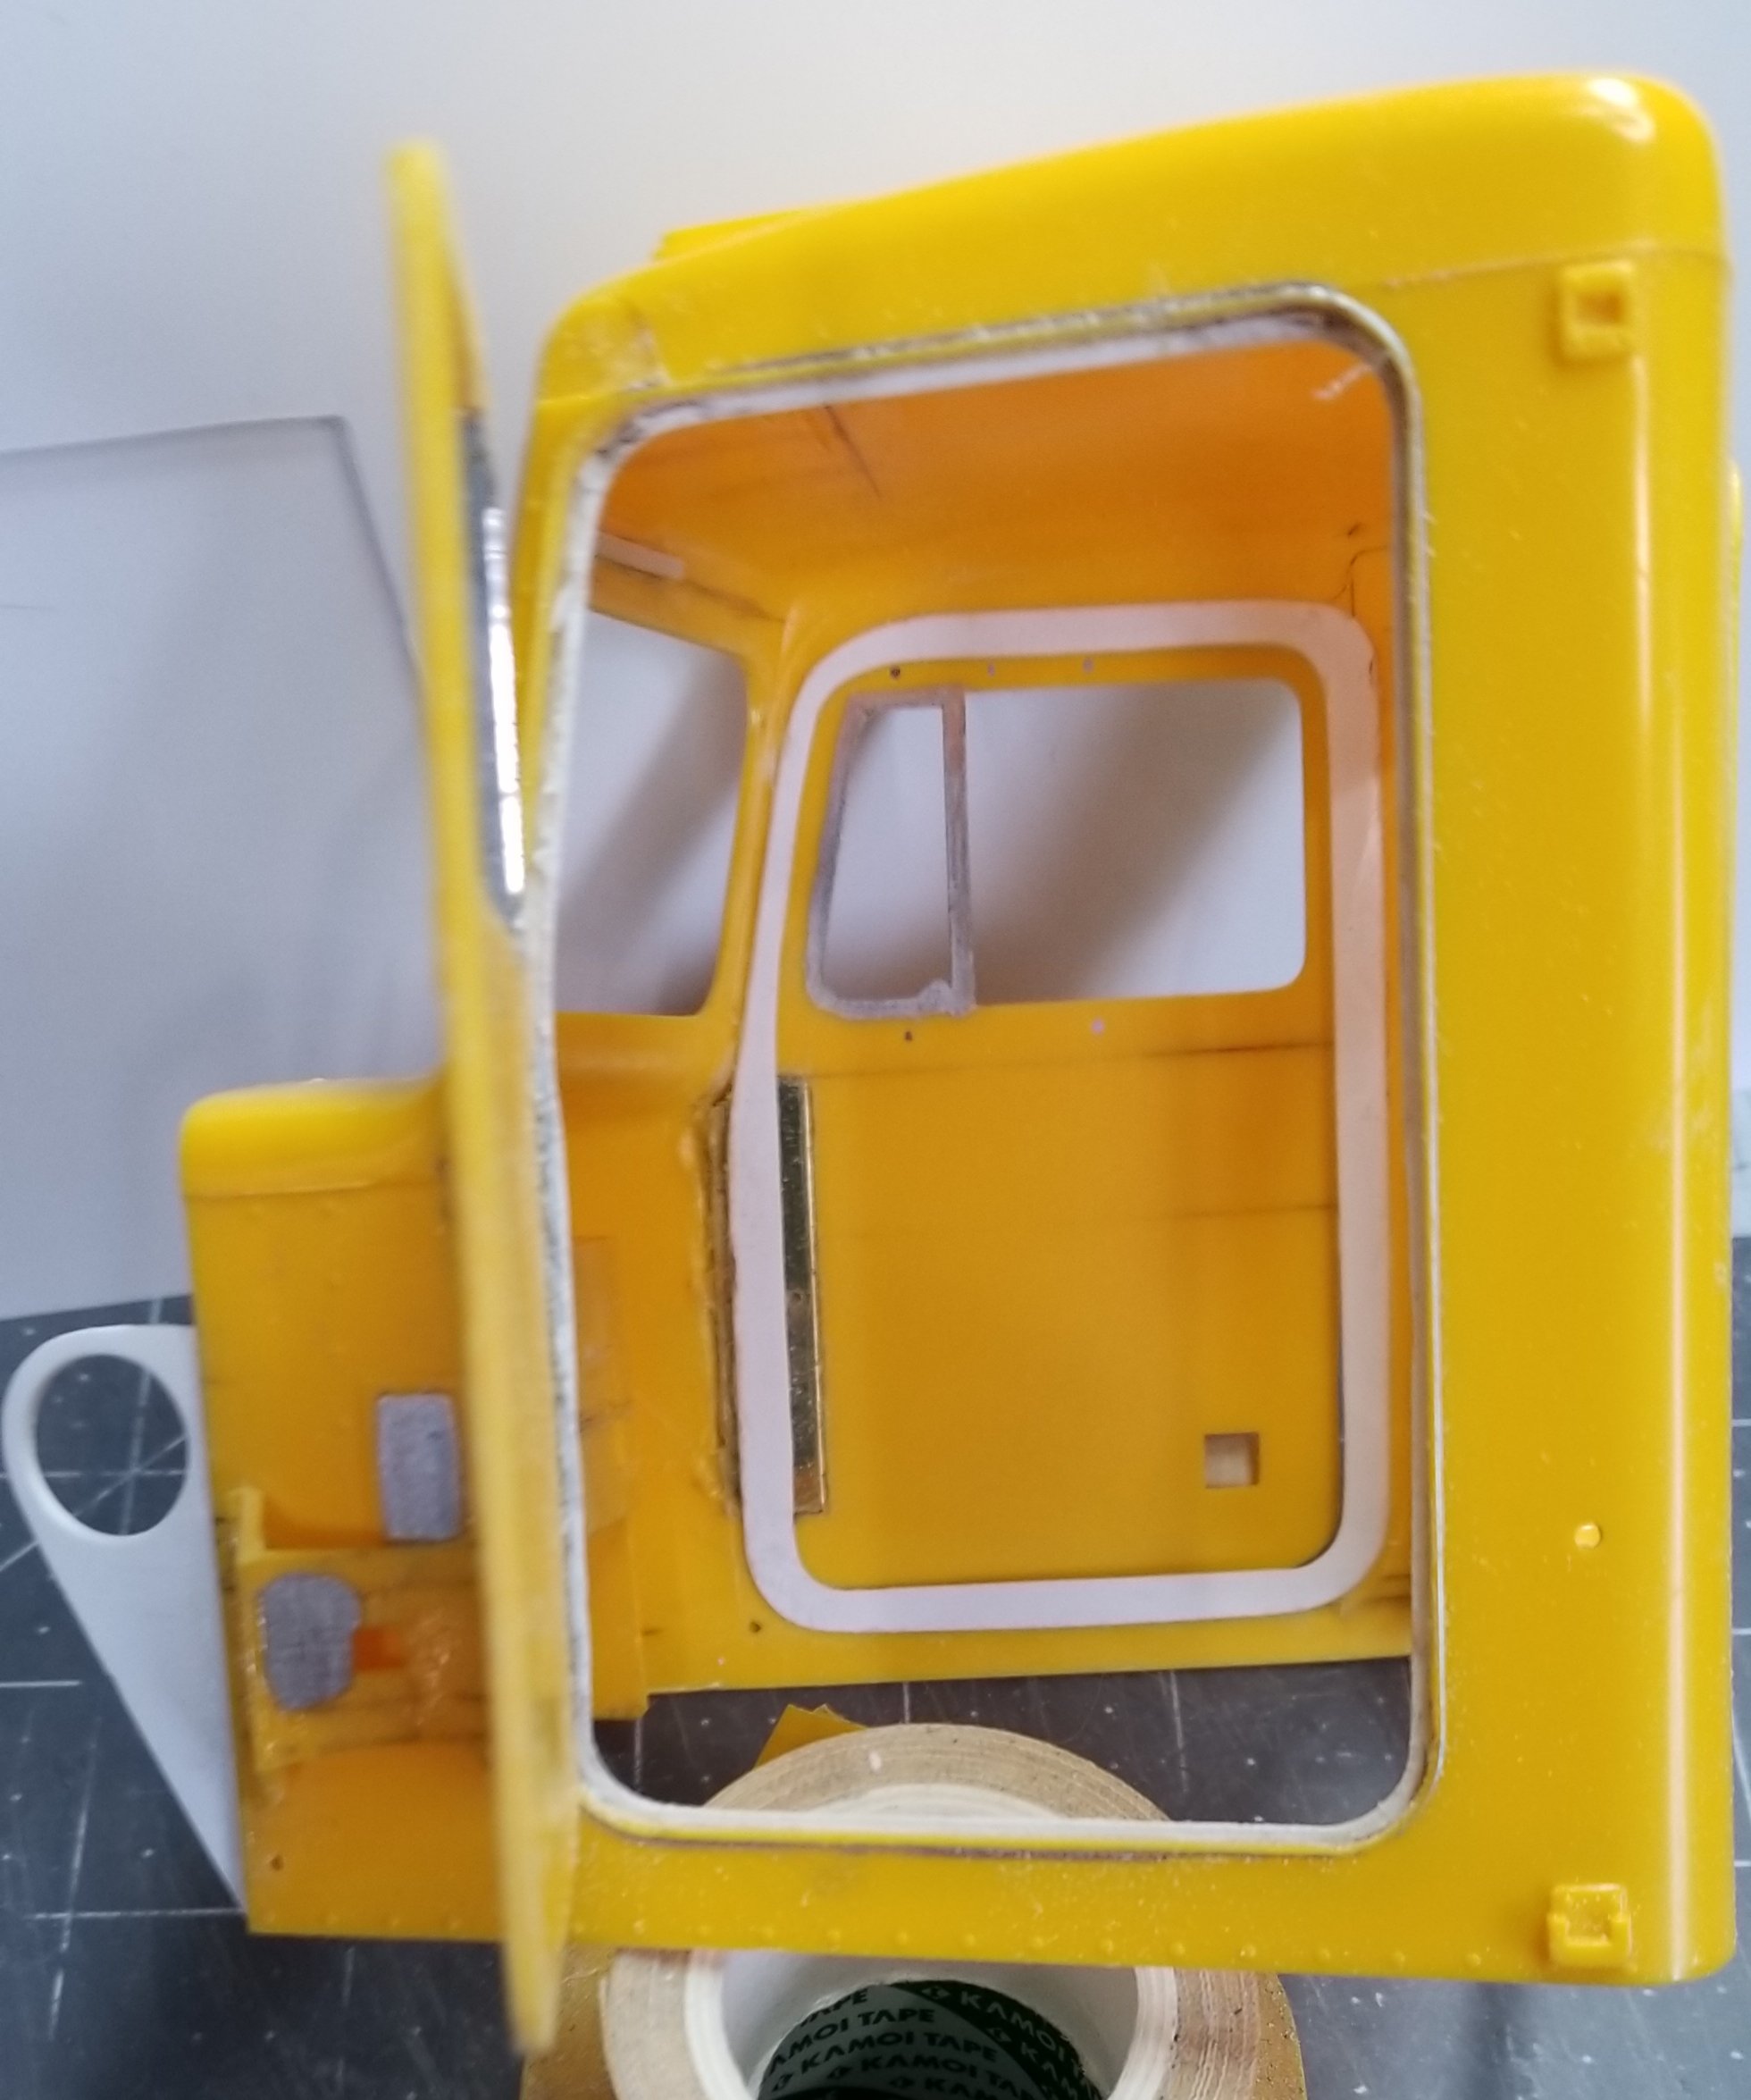
 this view shows the passenger side door mounted.
this view shows the passenger side door opened.
this view shows the 0.015" thk plastic I added to the inside of the cab for the door to close on.
view from the front of the passenger side door opened.
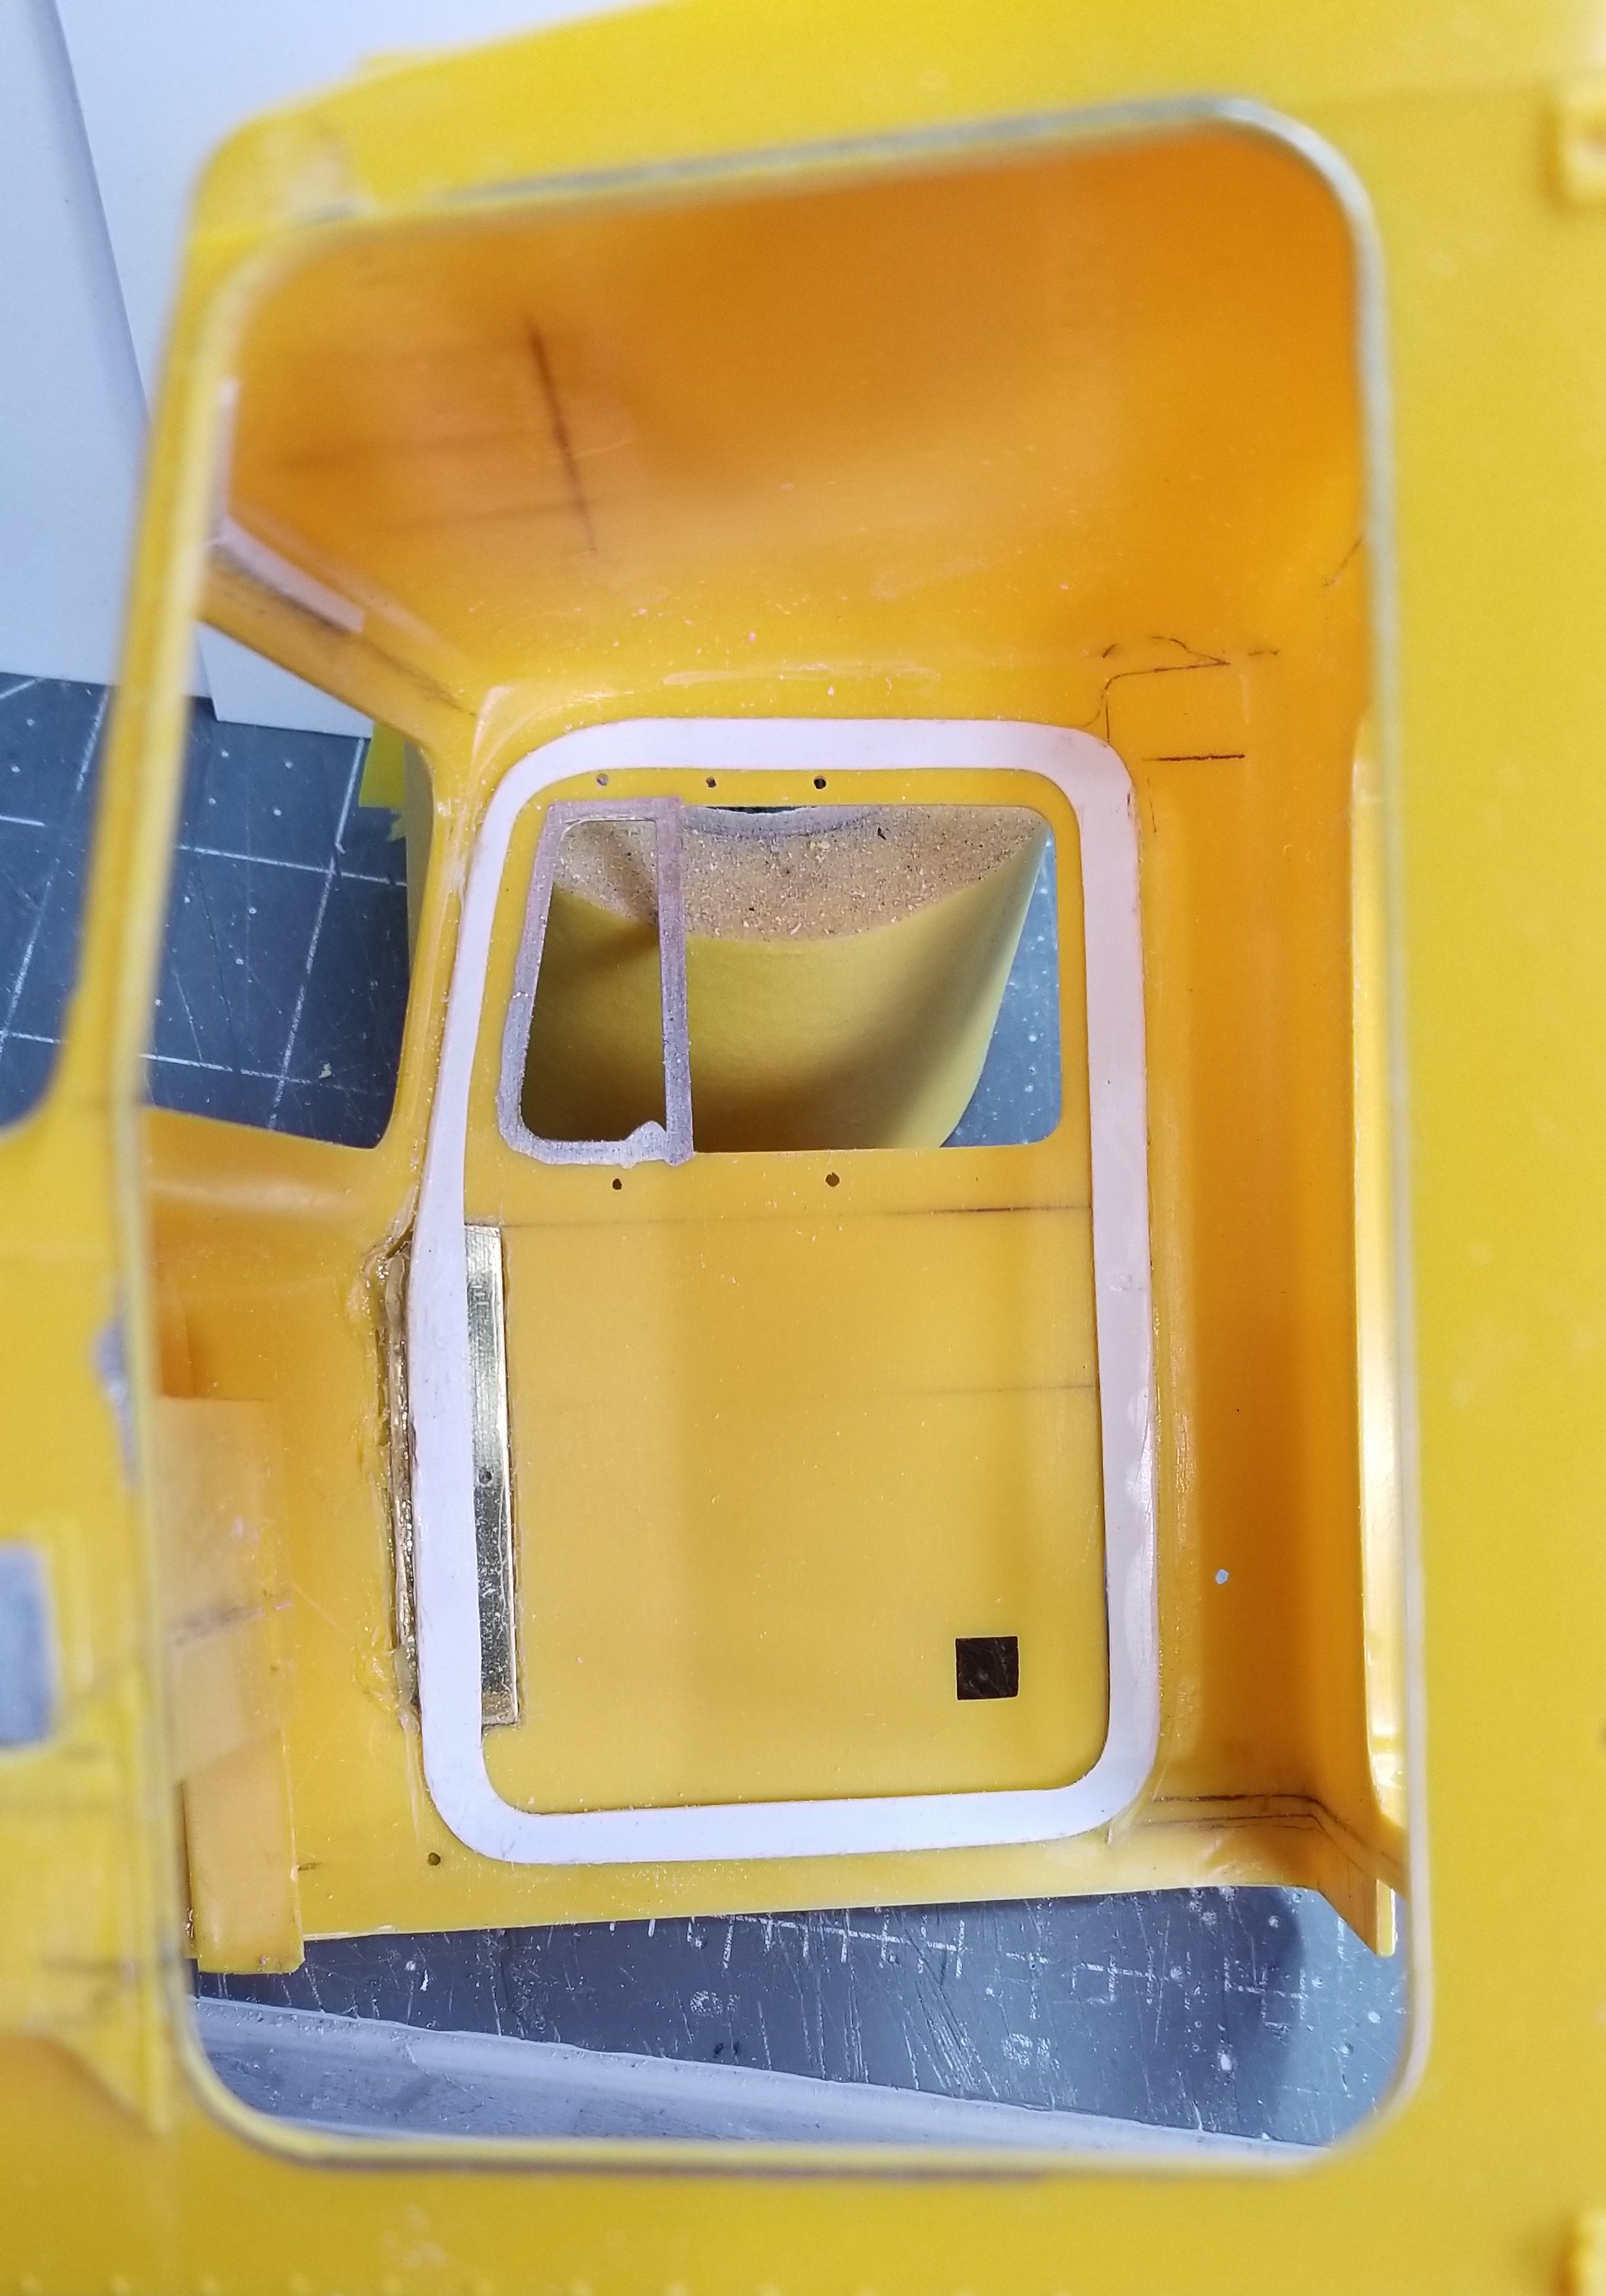
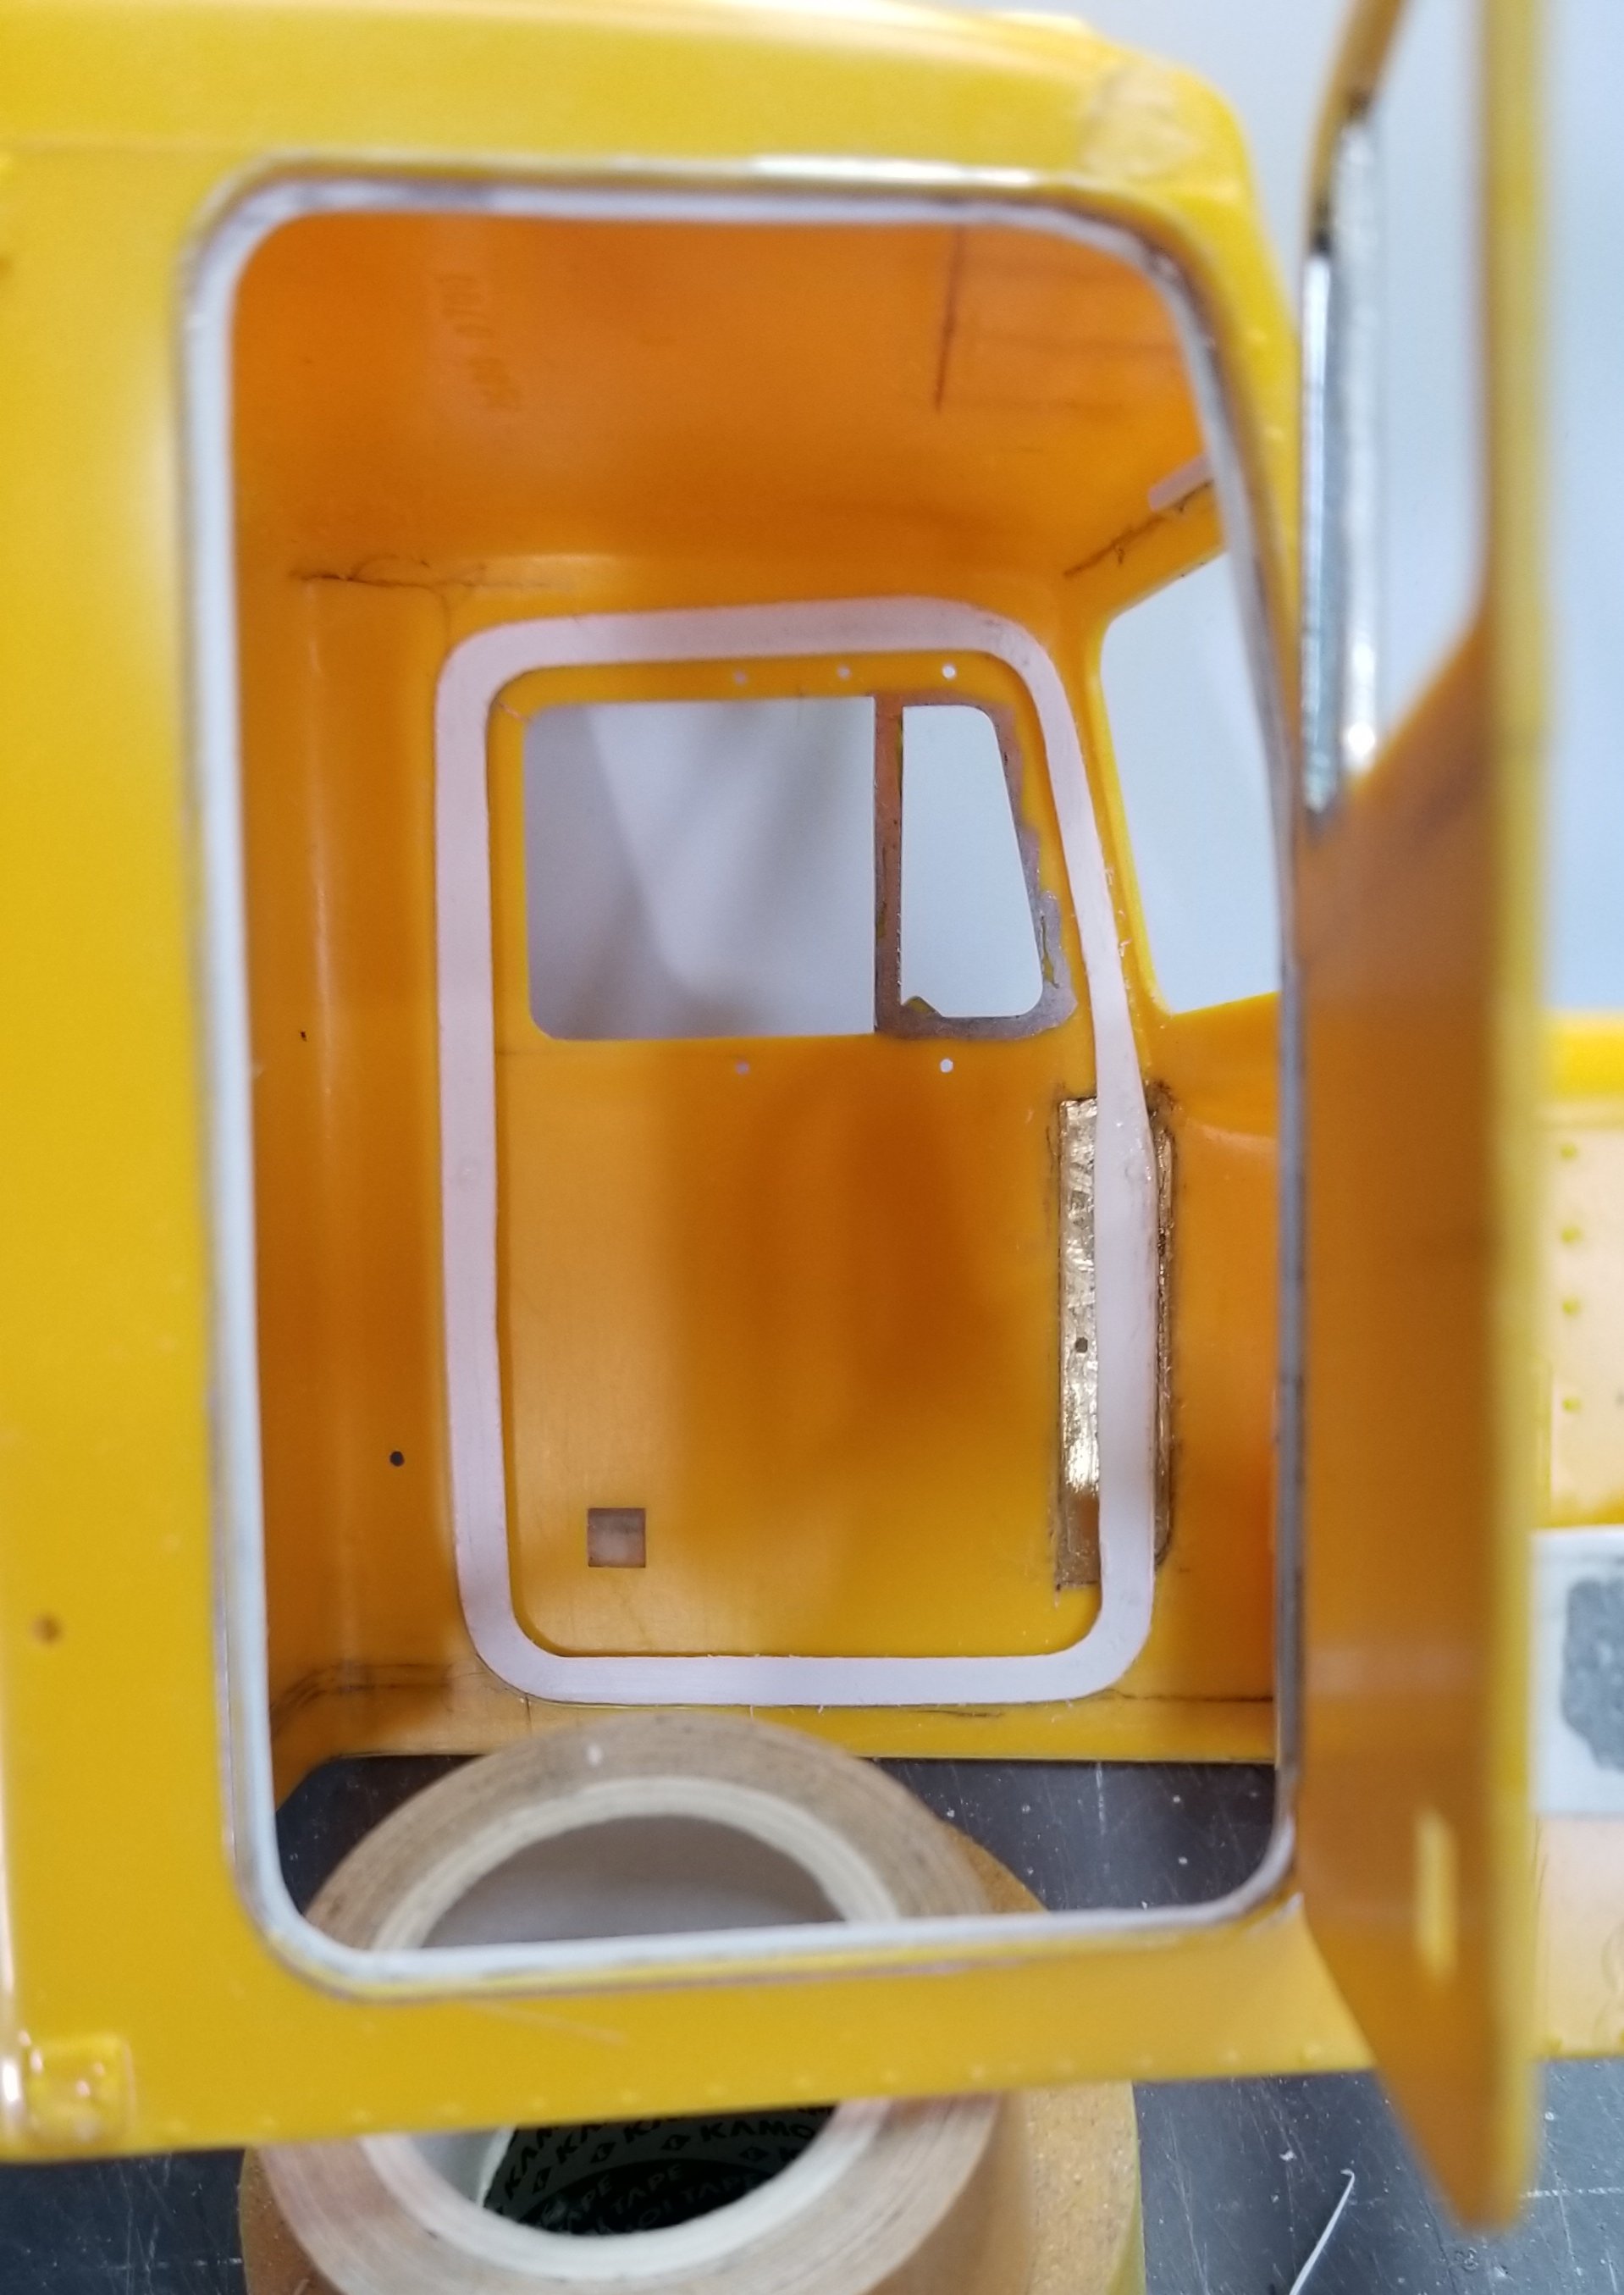
this view shows the drivers side door mounted. You can see at the top of the hinge where I almost went through the cab.
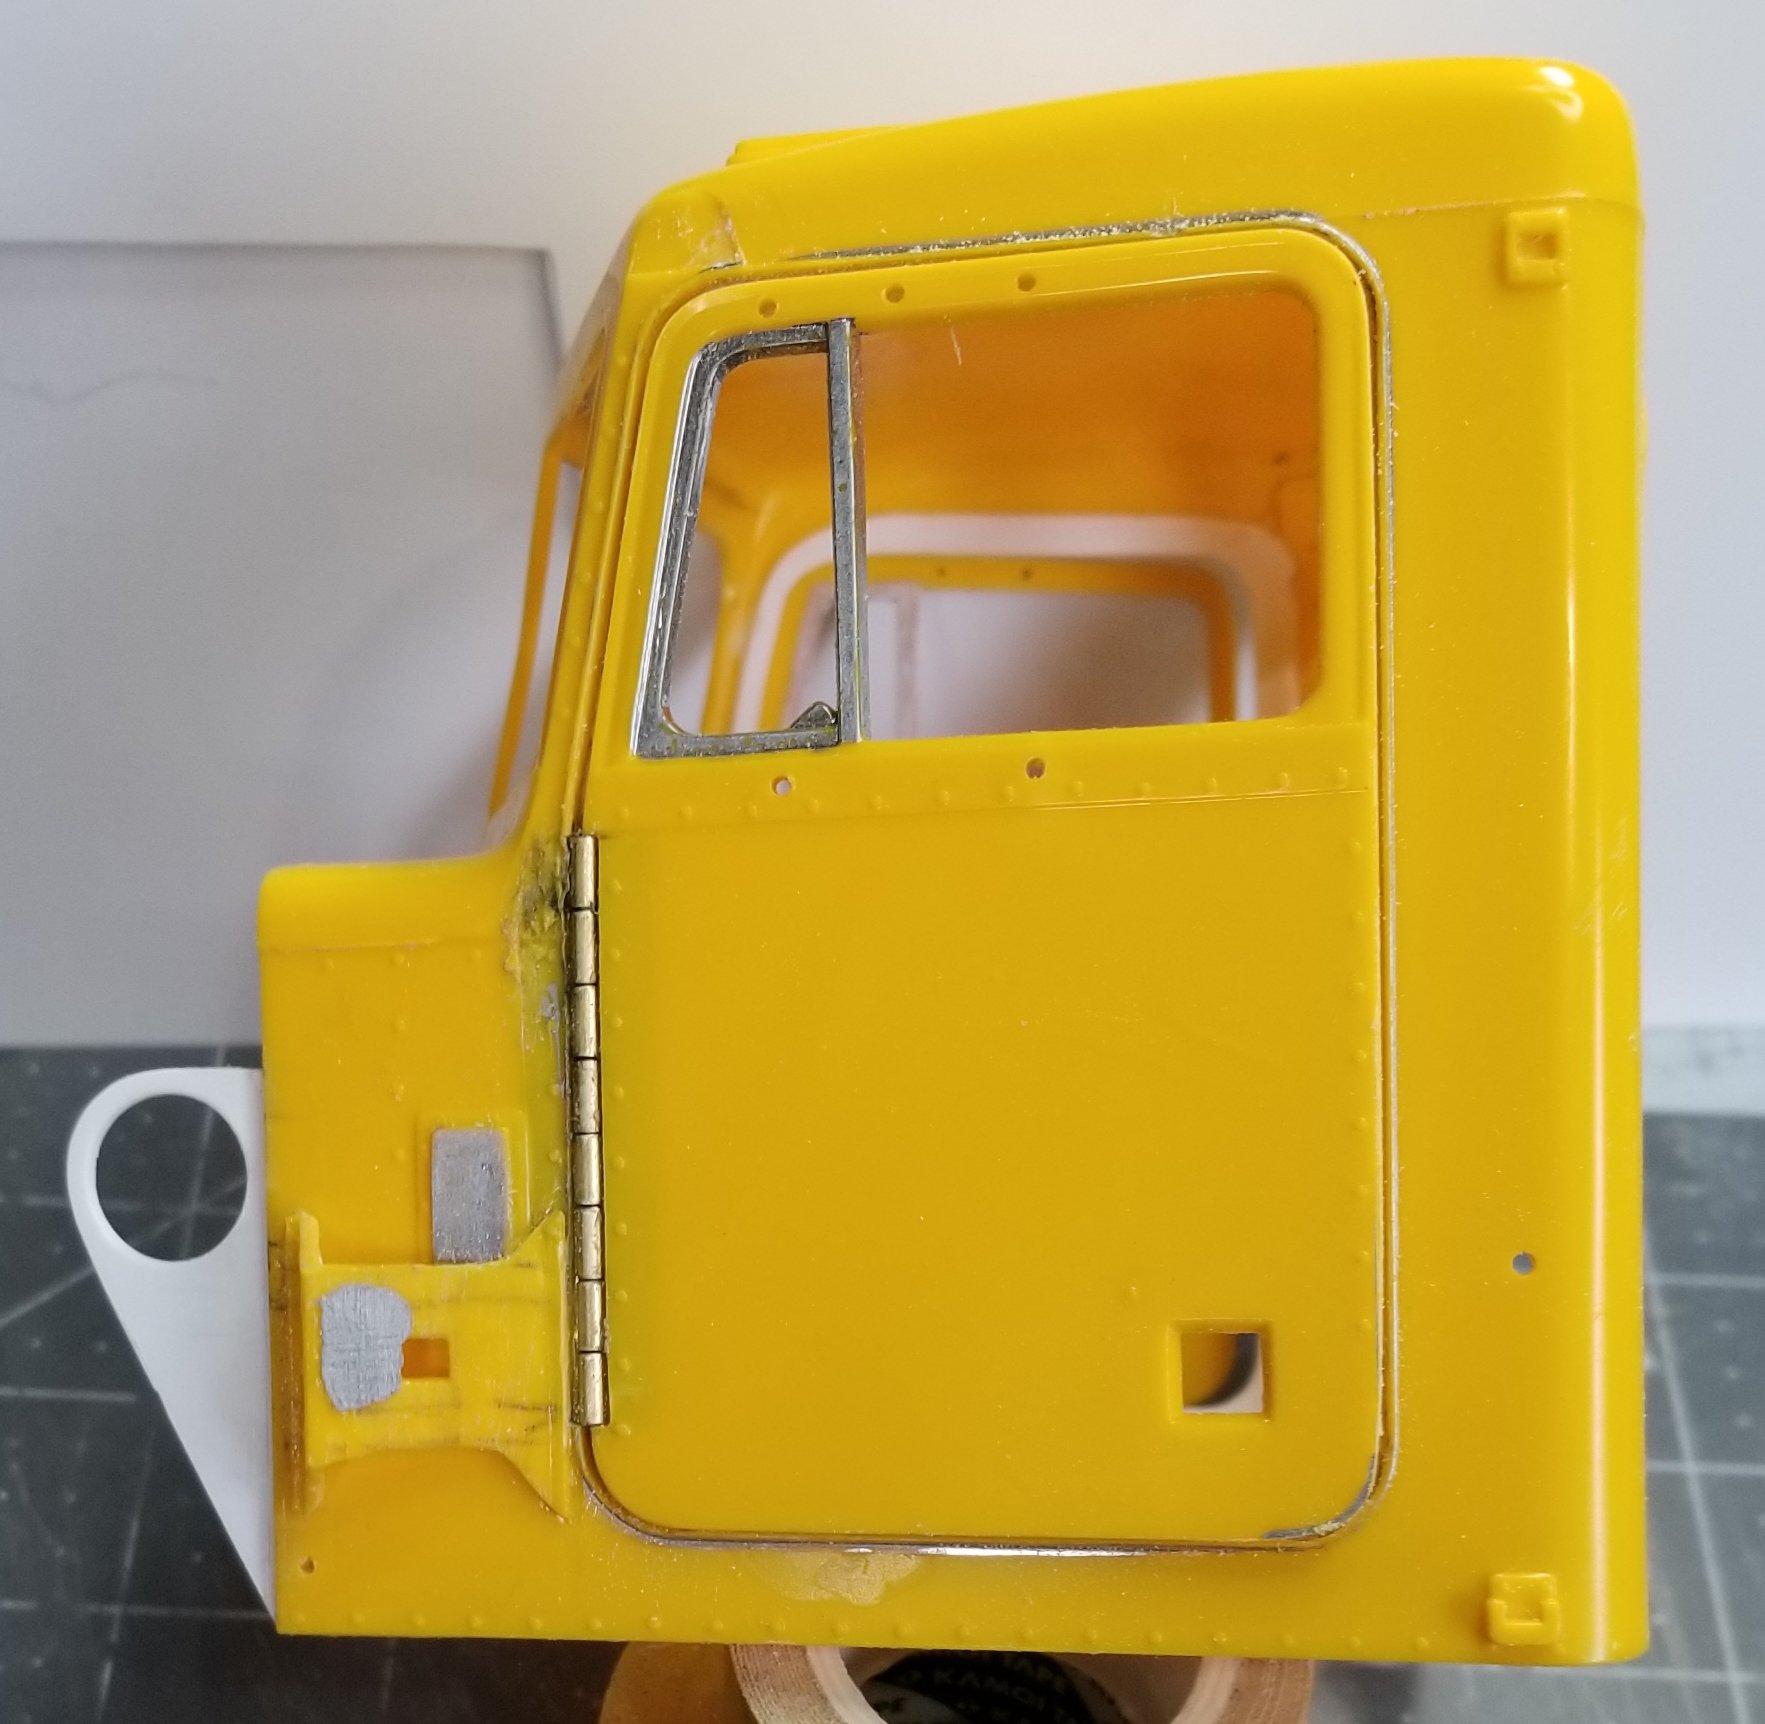
this view shows the passenger side door mounted.
this view shows the passenger side door opened.
this view shows the 0.015" thk plastic I added to the inside of the cab for the door to close on.
view from the front of the passenger side door opened.
this view shows the drivers side door mounted. You can see at the top of the hinge where I almost went through the cab. this view shows the drivers side door opened. You can see the plastic trim lip that I added around the door openings.
view of the drives side door with opening trim.
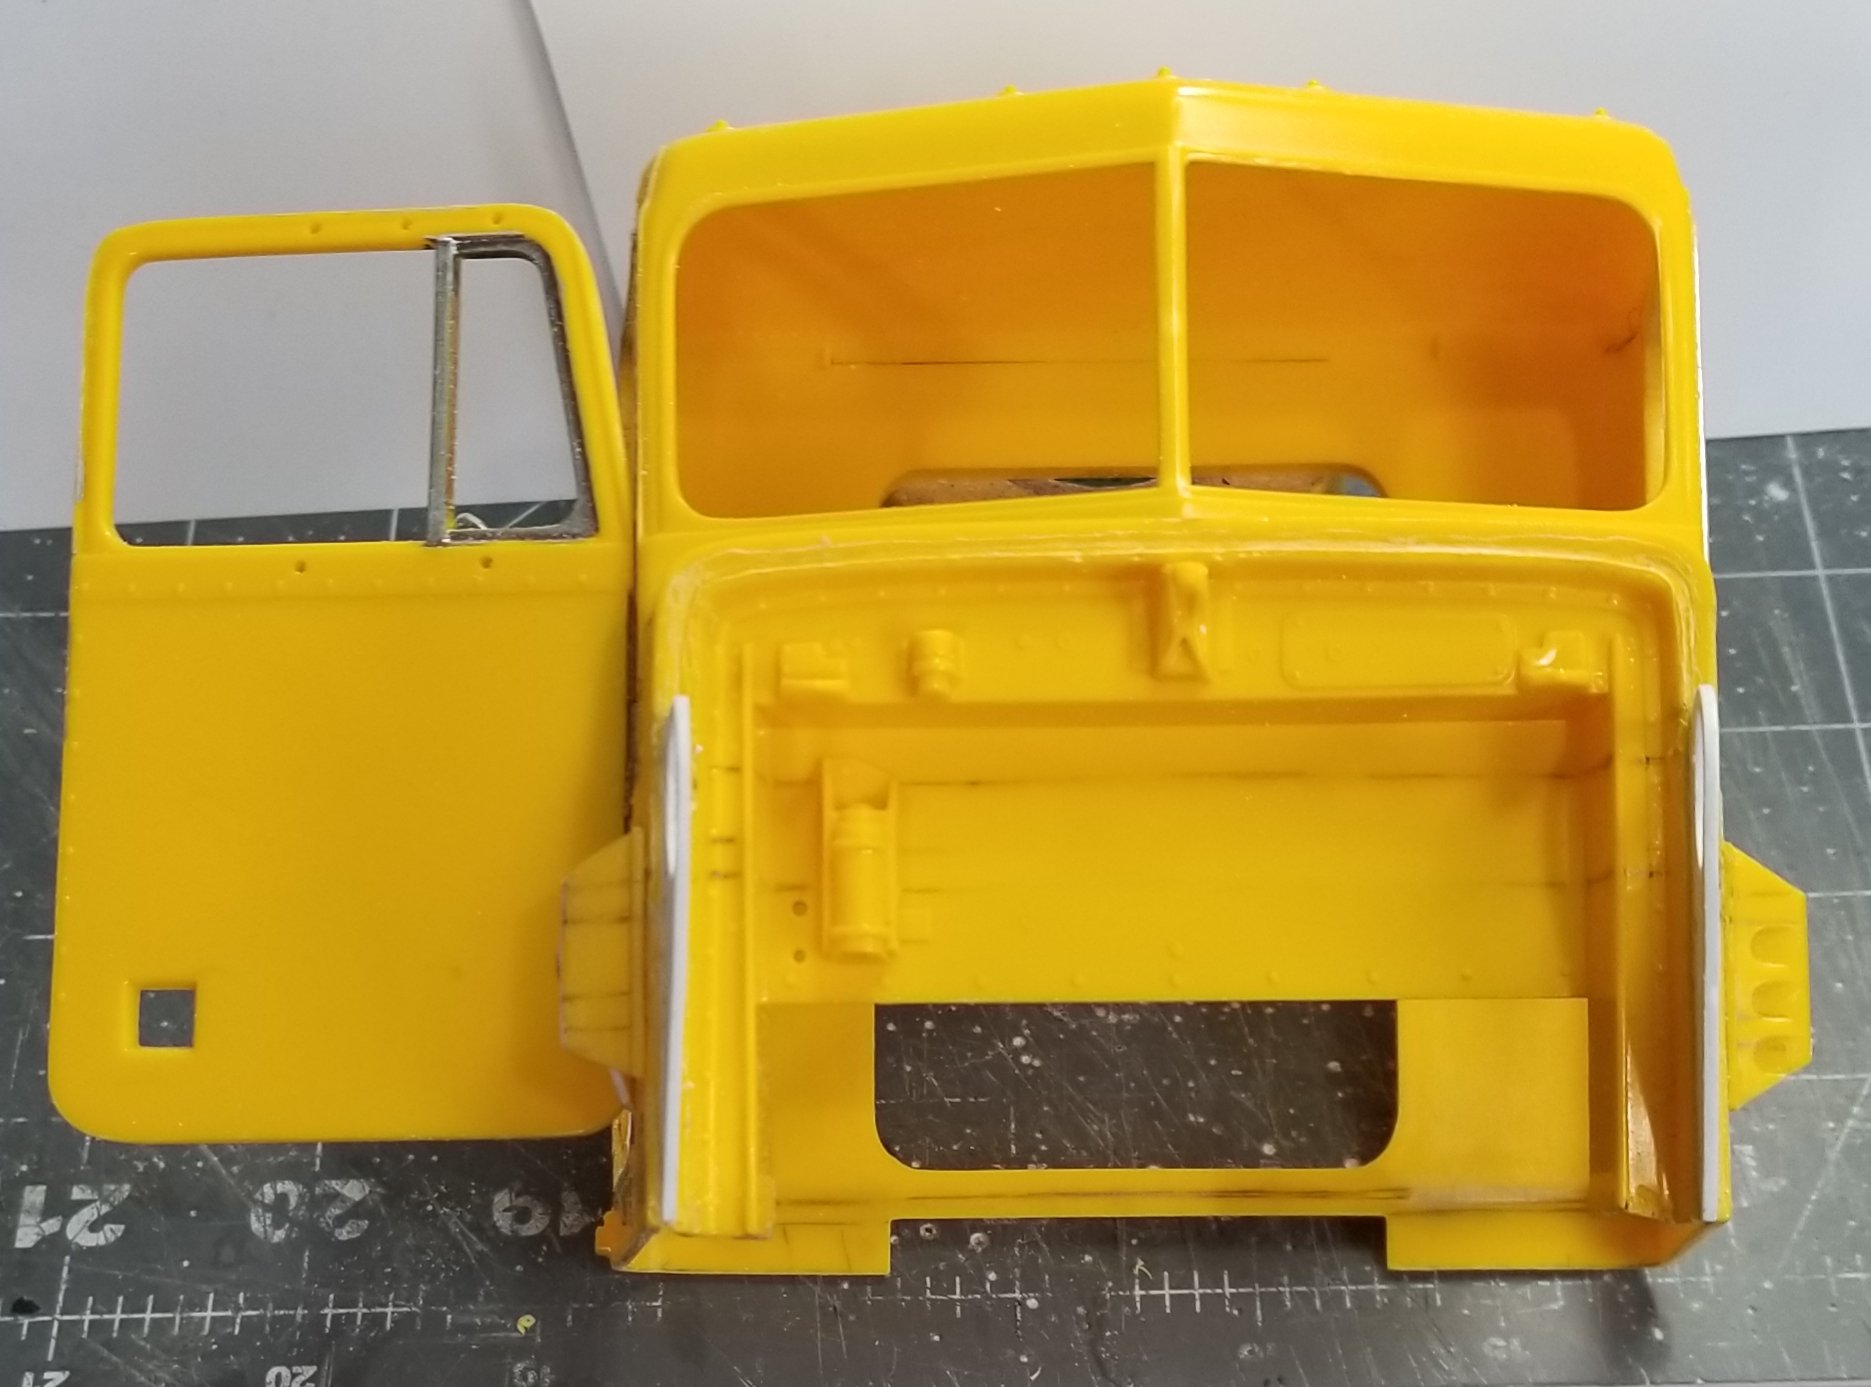
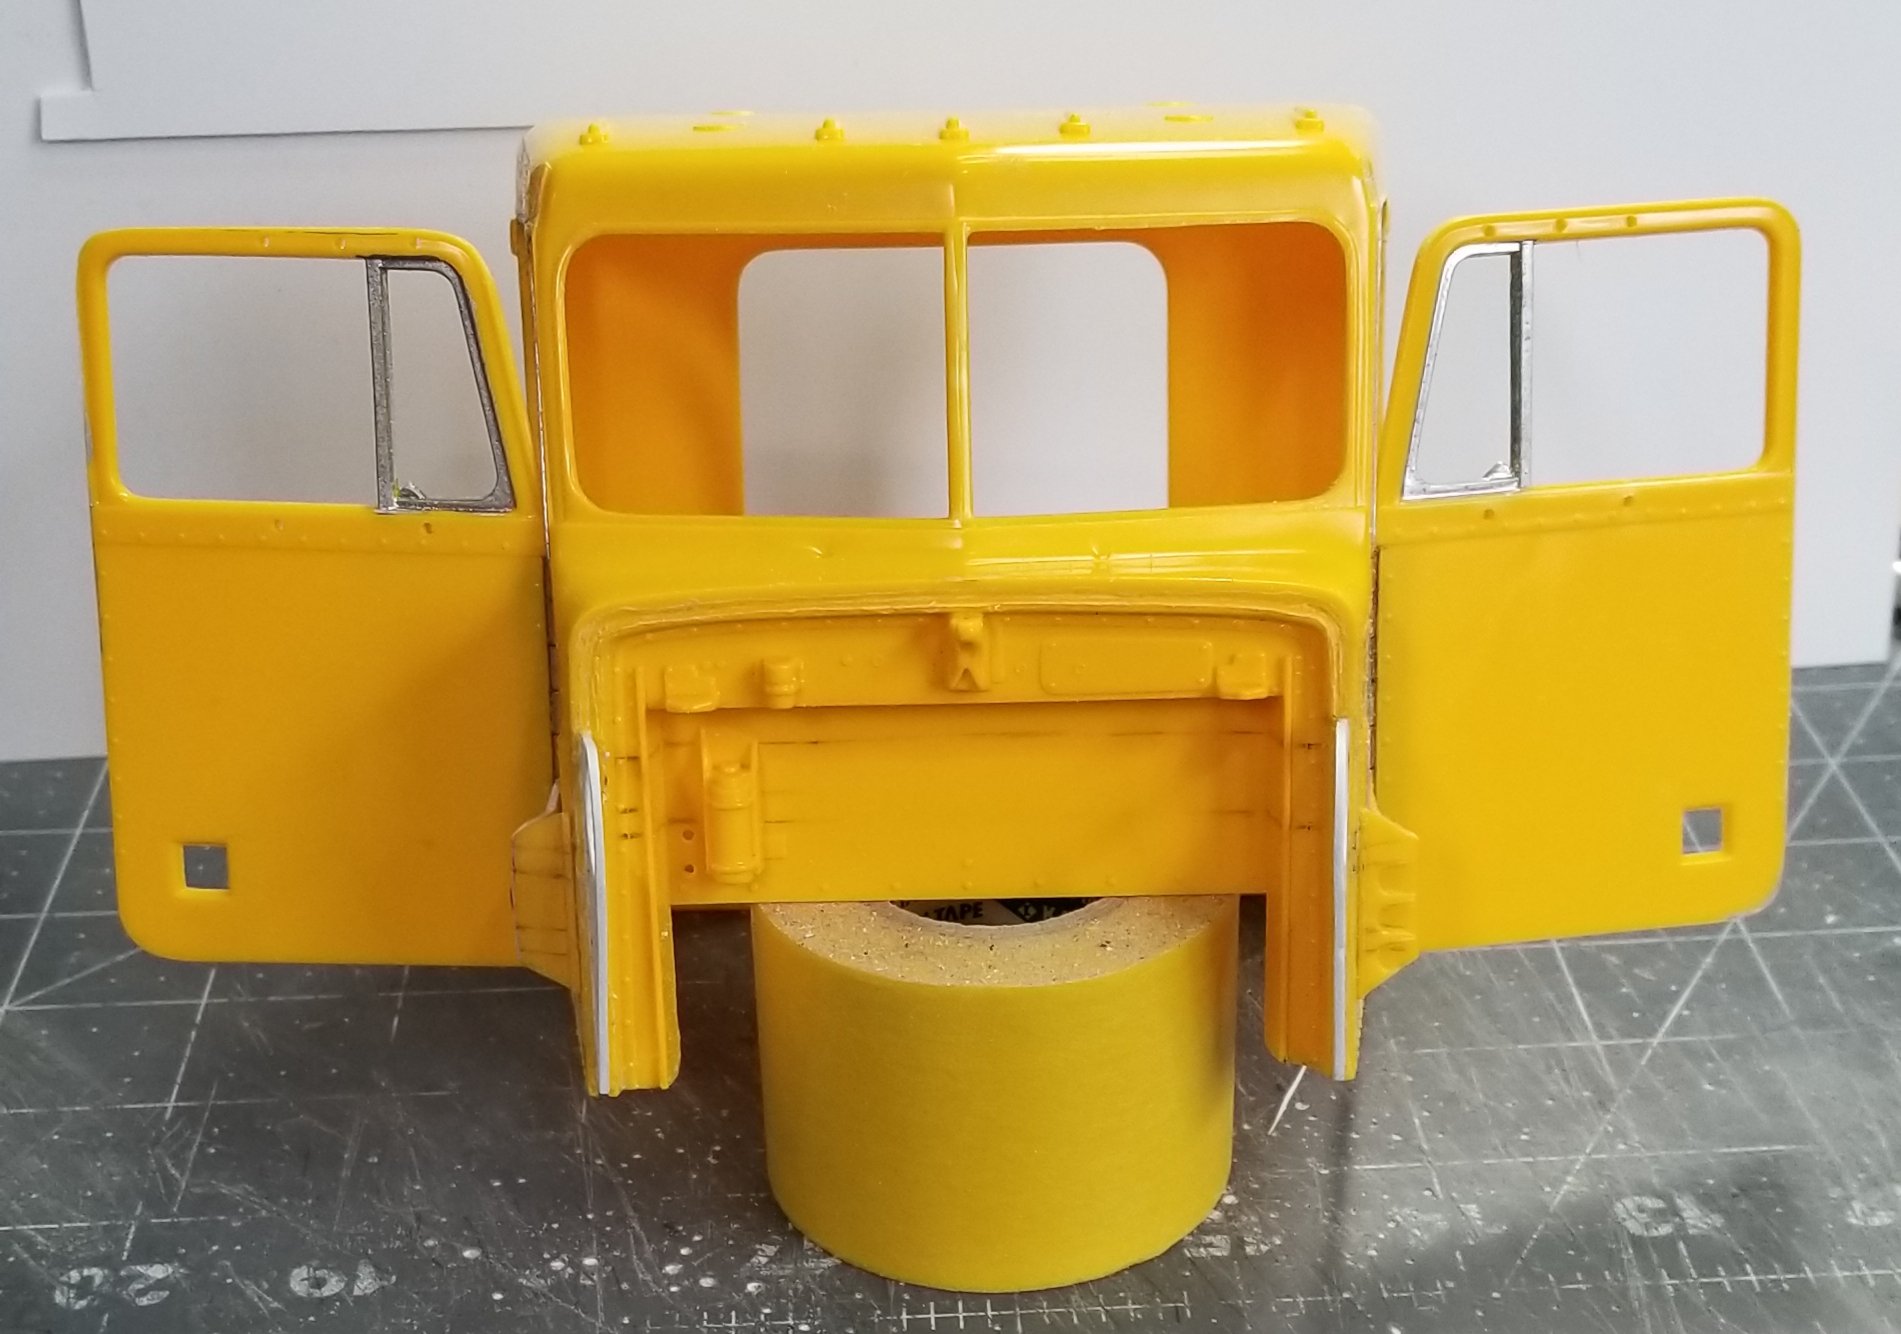
this view shows both doors opened.
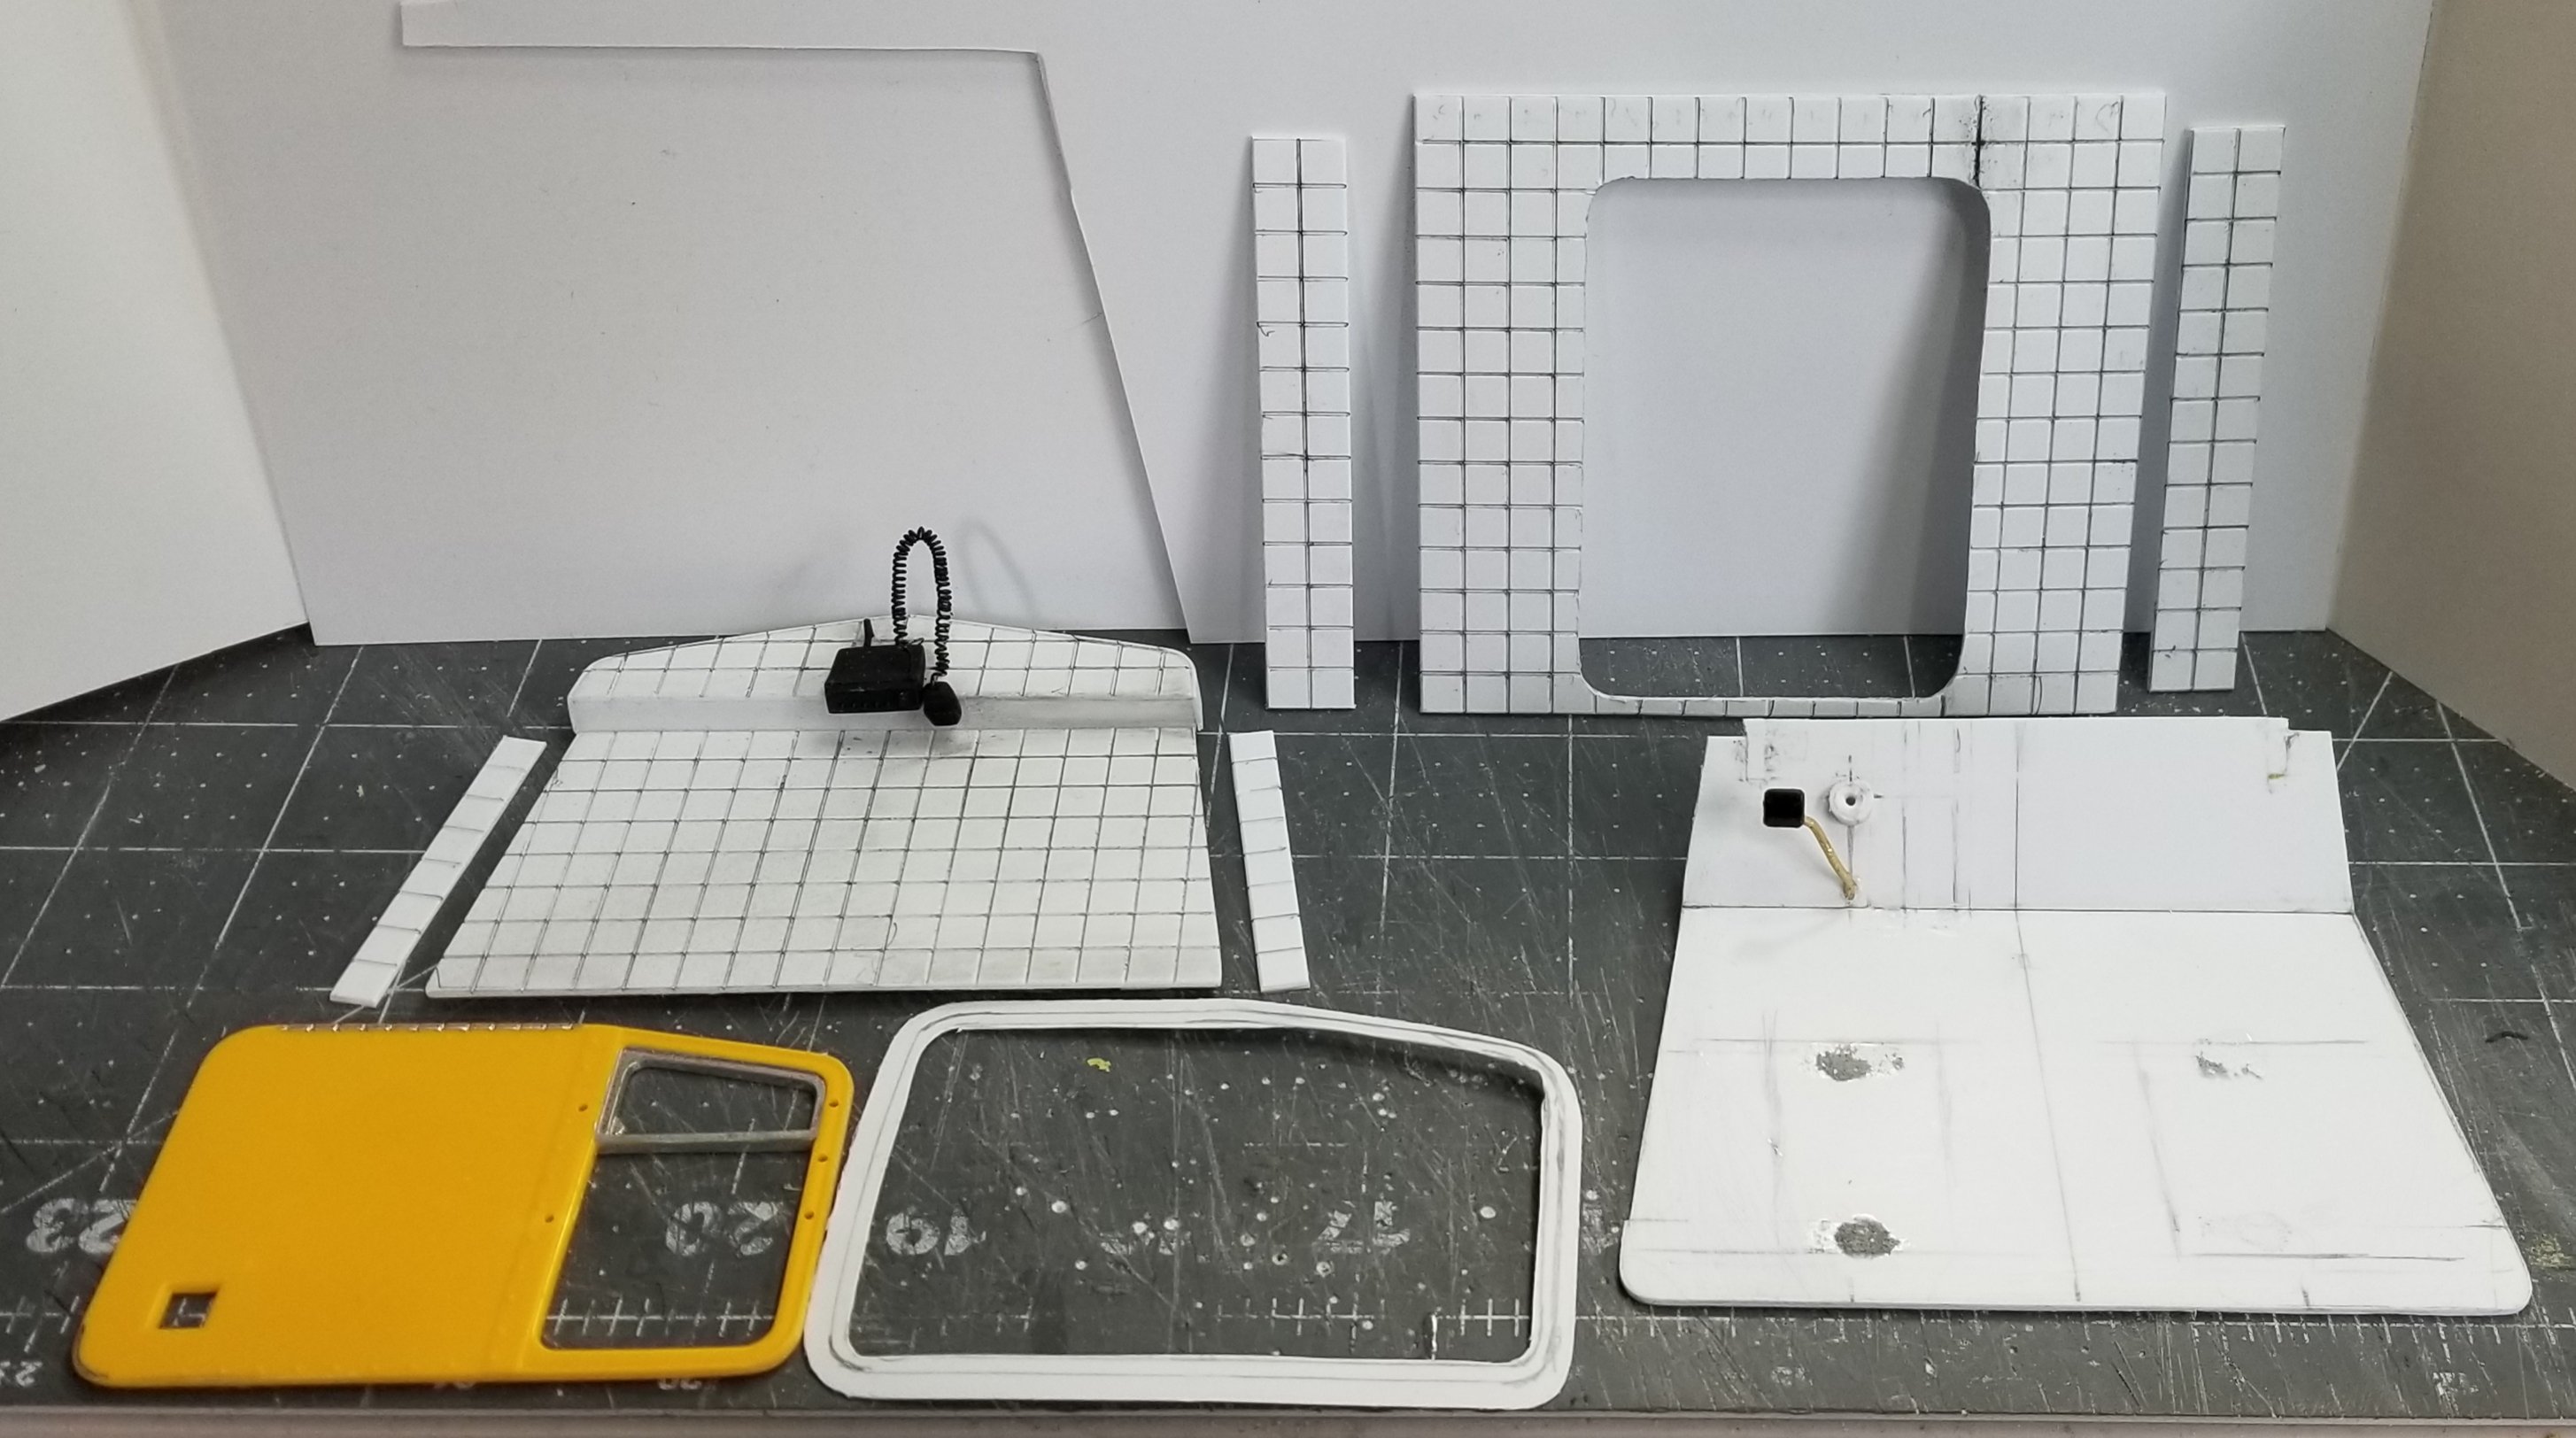
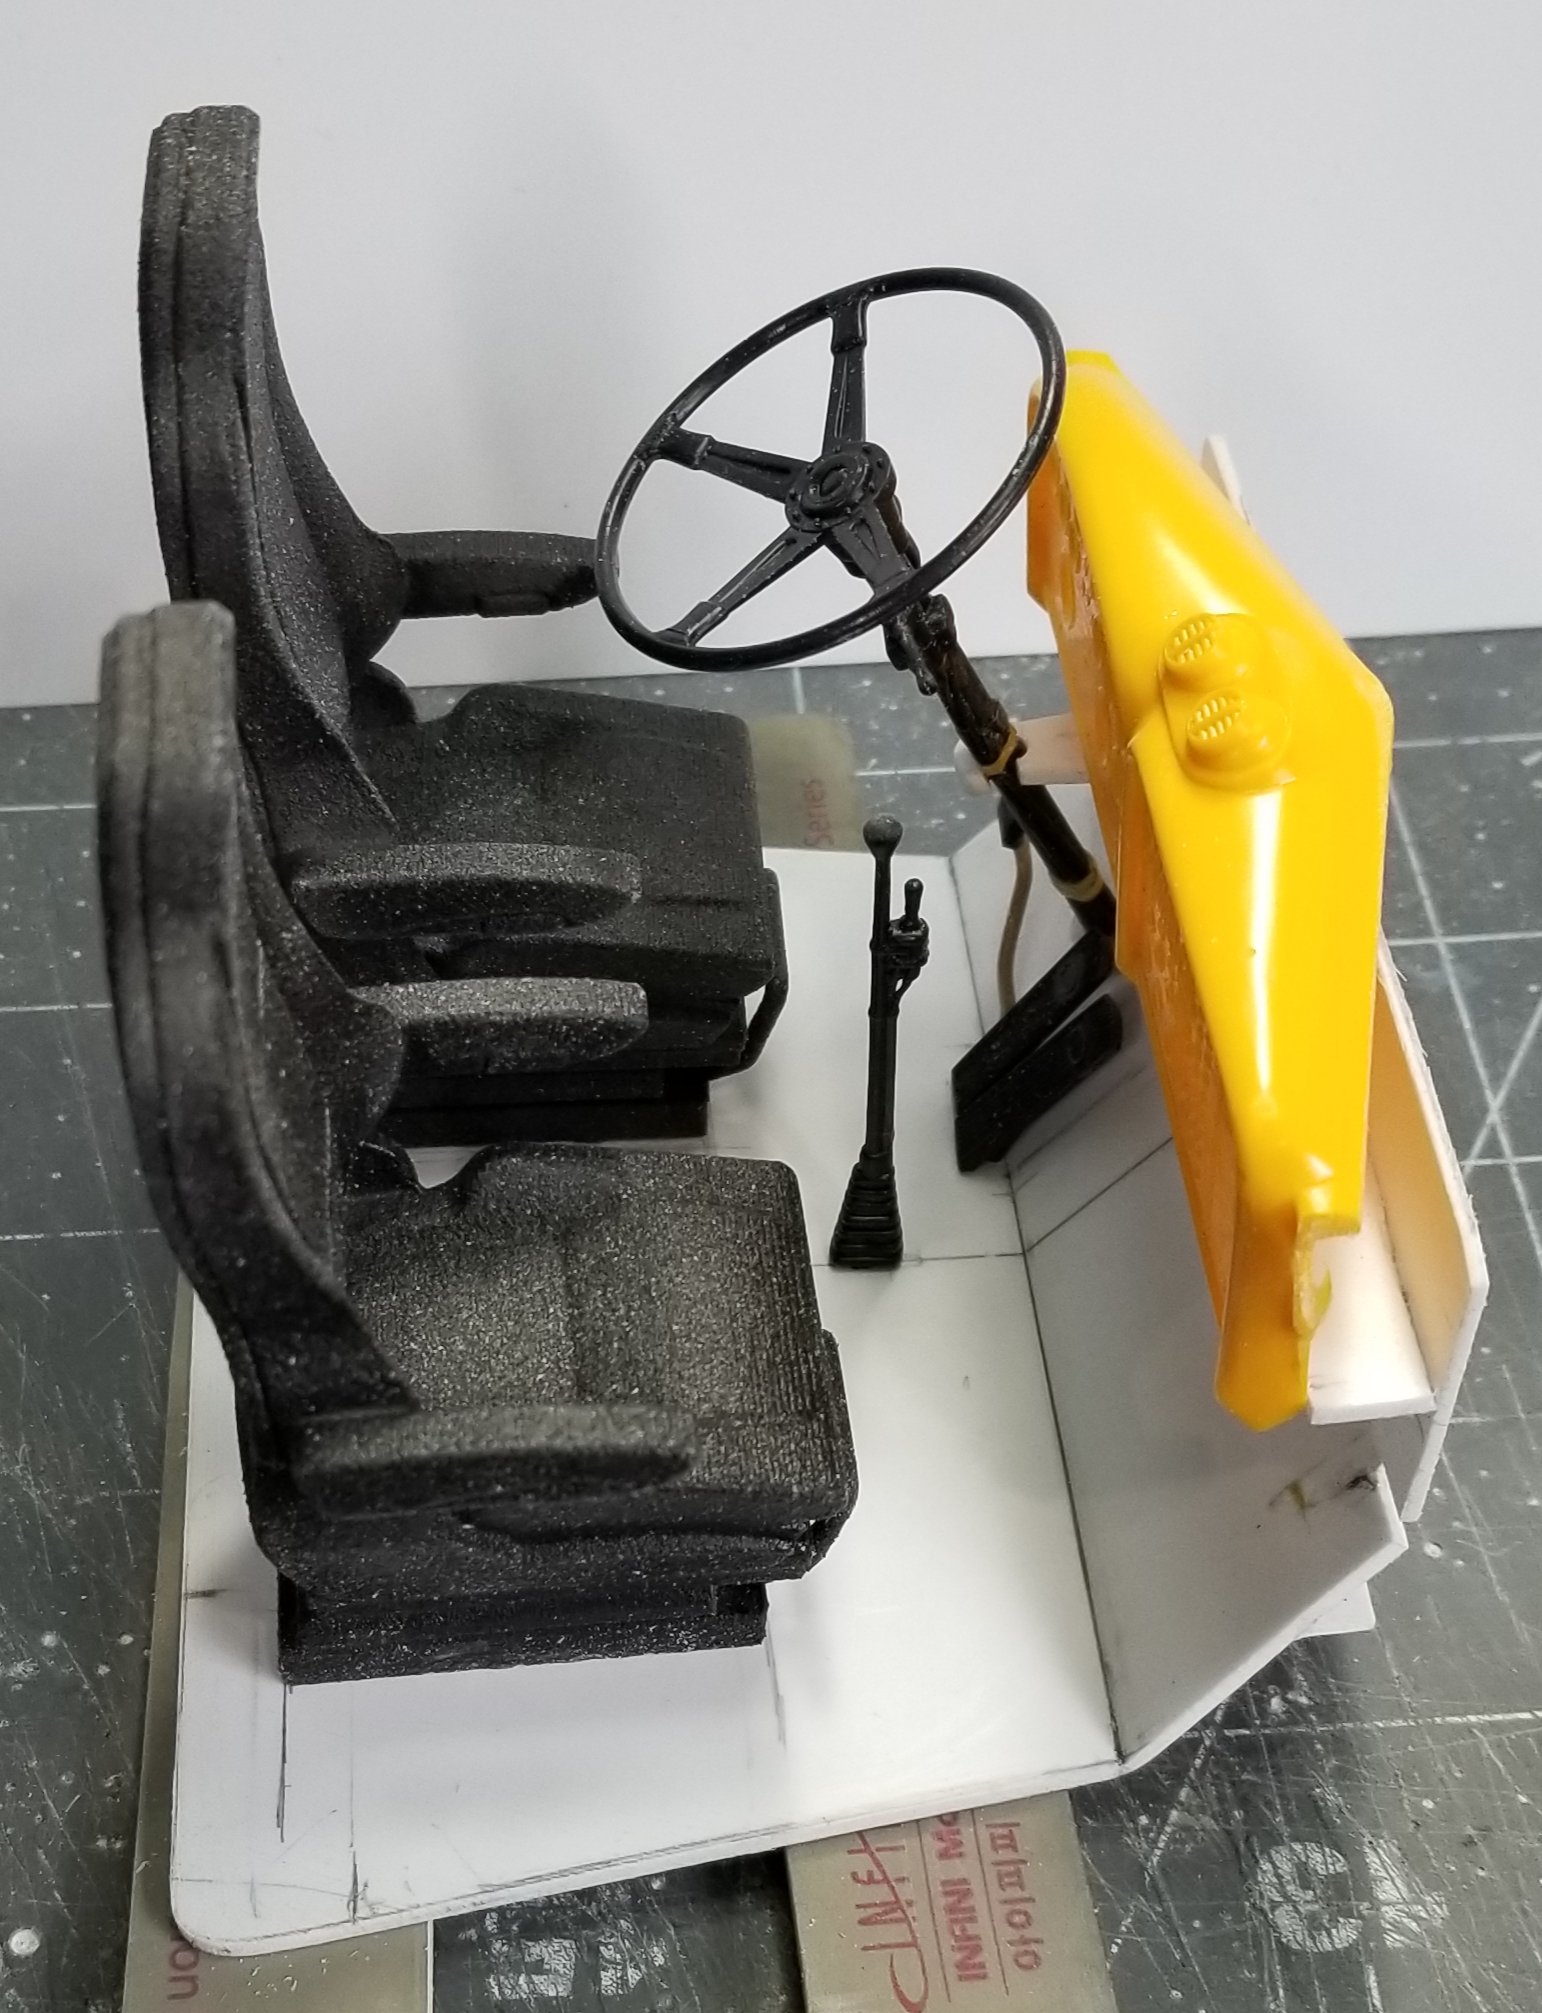
this view shows the drivers door and trim. Also the floor, roof panel with CB and sde peices, back wall and side peices. I'm planning on painting this in tan and brown to complement the exterior colors.
view from the rear of the interior.
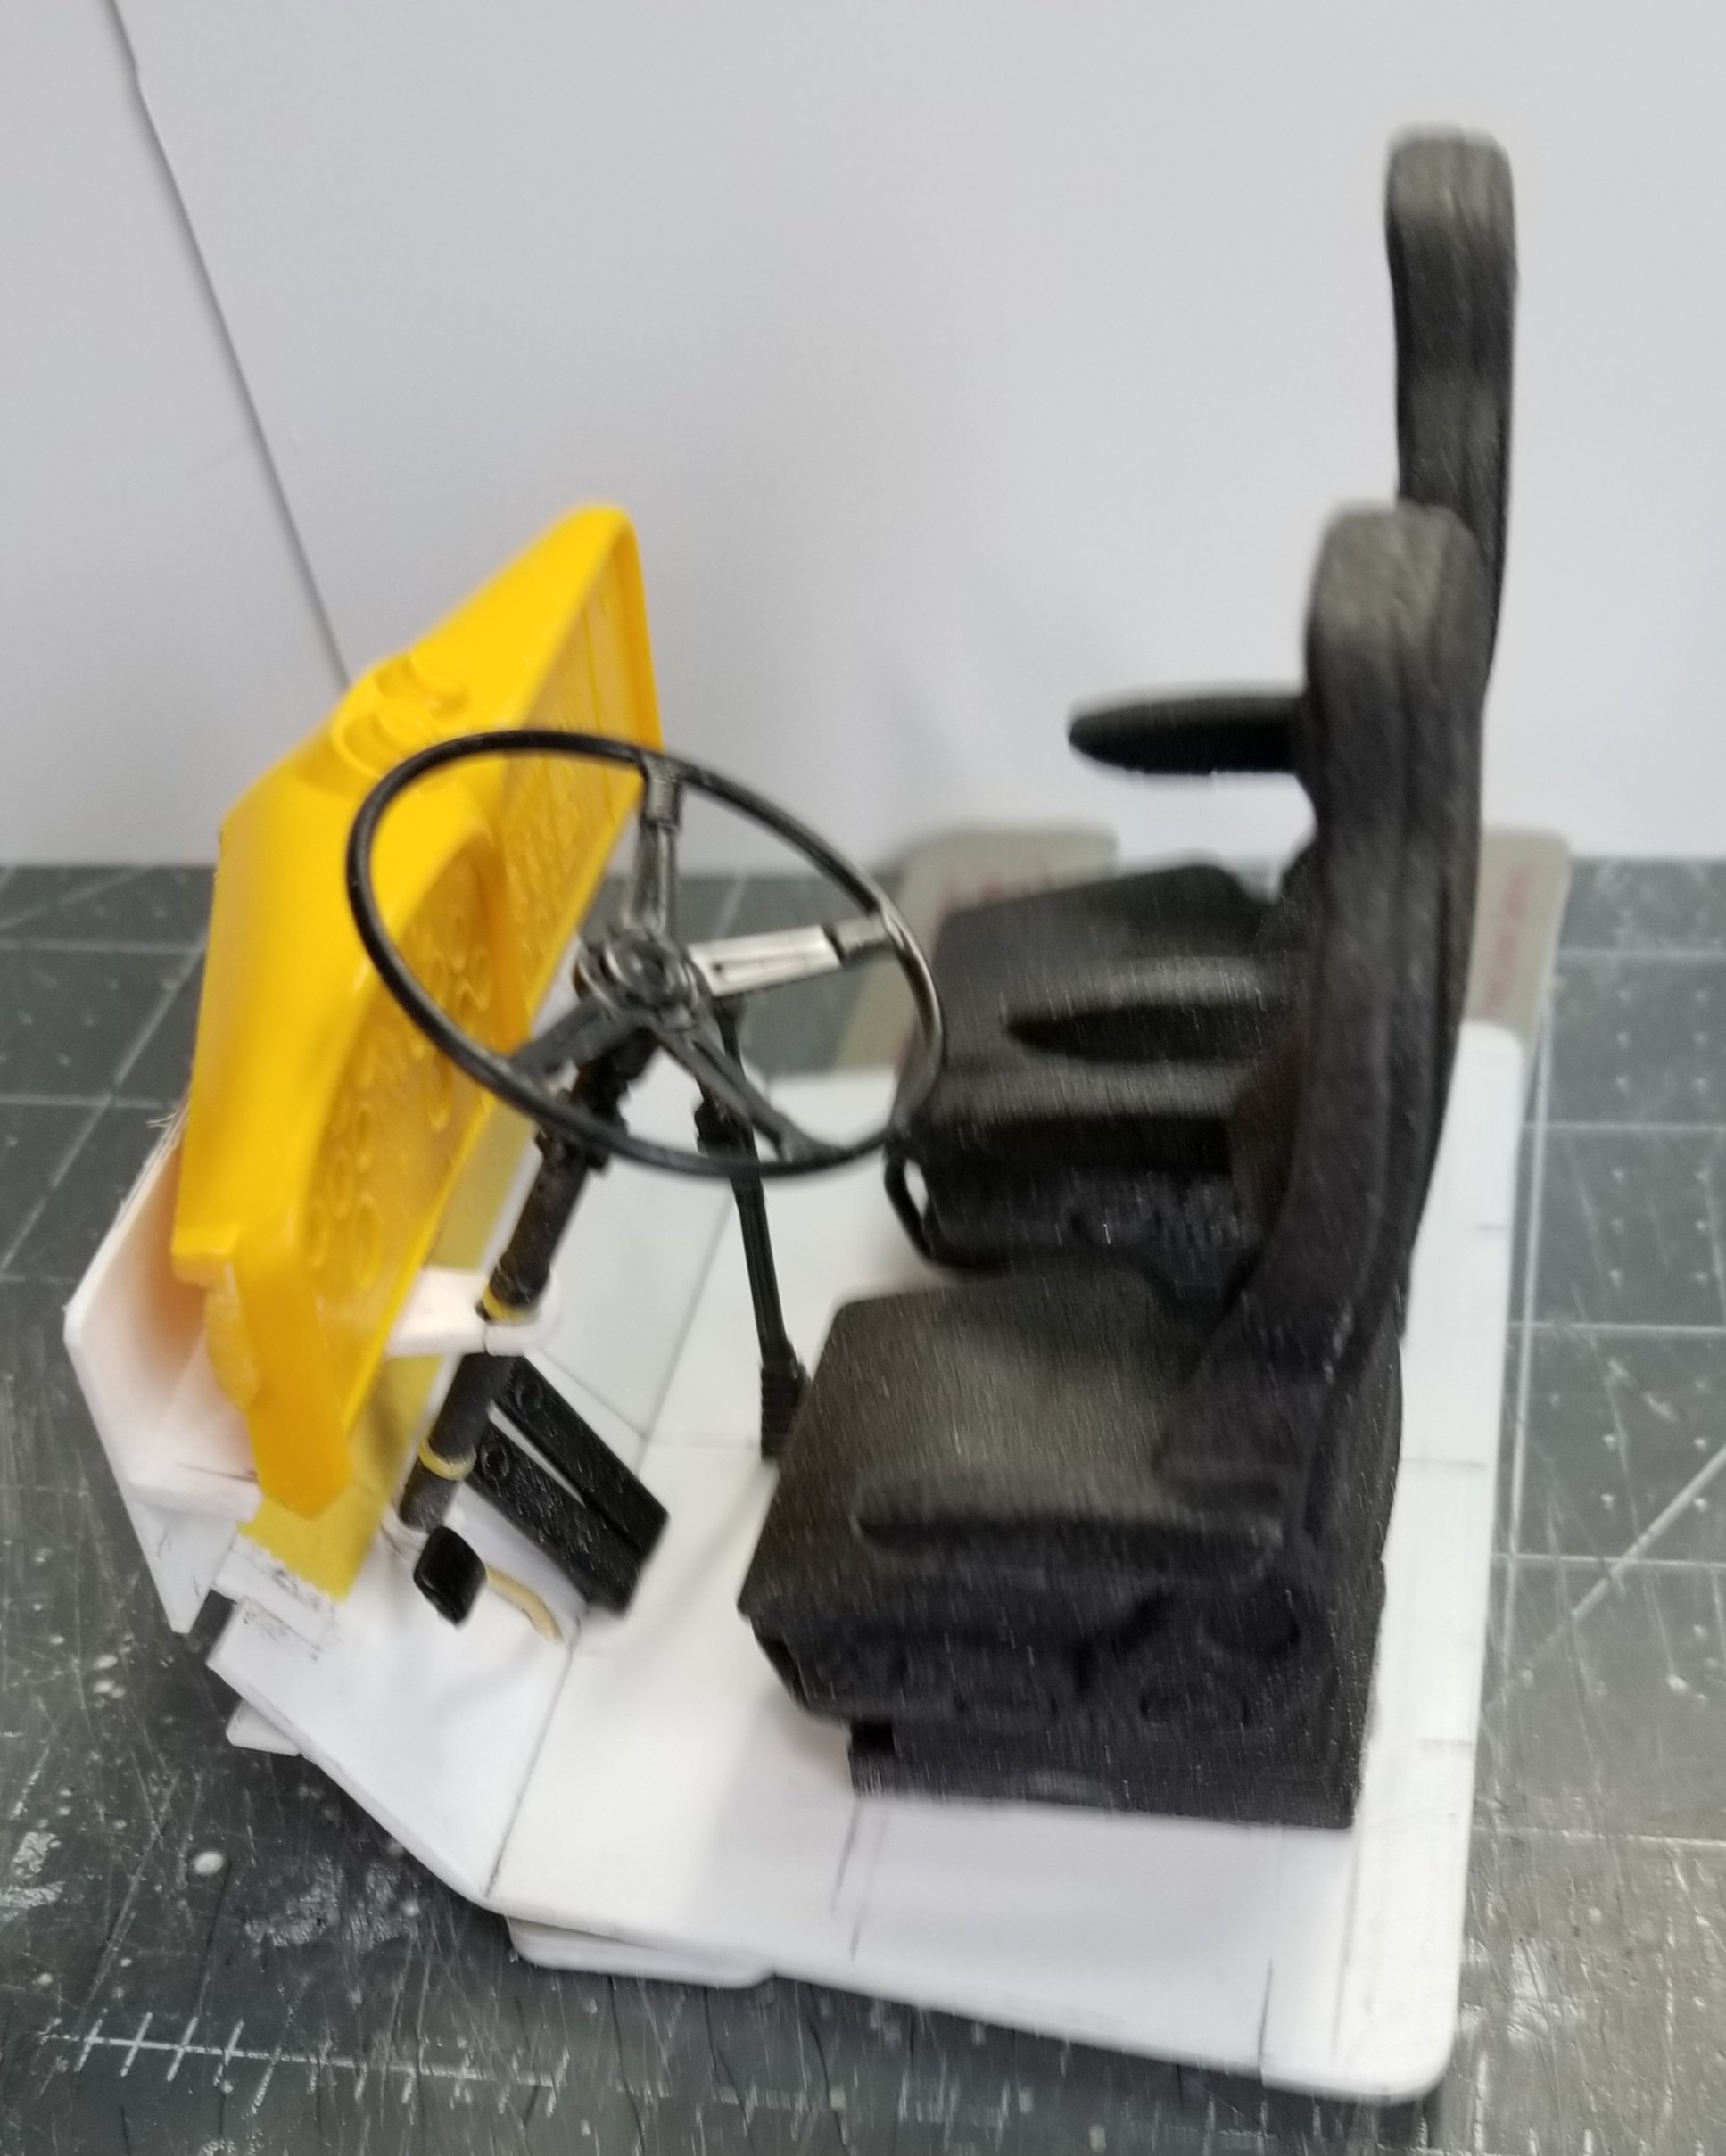
view of the interior from the passenger side.
view of the interior from the drivers side. I have gauge decals for the instrument panel. Well that's it for now be back with more updates soon.
this view shows the drivers side door opened. You can see the plastic trim lip that I added around the door openings.
view of the drives side door with opening trim.
this view shows both doors opened.
this view shows the drivers door and trim. Also the floor, roof panel with CB and sde peices, back wall and side peices. I'm planning on painting this in tan and brown to complement the exterior colors.
view from the rear of the interior.
view of the interior from the passenger side.
view of the interior from the drivers side. I have gauge decals for the instrument panel. Well that's it for now be back with more updates soon.
Ron G
-
Hey all
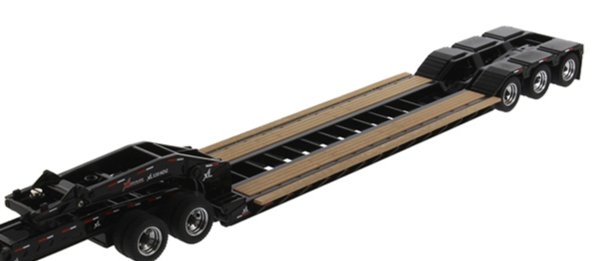
I found this on YouTube. It's a 1/16 scale XL Specialized XL120 drop nose lowboy trailer from Diecast Masters. They are making it for there 1/16 scale RC Freightliner Cascadia truck. I've contacted them via email and they said it is definitely coming out. It will be available in China in October and probably available for pre-order for Christmas 2021. I plan on using this for my 1/16 Monogram Peterbilt 359 and my 1/16 Monogram Kenworth W900L 4 axle Heavy haul (this will be my next build after the Pete)
this view is pulled from YouTube of the prototype of the trailer, that's their 1/16 scale blue RC Freightliner Cascadia in the upper right.
this view shows the front of the trailer.
this view shows the rear of the trailer.
this view shows their 1/50 scale XL120 diecast trailer. This is what they used for up scaling to 1/16. I'm not sure if this is going to be metal or some sort of plastic, but I'm assuming it will be plastic, as thats what they make their RC models from. I have a Bruder 1/16 scale Cat 336 excavator to put on it for a load.
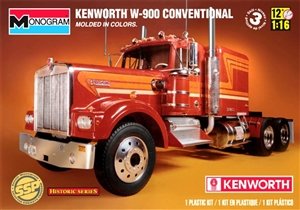
this is the Kenworth W900L model I will be modifying with a stretched frame, 12R/24.5 drive tires, 385R55/22.5 supersingles for the lift axle and 385R65/24.5 front floats. I'll be using the Cat 3408 V8 engine from the kit fully plumbed. Not sure how far I will be going on this, I'll see after I get the Peterbilt done. I will be doing a build thread on this.
Ron G
-
Hey all
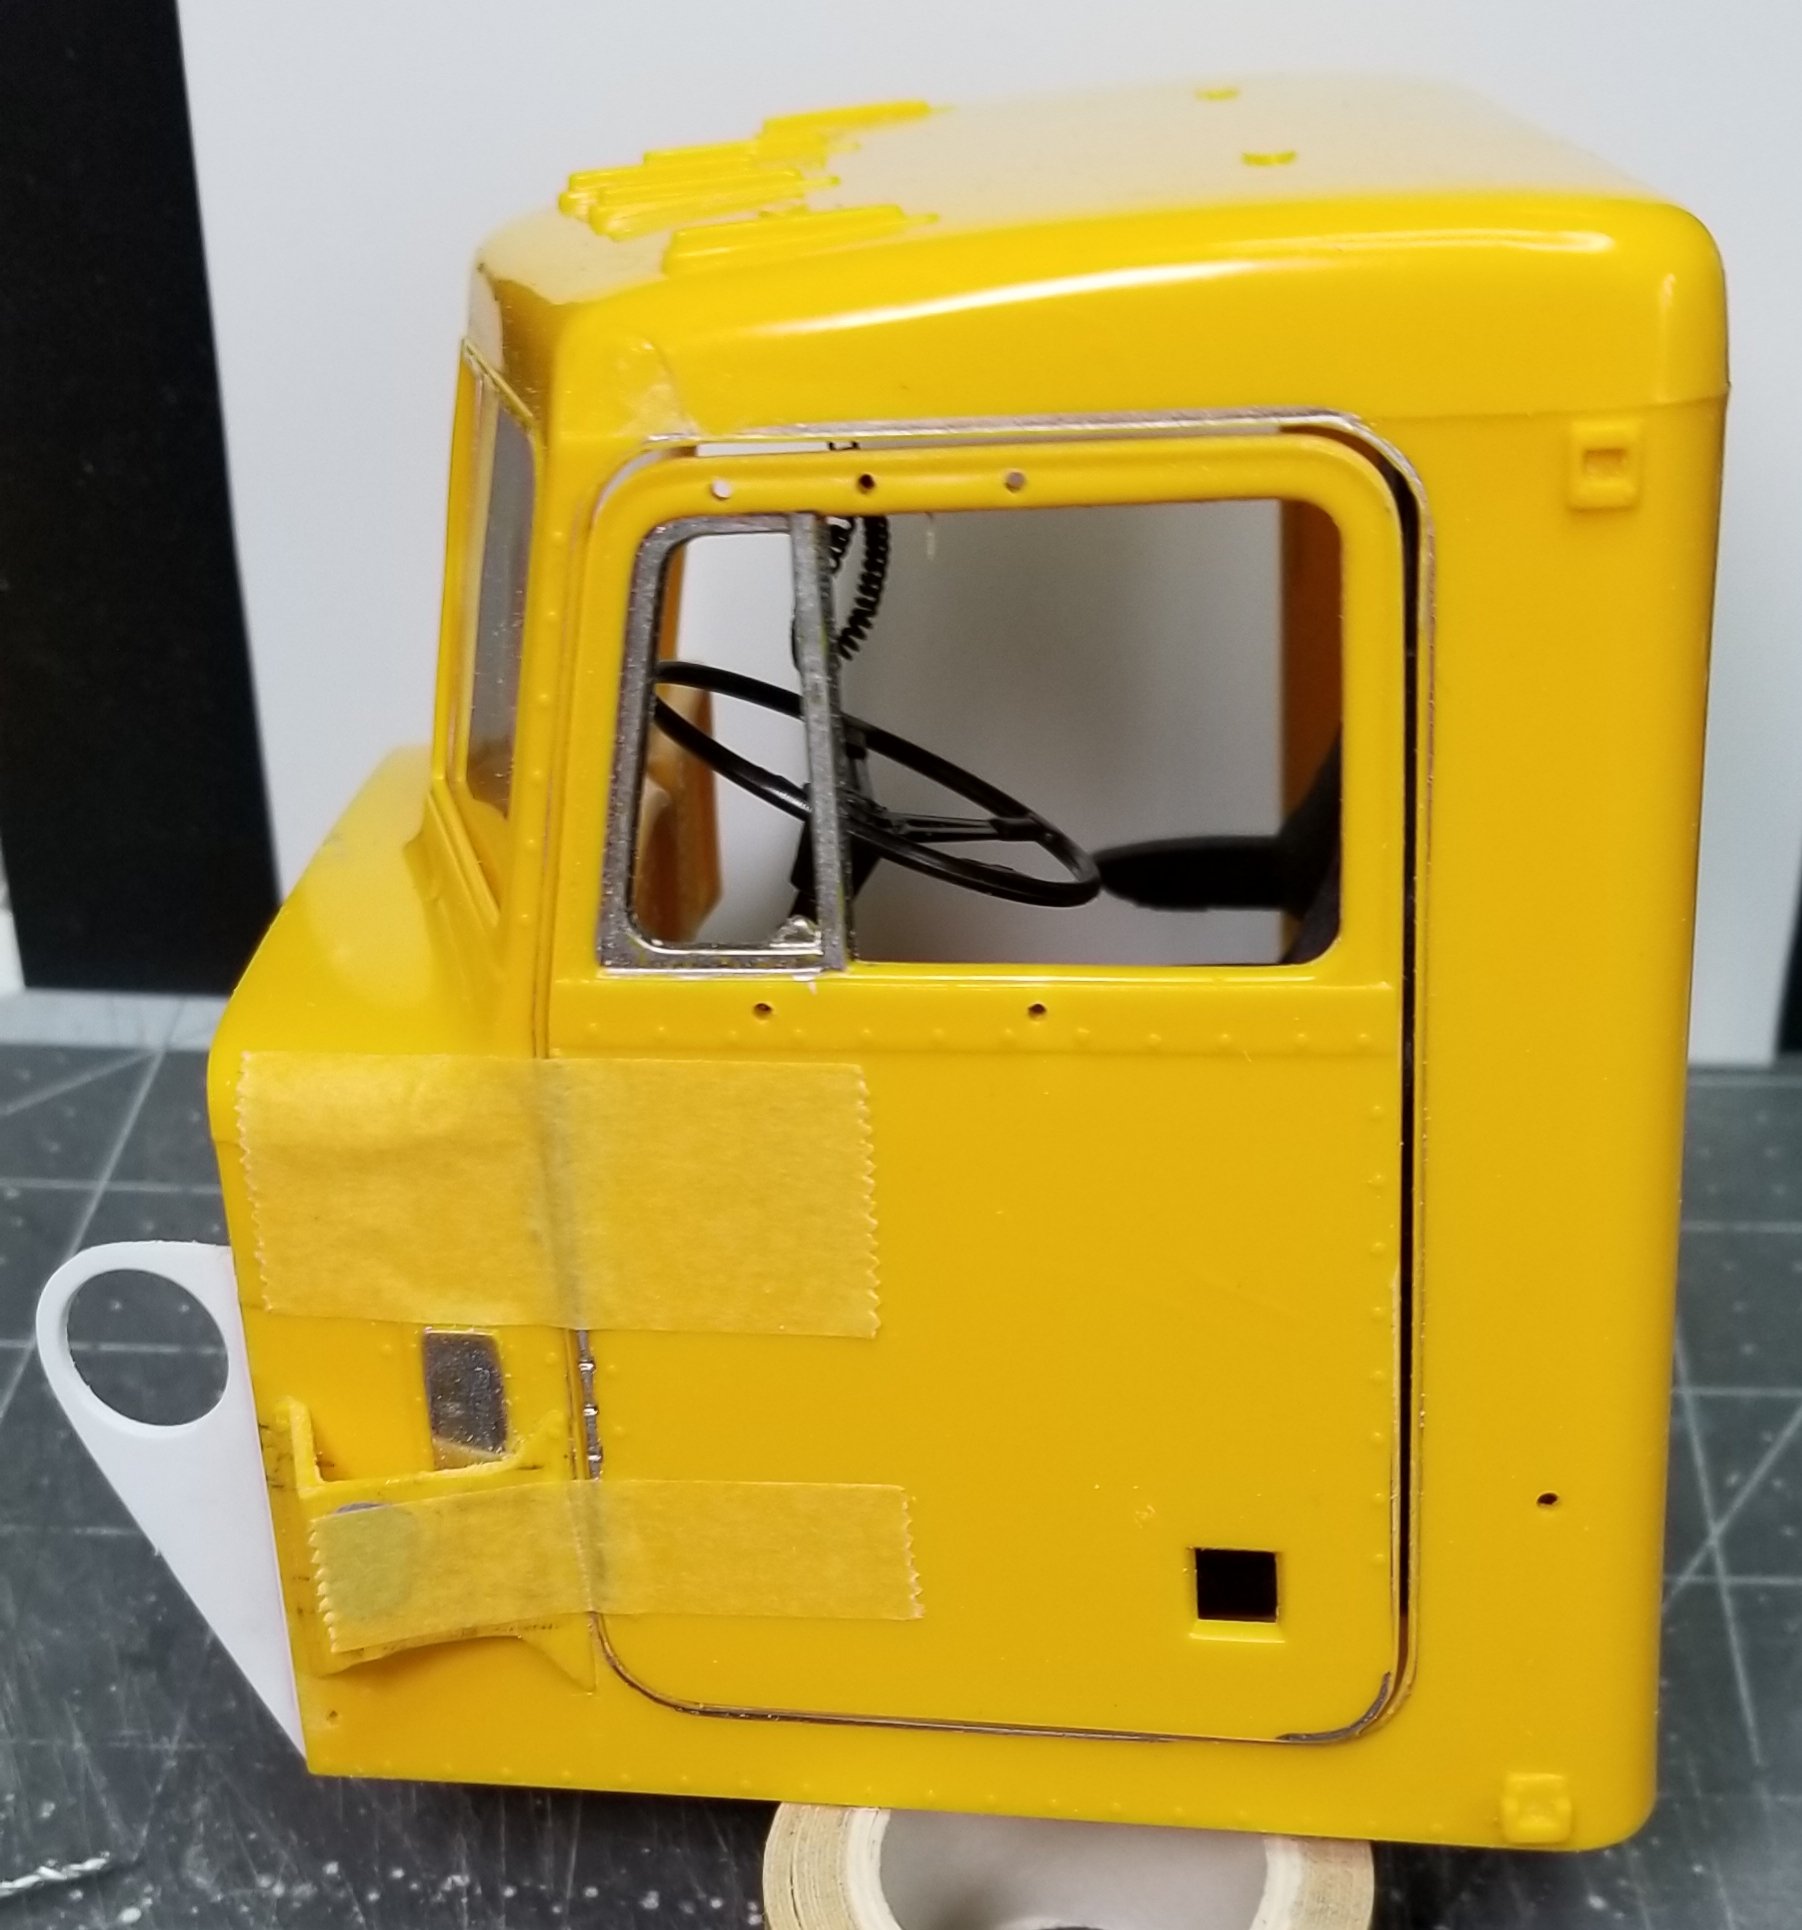
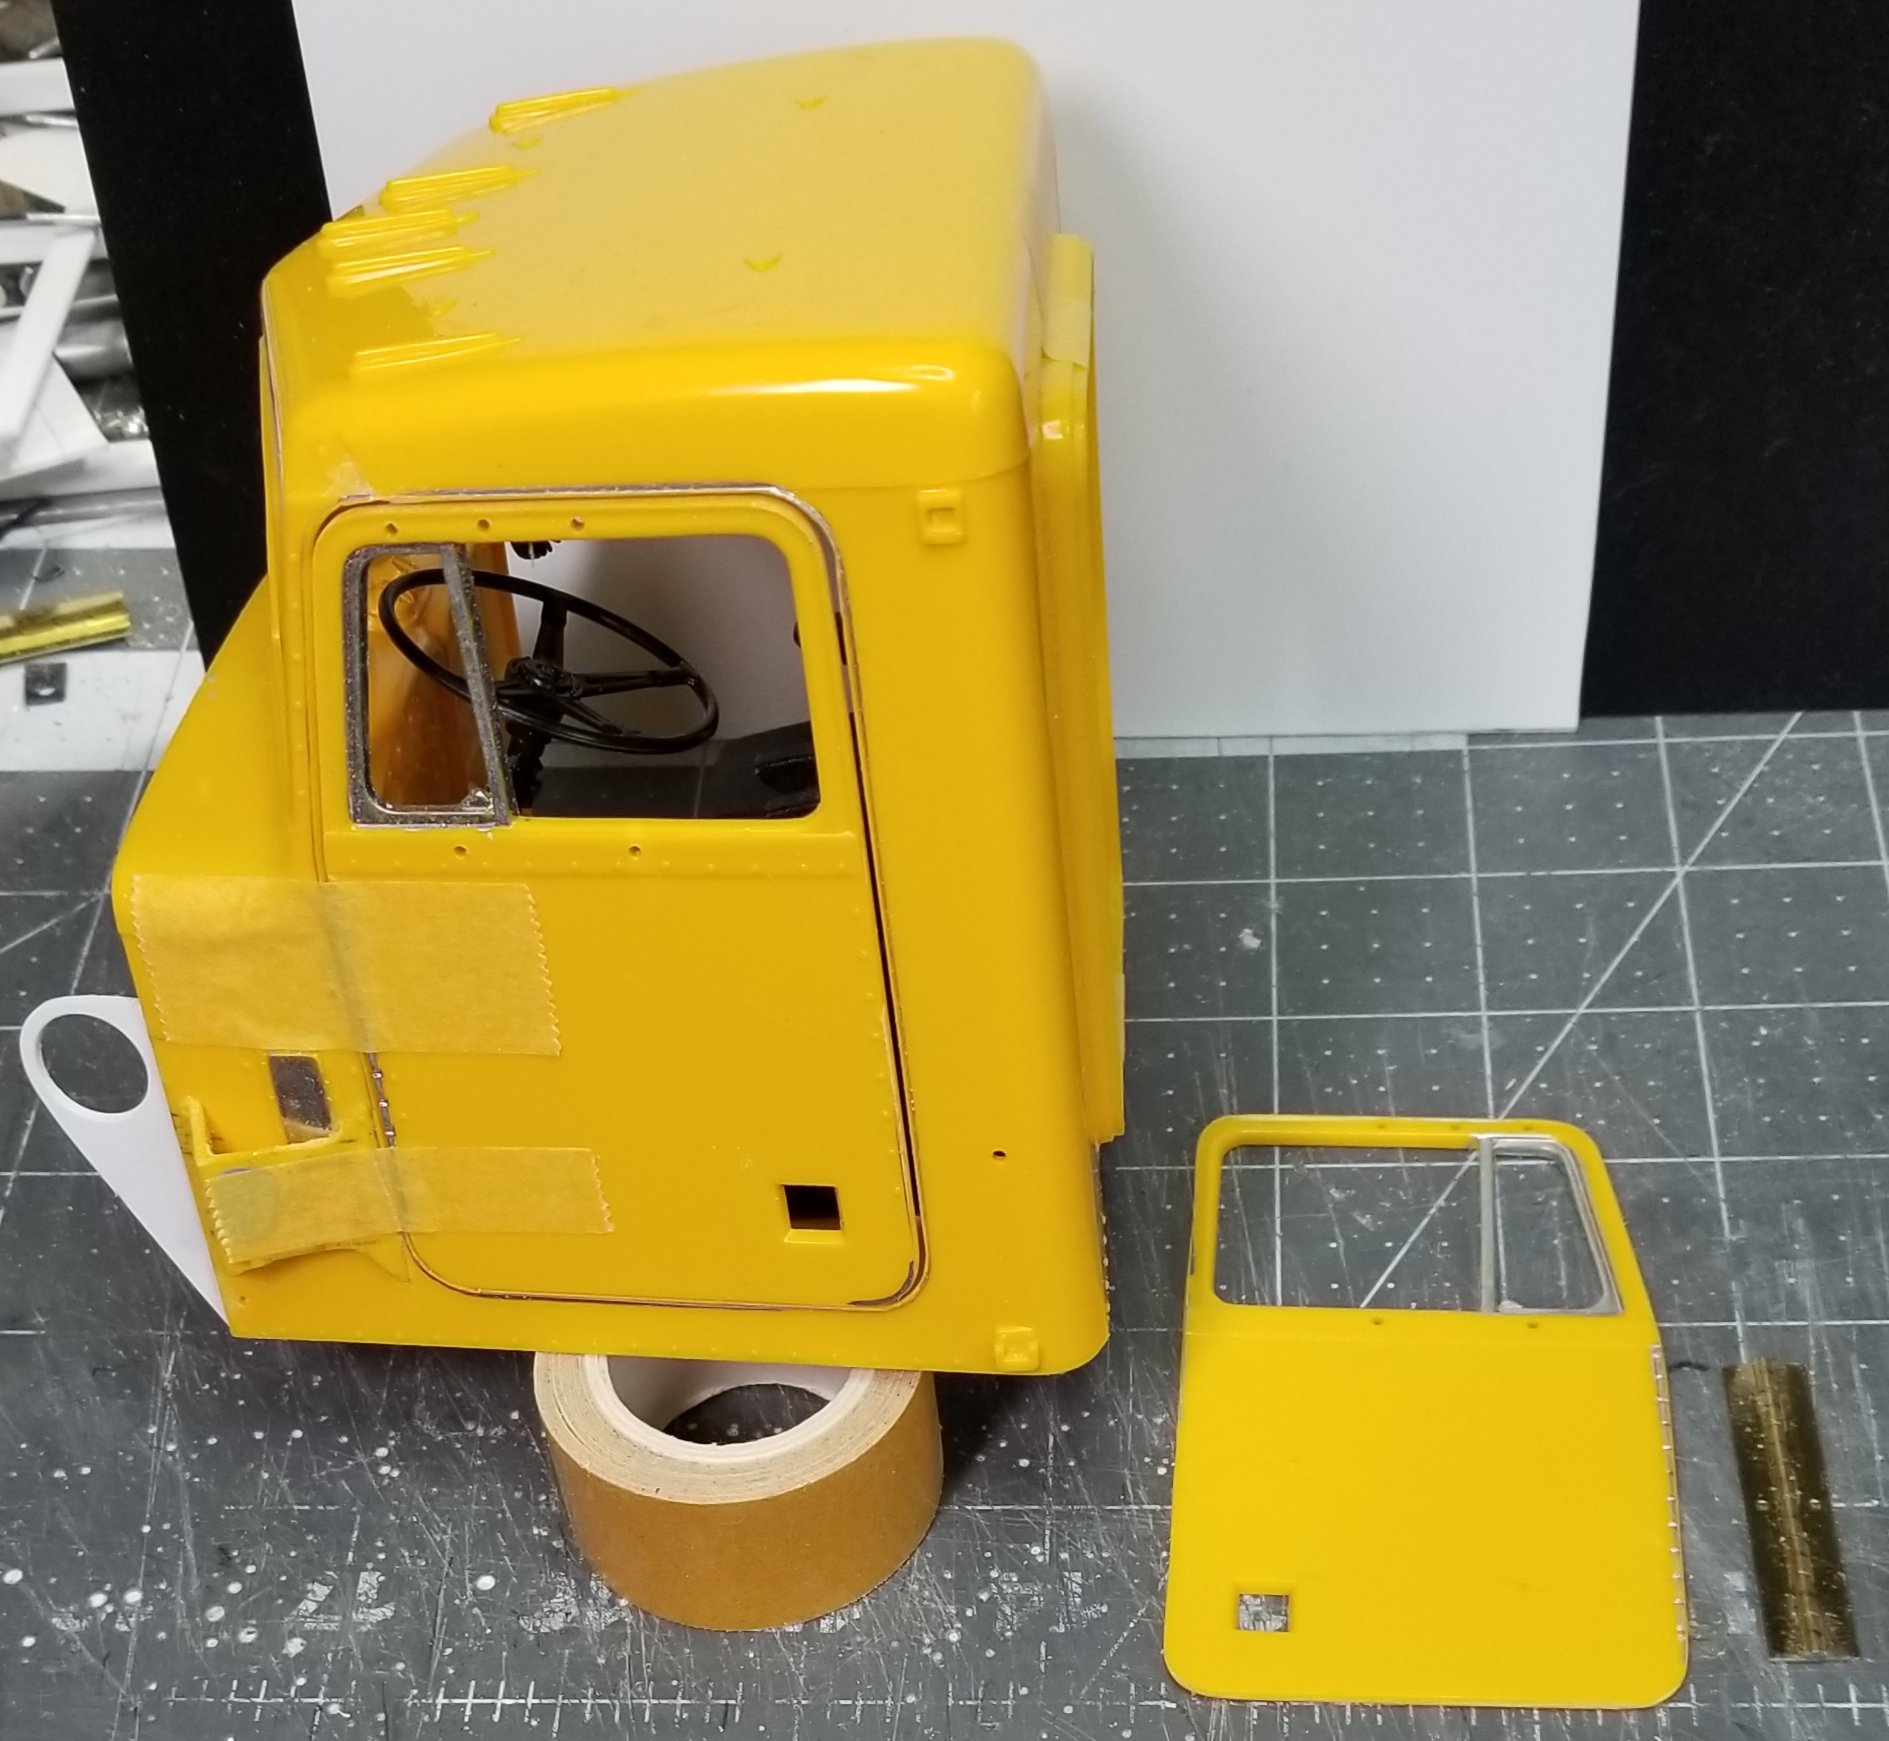
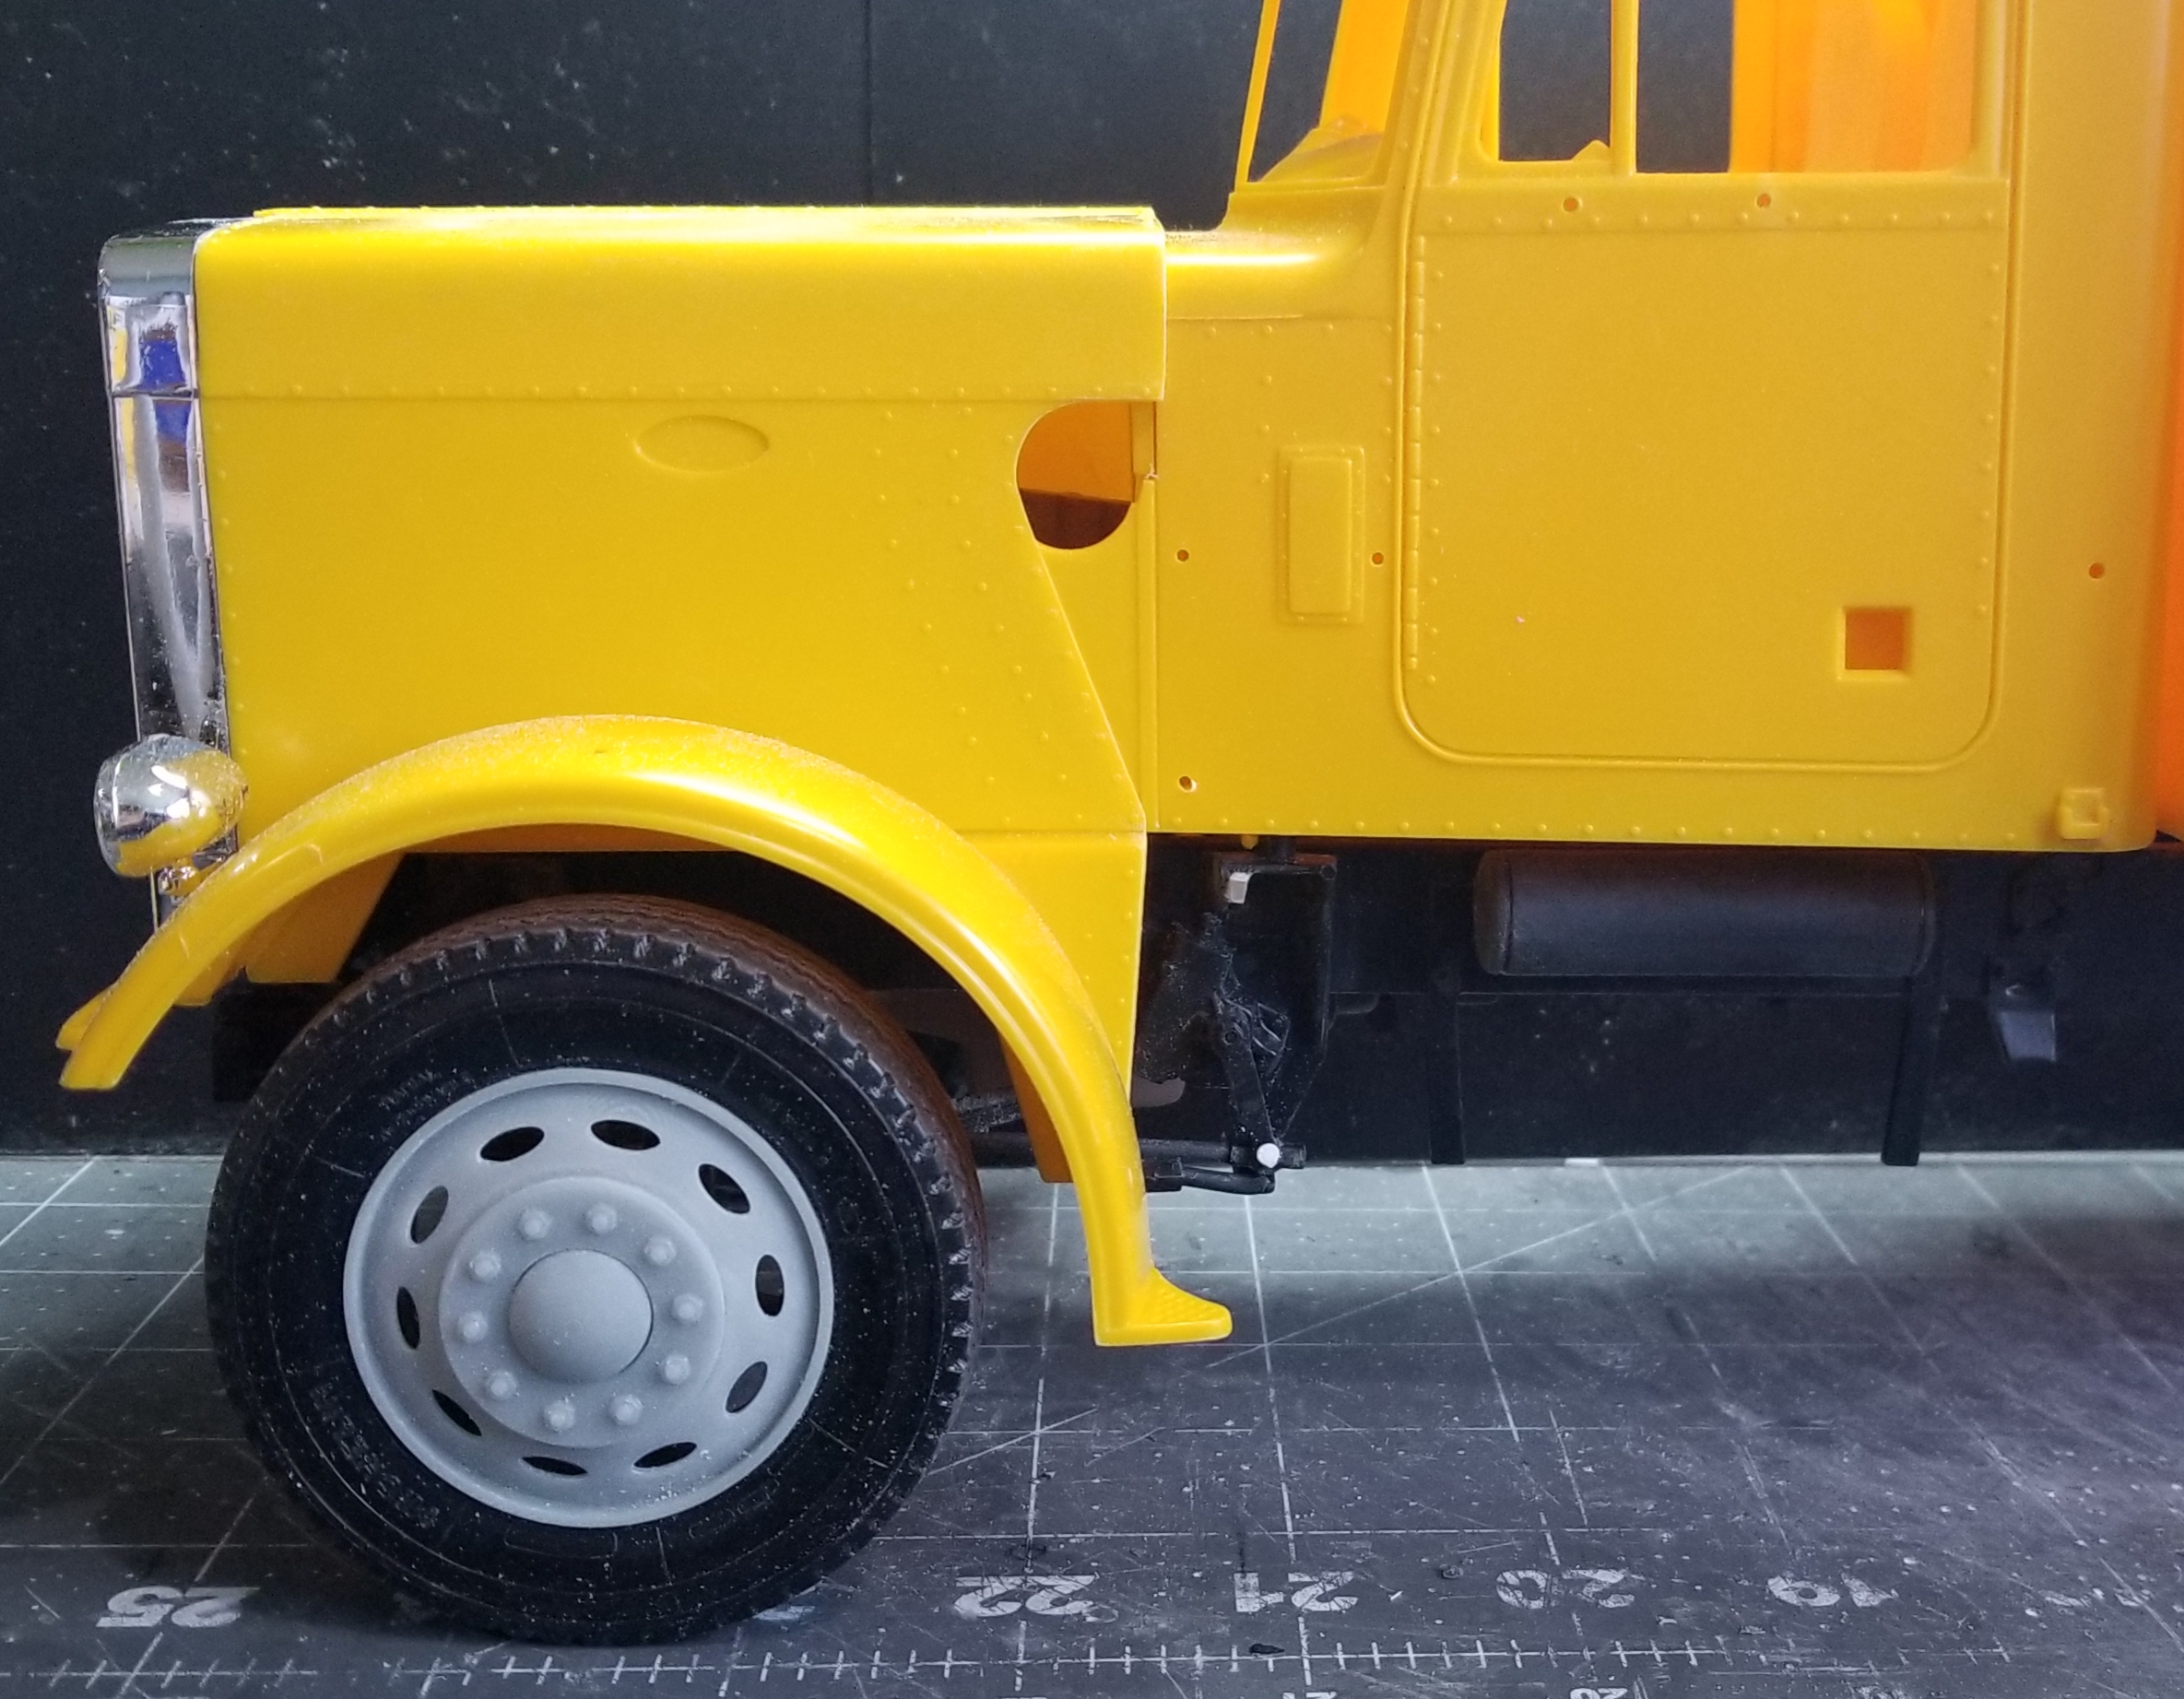
I've been working on the big Pete. I cut the doors out of the cab. They were a real pain in the buttocks!...lol. The plastic is a 1/16" plus thick and was very difficult to cut. I started by scribing it with a needle in a pin vise followed by a sharp scalpel, it was so tuff it broke the needle!, but I finally made it through.
this view shows the door in the opening held on with tape.
this view shows the door in the open position.
this view shows the cab with drivers door in place and the passenger door with one of the hinges I'm using for the doors.
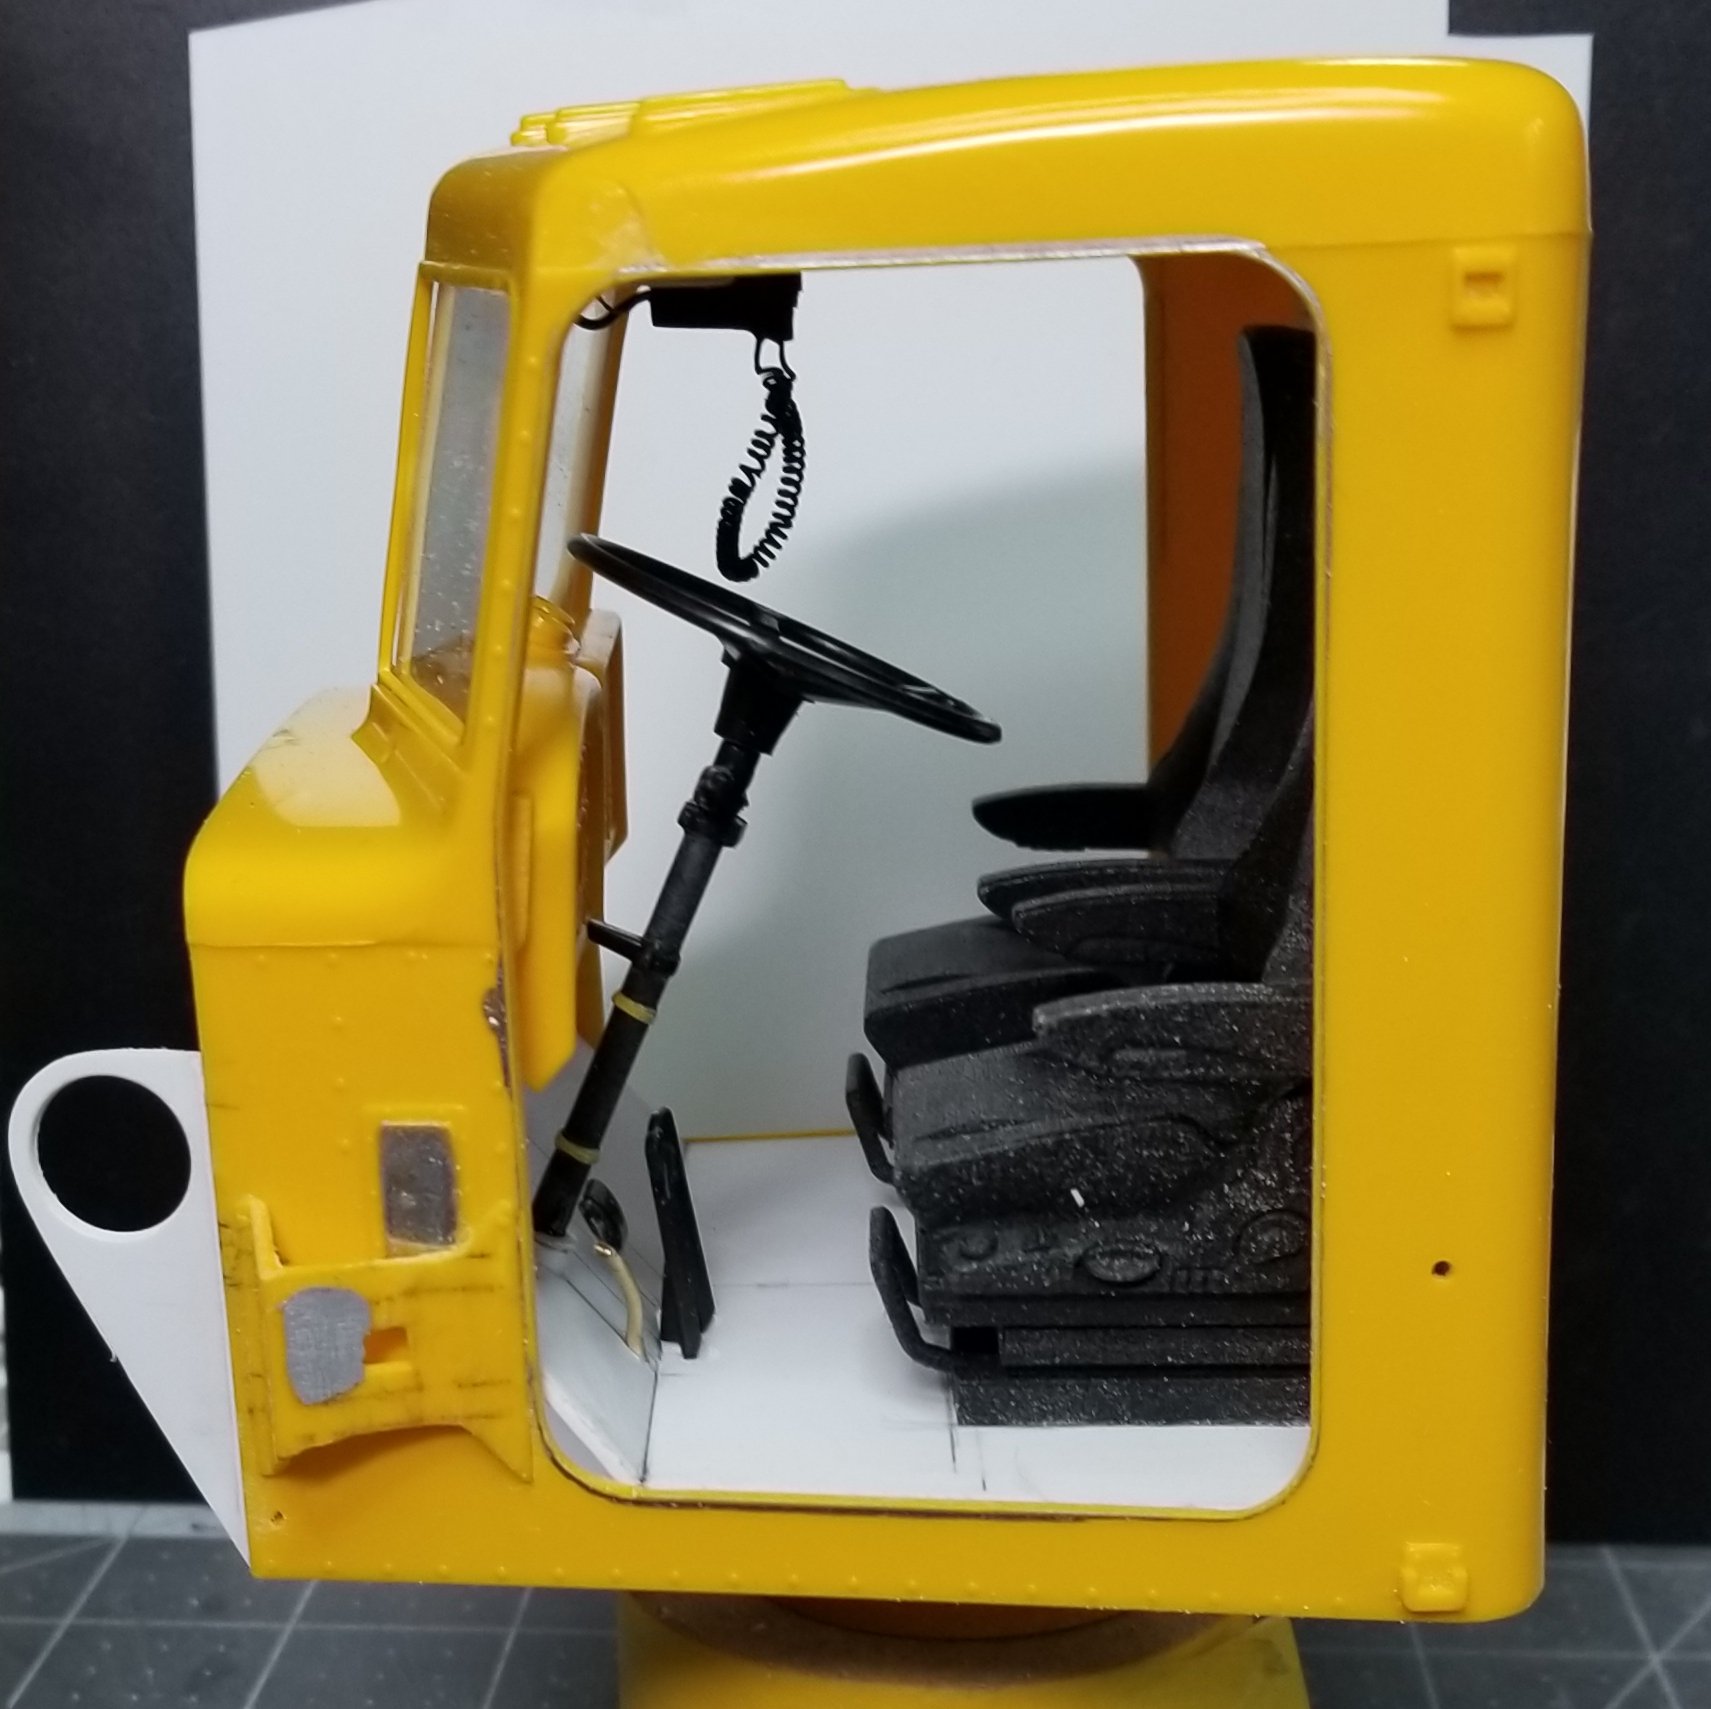
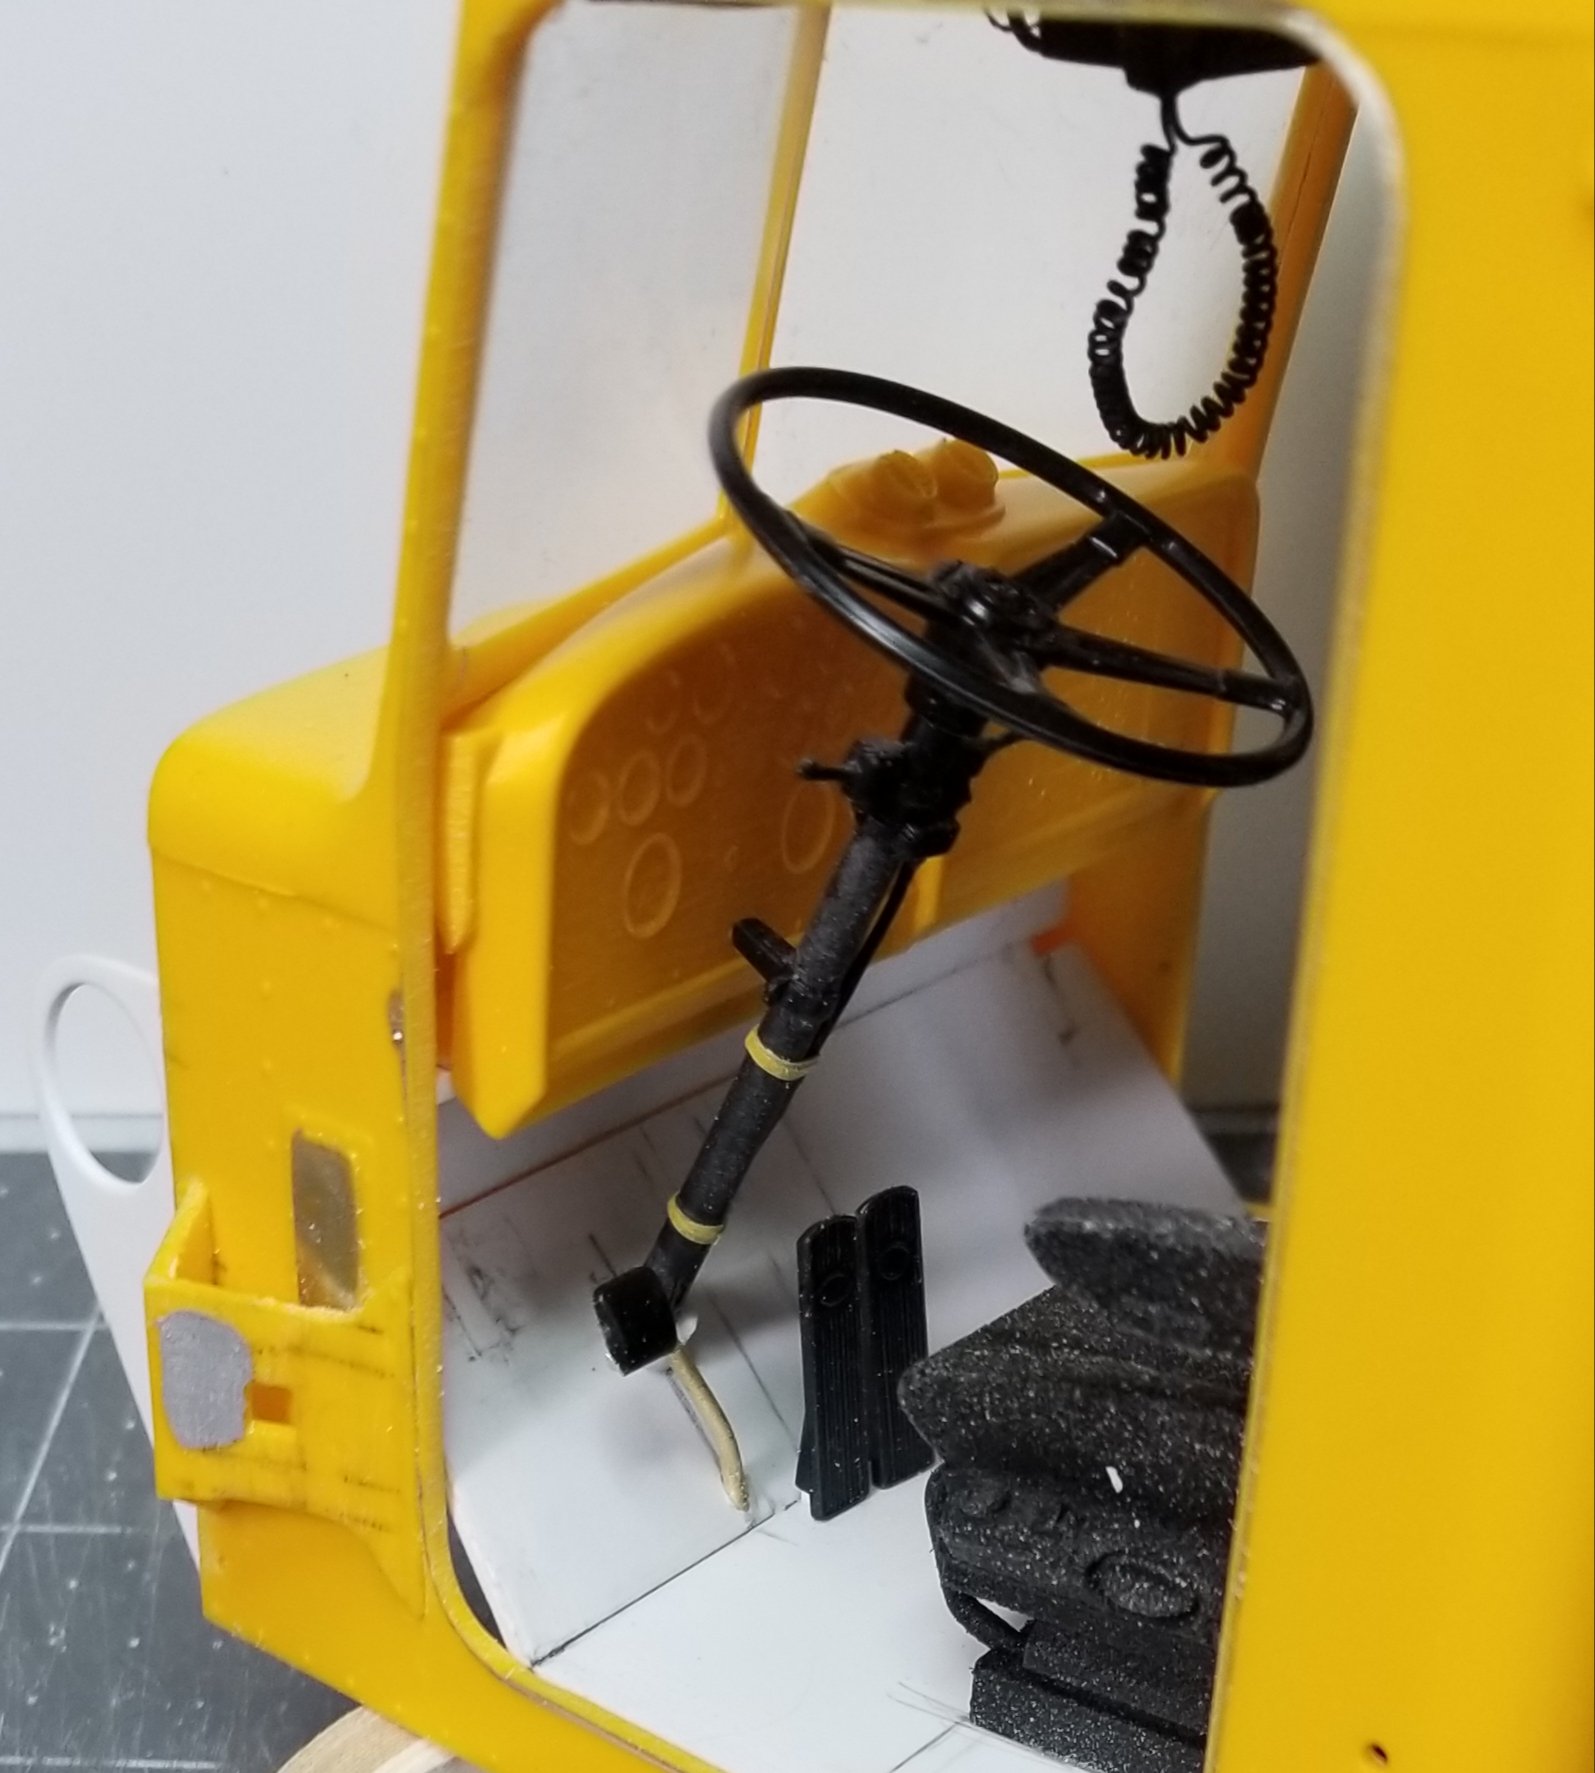
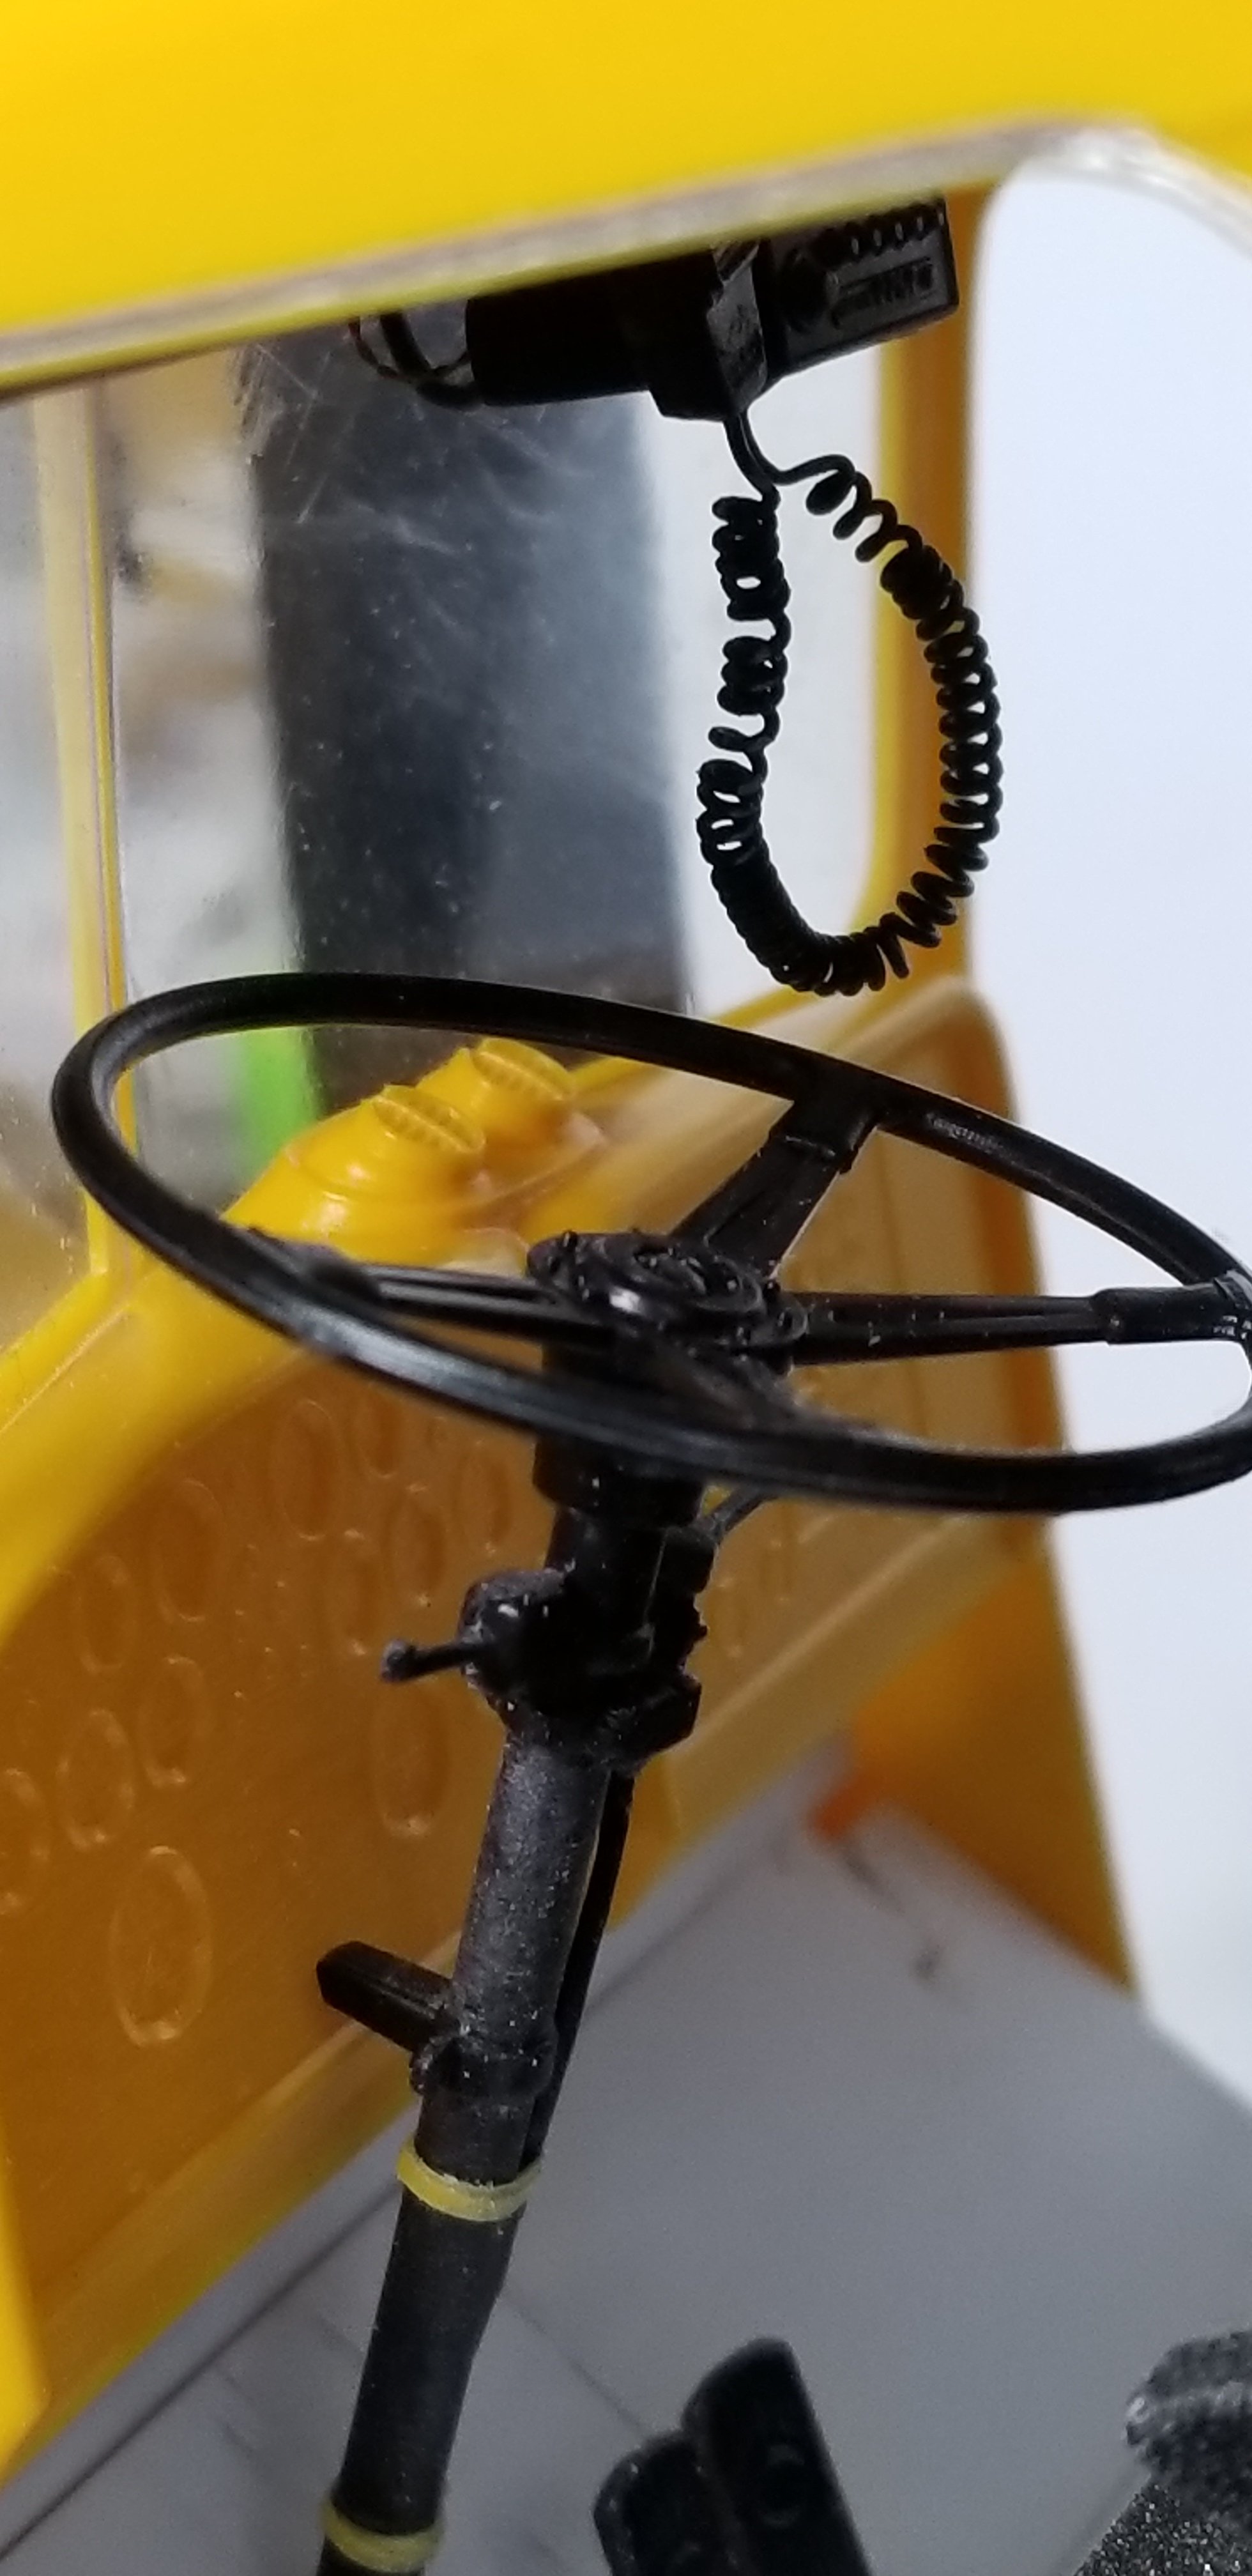
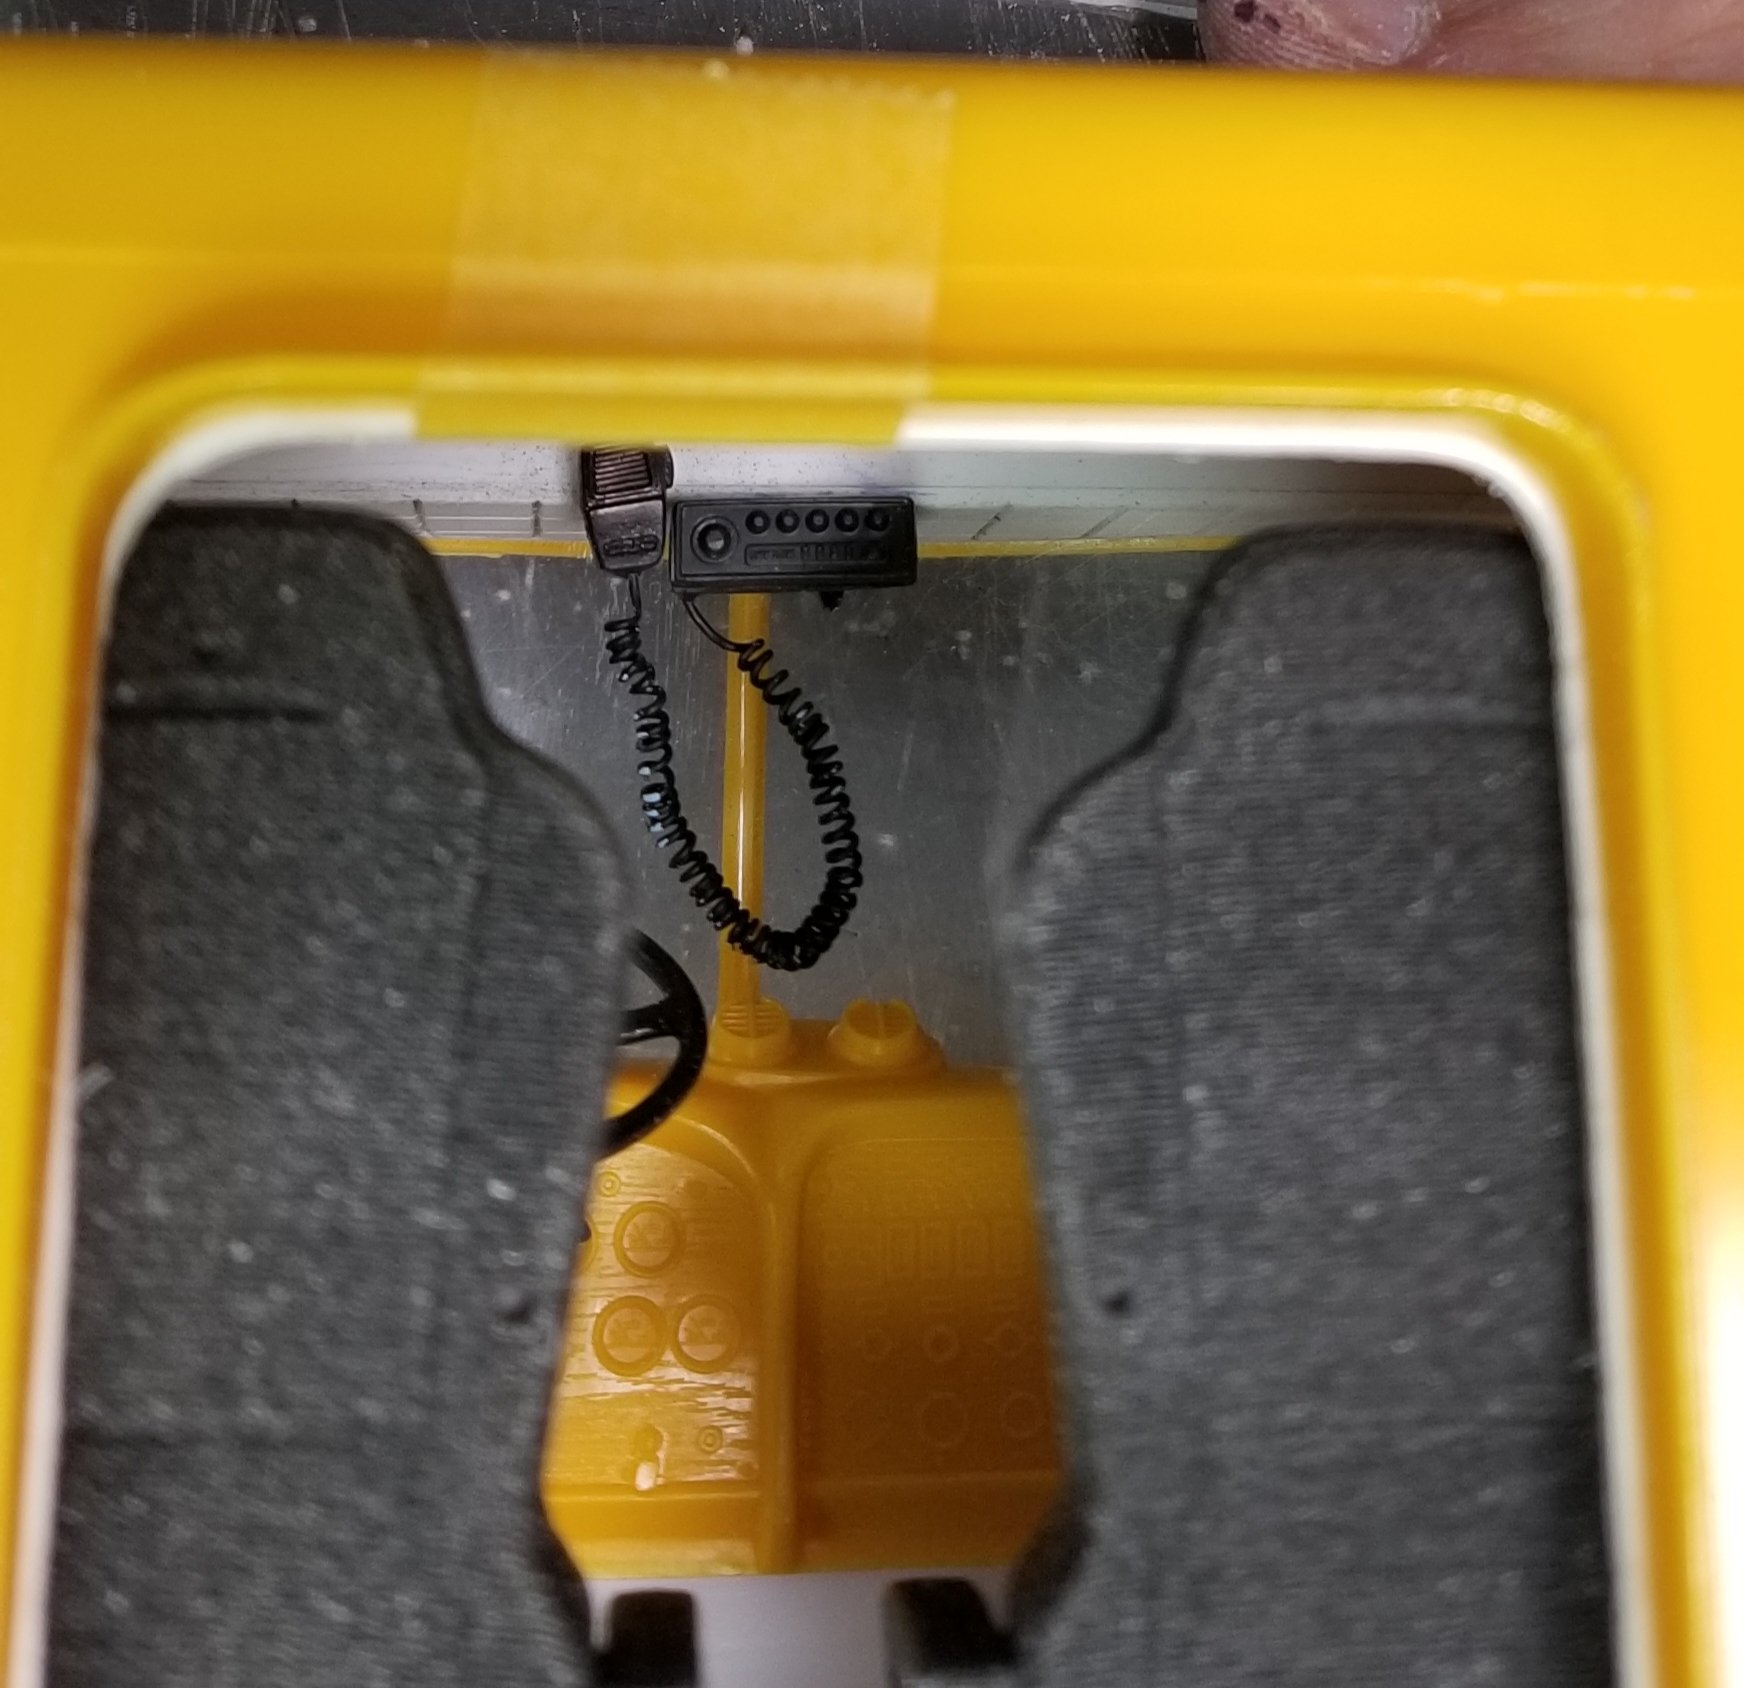
this view shows the interior temporarily assembled for pictures. You can just see the CB radio hanging from the roof.
this view shows the clutch pedal, brake pedal and gas/fuel pedal.
this view shows the interior roof panel and rear panel. I made these from 1/4" square evergreen plastic tile sheet stock.
side view of the CB radio and scratch built mick cord.
this view shows the CB radio from the rear. I still have alot of work to do on the interior, but I think it's coming along pretty good. Well that's it for now be back with more updates soon.
Ron G
-
Hey guys
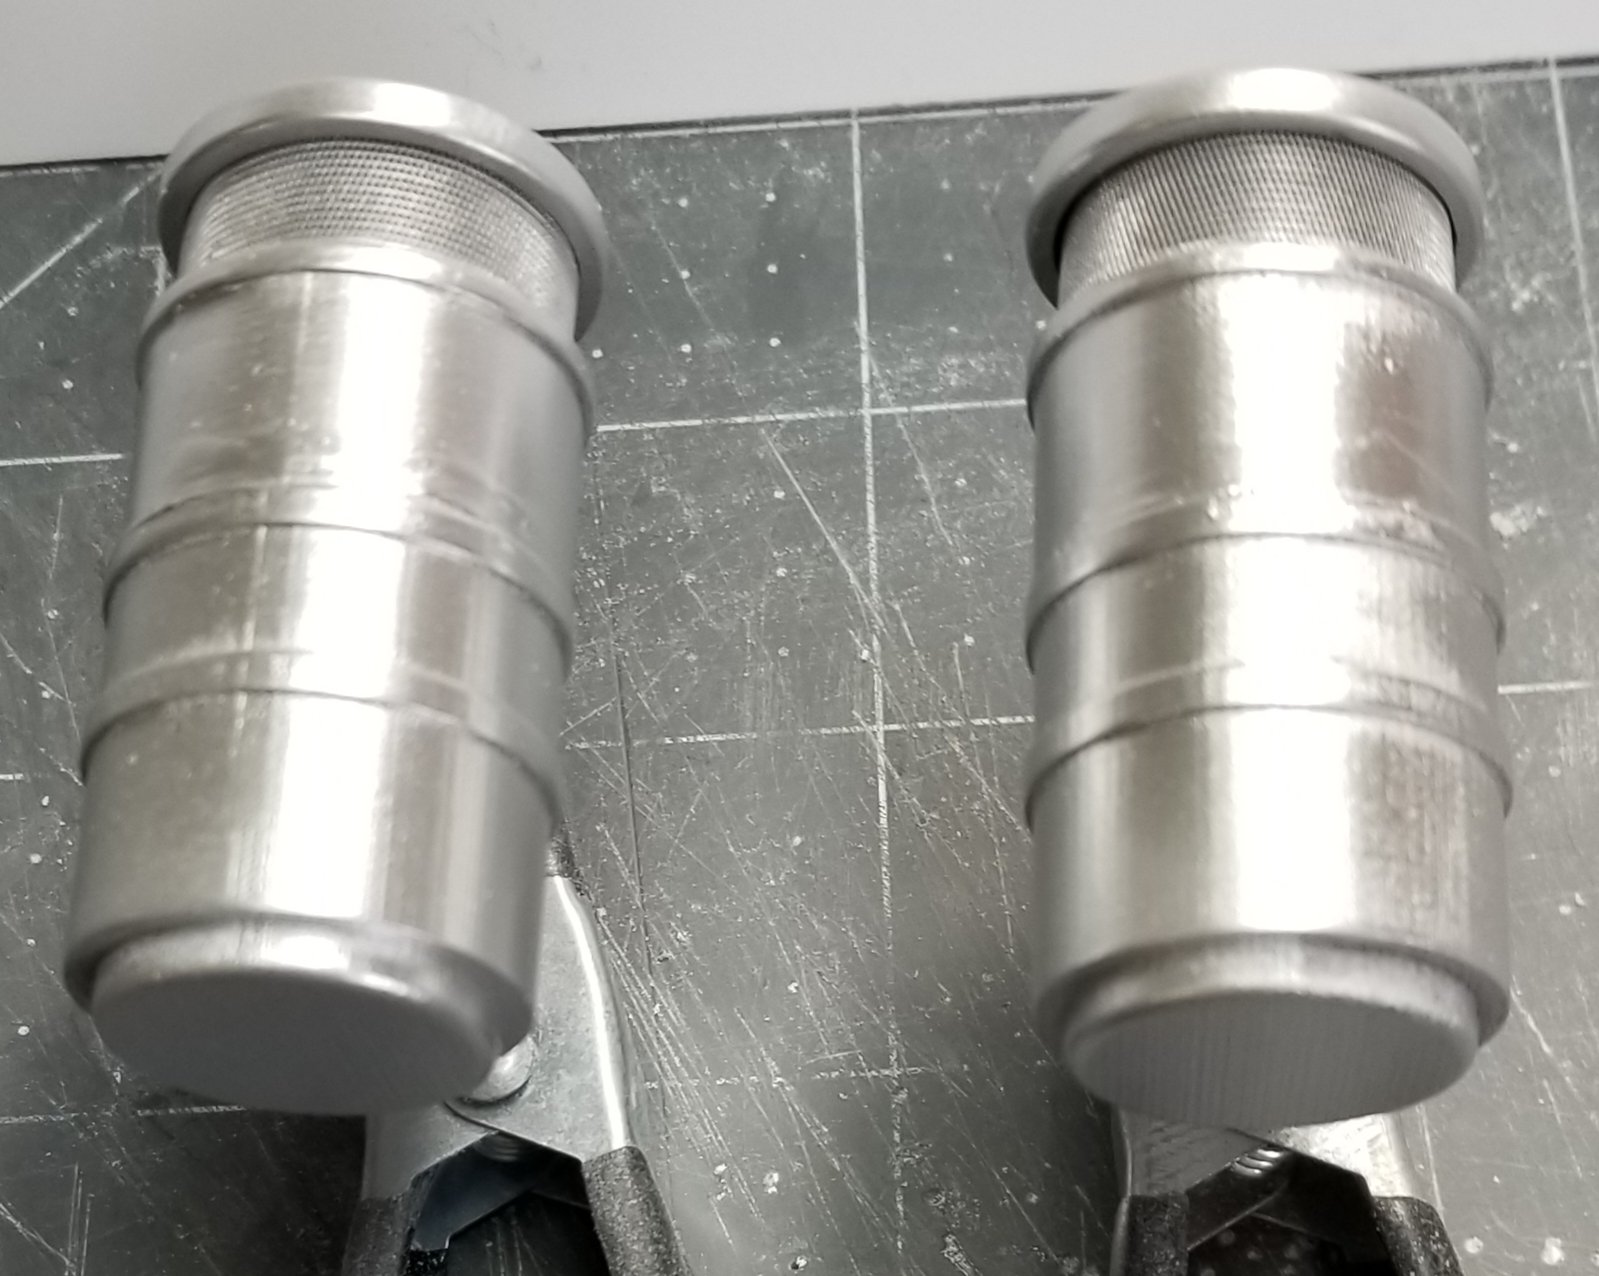
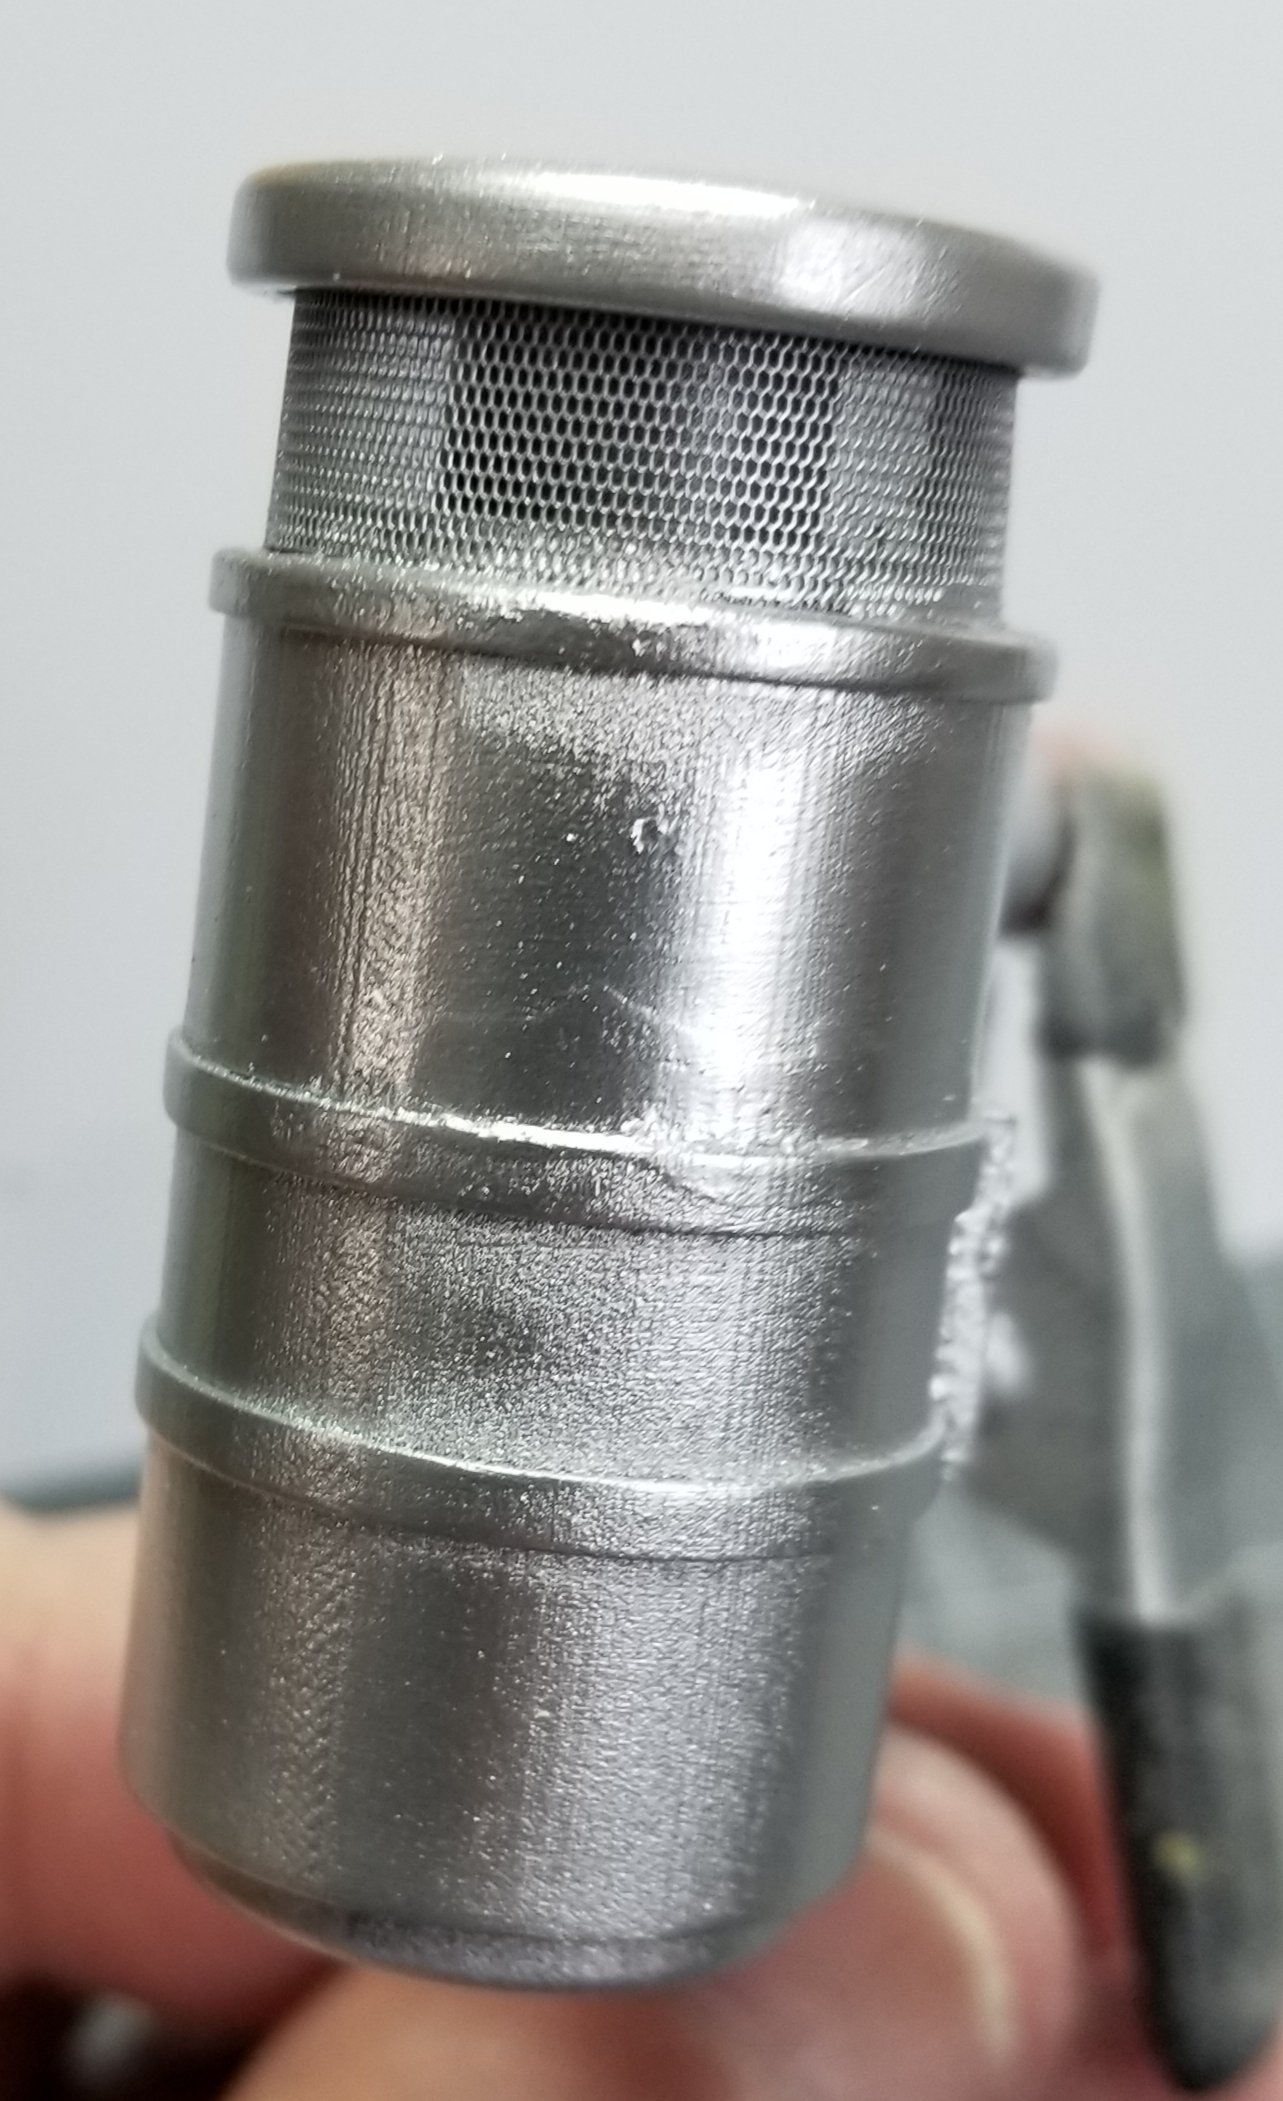
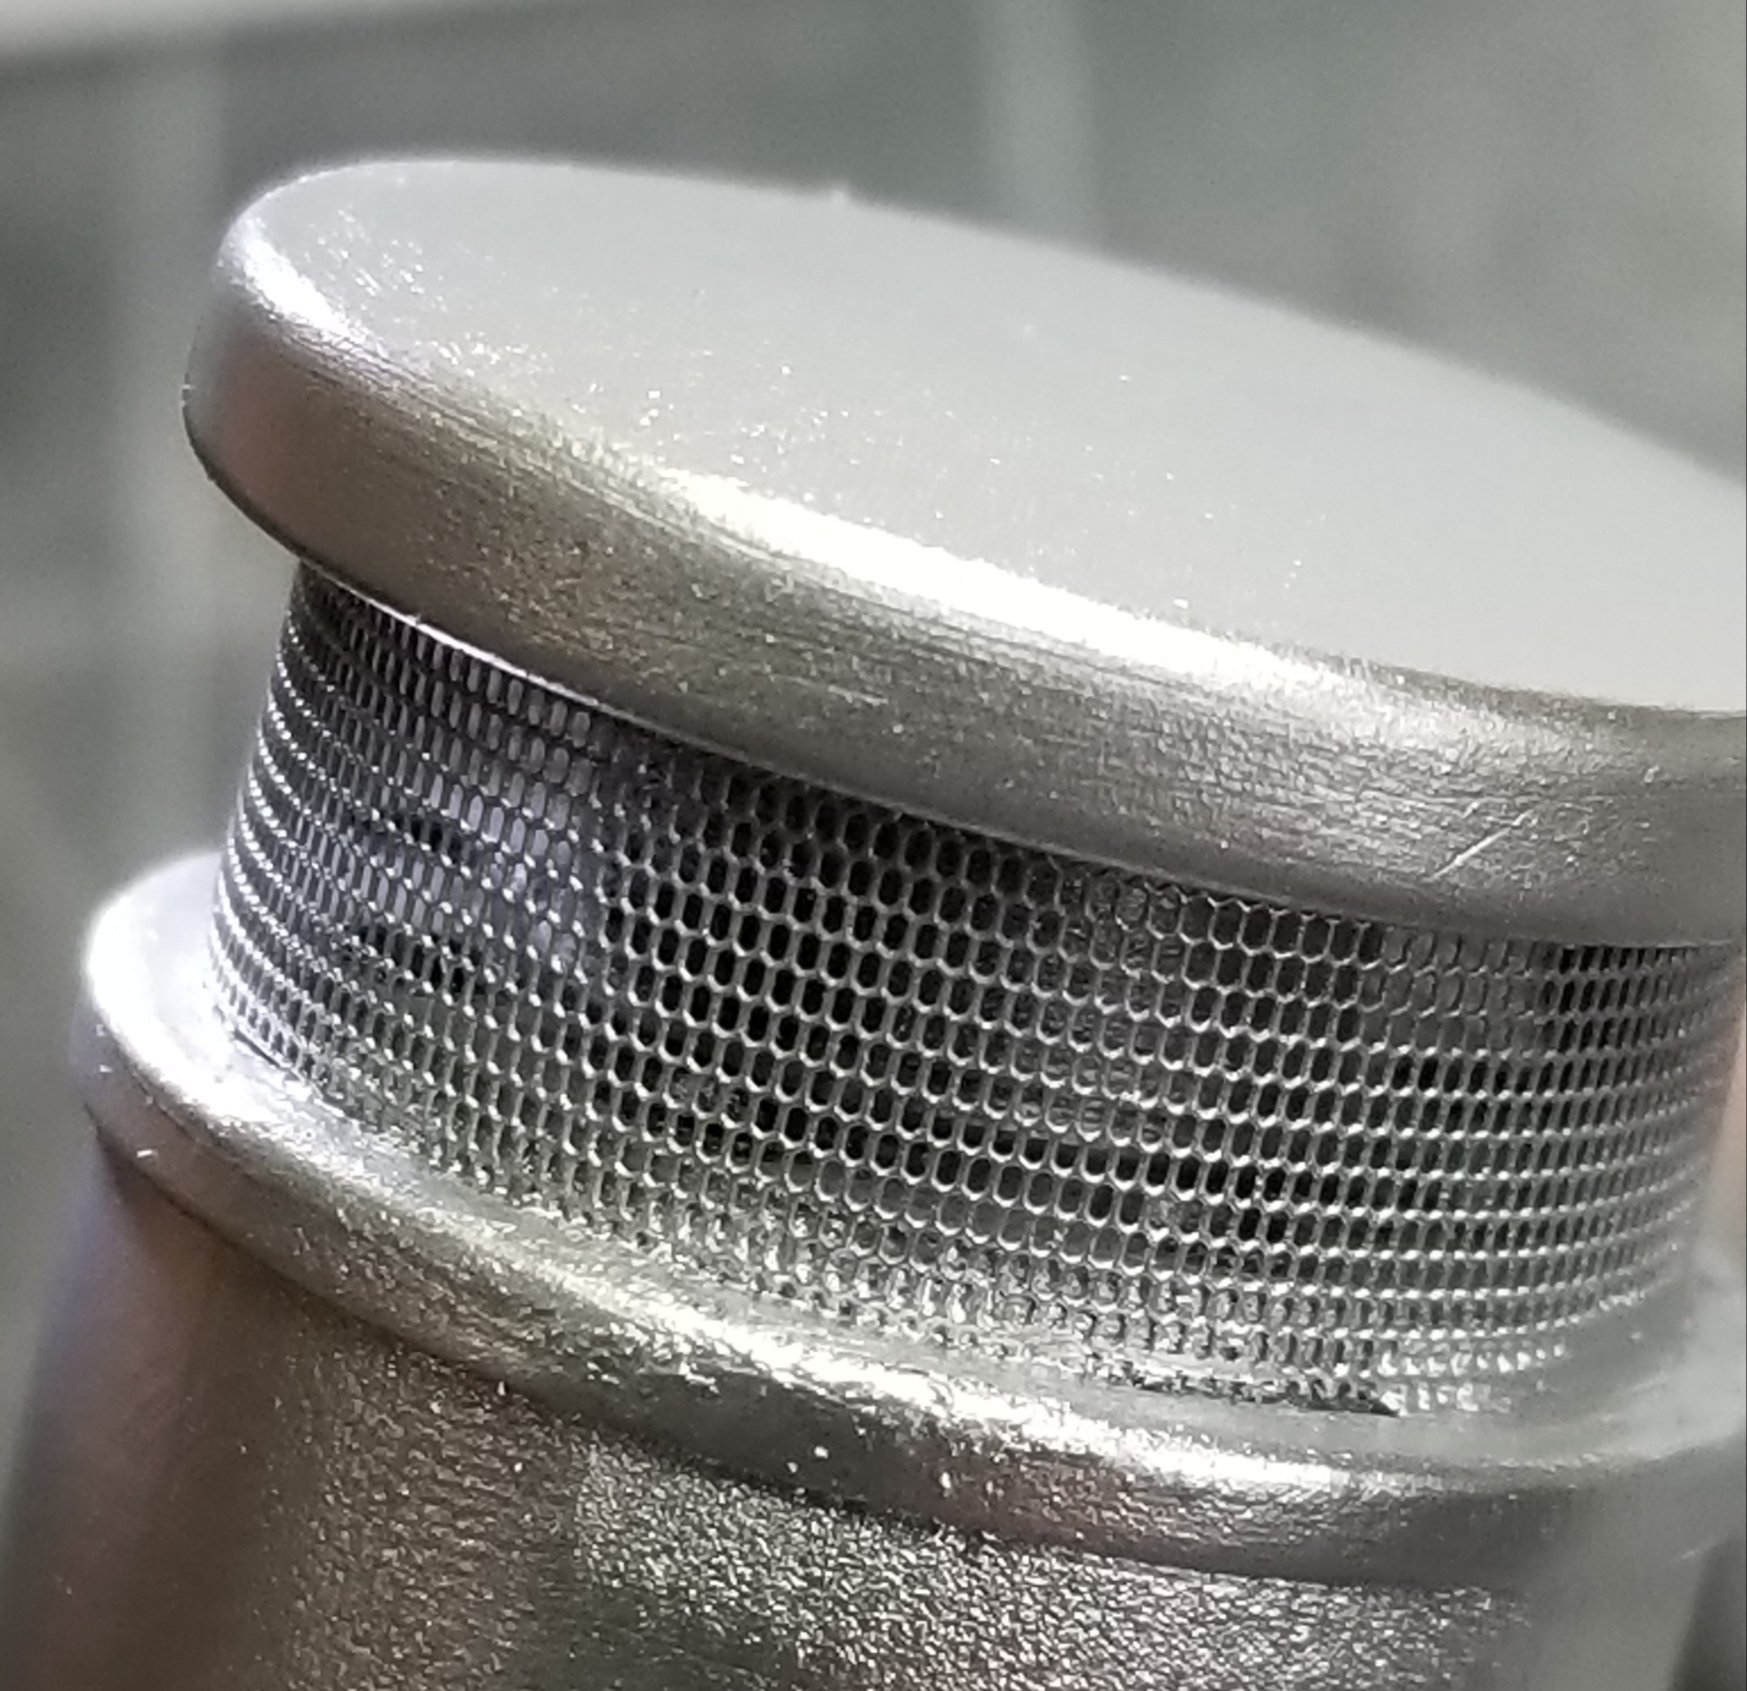
Another small update. I have the two air cleaners done and primed.
first primer coat on.
I removed the printed in screens and added some stainless steel mesh ones.
I added interior parts to them also. I know have to sand them and probably add some filler then paint them chrome. Well that's it for now be back soon.
Ron G
-
Hey all
Thanks guys
Not much of an update, just a couple of pictures showing the frame decals.
this view shows the rear frame decals.
this view shows the front frame decal. These are from Jerry at Model trucking.
Ron G
-
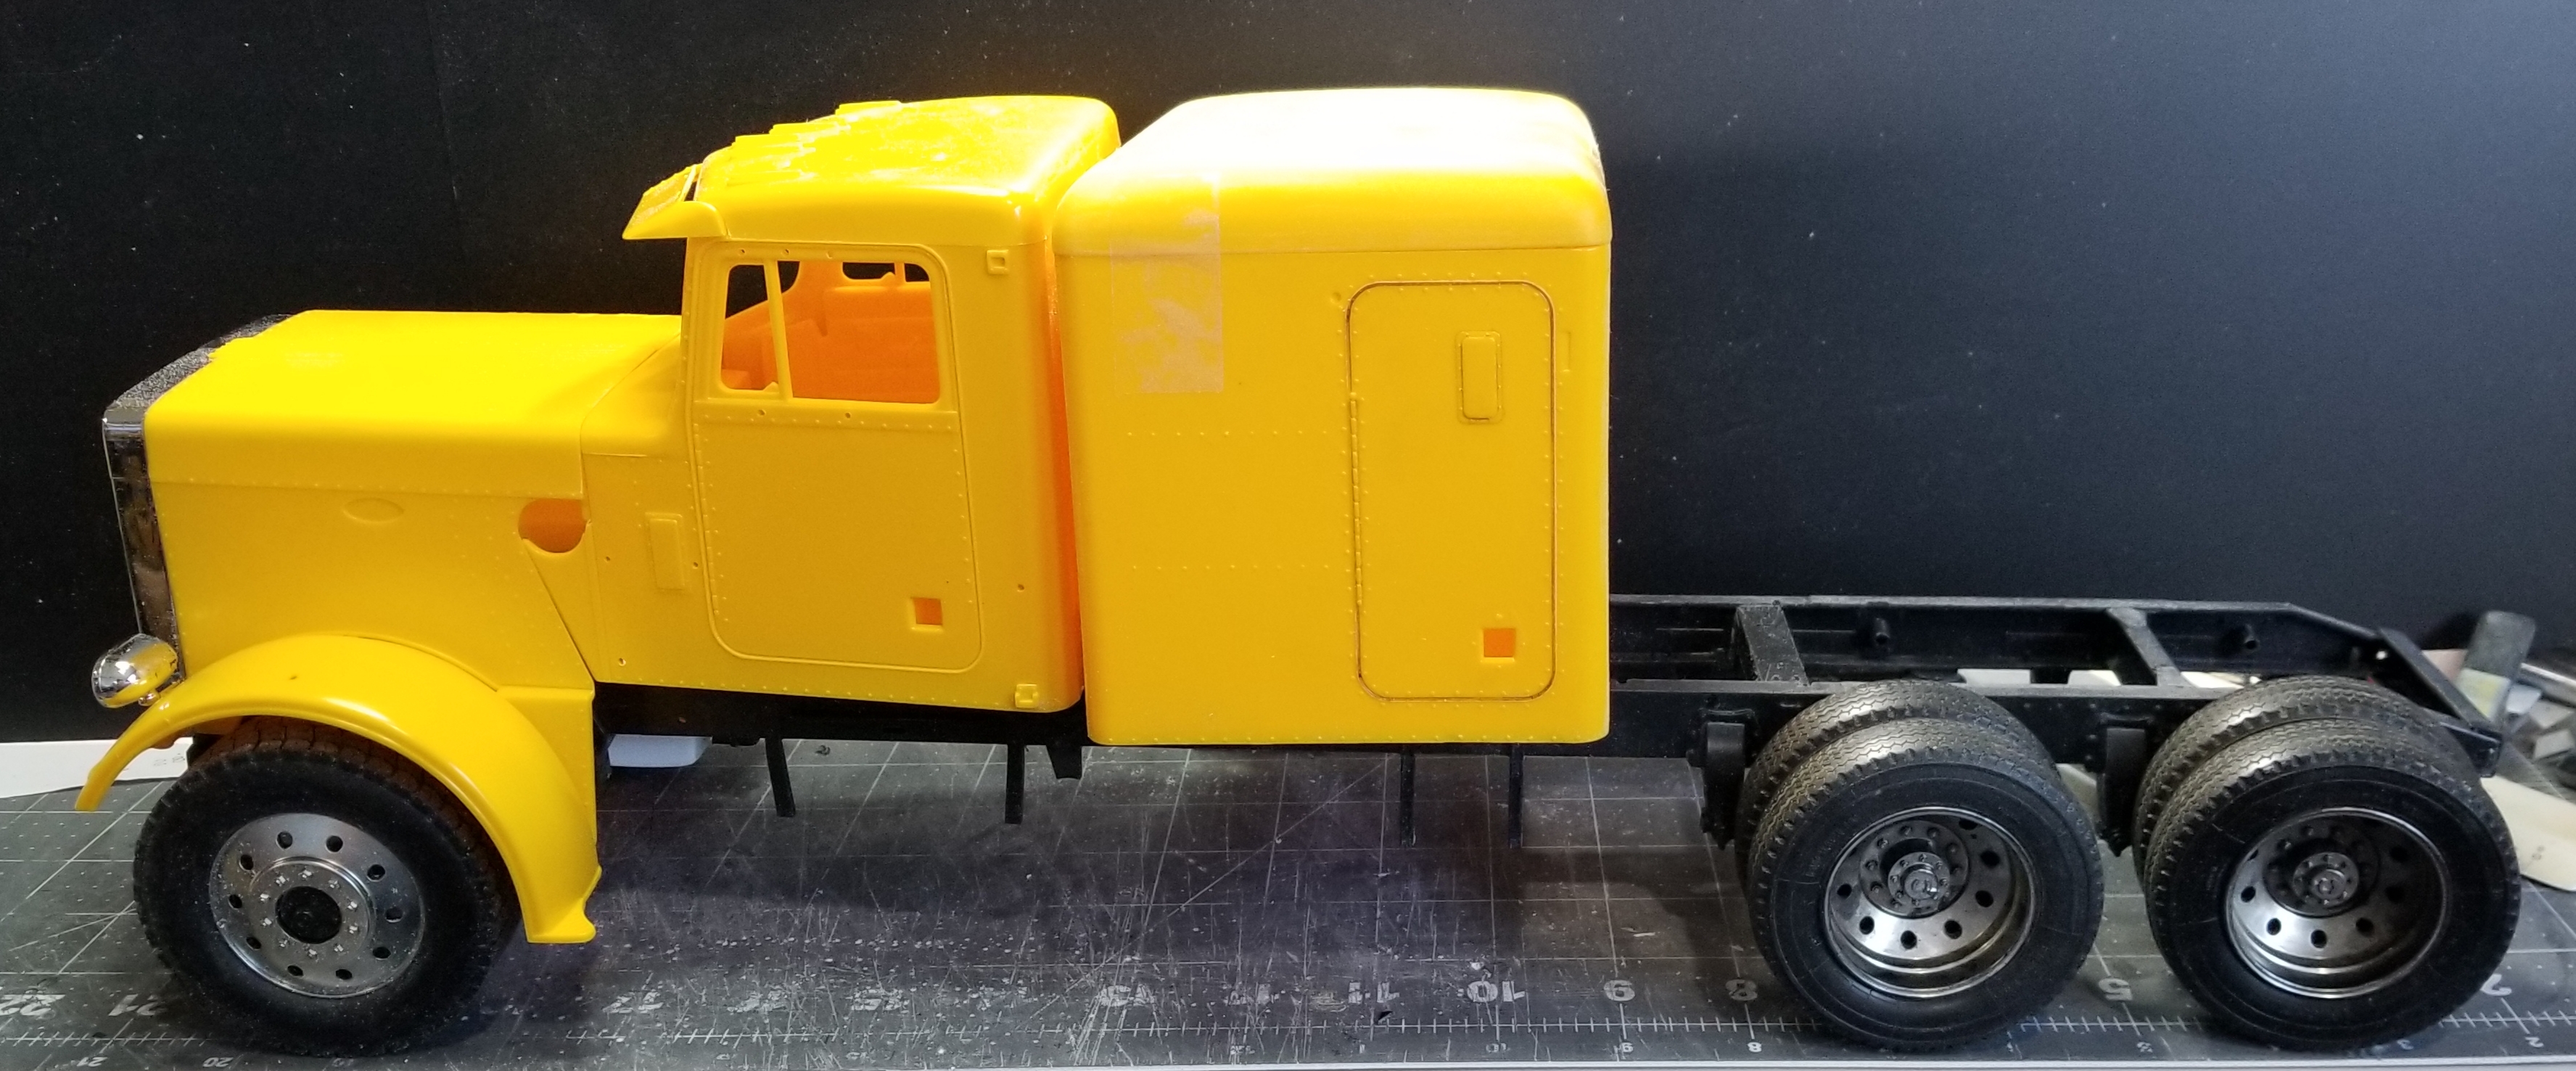
Hey guys
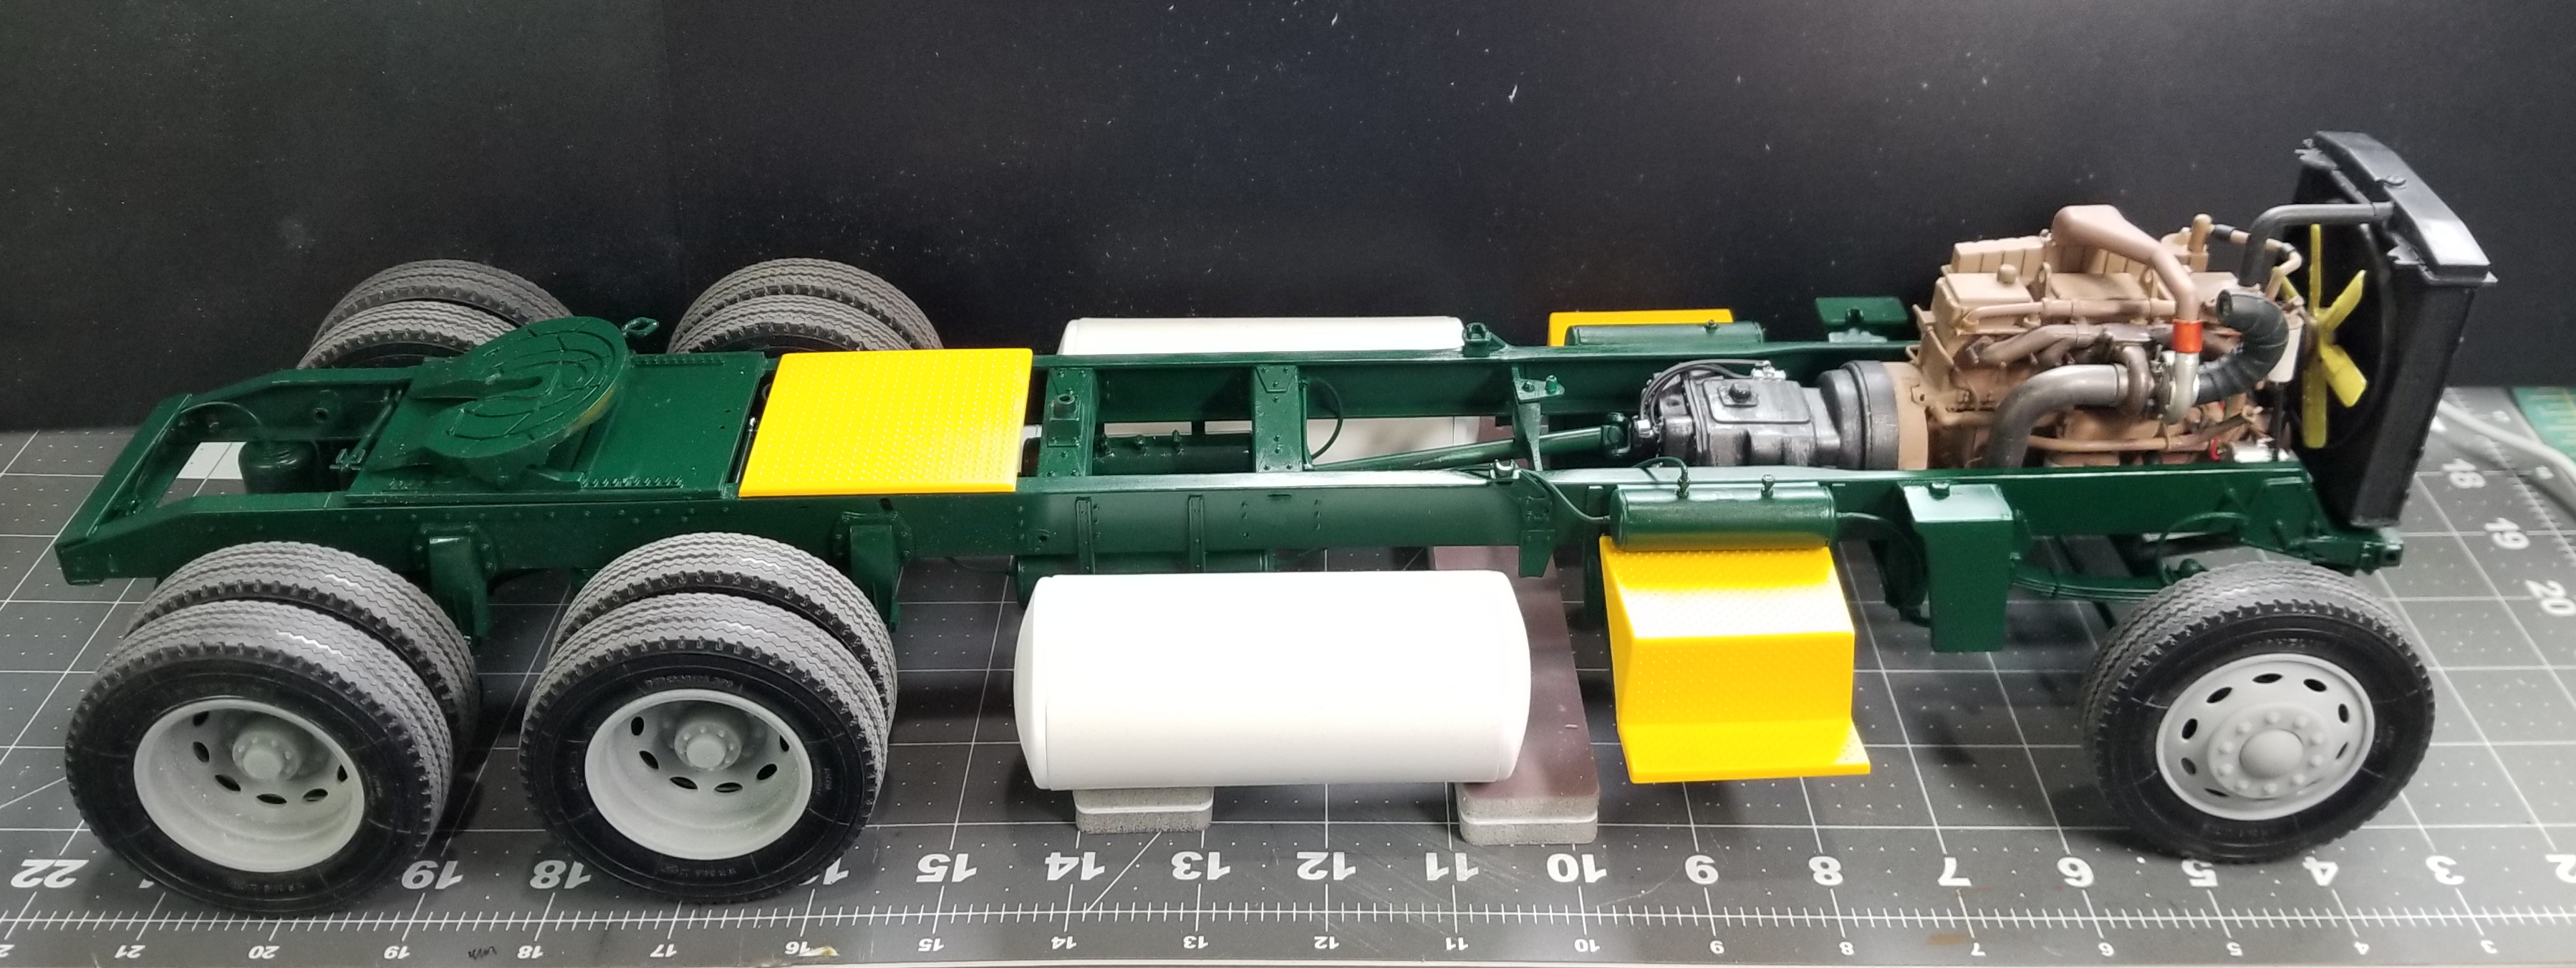
Did some more work on the big Pete. I have the fuel tanks done. I'm making the tank mounts now. I mounted the shocks. The next thing to mount is the engine, radiator and hoses.
this view shows the passenger side fuel tank temporarily mounted to the frame. The Tamiya tape will be replaced with black electrical tape and chrome custom made straps. Still undecided on how to paint them.
this view shows the tank and tool box cover. I did the covers and deck plate with Vallejo dull aluminum metal paint.
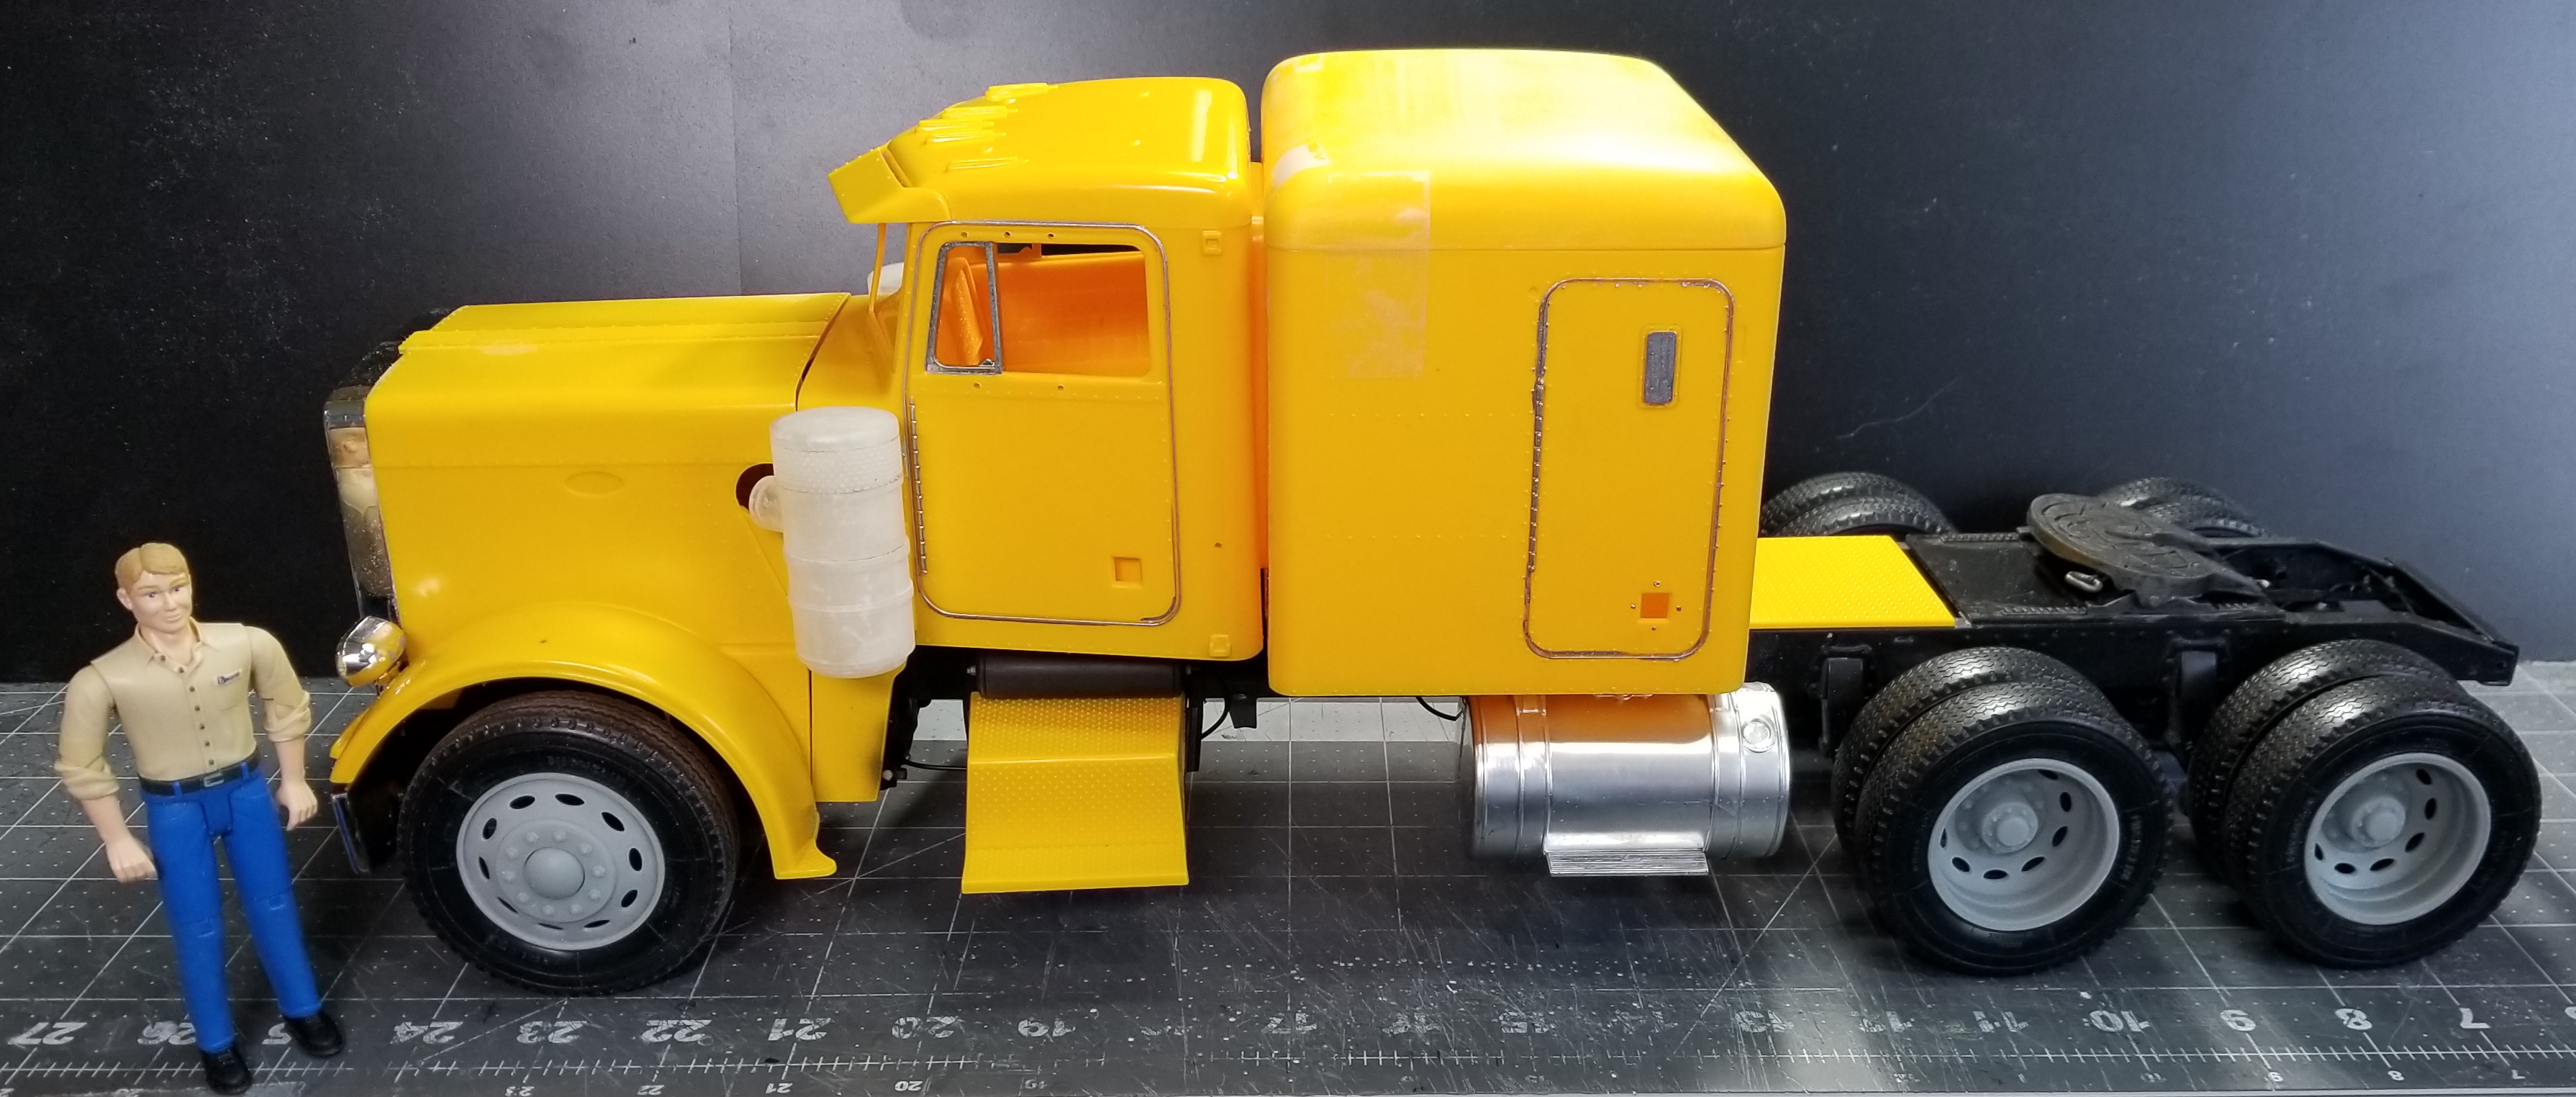
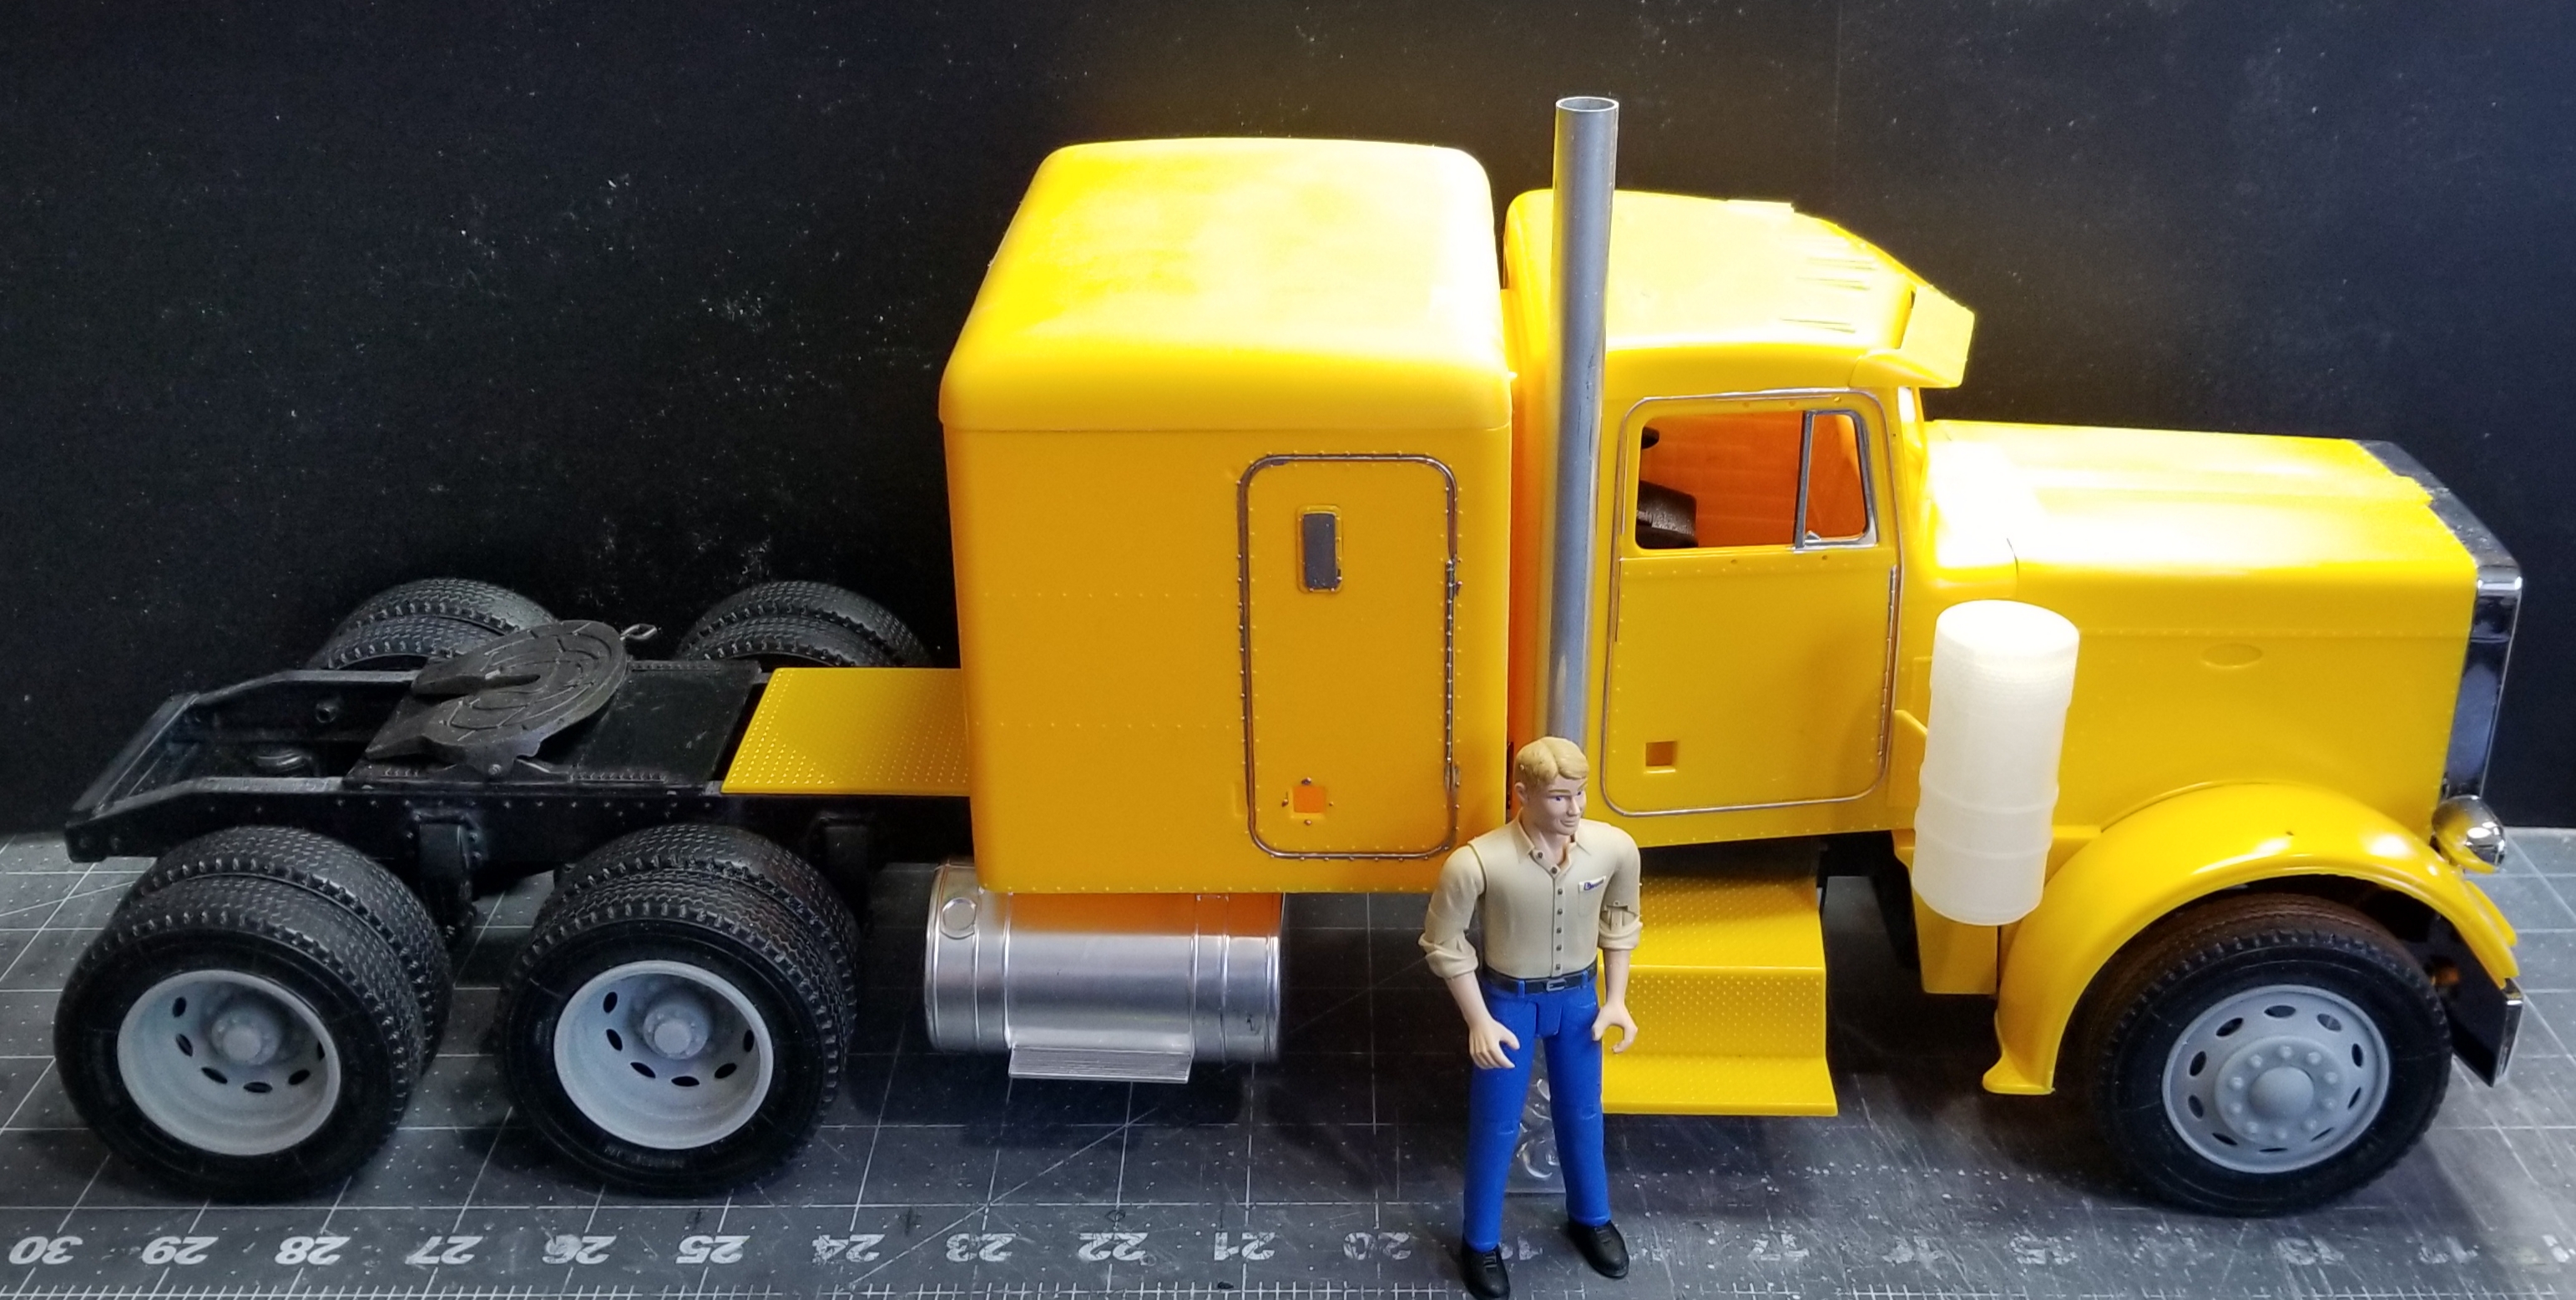
this view shows the truck temporarily assembled for pictures.
another view of the truck.
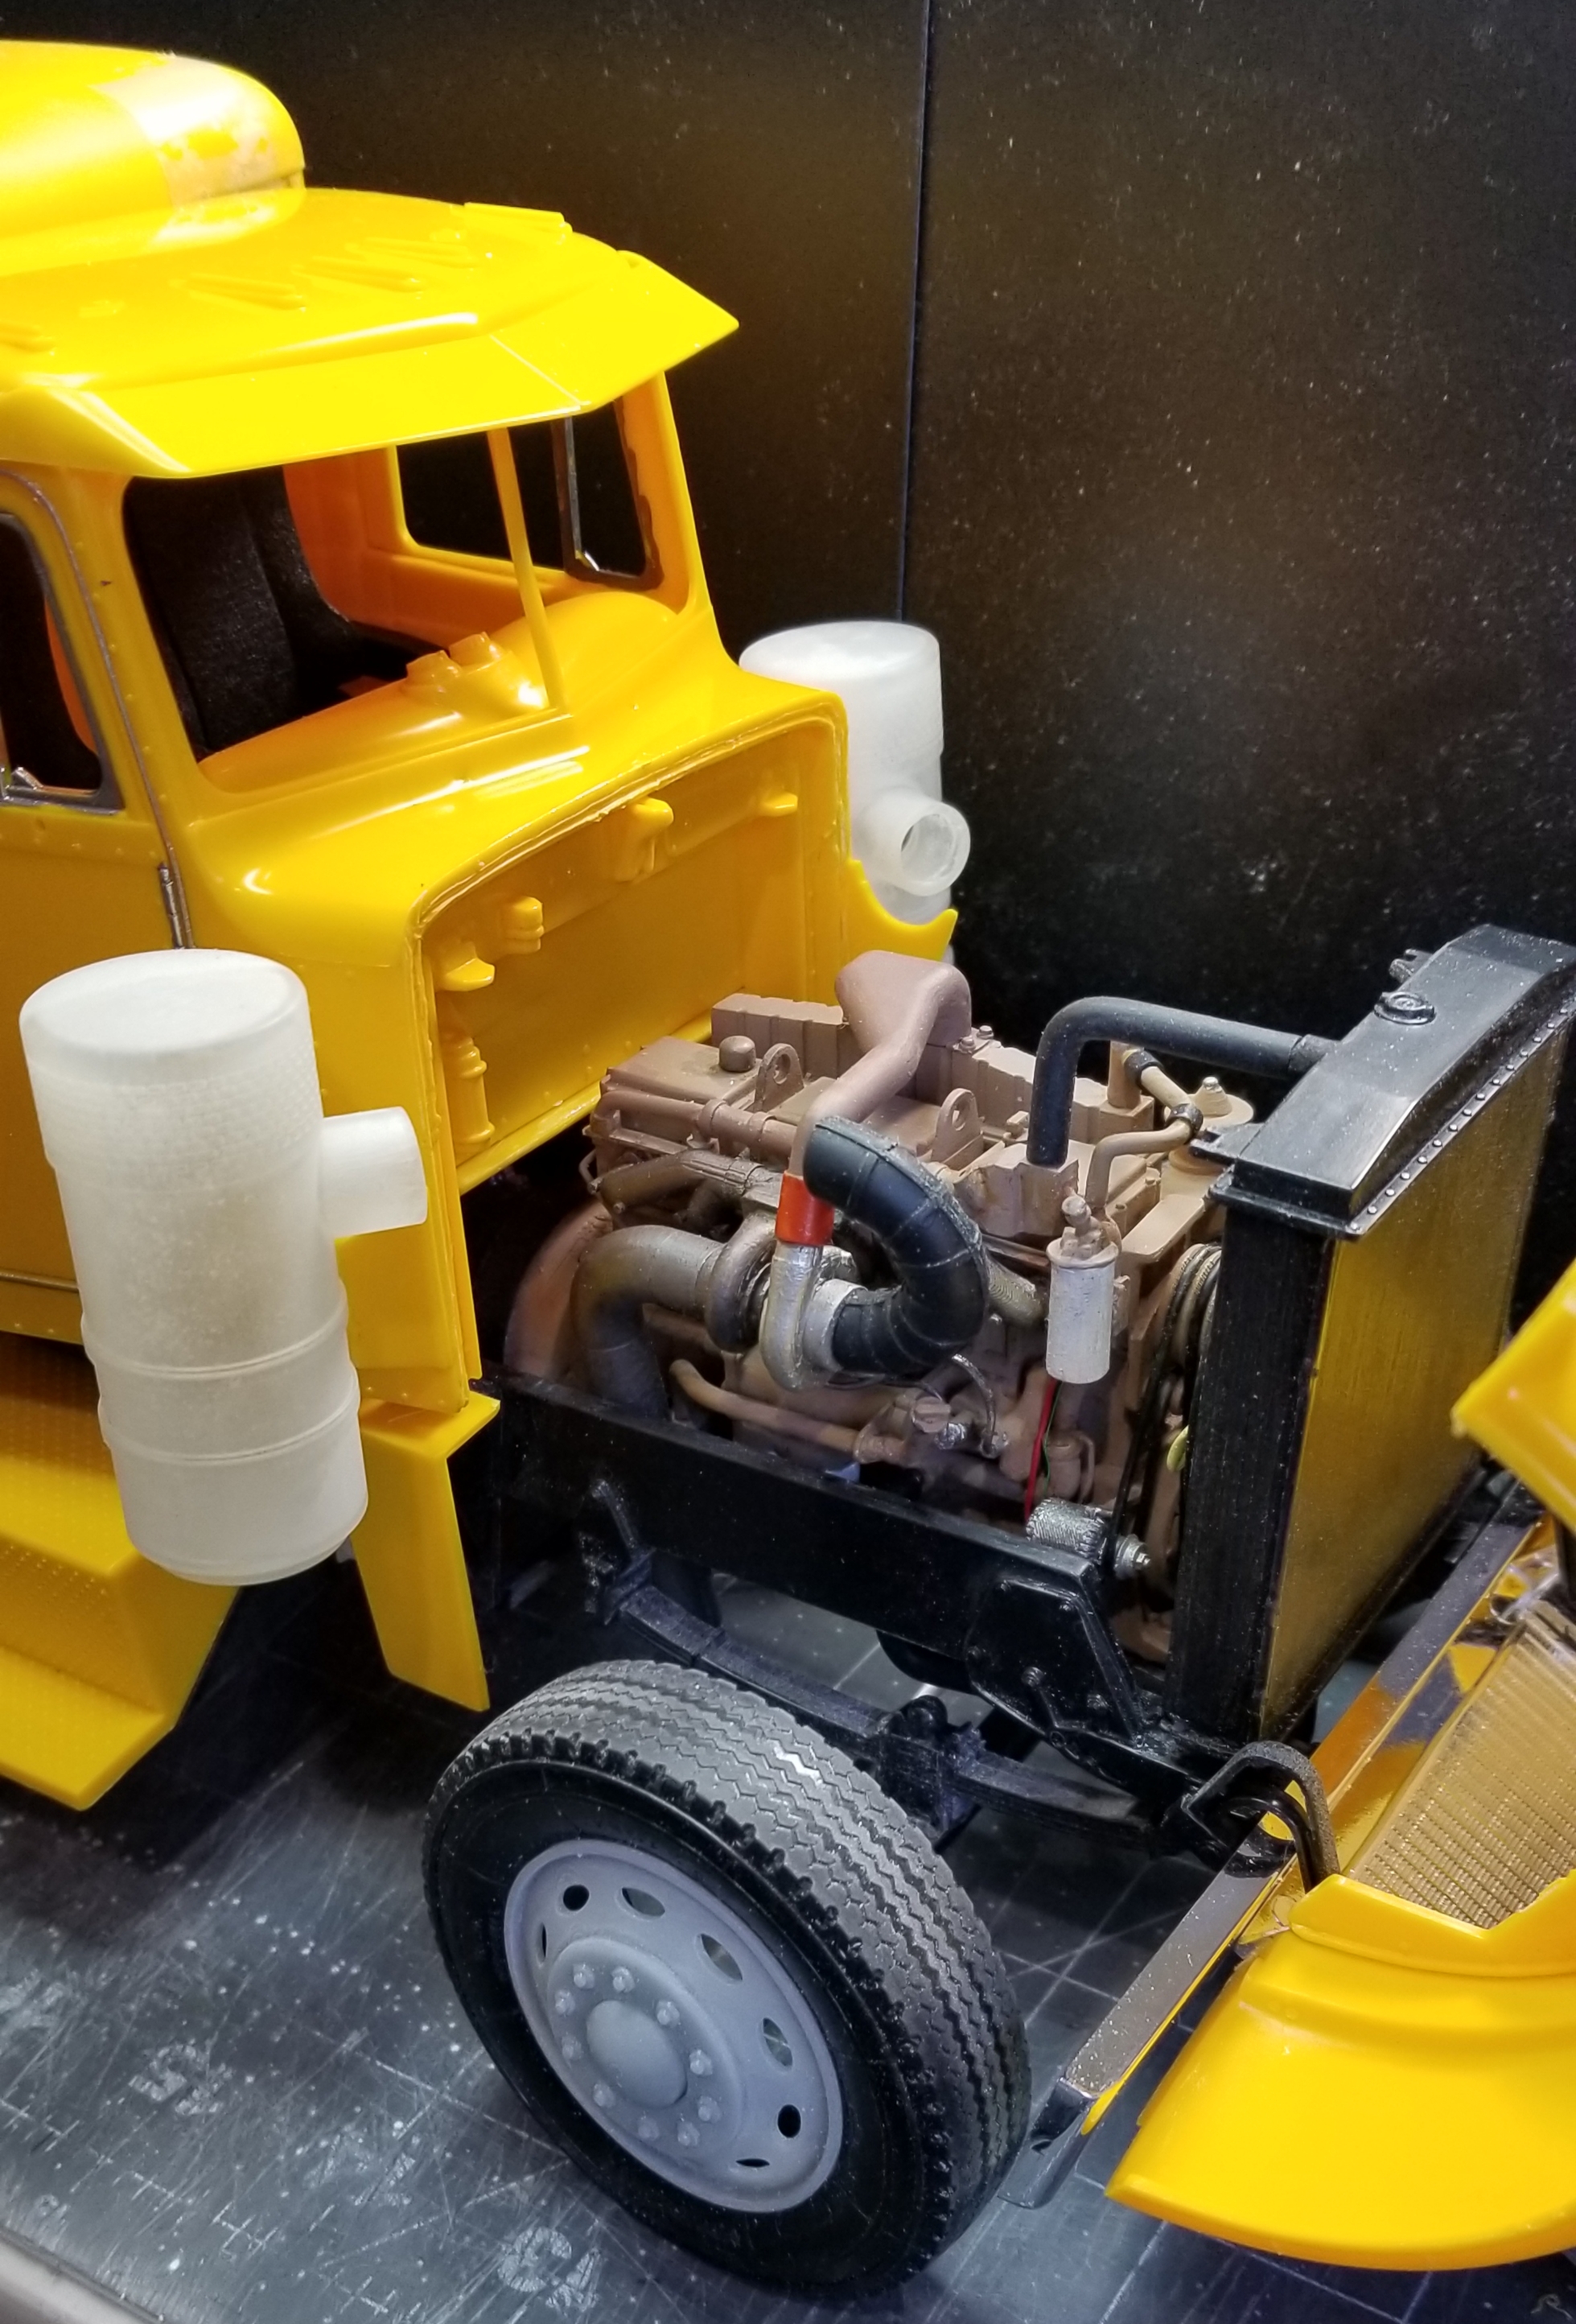
this view shows the motor. I added some tube clamps to the orange turbo tube and the radiator hoses. I added Cummins filter decals to all the filters, there from Jerry at model trucking.
view showing the front shock.
this view shows the rear shocks installed. Well that's it for now be back with more soon.
Ron G
-
Hey all
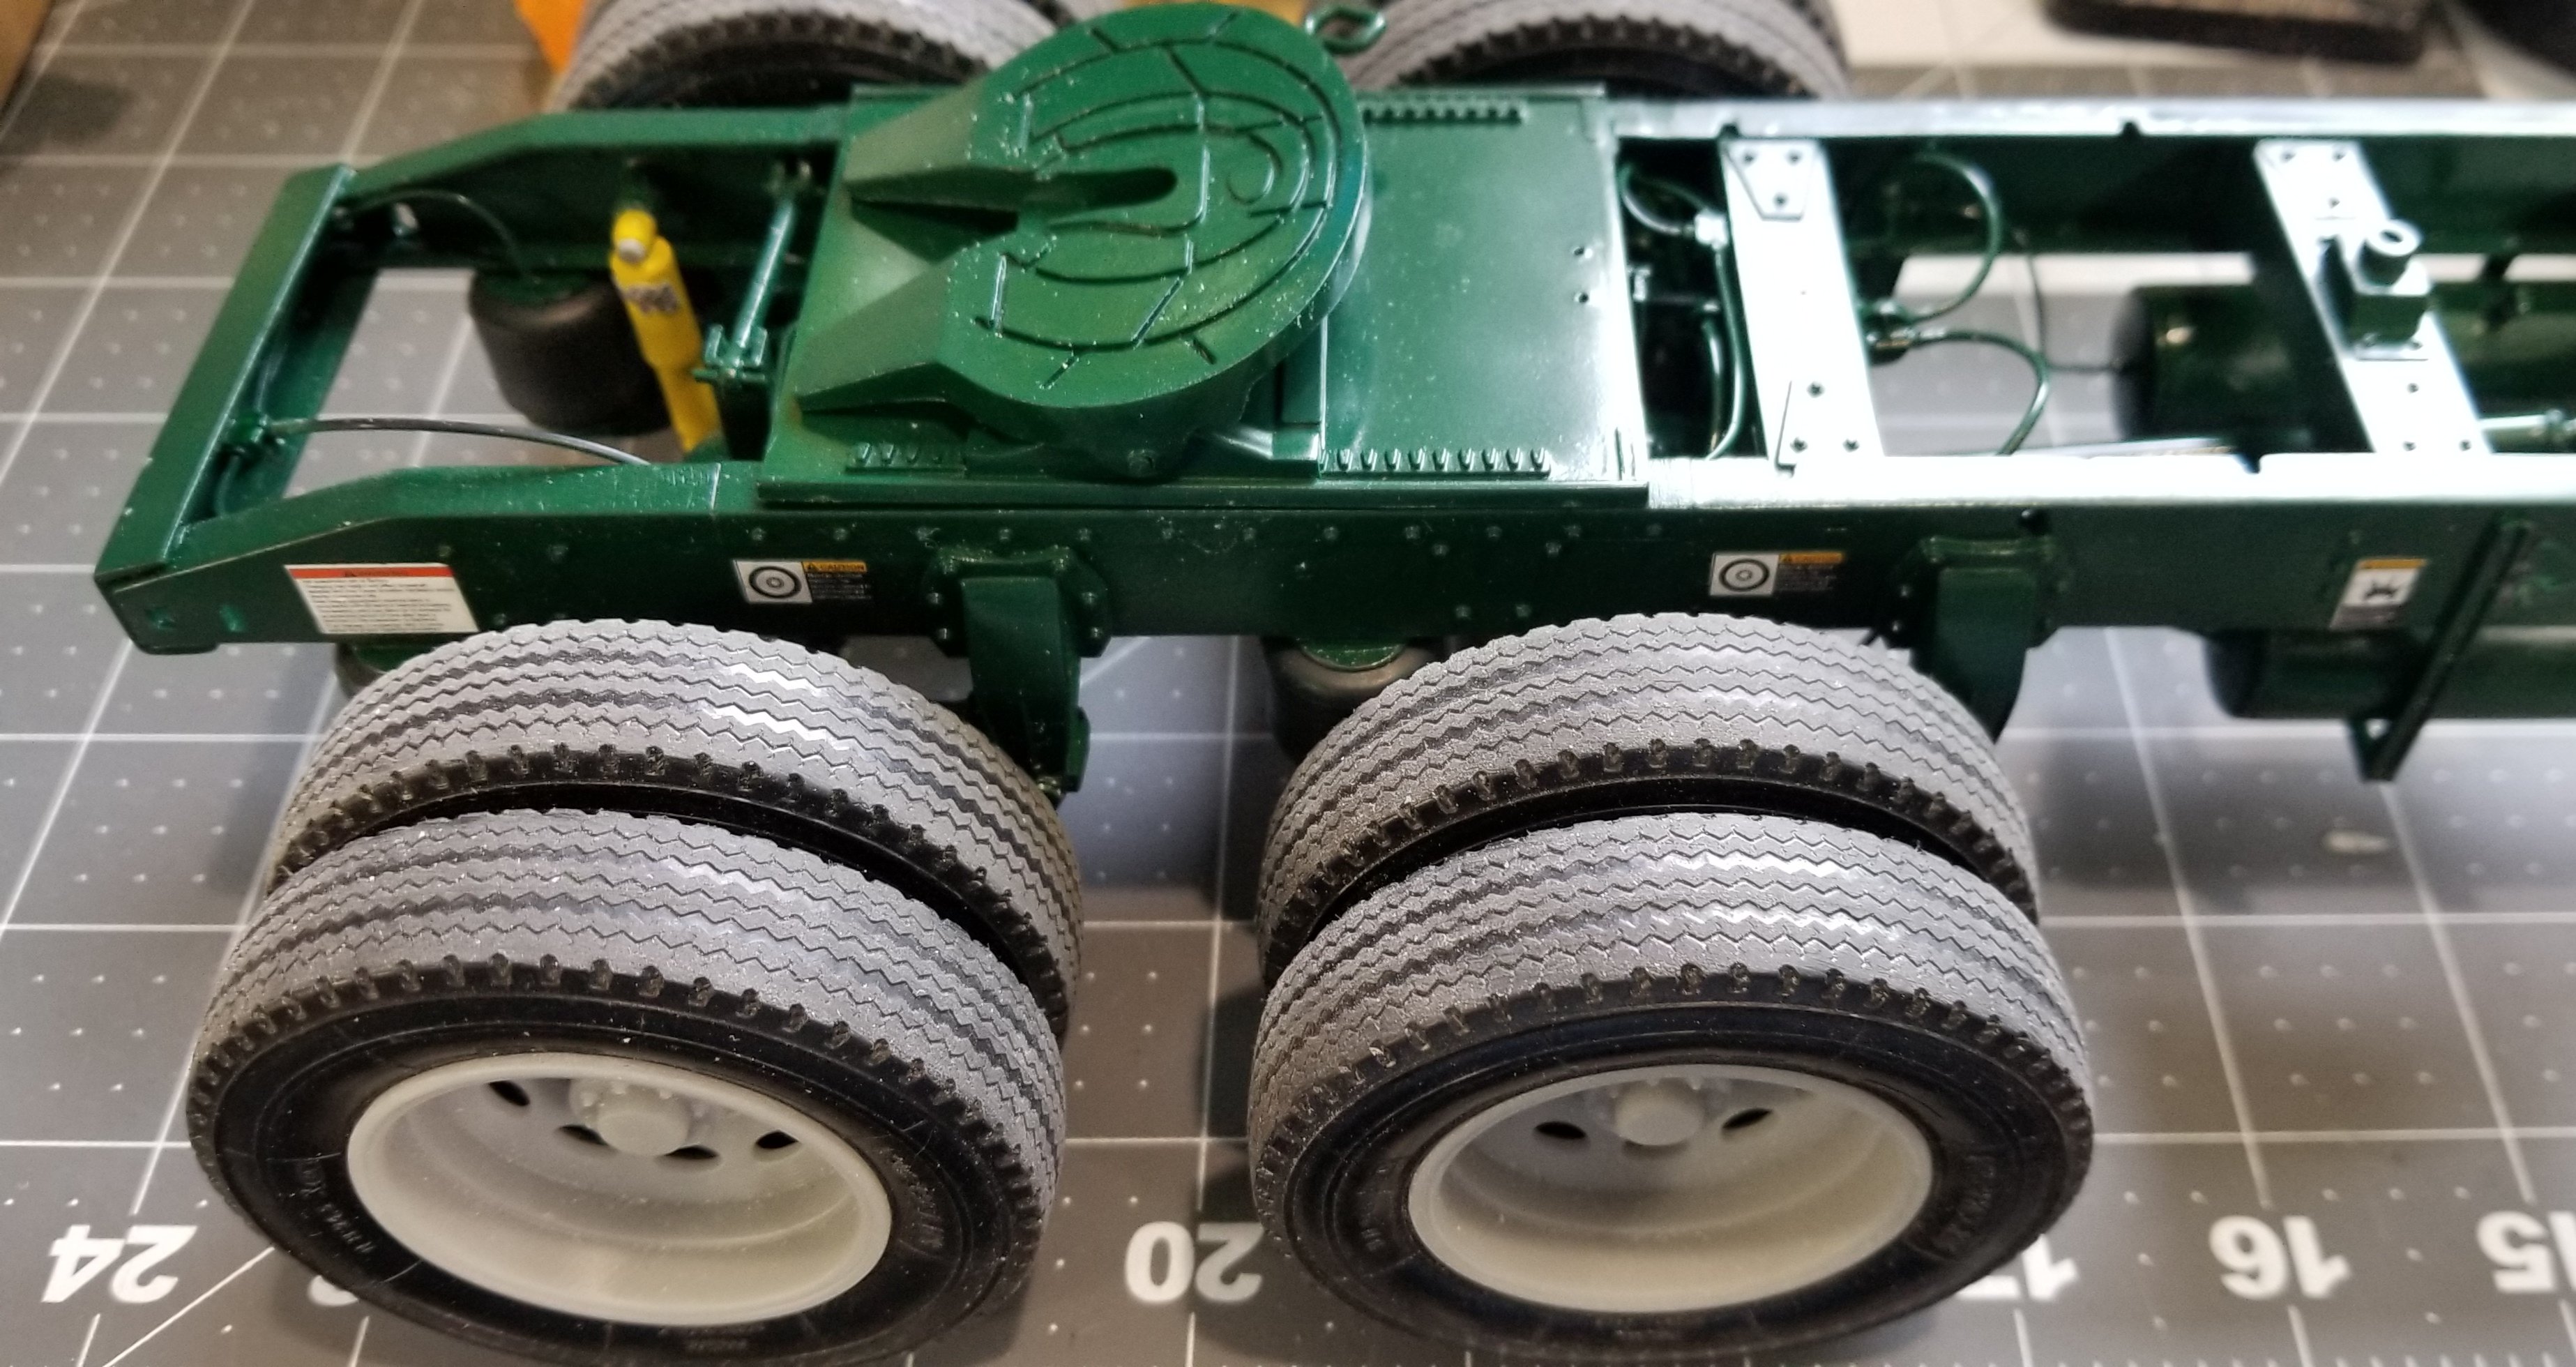
Well I have the chassis painted! Whoo hoo! It came out a little flat, so I'm going to go over it with some X22 gloss.
overall view of the rolling chassis. I have to paint the yellow peices chrome silver. I think I'm going to do the tanks dark green with chrome straps to match the frame, not sure what do you guys think?
rear of chassis.
front of chassis.
center of chassis. Well that's it for now be back soon.
Ron G
-
Thanks guys
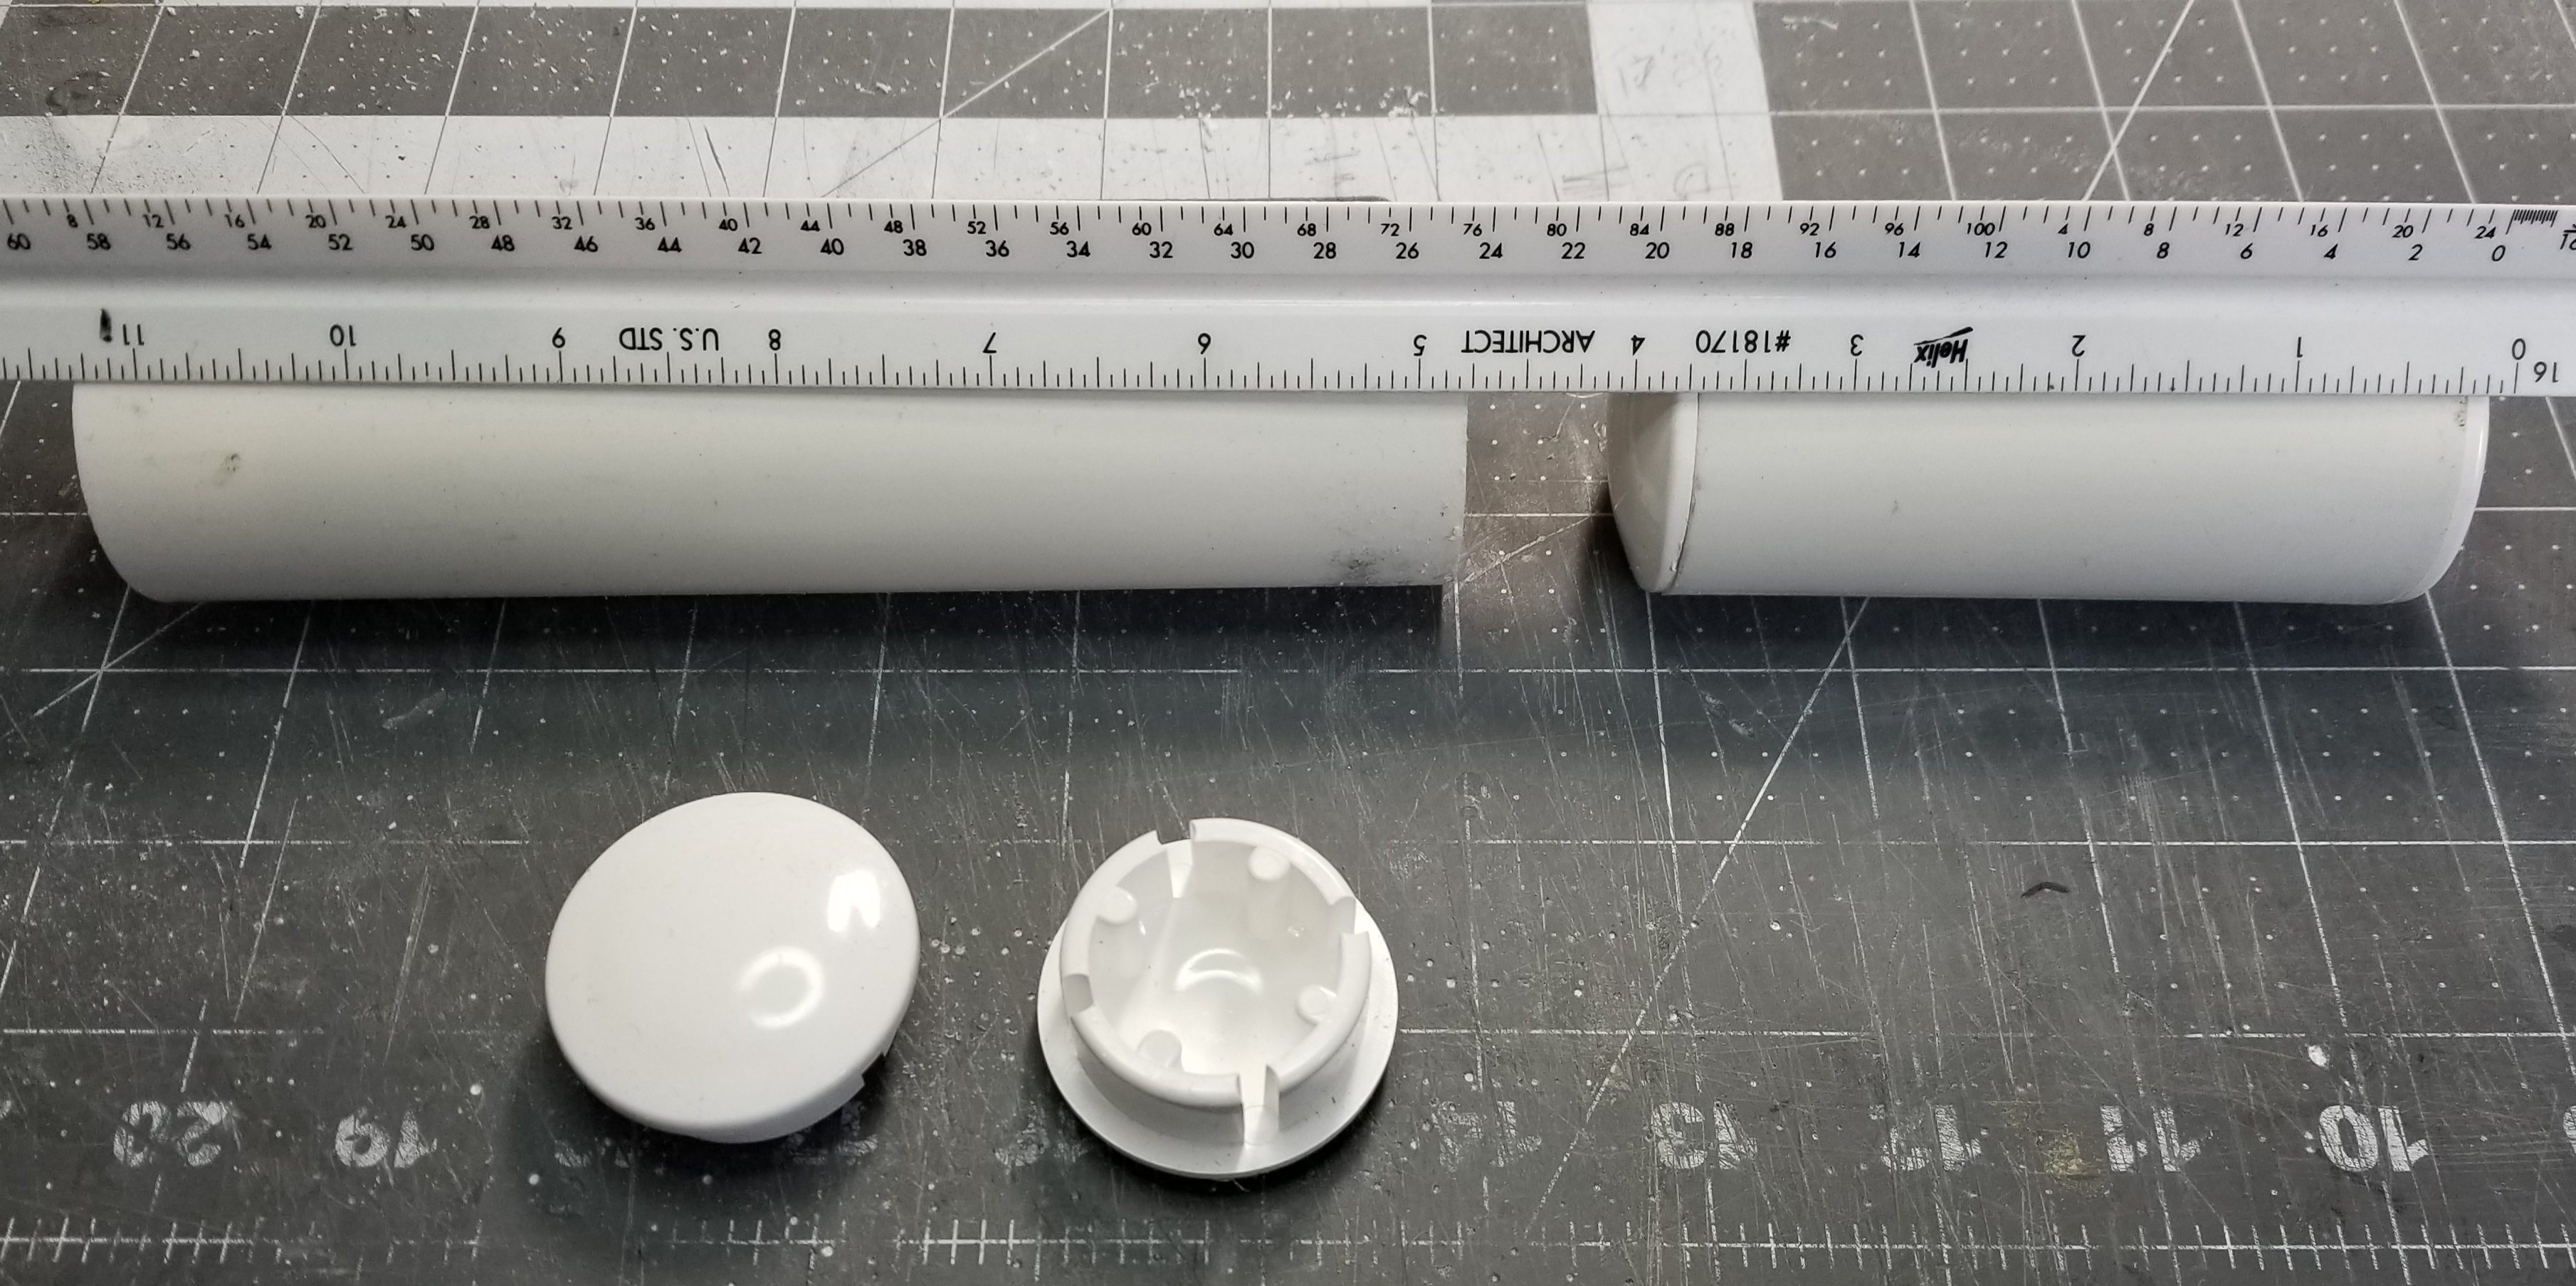
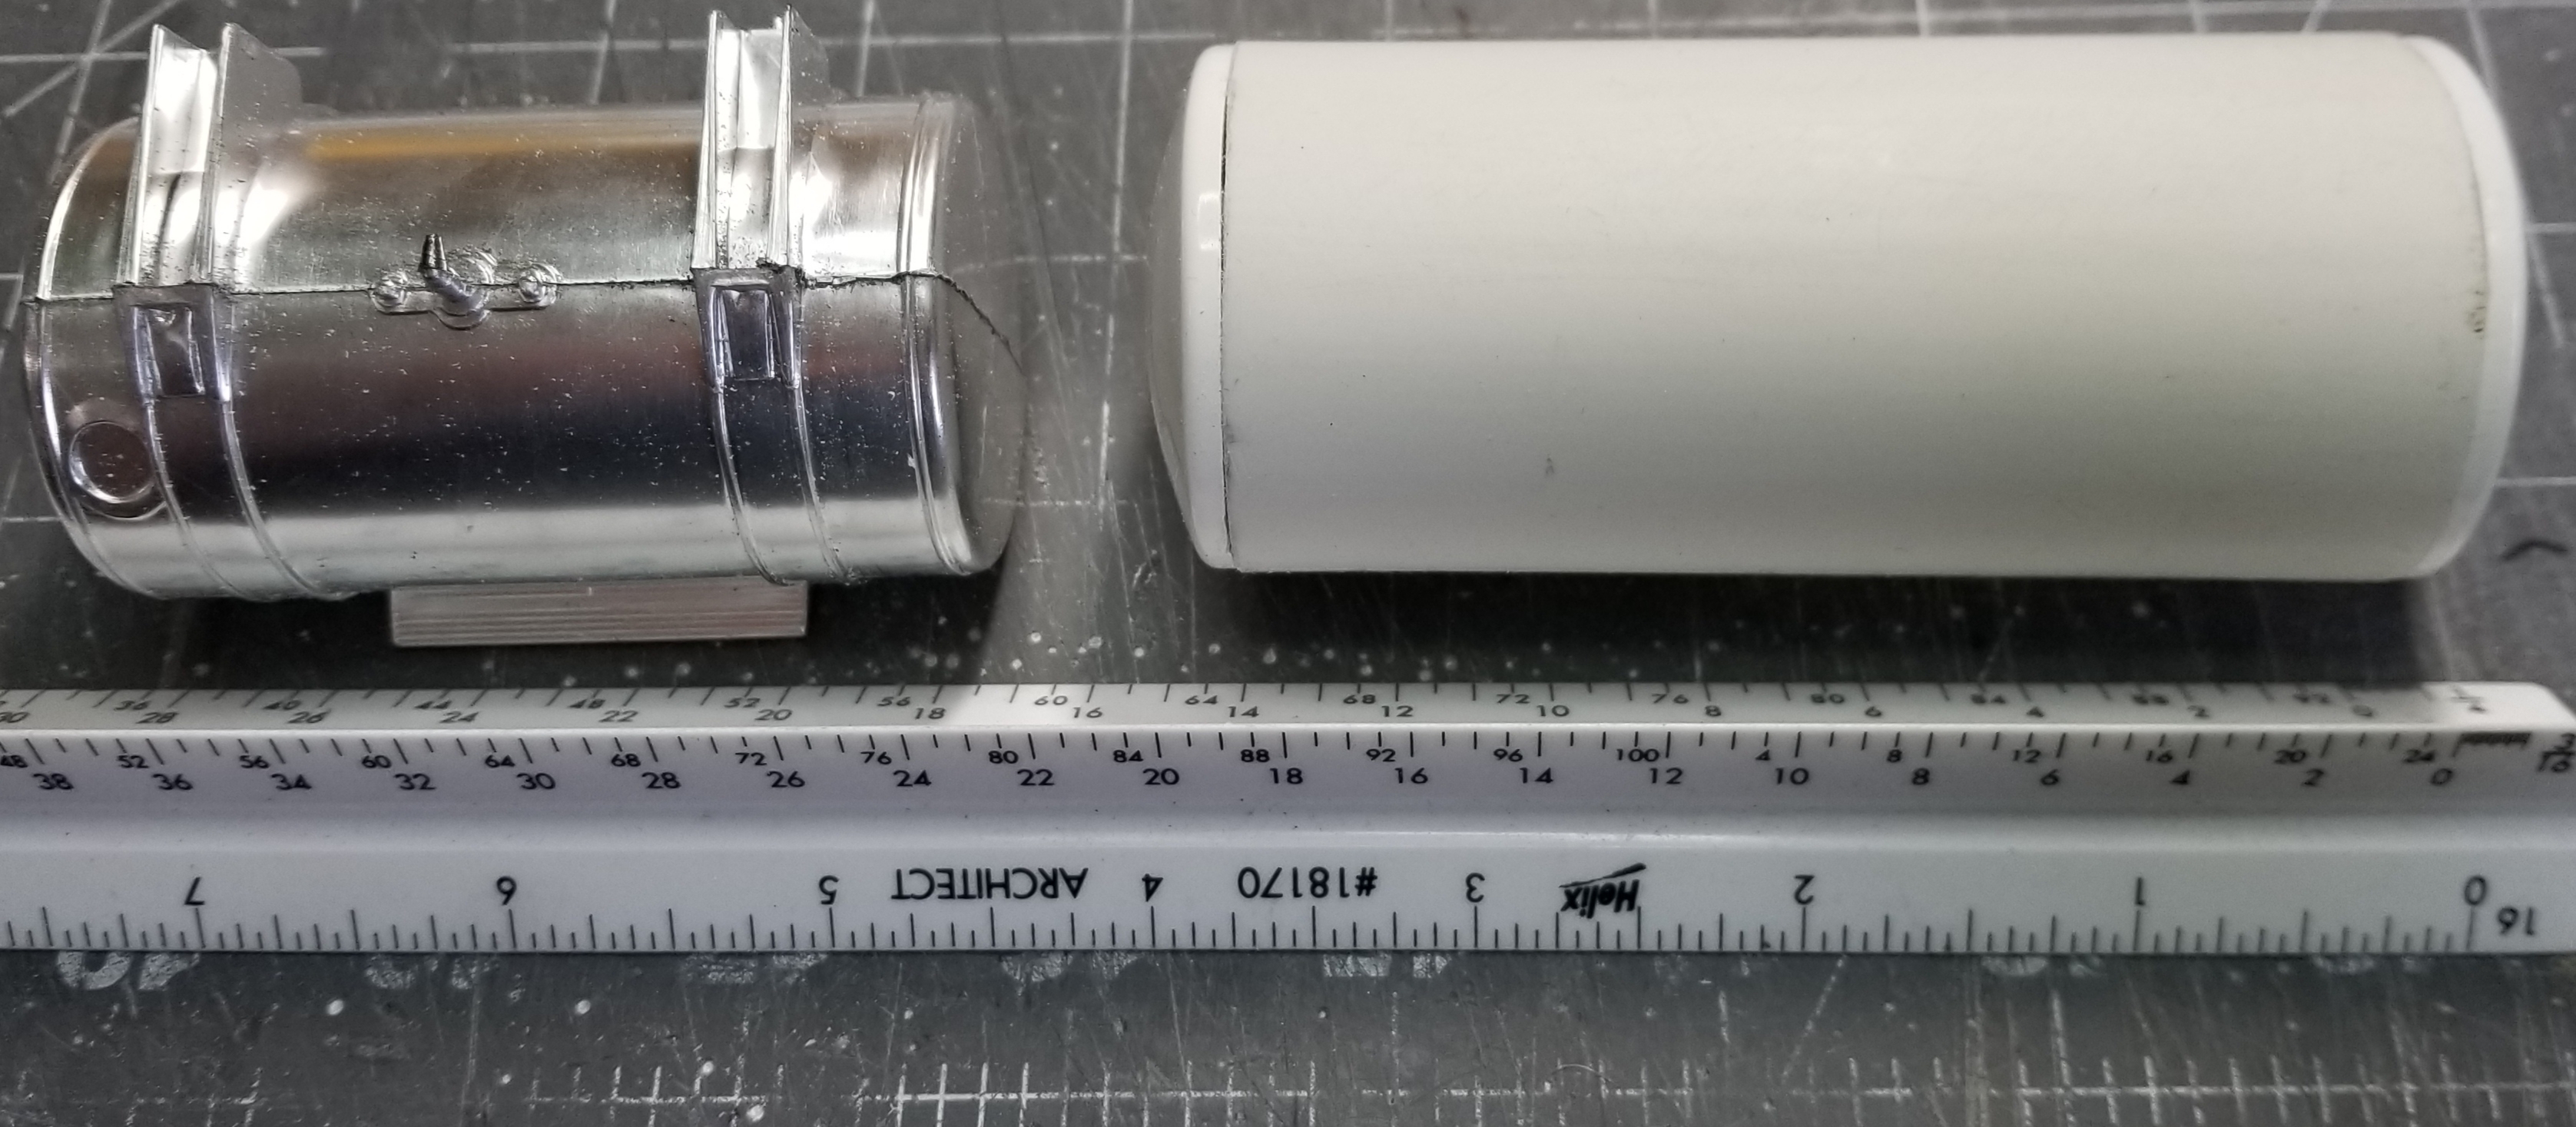
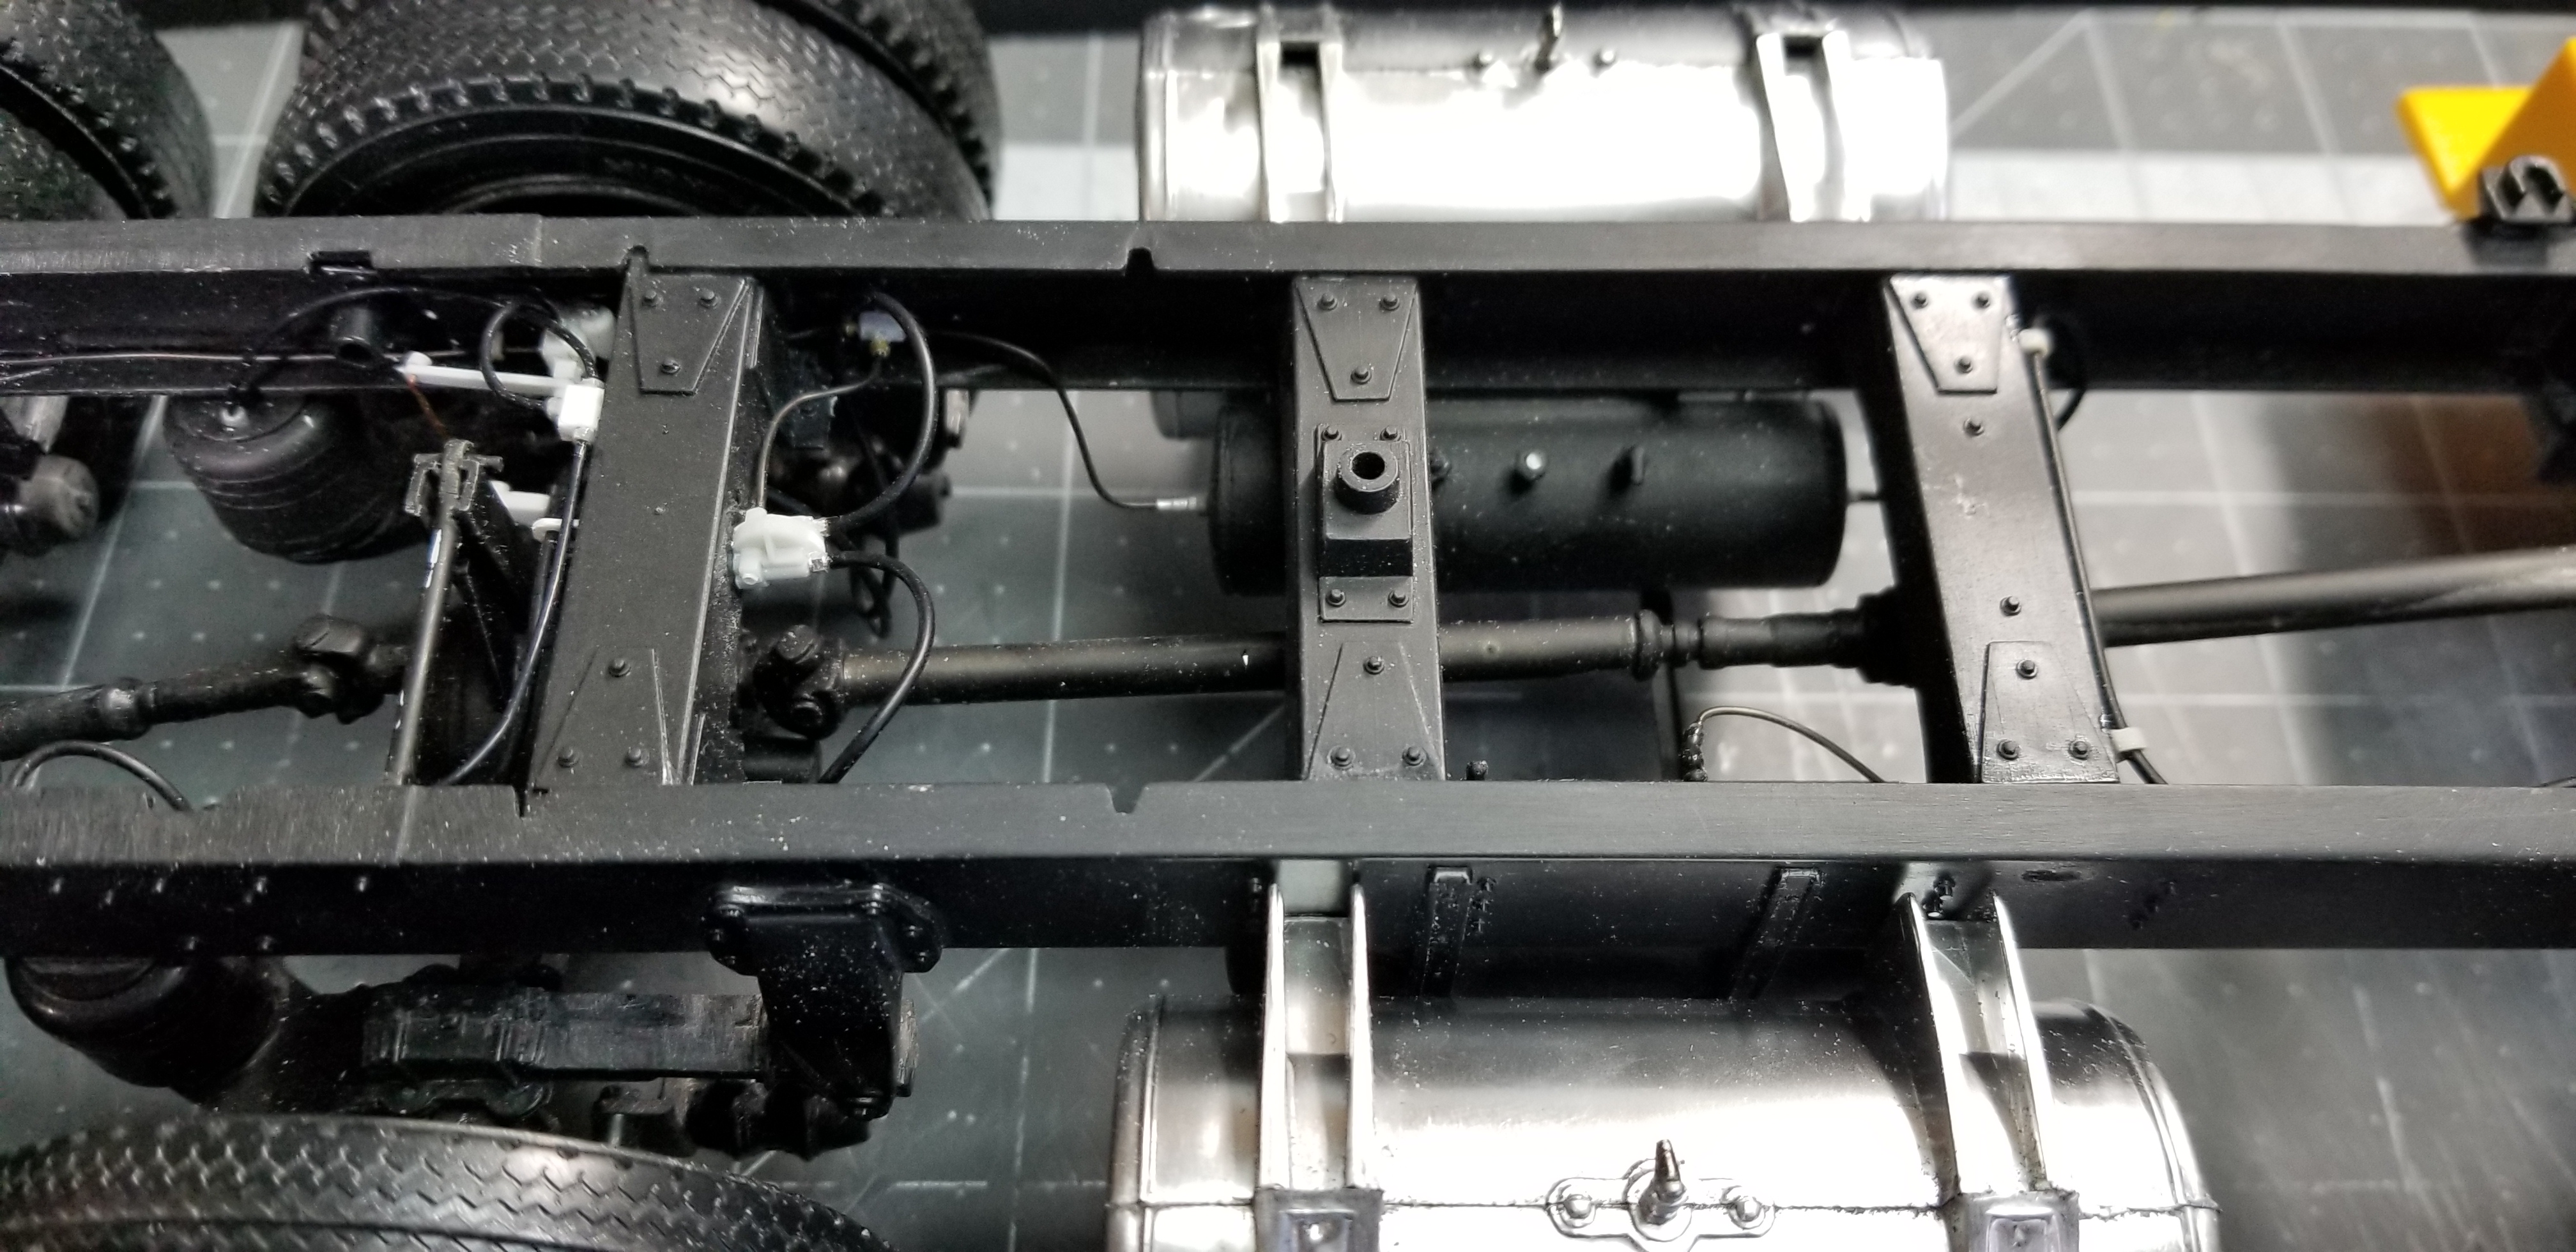
Ok, I got started on the fuel tanks. These are made from 1 1/4" PVC pipe with Formufit PVC internal domed end caps 1 1/4" diameter. These are also available for 3/4c PVC pipe which works out to a scale 25.2" in 1/24 scale and 26.25" in 1/25 scale. They are available in multiple colors along with the pipe.
this view shows the pipe and caps on the left and finished tank on the right.
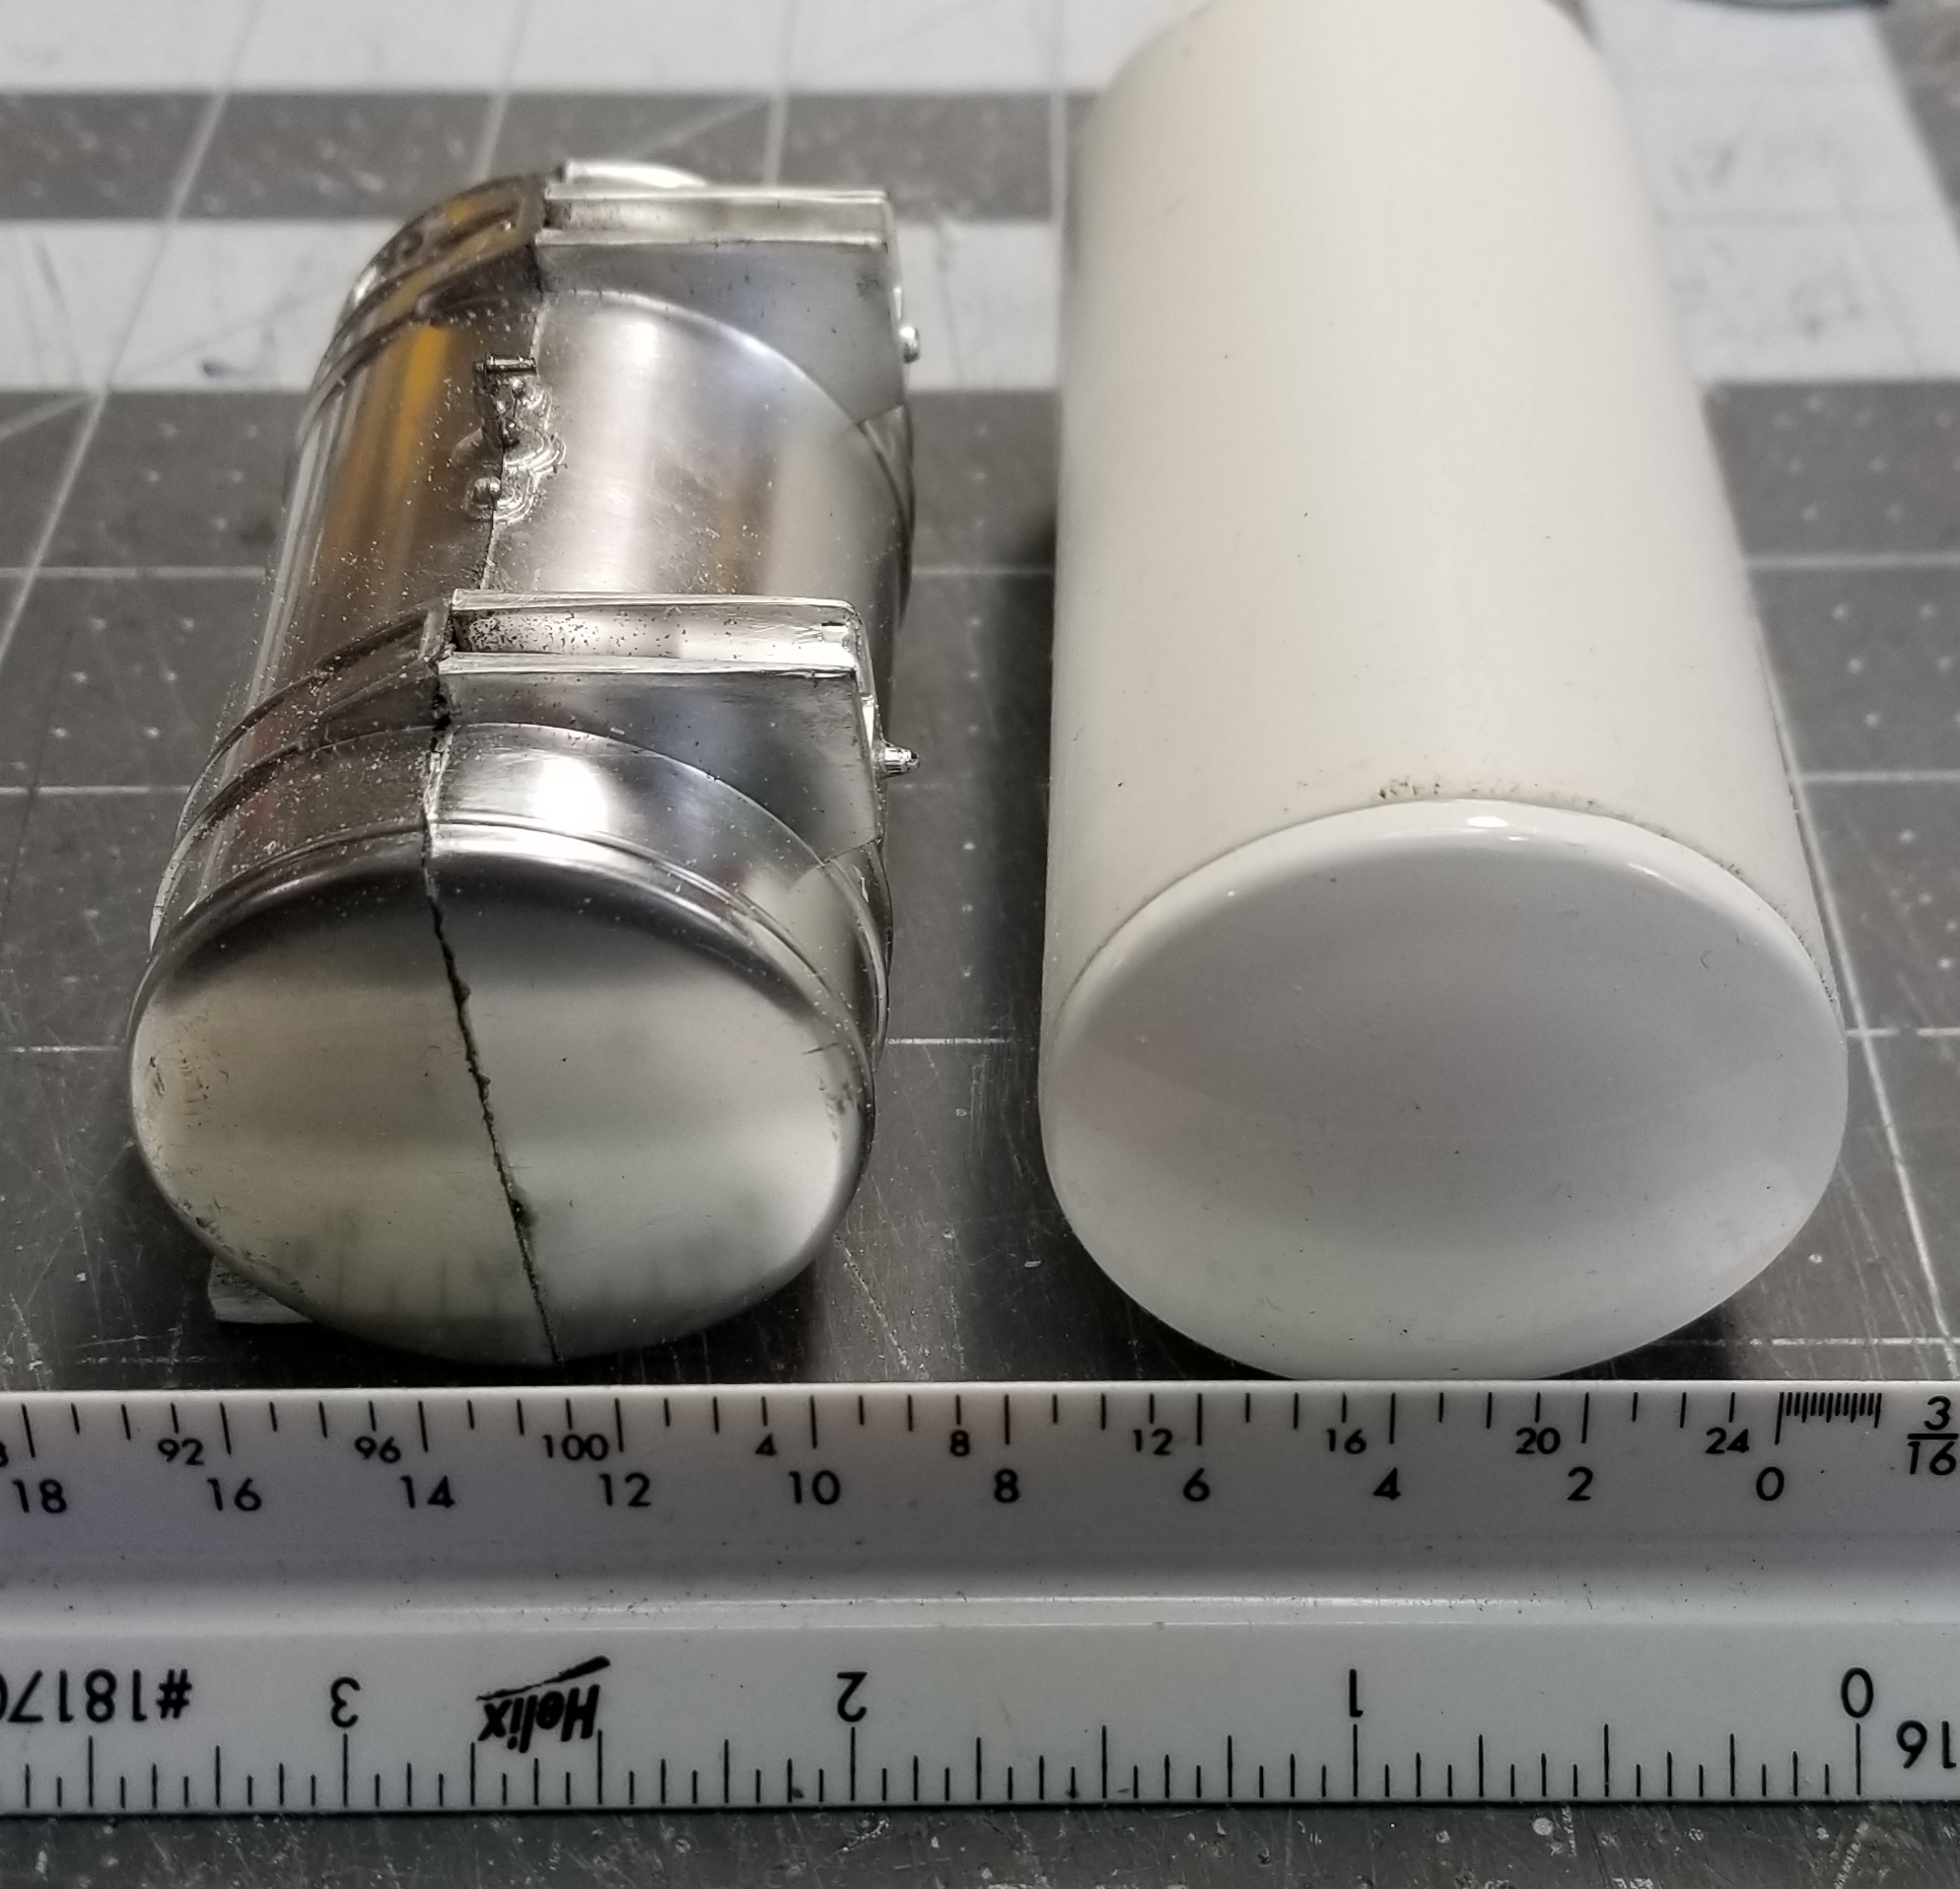
this view shows the kit tank on the left and my custom made tank on the right.
end view of the same thing.
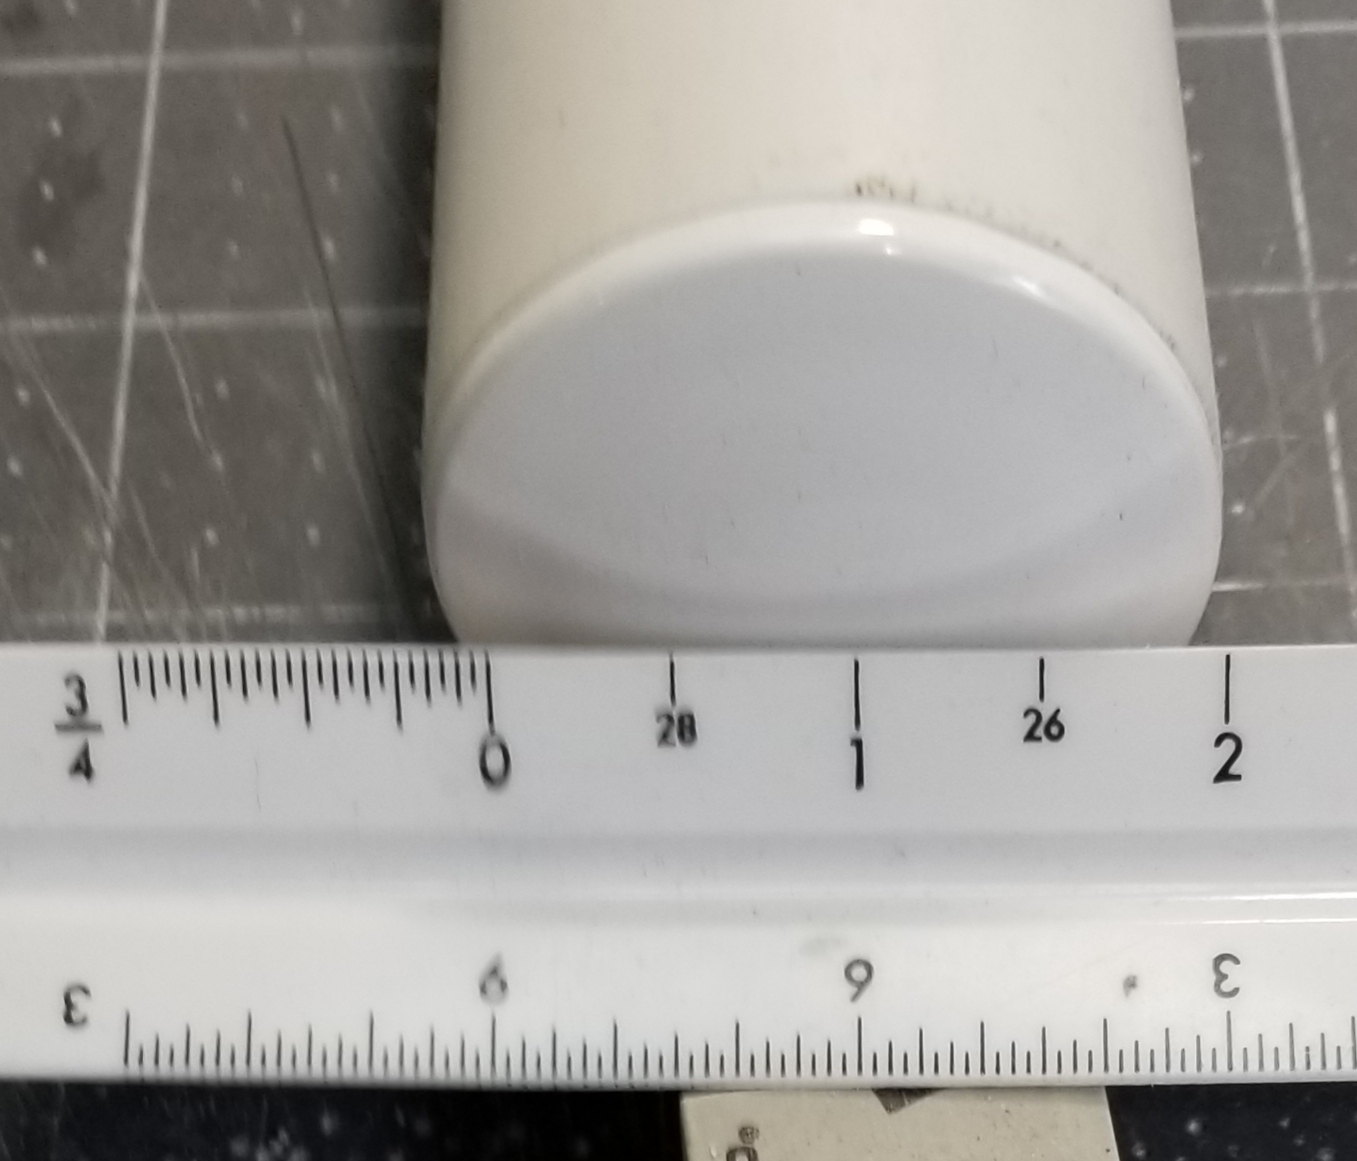
this view shows that the tank is a scale 26" diameter.
this view shows that the tank is a scale 65" long.
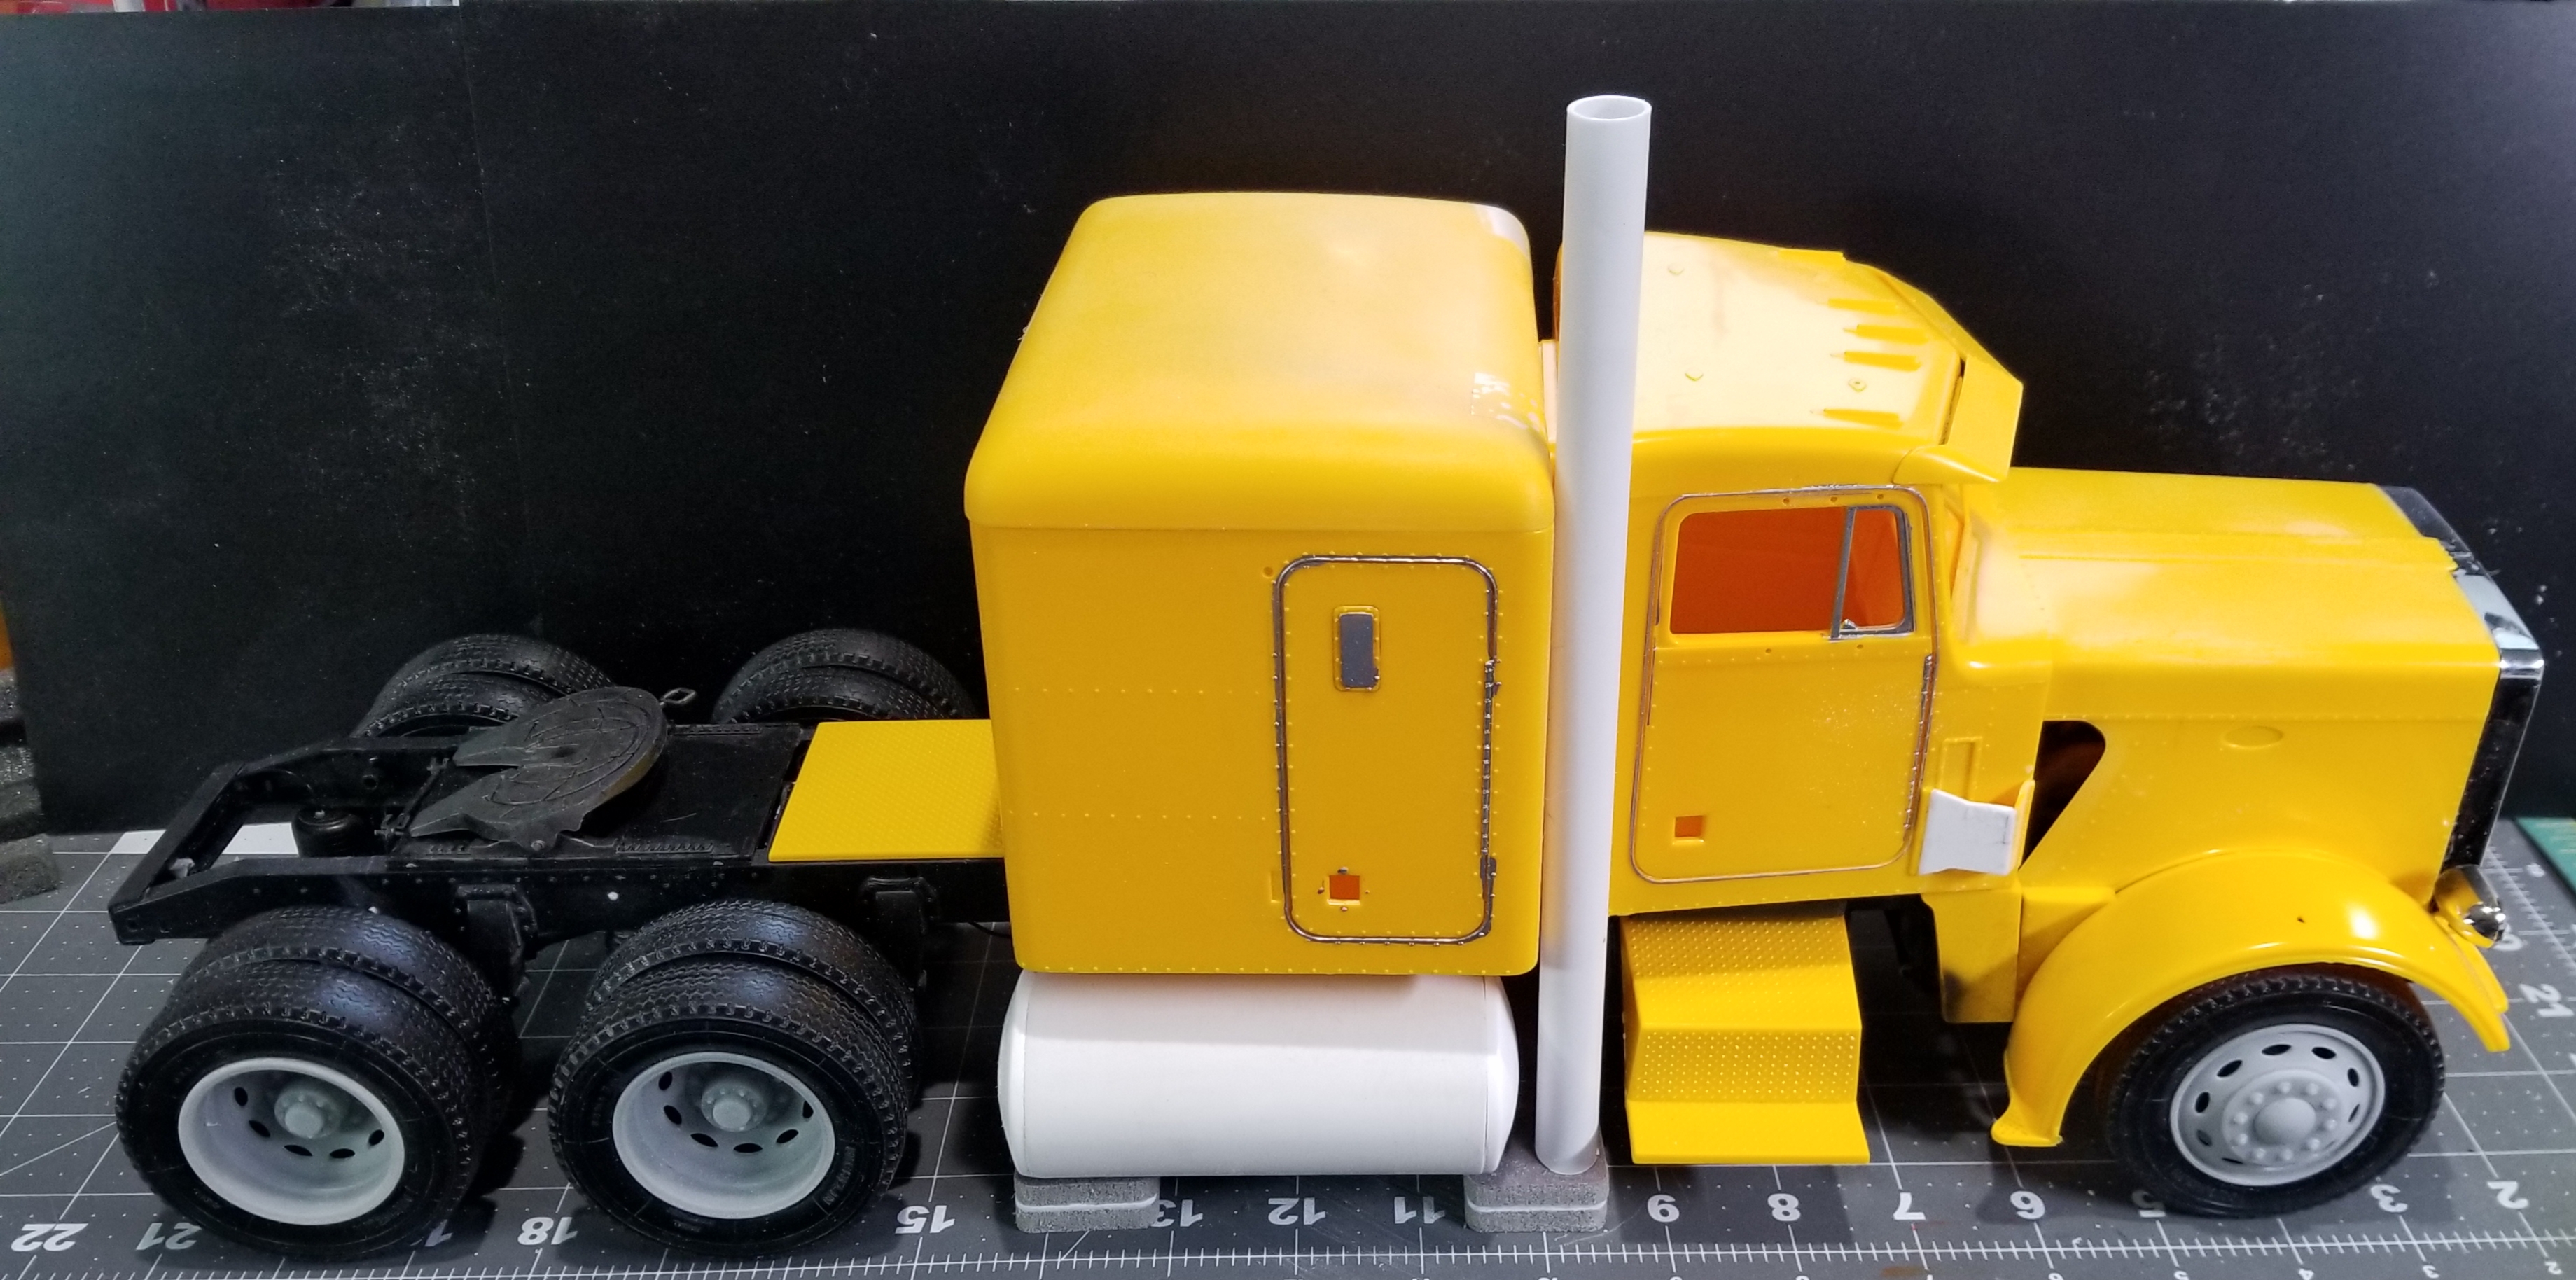
this view shows the custom tank on the truck. Thats a 1/2" (scale 8") diameter tube for the exhaust. Well that's it for now be back with more soon.
Ron G
-
Thanks guys
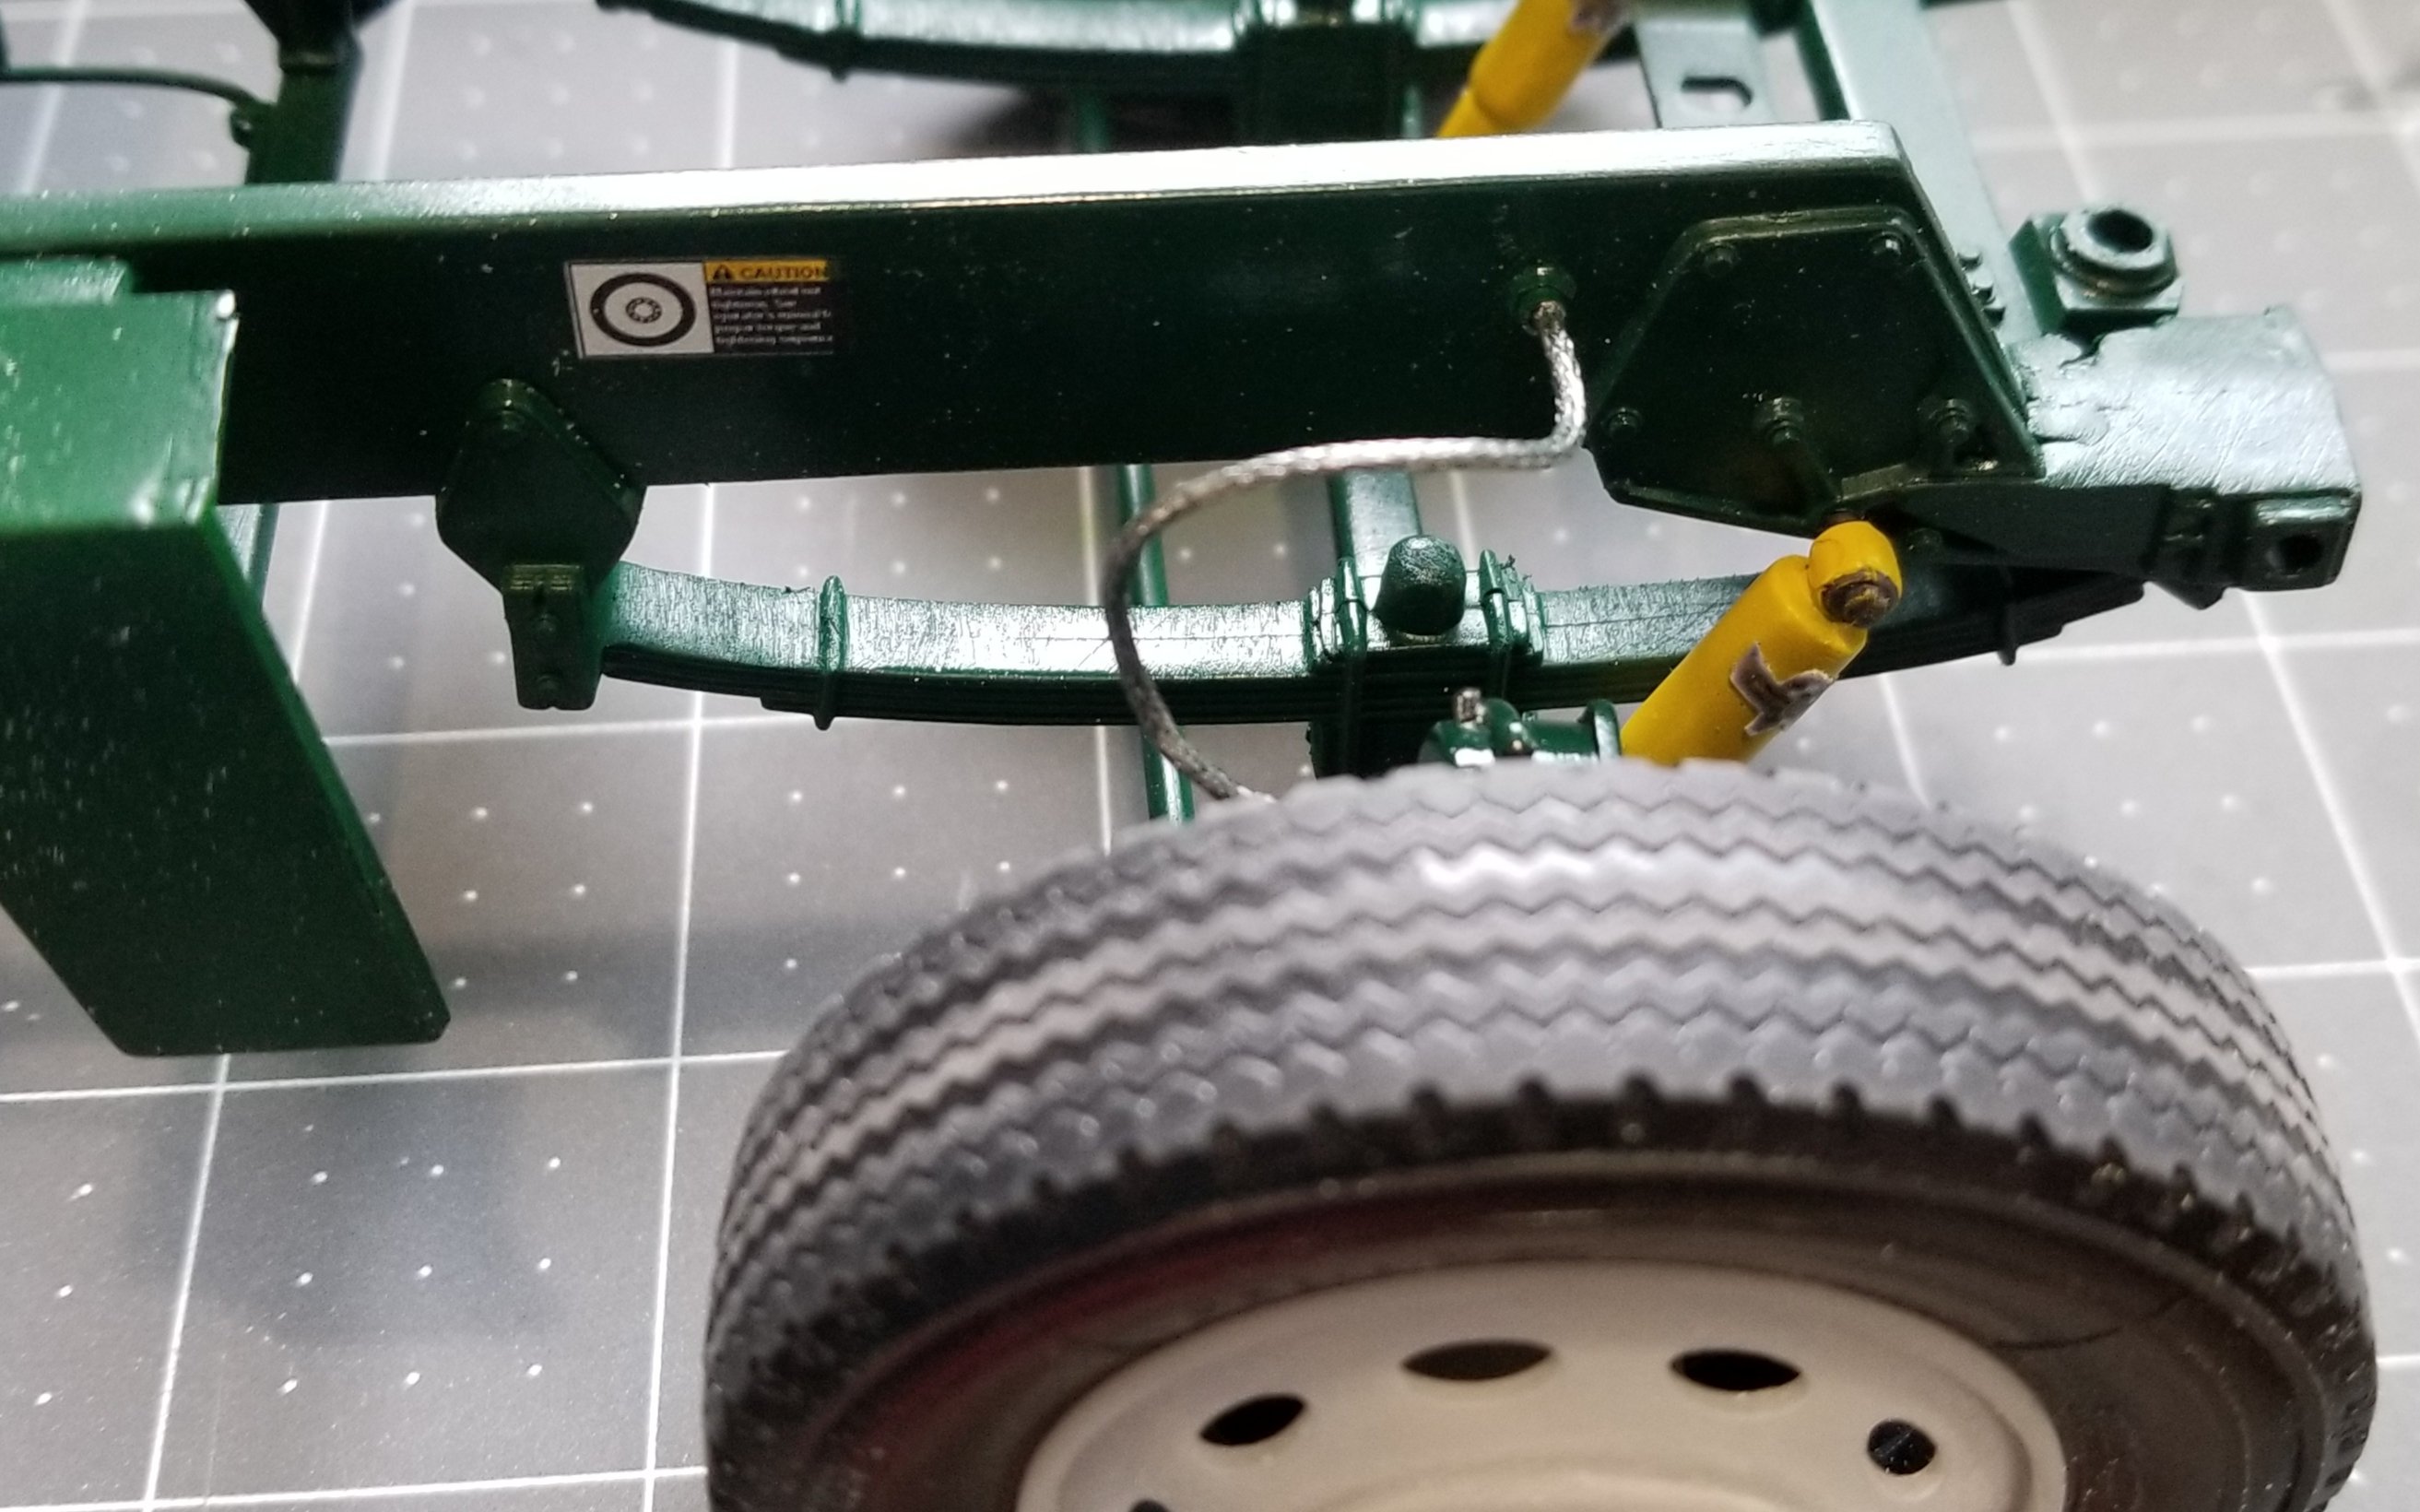
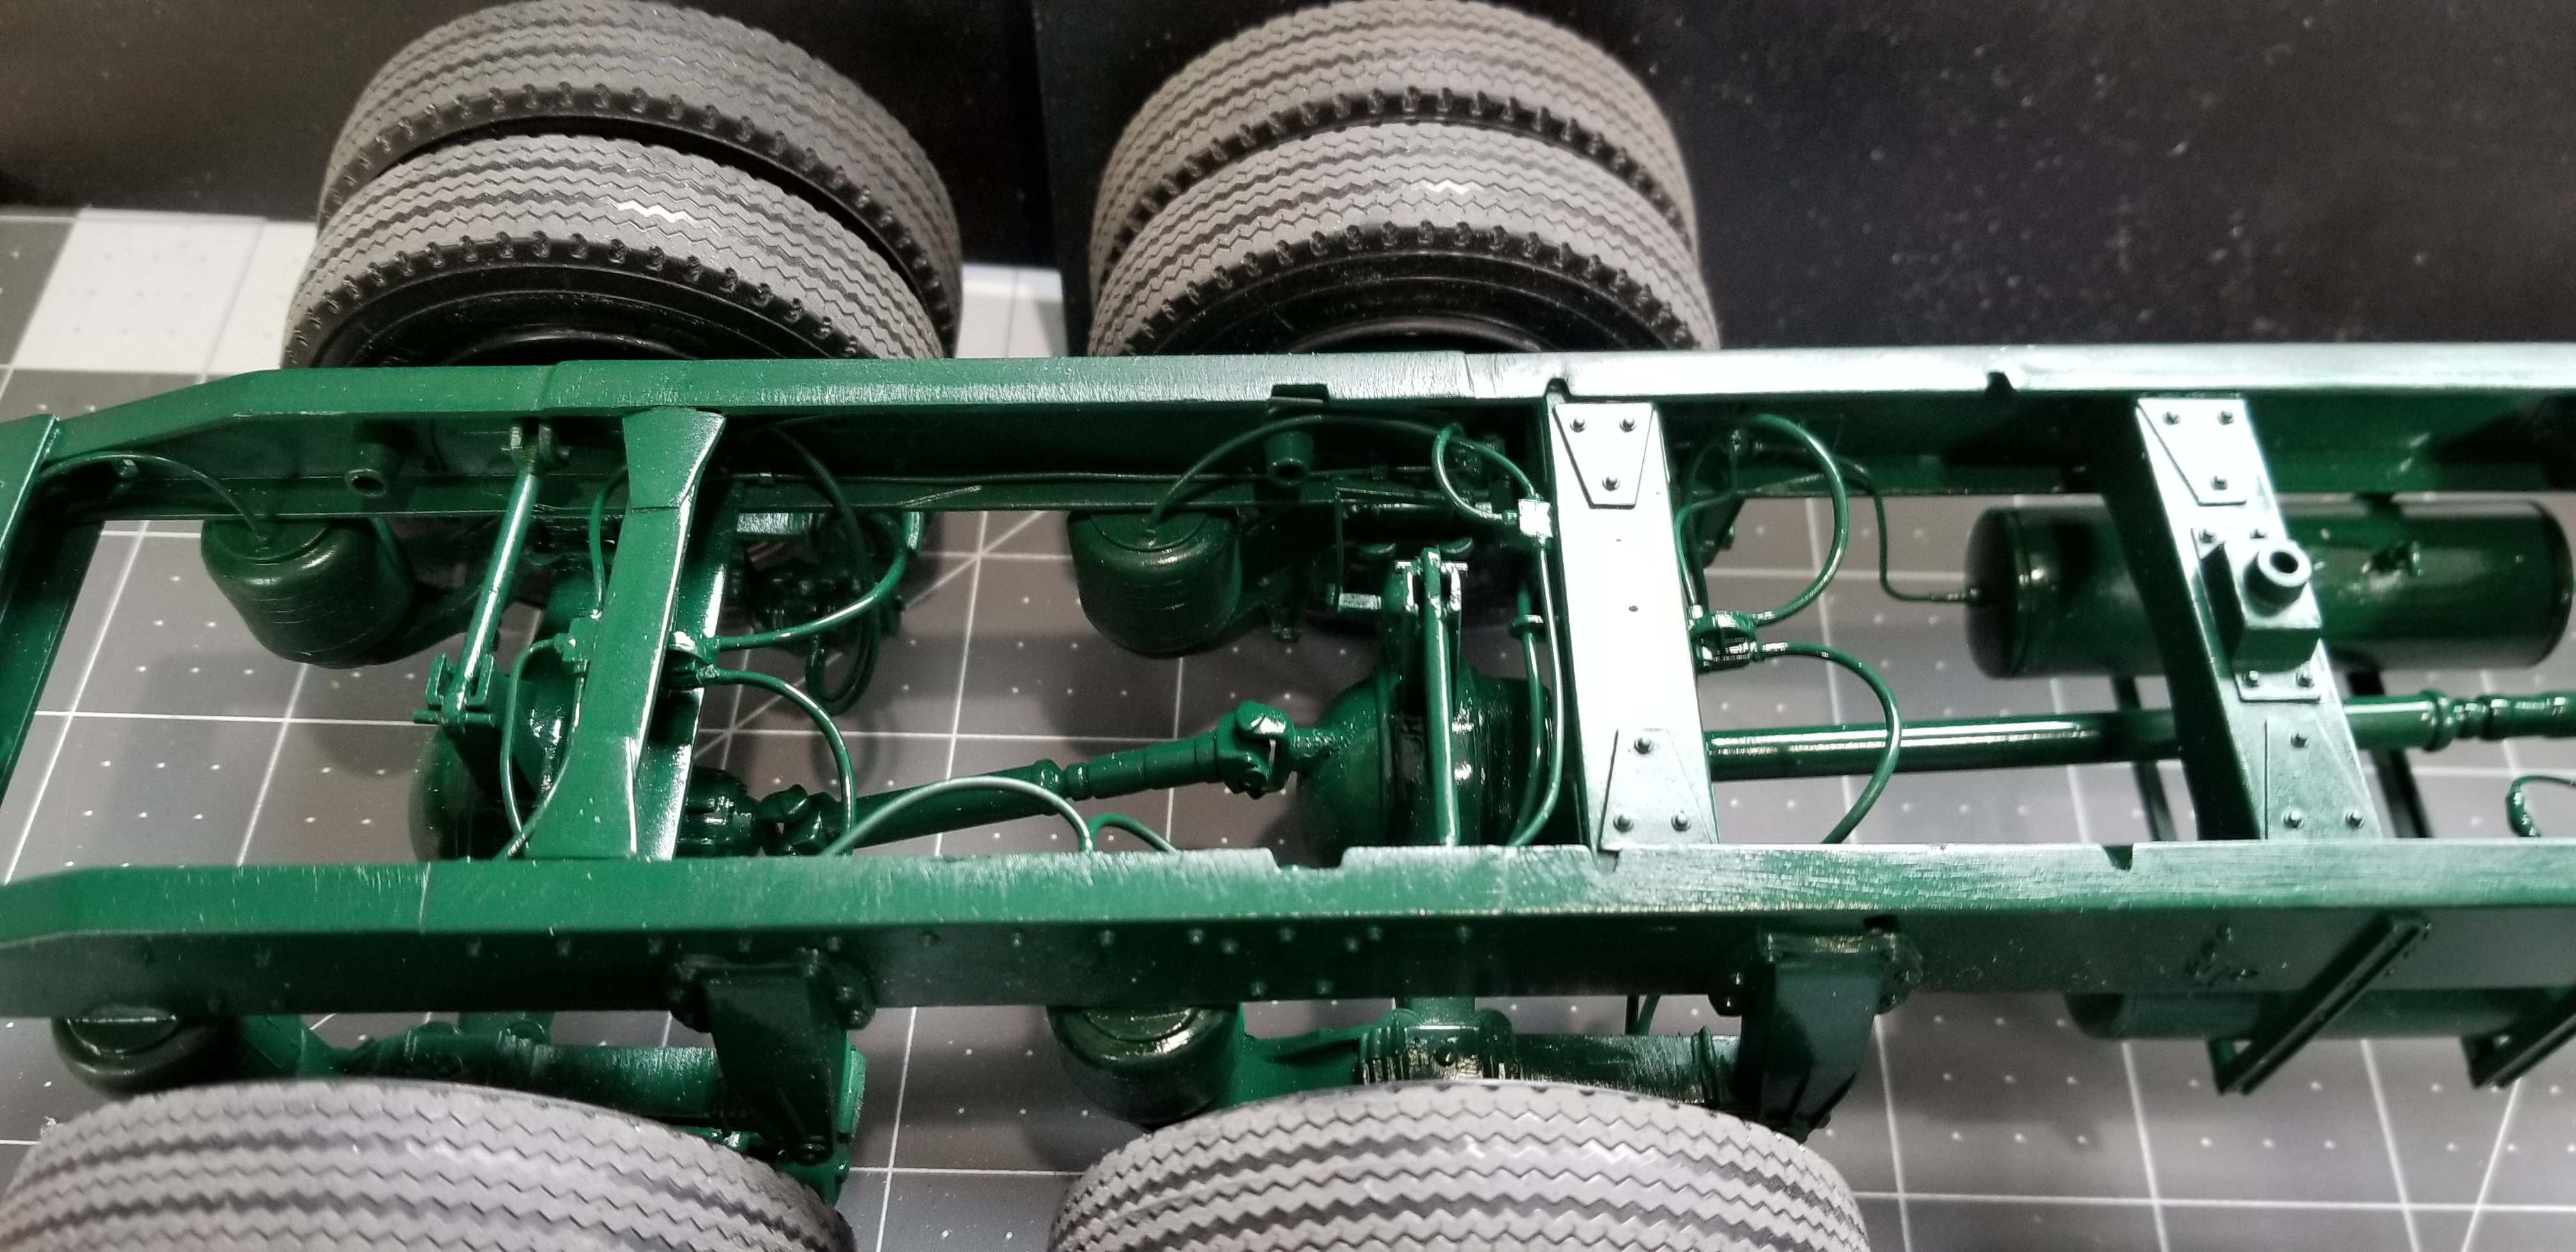
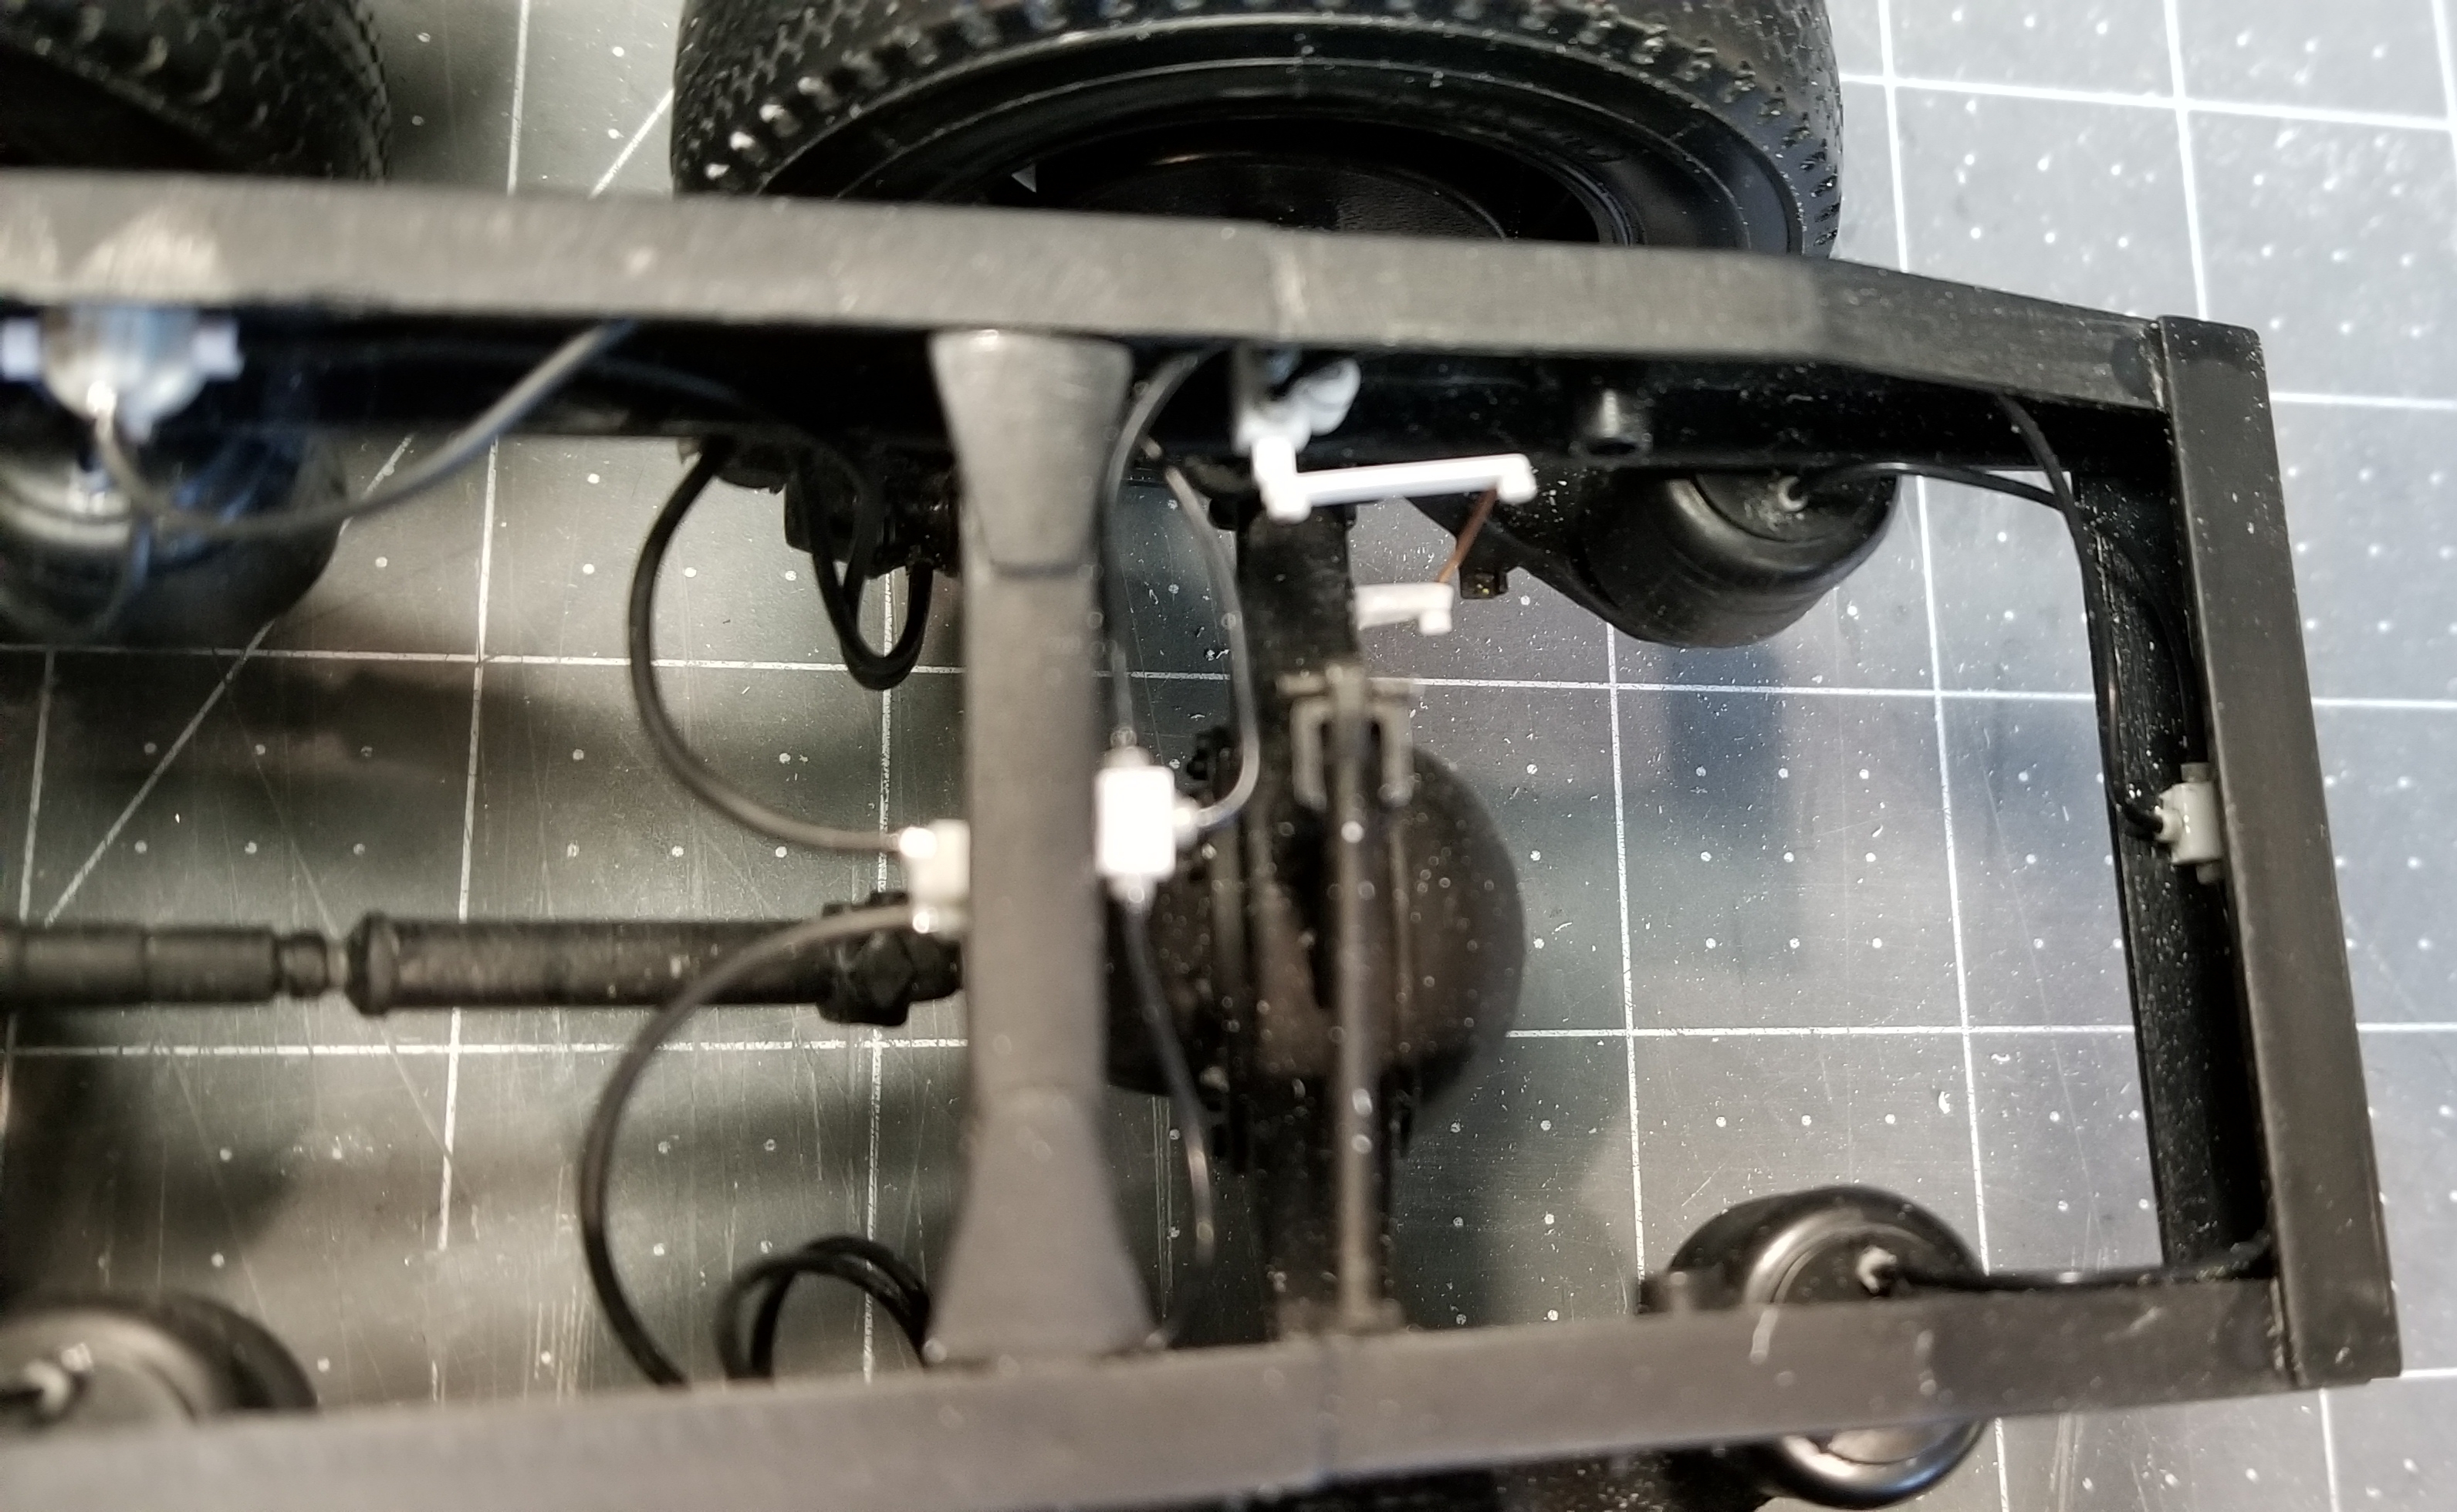
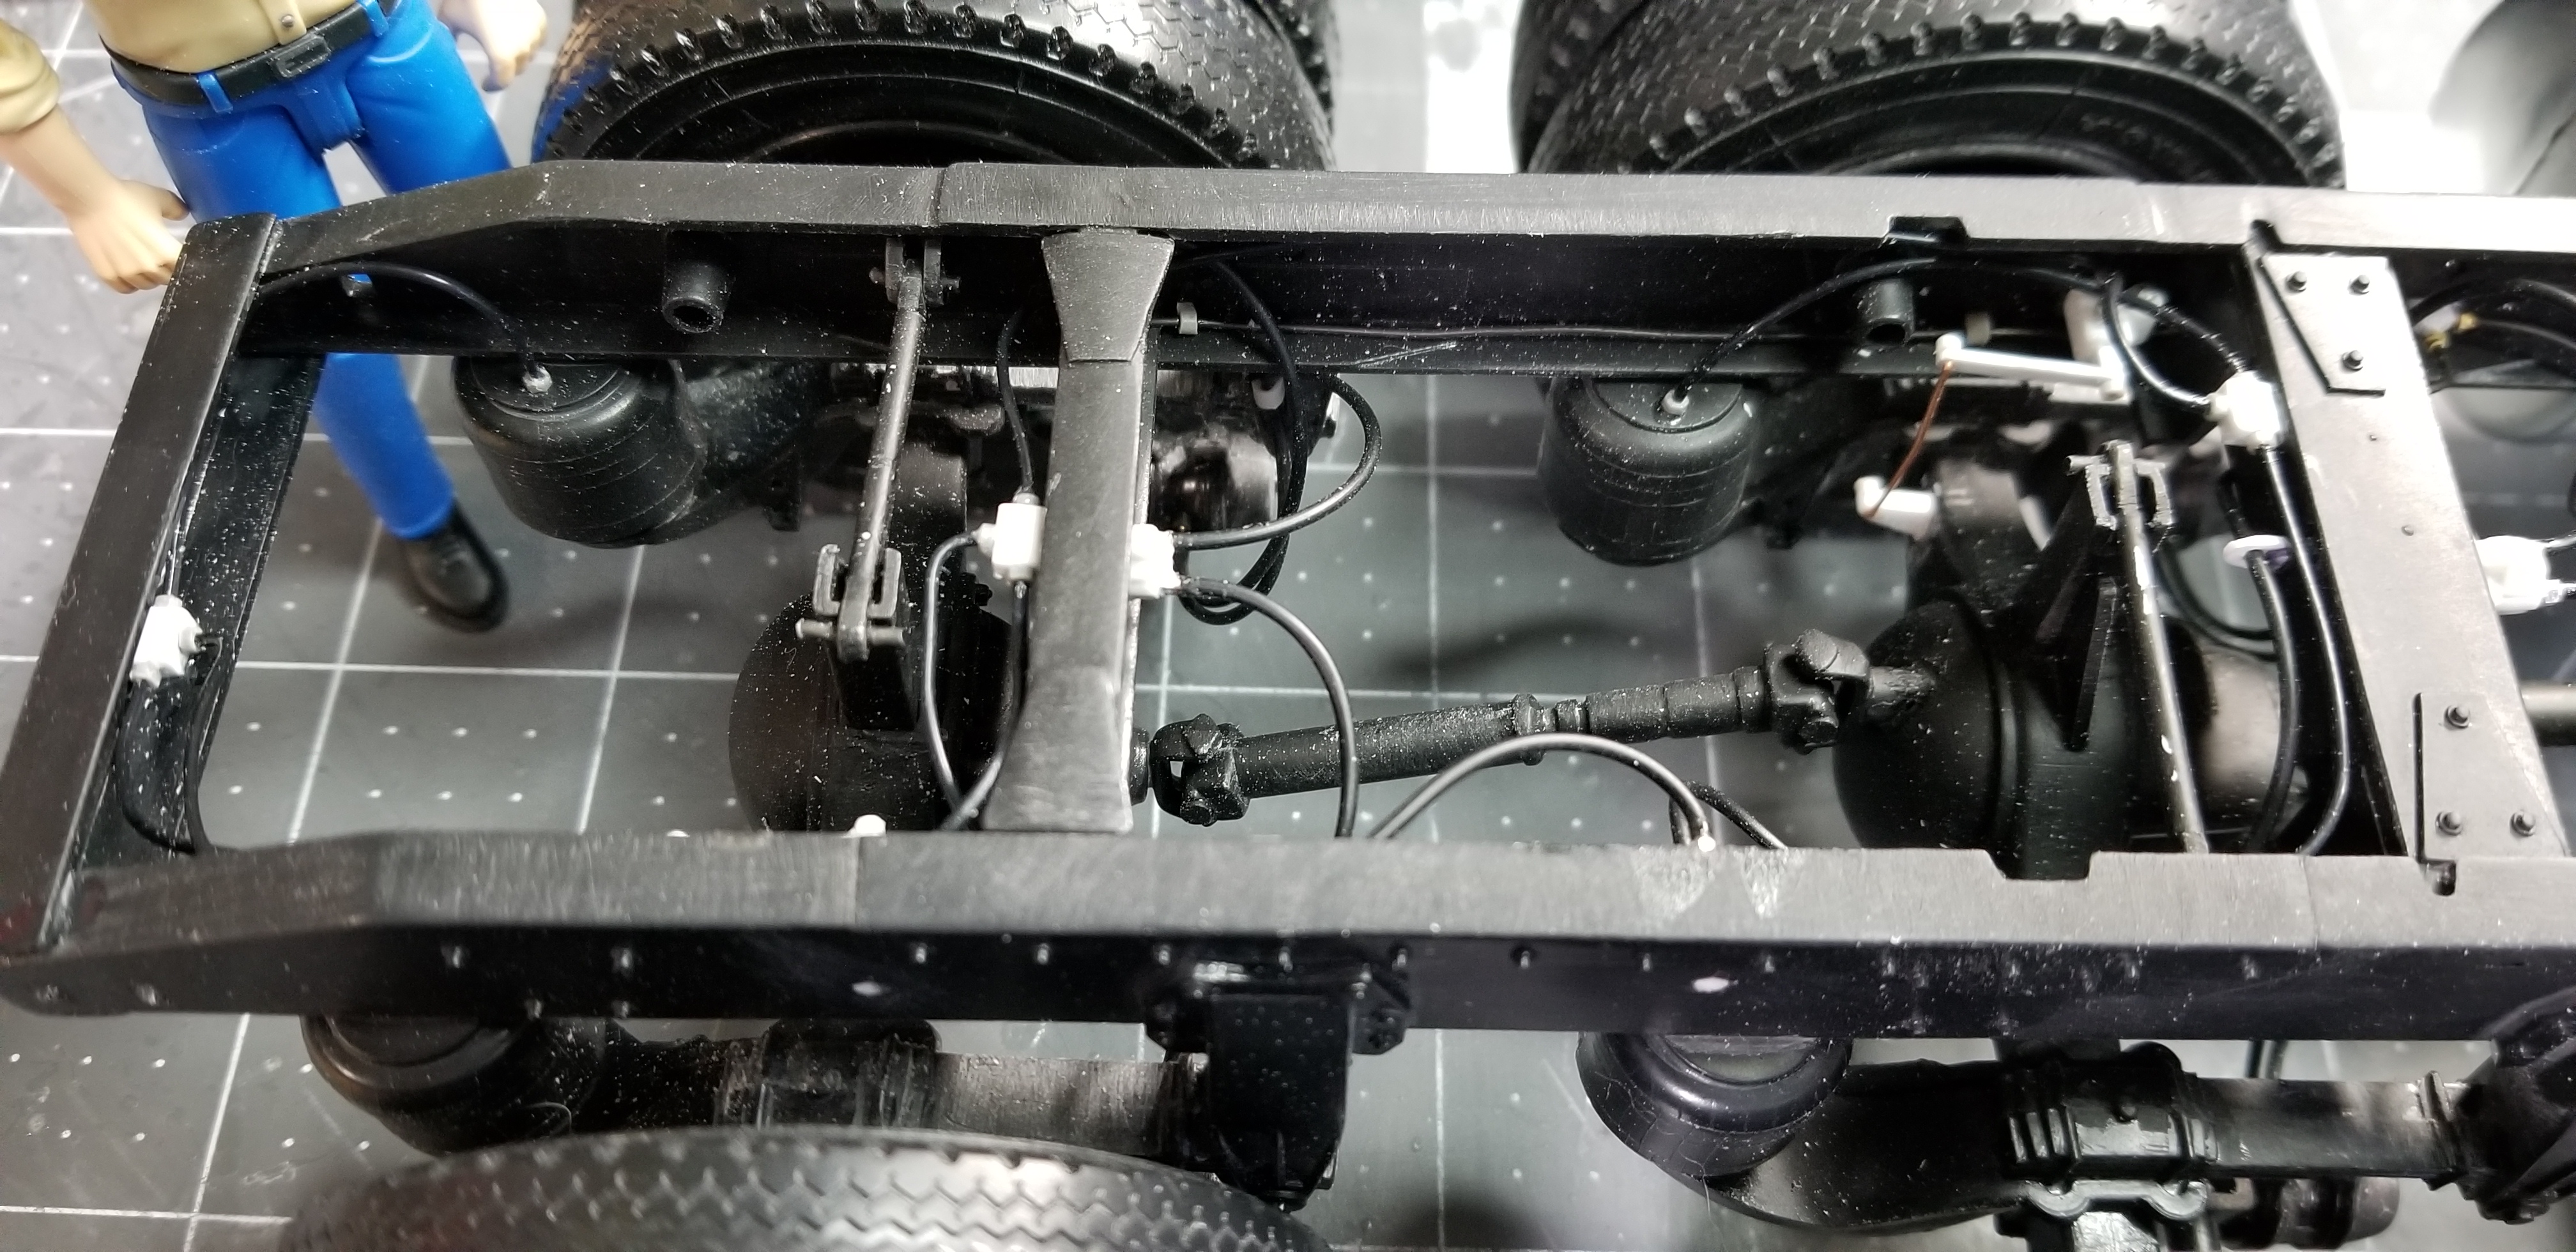
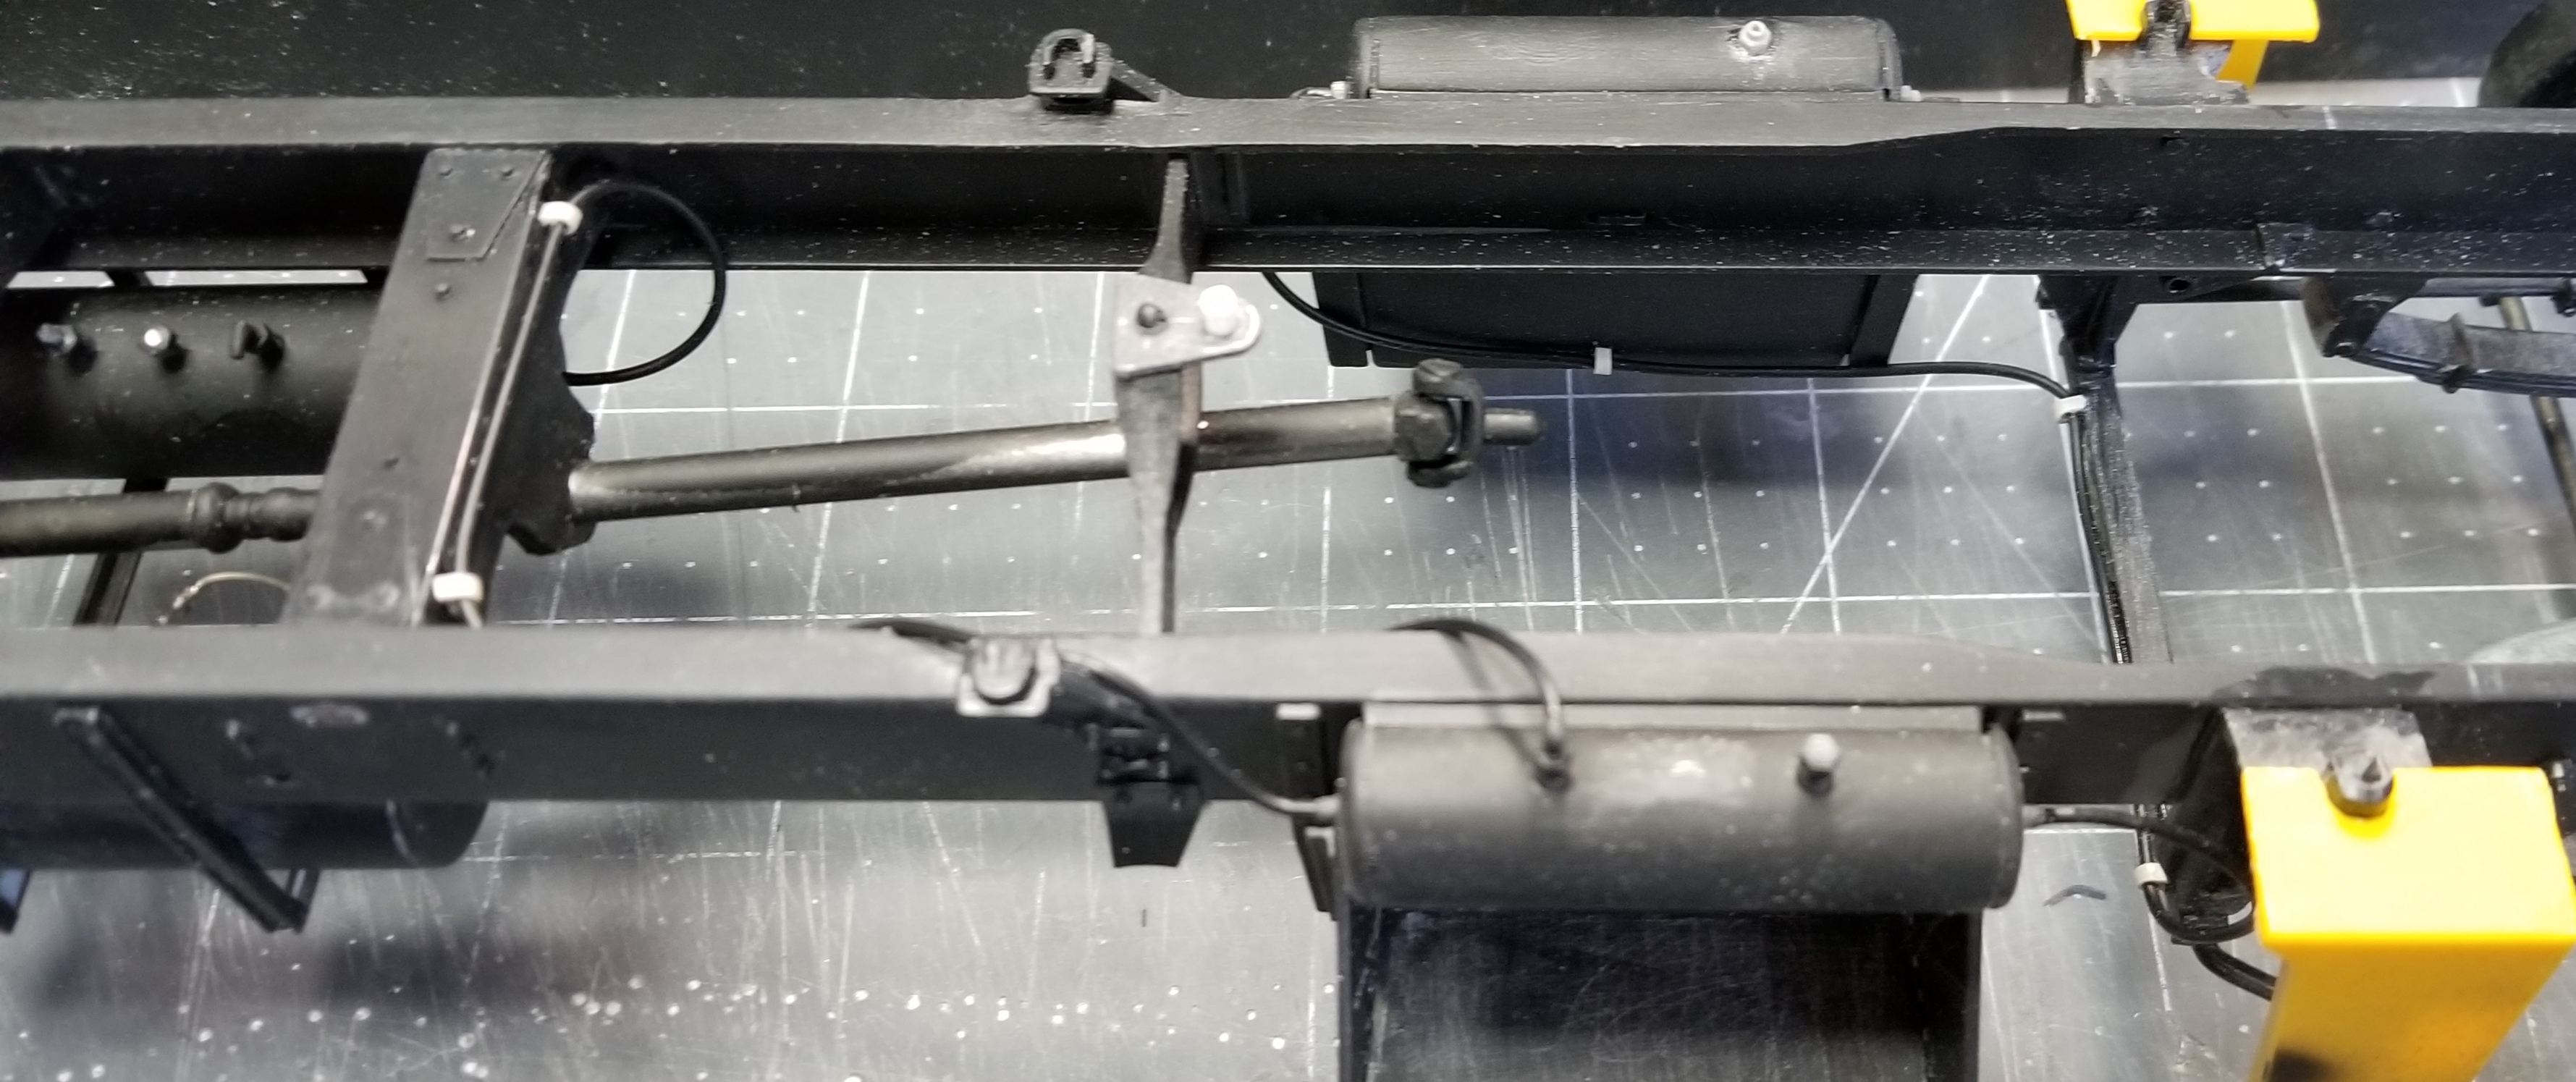
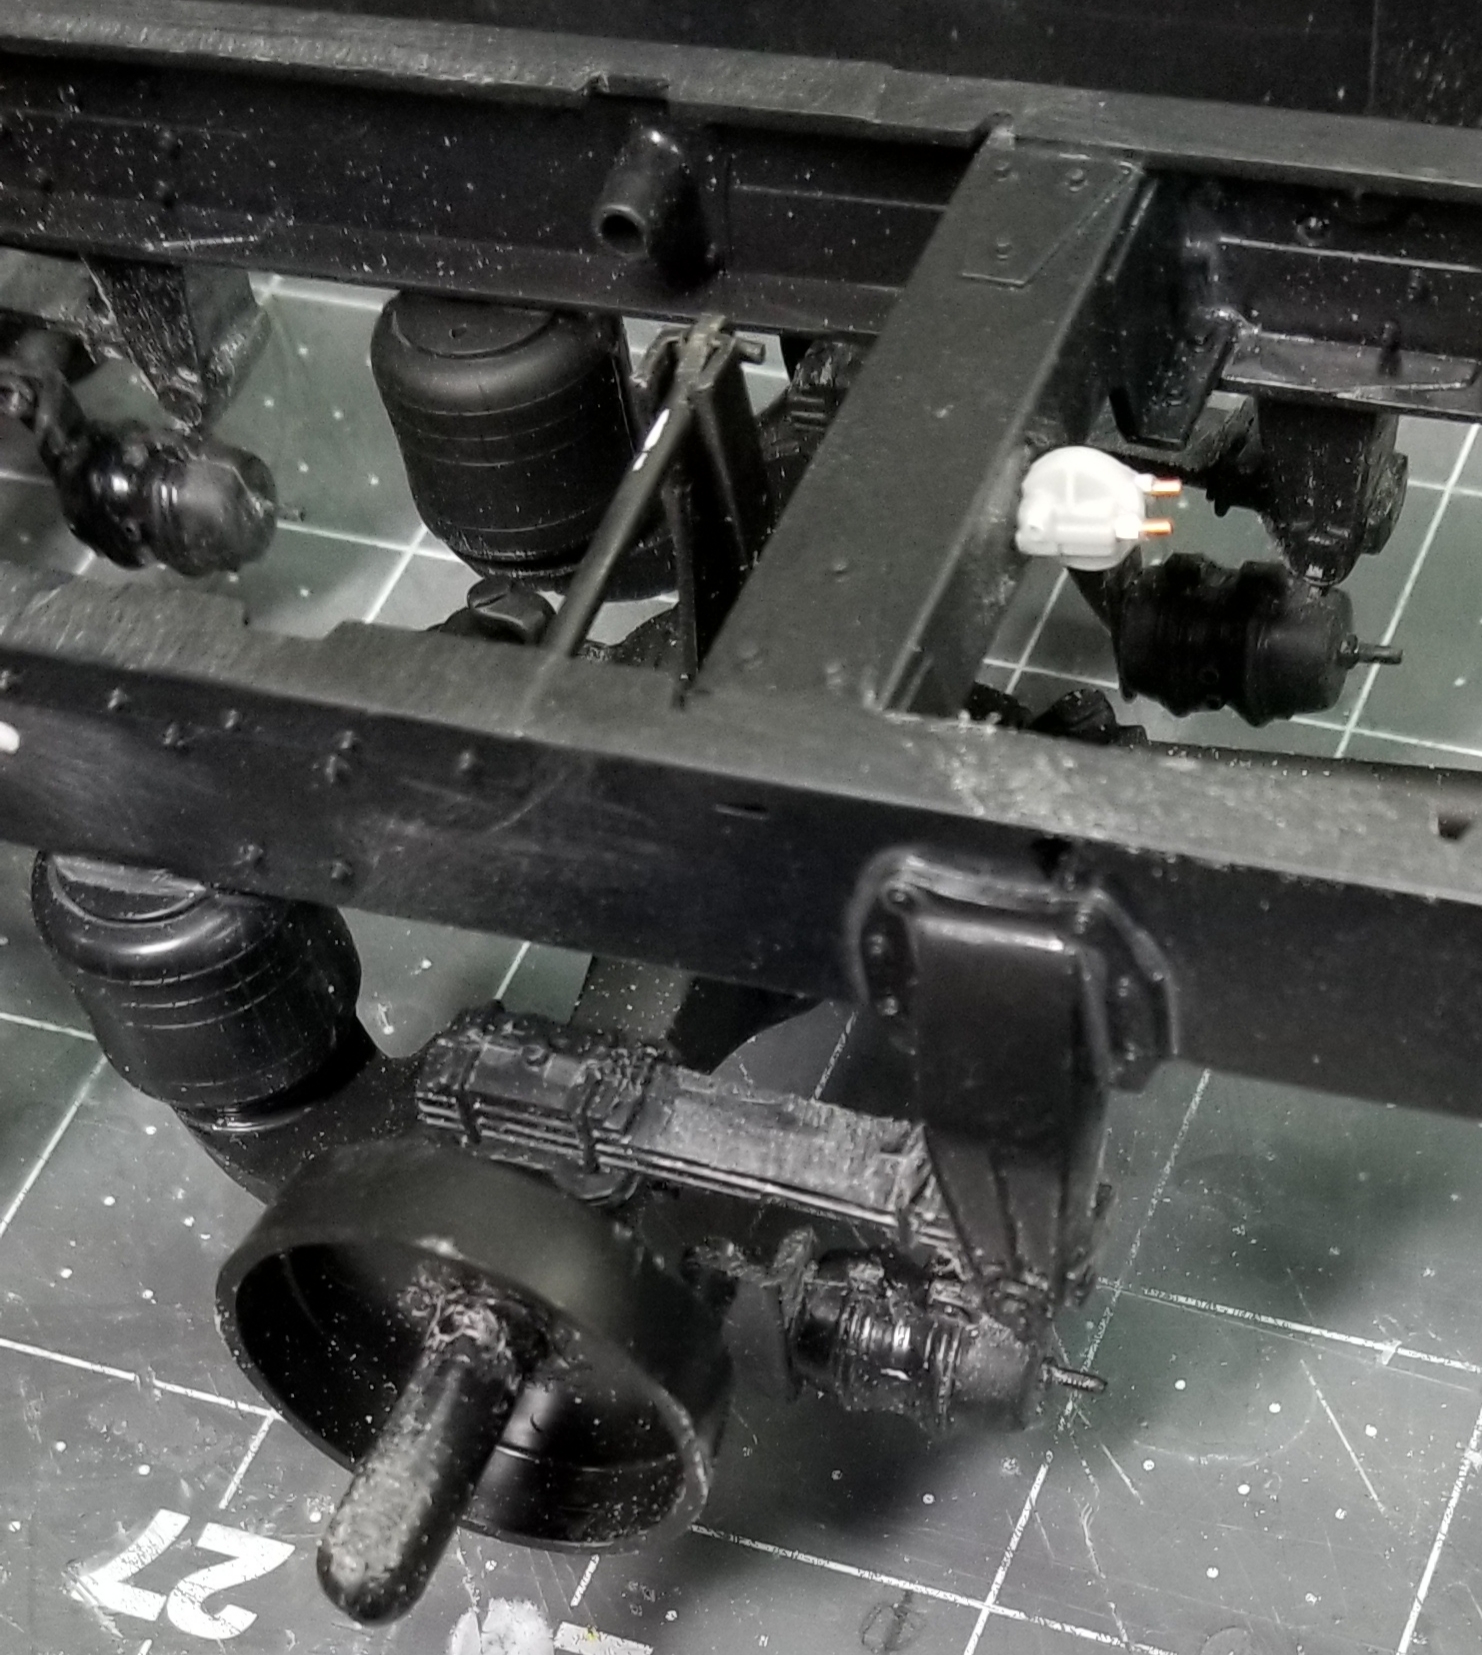
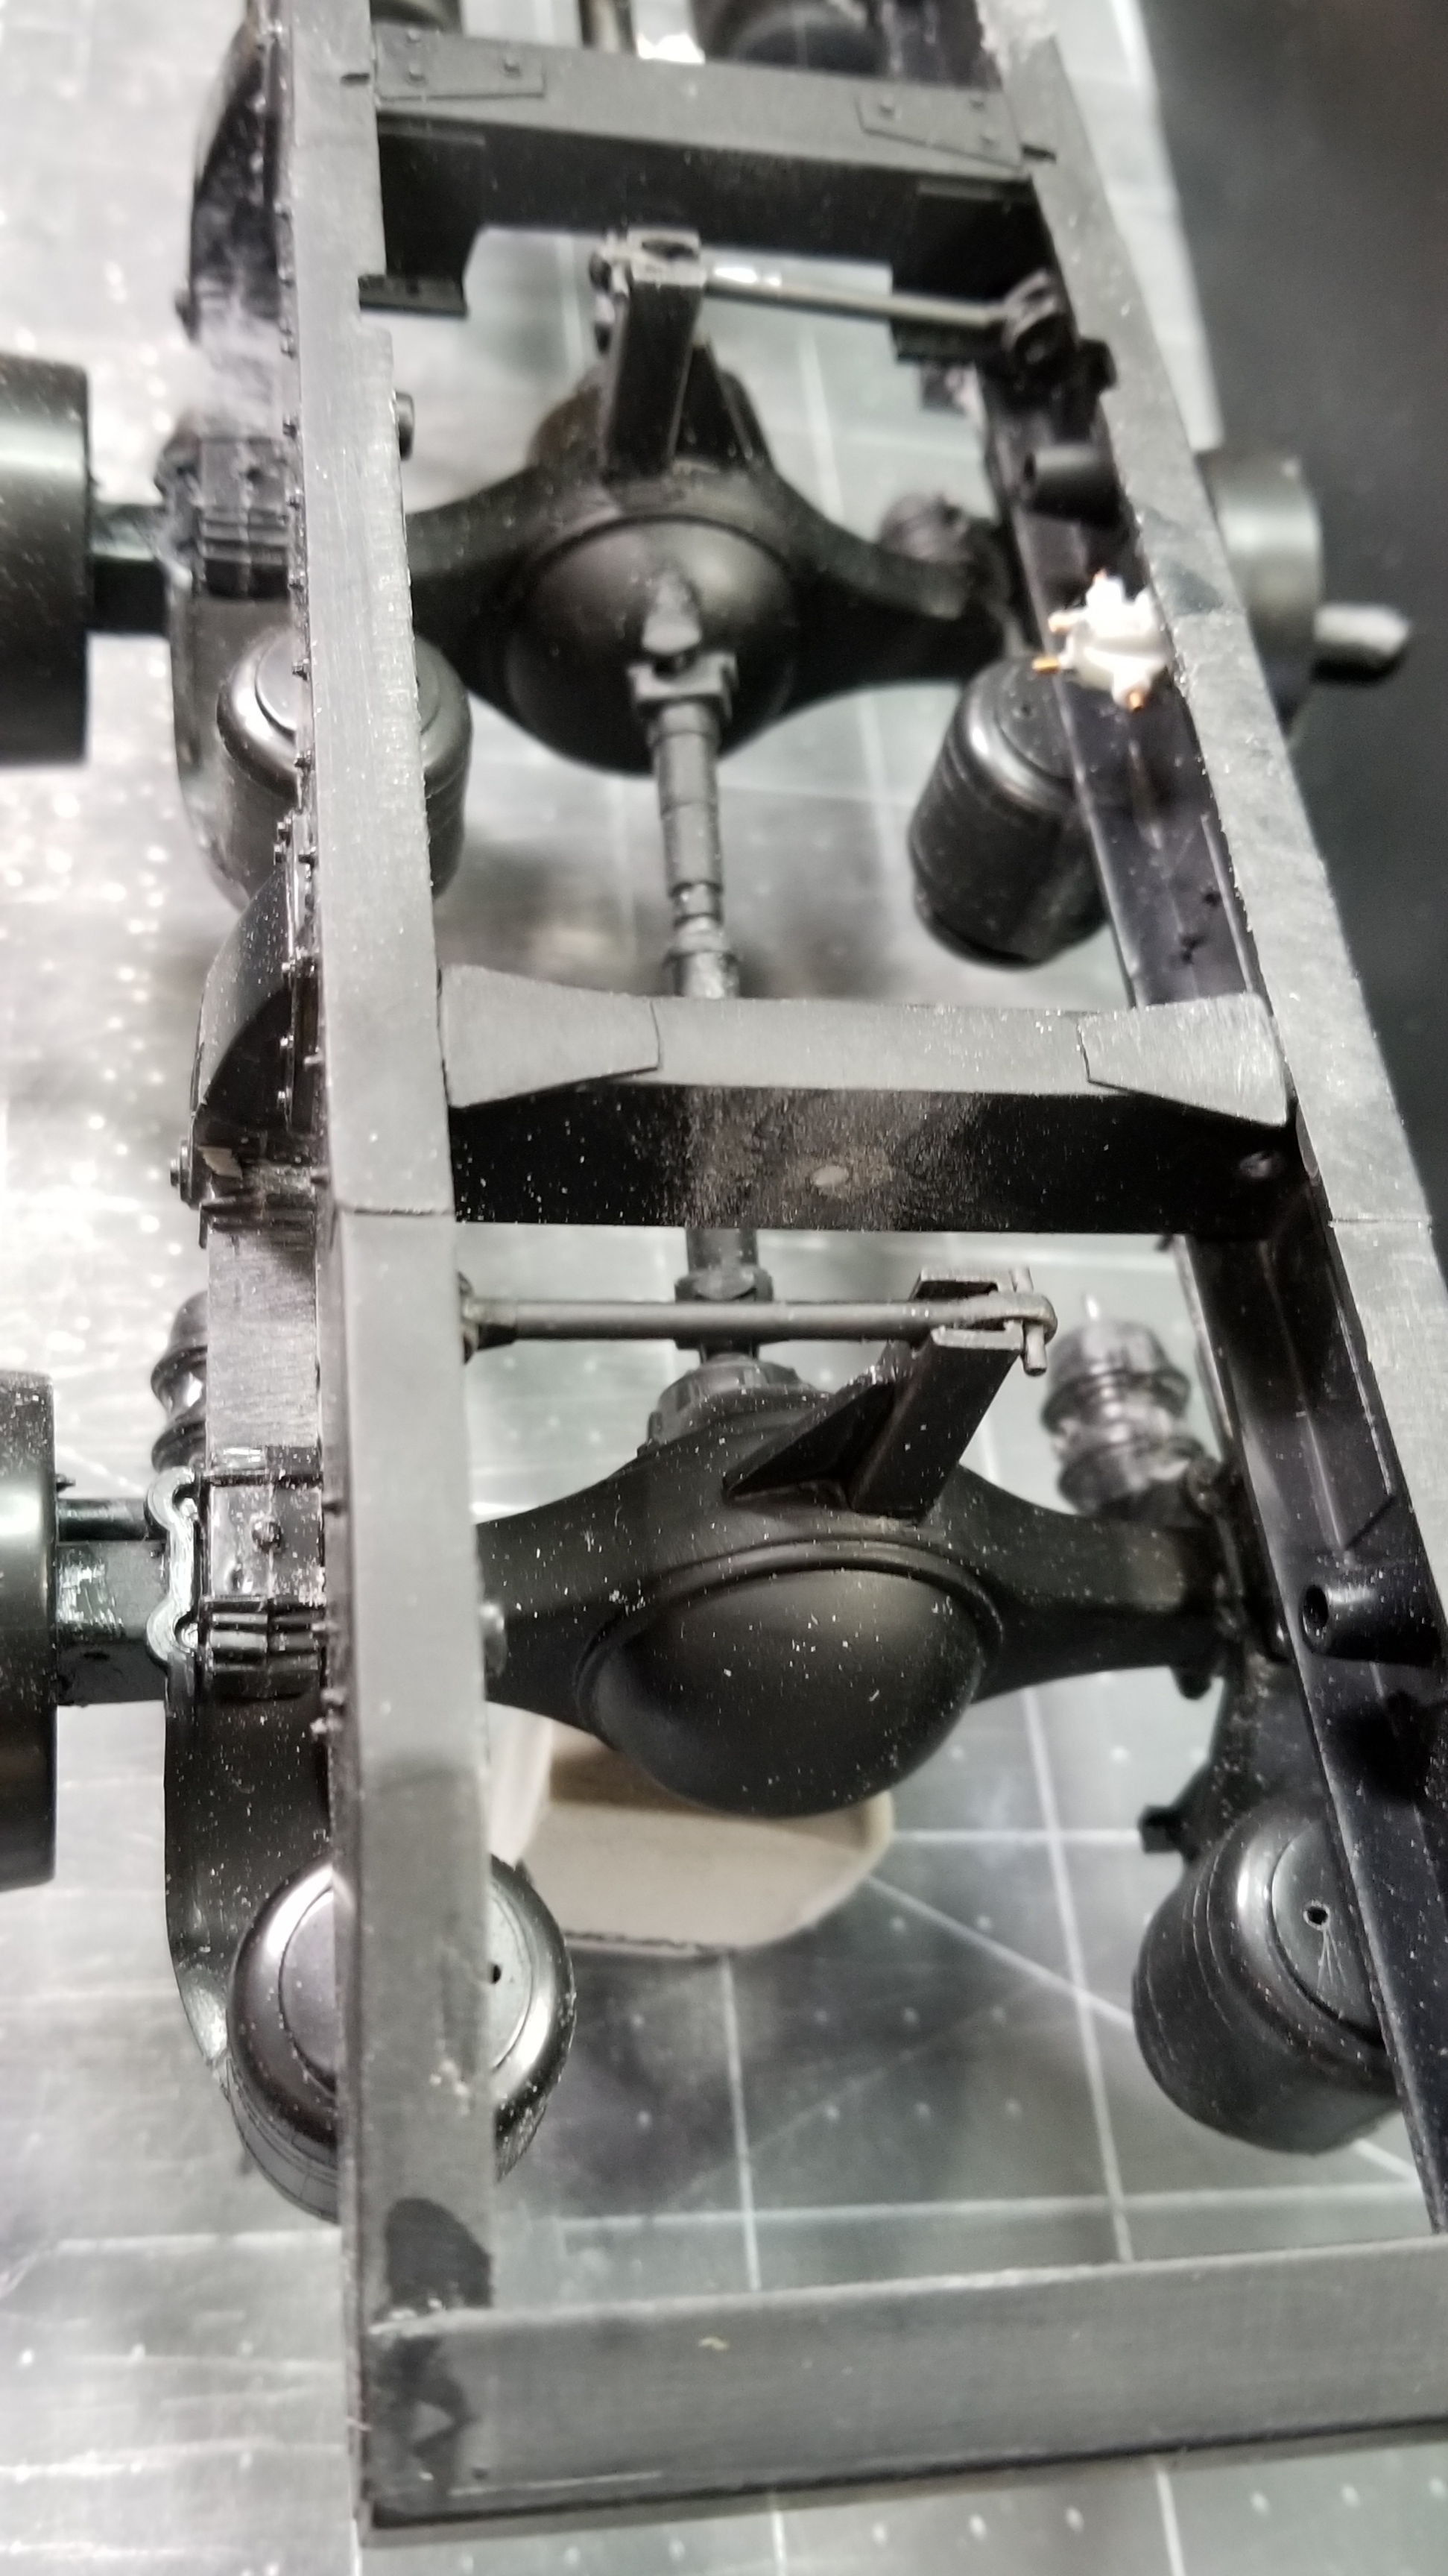
OK! the brakes and air bag plumbing is DONE! The brakes went pretty good, but the air bags were a real f#%*n pain in the but! I had to drill out some Meng 1.8mm bolt heads so I could use them as fittings (I ran out of my Detail Masters aluminum ones). I only needed 17 of them, but I end up drilling out twice as many because I was a real fumble finger modeller today! I guess I'm getting old, because I kept dropping my nuts...lol. I bet I dropped at least 20 of them lost and gone to the carpet monster.


I think the chassis is ready for paint. I'll have to check tomorrow and make sure I have everything done that needs to be done on the frame before I paint.
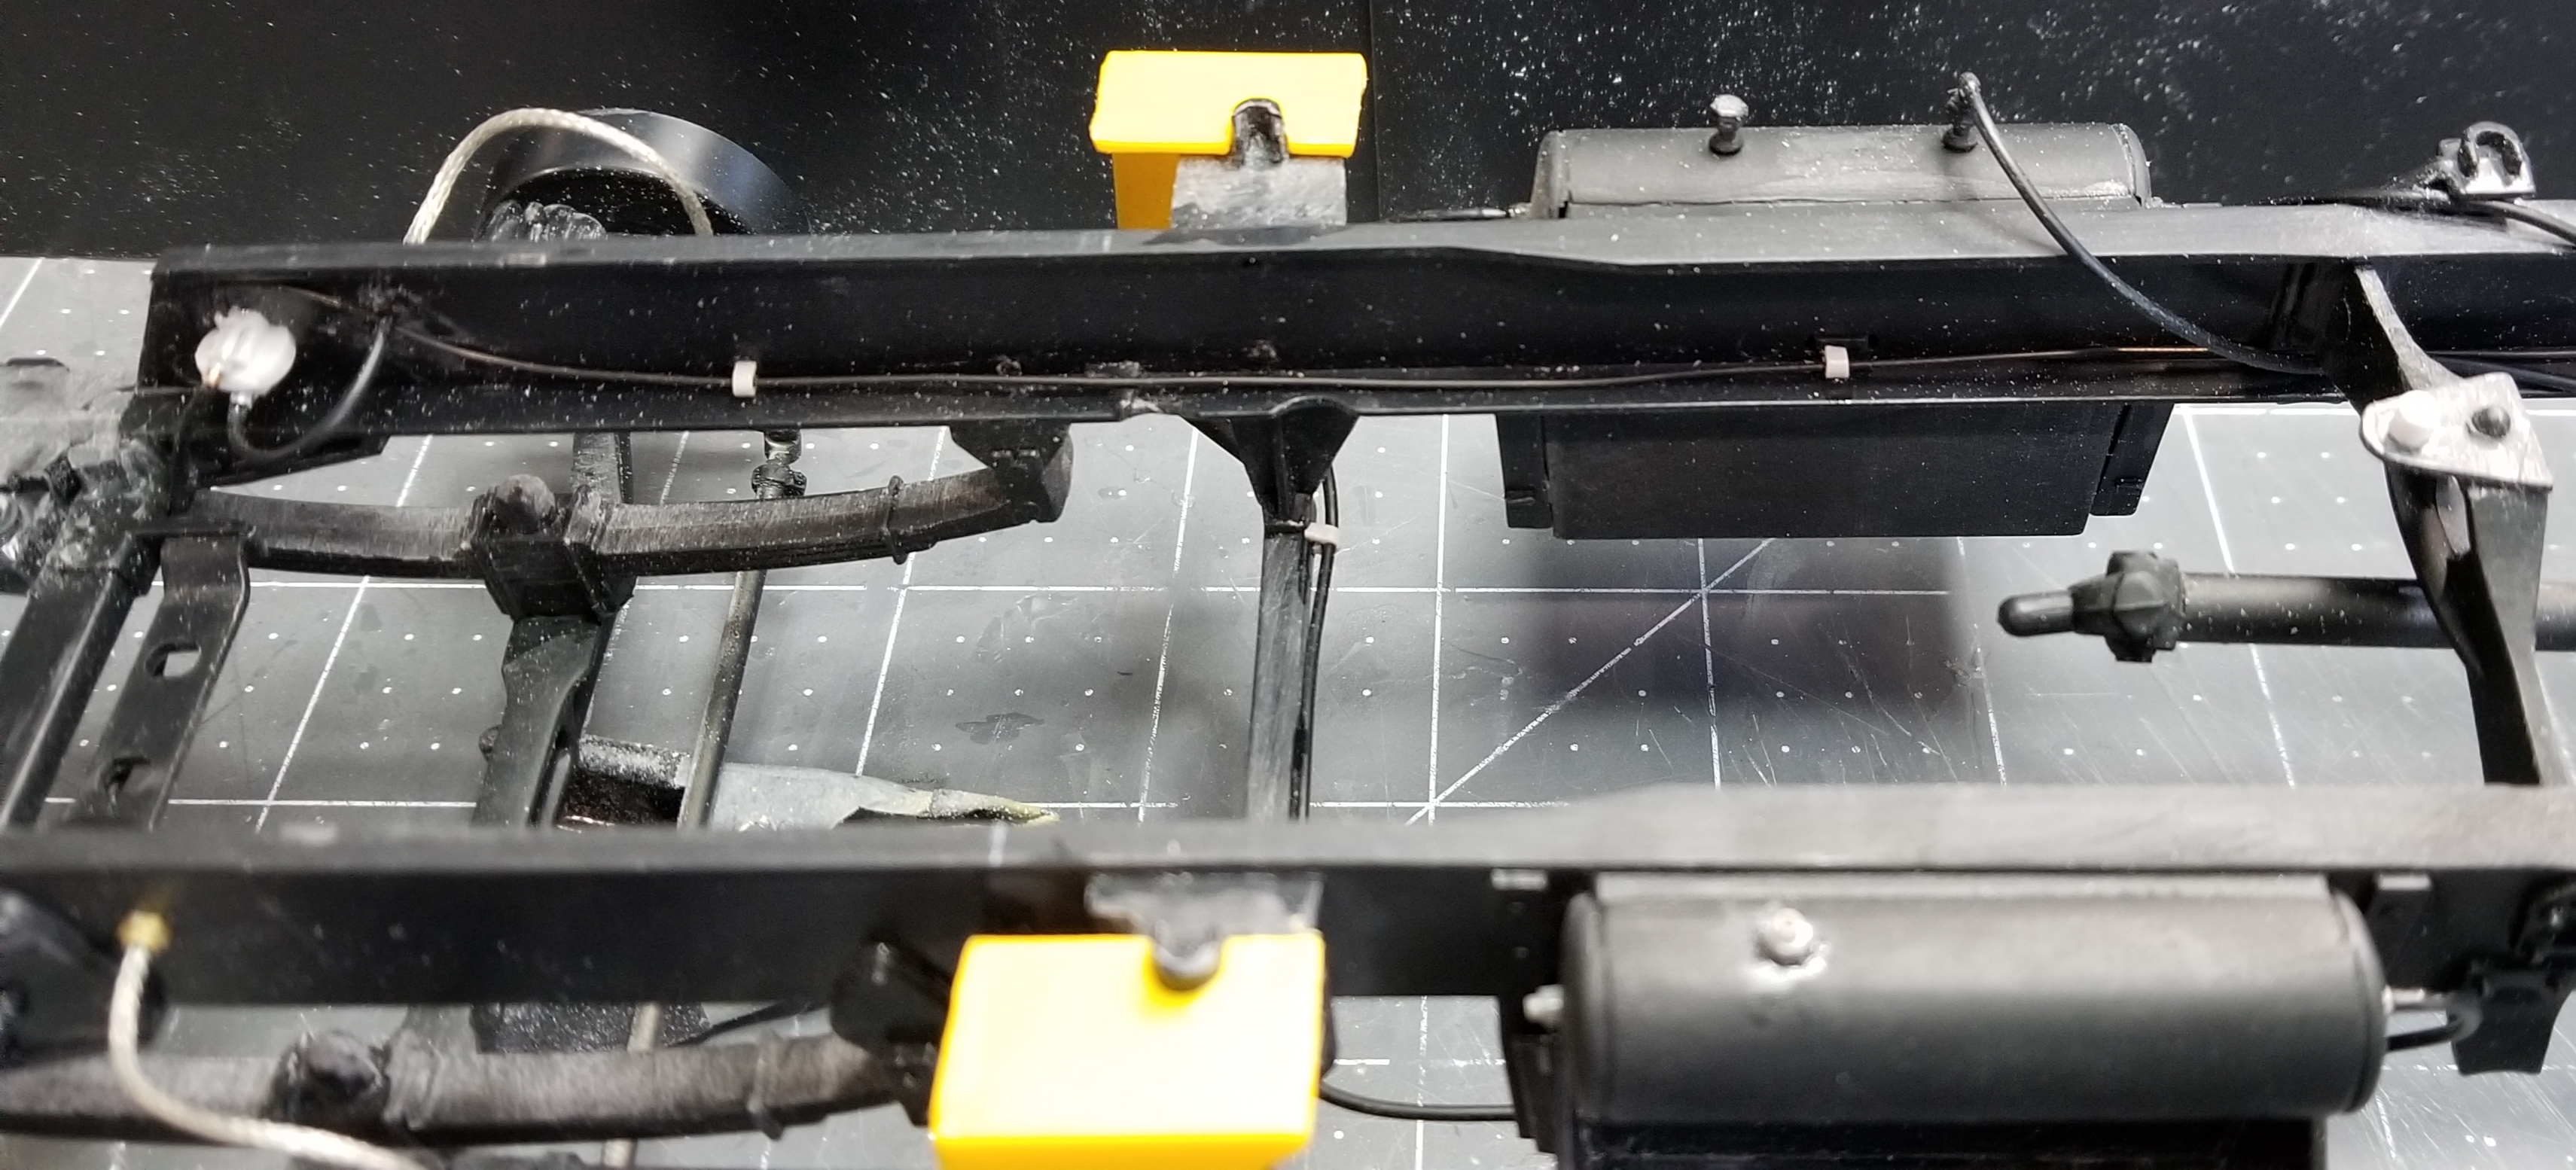
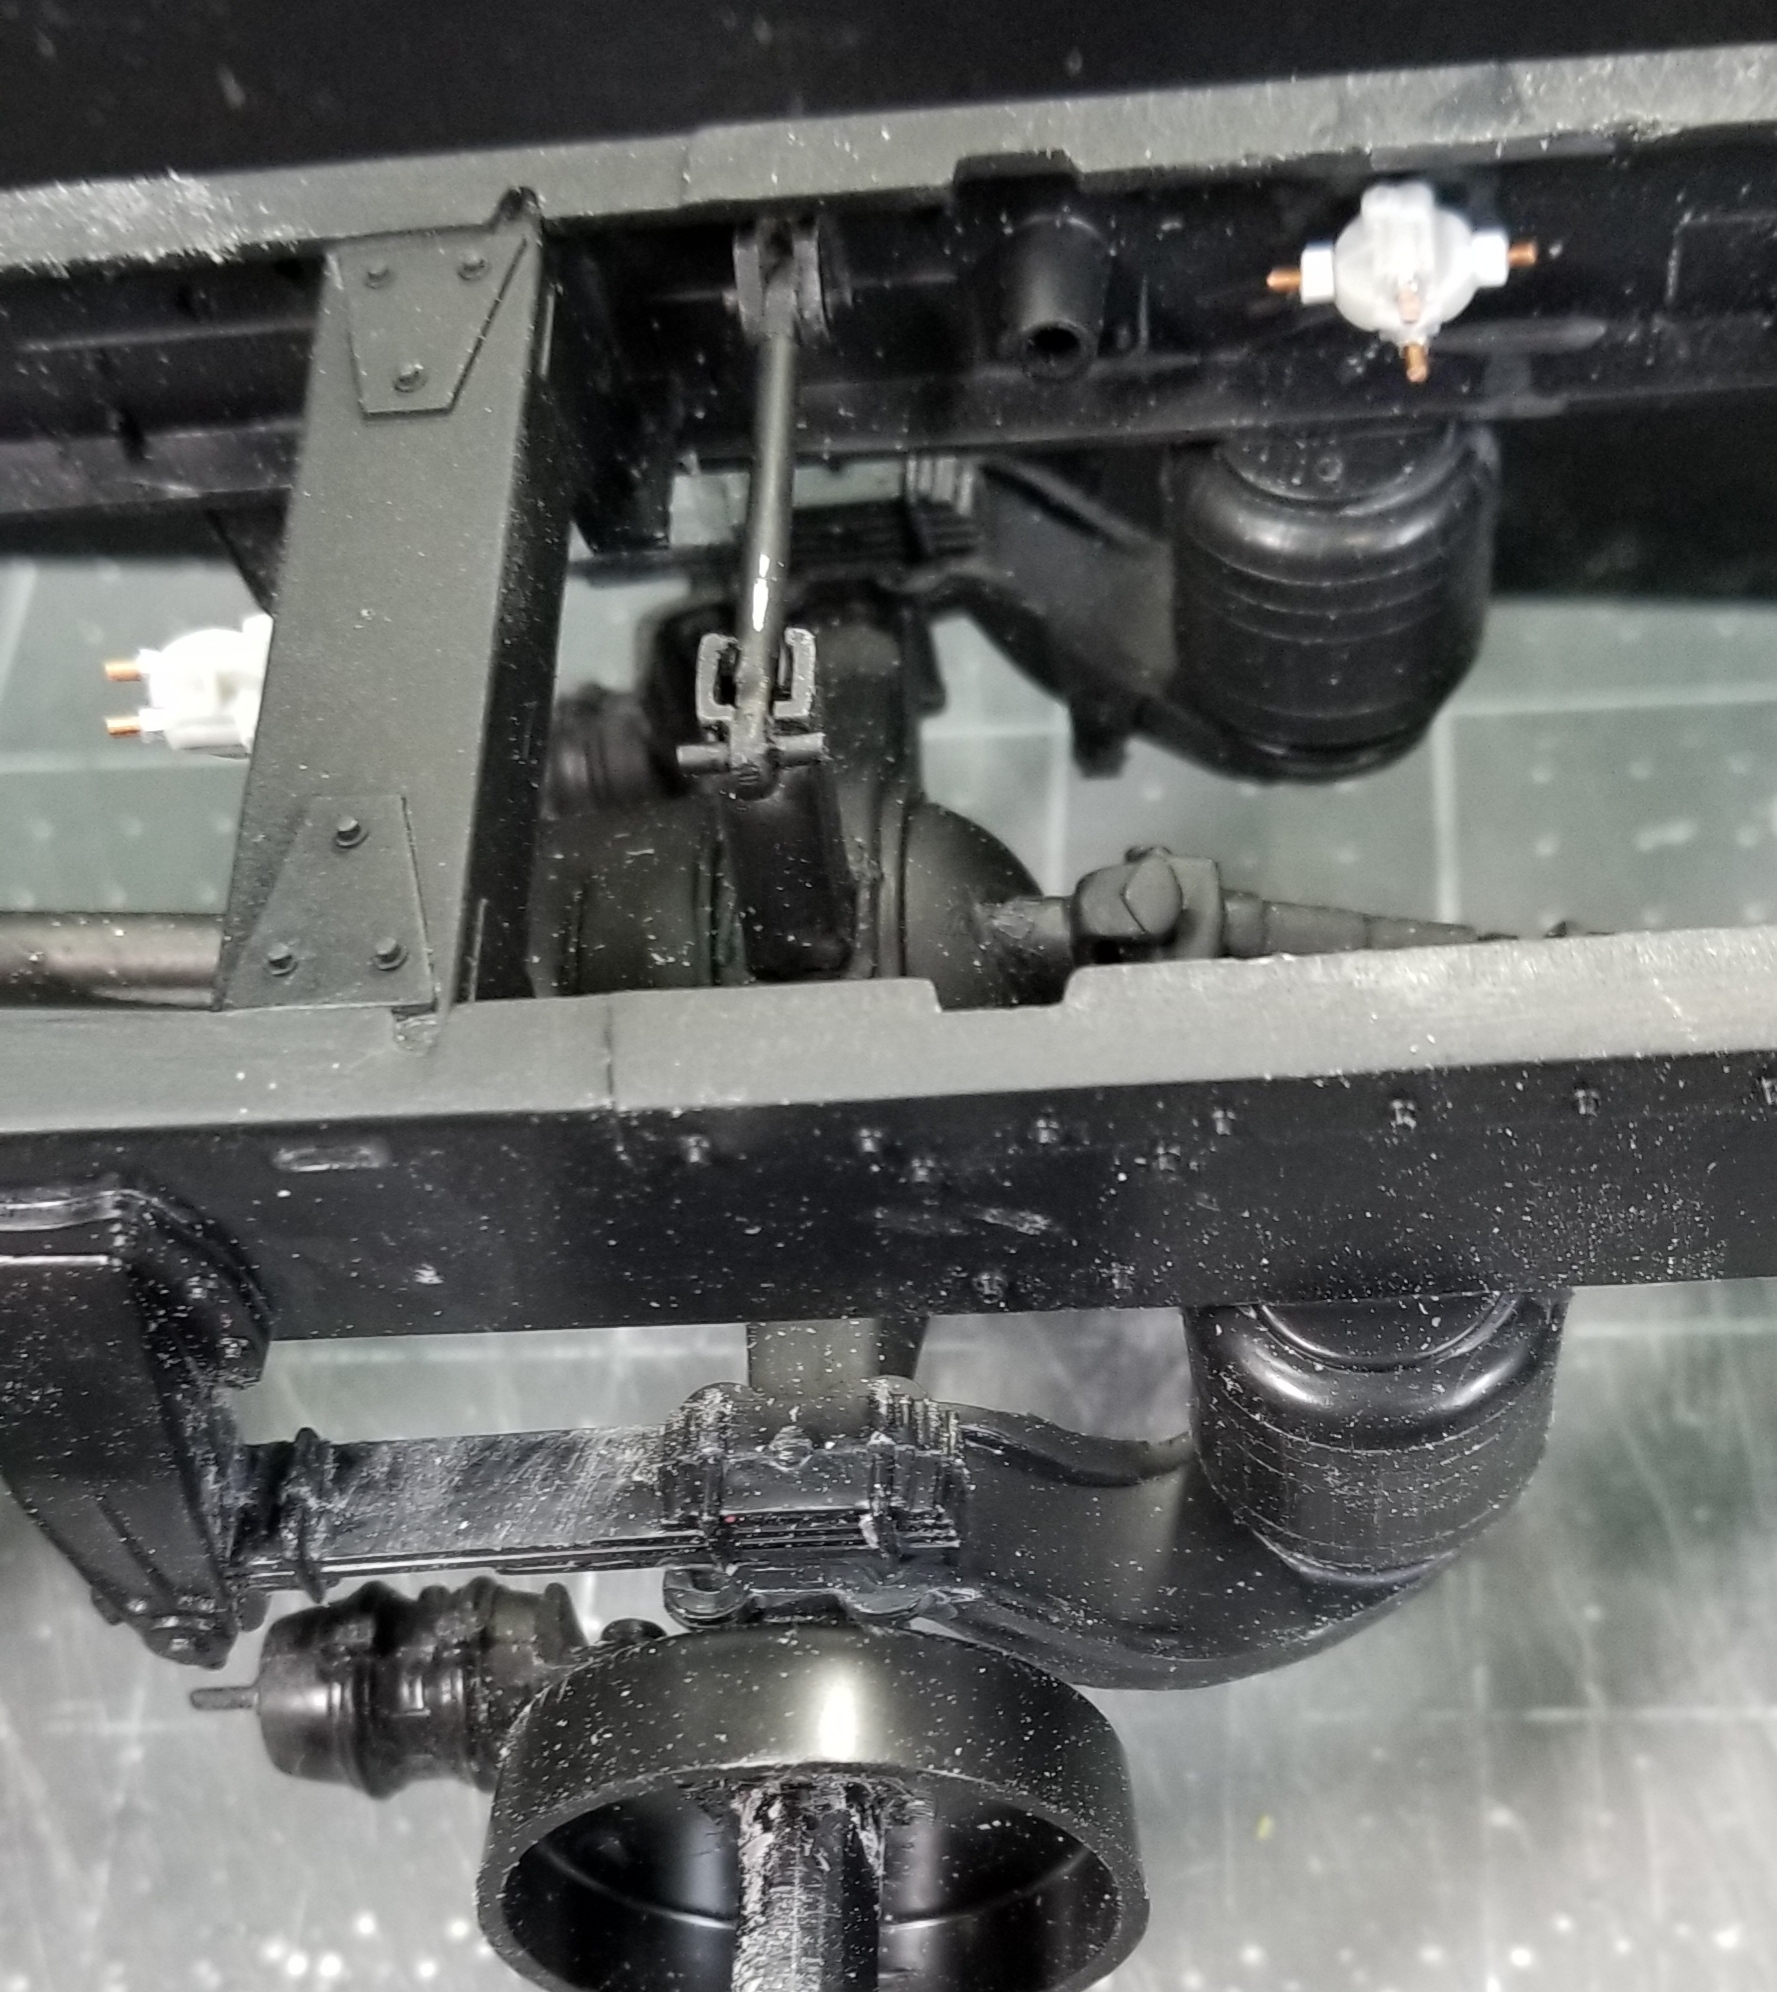
this view shows the rear height control valve and some of the plumbing for the air suspension.
this view shows the front height control valve and some more plumbing.
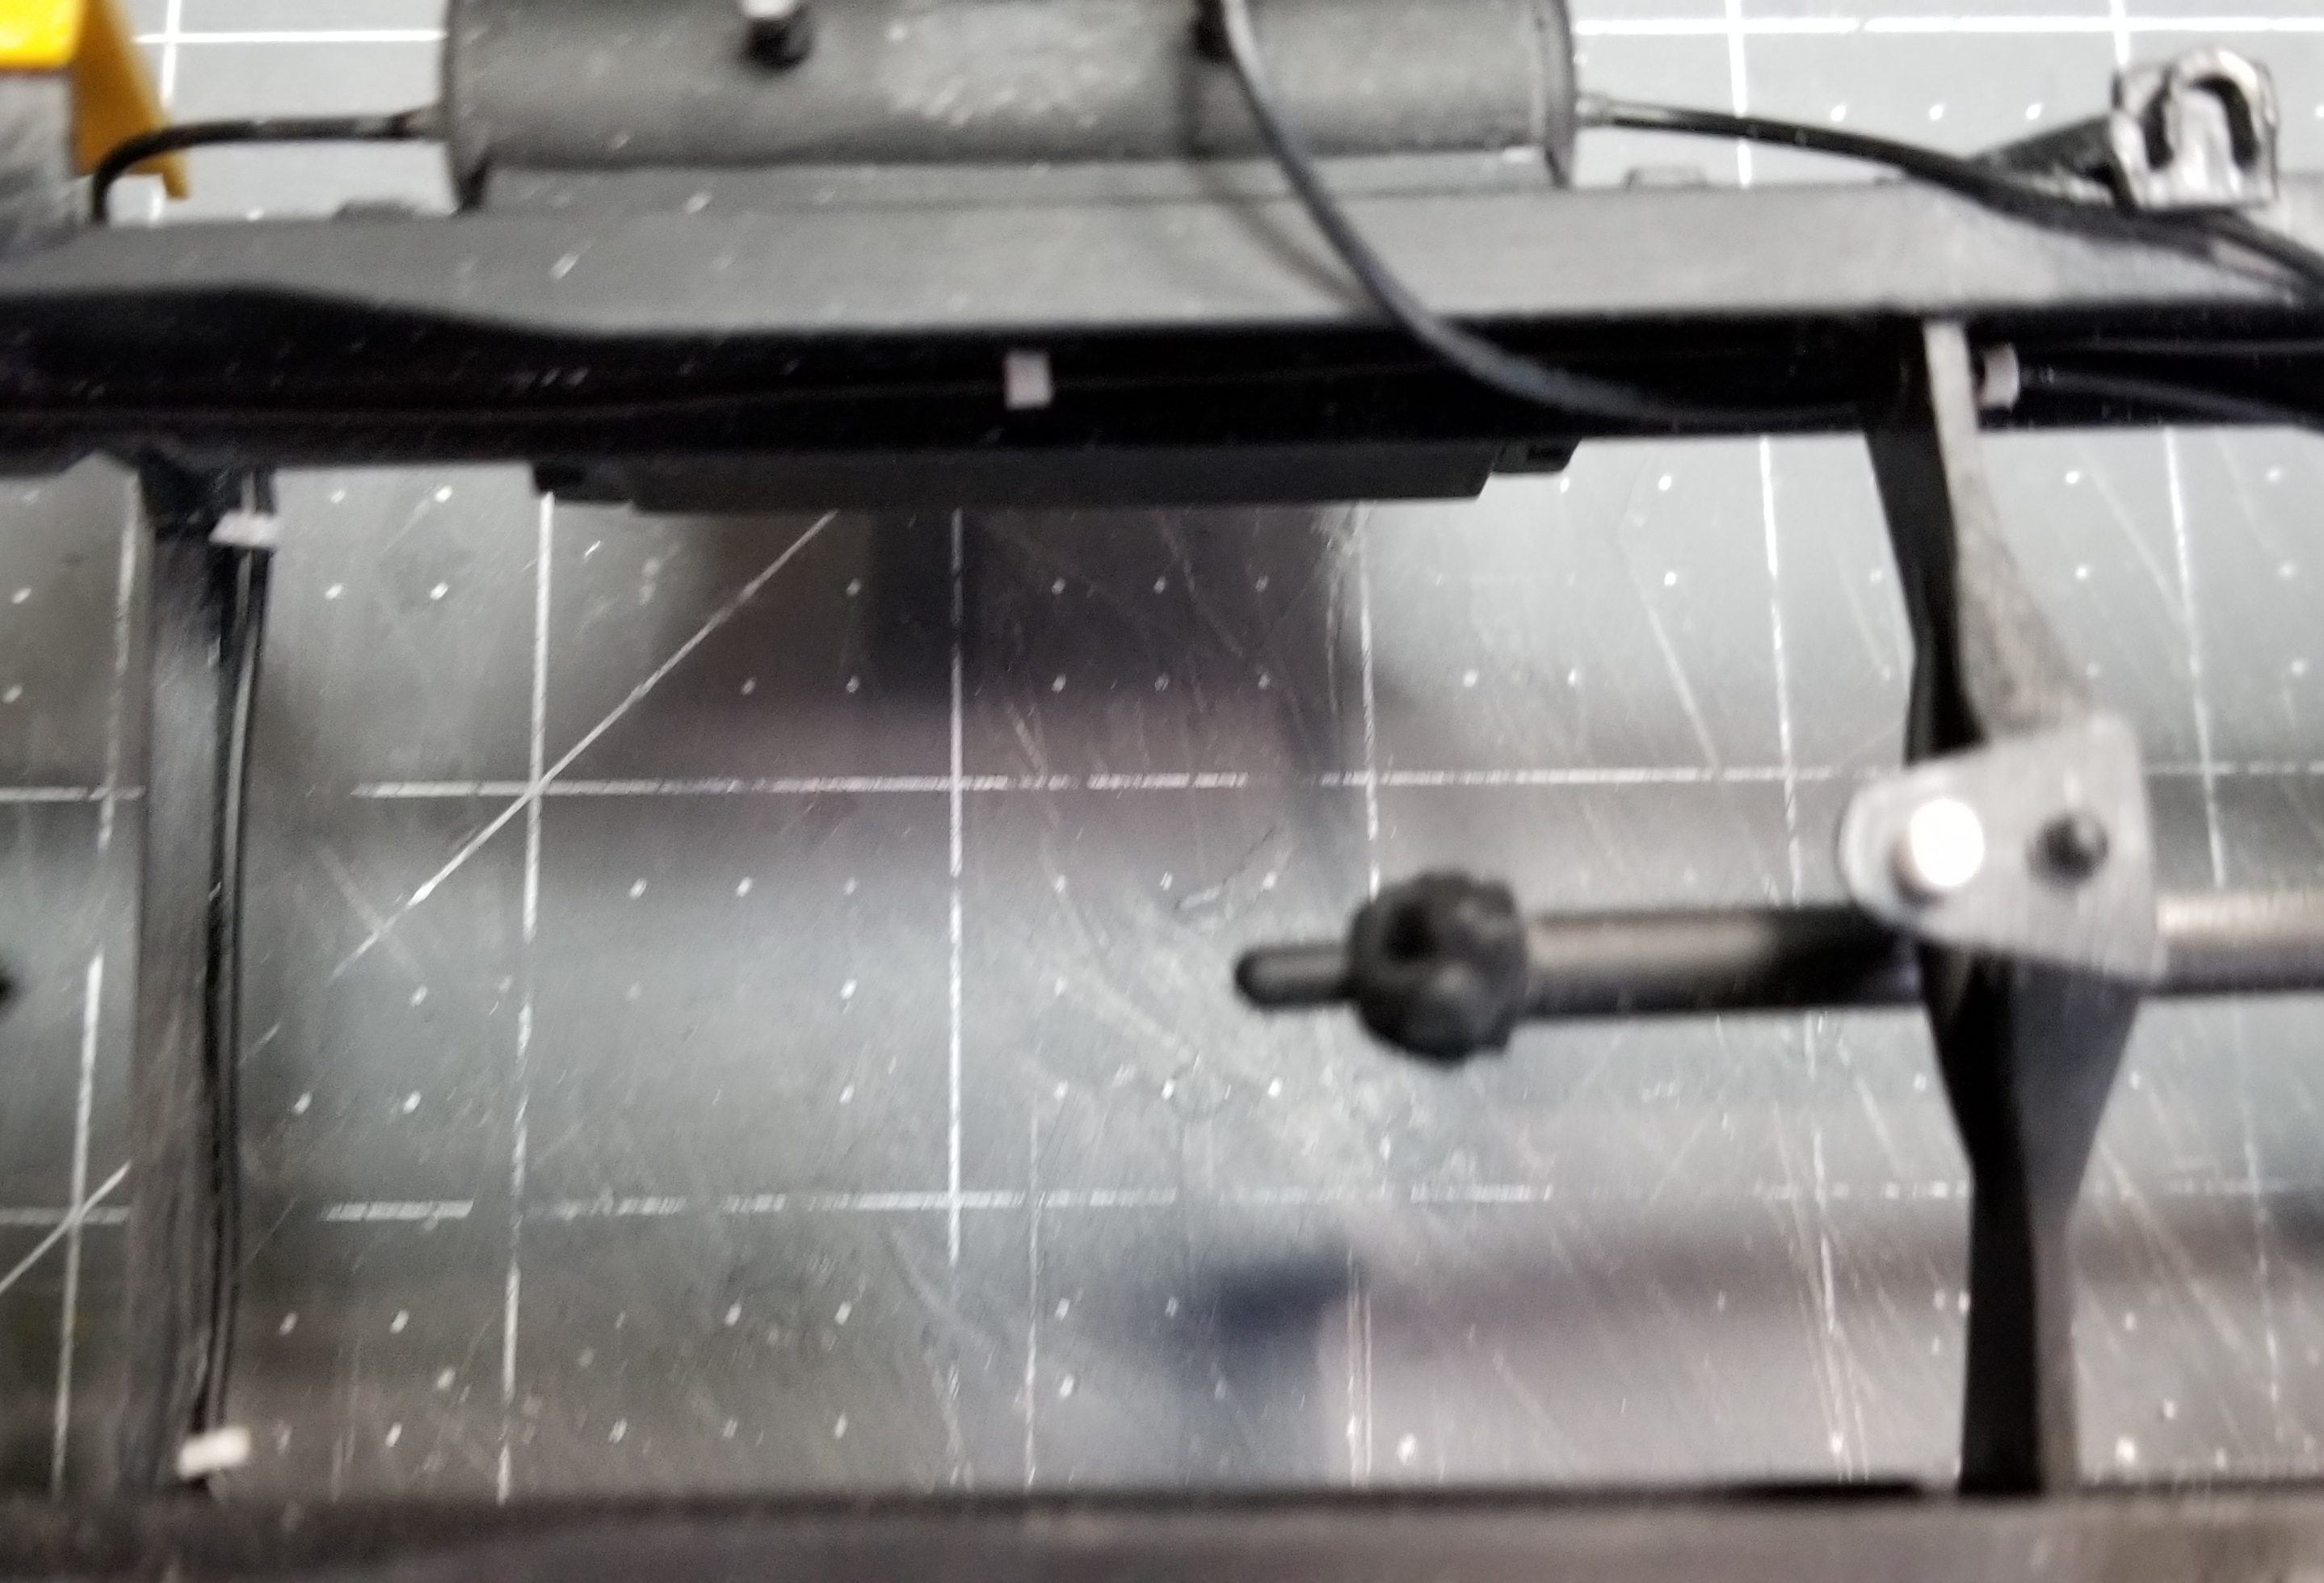
view from the bottom showing the brake lines.
bottom view of the front.
this view shows the air suspension plumbing.
this view shows some more plumbing.
hey, it's almost a rolling chassis!
just a picture of what it will look like. I'm making custom fuel tanks for it. They will be made from 1 1/4" PVC pipe with PVC dome caps for the ends, I'll show pictures tomorrow.
view from the front. Well that's it for now be back with more soon.
Ron G
-
Hey all
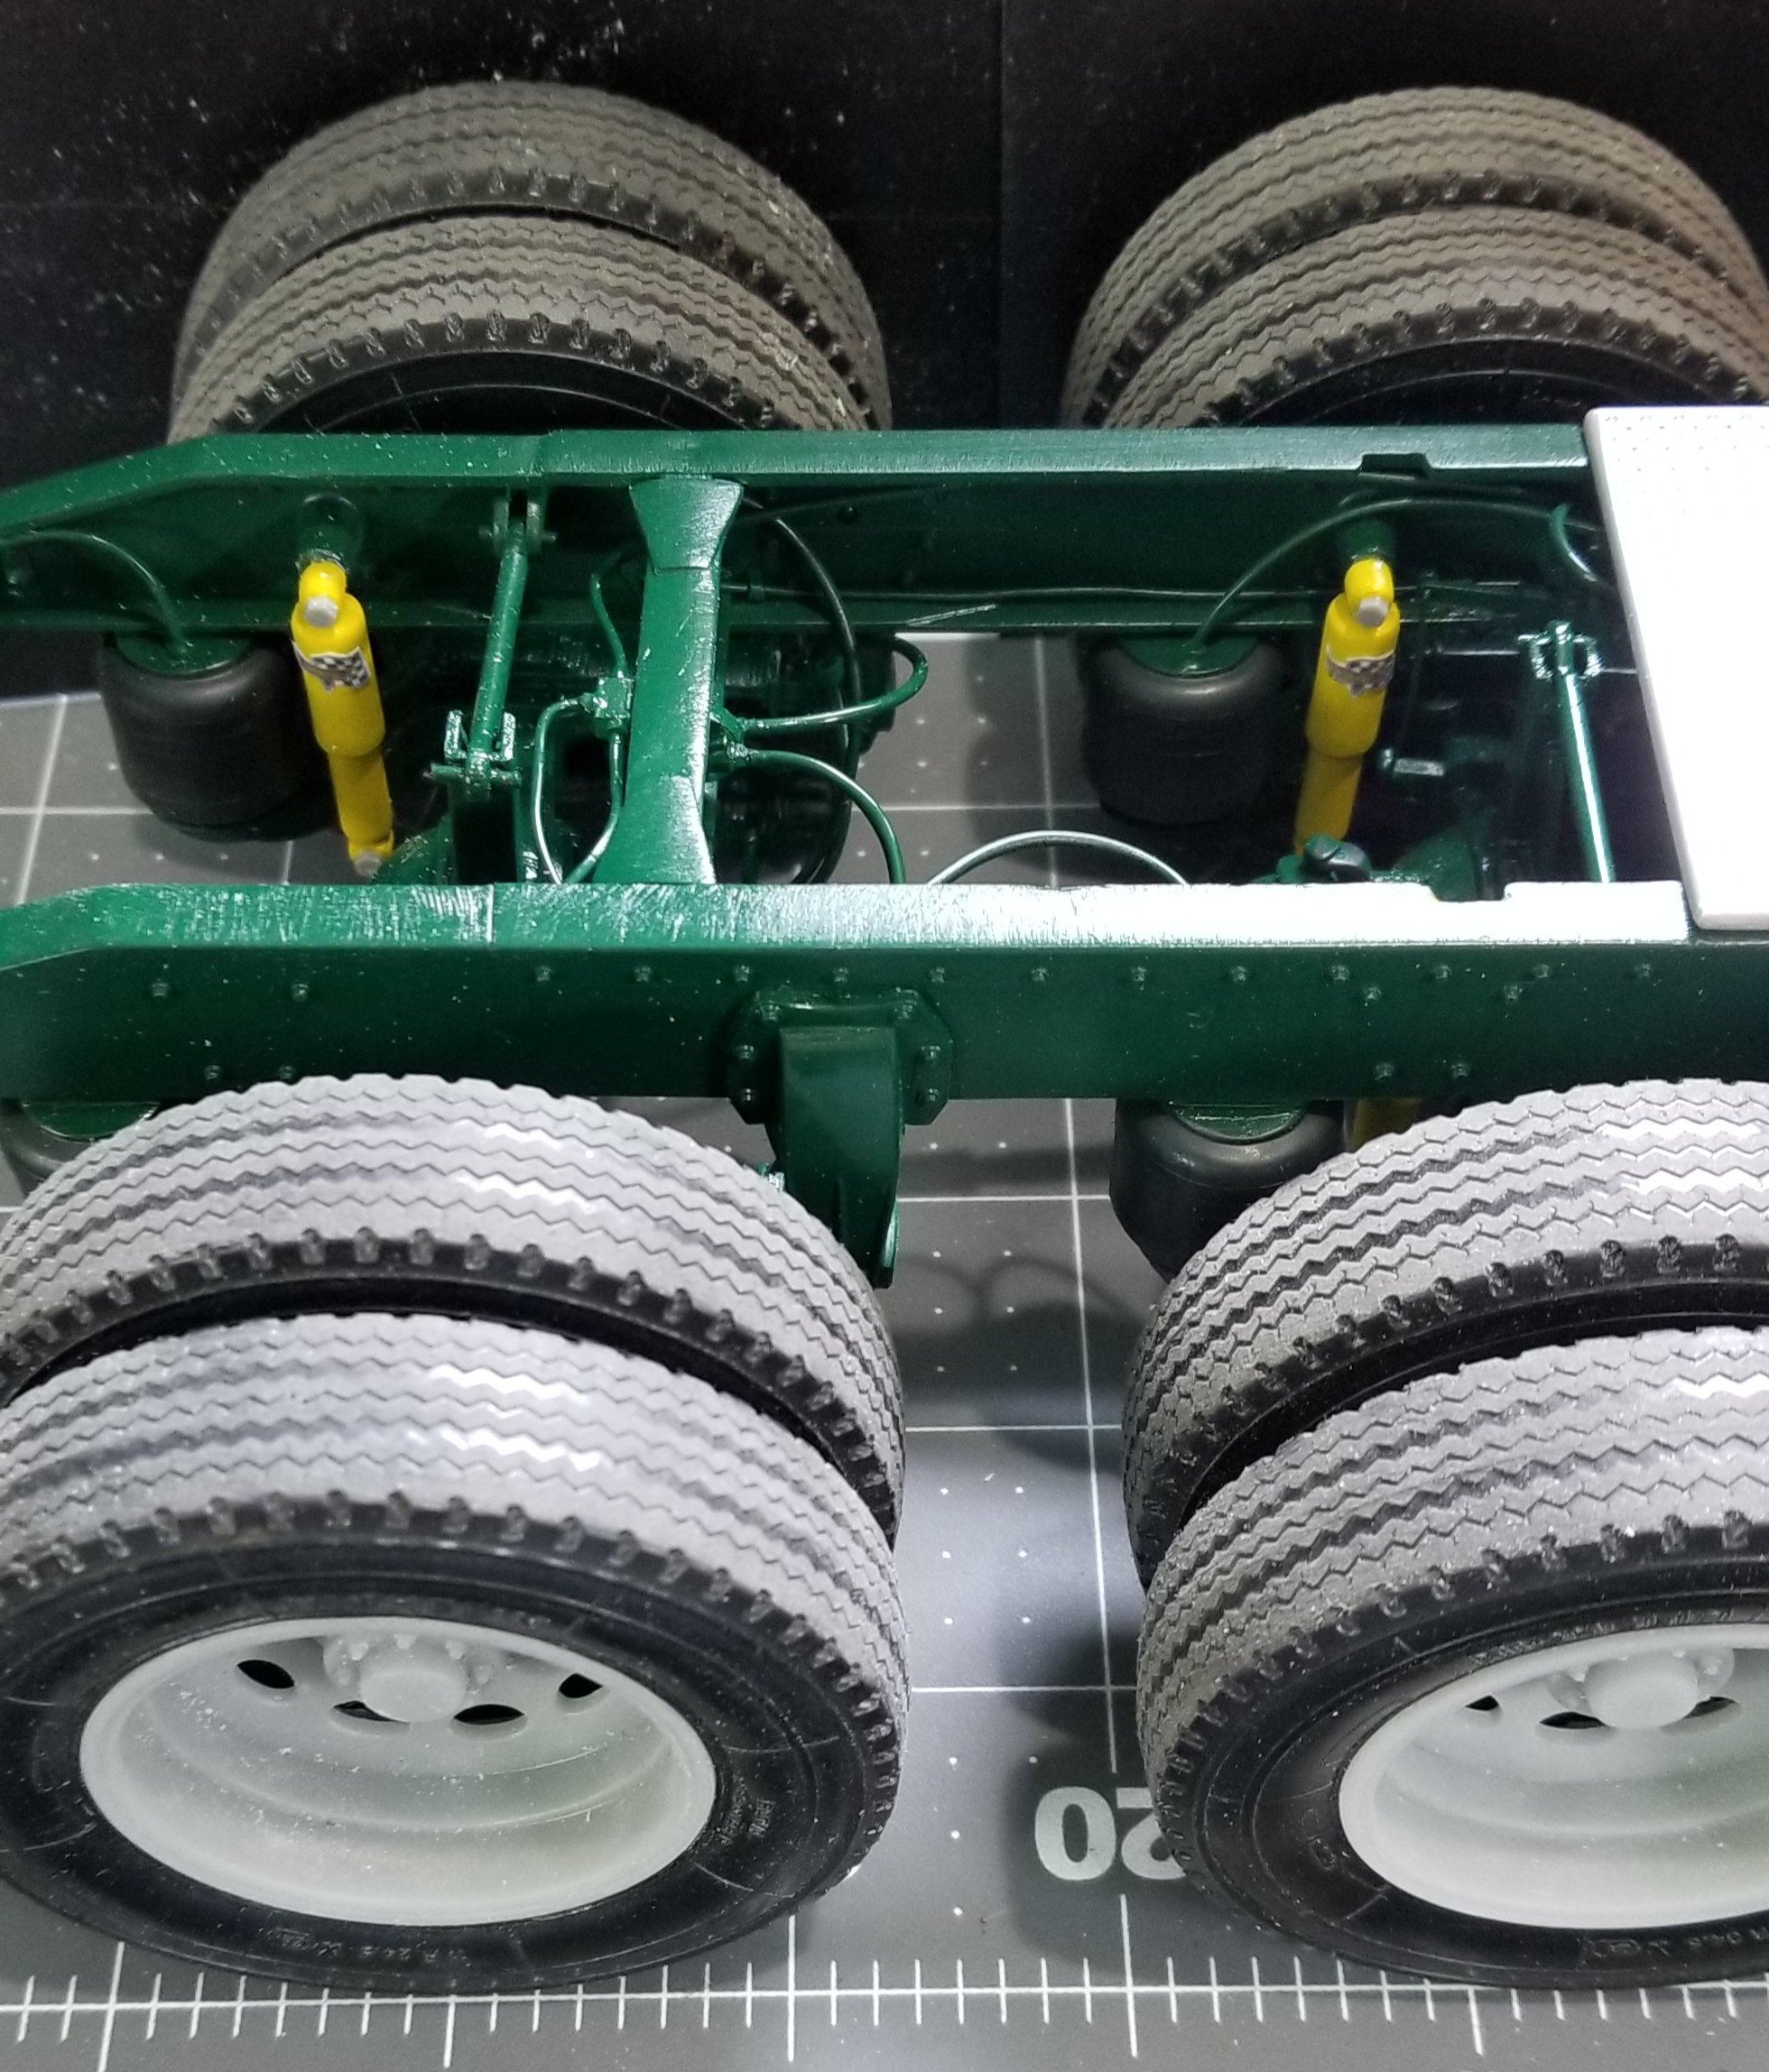
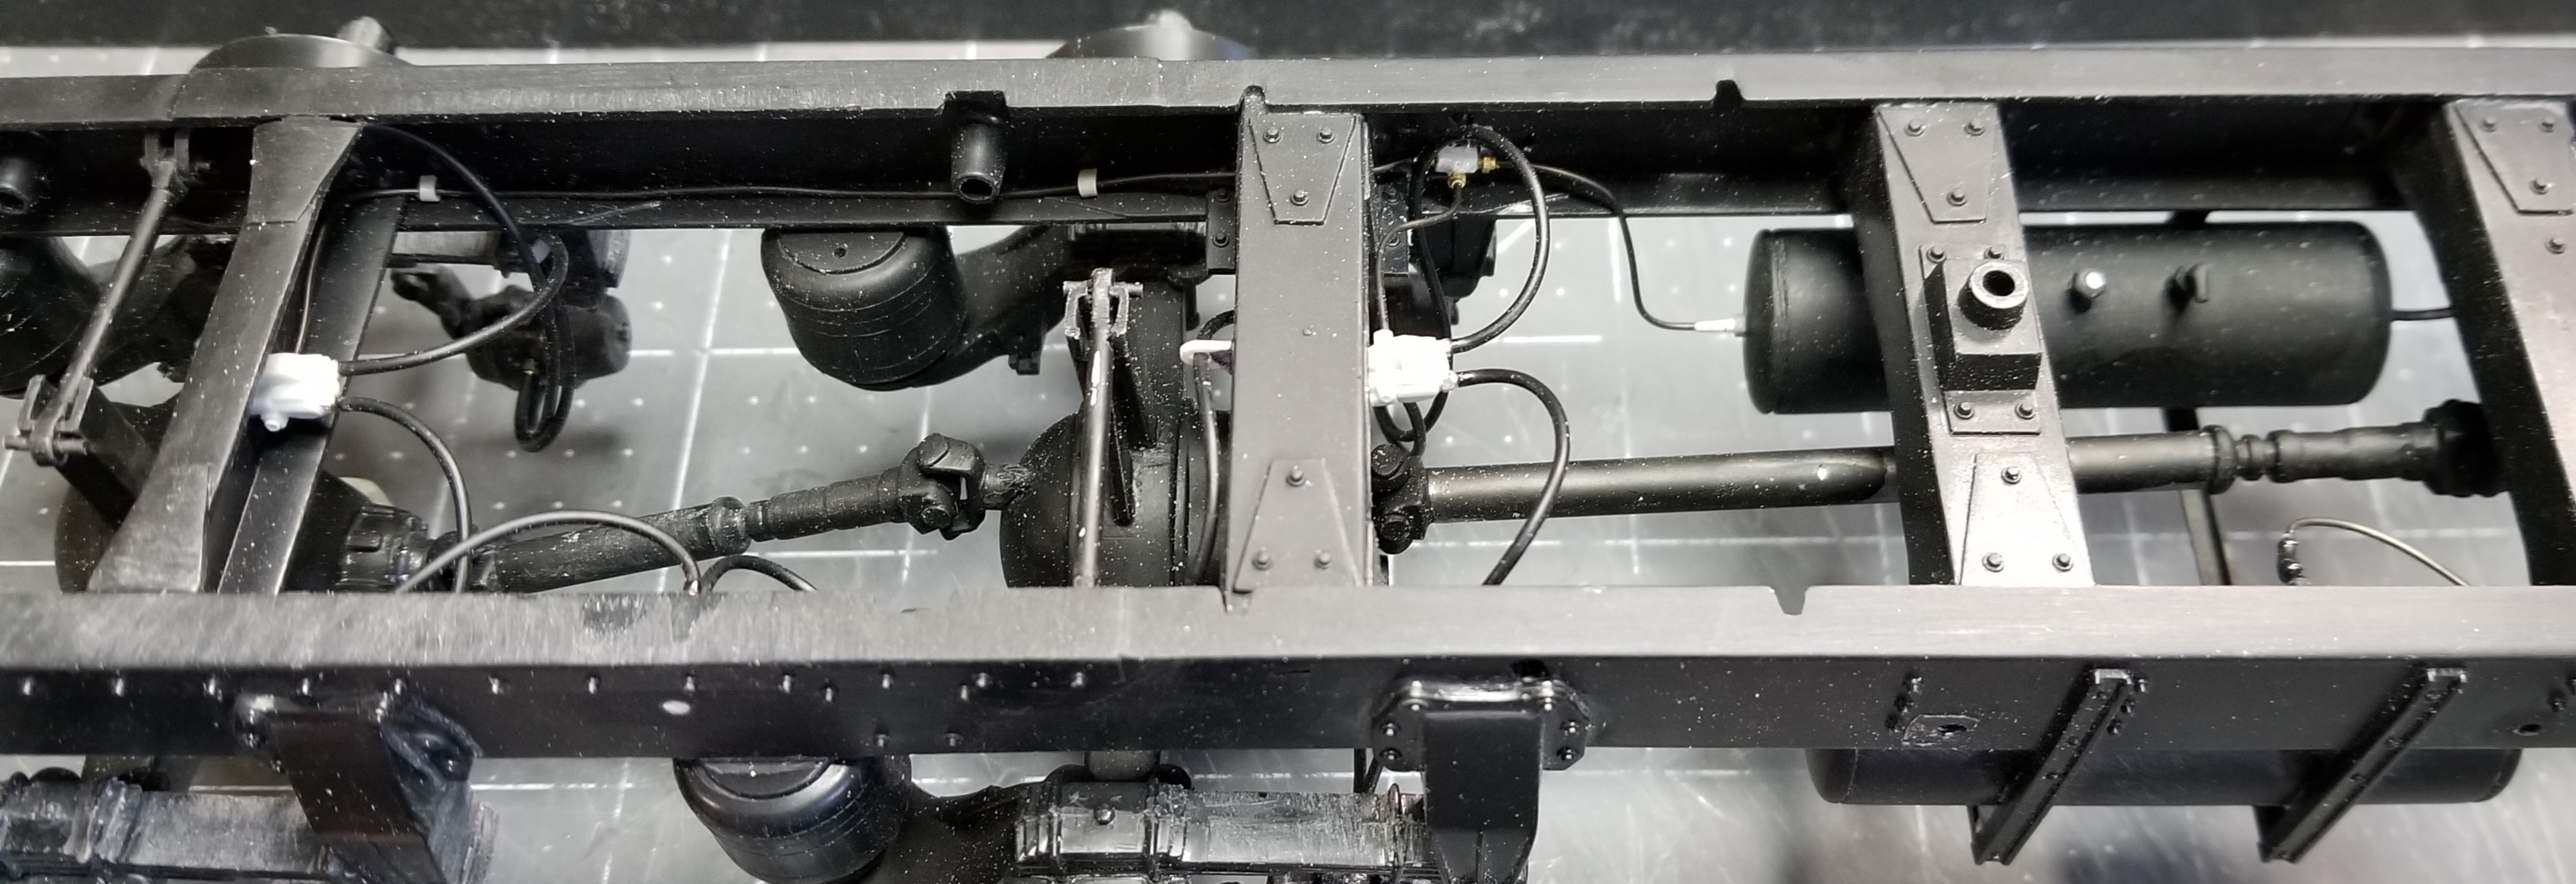
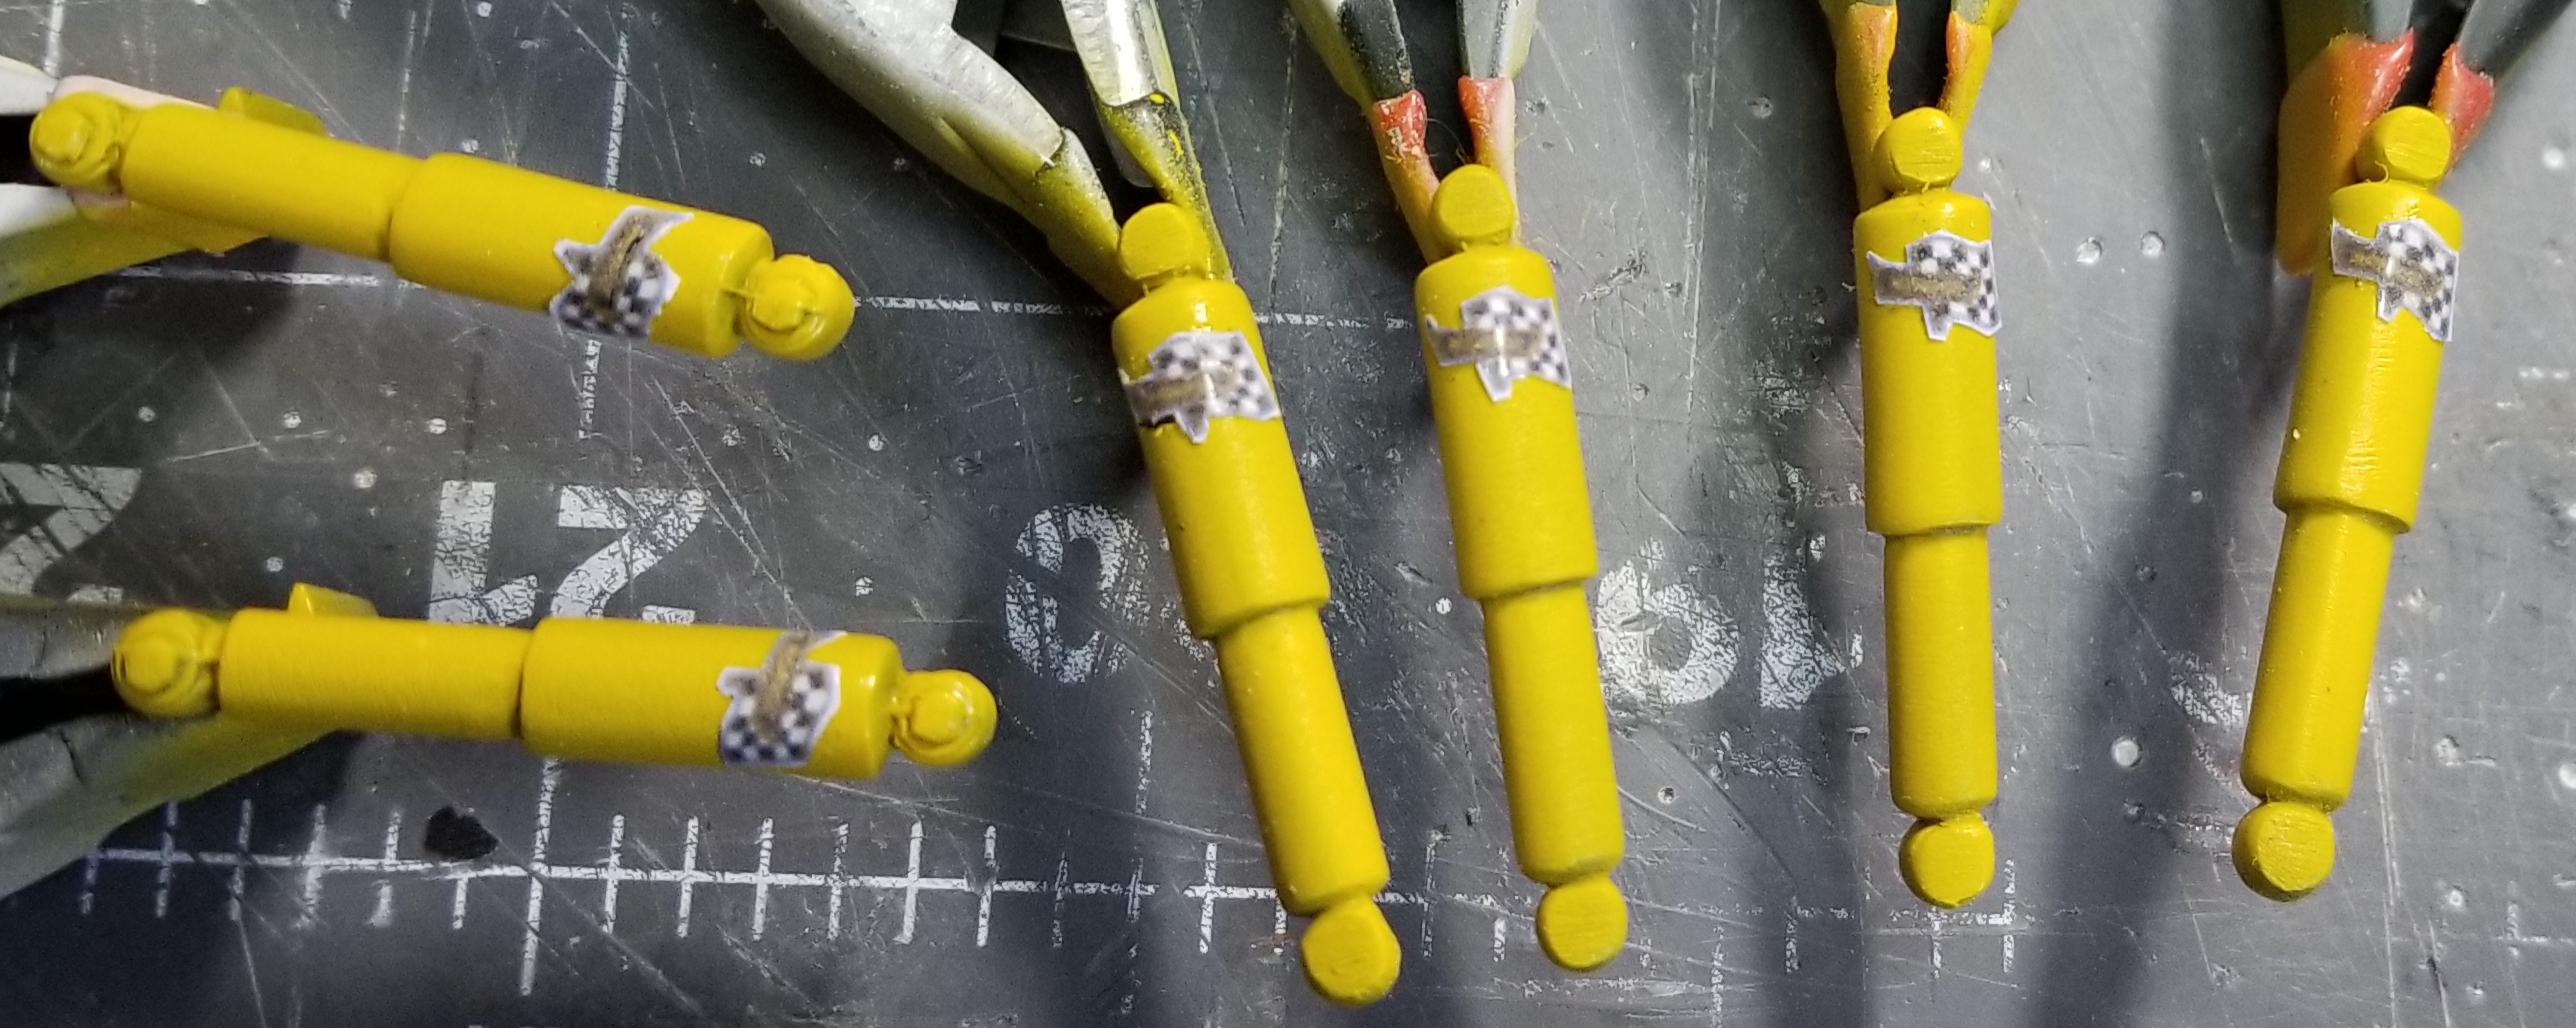
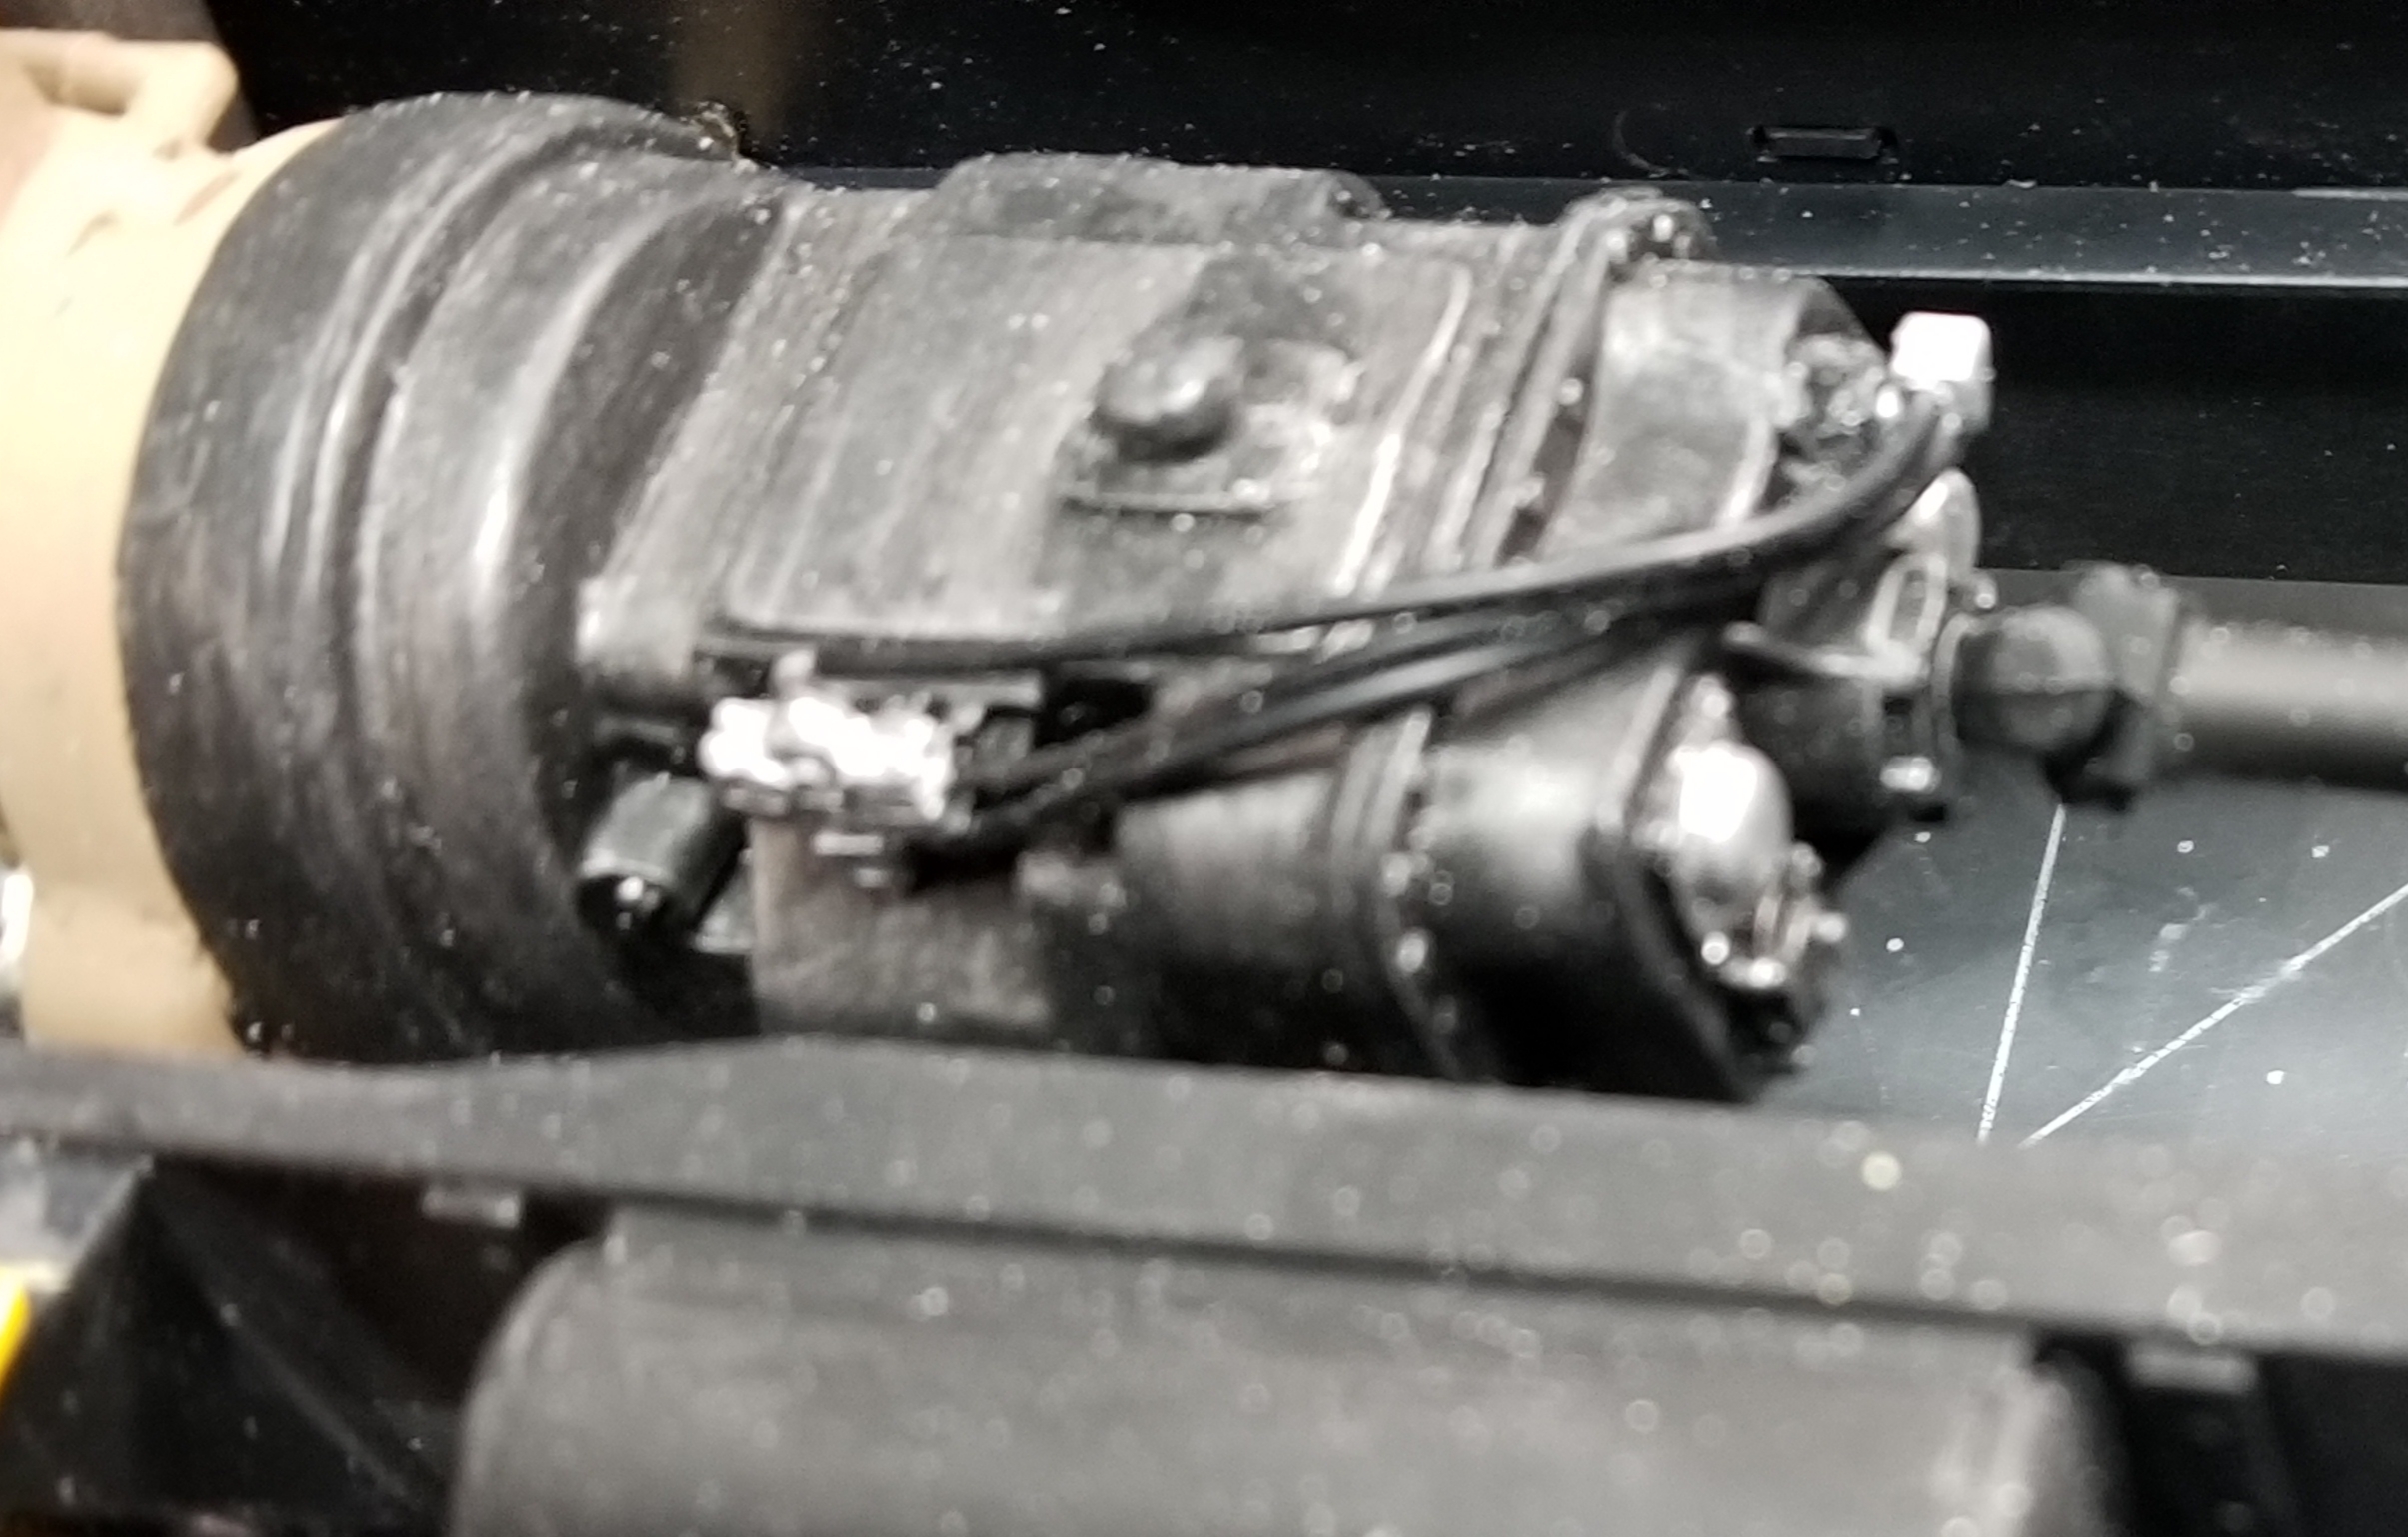
I have the brakes plumbed, But I still have a few lines left to do. I made air pressure gauges for the rear air tanks. I used some gauge decals and photo etch bezels from Airscale to create them. I also painted the shocks yellow and added some Monroe logos to them.
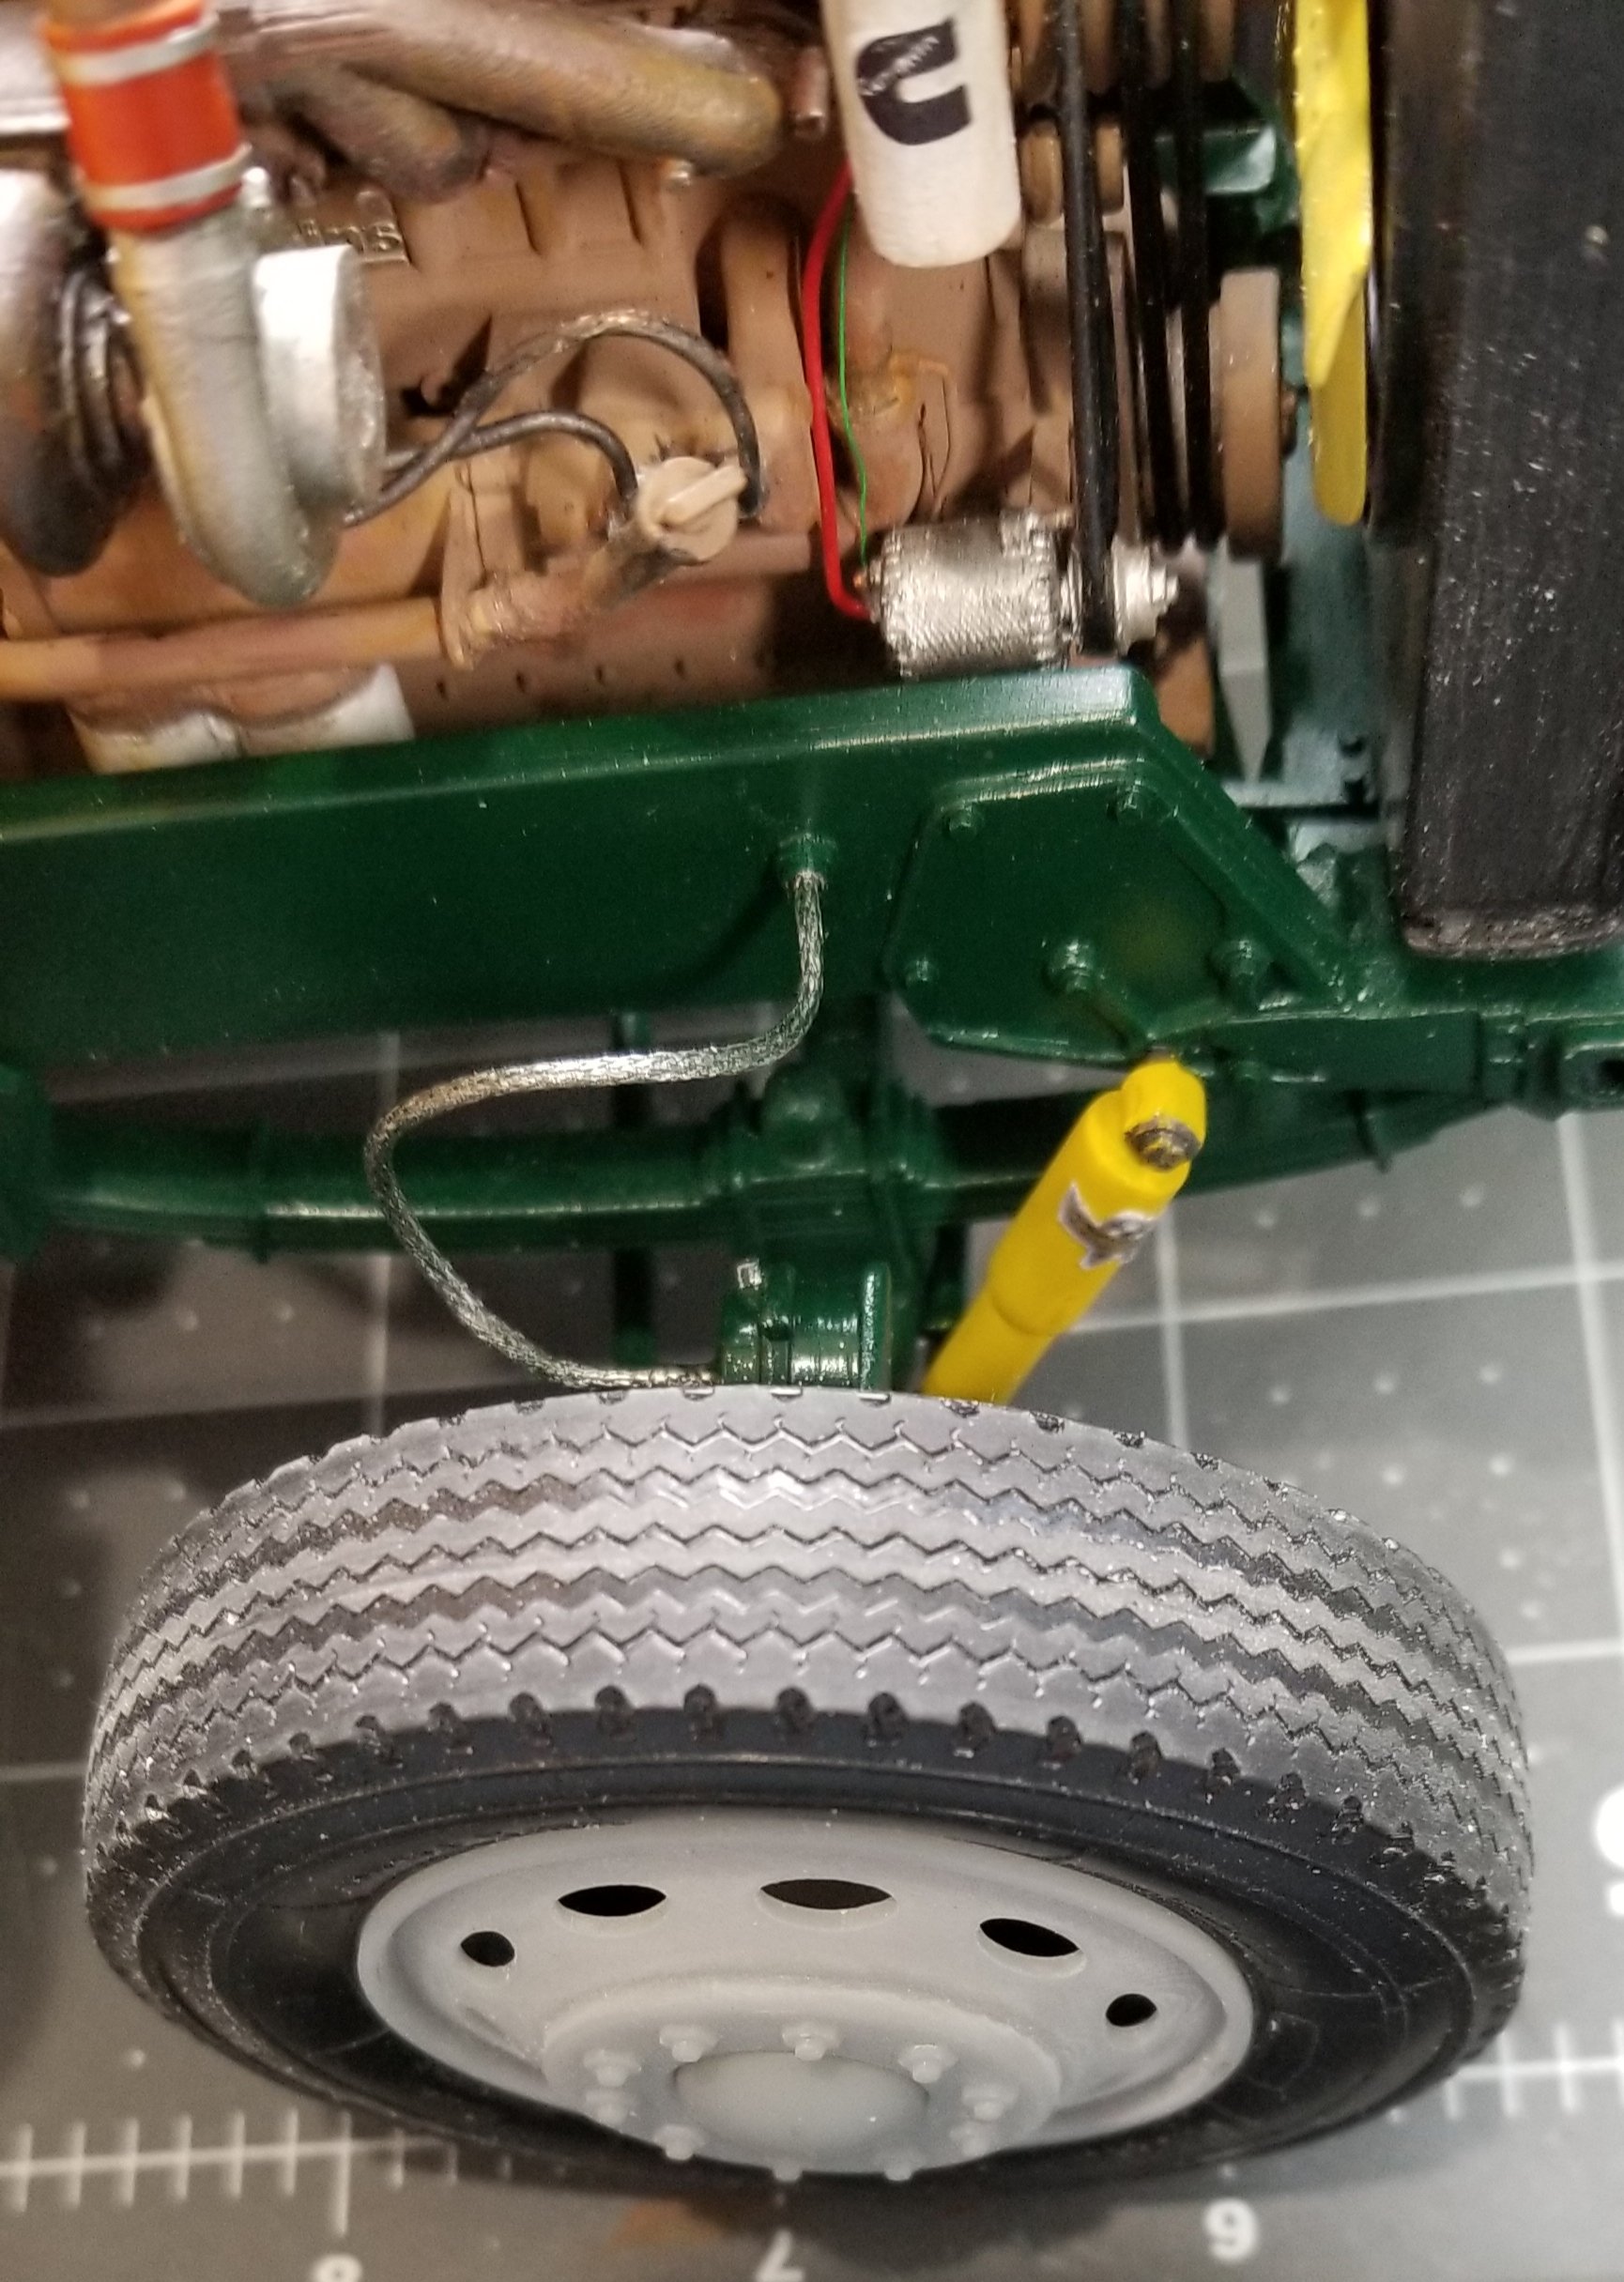
this view shows the line from the front brakes to the right rear air tank.
this view shows the air line, on the left, from the drivers side wet tank to the passenger side supply tank.
this view shows the air lines from the passenger side front air tank to the left side rear air tank.
this view shows the air line from the air chambers to the control valves.
view from the other side.
another view of the air lines.
this view shows the air gauge for the rear air tanks on the top and the items I used to create them. There's one for each rear air tank.
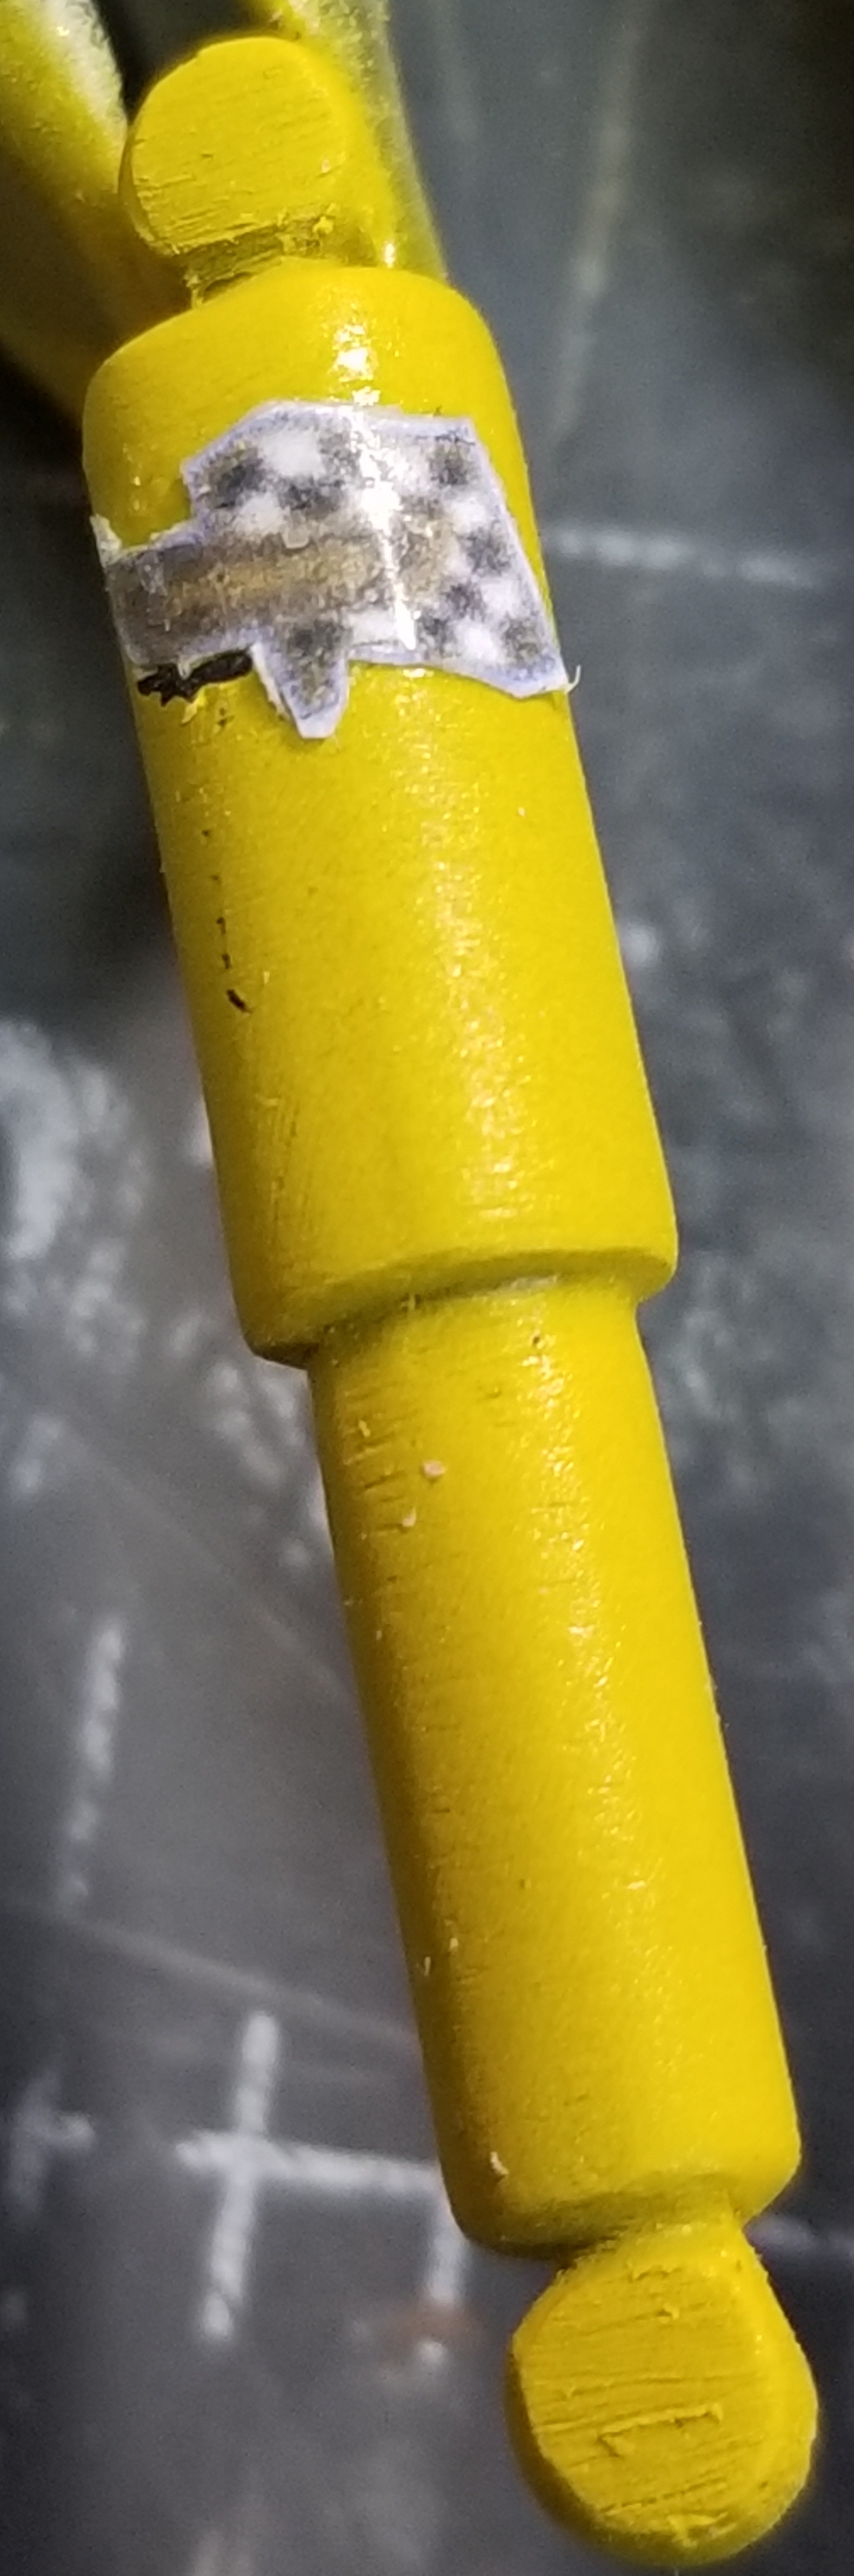
this view shows the front and rear shocks painted with logos added.
this view shows a closer view of the logo. I made these from printed images scaled to fit and covered with clear tape, then I individually cut out each one then added them to the shocks. I wish I had decals but I couldn't find any anywhere. I also added some bolts to the top and bottom of the shocks, but I didn't get pictures of them.
Well that's it for now be back with more updates soon.
Ron G
-
Hey guys
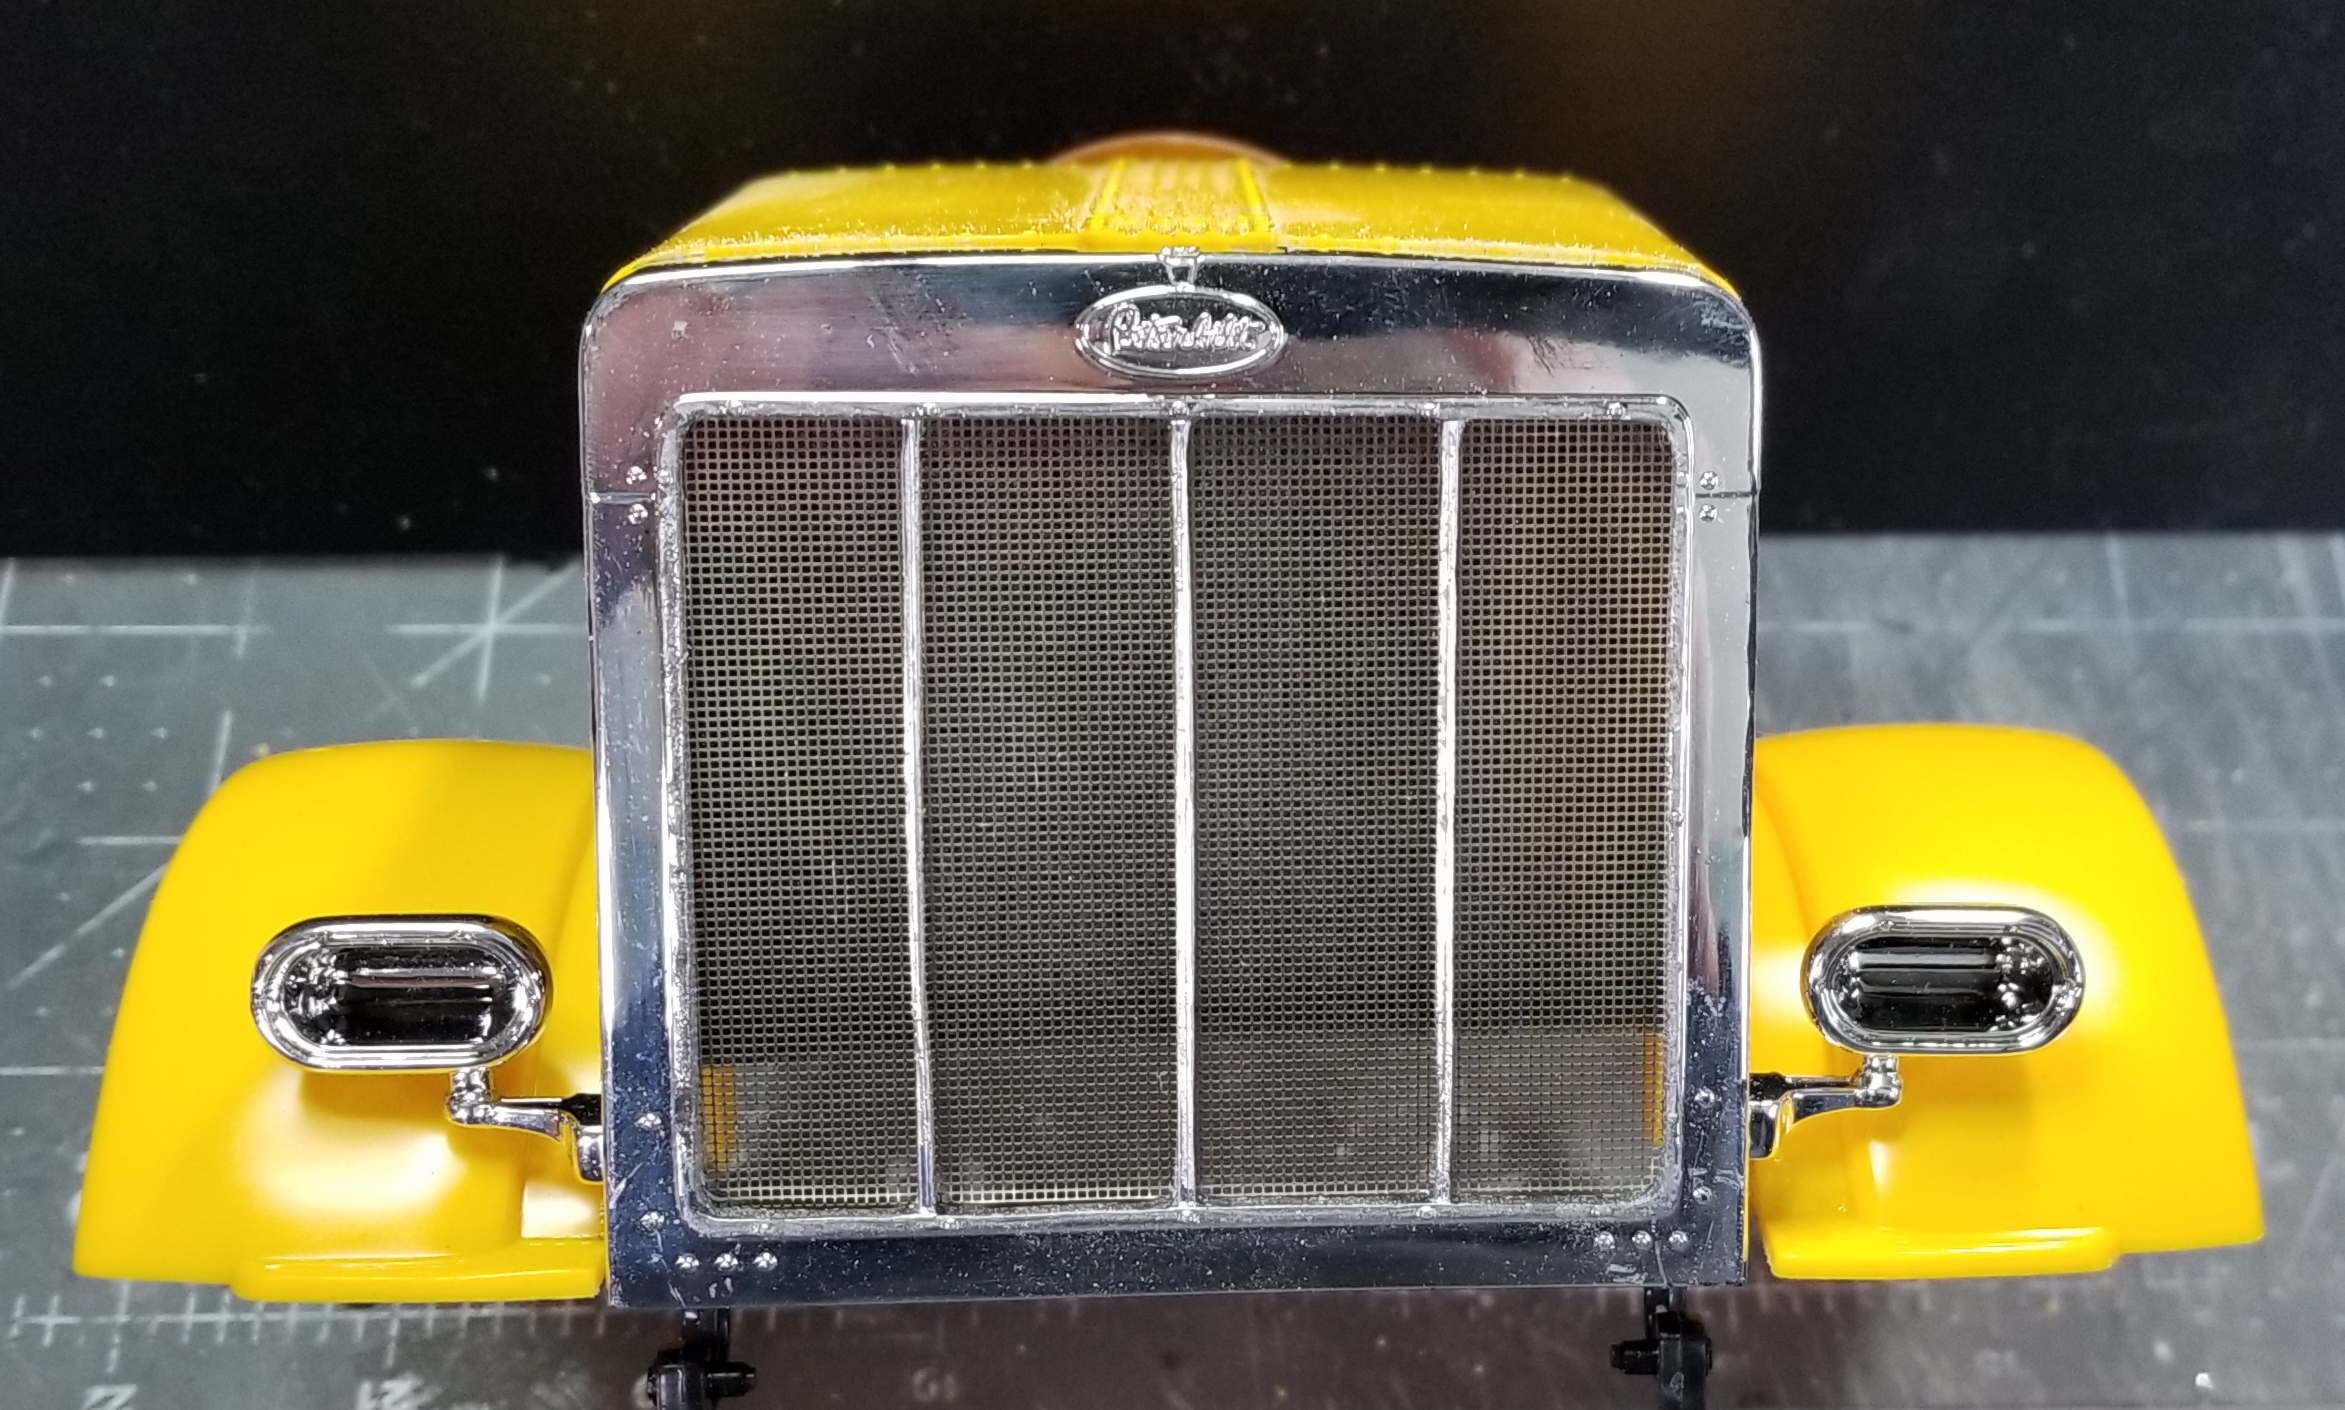
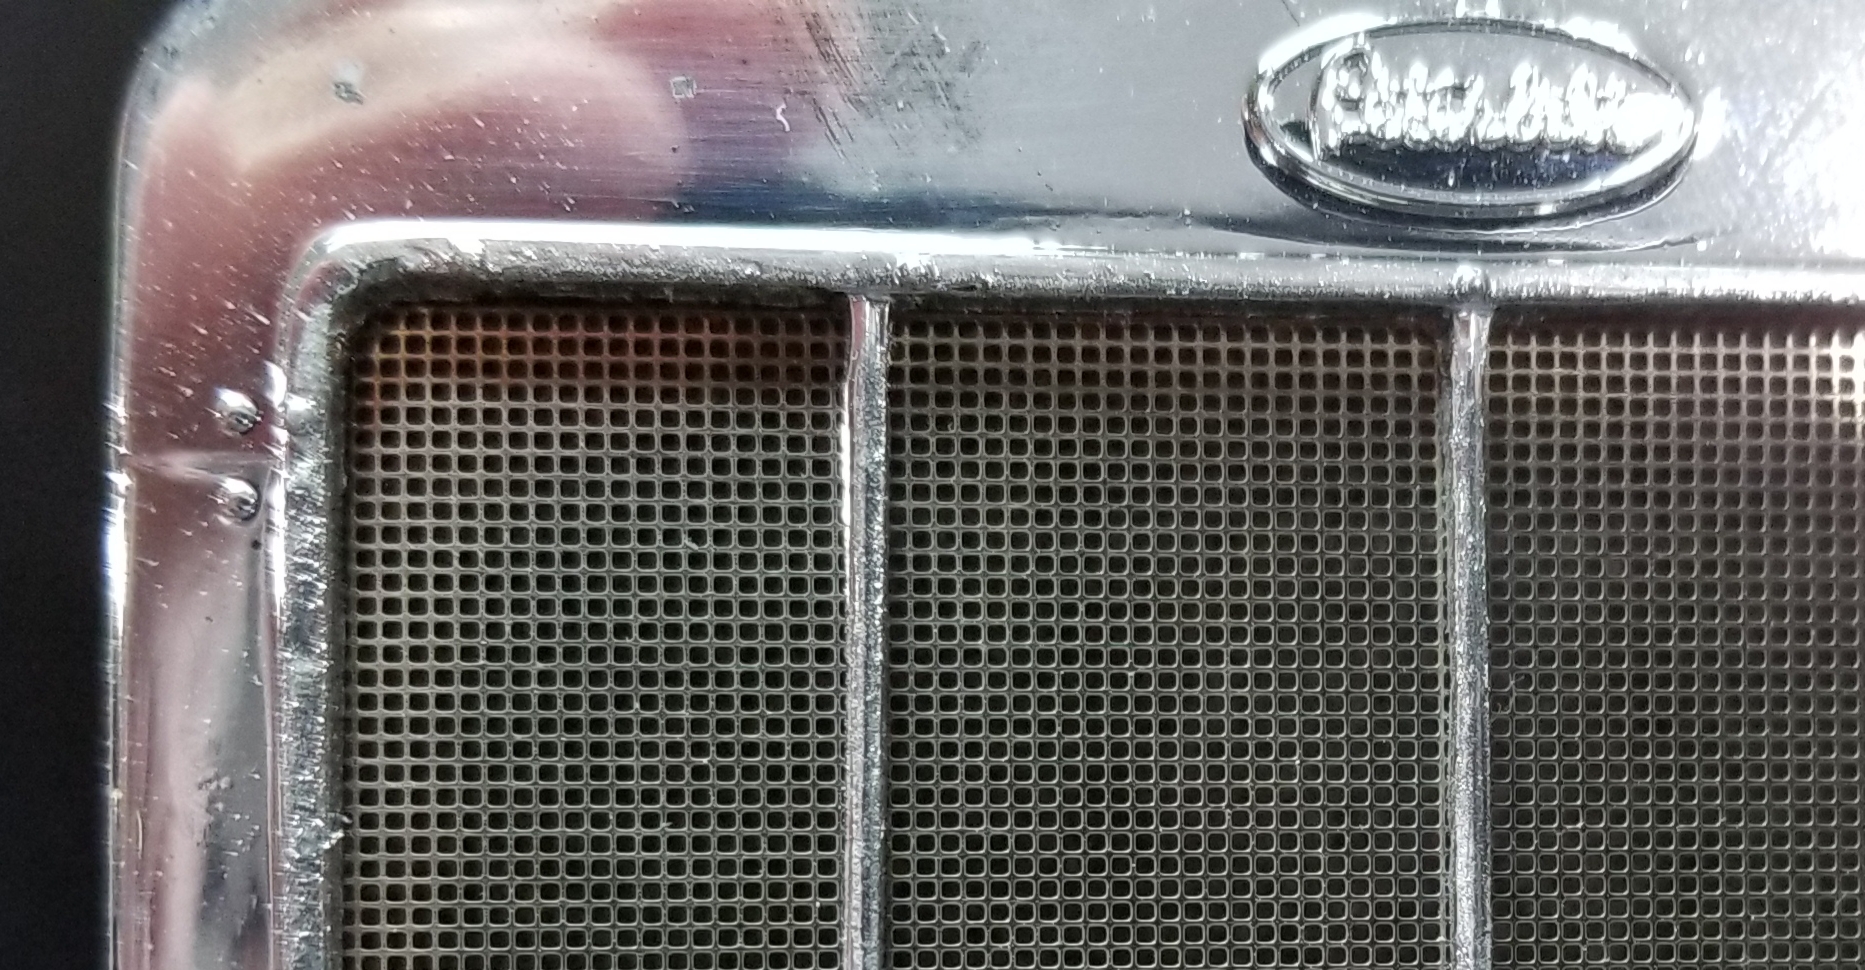
Small update, I did some work on the big Pete's grill shell. I carved out the cast in grill detail and added a screen mesh to the rear.
this view shows the grill after I modified it and added the stainless steel mesh. I will be painting this like dull polished aluminum. (It's a work truck)
close up view of the stainless steel mesh grill. This is temporarily assembled, I will be refining it later.
Ron G
-
Hey guys
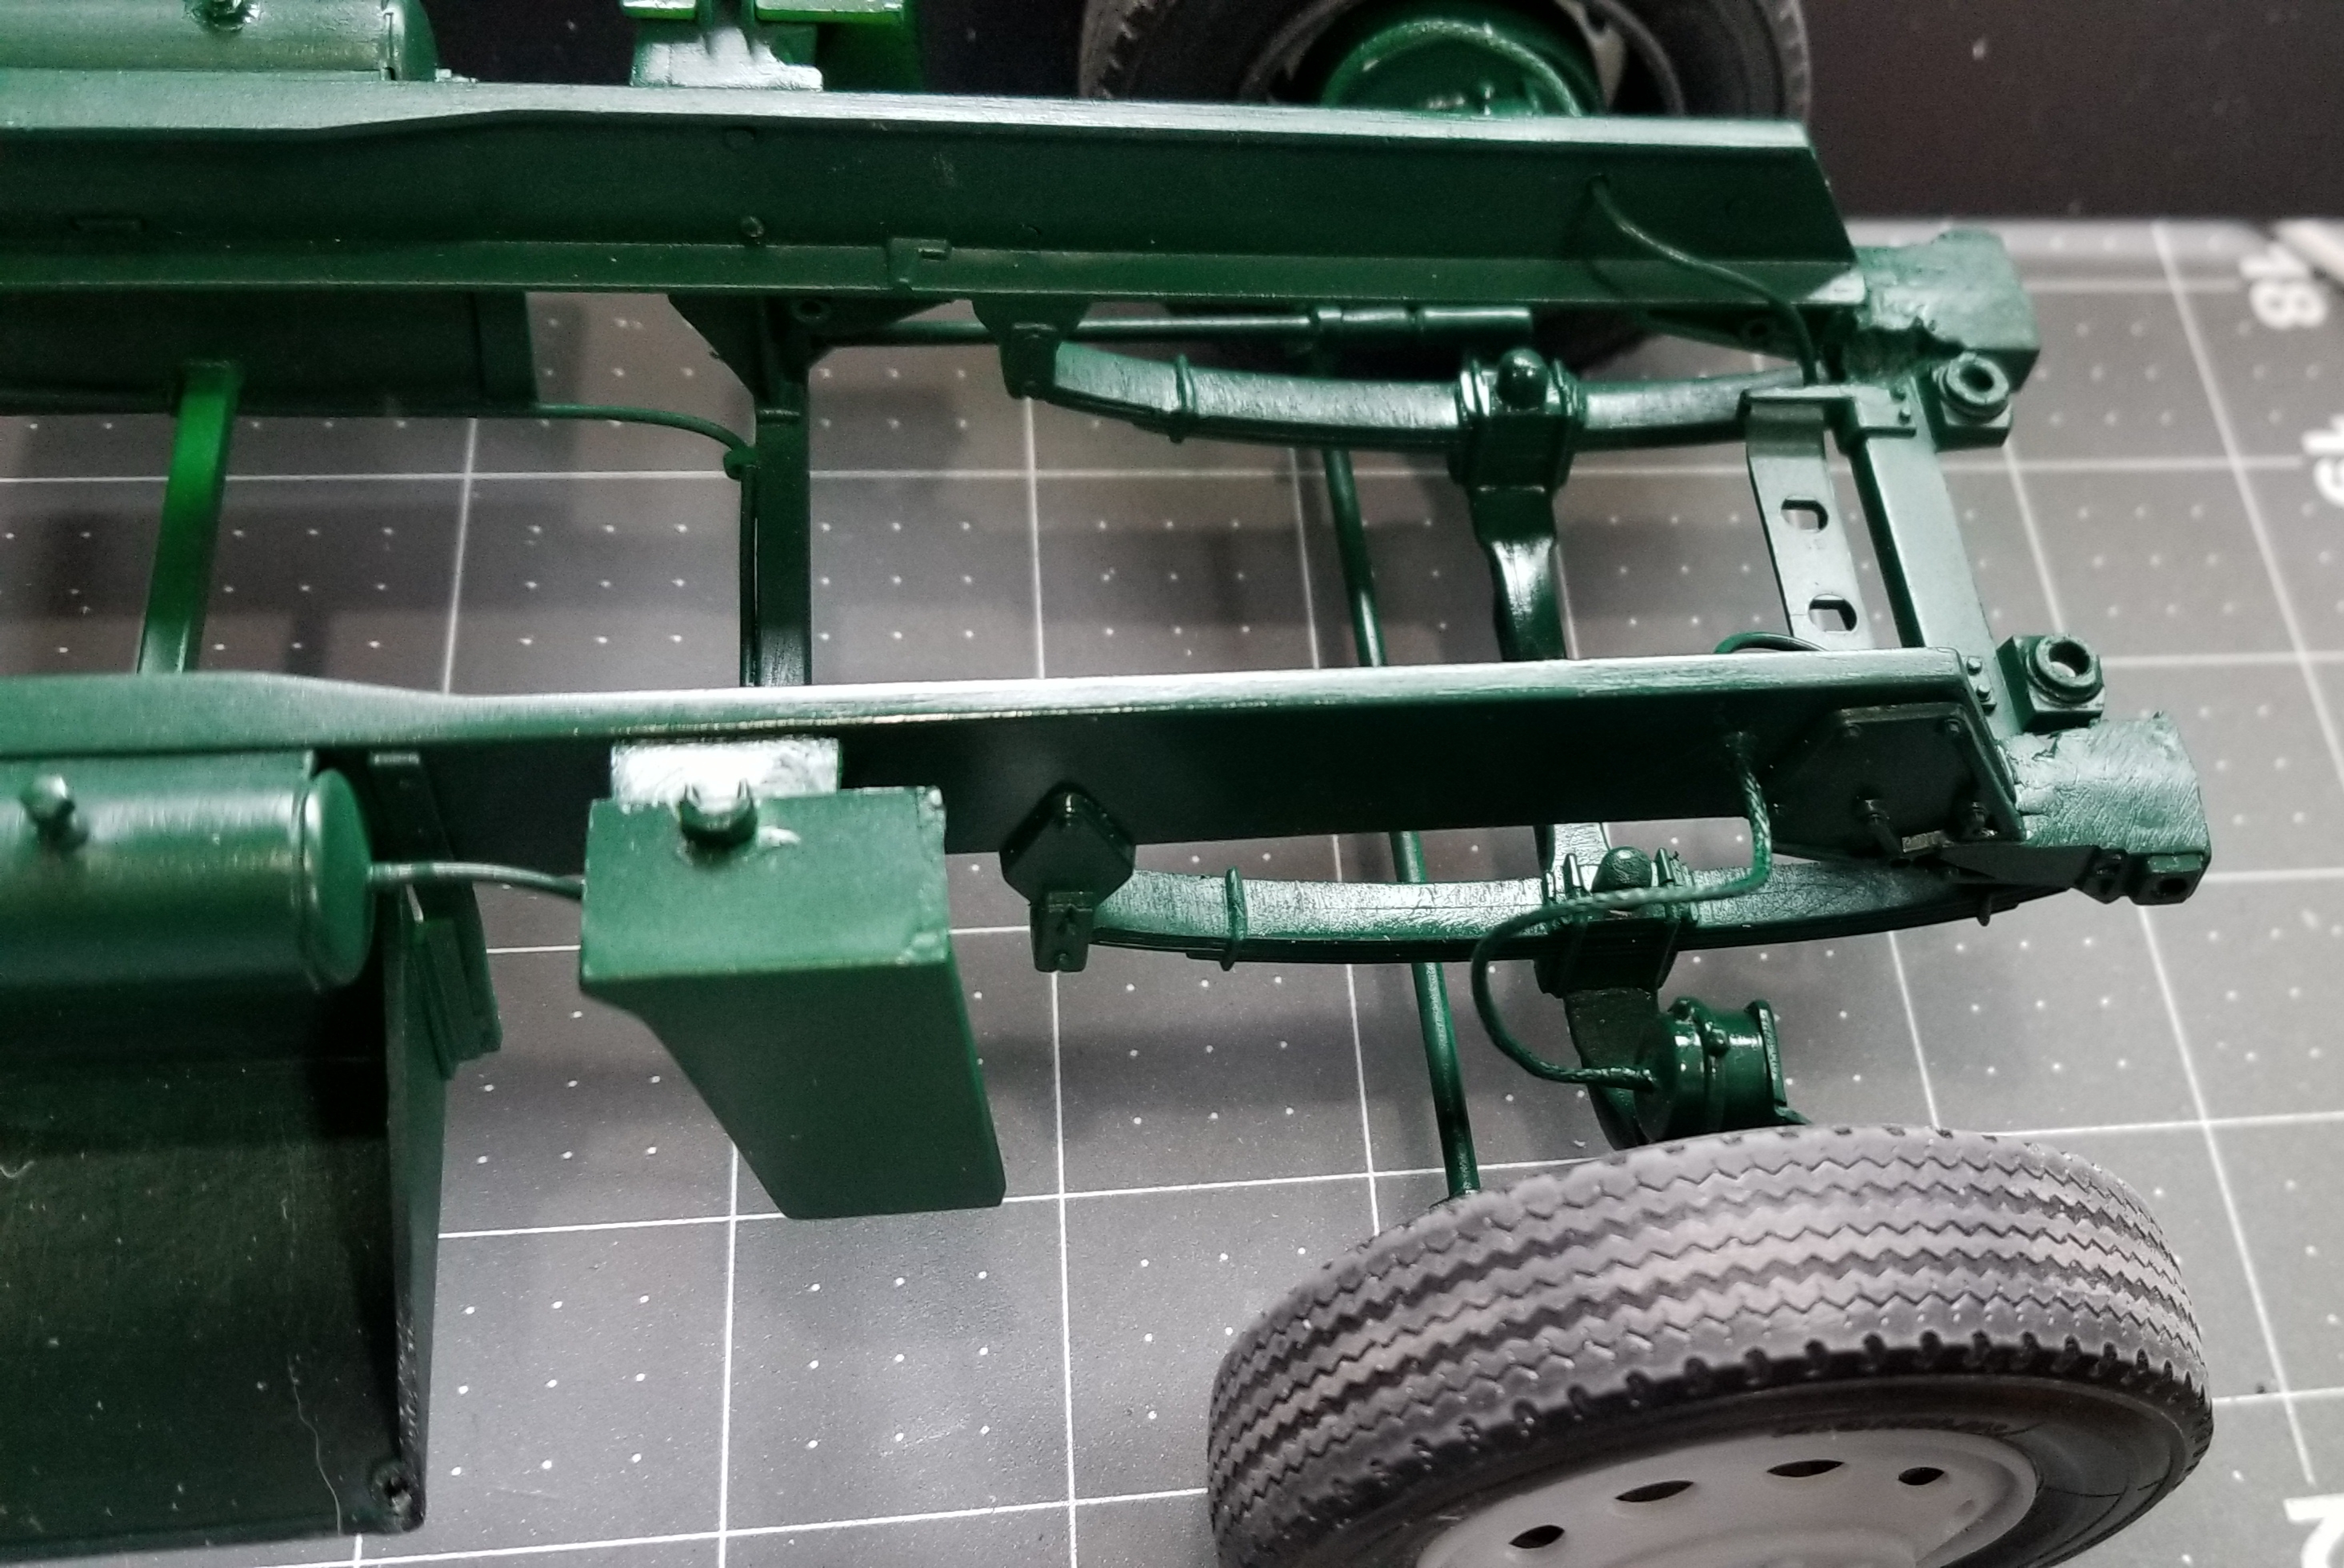
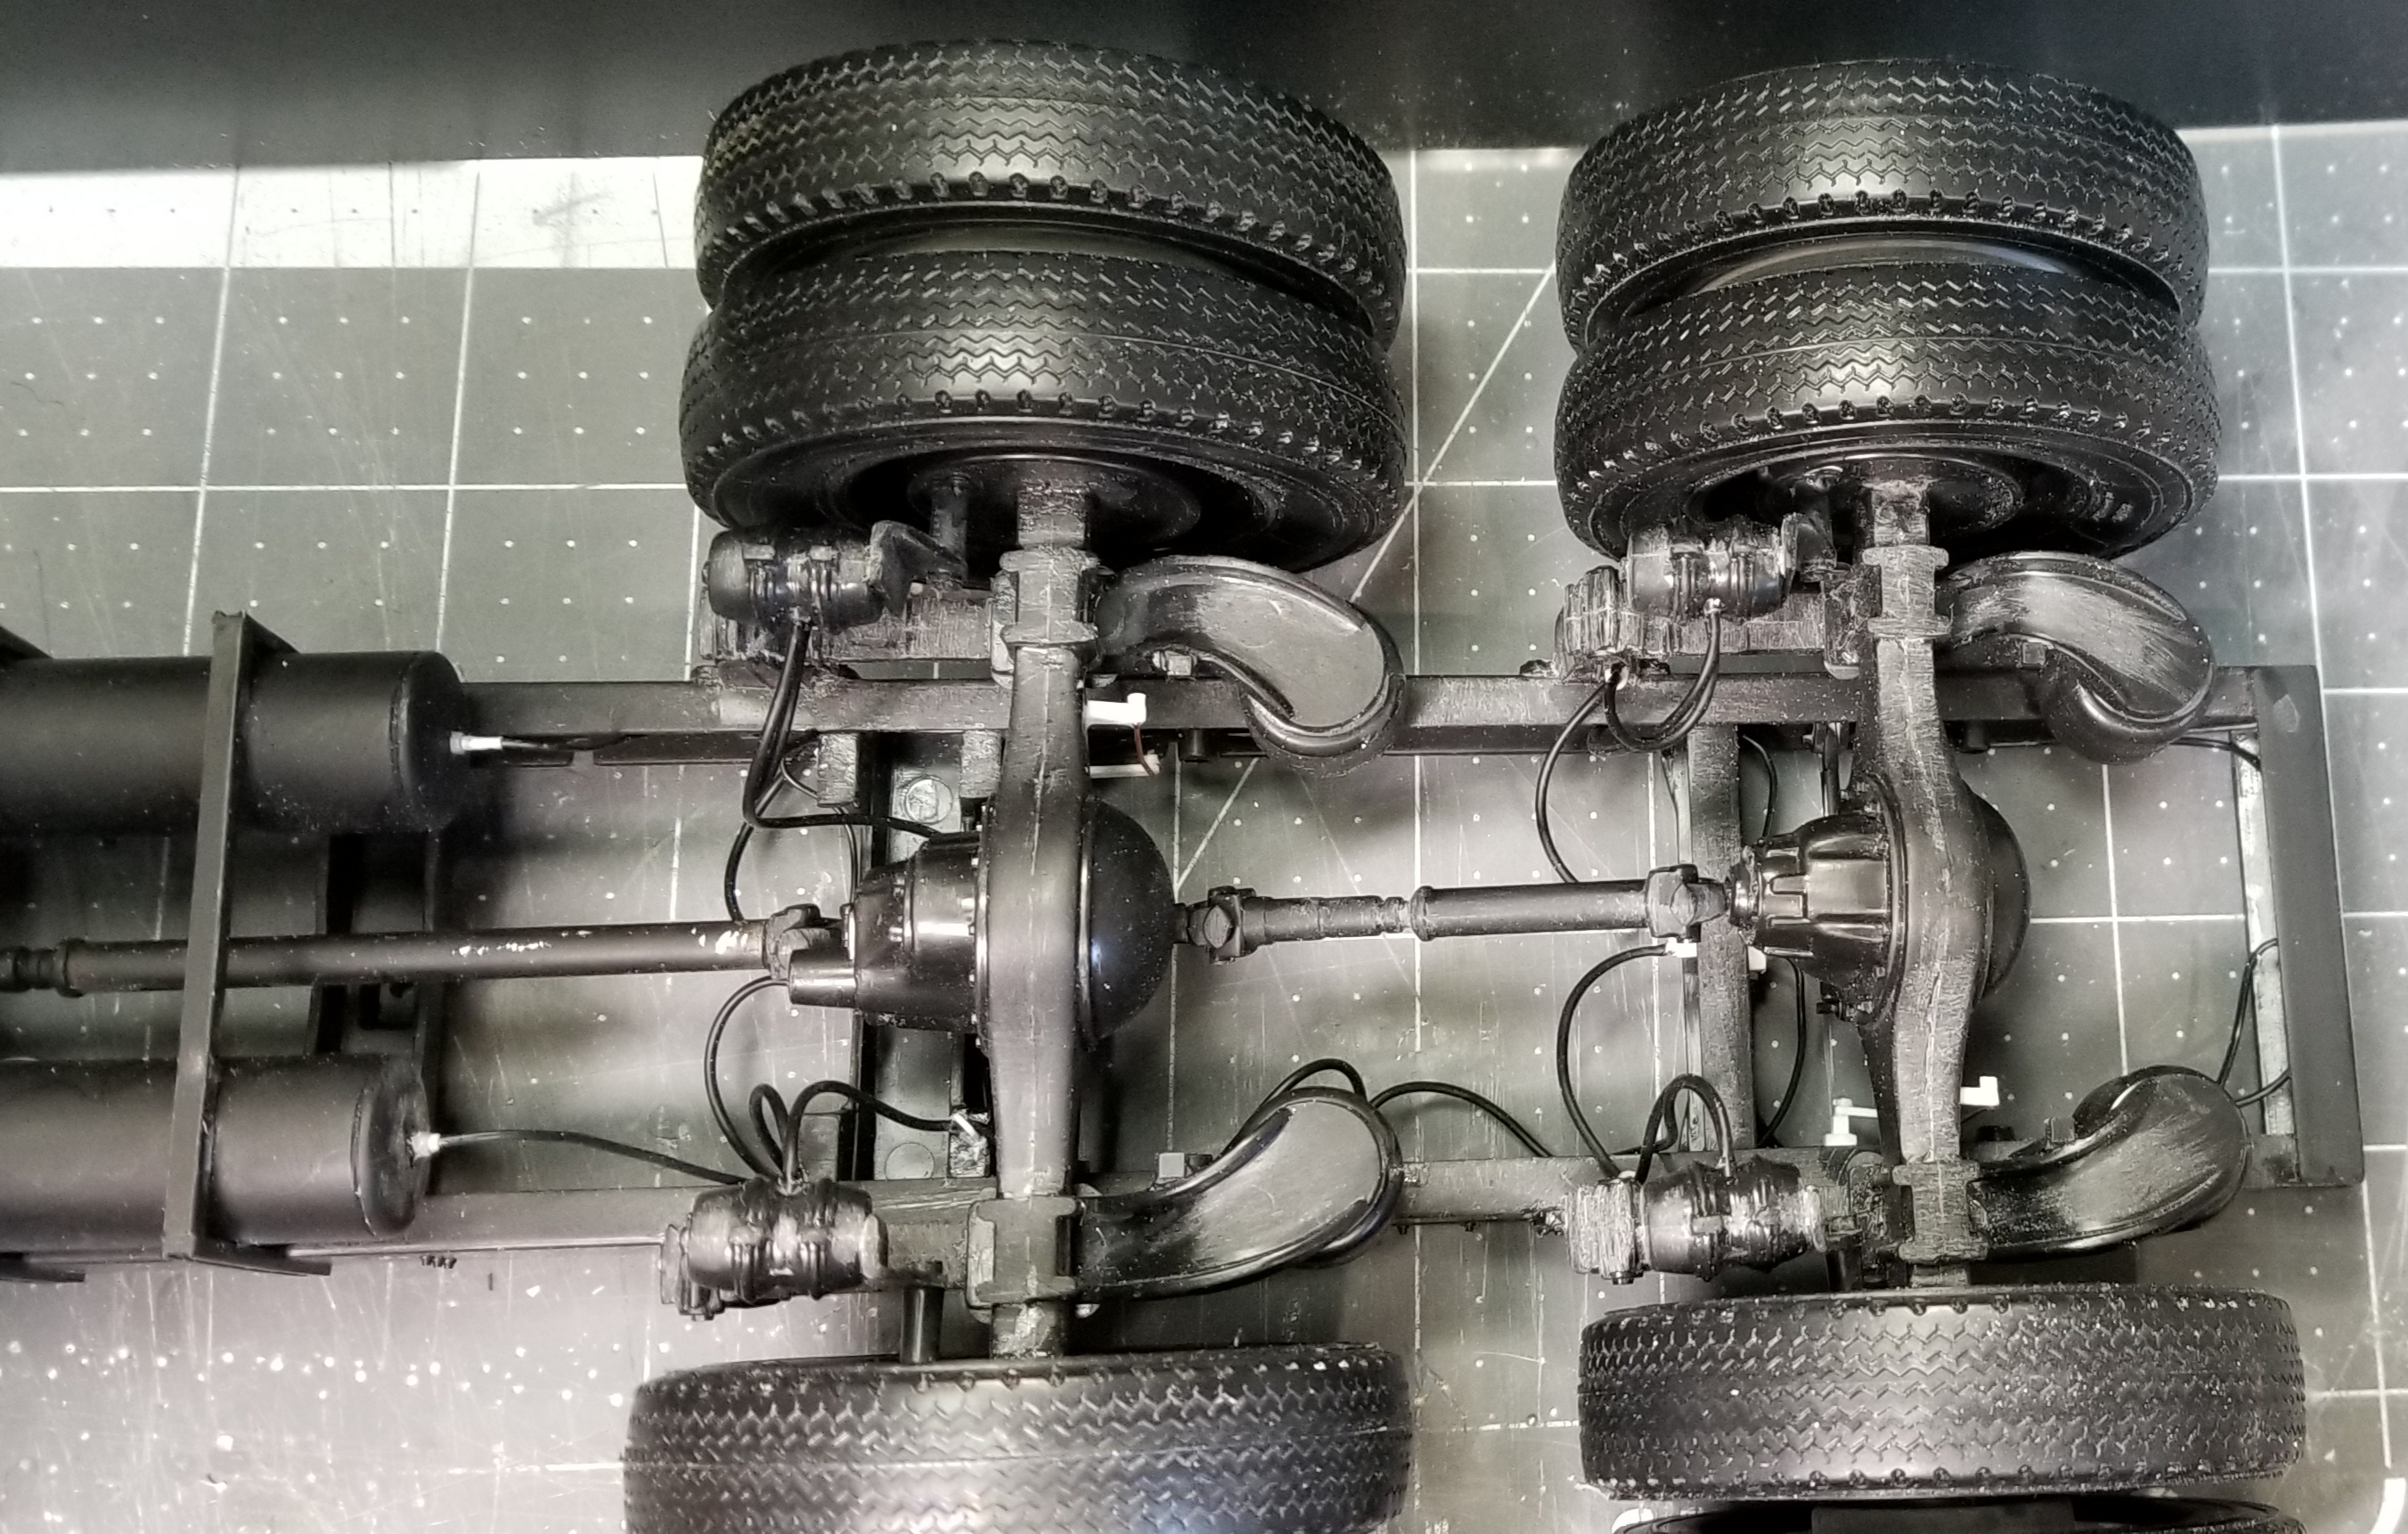
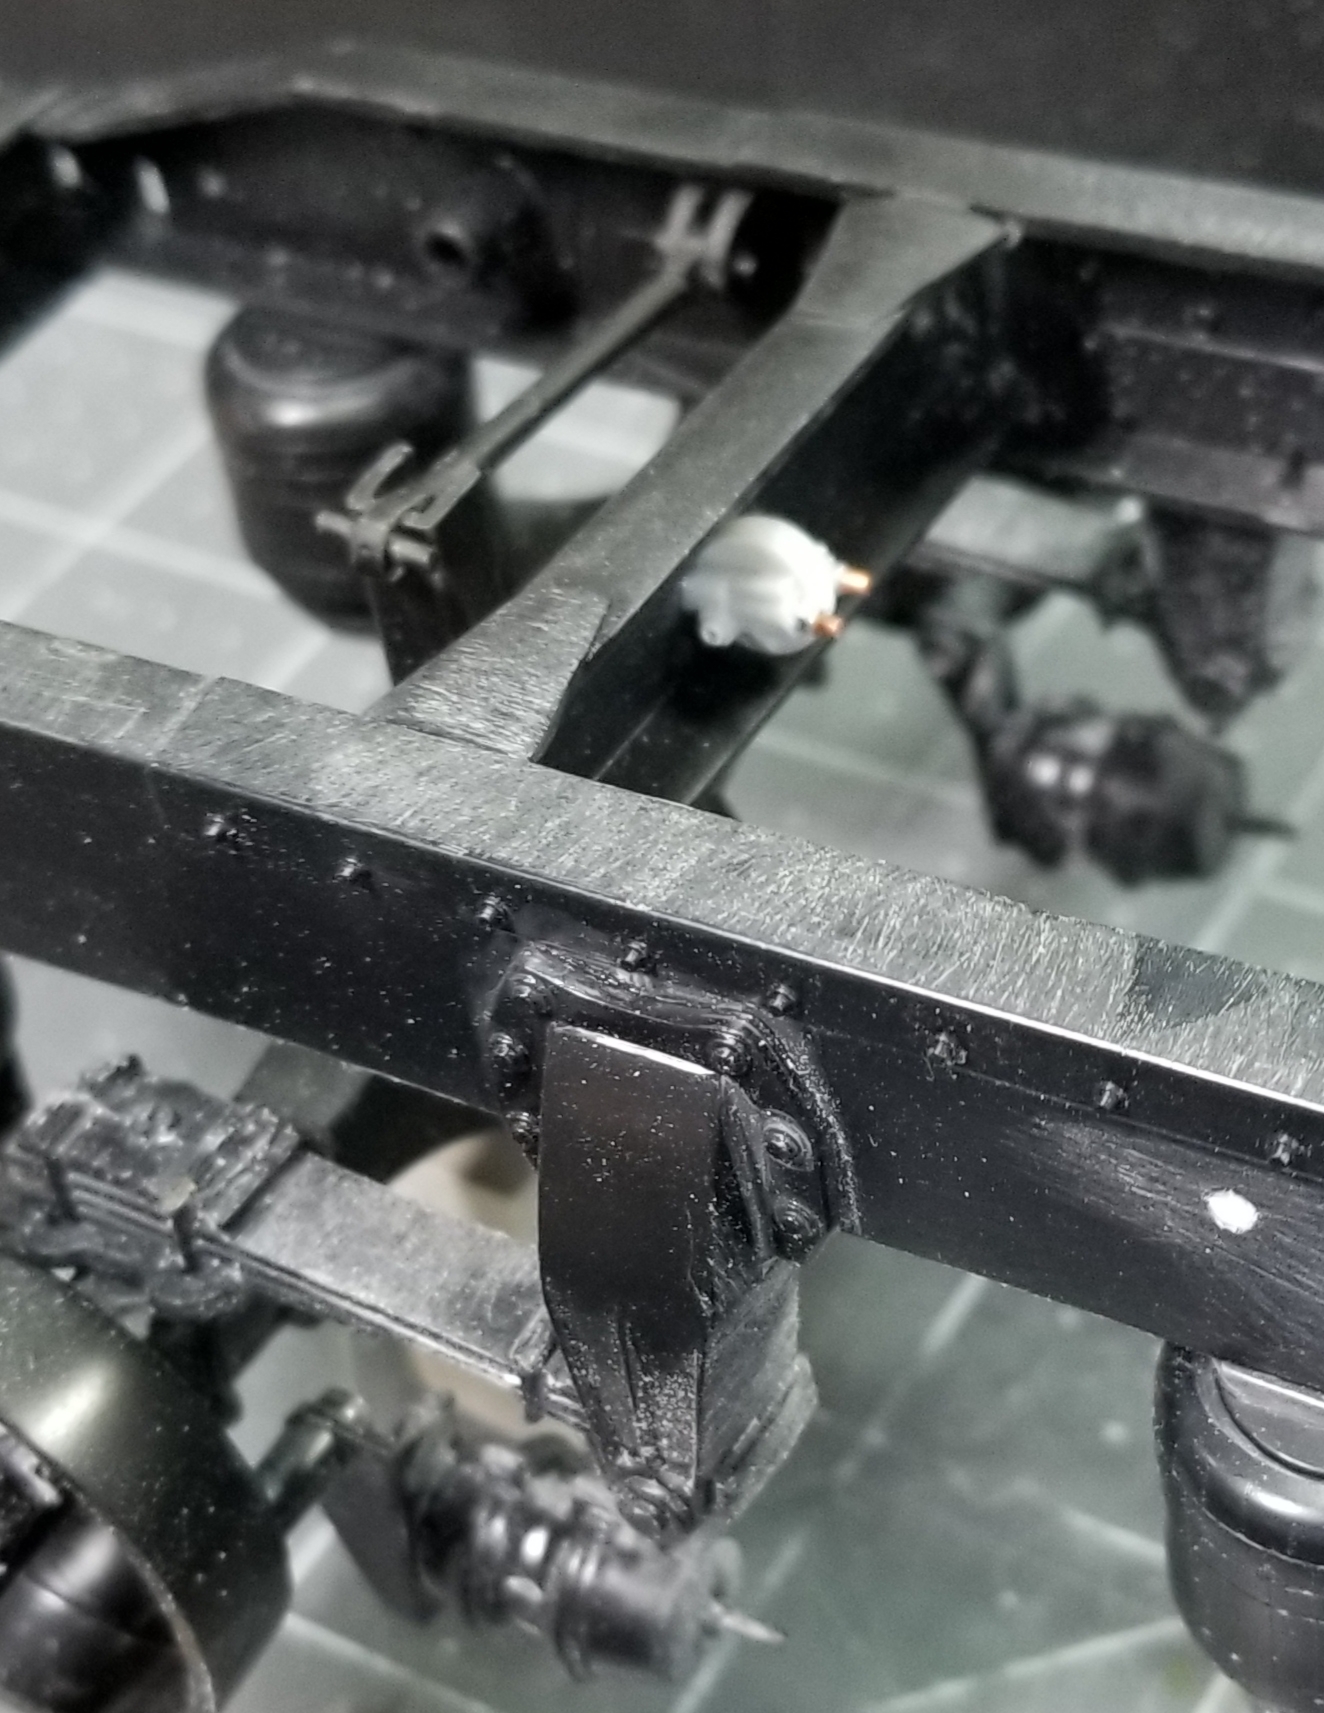
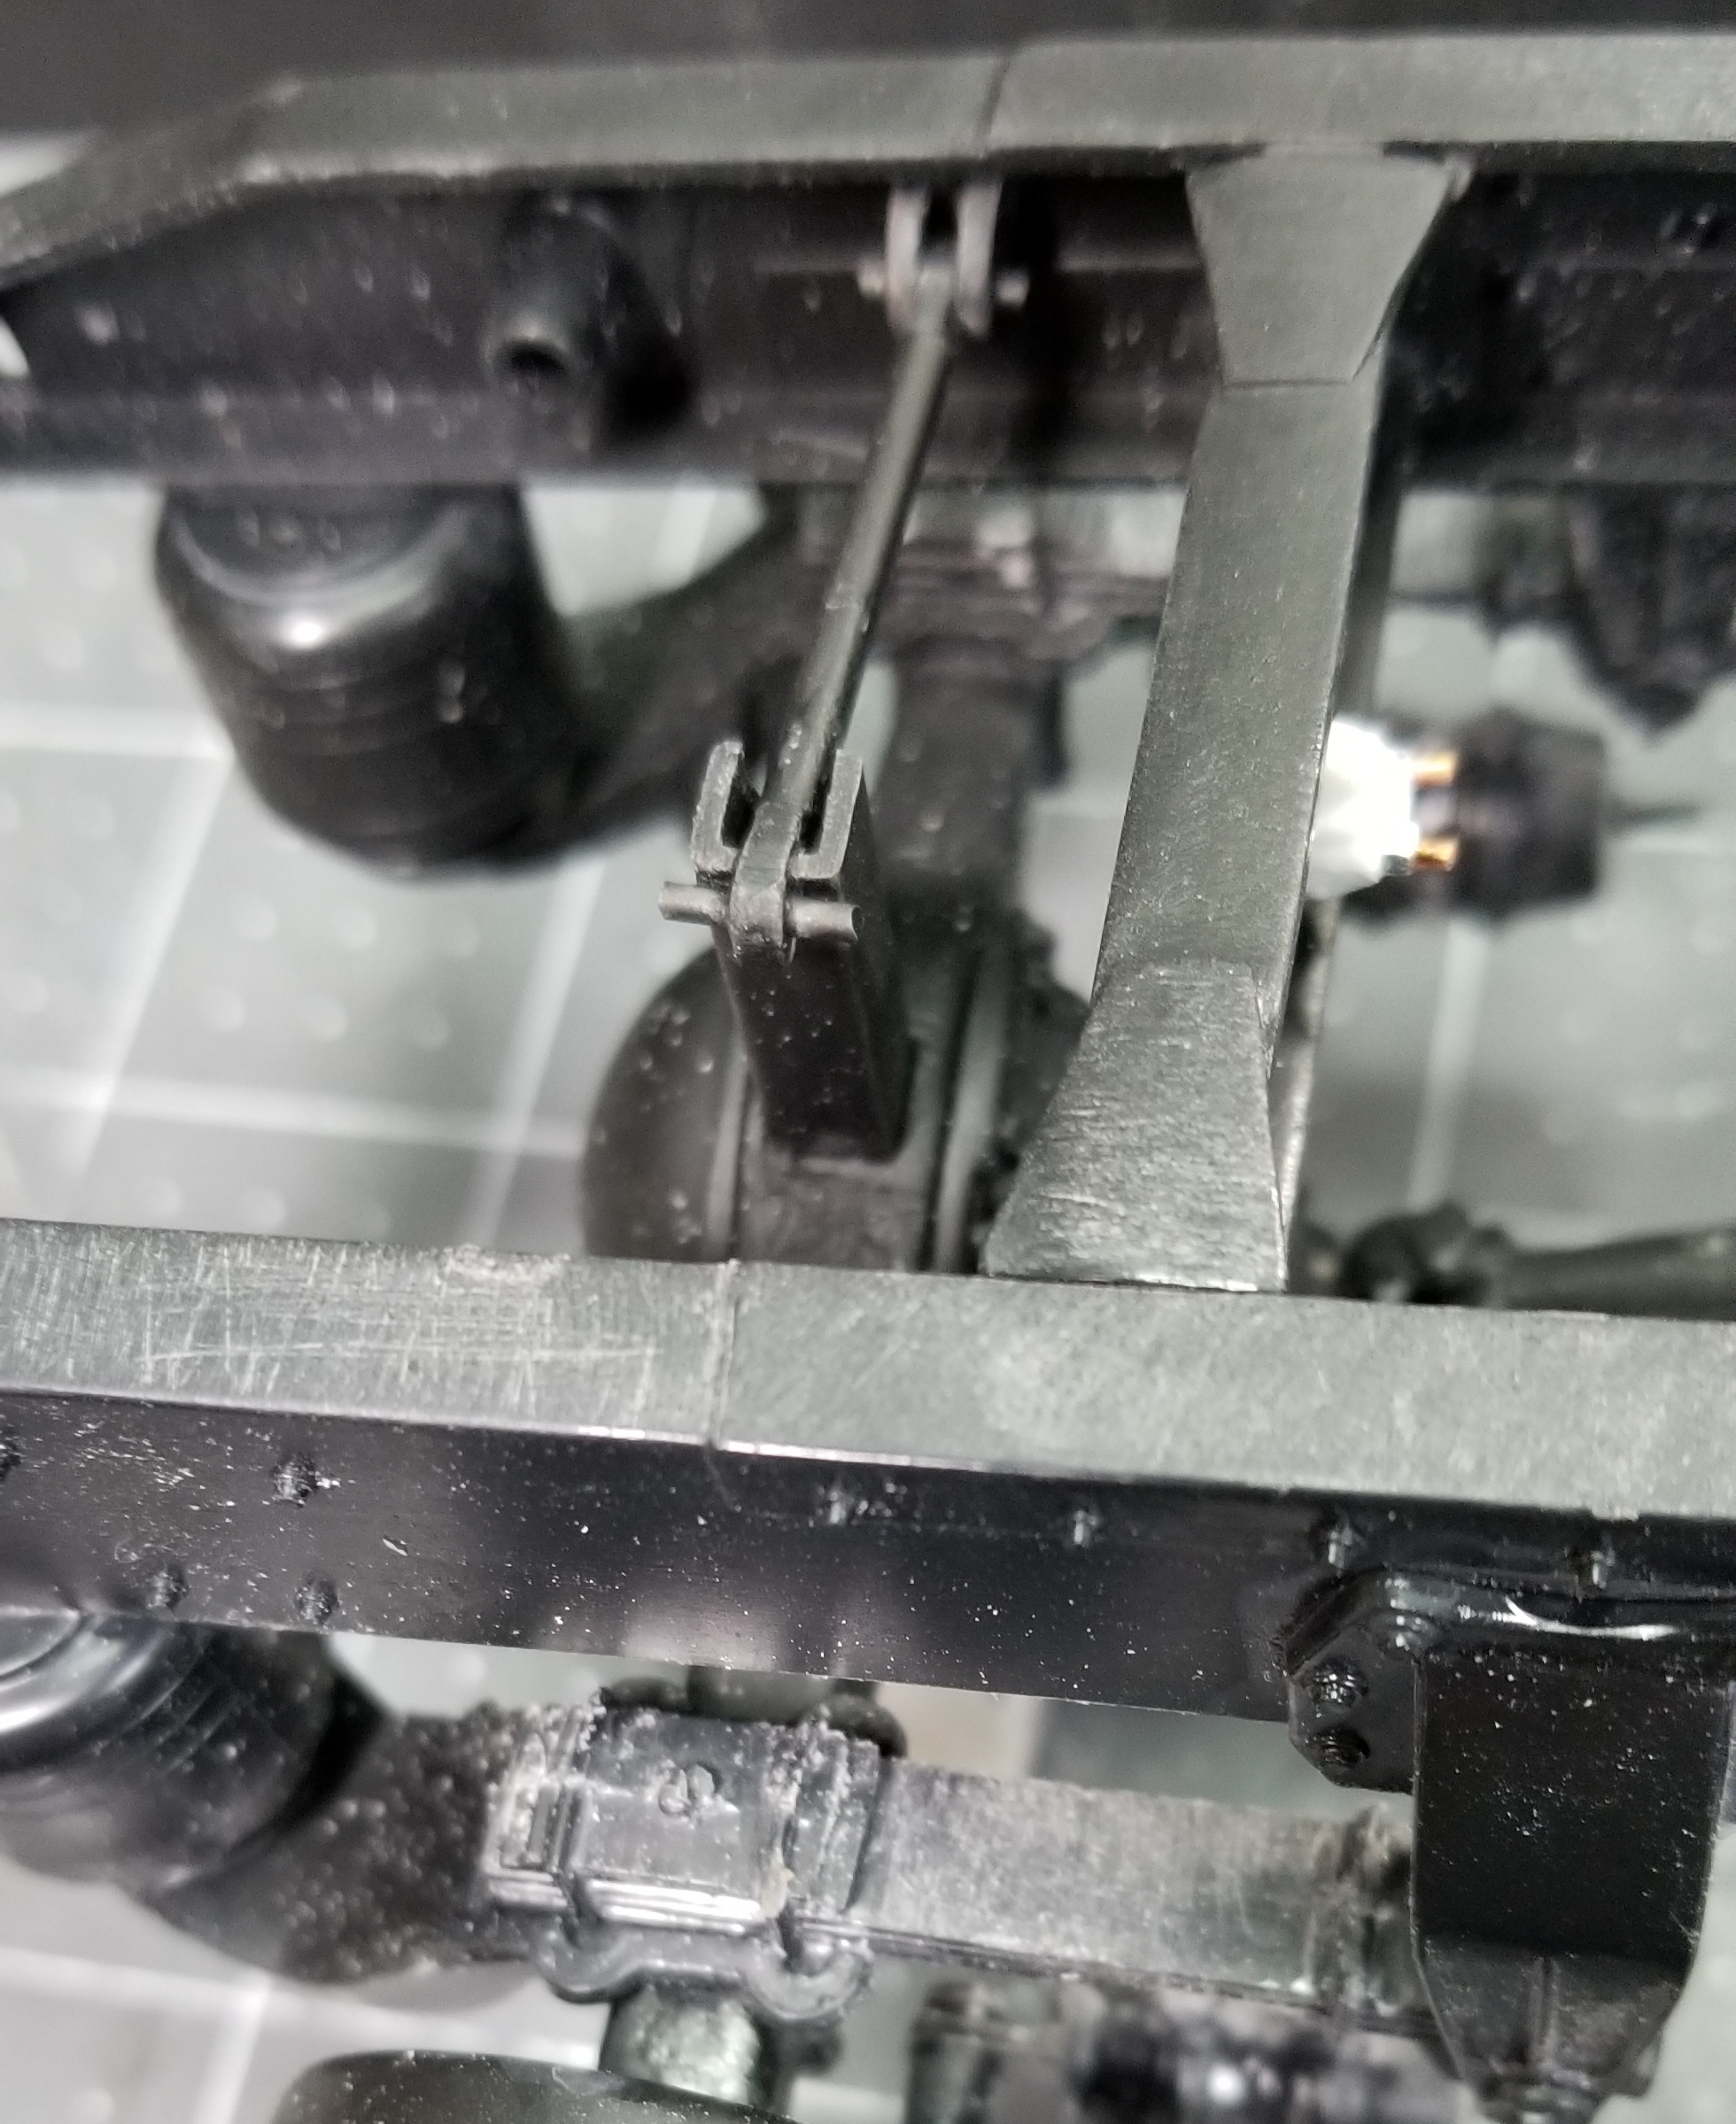
I've been working on the big Pete. I've started on plumbing the brakes and the air bags, I also added the missing panard/sway bars and brackets to tge rear axles.
this view shows the scratch built front quick release valve for the front brakes, also you can see the passenger front brake line.
this view shows the front drive side brake line. These are braided stainless steel lines.
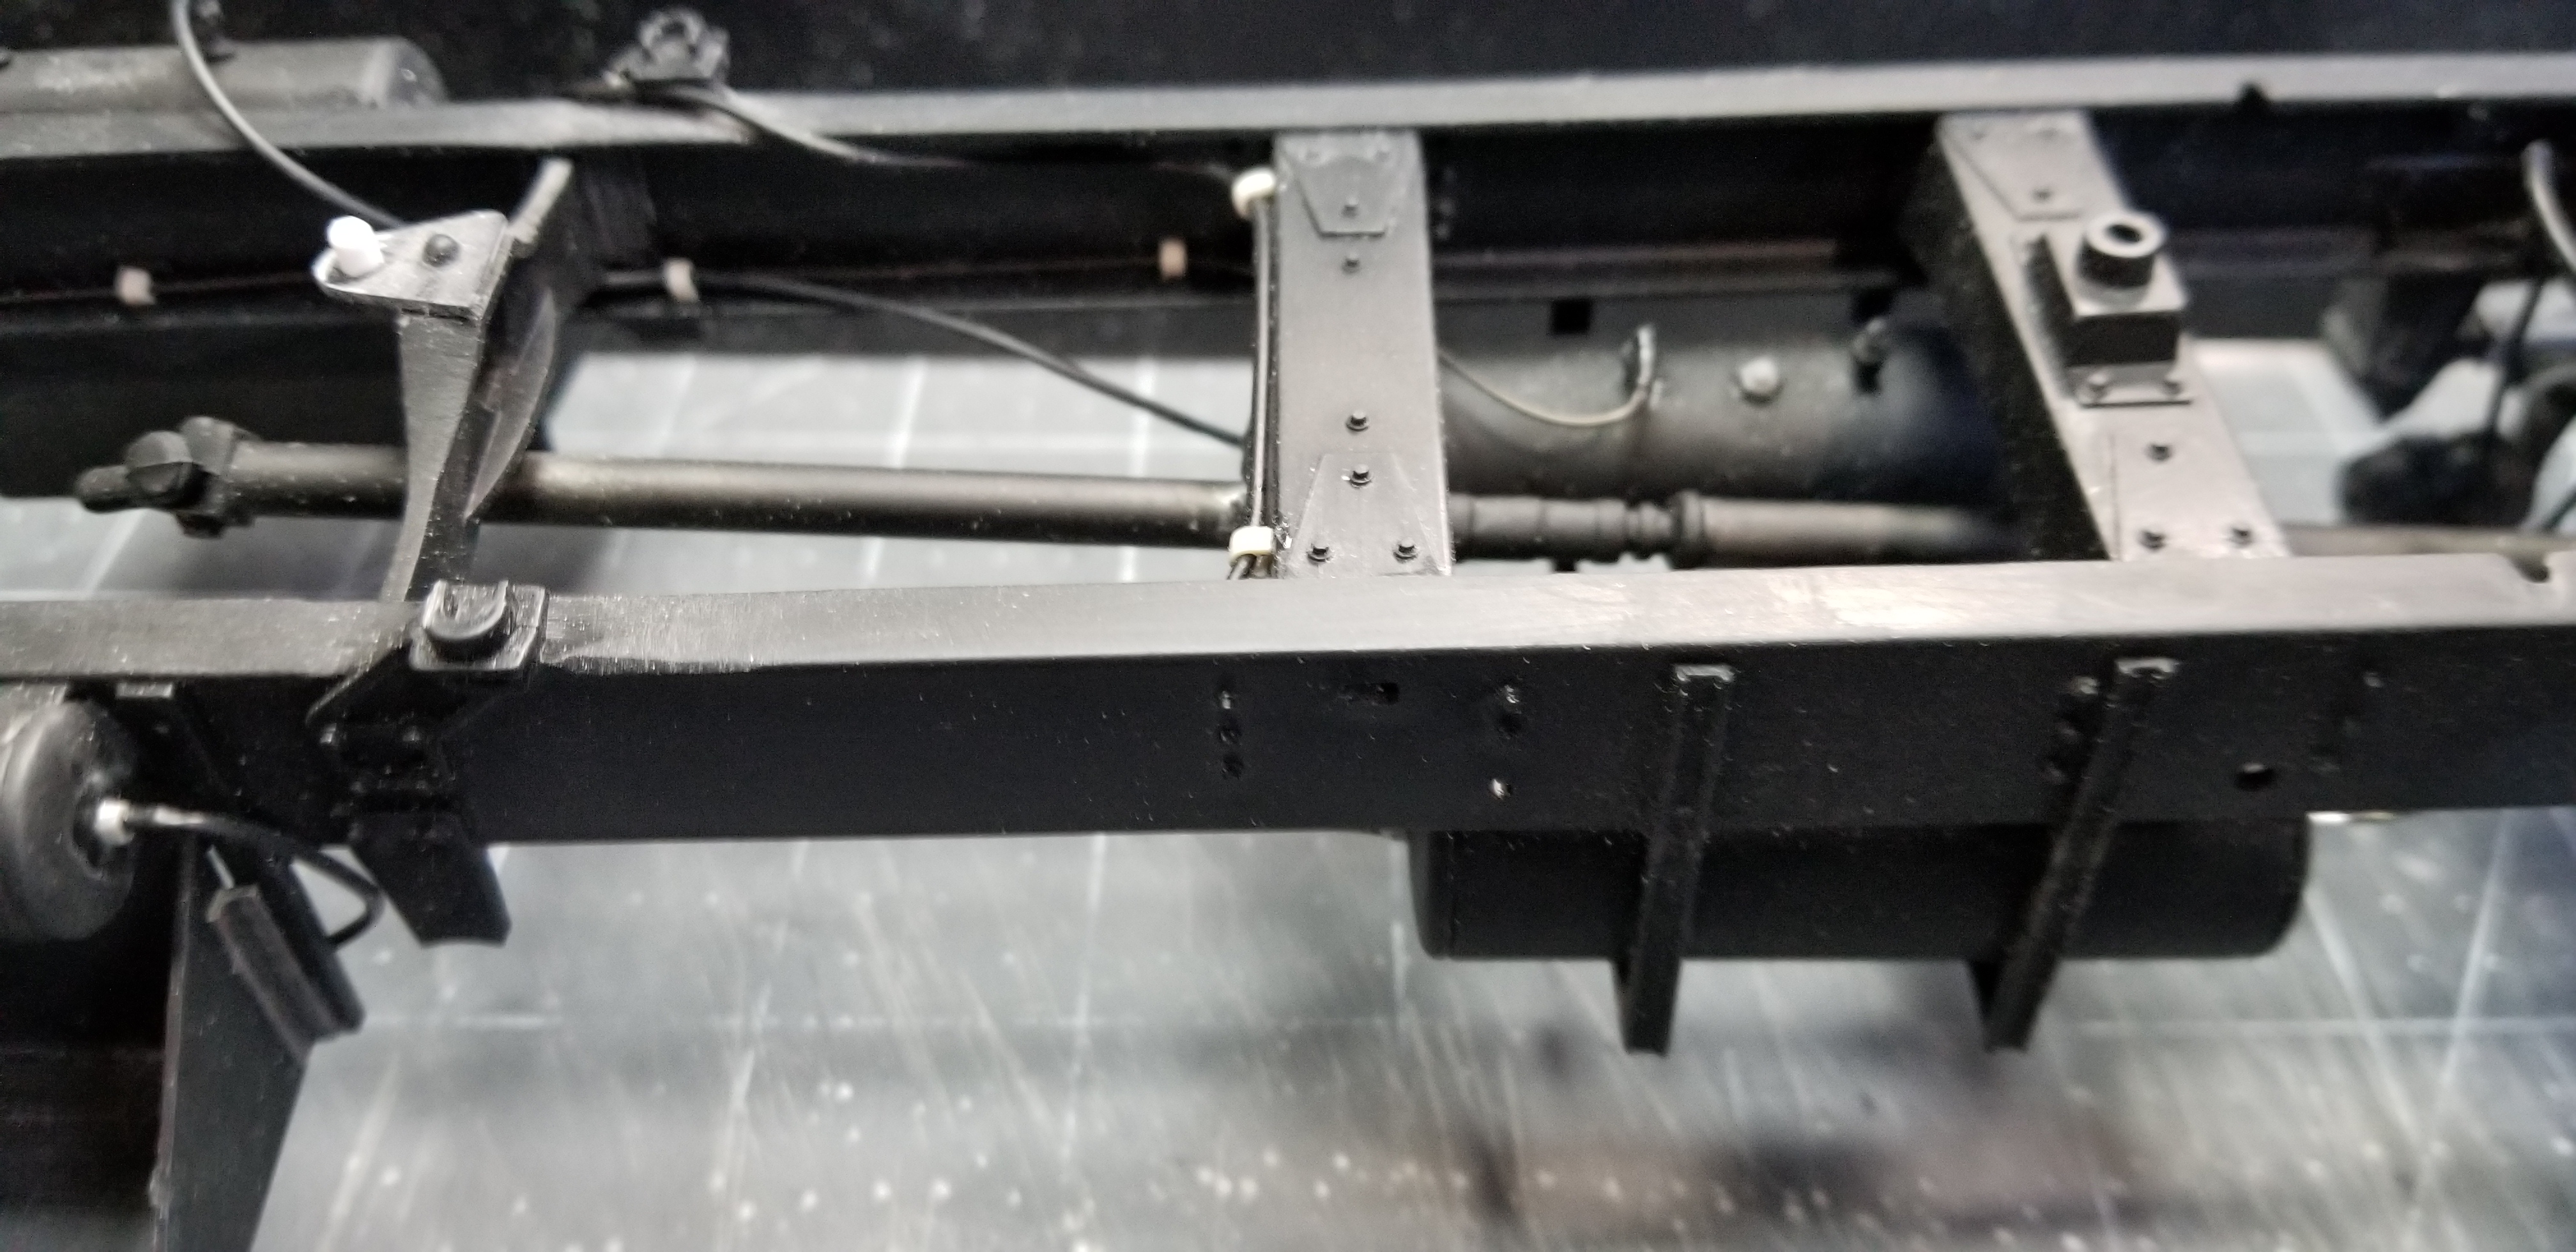
this view shows the scratch built front rear wheel lock control modulator valve. You can also see the scratch built front rear axle panard bar.
this view shows the scratch built rear wheel lock control modulator valve and rear panard bar.
another view of the rear panard bar setup.
this view shows the scratch built combination quick release/double check valve and front axle panard bar setup.
this view shows both of the panard bars. All of the valves are for the air brake system and need to be plumbed.
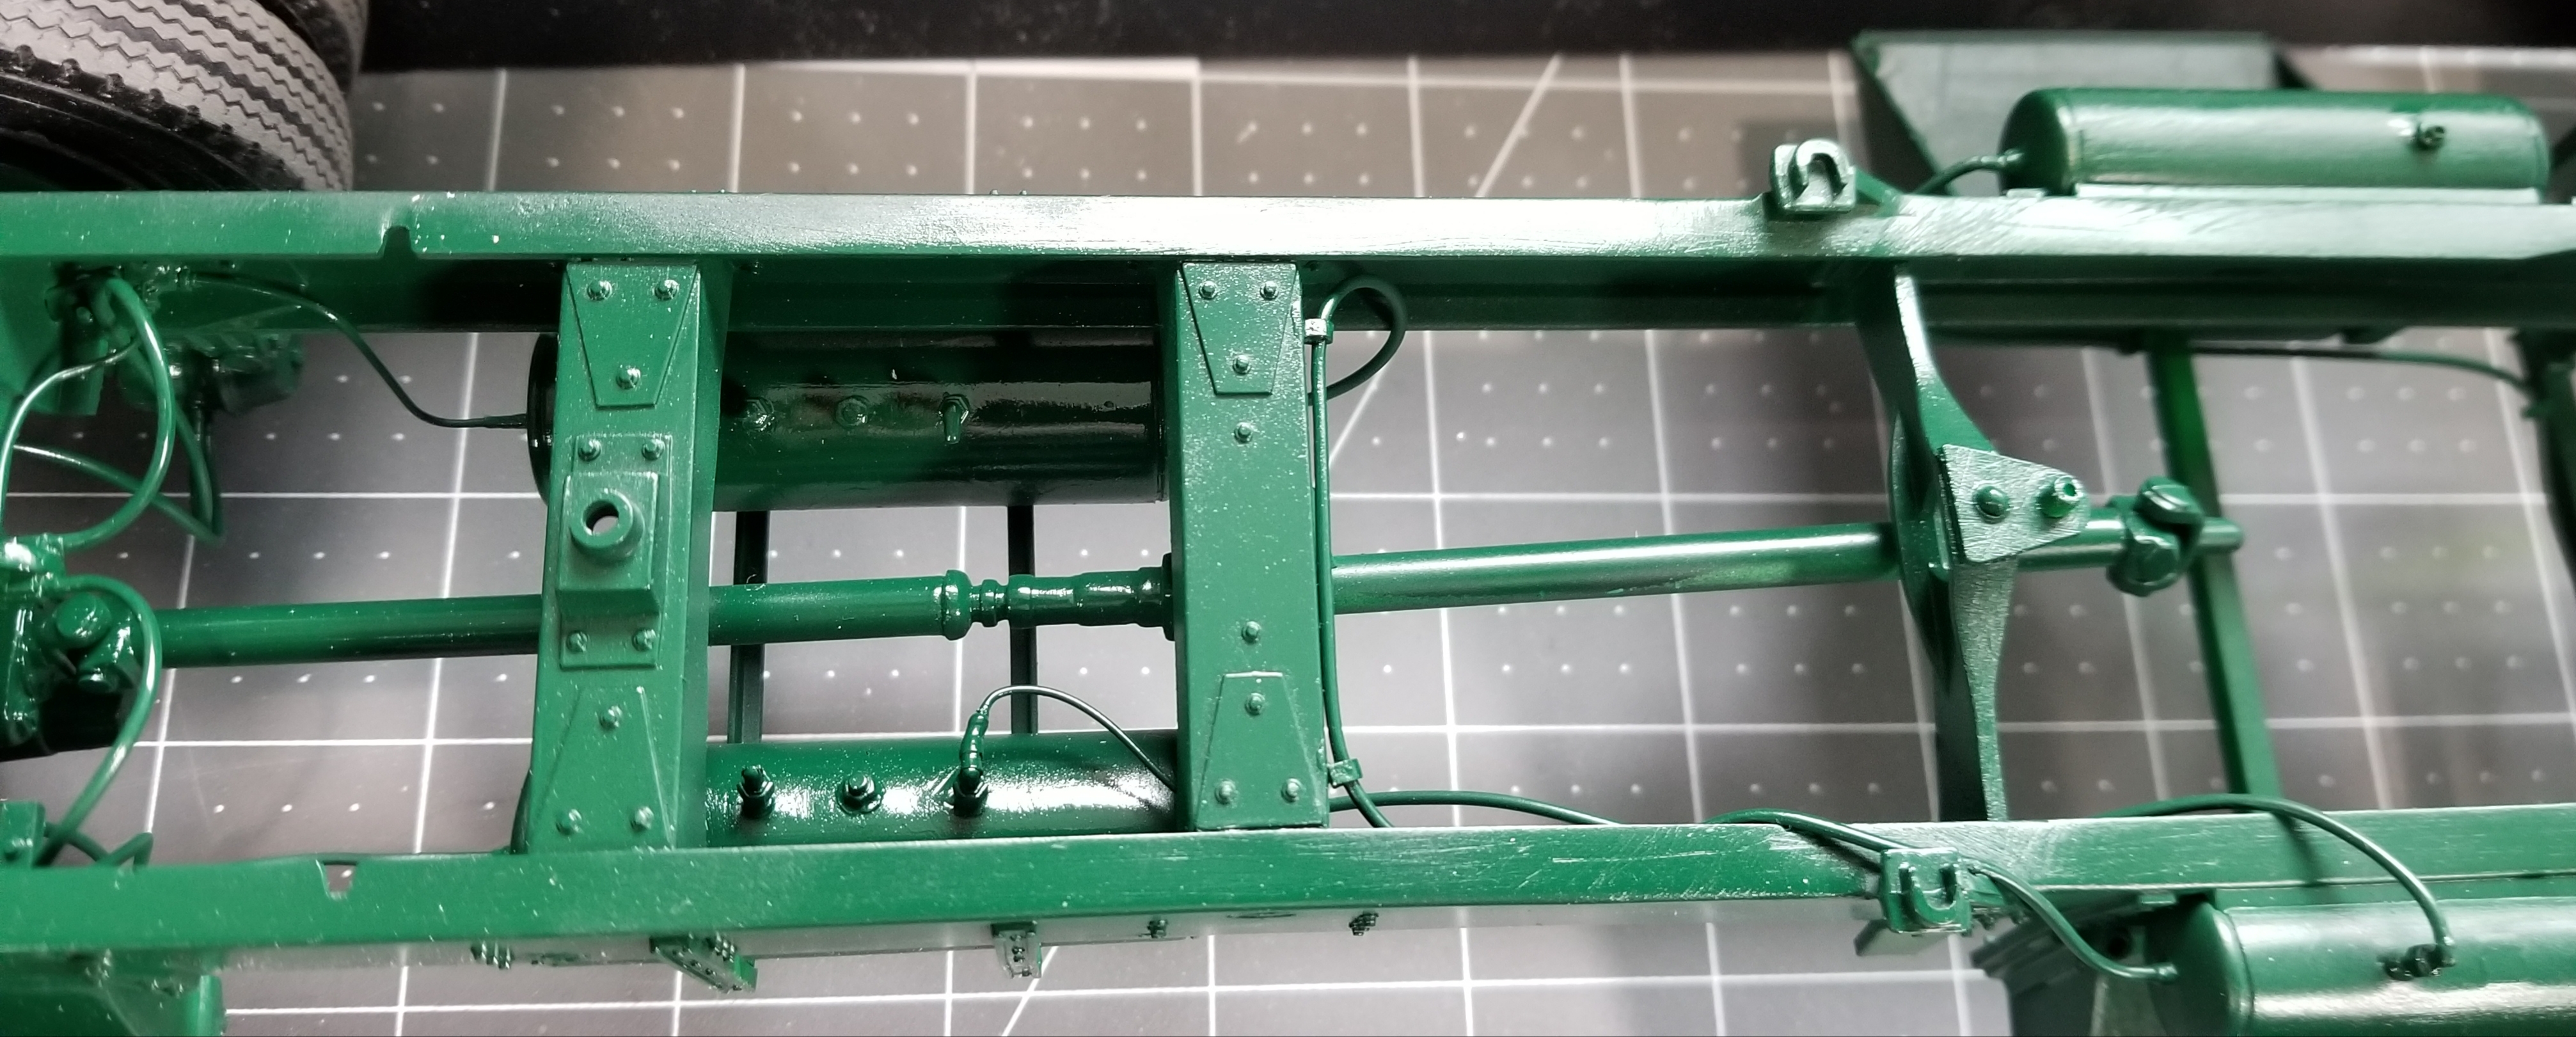
this view shows the shift control lines and valves that I added to the transmission.
this view shows the transmission lines and you can just see the start I made on the power steering lines I added to the power steering reservoir (I need to paint it black)
this view shows the 3D printed air cleaners temporarily mounted. I had to shorten them 3 scale inches, they were 36" long and should have been 33" long.
this view shows the cut out to the sleeper (this is closed up in the kit). You can also see the air cleaners.
view from the top showing the air cleaners. Well that's it for now be back with more updates soon.
Ron G
-
Hey guys
Here are some more pictures for yous to look at.
this view shows the 3D printed air cleaners.
another view of the air cleaners.
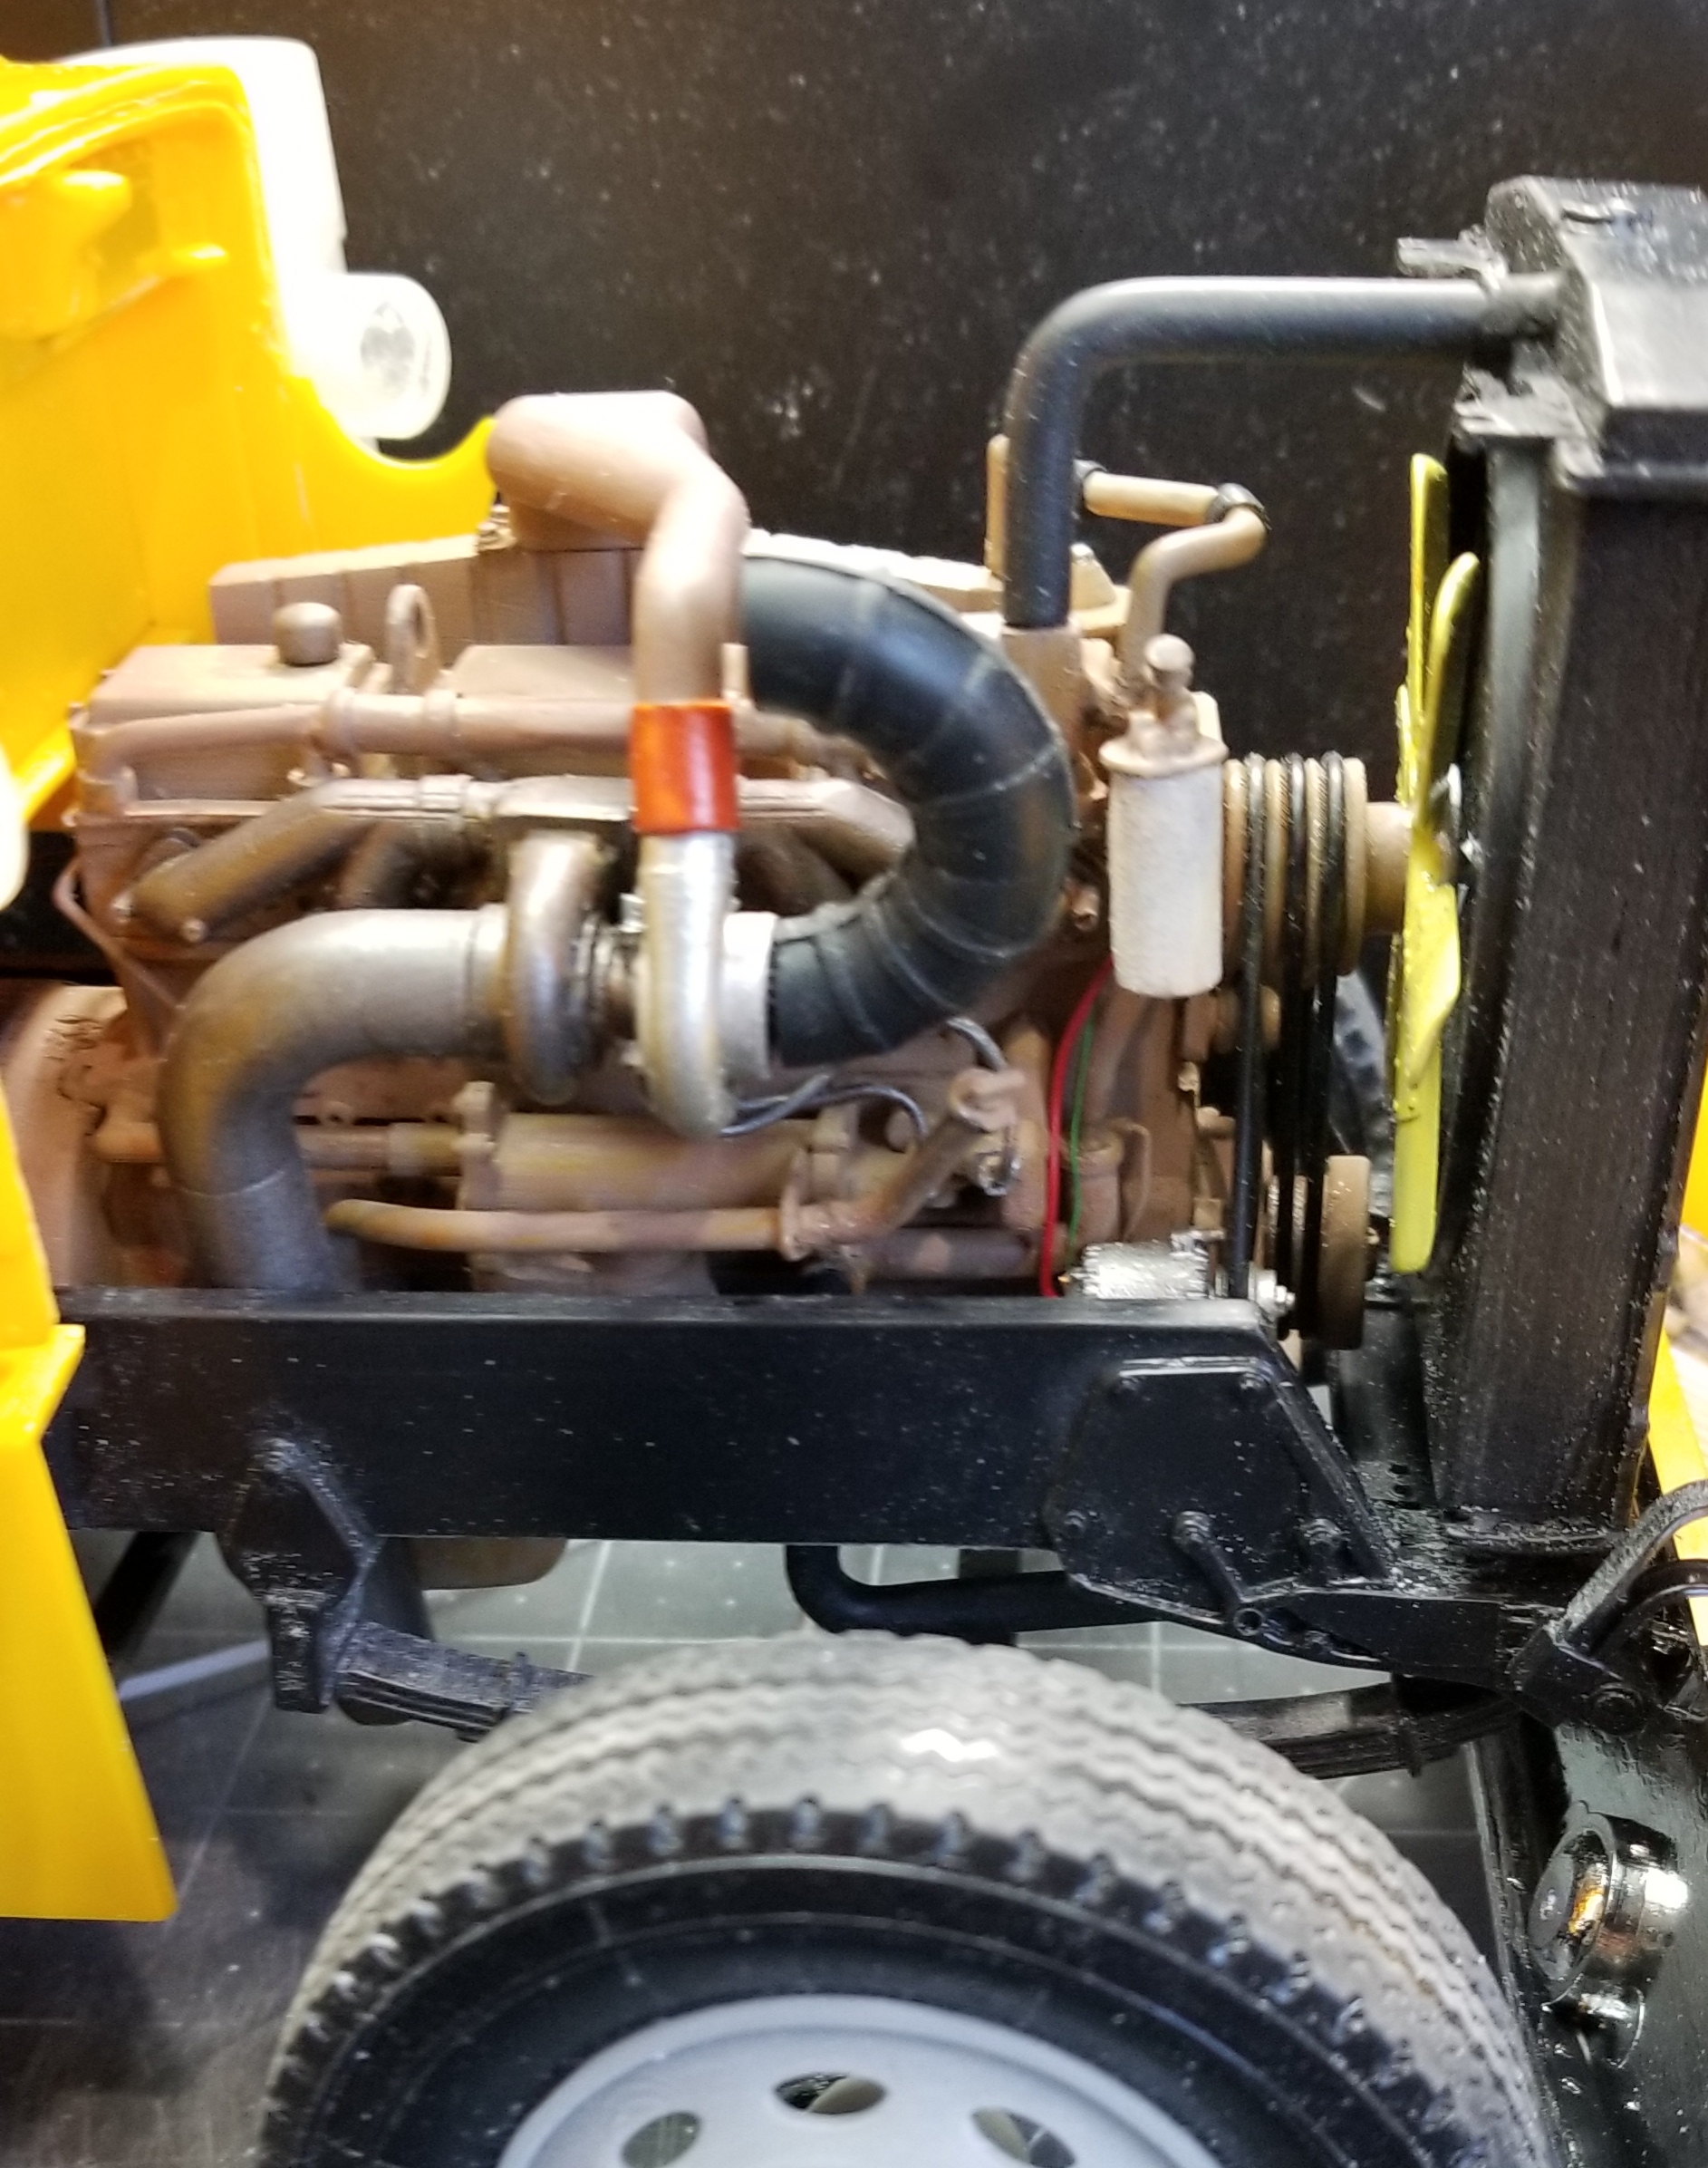
this view shows the engine, I modified the turbo intake and exhaust manifold and custom made air intake rubber elbows to look more like a big cam set up.
this view shows the fan belts that I made from 1.5mm diameter rubber tubing.
this view shows the wires from the starter to the alternator l.
this view shows the wires from the alternator to the starter.
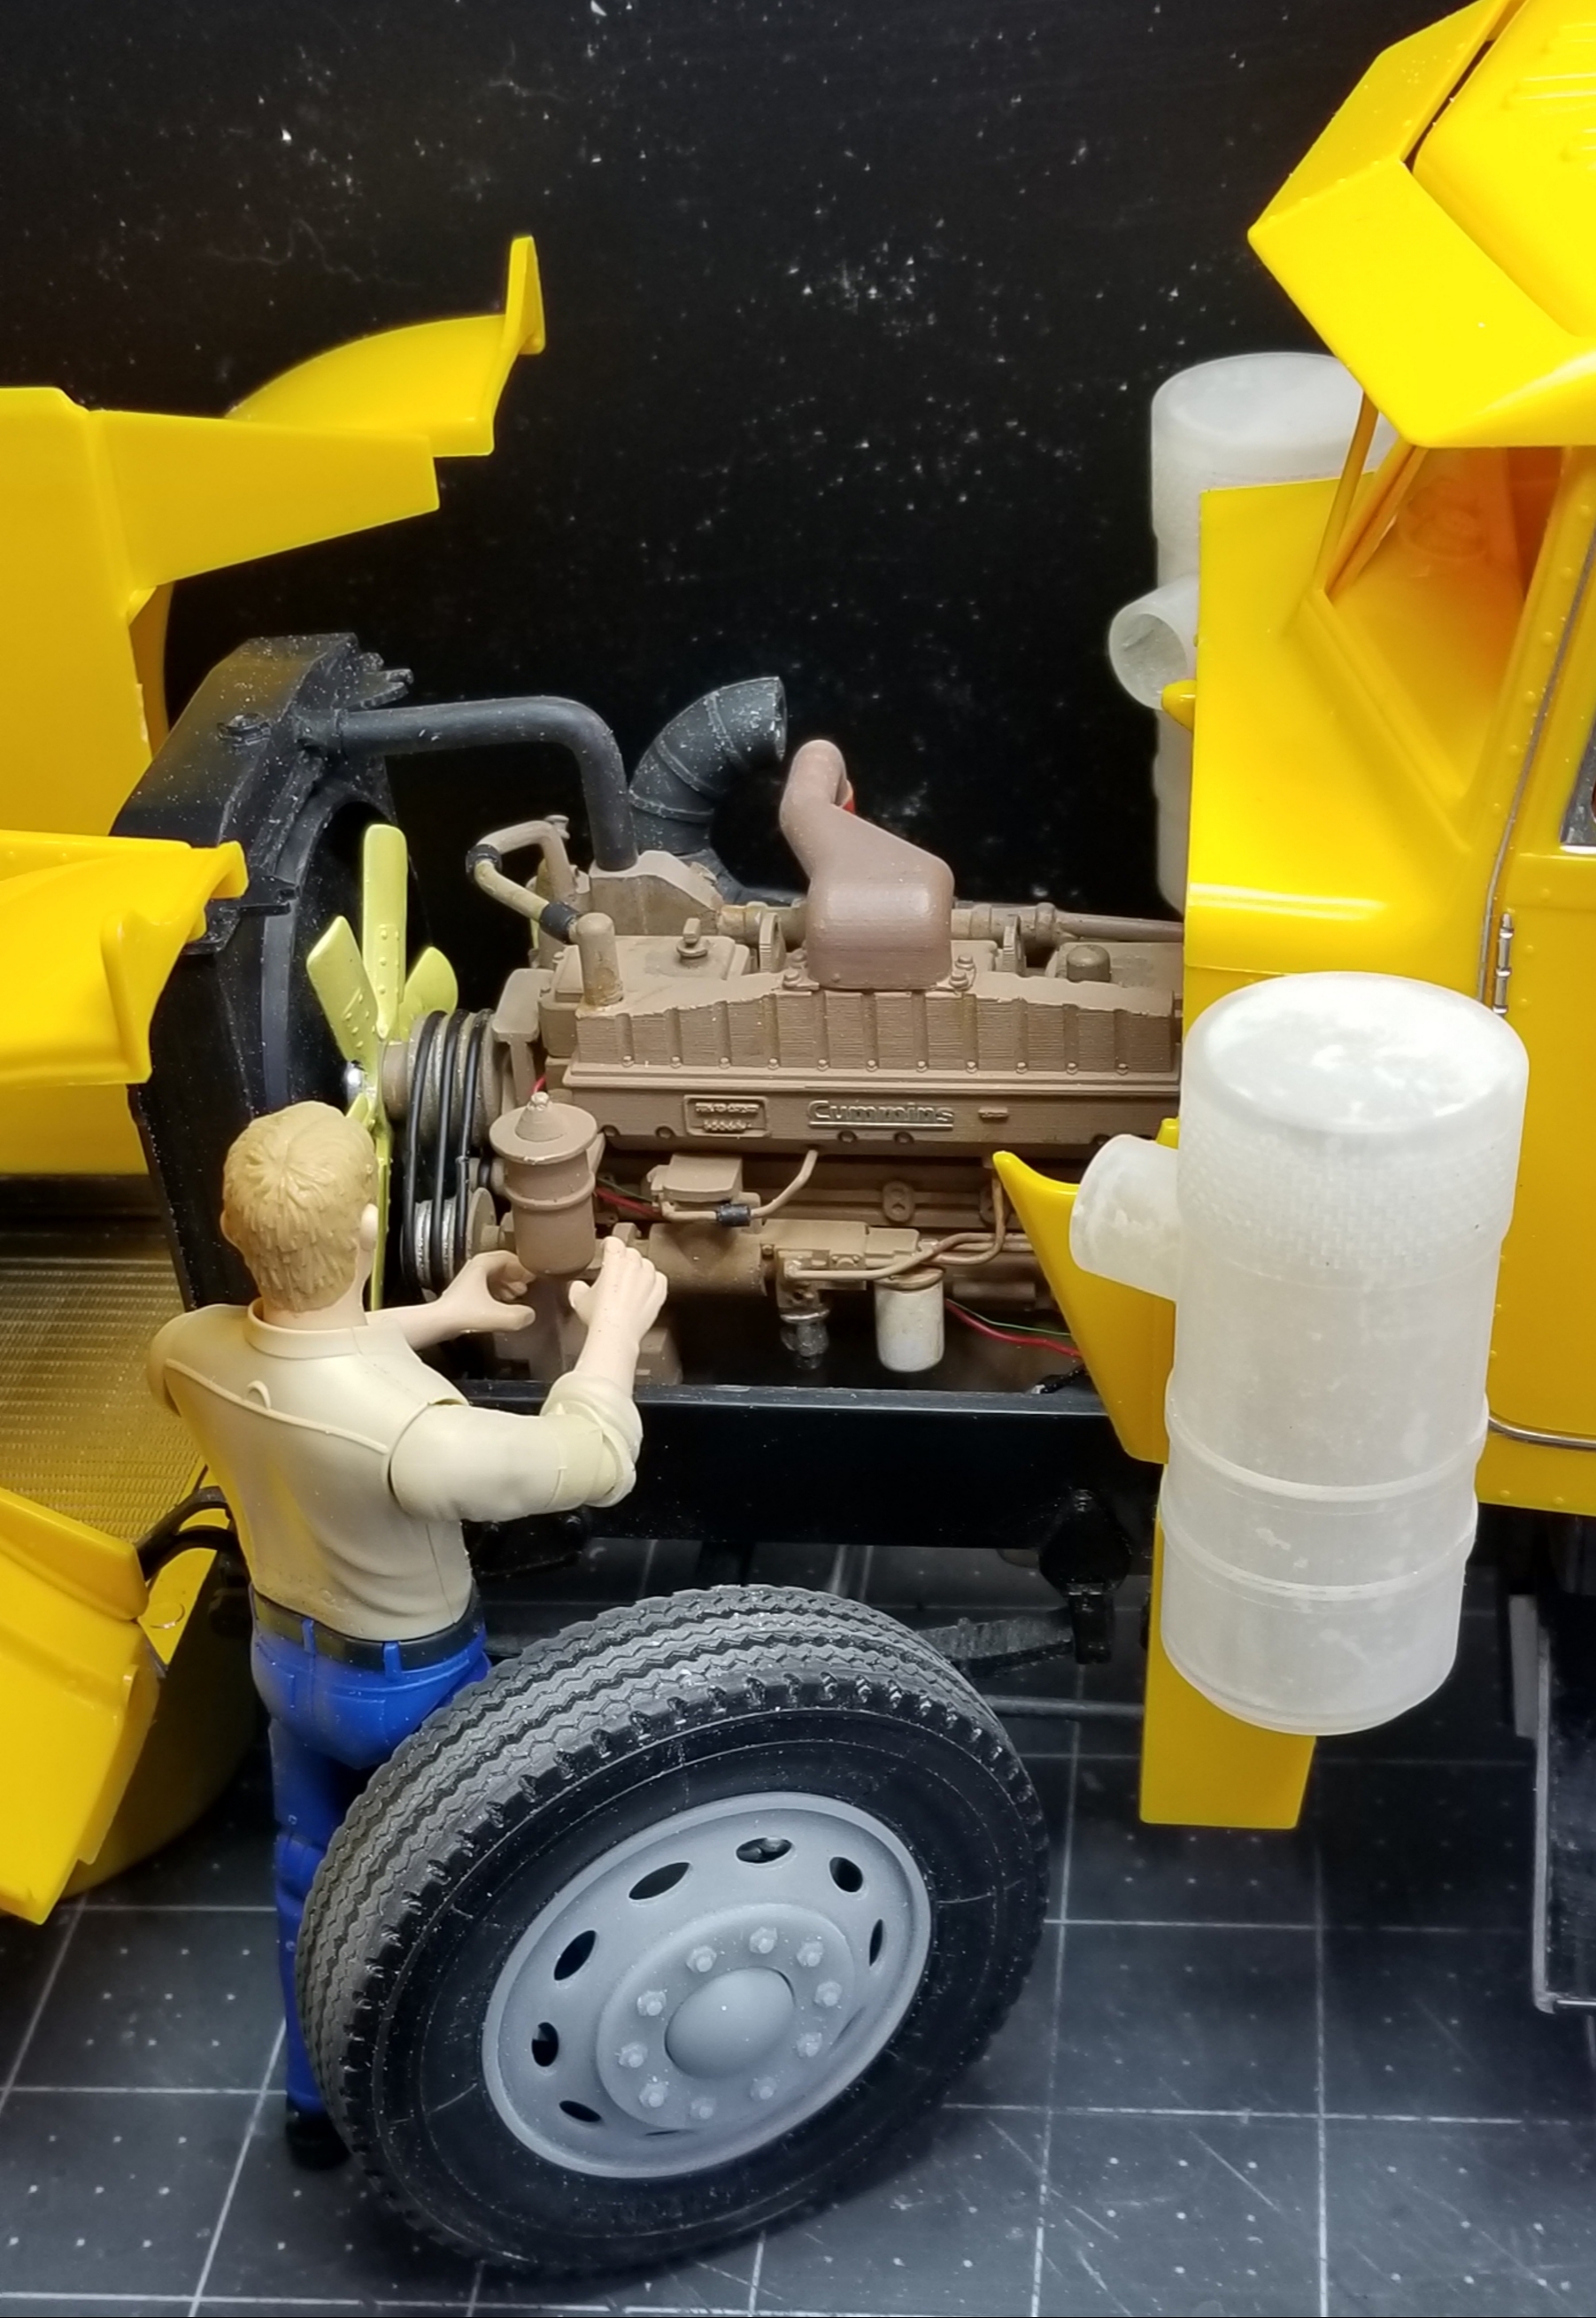
this view shows Mr. Bruder working on the engine...lol. well that's it for now be back soon with more.
Ron G
-
-
Small update.
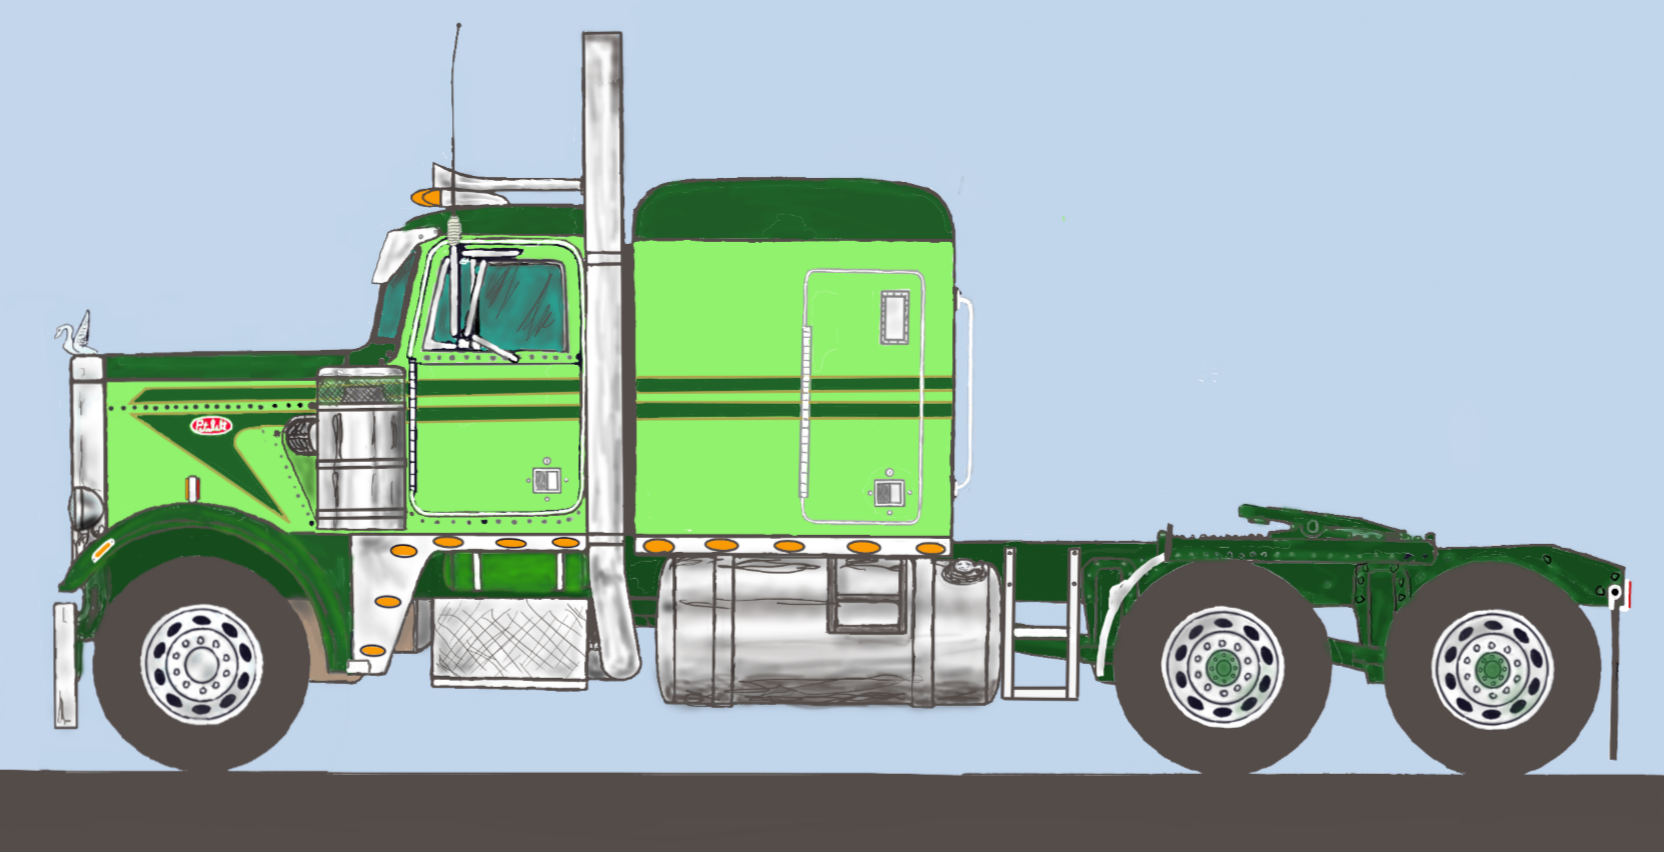
Found some decals to make truck look better, what do you think?
I also got some scrole work decals in gold to match the outline strips. Now, I have some scratch building to do so I'm going down to the work bench, see you later
Ron G
-
2 minutes ago, Jim B said:
That green on green is pretty slick.
Thanks, it will be Tamiya x-5 & x-15 gloss. I'm not sure what I want to do for the interior colors, I'm kinda leaning toward tans, I think it will look good with the greens.
Ron G
-
2 hours ago, Jim B said:
Some great additions to your kit. Those seats & wheels are awesome. Did you ever find any tires?
Hey Jim
I found front floats, but I think I'm going to save them for a future Kenworth heavy haul Tri-drive tractor. I couldn't find any rears. I have some modeled up on Unigraphics NX16, but my printer took a dump😪 so have to figure out how I want to proceed from here.
Ron G
-
3 hours ago, gotnitro? said:
Those upgrades really wake up this build ! Then add your touch for the smaller details really add realism . Are ya planning to weather the engine as a driver or plan more of a show truck theme
Hey Nitro
She's going to be a work truck, not much chrome more polished aluminum, and yes it will be weathered properly...lol here's a picture of what I want to do.
Ron G
-
-
Thanks guys
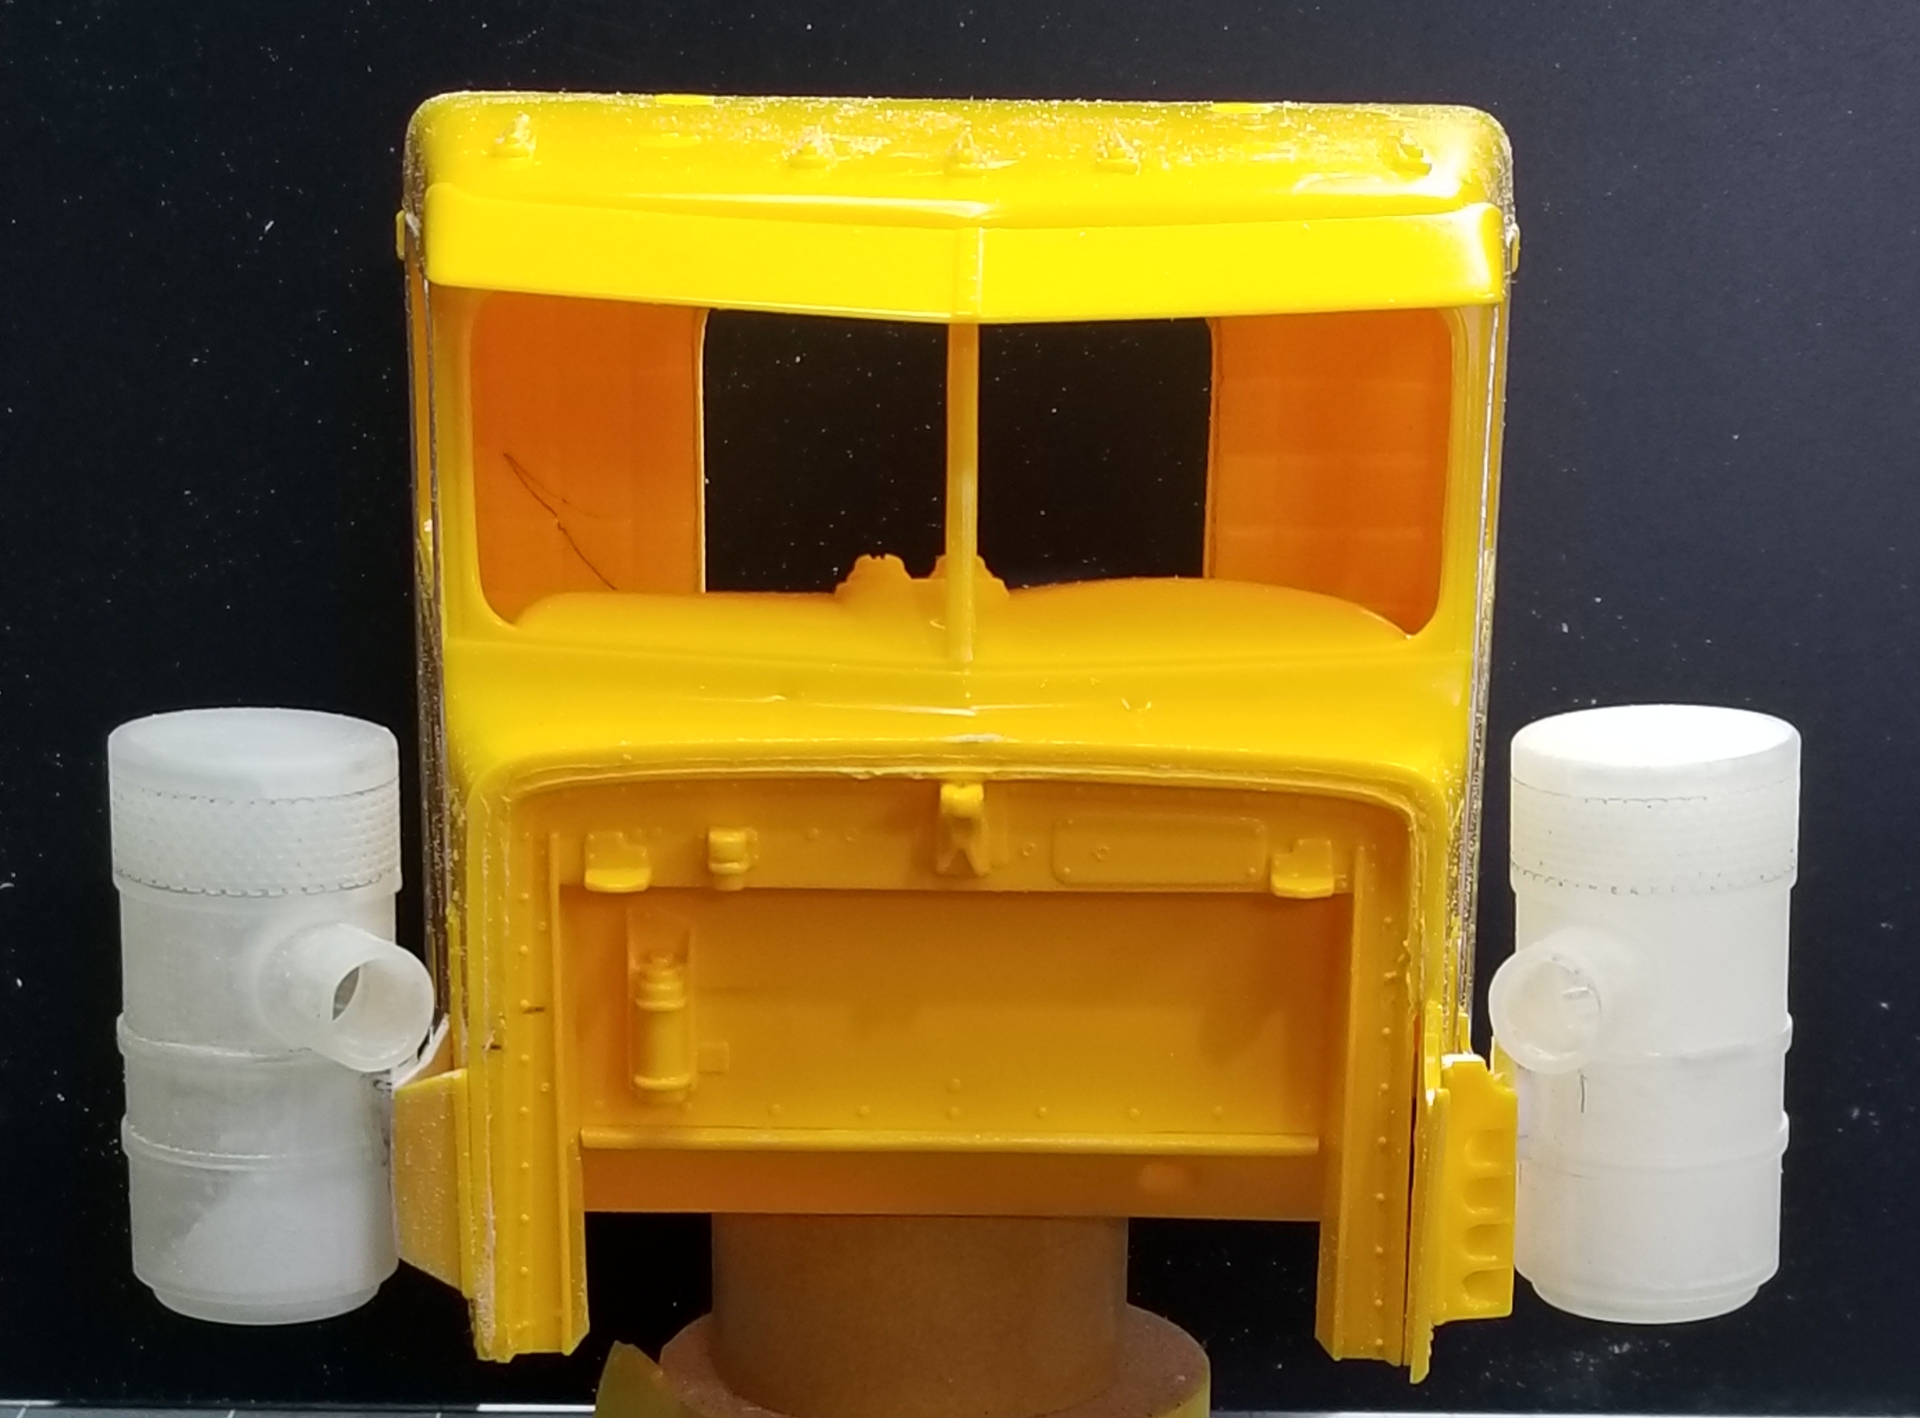
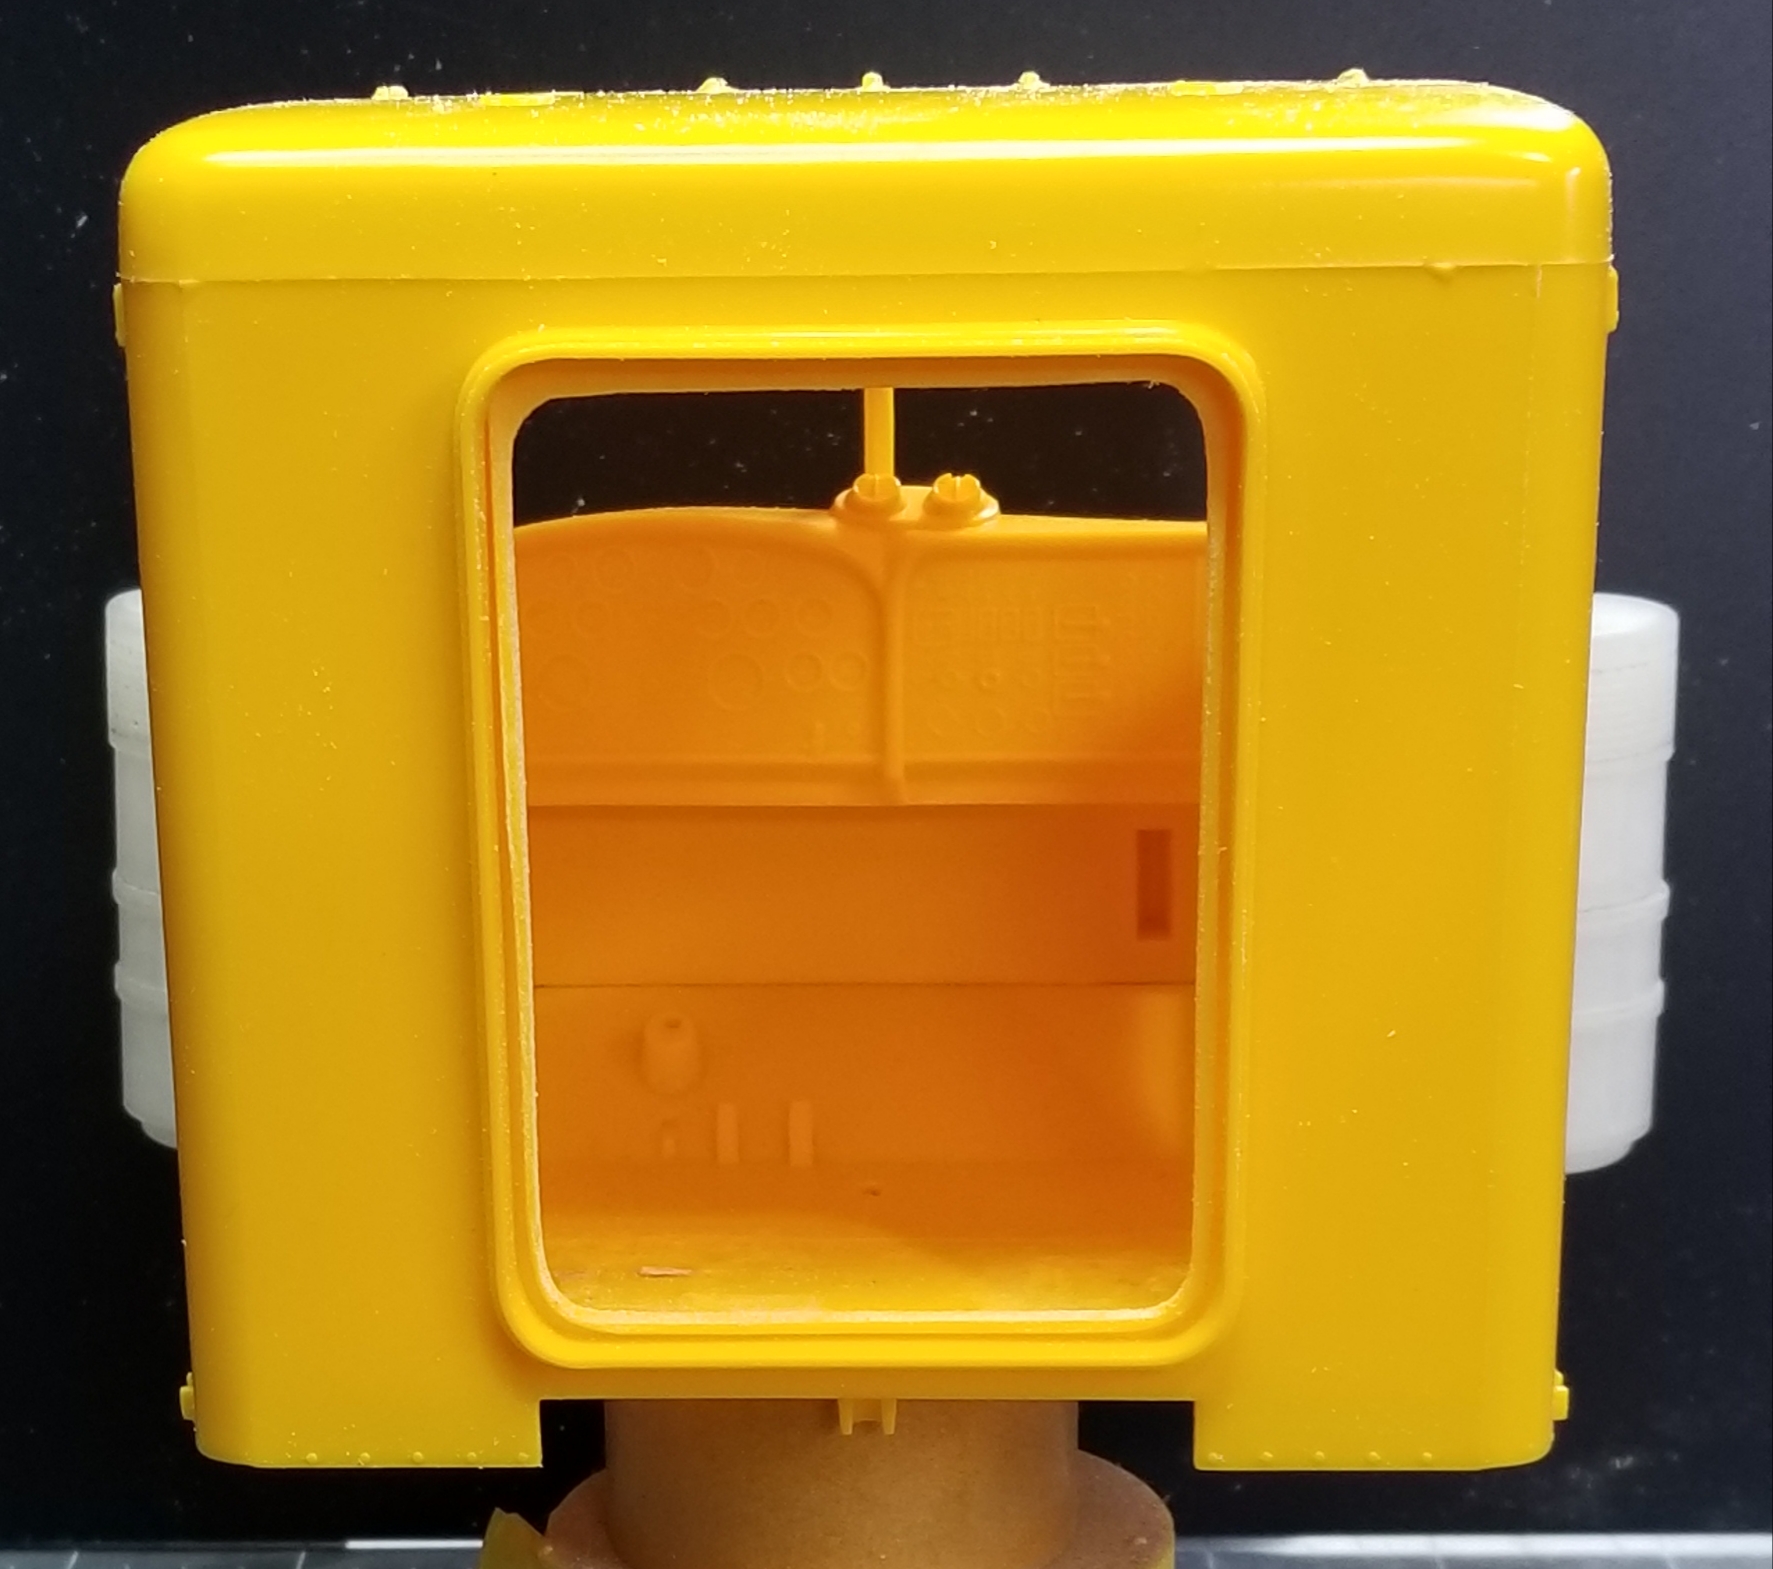
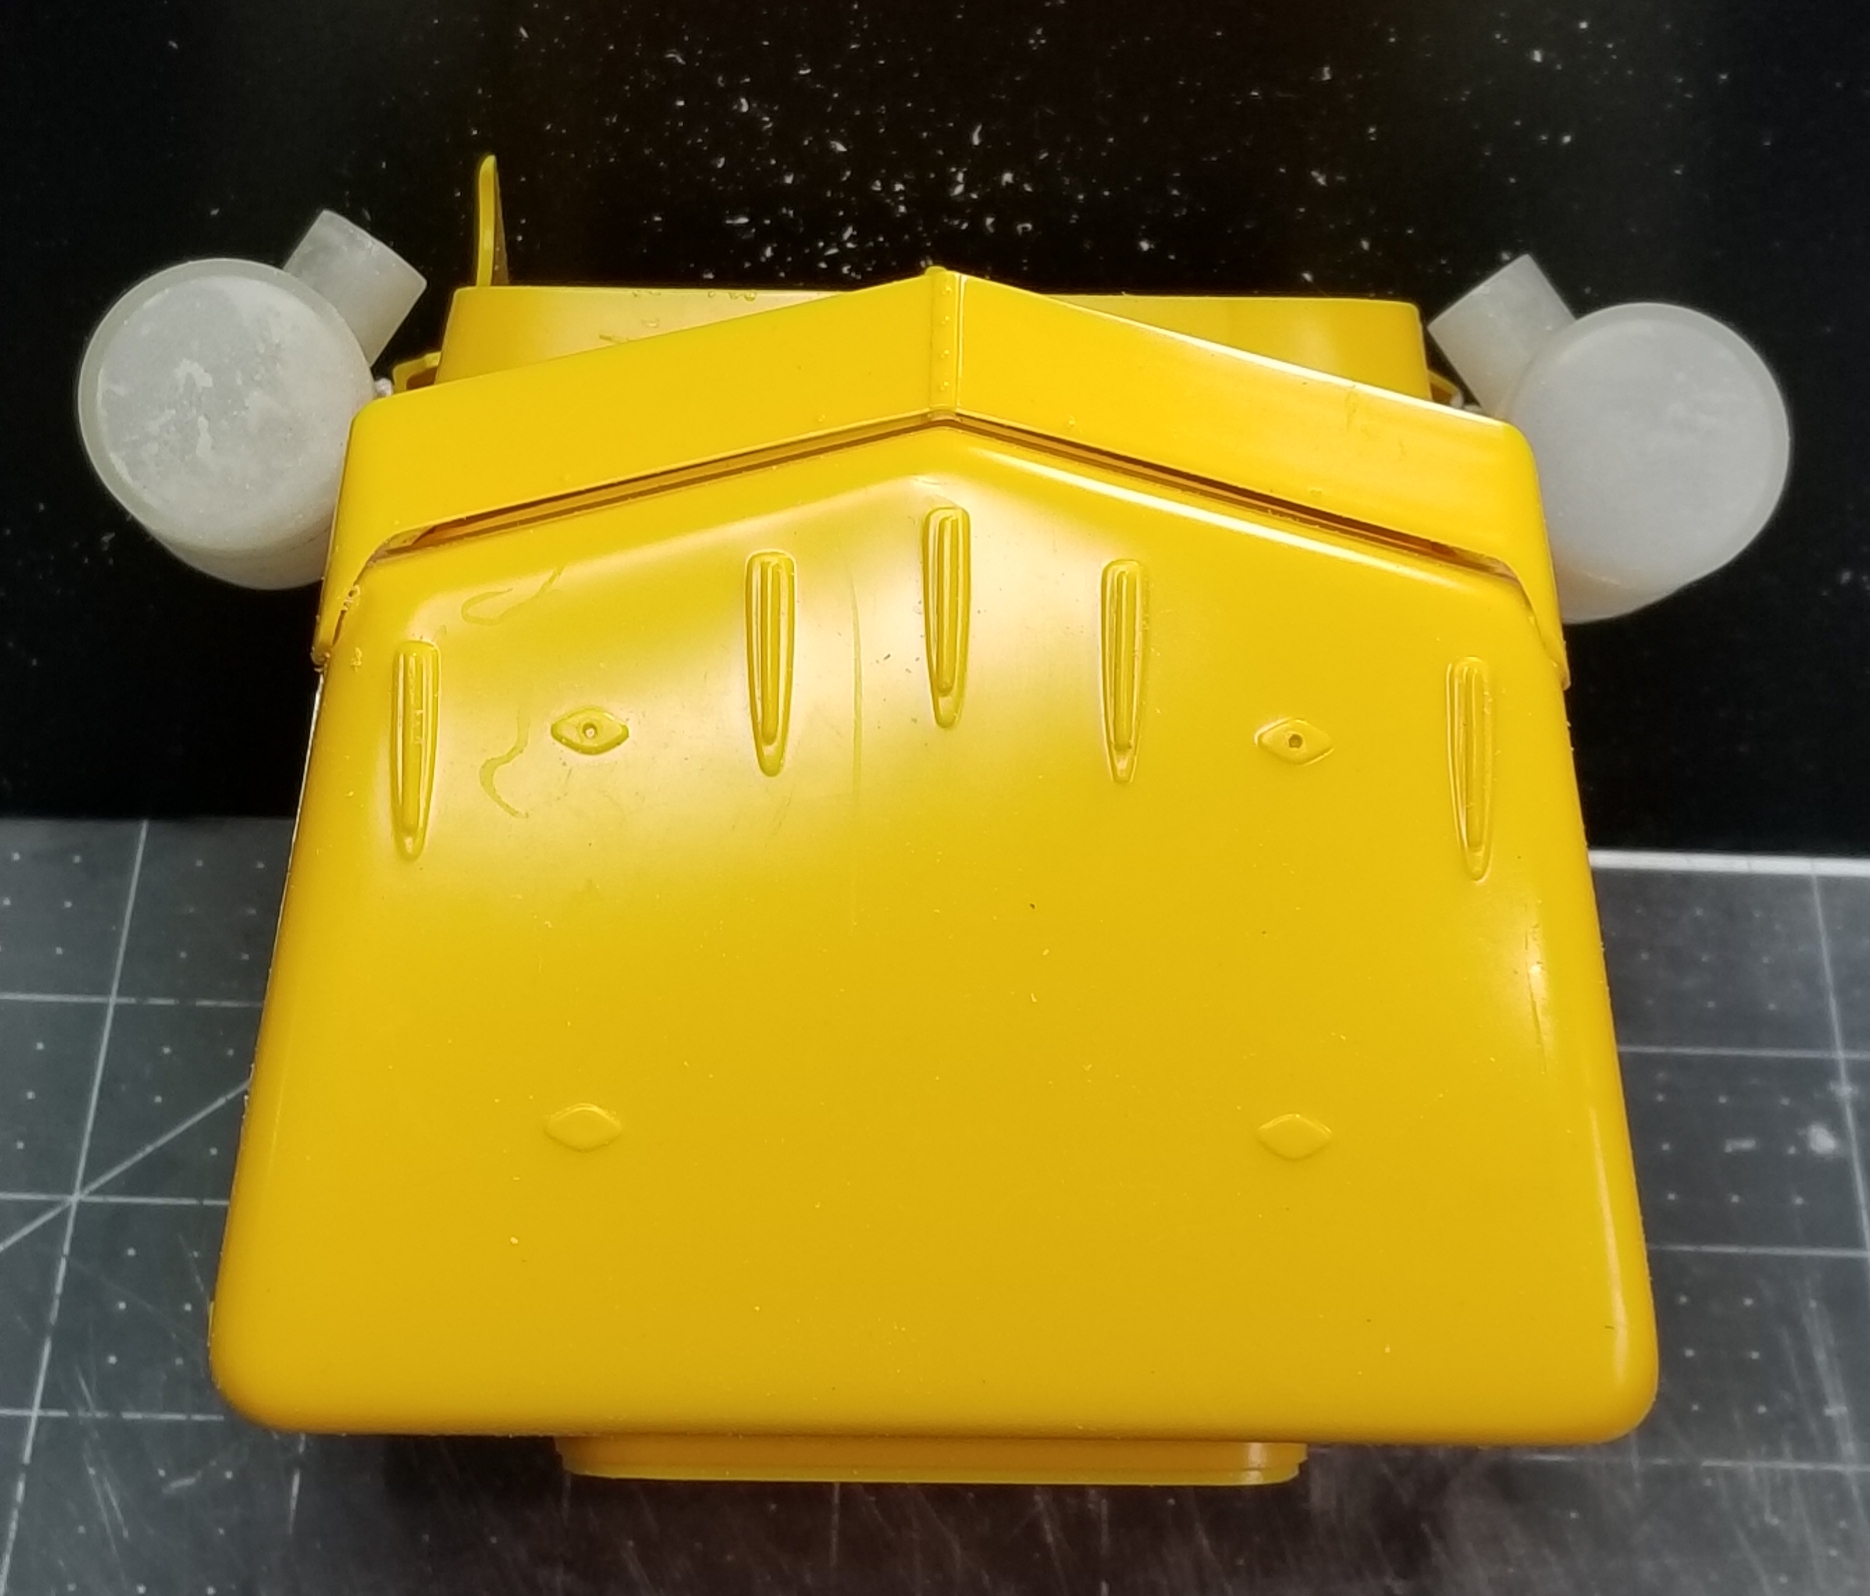
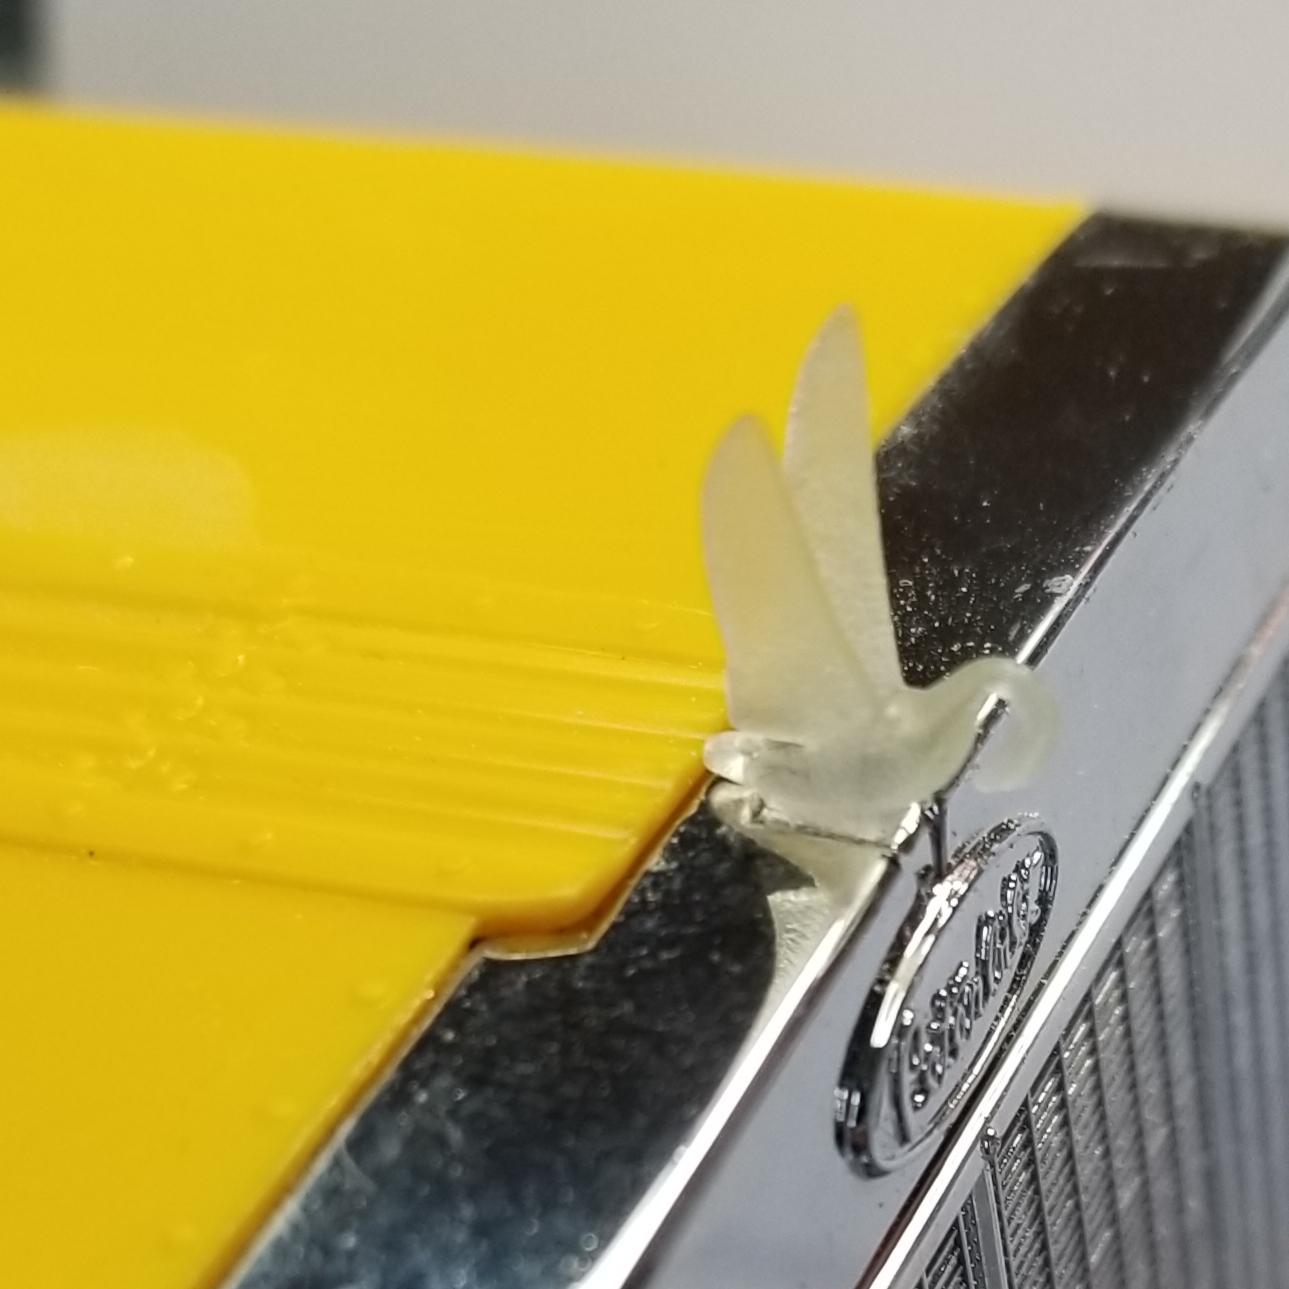
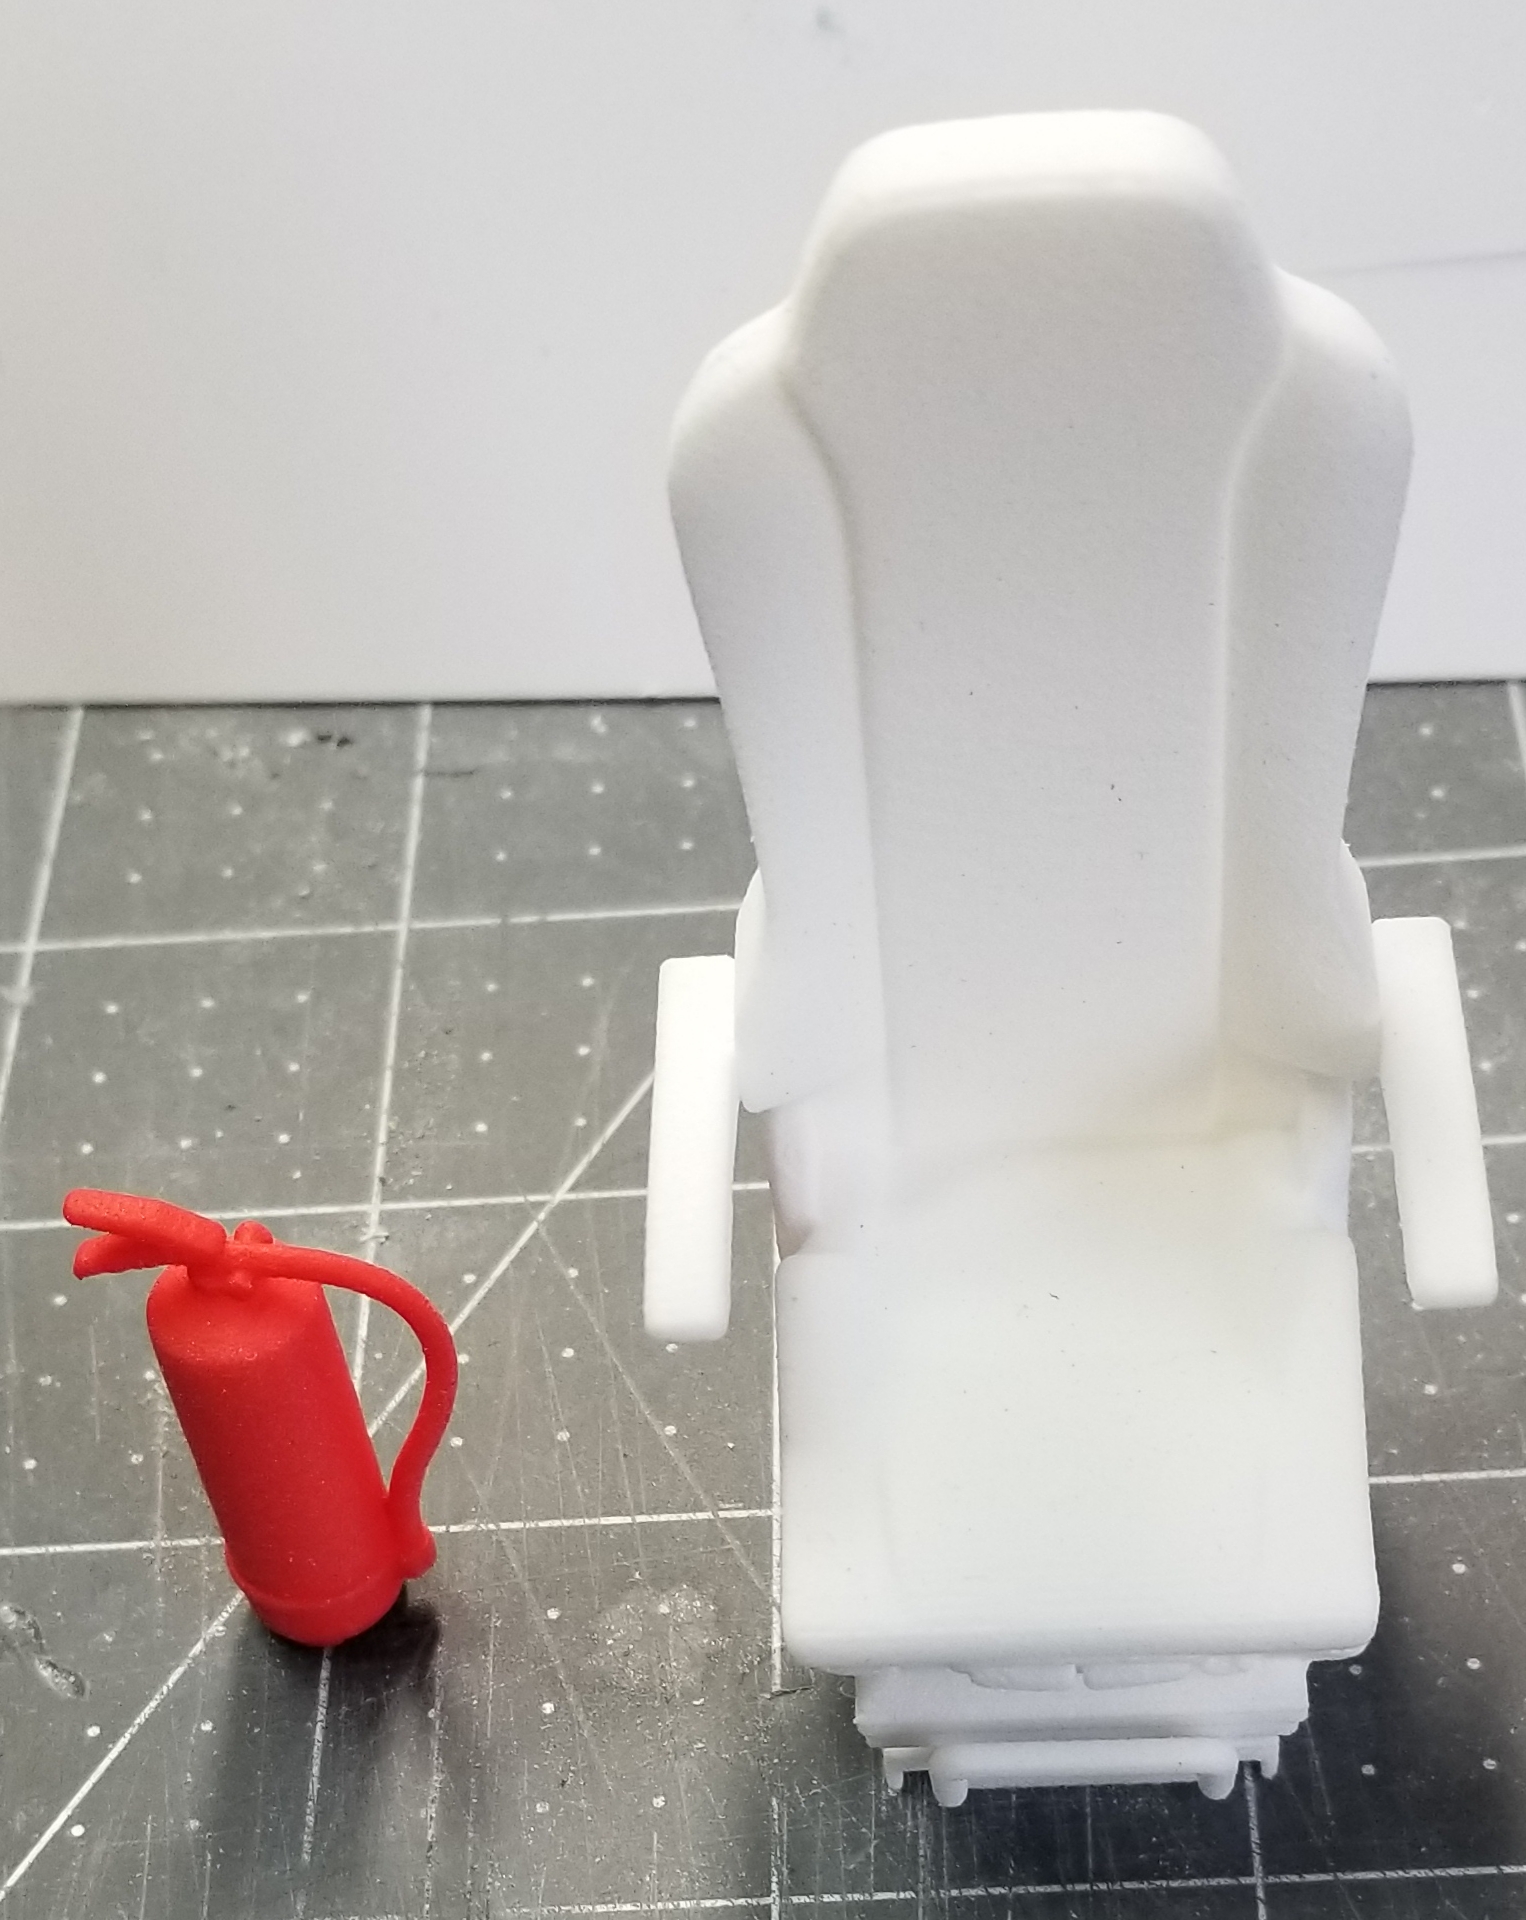
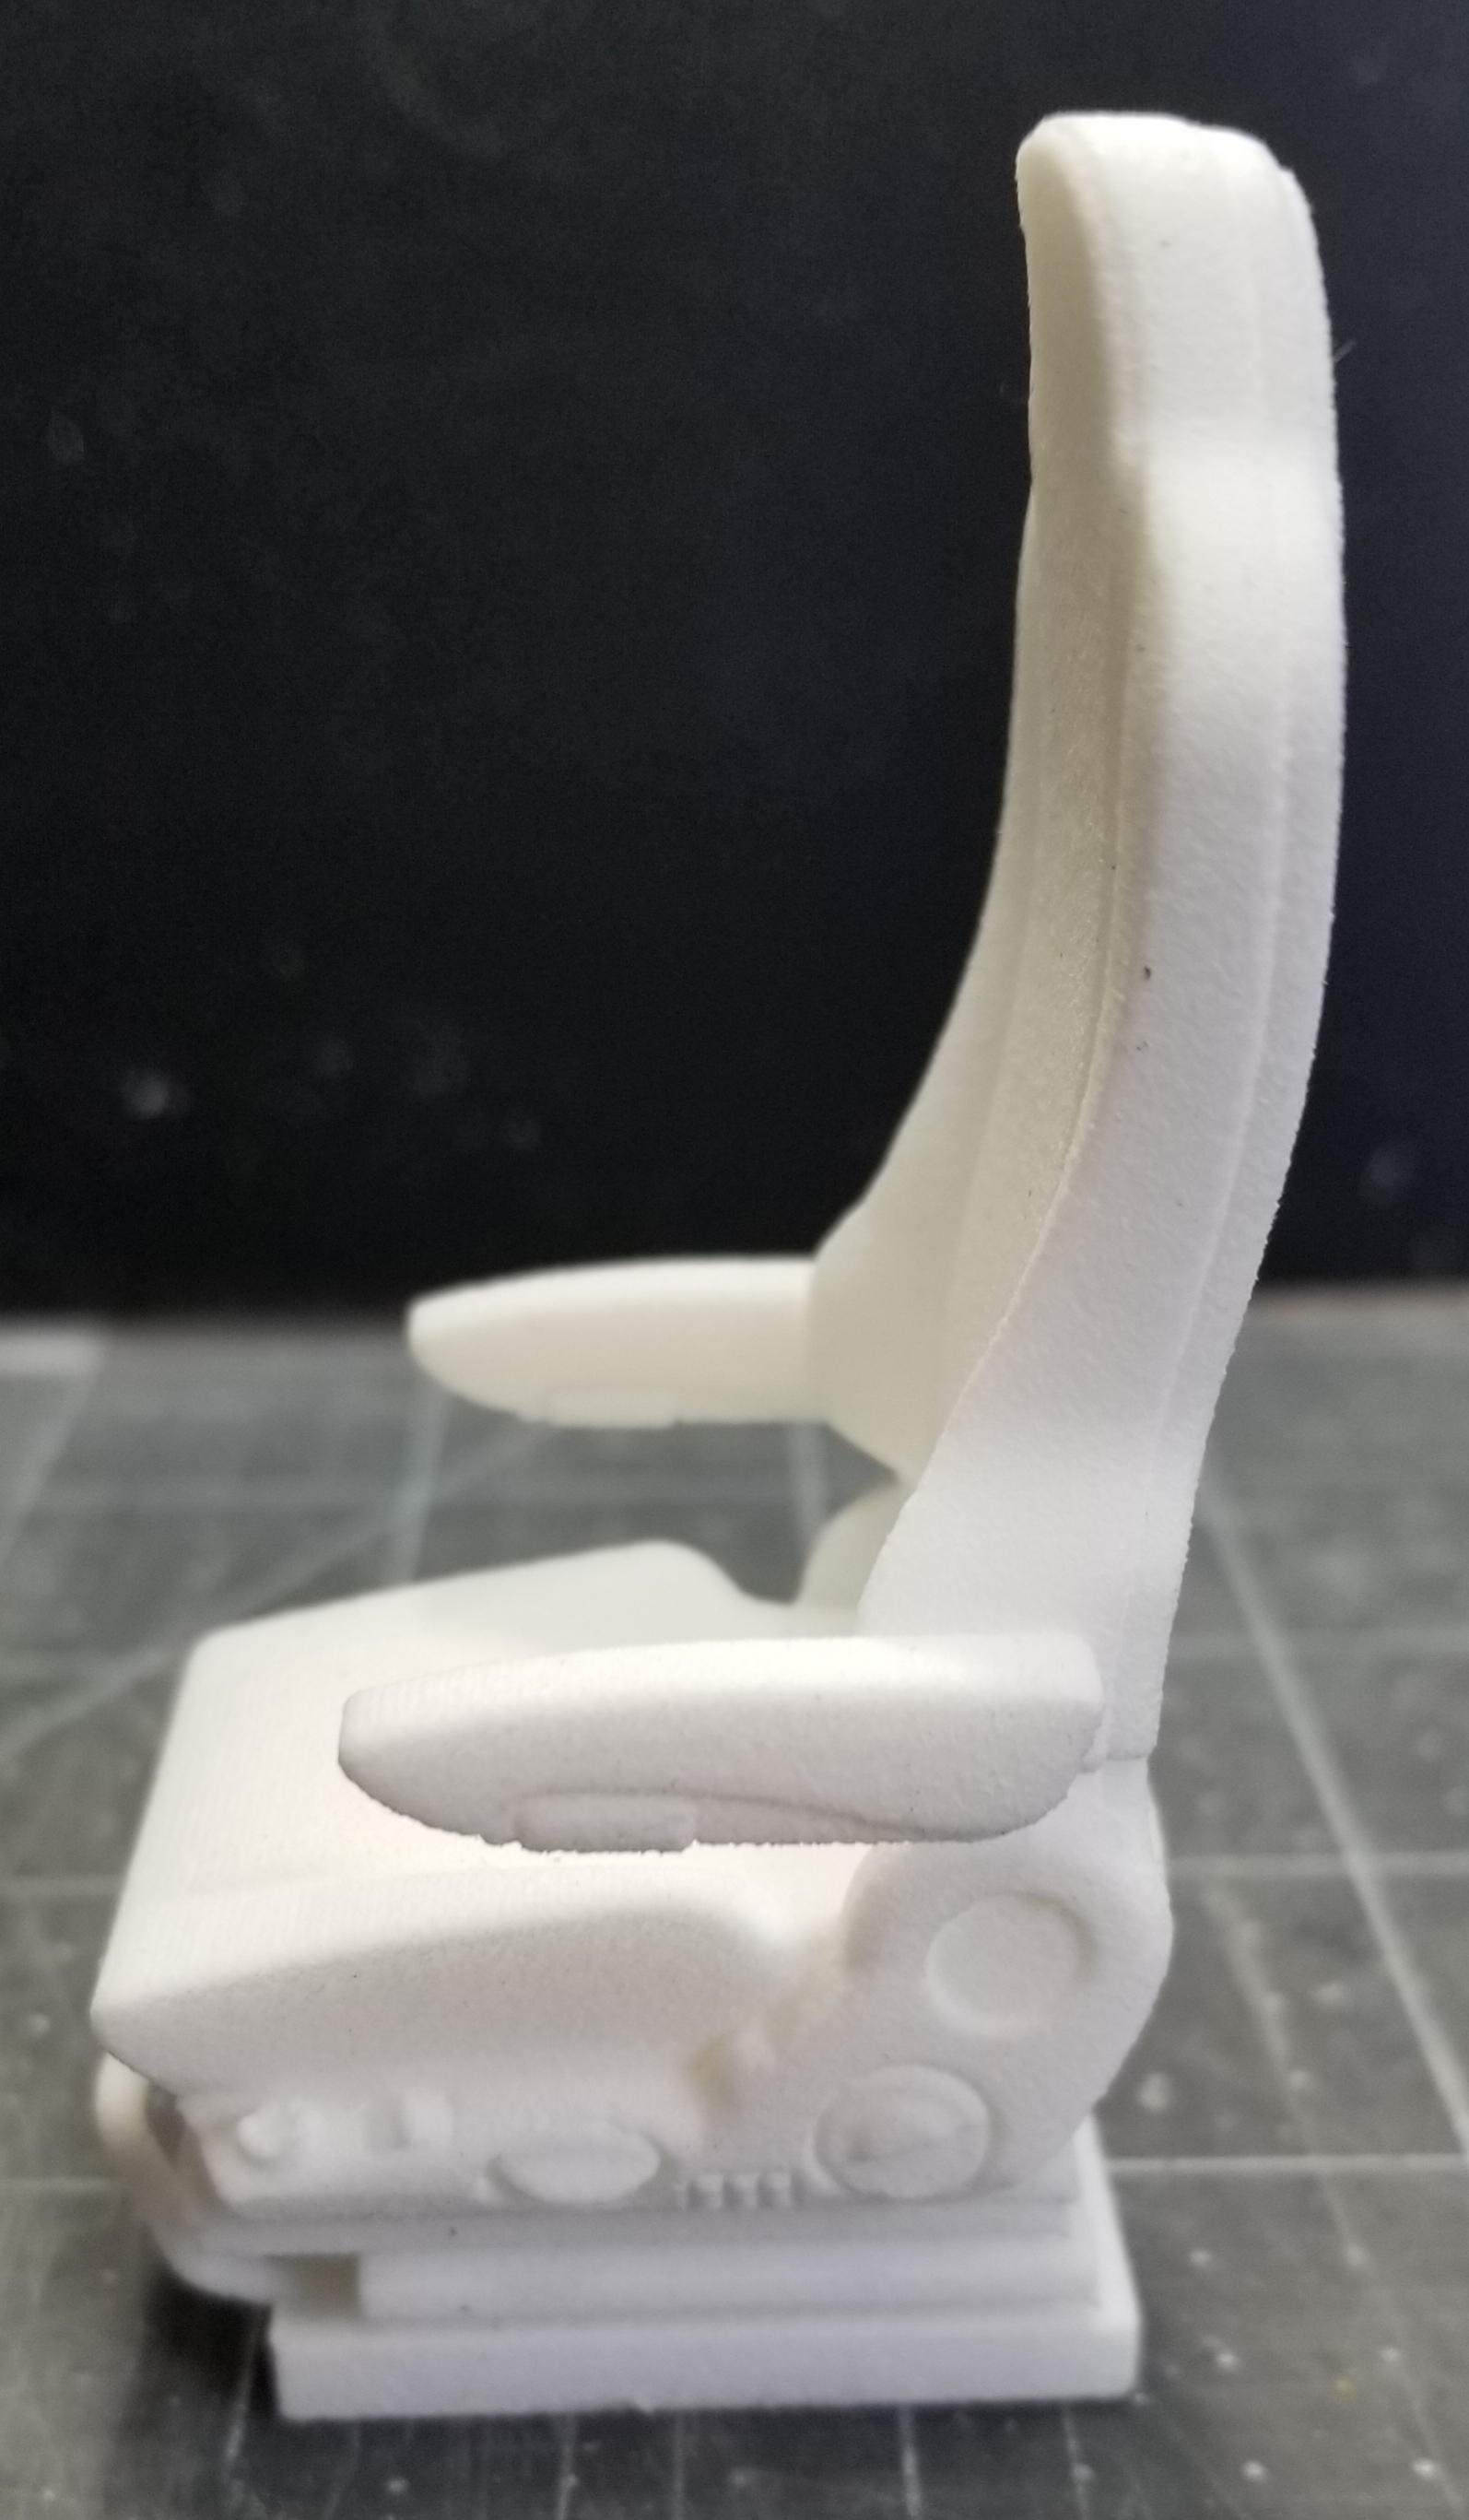
Small update, got some parts for the big Pete from Ebay and Shapeways.
3D printed swan hood ornament. This was described as being 1/24 scale, but it sure looks right for 1/16th.
3D printed fire extinguisher for cab.
3D printed Grammer air ride seats.
side view of the seat.
3D printed oval slot Peterbilt rear rims.
front 3D printed Peterbilt rims with moon caps.
Ron G
-
Looks real nice!
RonG
-
Thanks guys
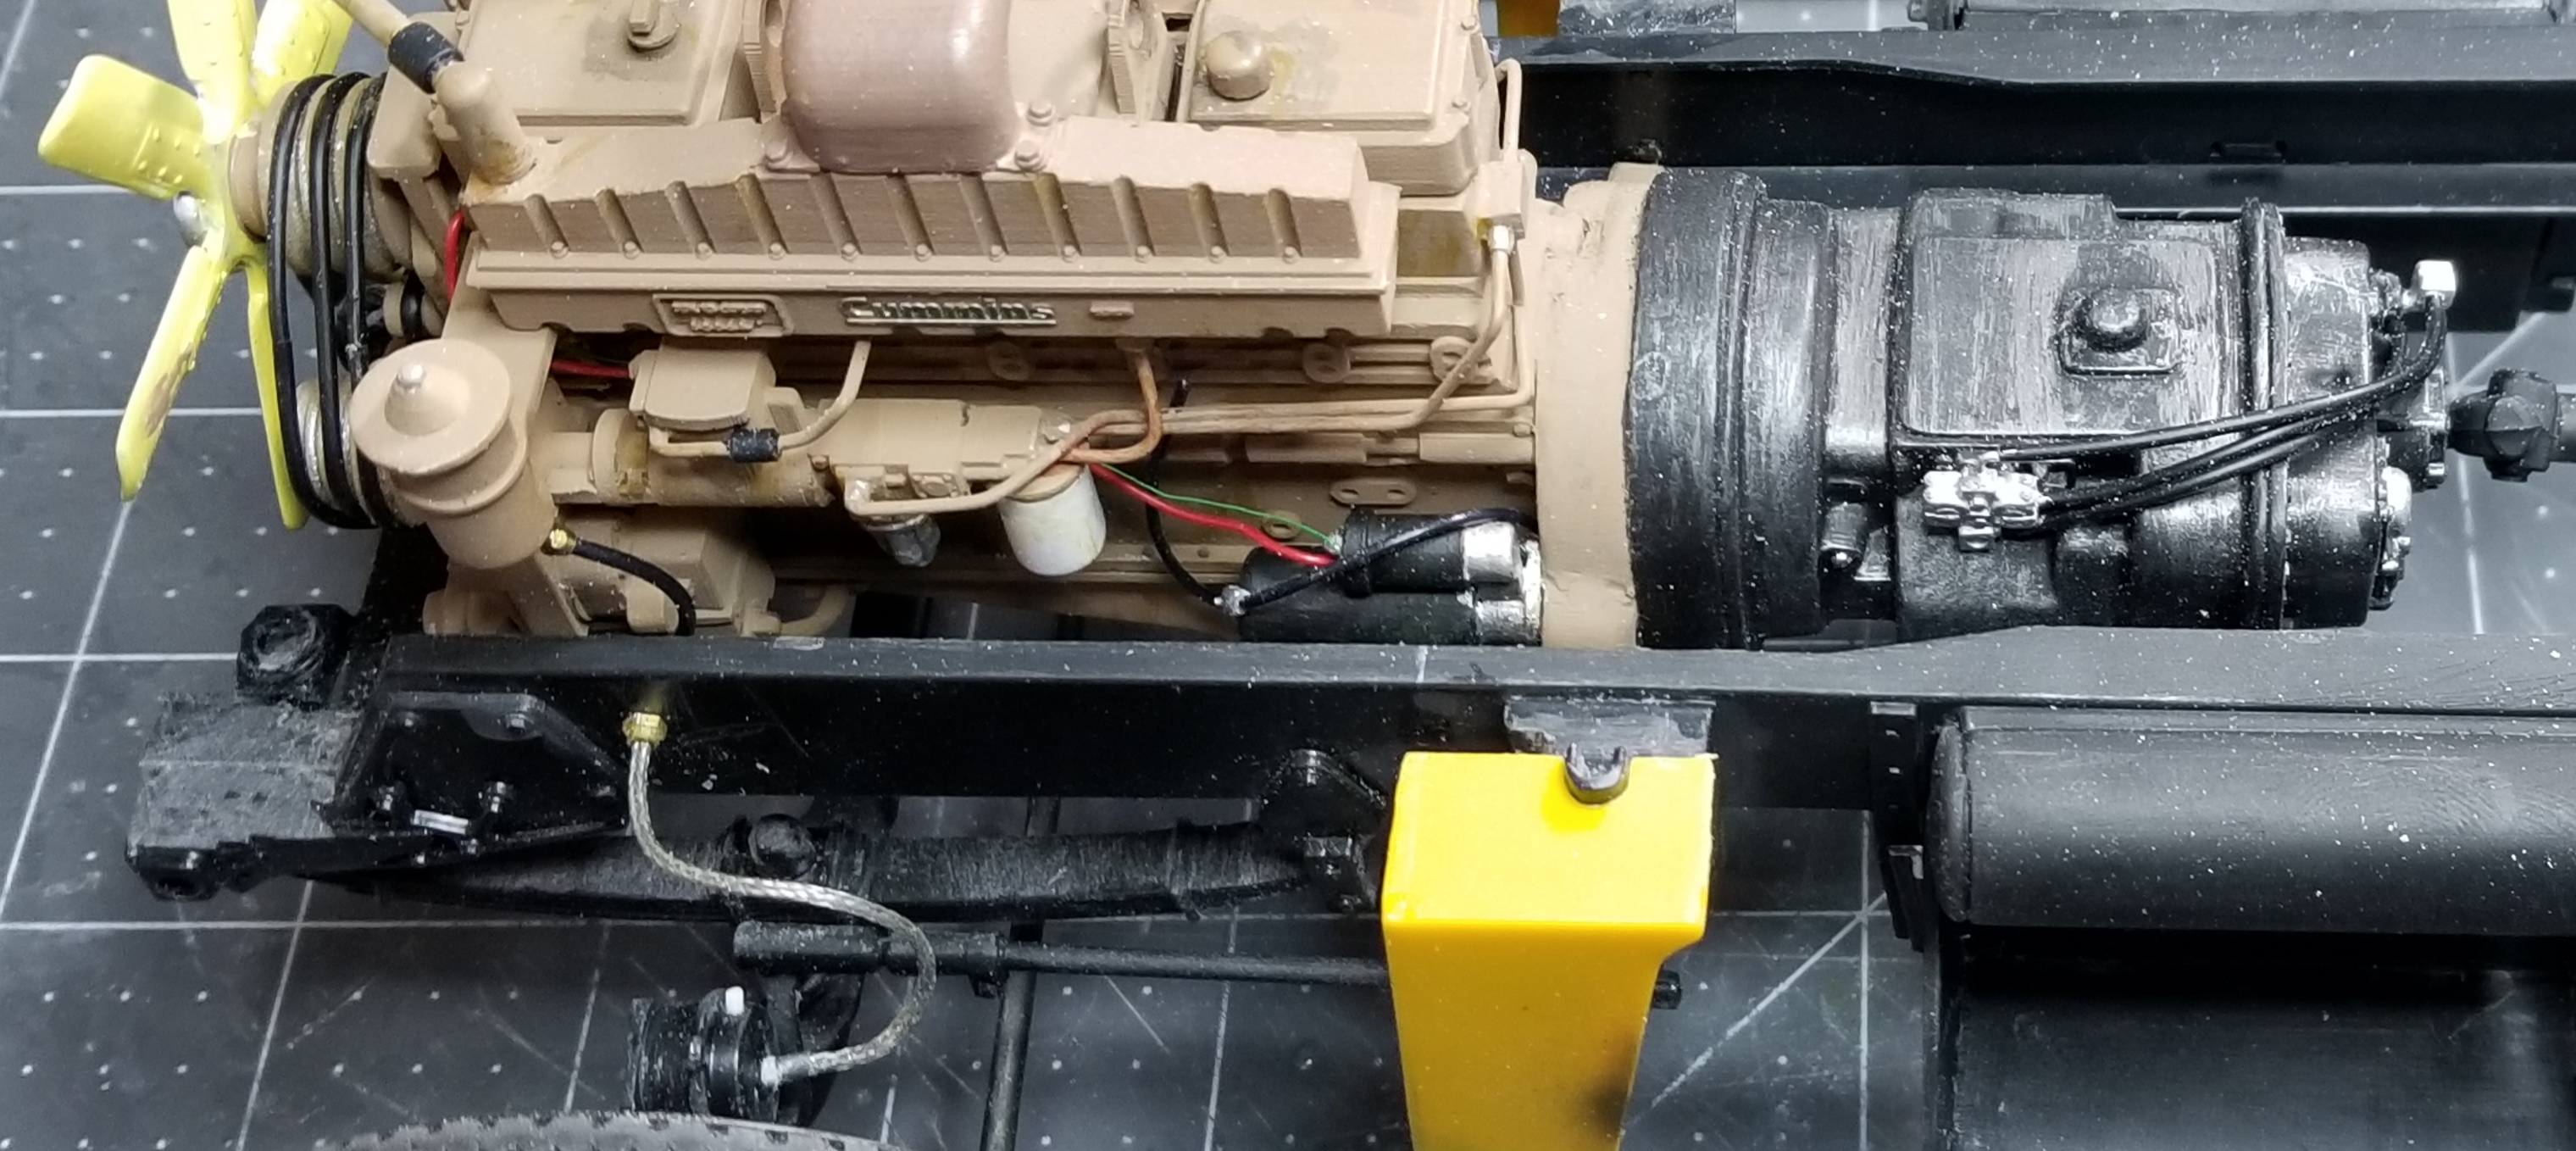
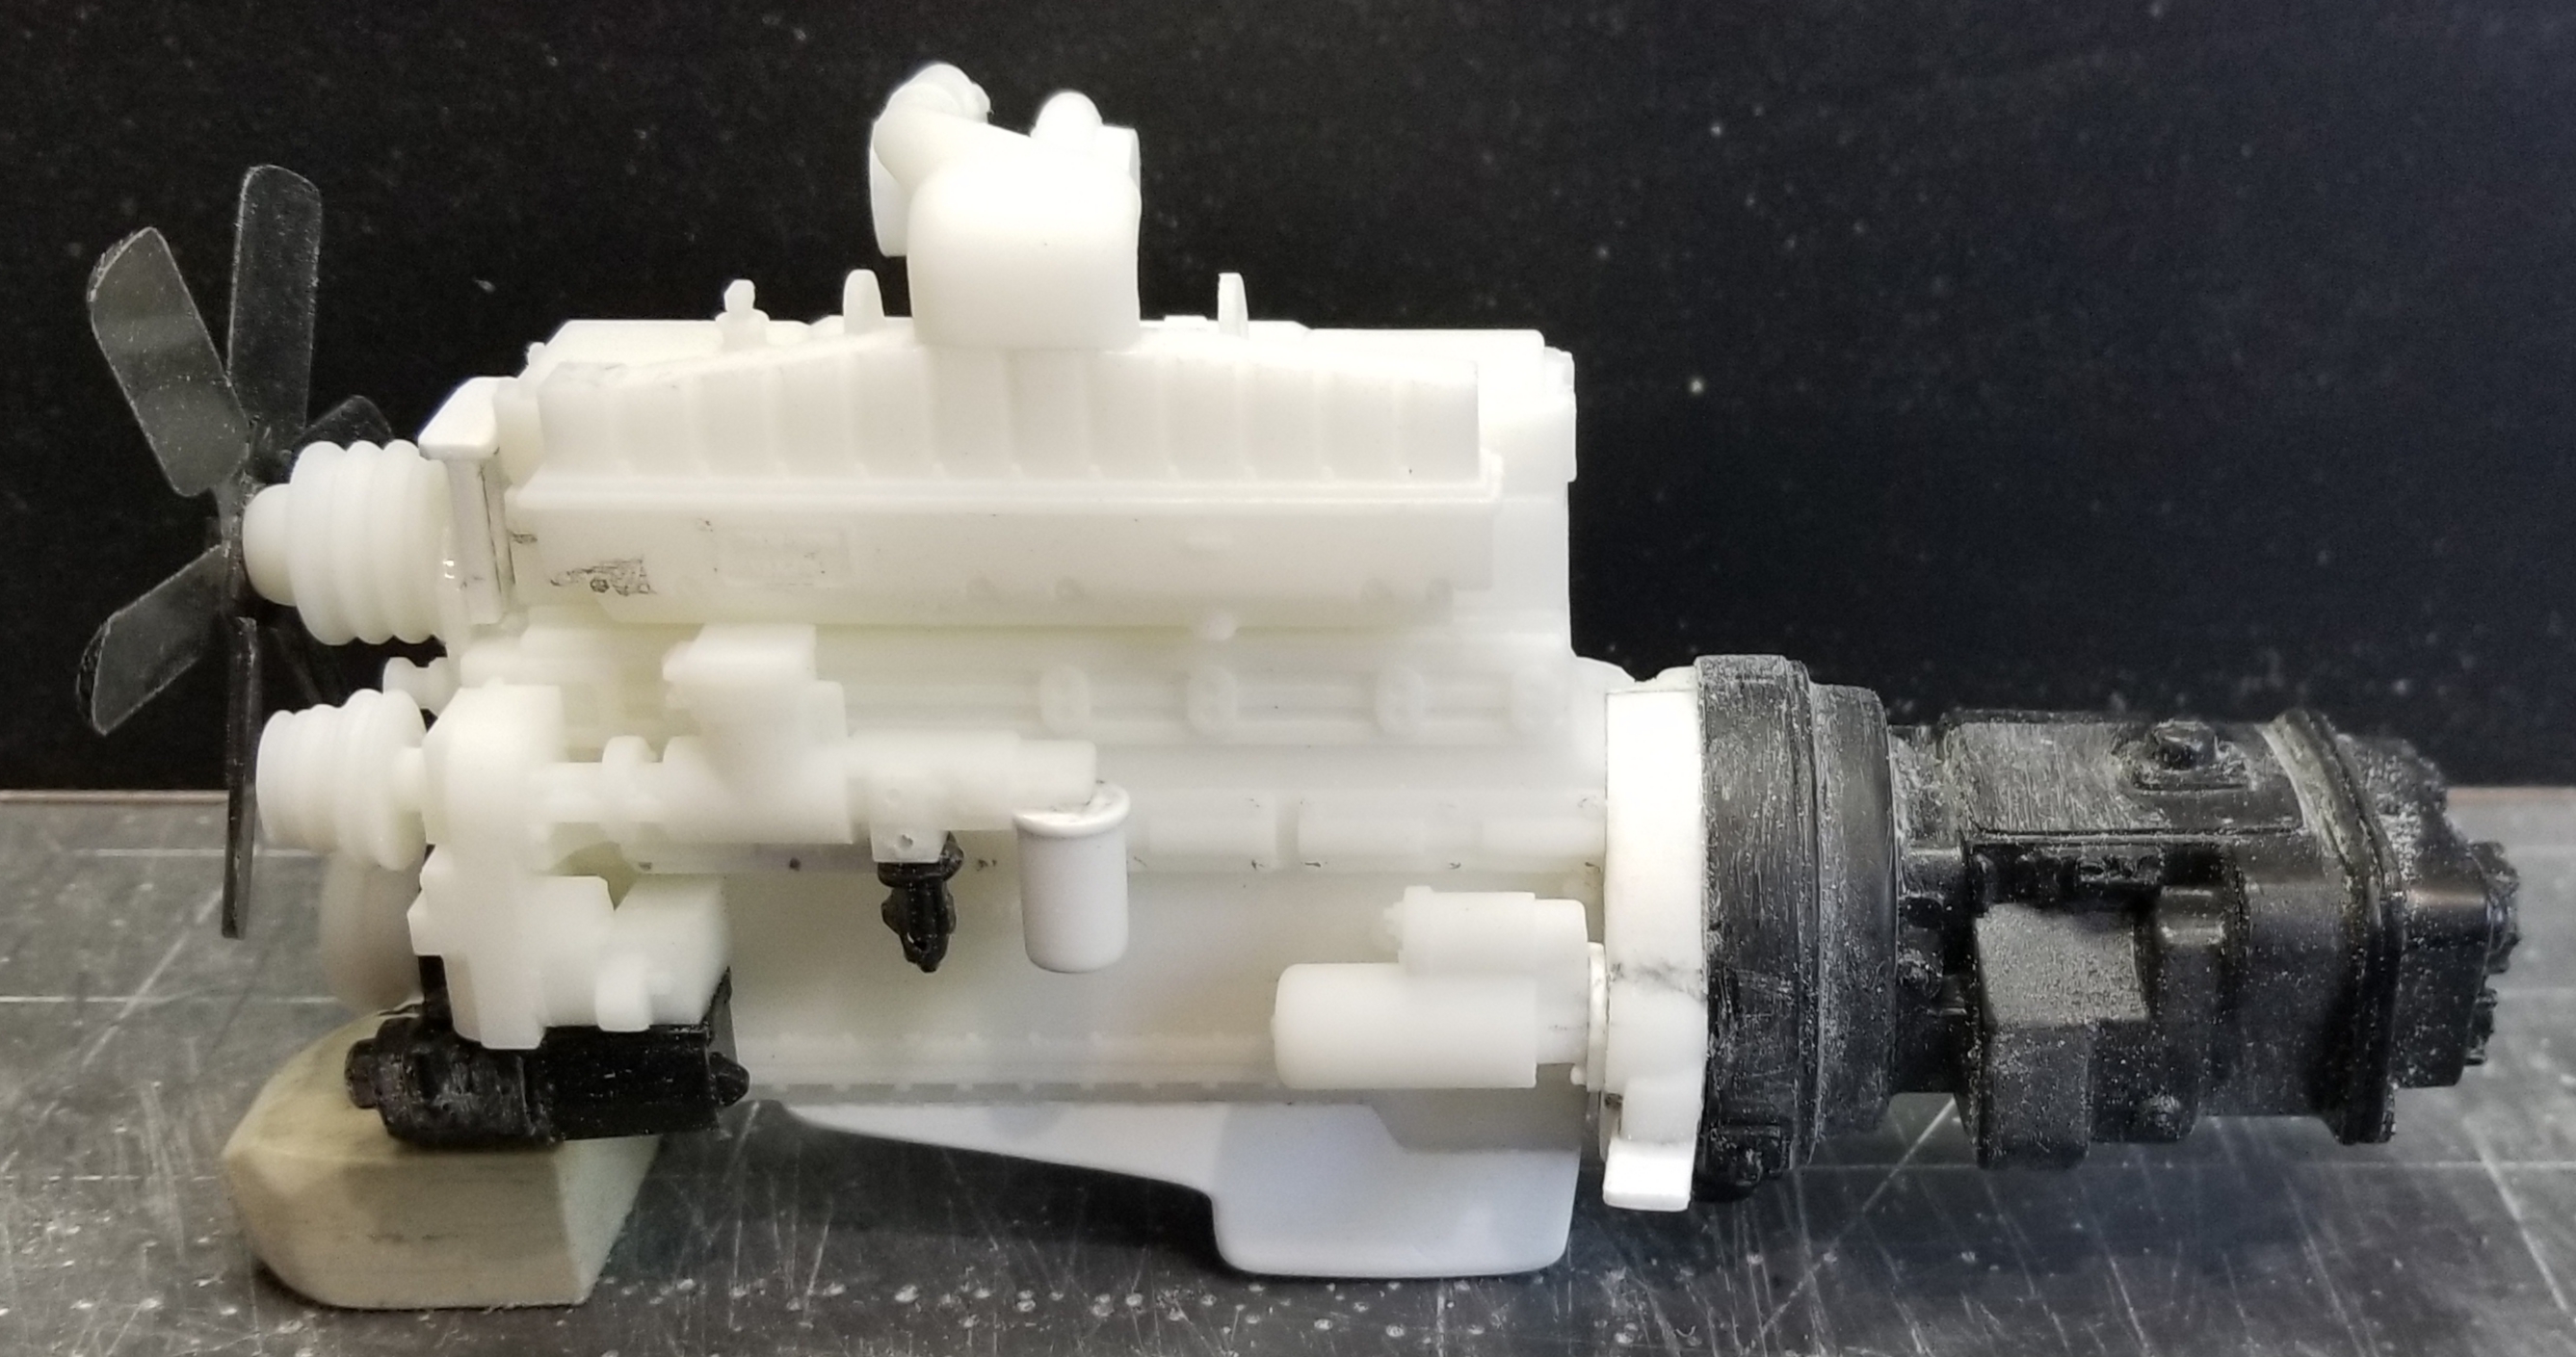
I have done some more work on the Pete. I purchased a 3D printed Cummins NTA855 big cam from a guy, Chucky's precision pullers & parts, I believe he is in Iowa.
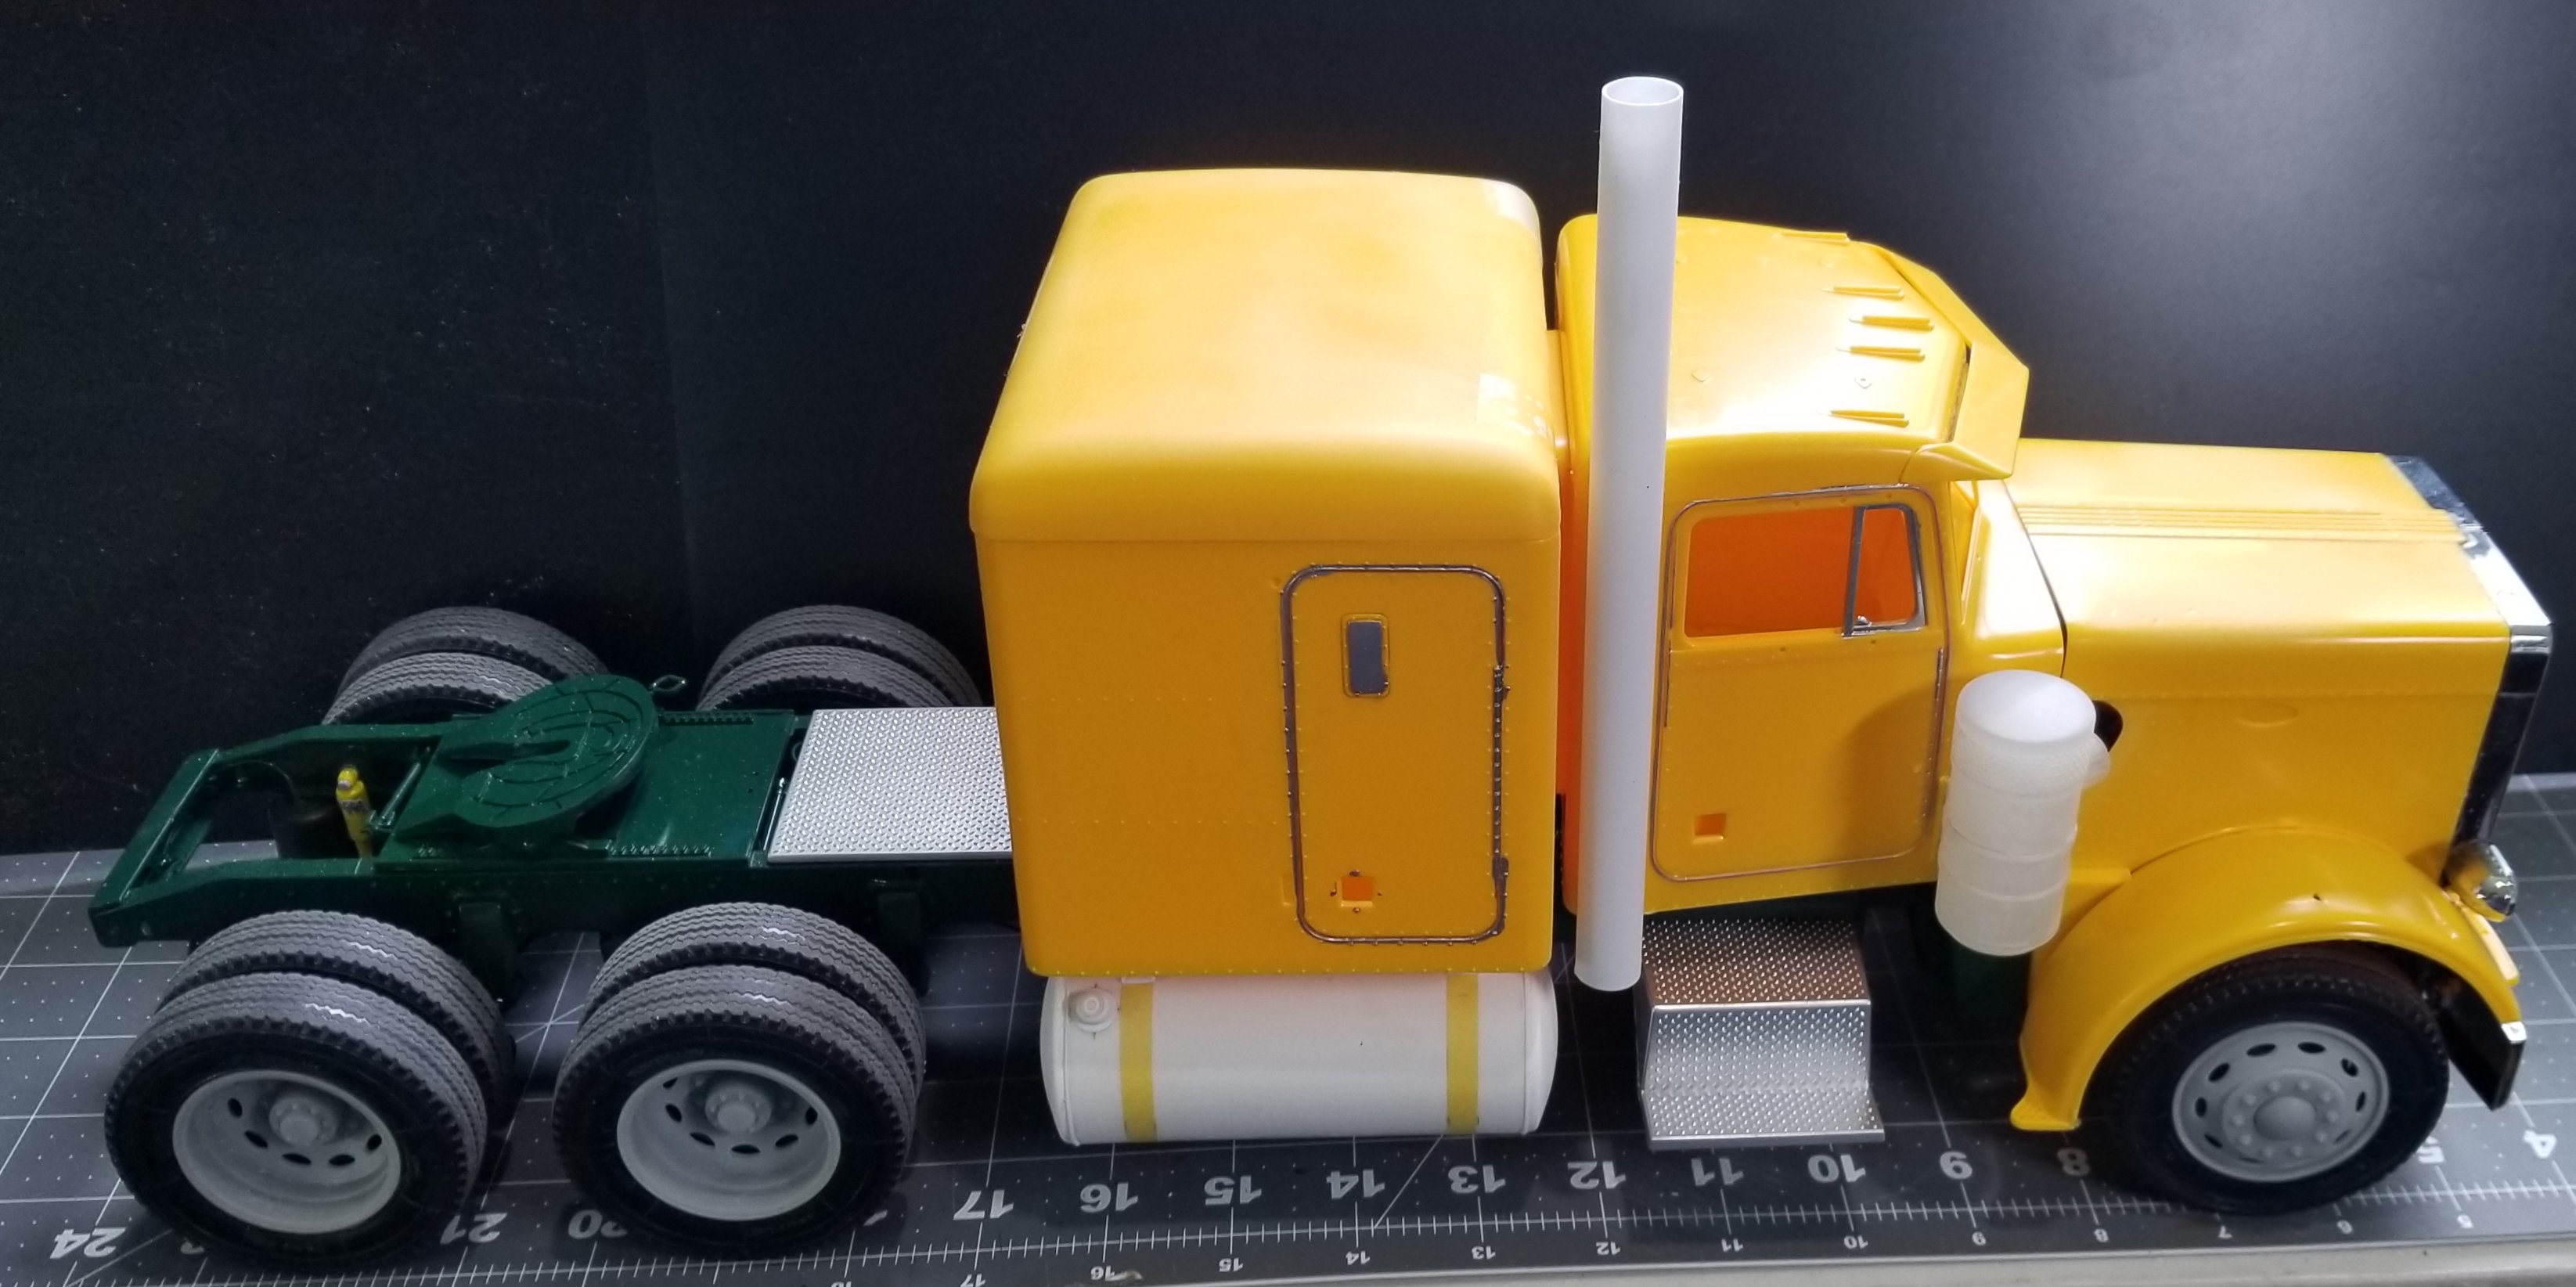
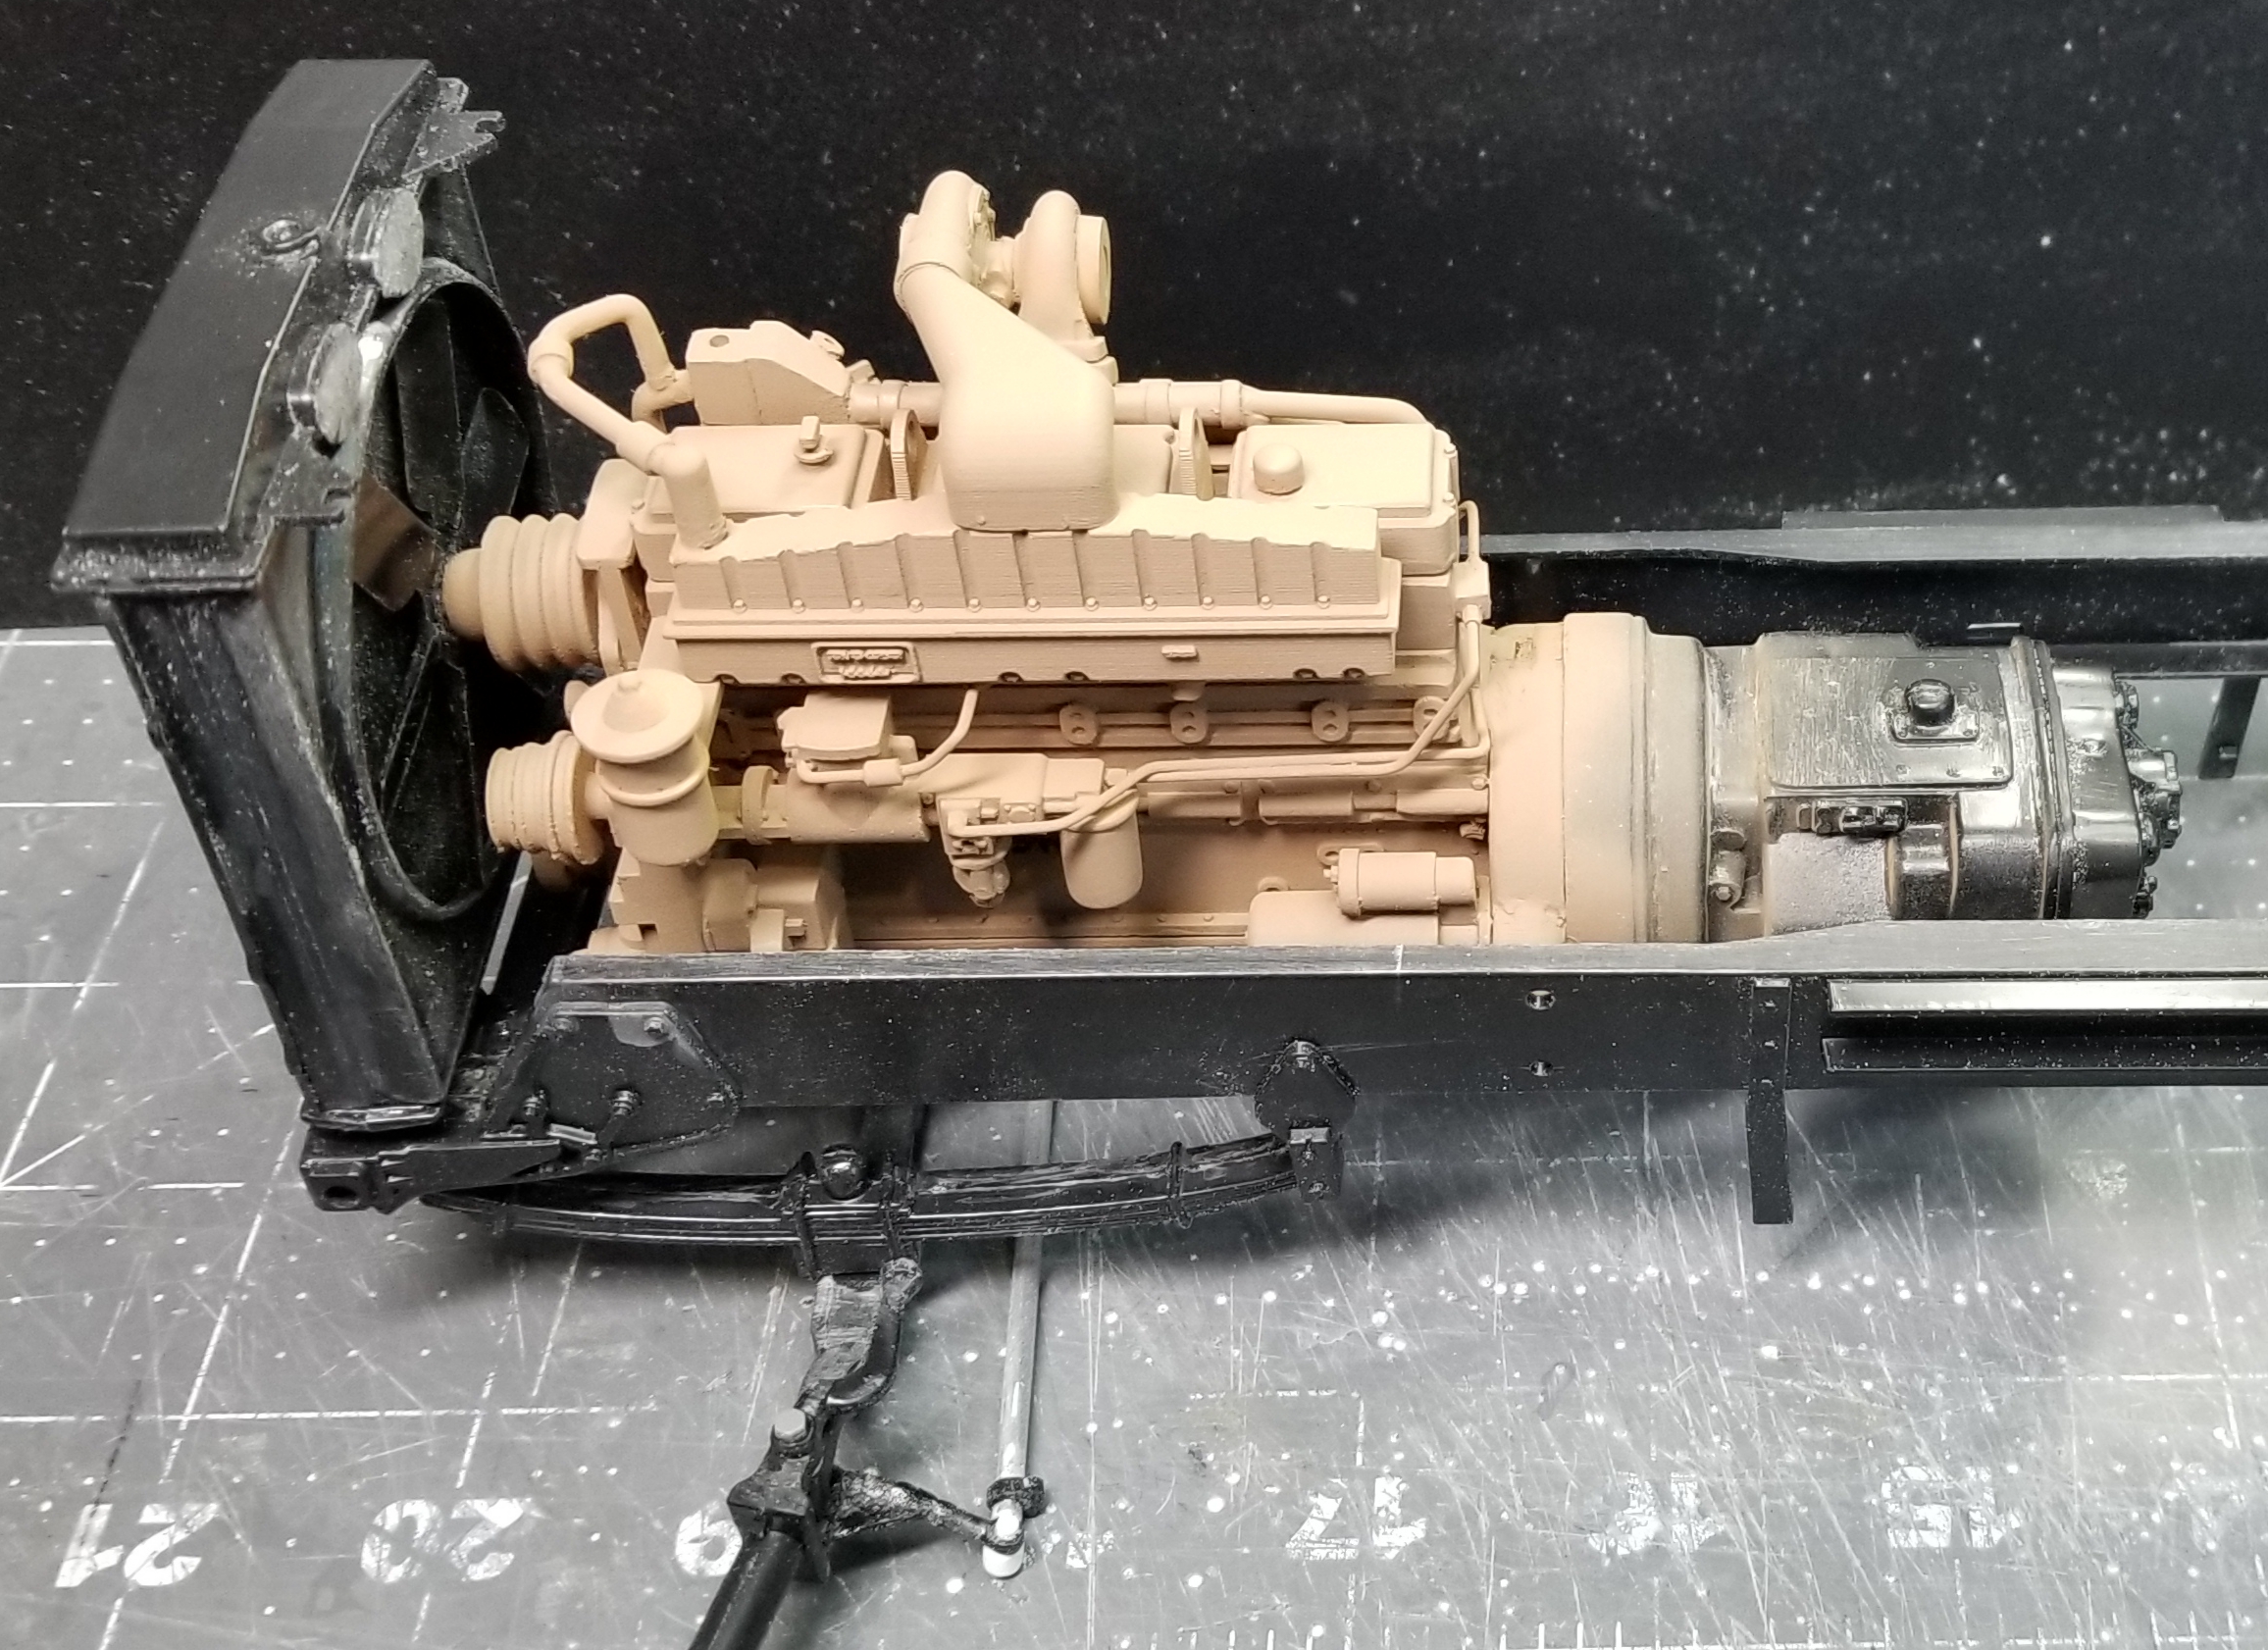
The engine is pretty nicely detailed, but it was missing some of the real engines components. So, I had to make them from scratch. They weren't really hard to make, just time consuming. I have the frame, cab, hood and sleeper assembled.
this view shows the tractor temporarily assembled for pictures.
this view shows the engine sitting in the frame and the front floats that are from a 1/16 Ertl dump truck.
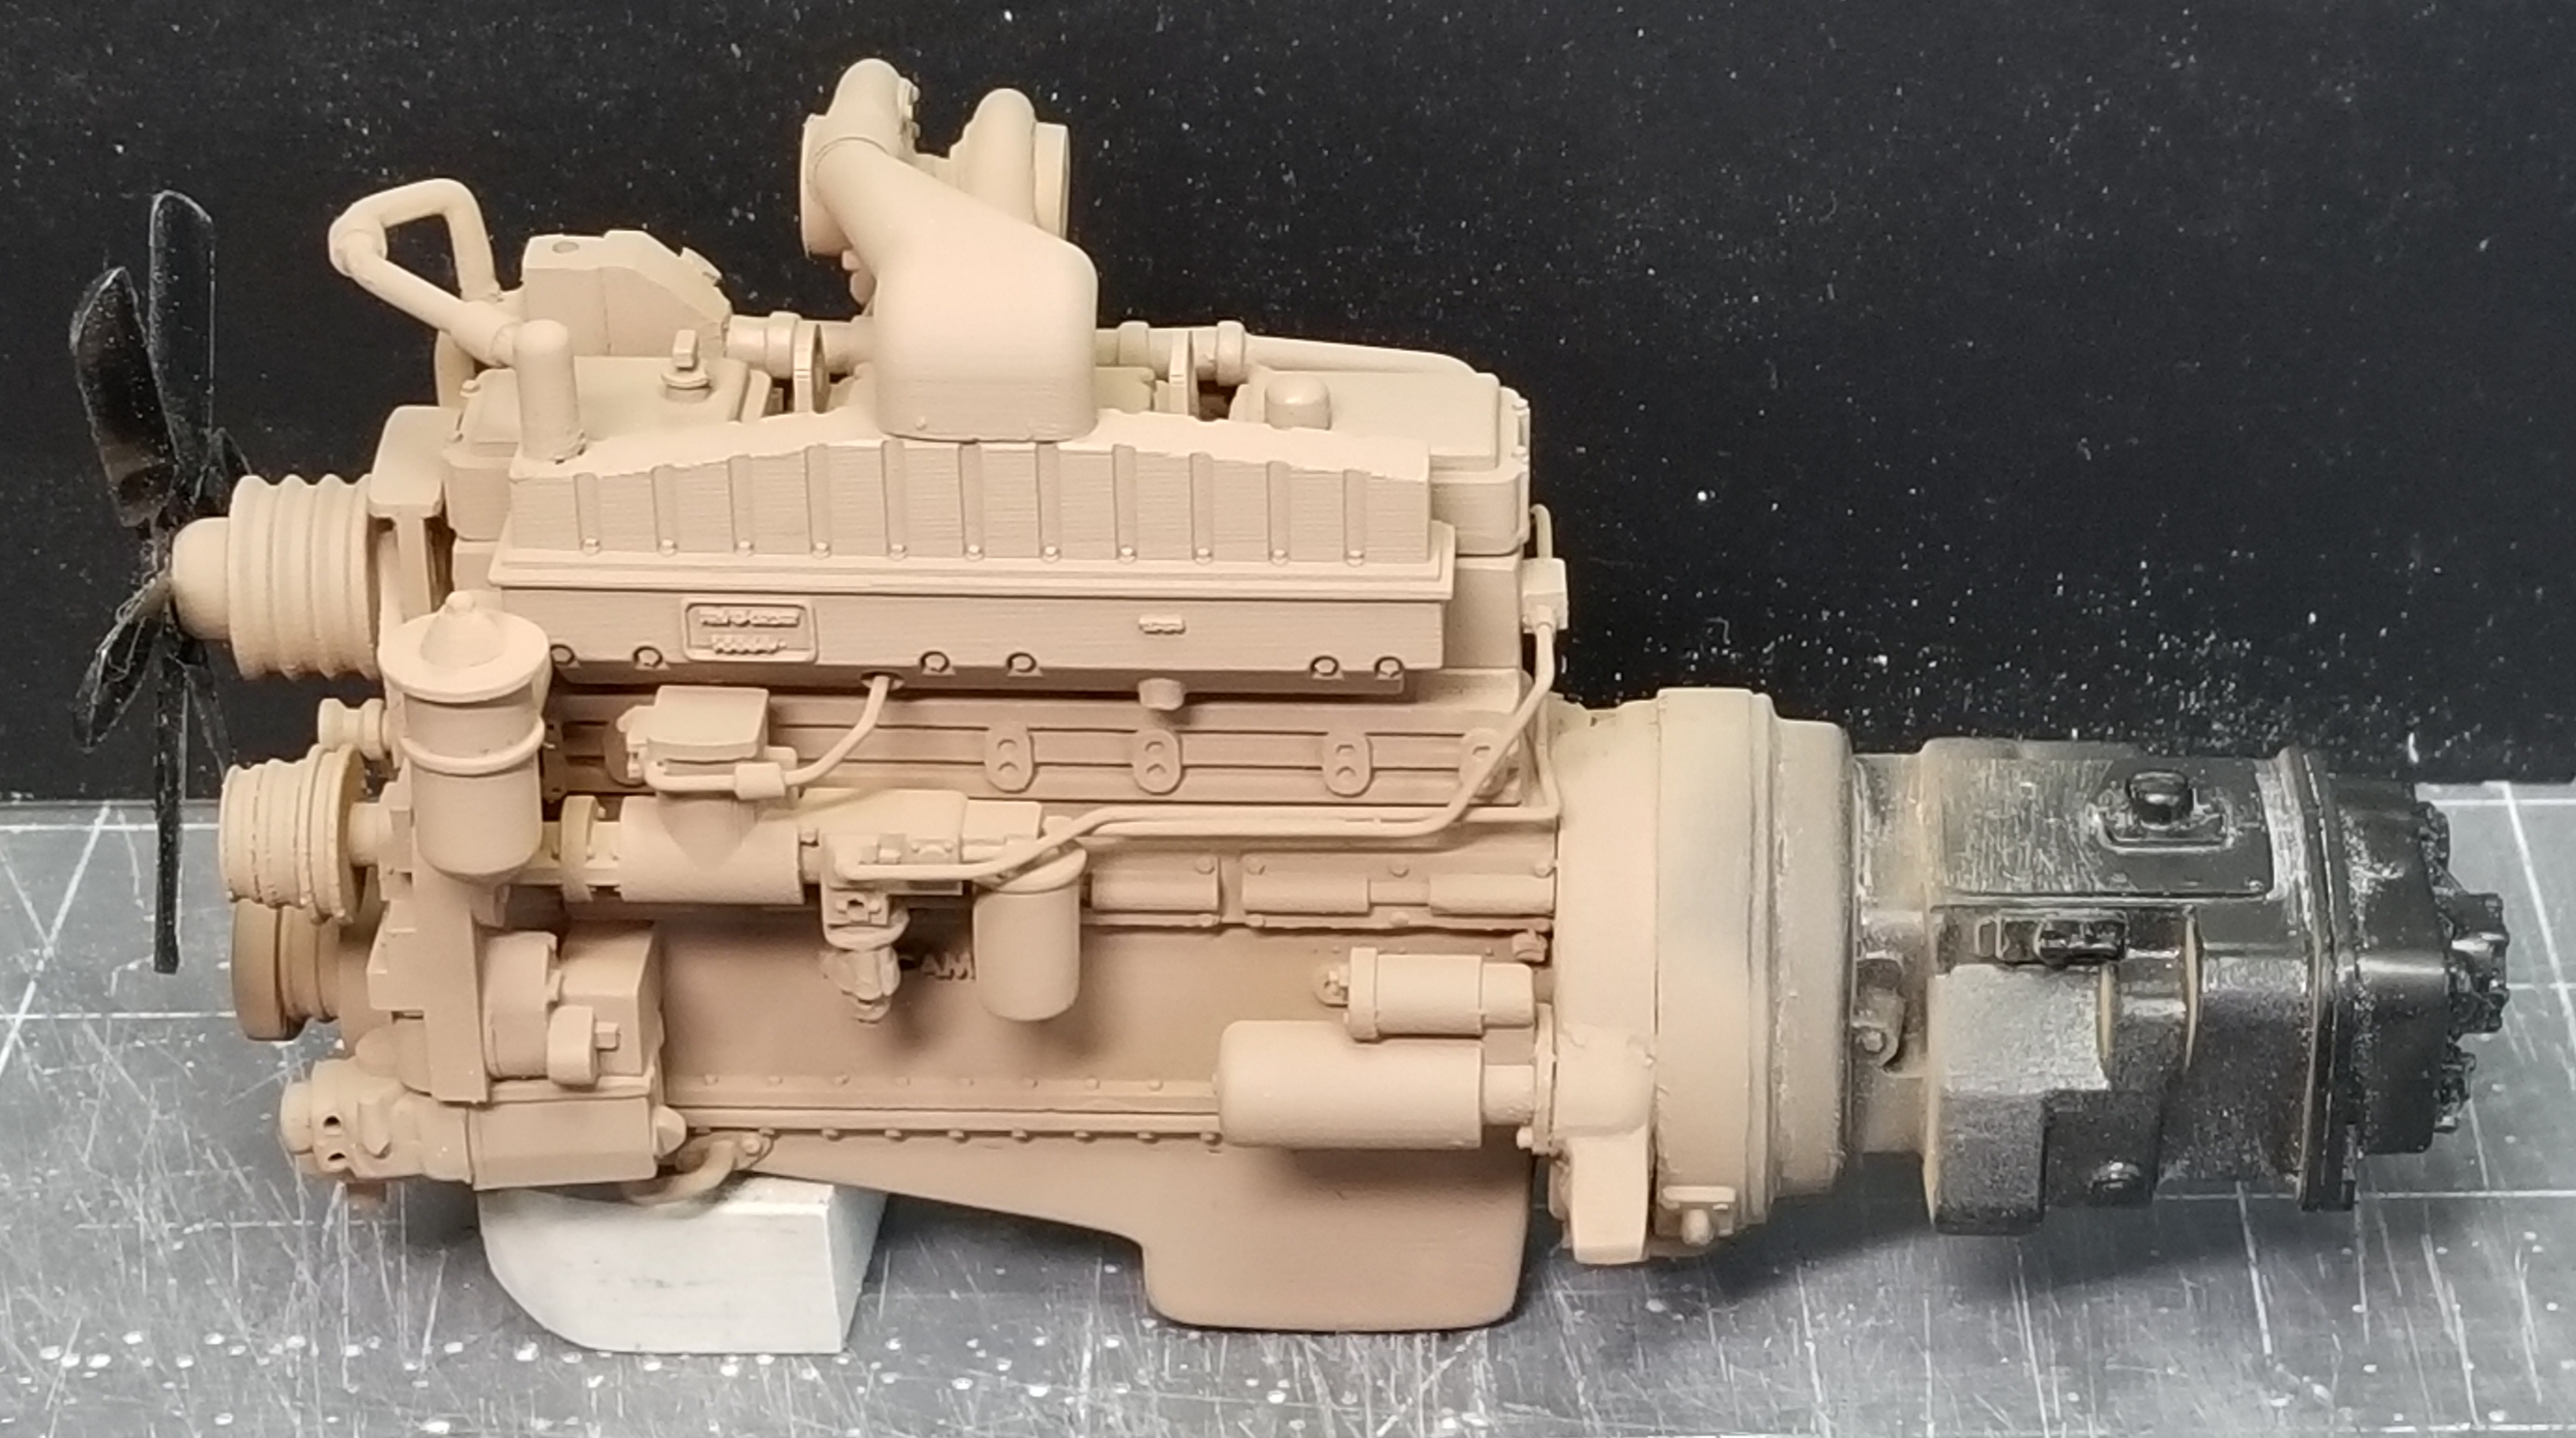
left side view of the Cummins NTA855 with the kits transmission installed.
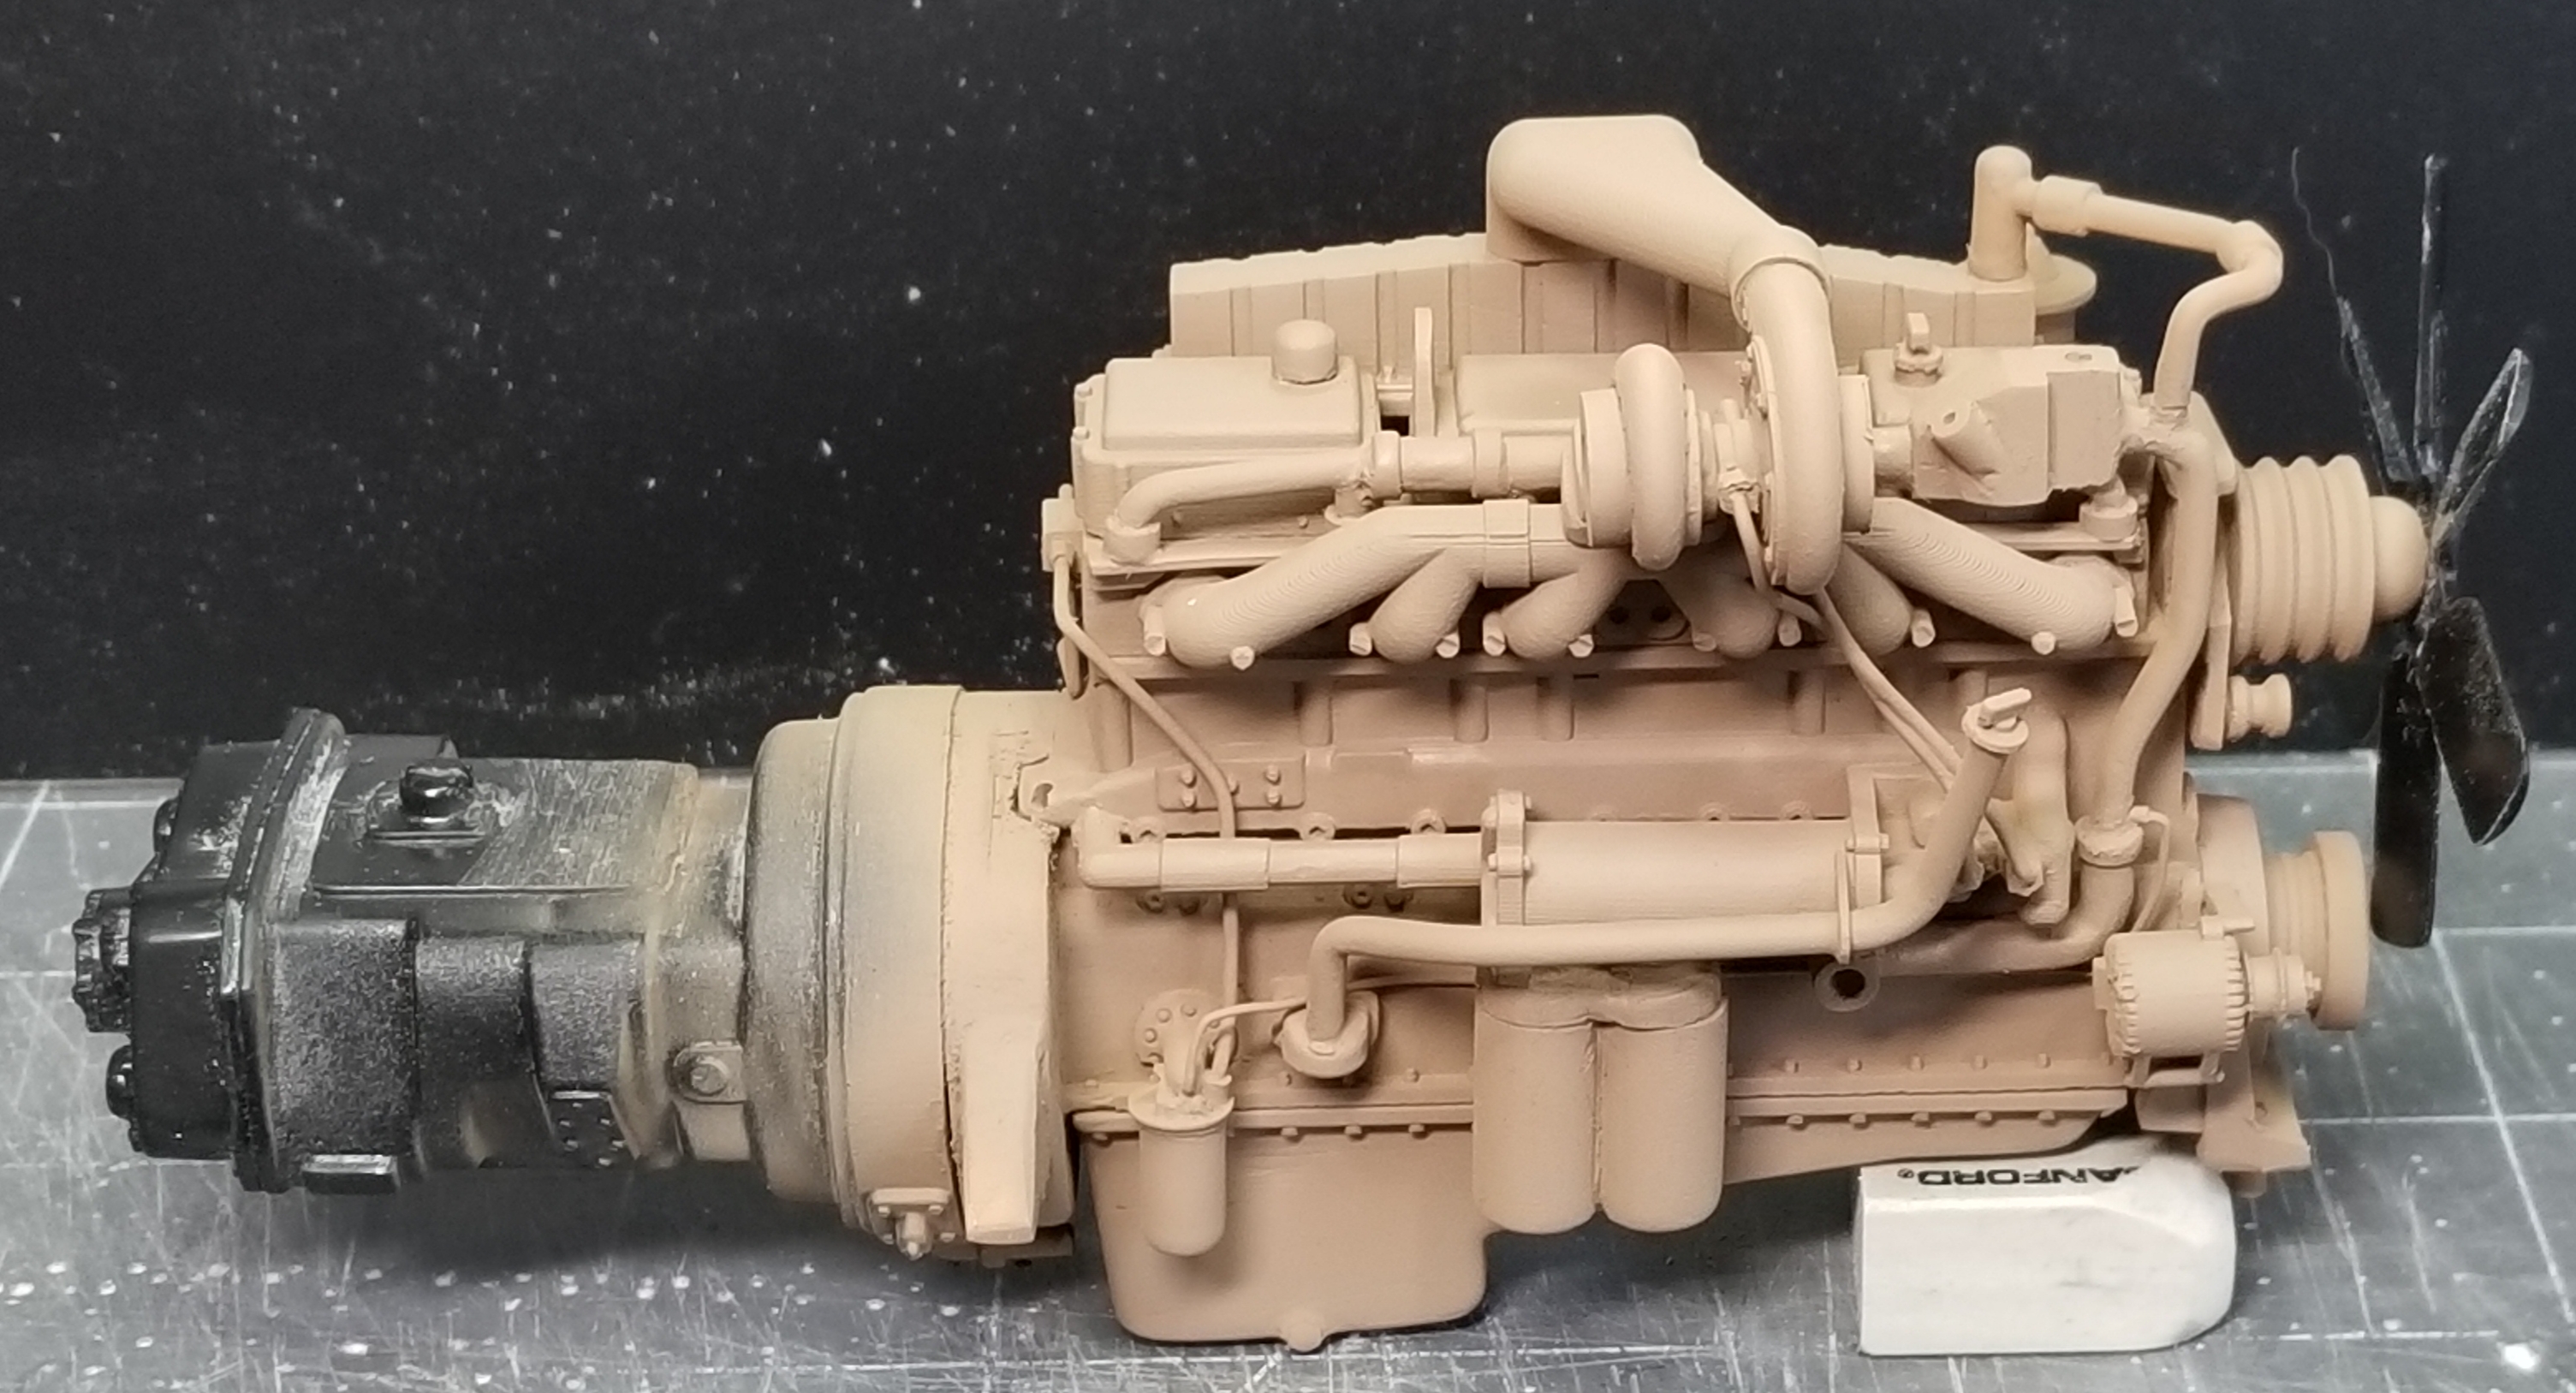
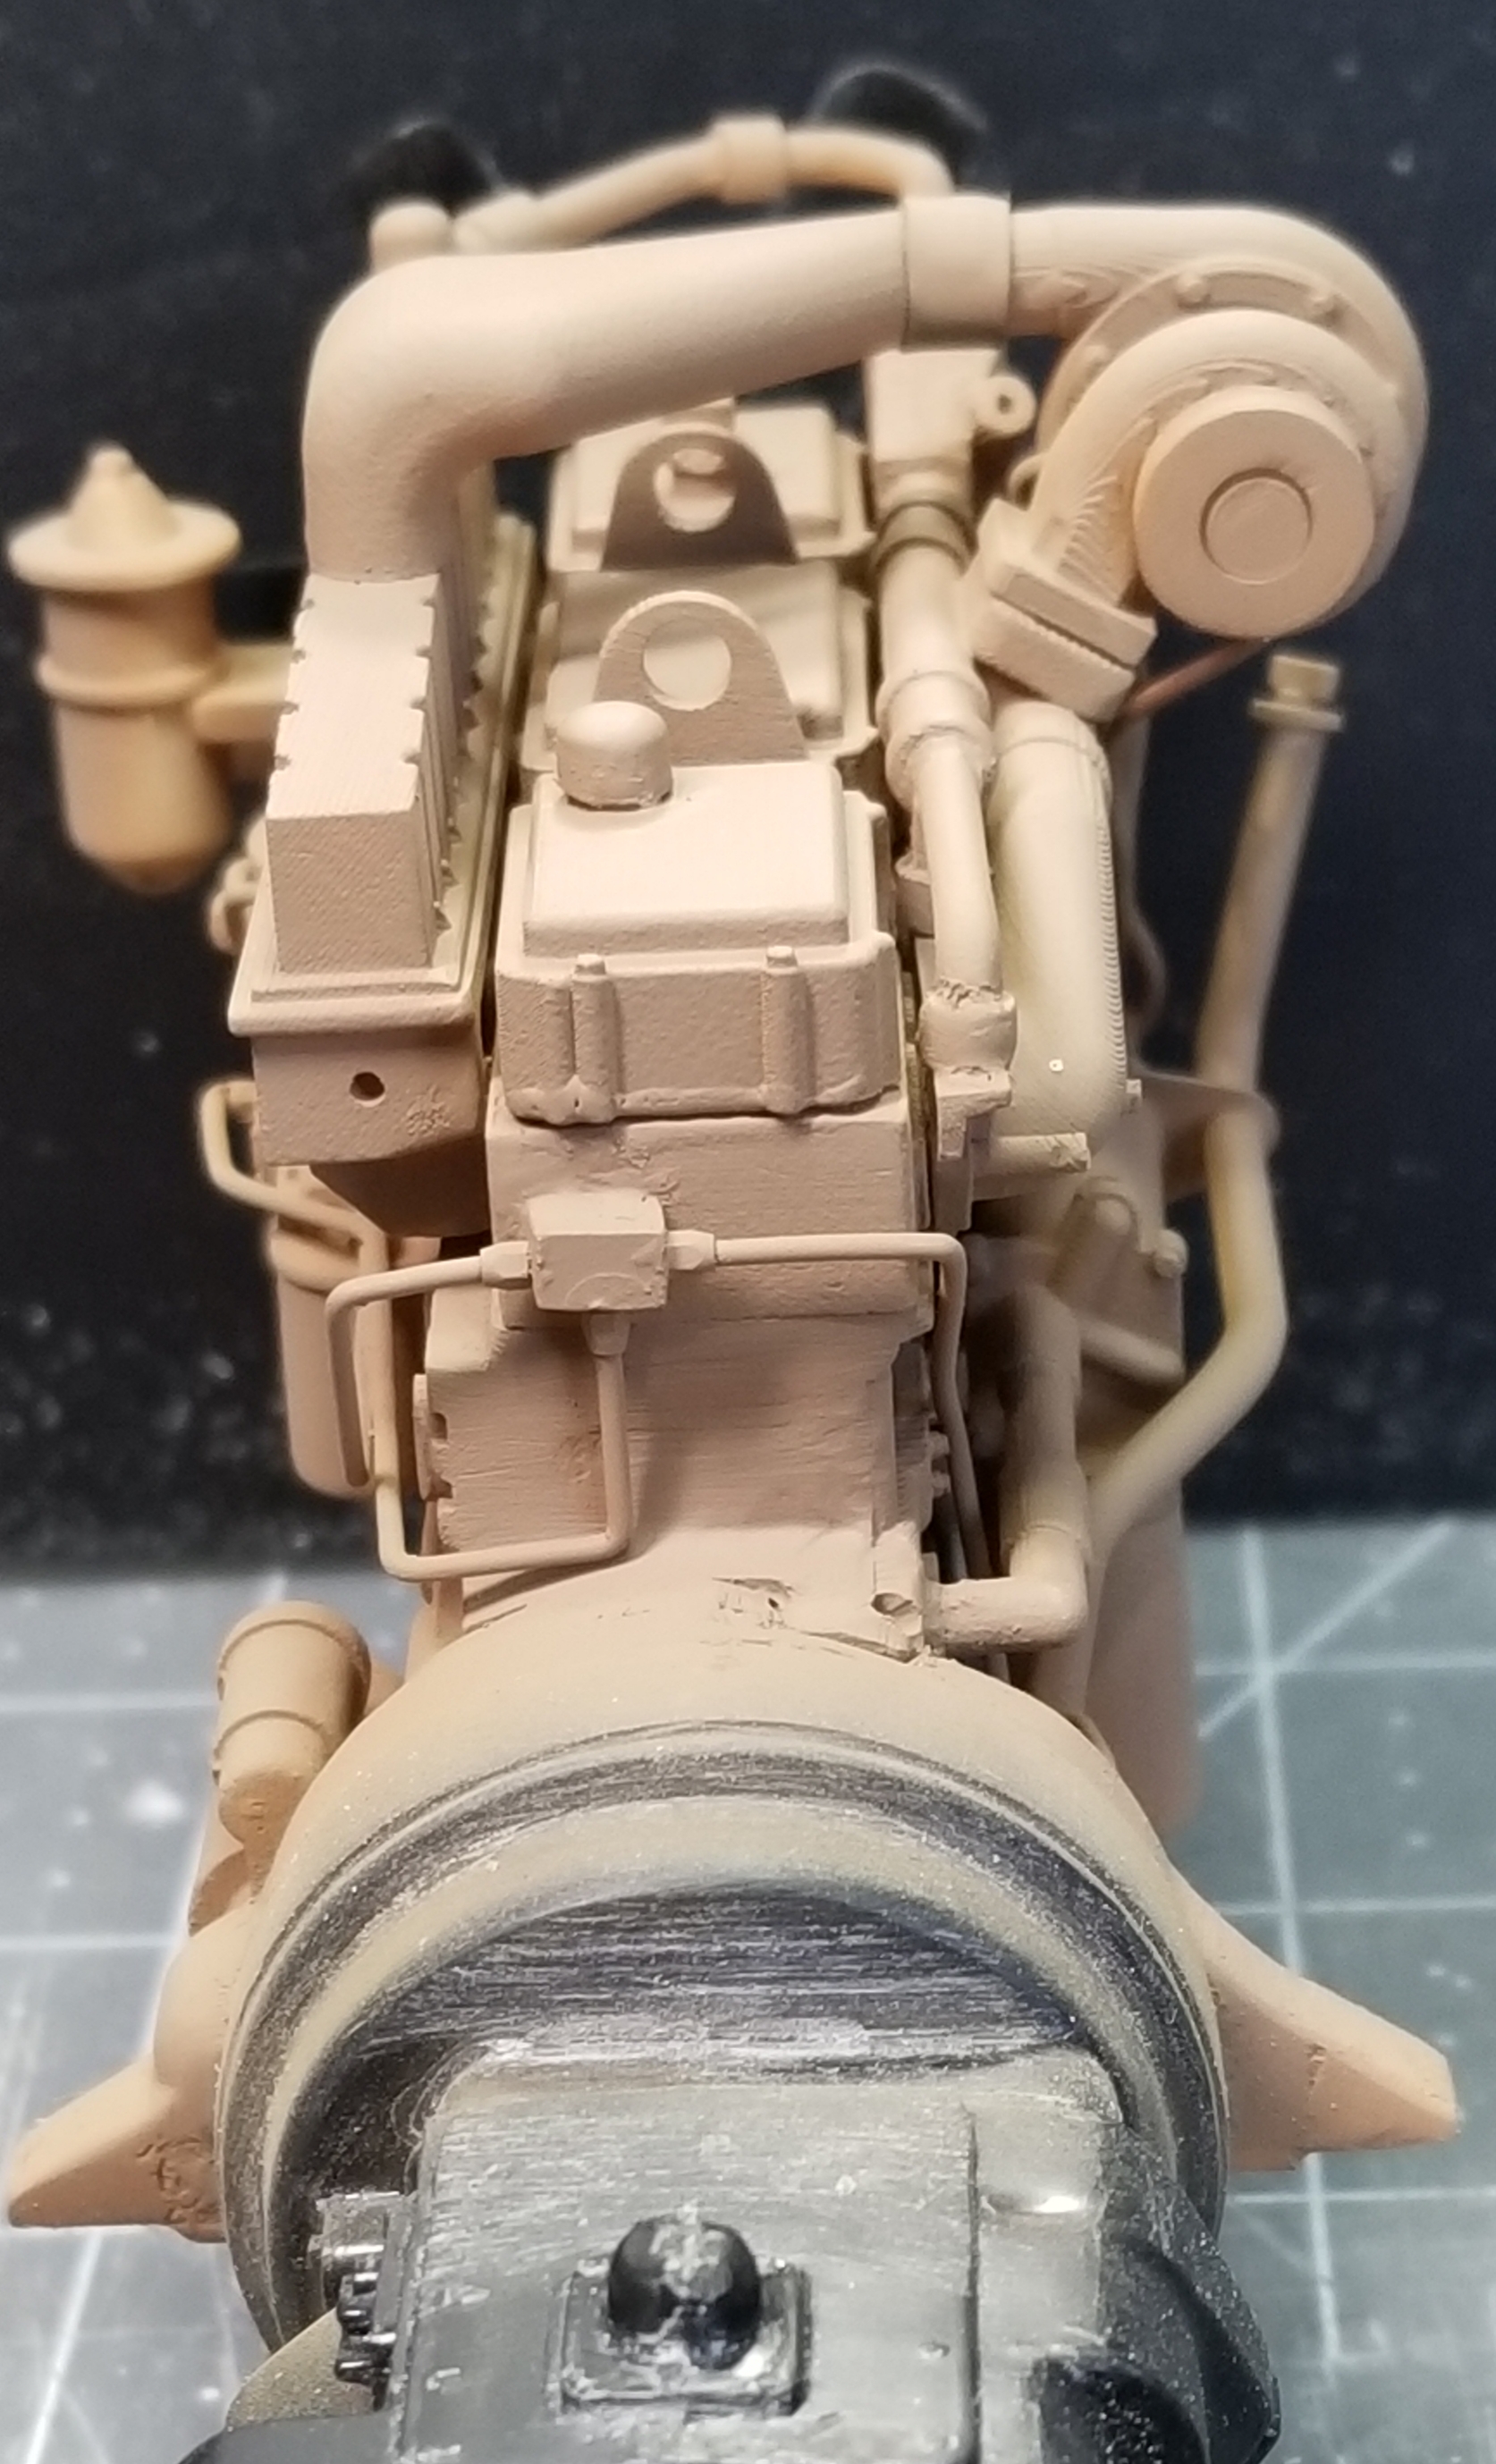
right side view of engine showing the oil filters. I added the rear filter (it only comes with one) and the water removale filter (the small black one) the fan is from the kit.
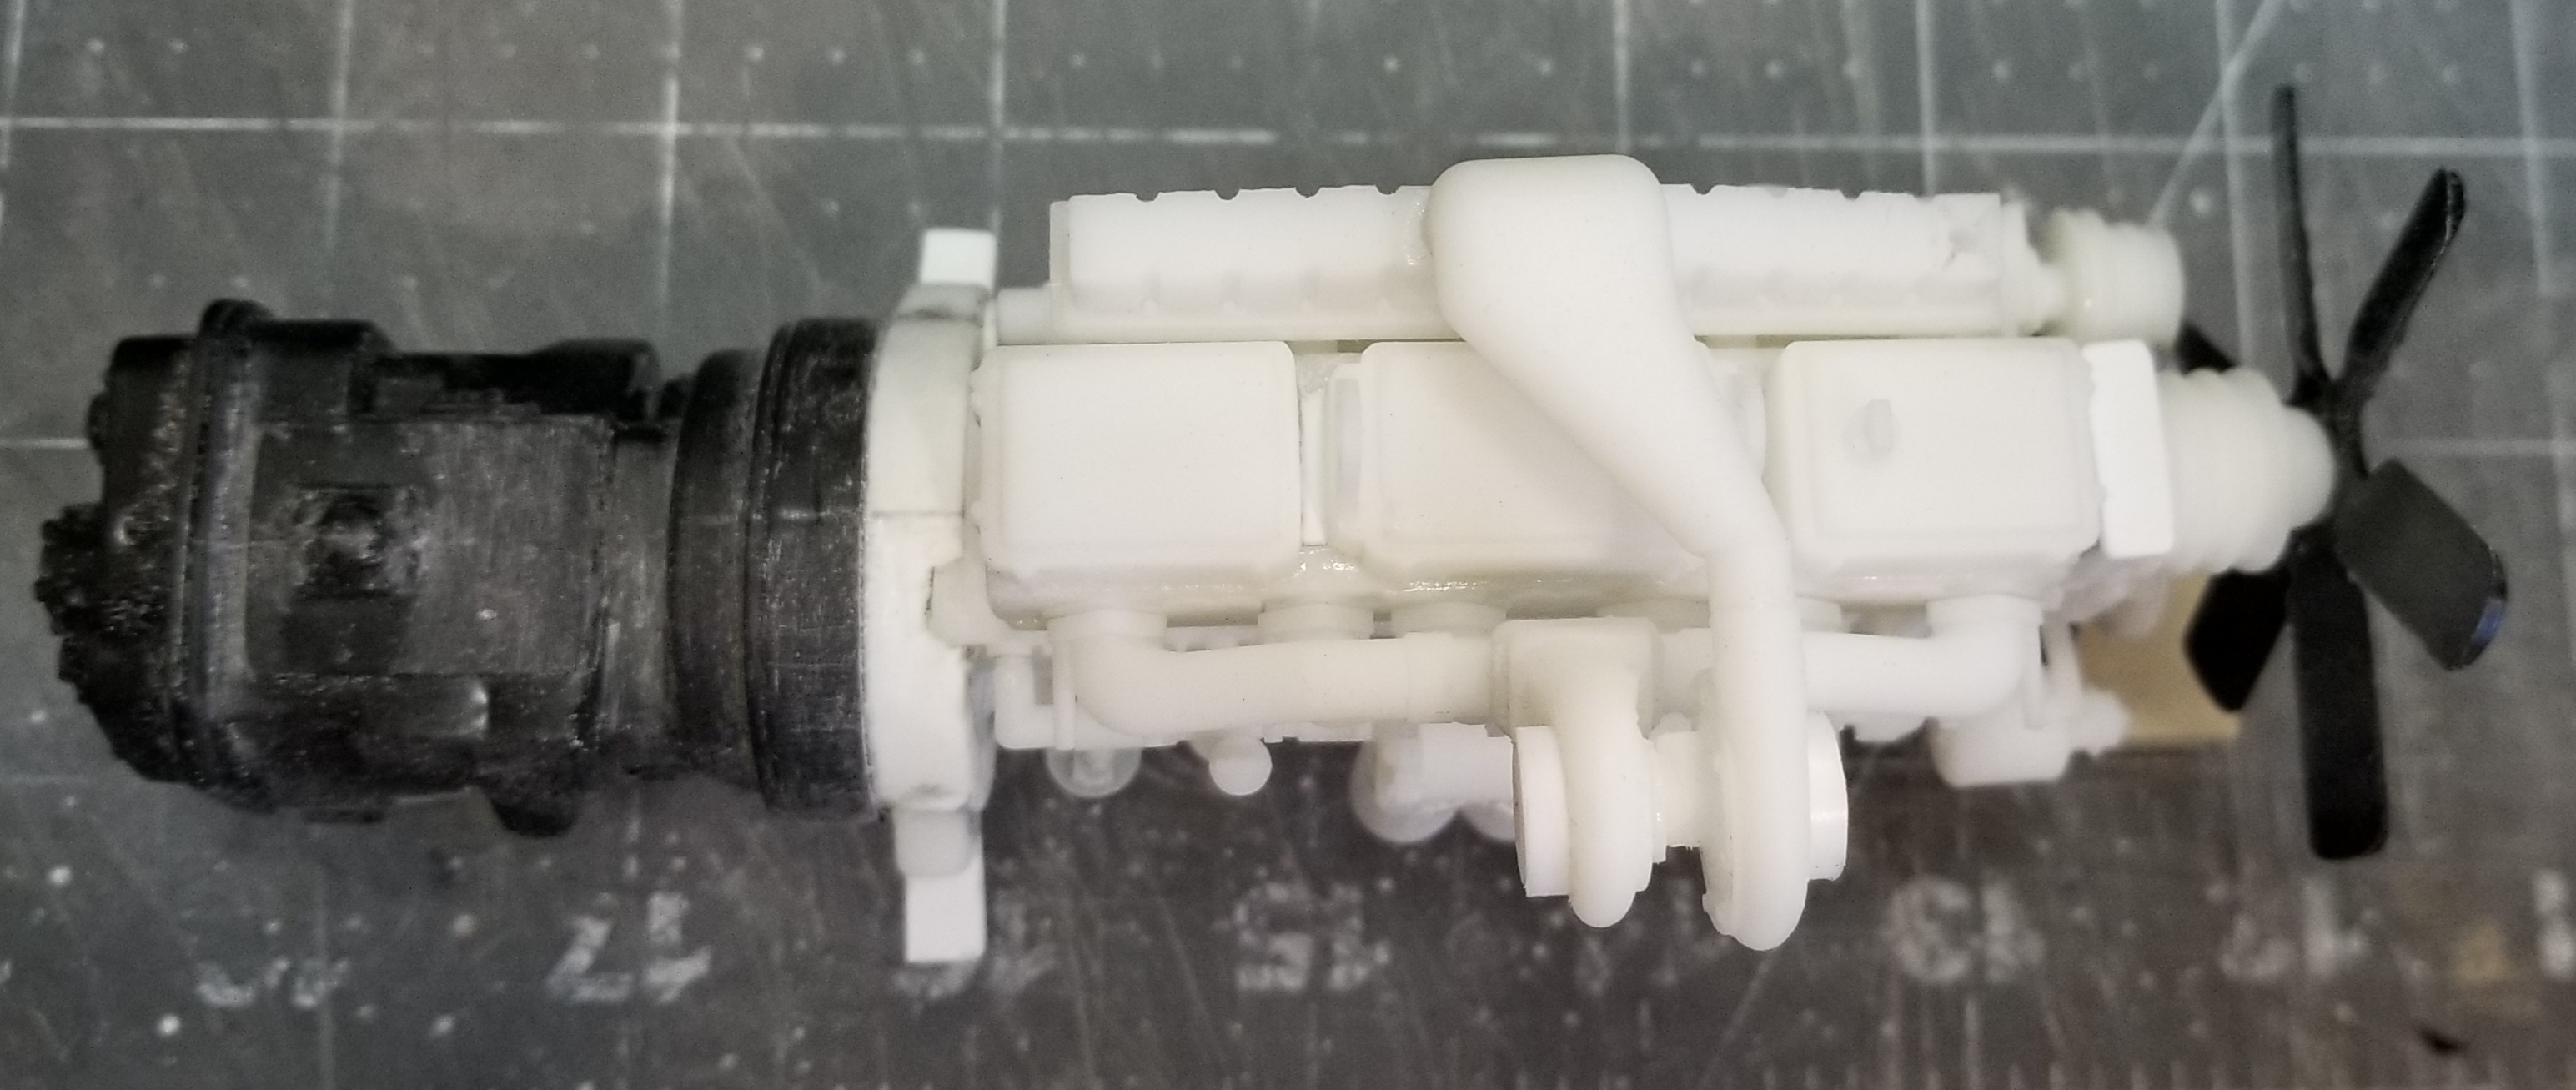
top view of the engine.
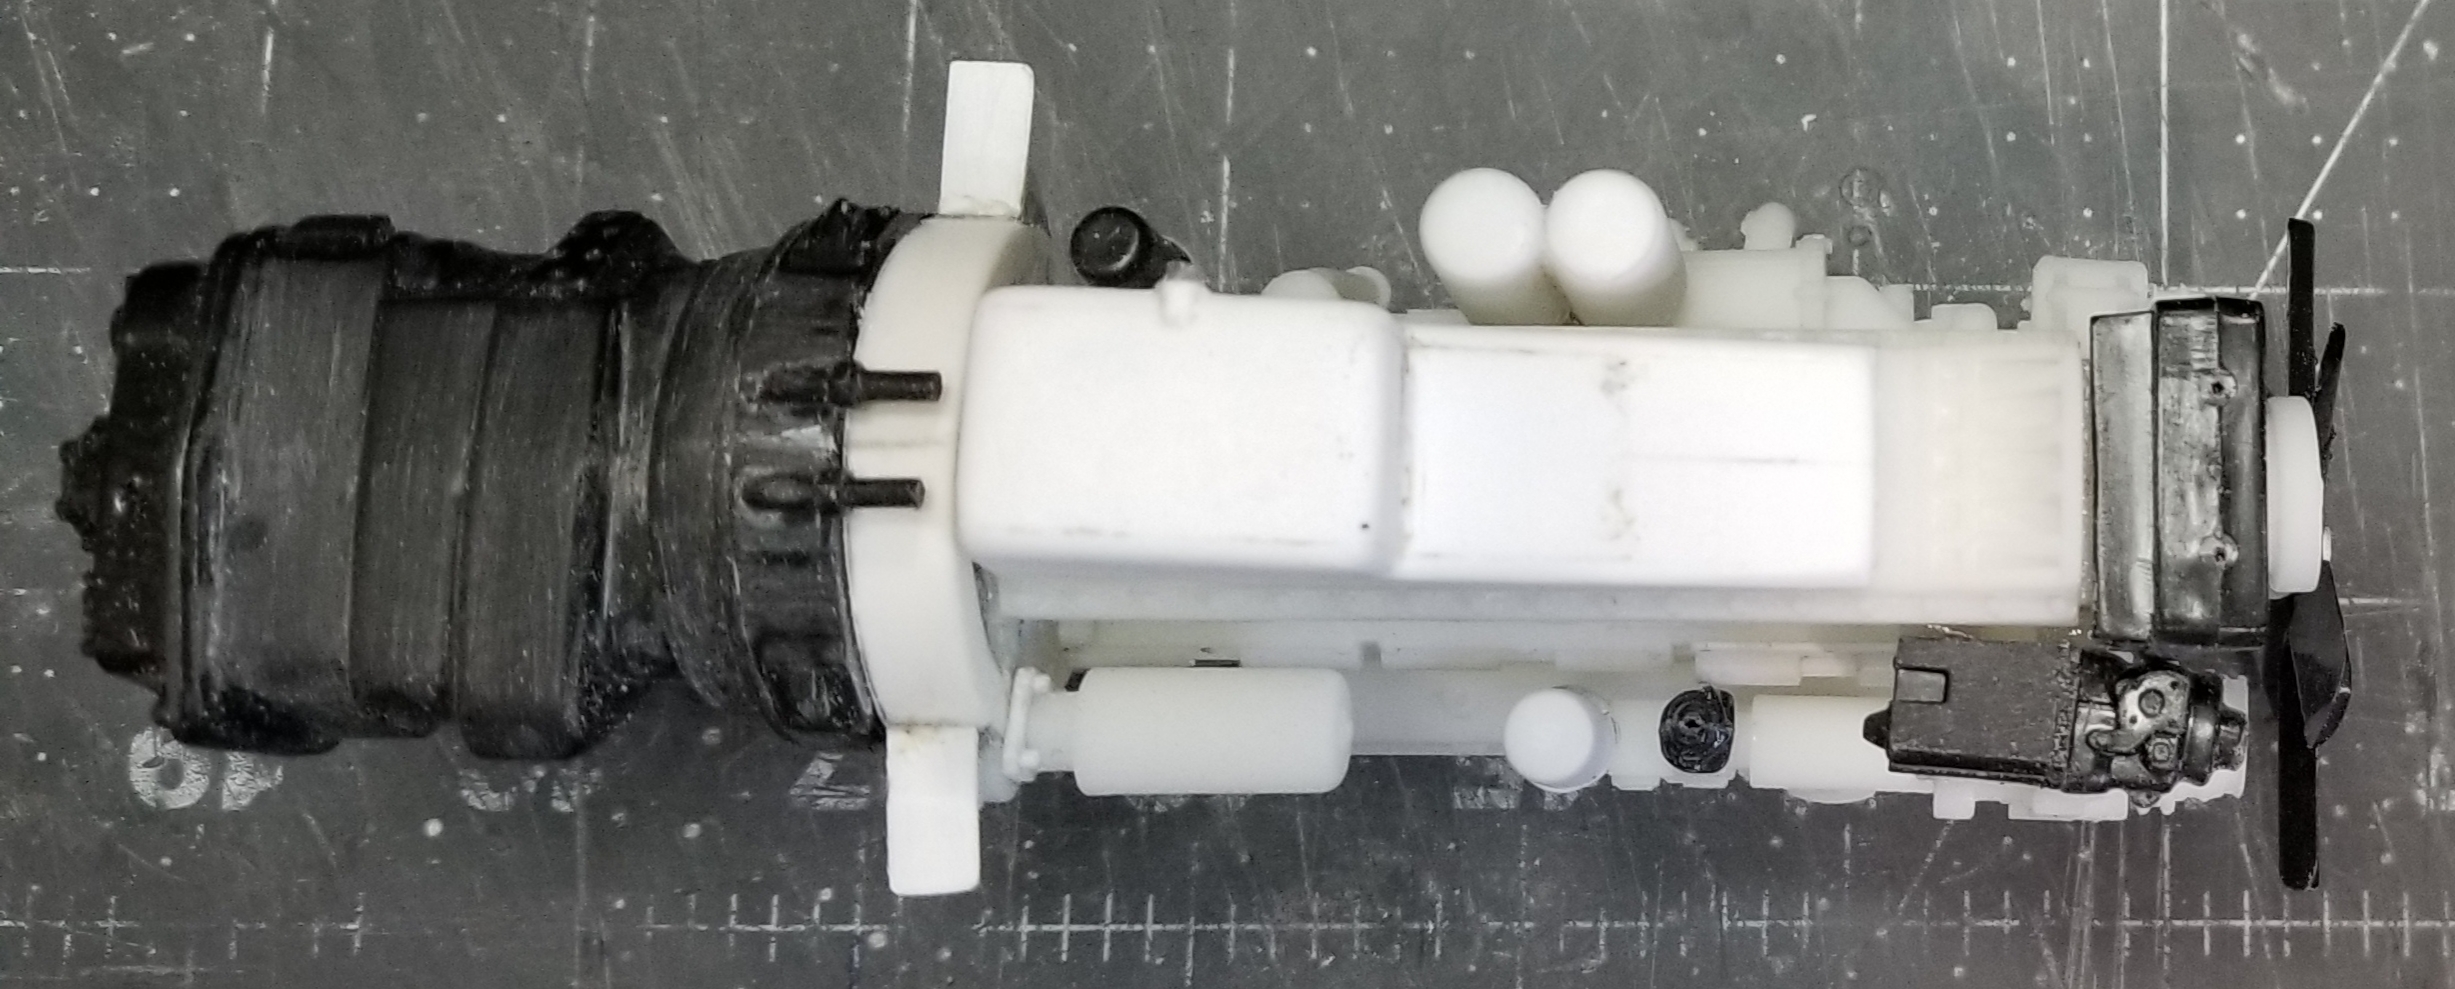
bottom view of the engine. I had to modify the oil pan ( it comes with one for a farm tracter)
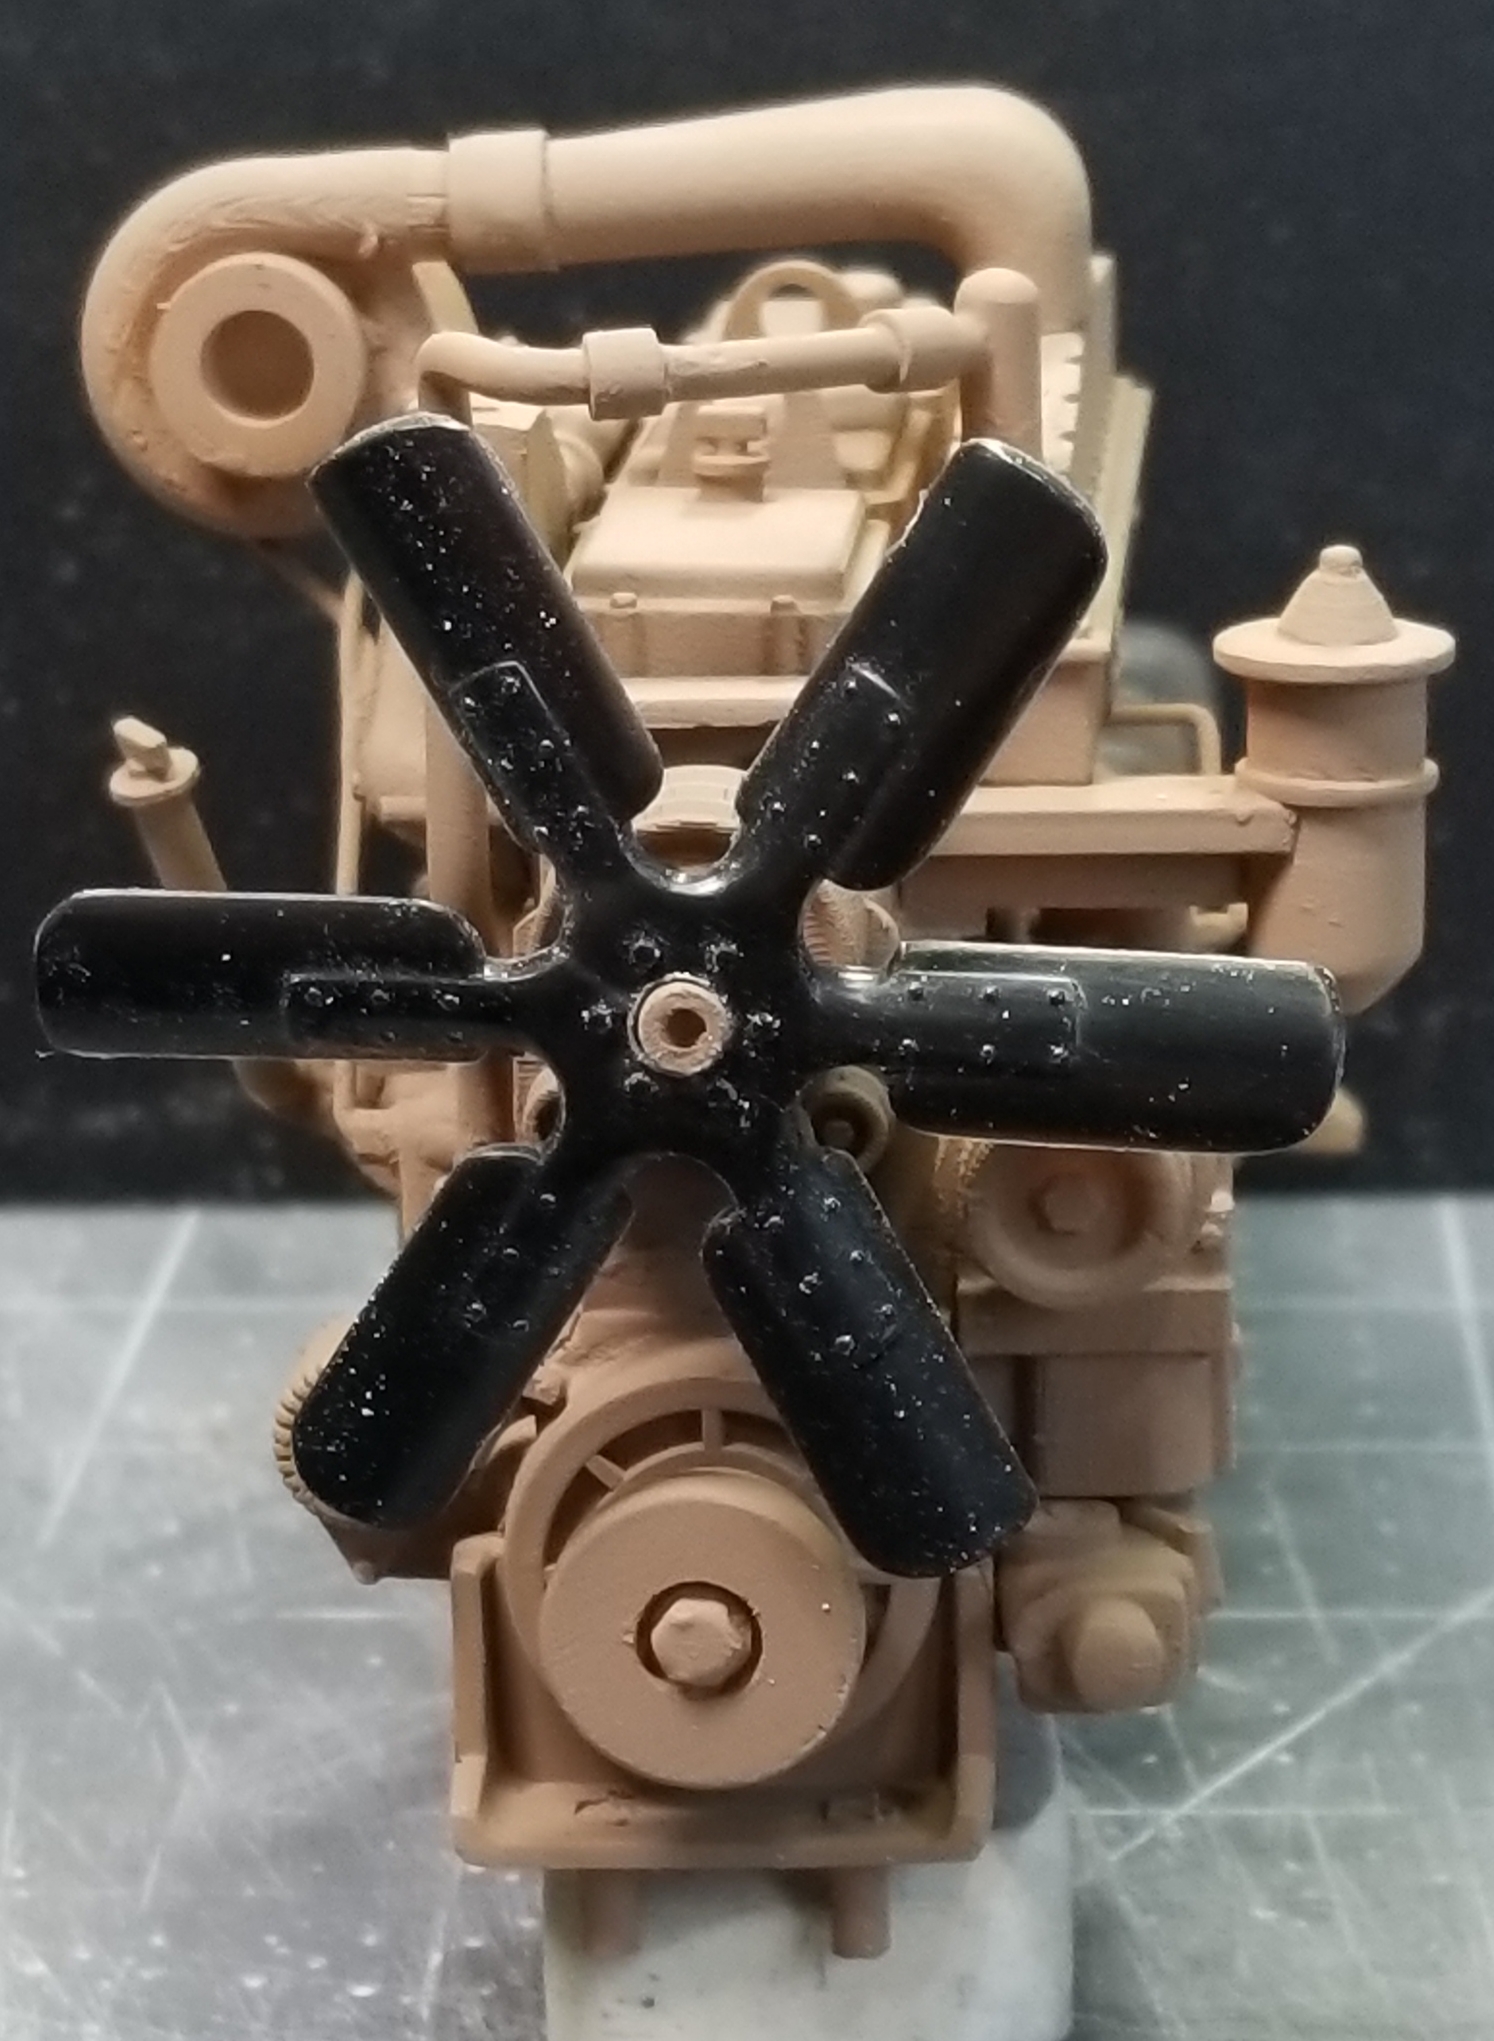
front view showing the kit fan.
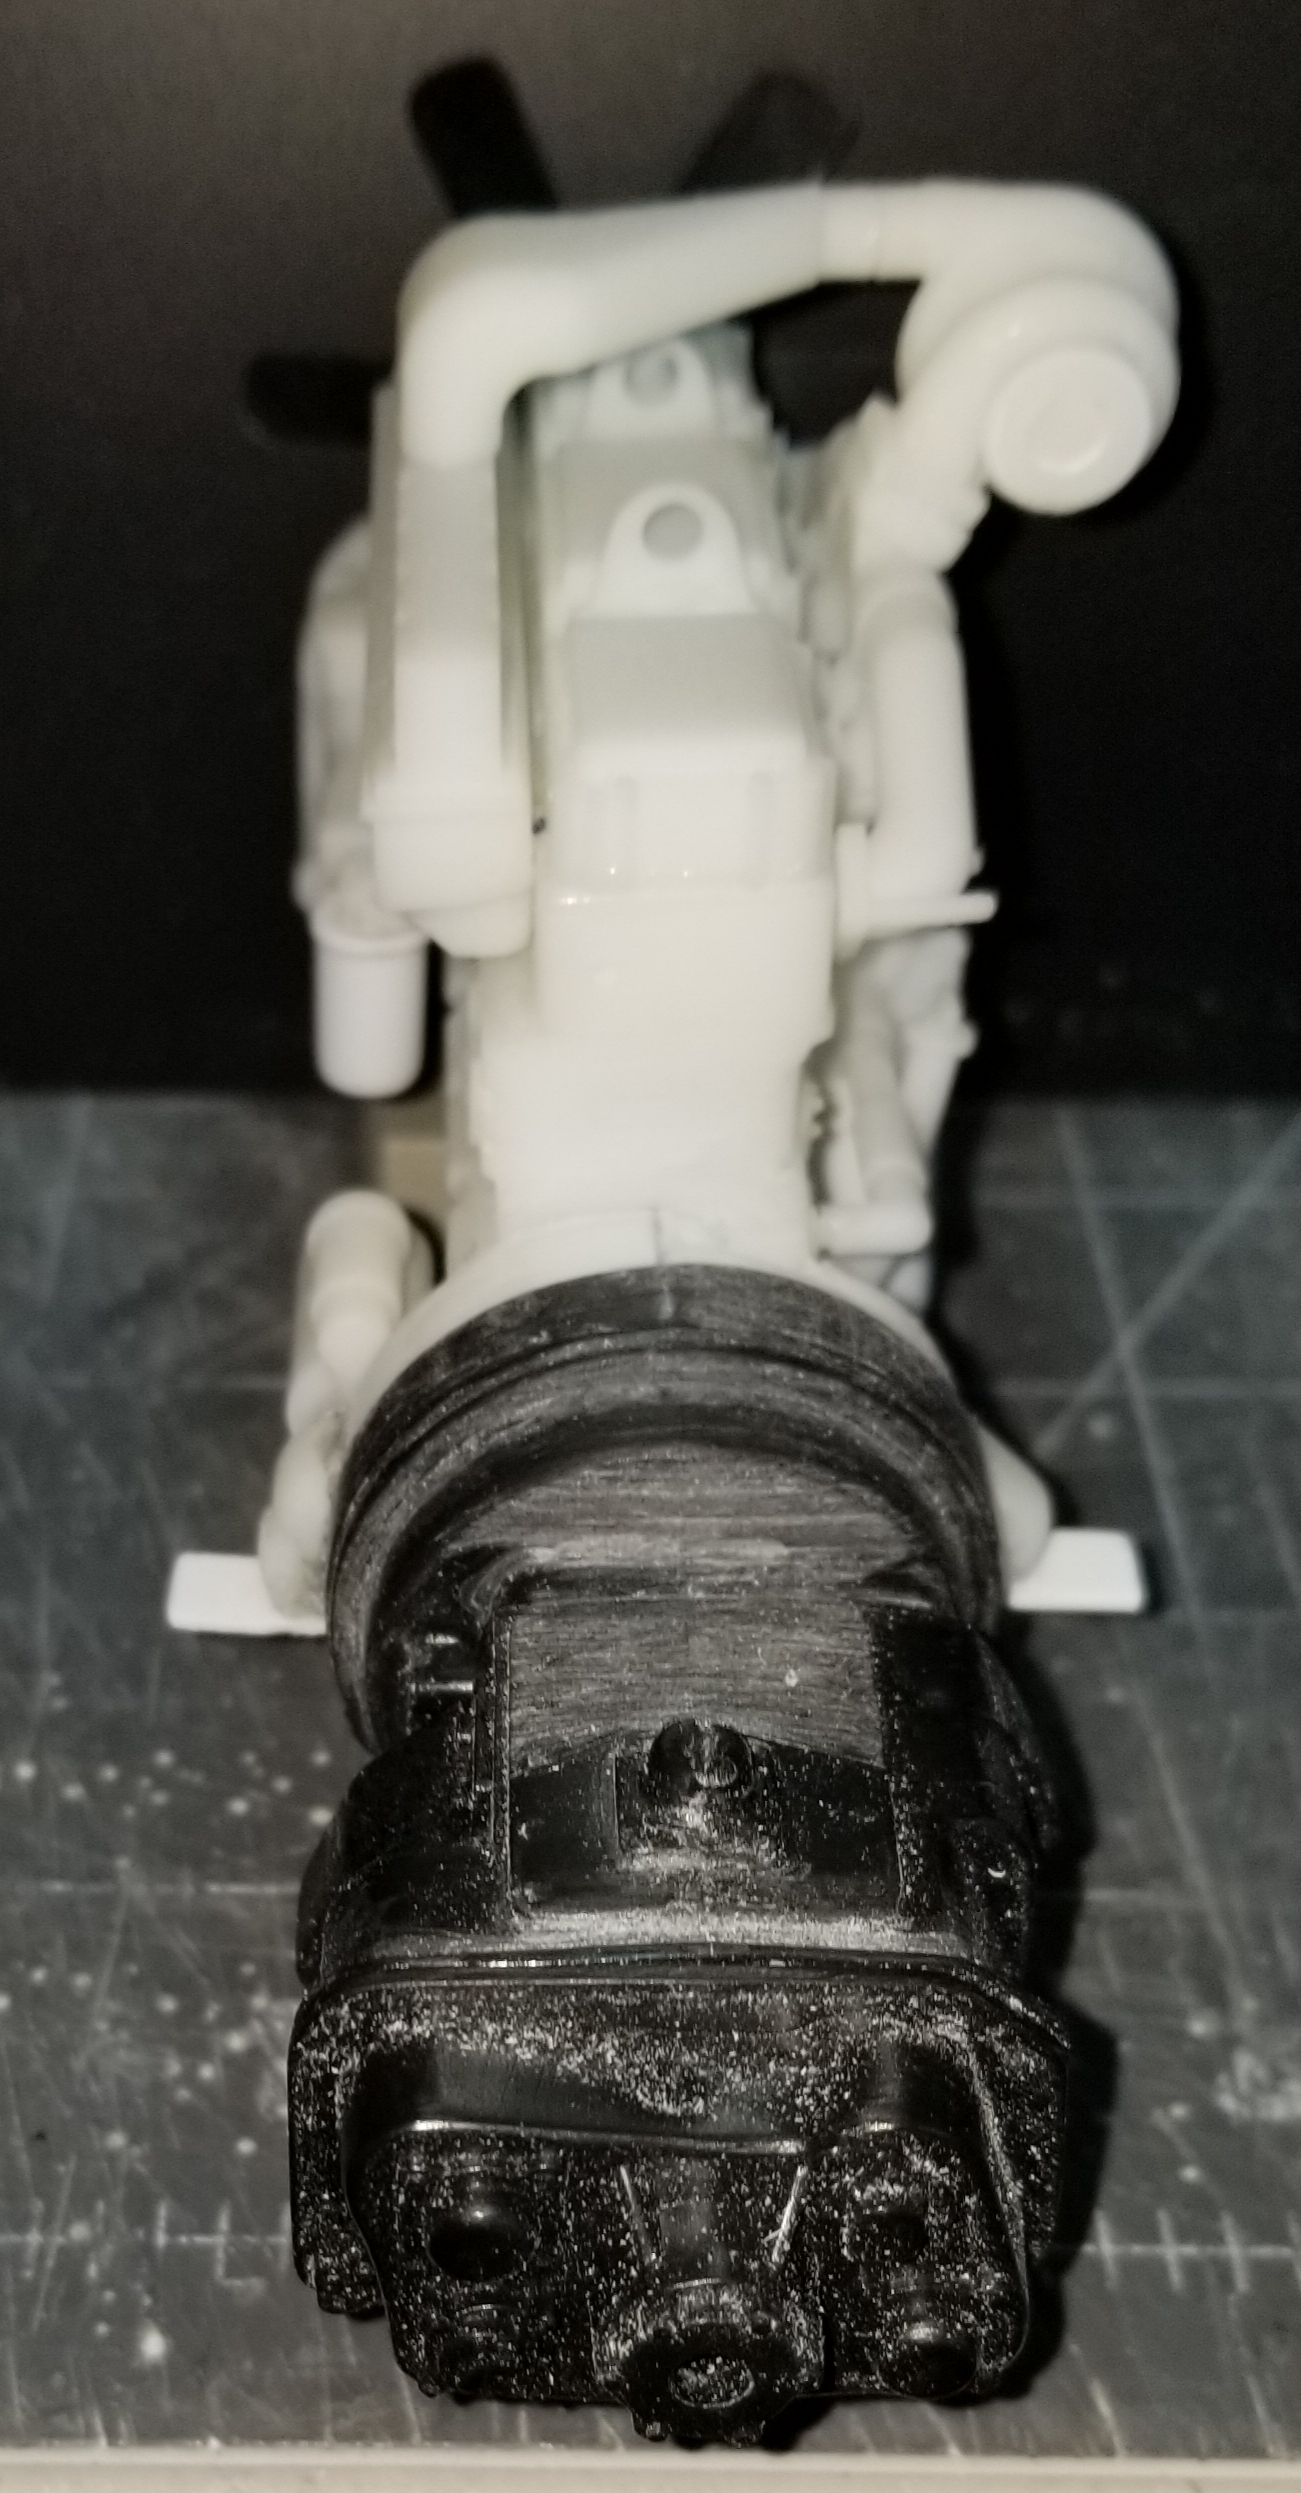
rear view of engine.
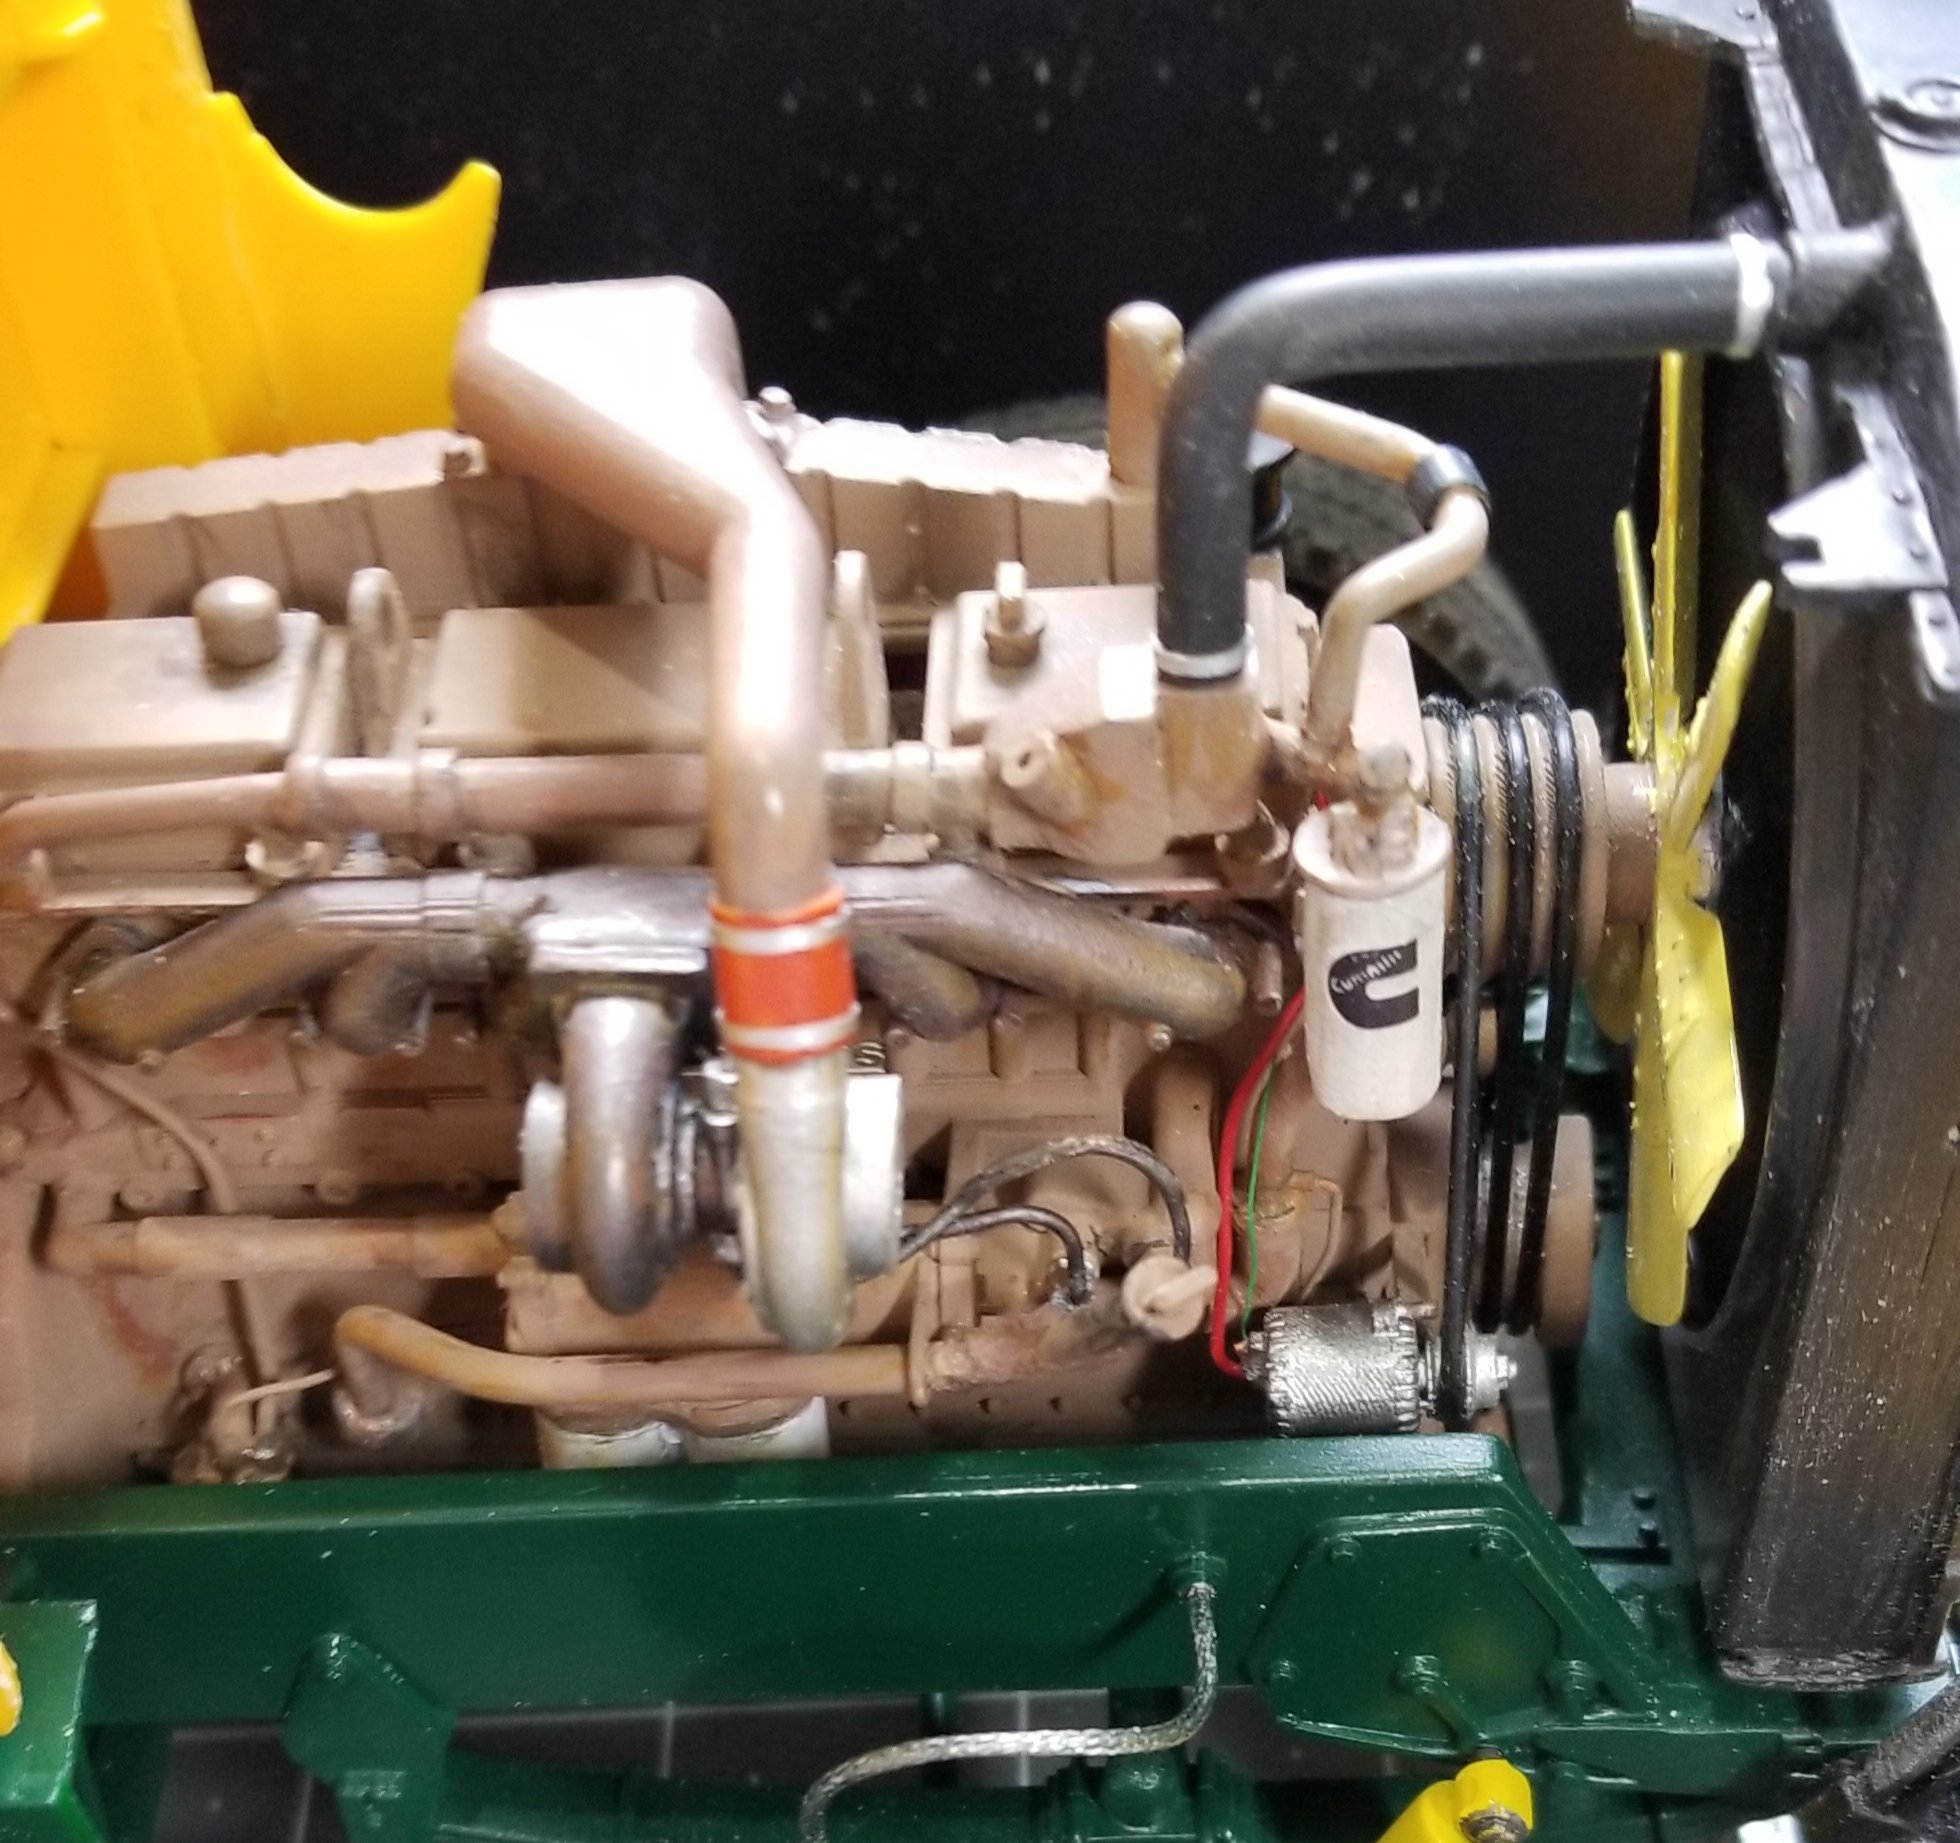
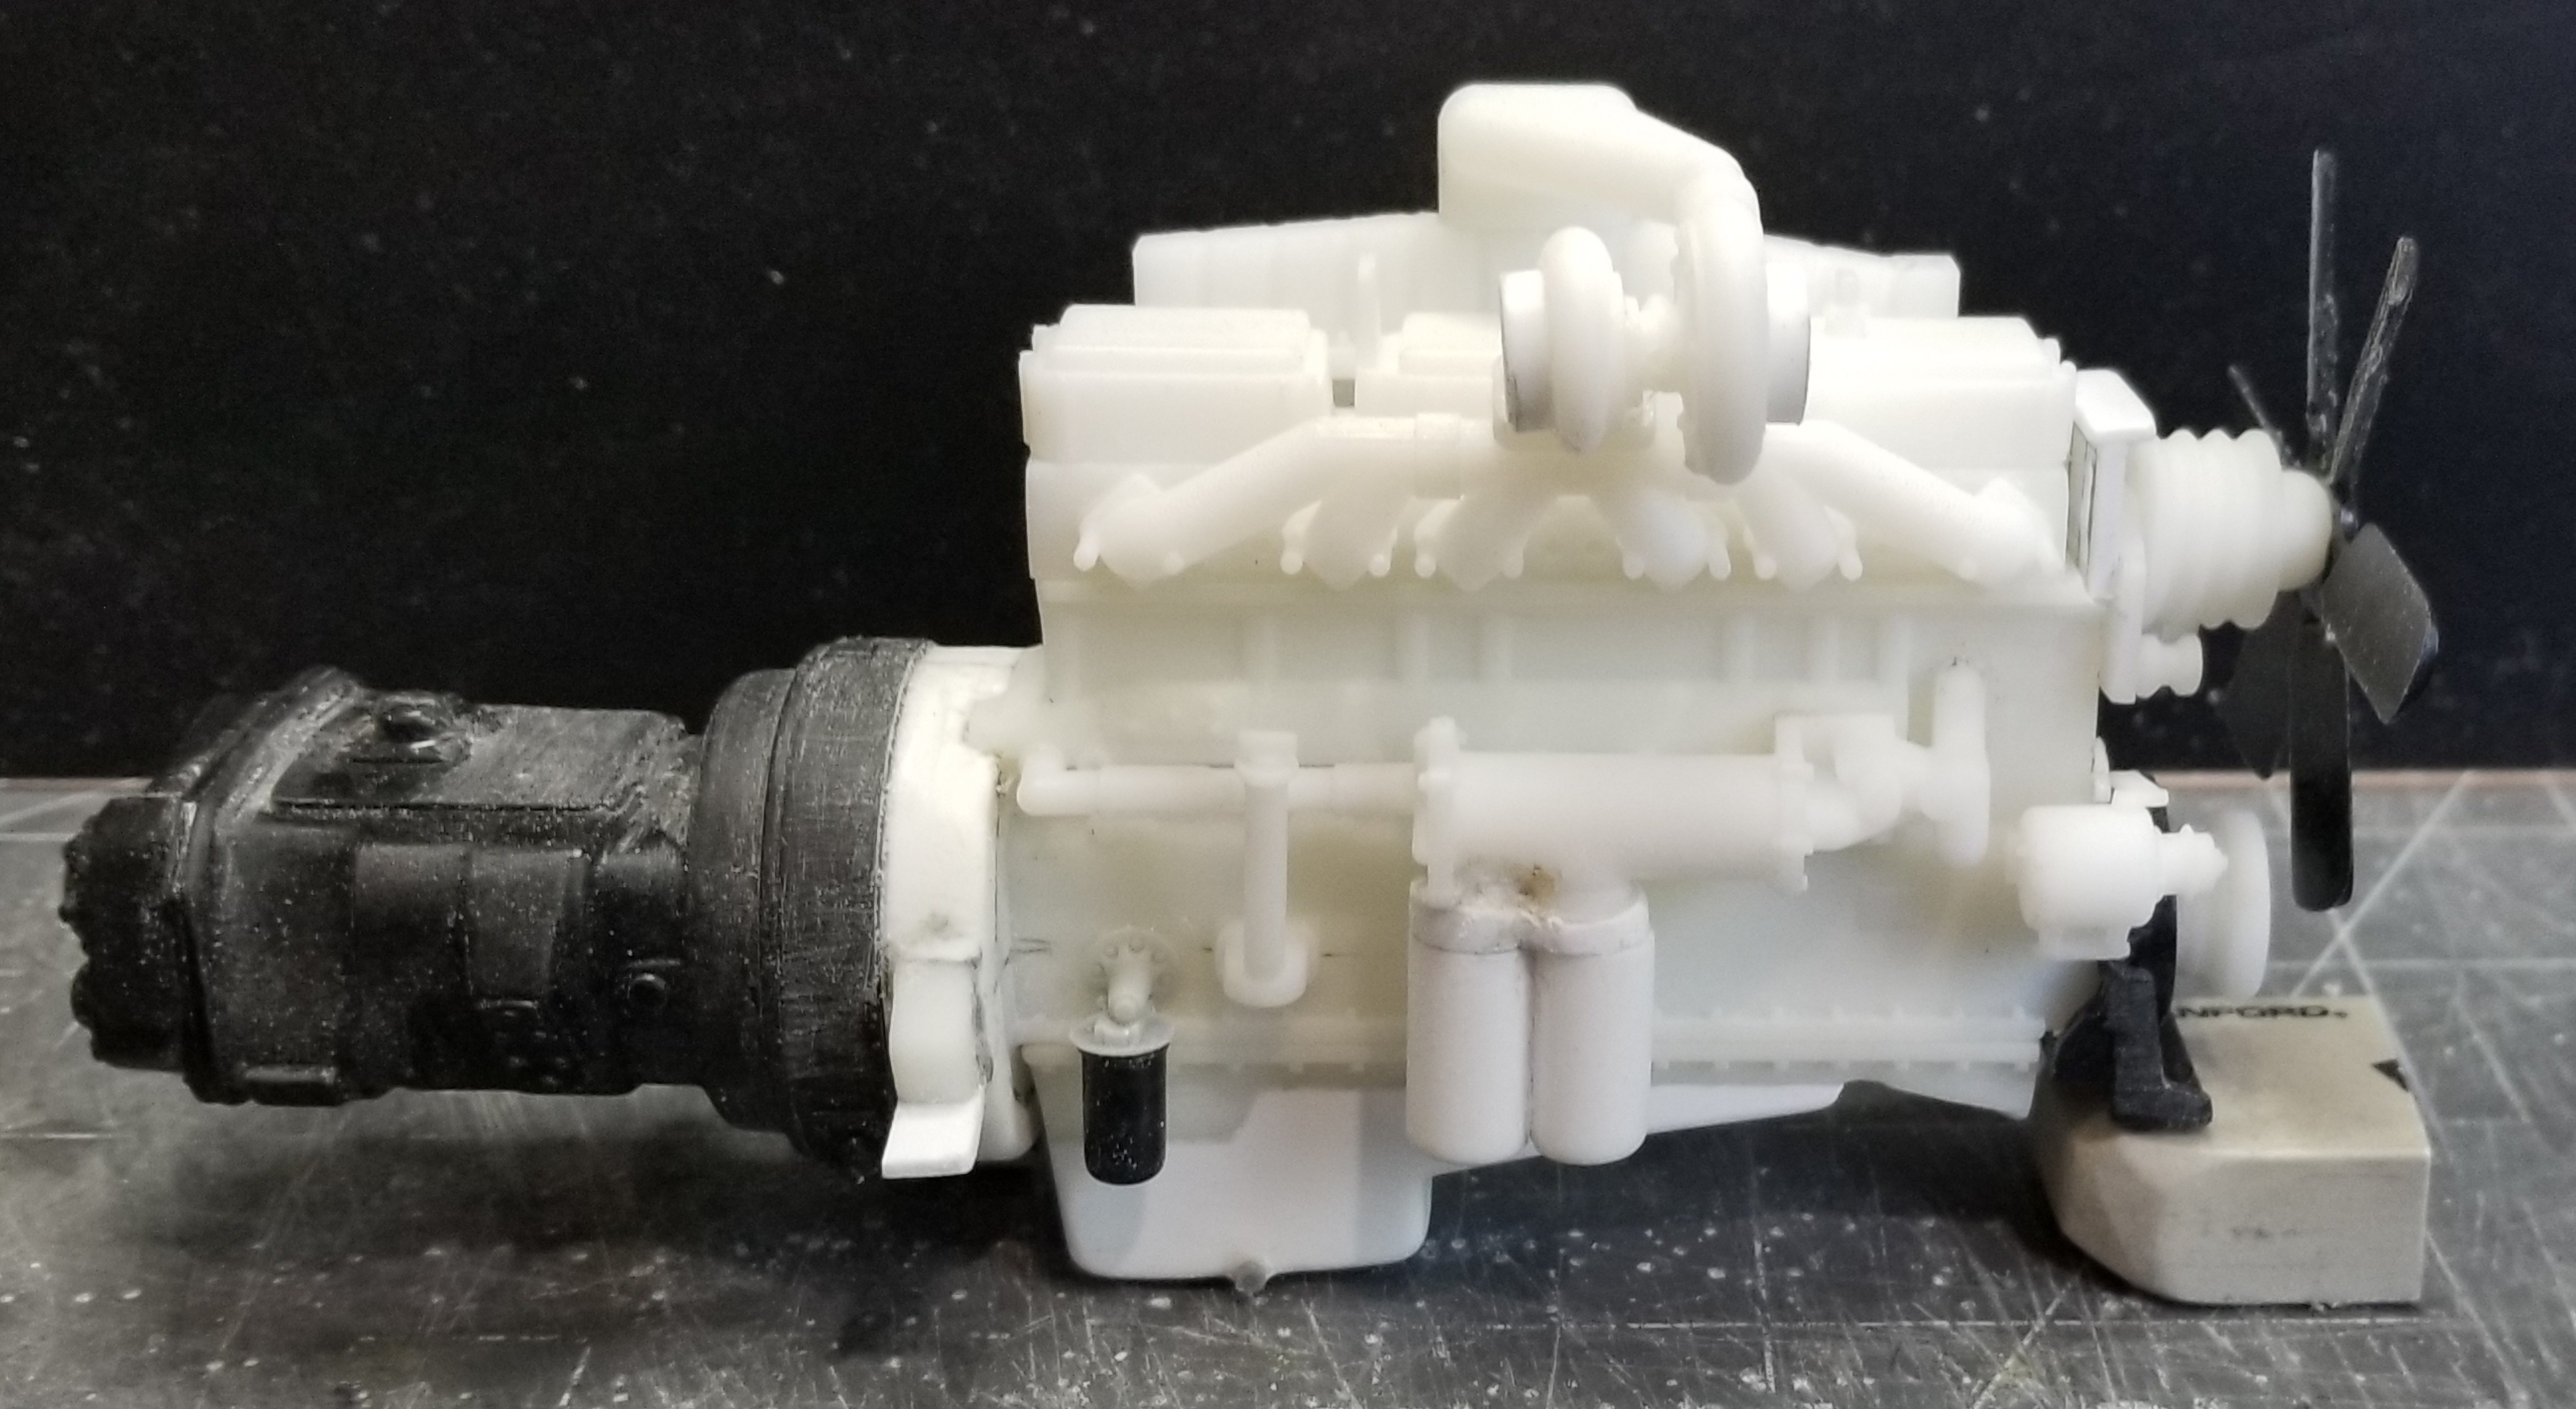
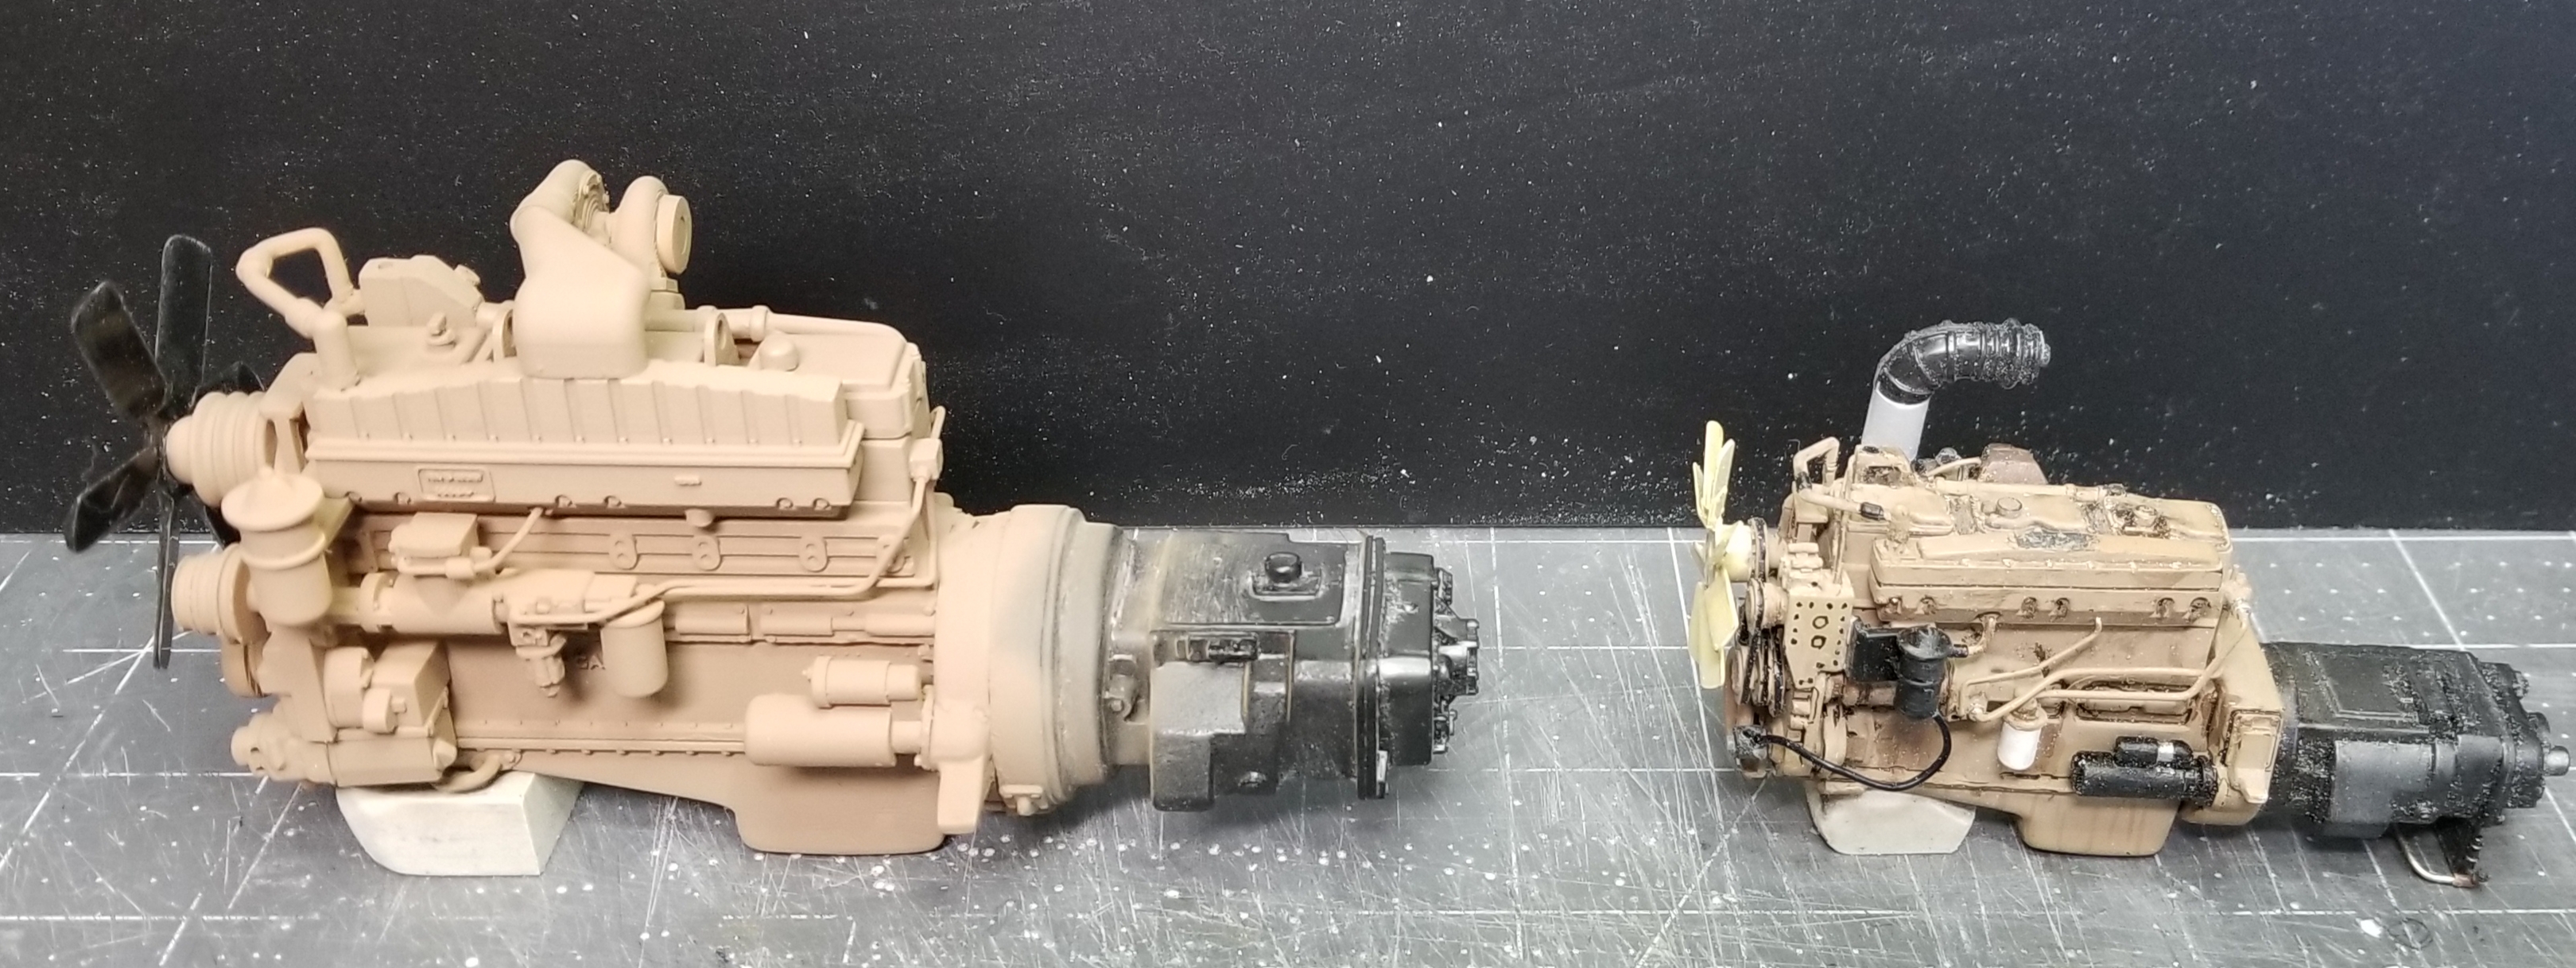
I added some more components to the engine and painted it with custom blended Cummins beige Tamiya paint.
this view shows the 1/16 scale Cummins NTA855 big cam on the left and the 1/24 scale Italeri Cummins NTC-400 on the right.
this view shows the fuel filter that I added plus the fuel and air lines. You can also see the water crossover pipe at the upper left, also I made a power steering fluid reservoir from scratch.
this view shows the small filter at the rear of the engine. I modified the oil dip stick tube, moved it forward to clear the exhaust down pipe. Between the exhaust manifold and the three heads I added from scratch a water manifold and lower pipe that connects to the radiator. I based this off of the 1/24 Italeri Cummins. Also I added the turbo oil lines.
this view shows the crossover pipe to the water manifold.
this view shows the fan, I still need to add the fan clutch and paint it yellow/white.
this view shows the tee fitting I made from scratch to connect the fuel lines.
this view shows the engine sitting in the frame. Well that's it for now be back with more updates soon.
Ron G
-
1 hour ago, Mike77 said:
He just listed a bunch of tires yesterday.
Yeah Mike, but like I said, I don't want super singles. I think I found what I was looking for on the Ertl 1/16 Peterbilt dump truck, floats and more aggressive rear tires. Waiting for it to come in the mail.
Ron G
-


.jpeg.6e25038ec797d1effe83c7c264deac48.jpeg)
.jpeg.adf6e883a9a93cc77b2c7a159466f79f.jpeg)


1/16 lowboy trailer from Diecast Masters
in WIP: Model Trucks: Big Rigs and Heavy Equipment
Posted
They haven't released any pricing yet, probably will find out around the pre order time. When they let me know I'll post it here. If it's the same quality as their 1/50 scale trailer it should be realky sweet!
Ron G