jean-lloyd
-
Posts
14 -
Joined
-
Last visited
jean-lloyd's Achievements
MCM Member (2/6)
-
Also, in my penance for acting like a jerk the other day, I a few more things to add. Now that I've had a sober look all all of your photos (never feel like more detailed photos are a detriment to sharing your skills on the community!), I have some positive things to add that should have been included in that first, aggressively critical post. First: GREAT photos! I know exactly how hard it is to take/convert/post pictures of scale work. Your pics are great, and thanks for posting so many of them. We all appreciate the effort, time, and bravery it takes to post such a generous batch of pics to the site. Second: looking at your interior, what was your process on the dash/console/steering wheel wood accents? Third: Huge kudos on the engine wiring. It is so real looking that I completely overlooked it, and it's fantastic! I'm working on learning how to get outside the box to make great looking engines, and your 340 is looking great! Fourth: What did you use on your trim? The hood pins look really good, but more importantly, I'm looking at your detail work on the Challenger T/A emblem on the back of of the rear spoiler. I'm terrible at that stuff, and the work is fine enough that it can't have been done with BMF. Did you dry-brush that with silver? Fifth: Your dash, even looking at pics that are so detailed, looks SO good. What did you use to get the outer rings done with the silver/chrome? There are more great things with this build that I could call out, but that's enough for now. Screw the orange peel in the pink finish, that's an easy fix. There's a TON with this build that it worth spending more time appreciating.
-
Great info, Casey and Fred! Casey, your point about recessing between the pulley lips is exactly what I was thinking as well. It seems like all of the kits I've ever worked on, the belts run flush with the outer radius of the pulleys (if not even proud of the profile!). I've been looking through my needle files to find something that has the right width to be able to mill around the outside of the pulleys and give that recessed look. I think I have a couple, but will need to experiment with them a bit. I've also been wracking my brain to figure out how to micro-mill something like the back of a #11 blade to add some tooth that could consistently remove material without compromising the circular integrity of the pulleys. If I were brave, I bet I could use the outer edge of a thin Dremel cutting/sanding/grinding wheel, but even at low speed, that would take a monstrously steady hand. Fred has a great point as well, the older v-groove belts (vs. the modern serpentine, wide/flat belts) were often deeper than they were wide, if not merely a 1:1 ratio. That means that along with thinning the belts, for complete accuracy, we should be narrowing them at like a 60-70 degree angle from the outer width to the inner width. I picked up a couple of different X-Acto blades this evening to help with cutting down the coves between the pulleys and the belts. As I get older, I fear that I've been gaining a greater understanding of the need for those bench lamps with the big magnifying lenses attached to them. I'll post more pics and thoughts as I practice and play more with building accurate belts. Thanks to all for the helpful replies!
-
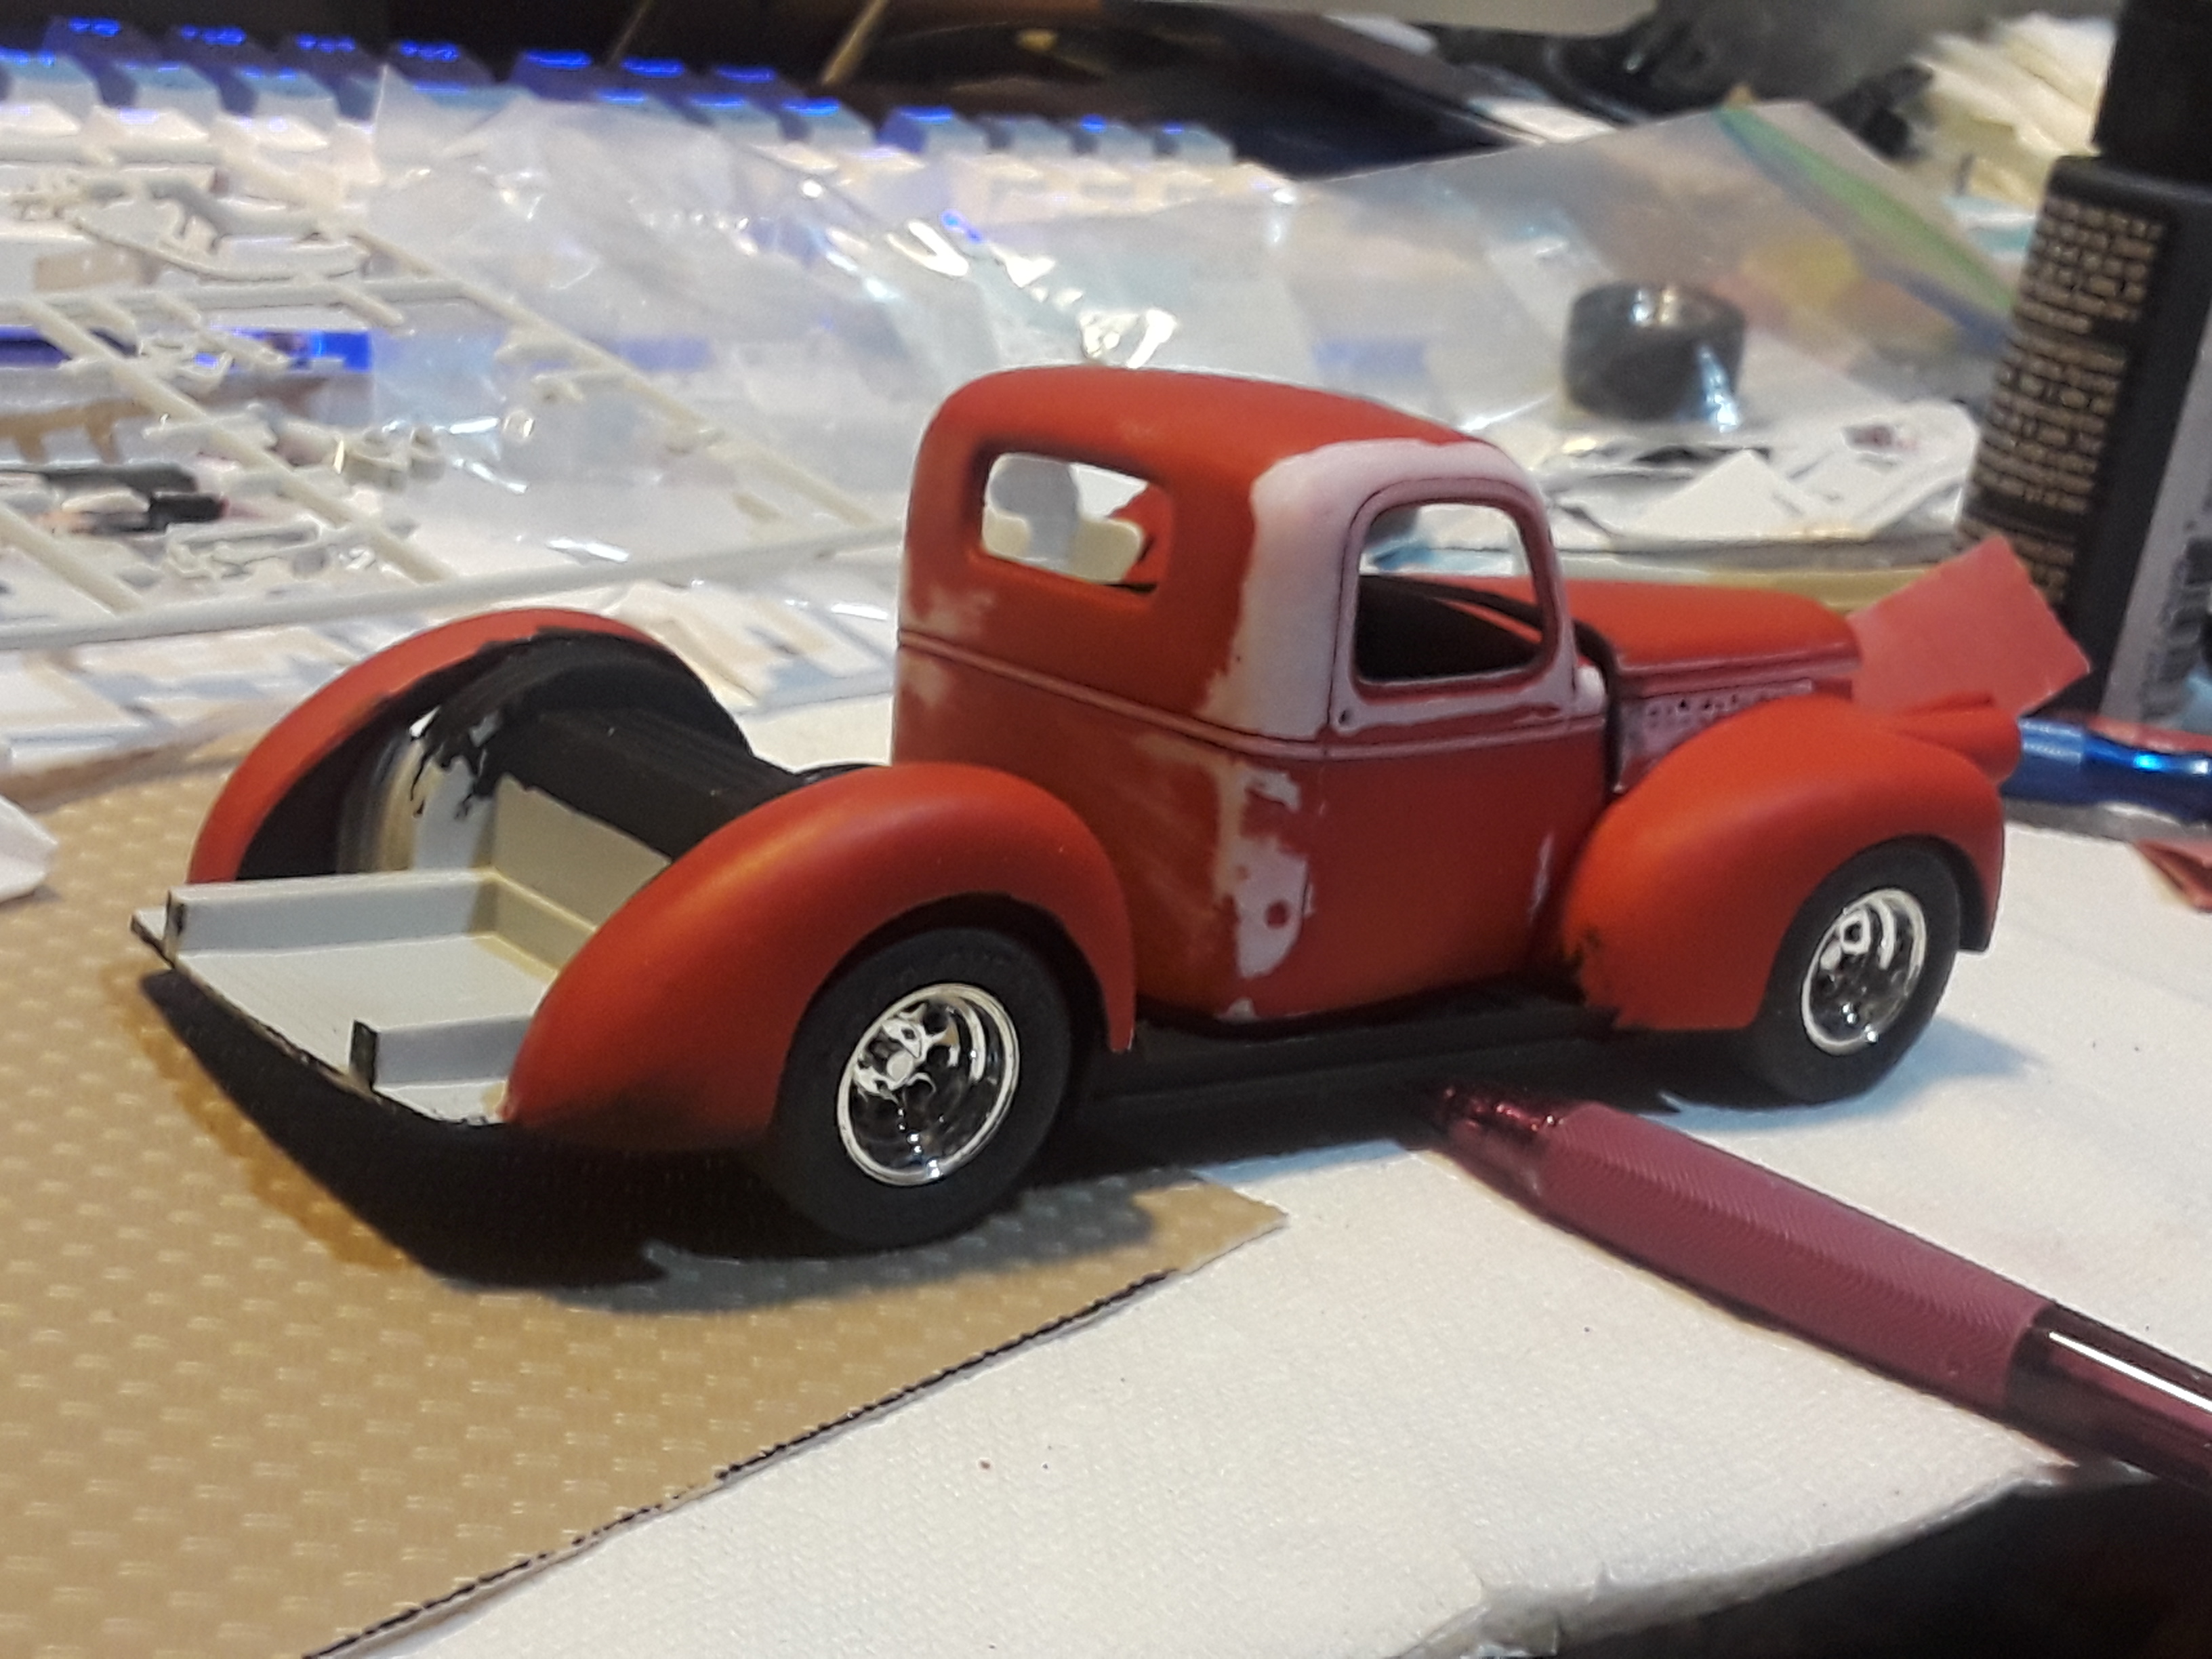
Thanks for the input, espo! I was thinking along the same lines as you, to more I trimmed down the body, the bigger the stock headlight assemblies looked. I tried nipping off the turn signal torpedoes and shortening the front of the mounts, but I still didn't like overall look. I wish I'd have taken pictures at that point, though, because it would have looked great on a custom street build. Instead, I just took the headlights all the way down into plane with the curve of the fenders. Since it's a dedicated race build, rather than French in the headlights, I just put in a backing on the holes and panel-filled. I think it's about ready to start sanding/fairing down, but I'm going to let it sit for a few more hours before I start. I used PPP to fill, and I like to let that dry completely before I start working it since it's not very good at structural integrity, and I have a couple of points where it's a little more than 1/16" thick. Here's a picture as the build sits right now, after some more priming/sanding and my "Bondo" pass on the door seams and trim lines:

-
Next stage: Hood/front clip sectioning milled into plane, initial coat sanding complete. I'm happy with the overall lines/flow, need to do a good bit of putty work, filling in door lines, body trim, then faring everything off for external painting. Since I spread the rear fenders to fit around the NASCAR t-bird chassis, I'm planning to back fill the insides of the fenders, and then scribe the rear bed panels down to fit low enough while covering the tubbed rear. Also need to extend the forward side of the rear fenders down to the bottom of the chassis and work in something that replicates the running boards while still being practical for go-fast-turn-left racing. Still haven't figured out what to do with the headlights on the front fenders, whether to plane them off and make the curve smooth, or to incorporate them into the design as is. There's also the option of nipping off the upper running light/blinker structure from the full headlight round. Thoughts/input appreciated.
-
Wow, just epic weathering skills. The panel rust-out on that green one is spectacular! Well done! Please divulge! What did you use for the grassy weeds growing next to the concrete? Must be something gossamer-thin!
-
Yeah, I'm really sorry about that post, I was a bit too far into a bottle of gin the other night, and my inner-arrogant-jerk came running to help me feel validated in the new community, so people would be impressed with my knowledge of hobby skills. It was a garbage post, and when I read what I wrote the next day, it was a shameful facepalm...took me like an hour of searching through all of my posts from that night to find it again. If it helps, I'm also just getting back into building for real again after a couple of decades (life, marriage, work, divorce, etc.), and, quite frankly, being the perfectionist that I am, my judgement on my own work is much more harsh. I would delete the original post, but I think leaving it there as a black mark on my account will keep me mindful of future stupidity. Friends don't let friends post on forums while drunk. I need more friends, man. Please forgive the pretentious d-baggery, and feel free to trash the builds that I'm planning to post soon.
-
Hi all So, I've been getting more into detailing my engines to look more realistic. Obviously, the injected mold parts in most kits leave a lot to be desired. I'm working on thinning the fan belts in order to make them look better in relation to the pulleys and such. Also, the fans that come with kits are always way too thick in scale. I've been having decent luck with just using a triangle needle file to thin the belts out, although it dawned on me tonight that I should also be thinning them down from the outside of the belt as well, to show a little bit of inset in the pulley groove. Thoughts, ideas on better/faster ways? Also, thinning down the cove area between the belt and the pulley gets tricky. I've been just using a sharp #11 blade to 'notch' out a sharp triangle after thinning the majority of the flat, but that gets really dicey. Here's an example of one that I'm working on, still attached to the sprue (the left side of the belt is thinned, the right is still stock). I haven't cut it away yet, and I always get a little sketchy about which part to nip through first so I don't compress the thinned belt to the point of breakage, but that's easy enough to figure out after a couple of "OOPS!" tries. lol Any helpful input would be much appreciated, thanks!
-
I know I'm new to the forums here, but I'm going to get critical. While your color choices are great, and the overall look and feel of the build is great, it's hard to overlook the obvious orange-peel, feathered tape lines and heavy build up of your finish. Also, I see several issues with your BMF application that result in hard/jagged edges that could easily be cleaned up in this project. I have dozens of models with the same issues, so it's not just you, for sure, but there is room for improvement. I'm not going to blow smoke up your skirt and tell you that this build is great. After being involved in a LOT of shows and such, I've had to learn the hard way about being open to critical opinions and assessments. As a quick fix, spend like $12 and invest in a package of Micromesh pads, and you'll be able to quickly cut through that spray can orange peel that you're getting. It's quick and fast to do, especially if you add some wet (water) to your sanding process. Once you've knocked down the physical imperfections, add some sort of wax, even if it's something like Johnson's paste wax. I'd recommend a good liquid automotive wax to start with. Regarding the paintline feathering that you see around the engine well color changes, just spend a little more time when you're running tape. Make sure to firmly run your finger or thumb nail across the seam. Also, if you're really looking for a sharp line, run your tape, then spray a light coat of clear prior to running your final top coat. Hope this helps. Keep crafting, for sure! Your build shows a lot of promise!
-
Yeah...Falling Water would have been much more elegant and desirable with that model as the real estate agent!
-
Model car related abbreviation?
jean-lloyd replied to 426 pack's topic in General Automotive Talk (Trucks and Cars)
DWIG - Damnit! Where'd It Go?! Usually happens right at the end of a successful build sequence, when you drop a piece that is crucial to the entire project, and it hits the ground normally but then does that *crazy bounce that sends it skipping off to the most unlikely place you'd ever look. * this acronym is NOT reserved for scale modeling alone...in fact, the effect is directly proportionate to both the size and price of the dropped component in all projects. [EDIT] I just saw that Jantrix beat me to the cleverness...I'm still going to hold out that my shorter acronym is more efficient, though, and carries the same emotional weight. -
I'm new to the site, and I just subscribed to the magazine, and also bought a digital download of issue #205 (or I think that was the issue), but I haven't seen any links in my email re: getting the digital copy of the magazine. I'd love to buy more of the past digital issues...is there some sort of wait period? Please advise, thank you!
-
WHOOPS! I just noticed that I should have posted this in the "Workbench" channel, sorry about that! Any mods available, please transplant me over there. Friggin' noobs...I'm why we can't have nice things...
-
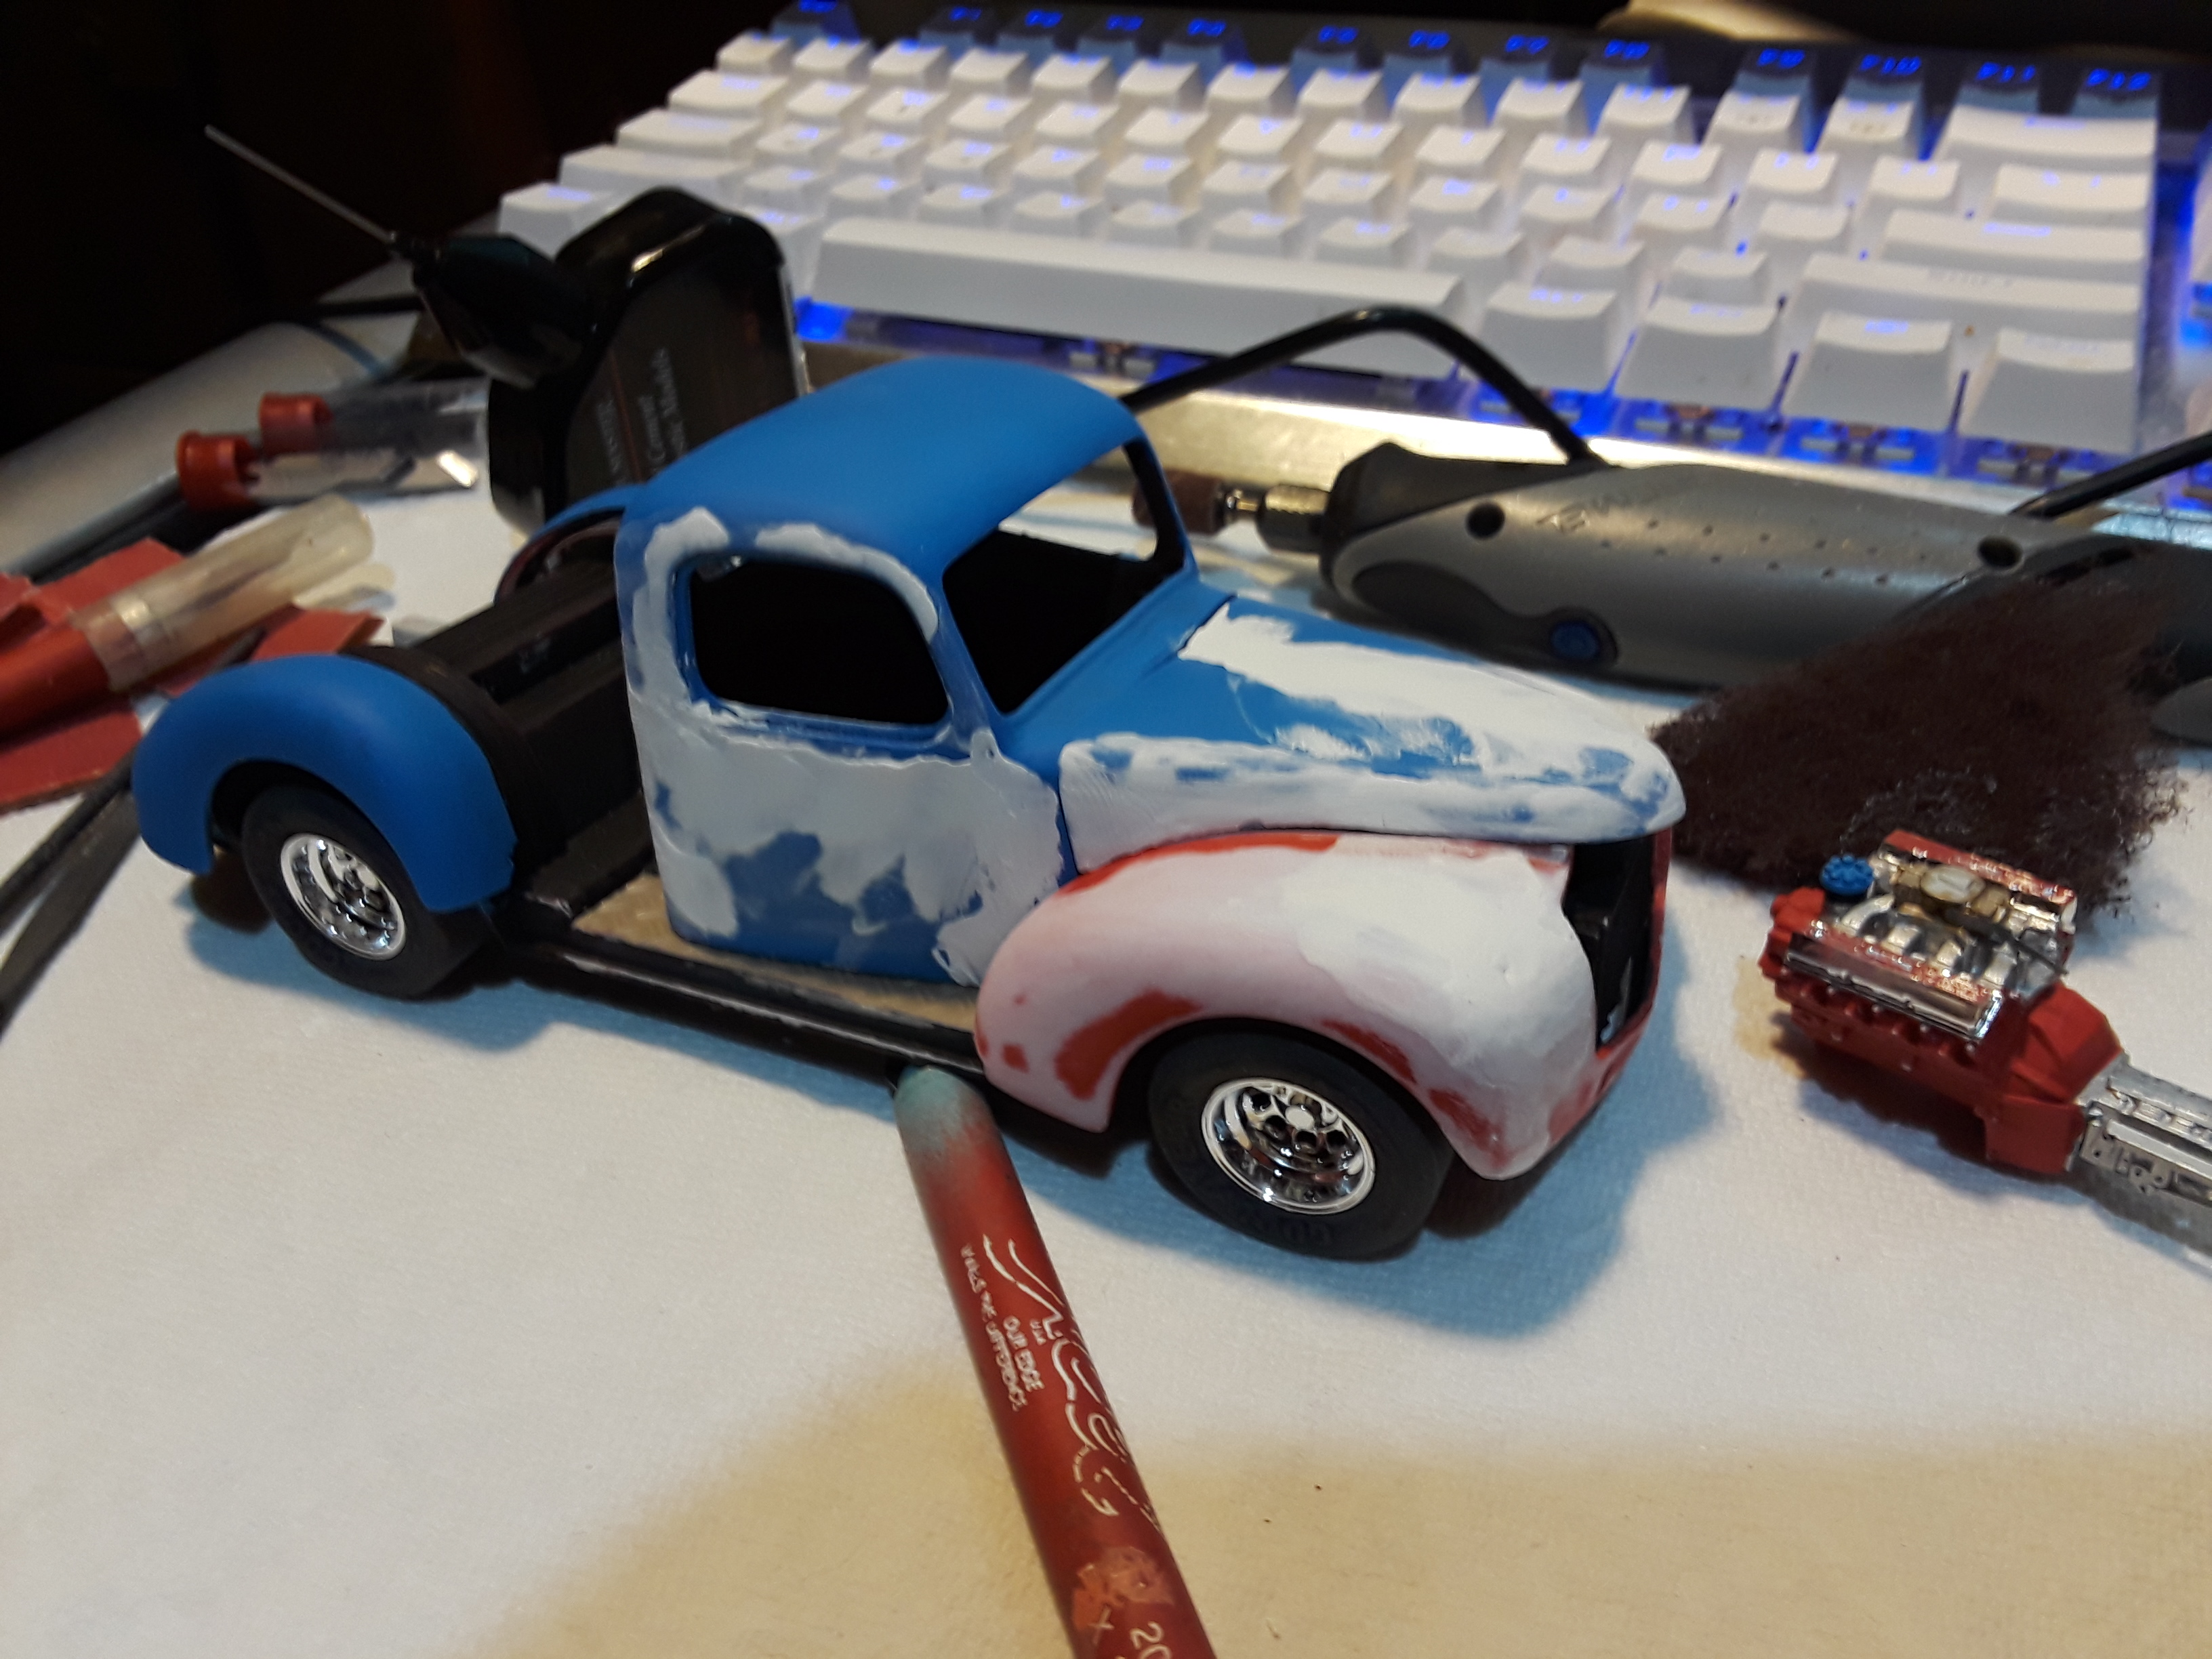
First post for me on this forum! Was happy to find this community. I'm working on building a fictional concept dirt track race truck that combines the power/speed of a NASCAR chassis and the idea of a "full-sized dwarf sprint" car. Starting with the basic AMT NASCAR Thunderbird (I think this is a mid 90's Bill Elliot Coors Light kit), I've been working on bashing an AMT '41 Chevy Pickup kit onto it. Thus far, all I've done to the NASCAR frame/tub is to clip the front radiator shroud and trimmed down the firewall to fit/work with the '41 Chevy cab/engine well. Most of the time, when I do NASCAR->Real Car builds, I do a lot of heavy altering to the race frame and such, so this one has been a little different for me. The first major modification to the stock truck body that I've done is to section the cab/hood down about (what I think is) 6 inches. I left the fenders full size so far, because I like the look of the big, sexy and aged swells that they give to the vehicle. I thought about chopping the top a little bit, but I think I'm going to keep it stock, because it gives the whole thing that great look that dwarf sprints give with all of the old-timey scaling that you see on them. Regarding the back fenders, I'm working to extending the bottom forward portion down to match the same height as the front fenders, and then building the connecting, pared-down running boards out between the front/rear fenders. By using the NASCAR tubbed chassis on the back end, I'm widening the bed-stretch about 12" from wheel to wheel between fenders to allow for the NASCAR rear-end and wheels/tires to be used. I still haven't decided whether I'm going to extend the insides of the fenders and use the stock bed width, or stretch the bed out to the wider fender stretch. Any thoughts or input would be welcomed! Here's a few pics of my frankenstrosity mocked up with the NASCAR wheels (still working on getting the sectioned hood/cowl into plane...the pencil is holding up the chassis to show how the wheels should look after the suspension is put in):
-
Hello all! I'm looking forward to chatting and collaborating with other scale car modelers on this site. Normally, I've kept to myself over the last 30 or so years of building, customizing, bashing, etc... I think there's a lot of value in sharing ideas with a strong community of like-minded/hobbied individuals. Hope to work with and hear from you all soon!