
papajohn97
-
Posts
522 -
Joined
-
Last visited
Content Type
Profiles
Forums
Events
Gallery
Posts posted by papajohn97
-
-
52 minutes ago, R. Thorne said:
Is the GX100 available in a spray can (I’m old and lazy)?
They do! “Mr Super Clear Gloss” and “Mr Super Clear UV Cut” (non-yellowing), both made by Gunze Mr Color. I always loved Tamiya TS-13 rattlecans but it eats decals. Think I’ll try these Mr Super Clear spray cans on my next shiny project.
-
48 minutes ago, R. Thorne said:
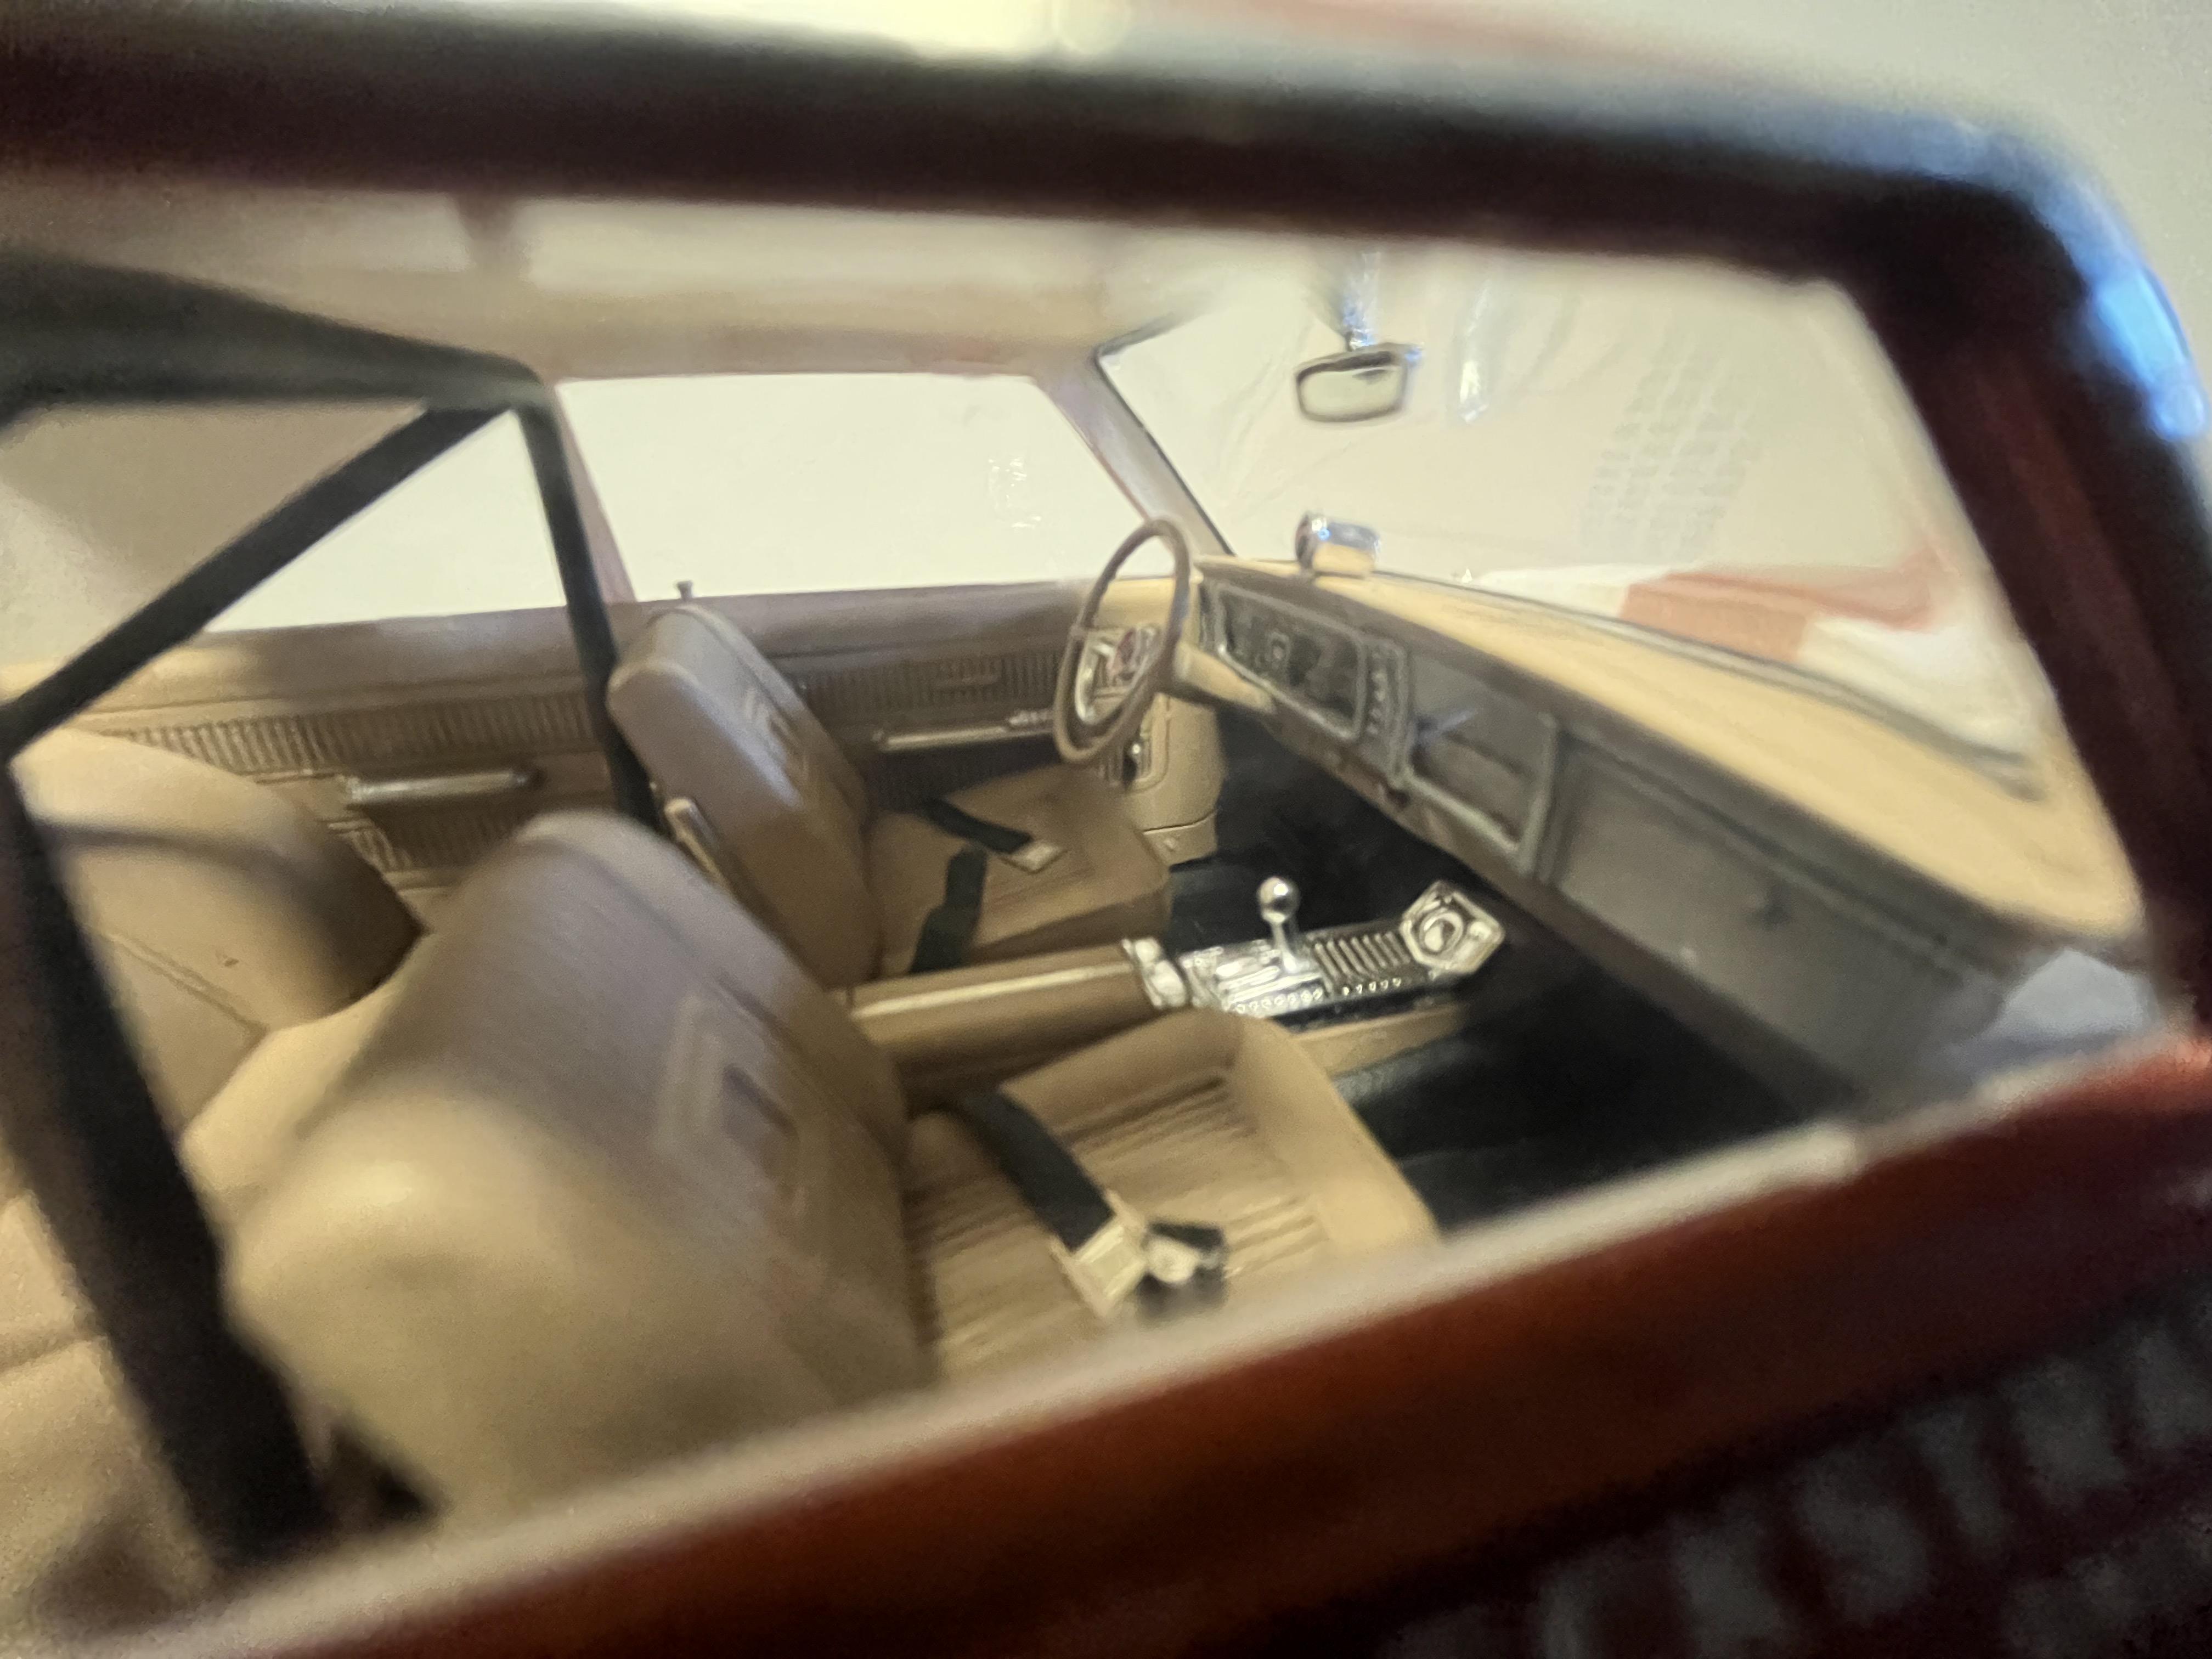
Not a 4 speed in Leal’s car?
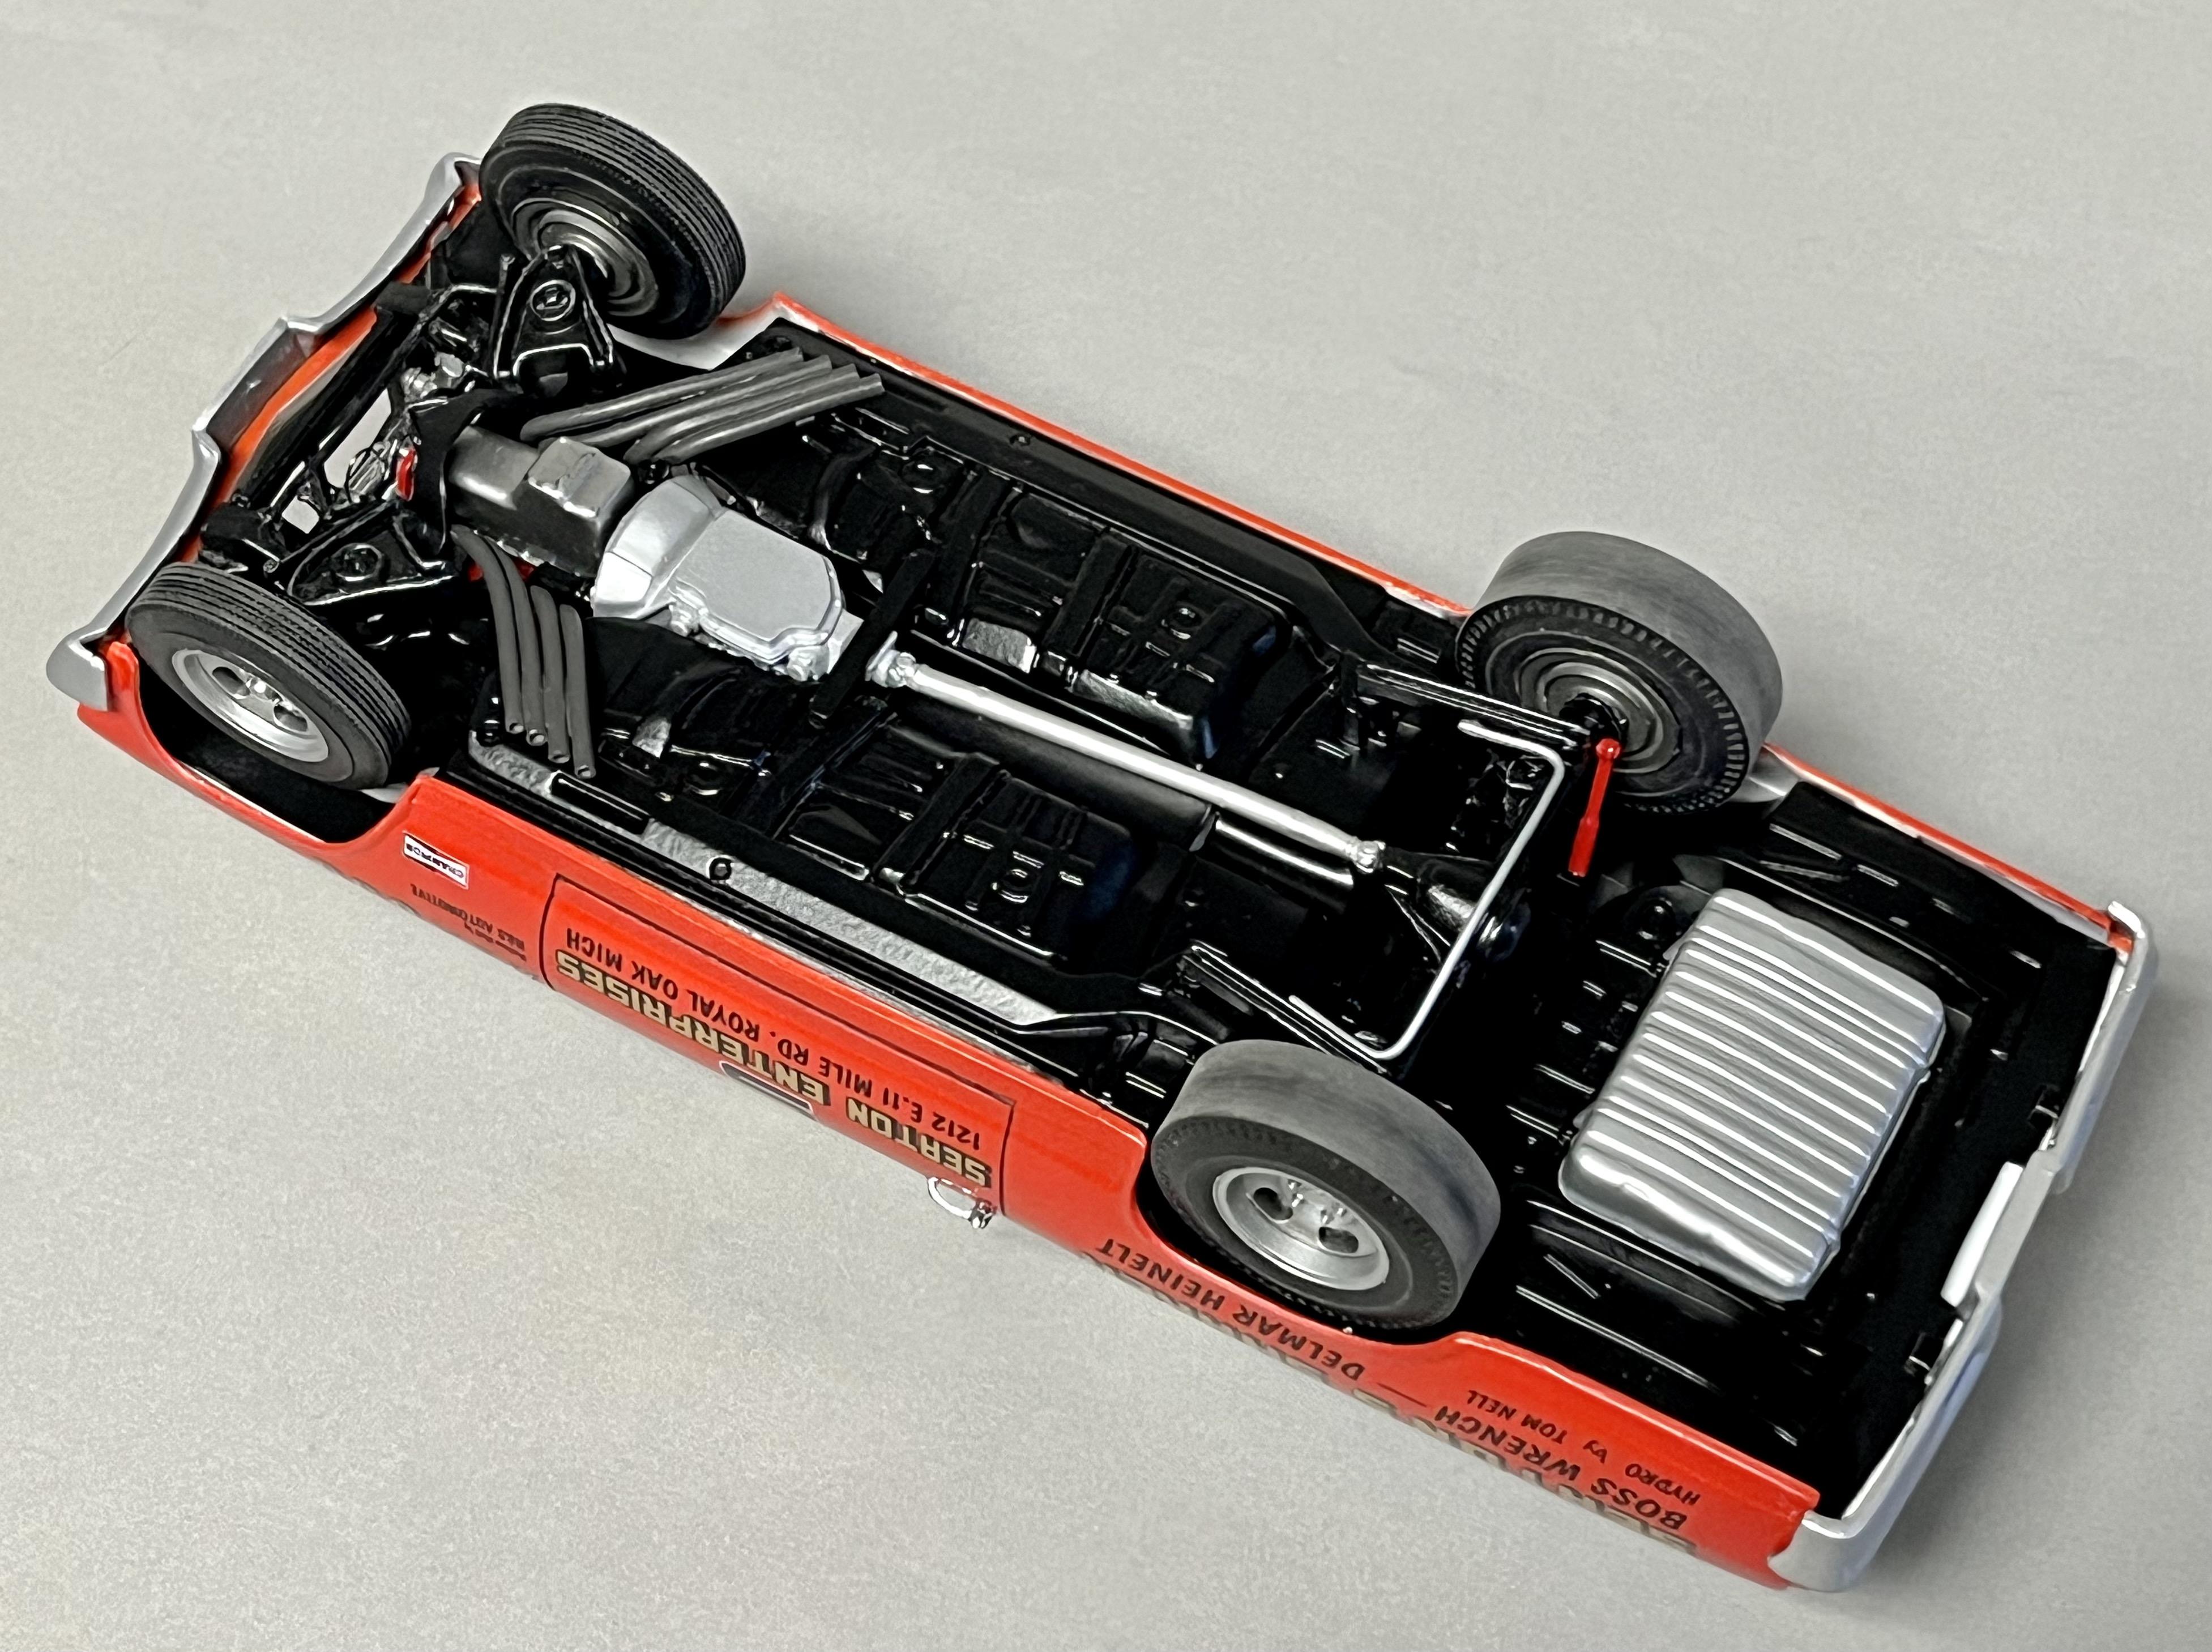
Oops! Four speed. Thank you for the correction. The coil is from the kit which specified mounting it perpendicular to the engine bay wall. I went parallel which I like the look of better. Also the entire underside of the chassis should be totally white (S&M wanted it to SHINE when they popped wheelies!) but I thought it might look like I forgot to paint it so I painted the frame rails black.
My scale modeling philosophy is fun over accuracy!
-
 1
1
-
-
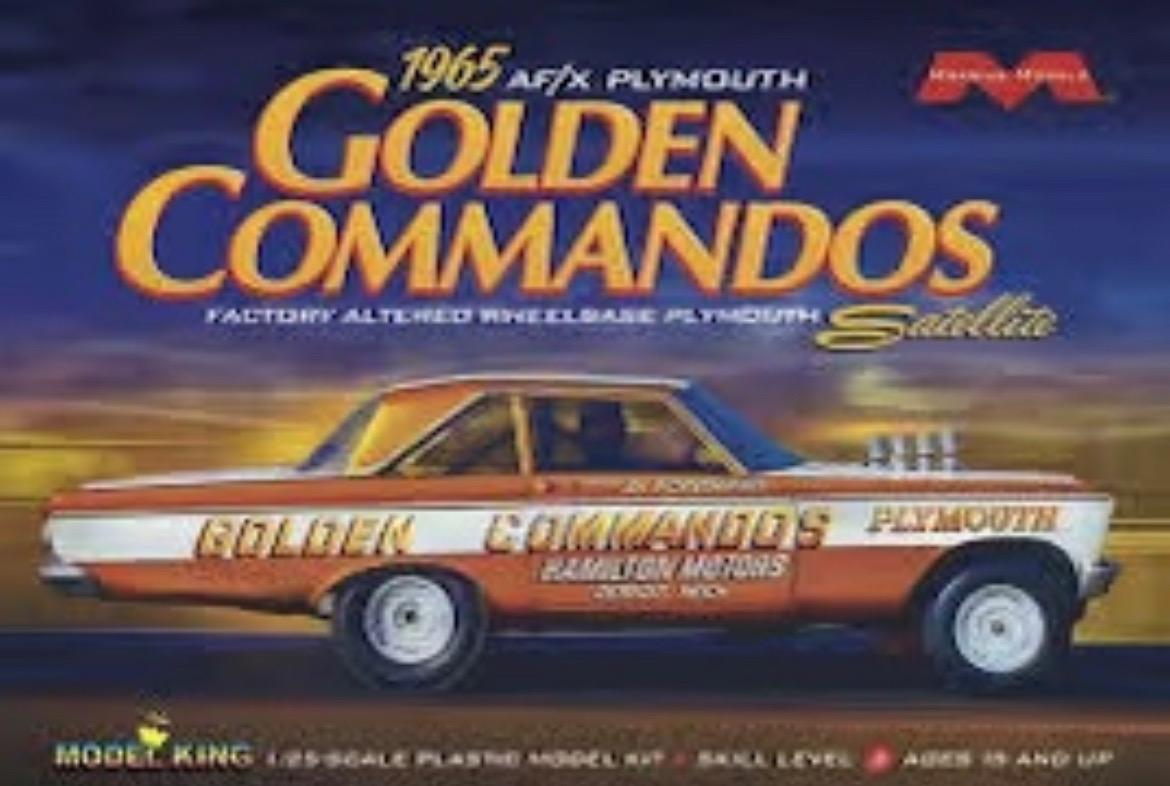
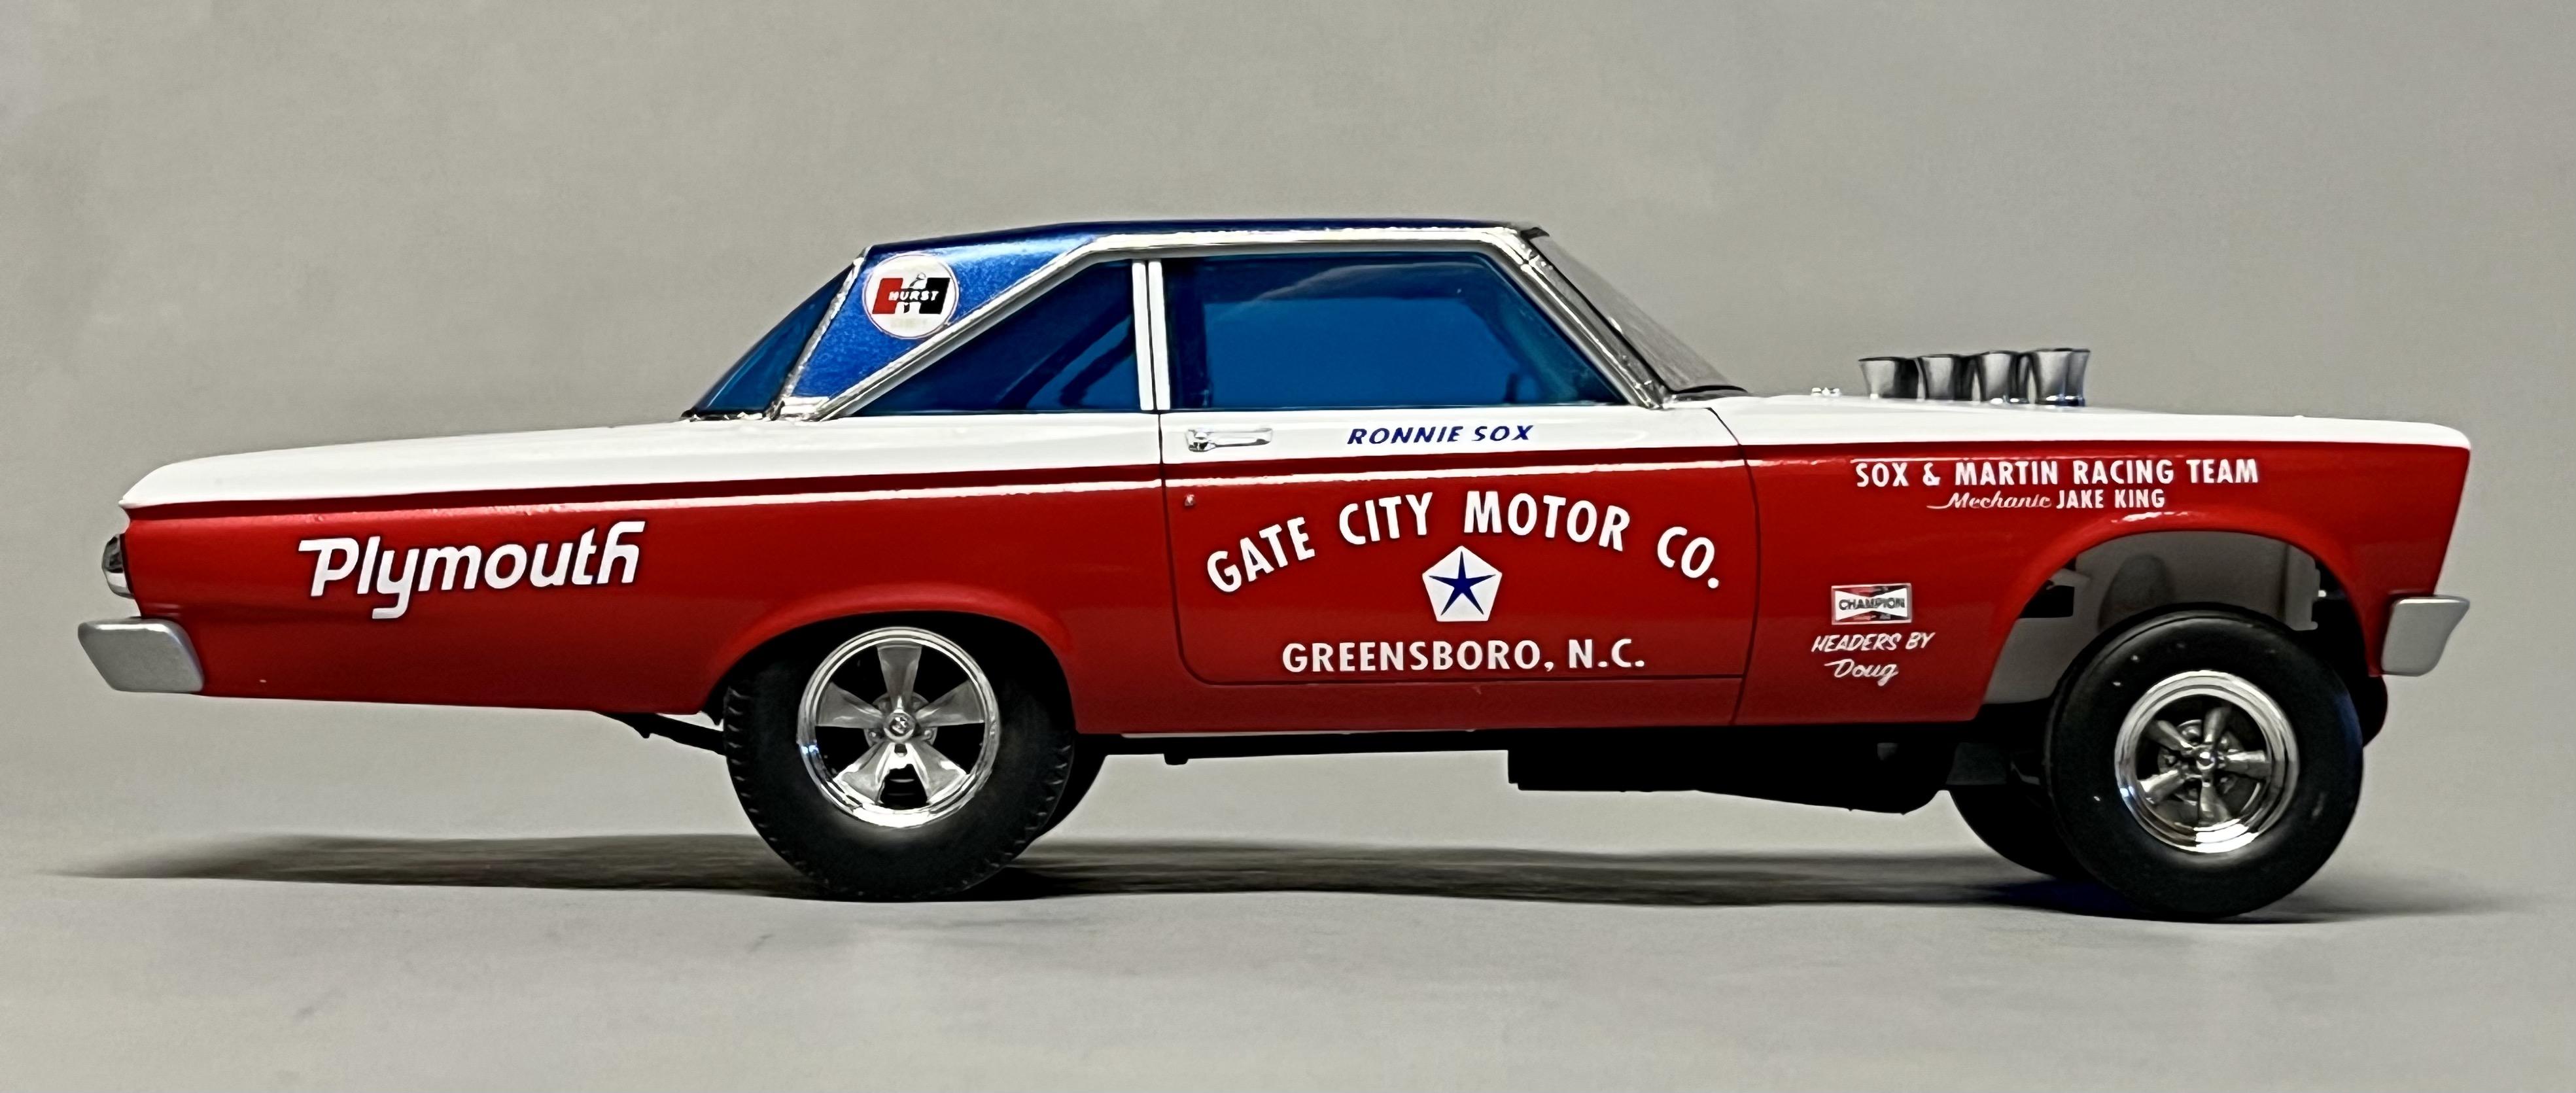
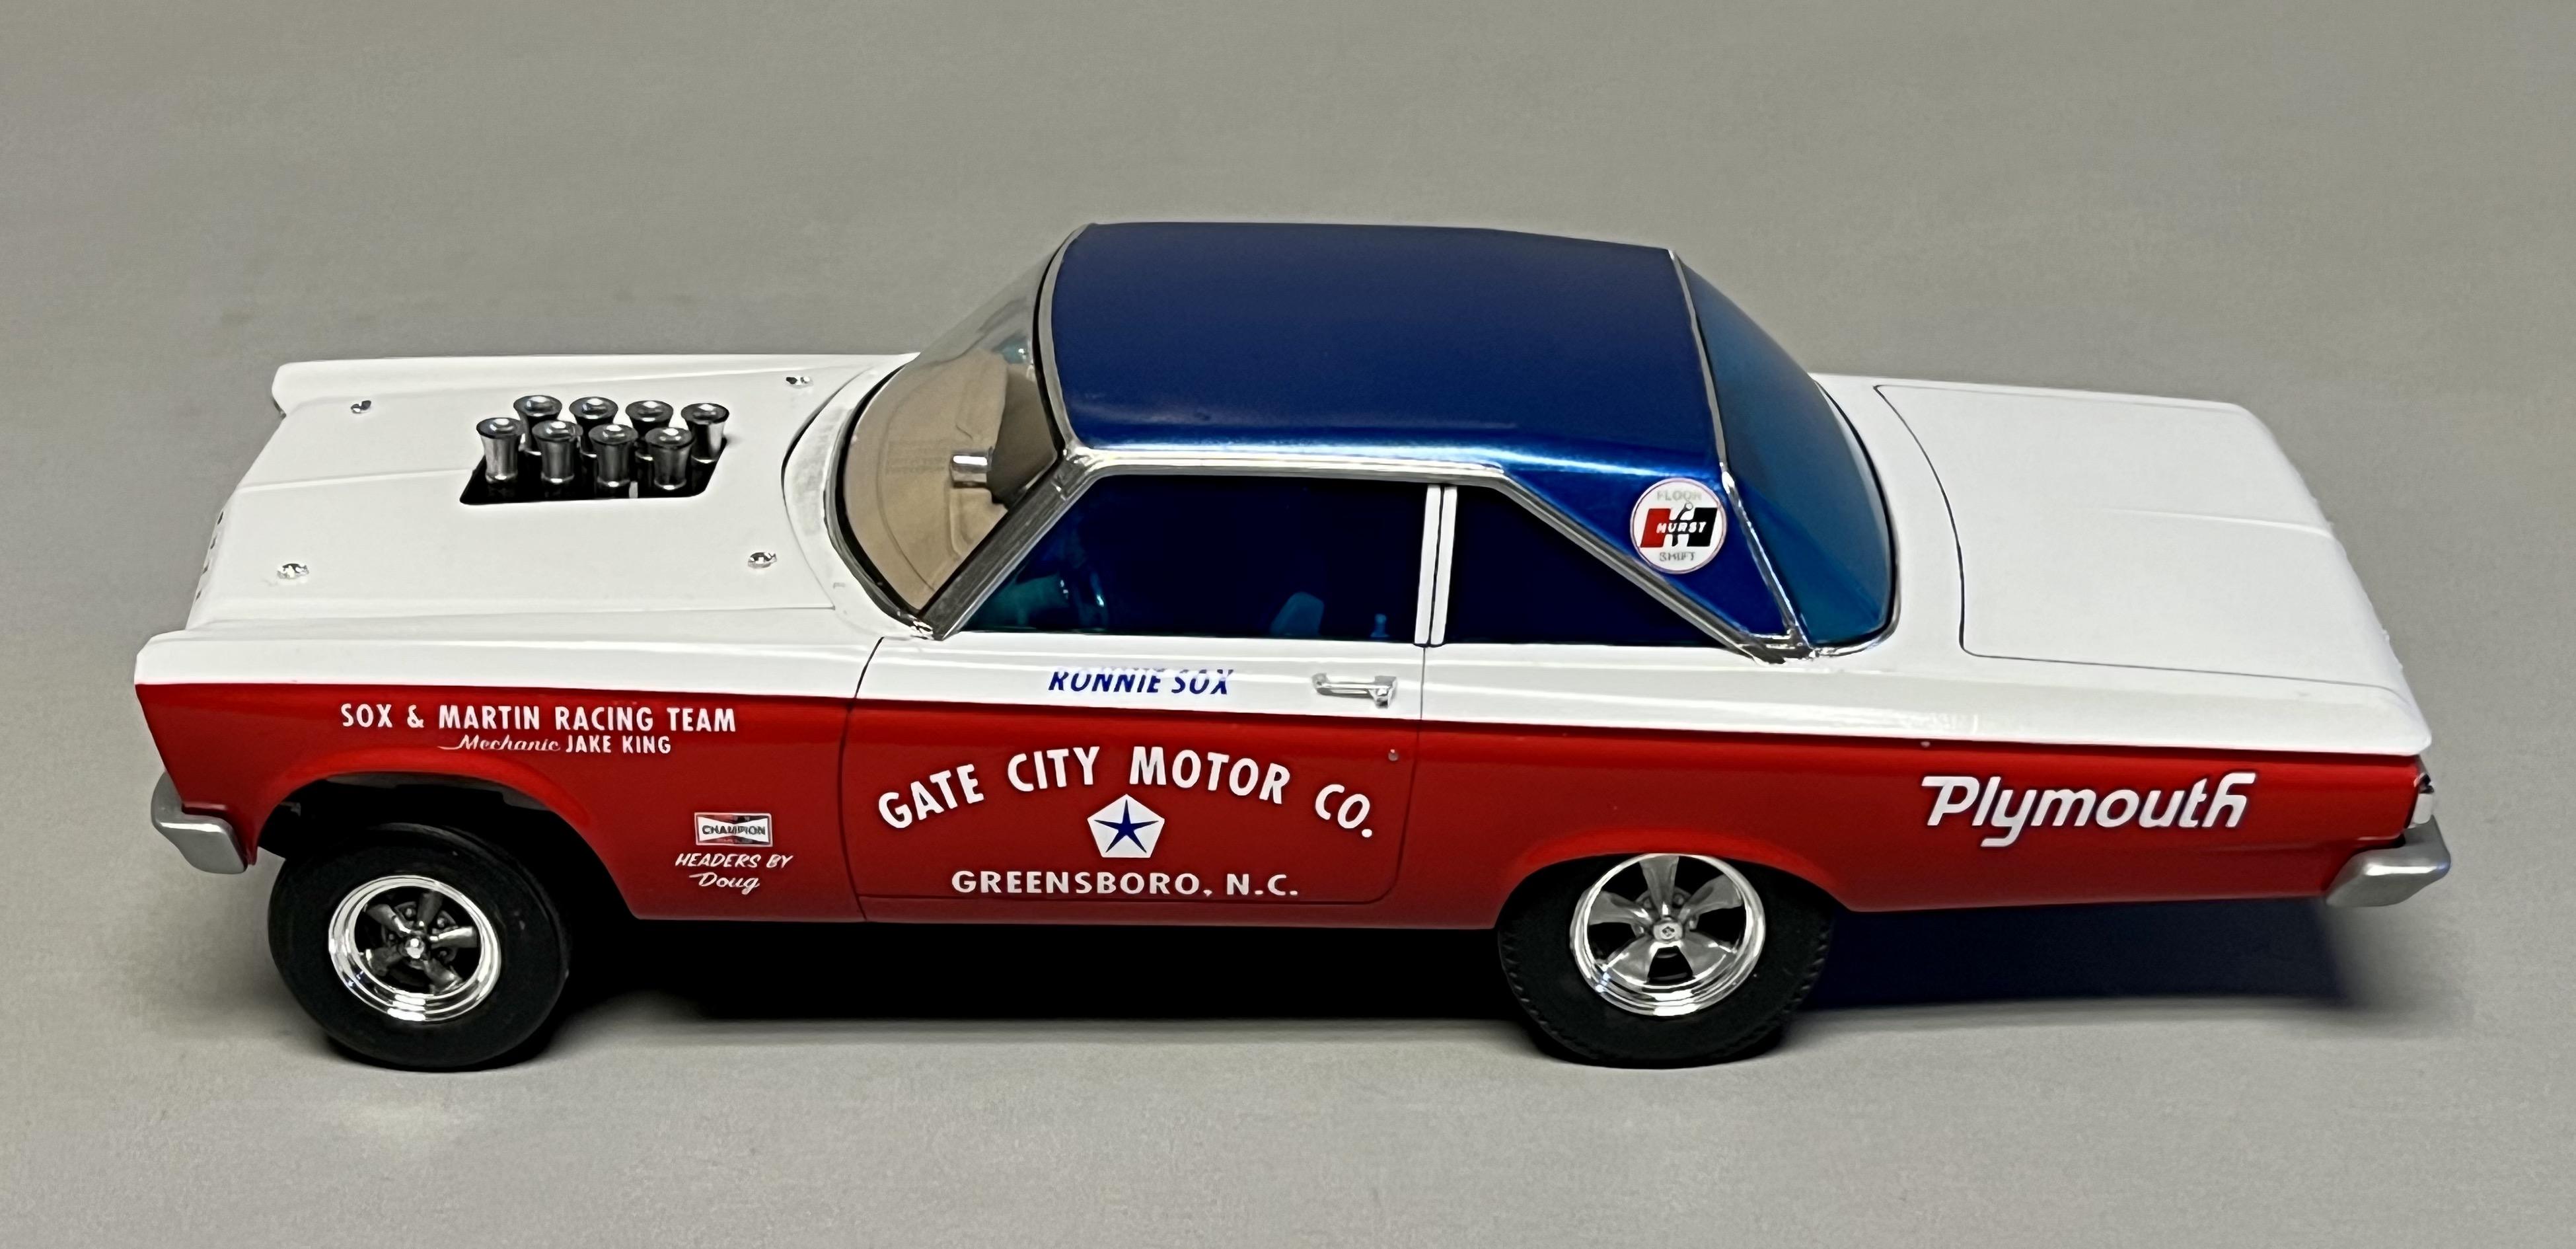
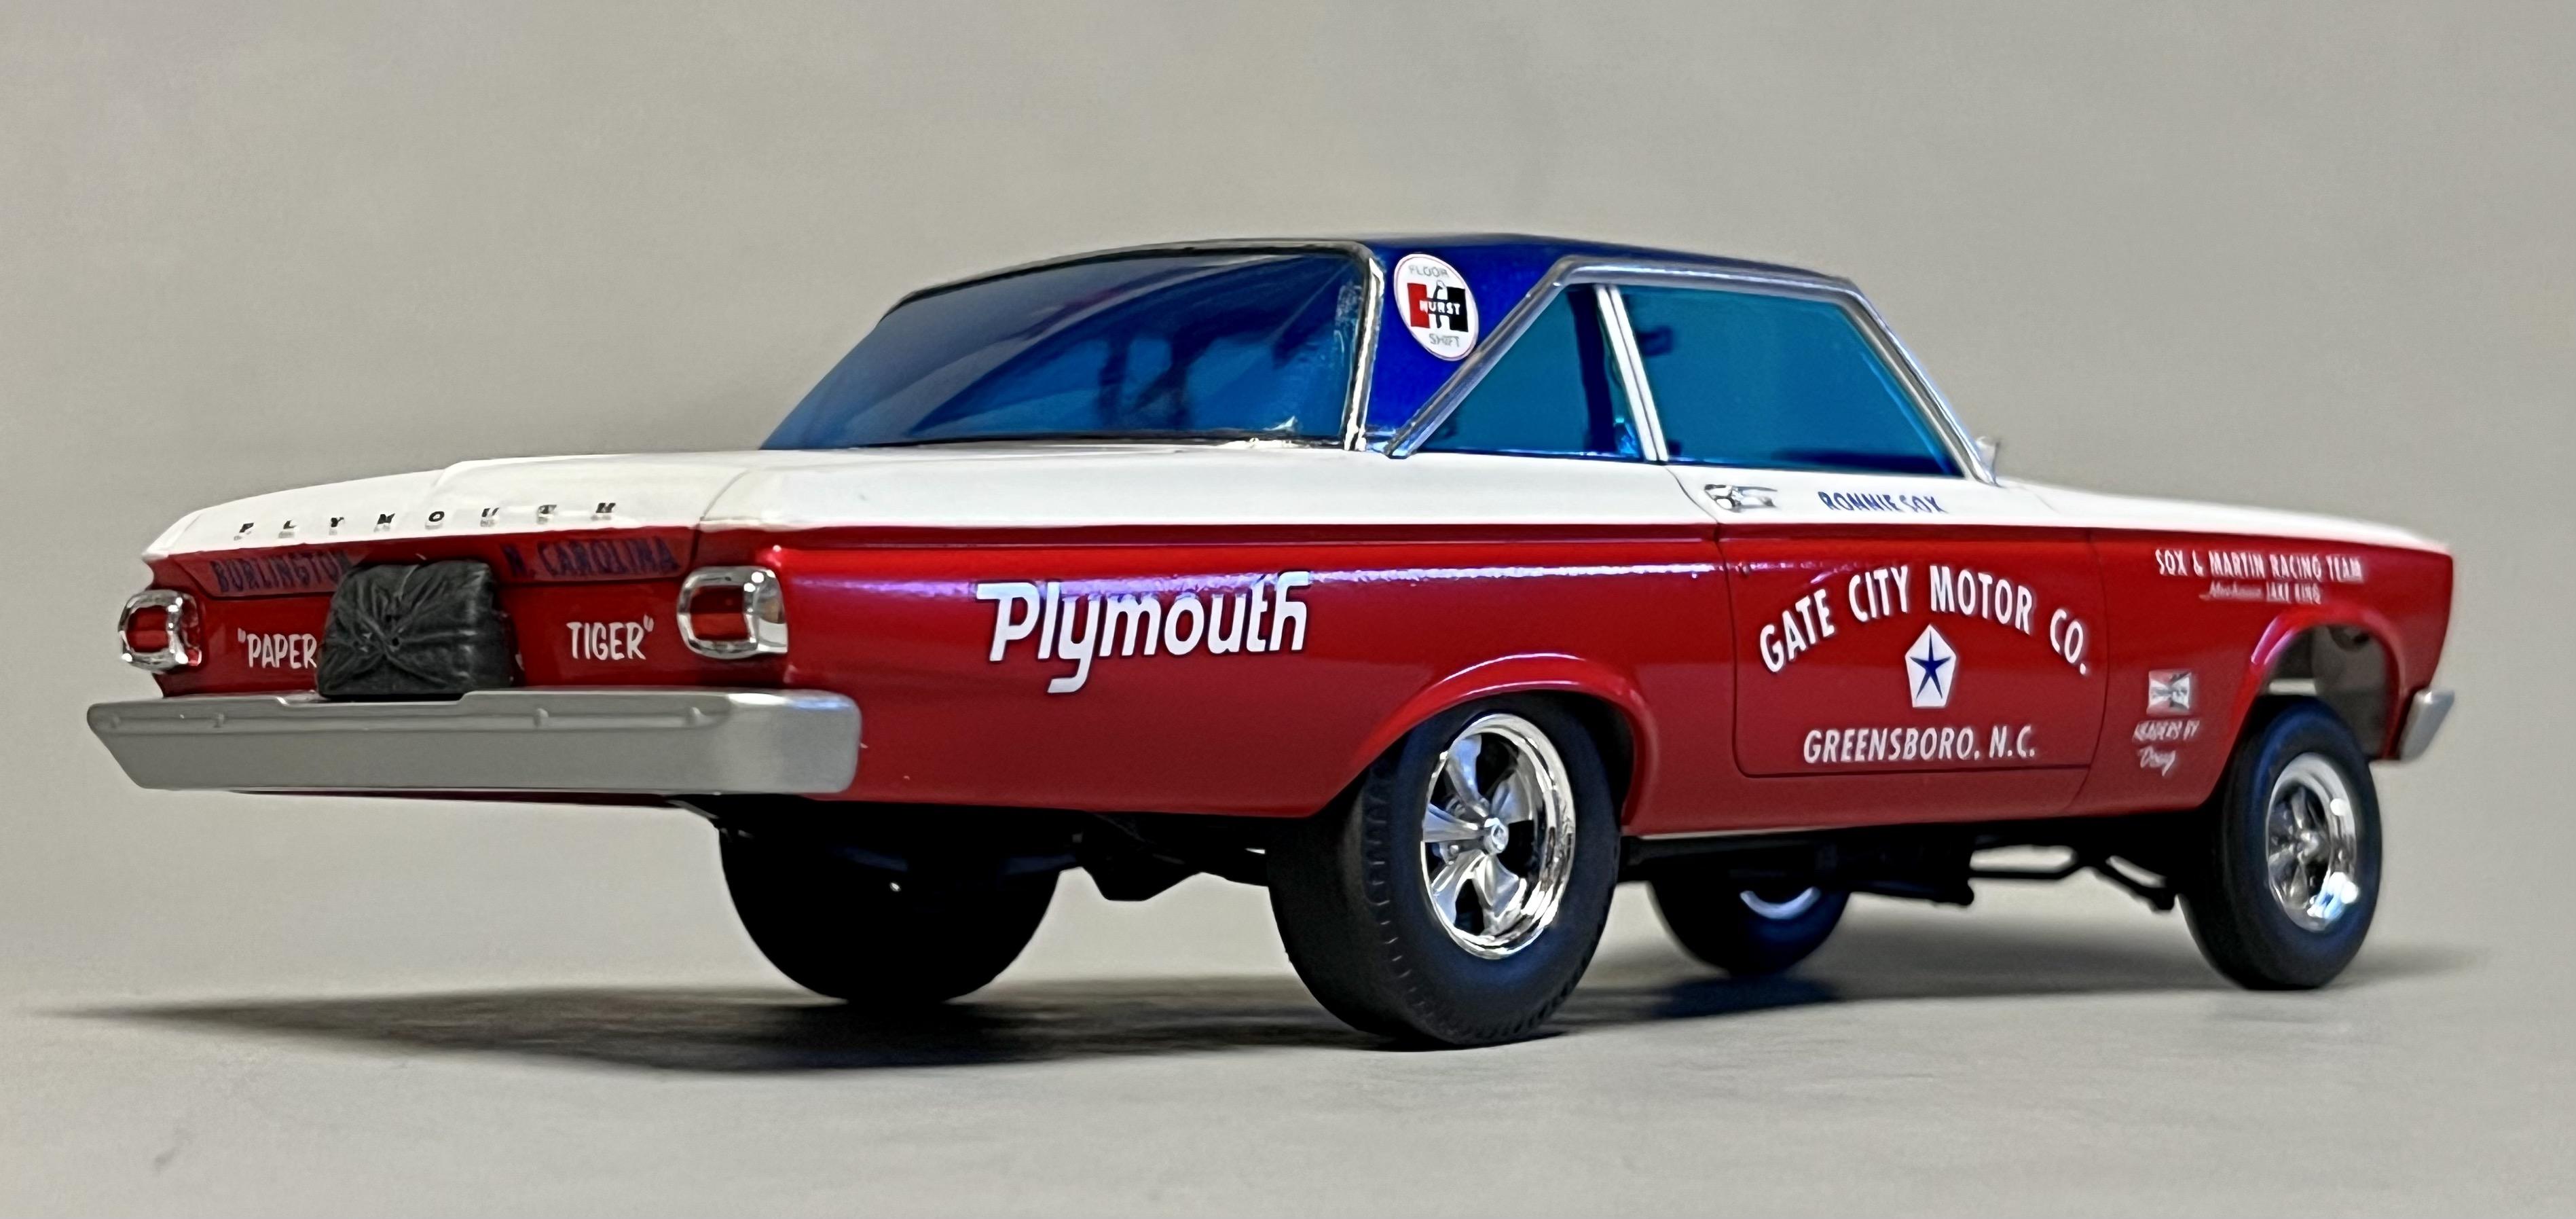
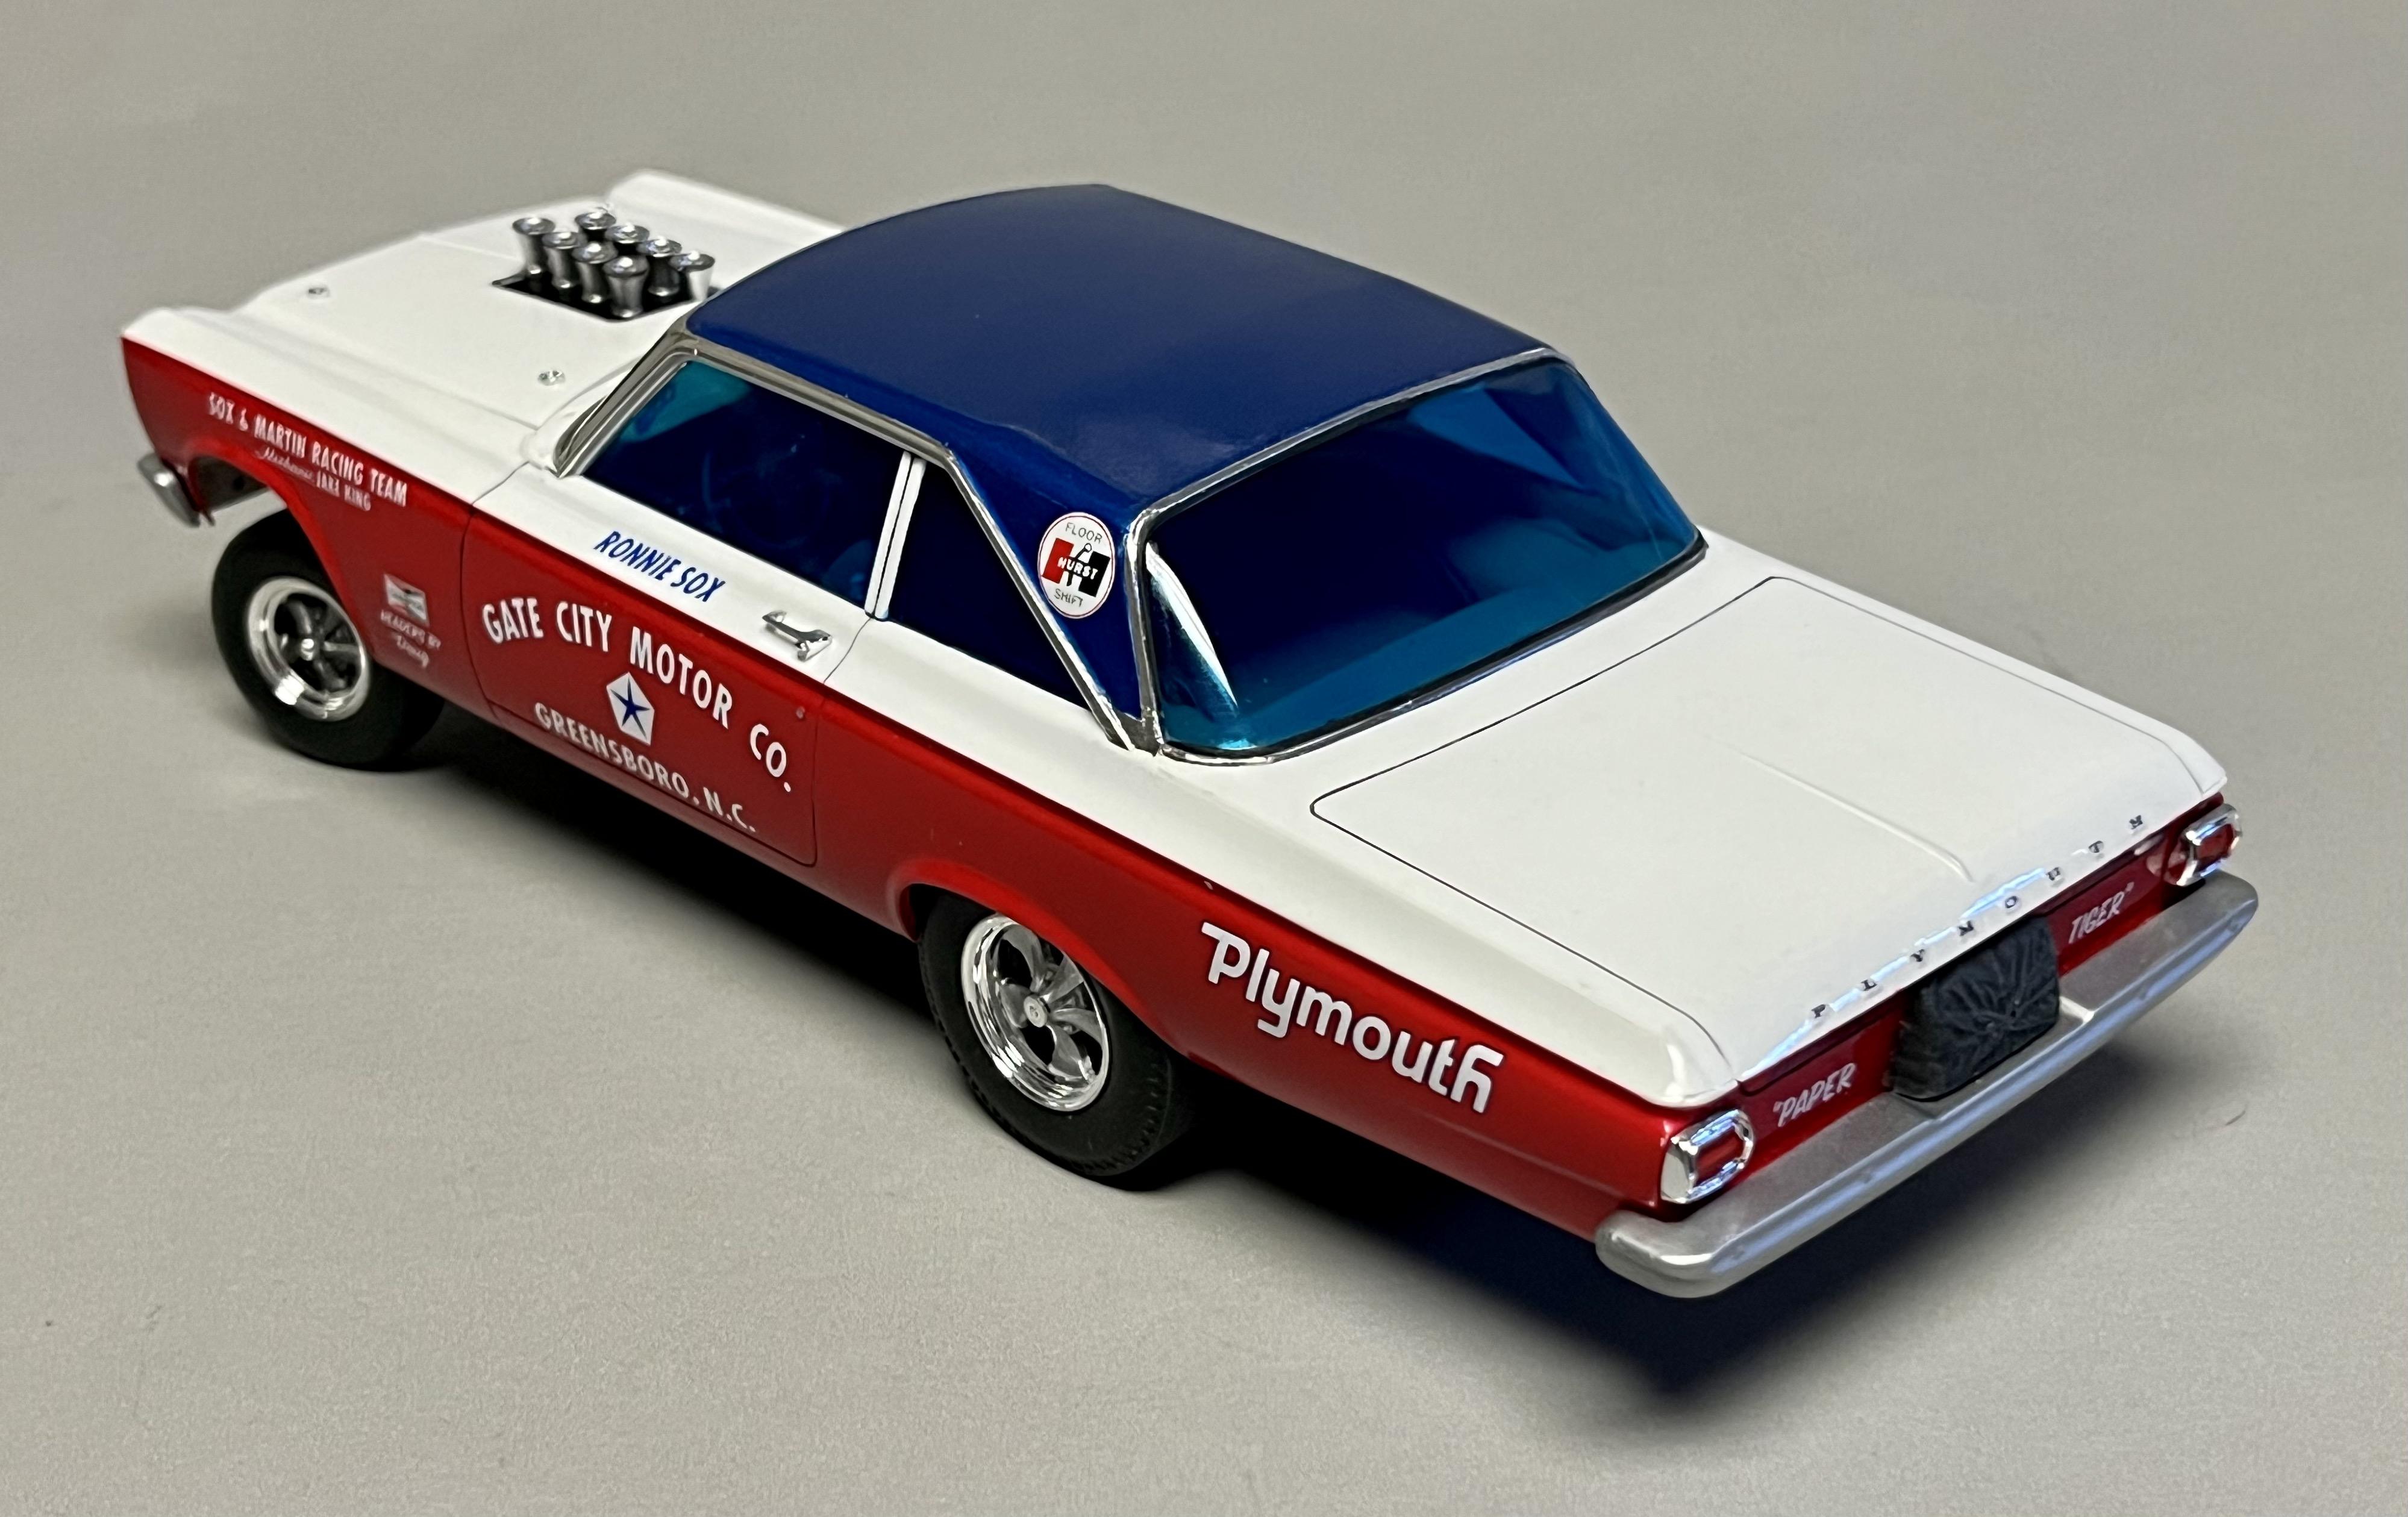
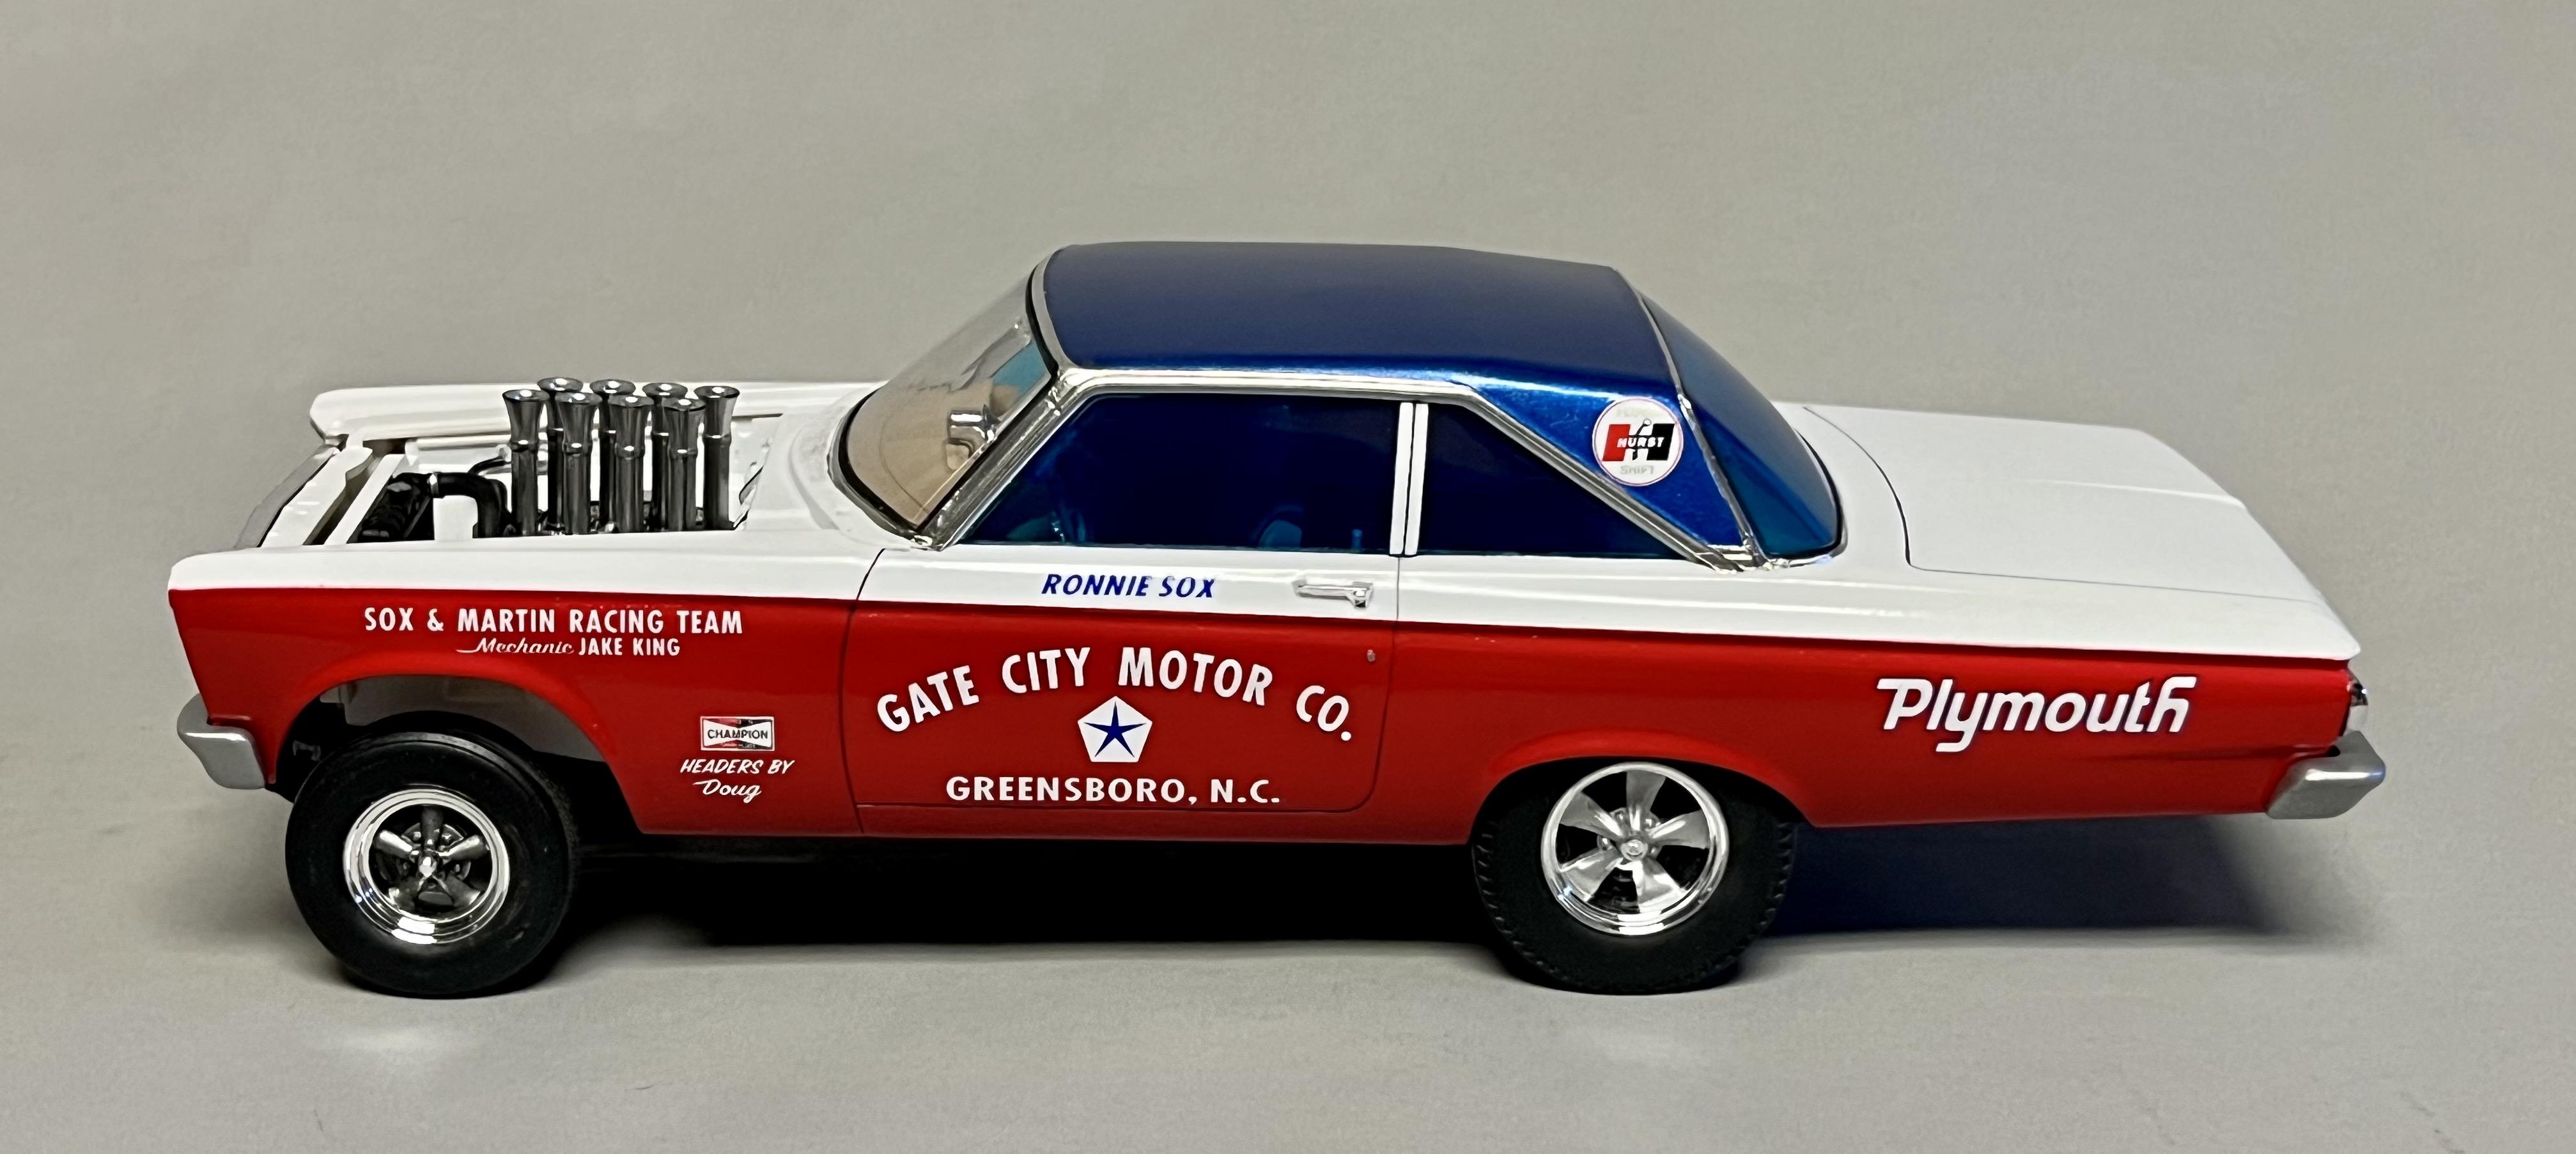
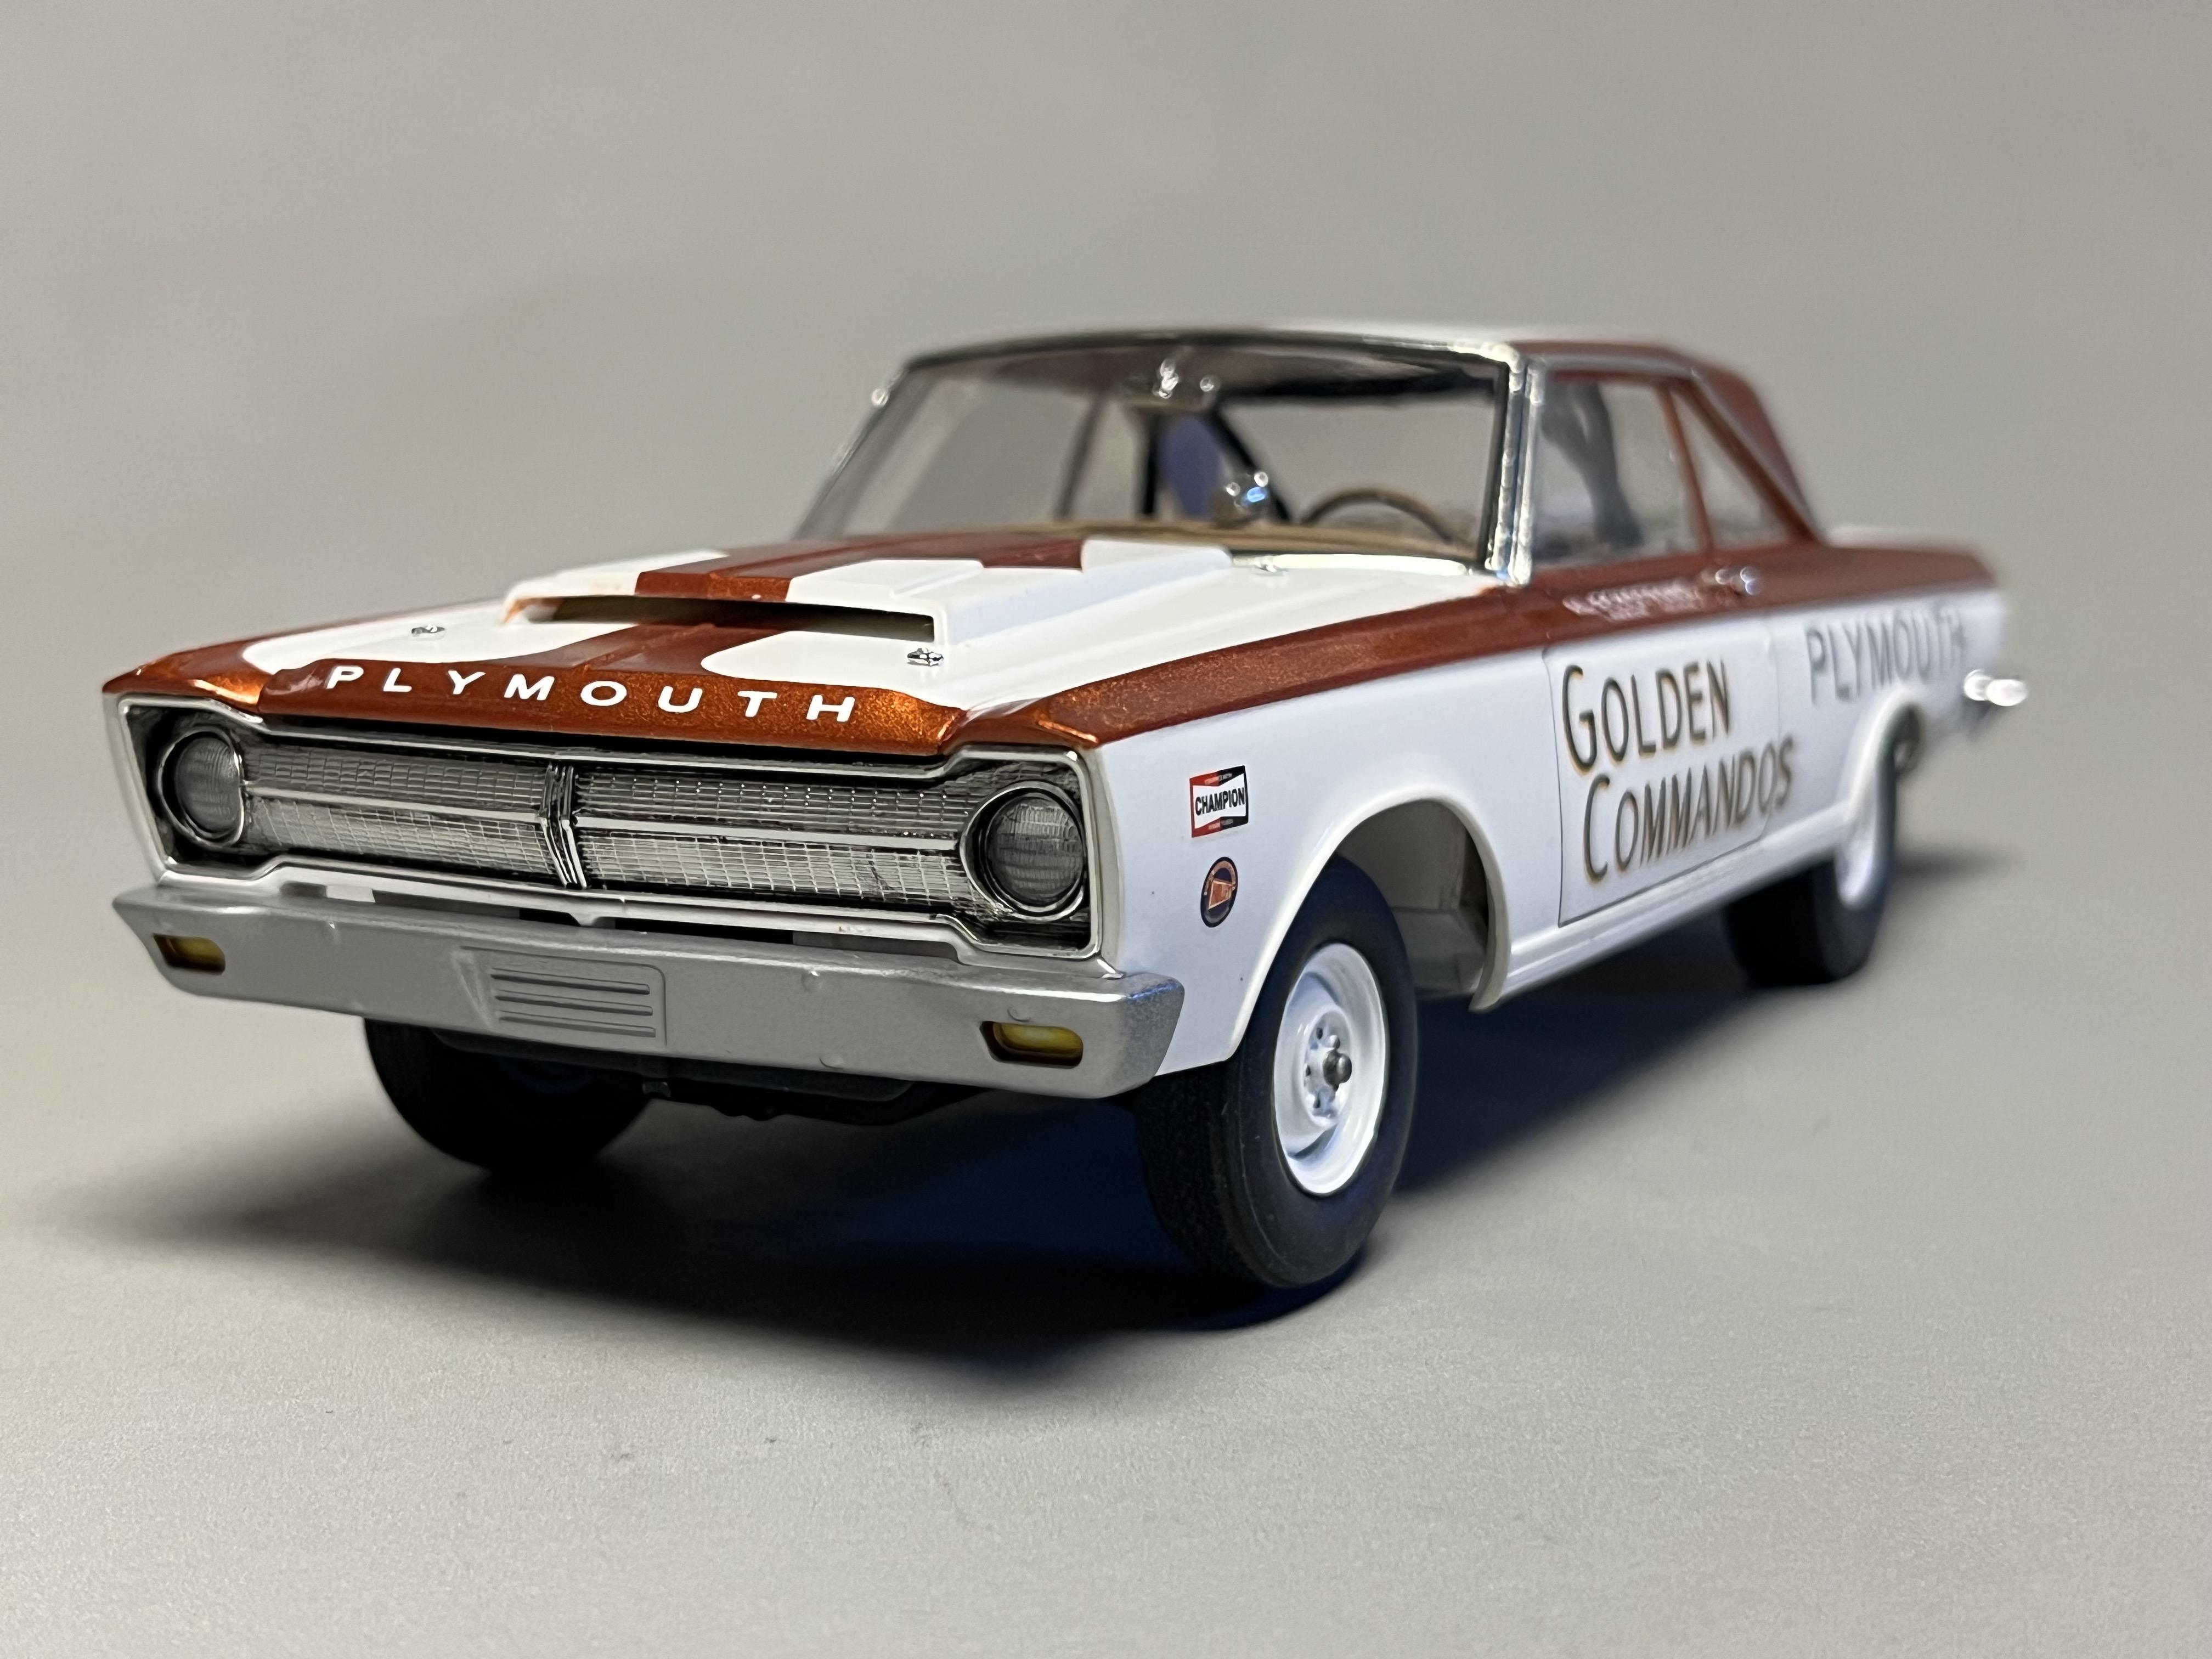
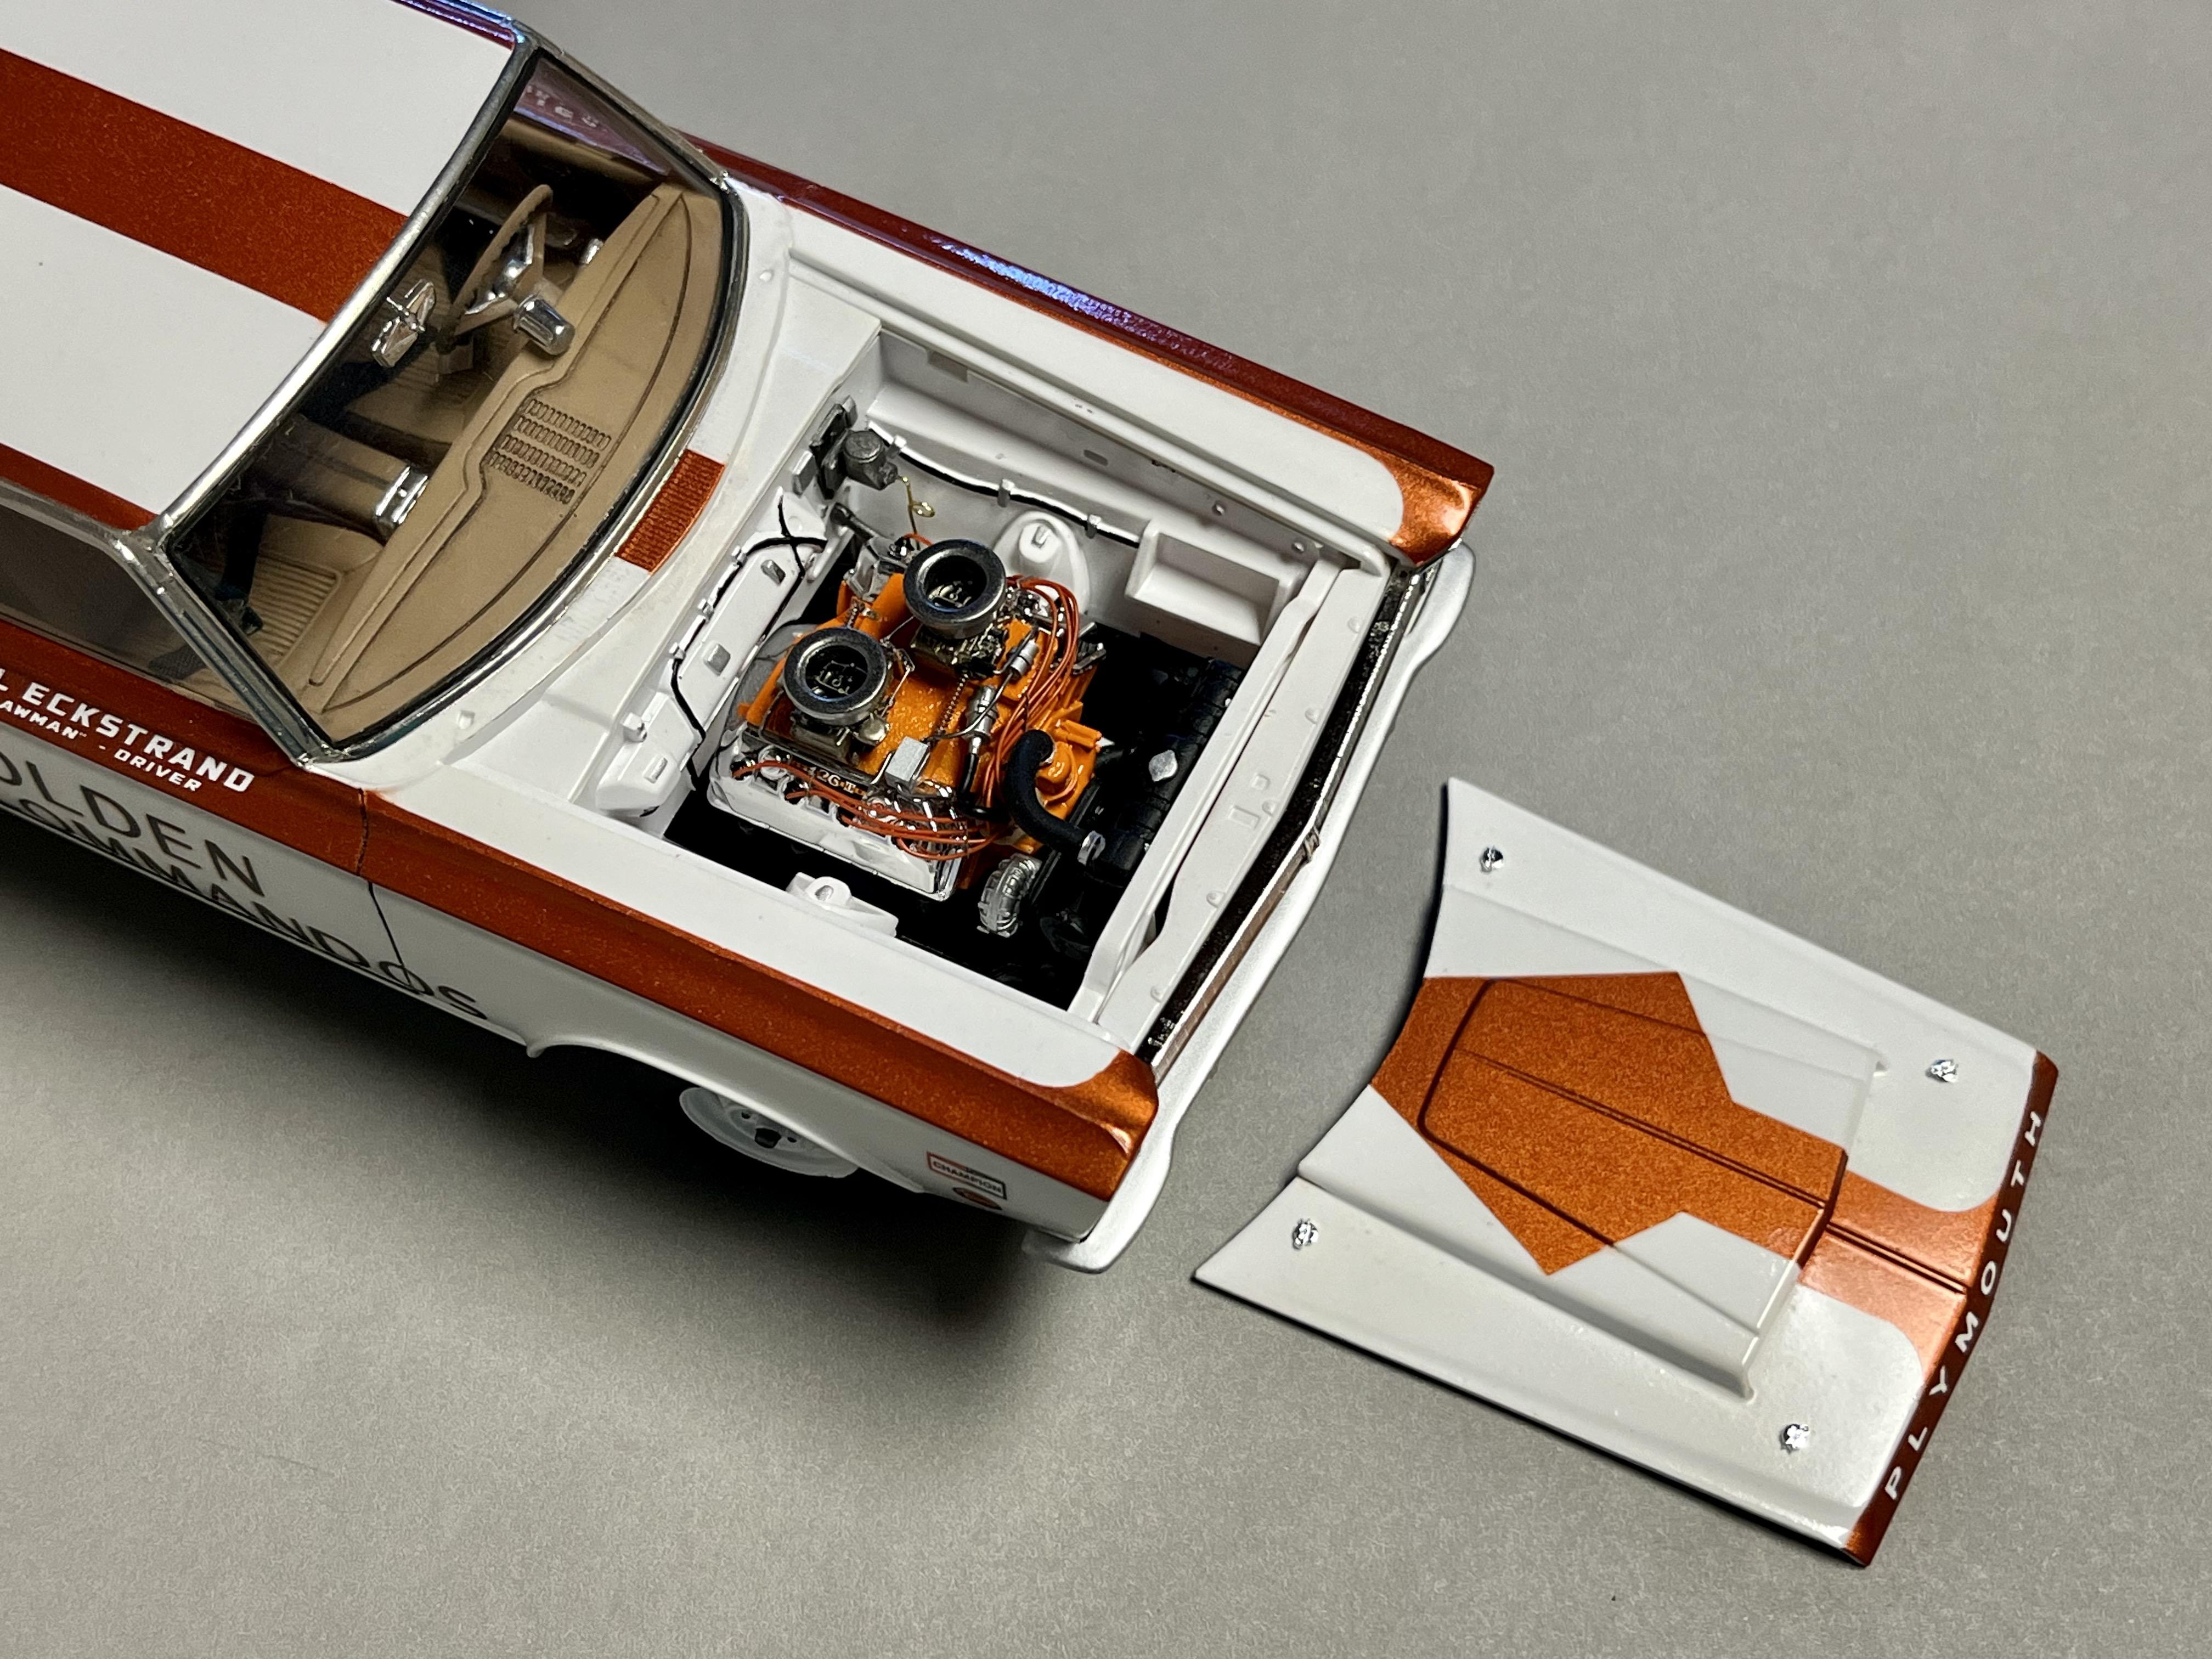
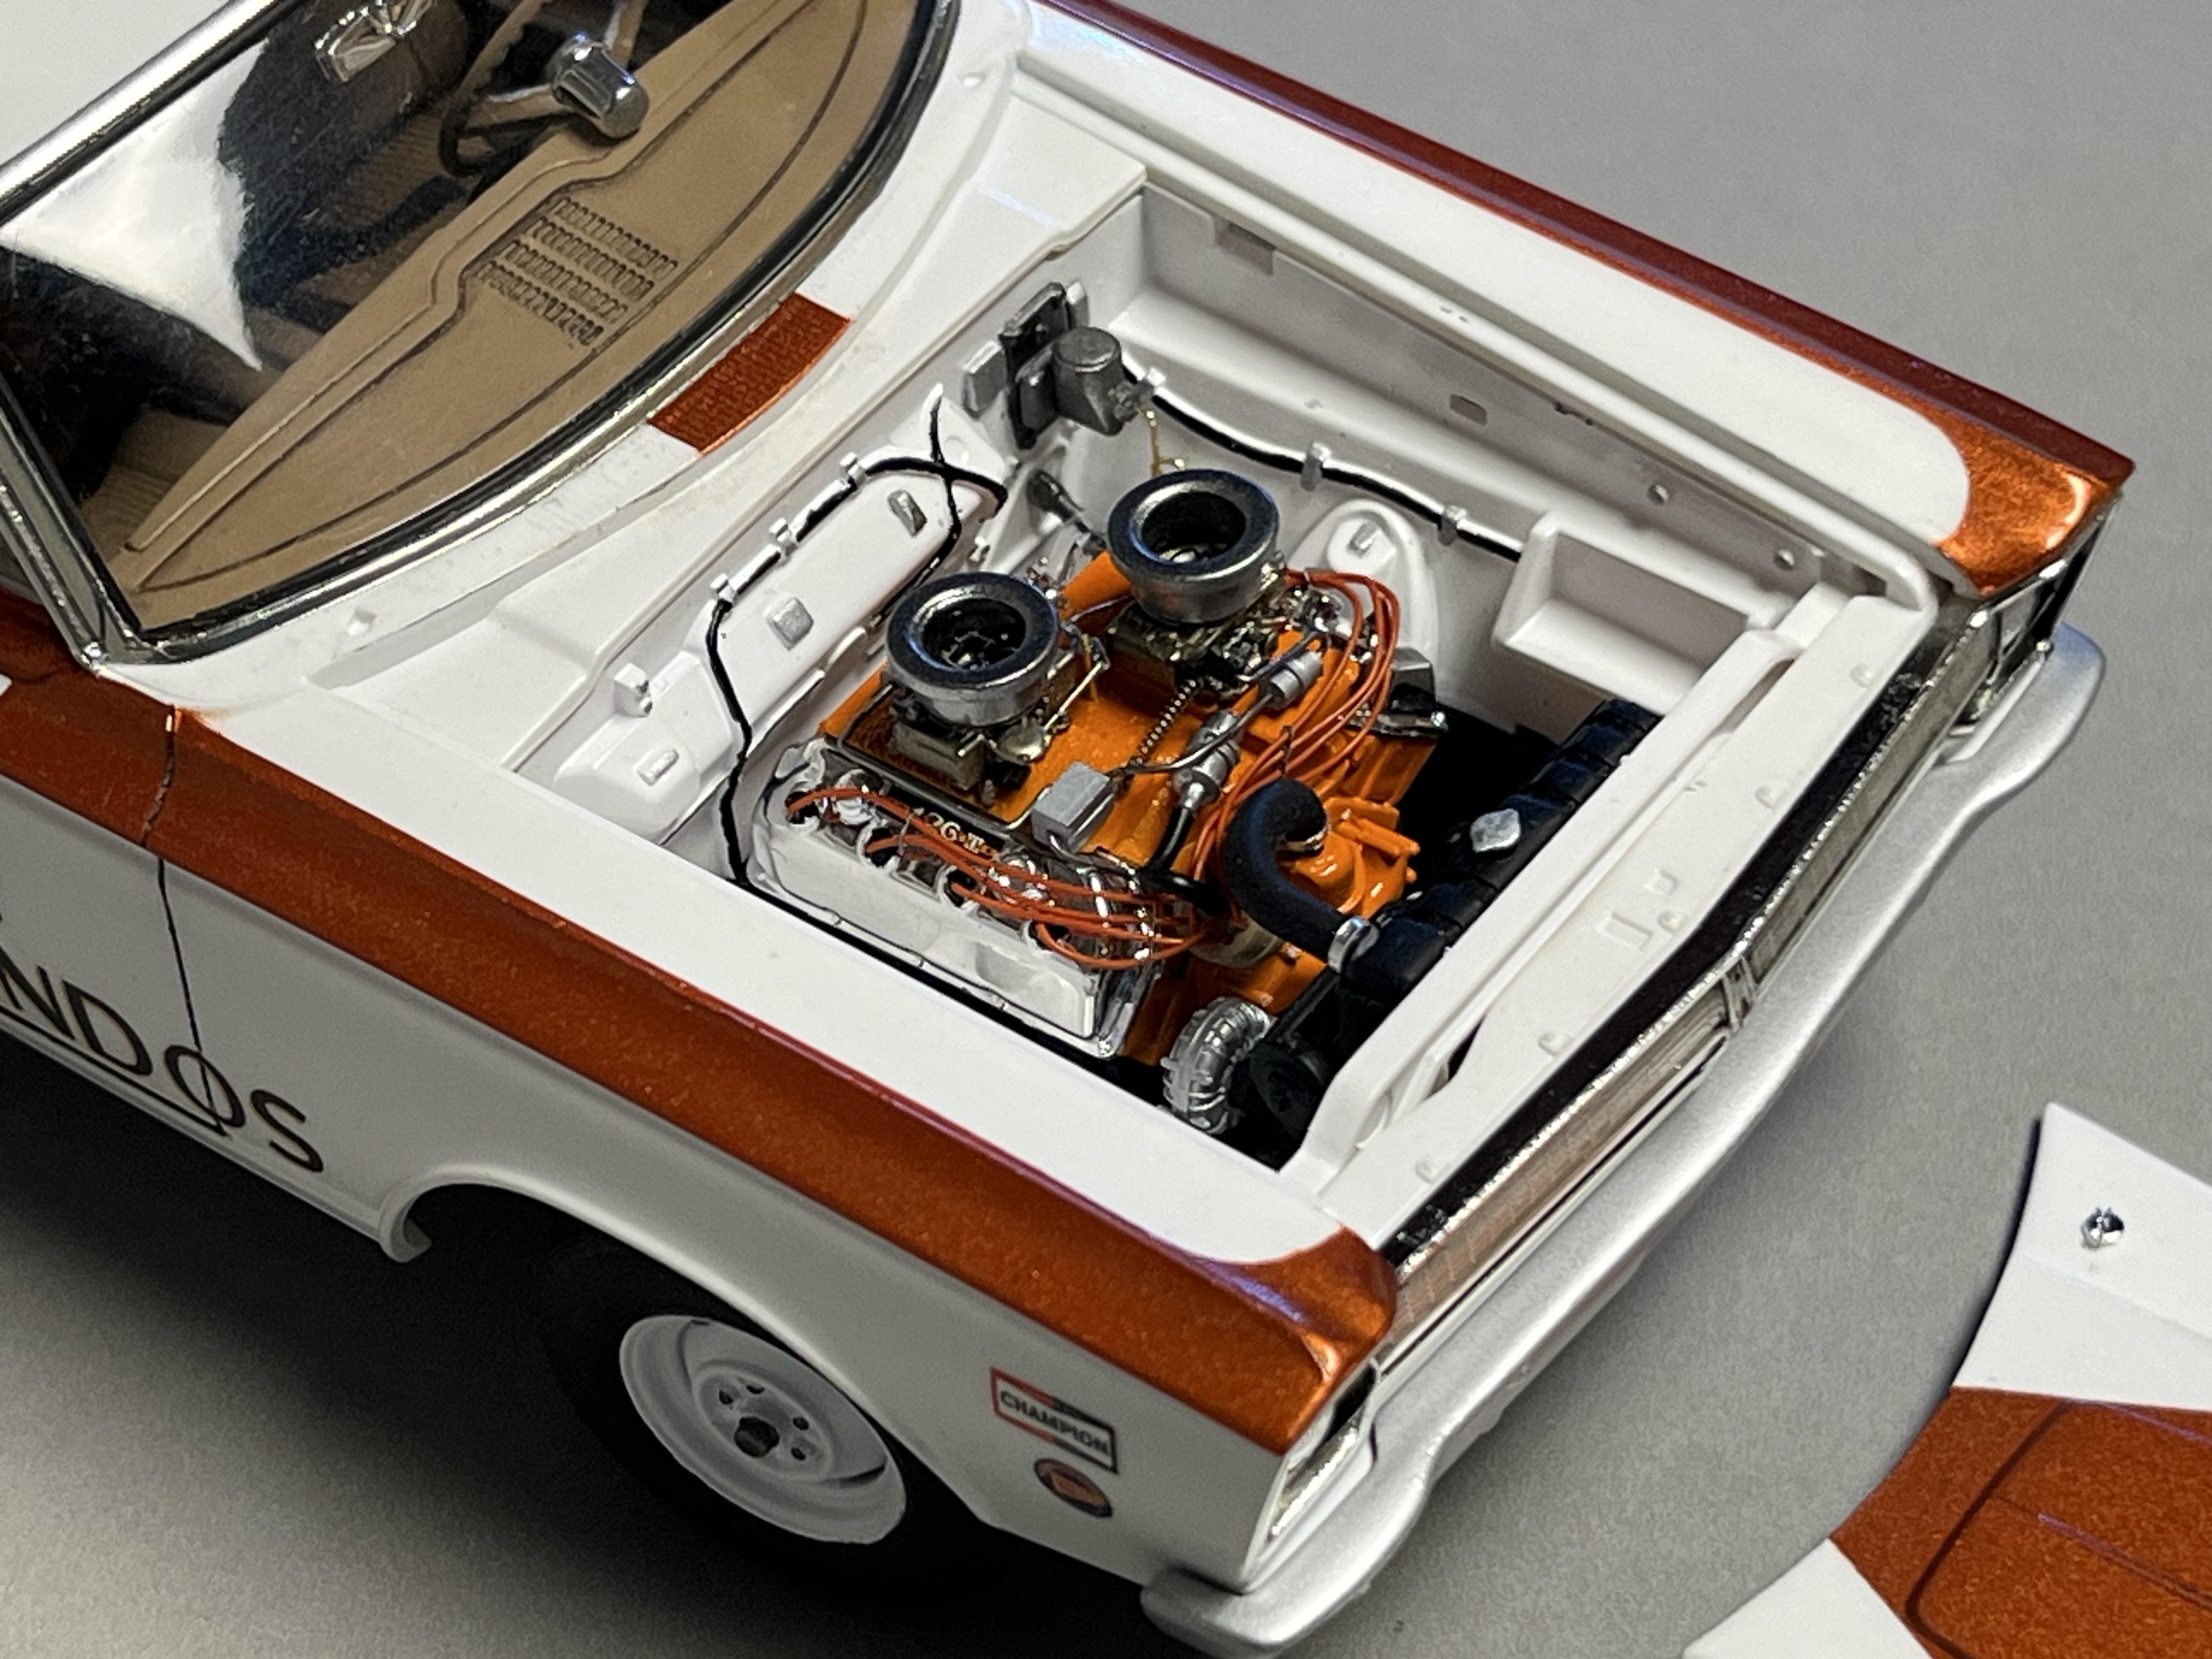
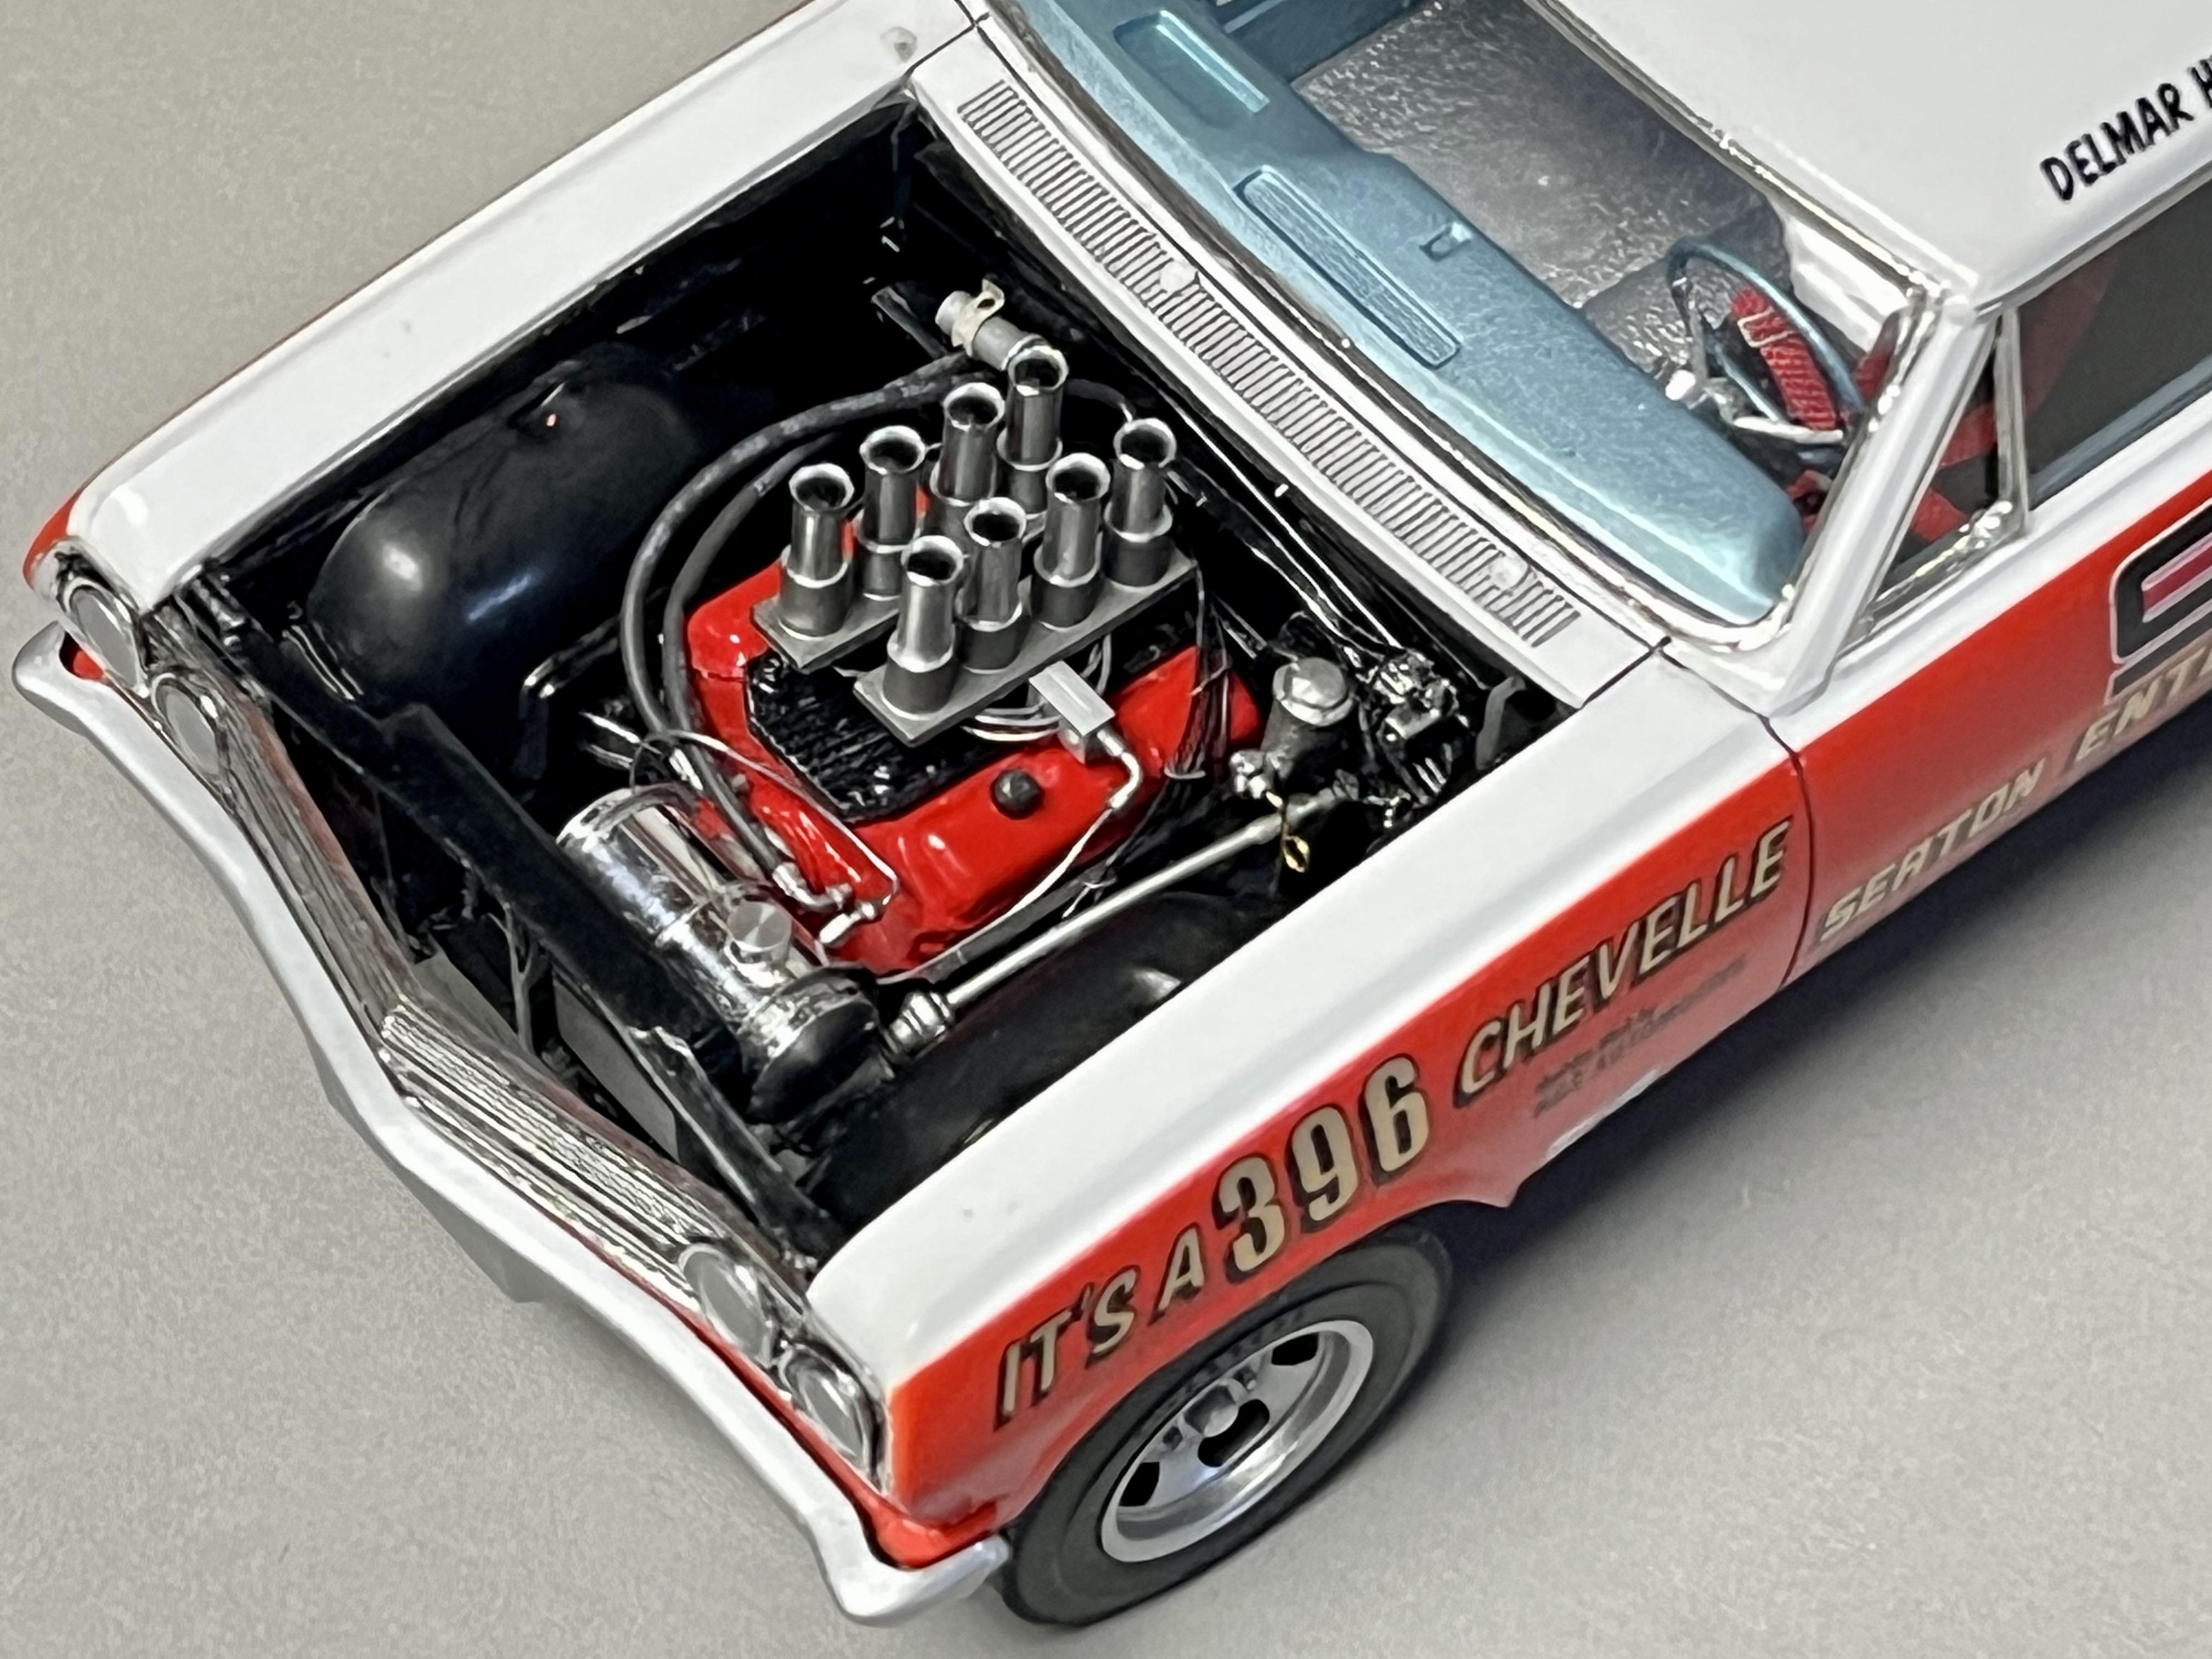
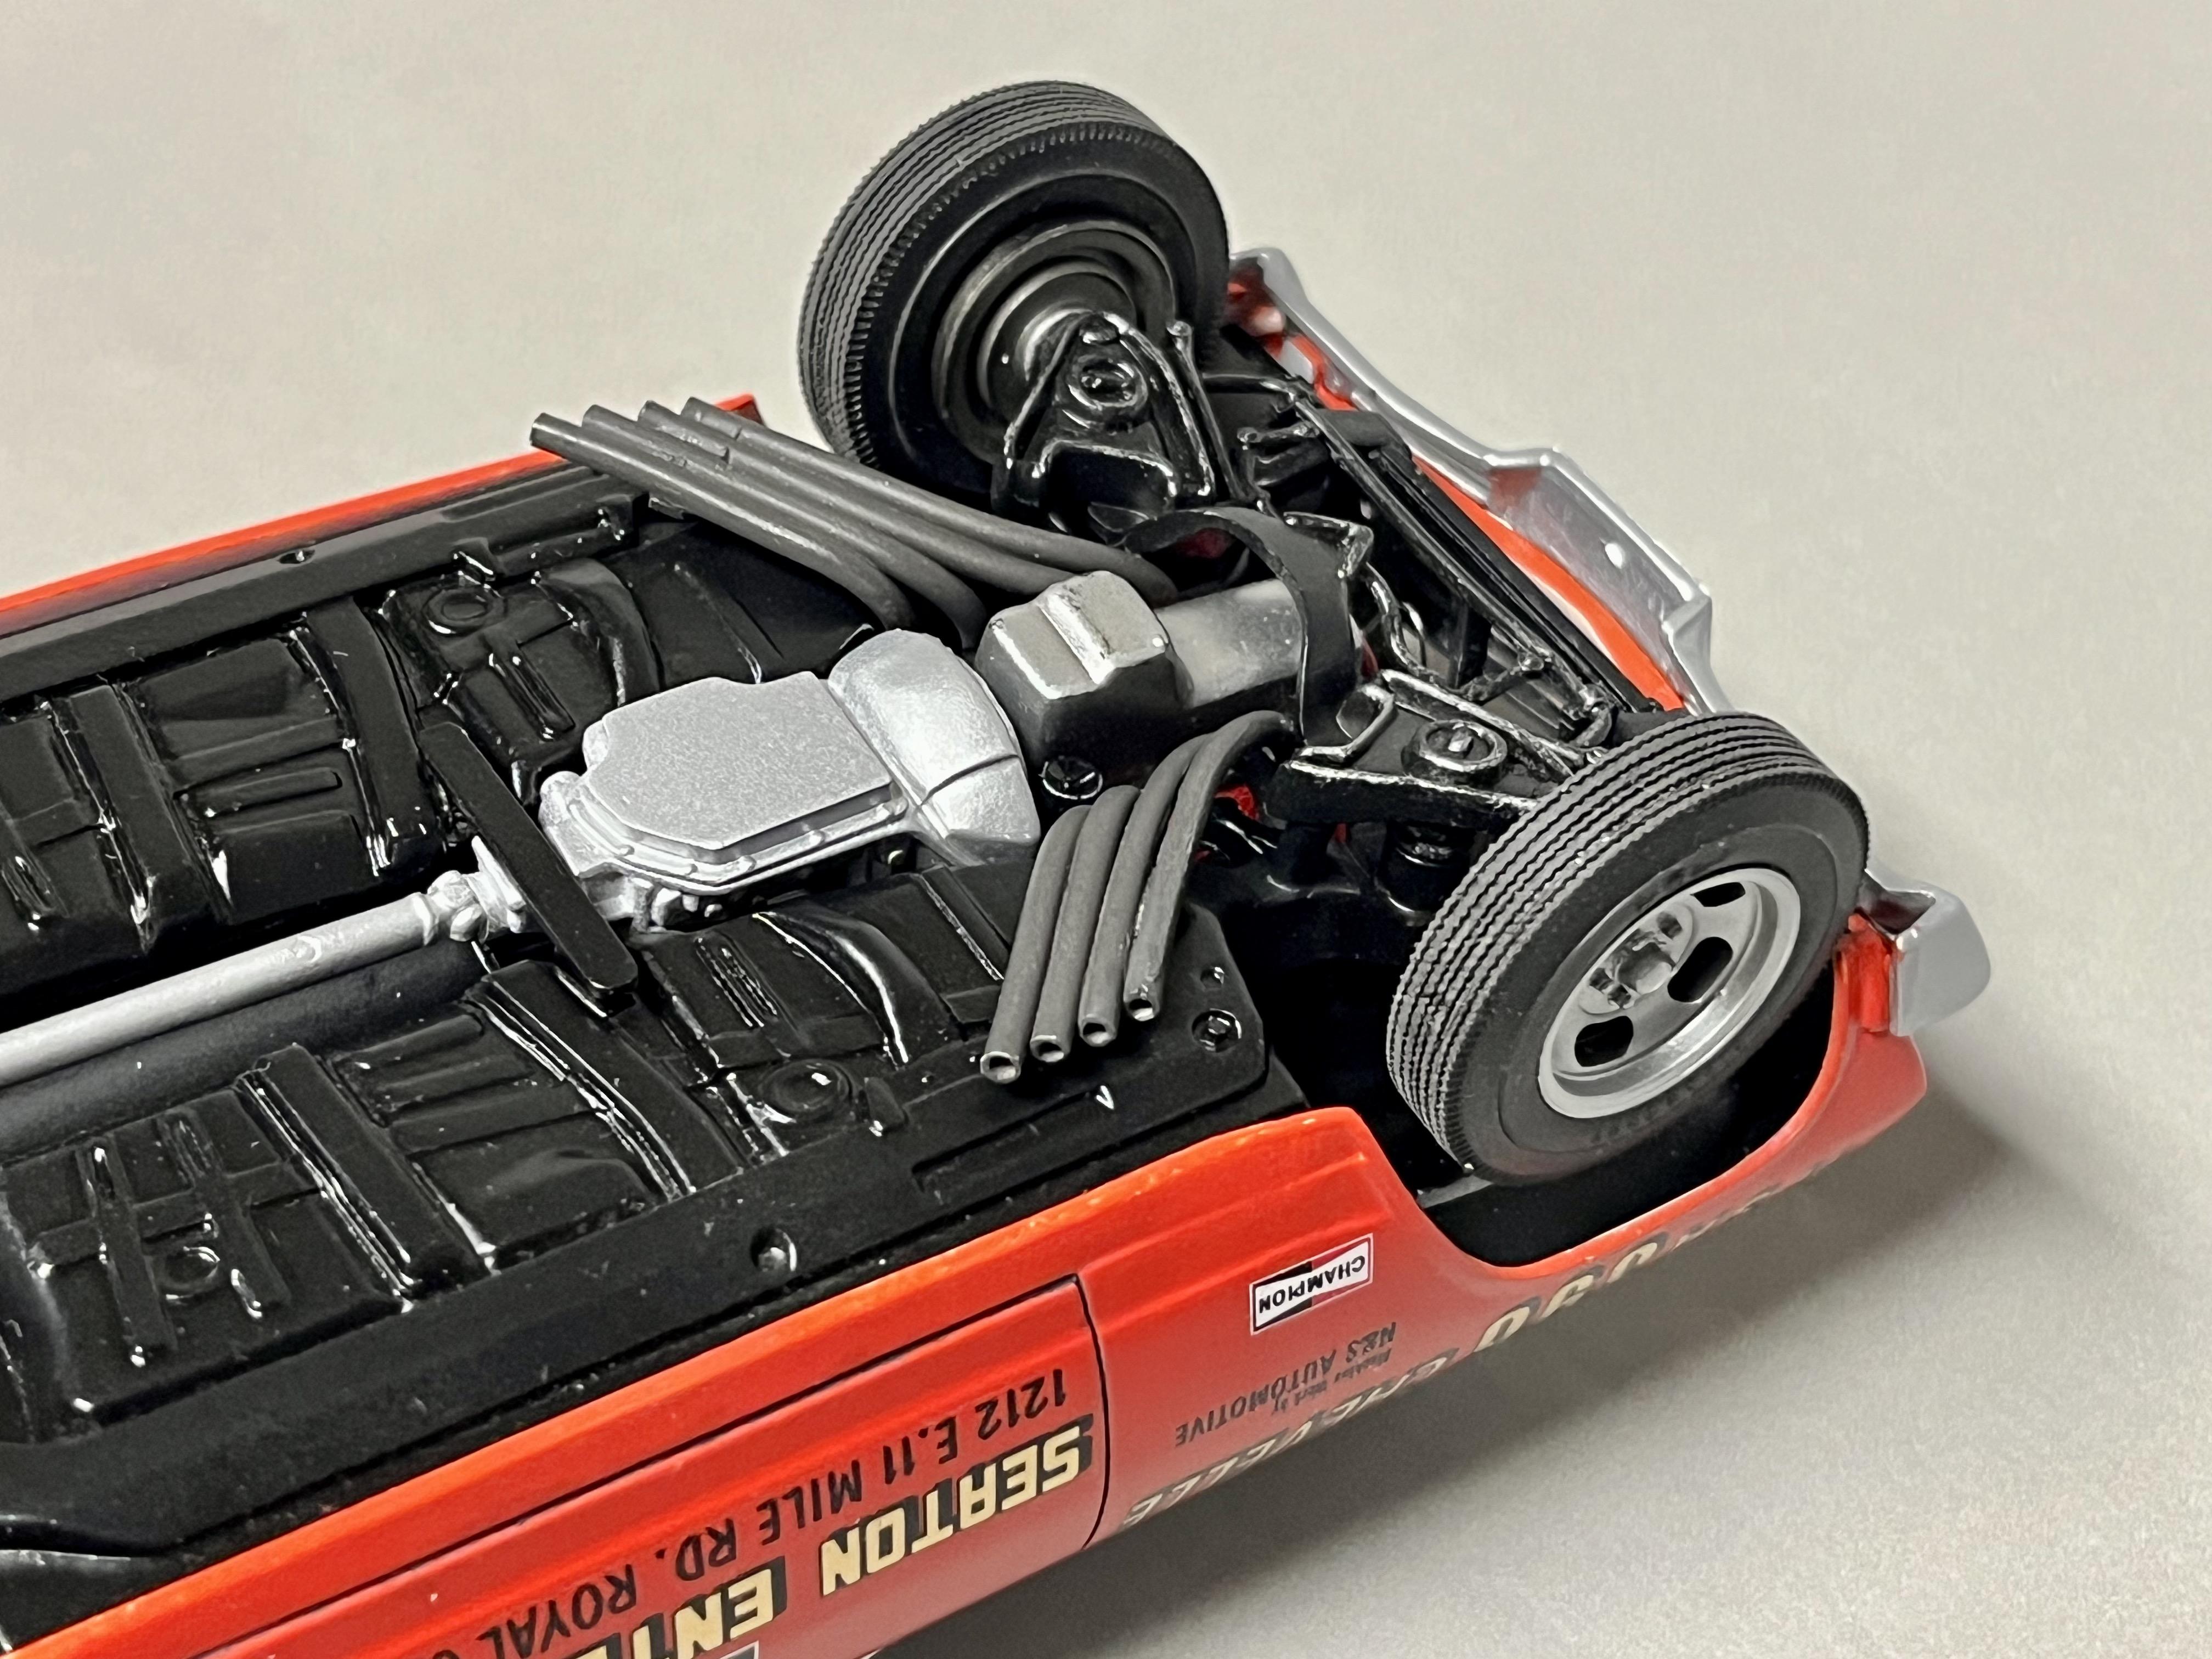
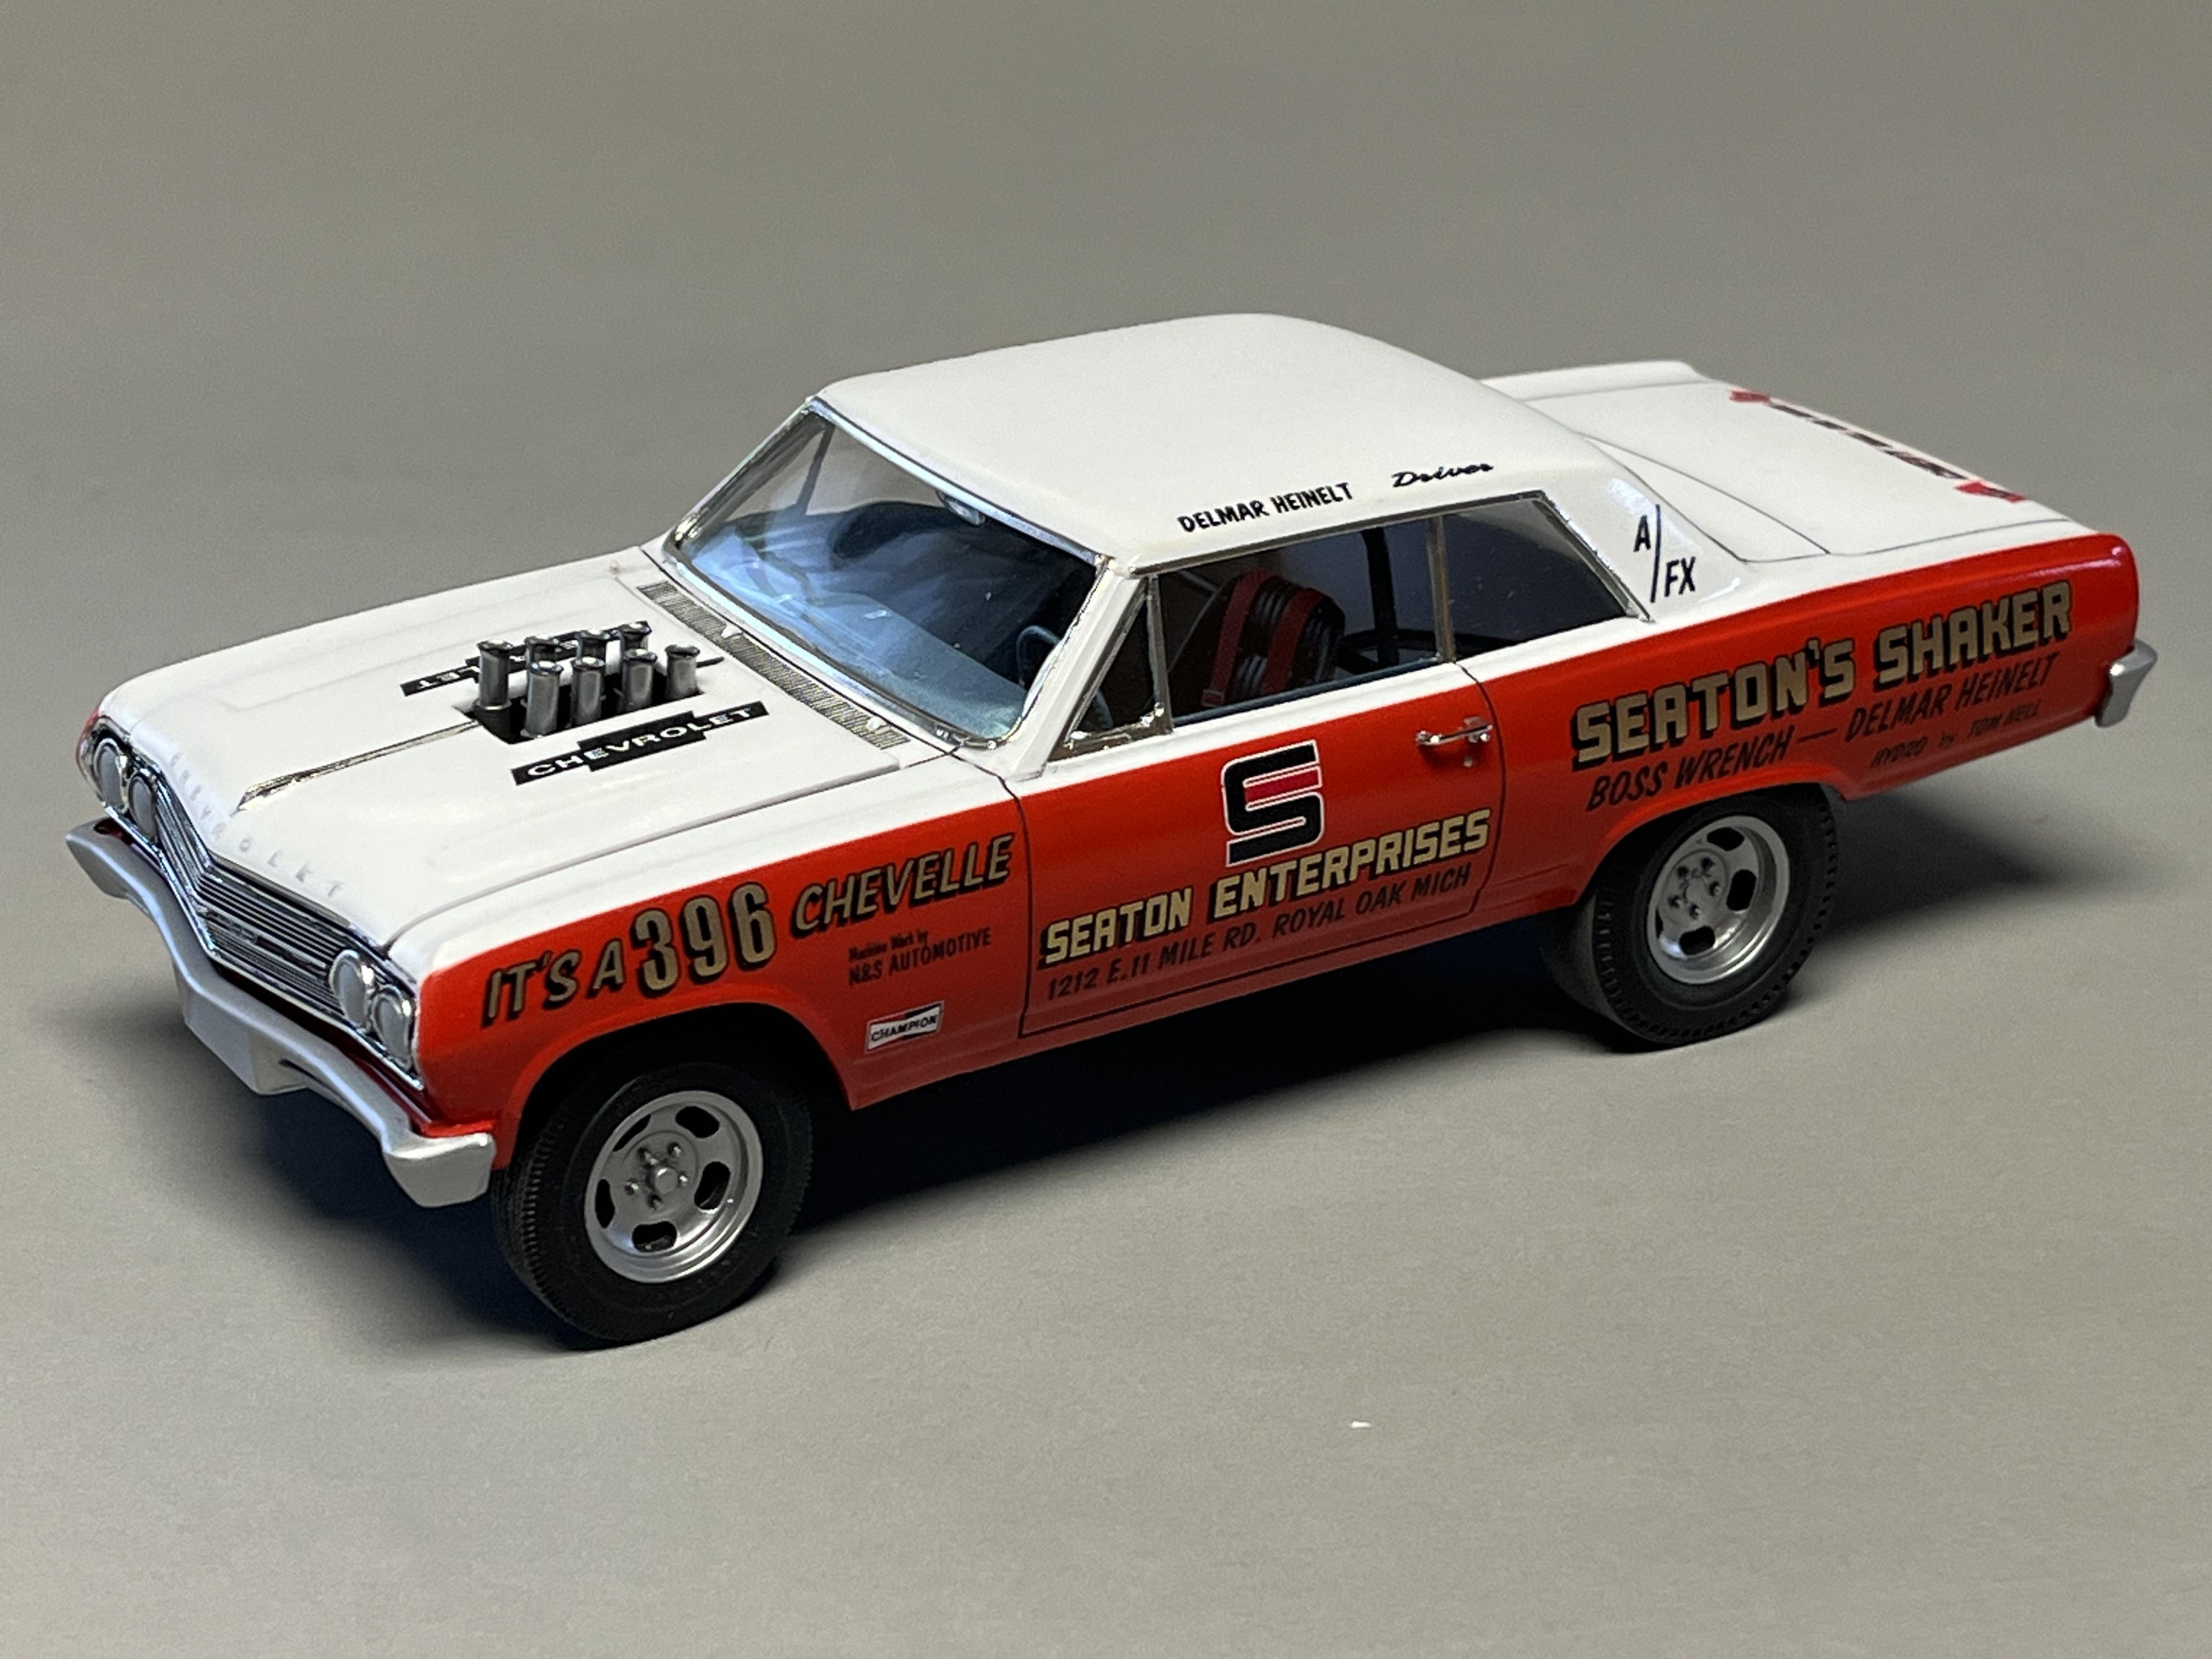
This is the third (and my favorite) from my three-car production line, the legendary Sox & Martin A/FX - Match Racer Hemi powered FI wheel stander. I built this one from this Moebius AWB Al Eckstrand Golden Commando kit:

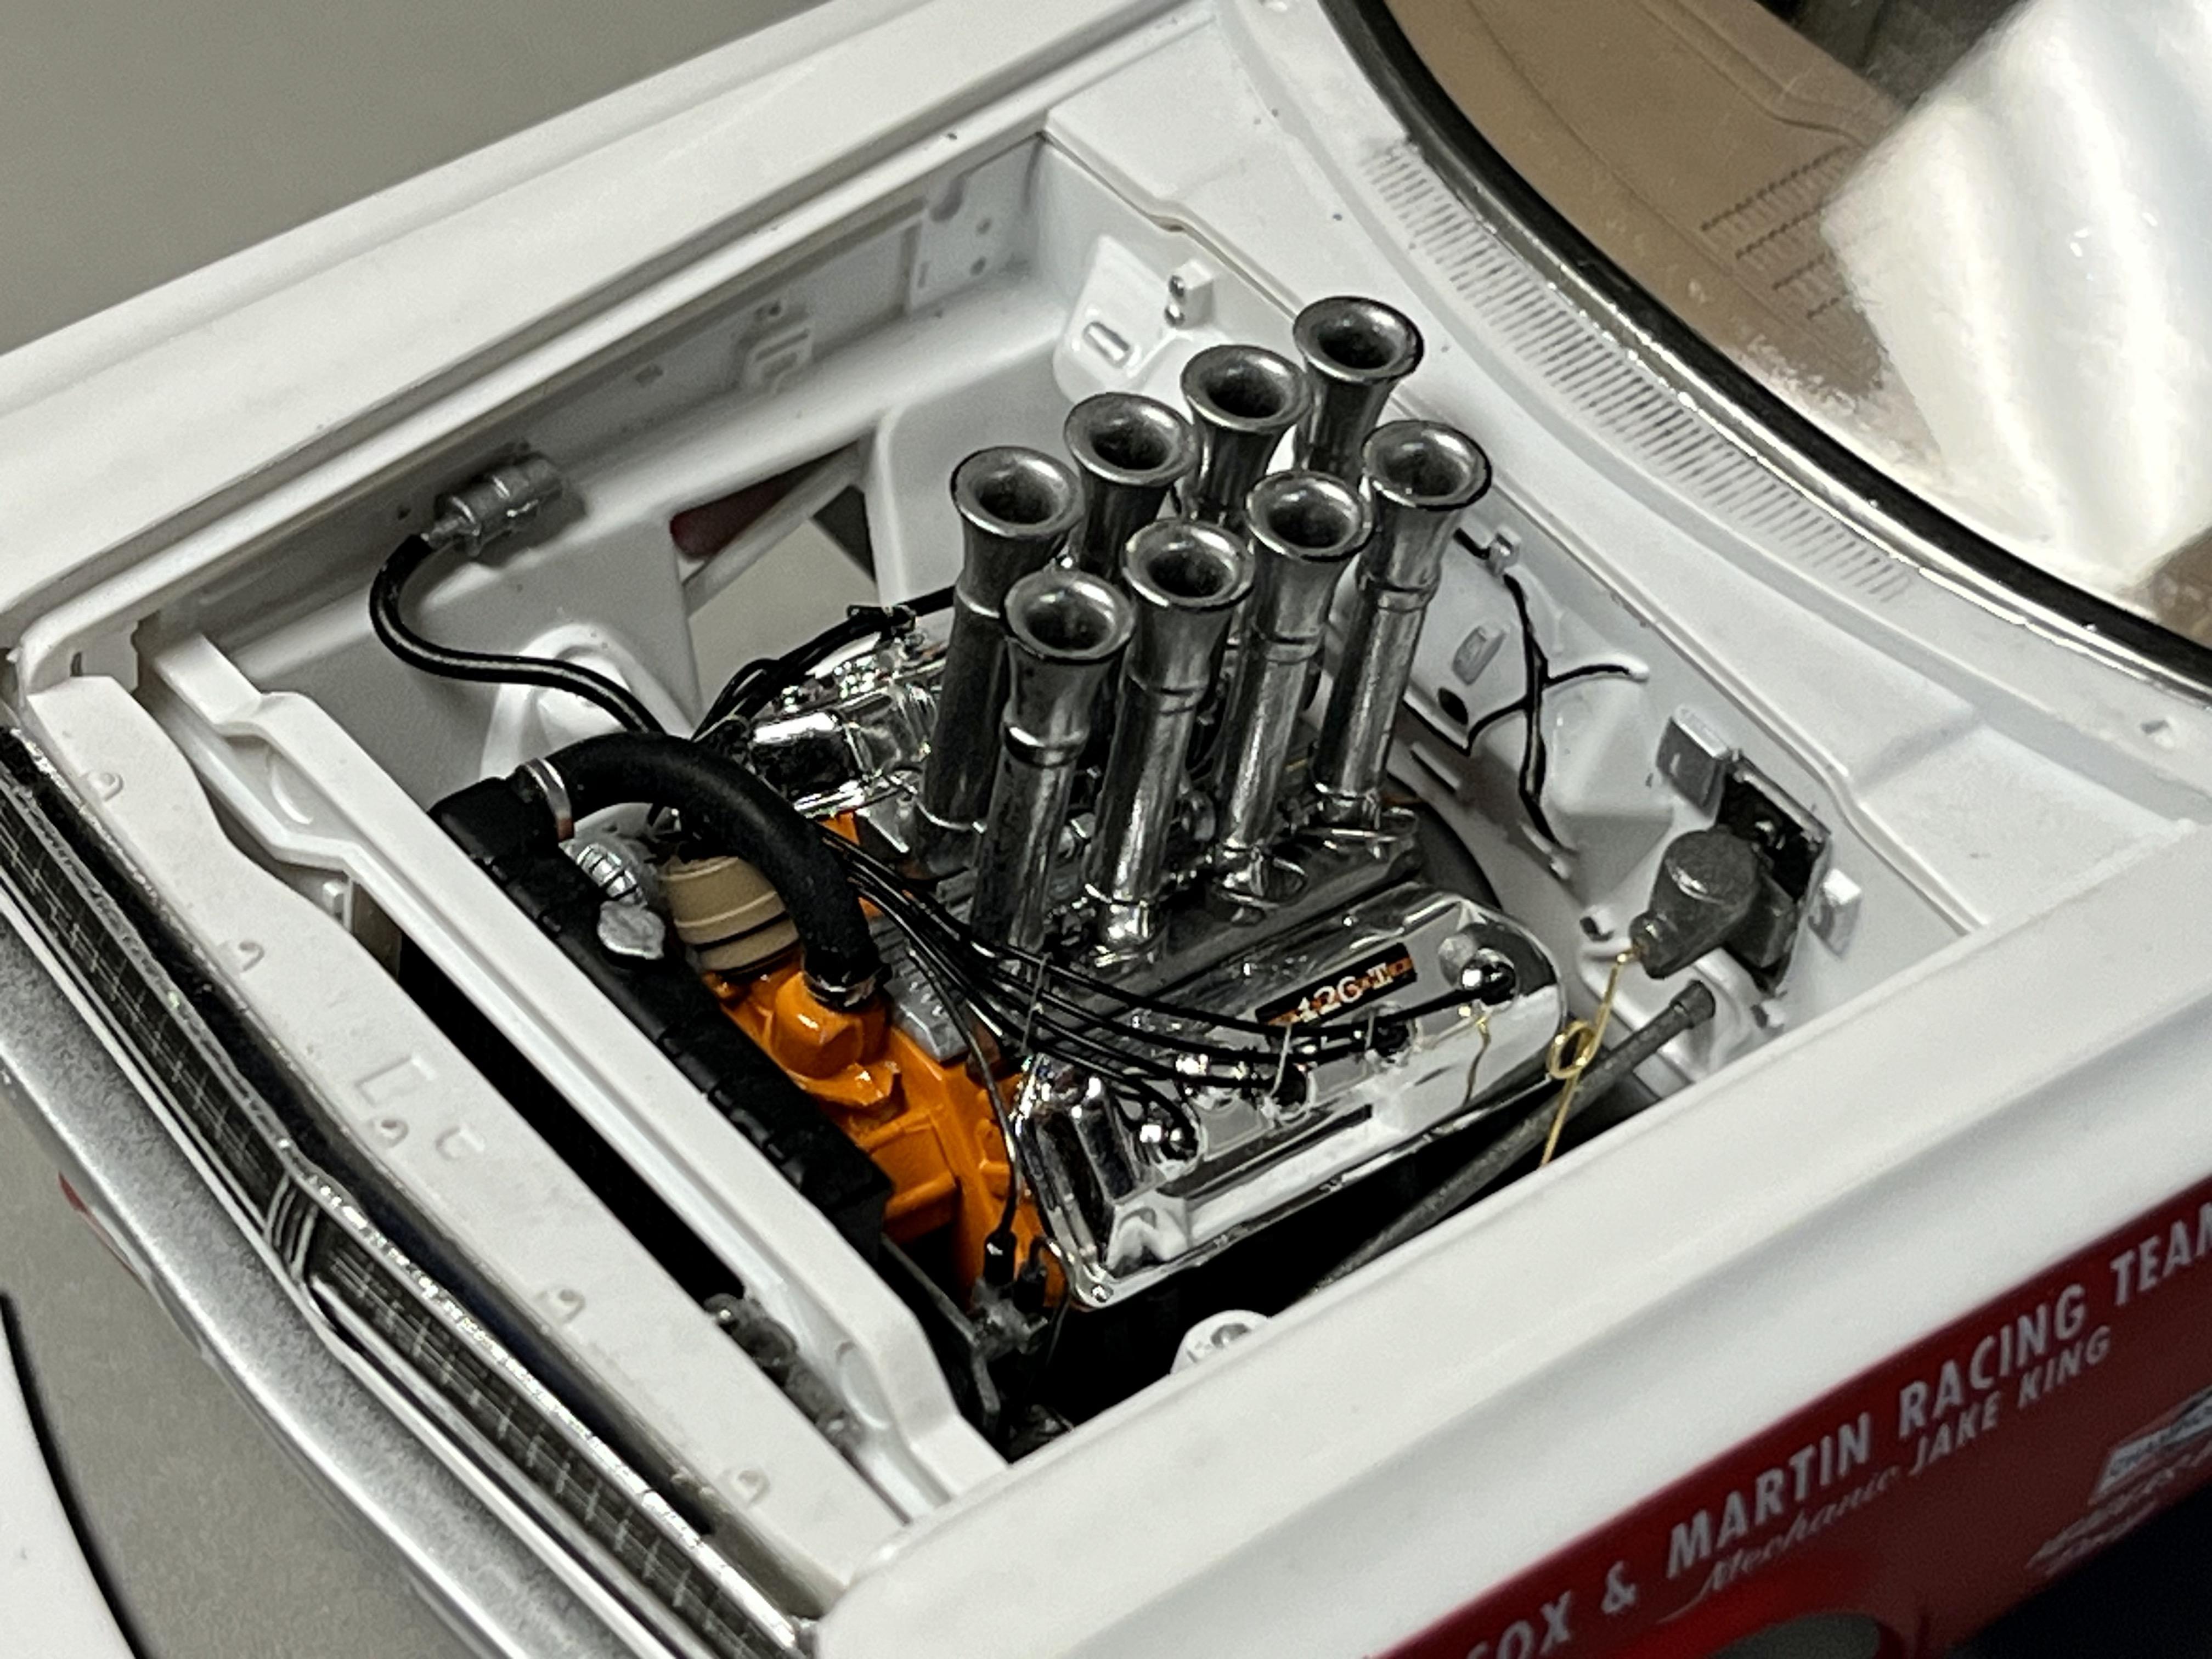
I added a three-speed manual transmission and engine block from the A990 Butch Leal kit (and used the block and transmission from this kit in the Grump build posted elsewhere here), Slixx decal set, a Detail Master distributor and plug wires and scratch-built fuel lines and linkage. The rear wheels were pulled from the Revell '64 Ford Thunderbolt kit. The red and white base paints were left over Zero paint from a Lotus 49B F1 build and the roof was sprayed using Tamiya metallic blue lacquer rattle can. I tinted the side and rear windows by air brushing thinned Tamiya transparent blue acrylic. The Hilborn FI velocity stacks used are the long ones right out of the box which are intended for the automatic transmission version but I decided not to shorten them. Reference photos of this car seem to show stacks that are either these long ones or are mine-way between the short and long ones.
I have one last unbuilt one of these kits in my stash along with a set of Lee Smith decals from Fremont Racing. I'll hopefully get around to doing later this year unless I get distracted by a new kit release that I could apply my Dick Landy decals to 😁....Cheers, John
-
14
-
-
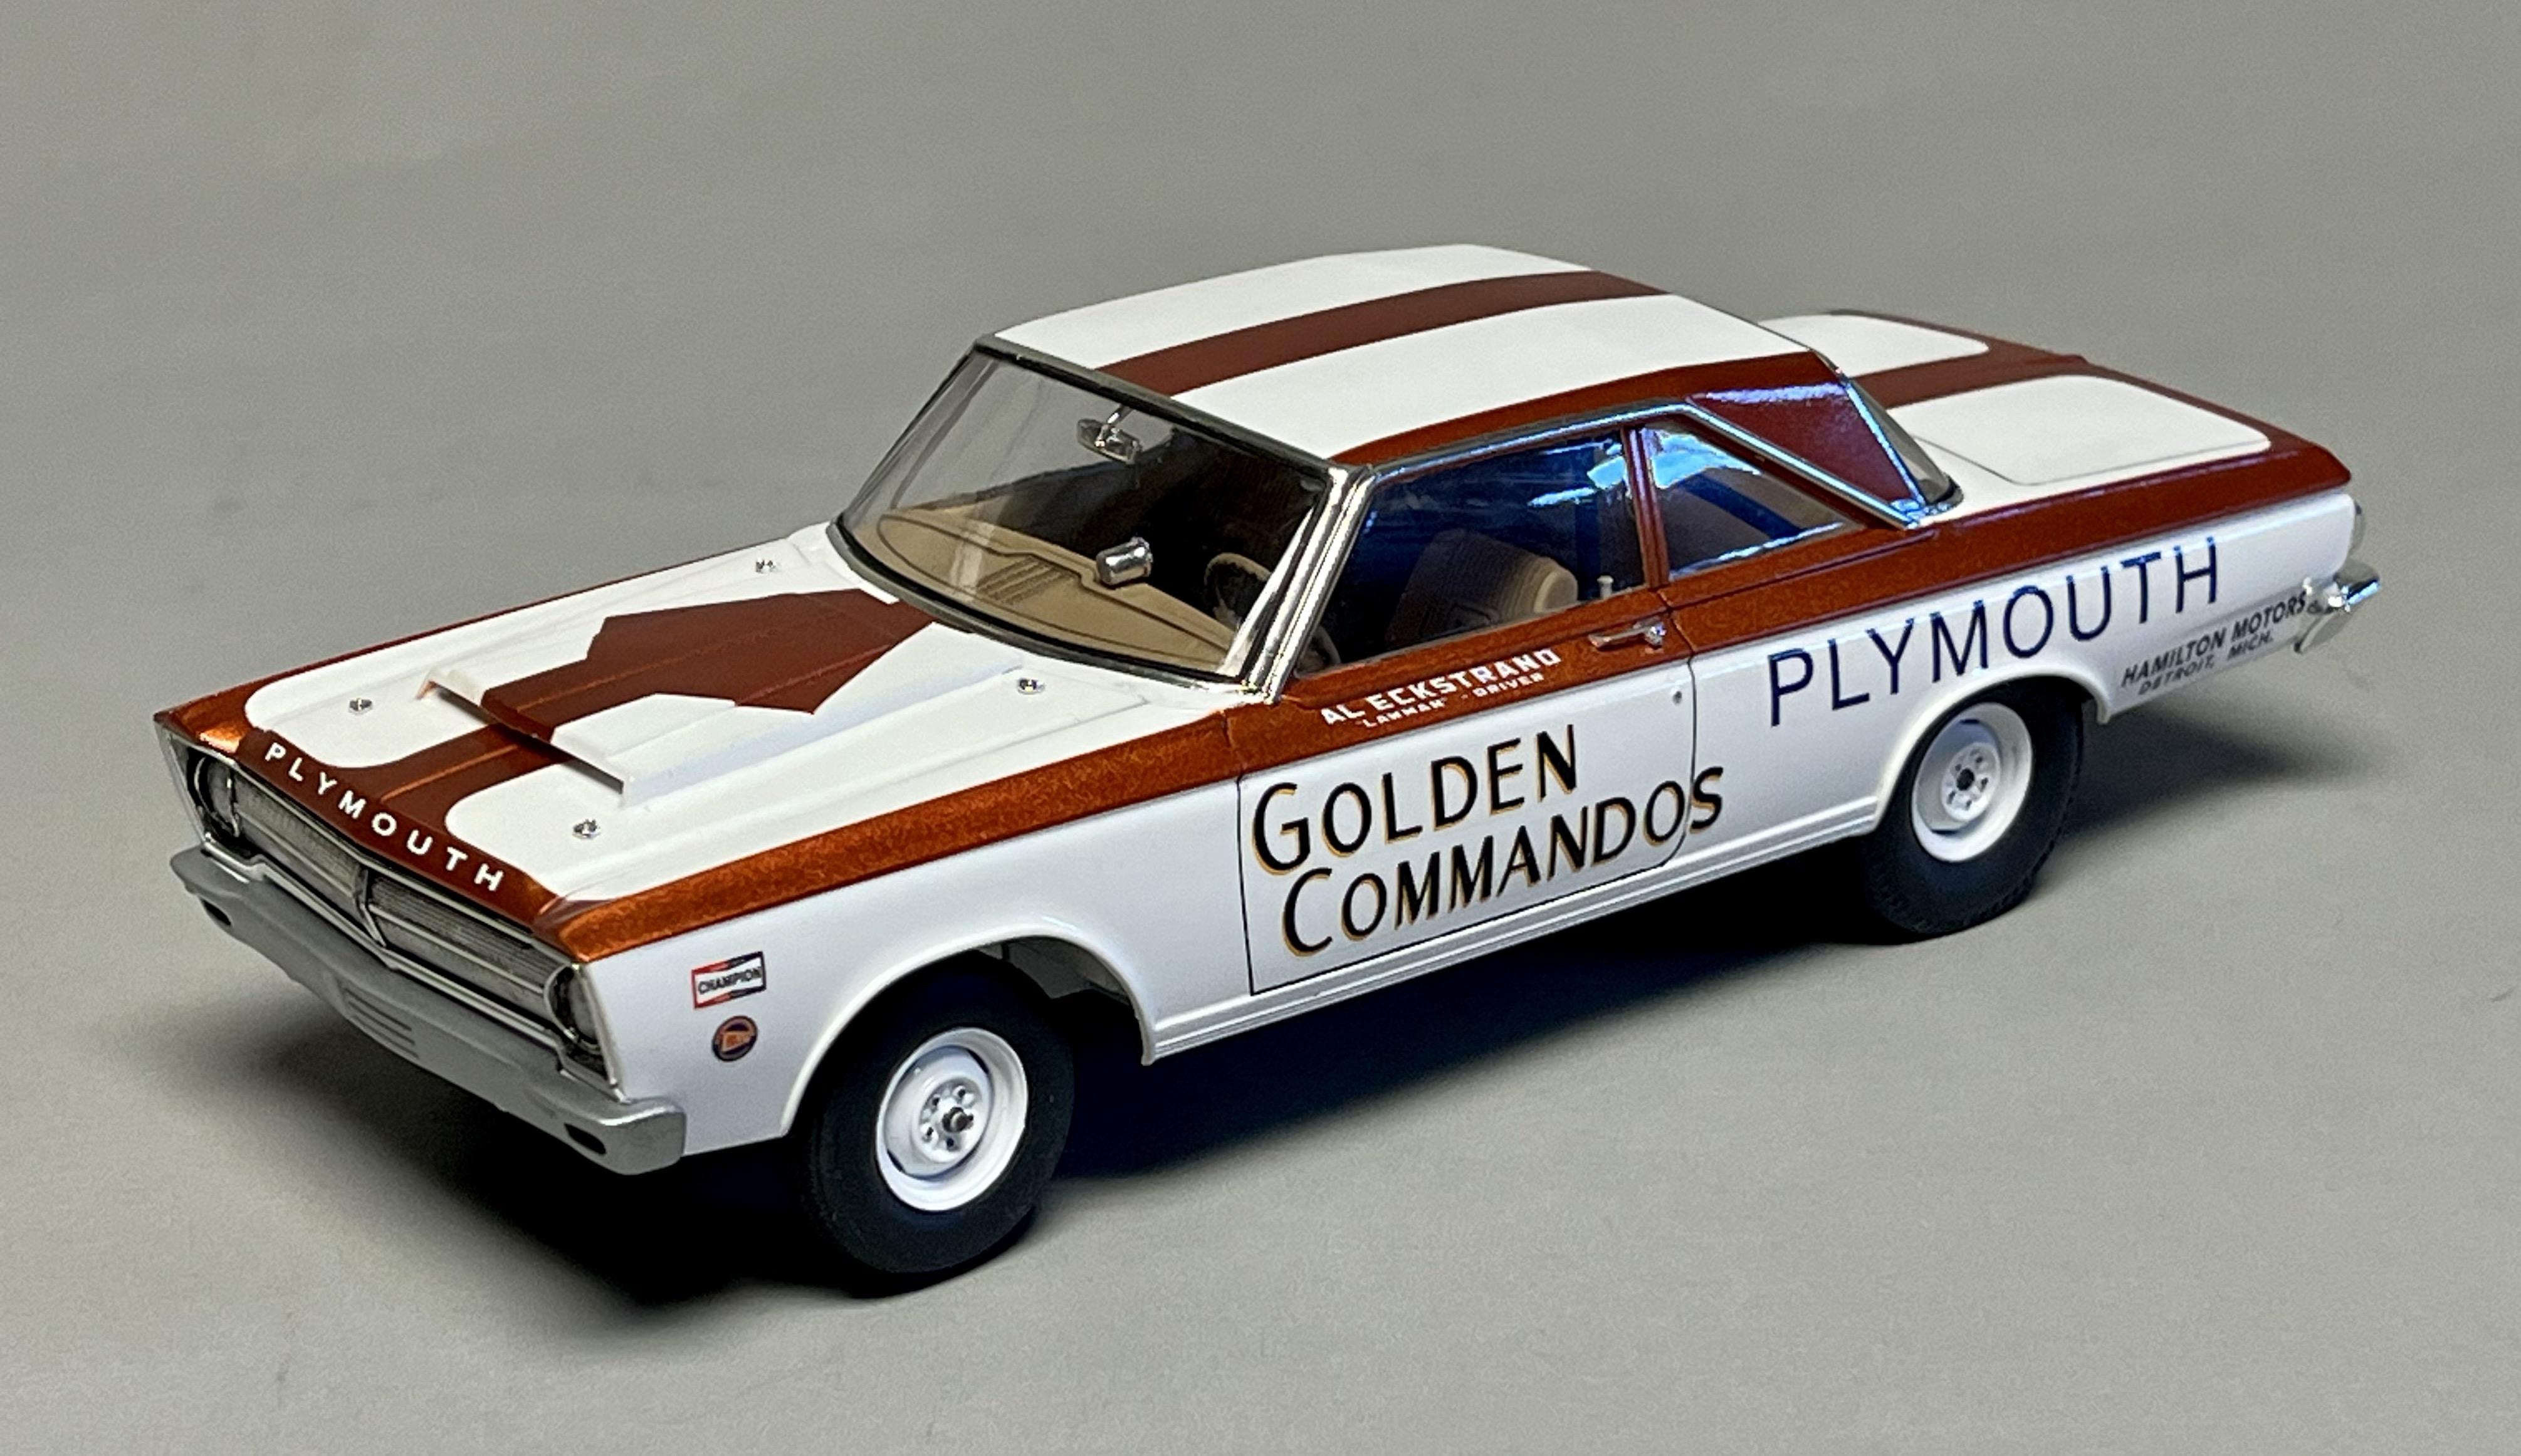
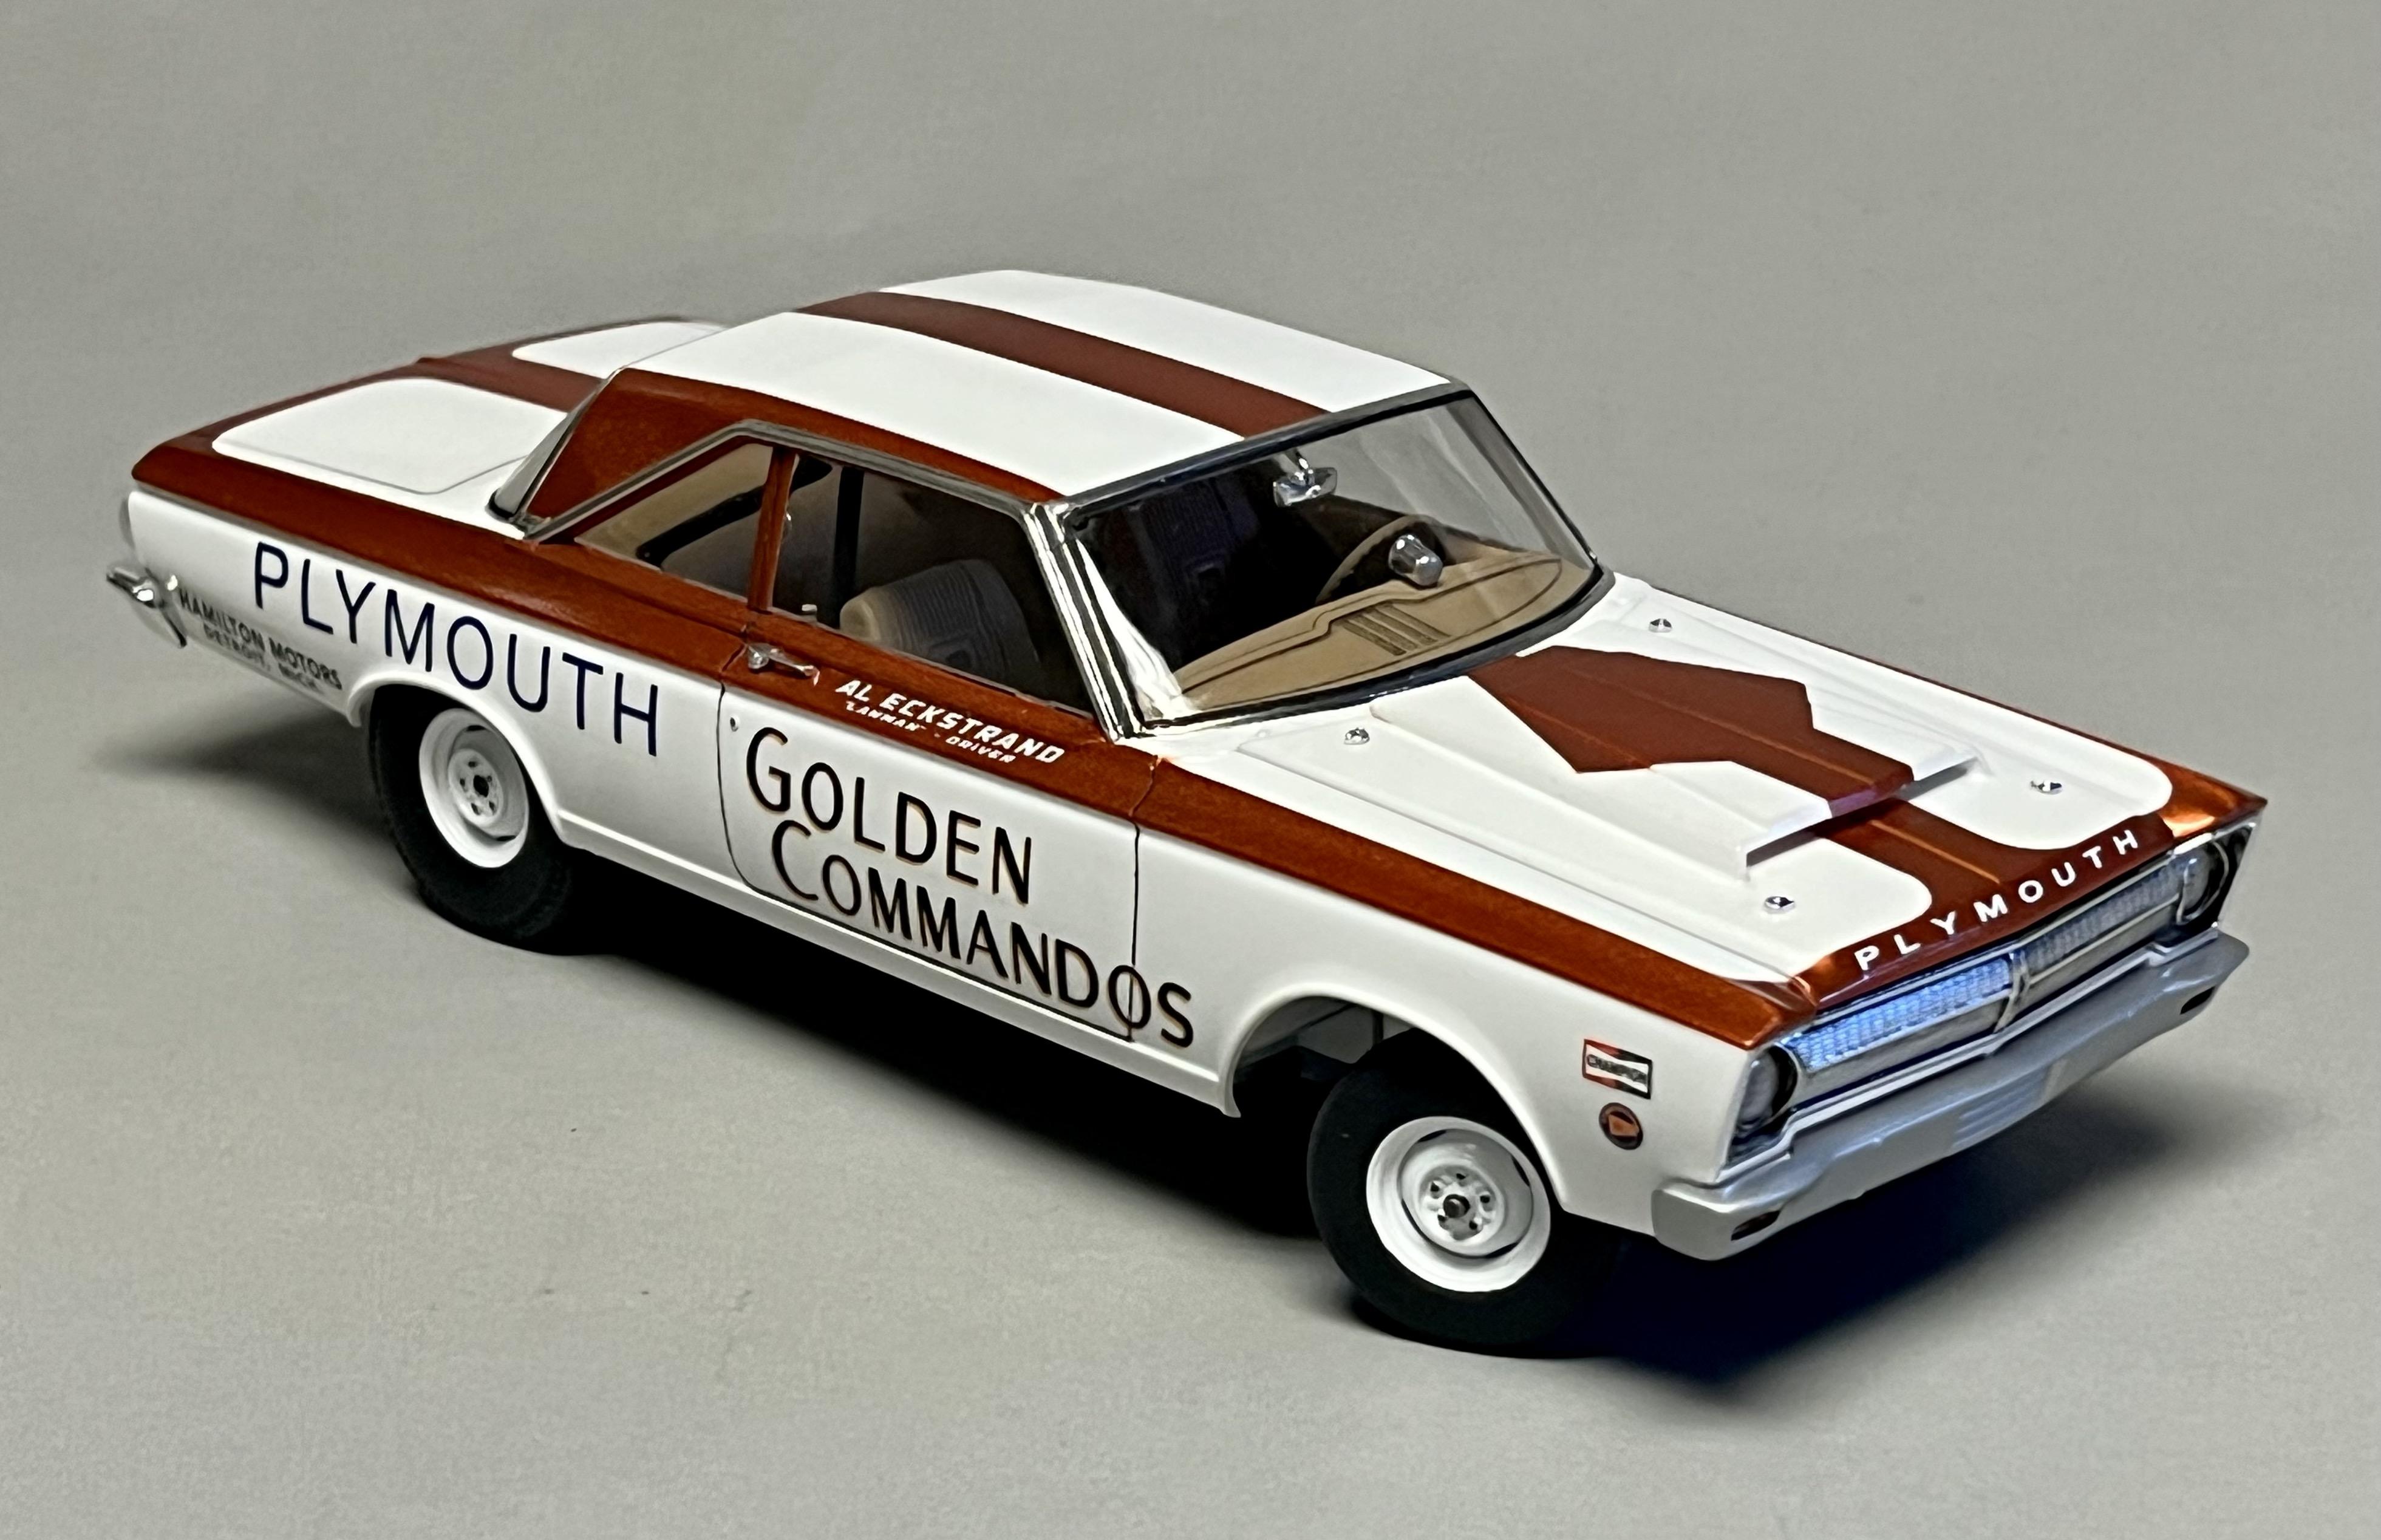
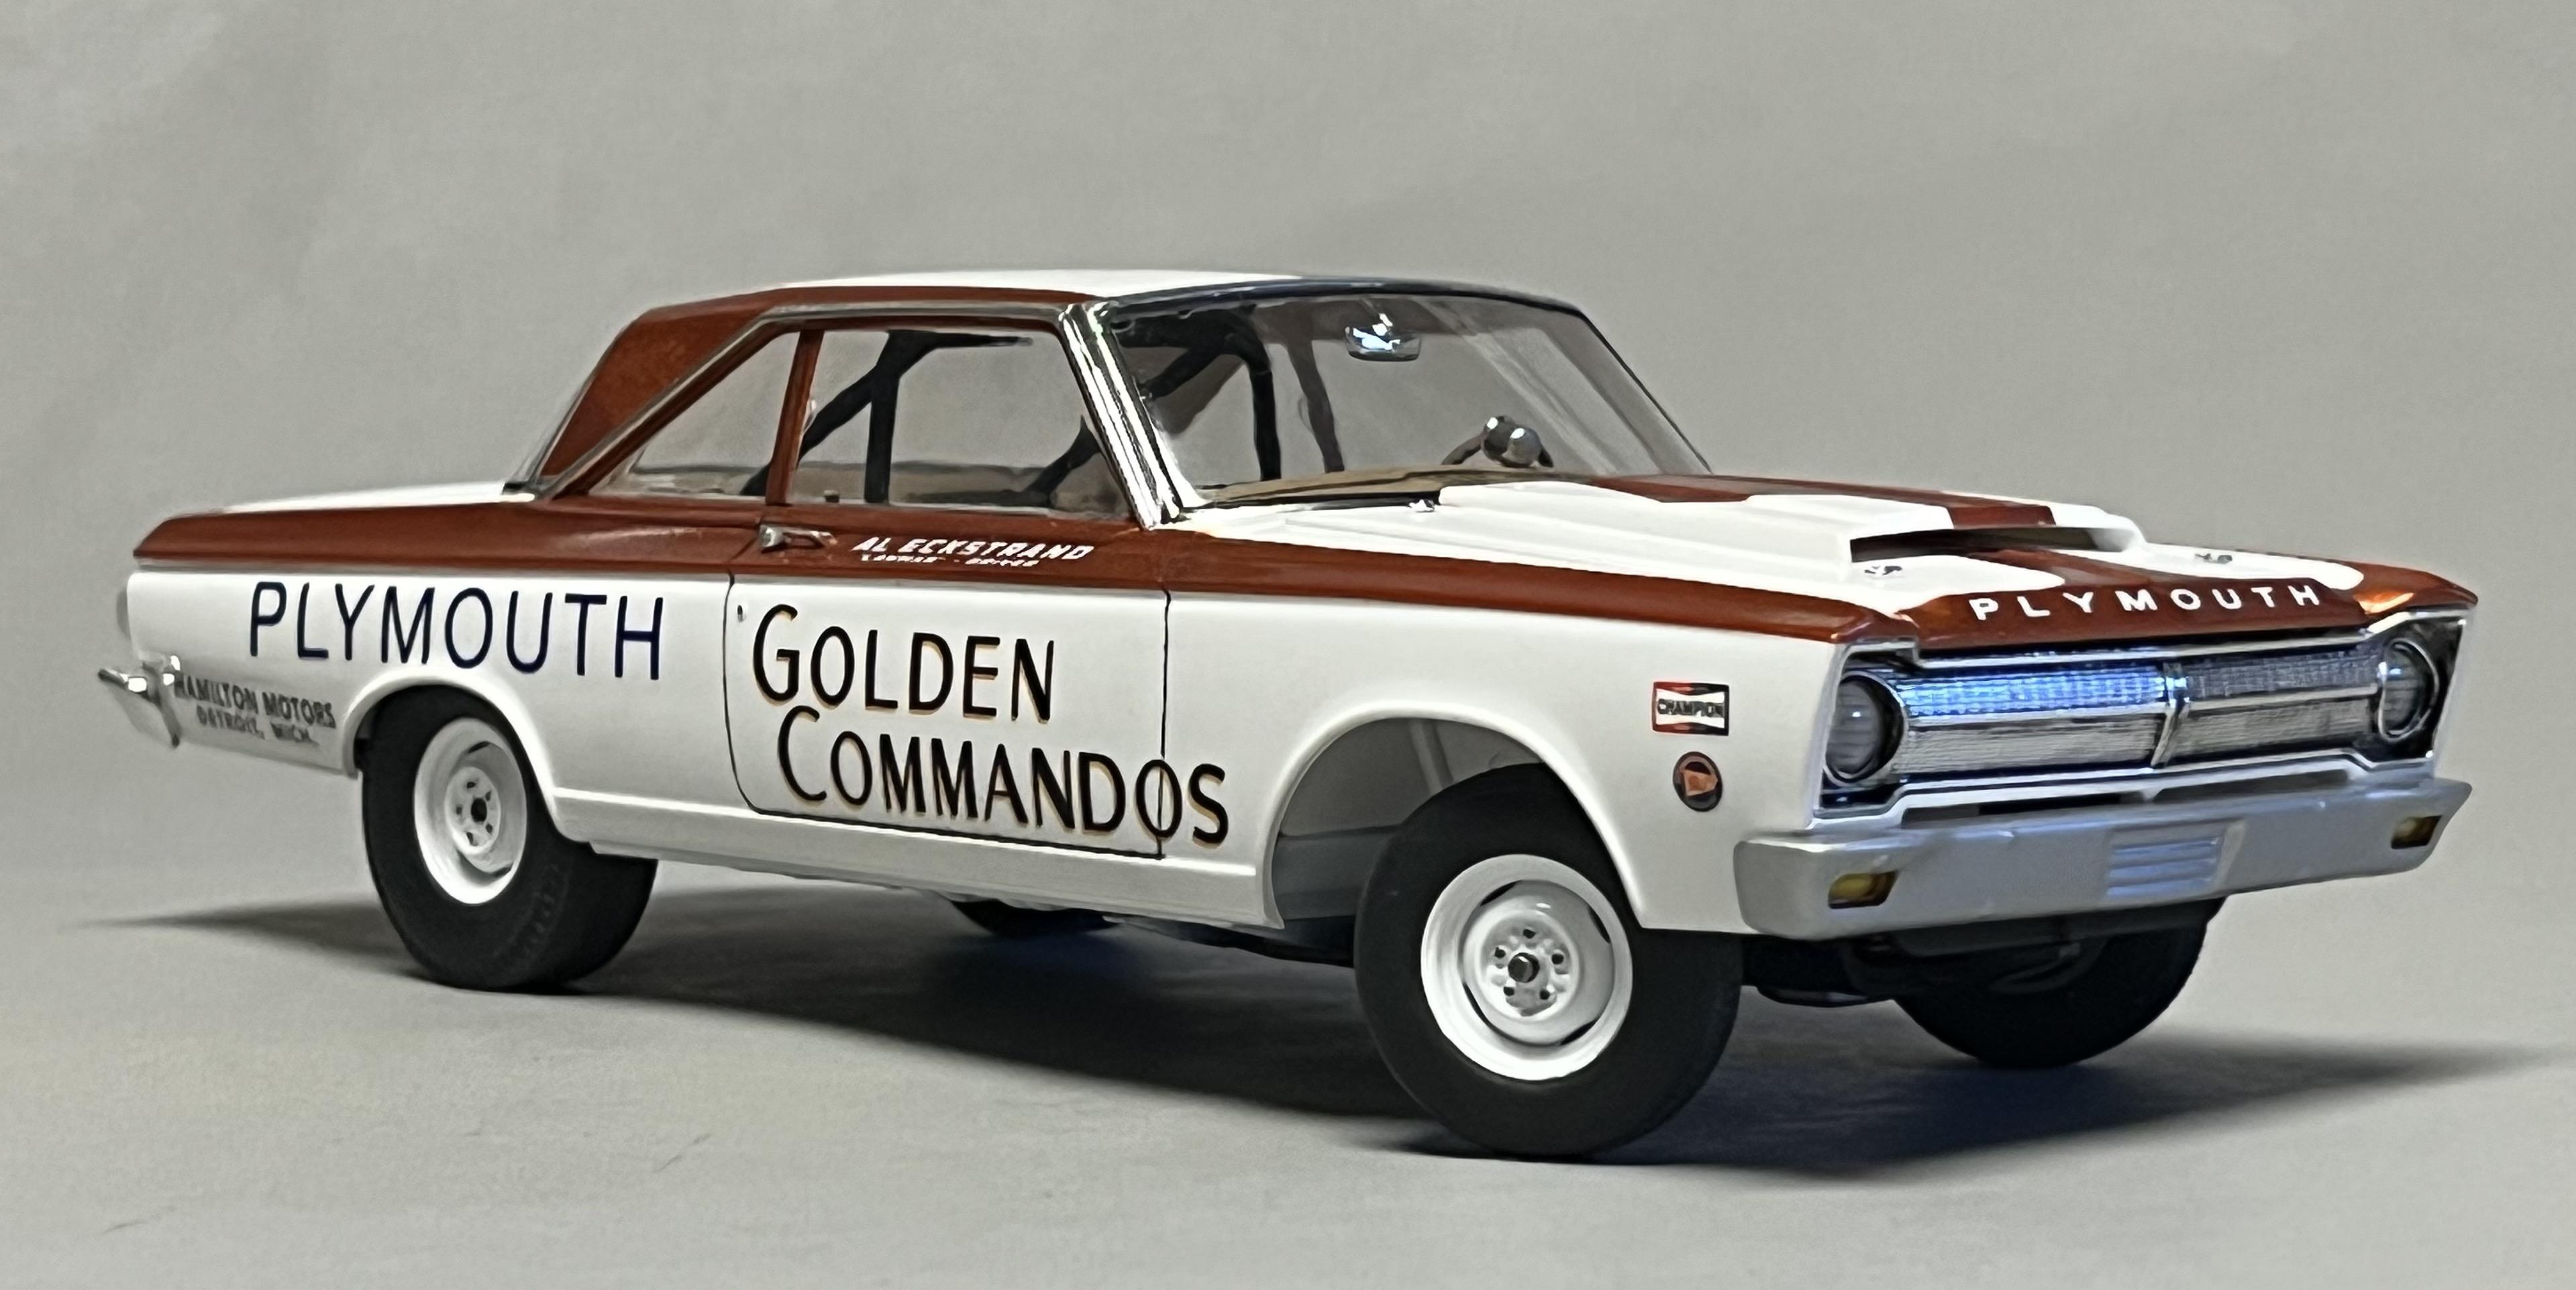
This second car in my assembly line is from this limited release Moebius kit which I can't recall ever seen posted as a build.
I believe his car was one of the 2% WB specials that was only raced one at the '65 Winternationals in Beeline Arizona after which the car was modified to match the other more radical AWB cars (15" rear/ 10" front wheel base shift). I built this one OOB except for some Fireball resin carbs, a detail Master distributor and plug wires and some scratch-built fuel lines, linkage and a roll bar (not included in kit). I used Scalefinishes Plymouth Viper Striker Orange and base white. I like the showroom stock look of these mid-sixties super stockers like this one. Cheer's, John.
-
5
-
-
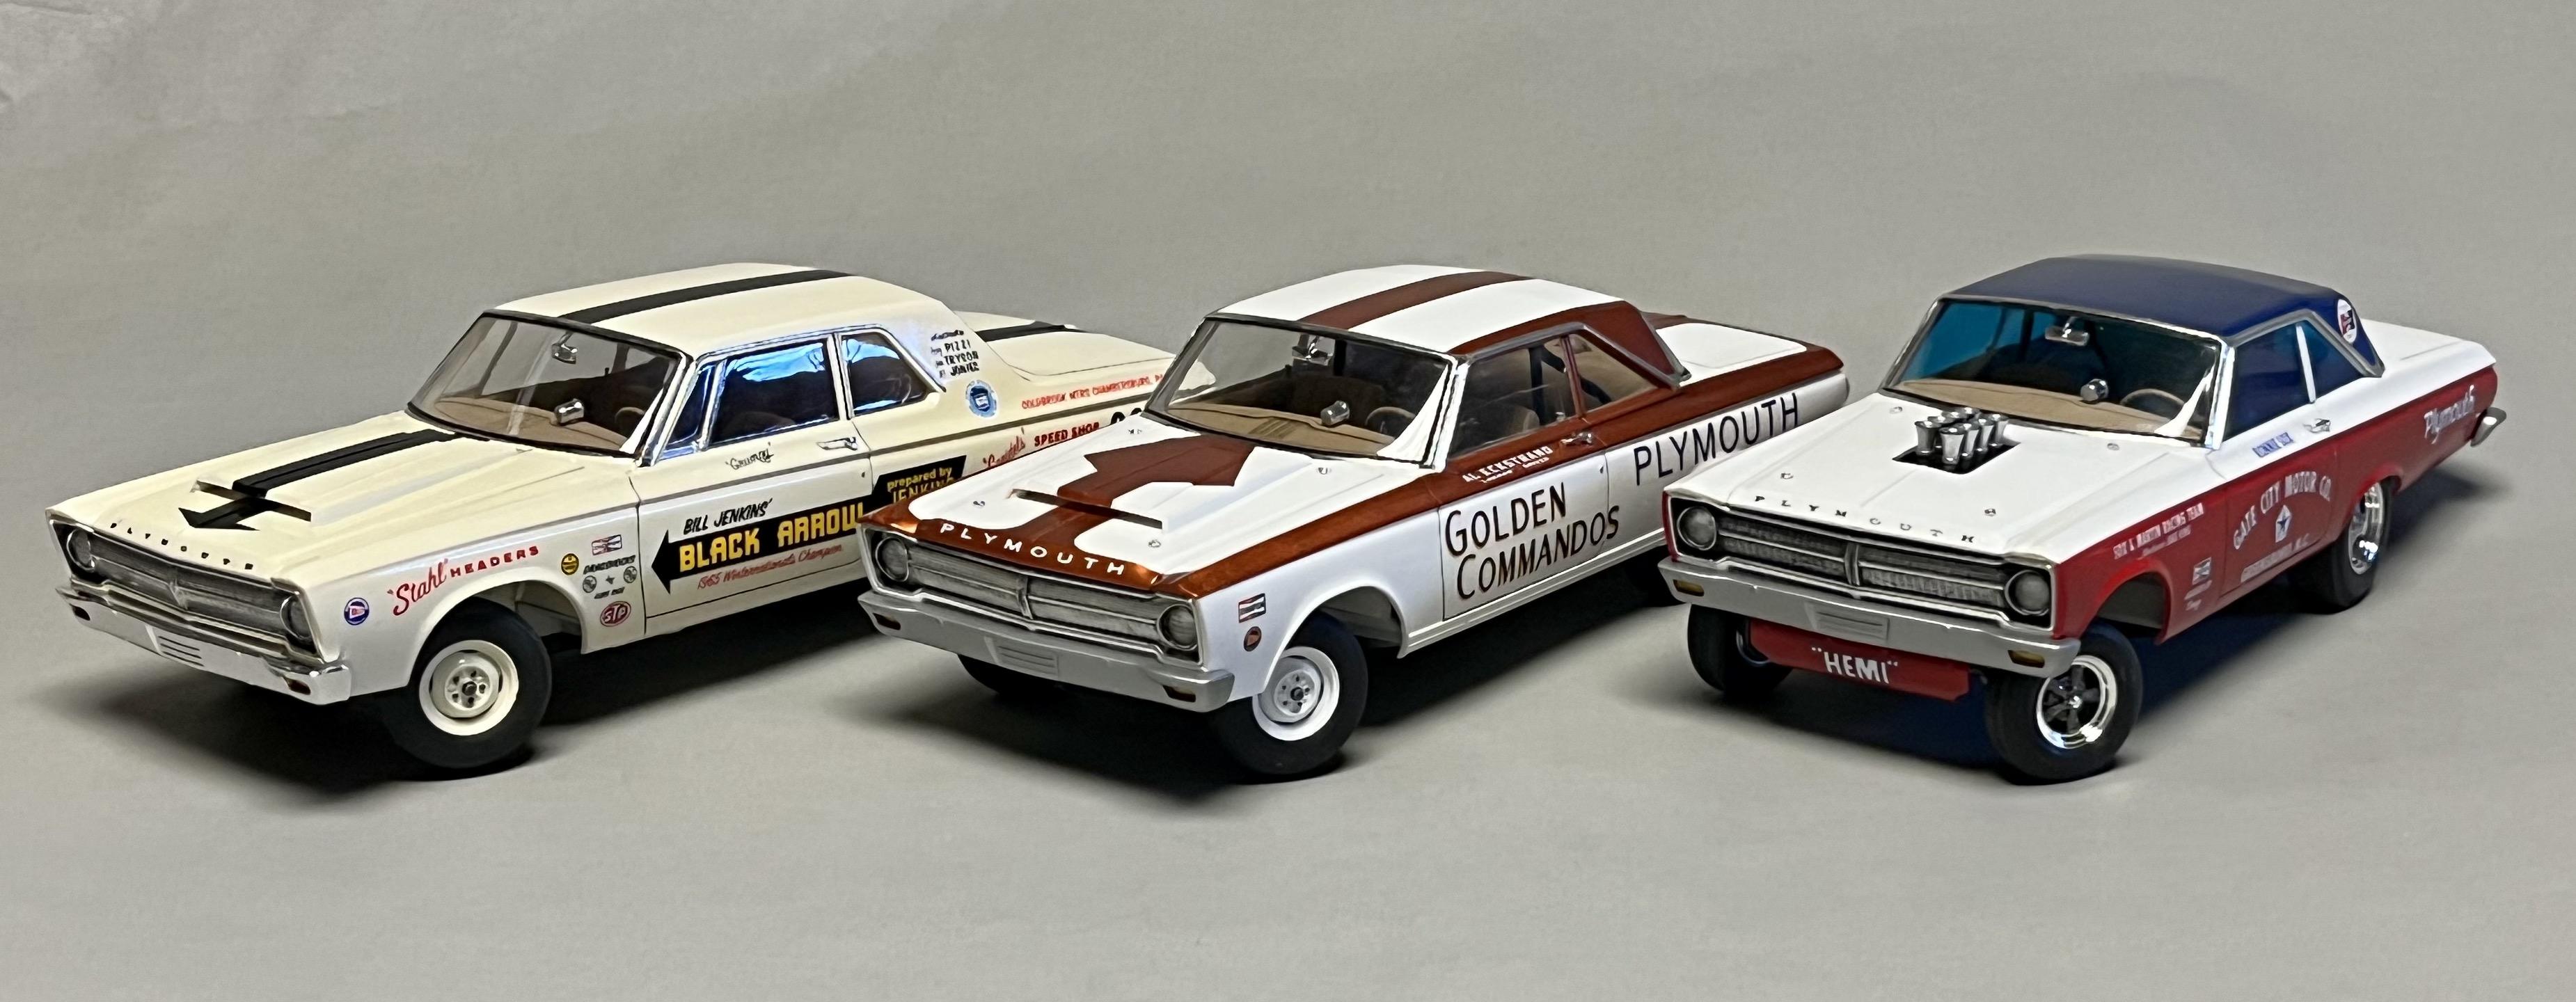
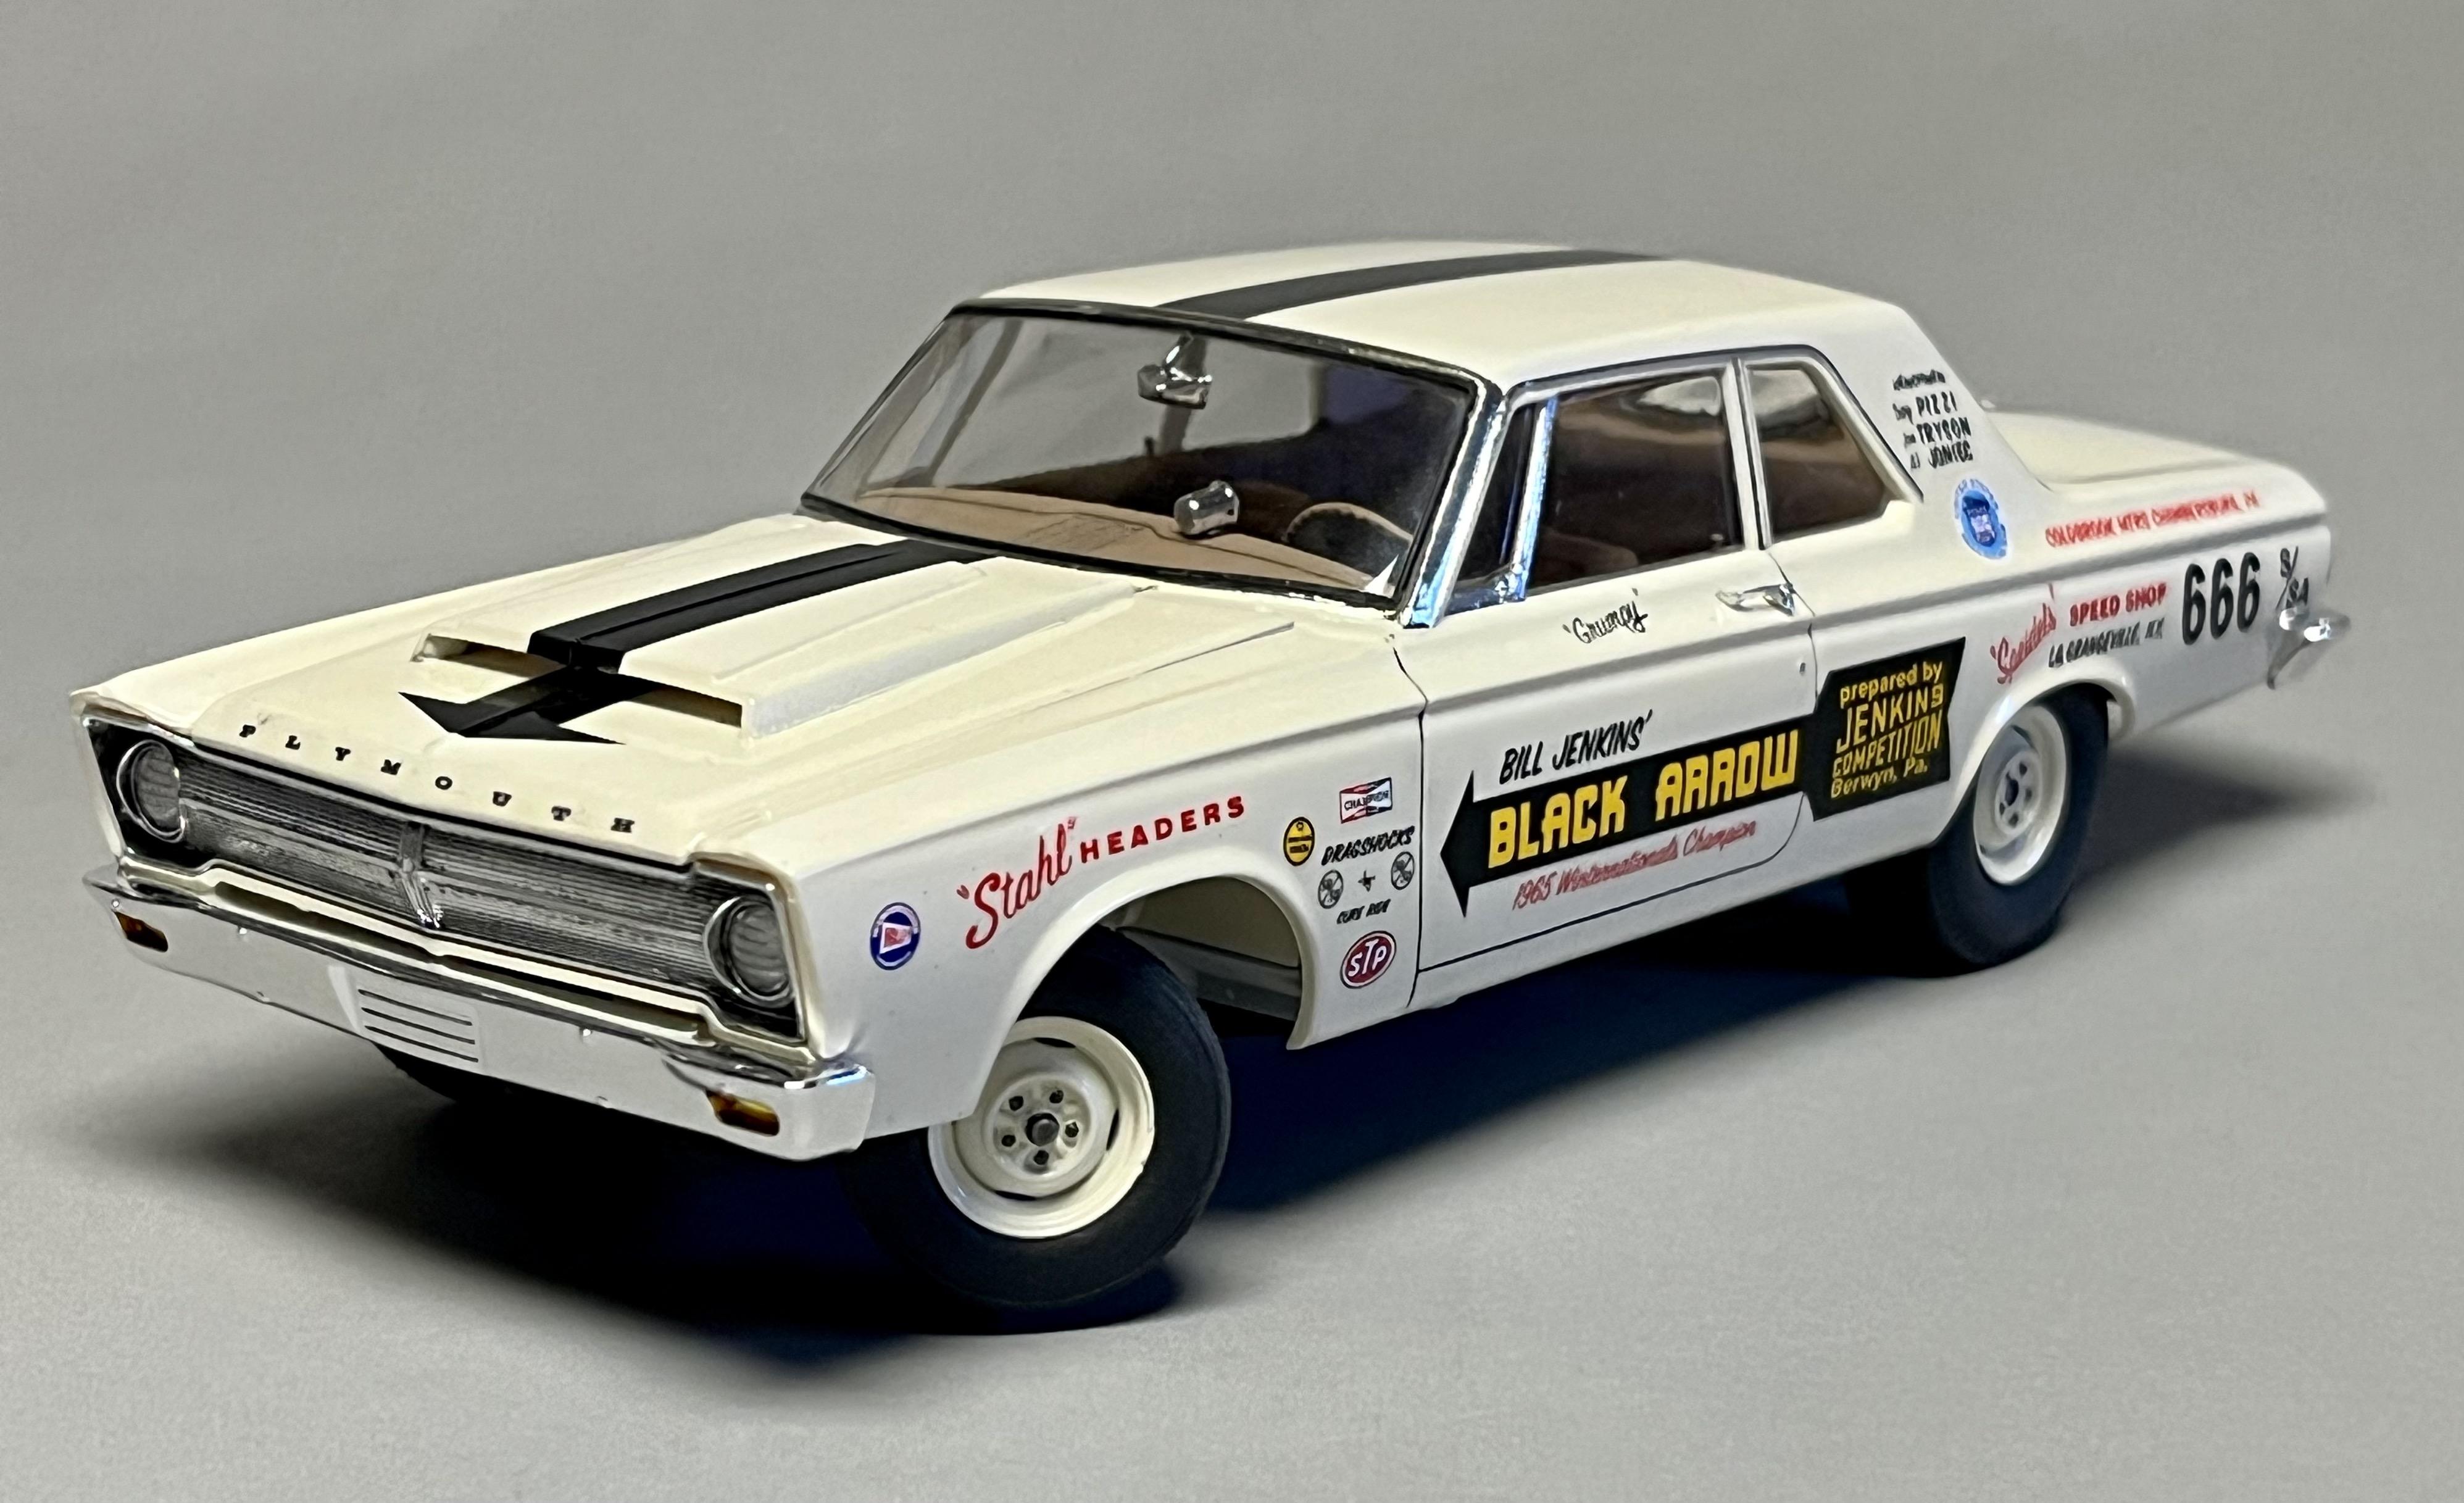
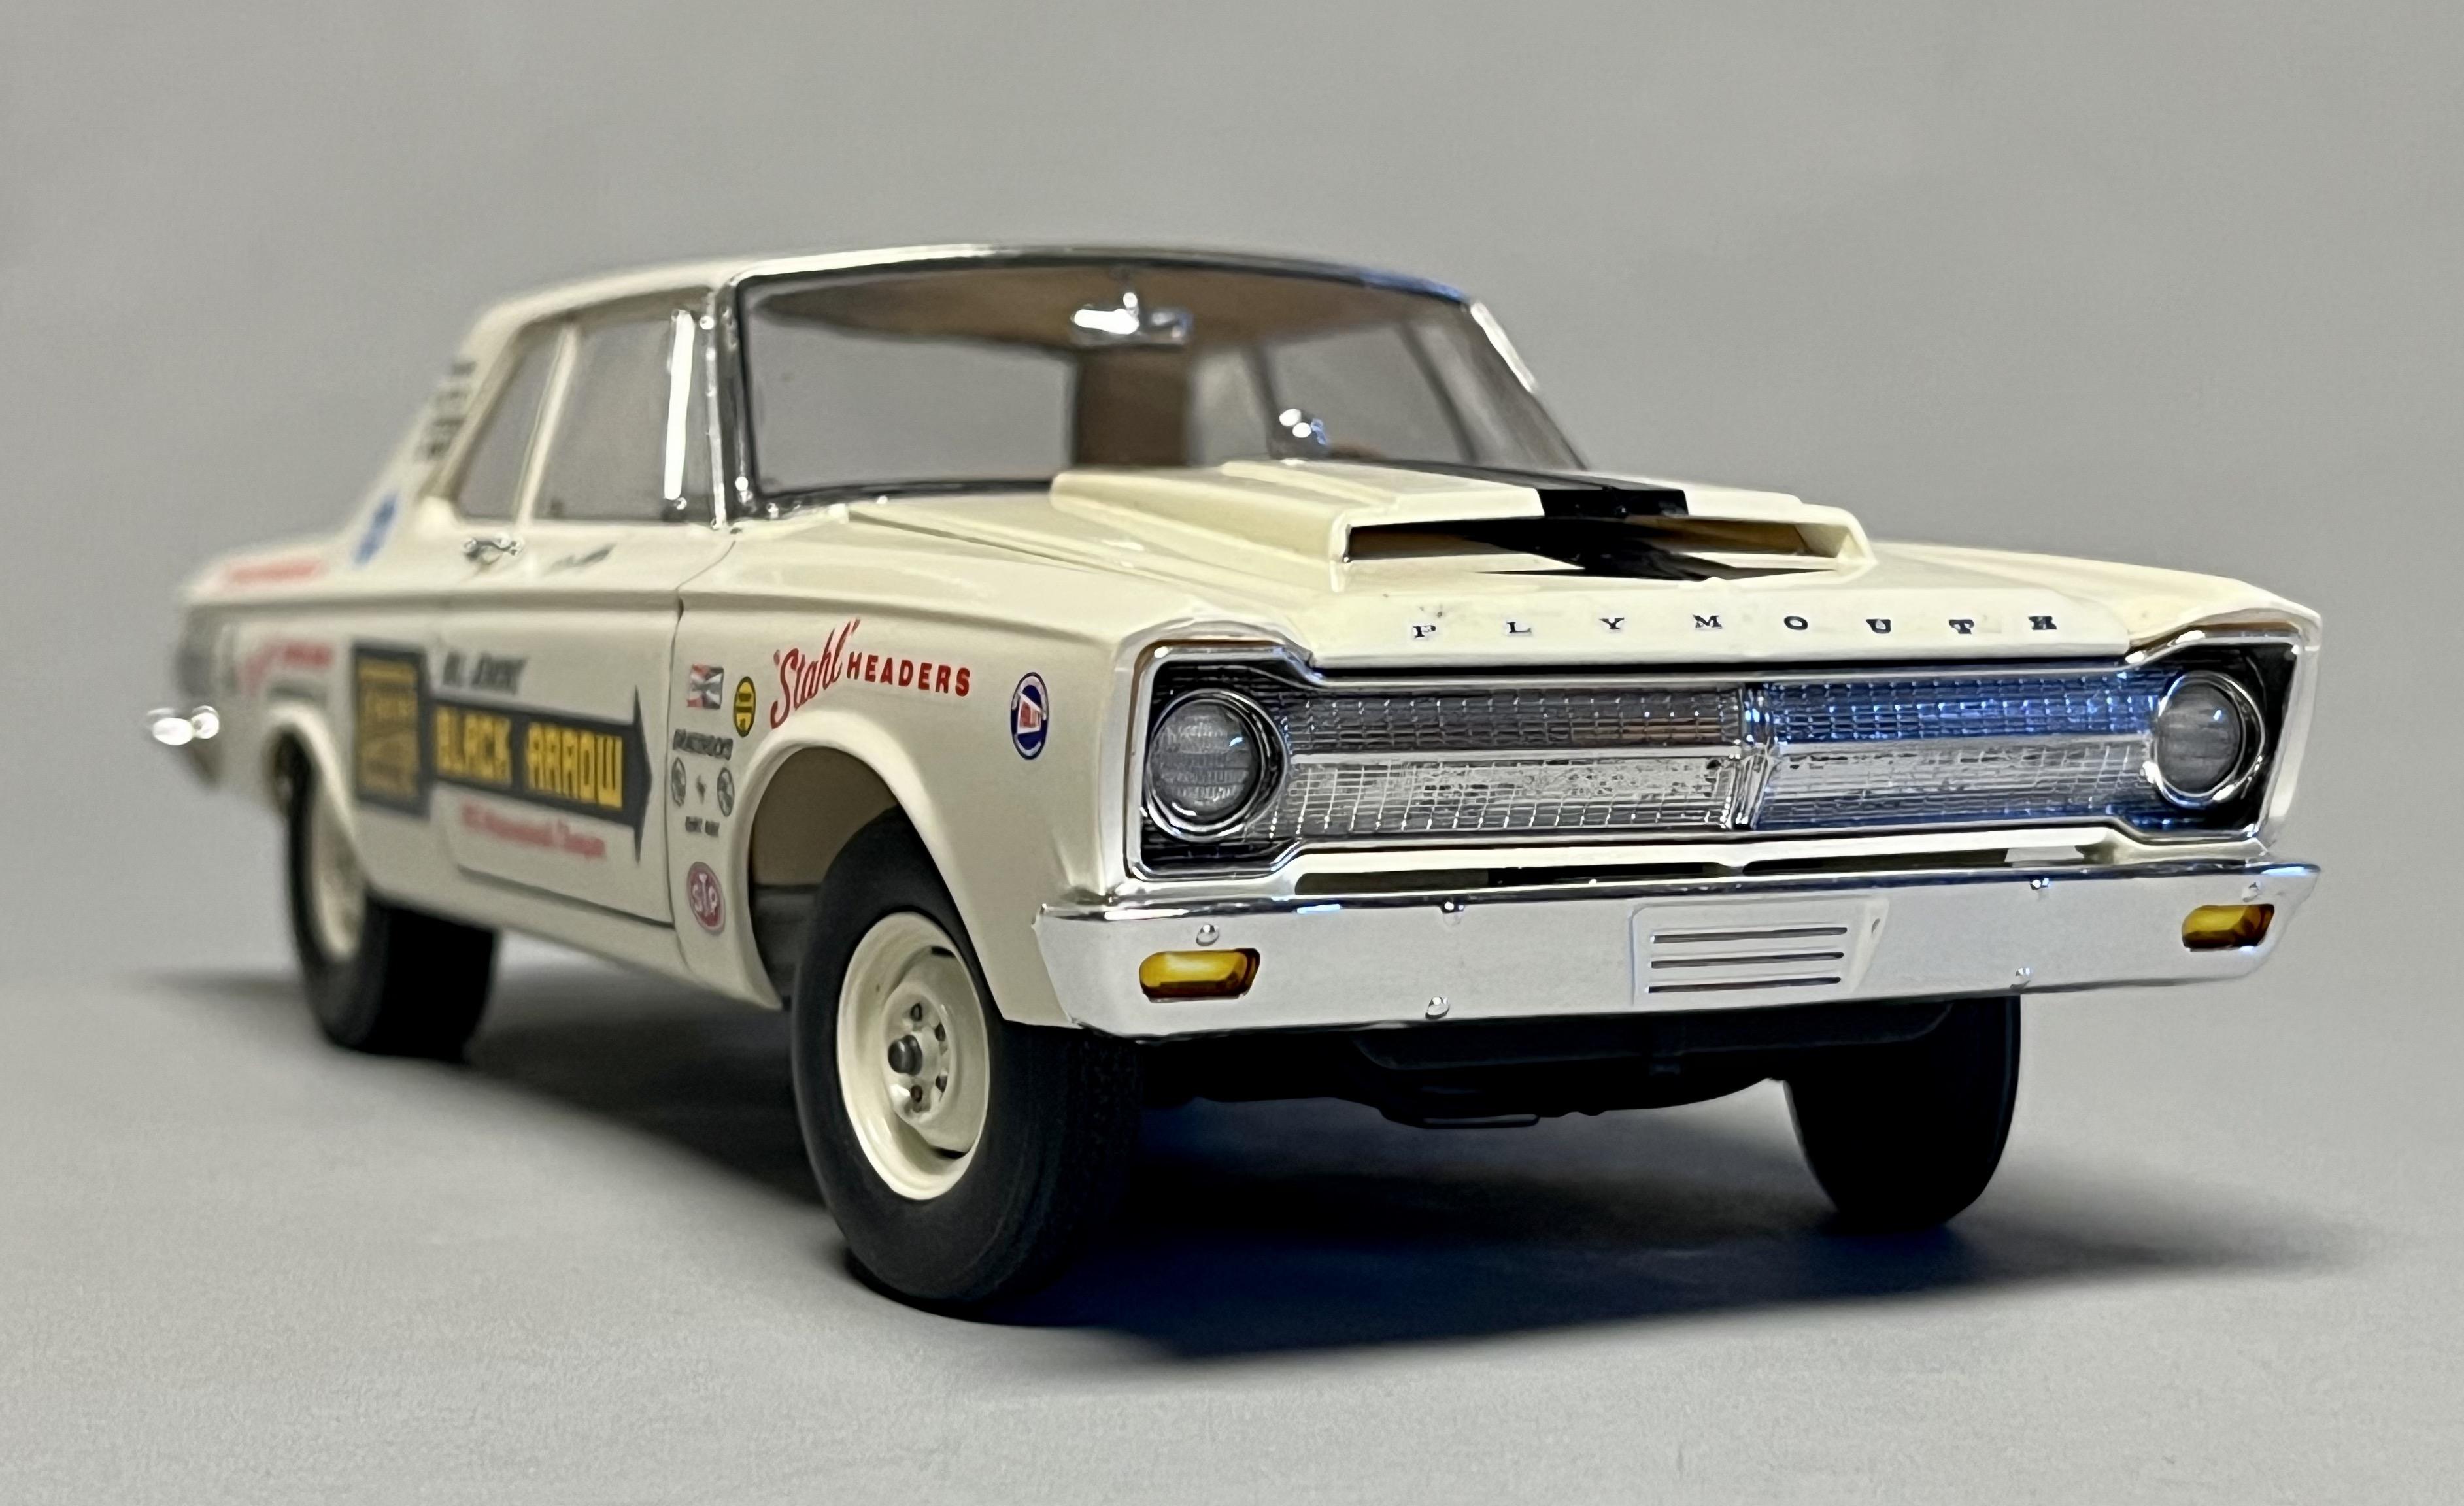
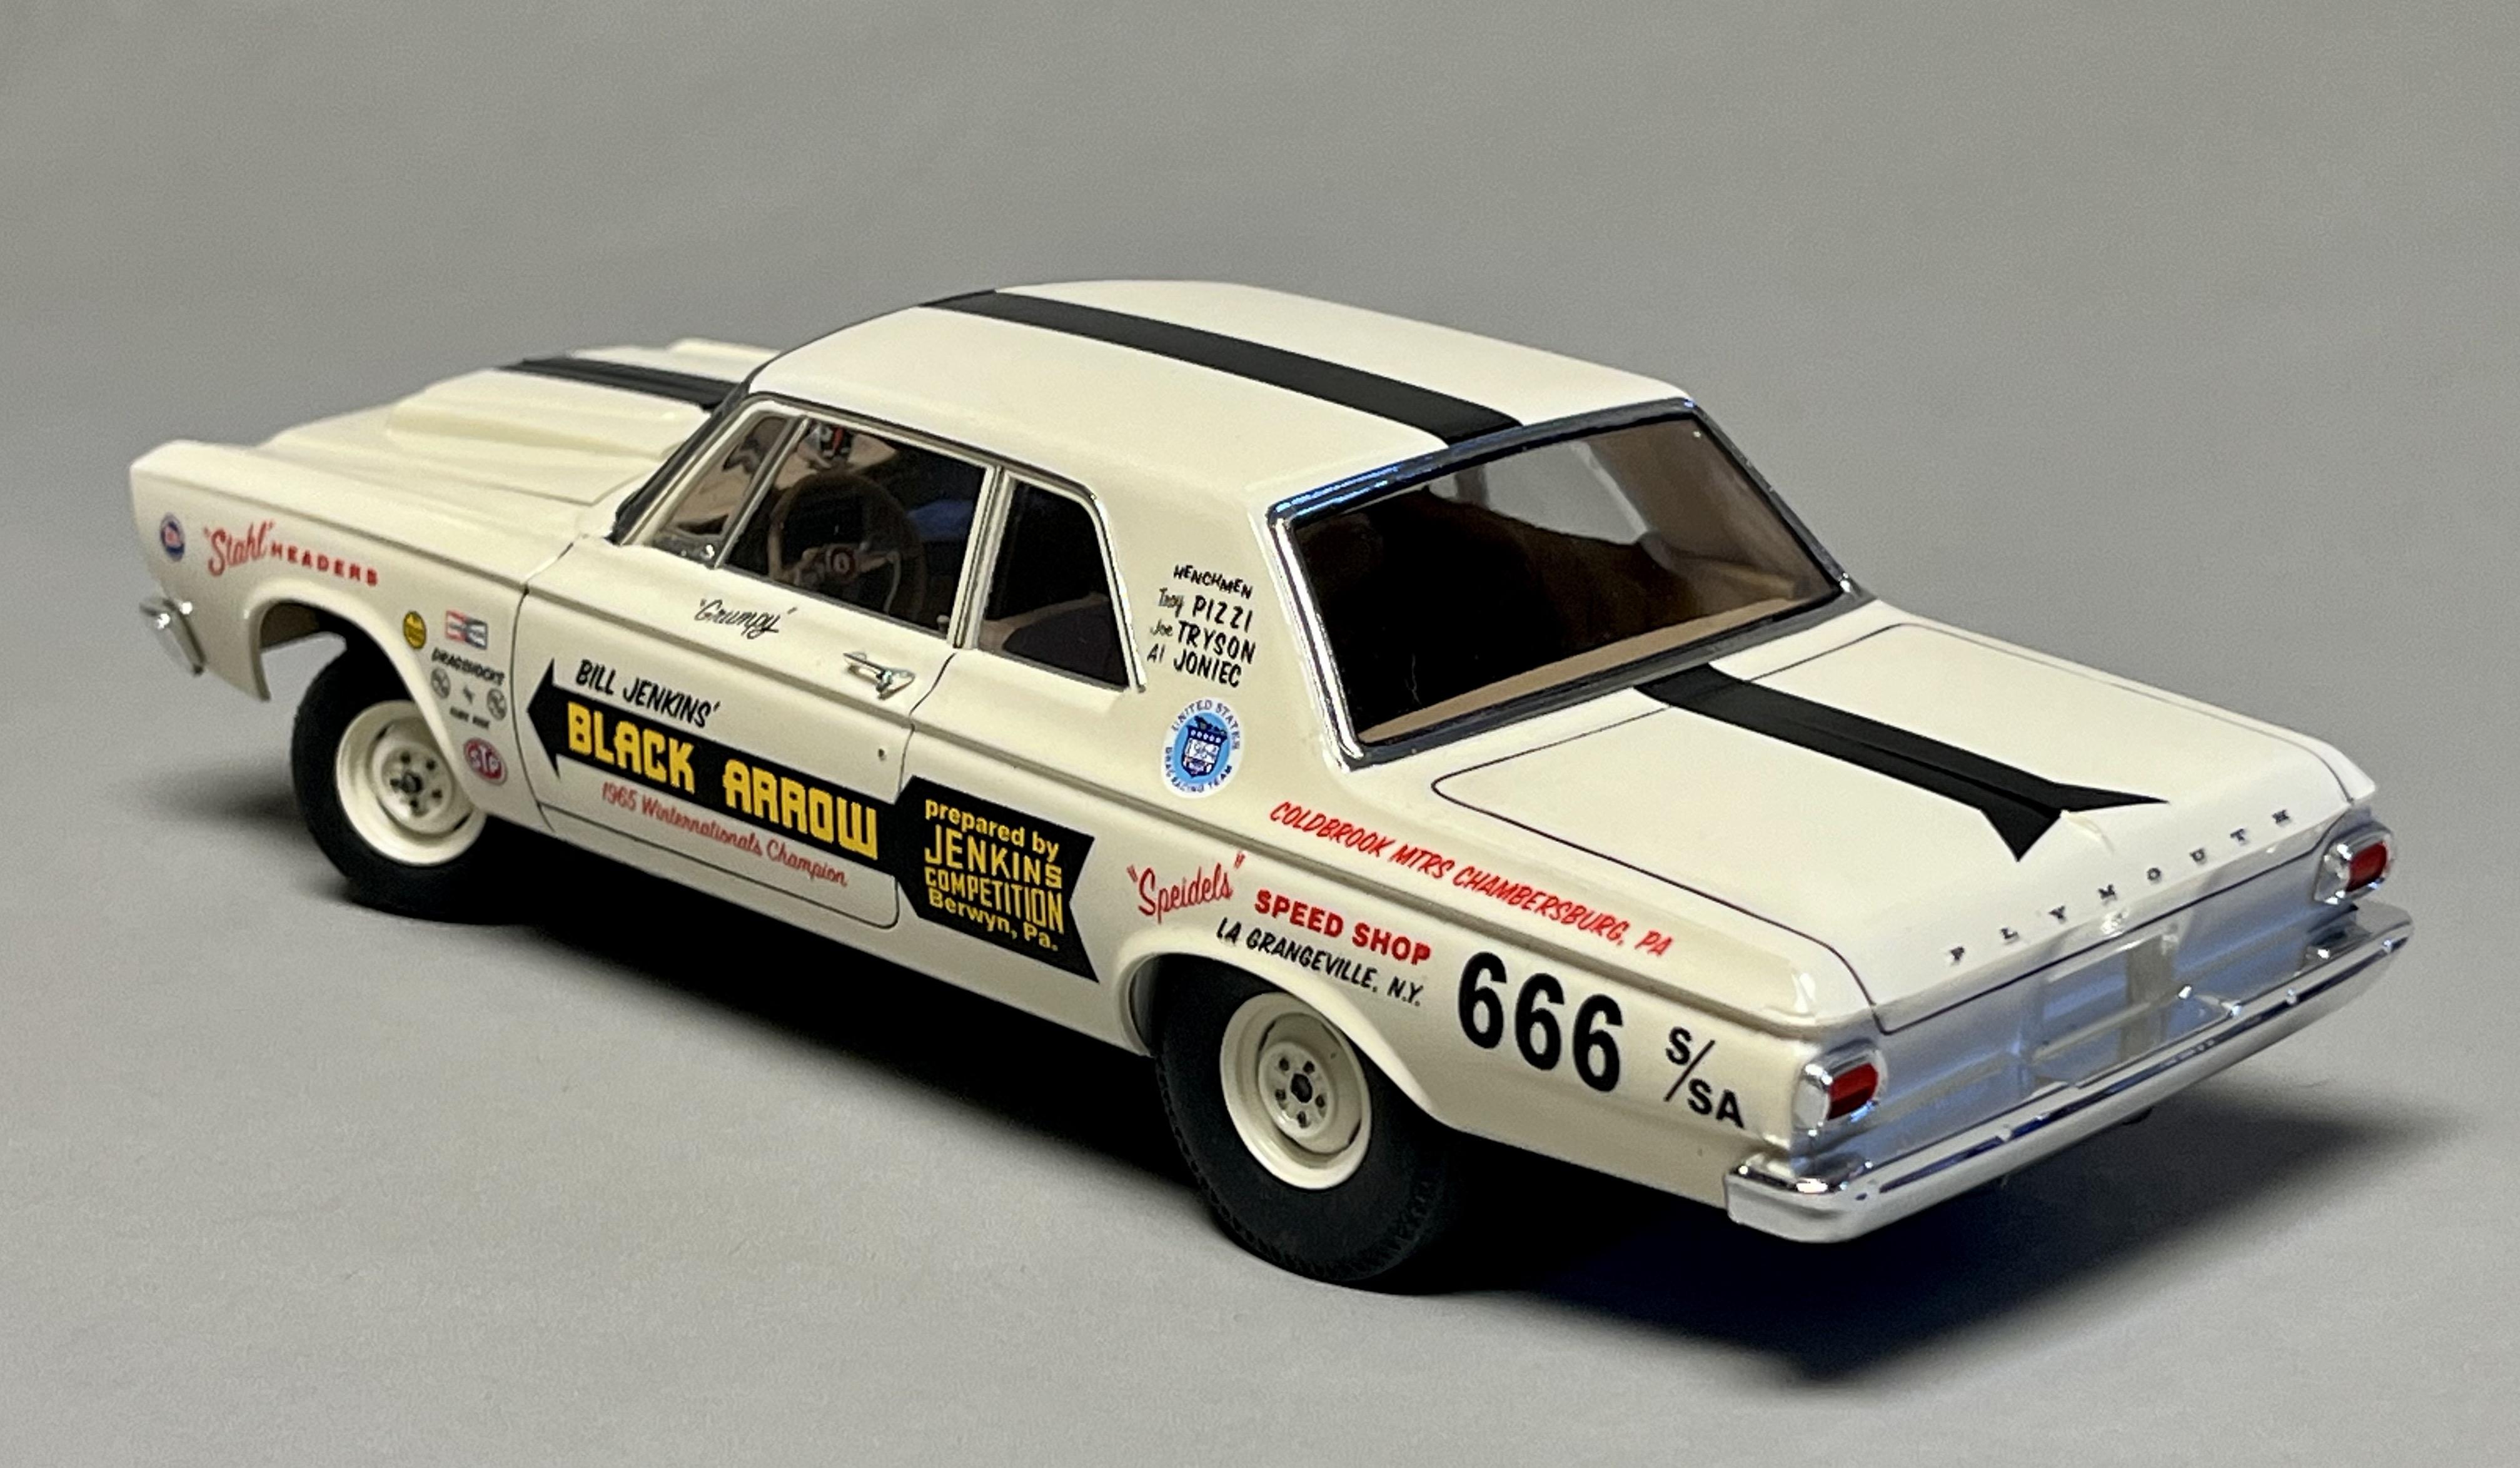
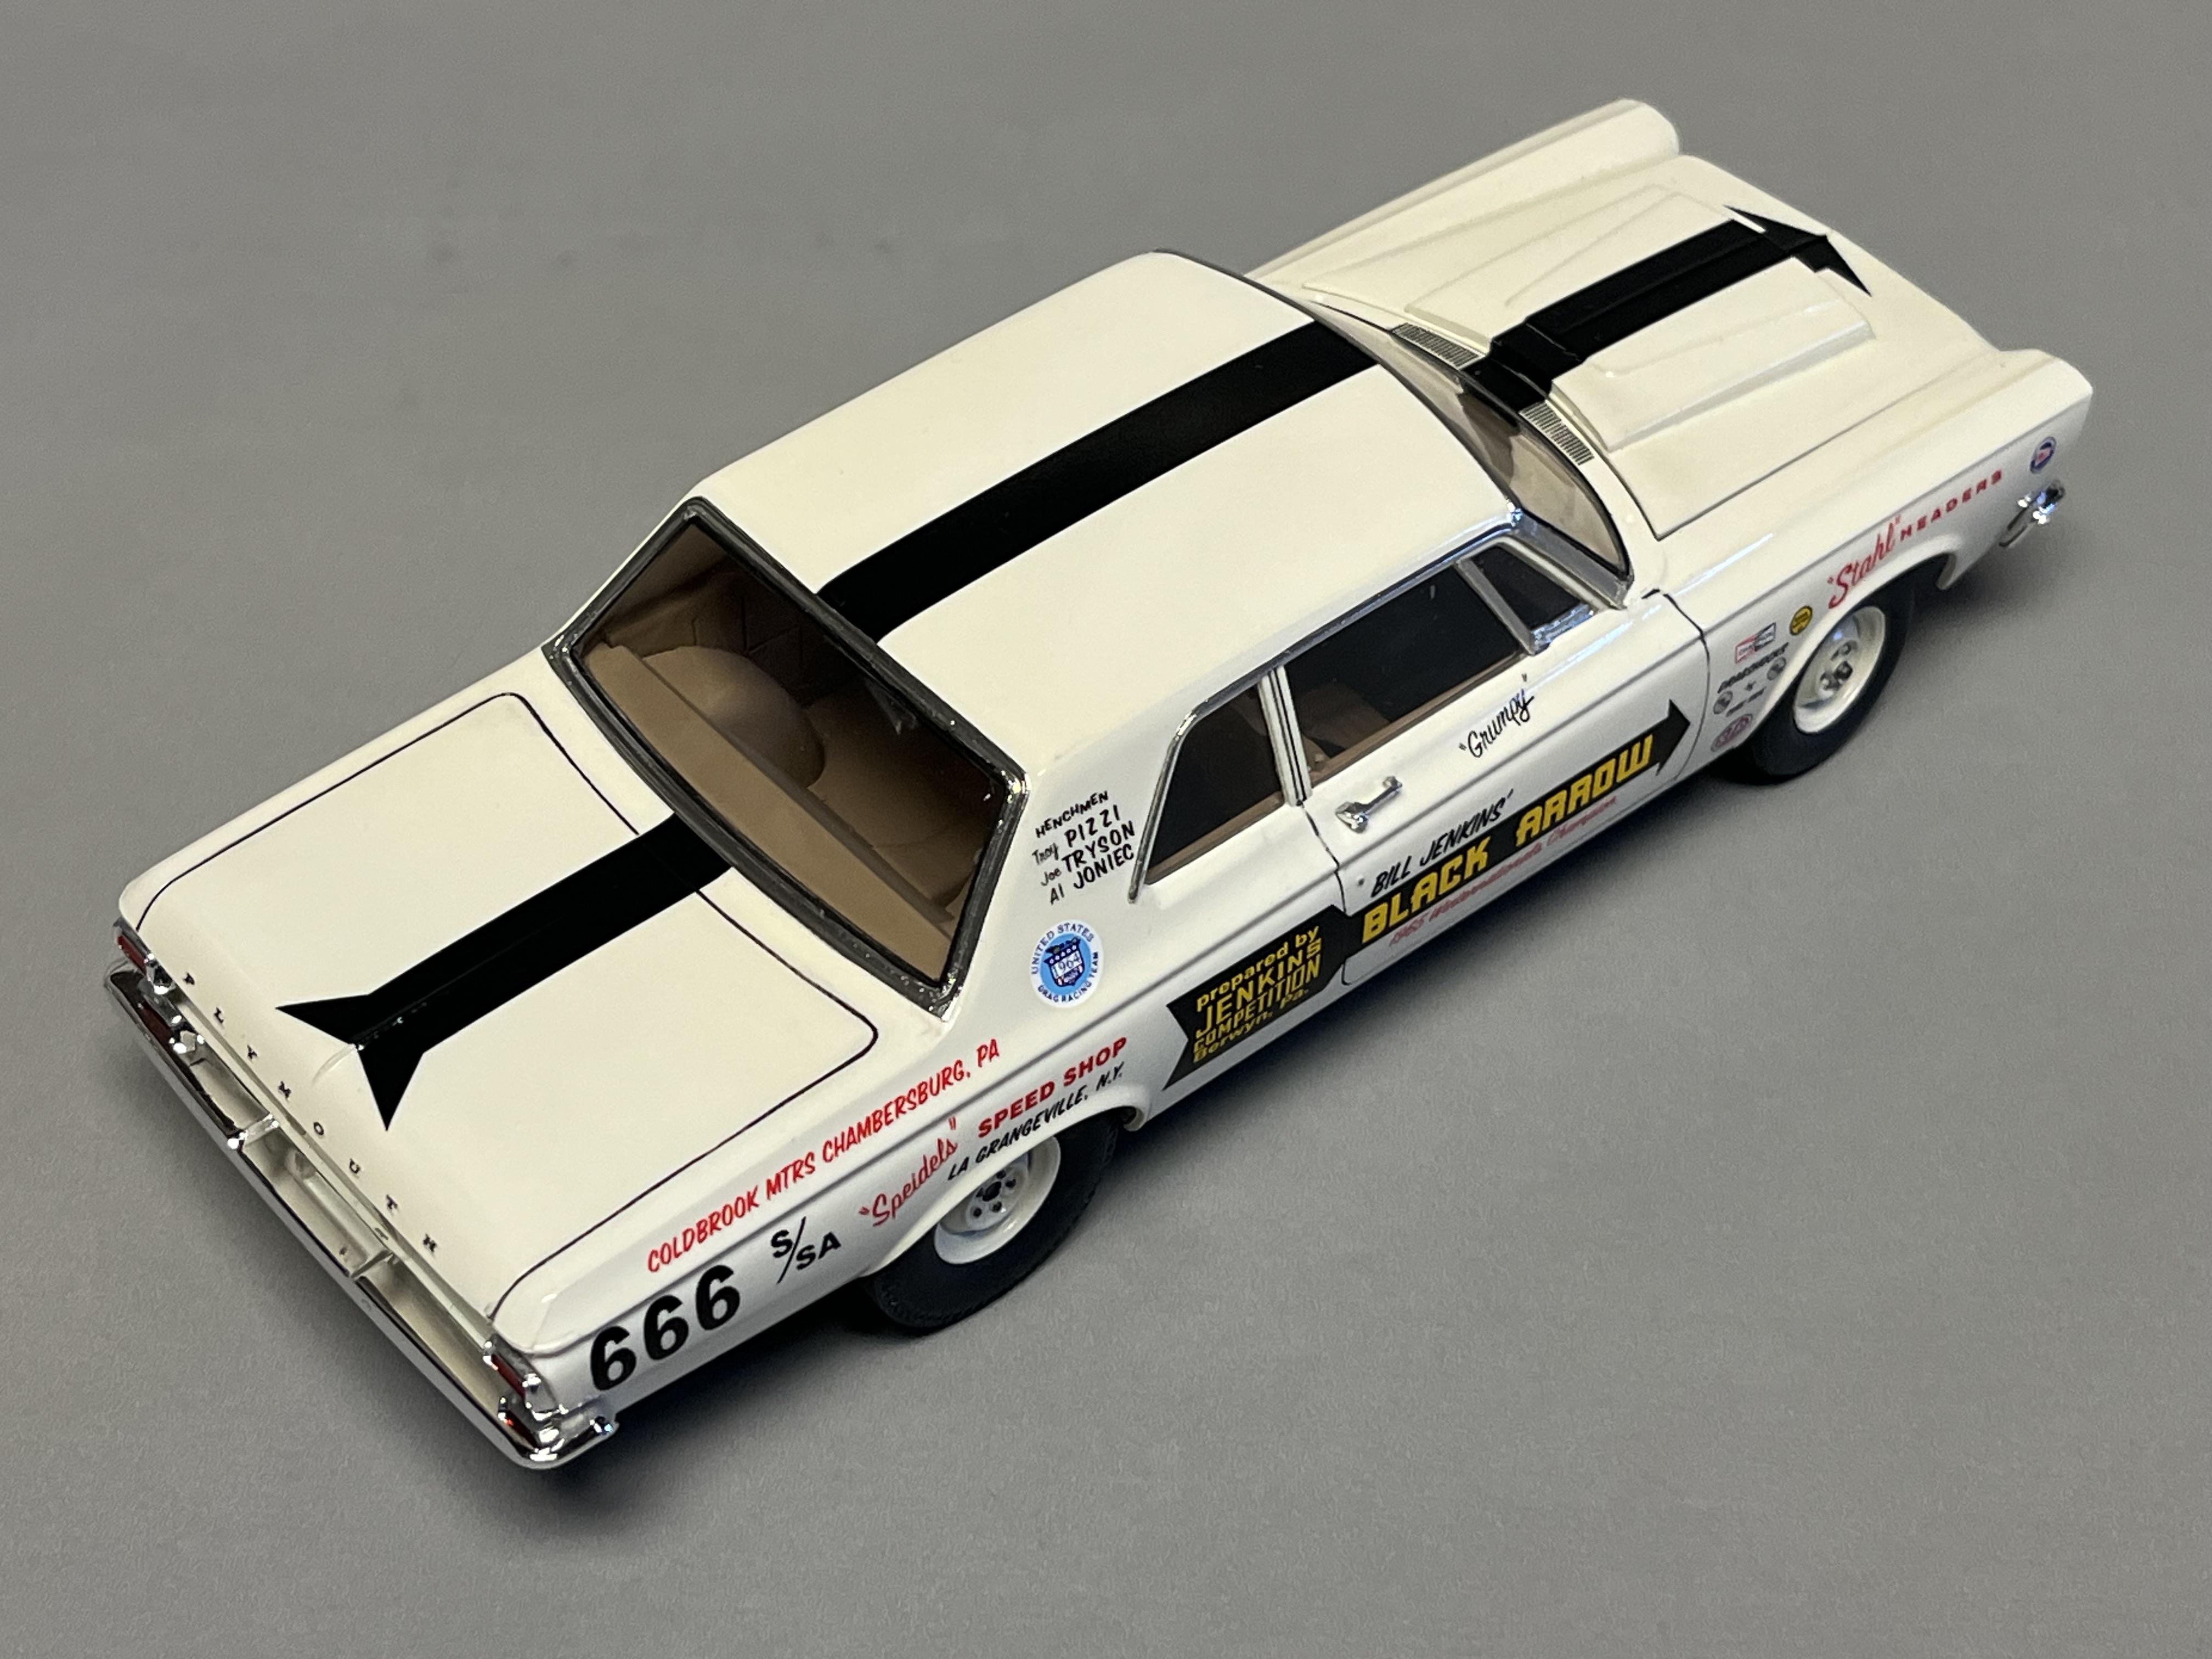
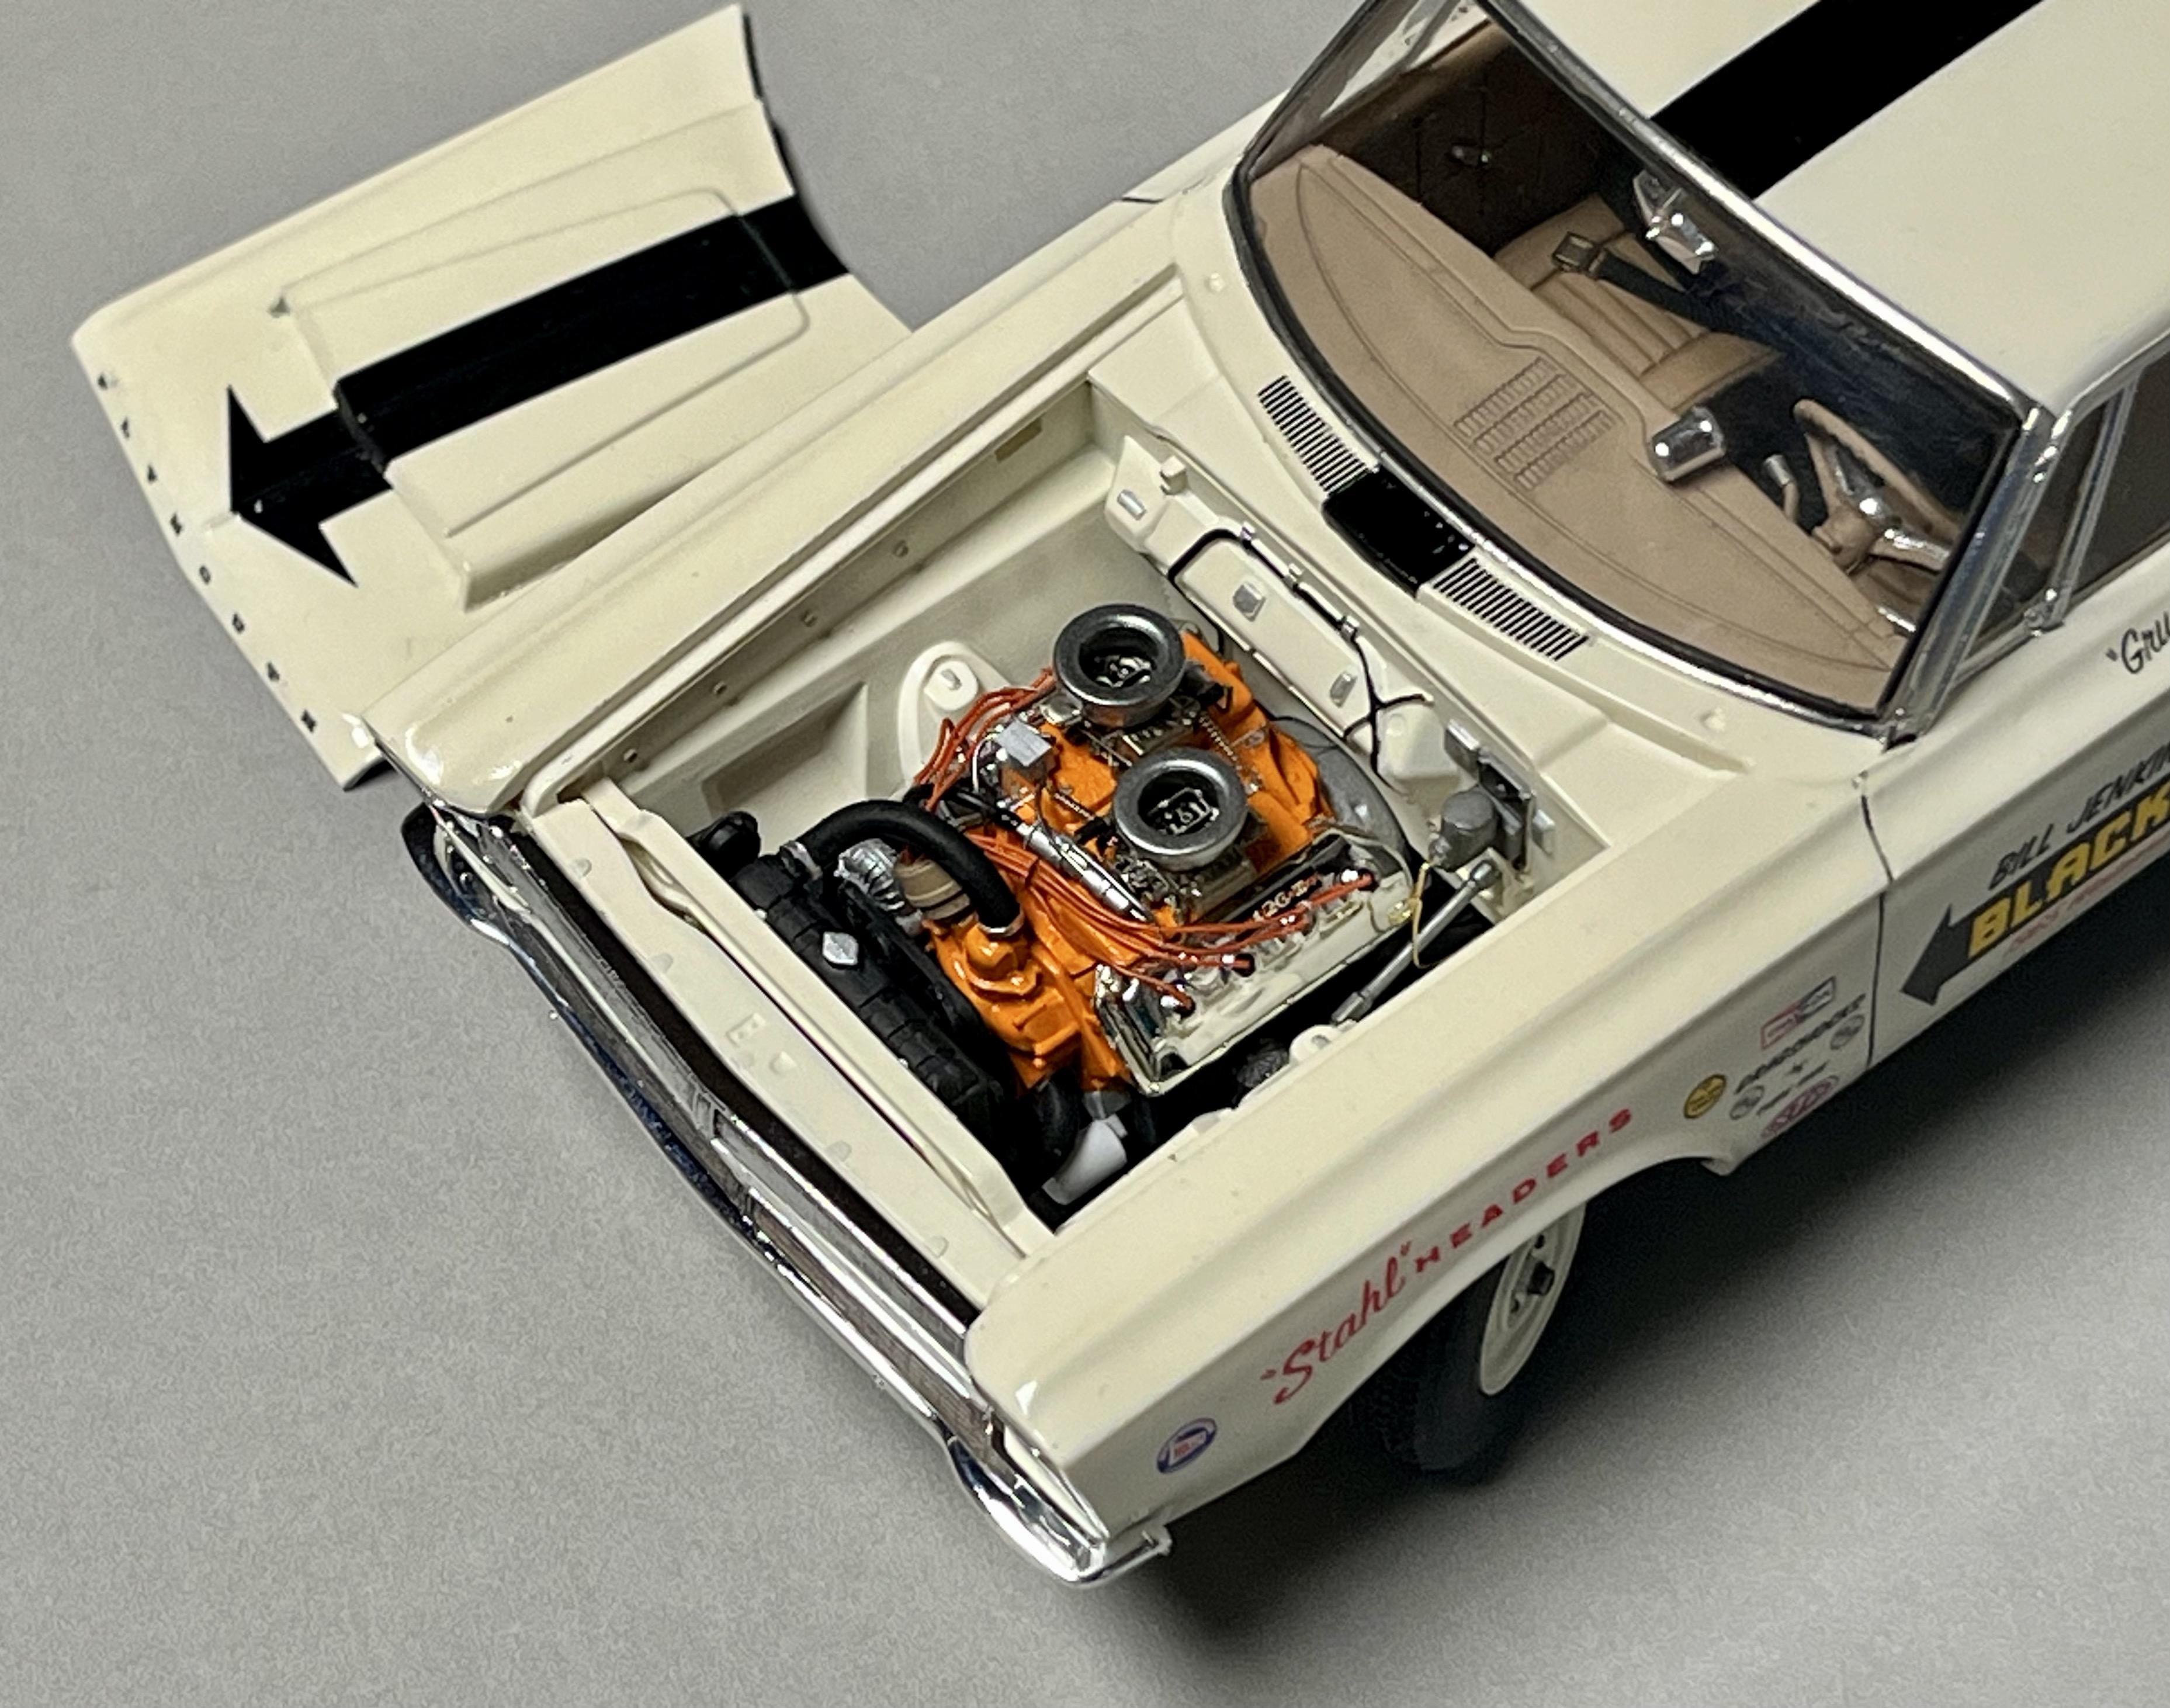
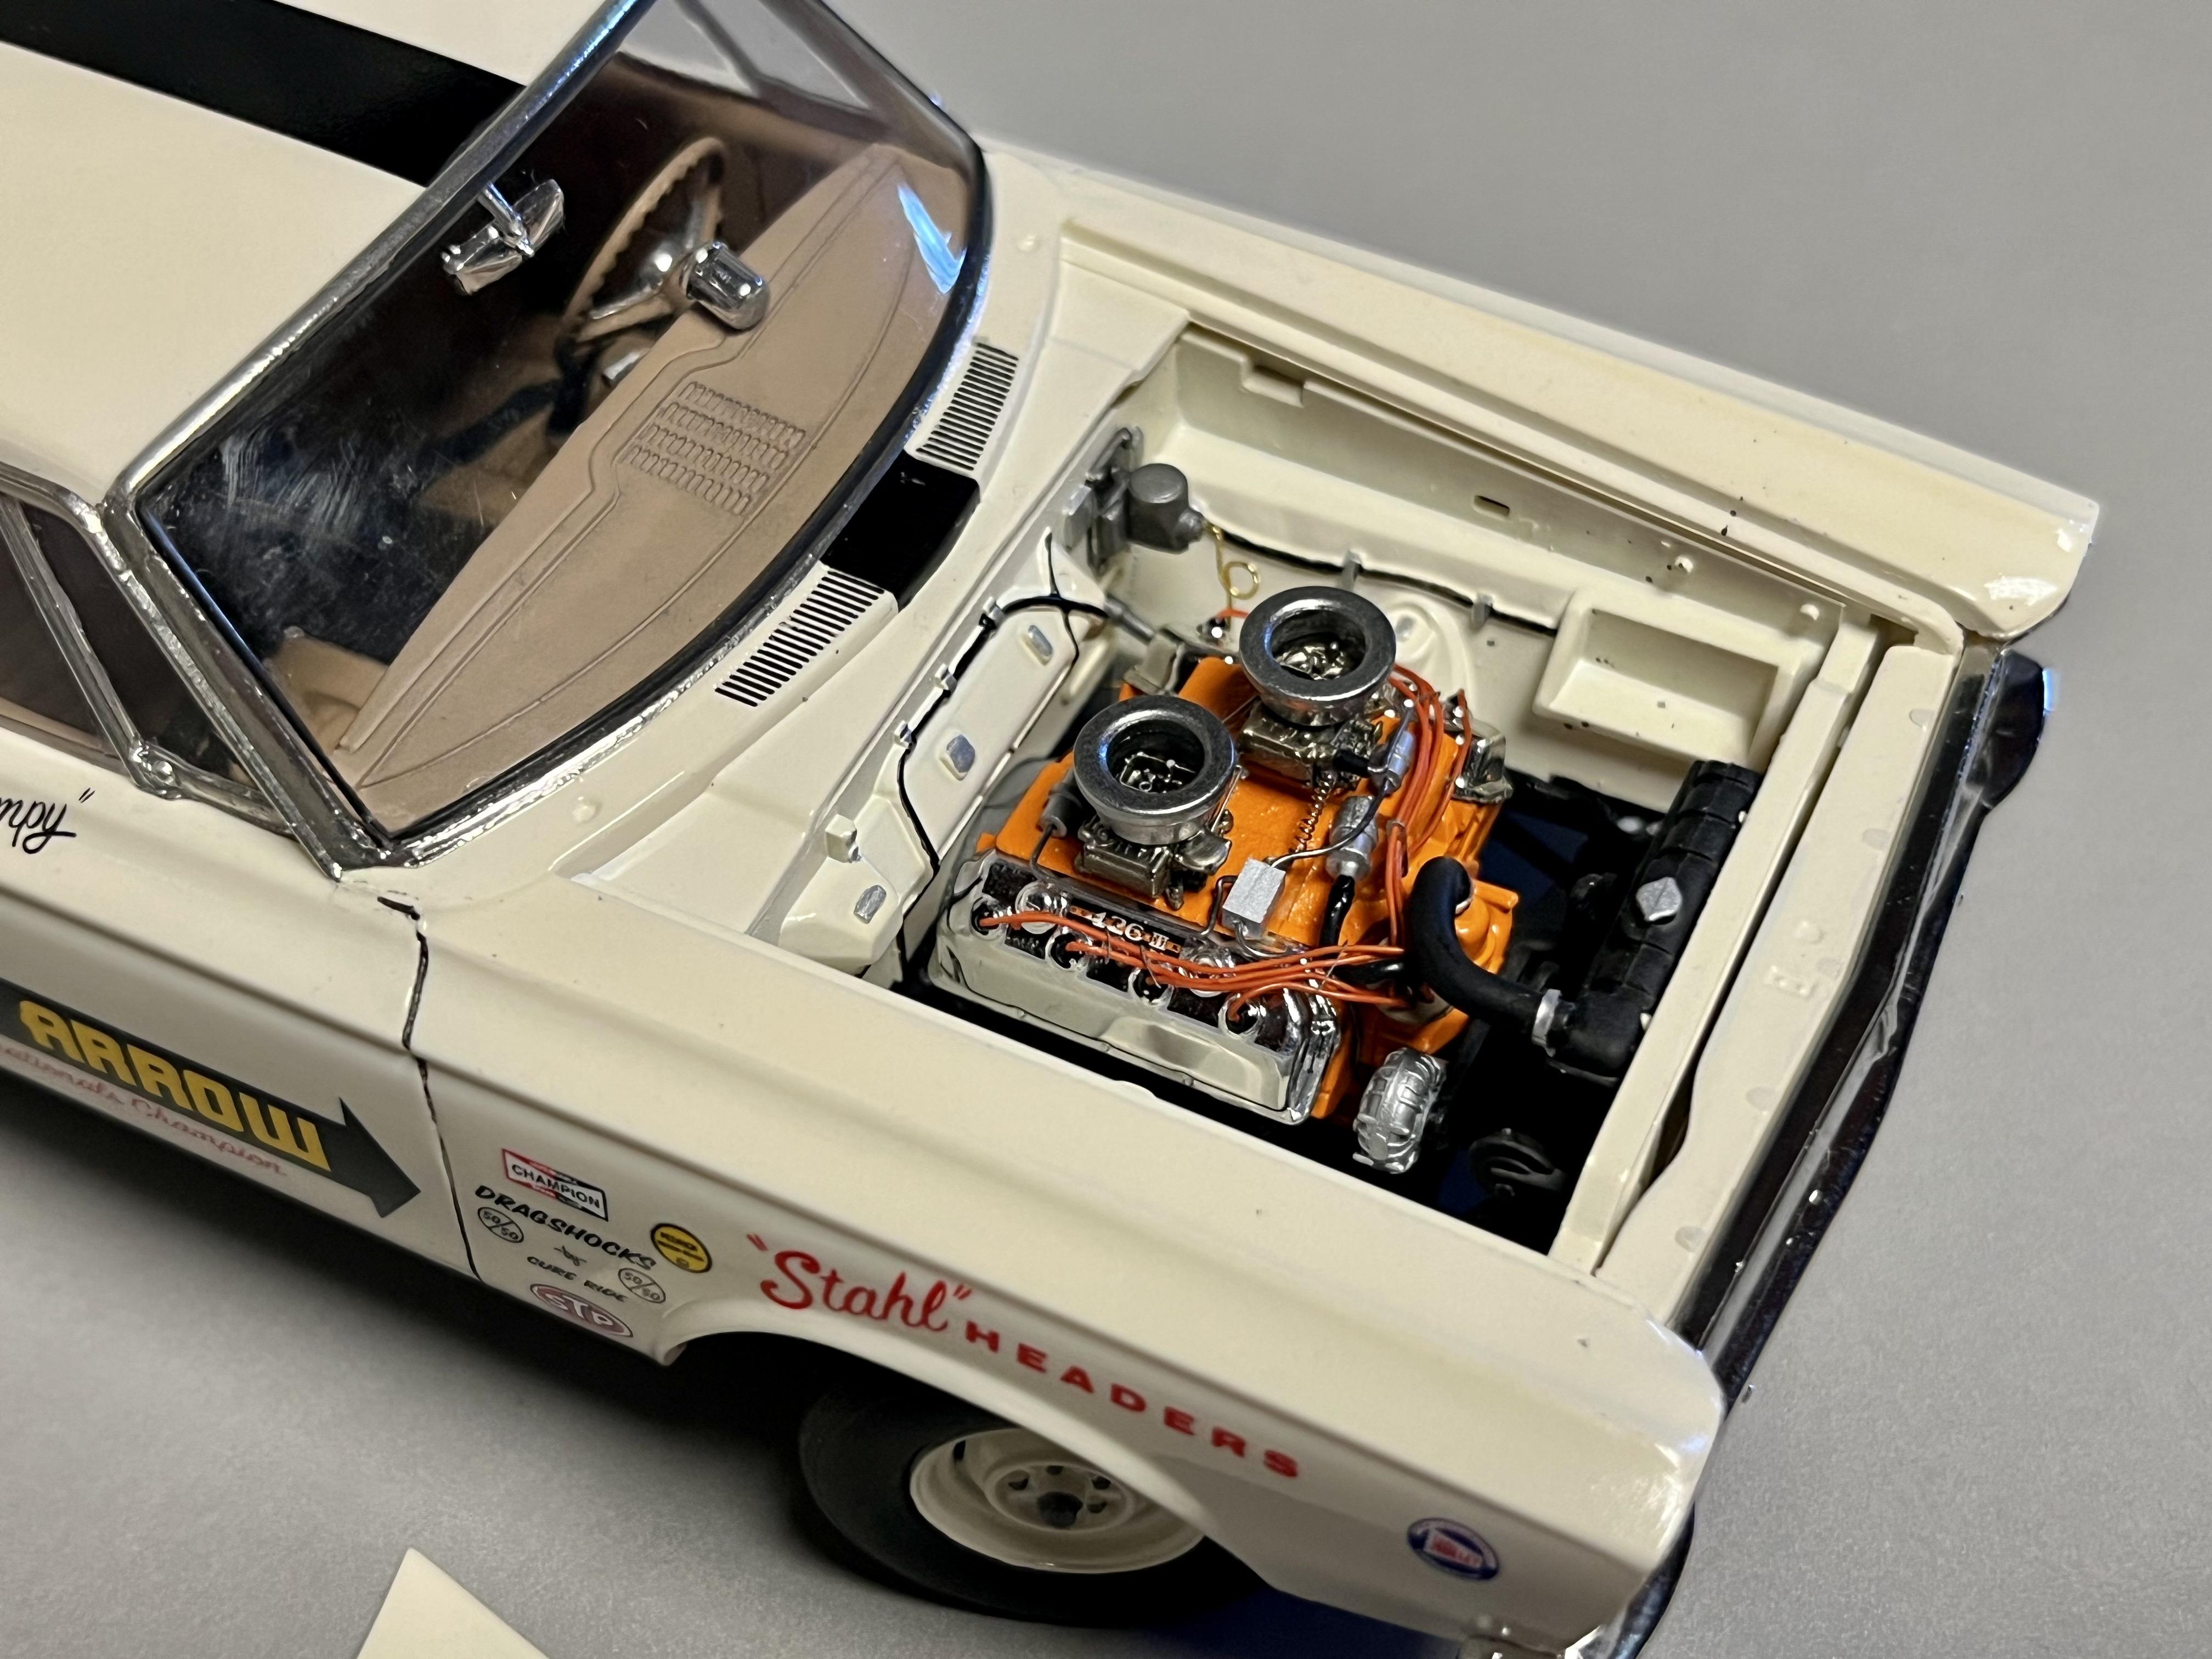
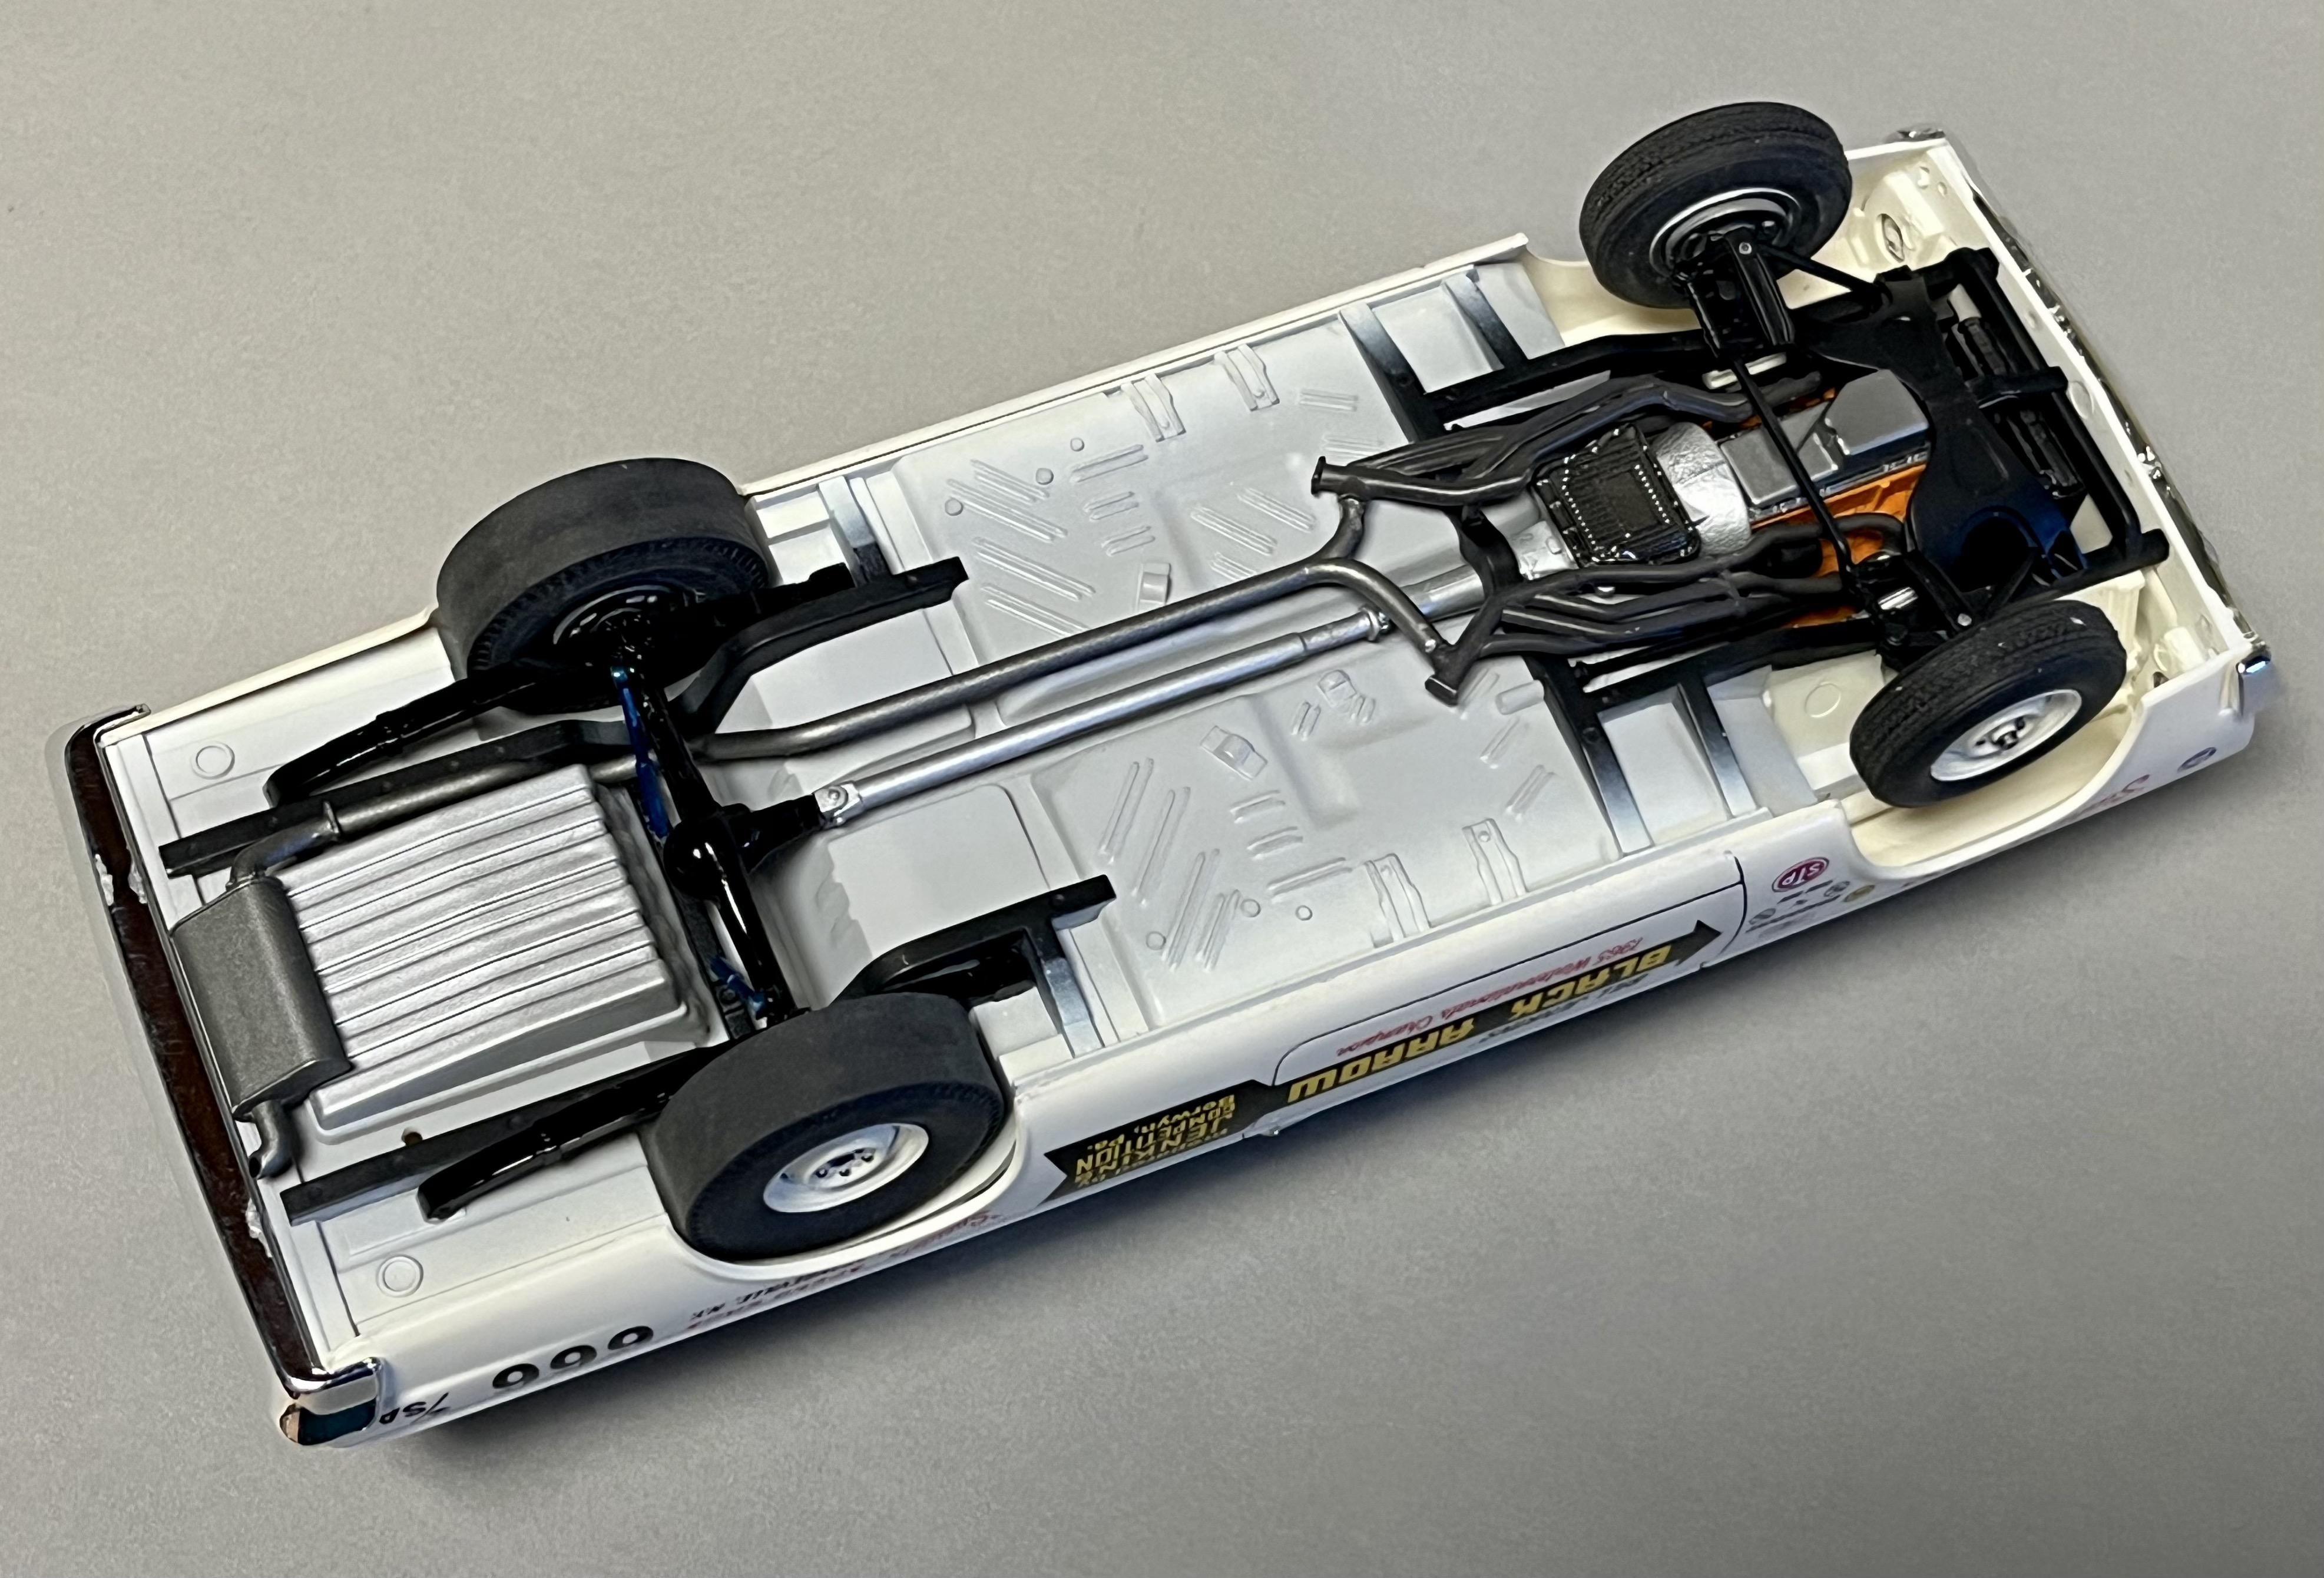
This is one of three Moebius '65 Plymouth super stock kits that I just completed, sort of a mini-production line I've been doing this month.
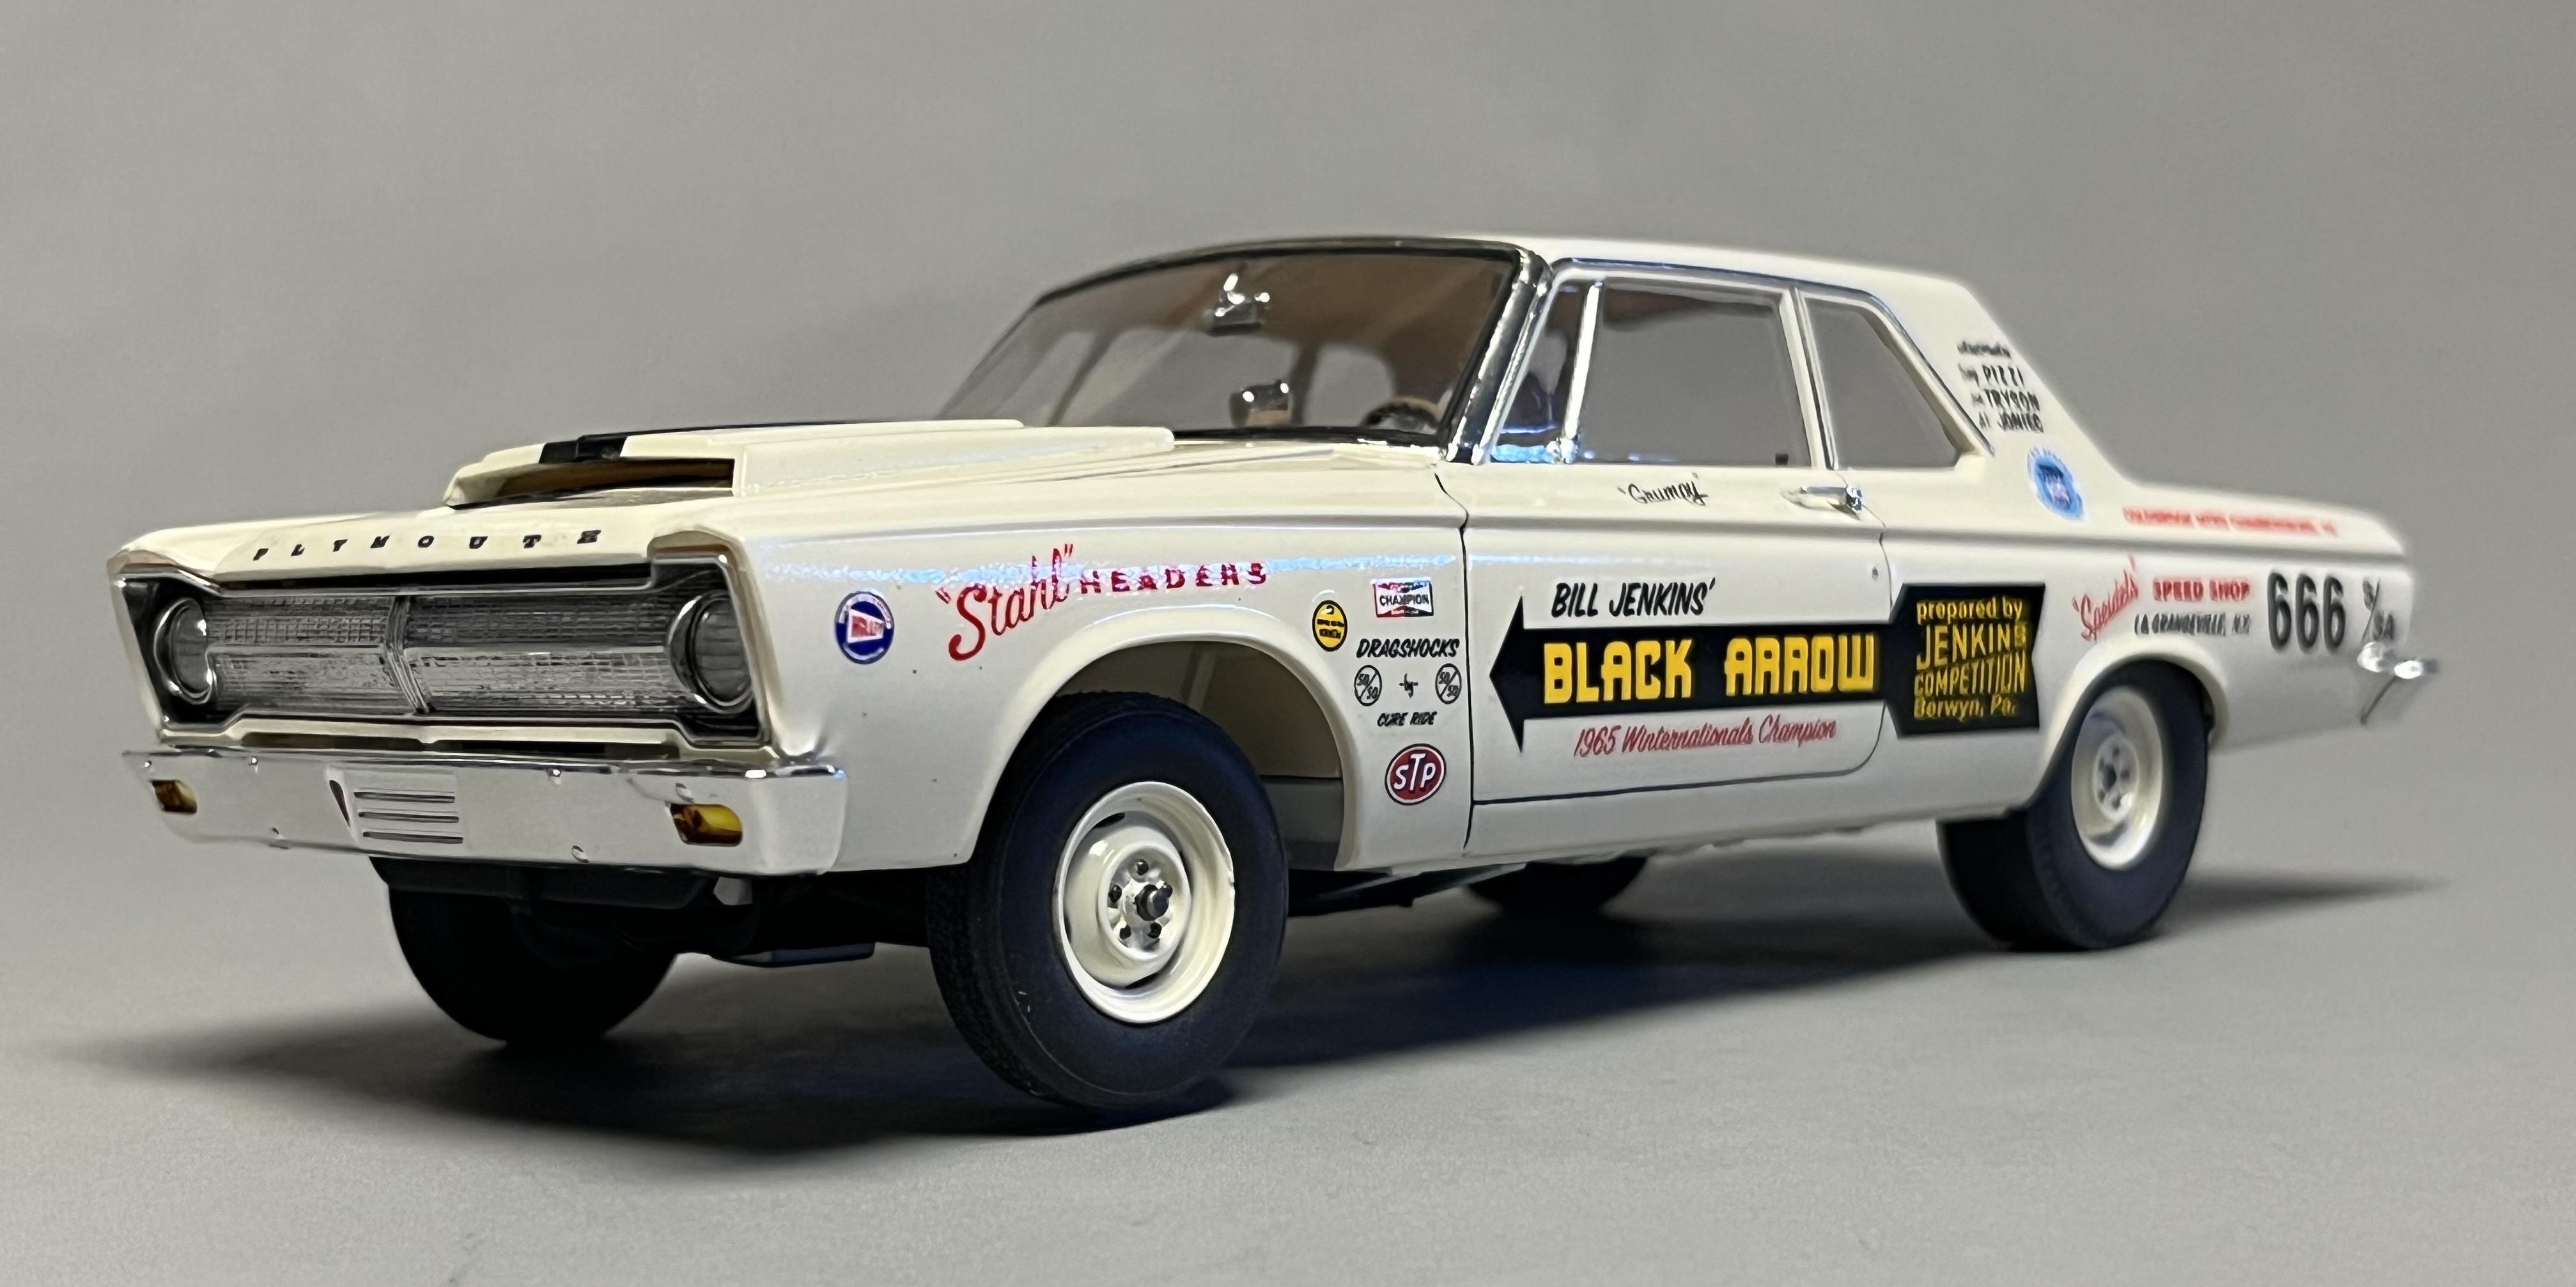
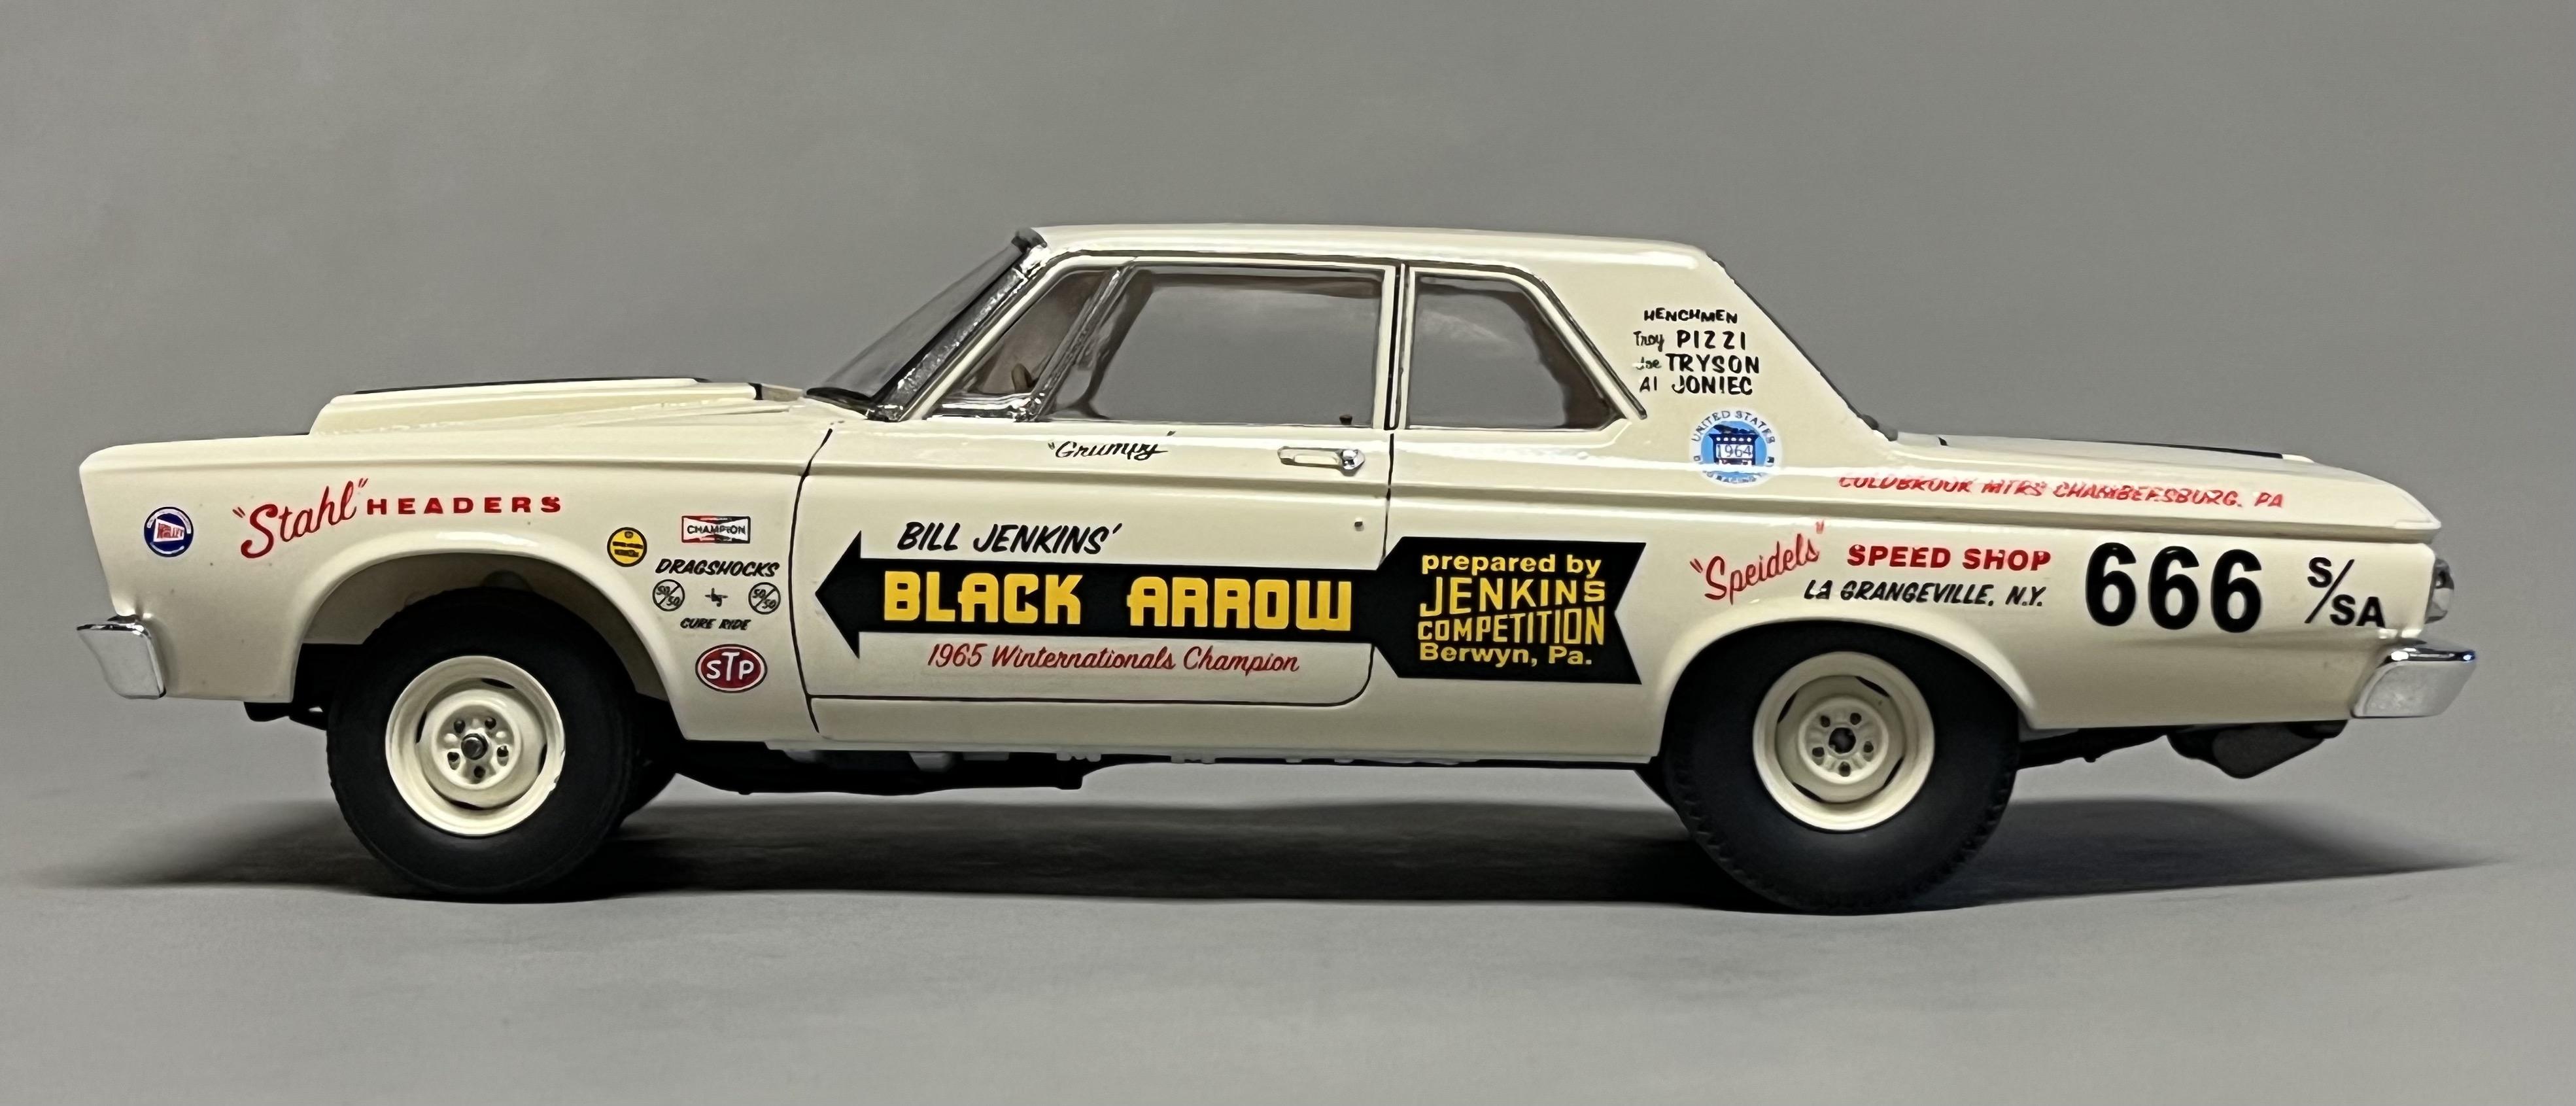
This one was built from the Moebius Butch Leal California Flash A990 kit to which I added the excellent Bill Jenkins Black Arrow decal set from Slixx, resin Holley carbs from Fireball, a Detail Master aluminum distributor and lug wires and some scratch built fuel lines and linkage. The Butch Leal kit came with a stick transmission which I switched out with an automatic and column shifter from the Moebius A/FX AWB Plymouth kit. Base paint is Scalefinishes Ford Corinthian White. These three builds are the first where Ive used BMF (the new stuff which sticks really well!) and clear coated my base paints with Mr. Color GX100 lacquer which is a far kinder to decals than Tamiya TS-13 which I've used for most of my past builds. Love love love these Moebius '65 Plymouths and am really looking forward to building the new Dodge when it gets released. I'll post photos of the other two separately. Cheers, John
-
10
-
-
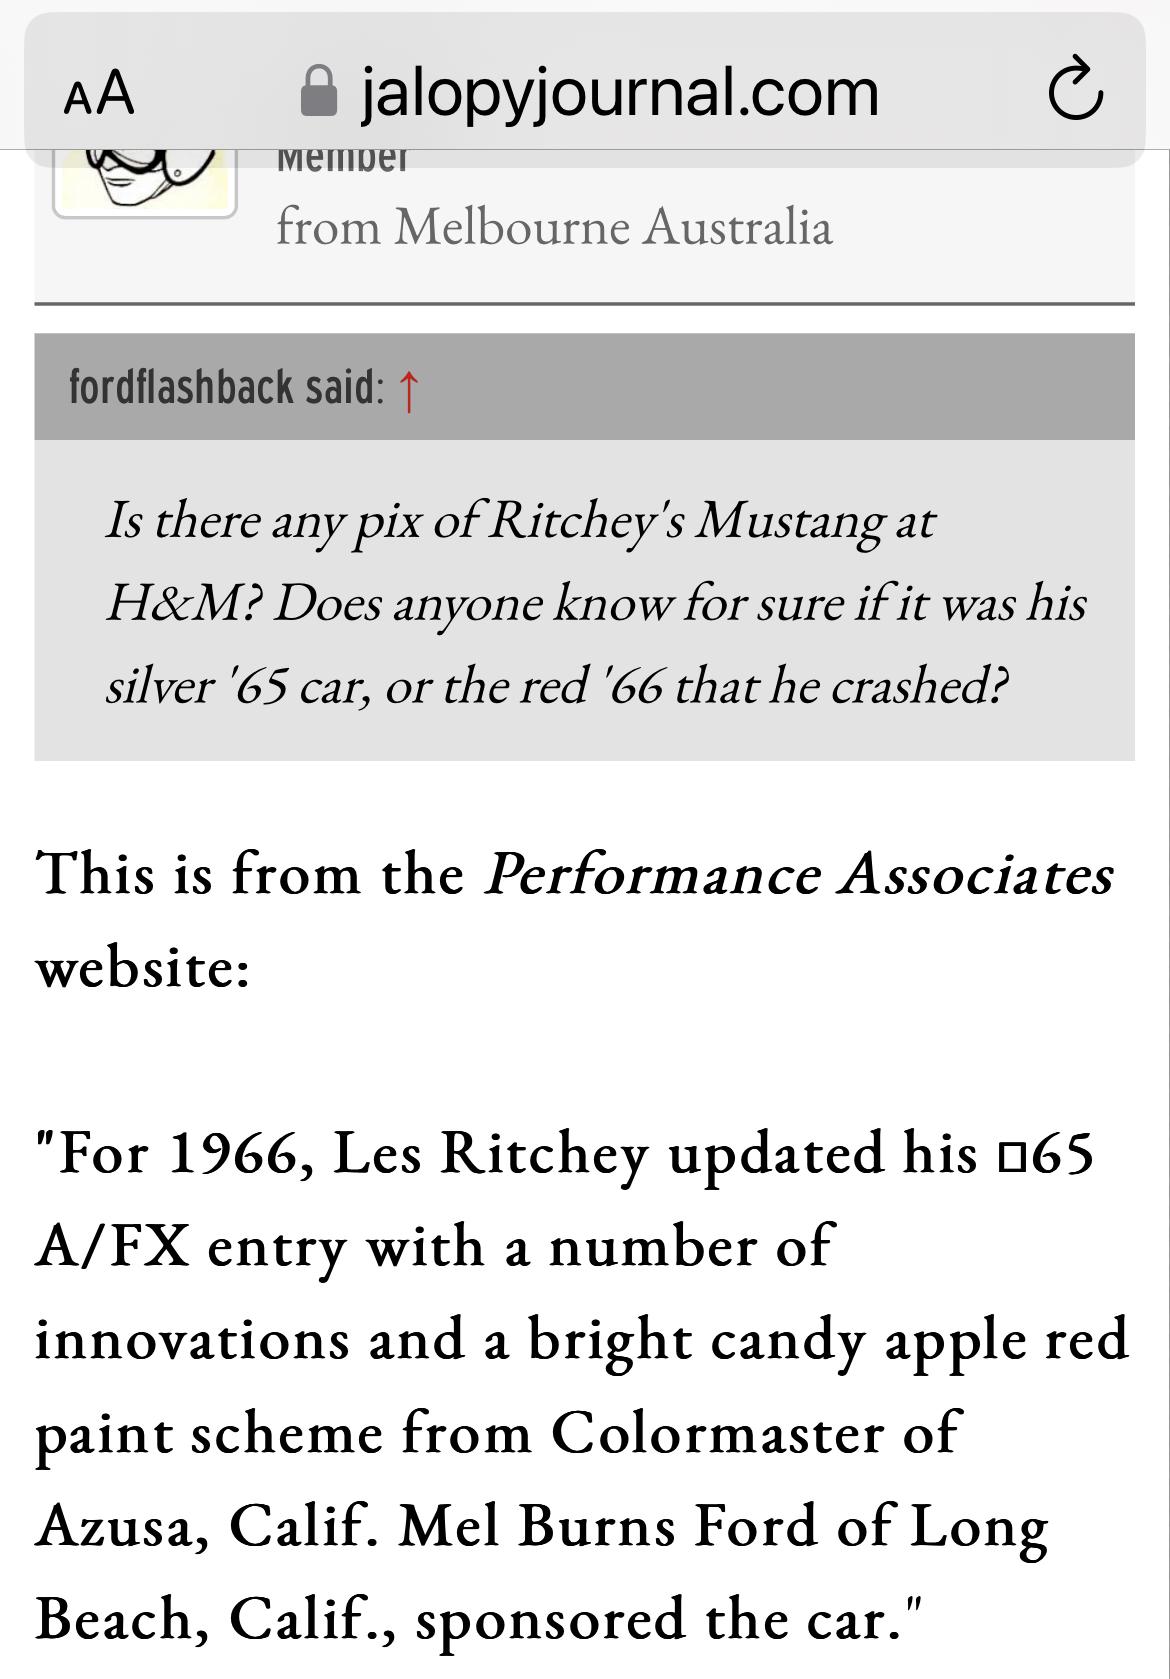
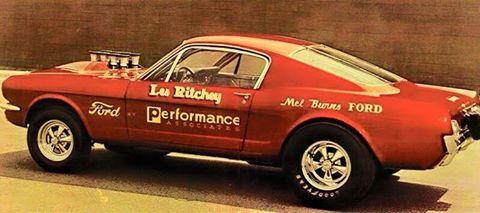
According to a HAMB reference that was posted in 2012, the silver car was re-painted red:
I was interested in more detailed pics of the red car while I was building this silver A/FX model, thinking I might also eventually build a model of the red one. In addition to the photo of the one taken with your Uncle, this is the only other one I could find:
Besides the red paint job, looks like he replaced the dual Holleys with Hilborn FI (nearly all the FX/ match racers went that way in ‘65).
There is a beautiful tribute car making the rounds in retro drag events in recent years in So. CA, I took a photo of this car at the Hot Rod Mag 70th anniversary event at Pomona in 2018 and saw it again at the Nitro Revival in Irwindale last year:
Your Uncle was THE MAN to see about tuning a Ford drag car in the 60’s, such a sad lost to the drag racing world.
-
Just now joining this WIP party and really liking your progress so far Bob. Your “debugging” of the dash to body fit is a good reminder to dry-fit liberally and get all the little fit problems solved before painting. It’s interesting how good a few of the ancient tooled AMT kits still are (‘49 Merc, ‘49 Ford) after sixty years.
Love this Maroon color. I’ve never had much luck decanting rattle can paint and airbrushing it, I’ve had better results just spraying Tamiya lacquers straight from the can (Tamiya’s nozzles are the best). What color(s) are you planning to go with for the interior? I think a grey & white or black & white might really pop? Good luck on your sanding!
-
Thanks Bill (Bills72sj). Unfortunately I didn’t shoot any pics of my disaster repair process but hope to post the finished build soon (Grump’s ‘65 Plymouth S/SA Black Arrow) and will try to include a close-up photo of the damaged area.
Hi Trevor (Bainford), I used Mr. Color GX100 Super Clear III bottle lacquer thinned 1:1 with Mr. Color Thinner and airbrush sprayed. I’ve always loved Tamiya TS-13 rattle can lacquer clear coat on car bodies but have found it to be way too hot over decals, even when sprayed in many thin coats (last “wet” coat always eats the decals). I believe the Mr. Color clear coat omits a strong solvent that’s in the Tamiya TS-13 (toulene?) that eats decals. I sprayed three heavily decaled car bodies this week using the Mr. Color CC and only had a few areas where the CC reacted with the decal causing slight “bubbling”. I think this happened where there was a tiny bit of residual air between the decal and surface after setting. I would use 2K but I’m a cancer survivor and need to limit my carcinogens exposure to Irish Whiskey 😁🥃!
-
Forgive me if I’m repeating a tip that’s been previously posted. I had a decal disaster today! In the process of masking off the edges of a painted/ decaled car hood to airbrush the underside black, I managed to damage a racing stripe decal that was mounted and clear coated on the top of the hood. A 3/4” long length of one side of the black stripe peeled off and stuck to a piece of green Frog tape that accidentally came in contact with the hood. So much for clear coating protecting mounted decals from masking damage…..
I discovered an effective way to extract the torn decal piece from the tape without damaging it. I sprayed a small amount of WD-40 into a plastic paint cup and then submerged the tape piece with the decal piece stuck to it into the cup for a minute or two. The torn decal piece easily slipped off the tape without any damage! I rinsed the WD-40 off of the decal piece by dipping it into another cup of IPA (isopropyl alcohol), carefully dried it with a paper towel and was then able to remount it back onto the hood using a drop of white glue diluted in SoluSet applied between the decal and hood. Disaster solved!
It’s always best to avoid getting tape anywhere near a mounted decal but it’s nice now to know there’s a way to salvage it if a disaster occurs. Cheers, John
-
1
-
 1
1
-
-
Hey Jeff - so this is where that partial Moebius Satellite kit went that I sent you - Cool build!!! More pics please!
I can’t build enough of these Moebius ‘65 Plymouth kits, one of my favorite kits. I’m currently building a production line of three more super stockers which I hope to post soon. Looking forward to building a few Moebius ‘65 Dodges next year!
-
This is the most interesting execution of this kit that I’ve seen. You’ve mastered the fine art of scale model weathering (“less is more”!). This build is so good I wanna copy it! The good old days of shoe-string back-yard built racers with day-jobs drag racing. All that’s missing are some wheelie bars made out of stolen shopping cart parts! Love it!
-
Beautiful model. I’m particularly impressed with all the high-quality scratch built details you incorporated into the interior and engine bay, looks like a ton of work!
I remember admiring a brand new Avanti in a shopping mall parking lot in 1962 (I was nine years old). It looked so exotic and radically futuristic, like the first C2 Sting Ray coupe I saw later that same year, both of them really left an impression on me. At the time I figured flying cars were only a few more years away!
-
Dang that’s nice! An A+ on that candy orange paint job. The color, the original mostly stock body with the cool stock head light pods, the big crate motor, the front Halibrands and massive rear slicks and wheelie bars and that “ready to lunge” stance….it all just clicks. Sweeeet!!!!
-
Nice job Dale! A very accurate representation of a milestone drag car. I have a set of Slixx decals for this car and would love to build one like this as a “bookend” for my early sixties super stock model collection showing the evolution of drag cars from showroom stock to flipper funnies. Which kit(s) did you use to create this model? It’s too bad we have to kit-bash to accurately recreate early funnies like this one. Thanks for posting! John
-
Really really nice job Ryan on this Starliner. I built and posted an evening orchid one as well last year, the best color on this car IMO. Painting the MCG PE emblems is a great idea, I masked and dry-brushed the molded on emblems on my build using gold enamel but your’s look better. Love the herringbone fabric seat decals as well. I think this is AMT’s best kit and have two more on my stash and hope to build an early stock drag car with one of them.
Question: did you use tires from an AMT Impala kit because of the funky Firestone sidewall emblems molded into the Starliner tires?
-
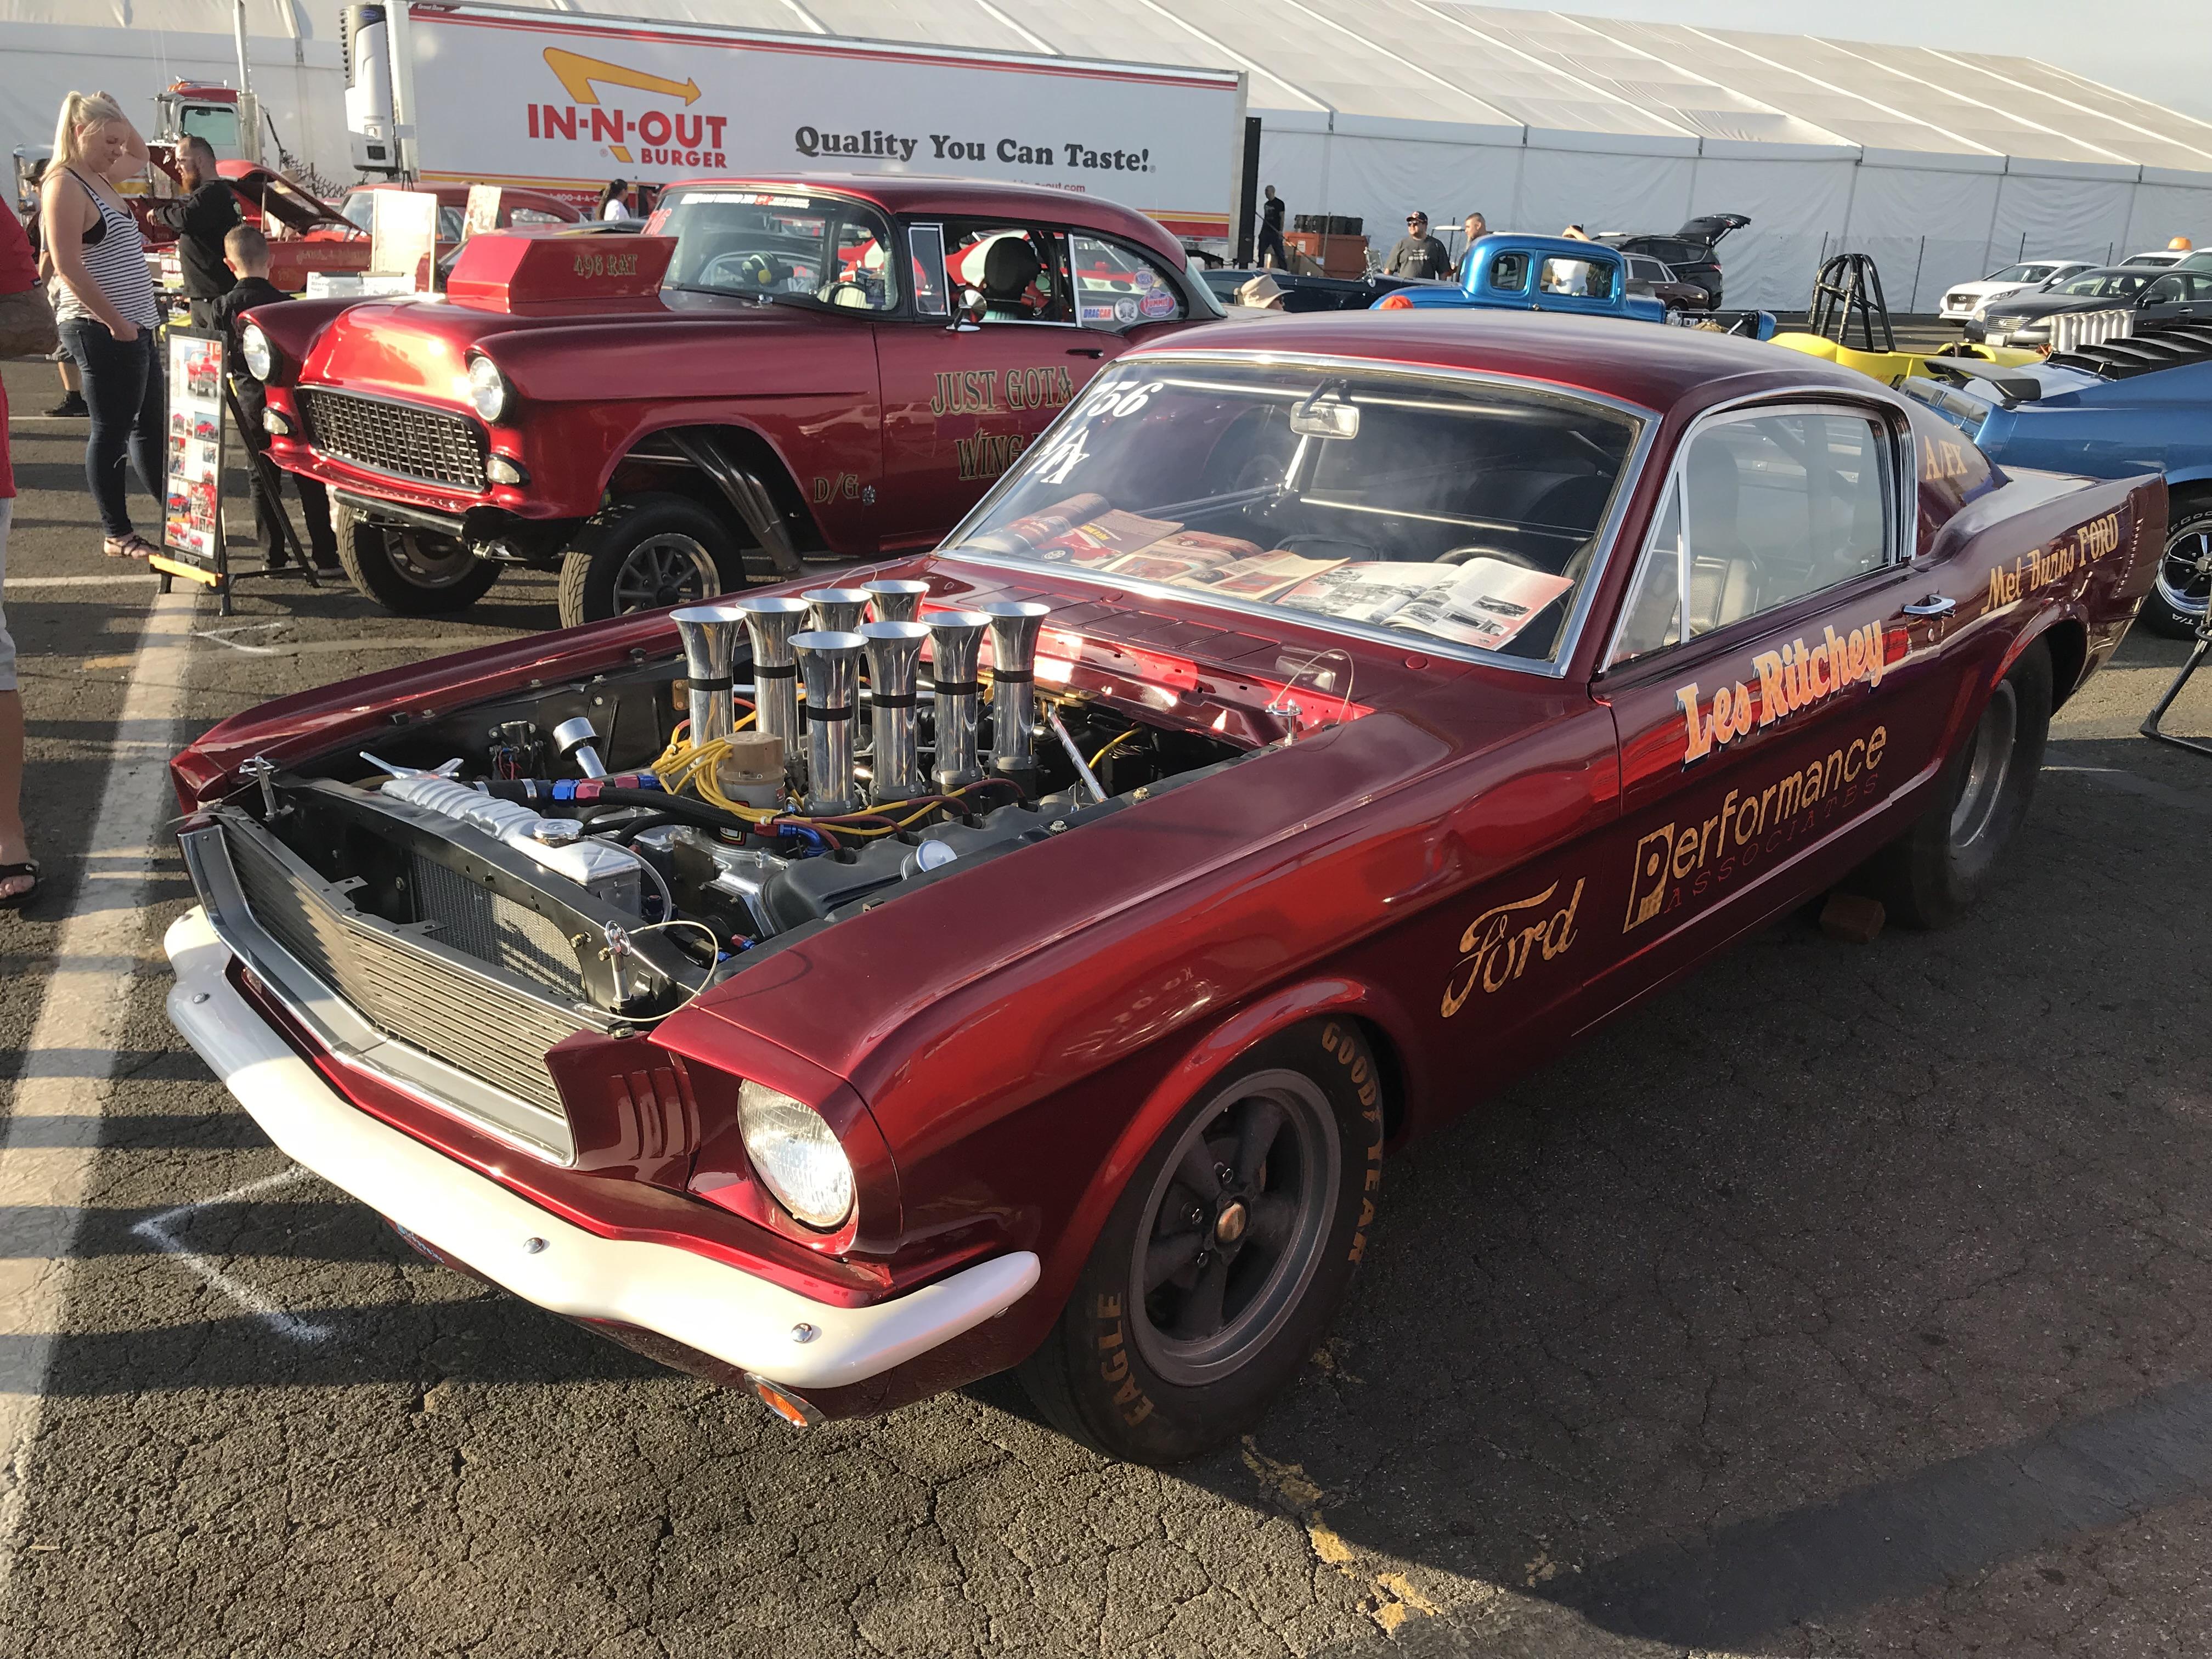
My dear friend of +50 years heard I was immersed in building models of mid-sixties super stock drag cars and gifted me his collection of “Super Stock & Drag Illustrated” Magazines. He was the original owner of these mags which he splurged on a subscription to in his middle school years. These are from ‘65 through ‘71 and are hit & miss month-wise but who’s complaining? They smell funky (like an old bookstore) but are in excellent condition. Boy ‘O boy are they fun to look at! I would love to buy the missing months in late ‘64 and ‘65 (missing about 8 of the 14 months) but, based on current eBay prices, I would blow through my remaining hobby budget for this year and then some…..Thank you Gordon!
-
4
-
-
On 6/5/2023 at 4:54 AM, tim boyd said:
My 2024 (that's the mostly all new one) Mustang GT Convertible 5.0L manual is scheduled to be built at Ford's Flat Rock assembly plant today.....TB
I’m driving a 4cyl Mazda in my retirement years these days but my last drive-to-work car was a Stirling Silver 2011 GT 6 spd (first year of the mighty Coyote). Drove it 81K miles, ZERO problems, Michilin Pilot SS tires transformed the handling, my favorite car of the +20 I’ve had. Unfortunately I had to sell it in 2017 to pay for a new roof 🥲. The thing I miss the most is the sound of that engine on cold starts in the morning with the windows down.
Im jealous. Post us some pics when you take delivery.
-
What a magnificent scale model of one of the weirdest, loudest and most innovative drag cars that ever raced. I’m particularly impressed with how accurate you were able to make body relative to period photos, the four bar rear suspension, the crude hand lettering (probably much more difficult to do than it looks?) and the scratch-built/ 3D printed crude tunnel ram and wild trumpet headers. Very very cool!
-
Thank you all for the kind comments and compliments, makes me want to keep building and posting more of these legendary door slammers. Hoping to start a B/FX version of the Moebius ‘65 Comet that I can post here in the near future.
-
Oooohhh, very nice! Hard to believe you started with the stinky AMT Mustang “Funny Car” kit (too bad it doesn’t build OOB anything like the pic on the box!). Great job on the mods to the front suspension, engine, rear quarter windows, beautiful paint and all-around clean build. I particularly like the side-view stance with those mags. Bravo!
-
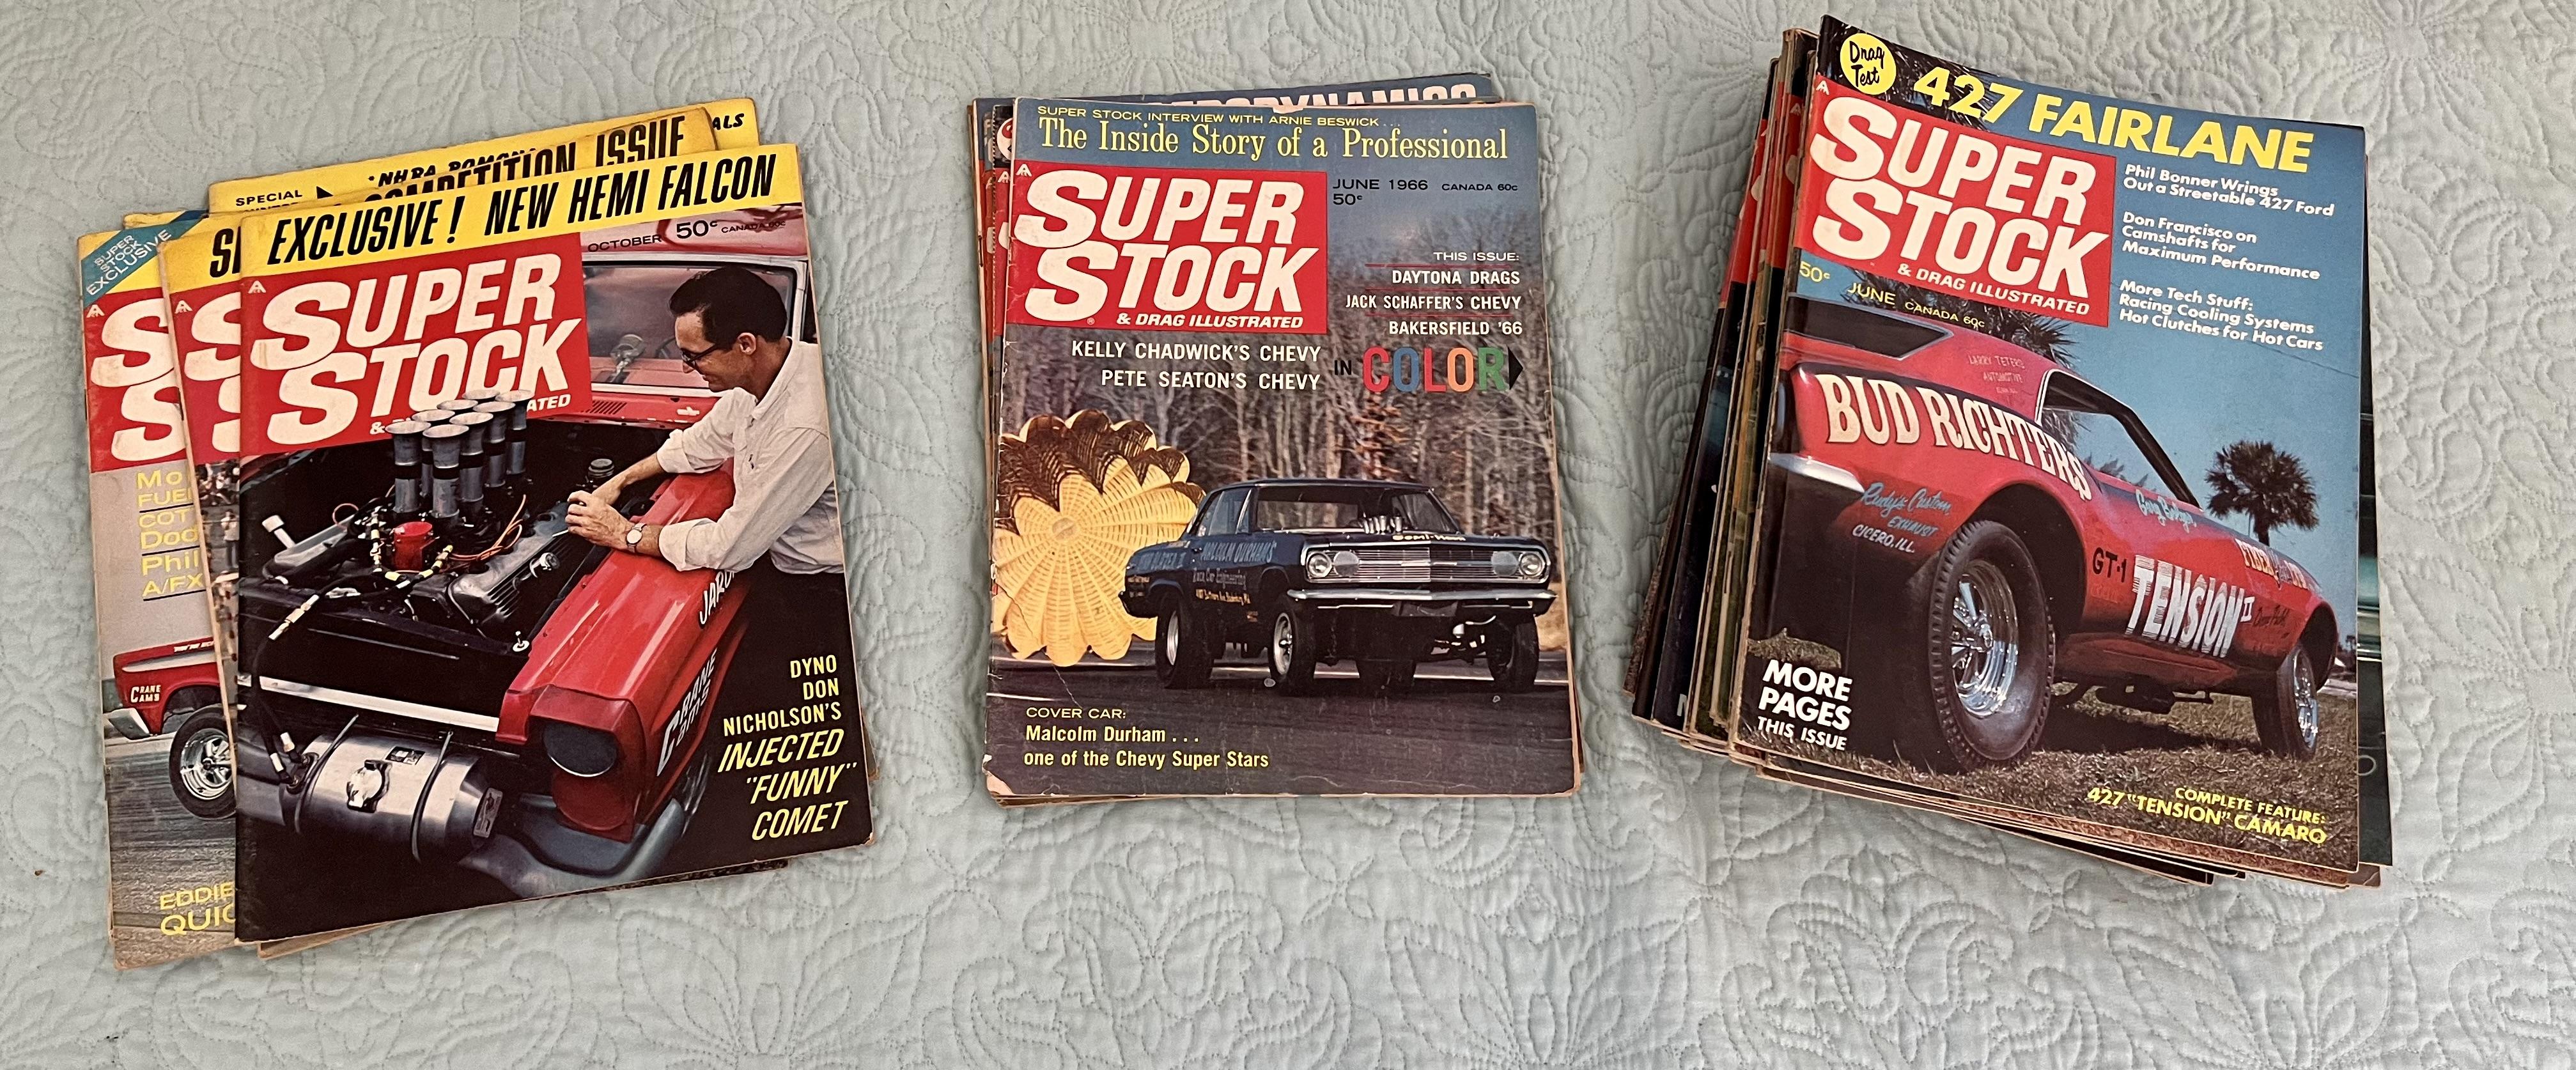
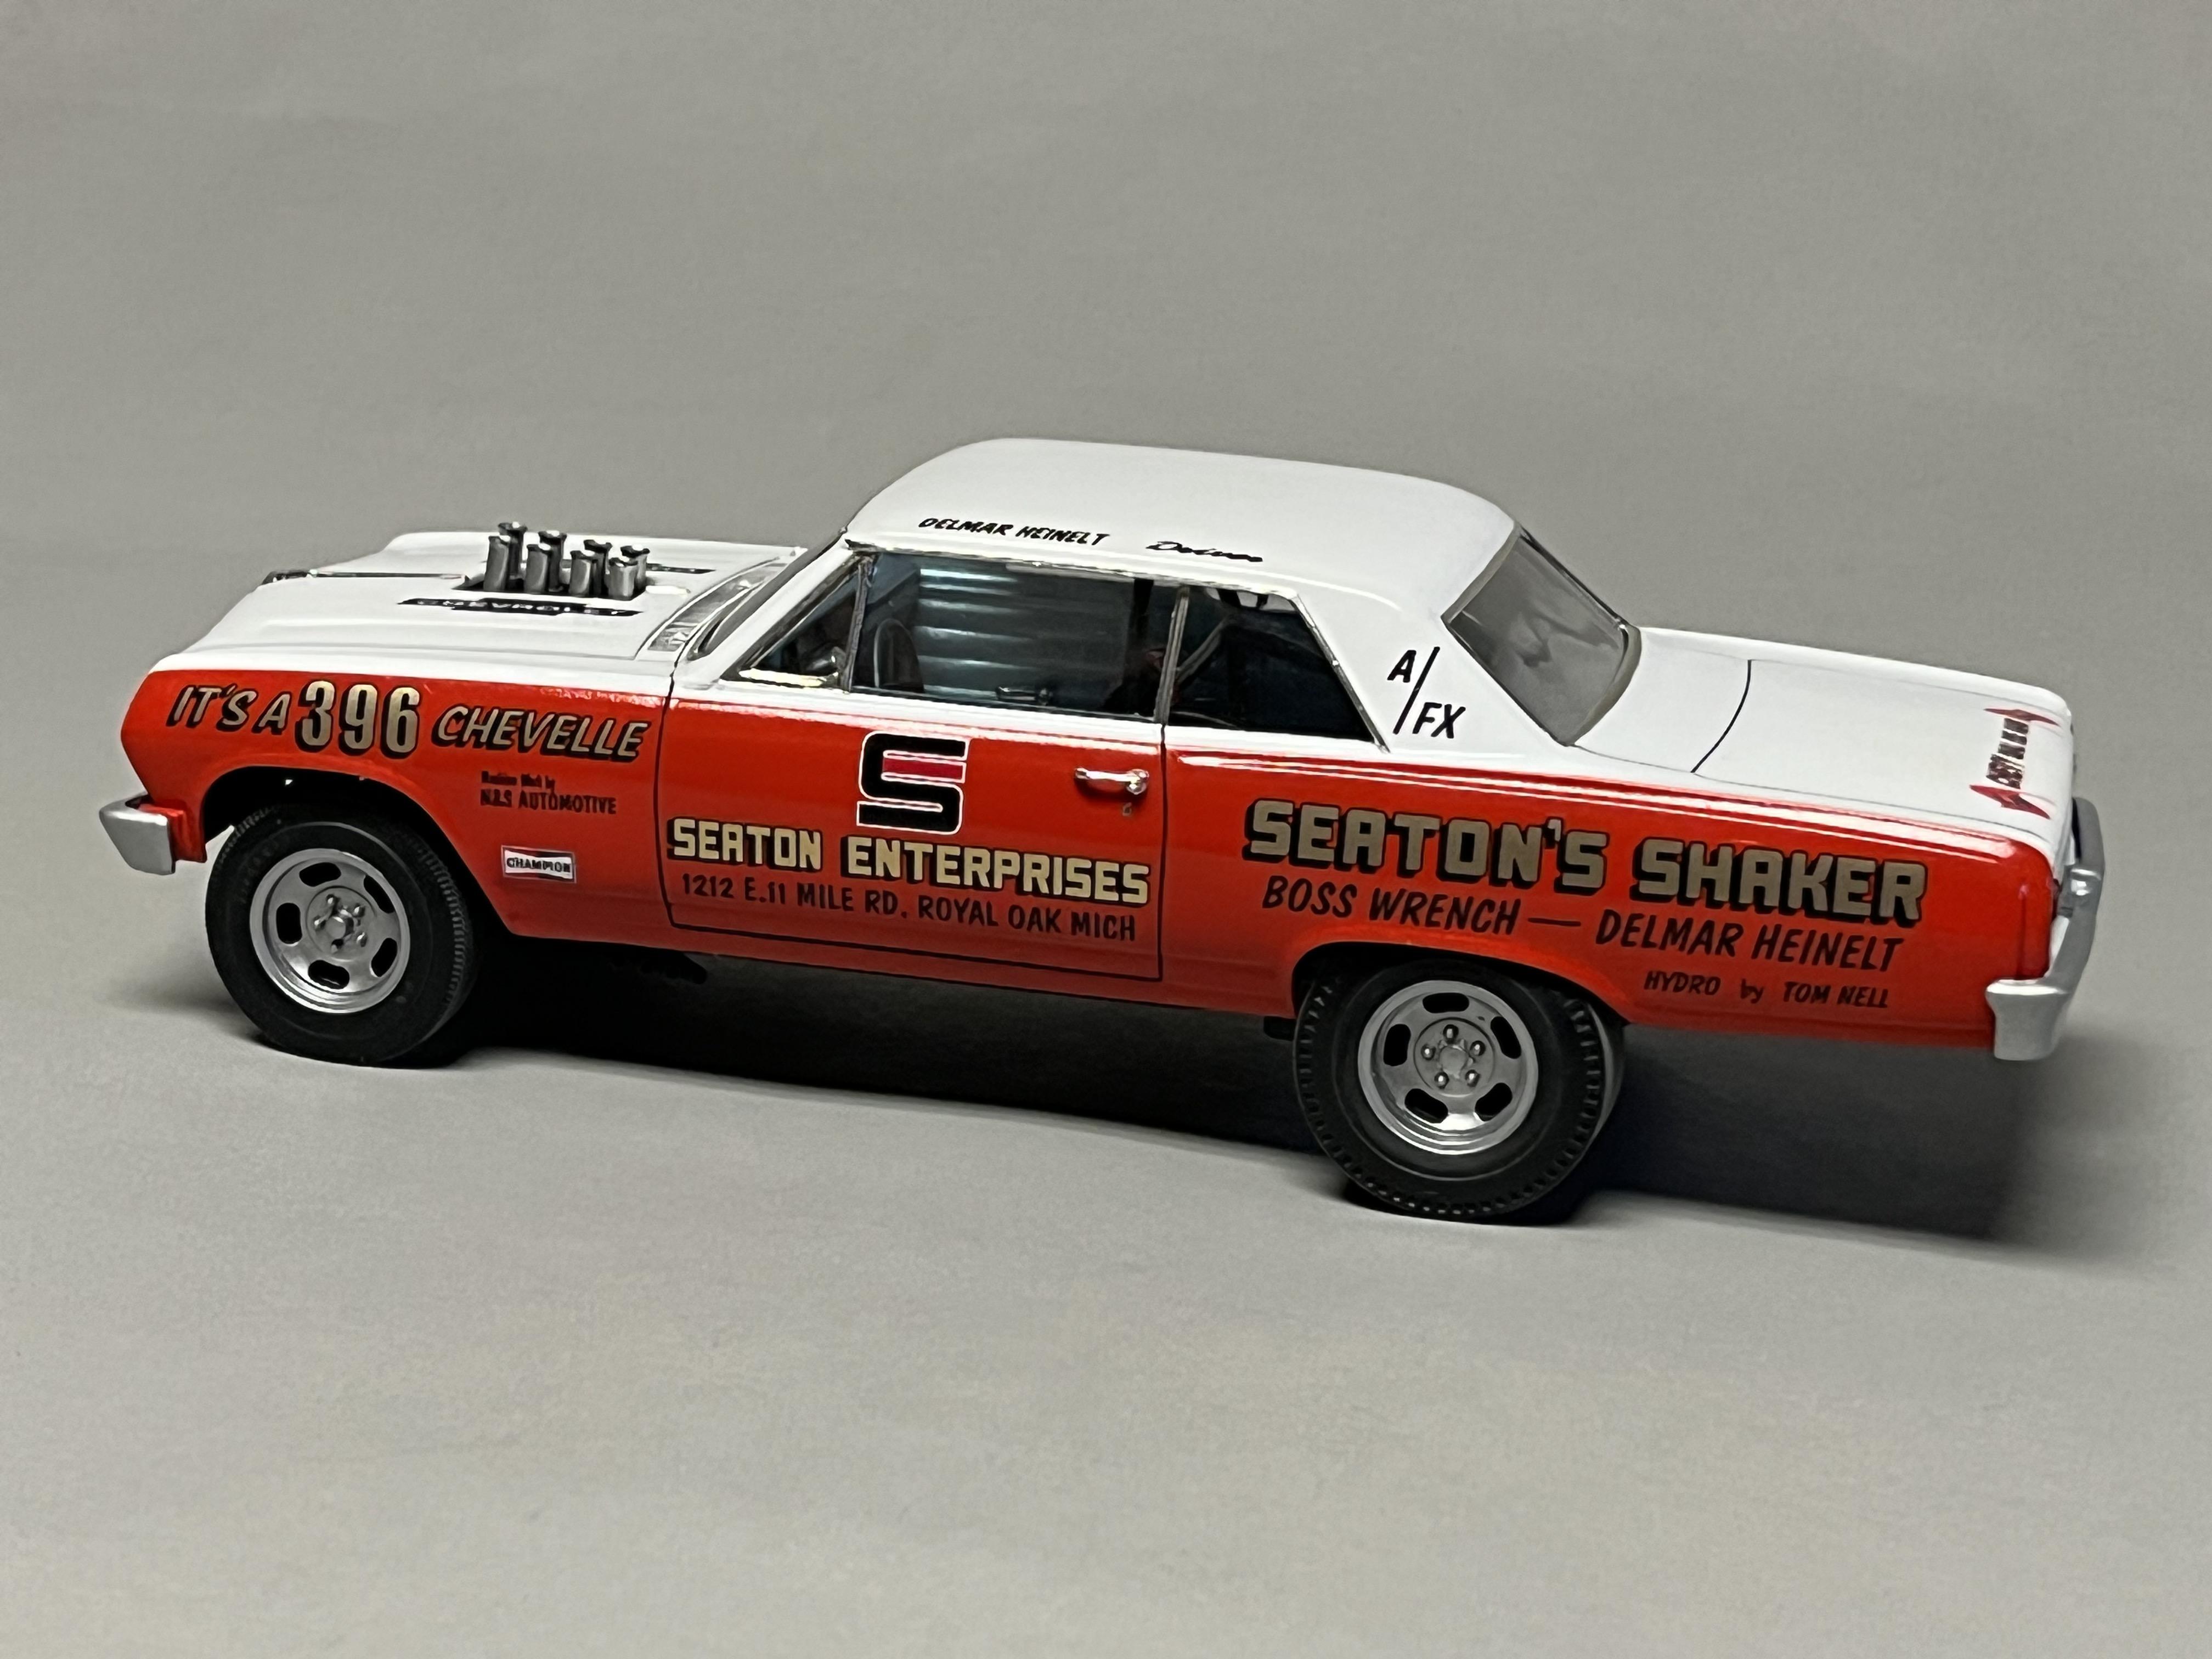
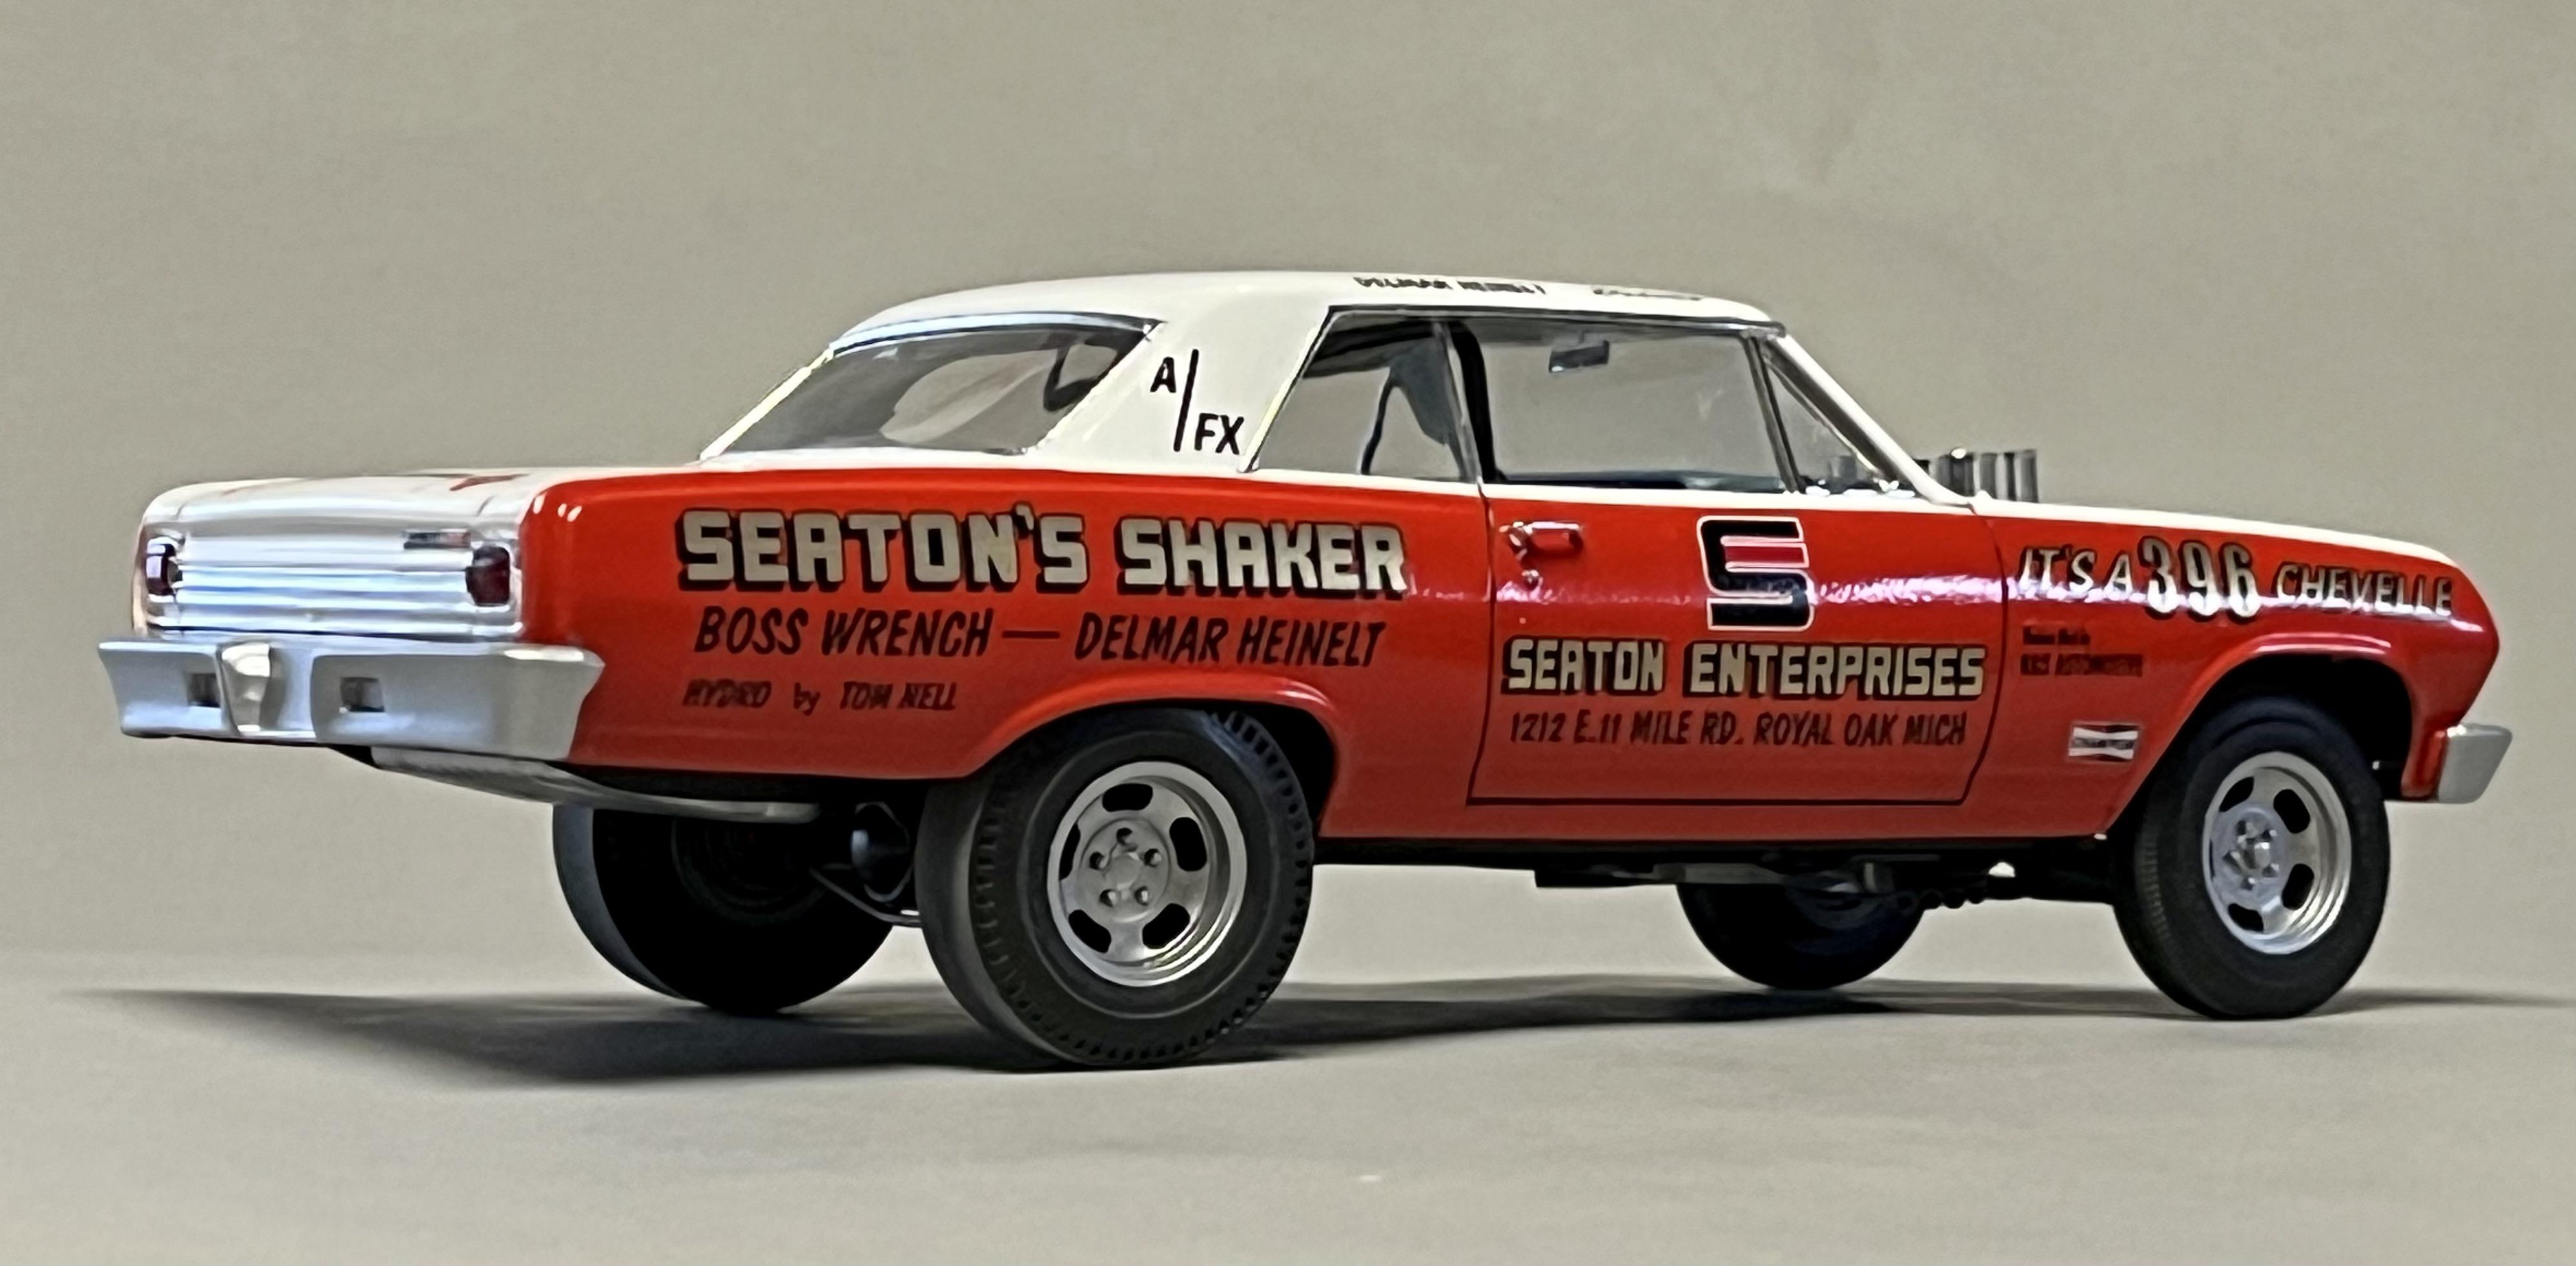
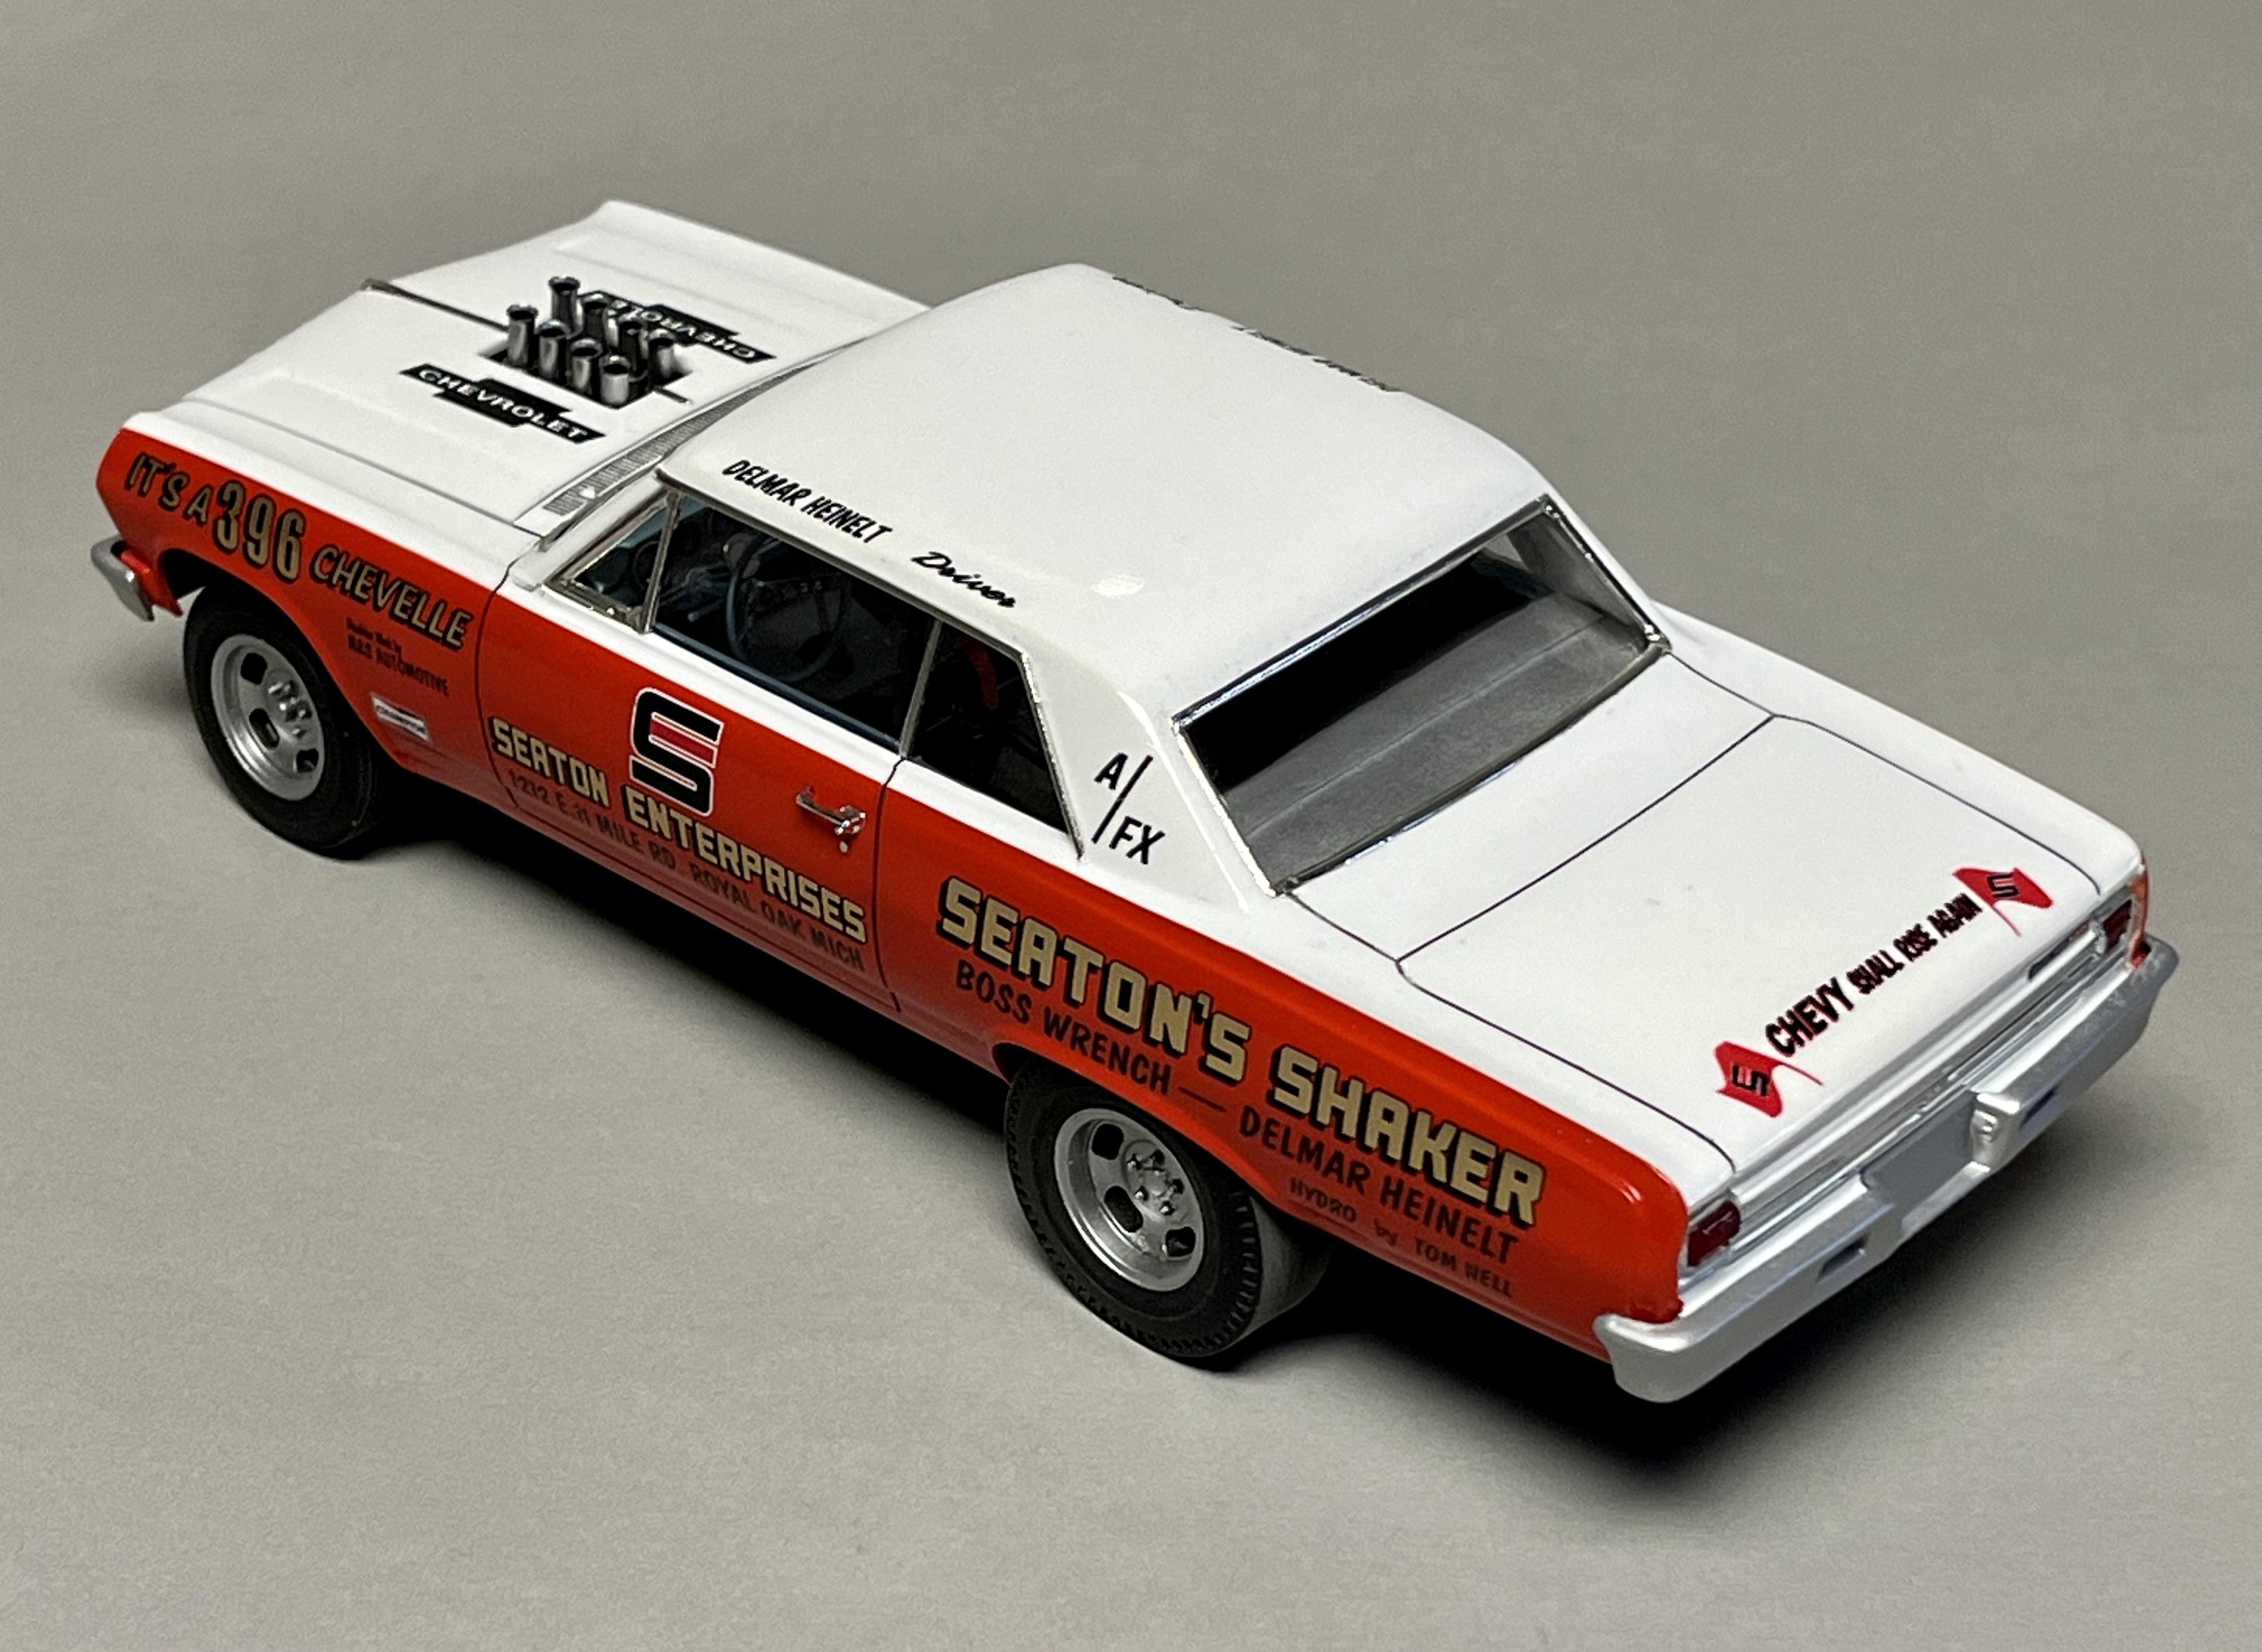
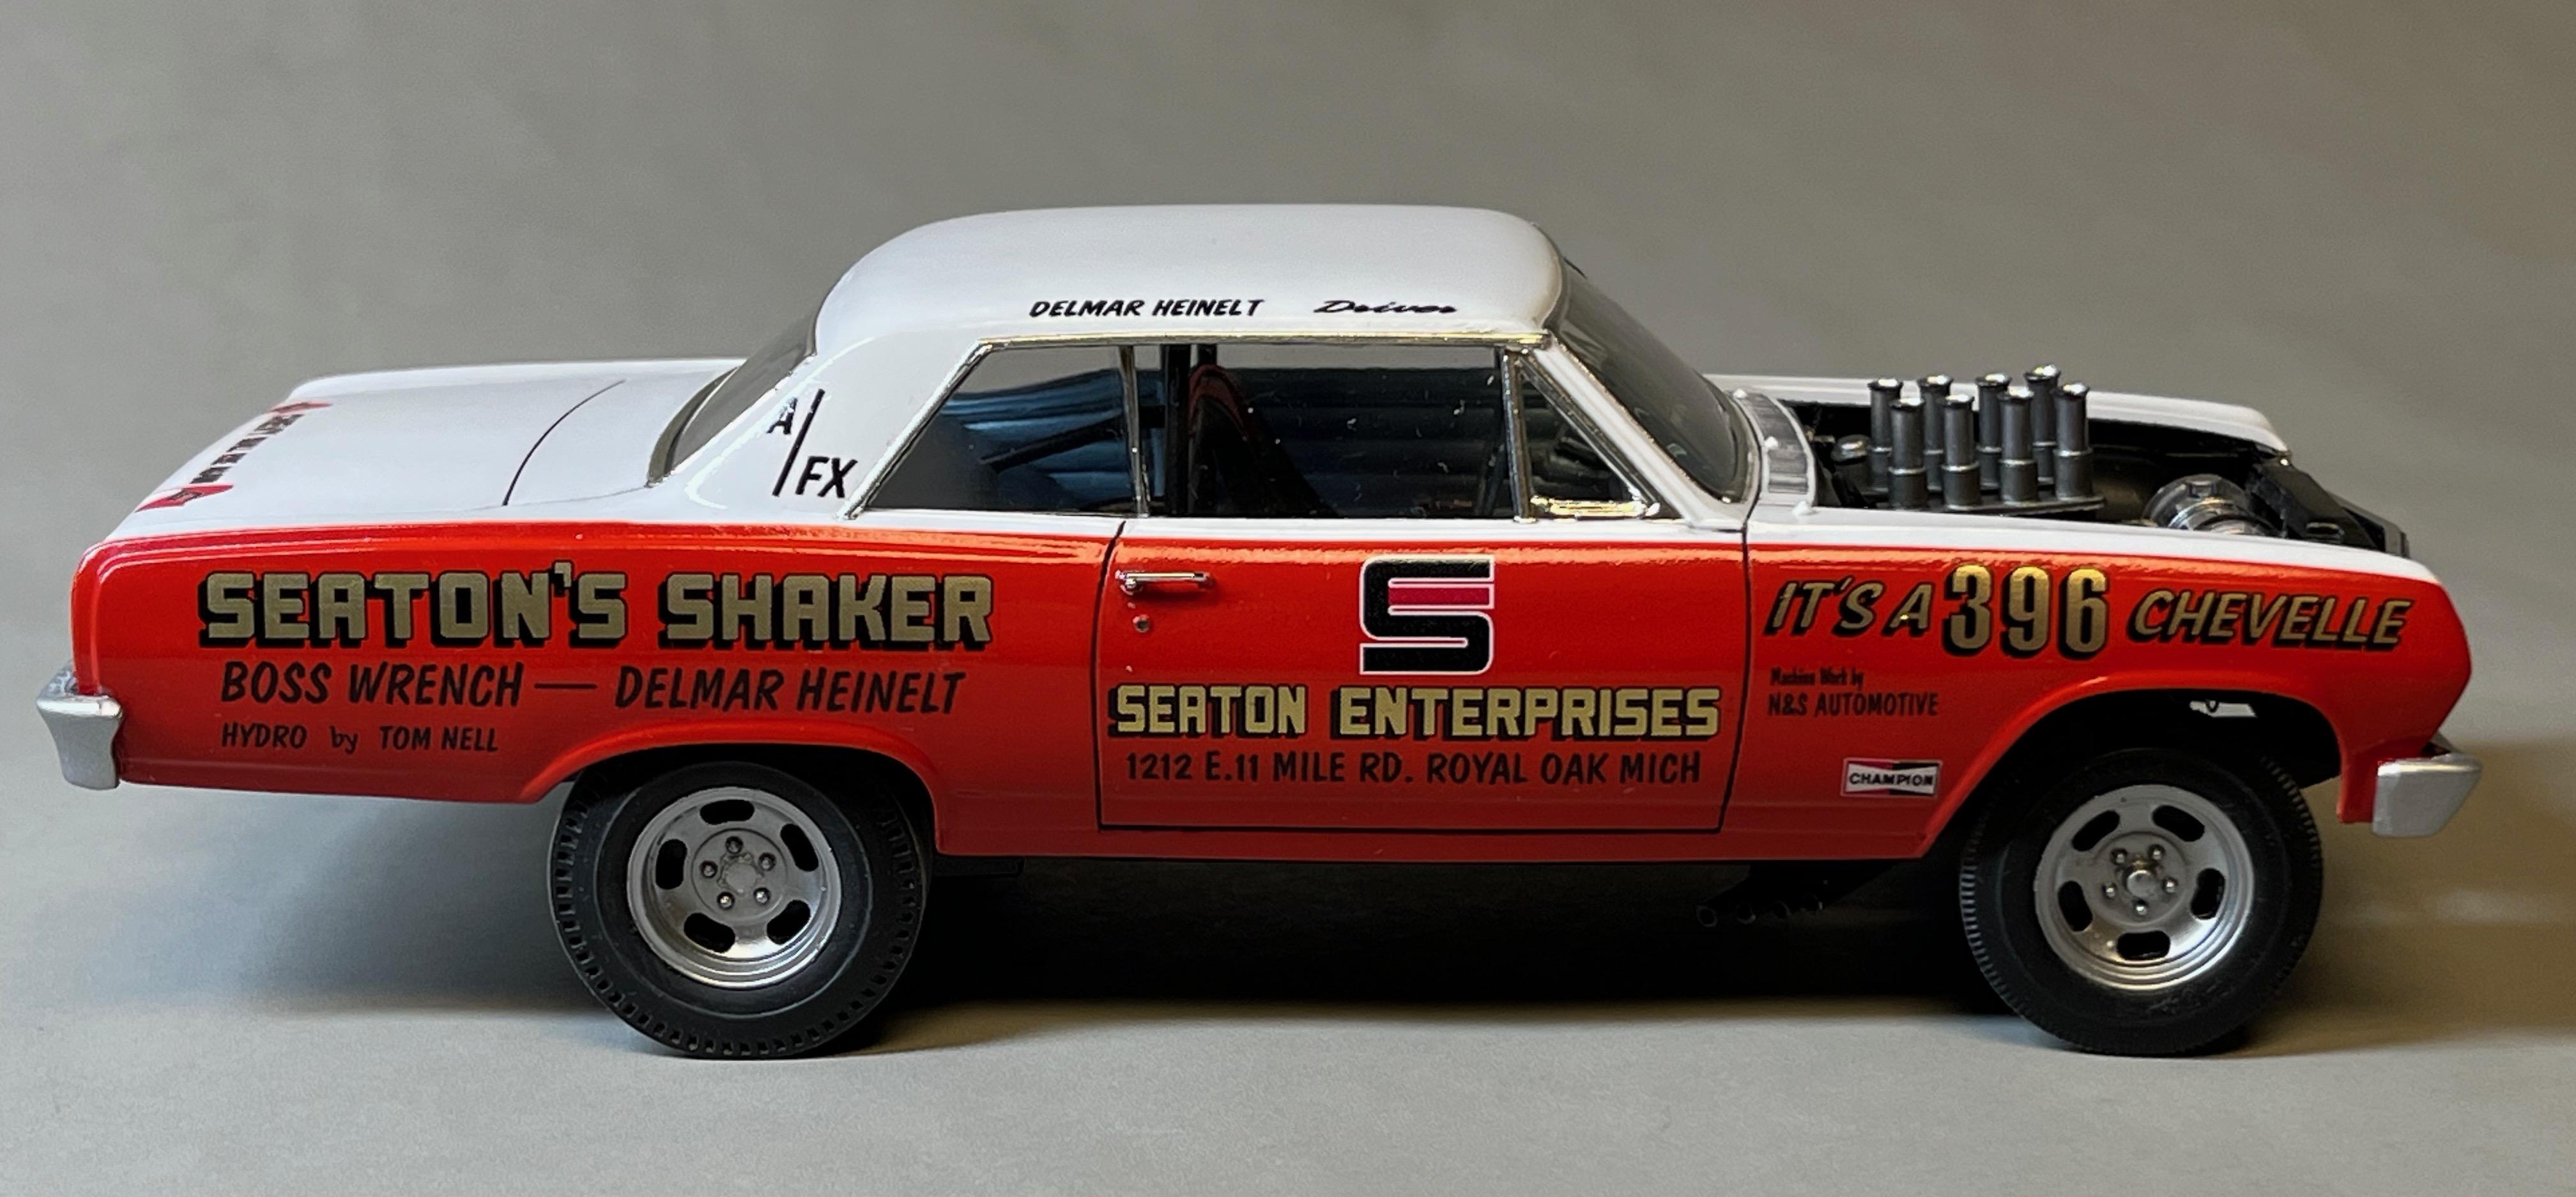
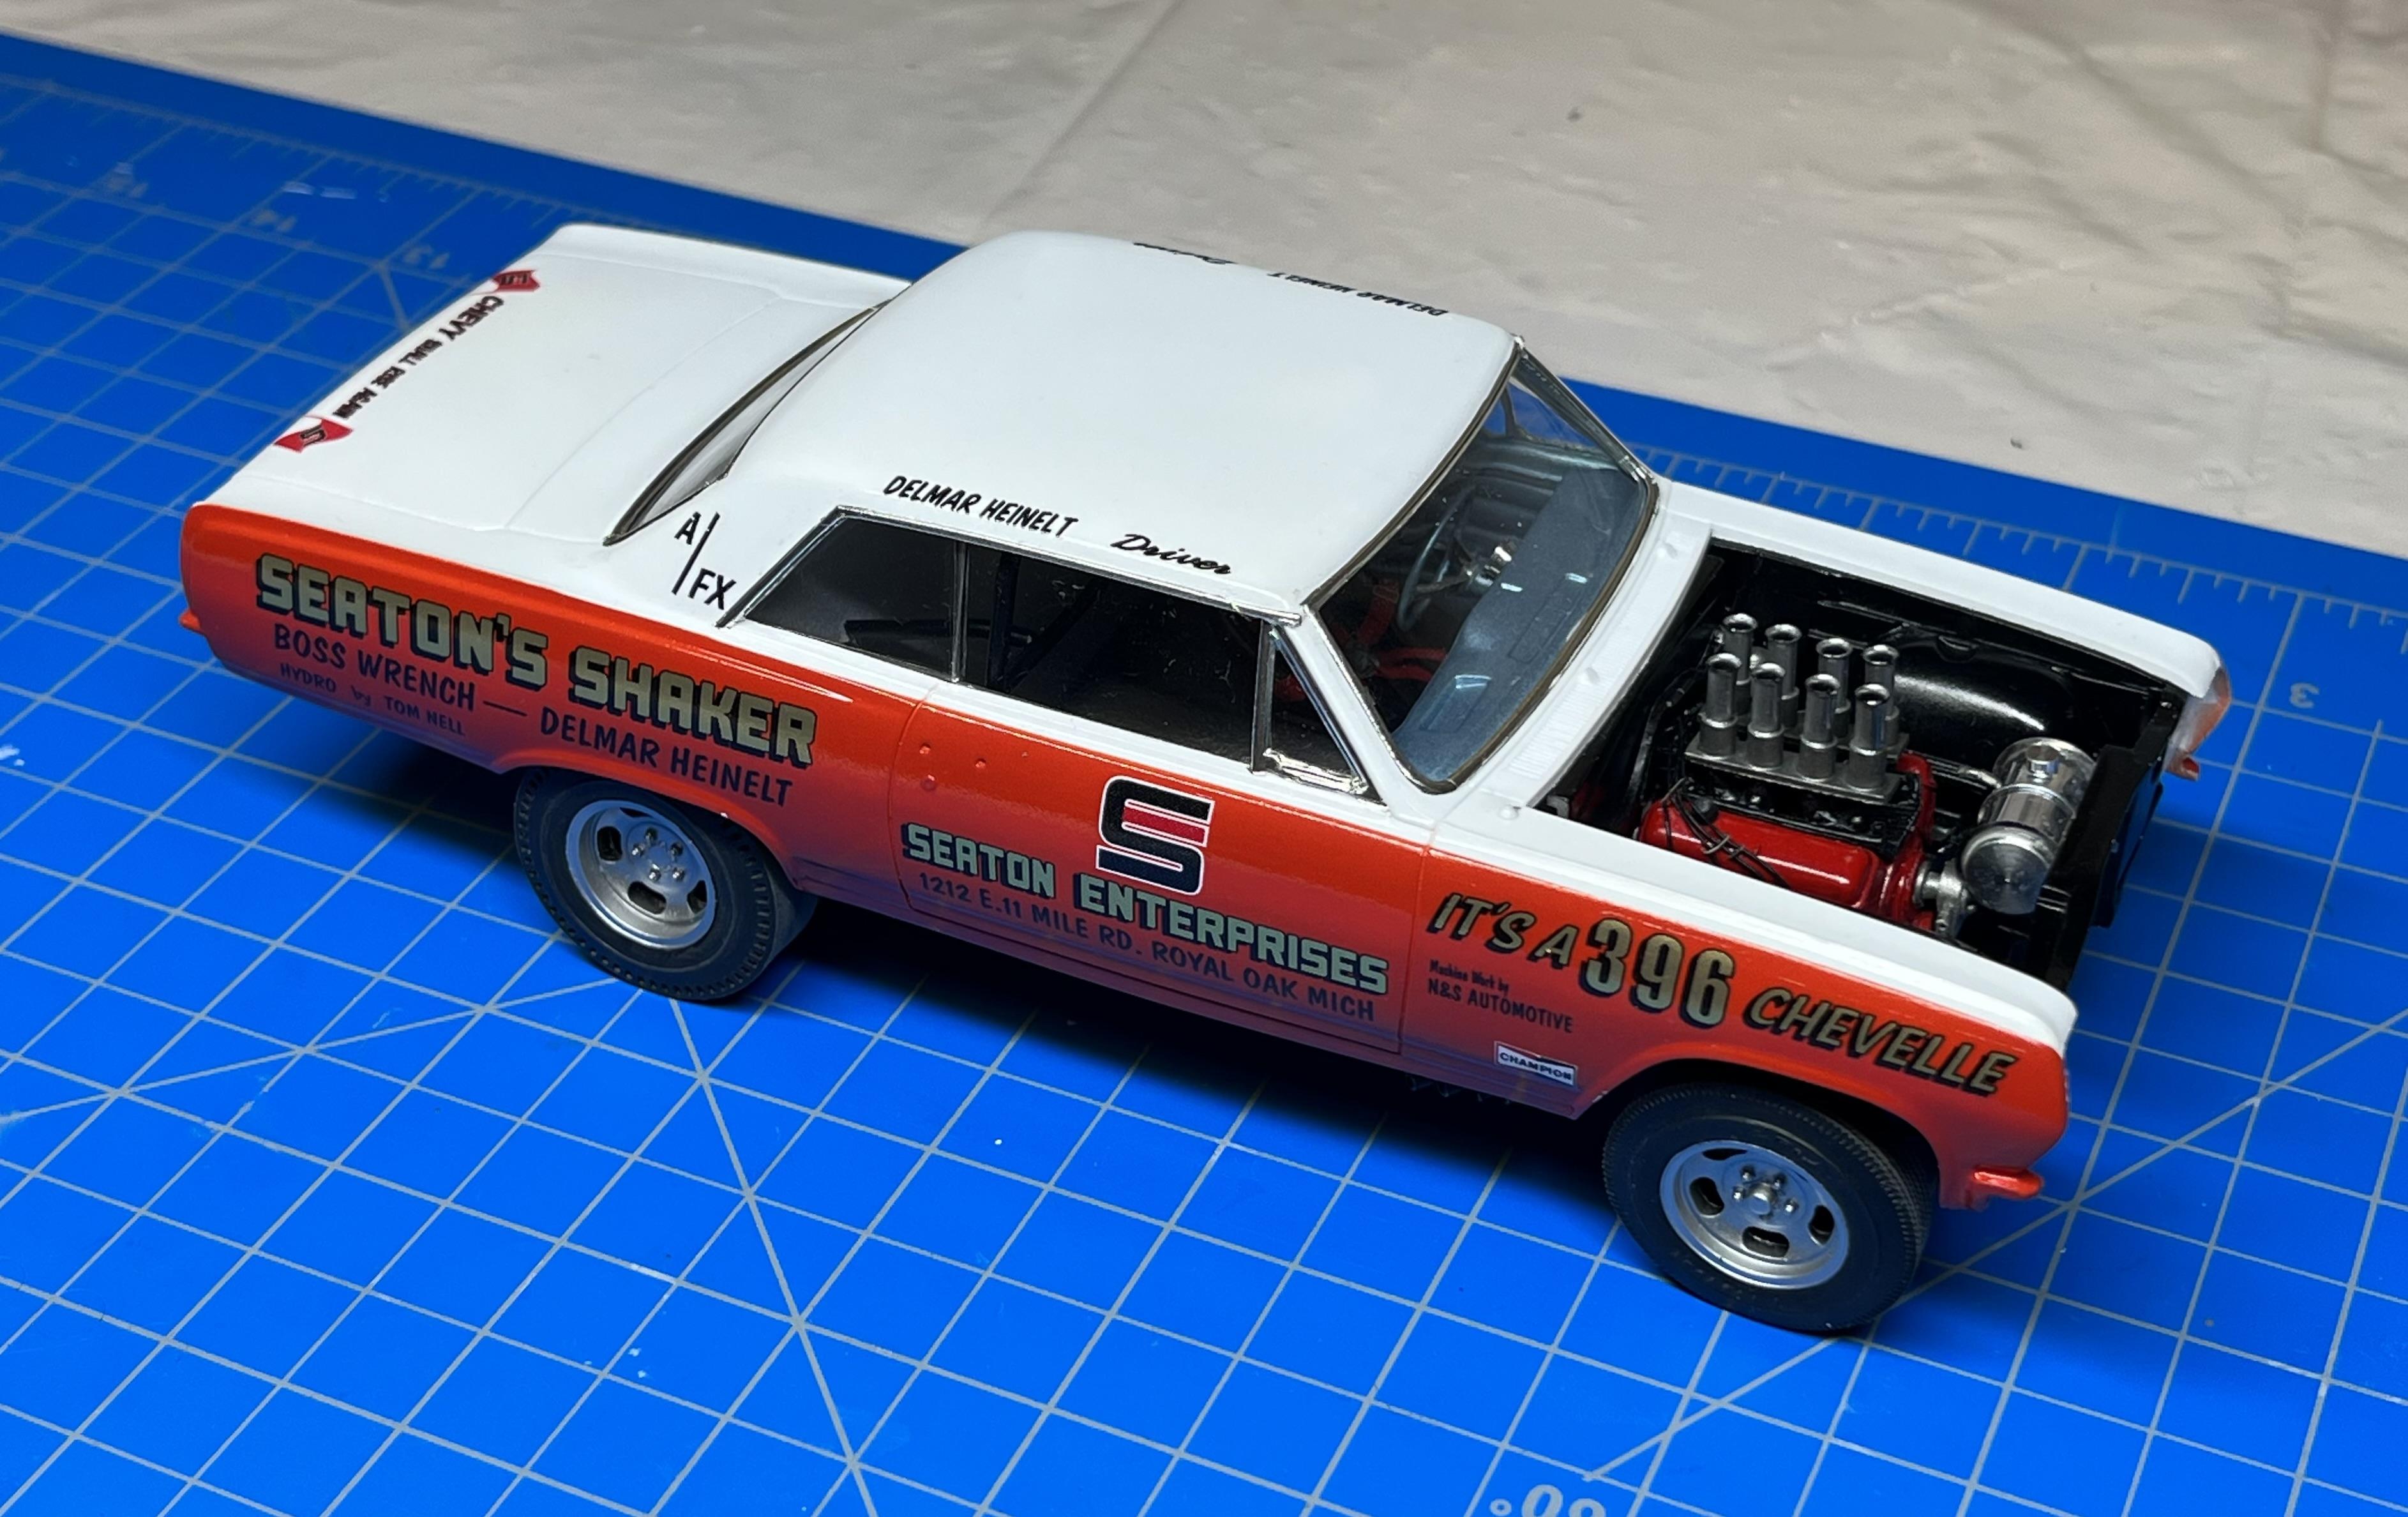
This AWB A/FX - Match Racer was built using the Revell 1/25 '65 Chevelle Z-16 SS 396 kit with a variety of spare parts from my spares box and after market items. This is the first build I've done where I relocated both front and rear wheel wells (both moved forward 7" (.28" at 1/25 scale) which was a lot more work than I anticipated both in cleaning up the body and making a bunch of corresponding changes to the chassis/ engine mounts/ drive shaft/ etc. It was a "scale modeling learning experience" that tested my patience and motivation at times...I look forward to a simple OOB build for my next project! Build details are described over in the WIP - Drag section.
Cheers, John
-
9
-
-
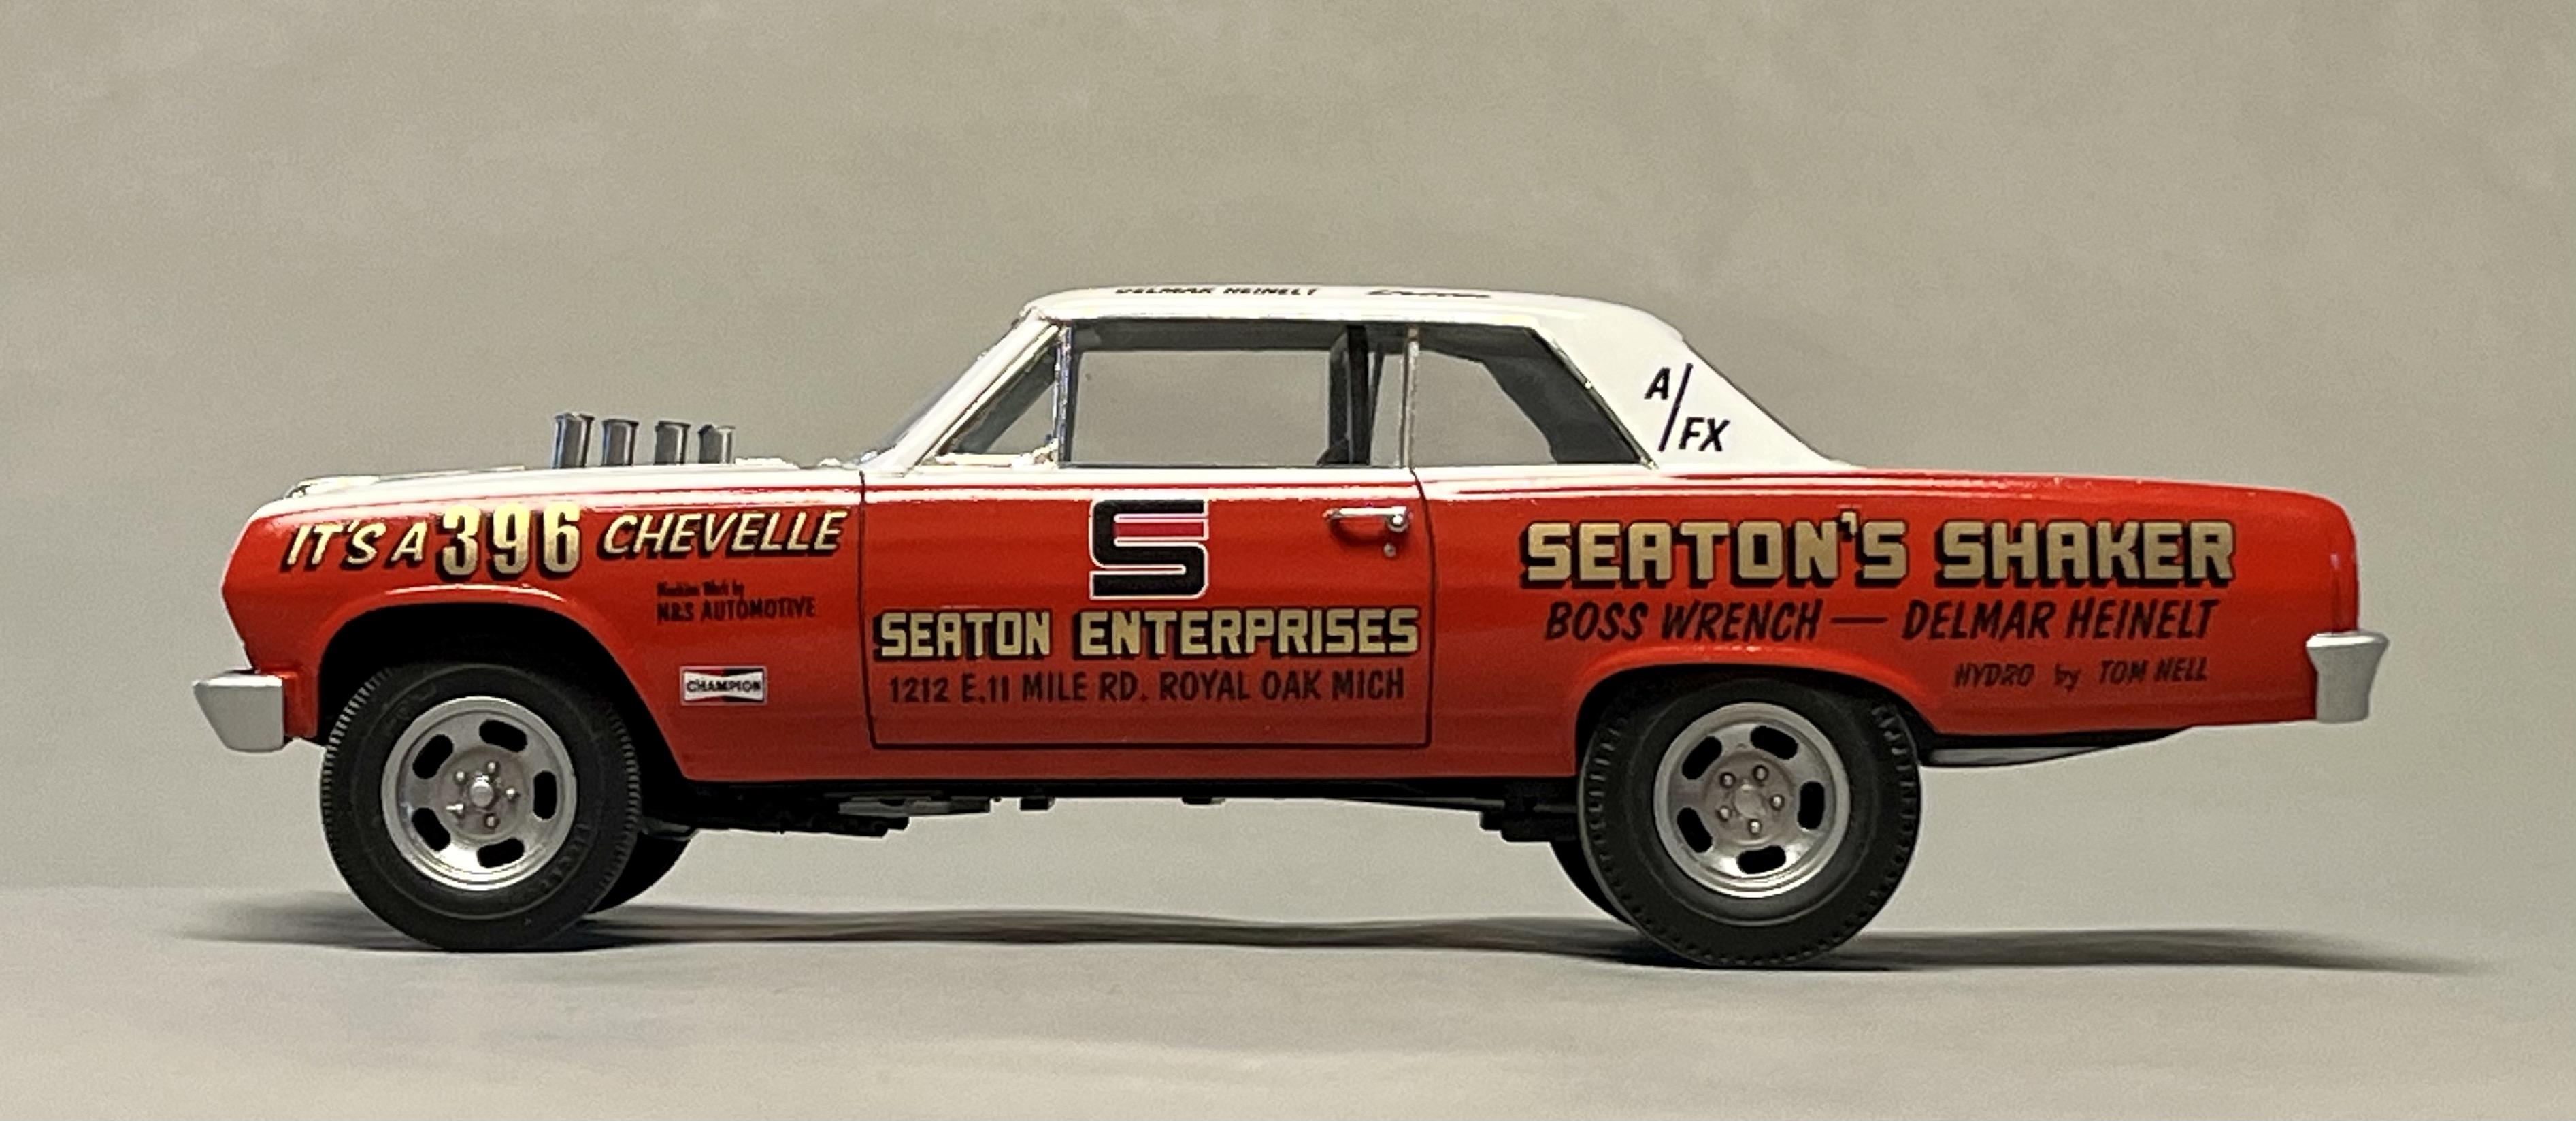
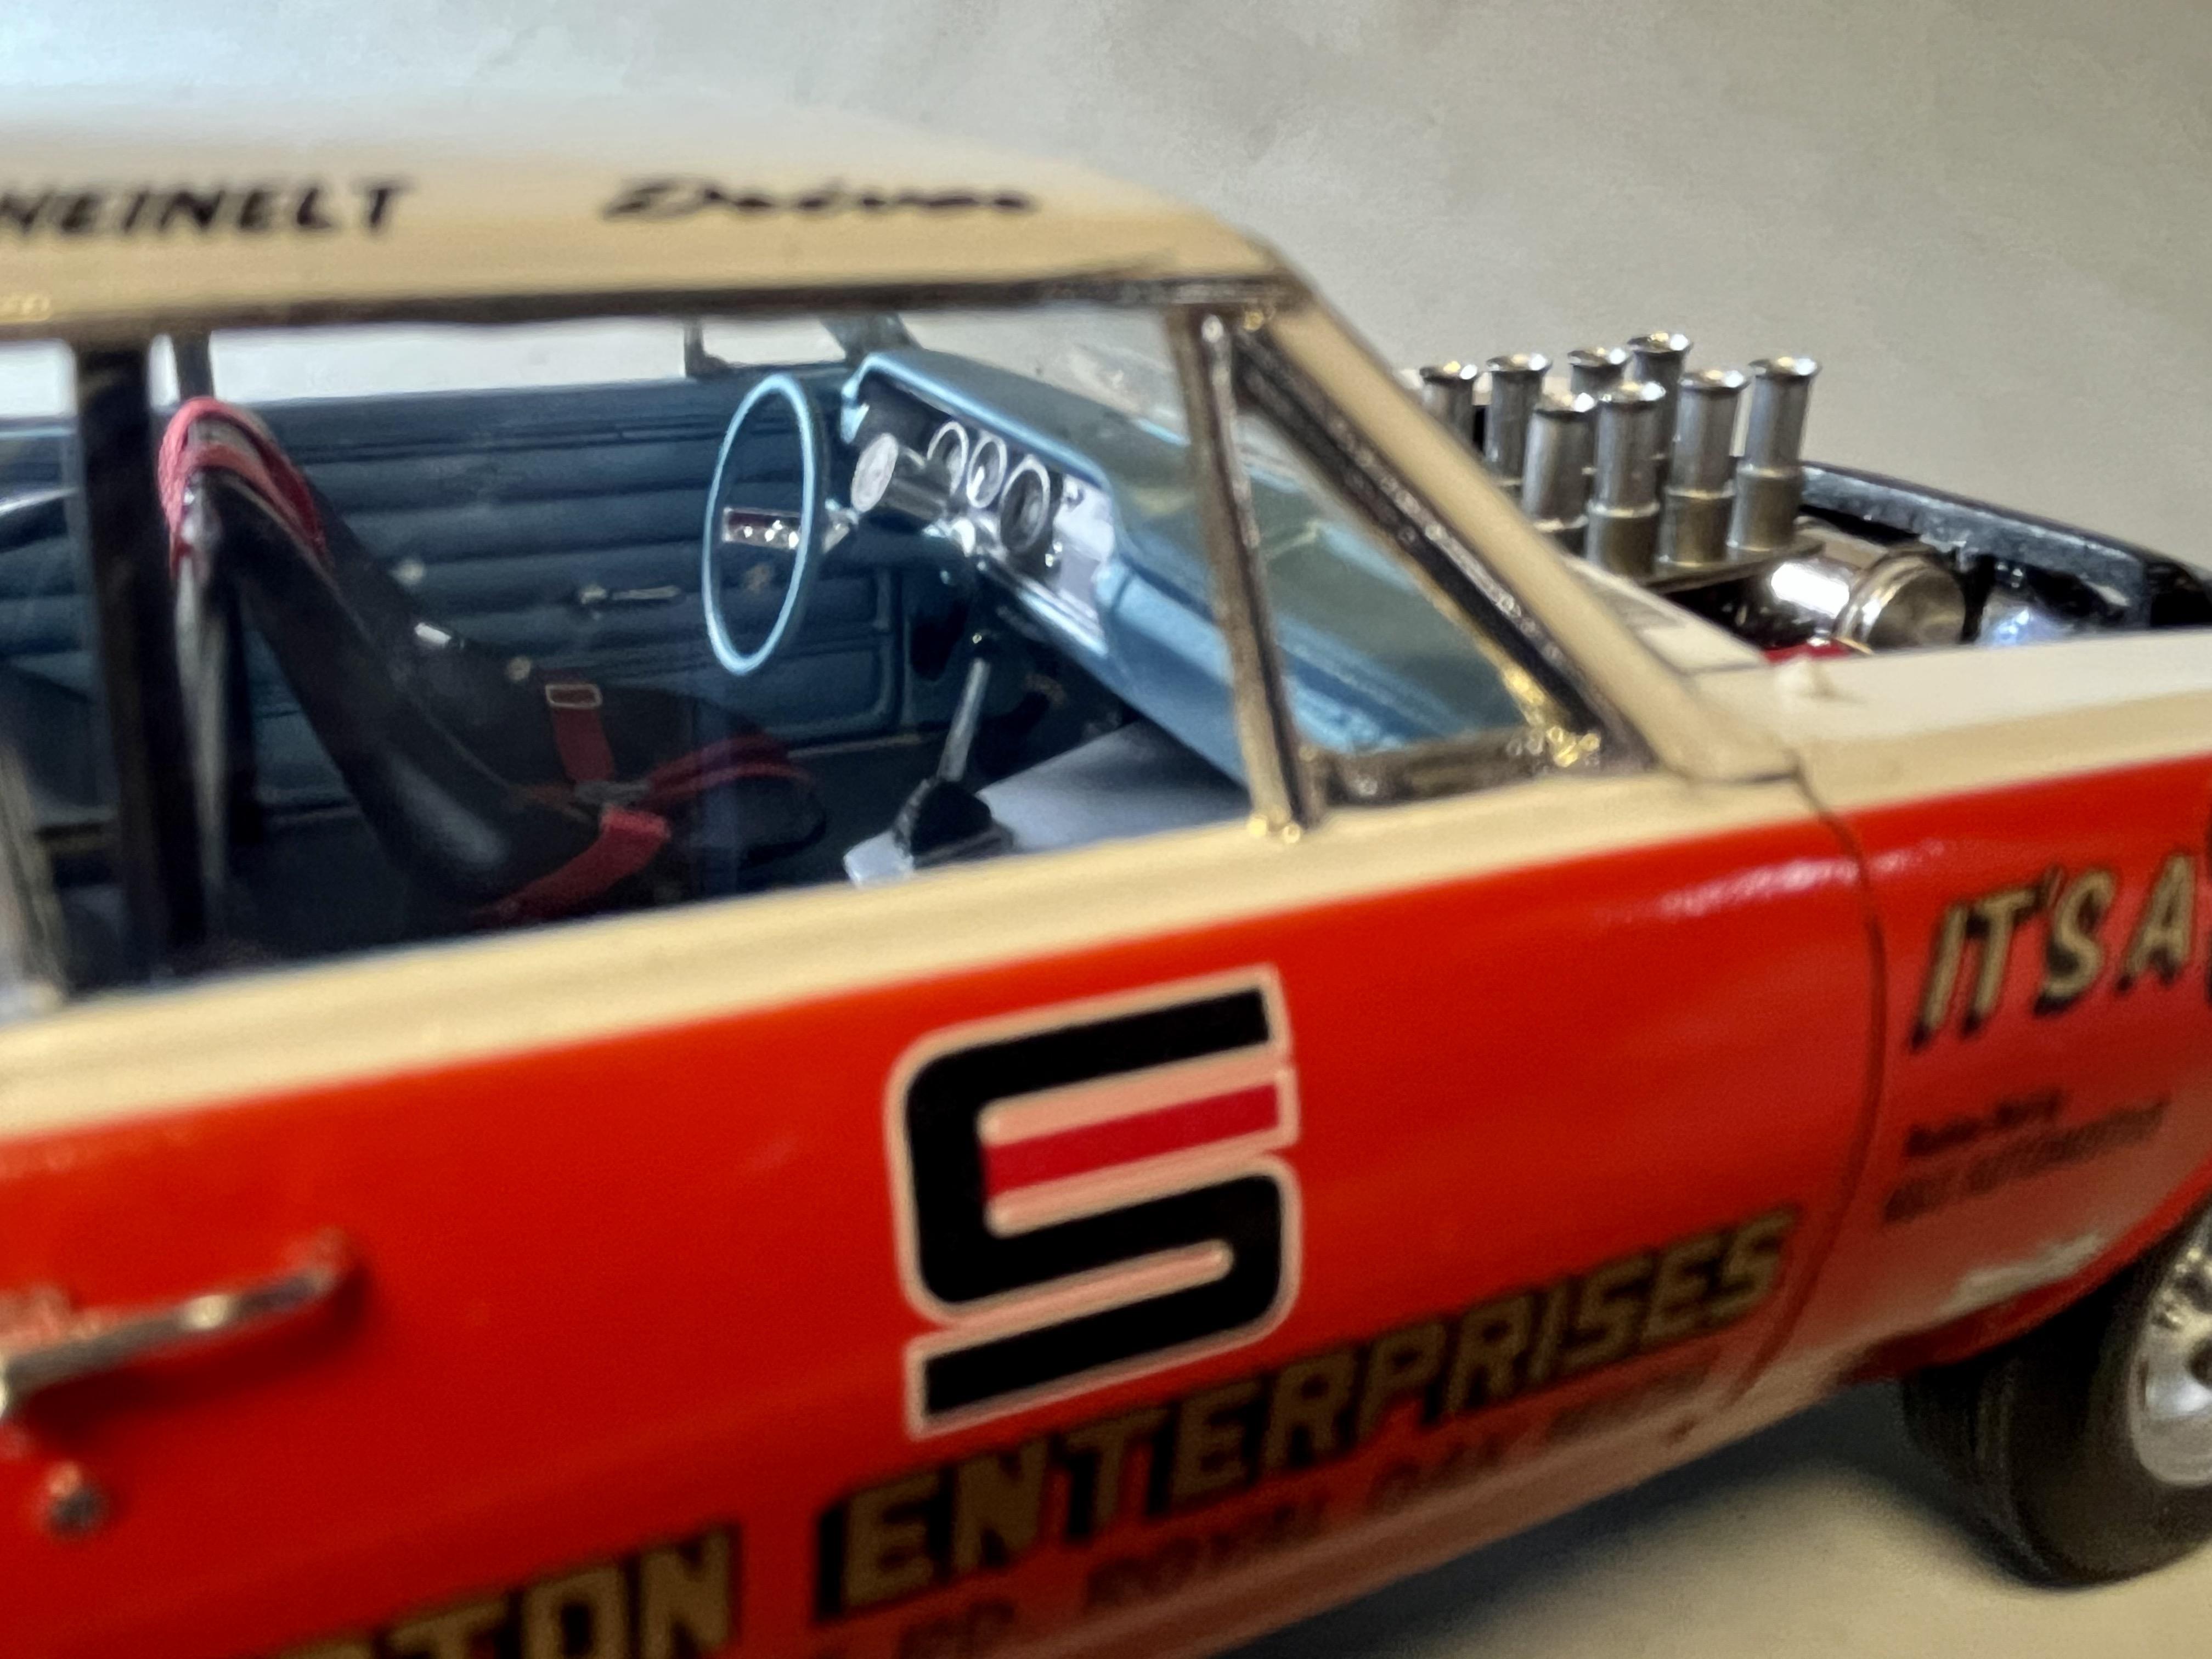
I wrapped this one up today and glad it’s over! My skills and patience tends to diminish as I get near the end of a challenging build and this one really kicked my &%#$ as I tried to get everything to fit, be aligned and generally behave…Seaton’s Shaker won the last few battles but I like to think I won the war!
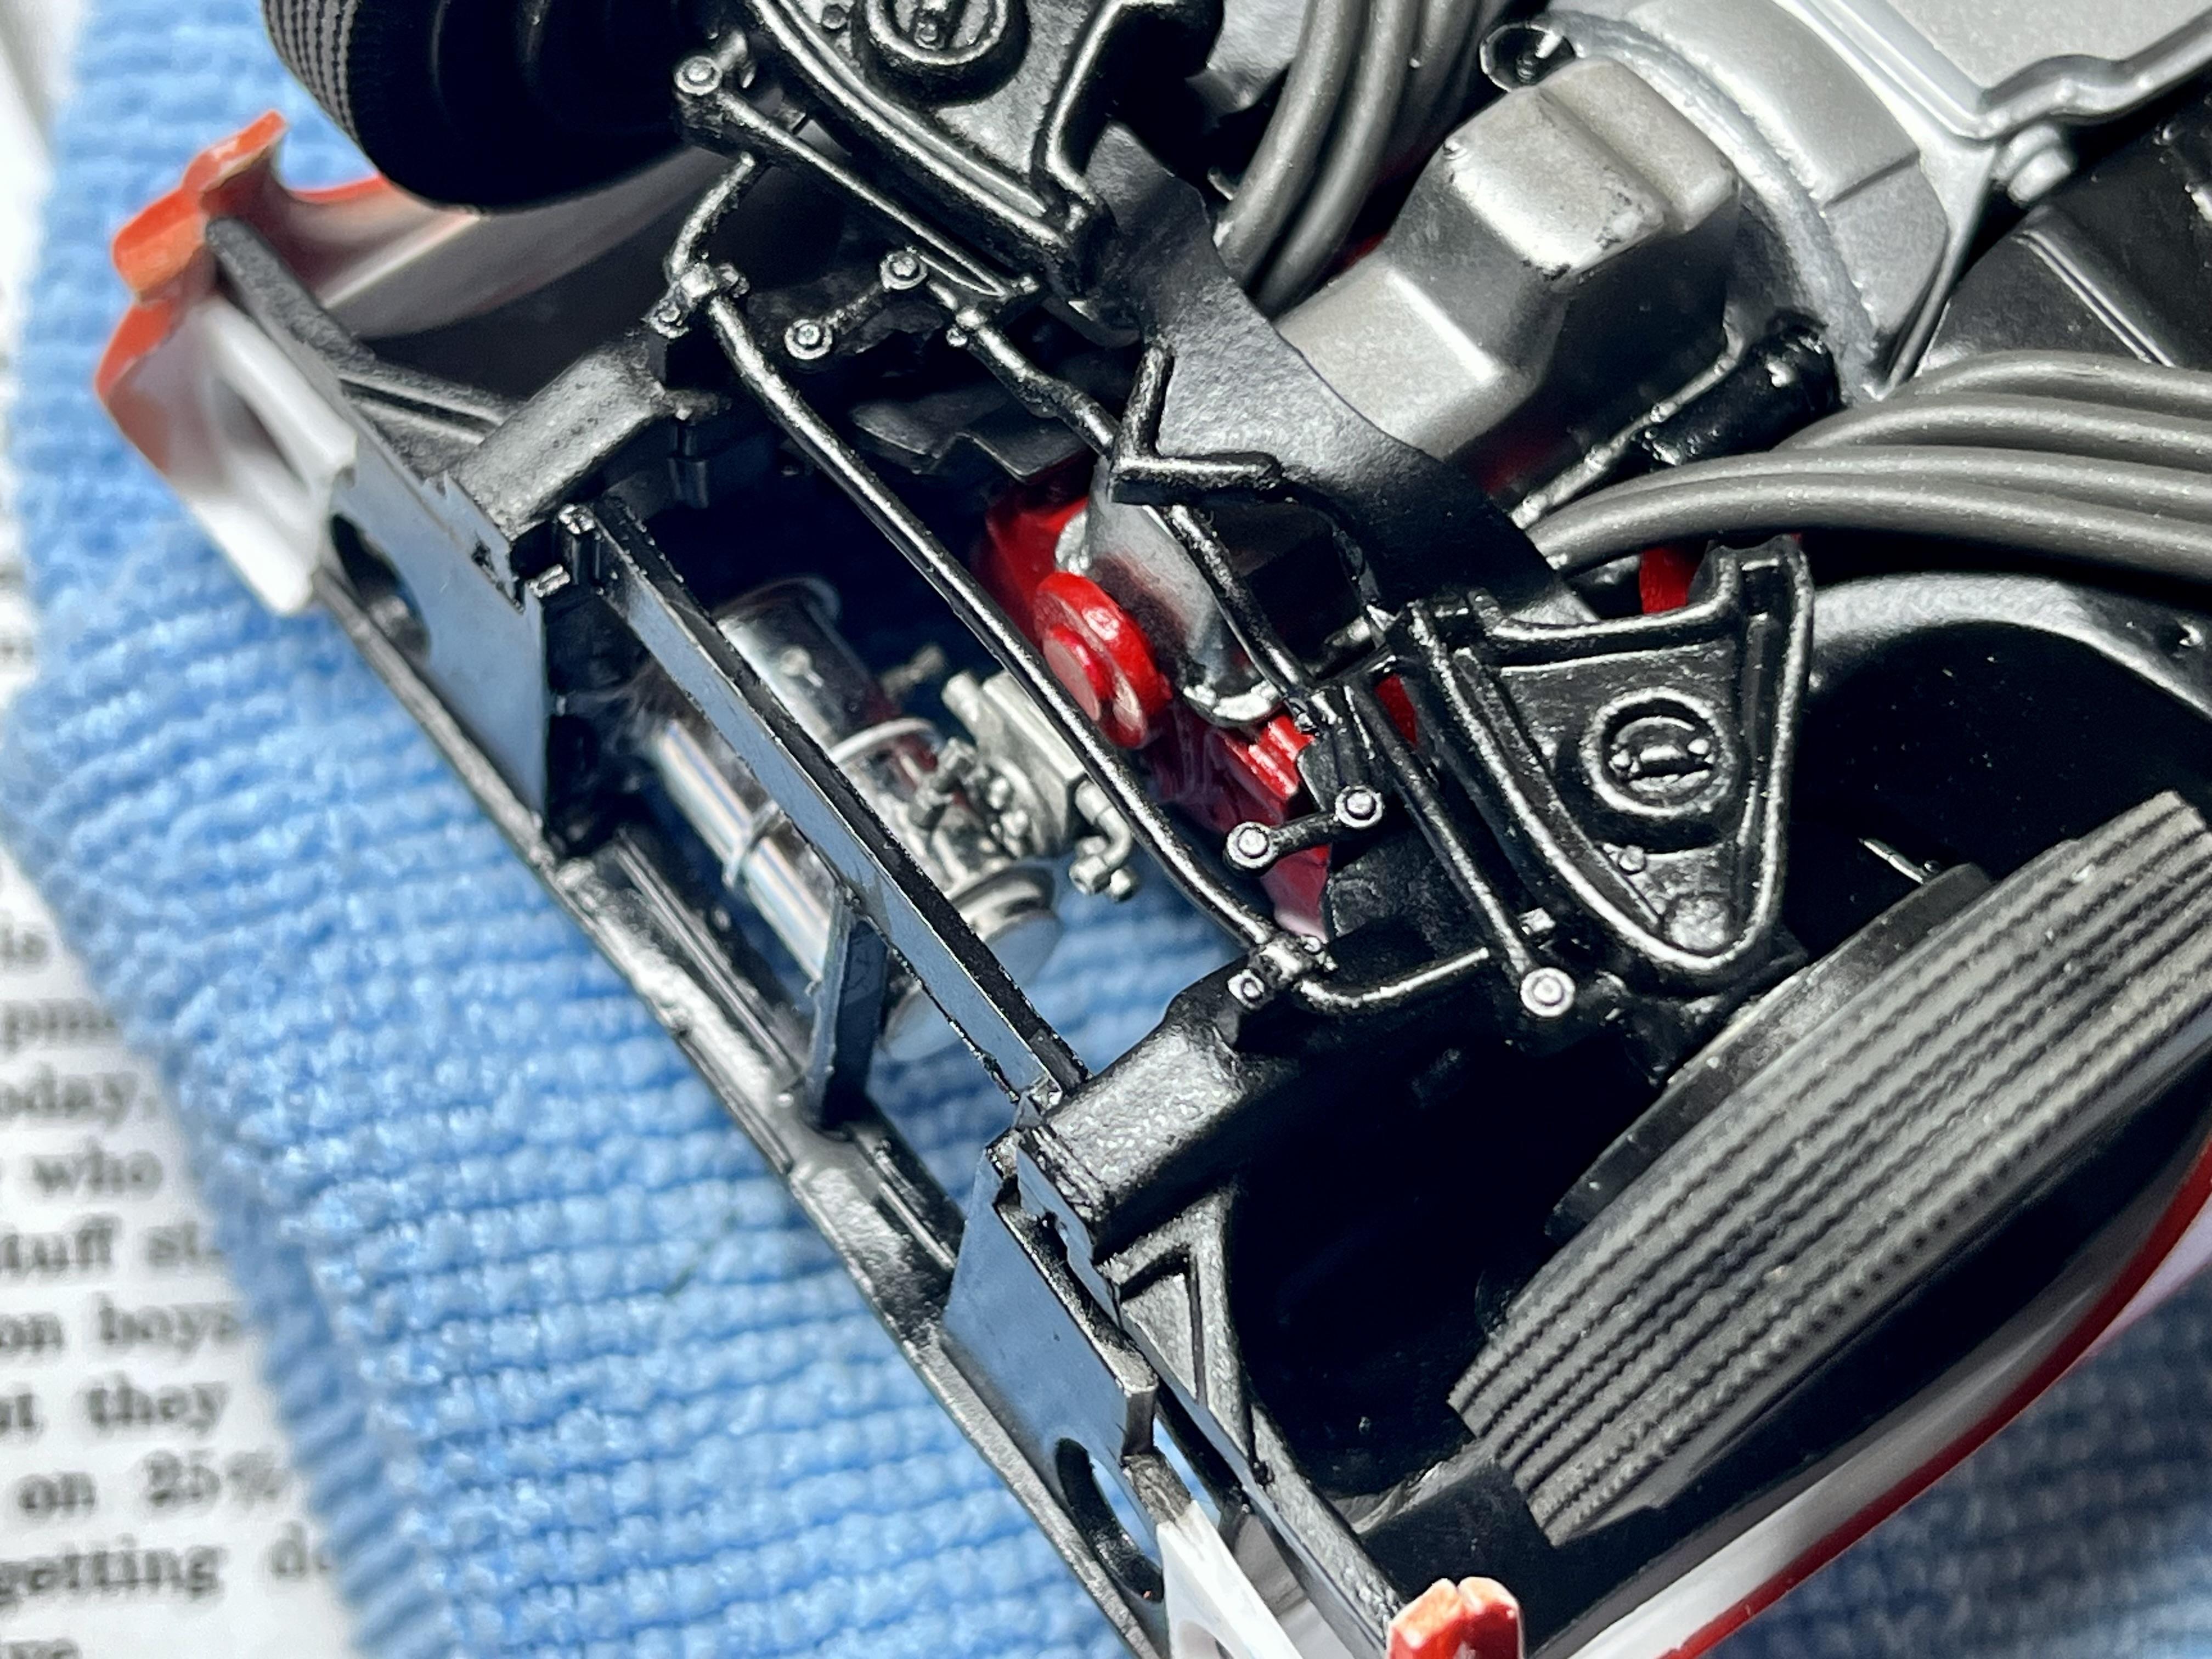
The biggest problems near the end were related to getting the interior tube/ chassis/ body to assemble properly, installing the front and rear grills/ fascia/ bumper to the body (not well engineered by Revell on this kit) and then installing the final detail bits in the engine bay (fuel lines, cooling lines, condenser, cooling hoses). Theres some residual misalignment here & there but it’s about as good as I can do on this one for now. I’ll post more pics in Under Glass - Drag.
Thanks everyone for following along, providing good suggestions and questions and passing on words of encouragement.
John
-
7
-
-
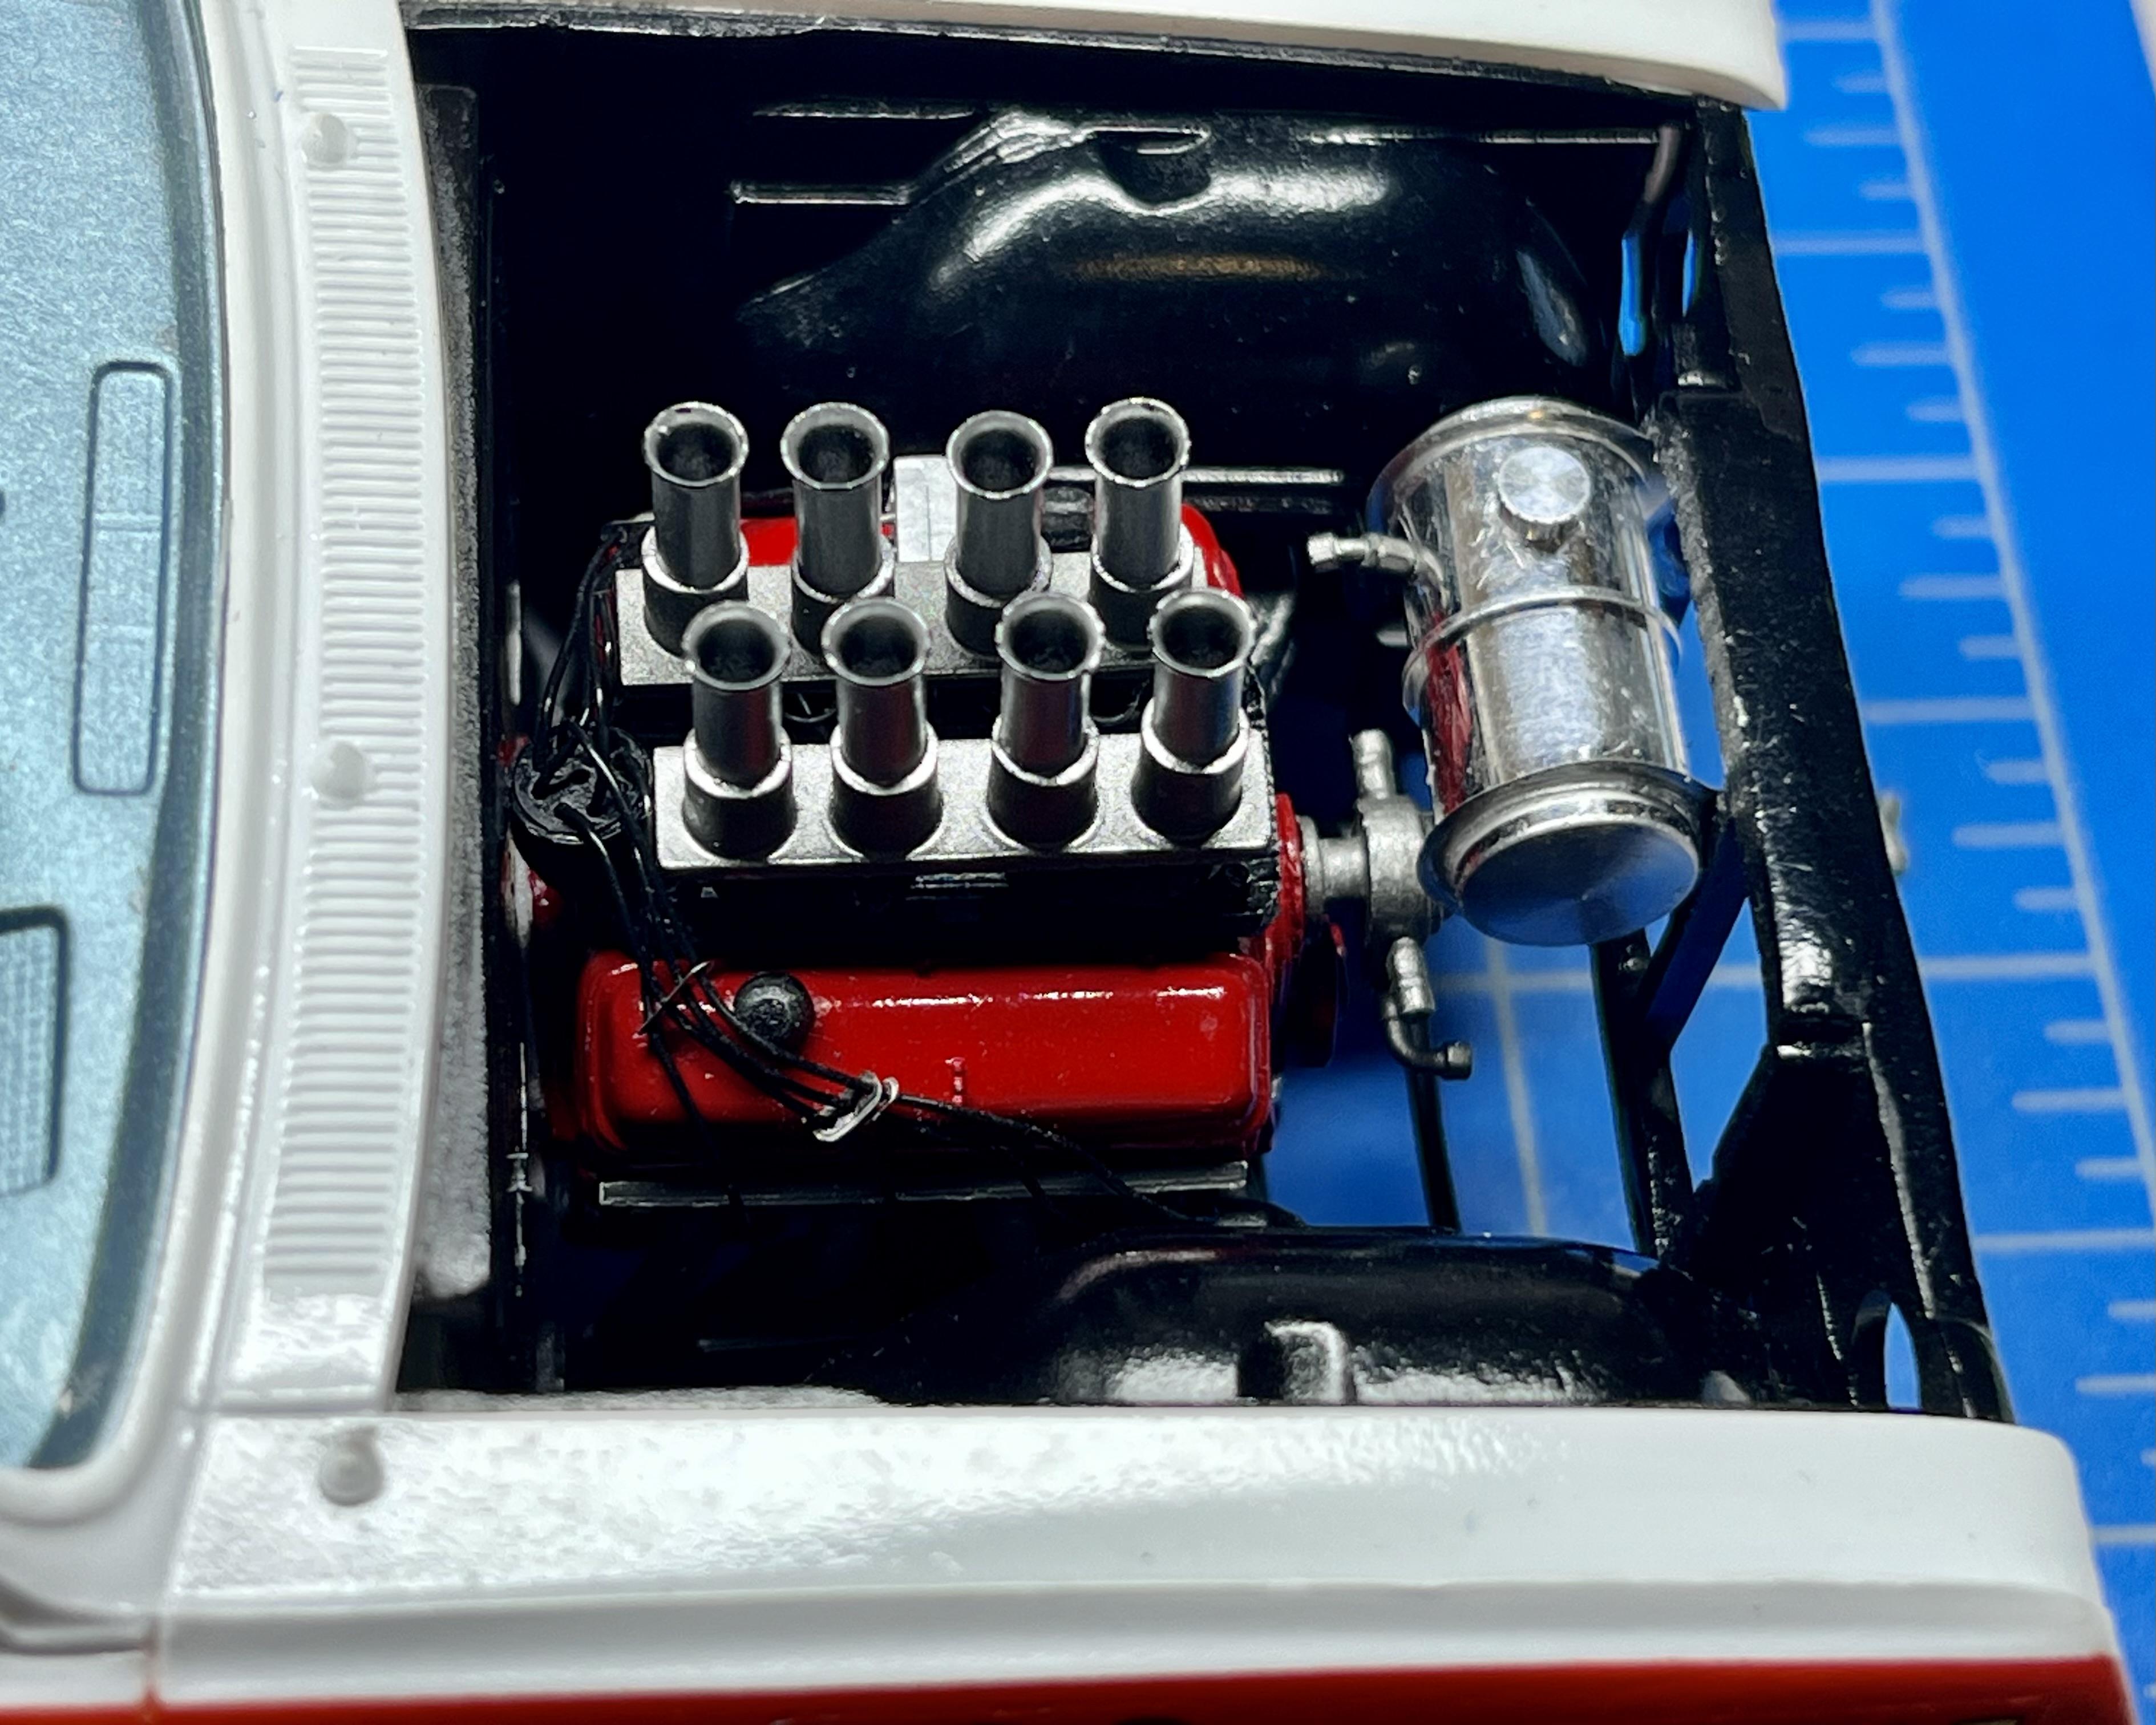
Mounting the Moon tank onto the front bulkhead of the body turned into a painful trial & error/ cut & fit exercise. I had to trim a little more off the front of the fuel pump to clear the tank:
I finished applying and trimming the BMF around the window frames and side rain gutters and then installed the windows:
I cut .005” clear styrene shapes for the right and left front side windows and wing windows and bonded them within the body to simulate the non-roll-down-able plexiglass.
I still need to install the firewall detail/ brake cylinder, fine-tune and finalize the body-chassis assembly, add the front/ rear grills/ bumpers/ install cooling hoses and fuel lines, install door handles. I’m hoping to wrap this build up this week, it’s become a grind….
John
-
4
-
-
Beautiful clean build Sid. I love the two-tone color choice and clean paint execution as well as that gorgeous interior. I feel your pain on the challenges of joining chassis to body and getting everything to seat perfectly, seems like I have the same problem on about half of the 1/25 builds I do. I’m slowly learning the more dry-fitting before painting, the better! I would be proud to have your build in my display case “as is”.
The one thing that sticks out to me with this Revell kit which surprises me (and is unrelated to your excellent build quality) is the unrealistic looking finished tires + wheels. The wheel rims appear to me to protrude way too far beyond the outside face of each tire and the tires also appear slightly undersized to my eyes. I built the Revell ‘57 “Black Widow” 150 coupe kit which was tooled a few years later than this ‘56 and the wheels and tires look so much more realistic to me. I have this ‘56 210 kit in my stash (it was my first 1:1 car) and I’m tempted to use the wheels and tires from the ‘57 kit when I get around to it.


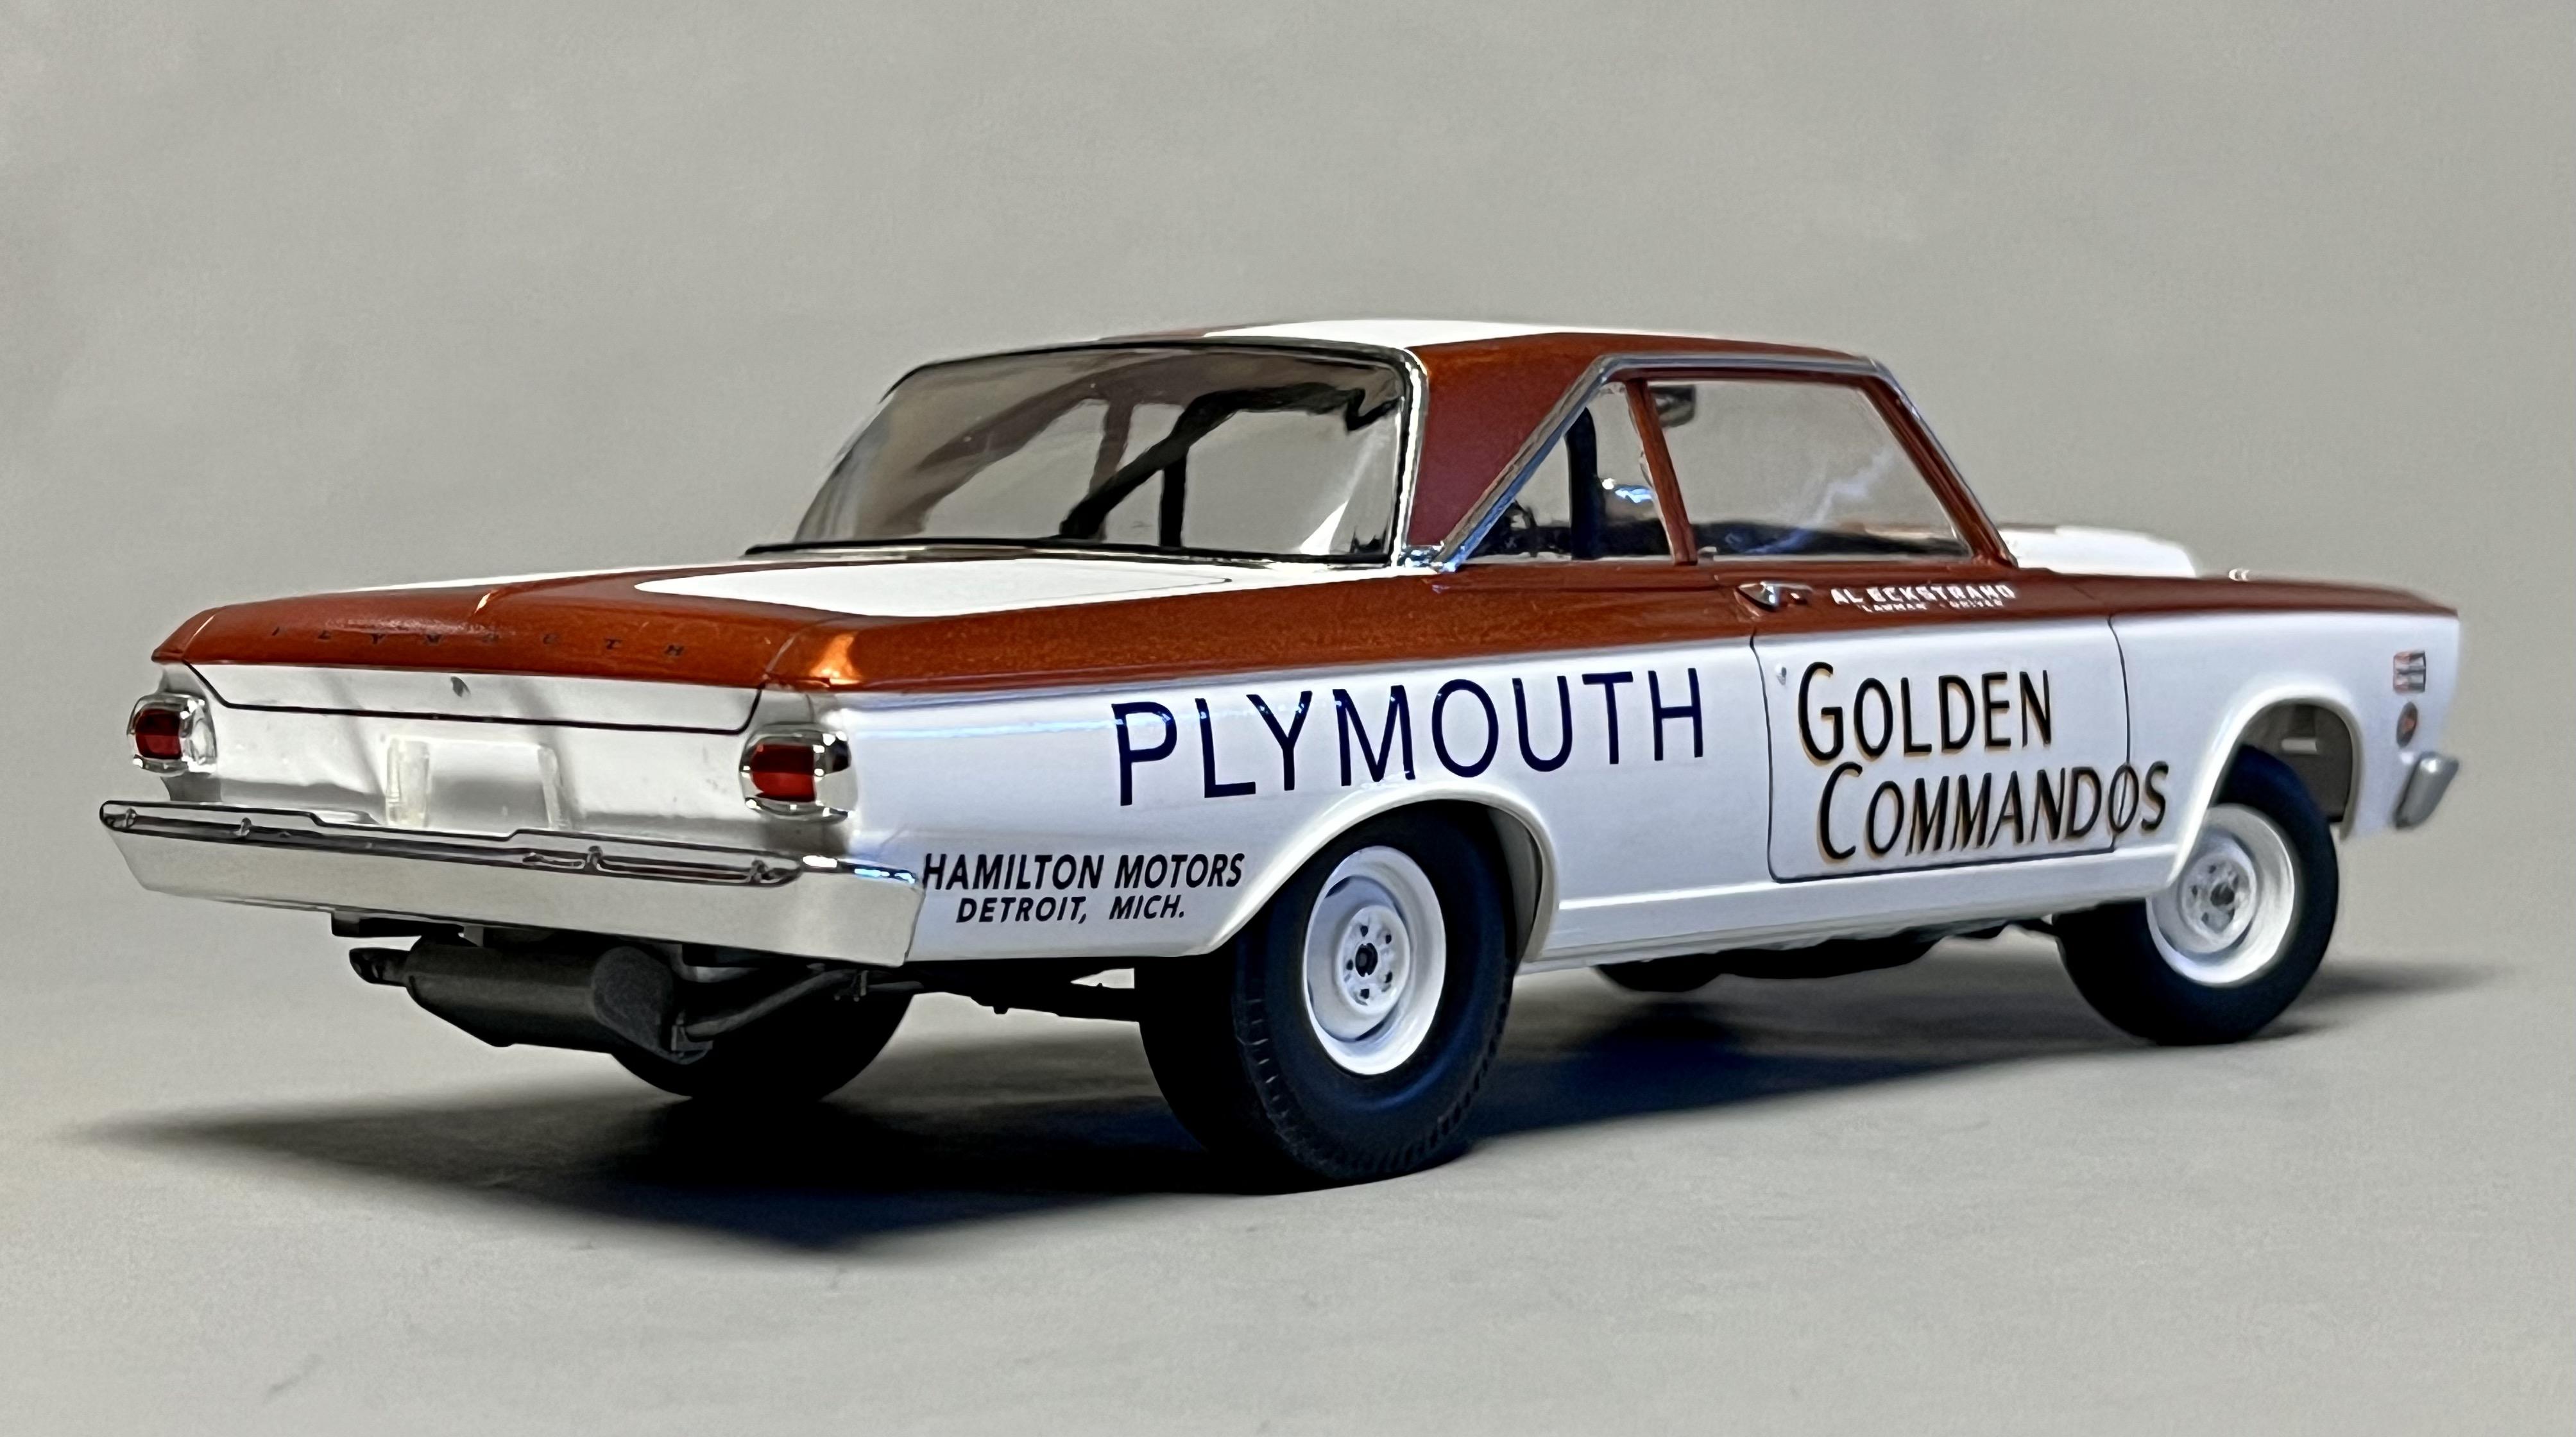


Al Eckstrand's '65 Plymouth Golden Commando
in Drag Racing
Posted · Edited by papajohn97
Spelling
Thanks Gunnar for the WB comments. My 2% note for the original WB of this race car came from a draglist.com here. I’m sure Moebius just used the stock Satellite body in this kit (I wouldn’t bother shifting the rear wheels openings for 2% (2.3” or .09” in 1/25)).
I love BS-ing about these old race cars. If I ever won one of those big lottos, I would gladly overpay for a well-done ‘65 A-990 reproduction to go for joy ride ice cream runs with the grandkids. Faster Grampa!!!!