

customline
-
Posts
3,791 -
Joined
-
Last visited
Content Type
Profiles
Forums
Events
Gallery
Everything posted by customline
-
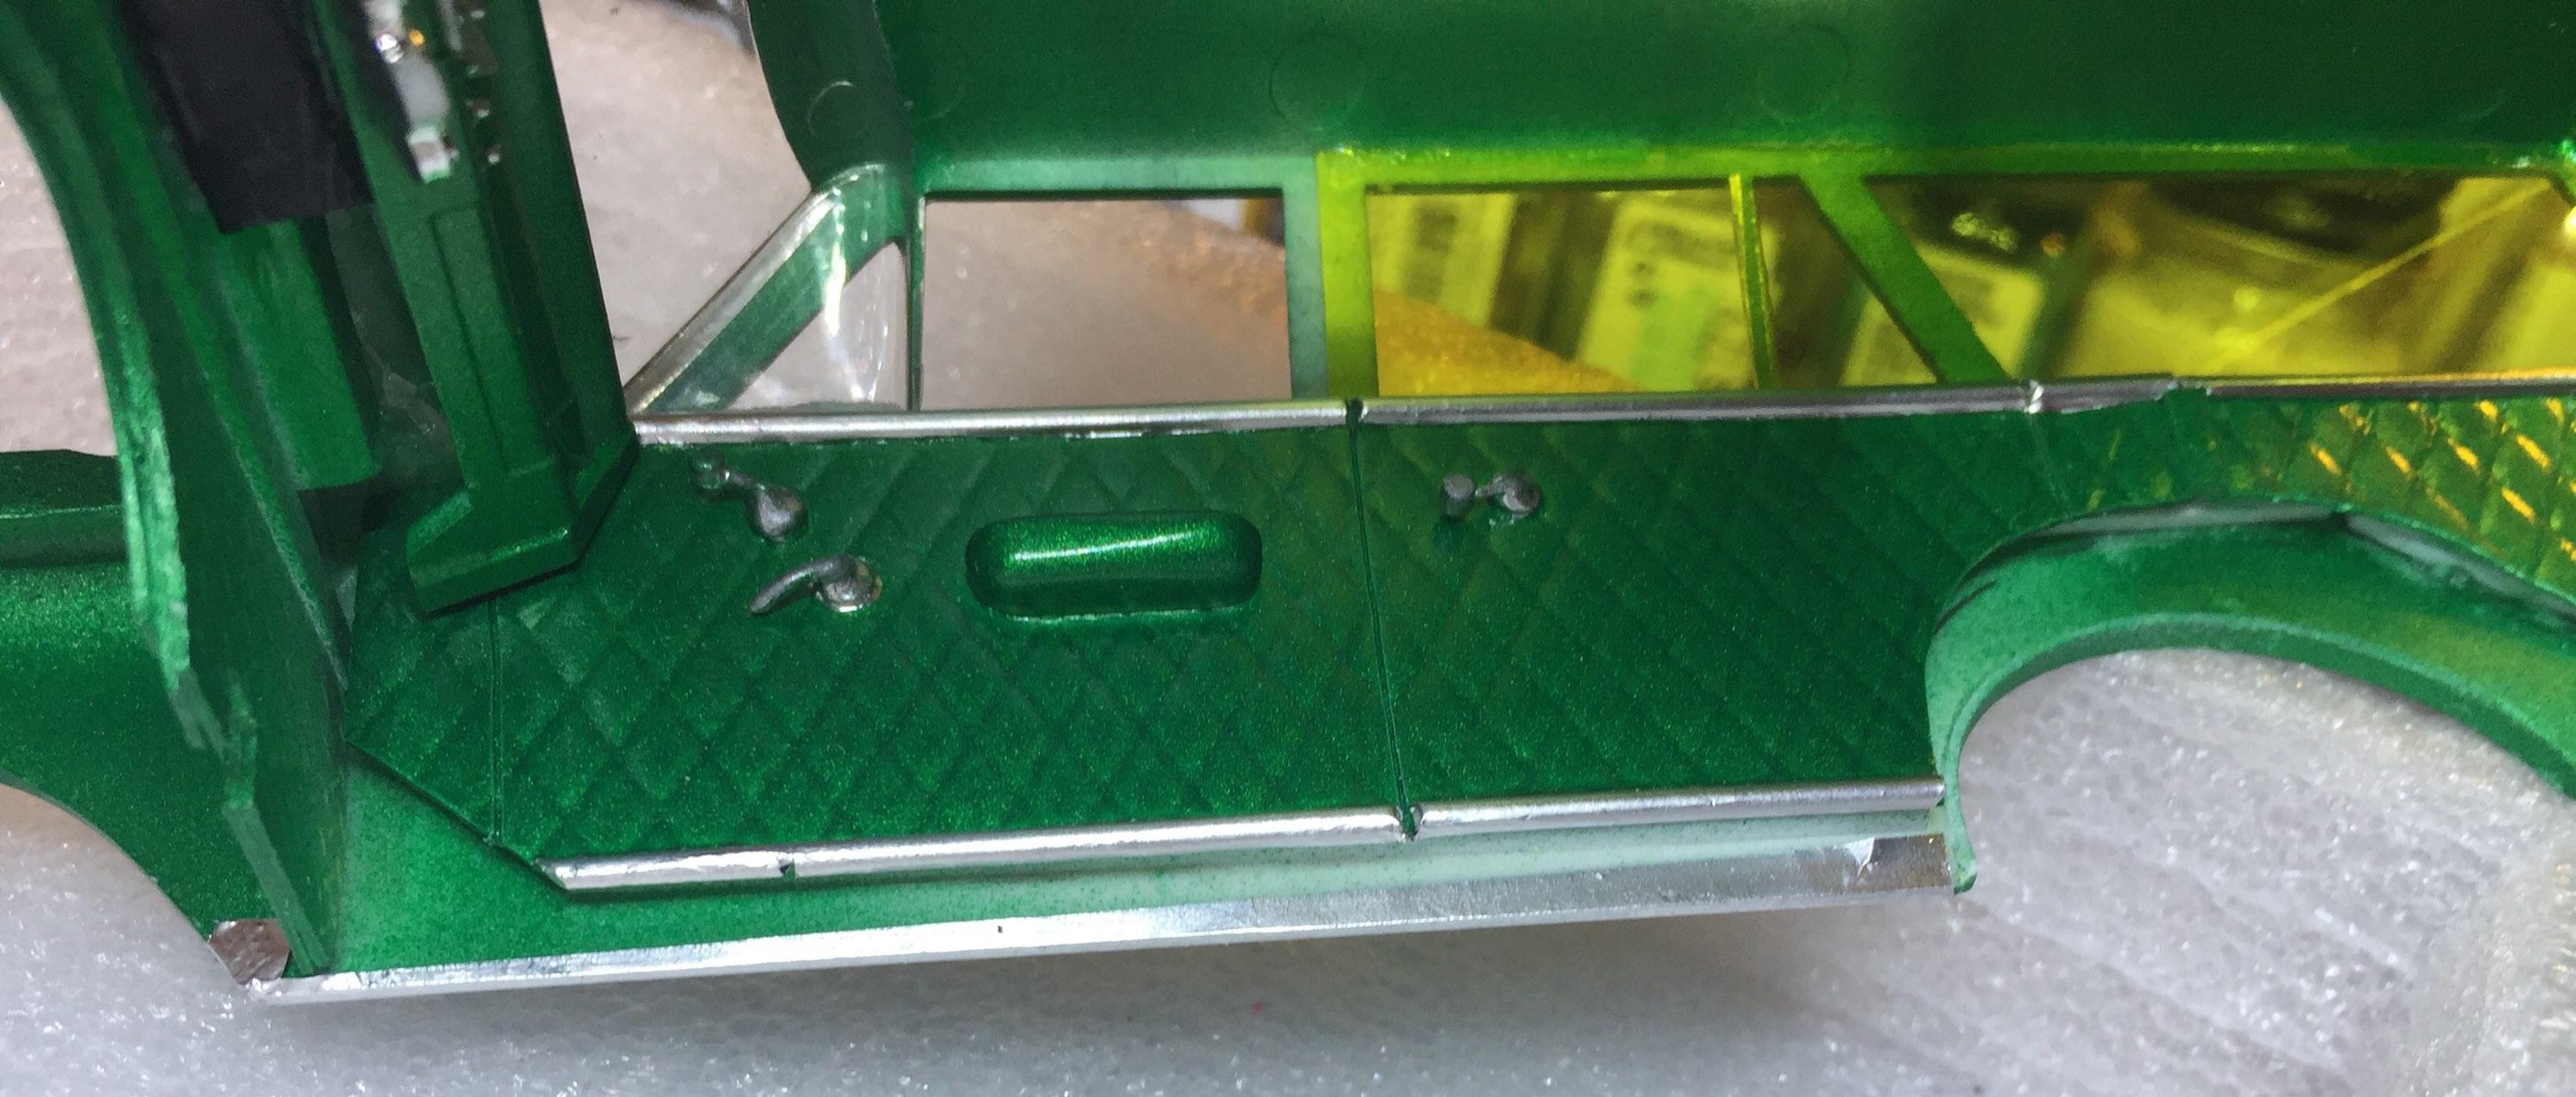
Thanks, Robert. The detail on the chassis is top shelf like a Moebius or the new Revell stuff. It's quite good. The way the glass is located is nice. The firewall is amazing. I'm quite happy with it. Gotta find a color combo but a lot of them are aqua or coral and white. I'm thinking black for the secondary and maybe red or some blue or green for the primary. I'll find a showroom catalog on line.
-
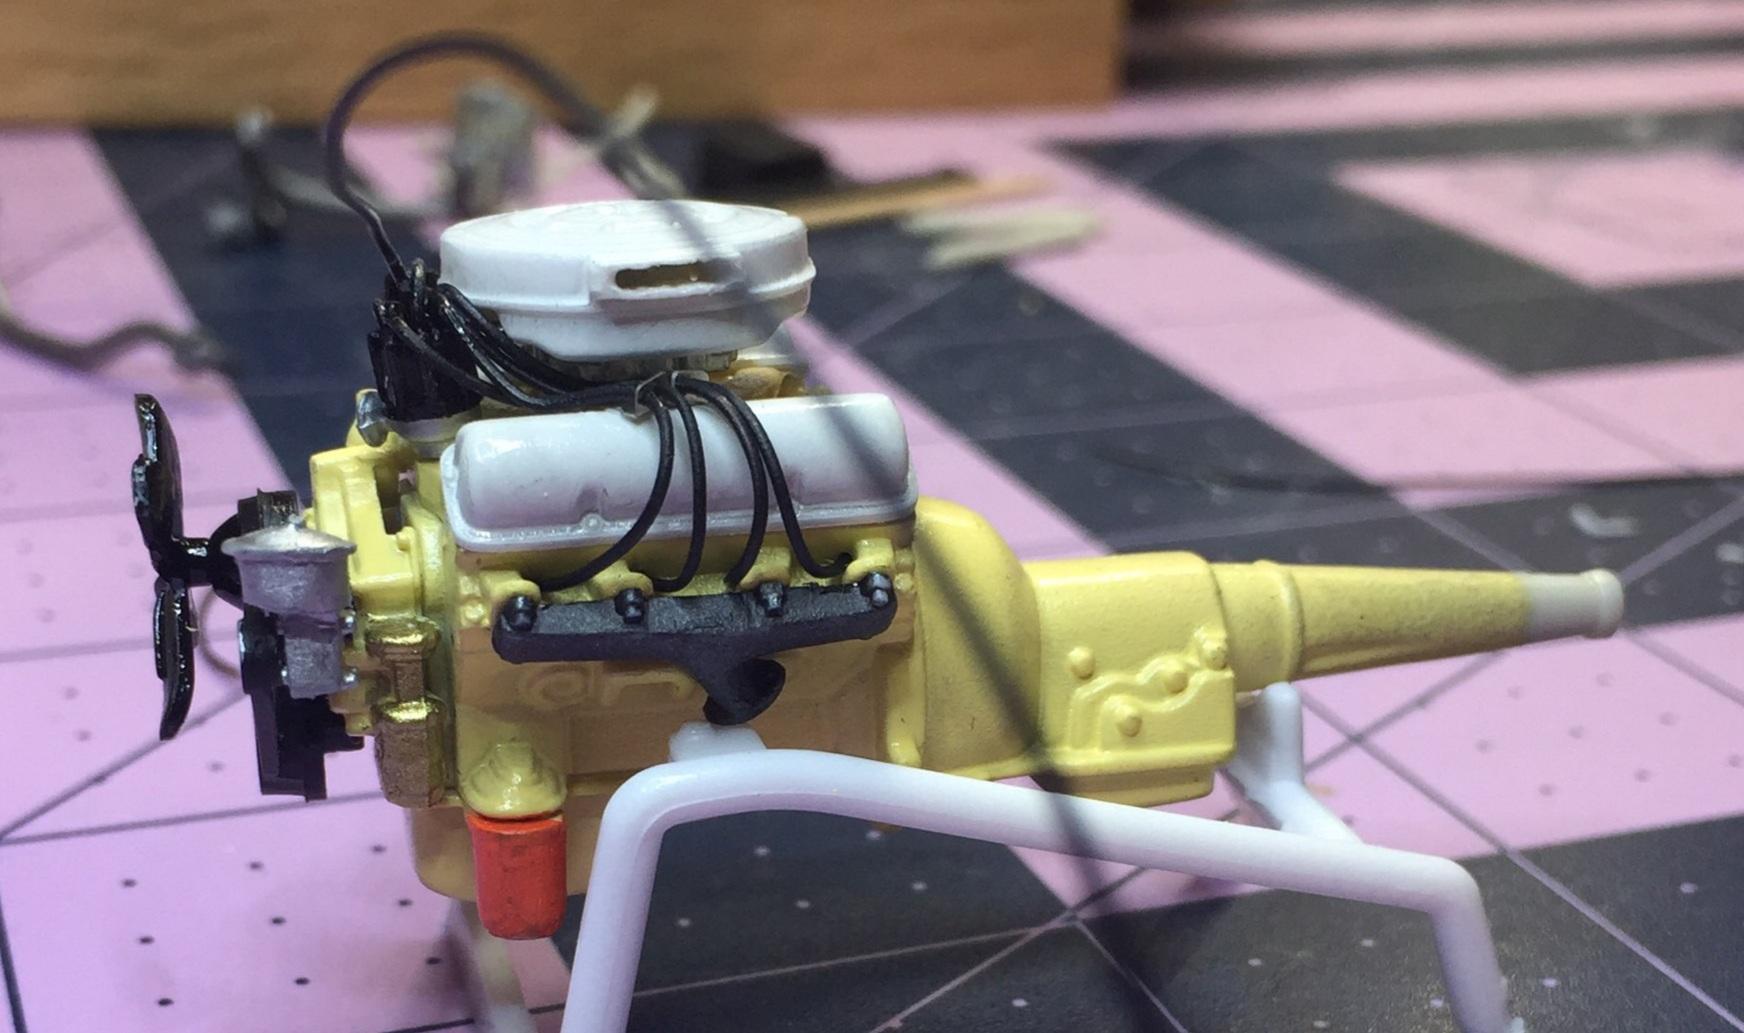
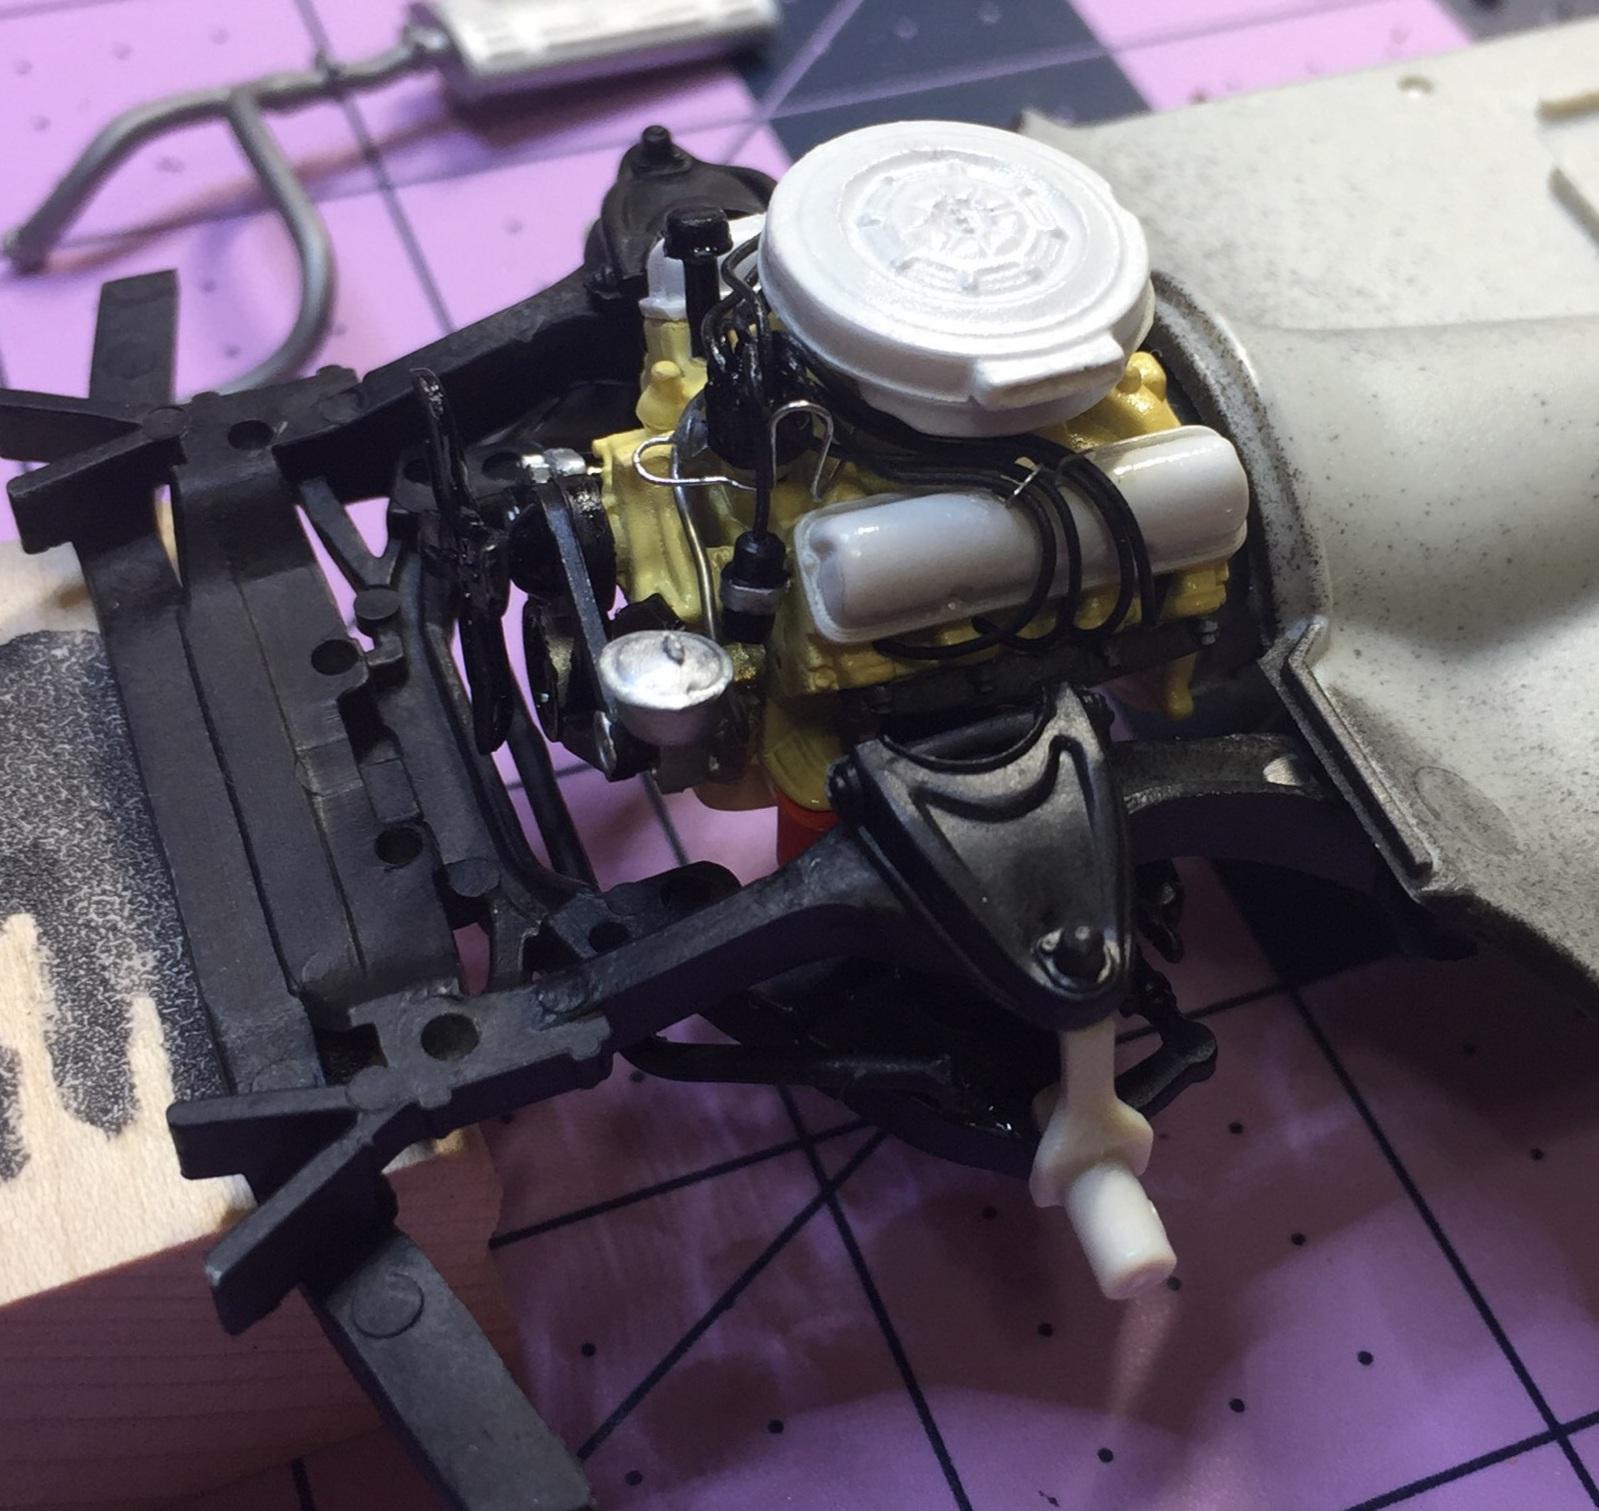
I was only a first-grader when these were new, David. The only derogatory words I recall was "horse collar". I would sure like to hear the crude stuff ? I can't imagine a front clip swap on a '58 ford. It must have been because the top of the front fenders were rusted out and all they could find in the salvage yard was Edsel clips. The engine was painted by the current owner, David. Thank you.
-
Thanks. I'm glad you think so, Mike. I don't ?
-
Welcome aboard, Will. I won't be painting this Edsel pink and white but it may be some other appropriate combination of whatever I can find in my rattlecan stock.....Krylon or Ace....I'm kidding, stop pulling your hair!
-
Thanks, Dominick. Krylon "gloss bright idea". It wasn't as bright as the cap color but It needed to be. A bit disappointing. Most reference photos show a bit brighter yellow.
-
Only if I can make it so, Noel. Thanks for your interest.
-

'57 El Nomado
customline replied to customline's topic in WIP: Model Trucks: Pickups, Vans, SUVs, Light Commercial
A couple of months ago, me and the old woman decided we didn't really need a guest bedroom so we sold the bed that had been slept in maybe twice in ten years and set up the room for our hobbies. Before that we were sharing our dining room table. I now have an 6' long, 2.5' wide work surface and it's still not enough. Why? Because now I can start a lot more kits! I appreciate you getting me back on the primary project, Greg. It's just a hazard of this hobby to wander off when we get a new idea. -
'57 El Nomado
customline replied to customline's topic in WIP: Model Trucks: Pickups, Vans, SUVs, Light Commercial
I know what "But that's just me" means, Dave, I use it all the time ?. I do have something I can use to simulate tufted upholstery. ? I spent all night on that stupid console (my patience was in high gear) and I still need to add cup holders. Shoulda done that before I glued it down ?. Not much room to work in that bucket but I can just veneer over the existing. We shall see. It will look like the above. No buttons- I may be crazy but I'm not completely insane ?....and it won't be shiny cheap metalflake vinyl like the above gasser. Rich Corinthian leather. Maybe. I wonder if there's a Cordoba kit ?.
-
I'm a sucker for a chopped A coupe, Bil. Are we headed to the lake with this one or just tooling around town? ?
-
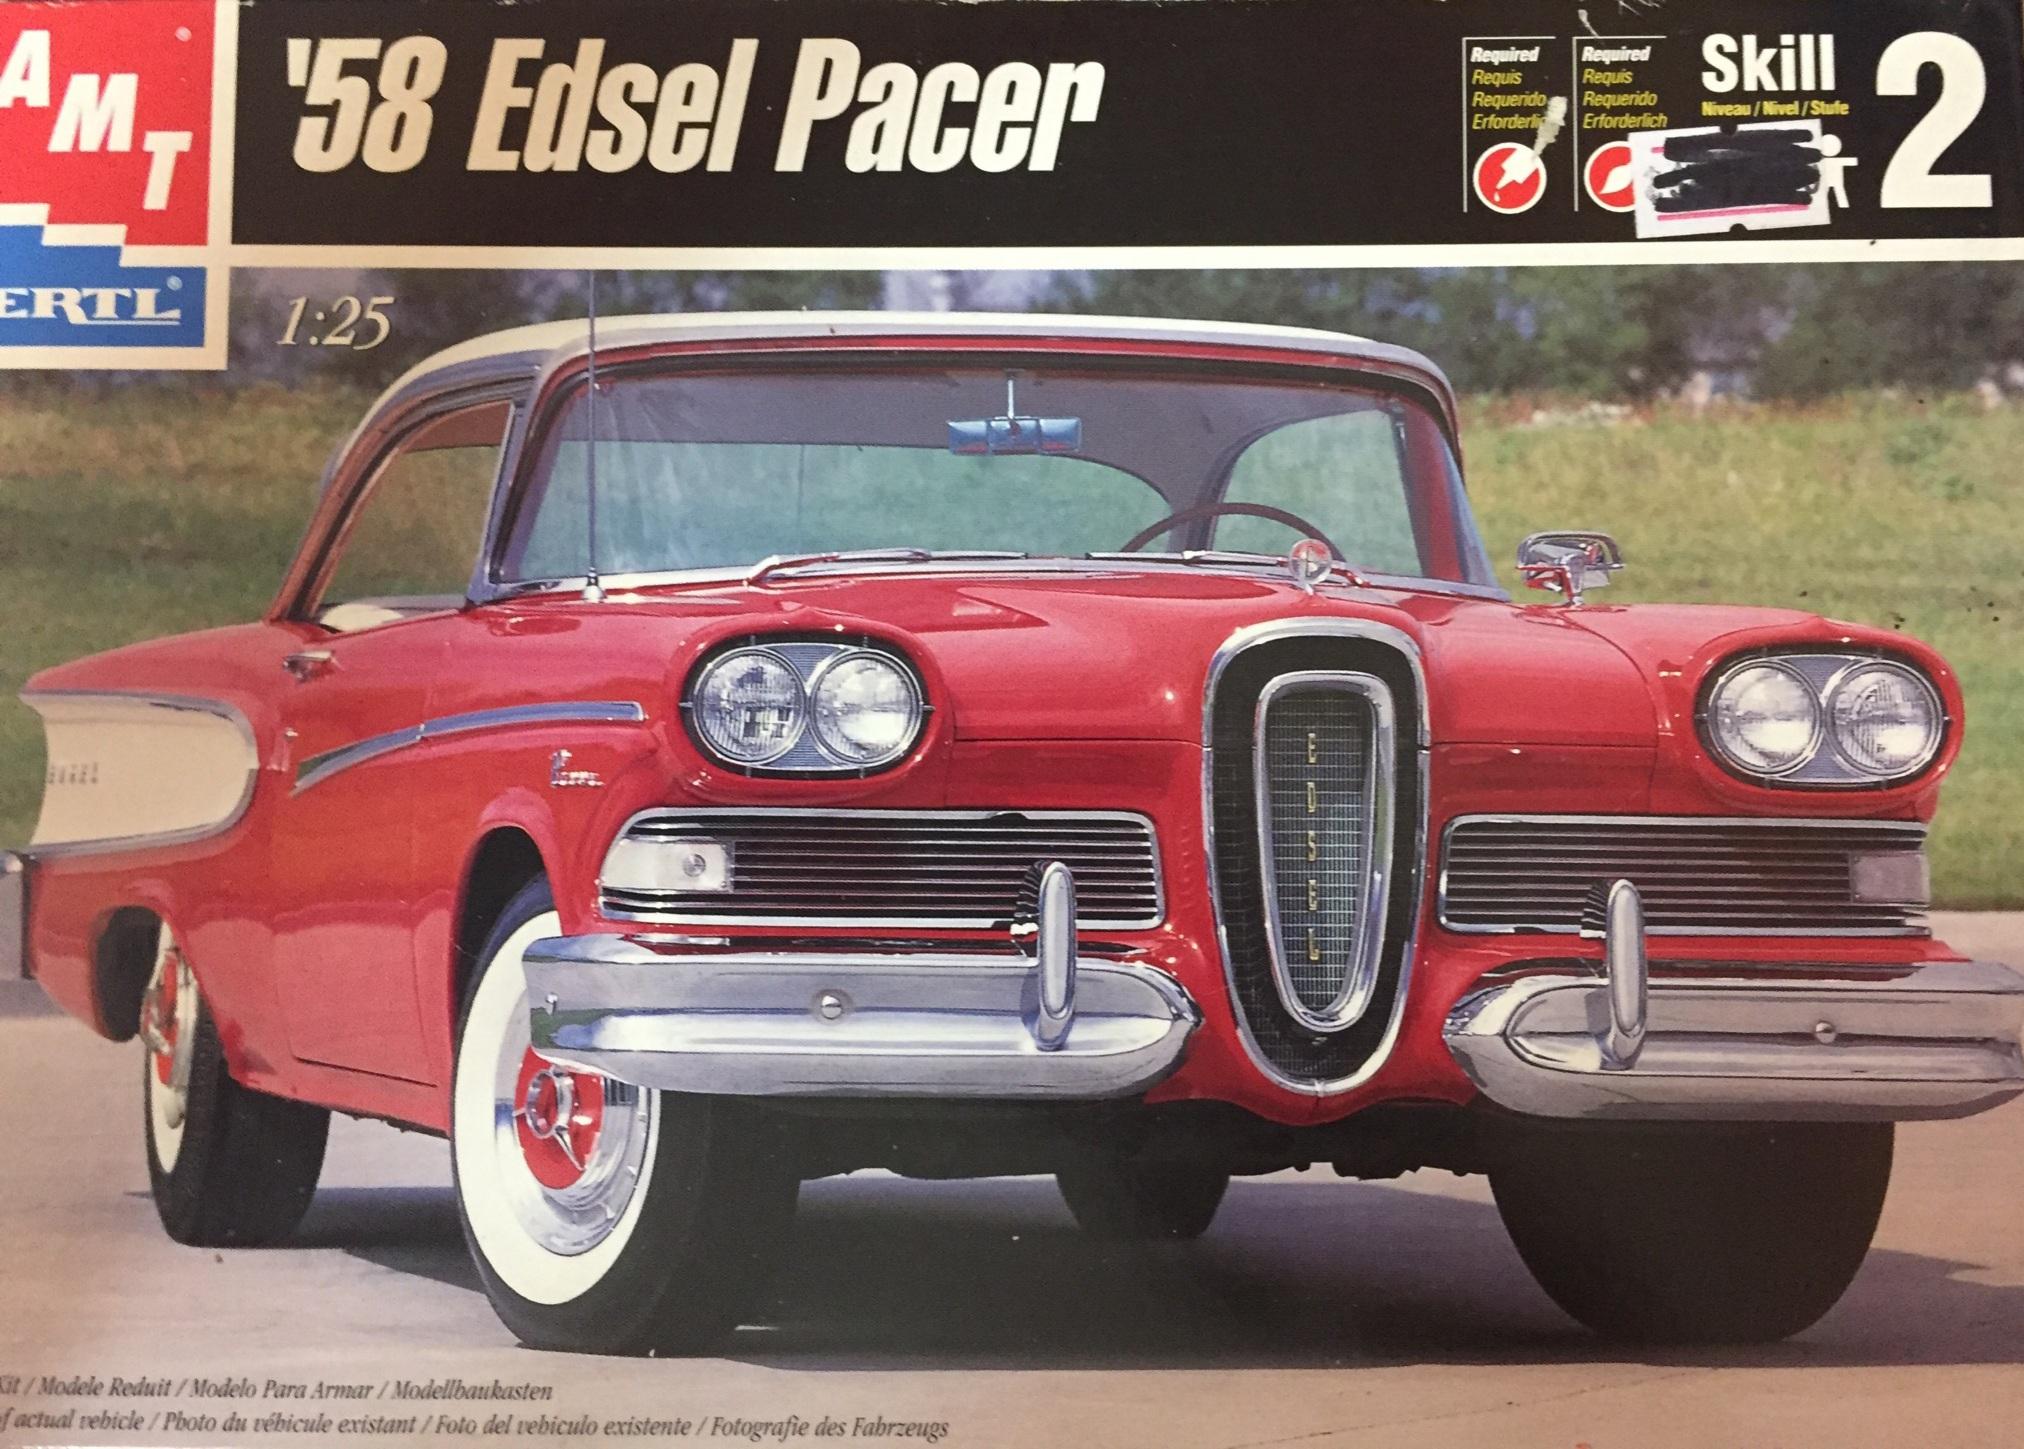
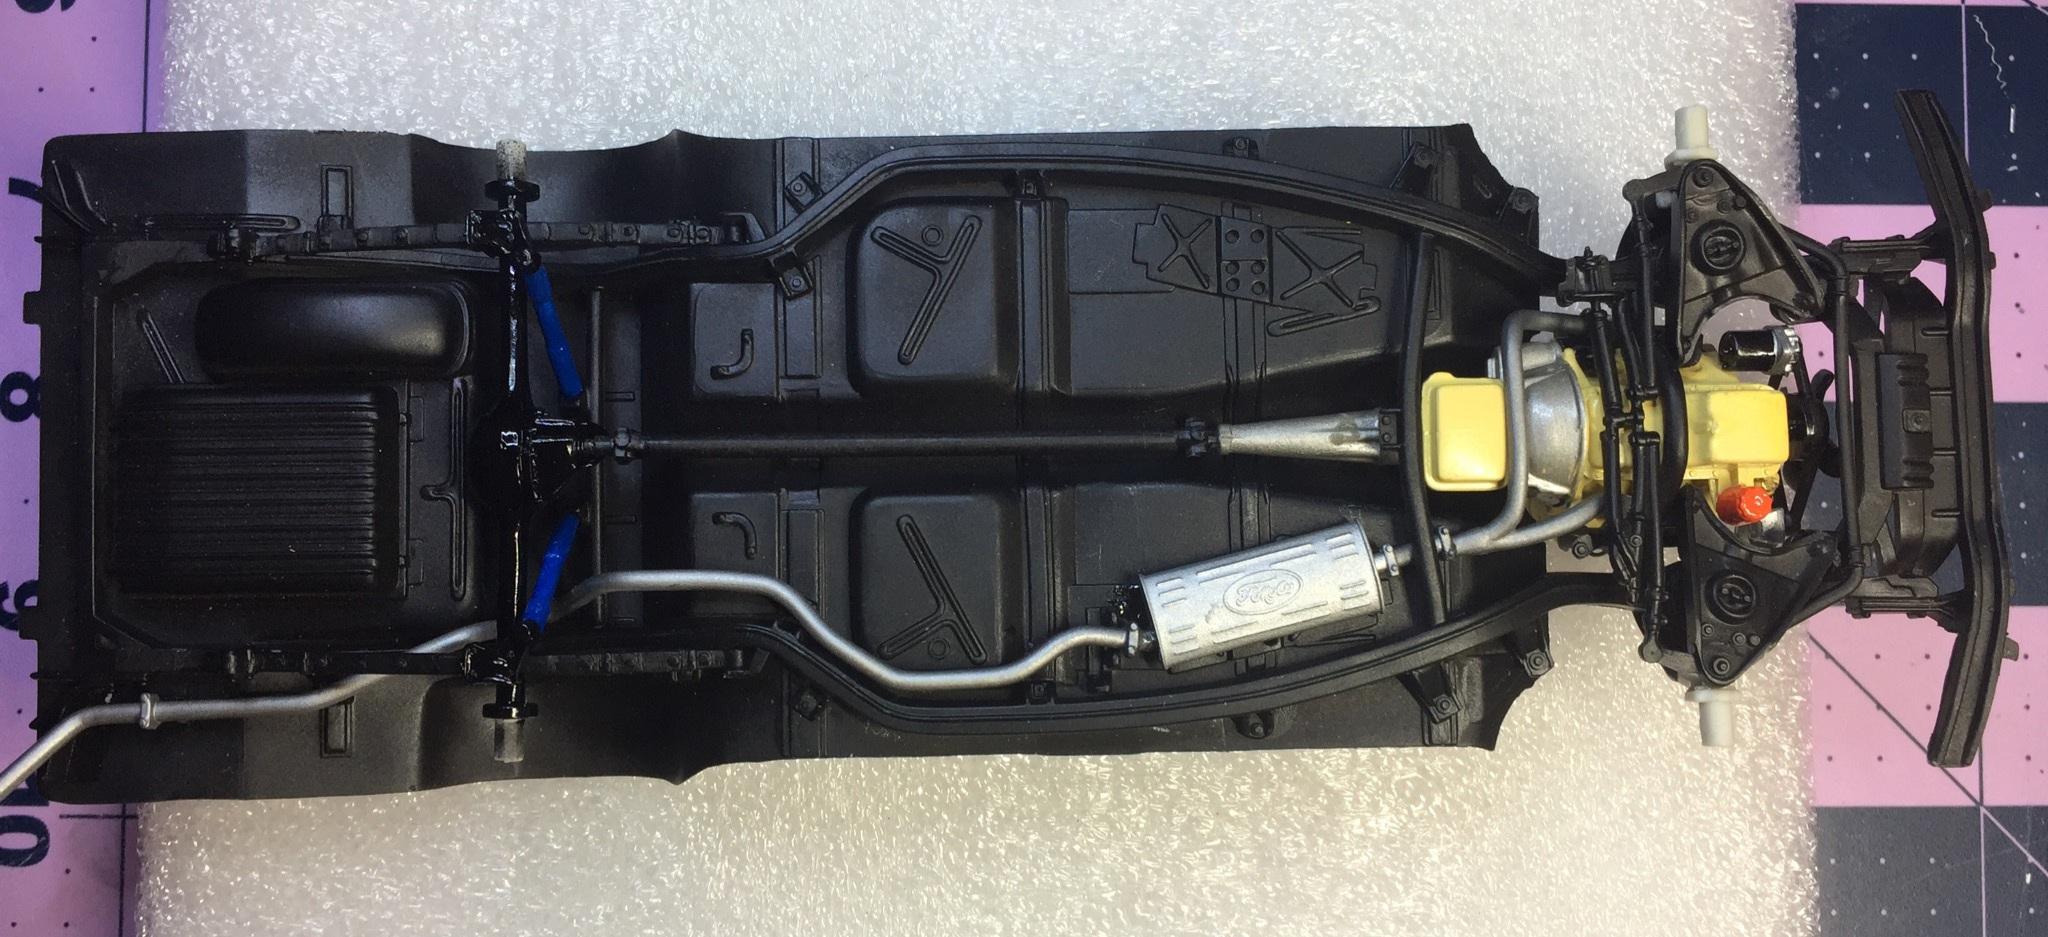
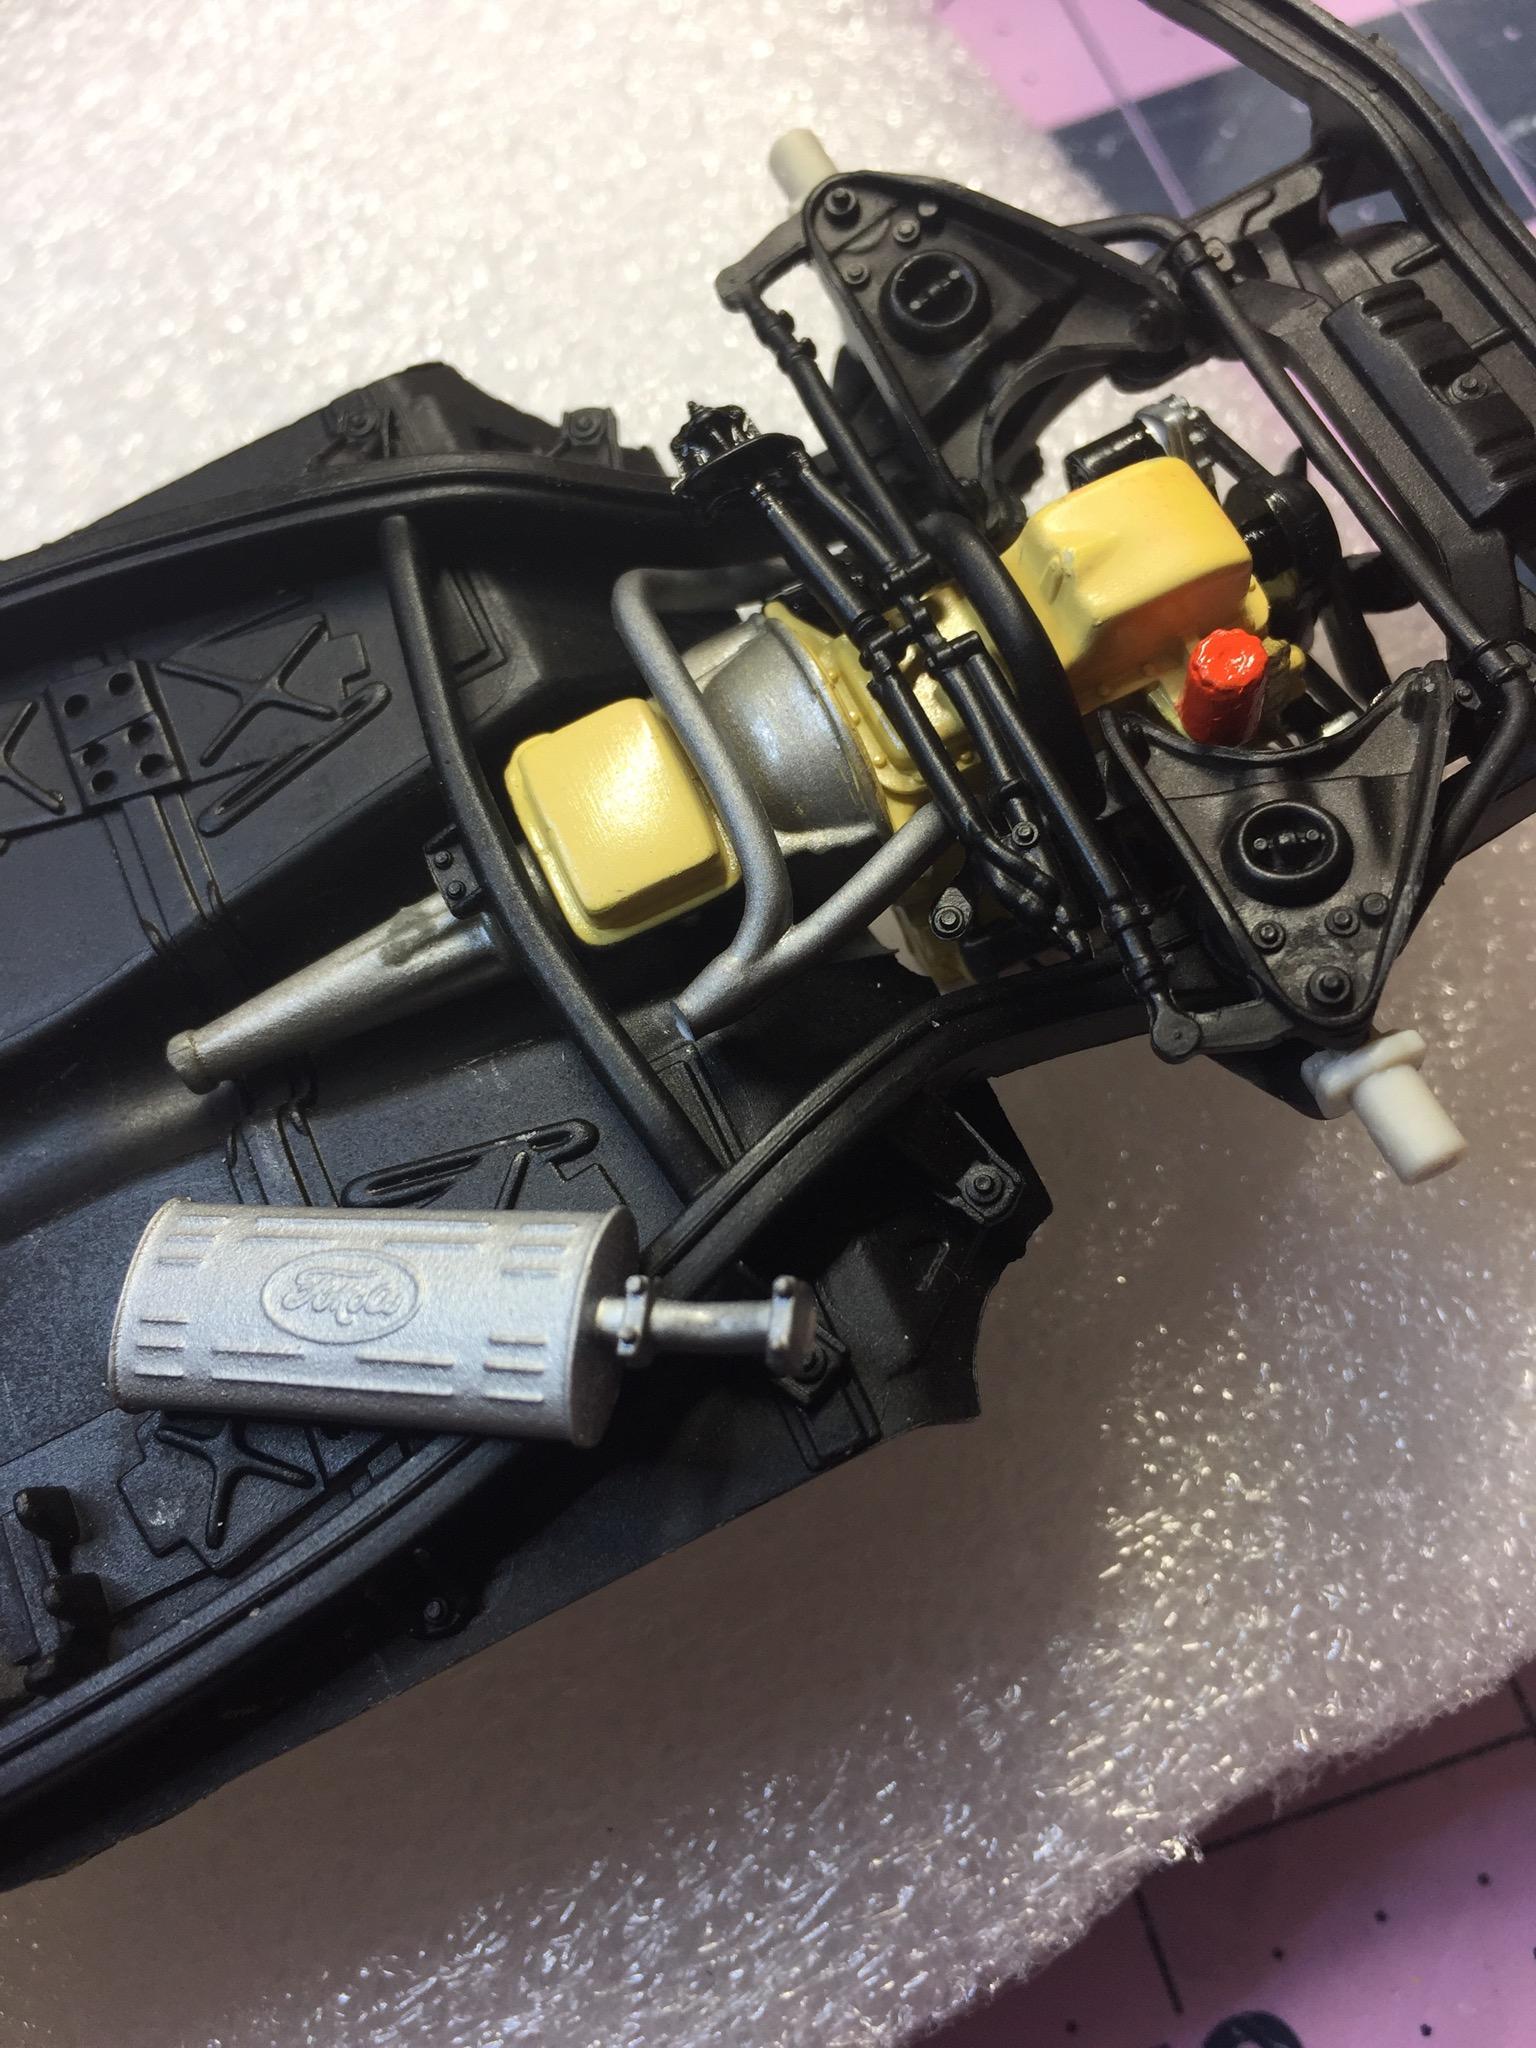
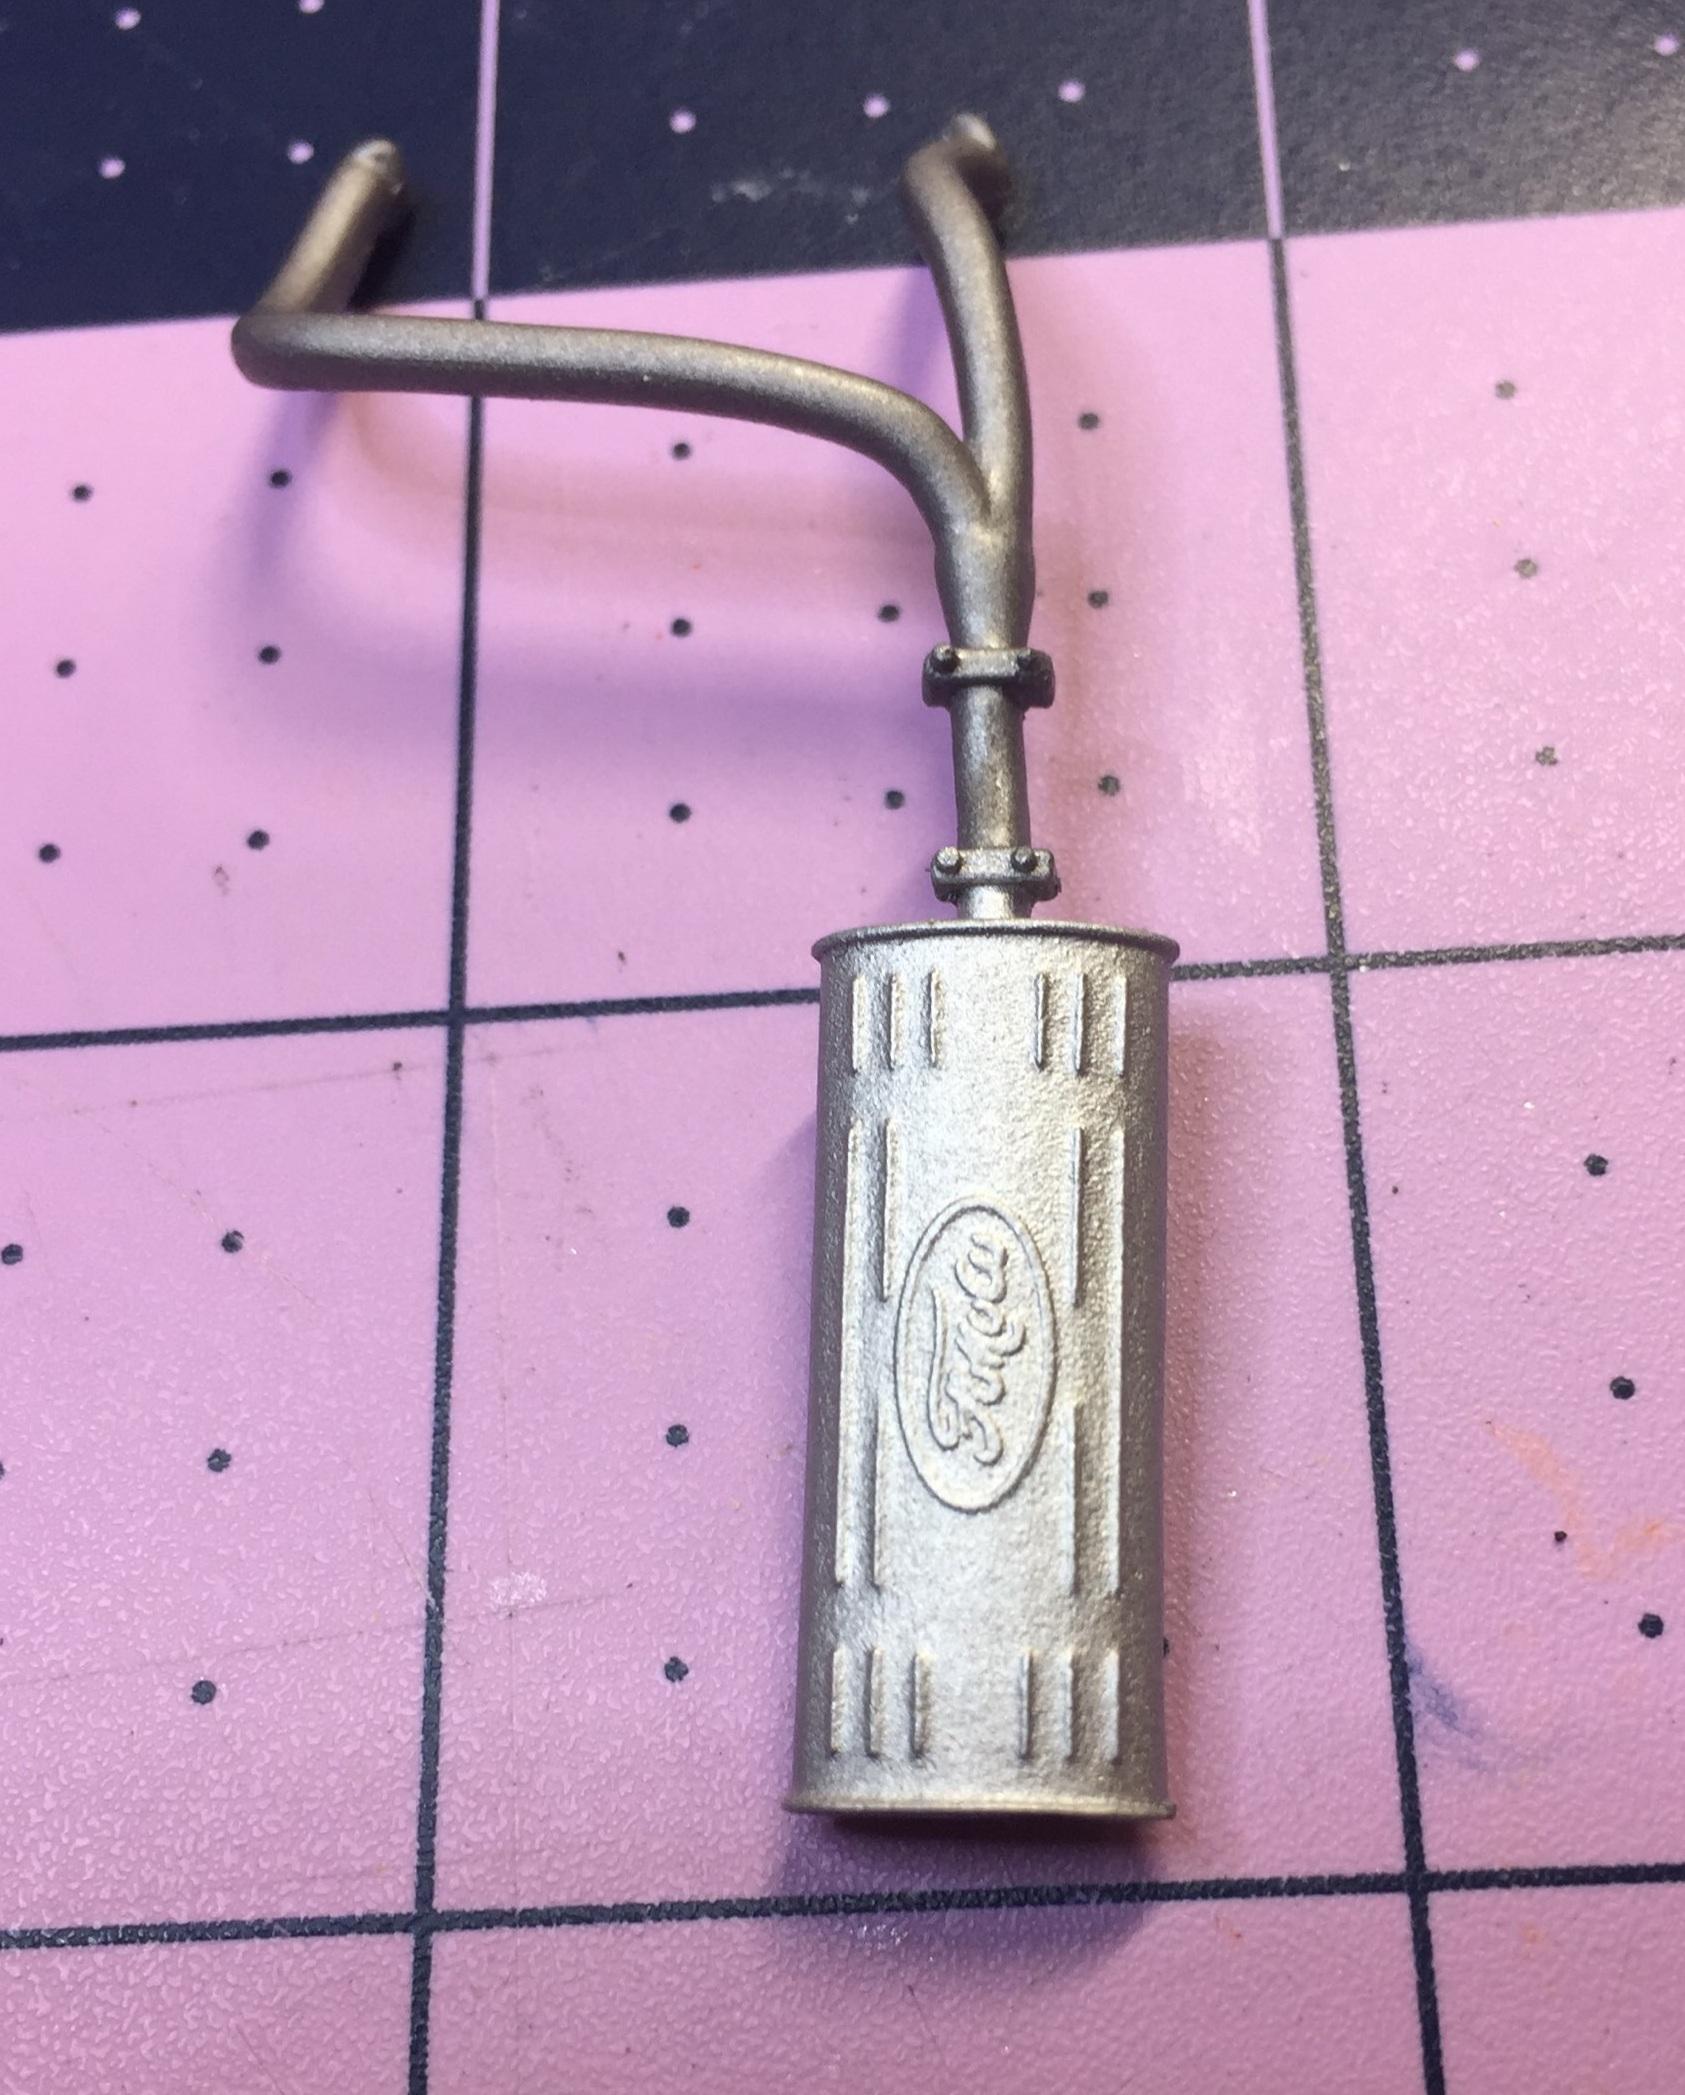
The Edsel never made sense to me. Ford already had the Mercury. Why did they need another one? The '58 Mercury was a gaudy tank so they said "it ain't ugly enough, let's see if we can make it reeeeally ugly". I know some of you may not agree but like my dad used to say "there's an ass for every seat" ? (close enough). I got this kit for a pretty good price because it was started. The chassis and frame were glued together and airbrushed satin black. Many of the parts that would be satin black were also painted. After going over the instructions and looking at the really nice detail common to many ERTL kits of this time period I concluded it compares well to the Starliner kit for quality and crisp detail. It appears to be well designed for ease of assembly. No flash, very little parting lines, white wall inserts, etc. I had a good head start thanks to whomever this kit had belonged to so I decided to just go ahead with it in spite of my already heavy workload ?. Nice engine, no accessory brackets though but the pan is separate and everything fits well... no bolt detail on the transmission pan - kinda odd considering the great detail elsewhere. Big distributor! With vacuum advance! I was able to drill all 9 holes without effing it up (a big deal for me.) How many kits detail the muffler? The normal sequence for assembling the exhaust pipe is 1)engine to frame 2) exhaust cross-over/muffler unit to engine. 3) frame to floor pan. Remember I said the frame and floor were already glued together? I had to cut the muffler off the pipe in order to install the exhaust system and rejoin the severed parts. The rear end and springs had been painted satin black so i assembled that and added the lower shock mounts and painted the axle housing glossy for some contrast. They said to paint the shocks blue so who am I to argue. Thanks for reading all that but if you didnt....you didn't miss much. ?
-
'57 El Nomado
customline replied to customline's topic in WIP: Model Trucks: Pickups, Vans, SUVs, Light Commercial
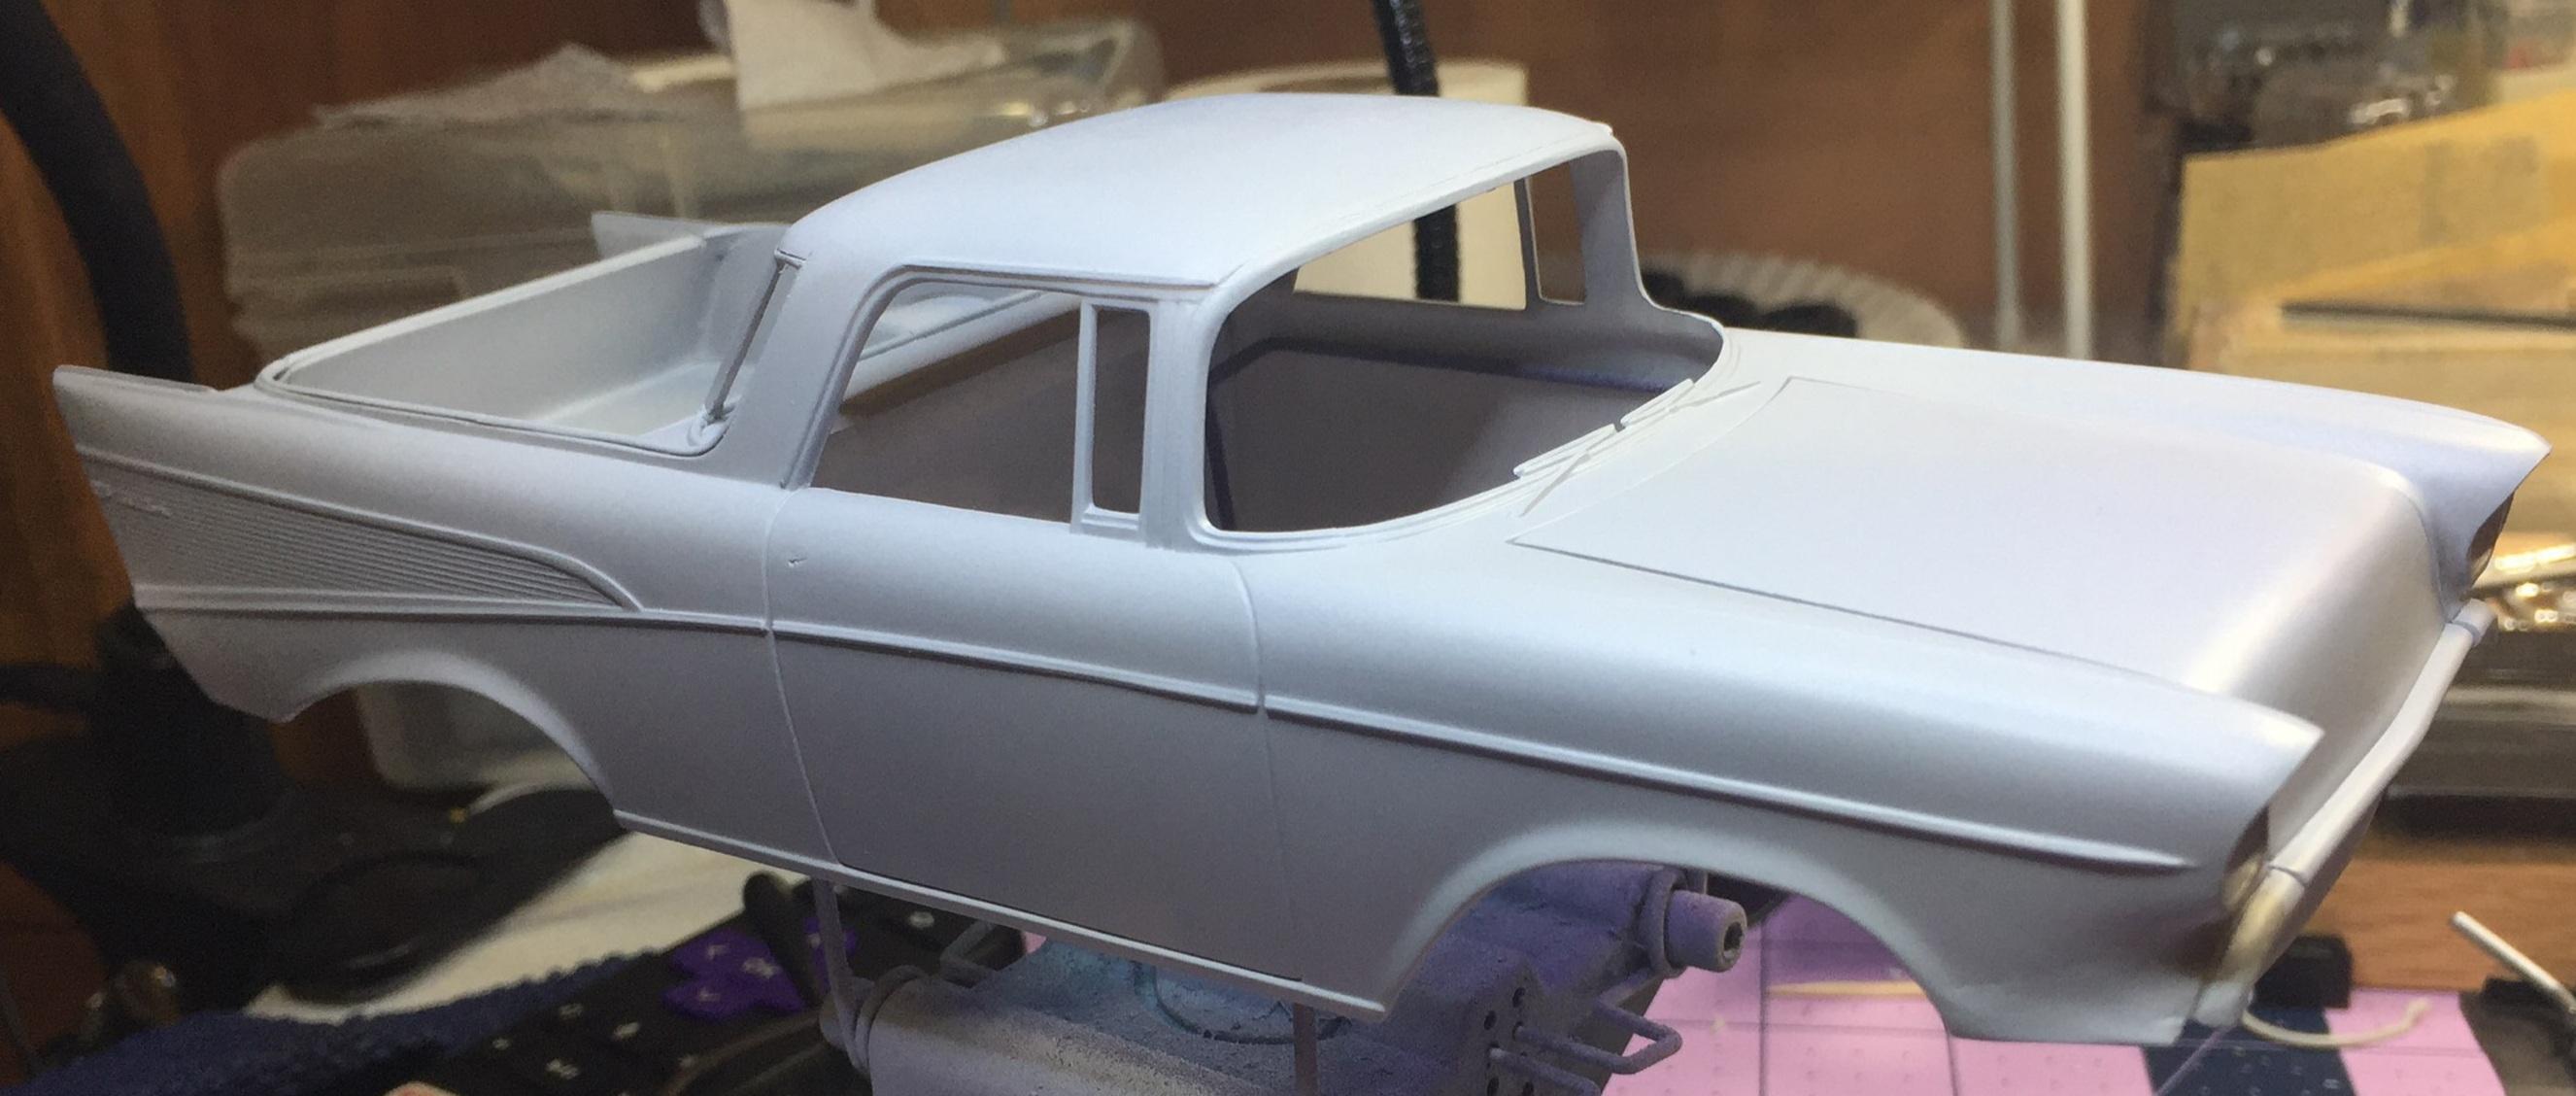
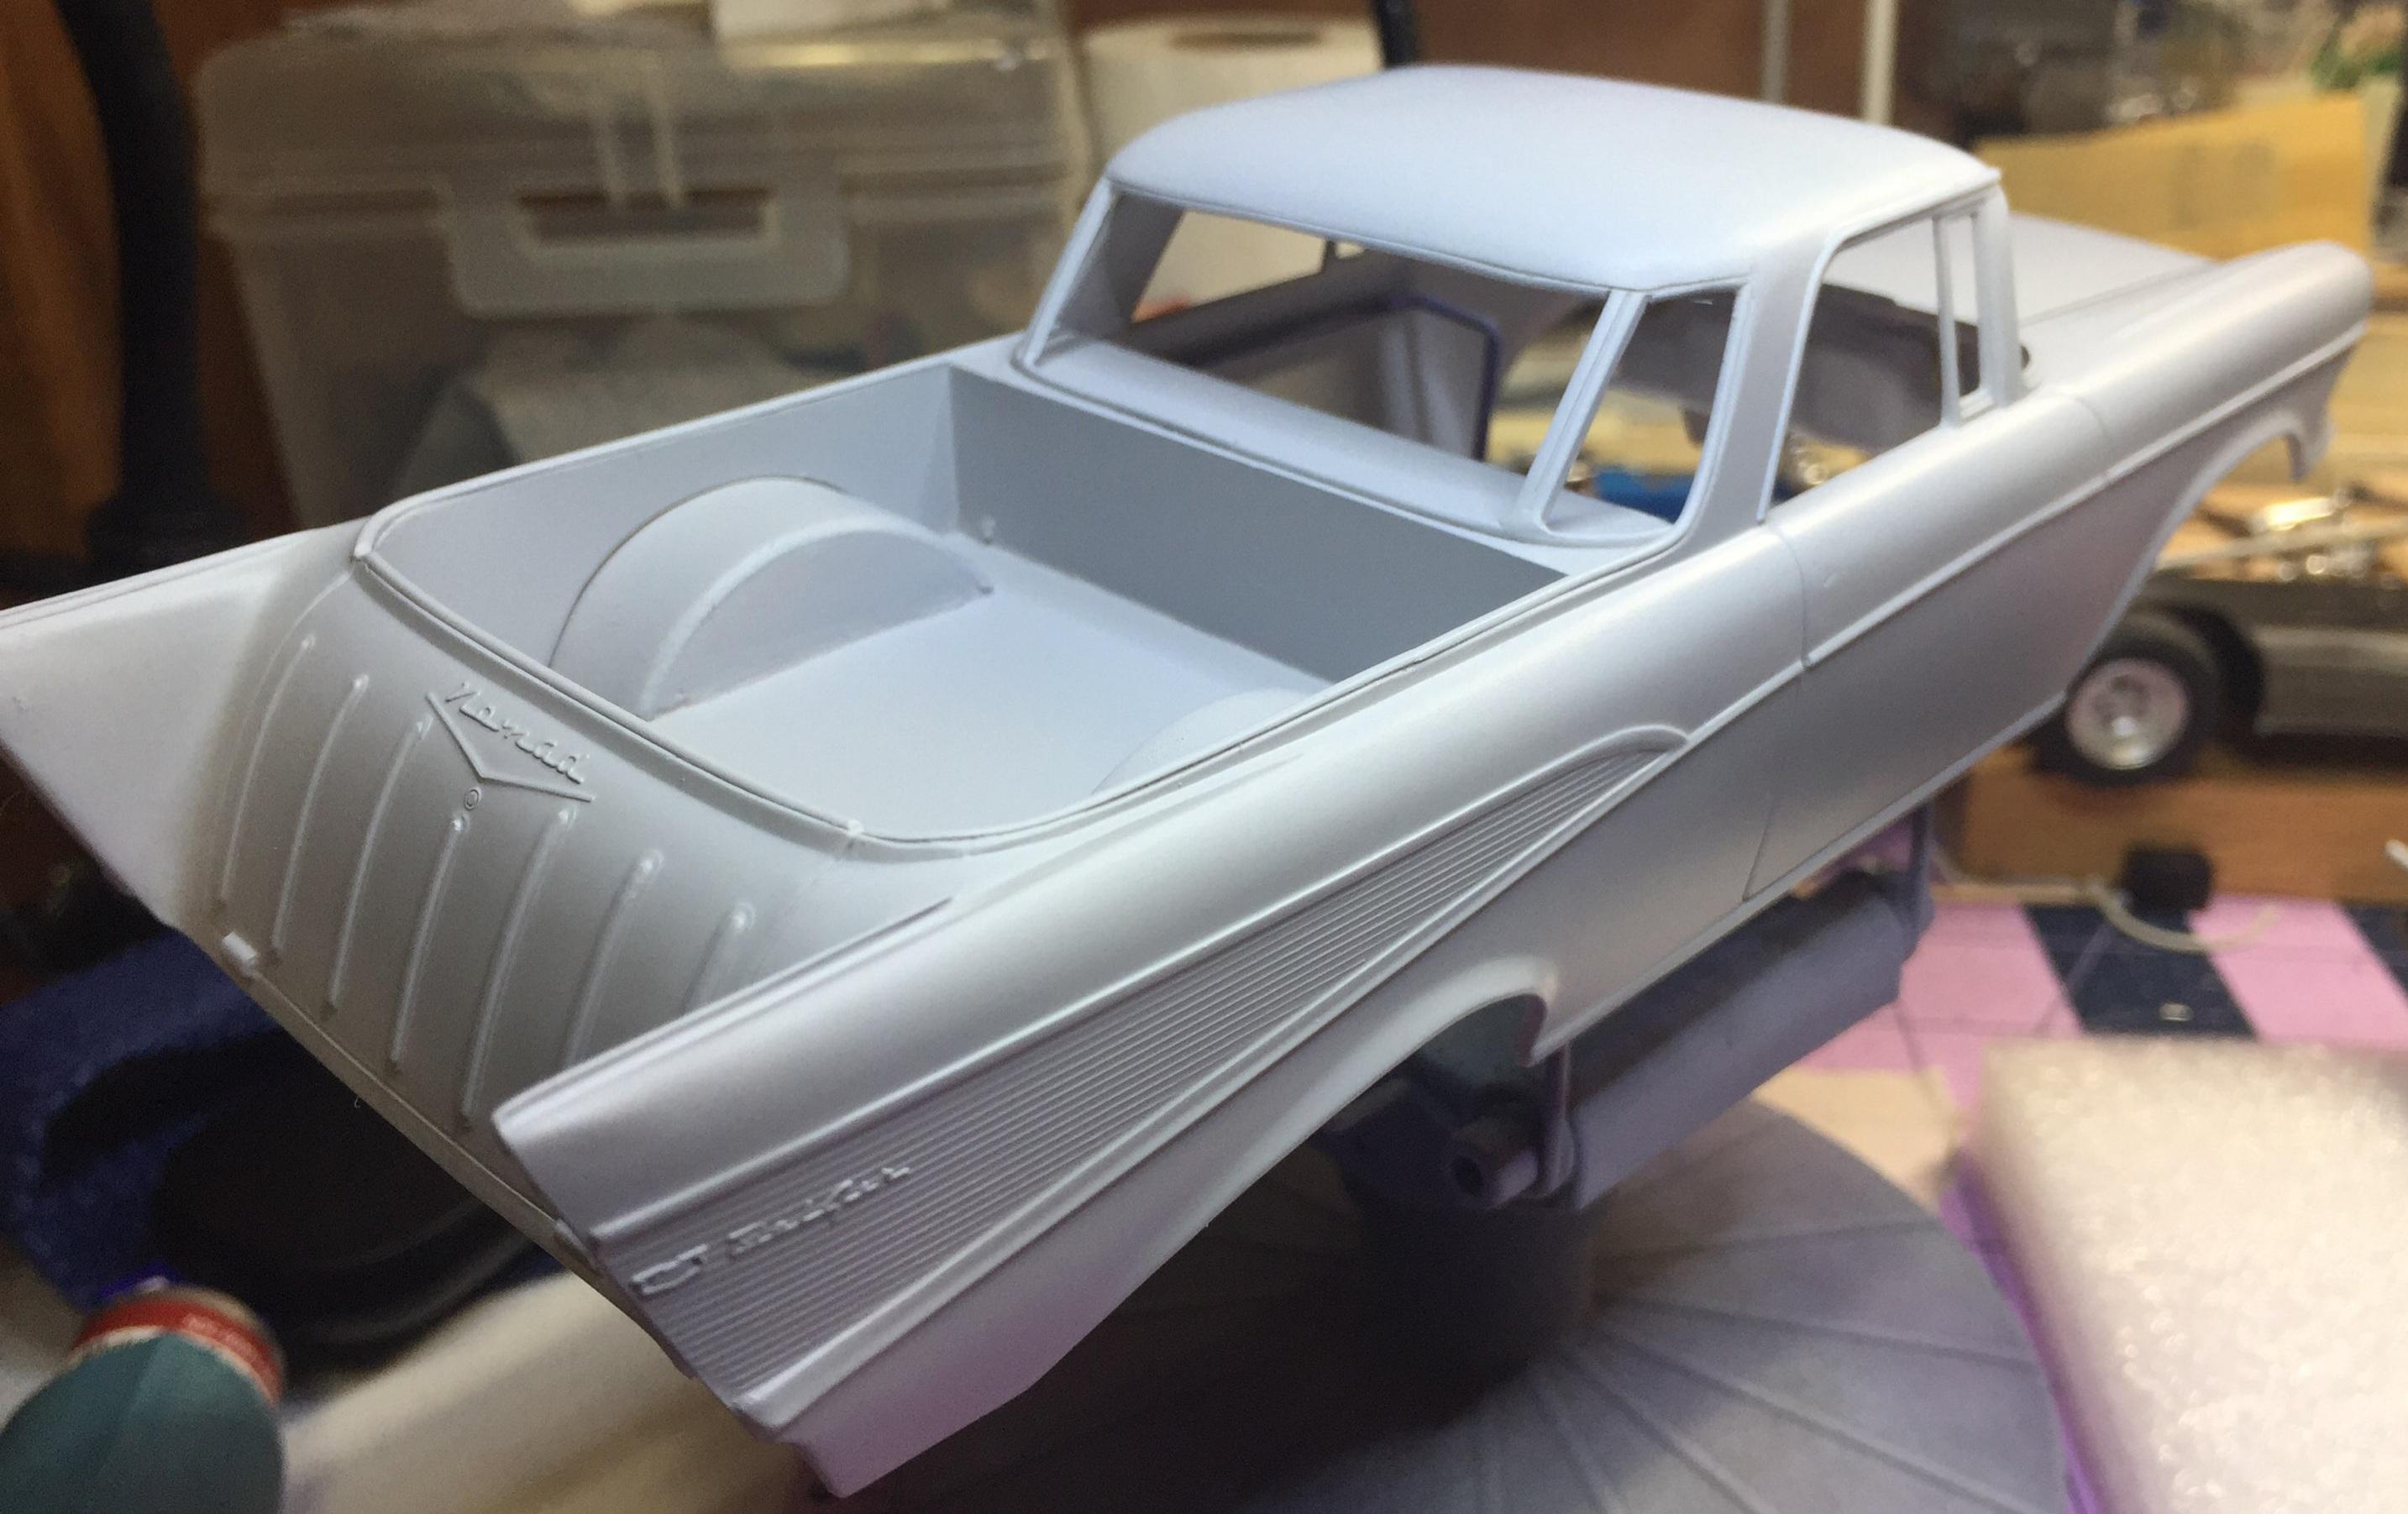
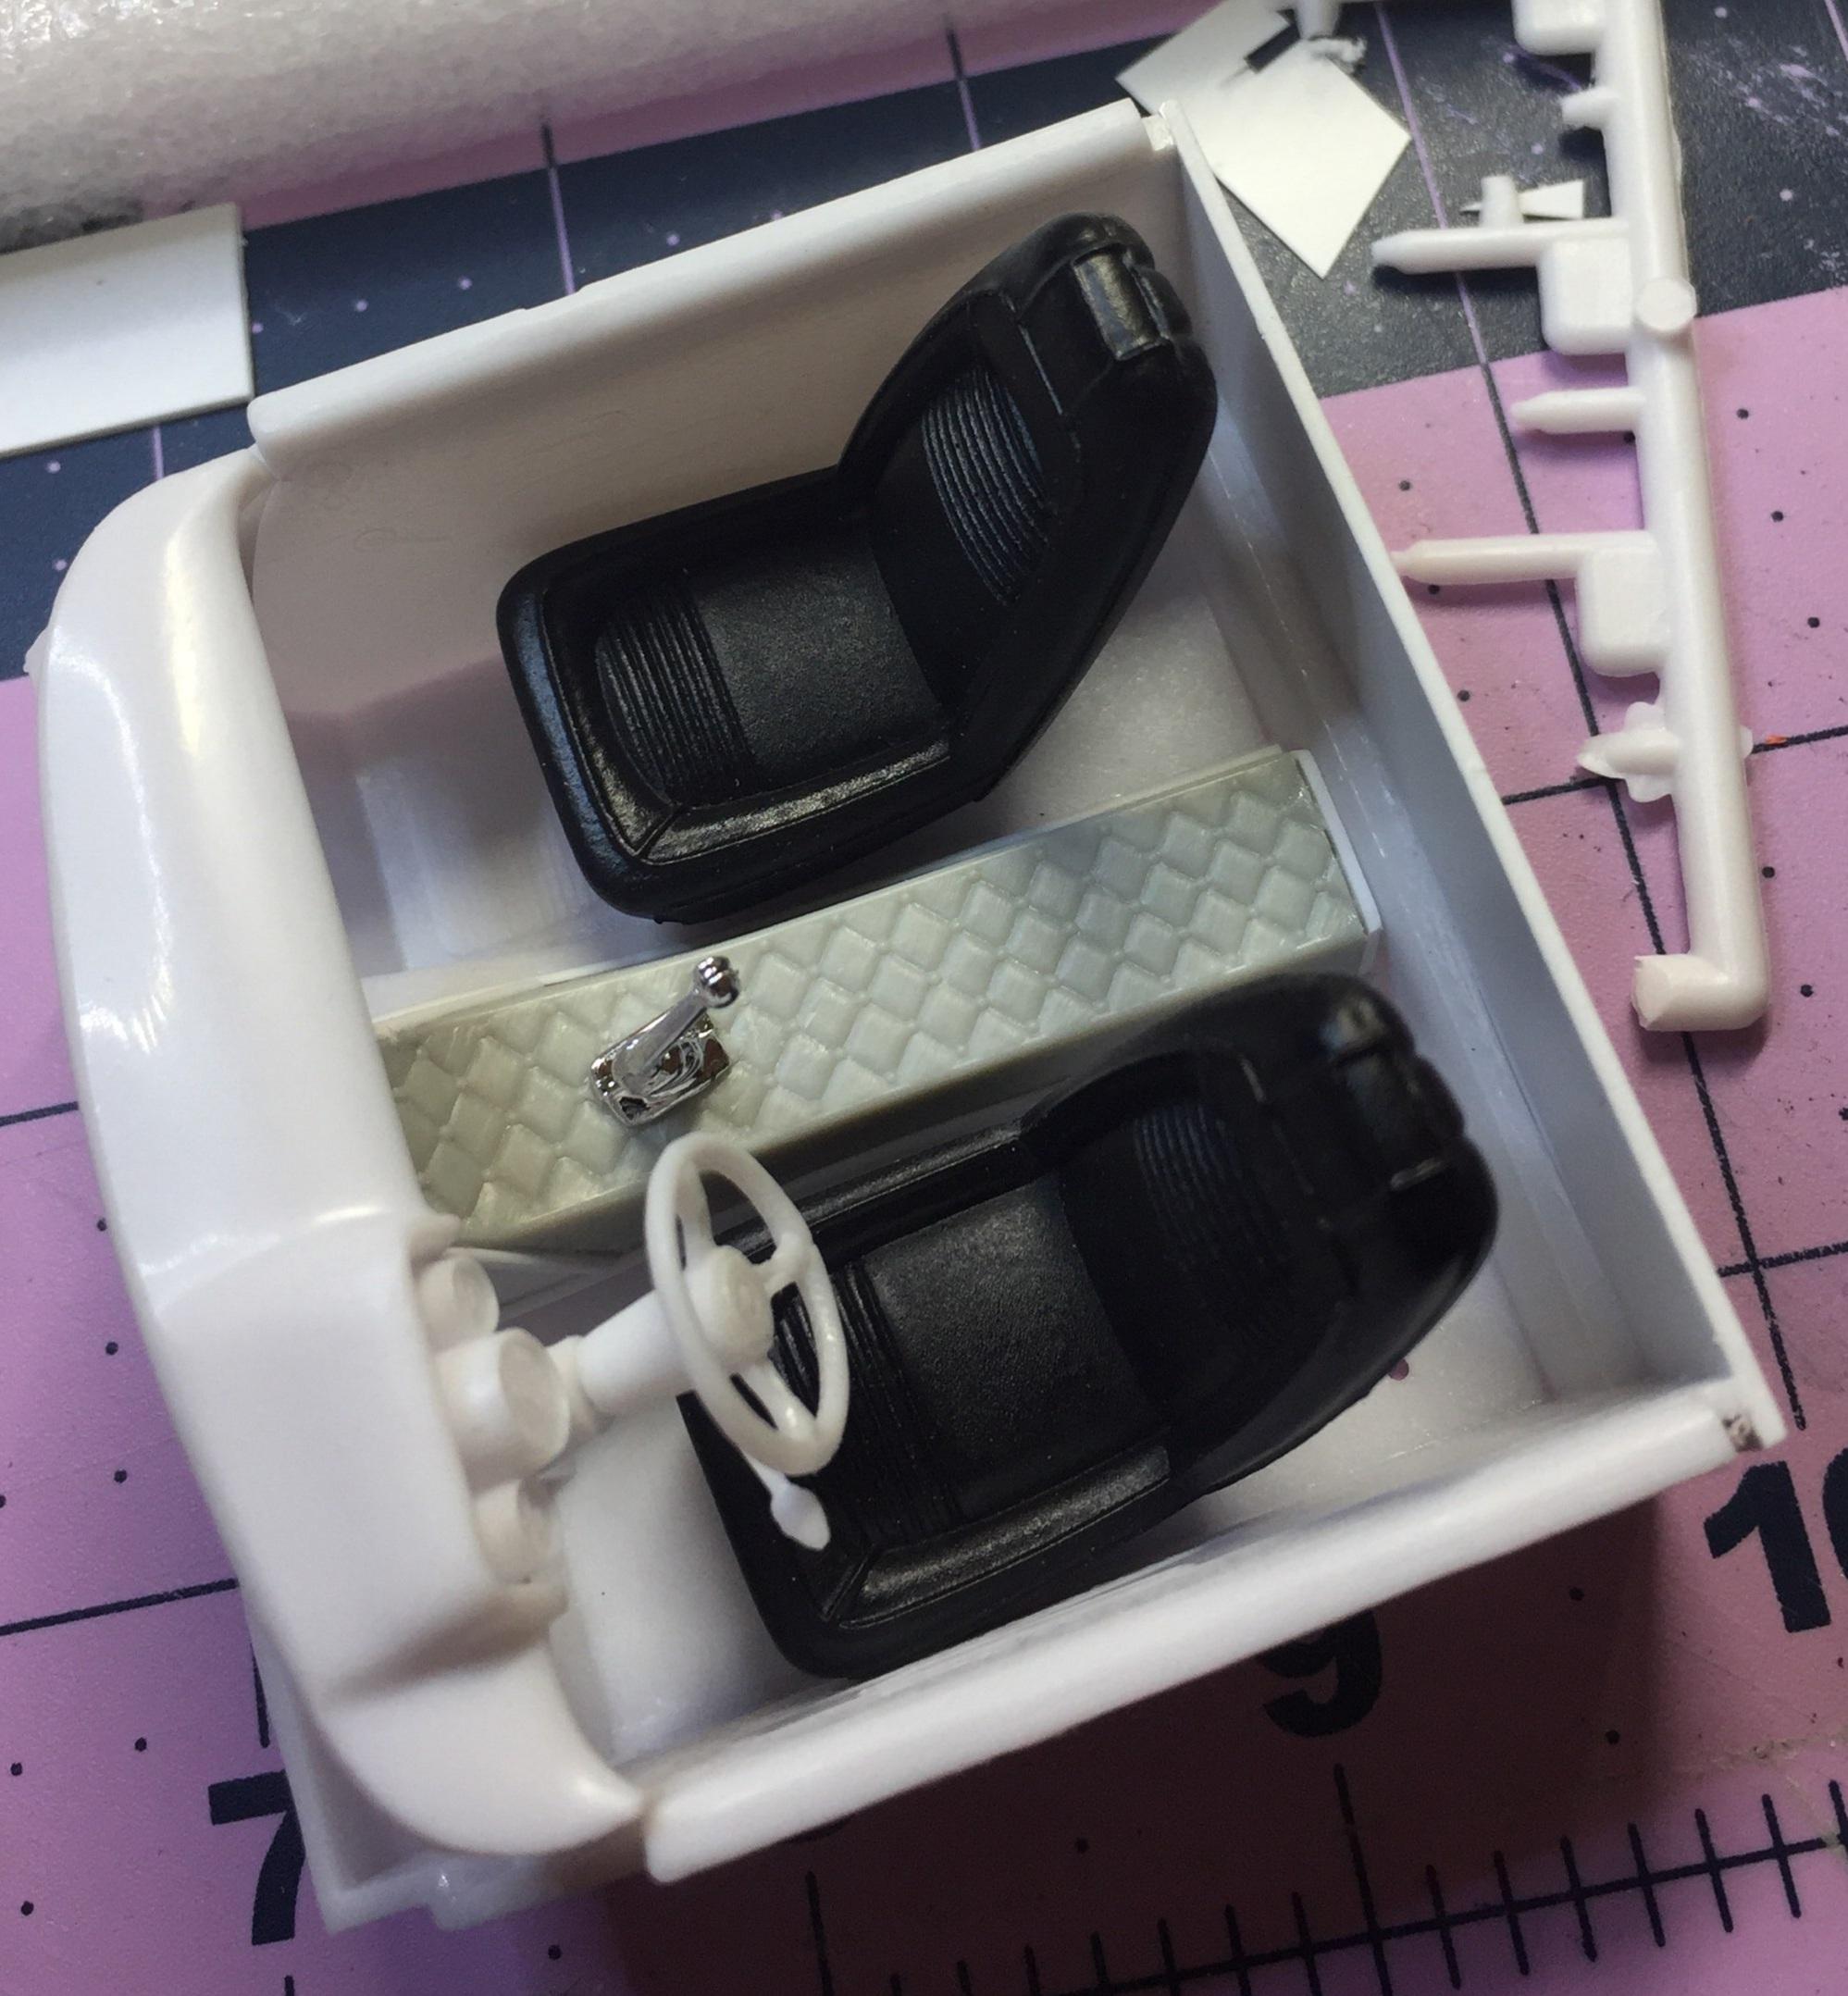
Actually, Bil, I did get a bit done on the roadster. I installed the tail lights, and I did some assembly; body to fender unit and radiator to frame. I just glued the hood on and your imagination will do the rest ( ? hidden fasteners.) I did give this one a coat of light primer to see what I need to pay more attention to. ? I think its time to hit the body work with some sand-able red oxide now followed by wet sanding. I also spent some time on the interior and here's a mock-up of that ? I just need to add cup holders ?
-
The "waste-not-want-not" Starliner project
customline replied to customline's topic in WIP: Model Cars
Well thank you, Will, I appreciate your kind words. -
The "waste-not-want-not" Starliner project
customline replied to customline's topic in WIP: Model Cars
Thanks, Rob. -
The "waste-not-want-not" Starliner project
customline replied to customline's topic in WIP: Model Cars
Thanks for your interest, Will. There's some great paint in those cheap little bottles! I don't know if you read the first post but adapting that '63 chassis was a disaster. The '60 was kind of unique and if I had it to do over again, I would have spent more time evaluating the swap. The scratch building could have been better. -
'57 El Nomado
customline replied to customline's topic in WIP: Model Trucks: Pickups, Vans, SUVs, Light Commercial
C'mon now, David, where would it go? True, I've been neglecting it lately....well, how about I get some primer on it today, would that make everyone happy? And I'll do a full-blown mock-up with glass, interior, and chrome but I've got to wait till it warms up out there and the humidity drops. I'll work on the Edsel till then. Or the T-birds. Or the Plymouth. Or the Fleetline. Or the '65 Chevy. Or the Chrysler. Or the Del Rey. Yes! ? The Del Rey! No....?..... -
The "waste-not-want-not" Starliner project
customline replied to customline's topic in WIP: Model Cars
Thanks, Bil. The Grape ape...hmmm.... -
The "waste-not-want-not" Starliner project
customline replied to customline's topic in WIP: Model Cars
Thank you , David. I came uncomfortably close to painting it light blue but my good sense returned just in time. This decision, however, may have been influenced by the voices and may prove to be the wrong one after all. We shall see. ? -
The "waste-not-want-not" Starliner project
customline replied to customline's topic in WIP: Model Cars
Oh, I'm not. What ever gave you that idea? -
'57 El Nomado
customline replied to customline's topic in WIP: Model Trucks: Pickups, Vans, SUVs, Light Commercial
Oh...wait....here's an update on the El Nomado....
-
The "waste-not-want-not" Starliner project
customline replied to customline's topic in WIP: Model Cars
OK, where was I ? The weather is getting better for paint now so the Starliner got painted. I think I have enough paint on it for a simple micro-polish job. The paint is Testor's Grape Metallic enamel thinned with Mr Color 400 and a bit of Mr. Color leveling thinner shot through my antique Binks Wren that probably needs a re-build. Just a quick mock-up with chrome on each end for contrast. Thanks for not giving up on this one ? I really like the Testor's enamels for airbrush jobs. Ain't that a gorgeous shade of purple? It spent several hours in the dehydrator but I'm gonna give it a few days to harden up.
-
'57 El Nomado
customline replied to customline's topic in WIP: Model Trucks: Pickups, Vans, SUVs, Light Commercial
Oh.....I dunno ?...hey - look who's talking( l mean laughing, Greg. When are you getting back on your Nomad? ) I get distracted quite easily these days ?.....I know! I'll post some pix of the Starliner in fresh, orange peel, dust included paint! There! Bugger off! (Ooo, did I say that aloud?) ?
-
You could keep it "in era" with a 409 ☺️ . I think the 327 with Rochester injection would do nicely. What sort of wheels are you planning to roll with? If you go contemporary then a late engine.... but personally, I don't like to open a hood and see the engine hidden under big plastic covers with all those pulleys and serpentine belts. I like old stuff. My $00.02.
-
OK, thanks Bil.
-
Yessiree! ?
-
Know what? Just glue the hood on and forget it. I don't know why I sweat this stuff. ?


.jpg.015eb31c861e601f27265b5cf4bd156c.jpg)
.jpg.8a0ec8e7302627312fe7d4ee7873bde8.jpg)
.jpg.0d97a0762636c5e55bc55013dff35f59.jpg)
.jpg.1370269ce0399dc60333e93fa5f9ce4e.jpg)


.jpg.d7c3732d504de92d87aab883927187e4.jpg)
.jpg.fb79f5c8a72a6e6009681b20977e8633.jpg)

