crb1024
-
Posts
44 -
Joined
-
Last visited
Content Type
Profiles
Forums
Events
Gallery
Everything posted by crb1024
-
1932 Ford Window Coupe UPDATED 11/19/13 FINISHED
crb1024 replied to crb1024's topic in WIP: Model Cars
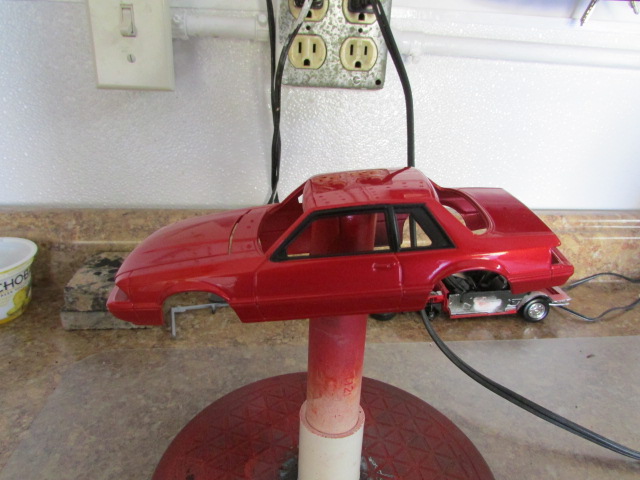
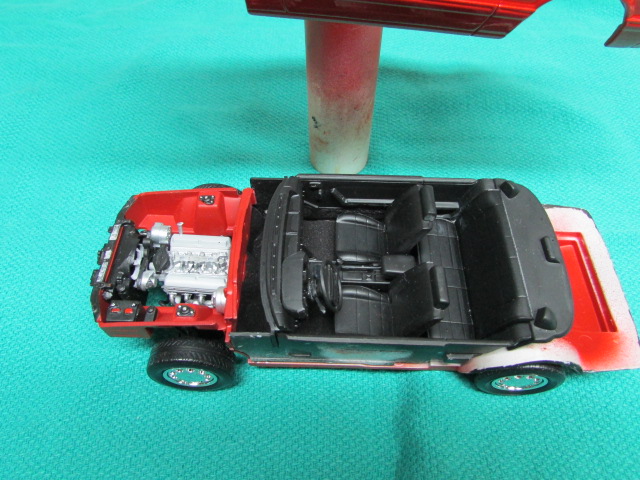
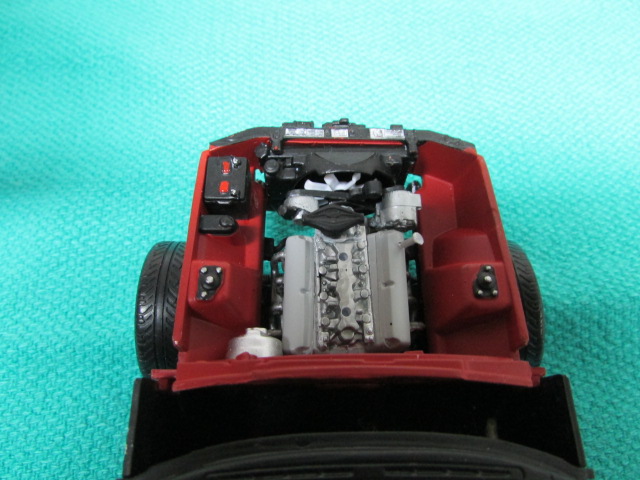
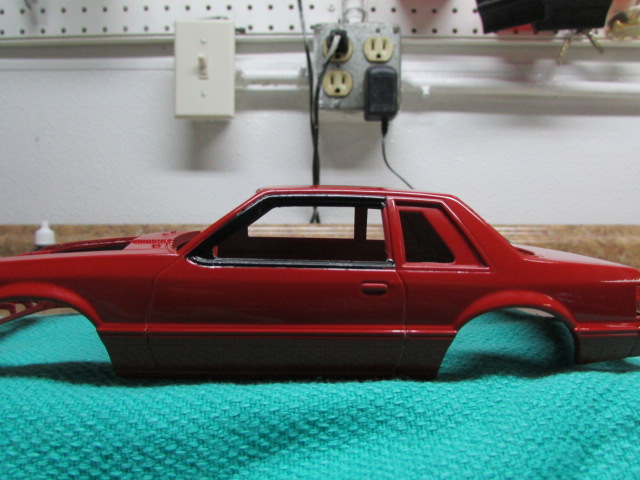
Had a chance to do a little more work. Body is done except for some waxing. Started the motor Added some BMF to the firewall area Any cooments or sugestions would be appreciated. Randy -
1932 Ford Window Coupe UPDATED 11/19/13 FINISHED
crb1024 replied to crb1024's topic in WIP: Model Cars
Great minds think alike nice job I like the tires. Is that the Tamiya color? Randy -
1932 Ford Window Coupe UPDATED 11/19/13 FINISHED
crb1024 replied to crb1024's topic in WIP: Model Cars
the steering wheel has just a flat clear over it , good eye as for tips I used a thin piece of plastic to cover the area were the Revell info was engraved just ahead of the rear axel Randy -
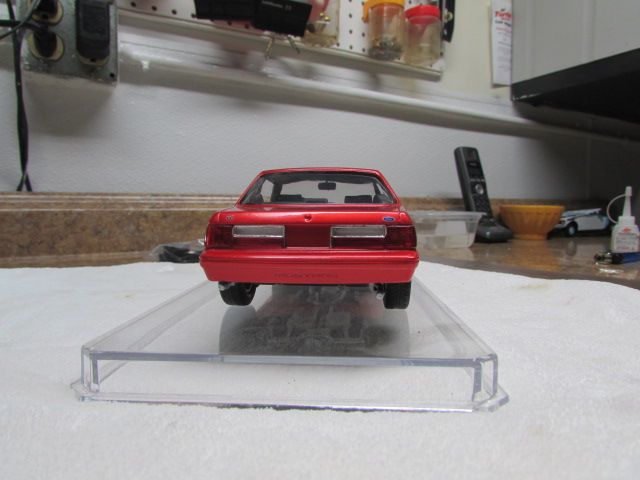
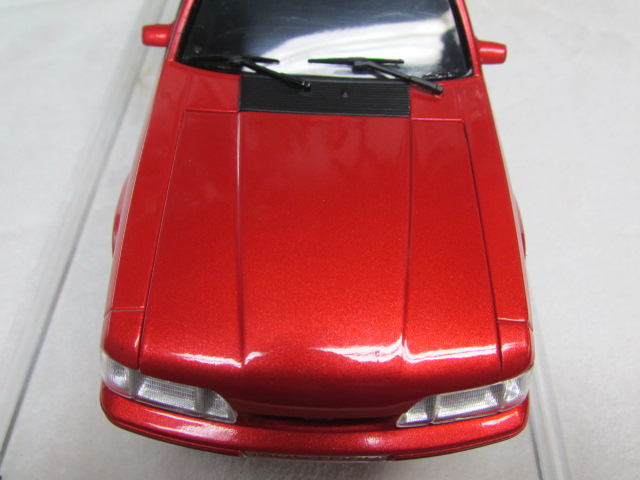
Well it's done a fun build. Here are some pics for you review Any comments or feedback is welcome. Next one will be with fenders and bucket seat with console Maybe in silver Thanks Randy
-
Here is how I removed some sink marks. I used a fiber tip sanding pen the do some leveling, followed by some putty. I thin the putty with a few drops of lacquer thinner then brush it on. Some sanding with the sanding pen, then I used some Mr. Surfacer 1000 thined and air brushed. Seems to work well. FYI the with bottle is from of the squart bottles that you get from the water flavor bottles. Works great for cleaning the air brush that has a cup. Randy

-
No problem. i forgot to mention Testors Lacquer has much less off-gasing than Tamiya Here is the link to the testors page for the bottel primers http://www.testors.com/search?q=lacquer+primer&.x=33&.y=18 Randy
-
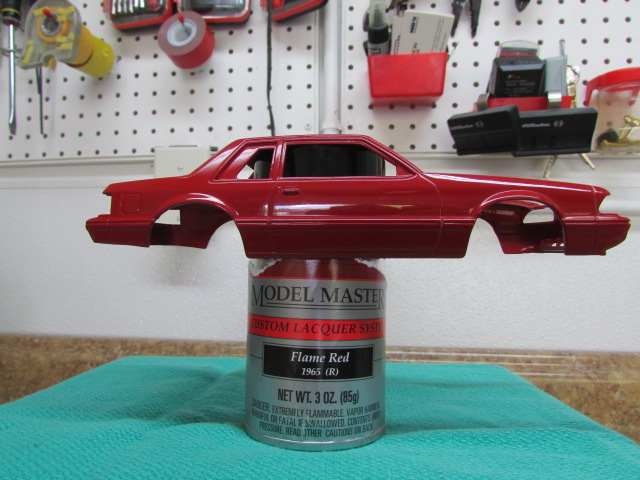
Hi Brandon Thanks for the kind words. I first used Testors (flame red) lacquer 2 part system. I decanted both the base and clear. It just did not give it body any "pop" of color. I stripped it down and went with Tamiya Mica Red (decanted). I've been using a lacquer prime from Testors. It comes in a bottle and is great for coverage and sanding. No need to thin shot it right from the jar. I gave it two lite coats. After a few hours in the dehydrator I give it a lite wet and with 3200 grit. The body was shot with 2 coats of Tamiya Mica Red then in the dehydrator for 3 hours. I use a Badger 360 at about 18-20 PSI. I got very little orange peel that way. Did a lite wet sand with 4000 grit., than 3 coats of Testors One Coat (decanted). To polish out I used Maquires clear coat rubbing compound. Then a few coats of Maquires liquid wax. Randy
-
This is my second build. I just got back into the hobby. My last kit was back in 1968. Any comments would be appreciate, always room for improvment. I also have the build in the Workbench section. Good to be back. Randy
-
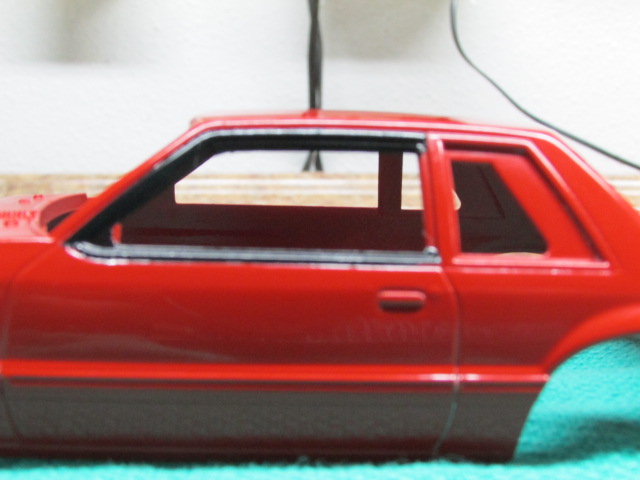
Well it is done.Far from contest qualitiy for sure. Not sure if in should be in the under glass section?? I would appreciate and comments or suggestion. I learned a lot with this build and still have more to learn. I'm pretty happy with the body paint work. I'm not very satisified with the glass work. I need inprovement there. Any suggestions on how to keep the glass free of light scratch marks. Randy
-
HI Tom; That is the way I went. Don't like the brush marks either. I had no problems with brushing the Vallejo paints, that is how I did the chassis. I do suugest using a primer the paints holds better. Randy
-
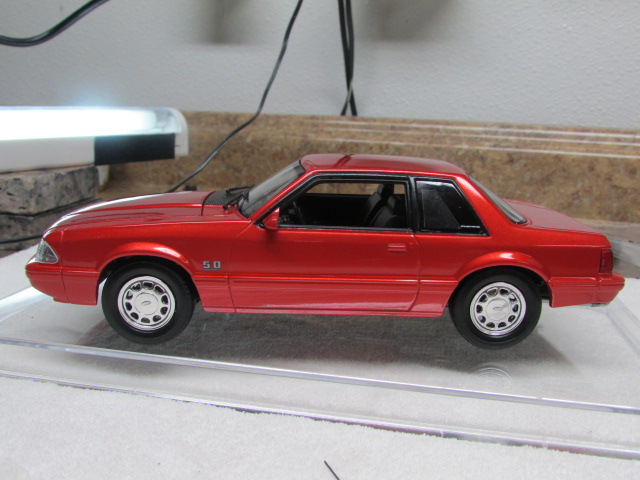
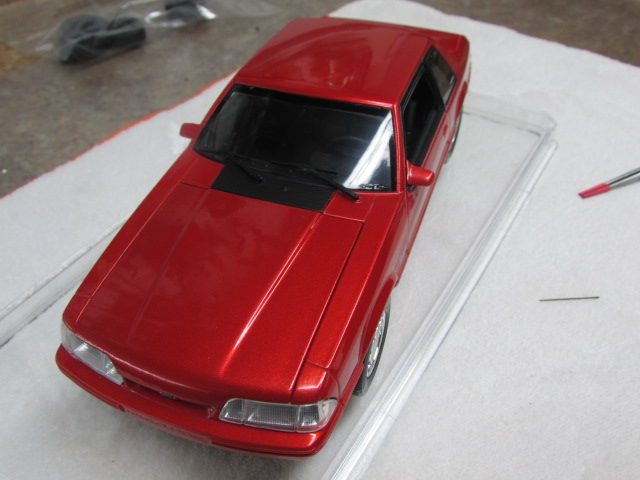
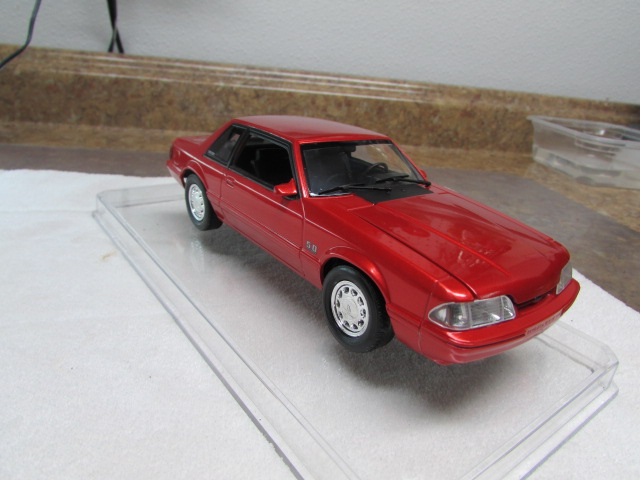
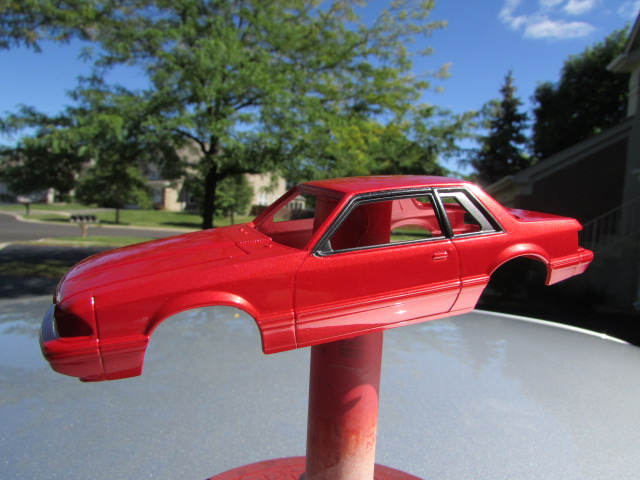
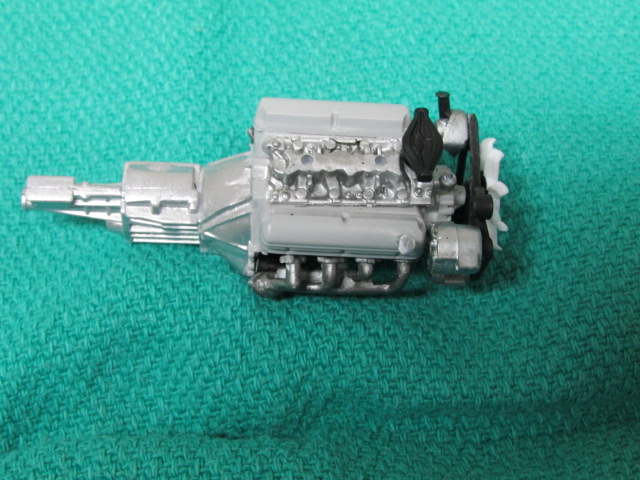
I decided that I did not like the Falme Red on the body so I stripped it and went with Mica red (decanted) from Tamiya wtih 3 coats of Testor clear (decanted). I know it is not a stock color,but I think it looks better. OLD Color NEW Color I also installed the engine. Getting close to bringing it all together
-
Thanks for the reply. Learned a good lesson. I tried to tuoch up a spot of the had the back come off. Don't use a Sharpie marker it took off the black finish. So I touched it up with Vallejo flat back. Could not leave well enough alone and tried some Vallejo satin finish all the BMF trim and it looks good. Not a shiny as the BMF was and closer to the finish that was on that trim (satin black0 Will post a new picture on Thursday. Randy
-
I statred the trim today with black Bare Metal foil. No sure if I like the way it looks . Any feedback would be of help. randy
-
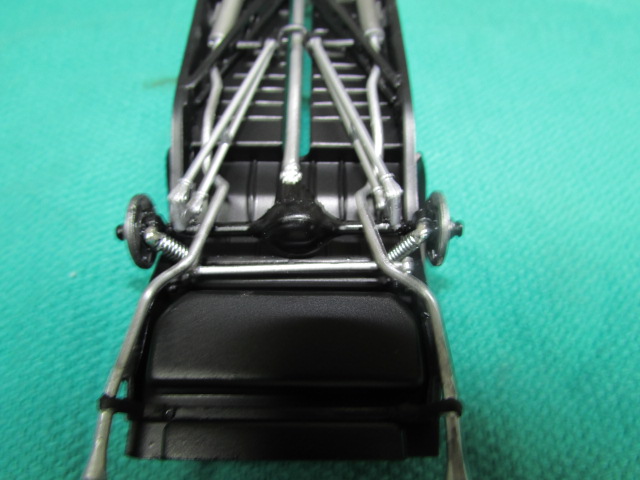
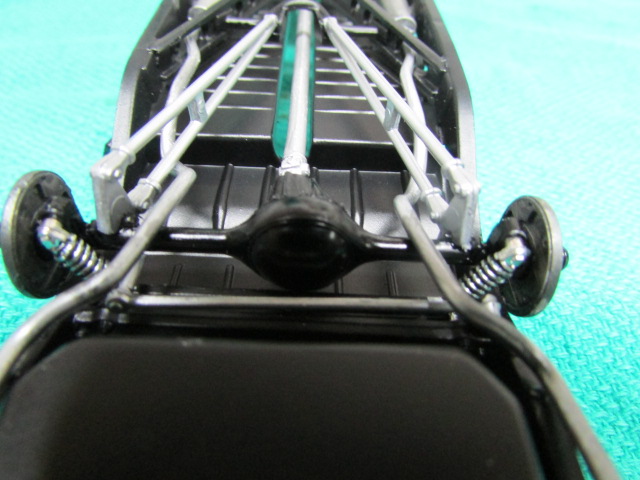
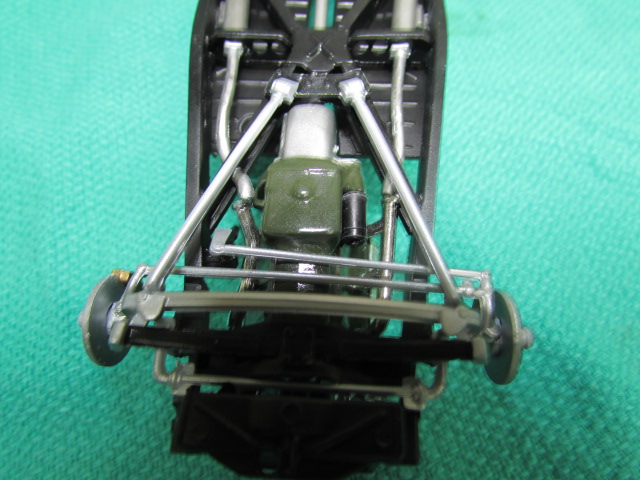
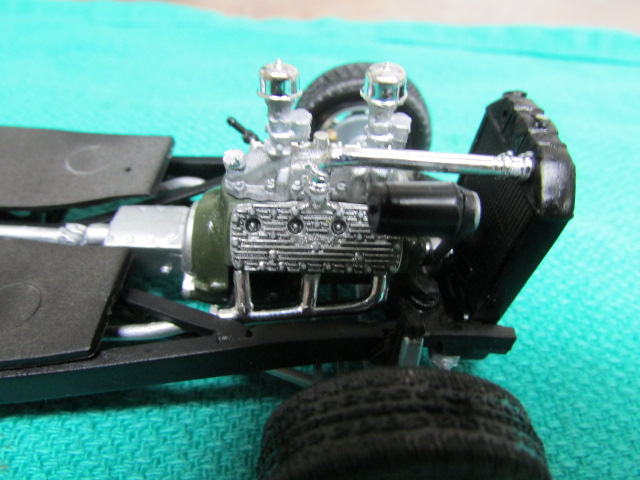
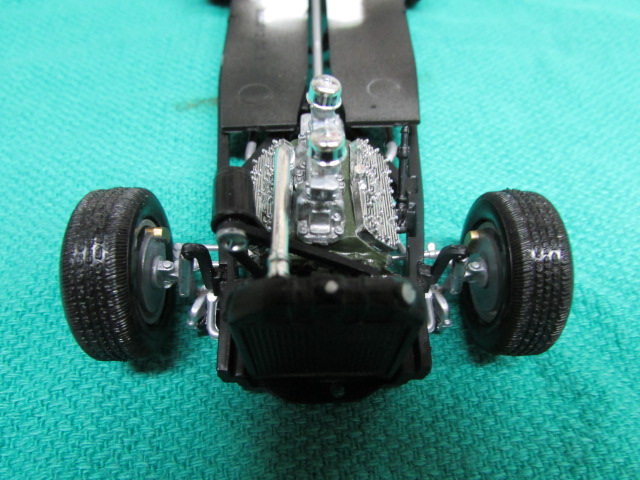
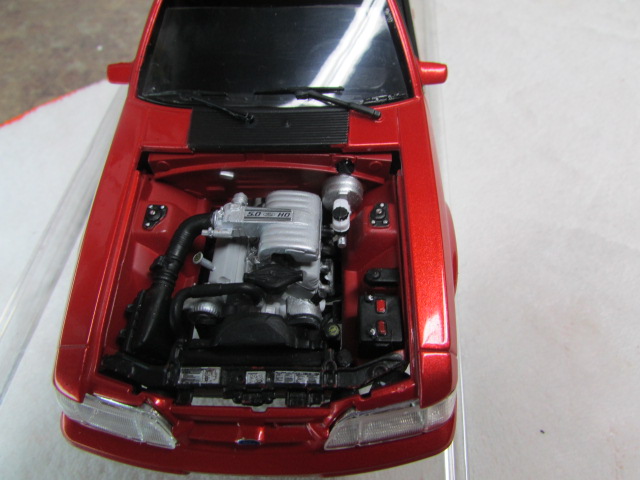
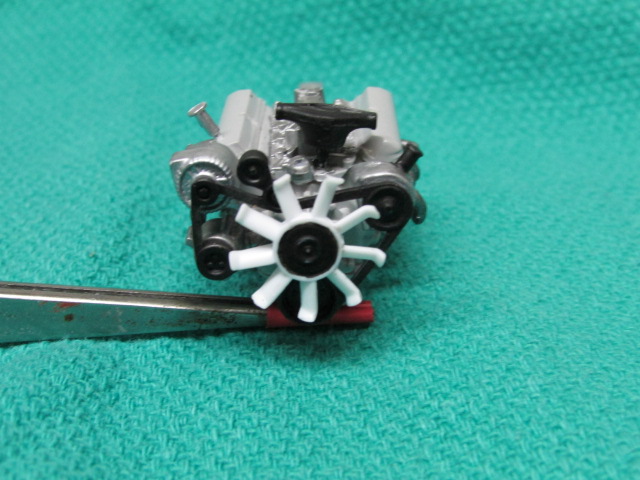
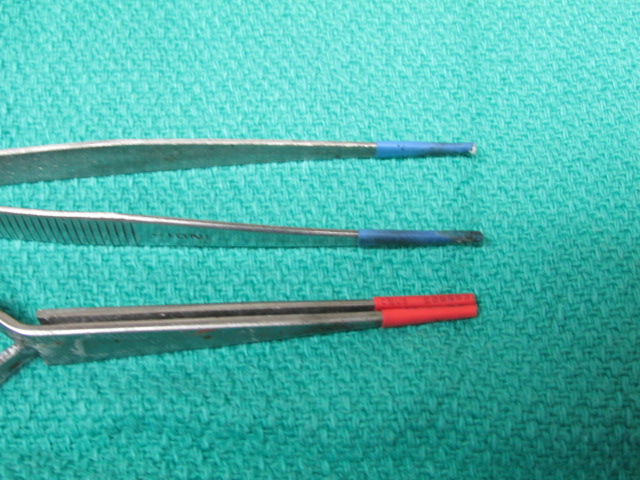
Got the engine done. Used a Testor FS Semi-semi gloss for the block. Vallejo for evrything else all brushed. I did some research and the fan blades were white (almost opaque). I found that the instructions show the lower radiator hose on the wrong side (LH), shoud be on the RH side. I did a dry fit to check the correct postion I added heat shrink tubing to a few of my twezzers. Helps protect the painted parts. Randy
-
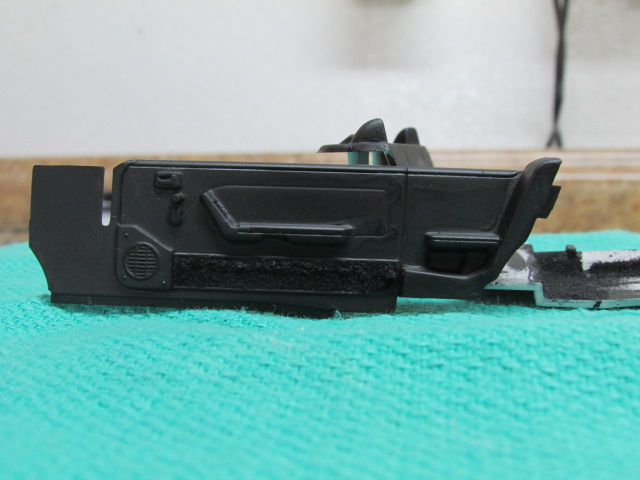
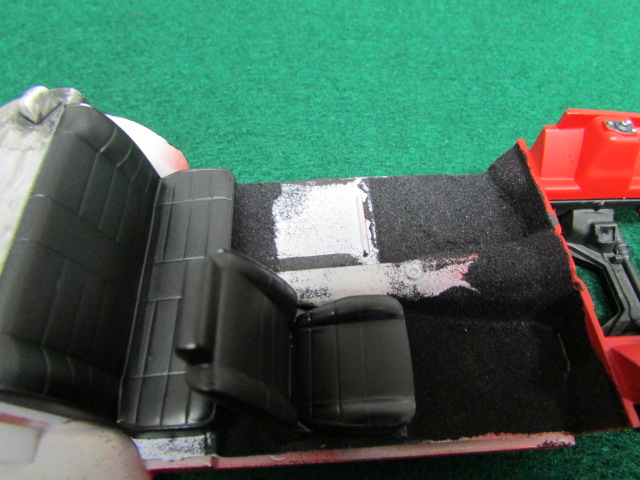
Al little progress. FInished the interior. I think the carpet for the door panel can out OK..
-
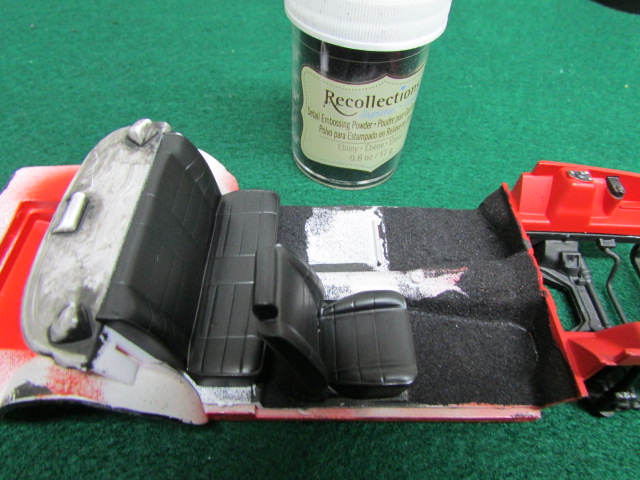
Started the interior. Used thinned Elmers glue with a few drops of flat black. Got the embossing powder at Hobby Lobby. A little goes a long way. I air brushed the seats with a mix of Testors semi-gloss black and Aircraft Interior black, About a 60/40 mix. I like the finish. Not to much gloss. You can see the difference comapred to a flat finish on the chassis.
-
Hi Greg No thinning let it off gass. I used a drinking straw and some epoxy putty to form the gasket. I got the basic idea from a Testor video. I made an extra one for clear coats that I used several times.
-
Thanks for the postings. Thanks have changed witth the hobby,but many have stayed the same. The internet sure has opened more doors to learn more about the hobby. Good to be back. I'm working on the interior this week. I used some embossing powder from Hobby Lobby to simulate carpet. Worked well. I will be posting more pics later this week. Randy
-
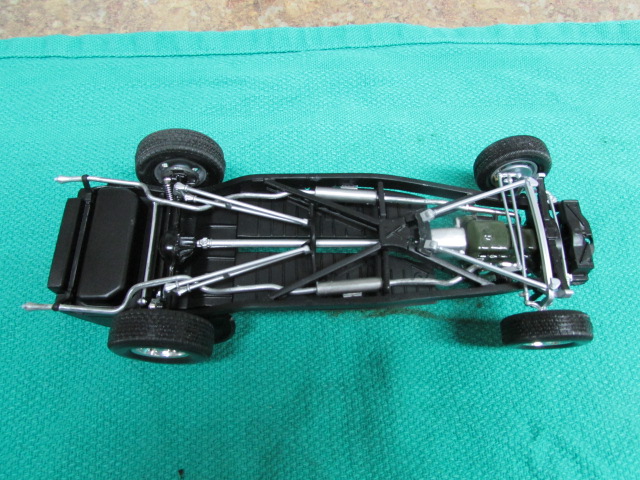
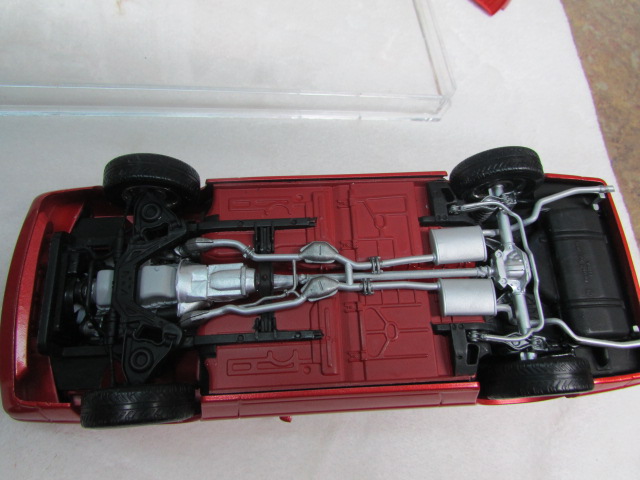
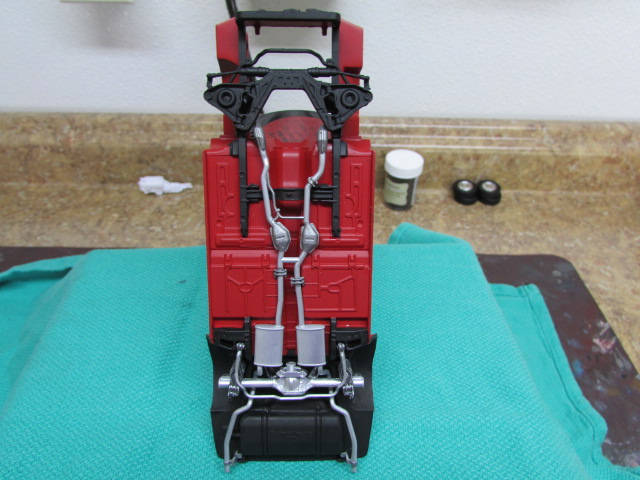
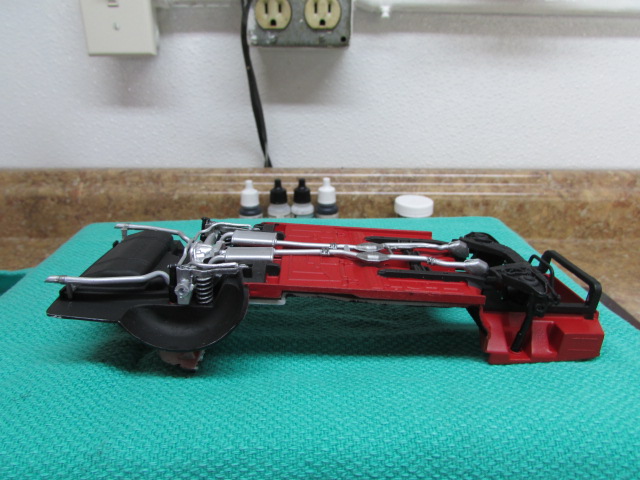
This is my second kit since getting back into the hobby. Last one was way way back in 1968. The body was airbrushed with Testors Flame Red de-canted lacquer and clear coat Randy . The chassis and was painted the same as the body color the back was brushed using Vallejo back, then airbrushed with Testors flat lacquer. The exhaust and suspension was painted using Vallejo airbrush paints.