

Metalmad
-
Posts
1,283 -
Joined
-
Last visited
Content Type
Profiles
Forums
Events
Gallery
Posts posted by Metalmad
-
-
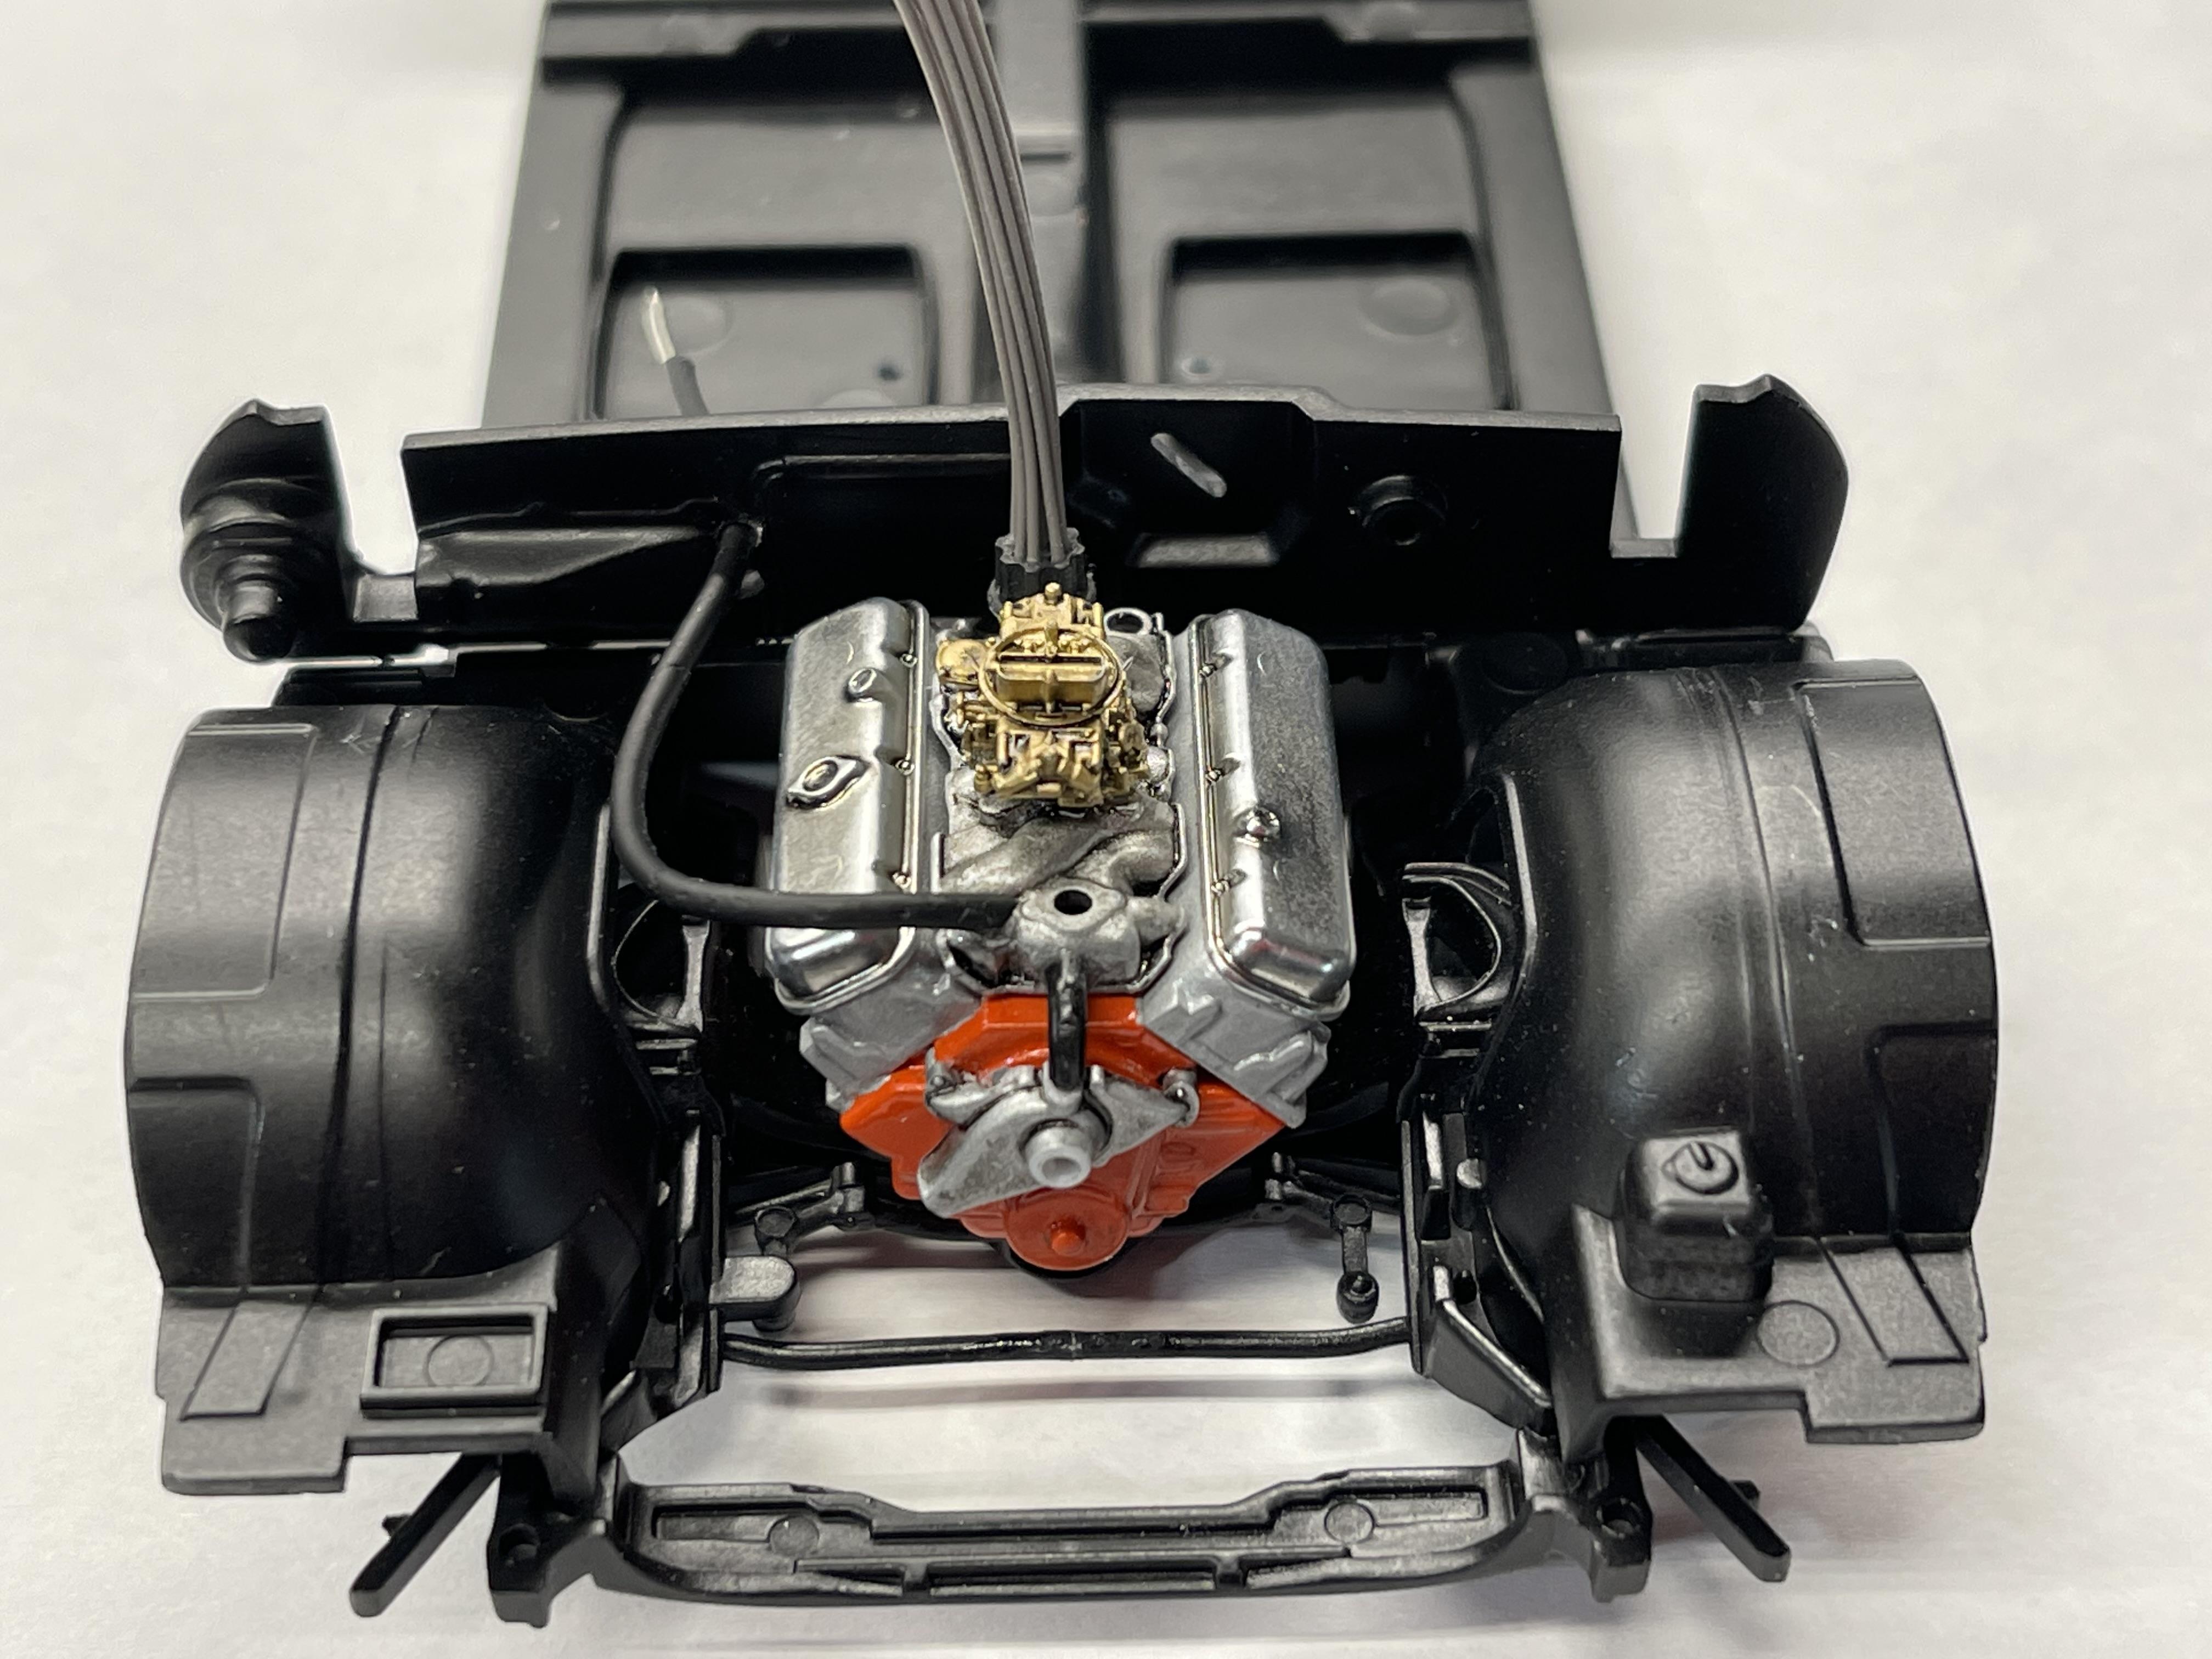
Small update which I have finished scratch building the two heater hoses that run from the heater core to the intake manifold and to the water pump and I also have lowered the front suspension a little to give it a better stance in the front. I will more than likely be lowering the rear suspension but how low I'm not sure yet and have also started the clean up of the exhaust system with getting it nice and smooth and I have shot the exhaust with primer.

-
 8
8
-
-
Thank you Carl ...... I still need to make some adjustment on how the coolant hose is actually routed which I'll do when I get the other coolant hose ran from the water pump to the heater core.
-
1
-
-
Hello All,
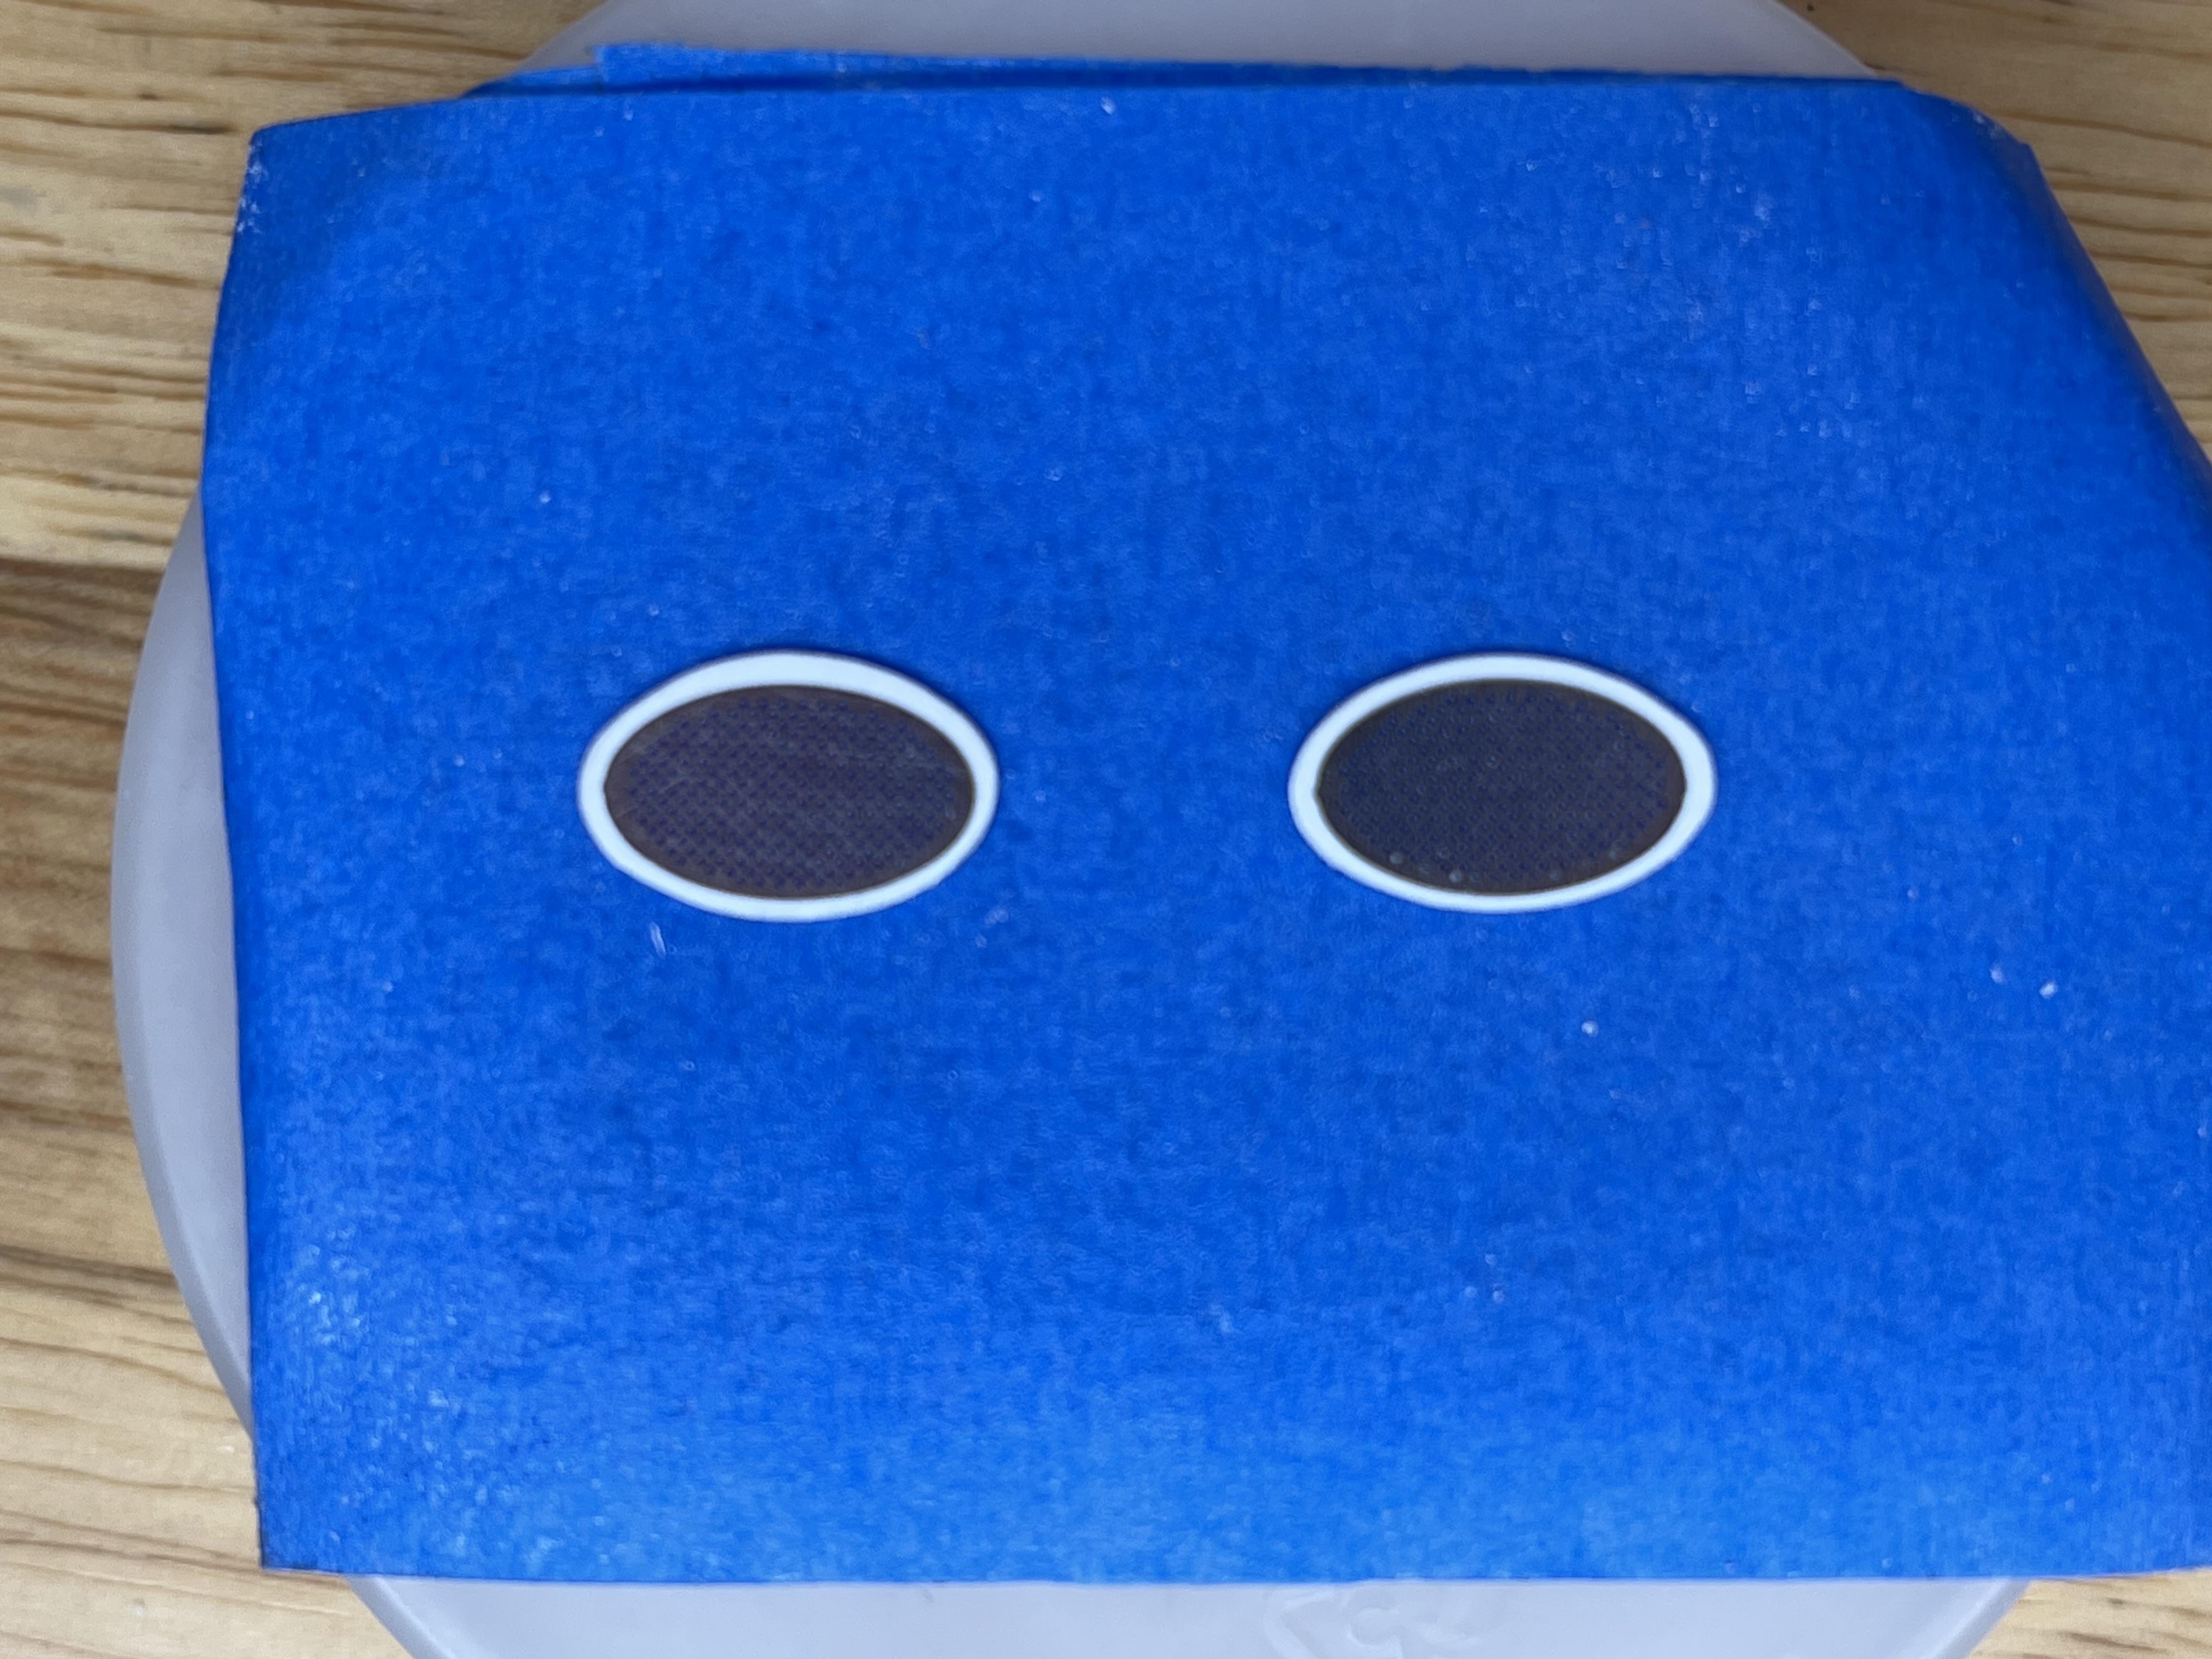
Small update on the Chevelle which I have finished getting the speaker grill mounts painted and the grills installed to the mounts and I have also started on scratch building the coolant hoses that run from the heater core to the water pump and to the intake manifold.
-
7
-
-
Thank you for the awesome complement on the show Steve ! We as a club try our best to put on a good show and we are always looking for ways to improve on it each year.
-
I will be there at the show since I'm a member of the club (The Model Car Guys) that put on the show and we always have a good turn out.
-
Thank you for the likes fellas !
-
Hello All ,
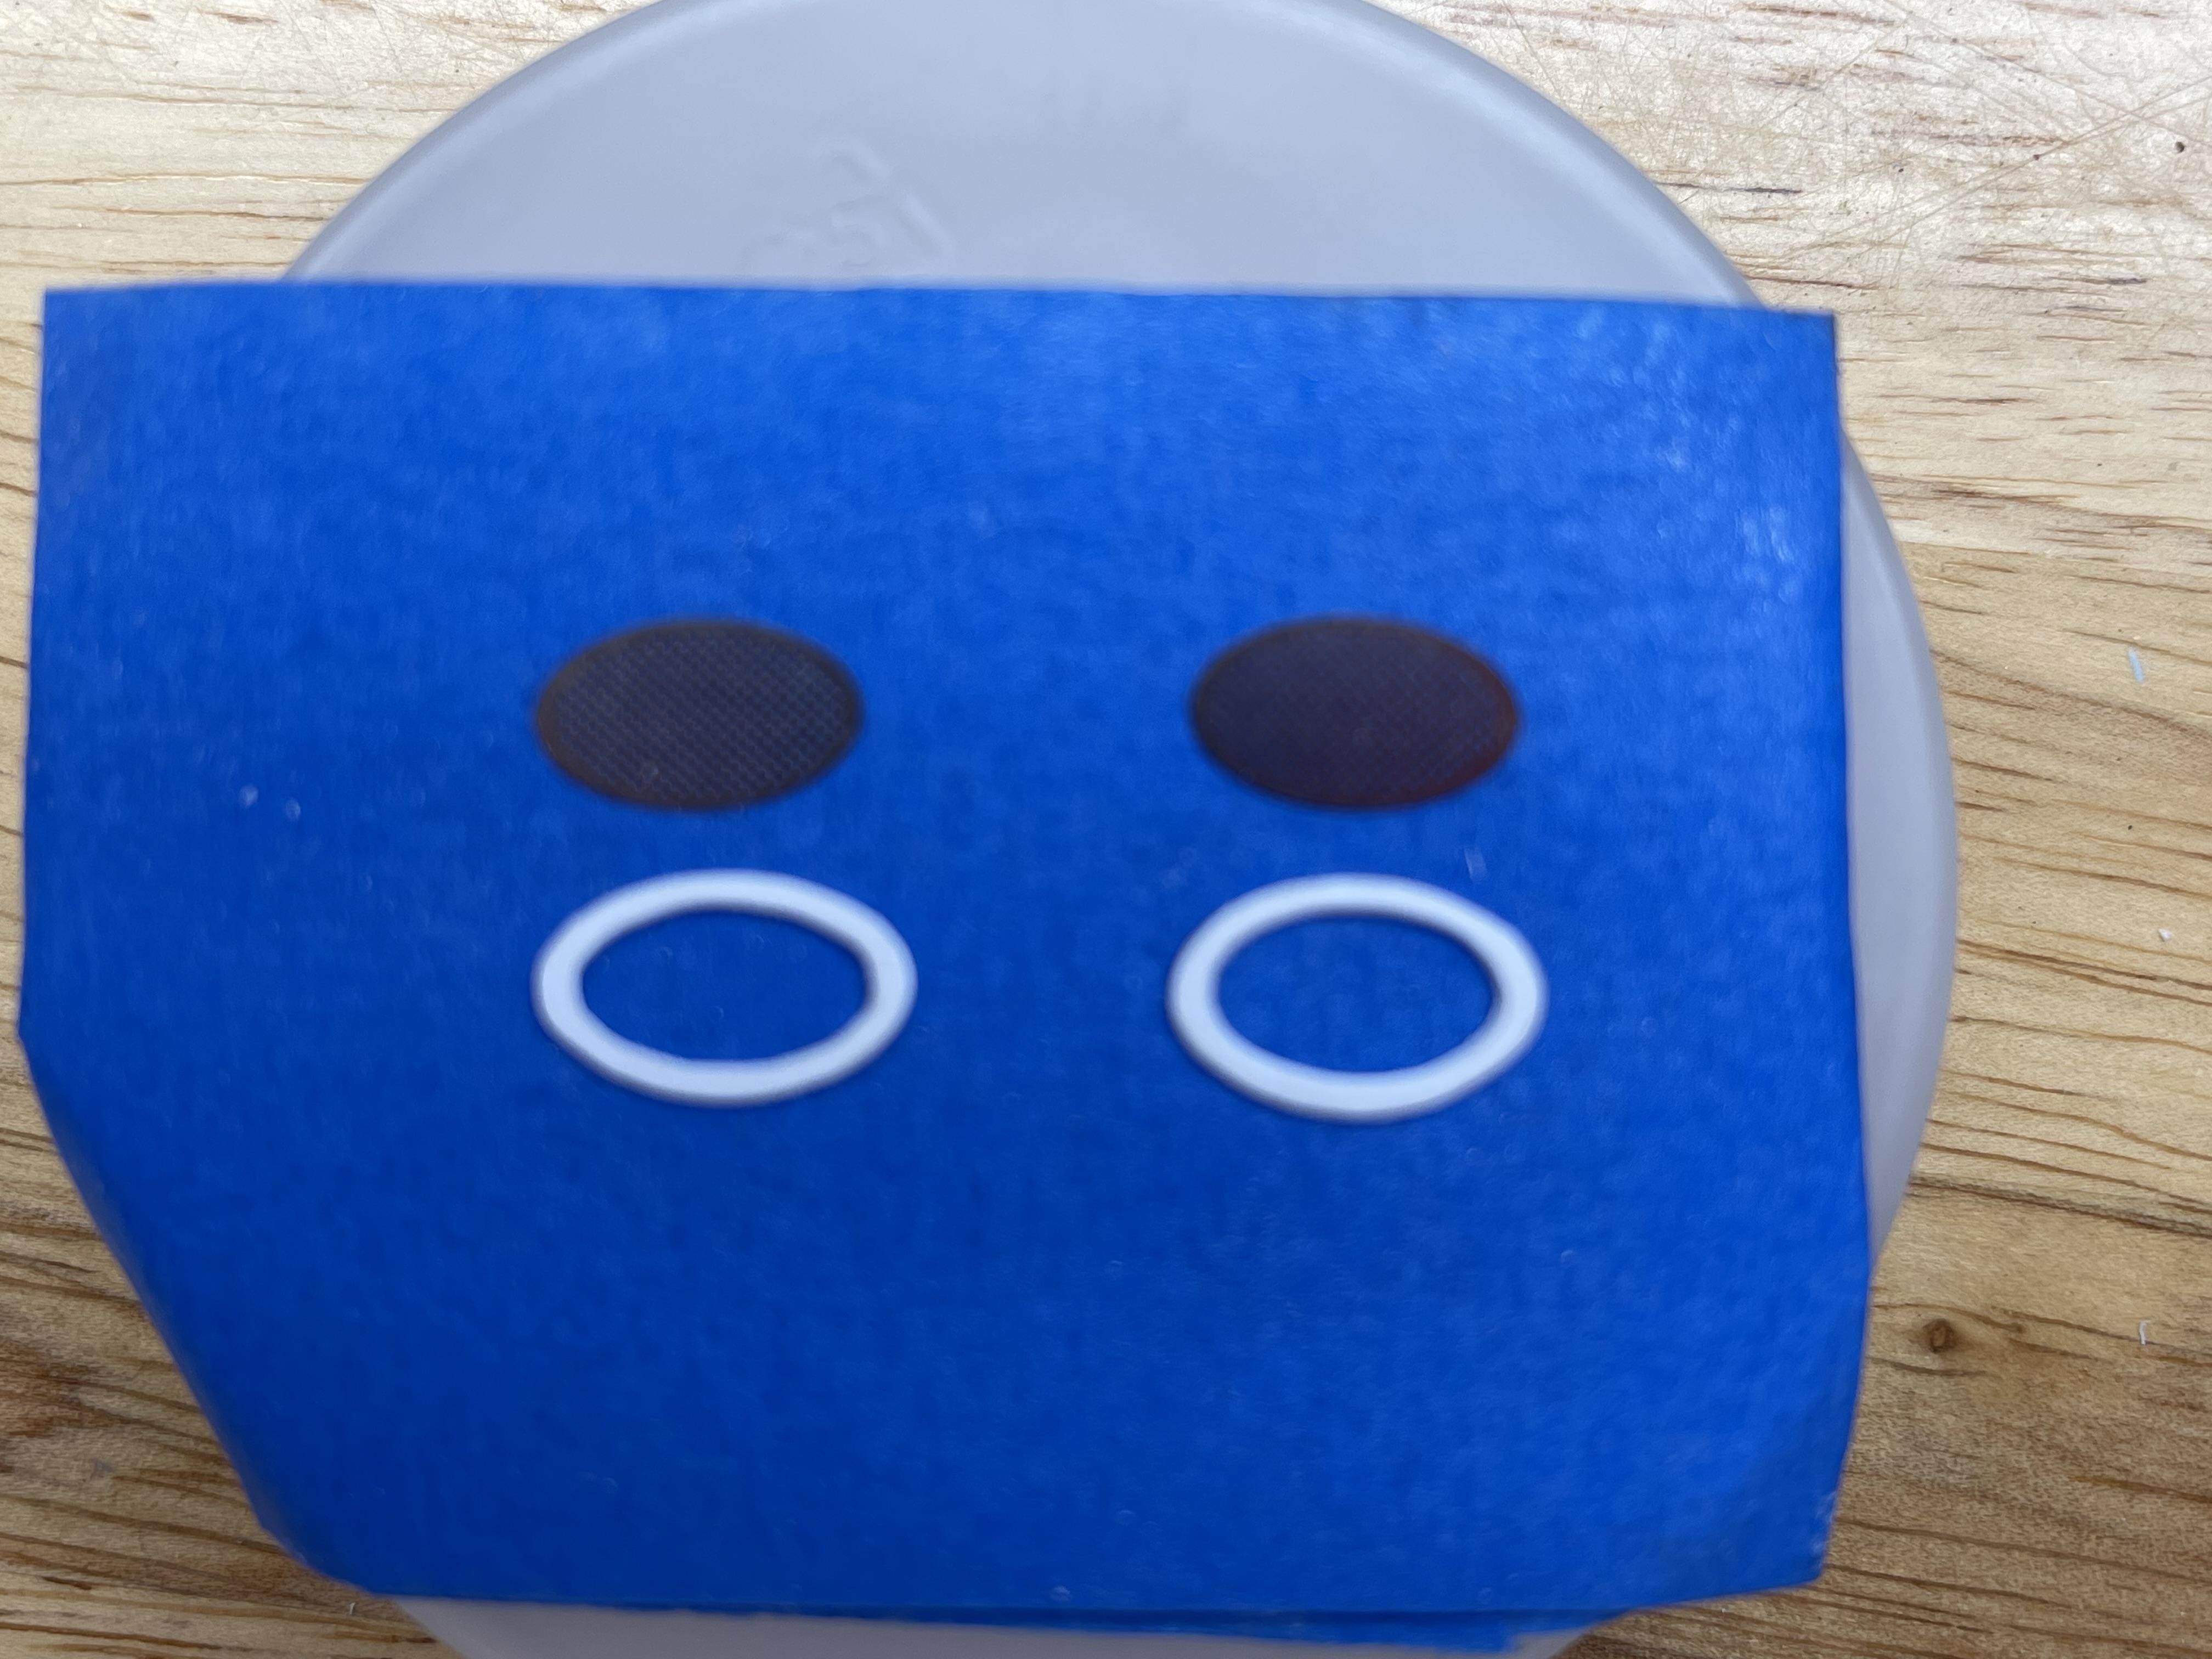
I got a little bench time today which I was able to finish scratch building the speaker grill mounts and will be getting the first coat of primer on them later which they are not perfect but they will have to do .
Sorry for the one picture being a little blurry.
-
9
-
-
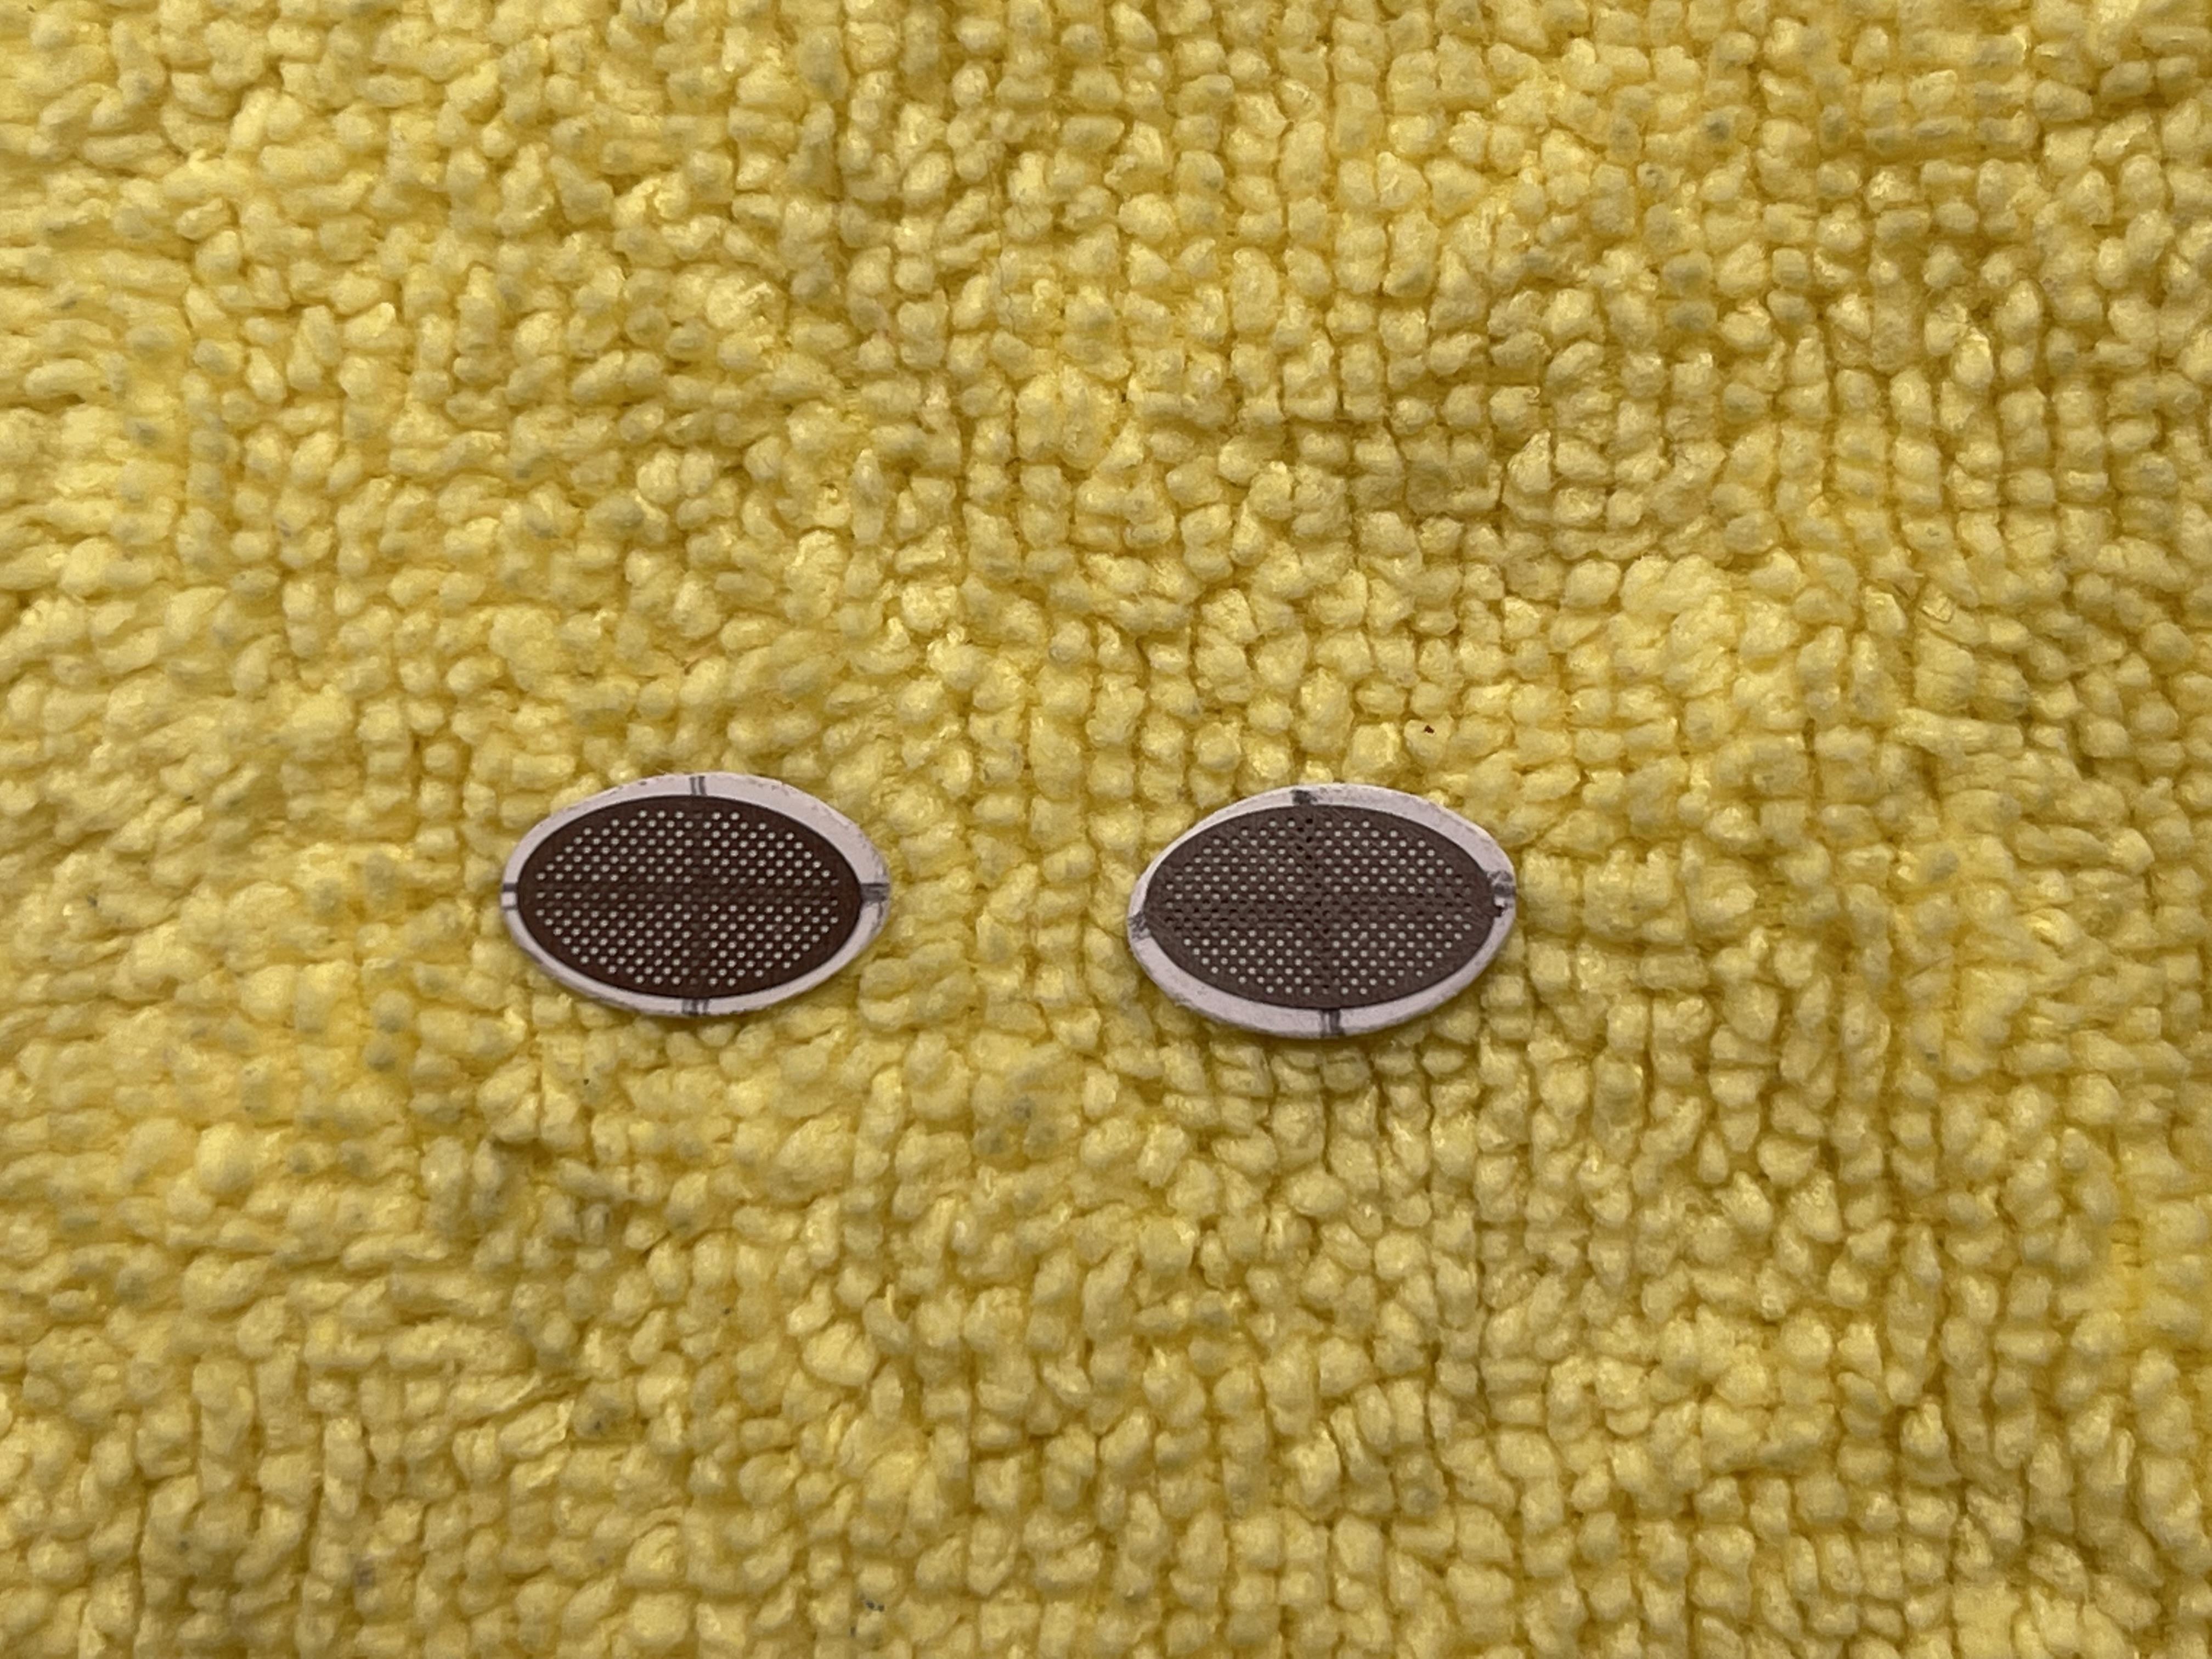
Well I have finished getting the locations drilled and pinned for the two other coolant hoses that will be installed to the intake manifold and the water pump so then I was looking through my stash of photo etched parts and and came across some 6X9 speaker grills so I decided to use them for the build.They will be installed to the rear deck so I have cut out some speaker grill plates out of styrene to install the grills to but I still need to cut out the inner portion on the plates to have a more realism look of the install which will be a challenge
-
3
-
-
Thank you Mike !
-
Kieth & James the Holley carburetor is from Fireball and thank you for the awesome comments as well.
-
Thank you Steve !
-
Thank you Carl !
-
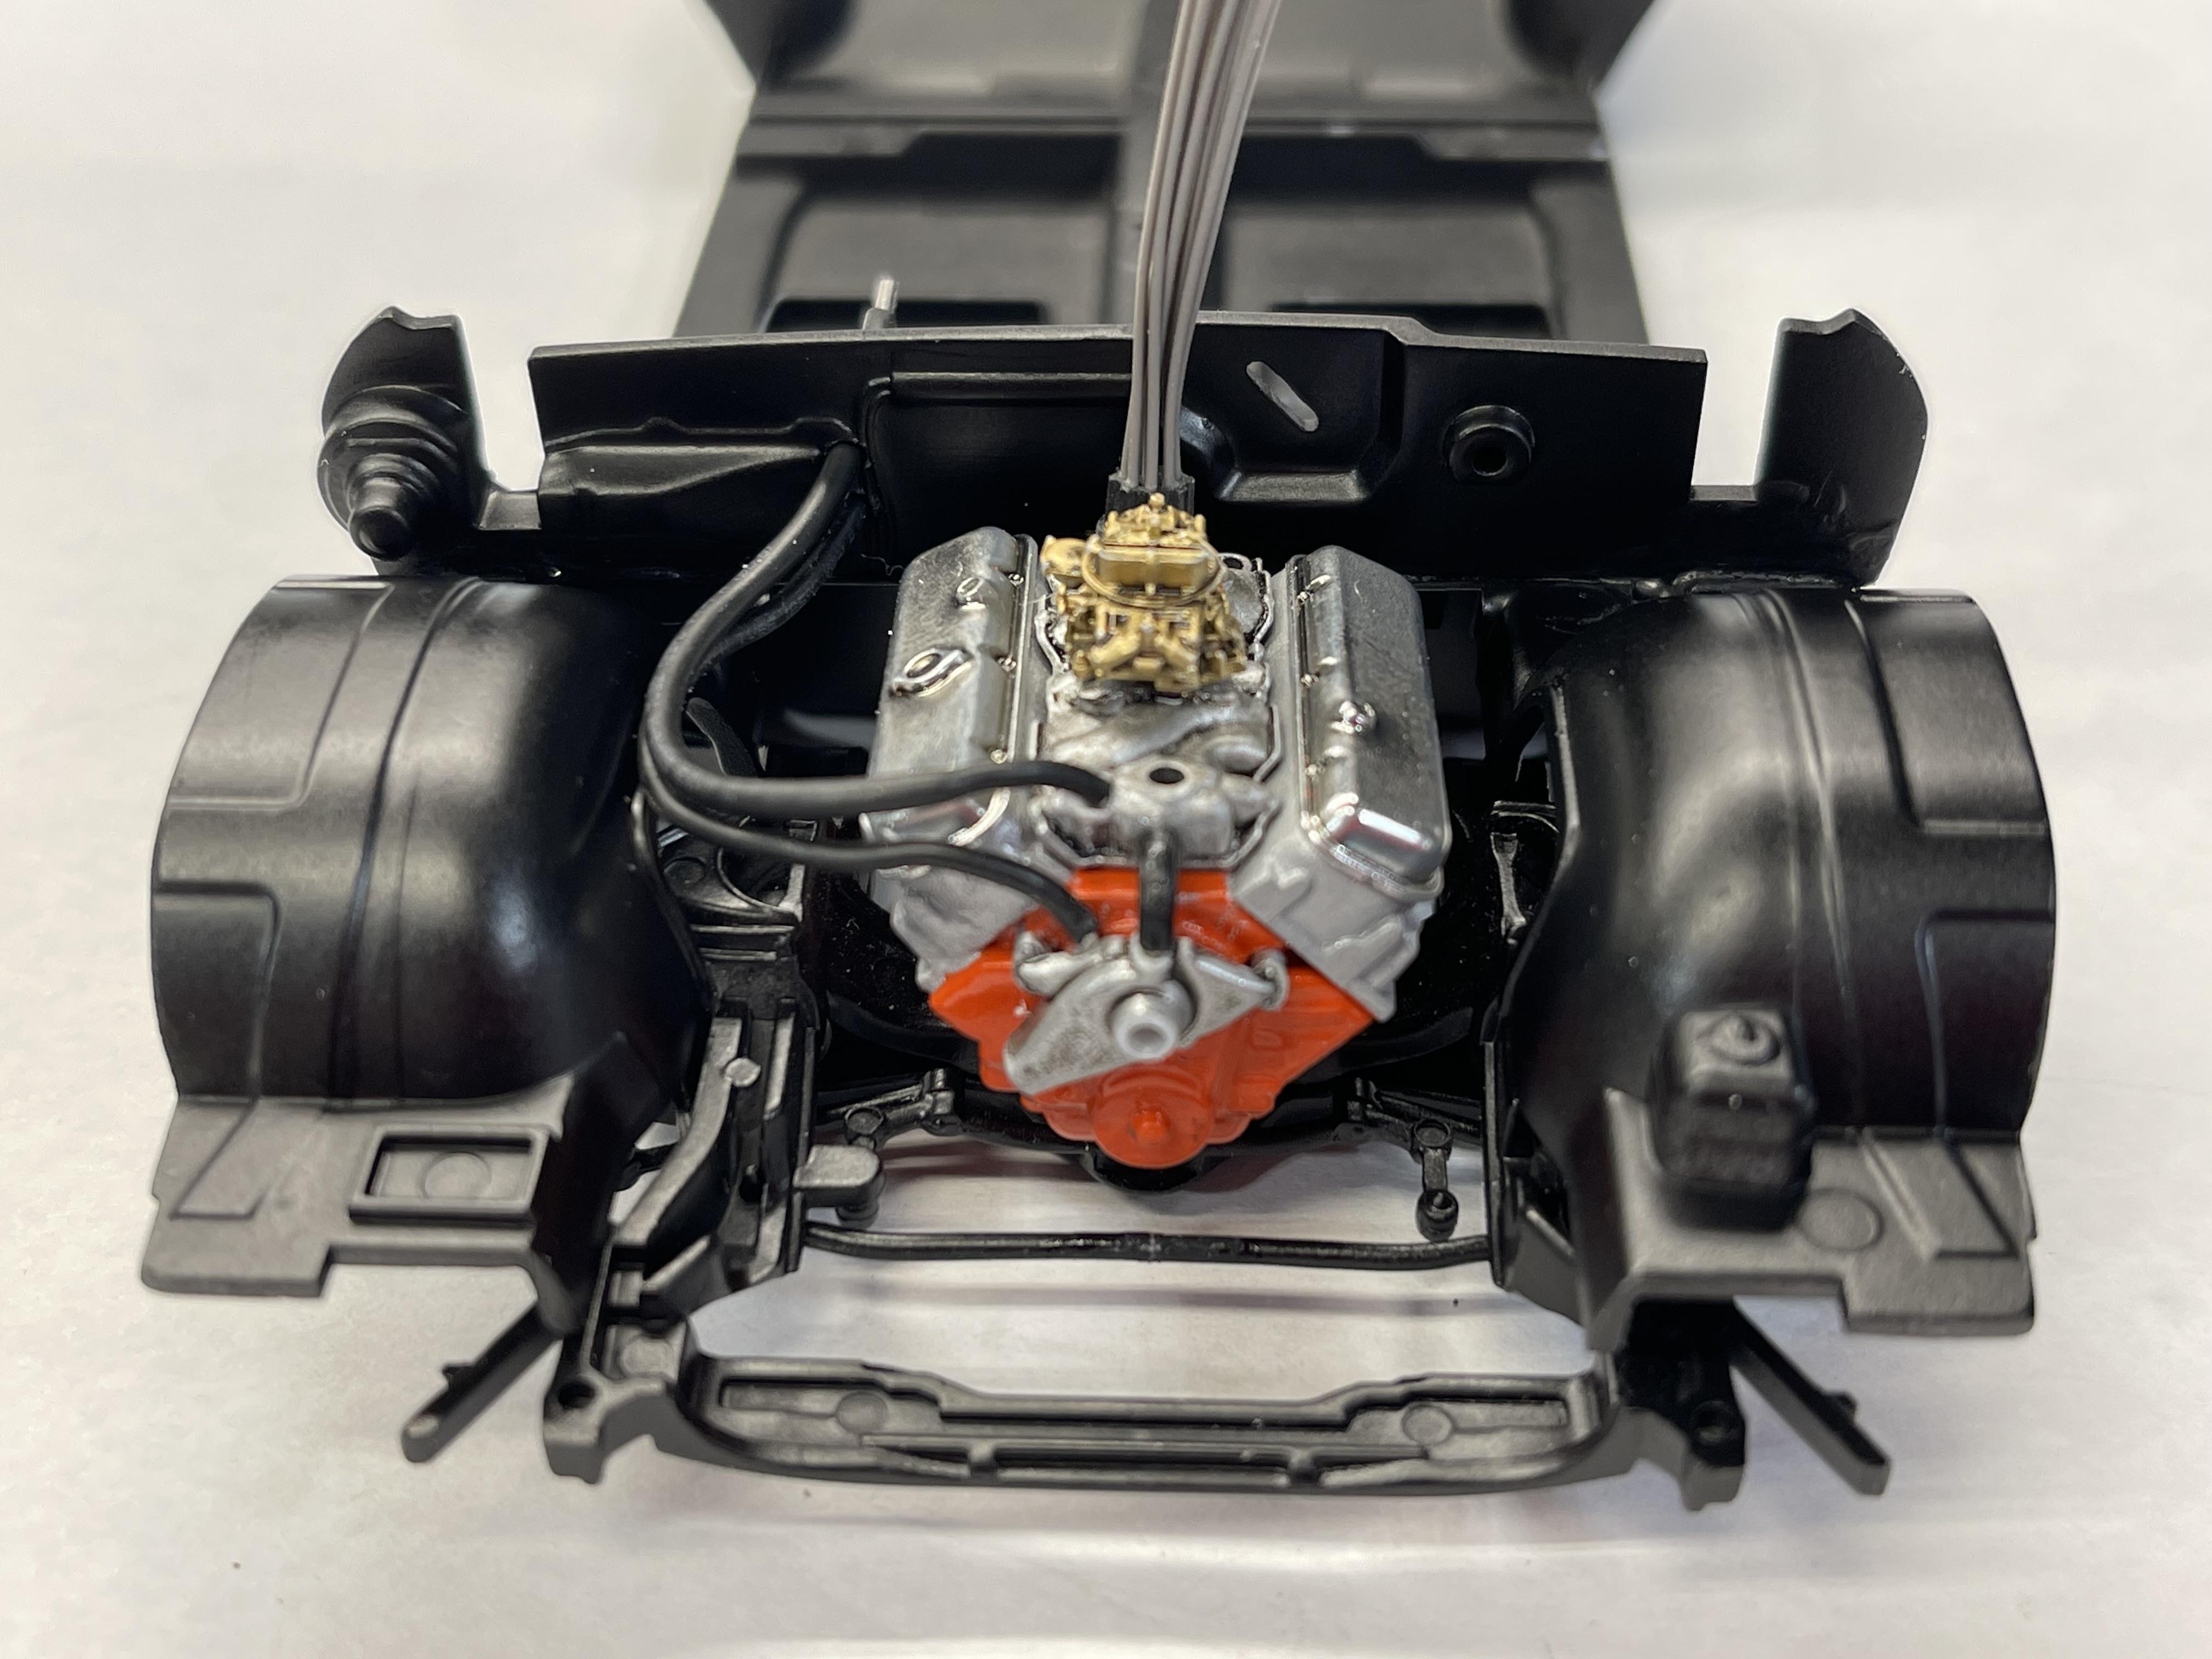
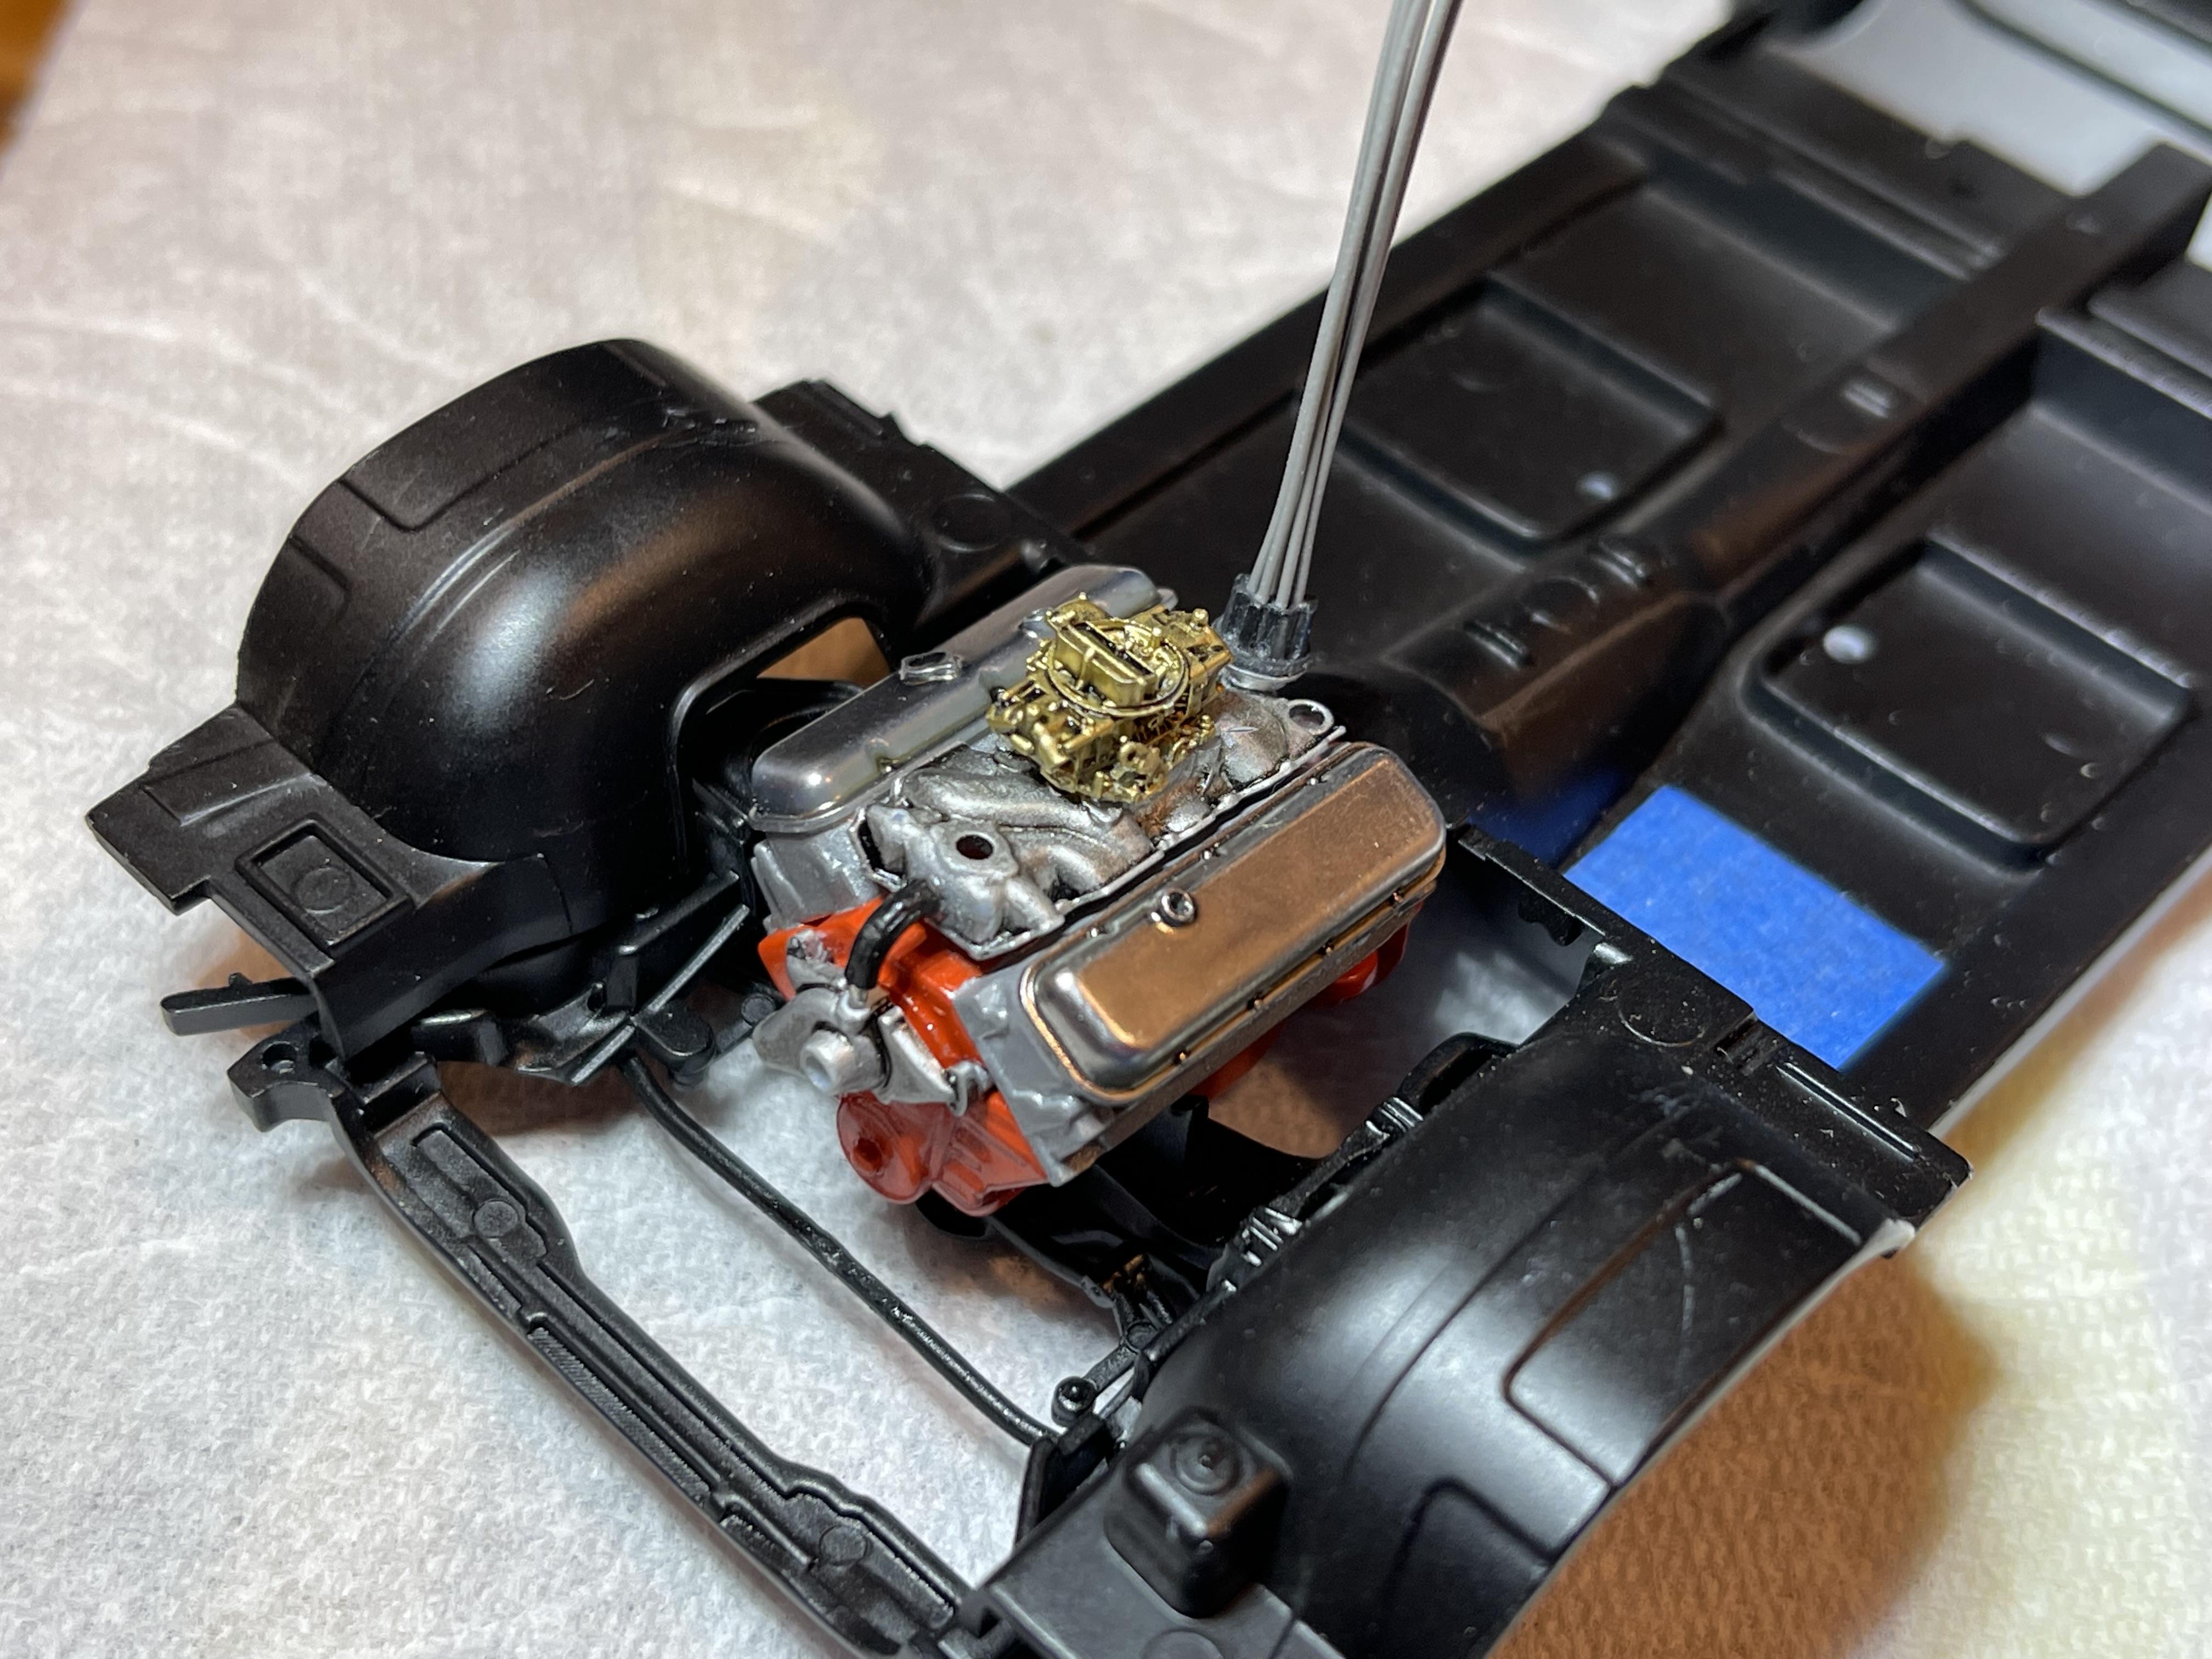
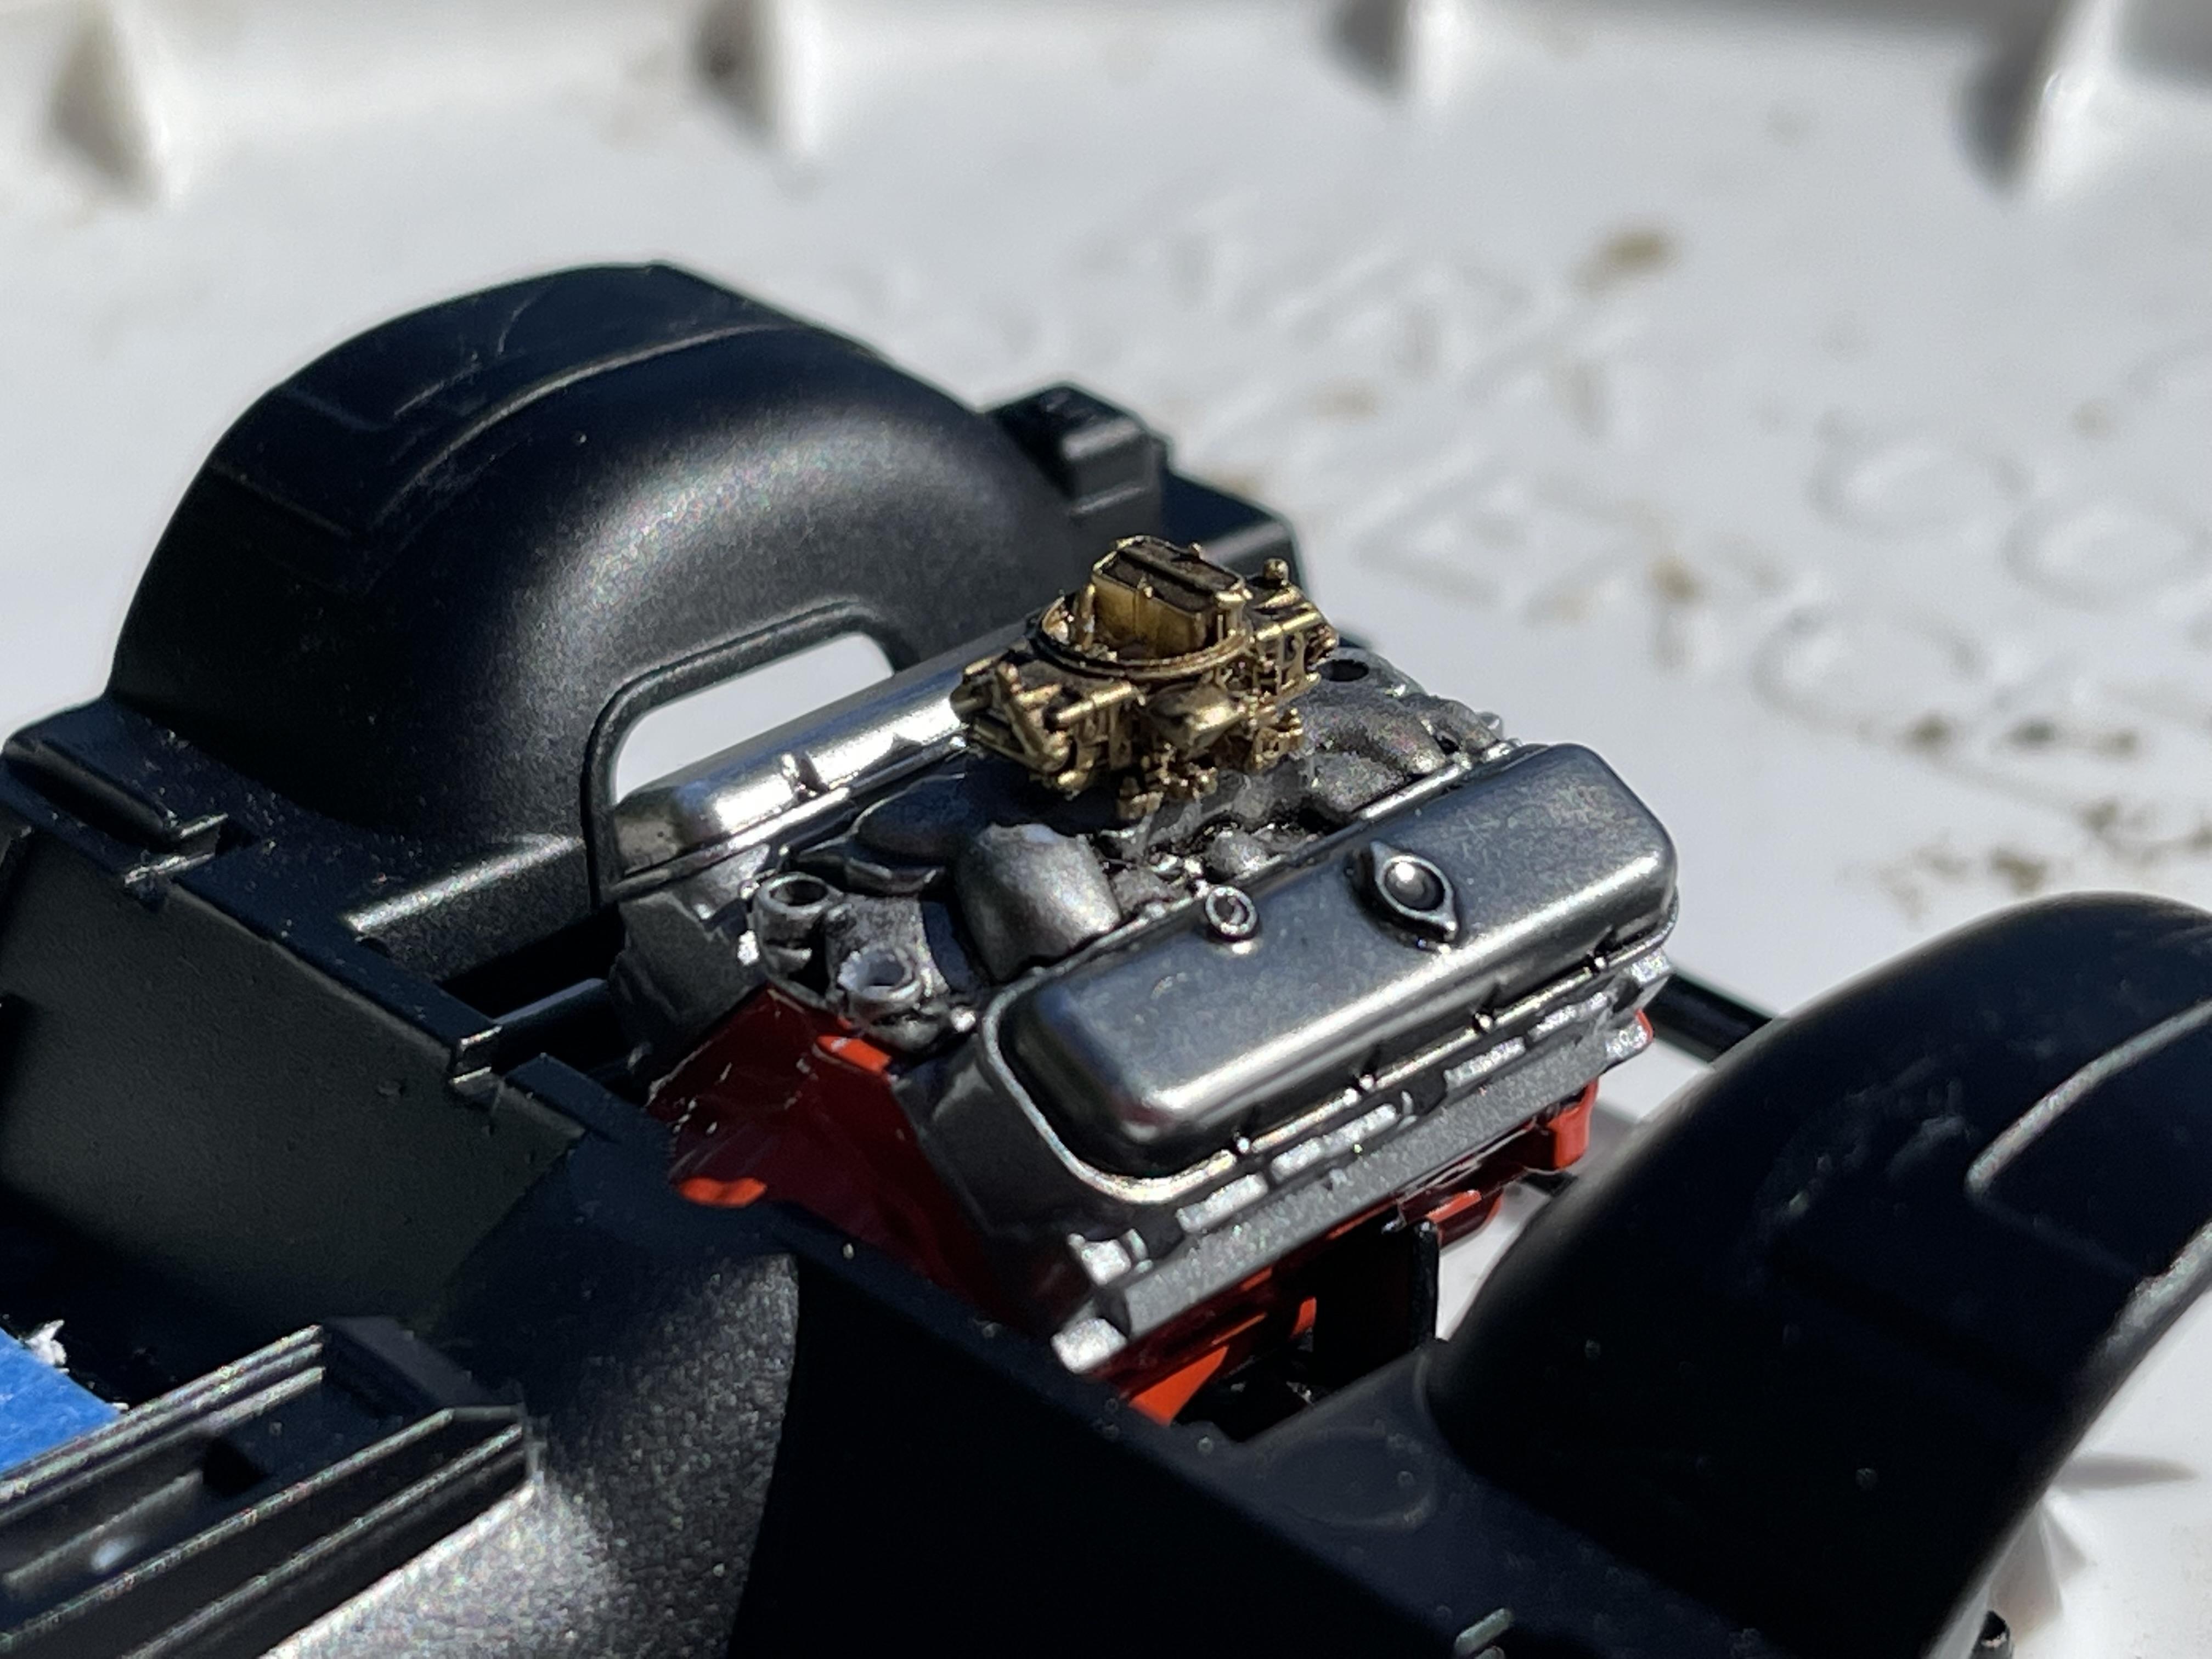
Thank you Greg ! I will be attempting to plumb the engine correctly by adding coolant hoses and wiring in their proper locations as well as adding a oil dip stick, throttle cable and vacuum hoses which the progress on adding these details will be slow.
-
Started working on where the coolant hoses will be installed to the intake manifold and to the water pump which I was able to get just one hose installed this evening that runs from the front of the intake manifold down to the top of the water pump and I must say it was a challenge to just get the one hose installed.
-
8
-
-
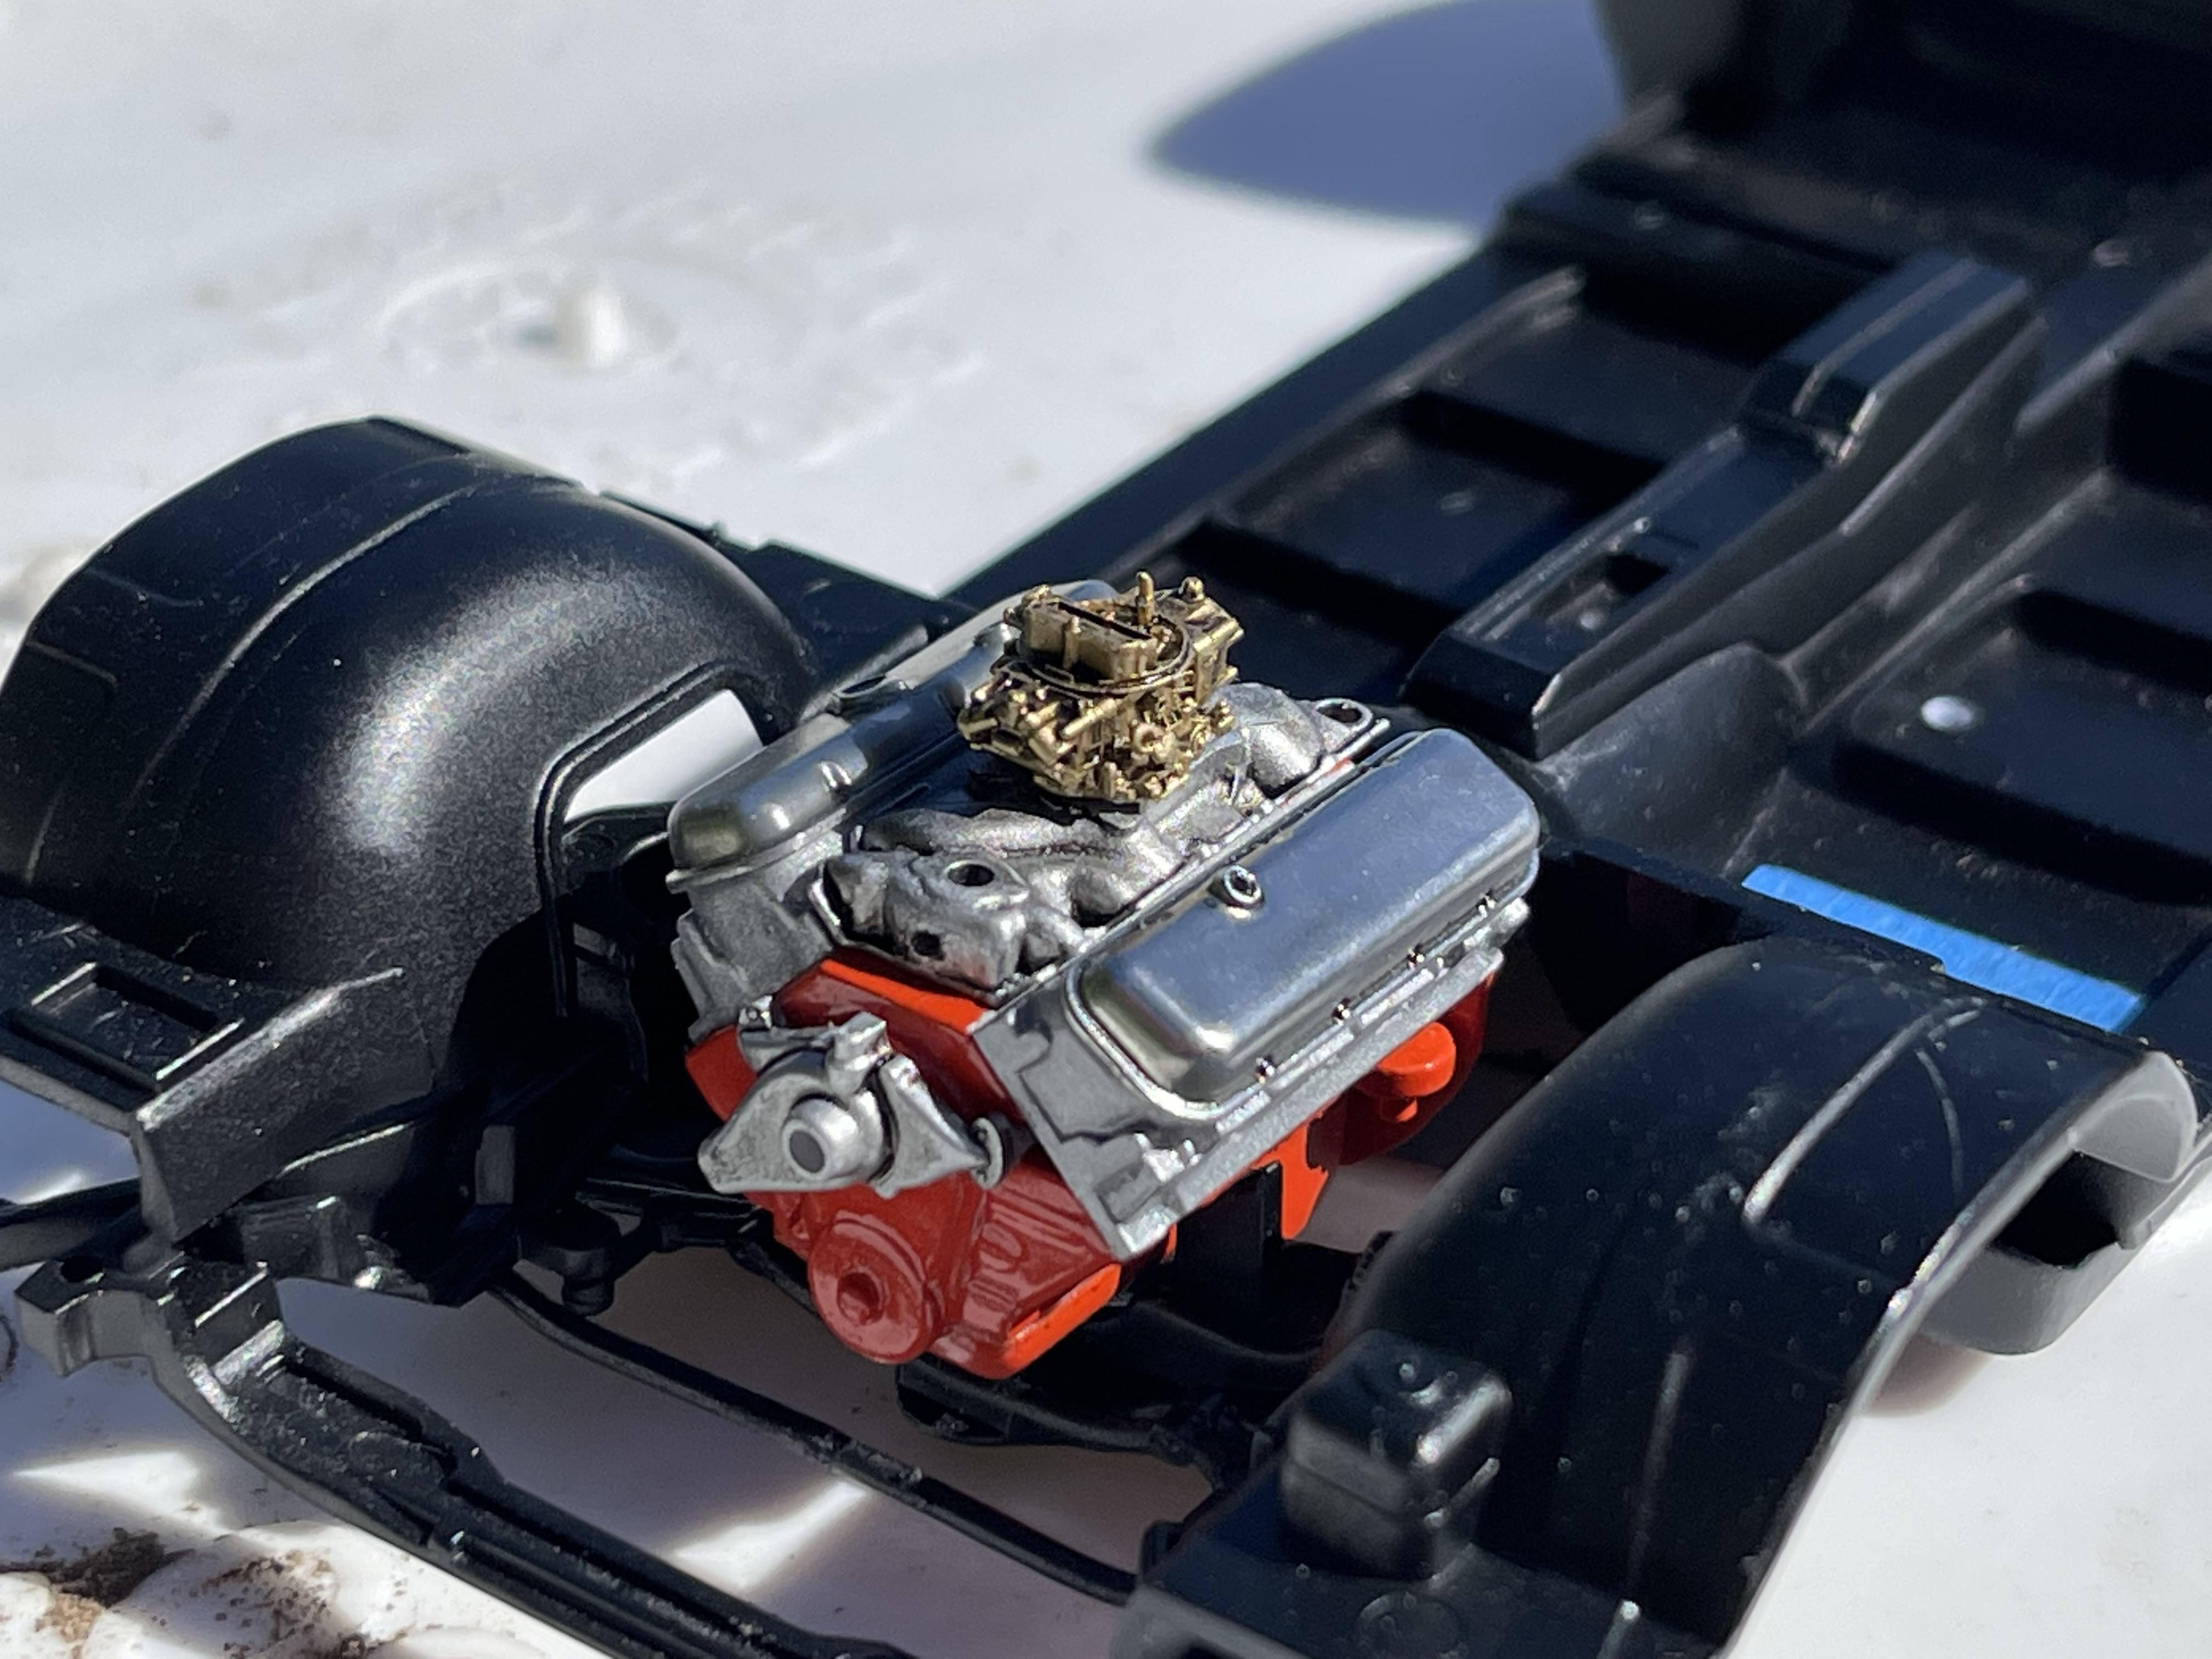
I sprayed the carb first with primer than Tamiya gold then I used a black wash to give it some depth. I also pre drilled for the fuel lines & vacuum lines before painting the carb as well. Plus I also scratch built the lower half of the air cleaner housing that sits on top of the carb.
-
3
-
 1
1
-
-
Thank you John !
-
Hello All,
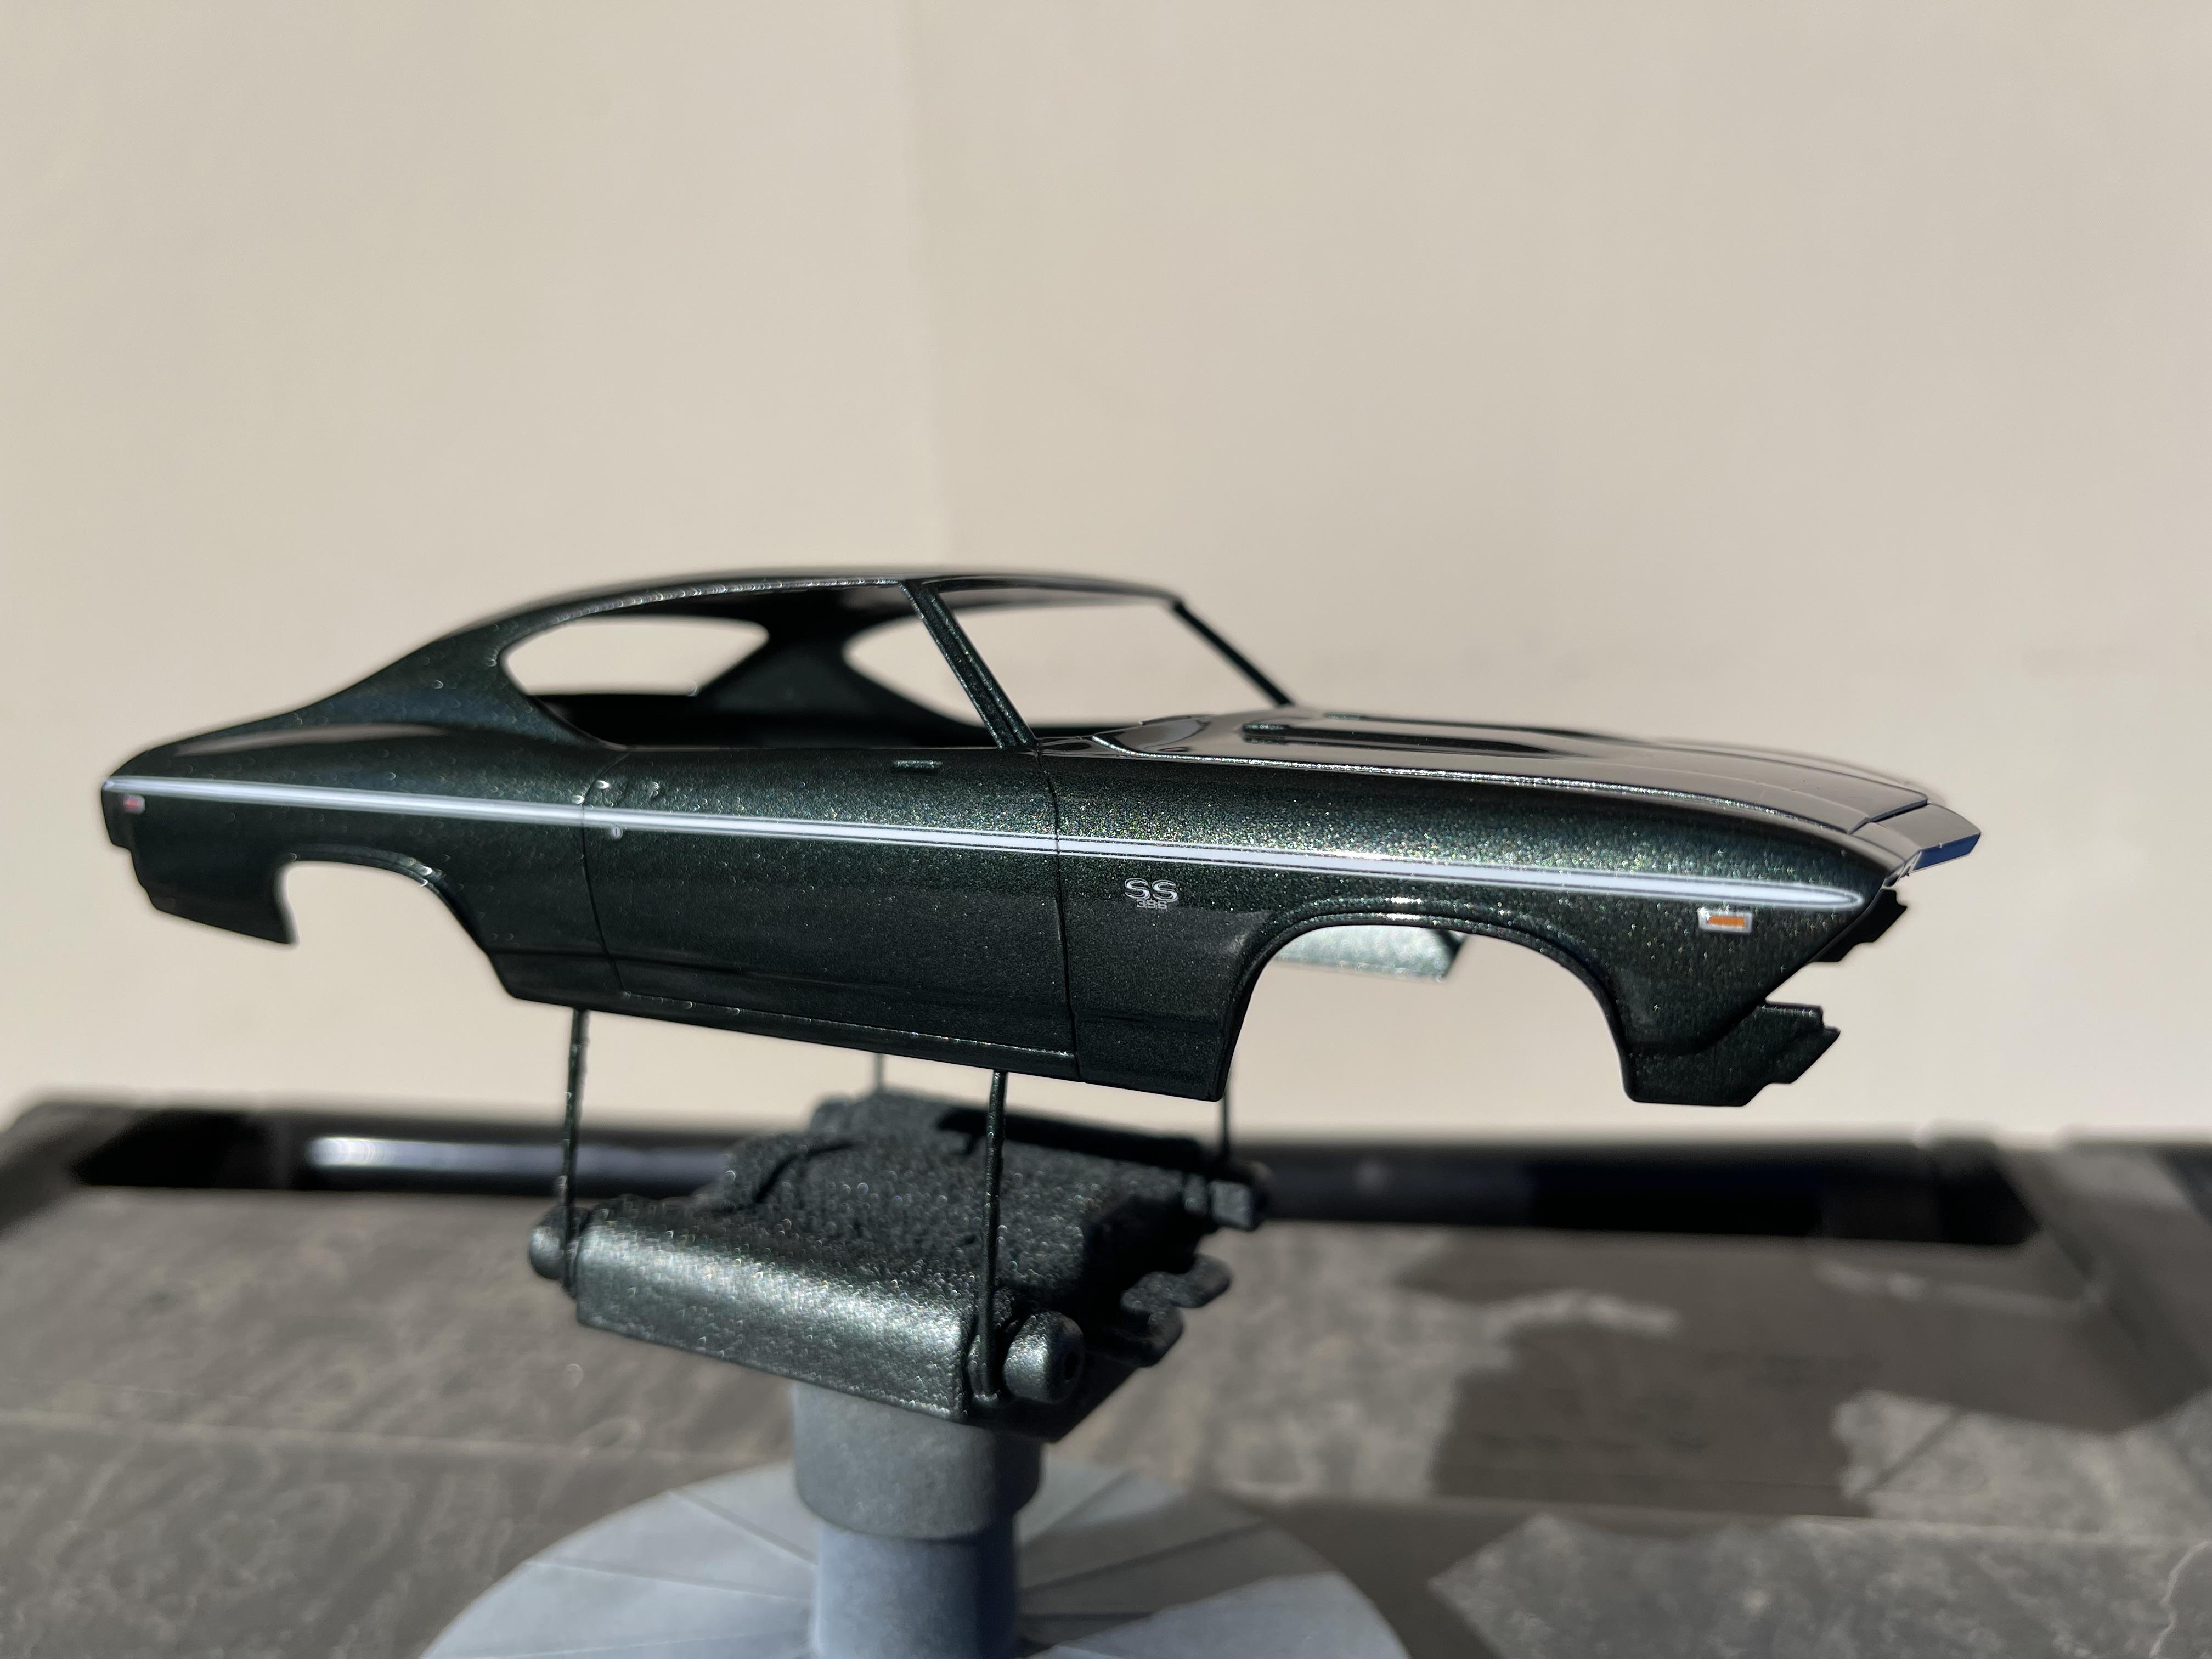
I started this build on the 69 SS a few months back then started on a Meng 1/24 1966 Ford GT but I ran into some paint and decal issues on the Ford so I put it aside for now so I could think about how I will attack to correct the issues so then I decided to start back on the 69 Chevelle. So here are some pics of the process of the build and where I'm at on the build. First off the body has been painted and decals added then a couple coats of clear but she will still need Thento be rubbed out. Then I started on the assembly of the engine which has been painted as well as the intake manifold , water pump , carburetor, heads and certain parts detailed with paint and holes drilled for spark plugs , distributor and couple for the coolant hoses.
-
15
-
-
She came out looking awesome !
-
Nice work !
-
1
-
-
Looking good Art ! It is always a pleasure to watch you build.
-
She looks nice & mean ! Good Job !
-
1
-
-
She is looking good and I feel you on the painting issues .
-
She's looking good ! I just wish that Revell would have included the ram air cleaner with the kit which I actually scratch built for my 66
-
Thank you David ! Next I will be working on getting the body tapped off around the headlamp and lower light buckets to shoot them a semi gloss black the I'll install the lights and the light covers.


1932 Ford 3-Window With 427SOHC From The Newest MCM Issue 216
in Model Cars
Posted
Dennis Congrats on the award ! This is the seventh show our club has done at the NHRA museum and as always the turn out was top notch and judging the builds was no easy task.