gwolf
-
Posts
434 -
Joined
-
Last visited
Content Type
Profiles
Forums
Events
Gallery
Everything posted by gwolf
-
Thanks Sam! It's fun, too, seeing what you can improvise with.
-
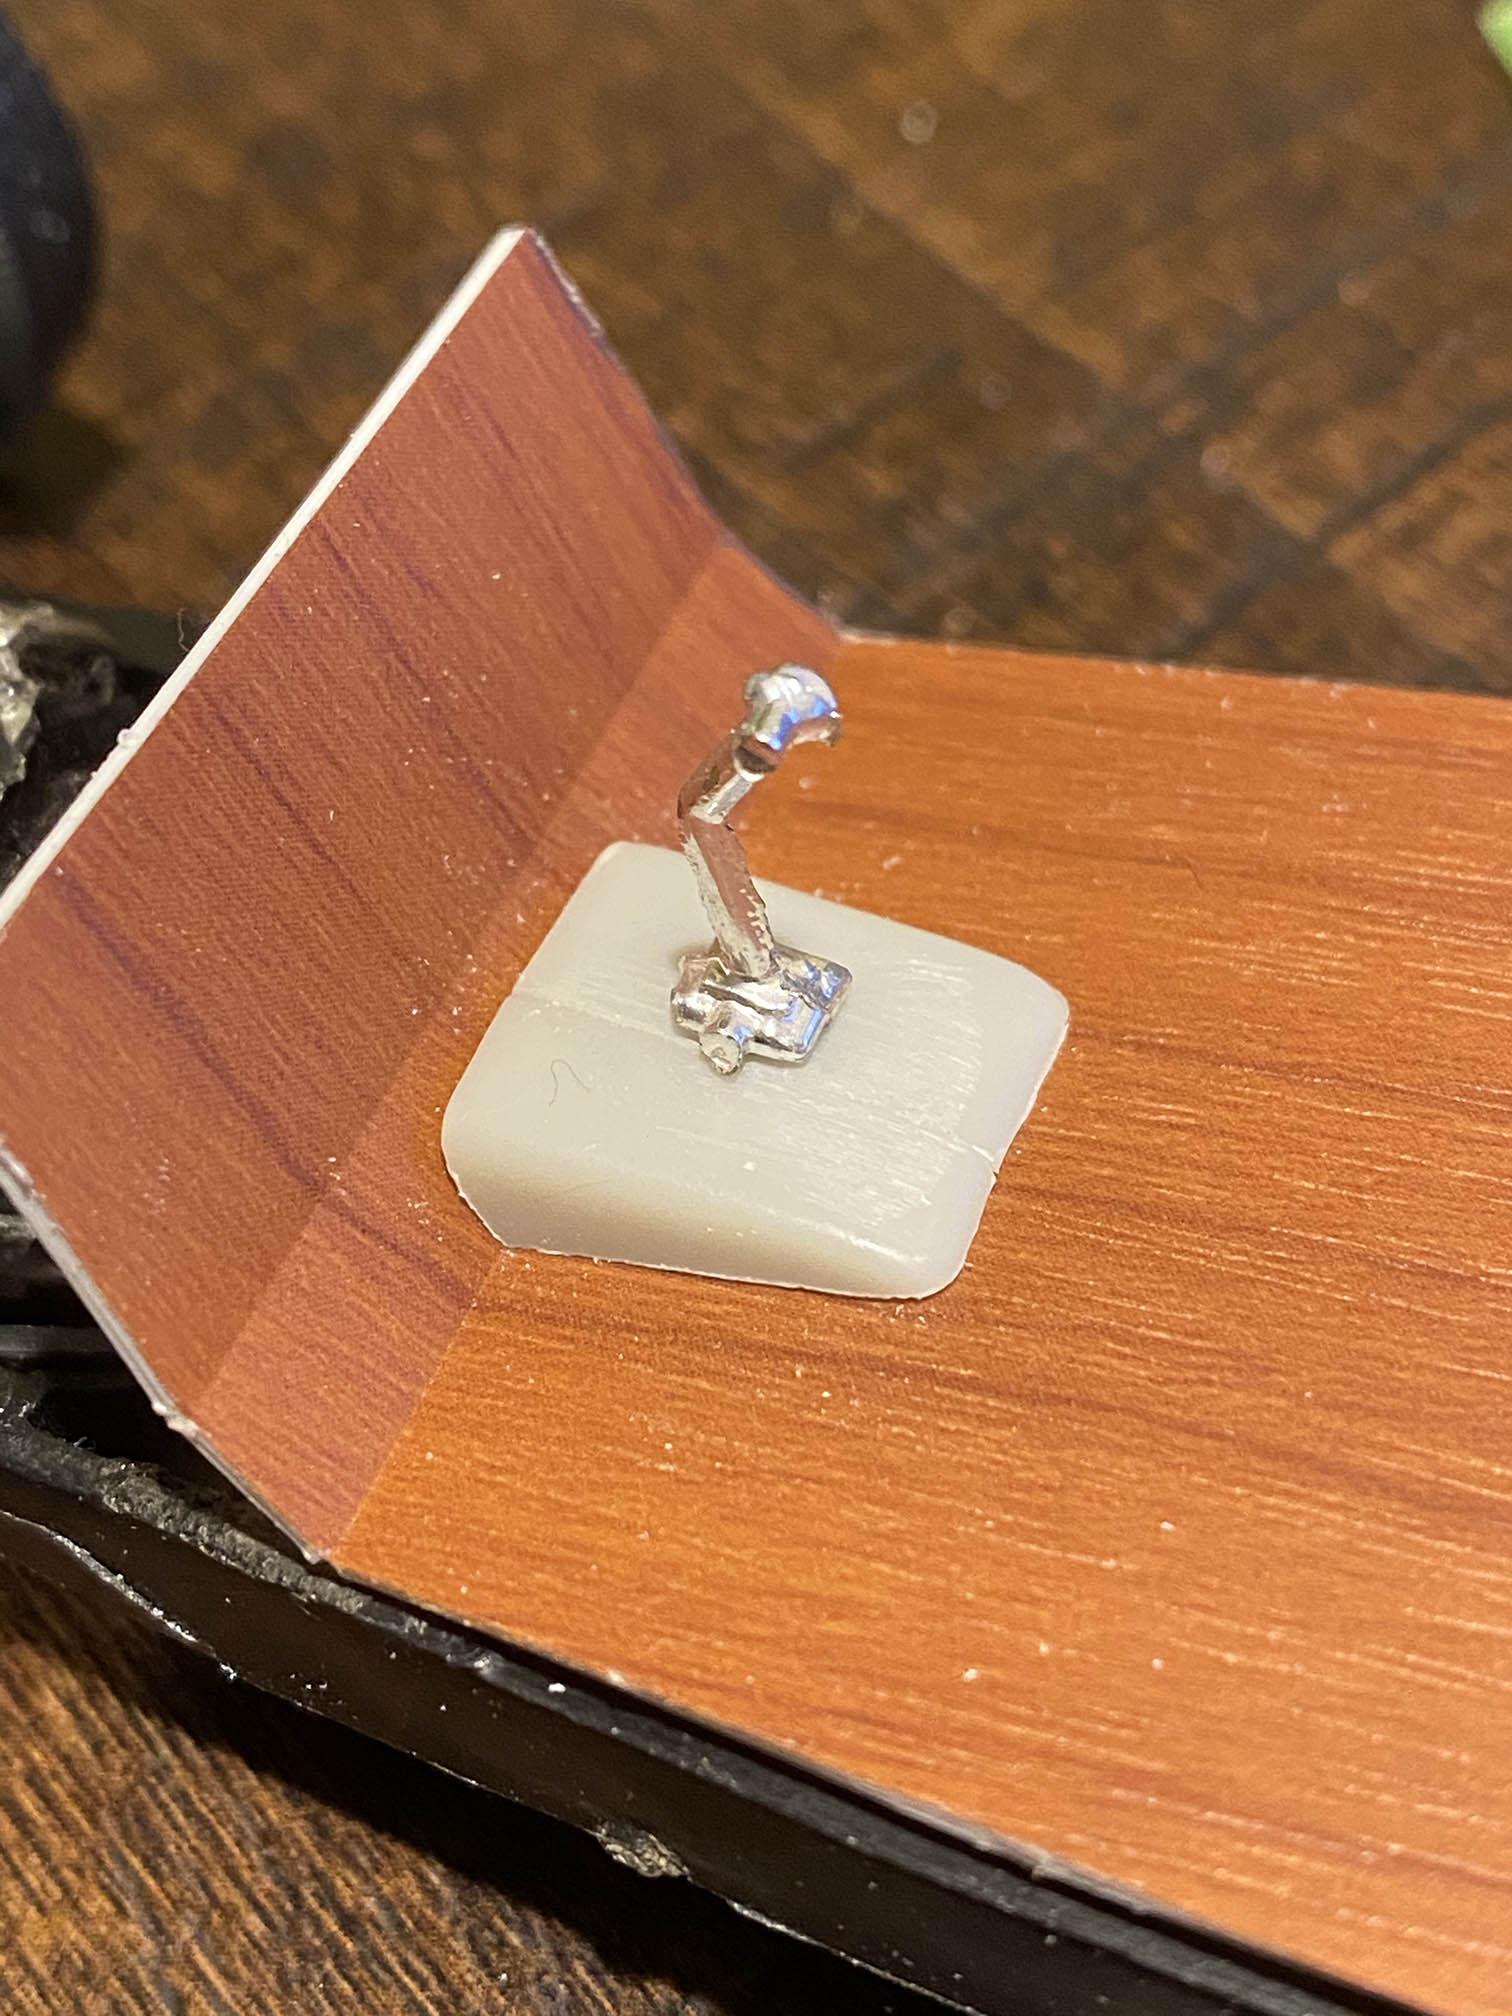
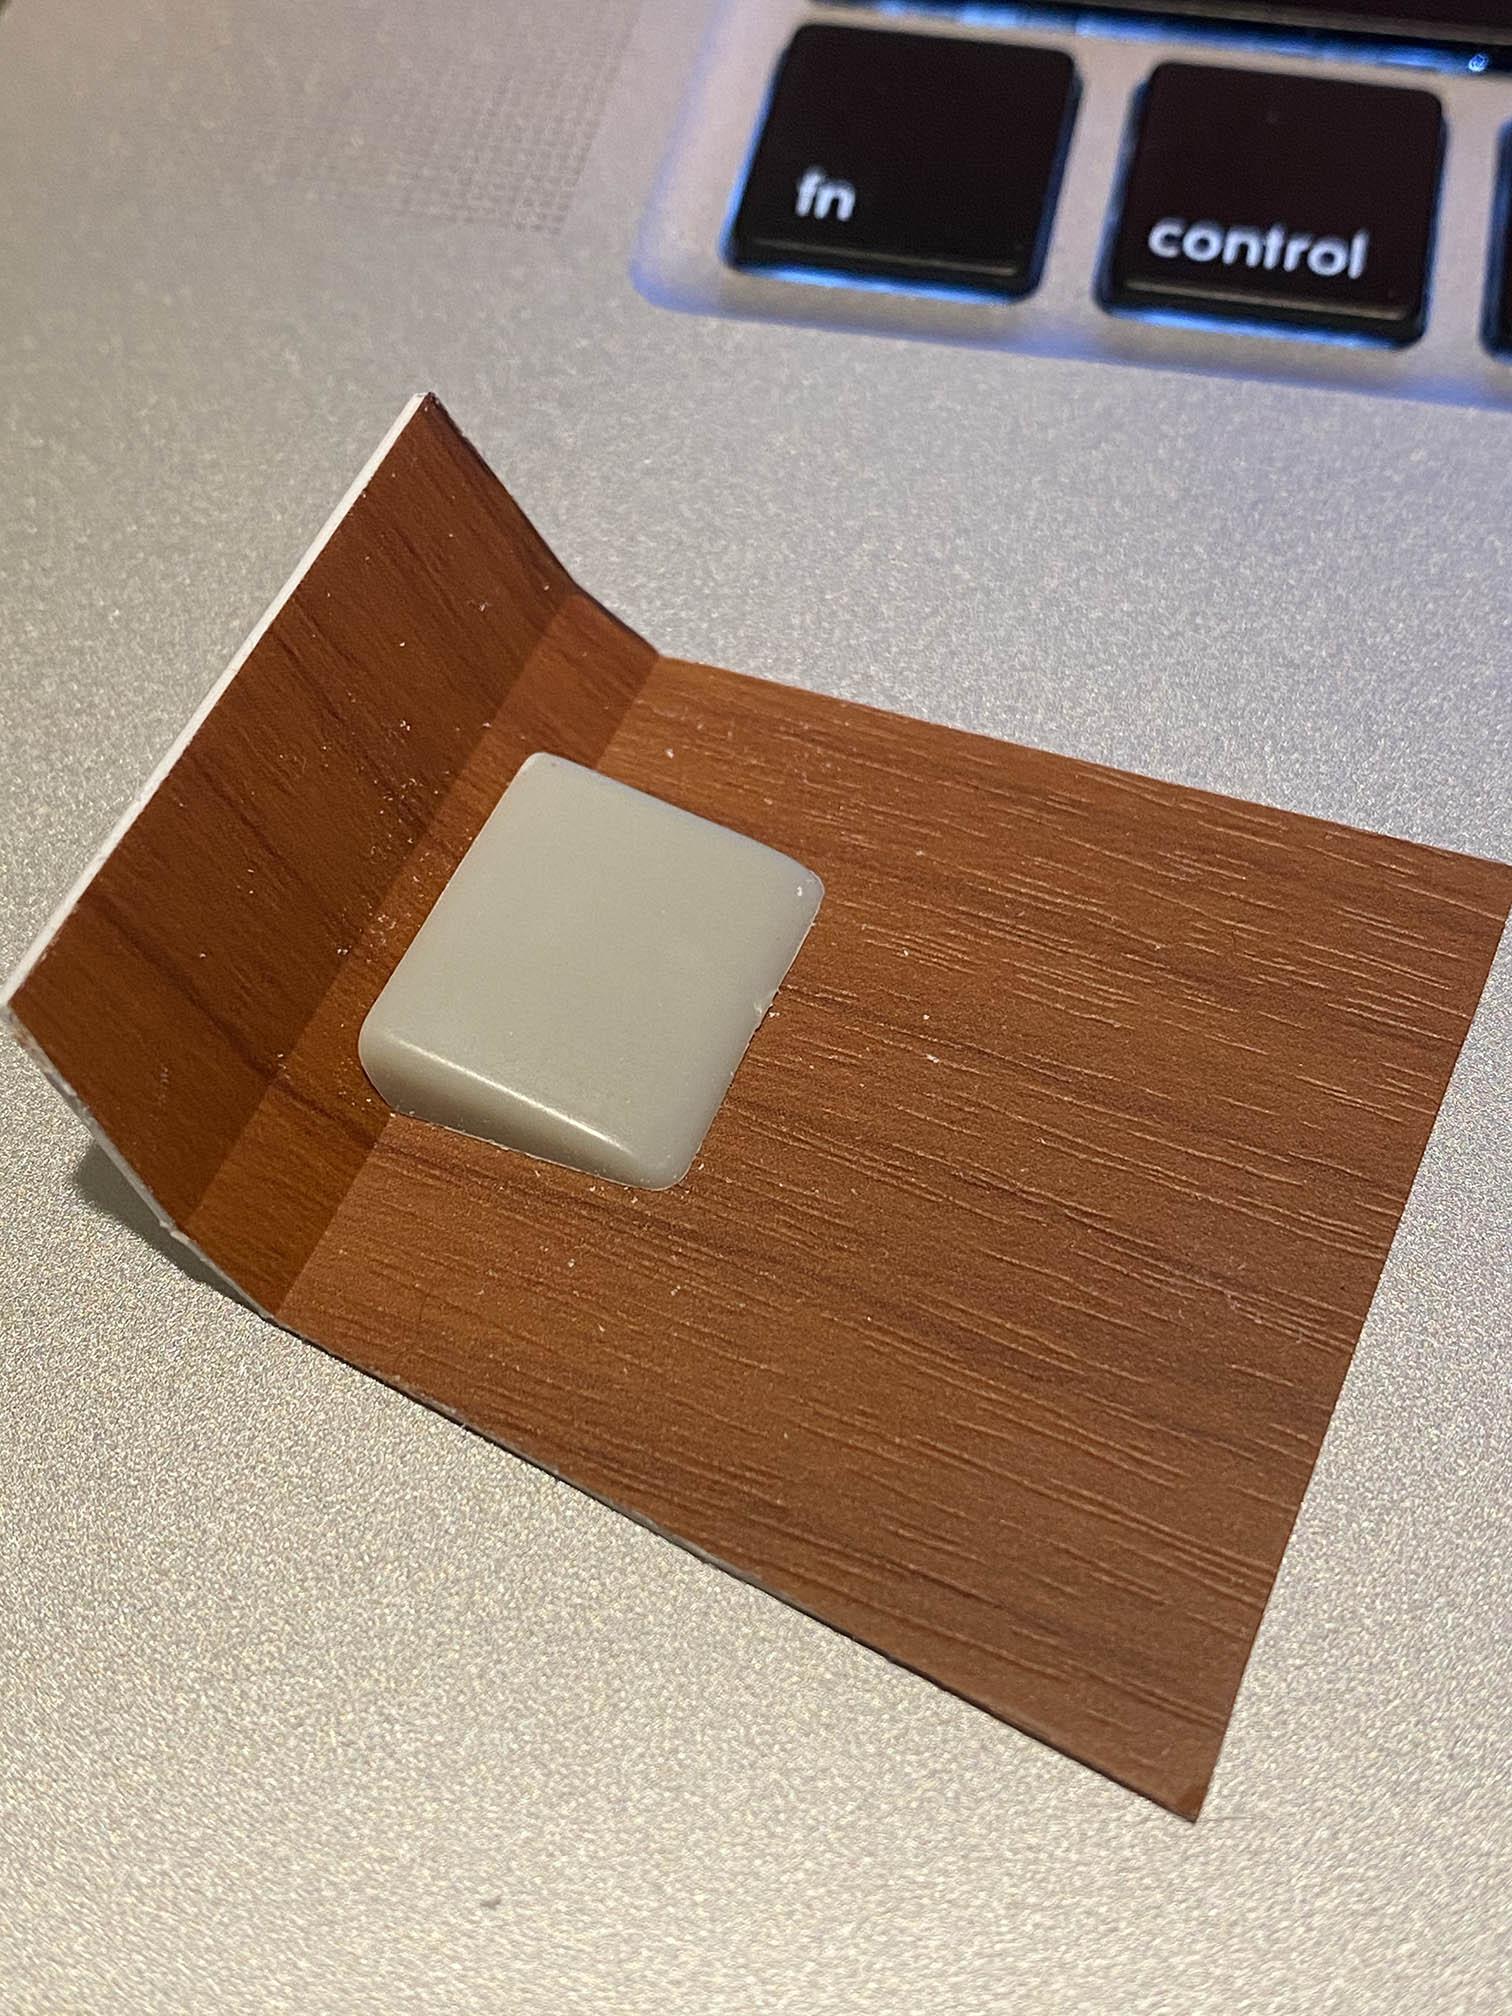
I have a pretty good stock of Model A junkers I build and take from, so I dug through them and pulled out a few things to add, mainly a dash console, shifter, and gear box. This parts box hood scoop will work great. I ground down the front of the scoop to match the angle of the bend in the floor. It takes up a lot of real estate, though... I sawed it in half with a X-Acto saw, then ground down the cut edges until I got the right size and the got them to match up straight.

-
Hi Paul, I was going for something like that. I'll try your trick. Or I could paint them green and it'll look like those old corrugated green patio roofs everyone had in the 70's. Just kidding. I hadn't planned on padding for the bomber seats, because these R&M ones are just so cool. But if you have an idea for some padding I'd love to hear it.
-
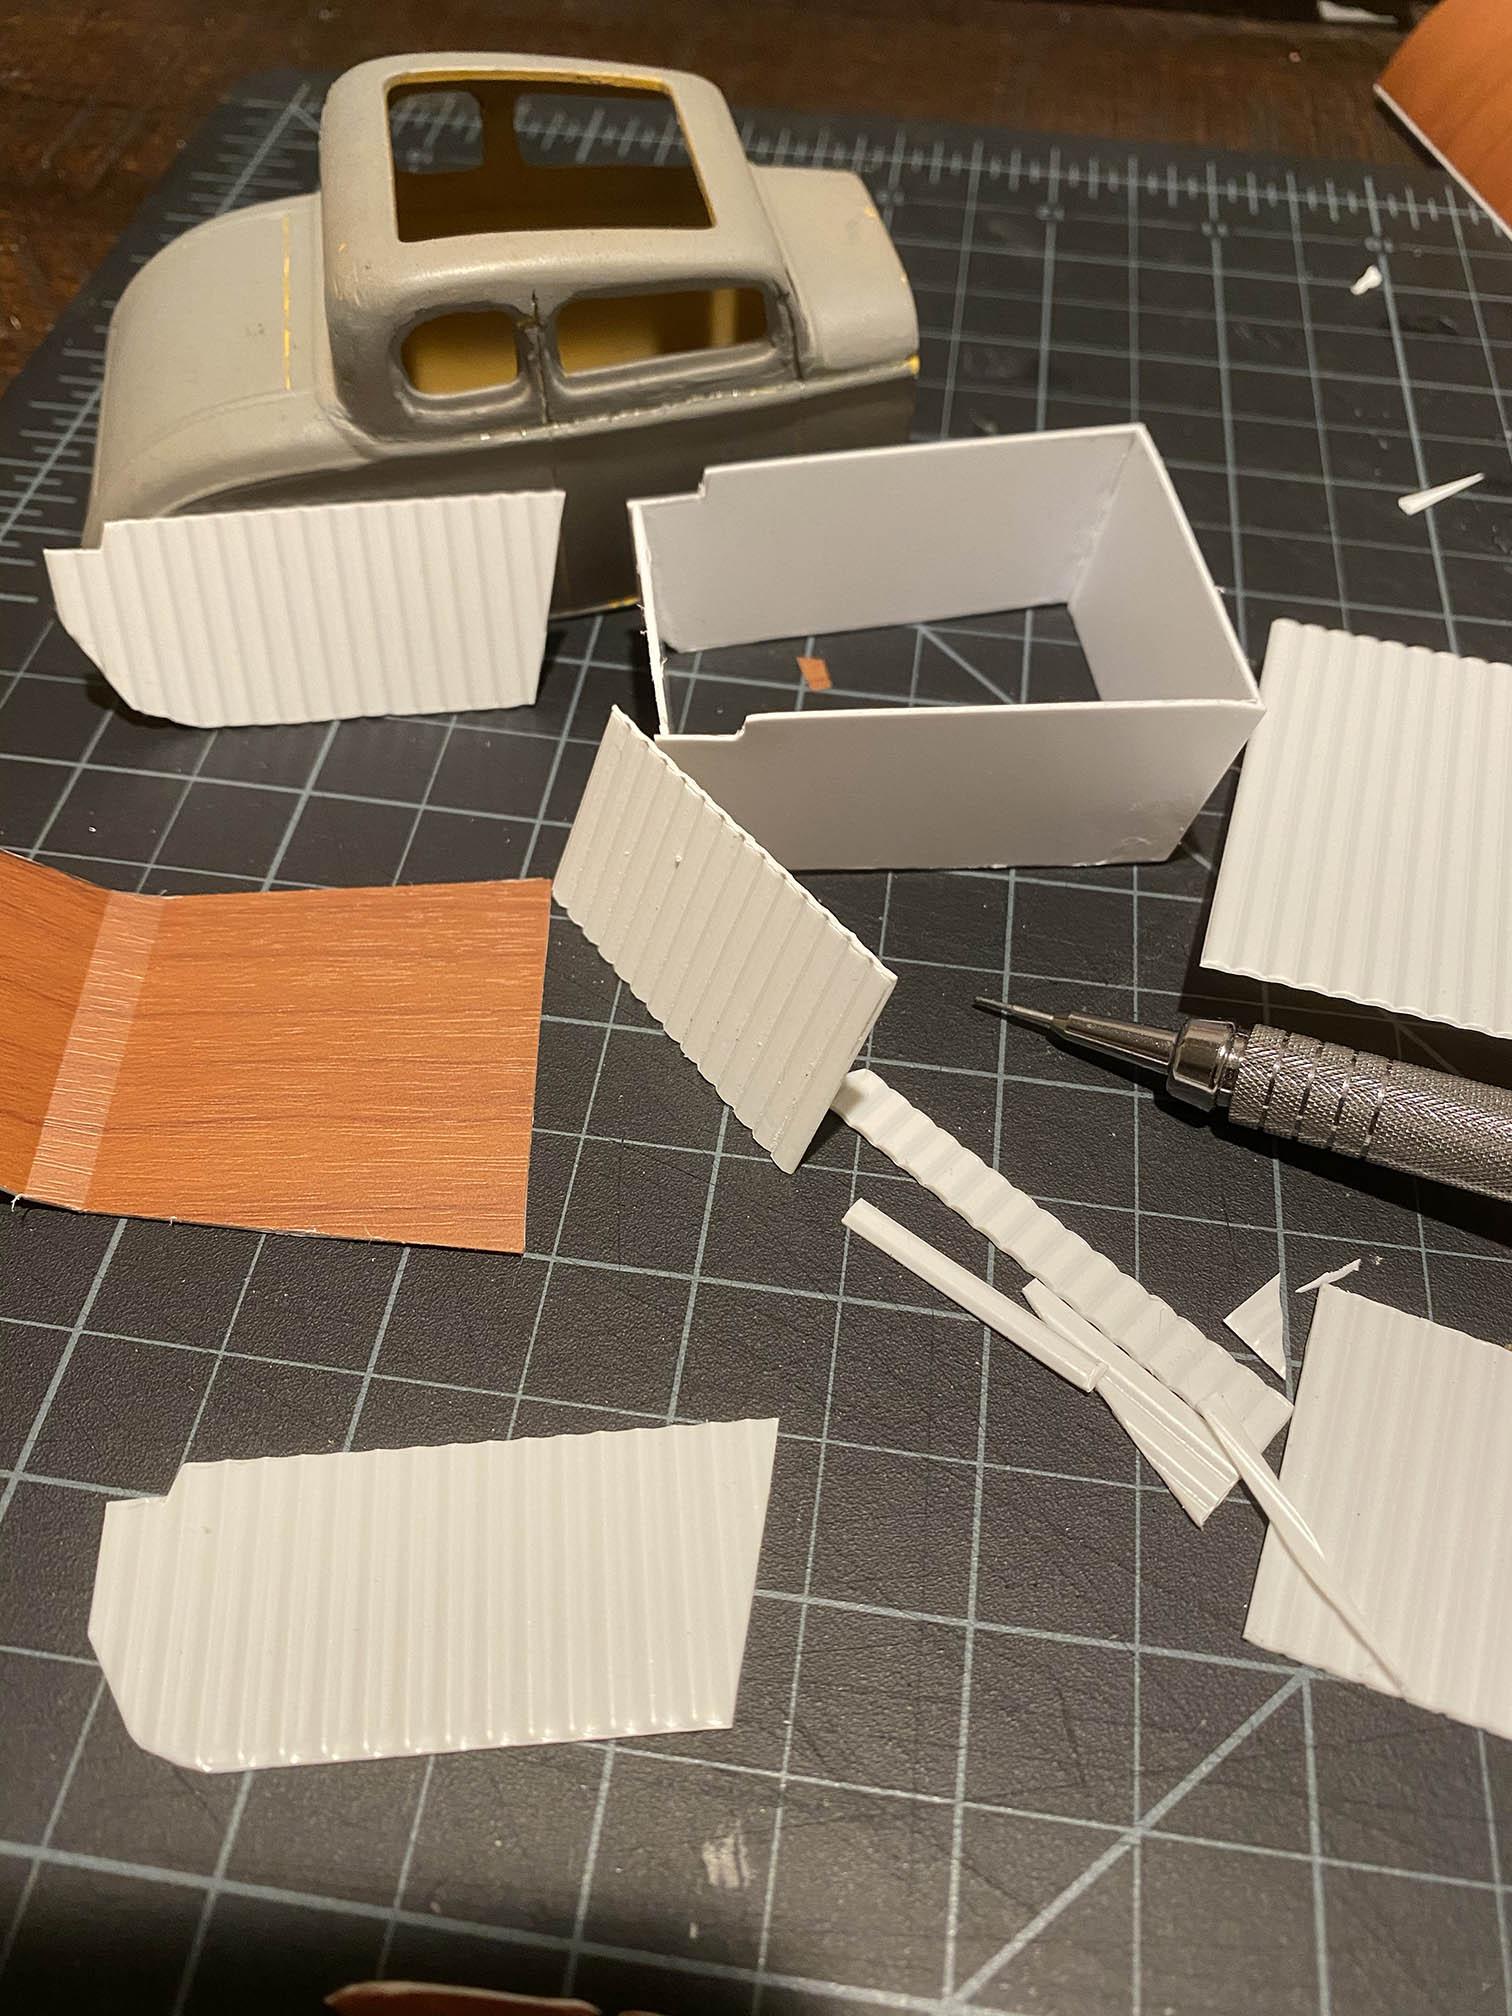
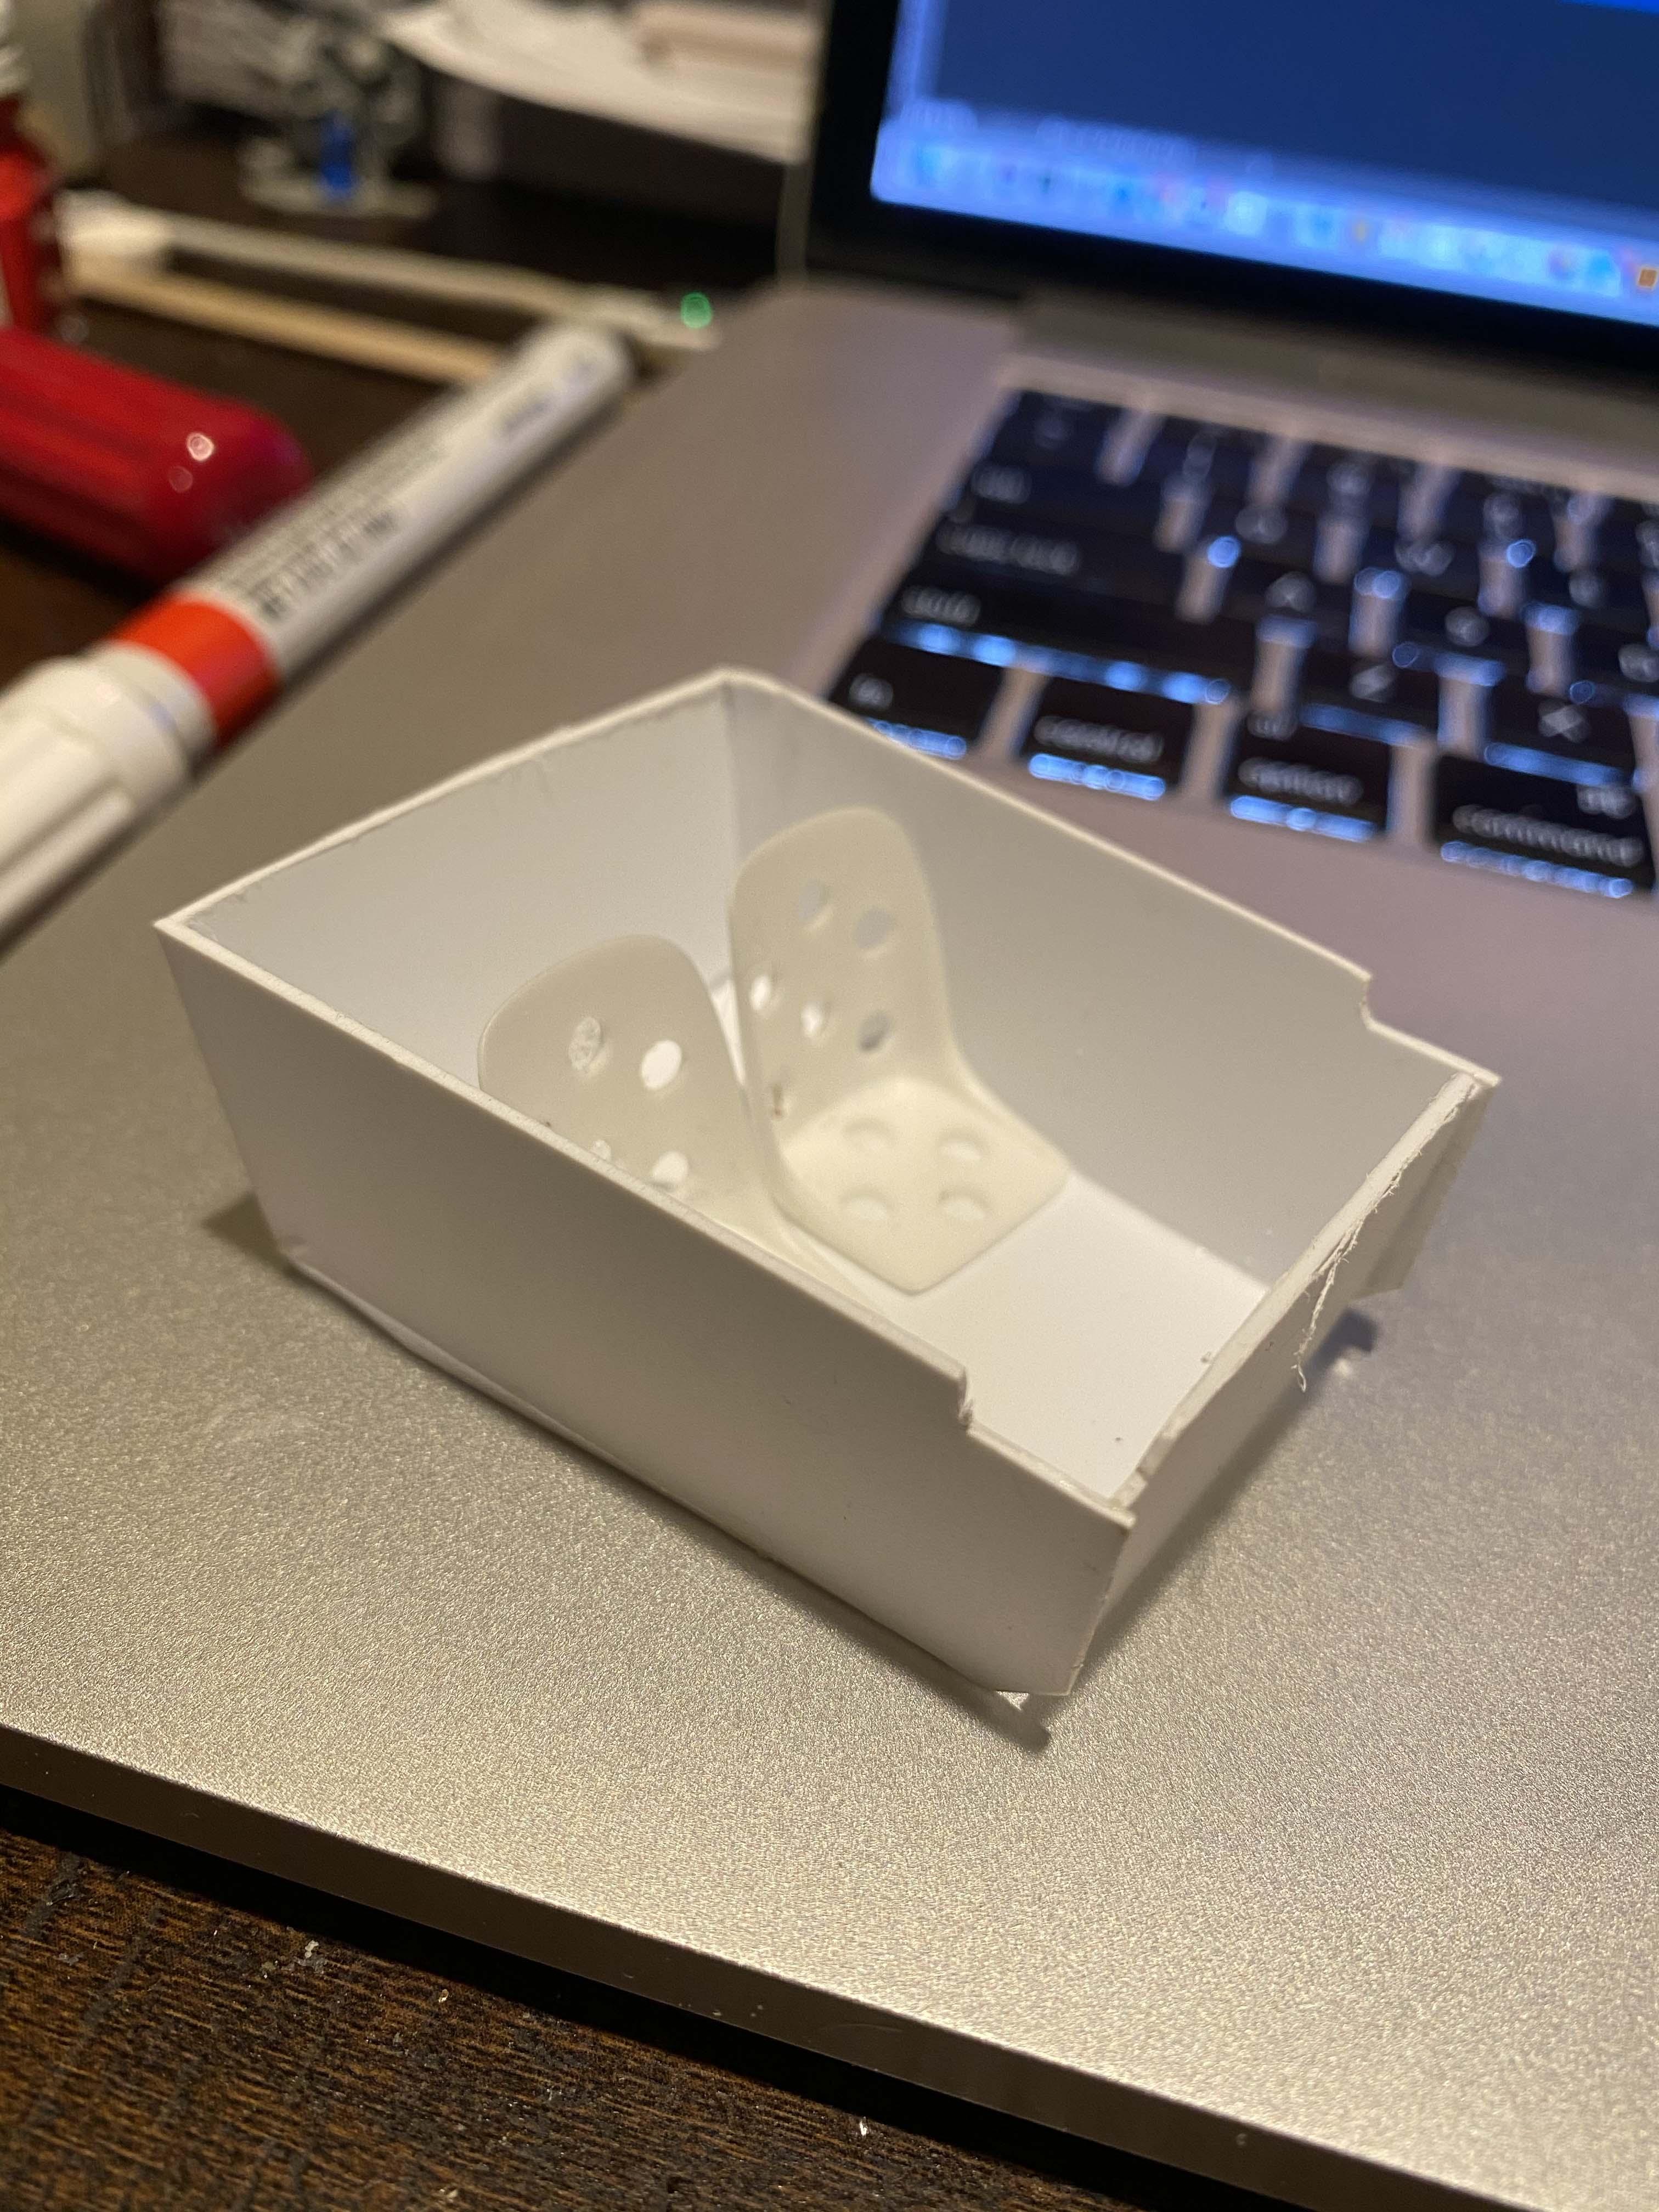
Ok, so I did a little work on the tub. I wanted to redo the floor so I cut a new, longer piece from styrene sheet and add two angled areas so the floor meets up to the wall a little better. Scoring the styrene on the underside allowed me to get the right bends. Some rods have wood floors over top of metal, so I like that look. The wood grain is actually self adhesive wallpaper from wallstickery.com. I made the mistake of misplacing the 6.5' door roll of this stuff (found it this morning) and went out and bought two rolls of wood grain shelf liner yesterday. Let me tell you, there's a world of difference. This modern self adhesive wallpaper is amazing. Tons of it in different colors on amazon.com. I wanted some kind of texture for the interior so I found this corrugated siding from Wee Scapes that's used for model train layouts. A little trimming, a little sanding and it lines up pretty well inside. Should look pretty good combined with a set of Replicas and Miniatures P-86 1/25 "Rat Rod" Seats (the best $4.95 you'll ever spend). I'm thinking a flat black or something like that for the color of the interior.
-
I think so too. And I kinda like that it's a little literally rough around the edges.
-
I do too, and it's almost ruined me on building new, unbuilt kits!
-
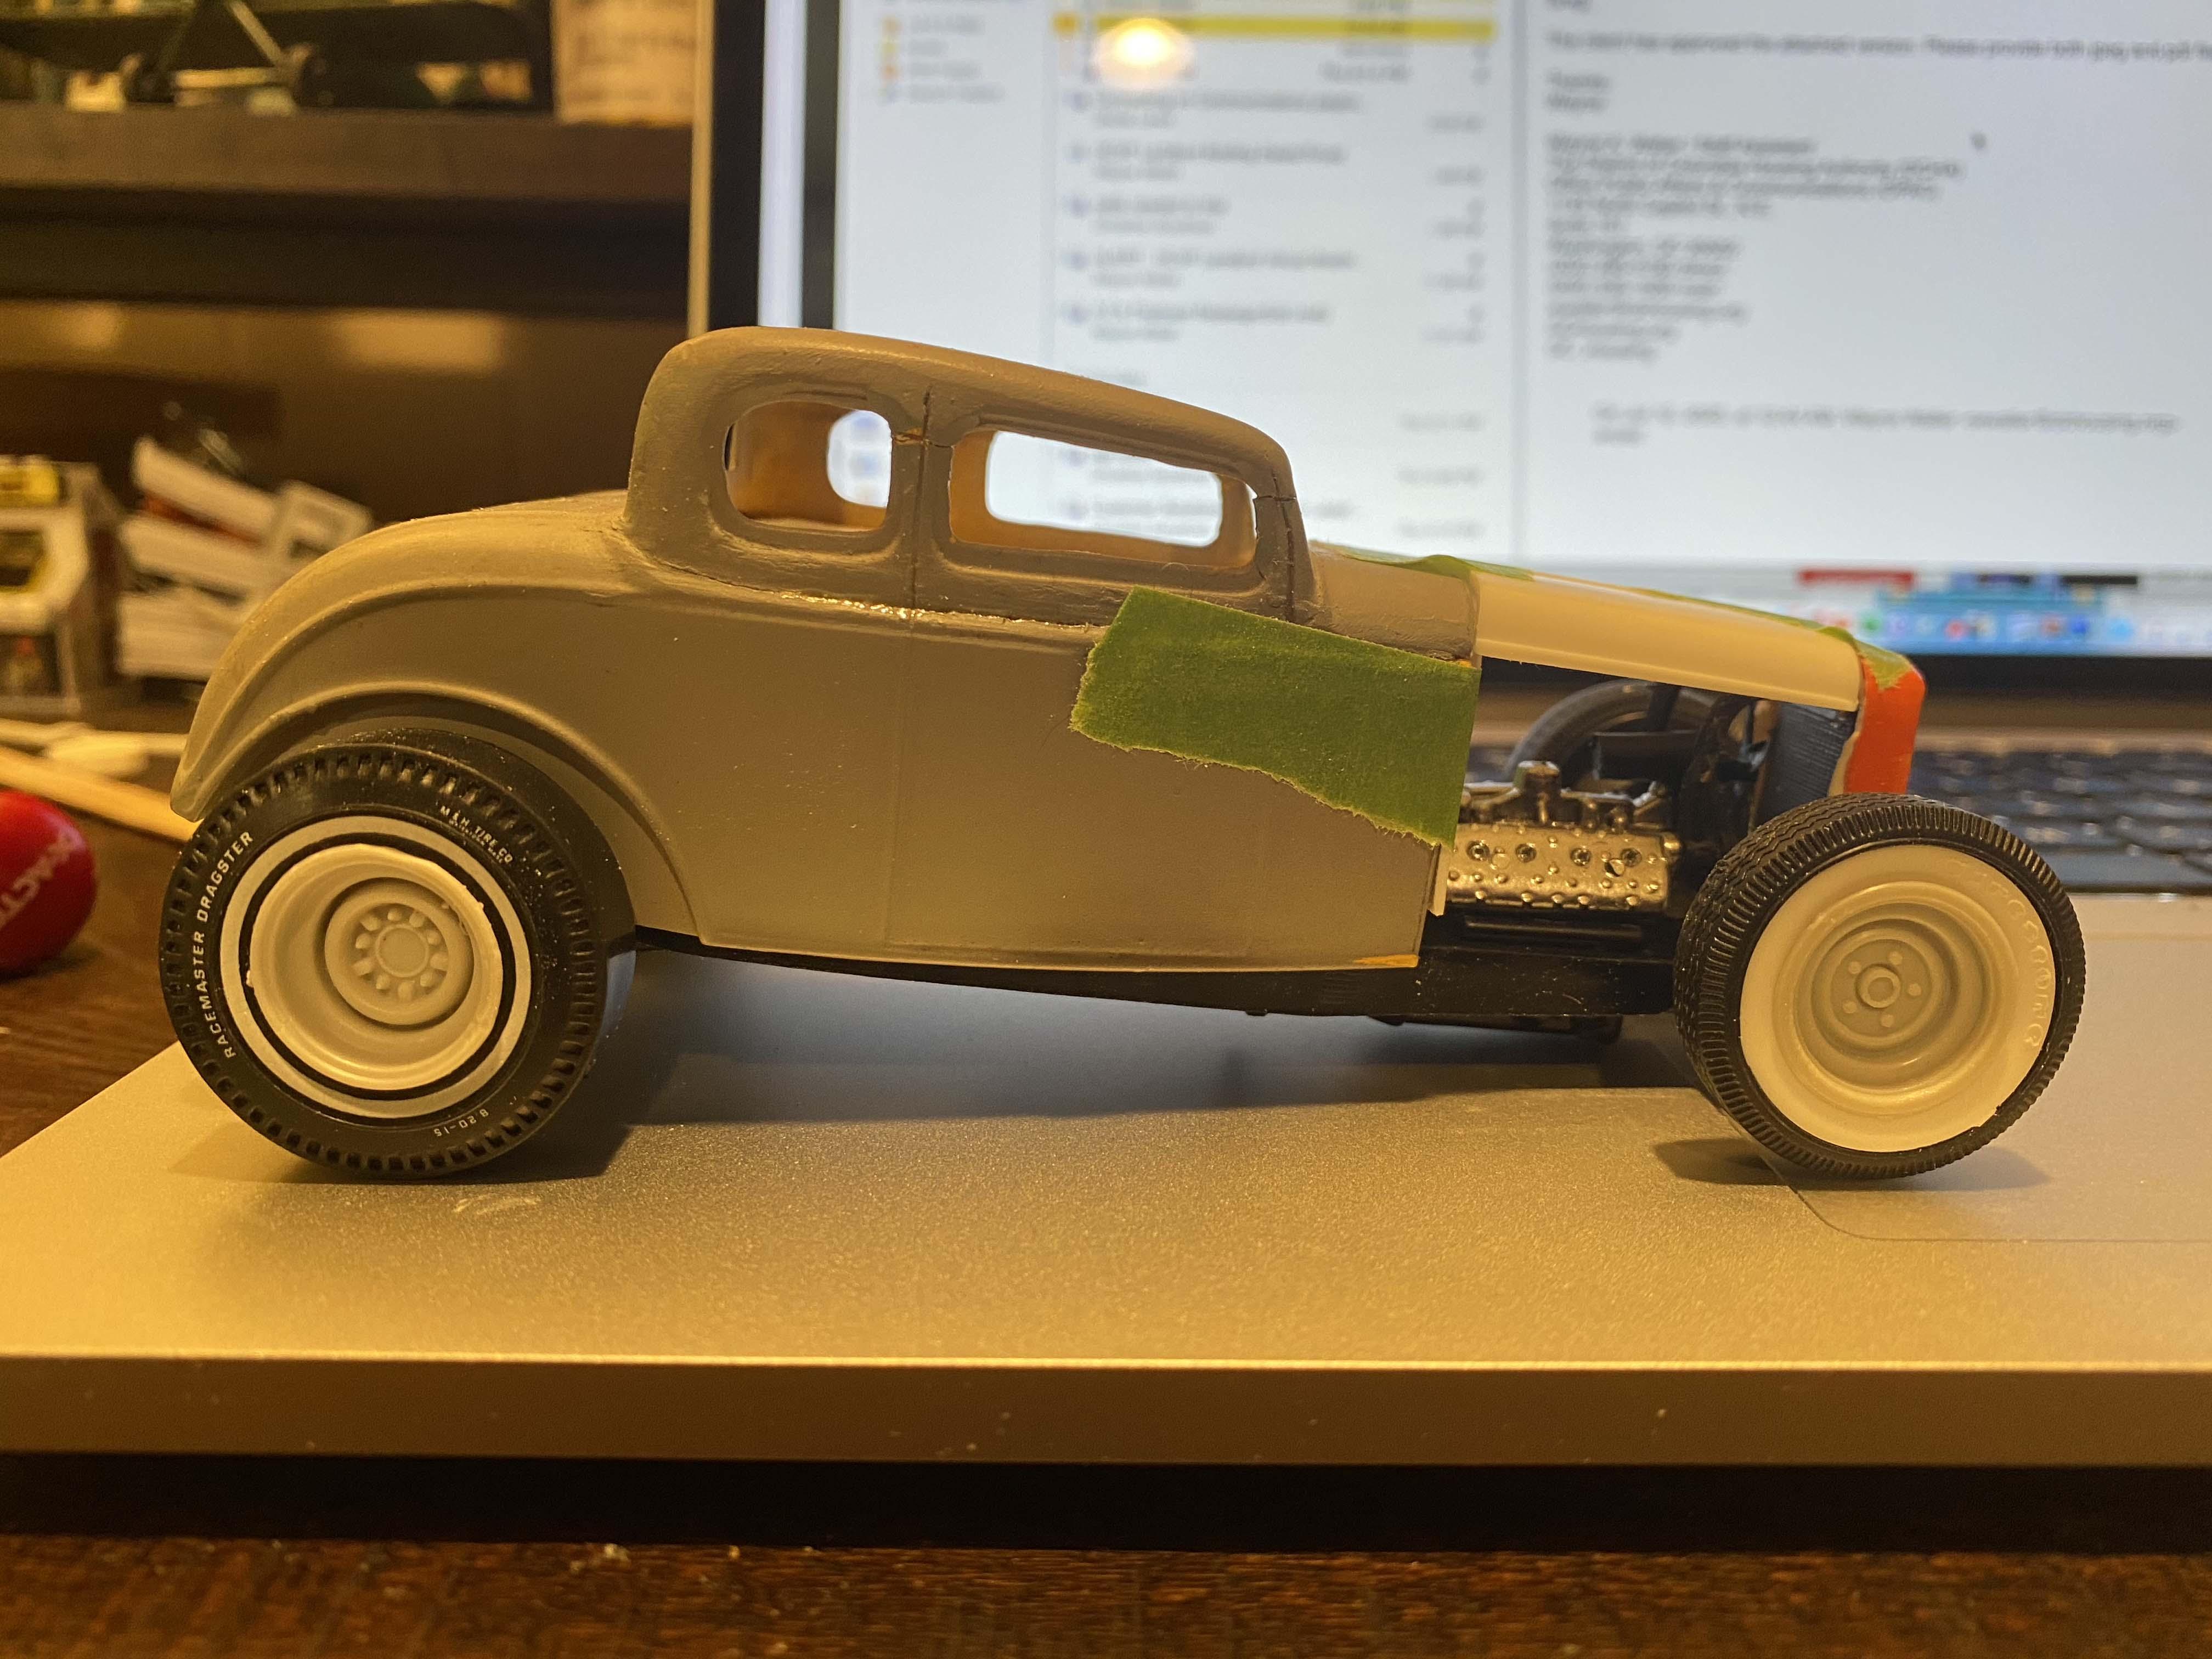
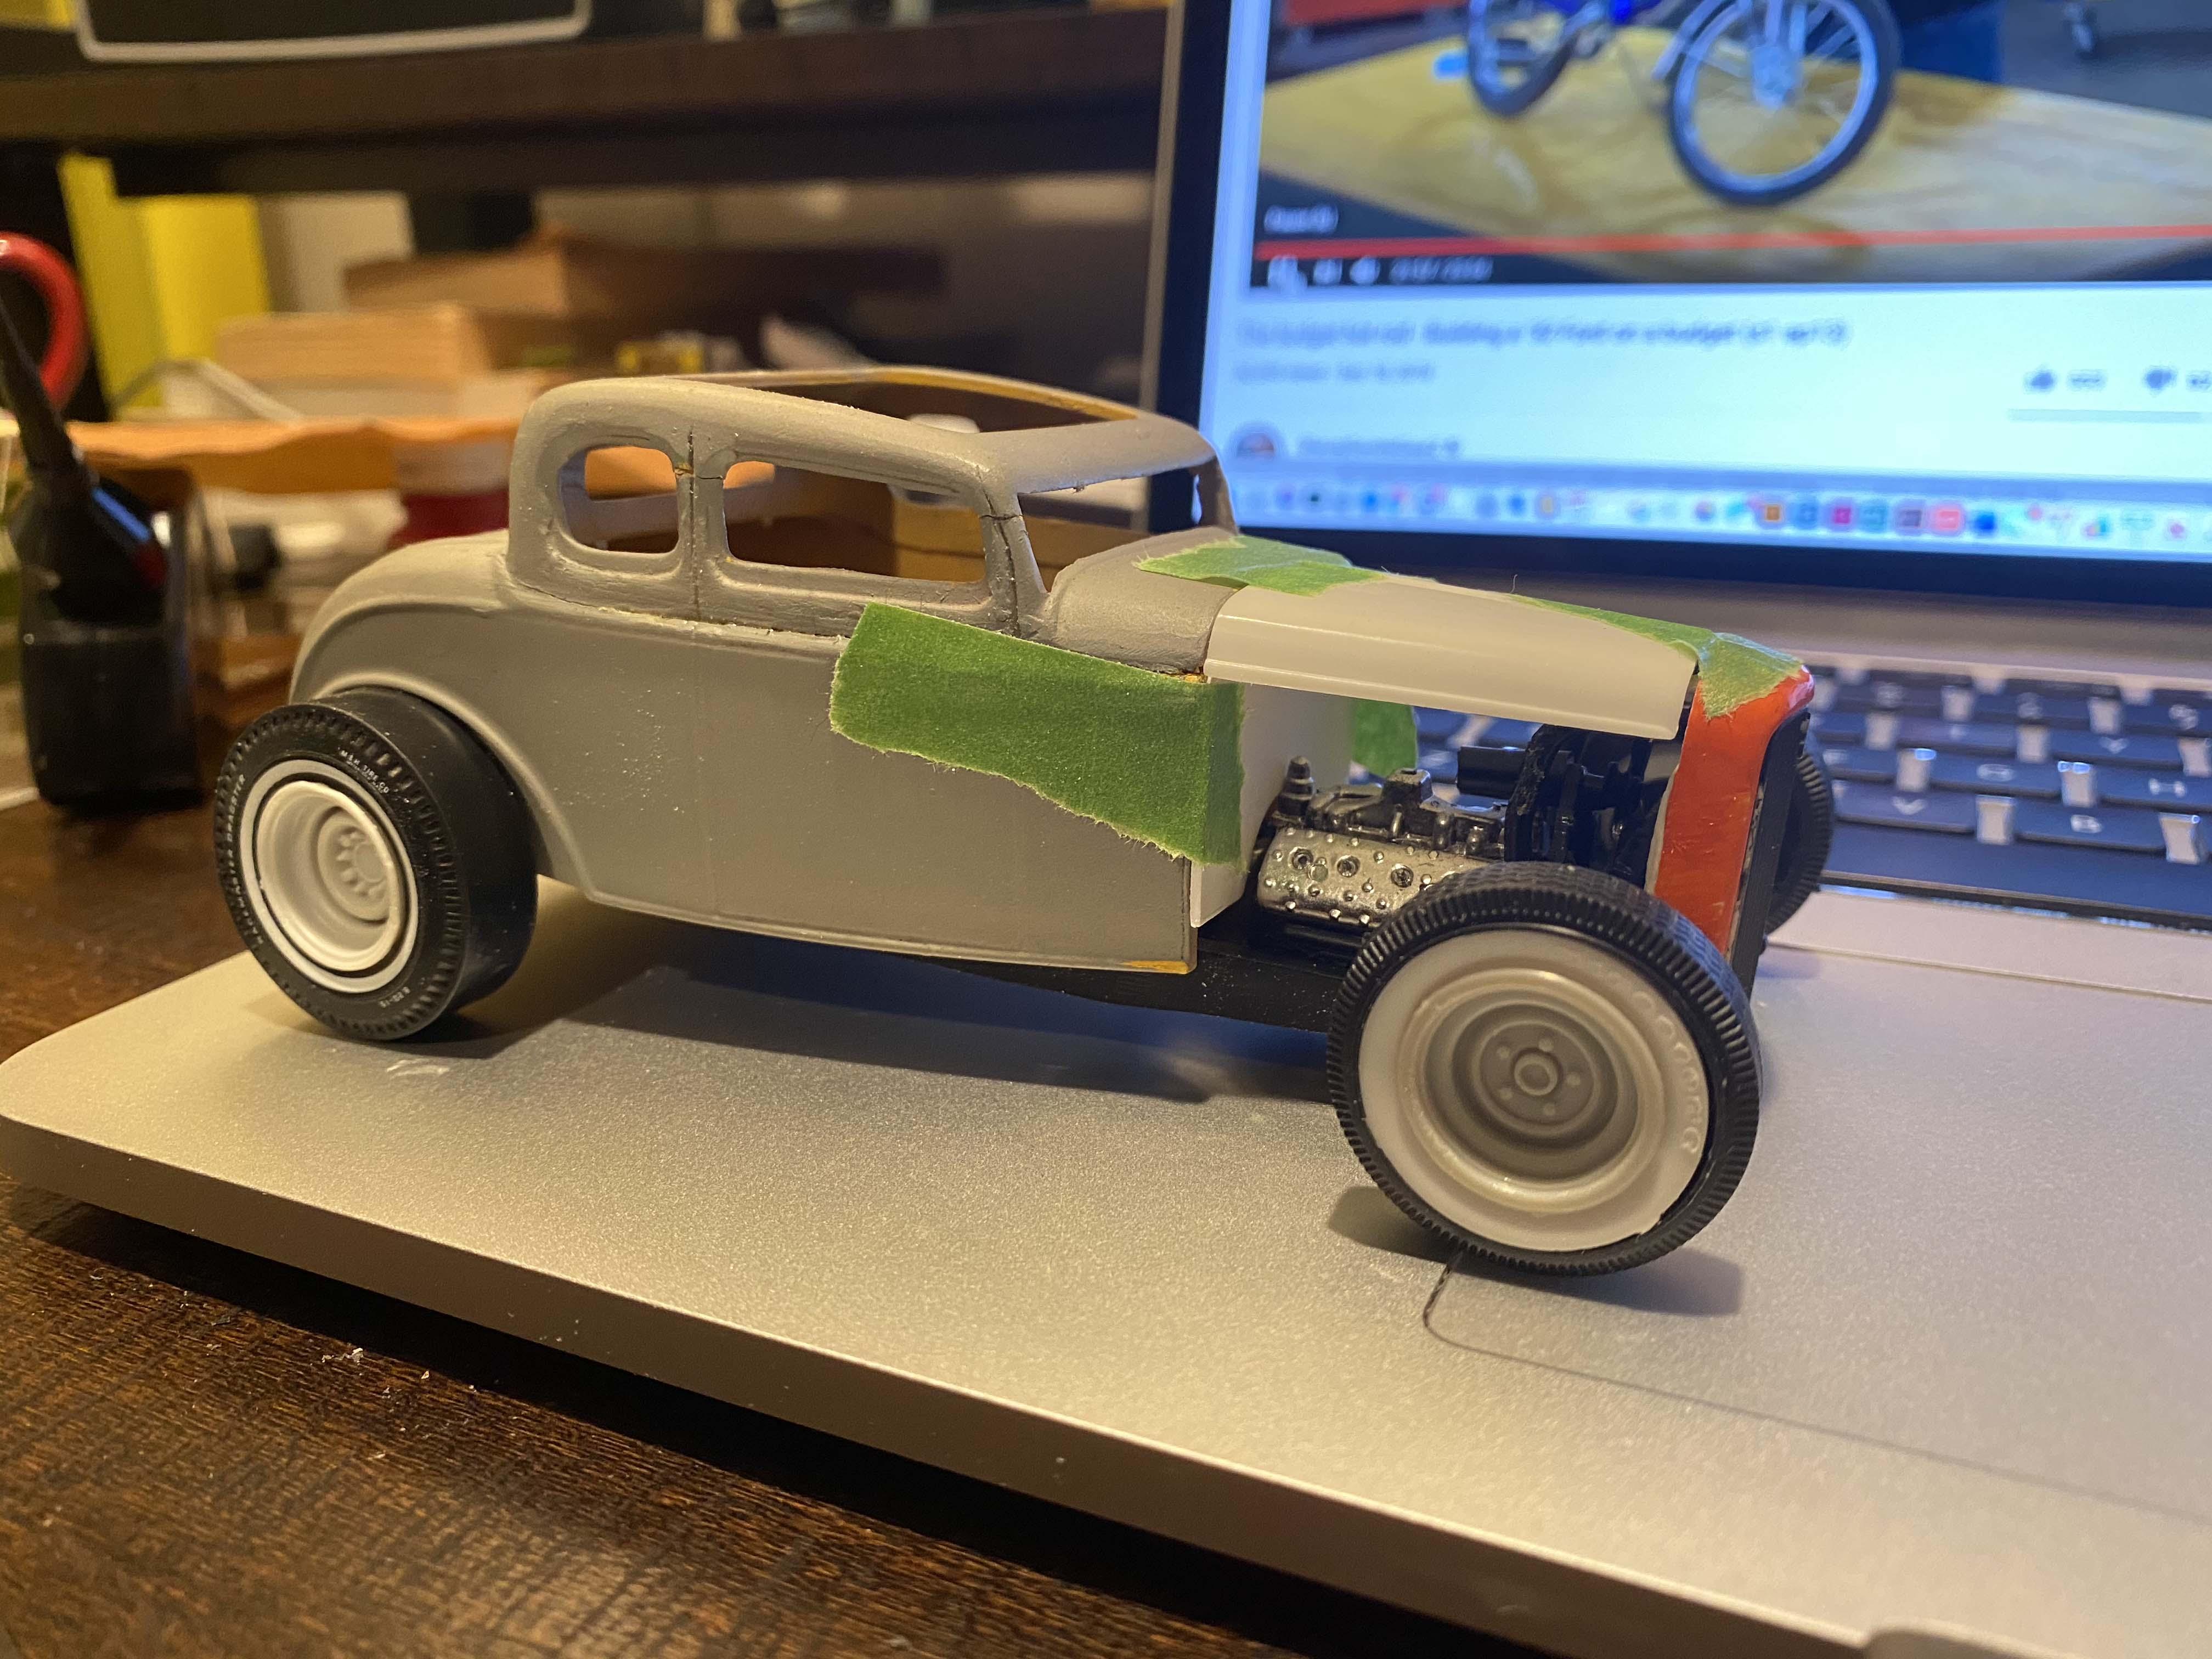
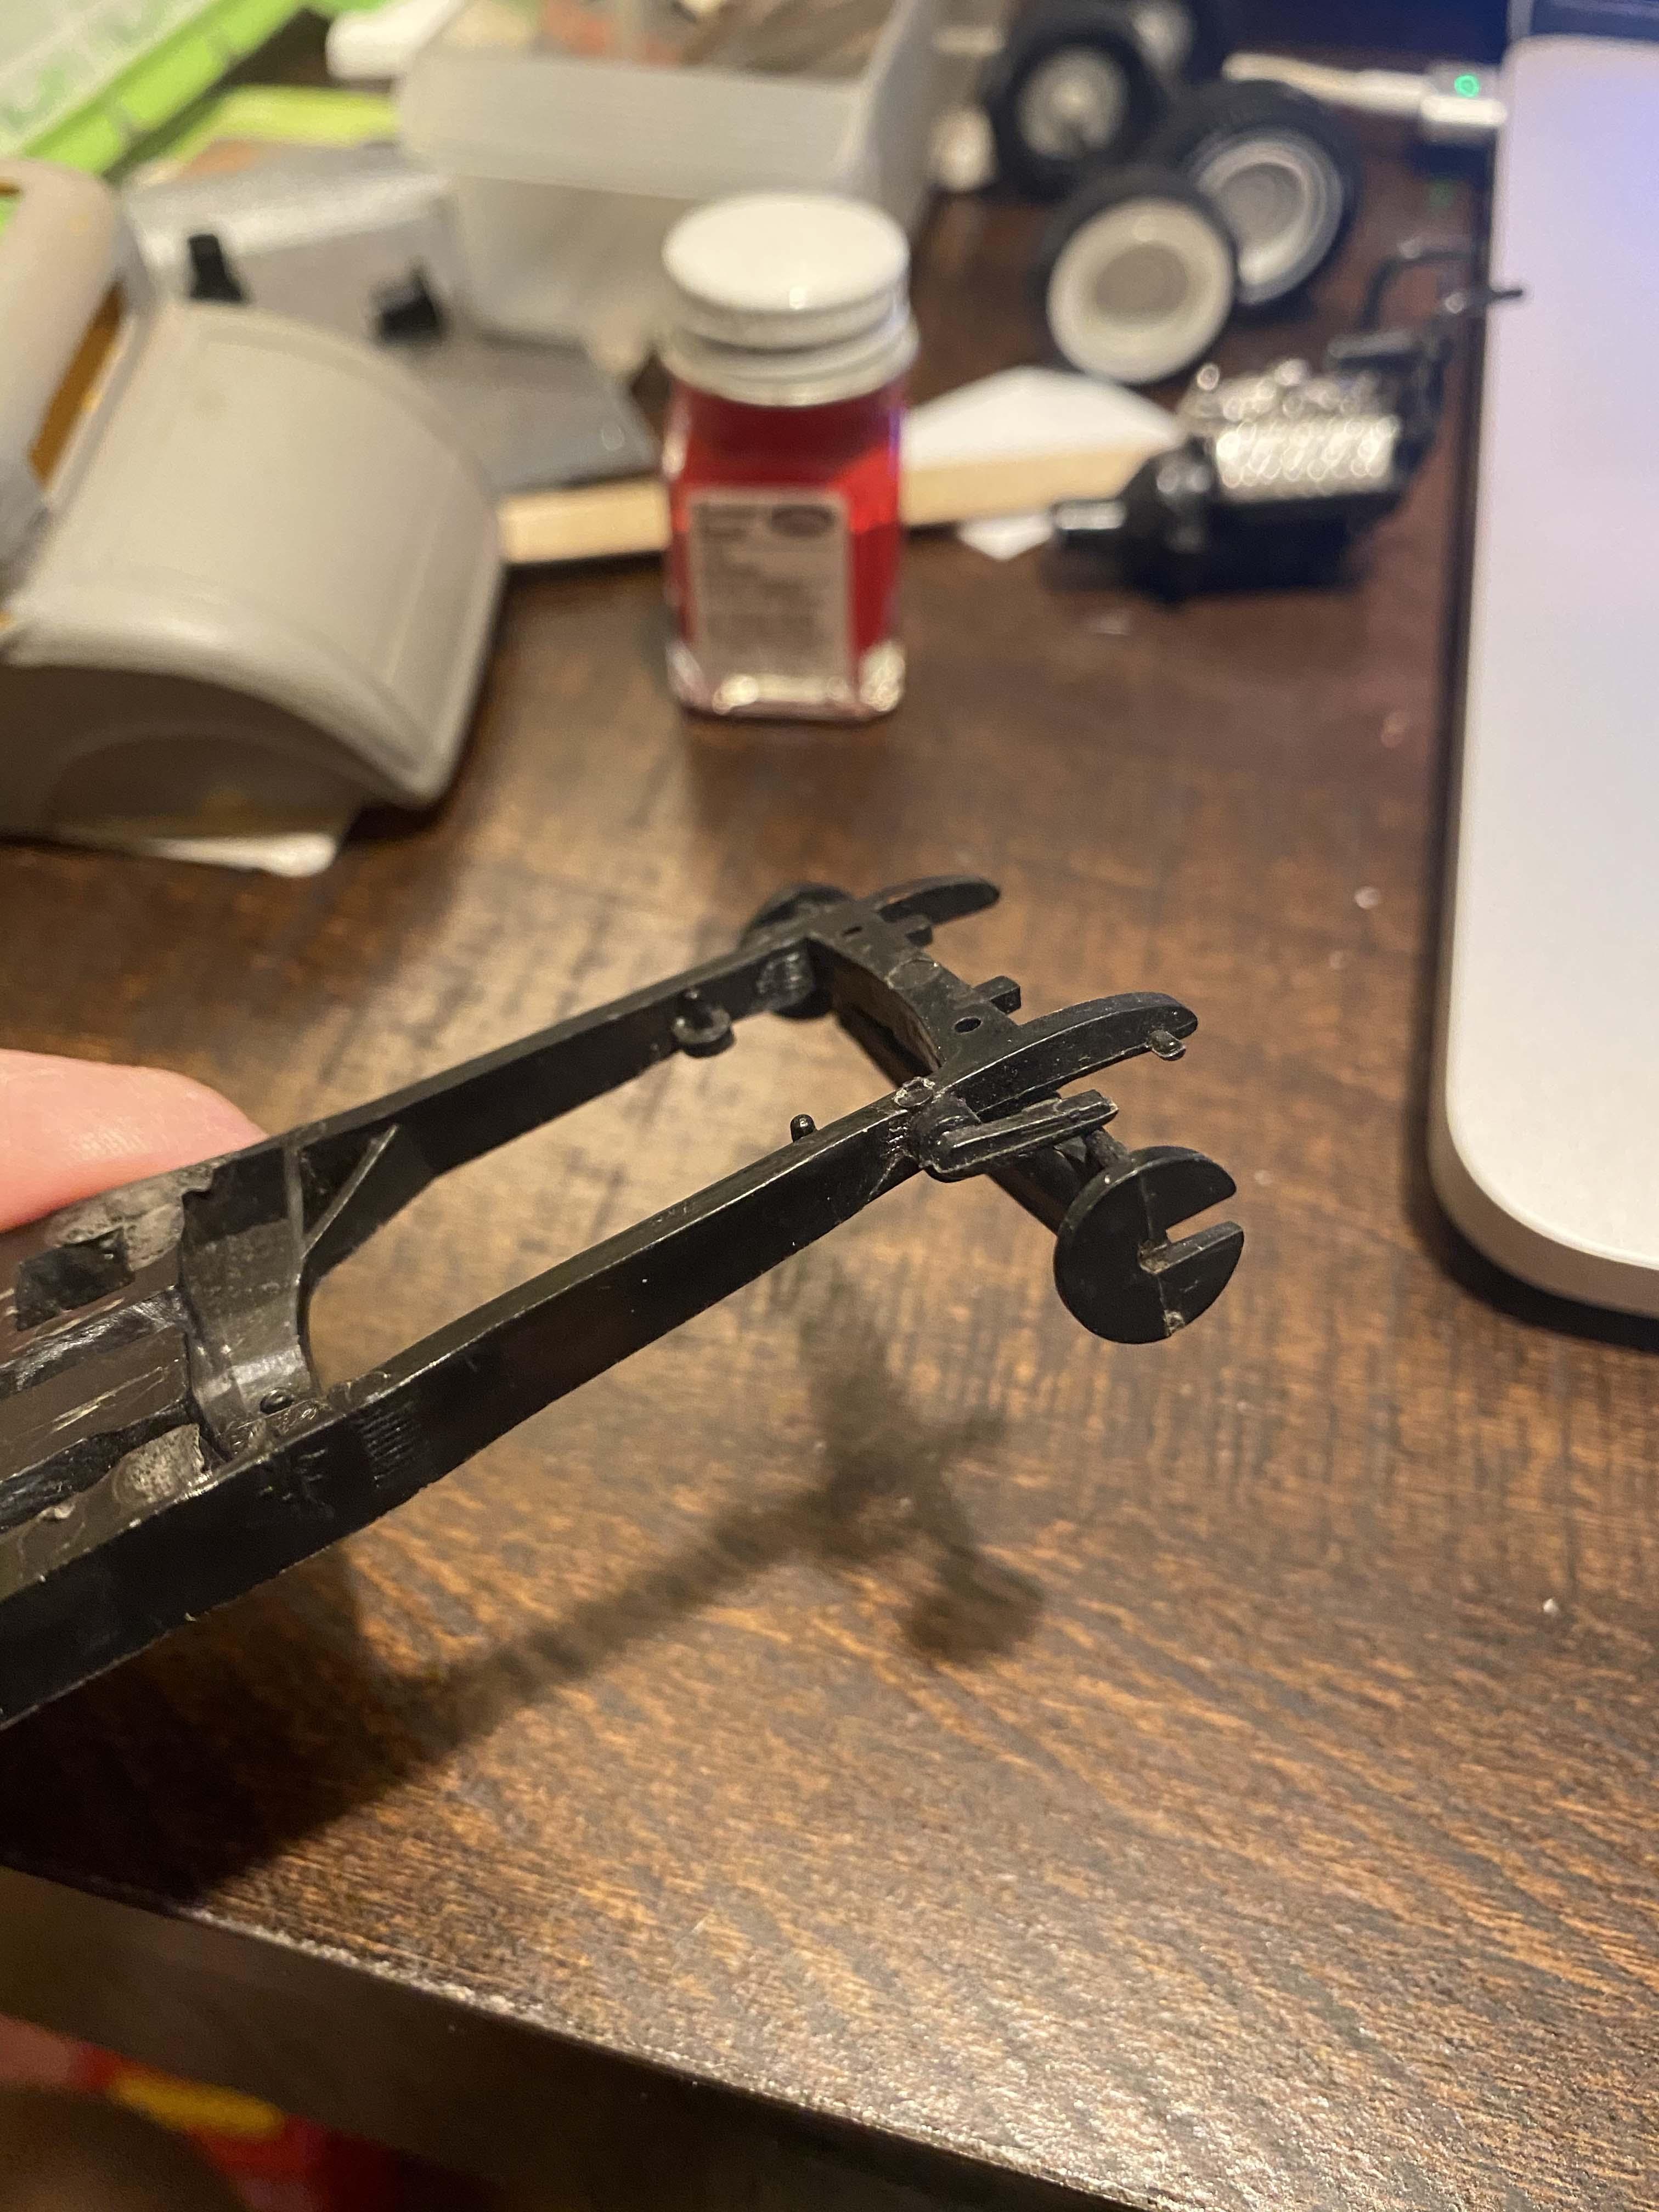
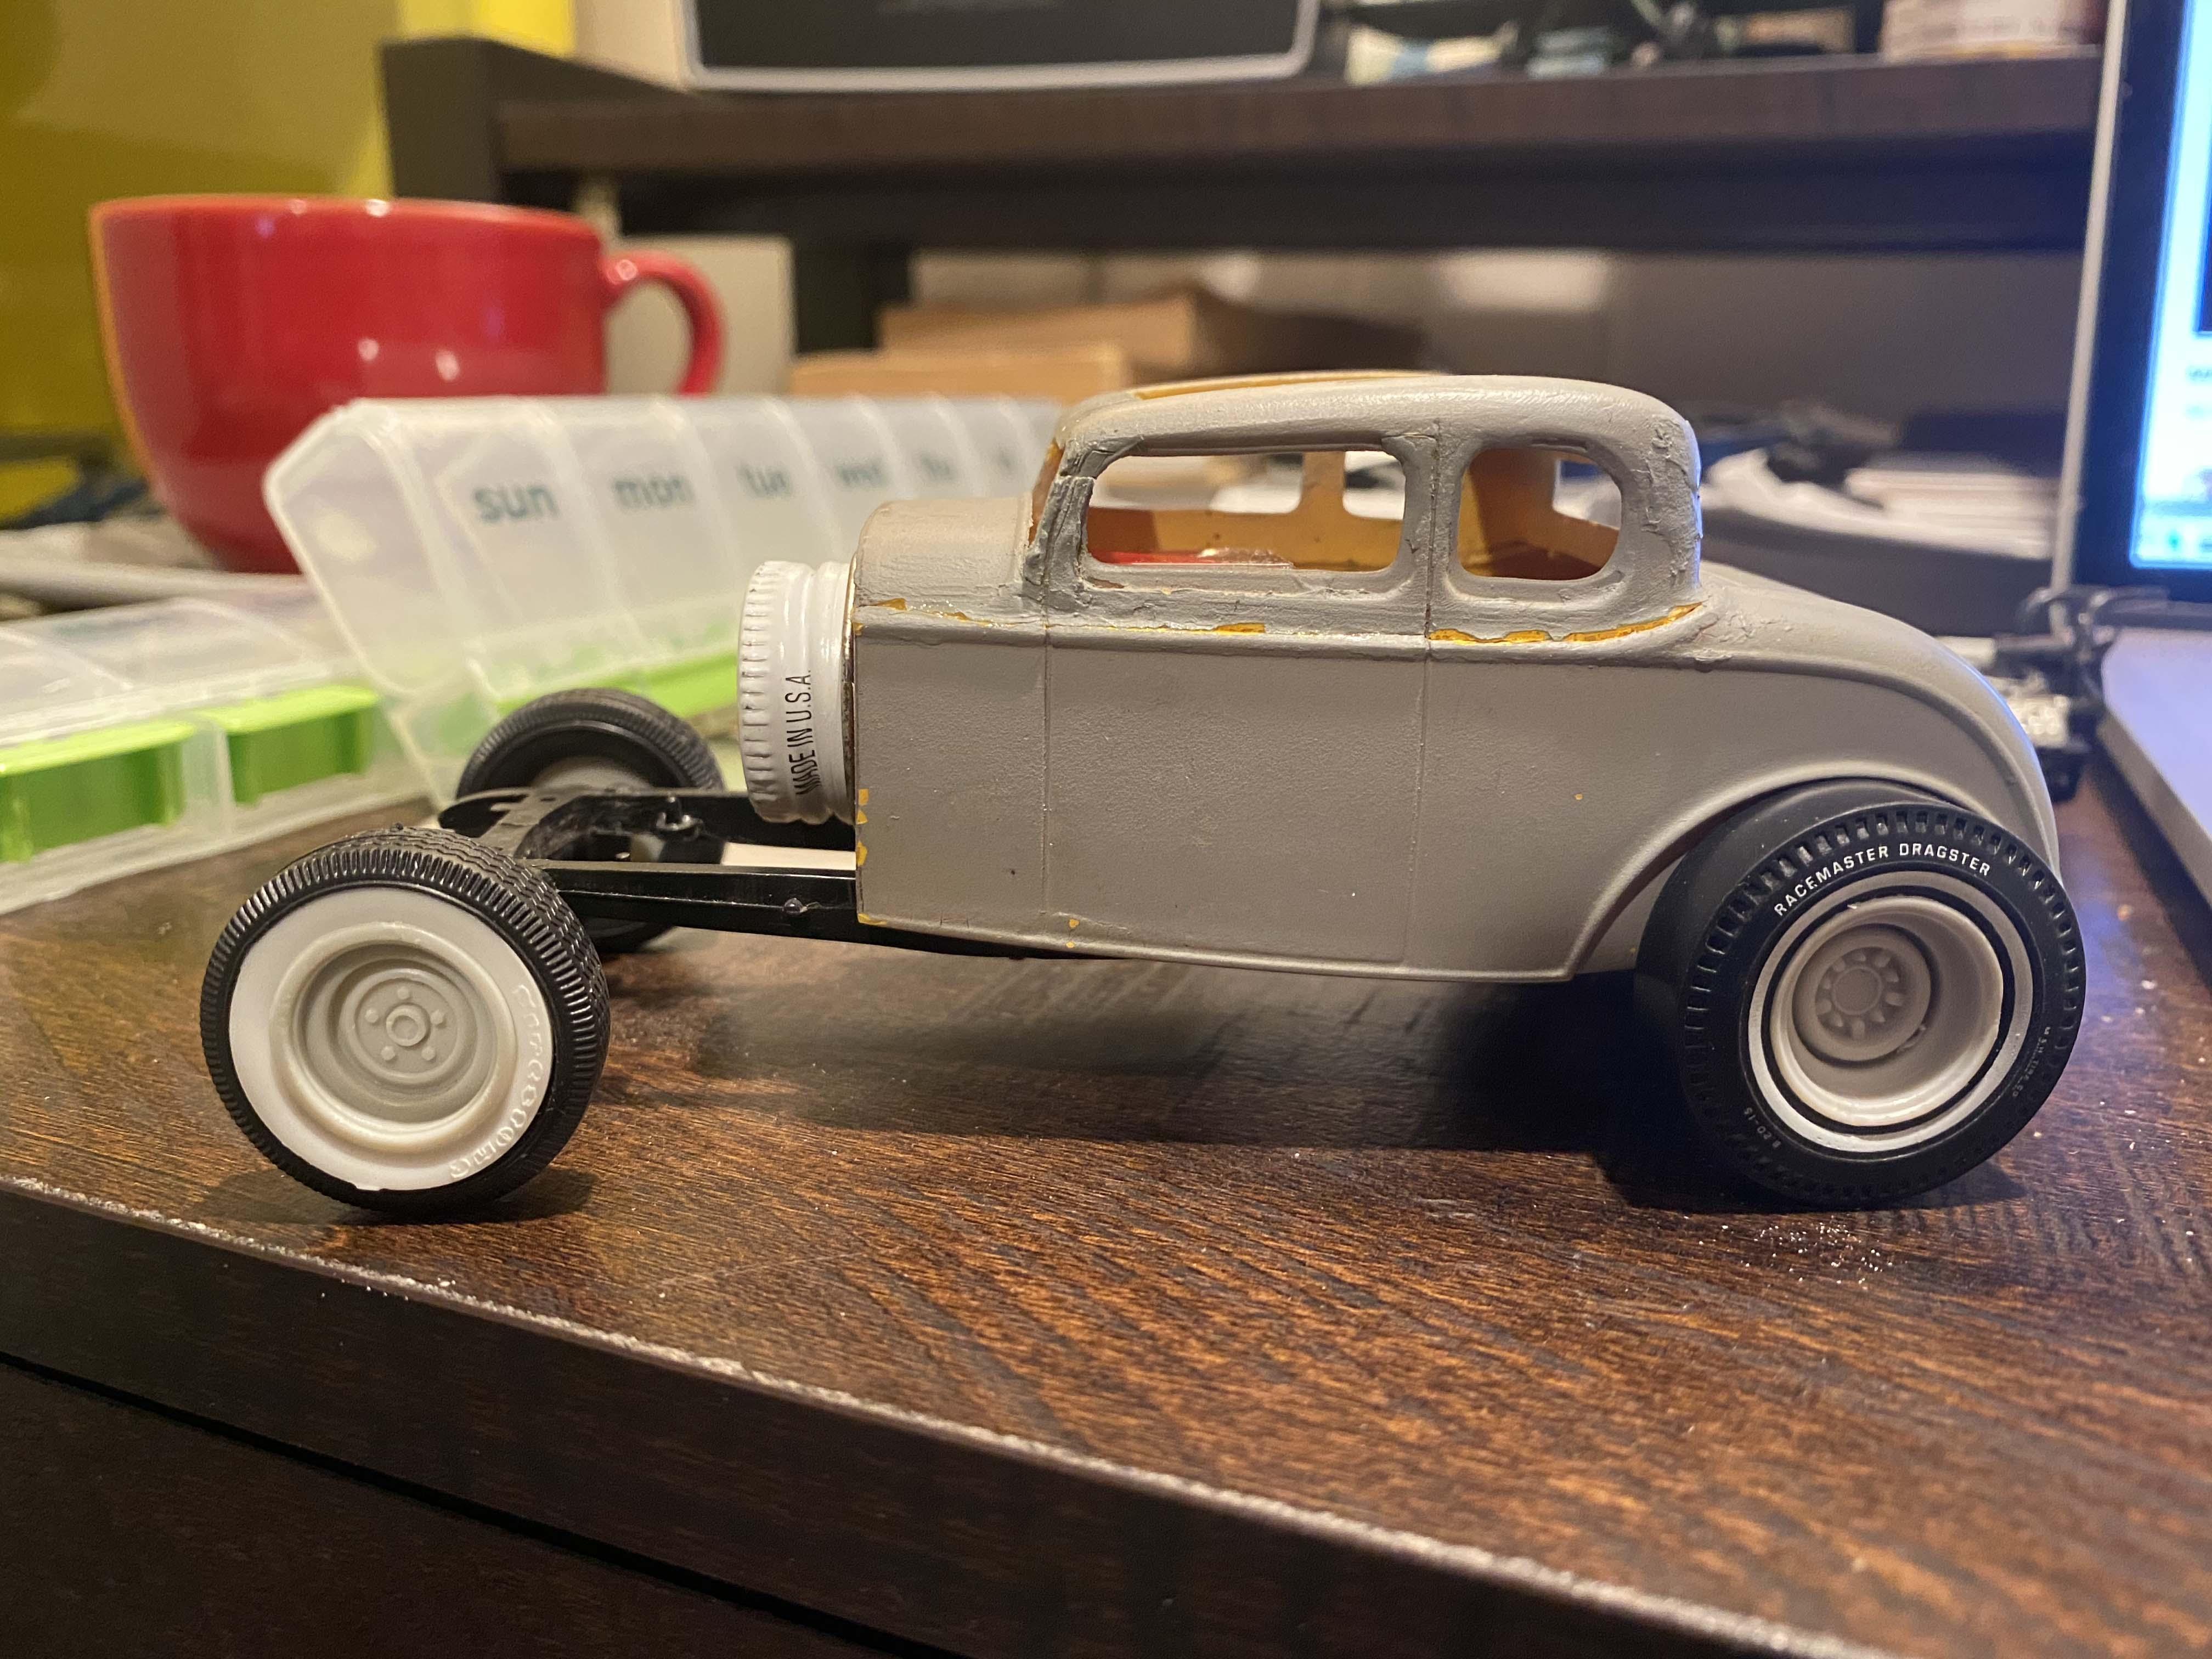
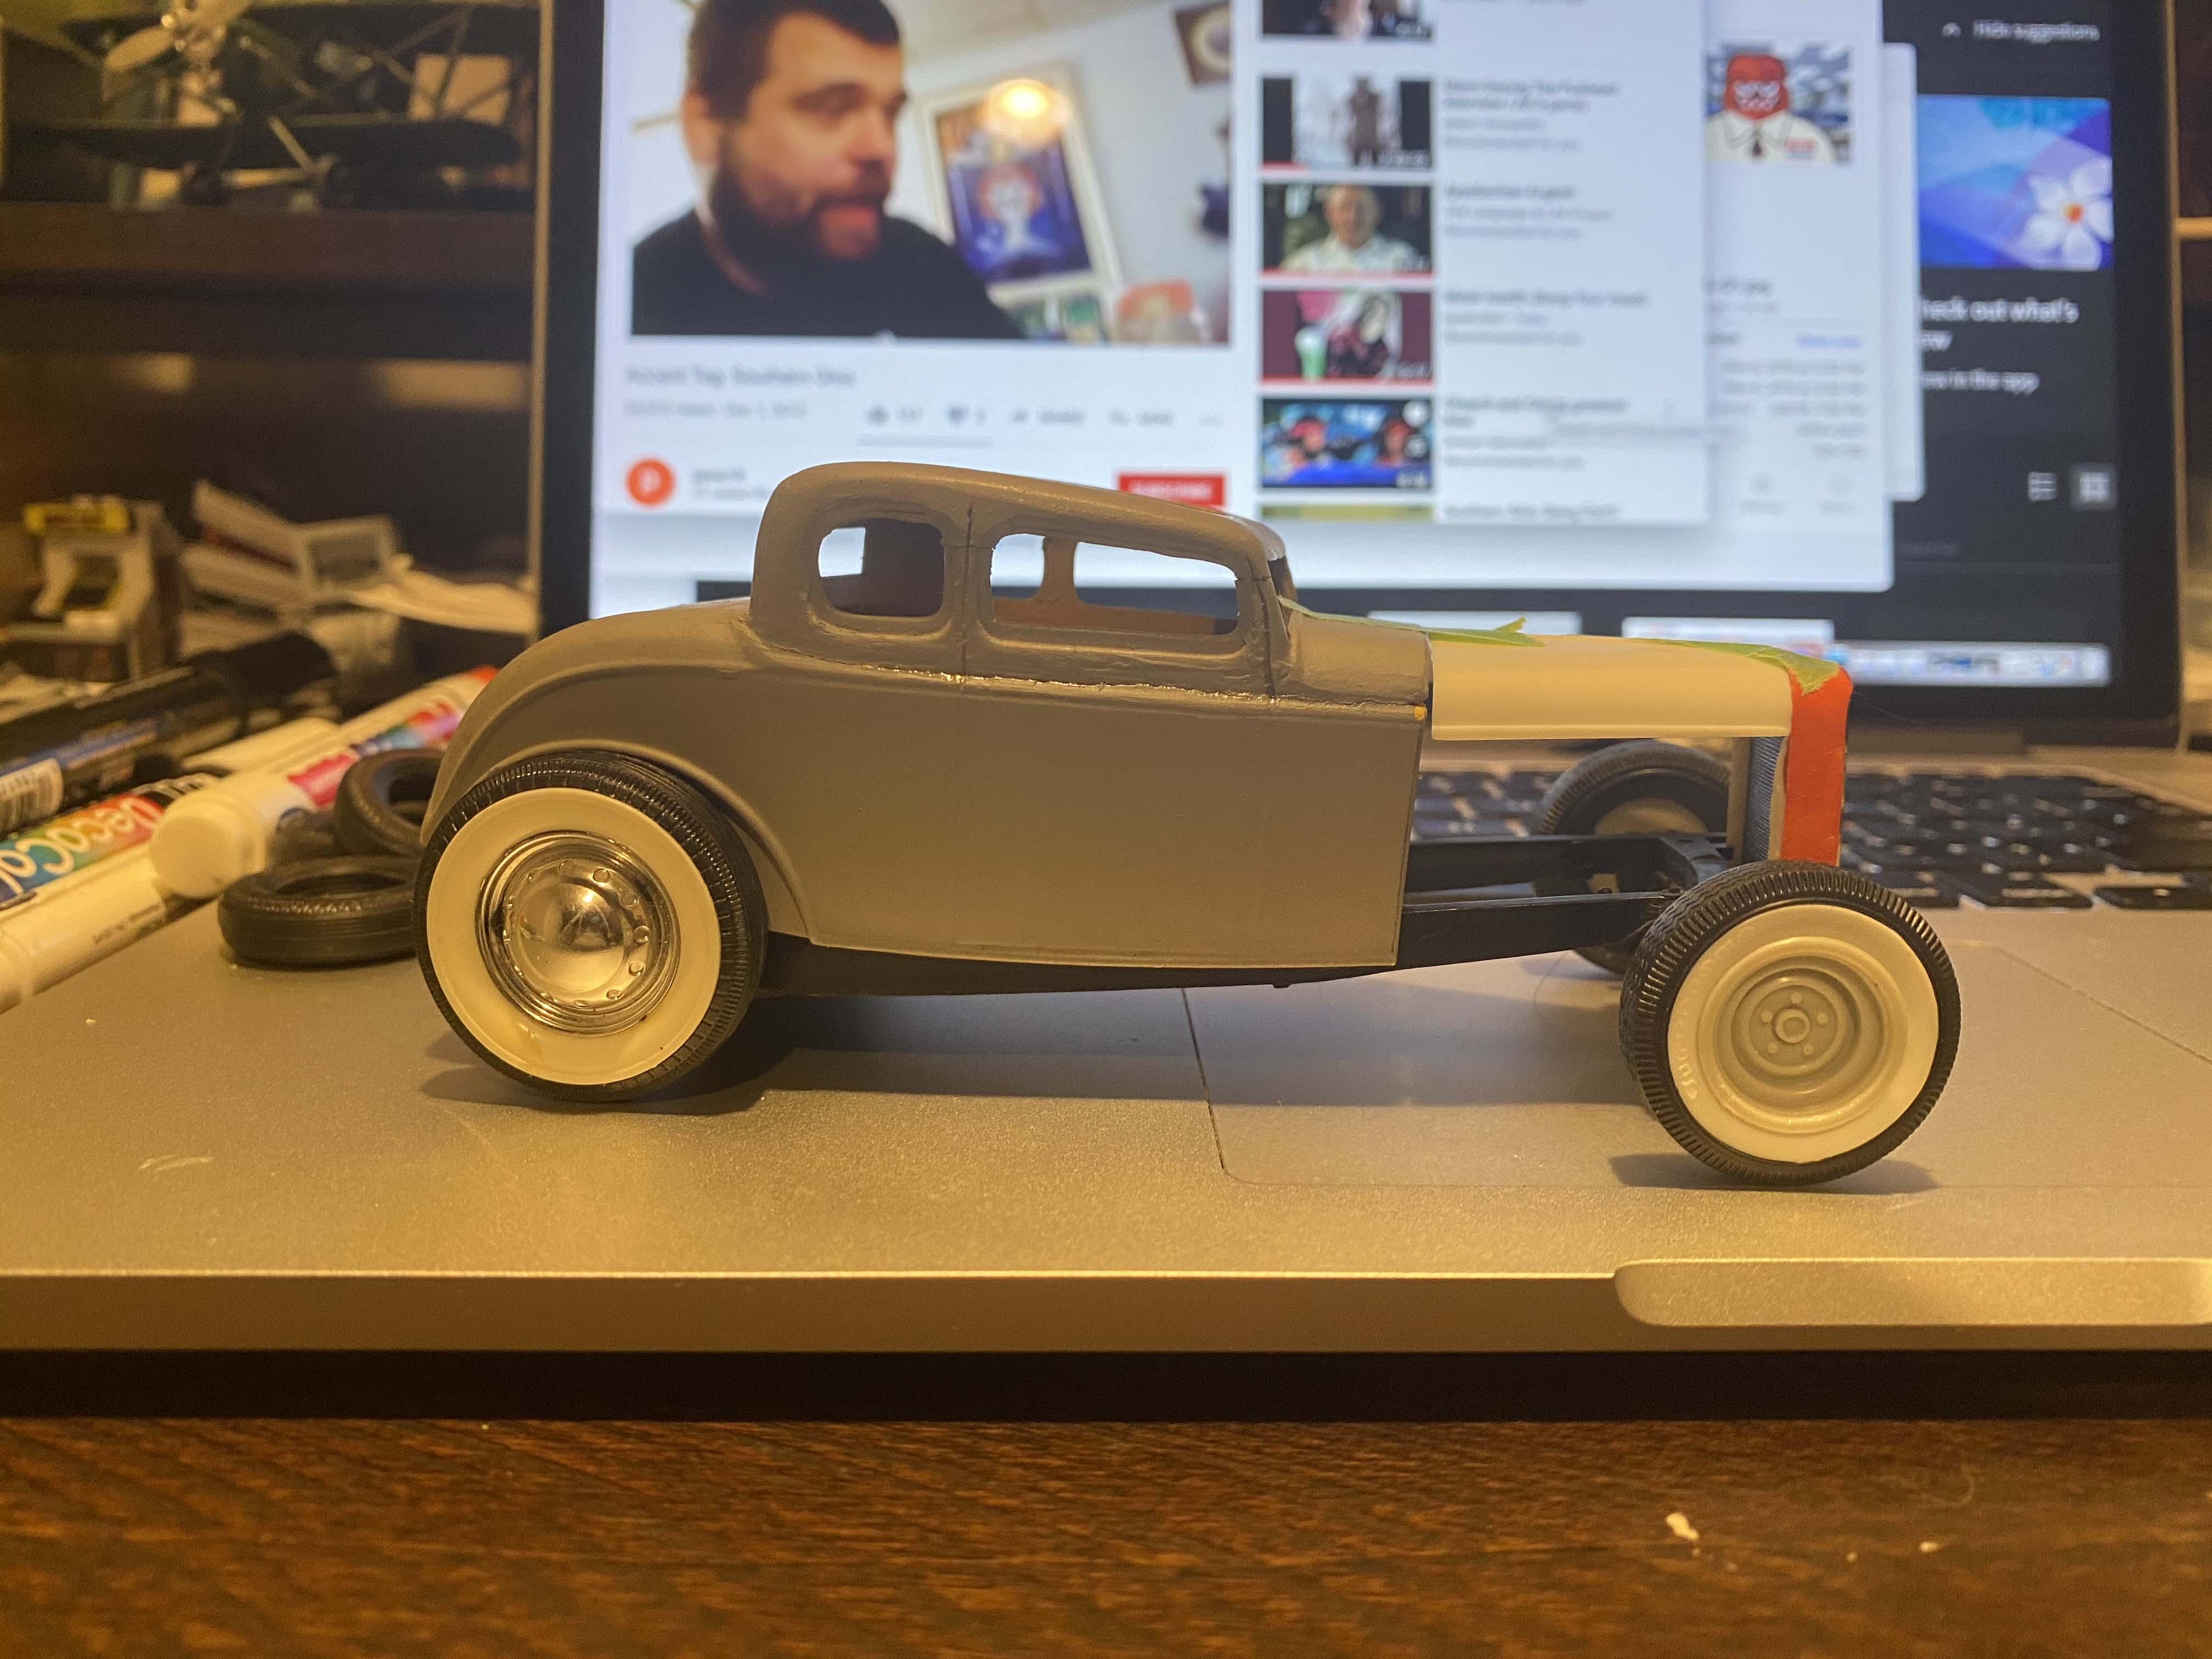
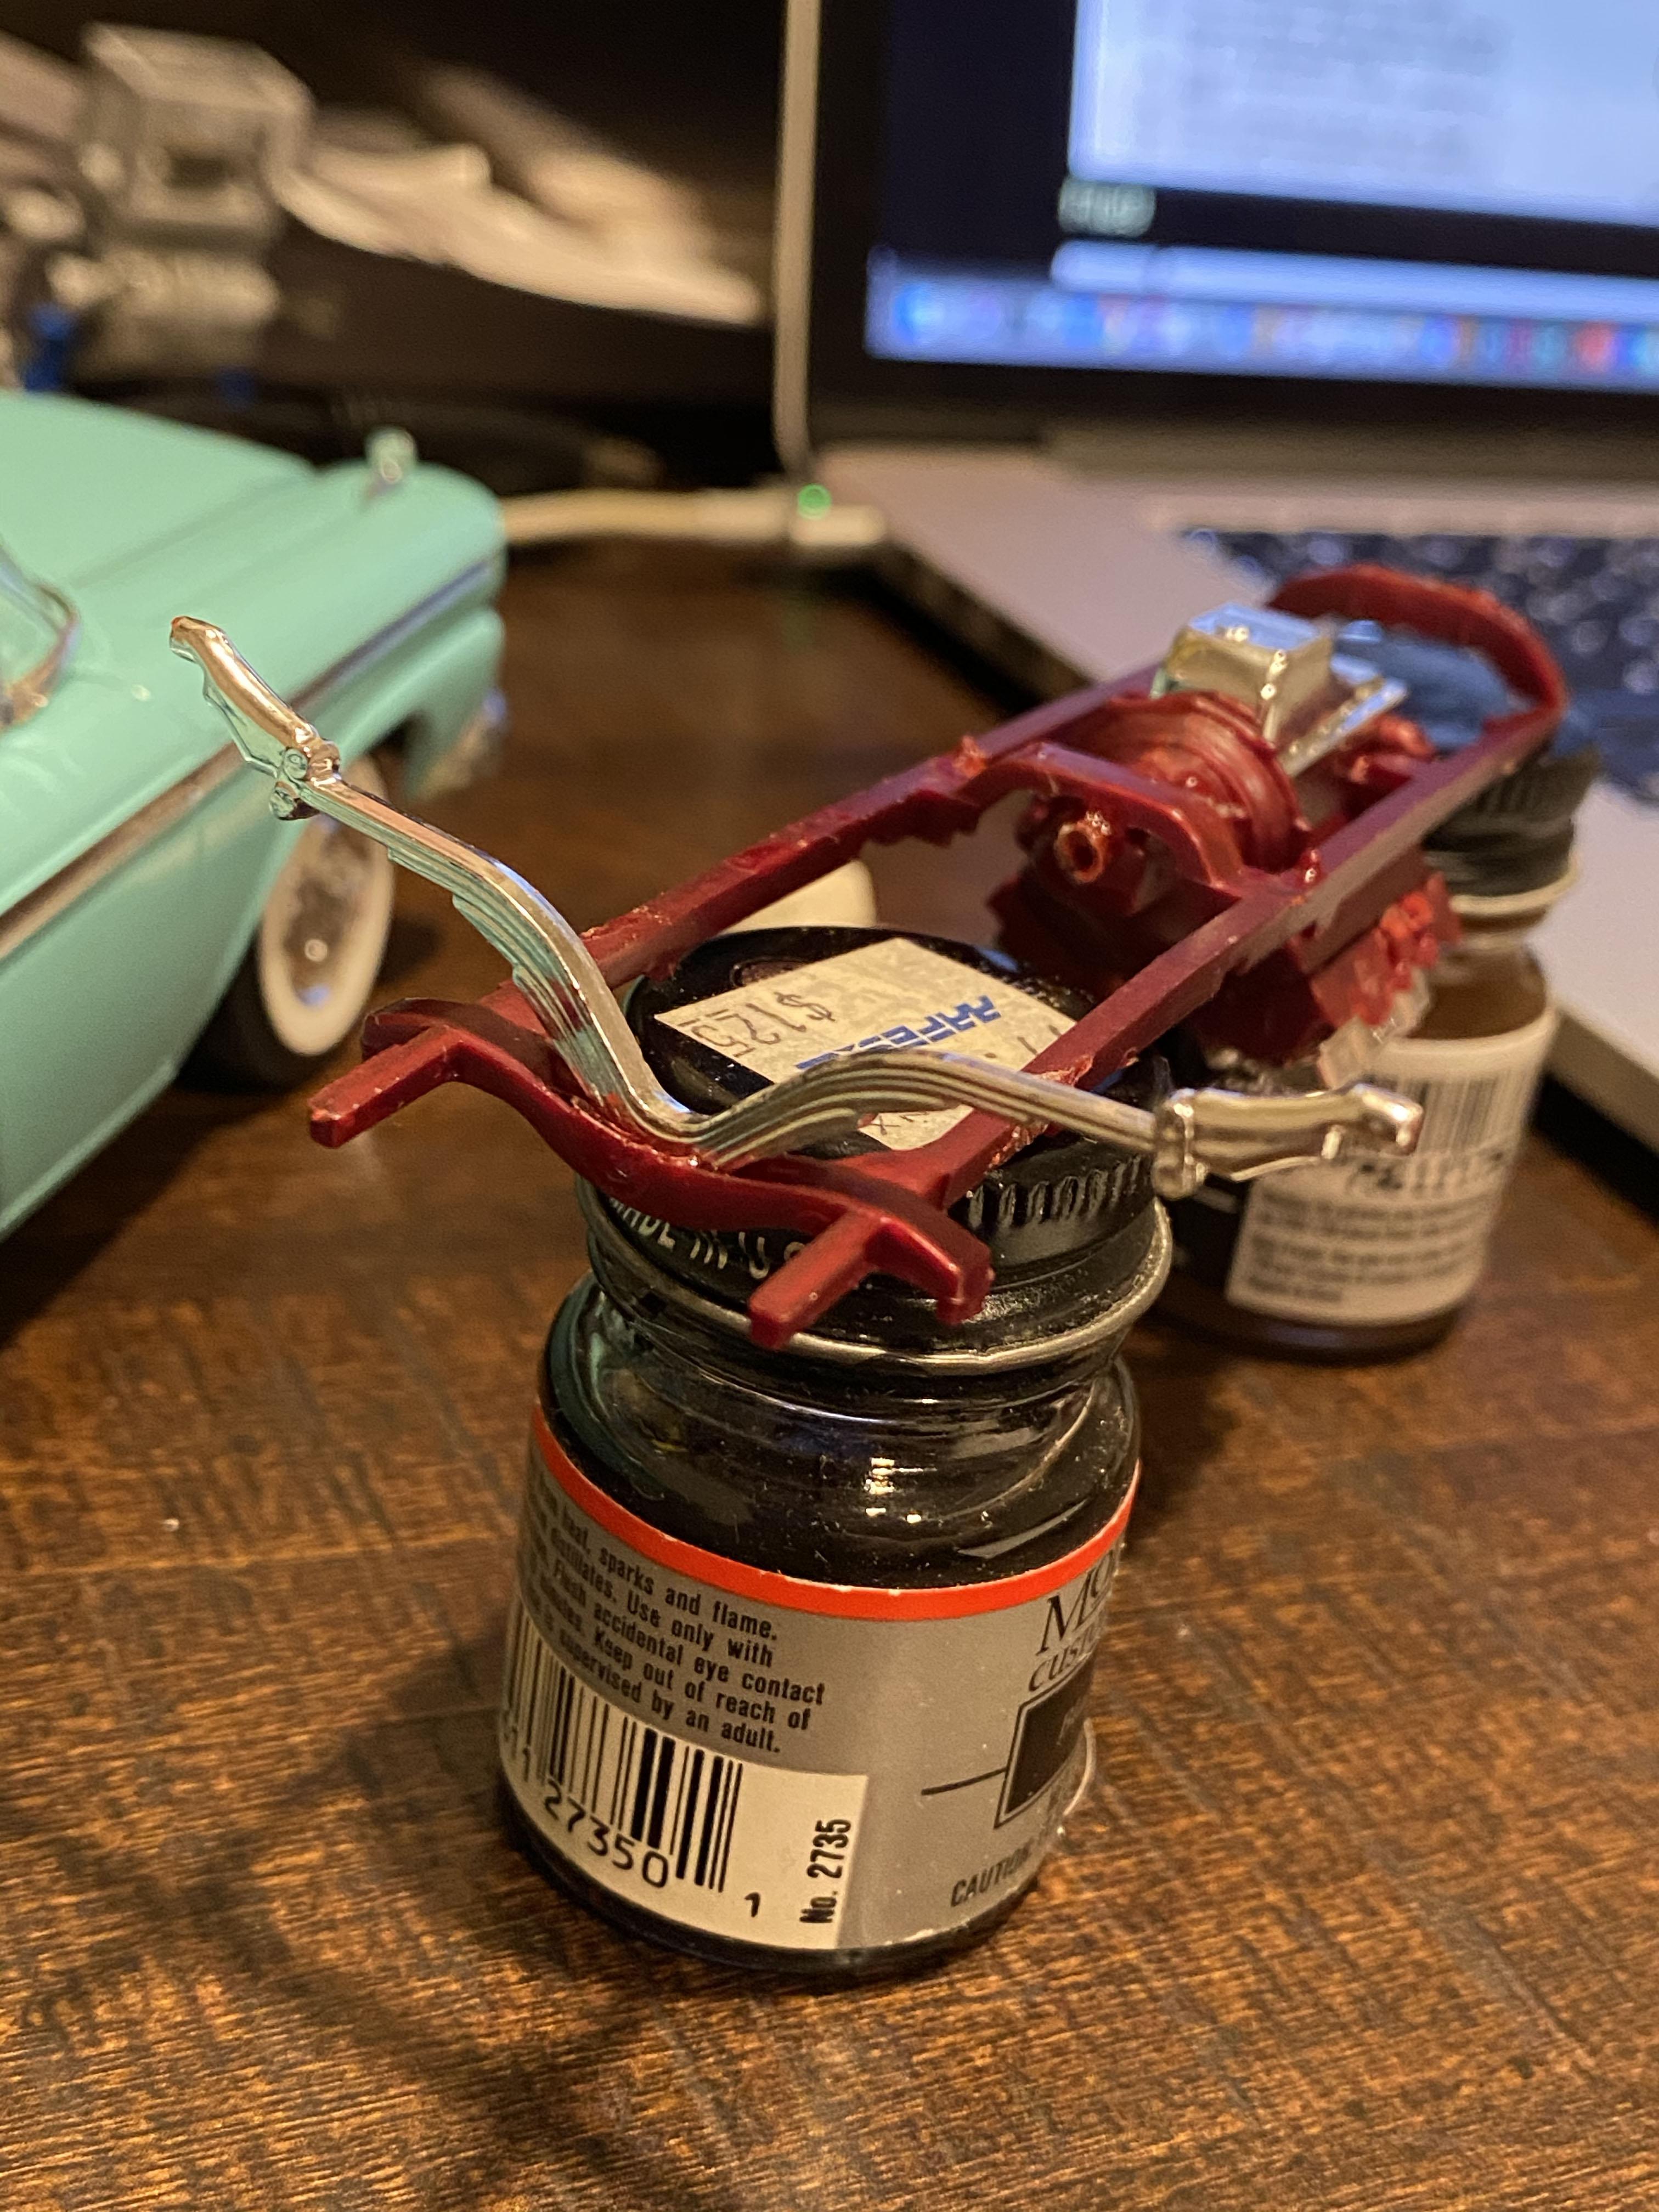
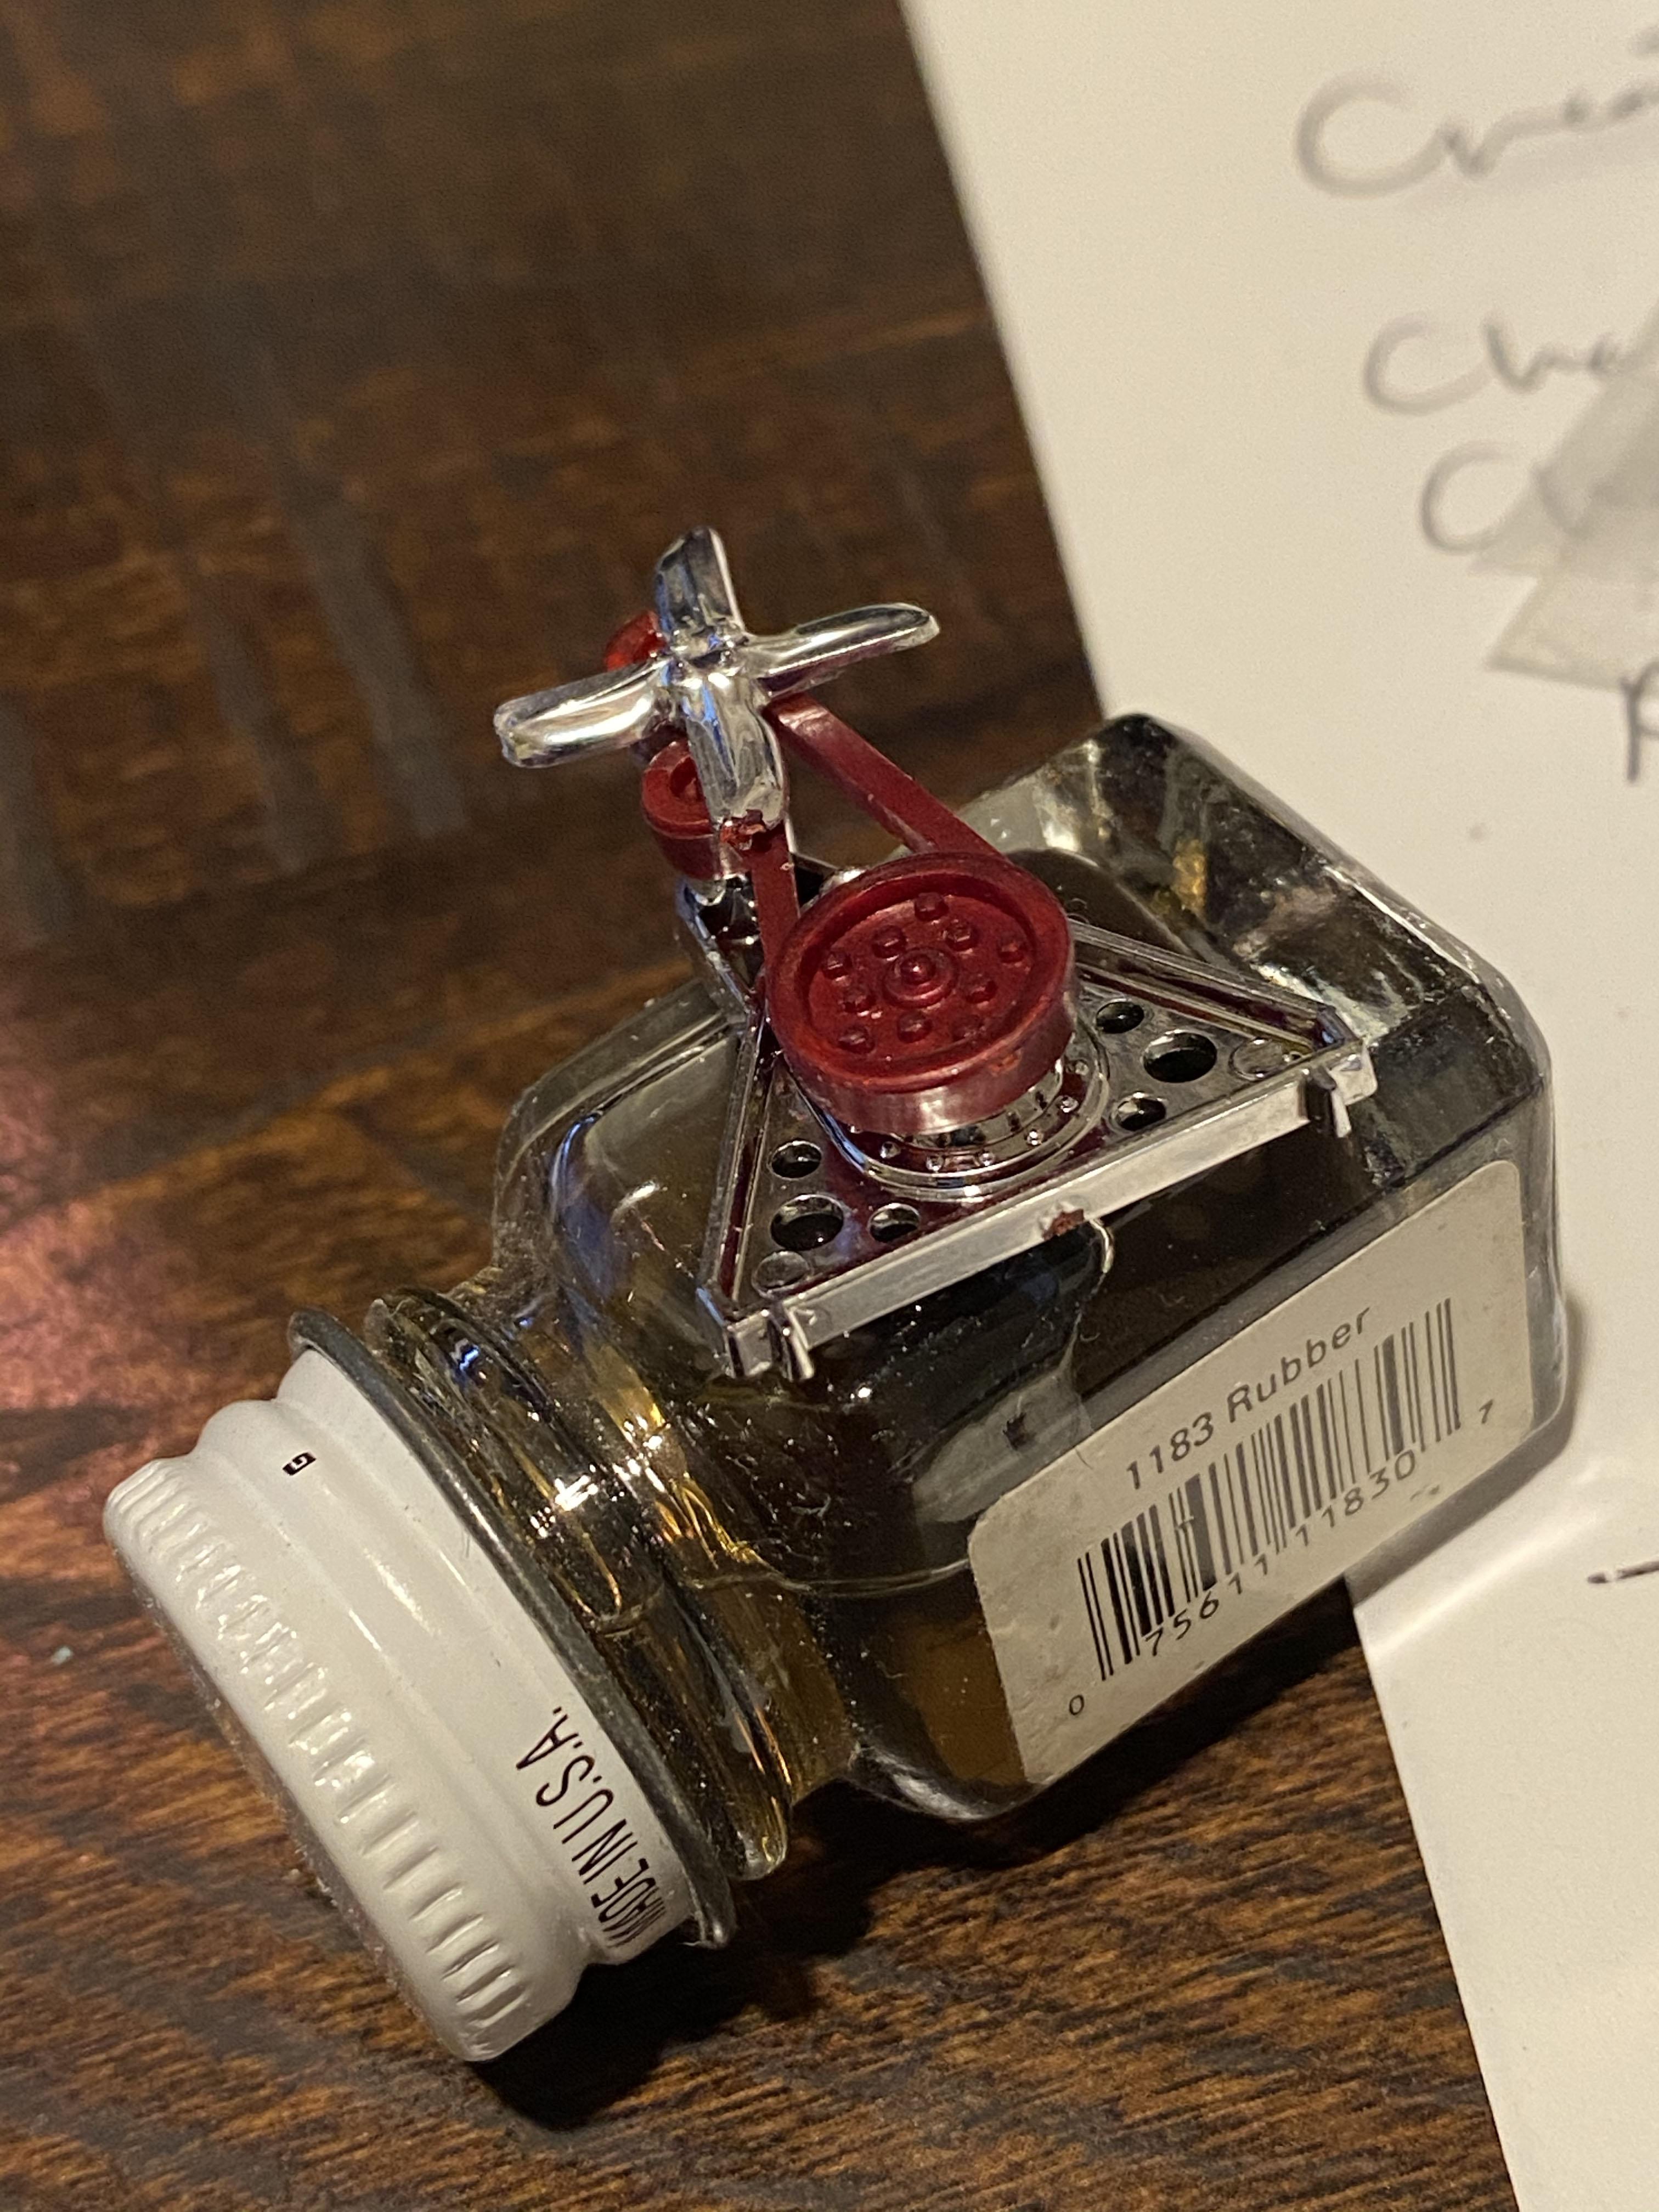
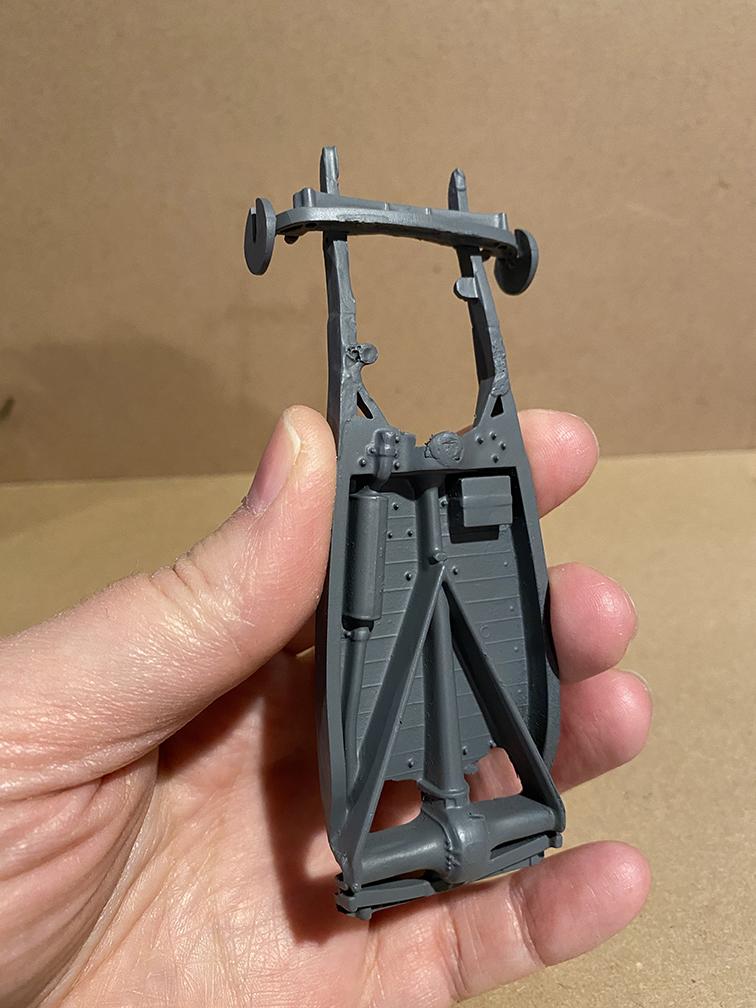
Here I go with another 32 Ford made out of parts box leftovers. The body, frame, hood, engine, and radiator shroud are all 100% parts box junk. I'm going to start out with an MPC Switchers 32 Ford body I had int he parts box (same as the MPC Milner's Coupe kit and AMT Earth Boyd Coddington's American Hot Rod 32 Ford kit). At some point in its life, the roof was chopped and there's some putty work that's not very nice. But that's ok, I'm ok with it. Some model glue fixed the split area where the roof connects to the body. I needed a new firewall, so I'll make one out of a sheet of styrene.After a few attempts at tracing, then cutting out the shape from the plastic sheet, I figured the easiest way to get an accurate shape was to glue the sheet to the firewall area, wait for it to dry, then trim around it with a box cutter blade. Not too shabby. A few minutes of sanding and now I have a firewall with a lip that the hood will sit on top of. I couldn't come up with a suitable interior tub, so I made my own based on measurement from the interior tub from the AMT Ertl Boyd Coddington American Hotrod 1932 Ford. Could I have just broken up the Boyd kit and used that tub? Sure, but I didn't want to. I made my own interior tub from sheet styrene. I'd never done this before and thought for sure I'd fail, but it went together pretty nicely and pretty easily. If I were to do it again (which I may when I get more sheet styrene) I'd glue the walls to the side of the floor piece, not on top of it; that would make the tub about 1/8" wider and that would be a perfect fit. Got my tub, got some parts box steelies and small whitewalls from an unknown kit (they're really small) and AMT Racemaster piecrust whitewall dragster slicks. The parts box AMT 32 Ford frame (I buy these every chance I get) is pristine, but the front suspension had already been glued and assembled. I can't live with the "going uphill" stance, so I start planning what I'll do. Someone ought to start producing altered AMT lowered front suspension parts. I had done this before and it worked out well even if it's a little unconventional. An old school model builder friend of mine taught me this. I used a thin X-Acto saw blade and cut through the suspension mount each side, then flipped it over. Boom, now we're lowered. I broke on of the frame horns off while cutting, but was able to put it back on. Model glue sort of melts parts together, so even hours after the glue setting, I'm able to gently push the horn into shape. Now I'm really liking the rake and suspension height on the front. The best part is that since I won't be using the sides of the hood, the metal axle (yes, I use them) won't be impeded. The parts box flathead V8 fits perfectly after trimming the homemade firewall. More to come...
-
Thanks Nigel!
-
There's a few parts missing, but everything that was in the bag I bought it in has been put back together. I wouldn't mind having one of these to put my own spin on.
-
That's really cool, Michael! Thanks for sharing that.
-
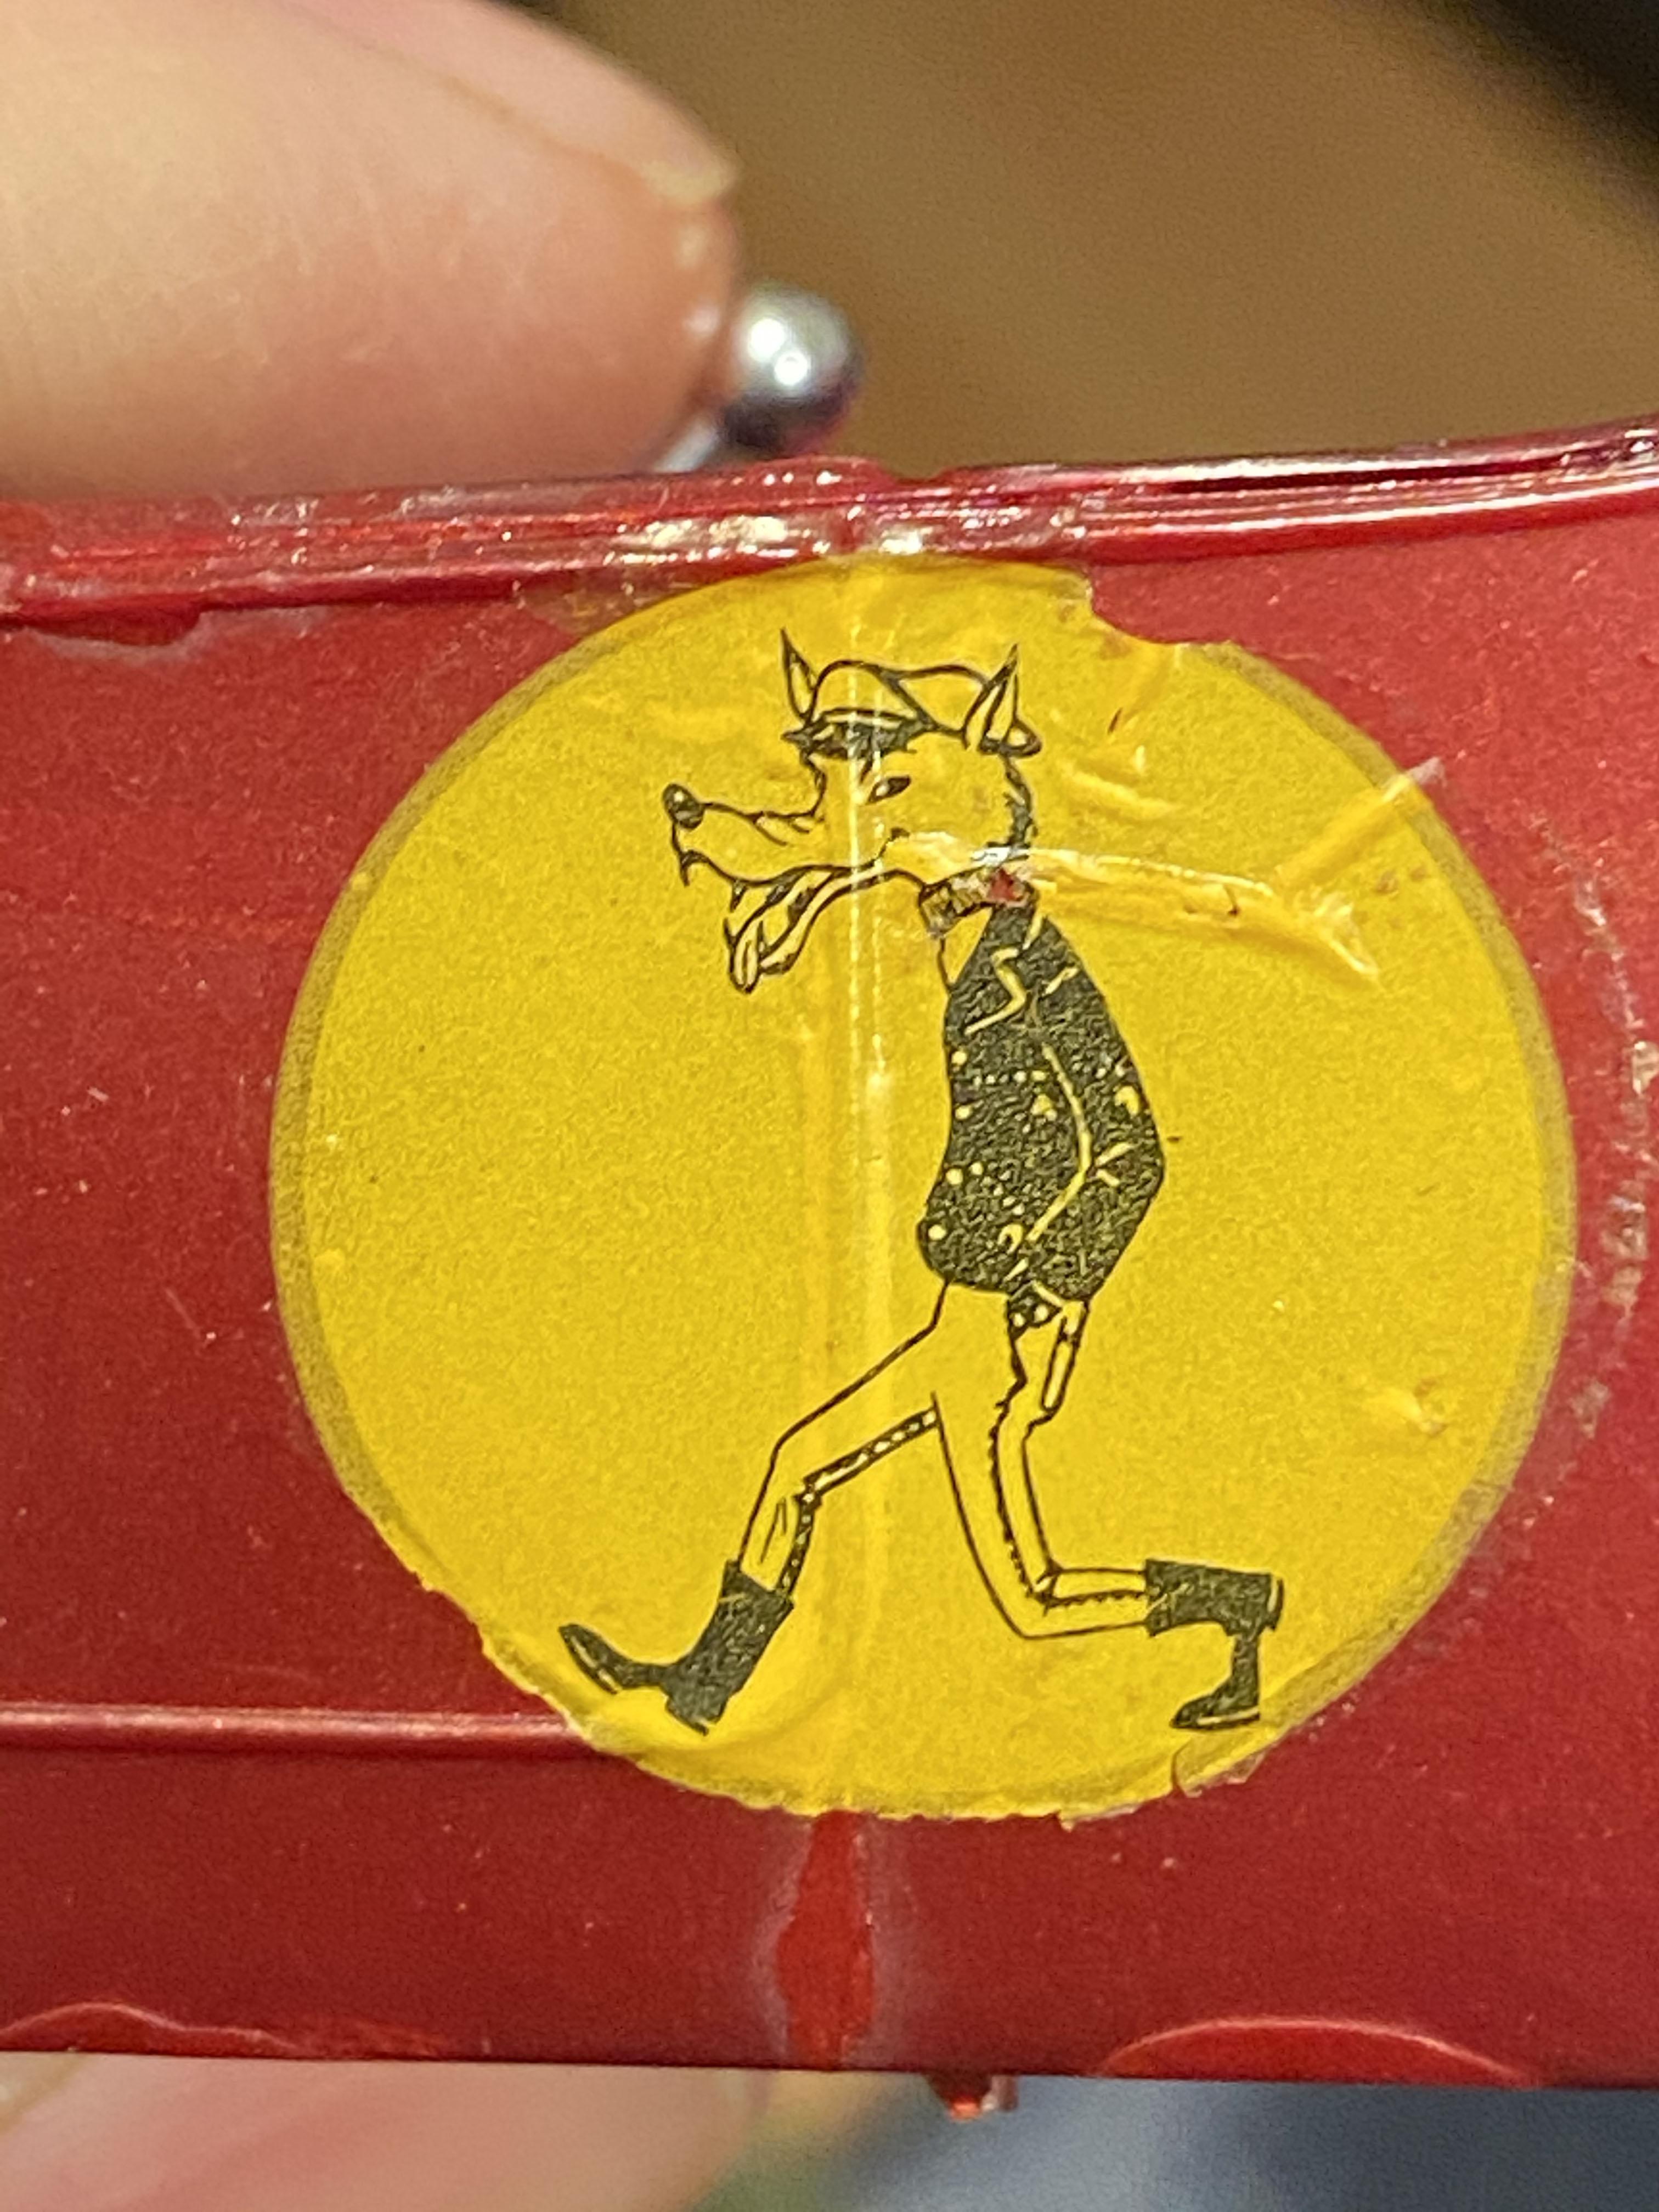
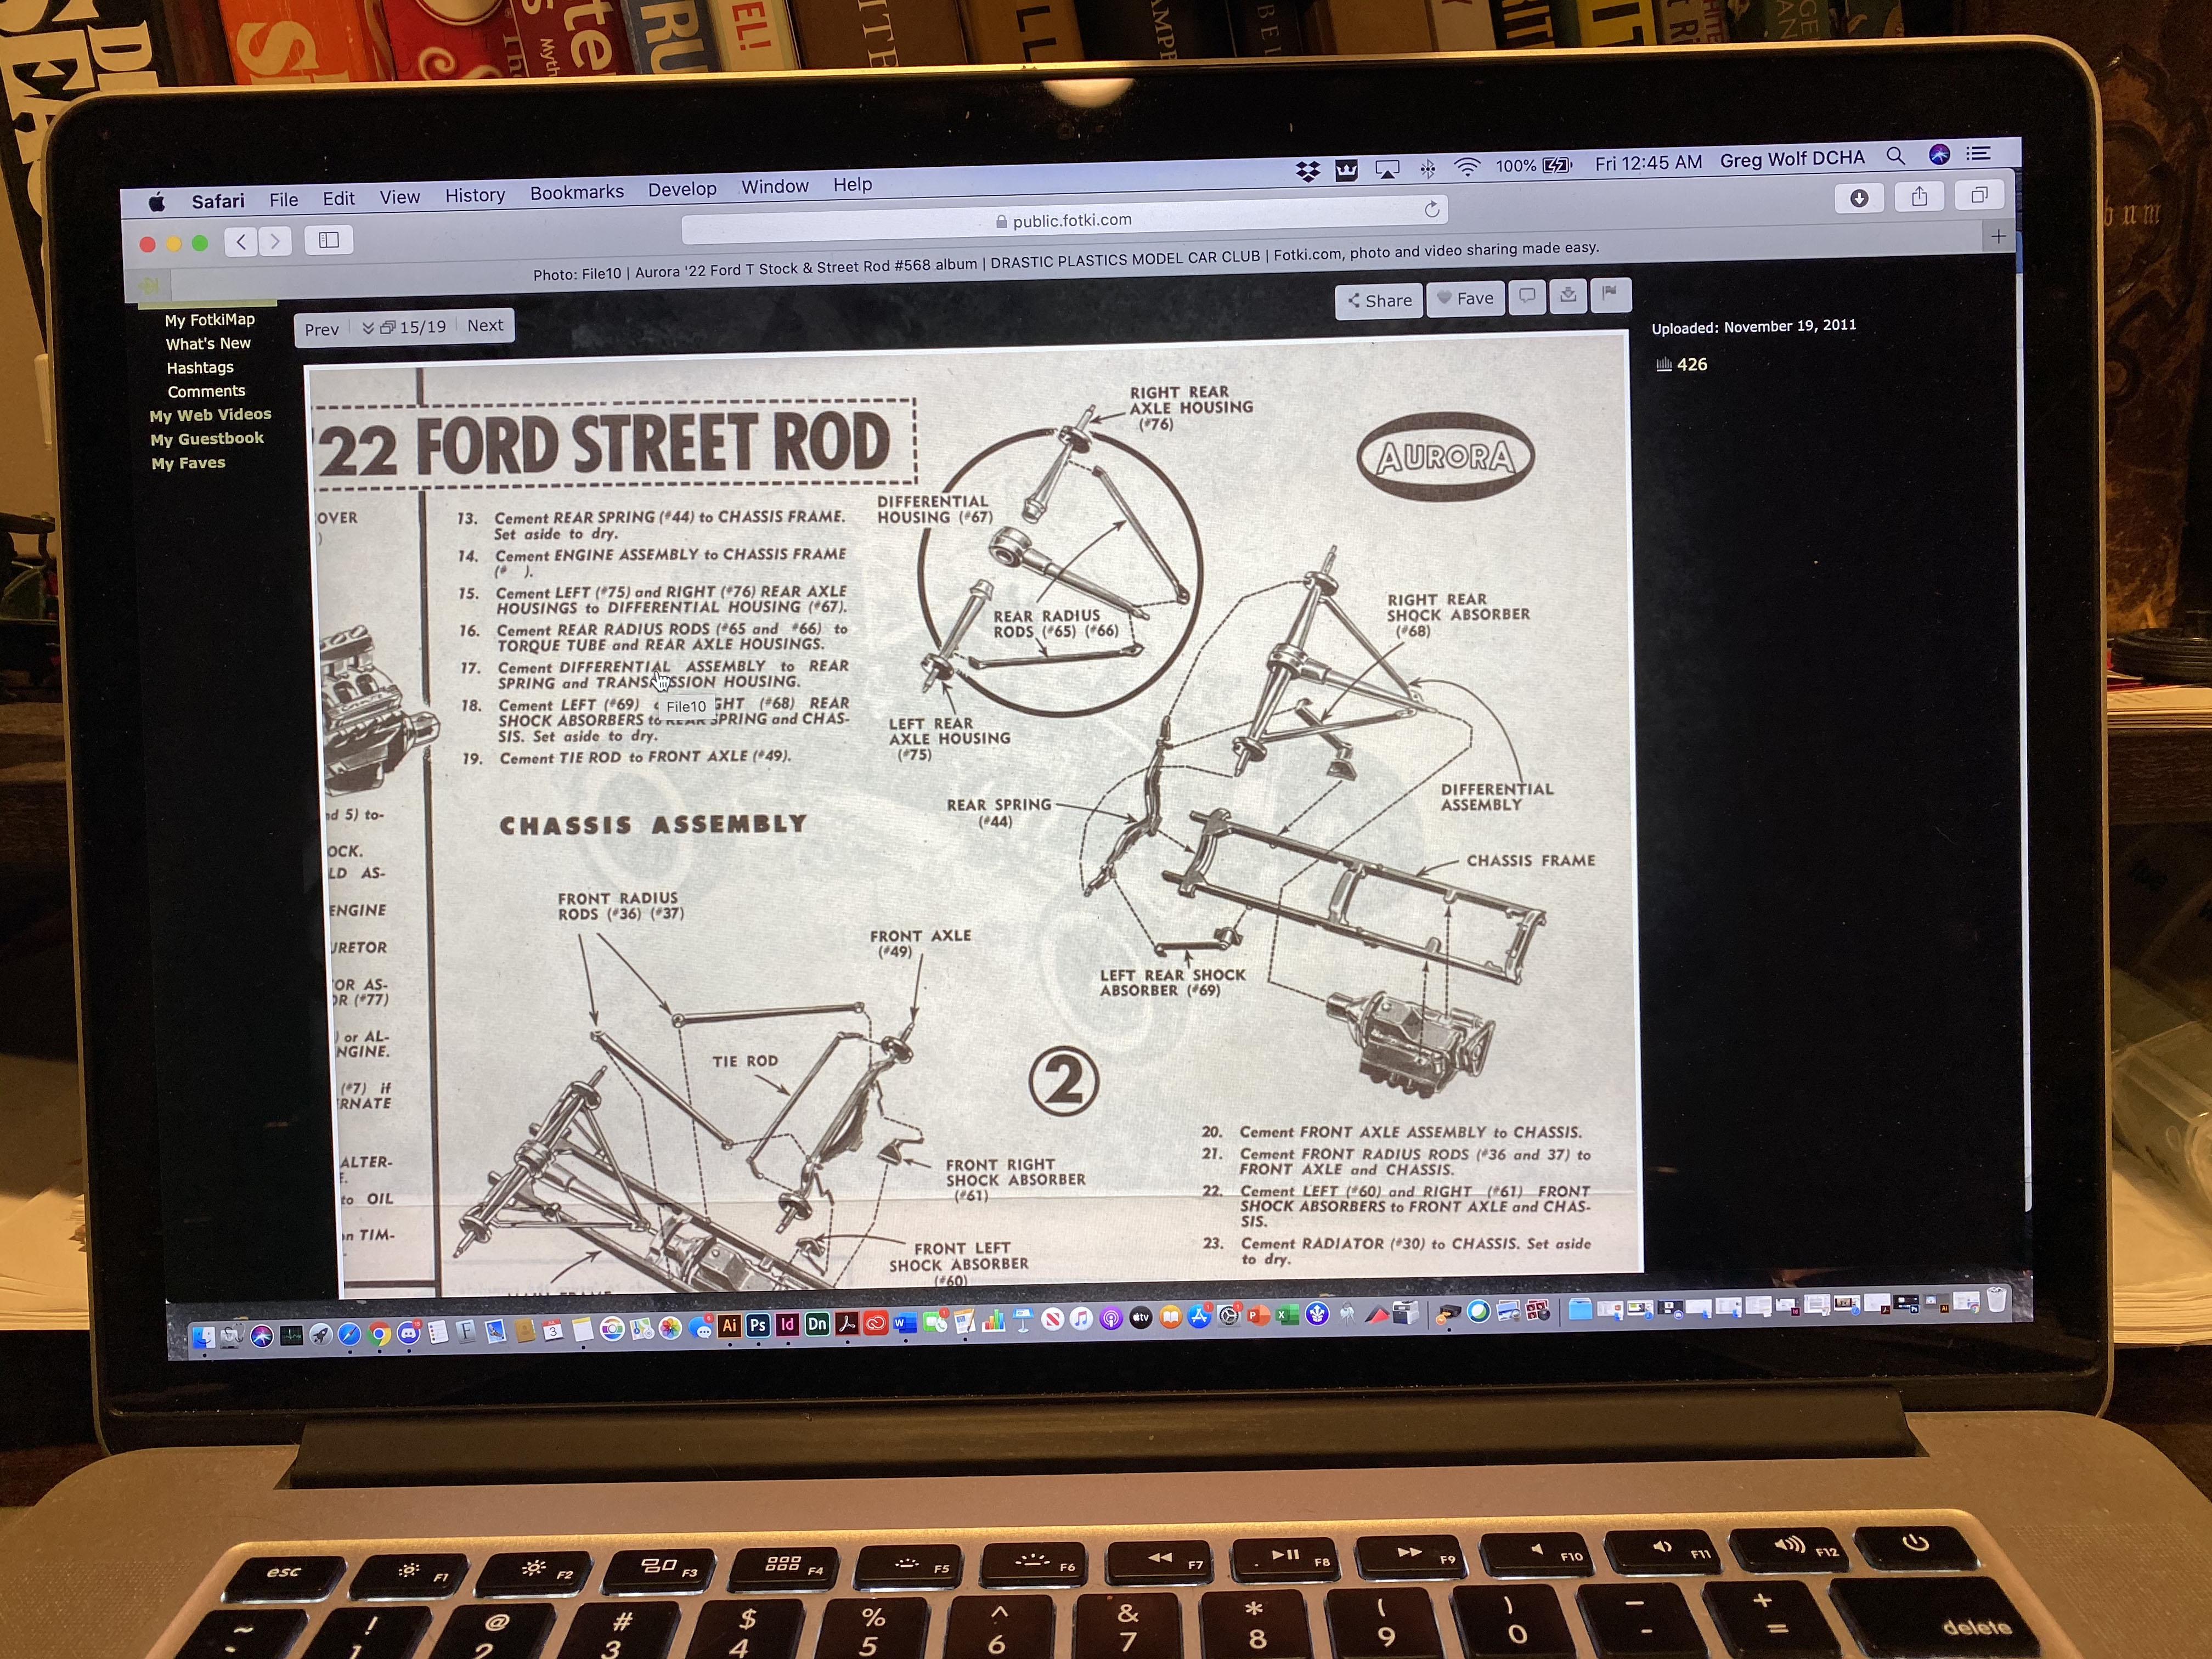
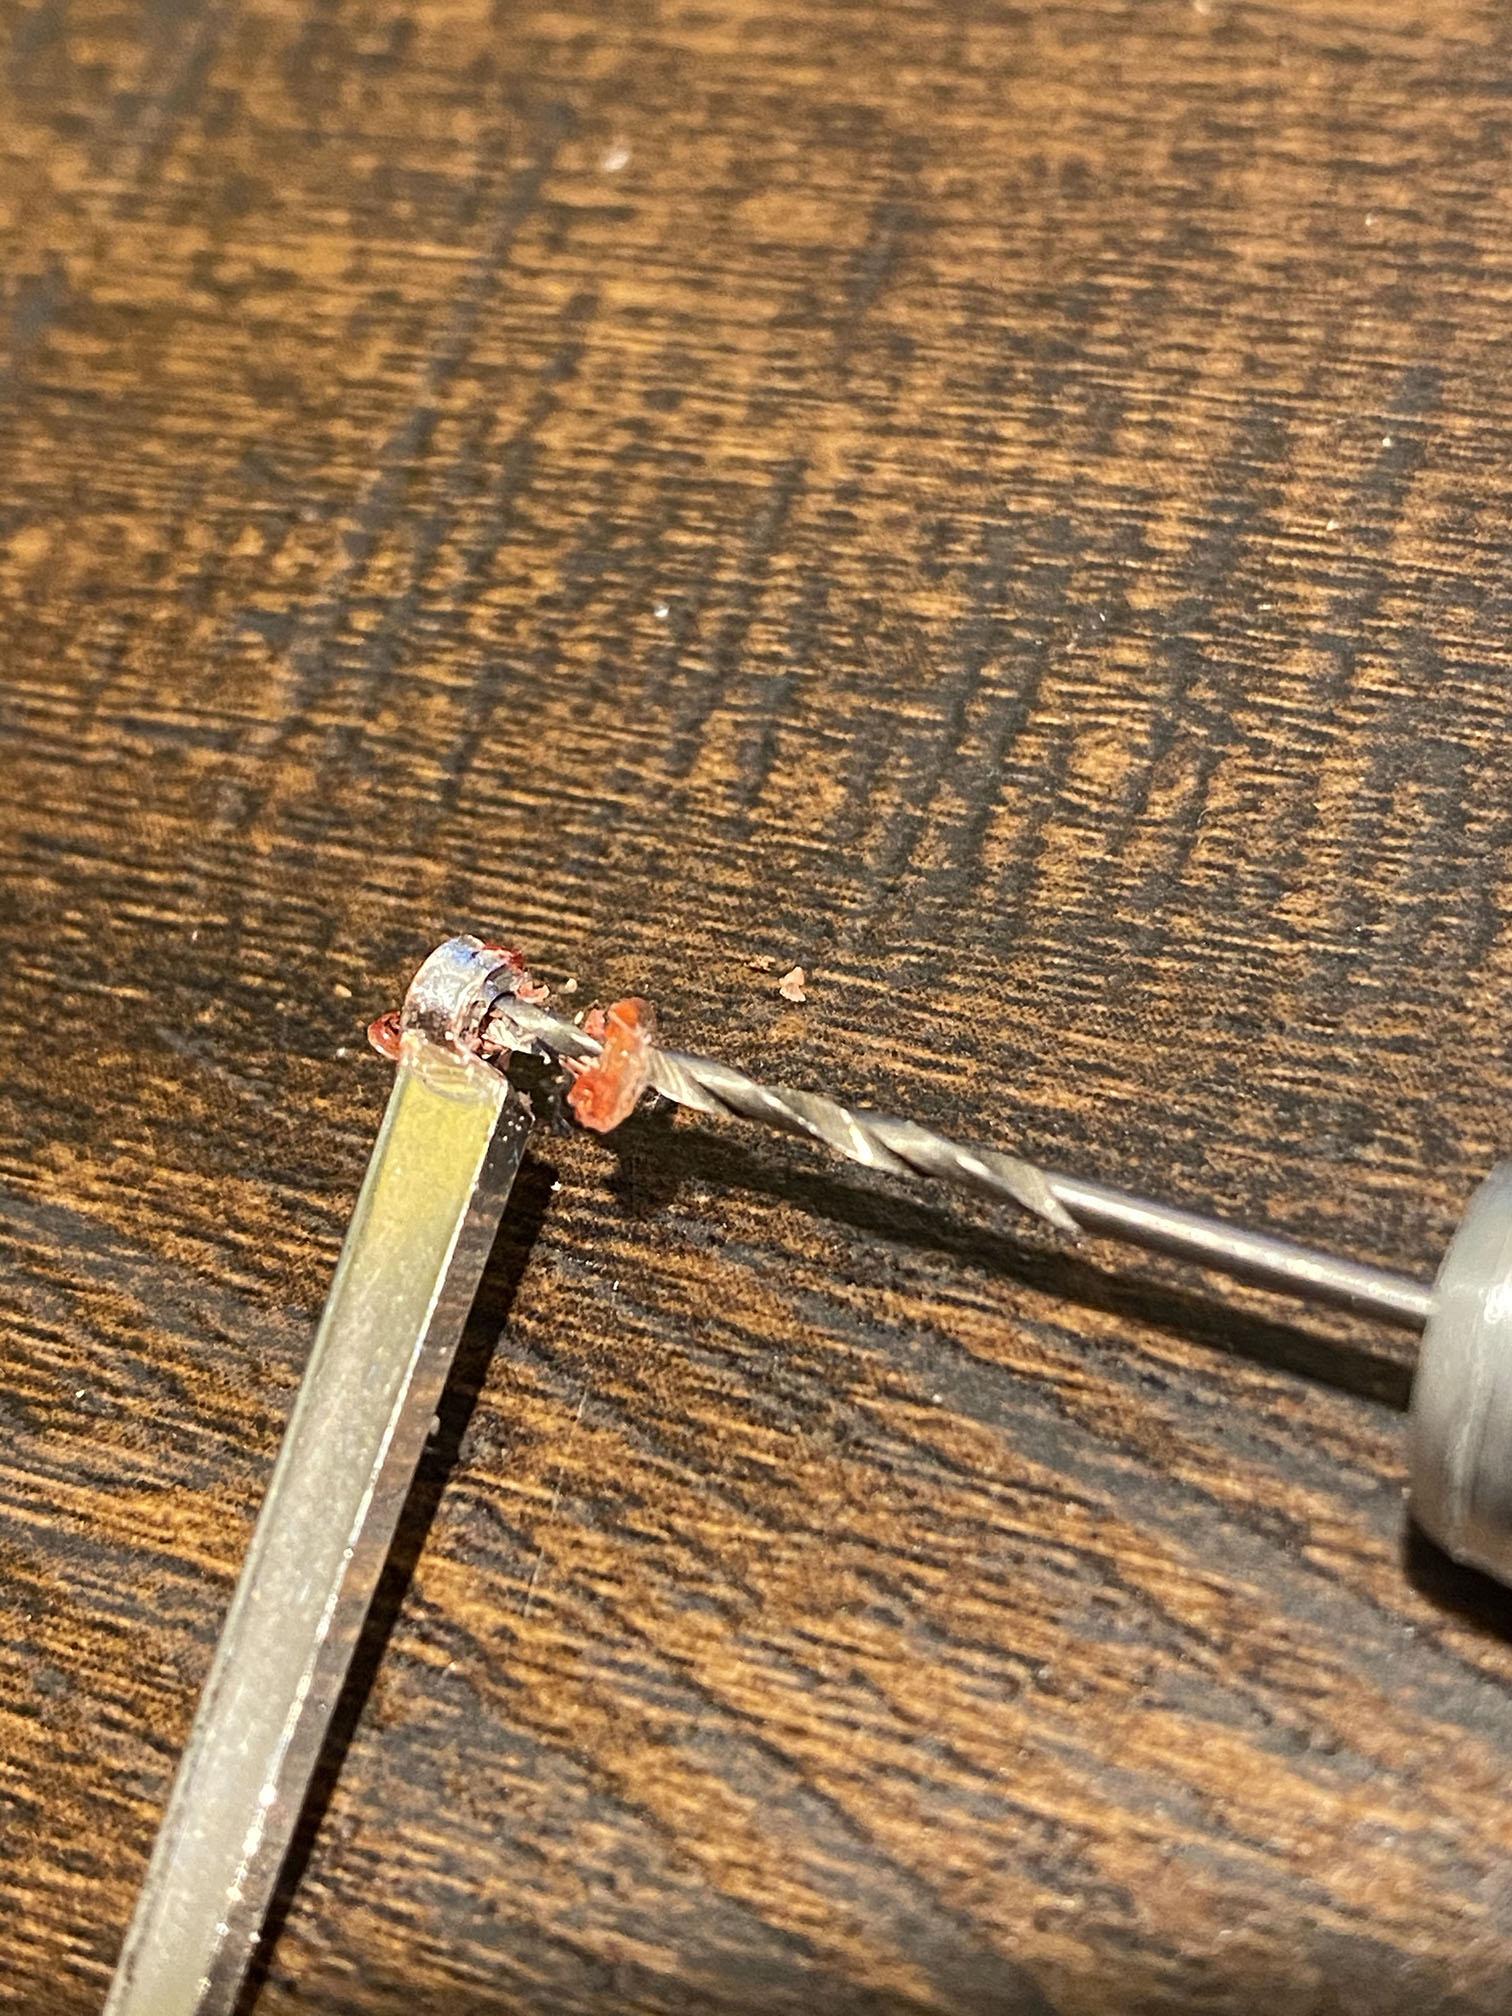
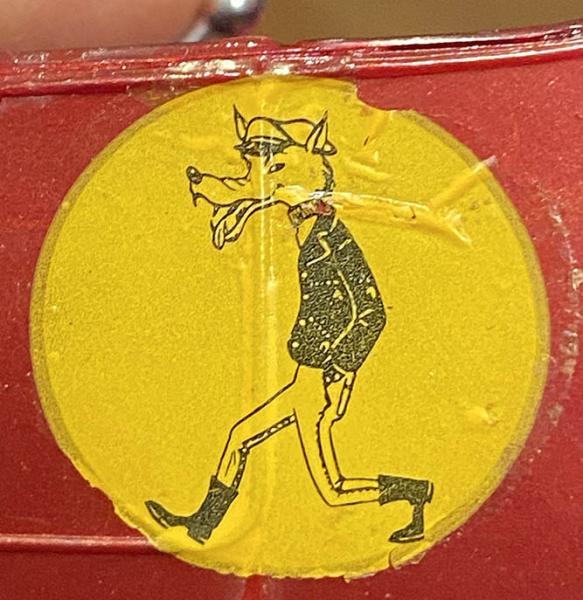
A quick rebuild of this built-up Aurora '22 T Double Deuce Street Rod I bought a few years ago at a Mid-Atlantic NNL show. I paid $10 for it and it came in a dirty ziplock bag. I bought it because I can't help myself and I really liked the wolf decal on the door. A little digging online and I found the box art: This is the first Aurora kit I've had. Most of the part looked like they were there, but I couldn't figure out how the suspension went together. Eventually I found a Fotoki site where someone had the instructions posted (may have been one of you guys!). My plan with this lil T is to just put it back together the way whoever originally bought it had it. Luckily, most of the chrome parts were never scored or sanded, so the old, dried glue came off pretty easily. I used a pin vise with a small drill bit got rid of the stuck, dried glue inside the holes on the front tie rods. There's a few parts missing, like the rear tie rods and shocks, but I think it'll display fine after it's all put together.
-

"Bring Out Your Dead" Completion Build--ROUND 2 Is On!
gwolf replied to Snake45's topic in WIP: Model Cars
Thanks Anthony! dang cousins, man! I would love to see an actual 1:1 version, but haven't so far. Did you get to see it operate? -
"Bring Out Your Dead" Completion Build--ROUND 2 Is On!
gwolf replied to Snake45's topic in WIP: Model Cars
Thank Bruce! -
"Bring Out Your Dead" Completion Build--ROUND 2 Is On!
gwolf replied to Snake45's topic in WIP: Model Cars
Thank you and you're welcome, Kevin! -
"Bring Out Your Dead" Completion Build--ROUND 2 Is On!
gwolf replied to Snake45's topic in WIP: Model Cars
Thanks John! This kit is a doozy! I plan on building another one, myself. -
"Bring Out Your Dead" Completion Build--ROUND 2 Is On!
gwolf replied to Snake45's topic in WIP: Model Cars
Thanks Richard! -
"Bring Out Your Dead" Completion Build--ROUND 2 Is On!
gwolf replied to Snake45's topic in WIP: Model Cars
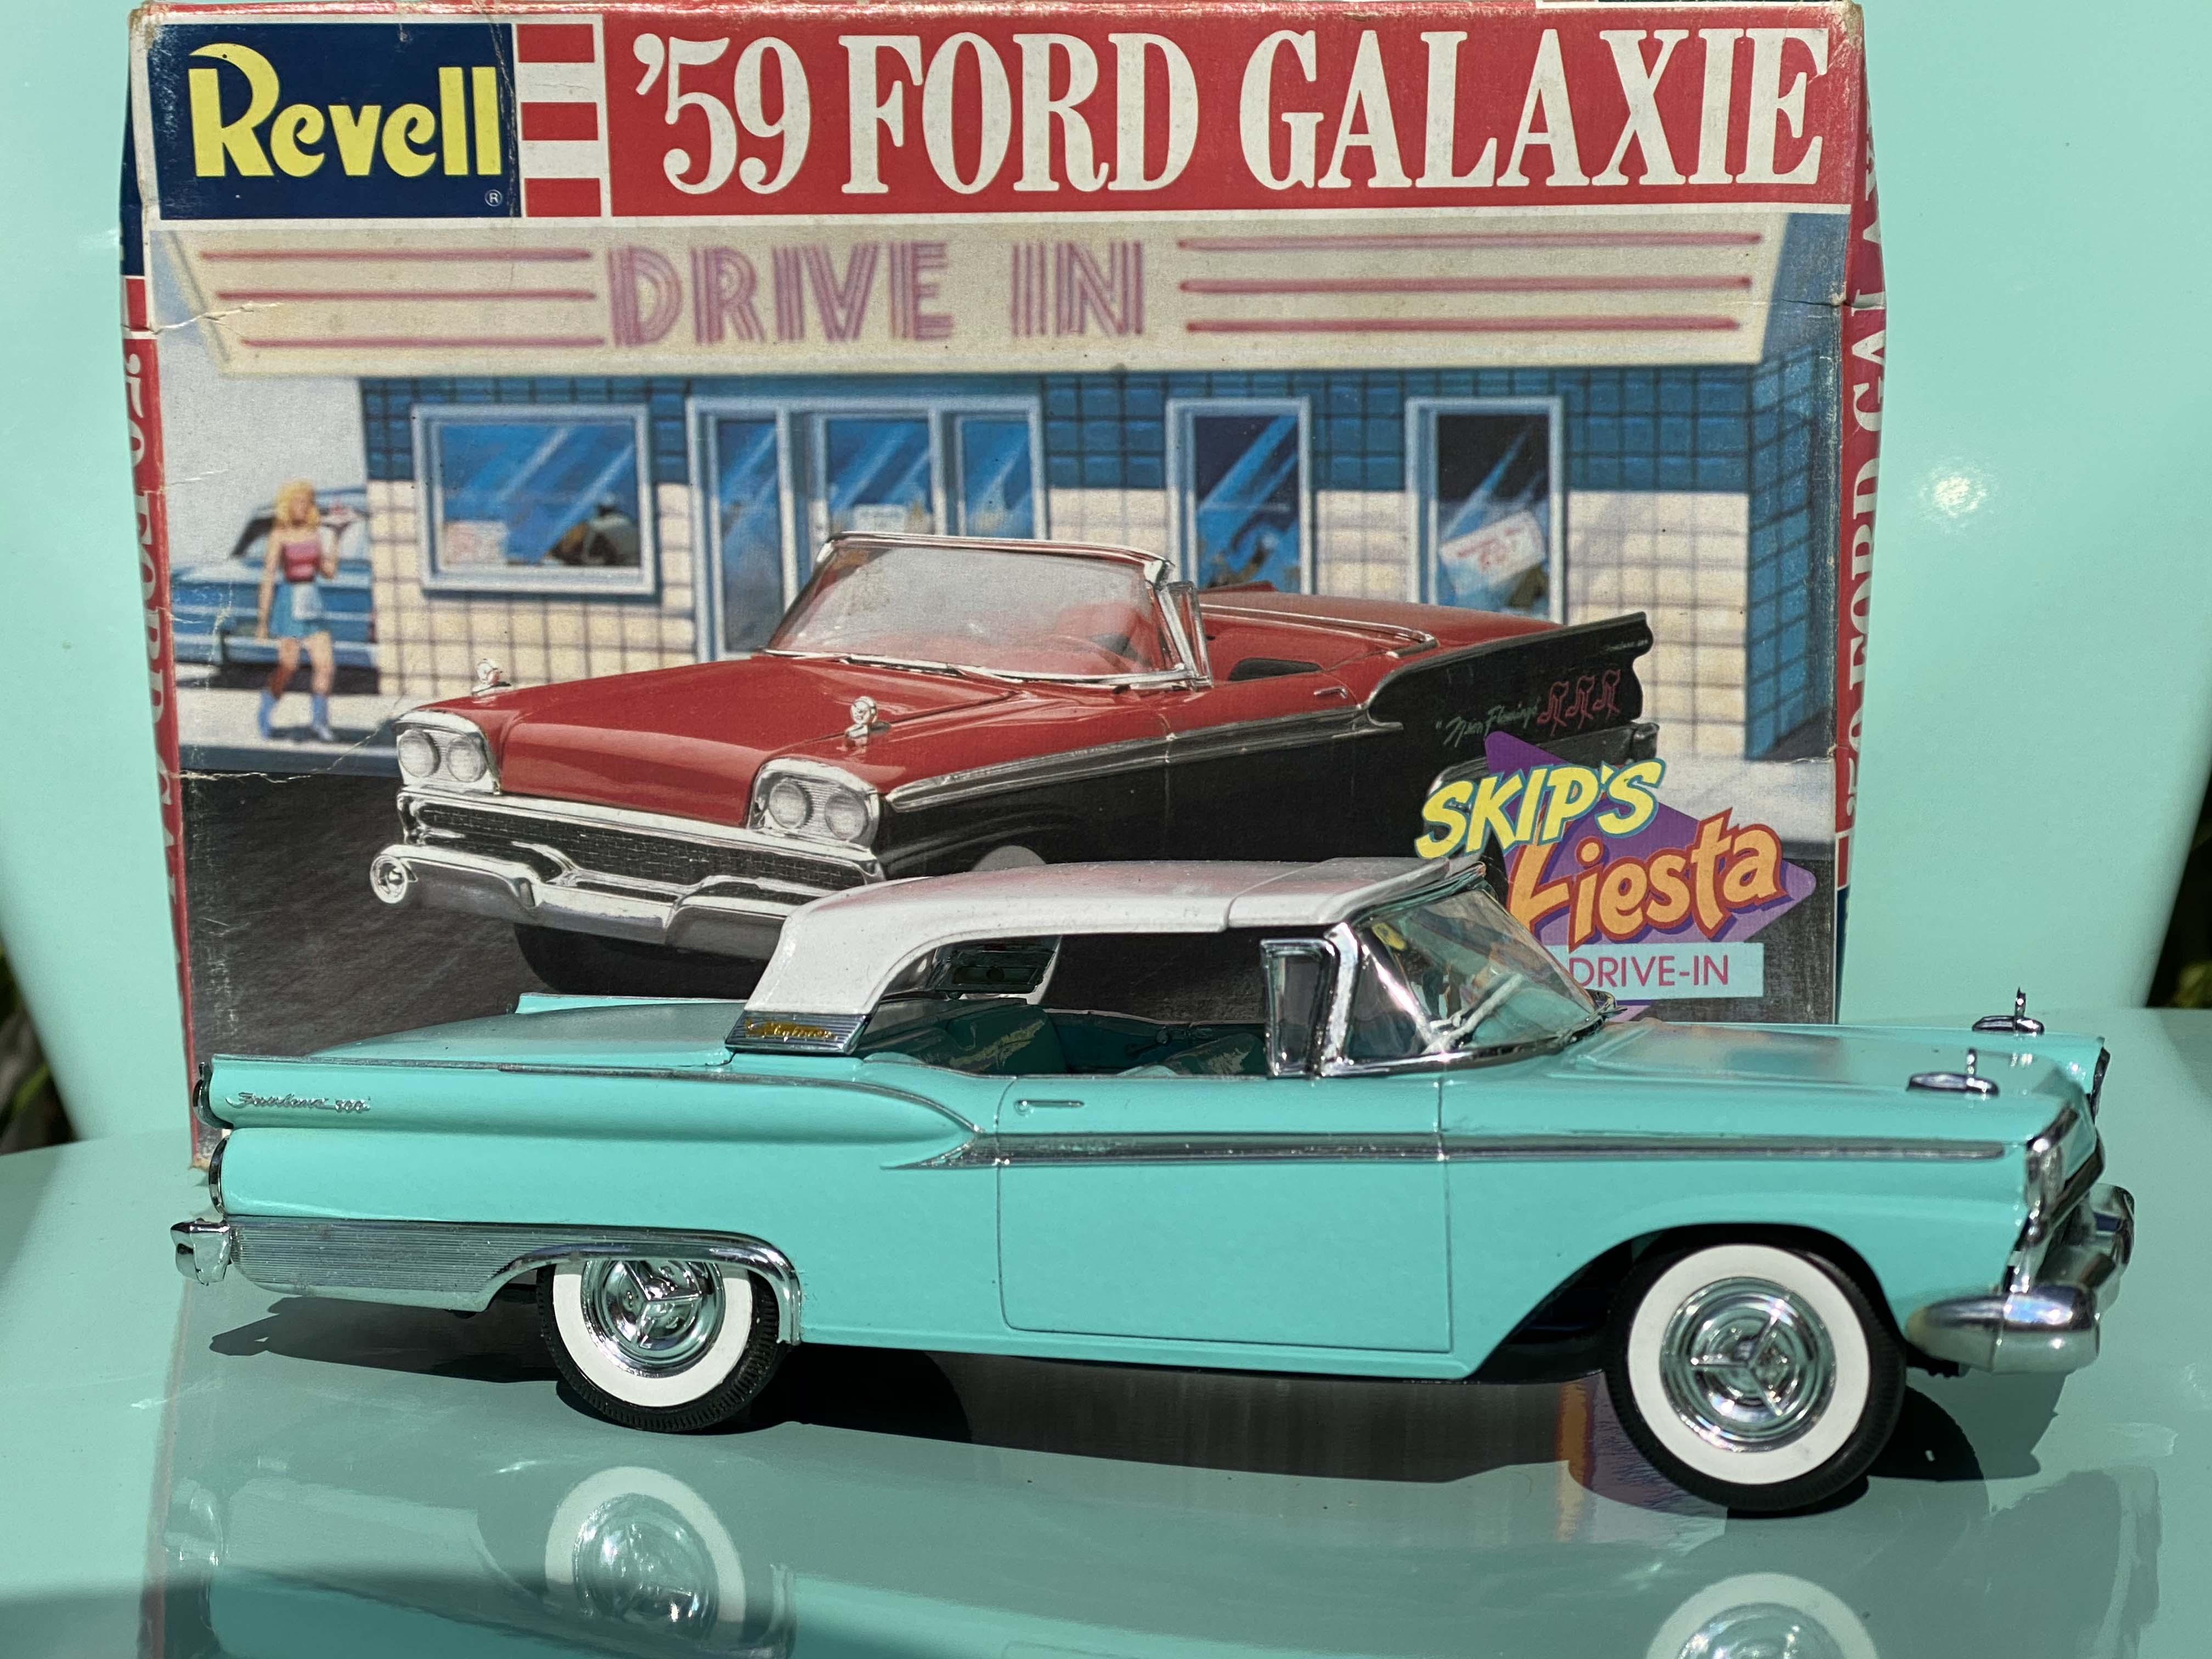
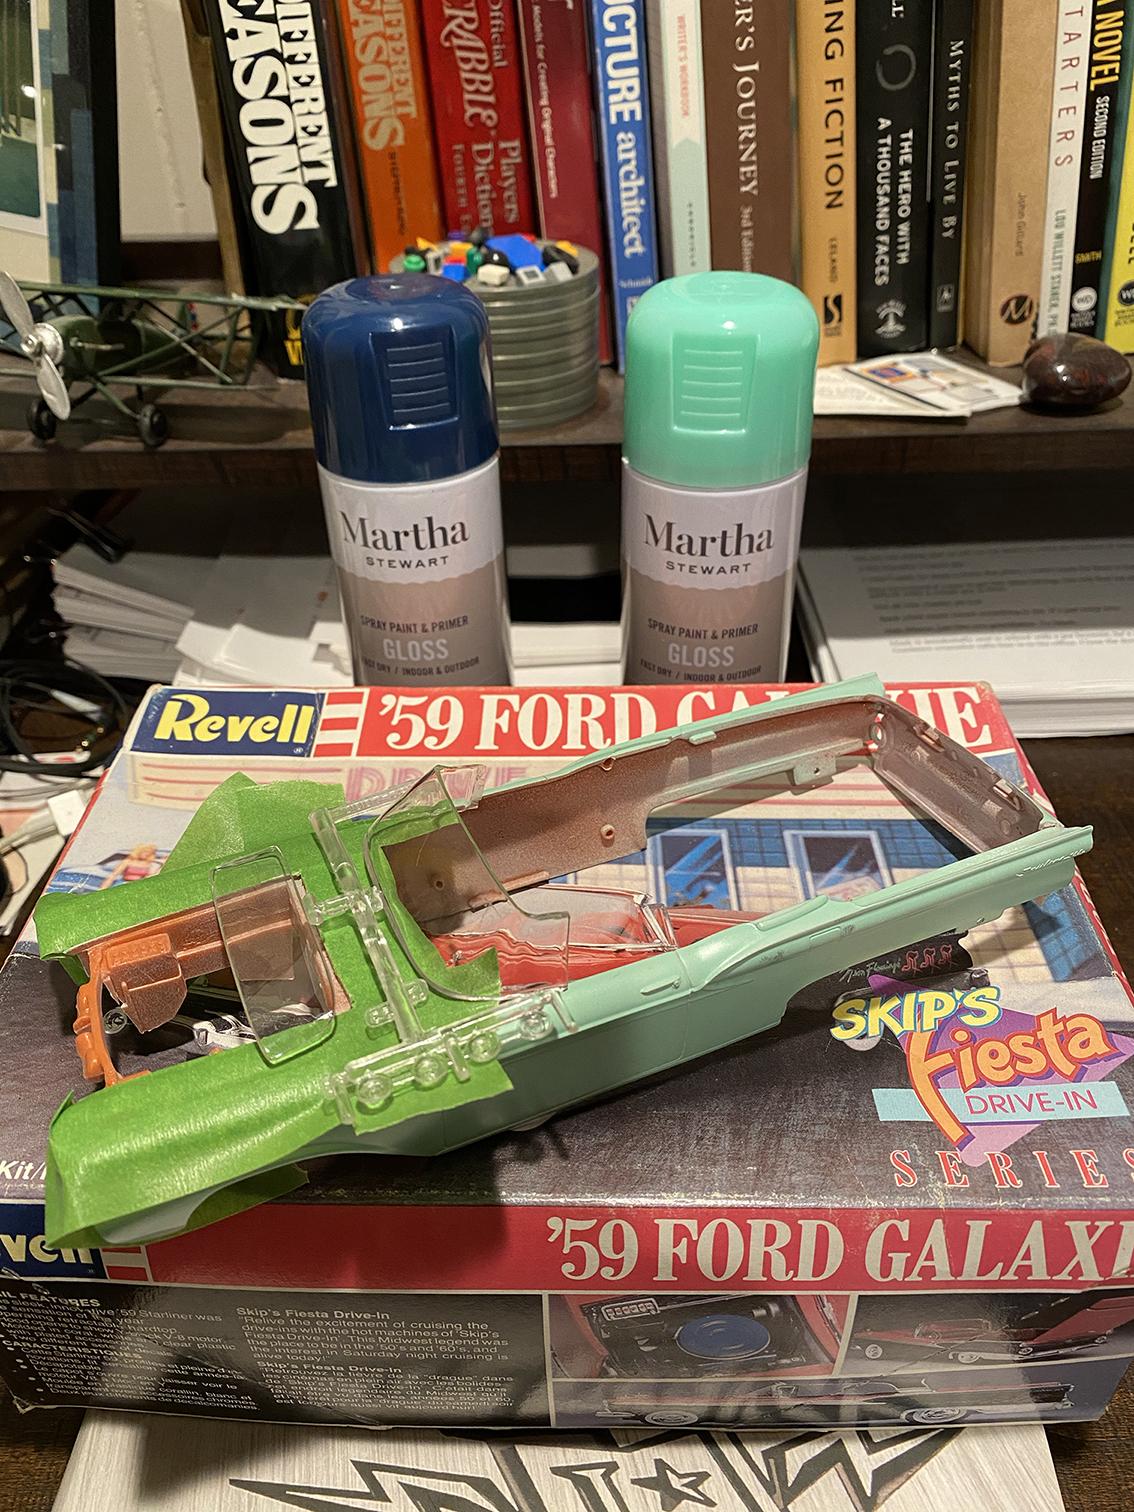
Well, after starting this kit in December 1988 when I was 15, I finished it last night. I'm 47 now. I replaced the tires and windshield (provided by modelcarsmag forum member, Khils). Seatbelts are from a Jo-Han 1962 Plymouth Fury. Everything else is from the original box. Does the retractable hood actually work? Kinda. The added thickness of the paint hinders it some, but it does work. Here's where I started in April: I was 15 in 1988 and got this kit for Christmas. I'm sure my father picked it out, probably because he had one as a kid. He knew it had the retractable roof, he knew the body came in four pieces, not like the one piece bodies I was used to. He probably thought it'd challenge me. He was probably disappointed that I never showed him the completed model. The thing was complex; the retractable roof had a lot of pieces, the rear deck hinges were delicate and could be broken easily, and I never could get the goddam four piece body to stay put together... until today, 32 years later. If my dad were still alive I think I would've called him today and told him about it. There's a few broken parts, and the front glass is ruined (at some point years ago I tipped over a bottle of Testors silver paint into the box and doused the windshield and tires with it. But I'm going to work with it. The photo below is exactly how Ieft it right after Christmas in 1988. So here we go, the Revell Skip's Fiesta Drive-In '59 Ford Galaxie Starliner: Before: After:
-
"Bring Out Your Dead" Completion Build--ROUND 2 Is On!
gwolf replied to Snake45's topic in WIP: Model Cars
Is the "Bring Out Your Dead" still running? Haven't seen any updates... -
"Bring Out Your Dead" Completion Build--ROUND 2 Is On!
gwolf replied to Snake45's topic in WIP: Model Cars
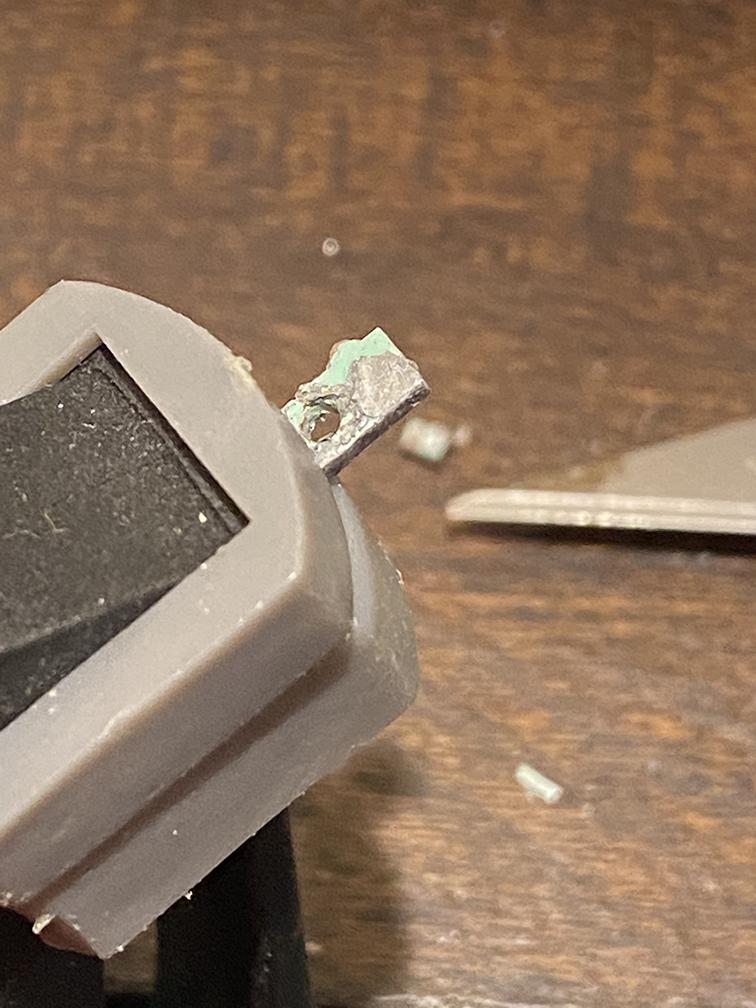
Here's my '59 Ford Galaxie Update: Aside from a new windshield, I needed replacements for part 36 and 37: Deck Lid Hinge Arm L and R and two part 38 Hinge Pivot Block. Wouldn't you know it, the parts kit I bought was only missing one piece: one of the art 38 Hinge Pivot Blocks. I've got two of part 38 Hinge Pivot Block if I count the original one I was able to remove from the Deck Lid. I cannot believe my luck: I was able to put in a clamp and push the old hinge arm out of the pivot block. We're back in business. I was also successful in removing the old, broken hinge arm pieces from the deck lid (folding section). Hot BLAH_BLAH_BLAH_BLAH!
-
"Bring Out Your Dead" Completion Build--ROUND 2 Is On!
gwolf replied to Snake45's topic in WIP: Model Cars
Still working the '59 Galaxie, but time to kick it up a notch! -
I just finished up my Revell '34 on AMT '32 frame, here:
-
"Bring Out Your Dead" Completion Build--ROUND 2 Is On!
gwolf replied to Snake45's topic in WIP: Model Cars
Update: Aright, things are moving along now. Got a new windshield from Kevin and some paint from Martha. Never tried her paint before but I thought the colors were perfect for this project.
-
Just need to find some door handles and touch up a few spots. Thanks for looking.
-
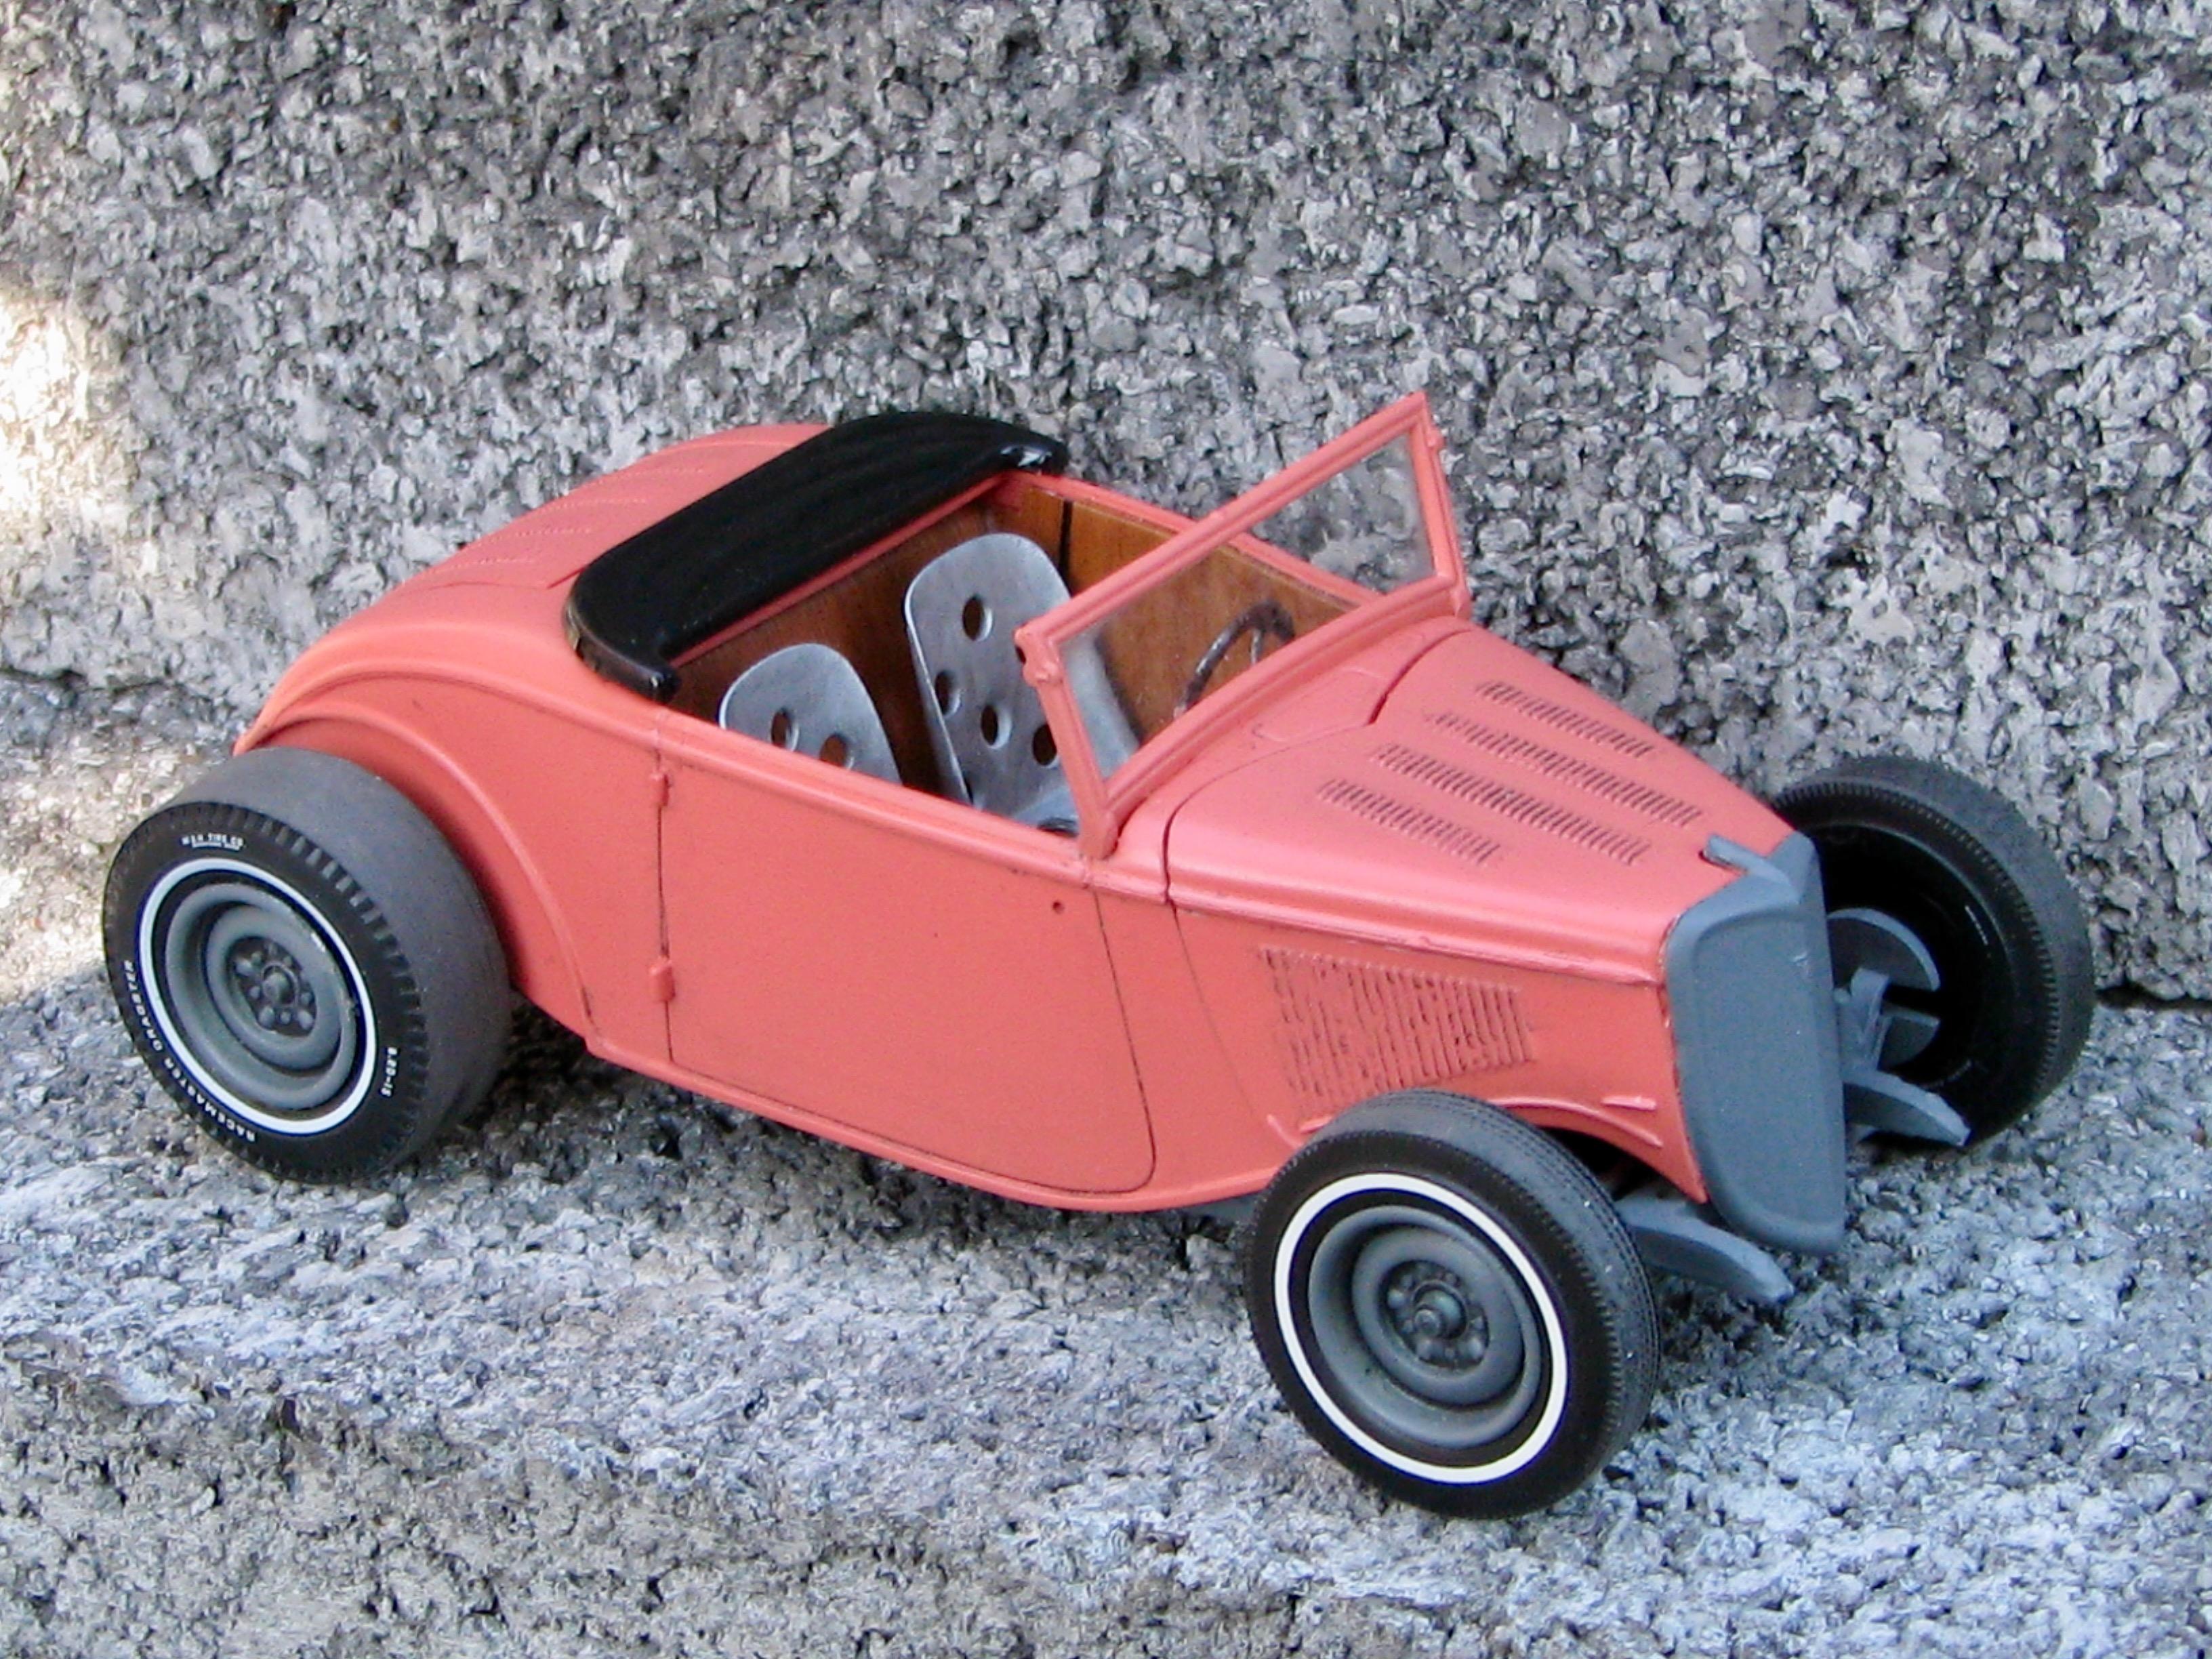
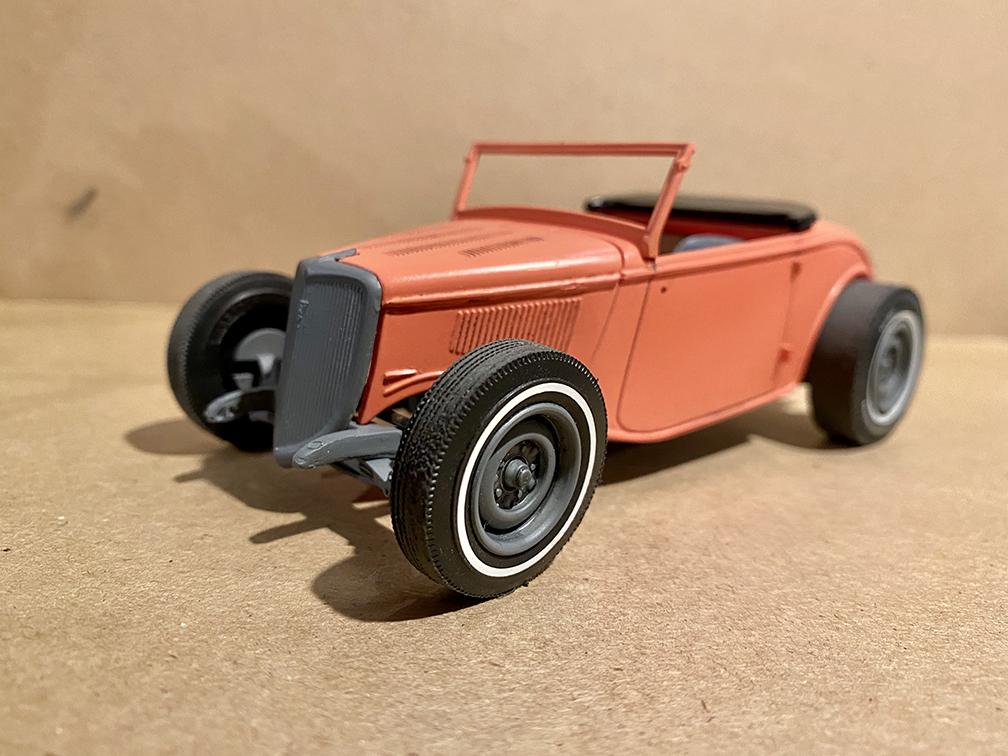
A little update: Frame is glued back together and painted. It still looks a little rough, but that's ok, it was in bad shape when I pulled it from the parts bin The chrome on the '34 Ford radiator grill was losing it's luster, so I just went ahead and painted it as well. Should it have been coral instead of battleship grey? I dig it either way.
-
Thanks Bob, going to post an update shortly.