JPS_Lotus
-
Posts
71 -
Joined
-
Last visited
Content Type
Profiles
Forums
Events
Gallery
Everything posted by JPS_Lotus
-
Modeling disaster stories?
JPS_Lotus replied to JPS_Lotus's topic in General Automotive Talk (Trucks and Cars)
lol That might have been one dead cat were it me. I think cats like to figure out whatever the most fragile items are in a house, then they go climbing around it to see how long it takes to destroy it. -
Very nice looking!
-
Modeling disaster stories?
JPS_Lotus replied to JPS_Lotus's topic in General Automotive Talk (Trucks and Cars)
Wow, that's a heck of a job you did with that body! Looks absolutely gorgeous, and there's no hint you had any problems with the body. -
Modeling disaster stories?
JPS_Lotus replied to JPS_Lotus's topic in General Automotive Talk (Trucks and Cars)
Thanks for that tip! I'll have to try that in the future with those thin body parts. The good news is I seem to have stripped the model for the most part. There's still dried primer in spots that feels flush to the surface now. I think things are about as good as I am going to get them. The good thing about this, is that it has given me a lot of practice with stripping a model completely. I will just do a wet sand before I do the primer to make sure things are smooth as I can get them. Funny thing is that the part of the 934 kit where you spray the underside with the body color, I had no problems getting that sprayed cleanly. Go figure that one out. -
Modeling disaster stories?
JPS_Lotus replied to JPS_Lotus's topic in General Automotive Talk (Trucks and Cars)
Probably would be a bad time to mention I am in the process of stripping it again? I have no one to blame but myself for this latest one. But what is they say...you can't learn if you don't make mistakes? At least that's what I am trying to tell myself. -
Since I'm fairly new to the modeling scene...it was a long long time ago that I did any modeling....I've had some disasters with the model building since January. I finally completed only my second model Sunday. Part of it is my fault for being a bit too anal about things instead of just going with the flow and not worrying so much about every little blemish. My problems have been primarily with the use of spray paint. My comfort level with it was very low, and getting the feel down for distances has been trying. As such, I have found out the Tamiya synthetic lacquer paints have little forgiveness if you mess up with them as they don't come off easily. Yesterday I started a Tamiya 1976 Porsche Turbo 934 Jagermeister curbside kit. I had no problems with the prep work and the primer coat. I was a little nervous with applying the TS-12 Orange spray given every disaster I've had. The body shell was on a Tamiya spray stand. So I did the initial mist coats outside, and was pleased with how they came out. After 2 sessions, I was ready to do a wet coat. The wet coat came out quite well, and I was very happy with it. As I turned around to go back inside I was holding the stand and tilted it a little bit just to check the bottom of the body to see if everything was covered. Well disaster struck, and unbeknownst to me, the spray stand wasn't as secure as I thought it was, and it fell off with the body shell onto the ground. The damage was done to the wet coat, so I rushed inside and got it into a tub that I then filled up with 91% alcohol. I spent the next several hours stripping the shell of all the paint. I find to use 91% with the Tamiya lacquers, you need to get them into the alcohol quickly. Once they start curing, it seems to make it a huge problem. Using toothpicks and the exacto knife allowed me to remove all of the paint and primer from the cracks. In the process I managed to break a part of the front bumper that sits beneath the opening for the mesh grill. Fortunately I used the Testor's super glue to fix it, and it looks ok for the most part. I called it a night at that point since everything appeared to be cleaned up. Before work this morning, I was able to do another primer coat on the body shell, and did some wet sanding. It looks like it should be good to go for when I get home, so I can do the actual spray painting. Primer was rough in some areas, which might have been due to some things being left on the surface that I thought were gone even after the sanding of the shell. Hopefully I will have no problems with the body work this time around. But it got me thinking to the point where I feel like a calamity is always right around the corner for me when it comes to doing body work. Silly mistakes that were avoidable for the most part, but definitely the sort that tries your patience. Anyone have any stories like mine?
-
Williams FW24 - Juan Pablo Montoya - 2002 US Grand Prix
JPS_Lotus replied to kilshaw's topic in Model Cars
Great build Jake! I love F1 car builds. It's nice to see the FW-24 build as I had debated a few times grabbing that kit to add to my growing pile of models in my closet, but decided against it. I like the display you did for it, it sets it apart from how most F1 builds look. -
Very nice looking! Just wanted to let you know that the yellow you wanted to buy for this is Giallo Modena. That's the Ferrari yellow we all know and love.
-
Will do Monty! Funny thing, I realized the local hobby shop actually does have the paints. I never even noticed the Mr Color rack when I've gone in, then I noticed it today. Didn't have enough time to grab what I was looking for, but did notice they were out of a few colors I wanted, so I will see what the story is next time I go in there.
-
How come they won't match up with the paint numbers? Based on what I read, they give two different numbers on the instructions for the paint colors. Mr Color supposedly matches up with the black box white number. Unless the information is inaccurate? Thanks for the suggestion about Red Frog, I will have to look into that.
-
Thanks for the information Monty! It looks like I may have found a place over in NYC that sells the Mr Color paints, but I need to see if they are out of stock on some of them, or if they only carry the ones listed on their website.
-
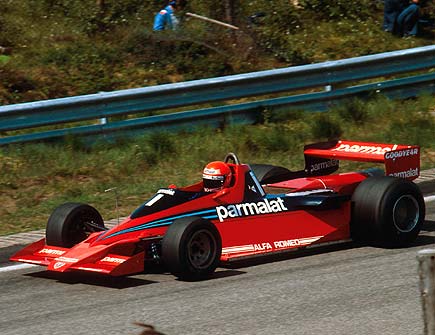
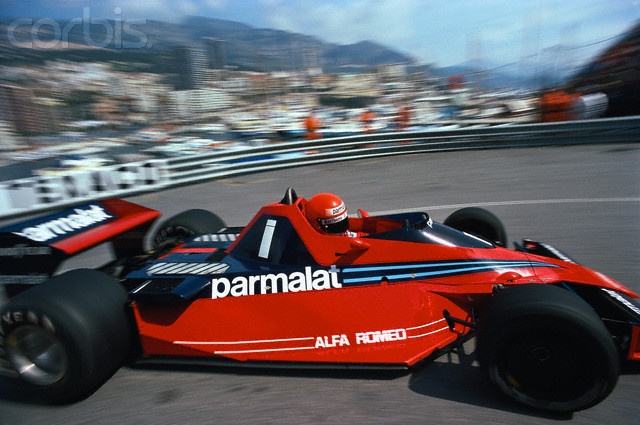
I think I am going to start building the Fujimi 1/20 Brabham BT-46B F1 car model, so I am just going through the initial supply preparation. I found this chart that helps decipher what color Tamiya paints match up with the Fujimi color code... http://www.ipmsstockholm.org/colorcharts/stuff_eng_colorcharts_gunze.htm However there are some gaps for which I cannot come up with an answer to, and was wondering if anyone here has any experience with Fujimi kits? For the body, the Fujimi instructions list the color as H8 which translate to a gloss red. Digging around online one person said they used Model Master Bright Red on a Tamiya Brabham BT-46 kit. I wish I had the Tamiya instructions to see what red they suggested for use on their kit. But in any event, I'm thinking of going with either the Tamiya spray of Italian Red or Bright Red. I'm thinking the Bright Red might make more sense because Italian Red from pictures I've seen looks a shade too dark...but I'm curious if anyone has opinions...I attached two pictures of the real life car at the end of the post. The next question is, does anyone know what would qualify as a "steel" color on Tamiya's color scale? The best I can come up with is their XF56 Metallic Grey. The same goes for Metallic Red. Tamiya has a metallic red in PS-15, but nothing in the acrylics. I know Gunze paints are much easier to match up with the Fujimi paint codes, so perhaps the better choice would be just to try and track their paints down. Hobbylinc seems to sell them, but they are on the pricier side, double what I would pay for Tamiya acrylics. Has anyone used Gunze paints?

-
1/12 Porsche 934 Brumos Racing
JPS_Lotus replied to maysula's topic in Other Racing: Road Racing, Salt Flat Racers
Very impressive work!! -
1/12 Porsche 934 Brumos Racing
JPS_Lotus replied to maysula's topic in Other Racing: Road Racing, Salt Flat Racers
That weathering job is amazing!! How did you mimic the debris along the front bumper? -
Tamiya Jordan 191
JPS_Lotus replied to JPS_Lotus's topic in WIP: Other Racing: Road Racing, Land Speed Racers
I will be honest, I bought it because I thought it would be an easy build. I somehow correlated price with difficulty. It was only when I started working on it, that the thought entered my head, "Maybe I should have settled for something a little easier." With that said, I'm actually glad I did this because the challenge was quite fun, and while I wanted to post on here with questions I had, I decided not to, just to see if I could come up with solutions on my own. As I always say, you cannot learn if you do not make mistakes. But it gives me a tremendous appreciation for so many of the completed models in general that I've looked at on this section of the forum. -
Tamiya Jordan 191
JPS_Lotus replied to JPS_Lotus's topic in WIP: Other Racing: Road Racing, Land Speed Racers
Thanks for that information Jordan! I began to think maybe it was something with the molding process. Older builds of the car that I've seen online did not have this issue at all, or at least no mention of this issue....makes me wonder if the actual mold might have a problem. Your build is quite gorgeous, I like it quite a bit! @Cobraman, thank you! -
Tamiya Jordan 191
JPS_Lotus replied to JPS_Lotus's topic in WIP: Other Racing: Road Racing, Land Speed Racers
Were you ever able to figure out what caused the gap? I almost feel like it has something to do with the lower piece being at the wrong angle, but I could be mistaken on that. It seems very few people from what I could find talk about the engine cover problems. Thanks Danno! I actually have 3 more kits waiting to be built, but I am thinking of buying another one because I kind of would like to work with the photo-etched parts. Decisions! -
Holy BLAH_BLAH_BLAH_BLAH! Looks incredible.
-
Let me just state that this was the first model I have built since the mid-90s, and the first car model I've ever built in my life. I used to build primarily Star Wars models and some naval ships back then. This was an interesting build for me, as I had bought it because it was relatively inexpensive price-wise, and I figured cheaper would be better since I was starting from scratch as far as my skill level was concerned. I did not bother doing a gloss coat for this model as I was more interested in making it to the end of the build. There are definitely things I would have done differently, but part of the fun is in learning how to do model building again. I will likely revisit this model again in the future. I used all of the decals included with the kit for the multi-tone paint job. Next time I will definitely paint those parts. It was a highly interesting learning experience with the decals as I had rarely used them many years ago. Biggest problem I had was with regard to the engine cover not fitting properly. You can see it in the pictures, it was worse on the other side of the car, hence why I didn't take a picture of the other side of the car! I couldn't come up with an idea on how to fix that. Though I may have an idea as to what the issue was, but I did not want to damage the model by trying to fix it, so I just chalked it up as part of the learning process. All in all, I had fun with the build. It's nowhere near the level of the various Jordan 191 builds I have seen! But it gives me hope that I can improve even further. The lighting varies, you may notice I forgot to add the side mirrors in the first few pictures but did add them near the end. I built the Bertrand Gachot version of the car. I know the instructions called for the Fluorescent Red paint on the mirrors, but there were various times in 1991 where Gachot's #32 Jordan had the light green mirrors, and I felt the light green mirrors fit in better with the car overall. Thanks for looking!
-
Totally ruined decals Jordan 191 1/20
JPS_Lotus replied to JPS_Lotus's topic in Model Building Questions and Answers
Jantrix- I used Microset based on a recommendation, but I'm wondering now based on what you said if that was the improper solution to use. Was that likely the incorrect solution to use? -
I just started building the Tamiya 1/20 Jordan 191 model. It's the first model I'm building since the late 90s, I recently decided to get back into the model building hobby. The models I built years ago didn't involve waterslide decals, so I had no experience with them back then. I was only up to step 3, but it was the first part that required decal application. What killed me was the decals needed to wrap around the surface, but when I slid it off the backing onto the piece, it did not wrap around. My efforts to try and get it to wrap around resulted in the decals on both of the pieces being torn to the point where there's nothing that can be done to salvage it. I put a call into Tamiya USA to see if I can get replacement decals, but the aggravation of this is rather high as there's not much else I can do with the model without these decals. Although I could just wing it, and continue building even though it won't look good there. Has anyone had issues with decals that have to wrap around very small pieces? I thought they would have more flexibility and adhere to the surface instead of just standing up and being rather resistant to wrapping around.