

Rusty Irons
-
Posts
61 -
Joined
-
Last visited
Content Type
Profiles
Forums
Events
Gallery
Posts posted by Rusty Irons
-
-
That is a flashy Caddy ! The chrome looks great.
-
21 hours ago, espo said:
Great looking build. I like the way you hinged the tail gate, that adds a great deal to the finished model.
Thanks David ! Working on the hinge was my favorite part of the build.
21 hours ago, cobraman said:Love a Nomad !
Me too Ray. Now I want to try a 57
Thanks David !
Thanks Joe !
Thanks Bob !
19 hours ago, 89AKurt said:It should be a requirement, that when one posts a car with lots of chrome, that you tell us Bare Metal foil, or Molotov pen was used!
 I'm amazed you used water-based paints, I've been bitterly clinging to using enamels, but for some things like interior parts, am using acrylics.
Nice job!Thanks Kurt ! I used Bare Metal Foil for most of the chrome. I used acrylic paint because it was all I had on hand at the time. I should mention that the waterborne varnish I used is a super hard exterior grade clear coat that polishes very well after a week of curing.
Thanks Snake !
Thanks Patrick !
12 hours ago, Mahogany Rush said:Nice job. I have one just moved to my workbench. Gonna be a modded version. Of course...lol
Thanks Max ! I look forward to seeing what you come up with.
Thanks Scott !
Thanks David !
-
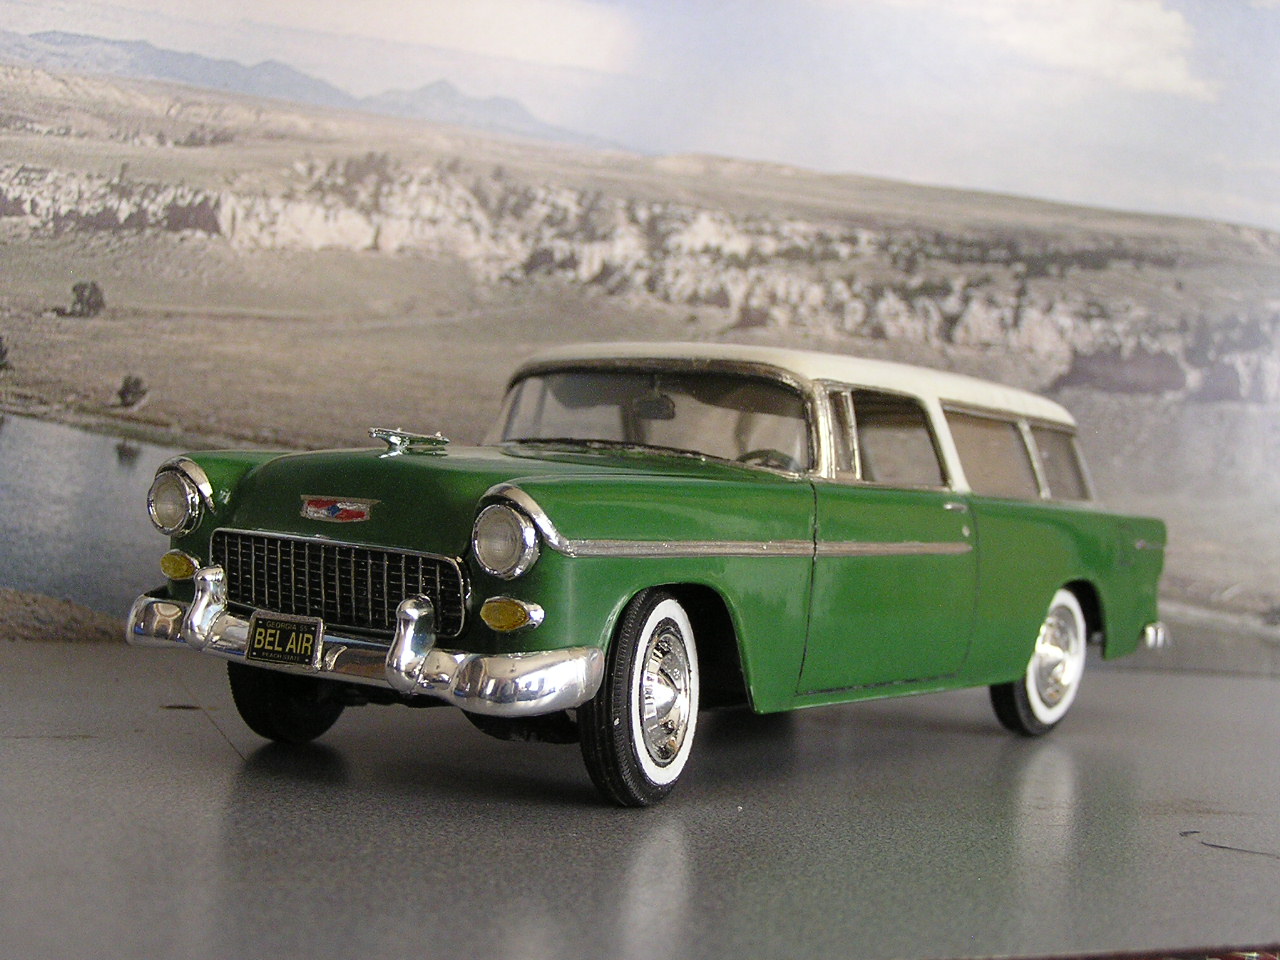
This AMT Nomad kit was the second model car I have built. I like the older cars and I wanted to try a two tone paint job. I don't think this is a Chevy color scheme but this is how I remember a friends nomad was painted. I mixed the colors from liqutex artists acrlyics and Tamiya acrylic thinner. I used waterborne varnish for a clear coat. Along with two tone paint, I wanted to have the tailgate open and close.The kit had a broken hinge for the tailgate so I wanted to fix that. The tailgate hinge was a challenge, but I learned alot in the process of reworking it. I made a pair of hinges from brass wire bent to make a pair of small eye bolts to accept the plastic pins molded into the original plastic hinge.
Overall, I am happy with the outcome. I have a two color paint job and the tailgate works.Now back to my 67 Camaro build with a swinging door and a jukebox.
-
Thanks everyone!
I had a lot of fun and learned many things from building this kit. One thing that I learned was to be sure that everything fits together well before painting the body and other parts that match it. On this kit I had to rebuild some parts of the door frame after the body was painted. I should be able to iron out some of these problems on my future builds which are sure to include a few more of my favorites like the older Pontiac and Chevy cars. It seems like a good hood hinge is needed on some of the kits I have looked at. So just for fun I may work on a hood hinge that opens and holds the hood up on its own.
-
1 minute ago, Oldcarfan27 said:
Nice that you showed us how you made the hinge, but I hope you didn't tear apart the finished car to do it.
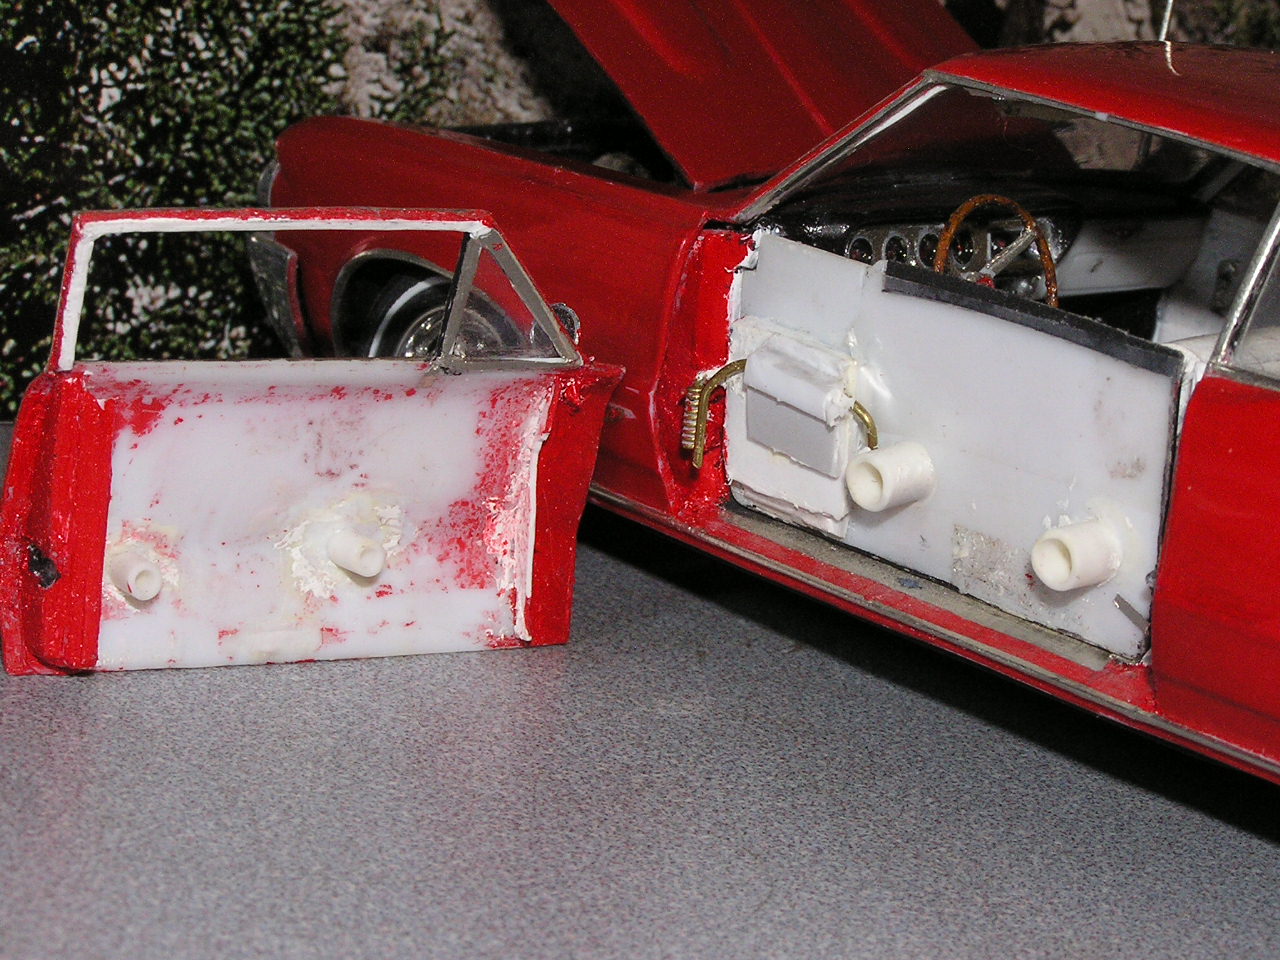
Thanks Patrick! The only way to adjust the hinge for fitting was to have a way to get inside the door. The 2 door halves simply snap together on the two pairs of tubes that are sticking out.
-
1 hour ago, DumpyDan said:
Well done, really like the detailing awesome body by fisher strip on the rocker.
Thanks Dan! I remember seeing the " body by Fisher " logo as a kid and thinking that was pretty classy, so I had to add that.
-
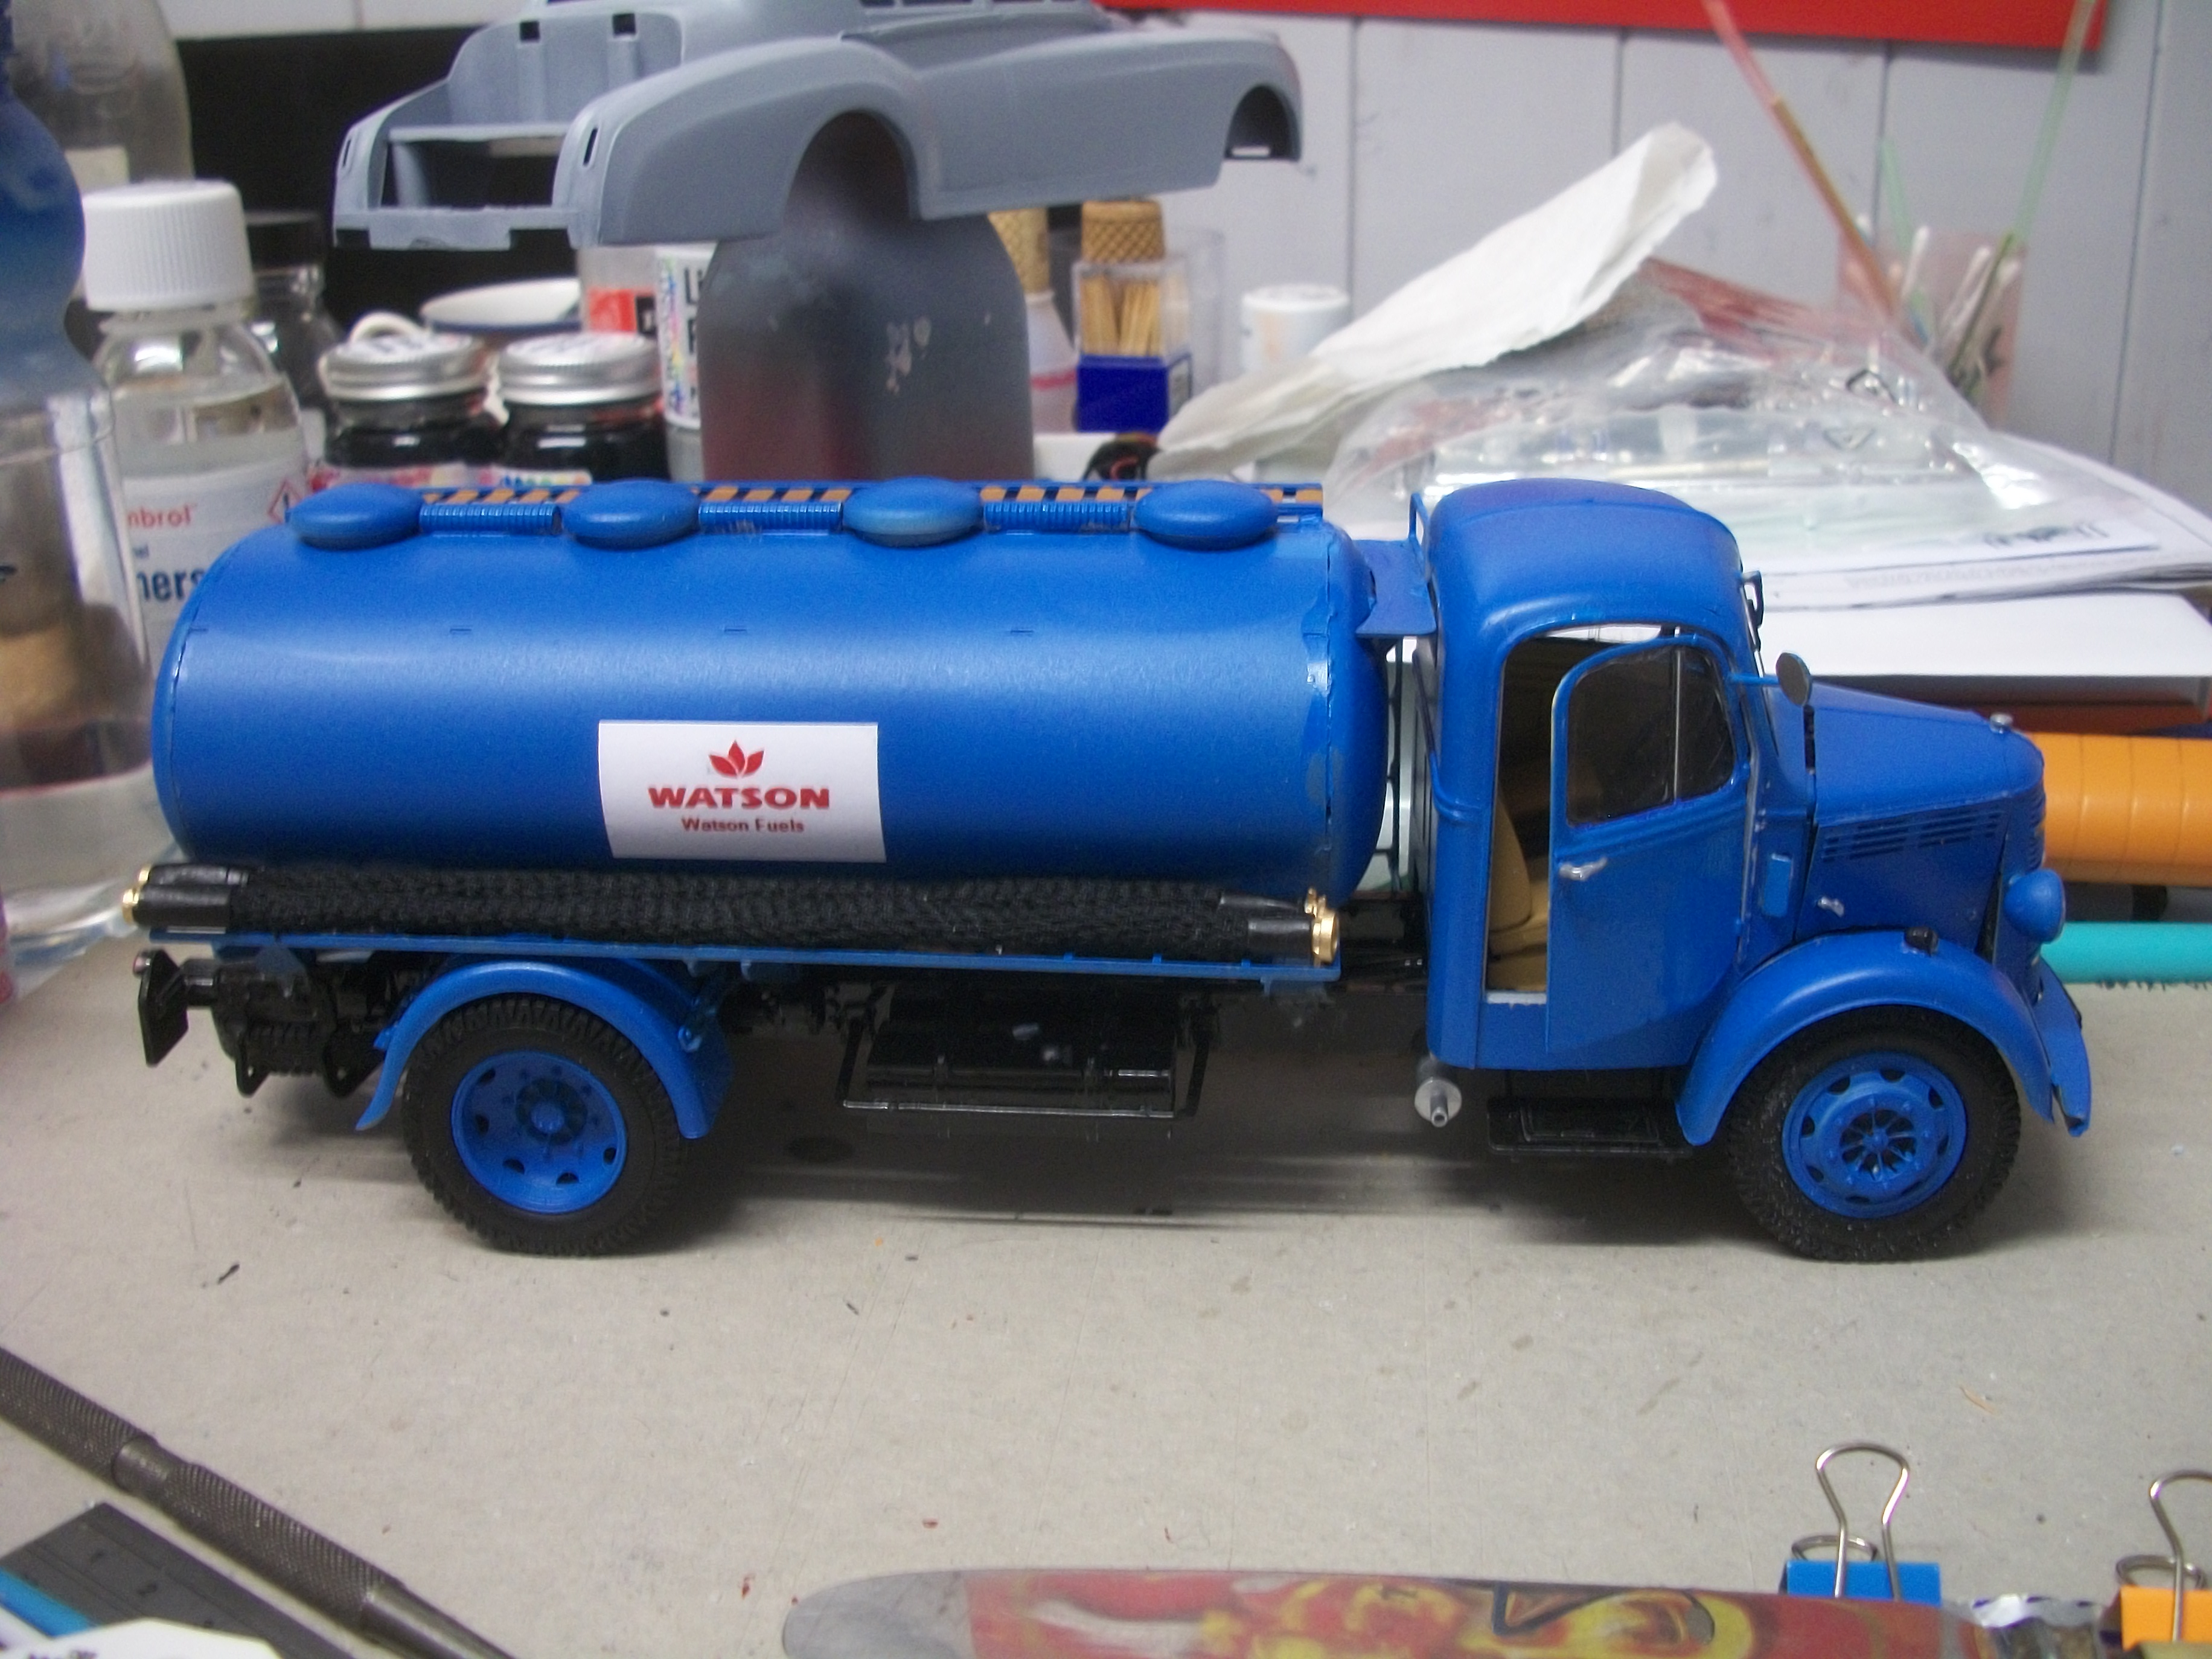
1 hour ago, Anglia105E said:
Your Pontiac as a first build is very nicely done, so as you do more builds your techniques will improve rapidly. As others on here have mentioned, opening up a door and fitting a hinge is what I would regard as advanced scale model car building. I had a go at hinged doors on my Bedford OLB tanker truck build, and I found it extremely difficult! ( one photo here to show you ).
David
Thanks David! Your tanker is very nicely done.
The open door adds an extra touch of realism to the model that I really like.
I always enjoy a model a bit more if it has a few moving parts, like steerable wheels or a trunk or door that opens up.
-
Thanks everyone!
I have been away from the forum for a few days. I have been busy adding the finishing touches to my Nomad.
The tailgate and rear window are swinging in good alinement now after some modifications.
I hope to get some photos posted this weekend.
-
18 minutes ago, donb said:
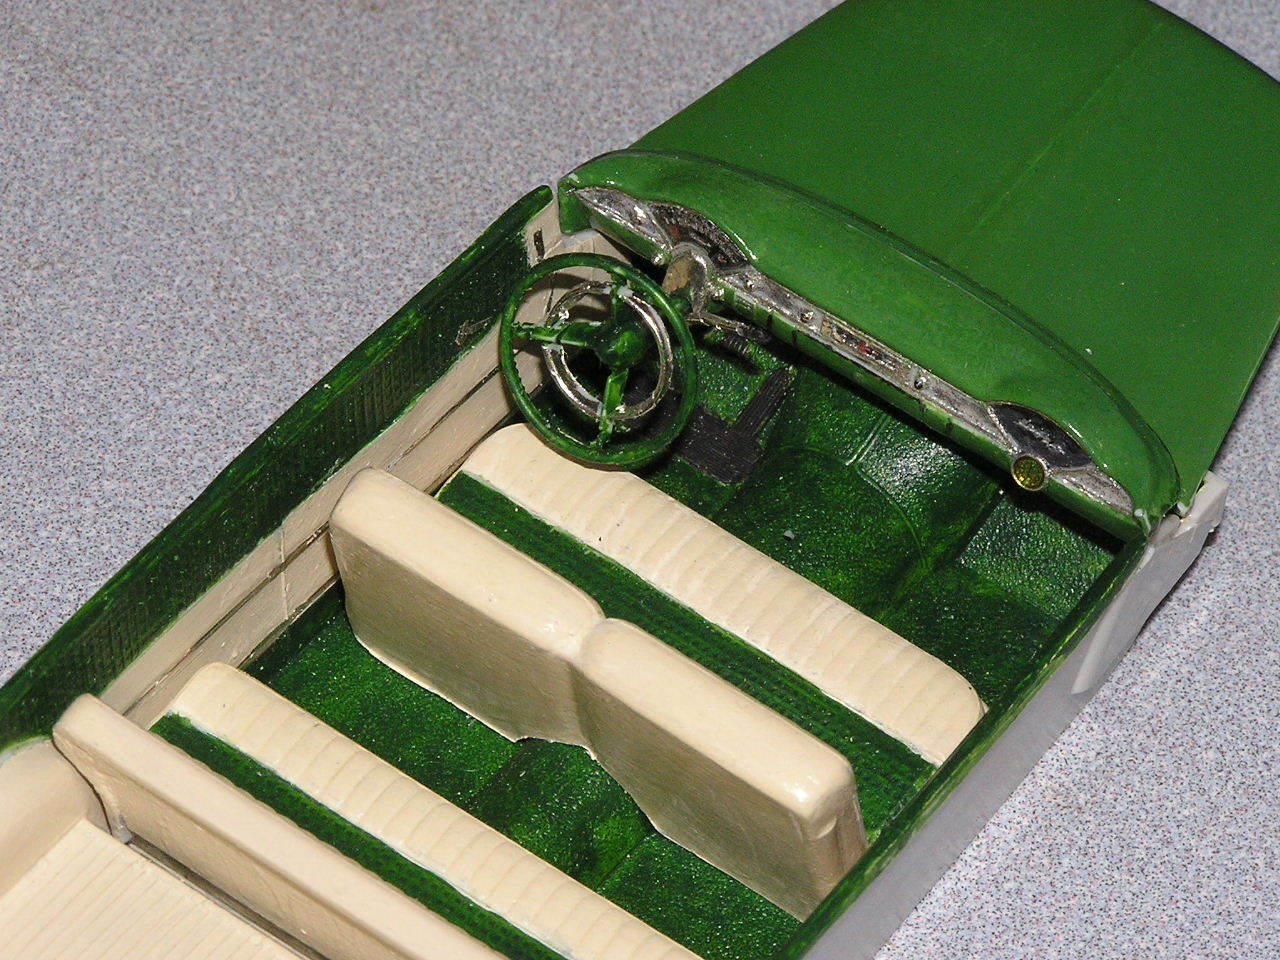
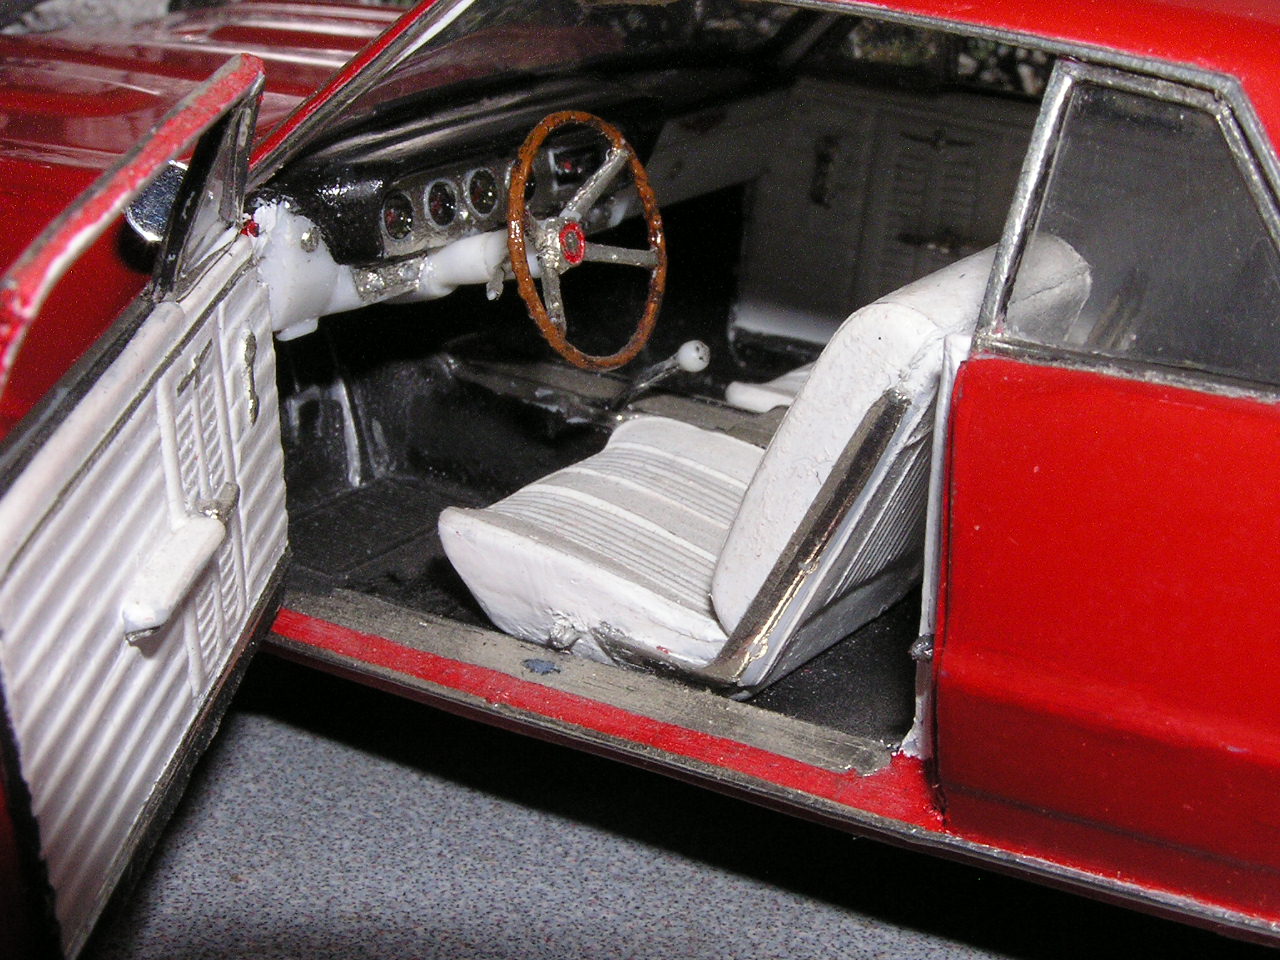
Nicely done. Interior is exceptional.
Thanks Don! The dome light should be bullet shaped but round was a lot easier to make.
-
On 2/1/2018 at 12:42 PM, El Caballo said:
Well done.
Thanks Ted!
Here is a photo of the hinge. If anyone was curious.
-
1 hour ago, espo said:
You can see that you used your skills from the ship and airplane building on this first car build. Opening a door on your first build shows you're not intimidated. Look forward to seeing more of your builds. I like the post cars better than the hardtops but that's just me.
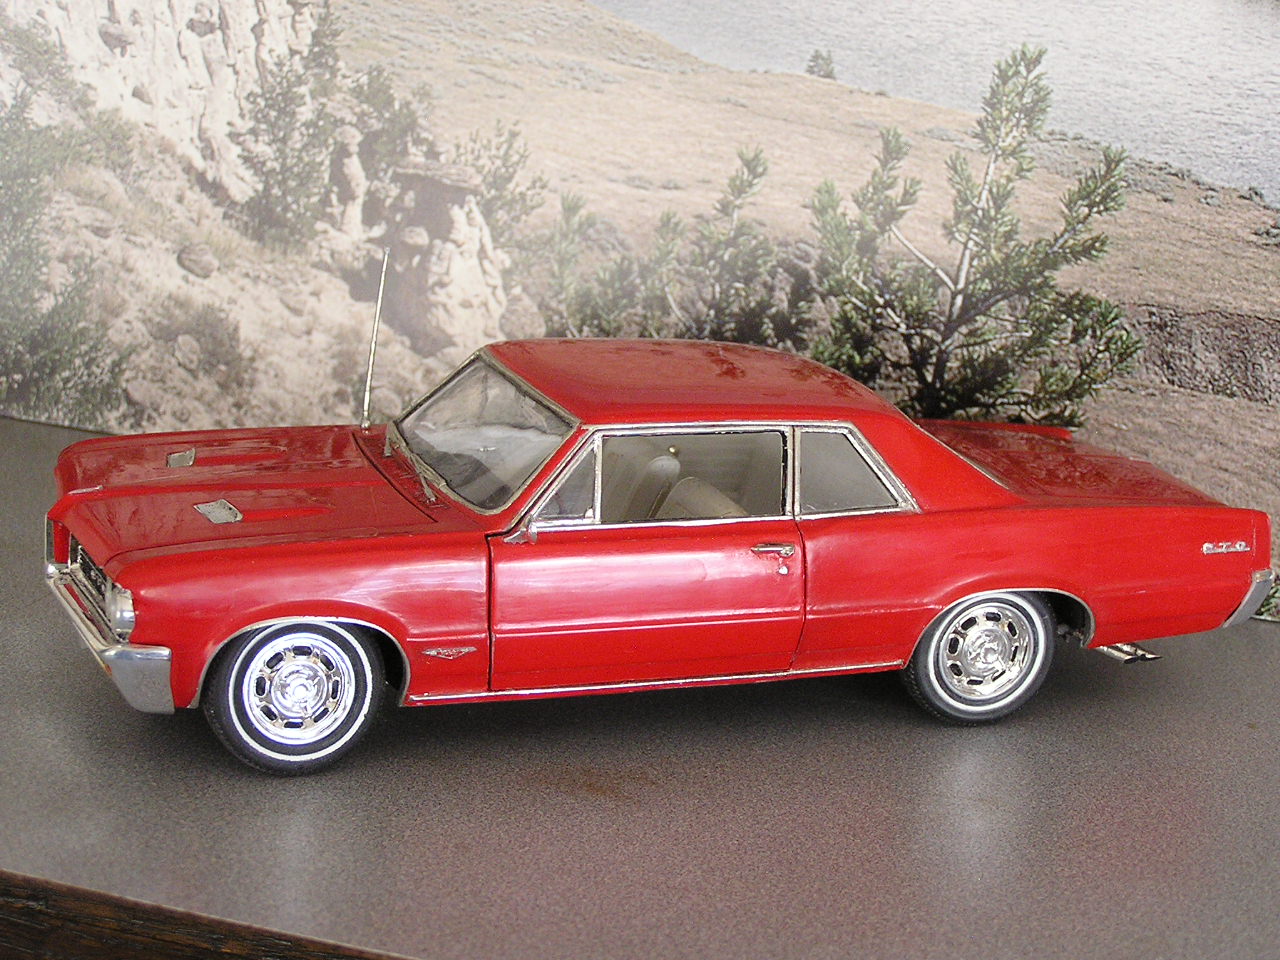
Thanks David! I did not know much about scale modeling when I started this kit. I learned a lot from the pages of this forum. I purchased this kit new but after buying this kit I stumbled on to a number of previously owned car kits in new condition. I now have at least 30 car kits to choose from for my next project. I like anything from the U S in the 80s era or older when it comes to car models.
-
22 minutes ago, shoopdog said:
For your first auto build you did a great job, especially with opening the door. Surely you've been modeling other subjects.
Thanks Keith! I have built a few wooden ship models and few balsa airplanes in the past. I build mandolins and guitars full time. So I have done a few finishes before. Opening the door turned into a bigger task than I expected. I plan on another open door project maybe I will post some photos in the workbench section.
-
17 minutes ago, kelson said:
A very nice first build!,i like the opening door,looking forward to more of your work.
Thanks Curtis, I am working on 55 Chevy nomad in green and white two tone paint but I left the doors closed. Cutting open the door seems easier to do on 60s cars than on 50s cars.
-
This is my first plastic car model. I had a lot of fun building this kit. I really wanted to get into this car so I opened a door ha ha. I thought you should see the inside better so cutting the door open made sense. It made the whole build way more difficult to fit together. I came up with a pretty solid and easy to make hinge in the process which is a bonus. Anyhow thanks for looking.
-
Man, that's pretty..............
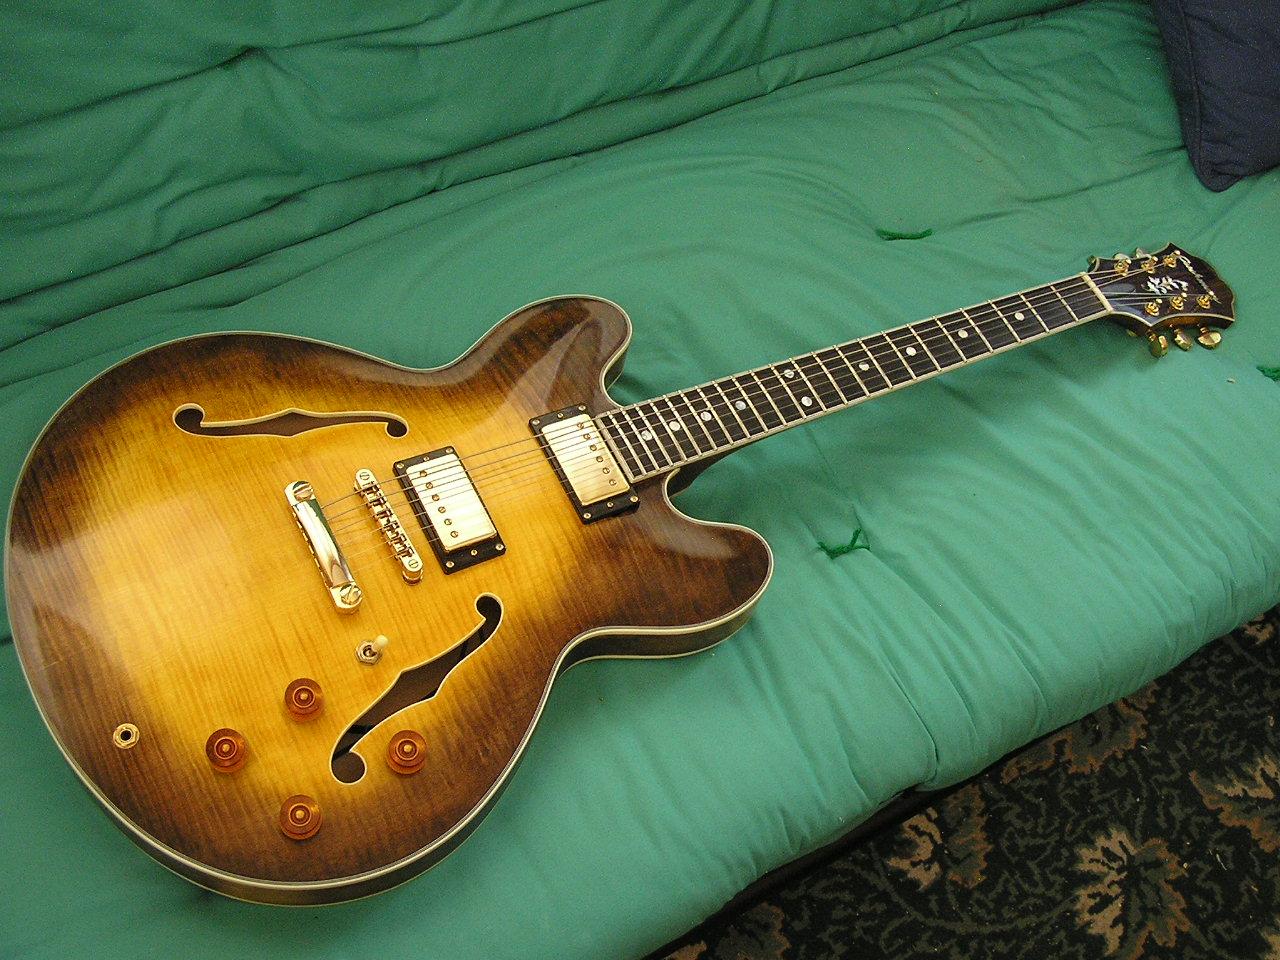
I don't know anything about kit guitars, what do they come with? and did you finish the top yourself?
Thanks. Most kits have everything you need to build the guitar. They don't include glue, finish or instructions. Most kits have low cost hardware such as tuners, pickups and bridges. For this guitar I only used the body and the bridge and tailpiece, all the other parts have been upgraded, the most notable being a scratch built neck. The neck that was included was a little too thick and I like big frets on an ebony fingerboard, so I made my own. Just like model cars, the finish is often the most demanding part of the build. I did finish this one myself. I sprayed 3 colors of dye (amber, medium brown and back ) on bare wood for the sunburst. Then I sealed with shellac and topped that with hybrid varnish.
-
I like to build guitars, mandolins and bass guitars. I have completed more than 50 so far. This is one that I built from a kit. The neck I scratch built from 3 pieces of big leaf maple with an ebony fingerboard.
-
It looks like you are off to a very good start on this build. These can look very good as display models. It helps if you can get the scale prop and wheels for it. Some kits have these and some don't. I have a Sopwith Camel at the same stage of construction. But I need a few plastic parts. I will be following with great interest. The Beaver is a great airplane And I can't wait to see her finished.
-
The last thing to attach is the antenna no matter how many times you have done it.
-
Sellers can block any member they want to. I have a long list of blocked bidders. Why not have a blocked out seller list as well?
-
I did not know about the exclude seller feature. It sounds like a good way to thin down a search. Expanding as you suggest sounds like a good idea.
-
I play harmonica and electric bass. I build bluegrass mandolins and archtop guitars in my basement. Finishing more than 50 instruments to near perfection has definitely helped me with my model finishing.
-
I have had mixed results with flocking so I will give the 3M a try. When I wanted to make some floor mats I found that Model Master flocking over double sided tape gave me a perfect carpet look. Fast and easy.
-
That is one fine looking Nova. You did an excellent job on it.
-
You have done a marvelous job on this model. I love the old timers and this is as nice as any I have seen. Bravo!


.JPG.7573d760b8a527bb628be0bff7ad790d.JPG)
.JPG.f6d9a9e5339d8b17b9c1f25d43099894.JPG)
.JPG.b5e04696cf197c2dac35899ff82aeb20.JPG)
.JPG.12baa30909793bfaee1b8948220c9c33.JPG)

'57 Chevy 150 Utility Sedan
in Model Cars
Posted
Great looking Chevy! The interior is remarkably good.