

ferrari87
-
Posts
235 -
Joined
-
Last visited
Content Type
Profiles
Forums
Events
Gallery
Posts posted by ferrari87
-
-
Last night I messed with the spare metal transfer you mentioned. One thing i did after placing it on my spare piece of styrene was lay down masking tape that had been folded in half to hide the tacky part, then layed it on top of the transfer and rubbed like hell. It stayed. But thats a differrent story than the Aston Martin and 6.0 V12 transfers. I'll be looking into the waterslide idea as well...
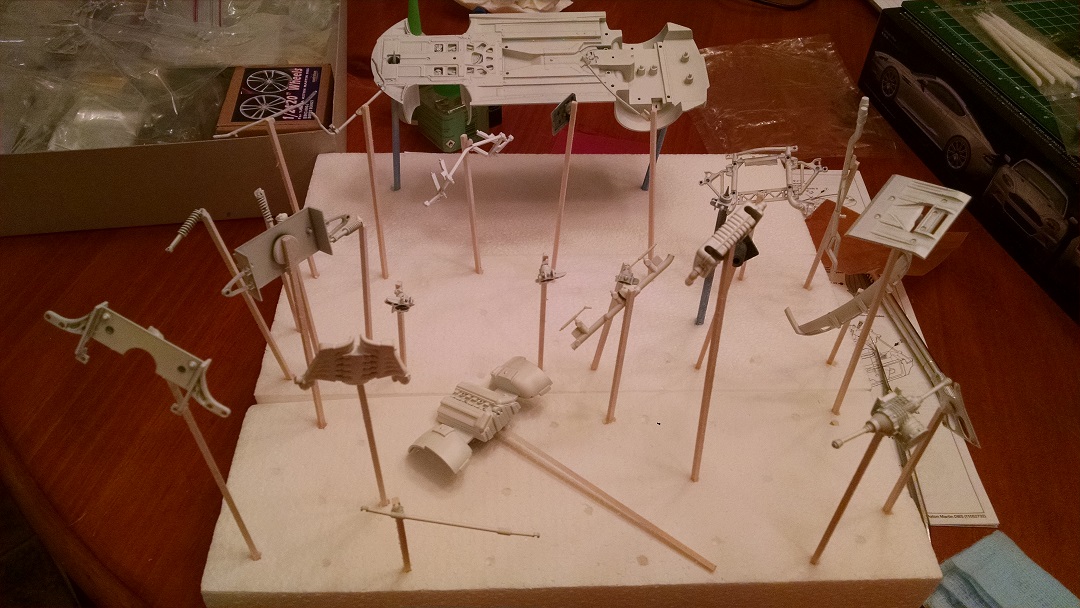
I fiddled with the rims today. I spent most of the morning mocking up the front end. First issue, the PE rotors are wider (measuring from the steering knuckle to the outside of the rotor hub- the part where the lugs stick out for the rim yo mount to) than the stock plastic rotors. Second issue, the HD rims and the supplied brass "male" connector sit further out using the stock rotors than the stock rims. SO...using the HD rims and PE rotos causes a significantly wider front end.
So to combat this, I cut away some material on the inside of the rim, allowing the brass "male" connector to sit closer to the area of the rim that it connects to. This solved most of my problem. The next issue, the round section of the brass connector, the part that looks like a hockey puck, is too thick. It needs to be shaved down to 3/4 of its size (i need to ax 1/4 of its thickness). That SHOULD solve my issues caused primarily with the thicker rotors.
I tested the clearance using both a stock rim and PE rotor and HD rim and PE rotor as well as HD rim and stock rotor.
Long story short, PE rotors and HD rims= wider wheelbase. So with a few mods to the rims and the male connector, this "should" be settled. I'll take pics tonight and hopefully you guys can help keep me straight on this or offer a better way!
-
Well if it works for you I might just give it a shot! I'll experiment on spare plastic first of course.. Next problem to tackle are those damned HD rims...
-
Matt, this looks amazing. You've set the bar quite high! I hope I can get my Carbon Black edition close to yours! Any tips you can pass along with those metal transfers would be awesome! I've never used them before.
Awesome job partner!!
-
Reading up on them, they need to be sprayed on bare plastic... I've already primed the underside of the car...i guess i'm stuck like chuck with using the metalizer aluminum for the underside. I originally planned on using them for the PE rotors but again not bare plastic. So unless metalizer works on metal, I'm going to use Modelmasters metallic gray for the rotors and flat black for the hubs.
-
Thomas, I believe that's what I am going to do. I plan on taking a long,thin rectangular piece of styrene and wrapping it around the outside on the rim. Hopefully, that will widen the rim to the necessary diameter, without causing the tire to bulge, either in the center of the tire, or at the sidewall where tire meets rim, causing a gap. If If I am further unhappy with the Hobby Design rims, I'm going to carefully cut the rim pattern out of both the stock wheels and the HD wheels then reattach the HD pattern into the stock rims. If that fails, then I'm going to look for a new set of rims.
-
I did mess around on the site. It does give invaluable pictures and ideas of how the interiors are set up. Kinda sad that the DBS got the axe but there wasn't much room for it in their line-up.
Today I primed all the suspension bits as well as the body and hood. I also spent some time practicing on spare styrene, the metallic black looks amazing. I discovered two things that contributed to some nasty orange peel on my R-33. First, I use a 60 watt light bulb to assist in drying time. I found out that this contributes to the orange peel by causing the paint to dry too quickly. Second, using the clear coat I put too much on at one time and likely over did it, again causing the clear to dry at different times. I did however practice with a set of 3200-12000 grit wet sanding papers. I was able to sand out the orange peel from the test piece of styrene and using Novus 1 and 2, I was able to bring the paint back to a fantastic shine. So I was happy for the practice.
Anyway, I have to assemble the rear rotors and experiment with Model Masters metalizer paints...

-
Looks sick!!!
-
I'm all for that air scoop. heck yes!
-
Matt that's awesome!! I think that's maranello orange if I'm not mistaken. I'll be opting for obsidian black. Most likely I will be using XF-63 (Tamiya german grey) but I may use a darkened version of this as I don't think flat black nor german grey truly gets the color right.
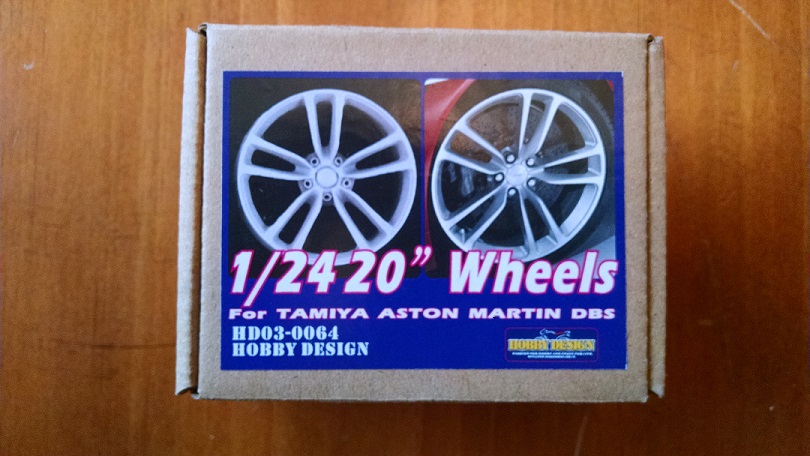
As for the wheels, I'm contemplating on cutting out the pattern and fixing them to the kit supplied outer rim. That's plan B after beefing up the outer diameter with thin sheets of styrene. Right now, the rims are "female" and come with brass pieces to convert them to "male." Right now, the part of the rim the brass pieces sit it are too deep and contact the brake rotors, so they will have to be shaved down to allow proper clearance for the brake rotors. I have a suspicion that this car will become a "don't pick that up!" car. Once she's done with her post-completion photoshoot in under construction diorama, I think it's off to a display case.
To answer the FG rims issue, the link you supplied says, laughably, "long sold out." LOL. That answers that. Worst case scenario, I simply use aftermarket rims of my choice.
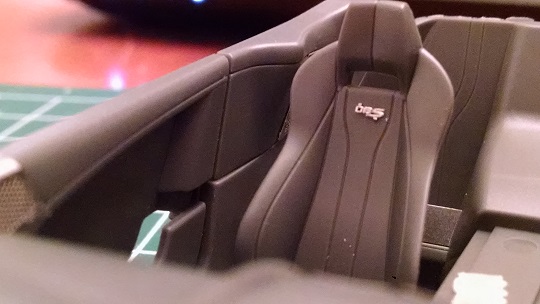
Today I focused on a slightly less tedious part of the car, the interior. The only thing that really tested my patience was the DBS logos for the seats. The driver seat decided to fall out of the tweezers and onto the shoulder of the seat, that glue and since been cleaned off. The passenger seat, you can still see the nubs from the sprue. I apparently didn't file off enough. That was the first one I did and I was hesitant to file it as it was so small! The second one filed ok, but I was so scared it would fall and I would lose it. Also, the center console air vents gave me fits until I figured out I had to remove the molded plastic from the dashboard that replicated the original vent and the piece that allows you to aim the vents up and down.
Anyway, I still have yet to add the gauge bezel but I don't know if thats before or after the decals and painting...
-
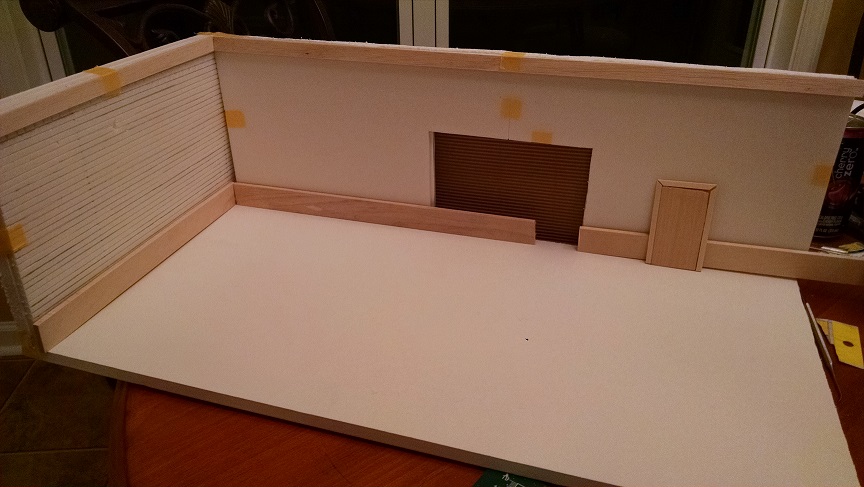
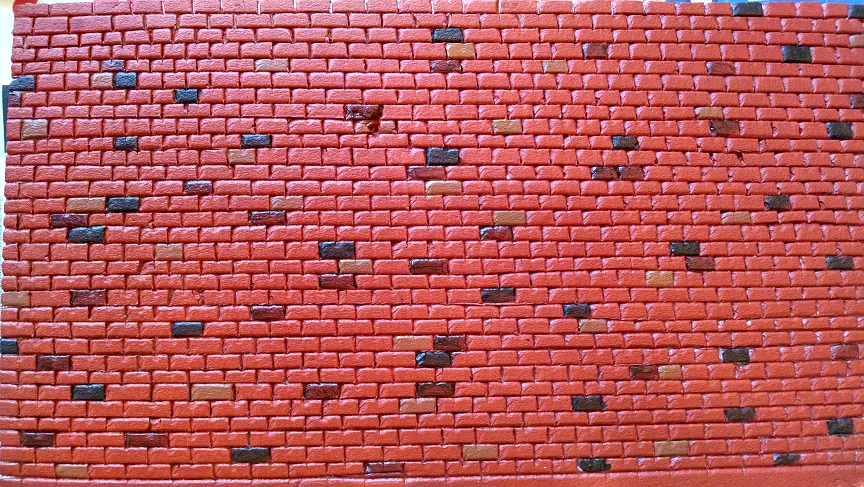
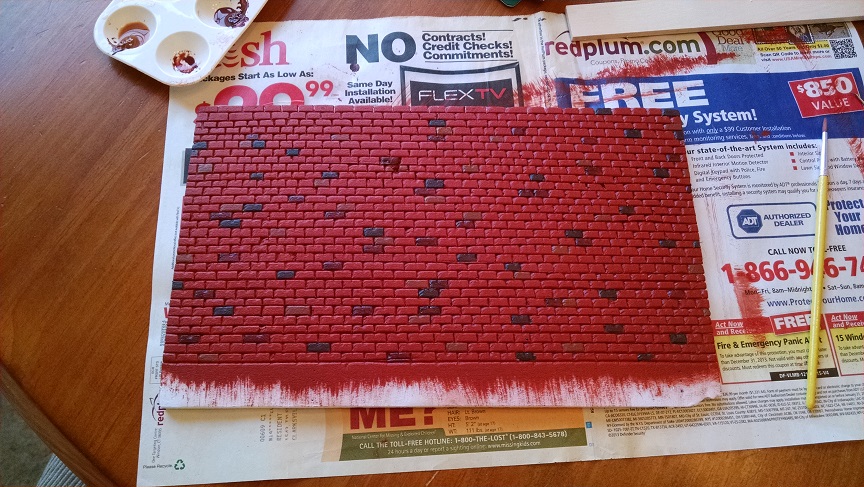
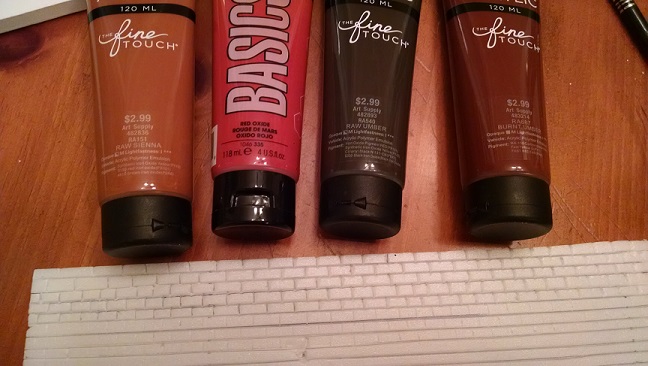
thanks Richard! I have the long wall painted the base red oxide, now I have to go back and paint the individual bricks. I'm also going to paint a few more bricks on the short wall as I feel there are too many red oxide bricks. The base has been painted, I just have not photographed it yet.
-
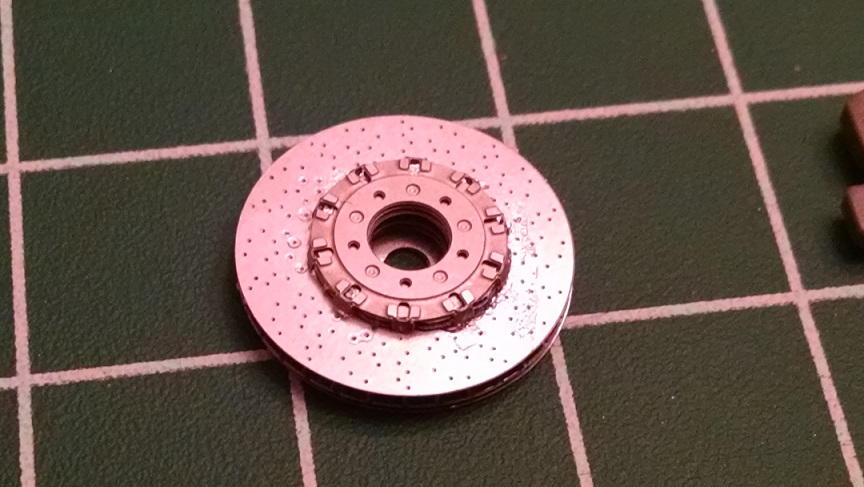
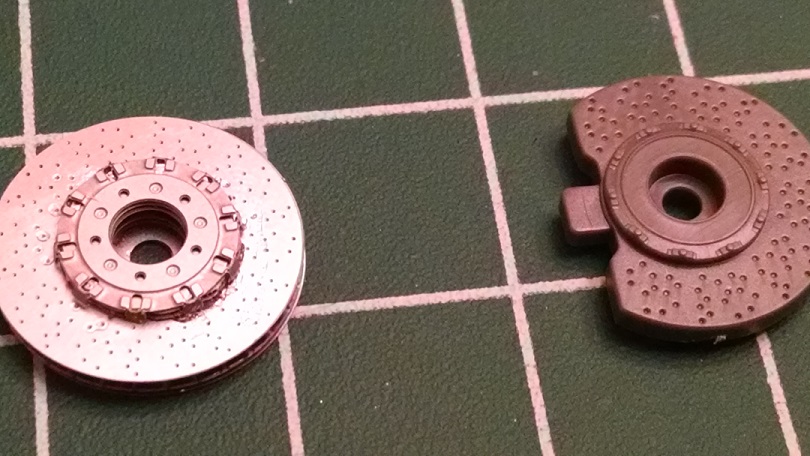
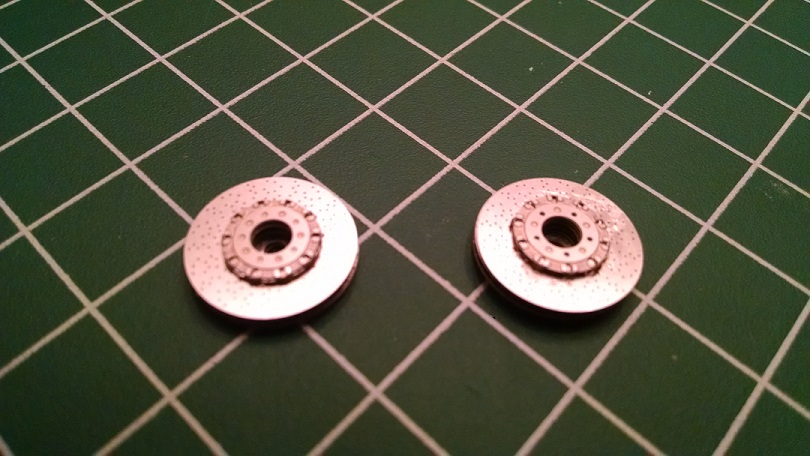
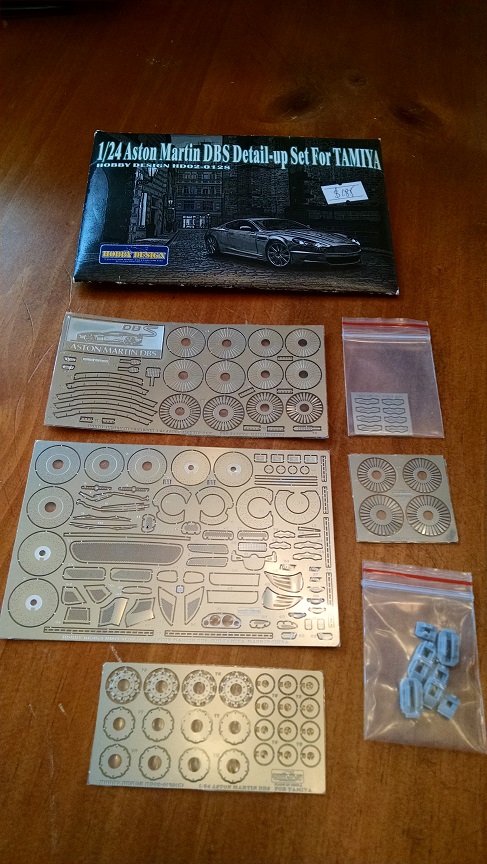
Chris, it looks like a great kit. Just the mock up almost snapped in place. So far I've only tangoed with the brakes and boy are they challenging yet fun. The rims are all different widths, so I've matched them up to the tires and will make the necessary modifications later. Also, I will have to modify the mounting point for the brass male connectors as it is too deep and doesn't allow the wheel to attach. I'll cover that when I get to it. Anyway, here are the awesome brake rotors compared to the stock plastic ones.
Total, it took me short of 2 hours to complete the front rotors. I made a small mistake on one, you have to attach a separate piece of PE for the actual rotor face. Well, I didn't realize that the holes are actually holes and some CA leaked through. I tried to wipe it up as best I could but I still have to weather the rotors to look used, no rotors look brand new so they'll need brake marks.
Anyway, that's all for tonight.
-
Thanks Scott and Curtis! I look forward to both of your future input! The color is going to be Tamiya TS-40, Metallic Black.
Here are some excellent source photos, first of a Carbon Black and then of a base DBS at the car wash.
A few updates for the first day:
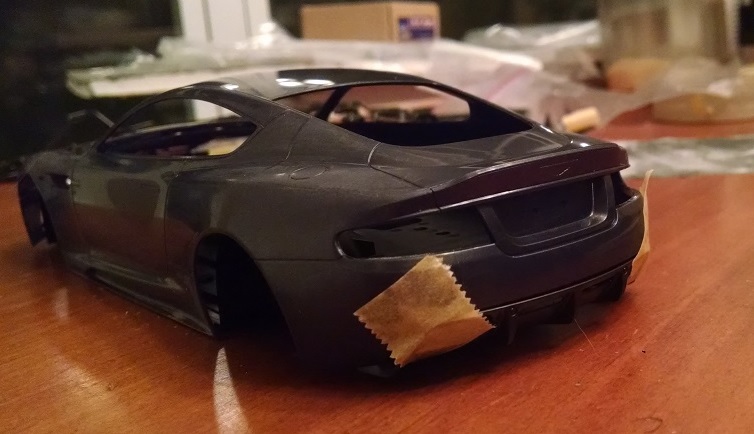
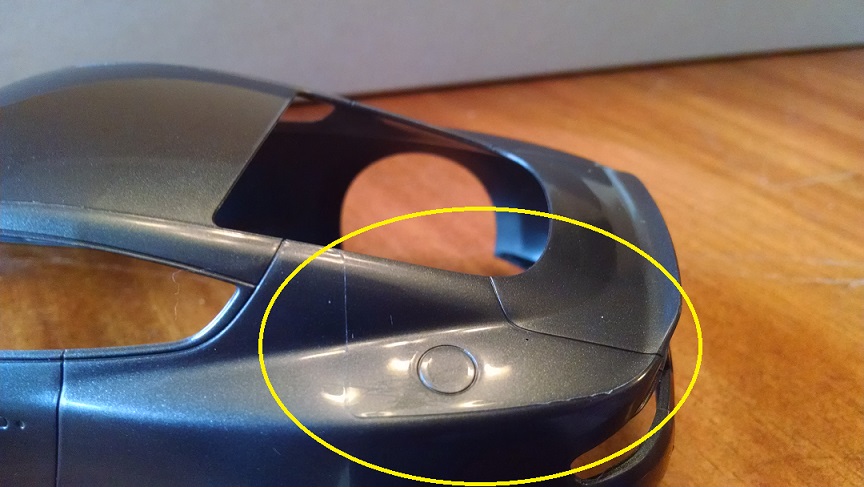
Except the easily lost little ones, parts were cut from the sprue and cleaned up. I did a very small mock-up and the parts almost snap together. Tamiya did leave a peculiar piece of, it is on the trunk just under the ducktail spoiler. The front bumper and this piece will be permanently attached tomorrow (or maybe Monday).
The mold lines were removed, they looked bad and are still visible but they have been sanded smooth. Then the body was washed in Dawn dish soap to remove any mold lubricant/oil/whatever-its-called and then wetsanded. Finally, the rims were cleaned up and now look respectable, although they will still need some attention.
-
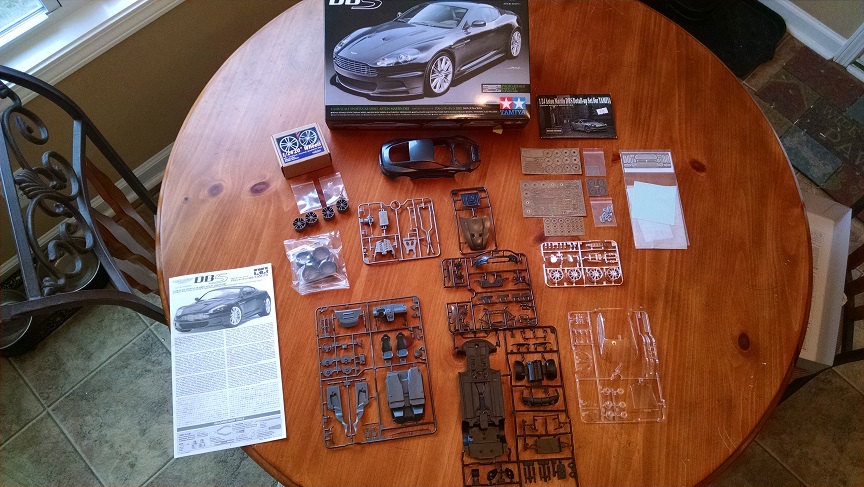
Hi guys. With my R-33 nearly wrapped up, I'm going to be working on my next model, Tamiya's Aston Martin DBS. However, I'm not only in love with the DBS (and it's evil sister, the DBR9S) but specifically, the Carbon Black Edition. It sported a gorgeous black paint (typically, I HATE black paint jobs, they hide the beauty of the car), special gloss black diamond turned wheels, and enough carbon fiber trim to resink the Titanic.
Anyway, away we go!
the rims will need cleaning up AND after test fitting the tires, the rims are not only too wide, but they are not big enough for the rubber. There is just a very small gap between rim and tire, it's hardly noticeable, but it does allow some "play" in the tire and rim. SO, I will have to attach a piece of styrene around the rim to widen its diameter.
four nasty mold lines dominate the sides of the car. Thankfully, the rear ones run down the B pillar and across the ducktail spoiler, the front ones run down the A pillar and into the headlight assembly. Those'll have to go!
and for the PE, Hobby Design.
And the whole build:
Not pictured is the Scale Motorsport 1/24 twill weave carbon fiber sheets.
-
Here's my reposted garage facade..
My garage name will be Project 5Five, paying a small tribute to Project Four Racing which was founded by McLaren boss Ron Dennis. It ran in junior fomulas and also the BMW M1 Procar championship until it was folded into McLaren F1. Hence, MP4-xx for their car designations.
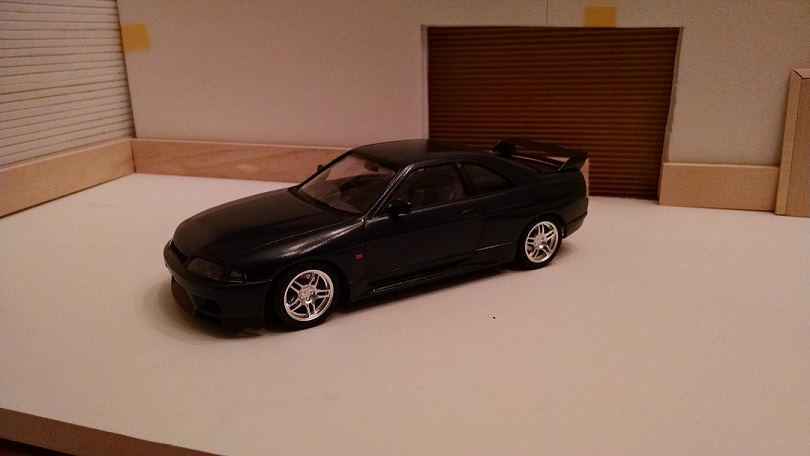
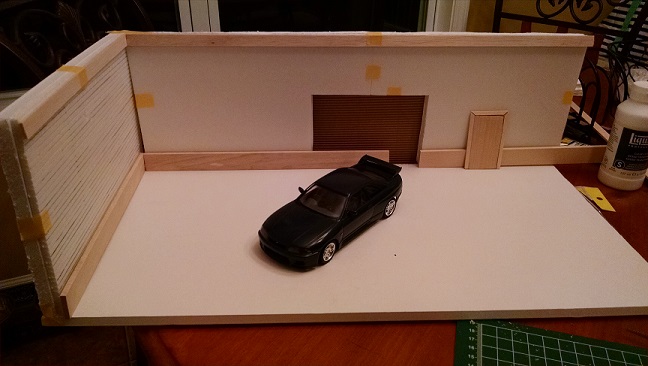
Overall Layout with my nearly completed R-33:
brick walls. Tutorial courtesy of Philbass's "Restoration" thread..
and asphalt...
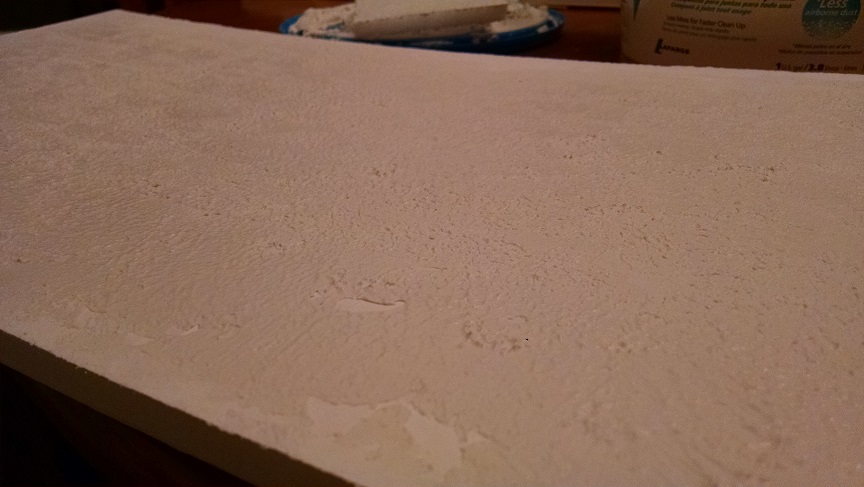
this is simply wall filling, spackle, whatever you call it textured with a styrofoam block.
-
here we go again... my entire thread on my dio is missing....
-
that's an awful gap. I've never come across a misfit so bad before. Did you by chance incorrectly place the interior tub? It's also possible that the kit was warped when you bought it. I haven't heard or seen of a revell kit being so off before.
If your suspension is falling apart, what type of glue are you using? CA (aka super glue) or cement? Or are you using an epoxy?
I can't think of a method that will fix the issues. You're going to have to tackle one at a time. First, find out what's causing the suspension to collapse. Then see what's causing the body to not properly align.
The windows, well I have no idea how to solve that.
-
so excited to see this turn out!
-
this looks fantastic!
-
Logan, in armor, i'd do flat coat of clear, then decals, then another clear coat. I've come across several ways of doing it on cars, you can lay a coat of clear, lay decals, then lay your second coat of clear OR you can apply a small amount of clear, to the area that the decal is going to go, and then place the decal. Either way it seems like you are doing the same thing.
Also, you can look into using Future aka, Pledge Multi-surface floor polish. It's an acrylic based miracle potion! It's self leveling, so you can either brush or spray it and it's ready to go straight from the bottle. Best yet, it cleans up with windex! Perhaps even bestest yet, because it's acrylic based, you don't have to worry about it attacking an enamel or lacquer based paint! It's truly awesome. Oh, did I mention a bottle will last you forever?!
You can also use it for the windows. In scale aircraft, guys would dip the aircraft canopies in a small bowl filled with future and then pull the window out and allow most of the future to drip off. The results are fantastic AND you can use it to secure the windows to the model without worrying about the window fogging or turning yellow!
Anyway, I'd say do a coat of clear, place the decals, then spray your second coat.
-
I stopped by Friday before work and I felt like I had gone to heaven. I picked up a few tools i've been needed and two Tamiya kits, an R-32 and an R-34 VSPEC II. It's a well stocked shop. It's a little far but it was worth the trip!
-
I see the cracks alright. It's ruined. Throw it away and start over.
Well hell, i'll take it. "Cracked" "scratched" or whatever, this would make my other models look amazing. Amazing job!!! I love this car!
-
They do carry Tamiya paints. You might want to call before hand if your going to drive that far to buy some.
Also i never even thought about the bag idea before. lol Stupid me!
Well, it might be worth to go just to simply nose around and see what's there. I work in the city so one of these days I might just leave for work extra early and go poke around before work.
-
Hobby Town in Mt Juliet is a very well stocked store for kits, bottle and spray paints. If you go there you will not be disappointed.
You do not want to warm a can in boiling water because heating the can so quick with that hot of water can cause the paint inside to heat so quick it can explode. Just filling a container of hot water out of the tap and letting the can sit for a min or two is more than enough.
I hate to get my cans wet because the labels fall off and a bigger problem is i have had water leak out from behind the label after drying it off and it landed right on my body while painting. Sucks when your spraying a metallic or pearl.
If they have Tamiya paint, it looks like it'll be worth the trip!
No, not boiling water, but I don't like using warm tap water as it really doesn't stay warm for long. It has to heat the paint. Now boiling would be bad obviously, but I struggle keeping warm tap water warm for very long.
I place my paints in ziploc bags into water. It avoids the soggy label and the water drip issue.
-
The other thing that helps warming rattle cans is the pressure. By placing them in very hot (not boiling) water, you help increase can pressure which helps with paint application.
Have you been to Hobbytown USA in Mt. Juliet? I'm considering taking a drive out there one of these days and seeing what they've got on hand. My LHS has to order pretty much everything I want and in the end, they just can't deliver like Hobbylinc and doesn't stock like HobbyEasy, Hobby Link Japan, or even HobbyStuff Depot in Canada as almost all of their inventory is electric R/C cars.


Aston Martin DBS "Carbon Black"
in WIP: Model Cars
Posted
Well, I cannot seem to get the rims to fit the tires, or clear the front fenders. I'm stuck between a rock and a hard place. On one hand, I can risk screwing up the hobby design rims by trying to grind down the brass connectors, allowing the wheel to sit closer to the rotor and subsequently further inside the fender. If done successfully, the tire should clear the fender.
However, even with the fenders cleared, the tires still don't fit the rim. I've tried using tape, i've used thin styrene, nothing increases the rims diameter without causing the tires to separate from the rim at the lip, causing a very ugly- in my opinion it would ruin the model- gap between rim and rubber.
So, my gut feeling is to abandon the Hobby Design wheels and the Carbon Black edition.
I'm thinking about a pseudo-carbon edition, I've seen a Red DBS here, by Zoom Zoom, and I absolutely love it (then again, it is painted Ferrari Red)...
So what I'm thinking is to use the stock rims, the PE rotors and using TS-39 Mica Red for the basecoat. Additionally, I'll use the PE front grill and black it out, and then continue to use the Carbon Fiber where the Carbon Black would have it. It won't be a true Carbon Black, but it will be my spin on a car several of you have absolutely done an amazing job on.