

Gt fan
-
Posts
748 -
Joined
-
Last visited
Content Type
Profiles
Forums
Events
Gallery
Posts posted by Gt fan
-
-
Well done.. looks great in that color blue.
-
Thank you everyone. Since finished studio 27 now makes a carbon kit for the kit. This is the car it was copied after

-
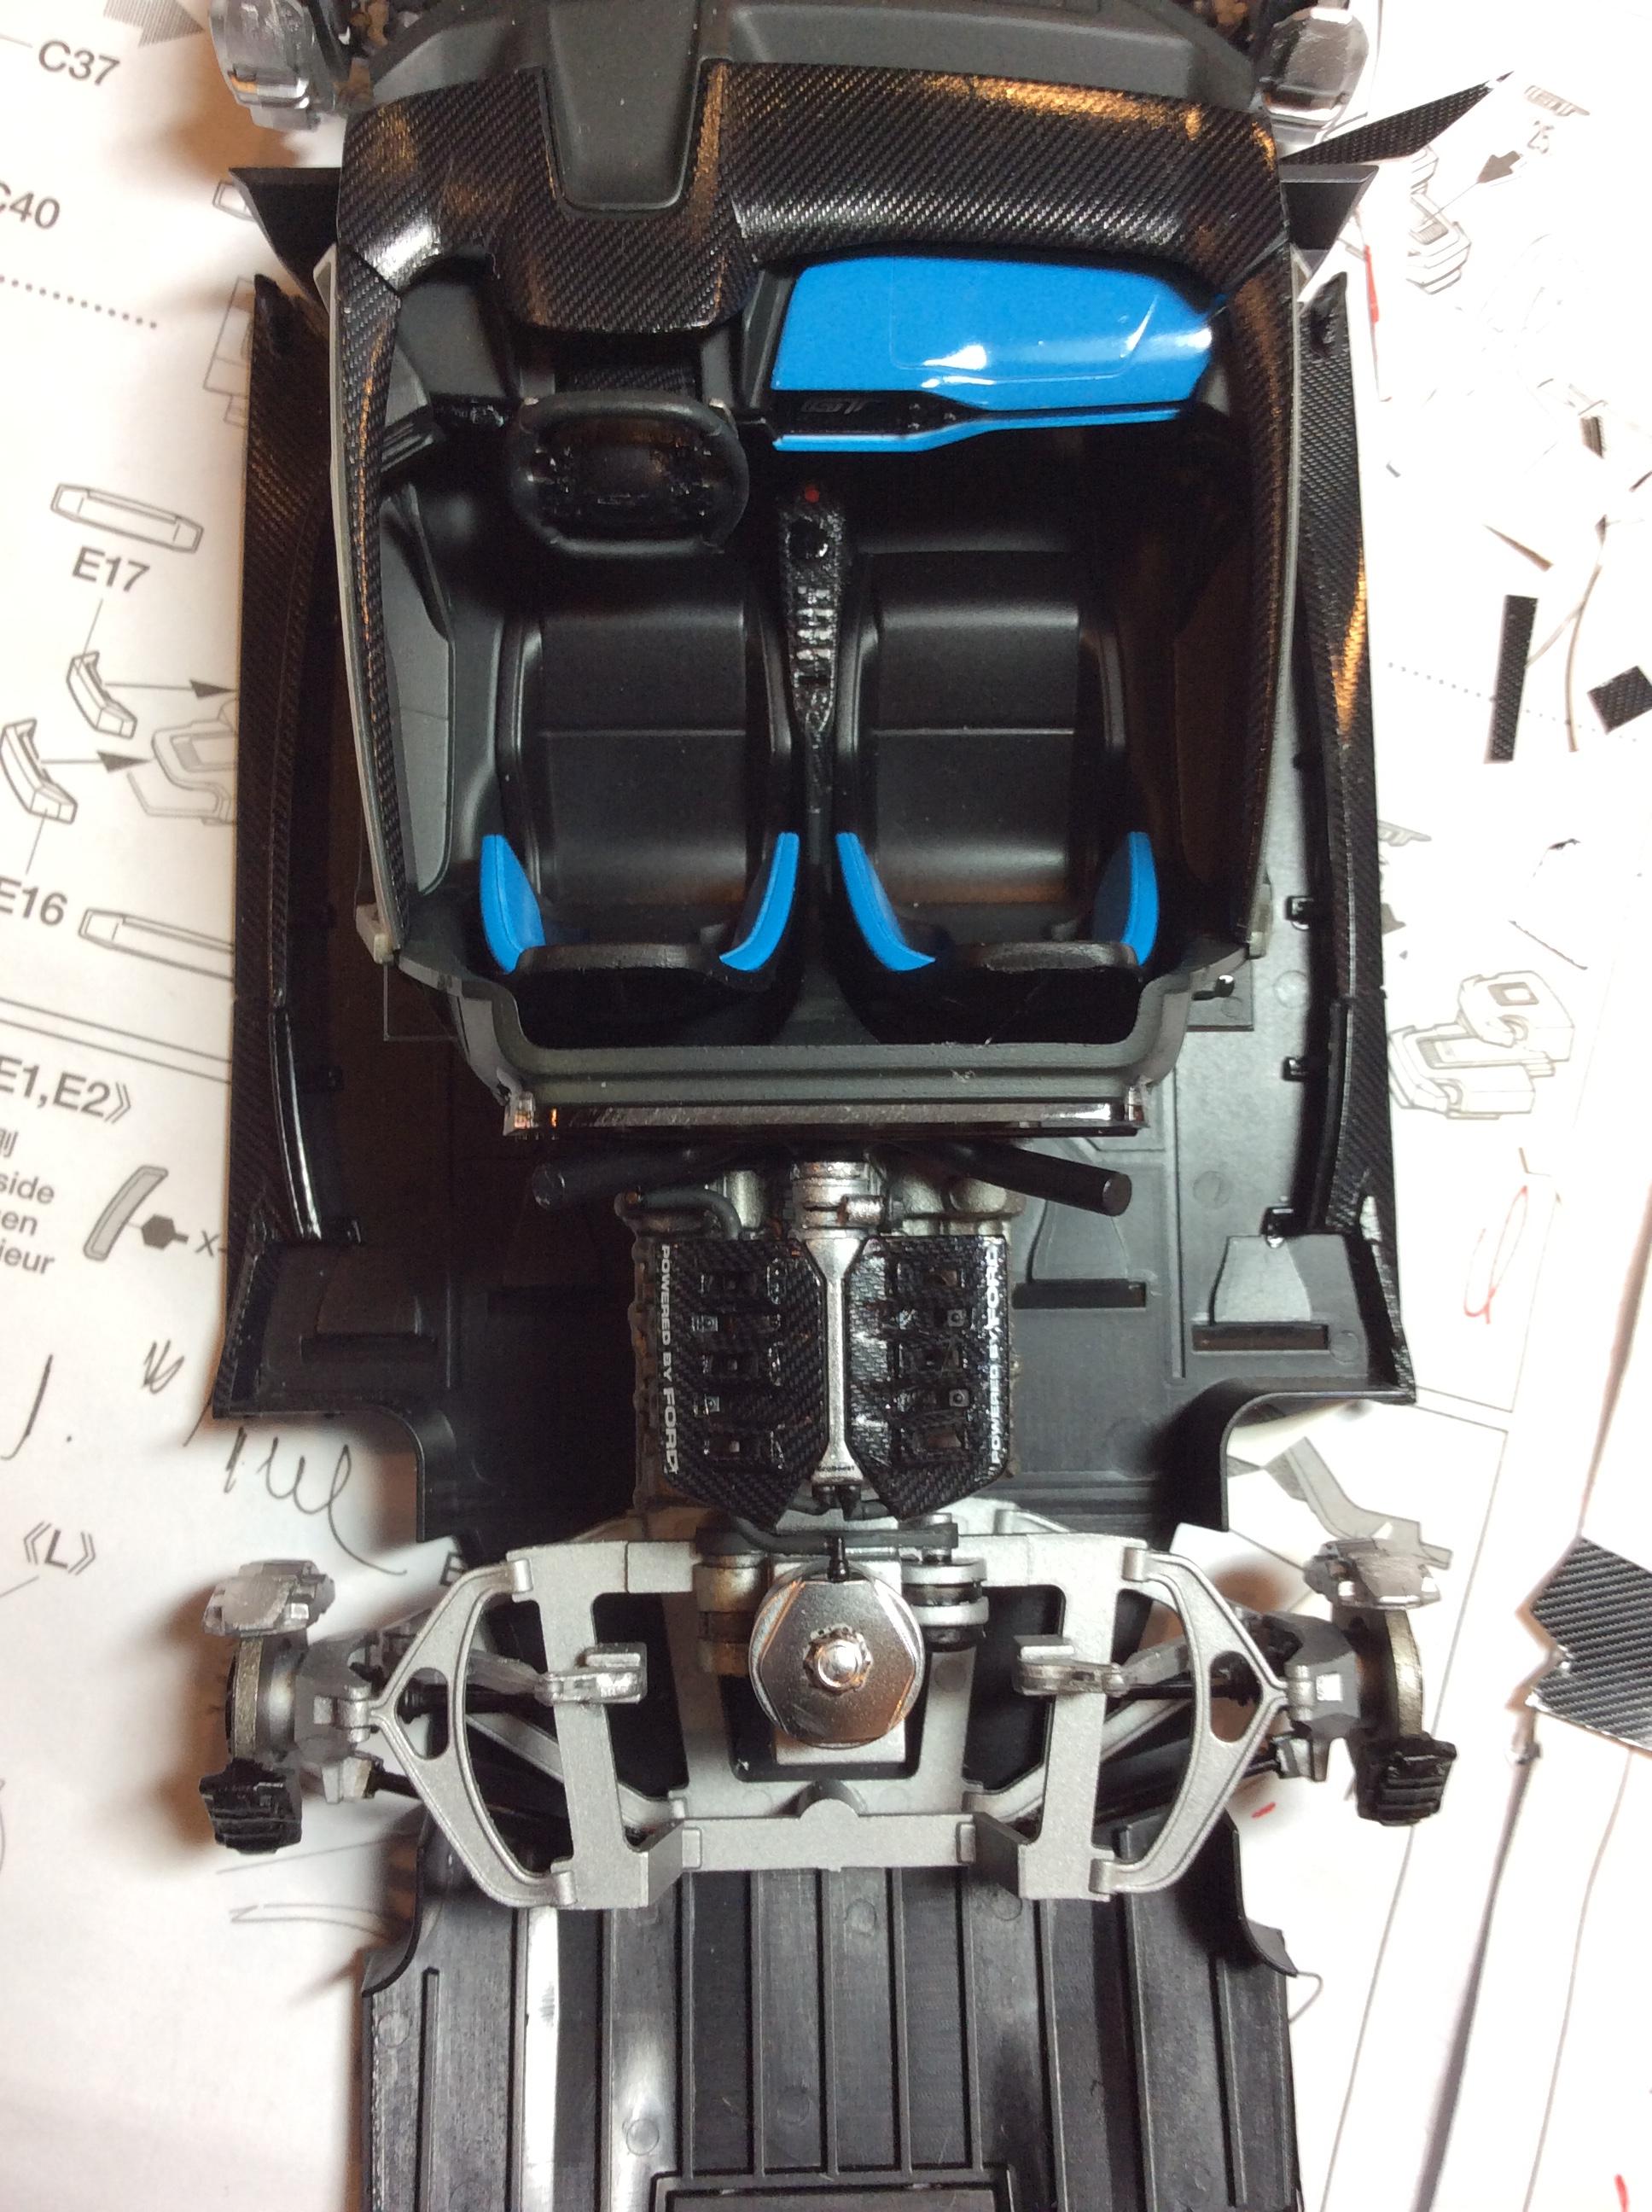
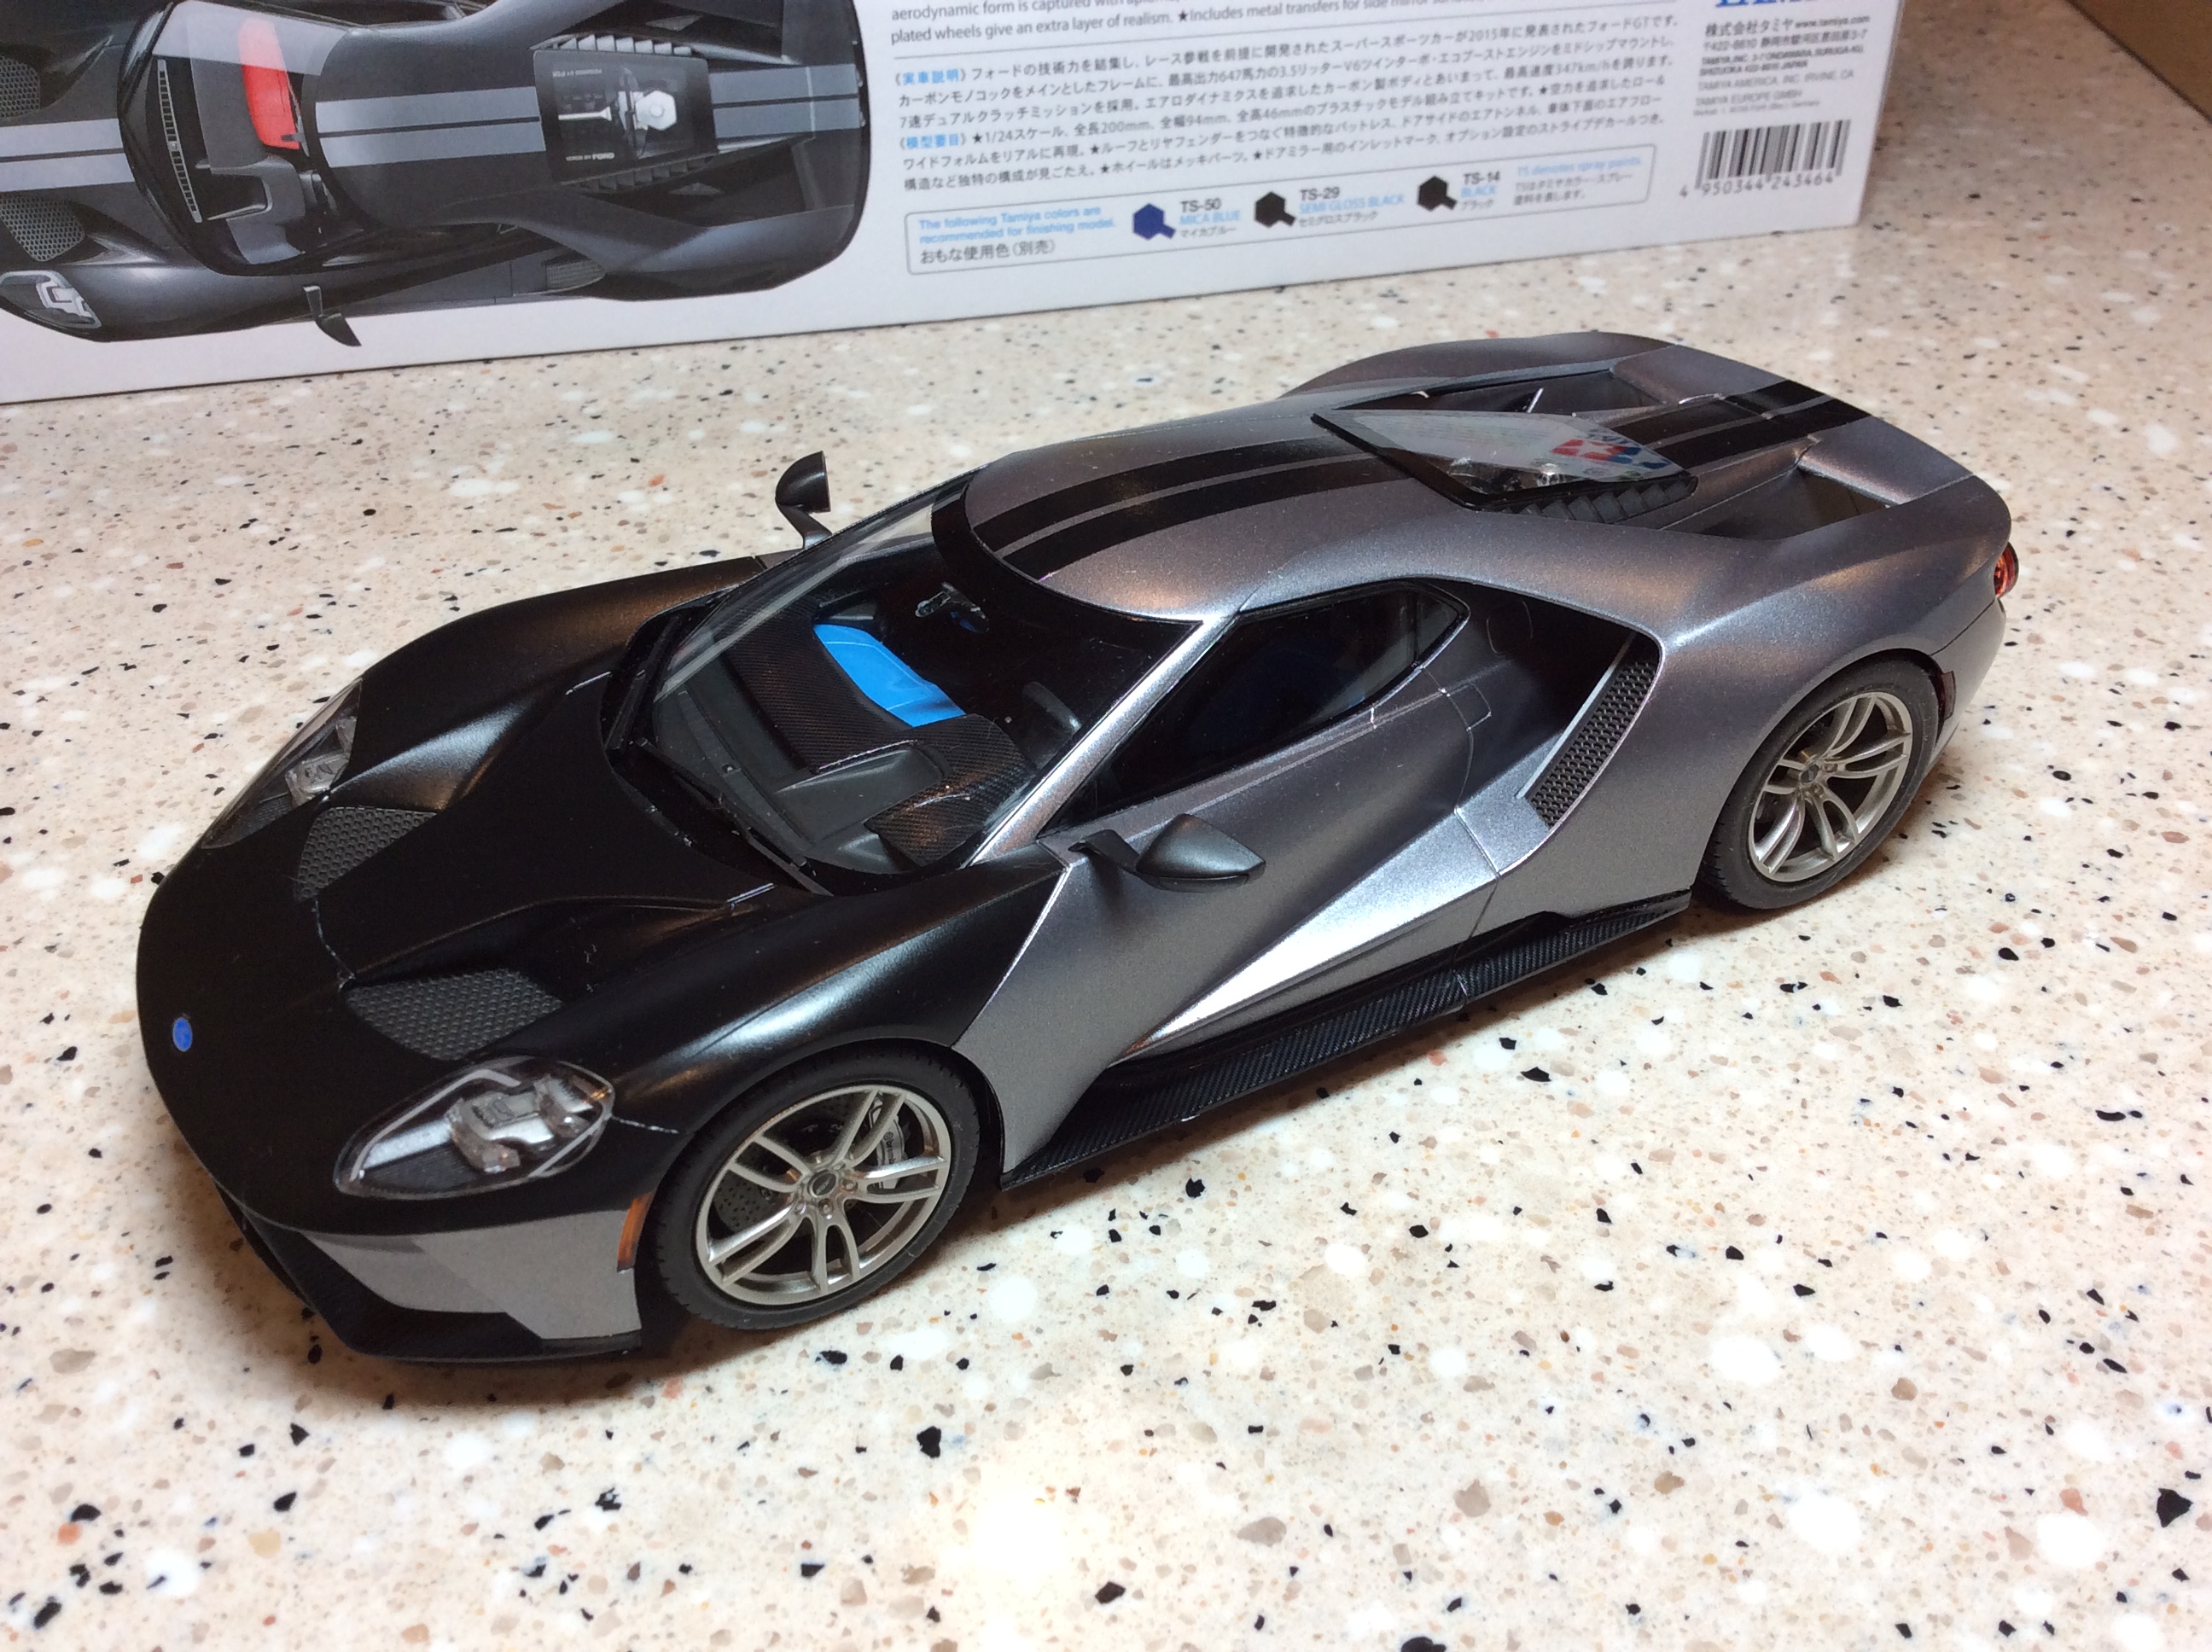
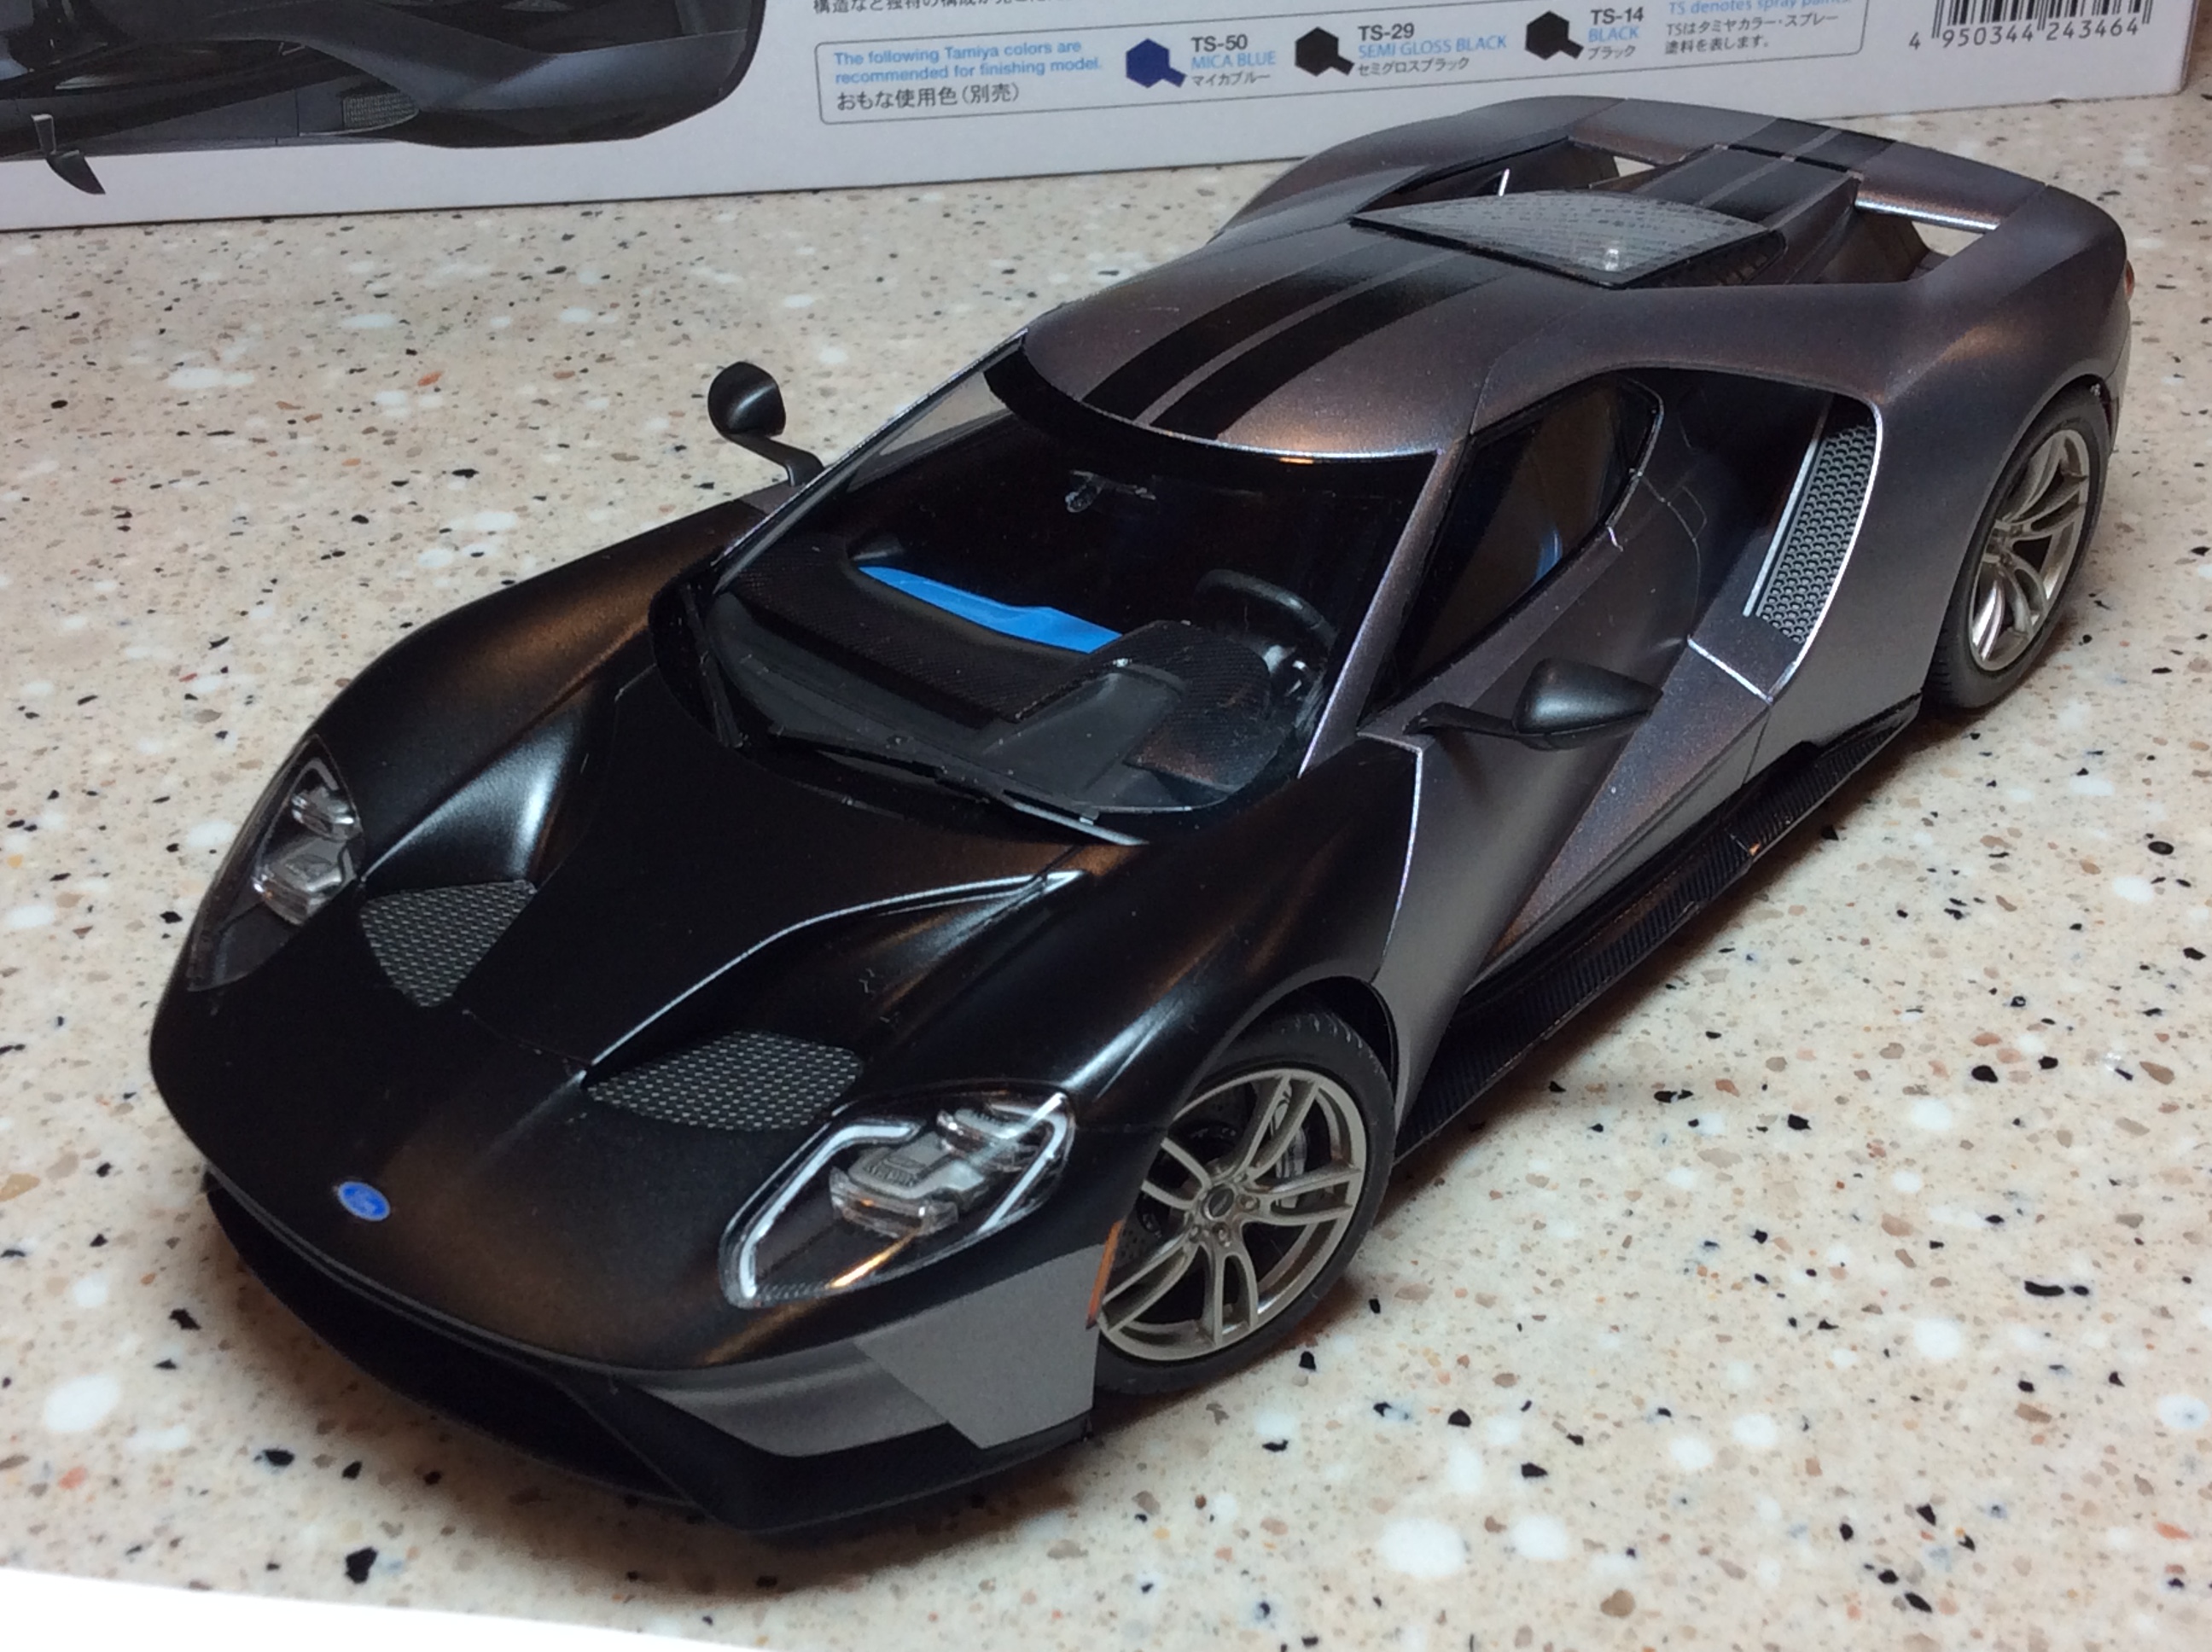
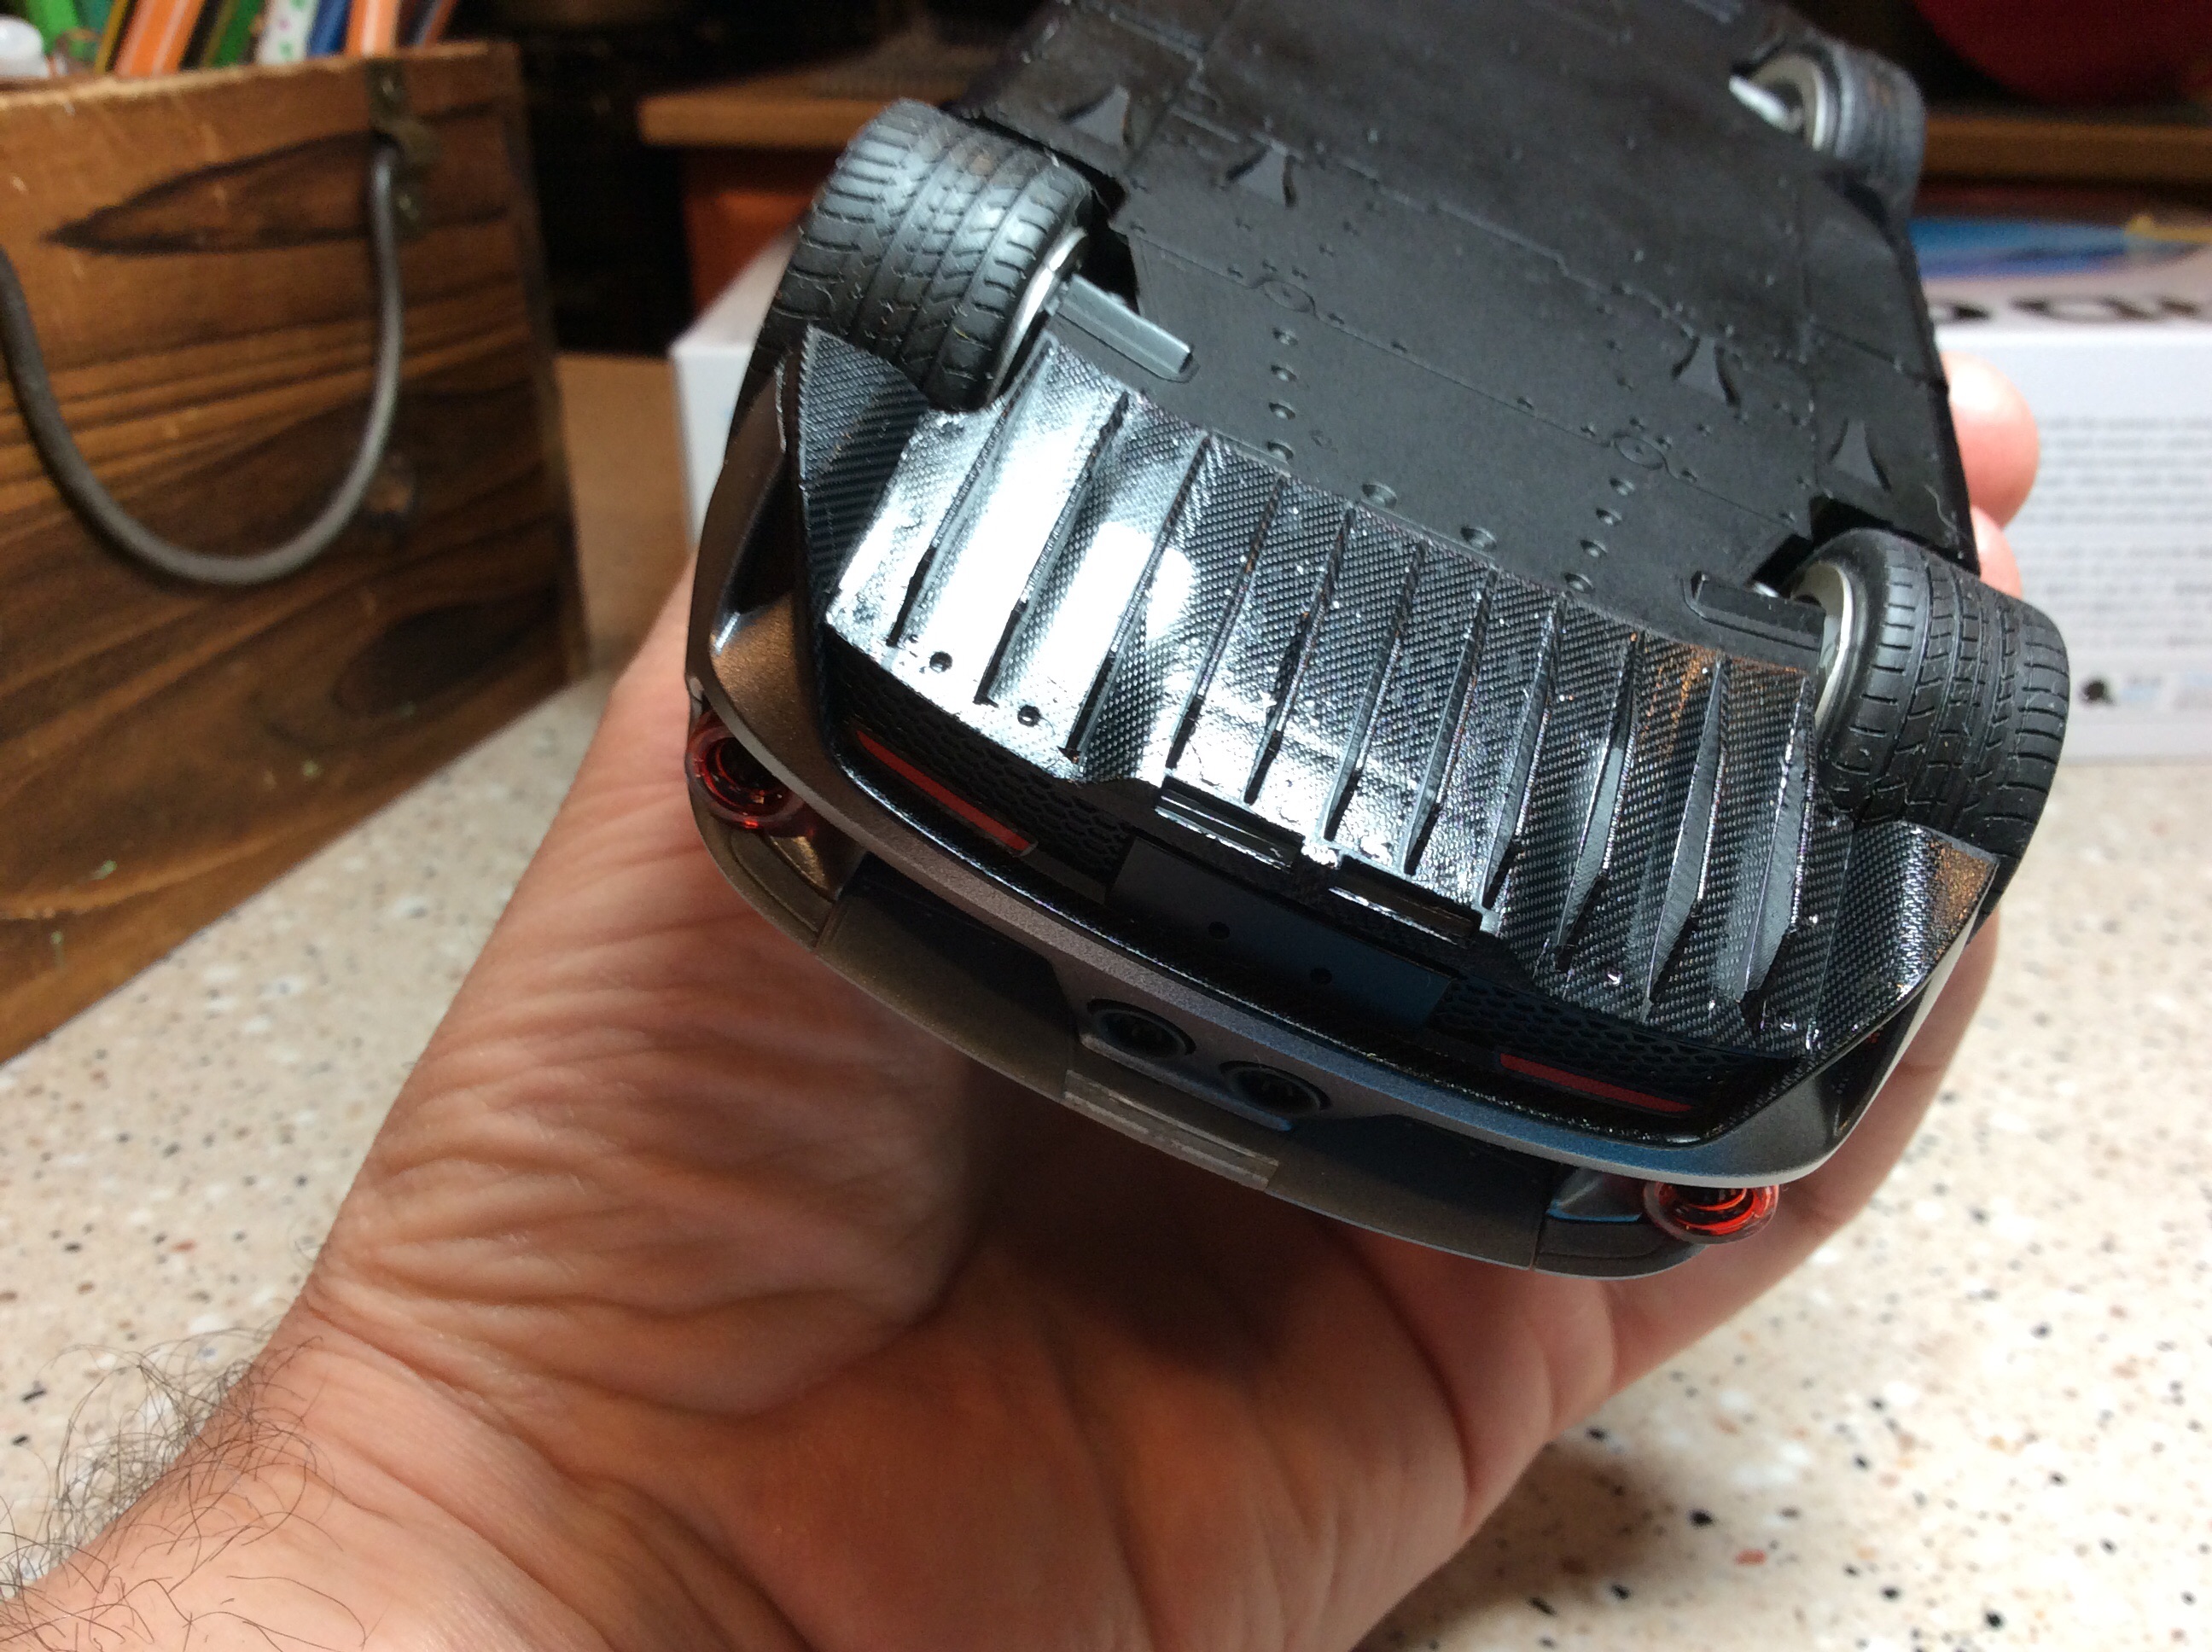
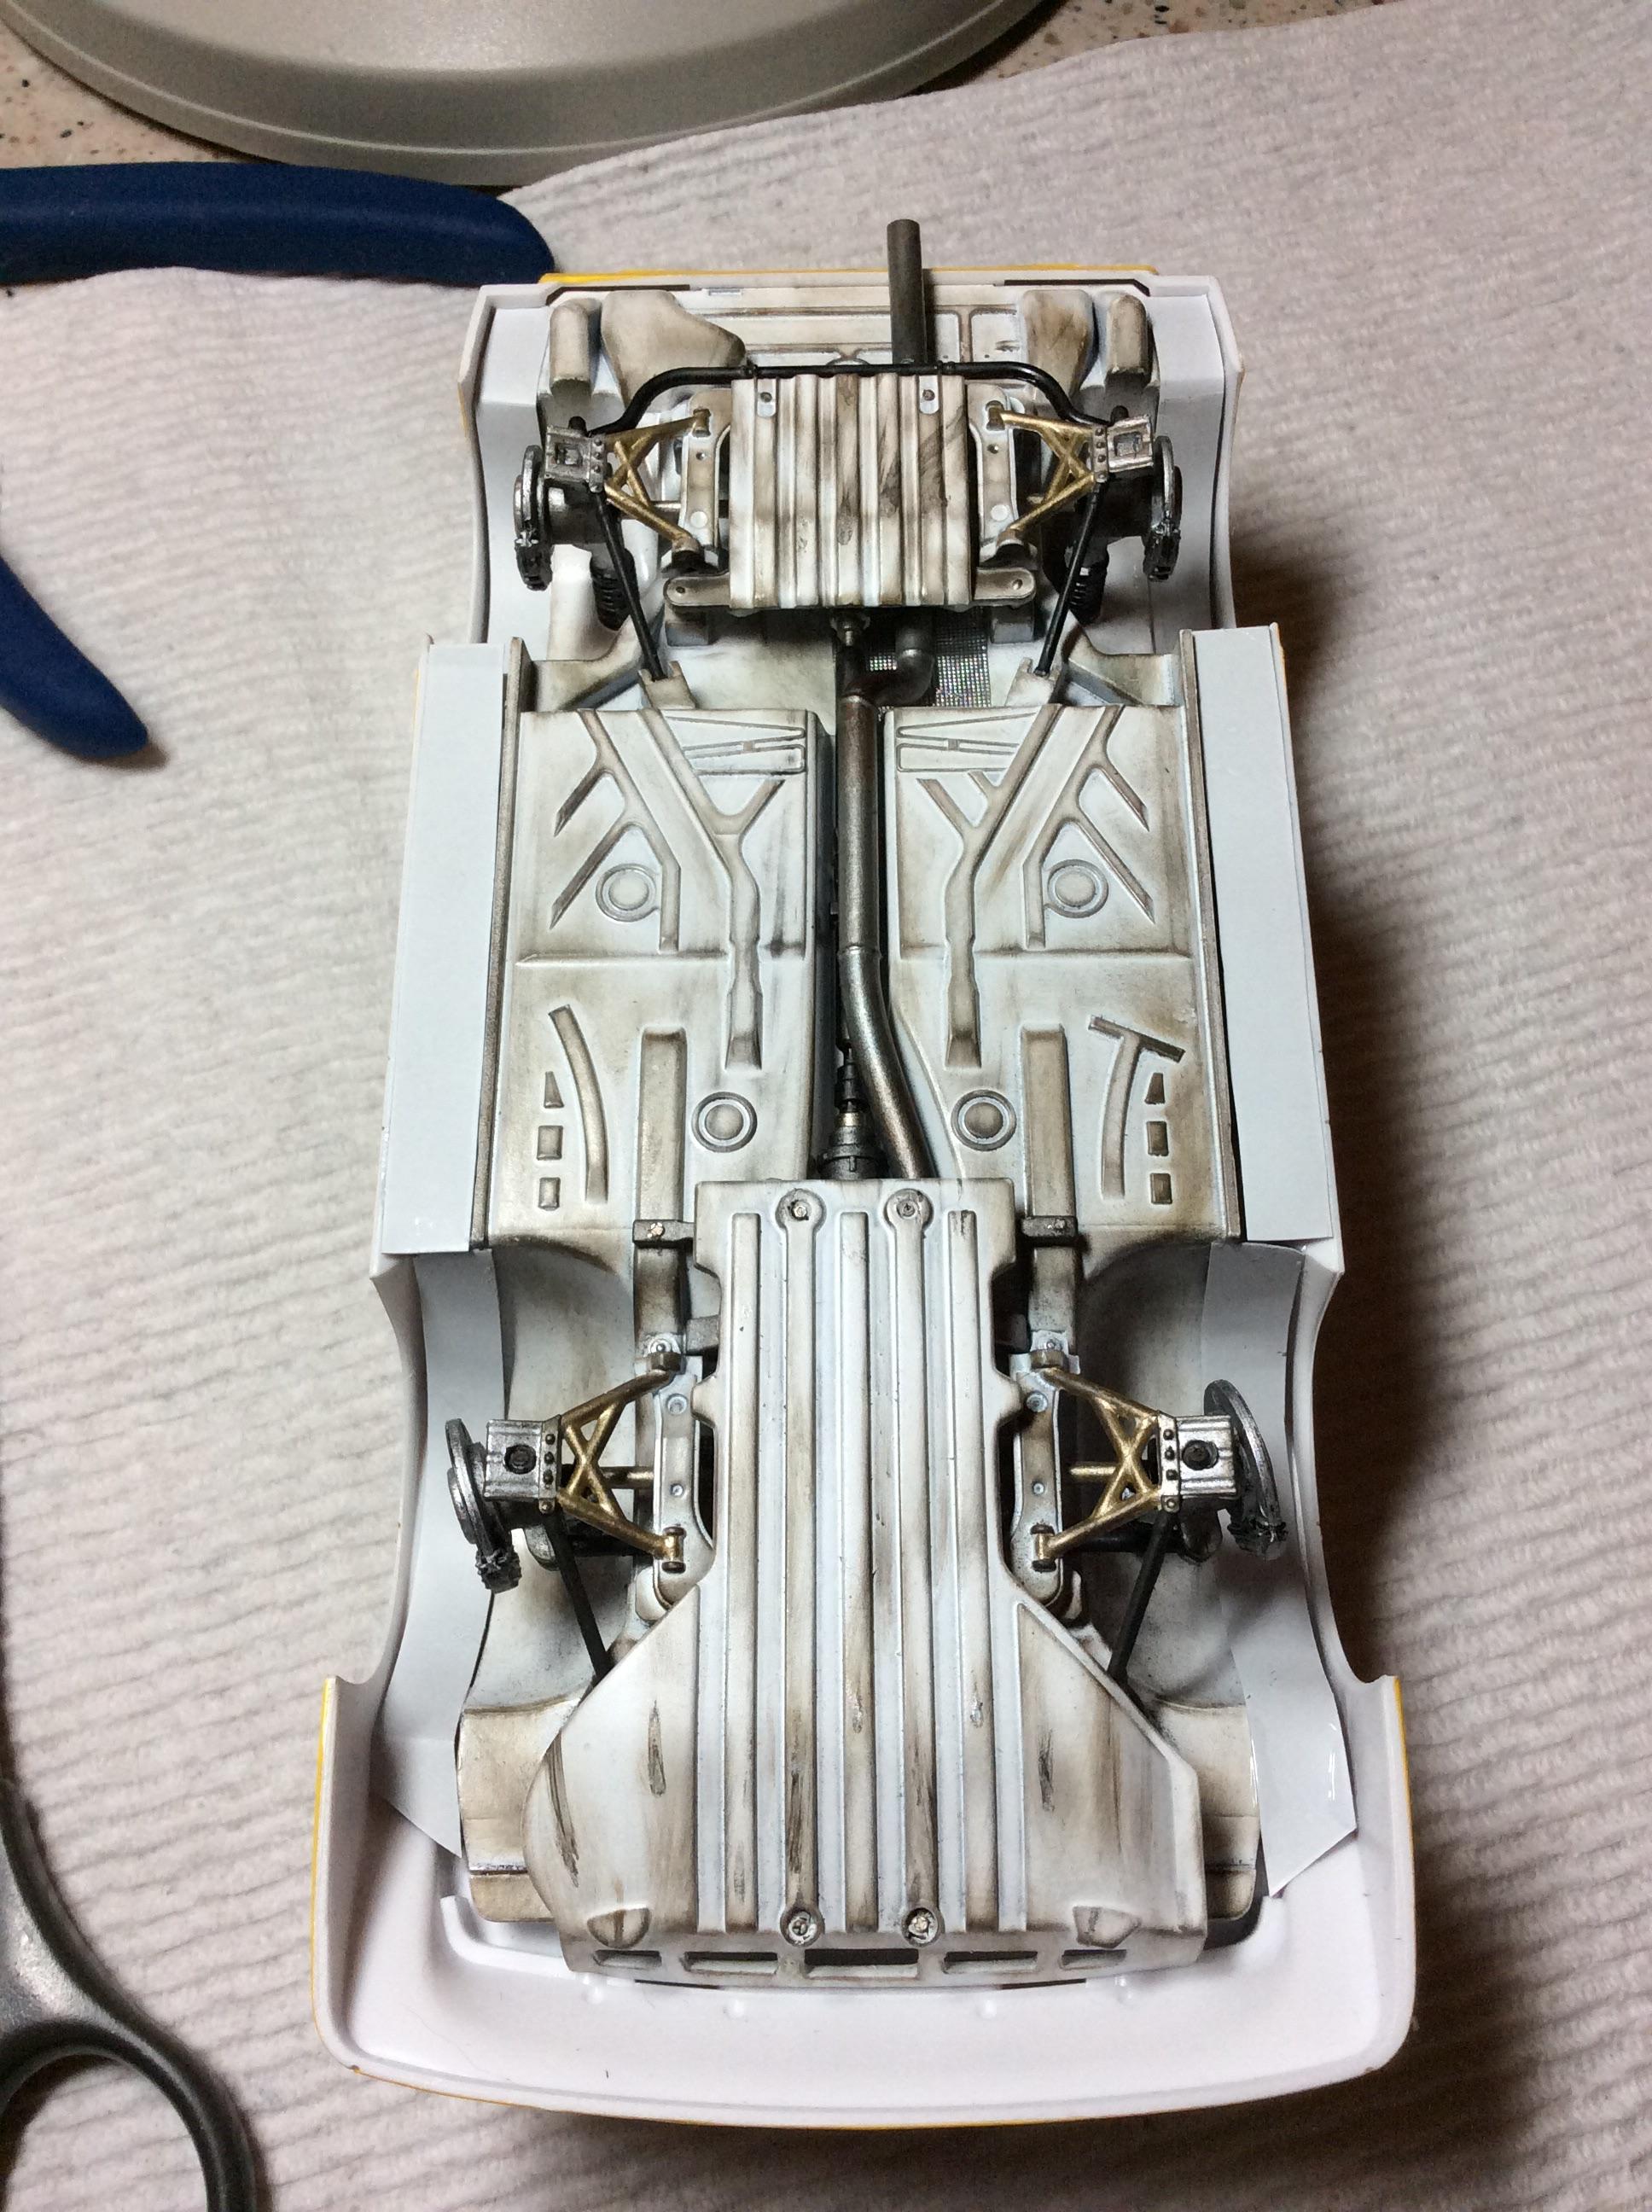
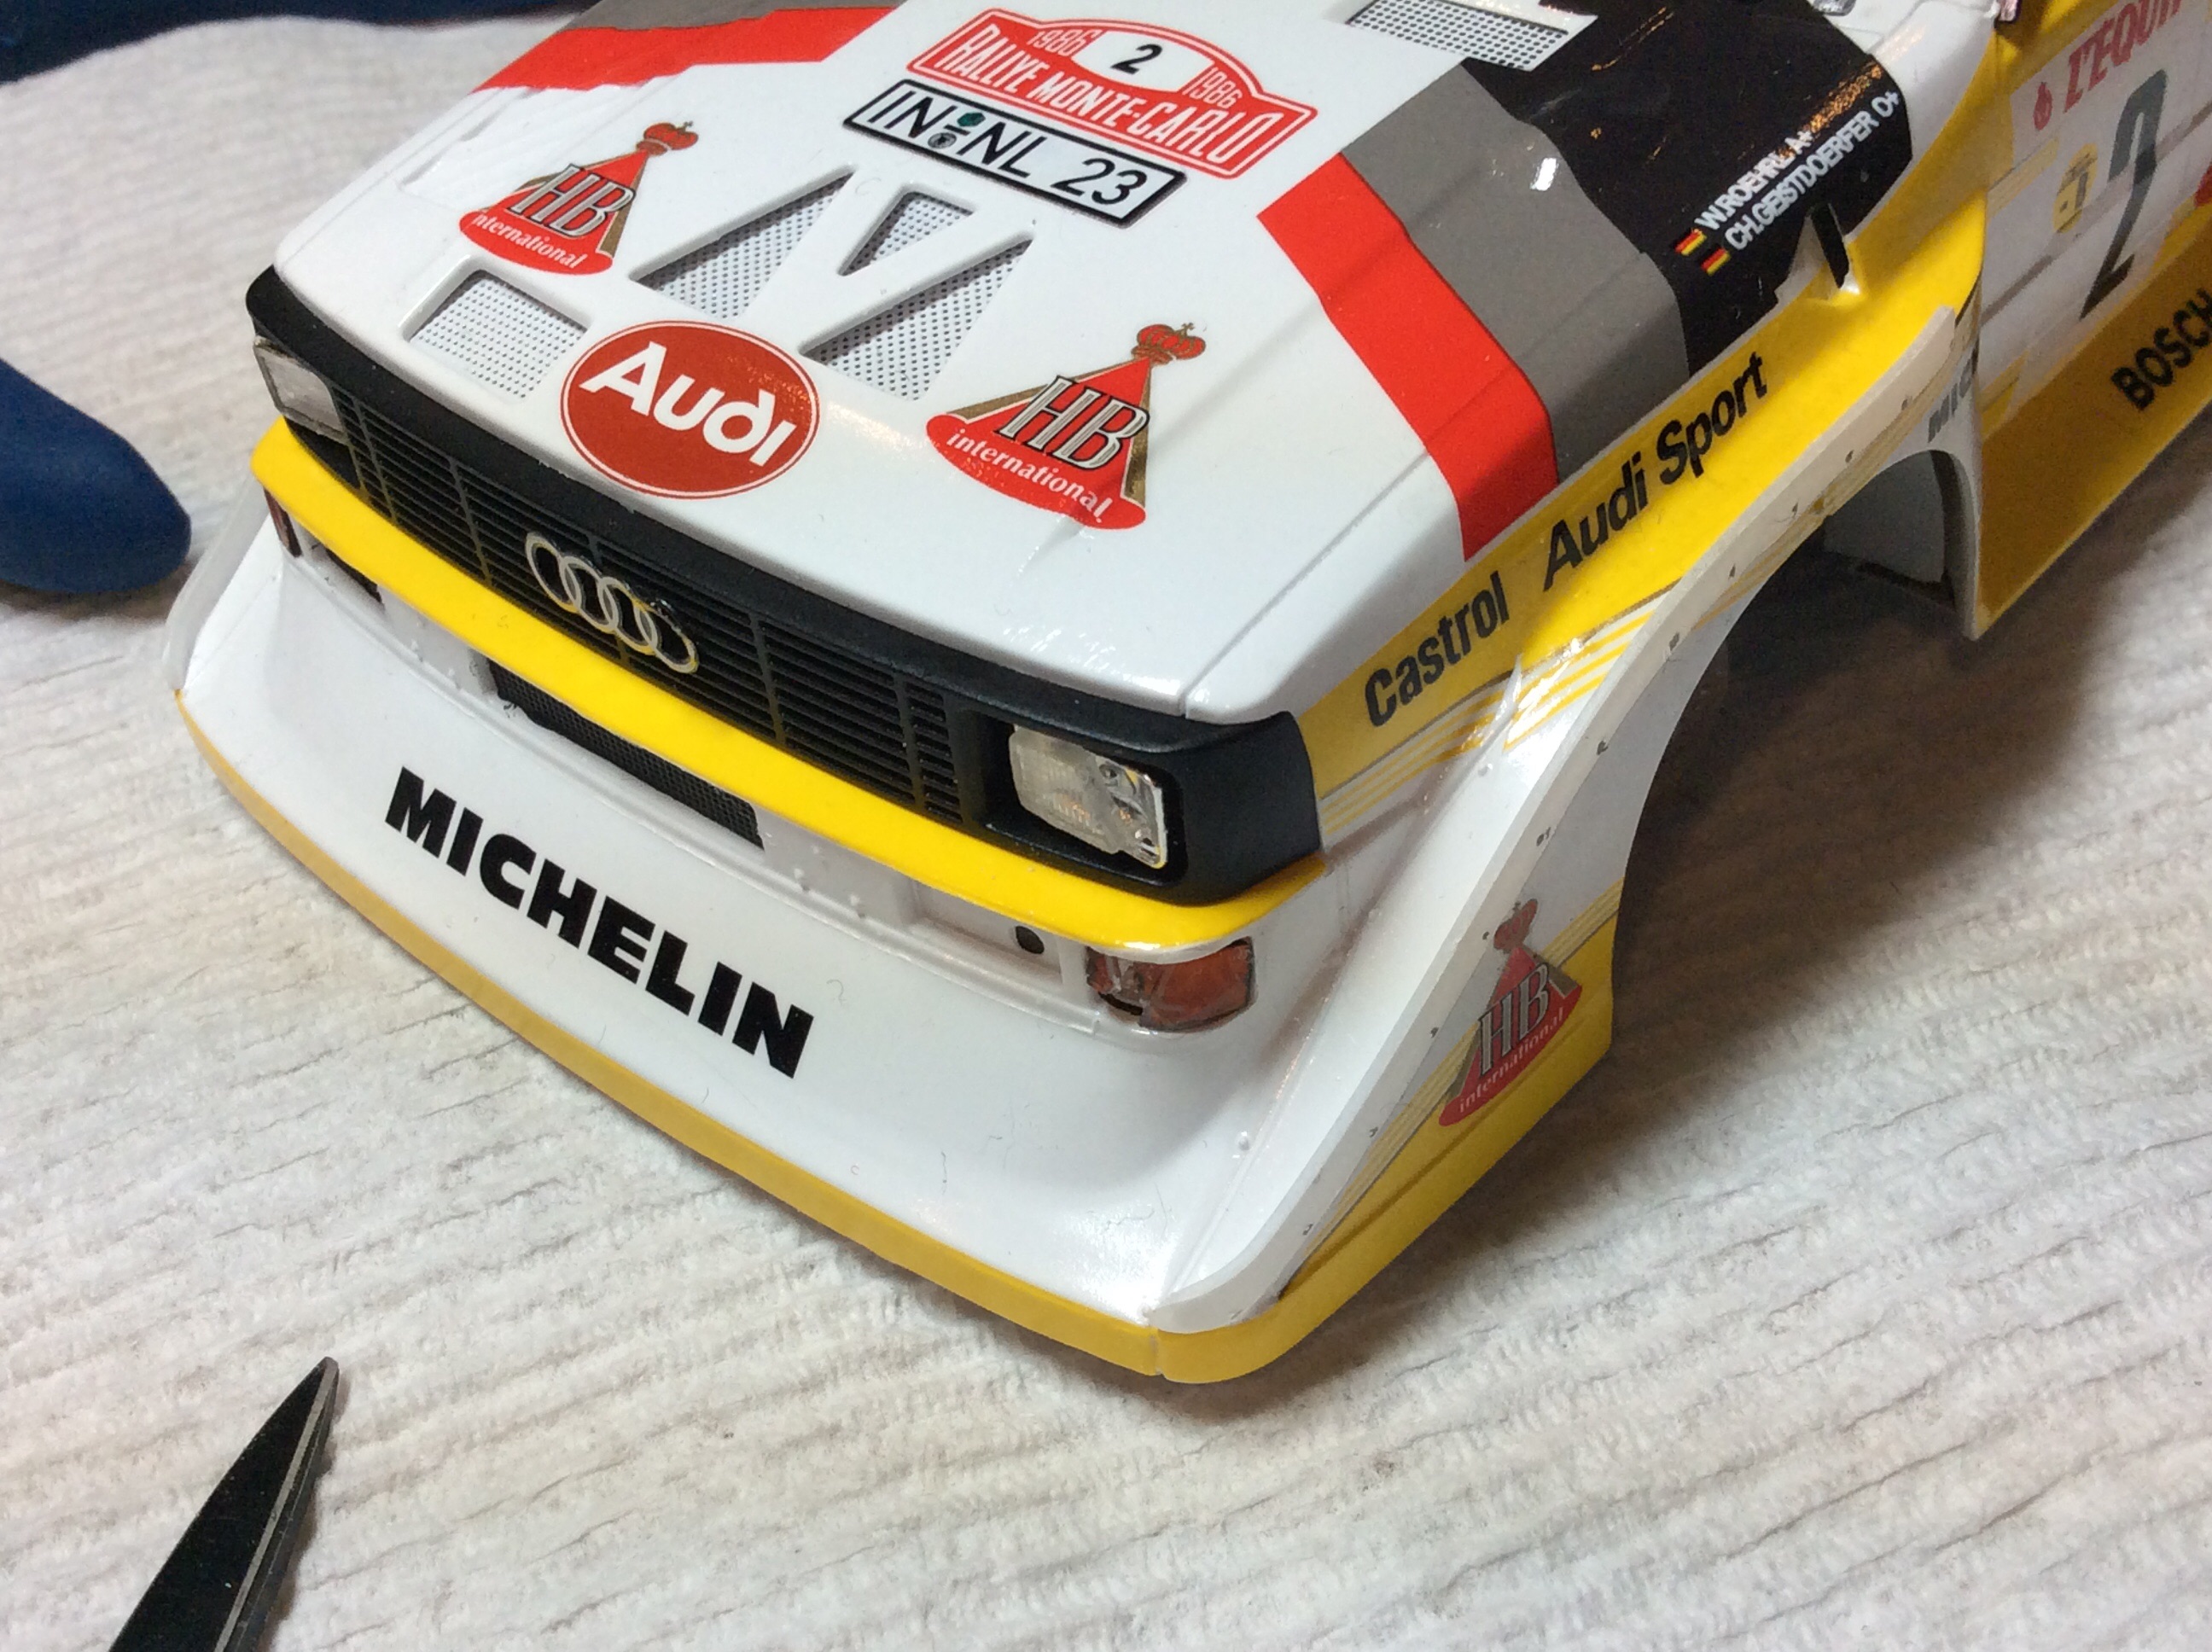
I started this one a months back and put it back in the box several times. Mainly to finish my Audi s1 rally car. This has been a chore, it’s been re-painted three times. Started out as French Blue. Then dropped twice with various parts flying off. It painted like the Shelby team GT 40 . Colors are semi gloss metallic grey and semi gloss black for the nose. Carbon decals ( Tamiya extra fine) were used in the interior and the rockers and rear diffuser and on the nose trim. As well in the engine area. Wheels are sprayed titanium silver. It has a gold huge to it. Not my best effort, but done. Just have to add the license plate. I wanna take a picture outside in the sun tomorrow.
-
Looks really good. Well done.
-
Looks really good Jay. The Indycals decals look like they went down very well. Great job. Hope to see it next weekend
-
Thank you everyone!!!!
-
1 hour ago, Funkychiken said:
Fantastic!
Thank you
-
5 hours ago, Ensis Ferrae said:
The weathering is quite nice. Watched this build from the workbench thread, and the contrast between the weathering on the inside and outside is quite big, but nice.
5 hours ago, Ensis Ferrae said:The weathering is quite nice. Watched this build from the workbench thread, and the contrast between the weathering on the inside and outside is quite big, but nice.
Thank you.
-
Looks really good. Well done. Rally cars are fun to build
-
9 hours ago, espo said:
Great looking build. Your diorama really adds to the look.
Thank you. Made the model make sense
-
Thank you everyone...
-
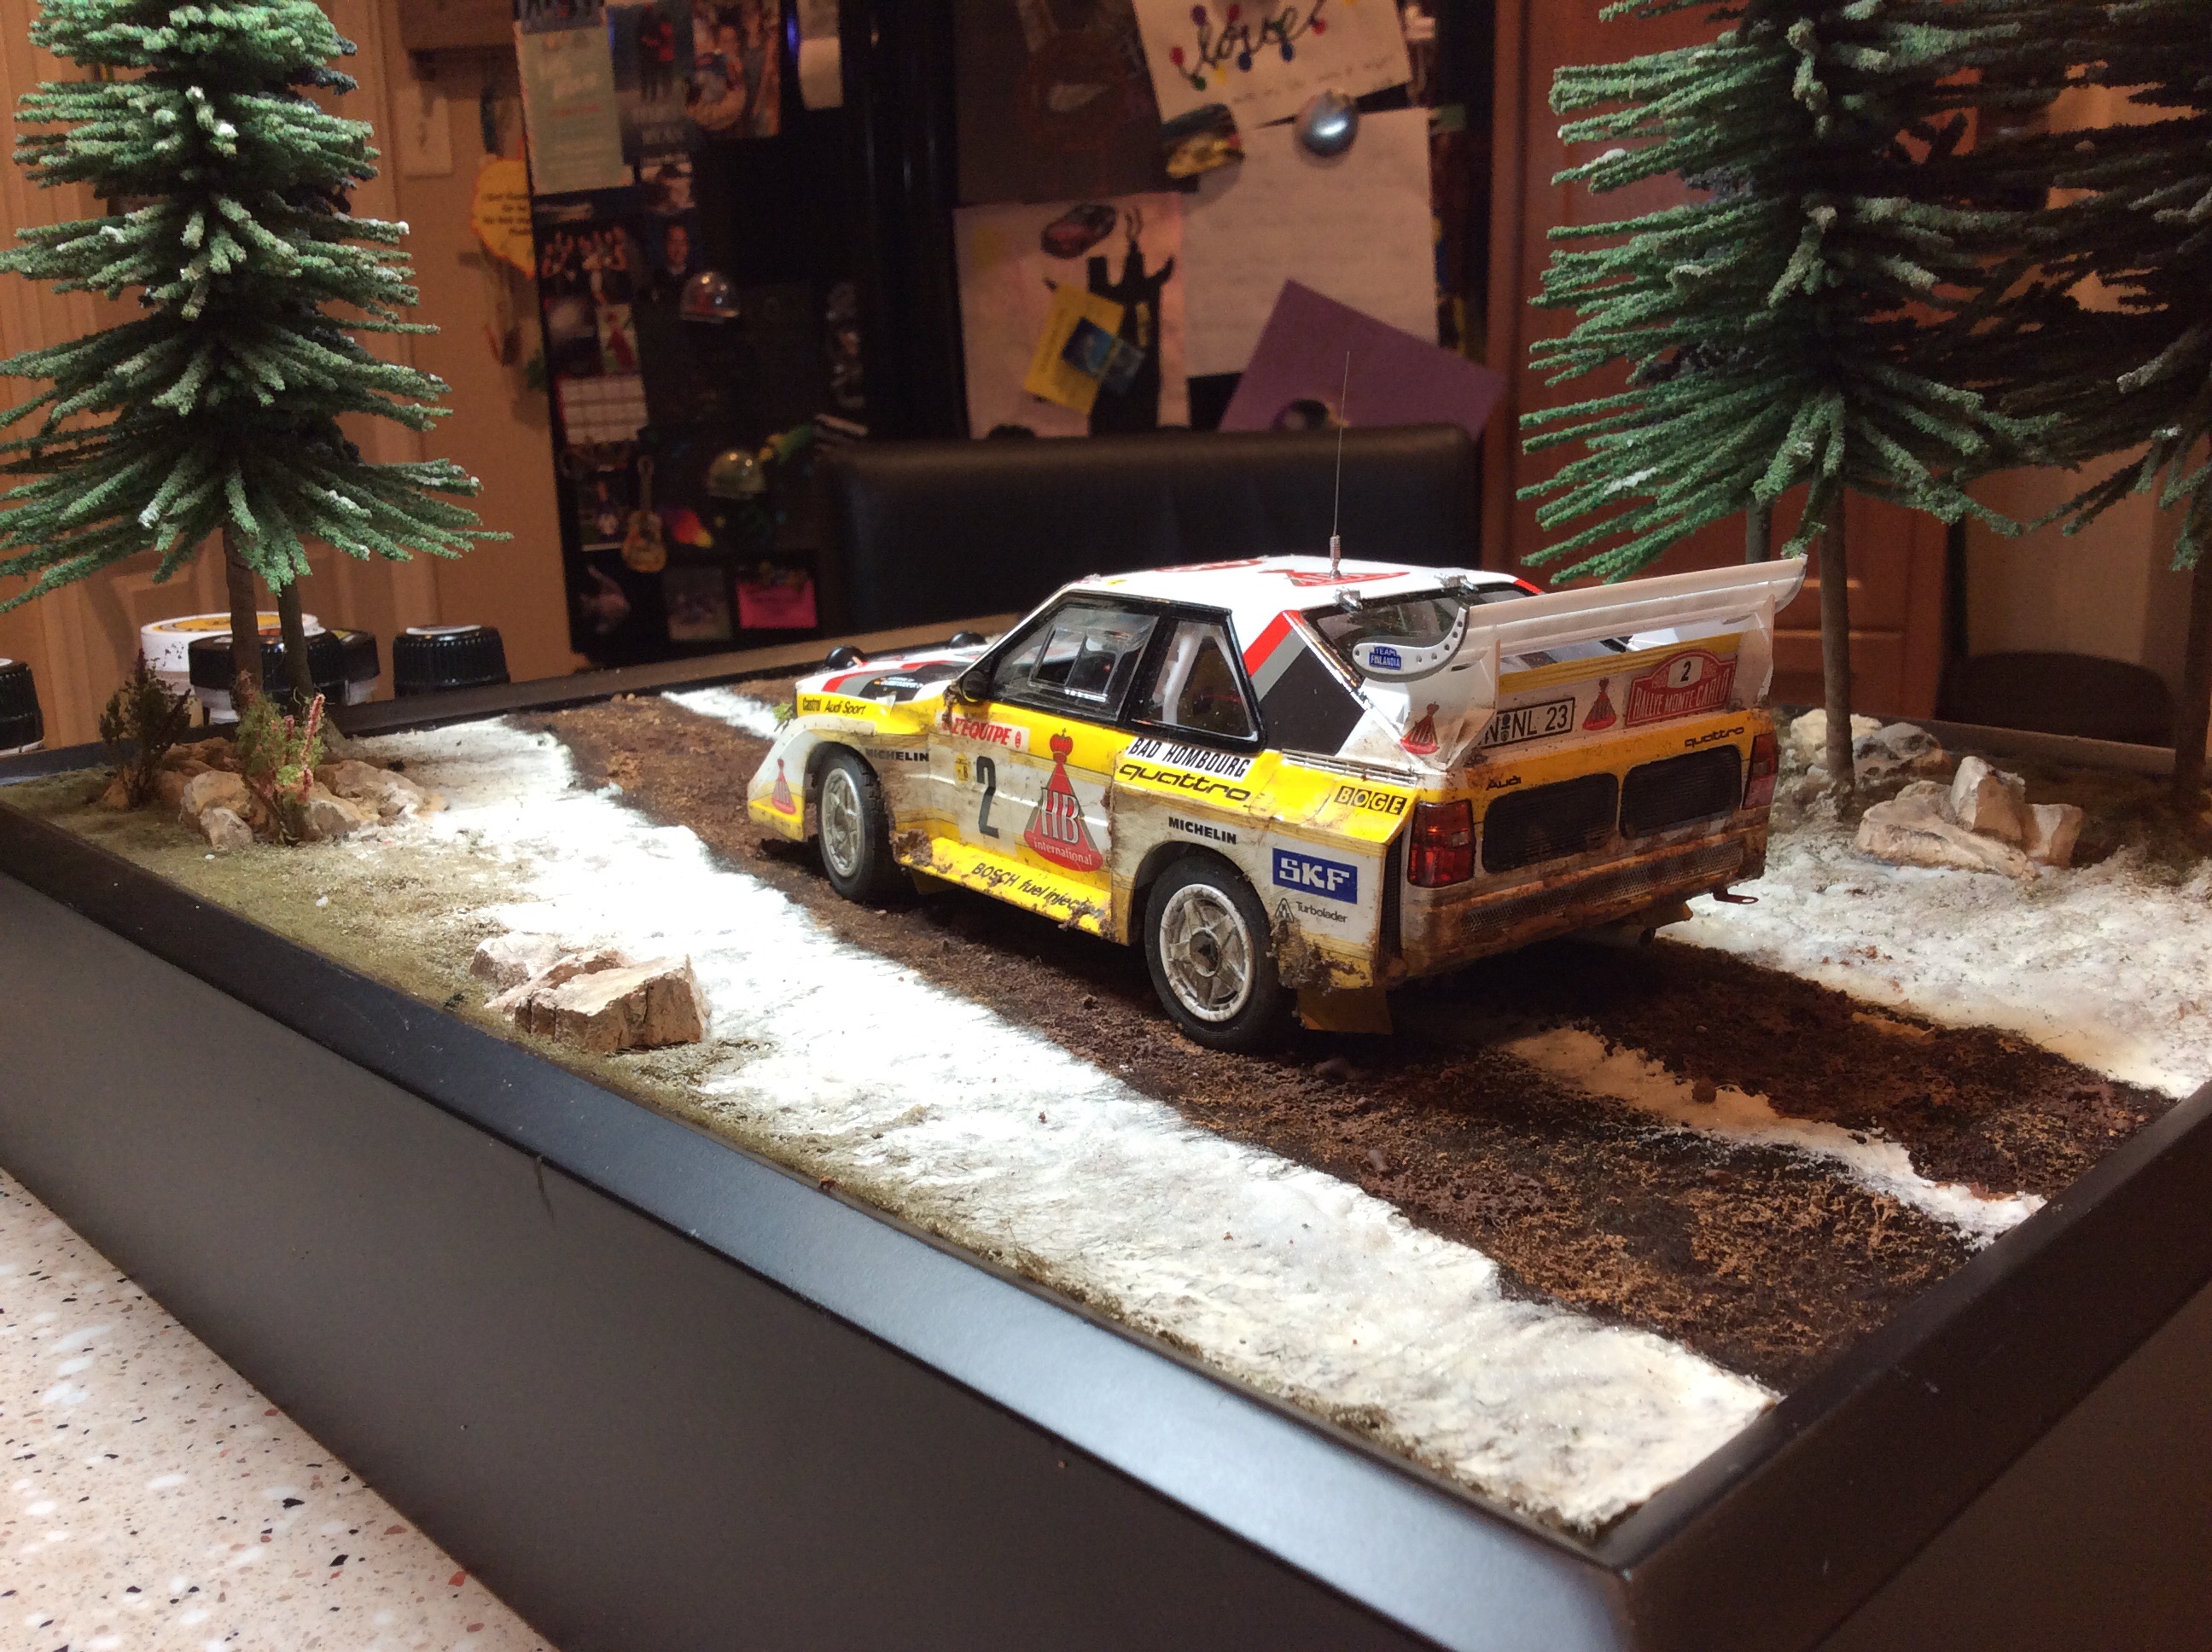
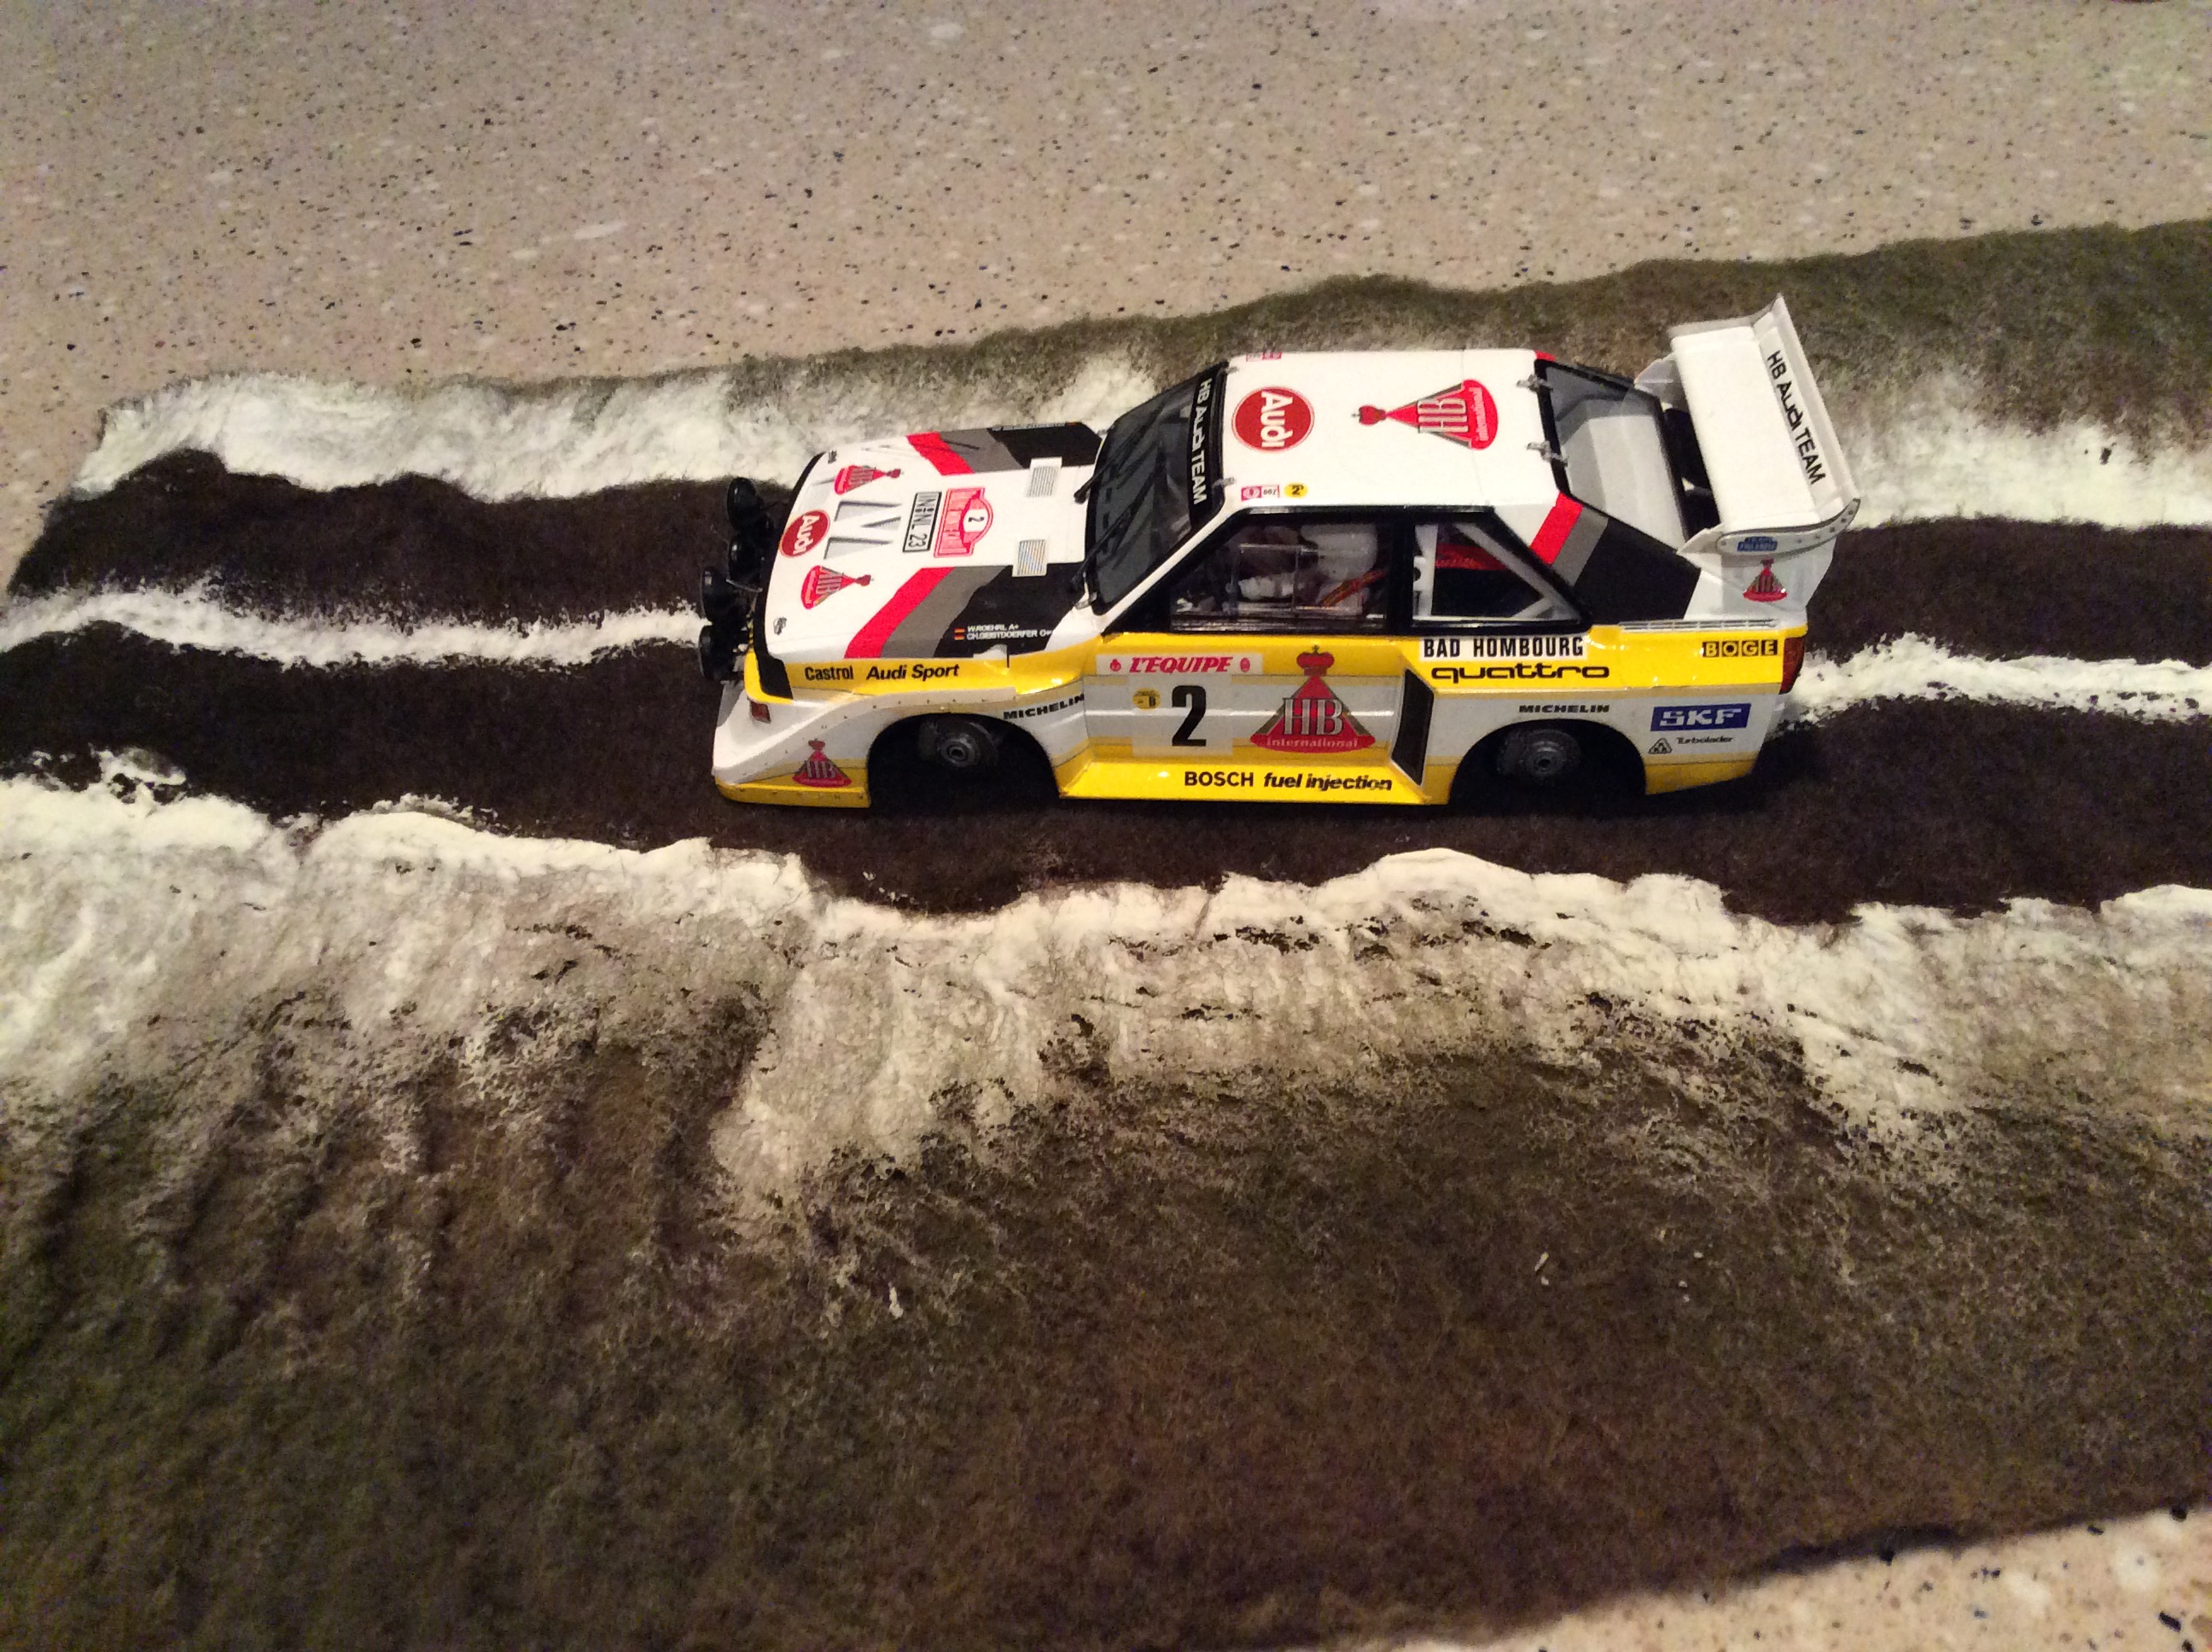
After I build I started in November,this one is about done. Just have to add a bit of base to the road and the wet effects fluid to some of the mud.
-
GT-40
in Model Cars
Looks really good. Well done
-
On 2/28/2019 at 7:04 AM, Dann Tier said:
Top-notch weathering!!!....and love the display!!
Thank you. I started more of the base needs to be done by Friday night. Game face on.
-
On 3/4/2019 at 2:06 PM, Kemszi said:
awesome!
Very nice jop,i like itThank you
-
11 hours ago, markx66 said:
WOW!!! Your details are so GREAT
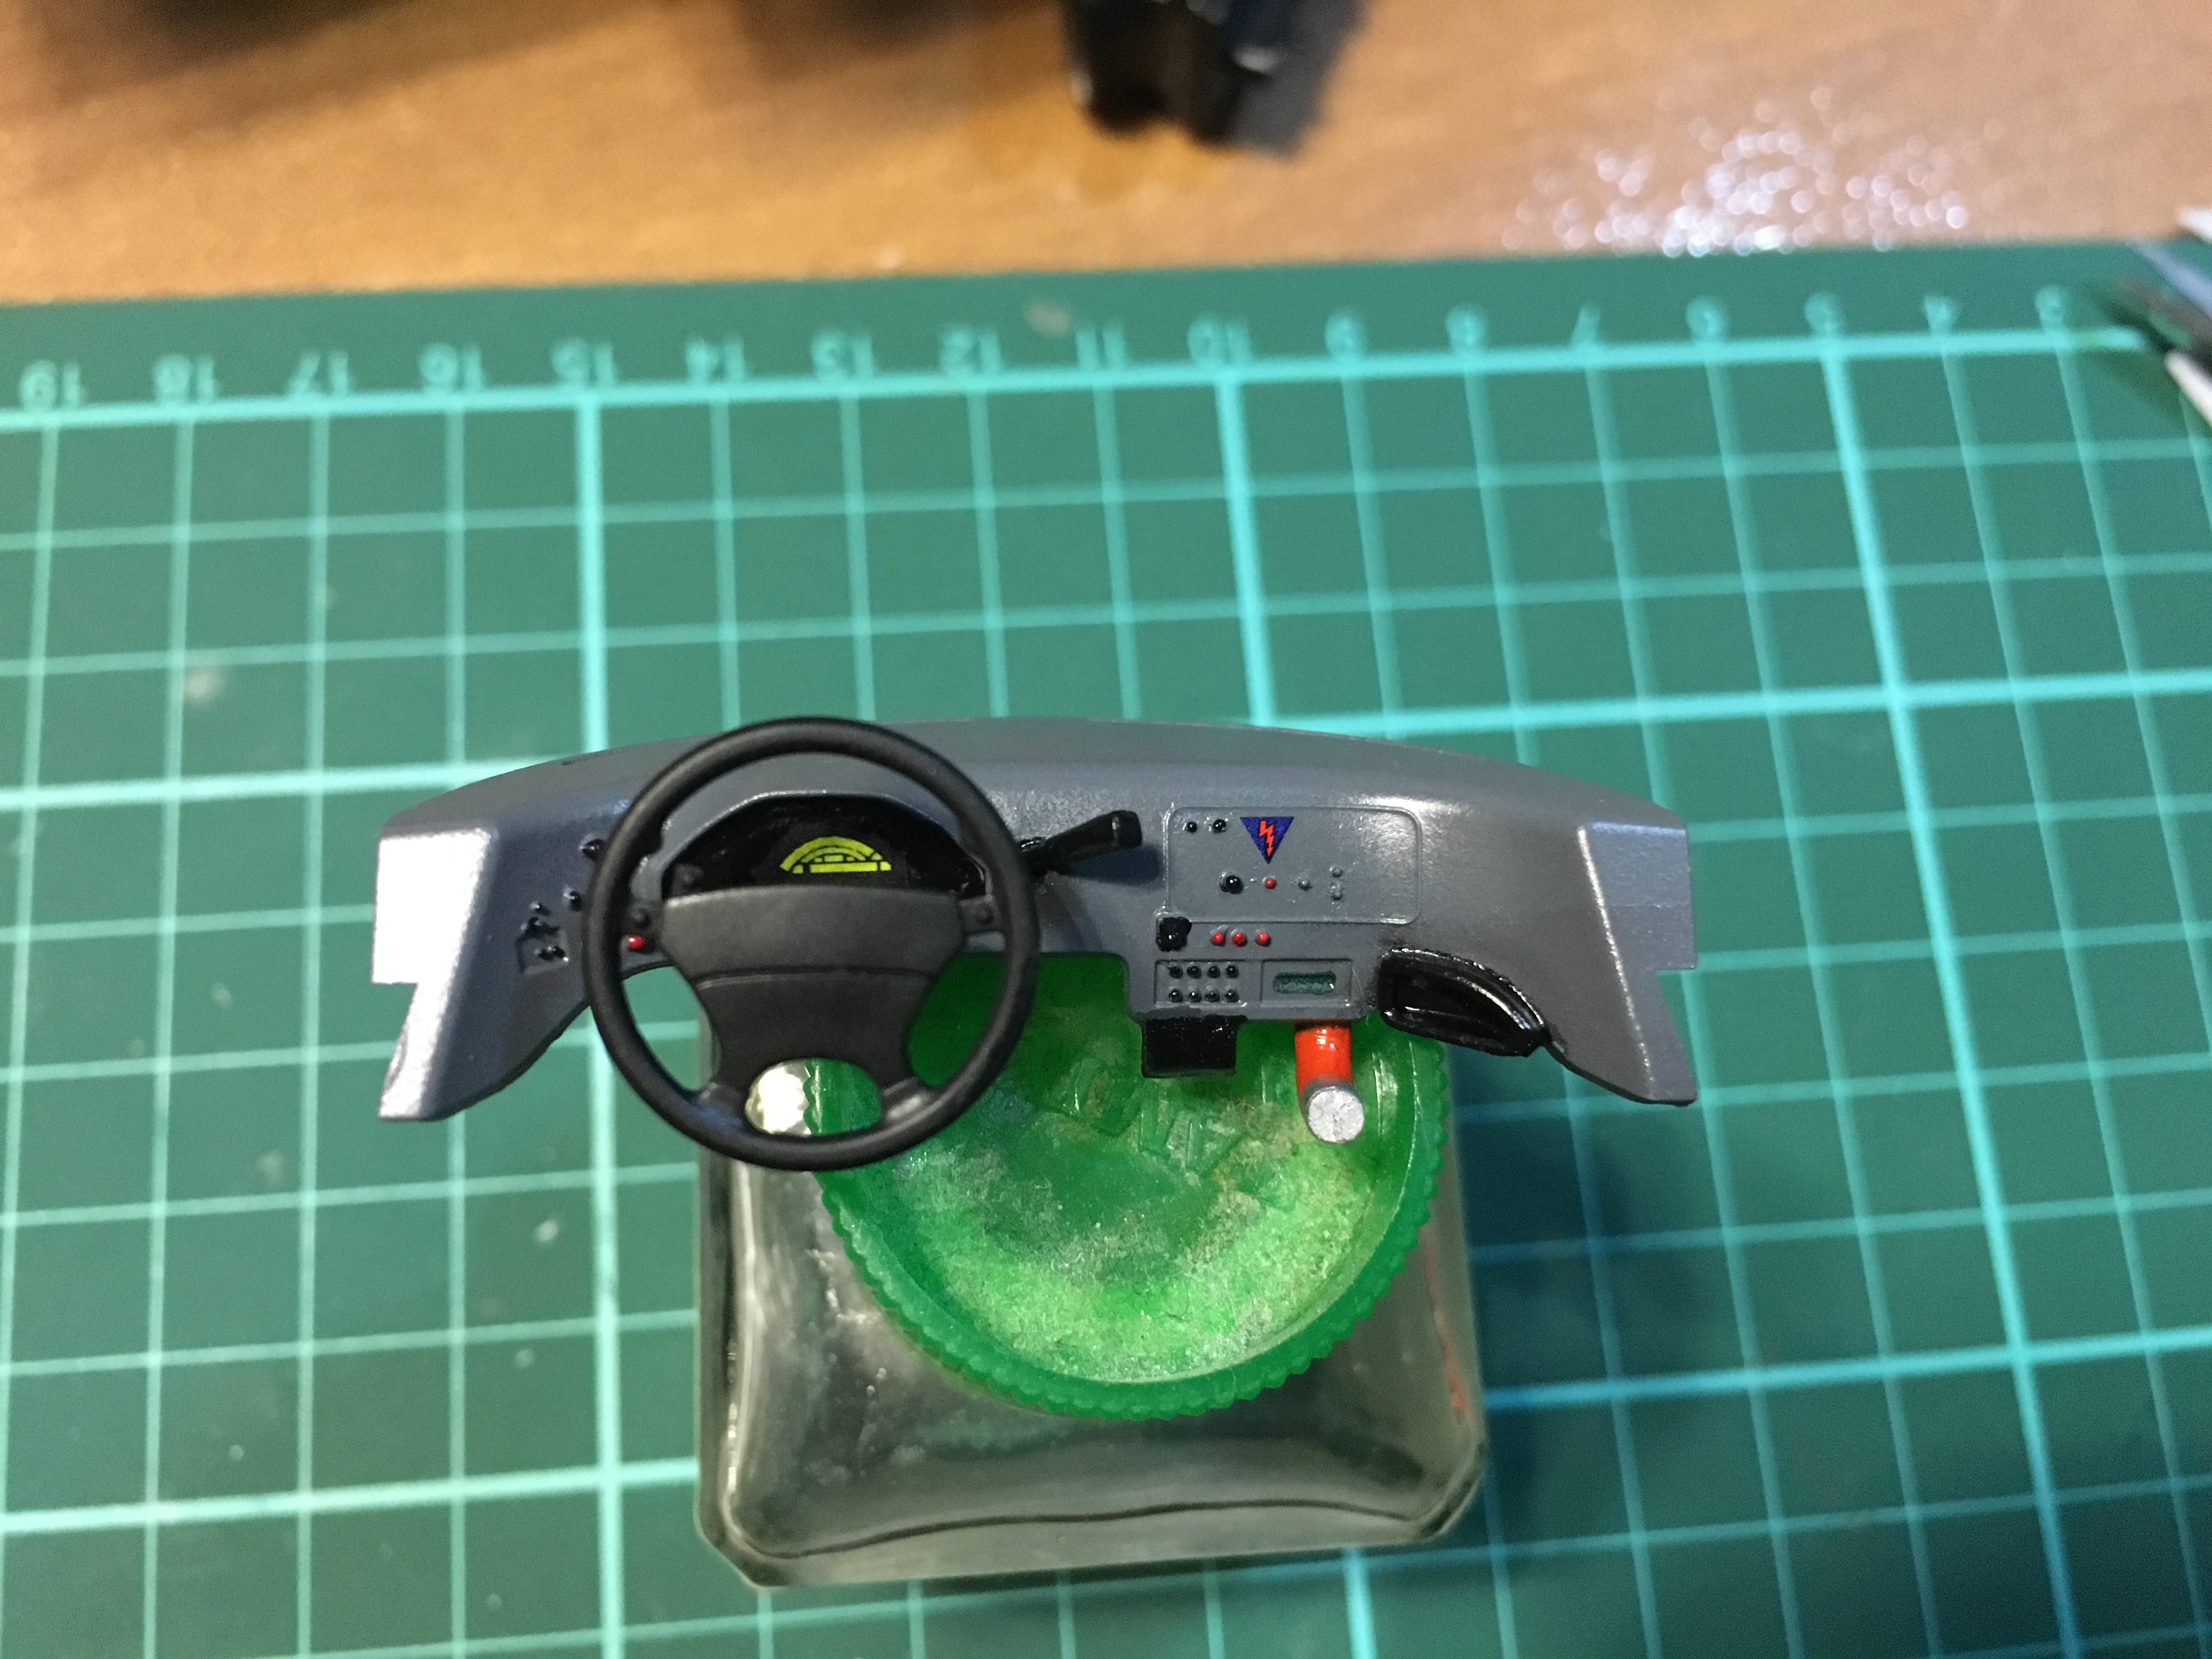
I suggest you paint the small buttons of the cockpit with the toothpicks like mine
The CLK is looking good. I use toothpicks all the time , I sharpen then to different points. Thanks here is the base in progress
-
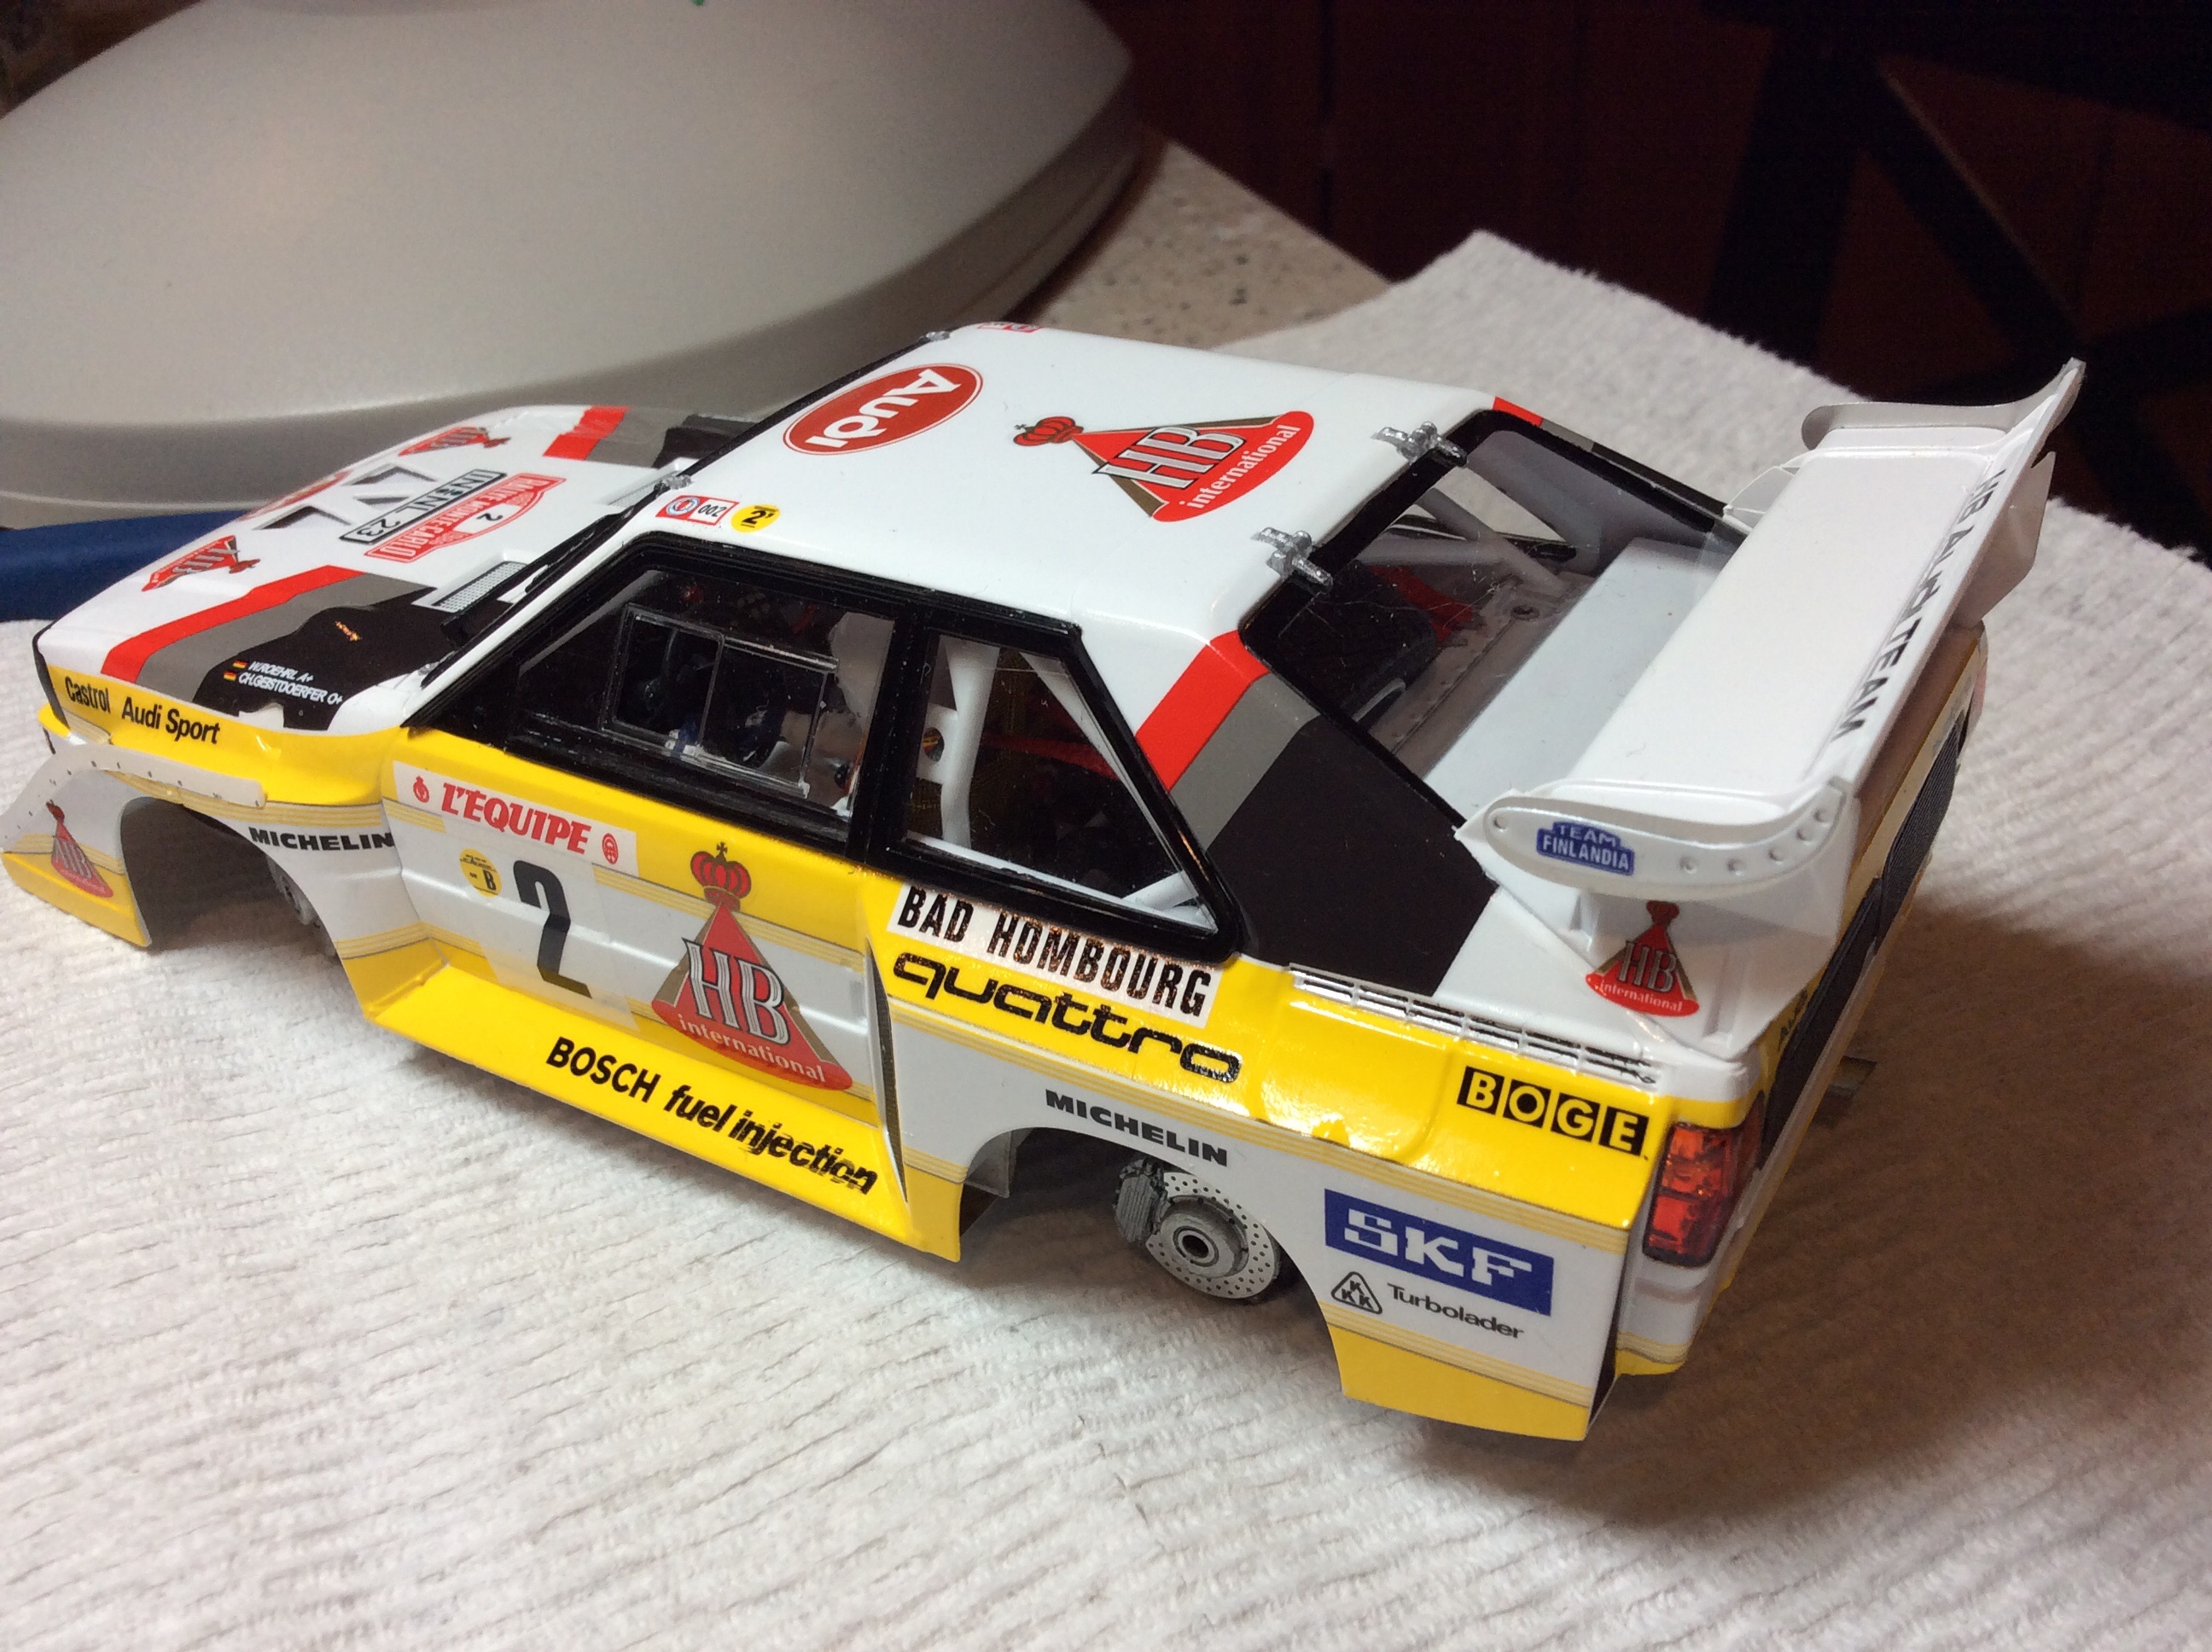
Car is just about finished. A few little details still left.
-
Looking really good.
-
That’s really cool. Well done.
-
Have been under the weather for sometime. I got a few supplies in the mail and just mocked this up. The box of AK weathering showed up today. Hope to have it done by the weekend.
-
Looks good Jay. Spot model has a transkit coming in that gives you a new thin rear diffuser and new thin wheels a steering wheel and a few other parts.
-
Looks really good .. well done. Always liked the way these cars looked
-
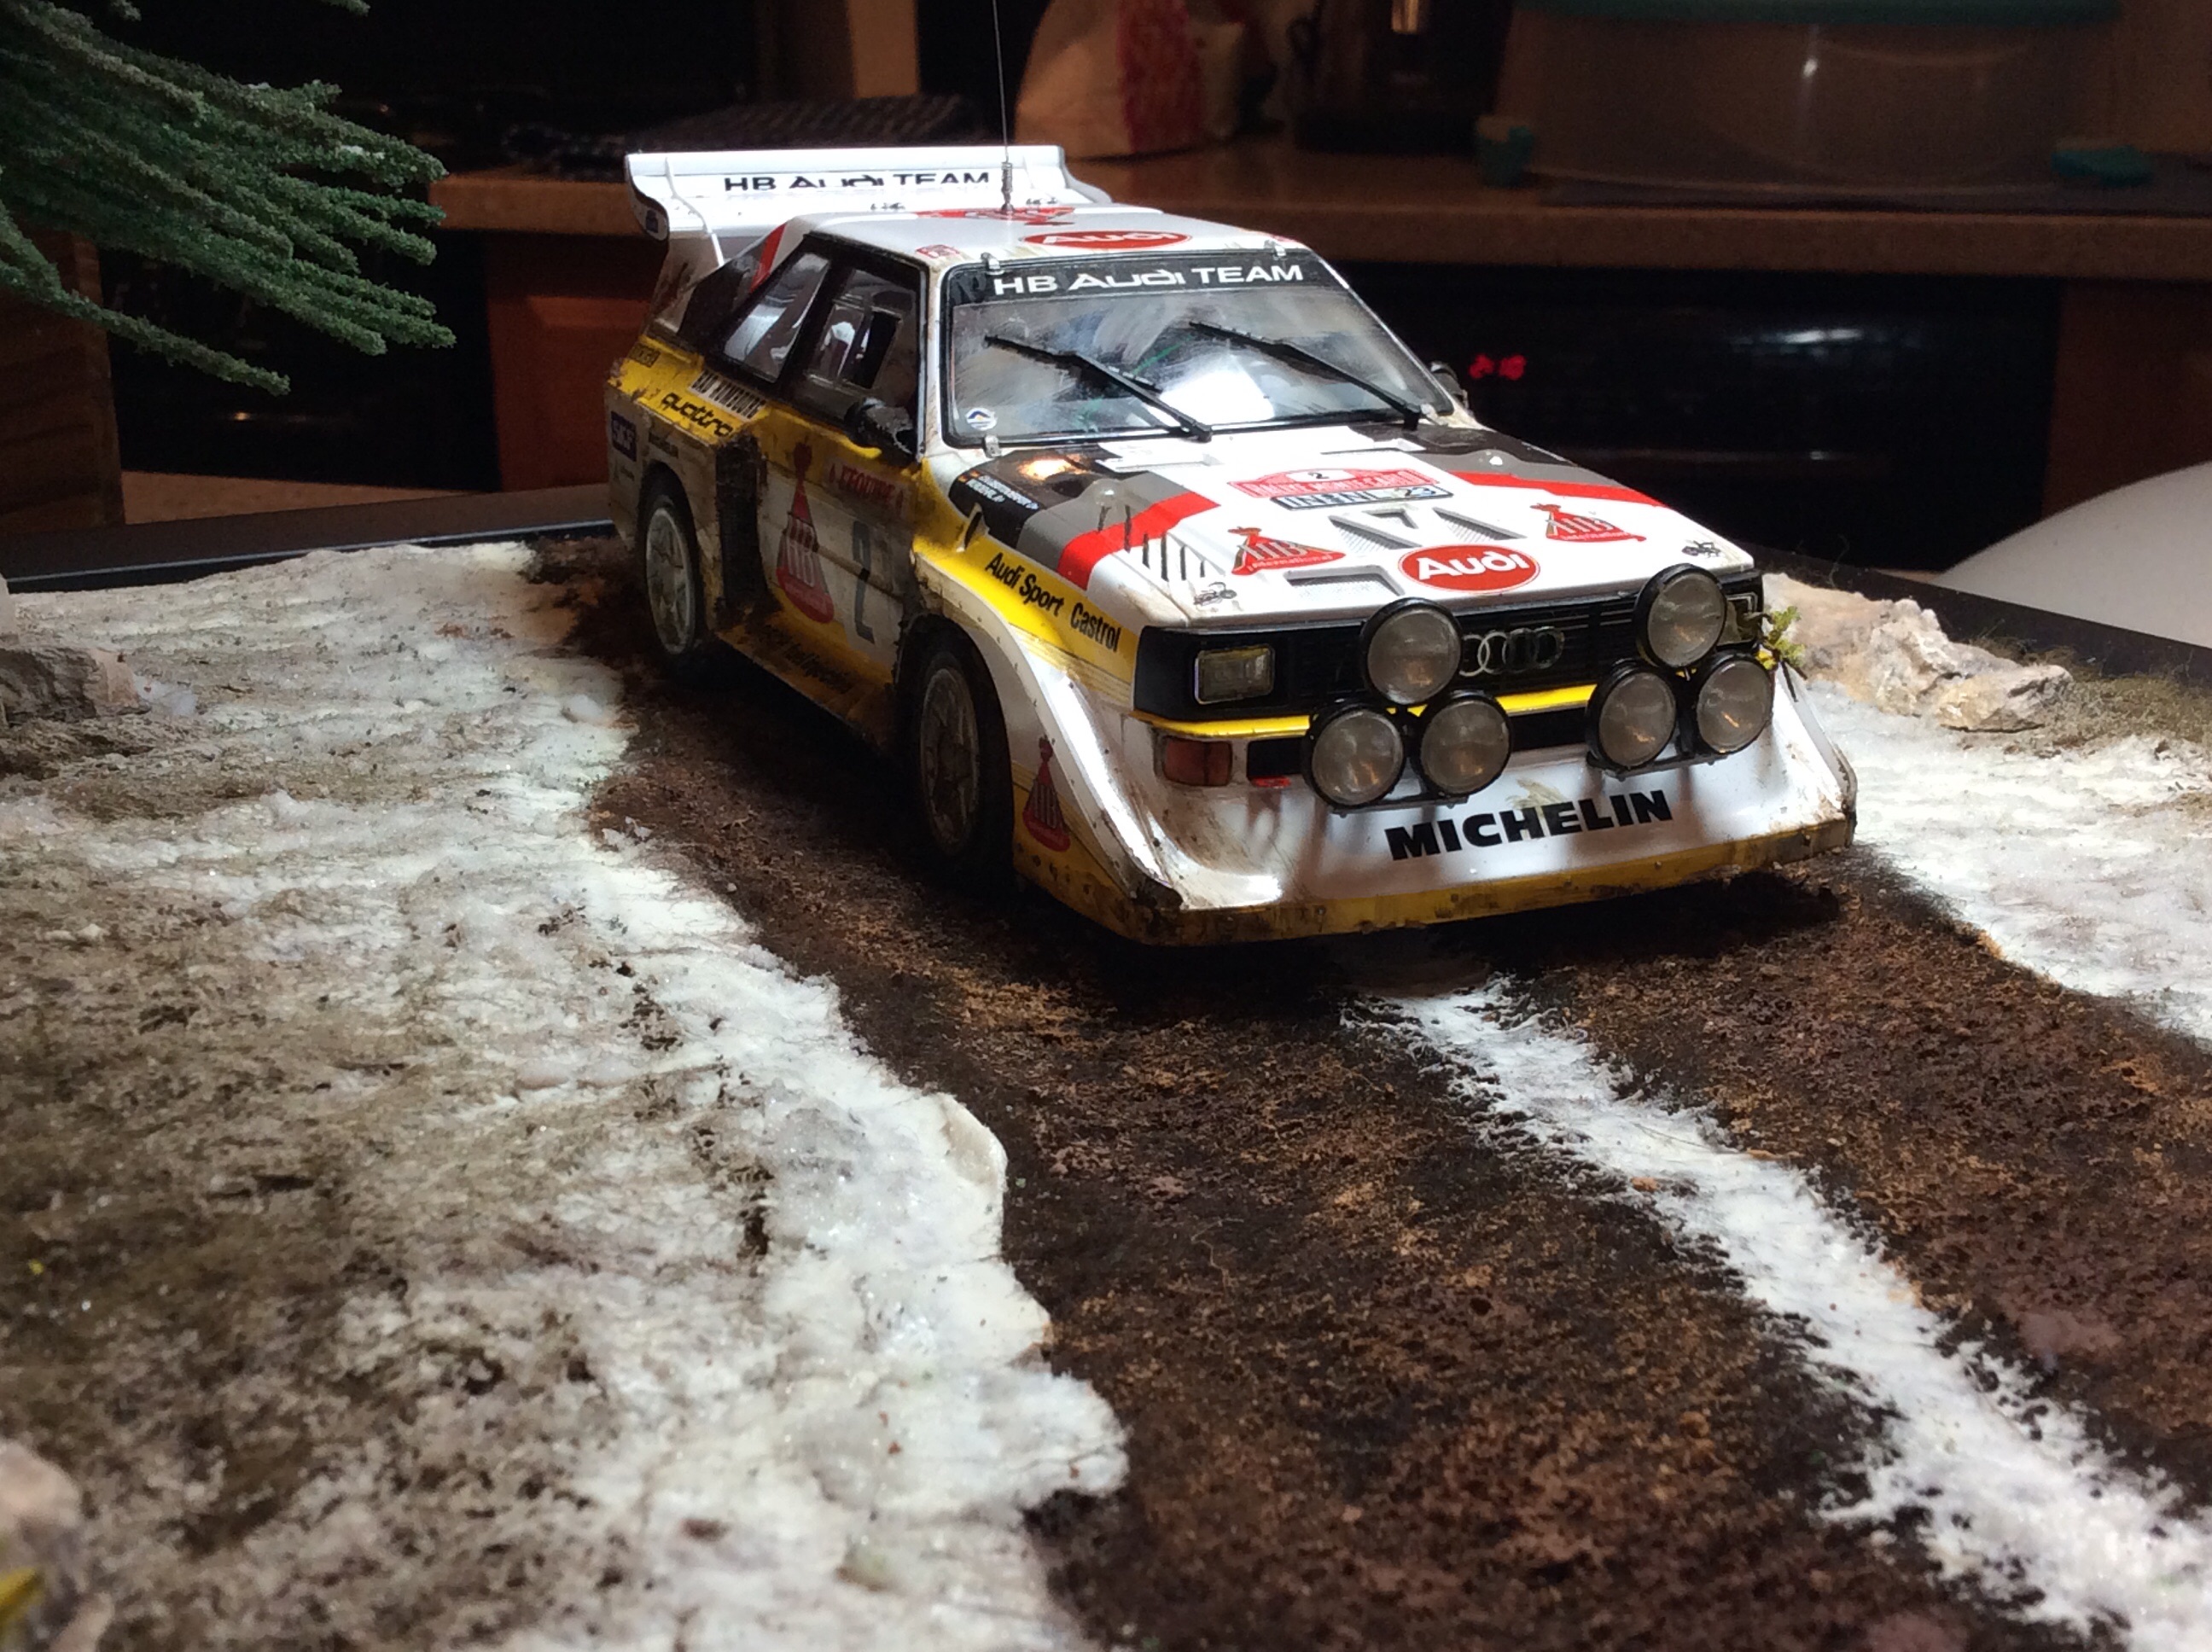
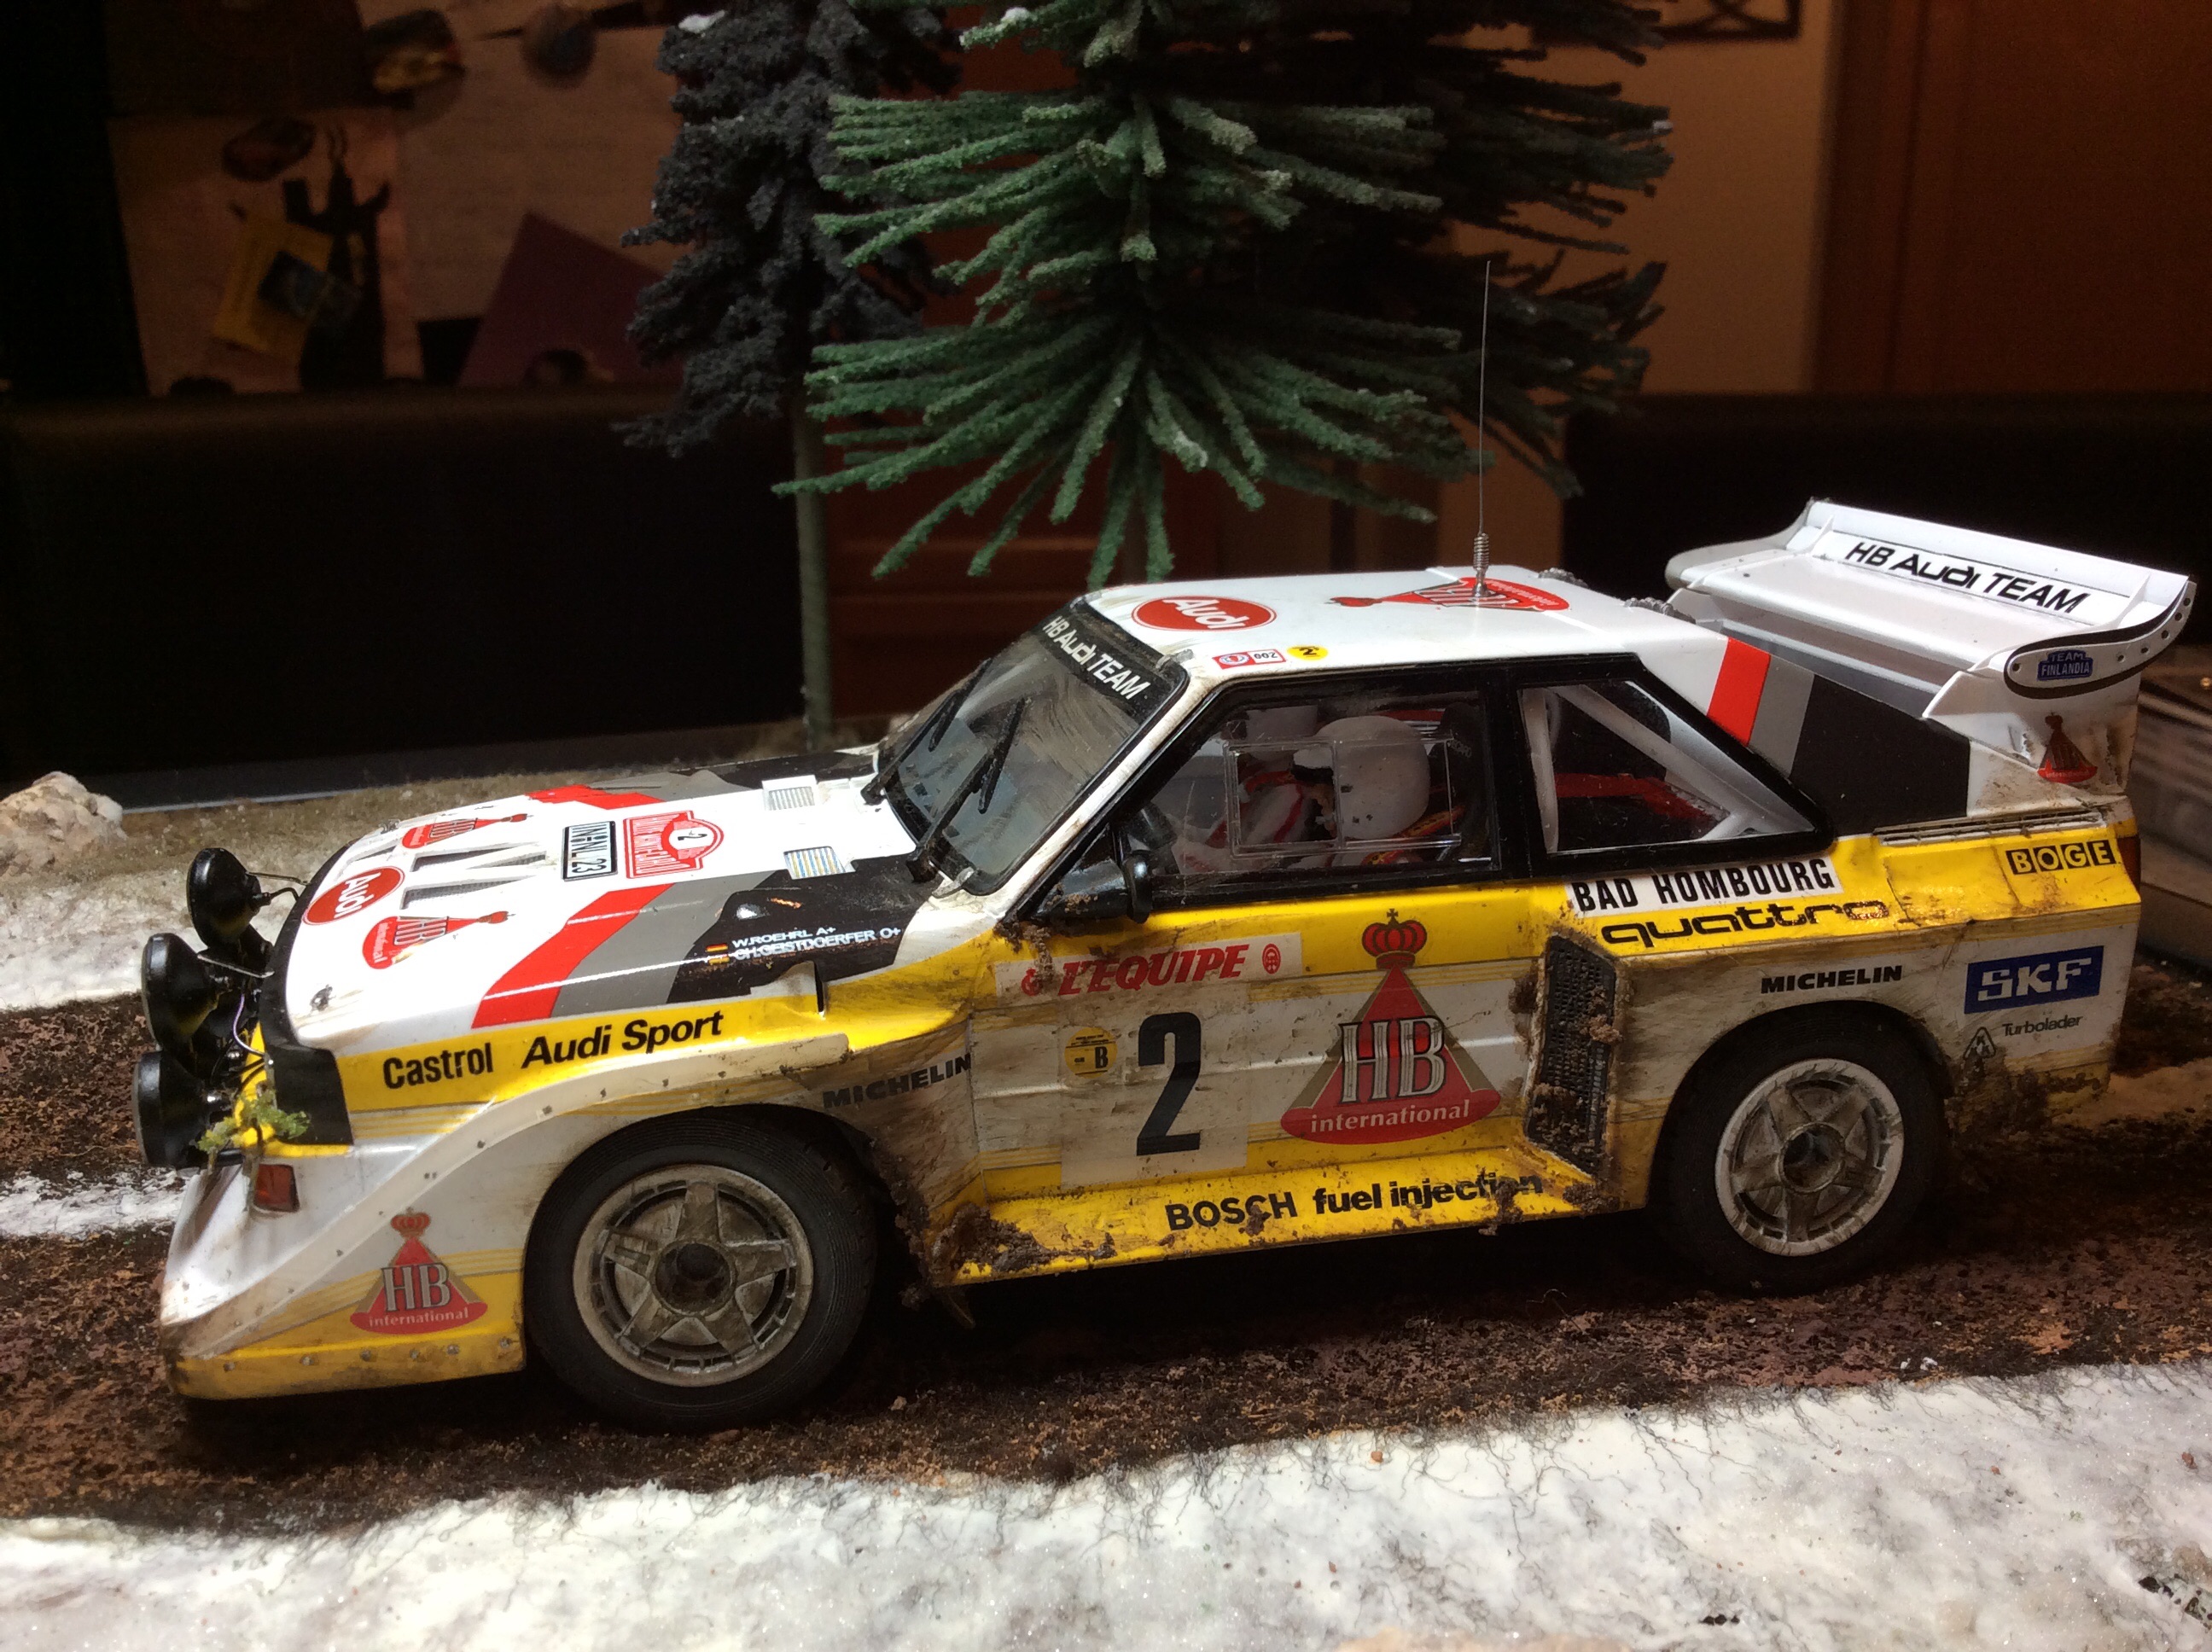
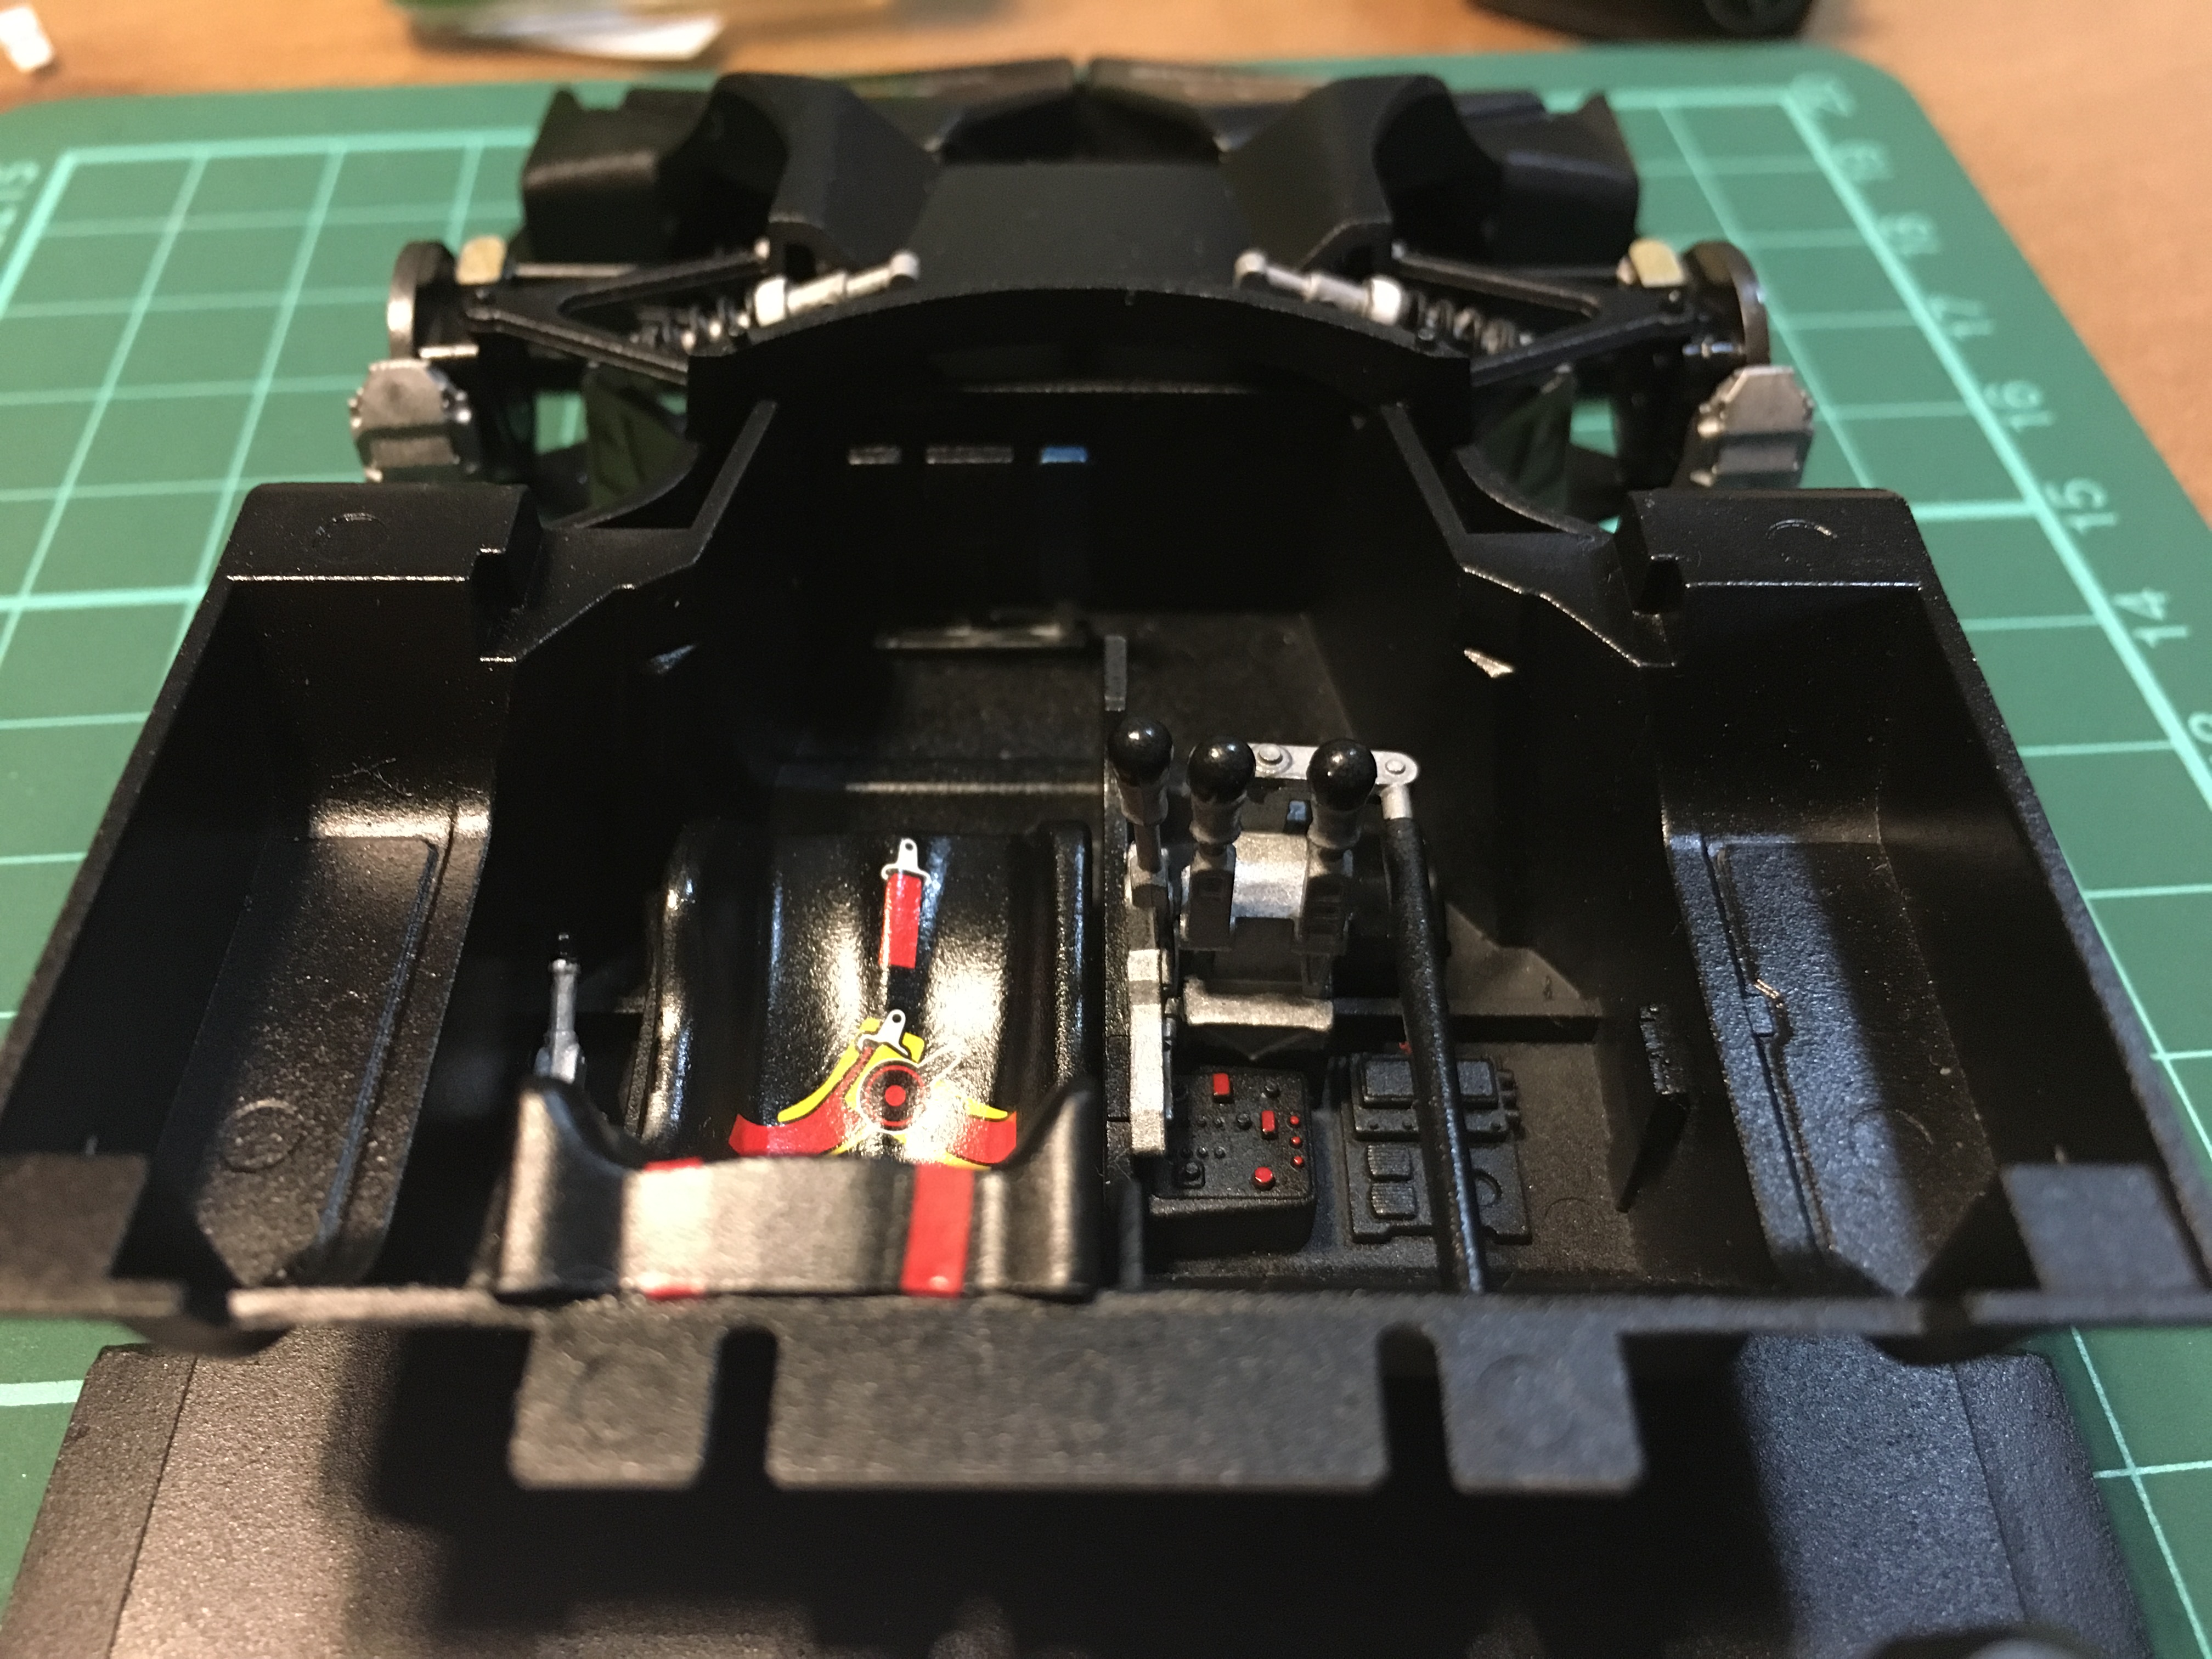
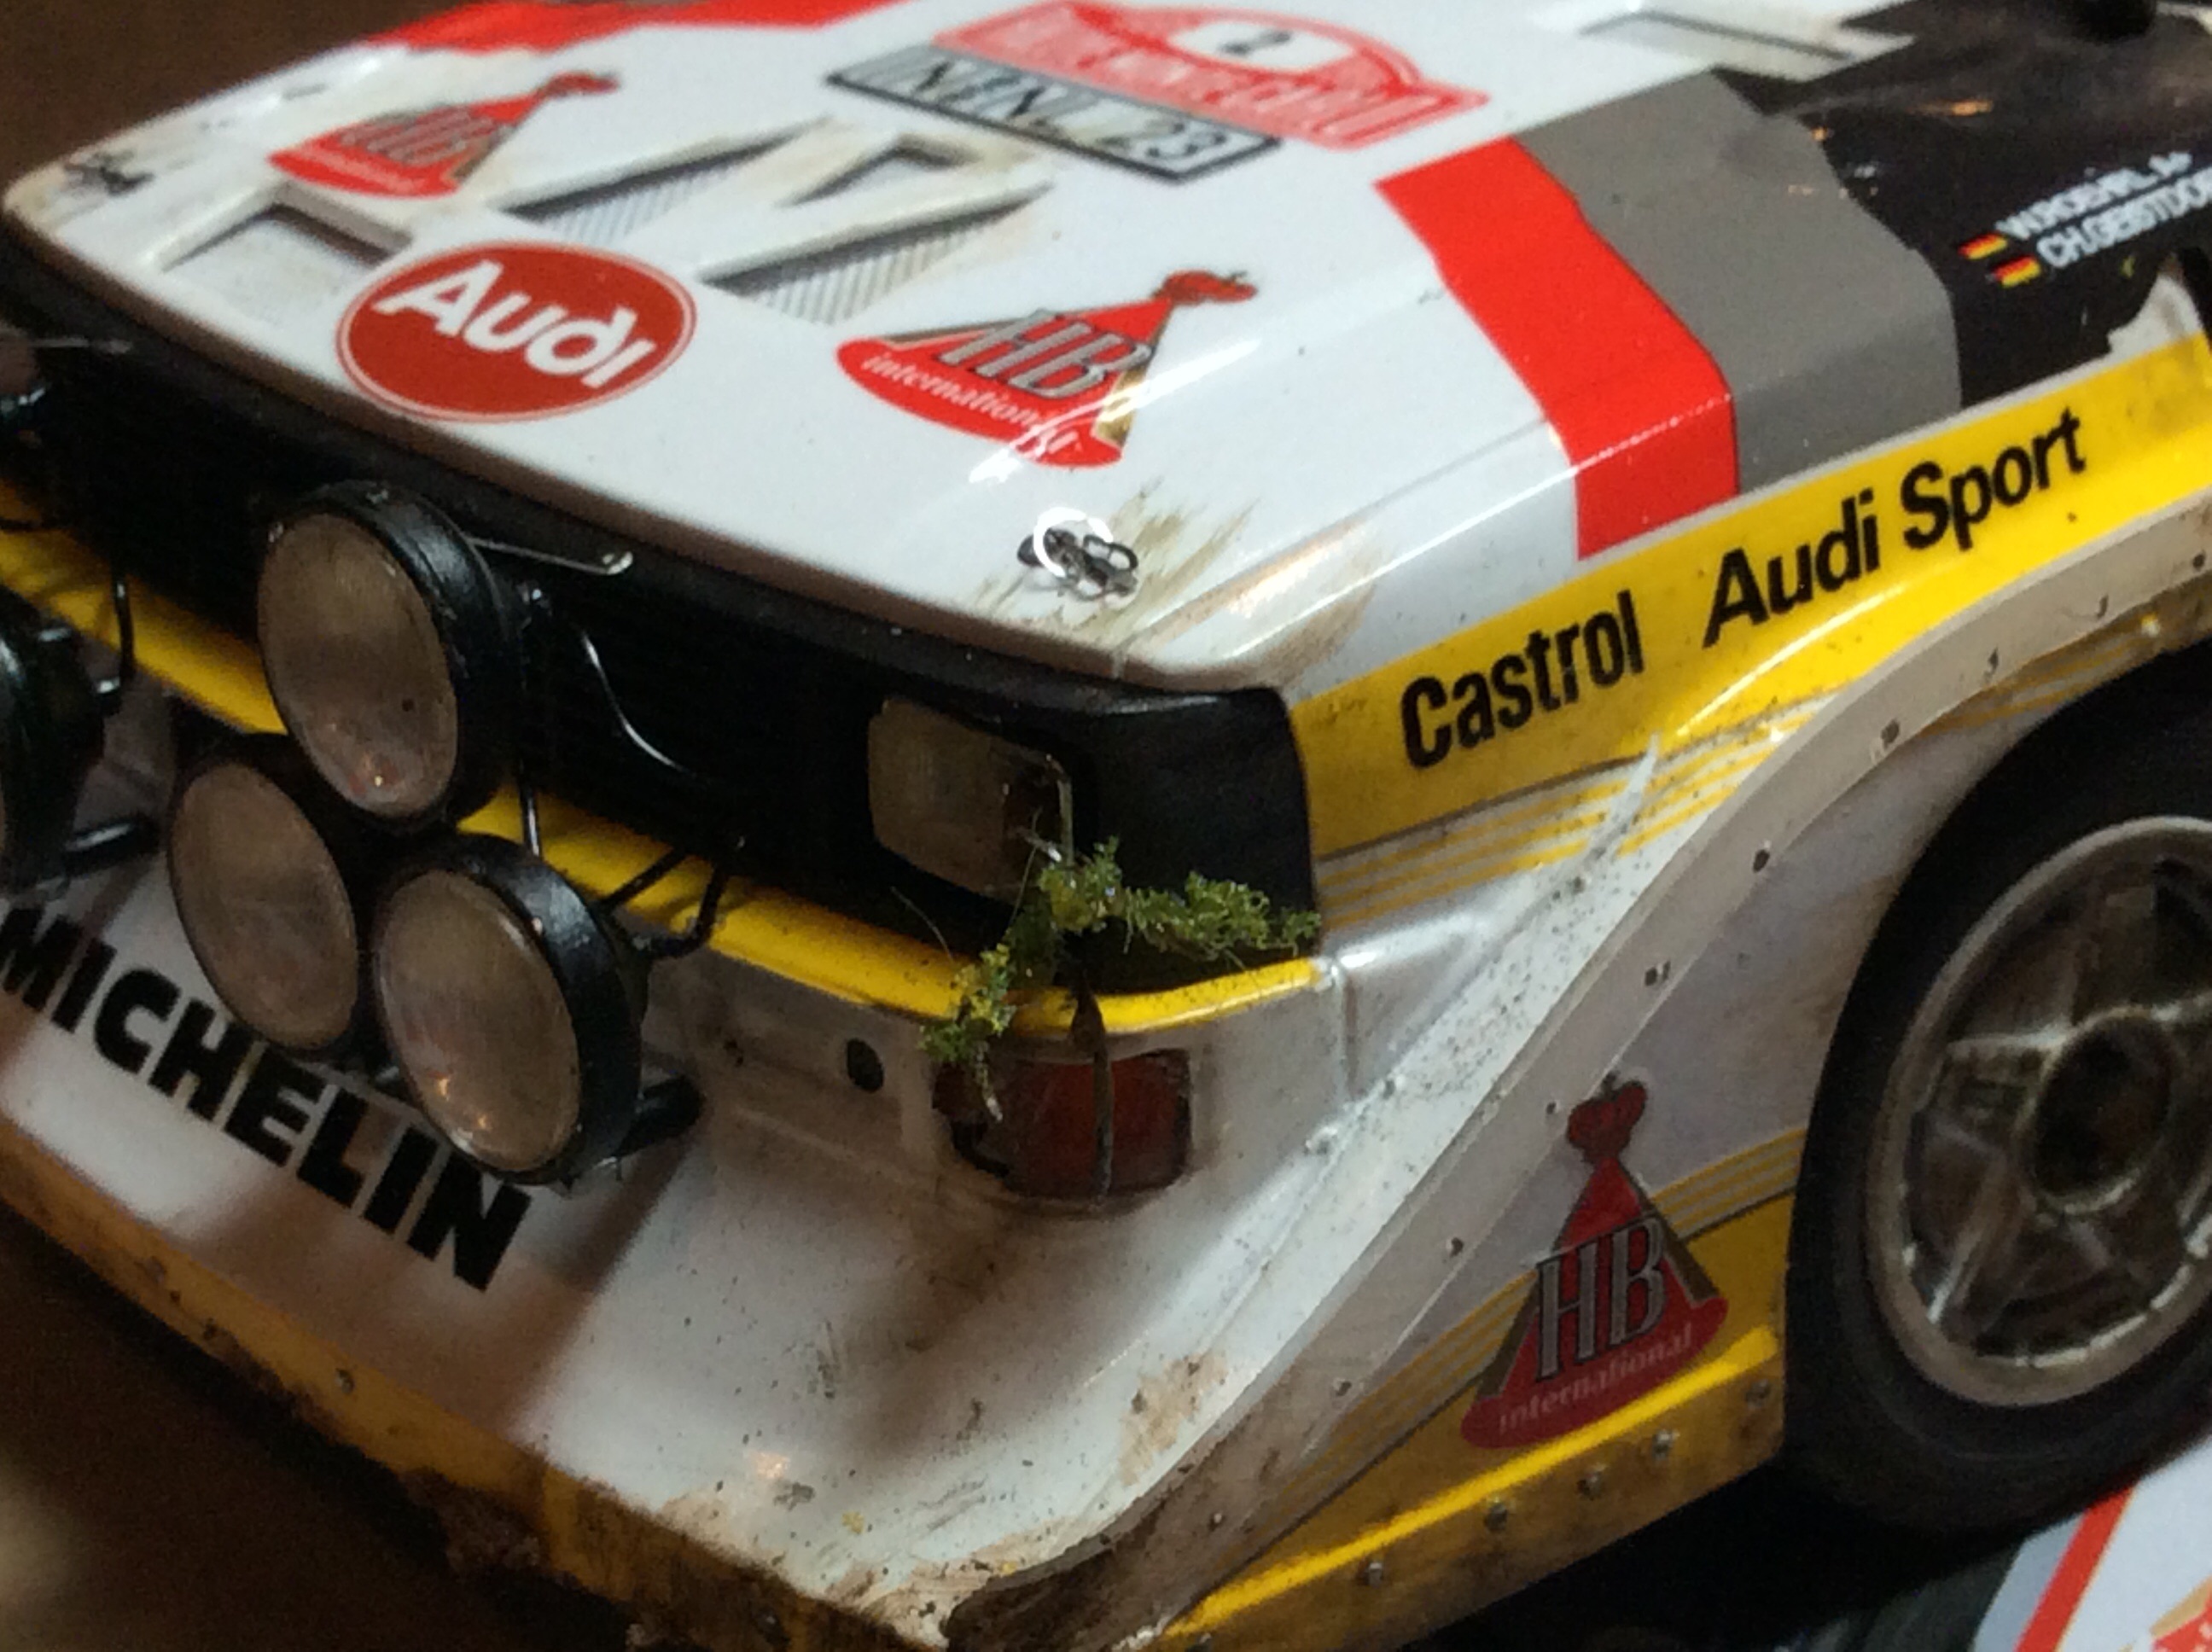
Back to finish the Audi. I filled in the negative spaces not a 100% , but I will fill in some of the space with snow pack. Now at least you can’t see though the car. Decided to do a broken head light lens. I will further this but scuffing the paint and decals in the area. Rear wing has been added as well as the wipers.
-
14 hours ago, Kit Basher said:
You're doing a great job on that carbon! Any advice you can offer about it for when I start mine?
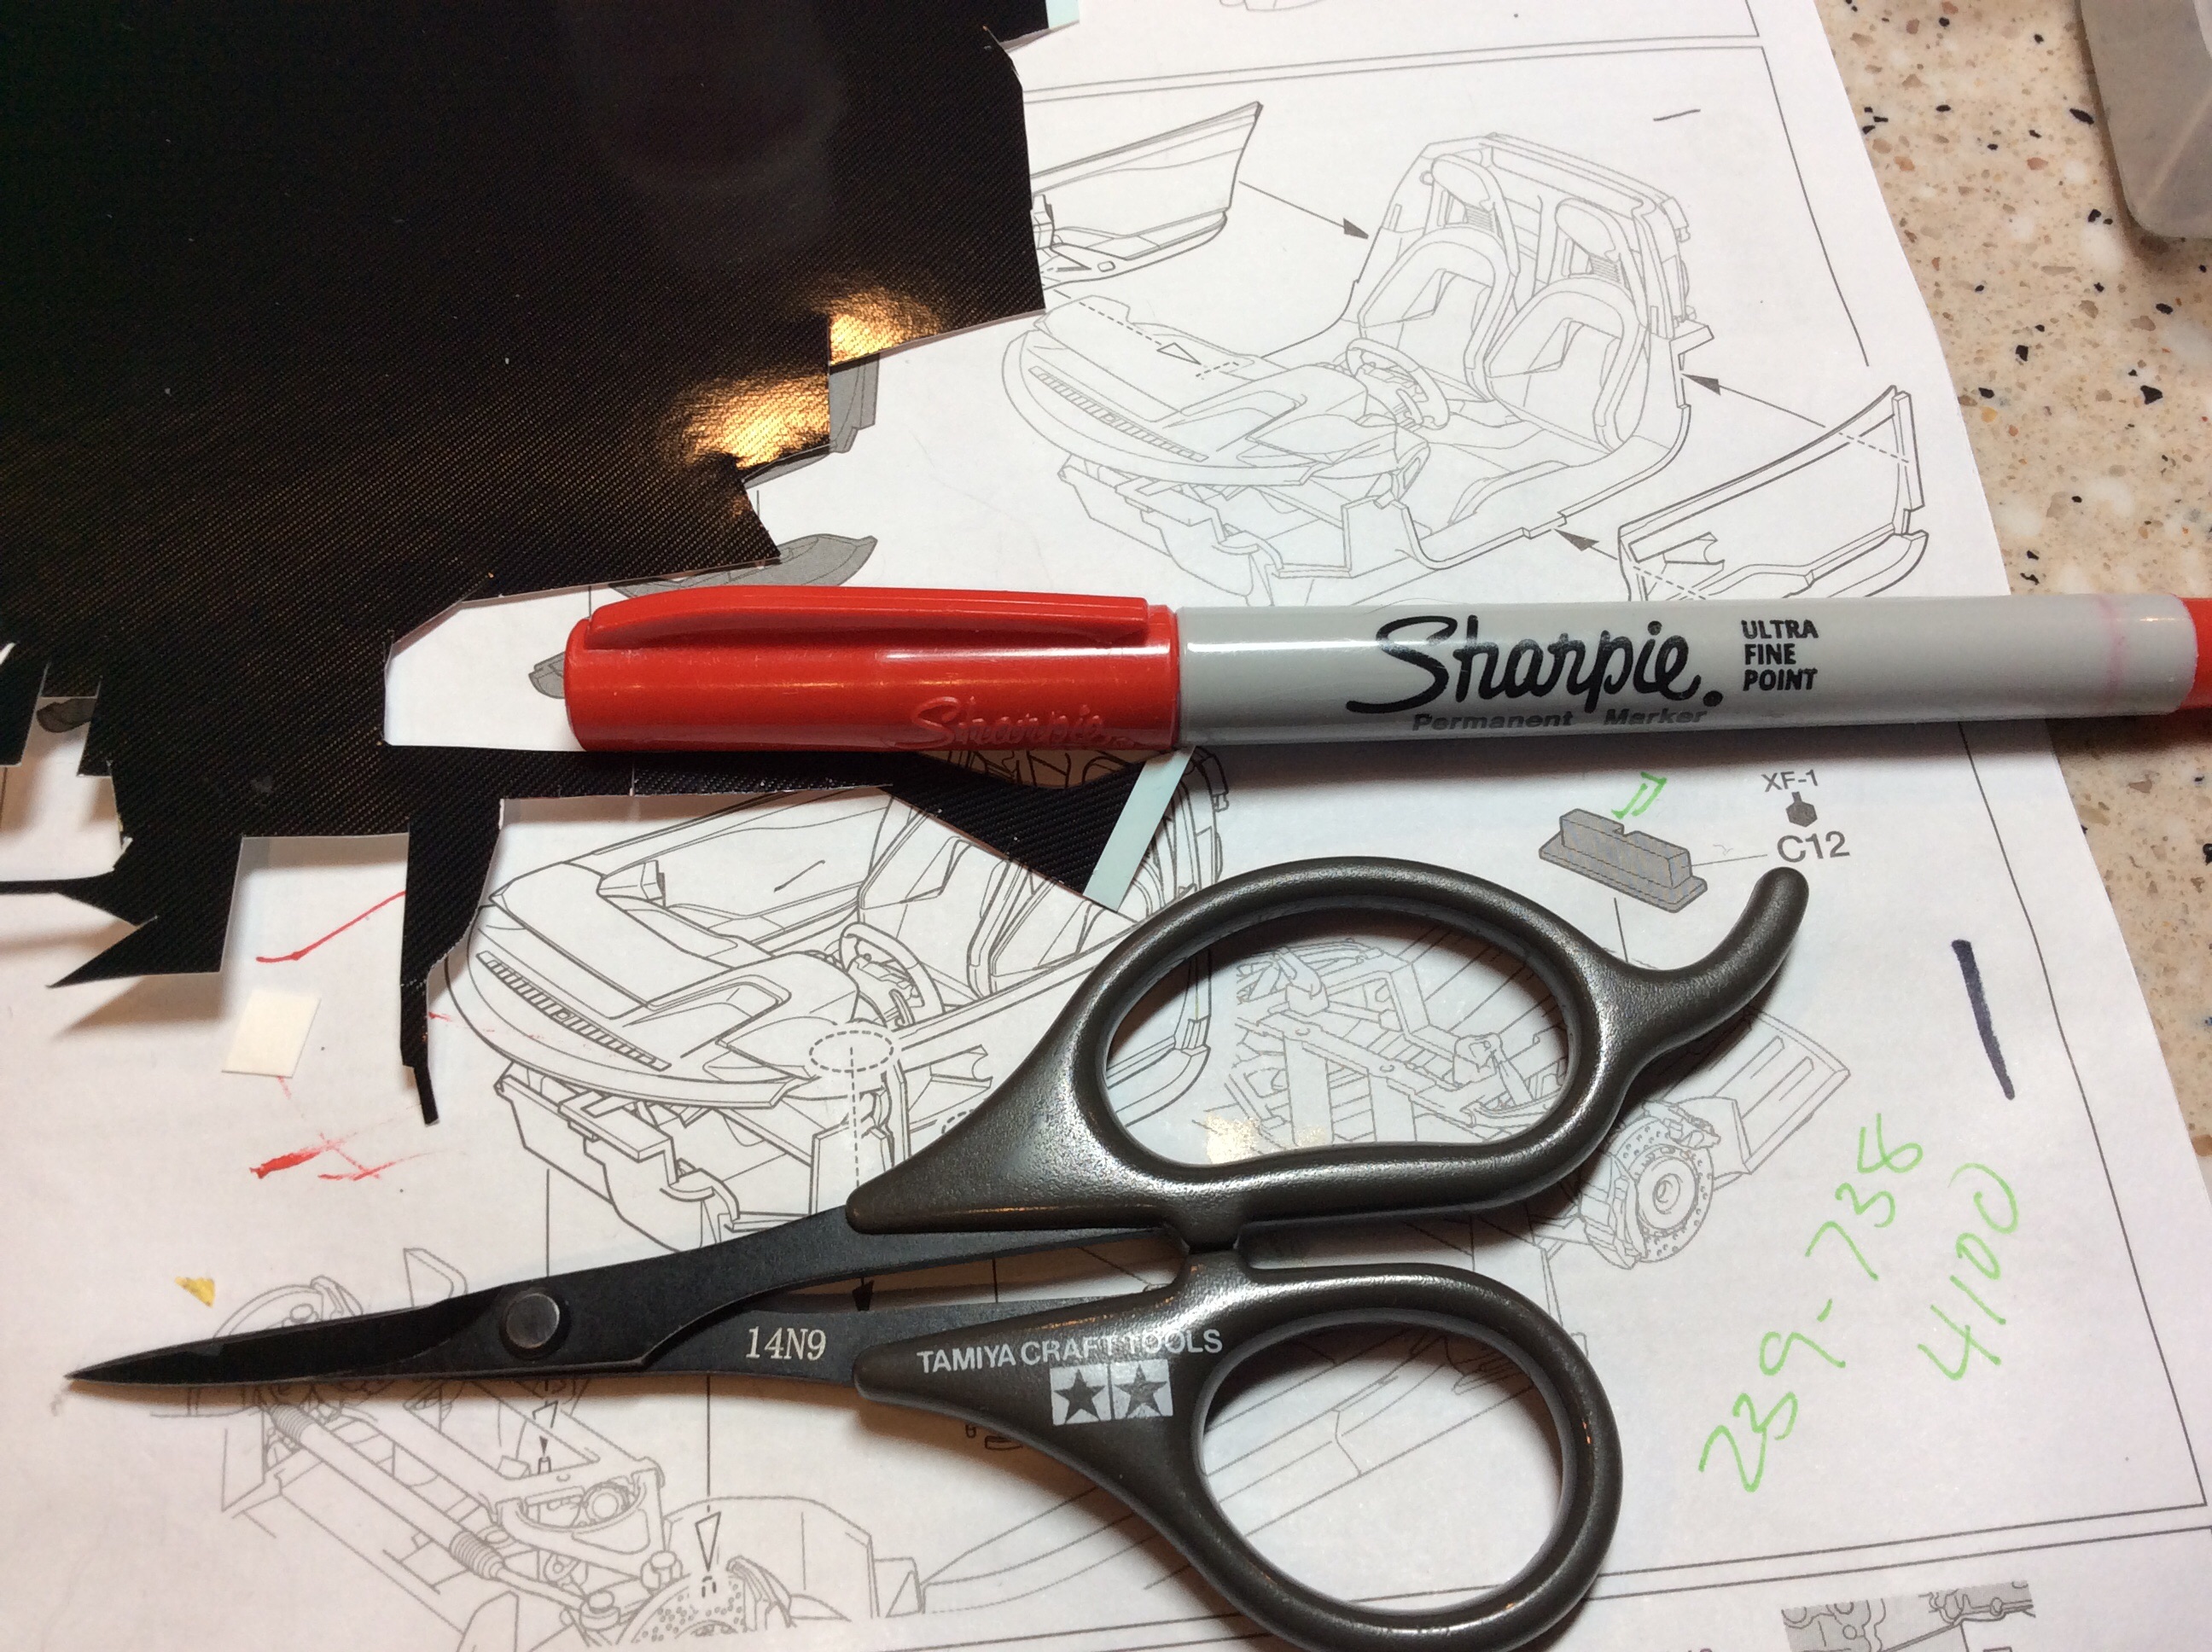
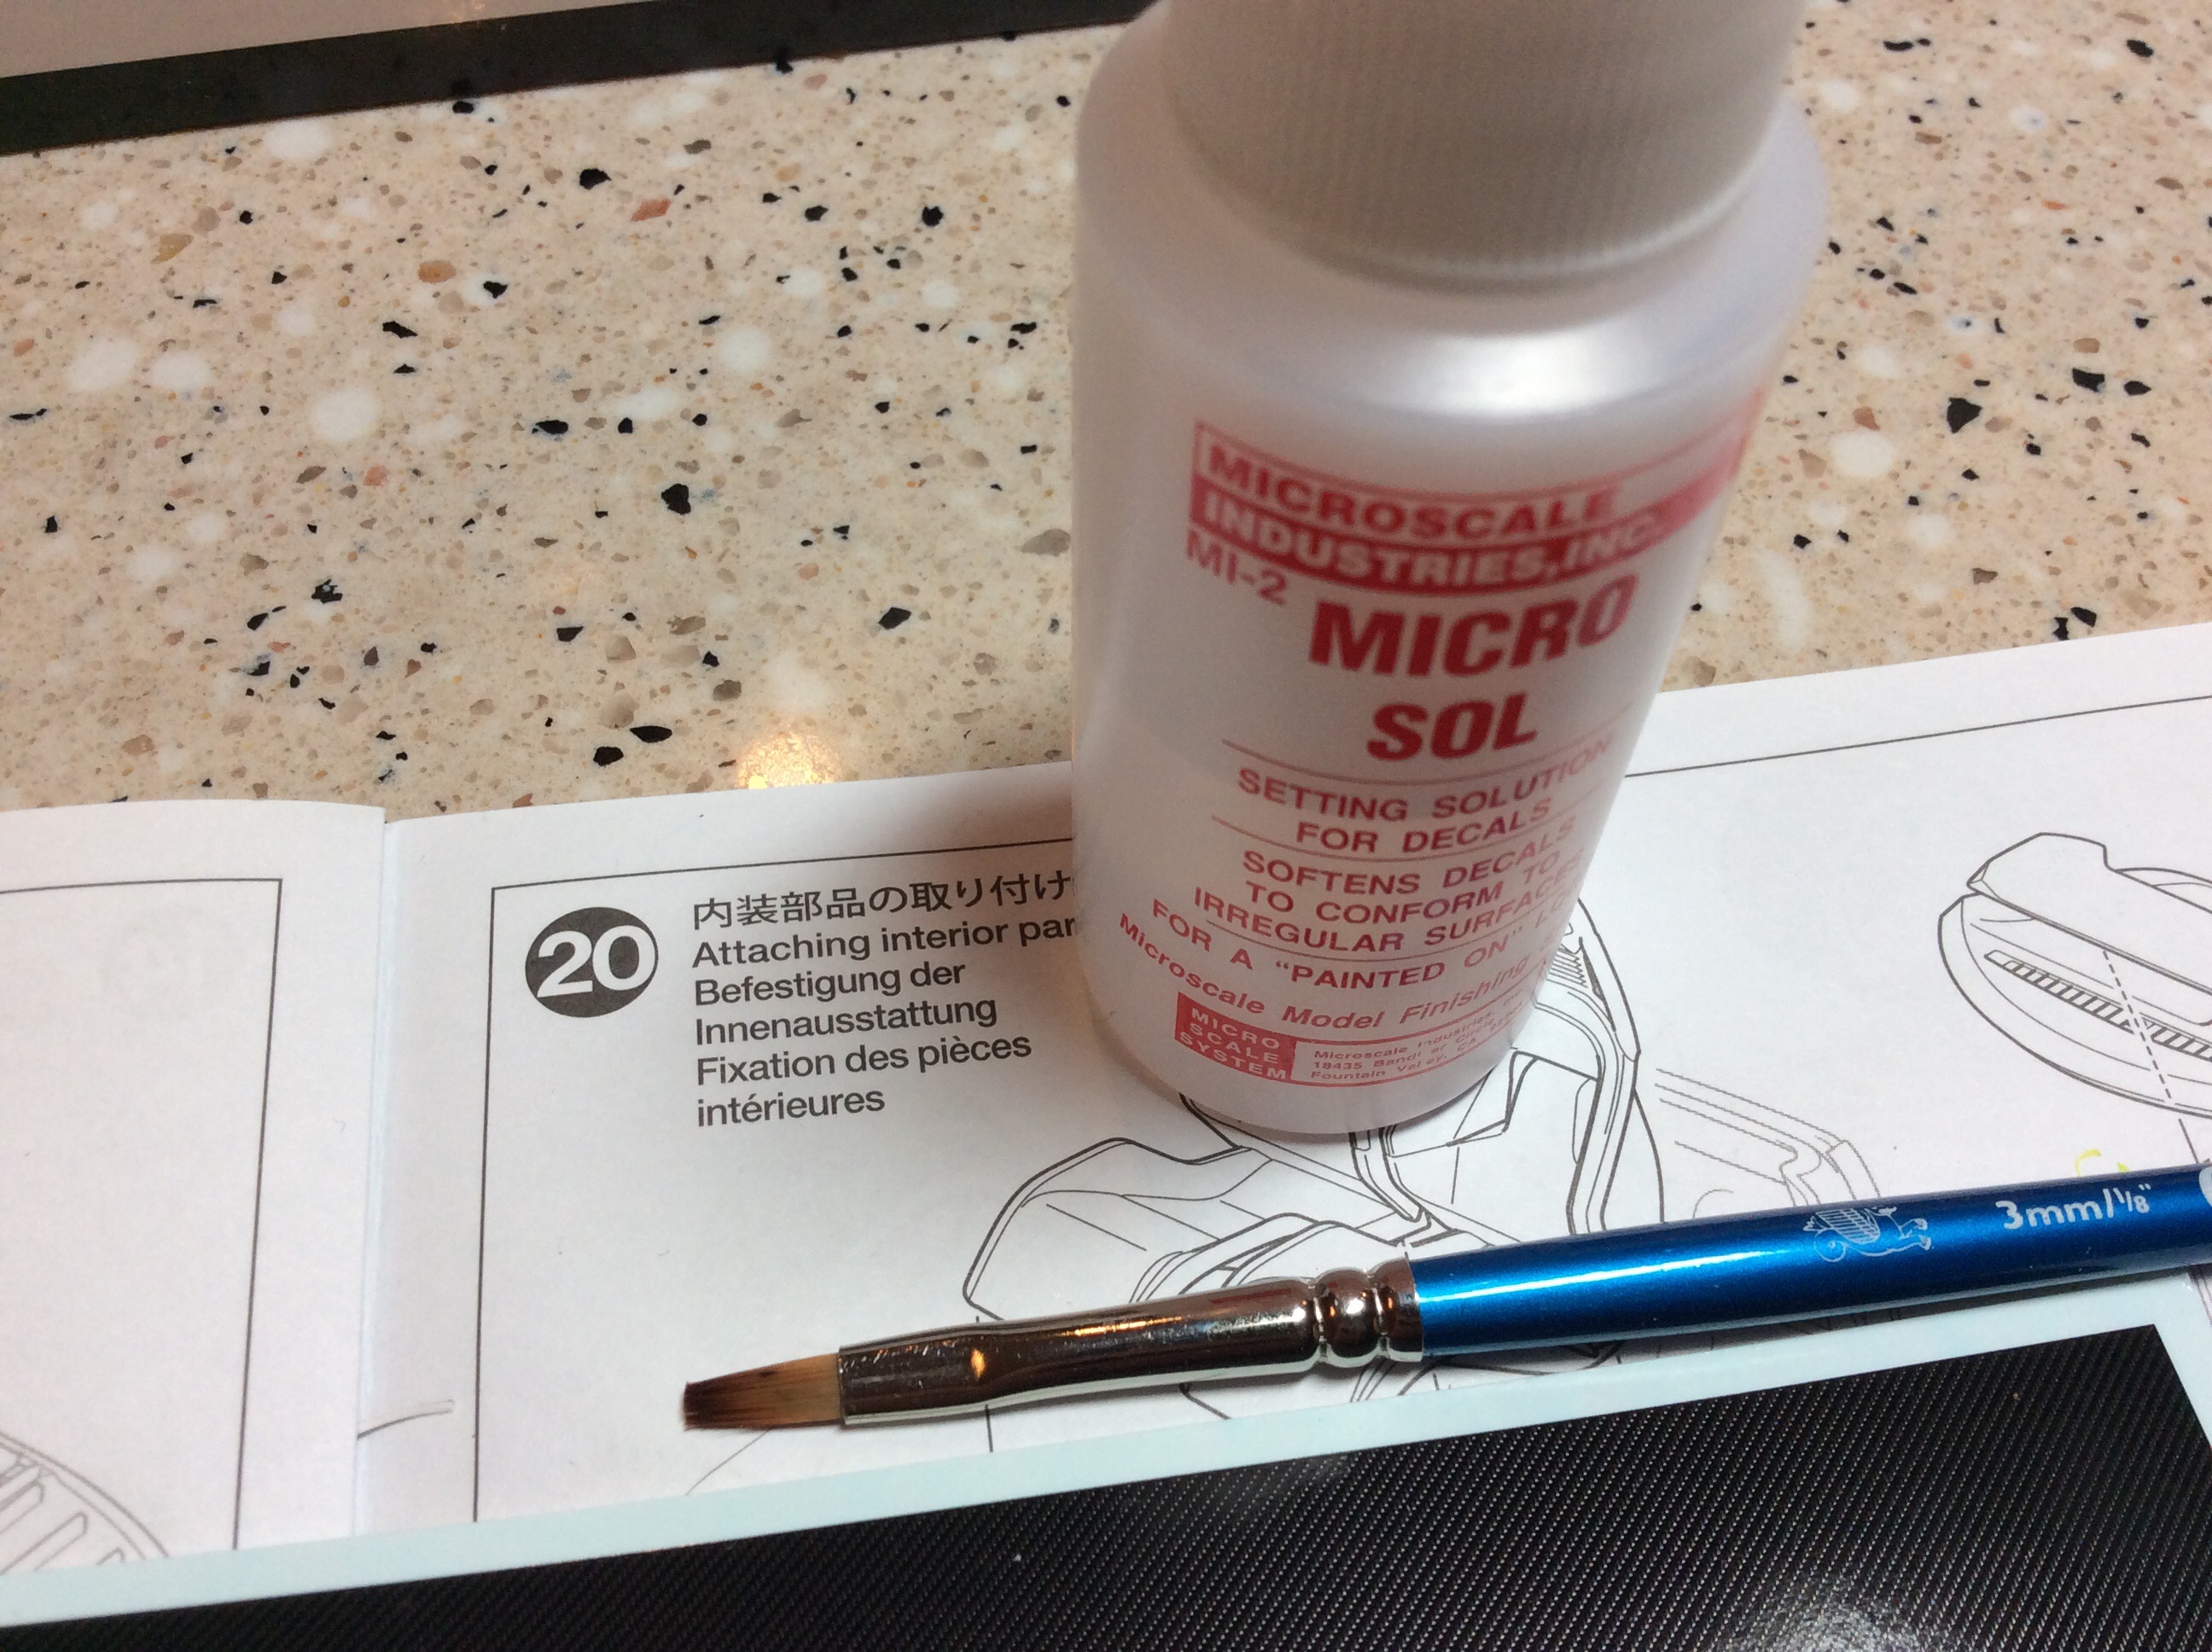
Just keep at it. I use Tamiya tape to make the template,I trace it with a red sharpie extra fine point. I have been using the Tamiya carbon sheets lately. That is what is on the GT. I’ve found that a square tip or chiseled tip brush works really good to lay the decal down. You can use the flat of the brush to get it down in the nooks and crannies of the part. I use setting solutions and a hair dryer when the decals won’t bend when I want them to. Use on low heat about 12-14 inches away. The solution that I use is micro sol the red label one. It is the hottest one for the decals. You can make a decal real rubbery and ruin it. I bush a very thin coat on the part and apply the decal. Let it set for 5-10 sec and brush on the sol. Gentle so you don’t move the decal. I let it set for a few more seconds and then work it down smoothing it out and getting the bubbles out if any. Always make sure you lay the carbon pattern in the same direction. I always work up a sheet, this keeps the weave in the same direction. Take a cut of decal and cut it in half and keep turning one half in a circular motion and you will see the weave not line up until you get back to start. If you make a mistake just try again. There is a lesson learned all the time. See photo for my favorite stuff


Corvette C7
in Model Cars
Posted
Well done. Looks really good in white.